pc gaming – How to build a high-end gaming PC under $2000?

In a world where gaming has evolved into a breathtaking blend of immersive storytelling and stunning graphics, building a high-end gaming PC can often feel like a daunting financial commitment.

However, what if we told you that you could assemble a powerhouse rig without breaking the bank? In this ultimate guide, we’ll unlock the secrets to crafting a top-tier gaming PC for under $2000, ensuring you get the best bang for your buck. We’ll cover everything from selecting the right components—like the latest graphics cards and lightning-fast processors—to tips on optimal cooling solutions and stylish cases that won’t compromise on aesthetics. Whether you’re a competitive gamer looking to dominate the leaderboard or a casual player wanting to experience the latest titles in stunning detail, this guide is your roadmap to achieving gaming greatness. Get ready to unleash your gaming potential on a budget that won’t leave your wallet gasping for air!

1. Introduction: Why Build a High-End Gaming PC?
pc gaming -  How to build a high-end gaming PC under $2000?
Credit : whatcanu.com

Building a high-end gaming PC is more than just assembling a collection of components; it’s about crafting a personalized experience that elevates your gaming to new heights. In an era where immersive graphics, lightning-fast processing speeds, and seamless gameplay are paramount, investing in a custom-built rig can make all the difference. Unlike pre-built systems, constructing your own gaming PC allows you to handpick each component, tailoring the setup to suit your unique gaming style and preferences.

But why specifically choose to build rather than buy? For starters, building your own PC often provides better value for your money. With a budget of under $2000, you can select the latest graphics cards, powerful CPUs, and ample storage options that are perfectly aligned with your gaming needs, without paying extra for brand markup. Moreover, building your own system gives you the flexibility to upgrade individual parts as technology evolves, ensuring your rig remains relevant in the fast-paced world of gaming.

Furthermore, the process of building a gaming PC is a rewarding journey in itself. It fosters a deeper understanding of computer hardware and how each component contributes to performance. Whether you’re a seasoned gamer or just starting, the satisfaction of watching your meticulously chosen parts come together is unmatched. Plus, there’s an undeniable sense of pride in knowing that you have created a machine that’s uniquely yours—one that can handle everything from the latest AAA titles to demanding creative tasks with ease.

So, if you’re ready to dive into the world of high-end gaming, join us as we explore the essential components, step-by-step assembly process, and tips to ensure your gaming PC not only meets your expectations but exceeds them—all while staying within your budget. Let’s embark on this exciting journey together!

2. Setting Your Budget: Breaking Down the $2000 Limit

When diving into the world of high-end gaming PCs, setting a budget can be both exhilarating and daunting. For many gamers, the $2000 limit serves as a golden threshold, offering the potential to build a powerhouse capable of handling the latest titles at ultra settings while future-proofing your setup for years to come. However, strategically breaking down this budget is crucial to ensure you achieve the best performance without any compromises.

Start by allocating approximately 30-40% of your budget to the heart of your gaming rig: the graphics card (GPU). This component is pivotal for rendering stunning visuals and smooth gameplay. Look for models that offer the best performance per dollar, and consider options that balance power with thermal efficiency.

Next, dedicate around 20-25% of your budget to the processor (CPU). A capable CPU complements your GPU to prevent bottlenecks and ensure seamless gaming experiences, especially in CPU-intensive titles. Research compatibility with your chosen motherboard to avoid any headaches down the line.

The remaining budget should be divided among other essential components: storage, memory (RAM), motherboard, power supply unit (PSU), and cooling solutions. Aim for at least 16GB of RAM to facilitate multitasking and smooth performance. For storage, consider a combination of an SSD for your operating system and frequently played games, alongside a larger HDD for additional storage needs.

Don’t forget to factor in peripherals and accessories if needed. A good gaming monitor, keyboard, and mouse can enhance your overall experience but should be approached with careful consideration to avoid overspending.

By thoughtfully dissecting your budget, you pave the way for a high-end gaming PC that satisfies your gaming aspirations without breaking the bank. Remember, each component plays a vital role in the overall performance of your machine, so invest wisely and enjoy the journey of crafting your ultimate gaming rig!

3. Essential Components for a High-End Gaming PC
pc gaming -  How to build a high-end gaming PC under $2000?
Credit : whatcanu.com

When embarking on the journey to build a high-end gaming PC, understanding the essential components is crucial to creating a machine that not only performs exceptionally but also offers great value for your investment. Here’s a breakdown of the key components that will form the backbone of your gaming rig.

**1. Processor (CPU):** At the heart of your gaming PC lies the CPU, which plays a pivotal role in determining your system’s speed and performance. Look for a high-performance processor, such as the AMD Ryzen 7 or Intel Core i7, which strikes the right balance between price and power. These processors are adept at handling demanding gaming applications and multitasking, ensuring that your gaming experience is smooth and responsive.

**2. Graphics Card (GPU):** The GPU is arguably the most critical component for gamers, as it directly influences your gaming visuals and frame rates. To achieve stunning graphics in the latest games, consider investing in a high-end graphics card like the NVIDIA RTX 3070 or AMD Radeon RX 6800. These cards are designed to handle 1440p and even 4K gaming, providing you with breathtaking visuals and immersive experiences.

**3. Memory (RAM):** For a high-end gaming PC, aim for a minimum of 16GB of RAM. This amount is sufficient for most modern games and allows for seamless multitasking. If your budget permits, consider upgrading to 32GB, which can provide extra headroom for more demanding titles and applications, especially if you plan to stream or record your gameplay.

**4. Storage:** Speed and capacity are vital when it comes to storage. A combination of a Solid State Drive (SSD) and a traditional Hard Disk Drive (HDD) is ideal. Opt for a 1TB SSD for your operating system and favorite games, ensuring quick load times and smooth performance. Additionally, a 2TB HDD can provide ample space for other files, media, and less frequently played games.

**5. Motherboard:** Your motherboard acts as the central hub connecting all components. Choose a motherboard that supports the latest technology, such as PCIe 4.0 for faster data transfer rates. Ensure it’s compatible with your chosen CPU and has enough ports for your GPU and peripherals.

**6. Power Supply Unit (PSU):** Don’t skimp on the PSU. A reliable power supply is essential for a stable system. Look for a PSU with an 80 Plus Gold certification to ensure efficiency and longevity. Aim for a wattage that can comfortably support your components, typically around 650W to 750W for high-end builds.

**7. Cooling System:** Maintaining optimal temperatures is crucial for performance and longevity. Consider a high-quality air cooler or an all-in-one liquid cooling solution to keep your CPU running cool under load. Additionally, ensure your case has good airflow, with several case fans to help dissipate heat.

**8. Case:** Finally, select a case that not only fits your aesthetic but also accommodates your components with ease. Look for features such as cable management options, airflow design, and enough space for future upgrades. A well-designed case can enhance both the functionality and the appearance of your build.

By carefully selecting these essential components, you can create a high-end gaming PC that delivers outstanding performance while staying within your $2000 budget. Each part works in harmony to ensure your gaming experience is nothing short of extraordinary, allowing you to dive into the latest titles with confidence and style.

4. Choosing the Right CPU: Options for Performance

When it comes to constructing a high-end gaming PC, the CPU (Central Processing Unit) is the heart of your system, influencing everything from game performance to multitasking capabilities. Selecting the right CPU within your budget of $2000 can be a game-changer, and fortunately, there are several outstanding options designed to deliver exceptional performance without breaking the bank.

First up, let’s consider the AMD Ryzen series. The Ryzen 5 7600X and the Ryzen 7 5800X are both excellent choices for gamers seeking performance without overspending. The Ryzen 5 offers six cores and twelve threads, which is perfect for gaming while still allowing for productive multitasking. On the other hand, the Ryzen 7, with its eight cores and sixteen threads, excels in both gaming and content creation, making it a versatile option if you plan to stream or edit videos.

If you’re leaning towards Intel, the Core i5-13600K is a formidable contender. This processor boasts a hybrid architecture, featuring both Performance-cores and Efficient-cores, which provides a significant boost to gaming and productivity tasks alike. For those willing to stretch their budget slightly, the Core i7-12700K offers even more power, ensuring you’re well-equipped to handle the latest AAA titles at high settings.

While choosing your CPU, also consider the cooling requirements, as high-performance CPUs can generate considerable heat. An aftermarket cooler may be essential for overclocking and maintaining optimal temperatures, ensuring your system runs smoothly under heavy gaming loads.

Ultimately, the choice of CPU will set the foundation for your gaming experience. Prioritize performance that caters not just to your current gaming needs but also considers future-proofing your build for upcoming titles. With the right CPU in your arsenal, you’ll be well on your way to crafting a gaming rig that can handle anything thrown its way—all while staying within your budget!

5. Selecting a Graphics Card: Maximizing Gaming Performance
pc gaming -  How to build a high-end gaming PC under $2000?
Credit : whatcanu.com

When it comes to building a high-end gaming PC, the graphics card is undoubtedly the crown jewel of your setup. It’s the powerhouse responsible for rendering stunning visuals and delivering smooth gameplay, making it a critical component in your build. Selecting the right graphics card requires careful consideration of your gaming needs, budget, and the latest technology available in the market.

As of 2023, the landscape of graphics cards is dominated by industry giants like NVIDIA and AMD, each offering a range of options tailored to various performance levels. For a budget of under $2000, you have the flexibility to choose from powerful mid-tier cards or even some entry-level models from the latest generation that offer exceptional value.

When evaluating graphics cards, focus on key specifications such as VRAM (Video Random Access Memory), clock speeds, and CUDA cores (for NVIDIA cards). A minimum of 8GB of VRAM is recommended for modern gaming, especially if you plan to play at higher resolutions or with demanding settings like ray tracing. Additionally, higher clock speeds can lead to better performance, allowing your games to run more smoothly.

Consider the resolution at which you’ll be gaming. If you’re looking to play at 1440p or even 4K, investing in a more powerful GPU can significantly enhance your experience. Models like the NVIDIA GeForce RTX 3060 Ti or the AMD Radeon RX 6700 XT deliver impressive performance without breaking the bank. Meanwhile, if you’re aiming for ultra settings in demanding titles, stepping up to something like the NVIDIA GeForce RTX 3080 or the AMD Radeon RX 6800 could be worthwhile.

Don’t overlook future-proofing your investment as well. With new titles constantly pushing the boundaries of graphics fidelity, opting for a card that supports the latest technologies—like ray tracing and DLSS (Deep Learning Super Sampling)—can extend the lifespan of your gaming rig.

Finally, keep an eye on market availability and pricing trends. Graphics card prices can fluctuate wildly due to supply chain issues and demand spikes, so timing your purchase can lead to significant savings. By carefully selecting a graphics card that meets your gaming demands and fits within your budget, you can ensure that your high-end gaming PC not only performs brilliantly but also delivers an immersive gaming experience for years to come.

6. Motherboard Matters: Finding the Best Fit for Your Build

When it comes to building a high-end gaming PC, choosing the right motherboard is a crucial step that can significantly impact your system’s performance and future upgradability. The motherboard serves as the backbone of your build, connecting all components and facilitating communication between them. With a budget of $2000, you have a wealth of options, but narrowing down your choices requires a careful consideration of several key factors.

First and foremost, you’ll want to ensure that the motherboard is compatible with your chosen CPU. Whether you’re opting for an Intel or AMD processor, each has a specific socket type that dictates which motherboards are compatible. Be sure to check the specifications of both the CPU and motherboard to avoid any compatibility issues.

Next, think about the form factor. Motherboards typically come in ATX, Micro-ATX, and Mini-ITX sizes. An ATX motherboard will provide ample space for additional components, such as extra RAM slots and PCIe lanes for graphics cards or other expansion cards. If you’re aiming for a compact build, however, a Micro-ATX or Mini-ITX might be more suited to your needs, though you may sacrifice some expandability.

Another critical aspect to consider is the features you need. Are you planning to overclock your CPU or RAM? If so, look for motherboards that offer robust power delivery systems and advanced cooling options. Additionally, consider the connectivity options – the number of USB ports, SATA connections for storage devices, and built-in Wi-Fi capabilities can all enhance your gaming experience.

Don’t forget about aesthetics! A motherboard with customizable RGB lighting can complement your overall build and create a visually stunning gaming rig. Many high-end motherboards also come with reinforced PCIe slots to prevent GPU sag and high-quality capacitors for improved durability.

Ultimately, the right motherboard will not only support your current components but also offer room for future upgrades, ensuring that your gaming PC remains relevant as technology evolves. Investing time in researching and selecting the best motherboard for your high-end gaming build can make all the difference in achieving the performance and longevity you desire. So take the time to explore your options and find the perfect fit for your gaming ambitions!

7. RAM Requirements: How Much Do You Need?
pc gaming -  How to build a high-end gaming PC under $2000?
Credit : whatcanu.com

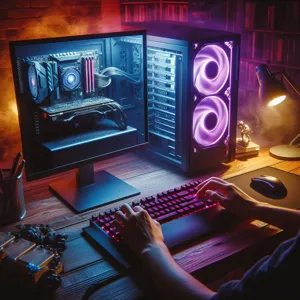
When it comes to building a high-end gaming PC, understanding your RAM requirements is crucial for achieving optimal performance. Random Access Memory (RAM) acts as your system’s short-term memory, allowing your CPU to access data quickly and efficiently. For gaming, the right amount of RAM can significantly affect load times, multitasking capabilities, and overall gameplay smoothness.

In today’s gaming landscape, 16GB of RAM is generally considered the sweet spot for most gamers. This amount provides plenty of headroom for modern titles, allowing you to run games at high settings without worrying about bottlenecks. With 16GB, you can also comfortably run background applications, such as streaming software or voice chat programs, without experiencing lag.

However, if you plan on pushing the limits with intensive tasks—like 4K gaming, video editing, or running multiple applications simultaneously—consider upgrading to 32GB of RAM. This setup is more future-proof, ensuring that your system can handle the latest games and demanding software without breaking a sweat.

When selecting your RAM, pay attention to the speed and latency as well. Opt for DDR4 RAM with a speed of at least 3200 MHz, as this can provide a noticeable performance boost in gaming scenarios. Lower latency also contributes to a snappier experience, so look for RAM with CL16 or lower for optimal performance.

Lastly, don’t overlook the aesthetic aspect. Many gamers enjoy RGB lighting options for their RAM modules, which can add a personal touch to your build. Ultimately, the choice of RAM is not just about numbers; it’s about striking the right balance between performance, capacity, and style to create a gaming rig that is both powerful and visually appealing. With the right RAM in place, you’ll be well on your way to an exceptional gaming experience that won’t break the bank.

8. Storage Solutions: SSD vs. HDD for Gaming

When it comes to building a high-end gaming PC, one of the critical decisions you’ll face is choosing the right storage solution. The choice between Solid State Drives (SSD) and Hard Disk Drives (HDD) can significantly impact your gaming experience, and understanding the differences between these two options is vital for any serious gamer.

### SSD: Speed and Performance

Solid State Drives have gained immense popularity in recent years, primarily due to their lightning-fast read and write speeds. Unlike traditional HDDs that rely on spinning disks and mechanical parts, SSDs store data on flash memory, which means quicker load times for games and applications. Imagine booting up your PC and diving straight into your favorite game in mere seconds—that’s the power of an SSD. For gaming, this translates to reduced lag during gameplay and faster loading screens, making for a more seamless experience. Additionally, many modern games are increasingly designed to take advantage of SSD technology, allowing for better performance and enhanced graphics.

### HDD: Capacity and Cost-Effectiveness

On the other hand, Hard Disk Drives offer larger storage capacities at a significantly lower price point compared to SSDs. If you have a vast library of games, movies, or other media, an HDD can provide the space you need without breaking the bank. While they may not match the speed of SSDs, they are still a reliable option for storing non-essential files or older games that don’t require lightning-fast load times. For gamers on a budget, integrating an HDD alongside an SSD can be an excellent way to balance speed with storage capacity—using the SSD for your most-played games and the HDD for everything else.

### The Best of Both Worlds

The ideal setup for a high-end gaming PC under $2000 often involves a combination of both storage types. Many gamers opt for a smaller SSD (e.g., 500GB or 1TB) to house their operating system and a few key games, while pairing it with a larger HDD (e.g., 2TB or more) for additional storage. This hybrid approach maximizes performance while still providing ample space for your gaming library and multimedia files.

In conclusion, the choice between SSD and HDD ultimately comes down to your gaming habits and budget. If speed and performance are your top priorities, an SSD is the way to go. However, if you need more space for a variety of games and applications, consider a dual-storage solution to get the best of both worlds. With the right storage setup, you’ll be well on your way to enjoying an exceptional gaming experience in your new high-end PC!

9. Power Supply: Ensuring Stability and Efficiency

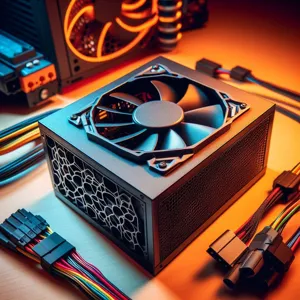
When building a high-end gaming PC, one component that often gets overlooked is the power supply unit (PSU). Yet, it plays a crucial role in ensuring your system’s stability and efficiency. Think of the PSU as the heart of your PC; it delivers the essential power that keeps all other components running smoothly. A reliable PSU not only provides the necessary wattage but also ensures that your components receive clean and stable power, which is vital for optimal performance, especially during intense gaming sessions.

Choosing the right power supply involves a few key considerations. First, assess the wattage requirements of your hardware. High-performance GPUs and CPUs can demand a significant amount of power, so it’s essential to select a PSU that can accommodate your system’s peak consumption. For a high-end gaming setup, aim for a power supply in the range of 650 to 850 watts, which should provide ample headroom for future upgrades and overclocking.

Efficiency ratings are also critical when selecting a PSU. Look for units that have an 80 PLUS certification, which indicates energy efficiency. The higher the certification (Bronze, Silver, Gold, Platinum, or Titanium), the more efficient the power supply will be, leading to lower electricity bills and less heat generation. A high-efficiency PSU can also prolong the lifespan of your components by reducing unnecessary stress caused by fluctuating power levels.

Additionally, consider the modularity of the power supply. A fully modular PSU allows you to connect only the cables you need, reducing clutter and improving airflow within your case. This attention to cable management not only enhances aesthetics but can also aid in cooling, which is crucial for maintaining performance during extended gaming sessions.

In summary, investing in a quality power supply is non-negotiable in your quest to build a high-end gaming PC under $2000. By ensuring stability and efficiency through careful selection, you set a solid foundation for your gaming rig, enabling you to unleash its full potential without the worry of power-related issues.

10. Cooling Systems: Keeping Your PC Running Smoothly

When it comes to building a high-end gaming PC, one of the most critical components that often gets overlooked is the cooling system. A powerful gaming rig can generate significant heat, especially during intense gaming sessions or demanding tasks like video editing and 3D rendering. Therefore, investing in an efficient cooling system is essential to keep your components running smoothly and to prolong their lifespan.

First, you have two primary options: air cooling and liquid cooling. Air coolers are generally easier to install, more affordable, and require less maintenance. High-quality air coolers, like those from Noctua or be quiet!, can effectively dissipate heat while operating quietly. They often come with multiple heat pipes and larger heatsinks that maximize airflow and enhance cooling performance.

On the other hand, liquid cooling systems provide superior thermal management, especially for overclocked components. A good AIO (All-in-One) liquid cooler can efficiently transfer heat away from crucial parts like the CPU and GPU, ensuring they remain at optimal temperatures. Look for models with larger radiators and multiple fans to enhance cooling performance, but be mindful of the space constraints in your case.

Regardless of the cooling method you choose, make sure to consider case airflow as well. A well-ventilated case with strategically placed fans can significantly impact overall system temperatures. Aim for a balance of intake and exhaust fans to promote a steady flow of cool air into the case while pushing hot air out.

Finally, don’t forget about monitoring your temperatures! Utilizing software like MSI Afterburner or HWMonitor can help you keep an eye on your system’s thermal performance. If you notice your temperatures creeping up, it may be time to reevaluate your cooling setup.

In summary, a robust cooling system is not just an accessory but a necessity for your high-end gaming PC. By carefully choosing between air and liquid cooling, optimizing case airflow, and keeping a close watch on temperatures, you can ensure that your gaming experience remains smooth and uninterrupted. Your components will thank you for it!

11. Choosing a Case: Style and Functionality

When it comes to building your high-end gaming PC, choosing a case is not just about aesthetics—it’s a critical decision that balances style with functionality. The case is the first thing people will notice, and a well-chosen enclosure can elevate the overall look of your setup while providing essential features for optimal performance.

Start by considering the size of your components. Ensure that your case is compatible with your motherboard form factor (ATX, Micro-ATX, or Mini-ITX) and has ample space for your GPU, which can be quite lengthy in high-end builds. A good case will also offer sufficient airflow to keep your components cool under heavy gaming loads. Look for models with mesh panels and multiple fan mounts; these features facilitate better air circulation and can help prevent overheating during extended gaming sessions.

Beyond functionality, think about the design. A sleek, modern case can enhance your gaming environment, especially if you plan to showcase it in a prominent location. Many gamers opt for cases with tempered glass panels that allow them to display their carefully curated setups. RGB lighting can also add a personal touch, transforming your PC into a glowing centerpiece that reflects your style.

Consider cable management as well—well-organized cables not only improve airflow but also contribute to a cleaner, more professional appearance. Cases with built-in cable routing options and ample space behind the motherboard tray can make a significant difference in achieving that tidy look.

Ultimately, the right case should harmonize functionality and aesthetics, creating a gaming rig that not only performs exceptionally but also stands out in any room. Take your time to research and select a case that aligns with your vision, as it will be the backbone of your high-end gaming experience.

12. Peripheral Considerations: Monitors, Keyboards, and Mice

When it comes to building a high-end gaming PC, the importance of peripherals can often be overlooked in the excitement of selecting the components that live within your case. However, the right monitors, keyboards, and mice can significantly enhance your gaming experience, making them essential considerations in your overall setup.

**Monitors:** The display is your window into the game world, and investing in a high-quality monitor can make all the difference. Aim for a monitor with a high refresh rate (144Hz or higher) and low response time, which will provide smooth visuals and reduce motion blur during fast-paced action. A 1440p or 4K resolution is ideal for stunning graphics, but make sure your graphics card can handle it. Consider going for an ultrawide monitor for an immersive feel, or a dual-monitor setup if multitasking is your style. The right monitor not only enhances your gameplay but also reduces eye strain during those long gaming sessions.

**Keyboards:** The keyboard is not just about typing; it’s your primary input device when gaming. Mechanical keyboards are highly recommended for their tactile feedback and durability. Look for features like customizable RGB lighting, programmable keys, and anti-ghosting capabilities, which can give you that competitive edge. Whether you prefer a tenkeyless design or a full-sized keyboard with a number pad, choose one that feels comfortable for marathon gameplay sessions.

**Mice:** A good gaming mouse is crucial for precision and speed. Opt for a mouse with adjustable DPI settings, allowing you to switch sensitivities on the fly, which is particularly useful in different gaming scenarios. Ergonomics should also be a priority; a mouse that fits comfortably in your hand can prevent fatigue during extended play. Look for models with customizable buttons that let you execute complex commands with ease, further enhancing your gameplay.

In summary, while your gaming PC’s internal components are vital for performance, the right peripherals can elevate your gaming experience to new heights. Investing wisely in high-quality monitors, keyboards, and mice will not only complement your setup but also ensure that you enjoy every moment of your gaming adventures to the fullest. Don’t skimp on these important elements; they are the finishing touches that complete your high-end gaming rig.

13. Assembly Tips: How to Build Your Gaming PC Step-by-Step

Assembling your high-end gaming PC can be an exhilarating experience, especially when you see all your carefully chosen components come together to form a powerful machine. Here’s a step-by-step guide to help you navigate through the assembly process, ensuring you build a reliable and efficient gaming rig without any hitches.

**1. Gather Your Tools and Components:**
Before diving into the assembly, make sure you have all your components ready: the CPU, motherboard, RAM, GPU, storage drives, power supply, and cooling system, along with tools like a screwdriver, anti-static wrist strap, and cable ties for neat cable management. A clean workspace will also help prevent any accidental damage to your parts.

**2. Prepare the Case:**
Start by removing the side panels of your case. This will give you easy access to the interior. Check for any pre-installed standoffs and ensure they align with the holes on your motherboard, as these will support it once it’s in place.

**3. Install the Power Supply:**
Next, mount the power supply unit (PSU) into the designated area of the case. Ensure the fan is positioned correctly for optimal airflow. Secure it with screws and route the necessary cables towards the motherboard area, but don’t plug them in just yet.

**4. Place the CPU:**
Now it’s time to install the CPU. Carefully lift the lever on the CPU socket, align the notches on the CPU with the socket, and gently place it in. Lower the lever back down to secure it. This part is critical, so handle the CPU with care to avoid bending any pins.

**5. Add the CPU Cooler:**
Whether you’re using an air cooler or liquid cooling, follow the manufacturer’s instructions to install it properly. Make sure to apply thermal paste if it’s not pre-applied, as this ensures efficient heat transfer from the CPU to the cooler.

**6. Insert RAM Modules:**
Locate the RAM slots on your motherboard and insert the RAM sticks. Ensure they click into place and are seated correctly. It’s often recommended to populate the slots in a specific order, so consult your motherboard’s manual for the best configuration.

**7. Install the Motherboard:**
Carefully lift the motherboard and align it with the standoffs in your case. Once it’s positioned correctly, secure it with screws. Make sure the I/O shield is properly in place and that all port openings align with the motherboard.

**8. Attach Storage Drives:**
Install your SSDs and HDDs into their designated bays. If you’re using an M.2 SSD, consult the motherboard manual for the correct slot. Make sure to secure them properly with screws or clips as needed.

**9. Install the GPU:**
Now it’s time for the graphics card, the star of your gaming PC. Find the PCIe slot on your motherboard, remove the necessary backplates from the case, and carefully slide the GPU into place. Secure it with screws to ensure it doesn’t move around.

**10. Connect Cables:**
With everything in place, it’s time to connect power and data cables. Use the cables from your PSU to connect the motherboard, GPU, and drives. Make sure to tidy up the cables using cable ties to maintain airflow and aesthetics.

**11. Perform a Final Check:**
Before closing up the case, double-check all connections and make sure everything is secure. Ensure that there are no stray cables blocking fans and that the

14. Post-Build Setup: Installing Software and Drivers

After the exhilarating experience of assembling your high-end gaming PC, the next crucial step is the post-build setup, where you’ll install the necessary software and drivers to ensure your machine runs smoothly and efficiently. This phase is vital in bringing your gaming rig to life and optimizing it for peak performance.

Start by booting up your new creation. If all goes well, you should see your BIOS screen. From here, you’ll want to install your chosen operating system—most gamers opt for Windows due to its compatibility with a vast array of games and applications. Insert your installation media, whether it’s a USB drive or a DVD, and follow the prompts to get Windows installed.

Once Windows is up and running, it’s time to dive into the driver installation. Drivers are essential as they allow your hardware components to communicate effectively with the operating system. Begin with your motherboard drivers, which typically include chipset, audio, and network drivers. These can usually be downloaded from the manufacturer’s website; just make sure to choose the correct model.

Next, focus on your graphics card. Whether you’ve opted for NVIDIA or AMD, downloading the latest drivers directly from their respective websites ensures that your GPU operates at its best, providing the optimal experience in games. Both companies offer utilities that can help keep your drivers updated automatically, a handy feature that saves time in the long run.

Don’t forget about other peripherals like printers, scanners, or gaming accessories; they may require additional drivers. After all hardware drivers are installed, it’s wise to check for Windows updates, as these can enhance system stability and security.

With your drivers in place, you can now install the essential gaming software. Start with your digital distribution platforms—Steam, Epic Games Store, or Origin—so you can access your game library. Additionally, consider installing performance monitoring tools such as MSI Afterburner or HWMonitor. These applications allow you to keep an eye on your system’s temperatures and performance metrics while gaming, ensuring that everything runs smoothly.

Lastly, before diving into your gaming session, take a moment to customize your settings. Adjust your graphics settings in games for the best balance between performance and visuals, and consider setting up software for voice communication if you game with friends, like Discord or TeamSpeak.

With your software and drivers successfully installed, you’re ready to embark on your gaming adventures. Sit back, relax, and prepare to enjoy the incredible gaming experience that your newly built powerhouse has to offer!

15. Conclusion: Enjoying Your High-End Gaming Experience!

As we wrap up this ultimate guide to building a high-end gaming PC for under $2000, it’s clear that the journey to crafting your dream rig is as exhilarating as the gaming experiences that await you. With the right components carefully selected and seamlessly assembled, you’re not just investing in hardware; you’re unlocking a portal to immersive worlds, breathtaking graphics, and smooth gameplay that brings your favorite titles to life like never before.

Imagine firing up your PC for the first time, the RGB lighting illuminating your space, as you dive into stunning landscapes and intense multiplayer battles. Each frame rendered with precision, every click of the mouse echoing your strategic prowess, and the thrill of victory echoing in the background—it’s all within your reach. Whether you’re exploring vast open worlds, engaging in competitive esports, or enjoying the latest AAA titles, your new gaming setup will elevate your experience to new heights.

But remember, the journey doesn’t end with the initial build. Keeping your system updated with the latest drivers, optimizing settings for each game, and exploring new expansions will ensure that your gaming experience remains fresh and exciting. Don’t hesitate to tweak and upgrade your components over time; technology evolves rapidly, and there’s always something new to explore.

So, gather your friends for a gaming night, stream your epic adventures, or simply lose yourself in a captivating single-player campaign. With your high-end gaming PC, you’re fully equipped to enjoy countless hours of exhilarating gameplay. Here’s to the adventures ahead, the challenges to conquer, and the memories to create—happy gaming!

In conclusion, building a high-end gaming PC for under $2000 is not only achievable but can also be an incredibly rewarding experience that enhances your gaming prowess. By carefully selecting components, prioritizing performance, and considering future upgrades, you can create a powerhouse rig that meets your gaming needs without exceeding your budget. We hope this ultimate guide has equipped you with the knowledge and confidence to embark on your PC-building journey. Remember, the world of gaming is limitless, and with your new setup, you’ll be ready to dive into immersive experiences and tackle any challenge that comes your way. Happy building, and may your gaming adventures be epic!

pc gaming – How to back up your gaming PC?

In the exhilarating world of gaming, where epic adventures and immersive experiences await, the last thing you want is to lose your hard-earned progress or valuable game files due to unforeseen circumstances.

Whether it’s a sudden hardware failure, an unexpected power surge, or a pesky malware attack, the risks to your gaming PC are all too real. That’s why understanding how to safely back up your gaming PC is not just a precaution—it’s an essential step toward ensuring ultimate peace of mind. In this comprehensive guide, we’ll explore the best practices for backing up your games, configurations, and essential data, empowering you to safeguard your digital treasures and enjoy uninterrupted gaming sessions. From choosing the right backup solutions to step-by-step instructions on executing the perfect backup strategy, we’ve got you covered. Dive in and discover how to protect your gaming universe so you can focus on conquering virtual realms without a worry in the world!

1. Introduction: Why Backing Up Your Gaming PC is Crucial

pc gaming -  How to back up your gaming PC?
Credit : whatcanu.com

In the fast-paced and immersive world of gaming, losing your hard-earned progress, custom builds, or meticulously crafted mods can feel like losing a part of yourself. The thrill of leveling up, the satisfaction of completing a challenging quest, and the joy of sharing your gaming achievements with friends are all memories that deserve to be preserved. This is where the importance of backing up your gaming PC comes into play.

Backing up your gaming PC is not just a precaution; it’s a vital practice that can save you from heartache and frustration. Hardware failures, accidental deletions, corrupt files, or even malware attacks can strike at any time, often without warning. Imagine spending weeks perfecting your character, only to find that your files have vanished due to a sudden system crash. The emotional toll is real, and the time lost is irreplaceable.

Moreover, the gaming landscape is ever-evolving. Updates, expansions, and new games frequently push the boundaries of what our systems can handle. Regularly backing up your data ensures that you’re prepared for any unforeseen circumstances that may arise during these transitions. It allows you to explore new gaming experiences with confidence, knowing that your previous achievements are safe and sound.

In this essential guide, we will delve into the various methods and best practices for backing up your gaming PC effectively. Whether you’re a casual gamer or a dedicated enthusiast, taking the time to implement a solid backup strategy will provide you with ultimate peace of mind, enabling you to focus on what matters most: the game itself. Let’s dive into the reasons why backing up is crucial and explore how you can safeguard your gaming legacy.

2. Understanding Different Types of Backups

When it comes to safeguarding your gaming PC, understanding the different types of backups is crucial for ensuring that your data remains secure and easily retrievable. Backups can be broadly categorized into three main types: full backups, incremental backups, and differential backups, each with its own advantages and ideal use cases.

**Full Backups** are the most comprehensive approach. This method involves copying all of your files and system settings to a backup location. While full backups provide a complete snapshot of your system at a specific point in time, they can be time-consuming and require significant storage space. However, their thoroughness means that restoring your system is a straightforward process, making them an excellent choice for your initial backup.

**Incremental Backups**, on the other hand, are designed for efficiency. This method saves only the data that has changed since the last backup, whether that was a full backup or another incremental backup. This approach conserves storage space and reduces the time needed for each backup session. However, restoring from incremental backups can be more complex, as you’ll need the last full backup along with all subsequent incremental backups to piece together your files correctly.

Lastly, **Differential Backups** strike a balance between the two. Like incremental backups, they only save the changes made since the last full backup. However, unlike incremental backups, each differential backup captures all changes since the last full backup, making the restoration process simpler. While they require more storage than incremental backups, they are generally quicker to restore, making them a solid choice for regular maintenance.

Incorporating a combination of these backup types into your routine can provide ultimate peace of mind. For instance, you might start with a full backup of your gaming PC, followed by weekly incremental backups to keep your data up to date. Periodically, you could perform differential backups to streamline your restoration process. Understanding these methods allows you to choose the best strategy tailored to your gaming habits and data needs, ensuring that all your precious game saves, custom settings, and cherished files are protected against unforeseen disasters.

3. Identifying What to Back Up on Your Gaming PC

pc gaming -  How to back up your gaming PC?
Credit : whatcanu.com

When it comes to backing up your gaming PC, understanding what to prioritize is crucial for a seamless experience. While it might be tempting to hit the “select all” button and back up everything on your hard drive, a strategic approach will save you time and storage space. Here’s a breakdown of what you should focus on to ensure your gaming experience remains intact.

**Game Saves and Profiles**: Your game saves and profiles are often the most irreplaceable components of your gaming library. Whether you’ve spent countless hours leveling up in an RPG or meticulously crafted your character in a simulation game, losing your progress can be devastating. Check for cloud save options offered by platforms like Steam, Origin, or Epic Games. If local backups are necessary, locate your game save files, which are typically found in the game’s directory or in your Documents folder, and back them up on an external drive or cloud storage.

**Installed Games**: While reinstalling games can be straightforward, downloading large files can be time-consuming and frustrating. Consider backing up your game installation files, especially for those you play frequently or are particularly large. Many game launchers have built-in features to manage local backups or allow you to copy the installation folder directly.

**Game Settings and Configurations**: Don’t forget about your personalized settings, including graphics tweaks, key bindings, and control configurations. These adjustments may take time to set up again, so exporting these settings, if possible, can save you a significant amount of hassle when you restore your system.

**Important Files and Documents**: Beyond games, consider backing up any essential documents related to your gaming, such as mods, custom maps, and scripts. If you’re part of a gaming community or have created content, those files are valuable and deserve protection.

**System and Software Configurations**: Finally, take a moment to back up your system settings, including drivers, software configurations, and your operating system settings. Tools like Windows Backup or third-party applications can help create a complete image of your system, which can be invaluable in case of hardware failure or data loss.

By identifying and prioritizing these essential elements, you can ensure that your gaming PC is backed up effectively, allowing you to dive back into your favorite virtual worlds with minimal disruption. Consider scheduling regular backups to maintain peace of mind and safeguard your digital gaming haven.

4. Choosing the Right Backup Method: Cloud vs. Local

When it comes to backing up your gaming PC, one of the most critical decisions you’ll face is choosing between cloud storage and local backup methods. Each option offers its own set of advantages and challenges, making it essential to evaluate which suits your needs best.

**Cloud Backup**
Cloud storage solutions, like Google Drive, Dropbox, or dedicated gaming backup services, provide the convenience of accessing your data from anywhere with an internet connection. This means that even if your gaming PC experiences a catastrophic failure, you’ll still have your files safe in the cloud, ready to be restored on a new device. Cloud backups often come with automatic syncing features, ensuring that your files are continuously updated without requiring manual intervention. However, it’s essential to consider subscription costs and potential data caps, which can be problematic for gamers who accumulate large files, such as high-resolution game assets and mods.

**Local Backup**
On the other hand, local backups involve storing your data on physical devices, such as external hard drives or network-attached storage (NAS). This method can be incredibly speedy, allowing for quick backups and restores, especially useful for large game files. Local backups also grant you complete control over your data, as you’re not reliant on internet speeds or external service providers. However, this method comes with its own risks. If a natural disaster strikes or if your hardware fails, you could lose everything stored on your local devices unless you have multiple backups in different locations.

Ultimately, the best approach may involve a hybrid strategy, combining the reliability of local backups with the accessibility of cloud storage. This way, you can enjoy the peace of mind that comes from knowing your gaming files are secure, no matter what happens to your primary system. By weighing the pros and cons of each method, you can create a robust backup plan that safeguards your digital gaming library against unforeseen mishaps and ensures you can dive back into your favorite games without missing a beat.

5. Recommended Backup Software for Gamers

pc gaming -  How to back up your gaming PC?
Credit : whatcanu.com

When it comes to safeguarding your gaming PC, selecting the right backup software is crucial for ensuring your precious game files, settings, and progress are secure. With a plethora of options available, it can be overwhelming to determine which software best fits the needs of a dedicated gamer. Here are some top recommendations that stand out for their reliability, ease of use, and features tailored specifically for gamers.

**1. Acronis True Image:** Acronis is a household name in the world of data backup, and for good reason. Its True Image software offers comprehensive features that allow you to create full disk images and backup specific files and folders. The software also includes built-in anti-malware protection, ensuring your gaming data is not only backed up but also secure from threats. With a user-friendly interface, Acronis makes the backup process straightforward, allowing you to schedule automatic backups, so you never have to worry about forgetting to save your progress.

**2. EaseUS Todo Backup:** Ideal for gamers seeking a balance between features and affordability, EaseUS Todo Backup provides a powerful backup solution with an intuitive interface. The software supports incremental backups, which means you can save changes made since your last backup, minimizing storage usage and backup time. It also allows you to clone your entire hard drive, making it easy to transfer all your games and settings to a new system if you decide to upgrade.

**3. Macrium Reflect:** If you’re a gamer on a Windows platform, Macrium Reflect is worth considering. This software excels in creating reliable disk images and provides robust recovery options. Its rapid imaging capabilities allow you to back up your system quickly, which is essential for minimizing downtime. Macrium also offers a free version, making it an accessible choice for those on a budget.

**4. Backblaze:** For those who prefer a cloud-based backup solution, Backblaze is an excellent option. It offers unlimited cloud storage for a flat fee, allowing you to back up all your game files without worrying about local storage limits. Its automatic backup feature ensures that your files are continuously updated, providing peace of mind that your gaming data is always secure. Plus, with easy file restoration options, you can quickly get everything back if the worst happens.

**5. Google Drive or Dropbox:** While not traditional backup software, these cloud storage services can be incredibly useful for gamers who want to ensure their most important files are safe. By using either platform, you can manually upload crucial game saves and mods, keeping them accessible from any device. With their generous free storage options, they can complement your primary backup solution perfectly.

By choosing the right backup software, you not only protect your gaming investments but also ensure that you can dive back into your favorite worlds without the fear of losing your progress. Each of these options offers unique features that cater to the diverse needs of gamers, providing the ultimate peace of mind as you embark on your gaming adventures.

6. Step-by-Step Guide to Backing Up Game Files

Backing up your game files doesn’t have to be a daunting task. In fact, following a step-by-step guide can streamline the process, ensuring you keep your gaming progress and cherished files safe from unexpected mishaps. Here’s how to do it effectively:

### Step 1: Identify Your Game Files

Start by locating your game files. Depending on your gaming platform and where you’ve installed the games, these can typically be found in one of several directories:
– For Steam users, navigate to `C:\Program Files (x86)\Steam\steamapps\common\`. Here, you’ll find folders for each of your installed games.
– If you use Epic Games, look in `C:\Program Files\Epic Games\`.
– Other platforms like Origin or GOG will have similar directories.

Make a list of the games you want to back up to ensure you don’t miss any of your favorites.

### Step 2: Choose Your Backup Method

Decide how you want to back up your files:
– **External Hard Drive:** A reliable option for large amounts of data. Simply connect your external drive to your PC and copy your game folders over.
– **Cloud Storage:** Services like Google Drive, Dropbox, or OneDrive offer a convenient way to back up files online. This method allows you to access your games from any device, but be mindful of storage limits.
– **Backup Software:** Consider using dedicated backup software that can automate the process and compress files for you. Programs like Acronis True Image or Macrium Reflect can make your life easier.

### Step 3: Execute the Backup

Once you’ve chosen your method, it’s time to execute the backup.
– **For External Drives:** Open the file explorer, navigate to your game files, and drag-and-drop the folders onto your external drive.
– **For Cloud Storage:** Upload the game folders directly to your chosen cloud service. Make sure the upload completes before closing your browser or app.
– **For Backup Software:** Follow the instructions provided by the software to initiate the backup process. Many tools allow you to schedule regular backups, which can save you time in the long run.

### Step 4: Verify Your Backup

After the backup is complete, don’t skip this crucial step! Navigate to your backup location—be it an external drive or cloud service—and check that all your files are intact. Open a few game folders to ensure they contain the expected data. This verification ensures you won’t run into issues down the line when you need to restore your files.

### Step 5: Develop a Regular Backup Schedule

To maintain peace of mind, make backing up your games a regular habit. Whether you choose to do this weekly, monthly, or after significant gaming milestones, consistency is key.

By following these steps, you’ll not only protect your beloved game files but also enjoy gaming with the ultimate peace of mind, knowing that your progress is securely backed up and easily restorable whenever needed. Happy gaming!

7. Backing Up Your Operating System and Settings

pc gaming -  How to back up your gaming PC?
Credit : whatcanu.com

Backing up your operating system and settings is a crucial step in safeguarding your gaming PC against unforeseen disasters, whether it’s a hardware failure, a malware attack, or simply a case of bad luck. Imagine losing your meticulously crafted game settings, your custom configurations, and all the hours spent fine-tuning your system’s performance—it’s a nightmare every gamer dreads.

To begin this essential process, you’ll want to create a complete image of your operating system. This image serves as a snapshot of your entire system at a specific point in time. Tools like Macrium Reflect, Acronis True Image, or the built-in Windows Backup and Restore feature can help you accomplish this. By creating a system image, you are not only backing up your OS but also preserving all your installed programs, drivers, and personal settings. This means that if something goes wrong, you can restore your entire setup to its previous state with minimal hassle.

In addition to the system image, consider exporting your settings and configurations for individual games and applications. Many games offer an option to save settings directly to the cloud or export them to a file, which allows you to quickly restore your preferences without starting from scratch. Don’t forget to back up your browser settings, bookmarks, and extensions, as these are often overlooked yet hold significant value for your online gaming experience.

Regularly schedule these backups, especially after significant changes or updates to your system. Setting a reminder on your calendar can help maintain this habit, ensuring that your valuable data is always protected. By taking these proactive measures, you’ll ensure that your gaming PC is not only a powerhouse for performance but also a fortress of safety, granting you the ultimate peace of mind to focus on what you love most—gaming.

8. Creating a Backup Schedule: Frequency and Timing

Creating a backup schedule is a crucial component of safeguarding your gaming PC, ensuring that your progress, files, and configurations remain intact. The frequency and timing of these backups can significantly influence how secure your data is against loss, whether due to hardware failures, accidental deletions, or software issues.

To start, consider how often you engage with your games and applications. For avid gamers who dive into multiple sessions daily, a daily backup might be your best bet. This ensures that all your latest save files, game settings, and custom configurations are protected with minimal risk of loss. On the other hand, if you game less frequently, a weekly or bi-weekly schedule could suffice.

Timing also plays a pivotal role in your backup routine. The ideal time for backups is when your system is least active. For many, this may be late at night or during off-peak hours when you’re less likely to be using your gaming PC. Scheduling backups during these times not only minimizes performance impacts but also allows for the backup process to run smoothly without interruptions.

Utilizing automated backup solutions can simplify this process. Many backup software applications allow you to set specific times and frequencies, taking the burden off your shoulders. This means you’ll never have to worry about forgetting to back up your data—peace of mind at its best!

Additionally, consider the types of data you’re backing up. While game saves and settings are essential, don’t overlook other valuable files such as mods, screenshots, or custom skins. Including these in your backup schedule will ensure that your gaming experience remains personalized and enjoyable.

In short, a well-planned backup schedule—considering both frequency and timing—will not only protect your valuable gaming data but also give you the confidence to explore new games and push your limits, knowing your efforts are secure.

9. Tips for Backing Up Save Files and Game Progress

Backing up your save files and game progress is a crucial step in safeguarding your gaming experience. After all, hours of gameplay and hard-earned achievements deserve protection from unforeseen events like hardware failures, accidental deletions, or corrupt files. Here are some essential tips to ensure your gaming data remains safe and sound.

### 1. Utilize Cloud Storage

Many modern games offer built-in cloud save functionality, allowing you to automatically back up your progress to the cloud. Platforms like Steam, Epic Games, and Origin provide this service, making it easy to retrieve your save files from any device. Ensure this feature is enabled in your game settings, as it offers a seamless way to protect your progress without additional effort.

### 2. Manual Backups

For games that don’t support cloud saves or if you want an additional layer of security, consider manually backing up your save files. Locate the folder where your games store save data—this is typically found in your Documents or AppData folder. Regularly copy these files to an external hard drive or a dedicated backup folder on your PC. Schedule these backups weekly or monthly to keep your saves up to date.

### 3. Use Backup Software

Consider employing dedicated backup software that can automate the process of backing up your important game files. Many programs allow you to set up scheduled backups, ensuring your saves are copied regularly without needing to remember to do it yourself. Look for software that offers incremental backups, so only changes are updated, saving you time and disk space.

### 4. Create a Recovery Drive

In case of a system failure, having a recovery drive can be a lifesaver. Use a USB flash drive to create a recovery disk that includes essential software and tools to restore your system. Make sure to include a copy of your game saves in this recovery drive. This way, if your PC ever crashes, you can quickly restore your system and your gaming progress in one go.

### 5. Document Your Game Progress

For particularly lengthy or complex games, consider maintaining a simple document or spreadsheet tracking your progress, achievements, and important in-game decisions. While this won’t replace actual save files, it can provide helpful context if you ever need to troubleshoot or restore your game state.

By employing these tips to back up your save files and game progress, you’ll ensure that your gaming memories remain intact, allowing you to focus on what truly matters: enjoying your favorite games without the anxiety of losing your hard work. Embrace these practices, and you can game with ultimate peace of mind.

10. Ensuring Data Security During the Backup Process

When it comes to backing up your gaming PC, ensuring data security throughout the backup process is paramount. The excitement of safeguarding your meticulously crafted game library, custom settings, and hard-earned achievements can quickly turn to anxiety if you don’t take the necessary precautions. Here are some essential tips to fortify your data security during backups.

First and foremost, utilize reputable backup software. Whether you choose a cloud-based solution or a local backup tool, ensure that it has a strong reputation for security. Look for features that include encryption, both in transit and at rest, to keep your data safe from prying eyes. This encryption acts as a protective barrier, ensuring that even if your backup files are intercepted, they remain unreadable without the right decryption key.

Next, always enable two-factor authentication (2FA) on your backup accounts. This extra layer of security requires not just your password, but also a second piece of information—like a code sent to your phone—before granting access. It’s a simple yet effective way to thwart potential unauthorized access to your backup data.

While backing up, be mindful of the storage location. If you opt for external hard drives or USB drives, ensure they are securely stored and not easily accessible to others. Additionally, consider keeping multiple backup copies in different locations. For instance, you might store one version on your external drive and another in the cloud. This redundancy ensures that even if one backup is compromised, you still have a secure copy to rely on.

Lastly, regularly update your backup strategy. As your gaming library grows and your PC undergoes changes, it’s crucial to revisit your backup process. This includes checking for software updates, testing your backups to ensure they’re functioning correctly, and revising your encryption methods if necessary. By staying proactive, you’ll maintain a robust security posture that keeps your data safe and sound.

By prioritizing data security during your backup process, you’re not just preserving your files; you’re ensuring that your gaming experience remains uninterrupted and enjoyable. With these strategies in place, you can gamely venture into new virtual worlds, confident that your hard work and achievements are securely backed up and protected.

11. Restoring Your Backup: How to Get Back in the Game

Restoring your backup is a crucial step in ensuring that you can seamlessly return to your gaming adventures without missing a beat. Whether it’s due to a hard drive failure, accidental deletion, or a complete system overhaul, knowing how to efficiently restore your backup can save you countless hours of frustration.

First, assess the type of backup you have created. Did you opt for a full system image, which captures everything on your hard drive, or did you choose a selective backup that only saves your game files, settings, and essential applications? Depending on your choice, the restoration process might vary slightly.

If you’ve created a full system image, the restoration process is typically straightforward. Boot your PC using a recovery drive or installation media that corresponds with your operating system. From there, navigate to the restore options and select the system image backup you wish to restore. This method will restore your entire system to the exact state it was in at the time of the backup, including all your games, settings, and personal files.

On the other hand, if you opted for selective backups, you will need to locate the saved files, whether they are stored on an external drive, cloud storage, or a dedicated backup software application. Simply copy the files back to their original locations. Be mindful of game-specific directories, as some titles save configurations in unique folders that may not be immediately obvious.

Additionally, many modern games and platforms, such as Steam and Epic Games Store, offer cloud save features. If your games support this, you may only need to reinstall the game client and allow it to sync your progress from the cloud, making restoration even easier.

Finally, once everything is restored, launch your games to ensure they are functioning correctly. Check your settings, graphics configurations, and saved progress to confirm that everything matches your previous setup. With your backup successfully restored, you can dive back into your gaming world, secure in the knowledge that your data is safe and sound for future sessions. Keeping your backups organized and regularly updated will maximize your gaming experience and give you ultimate peace of mind, allowing you to focus on what you enjoy most—playing games.

12. Best Practices for Keeping Your Backup Updated

Maintaining an updated backup of your gaming PC is crucial for safeguarding your valuable data, game progress, and personalized settings. Here are some best practices to ensure your backup remains current and reliable:

1. **Set a Regular Backup Schedule**: Establish a routine for backing up your files—whether it’s daily, weekly, or monthly—based on how often you modify your data. Automated backup software can help simplify this process, ensuring that you never forget to perform a manual backup.

2. **Utilize Multiple Backup Locations**: Don’t rely solely on one backup method. Use a combination of local external drives and cloud storage solutions. This strategy not only provides redundancy but also protects against hardware failures or local disasters.

3. **Version Control Your Backups**: Keep multiple versions of your backups. This practice allows you to restore your system to a specific point in time, which is especially useful if a recent change leads to issues. Many backup solutions offer versioning features that make this process seamless.

4. **Regularly Test Your Backups**: Just having backups isn’t enough; you need to ensure they work when you need them. Periodically restore files from your backups to verify their integrity and functionality. This test can save you from the panic of realizing a backup is corrupted when you need it most.

5. **Stay Informed About Game Updates**: Many games, especially those with online components, receive frequent updates. Make it a practice to back up your game saves and settings following major updates, as these can sometimes lead to unexpected changes or data loss.

6. **Monitor Storage Space**: Keep an eye on your backup storage. As your gaming library grows, so will the size of your backups. Regularly assess your storage solutions to ensure you have adequate space and consider upgrading when needed.

7. **Document Your Backup Process**: Create a simple guide outlining your backup procedures and schedule. This documentation can be invaluable in ensuring consistency, especially if someone else needs to manage your backups in your absence.

By following these best practices, you can ensure that your gaming PC backups remain up-to-date and reliable, providing you with peace of mind so you can focus on what truly matters—enjoying your gaming experience.

13. Troubleshooting Common Backup Issues

When it comes to backing up your gaming PC, encountering issues is not uncommon. However, troubleshooting these problems effectively can save you time and potential data loss. Here are some common backup issues you might face, along with practical solutions to help you navigate through them.

**1. Backup Fails to Complete:** One of the most frustrating issues is when your backup process abruptly fails. This could be due to insufficient storage space, a faulty external drive, or even software conflicts. First, ensure that your backup destination has enough space to accommodate your files. If using an external drive, try connecting it to a different USB port or using a different cable. Additionally, check for any updates for your backup software; outdated programs can often cause compatibility issues.

**2. Corrupted Backup Files:** Imagine the horror of discovering that your backup files are corrupted when you need them the most. To mitigate this risk, regularly test your backup files to ensure they can be restored successfully. If you suspect corruption, consider re-running the backup process. It’s also wise to maintain multiple backup copies in different locations, such as cloud storage and an external hard drive, to add an extra layer of safety.

**3. Permissions Issues:** Sometimes, your backup software may not have the necessary permissions to access certain files or directories, leading to incomplete backups. To resolve this, ensure that you are running your backup software with administrator privileges. Additionally, check the settings and permissions on the folders you wish to back up, ensuring the software can access all necessary files.

**4. Slow Backup Speeds:** If your backups are taking longer than expected, several factors could be at play. First, make sure you are not running other resource-intensive applications that could slow down your system. Additionally, consider the speed of your backup medium; USB 2.0 drives can significantly lag compared to USB 3.0 or SSDs. If you are backing up over a network, ensure your connection is stable and fast enough to handle large data transfers.

**5. Incomplete File Selection:** Lastly, a common oversight is failing to select all the files or folders you wish to back up. Before initiating the process, double-check your selections. If using a backup solution that allows for incremental backups, verify that it is set to include all new or changed files since your last backup.

By addressing these common backup issues proactively, you can ensure a smoother experience and maintain that ultimate peace of mind knowing your gaming data is safely stored. Remember, regular maintenance and checks can go a long way in keeping your backup processes running efficiently, allowing you to focus more on what truly matters—enjoying your games!

14. Additional Resources for PC Gamers

As a dedicated PC gamer, having a reliable backup strategy is crucial, but it doesn’t stop there. To enhance your gaming experience and ensure you’re making the most of your system, it’s wise to tap into additional resources specifically tailored for gamers. Here are some invaluable tools and communities that can help you elevate your gaming setup while safeguarding your data.

1. **Gaming Forums and Communities:** Platforms like Reddit’s r/pcgaming or dedicated gaming forums offer a wealth of knowledge. Here, you can find tips and tricks from fellow gamers, share experiences, and ask for advice on everything from backup solutions to the latest game releases.

2. **Performance Monitoring Tools:** Applications such as MSI Afterburner or HWMonitor provide real-time data on your system’s performance. Keeping an eye on your CPU and GPU temperatures can help you prevent overheating during those intense gaming sessions, ultimately extending the life of your components.

3. **Game Save Backup Services:** Services like Steam Cloud and GOG Galaxy automatically back up your game saves to the cloud, ensuring you never lose progress, even if your local files are compromised. Familiarize yourself with these options for a seamless gaming experience.

4. **Benchmarking Software:** Programs like 3DMark can help you test your system’s performance and stability, which is particularly useful after making hardware changes or updates. Regular benchmarking can also inform you about potential issues before they lead to data loss.

5. **Online Courses and Tutorials:** Websites such as YouTube and Udemy offer courses on everything from optimizing your gaming rig to advanced backup techniques. Learning from experts can empower you to take control of your gaming environment and secure your data effectively.

6. **Backup Solution Reviews:** Before settling on a backup solution, consider checking out review sites like TechRadar or CNET. These platforms often provide in-depth comparisons of backup software, helping you choose the best option based on your needs.

By leveraging these resources, you can not only ensure the safety of your data but also enhance your overall gaming experience. Remember, a well-rounded approach that combines reliable backups with ongoing education and community engagement will lead to ultimate peace of mind in your gaming endeavors.

15. Conclusion: Enjoying Your Gaming Experience with Peace of Mind

In conclusion, ensuring the safety and security of your gaming PC goes hand in hand with enhancing your overall gaming experience. By implementing a reliable backup strategy, you can protect your hard work, cherished achievements, and irreplaceable game files from unexpected mishaps, whether they stem from hardware failures, software issues, or even cyber threats.

Having a robust backup plan not only grants you peace of mind but also allows you to dive into your gaming sessions without the nagging worry of data loss hanging over your head. Imagine being able to fully immerse yourself in a captivating story or engaging in exhilarating multiplayer battles, all while knowing that your valuable data is securely stored and easily recoverable.

Remember, the steps you take to back up your gaming PC today will pay off in dividends tomorrow, ensuring that every exhilarating moment spent in your virtual worlds remains intact. So, take the time to set up a comprehensive backup system using a combination of cloud services and external drives, and make it a habit to update your backups regularly. By doing so, you’re not just safeguarding your files—you’re investing in the longevity of your gaming adventures. With this ultimate peace of mind, you can focus on what truly matters: enjoying the games you love without any interruptions. Happy gaming!

In conclusion, safeguarding your gaming PC is not just about protecting your valuable data; it’s about preserving the countless hours of joy and creativity that gaming brings. By following the steps outlined in this essential guide, you can ensure your games, settings, and personal achievements are securely backed up and easily recoverable. Whether you choose cloud storage for its convenience or external drives for their robust security, the key is to find a backup solution that fits your gaming lifestyle. Don’t wait for a mishap to occur—take proactive measures today for ultimate peace of mind. Now, dive back into your gaming adventures with confidence, knowing that your digital treasures are safe and sound! Happy gaming!

pc gaming – How to choose the best operating system for gaming?

In the ever-evolving landscape of PC gaming, the choice of operating system (OS) can make all the difference between a seamless gaming experience and one fraught with challenges.

With a myriad of options available, from the popular Windows to the emerging potential of Linux and the user-friendly macOS, gamers often find themselves at a crossroads. Each operating system brings its own set of features, compatibility, and performance levels that can significantly impact gameplay, graphics, and overall enjoyment. Whether you’re a casual player looking to dive into the latest titles or a hardcore gamer seeking every advantage in competitive play, understanding the strengths and weaknesses of each OS is crucial. In this comprehensive guide, we’ll delve into the intricacies of the best operating systems for PC gaming, helping you navigate the decision-making process with clarity and confidence, so you can optimize your setup and elevate your gaming experience to new heights.

1. Introduction to PC Gaming Operating Systems

pc gaming -  How to choose the best operating system for gaming?
Credit : whatcanu.com

In the vast and ever-evolving landscape of PC gaming, the operating system (OS) you choose is more than just a platform; it’s the foundation upon which your entire gaming experience is built. With a plethora of options available, ranging from the ubiquitous Windows to open-source alternatives like Linux, selecting the right OS can significantly influence performance, compatibility, and user experience.

Windows has long been the dominant player in the PC gaming arena, renowned for its extensive library of games and unparalleled support for the latest hardware and software. Its user-friendly interface, coupled with compatibility for a multitude of gaming peripherals, makes it a favorite among both casual gamers and hardcore enthusiasts alike. However, with the rise of Linux-based systems, many gamers are beginning to explore alternatives that promise enhanced customization and freedom from proprietary constraints.

In this guide, we’ll delve into the key features, advantages, and drawbacks of each operating system, helping you make an informed decision tailored to your gaming preferences. We’ll explore how each OS handles game installations, updates, and performance optimization, as well as discuss community support for troubleshooting and enhancements. Whether you’re a seasoned gamer looking to upgrade your setup or a newcomer eager to dive into the gaming world, understanding the nuances of each operating system will empower you to choose the one that aligns best with your gaming aspirations. Join us as we embark on this journey to uncover the perfect operating system for your gaming needs!

2. Overview of Popular Operating Systems for Gaming

When it comes to gaming on a PC, the choice of operating system plays a crucial role in your overall experience. The three most popular operating systems—Windows, macOS, and Linux—each offer unique advantages and drawbacks that can significantly influence gameplay, performance, and compatibility.

**Windows** is the dominant player in the gaming world, accounting for the vast majority of gamers’ setups. Its extensive compatibility with a wide range of games, from AAA blockbusters to indie gems, is unparalleled. With direct support for the latest graphics drivers and gaming technologies like DirectX 12, Windows ensures that gamers can tap into the full potential of their hardware. Additionally, the vast array of gaming peripherals and accessories, which often provide optimized drivers exclusively for Windows, further solidifies its position as the go-to OS for serious gamers. However, with all its advantages, Windows can sometimes be prone to stability issues or bloatware, requiring regular maintenance to keep it running smoothly.

**macOS**, on the other hand, offers a more polished and user-friendly experience but is often seen as a less viable option for gaming. While Apple has made strides in improving gaming performance with its recent hardware updates and the introduction of Metal for graphics rendering, the library of games available on macOS is still limited compared to Windows. Many popular titles may not be available natively, leading gamers to rely on workarounds like Boot Camp or virtualization software, which can impact performance. That said, if you’re already immersed in the Apple ecosystem and your gaming needs are more casual, macOS can still provide a satisfying experience.

**Linux** is often lauded for its open-source nature and customization options, making it a favorite among tech-savvy users. While traditionally seen as a less-than-ideal choice for gaming due to compatibility issues, the landscape has changed significantly in recent years. Platforms like Steam have made great strides in supporting Linux gaming, with a growing library of titles optimized for this OS. Additionally, tools like Proton allow many Windows-exclusive games to run on Linux, bridging the gap for avid gamers. However, the learning curve can be steep, and users may need to invest time in troubleshooting and configuration to achieve optimal performance.

In summary, the decision on which operating system to use for gaming boils down to your specific needs, preferences, and the types of games you want to play. While Windows remains the top choice for most gamers due to its unparalleled compatibility and performance, macOS and Linux are worth considering for specific use cases or if you’re looking for a unique gaming experience. Understanding the strengths and limitations of each can help you make an informed choice that enhances your gaming journey.

3. Windows: The Dominant Choice for Gamers

pc gaming -  How to choose the best operating system for gaming?
Credit : whatcanu.com

When it comes to PC gaming, Windows stands out as the undisputed champion, capturing a staggering market share that reflects its robust capabilities and extensive support for gaming. The reasons for this dominance are multifaceted, starting with the vast library of games available exclusively or primarily for Windows. Major titles, including AAA blockbusters and indie gems, are often developed with Windows in mind, ensuring that gamers have access to the latest and greatest in the gaming world.

One of the key advantages of Windows is its compatibility with a wide array of hardware. Whether you’re running a high-end rig with the latest graphics card or a more modest setup, Windows seamlessly integrates with various components, drivers, and peripherals, optimizing performance across the board. This flexibility enables gamers to customize their rigs according to their preferences and budget, ensuring a tailored gaming experience that can accommodate everything from casual gaming sessions to competitive play.

Furthermore, Windows consistently receives updates that enhance its performance and security features, making it a reliable choice for gamers who demand the best from their systems. The introduction of DirectX 12, for instance, has revolutionized graphics rendering and performance, allowing developers to create visually stunning games that push the boundaries of what’s possible on a PC.

Another significant factor contributing to Windows’ popularity is its vibrant gaming community. Platforms like Steam, Epic Games Store, and Origin thrive on Windows, offering gamers access to not only a vast selection of titles but also community features, multiplayer options, and frequent sales that make gaming more accessible and affordable.

While other operating systems have made strides in gaming, such as macOS and Linux, they still fall short in terms of game availability and optimization. For serious gamers, the choice is clear: Windows provides the most comprehensive, user-friendly, and future-proof environment for all your gaming needs. If you’re looking to dive into the world of PC gaming, choosing Windows will ensure that you’re equipped with the tools and support necessary to enjoy the immersive experiences that modern games have to offer.

4. macOS: Pros and Cons for Gaming

When it comes to PC gaming, macOS often finds itself in a contentious position. While Apple’s operating system is renowned for its sleek design, robust security, and user-friendly interface, it may not always be the first choice for gamers. Here’s a closer look at the pros and cons of macOS for gaming, helping you to determine if it aligns with your gaming needs.

### Pros of macOS for Gaming

**1. Stability and Security:**
One of the standout features of macOS is its stability. The operating system is less prone to crashes and malware compared to its competitors, providing a secure environment for gaming. This reliability can be particularly appealing for gamers who want a hassle-free experience without the constant worry of system failures.

**2. High-Quality Hardware:**
Apple’s hardware is designed with premium materials and exceptional craftsmanship, leading to high-performance machines capable of handling demanding titles. Macs often come equipped with powerful processors and high-resolution displays that enhance the gaming experience, especially for visually stunning titles.

**3. Exclusive Titles:**
Although the gaming library on macOS is smaller than that on Windows, there are still exclusive titles that can only be played on Apple devices. Games like “Civilization VI” and “Shadow of the Tomb Raider” have macOS versions, offering unique experiences that may not be available on other platforms.

### Cons of macOS for Gaming

**1. Limited Game Library:**
The most significant drawback of macOS for gaming is the limited selection of titles. Many popular games, particularly AAA titles, are often released for Windows first or exclusively. This can significantly restrict your gaming options if you’re committed to the macOS environment.

**2. Performance Issues:**
While Macs are known for their high-quality hardware, the gaming performance may not match that of similarly priced Windows PCs. Many games are optimized for Windows, meaning they can run more efficiently on that operating system, leaving Mac users facing lower frame rates and longer load times in some cases.

**3. Compatibility Challenges:**
Running certain gaming peripherals and software can be a headache on macOS. Some gaming mice, keyboards, and accessories are primarily designed for Windows, leading to compatibility issues. Additionally, if you enjoy using mods or customizations, you may find fewer options available for macOS compared to its more flexible counterpart.

In summary, while macOS offers a polished and secure environment that can appeal to certain gamers, its limitations in game availability and performance may deter those seeking a more robust gaming experience. If you’re a casual gamer who values design and stability, macOS might be suitable for you, but for hardcore enthusiasts, exploring a Windows-based setup could be more beneficial.

5. Linux: An Emerging Player in the Gaming Arena

pc gaming -  How to choose the best operating system for gaming?
Credit : whatcanu.com

In recent years, Linux has emerged as a formidable contender in the gaming landscape, challenging the long-held dominance of Windows. Traditionally seen as a platform for developers and tech enthusiasts, Linux is now catching the eye of gamers for several compelling reasons. With a growing library of compatible games and a supportive community, it’s becoming an increasingly viable option for those looking to maximize their gaming experience.

One of the most significant advantages of Linux is its open-source nature, which allows for greater customization and flexibility. Gamers can tailor their systems to suit their specific needs, optimizing performance, and enhancing graphics capabilities. Distributions like Ubuntu, Pop!_OS, and SteamOS have streamlined the installation process and made it easier than ever for users to dive into gaming without extensive technical expertise.

Moreover, the rise of gaming technologies such as Proton — a compatibility layer developed by Valve that enables Windows games to run on Linux — has dramatically expanded the library of titles available to Linux users. This means that popular AAA titles, indie games, and even some of the latest releases can be enjoyed without the need for a Windows operating system.

Furthermore, Linux benefits from lower resource consumption, which can free up more power for gaming. This efficiency can lead to smoother gameplay and improved performance on lower-end hardware, making it an attractive option for gamers on a budget.

However, it’s essential to note that while the gaming ecosystem on Linux is rapidly evolving, some titles may still face compatibility issues, and certain gaming peripherals may not have full support. Gamers considering the switch to Linux should conduct thorough research into the games they wish to play and check community forums for insights on performance and compatibility.

In summary, Linux is carving out its niche in the gaming arena, offering a unique blend of customization, efficiency, and an expanding library of games. As the gaming community continues to grow and innovate, Linux is positioned to be a valuable option for gamers looking to explore alternatives beyond traditional operating systems. For those willing to navigate its learning curve, the rewards can be substantial, making Linux an exciting player in the ever-evolving world of PC gaming.

6. Performance Comparison: Windows vs. macOS vs. Linux

When it comes to PC gaming, the choice of operating system can significantly influence your overall experience, and understanding the performance differences between Windows, macOS, and Linux is crucial for making an informed decision.

**Windows** has long been the dominant player in the gaming world, and for good reason. With the broadest compatibility for games, Windows boasts an extensive library of titles, ranging from indie gems to blockbuster hits. The operating system is optimized for gaming performance, offering support for DirectX, which enhances graphics and gameplay fluidity. Moreover, the regular updates and vast driver support for graphics cards mean that you can generally expect better performance and fewer issues than on other platforms. For gamers who prioritize high frame rates and cutting-edge graphics, Windows remains the gold standard.

**macOS**, on the other hand, often takes a backseat in the gaming arena. While it has made strides in recent years—thanks in part to the powerful M1 and M2 chips—its game library is still limited compared to Windows. Many popular titles simply aren’t available on macOS, and even those that are may not perform as well due to less optimization. However, for casual gamers or those who prefer gaming as a secondary activity, macOS can still provide a pleasant experience for lighter, less demanding games. Plus, the seamless integration with other Apple devices and the user-friendly interface can be appealing.

**Linux** is the underdog in this trio, often praised for its flexibility and open-source nature. While the number of games available for Linux is steadily increasing—thanks to platforms like Steam supporting Proton for compatibility—it’s still a smaller selection compared to Windows. Performance can vary widely, depending on how well a game is ported and optimized for Linux. Advanced users may appreciate the customization options and the ability to tweak their system for better performance. However, Linux may require more technical know-how to set up and maintain, making it less ideal for those who want a plug-and-play gaming experience.

In summary, if you’re seeking top-tier performance and the widest range of game options, Windows is your best bet. macOS may appeal to casual gamers or those already invested in the Apple ecosystem, while Linux offers a unique, customizable experience for the more tech-savvy gamer willing to navigate its limitations. Ultimately, the best choice depends on your gaming preferences, technical abilities, and how much you value performance versus convenience.

7. Game Compatibility: Which OS Supports Your Favorites?

pc gaming -  How to choose the best operating system for gaming?
Credit : whatcanu.com

When it comes to PC gaming, one of the most crucial factors to consider is game compatibility. Not all operating systems provide the same level of support for your favorite titles, and this can significantly impact your gaming experience. As you weigh your options, it’s essential to understand which OS aligns best with the games you love to play.

Windows has long been the dominant player in the gaming world, primarily due to its vast library of supported titles. From blockbuster AAA releases to indie gems, most games are optimized for Windows, ensuring the best possible performance. The compatibility extends beyond just the games themselves; many gaming peripherals, such as controllers and VR headsets, are designed with Windows in mind, offering seamless integration and functionality.

On the other hand, macOS has made strides in recent years, but its game library remains limited compared to Windows. While some popular titles are available, many gamers find themselves missing out on significant releases. Moreover, the gaming community on macOS is relatively smaller, which can lead to longer wait times for updates and fewer options for multiplayer gaming.

Linux, although gaining traction and offering some fantastic free-to-play games, still faces challenges when it comes to mainstream titles. While platforms like Steam have made strides in supporting Linux gaming, the reality is that many games require workarounds or additional software, such as Proton, to run effectively on this OS. If you’re passionate about open-source software and willing to navigate its complexities, Linux can be a rewarding option—but it might not be suitable for everyone.

When selecting an operating system for gaming, it’s vital to consider not just the games you currently enjoy but also any future titles you might be interested in. Research the compatibility of your favorite games and take stock of upcoming releases. Additionally, consider your gaming habits; if you enjoy playing the latest AAA titles, Windows is likely your best bet. However, if you’re drawn to indie games or have specific preferences that cater to Linux or macOS, those systems may also warrant consideration.

In summary, the right operating system for your gaming needs largely depends on the titles you want to play and how crucial a seamless gaming experience is to you. Take the time to explore each OS’s strengths and weaknesses, and you’ll be well on your way to choosing the perfect platform for your gaming adventures.

8. System Requirements: Hardware Considerations for Each OS

When it comes to PC gaming, selecting the right operating system is only part of the equation; understanding the system requirements associated with each OS is equally crucial. Different operating systems come with varying compatibility levels and performance capabilities, which can significantly impact your gaming experience.

### Windows

Windows has long been the favored choice among gamers, largely due to its extensive support for a vast library of games and gaming hardware. The system requirements for Windows can vary based on the version you choose—Windows 10 and Windows 11 are the most popular among gamers today. For optimal performance, ensure that your hardware meets the recommended specifications, which typically include a multi-core processor, at least 8GB of RAM (though 16GB is ideal for demanding titles), and a dedicated graphics card. Keep in mind that as games evolve, their requirements often increase, so investing in powerful hardware can future-proof your gaming setup.

### macOS

While macOS has made strides in gaming, it still lags behind Windows in terms of game availability. Many popular titles are either not available or run less efficiently on macOS. If you opt for macOS, it’s essential to choose hardware that meets the higher-end requirements for gaming. Recent Macs equipped with M1 or M2 chips provide impressive performance and can handle many games well, but be cautious as some older titles may not be compatible. Additionally, the limited upgradeability of Mac hardware compared to Windows systems could restrict your gaming potential down the line.

### Linux

Linux is gaining traction in the gaming community thanks to platforms like Steam offering a growing library of compatible games. However, Linux users often face unique challenges regarding hardware compatibility and driver support. To ensure a smooth gaming experience, it’s vital to check that your graphics card has reliable Linux drivers and that your system meets the minimum requirements for the games you wish to play. A robust setup with a multi-core processor and ample RAM (8GB or more) will enhance performance, but be prepared for a learning curve when it comes to optimizing your system for gaming.

### Conclusion

Ultimately, the choice of operating system will hinge on your gaming preferences, the types of games you wish to play, and your hardware setup. By carefully considering the system requirements of each OS and aligning them with your gaming hardware, you can ensure a more enjoyable and seamless gaming experience. Whether you choose Windows for its comprehensive support, macOS for its sleek performance, or Linux for its open-source flexibility, understanding the hardware implications will set you on the path to gaming success.

9. Drivers and Updates: Importance for Gaming Performance

When it comes to maximizing your gaming performance, the role of drivers and updates cannot be overstated. Drivers are the crucial pieces of software that allow your operating system to communicate with your hardware, including your graphics card, sound card, and other peripherals. Keeping these drivers up to date ensures that your gaming rig can leverage the latest optimizations and enhancements provided by manufacturers.

For gamers, outdated drivers can lead to a myriad of issues, from reduced frame rates and stuttering graphics to crashes and compatibility problems with new titles. For instance, graphics card manufacturers like NVIDIA and AMD frequently release driver updates that not only fix bugs but also enhance performance for newly launched games. By installing these updates, you can often unlock additional frames per second (FPS), sharper graphics, and improved overall stability during gameplay.

Equally important are system updates for your operating system. Whether you’re using Windows, Linux, or another OS, regular updates will patch security vulnerabilities, improve system stability, and sometimes even include optimizations that enhance gaming performance. For example, Microsoft frequently rolls out updates that improve DirectX performance, which is crucial for many modern games.

Incorporating a routine check for both driver and system updates into your gaming regimen can make a noticeable difference in your gaming experience. Whether you set a reminder to check for updates weekly or take advantage of automatic updates, staying current with the latest software versions can help you avoid potential pitfalls and ensure that your gaming system runs at its best. In a world where milliseconds can make the difference between victory and defeat, prioritizing your drivers and operating system updates is a critical step toward achieving peak gaming performance.

10. User Interface and Experience: Which OS is More Gamer-Friendly?

When it comes to gaming, the user interface (UI) and overall user experience (UX) of an operating system can significantly impact how players interact with their games and manage their systems. A gamer-friendly OS should not only provide easy access to games but also facilitate smooth navigation and customization options to enhance the gaming experience.

Windows, long considered the dominant platform for PC gaming, boasts a familiar and intuitive interface that many gamers have grown accustomed to. Its Start Menu provides quick access to installed games, and the taskbar allows for easy switching between applications. Furthermore, Windows supports a vast array of gaming peripherals and software, making it an ideal choice for gamers who want to optimize their setups. With features like the Game Bar, gamers can record gameplay, take screenshots, and access settings without interrupting their session, all of which add to the seamless experience Windows offers.

On the other hand, macOS, while known for its sleek design and stability, tends to lag in the gaming department. The user interface is polished and user-friendly, but the limited selection of games on this platform can be a drawback for serious gamers. Additionally, macOS is often not as customizable as Windows when it comes to performance tweaks and optimizations for gaming. However, for casual gamers or those who prioritize a clean and aesthetically pleasing interface, macOS can still provide a satisfactory experience.

Linux, meanwhile, has made significant strides in recent years with distributions like SteamOS and Pop!_OS designed specifically for gaming. The open-source nature of Linux allows for extensive customization, and many gamers appreciate the control they have over their system. However, the learning curve can be steep for newcomers, and compatibility issues with certain games and hardware may create a frustrating experience. The user interface can vary significantly between different distributions, which may be a determining factor for gamers looking for a specific look and feel.

Ultimately, the best OS for gaming will depend on individual preferences and gaming habits. Windows remains the go-to choice for its extensive game library and user-friendly interface, while macOS and Linux offer unique advantages and experiences for those who prioritize design or customization. As you weigh your options, consider how each operating system aligns with your gaming needs and lifestyle—after all, the right OS can elevate your gaming experience to new heights.

11. Customization Options: Flexibility for Gamers

When it comes to PC gaming, customization is paramount, and the operating system you choose can make all the difference in how flexible your gaming experience can be. A gaming-friendly OS should not only support a wide array of titles but also allow you to tailor the environment to suit your unique preferences and needs.

Windows, for instance, is renowned for its extensive customization capabilities. From tweaking system settings to enhance performance, to configuring graphics options for individual games, Windows provides gamers with the tools to fine-tune every aspect of their experience. Third-party applications and mods can easily be integrated, allowing you to adjust everything from user interfaces to in-game controls, ensuring that your gaming setup is as comfortable and efficient as possible.

On the other hand, Linux has gained traction in the gaming community for its high level of customization, albeit with a steeper learning curve. While traditionally seen as less compatible with mainstream games, many distributions now offer excellent support through platforms like Steam’s Proton, which allows Windows games to run seamlessly. The open-source nature of Linux enables enthusiasts to modify the OS down to the kernel level, giving technically savvy users the flexibility to create a gaming environment that is uniquely their own.

Regardless of your choice, having the ability to customize your operating system can significantly enhance your gaming experience. Whether it’s adjusting performance settings, organizing game libraries, or establishing shortcuts for quick access, the right OS will empower you to create the perfect gaming sanctuary tailored to your style. Embrace the flexibility offered by your chosen operating system, and watch as it transforms your gaming sessions into extraordinary adventures.

12. Gaming Communities and Support: Where to Find Help

When it comes to PC gaming, navigating the vast landscape of platforms and technologies can sometimes feel overwhelming. However, one of the most powerful resources at your disposal lies in the vibrant gaming communities and support networks that thrive online. These communities are not only hubs for sharing tips and tricks but also invaluable sources of assistance for troubleshooting issues, finding the best hardware, and discovering new games.

First, consider joining forums and discussion boards dedicated to gaming, such as Reddit’s numerous gaming subreddits, the Steam Community, and specialized forums like NeoGAF or GameFAQs. Browsing through these platforms can provide you with a treasure trove of information. Users often share their firsthand experiences with different operating systems, helping you gauge which one might suit your gaming needs best.

Social media platforms also host lively gaming communities. Join groups on Facebook or follow gaming influencers on Twitter and Twitch, where you can engage in discussions, ask questions, and receive real-time feedback from fellow gamers. Many content creators host live Q&A sessions or post video tutorials that can help you solve problems or optimize your gaming setup.

In addition to community support, don’t overlook the resources provided by game developers and hardware manufacturers. Many companies maintain forums or knowledge bases where you can find official documentation and troubleshooting guides. For example, NVIDIA and AMD both offer extensive support sections for their graphics cards, including common issues and solutions tailored to specific operating systems.

Finally, if you prefer a more personal touch, consider exploring Discord servers dedicated to your favorite games or gaming genres. These servers often have channels for technical support, where experienced members can offer guidance or share their expertise. Being part of a community not only enhances your gaming experience but also connects you with others who share your passion.

By leveraging these diverse gaming communities and support channels, you can easily find the help you need to enhance your PC gaming experience, troubleshoot any issues, and ultimately choose the operating system that best meets your gaming needs. Remember, you’re never alone in the gaming world; a community of passionate gamers is just a click away.

13. Future Trends in Gaming Operating Systems

As the gaming landscape continues to evolve, so too do the operating systems that support it. Keeping an eye on future trends in gaming operating systems can provide valuable insights into what gamers can expect in the coming years. One of the most significant trends is the rise of cloud gaming. With services like Google Stadia, NVIDIA GeForce NOW, and Xbox Cloud Gaming, the need for powerful local hardware is diminishing. Instead, gamers are beginning to prioritize operating systems that seamlessly integrate with cloud services, allowing them to access their favorite games from virtually any device with an internet connection.

Another notable trend is the increasing importance of cross-platform compatibility. As gamers demand more flexibility, operating systems that support cross-play and cross-save features are gaining traction. This means that whether you’re on Windows, macOS, or even Linux, you can enjoy a unified gaming experience with friends, regardless of the platform they choose. Developers are recognizing this need, prompting them to create games that can be played across multiple operating systems without sacrificing performance or user experience.

Additionally, the integration of artificial intelligence (AI) and machine learning into gaming operating systems is set to revolutionize how players interact with their games. From adaptive difficulty levels that respond to a player’s skill set to smarter matchmaking systems that pair players based on their behavior and preferences, AI can enhance the overall gaming experience. Operating systems that effectively harness these technologies will likely lead the way in the competitive gaming market.

Lastly, as we see more emphasis on user experience, gaming operating systems are expected to incorporate more customizable features, allowing players to tailor their environments to suit their personal preferences. From dynamic interfaces to customizable performance settings, the demand for a personalized gaming experience is stronger than ever.

In summary, the future of gaming operating systems is not just about performance but also about creating a holistic, user-centric experience that embraces emerging technologies and adapts to the evolving needs of gamers. Staying informed about these trends will help you make strategic decisions when choosing the best operating system for your gaming setup.

14. Making the Switch: Tips for Transitioning Between Operating Systems

Making the switch between operating systems can be a daunting task, especially for gamers who rely heavily on performance and compatibility. However, with the right approach, you can transition smoothly and enhance your gaming experience in the process. Here are some essential tips to help you navigate this change effectively.

First and foremost, it’s crucial to research the operating system you plan to switch to. Different OS options—like Windows, macOS, and Linux—offer varying levels of support for gaming. Windows remains the most popular choice among gamers due to its extensive library of games and support for the latest hardware. However, if you’re considering a shift to Linux for its open-source benefits, be prepared for some initial hurdles, such as finding compatible games and drivers.

Before making the switch, back up all your important files and game data. This step is vital to ensure you don’t lose any progress or essential documents during the transition. Use external drives or cloud storage services to create a comprehensive backup. This habit will not only save you from headaches but will also give you peace of mind as you proceed.

Once you’ve backed up your data, create a list of your most-played games and check their compatibility with the new operating system. Many popular titles are natively supported on Windows, while others may require workarounds or emulators on platforms like Linux. Websites such as ProtonDB can provide insights on how well games perform on Linux, helping you make informed decisions about your gaming library.

When you’re ready to install the new operating system, consider setting up a dual-boot system. This setup allows you to keep your current OS while experimenting with the new one. It gives you the flexibility to switch back if you encounter issues, ensuring you don’t sacrifice your gaming experience. For those who prefer a fresh start, a clean installation will require you to reinstall games and applications, so plan this process carefully.

Finally, once you’ve successfully transitioned, take time to familiarize yourself with the new environment. Each operating system has its own set of features, settings, and shortcuts that can enhance your gaming experience. Explore the settings to optimize performance, adjust graphics configurations, and customize controls according to your preferences. Engaging with community forums and gaming groups can also provide valuable tips and tricks tailored to your new operating system.

By following these steps, you can ensure that your transition between operating systems is as seamless as possible, allowing you to dive back into your favorite games and explore new titles with confidence. Happy gaming!

15. Conclusion: Choosing the Right OS for Your Gaming Needs

In the rapidly evolving world of PC gaming, selecting the right operating system (OS) can significantly influence your overall experience and performance. As we conclude this comprehensive guide, it’s essential to summarize the key considerations that will help you make an informed decision tailored to your gaming needs.

First and foremost, evaluate the types of games you play and the performance requirements they demand. If you’re an avid player of AAA titles that require robust hardware support and the latest graphical enhancements, Windows 10 or 11 may be your best bet due to their widespread compatibility and optimization for gaming. On the other hand, if you lean towards indie games or niche titles, you might explore alternatives like Linux, which can offer a lightweight environment and impressive customization options.

Next, consider your hardware. Some operating systems are better optimized for specific types of hardware setups. For instance, if you have high-end components, Windows tends to unlock their full potential, thanks to regular updates and driver support from manufacturers. If you’re using older hardware, a lightweight Linux distribution could breathe new life into your gaming rig by reducing resource overhead.

Also, don’t overlook community support and software availability. Windows has a vast library of games and applications, and its user base means you’ll find plenty of forums and resources for troubleshooting. Conversely, while Linux has made significant strides in terms of gaming compatibility—especially with platforms like Steam—its library is still not as extensive as Windows.

Lastly, think about your personal preferences and familiarity with an OS. If you’re comfortable navigating Windows and are used to its ecosystem, switching to a different OS might lead to unnecessary frustration. However, if you’re tech-savvy and enjoy tinkering, exploring alternatives could be a rewarding experience that enhances your gaming setup.

In conclusion, the right operating system for your gaming needs hinges on a combination of performance, compatibility, community support, and personal preference. Take the time to assess your unique gaming habits and hardware configuration, and you’ll be well on your way to creating an optimized gaming environment that keeps you fully engaged in your virtual adventures. Happy gaming!

In conclusion, selecting the right operating system for your PC gaming setup can significantly enhance your overall gaming experience, ensuring optimal performance and compatibility with your favorite titles. We hope this comprehensive guide has illuminated the key features and considerations needed to make an informed decision. Whether you lean towards the robust architecture of Windows, the versatility of Linux, or the seamless integration of macOS, understanding your gaming needs and preferences is crucial. As you embark on this journey, remember to keep your system updated and explore the vast world of games available on your chosen platform. Happy gaming, and may your adventures be filled with excitement and unforgettable moments!

pc gaming – How to maintain your PC for optimal gaming performance?

In the vibrant world of PC gaming, where every frame counts and every millisecond can make the difference between victory and defeat, ensuring your gaming rig operates at peak performance is more crucial than ever.

Whether you’re navigating vast open worlds, engaging in high-octane multiplayer battles, or immersing yourself in stunning graphics, the last thing you want is for your system to lag or crash. That’s why regular maintenance is key to maximizing your gameplay experience. In this comprehensive guide, we’ll delve into essential tips and techniques to keep your PC in top shape, from optimizing software settings and cleaning out dust to upgrading hardware components. With these strategies, you’ll not only enhance performance but also prolong the life of your gaming setup, allowing you to fully enjoy every epic quest and adrenaline-fueled match. Get ready to unlock the full potential of your gaming experience!

1. Introduction: The Importance of PC Maintenance for Gamers

pc gaming -  How to maintain your PC for optimal gaming performance?
Credit : whatcanu.com

In the fast-paced world of PC gaming, where every millisecond can mean the difference between victory and defeat, maintaining your gaming rig is not just a suggestion, but a necessity. Just as athletes train and refine their skills, gamers must ensure their equipment runs at peak performance to fully enjoy the immersive experiences that modern titles offer.

The importance of PC maintenance extends beyond mere aesthetics; it encompasses everything from hardware health to software optimization. Over time, dust can accumulate inside your PC, obstructing airflow and causing overheating, which can lead to throttling or even hardware failures. Similarly, software clutter—ranging from unused applications to fragmented files—can bog down your system, leading to longer load times, stuttering frames, and frustrating lag during critical moments in gameplay.

Moreover, regular maintenance can enhance your system’s longevity, ensuring that the investment you’ve made in high-performance components continues to yield top-tier experiences for years to come. By taking the time to implement a routine maintenance schedule, you can not only boost your gaming performance but also create a more stable and enjoyable gaming environment. In this guide, we will explore essential maintenance tips that will empower you to maximize your gameplay and keep your PC running smoothly, so you can focus on what truly matters—dominating the competition and conquering new worlds.

2. Regular Software Updates: Keeping Your System Updated

In the fast-paced world of PC gaming, having the latest hardware is only part of the equation for optimal performance. Regular software updates are equally crucial, as they ensure your system operates smoothly and efficiently. Just as game developers release patches and updates to fix bugs and improve gameplay, your operating system and drivers also require periodic updates to maintain compatibility and performance.

Start with your operating system—whether you’re using Windows, macOS, or Linux. Regular updates from Microsoft or Apple not only introduce new features but also enhance security and stability, protecting your gaming rig from potential vulnerabilities. These updates can improve system performance, reducing lag and ensuring seamless gameplay.

Next, turn your attention to your graphics card drivers. NVIDIA and AMD frequently release updates that optimize their drivers for the latest games, providing better graphics performance and resolving issues that may arise with new titles. Failing to update your graphics drivers can result in slower frame rates, visual glitches, and even crashes during gameplay. By keeping these drivers up to date, you can unlock the full potential of your hardware and enjoy visually stunning experiences without interruption.

Additionally, don’t overlook updates for other critical software components such as DirectX, game launchers (like Steam or Epic Games), and even your antivirus software. Each of these elements plays a role in the overall gaming experience. DirectX updates can enhance audio and visual performance, while game launcher updates often include optimizations and new features that can improve your gaming library’s efficiency.

Incorporating regular software updates into your gaming routine may seem like a minor task, but it can dramatically impact your overall gaming experience. Set a reminder to check for updates weekly or enable automatic updates where possible. By doing so, you ensure that your gaming system is always running at its best, allowing you to focus on what really matters—immersing yourself in the exhilarating worlds of your favorite games.

3. Optimizing Graphics Settings: Finding the Right Balance

pc gaming -  How to maintain your PC for optimal gaming performance?
Credit : whatcanu.com

When it comes to PC gaming, striking the perfect balance between stunning visuals and smooth performance is crucial for an immersive experience. Optimizing your graphics settings is a key step in achieving this balance, ensuring that your gameplay is not only visually appealing but also runs seamlessly without lag or stutter.

Start by assessing the capabilities of your hardware. Understanding your graphics card’s limits will help you make informed decisions about which settings to tweak. If you have a high-end GPU, you can afford to crank up the resolution and enable advanced features like ray tracing and ambient occlusion. However, if your system is on the lower end, you might need to dial back on these settings to maintain a fluid frame rate.

Most modern games offer a range of graphics presets, from low to ultra. While these presets are convenient, it’s worth taking the time to customize individual settings for a more tailored experience. Consider lowering shadows and texture quality, which can have a significant impact on performance without drastically affecting visual fidelity. Features like anti-aliasing, which smooths out jagged edges, can be adjusted to find a middle ground between aesthetics and performance.

Another important aspect to consider is your display resolution. Playing at a higher resolution can enhance detail, but it also demands more from your GPU. If you’re experiencing frame rate drops, reducing the resolution or switching to a lower aspect ratio can provide a noticeable boost in performance.

Lastly, remember to keep your drivers up to date. Graphics card manufacturers frequently release updates that optimize performance for the latest games, fix bugs, and improve overall stability. Staying current with these updates can give you the edge you need for a smoother gaming experience.

By carefully adjusting your graphics settings and finding that sweet spot between performance and aesthetics, you can ensure that your gaming sessions are not only visually stunning but also fluid and exhilarating. This optimization not only enhances your gameplay but also prolongs the life of your hardware, allowing you to dive into the virtual worlds you love without compromise.

4. Cleaning Your Hardware: Dusting and Airflow Management

When it comes to maximizing your gaming performance, maintaining a clean and well-ventilated environment for your hardware is crucial. Over time, dust and debris can accumulate inside your PC, obstructing airflow and causing components to overheat, which can lead to sluggish performance or even hardware failure. Regularly cleaning your gaming rig not only enhances its lifespan but also ensures that you’re getting the most out of your powerful setup.

Start by powering down your PC and disconnecting all cables. Using a can of compressed air, carefully blow out dust from fans, heat sinks, and ventilation grilles. Pay special attention to the CPU and GPU, as these components generate the most heat and are often the most affected by dust buildup. Make sure to hold the fans in place while cleaning to prevent them from spinning, which can cause damage.

In addition to dusting, it’s vital to manage airflow effectively. Ensure that your PC case has sufficient ventilation and that there are no obstructions blocking air intakes or exhausts. Consider investing in additional case fans or upgrading to higher-quality ones to enhance airflow. If your setup allows, position your tower in a location where it can breathe freely, rather than crammed into a corner or under a desk.

Finally, don’t overlook cable management. Neatly organized cables not only improve the aesthetics of your setup but also contribute to better airflow. Use zip ties or Velcro straps to group cables together and route them away from fans and other heat-producing components.

By keeping your hardware clean and ensuring optimal airflow, you’ll not only boost performance but also create a more reliable gaming experience. A little effort on maintenance will keep your PC running smoothly and ready for those intense gaming sessions ahead.

5. Managing Storage: Defragmentation and SSD Optimization

pc gaming -  How to maintain your PC for optimal gaming performance?
Credit : whatcanu.com

Managing storage is a critical step in ensuring your PC gaming performance remains at its peak. Over time, as you install and uninstall games, download updates, and save countless gaming files, your hard drive can become cluttered and fragmented. This is where defragmentation comes into play, especially for traditional hard disk drives (HDDs). Fragmentation occurs when files are scattered across the disk, leading to longer read times and sluggish performance. By regularly defragmenting your HDD, you can reorganize those files, allowing your system to access them more efficiently and ultimately enhancing your gaming experience.

However, if you’re using a solid-state drive (SSD), the approach is slightly different. SSDs operate on a different principle, and defragmentation can actually be detrimental to their performance and lifespan. Instead, focus on optimizing your SSD by ensuring that the TRIM command is enabled. TRIM helps the SSD manage unused data blocks, which can significantly improve read and write speeds. It’s also advisable to keep a portion of your SSD free—ideally around 10-15%—to maintain optimal performance.

In addition to routine defragmentation and SSD optimization, consider utilizing storage management tools that can identify large files and unnecessary duplicates. This not only frees up valuable space but also allows for quicker access to your games. A well-organized storage system means faster load times, smoother gameplay, and less time waiting to dive into your virtual adventures. Regularly managing your storage will keep your gaming rig running smoothly, ensuring that you stay fully immersed in your gaming experiences without the frustration of lag or long load times.

6. Checking for Malware: Maintaining a Secure System

In the exhilarating world of PC gaming, nothing disrupts your flow quite like a slow or compromised system. One of the most insidious threats to your gaming performance is malware, which can lurk undetected, siphoning off precious system resources and potentially jeopardizing your personal data. To ensure that your gaming rig remains in peak condition, regular checks for malware should be an integral part of your maintenance routine.

Start by investing in reputable antivirus software that is specifically designed to identify and eliminate malicious programs. Schedule routine scans, ideally once a week, to catch any potential threats before they have a chance to affect your gameplay. In addition to traditional antivirus tools, consider employing anti-malware applications that specialize in detecting spyware, adware, and other forms of unwanted software that can compromise your system’s integrity.

Furthermore, keep your operating system and all installed software up to date. Frequent updates often include security patches that address vulnerabilities that malware can exploit. Make it a habit to check for updates regularly, or enable automatic updates to ensure you’re always protected with the latest security enhancements.

Beyond software solutions, be mindful of your browsing habits. Many forms of malware are introduced through suspicious downloads or unsafe websites, so practice caution when clicking on links or downloading files. Familiarize yourself with the signs of phishing attempts and steer clear of untrusted sites.

By prioritizing your system’s security, you’re not only safeguarding your data but also maximizing your gaming performance. A clean, malware-free system runs smoother and more efficiently, allowing you to immerse yourself fully in your gaming adventures without the nagging worry of potential threats lurking in the shadows. Remember, a secure system is the foundation for an optimal gaming experience!

7. Monitoring Temperature: Keeping Your PC Cool

pc gaming -  How to maintain your PC for optimal gaming performance?
Credit : whatcanu.com

In the thrilling world of PC gaming, performance can make or break your experience, and one of the often-overlooked aspects of maintaining that performance is temperature management. Keeping your PC cool isn’t just about comfort; it’s essential for ensuring that your hardware operates at peak efficiency and longevity. High temperatures can lead to thermal throttling, where your CPU and GPU slow down to prevent overheating, resulting in lag, stuttering, and a less enjoyable gaming experience.

To effectively monitor and manage your PC’s temperature, start by investing in quality software tools that can provide real-time temperature readings for your components. Programs like HWMonitor, MSI Afterburner, or Core Temp can give you insights into how hot your CPU and GPU are running during those intense gaming sessions. Ideally, you want to keep your CPU temperature below 80°C and your GPU below 85°C, although these numbers can vary depending on your specific hardware.

Beyond monitoring, take proactive steps to enhance your cooling system. Ensure that your case has adequate airflow—this means not only having enough fans but also positioning them correctly. A well-ventilated case allows hot air to escape while drawing in cooler air. Dust can be a major enemy as it clogs vents and fans, so make it a habit to clean your gaming rig regularly. A can of compressed air can work wonders in removing dust from heat sinks and fans.

Consider upgrading your cooling solution if you’re serious about maintaining optimal temperatures. Aftermarket CPU coolers, such as liquid cooling systems or high-performance air coolers, can significantly lower your temperatures compared to stock options. Graphics cards often come with their own cooling solutions, but adding case fans or investing in a GPU cooler can provide additional support.

Finally, don’t underestimate the power of thermal paste. If you’re comfortable with a bit of DIY, reapplying thermal paste to your CPU can drastically improve heat transfer away from the chip, especially if it hasn’t been changed since you built your PC.

By keeping a close watch on temperatures and implementing these cooling strategies, you’ll not only maximize your gaming performance but also extend the lifespan of your components. In the high-stakes world of gaming, a cool PC is a happy PC, ready to deliver an immersive and uninterrupted experience.

8. Overclocking: Boosting Performance Safely

Overclocking can be a game-changer for avid PC gamers looking to squeeze every ounce of performance from their hardware. By pushing your CPU and GPU beyond their factory-set limits, you can achieve higher frame rates, quicker load times, and an overall smoother gaming experience. However, this pursuit of power comes with its own set of risks, and it’s essential to approach it with caution to avoid potential damage to your components.

Before diving into the world of overclocking, ensure that you have adequate cooling solutions in place. Overclocking generates additional heat, so investing in high-quality cooling systems—such as aftermarket CPU coolers or liquid cooling setups—is crucial. Monitoring your temperatures is equally important; use software tools like MSI Afterburner or HWMonitor to keep an eye on your system’s thermal performance during gaming sessions.

When you’re ready to start overclocking, take a methodical approach. Begin by incrementally increasing the clock speeds of your CPU or GPU, testing stability with benchmarks after each adjustment. Programs like Cinebench for CPUs or 3DMark for GPUs can help you evaluate performance gains while ensuring system stability. Always keep an eye on your temperatures and be prepared to dial back the settings if things get too hot.

Finally, don’t forget to regularly update your drivers and BIOS. Manufacturers often release updates that can enhance stability and performance, making your overclocking efforts even more rewarding. By carefully managing your overclocking journey and prioritizing safety, you can unlock significant performance boosts that will elevate your gaming experience to new heights. Remember, the key is to find the perfect balance between performance and stability—after all, you want to enjoy your games, not spend time troubleshooting.

9. Updating Drivers: Ensuring Compatibility and Performance

In the fast-paced world of PC gaming, having the latest drivers is akin to having a finely tuned race car: it ensures that your system runs smoothly and efficiently, providing the best possible gaming experience. Updating your drivers is not just a mundane task; it’s a crucial step in maximizing your gameplay. Graphics cards, sound cards, and even your motherboard’s chipset all have drivers that demand regular attention. These drivers are the software that allows your operating system to communicate with your hardware, and outdated drivers can lead to compatibility issues, decreased performance, and even crashes during gameplay.

To ensure your gaming rig performs at its peak, make it a habit to check for driver updates regularly. Most manufacturers, like NVIDIA and AMD for graphics cards, offer easy-to-use software that notifies you when new drivers are available. These updates can optimize your system for the latest games, improve frame rates, and enhance overall graphical fidelity. Moreover, they often fix bugs and issues that can hinder your gaming experience, allowing you to play without the frustrating interruptions of crashes or glitches.

But don’t stop at just the graphics card; remember to update your audio drivers as well, as sound is a pivotal component of immersion in gaming. A good audio driver can improve sound quality and reduce latency, making your gaming experience far more enjoyable. Furthermore, keeping your motherboard’s drivers up to date ensures that all your components communicate effectively, which can enhance performance across the board.

In summary, taking the time to regularly update your drivers is a simple yet powerful way to ensure compatibility and performance. It’s a small investment of time that can lead to significant gains in your gaming experience, keeping your rig ready to tackle even the most demanding titles with ease. So, before you dive into your next gaming session, make sure your drivers are up to date and ready to unleash their full potential!

10. Managing Background Processes: Freeing Up Resources

When it comes to optimizing your PC gaming performance, managing background processes is a crucial yet often overlooked step. Background processes are applications that run behind the scenes, consuming valuable system resources such as CPU, RAM, and bandwidth. These processes can significantly impact your gaming experience, leading to lag, stuttering, and frustrating delays. To free up resources and ensure your games run smoothly, follow these essential tips.

Start by checking your Task Manager (Ctrl + Shift + Esc on Windows) to identify which processes are consuming the most resources. You may find that certain applications—like web browsers, cloud storage services, or even system updaters—are running when they don’t need to be. Close any unnecessary programs, especially those that hog memory and processing power.

Next, consider disabling startup programs that launch automatically when you boot up your PC. This can be done in the Task Manager under the “Startup” tab. By preventing these applications from loading at startup, you not only speed up boot time but also free up resources for your gaming session.

For even greater control, you might want to explore the settings of your antivirus software. While it’s essential to keep your system protected, many antivirus programs run background scans and updates that can slow down your gameplay. Adjusting the settings to schedule these activities during off-peak gaming hours can help maintain performance when you need it most.

Additionally, consider using software tools designed to optimize your PC’s performance. Programs like CCleaner can help clear out unnecessary files and manage startup items, while game optimization tools can adjust system settings to prioritize gaming performance.

By effectively managing background processes, you create a more streamlined gaming environment, allowing your hardware to focus its resources where they matter most—on delivering an immersive and enjoyable gaming experience. With these simple adjustments, you’ll be well on your way to maximizing your gameplay and enjoying every moment in the virtual worlds you explore.

11. Using Game Optimization Software: Tools to Enhance Performance

In the fast-paced world of PC gaming, every millisecond counts. To ensure your gameplay is seamless and visually stunning, leveraging game optimization software is essential. These specialized tools are designed to fine-tune your system’s performance, allowing your hardware to work in harmony with the demands of modern games.

One of the primary benefits of game optimization software is its ability to diagnose performance bottlenecks, such as excessive background processes or resource-hungry applications running concurrently. With just a few clicks, you can close unnecessary programs, allocate more RAM to your game, and optimize CPU usage. This not only enhances the frame rate but also reduces lag, ensuring that your gaming experience is as smooth as possible.

Moreover, many game optimization tools come equipped with features that allow you to adjust graphics settings on the fly. If you’re facing a drop in frame rate during high-action sequences, these programs can automatically lower graphics quality or resolution, ensuring that gameplay remains fluid. Some advanced software even offers one-click optimization, where the tool analyzes your system and adjusts settings based on the specific game you’re playing.

In addition to performance enhancements, these tools often include features for hardware monitoring. Keeping an eye on your CPU and GPU temperatures, clock speeds, and system resource usage can help prevent overheating and potential hardware damage during those marathon gaming sessions. Some software suites also provide overclocking capabilities, allowing you to push your hardware to its limits for enhanced performance, provided you’re aware of the risks involved.

Finally, regular updates from these optimization tools ensure that your system stays compatible with the latest games and patches. As developers release updates that can significantly impact performance, having software that adapts to these changes is crucial for maintaining optimal gameplay.

In summary, using game optimization software is a smart move for any serious gamer looking to enhance their gaming experience. By streamlining system performance, adjusting settings intelligently, and monitoring hardware health, you can maximize your gameplay and immerse yourself fully in the captivating worlds that gaming has to offer.

12. Customizing Power Settings: Maximizing Performance vs. Energy Saving

When it comes to gaming on your PC, striking the right balance between performance and energy consumption can significantly enhance your overall experience. Customizing your power settings is a crucial step that often goes overlooked, yet it can have a substantial impact on gameplay smoothness and responsiveness.

Most operating systems come with predefined power plans, typically set to prioritize energy savings over performance. While this is great for conserving energy and extending battery life on laptops, it can lead to throttled performance during intense gaming sessions. To ensure your gaming rig is operating at its full potential, dive into your power settings and consider switching to a high-performance plan. This setting allows your CPU and GPU to run at their maximum clock speeds, reducing latency and increasing frame rates—exactly what you need for a competitive edge.

However, it’s essential to evaluate your gaming habits. If you’re playing high-demand titles that require robust performance, opting for the high-performance plan is beneficial. Conversely, if you’re engaged in more casual gameplay or simply browsing, a balanced or power-saving setting may suffice, ensuring your system remains energy-efficient.

You can also customize advanced power settings by adjusting parameters like the minimum and maximum processor states, which can help you fine-tune how your system responds under different loads. For instance, setting the minimum processor state to 100% in high-performance mode ensures that your CPU is always ready to deliver peak performance when you need it most.

Additionally, consider monitoring your system’s temperatures and performance metrics while gaming. Software tools can help you assess whether your power settings effectively enhance your gameplay or if adjustments are needed. Ultimately, customizing your power settings is not just about selecting a plan—it’s about tailoring your PC’s performance to match your gaming style, ensuring you can maximize your gameplay without compromising on energy efficiency.

13. Regular Backup Practices: Protecting Your Game Data

In the world of PC gaming, few nightmares rival the thought of losing your hard-earned progress due to unexpected crashes, hardware failures, or even cyber threats. This is where regular backup practices come into play, acting as a safety net to protect your game data and ensure you can dive right back into your virtual adventures without missing a beat.

Start by identifying where your game data is stored. Many modern games save your progress in the cloud, but it’s still wise to maintain a local backup for added security. Utilize external hard drives or cloud storage solutions like Google Drive, Dropbox, or OneDrive to routinely back up your game files. Setting a schedule—whether it’s weekly, bi-weekly, or after significant gaming sessions—will help you stay consistent and minimize the risk of loss.

Additionally, consider using backup software that automates the process, allowing you to focus on what you love most: gaming. These programs can be set to run in the background, capturing snapshots of your game data at regular intervals, so you can rest easy knowing your progress is secure.

Don’t forget about your saved configurations and mods! If you’ve invested time customizing your game experience, be sure to back up these files as well. This way, you won’t have to start from scratch if disaster strikes.

Lastly, educate yourself on the best practices for restoring your data. Knowing how to quickly retrieve your backups can save you precious gaming time in the event of a mishap. By implementing regular backup practices, you not only safeguard your game data but also enhance your overall gaming experience, allowing you to maximize your gameplay without the worry of loss.

14. Conclusion: Long-term Maintenance for Sustained Performance

In the world of PC gaming, achieving peak performance is not just a one-time endeavor; it’s a commitment to ongoing care and maintenance. As we’ve explored throughout this blog, the key to maximizing your gameplay experience lies in understanding that your setup requires regular attention and fine-tuning.

To ensure your gaming rig thrives in the long haul, create a maintenance schedule that includes routine checks and updates. This might involve cleaning your hardware, updating drivers, and optimizing your software settings to keep everything running smoothly. Remember that gaming technology evolves rapidly, so staying informed about the latest patches, upgrades, and best practices is essential.

Additionally, consider your environment. A well-ventilated space not only protects your components from overheating but also contributes to your overall comfort during those marathon gaming sessions. Investing in quality peripherals and accessories can also enhance your experience, offering ergonomic benefits that help prevent fatigue and improve performance over time.

Ultimately, by prioritizing long-term maintenance, you’re not just prolonging the lifespan of your hardware; you’re also amplifying your gaming experience. A well-maintained PC can lead to improved frame rates, reduced lag, and a more immersive experience—allowing you to fully engage with the games you love. So take the time to care for your machine, and it will reward you with countless hours of uninterrupted gaming joy. Happy gaming!

15. Additional Resources: Where to Find More Tips and Tools

In the ever-evolving world of PC gaming, having access to reliable resources is crucial for maintaining optimal performance and enhancing your gaming experience. Whether you’re a seasoned gamer or just starting, the right tools and information can make a significant difference in how your system runs.

One of the best places to begin your search for additional tips and tools is online gaming communities. Websites like Reddit’s r/pcgaming and forums on platforms like Tom’s Hardware offer a treasure trove of user-generated content and discussions. Here, you’ll find everything from hardware recommendations to software solutions, often featuring firsthand experiences and advice from fellow gamers.

YouTube is another excellent resource, housing countless channels dedicated to PC building and maintenance. Watching tutorials can provide you with practical, step-by-step guidance on everything from optimizing your graphics settings to cleaning your hardware. Channels like Linus Tech Tips and Gamers Nexus consistently produce high-quality content that can help you troubleshoot issues or enhance your setup.

Don’t overlook the power of dedicated software tools, either. Programs like MSI Afterburner and HWMonitor allow you to monitor your system’s performance, giving you insights into temperature, CPU usage, and overall system health. These tools enable you to make informed decisions about upgrades or adjustments needed to keep your gaming rig running smoothly.

Lastly, consider subscribing to gaming and tech blogs or newsletters. Websites like PC Gamer, IGN, and TechRadar regularly publish articles that cover the latest in gaming technology, performance tips, and hardware reviews. Staying informed about new developments can ensure you’re always one step ahead in optimizing your gameplay.

By leveraging these resources, you’ll be well-equipped to maximize your gameplay and keep your PC in peak condition, ensuring that your gaming sessions are as smooth and enjoyable as possible.

In conclusion, maintaining optimal performance for your PC gaming setup is crucial for an immersive and enjoyable gaming experience. By implementing the essential maintenance tips we’ve outlined in this post, you can ensure that your hardware runs smoothly, your software remains up-to-date, and your system is protected from potential threats. Regularly cleaning your components, optimizing settings, and monitoring performance will not only enhance your gameplay but also prolong the lifespan of your equipment. So, dive into your next gaming session with confidence, knowing that your rig is primed for peak performance. Happy gaming, and may your adventures be filled with excitement and victory!

pc gaming – How to fix lag in online PC games?

In the exhilarating realm of online PC gaming, every millisecond counts; a split-second delay can mean the difference between victory and defeat.

As players strategize, collaborate, and compete in immersive virtual worlds, experiencing lag can be incredibly frustrating. But fear not! Whether you’re a casual gamer looking to enhance your fun or a hardcore enthusiast aiming for peak performance, there are effective strategies to help you eliminate lag and optimize your gaming experience. In this blog post, we’ll dive into top tips that cover everything from upgrading your hardware and tweaking your network settings to choosing the right software. Get ready to elevate your gameplay, unleash your full potential, and immerse yourself in the action without the interruptions of lag!

1. Understanding Lag: What It Is and How It Affects Gameplay

pc gaming -  How to fix lag in online PC games?
Credit : whatcanu.com

Lag is a term every online gamer has encountered, yet its implications can often be misunderstood. At its core, lag refers to the delay between a player’s actions and the game’s response. This latency can stem from various sources, including slow internet connections, high ping times, or even server issues. When you press a key to jump, shoot, or maneuver your character, a millisecond delay can feel like an eternity in the heat of battle, dramatically affecting your gameplay experience.

Imagine this: you’re in a critical moment of a multiplayer match, your heart racing as you aim for a headshot. You click the mouse, but instead of instant gratification, there’s a frustrating pause before your character reacts. This disconnection can lead to missed opportunities, poor performance, and ultimately, a less enjoyable gaming session. The competitive edge you need can slip away, leaving you vulnerable to opponents who aren’t experiencing the same delays.

Lag manifests in several ways—choppy movements, unpredictable character behavior, or even complete freezes. These issues not only disrupt your flow but can also create a frustrating gap between your intentions and the game’s reality. Understanding the nuances of lag is crucial for gamers looking to enhance their performance. By identifying the contributing factors, you can take actionable steps to mitigate its impact, ensuring a smoother, more engaging gaming experience. Whether you’re a casual player or a competitive pro, grasping the concept of lag will empower you to make informed decisions that help you stay ahead in your game.

2. Check Your Internet Speed: Tools and Techniques

When it comes to online PC gaming, a stable and fast internet connection can be the difference between victory and defeat. Lag can ruin the excitement of a well-fought battle or a carefully strategized mission, so understanding your internet speed is crucial. Fortunately, there are a plethora of tools and techniques available to help you assess and optimize your connection.

Start by using reliable speed test websites like Ookla’s Speedtest, Fast.com, or Google’s built-in speed test. These platforms give you a quick snapshot of your download and upload speeds, along with latency (ping), which is particularly important for gaming. Aim for a ping under 50 ms for a smooth gaming experience; anything above that can lead to noticeable lag.

Once you’ve established your current speeds, it’s time to delve deeper. Consider conducting tests at different times of the day to identify any fluctuations. Internet congestion can vary based on peak usage times, so knowing when your connection is at its best can help you schedule your gaming sessions for optimal performance.

Additionally, take a closer look at your router’s settings. Many modern routers come equipped with Quality of Service (QoS) features that prioritize gaming traffic over other types of data, ensuring that your gameplay remains uninterrupted even if other devices are connected to the same network.

If you discover your internet speed is lacking, there are several actions you can take. Consider upgrading your internet plan or switching to a more reliable Internet Service Provider (ISP). For a more immediate solution, try connecting your PC directly to your router via an Ethernet cable, which typically offers a more stable connection than Wi-Fi. If you must use Wi-Fi, position your router in a central location, away from walls and obstructions, to maximize signal strength.

In summary, regularly checking your internet speed and taking proactive measures are essential steps in eliminating lag and enhancing your online PC gaming experience. By ensuring your connection is up to par, you can dive into your favorite games with confidence, knowing you’ve done your part to minimize any disruptions.

3. Optimize Your Network Settings: Router Tweaks for Gamers

pc gaming -  How to fix lag in online PC games?
Credit : whatcanu.com

In the world of online gaming, every millisecond counts. To ensure you’re not left lagging behind your competitors, it’s crucial to optimize your network settings. A few simple tweaks to your router can significantly enhance your gaming experience, keeping you connected and competitive.

First and foremost, take a moment to position your router in an ideal location. Elevate it away from walls and obstructions, ideally in a central spot within your gaming space. The fewer physical barriers between your gaming device and the router, the stronger and more stable your connection will be.

Next, consider changing your router’s Quality of Service (QoS) settings. QoS allows you to prioritize bandwidth for your gaming device over other devices on your network. By assigning higher priority to your gaming traffic, you can significantly reduce lag and ensure smoother gameplay, even when other household members are streaming videos or downloading files.

Another important step is to switch from a 2.4 GHz frequency to a 5 GHz frequency. While the 2.4 GHz band has a greater range, the 5 GHz band offers higher speeds and is often less congested, providing a clearer signal for your gaming sessions. Just make sure your gaming device supports this frequency!

Additionally, don’t overlook the benefits of updating your router’s firmware. Manufacturers regularly release updates to improve performance and security. Keeping your firmware current can enhance your router’s efficiency and help it handle the demands of online gaming more effectively.

Finally, if you’re serious about eliminating lag, consider a wired Ethernet connection. While wireless connections offer convenience, they can sometimes lead to instability. A direct cable connection will provide the most reliable and fastest internet experience, ensuring that you stay in the game without interruption.

By implementing these network optimizations, you’ll not only minimize lag but also enhance your overall gaming performance, allowing you to fully immerse yourself in the virtual worlds you love.

4. Use Ethernet Over Wi-Fi: Why Wired Connections Matter

When it comes to online gaming, every millisecond counts. While Wi-Fi may seem convenient, nothing beats the reliability and speed of a wired Ethernet connection. Using Ethernet over Wi-Fi can significantly enhance your gaming experience, providing a smoother, lag-free environment that is essential for competitive play.

Imagine this: you’re deep into a high-stakes match, your heart racing as you strategize your next move. Suddenly, your screen freezes, or you experience frustrating lag. This can be a game-changer, and often, the culprit is an unstable Wi-Fi connection. Wireless signals can be affected by a myriad of factors—distance from the router, physical barriers like walls, and interference from other devices. This variability can lead to packet loss and increased latency, which are detrimental to any gamer.

On the other hand, a wired Ethernet connection offers a direct line to your modem, ensuring a consistent and robust signal. With a wired setup, you can enjoy lower latency and higher data transfer speeds. This means quicker response times and a more immersive gaming experience, allowing you to stay one step ahead of your opponents. You’ll also benefit from reduced ping, which can make all the difference in fast-paced games where seconds matter.

Setting up an Ethernet connection is straightforward and often involves simply connecting your PC to your router with an Ethernet cable. This simple step can enhance your connection stability and provide peace of mind, knowing that you’re minimizing potential disruptions during your gaming sessions. So, if you’re serious about leveling up your online gaming experience, consider making the switch to wired. Your future self—who just scored that epic win—will thank you!

5. Close Background Applications: Free Up Your System Resources

pc gaming -  How to fix lag in online PC games?
Credit : whatcanu.com

When diving into the immersive worlds of online PC gaming, every frame counts, and lag can be the enemy of your gaming prowess. One effective way to enhance your gaming experience is to close background applications to free up your system resources.

Before launching your favorite game, take a moment to check what’s running in the background. Applications like web browsers, music players, and even system updates can quietly consume valuable CPU and RAM resources, leaving your gaming performance compromised.

To identify these resource-hungry applications, open the Task Manager on your Windows PC by pressing Ctrl + Shift + Esc. Here, you’ll see a list of all the applications currently running, along with their CPU and memory usage. Consider closing any unnecessary programs that you won’t need while gaming, especially those that might be performing automatic updates or syncing files.

Another great tip is to disable startup programs that launch automatically when you power on your computer. These can often include chat applications, cloud storage services, and even streaming platforms that could detract from your gaming performance. You can manage these in the Task Manager under the ‘Startup’ tab, ensuring that only the essential programs are set to launch at boot.

By taking these steps to eliminate background distractions, you’ll effectively free up system resources, leading to smoother gameplay, reduced load times, and an overall enhanced gaming experience. Your system will be better equipped to handle the demands of high-intensity graphics and online interactions, allowing you to focus wholly on conquering your virtual challenges.

6. Update Your Drivers: The Importance of Graphics and Network Driver Updates

In the fast-paced world of online PC gaming, every millisecond counts. Lag can be a gamer’s worst enemy, turning an epic battle into a frustrating experience. One of the simplest yet most impactful ways to enhance your gaming performance is to ensure that your drivers—particularly your graphics and network drivers—are up to date.

Graphics drivers are the backbone of your gaming visuals. They translate the game’s intricate graphics into stunning, smooth images on your screen. When these drivers are outdated, they can lead to a host of issues, including frame drops, screen tearing, and even crashes. Game developers often release updates to optimize performance for their latest titles, and without these updates, your hardware may not be fully equipped to handle the demands of modern games.

Network drivers, on the other hand, play a crucial role in maintaining a stable and fast internet connection. An outdated network driver can lead to sluggish download speeds and increased latency, causing you to lag behind your opponents in multiplayer settings. Ensuring that your devices are equipped with the latest network drivers can significantly reduce packet loss and improve overall connection stability, allowing for a smoother online gaming experience.

To update your drivers, start by visiting the manufacturer’s website for your graphics card and network adapter. Most manufacturers provide easy-to-follow guides to help you download and install the latest drivers. Additionally, you can use driver update software that automates the process, ensuring that you always have the latest versions installed without the hassle of doing it manually.

Incorporating regular driver updates into your gaming maintenance routine not only helps eliminate lag but also keeps your system running at peak performance. So, take a moment to check those drivers—your gaming experience will thank you!

7. Adjust In-Game Settings: Finding the Right Balance for Performance

pc gaming -  How to fix lag in online PC games?
Credit : whatcanu.com

When it comes to online PC gaming, the right in-game settings can mean the difference between a smooth experience and a frustrating one. Each game comes with a myriad of customizable options, and it’s crucial to find that sweet spot that enhances performance without sacrificing too much graphical fidelity.

Start by diving into the graphics settings menu. Here, you’ll typically encounter options such as resolution, texture quality, shadow detail, and anti-aliasing. If you’re battling lag, it may be wise to lower your resolution slightly, as this can significantly reduce the strain on your GPU and improve frame rates. However, be mindful of not dropping it too low; a balance must be struck to maintain visual clarity.

Texture quality is another vital setting to tweak. High-resolution textures can look stunning but may consume considerable memory. If you’re experiencing stuttering or frame drops, consider setting this to medium. Shadows can also be a major culprit for lag; turning them down or off can help smooth out gameplay significantly.

Additionally, pay attention to the refresh rate and V-Sync settings. If your monitor supports a higher refresh rate, ensure that your game is set to match it. Disabling V-Sync can also reduce input lag, making your gameplay more responsive, although it might introduce screen tearing. Experimenting with these settings will allow you to gauge how each adjustment impacts your gaming experience.

Lastly, don’t forget to explore the advanced settings. Options such as field of view (FOV) can enhance your awareness in-game, while motion blur can affect visibility during fast-paced action. Finding the right configuration of these settings will not only enhance your performance but also elevate your overall enjoyment of the game. By carefully adjusting these in-game parameters, you can achieve a balanced experience that keeps you immersed in the action without the frustration of lag holding you back.

8. Manage Your Game Library: Keeping Only What You Play

Managing your game library is not just about decluttering; it’s about optimizing your gaming experience. In the world of online PC gaming, where every millisecond counts, a streamlined library can significantly improve load times and overall performance.

Begin by assessing the games you currently own. Are there titles that you haven’t played in months—or even years? Removing these from your library can free up valuable storage space on your hard drive, allowing your system to allocate resources more efficiently to the games you actively enjoy. This can lead to faster loading times and smoother gameplay, ultimately enhancing your overall experience.

Organizing your library can also help you focus on the games that truly engage you. Utilize tagging features or create folders based on genres, play frequency, or even multiplayer versus single-player experiences. This way, you can quickly navigate through your collection and dive straight into the action without the distraction of a cluttered interface.

Additionally, consider uninstallation of games that are resource-intensive but no longer hold your interest. Many modern titles can take up tens of gigabytes of space, which can slow down your computer and affect its performance. By keeping only the games you play regularly, you’ll not only reduce lag but also make room for new titles that catch your eye.

Lastly, remember to revisit your library periodically. Gaming preferences evolve, and what might have seemed uninteresting a few months ago could now be a must-play. Keeping your library curated ensures that you stay engaged and ready for the next gaming session, without the frustration of dealing with unnecessary lag. Embrace the simplicity of a well-managed game library, and watch your online PC gaming experience soar to new heights.

9. Monitor and Manage Latency: Tools to Track Your Connection

When it comes to online PC gaming, latency can make or break your experience. High latency can lead to frustrating lag, making your character feel unresponsive and ruining the fluidity of gameplay. To ensure you’re always in the zone, it’s crucial to monitor and manage your connection effectively. Fortunately, there are several powerful tools available that can help you track latency and optimize your gaming performance.

Start by using ping testing tools like PingPlotter or WinMTR. These applications allow you to check the response time of your connection to the game server, giving you a clear picture of any potential issues. By running these tests, you can identify bottlenecks in your network and understand whether the problem lies with your internet service provider (ISP) or your local setup.

Additionally, you might want to explore network monitoring software such as NetLimiter or GlassWire. These tools not only track your latency but also provide insights into bandwidth usage by other applications on your system. This is particularly useful if you’re sharing your connection with others—whether it’s family members streaming videos or other devices hogging your bandwidth.

Once you have a clear understanding of your connection, take the next step by optimizing your network settings. Consider using a wired Ethernet connection instead of Wi-Fi, as it typically offers lower latency and more stability. If you must use Wi-Fi, ensure you’re on a less congested channel and close to your router to minimize interference.

Lastly, don’t forget to check the game’s settings themselves. Some games offer options to lower latency or optimize performance. Adjusting graphical settings or enabling features like “low latency mode” can make a significant difference in your gaming experience.

By actively monitoring and managing your latency, you can create a smoother, more enjoyable online gaming experience. Remember, every millisecond counts in the gaming world, and being proactive about your connection will put you ahead of the competition.

10. Upgrade Your Hardware: When to Consider New Components

As technology evolves at a rapid pace, keeping your gaming rig up to speed with the latest hardware is essential for an optimal online gaming experience. Upgrading your hardware can significantly enhance performance, eliminate lag, and provide a smoother, more immersive gaming environment. But how do you know when it’s time to invest in new components?

First and foremost, take a close look at your current setup. Are you frequently experiencing frame rate drops during intense gaming sessions? Is your system struggling to run the latest titles even on lower settings? If so, it might be time to consider an upgrade. Pay particular attention to your graphics card (GPU), as this component has the most significant impact on visual performance. If your GPU is several generations old, you may be missing out on crucial advancements in technology that enhance graphics quality and processing speed.

Next, consider your RAM. For online gaming, having sufficient memory is crucial. If you find that your system is frequently using up all available RAM, resulting in sluggish performance, it might be time to increase your memory capacity. Ideally, aim for at least 16GB for modern games; however, 32GB can provide an extra buffer for multitasking and streaming.

Another area to assess is your storage solution. Traditional hard drives can slow down load times, leading to frustrating delays in gameplay. Upgrading to a solid-state drive (SSD) can drastically reduce loading times and enhance overall system responsiveness, allowing you to jump straight into action without waiting around.

Lastly, don’t overlook your power supply unit (PSU) when considering upgrades. If you’re adding new components that require more power, ensure your PSU can handle the increased load. Investing in a quality PSU is essential for the stability and longevity of your system.

Ultimately, determining when to upgrade your hardware comes down to balancing performance needs with your budget. Regularly evaluating your gaming experience and staying informed about new technologies can help you make informed decisions that will keep your setup competitive and your gaming sessions lag-free. Remember, investing in the right components can mean the difference between a frustrating gaming experience and one that’s seamless and enjoyable.

11. Use Game Mode and Performance Settings on Your PC

When it comes to optimizing your online PC gaming experience, leveraging the built-in Game Mode and performance settings on your computer can make a significant difference. Game Mode, a feature integrated into Windows 10 and later versions, prioritizes your gaming applications by allocating more CPU and GPU resources to them. This helps to minimize background processes that could otherwise drain system performance, ensuring that your games run smoothly and with minimal interruptions.

To activate Game Mode, simply navigate to your system settings. Under the Gaming section, toggle on Game Mode. From here, you can also access the Game Bar, which provides quick access to performance metrics and allows you to take screenshots or record gameplay without interrupting your session. This streamlined toolset not only enhances your gaming experience but also gives you the power to monitor performance in real-time.

Additionally, delve into the performance settings of your PC. Adjusting your graphics settings, resolution, and refresh rate can lead to a more visually stunning and fluid gaming experience. Depending on your hardware capabilities, you may want to tweak these settings to find the perfect balance between aesthetics and performance. Lowering graphical details or resolution in particularly demanding games can drastically increase frame rates, which is often the key to a more enjoyable and competitive gaming experience.

Furthermore, consider adjusting your power settings. Opt for the “High Performance” plan in your power options to ensure that your CPU runs at its full potential while gaming. This can prevent throttling that might occur under less demanding power plans, where your system might try to conserve energy at the expense of performance.

By utilizing Game Mode and making strategic adjustments to your performance settings, you can significantly enhance your online gaming experience, reduce lag, and immerse yourself fully in the virtual worlds you love.

12. Optimize Your Operating System: Clean Up for Better Performance

When it comes to enhancing your online PC gaming experience, optimizing your operating system is a game-changer. Just like a sports car needs a well-tuned engine to perform at its best, your gaming rig requires a clean and efficient operating system to eliminate lag and ensure smooth gameplay.

Start by decluttering your hard drive. Uninstall any software or games you no longer use, as these can take up valuable storage space and system resources. Next, run a disk cleanup to remove temporary files, system caches, and other unnecessary data that can slow down your machine. Consider using built-in tools like Windows’ Disk Cleanup Utility or third-party applications that specialize in system optimization.

Another key aspect of optimizing your OS is managing startup programs. Many applications automatically launch when you start your computer, consuming RAM and processing power even when you’re not using them. Access the Task Manager (Ctrl + Shift + Esc) to review and disable programs that don’t need to start with your system. This simple step can lead to faster boot times and improved overall performance.

Don’t forget to keep your operating system and drivers up to date. Regular updates not only enhance security but also fix bugs and improve compatibility with the latest games. Check for updates for both your OS and your graphics card, as outdated drivers can significantly impact gaming performance.

Lastly, consider adjusting your power settings to prioritize performance. Switch to a High Performance power plan in your system settings to ensure that your CPU and other components are operating at their full potential during intense gaming sessions.

By taking these steps to clean up and optimize your operating system, you can create a more efficient environment for gaming, minimizing lag and maximizing your enjoyment of every virtual adventure. With a well-tuned system, you’ll be better equipped to tackle any challenge that comes your way in the gaming world.

13. Explore Gaming VPNs: Can They Help Reduce Lag?

In the world of online gaming, lag can be a frustrating adversary that disrupts your gameplay and impacts your overall experience. One potential solution that has gained traction among gamers is the use of a Gaming VPN. But how exactly can a VPN help reduce lag, and is it worth exploring for your gaming setup?

A Gaming VPN, or Virtual Private Network, creates a secure tunnel between your device and the internet, rerouting your connection through a server of your choice. This can lead to several benefits that may help in reducing lag. First and foremost, a VPN can help you connect to game servers that are geographically closer to you, potentially improving your ping times. Many gamers have reported that using a VPN allows them to access servers in different regions, where the connection might be more stable or less congested.

Additionally, a Gaming VPN can help mitigate issues related to throttling. Internet Service Providers (ISPs) sometimes intentionally slow down connections during peak usage times or for specific activities, such as gaming. By masking your traffic, a VPN can help prevent your ISP from detecting that you’re gaming, thus allowing for a smoother and more consistent connection.

Moreover, a VPN can provide added security against DDoS attacks, which can be particularly important for competitive players. By hiding your IP address, you make it more difficult for malicious actors to target your connection, ensuring that you can enjoy your gaming sessions without interruption.

However, it’s crucial to choose the right VPN for gaming. Look for one that offers low latency, high-speed connections, and a network of servers that are optimized for online gaming. Keep in mind that while a VPN can be beneficial, it may not be a one-size-fits-all solution. In some cases, a poorly chosen VPN can actually introduce more lag due to added latency. Therefore, it’s wise to do thorough research, read reviews, and even take advantage of free trials to find the best fit for your gaming needs.

In conclusion, exploring Gaming VPNs could be a game-changer in your quest to eliminate lag and enhance your online PC gaming experience. With the right VPN in place, you may find yourself enjoying smoother gameplay, reduced latency, and an overall more enjoyable gaming environment. So why not give it a shot? You might just discover that the lag-free gaming experience you’ve been longing for is only a VPN away.

14. Stay Informed: Join Communities for Tips and Tricks

In the fast-paced world of online PC gaming, staying informed is crucial to maintaining a competitive edge and enhancing your overall gaming experience. One of the most effective ways to do this is by joining gaming communities. These vibrant hubs are filled with fellow enthusiasts who share a passion for gaming and an eagerness to exchange knowledge. Whether you’re a seasoned pro or a newcomer, engaging with these communities can provide invaluable insights, tips, and tricks that can elevate your gameplay.

Online forums, Reddit threads, and Discord servers are just a few examples of places where gamers congregate to discuss strategies, share hardware recommendations, and troubleshoot common issues. By immersing yourself in these communities, you’ll not only gain access to a wealth of information but also foster connections with other gamers who can offer support and camaraderie.

Participating in discussions about game updates or hardware performance can keep you in the loop about the latest trends and innovations. Many community members often share their personal experiences with optimizing settings, tweaking graphics for better performance, or even recommending specific peripherals to reduce lag.

Moreover, joining a community can lead to discovering hidden gems—games that might not be on your radar but are highly recommended by your peers for their low-latency performance or exceptional playability. As you share your own tips and experiences, you’ll contribute to the community and build your reputation among fellow gamers. Ultimately, staying informed and connected with like-minded individuals can significantly enhance your online gaming experience, making it more enjoyable and ultimately more rewarding.

15. Regular Maintenance: Keeping Your System in Top Shape

Regular maintenance is the cornerstone of ensuring your gaming system runs smoothly and efficiently, allowing you to maximize your online PC gaming experience. Just like a fine-tuned racing car, your computer requires periodic checks and upkeep to perform at its best.

Start with the basics: regularly update your operating system and game software. These updates often include performance enhancements and bug fixes that can significantly improve your gaming experience. Additionally, keeping your graphics card drivers up to date ensures that your system can handle the latest games and graphics settings, providing you with the sharpest visuals and the most fluid gameplay.

Next, don’t overlook the importance of cleaning your hardware. Dust and debris can accumulate inside your PC over time, obstructing airflow and causing overheating. Regularly opening your case to carefully remove dust from fans, heat sinks, and components can prevent thermal throttling, which can lead to lag during intense gaming sessions.

Moreover, consider running disk cleanup and defragmentation tools to optimize your hard drive’s performance. An organized and decluttered hard drive can improve load times and reduce any lag when launching games or accessing files.

Lastly, monitor your system’s performance using built-in tools or third-party software. Keeping an eye on CPU and GPU usage, temperatures, and RAM can help you identify potential issues before they escalate. If you notice any abnormal spikes or performance dips, it might be time to delve deeper into your system’s health.

By committing to regular maintenance, you’ll not only enhance the longevity of your gaming rig but also create a more immersive and enjoyable gaming experience. A well-maintained system is your best ally in the quest for victory, minimizing lag and maximizing your gaming prowess.

In conclusion, optimizing your online PC gaming experience is essential for fully enjoying the immersive worlds and thrilling challenges that gaming has to offer. By implementing the top tips outlined in this article—ranging from upgrading your hardware and optimizing your internet connection to adjusting in-game settings and utilizing performance-enhancing software—you can effectively eliminate lag and enhance your gameplay. Remember, a smoother gaming experience not only improves your performance but also elevates your enjoyment, allowing you to fully engage with your favorite titles. So gear up, apply these strategies, and get ready to conquer your next gaming session without the frustration of lag holding you back. Happy gaming!

pc gaming – How to create a custom gaming PC build?

In the ever-evolving realm of gaming, nothing quite compares to the thrill of assembling your very own custom PC—a dream machine tailored to your unique gaming preferences and performance needs.

Whether you’re a casual gamer looking to dip your toes into the world of PC gaming or a seasoned enthusiast aiming for the ultimate powerhouse, building your own rig is a rewarding journey that combines creativity, technical skill, and personalized design. This comprehensive guide will walk you through each step of the process, from selecting the perfect components that suit your budget and performance goals to piecing them together in a way that maximizes efficiency and style. With expert tips and insider tricks, we’ll ensure that your custom gaming build not only meets your expectations but also elevates your gaming experience to new heights. Get ready to unleash your inner techie and embark on the exciting adventure of crafting a machine that’s truly your own!

1. Introduction to Custom PC Gaming Builds

pc gaming -  How to create a custom gaming PC build?
Credit : whatcanu.com

In the ever-evolving world of gaming, there’s something undeniably exhilarating about the prospect of building your own custom PC. Unlike purchasing a pre-built machine, a custom gaming rig allows you to tailor every component to your specific needs and preferences, resulting in a setup that perfectly aligns with your gaming style and visual expectations. Whether you’re a casual gamer, a competitive player, or simply someone who enjoys the artistry of PC hardware, embarking on this journey opens up a realm of possibilities.

A custom PC gaming build is not just about performance; it’s about crafting a unique experience. With the right knowledge and a dash of creativity, you can select components that not only deliver exceptional speed and graphics but also reflect your personal aesthetic. From choosing the perfect graphics card that can handle the latest AAA games at max settings to selecting a motherboard that provides the best features and expandability, each decision is an opportunity to create a machine that’s truly yours.

In this step-by-step guide, we’ll explore everything you need to know, from understanding the essential components and their functions to assembling your system with care. We’ll help demystify the process, ensuring you feel confident and excited as you dive into the world of custom builds. Whether you’re piecing together a powerhouse to experience the latest virtual reality landscapes or a sleek system for streaming, this guide will equip you with the information you need to bring your dream machine to life. Get ready to unleash your inner builder and elevate your gaming experience like never before!

2. Defining Your Gaming Needs and Budget

Before diving into the exhilarating world of custom PC gaming builds, it’s crucial to take a moment to define your gaming needs and set a realistic budget. This foundational step not only shapes the direction of your build but also ensures that you invest wisely in components that cater specifically to your gaming preferences.

Start by assessing the types of games you play or aspire to play. Are you a casual gamer who enjoys indie titles and classic RPGs, or are you a competitive player immersed in fast-paced shooters and graphically demanding open-world adventures? Understanding your gaming style will help you prioritize which components deserve more of your budget. For instance, a high-performance graphics card might be essential for those seeking stunning visuals and smooth frame rates in the latest AAA titles, while a solid processor may take precedence for gamers who rely on complex simulations or multitasking.

Next, consider how much you’re willing to spend to bring your dream machine to life. Custom PC builds can vary widely in price, from budget-friendly setups under $800 to extravagant systems that exceed several thousand dollars. Establishing a clear budget will help you make informed decisions and avoid the temptation of overspending on flashy components that may not significantly enhance your gaming experience.

As you outline your budget, remember to account for additional costs beyond just the core components. Don’t overlook the importance of peripherals—like a quality monitor, keyboard, and mouse—as well as software, such as gaming subscriptions and performance optimization tools.

By defining your gaming needs and budget upfront, you’ll create a roadmap for your custom PC build, ensuring that every dollar is spent wisely toward achieving the gaming experience you desire. This strategic approach not only maximizes the overall performance of your machine but also enhances your long-term satisfaction with your investment.

3. Understanding PC Components: A Quick Overview

pc gaming -  How to create a custom gaming PC build?
Credit : whatcanu.com

Building your dream gaming rig is an exciting venture, and understanding the core components that will make up your custom PC is crucial to creating a machine that meets your gaming needs. Here’s a quick overview of the essential parts that you’ll need to consider:

**1. Central Processing Unit (CPU):** Often referred to as the brain of your computer, the CPU processes all the instructions from your applications and games. When selecting a CPU, consider the number of cores and threads it has, as well as its clock speed. Popular brands like Intel and AMD offer a range of options, from budget-friendly to high-end models that can handle intense gaming sessions.

**2. Graphics Processing Unit (GPU):** The GPU is a critical component for gamers, as it handles all the rendering of graphics. A powerful GPU allows for high frame rates and stunning visual fidelity. Depending on your gaming preferences, you might opt for a mid-range card for casual gaming or a top-tier model for immersive experiences in the latest AAA titles.

**3. Motherboard:** The motherboard is the backbone of your PC, connecting all components and allowing them to communicate. When choosing a motherboard, ensure it is compatible with your CPU and supports the features you need, such as Wi-Fi capabilities or multiple GPU setups. Look for options with ample USB ports and expansion slots to future-proof your build.

**4. Memory (RAM):** RAM is essential for multitasking and smooth gameplay. For gaming, 16GB is typically the sweet spot, but if you plan on streaming or running demanding applications simultaneously, you might consider 32GB. The speed of the RAM, measured in MHz, can also impact performance, so be sure to choose RAM that complements your CPU and motherboard.

**5. Storage:** Fast storage drives significantly reduce load times and improve overall system responsiveness. Solid State Drives (SSDs) are preferred for their speed, while Hard Disk Drives (HDDs) offer larger storage capacities at a lower cost. A combination of both—a smaller SSD for your operating system and most-played games, paired with a larger HDD for additional storage—can be an ideal setup.

**6. Power Supply Unit (PSU):** The PSU provides power to all your components, so it’s crucial to choose one that offers enough wattage and reliability. Look for units with an 80 Plus certification, which indicates energy efficiency and stability. Always err on the side of caution by selecting a PSU with a bit more wattage than you think you’ll need, especially if you plan on upgrading in the future.

**7. Case:** Your case not only houses all these components but also affects airflow and cooling. Choose a case that fits your motherboard size (ATX, Micro-ATX, etc.) and has enough space for your GPU and cooling solutions. Pay attention to cable management features and aesthetics if you want your build to look as great as it performs.

**8. Cooling Solutions:** Keeping your components cool is vital for performance and longevity. Depending on your CPU and GPU, you can opt for air or liquid cooling solutions. Good airflow in your case, complemented by quality fans, can make a significant difference in keeping temperatures in check during long gaming sessions.

By understanding these key components, you’ll be better equipped to make informed decisions as you embark on your custom PC gaming build journey. Each element plays a vital role in ensuring that your dream machine not only meets your gaming expectations but also stands the test of time.

4. Choosing the Right CPU: Processing Power Explained

When it comes to building your dream gaming PC, the central processing unit (CPU) is the heart of your machine, responsible for executing commands and processing data. Choosing the right CPU is crucial, as it will determine not only the performance of your gaming experience but also how well your system can handle multitasking, streaming, and future software demands.

First, familiarize yourself with the two major players in the CPU market: Intel and AMD. Each brand offers a range of processors that cater to different needs and budgets. Intel’s Core series, particularly the i5 and i7 models, are known for their strong single-thread performance, making them excellent choices for gaming. On the other hand, AMD’s Ryzen processors have gained popularity for their competitive multi-threading capabilities and value for money, especially in the Ryzen 5 and Ryzen 7 lines.

When selecting a CPU, consider the number of cores and threads. Modern games are increasingly optimized to use multiple cores, so a processor with at least four cores is recommended for a smooth experience. However, opting for six or eight cores will future-proof your build, enabling it to handle more demanding titles as they are released.

Another essential factor is clock speed, measured in gigahertz (GHz). A higher clock speed usually translates to better performance, but it’s important to balance this with core count and the specific games you play. Keep an eye on benchmarks and reviews, as they provide real-world performance comparisons that can help you make an informed decision.

Finally, consider compatibility with your motherboard and cooling system. Ensure that your chosen CPU fits your motherboard’s socket type and keep in mind the thermal design power (TDP) rating. A CPU with a higher TDP may require superior cooling solutions to maintain optimal performance during intense gaming sessions.

In conclusion, selecting the right CPU is a foundational step in building your custom gaming PC. By understanding the nuances of processing power, you’ll set the stage for an exhilarating gaming experience that meets your expectations and evolves with your gaming needs.

5. Selecting the Perfect GPU for Your Gaming Experience

pc gaming -  How to create a custom gaming PC build?
Credit : whatcanu.com

When it comes to building your dream gaming machine, selecting the perfect Graphics Processing Unit (GPU) is one of the most crucial steps in ensuring an exhilarating gaming experience. The GPU is often considered the heart of a gaming rig, responsible for rendering images, animations, and video in real time. Choosing the right GPU can mean the difference between smooth, high-frame-rate gameplay and frustrating lag.

Start by assessing your gaming needs and preferences. Are you an avid gamer seeking the latest AAA titles with stunning graphics, or do you enjoy indie games that demand less power? Your answer will guide you toward the appropriate GPU. Modern games often come with heavy visual demands, so a robust GPU will ensure you can play at higher resolutions and settings, providing an immersive experience.

Next, consider the specifications that matter most. Look for a GPU with a good balance of core clock speed, memory bandwidth, and VRAM. For instance, if you’re gaming at 1080p, a card with 4GB to 6GB of VRAM may suffice; however, for 4K gaming or VR experiences, aim for 8GB or more. Popular choices from manufacturers like NVIDIA and AMD offer various models, so be sure to compare benchmarks and reviews to find a card that fits your performance expectations and budget.

It’s crucial to ensure compatibility with your motherboard and power supply. Check the PCIe slots and the wattage requirements of your GPU to avoid any surprises during installation. Additionally, consider the physical size of the GPU. Some high-end models can be quite large, so measure your case to ensure a proper fit.

Finally, don’t overlook the importance of cooling solutions. A powerful GPU can generate a significant amount of heat, so look for models with efficient cooling systems or consider investing in aftermarket cooling options. By carefully selecting a GPU that aligns with your gaming style, budget, and system compatibility, you’ll be well on your way to unlocking a thrilling gaming experience in your custom-built PC.

6. Motherboards: What You Need to Know

When it comes to building your dream gaming PC, the motherboard is the backbone of your setup. It serves as the central hub that connects all the components, from the CPU and RAM to storage devices and graphics cards. Choosing the right motherboard can significantly impact your system’s performance, expandability, and future upgrade options. Here are the key factors to consider when selecting a motherboard for your custom gaming rig.

**Form Factor:** Motherboards come in various sizes, including ATX, Micro-ATX, and Mini-ITX. The form factor determines the layout, the number of expansion slots, and how many peripheral devices you can connect. If you plan to build a compact setup, a Mini-ITX motherboard might be suitable. However, for larger builds with multiple graphics cards or extensive cooling systems, an ATX motherboard is the way to go.

**Socket Type:** The CPU socket type is crucial as it must match the processor you intend to use. Common socket types include Intel’s LGA 1200 and AMD’s AM4. Before purchasing your motherboard, ensure it supports the specific CPU model you wish to install, as this compatibility is essential for optimal performance.

**Chipset Features:** The chipset governs the motherboard’s capabilities and features. Higher-end chipsets often come with advanced overclocking support, more USB ports, and better networking options. Research the various chipsets available for your chosen CPU to find one that aligns with your gaming needs and performance aspirations.

**RAM Compatibility:** Look for a motherboard that supports the amount and type of RAM you want to use. Most modern motherboards support DDR4 memory, with options for speeds often exceeding 3000 MHz. Consider the number of RAM slots available, as this will determine how much memory you can install now and in the future.

**Expansion Slots:** If you plan to add additional components, such as extra GPUs or sound cards, check the number and type of expansion slots on the motherboard. PCIe slots come in various versions, with PCIe 4.0 providing faster data transfer speeds compared to older versions. Ensure that your motherboard has enough slots to accommodate your current and future upgrades.

**Connectivity Options:** The last thing you want is a lack of connectivity options. Look for motherboards with a variety of ports, including USB 3.0, USB-C, and HDMI. Additionally, consider built-in Wi-Fi and Bluetooth capabilities for added convenience, especially if you prefer a wireless setup.

In summary, selecting the right motherboard is a critical step in your custom gaming build. Take the time to research and compare different models, ensuring they align with your gaming goals and setup requirements. With the right motherboard, you’ll be one step closer to creating a powerful machine that delivers the performance you desire in your gaming adventures.

7. RAM: How Much Do You Really Need?

pc gaming -  How to create a custom gaming PC build?
Credit : whatcanu.com

When it comes to building your dream gaming machine, one of the most crucial components to consider is RAM (Random Access Memory). But how much do you really need? The answer depends on your gaming habits, the types of games you play, and how you intend to use your PC beyond gaming.

For most gamers, 16GB of RAM is the sweet spot. This amount provides plenty of headroom for modern games, allowing for smooth multitasking and eliminating the dreaded stuttering that can occur when your system runs out of memory. Whether you’re delving into expansive open-world adventures or engaging in fast-paced online battles, 16GB will keep your system running fluidly.

However, if you’re a power user who enjoys playing demanding titles, editing videos, or running multiple applications simultaneously, you might want to consider upgrading to 32GB. This gives you the flexibility to handle more intensive workloads and future-proofs your system for upcoming games that may require more resources.

It’s also worth noting that the speed of your RAM can impact performance. Look for RAM with a higher MHz rating to enhance your gaming experience further, as faster RAM can improve load times and overall responsiveness. Opting for dual-channel configurations can also help maximize your memory’s efficiency, ensuring that your system works harmoniously.

In summary, while 16GB is generally sufficient for most gamers, evaluating your specific needs and considering future-proofing options will guide you to the right amount of RAM for your custom build. Remember, a well-balanced system is key to achieving that seamless gaming experience you’ve always dreamed of.

8. Storage Solutions: SSD vs. HDD

When it comes to choosing the right storage solution for your custom gaming PC, understanding the differences between SSDs (Solid State Drives) and HDDs (Hard Disk Drives) is crucial. Each option has its own set of advantages and drawbacks that can significantly impact your gaming experience and overall system performance.

**SSDs: Speed and Performance**

SSDs are the go-to choice for gamers looking for speed and efficiency. Unlike traditional HDDs, which rely on spinning disks to read and write data, SSDs use flash memory to store information. This fundamental difference allows SSDs to deliver lightning-fast load times, dramatically reducing the time it takes to boot up your operating system, launch games, and access files. Imagine diving into your favorite game in seconds rather than minutes—this speed can be a game-changer in competitive environments where every second counts.

Another benefit of SSDs is their durability. With no moving parts, they are less susceptible to physical damage, making them an ideal choice for gamers who transport their machines frequently. Additionally, the compact form factor of SSDs allows for more flexible build designs, freeing up space for other components.

**HDDs: Capacity and Cost-Effectiveness**

On the other hand, HDDs offer a different set of benefits, primarily in terms of storage capacity and cost. If you’re a gamer with a vast library of titles, including large AAA games, an HDD can provide the massive storage space needed without breaking the bank. With capacities often reaching several terabytes at a fraction of the cost of SSDs, HDDs are a practical solution for storing your entire game collection, media files, and more.

However, it’s essential to consider the trade-offs. While HDDs are generally slower than SSDs, they can still serve well as secondary storage for files that don’t require rapid access, such as videos, music, and older games you don’t play as often.

**The Best of Both Worlds**

Ultimately, the best storage solution for your gaming PC may involve a combination of both SSD and HDD. Utilizing an SSD as your primary drive for your operating system and frequently played games will ensure optimal performance, while an HDD can serve as a secondary drive for less frequently accessed files and games. This hybrid approach allows you to harness the speed of SSDs without sacrificing the large storage capacity that HDDs offer, striking the perfect balance for any gaming enthusiast.

As you build your dream machine, weigh your options carefully to create a storage setup that meets your gaming needs and enhances your overall experience.

9. Power Supply Units (PSUs): Ensuring Reliability

When it comes to building your dream gaming PC, the importance of a reliable Power Supply Unit (PSU) cannot be overstated. Often overlooked in the excitement of selecting flashy graphics cards and cutting-edge CPUs, the PSU is the unsung hero of your build. It’s the component that ensures your entire setup runs smoothly, providing the necessary power to each part of your machine without interruption.

To start, it’s crucial to choose a PSU that offers both sufficient wattage and efficiency. Start by calculating the total power requirements of your components—this includes the CPU, GPU, motherboard, RAM, storage drives, and any additional peripherals. A PSU that delivers at least 20% more power than your maximum needs is a safe bet, as it allows for potential upgrades and prevents overloading the unit.

Efficiency ratings, indicated by the 80 PLUS certification, should also guide your choice. A PSU with a higher efficiency rating (such as 80 PLUS Gold or Platinum) will waste less energy as heat, translating to lower electricity bills and a cooler-running system. This is particularly important during those marathon gaming sessions where performance and stability are paramount.

Moreover, take note of the PSU’s build quality and features. Look for units with high-quality capacitors and sturdy cables that can withstand the rigors of daily usage. Modularity is another aspect to consider; a fully modular PSU allows you to connect only the cables you need, reducing clutter inside your case and improving airflow.

In summary, investing in a reliable PSU is not just about powering your gaming rig; it’s about ensuring longevity and maximized performance for your entire setup. A well-chosen PSU will keep your system stable, protect your components from power fluctuations, and ultimately provide peace of mind as you delve into the immersive worlds of your favorite games.

10. Cases and Cooling: Keeping Your Build Stylish and Efficient

When it comes to assembling your dream gaming rig, the case and cooling system play pivotal roles not just in functionality, but also in aesthetics. Choosing the right case is the first step to creating a visually stunning and efficient build. Look for a chassis that not only fits your components snugly but also complements your personal style. Whether you prefer a sleek minimalist design, a vibrant RGB-lit powerhouse, or a classic tower with elegant curves, your case serves as the canvas for your masterpiece.

Consider factors such as airflow, materials, and cable management when selecting your case. Good airflow is crucial for maintaining optimal temperatures, especially during long gaming sessions. Look for cases with ample ventilation, mesh panels, or pre-installed fans to ensure that your components remain cool and perform at their best. Additionally, a case with built-in cable management features will help keep your interior tidy, allowing for better airflow and easier upgrades in the future.

Cooling systems are equally important, as they directly impact performance and longevity. While many gamers opt for traditional air cooling solutions, liquid cooling has gained popularity for its efficiency and aesthetics. Custom liquid cooling loops can give your build a unique flair while keeping your CPU and GPU temperatures low. However, they require careful planning and maintenance, so weigh your options based on your comfort level and technical expertise.

Don’t forget about the importance of RGB lighting, which can breathe life into your build and create an immersive atmosphere. Synchronizing your lighting effects across your components can turn your gaming setup into a dazzling spectacle that reflects your personality.

In summary, the right case and cooling solution can transform your gaming PC from a mere collection of components into a stunning work of art, all while ensuring that everything runs smoothly and efficiently. So take your time, explore your options, and let your creativity shine as you equip your dream machine with style and functionality.

11. Assembling Your Custom PC: A Step-by-Step Guide

Assembling your custom PC is the moment you’ve been eagerly anticipating—the culmination of careful planning, selection, and investment in your dream gaming machine. With parts laid out before you, it’s time to dive into the hands-on part of the process. Here’s a step-by-step guide to help you navigate this exciting journey.

### Step 1: Prepare Your Workspace
Before you begin, ensure your workspace is clean and organized. A large, flat surface is ideal, as it provides ample room to maneuver. Consider using an anti-static mat to prevent any damage to sensitive components during assembly. Gather your tools—typically, all you’ll need is a Phillips screwdriver and perhaps a pair of tweezers for those tiny screws.

### Step 2: Install the CPU
Start with the heart of your machine: the CPU. Gently lift the lever on the CPU socket of your motherboard, align the CPU with the socket (noting the small triangle marking for proper orientation), and lower it into place. Secure the lever back down to lock it in. If you’re using an aftermarket cooler, now’s the time to apply thermal paste before installing the cooler.

### Step 3: Secure the RAM
Next, insert your RAM sticks. Open the clips on the RAM slots, align the notch on the RAM stick with the slot, and firmly press down until the clips click back into place. If you have multiple sticks, consult your motherboard manual for the optimal configuration, often utilizing alternating slots for dual-channel performance.

### Step 4: Mount the Motherboard
Now, it’s time to install the motherboard into the case. Carefully position the motherboard over the standoffs within the case, ensuring that the I/O shield aligns correctly with the ports. Secure the motherboard using the screws provided, taking care not to overtighten.

### Step 5: Install the Power Supply
Next, install the power supply unit (PSU) at the designated area within your case. Secure it with screws and manage the cables to ensure they won’t obstruct airflow. Connect the main power cable from the PSU to the motherboard, along with any additional cables needed for the CPU and components.

### Step 6: Add Storage Drives
Install your SSDs or HDDs next. If you’re using a 2.5-inch SSD, slide it into the designated bay or mount it on the motherboard using M.2 slots. For traditional HDDs, slide them into the drive bays and secure them with screws. Don’t forget to connect the SATA cables from the drives to the motherboard and the power cables from the PSU.

### Step 7: Install the Graphics Card
The graphics card is often the centerpiece of a gaming PC. Carefully remove the PCIe slot covers from your case, align the graphics card with the appropriate slot on the motherboard, and press down firmly until it clicks into place. Secure it with screws and connect any necessary power cables from the PSU.

### Step 8: Connect All Cables
Now, it’s time to connect all remaining cables. Manage your cable routing to keep the interior tidy and ensure optimal airflow. Connect case fans, RGB lighting, and any additional peripherals. Double-check that all connections are secure and that there are no loose cables that could obstruct airflow or damage components.

### Step 9: Power On and Test
With everything assembled, it’s time for the moment of truth. Connect your monitor, keyboard, and mouse, then power on the system. If all goes well,

12. Installing the Operating System and Drivers

Once your custom PC is fully assembled and all the cables neatly tucked away, it’s time to breathe life into your machine by installing the operating system (OS) and drivers. This step is crucial, as it transforms your hardware into a fully functional gaming powerhouse.

Begin by preparing a bootable USB drive with your chosen operating system. Whether you opt for Windows, Linux, or another OS, download the installation files from the official website and use tools like Rufus or the Windows Media Creation Tool to create your bootable drive. Make sure to check the system requirements for your OS to ensure compatibility with your new hardware.

Next, insert the USB drive into your custom PC and power it on. You’ll need to access the BIOS or UEFI settings by pressing a designated key (usually F2, Delete, or Esc) during startup. Once in the BIOS, navigate to the boot menu and set the USB drive as the primary boot device. Save your settings and restart the machine.

As the system boots from the USB, you’ll be greeted by the installation wizard. Follow the on-screen prompts to select your language, choose the installation type, and specify the drive where the OS will be installed. If you’ve built your PC with multiple drives, it’s essential to pick the correct one—typically, this is your primary SSD or HDD for optimal performance.

After the OS has been installed, it’s time to focus on the drivers. Drivers are crucial as they allow your operating system to communicate effectively with your hardware, ensuring optimal performance and functionality. Start by visiting the manufacturer’s website for each component, such as your graphics card, motherboard, and peripherals, to download the latest drivers. Some systems may also require chipset drivers to ensure smooth operation.

Install the drivers one by one, rebooting as necessary. This process will ensure that your graphics card can utilize its full capabilities, your motherboard can communicate with your CPU and RAM efficiently, and your peripherals perform as intended.

Once you’ve completed these installations, take a moment to check for any operating system updates. Keeping your OS updated will not only enhance performance but also provide important security patches.

With the operating system and drivers in place, your custom PC is now ready for the next exciting step—installing your favorite games and software. Take a moment to admire your handiwork; you’ve successfully built and powered on your dream machine, paving the way for countless gaming adventures ahead!

13. Optimizing Your PC for Gaming Performance

Once you’ve meticulously assembled your dream gaming machine and felt the thrill of powering it on for the first time, the next step is to ensure it operates at peak performance. Optimizing your PC for gaming isn’t just about having powerful components; it’s about tweaking settings and configurations to extract every ounce of performance from your system.

Begin with your graphics settings. Most modern games come equipped with a plethora of graphics options, ranging from texture quality to shadow effects. While it might be tempting to max out every setting, take the time to find a balance that enhances visual fidelity without sacrificing frame rates. Utilizing tools like NVIDIA GeForce Experience or AMD’s Radeon Software can help automate this process, optimizing settings based on your specific hardware.

Next, ensure your drivers are up to date. Graphics card manufacturers frequently release driver updates that enhance performance and fix bugs, so keeping these updated can lead to significant gains in gaming performance. Additionally, consider overclocking your GPU and CPU. While this requires some technical know-how and carries risks, when done correctly, it can provide a noticeable boost in performance. Just be sure to monitor temperatures closely to avoid overheating.

Another critical aspect of optimization is managing background processes. Before you dive into a gaming session, close unnecessary applications that could drain your system’s resources. Tools like Task Manager can help identify resource-heavy applications that may be running in the background.

Lastly, don’t overlook the importance of regular maintenance. Dust accumulation can lead to overheating, which can throttle your performance. Make it a routine to clean out your PC’s internals, ensuring optimal airflow and cooling.

By taking these steps to optimize your PC for gaming performance, you can transform your already impressive rig into a powerhouse that delivers the immersive experiences you crave. Whether you’re exploring vast open worlds or battling it out in fast-paced shooters, the right optimizations will ensure your custom-built machine runs smoothly and efficiently, providing you with the ultimate gaming experience.

14. Troubleshooting Common Build Issues

Building your dream gaming PC can be an exhilarating experience, but it’s not uncommon to encounter a few bumps along the way. Troubleshooting common build issues is an essential skill that can save you time, money, and a lot of headaches. Here are some typical problems you might face and how to address them.

**1. No Power or Boot Issues:** If your PC doesn’t power on at all, start by checking the basics. Ensure that all power cables are securely connected to the motherboard and components. Verify that your power supply unit (PSU) is functioning. A simple way to test this is to use a PSU tester or try booting with a different PSU if available. Additionally, ensure that the power switch on the back of the PSU is turned on and that the wall outlet is working.

**2. Beeping Sounds:** If your PC emits a series of beeps when trying to boot, this is often an indicator of hardware failure. The pattern of beeping can help identify the issue, so refer to your motherboard’s manual for beep codes. Common culprits include improperly seated RAM or GPU. Reseat these components and try booting again.

**3. Display Issues:** A blank screen can be frustrating, especially after all your hard work. First, check that your monitor is powered on and connected properly. Ensure that the correct input source is selected on your monitor. If everything seems in order, reseat your GPU and check for any visible damage to the graphics card.

**4. Overheating:** If your system boots but crashes shortly after, overheating might be the culprit. Make sure your CPU cooler is correctly installed and that thermal paste is applied adequately. Check all fans to ensure they’re spinning and that your case has proper airflow. Cleaning dust from vents and ensuring cables are neatly managed can improve cooling efficiency.

**5. Software Conflicts:** Once your PC is up and running, software issues can arise. If you experience crashes or performance issues, consider updating your drivers, especially for the GPU. Sometimes, a clean installation of your operating system can resolve persistent problems caused by software conflicts or corrupted files.

Remember, patience is key when troubleshooting. It’s perfectly normal to face challenges during the building process, but with a methodical approach and a little bit of research, you’ll be well-equipped to overcome any obstacles and enjoy your gaming experience to the fullest!

15. Conclusion: Enjoying Your Dream Machine and Future Upgrades

As you power up your custom-built gaming rig for the first time, a wave of excitement washes over you. The culmination of your careful planning, research, and hands-on assembly transforms into an exhilarating reality. You’re not just a gamer now; you’re the proud owner of a machine tailored to your specific needs and preferences, perfectly suited to deliver breathtaking graphics and lightning-fast processing speeds. The satisfaction of seeing your dream machine come to life is unparalleled, and it’s a testament to the hard work and dedication you’ve invested in this project.

But the journey doesn’t end here. One of the most rewarding aspects of building your own PC is the ability to upgrade and expand it over time. Technology is ever-evolving, and staying ahead of the curve means embracing future improvements. Whether it’s upgrading your graphics card to experience the latest titles with stunning realism or adding more RAM to enhance performance during resource-heavy tasks, your custom build is a canvas for continuous enhancement.

Moreover, understanding your machine inside and out empowers you to make informed decisions regarding upgrades. You’ll know exactly what components can be swapped out and what new technologies can elevate your gaming experience. Keep an eye on emerging trends, read reviews, and stay connected with the vibrant gaming community; they are invaluable resources for inspiration and advice.

As you embark on this exciting journey with your dream machine, remember to take the time to enjoy the fruits of your labor. Dive into your favorite games, experiment with different settings, and share your experiences with fellow gamers. Your custom PC is not just a tool; it’s a gateway to unforgettable adventures and a vibrant community. The world of gaming is at your fingertips, and with your custom build, you’re ready to conquer new realms. Happy gaming, and may your dream machine serve you well for years to come!

As we wrap up our step-by-step guide to building your dream gaming machine, we hope you feel inspired and empowered to embark on this exciting journey. Crafting a custom PC not only allows you to tailor your setup to your unique gaming preferences but also gives you the satisfaction of creating something truly your own. From selecting the right components to assembling them with care, each step brings you closer to an immersive gaming experience that’s optimized for performance and style. Whether you’re a seasoned gamer or a newcomer ready to take the plunge, remember that patience and attention to detail will be your best allies. Happy building, and may your new rig bring you countless hours of thrilling adventures in the gaming world! Share your progress with us—we can’t wait to see the incredible machines you create!

pc gaming – How to troubleshoot a blue screen of death while gaming?

For many PC gamers, few things are more frustrating than encountering the infamous Blue Screen of Death (BSOD) during an intense gaming session.

This ominous screen, often accompanied by cryptic error codes, can feel like a major roadblock, pulling you out of immersive worlds and halting your progress in a heartbeat. Whether you’re battling in the latest first-person shooter or exploring vast open worlds, the sudden appearance of the BSOD can leave you scratching your head and anxious about potential hardware failures. But fear not! In this ultimate guide, we will delve deep into the causes behind the Blue Screen of Death, equipping you with essential troubleshooting techniques to diagnose and resolve these issues effectively. From understanding common error messages to implementing preventative measures, we’ll empower you to reclaim your gaming experience and keep the action rolling. Get ready to transform your frustration into knowledge and confidence as you navigate the complexities of PC gaming!

1. Understanding the Blue Screen of Death (BSOD)

pc gaming -  How to troubleshoot a blue screen of death while gaming?
Credit : whatcanu.com

The Blue Screen of Death (BSOD) is often the most dreaded sight for any PC gamer. It’s not just a mere inconvenience; it can feel like a gut punch that pulls you out of the virtual worlds you’ve invested so much time in. But what exactly is the BSOD? At its core, the BSOD is a critical error screen that Windows displays when it encounters a serious issue that it can’t recover from. This blue screen serves as a warning that your system has run into a problem, and it needs to halt operations to prevent further damage.

When the BSOD occurs, it typically displays a message along with a stop code, which can provide crucial insights into the underlying issue. These stop codes can range from hardware failures to incompatible drivers, or even software bugs. The screen’s ominous hue isn’t just for shock value; it’s designed to grab your attention immediately, signaling that something has gone seriously awry.

Understanding the BSOD also involves recognizing its patterns. Different errors and codes can point to specific problems, such as “IRQL_NOT_LESS_OR_EQUAL” indicating memory issues, or “PAGE_FAULT_IN_NONPAGED_AREA” hinting at problems with your hard drive or RAM. By familiarizing yourself with these codes, you can begin troubleshooting more effectively, pinpointing the root cause without unnecessary guesswork.

While encountering a BSOD can be alarming, it’s important to remember that it is often a solvable problem. With a little knowledge and the right approach, you can navigate the complexities of the Blue Screen of Death, ensuring that your gaming experience remains uninterrupted and enjoyable. In the following sections, we’ll delve deeper into common causes of the BSOD and provide you with actionable solutions to get your gaming rig back in top form.

2. Common Causes of BSOD in PC Gaming

When it comes to PC gaming, few things are as frustrating as encountering the Blue Screen of Death (BSOD). This ominous screen can appear unexpectedly, abruptly interrupting your gaming session and leaving you staring at a cryptic error code. Understanding the common causes of BSOD in PC gaming is crucial for diagnosing and preventing these disruptive crashes.

One of the most prevalent culprits is hardware failure. Components such as your graphics card, memory (RAM), or hard drive can fail or become incompatible, leading to system instability. Overheating is another common issue; if your PC isn’t adequately cooled, it may struggle to handle the demands of high-intensity gaming, causing it to crash.

Driver issues also play a significant role in BSOD occurrences. Outdated, corrupted, or incompatible drivers—especially graphics drivers—can interfere with your system’s ability to communicate with hardware effectively. This can happen after a Windows update or a fresh install of a game that requires different driver versions for optimal performance.

Moreover, software conflicts can lead to BSOD errors. This often occurs when multiple programs or services attempt to access the same resources simultaneously, creating a conflict that results in system crashes. Malware infections can similarly destabilize your system by corrupting files or consuming excessive resources.

Lastly, system file corruption is a common underlying issue. Critical files needed for your operating system to run smoothly may become corrupted due to improper shutdowns, hardware failures, or even power surges. This corruption can trigger BSOD errors, manifesting as various stop codes that can leave even seasoned gamers scratching their heads.

Being aware of these common causes allows you to take proactive measures to maintain system stability, ensuring that you can focus on what really matters: enjoying your gaming experience without interruption.

3. How to Identify BSOD Error Codes

pc gaming -  How to troubleshoot a blue screen of death while gaming?
Credit : whatcanu.com

Identifying Blue Screen of Death (BSOD) error codes is a crucial step in troubleshooting the issues plaguing your gaming PC. When your system succumbs to a BSOD, it displays a cryptic series of numbers and messages that might seem intimidating at first glance. However, understanding these codes can lead you directly to the root of the problem.

The BSOD typically presents a specific error code that consists of a descriptive name and a hexadecimal code. For example, you might see something like “CRITICAL_PROCESS_DIED” alongside a code such as “0x000000EF”. Each of these codes provides vital information about what went wrong with your system.

To begin identifying the error codes, take note of the message displayed on your screen. If your game crashes and the BSOD appears, grab your smartphone or a notepad to jot down the exact wording of the error. This will be your guide for further investigation.

Once you have the error message, utilize online resources, such as Microsoft’s official documentation or tech forums, to decipher its meaning. Many websites offer comprehensive lists of BSOD error codes and their potential causes. For instance, “IRQL_NOT_LESS_OR_EQUAL” often indicates issues with drivers or memory, while “PAGE_FAULT_IN_NONPAGED_AREA” might suggest a problem with your system’s RAM or hard drive.

If your BSOD doesn’t remain on-screen long enough for you to write it down, don’t worry. Windows has a built-in tool that logs these events. After a restart, you can access the Event Viewer by typing “Event Viewer” in the Windows search bar. Navigate to the “Windows Logs” section, then select “System.” Here, you can filter the events to find critical errors corresponding to the time of your BSOD.

By accurately identifying the BSOD error codes and understanding their implications, you empower yourself to take targeted actions. Whether it’s updating drivers, checking hardware, or adjusting system settings, having this knowledge at your fingertips will streamline your troubleshooting process and get you back to gaming in no time.

4. Initial Troubleshooting Steps

When confronted with the dreaded Blue Screen of Death (BSOD) during your gaming session, the first instinct may be to panic. However, staying calm and following a systematic approach can save your gaming experience and potentially preserve your hardware. Here are some initial troubleshooting steps to help you get back to your virtual adventures as swiftly as possible.

**1. Note the Error Code:** One of the first things you should do is take note of the error code displayed on the blue screen. This alphanumeric code can provide crucial information about the root cause, guiding you toward a more targeted solution. You can jot down the code or take a picture of your screen for reference.

**2. Restart Your PC:** A simple reboot can often clear transient issues that lead to a BSOD. Restart your computer and see if the problem persists. If it was a one-time glitch, you may be back to gaming in no time. However, if the BSOD reappears, it’s time to dig a little deeper.

**3. Disconnect External Devices:** Sometimes, peripheral devices such as gaming controllers, USB drives, or printers can cause conflicts that lead to system crashes. Disconnect all non-essential hardware and restart your PC. If the BSOD doesn’t occur after this, reconnect devices one at a time to identify the culprit.

**4. Boot in Safe Mode:** If the problem continues, boot your PC in Safe Mode. This starts your system with minimal drivers and services, allowing you to troubleshoot. To access Safe Mode, restart your PC and repeatedly press the F8 key (or Shift + F8 on some systems) before the Windows logo appears. From there, select “Safe Mode” from the menu.

**5. Check for Recent Changes:** Consider any changes you may have made before the BSOD began appearing. Did you install new hardware or software? If so, you might need to uninstall it or update drivers associated with those changes. Roll back any recent updates if you suspect they are the cause of the crashes.

**6. Run Diagnostics:** Most PCs come with built-in diagnostics tools that can help identify hardware issues. Access these tools through your BIOS or by using third-party software. Running a memory test can reveal if faulty RAM is to blame, while a hard drive diagnostic can check for disk errors that may be causing instability.

**7. Keep Calm and Document:** Throughout this process, it’s essential to document each step you take. Not only does this help you keep track of what you’ve tried, but it also provides valuable information if you need to seek further assistance from tech forums or customer support.

By following these initial troubleshooting steps, you’ll be well on your way to diagnosing the root cause of the BSOD. Remember, each step is a chance to learn more about your system and its quirks, so take your time and stay methodical. With patience and persistence, you’ll soon be back to conquering your favorite games.

5. Updating Graphics Drivers

pc gaming -  How to troubleshoot a blue screen of death while gaming?
Credit : whatcanu.com

Updating your graphics drivers is one of the most crucial steps in troubleshooting the infamous Blue Screen of Death (BSOD), especially for PC gamers. Graphics drivers act as the bridge between your operating system and your graphics card, ensuring that they communicate effectively to deliver stunning visuals and smooth gameplay. Outdated or corrupted drivers can lead to system instability, crashes, and, yes, those dreaded blue screens.

To begin, identify your graphics card’s manufacturer—be it NVIDIA, AMD, or Intel. Each company provides dedicated software to streamline the update process. For NVIDIA users, the GeForce Experience app is a powerful tool that not only alerts you to new driver releases but also optimizes your game settings based on your hardware specifications. AMD users can utilize the Radeon Software Adrenalin Edition for similar capabilities, while Intel provides the Intel Driver & Support Assistant for its integrated graphics solutions.

Once you have the appropriate software, the update process is typically straightforward. Launch the application and navigate to the driver update section. Here, you’ll find the latest drivers available for your hardware. Always opt for the ‘clean installation’ option when prompted; this ensures that any remnants of old drivers are removed, reducing the risk of conflicts that could lead to further BSOD issues.

In some cases, you might find that the latest driver causes more problems than it solves. If that’s the case, consider rolling back to a previous version that was stable for your system. Most of the graphics driver applications allow you to revert to earlier versions easily.

Regularly updating your graphics drivers not only enhances performance and stability but can also unlock new features and optimizations for the latest games. Keeping your drivers current is a proactive approach that can prevent many issues, including the dreaded Blue Screen of Death, allowing you to focus on what truly matters: immersive gaming experiences.

6. Checking Hardware Compatibility

When diving into the world of PC gaming, ensuring that your hardware is compatible is crucial for a smooth and enjoyable experience. The Blue Screen of Death (BSOD) can often be a result of incompatible hardware components, so it’s important to take a thorough look at each piece of equipment you plan to use.

Start by reviewing the specifications of your graphics card, RAM, and motherboard. Each of these components has specific requirements and limitations that can affect performance and stability. For instance, if your graphics card requires a certain wattage that your power supply cannot deliver, it can lead to system instability and potentially trigger a BSOD.

Next, check the RAM compatibility, as not all RAM sticks work seamlessly together. Mismatched speeds or brands can lead to conflicts that manifest as system errors. It’s also wise to consult your motherboard’s manual for the list of supported hardware, including CPU types and RAM configurations.

Additionally, look into peripheral compatibility. Sometimes, even devices such as USB drives, external hard drives, or gaming mice can cause issues if they have outdated drivers or firmware. Keeping everything updated and within the recommended specifications will significantly reduce the likelihood of encountering the dreaded blue screen.

Lastly, don’t overlook the importance of thermal management. Overheating can result in hardware failures and sudden BSODs, especially when running demanding games. Ensure your cooling system is adequate and that your components are seated properly to maintain optimal temperatures. By taking the time to verify hardware compatibility, you’ll not only prevent future blue screens but also enhance your overall gaming experience.

7. Overheating Issues and Solutions

pc gaming -  How to troubleshoot a blue screen of death while gaming?
Credit : whatcanu.com

When you’re immersed in an epic gaming session, the last thing you want is for your screen to suddenly flash that dreaded blue error message. One of the most common culprits behind this frustrating phenomenon is overheating. As your CPU and GPU work vigorously to render stunning graphics and manage complex gameplay, they generate significant heat. If your computer’s cooling system isn’t up to the task, temperatures can soar, leading to unstable performance and, ultimately, the infamous Blue Screen of Death (BSOD).

To tackle overheating issues, start with monitoring your system’s temperatures. Use software like HWMonitor or MSI Afterburner to keep an eye on your CPU and GPU temperatures during gameplay. Ideally, your CPU should not exceed 80°C, and your GPU should stay below 85°C. If you notice your components nearing these thresholds, it’s time to take action.

First, ensure that your PC’s airflow is optimal. Dust buildup in fans and vents can significantly hinder cooling performance. Regularly clean your system, focusing on the fans, heat sinks, and filters. A can of compressed air can be your best friend here, effectively blowing away dust and debris that trap heat.

Next, consider the thermal paste between your CPU/GPU and their respective coolers. Over time, thermal paste can dry out and lose its effectiveness. Reapplying high-quality thermal paste can greatly improve heat dissipation, allowing your components to run cooler and more efficiently.

Upgrading your cooling solutions is another viable option. If you’re using stock coolers, consider investing in aftermarket air or liquid cooling systems that provide superior performance. High-performance fans can also enhance airflow within your case, reducing overall temperatures.

Lastly, keep your gaming environment in mind. Ensure your PC is in a well-ventilated space, away from walls or other obstructions. If possible, use a fan or air conditioning to maintain a cooler ambient temperature in the room.

By addressing overheating issues proactively, you can prevent unexpected BSODs and maintain a smooth gaming experience. Remember, a cool system is a happy system, and your gaming adventures will be much more enjoyable without the interruptions of a blue screen.

8. Running Memory and Disk Diagnostics

When it comes to diagnosing issues that may lead to the dreaded Blue Screen of Death (BSOD) while gaming, running memory and disk diagnostics can be invaluable. These tools help identify potential hardware malfunctions that could disrupt your gaming experience, leading to crashes and instability.

**Memory Diagnostics**

Your system’s RAM (Random Access Memory) plays a crucial role in performance, especially during demanding gaming sessions. If your memory is faulty, it can lead to system errors and crashes. To check for issues, you can use the built-in Windows Memory Diagnostic tool. Simply search for “Windows Memory Diagnostic” in your Start menu, select “Restart now and check for problems,” and let your PC reboot for the test. The diagnostic will run through a series of checks to identify any memory errors. If issues are found, you may need to replace or reseat the RAM sticks, or in some cases, consider a complete upgrade.

**Disk Diagnostics**

Next up is the health of your hard drive or SSD (Solid State Drive). Disk errors can also be a significant cause of BSODs, especially if your game files are located on a failing drive. Windows offers a handy built-in tool called Check Disk (CHKDSK) to scan your drives for errors. You can run this tool by opening Command Prompt as an administrator and typing `chkdsk /f`. This command will scan your drive and fix any detected issues. If you’re using an SSD, consider checking the drive’s health with specialized software like CrystalDiskInfo, which can provide a detailed overview of its status, including temperature and wear levels.

By regularly running these diagnostics, you can catch potential memory and disk issues before they escalate into more significant problems that could lead to BSODs. Moreover, maintaining your hardware’s health not only improves gaming performance but also prolongs the life of your PC. Keeping your system in top shape ensures that when you’re in the heat of battle, the only thing you’ll have to worry about is defeating your opponents—not losing your progress to a crash.

9. Verifying Game Files and Game Settings

When you encounter the dreaded Blue Screen of Death (BSOD) while indulging in your favorite PC games, it can be a frustrating experience. One step that often gets overlooked but can be pivotal in resolving these issues is verifying your game files and adjusting your game settings. This process ensures that your game is running as intended and not plagued by corrupted files or misconfigured settings.

To begin, most gaming platforms, such as Steam, Epic Games, or Origin, offer built-in tools that allow you to easily verify the integrity of your game files. This feature scans your game installation for any missing or corrupted assets and replaces them automatically. For instance, on Steam, simply right-click the game in your library, select Properties, navigate to the Local Files tab, and click on “Verify Integrity of Game Files.” This action can resolve crashes caused by missing textures, broken scripts, or corrupted saves, all of which can contribute to the BSOD during gameplay.

After ensuring that your game files are intact, it’s crucial to review your game settings. Sometimes, the default settings may not be optimized for your hardware, leading to instability. Check the graphics settings, resolution, and frame rate limits. If you’re running a high-performance game on a mid-range system, overly ambitious settings might push your hardware beyond its limits, triggering crashes. Lowering the graphics quality or disabling demanding features like anti-aliasing or V-Sync can significantly enhance stability.

Additionally, ensure that your game is updated to the latest version, as developers frequently release patches that fix bugs and improve performance. Pair this with running the game in compatibility mode if you’re using an older title on a newer operating system. By systematically verifying your game files and carefully adjusting your settings, you can minimize the risk of encountering the BSOD, allowing you to immerse yourself fully in your gaming adventures without interruptions.

10. Reinstalling Problematic Games

When all else fails and the dreaded Blue Screen of Death (BSOD) continues to plague your gaming experience, it may be time to consider reinstalling the problematic games. Although it might seem like a drastic measure, this step can often resolve underlying issues that other troubleshooting methods haven’t addressed.

Before you dive in, it’s crucial to identify which game or games are causing the BSOD. Take note of any error messages or patterns occurring when these games are launched. Whether it’s a specific title or a series of games, understanding the root of the problem will help streamline your reinstallation process.

To begin, ensure that you back up your saved files, mods, and custom settings. Many modern games have built-in cloud saves or allow you to manually back up your game data, so utilize these features to avoid losing hours of progress. Once your files are secure, you can proceed with the uninstallation process. This can typically be done through your game client (like Steam, Epic Games, or Origin) or the Windows Control Panel. Remove the game completely, ensuring all associated files and folders are deleted to eliminate any corrupted data.

After a clean uninstallation, reboot your PC. This step helps clear any residual files that may interfere with the new installation. Next, navigate to your game client or download platform and reinstall the game. Make sure to download the latest patches and updates, as game developers frequently release fixes that can resolve compatibility issues that might lead to BSOD errors.

Once the installation is complete, launch the game to see if the problem persists. If the BSOD continues to rear its ugly head, it may indicate deeper issues within your system, such as driver conflicts or hardware malfunctions. However, if the game runs smoothly, you’ve successfully eliminated the issue and can now dive back into your gaming world, free from interruptions. Reinstalling problematic games can be a simple yet effective solution in the broader troubleshooting process, allowing you to enjoy your favorite titles without the fear of sudden crashes.

11. System Restore and Recovery Options

When all else fails in the battle against the dreaded Blue Screen of Death (BSOD), system restoration and recovery options can be your saving grace. These powerful tools are designed to help you revert your system to a previous state, effectively undoing any recent changes that may have led to the dreaded crashes during your gaming sessions.

To begin, navigate to your Windows settings and locate the “System” tab. From here, select “System Protection” to access the System Restore feature. This tool allows you to roll back your operating system to a point in time before the issues began, without affecting your personal files. You’ll see a list of restore points—these are snapshots of your system taken automatically or manually at various times. Choose a point that predates the BSOD occurrences, and follow the prompts to initiate the restore. This process will require a restart and may take several minutes, but it can often eliminate the underlying problems that caused the BSOD in the first place.

In cases where System Restore doesn’t resolve the issue, you might need to explore the recovery options available through Windows Recovery Environment (WinRE). You can access WinRE by restarting your PC and repeatedly pressing the F8 or Shift + F8 key during boot-up (the exact key may vary depending on your system). Once inside, you’ll be presented with several recovery options, including Startup Repair, which can fix issues that prevent Windows from loading correctly, and Reset this PC, which allows you to keep or remove your personal files while reinstalling Windows.

Remember, before proceeding with any recovery options, back up any important data whenever possible. While these tools are designed to fix problems, they can sometimes lead to data loss, especially if you choose to reset your PC. By understanding and effectively utilizing System Restore and recovery options, you can reclaim your gaming experience and minimize downtime caused by the Blue Screen of Death.

12. Windows Updates: Importance and Impact

When it comes to troubleshooting the infamous Blue Screen of Death (BSOD) in PC gaming, one of the most crucial aspects to consider is the role of Windows updates. These updates are not just a routine annoyance; they play a vital role in maintaining the stability, performance, and security of your operating system. An outdated version of Windows can lead to compatibility issues, driver malfunctions, and even critical system failures that may result in the dreaded blue screen.

Windows updates often include important patches and fixes for known bugs, which can directly impact your gaming experience. For instance, a recent update might resolve a compatibility issue with the latest game title or improve the performance of your graphics card. Conversely, failing to install these updates can leave your system vulnerable to errors that could trigger BSOD crashes.

Moreover, Windows updates can introduce new features and enhancements that improve your gaming setup, such as DirectX updates, which can significantly enhance graphics performance and visual fidelity in games. Regularly checking for updates and ensuring that your system is running the latest version of Windows can help mitigate potential BSOD issues before they arise.

It’s also worth noting that while updates are essential, they can occasionally introduce their own set of problems. Some users have experienced new crashes or performance drops after a major update. In such cases, it’s important to stay informed about known issues related to specific updates and be prepared to roll back to a previous version if necessary. Keeping a close eye on Windows updates and understanding their importance can go a long way toward ensuring a smooth and enjoyable gaming experience, free from the interruptions of the Blue Screen of Death.

13. Advanced Troubleshooting Techniques

When faced with the dreaded Blue Screen of Death (BSOD) while gaming, it can feel like your PC has betrayed you at the most inconvenient moment. However, before you throw in the towel, it’s time to delve into advanced troubleshooting techniques that can help identify and resolve the underlying issues causing these crashes.

**1. Analyze the Dump Files:**
One of the first steps in advanced troubleshooting is to analyze the memory dump files created at the time of the BSOD. These files contain crucial information about what your system was doing when the crash occurred. You can use software like BlueScreenView or WinDbg to read these files. Look for patterns or recurring error messages, as they can provide insights into faulty drivers or hardware.

**2. Driver Verifier:**
Windows comes equipped with a tool known as Driver Verifier, designed to stress test your drivers and identify problematic ones. Enabling Driver Verifier can help you pinpoint which driver is causing the BSOD. Navigate to the Command Prompt as an administrator and type `verifier`. Follow the prompts to select the drivers you want to verify. Be cautious with this tool, as it may lead to additional crashes, but it can be invaluable for diagnosis.

**3. Hardware Diagnostics:**
Sometimes, the BSOD can be attributed to hardware failures, such as failing RAM or overheating components. Utilize built-in tools like Windows Memory Diagnostic to check for RAM issues or third-party software like HWMonitor to monitor your system’s temperatures. If you suspect a hardware component, consider running a stress test using tools like Prime95 for the CPU or MemTest86 for RAM to uncover faults that may not be immediately apparent.

**4. Clean Boot:**
Performing a clean boot can help isolate software conflicts that might be causing the BSOD. This process involves starting Windows with a minimal set of drivers and startup programs. By doing so, you can determine if background applications or services are contributing to the problem. To initiate a clean boot, type `msconfig` in the Run dialog (Windows + R) and adjust the settings under the ‘Services’ and ‘Startup’ tabs.

**5. Update BIOS and Firmware:**
In some cases, outdated BIOS or firmware can lead to compatibility issues, particularly with newer hardware or software. Check the manufacturer’s website for your motherboard or system to see if there are any updates available. Updating the BIOS can be a complex process, so be sure to follow the instructions carefully to avoid further complications.

By systematically applying these advanced troubleshooting techniques, you can significantly improve your chances of resolving the Blue Screen of Death and get back to enjoying your gaming experience. While these steps may require a bit more technical skill and patience, they can save you from future frustrations and ensure your system runs smoothly. Remember, every BSOD is an opportunity to learn more about your PC and its inner workings!

14. When to Seek Professional Help

In the world of PC gaming, the Blue Screen of Death (BSOD) can feel like a dark cloud hovering over your gaming experience, ready to strike at any moment. While many issues can be resolved with a little troubleshooting or by following DIY guides, there comes a time when you might need to recognize your limitations and seek professional help. Understanding when to make that call can save you not only time but also the potential for further damage to your system.

If you’ve diligently followed troubleshooting steps—updating drivers, checking for hardware issues, running diagnostics, and even reinstalling the operating system—yet the BSOD continues to rear its ugly head, it may indicate deeper, more complex problems. Persistent crashes could signal hardware failures, such as a failing hard drive, overheating components, or faulty RAM, which are often difficult to diagnose without specialized tools and expertise.

Additionally, if you’re encountering specific error codes that keep recurring, and online forums or tech articles are not providing clear solutions, it’s time to consider professional assistance. Experts have the experience and tools necessary to accurately assess and address the root cause of these errors, often spotting issues that an average user might overlook.

Moreover, if your gaming setup is critical for your livelihood—whether you’re a content creator, streamer, or professional gamer—delaying repairs due to uncertainty can lead to lost income and missed opportunities. In such cases, investing in professional help is not just advisable; it’s a necessity.

While it’s empowering to handle issues independently, knowing when to seek professional help ensures that your gaming rig remains in top condition, ready to deliver the seamless gaming experiences you crave. Don’t hesitate to reach out—whether to a trusted technician, a local repair shop, or even the customer support line of your hardware manufacturer. Your gaming journey deserves the best care possible to keep the BSOD at bay.

15. Preventive Measures for Future BSOD Issues

The Blue Screen of Death (BSOD) can be a frustrating setback for any PC gamer, but understanding how to prevent future occurrences can save you from repeated disruptions during your gaming sessions. Here are some essential preventive measures to keep your system running smoothly and minimize the chances of encountering BSOD issues in the future.

**1. Keep Your System Updated:** Regularly updating your operating system, drivers, and firmware is crucial. These updates often include important patches that fix security vulnerabilities and improve system stability. Make a habit of checking for updates frequently, especially after major game releases or hardware upgrades.

**2. Monitor Hardware Health:** Overheating components can lead to instability and crashes. Invest in monitoring software that tracks the temperature of your CPU, GPU, and other critical hardware. Ensure that your cooling systems—fans and heatsinks—are clean and functioning correctly. Additionally, consider running stress tests to detect any potential hardware issues before they lead to BSOD.

**3. Regular System Maintenance:** Performing routine maintenance can help prevent software-related BSOD issues. This includes disk cleanup to remove unnecessary files, defragmenting your hard drive (for HDDs), and checking for file system errors using built-in tools like CHKDSK. A well-maintained system is less likely to encounter critical errors.

**4. Use Reliable Power Sources:** Sudden power surges or outages can lead to system instability and BSOD. Make sure your gaming setup is connected to a reliable power source, preferably with an uninterruptible power supply (UPS) that can protect against fluctuations and allow for a safe shutdown during power loss.

**5. Be Cautious with Software Installations:** Installing incompatible or poorly designed software can lead to conflicts that result in BSOD. Always research applications and mods before installation, particularly those related to gaming. Stick to reputable sources and check user reviews for compatibility with your system.

**6. Scan for Malware:** Malware infections can cause significant instability in your system. Regularly scan your computer with trusted antivirus software to detect and eliminate threats. A clean system not only performs better but is also less prone to crashes.

**7. Back-Up Data Regularly:** While this may not prevent BSOD, having a robust backup strategy ensures that you won’t lose your progress in games or important files if a crash occurs. Use cloud services or external drives to keep your data safe.

By implementing these preventive measures, you can significantly reduce the likelihood of encountering the dreaded Blue Screen of Death in your gaming experience. Remember, a well-maintained system not only enhances performance but also provides you with the peace of mind needed to fully enjoy your gaming adventures without interruption.

In conclusion, navigating the challenges of the Blue Screen of Death can be daunting, especially for passionate PC gamers eager to dive back into their favorite virtual worlds. Our ultimate guide has equipped you with essential troubleshooting steps, from identifying hardware conflicts to updating drivers and optimizing system settings. Remember, patience and methodical problem-solving are key when addressing these technical hiccups. With the knowledge you’ve gained, you’ll be well-prepared to tackle any BSOD situation that arises, ensuring a smoother and more enjoyable gaming experience. Now, armed with these insights, it’s time to get back in the game—may your adventures be uninterrupted and your victories plentiful! Happy gaming!

pc gaming – How to choose the right cooling solution for your PC?

As gaming technology advances and graphics become increasingly demanding, keeping your PC cool has never been more crucial.

Overheating can lead to decreased performance, hardware damage, and ultimately, a frustrating gaming experience. Whether you’re a casual gamer or a competitive eSports enthusiast, ensuring your rig operates at optimal temperatures is essential for enjoying those intense gaming sessions without interruption. In this comprehensive guide, we’ll explore the various cooling solutions available, from traditional air coolers to advanced liquid cooling systems, helping you make an informed choice that suits your gaming setup. We’ll delve into the benefits and drawbacks of each option, provide tips for installation and maintenance, and share insights on how to monitor your PC’s temperature effectively. Get ready to cool your game and enhance your performance—your ultimate gaming experience awaits!

1. Understanding the Importance of PC Cooling

pc gaming -  How to choose the right cooling solution for your PC?
Credit : whatcanu.com

When it comes to building or upgrading your PC, understanding the importance of cooling is crucial to ensuring optimal performance and longevity. Just like a high-performance car needs a well-functioning radiator to prevent overheating, your computer requires an efficient cooling solution to manage the heat generated by its components. As processors and graphics cards become increasingly powerful, they also produce more heat during operation. Without adequate cooling, this heat can lead to thermal throttling, which reduces performance, or worse, permanent damage to your hardware.

Heat is an enemy to your PC’s health. It can accelerate wear and tear on vital components like the CPU, GPU, and power supply, ultimately shortening their lifespan. Moreover, excessive heat can cause system instability, leading to unexpected crashes, corrupted files, and lost work. A well-cooled system not only maintains peak performance but also enhances the overall user experience.

Moreover, an effective cooling strategy extends beyond just the immediate components. It contributes to a more comfortable environment, especially for gamers and professionals who spend long hours at their machines. A cooler PC runs quieter too, as overheating components often lead to increased fan speeds and noise. Therefore, investing time and resources into understanding your cooling needs is not just about maintaining system performance; it’s about creating a reliable, efficient, and enjoyable computing experience.

In this guide, we will explore various cooling solutions, their benefits, and how to choose the right one for your specific setup. Whether you’re a casual user, a gamer, or a content creator, understanding the importance of PC cooling is the first step in optimizing your machine for peak performance.

2. Common Signs Your PC Needs Better Cooling

Recognizing when your PC is in desperate need of better cooling is crucial for maintaining its performance and longevity. There are several telltale signs that indicate your system is struggling to keep its temperature in check.

One of the most obvious indicators is an increase in fan noise. If your once-quiet PC now sounds like a jet engine taking off, it’s likely that the fans are working overtime to dissipate excessive heat. This can be particularly pronounced during gaming sessions or when running demanding applications.

Another sign to watch for is elevated component temperatures. Most modern motherboards come equipped with temperature sensors that allow you to monitor your CPU and GPU temperatures. If you notice that your CPU is regularly hitting temperatures above 80°C or your GPU is consistently in the upper ranges, it’s a clear signal that something needs to change.

You might also experience unexpected performance drops, commonly referred to as thermal throttling. This occurs when the CPU or GPU reduces its performance to prevent overheating, resulting in lag during gameplay or slowdowns during intensive tasks.

Additionally, keep an eye out for system instability, including frequent crashes or unexpected shutdowns. These issues can often be linked to overheating, as components may become too hot to function properly.

Finally, physical signs like dust build-up or hot air blowing out of the case can’t be ignored. Dust accumulation can impede airflow, trapping heat inside your system and contributing to higher temperatures. Regular cleaning and maintenance can help prevent this issue.

By recognizing these common signs, you can take action to improve your PC’s cooling system before it leads to more serious problems, ensuring your gaming experience remains smooth and enjoyable.

3. Types of Cooling Solutions: Air vs. Liquid Cooling

pc gaming -  How to choose the right cooling solution for your PC?
Credit : whatcanu.com

When it comes to keeping your PC at optimal temperatures, understanding the two primary types of cooling solutions—air cooling and liquid cooling—is essential. Each system has its strengths, weaknesses, and unique characteristics, which cater to different needs and preferences among PC enthusiasts.

**Air Cooling** is the traditional go-to method for many builders. It utilizes heat sinks and fans to dissipate heat away from the CPU and GPU. The mechanics are straightforward: a heat sink, often made of aluminum or copper, absorbs heat generated by the components. Fans then push air through the heat sink, cooling it down before it re-enters the casing. This method is generally more cost-effective and easier to install, making it an excellent choice for casual gamers and those building their first PC. Moreover, air coolers are less prone to failure, as they have fewer moving parts and do not run the risk of leaks. However, they can be less efficient in overclocking scenarios, where higher performance necessitates superior cooling capabilities.

On the other hand, **Liquid Cooling** systems have gained popularity among serious gamers and overclockers for their superior thermal performance. These systems circulate a coolant, typically a mixture of water and other additives, through a closed loop that includes a pump, radiator, and water blocks. The coolant absorbs heat from the components, effectively moving it away to the radiator, where it is cooled by fans before being recirculated. Liquid cooling is particularly effective in maintaining lower temperatures, allowing for higher performance and quieter operation compared to air systems. However, the installation process can be more complex, requiring careful setup to avoid leaks and ensure proper flow. It’s also worth noting that liquid coolers tend to be pricier, which can be a consideration for budget-conscious gamers.

In summary, the choice between air and liquid cooling largely depends on your individual needs and preferences. If you’re after simplicity, reliability, and cost-effectiveness, air cooling is an excellent option. Conversely, if you’re aiming for high performance with potentially quieter operation and are willing to invest time and resources, liquid cooling might be the route for you. Understanding these differences will help you make an informed decision, ensuring your gaming rig runs cool and performs at its best.

4. How Air Coolers Work: Pros and Cons

When it comes to cooling your gaming rig, air coolers have long been a staple in the PC building community. Utilizing a straightforward yet effective mechanism, these cooling solutions rely on the combination of metal heat sinks and fans to dissipate heat generated by your CPU or GPU. The process begins with the heat sink, a metal structure—usually made of aluminum or copper—that absorbs heat from the processor. Once the heat is transferred, the attached fan kicks into gear, pushing cool air over the heat sink while simultaneously expelling the warm air away from the unit. This continuous airflow helps maintain optimal temperatures, ensuring your components operate efficiently even during intense gaming sessions.

### Pros of Air Coolers:

1. **Cost-Effective**: Air coolers are generally more budget-friendly than their liquid counterparts. They come in various price ranges, making them accessible to gamers at all levels.

2. **Simplicity and Reliability**: With fewer moving parts and no risk of leaks, air coolers often boast a reliability that many users appreciate. Installation is typically straightforward, requiring minimal maintenance.

3. **Less Noise**: While some air coolers can be loud, many modern designs feature efficient fans that operate quietly even under load, providing a peaceful gaming experience.

4. **No Risk of Liquid Damage**: Unlike liquid cooling solutions, air coolers eliminate concerns about coolant leaks, making them a safer choice for those wary of potential mishaps.

### Cons of Air Coolers:

1. **Bulkiness**: Depending on the model, air coolers can be quite large and may interfere with other components, such as RAM or case fans. It’s essential to ensure compatibility with your PC case before purchasing.

2. **Cooling Efficiency**: While air coolers can handle standard workloads efficiently, they may struggle to maintain lower temperatures under extreme conditions, such as overclocking or during heavy gaming sessions.

3. **Limited Aesthetics**: While some air coolers come with RGB lighting, they may not offer the same visual flair that some custom liquid cooling setups provide, which can be a consideration for gamers who prioritize aesthetics.

4. **Thermal Performance**: In scenarios where extreme cooling is necessary, air coolers may not perform as well as liquid cooling solutions, making them less suitable for high-end builds pushing performance limits.

In conclusion, air coolers represent a solid choice for gamers looking for a reliable, cost-effective cooling solution. Understanding their mechanics and weighing their pros and cons will help you determine if they meet your gaming needs, keeping your rig cool and your gameplay smooth.

5. Liquid Cooling Explained: A Deep Dive

pc gaming -  How to choose the right cooling solution for your PC?
Credit : whatcanu.com

Liquid cooling has emerged as a popular choice among PC enthusiasts and gamers alike, thanks to its efficiency and effectiveness in managing heat. Unlike traditional air cooling systems that rely on fans to circulate air and dissipate heat, liquid cooling employs a coolant—usually a mixture of water and antifreeze—that circulates through tubes to absorb and carry heat away from the components. This method not only provides superior cooling performance but also operates more quietly, making it an appealing option for those who demand both power and tranquility in their gaming rigs.

At the heart of a liquid cooling system is the pump, which propels the coolant through the loop. The coolant absorbs heat from the CPU or GPU via the water block, a metal component that makes direct contact with the processor. From there, the heated coolant travels to the radiator, where it passes through a series of thin fins. As air flows over these fins—thanks to one or more fans mounted on the radiator—the heat is dissipated, and the cooled liquid returns to the water block, ready to absorb heat once again.

Liquid cooling systems come in two main varieties: closed-loop (AIO) and custom loop. Closed-loop systems are pre-assembled and sealed, making them user-friendly and ideal for beginners or those who prefer a hassle-free setup. They offer excellent cooling performance and require minimal maintenance, which is perfect for gamers who want to focus on their gameplay rather than their hardware. On the other hand, custom loop systems provide an opportunity for advanced users to build a tailored cooling solution that not only meets their specific thermal demands but also showcases their creativity. These systems involve selecting individual components—such as pumps, radiators, tubing, and fittings—and can be as elaborate or straightforward as the user desires.

However, while liquid cooling offers numerous benefits, it also comes with its own set of challenges. Installation can be more complex than air cooling, and there’s the potential risk of leaks if not done correctly. Regular maintenance is also required to ensure that the coolant remains clean and at optimal levels. Despite these considerations, many PC builders find that the advantages far outweigh the drawbacks, enjoying lower temperatures and increased performance capabilities.

In summary, liquid cooling is a powerful option for any PC builder looking to enhance their system’s thermal performance. By understanding how it works and weighing the pros and cons, you can make an informed decision that aligns with your gaming needs and preferences, ensuring that your rig runs cool and efficiently while you conquer the digital battlefield.

6. A Guide to Passive Cooling Solutions

In the world of PC building and maintenance, passive cooling solutions often fly under the radar, yet they can be a game-changer for those seeking silent operation and energy efficiency. Unlike their active counterparts, which rely on fans or pumps to circulate air or coolant, passive cooling systems take a more subtle approach. They dissipate heat through natural convection and conduction, utilizing heat sinks, aluminum or copper fins, and thermal pads to draw heat away from critical components without any moving parts.

When considering passive cooling, one of the key factors is the material used. Copper, for instance, is renowned for its superior thermal conductivity, making it an excellent choice for heat sinks. Aluminum is lighter and more cost-effective, but it may not dissipate heat as efficiently. A combination of both materials can often yield the best results, providing a balance between performance and weight.

Another critical aspect of passive cooling is the design and placement of the heat sinks. These components should be strategically positioned to ensure optimal airflow around them, taking advantage of natural convection currents within the case. This means that not only should the heat sink itself be large enough to dissipate adequate heat, but it should also be complemented by a well-thought-out case layout that minimizes airflow obstruction.

While passive cooling might not be suitable for high-performance gaming rigs or overclocked systems, it excels in scenarios where low noise and energy efficiency are paramount. Ideal for home theater PCs, office computers, or even lightweight gaming systems, passive cooling can deliver sufficient thermal management without the whirring of fans to disrupt your environment.

Ultimately, if you’re looking for a cooling solution that operates quietly and efficiently, passive cooling might be the perfect match for your PC build. By understanding the materials, design, and placement of your cooling components, you can create a system that runs smoothly while keeping noise levels to a minimum. Embrace the silent revolution and let your PC perform without the distraction of noisy fans!

7. Factors to Consider When Choosing a Cooling Solution

pc gaming -  How to choose the right cooling solution for your PC?
Credit : whatcanu.com

When it comes to selecting the perfect cooling solution for your PC, several key factors should guide your decision-making process. The right choice can significantly enhance performance, prolong the lifespan of your components, and ensure a smooth user experience. Here are the most important factors to consider:

1. **Type of Cooling**: First, determine whether you want air or liquid cooling. Air cooling systems are generally easier to install, require less maintenance, and are more affordable. However, liquid cooling solutions can provide superior cooling efficiency and are often quieter, making them suitable for high-performance builds or overclocking.

2. **Case Compatibility**: Before making any purchases, check your case specifications. The size and configuration of your PC case will dictate the dimensions of your cooling solution. Ensure that your chosen cooler fits comfortably without obstructing other components, such as RAM or graphics cards.

3. **Thermal Performance**: Look at the thermal performance ratings of potential cooling solutions. This can usually be found in reviews or specifications. Consider the heat dissipation capabilities, especially if you plan to push your PC to its limits with gaming or intensive tasks.

4. **Noise Levels**: For many users, a quiet operation is a top priority. Compare the noise levels (measured in decibels) of different cooling systems. While some fans can be quite noisy at higher RPMs, others are designed for quiet operation, which can be particularly important if you’re building a system for gaming or media consumption.

5. **Aesthetics**: If you value the visual aspect of your PC build, take into account the design and look of the cooling solution. Many modern coolers come with customizable RGB lighting and sleek designs that can enhance the overall aesthetics of your setup.

6. **Budget**: Finally, consider your budget. Cooling solutions vary widely in price, so balance your need for performance with what you’re willing to spend. Remember that investing in a quality cooling system can save you money in the long run by preventing overheating and damage to your components.

By carefully evaluating these factors, you can make an informed decision that will not only keep your PC cool but will also optimize its performance and longevity. The right cooling solution is a crucial investment for any PC enthusiast looking to maintain a reliable and efficient system.

8. Cooling System Compatibility with Your PC Components

When considering a cooling solution for your PC, one of the most critical factors to keep in mind is compatibility with your existing components. The heart of your build—your CPU, GPU, motherboard, and case—must work harmoniously with your chosen cooling system to ensure optimal performance and longevity.

Start with your CPU. Different processors have varying thermal outputs, and the cooling solution you select must be capable of dissipating this heat efficiently. For example, high-performance CPUs often require robust air or liquid cooling systems. However, if you’re running a more modest setup, a simpler air cooler might suffice. Always check the thermal design power (TDP) rating of your CPU against the specifications of your cooling solution to ensure they match.

Next, consider your GPU. Graphics cards can generate significant heat during intense gaming or rendering sessions, requiring dedicated cooling solutions. Some aftermarket GPUs come equipped with advanced cooling systems, while others may benefit from additional case fans or external cooling solutions. Be sure to verify the dimensions of your chosen cooling system to avoid any spatial conflicts within your case, ensuring that all components fit comfortably without obstructing airflow.

Your motherboard also plays a crucial role in compatibility. Some cooling systems require specific mounting brackets or connectivity options, so it’s essential to check your motherboard’s specifications and ensure your cooling solution supports them. Additionally, certain motherboards have limited clearance for larger air coolers, making it vital to measure the available space before making a purchase.

Lastly, don’t overlook the case itself. A well-ventilated case can significantly enhance cooling performance. When selecting a cooling solution, ensure it not only fits within the physical dimensions of your case but also complements its airflow design. If you’re considering a liquid cooling solution, evaluate the case’s radiator support and hose routing options to avoid unnecessary complications during installation.

In summary, achieving an effective cooling setup isn’t just about choosing the most powerful solution—it’s about ensuring that every component of your PC works together seamlessly. By taking the time to assess compatibility with your CPU, GPU, motherboard, and case, you can create a balanced system that maintains optimal temperatures, ensuring your PC runs smoothly for years to come.

9. The Role of Case Airflow in PC Cooling

When it comes to maintaining optimal temperatures within your PC, the importance of case airflow cannot be overstated. Think of your computer case as a vital ecosystem where heat generation and dissipation must be carefully balanced to ensure peak performance and longevity of your components. Proper airflow is the unsung hero in this equation, working behind the scenes to usher hot air out while drawing in cooler air from the surroundings.

Case airflow is primarily dictated by the arrangement and quality of your fans, the design of your case, and the strategic placement of components. A well-ventilated case will have multiple intake and exhaust fans, creating a consistent flow of air that prevents heat buildup. This is crucial because every component within your PC generates heat—especially the CPU and GPU during intensive tasks like gaming or video editing. When airflow is restricted, you run the risk of overheating, which can lead to throttling, crashes, or even permanent damage to your hardware.

To optimize airflow, consider the direction of your fans. Typically, front and bottom fans should draw air into the case, while top and rear fans should expel warm air. Maintaining a positive pressure setup—where intake airflow exceeds exhaust—can also help minimize dust buildup, keeping your internals clean and efficient. Additionally, cable management plays a significant role in airflow; neatly routed cables not only enhance aesthetics but also reduce obstructions that can impede airflow.

In essence, understanding and optimizing case airflow is a foundational step in building a cooling solution tailored to your PC’s needs. It creates a harmonious environment where your components can thrive, ensuring that your gaming sessions remain uninterrupted and your system runs smoothly for years to come.

10. Noise Levels: Balancing Performance and Quiet Operation

When it comes to choosing the right cooling solution for your PC, noise levels are a crucial factor that often gets overlooked in the pursuit of peak performance. A powerful cooling system can keep your components running optimally, but if it sounds like a jet engine taking off, it can be a major distraction whether you’re gaming, working, or just enjoying some downtime.

The balance between performance and quiet operation is a delicate one, and understanding the nuances can make all the difference for your user experience. High-performance cooling solutions, such as aftermarket air coolers and liquid cooling systems, can vary significantly in their noise output. While some may boast impressive cooling capabilities, they might also come equipped with fans that spin at high RPMs, generating unwanted noise.

To find the sweet spot, consider the decibel (dB) rating of potential cooling solutions. Many manufacturers provide this information, allowing you to compare models based on their sound output. Generally, a fan operating below 30 dB is considered whisper-quiet, while anything above 40 dB can start to become intrusive.

Additionally, think about the type of cooling solution you’re opting for. High-quality fans often incorporate features like fluid dynamic bearings or magnetic levitation technology, which can significantly reduce noise while enhancing airflow. If you’re leaning toward liquid cooling, closed-loop systems tend to be quieter than custom loops, as they often use larger radiators and slower-spinning fans to maintain lower temperatures with minimal noise.

Finally, remember that ambient noise can also play a role. If your gaming setup is in a quiet environment, even a slightly noisy cooler can become a major annoyance. On the other hand, in a bustling space with other sounds, you might find that a louder solution is more tolerable. Ultimately, the goal is to create a harmonious balance where you enjoy optimal performance without sacrificing the peace of your gaming or work environment. By carefully considering noise levels in your cooling solution selection, you can ensure that your PC operates efficiently and quietly, allowing you to focus on what matters most—your gaming experience.

11. Budgeting for Your Cooling Solution

When it comes to choosing the right cooling solution for your PC, budgeting is a crucial step that cannot be overlooked. As the heart of your gaming rig, your cooling system plays a pivotal role in maintaining optimal performance and longevity. However, the vast array of options available can make it easy to overspend or, conversely, to skimp on an essential component.

Start by assessing your specific needs and the components in your build. High-performance CPUs and GPUs generate substantial heat, which means investing in a reliable cooling solution is more important than ever. A budget of around $50 to $100 can secure you a decent air cooler or a basic liquid cooling system, perfect for mid-range gaming setups. If you’re aiming for extreme performance or planning to overclock, consider allocating $150 or more for premium coolers that offer advanced features like customizable RGB lighting and enhanced airflow.

Remember to factor in not just the initial purchase price of your cooling solution but also any additional costs. Will you need extra thermal paste, fans, or a more powerful power supply to support your cooling system? These considerations can add up quickly. Don’t forget about the potential savings in energy costs and the extended lifespan of your components when you invest in an efficient cooling solution. A well-cooled system can run smoother and last longer, ultimately providing better value for your investment.

Lastly, keep an eye out for sales, bundles, or discounts from reputable brands. Sometimes, you can find high-quality cooling solutions at a fraction of the original price during special promotions. By carefully budgeting and considering your options, you can ensure that your cooling solution not only fits your financial plan but also meets the performance demands of your gaming experience.

12. Installation Tips for Different Cooling Systems

When it comes to installing your chosen cooling system for your PC, following the right steps can make the difference between optimal performance and a frustrating experience. Whether you’re opting for air coolers, liquid cooling systems, or even more advanced solutions, understanding the installation process is crucial.

### Air Coolers

For air coolers, start by ensuring your CPU socket is clean and free of dust. Apply a thin, even layer of thermal paste on the processor to promote efficient heat transfer. Carefully line up the cooler with the mounting bracket, ensuring that it is firmly seated before securing it in place. Be mindful of the cooler’s orientation to promote proper airflow within your case. Lastly, connect the cooler’s fan to the motherboard, and double-check that everything is snug and secure.

### Liquid Cooling Systems

Liquid cooling can be a bit more intricate, but with patience, you can master the process. Begin by removing the existing CPU cooler and cleaning the CPU surface thoroughly. Apply thermal paste as you would for air coolers. When mounting the radiator, ensure it is positioned for optimal airflow; typically, this means placing the fans so that air flows through the radiator and out of the case. Be sure to secure all tubing properly and double-check for any potential leaks before powering on your system. Don’t forget to fill the reservoir or loop with the appropriate coolant if you’re using a custom liquid cooling system.

### All-in-One (AIO) Coolers

AIO coolers strike a balance between convenience and performance. Installation begins similarly to liquid cooling systems, with a clean CPU surface and thermal paste application. Most AIOs come with pre-installed fans and tubes, making the process simpler. Attach the radiator to the case, aligning it with the pre-drilled holes, and connect the pump to the CPU socket. Make sure to run cables neatly to avoid obstructing airflow or fans, which can lead to overheating.

### General Tips

Regardless of the cooling system you choose, always refer to the manufacturer’s guidelines for specific installation instructions. Take your time during the process—rushing can lead to mistakes that might compromise your system’s cooling efficiency. Ensure that your case has adequate airflow, as well-placed fans can significantly enhance cooling performance. Lastly, after installation, monitor temperatures during the first few sessions to ensure that everything is working as intended.

By following these installation tips tailored to your cooling system of choice, you’ll not only optimize your PC’s performance but also extend its lifespan, keeping your gaming experience smooth and enjoyable.

13. Maintenance and Upkeep of Cooling Solutions

When it comes to maintaining the optimal performance of your PC cooling solutions, regular upkeep is non-negotiable. Just as you wouldn’t ignore the oil change in your car, your cooling system requires consistent attention to function efficiently and prolong the life of your components.

Start by assessing your cooling fans and heatsinks. Dust accumulation is their worst enemy, leading to reduced airflow and increased temperatures. A monthly check can make a world of difference: use compressed air to carefully blow out dust from fans and other components. Pay special attention to the corners and crevices where dirt tends to gather, as these can obstruct airflow significantly.

For liquid cooling systems, it’s essential to monitor the coolant levels and look for any signs of leaks. Over time, the coolant can evaporate or degrade, leading to inefficient cooling. If your setup allows for it, consider changing the coolant every six months to a year to keep your system running smoothly. Additionally, inspect the pump for functionality; a failing pump can lead to catastrophic overheating, so replacing it promptly can save your hardware.

Another critical aspect of maintenance is cable management. Poorly arranged cables can obstruct airflow, causing fans to work harder than necessary. Take the time to tidy up your cables, using zip ties or Velcro straps to secure them neatly against the chassis. This not only improves airflow but also enhances the overall aesthetics of your build.

Lastly, don’t overlook software monitoring tools that allow you to keep an eye on your system’s temperatures and fan speeds. Programs like HWMonitor or MSI Afterburner can provide real-time data, enabling you to make adjustments as needed. Keeping your cooling solutions well-maintained ensures that your PC operates at peak performance, allowing you to enjoy your games without the worry of overheating. In the world of gaming, where every frame counts, having a reliable cooling system is not just a luxury—it’s a necessity.

14. Upgrading Your Cooling System: When and Why

Upgrading your cooling system is a crucial step in maintaining optimal performance and longevity for your PC. As technology evolves, so do the demands placed on your hardware. If you’ve noticed your system struggling to keep cool during gaming marathons or intensive tasks, it may be time to consider an upgrade. But when exactly should you take the plunge, and why is it so important?

**Signs It’s Time to Upgrade**

1. **Increased Temperatures**: If your CPU or GPU temperatures consistently hit the upper limits of their thermal thresholds, it’s a clear sign that your current cooling solution isn’t cutting it. Regularly checking your component temperatures can help you make informed decisions about when to upgrade.

2. **Overclocking**: Enthusiasts often push their hardware beyond factory settings to gain extra performance. However, overclocking generates additional heat, making a robust cooling system essential. If you’ve overclocked your components and are still relying on stock cooling, it’s time to seek a more effective solution.

3. **Noise Levels**: As fans age or struggle to keep up with cooling demands, they can become noisy or even fail altogether. If you find your system sounding like a jet engine during use, consider upgrading to a more efficient cooling solution that operates quietly while still keeping your components cool.

4. **New Hardware**: Upgrading to a more powerful CPU or GPU requires adequate cooling to ensure reliable performance. Newer components may have different cooling requirements, so if you’re planning a hardware refresh, assess your current cooling system to ensure it can handle the increased heat output.

**Why Upgrade?**

Investing in a better cooling solution not only helps maintain lower temperatures but can also enhance the overall performance of your PC. Cooler components tend to operate more efficiently, reducing the risk of thermal throttling—where your hardware intentionally slows down to prevent overheating. Additionally, a well-cooled system can extend the lifespan of your components, saving you money in the long run.

Moreover, upgrading your cooling system can provide a more enjoyable user experience. Whether you’re gaming, streaming, or designing, a quieter and cooler PC makes for a more pleasant environment, allowing you to focus on what you love most—your games, work, or creative projects.

In summary, if you notice signs of thermal strain, are pushing your hardware to its limits, or are planning significant upgrades, it’s time to evaluate your cooling options. With the right solution, you can ensure your PC runs smoothly for years to come, no matter how intense the workload.

15. Final Thoughts: Finding the Right Balance for Your Gaming PC

As we reach the final thoughts of this comprehensive guide, it’s essential to emphasize the importance of finding the right balance for your gaming PC’s cooling solution. Your gaming rig is a significant investment, and ensuring it runs cool and efficiently is crucial for optimal performance and longevity.

When selecting a cooling solution, consider not just the raw power of your components, but also the unique environment in which your PC operates. Do you live in a warmer climate? Is your setup confined to a small space with limited airflow? These factors will influence your cooling needs.

Additionally, strike a balance between performance, noise level, and aesthetics. High-performance cooling systems can be noisy, which can detract from the immersive experience of gaming. On the other hand, stylish RGB-lit fans and heatsinks can enhance the visual appeal of your setup, but make sure they don’t compromise functionality for looks.

Remember that cooling is not a one-size-fits-all approach. Whether you opt for air cooling, liquid cooling, or a combination of both, ensure that you consider the specifications of your components, the case design, and your personal preferences. Regular maintenance, such as cleaning dust from fans and ensuring adequate airflow, will also play a vital role in maintaining your system’s cooling efficiency.

Ultimately, the goal is to create a harmonious environment where your gaming PC can thrive, providing you with seamless gameplay, high frame rates, and an enjoyable experience without the worry of overheating. Take the time to analyze your options, do your research, and invest wisely in a cooling solution that meets your needs. With the right balance, your gaming rig will not only perform at its best but will also endure the test of time. Happy gaming!

In conclusion, finding the perfect cooling solution for your PC is essential to maintaining optimal performance and extending the lifespan of your components. Whether you opt for air cooling, liquid cooling, or a hybrid approach, understanding the unique needs of your system and your personal preferences will guide you in making the best choice. Armed with the insights from our comprehensive guide, you can confidently navigate the myriad options available, ensuring your gaming rig runs cool and quiet during even the most intense sessions. Remember, a well-cooled PC not only enhances performance but also elevates your overall gaming experience. So, take the plunge, invest in the right cooling solution, and enjoy the smooth, uninterrupted gameplay that awaits you! Happy gaming!

pc gaming – How to optimize PC settings for maximum performance?

In the ever-evolving world of gaming, where split-second decisions can determine victory or defeat, having an optimized PC can mean the difference between an exhilarating gaming experience and frustrating lag.

Whether you’re a casual gamer or a serious competitor, your hardware’s performance can significantly impact your gameplay. From adjusting graphics settings for stunning visuals without sacrificing frame rates to fine-tuning system preferences for seamless multitasking, every tweak counts. In this comprehensive guide, we will explore the essential settings and configurations to unlock your PC’s full potential, ensuring you achieve peak performance in your favorite games. Get ready to dive deep into the world of optimization, where each adjustment can elevate your gaming experience to new heights and help you dominate the competition.

1. Introduction to Peak Performance in Gaming

pc gaming -  How to optimize PC settings for maximum performance?
Credit : whatcanu.com

In the ever-evolving landscape of gaming, achieving peak performance is not just an advantage; it’s a necessity. As technology continues to advance, games have become increasingly demanding, pushing the limits of our hardware. Whether you’re diving into sprawling open-world adventures, engaging in fast-paced first-person shooters, or exploring intricate role-playing games, the difference between victory and defeat often hinges on the performance of your PC.

Peak performance in gaming refers to the optimal functioning of your computer’s hardware and software, working in unison to deliver a seamless, immersive experience. This means not only maintaining high frame rates and quick load times but also ensuring that your system runs smoothly without glitches, stuttering, or overheating. The goal is to immerse yourself fully in the game without distractions, allowing your skills and strategies to shine through.

But how do you achieve this coveted state of peak performance? It begins with understanding your PC’s capabilities and making the right adjustments. From fine-tuning graphics settings to optimizing system resources, there are a plethora of tweaks and strategies you can implement. In this guide, we will explore the essential steps to transform your gaming rig into a powerhouse that can handle the latest titles with ease, ensuring that you stay ahead of the competition and fully enjoy every moment of your gaming journey. Get ready to unlock your PC’s true potential and elevate your gaming experience to new heights!

2. Understanding Your System Specifications

Before diving into the intricate world of optimizing your PC for gaming, it’s crucial to understand the specifications of your system. Think of your computer as a finely-tuned race car; each component plays a vital role in ensuring peak performance on the gaming track. Knowing what you have under the hood will not only help you identify potential bottlenecks but also empower you to make informed decisions about upgrades and settings adjustments.

Start by checking your CPU, GPU, and RAM specifications. The CPU (Central Processing Unit) is the brain of your operation, dictating how quickly your system can process tasks. A powerful CPU can handle complex calculations and multitasking, which is essential for modern gaming. Next, turn your attention to the GPU (Graphics Processing Unit), the heart of your gaming experience. This component renders the graphics you see on screen, and a high-quality GPU can significantly enhance your visual experience, providing smoother frame rates and stunning graphics.

Don’t overlook your RAM (Random Access Memory), either. This is your system’s short-term memory, responsible for storing data that your CPU needs to access quickly. More RAM can support better multitasking and improve overall system performance, especially in memory-intensive games.

To find out your specifications, you can use built-in tools like Windows’ Device Manager or third-party applications like CPU-Z and GPU-Z. Understanding these specs will give you insight into what games your system can handle and where potential upgrades may be needed to achieve the ultimate gaming experience.

Once you have a clear picture of your system’s specifications, you’ll be better equipped to make adjustments and optimizations that align with your gaming needs. Whether you’re looking to enhance performance or improve graphics quality, knowledge is your most powerful tool.

3. Updating Drivers for Optimal Performance

pc gaming -  How to optimize PC settings for maximum performance?
Credit : whatcanu.com

When it comes to gaming, having the latest drivers installed is akin to ensuring your vehicle runs on premium fuel—it’s essential for peak performance. Drivers serve as the bridge between your operating system and your hardware, translating commands into action. Outdated drivers can lead to a myriad of problems, from poor frame rates to unexpected crashes, all of which can derail your gaming experience.

To get started, you’ll want to identify which components of your PC require updates. The most critical drivers for gaming include those for your graphics card, sound card, and motherboard. Manufacturers like NVIDIA, AMD, and Intel frequently release updates to optimize performance and fix bugs, so checking their websites or using dedicated software can streamline this process.

Once you’ve pinpointed the drivers that need updating, download the latest versions directly from the manufacturer’s site. This ensures you’re getting the most stable and optimized software available. After installation, don’t forget to restart your PC. This simple step often consolidates the updates and maximizes your system’s potential.

Moreover, consider scheduling regular checks for driver updates. There are tools available that can notify you of new releases, allowing you to stay ahead of the curve. By investing a little time in keeping your drivers up to date, you can unlock a smoother, more immersive gaming experience, ensuring that your system performs at its absolute best while you dive into your favorite virtual worlds.

4. Configuring Windows Settings for Gaming

When it comes to optimizing your PC for gaming, the right Windows settings can make all the difference. An array of built-in features and adjustments can help streamline performance, reduce lag, and enhance your overall gaming experience. Here’s how to configure your Windows settings for maximum gaming success.

**Game Mode Activation**: Start by enabling Game Mode, a feature designed to prioritize your gaming experience. Navigate to Settings > Gaming > Game Mode and toggle it on. This will allocate more system resources to your game, ensuring smoother gameplay and fewer interruptions.

**Graphics Settings**: Next, dive into the Graphics Settings under Settings > System > Display. Here, you can specify which applications use the high-performance GPU versus integrated graphics. For your most demanding games, select the high-performance option to ensure they run at their best.

**Power Plan Optimization**: Your power settings play a crucial role in performance. Switch to a High-Performance power plan by going to Control Panel > Power Options and selecting the High-Performance option. This setting minimizes power-saving features that can throttle performance, allowing your system to run at full capacity during intense gaming sessions.

**Background Apps Management**: An often-overlooked aspect of performance optimization is managing background applications. Head to Settings > Privacy > Background Apps and disable any unnecessary apps that run in the background. This frees up valuable resources for your gaming experience, reducing the chance of lag or stuttering during critical moments.

**Disabling Full-Screen Optimizations**: Some games can benefit from disabling full-screen optimizations. Right-click on the executable file for your game, select Properties, navigate to the Compatibility tab, and check the box for “Disable fullscreen optimizations.” This can lead to a more stable and responsive gaming experience.

**Windows Updates**: Lastly, keep your Windows OS updated. While updates can sometimes seem like a nuisance, they often include performance improvements and security patches that can enhance your gaming experience. Schedule regular updates, but consider doing so during off-hours to prevent interruptions during your gaming sessions.

By taking the time to tweak these Windows settings, you’re setting the stage for peak performance in your gaming endeavors. With a few adjustments, your PC can transform into a finely tuned gaming machine, ready to tackle even the most demanding titles with ease.

5. Adjusting Graphics Settings in Games

pc gaming -  How to optimize PC settings for maximum performance?
Credit : whatcanu.com

When it comes to optimizing your gaming experience, adjusting the graphics settings in your games can make a world of difference. While modern games often come equipped with stunning visuals and intricate details, these can put a significant strain on your PC’s hardware, potentially hindering performance. The key is to find the sweet spot between visual fidelity and frame rate—ensuring that you not only enjoy breathtaking graphics but also smooth gameplay.

Start by launching your game and navigating to the graphics settings menu. Here, you’ll typically encounter a plethora of options, ranging from resolution and texture quality to shadow detail and anti-aliasing. If you’re aiming for maximum performance, consider lowering the resolution a notch. While it may sacrifice some visual sharpness, the increase in frame rates can be substantial, leading to a more fluid gaming experience.

Texture quality is another critical setting to tweak. High-resolution textures can enhance the visual appeal of a game, but they also require more VRAM. If you notice stuttering or lag, consider setting this to medium or high instead of ultra. Similarly, shadows can drastically impact performance—reducing shadow quality or turning off dynamic shadows altogether can free up valuable resources without significantly detracting from immersion.

Don’t forget about anti-aliasing, a setting designed to smooth out jagged edges. While options like FXAA or TAA provide a cleaner look, they also demand more processing power. For competitive gaming, you might want to disable or lower this setting to gain an edge in responsiveness.

Lastly, take advantage of presets. Most games offer predefined settings for low, medium, high, or ultra graphics. These can serve as a helpful starting point, allowing you to gauge performance before making additional adjustments.

By thoughtfully tweaking your graphics settings, you can strike the perfect balance between visual appeal and gaming performance, unlocking the full potential of your gaming rig. Whether you’re exploring vast open worlds or battling it out in high-stakes arenas, optimized graphics settings will ensure your gaming sessions are not only enjoyable but also responsive and immersive.

6. Overclocking Your GPU and CPU Safely

Overclocking your GPU and CPU can be a thrilling way to unlock the full potential of your gaming rig, pushing performance beyond standard specifications. However, this process is not without risks, and it’s essential to approach it with caution to ensure that your components remain safe while delivering enhanced performance.

Before embarking on your overclocking journey, start by familiarizing yourself with the specifications and capabilities of your hardware. Each GPU and CPU has its own limits, and exceeding these can lead to overheating and potential damage. Begin by researching the optimal overclocking ranges for your specific model, paying close attention to temperature thresholds and voltage limits.

Once you have a solid understanding of your hardware, install reliable monitoring software to keep an eye on your system’s temperature and performance metrics. Tools like MSI Afterburner for GPUs and CPU-Z for CPUs are excellent choices for real-time tracking. This will allow you to monitor your system’s stability and temperature as you make adjustments.

Next, you can start the overclocking process by gradually increasing the clock speeds. Make small increments—typically 5-10%—and test the stability of your system after each adjustment. Run demanding applications or benchmark tests to ensure that your system can handle the new settings without crashing or showing signs of instability.

Cooling is paramount during this process. Consider upgrading your cooling system if you haven’t already, whether it’s through better air coolers, liquid cooling solutions, or even improved case ventilation. Keeping your components cool will not only enhance performance but also extend the lifespan of your hardware.

Lastly, document your settings and the corresponding performance results. This will help you find the sweet spot between performance and stability, allowing you to enjoy an optimal gaming experience. Remember, the goal of overclocking is to achieve better performance without sacrificing the integrity of your components, so err on the side of caution and prioritize safe practices throughout the process.

By following these guidelines, you can safely overclock your GPU and CPU, unlocking a new level of performance that will elevate your gaming sessions to new heights. Get ready to experience smoother frame rates, faster load times, and an overall enhanced gaming experience!

7. Managing Background Applications and Processes

pc gaming -  How to optimize PC settings for maximum performance?
Credit : whatcanu.com

Managing background applications and processes is a crucial step in optimizing your PC for a seamless gaming experience. Every gamer knows the frustration of lag or stuttering gameplay, and often, the culprit lies in the multitude of programs quietly running in the background, siphoning away your system’s resources.

Before launching your favorite game, take a moment to check what’s running on your PC. Press `Ctrl + Shift + Esc` to open the Task Manager, where you can view a list of active processes. Look for any unnecessary applications consuming CPU or memory. Applications like web browsers, cloud storage services, or even music streaming platforms can hog valuable resources and degrade your gaming performance.

To elevate your gaming experience, prioritize your gameplay by closing non-essential programs. If you need to keep certain applications open, consider using performance-oriented settings. For instance, if you rely on Discord for voice chat, adjust its settings to minimize its impact on your system. You can also set the Discord application to run in “Low Priority” mode, ensuring it doesn’t interfere with your game’s performance.

Additionally, you can disable startup programs that automatically launch when you power on your PC. This will not only speed up your boot time but also free up resources for when you dive into your gaming sessions. Navigate to the Startup tab in the Task Manager to manage which programs you want to disable.

Lastly, consider using tools like Game Mode in Windows 10 and 11, which optimizes your system for gaming by reallocating resources and preventing background applications from interfering. By effectively managing your background applications and processes, you can create a more streamlined and responsive gaming environment, keeping you immersed in your virtual adventures without the hindrances of sluggish performance.

8. Optimizing Storage: SSD vs. HDD

When it comes to gaming, the type of storage you choose can significantly impact your overall experience. Understanding the differences between Solid State Drives (SSD) and Hard Disk Drives (HDD) is crucial for optimizing your PC settings and achieving peak performance.

**SSD (Solid State Drive)**
SSDs are the champions of speed. Unlike traditional HDDs that use spinning disks to read and write data, SSDs utilize flash memory, which allows for lightning-fast access times. This means shorter load times for games, quicker boot-up sequences, and a more responsive system overall. Imagine launching your favorite game and being greeted with the main menu almost instantaneously—this is the power of an SSD. Not only do they enhance performance, but SSDs are also more durable, as they have no moving parts, making them less susceptible to physical damage.

**HDD (Hard Disk Drive)**
On the other hand, HDDs provide a cost-effective solution for gamers who require extensive storage without breaking the bank. With larger capacities at a fraction of the price per gigabyte compared to SSDs, HDDs are ideal for storing vast libraries of games, especially those that occupy significant disk space. While they may not offer the speed of SSDs, modern HDDs can still deliver satisfactory performance for many games, particularly if you’re not concerned with ultra-fast load times.

**The Best of Both Worlds**
For gamers looking to optimize their storage solution, a hybrid approach often works best. Utilizing an SSD for your operating system and frequently played games can drastically reduce load times and enhance your gaming experience. Meanwhile, an HDD can serve as a secondary storage solution for less frequently accessed titles and large files, ensuring you have ample space without compromising on speed where it matters most.

Ultimately, the choice between SSD and HDD boils down to your gaming habits and budget. If you crave speed and responsiveness, an SSD is the way to go. However, if you’re looking to build a robust game library without the financial strain, an HDD can still provide solid performance. By carefully considering your storage options, you can significantly elevate your gaming experience and unlock your PC’s full potential.

9. Utilizing Game Mode in Windows

When it comes to gaming on a PC, every frame counts, and that’s where Windows’ Game Mode comes into play. This built-in feature is designed to prioritize your gaming experience by reallocating system resources and optimizing performance. To access Game Mode, simply navigate to the Settings menu, click on “Gaming,” and toggle the Game Mode switch to the “On” position.

Once activated, Game Mode works its magic by minimizing background processes and preventing unnecessary notifications, allowing your system to devote more power to the game at hand. This means smoother gameplay, reduced lag, and an overall enhanced gaming experience. Notably, Game Mode can also boost frame rates and improve responsiveness, which is crucial for competitive gaming scenarios where every millisecond matters.

Additionally, Game Mode helps maintain consistent performance by automatically adjusting settings for each game you play. For instance, it can optimize graphics settings based on your hardware capabilities and even record gameplay without causing significant performance drops. This feature is particularly useful for streamers and content creators looking to capture high-quality footage while playing.

To make the most of Game Mode, consider pairing it with other optimization techniques, such as updating your graphics drivers and managing your startup programs. Together, these steps can significantly enhance your gaming performance, providing an edge in your favorite titles. So, whether you’re diving into a fast-paced shooter or exploring vast open worlds, activating Game Mode is a simple yet powerful way to ensure your gaming sessions are as seamless and enjoyable as possible.

10. Enhancing Network Settings for Online Gaming

When it comes to online gaming, a stable and fast internet connection can make all the difference between victory and defeat. Enhancing your network settings is crucial for minimizing latency and ensuring a smooth gaming experience. Here are some key steps to optimize your network for peak performance.

First, consider your router’s placement. Ideally, your router should be centrally located in your home, away from obstructions and electronic devices that may cause interference. Elevating it on a shelf or mounting it on a wall can help improve signal strength. If possible, connect your gaming PC directly to the router using an Ethernet cable. Wired connections offer lower latency and more reliable speeds than Wi-Fi, making them the preferred choice for competitive gaming.

Next, take advantage of Quality of Service (QoS) settings in your router. QoS allows you to prioritize bandwidth for your gaming device, ensuring that it receives the necessary resources even when other devices are using the network. By allocating higher priority to your gaming traffic, you can reduce lag and improve responsiveness during intense gaming sessions.

Additionally, consider adjusting the MTU (Maximum Transmission Unit) settings on your router. Lowering your MTU size can help reduce packet fragmentation, which often leads to lag. Generally, an MTU size of around 1472 is a good place to start, but testing various sizes to find the optimal setting for your connection may yield better results.

Finally, keep your network firmware up to date. Manufacturers regularly release updates to improve performance and security. Regularly checking for these updates ensures that your router is running efficiently and can handle the demands of modern online gaming.

By taking these steps to enhance your network settings, you’ll be well on your way to unlocking your gaming potential. A robust, low-latency internet connection sets the stage for an immersive and competitive gaming experience, allowing you to focus on what really matters—dominating the battlefield!

11. Cooling Solutions: Keeping Your PC Temperate

When it comes to gaming, performance isn’t just about having the latest hardware; it’s also about maintaining an optimal environment for that hardware to thrive. One of the critical aspects often overlooked is cooling. A well-cooled PC not only enhances performance but also prolongs the lifespan of your components, ensuring that you can keep your gaming rig running at peak efficiency for years to come.

First, consider investing in a quality cooling solution. Air coolers are a popular choice for their balance of cost and efficiency, but if you’re looking for something more robust, liquid cooling systems can deliver significantly lower temperatures. These systems, whether custom-built or all-in-one units, circulate coolant through a series of tubes and radiators, drawing heat away from key components like the CPU and GPU. This not only keeps temperatures down but can also create a visually stunning centerpiece for your gaming setup.

Moreover, don’t underestimate the importance of case airflow. Ensure your PC case has an adequate number of fans for optimal air circulation. Position intake fans at the front and bottom of the case to pull cool air in while exhaust fans at the top and rear expel hot air out. This creates a constant flow of air that helps dissipate heat efficiently.

Additionally, keep an eye on dust buildup. Over time, dust can accumulate and clog fans and vents, significantly reducing cooling efficiency. Regularly cleaning your components and ensuring that airflow isn’t obstructed can make a world of difference. You might even consider adding dust filters to your case, which can help keep your internals clean while maintaining airflow.

Finally, don’t forget about monitoring your temperatures. Use software tools to track the heat levels of your CPU, GPU, and other critical components. This will help you identify any potential overheating issues before they become a problem, allowing you to take action, whether it’s adjusting fan speeds or improving case ventilation.

By implementing effective cooling solutions and maintaining a clean, well-ventilated environment, you can ensure your PC remains at a stable temperature, allowing you to enjoy an uninterrupted gaming experience without the fear of thermal throttling or hardware damage. Unlock the full potential of your gaming rig by keeping it cool—after all, a comfortable PC is a high-performing PC.

12. Regular Maintenance and Cleanup Tips

To achieve peak performance in gaming, regular maintenance and cleanup of your PC is essential. Over time, files accumulate, software becomes cluttered, and your system can slow down if not properly managed. Here are some vital tips to keep your gaming rig running smoothly and efficiently.

First and foremost, make it a habit to routinely delete unnecessary files. Temporary files, downloads, and unused applications can take up valuable storage space and affect your system’s speed. Utilize built-in tools like Disk Cleanup on Windows or third-party applications, such as CCleaner, to automate this process and free up disk space.

Next, don’t overlook the importance of updating your drivers, especially your graphics card drivers, which can significantly impact gaming performance. Keeping them updated ensures you have access to the latest optimizations and features. Most manufacturers provide easy-to-use utilities that can automatically check for updates, making this task simpler than ever.

Additionally, regularly defragmenting your hard drive (for HDD users, as SSDs don’t require this) can improve data retrieval speeds. Fragmentation can scatter files around your hard drive, leading to longer load times. Tools like Windows’ built-in defragmentation utility can streamline this process, ensuring your data is stored in an optimal manner.

Lastly, consider dusting out your hardware. Dust buildup can cause overheating, which leads to throttling and performance drops during demanding gaming sessions. Opening up your case to carefully clean fans and components or investing in a can of compressed air can help maintain optimal temperatures and enhance overall performance.

By incorporating these regular maintenance and cleanup tips into your gaming routine, you can ensure that your PC runs at its best, allowing you to enjoy a smoother, more immersive gaming experience. Remember, a well-maintained system not only enhances performance but also extends the lifespan of your hardware, giving you more time to conquer virtual worlds!

13. Monitoring Performance with Benchmark Tools

To truly unlock the peak performance of your gaming rig, monitoring your system’s performance with benchmark tools is essential. These tools serve as your digital compass, guiding you through the vast landscape of CPU, GPU, and overall system health. By using benchmarking software, you can gain valuable insights into how your components are performing under various loads and conditions, allowing you to make informed decisions to enhance your gaming experience.

Popular benchmarking tools like 3DMark, Unigine Heaven, and UserBenchmark provide detailed metrics on frame rates, temperatures, and system bottlenecks. These applications simulate demanding scenarios to push your hardware to its limits, revealing how well it holds up under pressure. For instance, if you’re noticing stuttering during intense gameplay, a benchmarking tool can help you pinpoint whether your graphics card is underperforming or if your CPU is the real culprit.

Additionally, many of these tools offer comparative analysis features, enabling you to see how your setup stacks up against similar configurations or the latest technology on the market. This not only helps in assessing your current performance but also in planning future upgrades. By identifying weak points in your hardware, you can prioritize upgrades that will deliver the most significant impact on your gaming experience.

Regularly monitoring your system’s performance through benchmarking can also alert you to potential issues before they escalate. Sudden drops in frame rates or unusually high temperatures can indicate hardware malfunctions or the need for maintenance. Staying proactive with these insights ensures that you’re not just gaming, but gaming at your best.

Incorporating performance monitoring into your gaming routine empowers you to optimize settings, adjust overclocking profiles, and tweak game configurations for the smoothest experience possible. By leveraging the data from benchmark tools, you can fine-tune your PC’s performance, ensuring that every pixel and frame is rendered with precision as you dive into your favorite virtual worlds.

14. Exploring Additional Software for Optimization

When it comes to maximizing your gaming experience, the right software can make all the difference. While adjusting your PC settings is a crucial step, exploring additional software solutions can unlock even greater performance. Here’s a look at some powerful tools that can help you optimize your system for a smoother, more immersive gaming experience.

First on the list are **game optimization tools**, such as Razer Cortex or NVIDIA GeForce Experience. These programs are designed to automatically adjust your system settings and game configurations based on the hardware you have. Razer Cortex, for example, can help manage your game library, shut down unnecessary background processes, and even optimize your game’s settings for the best performance. GeForce Experience offers similar features, along with the added bonus of keeping your graphics drivers up to date, ensuring you’re always equipped with the latest enhancements and bug fixes.

Another category worth considering is **system monitoring software**. Tools like MSI Afterburner or HWMonitor allow you to keep tabs on your GPU and CPU temperatures, usage, and clock speeds in real-time. By monitoring this data, you can identify potential bottlenecks during gameplay and make informed adjustments to your overclocking settings or cooling solutions, which can enhance stability and performance.

Additionally, consider utilizing **game launchers** with built-in optimization features. Platforms like Steam and Epic Games Store often include options to verify game files and optimize settings based on your hardware. This can be an invaluable tool, especially if you encounter performance issues or crashes.

Lastly, don’t overlook the importance of system cleanup and maintenance software. Programs like CCleaner can help you clear out unnecessary files, manage startup programs, and keep your system running smoothly. A clean system is a faster system, and this can greatly enhance your gaming experience.

By exploring and integrating these additional software options into your gaming setup, you can fine-tune your PC’s performance, ensuring you’re always ready to tackle the latest titles with the speed and efficiency they demand. With the right combination of settings and software, you’ll be well on your way to unlocking peak gaming performance.

15. Conclusion: Finding the Right Balance for Your Gaming Experience

In the realm of gaming, achieving peak performance often hinges on the delicate balance between hardware capabilities and software settings. As we’ve explored throughout this guide, optimizing your PC settings can significantly enhance your gaming experience, but it’s vital to remember that each gamer’s needs and preferences are unique.

Striking the right balance means understanding the interplay between graphics quality, frame rates, and system performance. High-resolution textures and stunning visuals can be immersive, but they may come at the cost of smooth gameplay if your hardware isn’t up to par. Conversely, cranking down the graphics settings can lead to buttery smooth performance, but at the expense of visual fidelity.

It’s also important to consider personal preferences; some gamers prioritize competitive edge and fluidity, while others revel in the artistry of game design. As you navigate through your optimization journey, take the time to experiment with different settings to discover what feels right for you.

Moreover, don’t forget to keep your system updated and clean from unnecessary bloatware that can hinder performance. Regularly checking for driver updates and conducting routine maintenance will ensure your PC runs at its best, providing a seamless experience that allows you to fully immerse yourself in the worlds you love.

In conclusion, optimizing your PC for gaming is not a one-size-fits-all approach. It’s about finding that sweet spot where performance meets personal enjoyment. By fine-tuning your settings and staying attuned to your hardware’s capabilities, you’ll unlock the full potential of your gaming rig and elevate your gaming sessions to new heights. Happy gaming!

In conclusion, optimizing your PC settings for gaming success is not just about enhancing performance; it’s about creating an immersive experience that allows you to fully enjoy the games you love. By following the tips and strategies outlined in this post, from updating drivers and adjusting graphics settings to managing background processes and ensuring proper cooling, you can unlock your PC’s full potential. As you implement these changes, you’ll not only notice smoother gameplay and improved frame rates, but you’ll also gain a competitive edge that can elevate your gaming sessions to new heights. So gear up, dive into your favorite titles, and enjoy the thrilling adventures that await you with your newly optimized gaming setup. Happy gaming!

pc gaming – How to choose a power supply for your gaming PC?

Building or upgrading a gaming PC can be an exhilarating experience, but one of the most critical components that often gets overlooked is the power supply unit (PSU).

The right PSU not only powers your system but also ensures stability, efficiency, and protection for your valuable hardware. With an overwhelming array of options available, selecting the perfect power supply can feel like navigating a maze. From understanding wattage requirements and efficiency ratings to considering modular designs and cable management, this complete guide will empower you with the knowledge you need to make an informed choice. Whether you’re a seasoned gamer or a first-time builder, join us as we break down the essentials and help you power up your gaming rig with confidence, ensuring that every gaming session is as smooth and thrilling as possible.

1. Understanding Power Supply Units (PSUs): An Overview

pc gaming -  How to choose a power supply for your gaming PC?
Credit : whatcanu.com

When it comes to building or upgrading your gaming PC, one of the most crucial components to consider is the Power Supply Unit (PSU). Often overlooked in favor of more glamorous hardware like graphics cards and CPUs, the PSU is the unsung hero that fuels your entire system. It converts the alternating current (AC) from your wall outlet into direct current (DC) that your computer components can use, providing stable and reliable power to ensure optimal performance.

Understanding PSUs begins with grasping their primary specifications: wattage, efficiency rating, and modularity. Wattage indicates the total amount of power the unit can deliver to your components. Depending on your gaming setup—whether you’re running a single GPU or a multi-GPU configuration—calculating your system’s total power consumption is vital to ensure that you select a PSU with sufficient capacity. As a rule of thumb, it’s wise to choose a PSU that offers 20-30% more wattage than your system consumes to accommodate for future upgrades and peak usage.

Efficiency is another key factor to consider, measured by the 80 PLUS certification system. This rating indicates how effectively a PSU converts AC power to DC power, with higher efficiency resulting in less wasted energy and lower electricity bills. For gamers, selecting a PSU with at least an 80 PLUS Bronze certification can lead to better performance and longevity, while Gold or Platinum ratings can further enhance efficiency and reduce heat output.

Lastly, modularity refers to the way cables are connected to the PSU. Fully modular units allow you to detach all cables, making cable management a breeze and improving airflow within your case. Semi-modular PSUs provide a balance by allowing you to disconnect some cables while keeping the essential ones fixed. Non-modular PSUs, on the other hand, come with all cables permanently attached, which can lead to clutter and hinder airflow.

In summary, understanding the intricacies of Power Supply Units is the first step in equipping your gaming rig with a reliable and efficient power source. By considering wattage, efficiency ratings, and modularity, you’ll be well on your way to selecting the perfect PSU that not only meets your current gaming needs but also prepares you for future upgrades and expansions.

2. Why Choosing the Right PSU Matters for Gaming

When it comes to building a gaming PC, the excitement often centers around selecting the latest graphics card, the fastest processor, and the sleekest case. However, one component that should never be overlooked is the power supply unit (PSU). Choosing the right PSU is crucial for several reasons, and understanding its significance can save you from a host of potential issues down the road.

First and foremost, a high-quality PSU ensures that your gaming rig receives a stable and consistent flow of power. Games today are demanding, often pushing hardware to their limits. If your PSU cannot deliver adequate power, you risk instability, crashes, or even hardware damage. Imagine being in the heat of an epic gaming battle only to have your experience abruptly interrupted by system failures—this is a nightmare no gamer wants to face.

Moreover, the efficiency of your PSU plays a vital role in your overall system performance. Power supplies come with efficiency ratings, such as 80 PLUS Bronze, Silver, Gold, Platinum, and Titanium. A more efficient PSU not only reduces electricity costs but also generates less heat, which can help maintain optimal temperatures for your components. This is especially important for gamers who engage in long sessions, as excess heat can lead to throttling and reduced performance.

Another critical factor is the future-proofing aspect of your PSU. As games evolve and hardware requirements increase, having a PSU with ample wattage and the right connectors is essential. This way, you can upgrade your graphics card or add more components without worrying about whether your power supply can handle the load. A robust PSU allows you to stay at the forefront of gaming technology without the need for frequent replacements.

In summary, while it may be tempting to skimp on the power supply in favor of flashier components, investing in the right PSU is a decision that pays off in the long run. It ensures stability, efficiency, and flexibility for your gaming setup, allowing you to focus on what truly matters—immersing yourself in the thrilling worlds of your favorite games.

3. Key Specifications to Consider

pc gaming -  How to choose a power supply for your gaming PC?
Credit : whatcanu.com

When it comes to selecting the perfect power supply for your gaming PC, understanding the key specifications is crucial for both performance and reliability. The right power supply unit (PSU) not only ensures that your components receive adequate power but also protects them from potential damage due to power surges or fluctuations. Here are the essential specifications you should consider:

**Wattage**: The first and foremost specification is wattage, which indicates the total amount of power the PSU can deliver. Generally, a gaming PC requires a PSU that can provide anywhere from 500 to 850 watts, depending on the components you plan to use. To determine your needs, you can utilize online wattage calculators, which take into account your CPU, GPU, and other peripherals. Opting for a PSU with a bit of headroom above your calculated wattage can help accommodate future upgrades.

**Efficiency Rating**: The efficiency rating of a power supply is another vital specification. This is denoted by the 80 PLUS certification, which signifies how efficiently the PSU converts AC power from the wall into DC power that your components can use. An 80 PLUS Bronze, Silver, Gold, or Platinum rating indicates increasing levels of efficiency, with Platinum being the most efficient. A higher efficiency not only reduces energy costs but also minimizes heat output, extending the lifespan of your PSU and components.

**Modularity**: Power supplies come in three types: non-modular, semi-modular, and fully modular. Non-modular PSUs have all cables permanently attached, which can lead to clutter in your case and hinder airflow. Semi-modular units allow you to detach non-essential cables, while fully modular PSUs enable you to connect only the cables you need. This flexibility can greatly improve cable management and aesthetics, making your build not just functional but visually appealing.

**Ripple and Noise**: Ripple refers to the small fluctuations in voltage that occur as the PSU supplies power. Excessive ripple can damage sensitive components over time. Look for PSUs that keep ripple within acceptable limits, ensuring stable power delivery. Similarly, noise levels are essential; a good PSU will operate quietly, particularly under load. Check reviews and specifications for sound levels, especially if you prefer a silent gaming experience.

**Protection Features**: Finally, don’t overlook the safety features of the power supply. Look for models equipped with Over Voltage Protection (OVP), Under Voltage Protection (UVP), Over Current Protection (OCP), and Short Circuit Protection (SCP). These features safeguard your components against potential damage caused by power anomalies, providing peace of mind as you game.

By carefully considering these specifications, you can confidently choose a power supply that not only meets your current gaming needs but also supports future upgrades, ensuring your PC runs smoothly and efficiently for years to come.

– Wattage

When it comes to selecting the ideal power supply for your gaming PC, wattage is one of the most critical factors to consider. Think of wattage as the lifeblood of your system; it dictates how much power your components can draw to function optimally. The right wattage not only ensures that your PC runs smoothly but also protects it from potential damage caused by underpowered or overpowered components.

To determine the wattage you need, start by calculating the total power consumption of all your components, including the CPU, GPU, motherboard, RAM, storage drives, and any additional peripherals. Most modern gaming setups require at least 500 watts, but high-performance rigs with multiple GPUs or overclocked components can demand 750 watts or more.

Using online wattage calculators can simplify this process by providing a detailed estimate based on your specific components. However, it’s wise to add a buffer of around 20-30% above your calculated needs. This extra headroom allows for future upgrades and accounts for power spikes during intensive gaming sessions.

It’s also important to consider the efficiency rating of the power supply. Look for units that are 80 Plus certified, which indicates that they operate at a minimum efficiency of 80%. Higher certifications, such as 80 Plus Gold or Platinum, not only reduce energy costs in the long run but also generate less heat, enhancing the longevity of your system.

Ultimately, choosing the right wattage is about balancing performance, efficiency, and future-proofing your gaming rig, ensuring that you can enjoy the latest titles without worrying about power limitations or system stability.

– Efficiency Rating (80 PLUS Certification)

pc gaming -  How to choose a power supply for your gaming PC?
Credit : whatcanu.com

When it comes to selecting the perfect power supply for your gaming PC, understanding efficiency ratings, specifically the 80 PLUS certification, is crucial. The 80 PLUS certification program was established to promote energy efficiency in power supply units (PSUs) and provides a reliable benchmark for consumers. This certification ensures that a PSU operates at a minimum of 80% efficiency at various load levels—20%, 50%, and 100%.

But what does this mean for you as a gamer? Higher efficiency translates to less wasted energy in the form of heat, resulting in lower electricity bills and a cooler, quieter system. A PSU with an 80 PLUS certification means that for every 100 watts it draws from the wall, at least 80 watts are being converted into usable power for your components. The remaining 20 watts are lost as heat, which not only affects your energy consumption but can also impact the longevity of your hardware over time.

The 80 PLUS certification comes in several tiers: Standard, Bronze, Silver, Gold, Platinum, and Titanium. Each tier represents a higher level of efficiency, with Titanium being the most efficient available on the market. For instance, a Gold-rated PSU maintains at least 90% efficiency at 50% load, making it a strong choice for gamers who desire performance without compromising on energy consumption.

Additionally, investing in a higher-rated PSU can provide peace of mind, as these units often come with enhanced features such as better components, improved cooling solutions, and longer warranties. So when you’re building or upgrading your gaming rig, consider the efficiency rating of the power supply to not only save on energy costs but also to ensure a reliable and sustainable gaming experience. By choosing a PSU with a solid 80 PLUS certification, you’re powering your gaming ambitions while being mindful of the environment.

– Modular vs. Non-Modular Design

When it comes to choosing the perfect power supply for your gaming PC, understanding the difference between modular and non-modular designs is crucial. The power supply unit (PSU) is the heart of your system, delivering the necessary power to all components, and the design can significantly impact both the performance and the aesthetics of your build.

**Modular Power Supplies:**
Modular PSUs come with detachable cables, allowing you to connect only the cords you need for your specific configuration. This design offers significant advantages in terms of cable management and airflow. With fewer cables cluttering your case, you can achieve a cleaner look and improve airflow, which is essential for keeping your components cool during intensive gaming sessions. Additionally, modular power supplies tend to make installation easier, as you can choose the optimal length and type of cable for your setup, minimizing the hassle of routing excess cables through your case.

**Non-Modular Power Supplies:**
On the other hand, non-modular power supplies come with all cables permanently attached. While this design often results in a lower price point, it can lead to a more chaotic interior if you have excess cables that you don’t need. This can hinder airflow and make your build look cluttered and disorganized. However, for those on a tight budget or for users with simpler setups that require fewer components, a non-modular PSU can still provide reliable performance without the bells and whistles of a modular design.

**Choosing Between the Two:**
Ultimately, the choice between a modular and non-modular power supply will depend on your specific needs, budget, and the complexity of your gaming rig. If aesthetics and cable management are high on your priority list, a modular PSU is likely the way to go. However, if you’re looking for a cost-effective solution and don’t mind a bit of extra cabling, a non-modular option may serve you well. Whichever route you choose, ensuring that your power supply meets the wattage requirements for your components is essential for a stable and high-performing gaming experience.

4. Calculating Your Power Needs

pc gaming -  How to choose a power supply for your gaming PC?
Credit : whatcanu.com

Calculating your power needs is a vital step in ensuring your gaming PC runs smoothly and efficiently. With the diverse range of components available on the market, each with its own power requirements, determining the right wattage for your power supply unit (PSU) can seem daunting. However, with a little math and some essential tools, you can confidently arrive at a number that will support your system’s needs.

Start by listing all the components in your gaming rig: the CPU, GPU, motherboard, RAM, storage drives, cooling fans, and any additional peripherals. Each of these components has a specific wattage requirement, which can usually be found in the product specifications. For example, high-performance graphics cards and processors may consume anywhere from 200 to 500 watts or more, depending on the model.

Once you have the wattage for each component, add them together to get a preliminary total. However, it’s crucial to account for additional factors, such as potential future upgrades and the PSU’s efficiency. Most experts recommend adding around 20% to your total wattage to provide a safety buffer, ensuring your system can handle peak loads without straining the power supply. This also allows for the occasional overclocking and ensures that your PSU operates within its optimal range, prolonging its lifespan.

To simplify this process, consider using online power supply calculators available on various hardware websites. These tools allow you to input your component specifications and will automatically calculate the recommended wattage for your PSU, factoring in the necessary overhead. Once you have a clear understanding of your power needs, you can confidently select a power supply that meets your requirements, ensuring your gaming experience is not only powerful but also stable and reliable. Remember, choosing the right PSU is not just about wattage; it’s also about efficiency ratings, modularity, and build quality, which we’ll delve into in subsequent sections.

5. Compatibility: Ensuring Your PSU Fits Your Components

When it comes to building the perfect gaming PC, compatibility is a crucial factor that often gets overshadowed by flashy components and high-end specs. Your power supply unit (PSU) is the heart of your system, and ensuring it seamlessly fits with your components is paramount. This means more than just ensuring the PSU physically fits within your case; it also involves verifying that it can supply the correct voltage and enough power for your entire setup.

First and foremost, check the wattage requirements of your components—especially your GPU and CPU. High-performance graphics cards and processors can be particularly power-hungry, requiring a PSU that can deliver a stable and adequate supply of power under load. Most manufacturers provide a recommended wattage for their products, so use those guidelines as your foundation. It’s generally wise to choose a PSU with a wattage rating that exceeds your total needs by at least 20-30%. This not only allows for future upgrades but also ensures that your PSU isn’t running at maximum capacity constantly, which can affect its lifespan and performance.

Next, consider the connectors your components require. Modern GPUs often need a combination of 6-pin and 8-pin PCIe connectors, while motherboards may require a 24-pin connector and additional 4 or 8-pin CPU power connectors. Make sure your chosen PSU comes equipped with the necessary cables and connectors that match your hardware. Some modular PSUs offer the flexibility to add only the cables you need, which can improve airflow and reduce clutter within your case.

Another vital aspect of compatibility is the PSU’s form factor. Standard ATX power supplies fit in most gaming cases, but if you’re using a smaller case, you might need a more compact SFX power supply. Always double-check the specifications of your case to avoid any last-minute surprises during assembly.

In summary, ensuring your PSU is compatible with your gaming PC components is essential for both performance and longevity. By taking the time to assess wattage needs, connector types, and form factors, you’ll lay a strong foundation for a powerful and efficient gaming system that can handle whatever challenges come your way.

6. The Importance of Rail Stability and Amperage

When it comes to selecting the ideal power supply for your gaming PC, understanding rail stability and amperage is crucial for ensuring your system runs smoothly and efficiently. Power supplies are designed with multiple “rails,” which can be thought of as dedicated channels for delivering power to various components of your PC, such as the CPU, GPU, and peripherals. Each rail has a specific amperage rating, dictating how much current it can supply at any given time.

Stability in these rails is paramount. Fluctuations or drops in power can lead to system instability, crashes, or even hardware damage, particularly during demanding gaming sessions or resource-intensive tasks. A power supply with stable rails ensures that your components receive a consistent flow of power, which is essential for maintaining peak performance and longevity.

Moreover, it’s important to pay attention to the amperage ratings on these rails. For instance, high-performance GPUs often require a substantial amount of current to function optimally. If your power supply cannot deliver sufficient amperage on the necessary rails, you may experience throttling, performance drops, or, in the worst-case scenario, a complete system failure.

When selecting a power supply, look for models that offer robust specifications, including a single-rail design with high amperage ratings for the GPU or multiple rails with balanced loads. Always check the manufacturer’s recommendations for the particular components you’re using; this will guide you in choosing a power supply that not only meets the wattage requirements but also excels in rail stability and amperage output. By prioritizing these factors, you can power up your gaming experience with confidence, knowing that your system is well-equipped to handle any challenge that comes its way.

7. Recognizing Quality Brands and Models

When it comes to selecting a power supply unit (PSU) for your gaming PC, recognizing quality brands and models is crucial for ensuring both performance and longevity. The PSU is the heart of your system, supplying power to all components, and investing in a reliable unit can save you from potential headaches down the line.

Start by familiarizing yourself with well-regarded brands in the industry. Companies such as Corsair, EVGA, Seasonic, and be quiet! have established reputations for producing high-quality PSUs that offer efficiency, stability, and durability. These brands often provide detailed specifications, including efficiency ratings (80 PLUS certifications), which indicate how effectively the PSU converts AC power from the wall into usable DC power for your components. The higher the rating—such as Gold or Platinum—the more efficient the PSU, meaning less energy waste and lower electricity bills.

Next, look for models that have garnered positive reviews from gamers and tech experts alike. Online forums, review websites, and YouTube channels dedicated to PC building can provide invaluable insights into the real-world performance of specific PSUs. Pay attention to reviews that detail long-term use, as a quality PSU should maintain stable voltage and low ripple over time, even under heavy load.

Additionally, it’s worth considering the warranty offered by the manufacturer. A longer warranty period often reflects the company’s confidence in its product’s reliability and can provide peace of mind. Brands that back their PSUs with extensive warranties signal a commitment to quality.

Lastly, don’t overlook the importance of modularity. High-quality PSUs often come in fully modular or semi-modular designs, allowing you to connect only the cables you need. This not only enhances cable management but also improves airflow within your case, contributing to better thermal performance.

By investing time in recognizing reputable brands and their top-performing models, you can ensure that your gaming rig is powered by a PSU that not only meets your current demands but is also built to last through countless gaming sessions.

8. Noise Levels: Choosing a Quiet Power Supply

When building the ultimate gaming PC, performance is undoubtedly a top priority, but it’s crucial not to overlook another essential factor: noise levels. A gaming setup can quickly become a cacophony of whirring fans and humming components, detracting from the immersive experience you’re aiming for. This is where selecting a quiet power supply (PSU) can make a significant difference in your overall gaming environment.

First and foremost, consider the efficiency rating of the PSU you’re eyeing. Power supplies with higher efficiency ratings, such as 80 Plus Gold or Platinum, tend to run cooler, generating less heat and requiring less fan activity to maintain optimal temperatures. This translates to quieter operation, as the fans don’t have to work as hard to cool down the unit during intense gaming sessions. A PSU that operates at high efficiency not only whispers rather than roars but also contributes to lower energy bills over time.

Next, pay attention to the design and quality of the power supply’s components. Look for models that feature hybrid or semi-passive cooling modes, which allow the PSU to run fanless under low to medium loads. This means that during less demanding gaming moments or everyday usage, you can enjoy an almost silent system. Additionally, investing in a power supply with high-quality capacitors and a well-engineered cooling system can significantly reduce the amount of noise produced.

Finally, don’t underestimate the importance of customer reviews and expert recommendations. Research models that gamers praise for their quiet operation, and consider checking out benchmarks that measure noise levels under various loads. Brands renowned for their commitment to silent operation, such as Seasonic, Corsair, and be quiet!, have built reputations on delivering power supplies that keep your gaming rig humming along without disruptive noise.

By prioritizing noise levels when selecting your power supply, you’re not just investing in a component; you’re enhancing your entire gaming experience. A quiet PSU allows you to immerse yourself in the gaming world, where the only sounds you hear are the thunderous explosions on screen and the subtle whispers of your virtual environment—rather than the distracting buzz of your hardware.

9. Future-Proofing Your Power Supply

When it comes to building a gaming PC, one of the most crucial components to consider is the power supply unit (PSU). While many gamers focus on the flashiness of graphics cards or the speed of CPUs, the PSU often gets overlooked. However, choosing a power supply that can adapt to your evolving gaming needs is essential for future-proofing your setup.

Future-proofing your power supply means selecting a unit that not only meets your current hardware requirements but also has the capability to support potential upgrades down the line. As gaming technology continues to advance, newer components—like high-performance GPUs and power-hungry CPUs—will demand more wattage. By opting for a PSU with a slightly higher wattage rating than you currently require, you can ensure that your system will have the necessary power to accommodate these upgrades without the need for an immediate replacement.

Look for a power supply with an 80 PLUS certification, which signifies that the unit operates efficiently and produces less heat. Higher efficiency ratings (such as 80 PLUS Gold or Platinum) not only contribute to lower electricity bills, but they also indicate a more reliable and durable power supply. Additionally, consider modular or semi-modular PSUs. These allow you to detach cables that you don’t need, resulting in a tidier build and improved airflow, which is especially important as your system evolves.

Also, pay attention to the PSU’s connectors. A power supply that comes with a variety of cables and connectors will provide you with the flexibility to accommodate new components as they come to market. For instance, if you’re planning on getting into high-end gaming or VR within the next few years, ensure your PSU has the necessary PCIe connectors to support upcoming graphics cards.

Lastly, don’t forget warranties and manufacturer reputation. A solid warranty can provide peace of mind, knowing that your investment is protected for years to come. Brands that are well-regarded in the industry often have built their reputations on reliability and customer service, making them a safer choice when investing in a power supply that you want to last through multiple upgrades.

By carefully considering these factors, you can select a power supply that not only meets your current gaming needs but also supports your future aspirations, allowing you to power up your gaming experience for years to come.

10. Understanding Warranty and Support Options

When investing in a power supply for your gaming PC, understanding warranty and support options is crucial. A quality power supply is not just a component; it’s the lifeblood of your entire system, delivering the necessary power to run your components smoothly and efficiently. However, even the best products can occasionally fail, and that’s where a robust warranty can save the day.

Most reputable power supply manufacturers offer warranties ranging from three to ten years, with some high-end models even providing lifetime coverage. These warranties usually cover defects in materials and workmanship, meaning that if something goes wrong due to a manufacturing issue, you can receive a replacement without incurring additional costs. It’s essential to read the fine print, though, as some warranties may require registration or have specific conditions regarding installation and use.

In addition to the warranty, consider the support options available to you. A manufacturer that offers responsive customer service can make a big difference if you encounter issues or have questions about your power supply. Look for companies that provide multiple avenues for support—such as phone, email, and live chat—so you can reach out in the way that’s most convenient for you.

Lastly, delve into user reviews and community feedback regarding the support experiences of others. A stellar warranty is only as good as the company behind it, and knowing how they handle customer inquiries and product failures can give you peace of mind. By carefully evaluating warranty terms and support options, you can ensure that your investment is safeguarded, allowing you to focus on what truly matters: enjoying an immersive gaming experience.

11. Installation Tips for Your Power Supply

Installing a power supply for your gaming PC might seem daunting at first, but with the right approach and some careful planning, you can turn this task into a straightforward process. First and foremost, ensure that you have all the necessary tools at hand, including a screwdriver, zip ties for cable management, and, of course, a clear workspace to avoid mishaps.

When you’re ready to begin, start by preparing your case. Make sure your PC is unplugged and that you’ve grounded yourself to prevent static electricity from damaging sensitive components. Remove the side panel of your case, which will give you access to the interior.

Next, insert the power supply into the designated space, typically located at the bottom or top of the case. Align it with the mounting holes and secure it with screws, ensuring it’s snug but not overly tight. This step is crucial because a loose power supply can lead to unwanted vibrations and noise during operation.

Once the power supply is securely in place, it’s time to connect the cables. Begin with the motherboard power cable, which is generally a large 24-pin connector, followed by the CPU power cable, usually an 8-pin or 4+4 pin connector. Make sure these cables are firmly connected, as a loose connection can lead to system instability.

After powering the motherboard and CPU, connect the graphics card power cables next, which are often 6-pin or 8-pin connectors, depending on your GPU model. Don’t forget to power any additional components such as SSDs or HDDs, ensuring you’re using the correct SATA or Molex power connectors.

As you connect each cable, take a moment to organize them. Use zip ties to bundle cables together, creating a neat and tidy interior that not only looks professional but also improves airflow within the case. Good cable management plays a vital role in maintaining temperature and performance, especially in high-powered gaming setups.

Finally, double-check all connections before plugging in your PC and powering it on for the first time. If you’ve followed these steps carefully, you should be greeted with the reassuring hum of your components working together harmoniously. With your power supply installed correctly, you’re one step closer to enjoying an immersive gaming experience on your newly built rig!

12. Common Mistakes to Avoid When Choosing a PSU

When it comes to selecting the perfect power supply unit (PSU) for your gaming PC, avoiding common pitfalls can save you time, money, and headaches. Here are some of the most frequent mistakes gamers make, and tips on how to steer clear of them.

**1. Neglecting to Calculate Your Wattage Needs:** One of the biggest missteps is not fully understanding your system’s power requirements. Many gamers underestimate the wattage needed, especially with high-performance components. Use online PSU calculators by inputting your specific hardware details—this will give you a clearer picture of the wattage range you should be looking at. Always aim for a PSU that offers a little more than your calculated needs to accommodate future upgrades.

**2. Skimping on Quality:** In the quest to save money, some gamers opt for cheaper, lower-quality PSUs. However, a poor-quality power supply can lead to unstable performance, system crashes, and even damage to your valuable components. Look for reputable brands and check for certifications like 80 PLUS, which indicates energy efficiency and reliability. Investing in a high-quality PSU is crucial for the longevity and stability of your gaming rig.

**3. Overlooking Connector Compatibility:** With a myriad of hardware options available, ensuring that your PSU has the right connectors is vital. Graphics cards, motherboards, and additional components often require specific types of power connectors. Before making a purchase, double-check the compatibility of your PSU with your components to avoid any last-minute surprises during installation.

**4. Ignoring Form Factor:** It’s easy to overlook the physical size of your PSU, but matching its form factor to your case is essential. PSUs come in various sizes, such as ATX, SFX, and TFX. If you have a compact case, a standard ATX PSU may not fit. Always measure your case and check the specifications to ensure a proper fit.

**5. Failing to Plan for Future Upgrades:** Many gamers make the mistake of choosing a PSU that meets only their current needs, neglecting potential future upgrades. If you plan to upgrade to a more powerful GPU or add additional components down the line, select a PSU with adequate wattage and connectors to support these enhancements.

By steering clear of these common mistakes, you can confidently choose a power supply that not only meets your current gaming demands but also sets you up for success in the future. A solid, reliable PSU is the backbone of your gaming PC—make sure you give it the attention it deserves!

13. Upgrading Your PSU: When and Why to Consider It

Upgrading your power supply unit (PSU) is a crucial decision that can significantly impact the performance and longevity of your gaming PC. But when should you consider making this upgrade, and what factors should guide your decision?

First and foremost, if you’ve recently upgraded your GPU or added more components to your rig, it’s essential to evaluate your current PSU’s wattage and efficiency ratings. Modern graphics cards, especially those from the latest generations, often require more power to operate optimally. If your existing PSU is struggling to deliver the necessary wattage, you may notice instability, frequent crashes, or even hardware malfunctions during intense gaming sessions.

Another key indicator that it might be time for an upgrade is the age of your PSU. Power supplies have a finite lifespan, and older models, particularly those over five years, may not only be less efficient but also lack the necessary connectors for newer components. Over time, the capacitors inside a PSU can degrade, leading to inconsistent power delivery, which can harm your sensitive hardware.

Moreover, if you’re planning to overclock your CPU or GPU for enhanced performance, a robust and reliable PSU is essential. Overclocking increases power demands, and a subpar power supply can result in inadequate voltage regulation, leading to instability and crashes. A high-quality, high-wattage PSU ensures that your system has enough headroom to handle these demands while maintaining stable performance.

Lastly, consider your energy efficiency. Upgrading to a PSU with a higher efficiency rating, such as 80 PLUS Gold or Platinum, not only reduces electricity costs but also generates less heat, contributing to a cooler and quieter system. This is particularly important for gamers who spend extended hours in front of their PC, as it creates a more pleasant gaming environment.

In summary, upgrading your PSU is a proactive measure that enhances your gaming experience, ensures system stability, and protects your investment in hardware. Whether driven by new components, age, overclocking ambitions, or a desire for energy efficiency, a timely PSU upgrade can power up your gaming setup and keep you ahead in the ever-evolving gaming landscape.

14. Troubleshooting Common Power Supply Issues

When it comes to building or upgrading your gaming PC, the power supply unit (PSU) is often overlooked—yet it plays a pivotal role in your system’s performance and stability. Even with a high-quality PSU, issues can arise, leaving gamers frustrated and uncertain about how to proceed. Here, we’ll explore some common power supply problems you might encounter and offer troubleshooting tips to help you get back to gaming without delay.

### 1. **No Power at All**
If your PC won’t power on, the first step is to check the basics. Ensure that the power cable is securely connected to both the wall outlet and the PSU. If your PSU has a switch, make sure it’s turned on. If everything appears to be connected properly, test the outlet with another device to rule out any electrical issues. If the problem persists, consider using a multimeter to check if the PSU is delivering the correct voltage.

### 2. **Random Shut Downs**
Experiencing unexpected shut downs can be alarming, especially during intense gaming sessions. This could be a sign of an overloaded power supply or failing components. Start by checking if your PSU has enough wattage to support all your hardware, including the CPU, GPU, and any additional peripherals. Also, ensure that all connectors are properly seated. If your PSU is functioning correctly, overheating due to poor ventilation could be the culprit; ensure that your case has adequate airflow and consider cleaning any dust buildup.

### 3. **Unstable Performance**
If your system is exhibiting instability—such as random reboots, freezes, or crashes—this could point towards a faulty power supply. Begin by checking for any loose connections. If the PSU is old or has been under heavy use, it may be worth testing it with a PSU tester or swapping it out temporarily to see if the issues persist. Additionally, ensure that your power supply is rated for continuous output and that the quality of the components inside your PC meets your gaming needs.

### 4. **Electrical Noises**
Humming, buzzing, or clicking noises coming from your PSU can be unsettling and indicate a potential problem. While some noise is normal, especially under load, loud or irregular sounds could suggest issues with the internal components. If you notice strange noises, it may be time to have your PSU inspected or replaced, as ignoring these signs can lead to further damage.

### 5. **Overheating**
If your PSU is overheating, it can lead to reduced performance and potential failure. Check for proper airflow within your case and ensure that the fan on the PSU is functioning correctly. Consider moving your PC to a cooler location or investing in additional case fans to improve circulation. If overheating continues despite these efforts, it may be necessary to replace the PSU with a more efficient model that can handle your gaming setup.

By addressing these common power supply issues with a systematic approach, you can ensure that your gaming rig runs smoothly and efficiently, allowing you to immerse yourself in the gaming experience without worry. Remember, a well-functioning power supply not only powers your components—it serves as the backbone of your entire gaming setup.

15. Conclusion: Making an Informed Choice for Optimal Gaming Performance

In conclusion, selecting the right power supply is an integral step in building a high-performance gaming PC. A well-chosen power supply not only ensures that your components receive stable and adequate power but also contributes to the overall reliability and longevity of your system. As we’ve discussed throughout this guide, understanding the wattage requirements of your hardware, considering efficiency ratings, and evaluating the importance of modularity are all critical factors in making an informed decision.

Remember, the heart of your gaming rig relies on a power supply that can meet its demands without compromise. Investing in a reputable brand that offers robust customer support and long warranties can save you headaches down the road. Additionally, always keep in mind the future-proofing aspect—accommodating potential upgrades can turn a good build into a great one.

As you venture into the world of gaming, let this guide serve as your roadmap to navigating the vast array of options available. Choose wisely, and you’ll not only enhance your gaming experience but also ensure that your setup runs smoothly under the most demanding conditions. With the right power supply, your gaming aspirations are only limited by your imagination. Happy gaming!

In conclusion, selecting the right power supply for your gaming PC is a critical step that can significantly impact your system’s performance and longevity. By following the guidelines outlined in this comprehensive guide, you’ll not only ensure that your components receive the appropriate power they need but also enhance the overall efficiency and stability of your gaming rig. Remember to consider wattage, efficiency ratings, and the importance of modularity when making your choice. Investing time in choosing the perfect power supply will pave the way for a smoother gaming experience and protect your prized hardware. Now that you’re equipped with the knowledge to make an informed decision, it’s time to power up your gaming journey—happy gaming!