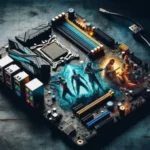
How to Overclock Your CPU for Gaming: A Practical Guide
Credit : whatcanu.com
Overclocking is the act of pushing your CPU beyond the clock speeds set by the factory. Think of it like tuning a car engine to get higher RPMs; you gain raw performance, but you must ensure your cooling system can handle the extra heat. For a gamer, this means smoother frame rates in CPU-intensive titles and better handling of background tasks like streaming.
Credit : whatcanu.com
Before touching any settings, you need to understand one rule: stability is more important than speed. An unstable system will crash during a winning match, which is the last thing you want. Follow this guide to optimize your rig systematically.
Preparation: The Prerequisites for Success
Do not attempt to overclock on a stock cooler. Overclocking creates thermal energy that requires a high-quality air cooler or an All-in-One (AIO) liquid cooling solution. If your idle temperature is already near 60°C, stop and upgrade your cooling first.
Identify your hardware: Ensure your CPU is “unlocked” (Intel K-series or AMD Ryzen).
Verify motherboard support: Your motherboard must have a chipset (like Intel Z-series or AMD B/X-series) that allows voltage and multiplier adjustments.
Download essential tools: Install CPU-Z for real-time monitoring, HWMonitor for thermal tracking, and Prime95 or Cinebench for stress testing.
Step-by-Step BIOS Overclocking Workflow
Credit : whatcanu.com
You will perform your changes in the BIOS/UEFI. Restart your PC and tap the Delete or F2 key repeatedly until the menu appears. Here is the safest process to find your CPU’s “sweet spot”:
Set to Manual: Locate the “CPU Ratio” or “Multiplier” setting. Set it to the default frequency.
Increment Slowly: Increase the multiplier by +1. If your base clock is 100MHz and you want 4.5GHz, set the multiplier to 45.
Voltage Adjustment: Start with the factory voltage (auto). If you encounter crashes, increase the VCore (CPU voltage) by small increments of 0.01V.
Save and Boot: Exit and save. If the PC fails to boot, don’t panic. Simply reset the CMOS by removing the small circular battery on your motherboard for 30 seconds to revert settings.
The Golden Rule of Stability Testing
Never assume an overclock is stable just because the desktop loads. You must stress-test to ensure the CPU won’t fail under pressure. Run Prime95 or Cinebench for at least one hour while keeping HWMonitor open on a second screen or in windowed mode.
Thermal Limit: If your CPU hits 85°C, your cooling is saturated. Stop immediately and lower the voltage or multiplier.
The Crash Test: If the PC freezes or shows a Blue Screen of Death (BSOD), your overclock is unstable. You need either more voltage (if temperatures allow) or a lower multiplier.
Efficiency vs. Heat: Sometimes, backing off the multiplier by 100MHz allows for a massive reduction in voltage and heat, resulting in a much more stable daily experience.
Error Analysis: Common Pitfalls to Avoid
Credit : whatcanu.com
Even pros run into issues. Here is how to fix the most common problems:
Boot Loops: If the computer refuses to start, the voltage is likely too low for the requested speed. Reset the BIOS.
Thermal Throttling: If your performance drops suddenly during a game, your CPU is likely hitting its thermal ceiling and slowing itself down to prevent damage. Improve your case airflow.
Voltage Degradation: Do not exceed the maximum safe voltage recommended by your specific CPU manufacturer. Pushing too much voltage is the only way to physically destroy a CPU through heat.
Final Advice for Longevity
Once you find a stable overclock, save your configuration as a “Profile” in the BIOS. This allows you to restore it instantly if you clear your CMOS. Remember that dust is your enemy; clean your radiator or heatsink every three months with compressed air to keep those overclocking temperatures in check. If you notice strange artifacts or stuttering after months of stability, your chip might be aging—simply dial back the overclock by one step.