
How to fix a leaky faucet?

A leaky faucet is a silent thief. It wastes water, inflates your utility bills, and creates damp environments that harbor mold. Fixing it yourself is a manageable task if you understand that faucets are not universal. Whether you have a classic two-handle mixer or a modern single-lever faucet, the core mechanics are similar but the disassembly varies.
The two main types of faucets
Before you pick up a wrench, identify what you are dealing with. Faucets fall into two main categories that require different approaches:
- Compression (Two-handle) Faucets: These are the traditional style with separate handles for hot and cold water. They use a rubber washer to compress against a valve seat. When that washer hardens or tears, the faucet drips.
- Cartridge or Ball (Single-lever) Faucets: These use a complex internal cartridge or a metal ball with holes to mix water. They are common in modern kitchens. If these leak, you usually replace the entire cartridge rather than a simple washer.
Essential tools for the job

Do not start until your workspace is ready. You need these tools to avoid mid-project frustration:
- Adjustable wrench: Use this to loosen nuts without stripping the chrome finish.
- Screwdriver set: You will need both Phillips and flathead bits to access handle screws.
- Hex (Allen) keys: Essential for removing the side-mounted handles on modern single-lever faucets.
- Needle-nose pliers: These help pull out stubborn O-rings or internal clips.
- Plumber’s grease: This silicone-based lubricant keeps seals flexible and prevents future leaks.
- Replacement parts: Never buy parts before disassembling. Take the old hardware to the store to match the exact size.
Step 1: Isolate the water supply
Never skip this. Look under the sink for the shut-off valves. Turn them clockwise until they stop. If you cannot find them, you must turn off the main water supply for your home. Once closed, open the faucet handles to release pressure and drain the trapped water in the pipes.
Step 2: Secure your workspace
Plug the drain with a rag or a sink stopper. This acts like a net for your hardware. If a tiny screw falls into the drain, it is gone forever. This simple step saves you a frustrating trip back to the hardware store for a replacement screw.
Step 3: Access and remove the internals
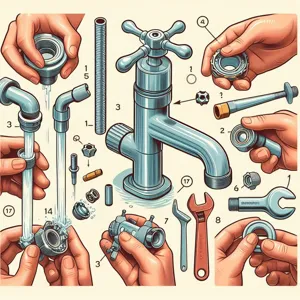
For two-handle faucets, remove the decorative cap on the handle to reveal the screw. For single-lever faucets, the Allen screw is often hidden behind a small plastic plug. Once the handle is off, use your wrench to unscrew the packing nut. Take a photo of the orientation of all parts before removing them. This creates a visual roadmap for your reassembly.
Step 4: Troubleshoot the specific fault
Once you reach the valve assembly, look for the wear. Not all leaks come from the same place:
- If it drips from the spout: This is a seat-and-washer issue. The washer is worn out and can no longer create a tight seal.
- If it leaks at the base of the handle: Your O-rings have likely dry-rotted. These are small rubber bands that prevent water from traveling up the stem.
- If it is a modern cartridge: If you see hairline cracks or mineral buildup on the cartridge body, replace the entire unit. Do not attempt to repair the internal plastic components.
Step 5: Install and grease

Clean the valve area thoroughly before installing new parts. Mineral deposits act like sandpaper and will destroy your new seals in weeks. Apply a thin layer of plumber’s grease to all new rubber gaskets. This prevents the seals from binding or tearing when you tighten the nut.
Errors to avoid
Based on field experience, most DIY plumbing repairs fail because of common shortcuts. Avoid these traps to ensure a permanent fix:
- Forcing stuck parts: If a nut refuses to budge, do not use brute force. You risk snapping the pipes hidden inside the wall. Use a penetrating oil like WD-40 and wait ten minutes.
- Overtightening: A common mistake is crushing the new rubber washer. Tighten until you feel resistance, then add only a quarter-turn more.
- Ignoring the aerator: Sometimes, the problem is not the valve at all. Unscrew the aerator at the tip of the faucet and check for debris. A clogged screen creates backpressure that causes the faucet to spit or drip unnecessarily.
When to call a professional
If you have replaced the seals and the leak persists, you may have a pitted valve seat. If the metal surface where the washer sits is corroded, it will chew through any new washer you install. At this stage, professional valve seat grinding or fixture replacement is required. If you are working with antique faucets or high-end designer hardware, call a specialist to avoid damaging rare finishes that are difficult to replace.
Content updated on 2026-10-14