pc gaming – How to build a high-end gaming PC under $2000?

In a world where gaming has evolved into a breathtaking blend of immersive storytelling and stunning graphics, building a high-end gaming PC can often feel like a daunting financial commitment.

However, what if we told you that you could assemble a powerhouse rig without breaking the bank? In this ultimate guide, we’ll unlock the secrets to crafting a top-tier gaming pc for under $2000, ensuring you get the best bang for your buck. We’ll cover everything from selecting the right components—like the latest graphics cards and lightning-fast processors—to tips on optimal cooling solutions and stylish cases that won’t compromise on aesthetics. Whether you’re a competitive gamer looking to dominate the leaderboard or a casual player wanting to experience the latest titles in stunning detail, this guide is your roadmap to achieving gaming greatness. Get ready to unleash your gaming potential on a budget that won’t leave your wallet gasping for air!

1. Introduction: Why Build a High-End Gaming PC?
pc gaming -  How to build a high-end gaming PC under $2000?
Credit : whatcanu.com

Building a high-end gaming PC is more than just assembling a collection of components; it’s about crafting a personalized experience that elevates your gaming to new heights. In an era where immersive graphics, lightning-fast processing speeds, and seamless gameplay are paramount, investing in a custom-built rig can make all the difference. Unlike pre-built systems, constructing your own gaming PC allows you to handpick each component, tailoring the setup to suit your unique gaming style and preferences.

But why specifically choose to build rather than buy? For starters, building your own PC often provides better value for your money. With a budget of under $2000, you can select the latest graphics cards, powerful CPUs, and ample storage options that are perfectly aligned with your gaming needs, without paying extra for brand markup. Moreover, building your own system gives you the flexibility to upgrade individual parts as technology evolves, ensuring your rig remains relevant in the fast-paced world of gaming.

Furthermore, the process of building a gaming PC is a rewarding journey in itself. It fosters a deeper understanding of computer hardware and how each component contributes to performance. Whether you’re a seasoned gamer or just starting, the satisfaction of watching your meticulously chosen parts come together is unmatched. Plus, there’s an undeniable sense of pride in knowing that you have created a machine that’s uniquely yours—one that can handle everything from the latest AAA titles to demanding creative tasks with ease.

So, if you’re ready to dive into the world of high-end gaming, join us as we explore the essential components, step-by-step assembly process, and tips to ensure your gaming PC not only meets your expectations but exceeds them—all while staying within your budget. Let’s embark on this exciting journey together!

2. Setting Your Budget: Breaking Down the $2000 Limit

When diving into the world of high-end gaming PCs, setting a budget can be both exhilarating and daunting. For many gamers, the $2000 limit serves as a golden threshold, offering the potential to build a powerhouse capable of handling the latest titles at ultra settings while future-proofing your setup for years to come. However, strategically breaking down this budget is crucial to ensure you achieve the best performance without any compromises.

Start by allocating approximately 30-40% of your budget to the heart of your gaming rig: the graphics card (GPU). This component is pivotal for rendering stunning visuals and smooth gameplay. Look for models that offer the best performance per dollar, and consider options that balance power with thermal efficiency.

Next, dedicate around 20-25% of your budget to the processor (CPU). A capable CPU complements your GPU to prevent bottlenecks and ensure seamless gaming experiences, especially in CPU-intensive titles. Research compatibility with your chosen motherboard to avoid any headaches down the line.

The remaining budget should be divided among other essential components: storage, memory (ram), motherboard, power supply unit (PSU), and cooling solutions. Aim for at least 16GB of RAM to facilitate multitasking and smooth performance. For storage, consider a combination of an SSD for your operating system and frequently played games, alongside a larger HDD for additional storage needs.

Don’t forget to factor in peripherals and accessories if needed. A good gaming monitor, keyboard, and mouse can enhance your overall experience but should be approached with careful consideration to avoid overspending.

By thoughtfully dissecting your budget, you pave the way for a high-end gaming PC that satisfies your gaming aspirations without breaking the bank. Remember, each component plays a vital role in the overall performance of your machine, so invest wisely and enjoy the journey of crafting your ultimate gaming rig!

3. Essential Components for a High-End Gaming PC
pc gaming -  How to build a high-end gaming PC under $2000?
Credit : whatcanu.com

When embarking on the journey to build a high-end gaming PC, understanding the essential components is crucial to creating a machine that not only performs exceptionally but also offers great value for your investment. Here’s a breakdown of the key components that will form the backbone of your gaming rig.

**1. Processor (CPU):** At the heart of your gaming PC lies the CPU, which plays a pivotal role in determining your system’s speed and performance. Look for a high-performance processor, such as the AMD Ryzen 7 or Intel Core i7, which strikes the right balance between price and power. These processors are adept at handling demanding gaming applications and multitasking, ensuring that your gaming experience is smooth and responsive.

**2. Graphics Card (GPU):** The GPU is arguably the most critical component for gamers, as it directly influences your gaming visuals and frame rates. To achieve stunning graphics in the latest games, consider investing in a high-end graphics card like the NVIDIA RTX 3070 or AMD Radeon RX 6800. These cards are designed to handle 1440p and even 4K gaming, providing you with breathtaking visuals and immersive experiences.

**3. Memory (RAM):** For a high-end gaming PC, aim for a minimum of 16GB of RAM. This amount is sufficient for most modern games and allows for seamless multitasking. If your budget permits, consider upgrading to 32GB, which can provide extra headroom for more demanding titles and applications, especially if you plan to stream or record your gameplay.

**4. Storage:** Speed and capacity are vital when it comes to storage. A combination of a Solid State Drive (SSD) and a traditional Hard Disk Drive (HDD) is ideal. Opt for a 1TB SSD for your operating system and favorite games, ensuring quick load times and smooth performance. Additionally, a 2TB HDD can provide ample space for other files, media, and less frequently played games.

**5. Motherboard:** Your motherboard acts as the central hub connecting all components. Choose a motherboard that supports the latest technology, such as PCIe 4.0 for faster data transfer rates. Ensure it’s compatible with your chosen CPU and has enough ports for your GPU and peripherals.

**6. Power Supply Unit (PSU):** Don’t skimp on the PSU. A reliable power supply is essential for a stable system. Look for a PSU with an 80 Plus Gold certification to ensure efficiency and longevity. Aim for a wattage that can comfortably support your components, typically around 650W to 750W for high-end builds.

**7. Cooling System:** Maintaining optimal temperatures is crucial for performance and longevity. Consider a high-quality air cooler or an all-in-one liquid cooling solution to keep your CPU running cool under load. Additionally, ensure your case has good airflow, with several case fans to help dissipate heat.

**8. Case:** Finally, select a case that not only fits your aesthetic but also accommodates your components with ease. Look for features such as cable management options, airflow design, and enough space for future upgrades. A well-designed case can enhance both the functionality and the appearance of your build.

By carefully selecting these essential components, you can create a high-end gaming PC that delivers outstanding performance while staying within your $2000 budget. Each part works in harmony to ensure your gaming experience is nothing short of extraordinary, allowing you to dive into the latest titles with confidence and style.

4. Choosing the Right CPU: Options for Performance

When it comes to constructing a high-end gaming PC, the CPU (Central Processing Unit) is the heart of your system, influencing everything from game performance to multitasking capabilities. Selecting the right CPU within your budget of $2000 can be a game-changer, and fortunately, there are several outstanding options designed to deliver exceptional performance without breaking the bank.

First up, let’s consider the AMD Ryzen series. The Ryzen 5 7600X and the Ryzen 7 5800X are both excellent choices for gamers seeking performance without overspending. The Ryzen 5 offers six cores and twelve threads, which is perfect for gaming while still allowing for productive multitasking. On the other hand, the Ryzen 7, with its eight cores and sixteen threads, excels in both gaming and content creation, making it a versatile option if you plan to stream or edit videos.

If you’re leaning towards Intel, the Core i5-13600K is a formidable contender. This processor boasts a hybrid architecture, featuring both Performance-cores and Efficient-cores, which provides a significant boost to gaming and productivity tasks alike. For those willing to stretch their budget slightly, the Core i7-12700K offers even more power, ensuring you’re well-equipped to handle the latest AAA titles at high settings.

While choosing your CPU, also consider the cooling requirements, as high-performance CPUs can generate considerable heat. An aftermarket cooler may be essential for overclocking and maintaining optimal temperatures, ensuring your system runs smoothly under heavy gaming loads.

Ultimately, the choice of CPU will set the foundation for your gaming experience. Prioritize performance that caters not just to your current gaming needs but also considers future-proofing your build for upcoming titles. With the right CPU in your arsenal, you’ll be well on your way to crafting a gaming rig that can handle anything thrown its way—all while staying within your budget!

5. Selecting a Graphics Card: Maximizing Gaming Performance
pc gaming -  How to build a high-end gaming PC under $2000?
Credit : whatcanu.com

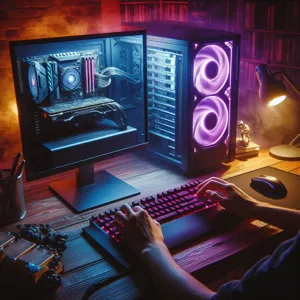
When it comes to building a high-end gaming PC, the graphics card is undoubtedly the crown jewel of your setup. It’s the powerhouse responsible for rendering stunning visuals and delivering smooth gameplay, making it a critical component in your build. Selecting the right graphics card requires careful consideration of your gaming needs, budget, and the latest technology available in the market.

As of 2023, the landscape of graphics cards is dominated by industry giants like NVIDIA and AMD, each offering a range of options tailored to various performance levels. For a budget of under $2000, you have the flexibility to choose from powerful mid-tier cards or even some entry-level models from the latest generation that offer exceptional value.

When evaluating graphics cards, focus on key specifications such as VRAM (Video Random access Memory), clock speeds, and CUDA cores (for NVIDIA cards). A minimum of 8GB of VRAM is recommended for modern gaming, especially if you plan to play at higher resolutions or with demanding settings like ray tracing. Additionally, higher clock speeds can lead to better performance, allowing your games to run more smoothly.

Consider the resolution at which you’ll be gaming. If you’re looking to play at 1440p or even 4K, investing in a more powerful GPU can significantly enhance your experience. Models like the NVIDIA GeForce RTX 3060 Ti or the AMD Radeon RX 6700 XT deliver impressive performance without breaking the bank. Meanwhile, if you’re aiming for ultra settings in demanding titles, stepping up to something like the NVIDIA GeForce RTX 3080 or the AMD Radeon RX 6800 could be worthwhile.

Don’t overlook future-proofing your investment as well. With new titles constantly pushing the boundaries of graphics fidelity, opting for a card that supports the latest technologies—like ray tracing and DLSS (Deep Learning Super Sampling)—can extend the lifespan of your gaming rig.

Finally, keep an eye on market availability and pricing trends. Graphics card prices can fluctuate wildly due to supply chain issues and demand spikes, so timing your purchase can lead to significant savings. By carefully selecting a graphics card that meets your gaming demands and fits within your budget, you can ensure that your high-end gaming PC not only performs brilliantly but also delivers an immersive gaming experience for years to come.

6. Motherboard Matters: Finding the Best Fit for Your Build

When it comes to building a high-end gaming PC, choosing the right motherboard is a crucial step that can significantly impact your system’s performance and future upgradability. The motherboard serves as the backbone of your build, connecting all components and facilitating communication between them. With a budget of $2000, you have a wealth of options, but narrowing down your choices requires a careful consideration of several key factors.

First and foremost, you’ll want to ensure that the motherboard is compatible with your chosen CPU. Whether you’re opting for an Intel or AMD processor, each has a specific socket type that dictates which motherboards are compatible. Be sure to check the specifications of both the CPU and motherboard to avoid any compatibility issues.

Next, think about the form factor. Motherboards typically come in ATX, Micro-ATX, and Mini-ITX sizes. An ATX motherboard will provide ample space for additional components, such as extra RAM slots and PCIe lanes for graphics cards or other expansion cards. If you’re aiming for a compact build, however, a Micro-ATX or Mini-ITX might be more suited to your needs, though you may sacrifice some expandability.

Another critical aspect to consider is the features you need. Are you planning to overclock your CPU or RAM? If so, look for motherboards that offer robust power delivery systems and advanced cooling options. Additionally, consider the connectivity options – the number of USB ports, SATA connections for storage devices, and built-in Wi-Fi capabilities can all enhance your gaming experience.

Don’t forget about aesthetics! A motherboard with customizable RGB lighting can complement your overall build and create a visually stunning gaming rig. Many high-end motherboards also come with reinforced PCIe slots to prevent GPU sag and high-quality capacitors for improved durability.

Ultimately, the right motherboard will not only support your current components but also offer room for future upgrades, ensuring that your gaming PC remains relevant as technology evolves. Investing time in researching and selecting the best motherboard for your high-end gaming build can make all the difference in achieving the performance and longevity you desire. So take the time to explore your options and find the perfect fit for your gaming ambitions!

7. RAM Requirements: How Much Do You Need?
pc gaming -  How to build a high-end gaming PC under $2000?
Credit : whatcanu.com

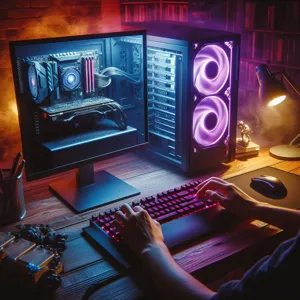
When it comes to building a high-end gaming PC, understanding your RAM requirements is crucial for achieving optimal performance. Random Access Memory (RAM) acts as your system’s short-term memory, allowing your CPU to access data quickly and efficiently. For gaming, the right amount of RAM can significantly affect load times, multitasking capabilities, and overall gameplay smoothness.

In today’s gaming landscape, 16GB of RAM is generally considered the sweet spot for most gamers. This amount provides plenty of headroom for modern titles, allowing you to run games at high settings without worrying about bottlenecks. With 16GB, you can also comfortably run background applications, such as streaming software or voice chat programs, without experiencing lag.

However, if you plan on pushing the limits with intensive tasks—like 4K gaming, video editing, or running multiple applications simultaneously—consider upgrading to 32GB of RAM. This setup is more future-proof, ensuring that your system can handle the latest games and demanding software without breaking a sweat.

When selecting your RAM, pay attention to the speed and latency as well. Opt for DDR4 RAM with a speed of at least 3200 MHz, as this can provide a noticeable performance boost in gaming scenarios. Lower latency also contributes to a snappier experience, so look for RAM with CL16 or lower for optimal performance.

Lastly, don’t overlook the aesthetic aspect. Many gamers enjoy RGB lighting options for their RAM modules, which can add a personal touch to your build. Ultimately, the choice of RAM is not just about numbers; it’s about striking the right balance between performance, capacity, and style to create a gaming rig that is both powerful and visually appealing. With the right RAM in place, you’ll be well on your way to an exceptional gaming experience that won’t break the bank.

8. Storage Solutions: SSD vs. HDD for Gaming

When it comes to building a high-end gaming PC, one of the critical decisions you’ll face is choosing the right storage solution. The choice between Solid State Drives (SSD) and Hard Disk Drives (HDD) can significantly impact your gaming experience, and understanding the differences between these two options is vital for any serious gamer.

### SSD: Speed and Performance

Solid State Drives have gained immense popularity in recent years, primarily due to their lightning-fast read and write speeds. Unlike traditional HDDs that rely on spinning disks and mechanical parts, SSDs store data on flash memory, which means quicker load times for games and applications. Imagine booting up your PC and diving straight into your favorite game in mere seconds—that’s the power of an SSD. For gaming, this translates to reduced lag during gameplay and faster loading screens, making for a more seamless experience. Additionally, many modern games are increasingly designed to take advantage of SSD technology, allowing for better performance and enhanced graphics.

### HDD: Capacity and Cost-Effectiveness

On the other hand, Hard Disk Drives offer larger storage capacities at a significantly lower price point compared to SSDs. If you have a vast library of games, movies, or other media, an HDD can provide the space you need without breaking the bank. While they may not match the speed of SSDs, they are still a reliable option for storing non-essential files or older games that don’t require lightning-fast load times. For gamers on a budget, integrating an HDD alongside an SSD can be an excellent way to balance speed with storage capacity—using the SSD for your most-played games and the HDD for everything else.

### The Best of Both Worlds

The ideal setup for a high-end gaming PC under $2000 often involves a combination of both storage types. Many gamers opt for a smaller SSD (e.g., 500GB or 1TB) to house their operating system and a few key games, while pairing it with a larger HDD (e.g., 2TB or more) for additional storage. This hybrid approach maximizes performance while still providing ample space for your gaming library and multimedia files.

In conclusion, the choice between SSD and HDD ultimately comes down to your gaming habits and budget. If speed and performance are your top priorities, an SSD is the way to go. However, if you need more space for a variety of games and applications, consider a dual-storage solution to get the best of both worlds. With the right storage setup, you’ll be well on your way to enjoying an exceptional gaming experience in your new high-end PC!

9. Power Supply: Ensuring Stability and Efficiency

When building a high-end gaming PC, one component that often gets overlooked is the power supply unit (PSU). Yet, it plays a crucial role in ensuring your system’s stability and efficiency. Think of the PSU as the heart of your PC; it delivers the essential power that keeps all other components running smoothly. A reliable PSU not only provides the necessary wattage but also ensures that your components receive clean and stable power, which is vital for optimal performance, especially during intense gaming sessions.

Choosing the right power supply involves a few key considerations. First, assess the wattage requirements of your hardware. High-performance GPUs and CPUs can demand a significant amount of power, so it’s essential to select a PSU that can accommodate your system’s peak consumption. For a high-end gaming setup, aim for a power supply in the range of 650 to 850 watts, which should provide ample headroom for future upgrades and overclocking.

Efficiency ratings are also critical when selecting a PSU. Look for units that have an 80 PLUS certification, which indicates energy efficiency. The higher the certification (Bronze, Silver, Gold, Platinum, or Titanium), the more efficient the power supply will be, leading to lower electricity bills and less heat generation. A high-efficiency PSU can also prolong the lifespan of your components by reducing unnecessary stress caused by fluctuating power levels.

Additionally, consider the modularity of the power supply. A fully modular PSU allows you to connect only the cables you need, reducing clutter and improving airflow within your case. This attention to cable management not only enhances aesthetics but can also aid in cooling, which is crucial for maintaining performance during extended gaming sessions.

In summary, investing in a quality power supply is non-negotiable in your quest to build a high-end gaming PC under $2000. By ensuring stability and efficiency through careful selection, you set a solid foundation for your gaming rig, enabling you to unleash its full potential without the worry of power-related issues.

10. Cooling Systems: Keeping Your PC Running Smoothly

When it comes to building a high-end gaming PC, one of the most critical components that often gets overlooked is the cooling system. A powerful gaming rig can generate significant heat, especially during intense gaming sessions or demanding tasks like video editing and 3D rendering. Therefore, investing in an efficient cooling system is essential to keep your components running smoothly and to prolong their lifespan.

First, you have two primary options: air cooling and liquid cooling. Air coolers are generally easier to install, more affordable, and require less maintenance. High-quality air coolers, like those from Noctua or be quiet!, can effectively dissipate heat while operating quietly. They often come with multiple heat pipes and larger heatsinks that maximize airflow and enhance cooling performance.

On the other hand, liquid cooling systems provide superior thermal management, especially for overclocked components. A good AIO (All-in-One) liquid cooler can efficiently transfer heat away from crucial parts like the CPU and GPU, ensuring they remain at optimal temperatures. Look for models with larger radiators and multiple fans to enhance cooling performance, but be mindful of the space constraints in your case.

Regardless of the cooling method you choose, make sure to consider case airflow as well. A well-ventilated case with strategically placed fans can significantly impact overall system temperatures. Aim for a balance of intake and exhaust fans to promote a steady flow of cool air into the case while pushing hot air out.

Finally, don’t forget about monitoring your temperatures! Utilizing software like MSI Afterburner or HWMonitor can help you keep an eye on your system’s thermal performance. If you notice your temperatures creeping up, it may be time to reevaluate your cooling setup.

In summary, a robust cooling system is not just an accessory but a necessity for your high-end gaming PC. By carefully choosing between air and liquid cooling, optimizing case airflow, and keeping a close watch on temperatures, you can ensure that your gaming experience remains smooth and uninterrupted. Your components will thank you for it!

11. Choosing a Case: Style and Functionality

When it comes to building your high-end gaming PC, choosing a case is not just about aesthetics—it’s a critical decision that balances style with functionality. The case is the first thing people will notice, and a well-chosen enclosure can elevate the overall look of your setup while providing essential features for optimal performance.

Start by considering the size of your components. Ensure that your case is compatible with your motherboard form factor (ATX, Micro-ATX, or Mini-ITX) and has ample space for your GPU, which can be quite lengthy in high-end builds. A good case will also offer sufficient airflow to keep your components cool under heavy gaming loads. Look for models with mesh panels and multiple fan mounts; these features facilitate better air circulation and can help prevent overheating during extended gaming sessions.

Beyond functionality, think about the design. A sleek, modern case can enhance your gaming environment, especially if you plan to showcase it in a prominent location. Many gamers opt for cases with tempered glass panels that allow them to display their carefully curated setups. RGB lighting can also add a personal touch, transforming your PC into a glowing centerpiece that reflects your style.

Consider cable management as well—well-organized cables not only improve airflow but also contribute to a cleaner, more professional appearance. Cases with built-in cable routing options and ample space behind the motherboard tray can make a significant difference in achieving that tidy look.

Ultimately, the right case should harmonize functionality and aesthetics, creating a gaming rig that not only performs exceptionally but also stands out in any room. Take your time to research and select a case that aligns with your vision, as it will be the backbone of your high-end gaming experience.

12. Peripheral Considerations: Monitors, Keyboards, and Mice

When it comes to building a high-end gaming PC, the importance of peripherals can often be overlooked in the excitement of selecting the components that live within your case. However, the right monitors, keyboards, and mice can significantly enhance your gaming experience, making them essential considerations in your overall setup.

**Monitors:** The display is your window into the game world, and investing in a high-quality monitor can make all the difference. Aim for a monitor with a high refresh rate (144Hz or higher) and low response time, which will provide smooth visuals and reduce motion blur during fast-paced action. A 1440p or 4K resolution is ideal for stunning graphics, but make sure your graphics card can handle it. Consider going for an ultrawide monitor for an immersive feel, or a dual-monitor setup if multitasking is your style. The right monitor not only enhances your gameplay but also reduces eye strain during those long gaming sessions.

**Keyboards:** The keyboard is not just about typing; it’s your primary input device when gaming. Mechanical keyboards are highly recommended for their tactile feedback and durability. Look for features like customizable RGB lighting, programmable keys, and anti-ghosting capabilities, which can give you that competitive edge. Whether you prefer a tenkeyless design or a full-sized keyboard with a number pad, choose one that feels comfortable for marathon gameplay sessions.

**Mice:** A good gaming mouse is crucial for precision and speed. Opt for a mouse with adjustable DPI settings, allowing you to switch sensitivities on the fly, which is particularly useful in different gaming scenarios. Ergonomics should also be a priority; a mouse that fits comfortably in your hand can prevent fatigue during extended play. Look for models with customizable buttons that let you execute complex commands with ease, further enhancing your gameplay.

In summary, while your gaming PC’s internal components are vital for performance, the right peripherals can elevate your gaming experience to new heights. Investing wisely in high-quality monitors, keyboards, and mice will not only complement your setup but also ensure that you enjoy every moment of your gaming adventures to the fullest. Don’t skimp on these important elements; they are the finishing touches that complete your high-end gaming rig.

13. Assembly Tips: How to Build Your Gaming PC Step-by-Step

Assembling your high-end gaming PC can be an exhilarating experience, especially when you see all your carefully chosen components come together to form a powerful machine. Here’s a step-by-step guide to help you navigate through the assembly process, ensuring you build a reliable and efficient gaming rig without any hitches.

**1. Gather Your Tools and Components:**
Before diving into the assembly, make sure you have all your components ready: the CPU, motherboard, RAM, GPU, storage drives, power supply, and cooling system, along with tools like a screwdriver, anti-static wrist strap, and cable ties for neat cable management. A clean workspace will also help prevent any accidental damage to your parts.

**2. Prepare the Case:**
Start by removing the side panels of your case. This will give you easy access to the interior. Check for any pre-installed standoffs and ensure they align with the holes on your motherboard, as these will support it once it’s in place.

**3. Install the Power Supply:**
Next, mount the power supply unit (PSU) into the designated area of the case. Ensure the fan is positioned correctly for optimal airflow. Secure it with screws and route the necessary cables towards the motherboard area, but don’t plug them in just yet.

**4. Place the CPU:**
Now it’s time to install the CPU. Carefully lift the lever on the CPU socket, align the notches on the CPU with the socket, and gently place it in. Lower the lever back down to secure it. This part is critical, so handle the CPU with care to avoid bending any pins.

**5. Add the CPU Cooler:**
Whether you’re using an air cooler or liquid cooling, follow the manufacturer’s instructions to install it properly. Make sure to apply thermal paste if it’s not pre-applied, as this ensures efficient heat transfer from the CPU to the cooler.

**6. Insert RAM Modules:**
Locate the RAM slots on your motherboard and insert the RAM sticks. Ensure they click into place and are seated correctly. It’s often recommended to populate the slots in a specific order, so consult your motherboard’s manual for the best configuration.

**7. Install the Motherboard:**
Carefully lift the motherboard and align it with the standoffs in your case. Once it’s positioned correctly, secure it with screws. Make sure the I/O shield is properly in place and that all port openings align with the motherboard.

**8. Attach Storage Drives:**
Install your SSDs and HDDs into their designated bays. If you’re using an M.2 SSD, consult the motherboard manual for the correct slot. Make sure to secure them properly with screws or clips as needed.

**9. Install the GPU:**
Now it’s time for the graphics card, the star of your gaming PC. Find the PCIe slot on your motherboard, remove the necessary backplates from the case, and carefully slide the GPU into place. Secure it with screws to ensure it doesn’t move around.

**10. Connect Cables:**
With everything in place, it’s time to connect power and data cables. Use the cables from your PSU to connect the motherboard, GPU, and drives. Make sure to tidy up the cables using cable ties to maintain airflow and aesthetics.

**11. Perform a Final Check:**
Before closing up the case, double-check all connections and make sure everything is secure. Ensure that there are no stray cables blocking fans and that the

14. Post-Build Setup: Installing Software and Drivers

After the exhilarating experience of assembling your high-end gaming PC, the next crucial step is the post-build setup, where you’ll install the necessary software and drivers to ensure your machine runs smoothly and efficiently. This phase is vital in bringing your gaming rig to life and optimizing it for peak performance.

Start by booting up your new creation. If all goes well, you should see your BIOS screen. From here, you’ll want to install your chosen operating system—most gamers opt for Windows due to its compatibility with a vast array of games and applications. Insert your installation media, whether it’s a USB drive or a DVD, and follow the prompts to get Windows installed.

Once Windows is up and running, it’s time to dive into the driver installation. Drivers are essential as they allow your hardware components to communicate effectively with the operating system. Begin with your motherboard drivers, which typically include chipset, audio, and network drivers. These can usually be downloaded from the manufacturer’s website; just make sure to choose the correct model.

Next, focus on your graphics card. Whether you’ve opted for NVIDIA or AMD, downloading the latest drivers directly from their respective websites ensures that your GPU operates at its best, providing the optimal experience in games. Both companies offer utilities that can help keep your drivers updated automatically, a handy feature that saves time in the long run.

Don’t forget about other peripherals like printers, scanners, or gaming accessories; they may require additional drivers. After all hardware drivers are installed, it’s wise to check for Windows updates, as these can enhance system stability and security.

With your drivers in place, you can now install the essential gaming software. Start with your digital distribution platforms—Steam, Epic Games Store, or Origin—so you can access your game library. Additionally, consider installing performance monitoring tools such as MSI Afterburner or HWMonitor. These applications allow you to keep an eye on your system’s temperatures and performance metrics while gaming, ensuring that everything runs smoothly.

Lastly, before diving into your gaming session, take a moment to customize your settings. Adjust your graphics settings in games for the best balance between performance and visuals, and consider setting up software for voice communication if you game with friends, like Discord or TeamSpeak.

With your software and drivers successfully installed, you’re ready to embark on your gaming adventures. Sit back, relax, and prepare to enjoy the incredible gaming experience that your newly built powerhouse has to offer!

15. Conclusion: Enjoying Your High-End Gaming Experience!

As we wrap up this ultimate guide to building a high-end gaming PC for under $2000, it’s clear that the journey to crafting your dream rig is as exhilarating as the gaming experiences that await you. With the right components carefully selected and seamlessly assembled, you’re not just investing in hardware; you’re unlocking a portal to immersive worlds, breathtaking graphics, and smooth gameplay that brings your favorite titles to life like never before.

Imagine firing up your PC for the first time, the RGB lighting illuminating your space, as you dive into stunning landscapes and intense multiplayer battles. Each frame rendered with precision, every click of the mouse echoing your strategic prowess, and the thrill of victory echoing in the background—it’s all within your reach. Whether you’re exploring vast open worlds, engaging in competitive esports, or enjoying the latest AAA titles, your new gaming setup will elevate your experience to new heights.

But remember, the journey doesn’t end with the initial build. Keeping your system updated with the latest drivers, optimizing settings for each game, and exploring new expansions will ensure that your gaming experience remains fresh and exciting. Don’t hesitate to tweak and upgrade your components over time; technology evolves rapidly, and there’s always something new to explore.

So, gather your friends for a gaming night, stream your epic adventures, or simply lose yourself in a captivating single-player campaign. With your high-end gaming PC, you’re fully equipped to enjoy countless hours of exhilarating gameplay. Here’s to the adventures ahead, the challenges to conquer, and the memories to create—happy gaming!

In conclusion, building a high-end gaming PC for under $2000 is not only achievable but can also be an incredibly rewarding experience that enhances your gaming prowess. By carefully selecting components, prioritizing performance, and considering future upgrades, you can create a powerhouse rig that meets your gaming needs without exceeding your budget. We hope this ultimate guide has equipped you with the knowledge and confidence to embark on your PC-building journey. Remember, the world of gaming is limitless, and with your new setup, you’ll be ready to dive into immersive experiences and tackle any challenge that comes your way. Happy building, and may your gaming adventures be epic!

pc gaming – How to create a custom gaming PC build?

In the ever-evolving realm of gaming, nothing quite compares to the thrill of assembling your very own custom PC—a dream machine tailored to your unique gaming preferences and performance needs.

whether you’re a casual gamer looking to dip your toes into the world of PC gaming or a seasoned enthusiast aiming for the ultimate powerhouse, building your own rig is a rewarding journey that combines creativity, technical skill, and personalized design. This comprehensive guide will walk you through each step of the process, from selecting the perfect components that suit your budget and performance goals to piecing them together in a way that maximizes efficiency and style. With expert tips and insider tricks, we’ll ensure that your custom gaming build not only meets your expectations but also elevates your gaming experience to new heights. Get ready to unleash your inner techie and embark on the exciting adventure of crafting a machine that’s truly your own!

1. Introduction to Custom PC Gaming Builds

pc gaming -  How to create a custom gaming PC build?
Credit : whatcanu.com

In the ever-evolving world of gaming, there’s something undeniably exhilarating about the prospect of building your own custom PC. Unlike purchasing a pre-built machine, a custom gaming rig allows you to tailor every component to your specific needs and preferences, resulting in a setup that perfectly aligns with your gaming style and visual expectations. Whether you’re a casual gamer, a competitive player, or simply someone who enjoys the artistry of PC hardware, embarking on this journey opens up a realm of possibilities.

A custom PC gaming build is not just about performance; it’s about crafting a unique experience. With the right knowledge and a dash of creativity, you can select components that not only deliver exceptional speed and graphics but also reflect your personal aesthetic. From choosing the perfect graphics card that can handle the latest AAA games at max settings to selecting a motherboard that provides the best features and expandability, each decision is an opportunity to create a machine that’s truly yours.

In this step-by-step guide, we’ll explore everything you need to know, from understanding the essential components and their functions to assembling your system with care. We’ll help demystify the process, ensuring you feel confident and excited as you dive into the world of custom builds. Whether you’re piecing together a powerhouse to experience the latest virtual reality landscapes or a sleek system for streaming, this guide will equip you with the information you need to bring your dream machine to life. Get ready to unleash your inner builder and elevate your gaming experience like never before!

2. Defining Your Gaming Needs and Budget

Before diving into the exhilarating world of custom PC gaming builds, it’s crucial to take a moment to define your gaming needs and set a realistic budget. This foundational step not only shapes the direction of your build but also ensures that you invest wisely in components that cater specifically to your gaming preferences.

Start by assessing the types of games you play or aspire to play. Are you a casual gamer who enjoys indie titles and classic RPGs, or are you a competitive player immersed in fast-paced shooters and graphically demanding open-world adventures? Understanding your gaming style will help you prioritize which components deserve more of your budget. For instance, a high-performance graphics card might be essential for those seeking stunning visuals and smooth frame rates in the latest AAA titles, while a solid processor may take precedence for gamers who rely on complex simulations or multitasking.

Next, consider how much you’re willing to spend to bring your dream machine to life. Custom PC builds can vary widely in price, from budget-friendly setups under $800 to extravagant systems that exceed several thousand dollars. Establishing a clear budget will help you make informed decisions and avoid the temptation of overspending on flashy components that may not significantly enhance your gaming experience.

As you outline your budget, remember to account for additional costs beyond just the core components. Don’t overlook the importance of peripherals—like a quality monitor, keyboard, and mouse—as well as software, such as gaming subscriptions and performance optimization tools.

By defining your gaming needs and budget upfront, you’ll create a roadmap for your custom PC build, ensuring that every dollar is spent wisely toward achieving the gaming experience you desire. This strategic approach not only maximizes the overall performance of your machine but also enhances your long-term satisfaction with your investment.

3. Understanding PC Components: A Quick Overview

pc gaming -  How to create a custom gaming PC build?
Credit : whatcanu.com

Building your dream gaming rig is an exciting venture, and understanding the core components that will make up your custom PC is crucial to creating a machine that meets your gaming needs. Here’s a quick overview of the essential parts that you’ll need to consider:

**1. Central Processing Unit (CPU):** Often referred to as the brain of your computer, the CPU processes all the instructions from your applications and games. When selecting a CPU, consider the number of cores and threads it has, as well as its clock speed. Popular brands like Intel and AMD offer a range of options, from budget-friendly to high-end models that can handle intense gaming sessions.

**2. Graphics Processing Unit (GPU):** The GPU is a critical component for gamers, as it handles all the rendering of graphics. A powerful GPU allows for high frame rates and stunning visual fidelity. Depending on your gaming preferences, you might opt for a mid-range card for casual gaming or a top-tier model for immersive experiences in the latest AAA titles.

**3. Motherboard:** The motherboard is the backbone of your PC, connecting all components and allowing them to communicate. When choosing a motherboard, ensure it is compatible with your CPU and supports the features you need, such as Wi-Fi capabilities or multiple GPU setups. Look for options with ample USB ports and expansion slots to future-proof your build.

**4. Memory (RAM):** RAM is essential for multitasking and smooth gameplay. For gaming, 16GB is typically the sweet spot, but if you plan on streaming or running demanding applications simultaneously, you might consider 32GB. The speed of the RAM, measured in MHz, can also impact performance, so be sure to choose RAM that complements your CPU and motherboard.

**5. Storage:** Fast storage drives significantly reduce load times and improve overall system responsiveness. Solid State Drives (SSDs) are preferred for their speed, while Hard Disk Drives (HDDs) offer larger storage capacities at a lower cost. A combination of both—a smaller SSD for your operating system and most-played games, paired with a larger HDD for additional storage—can be an ideal setup.

**6. power Supply Unit (PSU):** The PSU provides power to all your components, so it’s crucial to choose one that offers enough wattage and reliability. Look for units with an 80 Plus certification, which indicates energy efficiency and stability. Always err on the side of caution by selecting a PSU with a bit more wattage than you think you’ll need, especially if you plan on upgrading in the future.

**7. Case:** Your case not only houses all these components but also affects airflow and cooling. Choose a case that fits your motherboard size (ATX, Micro-ATX, etc.) and has enough space for your GPU and cooling solutions. Pay attention to cable management features and aesthetics if you want your build to look as great as it performs.

**8. Cooling Solutions:** Keeping your components cool is vital for performance and longevity. Depending on your CPU and GPU, you can opt for air or liquid cooling solutions. Good airflow in your case, complemented by quality fans, can make a significant difference in keeping temperatures in check during long gaming sessions.

By understanding these key components, you’ll be better equipped to make informed decisions as you embark on your custom PC gaming build journey. Each element plays a vital role in ensuring that your dream machine not only meets your gaming expectations but also stands the test of time.

4. Choosing the Right CPU: Processing Power Explained

When it comes to building your dream gaming PC, the central processing unit (CPU) is the heart of your machine, responsible for executing commands and processing data. Choosing the right CPU is crucial, as it will determine not only the performance of your gaming experience but also how well your system can handle multitasking, streaming, and future software demands.

First, familiarize yourself with the two major players in the CPU market: Intel and AMD. Each brand offers a range of processors that cater to different needs and budgets. Intel’s Core series, particularly the i5 and i7 models, are known for their strong single-thread performance, making them excellent choices for gaming. On the other hand, AMD’s Ryzen processors have gained popularity for their competitive multi-threading capabilities and value for money, especially in the Ryzen 5 and Ryzen 7 lines.

When selecting a CPU, consider the number of cores and threads. Modern games are increasingly optimized to use multiple cores, so a processor with at least four cores is recommended for a smooth experience. However, opting for six or eight cores will future-proof your build, enabling it to handle more demanding titles as they are released.

Another essential factor is clock speed, measured in gigahertz (GHz). A higher clock speed usually translates to better performance, but it’s important to balance this with core count and the specific games you play. Keep an eye on benchmarks and reviews, as they provide real-world performance comparisons that can help you make an informed decision.

Finally, consider compatibility with your motherboard and cooling system. Ensure that your chosen CPU fits your motherboard’s socket type and keep in mind the thermal design power (TDP) rating. A CPU with a higher TDP may require superior cooling solutions to maintain optimal performance during intense gaming sessions.

In conclusion, selecting the right CPU is a foundational step in building your custom gaming PC. By understanding the nuances of processing power, you’ll set the stage for an exhilarating gaming experience that meets your expectations and evolves with your gaming needs.

5. Selecting the Perfect GPU for Your Gaming Experience

pc gaming -  How to create a custom gaming PC build?
Credit : whatcanu.com

When it comes to building your dream gaming machine, selecting the perfect Graphics Processing Unit (GPU) is one of the most crucial steps in ensuring an exhilarating gaming experience. The GPU is often considered the heart of a gaming rig, responsible for rendering images, animations, and video in real time. Choosing the right GPU can mean the difference between smooth, high-frame-rate gameplay and frustrating lag.

Start by assessing your gaming needs and preferences. Are you an avid gamer seeking the latest AAA titles with stunning graphics, or do you enjoy indie games that demand less power? Your answer will guide you toward the appropriate GPU. Modern games often come with heavy visual demands, so a robust GPU will ensure you can play at higher resolutions and settings, providing an immersive experience.

Next, consider the specifications that matter most. Look for a GPU with a good balance of core clock speed, memory bandwidth, and VRAM. For instance, if you’re gaming at 1080p, a card with 4GB to 6GB of VRAM may suffice; however, for 4K gaming or VR experiences, aim for 8GB or more. Popular choices from manufacturers like NVIDIA and AMD offer various models, so be sure to compare benchmarks and reviews to find a card that fits your performance expectations and budget.

It’s crucial to ensure compatibility with your motherboard and power supply. Check the PCIe slots and the wattage requirements of your GPU to avoid any surprises during installation. Additionally, consider the physical size of the GPU. Some high-end models can be quite large, so measure your case to ensure a proper fit.

Finally, don’t overlook the importance of cooling solutions. A powerful GPU can generate a significant amount of heat, so look for models with efficient cooling systems or consider investing in aftermarket cooling options. By carefully selecting a GPU that aligns with your gaming style, budget, and system compatibility, you’ll be well on your way to unlocking a thrilling gaming experience in your custom-built PC.

6. Motherboards: What You Need to Know

When it comes to building your dream gaming PC, the motherboard is the backbone of your setup. It serves as the central hub that connects all the components, from the CPU and RAM to storage devices and graphics cards. Choosing the right motherboard can significantly impact your system’s performance, expandability, and future upgrade options. Here are the key factors to consider when selecting a motherboard for your custom gaming rig.

**Form Factor:** Motherboards come in various sizes, including ATX, Micro-ATX, and Mini-ITX. The form factor determines the layout, the number of expansion slots, and how many peripheral devices you can connect. If you plan to build a compact setup, a Mini-ITX motherboard might be suitable. However, for larger builds with multiple graphics cards or extensive cooling systems, an ATX motherboard is the way to go.

**Socket Type:** The CPU socket type is crucial as it must match the processor you intend to use. Common socket types include Intel’s LGA 1200 and AMD’s AM4. Before purchasing your motherboard, ensure it supports the specific CPU model you wish to install, as this compatibility is essential for optimal performance.

**Chipset Features:** The chipset governs the motherboard’s capabilities and features. Higher-end chipsets often come with advanced overclocking support, more USB ports, and better networking options. Research the various chipsets available for your chosen CPU to find one that aligns with your gaming needs and performance aspirations.

**RAM Compatibility:** Look for a motherboard that supports the amount and type of RAM you want to use. Most modern motherboards support DDR4 memory, with options for speeds often exceeding 3000 MHz. Consider the number of RAM slots available, as this will determine how much memory you can install now and in the future.

**Expansion Slots:** If you plan to add additional components, such as extra GPUs or sound cards, check the number and type of expansion slots on the motherboard. PCIe slots come in various versions, with PCIe 4.0 providing faster data transfer speeds compared to older versions. Ensure that your motherboard has enough slots to accommodate your current and future upgrades.

**Connectivity Options:** The last thing you want is a lack of connectivity options. Look for motherboards with a variety of ports, including USB 3.0, USB-C, and HDMI. Additionally, consider built-in Wi-Fi and Bluetooth capabilities for added convenience, especially if you prefer a wireless setup.

In summary, selecting the right motherboard is a critical step in your custom gaming build. Take the time to research and compare different models, ensuring they align with your gaming goals and setup requirements. With the right motherboard, you’ll be one step closer to creating a powerful machine that delivers the performance you desire in your gaming adventures.

7. RAM: How Much Do You Really Need?

pc gaming -  How to create a custom gaming PC build?
Credit : whatcanu.com

When it comes to building your dream gaming machine, one of the most crucial components to consider is RAM (Random Access Memory). But how much do you really need? The answer depends on your gaming habits, the types of games you play, and how you intend to use your PC beyond gaming.

For most gamers, 16GB of RAM is the sweet spot. This amount provides plenty of headroom for modern games, allowing for smooth multitasking and eliminating the dreaded stuttering that can occur when your system runs out of memory. Whether you’re delving into expansive open-world adventures or engaging in fast-paced online battles, 16GB will keep your system running fluidly.

However, if you’re a power user who enjoys playing demanding titles, editing videos, or running multiple applications simultaneously, you might want to consider upgrading to 32GB. This gives you the flexibility to handle more intensive workloads and future-proofs your system for upcoming games that may require more resources.

It’s also worth noting that the speed of your RAM can impact performance. Look for RAM with a higher MHz rating to enhance your gaming experience further, as faster RAM can improve load times and overall responsiveness. Opting for dual-channel configurations can also help maximize your memory’s efficiency, ensuring that your system works harmoniously.

In summary, while 16GB is generally sufficient for most gamers, evaluating your specific needs and considering future-proofing options will guide you to the right amount of RAM for your custom build. Remember, a well-balanced system is key to achieving that seamless gaming experience you’ve always dreamed of.

8. Storage Solutions: SSD vs. HDD

When it comes to choosing the right storage solution for your custom gaming PC, understanding the differences between SSDs (Solid State Drives) and HDDs (Hard Disk Drives) is crucial. Each option has its own set of advantages and drawbacks that can significantly impact your gaming experience and overall system performance.

**SSDs: Speed and Performance**

SSDs are the go-to choice for gamers looking for speed and efficiency. Unlike traditional HDDs, which rely on spinning disks to read and write data, SSDs use flash memory to store information. This fundamental difference allows SSDs to deliver lightning-fast load times, dramatically reducing the time it takes to boot up your operating system, launch games, and access files. Imagine diving into your favorite game in seconds rather than minutes—this speed can be a game-changer in competitive environments where every second counts.

Another benefit of SSDs is their durability. With no moving parts, they are less susceptible to physical damage, making them an ideal choice for gamers who transport their machines frequently. Additionally, the compact form factor of SSDs allows for more flexible build designs, freeing up space for other components.

**HDDs: Capacity and Cost-Effectiveness**

On the other hand, HDDs offer a different set of benefits, primarily in terms of storage capacity and cost. If you’re a gamer with a vast library of titles, including large AAA games, an HDD can provide the massive storage space needed without breaking the bank. With capacities often reaching several terabytes at a fraction of the cost of SSDs, HDDs are a practical solution for storing your entire game collection, media files, and more.

However, it’s essential to consider the trade-offs. While HDDs are generally slower than SSDs, they can still serve well as secondary storage for files that don’t require rapid access, such as videos, music, and older games you don’t play as often.

**The Best of Both Worlds**

Ultimately, the best storage solution for your gaming PC may involve a combination of both SSD and HDD. Utilizing an SSD as your primary drive for your operating system and frequently played games will ensure optimal performance, while an HDD can serve as a secondary drive for less frequently accessed files and games. This hybrid approach allows you to harness the speed of SSDs without sacrificing the large storage capacity that HDDs offer, striking the perfect balance for any gaming enthusiast.

As you build your dream machine, weigh your options carefully to create a storage setup that meets your gaming needs and enhances your overall experience.

9. Power Supply Units (PSUs): Ensuring Reliability

When it comes to building your dream gaming PC, the importance of a reliable Power Supply Unit (PSU) cannot be overstated. Often overlooked in the excitement of selecting flashy graphics cards and cutting-edge CPUs, the PSU is the unsung hero of your build. It’s the component that ensures your entire setup runs smoothly, providing the necessary power to each part of your machine without interruption.

To start, it’s crucial to choose a PSU that offers both sufficient wattage and efficiency. Start by calculating the total power requirements of your components—this includes the CPU, GPU, motherboard, RAM, storage drives, and any additional peripherals. A PSU that delivers at least 20% more power than your maximum needs is a safe bet, as it allows for potential upgrades and prevents overloading the unit.

Efficiency ratings, indicated by the 80 PLUS certification, should also guide your choice. A PSU with a higher efficiency rating (such as 80 PLUS Gold or Platinum) will waste less energy as heat, translating to lower electricity bills and a cooler-running system. This is particularly important during those marathon gaming sessions where performance and stability are paramount.

Moreover, take note of the PSU’s build quality and features. Look for units with high-quality capacitors and sturdy cables that can withstand the rigors of daily usage. Modularity is another aspect to consider; a fully modular PSU allows you to connect only the cables you need, reducing clutter inside your case and improving airflow.

In summary, investing in a reliable PSU is not just about powering your gaming rig; it’s about ensuring longevity and maximized performance for your entire setup. A well-chosen PSU will keep your system stable, protect your components from power fluctuations, and ultimately provide peace of mind as you delve into the immersive worlds of your favorite games.

10. Cases and Cooling: Keeping Your Build Stylish and Efficient

When it comes to assembling your dream gaming rig, the case and cooling system play pivotal roles not just in functionality, but also in aesthetics. Choosing the right case is the first step to creating a visually stunning and efficient build. Look for a chassis that not only fits your components snugly but also complements your personal style. Whether you prefer a sleek minimalist design, a vibrant RGB-lit powerhouse, or a classic tower with elegant curves, your case serves as the canvas for your masterpiece.

Consider factors such as airflow, materials, and cable management when selecting your case. Good airflow is crucial for maintaining optimal temperatures, especially during long gaming sessions. Look for cases with ample ventilation, mesh panels, or pre-installed fans to ensure that your components remain cool and perform at their best. Additionally, a case with built-in cable management features will help keep your interior tidy, allowing for better airflow and easier upgrades in the future.

Cooling systems are equally important, as they directly impact performance and longevity. While many gamers opt for traditional air cooling solutions, liquid cooling has gained popularity for its efficiency and aesthetics. Custom liquid cooling loops can give your build a unique flair while keeping your CPU and GPU temperatures low. However, they require careful planning and maintenance, so weigh your options based on your comfort level and technical expertise.

Don’t forget about the importance of RGB lighting, which can breathe life into your build and create an immersive atmosphere. Synchronizing your lighting effects across your components can turn your gaming setup into a dazzling spectacle that reflects your personality.

In summary, the right case and cooling solution can transform your gaming PC from a mere collection of components into a stunning work of art, all while ensuring that everything runs smoothly and efficiently. So take your time, explore your options, and let your creativity shine as you equip your dream machine with style and functionality.

11. Assembling Your Custom PC: A Step-by-Step Guide

Assembling your custom PC is the moment you’ve been eagerly anticipating—the culmination of careful planning, selection, and investment in your dream gaming machine. With parts laid out before you, it’s time to dive into the hands-on part of the process. Here’s a step-by-step guide to help you navigate this exciting journey.

### Step 1: Prepare Your Workspace
Before you begin, ensure your workspace is clean and organized. A large, flat surface is ideal, as it provides ample room to maneuver. Consider using an anti-static mat to prevent any damage to sensitive components during assembly. Gather your tools—typically, all you’ll need is a Phillips screwdriver and perhaps a pair of tweezers for those tiny screws.

### Step 2: Install the CPU
Start with the heart of your machine: the CPU. Gently lift the lever on the CPU socket of your motherboard, align the CPU with the socket (noting the small triangle marking for proper orientation), and lower it into place. Secure the lever back down to lock it in. If you’re using an aftermarket cooler, now’s the time to apply thermal paste before installing the cooler.

### Step 3: Secure the RAM
Next, insert your RAM sticks. Open the clips on the RAM slots, align the notch on the RAM stick with the slot, and firmly press down until the clips click back into place. If you have multiple sticks, consult your motherboard manual for the optimal configuration, often utilizing alternating slots for dual-channel performance.

### Step 4: Mount the Motherboard
Now, it’s time to install the motherboard into the case. Carefully position the motherboard over the standoffs within the case, ensuring that the I/O shield aligns correctly with the ports. Secure the motherboard using the screws provided, taking care not to overtighten.

### Step 5: Install the Power Supply
Next, install the power supply unit (PSU) at the designated area within your case. Secure it with screws and manage the cables to ensure they won’t obstruct airflow. Connect the main power cable from the PSU to the motherboard, along with any additional cables needed for the CPU and components.

### Step 6: Add Storage Drives
Install your SSDs or HDDs next. If you’re using a 2.5-inch SSD, slide it into the designated bay or mount it on the motherboard using M.2 slots. For traditional HDDs, slide them into the drive bays and secure them with screws. Don’t forget to connect the SATA cables from the drives to the motherboard and the power cables from the PSU.

### Step 7: Install the Graphics Card
The graphics card is often the centerpiece of a gaming PC. Carefully remove the PCIe slot covers from your case, align the graphics card with the appropriate slot on the motherboard, and press down firmly until it clicks into place. Secure it with screws and connect any necessary power cables from the PSU.

### Step 8: Connect All Cables
Now, it’s time to connect all remaining cables. Manage your cable routing to keep the interior tidy and ensure optimal airflow. Connect case fans, RGB lighting, and any additional peripherals. Double-check that all connections are secure and that there are no loose cables that could obstruct airflow or damage components.

### Step 9: Power On and Test
With everything assembled, it’s time for the moment of truth. Connect your monitor, keyboard, and mouse, then power on the system. If all goes well,

12. Installing the Operating System and Drivers

Once your custom PC is fully assembled and all the cables neatly tucked away, it’s time to breathe life into your machine by installing the operating system (OS) and drivers. This step is crucial, as it transforms your hardware into a fully functional gaming powerhouse.

Begin by preparing a bootable USB drive with your chosen operating system. Whether you opt for Windows, Linux, or another OS, download the installation files from the official website and use tools like Rufus or the Windows Media Creation Tool to create your bootable drive. Make sure to check the system requirements for your OS to ensure compatibility with your new hardware.

Next, insert the USB drive into your custom PC and power it on. You’ll need to access the BIOS or UEFI settings by pressing a designated key (usually F2, Delete, or Esc) during startup. Once in the BIOS, navigate to the boot menu and set the USB drive as the primary boot device. Save your settings and restart the machine.

As the system boots from the USB, you’ll be greeted by the installation wizard. Follow the on-screen prompts to select your language, choose the installation type, and specify the drive where the OS will be installed. If you’ve built your PC with multiple drives, it’s essential to pick the correct one—typically, this is your primary SSD or HDD for optimal performance.

After the OS has been installed, it’s time to focus on the drivers. Drivers are crucial as they allow your operating system to communicate effectively with your hardware, ensuring optimal performance and functionality. Start by visiting the manufacturer’s website for each component, such as your graphics card, motherboard, and peripherals, to download the latest drivers. Some systems may also require chipset drivers to ensure smooth operation.

Install the drivers one by one, rebooting as necessary. This process will ensure that your graphics card can utilize its full capabilities, your motherboard can communicate with your CPU and RAM efficiently, and your peripherals perform as intended.

Once you’ve completed these installations, take a moment to check for any operating system updates. Keeping your OS updated will not only enhance performance but also provide important security patches.

With the operating system and drivers in place, your custom PC is now ready for the next exciting step—installing your favorite games and software. Take a moment to admire your handiwork; you’ve successfully built and powered on your dream machine, paving the way for countless gaming adventures ahead!

13. Optimizing Your PC for Gaming Performance

Once you’ve meticulously assembled your dream gaming machine and felt the thrill of powering it on for the first time, the next step is to ensure it operates at peak performance. Optimizing your PC for gaming isn’t just about having powerful components; it’s about tweaking settings and configurations to extract every ounce of performance from your system.

Begin with your graphics settings. Most modern games come equipped with a plethora of graphics options, ranging from texture quality to shadow effects. While it might be tempting to max out every setting, take the time to find a balance that enhances visual fidelity without sacrificing frame rates. Utilizing tools like NVIDIA GeForce Experience or AMD’s Radeon Software can help automate this process, optimizing settings based on your specific hardware.

Next, ensure your drivers are up to date. Graphics card manufacturers frequently release driver updates that enhance performance and fix bugs, so keeping these updated can lead to significant gains in gaming performance. Additionally, consider overclocking your GPU and CPU. While this requires some technical know-how and carries risks, when done correctly, it can provide a noticeable boost in performance. Just be sure to monitor temperatures closely to avoid overheating.

Another critical aspect of optimization is managing background processes. Before you dive into a gaming session, close unnecessary applications that could drain your system’s resources. Tools like Task Manager can help identify resource-heavy applications that may be running in the background.

Lastly, don’t overlook the importance of regular maintenance. dust accumulation can lead to overheating, which can throttle your performance. Make it a routine to clean out your PC’s internals, ensuring optimal airflow and cooling.

By taking these steps to optimize your PC for gaming performance, you can transform your already impressive rig into a powerhouse that delivers the immersive experiences you crave. Whether you’re exploring vast open worlds or battling it out in fast-paced shooters, the right optimizations will ensure your custom-built machine runs smoothly and efficiently, providing you with the ultimate gaming experience.

14. Troubleshooting Common Build Issues

Building your dream gaming PC can be an exhilarating experience, but it’s not uncommon to encounter a few bumps along the way. Troubleshooting common build issues is an essential skill that can save you time, money, and a lot of headaches. Here are some typical problems you might face and how to address them.

**1. No Power or Boot Issues:** If your PC doesn’t power on at all, start by checking the basics. Ensure that all power cables are securely connected to the motherboard and components. Verify that your power supply unit (PSU) is functioning. A simple way to test this is to use a PSU tester or try booting with a different PSU if available. Additionally, ensure that the power switch on the back of the PSU is turned on and that the wall outlet is working.

**2. Beeping Sounds:** If your PC emits a series of beeps when trying to boot, this is often an indicator of hardware failure. The pattern of beeping can help identify the issue, so refer to your motherboard’s manual for beep codes. Common culprits include improperly seated RAM or GPU. Reseat these components and try booting again.

**3. Display Issues:** A blank screen can be frustrating, especially after all your hard work. First, check that your monitor is powered on and connected properly. Ensure that the correct input source is selected on your monitor. If everything seems in order, reseat your GPU and check for any visible damage to the graphics card.

**4. Overheating:** If your system boots but crashes shortly after, overheating might be the culprit. Make sure your CPU cooler is correctly installed and that thermal paste is applied adequately. Check all fans to ensure they’re spinning and that your case has proper airflow. Cleaning dust from vents and ensuring cables are neatly managed can improve cooling efficiency.

**5. Software Conflicts:** Once your PC is up and running, software issues can arise. If you experience crashes or performance issues, consider updating your drivers, especially for the GPU. Sometimes, a clean installation of your operating system can resolve persistent problems caused by software conflicts or corrupted files.

Remember, patience is key when troubleshooting. It’s perfectly normal to face challenges during the building process, but with a methodical approach and a little bit of research, you’ll be well-equipped to overcome any obstacles and enjoy your gaming experience to the fullest!

15. Conclusion: Enjoying Your Dream Machine and Future Upgrades

As you power up your custom-built gaming rig for the first time, a wave of excitement washes over you. The culmination of your careful planning, research, and hands-on assembly transforms into an exhilarating reality. You’re not just a gamer now; you’re the proud owner of a machine tailored to your specific needs and preferences, perfectly suited to deliver breathtaking graphics and lightning-fast processing speeds. The satisfaction of seeing your dream machine come to life is unparalleled, and it’s a testament to the hard work and dedication you’ve invested in this project.

But the journey doesn’t end here. One of the most rewarding aspects of building your own PC is the ability to upgrade and expand it over time. Technology is ever-evolving, and staying ahead of the curve means embracing future improvements. Whether it’s upgrading your graphics card to experience the latest titles with stunning realism or adding more RAM to enhance performance during resource-heavy tasks, your custom build is a canvas for continuous enhancement.

Moreover, understanding your machine inside and out empowers you to make informed decisions regarding upgrades. You’ll know exactly what components can be swapped out and what new technologies can elevate your gaming experience. Keep an eye on emerging trends, read reviews, and stay connected with the vibrant gaming community; they are invaluable resources for inspiration and advice.

As you embark on this exciting journey with your dream machine, remember to take the time to enjoy the fruits of your labor. Dive into your favorite games, experiment with different settings, and share your experiences with fellow gamers. Your custom PC is not just a tool; it’s a gateway to unforgettable adventures and a vibrant community. The world of gaming is at your fingertips, and with your custom build, you’re ready to conquer new realms. Happy gaming, and may your dream machine serve you well for years to come!

As we wrap up our step-by-step guide to building your dream gaming machine, we hope you feel inspired and empowered to embark on this exciting journey. Crafting a custom PC not only allows you to tailor your setup to your unique gaming preferences but also gives you the satisfaction of creating something truly your own. From selecting the right components to assembling them with care, each step brings you closer to an immersive gaming experience that’s optimized for performance and style. Whether you’re a seasoned gamer or a newcomer ready to take the plunge, remember that patience and attention to detail will be your best allies. Happy building, and may your new rig bring you countless hours of thrilling adventures in the gaming world! Share your progress with us—we can’t wait to see the incredible machines you create!

pc gaming – What are the best PC cases for airflow?

When it comes to building the ultimate gaming rig, the choice of PC case plays a pivotal role in not just aesthetics, but also in performance and longevity.

A well-ventilated case can mean the difference between a smooth gaming experience and one overshadowed by overheating components and unwanted noise. As gaming technology continues to advance, ensuring that your setup remains cool and quiet is more important than ever. In this blog post, we will explore the top PC cases designed specifically for optimal airflow, highlighting features such as innovative fan placements, mesh panels, and liquid cooling compatibility. Whether you’re a seasoned gamer looking to upgrade your current setup or a newcomer eager to build your first rig, we’ve curated a list of cases that will help you maintain peak performance while keeping your environment serene. Get ready to discover the perfect enclosure that not only showcases your hardware but also ensures it stays cool under pressure!

1. Introduction: Importance of Airflow in PC Cases

pc gaming -  What are the best PC cases for airflow?
Credit : whatcanu.com

When it comes to building the ultimate gaming rig, enthusiasts often focus on high-performance hardware, cutting-edge graphics cards, and lightning-fast processors. However, one crucial aspect that can make or break your gaming experience is often overlooked: airflow. Efficient airflow in a PC case is paramount for maintaining optimal temperatures, enhancing performance, and prolonging the lifespan of your components.

A well-ventilated case allows cool air to flow in while expelling hot air generated by the CPU, GPU, and other components. Without proper airflow, temperatures can soar, leading to thermal throttling, where your hardware automatically reduces its performance to prevent damage. This means that even the most powerful components can underperform if they aren’t adequately cooled.

Moreover, good airflow isn’t just about temperature control; it also plays a vital role in reducing noise levels. Cases designed with airflow in mind often feature sound-dampening materials and strategic fan placements, minimizing the whirring and buzzing that can disrupt your gaming sessions or work-from-home productivity.

In this guide, we’ll explore the top PC cases that excel in airflow design, ensuring that your gaming rig remains not only cool but also impressively quiet. Whether you are a seasoned builder or a newcomer to the world of PC gaming, understanding the importance of airflow will empower you to make informed decisions for the best possible setup. Let’s dive into the world of airflow-optimized PC cases and discover the perfect fit for your high-performance needs!

2. Key Features to Look for in Airflow-Friendly Cases

When it comes to selecting the perfect PC case for optimal airflow, there are several key features to consider that can make a significant difference in both cooling performance and overall system longevity. An airflow-friendly case doesn’t just look good; it plays a crucial role in maintaining efficient thermal management under heavy loads. Here are the essential features to look for:

1. **Mesh Front Panels**: One of the most important aspects of airflow is the case’s front panel design. Mesh panels allow for a greater volume of air to flow in compared to solid panels, reducing heat buildup. Look for cases that feature a full or partially mesh front panel to maximize intake airflow.

2. **Fan Compatibility**: A good airflow case should have ample options for fan installation. Check for multiple fan mounting points, both at the front and top, as well as the rear. The ability to install larger fans or multiple fans enhances airflow significantly. Some cases even support liquid cooling radiators, which can further improve thermal performance.

3. **Positive Air Pressure Design**: To optimize airflow and minimize dust accumulation, consider cases designed for positive air pressure. This means having more intake fans than exhaust fans, which creates a pressure difference that helps push air out through any gaps, effectively keeping dust out while ensuring cool air flows in.

4. **Cable Management Options**: Clean cable management not only looks aesthetically pleasing but also promotes better airflow. Look for cases with ample space behind the motherboard tray for routing cables, along with dedicated tie-down points. This prevents cables from obstructing airflow and allows for unobstructed passage of cool air.

5. **Space for High-Performance Components**: A well-ventilated case should have enough space to accommodate large graphics cards and CPU coolers. Ensure that your chosen case supports the dimensions of your components, as cramped spaces can lead to restricted airflow and increased temperatures.

6. **Dust Filters**: To maintain airflow efficiency, dust filters are a must-have feature. These filters can be found on intake areas like the front, top, and bottom of the case. They prevent dust buildup inside your rig, which can hinder airflow and lead to overheating. Look for cases with easily removable filters for convenient cleaning.

7. **Quality Build Materials**: The materials used in the construction of the case can impact airflow and noise levels. Cases made from high-quality metal with sound-dampening features can minimize vibration and noise while providing a sturdy structure for efficient airflow.

By keeping these key features in mind, you can ensure that your chosen case not only supports optimal airflow but also creates a cooler and quieter gaming environment. With the right airflow-friendly case, you’ll be well on your way to achieving peak performance in your gaming rig!

3. Understanding Positive vs. Negative Air Pressure

pc gaming -  What are the best PC cases for airflow?
Credit : whatcanu.com

When it comes to maintaining optimal airflow in your gaming rig, understanding the concepts of positive and negative air pressure is crucial. The balance of air pressure within your PC case can significantly affect not only cooling performance but also the overall longevity of your components.

**Positive Air Pressure** occurs when there is a greater intake of air than exhaust. This configuration can be highly beneficial for keeping dust and debris out of your system. By ensuring that more air is entering the case than is leaving it, you create a scenario where any unfiltered air that does enter is pushed out through the exhaust vents, rather than allowing dust to settle inside. This is especially important for gamers who tend to leave their rigs running for extended periods, as dust buildup can lead to thermal throttling and reduced performance. Cases with multiple front or bottom fans and fewer exhaust options typically favor this airflow method.

On the other hand, **Negative Air Pressure** is characterized by an intake that is weaker than the exhaust. This setup can promote superior cooling for components directly in the airflow path, as the exhaust fans actively pull hot air out, creating a strong flow of fresh, cooler air from outside the case. However, this method often leads to an increase in dust accumulation since unfiltered air is drawn into the case through any available openings, including gaps around cables and components. While some gamers prefer this setup for its cooling benefits, it’s essential to regularly clean out your rig to prevent dust from clogging your fans and heatsinks.

Ultimately, the choice between positive and negative air pressure will depend on your specific needs and preferences. Many enthusiasts find a balanced approach to be the most effective, combining a strategic arrangement of intake and exhaust fans to achieve a harmonious airflow that optimizes cooling while minimizing dust intrusion. As you explore the top PC cases for airflow, consider how each design accommodates these pressure dynamics, ensuring that your gaming rig remains both cool and quiet during those intense gaming sessions.

4. Top 5 PC Cases for Optimal Airflow

When it comes to building a gaming rig that performs at its peak, airflow is paramount. A well-ventilated case not only keeps your components cool but also reduces noise levels, ensuring an immersive gaming experience without unwanted distractions. Here, we’ve rounded up the top five PC cases that excel in providing optimal airflow, allowing gamers to push their systems to the limit without fear of overheating.

### 1. **Fractal Design Meshify C**
The Fractal Design Meshify C is a favorite among enthusiasts for its striking aesthetic and exceptional airflow. With its full mesh front panel, this case promotes unrestricted airflow while maintaining a sleek, modern look. The spacious interior accommodates large graphics cards and multiple cooling options, including support for radiators up to 360mm. The combination of high airflow design and customizable fan options makes the Meshify C a top pick for gamers looking to keep their systems cool and quiet.

### 2. **Corsair 4000D Airflow**
Corsair is known for its commitment to quality and performance, and the 4000D Airflow is no exception. Featuring a front panel designed for maximum airflow, this case comes with two pre-installed AirGuide fans that direct airflow towards your components. The 4000D also offers a generous amount of space for cable management, ensuring a clean build that enhances both aesthetics and cooling efficiency. Gamers will appreciate the ease of installation and the robust cooling potential of this versatile case.

### 3. **NZXT H510 Flow**
The NZXT H510 Flow blends style and functionality, making it an excellent choice for gamers who prioritize both aesthetics and performance. With a mesh front panel for optimal airflow and support for several cooling options, this case ensures your components stay chill under pressure. Its intelligent cable management system simplifies the building process, while the tempered glass side panel showcases your hardware beautifully. The H510 Flow is perfect for those looking to make a statement without sacrificing cooling capabilities.

### 4. **Cooler Master MasterBox Q300L**
For gamers seeking a compact solution without compromising on airflow, the Cooler Master MasterBox Q300L is an ideal choice. This mini-tower case features a perforated front panel and top ventilation, ensuring excellent airflow even in a smaller form factor. It’s designed with versatility in mind, supporting various cooling setups and customizable fan placements. With its lightweight design and easy-to-carry handle, the Q300L is perfect for LAN parties and gamers on the go.

### 5. **Phanteks Eclipse P400A**
The Phanteks Eclipse P400A stands out with its stunning RGB lighting options and superior airflow capabilities. The case features a full mesh front panel and comes with three pre-installed fans, ensuring optimal cooling right out of the box. With ample room for additional cooling solutions and a sleek design, the Eclipse P400A allows for a fully customized build that not only performs well but looks incredible too. Gamers who value aesthetics and functionality will find this case to be a perfect match.

Choosing the right case is essential for maintaining the longevity and performance of your gaming rig. With these top five PC cases for optimal airflow, you can ensure that your components remain cool, quiet, and ready to handle any gaming challenge that comes your way!

– 4.1 Case 1: Features and Benefits

pc gaming -  What are the best PC cases for airflow?
Credit : whatcanu.com

When it comes to optimizing airflow in your gaming rig, **the Corsair 4000D Airflow** stands out as a top contender. This mid-tower ATX case is meticulously designed to balance aesthetics with functionality, ensuring that your components stay cool under pressure while looking sleek on your desk.

**Features:**

One of the standout features of the Corsair 4000D is its innovative airflow design. The front panel boasts a high-performance mesh that allows for maximum air intake, effectively drawing in cool air while minimizing dust buildup. Coupled with a spacious interior that supports up to six fans, this case offers ample room for airflow optimization. The included two 120mm fans are engineered for low noise levels without compromising performance, making it an ideal choice for gamers who prioritize a quiet gaming environment.

The 4000D also supports a variety of cooling options, including compatibility with 240mm and 360mm radiators for those looking to implement liquid cooling solutions. With dedicated cable management channels and tie-down points, you can achieve a clean and organized build that promotes unobstructed airflow.

**Benefits:**

The benefits of the Corsair 4000D Airflow extend beyond just cooling. Its sleek design features a tempered glass side panel, allowing you to showcase your high-end components and RGB lighting. This case isn’t just about looks; it’s built for performance with its easy-to-access dust filters, ensuring that maintenance is a breeze and your components remain pristine.

Moreover, the case’s versatility caters to both novice builders and seasoned enthusiasts. Its intuitive layout simplifies the building process, saving you valuable time and effort. With stellar airflow, striking aesthetics, and practical design features, the Corsair 4000D Airflow is an excellent investment for anyone looking to enhance their gaming rig’s performance while keeping it cool and quiet.

– 4.2 Case 2: Features and Benefits

The **Cooler Master MasterCase H500** stands out as a top contender in the realm of high-performance PC cases designed specifically for optimal airflow. With its striking design and practical functionality, this case is an excellent choice for gamers and PC builders who prioritize cooling efficiency without sacrificing style.

**Features:**

1. **Mesh Front Panels**: The MasterCase H500 is equipped with dual mesh front panels that allow for an impressive influx of fresh air. This feature not only enhances cooling performance but also helps in reducing dust buildup, ensuring that your components remain clean and well-ventilated.

2. **Pre-Installed Fans**: Out of the box, the case comes with two massive 200mm RGB fans at the front and a 120mm exhaust fan at the rear. These fans not only provide substantial airflow but also add a touch of customizable aesthetics with their vibrant lighting options, allowing you to sync them with your gaming setup.

3. **Versatile Cooling Options**: The H500 doesn’t just stop at fans; it offers compatibility with multiple radiator sizes, accommodating both air and liquid cooling solutions. This flexibility means you can tailor your cooling system to suit your gaming needs, whether you prefer a simple air-cooled setup or a more advanced liquid cooling system.

4. **Spacious Interior**: Designed to support a variety of builds, the interior of the MasterCase H500 is spacious enough to house high-end graphics cards and large CPU coolers. The thoughtful cable management system also keeps your build tidy, ensuring optimal airflow without clutter.

**Benefits:**

– **Enhanced Performance**: With its exceptional airflow design and expansive cooling options, the Cooler Master MasterCase H500 ensures that your gaming rig operates at peak performance. Reduced temperatures lead to increased longevity for your components, allowing you to game harder and longer without overheating worries.

– **Aesthetically Pleasing**: Beyond performance, the case’s sleek design and customizable RGB lighting make it a visually appealing addition to any gaming setup. The ability to personalize your case to match your style adds an extra layer of enjoyment to your PC building experience.

– **Easy Accessibility**: The H500’s tempered glass side panel not only showcases your build but also allows for easy access to your components. Whether you need to upgrade your GPU or clean out the dust, accessing your rig is seamless and hassle-free.

In summary, the Cooler Master MasterCase H500 is more than just a pretty face; it’s engineered for optimal airflow and performance. Whether you’re a casual gamer or a hardcore enthusiast, this case is designed to keep your system cool, quiet, and ready for action.

– 4.3 Case 3: Features and Benefits

pc gaming -  What are the best PC cases for airflow?
Credit : whatcanu.com

When it comes to balancing aesthetics, functionality, and optimal airflow, **Case 3** truly stands out as a top contender for any gaming setup. This case is meticulously designed with a focus on cooling efficiency, ensuring that your components not only perform at their best but do so quietly, enhancing your overall gaming experience.

One of the most notable features of **Case 3** is its innovative airflow design. The case boasts a mesh front panel that promotes unrestricted air intake, allowing cool air to flow directly to your GPU and CPU. This design not only assists in maintaining lower temperatures but also helps in minimizing dust accumulation, ensuring that your components stay clean and efficient over time. The strategically placed dust filters are easy to remove and clean, further simplifying maintenance.

In addition to its cooling capabilities, **Case 3** comes equipped with multiple fan mounting options, supporting both 120mm and 140mm fan sizes. This flexibility allows you to customize your cooling setup according to your specific needs, whether you prefer a more aggressive cooling solution or a quieter operation. The case also features built-in RGB lighting options, giving you the ability to personalize your rig with vibrant colors and effects, all while maintaining a sleek appearance.

Moreover, **Case 3** is designed with cable management in mind. It includes ample space behind the motherboard tray for routing cables, which not only helps in improving airflow but also contributes to a cleaner, more organized interior. This is crucial for any gamer who appreciates aesthetics as much as performance.

The spacious interior of **Case 3** supports a variety of configurations, accommodating high-end GPUs and even multiple radiators for liquid cooling setups. This adaptability ensures that as your gaming needs evolve, your case can keep up with the demands of the latest hardware.

In summary, **Case 3** provides an exceptional blend of functionality and style, making it a prime choice for gamers who prioritize cooling and aesthetics. Its superior airflow design, customizable options, and practical features make it a valuable addition to any gaming rig, ensuring that your system remains cool and quiet during those intense gaming sessions.

– 4.4 Case 4: Features and Benefits

The **Cooler Master H500** is a standout option for gamers who prioritize both aesthetics and airflow in their PC builds. With its striking design, featuring a sleek tempered glass side panel, this case offers a window into your meticulously crafted rig, showcasing the vibrant RGB lighting of your components. But it’s not just about looks; this case is engineered for optimal cooling performance.

One of the defining features of the Cooler Master H500 is its impressive airflow system. It comes equipped with two 200mm ARGB fans at the front, drawing in ample fresh air while creating a dramatic visual impact. An additional 120mm fan at the rear ensures that hot air is efficiently expelled, maintaining a steady airflow throughout the case. This thoughtful design minimizes the risk of thermal throttling during intense gaming sessions, allowing your hardware to perform at its best.

The spacious interior of the H500 supports a variety of configurations, accommodating large graphics cards and multiple cooling options, including liquid cooling systems. This flexibility means you can customize your setup to meet your specific performance needs or aesthetic desires.

Additionally, the case offers thoughtful cable management options, with ample space behind the motherboard tray for tidy routing. This not only enhances airflow but also creates a clean and organized look for your build.

In summary, the Cooler Master H500 is a perfect blend of style and substance, making it a top choice for gamers who want a case that cools effectively while also making a statement. With its robust features and user-friendly design, it ensures that your gaming rig stays cool and quiet, even during the most demanding gaming marathons.

– 4.5 Case 5: Features and Benefits

When it comes to balancing aesthetics and functionality, Case 5 stands out as a top contender in the world of PC cases designed for optimal airflow. Crafted with gamers in mind, this case combines sleek design with a series of features aimed at enhancing cooling efficiency and minimizing noise.

**1. Mesh Front Panel:** One of the standout features of Case 5 is its full-length mesh front panel. This design not only provides a contemporary look but also facilitates unrestricted airflow. The mesh allows cold air to flow directly into the case, cooling your components effectively while preventing dust accumulation, a common concern for many PC builders.

**2. Multiple Cooling Options:** To further enhance its cooling capabilities, Case 5 supports an array of cooling configurations. It comes pre-installed with two high-performance fans, with additional mounting points available for up to six fans in total. This flexibility allows you to tailor your cooling setup according to your specific needs, whether you prefer a push-pull configuration or simply want to maximize airflow.

**3. Spacious Interior:** The case boasts a roomy interior that accommodates even the largest graphics cards and CPU coolers. With ample space to work, builders can manage cables more efficiently, promoting better airflow within the case. Less clutter translates to better performance, ensuring that your hardware operates at optimal temperatures.

**4. Sound-Dampening Features:** In addition to its airflow benefits, Case 5 is designed with noise reduction in mind. It features sound-dampening panels that help absorb and minimize operational noise, allowing you to enjoy a quieter gaming experience. This is particularly beneficial during intense gaming sessions or when running demanding applications.

**5. RGB Lighting Compatibility:** For gamers who love to personalize their setups, Case 5 is compatible with RGB lighting systems. Built-in channels and mounts allow for easy installation of RGB fans and strips, enabling you to create a visually stunning rig that reflects your style.

In summary, Case 5 combines impressive airflow capabilities with thoughtful design features that cater to gamers and PC enthusiasts alike. With its blend of performance, aesthetics, and noise reduction, it’s an excellent choice for anyone looking to build a powerful and visually appealing gaming rig.

5. Budget-Friendly Options for Great Airflow

When assembling your ultimate gaming rig, you don’t have to break the bank to ensure optimal airflow. There are numerous budget-friendly PC cases that offer impressive cooling capabilities without sacrificing performance or aesthetics. These options are perfect for gamers on a budget who still want to maintain a cool and quiet environment for their system.

One standout choice is the **Cooler Master MasterBox Q300L**. This compact case is designed with a mesh front panel and ventilation on both sides, promoting excellent airflow while maintaining a sleek profile. With its versatile layout and support for multiple cooling fans, the Q300L effectively dissipates heat without putting a dent in your wallet.

Another fantastic option is the **NZXT H510**, which combines affordability with functionality. Featuring a tempered glass side panel for a stylish look, the H510 also incorporates cable management features and a well-thought-out airflow design. It allows for the installation of multiple fans and even liquid cooling solutions, ensuring that your components stay frosty during long gaming sessions.

If you prefer a more minimalistic design, the **Fractal Design Focus G** is a case that delivers both aesthetic appeal and efficient airflow. With its dual front mesh panels and included fans, the Focus G promotes a steady flow of cool air into your system while providing ample space for additional upgrades in the future.

Choosing a budget-friendly case doesn’t mean you have to compromise on performance. By selecting one of these options, you can create a powerful gaming setup that remains cool and quiet, allowing you to fully immerse yourself in your gaming adventures without worrying about overheating components or excessive noise.

6. Premium Cases for Enthusiasts: Performance and Aesthetics

When it comes to building the ultimate gaming rig, enthusiasts know that performance and aesthetics go hand in hand. Premium PC cases designed for power users not only offer superior airflow but also make a statement with their striking designs. These cases often incorporate high-quality materials, innovative engineering, and customizable lighting, allowing gamers to create a setup that reflects their personal style while optimizing their system’s thermal performance.

Take, for instance, cases featuring tempered glass panels that showcase your meticulously arranged components and RGB lighting. These visually stunning designs not only draw attention but also serve a functional purpose—allowing for ample airflow while enabling you to admire your hardware. Many premium cases also come equipped with advanced cooling solutions, such as pre-installed fans with customizable speeds and additional fan mounts to achieve the perfect balance between airflow and noise levels.

Moreover, these enthusiast-grade cases often provide ample space for liquid cooling systems, which can significantly enhance cooling performance while keeping noise to a minimum. With flexible cable management options and modular designs, they ensure a clean and efficient build that not only performs at its best but looks incredible doing so.

For those serious about gaming and performance, investing in a premium PC case is more than just a purchase; it’s a commitment to superior cooling, ease of assembly, and aesthetic appeal that elevates the entire gaming experience. Whether it’s a sleek, minimalist design or a bold, futuristic look, these cases are crafted for those who demand the best from their systems and understand that a well-cooled rig is essential for peak performance.

7. How to Properly Position Fans for Maximum Cooling

When it comes to optimizing the airflow in your PC case, the positioning of your fans can make a world of difference. Proper fan placement not only enhances cooling performance but also contributes to a quieter system by ensuring air flows smoothly without turbulence. Here are some key strategies to achieve maximum cooling efficiency.

First and foremost, it’s crucial to understand the concept of airflow direction. Most fans are designed to push air in one direction, typically indicated by arrows on the side of the fan housing. As a general rule, front and bottom fans should bring cool air into the case, while rear and top fans should exhaust hot air out. This creates a balanced airflow, often referred to as a “positive pressure” setup, which helps prevent dust buildup while maintaining optimal temperatures.

Consider the configuration of your components as well. For instance, if you have a high-performance GPU that generates a substantial amount of heat, position an intake fan directly in front of it to ensure a steady stream of cool air. Additionally, if your CPU cooler is top-mounted, pairing it with a top exhaust fan can efficiently extract the rising heat generated by the processor.

Another important factor is fan speed and noise levels. Many modern fans come with adjustable speed settings, allowing you to find the sweet spot between cooling and noise. Using software to monitor temperatures can help you adjust the fan speeds dynamically, ensuring that cooling is sufficient during intense gaming sessions without unnecessary noise during lighter workloads.

Lastly, don’t overlook the importance of clear airflow paths. Avoid cluttering your case with excess cables or components that could obstruct airflow. Utilizing cable management solutions not only improves aesthetics but also significantly enhances airflow within the case.

In summary, the proper positioning of fans is essential for maintaining optimal airflow and cooling in your gaming rig. By strategically placing intake and exhaust fans, considering the heat output of your components, and ensuring unobstructed air pathways, you can create a system that runs cooler and quieter, allowing for a seamless gaming experience.

8. The Role of Dust Filters in Maintaining Airflow

When it comes to optimizing airflow in your gaming rig, dust filters play a crucial and often overlooked role. Imagine your PC as a finely tuned high-performance engine; just as an engine needs clean air to function efficiently, your system requires unobstructed airflow to keep temperatures down and components running smoothly. Dust filters act as the first line of defense against pesky particles that can accumulate over time and impede airflow, leading to overheating and decreased performance.

High-quality dust filters are typically made from fine mesh materials that allow air to flow freely while capturing dust, pet hair, and other debris before they can enter your case. Many modern PC cases come equipped with these filters, strategically placed in areas where air intake occurs—such as the front panel, bottom, and even the side vents. What’s more, the best dust filters are designed to be easily removable and washable, making maintenance a breeze. Regularly cleaning these filters can significantly enhance your system’s airflow, ensuring your rig remains cool and quiet during those intense gaming sessions.

Moreover, keeping your PC dust-free not only helps with temperature management but also extends the lifespan of your components. Dust buildup can lead to fan malfunctions, overheating graphics cards, and even power supply failures. By incorporating dust filters into your gaming setup, you’re not just investing in airflow; you’re also protecting your investment and ensuring that every gaming experience remains top-notch. So, when selecting a case, don’t underestimate the importance of effective dust filtration—it’s a small feature that can have a monumental impact on performance and longevity.

9. Cable Management Tips for Improved Airflow

When it comes to optimizing airflow in your gaming rig, cable management is often an overlooked aspect that can significantly impact both performance and aesthetics. A cluttered interior filled with tangled wires can obstruct airflow, trapping heat and causing your components to work harder than necessary. Here are some essential cable management tips to enhance airflow and keep your gaming PC running cool and quiet.

First, invest in high-quality cable ties or Velcro straps. These simple tools can help you bundle cables together neatly, reducing the visual chaos that can impede airflow. By securing cables along the edges of your case or routing them behind the motherboard tray, you can create a clear path for air to flow from front to back, ensuring that your cooling fans and heat sinks can operate efficiently.

Next, consider using cable extensions for your power supply. Many modular power supplies allow you to connect only the cables you need, reducing excess wiring. Opting for sleeker, low-profile cables can also minimize bulk, enabling better airflow around your components. This is particularly helpful in cases with tempered glass side panels, where aesthetics are just as important as functionality.

Additionally, always pay attention to the orientation of your cables. Try to route them in a way that keeps them away from fan intakes and exhausts. For instance, if you’re using fans at the front of the case to draw in cool air, position power and data cables behind the motherboard tray or along the sides of the case. This not only promotes better airflow but also helps prevent potential airflow obstructions.

Finally, don’t forget about regular maintenance. Dust accumulation can choke airflow and make your cable management efforts moot. Periodically open your case to clean out dust bunnies and ensure that your cables remain tidy and out of the way.

By implementing these cable management tips, you’ll not only enhance the airflow in your gaming rig but also create a cleaner, more organized environment that showcases your components beautifully. A well-maintained system is key to achieving optimal performance, so take the time to manage those cables — your gaming experience will thank you!

10. Custom Cooling Solutions: Liquid Cooling vs. Air Cooling

When it comes to keeping your gaming rig cool and running quietly, the debate between liquid cooling and air cooling is one that every PC builder faces. Both options have their merits, but understanding their differences can help you make an informed choice that best suits your setup and gaming needs.

**Liquid Cooling** is often viewed as the superior option for those pushing their hardware to the limits. These systems use a series of tubes and a radiator to circulate coolant around your CPU or GPU, effectively dissipating heat more efficiently than traditional air coolers. The result? Lower temperatures and potentially quieter operation. Liquid cooling can be particularly advantageous for overclockers who demand maximum performance from their components, as it allows for higher clock speeds without the risk of thermal throttling. Additionally, custom liquid cooling solutions offer aesthetics that can elevate the overall look of your build, with vibrant coolant colors and illuminated components that make your rig a visual masterpiece.

On the other hand, **Air Cooling** remains a popular choice for many gamers and system builders due to its simplicity and reliability. High-quality air coolers can provide excellent thermal performance, often at a lower cost and with less maintenance than their liquid counterparts. Unlike liquid cooling systems, air coolers do not run the risk of leaks, which can be a significant concern for those unfamiliar with liquid cooling setups. Furthermore, advancements in air cooler technology, such as larger heat sinks and more efficient fan designs, have made them increasingly capable of handling even high-performance CPUs and GPUs.

Ultimately, the choice between liquid and air cooling comes down to your specific needs, preferences, and comfort level with setup and maintenance. If you value aesthetics and are willing to invest in a more complex system, liquid cooling might be your best bet. However, if you prefer a no-fuss approach with reliable performance, a high-quality air cooler can keep your gaming rig cool and quiet, allowing you to focus on what matters most: enjoying your games.

11. The Impact of Ambient Temperature on Gaming Performance

When it comes to gaming performance, one often overlooked factor is the ambient temperature of your environment. While we tend to focus on high-end graphics cards, powerful CPUs, and advanced cooling solutions, the temperature of the room where your gaming rig resides can significantly influence how well those components perform.

A higher ambient temperature can lead to an increase in the internal temperature of your PC, causing your components to throttle down to prevent overheating. This throttling can result in lower frame rates, increased loading times, and an overall less enjoyable gaming experience. Conversely, a cooler room can help maintain optimal operating temperatures for your hardware, allowing it to run at peak performance without the fear of overheating.

Moreover, the relationship between temperature and performance extends beyond just the immediate effects on gaming. Components like graphics cards and processors are designed to operate within specific temperature ranges. When the ambient temperature rises, even the best cooling systems can struggle to keep everything within those safe limits. This is especially true during long gaming sessions when heat builds up over time.

Additionally, consider how ambient temperature affects the efficiency of your cooling solutions. For example, if you’re using air cooling, warmer surrounding air can reduce the cooling potential of your fans, leading to higher internal temperatures. On the other hand, liquid cooling systems often perform better in cooler environments, as they can dissipate heat more effectively.

To mitigate the effects of ambient temperature, ensure that your gaming area is well-ventilated and consider investing in additional cooling solutions, such as extra case fans or an air conditioner. By creating a comfortable environment for both you and your gaming rig, you can enhance performance, prolong the life of your components, and enjoy a seamless gaming experience. Remember, a cooler environment equals a cooler rig!

12. Case Modding for Enhanced Airflow: DIY Tips

Case modding is an exciting and rewarding way to enhance the airflow of your gaming rig while showcasing your personal style. Whether you’re a seasoned modder or just starting out, there are plenty of practical DIY tips to help you achieve optimal airflow and keep your system cool and quiet.

**1. Upgrade Your Fans:** Start with the basics—upgrading your case fans can make a significant difference in airflow. Look for high-quality, high-CFM (Cubic Feet per Minute) fans that offer a good balance between airflow and noise levels. Consider using larger fans, as they can move more air at lower RPMs, resulting in less noise.

**2. Optimize Fan Placement:** The arrangement of your fans matters. Typically, you want to create a balance between intake and exhaust. Position fans to draw cool air from the front and bottom of the case while exhausting warm air from the rear and top. Experiment with different configurations to find what works best for your setup.

**3. Remove Obstructions:** Ensure that there are no cables or components obstructing airflow within the case. Use cable management techniques such as zip ties or Velcro straps to neatly bundle and route cables away from airflow pathways. Additionally, consider removing unused drive bays or components that may hinder air circulation.

**4. Create Airflow Channels:** Consider adding custom ducting to direct airflow more effectively. This could be as simple as using cardboard or plastic sheeting to create channels that guide cool air directly over critical components, like your GPU and CPU, and out through exhaust fans.

**5. Install Dust Filters:** While it may seem counterintuitive, installing dust filters on your intake fans can improve airflow in the long run. Keeping dust out of your case will ensure that fans can operate efficiently without getting clogged, which can restrict airflow and lead to higher temperatures. Just remember to clean these filters regularly!

**6. Experiment with Case Panels:** If your case has solid side panels, consider replacing them with tempered glass or mesh panels. Mesh panels allow for better airflow while still showcasing your components. If you’re feeling adventurous, you could even cut out sections of the existing panels to create a more open design.

**7. Monitor Your Temperatures:** After making modifications, keep an eye on your system temperatures. Use software tools to monitor the CPU and GPU temperatures to ensure that your modifications are having the desired effect. This will help you fine-tune your setup for the best performance.

Case modding is not just about aesthetics; it’s about creating an efficient cooling system that enhances the longevity and performance of your gaming rig. By implementing these DIY tips, you can ensure that your components remain cool and quiet, allowing you to fully enjoy your gaming experience without the distraction of overheating or noisy fans. Happy modding!

13. Real User Reviews and Feedback on Top Cases

When it comes to selecting the perfect PC case for optimal airflow, there’s no better resource than the real-world experiences of fellow gamers and builders. User reviews offer invaluable insights that go beyond the technical specifications, revealing how these cases perform under pressure and in everyday use.

For instance, many users rave about the cooling efficiency of the **Fractal Design Meshify C**, noting its exceptional airflow thanks to a front panel comprised primarily of mesh. Gamers have reported that even during marathon gaming sessions, their components remained cool, and noise levels were remarkably low, allowing for an immersive experience. Feedback highlights not just temperature management, but also the ease of installation, making it a favorite among both novices and seasoned builders.

Conversely, some users may voice concerns about certain features. Take the **Corsair 4000D Airflow**, which has been praised for its spacious interior and cable management options. Yet, a few reviewers have pointed out that while its airflow is excellent, the glass side panel can sometimes be a fingerprint magnet, requiring regular cleaning to maintain its aesthetic appeal. Such candid feedback helps prospective buyers weigh the pros and cons before making a decision.

Additionally, many users share tips based on their experiences. For example, with cases like the **NZXT H510**, customers frequently recommend using additional aftermarket fans to further enhance airflow, especially if they plan on overclocking their components or using high-performance hardware.

Reading through these real user reviews not only helps you gauge the performance of each case but also provides a sense of community—an understanding that you’re not alone in your quest for the ideal setup. Ultimately, the shared experiences of fellow gamers can guide you toward a case that not only keeps your rig cool but also fits your aesthetic and functional needs perfectly. Whether you’re looking for the sleek design or superior airflow, tapping into the wisdom of real users can make all the difference in your purchasing decision.

14. Conclusion: Choosing the Right Case for Your Needs

In conclusion, selecting the right PC case is a pivotal decision that goes beyond mere aesthetics; it directly impacts your system’s performance, cooling efficiency, and overall longevity. As we’ve explored throughout this guide, optimal airflow is essential for maintaining lower temperatures in your gaming rig, which in turn enhances component lifespan and ensures smooth performance during those intense gaming sessions.

When choosing a case, consider factors such as size, airflow design, and compatibility with your existing hardware. A well-ventilated case with strategically placed fans can make all the difference in preventing thermal throttling and reducing noise levels. Look for cases that offer ample space for future upgrades, as well as features like dust filters to keep your components clean.

Additionally, think about your personal style and how the case fits into your gaming environment. Whether you prefer sleek minimalism or vibrant RGB lighting, there’s a perfect case out there to reflect your personality while delivering optimal functionality.

Ultimately, investing time in researching and selecting the right case can lead to a more enjoyable and trouble-free gaming experience. So take your time, weigh your options, and choose a case that not only meets your cooling needs but also complements your gaming setup perfectly. Your future self—and your gaming rig—will thank you!

15. Additional Resources for PC Building and Cooling Techniques

When embarking on the journey of PC building and ensuring optimal cooling for your gaming rig, having access to the right resources can make all the difference. Fortunately, the PC building community is vast and teeming with knowledge, offering a plethora of guides, forums, and video tutorials to help both novice and experienced builders achieve their goals.

**Online Communities and Forums**
Platforms like Reddit, Tom’s Hardware, and Linus Tech Tips are treasure troves of information. Here, you can engage with fellow enthusiasts, ask questions, and share experiences. These forums offer insights on everything from choosing the right case for airflow to troubleshooting cooling issues as they arise. The collaborative spirit of these communities means you’re never alone in your quest for the perfect build.

**YouTube Tutorials**
Visual learners will find YouTube invaluable. Channels dedicated to PC building often feature step-by-step guides that cover everything from basic assembly to advanced cooling techniques. Look for videos that specifically address airflow optimization and case reviews, as these can provide real-world demonstrations of how different cases perform under load. Seeing a cooling setup in action can help you visualize how to implement similar strategies in your own rig.

**Manufacturer Resources**
Don’t overlook the resources provided by case manufacturers themselves. Many brands, such as Corsair, NZXT, and Cooler Master, have detailed product pages that include airflow diagrams, cooling performance benchmarks, and user manuals. These documents often contain useful tips on fan placement and optimal cooling configurations tailored to their specific cases.

**Cooling Product Reviews**
Before investing in cooling components, take the time to read reviews from trusted tech sites. Websites like PC Gamer, AnandTech, and TechRadar typically conduct thorough testing and provide insights into the most efficient cooling solutions available. Understanding the pros and cons of various fans, liquid cooling systems, and thermal pastes can equip you with the knowledge to make informed decisions that enhance your build’s performance.

**Guides on Airflow Optimization**
Finally, consider seeking out comprehensive guides that focus specifically on airflow optimization techniques. These resources will delve into topics such as positive vs. negative pressure setups, the importance of dust filters, and how to achieve an unobstructed airflow path. Mastering these principles will not only keep your gaming rig cool but also extend the lifespan of your components.

By tapping into these additional resources, you’ll be well on your way to creating a gaming rig that not only performs at its best but stays cool and quiet, allowing you to fully immerse yourself in your favorite games without distraction. Happy building!

In conclusion, investing in the right PC case is crucial for achieving optimal airflow and maintaining a cool, quiet gaming rig. The options we’ve explored in this post offer a variety of features tailored to suit different needs and preferences, ensuring that you can find the perfect fit for your setup. Whether you prioritize aesthetics, functionality, or noise reduction, there’s a case out there that can enhance your gaming experience while keeping your components safe and performing at their best. As you embark on your journey to upgrade your setup, remember that a well-ventilated case not only extends the lifespan of your hardware but also elevates your gaming performance. Happy building, and may your gaming sessions be both cool and exhilarating!

pc gaming – How to choose the right cooling solution for your PC?

As gaming technology advances and graphics become increasingly demanding, keeping your PC cool has never been more crucial.

Overheating can lead to decreased performance, hardware damage, and ultimately, a frustrating gaming experience. Whether you’re a casual gamer or a competitive eSports enthusiast, ensuring your rig operates at optimal temperatures is essential for enjoying those intense gaming sessions without interruption. In this comprehensive guide, we’ll explore the various cooling solutions available, from traditional air coolers to advanced liquid cooling systems, helping you make an informed choice that suits your gaming setup. We’ll delve into the benefits and drawbacks of each option, provide tips for installation and maintenance, and share insights on how to monitor your PC’s temperature effectively. Get ready to cool your game and enhance your performance—your ultimate gaming experience awaits!

1. Understanding the Importance of PC Cooling

pc gaming -  How to choose the right cooling solution for your PC?
Credit : whatcanu.com

When it comes to building or upgrading your PC, understanding the importance of cooling is crucial to ensuring optimal performance and longevity. just like a high-performance car needs a well-functioning radiator to prevent overheating, your computer requires an efficient cooling solution to manage the heat generated by its components. As processors and graphics cards become increasingly powerful, they also produce more heat during operation. Without adequate cooling, this heat can lead to thermal throttling, which reduces performance, or worse, permanent damage to your hardware.

Heat is an enemy to your PC’s health. It can accelerate wear and tear on vital components like the CPU, GPU, and power supply, ultimately shortening their lifespan. Moreover, excessive heat can cause system instability, leading to unexpected crashes, corrupted files, and lost work. A well-cooled system not only maintains peak performance but also enhances the overall user experience.

Moreover, an effective cooling strategy extends beyond just the immediate components. It contributes to a more comfortable environment, especially for gamers and professionals who spend long hours at their machines. A cooler PC runs quieter too, as overheating components often lead to increased fan speeds and noise. Therefore, investing time and resources into understanding your cooling needs is not just about maintaining system performance; it’s about creating a reliable, efficient, and enjoyable computing experience.

In this guide, we will explore various cooling solutions, their benefits, and how to choose the right one for your specific setup. Whether you’re a casual user, a gamer, or a content creator, understanding the importance of PC cooling is the first step in optimizing your machine for peak performance.

2. Common Signs Your PC Needs Better Cooling

Recognizing when your PC is in desperate need of better cooling is crucial for maintaining its performance and longevity. There are several telltale signs that indicate your system is struggling to keep its temperature in check.

One of the most obvious indicators is an increase in fan noise. If your once-quiet PC now sounds like a jet engine taking off, it’s likely that the fans are working overtime to dissipate excessive heat. This can be particularly pronounced during gaming sessions or when running demanding applications.

Another sign to watch for is elevated component temperatures. Most modern motherboards come equipped with temperature sensors that allow you to monitor your CPU and GPU temperatures. If you notice that your CPU is regularly hitting temperatures above 80°C or your GPU is consistently in the upper ranges, it’s a clear signal that something needs to change.

You might also experience unexpected performance drops, commonly referred to as thermal throttling. This occurs when the CPU or GPU reduces its performance to prevent overheating, resulting in lag during gameplay or slowdowns during intensive tasks.

Additionally, keep an eye out for system instability, including frequent crashes or unexpected shutdowns. These issues can often be linked to overheating, as components may become too hot to function properly.

Finally, physical signs like dust build-up or hot air blowing out of the case can’t be ignored. Dust accumulation can impede airflow, trapping heat inside your system and contributing to higher temperatures. Regular cleaning and maintenance can help prevent this issue.

By recognizing these common signs, you can take action to improve your PC’s cooling system before it leads to more serious problems, ensuring your gaming experience remains smooth and enjoyable.

3. Types of Cooling Solutions: Air vs. Liquid Cooling

pc gaming -  How to choose the right cooling solution for your PC?
Credit : whatcanu.com

When it comes to keeping your PC at optimal temperatures, understanding the two primary types of cooling solutions—air cooling and liquid cooling—is essential. Each system has its strengths, weaknesses, and unique characteristics, which cater to different needs and preferences among PC enthusiasts.

**Air Cooling** is the traditional go-to method for many builders. It utilizes heat sinks and fans to dissipate heat away from the CPU and GPU. The mechanics are straightforward: a heat sink, often made of aluminum or copper, absorbs heat generated by the components. Fans then push air through the heat sink, cooling it down before it re-enters the casing. This method is generally more cost-effective and easier to install, making it an excellent choice for casual gamers and those building their first PC. Moreover, air coolers are less prone to failure, as they have fewer moving parts and do not run the risk of leaks. However, they can be less efficient in overclocking scenarios, where higher performance necessitates superior cooling capabilities.

On the other hand, **Liquid Cooling** systems have gained popularity among serious gamers and overclockers for their superior thermal performance. These systems circulate a coolant, typically a mixture of water and other additives, through a closed loop that includes a pump, radiator, and water blocks. The coolant absorbs heat from the components, effectively moving it away to the radiator, where it is cooled by fans before being recirculated. Liquid cooling is particularly effective in maintaining lower temperatures, allowing for higher performance and quieter operation compared to air systems. However, the installation process can be more complex, requiring careful setup to avoid leaks and ensure proper flow. It’s also worth noting that liquid coolers tend to be pricier, which can be a consideration for budget-conscious gamers.

In summary, the choice between air and liquid cooling largely depends on your individual needs and preferences. If you’re after simplicity, reliability, and cost-effectiveness, air cooling is an excellent option. Conversely, if you’re aiming for high performance with potentially quieter operation and are willing to invest time and resources, liquid cooling might be the route for you. Understanding these differences will help you make an informed decision, ensuring your gaming rig runs cool and performs at its best.

4. How Air Coolers Work: Pros and Cons

When it comes to cooling your gaming rig, air coolers have long been a staple in the PC building community. Utilizing a straightforward yet effective mechanism, these cooling solutions rely on the combination of metal heat sinks and fans to dissipate heat generated by your CPU or GPU. The process begins with the heat sink, a metal structure—usually made of aluminum or copper—that absorbs heat from the processor. Once the heat is transferred, the attached fan kicks into gear, pushing cool air over the heat sink while simultaneously expelling the warm air away from the unit. This continuous airflow helps maintain optimal temperatures, ensuring your components operate efficiently even during intense gaming sessions.

### Pros of Air Coolers:

1. **Cost-Effective**: Air coolers are generally more budget-friendly than their liquid counterparts. They come in various price ranges, making them accessible to gamers at all levels.

2. **Simplicity and Reliability**: With fewer moving parts and no risk of leaks, air coolers often boast a reliability that many users appreciate. Installation is typically straightforward, requiring minimal maintenance.

3. **Less Noise**: While some air coolers can be loud, many modern designs feature efficient fans that operate quietly even under load, providing a peaceful gaming experience.

4. **No Risk of Liquid Damage**: Unlike liquid cooling solutions, air coolers eliminate concerns about coolant leaks, making them a safer choice for those wary of potential mishaps.

### Cons of Air Coolers:

1. **Bulkiness**: Depending on the model, air coolers can be quite large and may interfere with other components, such as RAM or case fans. It’s essential to ensure compatibility with your PC case before purchasing.

2. **Cooling Efficiency**: While air coolers can handle standard workloads efficiently, they may struggle to maintain lower temperatures under extreme conditions, such as overclocking or during heavy gaming sessions.

3. **Limited Aesthetics**: While some air coolers come with RGB lighting, they may not offer the same visual flair that some custom liquid cooling setups provide, which can be a consideration for gamers who prioritize aesthetics.

4. **Thermal Performance**: In scenarios where extreme cooling is necessary, air coolers may not perform as well as liquid cooling solutions, making them less suitable for high-end builds pushing performance limits.

In conclusion, air coolers represent a solid choice for gamers looking for a reliable, cost-effective cooling solution. Understanding their mechanics and weighing their pros and cons will help you determine if they meet your gaming needs, keeping your rig cool and your gameplay smooth.

5. Liquid Cooling Explained: A Deep Dive

pc gaming -  How to choose the right cooling solution for your PC?
Credit : whatcanu.com

Liquid cooling has emerged as a popular choice among PC enthusiasts and gamers alike, thanks to its efficiency and effectiveness in managing heat. Unlike traditional air cooling systems that rely on fans to circulate air and dissipate heat, liquid cooling employs a coolant—usually a mixture of water and antifreeze—that circulates through tubes to absorb and carry heat away from the components. This method not only provides superior cooling performance but also operates more quietly, making it an appealing option for those who demand both power and tranquility in their gaming rigs.

At the heart of a liquid cooling system is the pump, which propels the coolant through the loop. The coolant absorbs heat from the CPU or GPU via the water block, a metal component that makes direct contact with the processor. From there, the heated coolant travels to the radiator, where it passes through a series of thin fins. As air flows over these fins—thanks to one or more fans mounted on the radiator—the heat is dissipated, and the cooled liquid returns to the water block, ready to absorb heat once again.

Liquid cooling systems come in two main varieties: closed-loop (AIO) and custom loop. Closed-loop systems are pre-assembled and sealed, making them user-friendly and ideal for beginners or those who prefer a hassle-free setup. They offer excellent cooling performance and require minimal maintenance, which is perfect for gamers who want to focus on their gameplay rather than their hardware. On the other hand, custom loop systems provide an opportunity for advanced users to build a tailored cooling solution that not only meets their specific thermal demands but also showcases their creativity. These systems involve selecting individual components—such as pumps, radiators, tubing, and fittings—and can be as elaborate or straightforward as the user desires.

However, while liquid cooling offers numerous benefits, it also comes with its own set of challenges. Installation can be more complex than air cooling, and there’s the potential risk of leaks if not done correctly. Regular maintenance is also required to ensure that the coolant remains clean and at optimal levels. Despite these considerations, many PC builders find that the advantages far outweigh the drawbacks, enjoying lower temperatures and increased performance capabilities.

In summary, liquid cooling is a powerful option for any PC builder looking to enhance their system’s thermal performance. By understanding how it works and weighing the pros and cons, you can make an informed decision that aligns with your gaming needs and preferences, ensuring that your rig runs cool and efficiently while you conquer the digital battlefield.

6. A Guide to Passive Cooling Solutions

In the world of PC building and maintenance, passive cooling solutions often fly under the radar, yet they can be a game-changer for those seeking silent operation and energy efficiency. Unlike their active counterparts, which rely on fans or pumps to circulate air or coolant, passive cooling systems take a more subtle approach. They dissipate heat through natural convection and conduction, utilizing heat sinks, aluminum or copper fins, and thermal pads to draw heat away from critical components without any moving parts.

When considering passive cooling, one of the key factors is the material used. Copper, for instance, is renowned for its superior thermal conductivity, making it an excellent choice for heat sinks. Aluminum is lighter and more cost-effective, but it may not dissipate heat as efficiently. A combination of both materials can often yield the best results, providing a balance between performance and weight.

Another critical aspect of passive cooling is the design and placement of the heat sinks. These components should be strategically positioned to ensure optimal airflow around them, taking advantage of natural convection currents within the case. This means that not only should the heat sink itself be large enough to dissipate adequate heat, but it should also be complemented by a well-thought-out case layout that minimizes airflow obstruction.

While passive cooling might not be suitable for high-performance gaming rigs or overclocked systems, it excels in scenarios where low noise and energy efficiency are paramount. Ideal for home theater PCs, office computers, or even lightweight gaming systems, passive cooling can deliver sufficient thermal management without the whirring of fans to disrupt your environment.

Ultimately, if you’re looking for a cooling solution that operates quietly and efficiently, passive cooling might be the perfect match for your PC build. By understanding the materials, design, and placement of your cooling components, you can create a system that runs smoothly while keeping noise levels to a minimum. Embrace the silent revolution and let your PC perform without the distraction of noisy fans!

7. Factors to Consider When Choosing a Cooling Solution

pc gaming -  How to choose the right cooling solution for your PC?
Credit : whatcanu.com

When it comes to selecting the perfect cooling solution for your PC, several key factors should guide your decision-making process. The right choice can significantly enhance performance, prolong the lifespan of your components, and ensure a smooth user experience. Here are the most important factors to consider:

1. **Type of Cooling**: First, determine whether you want air or liquid cooling. Air cooling systems are generally easier to install, require less maintenance, and are more affordable. However, liquid cooling solutions can provide superior cooling efficiency and are often quieter, making them suitable for high-performance builds or overclocking.

2. **Case Compatibility**: Before making any purchases, check your case specifications. The size and configuration of your PC case will dictate the dimensions of your cooling solution. Ensure that your chosen cooler fits comfortably without obstructing other components, such as RAM or graphics cards.

3. **Thermal Performance**: Look at the thermal performance ratings of potential cooling solutions. This can usually be found in reviews or specifications. Consider the heat dissipation capabilities, especially if you plan to push your PC to its limits with gaming or intensive tasks.

4. **Noise Levels**: For many users, a quiet operation is a top priority. Compare the noise levels (measured in decibels) of different cooling systems. While some fans can be quite noisy at higher RPMs, others are designed for quiet operation, which can be particularly important if you’re building a system for gaming or media consumption.

5. **Aesthetics**: If you value the visual aspect of your PC build, take into account the design and look of the cooling solution. Many modern coolers come with customizable RGB lighting and sleek designs that can enhance the overall aesthetics of your setup.

6. **Budget**: Finally, consider your budget. Cooling solutions vary widely in price, so balance your need for performance with what you’re willing to spend. Remember that investing in a quality cooling system can save you money in the long run by preventing overheating and damage to your components.

By carefully evaluating these factors, you can make an informed decision that will not only keep your PC cool but will also optimize its performance and longevity. The right cooling solution is a crucial investment for any PC enthusiast looking to maintain a reliable and efficient system.

8. Cooling System Compatibility with Your PC Components

When considering a cooling solution for your PC, one of the most critical factors to keep in mind is compatibility with your existing components. The heart of your build—your CPU, GPU, motherboard, and case—must work harmoniously with your chosen cooling system to ensure optimal performance and longevity.

Start with your CPU. Different processors have varying thermal outputs, and the cooling solution you select must be capable of dissipating this heat efficiently. For example, high-performance CPUs often require robust air or liquid cooling systems. However, if you’re running a more modest setup, a simpler air cooler might suffice. Always check the thermal design power (TDP) rating of your CPU against the specifications of your cooling solution to ensure they match.

Next, consider your GPU. Graphics cards can generate significant heat during intense gaming or rendering sessions, requiring dedicated cooling solutions. Some aftermarket GPUs come equipped with advanced cooling systems, while others may benefit from additional case fans or external cooling solutions. Be sure to verify the dimensions of your chosen cooling system to avoid any spatial conflicts within your case, ensuring that all components fit comfortably without obstructing airflow.

Your motherboard also plays a crucial role in compatibility. Some cooling systems require specific mounting brackets or connectivity options, so it’s essential to check your motherboard’s specifications and ensure your cooling solution supports them. Additionally, certain motherboards have limited clearance for larger air coolers, making it vital to measure the available space before making a purchase.

Lastly, don’t overlook the case itself. A well-ventilated case can significantly enhance cooling performance. When selecting a cooling solution, ensure it not only fits within the physical dimensions of your case but also complements its airflow design. If you’re considering a liquid cooling solution, evaluate the case’s radiator support and hose routing options to avoid unnecessary complications during installation.

In summary, achieving an effective cooling setup isn’t just about choosing the most powerful solution—it’s about ensuring that every component of your PC works together seamlessly. By taking the time to assess compatibility with your CPU, GPU, motherboard, and case, you can create a balanced system that maintains optimal temperatures, ensuring your PC runs smoothly for years to come.

9. The Role of Case Airflow in PC Cooling

When it comes to maintaining optimal temperatures within your PC, the importance of case airflow cannot be overstated. Think of your computer case as a vital ecosystem where heat generation and dissipation must be carefully balanced to ensure peak performance and longevity of your components. Proper airflow is the unsung hero in this equation, working behind the scenes to usher hot air out while drawing in cooler air from the surroundings.

Case airflow is primarily dictated by the arrangement and quality of your fans, the design of your case, and the strategic placement of components. A well-ventilated case will have multiple intake and exhaust fans, creating a consistent flow of air that prevents heat buildup. This is crucial because every component within your PC generates heat—especially the CPU and GPU during intensive tasks like gaming or video editing. When airflow is restricted, you run the risk of overheating, which can lead to throttling, crashes, or even permanent damage to your hardware.

To optimize airflow, consider the direction of your fans. Typically, front and bottom fans should draw air into the case, while top and rear fans should expel warm air. Maintaining a positive pressure setup—where intake airflow exceeds exhaust—can also help minimize dust buildup, keeping your internals clean and efficient. Additionally, cable management plays a significant role in airflow; neatly routed cables not only enhance aesthetics but also reduce obstructions that can impede airflow.

In essence, understanding and optimizing case airflow is a foundational step in building a cooling solution tailored to your PC’s needs. It creates a harmonious environment where your components can thrive, ensuring that your gaming sessions remain uninterrupted and your system runs smoothly for years to come.

10. Noise Levels: Balancing Performance and Quiet Operation

When it comes to choosing the right cooling solution for your PC, noise levels are a crucial factor that often gets overlooked in the pursuit of peak performance. A powerful cooling system can keep your components running optimally, but if it sounds like a jet engine taking off, it can be a major distraction whether you’re gaming, working, or just enjoying some downtime.

The balance between performance and quiet operation is a delicate one, and understanding the nuances can make all the difference for your user experience. High-performance cooling solutions, such as aftermarket air coolers and liquid cooling systems, can vary significantly in their noise output. While some may boast impressive cooling capabilities, they might also come equipped with fans that spin at high RPMs, generating unwanted noise.

To find the sweet spot, consider the decibel (dB) rating of potential cooling solutions. Many manufacturers provide this information, allowing you to compare models based on their sound output. Generally, a fan operating below 30 dB is considered whisper-quiet, while anything above 40 dB can start to become intrusive.

Additionally, think about the type of cooling solution you’re opting for. High-quality fans often incorporate features like fluid dynamic bearings or magnetic levitation technology, which can significantly reduce noise while enhancing airflow. If you’re leaning toward liquid cooling, closed-loop systems tend to be quieter than custom loops, as they often use larger radiators and slower-spinning fans to maintain lower temperatures with minimal noise.

Finally, remember that ambient noise can also play a role. If your gaming setup is in a quiet environment, even a slightly noisy cooler can become a major annoyance. On the other hand, in a bustling space with other sounds, you might find that a louder solution is more tolerable. Ultimately, the goal is to create a harmonious balance where you enjoy optimal performance without sacrificing the peace of your gaming or work environment. By carefully considering noise levels in your cooling solution selection, you can ensure that your PC operates efficiently and quietly, allowing you to focus on what matters most—your gaming experience.

11. Budgeting for Your Cooling Solution

When it comes to choosing the right cooling solution for your PC, budgeting is a crucial step that cannot be overlooked. As the heart of your gaming rig, your cooling system plays a pivotal role in maintaining optimal performance and longevity. However, the vast array of options available can make it easy to overspend or, conversely, to skimp on an essential component.

Start by assessing your specific needs and the components in your build. High-performance CPUs and GPUs generate substantial heat, which means investing in a reliable cooling solution is more important than ever. A budget of around $50 to $100 can secure you a decent air cooler or a basic liquid cooling system, perfect for mid-range gaming setups. If you’re aiming for extreme performance or planning to overclock, consider allocating $150 or more for premium coolers that offer advanced features like customizable RGB lighting and enhanced airflow.

Remember to factor in not just the initial purchase price of your cooling solution but also any additional costs. Will you need extra thermal paste, fans, or a more powerful power supply to support your cooling system? These considerations can add up quickly. Don’t forget about the potential savings in energy costs and the extended lifespan of your components when you invest in an efficient cooling solution. A well-cooled system can run smoother and last longer, ultimately providing better value for your investment.

Lastly, keep an eye out for sales, bundles, or discounts from reputable brands. Sometimes, you can find high-quality cooling solutions at a fraction of the original price during special promotions. By carefully budgeting and considering your options, you can ensure that your cooling solution not only fits your financial plan but also meets the performance demands of your gaming experience.

12. Installation Tips for Different Cooling Systems

When it comes to installing your chosen cooling system for your PC, following the right steps can make the difference between optimal performance and a frustrating experience. Whether you’re opting for air coolers, liquid cooling systems, or even more advanced solutions, understanding the installation process is crucial.

### Air Coolers

For air coolers, start by ensuring your CPU socket is clean and free of dust. Apply a thin, even layer of thermal paste on the processor to promote efficient heat transfer. Carefully line up the cooler with the mounting bracket, ensuring that it is firmly seated before securing it in place. Be mindful of the cooler’s orientation to promote proper airflow within your case. Lastly, connect the cooler’s fan to the motherboard, and double-check that everything is snug and secure.

### Liquid Cooling Systems

Liquid cooling can be a bit more intricate, but with patience, you can master the process. Begin by removing the existing CPU cooler and cleaning the CPU surface thoroughly. Apply thermal paste as you would for air coolers. When mounting the radiator, ensure it is positioned for optimal airflow; typically, this means placing the fans so that air flows through the radiator and out of the case. Be sure to secure all tubing properly and double-check for any potential leaks before powering on your system. Don’t forget to fill the reservoir or loop with the appropriate coolant if you’re using a custom liquid cooling system.

### All-in-One (AIO) Coolers

AIO coolers strike a balance between convenience and performance. Installation begins similarly to liquid cooling systems, with a clean CPU surface and thermal paste application. Most AIOs come with pre-installed fans and tubes, making the process simpler. Attach the radiator to the case, aligning it with the pre-drilled holes, and connect the pump to the CPU socket. Make sure to run cables neatly to avoid obstructing airflow or fans, which can lead to overheating.

### General Tips

Regardless of the cooling system you choose, always refer to the manufacturer’s guidelines for specific installation instructions. Take your time during the process—rushing can lead to mistakes that might compromise your system’s cooling efficiency. Ensure that your case has adequate airflow, as well-placed fans can significantly enhance cooling performance. Lastly, after installation, monitor temperatures during the first few sessions to ensure that everything is working as intended.

By following these installation tips tailored to your cooling system of choice, you’ll not only optimize your PC’s performance but also extend its lifespan, keeping your gaming experience smooth and enjoyable.

13. Maintenance and Upkeep of Cooling Solutions

When it comes to maintaining the optimal performance of your PC cooling solutions, regular upkeep is non-negotiable. Just as you wouldn’t ignore the oil change in your car, your cooling system requires consistent attention to function efficiently and prolong the life of your components.

Start by assessing your cooling fans and heatsinks. Dust accumulation is their worst enemy, leading to reduced airflow and increased temperatures. A monthly check can make a world of difference: use compressed air to carefully blow out dust from fans and other components. Pay special attention to the corners and crevices where dirt tends to gather, as these can obstruct airflow significantly.

For liquid cooling systems, it’s essential to monitor the coolant levels and look for any signs of leaks. Over time, the coolant can evaporate or degrade, leading to inefficient cooling. If your setup allows for it, consider changing the coolant every six months to a year to keep your system running smoothly. Additionally, inspect the pump for functionality; a failing pump can lead to catastrophic overheating, so replacing it promptly can save your hardware.

Another critical aspect of maintenance is cable management. Poorly arranged cables can obstruct airflow, causing fans to work harder than necessary. Take the time to tidy up your cables, using zip ties or Velcro straps to secure them neatly against the chassis. This not only improves airflow but also enhances the overall aesthetics of your build.

Lastly, don’t overlook software monitoring tools that allow you to keep an eye on your system’s temperatures and fan speeds. Programs like HWMonitor or MSI Afterburner can provide real-time data, enabling you to make adjustments as needed. Keeping your cooling solutions well-maintained ensures that your PC operates at peak performance, allowing you to enjoy your games without the worry of overheating. In the world of gaming, where every frame counts, having a reliable cooling system is not just a luxury—it’s a necessity.

14. Upgrading Your Cooling System: When and Why

Upgrading your cooling system is a crucial step in maintaining optimal performance and longevity for your PC. As technology evolves, so do the demands placed on your hardware. If you’ve noticed your system struggling to keep cool during gaming marathons or intensive tasks, it may be time to consider an upgrade. But when exactly should you take the plunge, and why is it so important?

**Signs It’s Time to Upgrade**

1. **Increased Temperatures**: If your CPU or GPU temperatures consistently hit the upper limits of their thermal thresholds, it’s a clear sign that your current cooling solution isn’t cutting it. Regularly checking your component temperatures can help you make informed decisions about when to upgrade.

2. **Overclocking**: Enthusiasts often push their hardware beyond factory settings to gain extra performance. However, overclocking generates additional heat, making a robust cooling system essential. If you’ve overclocked your components and are still relying on stock cooling, it’s time to seek a more effective solution.

3. **Noise Levels**: As fans age or struggle to keep up with cooling demands, they can become noisy or even fail altogether. If you find your system sounding like a jet engine during use, consider upgrading to a more efficient cooling solution that operates quietly while still keeping your components cool.

4. **New Hardware**: Upgrading to a more powerful CPU or GPU requires adequate cooling to ensure reliable performance. Newer components may have different cooling requirements, so if you’re planning a hardware refresh, assess your current cooling system to ensure it can handle the increased heat output.

**Why Upgrade?**

Investing in a better cooling solution not only helps maintain lower temperatures but can also enhance the overall performance of your PC. Cooler components tend to operate more efficiently, reducing the risk of thermal throttling—where your hardware intentionally slows down to prevent overheating. Additionally, a well-cooled system can extend the lifespan of your components, saving you money in the long run.

Moreover, upgrading your cooling system can provide a more enjoyable user experience. Whether you’re gaming, streaming, or designing, a quieter and cooler PC makes for a more pleasant environment, allowing you to focus on what you love most—your games, work, or creative projects.

In summary, if you notice signs of thermal strain, are pushing your hardware to its limits, or are planning significant upgrades, it’s time to evaluate your cooling options. With the right solution, you can ensure your PC runs smoothly for years to come, no matter how intense the workload.

15. Final Thoughts: Finding the Right Balance for Your Gaming PC

As we reach the final thoughts of this comprehensive guide, it’s essential to emphasize the importance of finding the right balance for your gaming PC’s cooling solution. Your gaming rig is a significant investment, and ensuring it runs cool and efficiently is crucial for optimal performance and longevity.

When selecting a cooling solution, consider not just the raw power of your components, but also the unique environment in which your PC operates. Do you live in a warmer climate? Is your setup confined to a small space with limited airflow? These factors will influence your cooling needs.

Additionally, strike a balance between performance, noise level, and aesthetics. High-performance cooling systems can be noisy, which can detract from the immersive experience of gaming. On the other hand, stylish RGB-lit fans and heatsinks can enhance the visual appeal of your setup, but make sure they don’t compromise functionality for looks.

Remember that cooling is not a one-size-fits-all approach. Whether you opt for air cooling, liquid cooling, or a combination of both, ensure that you consider the specifications of your components, the case design, and your personal preferences. Regular maintenance, such as cleaning dust from fans and ensuring adequate airflow, will also play a vital role in maintaining your system’s cooling efficiency.

Ultimately, the goal is to create a harmonious environment where your gaming PC can thrive, providing you with seamless gameplay, high frame rates, and an enjoyable experience without the worry of overheating. Take the time to analyze your options, do your research, and invest wisely in a cooling solution that meets your needs. With the right balance, your gaming rig will not only perform at its best but will also endure the test of time. Happy gaming!

In conclusion, finding the perfect cooling solution for your PC is essential to maintaining optimal performance and extending the lifespan of your components. Whether you opt for air cooling, liquid cooling, or a hybrid approach, understanding the unique needs of your system and your personal preferences will guide you in making the best choice. Armed with the insights from our comprehensive guide, you can confidently navigate the myriad options available, ensuring your gaming rig runs cool and quiet during even the most intense sessions. Remember, a well-cooled PC not only enhances performance but also elevates your overall gaming experience. So, take the plunge, invest in the right cooling solution, and enjoy the smooth, uninterrupted gameplay that awaits you! Happy gaming!

pc gaming – How to build a silent gaming PC?

In an age where immersive gaming experiences are paramount, the roar of fans and the hum of hardware can often detract from the thrill of your virtual adventures.

For many gamers, the quest for a whisper-quiet setup is as important as achieving high frame rates and stunning graphics. Building a silent gaming PC isn’t just about reducing noise; it’s about creating an environment where you can fully immerse yourself in your favorite worlds without distractions. In this ultimate guide, we’ll explore everything you need to know about assembling a near-silent gaming rig—from selecting the right components and utilizing sound-dampening materials to implementing effective cooling solutions. Whether you’re a seasoned builder or a newcomer to the gaming scene, get ready to transform your gaming space into a serene sanctuary that lets your gameplay shine through, all while keeping the noise to a bare minimum.

1. Understanding the Importance of a Silent Gaming PC

pc gaming -  How to build a silent gaming PC?
Credit : whatcanu.com

When it comes to the ultimate gaming experience, the roar of high-performance hardware can often drown out the immersive soundscapes of your favorite games. Understanding the importance of a silent gaming PC goes beyond just reducing noise; it’s about enhancing your gaming environment, improving focus, and creating a more enjoyable atmosphere.

In an age where gaming has evolved into a multisensory event, the auditory landscape plays a critical role. A silent PC allows you to fully appreciate the intricate details of sound design—every footstep, whisper, and explosion—without the distraction of grinding fans or vibrating components. Imagine diving into a visually stunning open-world game, only to be jolted out of the experience by the relentless hum of your system. By prioritizing silence, you can maintain that immersive bubble, allowing the game’s narrative and atmosphere to envelop you completely.

Moreover, a quiet gaming PC contributes to a more serene living or working space. Whether you’re gaming into the early hours or livestreaming your sessions, a peaceful environment is essential for both your enjoyment and your audience’s experience. The absence of disruptive noise can even lead to better concentration and longer gaming sessions without fatigue.

Additionally, the quest for silence often leads to the adoption of high-quality components and thoughtful design choices. This means investing in efficient cooling solutions, noise-dampening cases, and premium fans that operate at whisper-quiet levels. As you embark on building your silent gaming PC, you’ll find that this focus on quiet operation often results in improved performance and longevity, as components run cooler and with less strain.

In essence, understanding the importance of a silent gaming PC is about crafting an unparalleled gaming experience—one where every sound is intentional, every moment is immersive, and every session is enjoyable. By embracing silence, you not only enhance your gameplay but redefine what it means to be a gamer in a world where noise often reigns supreme.

2. Key Components for a Whisper-Quiet Build

When embarking on your journey to create a whisper-quiet gaming PC, selecting the right components is crucial. The heart of any gaming rig lies in its components, and for a silent build, you’ll want to prioritize those that are engineered for minimal noise output without sacrificing performance.

1. **Processor (CPU)**: Begin with a CPU that offers excellent performance while generating less heat. Look for models with lower thermal design power (TDP) ratings, as they tend to run cooler and quieter. Pair your CPU with a high-quality cooler designed for silent operation. Brands like Noctua or be quiet! manufacture coolers that excel in noise reduction, ensuring that your gaming sessions remain serene.

2. **Graphics Card (GPU)**: The GPU is often the noisiest component in a gaming PC, especially under heavy load. Opt for models with advanced cooling solutions that include larger fans and vapor chamber technology, which can dissipate heat efficiently at lower RPMs. Check reviews for noise levels during gaming to find cards that balance power and quiet performance.

3. **Power Supply Unit (PSU)**: A power supply can contribute significantly to system noise, so choose one that features a fanless operation or a semi-fanless mode that allows the fan to remain off under lower loads. Look for high-efficiency ratings (80 Plus Gold or Platinum) to ensure minimal energy waste and heat generation.

4. **Case Selection**: The right case can make all the difference. Opt for an enclosure designed specifically for noise reduction, featuring sound-dampening materials and a layout that promotes efficient airflow without the need for excessive fan speeds. Cases from brands like Fractal Design and Corsair often come with noise-reducing features that keep the cacophony at bay.

5. **Storage Solutions**: Traditional hard drives can be a source of noise, so consider solid-state drives (SSDs) instead. Not only do they perform faster, but they also operate silently since they have no moving parts. If you need larger storage capacities, look for hybrid solutions or silent hard drives that are designed for low noise output.

By carefully selecting these key components, you can build a gaming PC that not only meets your performance needs but also creates a peaceful gaming environment. With the right choices, you’ll find that immersive gameplay doesn’t have to be accompanied by the roar of fans and components, allowing you to focus fully on the adventure ahead.

3. Choosing the Right Case: Soundproofing Features

pc gaming -  How to build a silent gaming PC?
Credit : whatcanu.com

When it comes to building a whisper-quiet gaming PC, the choice of case is critical. Not all cases are created equal, and selecting one with soundproofing features can significantly dampen the noise generated by your components. Look for cases that come with sound-absorbing materials, often found in the form of foam lining on the interior or panels specifically designed to minimize vibrations.

Consider cases with thick, tempered glass or solid side panels, as these tend to provide better sound insulation compared to those with perforated designs. Additionally, some models come equipped with noise-dampening rubber mounts for hard drives and fans, which can further reduce the hum of mechanical parts in action.

Ventilation is another aspect to consider. While you want a case that keeps your components cool, too many openings can let sound escape. Look for cases that balance airflow with noise reduction, featuring strategically placed vents that allow for efficient cooling without compromising your quest for silence.

Finally, pay attention to the size and layout of the case. A larger case can house more fans and cooling solutions, allowing you to run them at lower speeds, which translates to quieter operation. Ultimately, investing in a well-designed case with soundproofing features will lay the foundation for your silent gaming experience, ensuring that the only sounds you hear during gameplay are the immersive audio of the game itself, rather than the clamor of your hardware.

4. Selecting Low-Noise Fans and Cooling Solutions

When it comes to assembling a whisper-quiet gaming PC, one of the most crucial elements to consider is your choice of fans and cooling solutions. Traditional cooling methods often produce unwanted noise, but with the right approach, you can create an environment that allows for immersive gaming without the distraction of whirring, buzzing, or rattling.

First and foremost, look for fans specifically designed for low noise operation. These fans typically feature advanced blade designs and high-quality bearings that minimize turbulence and vibration, significantly reducing sound levels. Brands like Noctua and Be Quiet! are renowned for their silent cooling products, offering fans that provide excellent airflow while maintaining a near-silent performance. Opting for larger fans can also be advantageous; they can move the same amount of air at lower RPMs compared to smaller counterparts, thereby decreasing noise output.

In addition to fans, consider your overall cooling solution. Liquid cooling systems, particularly those with larger radiators and quieter pumps, can be an excellent choice for a silent build. A closed-loop liquid cooler with a low-noise pump can keep your CPU temperatures in check without the incessant hum of traditional air cooling systems. Plus, many liquid coolers come with customizable RGB lighting, allowing you to enhance your build’s aesthetics while keeping noise at bay.

Don’t forget to prioritize the positioning and airflow within your case. Proper cable management and strategic fan placement can reduce noise levels by creating a more efficient airflow path. Consider using sound-dampening materials within your case, such as acoustic foam or rubber grommets, to further absorb sound.

By selecting low-noise fans and implementing effective cooling solutions, you can significantly enhance your gaming experience. With a silent setup, each sound becomes more pronounced, immersing you deeper into the worlds you explore. Enjoy your favorite games without the distracting drone of an overactive cooling system, and revel in the serenity of a whisper-quiet gaming environment.

5. The Role of a Silent Power Supply Unit (PSU)

pc gaming -  How to build a silent gaming PC?
Credit : whatcanu.com

When it comes to building a whisper-quiet gaming PC, the power supply unit (PSU) plays a pivotal role that often goes unnoticed. While many enthusiasts focus on the CPU, GPU, and cooling solutions, the PSU is a crucial component that can significantly affect your system’s noise levels. A silent PSU not only ensures steady power delivery to your components but also operates quietly, allowing you to immerse yourself fully in your gaming experience without the distracting hum of a loud fan.

Modern silent PSUs are designed with advanced technologies that minimize noise output. These units often feature larger, more efficient fans that can run at lower RPMs during typical gaming loads. Some even employ fanless designs for lower wattages, relying on passive cooling to maintain optimal temperatures without generating any sound. When selecting a PSU, look for models labeled as “80 Plus” certified; these units not only provide energy efficiency but also tend to produce less heat, meaning that their fans don’t need to work as hard—resulting in quieter operation.

Moreover, consider the PSU’s design and build quality. Units with high-quality capacitors and robust internal components are likely to operate more efficiently and quietly. Some brands have also implemented technologies such as hybrid fan modes, where the fan only kicks in under heavy loads, ensuring silent performance during light gaming or everyday tasks.

In essence, investing in a silent power supply unit is a crucial step in your quest for a serene gaming environment. By prioritizing a unit with low noise characteristics, you’ll enhance not just the tranquility of your setup but also the longevity and reliability of your entire system. Remember, a powerful gaming rig doesn’t have to come with a cacophony of noise; with the right PSU, you can enjoy your games in peaceful solitude.

6. Opting for a Quiet Graphics Card: What to Look For

When it comes to building a whisper-quiet gaming PC, the graphics card plays a pivotal role—not just in performance but also in noise levels. A powerful GPU can enhance your gaming experience, but if it sounds like a jet engine taking off, it can quickly ruin the immersion. Here are some key factors to consider when selecting a quiet graphics card that meets your gaming needs without causing a ruckus.

**Cooling Solutions**: The type of cooling solution used on the graphics card significantly affects its noise output. Look for models equipped with advanced cooling technologies, such as dual or triple fans with larger diameters, which can move more air at lower RPMs. Some cards even feature passive cooling modes, allowing them to operate silently during low-intensity tasks. Cards with liquid cooling systems are also worth considering, as they tend to generate minimal noise while efficiently dissipating heat.

**Fan Design and Quality**: Pay attention to the fan design as well. Look for graphics cards that utilize high-quality, low-noise fans. Some manufacturers offer specialized fan blades designed to optimize airflow while minimizing turbulence, resulting in quieter operation. Features like fan stop technology—where the fans only activate under load—can also help keep noise levels down during light usage.

**Build Quality**: A well-constructed graphics card with robust components can contribute to a quieter operation. Cards featuring metal backplates and reinforced frames often experience less vibration, meaning less noise. Additionally, check for customer reviews that highlight noise levels under load. Real-world feedback can provide insight into how a card performs in everyday gaming scenarios.

**Performance vs. Noise Balance**: While it’s essential to find a quiet graphics card, don’t sacrifice performance for silence. Look for a balance that meets your gaming requirements while still adhering to your noise preferences. Mid-range cards often provide excellent performance without the excessive noise levels found in some high-end models designed for extreme gaming.

In summary, opting for a quiet graphics card involves considering cooling solutions, fan design, build quality, and the performance-noise trade-off. By taking the time to research and select the right GPU, you can create a gaming setup that delivers thrilling visuals and gameplay—all while maintaining a serene and immersive environment. With the right choices, you can enjoy your favorite titles without the distracting hum of an overworked graphics card.

7. Solid-State Drives (SSDs) vs. Traditional Hard Drives (HDDs)

pc gaming -  How to build a silent gaming PC?
Credit : whatcanu.com

When it comes to building a whisper-quiet gaming PC, one of the most significant decisions you’ll face is choosing between Solid-State Drives (SSDs) and Traditional Hard Drives (HDDs). This choice not only affects your system’s performance but also its noise output, which is crucial for a serene gaming environment.

SSDs, with their sleek and modern design, stand out for their remarkable speed and efficiency. Unlike HDDs, which rely on spinning disks and moving read/write heads, SSDs utilize flash memory to store data. This fundamental difference means that SSDs operate silently, producing virtually no noise during use. Imagine diving into your favorite immersive game, with crisp graphics and responsive load times, all while enjoying the tranquility of your environment. With an SSD, you can achieve that blissful state, as it minimizes distractions and allows you to fully engage in your gaming sessions.

On the other hand, traditional HDDs, while often more affordable and offering larger storage capacities, come with mechanical components that can generate audible sounds. The whirring of spinning platters and the clicking of read/write arms can disrupt the gaming experience, creating an unwelcome backdrop of noise that detracts from the immersion. For gamers who value a quiet atmosphere, the clattering of an HDD can be a dealbreaker.

While SSDs may initially come with a higher price tag for similar storage capacities, the benefits extend beyond just silence. They boast faster boot times, quicker game load times, and improved system responsiveness, all of which contribute to a smoother gaming experience. Many gamers find that the investment in an SSD is well worth it, particularly when paired with a silent cooling system and other noise-reducing components.

For those who require ample storage and are considering an HDD, it’s worth exploring hybrid solutions. A setup combining an SSD for your operating system and frequently played games, alongside an HDD for bulk storage, can strike the perfect balance between speed and capacity while still keeping noise levels manageable.

Ultimately, your choice between SSDs and HDDs will depend on your specific gaming needs, budget, and desire for a quiet gaming environment. However, if silence is golden in your gaming setup, opting for an SSD is a step in the right direction towards achieving the ultimate whisper-quiet gaming experience.

8. Acoustic Dampening Materials: Where to Use Them

When it comes to building a whisper-quiet gaming PC, the strategic use of acoustic dampening materials can make all the difference in creating a serene gaming environment. These materials are designed to absorb sound and minimize vibrations, effectively lowering the noise levels generated by your components. Here are some key areas where you can implement these materials to achieve optimal soundproofing.

**1. Inside the Case:** Begin with the interior of your PC case. Applying acoustic foam or sound-dampening panels inside the case helps to absorb noise emitted from your graphics card, power supply, and cooling fans. Look for high-density foam or specialized soundproofing mats that can be cut to fit your case’s dimensions. When placing these materials, cover the side panels, the bottom, and even the top if your case design allows it. This will create a quieter environment for your components to operate.

**2. Around Fans and Radiators:** Fans are notorious for generating noise, especially under load. Utilize rubber grommets or foam pads to mount your fans, which can help to reduce both vibration and sound transmission. If you’re using a liquid cooling solution, consider wrapping the radiator in acoustic material or placing it in a way that minimizes direct contact with the case to dampen the vibrations further.

**3. HDD and SSD Mounts:** Hard disk drives (HDDs) can produce significant noise during operation. Ensure that your HDDs are mounted using rubber or silicone mounts, which can effectively absorb vibrations. If you have the option, consider using solid-state drives (SSDs) instead, as they operate silently. However, if you do include HDDs, placing them in dedicated, sound-insulated compartments within your case can also help reduce noise.

**4. Power Supply Units (PSUs):** The PSU can be a major source of noise, especially under heavy load. Look for cases that feature sound-dampened power supply chambers or consider adding acoustic foam around the PSU area. Just be cautious of airflow; you want to ensure that the PSU remains adequately ventilated while minimizing sound.

**5. Cables and Accessories:** Lastly, don’t overlook the importance of managing your cables. Well-organized cables not only improve airflow but can also reduce noise caused by rattling or vibration. Use cable ties and velcro straps to secure and bundle cables neatly, minimizing movement and potential noise generation.

By strategically placing acoustic dampening materials in these key areas, you can significantly reduce the noise produced by your gaming PC. The result? A tranquil gaming experience that allows you to immerse yourself fully in your virtual worlds without the distraction of unwanted noise.

9. Cable Management Tips for Reduced Noise

Effective cable management is often overlooked in the quest for a silent gaming PC, yet it can play a pivotal role in reducing noise levels. When cables are allowed to roam free within your case, they can obstruct airflow, leading to increased fan speeds and, consequently, more noise. Here are some key tips to help you achieve a tidy and quiet setup:

**1. Invest in Quality Cables:** Start with high-quality, flexible cables that are easier to manage and route. Flat cables can save space and help in reducing clutter compared to traditional round cables. Consider using modular power supplies that allow you to use only the cables you need, minimizing excess.

**2. Use Cable Ties and Velcro Straps:** Once your cables are in place, secure them with cable ties or Velcro straps. Keeping cables bundled together not only improves aesthetics but also helps prevent them from interfering with fans and other components. A clean layout allows for better airflow, which can help keep your system cooler and quieter.

**3. Route Cables Behind the Motherboard Tray:** Many modern cases come with a dedicated space to route cables behind the motherboard tray. Take advantage of this feature to hide unsightly cables, creating a clean look while keeping them out of the airflow path.

**4. Keep Power Cables Away from Fans:** Make a conscious effort to route power cables away from fan blades and airflow zones. This minimizes the chances of cables vibrating against fans, which can generate unwanted noise.

**5. Utilize Cable Management holes:** Most cases are equipped with cable management holes designed to help you neatly route cables. Use these strategically to keep cables organized and out of sight.

**6. Regular Maintenance:** Lastly, don’t forget to periodically check your cable management. Dust and wear can cause cables to shift over time, leading to potential noise issues. A regular cleanup and reorganization can help maintain a silent setup.

By implementing these cable management strategies, you’ll not only enhance the overall aesthetics of your gaming rig but also contribute significantly to a quieter environment. A well-organized interior not only promotes optimal airflow but also helps your components operate efficiently, ultimately leading to a more enjoyable gaming experience.

10. BIOS Settings for Fan Control and Noise Reduction

When it comes to building a whisper-quiet gaming PC, one of the often-overlooked aspects is the BIOS settings, particularly those related to fan control and noise reduction. Your BIOS is the gateway to optimizing your system’s performance and acoustic footprint, allowing you to tailor how your fans operate based on temperature and workload.

First and foremost, access your BIOS by pressing the designated key—usually Del or F2—during the boot-up process. Once inside, look for the hardware monitoring section, which typically includes fan speed controls. Many modern motherboards come equipped with advanced fan curve options, allowing you to adjust the speed of your fans based on temperature thresholds. Setting a more gradual fan curve can significantly reduce noise levels, as the fans will only ramp up when necessary, rather than running at full speed all the time.

Another valuable feature to consider is the ‘Quiet Mode’ or ‘Silent Mode’ setting, which many BIOS interfaces offer. Enabling these modes will automatically adjust the fan speeds to maintain a quieter operation. If your motherboard supports it, consider using PWM (Pulse Width Modulation) fans, which provide finer control over fan speeds and result in quieter operation.

Additionally, pay attention to any power-saving settings within the BIOS. Enabling features like C-states can help lower the power consumption of your CPU when it’s not under heavy load, allowing for a quieter overall system operation.

Lastly, don’t forget to keep an eye on the temperatures of your components. A well-optimized cooling system is crucial; if your system is running too hot, fans will inevitably work harder, increasing noise levels. Regularly monitoring your temperatures and making adjustments to your cooling solutions can help you strike the perfect balance between thermal performance and acoustic tranquility.

By fine-tuning your BIOS settings for fan control and noise reduction, you can create a serene gaming environment where the only sounds you’ll hear are the immersive audio from your games, not the whir of your cooling system.

11. Software Solutions for Monitoring and Managing Noise Levels

When it comes to creating a whisper-quiet gaming PC, the hardware choices are just part of the equation; the software you use can significantly impact your noise levels as well. Leveraging the right software solutions allows you to monitor, manage, and optimize your system for silent operation, ensuring that you can immerse yourself in your gaming experience without being distracted by unnecessary noise.

**Temperature and Fan Control Software**
One of the primary contributors to noise in a gaming PC is the cooling system, particularly the fans. By using software like MSI Afterburner or FanControl, you can monitor your GPU and CPU temperatures in real time and adjust fan curves accordingly. With these tools, you can set your fans to ramp up only when temperatures exceed certain thresholds, allowing them to run at lower speeds—and therefore quieter—during regular gameplay. This not only reduces noise but can also extend the lifespan of your components by preventing overcooling.

**System Monitoring Tools**
Monitoring software, such as HWMonitor or Open Hardware Monitor, gives you insight into the various temperatures and performance metrics of your PC. By keeping an eye on the system’s performance, you can identify any components that are underperforming or running excessively hot, which may lead to noisier operation. If you notice certain parts are generating more heat, you can consider options like improving airflow in your case or adjusting your cooling solutions to maintain optimal performance with minimal noise.

**Noise-Canceling Software**
In addition to hardware and fan management, consider employing noise-canceling software for your gaming setup. Applications like Krisp or RTX Voice can filter out unwanted background sounds during gaming sessions or streaming, ensuring that your audio output remains clear and focused. This is especially beneficial if you’re using a microphone for in-game communication or streaming, as it can significantly enhance your audio quality without adding any extra noise from your environment.

**Game Mode Settings**
Many operating systems and gaming platforms offer “Game Mode” settings that prioritize system resources for your gaming applications. This not only enhances performance but can also help in minimizing the workload on your CPU and GPU, which translates to lower energy consumption and reduced fan noise. Enabling these settings can create a more tranquil gaming experience, letting you enjoy your favorite titles without the distraction of a noisy system.

By integrating these software solutions into your whisper-quiet gaming PC build, you can take control of your noise levels and tailor your system’s performance to suit your gaming needs. With the right combination of monitoring and management, you’ll create a serene environment that allows you to fully immerse yourself in the gameplay, without the unwanted hum of fans and components.

12. Building vs. Buying: Tailoring Your Silent Gaming Experience

When it comes to creating the ultimate whisper-quiet gaming rig, a pivotal decision lies in whether to build your own PC or buy a pre-assembled one. Each option has its merits, but understanding your specific needs and preferences is crucial to tailoring a silent gaming experience that truly resonates with you.

Building your own gaming PC offers unparalleled customization. You have the freedom to select each component, from the CPU and GPU to the cooling system, ensuring that every part is optimized for silence. Consider investing in high-quality, low-noise fans, such as fluid dynamic or magnetic levitation models, which can significantly reduce operational sound. Additionally, selecting components that are known for their quiet performance—like certain models of graphics cards and power supplies—can help you achieve that elusive silent gaming experience.

Moreover, building your PC allows you to integrate noise-dampening materials into your case. Acoustic foam, rubber grommets, and soundproof panels can be added to minimize vibrations and noise. This level of control means you can design a system that not only performs brilliantly but also operates almost silently, enriching your gaming immersion without the distraction of fan whirs or hard drive clicks.

On the other hand, if you’re not comfortable with the DIY approach, buying a pre-built gaming PC can be an attractive alternative. Many manufacturers now offer models specifically designed for quiet operation, equipped with sound-insulated cases and optimized cooling solutions. This option saves you the time and effort of researching individual components and assembling them, making it ideal for those who prefer convenience.

However, be mindful of the specifications. Not all pre-built systems prioritize silence, so look for models that highlight their noise-reduction features. Reading customer reviews and expert recommendations can help you identify machines that strike the perfect balance between performance and quiet operation.

Ultimately, whether you choose to build or buy, the key is to prioritize components and systems designed for silence. Your decision should align with your comfort level and technical expertise, ensuring that the end result is a gaming experience that’s not just powerful, but also beautifully serene.

13. Real-World Testing: Measuring Your PC’s Noise Levels

Once you’ve meticulously selected your components and assembled your whisper-quiet gaming PC, the next step is to put it to the test. Real-world testing is crucial to ensure that your carefully chosen parts are delivering the serene gaming experience you envisioned. measuring your PC’s noise levels involves a few straightforward but essential steps that will help you assess its performance in a realistic setting.

Start by using a sound level meter, an essential tool for accurately capturing the decibel levels emitted by your system. These meters are widely available and can provide you with precise readings, allowing you to measure noise levels in different conditions—idle, during gaming, and under heavy load. Ideally, you want to position the meter at ear level and at a distance of around 1 meter from your PC to capture a true representation of its sound profile.

When you conduct your tests, choose a quiet room to eliminate background noise that could skew your results. Begin with the PC at idle, noting the decibel level as it operates without any demanding tasks. Next, launch a graphics-intensive game or application to see how the noise levels change under load. Pay attention not just to the overall dB levels, but also to the frequency of the sounds produced. A PC that maintains a low hum without high-pitched whines or rattling fans is a sign of a well-constructed silent gaming rig.

After recording your findings, compare your results against the noise levels of other systems and manufacturers’ specifications for your components. This comparison will help you identify any potential culprits that may be contributing to unwanted noise. If your tests reveal that your system is still louder than desired, consider revisiting your cooling solutions, re-evaluating fan speeds, or even implementing additional soundproofing measures.

Ultimately, real-world testing not only validates your efforts in building a silent gaming PC but also allows you to fine-tune and optimize your setup for an experience that is as immersive as it is serene. With the right measurements and adjustments, you can ensure that your gaming environment remains tranquil, letting you focus on your gameplay without distraction.

14. Maintenance Tips for Keeping Your PC Quiet Over Time

Building a whisper-quiet gaming PC is just the first step; maintaining that serene silence is essential for an uninterrupted gaming experience. Over time, dust accumulation, wear and tear, and changing components can introduce unwanted noise, but with a few proactive maintenance tips, you can preserve the tranquility of your setup.

**Regular Dusting and Cleaning:** Dust is the enemy of both cooling efficiency and noise levels. Every few months, open your case and gently blow out dust using compressed air, paying special attention to fans and heatsinks. Avoid using a vacuum cleaner, as it can generate static electricity that may harm sensitive components. wipe down surfaces with a microfiber cloth to keep everything looking clean and fresh.

**Monitor Fan Performance:** With the advent of temperature monitoring software, keeping track of your fans’ performance has never been easier. Use tools like MSI Afterburner or HWMonitor to keep an eye on temperatures and fan speeds. If you notice any fans running excessively fast or making irregular noises, it might be time for a replacement or repair.

**Upgrade Components When Necessary:** As games evolve and system requirements increase, you may find it necessary to upgrade certain components. When doing so, opt for quieter alternatives, such as low-noise graphics cards and CPU coolers. Research user reviews to find models that prioritize silence without sacrificing performance.

**Cable Management:** Not only does a tidy case look better, but good cable management can also improve airflow, which in turn can keep temperatures down. Use zip ties or Velcro straps to bundle cables neatly and out of the way of fans. This not only helps maintain a quieter operation but also makes future maintenance easier.

**Check for Loose Parts:** Over time, screws and fittings can become loose, leading to vibrations and increased noise. Periodically check that all screws on your case, fans, and components are tight. If you hear rattling or vibrations, take the time to identify and fix the source.

**Consider Sound-Dampening Materials:** If you want to take your quiet gaming experience to the next level, consider adding sound-dampening materials to your case. Acoustic foam or mass-loaded vinyl can absorb sound waves and minimize noise from fans and components. These materials are easy to install and can significantly enhance your setup’s overall silence.

By following these maintenance tips, you can ensure that your gaming PC remains a bastion of quiet, allowing you to immerse yourself fully in your gaming adventures without the distraction of unwanted noise. A little effort goes a long way in keeping your peaceful gaming oasis intact!

15. Conclusion: Achieving the Perfect Balance Between Performance and Silence

In the world of gaming, where performance often takes center stage, the quest for a whisper-quiet experience can sometimes feel like an uphill battle. However, as we conclude this guide, it’s clear that achieving the perfect balance between performance and silence is not only possible but also incredibly rewarding.

Building a silent gaming PC requires careful consideration of each component, from the choice of a whisper-quiet CPU cooler to the selection of noise-dampening cases and fans. Throughout this guide, we’ve explored how the right combination of hardware can dramatically reduce noise levels while still delivering top-tier gaming performance. Remember, it’s not just about slapping together high-end parts; it’s about meticulous planning and execution.

Additionally, leveraging software solutions to manage fan speeds and optimizing your system for thermal efficiency can lead to a significant reduction in noise. By prioritizing quality over quantity—choosing components that work harmoniously together—you can create a gaming rig that runs cool, quiet, and efficiently.

Ultimately, the journey to a silent gaming PC is one of patience and experimentation. Each gaming setup is unique, and finding what works best for you may require some trial and error. As you embark on this exciting adventure, keep in mind that the silence you achieve can amplify your gaming experience, allowing you to become wholly immersed in your digital worlds without the distracting hum of noisy fans or drives.

So, whether you’re delving into the latest AAA titles or enjoying indie gems, remember that a well-built silent gaming PC not only enhances your gameplay but also contributes to a more serene and enjoyable gaming environment. Embrace the tranquility, and let your gaming adventures unfold in peace. Happy building!

In conclusion, building a whisper-quiet gaming PC is not only achievable but can also enhance your overall gaming experience. By carefully selecting components designed for low noise levels, optimizing your cooling solutions, and implementing sound-dampening measures, you can create a powerful system that operates in serene silence. Whether you’re engaged in an intense gaming session or enjoying a cinematic experience, the tranquility of a silent setup allows you to immerse yourself fully without distractions. We hope this ultimate guide equips you with the knowledge and inspiration needed to embark on your quiet gaming journey. So, gather your parts, unleash your creativity, and get ready to enjoy the perfect blend of performance and peace—happy building!

pc gaming – How to choose a power supply for your gaming PC?

Building or upgrading a gaming PC can be an exhilarating experience, but one of the most critical components that often gets overlooked is the power supply unit (PSU).

The right PSU not only powers your system but also ensures stability, efficiency, and protection for your valuable hardware. With an overwhelming array of options available, selecting the perfect power supply can feel like navigating a maze. From understanding wattage requirements and efficiency ratings to considering modular designs and cable management, this complete guide will empower you with the knowledge you need to make an informed choice. Whether you’re a seasoned gamer or a first-time builder, join us as we break down the essentials and help you power up your gaming rig with confidence, ensuring that every gaming session is as smooth and thrilling as possible.

1. Understanding Power Supply Units (PSUs): An Overview

pc gaming -  How to choose a power supply for your gaming PC?
Credit : whatcanu.com

When it comes to building or upgrading your gaming PC, one of the most crucial components to consider is the Power Supply Unit (PSU). Often overlooked in favor of more glamorous hardware like graphics cards and CPUs, the PSU is the unsung hero that fuels your entire system. It converts the alternating current (AC) from your wall outlet into direct current (DC) that your computer components can use, providing stable and reliable power to ensure optimal performance.

Understanding PSUs begins with grasping their primary specifications: wattage, efficiency rating, and modularity. Wattage indicates the total amount of power the unit can deliver to your components. Depending on your gaming setup—whether you’re running a single GPU or a multi-GPU configuration—calculating your system’s total power consumption is vital to ensure that you select a PSU with sufficient capacity. As a rule of thumb, it’s wise to choose a PSU that offers 20-30% more wattage than your system consumes to accommodate for future upgrades and peak usage.

Efficiency is another key factor to consider, measured by the 80 PLUS certification system. This rating indicates how effectively a PSU converts AC power to DC power, with higher efficiency resulting in less wasted energy and lower electricity bills. For gamers, selecting a PSU with at least an 80 PLUS Bronze certification can lead to better performance and longevity, while Gold or Platinum ratings can further enhance efficiency and reduce heat output.

Lastly, modularity refers to the way cables are connected to the PSU. Fully modular units allow you to detach all cables, making cable management a breeze and improving airflow within your case. Semi-modular PSUs provide a balance by allowing you to disconnect some cables while keeping the essential ones fixed. Non-modular PSUs, on the other hand, come with all cables permanently attached, which can lead to clutter and hinder airflow.

In summary, understanding the intricacies of Power Supply Units is the first step in equipping your gaming rig with a reliable and efficient power source. By considering wattage, efficiency ratings, and modularity, you’ll be well on your way to selecting the perfect PSU that not only meets your current gaming needs but also prepares you for future upgrades and expansions.

2. Why Choosing the Right PSU Matters for Gaming

When it comes to building a gaming PC, the excitement often centers around selecting the latest graphics card, the fastest processor, and the sleekest case. However, one component that should never be overlooked is the power supply unit (PSU). Choosing the right PSU is crucial for several reasons, and understanding its significance can save you from a host of potential issues down the road.

First and foremost, a high-quality PSU ensures that your gaming rig receives a stable and consistent flow of power. Games today are demanding, often pushing hardware to their limits. If your PSU cannot deliver adequate power, you risk instability, crashes, or even hardware damage. Imagine being in the heat of an epic gaming battle only to have your experience abruptly interrupted by system failures—this is a nightmare no gamer wants to face.

Moreover, the efficiency of your PSU plays a vital role in your overall system performance. Power supplies come with efficiency ratings, such as 80 PLUS Bronze, Silver, Gold, Platinum, and Titanium. A more efficient PSU not only reduces electricity costs but also generates less heat, which can help maintain optimal temperatures for your components. This is especially important for gamers who engage in long sessions, as excess heat can lead to throttling and reduced performance.

Another critical factor is the future-proofing aspect of your PSU. As games evolve and hardware requirements increase, having a PSU with ample wattage and the right connectors is essential. This way, you can upgrade your graphics card or add more components without worrying about whether your power supply can handle the load. A robust PSU allows you to stay at the forefront of gaming technology without the need for frequent replacements.

In summary, while it may be tempting to skimp on the power supply in favor of flashier components, investing in the right PSU is a decision that pays off in the long run. It ensures stability, efficiency, and flexibility for your gaming setup, allowing you to focus on what truly matters—immersing yourself in the thrilling worlds of your favorite games.

3. Key Specifications to Consider

pc gaming -  How to choose a power supply for your gaming PC?
Credit : whatcanu.com

When it comes to selecting the perfect power supply for your gaming PC, understanding the key specifications is crucial for both performance and reliability. The right power supply unit (PSU) not only ensures that your components receive adequate power but also protects them from potential damage due to power surges or fluctuations. Here are the essential specifications you should consider:

**Wattage**: The first and foremost specification is wattage, which indicates the total amount of power the PSU can deliver. Generally, a gaming PC requires a PSU that can provide anywhere from 500 to 850 watts, depending on the components you plan to use. To determine your needs, you can utilize online wattage calculators, which take into account your CPU, GPU, and other peripherals. Opting for a PSU with a bit of headroom above your calculated wattage can help accommodate future upgrades.

**Efficiency Rating**: The efficiency rating of a power supply is another vital specification. This is denoted by the 80 PLUS certification, which signifies how efficiently the PSU converts AC power from the wall into DC power that your components can use. An 80 PLUS Bronze, Silver, Gold, or Platinum rating indicates increasing levels of efficiency, with Platinum being the most efficient. A higher efficiency not only reduces energy costs but also minimizes heat output, extending the lifespan of your PSU and components.

**Modularity**: Power supplies come in three types: non-modular, semi-modular, and fully modular. Non-modular PSUs have all cables permanently attached, which can lead to clutter in your case and hinder airflow. Semi-modular units allow you to detach non-essential cables, while fully modular PSUs enable you to connect only the cables you need. This flexibility can greatly improve cable management and aesthetics, making your build not just functional but visually appealing.

**Ripple and Noise**: Ripple refers to the small fluctuations in voltage that occur as the PSU supplies power. Excessive ripple can damage sensitive components over time. Look for PSUs that keep ripple within acceptable limits, ensuring stable power delivery. Similarly, noise levels are essential; a good PSU will operate quietly, particularly under load. Check reviews and specifications for sound levels, especially if you prefer a silent gaming experience.

**Protection Features**: Finally, don’t overlook the safety features of the power supply. Look for models equipped with Over Voltage Protection (OVP), Under Voltage Protection (UVP), Over Current Protection (OCP), and Short Circuit Protection (SCP). These features safeguard your components against potential damage caused by power anomalies, providing peace of mind as you game.

By carefully considering these specifications, you can confidently choose a power supply that not only meets your current gaming needs but also supports future upgrades, ensuring your PC runs smoothly and efficiently for years to come.

– Wattage

When it comes to selecting the ideal power supply for your gaming PC, wattage is one of the most critical factors to consider. Think of wattage as the lifeblood of your system; it dictates how much power your components can draw to function optimally. The right wattage not only ensures that your PC runs smoothly but also protects it from potential damage caused by underpowered or overpowered components.

To determine the wattage you need, start by calculating the total power consumption of all your components, including the CPU, GPU, motherboard, RAM, storage drives, and any additional peripherals. Most modern gaming setups require at least 500 watts, but high-performance rigs with multiple GPUs or overclocked components can demand 750 watts or more.

Using online wattage calculators can simplify this process by providing a detailed estimate based on your specific components. However, it’s wise to add a buffer of around 20-30% above your calculated needs. This extra headroom allows for future upgrades and accounts for power spikes during intensive gaming sessions.

It’s also important to consider the efficiency rating of the power supply. Look for units that are 80 Plus certified, which indicates that they operate at a minimum efficiency of 80%. Higher certifications, such as 80 Plus Gold or Platinum, not only reduce energy costs in the long run but also generate less heat, enhancing the longevity of your system.

Ultimately, choosing the right wattage is about balancing performance, efficiency, and future-proofing your gaming rig, ensuring that you can enjoy the latest titles without worrying about power limitations or system stability.

– Efficiency Rating (80 PLUS Certification)

pc gaming -  How to choose a power supply for your gaming PC?
Credit : whatcanu.com

When it comes to selecting the perfect power supply for your gaming PC, understanding efficiency ratings, specifically the 80 PLUS certification, is crucial. The 80 PLUS certification program was established to promote energy efficiency in power supply units (PSUs) and provides a reliable benchmark for consumers. This certification ensures that a PSU operates at a minimum of 80% efficiency at various load levels—20%, 50%, and 100%.

But what does this mean for you as a gamer? Higher efficiency translates to less wasted energy in the form of heat, resulting in lower electricity bills and a cooler, quieter system. A PSU with an 80 PLUS certification means that for every 100 watts it draws from the wall, at least 80 watts are being converted into usable power for your components. The remaining 20 watts are lost as heat, which not only affects your energy consumption but can also impact the longevity of your hardware over time.

The 80 PLUS certification comes in several tiers: Standard, Bronze, Silver, Gold, Platinum, and Titanium. Each tier represents a higher level of efficiency, with Titanium being the most efficient available on the market. For instance, a Gold-rated PSU maintains at least 90% efficiency at 50% load, making it a strong choice for gamers who desire performance without compromising on energy consumption.

Additionally, investing in a higher-rated PSU can provide peace of mind, as these units often come with enhanced features such as better components, improved cooling solutions, and longer warranties. So when you’re building or upgrading your gaming rig, consider the efficiency rating of the power supply to not only save on energy costs but also to ensure a reliable and sustainable gaming experience. By choosing a PSU with a solid 80 PLUS certification, you’re powering your gaming ambitions while being mindful of the environment.

– Modular vs. Non-Modular Design

When it comes to choosing the perfect power supply for your gaming PC, understanding the difference between modular and non-modular designs is crucial. The power supply unit (PSU) is the heart of your system, delivering the necessary power to all components, and the design can significantly impact both the performance and the aesthetics of your build.

**Modular Power Supplies:**
Modular PSUs come with detachable cables, allowing you to connect only the cords you need for your specific configuration. This design offers significant advantages in terms of cable management and airflow. With fewer cables cluttering your case, you can achieve a cleaner look and improve airflow, which is essential for keeping your components cool during intensive gaming sessions. Additionally, modular power supplies tend to make installation easier, as you can choose the optimal length and type of cable for your setup, minimizing the hassle of routing excess cables through your case.

**Non-Modular Power Supplies:**
On the other hand, non-modular power supplies come with all cables permanently attached. While this design often results in a lower price point, it can lead to a more chaotic interior if you have excess cables that you don’t need. This can hinder airflow and make your build look cluttered and disorganized. However, for those on a tight budget or for users with simpler setups that require fewer components, a non-modular PSU can still provide reliable performance without the bells and whistles of a modular design.

**Choosing Between the Two:**
Ultimately, the choice between a modular and non-modular power supply will depend on your specific needs, budget, and the complexity of your gaming rig. If aesthetics and cable management are high on your priority list, a modular PSU is likely the way to go. However, if you’re looking for a cost-effective solution and don’t mind a bit of extra cabling, a non-modular option may serve you well. Whichever route you choose, ensuring that your power supply meets the wattage requirements for your components is essential for a stable and high-performing gaming experience.

4. Calculating Your Power Needs

pc gaming -  How to choose a power supply for your gaming PC?
Credit : whatcanu.com

Calculating your power needs is a vital step in ensuring your gaming PC runs smoothly and efficiently. With the diverse range of components available on the market, each with its own power requirements, determining the right wattage for your power supply unit (PSU) can seem daunting. However, with a little math and some essential tools, you can confidently arrive at a number that will support your system’s needs.

Start by listing all the components in your gaming rig: the CPU, GPU, motherboard, RAM, storage drives, cooling fans, and any additional peripherals. Each of these components has a specific wattage requirement, which can usually be found in the product specifications. For example, high-performance graphics cards and processors may consume anywhere from 200 to 500 watts or more, depending on the model.

Once you have the wattage for each component, add them together to get a preliminary total. However, it’s crucial to account for additional factors, such as potential future upgrades and the PSU’s efficiency. Most experts recommend adding around 20% to your total wattage to provide a safety buffer, ensuring your system can handle peak loads without straining the power supply. This also allows for the occasional overclocking and ensures that your PSU operates within its optimal range, prolonging its lifespan.

To simplify this process, consider using online power supply calculators available on various hardware websites. These tools allow you to input your component specifications and will automatically calculate the recommended wattage for your PSU, factoring in the necessary overhead. Once you have a clear understanding of your power needs, you can confidently select a power supply that meets your requirements, ensuring your gaming experience is not only powerful but also stable and reliable. Remember, choosing the right PSU is not just about wattage; it’s also about efficiency ratings, modularity, and build quality, which we’ll delve into in subsequent sections.

5. Compatibility: Ensuring Your PSU Fits Your Components

When it comes to building the perfect gaming PC, compatibility is a crucial factor that often gets overshadowed by flashy components and high-end specs. Your power supply unit (PSU) is the heart of your system, and ensuring it seamlessly fits with your components is paramount. This means more than just ensuring the PSU physically fits within your case; it also involves verifying that it can supply the correct voltage and enough power for your entire setup.

First and foremost, check the wattage requirements of your components—especially your GPU and CPU. High-performance graphics cards and processors can be particularly power-hungry, requiring a PSU that can deliver a stable and adequate supply of power under load. Most manufacturers provide a recommended wattage for their products, so use those guidelines as your foundation. It’s generally wise to choose a PSU with a wattage rating that exceeds your total needs by at least 20-30%. This not only allows for future upgrades but also ensures that your PSU isn’t running at maximum capacity constantly, which can affect its lifespan and performance.

Next, consider the connectors your components require. Modern GPUs often need a combination of 6-pin and 8-pin PCIe connectors, while motherboards may require a 24-pin connector and additional 4 or 8-pin CPU power connectors. Make sure your chosen PSU comes equipped with the necessary cables and connectors that match your hardware. Some modular PSUs offer the flexibility to add only the cables you need, which can improve airflow and reduce clutter within your case.

Another vital aspect of compatibility is the PSU’s form factor. Standard ATX power supplies fit in most gaming cases, but if you’re using a smaller case, you might need a more compact SFX power supply. Always double-check the specifications of your case to avoid any last-minute surprises during assembly.

In summary, ensuring your PSU is compatible with your gaming PC components is essential for both performance and longevity. By taking the time to assess wattage needs, connector types, and form factors, you’ll lay a strong foundation for a powerful and efficient gaming system that can handle whatever challenges come your way.

6. The Importance of Rail Stability and Amperage

When it comes to selecting the ideal power supply for your gaming PC, understanding rail stability and amperage is crucial for ensuring your system runs smoothly and efficiently. Power supplies are designed with multiple “rails,” which can be thought of as dedicated channels for delivering power to various components of your PC, such as the CPU, GPU, and peripherals. Each rail has a specific amperage rating, dictating how much current it can supply at any given time.

Stability in these rails is paramount. Fluctuations or drops in power can lead to system instability, crashes, or even hardware damage, particularly during demanding gaming sessions or resource-intensive tasks. A power supply with stable rails ensures that your components receive a consistent flow of power, which is essential for maintaining peak performance and longevity.

Moreover, it’s important to pay attention to the amperage ratings on these rails. For instance, high-performance GPUs often require a substantial amount of current to function optimally. If your power supply cannot deliver sufficient amperage on the necessary rails, you may experience throttling, performance drops, or, in the worst-case scenario, a complete system failure.

When selecting a power supply, look for models that offer robust specifications, including a single-rail design with high amperage ratings for the GPU or multiple rails with balanced loads. Always check the manufacturer’s recommendations for the particular components you’re using; this will guide you in choosing a power supply that not only meets the wattage requirements but also excels in rail stability and amperage output. By prioritizing these factors, you can power up your gaming experience with confidence, knowing that your system is well-equipped to handle any challenge that comes its way.

7. Recognizing Quality Brands and Models

When it comes to selecting a power supply unit (PSU) for your gaming PC, recognizing quality brands and models is crucial for ensuring both performance and longevity. The PSU is the heart of your system, supplying power to all components, and investing in a reliable unit can save you from potential headaches down the line.

Start by familiarizing yourself with well-regarded brands in the industry. Companies such as Corsair, EVGA, Seasonic, and be quiet! have established reputations for producing high-quality PSUs that offer efficiency, stability, and durability. These brands often provide detailed specifications, including efficiency ratings (80 PLUS certifications), which indicate how effectively the PSU converts AC power from the wall into usable DC power for your components. The higher the rating—such as Gold or Platinum—the more efficient the PSU, meaning less energy waste and lower electricity bills.

Next, look for models that have garnered positive reviews from gamers and tech experts alike. Online forums, review websites, and YouTube channels dedicated to PC building can provide invaluable insights into the real-world performance of specific PSUs. Pay attention to reviews that detail long-term use, as a quality PSU should maintain stable voltage and low ripple over time, even under heavy load.

Additionally, it’s worth considering the warranty offered by the manufacturer. A longer warranty period often reflects the company’s confidence in its product’s reliability and can provide peace of mind. Brands that back their PSUs with extensive warranties signal a commitment to quality.

Lastly, don’t overlook the importance of modularity. High-quality PSUs often come in fully modular or semi-modular designs, allowing you to connect only the cables you need. This not only enhances cable management but also improves airflow within your case, contributing to better thermal performance.

By investing time in recognizing reputable brands and their top-performing models, you can ensure that your gaming rig is powered by a PSU that not only meets your current demands but is also built to last through countless gaming sessions.

8. Noise Levels: Choosing a Quiet Power Supply

When building the ultimate gaming PC, performance is undoubtedly a top priority, but it’s crucial not to overlook another essential factor: noise levels. A gaming setup can quickly become a cacophony of whirring fans and humming components, detracting from the immersive experience you’re aiming for. This is where selecting a quiet power supply (PSU) can make a significant difference in your overall gaming environment.

First and foremost, consider the efficiency rating of the PSU you’re eyeing. Power supplies with higher efficiency ratings, such as 80 Plus Gold or Platinum, tend to run cooler, generating less heat and requiring less fan activity to maintain optimal temperatures. This translates to quieter operation, as the fans don’t have to work as hard to cool down the unit during intense gaming sessions. A PSU that operates at high efficiency not only whispers rather than roars but also contributes to lower energy bills over time.

Next, pay attention to the design and quality of the power supply’s components. Look for models that feature hybrid or semi-passive cooling modes, which allow the PSU to run fanless under low to medium loads. This means that during less demanding gaming moments or everyday usage, you can enjoy an almost silent system. Additionally, investing in a power supply with high-quality capacitors and a well-engineered cooling system can significantly reduce the amount of noise produced.

Finally, don’t underestimate the importance of customer reviews and expert recommendations. Research models that gamers praise for their quiet operation, and consider checking out benchmarks that measure noise levels under various loads. Brands renowned for their commitment to silent operation, such as Seasonic, Corsair, and be quiet!, have built reputations on delivering power supplies that keep your gaming rig humming along without disruptive noise.

By prioritizing noise levels when selecting your power supply, you’re not just investing in a component; you’re enhancing your entire gaming experience. A quiet PSU allows you to immerse yourself in the gaming world, where the only sounds you hear are the thunderous explosions on screen and the subtle whispers of your virtual environment—rather than the distracting buzz of your hardware.

9. Future-Proofing Your Power Supply

When it comes to building a gaming PC, one of the most crucial components to consider is the power supply unit (PSU). While many gamers focus on the flashiness of graphics cards or the speed of CPUs, the PSU often gets overlooked. However, choosing a power supply that can adapt to your evolving gaming needs is essential for future-proofing your setup.

Future-proofing your power supply means selecting a unit that not only meets your current hardware requirements but also has the capability to support potential upgrades down the line. As gaming technology continues to advance, newer components—like high-performance GPUs and power-hungry CPUs—will demand more wattage. By opting for a PSU with a slightly higher wattage rating than you currently require, you can ensure that your system will have the necessary power to accommodate these upgrades without the need for an immediate replacement.

Look for a power supply with an 80 PLUS certification, which signifies that the unit operates efficiently and produces less heat. Higher efficiency ratings (such as 80 PLUS Gold or Platinum) not only contribute to lower electricity bills, but they also indicate a more reliable and durable power supply. Additionally, consider modular or semi-modular PSUs. These allow you to detach cables that you don’t need, resulting in a tidier build and improved airflow, which is especially important as your system evolves.

Also, pay attention to the PSU’s connectors. A power supply that comes with a variety of cables and connectors will provide you with the flexibility to accommodate new components as they come to market. For instance, if you’re planning on getting into high-end gaming or VR within the next few years, ensure your PSU has the necessary PCIe connectors to support upcoming graphics cards.

Lastly, don’t forget warranties and manufacturer reputation. A solid warranty can provide peace of mind, knowing that your investment is protected for years to come. Brands that are well-regarded in the industry often have built their reputations on reliability and customer service, making them a safer choice when investing in a power supply that you want to last through multiple upgrades.

By carefully considering these factors, you can select a power supply that not only meets your current gaming needs but also supports your future aspirations, allowing you to power up your gaming experience for years to come.

10. Understanding Warranty and Support Options

When investing in a power supply for your gaming PC, understanding warranty and support options is crucial. A quality power supply is not just a component; it’s the lifeblood of your entire system, delivering the necessary power to run your components smoothly and efficiently. However, even the best products can occasionally fail, and that’s where a robust warranty can save the day.

Most reputable power supply manufacturers offer warranties ranging from three to ten years, with some high-end models even providing lifetime coverage. These warranties usually cover defects in materials and workmanship, meaning that if something goes wrong due to a manufacturing issue, you can receive a replacement without incurring additional costs. It’s essential to read the fine print, though, as some warranties may require registration or have specific conditions regarding installation and use.

In addition to the warranty, consider the support options available to you. A manufacturer that offers responsive customer service can make a big difference if you encounter issues or have questions about your power supply. Look for companies that provide multiple avenues for support—such as phone, email, and live chat—so you can reach out in the way that’s most convenient for you.

Lastly, delve into user reviews and community feedback regarding the support experiences of others. A stellar warranty is only as good as the company behind it, and knowing how they handle customer inquiries and product failures can give you peace of mind. By carefully evaluating warranty terms and support options, you can ensure that your investment is safeguarded, allowing you to focus on what truly matters: enjoying an immersive gaming experience.

11. Installation Tips for Your Power Supply

Installing a power supply for your gaming PC might seem daunting at first, but with the right approach and some careful planning, you can turn this task into a straightforward process. First and foremost, ensure that you have all the necessary tools at hand, including a screwdriver, zip ties for cable management, and, of course, a clear workspace to avoid mishaps.

When you’re ready to begin, start by preparing your case. Make sure your PC is unplugged and that you’ve grounded yourself to prevent static electricity from damaging sensitive components. Remove the side panel of your case, which will give you access to the interior.

Next, insert the power supply into the designated space, typically located at the bottom or top of the case. Align it with the mounting holes and secure it with screws, ensuring it’s snug but not overly tight. This step is crucial because a loose power supply can lead to unwanted vibrations and noise during operation.

Once the power supply is securely in place, it’s time to connect the cables. Begin with the motherboard power cable, which is generally a large 24-pin connector, followed by the CPU power cable, usually an 8-pin or 4+4 pin connector. Make sure these cables are firmly connected, as a loose connection can lead to system instability.

After powering the motherboard and CPU, connect the graphics card power cables next, which are often 6-pin or 8-pin connectors, depending on your GPU model. Don’t forget to power any additional components such as SSDs or HDDs, ensuring you’re using the correct SATA or Molex power connectors.

As you connect each cable, take a moment to organize them. Use zip ties to bundle cables together, creating a neat and tidy interior that not only looks professional but also improves airflow within the case. Good cable management plays a vital role in maintaining temperature and performance, especially in high-powered gaming setups.

Finally, double-check all connections before plugging in your PC and powering it on for the first time. If you’ve followed these steps carefully, you should be greeted with the reassuring hum of your components working together harmoniously. With your power supply installed correctly, you’re one step closer to enjoying an immersive gaming experience on your newly built rig!

12. Common Mistakes to Avoid When Choosing a PSU

When it comes to selecting the perfect power supply unit (PSU) for your gaming PC, avoiding common pitfalls can save you time, money, and headaches. Here are some of the most frequent mistakes gamers make, and tips on how to steer clear of them.

**1. Neglecting to Calculate Your Wattage Needs:** One of the biggest missteps is not fully understanding your system’s power requirements. Many gamers underestimate the wattage needed, especially with high-performance components. Use online PSU calculators by inputting your specific hardware details—this will give you a clearer picture of the wattage range you should be looking at. Always aim for a PSU that offers a little more than your calculated needs to accommodate future upgrades.

**2. Skimping on Quality:** In the quest to save money, some gamers opt for cheaper, lower-quality PSUs. However, a poor-quality power supply can lead to unstable performance, system crashes, and even damage to your valuable components. Look for reputable brands and check for certifications like 80 PLUS, which indicates energy efficiency and reliability. Investing in a high-quality PSU is crucial for the longevity and stability of your gaming rig.

**3. Overlooking Connector Compatibility:** With a myriad of hardware options available, ensuring that your PSU has the right connectors is vital. Graphics cards, motherboards, and additional components often require specific types of power connectors. Before making a purchase, double-check the compatibility of your PSU with your components to avoid any last-minute surprises during installation.

**4. Ignoring Form Factor:** It’s easy to overlook the physical size of your PSU, but matching its form factor to your case is essential. PSUs come in various sizes, such as ATX, SFX, and TFX. If you have a compact case, a standard ATX PSU may not fit. Always measure your case and check the specifications to ensure a proper fit.

**5. Failing to Plan for Future Upgrades:** Many gamers make the mistake of choosing a PSU that meets only their current needs, neglecting potential future upgrades. If you plan to upgrade to a more powerful GPU or add additional components down the line, select a PSU with adequate wattage and connectors to support these enhancements.

By steering clear of these common mistakes, you can confidently choose a power supply that not only meets your current gaming demands but also sets you up for success in the future. A solid, reliable PSU is the backbone of your gaming PC—make sure you give it the attention it deserves!

13. Upgrading Your PSU: When and Why to Consider It

Upgrading your power supply unit (PSU) is a crucial decision that can significantly impact the performance and longevity of your gaming PC. But when should you consider making this upgrade, and what factors should guide your decision?

First and foremost, if you’ve recently upgraded your GPU or added more components to your rig, it’s essential to evaluate your current PSU’s wattage and efficiency ratings. Modern graphics cards, especially those from the latest generations, often require more power to operate optimally. If your existing PSU is struggling to deliver the necessary wattage, you may notice instability, frequent crashes, or even hardware malfunctions during intense gaming sessions.

Another key indicator that it might be time for an upgrade is the age of your PSU. Power supplies have a finite lifespan, and older models, particularly those over five years, may not only be less efficient but also lack the necessary connectors for newer components. Over time, the capacitors inside a PSU can degrade, leading to inconsistent power delivery, which can harm your sensitive hardware.

Moreover, if you’re planning to overclock your CPU or GPU for enhanced performance, a robust and reliable PSU is essential. Overclocking increases power demands, and a subpar power supply can result in inadequate voltage regulation, leading to instability and crashes. A high-quality, high-wattage PSU ensures that your system has enough headroom to handle these demands while maintaining stable performance.

Lastly, consider your energy efficiency. Upgrading to a PSU with a higher efficiency rating, such as 80 PLUS Gold or Platinum, not only reduces electricity costs but also generates less heat, contributing to a cooler and quieter system. This is particularly important for gamers who spend extended hours in front of their PC, as it creates a more pleasant gaming environment.

In summary, upgrading your PSU is a proactive measure that enhances your gaming experience, ensures system stability, and protects your investment in hardware. Whether driven by new components, age, overclocking ambitions, or a desire for energy efficiency, a timely PSU upgrade can power up your gaming setup and keep you ahead in the ever-evolving gaming landscape.

14. Troubleshooting Common Power Supply Issues

When it comes to building or upgrading your gaming PC, the power supply unit (PSU) is often overlooked—yet it plays a pivotal role in your system’s performance and stability. Even with a high-quality PSU, issues can arise, leaving gamers frustrated and uncertain about how to proceed. Here, we’ll explore some common power supply problems you might encounter and offer troubleshooting tips to help you get back to gaming without delay.

### 1. **No Power at All**
If your PC won’t power on, the first step is to check the basics. Ensure that the power cable is securely connected to both the wall outlet and the PSU. If your PSU has a switch, make sure it’s turned on. If everything appears to be connected properly, test the outlet with another device to rule out any electrical issues. If the problem persists, consider using a multimeter to check if the PSU is delivering the correct voltage.

### 2. **Random Shut Downs**
Experiencing unexpected shut downs can be alarming, especially during intense gaming sessions. This could be a sign of an overloaded power supply or failing components. Start by checking if your PSU has enough wattage to support all your hardware, including the CPU, GPU, and any additional peripherals. Also, ensure that all connectors are properly seated. If your PSU is functioning correctly, overheating due to poor ventilation could be the culprit; ensure that your case has adequate airflow and consider cleaning any dust buildup.

### 3. **Unstable Performance**
If your system is exhibiting instability—such as random reboots, freezes, or crashes—this could point towards a faulty power supply. Begin by checking for any loose connections. If the PSU is old or has been under heavy use, it may be worth testing it with a PSU tester or swapping it out temporarily to see if the issues persist. Additionally, ensure that your power supply is rated for continuous output and that the quality of the components inside your PC meets your gaming needs.

### 4. **Electrical Noises**
Humming, buzzing, or clicking noises coming from your PSU can be unsettling and indicate a potential problem. While some noise is normal, especially under load, loud or irregular sounds could suggest issues with the internal components. If you notice strange noises, it may be time to have your PSU inspected or replaced, as ignoring these signs can lead to further damage.

### 5. **Overheating**
If your PSU is overheating, it can lead to reduced performance and potential failure. Check for proper airflow within your case and ensure that the fan on the PSU is functioning correctly. Consider moving your PC to a cooler location or investing in additional case fans to improve circulation. If overheating continues despite these efforts, it may be necessary to replace the PSU with a more efficient model that can handle your gaming setup.

By addressing these common power supply issues with a systematic approach, you can ensure that your gaming rig runs smoothly and efficiently, allowing you to immerse yourself in the gaming experience without worry. Remember, a well-functioning power supply not only powers your components—it serves as the backbone of your entire gaming setup.

15. Conclusion: Making an Informed Choice for Optimal Gaming Performance

In conclusion, selecting the right power supply is an integral step in building a high-performance gaming PC. A well-chosen power supply not only ensures that your components receive stable and adequate power but also contributes to the overall reliability and longevity of your system. As we’ve discussed throughout this guide, understanding the wattage requirements of your hardware, considering efficiency ratings, and evaluating the importance of modularity are all critical factors in making an informed decision.

Remember, the heart of your gaming rig relies on a power supply that can meet its demands without compromise. Investing in a reputable brand that offers robust customer support and long warranties can save you headaches down the road. Additionally, always keep in mind the future-proofing aspect—accommodating potential upgrades can turn a good build into a great one.

As you venture into the world of gaming, let this guide serve as your roadmap to navigating the vast array of options available. Choose wisely, and you’ll not only enhance your gaming experience but also ensure that your setup runs smoothly under the most demanding conditions. With the right power supply, your gaming aspirations are only limited by your imagination. Happy gaming!

In conclusion, selecting the right power supply for your gaming PC is a critical step that can significantly impact your system’s performance and longevity. By following the guidelines outlined in this comprehensive guide, you’ll not only ensure that your components receive the appropriate power they need but also enhance the overall efficiency and stability of your gaming rig. Remember to consider wattage, efficiency ratings, and the importance of modularity when making your choice. Investing time in choosing the perfect power supply will pave the way for a smoother gaming experience and protect your prized hardware. Now that you’re equipped with the knowledge to make an informed decision, it’s time to power up your gaming journey—happy gaming!

pc gaming – Should I build or buy a pre-built gaming PC?

In the ever-evolving world of gaming, the battle between building your own gaming PC and buying a pre-built one has become a pivotal decision for enthusiasts and casual gamers alike.

Each option presents its own unique set of advantages and challenges, making the choice not just a matter of preference, but a strategic move that can impact your gaming experience for years to come. Are you a tech-savvy individual who revels in the thrill of assembling the perfect machine tailored to your specifications, or would you prefer the convenience of a ready-to-go system that promises reliability and performance? In this ultimate guide, we will delve deep into the pros and cons of both approaches, providing you with invaluable insights, expert tips, and essential considerations to help you make an informed decision. Whether you’re aiming for cutting-edge graphics, stellar processing power, or simply seeking the best value for your hard-earned money, this guide will illuminate the path to your perfect gaming setup. Get ready to level up your gaming experience!

1. Introduction: The Build vs. Buy Debate

pc gaming -  Should I build or buy a pre-built gaming PC?
Credit : whatcanu.com

In the world of gaming, your choice of hardware can significantly impact your experience, performance, and overall enjoyment. As you embark on your journey to acquire the perfect gaming PC, you’ll inevitably encounter the age-old debate: should you build your own rig or buy a pre-built system? This decision is more than just a matter of convenience; it’s about understanding your personal preferences, technical skills, and gaming aspirations.

Building your own gaming PC allows for unparalleled customization and the chance to curate every component to fit your specific needs. From selecting the ideal graphics card to choosing the right cooling system, the ability to handpick each part means you can tailor your machine for optimal performance in the latest games. For the DIY enthusiasts, this route offers a rewarding challenge that not only enhances your technical knowledge but also gives you a sense of pride in your creation.

On the other hand, buying a pre-built gaming PC provides a hassle-free solution, particularly for those who may not have the time or expertise to assemble a rig from scratch. With a pre-built system, you can enjoy the instant gratification of gaming right out of the box, often with warranties and customer support included. This option can be particularly appealing for newcomers to the gaming world who might feel overwhelmed by the myriad of components and configurations available.

As we dive deeper into this guide, we’ll explore the pros and cons of each approach, helping you weigh the benefits of customization against the convenience of ready-made solutions. Whether you’re a seasoned gamer looking to push the limits of your setup or a casual player seeking simplicity, understanding the nuances of the build vs. buy debate is crucial to making an informed decision that aligns with your gaming goals. Get ready to embark on a journey that will not only elevate your gaming experience but also empower you with the knowledge to choose the perfect gaming PC for your needs.

2. Understanding Your Gaming Needs

When it comes to choosing the perfect gaming PC, understanding your gaming needs is paramount. Not every gamer is the same; your preferences, gaming habits, and even your future aspirations can significantly influence your decision to build or buy.

First, consider the types of games you enjoy playing. Are you an avid fan of fast-paced first-person shooters that require high frame rates and rapid response times? Or do you prefer immersive role-playing games with expansive worlds and intricate graphics? Knowing the genre and specific titles you want to play will help you pinpoint the necessary hardware specifications. For example, a gaming PC tailored for competitive esports might prioritize a powerful graphics card and a high-refresh-rate monitor, while a system designed for open-world adventures might focus on a balanced performance between CPU and GPU to handle complex environments.

Next, evaluate the level of performance you desire. Are you looking to play games at 1080p, 1440p, or even 4K resolution? Higher resolutions demand more robust hardware. Additionally, consider your expectations for frame rates—do you want a buttery smooth 60 FPS, or are you aiming for 144 FPS or more for competitive edge? Understanding these aspects will not only guide your hardware choices but also help you determine whether building a custom rig or purchasing a pre-built system is more suitable for your needs.

Don’t forget about future-proofing your setup. The gaming landscape is constantly evolving, with new titles regularly pushing the limits of technology. If you plan to keep your gaming PC for several years, investing in slightly higher specifications now could save you from needing an upgrade sooner than expected.

Lastly, consider your gaming lifestyle. Will you be taking your PC to LAN parties, or will it be a stationary setup in your home? Portability may sway you toward a compact pre-built system or a custom build that prioritizes lightweight components.

By taking the time to understand your gaming needs, you’ll make a more informed decision, ensuring that your investment in a gaming PC—be it built or bought—aligns perfectly with your gaming aspirations. This clarity will enhance your gaming experience, allowing you to dive into virtual worlds with confidence and excitement.

3. Advantages of Building Your Own Gaming PC

pc gaming -  Should I build or buy a pre-built gaming PC?
Credit : whatcanu.com

Building your own gaming PC may seem like a daunting task at first, but the advantages it offers can make the effort well worth it. One of the most compelling benefits is customization. When you build your gaming rig, you have complete control over every component, allowing you to tailor the system to your specific gaming needs and preferences. Want the latest graphics card that delivers jaw-dropping visuals? Or perhaps you desire a high-speed SSD to minimize load times? With a custom build, the choices are entirely yours, ensuring that you get the best performance possible for the games you love.

Another significant advantage is cost-effectiveness. While pre-built gaming PCs can often come with a hefty price tag due to labor and brand markups, building your own can save you a substantial amount of money. By sourcing parts individually, you can shop around for the best deals and even opt for refurbished components without sacrificing quality. This approach not only stretches your budget further but also allows you to invest in higher-quality parts where it matters most.

Moreover, building your own gaming PC grants you a deeper understanding of how your system works. This knowledge is invaluable when it comes time for upgrades or troubleshooting. You’ll quickly learn how to swap out components, optimize settings, and diagnose issues, giving you the confidence to maintain and enhance your rig over time. This hands-on experience can be incredibly rewarding, transforming not just how you game, but how you perceive technology as a whole.

Lastly, there’s a unique sense of satisfaction that comes from assembling your own gaming PC. The pride of seeing your creation come to life, knowing that every component was chosen with care and precision, enhances your gaming experience. You’re not just playing games; you’re experiencing the culmination of your hard work and creativity. In a world where gaming can often feel impersonal, this connection to your machine can make all the difference. Whether you’re a casual gamer or a competitive player, building your own gaming PC is a fantastic way to ensure you have a system that truly reflects your style and needs.

4. Disadvantages of Building Your Own Gaming PC

While building your own gaming PC can be an exciting and rewarding venture, it’s essential to weigh the disadvantages that come with this choice. One of the most significant drawbacks is the time commitment involved in the entire process. From researching and selecting compatible components to assembling everything and troubleshooting potential issues, building a gaming PC can take hours, if not days. For those with busy schedules or limited technical knowledge, this can feel overwhelming and frustrating.

Additionally, there’s a steep learning curve for novice builders. Without prior experience, navigating the intricacies of hardware compatibility, installation procedures, and system optimization can be daunting. Mistakes can lead to costly damages or poor performance, which can discourage even the most determined enthusiasts.

Another consideration is the warranty and support aspect. When you build your own PC, individual components typically come with their own warranties, which means that if something goes wrong, you may have to diagnose the problem yourself and deal with each manufacturer separately. In contrast, pre-built systems usually come with a comprehensive warranty and customer support, streamlining the process of dealing with any issues that may arise.

Moreover, the initial costs might not always be lower than expected. While building a gaming PC can offer the allure of customizability, you may find that the total expense of purchasing high-quality components can rival or even exceed that of a pre-built system. Add in the potential for unforeseen costs, such as cooling solutions or additional peripherals, and your budget might start to balloon.

Lastly, there’s the risk of missing out on the latest technology. The gaming industry evolves rapidly, with new components and technologies being released regularly. If you take too long to build your PC, you might end up with outdated hardware by the time you’re ready to play. For gamers craving immediate access to cutting-edge performance, waiting to assemble your system might feel like a disadvantage that could cost you precious gaming time.

Ultimately, while building your own gaming PC can be a fulfilling project, it’s crucial to consider these disadvantages carefully before taking the plunge. Balancing the potential drawbacks with your personal skills, time availability, and gaming needs will help you make an informed decision that aligns with your gaming aspirations.

5. Advantages of Buying a Pre-Built Gaming PC

pc gaming -  Should I build or buy a pre-built gaming PC?
Credit : whatcanu.com

When it comes to the age-old debate of build versus buy, opting for a pre-built gaming PC can offer a plethora of advantages, especially for those who may not be tech-savvy or simply want to dive into gaming without the hassle of assembling components. Here are some compelling reasons why buying a pre-built gaming PC might be the right choice for you.

**1. Convenience and Time-Saving:** One of the most significant advantages of purchasing a pre-built gaming PC is the convenience it offers. With a pre-built system, you can skip the often daunting task of researching individual components, compatibility checks, and assembly. Instead, you can simply pick a model that suits your gaming needs and have it delivered straight to your door, ready to plug in and play. This saves you valuable time and allows you to jump into your favorite games without delay.

**2. Expert Assembly and Quality Assurance:** Pre-built gaming PCs are typically assembled by experienced professionals who ensure that all components are properly installed and configured. This means you can have peace of mind knowing that your system has undergone rigorous quality checks before it reaches you. Many reputable manufacturers also offer warranties and support services, giving you additional security against potential issues down the line.

**3. Optimized Performance:** Pre-built gaming PCs are often designed with optimal performance in mind. Manufacturers take the time to match components that work harmoniously together, ensuring that you get the most out of your hardware. They also pre-install drivers and necessary software, so you don’t have to worry about compatibility issues or performance bottlenecks. This level of optimization can enhance your gaming experience, allowing you to focus on gameplay rather than technical hurdles.

**4. Aesthetics and Customization Options:** Many pre-built gaming PCs come with stylish designs and customizable RGB lighting options, allowing you to choose a system that fits your personal aesthetic. Some brands even offer customizable configurations, so you can select the specifications that meet your performance needs while still enjoying the convenience of a pre-built system.

**5. Immediate Availability of Components:** In the current market, finding specific components can be a challenge due to shortages and high demand. By purchasing a pre-built gaming PC, you gain immediate access to a complete system without the stress of hunting down individual parts. This is especially beneficial if you’re eager to start gaming right away.

In summary, buying a pre-built gaming PC can be a fantastic choice for those looking for convenience, reliability, and optimized performance without the hassle of building their own system. Whether you’re a casual gamer or a dedicated enthusiast, a pre-built option can provide an excellent gaming experience right out of the box.

6. Disadvantages of Buying a Pre-Built Gaming PC

When considering the purchase of a pre-built gaming PC, it’s essential to weigh the disadvantages alongside the convenience it offers. While pre-built systems may seem like a hassle-free option, they come with certain drawbacks that could impact your gaming experience.

One of the most significant disadvantages is the cost. Pre-built gaming PCs often carry a premium price tag compared to their custom-built counterparts. This is partly due to the markup associated with assembling the system, as well as the inclusion of brand-name components that may not always deliver the best performance for your budget. You might find that you can get superior hardware if you opt to build your own, allowing for more flexibility in allocating your budget to key components like the graphics card or processor.

Another concern is the lack of customization. Pre-built systems typically come with a fixed configuration, which means you might have to settle for components that don’t quite meet your needs. Whether it’s a less than ideal graphics card, insufficient RAM, or a power supply that doesn’t allow for future upgrades, this limitation can stifle the long-term potential of your gaming rig.

Moreover, warranty and support can be a mixed bag. While many manufacturers offer warranties on pre-built systems, the specifics can vary widely. In some cases, certain components may only be covered under limited circumstances, and you might find it challenging to get support if you need repairs or replacements. This can be especially frustrating for gamers who rely on their rigs for consistent performance.

Lastly, there’s the issue of bloatware. Many pre-built PCs come with pre-installed software that you didn’t ask for, which can take up valuable storage space and slow down your system. Not only does this create an extra step in setting up your gaming experience, but it also means you might have to spend time removing unnecessary programs to optimize performance.

In summary, while buying a pre-built gaming PC offers convenience and immediate usability, the potential downsides—higher costs, limited customization, warranty complexities, and unwanted software—should be carefully considered. For dedicated gamers who want full control over their gaming experience, building a custom PC may ultimately provide a more satisfactory solution.

7. Cost Analysis: Building vs. Buying

pc gaming -  Should I build or buy a pre-built gaming PC?
Credit : whatcanu.com

When it comes to choosing between building or buying a gaming PC, cost analysis is a crucial element that can significantly impact your decision. On the surface, purchasing a pre-built gaming rig may seem like the more straightforward option, but a deeper look into the numbers can reveal a different story.

Building your own gaming PC typically involves an upfront investment in individual components—such as the CPU, GPU, motherboard, RAM, storage, and power supply. While this may require more initial research and effort, the potential savings can be substantial. As a DIY builder, you have the power to shop around, compare prices, and take advantage of sales or discounts. This flexibility allows you to prioritize components that matter most to your gaming experience, potentially yielding a more powerful setup for a fraction of the cost of a pre-built machine.

On the other hand, buying a pre-built gaming PC offers convenience and immediate gratification. However, this convenience often comes at a premium. Many manufacturers mark up their prices to cover assembly and customer support, which can lead to a higher overall cost. Additionally, while pre-built systems may come with warranties, they may also limit your upgrade options down the line, making it harder to keep up with the fast-evolving gaming landscape.

To make an informed decision, it’s essential to assess not only the initial costs but also the long-term value of each option. Consider factors like upgradeability, warranty services, and the potential for future-proofing your investment. Ultimately, whether you choose to build or buy, conducting a thorough cost analysis will empower you to make a choice that aligns with your budget and gaming aspirations, ensuring you get the most bang for your buck in your gaming journey.

8. Customization Options: Tailoring to Your Preferences

When it comes to building or buying a gaming PC, one of the most significant advantages of a custom build is the unparalleled level of personalization it offers. Customization options allow you to tailor your gaming rig to your specific preferences, ensuring that every component aligns perfectly with your gaming style, aesthetic tastes, and performance needs.

From selecting the right CPU to fit your gaming demands, to choosing a graphics card that not only delivers stunning visuals but also meets your budget, the possibilities are virtually endless. You can opt for high-performance components for gaming at ultra settings, or prioritize energy-efficient hardware for a quieter experience. Additionally, enthusiasts can decide on the cooling system: air cooling for simplicity or liquid cooling for aesthetics and efficiency.

Beyond performance, customization also extends to the aesthetics of your build. You can select cases in various colors and designs, add RGB lighting for a vibrant setup, and choose cooling fans that complement your theme. Want a sleek black and red color scheme? Or perhaps a futuristic look with neon accents? The choice is yours.

Moreover, customization isn’t just about looks; it’s also about functionality. Select the right motherboard that supports the features you need, such as multiple GPU setups or ample USB ports for peripherals. You can also choose storage options, deciding between SSDs for quicker load times or larger HDDs for extensive game libraries.

On the other hand, pre-built gaming PCs offer limited customization, often confining you to predefined configurations that may not fully meet your gaming aspirations. While they can be a convenient option for those who prefer an out-of-the-box solution, they may not allow for the same level of personalization that a custom build does.

Ultimately, when considering whether to build or buy, think about how much you value customization. If creating a unique gaming experience that reflects your individuality and gaming preferences excites you, then a custom build allows you to truly make your gaming PC your own.

9. Performance Considerations: Which Option Offers Better Specs?

When it comes to gaming PCs, performance is often the deciding factor for many enthusiasts. The question of whether to build or buy boils down to one crucial aspect: which option offers better specifications for your gaming needs?

Building your own gaming PC gives you unparalleled flexibility in choosing each component to suit your specific preferences and requirements. You can select high-end CPUs, powerful GPUs, ample RAM, and fast storage options tailored to the latest games and applications. This customization allows you to strike the perfect balance between performance and budget, ensuring that every dollar is spent in the areas that matter most to you. Plus, you have the satisfaction of knowing exactly what’s inside your machine, enabling easier upgrades and repairs down the line.

On the other hand, pre-built gaming PCs often come equipped with impressive specs right out of the box, designed by experts who understand the latest gaming trends and performance benchmarks. These systems can offer remarkable value, especially for those who may not have the technical expertise or time to assemble their own rig. Manufacturers often optimize their builds for specific gaming experiences, providing excellent performance in popular titles without the hassle of researching and selecting each individual component.

However, it’s essential to consider the potential trade-offs. Pre-built systems may sometimes include components that don’t align perfectly with your gaming preferences, or they might come with proprietary parts that limit future upgrades. Additionally, the price tag for convenience can be higher compared to building your own system, especially if you’re willing to hunt for deals on individual components.

Ultimately, the decision between building or buying hinges on your personal gaming ambitions. If you crave the thrill of customization and want to squeeze every ounce of performance from your setup, building a gaming PC might be the way to go. Conversely, if you value convenience and want a reliable machine that’s ready to game right out of the box, a pre-built system could be your best bet. With careful consideration of your gaming needs and performance expectations, you’ll be well-equipped to choose the option that offers the best specs for your gaming journey.

10. Warranty and Support: What to Expect

When it comes to investing in a gaming PC, understanding warranty and support options is crucial for ensuring peace of mind in your purchase. Whether you choose to build your own rig or buy a pre-built system, the level of warranty and support you receive can significantly impact your overall gaming experience.

For pre-built PCs, most manufacturers offer a standard warranty that typically spans one to three years. This warranty usually covers hardware defects, allowing you to get repairs or replacements at no extra cost if something goes wrong. However, the specifics can vary widely between brands, so it’s essential to read the fine print. Some companies may provide extended warranties for an additional fee, which can be a wise investment if you’re looking for extra coverage, especially for high-end components.

On the other hand, if you opt to build your own gaming PC, warranty coverage can be a bit more complex. Each component—be it your graphics card, motherboard, or power supply—will have its warranty terms set by individual manufacturers, often ranging from one to five years. This means you’ll need to keep track of multiple warranties, which can become cumbersome. Additionally, while you gain the satisfaction of assembling your machine and customizing it to your preferences, you’re also responsible for troubleshooting and repairs. This can be a rewarding challenge for tech enthusiasts, but it may prove daunting for those who are less experienced.

Support is another critical factor to consider. Pre-built systems typically come with customer support options, ranging from online chat to phone assistance. Some companies even offer on-site support for more serious issues, providing an added layer of convenience. Conversely, with a self-built PC, you’ll largely rely on online communities, forums, and guides for troubleshooting, which can be a fantastic resource but may not be as immediate or personalized as dedicated support.

In conclusion, whether you build or buy, understanding the warranty and support landscape is vital. Weigh the pros and cons based on your comfort level with technology, the complexity of potential repairs, and the importance of customer support when making your decision. After all, a new gaming PC is not just a purchase; it’s an investment in countless hours of immersive gameplay.

11. Resale Value: Building vs. Buying

When it comes to the resale value of your gaming PC, the choice between building and buying can significantly impact your return on investment. Understanding how each option holds its value in the ever-evolving gaming market is crucial for savvy gamers who may want to upgrade their rigs down the line.

**Building a PC** generally allows for greater flexibility when it comes to parts selection, which can influence resale value. High-quality components from reputable brands often hold their value better than pre-built systems that might use generic or lesser-known parts. If you carefully select your components—opting for popular CPUs, well-regarded GPUs, and reliable motherboards—you’ll find that your custom-built rig can attract buyers willing to pay a premium for quality. Moreover, the ability to easily upgrade parts means that you can keep your build relevant longer, potentially increasing its resale value as demand for certain hardware fluctuates.

On the other hand, **buying a pre-built gaming PC** might offer convenience, but it often comes with hidden depreciation. Many pre-built systems are designed to be affordable at the outset, which can mean they use cost-cutting measures that affect long-term value. Additionally, gamers are often less inclined to purchase a pre-built unit, especially if they know that the same components can be acquired for less through a DIY build. While some high-end brands do maintain good resale value, many pre-built systems lose value quickly once they leave the store, as new models are frequently released.

Ultimately, the decision between building and buying hinges on your long-term gaming goals. If you plan to resell your rig in a few years, carefully consider the components you choose if you build your own, or research the resale trends of pre-built systems to ensure you make a wise investment. Whether you’re looking to build a powerhouse gaming rig or opting for a convenient pre-built solution, understanding the resale potential will guide you in making a choice that suits both your gaming needs and financial future.

12. Future Upgrade Paths: Flexibility and Scalability

When it comes to gaming PCs, one of the most compelling considerations in the build vs. buy debate is the potential for future upgrades. Flexibility and scalability are pivotal for gamers looking to maximize their investment over time.

Building your own gaming PC often provides a significant advantage in this area. With a custom build, you can select components that not only meet your current gaming needs but also allow for seamless upgrades down the line. For instance, if you start with a mid-range CPU and GPU, you can easily swap them out for more powerful versions as new games are released or as your performance needs increase. Additionally, choosing a motherboard with multiple RAM slots or PCIe lanes means that you can expand your system as your budget allows or as new technologies become available.

On the other hand, pre-built gaming PCs can also be designed with future upgrades in mind, but they often come with limitations. Manufacturers may use proprietary components or designs that can make it challenging to upgrade specific parts. While some models are designed to be modular and upgrade-friendly, others may lock you into a specific ecosystem that makes future enhancements difficult or expensive.

As you contemplate your gaming PC journey, think about your long-term gaming aspirations. Are you someone who likes to stay on the cutting edge with the latest graphics or processing power? Or do you prefer a system that performs well now without the need for constant upgrades? Understanding your preferences will help you determine the best path for ensuring your gaming rig remains powerful and relevant for years to come. Whether you choose to build or buy, planning for future upgrade paths will enhance your gaming experience and protect your investment in the long run.

13. Recommended Components for Building Your Gaming PC

When embarking on the journey of building your own gaming PC, selecting the right components is crucial to ensure optimal performance and longevity of your system. Here’s a breakdown of the essential components you should consider, along with some recommended options that cater to various budgets and gaming needs.

**1. Central Processing Unit (CPU):** The heart of your gaming rig, the CPU, determines how efficiently your system can process tasks. For gaming, consider a high-performance option like the AMD Ryzen 5 5600X or Intel Core i5-12400. Both offer excellent multitasking capabilities and gaming performance without breaking the bank.

**2. Graphics Processing Unit (GPU):** The GPU is arguably the most critical component for gaming. It handles rendering graphics and is responsible for delivering the visual quality you crave in your games. For a solid mid-range option, the NVIDIA GeForce RTX 3060 or AMD Radeon RX 6600 XT are excellent choices. If you’re looking for top-tier performance, consider investing in the NVIDIA GeForce RTX 3080 or the AMD Radeon RX 6800 XT.

**3. Motherboard:** Your motherboard acts as the backbone of your build, connecting all components together. Ensure it is compatible with your chosen CPU and GPU. For AMD, the MSI B550-A PRO is a reliable choice, while the ASUS TUF Gaming Z590-Plus is a great option for Intel builds.

**4. memory (RAM):** A minimum of 16GB of RAM is recommended for gaming to ensure smooth performance. Brands like Corsair and G.Skill offer high-performance options, such as the Corsair Vengeance LPX 16GB (2 x 8GB) DDR4-3200 or G.Skill Ripjaws V Series.

**5. Storage:** Speed up load times and system responsiveness with an SSD. A 1TB NVMe SSD, like the Samsung 970 EVO Plus, strikes a balance between performance and capacity. Pair it with a larger HDD for additional storage, especially if you have a vast library of games.

**6. Power Supply Unit (PSU):** A reliable PSU is vital for the stability of your system. Look for one from reputable brands like EVGA or Corsair. A 650W 80+ Gold certified unit should provide ample power for most builds while ensuring efficiency.

**7. Cooling System:** Keeping your components cool is essential for performance and longevity. A good air cooler, like the Noctua NH-U12S, or an all-in-one liquid cooler such as the Corsair H100i, can help maintain optimal temperatures during intense gaming sessions.

**8. Case:** Finally, your case should not only accommodate your components but also provide adequate airflow. Look for cases that allow for future upgrades and have good cable management options. The NZXT H510 or Fractal Design Meshify C are both stylish and functional choices.

As you select your components, always consider your specific gaming needs and style. Whether you prefer casual gaming or aim for high-end graphics, choosing the right mix of parts will set you up for an exceptional gaming experience. Building your gaming PC can be a rewarding endeavor, allowing you to tailor every aspect of your machine to fit your preferences and performance needs.

14. Top Pre-Built Gaming PCs for Different Budgets

When it comes to diving into the world of gaming, selecting the right pre-built gaming PC can make all the difference in your experience. With an array of options available for various budgets, you can find a machine that not only meets your gaming needs but also aligns with your financial comfort zone. Here’s a curated list of some of the top pre-built gaming PCs across different price ranges, ensuring that everyone can find their perfect gaming rig.

**Budget-Friendly Options (Under $800)**
For those just starting out or looking for a cost-effective solution, the **Acer Nitro 50** stands out. Priced around $600, this compact powerhouse is equipped with an AMD Ryzen 5 processor and NVIDIA GTX 1650 graphics card, making it an excellent choice for casual gaming and eSports titles. Its sleek design and decent cooling system ensure that it performs well without breaking the bank.

**Mid-Range Marvels ($800 – $1500)**
If you’re ready to invest a bit more for enhanced performance, the **HP Omen 30L** is a fantastic mid-range option. Starting at approximately $1,200, this gaming rig comes with an Intel Core i7 CPU and NVIDIA RTX 3060 GPU, providing a remarkable balance of power and efficiency. The customizable RGB lighting and spacious interior not only look good but also offer impressive cooling capabilities, perfect for prolonged gaming sessions.

**High-End Beasts ($1500 and Up)**
For serious gamers seeking top-tier performance, the **Alienware Aurora R12** is a standout choice. With a starting price around $1,800, this beast is powered by an Intel Core i9 processor and NVIDIA RTX 3080 graphics card. Its futuristic design and customizable features make it a showstopper, while its advanced cooling system ensures optimal performance during intense gaming marathons. Whether you’re into AAA titles or VR gaming, the Aurora R12 is designed to handle it all with ease.

**Customizability & Warranty**
When selecting a pre-built gaming PC, consider not just the specs but also the level of customizability. Many brands offer options for upgrades, allowing you to enhance your system as your gaming needs evolve. Additionally, don’t overlook the importance of a solid warranty and customer support, as this can provide peace of mind with your investment.

In conclusion, whether you’re a casual gamer or a hardcore enthusiast, there’s a pre-built gaming PC out there that fits your budget and gaming style. With this guide, you can confidently explore your options and gear up for countless hours of gaming adventure!

15. Conclusion: Making the Right Choice for Your Gaming Journey

As we reach the conclusion of this guide, it’s clear that the decision between building or buying a gaming PC hinges on several key factors, including your personal preferences, budget, and gaming aspirations. Both paths offer distinct advantages, and understanding these can help you make a choice that aligns with your gaming journey.

If you opt to build your own gaming PC, you’re not just acquiring a machine; you’re embarking on a rewarding project that allows you to customize every component to your liking. This route provides a sense of ownership and accomplishment, as you handpick each element—from the powerful graphics card to the RGB-lit case—tailoring the system to meet your specific gaming needs. Additionally, building your own PC can often be more cost-effective, allowing you to allocate funds to higher-quality components rather than paying a premium for assembly and branding.

On the other hand, choosing to buy a pre-built gaming PC can save you time and eliminate the potential frustrations associated with assembly and troubleshooting. This option is ideal for those who may not have the technical know-how or simply prefer a hassle-free experience. Many manufacturers offer powerful, well-optimized systems that come with warranties, ensuring you have support in case something goes awry. Plus, you can often find pre-builts that are specifically designed for gaming, with performance benchmarks that are tried and tested.

Ultimately, the right choice depends on your individual needs and circumstances. Consider the level of involvement you want in the process, your budget constraints, and how you envision your gaming experience. Whether you decide to roll up your sleeves and build your dream machine or opt for the convenience of a pre-built system, both paths can lead to an exhilarating gaming experience. As you embark on this journey, remember that the most important aspect is to enjoy the games you love, and your choice should empower you to do just that. Happy gaming!

In conclusion, choosing between building or buying your perfect gaming PC is a significant decision that can shape your gaming experience for years to come. Throughout this guide, we’ve explored the pros and cons of both options, empowering you with the knowledge to make an informed choice that aligns with your budget, technical skills, and gaming aspirations. Whether you opt for the personalized touch and potential cost savings of building your own rig or the convenience and reliability of purchasing a pre-built system, remember that the ultimate goal is to enhance your gaming adventures. With the right setup, you’ll be ready to dive into immersive worlds and tackle epic challenges with ease. Happy gaming, and may your new PC bring you countless hours of enjoyment!

pc gaming – How to upgrade your PC for better gaming performance?

In the ever-evolving world of gaming, staying ahead of the curve often means pushing the limits of your hardware to achieve that coveted peak performance.

Whether you’re a casual player seeking smoother gameplay or a competitive gamer aiming for a tactical edge, upgrading your PC can make all the difference. From enhancing graphics and reducing load times to improving system responsiveness, the right upgrades can transform your gaming experience into something truly exhilarating. In this comprehensive guide, we’ll explore everything you need to know about leveling up your gaming rig, including selecting the best components, optimizing your setup, and troubleshooting common issues. Join us as we dive into the exciting realm of PC upgrades, ensuring that your gaming sessions are not only enjoyable but also a testament to your dedication and passion for the game. Get ready to unleash the full potential of your gaming experience!

1. Introduction: Why Upgrade Your PC?

pc gaming -  How to upgrade your PC for better gaming performance?
Credit : whatcanu.com

In today’s fast-paced digital landscape, the performance of your PC can significantly impact not just your productivity, but also your overall experience—whether you’re gaming, designing, or simply browsing the web. If you’ve ever found yourself waiting for a program to load or experiencing lag during an intense gaming session, you know how frustrating it can be. Upgrading your PC is not just about enhancing speed; it’s about unlocking its full potential and ensuring that it meets your evolving needs.

With technology advancing at an unprecedented rate, older systems can quickly become outdated, struggling to keep up with the latest software and applications. In gaming, for instance, the demand for higher graphics, faster processing speeds, and increased memory has never been greater. Similarly, creative professionals looking to run resource-intensive applications like video editing software or 3D modeling tools will find that an upgrade can save them hours of rendering time and enhance their workflow.

Moreover, upgrading your PC can be a cost-effective solution compared to purchasing a brand-new system. By replacing specific components—such as your graphics card, processor, or RAM—you can breathe new life into your machine without the hefty price tag of a complete overhaul. This not only extends the lifespan of your hardware but also allows for a tailored approach to meet your specific requirements.

In this guide, we will delve into the myriad reasons why upgrading your PC can be beneficial. From enhanced performance and improved multitasking capabilities to greater energy efficiency and the ability to run the latest applications, we’ll explore the advantages that come with investing in your system. Whether you’re a casual user or a dedicated gamer, understanding the importance of upgrading your PC can help you make informed decisions that lead to a superior computing experience. So, let’s embark on this journey to elevate your gaming and computing performance to new heights!

2. Assessing Your Current Hardware: What to Check

Before diving headfirst into the world of upgrades, it’s crucial to take a moment to assess your current hardware. This step is not just about knowing what components you have; it’s about understanding how they interact and where the bottlenecks in your system lie. A comprehensive evaluation can save you time and money, ensuring that you invest in the right upgrades that will yield the most significant performance improvement.

Start with your CPU, the brain of your computer. You’ll want to check its model and clock speed, as well as its core count. Is it struggling to keep up with demanding applications or games? Tools like CPU-Z can provide detailed information about your processor’s performance, helping you determine if an upgrade is necessary.

Next, turn your attention to your RAM. How much do you currently have, and what type is it? For most modern gaming and multitasking needs, 16GB is becoming the standard, while serious gamers and content creators may benefit from 32GB or more. Use a tool like Task Manager to monitor your memory usage during your typical workload; if you’re consistently maxing out your RAM, it’s time to consider an upgrade.

Your GPU is another critical component, especially if you’re into gaming or graphic-intensive tasks. Identify your graphics card model and check its performance against current benchmarks. If you find that your frame rates are suffering in the latest games or your rendering times are longer than you’d like, it may be time to invest in a new graphics card.

Finally, don’t overlook your storage options. Traditional hard drives (HDDs) can significantly slow down your system, while solid-state drives (SSDs) offer much quicker data access speeds. Assess how much storage you have and whether it’s enough for your needs. If you’re running low and relying on an HDD, consider upgrading to an SSD for faster load times and an overall snappier system.

By carefully evaluating each of these components, you’ll create a clear picture of your current setup’s strengths and weaknesses. This foundational understanding will empower you to make informed decisions as you embark on your upgrade journey, ensuring that your investment translates into tangible performance gains.

3. Setting Your Goals: Gaming vs. Multitasking Performance

pc gaming -  How to upgrade your PC for better gaming performance?
Credit : whatcanu.com

When it comes to upgrading your PC, the first step in ensuring you achieve peak performance is to clearly define your goals. Are you primarily a gamer, or do you value multitasking across various applications? Understanding your primary use case will inform the choices you make regarding which components to upgrade.

For gamers, performance is often measured in frames per second (FPS), graphical fidelity, and the ability to handle demanding titles seamlessly. If your goal is to play the latest AAA games at ultra settings, then investing in a powerful graphics card should be at the top of your list. Look for GPUs that offer high clock speeds and ample VRAM, as these features will ensure smooth gameplay even in graphically intensive scenarios. Additionally, pairing your GPU with a fast processor and sufficient RAM will help eliminate bottlenecks, ensuring that your gaming experience is as fluid as possible.

On the other hand, if multitasking is your primary focus—whether for content creation, video editing, or running multiple programs simultaneously—you’ll want to prioritize different aspects of your build. A robust CPU with multiple cores and threads will be essential for handling demanding tasks, while an upgrade to your RAM capacity can significantly enhance your system’s ability to juggle various applications without a hitch. Consider investing in an SSD for faster load times and quick file access, which can dramatically improve your workflow efficiency.

Ultimately, setting clear goals based on your gaming or multitasking needs will streamline your upgrade process, helping you to allocate your budget effectively and maximize your PC’s potential. By understanding the demands of your primary activities, you can make informed decisions that lead to a noticeable performance boost, whether you’re diving into a virtual world or tackling a hefty project.

4. Budgeting for Your Upgrade: Cost vs. Benefit

When it comes to upgrading your PC, understanding the balance between cost and benefit is crucial for maximizing your investment. Before diving headfirst into the latest hardware or software, take a moment to assess your current setup and your specific needs. This begins with a comprehensive inventory of your existing components—CPU, GPU, RAM, and storage—to determine what truly requires an upgrade.

Next, set a realistic budget that aligns with your upgrade goals. The world of PC components can be overwhelming, with prices ranging from budget-friendly to premium options that promise cutting-edge performance. Prioritize your upgrades based on the activities you engage in most frequently. For instance, if you’re a gamer, investing in a high-quality graphics card might offer the most noticeable improvement in your gaming experience. Conversely, if you’re a content creator, a faster processor and more RAM could significantly enhance your productivity.

Once you’ve identified which components to upgrade, compare the potential benefits against their costs. Research benchmarks and reviews to understand how much performance you can expect from each upgrade. This will help you avoid overspending on a component that doesn’t provide a marked improvement in performance for your specific needs.

Additionally, consider the longevity of your investment. Sometimes, spending a little more upfront on higher-quality components can save you money in the long run by delaying the need for future upgrades. Remember, PC upgrades are not merely an expense—they’re an investment in your computing experience. By thoughtfully budgeting and weighing the cost against the benefits, you can ensure that each dollar spent contributes to a more powerful and efficient system, ultimately leveling up your entire gaming experience.

5. Choosing the Right Components: CPU, GPU, and RAM

pc gaming -  How to upgrade your PC for better gaming performance?
Credit : whatcanu.com

When it comes to upgrading your PC for peak performance, selecting the right components is paramount. Each part of your system plays a crucial role in determining how well your machine performs, and understanding the intricacies of the CPU, GPU, and RAM will empower you to make informed decisions that can dramatically enhance your gaming experience.

**CPU (Central Processing Unit)**
The CPU is often referred to as the brain of your computer, and for good reason. It processes instructions and manages tasks, making it essential for overall system performance. When choosing a CPU, consider the number of cores and threads, as well as the clock speed. A higher core count allows for better multitasking and improved performance in CPU-intensive games, while a faster clock speed can significantly boost your gaming frame rates. Popular options include AMD’s Ryzen series and Intel’s Core processors, which offer various models to suit different budgets and performance needs.

**GPU (Graphics Processing Unit)**
The GPU is the powerhouse behind your gaming visuals, rendering images, animations, and video in real-time. In the gaming world, this component is often the most critical for achieving stunning graphics and smooth gameplay. When selecting a GPU, look for models that align with your gaming resolution and refresh rate. For instance, if you’re gaming at 4K resolution, you’ll want a high-end graphics card such as NVIDIA’s RTX 30 series or AMD’s RX 6000 series to ensure you can keep up with demanding titles. Additionally, consider the VRAM (video RAM)—more VRAM allows for better performance in graphically intensive games and higher settings.

**RAM (Random Access Memory)**
RAM is the short-term memory of your computer, allowing for quick data access and storage for the applications and games you’re currently running. While it may not have the same immediate impact on graphics as the GPU, having sufficient RAM is crucial for smooth multitasking and fast load times. For gaming, a minimum of 16GB is recommended, but as games become increasingly complex, consider upgrading to 32GB for future-proofing and enhanced performance. Additionally, pay attention to the speed of the RAM (measured in MHz) and ensure it is compatible with your motherboard.

In summary, selecting the right components—CPU, GPU, and RAM—requires careful consideration of your gaming needs and budget. By understanding the roles each part plays, you can tailor your upgrades to create a balanced system that excels in performance, ensuring you can enjoy your favorite titles at their best. With the right components in place, you’ll be well on your way to leveling up your gaming experience.

6. Understanding Motherboards and Compatibility

When it comes to upgrading your PC, understanding motherboards and their compatibility is crucial. The motherboard is the backbone of your system, connecting all the components and allowing them to communicate with each other. It serves as the foundation upon which your entire build stands, making it imperative to choose wisely.

First and foremost, you need to consider the form factor of the motherboard. Common sizes include ATX, Micro-ATX, and Mini-ITX. The form factor not only influences the physical dimensions of the motherboard but also determines how many components you can install, such as RAM slots and PCIe slots for graphics cards. If you’re looking to upgrade your system for gaming or heavy multitasking, an ATX motherboard might be the ideal choice due to its larger size and greater expandability.

Next, you must pay attention to the chipset on the motherboard. This is the chip that governs communication between the CPU, RAM, and other components. Different chipsets come with varying features, such as support for overclocking, multiple graphics cards, or advanced connectivity options. Make sure to research which chipset is compatible with your CPU, as this will dictate your motherboard choices.

Additionally, you’ll want to verify that your new motherboard supports the type of RAM you plan to use. Check the RAM slots for compatibility with DDR4 or DDR5 memory and ensure you know the maximum supported speed and capacity. If you’re planning to expand your memory in the future, having a motherboard with additional RAM slots can save you from needing another upgrade down the line.

Lastly, don’t forget about connectivity options. Look for a motherboard that provides ample USB ports, Thunderbolt support, or onboard Wi-Fi if you need these features. Whether you plan to connect multiple peripherals or prefer a clean, wireless setup, having a motherboard that meets your connectivity needs will enhance your overall experience.

In conclusion, understanding motherboards and compatibility is a foundational step in upgrading your PC for peak performance. Take the time to research and select a motherboard that not only meets your current requirements but also allows for future growth, ensuring your system remains powerful and relevant for years to come.

7. Solid-State Drives vs. Hard Drives: Storage Upgrades

pc gaming -  How to upgrade your PC for better gaming performance?
Credit : whatcanu.com

When it comes to upgrading your PC’s storage, understanding the difference between Solid-State Drives (SSDs) and Hard Disk Drives (HDDs) is crucial for optimizing performance. The choice between these two storage types can significantly impact your system’s responsiveness, speed, and overall user experience.

**Solid-State Drives (SSDs)** are the modern powerhouse of storage solutions. Unlike traditional hard drives, which rely on spinning disks and mechanical arms to read and write data, SSDs use flash memory to store information. This means they have no moving parts, resulting in faster data access times, quicker boot-ups, and snappier application launches. If you’ve ever experienced the frustration of waiting for your PC to start or load a game, switching to an SSD can feel like a revelation. Not only do they improve speed, but SSDs also consume less power, generate less heat, and are more resistant to physical shock, making them a smart choice for gamers and professionals alike.

On the other hand, **Hard Disk Drives (HDDs)** still have their place in the storage hierarchy. They offer larger capacities at a lower price point, making them suitable for users who need a lot of space without breaking the bank. If you’re looking to store vast amounts of data—such as large game libraries, videos, or backups—HDDs can provide the bulk storage that SSDs lack, even though they may lag in speed. Many users opt for a hybrid approach, using an SSD for their operating system and frequently used applications, while relying on an HDD for mass storage needs.

When considering storage upgrades, think about your usage patterns. If you prioritize speed and performance, an SSD is the way to go. However, if you’re managing a vast media collection or working with large files, pairing an SSD with an HDD can yield the best of both worlds. In either case, upgrading your storage to include an SSD is one of the most transformative enhancements you can make to your PC, elevating your gaming experience and productivity to new heights.

8. Cooling Solutions: Keeping Your PC Running Smoothly

When it comes to upgrading your PC for peak performance, one aspect that often gets overlooked is the importance of effective cooling solutions. As your hardware components work harder and faster, they generate heat—sometimes, an alarming amount of it. If this heat isn’t managed efficiently, it can lead to thermal throttling, reduced performance, and even permanent damage to your components. Therefore, investing in a robust cooling system is not just a luxury; it’s a necessity for those serious about gaming or demanding applications.

There are various cooling solutions available, each with its own pros and cons. Air cooling remains the most popular choice for many PC builders due to its simplicity and cost-effectiveness. High-quality air coolers often feature large heatsinks and multiple fans that can dissipate heat effectively. Brands like Noctua and be quiet! offer exceptional models that provide excellent cooling performance while maintaining low noise levels.

However, for those seeking to push their systems to the limits, liquid cooling presents a more advanced option. Liquid coolers, either in an all-in-one (AIO) format or as custom loops, use a liquid coolant to absorb heat from the CPU and GPU before dissipating it through radiators. This method not only enhances cooling efficiency but also adds a sleek aesthetic to your build. A well-set-up liquid cooling system can keep temperatures significantly lower than traditional air cooling, allowing for higher overclocks and better performance in demanding scenarios.

It’s also crucial to consider airflow within your case. proper cable management, strategically placed fans, and even case design can vastly influence how well your cooling solution performs. Ensure that there’s a clear path for air to flow in and out of your system, reducing hotspots that can lead to overheating.

In summary, prioritizing cooling solutions is essential for maintaining your PC’s performance and longevity. Whether you opt for air or liquid cooling, keeping temperatures under control will not only enhance your gaming experience but also ensure that your upgraded components continue to perform at their best for years to come.

9. Power Supplies: Ensuring Reliable Performance

When it comes to upgrading your PC for peak performance, one component that often gets overlooked is the power supply unit (psu). However, ensuring that you have a reliable and efficient power supply is crucial for the stability and longevity of your system. A high-quality PSU acts as the backbone of your PC, delivering consistent power to all your components and preventing potential failures caused by power fluctuations.

First and foremost, it’s essential to choose a PSU with sufficient wattage to support your hardware. When upgrading your CPU, GPU, or adding new components, keep in mind that each part has specific power requirements. It’s recommended to calculate your system’s total power draw using online calculators that take into account each component’s consumption. This will help you select a PSU that not only meets but exceeds your system’s needs, providing headroom for future upgrades.

Additionally, pay attention to the efficiency rating of the power supply. Look for units that are certified by the 80 PLUS program, which indicates their efficiency at various load levels. A higher efficiency rating—such as Gold or Platinum—means less wasted energy, lower electricity bills, and less heat generated within your case. This is particularly important for high-performance setups that may run under heavy loads for extended periods.

Another critical factor to consider is the PSU’s build quality and features. Opt for models with reputable brands known for their reliability and robust construction. Look for features such as modular cables, which allow for better cable management and airflow within your case; this can lead to improved cooling and easier maintenance. Furthermore, a PSU with built-in protections against over-voltage, under-voltage, and short circuits will help safeguard your valuable components from unexpected issues.

Finally, don’t underestimate the importance of noise levels. Silent operation is a desirable feature, especially for gamers and professionals who need a quiet environment. Many modern power supplies come with fan control technologies that adjust the fan speed based on temperature, allowing for near-silent performance during light loads.

In summary, when upgrading your PC, don’t skimp on the power supply. By investing in a high-quality PSU, you ensure that your system runs reliably and efficiently, allowing you to fully unleash the potential of your upgraded components. A dependable power supply lays the groundwork for a powerful and stable gaming or productivity experience, making it an essential part of your performance enhancement journey.

10. Upgrading Peripherals: Monitors, Keyboards, and Mice

When it comes to upgrading your PC for peak performance, enhancing your peripherals—such as monitors, keyboards, and mice—can make a significant difference in your overall experience. Often overlooked, these components play a vital role in how effectively you can utilize your upgraded hardware. Let’s delve into how each of these peripherals can elevate your gaming and productivity to new heights.

**Monitors:** A high-quality monitor is the centerpiece of your setup. Investing in a display with a higher resolution, such as 1440p or 4K, will provide stunning visuals that bring your games and applications to life. Additionally, consider a monitor with a high refresh rate (at least 144Hz) and low response time for smoother gameplay and reduced motion blur. Features like G-Sync or FreeSync can further enhance your gaming experience by synchronizing the display refresh rates with your graphics card, eliminating screen tearing. Don’t forget about ergonomics—an adjustable stand or VESA mount can help you find the perfect viewing angle, reducing strain during those marathon gaming sessions.

**Keyboards:** The keyboard is your primary tool for interaction, so why settle for anything less than exceptional? Mechanical keyboards, with their tactile feedback and customizable switches, offer a superior typing experience and can significantly enhance your gaming performance. Look for keyboards with programmable keys that allow for macros, giving you the ability to execute complex commands with a single press. Backlighting is another feature to consider, not only for aesthetics but also for improved visibility in low-light conditions. Whether you prefer a compact layout or a full-sized keyboard with a number pad, find one that complements your gaming style.

**Mice:** A responsive and comfortable mouse is crucial for precision, especially in fast-paced gaming environments. Opt for a gaming mouse with adjustable DPI settings to tailor sensitivity to your preferences, allowing for quick movements or precise targeting as the situation demands. Ergonomics should be a top priority; a mouse that fits comfortably in your hand can prevent fatigue during extended use. Many gaming mice also come with customizable buttons and weight adjustments, giving you the flexibility to design your ideal setup.

In summary, upgrading your peripherals can significantly impact both your gaming and workflow efficiency. Take the time to choose monitors, keyboards, and mice that not only meet your performance needs but also enhance your overall PC experience. By investing in these components, you’ll not only elevate your gameplay but also create a more enjoyable and productive environment that keeps you coming back for more.

11. Installing New Hardware: Step-by-Step Guide

Upgrading your PC can feel like a daunting task, especially when it comes to installing new hardware. However, with the right approach and a little patience, you can transform your system into a high-performance machine. Here’s a step-by-step guide to help you through the process.

**1. Gather Your Tools and Components**
Before diving in, ensure you have all the necessary tools at hand. A Philips screwdriver, anti-static wrist strap, and a clean workspace will make the installation much easier. Additionally, gather your new hardware components—whether it’s a graphics card, additional RAM, or a new SSD. Make sure all the parts are compatible with your motherboard and existing setup.

**2. Power Down and Disconnect**
Begin by shutting down your PC and unplugging it from the power source. This is crucial for your safety and to prevent any damage to your components. Disconnect all peripherals, including monitors, keyboards, and mice, to give yourself ample space to work.

**3. Open the Case**
Carefully remove the side panel of your computer case. Most cases have screws or thumb latches that allow you to access the inner workings. After removing the panel, take a moment to familiarize yourself with the layout of your PC, including where the existing hardware is located.

**4. Ground Yourself**
To prevent static electricity from damaging your components, ground yourself by wearing an anti-static wrist strap or frequently touching a metal part of the case. This simple step can save you from costly mistakes.

**5. Install the New Hardware**
Now comes the exciting part—installing your new hardware! If you’re adding RAM, locate the RAM slots and gently push down on the new sticks until they click into place. For a graphics card upgrade, find the PCIe slot, remove any protective covers, and firmly insert the card until it locks in. If you’re installing a new SSD or HDD, slide it into the designated bay and connect the necessary cables.

**6. Connect Cables and Power On**
After everything is securely installed, check that all cables are connected properly. This includes power cables for any new components and data cables for storage devices. Once you’re sure everything is in place, replace the side panel of your case and reconnect all peripherals.

**7. Boot Up and Install Drivers**
Power on your PC and be ready to enter the bios if necessary. Ensure that your new hardware is recognized. Once booted into your operating system, install any required drivers for your new components. This is essential for optimal performance and stability.

**8. Test and Optimize**
Finally, it’s time to test your system. Run benchmarks or your favorite games to see how the new hardware performs. Monitor temperatures and make adjustments in your system settings if needed. This is also a great time to explore any software that can help you optimize performance, such as overclocking tools or system monitoring applications.

By following these steps, you can confidently upgrade your PC hardware, unlocking new levels of performance for gaming, content creation, or any other demanding tasks. Each upgrade not only enhances your experience but also extends the life of your machine, ensuring you’re always ready for the next big challenge.

12. Software Optimization: Drivers and Operating Systems

When it comes to maximizing your PC’s performance, software optimization is just as crucial as hardware upgrades. One of the first steps in this process is ensuring that your drivers are up to date. Drivers act as the communication bridge between your operating system and your hardware components, such as your graphics card, sound card, and even your motherboard. Outdated drivers can lead to compatibility issues, reduced performance, and even system crashes. To keep your system running smoothly, regularly check the manufacturer’s website for the latest driver releases, or use a dependable driver update tool that automates the process for you.

Equally important is the health of your operating system. Over time, your OS can accumulate unnecessary files, outdated applications, and even malware, all of which can slow down your computer. Conducting routine maintenance, like disk cleanup and defragmentation, can significantly enhance your system’s responsiveness. Furthermore, consider disabling startup programs that aren’t essential; this will free up system resources and speed up boot times.

Another vital aspect of software optimization is managing your operating system settings. Tweaking settings such as visual effects, power options, and background processes can lead to a substantial boost in performance. For gamers, enabling Game Mode in windows 10 or later can prioritize system resources towards your gaming applications, reducing lag and improving frame rates.

Don’t forget to keep an eye on your system’s performance metrics. Tools like Task Manager or third-party software can provide insights into resource usage, helping you identify any bottlenecks. By systematically keeping your drivers and operating system optimized, you’ll create a robust foundation upon which to build your upgraded PC experience, ensuring that every component operates at its peak potential.

13. Benchmarking Your Performance: Testing After Upgrades

Once you’ve made upgrades to your PC, whether it be a new graphics card, additional RAM, or a faster SSD, the next crucial step is benchmarking your performance. Benchmarking isn’t just about seeing numbers; it’s about understanding how your upgrades translate into real-world improvements for your gaming or productivity experience.

Start by using reliable benchmarking software such as 3DMark for graphics performance, Cinebench for CPU capabilities, or UserBenchmark for an overall system assessment. These tools will run a series of tests designed to push your hardware to its limits and provide you with performance scores that you can compare against previous results or industry averages.

As you run these benchmarks, take note of key metrics like frame rates, load times, and overall system responsiveness. For gamers, a significant jump in frames per second (FPS) can mean the difference between a smooth gameplay experience and frustrating stutter. For content creators, faster render times can significantly enhance productivity, allowing you to spend more time creating and less time waiting.

After conducting your benchmarks, it’s essential to analyze the results. Look for areas where your upgrades made the most impact and consider whether there are still bottlenecks in your system. For instance, if you upgraded your GPU but noticed that your CPU is still struggling to keep up, it might be time to consider a CPU upgrade as well.

Lastly, don’t forget to keep your benchmarking software updated, as new versions may include tests that reflect the latest gaming titles or software applications. Regularly benchmarking your system after each upgrade will not only help you track your performance improvements over time but will also ensure that your PC runs at its peak, providing you with the ultimate gaming or working experience. By keeping a close eye on your performance metrics, you can make informed decisions about future upgrades and maintain a system that consistently meets your demands.

14. Maintenance Tips: Keeping Your PC in Top Shape

Maintaining your PC is just as crucial as upgrading its hardware. A well-maintained system not only performs more efficiently but also extends the lifespan of your components, ensuring you get the most out of your investment. Here are some essential maintenance tips to keep your PC in top shape.

**1. Regular Dusting and Cleaning:** Dust is the enemy of any computer. It can clog fans and vents, leading to overheating and decreased performance. Make it a habit to open up your case every few months and gently remove dust using compressed air. Pay special attention to the CPU cooler, power supply, and GPU fans. Additionally, clean your keyboard and monitor regularly to prevent buildup and smudges.

**2. Software Updates:** Keep your operating system, drivers, and software updated. Manufacturers release updates to fix bugs, improve performance, and patch security vulnerabilities. Enable automatic updates where possible, but also check periodically to ensure everything is current.

**3. Disk Cleanup and Defragmentation:** Over time, your hard drive accumulates unnecessary files that can slow down your system. Use built-in tools like Disk Cleanup on Windows to remove temporary files, system files, and empty your recycle bin. If you’re using a traditional HDD (not SSD), consider running a defragmentation tool to reorganize fragmented data, boosting access speeds.

**4. Monitor Your System’s Health:** Keep an eye on the temperature of your CPU and GPU, as well as the health of your drives. Software tools like HWMonitor or CrystalDiskInfo can provide real-time stats and alerts if something is off. This early detection can prevent catastrophic failures down the line.

**5. Backup Your Data:** Regularly back up your data to an external drive or a cloud service. This precautionary measure ensures that in the event of hardware failure or data corruption, you won’t lose your important files and documents.

**6. Manage Startup Programs:** Too many programs launching at startup can bog down your system’s boot time and overall performance. Use the Task Manager (Windows) or System Preferences (Mac) to disable unnecessary startup items.

**7. Check for Malware:** Malware can severely impact your system’s performance and security. Install reliable antivirus software and conduct regular scans to keep your PC safe from harmful threats.

By incorporating these maintenance tips into your routine, you can ensure that your PC remains a powerhouse of performance. Regular care not only enhances your gaming experience but also saves you from unexpected repairs and replacements, allowing you to focus on leveling up your game.

15. Conclusion: Enjoying Your Upgraded Gaming Experience

As you reach the end of this comprehensive guide on upgrading your PC for peak gaming performance, it’s time to savor the rewards of your hard work and investment. Picture this: you’ve meticulously chosen and installed every component, from the latest graphics card that renders stunning visuals to the lightning-fast SSD that minimizes load times. Now, it’s time to indulge in that upgraded gaming experience you’ve been anticipating.

Imagine launching your favorite title, the screen bursting to life with vivid colors and intricate details that transport you into another world. Each frame flows seamlessly, thanks to your optimized hardware—no more stutters or lag to disrupt your immersion. Whether you’re battling fierce opponents in a competitive match or exploring sprawling virtual landscapes, your upgraded setup ensures that every moment is exhilarating.

But it’s not just about the graphics; it’s about the entire ecosystem you’ve created. With enhanced cooling solutions, your system runs quieter and cooler, allowing you to focus on what truly matters: the game. The responsiveness of your new peripherals—the mechanical keyboard that gives tactile feedback with every click, the high-DPI gaming mouse that glides effortlessly—adds another layer of satisfaction to your gameplay.

Beyond the immediate thrill of gaming, remember that this upgrade is an investment in your passion. You’ve positioned yourself to dive into the latest releases and immerse yourself in expansive worlds that push the boundaries of technology. And as you take on new challenges, don’t forget to share your journey with fellow gamers. Join forums, stream your gameplay, or connect on social media to showcase your achievements and the triumphs of your upgraded rig.

So, take a moment to revel in your success. Your upgraded gaming PC isn’t just a collection of components; it’s a gateway to countless adventures and unforgettable memories. Enjoy every pixel, every sound, and every victory, knowing that you’ve leveled up not just your machine, but your entire gaming experience. Happy gaming!

As we wrap up our comprehensive guide on upgrading your PC for peak performance, we hope you’re feeling inspired and equipped to take your gaming experience to the next level. By carefully assessing your current setup and making thoughtful upgrades—whether it’s enhancing your graphics card, boosting your RAM, or optimizing your cooling system—you can unlock a whole new realm of gaming potential. Remember, investing in the right components not only enhances your gameplay but also extends the lifespan of your system. So gear up, dive into the world of upgrades, and get ready to conquer your favorite games with unparalleled speed and visual fidelity. Happy gaming, and may your performance always be at its peak!

How to fix a leaky faucet?

A leaky faucet may seem like a minor inconvenience, but those constant drips can lead to a significant waste of water and an uptick in your utility bills.

If you’ve found yourself frustrated by the incessant sound of dripping water or the unsightly puddles forming in your sink, fear not! Tackling this common household issue can be simpler than you think. In this DIY guide, we’ll walk you through five straightforward steps to fix that leaky faucet and restore peace to your kitchen or bathroom. Armed with just a few basic tools and a little bit of patience, you’ll not only save money but also gain the satisfaction of completing a home repair on your own. So roll up your sleeves, and let’s get started on making that drippy faucet a thing of the past!

1. Introduction: Why Fixing a Leaky Faucet Matters

How to fix a leaky faucet?
Credit : whatcanu.com

A leaky faucet may seem like a minor inconvenience, but it can lead to significant issues if left unaddressed. The incessant drip-drip-drip can be more than just an annoyance; it can waste an astonishing amount of water over time, potentially driving up your utility bills and harming the environment. In fact, a single faucet that drips just once every second can waste more than 3,000 gallons of water a year—enough to fill a swimming pool!

Beyond the financial implications, a leaky faucet can also indicate underlying plumbing problems that require immediate attention. The constant moisture can lead to mold growth, damaging your home and impacting your health. Furthermore, if the leak is severe, it may cause water to pool around the base of the faucet, leading to corrosion or even structural damage to your cabinetry.

By fixing a leaky faucet, you not only save water and money but also contribute to a more sustainable lifestyle and protect your home’s integrity. Plus, the satisfaction of resolving a home maintenance issue yourself can be incredibly rewarding. In this DIY guide, we will take you through five simple steps to help you tackle that leaky faucet and restore peace to your household. Let’s get started!

2. Tools and Materials You’ll Need

Before diving into the repair process, it’s essential to gather all the necessary tools and materials to ensure a smooth and efficient fix. Having everything at your fingertips will save you time and frustration, allowing you to stay focused on the task at hand. Here’s a handy list of what you’ll need:

### Tools:
1. **Adjustable Wrench**: This versatile tool will help you grip and turn various nuts and bolts securely, making it easier to disassemble the faucet.
2. **Screwdriver Set**: Depending on the type of faucet, you’ll likely need both flathead and Phillips head screwdrivers. These will assist in removing screws that secure the faucet handle and other components.
3. **Pliers**: A good pair of pliers will be invaluable for gripping and twisting stubborn components that may be difficult to handle with your fingers alone.
4. **Allen Wrench**: If you have a faucet with a hex screw, an Allen wrench will be necessary to remove the handle.

### Materials:
1. **Replacement Washers or O-Rings**: These small yet crucial components often wear out and are common culprits behind leaks. Be sure to check your faucet type to purchase the correct size.
2. **Plumber’s Grease**: This lubricant is perfect for ensuring a smooth operation of moving parts and can help extend the life of your faucet components.
3. **Drop Cloth or Towels**: Having a drop cloth or some old towels handy will protect your countertop from scratches and absorb any water that spills during the repair process.

With your tools and materials assembled, you’re now ready to tackle that leaky faucet! Each item plays a vital role in ensuring that your repair goes off without a hitch, so double-check that you have everything before proceeding to the next step. With a little preparation, you’ll not only fix that pesky leak but also gain confidence in your DIY skills.

3. Step 1: Turn Off the Water Supply

How to fix a leaky faucet?
Credit : whatcanu.com

Before you dive into the intricate world of faucet repairs, the very first step—perhaps the most crucial one—is to turn off the water supply. This simple yet essential action will save you from a potential deluge and allow you to work without the constant worry of water spraying unexpectedly.

To locate the water supply, look beneath your sink for the shut-off valves. These are typically two knobs or lever handles, one for hot water and another for cold. Turn them clockwise until they stop to fully close the valves. If your faucet is connected to a separate shut-off valve, ensure that it is also turned off.

After shutting off the water, it’s wise to open the faucet to relieve any remaining pressure and drain any leftover water in the lines. This step not only keeps your workspace dry but also minimizes the mess you’ll have to deal with later.

Once you’ve ensured that the water is completely off and the faucet is dry, you can confidently proceed with the next steps of your repair, knowing that you’ve set a solid foundation for a successful fix. Remember, safety first—taking the time to properly turn off the water supply will make your DIY experience smoother and more efficient.

4. Step 2: Plug the Drain

Before diving into the intricate workings of your faucet, it’s essential to create a clean and manageable workspace. Step 2: Plug the Drain may seem like a minor detail, but it’s actually a crucial step in preventing any small parts or debris from disappearing into the abyss of your sink.

To begin, gather a clean rag or a purpose-made sink plug. If your sink has a built-in stopper, ensure it’s securely closed. For those without one, simply take the rag and wad it up tightly; then, place it in the drain opening. This acts as a safeguard, blocking any screws, washers, or other components from slipping away during your repair.

While this may feel like a small task, it’s a foundational step that can save you a significant amount of frustration later on. Imagine reaching the end of your fix only to realize a vital screw has vanished down the drain! By taking this extra precaution, you’ll maintain control over your workspace and ensure a smooth and efficient repair process. With the drain securely plugged, you can now confidently proceed to the next step in fixing that pesky leak.

5. Step 3: Disassemble the Faucet

How to fix a leaky faucet?
Credit : whatcanu.com

Once you’ve gathered your tools and turned off the water supply, it’s time to tackle the heart of the problem: disassembling the faucet. This step is crucial for accessing the inner components that may be causing the leak.

Begin by placing a cloth or towel beneath the faucet to catch any residual water that might spill during this process. Using a screwdriver, carefully remove any decorative caps or handles that are covering the screws. If your faucet features a lever, you may need to look for a small set screw located at the back or underside, which can often be loosened with an Allen wrench.

With the handles removed, you’ll need to unscrew the packing nut. This nut can be tightly fitted, so employ your adjustable wrench to gently loosen it. Be mindful not to apply too much force, as excessive pressure can damage the faucet body. Once the packing nut is loose, carefully lift it off to expose the stem or cartridge inside.

At this stage, take a moment to examine the parts you’ve disassembled. Look for worn-out washers, O-rings, or other components that may need replacing. Keeping these parts organized will save you hassle when it’s time to reassemble. Documenting the order of disassembly with your phone or a notepad can also be incredibly helpful, ensuring you can easily put everything back together once you’ve made your repairs.

Disassembling the faucet might seem intimidating, but with patience and attention to detail, you’ll be well on your way to fixing that leaky faucet and restoring peace to your home.

6. Step 4: Identify the Problem: Washer, O-ring, or Cartridge

Once you have the faucet disassembled and laid out in front of you, it’s time to diagnose the issue. This is a crucial step in your DIY journey, as identifying whether the culprit is a worn washer, a faulty O-ring, or a damaged cartridge will dictate your next moves and ensure a successful repair.

**Washer Problems:** If your faucet is dripping from the spout, the most common offender is often the washer. The washer is a rubber component that provides a tight seal when the faucet is turned off. Over time, regular use can wear down this component, leading to leaks. Inspect the washer for any signs of cracks, fraying, or compression. If it looks worn, it’s likely time for a replacement.

**O-ring Issues:** O-rings are small circular gaskets that help prevent leaks around the handle of the faucet. If you notice water pooling around the faucet handle itself, the O-ring may be to blame. Check for signs of wear or deterioration. If it seems to be losing its elasticity or has developed hard spots, replacing it can resolve the issue and restore your faucet’s functionality.

**Cartridge Dilemmas:** If your faucet is still leaking despite having replaced the washer and O-ring, the problem may lie in the cartridge. Cartridges are more commonly found in cartridge faucets, and they can wear out over time, leading to leaks. Look for any visible cracks or damage, and if necessary, take the cartridge to a hardware store to find an exact match for replacement.

Understanding these components and their roles is essential for diagnosing and addressing the leak effectively. Once you’ve identified the problem, you can move forward with the appropriate replacements, confident in your ability to restore your faucet to its drip-free state. This step not only empowers you as a DIYer but also saves you money and the hassle of calling in a professional.

7. Step 5: Replace the Damaged Parts

How to fix a leaky faucet?
Credit : whatcanu.com

### Step 5: Replace the Damaged Parts

Once you’ve successfully disassembled the faucet and identified the culprit behind the leak, it’s time to replace the damaged parts. This is a crucial step in ensuring your repair is effective and long-lasting. Depending on the type of faucet you have—be it compression, cartridge, ball, or ceramic disc—the parts you need to replace may vary.

First, carefully inspect the components you’ve removed. Look for worn-out washers, O-rings, or seals, as these are often the primary suspects in leaks. If they appear cracked, frayed, or misshapen, it’s time to swap them out. Many hardware stores offer repair kits that include all the necessary parts for your specific faucet model, making it easy to find replacements.

Before purchasing new parts, bring the old ones with you as a reference. This will ensure you get the right size and type for a proper fit. Once you have your new components, follow the manufacturer’s instructions to install them. Make sure to seat the washers and O-rings snugly, as a proper seal is essential to prevent future leaks.

As you reassemble the faucet, take care not to overtighten any screws or nuts, as this can cause damage to the new parts. Instead, aim for a firm but gentle tightening to ensure everything is secure without compromising the integrity of the fittings.

Replacing the damaged parts is a straightforward yet vital step in your faucet repair journey. Doing it correctly will not only stop the leak but also extend the life of your faucet, giving you peace of mind and a fully functional kitchen or bathroom fixture. With the new parts in place, you’re now one step closer to enjoying a leak-free experience!

8. Reassemble the Faucet

After you’ve successfully replaced the faulty components, it’s time to reassemble the faucet to restore it to its original state. This step is crucial, as a proper reassembly not only ensures functionality but also prevents future leaks.

Start by carefully placing the faucet handle back onto its base, aligning any screws or fasteners as needed. If your faucet has a decorative cap, don’t forget to secure it back in place; this is often a simple twist-on piece that can enhance the overall appearance of your fixture.

Next, use your screwdriver to tighten any screws that hold the handle in position. Be cautious not to overtighten, as this could cause damage to the faucet or its components. If your faucet has multiple handles or levers, repeat this process for each one, ensuring they all fit snugly and operate smoothly.

Once the handles are secure, it’s time to reattach any decorative elements or covers that you removed earlier. These parts not only contribute to the aesthetics of your faucet but also provide additional protection against moisture and dust.

Finally, turn the water supply back on and check for leaks. With everything reassembled, run the faucet for a few moments to ensure that water flows freely and that no drips or leaks are present. If all looks good, congratulations—you’ve successfully reassembled your faucet! Enjoy the satisfaction of knowing you tackled this DIY project with skill and precision, and relish in the quiet of a leak-free home.

9. Step 6: Turn the Water Supply Back On

Once you’ve reassembled the faucet and ensured that all components are securely in place, it’s time to turn the water supply back on. This step marks a significant moment in your DIY journey, as it will reveal whether your repairs have been successful. Start by locating the shut-off valves beneath the sink; they are typically positioned on the wall or the cabinet floor.

Carefully turn the valves counterclockwise to restore the water flow. As you do this, listen for the sound of rushing water—this is a good sign that you’re on the right track! However, immediate caution is warranted: keep an eye on the faucet to check for any signs of leaks.

Once the water is flowing, turn the faucet handle to test its operation. Run the water for a moment to ensure a steady stream without spluttering or drips. Feel the temperature of the water to confirm that hot and cold are functioning correctly. If everything seems to be in order, congratulations! You’ve successfully tackled the leaky faucet. But don’t get too comfortable just yet—take a few moments to wipe down any excess water around the sink area and double-check your work. If all looks good, you can pat yourself on the back for a job well done and enjoy the satisfaction of having fixed the issue yourself!

10. Step 7: Test for Leaks

After you’ve meticulously reassembled your faucet and tightened all the screws and fittings, it’s time for the moment of truth: testing for leaks. This crucial step ensures that your hard work has paid off and that your faucet is working as it should.

Start by turning the water supply back on, gradually opening the valves to avoid any sudden bursts of water. As the flow begins, pay close attention to the area around the faucet itself and the joints where you’ve made adjustments. Look for any signs of dripping or pooling water. A small leak can often be fixed with a simple twist of a screw or a minor adjustment, so don’t be discouraged if you see a little moisture at first.

To get a comprehensive check, run the faucet through its various settings—hot, cold, and mixed. This will help you identify any leaks that might only occur under certain conditions. If you do notice any leaks, it’s essential to turn the water supply off again and revisit your work. Check the O-rings, washers, and any seals you might have changed; sometimes, a misaligned component is all it takes to create a leak.

Once you’re confident that everything is secure and there are no leaks, take a moment to admire your handiwork. Not only have you just saved yourself some money by avoiding a plumber, but you’ve also gained valuable skills in home maintenance. With a little patience and attention to detail, you’ve turned a potentially frustrating problem into a successful DIY project!

11. Common Mistakes to Avoid

When tackling a DIY project like fixing a leaky faucet, it’s crucial to be aware of common mistakes that can turn a simple repair into a frustrating endeavor. Here are some pitfalls to steer clear of as you embark on your plumbing adventure:

1. **Neglecting to Turn Off the Water Supply**: It may seem obvious, but many DIYers forget this essential step. Failing to shut off the water supply can lead to a messy situation, with water gushing out as you start disassembling the faucet. Always locate the shut-off valves under the sink and turn them off before you begin.

2. **Skipping the Preparation**: Jumping right into the repair without gathering the necessary tools and materials can lead to interruptions and confusion. Ensure you have everything you need—like wrenches, screwdrivers, replacement parts, and a cloth to catch any drips—before you start.

3. **Using the Wrong Tools**: Each faucet type requires specific tools for repair. Using the wrong tools can damage the faucet or make it difficult to complete the repair. Invest in or borrow the right tools, such as basin wrenches, pliers, and screwdrivers, to ensure you can work effectively and avoid stripping screws or damaging fittings.

4. **Ignoring the Manufacturer’s Instructions**: Each faucet brand and model may have unique components and assembly methods. Failing to consult the manufacturer’s instructions can lead to confusion during reassembly or the use of incorrect replacement parts. Always refer to the manual or look up the model online for guidance.

5. **Over-Tightening**: It’s easy to think that cranking down on screws and bolts will ensure a watertight seal, but over-tightening can cause damage to the components, leading to future leaks or breakage. Use a gentle hand and tighten just enough to create a good seal.

By being mindful of these common mistakes, you’ll set yourself up for a successful faucet repair. With a little patience and the right approach, you can effectively fix that leaky faucet and enjoy the satisfaction of a job well done!

12. Tips for Preventing Future Faucet Leaks

While fixing a leaky faucet can save you money and water, taking proactive steps to prevent future leaks is equally important. Here are some essential tips to keep your faucet in top condition and avoid the hassle of leaks down the line.

**1. Regular Maintenance:** Schedule routine checks on your faucets and fixtures. Inspect for signs of wear, such as corrosion or loose parts, and replace washers or O-rings as needed. A little preventive care can go a long way in extending the life of your faucet.

**2. Use the Right Tools:** When working on your faucet, always use the appropriate tools for the job. Using the wrong size wrench or screwdriver can strip screws or damage components, leading to leaks. Invest in a good set of plumbing tools to ensure you have what you need.

**3. Avoid Over-Tightening:** It may be tempting to crank down on screws or nuts to prevent leaks, but over-tightening can cause more harm than good. This can lead to cracks in hardware or misalignment, ultimately creating new leaks. Tighten only until snug.

**4. Check Water Pressure:** High water pressure can put unnecessary stress on your faucet and its components, leading to leaks. Use a pressure gauge to check your home’s water pressure, and if it’s above the recommended range (generally 40-60 psi), consider installing a pressure regulator.

**5. Choose Quality Fixtures:** When replacing faucets or fixtures, invest in high-quality products from reputable brands. While they might carry a higher upfront cost, quality fixtures are often built to last longer and withstand wear and tear better than cheaper alternatives.

By adopting these simple practices, you can significantly reduce the likelihood of future leaks and enjoy a well-functioning faucet for years to come. Remember, a little attention today can save you time, money, and the frustration of unexpected repairs tomorrow.

13. When to Call a Professional

While many leaky faucet repairs can be successfully tackled by enthusiastic DIYers, there are times when calling a professional is the wisest course of action. Knowing when to hand the wrench over to an expert can save you time, money, and frustration down the line.

If you’ve followed the previous steps and your faucet is still leaking, it may be a sign of a more complex issue. Sometimes, the problem might stem from deeper within your plumbing system, such as high water pressure or corroded pipes, which aren’t easily fixable without specialized knowledge and tools. Additionally, if you notice water pooling around the base of the faucet or under the sink, this could indicate a more serious leak that requires an experienced plumber’s intervention.

Another situation where a professional’s help is warranted is if you’re dealing with a faucet type that is particularly intricate or outdated. Vintage or specialty faucets may have unique components that are hard to find or require specific expertise to repair correctly. In these cases, a professional can ensure that repairs are done without damaging your faucet further.

Finally, if you feel overwhelmed or uncertain at any point during your repair attempts, it’s perfectly okay to reach out for help. Plumbing can be tricky, and the last thing you want is to inadvertently create a bigger problem that leads to costly repairs. Trust your instincts—if a task feels beyond your skill level, calling a licensed plumber is a smart and responsible decision. They can provide peace of mind, ensure the job is done right, and ultimately save you from the headache of future complications.

14. Conclusion: Enjoying Your Leak-Free Faucet!

Congratulations! You’ve successfully tackled the task of fixing your leaky faucet, and now it’s time to sit back, relax, and enjoy the fruits of your labor. There’s something immensely satisfying about resolving a household issue with your own hands, and a leak-free faucet is a testament to your DIY skills. No more drips, no more annoying water sounds in the night, and certainly no more wasted water sneaking through those faulty seals.

As you turn on the faucet and hear the smooth flow of water, take a moment to appreciate the quietude of your kitchen or bathroom—free from the persistent drip-drip that once interrupted your peace. Not only have you saved yourself money on potential plumbing bills, but you’ve also contributed to water conservation, which is essential for our planet.

Remember, maintaining your faucet is key to ensuring its longevity. Regular checks for wear and tear, cleaning out aerators, and replacing washers can prevent future leaks. Should you encounter any further issues, don’t hesitate to refer back to this guide or consult a professional if needed.

By embracing the DIY spirit, you’ve not only fixed a problem but also gained valuable skills that empower you to handle similar repairs in the future. So, go ahead, enjoy that leak-free faucet, and let the water flow freely—without the worry of unwanted puddles beneath!

15. Additional Resources and References

When tackling a DIY project like fixing a leaky faucet, having the right resources at your fingertips can make all the difference. Here are some additional materials and references that can help you along the way, ensuring your repair is successful and stress-free.

1. **Online Tutorials and Videos:** Websites like YouTube are treasure troves of DIY content. Search for specific faucet types or brands for step-by-step video guides that visually walk you through the repair process. Seeing the steps in action can help clarify complex instructions and give you the confidence to proceed.

2. **Manufacturer’s Manuals:** If you still have the manual that came with your faucet, it’s worth a look. These manuals often include troubleshooting sections that can point you directly to the source of the leak, as well as specific diagrams and parts lists that are invaluable during repairs.

3. **DIY Forums and Communities:** Online forums such as Reddit’s r/HomeImprovement or DIY Network can be excellent resources. Here, you can ask questions, share your experiences, and learn from others who have tackled similar projects. Community members often provide tips and tricks that can save you time and frustration.

4. **Home Improvement Books:** If you prefer a more traditional approach, consider picking up a home improvement book from your local library or bookstore. Many of these guides offer comprehensive chapters on plumbing and faucet repairs, complete with illustrations and troubleshooting advice.

5. **Local Hardware Store Workshops:** Some hardware stores offer free workshops or classes on home repairs, including plumbing. Check with your local store to see if they have any upcoming sessions where you can gain hands-on experience and ask questions from knowledgeable staff.

By utilizing these additional resources, you can enhance your understanding of faucet repairs and gain the confidence to tackle even the trickiest plumbing issues. Remember, every DIY project is a learning opportunity, so don’t hesitate to seek out information that can help refine your skills. With the right guidance, you’ll not only fix that leaky faucet but also feel empowered to take on future home improvement challenges!

In conclusion, fixing a leaky faucet doesn’t have to be an overwhelming task. With the straightforward steps outlined in our DIY guide, you can tackle this common household issue with confidence and ease. Not only will you save money by avoiding costly plumber fees, but you’ll also gain a sense of accomplishment by successfully completing the repair yourself. Remember, every drop counts—both in conserving water and in preserving your home’s plumbing health. We encourage you to gather your tools, roll up your sleeves, and embark on this simple yet rewarding project. Happy fixing, and may your faucet be forever drip-free!

Is industrial machinery/components a good career path ?

Industrial machinery and components is a growing field with many opportunities for those interested in a career in this industry.

Industrial machinery and components is a field that offers a variety of roles and responsibilities, from design and manufacturing to sales and service.

Industrial machinery and components
Credit : cang hai

one of the main benefits of a career in industrial machinery and components is the opportunity to work with cutting-edge technology. This industry is constantly evolving, with new developments and advancements being made all the time. This means that those working in this field will have the opportunity to learn and grow alongside the industry.

Another benefit of this career path is the potential for job stability. The demand for industrial machinery and components is high and expected to continue to grow in the coming years. This means that there will be plenty of job opportunities available for those with the right skills and experience.

Wide range of roles and responsibilities

The field also offers a wide range of roles and responsibilities. For example, those interested in design and manufacturing can work on the development of new machinery and components. Those interested in sales and service can work on the marketing and distribution of these products. This means that there is something for everyone in this field.

Working in the industrial machinery and components industry also offers the opportunity to work in a variety of different settings. This field is not limited to just one type of company or industry. Instead, it is a field that is applicable to many different industries and companies, from manufacturing to construction to energy.

Finally, a career in industrial machinery and components offers the opportunity to make a difference in the world. These products are used in many different industries and are essential for the functioning of many different businesses. This means that those working in this field are playing an important role in the global economy and helping to keep our world running smoothly.

Overall, industrial machinery and components is a great career path for those interested in technology, job stability, and a wide range of roles and responsibilities. It offers the opportunity to work with cutting-edge technology, make a difference in the world, and have a stable and well-paying job.