What are the common motorbike repairs you can do yourself?

For many motorbike enthusiasts, the thrill of the ride is only matched by the satisfaction of mastering their machine.

However, the journey of motorcycle ownership often comes with its fair share of challenges, especially when it comes to maintenance and repairs. While some riders may shy away from getting their hands dirty, there’s a whole world of DIY motorbike repairs waiting to be explored, offering not only a sense of accomplishment but also the potential for significant cost savings. In this blog post, we’ll delve into some common motorbike repairs that you can confidently tackle yourself, empowering you to take control of your bike’s upkeep. From changing your oil and replacing brake pads to diagnosing electrical issues, we’ll provide you with essential tips, tricks, and step-by-step guides to help you get back on the road faster and more knowledgeable than ever. Whether you’re a seasoned rider or a newcomer to the scene, mastering these skills will deepen your connection with your bike and enhance your riding experience. So roll up your sleeves, grab your tools, and let’s dive into the world of DIY motorbike repairs!

1. Introduction to DIY Motorbike Repairs

What are the common motorbike repairs you can do yourself?
Credit : whatcanu.com

Motorbikes are not just a mode of transportation; they represent freedom, adventure, and a sense of community. However, owning a motorbike also comes with the responsibility of maintenance and repairs. Many riders shy away from DIY repairs, fearing the complexity of mechanics and the potential for costly mistakes. But, with the right knowledge and a bit of confidence, you can take charge of your bike’s upkeep and handle common repairs yourself.

In this section, we’ll explore the basics of DIY motorbike repairs, empowering you to roll up your sleeves and dive into the hands-on world of motorcycle maintenance. Whether it’s changing the oil, replacing a flat tire, or adjusting the chain, these tasks not only enhance your riding experience but can also save you money and deepen your understanding of your machine.

Embracing DIY repairs can transform the way you perceive your motorbike, turning it from a mere vehicle into a personal project that you can nurture and improve over time. With the right tools, a bit of patience, and a willingness to learn, you’ll discover that many repairs are well within your skill set. So, let’s rev up your confidence and get started on the road to mastering DIY motorbike repairs!

2. Essential Tools for Motorbike Maintenance

When it comes to mastering DIY motorbike repairs, having the right tools is just as crucial as understanding the mechanics of your bike. Equipping yourself with essential tools not only empowers you to tackle common repairs but also ensures that the job is done efficiently and safely. Here’s a rundown of the must-have tools every DIY motorbike enthusiast should have in their arsenal.

**1. Socket Set:** A comprehensive socket set is the backbone of any motorbike repair toolkit. With various sizes and types, it allows you to tackle everything from tightening bolts to removing engine components. Look for a set that includes both metric and imperial sizes to cover all bases.

**2. Wrenches:** A combination of adjustable and fixed wrenches is essential for gripping and turning nuts and bolts. A torque wrench is particularly important for ensuring that your fasteners are tightened to the manufacturer’s specifications, preventing damage to sensitive components.

**3. Screwdrivers:** A quality set of screwdrivers, including both flathead and Phillips, is necessary for handling a variety of screws found throughout your motorbike. Magnetic tips can be a great addition to ensure you don’t lose screws in hard-to-reach places.

**4. Pliers:** Needle-nose pliers and slip-joint pliers will come in handy for gripping, twisting, and cutting wires or cables. They are particularly useful when you need to maneuver in tight spaces or handle delicate components.

**5. Oil Change Supplies:** Regular oil changes are vital for maintaining engine health. Ensure you have an oil filter wrench, a drain pan to catch old oil, and a funnel for easy pouring. Don’t forget the proper type of oil and a new filter specific to your motorbike model.

**6. Tire Changing Tools:** Flat tires can happen when you least expect it, so having a tire lever and a pump is essential. A pressure gauge will also help you keep your tires properly inflated for optimal performance.

**7. Safety Gear:** Never underestimate the importance of safety. Gloves, goggles, and a good-quality mechanic’s apron will protect you from grease and grime, while also keeping you safe from potential hazards.

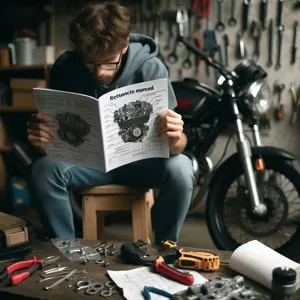
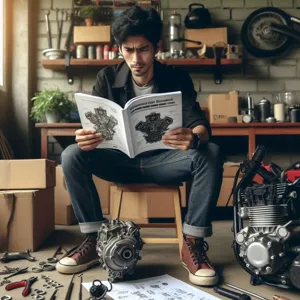
**8. A Repair Manual:** While not a tool in the traditional sense, having a repair manual specific to your bike can be invaluable. It provides step-by-step instructions for repairs and maintenance, making even complex tasks more manageable.

By investing in these essential tools, you’ll not only be prepared for common motorbike repairs but also gain the confidence to tackle more intricate issues over time. Mastering DIY repairs not only saves you money but also deepens your understanding of your motorbike, allowing you to enjoy every ride with peace of mind.

3. Safety First: Protective Gear and Precautions
What are the common motorbike repairs you can do yourself?
Credit : whatcanu.com

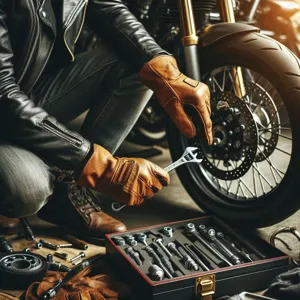
When it comes to tackling DIY motorbike repairs, prioritizing safety should always be your first step. Whether you’re changing the oil, replacing brake pads, or adjusting the chain, the right protective gear is essential to keep you safe from potential hazards. Start with a sturdy pair of gloves; they provide a barrier against sharp edges and hot components while also ensuring a better grip on tools. Look for gloves specifically designed for mechanical work, as they offer added durability and tactile sensitivity.

Next, don’t underestimate the importance of eye protection. Safety goggles or a full-face shield protect your eyes from flying debris, dust, and harmful chemicals that could cause serious injuries. Additionally, consider wearing a long-sleeved shirt and durable pants to shield your skin from cuts and scrapes, especially when working around the engine or under the bike.

Your workspace also plays a crucial role in maintaining safety. Ensure that your garage or workshop is well-ventilated, especially when dealing with fuels or solvents. Keep your tools organized and within reach to prevent accidents caused by searching for misplaced items. Also, make sure to elevate your bike securely if you’re working underneath it; a stable motorcycle lift or stands can prevent tipping and provide a safe environment to work.

Lastly, familiarize yourself with the specific repairs you plan to undertake. Read through manuals, watch instructional videos, or join online forums to gather insights and tips from experienced DIYers. The more prepared you are, the less likely you are to encounter surprises that could compromise your safety. By equipping yourself with the right knowledge and gear, you’ll not only protect yourself but also gain confidence as you master those common motorbike repairs.

4. Understanding Your Motorbike: A Quick Overview of Components

Before you dive into the world of DIY motorbike repairs, it’s essential to familiarize yourself with the various components of your machine. Understanding these parts not only empowers you to tackle repairs with confidence but also helps you appreciate the mechanics of your ride.

At the heart of your motorbike lies the **engine**, often referred to as the beating heart of the machine. Comprising intricate components such as cylinders, pistons, and camshafts, the engine is where the magic happens, converting fuel into the power that propels you forward. Familiarize yourself with the engine type—be it a single-cylinder, twin-cylinder, or four-cylinder—as each will have distinct characteristics and maintenance needs.

Next, we have the **transmission**, which plays a crucial role in managing the power generated by the engine. It allows you to shift gears smoothly, ensuring optimal performance and fuel efficiency. Understanding how to check the transmission fluid levels and recognizing the signs of wear can save you from costly repairs down the line.

The **braking system** is another critical component that demands your attention. Motorbikes typically feature either disc or drum brakes. Knowing how to inspect brake pads, change fluid, and recognize the signs of wear can keep you safe on the road. A well-maintained braking system can be the difference between a smooth ride and a potentially dangerous situation.

Don’t overlook the **suspension system**, which includes components like forks, shocks, and swingarms. A properly functioning suspension ensures a comfortable ride and better handling. Learning how to adjust your suspension settings based on your weight, riding style, and terrain can enhance your riding experience significantly.

Lastly, the **electrical system** is the nerve center of your motorbike. From the battery to the ignition system, understanding how these components work together is essential. Regularly checking your battery’s charge, ensuring your wiring is intact, and replacing blown fuses can prevent frustrating breakdowns.

By gaining a solid understanding of these key components, you’ll be better equipped to diagnose issues, perform routine maintenance, and tackle repairs with ease. This knowledge not only enhances your confidence as a DIY mechanic but also deepens your connection with your motorbike, transforming your riding experience into something truly special.

5. How to Change Your Motorbike Oil
What are the common motorbike repairs you can do yourself?
Credit : whatcanu.com

Changing your motorbike oil is one of the most essential maintenance tasks you can undertake to keep your ride running smoothly and efficiently. While it may seem intimidating at first, with the right tools and a bit of guidance, you’ll find that this task is well within your capabilities.

### Gather Your Supplies

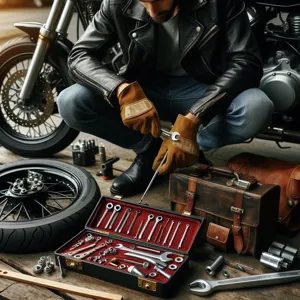
Before you dive in, make sure you have all the necessary tools on hand. You’ll need a socket wrench or spanner, an oil filter wrench, a drain pan, a funnel, and, of course, the right type of motorbike oil and a new oil filter. It’s crucial to consult your owner’s manual to determine the specific oil type and capacity recommended for your motorcycle.

### Prepare Your Workspace

Find a flat and stable surface to work on, ideally in a well-ventilated area. If you have a motorcycle stand, this is the perfect time to use it, as it will elevate your bike and make the process easier. Ensure you have plenty of rags or paper towels handy to clean up any spills.

### Drain the Old Oil

Start by warming up your engine for a few minutes; this helps the oil drain more smoothly. Once warmed, turn off the engine and allow it to cool slightly. Locate the oil drain plug underneath your motorbike. Using your socket wrench, carefully remove the drain plug, allowing the old oil to flow into your drain pan. Be mindful of the hot oil and give it enough time to drain completely.

### Replace the Oil Filter

While the oil is draining, take this opportunity to replace the oil filter. Using your oil filter wrench, remove the old filter, making sure to catch any residual oil that may spill out. Before installing the new filter, apply a bit of fresh oil to the rubber gasket on the new filter to ensure a proper seal. Screw the new filter into place, but avoid over-tightening.

### Add the New Oil

Once the old oil has fully drained and the plug is securely replaced, it’s time to add the new oil. Using your funnel, pour in the recommended amount of fresh motorbike oil through the fill cap, taking care not to overfill. After adding the new oil, replace the fill cap and wipe down any spills.

### Check the Oil Level

Finally, start your motorbike and let it run for a minute. This helps circulate the new oil throughout the engine. Once done, turn off the engine and wait a moment before checking the oil level with the dipstick or sight glass. If needed, add more oil to reach the appropriate level.

### Clean Up

Dispose of the old oil and filter responsibly by taking them to a local recycling center or automotive shop that accepts hazardous waste. cleaning up your workspace not only helps you maintain a safe environment but also prepares you for your next DIY adventure.

By mastering the skill of changing your motorbike oil, you not only save money but also gain a deeper understanding of your machine. With regular oil changes, you’ll ensure a longer lifespan for your bike, a smoother ride, and a rewarding sense of accomplishment after each job well done.

6. Replacing the Air Filter: Step-by-Step Guide

Replacing the air filter on your motorbike is one of the most straightforward yet essential maintenance tasks you can undertake to ensure your machine runs efficiently. A clean air filter improves airflow to the engine, enhancing performance and fuel economy, while also prolonging the life of your engine. Here’s a step-by-step guide to help you tackle this DIY project with confidence.

**Step 1: Gather Your Tools and Materials**
Before diving into the replacement, gather the necessary tools: a socket wrench, screwdrivers (both flathead and Phillips), and a new air filter (be sure to check your bike’s model specifications for the correct type). Having everything at hand will make the process smoother and more efficient.

**Step 2: Locate the Air Filter**
Next, find the air filter compartment on your motorbike. Depending on your model, it may be located under the seat, side panel, or within the frame. Refer to your owner’s manual if you’re unsure – it’s a handy resource that often provides diagrams and specific instructions tailored to your bike.

**Step 3: Remove the Cover**
Using your screwdriver or socket wrench, carefully remove the screws or bolts securing the air filter cover. Keep these fasteners in a safe place so you don’t lose them. Gently lift off the cover, taking care not to damage any clips or rubber seals.

**Step 4: Take Out the Old Filter**
Carefully remove the old air filter from its compartment. Be mindful of any dirt or debris that may have accumulated around it; using a soft brush or cloth, clean the area to ensure no contaminants enter the engine during the replacement.

**Step 5: Insert the New Air Filter**
Now it’s time to install the new air filter. Ensure it fits snugly into the compartment, following the orientation of the old filter. If your new filter has a specific side that should face the engine, make sure to adhere to this to maximize airflow efficiency.

**Step 6: Reattach the Cover**
Once the new filter is securely in place, reattach the cover by aligning it correctly and securing it with the screws or bolts you removed earlier. Double-check that everything is tight but not over-tightened, as this can damage the plastic components.

**Step 7: Final Check**
Before you take your bike for a spin, do a quick visual inspection to ensure everything is properly reassembled and that no tools or debris are left behind. A clean air filter can significantly improve your bike’s performance, so you may notice the difference in how smoothly it runs.

By following these simple steps, you not only save on labor costs but also gain a sense of accomplishment and deeper knowledge of your motorbike. Regularly replacing your air filter can contribute to a longer lifespan for your bike and a more enjoyable ride, making it a worthwhile addition to your DIY maintenance routine. Happy riding!

7. Brake Maintenance: Inspecting and Replacing Brake Pads

What are the common motorbike repairs you can do yourself?
Credit : whatcanu.com

Brake maintenance is one of the most critical aspects of motorbike upkeep that every rider should master. After all, your brakes are your lifeline on the road, ensuring not only your safety but that of others as well. Regularly inspecting and replacing brake pads can significantly enhance your bike’s performance and extend the lifespan of your braking system.

To begin, gather the necessary tools: a socket set, a torque wrench, and a flathead screwdriver. Start by carefully lifting your bike on a stand to access the wheels. Once elevated, take a moment to visually inspect the brake pads. Look for signs of wear and tear, such as uneven surfaces, cracks, or a thickness below the manufacturer’s recommended minimum. If you notice such issues, it’s time to replace them.

Removing the wheel is typically your next step. For most bikes, this involves loosening the axle nut and sliding the wheel off. With the wheel removed, you can easily access the brake caliper. Carefully unbolt the caliper, ensuring you don’t damage any surrounding components. Once the caliper is free, you can slide out the old brake pads. Pay close attention to how they’re fitted, as this will guide you when it’s time to install the new ones.

When selecting replacement brake pads, consider the type of riding you do. Organic pads offer a quieter ride with less dust but may wear out faster, while metallic pads provide superior stopping power and durability, making them ideal for aggressive riding. Once you’ve chosen the right pads, slide them into place, ensuring they fit snugly into the caliper.

Afterward, reattach the caliper and wheel, tightening everything to the manufacturer’s specifications. Don’t forget to pump the brake lever a few times to seat the new pads properly against the rotor before hitting the road. Finally, take a moment to test your brakes in a safe area. This simple yet essential maintenance task not only enhances your bike’s safety and performance but also enriches your understanding of your machine, empowering you as a DIY enthusiast. With regular brake inspections and timely replacements, you can ensure a smoother, safer ride for miles to come.

8. Tire Care: How to Check and Change Tires

When it comes to maintaining your motorbike, tire care is paramount—not only for your bike’s performance but also for your safety on the road. Your tires are the only contact point between your bike and the asphalt, making regular checks essential for optimal handling and performance. Luckily, checking and changing tires is a straightforward DIY task that can save you time and money while giving you a deeper understanding of your bike.

**Checking Your Tires: The Essentials**

Start by inspecting your tires for any visible signs of wear and tear. Look for cracks, bulges, or punctures, and check the tread depth. A simple way to gauge tread wear is to use the penny test: insert a penny into the tread with Lincoln’s head facing down. If you can see all of Lincoln’s head, it’s time for a replacement. Additionally, ensure your tires are properly inflated. Under-inflated tires can lead to poor handling and increased wear, while over-inflated tires reduce traction and can lead to blowouts. Use a reliable pressure gauge to check the PSI and adjust accordingly, following the manufacturer’s recommendations found in your bike’s manual.

**Changing Your Tires: A Step-by-Step Guide**

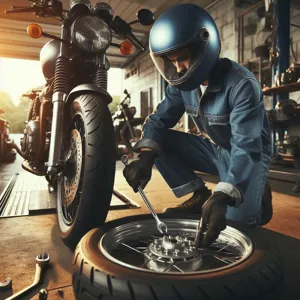
If it turns out your tires need replacing, don’t worry; changing them is a manageable task. Begin by securing your bike on a stable surface, preferably on a center stand or paddock stand to keep it upright. Use a wrench to loosen the wheel bolts, then carefully remove the wheel from the bike.

Once you have the wheel off, it’s time to remove the old tire. Use tire levers to pry the tire off the rim, taking care not to damage the rim in the process. Once the tire is off, clean the rim thoroughly to remove any debris, dirt, or old tire sealant.

Now, it’s time to fit the new tire. Align the tire with the rim and use the tire levers to push it into place, ensuring it sits evenly. Inflate the tire to the recommended PSI, and before reattaching the wheel to your bike, check for any air leaks and make sure the tire is seated correctly.

Finally, reattach the wheel to your bike, tightening the bolts in a crisscross pattern to ensure even pressure. Once you’ve completed the installation, take a moment to double-check everything before taking your bike for a spin.

By mastering tire checks and changes, you enhance your DIY skills and ensure your ride is always road-ready. Keeping your tires in top condition not only boosts performance but also ensures you enjoy every ride with peace of mind.

9. Battery Maintenance: Cleaning and Replacing the Battery

When it comes to maintaining your motorbike, one of the most critical components to keep in check is the battery. A well-functioning battery ensures reliable starts, consistent power delivery, and overall performance of your bike. Neglecting this vital piece of machinery can lead to frustrating breakdowns and costly repairs. Luckily, battery maintenance is a straightforward task that you can tackle yourself, saving both time and money.

**Cleaning the Battery**

Before you get started, it’s essential to gather your tools: a pair of gloves, a wrench, a wire brush or battery cleaning tool, and a solution of baking soda and water. Begin by turning off your bike and disconnecting the negative terminal first to avoid any electrical shorts. Once that’s done, inspect the battery for corrosion— a white, powdery substance around the terminals is a clear sign that it needs attention.

To clean the terminals, dip your brush in the baking soda solution and gently scrub away the corrosion. This not only improves electrical connectivity but also extends the life of your battery. After cleaning, rinse the terminals with a small amount of water and dry them thoroughly. Reconnect the terminals, starting with the positive side, and apply a thin layer of petroleum jelly to prevent future corrosion.

**Replacing the Battery**

If your battery is older than three to five years or you’ve noticed signs of weakness—like dim lights or slow engine cranking—it may be time for a replacement. To replace the battery, you’ll need a new one that is compatible with your motorbike. Always consult your owner’s manual or speak to an expert if you’re unsure.

Disconnect the old battery by following the same disconnection process mentioned earlier. Remove any securing straps or brackets, and lift the old battery out carefully, as they can be heavier than they look. Place the new battery in the same position, securing it with straps or brackets, and connect the terminals—positive first, followed by negative.

Finally, ensure everything is tight and secure, and give your bike a test start. With proper battery maintenance, your motorbike will be ready to hit the road with confidence, and you’ll feel accomplished knowing you’ve tackled this essential repair on your own. Regular battery checks can save you from unexpected inconveniences and keep your ride smooth and reliable.

10. Diagnosing and Fixing Electrical Issues

Diagnosing and fixing electrical issues on your motorbike can seem daunting, but with a little patience and the right approach, it’s a task well within the reach of the DIY enthusiast. Electrical problems can manifest in various ways—dim lights, dead batteries, or even a complete failure to start. Understanding the basics of your bike’s electrical system is key to identifying and resolving these issues effectively.

Start by ensuring that the battery is fully charged and properly connected. A loose or corroded battery terminal can lead to all sorts of electrical gremlins, so give it a good clean and tighten any loose connections. If the battery checks out, move on to the fuses. A blown fuse can often be the culprit behind non-functioning lights or signals. Consult your owner’s manual to locate the fuse box and replace any blown fuses with the correct amperage.

Next, inspect the wiring harness for any visible damage, such as frayed wires or exposed connections. These can cause shorts or intermittent connections that lead to erratic behavior. If you find any damaged wires, use electrical tape or heat-shrink tubing to secure them, or consider replacing the entire harness if the damage is extensive.

For more complex electrical issues, a multimeter becomes an invaluable tool. This device allows you to measure voltage, continuity, and resistance, helping you pinpoint issues with components like the ignition system, starter relay, or even the ECU. Testing these components methodically can reveal whether they are functioning correctly or need replacement.

Lastly, don’t underestimate the power of online forums and repair guides. The motorcycling community is vast, and chances are someone has encountered the same issue you are facing. With the right resources and a bit of determination, you can tackle electrical repairs yourself, saving money and gaining valuable knowledge about your bike in the process. Remember, every time you successfully resolve an issue, you’re not just fixing your motorbike; you’re also becoming a more skilled and confident DIY mechanic.

11. Chain Maintenance: Lubrication and Adjustment

Maintaining your motorbike chain is crucial for ensuring a smooth ride and prolonging the life of your bike. A well-lubricated and properly adjusted chain not only enhances performance but also improves safety on the road. Fortunately, chain maintenance is a straightforward task that any DIY enthusiast can master with a little knowledge and the right tools.

**Lubrication** is the first step in chain maintenance. Over time, dirt, grime, and moisture can accumulate on your chain, causing friction and wear. To begin, gather the necessary supplies: a quality chain lubricant, a cleaning brush or rag, and a chain cleaning solution if your chain is particularly dirty. Start by raising your bike on a stand to give you easy access to the chain. Rotate the rear wheel to expose all sections of the chain, and use the brush to remove any debris. For stubborn dirt, apply the cleaning solution and wipe it away with a clean rag. Once the chain is clean, spray or apply the lubricant evenly along the chain while turning the wheel to ensure that every link is coated. This helps to reduce wear and tear while preventing rust and corrosion.

**Adjustment** is equally important to keep your chain in optimal condition. Chains can stretch over time due to the forces exerted during riding, which can lead to poor performance and even potential hazards. To check the chain tension, refer to your motorbike’s manual for the manufacturer’s recommended slack. Using a ruler or a chain tension gauge, measure the slack at the midpoint of the chain. If it’s too loose, you’ll need to adjust it. Locate the adjustment bolts on the rear axle and loosen them slightly. Then, turn the adjustment screws evenly on both sides until the desired tension is achieved. Make sure to re-tighten the bolts securely once you’re satisfied with the adjustment.

By regularly lubricating and adjusting your motorbike chain, you can enhance performance, improve safety, and extend the lifespan of your bike. Not only does this routine maintenance save you money on professional repairs, but it also gives you a sense of accomplishment as you take control of your bike’s upkeep. With practice, chain maintenance will become an effortless part of your DIY routine, keeping your ride smooth and your spirit high on every journey.

12. Troubleshooting Common Engine Problems

When it comes to mastering DIY motorbike repairs, troubleshooting common engine problems is an invaluable skill that every rider should possess. The engine is the heart of your motorcycle, and understanding its quirks can save you both time and money.

Start by familiarizing yourself with the sounds your engine makes. A well-tuned engine should hum smoothly, but if you notice unusual noises—like knocking, grinding, or rattling—it’s a sign that something is amiss. These sounds can often indicate problems such as a loose component or an issue with the oil levels.

Next, pay attention to your bike’s performance. If you experience a lack of power during acceleration or notice that your motorcycle is stalling frequently, it could be an issue with the fuel system. Check the fuel lines for blockages, inspect the air filter for dirt and debris, and ensure that your carburetor or fuel injection system is functioning properly.

Another common problem is overheating. Always keep an eye on your temperature gauge, and if your engine seems to be running hot, check the coolant levels and ensure that there are no leaks in the cooling system. A dirty radiator or a malfunctioning thermostat can also contribute to overheating, so regular cleaning and maintenance are essential.

Don’t forget to check for warning lights on your dashboard as well. These indicators are your motorcycle’s way of communicating potential issues. A flashing check engine light could alert you to a variety of problems, from minor sensor issues to serious engine failures.

Lastly, don’t underestimate the importance of regular maintenance. Routine checks on your spark plugs, oil levels, and fuel filters can prevent many engine problems before they even arise. With a bit of patience and a willingness to learn, you can troubleshoot and resolve common engine issues, ensuring that your motorbike remains in peak condition for every ride. Embrace the challenge and take pride in your ability to keep your machine running smoothly!

13. Seasonal Maintenance Tips for Your Motorbike

As the seasons change, so too does the condition and performance of your motorbike. Proper seasonal maintenance is crucial for ensuring your ride remains in top shape, whether you’re gearing up for summer road trips or hunkering down for the winter months. Here are some essential tips to keep your motorbike running smoothly all year long.

**Spring Refresh:** After a long winter, your motorbike deserves some TLC. Start by giving it a thorough wash to remove any road salt, grime, and debris that may have accumulated. Next, check the battery, as cold temperatures can affect its lifespan. A quick charge or a replacement might be necessary. Inspect your tires for wear and ensure they’re properly inflated; this not only enhances performance but also improves safety. Finally, it’s a good idea to change the oil and replace the oil filter to keep your engine running smoothly as you hit the open road.

**Summer Readiness:** As the temperatures rise, so do the odds of overheating. Check your coolant levels and inspect the hoses for any signs of wear or leaks. Cleaning the air filter is also vital during these warmer months, as it prevents dirt and debris from clogging your engine. Ensure your brakes are in top condition; summer rides often mean longer distances and higher speeds, making brake reliability essential.

**Fall Preparation:** As leaves start to change, it’s time to prepare for the cooler air and potential rain. Start by checking your lights and signals; shorter days mean you’ll be riding in lower visibility. Ensure your tires have adequate tread for wet conditions and consider switching to a more suitable tire for the season. It’s also wise to inspect your chain and lubricate it if necessary, as autumn can introduce moisture to your ride.

**Winter Storage:** If you live in an area where winter brings snow and ice, proper storage is key to preserving your motorbike. Clean it thoroughly, then apply a protective coat of wax to shield the paint from harsh elements. Fill up your gas tank and add a fuel stabilizer to prevent any issues with fuel degradation. Finally, consider investing in a quality cover to keep dust and moisture at bay while your bike hibernates until spring.

By staying proactive with seasonal maintenance, you’ll not only prolong the life of your motorbike but also enhance your riding experience throughout the year. Each season presents its own set of challenges, but with these tips in your toolkit, you’ll be equipped to tackle them all like a pro.

14. Resources for Further Learning: Manuals and Online Communities

When it comes to mastering DIY motorbike repairs, having access to the right resources can make all the difference. Whether you’re a beginner or a seasoned enthusiast, tapping into the wealth of knowledge available through manuals and online communities is essential for enhancing your skills and confidence.

**Manuals: Your Go-To Guides**
Service manuals are indispensable for any motorbike owner. These detailed documents provide step-by-step instructions for repairs, maintenance schedules, and specifications tailored to your specific make and model. They often include diagrams that make complex tasks more manageable, such as adjusting the chain tension or replacing brake pads. Many manufacturers offer downloadable versions on their websites, while others can be found in print at your local dealership or motorcycle parts store. Investing in a high-quality service manual not only empowers you to handle repairs but also helps you understand your bike better, fostering a deeper appreciation for its mechanics.

**Online Communities: A Wealth of Knowledge**
In addition to manuals, the internet is brimming with online communities where motorbike enthusiasts gather to share tips, troubleshoot issues, and celebrate their successes. Popular forums and social media groups are fantastic places to ask questions and receive advice from more experienced riders. Websites like Reddit have dedicated subreddits for motorbike repairs, while platforms like Facebook host numerous groups tailored to specific brands or types of bikes. By engaging in these communities, you can gain insights into common problems, learn about the latest repair techniques, and even share your own experiences with others.

**YouTube and Online Courses**
Don’t overlook the power of visual learning! YouTube is an invaluable resource for DIY repairs, featuring countless tutorial videos that walk you through everything from basic maintenance tasks to complex overhauls. Many channels are hosted by seasoned mechanics who break down the processes into easy-to-follow steps. Additionally, consider exploring online courses offered by motorcycle repair schools or platforms like Udemy, which can provide structured learning and cover more advanced topics at your own pace.

By utilizing these resources, you’ll not only become more adept at handling repairs but also build a supportive network of fellow motorbike enthusiasts who share your passion. Embrace the journey of learning, and watch as your confidence in tackling motorbike repairs grows with every step you take.

15. Conclusion: Benefits of DIY Repairs and Keeping Your Motorbike in Top Shape

In conclusion, mastering DIY motorbike repairs not only enhances your mechanical skills but also fosters a deeper connection with your ride. Taking the reins of your bike’s maintenance allows you to intimately understand its workings, ensuring that every bolt is tightened, every component is lubricated, and every part is in top-notch condition. This hands-on approach can lead to significant savings on labor costs and spare parts, freeing up your budget for essential upgrades or accessories that enhance your biking experience.

Moreover, the sense of accomplishment that comes from successfully completing repairs can be incredibly rewarding. It empowers you to take control of your motorbike’s health and performance, instilling confidence in your ability to handle any issue that may arise on the road. You’ll find that regular DIY maintenance keeps your motorbike running smoothly, prolonging its lifespan and enhancing your overall riding experience.

Additionally, engaging in DIY repairs can foster a sense of community among fellow motorbike enthusiasts. Sharing tips, tricks, and experiences can lead to lasting friendships and invaluable knowledge exchange. Whether you’re in a garage tinkering with your bike or discussing techniques in an online forum, the camaraderie of the biking community is a powerful motivator to keep your motorbike in peak condition.

Ultimately, embracing DIY repairs not only saves you time and money but also cultivates a sense of pride and ownership in your motorbike. So, roll up your sleeves, grab those tools, and enjoy the journey of keeping your beloved machine in top shape. You’ll not only enhance your riding experience but also unlock a world of knowledge and satisfaction that comes from being hands-on with your motorbike.

We hope you found our guide on mastering DIY motorbike repairs both informative and inspiring. Embracing the world of hands-on maintenance can not only save you money but also deepen your bond with your bike, giving you the satisfaction of knowing that you’ve tackled those repairs yourself. From changing your oil to adjusting your brakes, each step you take empowers you as a rider and enhances your understanding of your machine. So gear up, grab your tools, and don’t hesitate to take on these common repairs with confidence! Remember, every successful repair is a step toward becoming a more skilled and self-sufficient motorcyclist. Happy riding and repairing!

How to troubleshoot common motorbike problems?

There’s nothing quite like the thrill of riding a motorbike—the wind in your hair, the open road ahead, and the sense of freedom that comes with every twist and turn.

However, every rider knows that with great adventure can come unexpected challenges. Whether you’re a seasoned rider or a new enthusiast, encountering mechanical issues is an inevitable part of the journey. From sputtering engines to stubborn brakes, motorbike problems can quickly turn your joyride into a frustrating ordeal. In this comprehensive guide, we’ll delve into the most common motorbike issues you might face on the road and provide you with practical troubleshooting tips to help you master the ride. With our expertise at your fingertips, you’ll be equipped to handle any hiccup with confidence, ensuring that your adventures remain as exhilarating as they should be. So, gear up and get ready to hit the road prepared—because every great ride deserves a smooth journey!

1. Introduction to Common Motorbike Problems

How to troubleshoot common motorbike problems?
Credit : whatcanu.com

Motorbikes are not just a mode of transportation; they embody freedom, adventure, and a sense of connection with the open road. However, like any machine, they can encounter a variety of issues that may disrupt that exhilarating experience. Understanding common motorbike problems is essential for every rider, whether you’re a seasoned enthusiast or a newcomer eager to hit the pavement.

In this section, we’ll delve into the most frequent issues that motorbike owners face, from the frustrating to the alarming. Imagine setting out on a beautiful sunny day, only to find your bike won’t start; the disappointment can be palpable. Or perhaps you’ve experienced the unsettling sensation of your bike wobbling unexpectedly while cruising down the highway. These problems can range from minor inconveniences, like a flat tire or a dead battery, to more serious complications involving the engine or braking systems.

Being proactive and knowledgeable about these common issues can save you time, money, and the headache of unexpected breakdowns. We’ll explore the symptoms to watch for, potential causes behind each problem, and practical troubleshooting tips to help you get back on the road with confidence. So, let’s gear up and embark on a journey through the most prevalent motorbike problems and learn how to master the ride!

2. Understanding Your Motorbike’s Mechanics

Understanding your motorbike’s mechanics is crucial for any rider who wants to ensure a smooth and safe ride. Your bike is a complex machine, composed of various systems that must work in harmony to deliver the exhilarating experience that motorbiking offers. By familiarizing yourself with the fundamental components and mechanics of your motorbike, you empower yourself to identify potential issues before they escalate into significant problems.

Start with the engine—the heart of your motorbike. It’s essential to understand how it operates, including the functions of key components like the pistons, valves, and spark plugs. A well-functioning engine provides the power you need, while irregularities such as unusual noises or decreased acceleration can indicate underlying issues. Pay close attention to the engine oil; regular checks and timely changes can prolong its life and enhance performance.

Next, dive into the braking system, which is vital for your safety. Understand the differences between disc and drum brakes, and familiarize yourself with the mechanics of brake pads and rotors. Regularly inspect these components for wear and tear, as well as the brake fluid levels, to ensure your stopping power is reliable.

Don’t overlook the electrical system either; it powers everything from your lights to your ignition. Learning how to troubleshoot common electrical issues, like a dead battery or faulty wiring, can save you from getting stranded. Keep an eye on your battery terminals for corrosion and ensure connections are secure.

Finally, familiarize yourself with the suspension and tires. The suspension system impacts your bike’s stability and handling, while properly inflated and well-maintained tires are critical for traction and safety. Regularly check tire pressure and tread depth, and be vigilant for any signs of wear.

By cultivating a strong understanding of your motorbike’s mechanics, you not only enhance your riding experience but also build confidence in your ability to tackle common problems. Remember, a well-maintained motorbike is a safer and more enjoyable ride, turning every journey into an adventure rather than a potential headache.

3. Essential Tools for Troubleshooting

How to troubleshoot common motorbike problems?
Credit : whatcanu.com

When it comes to troubleshooting common motorbike problems, having the right tools at your disposal can make all the difference between a minor inconvenience and a full-blown repair disaster. Equipping yourself with a well-curated toolkit not only empowers you to tackle issues head-on but also enhances your confidence as a rider. Here are the essential tools you should have in your arsenal:

1. **Basic Socket Set**: A good socket set is the backbone of any mechanic’s toolkit. Look for a set that includes a variety of sizes, as motorbike components can vary widely. A ratchet and a selection of sockets will enable you to quickly remove and replace bolts, whether you’re adjusting your handlebars or performing a full engine overhaul.

2. **Torque Wrench**: Properly torquing bolts is crucial for the safety and longevity of your motorbike. A torque wrench ensures that you apply the correct amount of pressure, preventing overtightening that could strip threads or cause damage. This tool is especially vital when working with critical components like the engine and suspension.

3. **Screwdrivers**: A set of screwdrivers in various sizes—both Phillips and flathead—is essential for tackling everything from panel removal to adjusting carburetors. magnetic screwdrivers can save you time by preventing screws from falling into hard-to-reach places.

4. **Pliers and Wrenches**: Needle-nose pliers are perfect for reaching tight spots, while regular pliers can assist with gripping and twisting. A good adjustable wrench is also a must-have for loosening or tightening nuts and bolts of various sizes.

5. **Multimeter**: Electrical issues can be particularly tricky to diagnose, making a multimeter an invaluable tool in your troubleshooting kit. It allows you to test voltage, continuity, and resistance, helping you identify problems in the wiring or components like the battery and ignition system.

6. **Tire Pressure Gauge and Repair Kit**: Your tires are your connection to the road, so keeping them in top shape is vital. A tire pressure gauge helps you monitor the air pressure, while a tire repair kit can be a lifesaver in the event of a flat. Being able to patch a tire on the go can keep you riding instead of waiting for assistance.

7. **Service Manual**: While not a physical tool, having a service manual specific to your motorbike model is crucial. It provides detailed diagrams, maintenance guidelines, and troubleshooting tips tailored to your machine. This resource can guide you through repairs with confidence and accuracy.

By arming yourself with these essential tools, you’ll be well-equipped to tackle a variety of common motorbike problems. Not only will you save money on repairs, but you’ll also deepen your understanding of your bike, leading to a more enjoyable and informed riding experience. Remember, the key to mastering the ride lies not just in your skills on the road but also in your ability to troubleshoot and maintain your machine with confidence.

4. Diagnosing Starting Issues

When it comes to the thrill of riding, few things are more frustrating than a motorbike that refuses to start. Diagnosing starting issues can be a daunting task for any rider, but with a systematic approach, you can pinpoint the problem and get back on the road in no time.

First and foremost, check the basics—ensure that your bike is in neutral and the kickstand is up. It sounds simple, but you’d be surprised how often these preliminary checks are overlooked. Next, listen for any signs of life when you press the starter button. A clicking sound may indicate a weak battery, while silence could suggest a more serious electrical issue.

If the battery is the culprit, it’s worth testing both the voltage and the connections. A fully charged battery should read around 12.6 volts. If the voltage is lower, you may need to jump-start your bike or replace the battery altogether. Don’t forget to inspect the terminals for corrosion or loose connections, as these can impede electrical flow and prevent starting.

If the battery checks out, move on to the fuel system. Ensure there’s gas in the tank and that the fuel shut-off valve is in the correct position. A clogged fuel filter or a malfunctioning fuel pump can also hinder your bike’s ability to start. If you suspect fuel issues, listening for the sound of the fuel pump priming when you turn the key can provide valuable insight.

Next, consider the ignition system. Check the spark plugs for signs of wear, such as fouling or excessive carbon buildup. These little components play a crucial role in starting your bike, and replacing them is often a straightforward solution to starting woes. If you have a multimeter, you can also test the ignition coil for proper voltage output.

Lastly, don’t overlook the importance of the starter relay and the ignition switch. A faulty relay can prevent the starter motor from engaging, while issues with the ignition switch can disrupt the electrical flow required to start your bike. If you’ve checked all other components and still face starting issues, it might be time to consult a professional mechanic for further diagnosis.

By following these troubleshooting steps systematically, you’ll not only develop a better understanding of your motorbike’s inner workings but also empower yourself to tackle starting issues with confidence. Remember, the road awaits, and with a little perseverance, you’ll soon be back enjoying the wind in your hair and the freedom of the open road.

5. Resolving Fuel System Problems

How to troubleshoot common motorbike problems?
Credit : whatcanu.com

Fuel system problems can be a biker’s worst nightmare, but with a little knowledge and patience, you can troubleshoot and resolve these issues to get back on the road in no time. The fuel system is the heart of your motorbike, responsible for delivering the right amount of fuel to the engine for optimal performance. When something goes awry, it can manifest in a variety of ways—poor acceleration, stalling, or even a bike that won’t start at all.

First, start with the basics: check your fuel level. It may sound simple, but a low fuel tank can lead to the assumption that your bike has a more complex issue. If the fuel is low, fill it up and see if that resolves the problem. If not, proceed to inspect the fuel lines for any signs of leaks, cracks, or blockages. A clogged fuel line can prevent the proper flow of fuel to the engine, ultimately crippling performance.

Next, examine the fuel filter. Over time, filters can become clogged with dirt and debris, restricting fuel flow. If it looks dirty or hasn’t been replaced in a while, swapping it out could make a world of difference. Moving on to the carburetor or fuel injector—depending on your bike’s system—cleaning these components can often solve many fuel-related issues. A buildup of grime can interfere with fuel mixing and delivery, leading to poor performance.

Lastly, if you’re still experiencing problems, consider checking the fuel pump. A failing fuel pump may not provide enough pressure to deliver fuel effectively. Listen for the pump’s operation when you turn the ignition—if you don’t hear that reassuring hum, it might be time for a replacement.

By methodically checking each component of your bike’s fuel system, you can identify and rectify issues that may be plaguing your ride. Regular maintenance and immediate attention to any signs of trouble will help ensure that your motorbike continues to run smoothly, allowing you to enjoy the open road without worry.

6. Addressing Electrical System Failures

When it comes to motorbike maintenance, the electrical system often ranks high on the list of trouble spots. A failure in this critical component can manifest in various ways, from flickering lights and unresponsive ignition switches to complete power loss. Understanding how to troubleshoot these electrical issues is essential for any rider who wants to keep their bike running smoothly.

Start by checking the battery—a common culprit in electrical failures. Ensure that the terminals are clean and tightly connected, as corrosion or loose connections can impede performance. If your bike struggles to start or the lights dim when you rev the engine, it might be time to test the battery voltage with a multimeter. A healthy battery should read around 12.6 volts when fully charged. If the reading is significantly lower, consider replacing the battery to avoid being stranded on your next ride.

Next, examine the fuses. Many modern bikes are equipped with a fuse box that protects the electrical circuits from overloads. Locate the fuse panel, typically found under the seat or side panel, and inspect the fuses for any signs of damage or breakage. A blown fuse is often a straightforward fix, but be sure to replace it with one of the correct amperage to prevent further issues.

Don’t overlook the wiring harness, as frayed or damaged wires can lead to intermittent electrical problems. Look for any signs of wear, such as exposed wires or loose connections, and repair or replace them as necessary. Pay special attention to areas that may be subject to vibration or movement, as these can wear down insulation over time.

Lastly, if your bike features components like the ignition switch, starter relay, or electronic control units, these may also be sources of electrical failure. Testing these parts usually requires a bit more expertise and equipment, so don’t hesitate to consult your bike’s service manual or seek professional help if you’re unsure.

By systematically addressing these potential issues, you can tackle electrical system failures effectively and keep your motorbike in top-notch condition, ensuring that every ride is as exhilarating as the last.

7. Tackling Brake and Suspension Issues

How to troubleshoot common motorbike problems?
Credit : whatcanu.com

When it comes to the safety and performance of your motorbike, few things are as crucial as your brakes and suspension. These two components work in tandem to provide a smooth, controlled ride, and any issues in these areas can not only compromise your riding experience but also put you at risk on the road.

**Brake Problems**
If you notice that your bike is taking longer to stop than usual or the brakes feel spongy underfoot, it’s a clear sign that something isn’t right. Start by checking the brake fluid level; low fluid can lead to decreased braking performance. If the fluid is fine, inspect the brake pads for wear. Worn-out pads can lead to metal-on-metal contact, which can severely damage your rotors. Listen for any unusual noises when braking—squeaking can indicate debris caught in the system, while grinding suggests immediate attention is needed. Remember, effective brakes are not just about stopping; they are integral to your overall control of the bike.

**Suspension Issues**
The suspension system is responsible for absorbing shocks and ensuring a smooth ride, adapting to various terrains and conditions. If you find your bike feeling bouncy or stiff, or if you notice uneven tire wear, these could be signs of suspension problems. Start by checking the fork seals for leaks; oil leaking from the forks can impact handling and safety. Additionally, inspect the rear shock for any signs of wear. A well-maintained suspension not only enhances comfort but also improves your bike’s stability and cornering capabilities.

In both cases, regular maintenance is key. Make it a habit to perform routine checks on your brakes and suspension, and don’t hesitate to consult with a professional mechanic if you’re unsure about any symptoms. By staying proactive, you’ll ensure that your ride remains smooth, safe, and enjoyable, allowing you to tackle any road with confidence.

8. Managing Overheating Concerns

Managing overheating concerns is crucial for any motorbike enthusiast, as excessive heat can lead to severe engine damage and potentially ruin your riding experience. As you twist the throttle and hit the open road, it’s essential to keep a vigilant eye on your bike’s temperature gauge, especially during those sweltering summer rides or when tackling steep inclines.

One of the most common culprits of overheating is a low coolant level. Regularly check your coolant reservoir to ensure it’s filled to the recommended level. If you find it consistently low, it may indicate a leak in the cooling system. In such cases, inspect hoses and connections for any signs of wear or damage, as even the tiniest crack can lead to significant coolant loss.

Another factor to consider is the condition of your radiator. A clogged or dirty radiator can severely restrict airflow, causing your engine to overheat. Make it a habit to clean your radiator fins, removing any debris or dirt that may have accumulated during your rides. If you notice any bent fins, gently straighten them to restore optimal airflow.

Additionally, pay attention to your bike’s oil level and quality. Engine oil not only lubricates moving parts but also plays a critical role in dissipating heat. Ensure your oil is at the correct level and consider changing it if it appears dark or gritty. Using the right oil type, as specified in your owner’s manual, can also make a substantial difference in heat management.

Lastly, be mindful of your riding habits. Constantly revving the engine or riding at high RPMs can exacerbate overheating issues. Instead, adopt smoother acceleration techniques and allow your bike to cool down during extended stops. If you find yourself stuck in traffic on a hot day, periodically rev the engine while in neutral to help increase airflow to the engine.

By taking these proactive measures, you can effectively manage overheating concerns and keep your motorbike running smoothly. Remember, a well-maintained bike is a happy bike, and your attention to these details will ensure many more enjoyable rides ahead.

9. Troubleshooting Transmission and Clutch Problems

When it comes to the heart of your motorbike’s performance, few components are as crucial as the transmission and clutch. These systems work in harmony to transfer the power generated by your engine to the wheels, enabling you to accelerate smoothly and shift gears with ease. However, issues with either can lead to frustrating riding experiences and, in some cases, unsafe conditions. Therefore, understanding how to troubleshoot common transmission and clutch problems is essential for every rider.

One of the most frequent symptoms of transmission trouble is difficulty shifting gears. If you find yourself struggling to engage a gear or experiencing grinding noises when shifting, it’s time to investigate. Start by checking your clutch lever. Ensure it’s properly adjusted and has the right amount of free play. An improperly adjusted clutch can lead to incomplete disengagement, causing those pesky grinding noises and gear-shifting woes. If adjustments don’t remedy the situation, it may be time to inspect the clutch plates themselves for wear and tear.

Another common issue is slipping gears, where the transmission unexpectedly pops out of gear or refuses to engage. This can stem from various problems, including low transmission fluid levels or a worn-out shift fork. If you suspect low fluid, check the levels and top them off as needed. If the fluid is clean but slipping persists, it’s wise to consult a professional mechanic, as internal transmission repairs can be complex.

Additionally, listen for unusual sounds when operating the bike. Clunking, whining, or rattling noises can indicate serious issues within the transmission or clutch assembly. Don’t ignore these auditory warnings; they can be signs of worn bearings, damaged gears, or other mechanical failures that require immediate attention.

Lastly, make it a habit to conduct regular maintenance checks on your bike’s transmission and clutch systems. This includes ensuring that cables are lubricated and functioning properly, inspecting for leaks, and replacing worn or damaged components promptly. By staying proactive, you can prevent minor issues from escalating into major problems, allowing you to enjoy a smoother, more enjoyable ride. Remember, keeping your transmission and clutch in top shape is key to mastering the ride and ensuring your adventures on two wheels remain thrilling and safe.

10. Dealing with Tire Issues and Maintenance

Tires are the unsung heroes of your motorbike, acting as the crucial point of contact between your ride and the road. Proper tire maintenance is essential for ensuring a smooth, safe, and enjoyable ride. Neglecting this vital aspect can lead to a host of problems, from reduced traction to unexpected blowouts. To master the ride, it’s important to be proactive in dealing with tire issues, understanding when to replace them, and knowing how to maintain them for optimal performance.

First and foremost, regular inspections are key. Check your tires for signs of wear and tear, such as uneven tread wear, cracks, or bulges. Use the penny test to gauge tread depth: insert a penny into the tread with Lincoln’s head facing down. If you can see all of Lincoln’s head, it’s time for a new set of tires. Additionally, keep an eye out for foreign objects embedded in the tire, as these can lead to slow leaks or sudden punctures.

Proper inflation is another critical factor in tire maintenance. Under-inflated tires can negatively impact handling and fuel efficiency, while over-inflated tires can make your ride harsh and increase the risk of a blowout. Invest in a reliable pressure gauge and check your tire pressure regularly, ensuring they match the manufacturer’s recommended levels, which you can find in your bike’s owner manual or on a sticker usually located on the frame.

Rotation and alignment are also vital components to prolonging the life of your tires. Just as with a car, your motorcycle tires should be rotated periodically to ensure even wear. This is especially important for those who ride with a passenger or heavy loads. Additionally, maintaining proper wheel alignment can prevent uneven tire wear and enhance handling, making your rides smoother and safer.

Finally, remember the importance of seasonal considerations. Different weather conditions can affect tire performance. If you live in an area that experiences extreme temperatures or wet conditions, consider investing in specialized tires designed for those conditions. From all-season tires for versatility to wet-weather tires for better grip, choosing the right tires for the right environment can make a world of difference.

By staying vigilant about tire maintenance and addressing issues promptly, you’ll not only enhance your motorbike’s performance but also ensure a safer and more enjoyable riding experience. So, keep those tires in check, and you’ll be well on your way to mastering the ride!

11. Engine Performance: Common Symptoms and Solutions

When it comes to your motorbike’s engine performance, a few telltale signs can indicate underlying issues that may require immediate attention. Understanding these symptoms is essential for maintaining not only your bike’s efficiency but also your safety on the road.

One of the most common indicators of engine trouble is a decrease in power or acceleration. If you find yourself twisting the throttle and your bike is sluggish to respond or struggles to reach higher speeds, it could signify a problem with the fuel delivery system, such as a clogged fuel filter or failing fuel pump. Regular maintenance checks should involve inspecting these components to ensure they’re functioning optimally.

Another frequent symptom is unusual noises emanating from the engine. A knocking or tapping sound can indicate issues with the valve clearance or even more serious problems like worn piston rings. Conversely, if the engine is producing excessive vibrations, it may suggest that the engine mounts are loose or damaged. These noises are not just bothersome; they can be warning signs that if left unaddressed, may lead to more significant damage down the line.

Overheating is another critical issue that can severely impact engine performance. If your bike’s temperature gauge is consistently in the red, it might be due to low coolant levels, a malfunctioning thermostat, or a blocked radiator. Overheating can cause catastrophic engine failure, so it’s vital to investigate the root cause immediately.

Lastly, keep an eye on your exhaust. If you notice dark smoke or an unusual smell, it can be a sign of an incorrect air-fuel mixture, which not only affects performance but can also lead to increased emissions. This can often be resolved by adjusting the carburetor or fuel injection settings.

In summary, being aware of these common symptoms and their potential solutions can help you troubleshoot engine performance issues before they escalate. Regular maintenance checks and being attuned to your bike’s behavior can ensure a smooth and safe riding experience, allowing you to enjoy the journey without unexpected interruptions.

12. Regular Maintenance Practices to Prevent Problems

Regular maintenance practices are essential for ensuring the longevity and optimal performance of your motorbike, preventing issues before they escalate into costly repairs. Think of your motorbike as a finely tuned machine that thrives on attention and care. By integrating a routine maintenance schedule into your riding life, you can significantly reduce the risk of unexpected breakdowns and enhance your overall riding experience.

Start with the basics: regularly checking and changing the oil is crucial. fresh oil lubricates the engine components, reduces friction, and keeps your motorbike running smoothly. aim to change the oil based on the manufacturer’s recommendations, or at least every 3,000 to 5,000 miles, depending on your riding habits.

Tire maintenance is another critical aspect. Inspect your tires for proper inflation, tread wear, and any signs of damage. Maintaining the correct tire pressure not only improves handling but also enhances safety and fuel efficiency. Rotate your tires periodically and replace them when tread depth approaches the minimum limit.

Don’t forget about your brakes! Regularly inspect the brake pads for wear and tear, and ensure that the brake fluid is at the appropriate level. Squeaky or spongy brakes can indicate a need for immediate attention, so address these issues promptly to avoid compromising your safety.

Additionally, make it a habit to clean and lubricate the chain regularly. A well-maintained chain ensures smooth gear shifts and prevents wear on the sprockets. Every few hundred miles, clean the chain with a degreaser and apply a suitable lubricant to keep it in top condition.

Finally, give your motorbike a thorough inspection before long rides. Check the lights, signals, and horn for functionality. Ensure that all electrical systems are operational, as visibility and communication with other road users are vital for your safety.

By committing to these regular maintenance practices, you not only enhance the performance and reliability of your motorbike but also cultivate a deeper connection with your ride, allowing for countless adventures on the open road. Remember, a well-maintained motorbike is not just a machine—it’s a trusted companion that is ready to take you wherever the journey leads.

13. When to Seek Professional Help

While many motorbike enthusiasts relish the challenge of diagnosing and fixing issues on their own, there comes a time when the complexities of a problem necessitate the expertise of a professional. Knowing when to seek professional help can not only save you time and money but can also ensure your safety on the road.

First and foremost, if you find yourself dealing with a problem that is beyond your skill set—such as intricate electrical issues or engine problems—it’s wise to consult a certified mechanic. These professionals possess the training and tools to diagnose complex issues accurately and perform repairs that you may not have the capability or resources to undertake.

Another indicator that it’s time to seek professional assistance is if you’ve attempted to fix a problem but it persists or worsens. For instance, if you’ve replaced a faulty component, like the spark plug, but your bike continues to misfire, it could be a sign that there’s a deeper issue at play. Continuing to tinker without understanding the root cause can lead to more significant damage and costly repairs, so don’t hesitate to reach out to a mechanic who can provide a thorough inspection.

Additionally, if you notice unusual sounds, smells, or performance changes while riding, it’s critical to get your bike checked out immediately. Sounds like grinding, popping, or hissing can indicate serious mechanical issues, while odors such as burning rubber or oil can signal potential hazards. Riding with an unresolved problem can put both you and your bike at risk, so err on the side of caution.

Finally, if you’re approaching a major service milestone—like a significant mileage interval or a seasonal change—it’s a good idea to have your bike inspected by a professional. Regular maintenance can prevent minor issues from escalating into significant problems.

In summary, while diy repairs can be rewarding, recognizing the limits of your own expertise is crucial. If you encounter persistent problems, complicated issues, or signs of serious trouble, don’t hesitate to seek professional help. Your safety and the longevity of your motorbike depend on it.

14. Helpful Resources and Communities for Motorbike Enthusiasts

When it comes to mastering the ride and addressing common motorbike issues, having a wealth of resources at your fingertips can make all the difference. Fortunately, the vibrant world of motorbike enthusiasts is filled with communities and tools that can help you navigate through troubleshooting challenges with ease.

**Online Forums and Communities**: One of the most valuable resources available to motorbike enthusiasts is the plethora of online forums dedicated to motorcycle maintenance and repair. Websites like Reddit’s r/motorcycles, Motorcycle.com, and Bike Forum provide a platform where riders can share their experiences, ask questions, and offer solutions. Engaging in these communities not only allows you to tap into a vast pool of collective knowledge but also fosters a sense of camaraderie as you connect with fellow riders who share your passion.

**YouTube Channels**: For visual learners, YouTube is an invaluable tool for troubleshooting motorbike problems. Channels like MC Garage and FortNine offer step-by-step guides that cover everything from basic maintenance to complex repairs. Watching experienced mechanics and enthusiastic hobbyists in action can demystify the repair process and empower you to tackle issues with confidence.

**Social Media Groups**: Facebook and other social media platforms host numerous groups dedicated to specific bike brands, models, or repair techniques. Joining these groups allows you to ask questions and share insights with fellow enthusiasts and experts who can provide tailored advice for your particular motorbike. Additionally, many groups organize local meetups and events, creating opportunities for networking and learning in person.

**Manuals and Repair Guides**: Don’t underestimate the power of a good manual. Obtaining a service manual specific to your motorbike model can be a game-changer when it comes to troubleshooting. These manuals often include detailed diagrams, specifications, and step-by-step instructions for repairs and maintenance, making them an essential addition to your toolkit.

**Local Motorcycle Shops and Mechanics**: Sometimes, hands-on experience is the best teacher. Building a relationship with your local motorcycle shop can provide you with both resources and mentoring. Many shops offer workshops or classes that cover various aspects of motorcycle maintenance, allowing you to learn directly from seasoned professionals. They can also be a great source for parts, tools, and expert advice when you’re faced with a particularly tricky problem.

By tapping into these resources and communities, you’ll not only enhance your troubleshooting skills but also deepen your connection to the motorbike community. Whether you’re a novice rider or a seasoned mechanic, the support and knowledge available to you can transform your riding experience and keep your bike in top-notch condition. Happy riding!

15. Conclusion: Riding with Confidence After Troubleshooting

As we bring this guide to a close, it’s essential to reflect on the journey you’ve taken in mastering the art of troubleshooting common motorbike problems. Riding a motorbike is not just about the thrill of the open road; it’s about the freedom and confidence that comes from knowing you have the skills to handle whatever challenges may arise.

By familiarizing yourself with the common issues that can affect your ride—from engine troubles and brake failures to electrical glitches and tire wear—you’ve equipped yourself with invaluable knowledge that will serve you well on your journeys. Each problem resolved not only enhances your bike’s performance but also deepens your understanding of your machine, creating a stronger bond between rider and bike.

Confidence while riding is paramount. When you know how to identify and troubleshoot issues, you can enjoy your ride without the nagging worry of unexpected breakdowns. Imagine cruising down the highway, fully aware that you can tackle any hiccup with ease! This peace of mind allows you to focus on what truly matters: the exhilaration of the ride, the beauty of the landscape, and the camaraderie with fellow riders.

So, the next time you mount your motorbike, carry with you the knowledge and skills you’ve gained. Embrace each ride as an adventure, knowing that you are prepared for the unexpected. With the right tools, a keen eye, and a proactive approach to maintenance, you can ride with confidence, enjoying every moment on the road ahead. Happy riding!

As we reach the end of our ultimate guide to troubleshooting common motorbike problems, we hope you are now equipped with the knowledge and confidence to tackle any issue that may arise on your riding journey. Understanding your motorbike is not only essential for ensuring a smooth ride but also enhances your overall experience as a rider. By mastering the art of troubleshooting, you can save time, money, and frustration while developing a deeper connection with your machine. Remember, each challenge you face is an opportunity to learn and grow as a motorbike enthusiast. So, hit the road with newfound confidence, ready to embrace every twist and turn, knowing you have the skills to keep your ride in top shape. Happy riding!

How to understand motorbike engine specifications?

For many, the thrill of riding a motorbike is matched only by the intrigue of understanding what makes it roar to life.

But for beginners, navigating the world of motorbike engine specifications can feel like deciphering a foreign language. From horsepower to torque, displacement to compression ratios, these technical terms hold the key to unlocking the true performance and power of your ride. Whether you’re a novice looking to buy your first bike or an enthusiast eager to enhance your knowledge, this beginner’s guide will break down the essential elements of motorbike engines, demystifying the specifications that dictate how your machine performs on the road. Join us as we dive into the mechanics of motorbike engines, equipping you with the knowledge to make informed decisions and truly appreciate the engineering marvel behind every ride.

1. Introduction to Motorbike Engine Specifications

How to understand motorbike engine specifications?
Credit : whatcanu.com

When it comes to motorbikes, the engine is the heart that powers the ride, and understanding its specifications is crucial for anyone looking to navigate the world of two-wheeled machines. Whether you’re a novice rider contemplating your first purchase or an experienced enthusiast aiming to upgrade, familiarizing yourself with engine specifications can significantly enhance your riding experience. This guide is designed to demystify the technical jargon and break down the essential components that contribute to a motorbike’s performance and power.

Motorbike engines come in various configurations, sizes, and technologies, each influencing how a bike behaves on the road. Key specifications include engine displacement, which refers to the total volume of all the cylinders in the engine, typically measured in cubic centimeters (cc). This figure is often a primary indicator of the engine’s power output and potential speed. Additionally, horsepower and torque are pivotal metrics that describe the engine’s ability to perform under different conditions, with horsepower representing the engine’s top speed capabilities and torque reflecting its acceleration and pulling power.

Understanding the difference between air-cooled and liquid-cooled engines, the significance of fuel types (such as unleaded or high-octane), and the implications of various engine layouts (like parallel twin, V-twin, or inline-four) can also help you make informed decisions when considering a motorbike. With this introduction, you’ll be better equipped to interpret the specifications that matter most, allowing you to choose a motorbike that aligns perfectly with your riding style and performance expectations. Buckle up as we dive deeper into the fascinating world of motorbike engine specifications!

2. Understanding Engine Displacement: What It Means

Engine displacement is one of the most fundamental specifications to grasp when delving into the world of motorbike performance. Simply put, displacement refers to the total volume of all the cylinders in an engine, measured in cubic centimeters (cc) or liters. This measurement essentially indicates the engine’s capacity to draw in air and fuel, which directly correlates to its power output.

To visualize this, think of engine displacement as the size of a balloon. A larger balloon can hold more air, just as a larger engine can accommodate more air-fuel mixture. Therefore, a motorcycle with a higher displacement typically boasts greater horsepower and torque, allowing it to accelerate faster and achieve higher speeds. For example, a 1000cc engine is generally more powerful than a 500cc engine, making it better suited for high-performance riding scenarios.

However, it’s important to note that displacement alone doesn’t paint the complete picture of an engine’s capabilities. Factors such as engine design, the number of cylinders, fuel delivery systems, and tuning also play crucial roles in determining overall performance. A smaller engine with advanced technology and efficient tuning can sometimes outperform a larger engine that lacks these characteristics.

For beginners, understanding engine displacement is essential as it helps in making informed decisions when purchasing a motorcycle. If you’re looking for a bike for leisurely rides, a model with smaller displacement may suffice. However, if thrilling speed and power are what you seek, aiming for a bike with a larger engine can significantly enhance your riding experience. As you dive deeper into the specifications, you’ll discover that engine displacement is just the first step in unlocking the intricacies of motorbike performance and power.

3. The Role of Horsepower in Motorcycle Performance

How to understand motorbike engine specifications?
Credit : whatcanu.com

Horsepower is often touted as the benchmark for a motorcycle’s performance, acting as a pivotal metric that enthusiasts and beginners alike reference when evaluating a bike’s capabilities. But what exactly does horsepower mean, and why is it so crucial in the context of motorcycle performance?

At its core, horsepower is a unit of measurement that quantifies the power output of an engine. It reflects how quickly the engine can do work — in this case, propelling the motorcycle forward. The higher the horsepower rating, the more power the engine can produce. This translates to greater acceleration, higher top speeds, and an overall more exhilarating riding experience. However, it’s essential to understand that horsepower alone doesn’t tell the whole story.

When we delve deeper, we find that horsepower is closely linked to torque, the twisting force that the engine generates. While horsepower measures how fast an engine can work, torque determines how much pulling power it has, especially at lower RPMs. A well-balanced combination of both horsepower and torque can significantly impact how a motorcycle performs in various riding conditions, whether it’s a leisurely cruise through city streets or a high-speed dash on the open highway.

For beginners, understanding horsepower can guide you in choosing the right motorcycle for your riding style. If you’re looking for a bike that offers quick acceleration and thrilling rides, a model with a higher horsepower rating may be more suitable. Conversely, if you prefer a bike that’s easier to handle, especially for city commuting or beginner-level riding, you might want to look for one that balances moderate horsepower with good torque.

In summary, horsepower is a critical element in the performance equation of a motorcycle. It’s not merely a number on a spec sheet—it’s an indication of the bike’s potential to deliver the thrilling rides that motorcyclists crave. As you explore different models, keep in mind that a thorough understanding of horsepower will help you decode the performance capabilities of each motorcycle you encounter, ensuring you make an informed choice that aligns with your riding aspirations.

4. Torque Explained: Why It Matters for Acceleration

When diving into the world of motorbike engine specifications, understanding torque is essential, especially when it comes to acceleration. Torque, measured in pound-feet (lb-ft) or Newton-meters (Nm), represents the twisting force produced by the engine. Think of it as the engine’s ability to do work; the higher the torque, the more force available to propel the bike forward from a standstill.

For beginners, grasping the significance of torque can be likened to understanding how a bicycle operates. Imagine pedaling uphill: the effort you exert is akin to torque. The more torque your motorbike generates, the easier it is to accelerate, especially from lower revs. This is particularly crucial in situations such as merging onto highways or navigating city traffic, where quick bursts of power are necessary.

A bike with a high torque rating provides a thrilling, responsive ride, allowing it to accelerate rapidly without the need to rev the engine to high RPMs. This characteristic is especially advantageous for cruisers and touring bikes, where low-end torque contributes to a smooth and enjoyable riding experience. Conversely, sportbikes may prioritize higher RPM power for top-speed performance, but a solid torque curve can enhance everyday usability and responsiveness.

Understanding torque also informs how you choose to ride. Bikes with ample low-end torque can be more approachable for beginners, offering the confidence to handle various riding scenarios without constantly wrestling with the throttle. In essence, torque is more than just a number on a spec sheet; it’s a vital component that directly affects your riding experience, making it crucial for anyone looking to decode motorbike specifications and unlock the full potential of their machine.

5. The Importance of RPM: What to Look For

How to understand motorbike engine specifications?
Credit : whatcanu.com

When delving into the world of motorbike engine specifications, understanding RPM (revolutions per minute) is crucial for evaluating a bike’s performance and power potential. RPM measures how many times the engine’s crankshaft completes a full rotation each minute, and this figure is key to grasping how an engine operates under various conditions.

To assess the significance of RPM, first consider the relationship between engine speed and power output. Most motorcycle engines produce their maximum power at a certain RPM range, often referred to as the “power band.” This is where the engine feels most responsive, delivering exhilarating acceleration and speed. For beginners, knowing this range is essential: it tells you when to shift gears to maintain optimal performance without straining the engine.

Moreover, RPM affects torque, the twisting force that propels the bike forward. Generally, a higher RPM can mean increased power, but it also means that the engine is working harder, which can impact fuel efficiency. As a beginner, it’s important to strike a balance between performance and practicality. Look for bikes with a good torque curve that provides ample power at lower RPMs for urban riding, while still offering the thrill of higher RPMs for those open-road excursions.

Additionally, pay attention to the redline—the maximum RPM the engine can handle before potential damage occurs. Understanding where this threshold lies can help you avoid over-revving and ensure a longer engine lifespan.

Ultimately, as you decode motorbike engine specifications, remembering the importance of RPM will empower you to choose a bike that aligns with your riding style, whether you’re cruising through city streets or tearing down the highway. By keeping RPM in mind, you’ll be better equipped to appreciate the nuances of engine performance and make informed decisions that enhance your riding experience.

6. Fuel Types and Their Impact on Engine Performance

When it comes to motorbike engines, the type of fuel you choose can dramatically influence performance, efficiency, and overall riding experience. Understanding the differences between fuel types is essential for any budding motorbike enthusiast.

Most motorcycles operate on either regular unleaded gasoline, premium gasoline, or a blend of both. Regular unleaded fuel, typically rated at 87 octane, is the standard choice for many entry-level bikes and commuter models. However, while it may be economical, using lower octane fuel in high-performance engines designed for premium fuel can lead to knocking or pinging—unwanted sounds that indicate engine stress.

Premium gasoline, with an octane rating of 91 or higher, is specially formulated to withstand the higher compression ratios prevalent in performance-oriented bikes. This fuel type not only enhances power output but also promotes smoother acceleration and improved throttle response. For riders who crave speed and agility, opting for premium fuel can mean the difference between a thrilling ride and a sluggish performance.

In addition to octane ratings, the fuel’s formulation also plays a crucial role in engine performance. The introduction of ethanol in fuel blends, for instance, has become common practice in many regions. While ethanol can provide some environmental benefits, it can also affect performance. Ethanol-blended fuels may absorb moisture and lead to corrosion in older engines, potentially causing damage over time. Furthermore, these fuels often yield less energy than traditional gasoline, which can impact your bike’s efficiency and power delivery.

For those who ride vintage or classic motorcycles, it’s vital to choose fuels that align with the engine’s specifications to avoid any adverse effects. Specialty fuels are available that cater specifically to older engines, ensuring optimal performance without compromising integrity.

In summary, understanding the impact of fuel types on motorbike engine performance is not just about picking the most expensive option. It’s about aligning your fuel choice with your bike’s design, purpose, and your riding style. As you decode the intricacies of engine specifications, remember that the right fuel can unlock the full potential of your motorcycle, enhancing every ride.

7. Compression Ratio: Understanding Its Significance

How to understand motorbike engine specifications?
Credit : whatcanu.com

The compression ratio is a fundamental aspect of any motorbike engine that significantly impacts its performance, efficiency, and power output. At its core, the compression ratio is a simple numerical representation of the relationship between the volume of the combustion chamber when the piston is at the bottom of its stroke (BDC) and the volume when the piston is at the top of its stroke (TDC). It is expressed as a ratio, such as 10:1, which means that the volume of the chamber at BDC is ten times greater than at TDC.

So why is this ratio so crucial? A higher compression ratio typically indicates that the engine can generate more power from the same amount of fuel. This is because a greater compression allows for a more efficient combustion process, leading to a more powerful explosion within the cylinder when the fuel-air mixture ignites. Consequently, engines with higher compression ratios often produce more horsepower and torque, enabling better acceleration and overall performance.

However, it’s essential to balance the compression ratio with considerations like fuel quality and engine design. Higher compression can lead to knocking or pinging, which occurs when the fuel-air mixture ignites prematurely due to excessive pressure. This phenomenon can damage the engine over time, so it’s crucial to use high-octane fuel that can withstand the increased pressure without causing detonation.

For beginners, understanding the implications of compression ratios can guide not only the choice of the motorbike but also how to maintain and modify it for optimal performance. When shopping for a bike, be mindful of its compression ratio in relation to your riding style and the type of fuel you plan to use. A motorbike with a compression ratio that matches your needs can lead to an exhilarating ride while ensuring the longevity of your engine. In essence, the compression ratio is a key player in the game of performance and power, making it a vital specification to decode as you dive into the world of motorbikes.

8. Cooling Systems: Air-Cooled vs. Liquid-Cooled Engines

When it comes to understanding motorbike engine specifications, one of the crucial elements to consider is the cooling system. A well-functioning cooling system ensures that your engine operates efficiently, maintaining optimal performance while preventing overheating. The two primary types of cooling systems found in motorbike engines are air-cooled and liquid-cooled systems, each with its distinct advantages and characteristics.

**Air-Cooled Engines**
Air-cooled engines utilize the natural flow of air to dissipate heat. As the engine runs, fins attached to the engine block increase the surface area, allowing more air to pass over the engine and carry away excess heat. This system is simpler in design, often lighter, and requires less maintenance, making it a popular choice for smaller bikes and vintage models. However, it can struggle in extreme conditions, such as stop-and-go traffic or hot weather, where airflow is minimal. Riders may notice that air-cooled engines can run hotter under these conditions, potentially affecting performance.

**Liquid-Cooled Engines**
On the other hand, liquid-cooled engines employ a more sophisticated system that circulates coolant through the engine block, absorbing heat and transferring it to a radiator, where it is cooled by airflow. This type of cooling system is more efficient, allowing for better temperature regulation and improved performance, especially in high-performance bikes or larger engines. Liquid-cooling is particularly advantageous for riders who frequently tackle long rides or challenging terrains, as it minimizes the risk of overheating. However, this system is typically heavier and more complex, requiring regular maintenance checks for leaks and coolant levels.

Ultimately, the choice between air-cooled and liquid-cooled engines comes down to the rider’s needs and the intended use of the motorcycle. Understanding these cooling systems is essential for beginners looking to decode the intricacies of motorbike performance and power. Whether you prioritize simplicity and lower maintenance or seek the reliability of advanced cooling technology, being informed about these specifications will help you make a more educated decision when selecting your next ride.

9. The Impact of Engine Configuration: Inline, V-Twin, and More

When diving into the world of motorbike engines, one of the most significant factors that influence a bike’s performance and power is its engine configuration. Understanding these configurations—primarily inline and V-twin—can dramatically enhance your knowledge of how bikes operate and how to choose the right one for your riding style.

**Inline Engines**
Inline engines, commonly found in sportbikes and touring motorcycles, feature cylinders arranged in a straight line, typically either four or three cylinders. This configuration allows for a smoother operation and higher RPMs, translating to impressive power outputs. Because of the balanced nature of inline engines, they tend to have less vibration, making long rides more comfortable. The design also allows for a more compact engine, which contributes to a leaner bike profile. Riders often appreciate the quick throttle response and the high-revving capabilities of these engines, making them ideal for those who enjoy spirited riding and agility on twisting roads.

**V-Twin Engines**
On the other hand, V-twin engines are a hallmark of cruiser and touring bikes, with their cylinders arranged in a “V” shape. This configuration, often with two cylinders, produces a distinctive rumble and a strong low-end torque, making them ideal for laid-back cruising and acceleration from low speeds. The V-twin’s torque delivery is particularly favorable for riders who prefer a more relaxed riding experience, as it provides ample power without the need for constant shifting. However, the V-twin’s design can lead to more vibration at high speeds, which is something to consider if you plan on long-distance rides.

**Other Configurations**
While inline and V-twin engines dominate the motorcycle landscape, other configurations exist, such as parallel twins, flat engines, and even triples. Each has its unique characteristics, advantages, and disadvantages, contributing to different riding experiences. For instance, parallel twins often offer a balance between the compactness of inline engines and the torque of V-twins, making them versatile for various types of riders.

Ultimately, the engine configuration you choose will have a profound impact on your riding style and experience. Whether you lean towards the high-revving nature of inline engines or the torque-rich power of V-twins, understanding these differences is essential for decoding motorbike engine specifications and selecting the motorcycle that best suits your aspirations on the open road.

10. Understanding Engine Technology: Carburetors vs. Fuel Injection

When it comes to motorbike engines, one of the most crucial distinctions to understand is the difference between carburetors and fuel injection systems. These two technologies play a pivotal role in how your bike performs, and knowing their advantages and disadvantages can significantly influence your riding experience.

**Carburetors** are traditional devices that mix air and fuel in a specific ratio before sending it into the engine. They operate on the principle of vacuum, leveraging the natural airflow created by the engine to pull in fuel. Riders who appreciate the vintage charm of older bikes often favor carburetors for their simplicity and ease of maintenance. Tuning a carbureted engine can be a rewarding experience, allowing enthusiasts to fine-tune performance based on individual preferences. However, carburetors can sometimes struggle with fuel efficiency and emissions, particularly in varying conditions, as they lack the adaptability of modern systems.

On the other hand, **fuel injection (FI)** has become the standard for most contemporary motorbikes. This technology utilizes electronic sensors to monitor various engine parameters, such as air intake and temperature, and adjust the fuel delivery accordingly. As a result, fuel-injected engines tend to deliver better fuel efficiency, smoother acceleration, and reduced emissions. This adaptive response makes them ideal for a wide range of riding conditions, from city commutes to high-speed highway cruising. However, the complexity of fuel injection systems can make them more challenging and expensive to repair if issues arise.

Ultimately, the choice between carburetors and fuel injection comes down to personal preference and riding style. Carburetors may appeal to those who enjoy the tactile experience of tuning their bike, while fuel injection offers the reliability and efficiency that modern riders often seek. Understanding these engine technologies not only helps you make an informed decision when purchasing a bike but also enriches your overall riding experience by deepening your appreciation for the mechanics that power your passion.

11. The Role of Exhaust Systems in Performance

When it comes to motorbike performance, the exhaust system plays a pivotal role that often goes underestimated by beginners. Think of the exhaust as the lungs of your bike; it not only expels the spent gases from the engine but also significantly influences how efficiently that engine can breathe. A well-designed exhaust system can enhance power output, improve fuel efficiency, and even alter the sound of your bike, giving it that exhilarating roar that many riders crave.

At its core, the exhaust system comprises several components, including headers, mufflers, and catalytic converters, each serving a specific function. Headers channel exhaust gases away from the engine, while mufflers dampen sound and reduce noise pollution. Aftermarket options often modify these components to optimize performance. For instance, a performance header can reduce back pressure, allowing for a quicker exit of exhaust gases and thereby increasing horsepower. Meanwhile, a less restrictive muffler can enhance sound without sacrificing power, appealing to both performance enthusiasts and those who appreciate a good growl on the open road.

Moreover, the material of the exhaust system can impact weight and durability. Stainless steel and titanium are popular choices for performance exhausts due to their strength and resistance to corrosion. A lighter exhaust can reduce the overall weight of the bike, leading to better handling and acceleration, which is a significant advantage for competitive riders.

In summary, the exhaust system is more than just a shiny addition to your motorbike; it’s an integral part of your bike’s performance profile. Whether you’re looking to enhance speed, improve fuel efficiency, or simply enjoy a more aggressive sound, understanding how exhaust systems work is key to decoding motorbike engine specifications and making informed decisions about upgrades. So, next time you rev your bike, remember that the exhaust doesn’t just let the engine breathe; it helps your bike roar to life.

12. How Weight and Power-to-Weight Ratio Affect Handling

When it comes to motorcycle performance, understanding how weight and power-to-weight ratio play a crucial role in handling is essential for any budding rider. The weight of a bike is not just a number; it influences every aspect of how the motorcycle responds to your inputs, affects acceleration, braking, and cornering capabilities, and ultimately determines the overall riding experience.

The power-to-weight ratio is a key metric that compares the engine’s power output to the bike’s weight. A high power-to-weight ratio means that the motorcycle has more power available for each kilogram it carries, leading to snappier acceleration and more agile handling. For instance, a lightweight sportbike with a powerful engine can dart through corners with ease, providing a thrilling and responsive ride. In contrast, a heavier cruiser might boast a larger engine but may feel sluggish in comparison due to its increased mass.

This balance of weight and power becomes particularly evident during turns. A lighter bike can change direction more readily, allowing for quicker lean angles and more confidence in navigating winding roads. Riders often report that lightweight motorcycles feel more “flickable,” giving them the ability to maneuver through tight corners more easily. Conversely, a heavier bike might require more effort to shift its mass, demanding greater skill and experience from the rider.

Moreover, the power-to-weight ratio is not static; it can be affected by various factors such as rider weight, luggage, or modifications made to the bike. For example, adding aftermarket accessories can increase the weight, potentially diminishing the bike’s agility. Hence, it’s vital to consider how you will use your motorcycle and what riding style suits you best.

In summary, both weight and power-to-weight ratio are paramount in determining how a motorcycle handles on the road. As you explore different bikes, pay attention to these specifications—they’re not just numbers; they’re the keys to unlocking the full potential of your riding experience. Understanding this relationship will empower you to make informed decisions, whether you’re choosing your first bike or upgrading to a more performance-oriented model.

13. Evaluating Engine Reliability and Maintenance Needs

When it comes to motorbike engines, reliability and maintenance needs are crucial factors that can significantly impact your riding experience. As a beginner, understanding how these elements interplay can save you time, money, and frustration down the line.

First and foremost, engine reliability is often reflected in its design and build quality. Look for engines known for their durability, particularly those with a reputation for withstanding the rigors of everyday use. Brands that have a longstanding presence in the market typically have honed their engineering to produce reliable machines. Researching customer reviews and industry reports can provide valuable insights into the reliability of specific models.

Maintenance needs are equally important to consider. Every engine requires regular upkeep, but the frequency and complexity can vary widely. Some engines may need simple oil changes and filter replacements every few thousand miles, while others may require more intricate servicing. Checking the manufacturer’s specifications for maintenance schedules will give you an idea of what to expect.

Additionally, consider the availability of parts and service. Opting for a model with widely available parts can ease the burden of repairs and routine maintenance. If you find yourself needing to source rare components or specialized services, it could lead to frustration and increased costs.

Finally, don’t overlook the importance of your own skill level and willingness to perform maintenance. Some riders enjoy getting hands-on with their bikes, while others prefer to leave it to the professionals. Understanding your capabilities will help you choose an engine that aligns with your comfort zone.

Ultimately, a reliable engine that fits your maintenance preferences will not only enhance your riding experience but also ensure you can enjoy your motorbike for years to come. By taking the time to evaluate these factors, you’re setting yourself up for a more fulfilling and hassle-free journey on the open road.

14. Real-World Testing: How to Assess Performance

When it comes to understanding motorbike engine specifications, nothing quite compares to real-world testing. While numbers and graphs from manufacturer data can provide a preliminary understanding of performance, experiencing a bike on the road offers invaluable insights that raw statistics simply cannot convey.

To assess a motorbike’s performance effectively, it’s essential to consider a combination of factors that encompass both the engine’s specifications and the overall riding experience. Start by evaluating how the bike accelerates from a standstill. Pay attention to throttle response and whether the power delivery feels smooth or abrupt. A bike with a well-tuned engine should respond eagerly without unnecessary lag, making for a more exhilarating ride.

Next, consider the bike’s handling and agility. Take it around corners and observe how it responds to your inputs. A bike that feels nimble and planted inspires confidence, while one that struggles with sharp turns may indicate a lack of balance or weight distribution issues. Additionally, assess its braking performance. Effective braking is crucial, so take note of how the bike decelerates under various conditions—whether it’s a gradual slow down or an emergency stop.

Don’t forget to evaluate comfort and ergonomics during your test ride. A bike’s design should allow for a natural riding posture that doesn’t strain your back or wrists, especially on longer journeys. The vibration levels at different speeds can also impact comfort; a smooth ride often translates to a more enjoyable experience.

Finally, consider the sound of the engine. An engine that purrs like a kitten or roars like a lion can enhance the emotional connection between rider and machine. A bike’s exhaust note can be just as significant as its performance figures, adding an element of excitement to the ride.

Ultimately, real-world testing is about immersing yourself in the experience. By combining your observations on acceleration, handling, braking, comfort, and sound, you can better understand how a motorbike’s engine specifications translate into performance on the road. So, gear up, hit the pavement, and enjoy the journey of discovering your perfect ride!

15. Conclusion: Putting It All Together for Smart Buying Decisions

As we reach the conclusion of our journey through the intricate world of motorbike engine specifications, it’s essential to synthesize what we’ve learned into actionable insights that can inform your purchasing decisions. Understanding the nuances of engine size, horsepower, torque, and other key specifications is not just about numbers; it’s about translating these figures into real-world performance and riding experiences.

A well-rounded comprehension of engine specifications empowers you to align your choices with your riding style and preferences. Whether you’re a novice looking for a bike that balances power and ease of handling or a seasoned rider seeking the thrill of high-performance engines, the information gathered here serves as a solid foundation. Remember, it’s not solely about the raw power a motorbike can deliver; it’s also about how that power translates into comfort, control, and safety on the road.

Before making your final decision, take the time to consider the type of riding you plan to do. Are you looking for a commuter bike for city streets, a touring model for long distances, or a sportbike for those weekend thrill rides? Each category has its own set of specifications that cater to different needs.

Additionally, don’t overlook the importance of conducting real-world tests, if possible. Sitting on the bike, feeling its weight, and experiencing how it responds to your commands can provide invaluable insight beyond the specifications on paper. Use your newfound knowledge to assess not only the numbers but also the overall fit and feel of the motorcycle.

In the end, smart buying decisions stem from a combination of understanding engine specifications, aligning them with your personal preferences, and engaging with the motorcycle community for advice and shared experiences. Equip yourself with the right information, and you’ll not only choose a motorbike that suits your needs but also one that enhances your riding journey for years to come. Happy riding!

As we conclude our exploration of motorbike engine specifications, we hope this beginner’s guide has illuminated the intricate world of performance and power for you. Understanding these specifications is crucial for both novice riders and seasoned enthusiasts alike, empowering you to make informed decisions about your bike and its capabilities. From grasping the significance of horsepower and torque to deciphering engine displacement and compression ratios, each detail plays a pivotal role in how your motorbike performs on the road. With this knowledge in hand, you can confidently engage in discussions, choose the right bike for your needs, and even optimize your riding experience. So, gear up, embrace the thrill of the ride, and remember that the more you learn about your machine, the more enjoyable your journey will be. Safe travels and happy riding!

What are the different types of motorbike engines and their pros and cons?

For enthusiasts and newcomers alike, the world of motorbike engines can seem complex and overwhelming.

Yet, understanding the different types of engines is crucial for anyone looking to dive into the thrilling realm of motorcycling. From the roaring power of a V-twin to the nimble agility of a single-cylinder, each engine type offers its own unique blend of performance, efficiency, and riding experience. In this comprehensive guide, we’ll break down the various motorbike engine types, exploring their distinctive features, benefits, and drawbacks. Whether you’re a seasoned rider considering an upgrade or a novice puzzled by the choices available, this post will equip you with the knowledge you need to make informed decisions and enhance your riding adventures. Join us as we demystify motorbike engines and help you rev up your understanding!

1. Introduction to Motorbike Engines

What are the different types of motorbike engines and their pros and cons?
Credit : whatcanu.com

Motorbike engines are the heart and soul of every motorcycle, translating fuel into the thrilling performance that riders crave. Understanding the intricacies of these engines is essential for anyone looking to delve deeper into the world of motorbiking, whether you’re a seasoned rider or a newcomer eager to learn. In the realm of motorbike engines, there isn’t a one-size-fits-all solution. Instead, a variety of engine types exist, each with unique characteristics that cater to different riding styles, preferences, and purposes.

At the most basic level, motorbike engines can be classified into two main categories: two-stroke and four-stroke engines. Each type has its own set of advantages and disadvantages, influencing everything from power delivery and efficiency to maintenance and emissions. Two-stroke engines are known for their simplicity, lightweight design, and high power-to-weight ratio, making them popular in dirt bikes and smaller motorcycles. However, they tend to consume fuel more quickly and produce higher emissions. On the other hand, four-stroke engines are renowned for their fuel efficiency, smoother power delivery, and lower emissions, which makes them the preferred choice for touring bikes and cruisers.

As we embark on this exploration of motorbike engines, we’ll break down each type in detail, examining their pros and cons to help you understand which engine might be the best fit for your riding style. Whether you’re looking for speed, efficiency, or a combination of both, knowledge of motorbike engines will empower you to make informed decisions and enhance your riding experience. Let’s rev up our engines and dive into the fascinating world of motorbike engineering!

2. The Basics of How Motorbike Engines Work

To truly appreciate the mechanics behind motorbike engines, it’s essential to grasp the fundamental principles that govern their operation. At the heart of every motorbike engine lies the internal combustion process, where fuel and air mix and ignite to produce power. This power is then converted into movement, propelling the bike forward.

Most motorbike engines function on a four-stroke cycle, a process that involves four distinct phases: intake, compression, power, and exhaust. During the **intake stroke**, the engine draws in a mixture of air and fuel through the open intake valve. Next, in the **compression stroke**, the piston moves upwards, compressing this mixture, which raises its temperature and pressure. The **power stroke** follows, ignited by a spark plug, creating an explosion that forces the piston back down, generating power. Finally, in the **exhaust stroke**, the spent gases are expelled through the exhaust valve, making room for another cycle to begin.

Motorbike engines can be categorized into two main types: two-stroke and four-stroke engines. **Two-stroke engines** are lighter, simpler, and deliver power with every revolution of the crankshaft, making them popular for off-road and racing bikes. However, they are less fuel-efficient and produce more emissions compared to their four-stroke counterparts. On the other hand, **four-stroke engines** are more complex, featuring additional components like valves and camshafts, which contribute to their greater efficiency and lower emissions. While they may be heavier and more expensive, they are generally favored for their durability and smoother power delivery.

Understanding these basics not only helps riders appreciate the intricacies of their machines but also empowers them to make informed decisions when purchasing a motorbike or considering modifications. Whether you’re a seasoned rider or a newcomer, having a grasp of how motorbike engines work lays the groundwork for a deeper understanding of performance, maintenance, and the overall riding experience.

3. Types of Motorbike Engines

What are the different types of motorbike engines and their pros and cons?
Credit : whatcanu.com

When it comes to motorbike engines, variety is key. Each type of engine brings its own unique characteristics, influencing everything from performance to maintenance requirements. Understanding these differences can help you make an informed decision when selecting your next bike. Let’s explore the main types of motorbike engines, along with their pros and cons.

### 1. Single-Cylinder Engines
Single-cylinder engines are often found in smaller bikes and are known for their simplicity and lightweight design. These engines typically consist of just one piston, which makes them easy to maintain and repair.

**Pros:**
– **Lightweight:** ideal for beginners and city riding.
– **Fuel Efficiency:** Generally, these engines consume less fuel, making them economical for daily commutes.
– **Torque:** They provide good low-end torque, making them fun to ride in urban settings.

**Cons:**
– **Power Limitations:** They can struggle to deliver higher speeds and power, which may not satisfy more experienced riders.
– **Vibration:** Single-cylinder engines tend to produce more vibration, which can lead to a less comfortable ride over long distances.

### 2. Parallel-Twin Engines
Parallel-twin engines feature two cylinders arranged side by side. They are a popular choice for mid-range bikes, balancing power and weight.

**Pros:**
– **Smooth Operation:** Compared to single-cylinder engines, parallel-twins offer a smoother ride with less vibration.
– **Versatility:** They provide a good balance of power and efficiency, suitable for both city and highway riding.
– **Compact Design:** Their narrower profile allows for agile handling and maneuverability.

**Cons:**
– **Less Power than Larger Engines:** While still powerful, they may not provide the exhilarating experience some riders seek.
– **Potential Complexity:** More components can mean more complexity in maintenance compared to single-cylinder engines.

### 3. V-Twin Engines
V-twin engines, with their distinctive V-shape, are commonly found in cruisers and touring bikes. They are known for rich torque and a throaty exhaust note.

**Pros:**
– **Torque:** V-twin engines excel in low-end torque, making them perfect for cruising and enjoying laid-back rides.
– **Sound:** The unique sound of a V-twin engine is often described as iconic, enhancing the overall riding experience.
– **Stability:** These engines provide a stable power delivery, making them suitable for long-distance touring.

**Cons:**
– **Weight:** V-twin bikes can be heavier, which may be a drawback for beginners or those who prefer lighter rides.
– **Fuel Efficiency:** They typically consume more fuel than smaller engine types, which can add up over time.

### 4. Inline-Three and Inline-Four Engines
Inline-three and inline-four engines are characterized by their arrangement in a straight line. Often found in sport bikes, they provide excellent performance and higher RPMs.

**Pros:**
– **Powerful Performance:** Inline-four engines are known for their high power output and speed, delivering an exhilarating ride.
– **Smoothness:** These engines run smoothly at high speeds with minimal vibration, providing a comfortable experience for the rider.
– **Advanced Technology:** Many inline engines come with advanced features such as fuel injection and multi-valve setups, enhancing performance and efficiency.

**Cons:**
– **Complexity and Cost:** More cylinders and technology can lead to increased maintenance costs and complexity.
– **

– 3.1. Single-Cylinder Engines

Single-cylinder engines are a popular choice among motorbike enthusiasts, especially those who appreciate simplicity and efficiency. As the name suggests, these engines contain just one cylinder where the combustion process occurs, driving the piston up and down to generate power. This design results in a lightweight and compact engine, making it an excellent option for smaller motorcycles and off-road bikes.

**Pros:**

One of the main advantages of single-cylinder engines is their simplicity. With fewer moving parts compared to multi-cylinder engines, single-cylinder designs are generally easier to maintain and repair. This simplicity often translates to lower production costs, making these bikes more affordable for first-time riders or those on a budget. Riders also enjoy a sense of agility, as the lightweight nature of these engines contributes to a more responsive handling experience, particularly in urban settings or on winding country roads.

Additionally, single-cylinder engines tend to be more fuel-efficient, delivering impressive mileage that can make longer journeys less daunting on the wallet. The torque delivery is often strong at low RPMs, which is beneficial for navigating through city traffic or tackling off-road trails.

**Cons:**

However, single-cylinder engines do have their drawbacks. The most notable is their limited power output. Riders looking for high-speed performance or rapid acceleration may find themselves needing more displacement or additional cylinders. This makes single-cylinder engines less suitable for highway cruising or long-distance travel, where the demand for sustained power increases.

Moreover, the vibration produced by these engines can be more pronounced, leading to rider fatigue over extended rides. The sound of single-cylinder engines can also be polarizing; while some riders appreciate the throaty growl, others may find it less refined compared to the smoother tones of multi-cylinder counterparts.

In summary, single-cylinder engines offer a unique blend of affordability, simplicity, and efficiency, making them ideal for certain riding scenarios. However, potential buyers should carefully weigh these advantages against the limitations in power and comfort, ensuring that their choice aligns with their riding style and expectations.

– 3.2. Parallel-Twin Engines

What are the different types of motorbike engines and their pros and cons?
Credit : whatcanu.com

Parallel-twin engines are a popular choice among motorbike manufacturers, known for their simplicity and versatility. Characterized by two cylinders arranged side by side, these engines deliver a unique blend of performance and efficiency, making them a favorite for both beginners and seasoned riders alike.

One of the standout features of parallel-twin engines is their compact design. With a narrower profile compared to other engine configurations, they allow for a more streamlined bike, ideal for urban commuting and maneuvering through tight spaces. This compactness also contributes to a lower center of gravity, enhancing stability and agility while riding.

From a performance standpoint, parallel-twin engines typically offer a good balance of power and torque, making them suitable for a variety of riding styles. Riders can enjoy a linear power delivery, which is particularly advantageous for everyday use and city riding. Many models equipped with parallel-twin engines excel in fuel efficiency, allowing riders to cover more distance between fill-ups—a significant perk for long commutes or weekend adventures.

However, there are some drawbacks to consider. While parallel-twins can be efficient, they might lack the raw power and high-revving excitement of larger engine configurations, such as inline-fours or V-twins. This can be a critical factor for riders seeking thrilling performance on the open road. Additionally, the sound produced by parallel-twin engines tends to be less aggressive compared to their counterparts, which might not appeal to everyone’s taste.

In summary, parallel-twin engines strike a commendable balance between practicality and performance, making them an excellent choice for a wide range of riders. Whether you’re navigating busy city streets or enjoying a leisurely ride through the countryside, these engines provide the reliability and efficiency needed for a satisfying motorcycling experience.

– 3.3. V-Twin Engines

V-twin engines are a popular choice among motorcycle enthusiasts, lauded for their distinctive power delivery and unique character. Characterized by two cylinders arranged in a “V” formation, these engines come in various configurations, typically with angles ranging from 45 to 90 degrees between the cylinders. This layout not only contributes to a compact design but also enhances the engine’s overall aesthetic, giving many cruiser-style bikes their signature look.

**Pros of V-Twin Engines:**
One of the most notable advantages of V-twin engines is their impressive torque output, especially at lower RPMs. This translates to a thrilling riding experience, as riders can enjoy robust acceleration without needing to rev the engine high. Additionally, the low center of gravity offered by the V-twin configuration contributes to better handling and stability, particularly in larger motorcycles. The sound of a V-twin engine is another key appeal; the unique rumble produced can evoke a sense of nostalgia and excitement, making every ride feel special.

**Cons of V-Twin Engines:**
However, V-twin engines are not without their drawbacks. One significant downside is the inherent vibration, which can be pronounced due to the uneven firing intervals. While some riders appreciate the raw feel of the engine, others may find it tiring on longer journeys. Additionally, the design often results in a larger engine size and weight compared to parallel-twin or single-cylinder engines, which can affect the bike’s agility, especially in tight corners or urban settings.

In summary, V-twin engines are a beloved choice for many riders, providing a blend of power, character, and style. However, potential buyers should weigh the benefits against the drawbacks to ensure that this engine type aligns with their riding preferences and needs. Whether you’re cruising down the highway or navigating city streets, understanding the nuances of V-twin engines can help you make an informed decision about your motorcycle of choice.

– 3.4. Inline-Three Engines

What are the different types of motorbike engines and their pros and cons?
Credit : whatcanu.com

Inline-three engines are a fascinating and somewhat underrated category in the world of motorcycle powertrains. Characterized by their arrangement of three cylinders in a straight line, these engines strike a unique balance between the compactness of smaller engines and the performance capabilities typically found in larger configurations.

One of the standout features of inline-three engines is their smooth power delivery. The three-cylinder layout allows for a more even firing interval compared to two-cylinder engines, resulting in less vibration and a more refined riding experience. This smoothness makes them particularly appealing for riders who enjoy long-distance touring or commuting, where comfort is paramount.

From a performance standpoint, inline-three engines offer a delightful combination of torque and horsepower. They tend to produce a healthy mid-range power, making them versatile for a variety of riding styles—from spirited canyon carving to relaxed highway cruising. Additionally, their relatively lightweight design contributes to agile handling, enhancing the overall riding dynamics of the motorcycle.

However, like any engine type, inline-three engines have their drawbacks. One of the primary concerns is the complexity of the engine design. With an additional cylinder comes more components and potential points of failure, which can lead to increased maintenance needs compared to simpler configurations such as single or twin-cylinder engines. Moreover, tuning and aftermarket support for inline-three engines might not be as robust as for more common engine types, making it more challenging to find performance upgrades or replacement parts.

In conclusion, inline-three engines present a compelling option for motorcyclists seeking a balance of smoothness, performance, and handling. While they may not be as mainstream as their four-cylinder counterparts or as raw as twin-cylinder engines, they offer a unique riding experience that is well worth exploring for those looking to understand the diverse world of motorcycle engines.

– 3.5. Inline-Four Engines

The inline-four engine configuration is one of the most common types found in modern motorbikes, revered for its balance of performance, efficiency, and smooth operation. Characterized by four cylinders arranged in a straight line, this engine type has become a staple in both sport and touring motorcycles, thanks to its ability to deliver robust power while maintaining a compact design.

One of the standout advantages of inline-four engines is their remarkable smoothness. The even firing order of the cylinders results in minimal vibrations, providing a comfortable ride for both the rider and the passenger. This characteristic is especially appreciated during long-distance journeys where comfort is paramount. Additionally, the design allows for a relatively high power output, with many inline-fours capable of producing impressive horsepower figures, making them ideal for riders seeking thrilling acceleration and speed.

Another benefit is the engine’s efficiency. Inline-four engines typically offer good fuel economy compared to larger configurations, which can be a significant consideration for both daily commuters and adventure-seeking riders. They also tend to be lighter than similar displacement V-twin engines, contributing to better handling and agility on the road.

However, inline-four engines do come with their set of drawbacks. One notable downside is the complexity of the design; with more moving parts and a more intricate valve train, maintenance can be more challenging and potentially costlier. Furthermore, the engine’s high-revving nature, while exhilarating, may not appeal to all riders, especially those who prefer the low-end torque often found in V-twin or single-cylinder engines.

In terms of sound, inline-fours offer a unique character known for their high-pitched, rev-happy roar, which can be both thrilling and polarizing. Some riders love the exhilarating scream of an inline-four at full throttle, while others may find it less appealing compared to the deep rumble of a V-twin.

In summary, inline-four engines are celebrated for their performance, smoothness, and fuel efficiency, making them an excellent choice for a wide variety of motorcycle enthusiasts. However, potential buyers should weigh the complexity of the engine and its maintenance needs against their riding style and preferences to determine if this configuration is the right fit for their motorcycling journey.

– 3.6. Boxer Engines

Boxer engines, also known as flat engines, are a unique design that features horizontally opposed cylinders. This configuration allows the pistons to move in and out in a manner that maintains a low center of gravity, contributing to enhanced stability and handling. Popularized by manufacturers like BMW, boxer engines offer a distinctive rumble and a smooth ride that many motorbike enthusiasts appreciate.

**Pros of Boxer Engines:**

1. **Low Center of Gravity:** The horizontal layout of the cylinders results in a lower center of gravity, improving balance and cornering capability. This design can significantly enhance the handling characteristics of the motorcycle, making it more agile on the road.

2. **Reduced Vibration:** Boxer engines tend to produce less vibration compared to inline or V engines. The opposing pistons help to cancel out some of the engine’s vibrations, providing a smoother ride and less fatigue for the rider over long distances.

3. **Unique Sound:** The sound produced by a boxer engine is distinctive and often described as a deep, throaty growl. This auditory feedback can be a significant draw for riders who appreciate the character and personality that comes with their machine.

4. **Better Airflow and Cooling:** The design of a boxer engine allows for better airflow around the engine, which can lead to improved cooling efficiency. This is particularly beneficial during long rides or in hot weather conditions, as it helps prevent overheating.

**Cons of Boxer Engines:**

1. **Wider Design:** The horizontal layout means that boxer engines can be wider than other engine types. This may affect the overall width of the motorcycle, potentially making it less maneuverable in tight spaces or heavy traffic.

2. **Complexity and Cost:** The design and assembly of boxer engines can be more complex than traditional engine types, potentially leading to higher manufacturing costs. This complexity may also translate to increased maintenance challenges for owners.

3. **Limited Availability:** While boxer engines are well-regarded in certain motorcycle segments, they are not as commonly found as other engine types. This can limit the options available for riders looking for a new motorcycle with this engine configuration.

In summary, boxer engines provide a unique blend of performance, stability, and character that appeals to many motorbike enthusiasts. While they come with some drawbacks, their advantages make them a compelling choice for those seeking a distinctive riding experience. Whether you’re navigating winding roads or cruising on the highway, a boxer engine can deliver the smooth, powerful ride that many riders crave.

4. Comparing Engine Displacement: What It Means for Performance

When it comes to motorbike engines, one of the most critical specifications to understand is engine displacement. Measured in cubic centimeters (cc), engine displacement refers to the total volume of all the cylinders in an engine. In simpler terms, it’s the space where the fuel-air mixture is burned to produce power. Displacement significantly influences a bike’s performance, speed, and efficiency, making it a crucial factor for any rider to consider.

Higher engine displacement typically equates to more power. For instance, a motorcycle with a 1000cc engine will generally outperform a 500cc bike in terms of acceleration, top speed, and overall power output. This additional power can provide an exhilarating riding experience, especially for those who crave speed and quick maneuvers on highways or during spirited rides. However, more displacement often means increased weight and reduced fuel efficiency, which can be a downside for those looking for a practical daily driver.

On the other hand, bikes with lower engine displacement—often found in smaller models and commuter bikes—are usually lightweight and easier to handle, making them ideal for beginners or city riding. These engines tend to deliver better fuel economy and can be more forgiving on the wallet regarding maintenance costs. However, they might struggle with high-speed performance or carrying heavier loads, which could be a consideration if you plan on long trips or carrying a passenger.

Ultimately, understanding engine displacement is about finding a balance that aligns with your riding style and needs. Whether you’re looking for power and speed or comfort and efficiency, each engine size offers unique advantages and limitations. By comparing the displacement of various models, you can make an informed decision that enhances your riding experience and meets your expectations.

5. Understanding Two-Stroke vs. Four-Stroke Engines

When it comes to motorbike engines, one of the most fundamental distinctions to grasp is the difference between two-stroke and four-stroke engines. Each type has its unique characteristics, advantages, and drawbacks, making them suitable for varying riding preferences and applications.

### Two-Stroke Engines

Two-stroke engines are known for their simplicity and lightweight design. In a two-stroke cycle, the engine completes a power stroke with every revolution of the crankshaft, which means they can produce a power pulse with every turn. This design allows for a more compact engine that can deliver a high power-to-weight ratio, making them particularly popular in smaller bikes and dirt bikes.

**Pros:**
– **Lightweight and Compact:** The fewer moving parts and smaller design contribute to a lighter overall weight, enhancing agility and maneuverability.
– **Higher Power Output:** The engine’s ability to produce power on every revolution results in a more potent performance, especially beneficial in racing and off-road conditions.
– **Simplicity of Design:** With fewer parts, maintenance tends to be easier and generally less expensive.

**Cons:**
– **Fuel Efficiency:** Two-stroke engines tend to consume more fuel and emit more emissions compared to their four-stroke counterparts, which can be a concern for environmentally-conscious riders.
– **Durability and Longevity:** The higher RPMs and increased wear can lead to a shorter lifespan when compared to four-stroke engines, necessitating more frequent rebuilds.
– **Noise and Vibration:** They can be louder and produce more vibration, which might be less comfortable for longer rides.

### Four-Stroke Engines

On the other hand, four-stroke engines operate on a cycle that completes a power stroke every two revolutions of the crankshaft, resulting in a more complex design. This engine type is predominant in a wide range of motorcycles, from cruisers to sport bikes, offering a balanced mix of power, efficiency, and longevity.

**Pros:**
– **Fuel Efficiency:** Four-stroke engines are generally more fuel-efficient, allowing for longer rides without the need for frequent refueling.
– **Smoother Operation:** The design results in less vibration and smoother power delivery, contributing to a more comfortable riding experience.
– **Longevity:** These engines tend to last longer due to their design, making them ideal for riders looking for durability and reliability over time.

**Cons:**
– **Weight and Size:** The additional moving parts and complexity can lead to a heavier engine, which may affect handling and agility, particularly in off-road scenarios.
– **Power Delivery:** Four-stroke engines may have a less aggressive power delivery compared to two-strokes, which can be a disadvantage in performance-oriented riding.
– **Maintenance Complexity:** With more components involved, servicing and repairs can be more complicated and potentially more costly.

In essence, the choice between a two-stroke and a four-stroke engine will largely depend on your riding style, preferences, and intended use of the motorcycle. Whether you seek the raw power and lightweight agility of a two-stroke or the efficiency and smooth ride of a four-stroke, understanding the nuances of each engine type is crucial in making an informed decision for your motorbike journey.

6. Pros and Cons of Single-Cylinder Engines

Single-cylinder engines, often celebrated for their simplicity and efficiency, hold a unique place in the world of motorbikes. Characterized by having only one cylinder, these engines deliver a distinctive riding experience that appeals to many enthusiasts, particularly those who favor lightweight and agile motorcycles. However, like any technology, single-cylinder engines come with their own set of advantages and disadvantages.

**Pros:**

1. **Lightweight Design**: One of the most compelling benefits of single-cylinder engines is their lightweight construction. With fewer components than multi-cylinder counterparts, these engines contribute to a lighter overall bike, enhancing maneuverability and making them ideal for urban commuting and off-road adventures alike.

2. **Fuel Efficiency**: Single-cylinder engines tend to be more fuel-efficient, making them a cost-effective option for riders who prioritize long-distance travel or daily commutes. Their simpler design means less friction and fewer moving parts, which can result in better gas mileage.

3. **Lower Maintenance Costs**: The straightforward nature of single-cylinder engines translates to easier maintenance. With fewer parts to check and replace, owners often find that upkeep is less intensive and more affordable, allowing for a worry-free riding experience.

4. **Torque Delivery**: Single-cylinder engines typically deliver strong low-end torque, making them responsive and fun to ride at lower speeds. This characteristic is particularly advantageous for novices or those navigating congested city streets.

**Cons:**

1. **Vibration**: One drawback of single-cylinder engines is the increased vibration they produce, especially at higher speeds. While some riders appreciate the raw connection to the machine, others may find the vibrations uncomfortable during extended rides.

2. **Limited Power**: The power output of single-cylinder engines is generally lower compared to multi-cylinder designs. For riders seeking high-speed performance or rapid acceleration, this limitation can be a significant downside, particularly on highways or racetracks.

3. **Noise Levels**: Single-cylinder engines often produce a distinctive thump, which can be appealing to some but annoying to others. Depending on the design and tuning, these engines can be louder than their multi-cylinder counterparts, which might be a consideration for those living in noise-sensitive areas.

4. **Less Versatility**: While single-cylinder engines excel in certain scenarios, they may not offer the versatility needed for varied riding experiences. Riders looking for a bike that can handle both city commutes and high-speed touring may find single-cylinder options less suitable.

In summary, understanding the pros and cons of single-cylinder engines is essential for potential motorbike buyers. They offer a fantastic mix of lightweight agility and fuel efficiency, making them ideal for city riding and beginners. However, their limitations in power and comfort at higher speeds may steer experienced riders toward multi-cylinder options. Ultimately, the choice comes down to personal preference and riding style, ensuring that every rider can find their perfect match on two wheels.

7. Pros and Cons of Twin-Cylinder Engines

Twin-cylinder engines, often referred to as parallel-twin or V-twin engines depending on their configuration, offer a unique blend of performance characteristics that appeal to a wide range of motorbike enthusiasts. Understanding the pros and cons of these engines can help riders make informed decisions when choosing their next bike.

**Pros:**

1. **Smooth Power Delivery:** Twin-cylinder engines are known for their balanced performance, delivering power smoothly and consistently across various RPM ranges. This makes them ideal for both city commuting and long-distance touring.

2. **Torque Characteristics:** With two cylinders working in unison, these engines typically produce more torque at lower RPMs compared to single-cylinder engines. This means riders can enjoy better acceleration and responsiveness, especially during low-speed maneuvers, making them great for urban riding.

3. **Compact Design:** Twin-cylinder engines often have a more compact design compared to larger multi-cylinder engines, allowing for lighter and more maneuverable motorcycles. This can enhance the handling characteristics of the bike, which is particularly beneficial for newer riders or those navigating tight city streets.

4. **Versatility:** Twin-cylinder engines are versatile and can be found in a variety of bike types, from cruisers and touring bikes to sport and adventure motorcycles. This wide availability means riders can find a twin-cylinder engine that fits their specific riding style and preferences.

**Cons:**

1. **Vibration:** While twin-cylinder engines typically offer a smoother ride than single-cylinder engines, they can still produce more vibration than their four-cylinder counterparts. This can lead to rider fatigue on longer journeys and may require additional counterbalancing measures in the bike’s design.

2. **Limited Top-End Power:** Although twin-cylinder engines excel in torque and low-end power, they may fall short when it comes to high-end performance. Riders looking for blistering speed on the racetrack might find these engines less satisfying compared to the high-revving capabilities of multi-cylinder engines.

3. **Complexity and Maintenance:** Depending on the design (e.g., V-twin versus parallel-twin), twin-cylinder engines can be more complex to maintain. Specific parts, such as the intake and exhaust systems, may require more frequent attention or replacement, potentially leading to increased maintenance costs.

4. **Fuel Consumption:** Generally, twin-cylinder engines can consume more fuel than single-cylinder engines, particularly if they are tuned for higher performance. This can be a consideration for those who are budget-conscious and looking for a more economical ride.

In conclusion, twin-cylinder engines present a compelling option for riders who appreciate a balance of torque, compact design, and versatility. However, it’s essential to weigh these advantages against the potential downsides, such as vibrations and maintenance considerations, to determine if a twin-cylinder motorcycle is the right fit for your riding experience.

8. Pros and Cons of Four-Cylinder Engines

Four-cylinder engines are a popular choice among motorbike enthusiasts, and for good reason. Offering a blend of performance, efficiency, and smooth operation, they have carved a significant niche within the motorcycle market. However, like any engine type, they come with their own set of advantages and disadvantages.

**Pros:**

1. **Smooth Power Delivery:** One of the most notable benefits of four-cylinder engines is their ability to deliver a smoother power band. With more cylinders working together, the engine can provide a more refined and consistent power output, making for a more enjoyable riding experience, especially at higher RPMs.

2. **Higher RPM Potential:** Four-cylinder engines generally excel at higher revs compared to their two-cylinder counterparts. This allows for impressive top-end performance, making them ideal for sport and racing applications where speed is paramount.

3. **Efficient Cooling:** The design of four-cylinder engines often allows for more efficient cooling, as the heat is distributed more evenly across the engine. This can lead to better performance during long rides or in demanding conditions.

4. **Versatility:** From sportbikes to touring models, four-cylinder engines are versatile enough to be found in a wide range of motorcycle styles. This adaptability makes them a popular choice for manufacturers aiming to cater to different segments of the market.

**Cons:**

1. **Weight:** One potential drawback is that four-cylinder engines tend to be heavier than their simpler counterparts. This added weight can affect the overall handling of the motorcycle, making it feel less nimble, particularly in urban or off-road settings.

2. **Complexity and Maintenance:** With more components comes increased complexity. Four-cylinder engines may require more intricate maintenance and can be more costly to repair compared to simpler engine designs. This can be a significant consideration for riders who prefer low-maintenance machines.

3. **Cost:** Due to their complexity and the precision engineering required, motorcycles equipped with four-cylinder engines may come at a higher price point. This can deter budget-conscious buyers who are looking for more economical options.

4. **Fuel Economy:** While four-cylinder engines can be efficient at high speeds, they may not always perform as well in terms of fuel economy when compared to smaller engines, especially during city riding or at lower RPMs. Riders focused on fuel efficiency might want to consider their options carefully.

In summary, four-cylinder engines offer a unique blend of power and performance that can enhance the riding experience for many. However, prospective buyers should weigh these pros and cons carefully to determine if this engine type aligns with their riding style and preferences. Whether you’re a speed seeker on the racetrack or a commuter navigating city streets, understanding the nuances of four-cylinder engines can help you make an informed decision.

9. The Role of Engine Tuning in Performance

Engine tuning plays a pivotal role in maximizing the performance of a motorbike, transforming a standard machine into a finely-tuned instrument of speed and agility. At its core, engine tuning involves adjusting various components and settings to enhance performance characteristics, fuel efficiency, and overall riding experience.

There are several aspects of engine tuning that can significantly impact how a motorbike performs. One of the most common methods is adjusting the fuel-air mixture, ensuring that the engine receives the optimal blend for combustion. A well-tuned engine can produce higher horsepower and torque, translating into quicker acceleration and a more exhilarating ride. For riders who frequent the racetrack or enjoy spirited weekend rides, this adjustment can mean the difference between winning a race and finishing in the dust.

Another key area of tuning is the exhaust system. By optimizing the exhaust flow, tuners can reduce back pressure and increase engine efficiency, allowing for better performance at higher RPMs. Aftermarket exhaust systems are often lighter and designed to improve sound and aesthetics while enhancing performance. However, while a roaring exhaust can be thrilling, it’s important to consider local noise regulations and the impact on your riding experience.

On the flip side, engine tuning does come with its challenges. For instance, pushing a bike beyond its factory settings can lead to increased wear and tear, potentially shortening the lifespan of vital components. Moreover, meticulous attention to detail is required during the tuning process; even minor mistakes can result in engine knocking or a complete failure to start. It’s essential to have a deep understanding of your motorbike’s engine configuration and the specific characteristics of your model before diving into tuning modifications.

Ultimately, engine tuning combines art and science, requiring a blend of technical knowledge and hands-on experience. Whether you’re seeking to enhance your daily commute or pushing the limits on the racetrack, understanding the role of engine tuning in performance is crucial for any motorbike enthusiast. Embracing this aspect of motorcycle mechanics can lead to greater satisfaction on every ride, making it a worthwhile endeavor for those who crave speed and precision.

10. Common Engine Problems and Maintenance Tips

When it comes to motorbike engines, understanding common problems and knowing how to maintain them is crucial for every rider. Just like any other vehicle, motorbike engines are prone to a variety of issues, some of which can lead to significant performance drops or even complete breakdowns if left unaddressed.

### Common Engine Problems

1. **Overheating**: This is a prevalent issue, particularly in air-cooled engines. If your bike is running hotter than normal, it could indicate low coolant levels, a malfunctioning thermostat, or clogged radiator fins. Signs of overheating can include a decrease in power, strange noises, or even a warning light on your dashboard.

2. **Oil Leaks**: Oil leaks can occur due to worn gaskets, seals, or oil lines. Not only can these leaks diminish your engine’s lubrication, leading to severe damage, but they can also present safety hazards on the road. Regularly check your oil levels and hoses for any signs of leakage.

3. **Fuel System Issues**: Problems with the fuel system, such as clogged fuel filters or dirty injectors, can lead to poor engine performance. If you’re experiencing difficulty starting your bike or inconsistent acceleration, it may be time to inspect your fuel system.

4. **Electrical Failures**: Motorbike engines rely on various electrical components, including the battery, spark plugs, and wiring. Issues like a dead battery or faulty spark plugs can lead to starting problems or stalling. Regularly inspecting these components can help prevent electrical-related headaches.

5. **Transmission Problems**: A smooth transmission is essential for the overall performance of your motorbike. If you notice grinding noises while shifting gears or slipping in and out of gear, your transmission may need attention, which could range from simple adjustments to complete overhauls.

### Maintenance Tips

To keep your engine running smoothly and prevent these common problems, here are some effective maintenance tips:

– **Regular Oil Changes**: Change your oil according to the manufacturer’s recommendations. Fresh oil keeps the engine lubricated and helps to remove harmful debris.

– **Check and Replace Filters**: Regularly inspect air and fuel filters. A clean air filter ensures optimal airflow to the engine, while a clean fuel filter lets fuel flow freely, both contributing to better engine performance.

– **Inspect Spark Plugs**: Spark plugs should be checked periodically and replaced as needed. Worn plugs can cause misfires and inefficiencies in fuel combustion.

– **Keep Your Fuel System Clean**: Use fuel additives designed to clean injectors and prevent build-up. Additionally, regularly topping off with high-quality fuel can help maintain your engine’s health.

– **Monitor Fluid Levels**: Regularly check coolant, brake fluid, and oil levels. Maintaining proper fluid levels is essential to avoid overheating and ensure overall engine performance.

– **Follow a Maintenance Schedule**: create and adhere to a regular maintenance schedule that includes inspections, adjustments, and necessary service tasks. This proactivity can save you from costly repairs down the line.

By familiarizing yourself with these common engine problems and following these maintenance tips, you can ensure a longer lifespan for your motorbike engine and a more enjoyable riding experience. Remember, a well-maintained engine not only performs better but also enhances your safety on the road.

11. How Engine Type Affects Riding Style and Experience

The type of engine in your motorbike significantly influences not just the performance of the machine, but also the overall riding experience and your personal riding style. From the throaty growl of a V-twin to the high-revving excitement of an inline-four, each engine configuration offers unique characteristics that cater to different riders.

### Engine Types and Their Effects on Riding

1. **Single-Cylinder Engines**: Often found in entry-level bikes and dirt bikes, single-cylinder engines are lightweight and provide excellent torque at low RPMs. This makes them perfect for beginners who are still mastering their balance and throttle control. However, while they excel in agility and maneuverability, they may lack the higher-speed power and smoothness desired for long-distance highway riding.

2. **Parallel-Twin Engines**: These engines strike a balance between power and weight, delivering a lively performance ideal for urban commuting and weekend trips. They are known for their torque and reliability, making them a popular choice for versatile riders. However, their sound may not be as thrilling as that of other configurations, which can be a drawback for those who crave a more visceral experience.

3. **V-Twin Engines**: Renowned for their rich, throaty sound and substantial torque, V-twin engines are often found in cruiser and touring bikes. They offer a relaxed riding style, perfect for long distances and leisurely rides. The downside is that they may have a heavier weight and can produce vibrations that can be fatiguing over time.

4. **Inline-Four Engines**: These engines are the powerhouse of sportbikes, characterized by high revs and a smooth delivery of power. Riders who thrive on speed and performance will love the responsiveness of inline-fours. However, they may not provide the low-end torque needed for off-road or city riding, making them less versatile for those who enjoy varied terrains.

5. **Boxer Engines**: Unique to brands like BMW, boxer engines offer a low center of gravity and excellent stability. Riders benefit from a smooth, balanced ride with reduced vibrations. However, their bulk can make the bikes less agile and harder to maneuver in tight spaces.

### Riding Style and Experience

As you can see, the engine type plays a crucial role in defining your riding style. A sportbike with an inline-four engine may inspire you to push your limits on the track, while a cruiser with a V-twin could encourage long, scenic rides along winding roads. The key is to match your engine type with your personal preferences and riding goals.

Understanding these nuances not only helps you select the right motorbike but also enhances your connection to the machine. Ultimately, the more you know about how engine types affect your riding experience, the better equipped you’ll be to make an informed decision that aligns with your passion for the open road.

12. Choosing the Right Engine for Your Riding Needs

Choosing the right engine for your riding needs is a pivotal decision that can significantly enhance your overall motorcycling experience. The engine not only defines the bike’s performance but also influences ride comfort, fuel efficiency, and maintenance requirements. When selecting an engine type, it’s essential to consider your riding style, the terrain you’ll be navigating, and your personal preferences.

For those who crave speed and adrenaline, a high-performance sportbike with a powerful inline-four engine might be the ideal choice. These engines deliver rapid acceleration and impressive top speeds, making them perfect for twisty roads and track days. However, their aggressive power delivery can be overwhelming for novice riders or those who prefer a more relaxed cruising experience.

On the other hand, if you envision long-distance tours or leisurely rides through scenic landscapes, a touring bike equipped with a larger displacement V-twin or flat-six engine may be more suitable. These engines are designed for comfort, boasting low-end torque that provides a smooth, steady ride, allowing you to tackle highway miles with ease. Keep in mind, though, that these engines can be heavier and may consume more fuel, which could be a consideration for budget-conscious riders.

For off-road enthusiasts, dual-sport motorcycles with single-cylinder engines offer the versatility needed for both pavement and dirt trails. These engines are lightweight and agile, making them ideal for navigating rough terrains. However, they may lack the power and speed of larger engines, which can be a drawback for riders who spend significant time on the highway.

Finally, don’t overlook the emerging category of electric motors. While they differ significantly from traditional combustion engines, electric bikes provide instant torque, silent operation, and lower maintenance costs. They are increasingly popular among urban riders seeking eco-friendly options, but range limitations can affect long-distance travel.

Ultimately, the right engine for you will depend on a blend of your riding ambitions, experience level, and lifestyle. Take the time to test ride different models and consult with experienced riders or dealers to find the perfect match. After all, the engine you choose will shape not just your bike, but your entire riding journey.

13. Future Trends in Motorbike Engine Technology

As we look to the future of motorbike engine technology, several exciting trends are emerging that promise to revolutionize the riding experience. The shift toward sustainability is at the forefront, with electric and hybrid engines gaining traction. These eco-friendly alternatives not only minimize emissions but also offer impressive torque and acceleration, providing a thrilling ride while reducing the overall carbon footprint. Companies like Zero Motorcycles and Harley-Davidson are leading the charge, creating electric models that blend traditional aesthetics with modern technology.

Another trend gaining momentum is the advancement of smart engine technology. Integration of IoT (Internet of Things) capabilities into motorbike engines allows for real-time data monitoring, enabling riders to track performance metrics, fuel efficiency, and even maintenance needs through smartphone applications. This connectivity enhances the riding experience by providing valuable insights and ensuring that your bike is always performing at its best.

Furthermore, the increasing popularity of alternative fuels, such as hydrogen and biofuels, is reshaping the landscape of motorbike engines. These fuels not only promise a cleaner burn but also aim to extend the range and performance of traditional combustion engines. Manufacturers are exploring innovative designs that can accommodate these fuels, paving the way for a future where motorbikes are both powerful and environmentally friendly.

Lastly, advancements in lightweight materials and manufacturing techniques, such as 3D printing, are making engines more efficient and easier to produce. This not only reduces costs but also allows for more intricate designs that enhance performance and reduce weight, further improving the riding experience.

In conclusion, the future of motorbike engine technology is poised for groundbreaking changes. As manufacturers embrace electric power, smart technology, alternative fuels, and innovative materials, riders can look forward to a new era of motorcycling that combines performance, sustainability, and connectivity in ways we are only beginning to imagine. Whether you are a seasoned rider or a newcomer to the scene, these advancements will undoubtedly shape the future of the open road.

14. Conclusion: Making Informed Decisions about Motorbike Engines

In conclusion, navigating the world of motorbike engines can initially seem daunting, but understanding the various types and their respective advantages and disadvantages empowers you to make informed decisions tailored to your riding style and needs. Whether you’re drawn to the raw power and torque of a V-twin engine or the lightweight responsiveness of a single-cylinder, each engine type offers unique characteristics that cater to different experiences on the road.

As you consider your options, it’s essential to weigh factors such as performance, fuel efficiency, maintenance costs, and your intended use—be it daily commuting, off-road adventures, or leisurely weekend rides. Don’t forget to factor in your level of experience and comfort with handling different engine configurations, as some may require more skill and familiarity than others.

Moreover, engaging with fellow riders, visiting local dealerships, and conducting thorough research can provide valuable insights and firsthand accounts that further guide your decision-making process. Ultimately, the right motorbike engine is one that aligns with your personal preferences, lifestyle, and aspirations as a rider. By taking the time to understand the nuances of motorbike engines, you can confidently choose a machine that not only meets your practical needs but also enhances your overall riding experience. So gear up, do your homework, and hit the open road with both excitement and assurance!

In conclusion, understanding motorbike engines is essential for any rider looking to make informed decisions about their vehicle and enhance their riding experience. With a thorough grasp of the various engine types—from the powerful V-twins to the efficient parallel twins and the nimble single cylinders—you can weigh the pros and cons that align with your riding style, preferences, and performance needs. As you embark on your journey into the world of motorbikes, remember that the right engine can significantly impact not only your bike’s performance but also your overall enjoyment on the road. Whether you’re a seasoned rider or just starting out, we hope this guide has demystified the complexities of motorbike engines and empowered you to choose wisely. Happy riding, and may your adventures on two wheels be thrilling and fulfilling!

How to maintain your motorbike for optimal performance?

For motorbike enthusiasts, the thrill of the open road is a cherished experience, but maintaining peak performance requires more than just a love for riding.

Just as an athlete must train and care for their body, your motorbike demands attention and regular maintenance to ensure it runs smoothly and safely. From the roar of the engine to the sleek handling on winding roads, every aspect of your bike depends on proper care and upkeep. In this blog post, we’ll explore essential maintenance tips that will not only enhance your motorbike’s performance but also extend its lifespan. Whether you’re a seasoned rider or a novice looking to elevate your skills, these practical insights will help you unlock the full potential of your machine, ensuring every ride is as exhilarating as the last. Join us as we delve into the world of motorbike maintenance and discover how to keep your two-wheeled companion in top shape for countless adventures ahead!

1. Introduction to Peak Performance in Motorbikes

How to maintain your motorbike for optimal performance?
Credit : whatcanu.com

When it comes to motorbikes, peak performance is not just a concept—it’s the exhilarating sensation of the wind rushing past you as you navigate winding roads, the thrill of acceleration as you conquer straightaways, and the pure joy of riding a machine that responds seamlessly to your every command. Achieving this level of performance requires more than just a powerful engine and sleek design; it demands a commitment to regular maintenance and an understanding of the vital components that keep your bike running smoothly.

Just like an athlete preparing for a competition, your motorbike needs consistent care and attention to reach its full potential. From the engine and transmission to the brakes and tires, each part plays a crucial role in ensuring that your ride is not only enjoyable but also safe. Neglecting these components can lead to decreased performance, compromised safety, and, ultimately, a less rewarding riding experience.

In this guide, we will delve into the essential maintenance tips that will help you unlock the peak performance of your motorbike. Whether you’re a seasoned rider or a newcomer to the world of two wheels, understanding these maintenance fundamentals will empower you to keep your bike in top-notch condition, allowing you to hit the road with confidence and enthusiasm. So, let’s gear up and explore the best practices for maintaining your motorbike, ensuring that every ride is as thrilling as the last!

2. Understanding the Importance of Regular Maintenance

When it comes to owning a motorbike, understanding the importance of regular maintenance is crucial for ensuring its longevity, performance, and your safety on the road. Just like your body requires regular check-ups to stay healthy, your bike benefits immensely from routine care and attention. Neglecting this fundamental aspect can lead to more severe issues down the line, potentially costing you not just money, but also risking your safety.

Regular maintenance encompasses a variety of tasks, from checking fluid levels and inspecting brakes to monitoring tire pressure and cleaning air filters. Each of these components plays a vital role in your bike’s overall performance. For instance, underinflated tires can significantly affect handling and fuel efficiency, while worn-out brake pads can compromise your stopping power, putting you in harm’s way.

Moreover, routine maintenance helps to identify minor issues before they escalate into major repairs. A simple oil change, for example, can keep your engine running smoothly, preventing wear and tear that could lead to costly engine repairs. By dedicating time to regular inspections and servicing, you not only enhance the bike’s performance but also improve your riding experience, allowing you to enjoy more of those exhilarating rides.

In essence, regular maintenance is not just about keeping your motorbike looking good; it’s about ensuring that it operates at its peak performance, keeps you safe, and prolongs its lifespan. Consider it an investment in your riding journey—one that pays dividends in reliability and enjoyment. So, make it a priority to incorporate maintenance into your routine, and you’ll reap the benefits every time you hit the open road.

3. Essential Tools Every Motorbike Owner Should Have

How to maintain your motorbike for optimal performance?
Credit : whatcanu.com

As a motorbike owner, having the right tools at your disposal is crucial for maintaining your ride and ensuring peak performance on the road. Whether you’re a seasoned mechanic or a casual enthusiast, equipping your garage with essential tools can make all the difference in keeping your motorbike in top shape. Here’s a rundown of the must-have tools every motorbike owner should consider:

**1. Socket Set:** A comprehensive socket set is foundational for any motorbike maintenance. Look for a set that includes a variety of sizes, both metric and imperial, to tackle different nuts and bolts on your bike. A ratchet and extension bar will also come in handy for those hard-to-reach areas.

**2. Torque Wrench:** Proper torque is vital for motorbike safety and performance. A torque wrench allows you to tighten bolts to the manufacturer’s specifications, preventing over-tightening or under-tightening, which can lead to mechanical failures.

**3. Screwdrivers:** A set of quality screwdrivers, including flathead and Phillips, is essential for various adjustments and repairs. Consider investing in a magnetic tip screwdriver for added convenience, as it helps keep screws in place when working in tight spots.

**4. Pliers and Wire Cutters:** These versatile tools are invaluable for gripping, twisting, and cutting wires or cables. Needle-nose pliers can be particularly useful for accessing tight areas, while wire cutters are perfect for managing electrical components.

**5. Tire Pressure Gauge:** Maintaining the correct tire pressure is critical for handling and safety. A reliable tire pressure gauge will help you monitor your tires regularly, ensuring they are always at the optimal level for your riding conditions.

**6. Chain Maintenance Tools:** For motorcycles with a chain drive, a chain cleaner and lubricant are essential. A chain tool can also help you adjust or replace links when needed, keeping your bike running smoothly.

**7. Cleaning Supplies:** Regular cleaning not only keeps your motorbike looking great but also helps prevent corrosion and wear. Invest in microfiber cloths, brushes, and a gentle motorcycle cleaner to maintain the finish and functionality of your bike.

**8. First Aid Kit:** Safety should always be a priority. A well-stocked first aid kit can be a lifesaver in case of minor injuries while working on your bike or during rides. This should include bandages, antiseptic wipes, and essential medications.

By keeping these essential tools at hand, you’ll be better equipped to handle routine maintenance and unexpected repairs, empowering you to enjoy your motorbike to its fullest. Regular upkeep will not only enhance performance but also extend the lifespan of your beloved ride, ensuring countless adventures ahead.

4. Checking and Changing the Oil: A Step-by-Step Guide

Maintaining the health of your motorbike is a critical aspect of ensuring it performs at its best, and one of the most vital tasks you can undertake is checking and changing the oil. Regular oil changes not only extend the life of your engine but also enhance its performance, ensuring that your rides are smooth and trouble-free. Here’s a comprehensive step-by-step guide to help you through the oil check and change process.

### Step 1: Gather Your Supplies
Before you dive into the task, gather all necessary tools and supplies. You’ll need a new oil filter, the correct type of oil for your bike (check your owner’s manual for specifications), a wrench to remove the oil drain plug, a funnel, an oil catch pan, and some rags for cleanup. Having everything at hand will make the process much smoother.

### Step 2: Warm Up the Engine
Start by warming up your engine for a few minutes. This is important because warm oil flows more easily, allowing for a more thorough drain. However, be cautious not to overheat the engine; just enough warmth to make the oil easier to work with is ideal.

### Step 3: Position Your Bike
Once warmed up, turn off the engine and position your bike on a level surface. Using a motorcycle stand can be helpful for stability and access. Place the oil catch pan under the oil drain plug to collect the old oil.

### Step 4: Drain the Old Oil
Using your wrench, carefully remove the oil drain plug. Allow the old oil to completely drain into the catch pan. This may take a few moments, so be patient. While the oil is draining, inspect the drain plug for any metal shavings or debris, which could indicate engine wear.

### Step 5: Replace the Oil Filter
With the old oil fully drained, it’s time to replace the oil filter. Use an oil filter wrench to remove the old filter, making sure to have a rag handy to catch any residual oil. Before installing the new filter, apply a small amount of new oil to the rubber gasket of the new filter; this helps create a good seal and makes it easier to remove during the next change. Screw the new filter into place, hand-tightening it securely.

### Step 6: Add New Oil
Reattach the drain plug securely, and then use your funnel to pour in the new oil through the oil filler cap. Refer to your owner’s manual for the correct oil capacity. Take your time, ensuring you don’t overfill, as this can lead to increased pressure and potential leaks.

### Step 7: Check Oil Level
After adding oil, give your bike a moment to settle. Remove the dipstick (if equipped) or check the sight glass to ensure the oil level is correct. Add more oil if necessary, ensuring it sits between the minimum and maximum marks.

### Step 8: Clean Up
Once everything is in place, clean up your workspace and dispose of the old oil and filter properly. Many auto parts stores and service centers will accept used oil for recycling, so check for local disposal options to ensure you’re being environmentally responsible.

### Step 9: Start the Engine
Finally, start your motorbike and let it run for a minute. This allows the new oil to circulate throughout the engine. Check for any leaks around the drain plug and oil filter. If everything looks good, you’re ready to hit the road!

By following these steps to check and change your motor

5. Keeping Your Tyres in Top Condition

How to maintain your motorbike for optimal performance?
Credit : whatcanu.com

Tyres are the unsung heroes of your motorbike, forming the critical connection between you and the road. Neglecting their maintenance can lead to reduced performance and safety hazards, making it essential to keep them in top condition. Regularly checking the tyre pressure is a fundamental yet often overlooked task. Under-inflated tyres can cause poor handling and increased fuel consumption, while over-inflation can lead to a harsher ride and uneven wear. Aim to check the pressure at least once a month and before any long ride, always adjusting it to the manufacturer’s recommended specifications.

Visual inspections are equally important. Look for any signs of wear and tear, such as cracks, bulges, or uneven tread patterns. These could indicate a potential blowout or compromised grip, especially in wet conditions. If you notice excessive wear on one side, it may be a sign of misalignment or improper suspension settings—issues that should be addressed immediately to ensure your safety and enhance your riding experience.

Don’t forget about tread depth, which is crucial for maintaining traction. In many regions, the legal minimum tread depth is 1.6mm, but for optimal performance, especially in wet weather, it’s advisable to replace tyres when they reach around 3mm. Investing in quality tyres designed for your riding style and conditions can make a significant difference in performance and safety.

Finally, consider the age of your tyres. Even if they appear to be in good condition, rubber compounds degrade over time. As a general rule, if your tyres are over five years old, it’s wise to have them professionally inspected, and if they’re over ten years old, it’s time to replace them—regardless of tread wear.

By keeping your tyres in top condition, you not only enhance your motorbike’s performance but also ensure a safer ride every time you hit the road. Regular maintenance of this essential component is not just an option; it’s a necessity for any responsible rider.

6. Brake System Maintenance: Ensuring Safety and Performance

The brake system of your motorbike is not just a critical component for safety; it’s also integral to the overall performance of your ride. Ignoring brake maintenance can lead to diminished stopping power, increased wear on components, and potentially dangerous situations on the road. Thus, prioritizing brake system maintenance is an essential part of unlocking your bike’s peak performance.

Start with a visual inspection of the brake pads. Look for signs of wear—if they appear thin or uneven, it’s time for a replacement. Worn brake pads can greatly reduce your bike’s ability to stop quickly, especially in emergency situations. Additionally, don’t forget to check the brake discs for any scoring or warping, which can compromise braking efficiency. Smooth, well-maintained discs are crucial for optimal performance.

Next, pay attention to the brake fluid. Over time, brake fluid can absorb moisture, leading to reduced effectiveness and potentially causing components to rust. Regularly check the fluid level and color; if it appears dark or murky, a fluid change may be necessary. Always use the manufacturer-recommended fluid type to ensure compatibility and optimal performance.

Another essential aspect of brake system maintenance is inspecting the brake lines. Look for any signs of fraying, cracks, or leaks. Damaged brake lines can lead to catastrophic brake failure, so it’s vital to address any issues immediately. If your bike has hydraulic brakes, ensure that the master cylinder is functioning properly and that the fluid reservoir is filled to the appropriate level.

Lastly, remember that brake system maintenance isn’t just about function; it’s about safety. Regularly scheduled checks, ideally before every ride or at least once a month, will help you catch any potential issues before they become serious problems. Keeping your brake system in top condition not only boosts your bike’s performance, but it also ensures a safer ride, allowing you to enjoy the thrill of the open road with peace of mind. By taking these proactive steps, you’re not just maintaining your motorbike; you’re enhancing your entire riding experience.

7. Cleaning and Lubricating the Chain

How to maintain your motorbike for optimal performance?
Credit : whatcanu.com

Cleaning and lubricating the chain is one of the most crucial maintenance tasks for any motorbike enthusiast looking to unlock peak performance. The chain is not just a component; it is the lifeline of your bike’s power delivery system, transferring engine energy to the rear wheel. A clean and well-lubricated chain ensures smooth operation, enhances longevity, and optimizes performance, making it essential for both safety and efficiency.

Start by raising the bike securely on a stand, which allows easy access to the chain. Using a soft brush or cloth, gently scrub away dirt, grime, and any stubborn residue that may have accumulated. Pay close attention to the side plates and rollers, as these areas often trap debris. A specialized chain cleaner can be highly effective in breaking down grease and contaminants, providing your chain with a fresh start.

Once the chain is clean, it’s time to lubricate. Choose a high-quality motorcycle chain lubricant that is suitable for your riding conditions—whether you’re navigating city streets or tearing through muddy trails. Apply the lubricant evenly along the entire length of the chain while rotating the wheel to ensure complete coverage. This step is vital, as it not only facilitates smooth engagement but also protects against rust and wear.

Remember to wipe off any excess lubricant after application. Over-lubricating can attract dirt and dust, leading to premature wear. Ideally, you should clean and lubricate your chain every 500 to 1,000 kilometers, or more frequently if you ride in harsh conditions.

Incorporating this simple yet effective maintenance routine into your bike care regimen will not only extend the life of your chain but also result in a smoother, more responsive ride. With a well-maintained chain, you’ll experience improved acceleration, reduced friction, and the peace of mind that comes with knowing you’re keeping your motorbike in peak condition.

8. Battery Care: Tips for Longevity and Reliability

When it comes to motorbike maintenance, one component that often gets overlooked is the battery. Yet, it plays a crucial role in ensuring your bike starts smoothly and runs efficiently. Proper battery care not only enhances reliability but also extends its lifespan, saving you time and money in the long run. Here are some essential tips to keep your battery in peak condition.

First and foremost, regularly check the battery terminals for any signs of corrosion. A buildup of grime can impede electrical flow, leading to starting issues. Cleaning the terminals with a mixture of baking soda and water can help neutralize any corrosion, ensuring a solid connection. Make sure to disconnect the cables before cleaning, and reconnect them firmly afterwards to prevent any loose connections.

Next, monitor the battery’s fluid levels if you have a conventional lead-acid battery. These batteries rely on a liquid electrolyte to function effectively. If the fluid is low, top it up with distilled water to maintain the proper level, which is typically just above the lead plates. Avoid using tap water, as it contains impurities that can harm the battery’s performance.

Temperature extremes can also affect battery life. If you live in a region with harsh winters or scorching summers, consider investing in a battery maintainer or tender. These devices help keep the battery charged and ready to go, especially during periods of inactivity, which are common in off-seasons.

Lastly, don’t forget about regular inspections. Check for signs of wear and tear, such as cracks or swelling in the battery case, which can indicate a failing unit. If your battery is more than three to five years old, it may be time to consider a replacement.

By following these simple yet effective battery care tips, you can ensure your motorbike remains reliable and ready for the open road, providing you with the performance you need for all your adventures. Remember, a well-maintained battery is the heartbeat of your bike, so give it the attention it deserves!

9. Inspecting and Replacing Air Filters

When it comes to ensuring your motorbike operates at peak performance, one of the most often overlooked components is the air filter. An efficient air filter plays a crucial role in your bike’s overall health, as it ensures that your engine receives a clean supply of air for optimal combustion. Over time, dust, debris, and other contaminants can clog the filter, leading to reduced airflow, decreased fuel efficiency, and even potential engine damage.

Start by regularly inspecting your air filter. If you ride in dusty conditions or frequently encounter off-road terrain, consider checking it more often—ideally every couple of weeks. Look for signs of dirt buildup or visible damage. A clean filter should appear light and free of obstruction, while a clogged one may look discolored and feel heavy.

When it’s time for a replacement, choose a high-quality air filter that suits your bike’s model and riding style. While reusable filters can be more cost-effective in the long run, disposable options can offer convenience. Ensure you consult your owner’s manual for specific recommendations regarding maintenance schedules and types of filters.

When installing a new filter, take care to fit it securely in place, as a poor seal can allow unfiltered air to enter the engine, leading to performance issues. A correctly maintained air filter will not only help your bike run smoothly but also improve throttle response and overall acceleration.

By incorporating regular air filter inspections and timely replacements into your maintenance routine, you can enhance your motorbike’s efficiency and longevity, allowing you to ride with confidence, knowing your machine is in its best shape. Remember, a well-breathing engine is a happy engine!

10. The Importance of Regular Fluid Checks

When it comes to maximizing the performance and longevity of your motorbike, regular fluid checks should be at the top of your maintenance to-do list. Just like a human body needs water and nutrients to function optimally, your bike relies on a range of fluids—engine oil, coolant, brake fluid, and transmission fluid—to operate smoothly.

Engine oil is the lifeblood of your motorcycle, ensuring that all moving parts work in harmony. Over time, oil can become contaminated with dirt and debris, losing its lubricating properties and potentially leading to engine wear or even catastrophic failure. Checking the oil level regularly and changing it according to your manufacturer’s recommendations can prevent costly repairs and keep your engine humming like new.

Coolant, on the other hand, is essential for regulating your bike’s temperature. An overheating engine can lead to severe damage, so ensure that your coolant levels are adequate and the fluid is free of contaminants. Don’t forget to inspect the hoses and clamps for any signs of wear or leaks, as these can compromise your cooling system’s efficiency.

Brake fluid is another critical component that often gets overlooked. Proper brake function is vital for your safety, and degraded brake fluid can significantly diminish your stopping power. Regularly checking and replacing brake fluid as needed is crucial, especially before embarking on longer rides or after periods of inactivity.

Lastly, transmission fluid plays a key role in ensuring smooth gear shifts and overall bike performance. Keeping an eye on its level and condition can help you catch potential issues before they escalate.

Incorporating regular fluid checks into your maintenance routine not only enhances safety but also elevates your riding experience. By committing to this essential habit, you’ll ensure your motorbike performs at its peak, allowing you to enjoy the open road with confidence and peace of mind.

11. Monitoring Electrical Systems and Lights

Monitoring the electrical systems and lights of your motorbike is crucial to ensuring both safety and performance on the road. The electrical system is the heart of your bike, powering everything from the ignition to the headlights, and any failure can lead to serious consequences. Regular checks can prevent small issues from becoming major headaches.

Start by inspecting the battery. Look for any signs of corrosion around the terminals, which can impede performance. Clean the terminals with a solution of baking soda and water if you spot any buildup. Also, check the battery’s charge level, especially before long rides or after periods of inactivity. A well-maintained battery is essential for reliable starts and smooth operation.

Next, turn your attention to the wiring. Inspect the wires for frays, cracks, or any signs of wear. Pay close attention to areas where wires are exposed to abrasion or extreme temperatures, as these can lead to electrical shorts. Secure any loose connections and replace damaged wires promptly to avoid potential failures.

The lights on your motorbike not only illuminate your path but also communicate your presence to other road users. Regularly check that all lights—headlights, brake lights, turn signals, and indicators—are functioning correctly. A burned-out bulb can lead to dangerous situations or traffic violations. If you notice a dim light or flickering, it may indicate an underlying electrical issue, so don’t hesitate to investigate further.

Finally, consider integrating a routine check into your maintenance schedule. Dedicate a few minutes each month to test your bike’s electrical systems and lights. This practice not only enhances your safety but also prolongs the lifespan of your bike’s electrical components, ensuring that your ride remains enjoyable and dependable. By keeping a close eye on these vital systems, you’re taking a proactive step towards unlocking the peak performance of your motorbike.

12. Seasonal Maintenance: Preparing Your Bike for Different Weather

As the seasons change, so do the demands placed on your motorbike. Each weather condition presents unique challenges that can affect performance and safety. Therefore, seasonal maintenance is not just a good practice; it’s essential for unlocking peak performance year-round.

**Spring Preparation**: After a long winter, your motorbike deserves some tender loving care. Start by thoroughly cleaning the bike to remove any salt or grime that accumulated during snowy months. Check the battery, as cold weather can drain it. Inspect the tires for wear and ensure proper inflation, as temperature fluctuations can affect tire pressure. Finally, give the brakes a once-over to ensure they are functioning at peak efficiency before hitting the open road.

**Summer Savvy**: High temperatures can lead to overheating and increased wear on your engine. Ensure your coolant levels are topped up and inspect hoses for any signs of wear or leaks. Additionally, make it a habit to check your oil more frequently during the hotter months, as it can break down faster in the heat. Remember to pay attention to your tires, too; hot asphalt can increase tire pressure, so adjust accordingly to maintain optimal performance.

**Autumn Adjustments**: As the leaves begin to fall, riding conditions can become trickier with wet roads and reduced visibility. It’s crucial to check your lights and signals to ensure they are functioning properly. Also, consider switching to a more aggressive tread pattern on your tires for better grip on slick surfaces. Don’t forget to clean your bike thoroughly, as road debris and leaves can accumulate and cause damage if left unattended.

**Winterizing Your Bike**: If you live in an area where winter means snow and ice, proper winterization of your motorbike is vital. Start by changing the oil and adding a fuel stabilizer to prevent gumming in the engine. It’s also wise to remove the battery and store it in a warm place to keep it charged and healthy. Finally, cover your bike with a breathable motorcycle cover to protect it from the elements while it waits for warmer days.

By tailoring your maintenance routine to the seasonal demands, you can ensure your motorbike remains in top condition, ready to deliver peak performance no matter the weather. This proactive approach not only extends the lifespan of your bike but also enhances your riding experience, making each journey as enjoyable as the last.

13. Tips for Storing Your Motorbike Properly

Proper storage of your motorbike is crucial for maintaining its peak performance and longevity, especially when it’s not in use for an extended period. Whether you’re preparing for the off-season or simply need to tuck your bike away for a few weeks, following some essential storage tips can help safeguard your investment and keep it in top shape.

First, choose a suitable location for storage. Aim for a cool, dry place that is shielded from direct sunlight, extreme temperatures, and moisture. A garage or a dedicated shed works best, but if those aren’t available, consider investing in a high-quality bike cover that protects against the elements. This cover should be breathable to prevent moisture buildup, which can lead to rust and corrosion.

Before storing your motorbike, perform a thorough cleaning. Wash away dirt, grime, and road salt, paying special attention to the chain and undercarriage. After cleaning, apply a layer of wax to the bodywork to protect the paint. It’s also advisable to lubricate moving parts, such as the chain and cables, to keep them functioning smoothly when you bring the bike back out.

Next, consider the fuel system. It’s wise to fill your tank to prevent moisture buildup inside, and adding a fuel stabilizer can keep the fuel from degrading. Run the engine for a few minutes to ensure the stabilizer circulates throughout the system. Additionally, disconnect the battery or use a battery maintainer to keep it charged during long storage periods.

Tires also need attention. Check the tire pressure and inflate them to the recommended levels to prevent flat spots. If possible, elevate your bike using stands to relieve pressure on the tires and suspension.

Lastly, don’t forget to cover any exposed parts, such as the seat and mirrors, with cloths or specialized covers to minimize dust accumulation. By following these storage tips, you’ll ensure that your motorbike is ready to hit the road whenever you are, performing at its best and looking like new.

14. When to Seek Professional Help

While many motorbike enthusiasts relish the hands-on approach of maintenance, there comes a time when the expertise of a professional becomes indispensable. Understanding when to seek professional help is crucial for ensuring both your safety and the longevity of your bike.

If you notice unusual sounds emanating from the engine, such as knocking or grinding, it’s a clear signal that something isn’t right. Strange vibrations can indicate alignment issues or problems with the suspension, which require a trained eye to diagnose and fix. Additionally, if your bike is leaking fluids—be it oil, coolant, or brake fluid—it’s a sign that you should not delay in consulting a mechanic. These leaks can lead to serious issues if left unaddressed, compromising both performance and safety.

Another critical moment to consider professional intervention is during routine maintenance checks, especially if you’re unfamiliar with the intricate systems of your motorbike. Tasks such as brake pad replacement, tire alignment, and chain adjustments may seem straightforward, but improper handling can lead to dangerous situations on the road.

Moreover, if your bike’s performance suddenly decreases, such as sluggish acceleration or difficulty starting, it’s wise to consult a professional. These symptoms could be indicative of deeper issues like fuel system problems or electrical faults, which require specialized knowledge and tools to resolve.

In summary, while DIY maintenance can be fulfilling and cost-effective, recognizing when to hand over the reins to a professional is equally important. Trusting a skilled mechanic not only preserves the integrity of your bike but also enhances your riding experience, allowing you to enjoy the open road with confidence.

15. Conclusion: Keeping Your Motorbike at Peak Performance

In conclusion, maintaining your motorbike at peak performance isn’t just about ensuring it runs smoothly; it’s about fostering a deeper connection between you and your ride. By regularly performing essential maintenance tasks—such as checking tire pressure, changing the oil, inspecting the brakes, and cleaning the air filter—you can extend the life of your bike while enhancing your overall riding experience.

Remember, a well-maintained motorbike not only performs better but also offers you peace of mind on the road. The thrill of riding is amplified when you know your machine is in top condition, ready to respond to your every command. Regular maintenance is a small investment of time and resources that pays off in reliability and enjoyment.

Take the time to understand your motorbike’s specific needs and follow a maintenance schedule that works for you. Whether you’re a seasoned rider or a newcomer, these simple tips will empower you to unlock the full potential of your machine. So, gear up and hit the road with confidence, knowing that you’ve done your part to keep your motorbike in peak performance. Happy riding!

In conclusion, maintaining your motorbike is not just about keeping it in good shape; it’s about unlocking its full potential and ensuring you enjoy every ride to the max. By following the essential maintenance tips outlined in this blog post, you can enhance performance, increase longevity, and ensure your safety on the road. From regular oil changes to keeping your tires in prime condition, each step you take contributes to a smoother, more exhilarating riding experience. So, gear up, embrace the journey, and let your well-maintained motorbike take you to new adventures. Here’s to countless miles of joy and the thrill of the open road! 🏍️✨

How to Handle Car Maintenance During the Summer?

As the sun shines brighter and the days stretch longer, summer road trips and weekend getaways beckon, promising adventure and relaxation.

However, before you hit the open road, it’s crucial to ensure that your vehicle is ready for the journey ahead. The sweltering heat and changing driving conditions can take a toll on your car, making regular maintenance not just a good idea but an essential part of summer preparation. In this blog post, we will explore essential summer car maintenance tips that will help you keep your vehicle in top shape, from checking your tire pressure and coolant levels to ensuring your air conditioning system is functioning optimally. With these straightforward tips, you can enjoy a smooth and safe ride while making the most of the sunny season ahead!

1. Understanding the Importance of Summer Car Maintenance

How to Handle Car Maintenance During the Summer?
Credit : whatcanu.com

As the temperature rises and the days grow longer, summer brings with it not just sunshine and vacations but also a unique set of challenges for our vehicles. Understanding the importance of summer car maintenance is crucial to ensuring a smooth and safe ride throughout the season.

During the hotter months, your car endures increased stress from higher temperatures, intense sunlight, and more rigorous driving conditions. The heat can cause engine components to overheat, tires to wear unevenly, and battery life to diminish more rapidly. Without proper maintenance, these factors can lead to breakdowns or costly repairs at the most inconvenient times—think roadside emergencies during a family road trip or delays that can derail your plans.

Moreover, summer often means longer drives, whether it’s a weekend getaway or a daily commute under the sweltering sun. Keeping your vehicle in peak condition not only enhances performance but also ensures your safety and that of your passengers. Regular checks on fluid levels, tire pressure, and air conditioning systems can mitigate the risk of overheating or other summer-related issues.

By proactively addressing these concerns, you not only boost your vehicle’s longevity but also enhance your driving experience. Imagine gliding down the highway with the windows down, the air conditioning running smoothly, and your car performing flawlessly. Understanding and prioritizing summer car maintenance is the key to unlocking that perfect summer ride. So, let’s dive into the essential maintenance tips that will keep your vehicle in top shape all season long!

2. Checking Your Coolant Levels

As the summer sun blazes overhead, ensuring your vehicle’s engine remains cool is crucial for maintaining optimal performance and avoiding costly breakdowns. One of the simplest yet most vital tasks on your summer car maintenance checklist is checking your coolant levels.

Coolant, a mixture of antifreeze and water, regulates your engine’s temperature by absorbing heat and dissipating it through the radiator. An inadequate coolant level can lead to overheating, which can cause severe engine damage and leave you stranded on a hot day. To check your coolant levels, start by ensuring your engine is cool—never open a hot radiator cap, as it can lead to serious burns. Locate the coolant reservoir, which is typically a translucent plastic tank marked with minimum and maximum lines. If the level is below the minimum mark, it’s time to top it up with the appropriate coolant for your vehicle.

While you’re at it, inspect the condition of the coolant itself. It should be a bright, clear color—if it appears rusty or murky, it may be time for a complete coolant flush. Additionally, take a moment to examine the hoses and connections for any signs of cracks or leaks, as these can compromise your cooling system’s efficiency.

By proactively checking and maintaining your coolant levels, you can help ensure a smooth, trouble-free ride all summer long. Remember, a well-maintained cooling system not only enhances your vehicle’s performance but also extends its lifespan, allowing you to enjoy those long, sunny drives with peace of mind.

3. Inspecting and Replacing Air Filters

How to Handle Car Maintenance During the Summer?
Credit : whatcanu.com

As the temperatures rise and summer adventures beckon, ensuring your vehicle runs smoothly is paramount. One often-overlooked component that plays a crucial role in your car’s performance is the air filter. Over time, air filters can become clogged with dust, pollen, and debris, which not only affects engine efficiency but also impacts the quality of air circulating within your vehicle.

Start your summer maintenance by inspecting the air filter. If it appears dirty or discolored, it’s likely time for a replacement. A clean air filter allows for optimal airflow to the engine, enhancing performance and fuel efficiency. It also helps to protect sensitive engine components from harmful contaminants.

Replacing the air filter is a simple task that can usually be done at home with minimal tools. Refer to your owner’s manual for specific instructions on accessing the air filter compartment, and always opt for high-quality filters that meet or exceed manufacturer standards.

Additionally, don’t forget the cabin air filter, which ensures that the air you breathe inside the vehicle is clean and fresh. This is particularly important during summer when pollen counts soar and allergens are prevalent. A quick inspection of this filter can significantly enhance your driving comfort, especially during those long road trips.

By prioritizing the inspection and replacement of air filters, you’ll not only ensure a smoother ride but also contribute to the longevity of your vehicle, keeping it in peak condition for all your summer journeys.

4. Ensuring Your Tires are Summer Ready

As the temperatures rise and road trips beckon, ensuring your tires are summer-ready is a crucial step in maintaining your vehicle’s performance and safety. Hot weather can take a toll on tire integrity, making it essential to inspect and prepare them for the summer months ahead.

Start by checking the tire pressure, as heat can cause air to expand and increase pressure levels. Ideally, you should check your tire pressure in the morning when the tires are cool, and compare the readings to your vehicle’s recommended specifications found in the owner’s manual or on the driver’s side door jamb. Maintaining the correct tire pressure not only enhances fuel efficiency but also ensures better handling and reduces the risk of blowouts.

Next, inspect the tread depth of your tires. Adequate tread helps maintain traction on both dry and wet roads, which is vital during summer thunderstorms. You can easily check the tread depth using the penny test: insert a penny into the grooves of the tire with Lincoln’s head facing down; if you can see the top of his head, it’s time to replace your tires.

Additionally, examine your tires for any signs of wear or damage, such as cracks, blisters, or uneven wear patterns. These could indicate underlying issues that need addressing, such as misalignment or suspension problems. If you notice any abnormalities, consider consulting a tire professional for a thorough assessment.

Finally, don’t forget about tire rotation. Summer road trips can lead to uneven wear, especially if you’re heavily loading your vehicle for vacations. Rotating your tires every 5,000 to 7,000 miles helps to promote even wear and extend the life of your tires, ensuring you’re ready for whatever adventures lie ahead.

By taking the time to ensure your tires are summer ready, you not only enhance your vehicle’s performance but also your safety on the road, allowing you to enjoy those long, sunny drives with peace of mind.

5. Examining and Replacing Windshield Wipers

How to Handle Car Maintenance During the Summer?
Credit : whatcanu.com

As the summer sun shines brightly, it’s easy to forget about the often-overlooked components of your vehicle, like the windshield wipers. However, ensuring that your wipers are in top condition is crucial for maintaining visibility during unexpected summer rain showers and sudden thunderstorms. Start by inspecting the rubber blades for any signs of wear and tear—look for cracks, splits, or fraying edges that can hinder performance. If you notice any of these issues, it’s time to replace them.

Replacing your windshield wipers is a straightforward task that can save you from potentially dangerous driving conditions. Most wipers are designed for easy removal and installation, making it a project you can tackle yourself in just a few minutes. Opt for high-quality blades that offer durability and superior performance, particularly those designed to handle the unique challenges of summer weather, such as UV exposure and rapid temperature changes.

Additionally, while you’re at it, take a moment to clean your windshield thoroughly. Dirt, grime, and even old wiper fluid residue can create streaks that impair your visibility, especially during those bright summer days. A clean windshield combined with freshly replaced wipers will enhance your driving experience, providing a clear and unobstructed view of the road ahead. Don’t let poor visibility dampen your summer adventures—taking the time to examine and replace your windshield wipers will ensure a smooth and safe ride all season long.

6. Battery Health: Preparing for Summer Heat

As the summer sun blazes overhead, it’s crucial to ensure your car’s battery is ready to handle the heat. High temperatures can take a significant toll on battery performance, leading to decreased efficiency and, in some cases, unexpected failure. Begin your summer preparation by inspecting your battery for any signs of wear and tear. Look for corrosion around the terminals, which can disrupt the flow of electricity and hinder overall performance. A simple cleaning with a mixture of baking soda and water can help remove any buildup and improve connectivity.

Next, check the battery’s fluid levels, especially if you have a traditional lead-acid battery. If the fluid is low, carefully add distilled water to the appropriate level. This small step can make a big difference in how well your battery functions during the sweltering months ahead.

Don’t forget to test the battery’s charge. Many auto parts stores offer free battery testing, or you can invest in a multimeter to check the voltage yourself. A healthy battery should typically read around 12.6 volts or higher when the engine is off. If your battery is nearing the end of its lifespan—usually 3 to 5 years—consider replacing it before the heat exacerbates any existing issues.

Finally, parking in shaded areas or using a reflective windshield cover can help keep your battery cool and extend its life. Remember, a well-maintained battery is your car’s lifeline, ensuring a smooth and trouble-free ride throughout the summer adventures ahead. By taking the time to prepare your battery for the heat, you can enjoy peace of mind on the road, knowing your vehicle is ready for whatever summer brings.

7. Engine Oil: The Right Type and Timing for Change

How to Handle Car Maintenance During the Summer?
Credit : whatcanu.com

When it comes to maintaining a smooth and reliable ride during the sweltering summer months, one of the most crucial aspects to consider is your engine oil. Just as sunscreen protects your skin from harmful UV rays, the right engine oil acts as a shield for your car’s engine, especially under the intense heat of summer. It lubricates the engine components, prevents wear and tear, and helps to dissipate heat.

First and foremost, it’s essential to know the correct type of engine oil for your vehicle. Consult your owner’s manual to determine the manufacturer’s recommended viscosity, typically denoted by a combination of numbers and letters (e.g., 5W-30). This specification is designed to ensure optimal performance and protection based on your car’s engine design.

Timing is equally critical; summer heat can exacerbate the breakdown of engine oil, leading to decreased performance and potential engine damage. Generally, it’s advisable to change your engine oil every 5,000 to 7,500 miles, but during the summer months, consider checking your oil level and condition more frequently. If your oil appears dark and gritty or if it’s past its recommended mileage, don’t hesitate to perform an oil change.

Additionally, consider switching to synthetic oil during the hotter months. Synthetic oils offer superior heat resistance and can enhance your engine’s performance in extreme temperatures, providing that extra layer of protection against overheating.

Don’t forget about the oil filter, either. A clogged oil filter can hinder oil flow, causing your engine to work harder and run less efficiently. Ensure that you replace the oil filter whenever you change the oil, keeping your engine running smoothly and efficiently.

By paying close attention to your engine oil type and change schedule, you can significantly improve your vehicle’s longevity and performance, ensuring that every summer road trip is a smooth and enjoyable experience.

8. Brake System Inspection for Safety

### 8. Brake System Inspection for Safety

As the temperatures rise and summer adventures beckon, ensuring your vehicle’s brake system is in optimal condition is paramount for your safety on the road. The brake system is one of the most critical components of your car, responsible for bringing your vehicle to a halt and ensuring you can navigate steep hills or sudden stops without a hitch. With the hot summer sun beating down, brake components can be subjected to increased wear and tear, making regular inspection essential.

Start your brake system inspection by checking the brake pads for wear. If they appear thin or if you hear a squealing noise when you apply the brakes, it may be time for replacement. Worn-out pads can significantly reduce braking effectiveness, putting you and your passengers at risk. Additionally, inspect the brake rotors for any signs of warping or scoring; uneven surfaces can lead to vibrations and reduced stopping power.

Don’t forget to examine the brake fluid level in the reservoir. Low brake fluid can indicate a leak in the system, which could lead to brake failure. Make sure the fluid is clear and within the recommended range. If it appears dark or contaminated, it may be time for a complete brake fluid flush to maintain optimal performance.

Finally, pay attention to the brake lines. Look for any signs of wear, such as cracks or corrosion, as compromised lines could lead to brake failure. If you notice anything unusual, it’s best to consult a professional mechanic for a thorough inspection.

By prioritizing your brake system maintenance this summer, you can enjoy peace of mind on the road, knowing that you’re equipped to handle any situation that comes your way. Safe travels start with a reliable braking system—don’t overlook this essential aspect of your summer car care routine!

9. Keeping Your AC Running Smoothly

As temperatures rise during the summer months, ensuring that your vehicle’s air conditioning (AC) system is functioning optimally becomes a top priority. A well-maintained AC not only keeps you comfortable during those sweltering road trips but also plays a crucial role in the overall health of your vehicle. Here are some essential tips to help you keep your AC running smoothly all summer long.

First and foremost, it’s important to regularly check the AC system’s refrigerant levels. Low refrigerant can lead to poor cooling efficiency and may indicate a leak in the system. If you notice that your AC isn’t blowing cold air, consider having a professional technician inspect for leaks and recharge the system as needed.

Additionally, pay attention to the cabin air filter. A clogged filter can restrict airflow and reduce the system’s efficiency, making your AC work harder than necessary. Replacing the cabin air filter every 12,000 to 15,000 miles is a good rule of thumb, especially during the summer when dust and pollen are more prevalent.

Another crucial aspect of AC maintenance is the condenser. This component is often located at the front of the vehicle, making it susceptible to debris, dirt, and bugs. Regularly cleaning the condenser can help maintain its ability to dissipate heat effectively. A gentle rinse with water can help clear away any accumulated grime, allowing your AC to function at its best.

Finally, don’t forget to run your AC regularly, even during cooler months. This helps lubricate the AC components and prevents seals from drying out, ensuring that your system is ready to perform when you need it most.

By staying proactive about your vehicle’s air conditioning system, you can enjoy a comfortable and smooth ride throughout the scorching summer months. Remember, a little maintenance goes a long way in keeping you cool and your car running efficiently!

10. Cleaning and Protecting Your Car’s Exterior

As the summer sun beats down and the temperatures rise, it’s essential to give your car’s exterior the care it deserves. A thorough cleaning and protection routine not only enhances your vehicle’s appearance but also safeguards it against the harsh elements of the season.

Start with a comprehensive wash to remove dirt, grime, and any remnants of winter salt. Choose a pH-balanced car shampoo to ensure that you’re not damaging the paintwork. Pay special attention to the wheels and wheel wells, where brake dust and road debris can accumulate. A soft sponge or microfiber cloth will help lift dirt without scratching the surface.

Once your car is clean, it’s time to dry it properly. Using a microfiber drying towel helps prevent water spots that can mar your vehicle’s shine. After drying, consider applying a high-quality wax or sealant. This step is crucial for creating a protective barrier against UV rays, bird droppings, tree sap, and other summer hazards. Not only does wax enhance the shine, but it also makes future cleaning easier by creating a slick surface that repels dirt.

For an extra layer of protection, you might explore ceramic coatings, which offer long-lasting durability and a stunning glossy finish. These coatings bond with the paint, providing robust resistance against scratches and environmental contaminants.

Finally, don’t forget your windows! Clean them with a glass cleaner and consider applying a rain repellent treatment. This not only improves visibility during summer showers but also makes it easier to wipe away dirt and bugs.

By investing a little time in cleaning and protecting your car’s exterior, you ensure that it looks great and stays in peak condition, ready for all your summer adventures. With a sparkling finish, you’ll not only enjoy the ride but also maintain the value of your vehicle for years to come.

11. Checking and Maintaining Fluid Levels

Keeping your vehicle in optimal condition during the sweltering summer months requires diligent attention to its various fluid levels. As temperatures rise, so does the strain on your car’s systems, making it crucial to ensure that all essential fluids are topped off, clean, and functioning properly.

Start with your engine oil. This vital lubricant not only reduces friction among the engine’s moving parts but also aids in cooling the engine. In the heat of summer, engine oil can degrade faster, leading to potential overheating or engine wear. Check the oil level using the dipstick, and don’t forget to inspect its color and consistency. If it appears dark and gritty, it’s time for a change.

Next, turn your attention to the coolant. The last thing you want during a summer road trip is an overheated engine. Check the coolant reservoir regularly and ensure that the mixture is appropriate—typically a 50/50 mix of antifreeze and water. If the level is low, top it up, and consider a flush if it appears rusty or murky.

Don’t neglect the brake fluid, either. This fluid not only provides the necessary hydraulic pressure to your braking system but also absorbs moisture over time, which can lead to brake failure during high-stress summer driving conditions. Inspect the brake fluid reservoir, and if the fluid level is low or the color is cloudy, have it replaced.

Also, verify the transmission fluid and power steering fluid levels. These fluids may not require frequent checks, but ensuring they are at proper levels can prevent serious and costly repairs down the road.

Lastly, windshield washer fluid is often overlooked but is especially important during summer months when road trips and outdoor adventures increase. A clear view is essential, so top up your washer fluid reservoir before hitting the open road.

By regularly checking and maintaining these crucial fluid levels, you can ensure a smoother, safer ride throughout the summer, reducing the chances of unexpected breakdowns and maximizing your driving enjoyment. Taking these simple steps will not only extend the life of your vehicle but also give you peace of mind as you embark on your summer adventures.

12. Preparing for Road Trips: A Checklist

As summer approaches, the allure of the open road becomes irresistible, beckoning you to embark on adventures filled with sun-soaked landscapes and memorable experiences. However, before you rev up your engine and hit the highway, it’s essential to ensure that your vehicle is in tip-top shape. A well-prepared checklist can be your best friend, helping you avoid unexpected breakdowns and ensuring a smooth ride.

**1. Check Your Fluids:** Start by inspecting all essential fluids: engine oil, coolant, brake fluid, transmission fluid, and windshield washer fluid. Topping off fluids will not only keep your engine running efficiently but also help prevent overheating during those hot summer drives.

**2. Inspect the Tires:** Your tires are the contact point between your vehicle and the road, so it’s crucial to ensure they’re in good condition. Check for proper inflation, tread depth, and any signs of wear or damage. Don’t forget to check the spare tire and ensure you have all necessary tools for a tire change.

**3. Test the Battery:** Summer heat can be tough on car batteries, increasing the likelihood of failure. Inspect battery terminals for corrosion and ensure that the battery is securely mounted. If your battery is more than three years old, consider having it tested at a local auto shop.

**4. Examine the Brakes:** Safety is paramount, especially during road trips. Listen for any unusual sounds when braking and check the brake pads and rotors for wear. If you notice anything concerning, it’s best to have them inspected by a professional.

**5. Check the Air Conditioning:** There’s nothing worse than getting stuck in traffic on a hot summer day without a functioning A/C. Test your air conditioning system in advance to ensure it’s blowing cold air. If it’s not, consider having it serviced to avoid discomfort on your journey.

**6. Clean Your Windshield and Wipers:** Visibility is key for safe driving. Clean your windshield thoroughly and check the wiper blades for any signs of wear. Replace them if they’re streaking or not functioning well, ensuring you can handle unexpected summer rain showers.

**7. Emergency Kit:** Lastly, prepare an emergency kit containing first-aid supplies, a flashlight, road flares, a multi-tool, bottled water, and non-perishable snacks. Being prepared for any situation will provide peace of mind as you travel.

By following this checklist, you’ll not only enhance your vehicle’s performance but also ensure a safer and more enjoyable road trip experience. With your car in prime condition, all that’s left is to pack your bags, gather your favorite travel companions, and set off on the adventure of a lifetime!

13. The Benefits of Regular Professional Inspections

When it comes to summer car maintenance, one of the most crucial steps you can take is scheduling regular professional inspections. While many car owners may feel confident handling simple tasks like oil changes or tire rotations, there’s a wealth of knowledge and expertise that only trained mechanics can provide. A professional inspection goes beyond the superficial checks, offering a comprehensive evaluation of your vehicle’s overall health.

During these inspections, mechanics can identify potential issues that you might overlook, such as worn brake pads, fluid leaks, or developing electrical problems. This proactive approach not only ensures your safety on the road but also helps extend the lifespan of your vehicle. For instance, catching a minor issue early on can save you from a costly repair down the road, making it a wise investment in your car’s future.

Moreover, professional inspections often include a thorough examination of your cooling system, which is particularly important during the hot summer months. Overheating can lead to serious engine damage, but a qualified mechanic can check for leaks, ensure that your coolant levels are adequate, and inspect hoses for wear and tear, helping you avoid unexpected breakdowns.

In addition to safety and cost-effectiveness, regular inspections can also enhance your car’s performance and fuel efficiency. A well-maintained vehicle runs more smoothly, which means better gas mileage and a more enjoyable driving experience. So, as summer heats up and you hit the open road, make sure to prioritize professional inspections as a key part of your car maintenance routine. Your vehicle—and your peace of mind—will thank you for it.

14. Tips for Staying Cool During Hot Drives

When the sun blazes overhead and the temperature soars, staying cool during those long summer drives becomes a priority for both comfort and safety. Here are some essential tips to ensure your car remains a refreshing oasis, even on the hottest days.

**1. Start with the A/C:** Before hitting the road, give your air conditioning system a quick check. Ensure it’s functioning properly by turning it on and listening for any unusual noises. If you find that it’s not cooling effectively, consider having it serviced. A well-maintained A/C system is critical for keeping the cabin temperature down.

**2. Use the Recirculate Feature:** When you’re on the road and the heat is intense, engage the recirculate feature on your A/C. This function helps to cool the air already inside the vehicle rather than drawing in hot air from outside, allowing for a more efficient cooling process.

**3. Crack the Windows:** Before starting your journey, leave your windows cracked open for a few minutes while the car is parked. This allows hot air to escape and can help lower the interior temperature before you get in. Once you start driving, roll the windows up to keep the cool air in.

**4. Invest in Sunshades:** A sunshade for your windshield can be a game-changer. It prevents the sun’s rays from heating up your car’s interior while parked, making it much cooler when you return. Consider using reflective shades for your side windows as well to protect against glare.

**5. Hydrate Yourself:** Keep a cooler with ice-cold water or your favorite refreshing beverages on hand. Staying hydrated is essential during hot drives, not only for your comfort but also for your focus and reaction times.

**6. Plan Your Trips Wisely:** If possible, schedule your drives during the cooler parts of the day, such as early morning or late evening. This not only helps to avoid the peak heat but also makes for a more enjoyable driving experience.

By implementing these simple strategies, you can transform your car into a cool retreat, making every summer drive a breeze. Remember, safety and comfort go hand in hand, so ensure you prioritize your well-being on the road this season!

15. Conclusion: Enjoying a Safe and Smooth Summer Ride

As the summer sun shines brighter and the days grow longer, ensuring your vehicle is in top shape is essential for enjoying all the adventures this season has to offer. The culmination of our essential summer car maintenance tips leads us to the conclusion that proactive care will not only enhance your driving experience but also ensure your safety on the road.

Regular check-ups, tire maintenance, fluid checks, and battery inspections are crucial steps that can prevent unexpected breakdowns and costly repairs. By taking the time to inspect your vehicle and address any issues before they escalate, you’re setting yourself up for a stress-free journey. Remember, the heat can be particularly harsh on your car, affecting everything from your engine to your air conditioning system.

Moreover, planning ahead for road trips or long drives can make a significant difference. Having an emergency kit, knowing your route, and keeping your phone charged can provide peace of mind during your travels. Embrace the spirit of summer, whether it’s a scenic drive along the coast, a weekend camping trip in the mountains, or simply a joyride through the countryside.

By following these maintenance tips, you can rest easy knowing your car is ready for the road ahead. So, buckle up, enjoy the ride, and make the most of your summer adventures with confidence and joy, knowing that your vehicle is as ready for the journey as you are. Safe travels!

As summer approaches, ensuring your vehicle is in top shape is crucial for enjoying those sunny road trips and weekend getaways. We hope our essential summer car maintenance tips have equipped you with the knowledge needed to keep your ride smooth and safe during the warmer months. From checking your tire pressure to ensuring your cooling system is functioning optimally, taking these proactive steps can prevent unexpected breakdowns and enhance your driving experience. So, before you hit the road, take a moment to perform a quick check and enjoy the peace of mind that comes with knowing your vehicle is summer-ready. Here’s to a season filled with adventure, comfort, and the joy of the open road! Safe travels!

How to Handle Car Problems on the Road?

There’s nothing quite like the freedom of hitting the open road, but the thrill of adventure can quickly turn into a nightmare when unexpected car problems arise.

From sudden engine troubles to flat tires, being stranded or dealing with a malfunction can be stressful and daunting, especially when you’re far from home. However, with the right knowledge and preparation, you can navigate these challenges with confidence and ease. In this blog post, we’ll equip you with essential tips to help you master the road and tackle car issues on the go. Whether you’re a seasoned road warrior or a casual weekend traveler, understanding how to diagnose problems, perform basic repairs, and know when to seek help can make all the difference between an enjoyable journey and a frustrating ordeal. Get ready to turn those potential roadblocks into stepping stones for your next adventure!

1. Introduction: The Importance of Being Prepared for Car Problems

How to Handle Car Problems on the Road?
Credit : whatcanu.com

When you’re out on the open road, the freedom of travel can quickly turn into a stressful situation if car problems arise. Whether it’s a flat tire, engine trouble, or unexpected warning lights, being unprepared can leave you feeling vulnerable and anxious. That’s why understanding the importance of being prepared for car problems is crucial for every driver.

Preparation begins long before you hit the highway. It involves a blend of knowledge, tools, and a proactive mindset that can make all the difference in a potentially dire scenario. Imagine yourself on a serene country road or navigating through bustling city traffic, when suddenly your car begins to sputter. Without the right preparation, what could have been a minor inconvenience might spiral into a frustrating ordeal.

Think of your vehicle as a loyal companion on your adventures. Just like any relationship, it thrives on attention and care. Regular maintenance checks, a well-stocked emergency kit, and a basic understanding of your car’s functions can empower you to handle issues confidently when they arise. This not only enhances your safety but also saves you time and money by preventing small issues from turning into major repairs.

So, as we embark on this journey toward mastering road readiness, let’s explore the essential tips and strategies that will equip you to tackle car problems with ease and assurance, ensuring that your travels remain as smooth and enjoyable as possible.

2. Common Car Issues You Might Encounter on the Road

When you’re out on the road, the last thing you want is for your car to start acting up. However, knowing the common car issues you might encounter can empower you to handle these situations with confidence and ease. Here are some of the most frequent problems drivers face and what you can do about them:

**1. Flat Tires:** One of the most common issues, flat tires can occur due to punctures, wear and tear, or even unfavorable road conditions. If you notice your car pulling to one side or hear a sudden thump, it’s time to pull over and inspect your tires. Always carry a spare tire, jack, and tire iron, and familiarize yourself with how to change a tire. Additionally, keeping a portable air compressor in your trunk can help you inflate a tire if it loses pressure unexpectedly.

**2. Overheating Engine:** An overheating engine can lead to severe damage if not addressed promptly. Keep an eye on the temperature gauge; if it starts climbing toward the red zone, pull over and switch off the engine. Check the coolant levels and look for leaks. If you’re low on coolant, adding water can serve as a temporary fix until you can get to a mechanic.

**3. Dead Battery:** A battery can fail without warning, leaving you stranded. Signs of a failing battery include dim headlights, slow engine cranking, or electrical issues. Always keep jumper cables in your vehicle, and if you find yourself with a dead battery, don’t hesitate to ask for help from fellow motorists or call roadside assistance.

**4. Brake Problems:** If your brakes feel spongy, make unusual noises, or your car pulls to one side when braking, it’s crucial to address these issues immediately. Pull over to a safe location and inspect the brake fluid level. If it’s low, topping it off may be a temporary solution, but seek professional help as soon as possible, as brake problems can jeopardize your safety on the road.

**5. Warning Lights:** Dashboard warning lights can indicate various issues, from a loose gas cap to more severe engine problems. Don’t ignore these alerts. If a warning light appears, pull over to a safe spot and consult your owner’s manual to understand its significance. Some lights may allow you to drive a short distance, while others require immediate attention.

Being prepared for these common car issues can make all the difference in your travel experience. Regular maintenance and inspections can help minimize the risk of encountering these problems, but knowing how to address them when they arise will ensure you stay safe and confident on the road. Always carry a basic emergency kit, including tools and supplies, and consider investing in a roadside assistance plan for added peace of mind.

3. Essential Tools and Supplies to Keep in Your Vehicle

How to Handle Car Problems on the Road?
Credit : whatcanu.com

When it comes to tackling car problems on the go, being well-prepared can make all the difference. Keeping a well-stocked arsenal of essential tools and supplies in your vehicle is not just a precaution—it’s a smart strategy that can save you time, money, and stress when unexpected issues arise. Here’s a breakdown of must-have items that every driver should consider keeping in their trunk or glove compartment.

**1. Basic Tool Kit:** A compact tool kit is your first line of defense against minor repairs. Equip yourself with a set of screwdrivers (both flathead and Phillips), pliers, an adjustable wrench, and a tire iron. These tools are invaluable for tightening loose parts or making quick adjustments.

**2. Jumper Cables:** A dead battery can strike at the most inconvenient times. Keeping a quality set of jumper cables in your vehicle means you can help yourself or assist a fellow motorist in need. Just remember to familiarize yourself with the proper connection process to avoid any mishaps.

**3. Tire Repair Kit:** Flat tires are one of the most common roadside emergencies. A tire repair kit, which typically includes tire plugs and a sealant, can help you patch a puncture temporarily, allowing you to reach the nearest service station without a hitch.

**4. First Aid Kit:** Safety should always be your priority. A well-stocked first aid kit can help you manage minor injuries or medical emergencies until professional help arrives. Look for kits that include adhesive bandages, antiseptic wipes, gauze pads, and a small pair of scissors.

**5. Flashlight and Extra Batteries:** Whether it’s a late-night breakdown or inspecting your engine during the day, a reliable flashlight is essential. Opt for a durable, waterproof model, and don’t forget to pack extra batteries to ensure it’s always ready when you need it.

**6. Emergency Flares or Reflective Triangles:** In the event of a breakdown, visibility is crucial. Emergency flares or reflective triangles alert other drivers to your presence, helping to prevent accidents. These items are especially important if you find yourself stranded on a busy road.

**7. Water and Non-Perishable Snacks:** While not tools, having water and snacks on hand can be a lifesaver if you’re stuck waiting for assistance. Staying hydrated and keeping your energy up helps maintain your focus and composure during frustrating situations.

**8. Roadside Assistance Membership:** Though not a physical tool, investing in a roadside assistance membership can provide peace of mind. Access to professional help—whether it’s a tow, a tire change, or a fuel delivery—can be invaluable in a pinch.

By taking the time to equip your vehicle with these essential tools and supplies, you’re setting yourself up for success on the road. With the right preparation, you can confidently handle car problems as they arise, allowing you to focus on the journey ahead instead of the bumps along the way.

4. Understanding Warning Lights: What They Mean

When you’re on the road, your vehicle’s dashboard can often feel like a cryptic language, especially when warning lights start illuminating in vibrant shades of red and yellow. Understanding what these signals mean is crucial for your safety and the longevity of your car. Each light serves as a communication tool from your vehicle, alerting you to potential problems that may require immediate attention or simply a watchful eye.

For instance, a temperature warning light could signify that your engine is overheating, which, if ignored, might lead to more severe damage down the line. Similarly, a battery warning light can indicate that your car’s electrical system is facing issues, possibly affecting your ability to start the vehicle. On the other end of the spectrum, the check engine light can be a bit more ambiguous, ranging from a loose gas cap to a more serious engine malfunction.

To avoid panic when those lights come on, familiarize yourself with the symbols in your owner’s manual. Many modern vehicles also provide handy smartphone apps that can interpret these warnings for you, offering insights into the severity of the issue and recommended next steps.

Taking a proactive approach by keeping an eye on these warning lights allows you to address potential issues early, preventing roadside breakdowns and costly repairs. Remember, your dashboard is not just a panel of lights; it’s your car’s way of keeping you informed and ensuring that your journey remains safe and smooth. So, the next time a warning light flickers to life, don’t dismiss it—take a moment to understand its meaning and act accordingly.

5. How to Conduct a Quick Vehicle Inspection

How to Handle Car Problems on the Road?
Credit : whatcanu.com

When you’re on the road, a little preventive maintenance can go a long way in avoiding major headaches later. Conducting a quick vehicle inspection can help you catch potential issues before they escalate, ensuring your journey remains smooth and hassle-free. Here’s how to perform a rapid yet thorough assessment of your vehicle while keeping safety in mind.

**1. Start with the Exterior:** Before you even slide into the driver’s seat, take a moment to walk around your car. Check for any visible damage, like dents or scratches, and ensure that your tires are properly inflated. Look for any signs of wear or flatness in the tires; a quick visual inspection of the tread can reveal if they’re ready for replacement. Also, check your headlights and taillights to ensure they’re functioning properly—this is crucial for your safety, especially if you find yourself driving after dark.

**2. Pop the Hood:** Once you’re inside, don’t skip opening the hood. Begin by checking the oil level using the dipstick; low oil can lead to engine trouble. Next, inspect the coolant reservoir to ensure it’s filled to the recommended level, as overheating can be a common road hazard. Finally, take a look at the battery terminals for any corrosion and make sure they’re tightly connected.

**3. Assess the Brakes:** While you can’t always inspect brakes without professional tools, you can pay attention to any unusual sounds when you press the pedal or check for a spongy feel. If you notice anything alarming, it’s best to have them looked at before hitting the highway.

**4. Monitor Dashboard Indicators:** Your vehicle’s dashboard is equipped with warning lights designed to inform you of potential issues. Make it a habit to check these indicators before you drive. If any lights are illuminated, take them seriously and investigate further.

**5. Check Your Essentials:** Ensure you have a spare tire, jack, and emergency kit in case you need them while on the road. Familiarize yourself with the location of these items, as they can be lifesavers in unexpected situations.

Taking a few moments to conduct this quick vehicle inspection can help you avoid breakdowns and ensure you’re ready for the open road. A little diligence goes a long way in making sure your travels are not just enjoyable but safe as well. Remember, when it comes to car problems, an ounce of prevention is worth a pound of cure!

6. Dealing with a Flat Tire: Step-by-Step Guide

Encountering a flat tire while on the road can be a stressful experience, but with a little preparation and knowledge, you can handle it confidently and safely. Here’s a step-by-step guide to help you navigate this common roadside issue.

**1. Find a Safe Location**
As soon as you notice your tire is flat, remain calm and reduce your speed. Look for a safe place to pull over, away from traffic. An empty parking lot, a rest area, or the shoulder of a road with ample space is ideal. Once stationary, engage your hazard lights to alert other drivers.

**2. Gather Your Tools**
Before you start the repair, ensure you have the necessary tools. Typically, you’ll need a spare tire, a jack, a lug wrench, and possibly a tire pressure gauge. If you don’t already have these essentials in your vehicle, consider investing in a roadside emergency kit to prepare for any unexpected situation.

**3. Loosen the Lug Nuts**
Using the lug wrench, begin loosening the lug nuts on the flat tire. It’s best to do this while the tire is still on the ground, as it prevents the wheel from spinning. Turn the lug nuts counterclockwise until they are loose enough to remove by hand.

**4. Jack Up the Vehicle**
Next, locate the vehicle’s jack point, usually found beneath the frame near the flat tire. Place the jack securely under this point and begin lifting the vehicle until the flat tire is off the ground. Make sure the jack is stable, and avoid putting any part of your body under the vehicle while it’s elevated.

**5. Remove the Flat Tire**
With the vehicle raised, completely remove the loosened lug nuts and carefully take off the flat tire. Set it aside in a safe spot, ensuring it won’t roll away or become a tripping hazard.

**6. Install the Spare Tire**
Align the spare tire with the wheel hub, ensuring it fits snugly over the bolts. Hand-tighten the lug nuts onto the bolts, securing the spare tire in place. Once it’s on, lower the vehicle back to the ground.

**7. Tighten the Lug Nuts**
With the vehicle back on solid ground, use the lug wrench to tighten the lug nuts completely. It’s important to do this in a star pattern (across from each other) to evenly distribute the pressure and secure the tire properly.

**8. Store the Flat Tire and Tools**
Lastly, store the flat tire and your tools back in your vehicle. Don’t forget to check the pressure on the spare tire before you continue your journey, as some spares can also lose air over time.

Handling a flat tire doesn’t have to be a daunting task. With this step-by-step guide, you can get back on the road quickly and safely, equipped with the knowledge to tackle one of the most common car problems drivers face. Remember, regular maintenance checks and keeping your emergency kit stocked can make all the difference when trouble strikes.

7. Jumpstarting a Dead Battery: Tips and Tricks

How to Handle Car Problems on the Road?
Credit : whatcanu.com

A dead battery can be one of the most frustrating issues to encounter on the road, leaving you stranded and anxious about how to get back on track. Fortunately, jumpstarting a dead battery is a straightforward process that can be mastered with a bit of knowledge and preparation.

First and foremost, ensure you have a reliable set of jumper cables handy in your vehicle. These cables are usually color-coded—red for positive and black for negative—making it easy to connect them correctly. Before you begin, it’s essential to assess the situation: is the dead battery in your vehicle, or are you helping out a fellow motorist? If it’s your battery, you’ll need a good Samaritan with a functioning vehicle willing to lend a hand.

When you’re ready to jumpstart, park the working vehicle close enough to your car so the jumper cables can reach both batteries, but make sure the vehicles aren’t touching. Turn off both ignitions, as this reduces the risk of electrical surges. Attach the red cable to the positive terminal of the dead battery first, followed by the other end to the positive terminal of the good battery. Next, connect the black cable to the negative terminal of the good battery, and then attach the other end to an unpainted metal surface on the car with the dead battery. This serves as a ground and minimizes the risk of sparks near the battery.

Once everything is connected, start the working vehicle and let it run for a few minutes. This allows the dead battery to absorb some charge. Then, try starting your vehicle. If it sputters to life, great! Allow it to run for a while to help recharge the battery further. If it doesn’t start, double-check your connections and give it another shot.

After successfully jumpstarting, remember to disconnect the cables in the reverse order of how you connected them. Always be cautious and avoid letting the jumper cable clamps touch each other to prevent any electrical mishaps. Lastly, consider visiting a mechanic soon to assess the health of your battery, as repeated jumpstarts can indicate a battery on its last leg.

Being prepared with these tips can transform a potentially stressful situation into a manageable one, ensuring you master the road and keep moving forward.

8. Overheating Engine: Causes and Immediate Actions

An overheating engine is not just a minor inconvenience; it can lead to severe damage if not addressed promptly. Understanding the common causes of engine overheating and knowing the immediate actions to take can save you both time and money on the road.

### Causes of Overheating

Several factors can contribute to an engine running hot. The most common culprits include:

1. **Coolant Issues**: Low coolant levels or a leak in the cooling system can result in insufficient coolant circulation, leading to overheating. Check your reservoir periodically and top off as needed.

2. **Thermostat Failure**: The thermostat regulates the flow of coolant. If it becomes stuck closed, it can prevent coolant from circulating through the engine, causing temperatures to soar quickly.

3. **Radiator Problems**: A clogged or damaged radiator can impede heat dissipation. Debris buildup, corrosion, or a broken radiator fan can exacerbate this issue.

4. **Water Pump Failure**: The water pump is responsible for circulating coolant throughout the engine. If it fails, the engine can quickly overheat due to a lack of proper coolant flow.

5. **Oil Issues**: Engine oil not only lubricates moving parts but also plays a role in temperature regulation. Low oil levels or dirty oil can lead to increased friction and heat.

### Immediate Actions to Take

If you notice your engine temperature gauge rising or see warning lights indicating overheating, take the following steps immediately:

1. **Pull Over Safely**: As soon as it’s safe to do so, pull over to the side of the road. Turn off the engine to prevent further damage.

2. **Wait for the Engine to Cool**: Allow the engine to cool for at least 15-30 minutes before attempting to inspect it. Opening the hood can help dissipate heat more quickly.

3. **Check Coolant Levels**: Once the engine has cooled, carefully open the hood and check the coolant reservoir. If it’s low, you may need to add coolant or water. However, never open the radiator cap while the engine is hot, as it could lead to burns from steam or hot coolant.

4. **Inspect for Leaks**: Look under the vehicle for any signs of leaking coolant. If you spot a puddle or see coolant spraying, it may indicate a more significant issue that requires professional assistance.

5. **Contact a Professional**: If you’re unable to identify the problem or if the engine continues to overheat after adding coolant, it’s best to call for roadside assistance. Driving an overheating vehicle can cause catastrophic engine damage, so don’t take any chances.

By understanding the causes of an overheating engine and knowing how to respond, you can prevent minor issues from escalating into major repairs. Stay vigilant and proactive, and you’ll be better equipped to handle this common car problem when it arises on your travels.

9. Handling Fuel Issues: Running Out of Gas or Contaminated Fuel

When it comes to handling fuel issues, two scenarios can quickly turn your smooth drive into a stressful situation: running out of gas and dealing with contaminated fuel. Both can lead to unexpected delays and headaches, but being prepared can help you navigate these challenges with ease.

**Running Out of Gas**
We’ve all been there—lost in thought, jamming to your favorite playlist, when suddenly the fuel gauge dips perilously close to “E.” If you find yourself running low on gas and unable to reach a station, the first step is to stay calm. Pull over to a safe location, turn off your engine, and assess your options. If you’re in a remote area, consider using a roadside assistance app to call for help; many services will send someone to bring you fuel. If you have a friend or family member nearby, a quick phone call could save the day. In the future, it’s wise to keep a portable fuel container in your trunk for emergencies, ensuring you’re never left stranded.

**Dealing with Contaminated Fuel**
Contaminated fuel can lead to a host of engine problems, from poor performance to complete breakdowns. Signs of contaminated fuel include sputtering, difficulty starting your engine, or unusual noises from the fuel system. If you suspect you’ve filled up with bad gas, the best course of action is to pull over and turn off your engine to prevent further damage. If you’re able to, have your vehicle towed to a trusted mechanic who can drain the tank and inspect the fuel system. To minimize the risk of this issue, always refuel at reputable gas stations and consider using a fuel additive as a preventative measure.

By knowing how to handle fuel issues, you can keep your vehicle running smoothly and reduce the chances of being sidelined by unexpected fuel mishaps. Remember, a little preparation goes a long way in mastering the road ahead.

10. When to Call for Help: Knowing Your Limits

When you’re on the road, it’s vital to recognize that not every car problem can be resolved with a simple fix or a little ingenuity. While it’s essential to equip yourself with the knowledge and tools to handle minor issues, there comes a time when calling for professional help is the wisest course of action. Understanding your limits not only ensures your safety but also prevents further damage to your vehicle.

So, when should you pick up that phone and call for assistance? If your vehicle has started making unusual noises—like grinding, clanking, or hissing—trust your instincts. These sounds can indicate serious mechanical problems that may worsen if ignored. Additionally, if warning lights on your dashboard start flashing, such as the engine or oil light, it’s a clear signal that your car requires immediate professional attention.

Another red flag is if you find yourself stranded due to a flat tire or a dead battery. While you may be able to change a tire or jumpstart a battery with the right tools, if you’re in an unfamiliar location or feel unsafe, it’s best to call for roadside assistance. Your safety should always take precedence over any DIY attempts.

Furthermore, if you’re experiencing issues like overheating or smoke emanating from the engine, pull over and turn off your vehicle immediately. Attempting to drive a car in such a condition can lead to catastrophic damage, not to mention the risk of a fire hazard.

Remember, knowing when to ask for help is a sign of wisdom, not weakness. Being proactive about seeking assistance can save you time, money, and stress in the long run. Carrying the contact information of a reliable roadside assistance service or having a trusted mechanic on speed dial can make all the difference when you find yourself facing the unexpected on your journey. By recognizing your limits and embracing the support available to you, you can navigate car troubles with confidence and peace of mind.

11. Preventive Maintenance Tips to Avoid Roadside Issues

When it comes to ensuring a smooth journey and avoiding unexpected roadside mishaps, preventive maintenance is your best friend. Regularly inspecting and maintaining your vehicle can save you time, money, and stress down the line. Here are some essential preventive maintenance tips that every driver should incorporate into their routine.

First and foremost, **check your oil levels** regularly. Engine oil is the lifeblood of your car, helping to lubricate moving parts and prevent overheating. Make it a habit to check your oil level monthly and change it according to your vehicle manufacturer’s recommendations. Clean oil ensures your engine operates efficiently and can prevent costly repairs.

Next, **inspect your tires**. Tires are your only contact with the road, so maintaining their health is crucial for safety and performance. Look for signs of wear, check the tread depth, and ensure they’re properly inflated. Rotate your tires every 5,000 to 8,000 miles to ensure even wear, and don’t forget to keep a spare tire and tools handy in case of emergencies.

Another critical area to focus on is your **brake system**. Squeaking or grinding noises, a soft brake pedal, or a warning light on your dashboard are all signs that your brakes may need attention. Regularly testing and servicing your brakes can help you avoid serious accidents and ensure you can stop safely.

Don’t overlook your **battery health**, either. Car batteries can fail unexpectedly, often without any warning. Check for corrosion on the terminals, and ensure your battery is securely mounted. If your battery is older than three years, it’s wise to have it tested annually to prevent any surprises.

Finally, keep an eye on your **fluid levels**. This includes coolant, transmission fluid, brake fluid, and windshield washer fluid. Low levels can lead to overheating, transmission issues, or poor visibility, all of which can result in roadside problems. Regularly topping off these fluids can help your vehicle run smoothly and efficiently.

By investing a little time in preventive maintenance, you can significantly reduce the likelihood of roadside issues and enjoy peace of mind on your travels. Remember, a well-maintained vehicle is not just about avoiding breakdowns; it’s also about ensuring your safety and the safety of those around you. So take these tips to heart, and keep your car in top shape for every journey ahead.

12. Emergency Contacts: Who to Call and When

When trouble strikes on the road, knowing who to call can be just as critical as having a spare tire or a first-aid kit. Emergency contacts are your lifeline during a car crisis, providing the support and expertise needed to navigate unexpected situations. Start by creating a list of essential contacts, ensuring they are easily accessible—perhaps saved in your phone or written down in your glove compartment.

**1. Roadside Assistance Services:** If you have a membership with AAA, your insurance company, or an auto club, their roadside assistance hotline should be your first call for issues like flat tires, dead batteries, or locking your keys inside the car. These services often provide quick help and can even tow your vehicle to a nearby mechanic if necessary.

**2. Mechanics and Repair Shops:** Having a trusted mechanic’s number saved in your contacts can save you time and stress. Whether you need a tow or advice on a strange noise your car is making, reaching out to a professional can provide clarity and assistance.

**3. Family or Friends:** Sometimes, a familiar voice can ease the panic that sets in during a roadside emergency. Whether it’s a family member who can offer advice, a friend who can come to your aid, or someone who can help you with a ride if your car is immobile, having this support network can be invaluable.

**4. Insurance Provider:** In the unfortunate event of an accident, your insurance company should be contacted promptly to report the incident and initiate a claim. They can guide you through the process and help you understand your coverage, ensuring you are effectively protected during your time of need.

**5. Local Authorities:** If you find yourself in a situation where safety is a concern, such as a breakdown in a high-traffic area or an accident involving injury, don’t hesitate to call local law enforcement. They can help manage the scene, direct traffic, and ensure you receive any necessary medical assistance.

When you’re prepared with a list of emergency contacts, you’re not just easing your own mind—you’re setting yourself up for a more manageable response to whatever challenges the road throws your way. Always remember: staying calm and knowing who to reach out to is half the battle when handling car problems on the go.

13. Staying Calm: Managing Stress During Car Troubles

Car troubles can strike at the most inconvenient moments, turning a simple trip into a stressful ordeal. Whether you’re on a busy highway, stuck in a parking lot, or in the middle of nowhere, the key to handling these unexpected situations lies in maintaining your composure. Staying calm is not just about keeping your cool; it’s about empowering yourself to think clearly and take the necessary steps to resolve the issue.

When faced with car problems, your first instinct may be to panic, but taking a deep breath can work wonders. Start by assessing the situation. Is it a flat tire, overheating engine, or a dead battery? Understanding the nature of the problem can help you determine your next steps. If you’re safe and your vehicle is in a secure location, take a moment to gather your thoughts. Remember that many drivers experience vehicle malfunctions, and most issues can be resolved with a bit of patience and a plan.

If you’re feeling overwhelmed, don’t hesitate to reach out for support. Whether it’s calling a roadside assistance service, contacting a knowledgeable friend, or even seeking help from fellow motorists, don’t underestimate the power of a little assistance. Having a reliable contact list of mechanics or towing services saved in your phone can also ease anxiety in stressful times.

Moreover, keeping a roadside emergency kit in your vehicle can provide peace of mind. Stock it with essentials like jumper cables, a flashlight, basic tools, and first aid supplies. Knowing you’re prepared can significantly reduce stress levels when things go awry.

Finally, practice self-care techniques to manage stress effectively. Listen to calming music, use breathing exercises, or visualize a positive outcome. By staying calm and collected, you’re not only more likely to solve the problem at hand but also to ensure your safety and well-being. Remember, every driver faces car troubles at some point, and how you handle them can make all the difference in turning a frustrating situation into a manageable experience.

14. Resources for Roadside Assistance and Repair Services

When you find yourself facing car troubles on the road, having access to reliable resources for roadside assistance and repair services can make all the difference. Planning ahead and knowing where to turn in times of automotive distress can save you time, money, and unnecessary stress.

Start by familiarizing yourself with the roadside assistance programs offered by your insurance provider or credit card company. Many insurers offer complimentary services or at least discounted rates for their policyholders. Additionally, some credit cards provide roadside assistance as a perk, making it worthwhile to check the benefits associated with the cards you carry.

In addition to insurance and credit card options, consider downloading popular roadside assistance apps, such as AAA Mobile, Urgently, or Honk. These apps allow you to easily request help, track your service provider, and even access user reviews to ensure you’re getting quality assistance. Also, keep a list of local towing and repair services saved in your phone; having these contacts easily accessible can expedite the process of getting your vehicle back on the road.

For those who love to be prepared, investing in a membership with a service like AAA or a similar organization can provide peace of mind. Membership often includes not only roadside assistance but also various discounts on travel, restaurant dining, and even automotive services, making it a practical investment for frequent travelers.

Lastly, don’t underestimate the power of community. Social media groups and forums dedicated to local automotive enthusiasts can be invaluable resources. They often share recommendations for trusted mechanics and quick-fix solutions that can help you get back on the road sooner rather than later.

By equipping yourself with the right resources and knowledge, you’ll feel more confident and prepared to handle any car problems that may come your way while traveling. Remember, a little preparation goes a long way in ensuring a smoother ride, no matter what challenges you may encounter.

15. Conclusion: Empowering Yourself for Future Road Trips

As we wrap up our journey through the essential tips for handling car problems on the go, it’s clear that being prepared is your best ally when hitting the open road. Road trips are meant to be exhilarating adventures filled with exploration and spontaneity, but they can quickly turn daunting when faced with unexpected car troubles. The key takeaway from our discussion is empowerment—equipping yourself with knowledge, tools, and a proactive mindset can make all the difference.

By familiarizing yourself with common car issues, understanding basic troubleshooting techniques, and knowing how to effectively communicate with roadside assistance or mechanics, you’ll be able to navigate challenges with confidence. Remember to keep an emergency kit stocked with essentials like a spare tire, first-aid supplies, and basic tools; these items can turn a potential crisis into a manageable inconvenience.

Moreover, embracing technology—whether through roadside assistance apps, navigation tools, or car diagnostic apps—can provide real-time support and keep you informed. And don’t forget the importance of regular vehicle maintenance; a well-cared-for car is less likely to leave you stranded.

As you set out on your next road trip, take these insights and tips with you. Approach the journey not just as a means to an end, but as an opportunity for learning and growth. With the right preparation and mindset, you’ll not only master the road but also create memorable experiences along the way. Safe travels!

In conclusion, mastering the road and being prepared for car problems on the go is essential for any driver. By equipping yourself with the knowledge and tools outlined in this article, you’ll find that you can navigate unexpected challenges with confidence and ease. Whether it’s knowing the importance of routine maintenance or having a reliable emergency kit at your disposal, these tips will empower you to tackle any situation that arises. Remember, a little preparation goes a long way in ensuring your journey remains smooth and enjoyable. So, take these insights to heart, stay vigilant on the road, and embrace the freedom of driving without fear of the unknown. Safe travels!

Car – How to Improve Your Fuel Economy?

In a world where fuel prices seem to soar higher with each passing day, finding ways to maximize your car’s fuel economy has never been more essential.

Whether you’re a daily commuter, a weekend road tripper, or someone who simply wants to get the most out of their vehicle, understanding how to enhance fuel efficiency can lead to significant savings and a lighter environmental footprint. In this blog post, we’ll explore ten proven tips that are not only easy to implement but can also lead to noticeable improvements in your car‘s mileage. From simple maintenance checks to smart driving habits, these strategies will empower you to take control of your fuel consumption and make every gallon count. Say goodbye to frequent gas station stops and hello to a more efficient, budget-friendly driving experience!

1. Understanding Fuel Economy: Why It Matters

Car - How to Improve Your Fuel Economy?
Credit : whatcanu.com

Understanding fuel economy is more important than ever in today’s world, where fluctuating gas prices and environmental concerns are at the forefront of many drivers’ minds. Fuel economy, typically expressed in miles per gallon (MPG), measures how efficiently your vehicle converts fuel into distance traveled. It’s not just about saving a few bucks at the pump; it’s also about reducing your carbon footprint and contributing to a healthier planet.

Improved fuel economy translates to fewer trips to the gas station and more money in your pocket, which can be a game-changer for your budget. It means you can enjoy those spontaneous road trips without the constant worry of rising fuel costs cutting into your plans. Moreover, with the growing emphasis on sustainability, driving a vehicle that maximizes fuel efficiency aligns with a more eco-conscious lifestyle.

Understanding how various factors—such as driving habits, vehicle maintenance, and even the type of fuel you use—can affect your fuel economy allows you to make informed decisions that benefit both your wallet and the environment. By prioritizing fuel efficiency, you’re not only ensuring that your car runs optimally, but you’re also becoming part of a larger movement towards sustainable transportation. Embracing fuel economy is a win-win situation that ultimately leads to a more enjoyable and responsible driving experience.

2. Tip 1: Maintain Proper Tire Pressure

Maintaining proper tire pressure is one of the simplest yet most effective ways to enhance your car’s fuel economy. Under-inflated tires create more rolling resistance, which forces your engine to work harder and consume more fuel. Conversely, over-inflated tires can lead to uneven wear and a harsher ride, compromising safety and comfort.

To ensure optimal tire pressure, it’s crucial to check your tires regularly—ideally once a month and before long trips. Most vehicles have a recommended tire pressure listed in the owner’s manual or on a sticker located inside the driver’s side door. Use a reliable tire pressure gauge to measure each tire’s inflation level when they are cold, as heat from driving can artificially inflate the readings.

Keeping your tires properly inflated not only maximizes fuel efficiency but also extends the life of your tires, improving overall vehicle performance. Additionally, well-maintained tires provide better traction, ensuring safer handling on the road. By dedicating just a few minutes each month to this essential maintenance task, you can enjoy a smoother ride, enhance your car’s fuel economy, and save money at the pump. It’s a small investment of time that yields significant returns.

3. Tip 2: Keep Your Engine Well-Tuned

Car - How to Improve Your Fuel Economy?
Credit : whatcanu.com

A well-tuned engine is the heart of your vehicle, directly influencing its performance and fuel efficiency. Just like a finely tuned musical instrument, your car’s engine needs regular care and attention to operate at its best. When your engine is running smoothly, it not only extends the life of your vehicle but also enhances its fuel economy significantly.

Regular maintenance is key. This includes routine oil changes, replacing air filters, and checking spark plugs. When you keep your engine oil clean and at the proper level, it reduces friction between moving parts, allowing your engine to run more efficiently. Likewise, changing your air filter regularly ensures that your engine receives a steady flow of clean air, which is essential for optimal combustion.

Another critical aspect of engine tuning is ensuring that your fuel injectors are clean and functioning correctly. Clogged or malfunctioning injectors can lead to poor fuel atomization, causing your engine to burn more fuel than necessary and resulting in decreased fuel economy. Consider using fuel additives occasionally to help clean your fuel system and maintain optimal performance.

Additionally, keeping an eye on your vehicle’s diagnostic system can help you catch potential engine issues before they escalate. Many modern cars come equipped with onboard diagnostics that can alert you to problems such as misfires or inefficient fuel usage. Addressing these issues promptly can save you money at the pump and prevent more extensive repairs down the line.

In summary, a well-tuned engine is essential for achieving the best possible fuel economy. By committing to regular maintenance and addressing any issues as they arise, you can ensure that your vehicle operates efficiently, allowing you to enjoy longer drives with fewer stops at the gas station.

4. Tip 3: Use the Recommended Motor Oil

Using the recommended motor oil for your vehicle is a simple yet often overlooked tip that can significantly enhance your car’s fuel economy. Each vehicle is engineered with specific requirements, and the manufacturer specifies the type and viscosity of motor oil that works best for optimal performance. Selecting the appropriate oil not only ensures that your engine runs smoothly but also promotes efficient fuel usage.

When you use the right motor oil, you minimize engine friction, allowing your engine to operate more efficiently. This efficiency translates to less energy wasted, which means your car doesn’t have to work as hard to maintain speed or acceleration. Additionally, high-quality synthetic oils often contain additives that help to clean engine components and reduce deposits, further enhancing performance and fuel efficiency.

To find the motor oil recommended for your car, check the owner’s manual or consult with a professional mechanic. Pay attention to the viscosity rating, typically denoted by a grading system like 5W-30 or 10W-40, which indicates how well the oil flows at different temperatures. Investing in the right oil may cost a bit more upfront, but the long-term benefits of improved fuel economy and engine longevity are well worth it.

Moreover, remember to change your oil regularly as per the manufacturer’s guidelines. Old or contaminated oil can lose its effectiveness, leading to increased friction and reduced fuel economy. By staying proactive and using the recommended motor oil, you can take a significant step towards maximizing your car’s fuel efficiency and enjoying longer drives with fewer stops at the pump.

5. Tip 4: Adopt Smooth Driving Habits

Car - How to Improve Your Fuel Economy?
Credit : whatcanu.com

Adopting smooth driving habits can significantly enhance your car’s fuel economy, and it’s easier than you might think. Picture the difference between a serene glide down the highway and a jerky, stop-and-go commute. The former not only feels more enjoyable but also translates to substantial fuel savings.

When you accelerate gently and anticipate traffic conditions, you can maintain a steady speed, which is key to maximizing efficiency. Quick, aggressive acceleration consumes more fuel than a gradual increase in speed. Similarly, hard braking can lead to increased fuel consumption, as it often requires you to speed up again. Instead, aim to coast to a stop whenever possible. This simple shift in approach can help you save fuel and extend the life of your brakes.

Using cruise control on the highway can also contribute to smoother driving. By maintaining a constant speed, you reduce the likelihood of fluctuations in acceleration that can lead to unnecessary gas usage. Additionally, keeping a safe following distance allows you to react smoothly to changes in traffic, further conserving fuel.

Lastly, consider limiting your use of air conditioning and other electrical accessories, as these can strain your engine and reduce fuel efficiency. When combined with other eco-friendly driving techniques, such as reducing idling time and planning your trips to avoid heavy traffic, adopting smooth driving habits can lead to significant improvements in your car’s fuel economy. Not only will your wallet thank you, but your vehicle will likely perform better in the long run!

6. Tip 5: Reduce Excess Weight in Your Vehicle

Every extra pound in your vehicle can make a noticeable difference in fuel efficiency. It’s a simple yet often overlooked factor that can significantly impact your car’s performance and economy. To put it into perspective, studies suggest that for every 100 pounds of extra weight, your vehicle’s fuel efficiency could decrease by up to 1%. This might not seem like much on the surface, but over time, especially with frequent short trips or in stop-and-go traffic, that can add up to a significant waste of fuel.

Begin by doing a thorough inventory of your vehicle. Clear out the clutter—remove any unnecessary items that have found their way into your trunk or backseat. Those sports equipment bags, old tools, and even the extra set of golf clubs you swear you’ll use can all contribute to extra weight.

Next, consider the permanent fixtures in your car. If you frequently carry items like roof racks or heavy towing equipment that you rarely use, removing them when not needed can also help lighten the load. Additionally, if your vehicle has a third-row seat that you rarely utilize, consider folding it down or removing it entirely if possible.

Not only does reducing excess weight improve your fuel economy, but it can also enhance your vehicle’s handling and braking performance. A lighter car accelerates more quickly and stops more effectively, providing a safer driving experience. So, take a moment to lighten your load—your wallet and your car will thank you!

7. Tip 6: Optimize Your Air Conditioning Use

Car - How to Improve Your Fuel Economy?
Credit : whatcanu.com

Optimizing your air conditioning use can significantly influence your car’s fuel economy, especially during those sweltering summer months. While it might be tempting to crank up the AC to escape the heat, doing so can lead to increased fuel consumption. Air conditioning systems draw power from the engine, and this demand can cause your vehicle to use more fuel.

One effective strategy is to balance comfort with efficiency. When driving at lower speeds, consider rolling down the windows instead of using the AC. The natural airflow can cool you down without the added fuel cost. However, once you hit the highway and your speed increases, it’s often more fuel-efficient to close the windows and rely on the AC. This is because open windows can create drag, reducing your vehicle’s aerodynamics.

Additionally, using the AC wisely can make a difference. Start by turning on your car’s ventilation system and allowing the hot air to escape before activating the air conditioning. This approach cools the cabin more quickly, reducing the time the AC has to run at full power.

Moreover, regularly maintaining your air conditioning system is crucial. A well-maintained AC unit operates more efficiently, thus consuming less fuel. Ensure that your system is serviced regularly, and replace any clogged filters to maximize airflow.

By being mindful of how and when you use your air conditioning, you can enjoy a cooler ride while also enhancing your car’s fuel economy. Implement these adjustments, and you may find yourself saving both fuel and money on those long summer drives!

8. Tip 7: Plan Your Trips Efficiently

Planning your trips efficiently is crucial for maximizing your car’s fuel economy. By taking a little time to strategize your routes and schedules, you can significantly reduce unnecessary mileage and fuel consumption. Start by mapping out your destinations and identifying the most direct routes. Use navigation apps that provide real-time traffic updates to avoid congested areas and roadwork, which can lead to idling and excessive fuel usage.

Consider combining errands into a single trip rather than making multiple short journeys. This not only saves fuel but also minimizes wear and tear on your vehicle. For instance, instead of driving back and forth to the grocery store, the post office, and the gym throughout the week, plan a single outing that includes all these stops.

Timing your trips can also make a difference. Aim to travel during off-peak hours when traffic is lighter, allowing for smoother driving and less stop-and-go congestion. If you’re heading out for a longer journey, try to leave early in the morning or later in the evening to avoid midday heat and traffic jams.

Lastly, don’t forget to consider the weather. On cold days, for example, your car’s engine works harder, consuming more fuel. If possible, wait for milder weather to run errands or group your trips on warmer days. By being mindful of when and how you travel, you can enhance your car’s fuel efficiency and keep more money in your pocket.

9. Tip 8: Limit Idling Time

### 9. Tip 8: Limit Idling Time

One of the most overlooked factors affecting your car’s fuel economy is idling time. Many drivers are unaware that their vehicles consume fuel even when they are stationary, simply idling in a parking lot or waiting for a friend to hop in. In fact, idling can waste more fuel than you might think!

When your engine is running without moving the car, it continues to burn fuel unnecessarily, leading to reduced miles per gallon (MPG) and higher emissions. The U.S. Department of Energy estimates that idling can consume a quarter to a half gallon of fuel per hour, depending on the size of your engine and the conditions.

So, what can you do? If you find yourself stopped for more than a minute or two—perhaps waiting in a drive-thru line or sitting in traffic—consider turning off your engine. Not only will this save fuel, but it will also reduce wear and tear on your vehicle’s engine and exhaust system.

For those who drive in urban areas where stoplights and traffic frequently disrupt flow, investing in a car with automatic start-stop technology may be worth considering. This feature automatically shuts off the engine when the vehicle is at rest and seamlessly restarts it when you’re ready to move, ensuring you’re not wasting fuel during those inevitable stops.

Additionally, educate those around you about the benefits of limiting idling. If your friends or family are waiting in the car, encourage them to turn off the engine while they wait. By adopting this simple habit, you can collectively contribute to better fuel economy and a healthier environment.

By being mindful of your idling time, you’ll not only extend the life of your vehicle, but you’ll also see a noticeable improvement in your fuel economy, keeping more money in your pocket for what really matters—enjoying the open road!

10. Tip 9: Use Cruise Control on Highways

Using cruise control on highways is a simple yet effective strategy to enhance your vehicle’s fuel economy. When you’re cruising down the open road, maintaining a steady speed becomes crucial, and that’s where cruise control shines. By automating your speed, this feature helps eliminate the tendency to accelerate or decelerate unnecessarily, which can lead to increased fuel consumption.

Imagine gliding along a stretch of highway, your car maintaining a consistent speed without your foot hovering over the gas pedal. This steadiness not only reduces the strain on your engine but also minimizes the amount of fuel consumed. Studies have shown that using cruise control can improve fuel efficiency by approximately 7% to 14% on long highway drives, depending on your speed and driving conditions.

Additionally, cruise control helps you avoid the common pitfall of aggressive driving habits, such as sudden accelerations and hard braking, which can sap your fuel reserves faster than you might realize. By giving your foot a break, you’re allowing your vehicle to operate more efficiently and smoothly, translating to fewer stops at the gas station.

However, it’s essential to use cruise control wisely. It’s best suited for long, flat highway stretches rather than winding roads or busy urban areas where frequent speed changes are necessary. By incorporating cruise control into your driving routine, you not only enjoy a more relaxed ride but also contribute to better fuel economy, making it a win-win for both your wallet and the environment. So, the next time you hit the highway, set your cruise control and watch your fuel efficiency improve!

11. Tip 10: Regularly Replace Air Filters

When it comes to optimizing your car’s fuel economy, one of the simplest yet often overlooked tips is to regularly replace your air filters. The air filter plays a crucial role in ensuring that your engine receives a steady supply of clean air for optimal combustion. Over time, dirt, dust, and debris can clog the filter, restricting airflow and forcing your engine to work harder. This not only diminishes performance but also leads to increased fuel consumption.

To maximize your vehicle’s efficiency, it is recommended to check your air filter every 12,000 to 15,000 miles, or as specified in your owner’s manual. If you notice that it appears dirty or discolored, it’s time for a replacement. A clean air filter can improve acceleration, reduce emissions, and, most importantly, enhance fuel efficiency by as much as 10 percent.

Replacing your air filter is a straightforward process that can often be done at home with minimal tools. Simply locate the air filter compartment, remove the old filter, and install the new one. Not only will this small investment in maintenance help your wallet at the pump, but it will also contribute to the longevity of your engine, ensuring a smoother and more efficient ride. By incorporating regular air filter replacements into your car care routine, you can keep your vehicle running at its best while enjoying the benefits of improved fuel economy.

12. The Role of Fuel Quality in Fuel Economy

When it comes to maximizing your car’s fuel economy, the quality of the fuel you use plays a pivotal role that often goes overlooked. Not all fuels are created equal; they come with varying levels of additives, octane ratings, and purity that can significantly impact your vehicle’s performance and efficiency.

High-quality fuels, often branded as “premium” or “top-tier,” usually contain detergents and additives designed to keep your engine clean and running smoothly. These additives help prevent carbon build-up and improve combustion efficiency, which can lead to better fuel economy. Conversely, subpar fuels may contain impurities that can clog fuel injectors or reduce engine efficiency, resulting in poorer mileage and increased emissions.

Understanding the octane rating is also crucial. Higher octane fuels are beneficial for high-performance vehicles that require it for optimal operation. However, using high-octane fuel in a vehicle that doesn’t need it won’t necessarily improve fuel economy. Instead, it’s vital to follow the manufacturer’s recommendations for your car to ensure you’re using the right fuel type for maximum efficiency.

In addition, consider the source of your fuel. Purchasing from reputable gas stations ensures that you’re getting cleaner, higher-quality fuel, which can make a difference in your day-to-day driving experience. Avoiding discount or off-brand fuel stations may save you a few cents initially, but the long-term benefits of using better-quality fuel can translate to improved mileage and overall vehicle health.

In summary, investing in high-quality fuel is not just about filling your tank; it’s about fueling your vehicle for optimal performance and efficiency. By making smarter choices at the pump, you can significantly boost your car’s fuel economy and enjoy a smoother ride.

13. How Driving Conditions Affect Fuel Consumption

Driving conditions play a pivotal role in determining your vehicle’s fuel consumption. Understanding how to navigate different environments can significantly enhance your car’s fuel economy and save you money at the pump.

Firstly, let’s consider urban driving, characterized by frequent stops and starts, traffic signals, and congested roadways. In these conditions, your engine works harder, leading to increased fuel usage. To mitigate this, try to anticipate traffic lights and maintain a steady speed whenever possible. This can help you avoid unnecessary acceleration and braking, which can guzzle fuel.

On the other hand, highway driving often yields better fuel efficiency due to consistent speeds and fewer stops. However, factors like wind resistance can come into play, especially if you’re driving at higher speeds. For optimal fuel economy, aim to cruise at a moderate speed and avoid excessive lane changes that can disrupt your momentum.

Weather conditions also significantly impact fuel consumption. Cold temperatures can reduce fuel efficiency as your engine takes longer to reach optimum operating temperature. Additionally, using the heater can place extra strain on your engine. Conversely, using air conditioning in hot weather can also lead to increased fuel consumption. In extreme weather, consider adjusting your driving habits or planning your trips during milder parts of the day to optimize efficiency.

Lastly, be mindful of road conditions. Uneven or poorly maintained roads can create additional drag on your vehicle, forcing your engine to work harder. Whenever possible, choose well-paved routes to help keep fuel consumption in check.

By being aware of these driving conditions and adjusting your habits accordingly, you can make a substantial difference in your car’s fuel economy and ensure you’re getting the most out of every gallon. Keep these insights in mind to maximize your fuel efficiency and enjoy a more economical driving experience.

14. The Benefits of Eco-Driving Techniques

Eco-driving techniques are more than just a trend; they represent a fundamental shift in how we approach driving with the environment—and our wallets—in mind. By adopting these strategies, not only do you contribute to a greener planet, but you can also enhance your vehicle’s fuel economy significantly.

At its core, eco-driving involves a range of practices aimed at maximizing fuel efficiency and minimizing emissions. Simple adjustments like maintaining a steady speed, smoothly accelerating, and anticipating traffic flow can lead to remarkable improvements in how far your car can travel on a tank of gas. For instance, studies show that driving at a constant speed can reduce fuel consumption by as much as 10%.

Additionally, employing techniques such as reducing your speed on the highway can yield impressive gains. Driving at just 55 mph instead of 65 mph can boost your fuel efficiency by around 15%. This not only saves you money at the pump but also lessens the strain on your engine, leading to a smoother ride and prolonging the life of your vehicle.

Another crucial aspect of eco-driving is minimizing unnecessary idling. If you find yourself waiting for more than a minute, consider turning off your engine. Idling not only wastes fuel but also contributes to unnecessary emissions, making it a practice worth avoiding.

Moreover, being mindful of your vehicle’s weight and aerodynamics can further optimize your fuel economy. Removing excess cargo and ensuring your tires are properly inflated can make a notable difference. Studies have shown that for every 100 pounds, fuel efficiency can decrease by up to 2%.

Incorporating eco-driving techniques into your daily routine not only benefits your fuel economy but also fosters a sense of responsibility toward the environment. By embracing these practices, you’re not just saving money; you’re also playing a part in reducing your carbon footprint and promoting a sustainable future. So, buckle up, drive smart, and enjoy the dual rewards of lower fuel costs and a cleaner planet.

15. Conclusion: Start Implementing These Tips Today!

In conclusion, improving your car’s fuel economy is not just a one-time effort but a continuous journey that yields significant rewards. By implementing the tips discussed in this blog post, you can take meaningful steps towards maximizing your vehicle’s efficiency, saving money at the pump, and reducing your carbon footprint.

Start small—perhaps by checking your tire pressure or adopting a more economical driving style—and gradually integrate more strategies into your routine. Each change, no matter how minor it may seem, contributes to the bigger picture of fuel efficiency. Whether it’s regular maintenance, optimizing your driving habits, or considering eco-friendly alternatives, every little effort counts.

Remember, the road to better fuel economy begins with you. By making conscientious choices today, you are not only enhancing your driving experience but also playing a part in promoting a more sustainable future. So, don’t wait—start implementing these tips today, and watch as your fuel efficiency improves, your wallet grows heavier, and your environmental impact lessens. Safe travels!

In conclusion, improving your car’s fuel economy doesn’t have to be a daunting task. By implementing the 10 proven tips we’ve outlined in this blog post, you can not only save money at the pump but also contribute to a greener planet. From regular maintenance to mindful driving habits, each step plays a vital role in enhancing your vehicle’s efficiency. We hope these tips motivate you to take action today and enjoy the benefits of a more fuel-efficient ride. Remember, every little change counts, so start today and watch your fuel savings grow! Safe travels and happy driving!

How to Avoid Common Car Problems?

Owning a car is a significant investment, and maintaining its health is crucial to ensure longevity and reliability on the road.

Unfortunately, many drivers find themselves facing unexpected breakdowns and costly repairs due to common car problems that could have been easily prevented. From engine troubles and brake issues to battery failures and tire blowouts, these challenges can disrupt your routine and lead to stress and frustration. But fear not! With a little proactive care and attention, you can safeguard your vehicle against these pitfalls. In this blog post, we’ll explore essential tips and tricks to keep your car running smoothly, helping you save time, money, and the hassle of emergency repairs. Whether you’re a seasoned car enthusiast or a first-time owner, these practical strategies will empower you to take charge of your vehicle’s maintenance and enjoy peace of mind on every drive.

1. Understanding the Importance of Preventive Maintenance

How to Avoid Common Car Problems?
Credit : whatcanu.com

Preventive maintenance is more than just a buzzword; it’s a fundamental practice that can save you time, money, and stress in the long run. Much like a regular check-up at the doctor’s office, routine maintenance for your vehicle is essential in identifying potential issues before they escalate into costly repairs. Understanding the importance of preventive maintenance means recognizing that your car is a complex machine that requires consistent care to function optimally.

Imagine cruising down the highway, the sun shining, music playing, and then suddenly—your engine sputters, or worse, it overheats. These scenarios can often be traced back to neglecting those crucial maintenance checks. Regular oil changes, tire rotations, brake inspections, and fluid level assessments can significantly enhance your vehicle’s performance and lifespan. By adhering to your manufacturer’s recommended service schedule, you not only ensure that your car runs smoothly, but you also maintain its resale value.

In addition to keeping your vehicle in prime condition, preventive maintenance helps improve safety on the road. Faulty brakes, worn-out tires, or malfunctioning lights can create dangerous situations for you and other drivers. By taking proactive steps to address these issues, you provide peace of mind for yourself and your passengers.

Ultimately, preventive maintenance is an investment in your vehicle’s health. It fosters a routine that can help you catch minor issues before they spiral into major problems, allowing you to enjoy your driving experience worry-free. So, take the time to understand its importance—your car (and your wallet) will thank you.

2. Regularly Check Your Oil Levels

Regularly checking your oil levels is one of the simplest yet most crucial maintenance tasks you can perform to ensure the longevity and efficiency of your vehicle. Oil serves as the lifeblood of your engine, lubricating its moving parts and preventing excessive wear and tear. Over time, oil can become contaminated with dirt and debris or simply diminish in quantity, leading to inadequate lubrication. This can result in catastrophic engine damage and costly repairs.

To make this task a habit, set a reminder to check your oil levels at least once a month or before long trips. Start by parking your vehicle on a level surface and allowing the engine to cool down. After a few minutes, pop the hood and locate the dipstick—usually marked with a bright color for easy identification. Pull it out, wipe it clean with a cloth, and reinsert it to get an accurate reading. The oil should ideally be between the two markings on the dipstick. If it’s low, it’s time to top it off with the appropriate type of oil recommended in your owner’s manual.

Additionally, pay attention to the color and consistency of the oil. Fresh oil is typically a clear amber color, while dark, gritty, or milky oil can signal problems that may require further investigation. If you notice any unusual changes or if the oil appears to be low frequently, it might be worth consulting a professional to check for leaks or other underlying issues.

Incorporating regular oil checks into your vehicle maintenance routine not only helps prevent engine problems but also promotes better fuel efficiency, smoother performance, and ultimately extends the life of your car. Remember, a few minutes spent checking your oil can save you from significant headaches down the road—both literally and figuratively!

3. Monitor Tire Health and Pressure

How to Avoid Common Car Problems?
Credit : whatcanu.com

Monitoring tire health and pressure is an essential yet often overlooked aspect of car maintenance that can save you from a multitude of common problems down the road. Your tires are the only contact between your vehicle and the road, and their condition can significantly affect not only your car’s performance but also your safety.

Start by regularly checking the tire pressure, as it can fluctuate with changes in temperature and over time. Under-inflated tires can lead to poor fuel efficiency, increased tire wear, and a greater risk of blowouts. On the other hand, over-inflated tires can reduce traction and affect your vehicle’s handling. Keeping a reliable tire pressure gauge in your glove compartment can make this task simple and efficient. Aim to check your tire pressure at least once a month, and don’t forget to include your spare tire in this routine.

Equally important is the inspection of your tires for signs of wear and damage. Look for uneven tread wear, cracks, or bulges on the sidewalls, and check for any embedded objects like nails or stones. A simple tread depth test—using a penny or a dedicated tread depth gauge—can help you assess whether your tires need replacing. The rule of thumb is that if you can see the tops of Lincoln’s head when inserting a penny into the tread, it’s time to shop for new tires.

Additionally, consider rotating your tires every 5,000 to 7,000 miles. This practice ensures even wear across all tires, prolonging their lifespan and enhancing your vehicle’s handling and performance. Keeping your tires in optimal condition not only promotes a smoother ride but also contributes to better fuel economy and overall vehicle safety. By being proactive about tire health and pressure, you can prevent common car problems before they happen, ensuring a safer and more enjoyable driving experience.

4. The Role of Fluid Levels in Car Functionality

Maintaining proper fluid levels is one of the simplest yet most crucial aspects of car care that can significantly impact your vehicle’s performance and longevity. Think of your car as a finely tuned machine where each component relies on a specific fluid to function optimally. From engine oil to coolant, transmission fluid to brake fluid, each type plays a vital role in ensuring that your car operates smoothly and efficiently.

Engine oil, for instance, acts as the lifeblood of your engine, lubricating moving parts to prevent friction and wear. Low oil levels can lead to inadequate lubrication, resulting in increased engine temperature and potential damage. Regularly checking and changing your engine oil according to your manufacturer’s recommendations can save you from costly repairs down the road.

Coolant, on the other hand, is essential for regulating your engine’s temperature. A low coolant level can cause your engine to overheat, leading to severe engine damage. It’s important to inspect your coolant reservoir periodically, especially before long trips or during extreme weather conditions.

Transmission fluid is another critical player, responsible for ensuring smooth gear shifts. If your transmission fluid is low or dirty, you may experience slipping gears or harsh shifting, which can compromise the overall functionality of your vehicle. Regularly checking and replacing your transmission fluid can help maintain seamless performance.

Don’t overlook brake fluid either; it’s vital for your safety. Low brake fluid levels can lead to reduced braking efficiency, putting you and others on the road at risk. Always ensure your brake fluid is at the recommended level and check for any signs of leaks.

In summary, taking the time to monitor your car’s fluid levels is an investment in its health and your safety. Establish a regular maintenance routine that includes fluid checks, and you’ll be well on your way to preventing common car problems before they arise. By being proactive, you’ll not only enhance your car’s performance but also extend its lifespan, leading to a more reliable and enjoyable driving experience.

5. Keeping Your Battery in Good Condition

How to Avoid Common Car Problems?
Credit : whatcanu.com

Keeping your battery in good condition is crucial for ensuring your vehicle starts reliably and runs smoothly. A healthy battery not only powers your engine but also supports all the electrical components in your car, from headlights to infotainment systems. Here are some essential practices to maintain your battery and extend its lifespan.

First, regularly check the battery terminals for corrosion, which can appear as a white, powdery substance. Corrosion can hinder the flow of electricity and lead to starting issues. If you notice any buildup, clean the terminals with a mixture of baking soda and water, scrubbing gently with a brush. This simple maintenance task can significantly improve your battery’s performance.

Next, ensure that the battery is securely mounted in its tray. Vibration from driving can cause internal damage to the battery, leading to premature failure. If you notice any looseness, tighten the hold-downs to keep the battery stable.

Temperature plays a significant role in battery health. Extreme heat can evaporate battery fluid, while severe cold can reduce its capacity. During the summer months, park in shaded areas or garages whenever possible, and in winter, consider using a battery blanket to maintain optimal temperatures.

Finally, it’s wise to have your battery tested regularly, especially if it’s over three years old. Many auto parts stores offer free battery testing, which can provide you with information about its charge level and overall health. If your battery is showing signs of weakness, replacing it before it fails can save you from being stranded.

By following these simple yet effective tips, you can keep your battery in top shape, ensuring your car starts when you need it and minimizing the risk of unexpected breakdowns. Regular attention to your battery can lead to a more reliable driving experience and help prevent common car problems before they arise.

6. Importance of Brake Inspections

When it comes to vehicle safety, one of the most critical components to monitor is your brakes. Brake inspections are not just a routine check; they’re an essential part of vehicle maintenance that can prevent catastrophic accidents and costly repairs down the line. Your brakes are responsible for slowing down or stopping your vehicle, and even the slightest issue can have serious consequences.

Regular brake inspections help identify problems before they escalate. During an inspection, a qualified technician will check the brake pads, rotors, and fluid levels, looking for signs of wear or damage. Worn-out brake pads can lead to reduced stopping power and increased stopping distances, which is particularly dangerous in emergency situations. Moreover, neglecting to check the brake fluid can lead to air bubbles in the brake lines, resulting in a spongy pedal feel and compromised braking performance.

In addition to safety, proactive brake inspections can save you money in the long run. Addressing minor issues before they develop into major repairs can extend the lifespan of your braking system and help you avoid emergency service costs. For instance, replacing brake pads is significantly less expensive than having to replace damaged rotors or calipers due to neglect.

To ensure that your brakes are always in top condition, aim to have them inspected at least once a year or every 12,000 miles, whichever comes first. However, if you notice any unusual noises, vibrations, or changes in braking performance, don’t wait for your scheduled inspection—take your vehicle in immediately. By prioritizing regular brake inspections, you’re not just maintaining your car; you’re investing in your safety and peace of mind on the road.

7. How to Maintain Your Cooling System

How to Avoid Common Car Problems?
Credit : whatcanu.com

Maintaining your vehicle’s cooling system is crucial for preventing overheating and ensuring that your engine operates at optimal temperatures. A well-functioning cooling system not only extends the life of your engine but also enhances fuel efficiency and overall vehicle performance. Here are some essential tips to keep your cooling system in top shape.

First and foremost, regularly check the coolant level. Your engine relies on a proper balance of coolant and water to regulate its temperature. Make it a habit to inspect the coolant reservoir at least once a month, especially before long trips. If you notice that the coolant is low, top it up with a mixture of antifreeze and water, following the manufacturer’s recommendations for your specific vehicle.

Next, pay attention to the condition of your coolant. Over time, coolant can become contaminated with rust, debris, and other harmful substances. If it appears dirty or discolored, it might be time for a coolant flush. This process involves draining the old coolant and replacing it with fresh fluid, ensuring that your cooling system operates efficiently.

Additionally, inspect the radiator and hoses for any signs of wear or damage. Look for cracks, leaks, or bulges in the hoses, as these can lead to coolant loss and overheating. If you find any issues, replace the affected parts promptly. It’s also a good idea to clean the radiator fins, as dirt and debris can impede airflow, reducing its efficiency.

Don’t forget to check the thermostat as well. A malfunctioning thermostat can cause your engine to run too hot or too cold. If you notice any changes in your engine’s temperature gauge or experience fluctuating temperatures, consider having the thermostat tested and replaced if necessary.

Lastly, ensure that your vehicle’s water pump is functioning properly. This component is essential for circulating coolant throughout the engine. Listen for any unusual noises that might indicate a failing pump, and keep an eye out for coolant leaks under your vehicle. If you suspect an issue, it’s best to consult a professional mechanic.

By following these tips and incorporating regular maintenance into your car care routine, you can significantly reduce the risk of cooling system failures and enjoy peace of mind on the road. Remember, a little preventive care goes a long way in extending the lifespan of your vehicle and keeping it running smoothly.

8. Regularly Inspect Worn Belts and Hoses

Regularly inspecting worn belts and hoses is a crucial aspect of vehicle maintenance that can save you from unexpected breakdowns and costly repairs. Over time, the rubber in belts and hoses can degrade due to heat, friction, and exposure to various elements, leading to cracks, fraying, or even complete failure. These components play essential roles in your vehicle’s operation, from powering the alternator to circulating coolant, and neglecting them can result in significant issues down the road.

To stay ahead of potential problems, make it a habit to visually check your belts and hoses every few months. Look for signs of wear such as cracks, splits, or discoloration. If you notice any irregularities or if they feel brittle to the touch, it’s time to replace them. Pay special attention to high-stress areas, like the serpentine belt, which can wear out more quickly due to its continuous operation.

Don’t forget to inspect the connections as well. Hoses can develop leaks at their junction points, which can lead to fluid loss and overheating. Ensure that the clamps are tight and that there are no signs of coolant or oil seeping from the connections.

For extra peace of mind, consider scheduling a professional inspection during routine maintenance services. A trained mechanic can identify issues that may go unnoticed and advise on when to replace belts and hoses before they become a problem. By being proactive in your inspections, you not only extend the life of your vehicle but also ensure a smoother, more reliable driving experience.

9. The Benefits of Cleaning Your Fuel System

Keeping your fuel system clean is one of the most crucial yet often overlooked aspects of vehicle maintenance. A well-maintained fuel system ensures that your engine runs smoothly and efficiently, providing you with optimal performance and fuel economy. Over time, however, deposits and contaminants can build up in your fuel lines, injectors, and filters, leading to a host of problems that can hinder your car’s performance and lifespan.

Regularly cleaning your fuel system can prevent these issues from occurring. For starters, it helps to eliminate carbon buildup and other residues that can cause misfires, reduced power, and even stalling. When your fuel injectors are clean, they spray a fine mist of fuel into the combustion chamber, which promotes better combustion and improves your vehicle’s overall efficiency. This not only leads to a smoother ride but also enhances your gas mileage, saving you money at the pump.

Moreover, a clean fuel system reduces the risk of engine knocking and pinging, which can lead to costly repairs if not addressed in time. By maintaining your fuel system, you’re not just preventing immediate issues; you’re also extending the life of your engine and other vital components. This proactive approach can save you considerable time and expense in the long run.

Incorporating a fuel system cleaning into your regular maintenance schedule is a simple yet effective way to bolster your car’s performance. Whether you choose to do it yourself with fuel additives or opt for professional cleaning services, the benefits are clear: a cleaner fuel system translates to a healthier engine and a more enjoyable driving experience. So don’t wait until you experience a problem—take the initiative to keep your fuel system in top shape and enjoy the peace of mind that comes with it.

10. Scheduling Routine Tune-Ups

Scheduling routine tune-ups is one of the most effective strategies to prevent common car problems before they escalate into costly repairs. Just like regular check-ups are essential for maintaining your health, tune-ups are vital for ensuring your vehicle runs smoothly and efficiently. These preventive maintenance appointments typically involve a comprehensive inspection of critical components, including the engine, brakes, tires, and fluid levels.

During a routine tune-up, a certified mechanic will check the condition of your spark plugs, replace air and fuel filters, and inspect belts and hoses for wear and tear. This proactive approach not only helps identify potential issues early but also optimizes your car’s performance, enhancing fuel efficiency and extending the lifespan of your vehicle.

It’s important to follow the manufacturer’s recommended maintenance schedule, typically found in your owner’s manual, which outlines when to schedule these tune-ups. Setting calendar reminders or syncing them with your vehicle’s mileage can help ensure you never miss an appointment. Consider establishing a relationship with a trusted mechanic who understands your car’s specific needs and can provide tailored advice based on its make and model.

Additionally, routine tune-ups are an opportunity to address any minor concerns you might have noticed while driving. Whether it’s a strange noise or a warning light on the dashboard, bringing these issues to your mechanic’s attention can prevent them from developing into more significant problems. By investing a little time and effort into regular tune-ups, you can save yourself from the stress of unexpected breakdowns and enjoy a smoother, safer ride for years to come.

11. Tips for Seasonal Vehicle Preparation

Preparing your vehicle for the changing seasons is crucial to ensure its longevity and your safety on the road. Each season brings its own unique challenges, and proactive maintenance can save you from common car problems down the line.

**Spring:** As winter melts away, it’s the perfect time to inspect your vehicle after months of harsh weather. Start by checking your windshield wipers and replacing any worn blades to ensure clear visibility during spring showers. Don’t forget to inspect your tires for tread wear and ensure they are inflated to the recommended pressure; fluctuating temperatures can affect tire performance. Additionally, consider getting an oil change to remove any buildup that may have accumulated during the colder months.

**Summer:** The hot sun can take a toll on your vehicle, especially on the battery and cooling systems. As temperatures rise, check your battery for corrosion and test its charge; a weak battery can leave you stranded in the heat. Make sure your coolant levels are adequate and inspect the radiator for leaks to prevent overheating. It’s also wise to examine your air conditioning system to ensure it’s functioning effectively, providing you with comfort during those sweltering drives.

**Fall:** As leaves begin to fall, so too do the temperatures. This is the ideal time to prepare your vehicle for the chilly months ahead. Inspect your headlights and taillights to ensure they are bright and functioning; shorter days mean more driving in low light. Additionally, check your antifreeze levels and replace any worn or cracked hoses to prevent freezing and engine damage. Don’t forget to swap out summer tires for winter ones if you live in an area prone to snow and ice.

**Winter:** Cold weather can be harsh on your vehicle, so it’s essential to take special precautions. Begin by checking your battery’s health, as extreme temperatures can diminish its capacity. Ensure your tires have adequate tread for winter conditions and consider switching to snow tires for added traction. Keep an emergency kit in your trunk, complete with blankets, snacks, and basic tools, in case you encounter unexpected weather conditions.

By taking these seasonal steps, you can prevent common car problems and ensure your vehicle stays road-ready all year round. Regular maintenance and preparation not only enhance your safety but also prolong the life of your vehicle, giving you peace of mind for every journey ahead.

12. Keeping an Eye on Warning Lights

Keeping an eye on warning lights is not just a good habit; it’s a critical preventive measure that can save you time, money, and a whole lot of frustration. Modern vehicles come equipped with a sophisticated dashboard that serves as your car’s communication center, alerting you to potential issues before they escalate into serious problems. Ignoring these warning lights can lead to catastrophic breakdowns or costly repairs, which could have easily been avoided with timely intervention.

Take a moment to familiarize yourself with the various warning lights on your dashboard. Each symbol is designed to convey a specific message about your car’s health, from engine malfunctions to tire pressure issues. For instance, the check engine light, which often strikes fear into the hearts of drivers, can indicate anything from a minor issue, like a loose gas cap, to a major engine problem requiring immediate attention. Similarly, the oil pressure warning light is a crucial indicator that your engine’s lubrication system may be compromised and needs urgent investigation.

Regularly monitoring these lights can be your first line of defense against unforeseen car troubles. Pay attention to any lights that illuminate while driving; don’t dismiss them as mere annoyances. If a warning light appears, consult your owner’s manual for guidance on the next steps. For instance, some lights may require you to pull over and stop driving immediately, while others may allow you to reach a safe location before taking action.

Additionally, consider establishing a routine where you take a few moments each week to check your dashboard lights and ensure they are functioning properly. If a warning light comes on, don’t hesitate to schedule a diagnostic check with a trusted mechanic. By being proactive and attentive to these signals, you can maintain your vehicle’s performance and longevity while avoiding the stress of unexpected breakdowns. Remember, a little vigilance goes a long way in keeping your car—and your peace of mind—on the road for years to come.

13. The Value of Professional Inspections

When it comes to maintaining the health of your vehicle, the importance of professional inspections cannot be overstated. Regular inspections are your first line of defense against common car problems that can lead to costly repairs down the road. A skilled mechanic has the expertise to identify potential issues that may not be visible to the untrained eye.

Imagine driving your car, oblivious to a subtle but significant problem brewing beneath the surface—like a minor oil leak, worn-out brake pads, or a cooling system that’s beginning to fail. These issues often start small but can escalate into major headaches if left unchecked. By scheduling routine inspections, you’re not just investing in your car’s longevity; you’re also ensuring your safety on the road.

Professional inspections typically include a comprehensive review of critical components, such as the engine, transmission, brakes, and tires. Mechanics often employ diagnostic tools to assess the vehicle’s electronic systems, catching glitches before they become major malfunctions. Furthermore, they can provide invaluable advice on maintenance practices tailored to your specific vehicle model and driving habits.

Additionally, building a relationship with a trusted mechanic can lead to personalized service and a better understanding of your vehicle’s history. They can track recurring issues, recommend preventative measures, and help you establish a maintenance schedule that aligns with your driving patterns.

In essence, prioritizing professional inspections is not just about preventing car problems—it’s about fostering a proactive approach to vehicle care that protects your investment and enhances your driving experience. So, don’t wait for a warning light to appear on your dashboard; make professional inspections a regular part of your vehicle maintenance routine, and enjoy peace of mind knowing that you are doing everything you can to keep your car in top shape.

14. Creating a Maintenance Checklist

Creating a maintenance checklist is a practical and proactive approach to ensuring your vehicle remains in optimal condition. Just as we schedule regular check-ups for our health, your car deserves the same level of attention to prevent unforeseen issues down the road. A well-structured checklist serves as a roadmap for routine maintenance, helping you track essential tasks and timelines.

Start by breaking down your checklist into categories: engine, fluids, tires, brakes, and electrical systems. For the engine, note tasks such as checking the oil level, inspecting belts and hoses for wear, and replacing the air filter at recommended intervals. Under fluids, include checks for coolant, brake fluid, transmission fluid, and windshield washer fluid—each vital for your car’s performance and longevity.

Tire maintenance is another crucial aspect; keep track of tire pressure checks, rotations, and tread depth inspections. Not only does this help improve fuel efficiency, but it also enhances safety on the road. Don’t forget to include brake inspections and fluid replacements, as well as a periodic check of your car’s battery and electrical system to ensure everything is functioning as it should.

Once you’ve compiled your checklist, set reminders on your phone or calendar to prompt you for each maintenance task. This simple habit can save you money in the long run by identifying potential problems before they escalate into costly repairs. By committing to a regular maintenance routine, you not only enhance the performance of your vehicle but also extend its lifespan, ensuring that your journeys are smooth and worry-free.

15. Resources for Car Maintenance Education

In today’s fast-paced world, knowledge is power—especially when it comes to maintaining one of your most valuable assets: your car. Utilizing various resources for car maintenance education can empower you to spot issues before they escalate into costly repairs. From online tutorials to local workshops, a wealth of information is at your fingertips, enabling you to take control of your vehicle’s upkeep.

Start with reputable websites and forums dedicated to automotive care. Platforms like YouTube are treasure troves of instructional videos, where seasoned mechanics and car enthusiasts share their expertise on everything from oil changes to brake pad replacements. Watching these step-by-step guides can boost your confidence and equip you with the practical skills needed to tackle minor maintenance tasks yourself.

Additionally, consider enrolling in local community college courses or workshops that focus on car maintenance and repair. Many of these programs offer hands-on experience, allowing you to learn in a supportive environment while gaining valuable insights from experienced instructors. Participating in these classes not only enhances your understanding of car mechanics but also connects you with fellow car owners who share your interests.

Don’t overlook the importance of manuals and guides specific to your vehicle model. Most manufacturers provide comprehensive user manuals that outline routine maintenance schedules, troubleshooting tips, and specifications for parts and fluids. Keeping these documents accessible can help you stay on top of your car’s needs.

Finally, podcasts and blogs dedicated to automotive topics can be excellent resources for staying informed about the latest trends, technology, and maintenance tips in the automotive world. Subscribing to these can provide you with fresh insights and reminders to keep your vehicle in top shape.

By actively seeking out these resources, you can arm yourself with the knowledge necessary to prevent common car problems, ensuring smoother rides and longer-lasting performance.

In conclusion, taking proactive steps to maintain your vehicle can save you from the stress and expense of common car problems down the road. By implementing the essential tips outlined in this article—such as regular inspections, timely oil changes, and keeping an eye on your tire health—you can significantly extend the life of your car and enhance its performance. Remember, a little attention today can prevent major headaches tomorrow. We hope you found this guide helpful and encourage you to share your own car care experiences in the comments below. Safe travels on the road ahead!

How to Handle Car Repairs and Maintenance?

Owning a car is not just about the thrill of the open road; it requires a commitment to regular care and maintenance to keep it running smoothly and efficiently.

Just like any other valuable asset, your vehicle demands attention to ensure it remains in peak condition. From routine oil changes and tire rotations to more complex repairs, understanding the ins and outs of car care can save you time, money, and frustration. In this comprehensive guide, we will delve into the essential aspects of car maintenance and repairs, empowering you with the knowledge to recognize potential issues before they escalate and to confidently tackle common challenges. Whether you’re a seasoned gearhead or a first-time car owner, mastering car care will enhance your driving experience and extend the life of your vehicle. get ready to roll up your sleeves and unlock the secrets to keeping your car in top shape for years to come!

1. Introduction to Car Care: Importance of Regular Maintenance

How to Handle Car Repairs and Maintenance?
Credit : whatcanu.com

Car care is an essential aspect of vehicle ownership that goes far beyond simply filling up the gas tank or washing the exterior. regular maintenance is the backbone of a well-functioning vehicle, serving as the key to ensuring safety, performance, and longevity. Just as we prioritize our health through routine check-ups and healthy habits, our cars require a similar commitment to upkeep.

Neglecting regular maintenance can lead to a host of problems, ranging from minor inconveniences like reduced fuel efficiency to severe issues such as engine failure or costly repairs. Imagine the peace of mind that comes with knowing your car is in optimal condition, ready to take you wherever you need to go without the worry of unexpected breakdowns. Regular maintenance not only enhances the reliability of your vehicle but also preserves its resale value, a crucial factor to consider if you plan to upgrade or sell your car in the future.

Moreover, regular check-ups and servicing can significantly reduce the risk of accidents caused by mechanical failures. By adhering to a maintenance schedule that includes oil changes, tire rotations, brake inspections, and fluid checks, you are actively investing in your safety and the safety of your passengers.

In this comprehensive guide, we will delve into the importance of regular maintenance and explore practical tips and strategies for car care that will help you master the art of maintaining your vehicle. From understanding your car’s specific needs to knowing when to seek professional help, we aim to empower you with the knowledge necessary to keep your car running smoothly for years to come. Whether you’re a seasoned car enthusiast or a first-time owner, this guide is designed to equip you with the insights and skills to ensure that your vehicle remains a reliable companion on all your journeys.

2. Understanding Your Vehicle: Key Components and Systems

To truly master car care, it’s essential to develop a comprehensive understanding of your vehicle’s key components and systems. Your car is a complex machine comprised of numerous interconnected parts, each playing a vital role in its overall performance and safety.

Start with the engine, often referred to as the heart of your vehicle. It converts fuel into mechanical energy, powering everything from the wheels to the electrical systems. Familiarize yourself with its major components, including the cylinders, pistons, and camshaft, as well as the importance of regular oil changes to maintain engine health.

Next, delve into the transmission system, which is responsible for transferring power from the engine to the wheels. Understanding whether your vehicle has an automatic or manual transmission can help you grasp the nuances of shifting gears and the significance of maintaining transmission fluid levels.

Brakes are another crucial system that demands your attention. From the brake pads and rotors to the brake lines and fluid, knowing how these elements work together can significantly impact your safety on the road. Regular inspections and timely replacements will ensure your brakes remain responsive.

Additionally, don’t overlook the importance of the suspension system, which absorbs shocks and maintains vehicle stability. Comprising springs, shock absorbers, and struts, a well-maintained suspension system contributes to a smooth ride and better handling.

Lastly, familiarize yourself with your vehicle’s electrical system, which powers everything from headlights to infotainment systems. Understanding the battery, alternator, and starter motor can help you troubleshoot common electrical issues and avoid unexpected breakdowns.

By taking the time to learn about these key components and systems, you empower yourself to perform basic maintenance, make informed repair decisions, and ultimately extend the life of your vehicle. This knowledge is the cornerstone of effective car care, ensuring that you keep your ride running smoothly for years to come.

3. Essential Tools for DIY Car Maintenance

How to Handle Car Repairs and Maintenance?
Credit : whatcanu.com

When it comes to DIY car maintenance, having the right tools is essential for ensuring that your vehicle runs smoothly and performs optimally. Whether you’re a seasoned mechanic or a novice just starting on your car care journey, equipping yourself with a solid toolkit can make all the difference. Here’s a rundown of the essential tools that every car enthusiast should have on hand:

**1. Socket Set:** A good-quality socket set is indispensable for any repair or maintenance task. Look for a set that includes various sizes, both metric and standard, to accommodate different bolts and nuts found across various makes and models. Swivel sockets can also be a valuable addition, as they allow you to reach hard-to-access areas with ease.

**2. Wrenches:** Like socket sets, a complete wrench set is crucial for loosening and tightening various components. Consider a combination of open-end and box-end wrenches to tackle a wide range of jobs. Adjustable wrenches can also be handy for those unexpected repairs.

**3. Screwdrivers:** A set of flathead and Phillips screwdrivers in various sizes will help you tackle everything from interior fixes to exterior components. Magnetic screwdrivers can be particularly useful for retrieving dropped screws in tight spots.

**4. Pliers:** Pliers are versatile tools that can assist in gripping, twisting, and cutting. Needle-nose pliers are excellent for reaching into confined spaces, while slip-joint pliers offer the flexibility needed for various tasks. Don’t forget wire cutters, as they are ideal for electrical work and general repairs.

**5. Jack and Jack Stands:** Safety is paramount when working under your car, so invest in a reliable hydraulic jack and sturdy jack stands. This combination allows you to lift your vehicle securely for tire changes, brake work, and more, giving you peace of mind while you work.

**6. Tire Pressure Gauge:** Keeping your tires properly inflated is essential for safety and fuel efficiency. A tire pressure gauge is a simple yet effective tool that helps you monitor and adjust tire pressure regularly.

**7. Oil Filter Wrench:** Changing your oil is one of the most critical maintenance tasks, and an oil filter wrench makes this job significantly easier. This tool helps you grasp and remove the oil filter without the mess or hassle of struggling with slippery surfaces.

**8. Multimeter:** If you’re venturing into electrical repairs, a multimeter is an invaluable tool. This device measures voltage, current, and resistance, helping you diagnose electrical issues with precision.

These essential tools not only empower you to handle routine maintenance with confidence but also enable you to tackle more complex repairs as your skills advance. As you build your toolkit, remember that quality matters. Investing in durable, reliable tools will not only make your car care tasks easier but also save you money in the long run by reducing the need for replacements. With the right gear at your disposal, you’re well on your way to mastering car care and keeping your vehicle in top shape for years to come.

4. Routine Maintenance: Oil Changes, Filters, and Fluids

Routine maintenance is the cornerstone of keeping your vehicle running smoothly and efficiently. Among the most critical components of this maintenance regimen are oil changes, filters, and fluids. Regularly attending to these elements not only enhances your car’s performance but also extends its lifespan, saving you money in the long run.

**Oil Changes**: Think of your engine oil as the lifeblood of your car. It lubricates the moving parts, reduces friction, and helps keep the engine cool. Over time, oil breaks down and becomes less effective, leading to increased wear and tear. Most experts recommend changing your oil every 3,000 to 7,500 miles, depending on your vehicle’s make and model, as well as the type of oil you use. Regular oil changes not only boost fuel efficiency but also promote a smoother ride and a healthier engine.

**Filters**: Your vehicle relies on several filters to function optimally, including the oil filter, air filter, and fuel filter. The oil filter traps contaminants and debris from the oil, ensuring that your engine receives clean lubrication. Similarly, the air filter prevents dirt and dust from entering the engine, promoting better combustion and improving fuel efficiency. The fuel filter ensures that the gasoline reaching your engine is free from impurities. Neglecting these filters can lead to decreased performance and potentially costly repairs.

**Fluids**: Beyond oil, your car requires a variety of fluids to operate properly. Coolant keeps your engine from overheating, brake fluid ensures your brakes function effectively, and transmission fluid is crucial for smooth shifting. Regularly checking and topping off these fluids is essential for maintaining your car’s health. A simple inspection can reveal leaks or low levels that need immediate attention, preventing minor issues from escalating into major problems.

Incorporating routine maintenance of oil changes, filters, and fluids into your car care regimen is a proactive approach that pays dividends. Not only will your vehicle perform better, but you’ll also enjoy peace of mind knowing that you’re taking the necessary steps to protect your investment. So, grab your owner’s manual, set a schedule, and make routine maintenance a priority—your car will thank you!

5. Tire Care: Rotation, Alignment, and Pressure Checks

How to Handle Car Repairs and Maintenance?
Credit : whatcanu.com

Tire care is a crucial aspect of vehicle maintenance that often goes overlooked, yet it plays a significant role in ensuring both safety and performance on the road. Properly maintaining your tires can enhance fuel efficiency, extend their lifespan, and improve your overall driving experience. In this section, we’ll delve into three key components of tire care: rotation, alignment, and pressure checks.

**Tire Rotation**
Regular tire rotation is essential for promoting even wear across all four tires. As you drive, different tires endure varying levels of stress depending on their position. For instance, front tires typically wear out faster due to the added weight of the engine and the demands of steering. By rotating your tires every 5,000 to 7,500 miles—or as recommended by your vehicle’s manufacturer—you can help ensure they wear evenly, ultimately prolonging their life and enhancing traction.

**Wheel Alignment**
Alignment is another critical aspect of tire care. When your wheels are misaligned, it can lead to uneven tire wear, steering issues, and decreased fuel efficiency. Signs that your vehicle may need a wheel alignment include a crooked steering wheel, the car pulling to one side, or visible uneven wear on your tires. It’s advisable to get a professional alignment check at least once a year or whenever you notice these symptoms, especially after hitting a pothole or curb.

**Tire Pressure Checks**
Maintaining the proper tire pressure is vital for optimal vehicle performance. Under-inflated tires can lead to reduced fuel efficiency, increased tire wear, and compromised safety due to decreased traction. Conversely, over-inflated tires can cause a harsher ride and may lead to blowouts. To ensure your tires are at the correct pressure, check them at least once a month and before long trips. Use a reliable tire pressure gauge and consult your vehicle’s manual for the recommended PSI (pounds per square inch).

Incorporating these tire care practices into your maintenance routine will not only enhance the longevity of your tires but also contribute to a safer and more enjoyable driving experience. Remember, your tires are the only contact between your vehicle and the road—taking care of them is essential for mastering car care.

6. Brake System: Signs of Wear and How to Inspect

The brake system is arguably one of the most critical components of your vehicle, directly influencing your safety on the road. A well-functioning brake system ensures that you can stop effectively, providing peace of mind during daily commutes or long road trips. However, like any mechanical system, brakes can wear down over time, requiring regular inspection and maintenance. Understanding the signs of wear and knowing how to inspect your brakes can greatly enhance your driving experience and safety.

### Signs of Wear

As a driver, it’s essential to be attuned to the subtle signals that your brake system might be sending. Here are some common signs of wear to watch out for:

1. **Squeaking or Squealing Noises**: If you hear a high-pitched squeal when applying the brakes, it could indicate that your brake pads are worn down and need replacement. Many brake pads are designed with a wear indicator that produces this sound as a warning.

2. **Grinding Sounds**: A grinding noise when braking suggests that the brake pads have worn completely through and metal is grinding against metal. This situation can lead to more severe damage to your brake rotors and should be addressed immediately.

3. **Vibration or Pulsation**: If you feel a vibration or pulsing sensation in the brake pedal when applying the brakes, it may indicate warped brake rotors. This issue can compromise your braking power and should be inspected by a professional.

4. **Dashboard Warning Light**: Most modern vehicles are equipped with a dashboard warning light that illuminates when there’s an issue with the brake system. If this light appears, it’s crucial to investigate the underlying problem promptly.

5. **Decreased Responsiveness**: If you notice that your brakes are not responding as quickly or effectively as they used to, it may be time to inspect them. A spongy feel when pressing the pedal can signal air in the brake lines or low brake fluid.

### How to Inspect Your Brake System

Inspecting your brake system doesn’t necessarily require a mechanic’s expertise, but it does demand a bit of diligence and the right tools. Here’s a straightforward approach to conducting a brake inspection:

1. **Visual Inspection**: Start by visually examining your brake pads and rotors through the wheel spokes. Look for signs of wear, such as thin pads or scoring on the rotors. If you see less than a quarter of an inch of pad material, it’s time for a replacement.

2. **Check Brake Fluid**: Locate the brake fluid reservoir under the hood. Ensure that the fluid level is within the recommended range marked on the reservoir. If the fluid is low, it may indicate a leak in the system, which requires immediate attention.

3. **Assess Brake Lines**: Inspect the brake lines for any signs of wear, cracking, or leaks. Damaged lines can lead to brake failure, so it’s essential to address any issues before they escalate.

4. **Test Drive**: After your visual inspection, take your vehicle for a short drive to test the brakes. Pay attention to how the brakes feel and listen for any abnormal noises. If anything feels off, it’s best to have a professional take a closer look.

By staying vigilant and regularly inspecting your brake system, you can catch potential problems early and ensure that your vehicle remains safe and reliable. Remember, your brakes are your first line of defense on the road; don’t wait until it’s too late to give them the care they deserve

7. Battery Maintenance: Tips for Longevity and Performance

How to Handle Car Repairs and Maintenance?
Credit : whatcanu.com

Battery maintenance is a crucial yet often overlooked aspect of vehicle care that can significantly impact your car’s performance and longevity. A healthy battery ensures that your vehicle starts reliably and runs smoothly, while a poorly maintained battery can lead to frustrating breakdowns and costly replacements. To help you master the art of battery upkeep, here are some essential tips to ensure your battery remains in top-notch condition.

First and foremost, regular inspection is key. Take a moment to visually check your battery every month for any signs of corrosion or leakage. Corrosion appears as a white, ashy substance around the terminals and can hinder the battery’s performance by impeding the flow of electricity. If you notice any buildup, clean it off using a mixture of baking soda and water, taking care to wear gloves and eye protection. A clean battery will not only improve performance but will also extend its lifespan.

Next, ensure that the battery connections are tight and secure. Loose connections can lead to inconsistent power supply, causing your vehicle to stall or fail to start. If you find that the terminals are corroded, consider replacing them with new ones to ensure a solid connection.

Temperature extremes can also affect battery performance. If you live in an area with harsh winters or scorching summers, investing in a battery blanket or insulation can help maintain optimal operating temperatures. Additionally, be mindful of the age of your battery; most batteries have a lifespan of three to five years. If your battery is nearing the end of this range, consider having it tested at a local automotive store or by a professional mechanic to gauge its remaining life.

Lastly, remember to drive your vehicle regularly. Batteries can discharge if left unused for extended periods. If you know you won’t be driving your car for a while, consider using a battery maintainer or trickle charger to keep it charged without overloading it.

By following these simple yet effective battery maintenance tips, you can enhance your car’s performance, prevent unexpected issues, and prolong the life of your battery. With a little attention and care, you’ll keep your car running smoothly and ensure that it reliably gets you where you need to go.

8. Understanding Engine Diagnostics: When to Seek Help

Understanding engine diagnostics is crucial for every car owner who wants to keep their vehicle in top shape. The engine is the heart of your car, and when it starts to show signs of trouble, it can be daunting to figure out what’s wrong. Modern vehicles are equipped with an array of sensors and onboard computers that monitor a multitude of systems, making engine diagnostics more sophisticated than ever.

But how do you know when it’s time to seek professional help? Firstly, pay attention to warning lights on your dashboard. A check engine light, for instance, is a universal signal that something needs attention. While it may be tempting to ignore it, doing so can lead to more severe problems down the road.

Listen to your engine; it often communicates through sounds. Unusual noises like knocking, rattling, or hissing can indicate underlying issues that require expert investigation. Additionally, if you notice a decrease in performance, such as a drop in acceleration or a rough idling experience, it’s time to consult a professional. These symptoms might be linked to problems with fuel injectors, spark plugs, or even more serious mechanical failures.

Moreover, keep an eye on your fuel efficiency. If you find yourself making more frequent trips to the gas station without changing your driving habits, your engine may not be operating at its best, and diagnostics may be necessary.

Ultimately, understanding the basics of engine diagnostics empowers you to make informed decisions about your vehicle’s health. Don’t hesitate to seek help from a qualified mechanic when faced with these indicators. Early intervention can save you from costly repairs and keep your car running smoothly for years to come. Remember, when it comes to engine health, an ounce of prevention is indeed worth a pound of cure.

9. Cooling System: Importance of Radiator Maintenance

The cooling system is one of the unsung heroes of your vehicle’s performance, playing a crucial role in preventing engine overheating and ensuring optimal operation. At the heart of this system lies the radiator, a vital component that dissipates heat generated by the engine. Proper radiator maintenance is not just about prolonging the life of your vehicle; it’s about safeguarding your investment and ensuring your safety on the road.

Over time, radiators can become clogged with debris, rust, and sediment, which can impede their ability to effectively cool the engine. Regularly flushing the coolant and checking for leaks or corrosion is essential to maintain the radiator’s efficiency. A well-maintained radiator ensures that the coolant circulates smoothly, absorbing heat from the engine and releasing it into the air, thereby preventing potential overheating and costly repairs.

Moreover, the importance of checking the radiator’s hoses and connections cannot be overstated. Over time, hoses can become brittle and develop leaks, leading to a drop in coolant levels and, ultimately, engine failure. Inspecting these components for any signs of wear can save you from the headaches and expenses associated with a breakdown.

In addition to routine checks, consider the quality of the coolant you use. A mixture of antifreeze and water is standard, but it’s essential to use a high-quality coolant that meets your vehicle’s specifications. This not only enhances the performance of your radiator but also extends the lifespan of the entire cooling system.

In essence, prioritizing radiator maintenance is a straightforward yet powerful way to enhance your vehicle’s longevity and performance. By incorporating regular inspections and maintenance into your car care routine, you’ll ensure that your engine runs smoothly and efficiently, giving you peace of mind on every journey.

10. Electrical System Basics: Troubleshooting Common Issues

Understanding the electrical system of your vehicle is crucial for any car owner. This intricate web of wiring, fuses, and components is responsible for everything from starting the engine to powering your headlights. By mastering the basics of your car’s electrical system, you’ll be equipped to troubleshoot common issues that can arise, potentially saving you time and money.

One of the most frequent problems drivers encounter is a dead battery. If your car refuses to start and you hear nothing but a faint click, it’s likely time to check your battery connections. Loose or corroded terminals can inhibit the flow of electricity, so make sure they’re clean and securely fastened. If the battery is substantially old or failing, a replacement might be in order.

Another common issue revolves around blown fuses. If certain electrical components, like the radio or dashboard lights, suddenly stop working, a blown fuse could be the culprit. Consult your owner’s manual to locate the fuse box and check for any burnt fuses. Replacing a fuse is usually a quick and inexpensive fix, and it can restore functionality in no time.

Additionally, pay attention to warning lights on your dashboard. The check engine light, in particular, can signify a range of issues, some of which may be electrical in nature. While it can be tempting to ignore this light, it’s wise to have a diagnostic scan performed to identify the underlying problem. Many auto parts stores offer this service for free, allowing you to understand the issue without incurring hefty mechanic fees.

Lastly, don’t overlook the importance of regular maintenance. Keeping your battery terminals clean, ensuring that all electrical connections are secure, and routinely inspecting the wiring for signs of wear can prevent many electrical issues before they arise. By familiarizing yourself with these basics and addressing any concerns promptly, you’ll not only keep your vehicle running smoothly but also gain greater confidence in your car care abilities.

11. Body Care: Cleaning, Waxing, and Paint Protection

When it comes to mastering car care, body maintenance is often overlooked but is crucial for preserving your vehicle’s aesthetic appeal and structural integrity. Your car’s exterior is not only the first thing people notice but also its first line of defense against environmental elements. Neglecting this aspect can lead to a myriad of issues, including rust, paint damage, and decreased resale value.

**Cleaning** is the foundation of body care. Regular washing removes dirt, grime, and road salt, which can accumulate and cause corrosion over time. Use a pH-balanced car shampoo and a soft sponge or microfiber cloth to prevent scratching the paint. Don’t forget to clean the wheels and wheel wells, as brake dust and road debris can also cause damage if left unattended. For added protection, consider using a clay bar treatment once or twice a year. This technique eliminates embedded contaminants, leaving your paint smooth and ready for the next step.

**Waxing** is essential to provide a protective layer against UV rays, bird droppings, tree sap, and other potential hazards. Applying a high-quality wax every three to six months not only enhances your car’s shine but also creates a barrier that can repel water and dirt. When waxing, choose a cool, shaded area to work in, and apply the wax in thin, even coats using a soft applicator pad. Buffing with a microfiber towel will give your car that glossy finish while ensuring you don’t leave any residue behind.

Finally, **paint protection** is a vital component of body care. Beyond waxing, consider investing in a ceramic coating or paint sealant. These products offer long-lasting protection from the elements and significantly reduce the frequency of cleaning needed. Ceramic coatings create a strong bond with your car’s paint, providing a hydrophobic surface that repels water and dirt, while also enhancing the depth and clarity of the color.

Incorporating a routine of thorough cleaning, regular waxing, and applying paint protection will not only keep your car looking showroom-ready but will also preserve its value for years to come. Recognizing the importance of body care ensures that your investment remains protected against the wear and tear of daily driving, allowing you to enjoy your vehicle to its fullest.

12. Seasonal Maintenance: Preparing Your Car for Winter and Summer

When it comes to car care, seasonal maintenance is crucial for ensuring your vehicle remains reliable and safe throughout the year. Each season brings its own set of challenges and conditions that can affect your car’s performance. Preparing your vehicle for winter and summer not only prolongs its lifespan but also enhances your driving experience.

**Preparing for Winter:**

As the temperatures drop and the roads become slick with ice and snow, it’s essential to winterize your vehicle. Start by checking your battery, as cold weather can reduce its efficiency. Ensure your battery terminals are clean and free from corrosion. Next, inspect your tires; winter tires, with their specialized tread patterns, provide better grip on snow and ice, making them a wise investment for colder climates. Additionally, check your windshield wipers and fluid levels. Winter wiper blades are designed to handle the harsh conditions, while antifreeze should be topped off to prevent your engine from freezing.

Don’t forget to examine your brakes and lights, as visibility and stopping power are critical in winter driving. A complete check-up will not only give you peace of mind but also ensure you’re ready for any unexpected weather.

**Preparing for Summer:**

As the sun shines brighter and temperatures rise, your car faces a different set of challenges. Begin with an inspection of your cooling system, as overheating is a common issue in the summer months. Check your coolant levels and the condition of hoses and belts to prevent breakdowns on hot days. Make sure your air conditioning is functioning properly to keep you comfortable during those sweltering drives.

Just like in winter, tire care is paramount; check the tire pressure regularly, as heat can cause it to increase, leading to potential blowouts. Also, ensure your wiper blades are in good condition, as summer storms can be sudden and intense. Finally, consider a thorough cleaning of your vehicle. Dust, pollen, and debris can accumulate, not only affecting aesthetics but also your car’s performance.

By investing time in seasonal maintenance, you’re not just protecting your vehicle; you’re enhancing its efficiency and safety year-round. Embrace the changes in climate by being proactive, and your car will reward you with a smoother, more reliable ride no matter the season.

13. DIY vs. Professional Repairs: When to Call a Mechanic

When it comes to car care, one of the most pivotal decisions you’ll face is whether to tackle repairs yourself or call in a professional mechanic. Understanding the boundaries of your mechanical skills and the complexity of the issue at hand is crucial for both your safety and your vehicle’s longevity.

**DIY Repairs: A Hands-On Approach**
For minor repairs and routine maintenance, such as changing the oil, replacing air filters, or swapping out windshield wipers, diving into DIY can be a rewarding experience. Not only do these tasks save you money, but they also empower you with knowledge about your vehicle. There are countless online resources, forums, and video tutorials available that make it easier than ever to learn these skills. Plus, there’s a certain satisfaction that comes from successfully completing a repair on your own, adding to your confidence as a car owner.

However, it’s essential to be realistic about your capabilities. If you’re not comfortable working with tools or lack the necessary experience, attempting more complicated tasks—like brake replacements, engine repairs, or electrical issues—can lead to mistakes that may end up costing you more in the long run.

**When to Call a Professional**
On the other hand, certain repairs simply demand the expertise of a trained mechanic. If you encounter persistent warning lights on your dashboard, strange noises coming from the engine, or issues with the braking system, it’s best to seek professional help immediately. Mechanics have the diagnostic tools and experience to pinpoint problems that may not be visible to the untrained eye. Furthermore, they can ensure that repairs are completed to industry standards, providing peace of mind that your vehicle is safe and reliable.

Additionally, if a repair involves intricate systems—such as the transmission or electrical components—it’s wise to let a professional handle it. Not only can these repairs be time-consuming, but they also require specialized knowledge and equipment that the average car owner may not possess.

In conclusion, balancing DIY efforts with professional assistance is key to mastering car care. By recognizing your limits and knowing when to seek help, you can maintain your vehicle effectively, ensuring it runs smoothly for years to come. Always remember, your safety on the road is paramount, so don’t hesitate to call a mechanic when in doubt!

14. Cost-Effective Car Care Tips and Tricks

When it comes to maintaining your vehicle, keeping costs low while ensuring your car runs smoothly can feel like a daunting task. However, with a few smart strategies and a little bit of know-how, you can implement cost-effective car care tips and tricks that not only save you money but also extend the life of your vehicle.

First, regular maintenance is your best friend. Simple tasks such as changing your engine oil and filters at recommended intervals can prevent costly repairs down the road. Instead of rushing to a mechanic every time you notice something amiss, familiarize yourself with basic car maintenance. Invest in a good quality oil filter wrench and a jack to perform oil changes yourself, or check your owner’s manual for simple fluid checks, like coolant and brake fluid.

Next, consider keeping a close eye on your tire health. Properly inflated tires not only improve fuel efficiency but also enhance safety. Invest in a reliable tire pressure gauge and check your tire pressure regularly. Rotating your tires every 5,000 to 7,500 miles can also prolong their life, allowing you to get the most mileage out of your investment.

Additionally, DIY repairs can be a significant money-saver. With the wealth of online resources available, you can find step-by-step guides and video tutorials for tasks ranging from replacing brake pads to changing headlight bulbs. Just be sure to tackle projects within your skill set—some repairs are best left to professionals.

Finally, don’t overlook the importance of maintaining your car’s cleanliness. Regular washing and waxing not only keep your vehicle looking great but also protect the paint and body from rust and corrosion. A clean engine bay can help you spot leaks early, saving you from more expensive repairs later.

By adhering to these cost-effective car care tips and tricks, you’ll not only save money but also develop a deeper understanding of your vehicle, making you a more empowered and confident car owner. Remember, a little proactive care goes a long way in ensuring your car remains reliable and efficient for years to come.

15. Conclusion: Building a Long-Lasting Relationship with Your Vehicle

In conclusion, building a long-lasting relationship with your vehicle goes beyond mere ownership; it’s about understanding, respecting, and nurturing the intricate machine that serves as your companion on the road. Just like any significant relationship, it requires time, attention, and care. By mastering the fundamentals of car care, you empower yourself to make informed decisions that enhance your vehicle’s performance and longevity.

Regular maintenance is the cornerstone of this relationship. Commit to a schedule of routine checks—oil changes, tire rotations, brake inspections, and fluid top-offs. These practices not only prevent costly repairs down the line but also foster a sense of trust between you and your vehicle. When you take the time to understand its sounds, feels, and movements, you become attuned to its needs, allowing for early detection of potential issues before they escalate.

Moreover, investing in quality repairs when necessary reflects your commitment to your vehicle’s well-being. Don’t shy away from consulting professionals when the situation calls for expert advice. A well-cared-for car can provide a reliable and enjoyable driving experience, ensuring that it remains a source of joy and freedom for years to come.

Ultimately, the bond you create with your vehicle is built on knowledge and respect. Embrace the learning journey as you explore the ins and outs of car care, and your efforts will be rewarded with a reliable ride that stands the test of time. With dedication and patience, you can transform your driving experience, turning a simple mode of transport into a trusted partner in all your adventures. So take the wheel, invest in your vehicle’s future, and enjoy the open road ahead!

As we conclude our comprehensive guide to mastering car care, we hope you now feel empowered with the knowledge and skills to keep your vehicle running smoothly and efficiently. From routine maintenance to essential repairs, understanding your car’s needs can save you time and money while enhancing its longevity and performance. Remember, a well-maintained vehicle not only ensures your safety on the road but also contributes to a more enjoyable driving experience. So, roll up your sleeves, grab those tools, and embrace the journey of car care with confidence. Your vehicle will thank you for it! Happy driving!