How to Handle Car Problems on the Road?

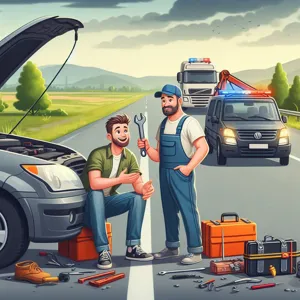
There’s nothing quite like the freedom of hitting the open road, but the thrill of adventure can quickly turn into a nightmare when unexpected car problems arise.

From sudden engine troubles to flat tires, being stranded or dealing with a malfunction can be stressful and daunting, especially when you’re far from home. However, with the right knowledge and preparation, you can navigate these challenges with confidence and ease. In this blog post, we’ll equip you with essential tips to help you master the road and tackle car issues on the go. Whether you’re a seasoned road warrior or a casual weekend traveler, understanding how to diagnose problems, perform basic repairs, and know when to seek help can make all the difference between an enjoyable journey and a frustrating ordeal. Get ready to turn those potential roadblocks into stepping stones for your next adventure!

1. Introduction: The Importance of Being Prepared for Car Problems

How to Handle Car Problems on the Road?
Credit : whatcanu.com

When you’re out on the open road, the freedom of travel can quickly turn into a stressful situation if car problems arise. Whether it’s a flat tire, engine trouble, or unexpected warning lights, being unprepared can leave you feeling vulnerable and anxious. That’s why understanding the importance of being prepared for car problems is crucial for every driver.

Preparation begins long before you hit the highway. It involves a blend of knowledge, tools, and a proactive mindset that can make all the difference in a potentially dire scenario. Imagine yourself on a serene country road or navigating through bustling city traffic, when suddenly your car begins to sputter. Without the right preparation, what could have been a minor inconvenience might spiral into a frustrating ordeal.

Think of your vehicle as a loyal companion on your adventures. Just like any relationship, it thrives on attention and care. Regular maintenance checks, a well-stocked emergency kit, and a basic understanding of your car’s functions can empower you to handle issues confidently when they arise. This not only enhances your safety but also saves you time and money by preventing small issues from turning into major repairs.

So, as we embark on this journey toward mastering road readiness, let’s explore the essential tips and strategies that will equip you to tackle car problems with ease and assurance, ensuring that your travels remain as smooth and enjoyable as possible.

2. Common Car Issues You Might Encounter on the Road

When you’re out on the road, the last thing you want is for your car to start acting up. However, knowing the common car issues you might encounter can empower you to handle these situations with confidence and ease. Here are some of the most frequent problems drivers face and what you can do about them:

**1. Flat Tires:** One of the most common issues, flat tires can occur due to punctures, wear and tear, or even unfavorable road conditions. If you notice your car pulling to one side or hear a sudden thump, it’s time to pull over and inspect your tires. Always carry a spare tire, jack, and tire iron, and familiarize yourself with how to change a tire. Additionally, keeping a portable air compressor in your trunk can help you inflate a tire if it loses pressure unexpectedly.

**2. Overheating Engine:** An overheating engine can lead to severe damage if not addressed promptly. Keep an eye on the temperature gauge; if it starts climbing toward the red zone, pull over and switch off the engine. Check the coolant levels and look for leaks. If you’re low on coolant, adding water can serve as a temporary fix until you can get to a mechanic.

**3. Dead Battery:** A battery can fail without warning, leaving you stranded. Signs of a failing battery include dim headlights, slow engine cranking, or electrical issues. Always keep jumper cables in your vehicle, and if you find yourself with a dead battery, don’t hesitate to ask for help from fellow motorists or call roadside assistance.

**4. Brake Problems:** If your brakes feel spongy, make unusual noises, or your car pulls to one side when braking, it’s crucial to address these issues immediately. Pull over to a safe location and inspect the brake fluid level. If it’s low, topping it off may be a temporary solution, but seek professional help as soon as possible, as brake problems can jeopardize your safety on the road.

**5. Warning Lights:** Dashboard warning lights can indicate various issues, from a loose gas cap to more severe engine problems. Don’t ignore these alerts. If a warning light appears, pull over to a safe spot and consult your owner’s manual to understand its significance. Some lights may allow you to drive a short distance, while others require immediate attention.

Being prepared for these common car issues can make all the difference in your travel experience. Regular maintenance and inspections can help minimize the risk of encountering these problems, but knowing how to address them when they arise will ensure you stay safe and confident on the road. Always carry a basic emergency kit, including tools and supplies, and consider investing in a roadside assistance plan for added peace of mind.

3. Essential Tools and Supplies to Keep in Your Vehicle

How to Handle Car Problems on the Road?
Credit : whatcanu.com

When it comes to tackling car problems on the go, being well-prepared can make all the difference. Keeping a well-stocked arsenal of essential tools and supplies in your vehicle is not just a precaution—it’s a smart strategy that can save you time, money, and stress when unexpected issues arise. Here’s a breakdown of must-have items that every driver should consider keeping in their trunk or glove compartment.

**1. Basic Tool Kit:** A compact tool kit is your first line of defense against minor repairs. Equip yourself with a set of screwdrivers (both flathead and Phillips), pliers, an adjustable wrench, and a tire iron. These tools are invaluable for tightening loose parts or making quick adjustments.

**2. Jumper Cables:** A dead battery can strike at the most inconvenient times. Keeping a quality set of jumper cables in your vehicle means you can help yourself or assist a fellow motorist in need. Just remember to familiarize yourself with the proper connection process to avoid any mishaps.

**3. Tire Repair Kit:** Flat tires are one of the most common roadside emergencies. A tire repair kit, which typically includes tire plugs and a sealant, can help you patch a puncture temporarily, allowing you to reach the nearest service station without a hitch.

**4. First Aid Kit:** Safety should always be your priority. A well-stocked first aid kit can help you manage minor injuries or medical emergencies until professional help arrives. Look for kits that include adhesive bandages, antiseptic wipes, gauze pads, and a small pair of scissors.

**5. Flashlight and Extra Batteries:** Whether it’s a late-night breakdown or inspecting your engine during the day, a reliable flashlight is essential. Opt for a durable, waterproof model, and don’t forget to pack extra batteries to ensure it’s always ready when you need it.

**6. Emergency Flares or Reflective Triangles:** In the event of a breakdown, visibility is crucial. Emergency flares or reflective triangles alert other drivers to your presence, helping to prevent accidents. These items are especially important if you find yourself stranded on a busy road.

**7. Water and Non-Perishable Snacks:** While not tools, having water and snacks on hand can be a lifesaver if you’re stuck waiting for assistance. Staying hydrated and keeping your energy up helps maintain your focus and composure during frustrating situations.

**8. Roadside Assistance Membership:** Though not a physical tool, investing in a roadside assistance membership can provide peace of mind. Access to professional help—whether it’s a tow, a tire change, or a fuel delivery—can be invaluable in a pinch.

By taking the time to equip your vehicle with these essential tools and supplies, you’re setting yourself up for success on the road. With the right preparation, you can confidently handle car problems as they arise, allowing you to focus on the journey ahead instead of the bumps along the way.

4. Understanding Warning Lights: What They Mean

When you’re on the road, your vehicle’s dashboard can often feel like a cryptic language, especially when warning lights start illuminating in vibrant shades of red and yellow. Understanding what these signals mean is crucial for your safety and the longevity of your car. Each light serves as a communication tool from your vehicle, alerting you to potential problems that may require immediate attention or simply a watchful eye.

For instance, a temperature warning light could signify that your engine is overheating, which, if ignored, might lead to more severe damage down the line. Similarly, a battery warning light can indicate that your car’s electrical system is facing issues, possibly affecting your ability to start the vehicle. On the other end of the spectrum, the check engine light can be a bit more ambiguous, ranging from a loose gas cap to a more serious engine malfunction.

To avoid panic when those lights come on, familiarize yourself with the symbols in your owner’s manual. Many modern vehicles also provide handy smartphone apps that can interpret these warnings for you, offering insights into the severity of the issue and recommended next steps.

Taking a proactive approach by keeping an eye on these warning lights allows you to address potential issues early, preventing roadside breakdowns and costly repairs. Remember, your dashboard is not just a panel of lights; it’s your car’s way of keeping you informed and ensuring that your journey remains safe and smooth. So, the next time a warning light flickers to life, don’t dismiss it—take a moment to understand its meaning and act accordingly.

5. How to Conduct a Quick Vehicle Inspection

How to Handle Car Problems on the Road?
Credit : whatcanu.com

When you’re on the road, a little preventive maintenance can go a long way in avoiding major headaches later. Conducting a quick vehicle inspection can help you catch potential issues before they escalate, ensuring your journey remains smooth and hassle-free. Here’s how to perform a rapid yet thorough assessment of your vehicle while keeping safety in mind.

**1. Start with the Exterior:** Before you even slide into the driver’s seat, take a moment to walk around your car. Check for any visible damage, like dents or scratches, and ensure that your tires are properly inflated. Look for any signs of wear or flatness in the tires; a quick visual inspection of the tread can reveal if they’re ready for replacement. Also, check your headlights and taillights to ensure they’re functioning properly—this is crucial for your safety, especially if you find yourself driving after dark.

**2. Pop the Hood:** Once you’re inside, don’t skip opening the hood. Begin by checking the oil level using the dipstick; low oil can lead to engine trouble. Next, inspect the coolant reservoir to ensure it’s filled to the recommended level, as overheating can be a common road hazard. Finally, take a look at the battery terminals for any corrosion and make sure they’re tightly connected.

**3. Assess the Brakes:** While you can’t always inspect brakes without professional tools, you can pay attention to any unusual sounds when you press the pedal or check for a spongy feel. If you notice anything alarming, it’s best to have them looked at before hitting the highway.

**4. Monitor Dashboard Indicators:** Your vehicle’s dashboard is equipped with warning lights designed to inform you of potential issues. Make it a habit to check these indicators before you drive. If any lights are illuminated, take them seriously and investigate further.

**5. Check Your Essentials:** Ensure you have a spare tire, jack, and emergency kit in case you need them while on the road. Familiarize yourself with the location of these items, as they can be lifesavers in unexpected situations.

Taking a few moments to conduct this quick vehicle inspection can help you avoid breakdowns and ensure you’re ready for the open road. A little diligence goes a long way in making sure your travels are not just enjoyable but safe as well. Remember, when it comes to car problems, an ounce of prevention is worth a pound of cure!

6. Dealing with a Flat Tire: Step-by-Step Guide

Encountering a flat tire while on the road can be a stressful experience, but with a little preparation and knowledge, you can handle it confidently and safely. Here’s a step-by-step guide to help you navigate this common roadside issue.

**1. Find a Safe Location**
As soon as you notice your tire is flat, remain calm and reduce your speed. Look for a safe place to pull over, away from traffic. An empty parking lot, a rest area, or the shoulder of a road with ample space is ideal. Once stationary, engage your hazard lights to alert other drivers.

**2. Gather Your Tools**
Before you start the repair, ensure you have the necessary tools. Typically, you’ll need a spare tire, a jack, a lug wrench, and possibly a tire pressure gauge. If you don’t already have these essentials in your vehicle, consider investing in a roadside emergency kit to prepare for any unexpected situation.

**3. Loosen the Lug Nuts**
Using the lug wrench, begin loosening the lug nuts on the flat tire. It’s best to do this while the tire is still on the ground, as it prevents the wheel from spinning. Turn the lug nuts counterclockwise until they are loose enough to remove by hand.

**4. Jack Up the Vehicle**
Next, locate the vehicle’s jack point, usually found beneath the frame near the flat tire. Place the jack securely under this point and begin lifting the vehicle until the flat tire is off the ground. Make sure the jack is stable, and avoid putting any part of your body under the vehicle while it’s elevated.

**5. Remove the Flat Tire**
With the vehicle raised, completely remove the loosened lug nuts and carefully take off the flat tire. Set it aside in a safe spot, ensuring it won’t roll away or become a tripping hazard.

**6. Install the Spare Tire**
Align the spare tire with the wheel hub, ensuring it fits snugly over the bolts. Hand-tighten the lug nuts onto the bolts, securing the spare tire in place. Once it’s on, lower the vehicle back to the ground.

**7. Tighten the Lug Nuts**
With the vehicle back on solid ground, use the lug wrench to tighten the lug nuts completely. It’s important to do this in a star pattern (across from each other) to evenly distribute the pressure and secure the tire properly.

**8. Store the Flat Tire and Tools**
Lastly, store the flat tire and your tools back in your vehicle. Don’t forget to check the pressure on the spare tire before you continue your journey, as some spares can also lose air over time.

Handling a flat tire doesn’t have to be a daunting task. With this step-by-step guide, you can get back on the road quickly and safely, equipped with the knowledge to tackle one of the most common car problems drivers face. Remember, regular maintenance checks and keeping your emergency kit stocked can make all the difference when trouble strikes.

7. Jumpstarting a Dead Battery: Tips and Tricks

How to Handle Car Problems on the Road?
Credit : whatcanu.com

A dead battery can be one of the most frustrating issues to encounter on the road, leaving you stranded and anxious about how to get back on track. Fortunately, jumpstarting a dead battery is a straightforward process that can be mastered with a bit of knowledge and preparation.

First and foremost, ensure you have a reliable set of jumper cables handy in your vehicle. These cables are usually color-coded—red for positive and black for negative—making it easy to connect them correctly. Before you begin, it’s essential to assess the situation: is the dead battery in your vehicle, or are you helping out a fellow motorist? If it’s your battery, you’ll need a good Samaritan with a functioning vehicle willing to lend a hand.

When you’re ready to jumpstart, park the working vehicle close enough to your car so the jumper cables can reach both batteries, but make sure the vehicles aren’t touching. Turn off both ignitions, as this reduces the risk of electrical surges. Attach the red cable to the positive terminal of the dead battery first, followed by the other end to the positive terminal of the good battery. Next, connect the black cable to the negative terminal of the good battery, and then attach the other end to an unpainted metal surface on the car with the dead battery. This serves as a ground and minimizes the risk of sparks near the battery.

Once everything is connected, start the working vehicle and let it run for a few minutes. This allows the dead battery to absorb some charge. Then, try starting your vehicle. If it sputters to life, great! Allow it to run for a while to help recharge the battery further. If it doesn’t start, double-check your connections and give it another shot.

After successfully jumpstarting, remember to disconnect the cables in the reverse order of how you connected them. Always be cautious and avoid letting the jumper cable clamps touch each other to prevent any electrical mishaps. Lastly, consider visiting a mechanic soon to assess the health of your battery, as repeated jumpstarts can indicate a battery on its last leg.

Being prepared with these tips can transform a potentially stressful situation into a manageable one, ensuring you master the road and keep moving forward.

8. Overheating Engine: Causes and Immediate Actions

An overheating engine is not just a minor inconvenience; it can lead to severe damage if not addressed promptly. Understanding the common causes of engine overheating and knowing the immediate actions to take can save you both time and money on the road.

### Causes of Overheating

Several factors can contribute to an engine running hot. The most common culprits include:

1. **Coolant Issues**: Low coolant levels or a leak in the cooling system can result in insufficient coolant circulation, leading to overheating. Check your reservoir periodically and top off as needed.

2. **Thermostat Failure**: The thermostat regulates the flow of coolant. If it becomes stuck closed, it can prevent coolant from circulating through the engine, causing temperatures to soar quickly.

3. **Radiator Problems**: A clogged or damaged radiator can impede heat dissipation. Debris buildup, corrosion, or a broken radiator fan can exacerbate this issue.

4. **Water Pump Failure**: The water pump is responsible for circulating coolant throughout the engine. If it fails, the engine can quickly overheat due to a lack of proper coolant flow.

5. **Oil Issues**: Engine oil not only lubricates moving parts but also plays a role in temperature regulation. Low oil levels or dirty oil can lead to increased friction and heat.

### Immediate Actions to Take

If you notice your engine temperature gauge rising or see warning lights indicating overheating, take the following steps immediately:

1. **Pull Over Safely**: As soon as it’s safe to do so, pull over to the side of the road. Turn off the engine to prevent further damage.

2. **Wait for the Engine to Cool**: Allow the engine to cool for at least 15-30 minutes before attempting to inspect it. Opening the hood can help dissipate heat more quickly.

3. **Check Coolant Levels**: Once the engine has cooled, carefully open the hood and check the coolant reservoir. If it’s low, you may need to add coolant or water. However, never open the radiator cap while the engine is hot, as it could lead to burns from steam or hot coolant.

4. **Inspect for Leaks**: Look under the vehicle for any signs of leaking coolant. If you spot a puddle or see coolant spraying, it may indicate a more significant issue that requires professional assistance.

5. **Contact a Professional**: If you’re unable to identify the problem or if the engine continues to overheat after adding coolant, it’s best to call for roadside assistance. Driving an overheating vehicle can cause catastrophic engine damage, so don’t take any chances.

By understanding the causes of an overheating engine and knowing how to respond, you can prevent minor issues from escalating into major repairs. Stay vigilant and proactive, and you’ll be better equipped to handle this common car problem when it arises on your travels.

9. Handling Fuel Issues: Running Out of Gas or Contaminated Fuel

When it comes to handling fuel issues, two scenarios can quickly turn your smooth drive into a stressful situation: running out of gas and dealing with contaminated fuel. Both can lead to unexpected delays and headaches, but being prepared can help you navigate these challenges with ease.

**Running Out of Gas**
We’ve all been there—lost in thought, jamming to your favorite playlist, when suddenly the fuel gauge dips perilously close to “E.” If you find yourself running low on gas and unable to reach a station, the first step is to stay calm. Pull over to a safe location, turn off your engine, and assess your options. If you’re in a remote area, consider using a roadside assistance app to call for help; many services will send someone to bring you fuel. If you have a friend or family member nearby, a quick phone call could save the day. In the future, it’s wise to keep a portable fuel container in your trunk for emergencies, ensuring you’re never left stranded.

**Dealing with Contaminated Fuel**
Contaminated fuel can lead to a host of engine problems, from poor performance to complete breakdowns. Signs of contaminated fuel include sputtering, difficulty starting your engine, or unusual noises from the fuel system. If you suspect you’ve filled up with bad gas, the best course of action is to pull over and turn off your engine to prevent further damage. If you’re able to, have your vehicle towed to a trusted mechanic who can drain the tank and inspect the fuel system. To minimize the risk of this issue, always refuel at reputable gas stations and consider using a fuel additive as a preventative measure.

By knowing how to handle fuel issues, you can keep your vehicle running smoothly and reduce the chances of being sidelined by unexpected fuel mishaps. Remember, a little preparation goes a long way in mastering the road ahead.

10. When to Call for Help: Knowing Your Limits

When you’re on the road, it’s vital to recognize that not every car problem can be resolved with a simple fix or a little ingenuity. While it’s essential to equip yourself with the knowledge and tools to handle minor issues, there comes a time when calling for professional help is the wisest course of action. Understanding your limits not only ensures your safety but also prevents further damage to your vehicle.

So, when should you pick up that phone and call for assistance? If your vehicle has started making unusual noises—like grinding, clanking, or hissing—trust your instincts. These sounds can indicate serious mechanical problems that may worsen if ignored. Additionally, if warning lights on your dashboard start flashing, such as the engine or oil light, it’s a clear signal that your car requires immediate professional attention.

Another red flag is if you find yourself stranded due to a flat tire or a dead battery. While you may be able to change a tire or jumpstart a battery with the right tools, if you’re in an unfamiliar location or feel unsafe, it’s best to call for roadside assistance. Your safety should always take precedence over any DIY attempts.

Furthermore, if you’re experiencing issues like overheating or smoke emanating from the engine, pull over and turn off your vehicle immediately. Attempting to drive a car in such a condition can lead to catastrophic damage, not to mention the risk of a fire hazard.

Remember, knowing when to ask for help is a sign of wisdom, not weakness. Being proactive about seeking assistance can save you time, money, and stress in the long run. Carrying the contact information of a reliable roadside assistance service or having a trusted mechanic on speed dial can make all the difference when you find yourself facing the unexpected on your journey. By recognizing your limits and embracing the support available to you, you can navigate car troubles with confidence and peace of mind.

11. Preventive Maintenance Tips to Avoid Roadside Issues

When it comes to ensuring a smooth journey and avoiding unexpected roadside mishaps, preventive maintenance is your best friend. Regularly inspecting and maintaining your vehicle can save you time, money, and stress down the line. Here are some essential preventive maintenance tips that every driver should incorporate into their routine.

First and foremost, **check your oil levels** regularly. Engine oil is the lifeblood of your car, helping to lubricate moving parts and prevent overheating. Make it a habit to check your oil level monthly and change it according to your vehicle manufacturer’s recommendations. Clean oil ensures your engine operates efficiently and can prevent costly repairs.

Next, **inspect your tires**. Tires are your only contact with the road, so maintaining their health is crucial for safety and performance. Look for signs of wear, check the tread depth, and ensure they’re properly inflated. Rotate your tires every 5,000 to 8,000 miles to ensure even wear, and don’t forget to keep a spare tire and tools handy in case of emergencies.

Another critical area to focus on is your **brake system**. Squeaking or grinding noises, a soft brake pedal, or a warning light on your dashboard are all signs that your brakes may need attention. Regularly testing and servicing your brakes can help you avoid serious accidents and ensure you can stop safely.

Don’t overlook your **battery health**, either. Car batteries can fail unexpectedly, often without any warning. Check for corrosion on the terminals, and ensure your battery is securely mounted. If your battery is older than three years, it’s wise to have it tested annually to prevent any surprises.

Finally, keep an eye on your **fluid levels**. This includes coolant, transmission fluid, brake fluid, and windshield washer fluid. Low levels can lead to overheating, transmission issues, or poor visibility, all of which can result in roadside problems. Regularly topping off these fluids can help your vehicle run smoothly and efficiently.

By investing a little time in preventive maintenance, you can significantly reduce the likelihood of roadside issues and enjoy peace of mind on your travels. Remember, a well-maintained vehicle is not just about avoiding breakdowns; it’s also about ensuring your safety and the safety of those around you. So take these tips to heart, and keep your car in top shape for every journey ahead.

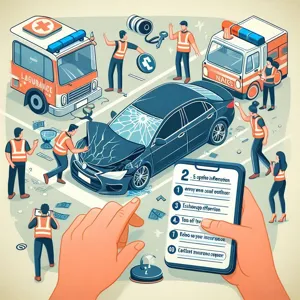
12. Emergency Contacts: Who to Call and When

When trouble strikes on the road, knowing who to call can be just as critical as having a spare tire or a first-aid kit. Emergency contacts are your lifeline during a car crisis, providing the support and expertise needed to navigate unexpected situations. Start by creating a list of essential contacts, ensuring they are easily accessible—perhaps saved in your phone or written down in your glove compartment.

**1. Roadside Assistance Services:** If you have a membership with AAA, your insurance company, or an auto club, their roadside assistance hotline should be your first call for issues like flat tires, dead batteries, or locking your keys inside the car. These services often provide quick help and can even tow your vehicle to a nearby mechanic if necessary.

**2. Mechanics and Repair Shops:** Having a trusted mechanic’s number saved in your contacts can save you time and stress. Whether you need a tow or advice on a strange noise your car is making, reaching out to a professional can provide clarity and assistance.

**3. Family or Friends:** Sometimes, a familiar voice can ease the panic that sets in during a roadside emergency. Whether it’s a family member who can offer advice, a friend who can come to your aid, or someone who can help you with a ride if your car is immobile, having this support network can be invaluable.

**4. Insurance Provider:** In the unfortunate event of an accident, your insurance company should be contacted promptly to report the incident and initiate a claim. They can guide you through the process and help you understand your coverage, ensuring you are effectively protected during your time of need.

**5. Local Authorities:** If you find yourself in a situation where safety is a concern, such as a breakdown in a high-traffic area or an accident involving injury, don’t hesitate to call local law enforcement. They can help manage the scene, direct traffic, and ensure you receive any necessary medical assistance.

When you’re prepared with a list of emergency contacts, you’re not just easing your own mind—you’re setting yourself up for a more manageable response to whatever challenges the road throws your way. Always remember: staying calm and knowing who to reach out to is half the battle when handling car problems on the go.

13. Staying Calm: Managing Stress During Car Troubles

Car troubles can strike at the most inconvenient moments, turning a simple trip into a stressful ordeal. Whether you’re on a busy highway, stuck in a parking lot, or in the middle of nowhere, the key to handling these unexpected situations lies in maintaining your composure. Staying calm is not just about keeping your cool; it’s about empowering yourself to think clearly and take the necessary steps to resolve the issue.

When faced with car problems, your first instinct may be to panic, but taking a deep breath can work wonders. Start by assessing the situation. Is it a flat tire, overheating engine, or a dead battery? Understanding the nature of the problem can help you determine your next steps. If you’re safe and your vehicle is in a secure location, take a moment to gather your thoughts. Remember that many drivers experience vehicle malfunctions, and most issues can be resolved with a bit of patience and a plan.

If you’re feeling overwhelmed, don’t hesitate to reach out for support. Whether it’s calling a roadside assistance service, contacting a knowledgeable friend, or even seeking help from fellow motorists, don’t underestimate the power of a little assistance. Having a reliable contact list of mechanics or towing services saved in your phone can also ease anxiety in stressful times.

Moreover, keeping a roadside emergency kit in your vehicle can provide peace of mind. Stock it with essentials like jumper cables, a flashlight, basic tools, and first aid supplies. Knowing you’re prepared can significantly reduce stress levels when things go awry.

Finally, practice self-care techniques to manage stress effectively. Listen to calming music, use breathing exercises, or visualize a positive outcome. By staying calm and collected, you’re not only more likely to solve the problem at hand but also to ensure your safety and well-being. Remember, every driver faces car troubles at some point, and how you handle them can make all the difference in turning a frustrating situation into a manageable experience.

14. Resources for Roadside Assistance and Repair Services

When you find yourself facing car troubles on the road, having access to reliable resources for roadside assistance and repair services can make all the difference. Planning ahead and knowing where to turn in times of automotive distress can save you time, money, and unnecessary stress.

Start by familiarizing yourself with the roadside assistance programs offered by your insurance provider or credit card company. Many insurers offer complimentary services or at least discounted rates for their policyholders. Additionally, some credit cards provide roadside assistance as a perk, making it worthwhile to check the benefits associated with the cards you carry.

In addition to insurance and credit card options, consider downloading popular roadside assistance apps, such as AAA Mobile, Urgently, or Honk. These apps allow you to easily request help, track your service provider, and even access user reviews to ensure you’re getting quality assistance. Also, keep a list of local towing and repair services saved in your phone; having these contacts easily accessible can expedite the process of getting your vehicle back on the road.

For those who love to be prepared, investing in a membership with a service like AAA or a similar organization can provide peace of mind. Membership often includes not only roadside assistance but also various discounts on travel, restaurant dining, and even automotive services, making it a practical investment for frequent travelers.

Lastly, don’t underestimate the power of community. Social media groups and forums dedicated to local automotive enthusiasts can be invaluable resources. They often share recommendations for trusted mechanics and quick-fix solutions that can help you get back on the road sooner rather than later.

By equipping yourself with the right resources and knowledge, you’ll feel more confident and prepared to handle any car problems that may come your way while traveling. Remember, a little preparation goes a long way in ensuring a smoother ride, no matter what challenges you may encounter.

15. Conclusion: Empowering Yourself for Future Road Trips

As we wrap up our journey through the essential tips for handling car problems on the go, it’s clear that being prepared is your best ally when hitting the open road. Road trips are meant to be exhilarating adventures filled with exploration and spontaneity, but they can quickly turn daunting when faced with unexpected car troubles. The key takeaway from our discussion is empowerment—equipping yourself with knowledge, tools, and a proactive mindset can make all the difference.

By familiarizing yourself with common car issues, understanding basic troubleshooting techniques, and knowing how to effectively communicate with roadside assistance or mechanics, you’ll be able to navigate challenges with confidence. Remember to keep an emergency kit stocked with essentials like a spare tire, first-aid supplies, and basic tools; these items can turn a potential crisis into a manageable inconvenience.

Moreover, embracing technology—whether through roadside assistance apps, navigation tools, or car diagnostic apps—can provide real-time support and keep you informed. And don’t forget the importance of regular vehicle maintenance; a well-cared-for car is less likely to leave you stranded.

As you set out on your next road trip, take these insights and tips with you. Approach the journey not just as a means to an end, but as an opportunity for learning and growth. With the right preparation and mindset, you’ll not only master the road but also create memorable experiences along the way. Safe travels!

In conclusion, mastering the road and being prepared for car problems on the go is essential for any driver. By equipping yourself with the knowledge and tools outlined in this article, you’ll find that you can navigate unexpected challenges with confidence and ease. Whether it’s knowing the importance of routine maintenance or having a reliable emergency kit at your disposal, these tips will empower you to tackle any situation that arises. Remember, a little preparation goes a long way in ensuring your journey remains smooth and enjoyable. So, take these insights to heart, stay vigilant on the road, and embrace the freedom of driving without fear of the unknown. Safe travels!

How to Handle a Car Breakdown?

A car breakdown can be one of life’s most stressful experiences, striking when you least expect it and leaving you feeling vulnerable and anxious.

Whether you’re on a quiet country road, stuck in heavy traffic, or miles away from home, knowing how to respond can make all the difference between a minor inconvenience and a major headache. In this ultimate guide, we’ll equip you with essential tips and strategies to help you stay calm and safe during a car breakdown. From understanding the common causes of breakdowns to mastering the art of roadside assistance, you’ll learn how to effectively navigate this challenging situation with confidence. So buckle up and prepare to turn a potentially stressful scenario into a manageable experience, ensuring that you and your vehicle are well-prepared for whatever the road throws your way!

1. Understanding the Types of Car Breakdowns

How to Handle a Car Breakdown?
Credit : whatcanu.com

When it comes to car breakdowns, knowledge is your first line of defense. Understanding the various types of breakdowns can help you prepare, respond appropriately, and potentially avoid panic when your vehicle encounters trouble on the road.

**Mechanical Failures:** These are perhaps the most common and can range from engine troubles to issues with the transmission, brakes, or electrical systems. A mechanical failure might manifest as strange noises, warning lights on the dashboard, or a sudden loss of power. It’s crucial to pay attention to your car’s signals—ignoring them can lead to more severe problems.

**Flat Tires:** A flat tire can happen to anyone at any time, often without warning. Whether caused by a sharp object on the road, wear and tear, or a slow leak, flat tires can leave you stranded if you’re unprepared. Having a spare tire and the tools to change it can make all the difference.

**Fuel Issues:** Running out of gas is more common than you might think, especially if you’re not monitoring your fuel gauge closely or if there’s a sudden detour on your route. Being caught in this situation can be frustrating, but it serves as a reminder to always keep your tank above a quarter full whenever possible.

**Electrical Problems:** Issues with your car’s electrical system can lead to sudden breakdowns. From dead batteries to faulty alternators, electrical problems often arise unexpectedly. Familiarize yourself with the signs of battery failure, such as dimming headlights or difficulty starting your engine.

**Overheating:** An overheating engine can bring your journey to a grinding halt and can be caused by several factors, including low coolant levels, a malfunctioning thermostat, or a broken water pump. Recognizing the signs of overheating—such as a warning light or steam rising from the hood—can help you take proactive measures before the situation escalates.

By understanding these types of breakdowns, you’ll not only be better prepared to handle them but also equip yourself with the knowledge to maintain your vehicle and minimize the risk of being stranded. Remember, awareness is key in ensuring your safety and calm during a vehicular emergency.

2. Preparing Your Vehicle for the Unexpected

Preparing your vehicle for the unexpected is the first line of defense against the stress and danger of a car breakdown. A well-maintained vehicle can significantly reduce the likelihood of mechanical failures and unexpected issues on the road. Start by scheduling regular maintenance checks with a trusted mechanic who can inspect essential components such as the engine, brakes, tires, and battery.

Consider creating a maintenance checklist to stay on top of routine tasks—things like checking tire pressure, changing the oil, and replacing worn-out wiper blades. Don’t underestimate the importance of your tires; ensure they have sufficient tread and are inflated to the recommended pressure. A sudden flat can leave you stranded in an inconvenient location, increasing the risk of danger.

Additionally, keep an eye on your vehicle’s fluid levels—engine oil, coolant, brake fluid, and windshield washer fluid. Low fluid levels can lead to overheating or reduced braking efficiency, making your car more susceptible to breakdowns.

Lastly, equip your vehicle with an emergency kit that includes items like a flashlight, first aid supplies, jumper cables, road flares, and a spare tire. Having these essentials can provide peace of mind, ensuring you’re prepared to handle minor incidents without panic. By investing time and effort into preparing your vehicle, you turn the unexpected into manageable situations, allowing you to remain calm and safe on the road.

3. Essential Emergency Tools to Keep in Your Car

How to Handle a Car Breakdown?
Credit : whatcanu.com

When it comes to ensuring your safety and calm during an unexpected car breakdown, having the right emergency tools at your disposal can make all the difference. These essential items not only equip you to handle minor issues but also provide peace of mind knowing you’re prepared for the unexpected. Here’s a detailed look at the must-have tools you should keep in your vehicle:

1. **Roadside Emergency Kit**: Every car should be equipped with a comprehensive roadside emergency kit. This should include basic tools like wrenches, screwdrivers, and pliers, as well as jumper cables for dead batteries. Additionally, consider including a tire inflator and sealant, which can be a lifesaver if you experience a flat tire.

2. **First Aid Kit**: Accidents can happen at any time, so having a first aid kit is crucial. Pack it with bandages, antiseptic wipes, pain relievers, and any personal medications you may need. A well-stocked first aid kit can help you address minor injuries and stabilize more serious ones until help arrives.

3. **Reflective Triangles and Flares**: Visibility is key during a breakdown, especially at night or in low-light conditions. Reflective triangles or road flares should be part of your emergency arsenal. They alert other drivers to your presence and help prevent further accidents, ensuring you stay safe while waiting for assistance.

4. **Flashlight and Extra Batteries**: A reliable flashlight is essential for nighttime breakdowns or when checking under the hood. Opt for a durable, waterproof flashlight, and don’t forget to pack extra batteries or consider a rechargeable option.

5. **Multi-tool or Swiss Army Knife**: This handy tool can serve multiple purposes, from cutting through seatbelts to making minor repairs. A good multi-tool combines several functions into one compact device, which can be invaluable during emergencies.

6. **Blanket and Warm Clothing**: If you’re stranded in colder weather, a thermal blanket and extra clothing can keep you warm until help arrives. Hypothermia is a serious risk in the winter months, so include these items in your emergency kit for added safety.

7. **Portable Phone Charger**: In today’s tech-driven world, a dead phone can be a serious liability. Keep a portable charger in your car to ensure your phone remains charged, allowing you to call for help or access navigation tools when you need them most.

By assembling these essential emergency tools, you empower yourself to handle a variety of situations that may arise during a car breakdown. Not only will you be prepared, but you’ll also feel more confident and calm knowing that you have the necessary resources to navigate the unexpected. Remember, a little preparedness goes a long way in ensuring your safety on the road!

4. Steps to Take Immediately After a Breakdown

Experiencing a car breakdown can be a jarring event, but knowing the right steps to take immediately afterward can make a significant difference in ensuring your safety and minimizing stress. The moment you realize your vehicle has stalled, the first priority is to remain calm. Take a deep breath, and follow these essential steps to navigate the situation effectively.

**1. Get to Safety:** If your car is still rolling, steer it to the side of the road as safely as possible. Aim for a flat, stable area away from traffic. Once stopped, turn on your hazard lights to alert other drivers that you are in distress. If you can, exit the vehicle from the passenger side to avoid oncoming traffic.

**2. Assess the Situation:** Take a moment to evaluate what went wrong. If it’s safe to do so, pop the hood to signal that you’re experiencing car trouble. Look for warning lights on the dashboard or any visible signs of damage, such as smoke or leaks. However, be cautious—if anything looks dangerous, prioritize your safety by keeping a safe distance.

**3. Call for Help:** If you have roadside assistance coverage, now is the time to use it. Call the service provider and provide them with your exact location and a description of the problem. If you don’t have roadside assistance, consider contacting a friend or family member for support or look up a nearby mechanic or towing service.

**4. Stay Visible and Patient:** While waiting for help, it’s crucial to remain visible. If you’re on a busy road, consider setting up emergency flares or reflective triangles to alert other drivers. Stay inside your vehicle if you’re on a busy highway, as this is often the safest option. Use this time to gather your thoughts, check your phone for updates, or review your roadside assistance options.

**5. Prepare for the Next Steps:** Once help arrives, be ready to explain your situation clearly. If a mechanic is on the way, have your vehicle’s details handy, including the make, model, and any relevant service history. This preparation will facilitate a smoother resolution and get you back on the road more quickly.

By following these steps immediately after a breakdown, you can ensure not only your safety but also a more efficient recovery process. Remember, staying calm and collected is key—help is on the way.

5. How to Safely Exit Your Vehicle

How to Handle a Car Breakdown?
Credit : whatcanu.com

When faced with a car breakdown, knowing how to safely exit your vehicle can make all the difference in ensuring your safety. The first step is to assess your surroundings: if you’re on a busy highway or a narrow road, your safety should be your primary concern. If possible, gently steer your vehicle to the shoulder or a safe area away from the flow of traffic before you exit.

Once you’ve found a secure location, put your hazard lights on to alert other drivers of your situation. This is a vital step that helps to prevent any potential accidents. Before you open your door, take a moment to look in your mirrors and check for any approaching vehicles. Open the door slowly, being mindful of traffic, and exit the vehicle with caution.

As you step outside, it’s important to keep your distance from the roadside. Ideally, you should stand behind a guardrail or a safe distance away from the edge of the road. If you have passengers, ensure they exit the vehicle in the same manner, prioritizing their safety as well.

Once outside, make your way to a safe spot, such as a nearby parking lot or a designated waiting area, and avoid standing directly next to your car. If you need to call for help, do so from a safe distance, using your phone or a roadside assistance app. Remember, staying calm and composed during this stressful situation is crucial not only for your safety but also for the safety of others on the road. Following these steps will help you handle a car breakdown with confidence and care.

6. Setting Up Roadside Flares and Safety Cones

When faced with a car breakdown, ensuring your safety and the safety of others is paramount. One of the most effective ways to alert other drivers to your situation is by setting up roadside flares and safety cones. This quick action not only provides a visual warning but also helps to create a secure perimeter around your vehicle.

Start by positioning your vehicle as safely off the road as possible, ideally on a flat area where you won’t risk rolling back into traffic. Once you’ve done that, retrieve your roadside flares or safety cones from your emergency kit. If you’re using flares, light them one at a time and place them at a safe distance behind your vehicle—typically about 30 feet, depending on visibility conditions. The bright, flickering light of the flares will catch the attention of oncoming vehicles, making it clear that there’s a problem ahead.

If you have safety cones, deploy them in a similar manner. Set them up at least 10-15 feet behind your vehicle, angling them slightly toward the road. This creates a visual cue that extends the warning zone and helps drivers understand that they should slow down and navigate around you with caution.

For added visibility during twilight or nighttime conditions, consider using reflective triangles in conjunction with your flares or cones. These triangles can be seen from a distance and will further enhance your safety. Remember, the goal is to create a clear and visible warning to other drivers while also providing yourself with a safe space to wait for assistance. By taking these steps, you not only protect yourself but also contribute to the overall safety of the roadways, making a stressful situation a little more manageable.

7. When to Call for Roadside Assistance

How to Handle a Car Breakdown?
Credit : whatcanu.com

Knowing when to call for roadside assistance can be the difference between a minor inconvenience and a major headache during a car breakdown. While some situations may allow for a quick fix, others may leave you stranded and in need of professional help. Here are some key scenarios when you should reach for your phone and request assistance.

First and foremost, if you find yourself with a flat tire and lack the necessary tools or experience to change it safely, don’t hesitate to call for help. Attempting to change a tire on a busy road can be dangerous, and roadside assistance professionals have the equipment and expertise to handle the situation quickly and safely.

Similarly, if your vehicle overheats, it’s crucial to know when to step back. While you may be able to identify that the engine is too hot, addressing the problem without the right knowledge can lead to further damage. In these cases, it’s best to wait for a professional who can assess the issue and get you back on the road.

Another common scenario is running out of fuel. If you find yourself stuck on the side of the road with an empty tank, calling for roadside assistance is a practical solution. Many services can deliver fuel directly to your location, saving you the hassle of finding a gas station on foot.

Additionally, if your car won’t start due to a dead battery or electrical issue, it’s wise to call for help rather than attempting to jump-start the vehicle yourself, especially if you’re unsure about the process. Professionals can diagnose the problem and ensure that any underlying issues are addressed.

Lastly, if you’re in an unfamiliar area and feel unsafe, don’t hesitate to reach out for roadside assistance. Whether it’s a remote location or a high-crime area, your safety is the top priority. A roadside assistance service can provide not only mechanical help but also guide you to a safer location.

In summary, knowing when to call for roadside assistance can help you handle a breakdown with confidence. Keep these scenarios in mind, and don’t hesitate to lean on professionals when you need them. It’s better to err on the side of caution and ensure your safety and the safety of others on the road.

8. Communicating with Emergency Services

When faced with a car breakdown, communicating effectively with emergency services can make a significant difference in the outcome of the situation. It’s essential to remain calm and focused, as clear communication can expedite assistance and ensure your safety.

Start by providing your location in as much detail as possible. If you’re on a highway, mention the mile marker or exit number, as well as the direction you were traveling. In urban areas, reference nearby landmarks, intersections, or street names to help responders find you quickly. For added convenience, many smartphones have GPS capability that can automatically send your location to emergency services, so don’t hesitate to use this feature if available.

Next, describe the nature of your breakdown. Are you experiencing engine trouble, a flat tire, or something more serious? Providing specific details will help the dispatcher understand your situation better, allowing them to send the appropriate type of assistance. If there are any potential hazards, such as being stranded on a busy road or in inclement weather, be sure to communicate this as well.

Remain on the line until the dispatcher confirms they have all the necessary information. They may have additional questions or instructions, and staying connected ensures you’re informed about what to expect. If you have a roadside assistance plan, mention that to the operator, as they can coordinate with your service provider for a faster response.

Finally, once you hang up, keep your phone handy and remain alert for the arrival of emergency services. While waiting, stay inside your vehicle if it’s safe to do so, as this provides protection from other traffic. Turn on your hazard lights to increase visibility and use reflective triangles if you have them to alert other drivers of your presence. By communicating effectively with emergency services, you can navigate a stressful situation with greater ease and ensure that help arrives as quickly as possible.

9. Managing Stress and Anxiety During a Breakdown

Experiencing a car breakdown can be a highly stressful and anxiety-inducing situation. The unexpected halt of your vehicle often brings a rush of negative emotions—fear of being stranded, concerns about safety, and worries about the cost of repairs. However, managing stress and anxiety during such moments is crucial for both your mental well-being and your ability to respond effectively.

First and foremost, take a deep breath. Grounding yourself through controlled breathing can help reduce immediate feelings of panic. Inhale deeply through your nose for a count of four, hold for a moment, and then exhale slowly through your mouth. Repeat this a few times until you feel a sense of calm wash over you.

Next, remind yourself of the steps you can take to resolve the situation. Being proactive can significantly alleviate feelings of helplessness. Ensure you have your emergency kit within reach, complete with essentials like a flashlight, water, snacks, and a first aid kit. Familiarize yourself with your roadside assistance options, whether it’s a service provided by your insurance or a separate membership. Knowing help is just a phone call away can provide immense reassurance.

While waiting for assistance, try to keep your mind occupied. Listen to an engaging podcast, read a book on your phone, or even practice mindfulness techniques to center your thoughts. These distractions can diminish the focus on your stress and help the time pass more quickly.

It’s also important to acknowledge your feelings. It’s entirely natural to feel anxious in this situation. Don’t hesitate to reach out to a friend or family member for support. A quick chat can provide comfort and remind you that you’re not alone.

Finally, once the situation is resolved, reflect on the experience. Consider what you’ve learned and how you can prepare for the future. This can transform a stressful event into an opportunity for growth, equipping you with the knowledge and tools to handle similar situations with greater ease and confidence next time.

By managing your stress and anxiety effectively, you can not only navigate the challenges of a car breakdown but also emerge from the experience feeling empowered and more resilient.

10. Tips for Waiting Safely for Help to Arrive

Waiting for help during a car breakdown can be a tense experience, but keeping your composure and prioritizing safety is essential. Here are some practical tips to ensure you remain calm and secure while you wait for assistance.

**1. Move Your Vehicle:** If it’s safe to do so, try to move your car to the side of the road or onto a shoulder. This not only reduces the risk of accidents but also makes it easier for emergency responders to reach you. If your vehicle is immobile, turn on your hazard lights to alert other drivers of your presence.

**2. Stay Inside Your Vehicle:** Unless you’re in a particularly unsafe location, it’s generally best to stay inside your car with your seatbelt fastened. This provides you with a protective barrier from passing traffic and keeps you safe from any potential threats.

**3. Lock Your Doors:** Keeping your doors locked while you wait is crucial for your safety. It acts as a deterrent against unwanted intruders and provides peace of mind as you wait for help.

**4. Keep Your Phone Charged:** Always ensure your phone is charged before embarking on a journey. If you find yourself stranded, you can easily contact roadside assistance or loved ones. If your battery is low, conserve power by limiting unnecessary app use, and consider using a power bank if you have one on hand.

**5. Stay Visible:** If you have warning triangles or flares, use them to make your vehicle more visible to oncoming traffic. This is especially important during low-light conditions or inclement weather.

**6. Remain Patient and Calm:** It’s natural to feel anxious, but try to remain calm. Use this waiting time to take deep breaths, listen to music, or read a book. Keeping your mind occupied can help reduce stress and make the wait more bearable.

**7. Prepare for the Unexpected:** Always have an emergency kit in your vehicle that includes water, snacks, a flashlight, and a first-aid kit. These supplies can be invaluable in case you end up waiting longer than expected.

By following these tips, you can ensure that you remain safe and composed while waiting for help to arrive after a car breakdown. Remember, staying calm is key to handling the situation effectively.

11. What to Do if Your Car Breaks Down in an Unsafe Area

Experiencing a car breakdown is stressful enough, but when it occurs in an unsafe area, the anxiety can escalate dramatically. Whether you’re roadside in a dimly lit part of town, on a deserted highway, or in a location that feels isolated, it’s crucial to prioritize your safety first. Here’s what to do if you find yourself in such a precarious situation.

**Stay Inside Your Vehicle**
If you break down in an area that feels unsafe, your first instinct might be to exit the vehicle. However, it’s generally safer to stay inside your car, especially if traffic is heavy or there is a risk of encountering suspicious individuals. Lock your doors and keep your windows rolled up to create a barrier between you and potential threats.

**Assess Your Surroundings**
While remaining in your vehicle, take a moment to assess your surroundings. Look for safe havens nearby, such as gas stations, populated areas, or well-lit places where you can seek assistance. If you can do so safely, turn on your hazard lights to make your vehicle more visible to other drivers.

**Contact Roadside Assistance**
Once you feel it is safe to do so, reach for your phone and contact your roadside assistance service. If you aren’t a member of a service, consider calling a friend or family member who can help you arrange for a tow or provide support. When speaking to the operator, give them your exact location and any landmarks that can help them find you quickly.

**Use Your Emergency Kit**
If you have a roadside emergency kit in your car, it’s wise to utilize it. Set up warning triangles or flares at a safe distance behind your vehicle to alert other drivers of your situation. This can help prevent further accidents and provide visibility to potential good Samaritans who might stop to assist.

**Stay Calm and Alert**
While waiting for help to arrive, try to stay calm and collected. Keep your phone charged and stay alert to your surroundings. If anyone approaches your vehicle and you feel uncomfortable, do not hesitate to drive away if it is safe to do so. Trust your instincts; if something doesn’t feel right, it’s always better to err on the side of caution.

**Plan Your Escape**
If the situation begins to feel more threatening, and it becomes necessary to leave your car, plan your exit carefully. Choose a direction that leads you to safety, such as toward a well-lit area or a nearby business. Always be aware of your surroundings as you make your way, and if possible, flag down a passing vehicle for assistance.

Remember, staying calm and focused during a breakdown in an unsafe area can make all the difference. Prepare yourself with these strategies, and you’ll be equipped to handle the unexpected with confidence.

12. Keeping Yourself and Passengers Safe

When faced with a car breakdown, the safety of yourself and your passengers should be your top priority. The moment you realize something is wrong with your vehicle, take a deep breath and assess the situation calmly. If possible, steer your car towards the side of the road, away from traffic. Use your turn signal to indicate your intention to pull over, allowing other drivers to anticipate your movements.

Once you’ve come to a stop, ensure that everyone in the car is wearing their seatbelt until the vehicle is fully stationary and it’s safe to exit. If you’re on a busy highway or a road with high-speed traffic, it’s best to stay in the car with your seatbelt fastened until help arrives. Turn on your hazard lights to alert other drivers that you are experiencing trouble. This small step can significantly reduce the risk of an accident.

If you must exit the vehicle, ensure that it’s safe to do so. Check for oncoming traffic before opening the door and encourage your passengers to do the same. When stepping outside, be cautious and remain near the vehicle if possible. If you have a roadside emergency kit, now is the time to use it. Wearing a reflective vest can increase your visibility to passing vehicles, making it less likely that you’ll be involved in another mishap.

Additionally, if you have children or pets in the car, take extra precautions. Secure them in a safe area away from the road while you assess the situation or await help. Explain to them what’s happening in a calm manner to reduce anxiety. Keeping your passengers informed and reassured can help maintain a sense of calm during what can be a stressful experience.

In case you need to call for assistance, make sure you have a charged mobile phone and that you’re in a location where you can be easily found. Share specific details about your situation and location to ensure help arrives as quickly as possible. Remember, staying calm and focused is your best strategy in ensuring that everyone remains safe until the situation is resolved.

13. Preventative Measures to Avoid Future Breakdowns

Preventative measures are essential in ensuring your peace of mind while on the road. By taking the time to care for your vehicle and being proactive about potential issues, you can significantly reduce the risk of a breakdown. Start with a regular maintenance schedule — this includes oil changes, tire rotations, and fluid checks. Keeping your engine well-tuned and your tires properly inflated not only enhances performance but also extends the life of your vehicle.

Next, familiarize yourself with your car’s manual. Understanding the recommended service intervals and specifications can help you catch problems before they escalate. Moreover, pay attention to warning signs. Unusual sounds, dashboard alerts, or changes in handling should never be ignored; addressing these issues early can prevent a roadside emergency.

Invest in a reliable roadside assistance plan as an added layer of security. This service can provide peace of mind, knowing that help is just a phone call away, should you ever find yourself in a tight spot. Additionally, consider keeping an emergency kit in your vehicle. Equip it with essentials such as jumper cables, a tire inflator, a flashlight, and basic tools. Being prepared can make a world of difference should an unexpected situation arise.

Finally, stay informed about your vehicle’s health. Many modern cars come equipped with diagnostic systems that can alert you to potential issues. Utilize these features and consider periodic inspections from a trusted mechanic to ensure everything is in working order. By implementing these preventative measures, you can keep your vehicle running smoothly and enjoy a safer, more reliable driving experience.

14. Resources for Emergency Preparedness

Being prepared for a car breakdown can make all the difference in how calmly and safely you navigate the situation. Having the right resources at your disposal not only equips you to handle emergencies but also instills a sense of confidence that you can manage whatever comes your way. Here are some essential resources to consider for your emergency preparedness kit:

1. **Emergency Kit Essentials**: Start with a well-stocked emergency kit that includes items like a first aid kit, flashlight, extra batteries, a multi-tool, and emergency blankets. These supplies can provide immediate assistance if you’re injured or find yourself in need of basic tools.

2. **Roadside Assistance Membership**: Investing in a roadside assistance program can be a lifesaver. Services like AAA or your insurance provider often offer 24/7 help with flat tires, dead batteries, and towing. Before a breakdown occurs, ensure you have your membership information handy and understand the coverage details.

3. **Mobile Apps**: There are several apps designed to help you stay safe in the event of a breakdown. Apps like Waze can provide real-time alerts about road conditions, while others can help you find nearby mechanics or gas stations. Keeping these apps updated on your phone ensures you have access to vital information at your fingertips.

4. **Emergency Contact List**: Maintain an updated list of emergency contacts, including family members, friends, and your insurance provider. This list should be easily accessible, whether it’s stored in your phone or printed and kept in your glove compartment.

5. **Basic Car Maintenance Knowledge**: Familiarize yourself with basic car maintenance and troubleshooting tips. Knowing how to check your oil, identify warning lights, and even change a tire can empower you when you’re faced with unexpected car troubles.

6. **Roadside Flares and Warning Triangles**: Keeping roadside flares or warning triangles in your vehicle is crucial for ensuring your safety. These items alert other drivers that you are in need of assistance, reducing the risk of further incidents.

7. **Water and Non-Perishable Snacks**: In case of a prolonged wait for help, it’s wise to keep bottled water and non-perishable snacks—like granola bars or trail mix—on hand. Staying hydrated and nourished can help you remain calm and alert while you wait.

By gathering these resources and incorporating them into your emergency preparedness plan, you can take proactive steps to ensure a safer, calmer experience during a car breakdown. Remember, being prepared not only protects your safety but also eases the stress that often accompanies unexpected car troubles.

15. Conclusion: Staying Calm and Prepared for Any Situation

In conclusion, the key to navigating a car breakdown lies in maintaining a calm demeanor and being thoroughly prepared for any situation that may arise. While breakdowns can be stressful and unexpected, having a solid plan in place can transform a potentially daunting experience into a manageable one.

Preparation is your best ally; ensure your vehicle is regularly maintained, and keep essential tools like a spare tire, jack, jumper cables, and a first-aid kit within reach. Familiarize yourself with your vehicle’s manual, as it often contains vital information on troubleshooting common issues. Additionally, consider investing in a roadside assistance membership for peace of mind, knowing that help is just a phone call away.

When faced with a breakdown, remember to breathe and assess the situation calmly. Prioritize your safety by moving your vehicle to a safe location, turning on your hazard lights, and using warning triangles if necessary. This not only protects you but also alerts other drivers to your presence, reducing the risk of further incidents.

Finally, don’t underestimate the power of communication. Always keep your phone charged, and don’t hesitate to reach out to friends, family, or roadside assistance for support. By staying calm and prepared, you transform a moment of adversity into an opportunity to demonstrate resilience and resourcefulness. With these strategies in mind, you can confidently face any breakdown that may come your way, knowing you have the tools and mindset to handle it with grace.

In conclusion, navigating the challenges of a car breakdown can be daunting, but with the right knowledge and preparation, you can stay calm and safe during such an unexpected event. By following the guidelines outlined in our ultimate guide, you’ll be equipped to handle emergencies with confidence and poise. Remember, a little foresight can go a long way—keep your emergency kit stocked, know the basic protocols for roadside assistance, and always prioritize your safety and the safety of others. As you hit the road, embrace the journey, knowing you are well-prepared for any bumps along the way. Safe travels, and here’s to many smooth and enjoyable rides ahead!

How to Handle a Car Accident?

Car accidents can be jarring experiences, leaving us feeling overwhelmed and unsure of what to do next.

Whether it’s a minor fender bender or a more serious collision, the moments immediately following an accident are crucial for ensuring safety, protecting your rights, and minimizing stress. In the blink of an eye, you may find yourself grappling with shock, potential injuries, and the chaos of exchanging information with other parties involved. That’s why knowing how to navigate the aftermath is essential. In this comprehensive guide, we’ll walk you through the essential steps to handle a car accident safely and effectively—from the immediate actions you should take at the scene to the necessary follow-up procedures that will safeguard your well-being and legal standing. With a clear plan in place, you can approach this daunting situation with confidence and clarity, allowing you to focus on recovery and moving forward.

1. Understanding the Immediate Aftermath of a Car Accident

How to Handle a Car Accident?
Credit : whatcanu.com

In the chaotic moments following a car accident, emotions run high, and the adrenaline can make it difficult to think clearly. Understanding the immediate aftermath is crucial for ensuring your safety, protecting your rights, and facilitating a smoother recovery process.

First and foremost, take a deep breath and assess your surroundings. Check yourself and any passengers for injuries, and if it is safe to do so, move to a secure location away from traffic. If your vehicle is operational and can be safely moved, pull it to the side of the road to avoid further accidents. Your safety and the safety of others should be your priority.

Once you’ve ensured everyone is safe, it’s essential to call emergency services, especially if there are injuries or significant damage to vehicles. Even if the accident seems minor, having a police report can be invaluable for insurance claims and any future legal matters. While waiting for help, begin gathering crucial information. Document the scene with photos, noting the position of the vehicles, road conditions, and any visible damages. Collect contact and insurance information from all parties involved, as well as names and numbers of any witnesses.

Keep your emotions in check during this process. It’s easy to let frustration or anger surface, but remaining calm and composed will help you handle the situation more effectively. Avoid admitting fault or discussing the accident in detail with others at the scene, as this can complicate matters later on.

As you navigate this uncertain and often overwhelming experience, remember that the immediate aftermath of a car accident sets the stage for your recovery. By focusing on safety, documentation, and communication, you can take critical steps toward managing the situation effectively, allowing you to move forward with clarity and confidence.

2. Ensuring Safety First: Checking for Injuries

In the chaotic moments following a car accident, your first instinct may be to assess the damage to your vehicle or to exchange information with the other driver. However, prioritizing safety and checking for injuries should be your immediate focus. The adrenaline rush can mask pain and injuries, making it crucial to be vigilant.

Begin by calmly checking yourself and any passengers for visible injuries. Look for signs of distress, such as difficulty breathing, bleeding, or unconsciousness. If anyone appears to be in severe pain or unable to move, avoid moving them unless there is an immediate danger, such as a fire. Instead, call emergency services right away, providing them with clear information about the accident’s location and the number of people potentially injured.

Once you’ve ensured everyone’s initial safety, turn your attention to the other parties involved in the accident. Approach with caution and empathy, asking if they or their passengers are okay. Keep in mind that emotions may be running high, so it’s important to remain calm and collected.

If it’s safe to do so and you are able, take a moment to assess the broader scene. Ensure that your vehicle and others are positioned safely away from oncoming traffic, if possible. Use hazard lights and road flares to alert other drivers of the incident. The safety of everyone involved is paramount, and a clear assessment of injuries and potential hazards will lay the groundwork for a more effective response.

Remember, regardless of how minor the accident may seem, it’s always wise to seek medical attention. Some injuries – like concussions or whiplash – may not present immediate symptoms. Documenting any medical assessments can also be crucial for insurance claims and legal proceedings later on. By prioritizing safety and checking for injuries right away, you not only protect yourself and others but also establish a responsible approach to handling the aftermath of an accident.

3. Moving to Safety: What to Do with Your Vehicle

How to Handle a Car Accident?
Credit : whatcanu.com

After a car accident, your immediate priority should be ensuring the safety of yourself and others involved. If your vehicle is still operable and it’s safe to do so, carefully move it to a secure location away from traffic. This reduces the risk of further collisions and helps keep the roadway clear for emergency responders.

Before moving your vehicle, take a moment to assess the situation. Are you on a busy road or highway? Is there a potential for additional accidents due to other drivers being distracted by the scene? If your car is in a dangerous position, such as in the middle of an intersection or along the edge of a busy street, it’s crucial to shift it to a safer location if possible. Use your hazard lights to alert other drivers of your presence, and, if you have flares or reflective triangles, set those up to create a visible barrier around your vehicle.

If your car is too damaged to move, or if there are injuries involved, stay inside your vehicle with your seatbelt fastened until help arrives. This is often the safest position until emergency services can assess the situation.

While waiting, take the time to document the accident. Use your smartphone to capture photos of the scene, including the position of vehicles, any visible damages, road conditions, and traffic signs. This evidence can be invaluable later when dealing with insurance claims or legal matters.

Remember, remaining calm and composed is key. Your safety and the safety of others is paramount. Once the immediate situation is under control and help is on the way, you can focus on the next steps in navigating the aftermath of the accident.

4. Calling for Help: When and How to Contact Authorities

In the aftermath of a car accident, knowing when and how to contact authorities is crucial for ensuring safety and facilitating the proper handling of the situation. The first step is to assess the severity of the accident. If there are injuries, significant damage, or if the vehicles obstruct traffic, it’s essential to call for help immediately. Dialing emergency services should be your first action, as they can dispatch police, medical assistance, and fire services if needed.

When you call, be prepared to provide essential information: your location, the number of vehicles involved, and any visible injuries. Speak clearly and stay calm; the operator is trained to guide you through the process. If it is safe to do so, move your vehicle to the side of the road to prevent further accidents, but only if it is possible without causing additional harm.

Once authorities arrive, be sure to provide them with accurate details about the accident. This includes your account of what happened, the conditions at the time, and any witness statements if available. It’s also wise to take your own notes and photographs of the scene for your records, as this documentation can be invaluable later on.

In some cases, such as minor accidents with no injuries and where both parties agree on the situation, you may decide to forgo involving the police. However, this can lead to complications, especially if disputes arise later regarding fault or damages. Even in less severe accidents, it’s generally advisable to file a police report, as it provides official documentation that can be crucial for insurance claims.

By knowing when and how to contact the authorities, you can navigate the aftermath of a car accident more effectively, ensuring that you and everyone involved receive the assistance needed to move forward safely.

5. Documenting the Scene: Essential Information to Gather

How to Handle a Car Accident?
Credit : whatcanu.com

Documenting the scene of a car accident is a crucial step that can significantly influence the outcome of your insurance claim or any legal proceedings that may follow. In the immediate aftermath of the incident, emotions can run high, making it easy to overlook vital details. However, taking the time to gather essential information can make all the difference.

Begin by ensuring everyone’s safety. Once you’ve confirmed that you and others involved are safe, start documenting the scene. Use your smartphone or a camera to take comprehensive pictures of the accident site from various angles. Capture the positions of all vehicles involved, any visible damages, road conditions, traffic signs, and any relevant landmarks. These images serve as visual evidence that can help clarify the circumstances of the accident.

Next, exchange information with the other driver(s). Collect names, contact details, insurance information, and license plate numbers. It’s also important to note the make, model, and color of the vehicles involved. If there are any witnesses nearby, don’t hesitate to ask for their names and contact information as well; their accounts may provide critical support for your claims.

Additionally, document any visible injuries you or your passengers may have sustained. This may include taking photos of bruises, cuts, or other injuries that could worsen over time. Note the date, time, and location of the accident, and write down a detailed account of what happened while the events are still fresh in your mind. Be sure to include any statements made by the other driver(s) or witnesses, which might be relevant later.

Lastly, consider contacting local law enforcement to file an official report. The police will document the scene and create an accident report, which can serve as an important piece of evidence when dealing with insurance companies. Make sure to request a copy of this report for your records.

By meticulously gathering and documenting this information, you not only protect your interests but also lay the groundwork for an effective response to the incident, ensuring that all details are accounted for when it matters most.

6. The Importance of Witness Statements

When navigating the aftermath of a car accident, one of the most crucial elements often overlooked is the collection of witness statements. These statements can provide invaluable insights into the incident and serve as a critical piece of evidence in determining fault and liability. Witnesses—whether they are bystanders, other drivers, or passengers—can offer objective accounts of the events leading up to, during, and after the accident. Their perspectives can corroborate your version of the story or provide details that may have been missed in the chaos.

Immediately after ensuring everyone’s safety and calling for medical assistance if needed, it’s important to approach witnesses calmly and respectfully. Politely ask for their names, contact information, and a brief account of what they observed. If they are willing, request a more detailed written statement or even a recorded version of their recollection. It’s essential to document their observations accurately, as memories can fade over time.

Witness statements can be particularly powerful if there are conflicting accounts between the parties involved in the accident. Insurance companies typically value unbiased third-party testimonies, which can significantly influence the outcome of claims and legal proceedings. In addition, having solid witness accounts can help expedite the claims process, making it easier for you to receive the compensation you deserve.

Remember to express appreciation to your witnesses for their help. Not only does this foster goodwill, but it also encourages them to remain available if your case requires follow-up or additional statements. Collecting witness statements is an essential step that can make a significant difference in how effectively you navigate the aftermath of a car accident. By taking this proactive approach, you can reinforce your position and ensure that the truth of the incident is accurately represented.

7. Communicating with Other Parties Involved

How to Handle a Car Accident?
Credit : whatcanu.com

Communicating with other parties involved in a car accident is a critical step that can significantly influence the outcome of the situation. Once you’ve ensured everyone’s safety and contacted emergency services, it’s time to engage in dialogue with the other driver(s) and any witnesses. Approach this interaction with a calm demeanor and a focus on clarity.

Start by exchanging essential information such as names, contact details, insurance information, and vehicle registration numbers. It’s important to remain polite and non-confrontational, even if emotions are running high. Avoid assigning blame or getting into heated discussions about the accident; instead, focus on gathering facts. Document any statements made by the other party, as these can be valuable later on.

If there are witnesses present, don’t hesitate to ask for their contact information as well. Their accounts might provide crucial insights that can aid in understanding the circumstances surrounding the accident. Additionally, consider using your smartphone to take photos of the scene, including vehicle damage, road conditions, and any relevant traffic signs. These images can serve as vital evidence if disputes arise later.

Always remember to avoid discussing your injuries or the accident’s specifics in detail at the scene. What you say can be misconstrued or used against you later, especially when dealing with insurance claims. Instead, focus on collecting information and ensuring that everyone is safe and accounted for. Clear and respectful communication during this stressful time can pave the way for smoother resolutions and help you navigate the aftermath with greater ease.

8. Dealing with Insurance Companies: What You Need to Know

Dealing with insurance companies can be one of the most daunting aspects of navigating the aftermath of a car accident. Once the dust settles and you’ve ensured that everyone involved is safe, the next step often involves engaging with your insurance provider and possibly the other party’s insurer. Understanding how to communicate effectively and what information you need to provide can significantly affect the outcome of your claim.

Firstly, it’s crucial to gather all pertinent information at the accident scene. This includes the names and contact details of all parties involved, insurance policy numbers, and any witness statements. Take photographs of the accident scene, vehicle damage, and any relevant road conditions. This documentation will serve as essential evidence when you file your claim.

When you contact your insurer, be prepared to provide a detailed account of the accident. Stick to the facts and avoid speculating about fault or assigning blame. Insurance adjusters are trained to assess claims, and any inconsistencies or emotional language can complicate the process. Remember, your goal is to ensure that your version of events is accurately represented.

It’s also wise to familiarize yourself with your policy details before engaging with your insurance company. Understand what coverage you have, including liability, comprehensive, and collision coverage. Knowing your rights and the extent of your coverage can empower you to advocate for yourself effectively.

Be cautious with any communication from the other driver’s insurance company. While they may seem friendly and eager to resolve the matter, their primary goal is to protect their client’s interests, not yours. It’s advisable to consult with a legal professional before discussing the accident with them, especially if there are injuries or significant damages involved.

Lastly, keep detailed records of all communications with insurance representatives, including dates, times, and the names of those you speak with. This can help you stay organized and provide a timeline if disputes arise later on.

Navigating the insurance process after a car accident can be complex, but with the right preparation and knowledge, you can streamline the experience and focus on what truly matters: recovery and moving forward.

9. Understanding Your Rights and Responsibilities

When navigating the aftermath of a car accident, understanding your rights and responsibilities is paramount. The moments immediately following a collision can be chaotic, but being aware of what you are entitled to and what is expected of you can help alleviate some of the stress.

First and foremost, it is critical to know that you have the right to seek medical attention for any injuries sustained during the accident. Whether you feel fine immediately after the incident or not, some injuries may not manifest symptoms until later. Documenting your condition and seeking medical advice will not only ensure your health but also provide essential documentation should you decide to pursue a claim later.

Equally important is your responsibility to report the accident to the appropriate authorities. In many jurisdictions, failing to report an accident that results in injury or significant property damage can lead to legal consequences. Be sure to exchange information with the other party involved, including names, contact details, insurance information, and vehicle details. Taking photographs of the scene, vehicle damage, and any relevant road conditions can also bolster your case later on.

In addition to legal obligations, understanding your rights regarding insurance claims is crucial. This includes the right to file a claim with your insurance company, as well as the other driver’s insurance if they are at fault. It is wise to familiarize yourself with your policy details, including coverage limits and deductibles, so you can navigate the claims process with confidence.

Finally, consider consulting with a legal professional who specializes in automotive accidents. They can provide insight into your rights and help you understand the complexities of the claims process. By being informed and proactive, you can take significant steps toward ensuring that your rights are protected while fulfilling your responsibilities in the wake of a car accident.

10. Seeking Medical Attention: Why It’s Crucial

After a car accident, the adrenaline rush can mask the pain and trauma that your body may have suffered, leading you to believe that you’re perfectly fine. However, seeking medical attention promptly is crucial for several reasons. First and foremost, injuries such as whiplash, concussions, or internal injuries may not present immediate symptoms. A medical professional can perform a thorough examination and identify any hidden issues that could worsen if left untreated.

Additionally, obtaining a medical evaluation creates an official record of your injuries, which can be vital if you decide to file an insurance claim or pursue legal action later on. It demonstrates that you took your health seriously and sought the appropriate care, bolstering your case. Furthermore, medical professionals can provide guidance on the necessary follow-up care, rehabilitation, or therapy that may be required, ensuring your long-term recovery.

Don’t underestimate the emotional toll of an accident either. Many individuals experience anxiety, depression, or post-traumatic stress after such events. Seeking medical attention can also open the door to mental health support, helping you navigate any emotional challenges you might face in the aftermath.

In summary, prioritizing medical attention after a car accident is essential—not just for your physical health, but for your overall well-being and peace of mind. Always err on the side of caution and seek help, even if you feel okay at the moment. Your health and safety should always come first.

11. The Role of Accident Reports in Claims

Accident reports play a critical role in the aftermath of a car accident, serving as a foundational document that can significantly influence the claims process. These reports, typically compiled by law enforcement officials, detail the circumstances surrounding the accident, including the time, location, and the parties involved. They often include witness statements, diagrams of the scene, and critical evidence such as weather conditions and road conditions at the time of the incident.

When it comes to filing an insurance claim, these reports become invaluable. Insurance companies rely heavily on the information contained in the accident report to assess liability and determine the validity of a claim. A well-documented report can provide clarity on who was at fault, which is crucial for ensuring that the responsible party is held accountable and that the affected individuals receive the compensation they deserve.

Additionally, the accident report can serve as a protective measure for all parties involved. If discrepancies arise later—such as conflicting accounts of the accident or changes in the details of the incident—the report stands as an official record. This can help to counteract any attempts by the other party or their insurer to minimize their liability or shift blame.

It’s essential to obtain a copy of the accident report as soon as it’s available and to review it carefully for any inaccuracies. If you find discrepancies, you have the right to contest them with the relevant authorities. Keeping accurate documentation throughout the claims process, including the accident report, is key to navigating the complexities of insurance claims and ensuring a smoother recovery journey following the accident.

12. Evaluating Vehicle Damage and Repair Options

After ensuring that everyone involved in the accident is safe and that necessary medical attention has been sought, the next crucial step is evaluating the damage to your vehicle and exploring repair options. This process can feel daunting, especially in the wake of the accident’s emotional turmoil, but approaching it methodically can help restore a sense of control.

Begin by conducting a thorough visual inspection of your vehicle. Look for obvious signs of damage such as dents, scratches, and broken parts. Pay close attention to the structural integrity of your car—elements like the frame, suspension, and alignment may not be immediately visible but can affect your vehicle’s safety and performance. If your car is drivable, take it to a safe location where you can assess the damage without the stress of traffic.

Once you’ve documented the visible damage, it’s wise to take photographs from multiple angles. These images will serve as essential documentation for insurance claims and potential repair estimates. If you’re unsure about what to look for, consider enlisting the help of a qualified mechanic who can provide a professional evaluation.

Next, it’s time to explore repair options. Contact your insurance company to understand your coverage and the process for filing a claim. They may provide a list of preferred repair shops, but you are entitled to choose where to take your vehicle. Research local repair facilities, read reviews, and inquire about their certifications and warranties on services. Getting multiple estimates can also help you gauge the cost and scope of repairs.

As you weigh your options, consider the long-term implications of the repairs. Ensure that the repair shop uses quality parts and has a solid reputation for their work. It’s important to balance cost with quality; opting for the cheapest option might save you money upfront but could lead to more significant issues down the road.

Lastly, keep communication lines open with your insurance agent and the repair shop as the process unfolds. Staying informed will help ease anxiety and ensure that your vehicle is restored to its pre-accident condition, allowing you to get back on the road with confidence. Remember, the goal is not just to fix the damage but to ensure your safety and the longevity of your vehicle.

13. Navigating Emotional Aftermath: Coping with Trauma

After the shock of a car accident has begun to fade, many individuals find themselves grappling with a wave of emotions that can be just as overwhelming as the physical aftermath. The trauma from a collision can manifest in various ways, including anxiety, anger, confusion, or even feelings of guilt, regardless of who was at fault. It’s essential to acknowledge these emotions and take proactive steps to navigate this complex emotional landscape.

First and foremost, give yourself permission to feel. It’s normal to experience a range of emotions after such an event, and suppressing them can lead to long-term psychological effects. Consider speaking with a professional therapist who specializes in trauma; they can provide valuable coping strategies and a safe space to process what you’ve been through.

Additionally, don’t underestimate the power of a support system. Surround yourself with friends and family who can offer comfort and understanding. Sharing your feelings and experiences with loved ones can help ease the burden and remind you that you are not alone in this journey.

Another effective coping mechanism is journaling. Writing down your thoughts and feelings can serve as an emotional outlet and help clarify your experiences. You might also find solace in mindfulness practices such as meditation or yoga, which can ground you and foster a sense of calm amidst the chaos.

Lastly, allow yourself time to heal. Emotional recovery doesn’t have a set timeline, and it’s important to be patient with yourself as you navigate this process. By taking these steps, you can gradually reclaim a sense of normalcy and peace in your life after the accident. Remember, seeking help is a sign of strength, and taking care of your emotional well-being is just as crucial as addressing any physical injuries.

14. Legal Considerations: When to Consult a Lawyer

After a car accident, navigating the legal landscape can feel daunting, especially if the incident resulted in injuries or significant property damage. Understanding when to consult a lawyer is crucial for ensuring that your rights are protected and that you receive the compensation you deserve.

In general, if the accident involved serious injuries, multiple parties, or disputed liability, seeking legal counsel should be your next step. Insurance companies are skilled negotiators and may try to minimize your claim or deny it altogether. An experienced attorney can help you understand your rights, negotiate with insurers, and represent you in court if necessary. They can also provide invaluable guidance on collecting evidence, documenting damages, and understanding the intricacies of personal injury law.

It’s also wise to consult a lawyer if you’re facing any legal complexities, such as driving without insurance, involvement in a hit-and-run, or if the police report is disputed. These situations can complicate your case significantly, and having a legal expert on your side can help clarify your options and create a strong defense.

Additionally, don’t wait too long to reach out for legal help. Each state has its own statute of limitations for filing claims, which means you may lose your right to compensation if you don’t act quickly. A good rule of thumb is to consult a lawyer as soon as possible after the accident, preferably before engaging in any discussions with insurance representatives.

Ultimately, knowing when to consult a lawyer can make a significant difference in the aftermath of an accident. By securing legal representation, you empower yourself to navigate the complexities of the situation with confidence, ensuring that your interests are prioritized and that you can focus on recovering from the incident.

15. Preventing Future Accidents: Tips for Safe Driving

Preventing future accidents is not just about following the rules of the road; it’s about cultivating a mindset of safety and awareness every time you get behind the wheel. Adopting safe driving habits can significantly reduce the likelihood of accidents and ensure a safer experience for you and everyone else on the road. Here are some essential tips to keep in mind:

1. **Stay Focused**: Distracted driving is one of the leading causes of accidents. Whether it’s texting, fiddling with the radio, or having heated conversations with passengers, it’s vital to keep your attention on the road. Consider using hands-free devices if you need to make a call, and always pull over safely if you need to send a message.

2. **Follow Speed Limits**: Speed limits are set for a reason. Driving too fast reduces your reaction time and increases the severity of any potential accidents. Always adjust your speed according to road conditions—be it rain, snow, or heavy traffic—and remember that slower speeds can improve your ability to react to unforeseen circumstances.

3. **Use Turn Signals**: Communicating your intentions to other drivers is crucial for road safety. Always use your turn signals when changing lanes or turning. This not only helps prevent collisions but also fosters a culture of awareness and predictability among drivers.

4. **Maintain a Safe Following Distance**: The general rule of thumb is to maintain at least a three-second gap between your vehicle and the one in front of you. This distance gives you ample time to react in case of sudden stops. In adverse weather conditions, increase that distance to ensure you have even more time to respond.

5. **Be Aware of Your Surroundings**: Regularly scan your surroundings and be alert to pedestrians, cyclists, and other vehicles. This vigilance allows you to anticipate what others might do and take pre-emptive action to avoid accidents.

6. **Avoid Impaired Driving**: Never get behind the wheel if you’ve consumed alcohol, drugs, or even certain medications that can impair your ability to drive. Use alternative transportation options like rideshares, taxis, or public transit if you’re not fit to drive.

7. **Conduct Regular Vehicle Maintenance**: Ensure your vehicle is in good working order by keeping up with regular maintenance. Check tire pressure, brakes, lights, and fluid levels to avoid mechanical failures that could lead to accidents.

By integrating these safe driving practices into your routine, you not only protect yourself but also contribute to the well-being of all road users. Remember, every journey is an opportunity to prioritize safety, and a little mindfulness can go a long way in preventing future accidents. Stay alert, stay safe, and keep the roads clear for everyone to enjoy.

In conclusion, navigating the aftermath of a car accident can be overwhelming, but with the right knowledge and preparation, you can handle the situation safely and effectively. By following the essential steps outlined in this article—such as ensuring safety, gathering information, contacting authorities, and documenting the scene—you can protect yourself and your interests. Remember, staying calm and composed is crucial during such stressful moments. With these strategies in your toolkit, you can confidently address the challenges that arise after an accident, ensuring that you are well-equipped to move forward. Stay safe on the road, and may you always drive with caution and care.

How Can I Get Rid of My Golf Slice?

If you’ve ever found yourself watching your golf ball veer dramatically to the right after your swing, you’re not alone—many golfers struggle with the dreaded slice.

This common issue can be frustrating, not to mention detrimental to your scorecard. But fear not! In this comprehensive guide, we will explore proven tips and techniques to help you say goodbye to your golf slice once and for all. From understanding the key elements of grip and stance to mastering your swing mechanics and refining your follow-through, this post will empower you with the knowledge and skills needed to achieve a straighter drive. Whether you’re a beginner looking to establish a solid foundation or a seasoned player aiming to fine-tune your game, these actionable strategies will elevate your performance and bring you one step closer to hitting those fairways with confidence. Let’s tee off on the journey to a more accurate game!

1. Understanding the Golf Slice: What It Is and Why It Happens

How Can I Get Rid of My Golf Slice?
Credit : whatcanu.com

Understanding the golf slice is the first step toward reclaiming your drive and transforming your game. A golf slice is characterized by a shot that curves dramatically to the right (for right-handed golfers), often resulting in a frustrating loss of distance and direction. This common mishap can be both perplexing and disheartening, especially for those who strive for consistency and accuracy on the course.

So, what causes this notorious slice? At its core, a slice is primarily the result of an open clubface at impact, combined with an outside-to-inside swing path. When the clubface is angled away from the target line at the moment of contact, it imparts sidespin on the ball, causing it to veer off course. Additionally, swinging from outside the target line to inside can exacerbate the problem, creating an angle that sends your ball spiraling away from your intended direction.

Other factors contributing to a slice include grip issues, stance misalignment, and swing mechanics. A weak grip can lead to an open clubface, while improper alignment can force you into a swing that naturally cuts across the ball. Furthermore, physical elements like tension in your arms or over-the-top swings can all play a role in creating that frustrating slice.

Understanding these underlying causes is crucial for any golfer looking to rectify their drive. By pinpointing where things might be going awry in your technique, you can take the necessary steps toward a straighter, more controlled shot. In the following sections, we’ll delve deeper into actionable tips and techniques to help you counteract your slice, regain your confidence, and enjoy the game of golf like never before.

2. Analyzing Your Grip: The Foundation of a Straight Drive

The grip is often overlooked, yet it is the very foundation of a successful golf swing. A proper grip not only influences the direction of your shot but also affects the power and control you can exert over the ball. When it comes to eliminating that pesky slice, analyzing and adjusting your grip is a crucial first step.

Start by examining how the club rests in your hands. For a straighter drive, aim for a neutral grip—where the club sits comfortably across the base of your fingers rather than your palms. This positioning allows for better wrist hinge and an optimal swing path. As you hold the club, check the alignment of your hands: your left hand (for right-handed golfers) should be turned slightly to the right, showcasing at least two knuckles, while your right hand should fit snugly below.

Consider the pressure with which you grip the club. A grip that is too tight can lead to tension in your arms and wrists, hampering a fluid swing. Instead, apply just enough pressure to maintain control without compromising your natural swing mechanics. Imagine you are holding a tube of toothpaste—firm enough to keep it from slipping, but gentle enough not to squeeze out any product.

Lastly, practice makes perfect. Use a mirror or record your grip as you practice in your backyard or at the driving range. This visual feedback can help you fine-tune your grip until it feels just right. By focusing on your grip and making necessary adjustments, you’ll be laying the groundwork for a more consistent and straighter drive, ultimately helping you say goodbye to that frustrating golf slice.

3. Posture and Alignment: Setting Up for Success

How Can I Get Rid of My Golf Slice?
Credit : whatcanu.com

Your posture and alignment play a crucial role in achieving a straighter drive and reducing that pesky golf slice. Before you even take your swing, it’s essential to establish a solid foundation that sets you up for success. Start by standing with your feet shoulder-width apart, ensuring your weight is evenly distributed between both legs. This balanced stance not only provides stability but also allows for a more fluid swing movement.

Next, focus on your alignment. Position your body parallel to the target line, with your shoulders, hips, and feet all pointing in the same direction. A common mistake many golfers make is aiming their body left of the target, which can inadvertently lead to an outside-in swing path—one of the primary culprits of a slice. To combat this, use an alignment stick or a club laid on the ground to visualize your target line and ensure you’re properly aligned.

Additionally, pay attention to your posture. Your spine should be straight, with a slight bend at the hips, allowing your arms to hang naturally down towards the club. Avoid slouching or leaning too far forward, as this can restrict your swing mechanics and lead to inconsistencies. Instead, maintain an athletic posture that promotes freedom of movement throughout your swing.

Finally, remember to relax your grip. A tense grip can lead to tension in your arms and shoulders, making it difficult to execute a smooth, controlled swing. By adopting a comfortable grip pressure, you’ll not only improve your feel for the club but also enhance your chances of hitting straighter drives.

By mastering your posture and alignment, you’ll create a solid base from which to launch your drives, minimizing the risk of slicing the ball and setting yourself up for success on the course. With practice, these elements will become second nature, paving the way for a more consistent and enjoyable golfing experience.

4. The Importance of Swing Mechanics: Key Concepts to Remember

When it comes to eliminating your golf slice, mastering swing mechanics is paramount. Understanding the various components of your swing can make all the difference between a frustrating day on the course and a triumphant round filled with straight drives. Here are some key concepts to remember:

**Grip**: The foundation of a good swing starts with your grip. A neutral grip allows for a natural release of the club through impact, reducing the likelihood of an open clubface that contributes to slicing. Ensure that your hands are positioned correctly on the club, and experiment with grip pressure; too tight can hinder your swing, while too loose may lead to a lack of control.

**Stance and Alignment**: Before you even take the club back, your stance and alignment play a crucial role in your overall swing mechanics. Stand with your feet shoulder-width apart, and ensure that your shoulders, hips, and feet are all aligned parallel to your target line. This alignment encourages a more straightforward path, reducing the chances of an outside-in swing that often leads to a slice.

**Backswing**: As you initiate your backswing, focus on maintaining a smooth, controlled motion. A common mistake many golfers make is overswinging, which can lead to a breakdown in mechanics. Instead, aim for a full turn of your shoulders while keeping your arms relaxed and your wrists hinged. This helps set you up for a powerful downswing.

**Downswing**: The transition from your backswing to your downswing is critical. Start the downswing with your lower body rather than your arms, allowing your hips to rotate towards the target. This sequence helps to create a more natural swing path and encourages an inside-out approach, which is vital for correcting a slice. Concentrate on leading with your hips and maintaining your spine angle throughout the motion.

**Follow-Through**: Finally, don’t underestimate the importance of a proper follow-through. A complete, balanced finish not only signifies that you’ve executed your swing correctly, but it also helps to ensure that your clubface is square at impact. Aim for a high finish, with your hands above your shoulder and your weight shifted onto your front foot.

By honing in on these key swing mechanics, you’ll not only improve your overall game but also take significant strides toward saying goodbye to that pesky golf slice. Remember, consistency is key, so practice these fundamentals regularly to see lasting improvement on the course!

5. Drills to Fix Your Slice: Step-by-Step Techniques

How Can I Get Rid of My Golf Slice?
Credit : whatcanu.com

When it comes to conquering your golf slice, drills can be your best ally on the path to a straighter drive. Here are a few step-by-step techniques that can help you solidify your swing mechanics and regain control of your ball flight.

### 1. **The Alignment Stick Drill**
Start by placing an alignment stick or a club on the ground parallel to your target line. Stand a few feet behind the stick and practice your setup, ensuring that your feet, hips, and shoulders are aligned with the stick. This visual cue will help you maintain proper alignment throughout your swing. Take practice swings, focusing on keeping your body parallel to the stick, which will encourage a straighter path to the ball.

### 2. **The Half-Swing Drill**
To promote better clubface control, try the half-swing drill. Begin by setting up in your normal stance but only take the club back halfway to the top of your backswing. Focus on the position of your hands and how they relate to the clubface. From this position, make your downswing while keeping your rotation smooth and your grip relaxed. This drill emphasizes a more controlled movement, helping you to avoid over-rotating and closing the clubface too quickly.

### 3. **The Bucket Drill**
To address swing path issues, place a bucket or a similar object just outside your target line, approximately a foot behind the ball. As you swing, visualize the path of your clubhead and aim to avoid hitting the bucket on your follow-through. This drill encourages an inside-out swing path, which is critical for reducing slices. Start slowly, focusing on your form, and gradually increase your speed as you become more comfortable.

### 4. **The Impact Bag Drill**
Using an impact bag can provide immediate feedback on your swing mechanics. Position the bag in front of you, and practice your swing by making contact with it, focusing on striking the bag with a square clubface. Pay attention to your grip pressure and body positioning at impact. This drill reinforces the feeling of a proper wrist hinge and helps you develop an awareness of how your swing should feel during the crucial moment of contact.

### 5. **Video Analysis**
Finally, consider recording your swings from different angles. Reviewing your form can help you identify any flaws in your technique that may be contributing to your slice. look for signs of an open clubface at impact or an outside-in swing path. Compare your swings to those of professional golfers or utilize apps designed for swing analysis to receive detailed feedback and tips for improvement.

By incorporating these drills into your practice routine, you’ll not only work towards fixing your slice but also build a more consistent and powerful swing. Remember, persistence is key, and with each session, your drive will inch closer to that coveted straight shot down the fairway!

6. The Role of Equipment: Choosing the Right Club and Ball

When it comes to conquering your golf slice, the equipment you choose can make a world of difference. Not all clubs and balls are created equal, and the right combination can significantly improve your game.

**Choosing the Right Club**
The choice of club is paramount in curbing that pesky slice. Opt for a driver with a larger sweet spot and a slightly closed face, which can help promote a straighter ball flight. Many manufacturers now offer clubs specifically designed for players who struggle with slices. These clubs often feature adjustable weights and loft settings, allowing you to customize your setup. A club with a lower center of gravity can also help you achieve better launch angles, minimizing sidespin and keeping your drives on target.

**The Importance of the Right Ball**
Equally important is the golf ball you choose. Opt for a ball that offers a softer cover and lower spin rate, as this can help reduce the tendency for your shots to curve excessively. Balls designed for distance control often produce lower spin off the driver, which can aid in achieving a straighter trajectory. Additionally, consider the dimples on the ball; those designed to reduce drag can help maintain a more stable flight path, especially in windy conditions.

**Getting Fitted for Equipment**
If you’re serious about improving your game, investing in a professional fitting session can be invaluable. A fitting specialist can analyze your swing and recommend clubs and balls tailored to your unique style and needs. This personalized approach not only boosts your confidence but also increases your chances of making solid contact and hitting straighter shots.

Incorporating the right equipment into your golfing arsenal is a crucial step toward saying goodbye to your slice. By carefully selecting your clubs and balls, you set the foundation for more accurate drives and a more enjoyable round on the course. Remember, the right tools in your hands can transform your game and help you achieve that long-coveted straight drive!

7. Mental Focus: The Psychology of a Successful Drive

How Can I Get Rid of My Golf Slice?
Credit : whatcanu.com

When it comes to improving your golf swing, the mental aspect is just as critical as the physical mechanics. Mental focus is the silent partner in every successful drive, and understanding its importance can significantly enhance your performance on the course. A common pitfall for many golfers is allowing distractions—whether they stem from the crowd, past mistakes, or even personal worries—to creep into their minds just before they take their shot. This mental clutter can lead to tension, resulting in a slice that shatters your confidence and disrupts your game.

To combat this, develop a pre-shot routine that centers your mind and fosters a sense of calm. This could involve taking a few deep breaths, visualizing a successful shot, or even repeating a positive mantra. By creating a consistent routine, you can condition your mind to enter a focused state, which will help eliminate anxiety and set the stage for a more controlled swing.

Additionally, consider the power of visualization. Picture the perfect drive—swinging smoothly, the ball soaring through the air, and landing exactly where you want it. This mental imagery can enhance muscle memory and boost your confidence, making you more likely to replicate that successful drive when it counts.

Lastly, practice mindfulness techniques both on and off the course. Being present in the moment can help alleviate the pressure of performance and allow you to focus solely on the task at hand. Embrace the rhythm of the game, and remember that each swing is an opportunity to improve. By honing your mental focus, you’ll not only enhance your physical abilities but also transform your overall attitude towards the game. A strong, clear mind can be the key to saying goodbye to your golf slice and welcoming a straighter, more powerful drive!

8. Practicing with Purpose: Creating a Training Plan

When it comes to eliminating your golf slice, practicing with purpose is key. Simply hitting balls on the driving range without a clear objective can lead to frustration and minimal improvement. Instead, take the time to create a structured training plan that focuses on the specific aspects of your swing that contribute to that pesky slice.

Start by identifying the fundamental elements of your swing that need attention. Are you struggling with your grip, stance, or alignment? Perhaps your swing path is the culprit, or your clubface isn’t square at impact. Once you pinpoint the areas for improvement, you can tailor your practice sessions to address these issues directly. For instance, if you find that your grip is too weak, dedicate a portion of your practice to working on a stronger grip through drills and repetition.

Incorporate a variety of drills into your training plan, focusing on one aspect of your game at a time. Use alignment sticks to ensure you’re set up correctly and practice with a purpose by limiting the number of swings you take. For example, instead of mindlessly hitting 50 balls, set a goal to execute 10 perfect swings with your focus solely on maintaining a square clubface.

Additionally, consider introducing video analysis into your practice routine. Recording your swings can provide valuable insights into your mechanics, allowing you to see firsthand where adjustments are needed. Review your footage after each session to track your progress and make necessary refinements.

Finally, keep your training plan dynamic and engaging. Incorporate competitive elements, such as challenging a friend to a “straightest drive” contest or setting personal bests for consistency. The more engaged you are with your practice, the more likely you are to see significant improvements. By practicing with intention and maintaining focus on your specific goals, you’ll be well on your way to saying goodbye to your golf slice and enjoying straighter drives on the course!

9. Video Analysis: Using Technology to Improve Your Swing

In the era of technology, harnessing the power of video analysis can dramatically transform your golf game, especially when it comes to eliminating that pesky slice. Watching yourself swing may feel a bit awkward at first, but it’s one of the most effective ways to identify and correct flaws in your technique.

Start by recording your swing from multiple angles—preferably from the side, down the line, and an overhead view if possible. This allows you to see the entire motion, revealing crucial details that you might miss in real-time. Pay close attention to your grip, stance, and the alignment of your body. Are your shoulders square to the target? Is your clubface open at impact? These subtleties can make a significant difference in the trajectory of your ball.

Once you’ve captured your swing on video, take the time to review it critically. Look for common indicators of a slice, such as an exaggerated outside-to-inside swing path or an improper grip that causes the clubface to open at impact. Many golfers find it helpful to compare their swings to those of professional players. By watching their technique, you can gain insight into proper mechanics and rhythm.

Moreover, various apps and software now offer advanced features, such as slow-motion playback, frame-by-frame analysis, and even swing comparison tools. These technologies can provide you with a comprehensive analysis of your performance, helping you pinpoint the exact moments in your swing that need adjustment.

Incorporating video analysis into your practice routine not only helps you identify problems but also tracks your progress over time. You’ll be amazed at the transformation that can occur when you have a clear visual of your swing mechanics. With dedication and a bit of tech-savvy training, you’ll be on your way to saying goodbye to that slice and enjoying straighter drives down the fairway!

10. Seeking Professional Help: When to Consider a Golf Lesson

Sometimes, no matter how diligently you practice or how many tips you try to implement, the elusive straight drive continues to evade you. If you find yourself frustrated, it may be time to consider seeking professional help through a golf lesson. Recognizing when to reach out for guidance can be a game changer in your pursuit of a cleaner, more controlled swing.

A golf instructor can provide personalized feedback that is often difficult to achieve on your own. They possess the expertise to analyze your swing mechanics, identify flaws, and offer specific drills tailored to your unique style. Whether it’s adjusting your grip, stance, or swing path, a professional can break down the complexities of your game into manageable elements, helping you to understand the cause of your slice and providing actionable steps to correct it.

Moreover, lessons can also help you develop a more consistent routine, which is crucial for maintaining the same form and confidence on the course. After all, golf is as much a mental game as it is a physical one. An instructor can also help you set realistic goals, keeping you motivated as you track your progress over time.

So, when should you consider a lesson? If you’ve been struggling with a persistent slice for several rounds, or if you’re preparing for an important tournament and want to refine your skills, seeking professional guidance could be the key to unlocking your potential. With the right instruction, you’ll not only gain a clearer understanding of your game, but you’ll also walk away with newfound confidence—ready to say goodbye to that frustrating slice for good!

11. Common Mistakes to Avoid: Pitfalls That Can Worsen Your Slice

When it comes to mastering your golf swing and eliminating that pesky slice, understanding the common mistakes you might be making is crucial. Many golfers unknowingly fall into traps that can exacerbate their slicing issues, leading to frustration on the course. Here are some pitfalls to avoid:

1. **Poor Grip Alignment**: One of the most frequent errors is an incorrect grip. Many golfers grip the club too loosely or hold it in their palms rather than their fingers. This can lead to a lack of control over the clubface, causing it to open at impact and sending the ball veering off to the right. Ensure your grip is firm yet relaxed, with the club resting naturally in your fingers for optimal control.

2. **Inconsistent Stance and Alignment**: Positioning yourself incorrectly can also contribute to a slice. If your stance is too open or your shoulders are aimed left of the target, your swing path will likely follow suit. Always double-check your alignment before stepping up to the ball; your feet, hips, and shoulders should be parallel to your target line.

3. **Overemphasizing Power Over Technique**: In the quest for distance, many golfers focus too much on generating power rather than maintaining proper swing mechanics. This often results in a hurried, uncontrolled swing that exacerbates a slice. Instead, prioritize a smooth, balanced swing that allows for proper timing and rhythm. Remember, control is key—power will come with practice.

4. **Neglecting the Follow-Through**: A common misconception is that the follow-through doesn’t matter as much as the setup and backswing. However, a proper follow-through is essential for a straight shot. If you’re cutting your follow-through short or allowing your hands to cross your body, your clubface is more likely to be open at impact. Focus on completing your swing, allowing your body to naturally finish facing the target.

5. **Ignoring the Importance of Equipment**: Sometimes, the solution lies not within your swing but in your equipment. Clubs that are too long, too stiff, or ill-fitted can exacerbate slicing issues. It’s worth getting a professional fitting to ensure your clubs suit your swing style and body type, allowing for better performance and control.

By steering clear of these common mistakes, you’ll be well on your way to refining your swing and saying goodbye to that frustrating golf slice. Remember, practice makes perfect, and being mindful of these pitfalls can help you stay focused on your goal of achieving a straighter drive!

12. The Importance of Consistent Practice: Staying Committed

When it comes to conquering your golf slice, consistent practice is your best ally. Just as a musician hones their craft through repetition and dedication, golfers must commit to regular practice sessions to develop the muscle memory and confidence necessary for a straighter drive. This means setting aside time each week—ideally several days—to focus on your swing mechanics, alignment, and grip.

Imagine stepping onto the driving range, the sun warming your back, and the sound of clubs striking balls filling the air. This environment provides the perfect backdrop for refining your technique. Begin with slow, deliberate swings to ensure that your form is correct, focusing on the fundamentals that will help eliminate your slice. As you become more comfortable, gradually increase your speed and intensity, but remain mindful of your form—consistency is key.

Incorporating drills specifically designed to address your slice can accelerate your progress. For instance, practicing with alignment sticks can help you maintain a proper stance and path, while using a weighted club can strengthen the muscles involved in your swing.

Moreover, consider keeping a practice journal to track your improvements and setbacks. Documenting your sessions can help you identify patterns in your game, allowing you to adjust your approach as needed. Celebrate small victories, whether it’s hitting a few straighter shots or improving your overall consistency.

Remember, the journey to a straighter drive is a marathon, not a sprint. Stay committed to your practice routine, and over time, you’ll see the fruits of your labor manifest on the course. With patience and persistence, you’ll not only say goodbye to your slice but also welcome a new level of confidence in your game.

13. Real-Life Success Stories: Golfers Who Overcame Their Slices

When it comes to overcoming the notorious golf slice, stories of real-life success can be both inspiring and instructive. These golfers, once plagued by errant shots that veered dramatically to the right, turned their game around through persistence, practice, and the right techniques.

Take, for example, the journey of Mark, a weekend warrior who had nearly given up hope. After countless rounds of frustration and embarrassment on the course, he decided to invest time in understanding the mechanics of his swing. With the help of a local pro, Mark discovered that his grip was too weak, causing an open clubface at impact. By adjusting his grip and incorporating drills focused on proper alignment, he transformed his slice into a powerful, straight drive. Now, Mark confidently steps up to the tee, knowing that he can unleash a shot that not only stays straight but also adds substantial distance.

Then there’s Sarah, whose slice had become a hallmark of her game. After receiving advice from a friend about the importance of weight transfer during the swing, she began to focus on her footwork. By practicing the “step-through” drill, she learned to shift her weight more effectively, allowing her clubface to remain square at impact. The result? A remarkable transformation that has not only improved her scores but also rekindled her love for the game.

These success stories are a testament to the fact that with the right mindset and techniques, any golfer can overcome their slice. By sharing their journeys, they motivate others who may be struggling, proving that patience and perseverance can lead to significant improvement on the course. If you’re facing a slice, remember that you’re not alone—and with the right adjustments, you too can join the ranks of golfers who have turned their game around.

14. Maintaining a Positive Mindset: Enjoying the Journey

Golf is as much a mental game as it is a physical one, and maintaining a positive mindset can make all the difference in your quest to say goodbye to that frustrating slice. Embracing an optimistic outlook not only enhances your enjoyment of the game but also plays a significant role in your performance on the course.

Start by celebrating your progress, no matter how small. Each time you step onto the driving range or the course, take a moment to acknowledge the improvements you’ve made, whether it’s a slight decrease in your slice or a newfound consistency in your swing. Keeping a journal can help track these milestones, serving as a tangible reminder of your journey and the hard work you’ve put in.

Additionally, approach each practice session with an open mind, viewing it as an opportunity for growth rather than a chore. Golf can be a challenging sport, and it’s easy to get bogged down by mistakes or setbacks. Instead, try to view each round as a learning experience. If a shot doesn’t go as planned, take a deep breath, reassess, and focus on what you can adjust next time.

Incorporating mindfulness techniques can also help foster a positive mindset. Before you tee off, take a moment to visualize your ideal drive—picture the ball soaring through the air, landing perfectly on the fairway. This mental rehearsal can boost your confidence and set a positive tone for your game.

Finally, surround yourself with positivity. Whether it’s playing with supportive friends, joining a local golf club, or engaging with a community of fellow golfers online, having a supportive network can be incredibly uplifting. Share your experiences, celebrate each other’s victories, and remind one another that the journey to improvement is as important as the destination.

By maintaining a positive mindset and enjoying the journey, you’ll not only see improvements in your game but also cultivate a deeper love for golf, making every swing a step toward success.

15. Conclusion: Embracing the Challenge and Celebrating Progress

As we draw this guide to a close, it’s essential to remember that overcoming a golf slice is not merely about correcting a swing flaw; it’s a journey of self-discovery, resilience, and improvement. Embracing the challenge of refining your drive will not only enhance your game but also deepen your love for the sport. Every golfer, from amateurs to seasoned pros, has faced their own set of obstacles on the course, and your slice is just another hurdle to conquer.

As you implement the tips and techniques outlined in this post, take the time to celebrate each small victory along the way. Perhaps you’ve managed to straighten out your drive for a few holes, or maybe you’ve noticed an improvement in your consistency at the driving range. Recognizing these moments of progress will keep you motivated and engaged in your practice.

Remember, the road to a straighter drive is paved with patience and persistence. So, equip yourself with the right mindset, commit to regular practice, and don’t shy away from seeking guidance from professionals if needed. As you continue to refine your technique and embrace the learning process, you’ll not only say goodbye to your golf slice but also hello to a new level of confidence on the course. Now, go out there, enjoy the game, and relish in the thrill of watching your hard work transform into tangible results!

As we wrap up our guide on how to say goodbye to your golf slice and achieve a straighter drive, we hope you feel empowered with the tips and techniques shared throughout this article. Golf is as much a mental game as it is physical, so remember to stay patient and practice consistently. By incorporating these strategies into your routine, you’ll not only improve your swing mechanics but also boost your confidence on the course. So grab your clubs, hit the driving range, and watch as those once-persistent slices transform into straight, powerful drives. We can’t wait to hear about your progress and how these tips have elevated your game. Here’s to many rounds of enjoyable, slice-free golf ahead!

What Are the Best Ways to Practice Golf at Home?

Golf is often seen as a game of precision, patience, and practice, but what if you could sharpen your skills without ever stepping foot on the course? For avid golfers and newcomers alike, the challenges of busy schedules and limited access to driving ranges can be daunting.

Fortunately, with the right tools and techniques, you can transform your home into a personal golf practice haven. “Swing into Success: The Ultimate Guide to Practicing Golf at Home” will explore innovative ways to enhance your swing, improve your short game, and develop your putting skills, all from the comfort of your living room or backyard. Whether you’re looking to maintain your form during the off-season or simply want to refine your techniques, this comprehensive guide will equip you with practical tips, essential drills, and creative exercises to help you elevate your golf game to new heights. Get ready to swing into success and make every day a step closer to mastering your craft!

1. Introduction: The Benefits of Practicing Golf at Home

What Are the Best Ways to Practice Golf at Home?
Credit : whatcanu.com

Practicing golf at home offers a myriad of benefits that can elevate your game without the need for a driving range or golf course. First and foremost, it provides the convenience of training at your own pace, allowing you to fit practice sessions into your busy schedule. Whether you have just 15 minutes between meetings or a full afternoon to dedicate, you can easily squeeze in valuable practice time without the hassle of travel.

Moreover, practicing at home fosters a relaxed atmosphere where you can focus on refining your skills without the pressure of others watching. This is particularly beneficial for beginners who may feel intimidated by the presence of more experienced players. In the comfort of your own space, you can experiment with different techniques, make mistakes, and learn at your own speed.

Another advantage is the ability to create a personalized practice environment tailored to your specific needs. With just a few essential tools, such as a putting mat, chipping net, and swing trainer, you can set up a mini-golf academy right in your living room or backyard. This customization allows you to concentrate on areas you want to improve, whether it’s your short game, putting, or overall swing mechanics.

Additionally, practicing golf at home can lead to significant cost savings. You’ll reduce the expenses associated with frequent trips to the course, range fees, and even lessons. Instead, you can invest in quality equipment or training aids that will support your development over time.

Lastly, home practice encourages consistency, an essential component of mastering any skill. By integrating golf practice into your daily routine, you’ll build muscle memory and develop a rhythm that translates to improved performance on the course. So, whether you’re a seasoned golfer looking to maintain your edge or a newcomer eager to learn the fundamentals, embracing the flexibility and benefits of practicing golf at home can be a game-changer in your journey to success on the fairways.

2. Setting Up Your Home Golf Practice Space

Creating a dedicated golf practice space at home can be a game-changer for improving your skills and maintaining your swing between rounds. Whether you have a spacious backyard, a cozy garage, or even just a small corner in your living room, you can transform any area into your personal golfing haven with a little creativity and the right tools.

**Choose the Right Location:** Start by identifying the best spot in your home where you can practice without interruption. Ideally, this space should have enough room for a full swing. If you have outdoor space, a backyard or patio can be perfect for setting up a driving range or a putting green. If you’re working indoors, look for a space with high ceilings and minimal breakable items nearby.

**Invest in Essential Equipment:** Depending on your available space, consider investing in some essential golf practice equipment. A high-quality putting mat can simulate the feel of a real green and can be easily rolled out in any room. For swing practice, a net or a hitting mat will allow you to work on your drives without the risk of shattering windows or damaging walls. Additionally, tools like alignment sticks and swing trainers can provide valuable feedback on your technique.

**Create a Comfortable Atmosphere:** To make your practice space inviting, ensure it’s well-lit and free from distractions. A comfortable mat or rug can be added for those longer practice sessions, and you might want to set up a small speaker to play your favorite music or a podcast to keep you entertained while you work on your swing.

**Incorporate technology:** If you’re serious about honing your skills, consider using technology to your advantage. There are various apps and devices available that can analyze your swing, track your progress, and offer personalized tips. Setting up a smartphone or tablet on a tripod can also allow you to film your swings, enabling you to review your form and make necessary adjustments.

**Personalize Your Space:** Finally, don’t forget to infuse your personality into your practice area. Hang up pictures of your favorite golfers, display trophies, or even put up motivational quotes that inspire you to improve. This personal touch will not only make your practice space more enjoyable but will also reinforce your commitment to becoming a better golfer.

By thoughtfully setting up your home golf practice space, you’ll create an environment that encourages consistent practice and fosters improvement, making it easier to swing into success on the course!

3. Essential Equipment for Home Golf Practice

What Are the Best Ways to Practice Golf at Home?
Credit : whatcanu.com

When it comes to honing your golf skills from the comfort of your home, having the right equipment is paramount. Investing in essential gear not only enhances your practice sessions but also ensures you’re making the most out of your time spent away from the course. Here’s a rundown of the must-have items that can transform your living space into a mini-golf training ground.

**1. Golf Mat:** A high-quality golf mat is the foundation of any home practice setup. Look for a mat that mimics the feel of real grass, allowing you to practice your swings without worrying about the wear and tear on your lawn. Many mats come with alignment aids to help you hone your stance and aim.

**2. Indoor Putting Green:** A portable indoor putting green is a game-changer for refining your short game. These greens come in various sizes and often feature contours and breaks to simulate real-life putting conditions. With regular practice on a putting green, you can develop a better feel for distance and accuracy, all from the comfort of your living room.

**3. Swing Trainer:** To improve your swing mechanics, consider a swing trainer. These devices can help you practice your swing path, tempo, and follow-through. Some trainers even provide instant feedback, allowing you to make adjustments in real-time and develop a more consistent swing.

**4. Alignment Sticks:** Alignment sticks are invaluable tools for improving your stance and alignment. Placing these sticks on the ground can help you visualize your target line and ensure that your body is properly aligned during practice. They are lightweight, portable, and can be easily stored when not in use.

**5. Training Aids:** There are a variety of training aids available, from weighted clubs that help build strength and control, to devices that help with grip and wrist positioning. These aids can be particularly beneficial for addressing specific areas of improvement in your game.

**6. Golf Balls:** While it may seem obvious, having a supply of golf balls is essential for practicing your shots effectively. Consider investing in practice balls that are designed for indoor use, as they are often softer and less likely to cause damage to your home.

**7. Video Recording Device:** Capturing your swing on video can provide invaluable insights into your technique. Use your smartphone or a dedicated camera to record your practice sessions, then analyze your performance to identify areas for improvement.

By equipping yourself with these essential items, you can create an effective home practice environment that will help you swing into success on the golf course. Whether you’re refining your swing, perfecting your putting, or simply enjoying a few swings in your backyard, the right equipment can elevate your game and keep your skills sharp.

4. Swing Fundamentals: Key Techniques to Focus On

When it comes to mastering the art of golf, solidifying your swing fundamentals is essential, even if you’re practicing at home. Focusing on key techniques helps to build muscle memory and consistency, both crucial for improving your game. Here are some vital aspects to pay attention to as you work on your swing:

**Grip**: Your grip is the foundation of your swing. Ensure that your hands are positioned correctly on the club, with the grip resting snugly in the fingers rather than the palms. A neutral grip allows for better control and alignment, so take the time to experiment with your grip until you find what feels comfortable and effective.

**Stance**: A proper stance sets up the entire swing. Stand with your feet shoulder-width apart, knees slightly bent, and weight distributed evenly. Your posture should be athletic, with a slight bend at the hips and your back straight. Practice addressing the ball in this position, ensuring that your alignment is directed towards your target.

**Backswing**: The backswing is where the magic begins. Focus on rotating your shoulders and hips away from the target while keeping your arms relaxed. A common mistake is to overextend the arms, which can lead to an inconsistent swing. Instead, allow your arms to follow the natural motion of your torso as you complete your backswing. Consider using a mirror to check your form, ensuring your club is parallel to the ground at the top of your swing.

**Downswing**: Transitioning from your backswing to your downswing is where precision matters. Start the downswing by shifting your weight from your back foot to your front foot, allowing your hips to lead the motion. This weight transfer generates power and sets the stage for a more effective strike on the ball. Keep your eyes on the ball and maintain your focus as you bring the club down.

**Follow-Through**: Don’t underestimate the importance of a proper follow-through. A complete follow-through not only indicates a well-executed swing but also helps maintain balance. Make sure your body rotates fully towards the target, and finish with your weight on your front foot. This will ensure that your swing is not only powerful but also controlled.

By honing in on these swing fundamentals at home, you’ll be well on your way to developing a reliable and effective golf swing. Regular practice focusing on these key techniques will pay off when you finally hit the course, allowing you to swing into success with confidence!

5. Drills for Improving Your Swing Mechanics

What Are the Best Ways to Practice Golf at Home?
Credit : whatcanu.com

When it comes to honing your golf swing, the mechanics are everything. Even if you’re practicing at home, there are a variety of drills you can incorporate into your routine that will help you develop a more consistent and powerful swing. Here are a few effective drills to get you started:

**1. The Half-Swing Drill:** This drill focuses on your follow-through and ensures that you maintain balance and control. Stand in your golf stance but only take your swing back to waist height. As you swing through, concentrate on making a smooth motion and finishing with your body facing the target. This helps reinforce proper body rotation and weight transfer without the complexity of a full swing.

**2. The Door Frame Drill:** To improve your swing path and prevent slicing, find a door frame or a wall corner in your home. Stand with your back to the frame, and take your backswing while ensuring your club doesn’t hit the wall. This drill encourages you to swing on the correct path, promoting an inside-out swing that can lead to better ball striking.

**3. The Alignment Stick Drill:** If you have alignment sticks or even a couple of broom handles, use them to ensure your stance and swing path are aligned properly. place one stick on the ground pointing towards your target and another vertically in front of you, aligned with your feet. Practice your swing while focusing on keeping the club on the correct path, ensuring your body aligns with both sticks. This visual aid can significantly enhance your understanding of proper alignment and swing mechanics.

**4. The One-Handed Swing Drill:** Strengthening your grip and improving your control can be achieved through one-handed swings. Practice swinging with your dominant hand only, then switch to your non-dominant hand. This drill not only builds strength and coordination but also helps you identify any imbalances in your swing that you may need to address.

**5. Mirror Work:** If you have a full-length mirror at home, use it to observe your swing mechanics. Watching yourself swing allows you to self-correct and understand the positions of your body throughout the swing. Pay attention to your grip, posture, and follow-through, making adjustments as needed.

By incorporating these drills into your at-home practice sessions, you’ll develop a deeper understanding of your mechanics, allowing you to refine your swing and enhance your overall game. Remember, consistency is key—dedicate regular time to these practices, and you’ll be on your way to swinging into success on the course!

6. Putting Practice: Tips for a Better Short Game

When it comes to honing your golf skills, putting is often the most underrated aspect of the game, yet it can make all the difference in lowering your score. Mastering your short game requires patience and precision, and practicing at home can be both fun and rewarding. Here are some tips to help you elevate your putting game without ever leaving your living room.

**Create a Dedicated Practice Space:** First things first, carve out a little corner of your home as your putting haven. Whether it’s a section of your basement, a spare room, or even your backyard, having a designated area helps you focus. Invest in a quality putting mat that simulates the feel of real greens. This will not only give you a consistent surface to practice on but will also help you develop a sense of distance and speed.

**Set Up Targets:** Just like on the course, aim for specific targets while you practice. Use cups, cones, or even plastic cups placed at varying distances to challenge yourself. This will enhance your targeting skills and help you learn to adjust your putts based on distance and break. To increase the difficulty, try to hit your target from different angles or with different slopes.

**Practice Your Grip and Stance:** Consistency is key in putting. Focus on your grip and stance; they should feel comfortable and natural. Stand with your feet shoulder-width apart, and keep your eyes directly over the ball. Make sure your grip is light—too much tension can lead to inconsistent strokes. Spend time in front of a mirror to ensure your posture is optimal, allowing you to strike the ball cleanly.

**Use Alignment Aids:** To improve your aim, consider utilizing alignment aids. These can be as simple as laying down a piece of string or a straight edge that connects your ball to the target. This visual cue will help you see any misalignment in your stance or stroke, allowing for quick adjustments.

**Practice Drills:** Incorporate specific drills into your routine. One effective drill is the “Gate Drill,” where you set up two tees just wider than your putter’s head. Try to roll the ball through the “gate” without hitting the tees. This exercise encourages a straight back-and-through stroke and helps build muscle memory.

**Track Your Progress:** Keep a journal of your putting sessions. Note the drills you performed, the distances you practiced, and your successes and challenges. Tracking your progress not only provides motivation but also helps identify areas where you need improvement.

By integrating these tips into your home practice routine, you’ll develop a more reliable short game and gain the confidence to sink those crucial putts when it matters most. Remember, the key to becoming a better putter lies in consistent practice and a focused mindset. So, grab your putter, set up your home practice area, and swing your way to success on the greens!

7. Chipping Techniques: Mastering the Around-the-Green Game

What Are the Best Ways to Practice Golf at Home?
Credit : whatcanu.com

When it comes to golf, mastering your chipping technique can make all the difference in lowering your score and boosting your confidence on the course. Chipping is often the unsung hero of golf, but it can be the key to saving strokes around the green. Practicing chipping at home not only sharpens your skills but also helps you feel more prepared when you step onto the course.

Start by creating a dedicated chipping area in your backyard or even in your living room if space permits. Use a mat or an old blanket to simulate the feel of grass, and set up targets at varying distances. You might use buckets, hula hoops, or even just a towel laid out flat to create your target zones. The goal here is to replicate the conditions you might find on a golf course, so make it as realistic as possible.

Once you have your setup ready, focus on your grip and stance. A proper grip will give you more control over the club, while a stable stance will enhance your balance and precision. Experiment with different clubs, starting with a pitching wedge and then transitioning to a sand wedge or even a 9-iron. each club will produce a different trajectory and roll, which is essential to understand for various chipping situations.

As you begin to chip, pay attention to your swing mechanics. The idea is to maintain a smooth, controlled motion rather than trying to hit the ball hard. Use your shoulders to initiate the swing while keeping your wrists firm. Practice different shot types—high chips that land softly and roll out, as well as low, running chips that travel further. This variation will prepare you for the unpredictable nature of real-life chipping scenarios.

To track your progress, challenge yourself! Set goals for your practice sessions, such as aiming to hit a certain number of chips within a designated area or achieving a specific success rate. Engaging in friendly competitions with family members or friends can also make practice more enjoyable and rewarding.

Ultimately, the key to mastering your chipping game is repetition and focus. The more time you dedicate to practicing these techniques, the more confident you’ll feel when faced with tricky shots around the green. So grab your clubs, set up your practice area, and swing into success—your improved chipping skills will undoubtedly pay off when you hit the course!

8. Utilizing Technology: Apps and Devices for Golf Improvement

In the age of technology, enhancing your golf skills from the comfort of your home has never been easier. With a plethora of apps and devices tailored specifically for golfers, you can transform your living room or backyard into a personal training ground. These tools not only provide instant feedback but also make practice more engaging and effective.

First, let’s talk about golf swing analysis apps. Programs like **Golfshot** and **SwingU** allow you to record your swings using your smartphone, analyze your form, and track your progress over time. These apps often use sophisticated algorithms to break down your technique, offering tips to correct flaws and improve your performance. Many even feature tutorials from professional coaches, giving you access to expert advice right at your fingertips.

Another invaluable resource is swing analyzers, such as the **Zepp Golf 2** or **Blast Motion Golf** sensor. These compact devices attach to your glove or club and measure various metrics, including swing speed, angle, and tempo. The data collected is synchronized with your mobile app, providing insights that can help you refine your technique. Imagine being able to see your swing metrics in real-time and adjust accordingly—this kind of feedback loop is crucial for improvement.

Don’t overlook the power of virtual reality (VR) either. Programs like **Golf+** immerse you in stunning golf courses from around the world, allowing you to practice your swing as if you were on the green. This innovative technology not only makes practice more enjoyable but also helps with muscle memory, as the immersive experience mimics actual play.

Lastly, consider using fitness tracking devices or smartwatches to monitor your physical fitness, which is a crucial component of golfing success. Keeping track of your workouts, steps, and heart rate can help you stay in shape and improve your endurance on the course. Some advanced devices even offer specific workouts tailored to enhance your golf game, focusing on flexibility and strength in the muscles most used during a swing.

By leveraging these technologies, you can create a comprehensive training program that fits into your lifestyle. Whether you’re analyzing your swing, immersing yourself in a virtual course, or tracking your fitness progress, technology makes it easier than ever to hone your skills and swing into success, all from the comfort of your home.

9. Creating a Practice Routine: How to Stay Consistent

Creating a practice routine is the cornerstone of improvement in any sport, and golf is no exception. To truly swing into success, you need a structured approach that not only fits into your lifestyle but also keeps you motivated and engaged.

Start by setting specific, measurable goals. Perhaps you want to improve your putting accuracy or work on your swing mechanics. Whatever it is, having clear objectives helps you focus your practice sessions and gives you a sense of achievement as you progress. Break these goals down into manageable tasks, like dedicating 10 minutes to putting drills or 20 minutes to swing exercises each day.

Next, carve out dedicated practice time in your schedule. Consistency is key, so choose a time that works best for you—whether it’s early morning before work or a relaxing evening session after dinner. Treat this time as an important appointment; it will reinforce the habit and make it easier to stick to your routine.

Incorporate a variety of drills to keep things fresh and exciting. Mix short game practice with full swings and flexibility exercises to avoid monotony and develop all aspects of your game. You might also consider using training aids or golf simulators to enhance your experience and provide immediate feedback on your performance.

Additionally, track your progress. Use a practice journal or a golf app to log your sessions, noting improvements and areas that need more attention. This not only helps you stay accountable but also allows you to celebrate small victories along the way.

Lastly, don’t forget to make it social. Invite a friend or family member to join your practice sessions. Having a partner not only adds an element of fun but also creates a support system that can encourage you to maintain your practice routine.

By establishing a consistent practice routine, you’ll develop the skills and confidence needed to take your game to the next level—all from the comfort of your own home. So grab your clubs, set those goals, and swing into a successful golf journey!

10. Mental Game: Visualization and Mindfulness Techniques

When it comes to mastering golf, the mental game is just as crucial as your physical skills. Visualization and mindfulness techniques can elevate your practice sessions at home and help you develop a winning mindset that translates onto the course.

**Visualization** involves creating a mental image of your ideal golf swing, a successful putt, or even the entire game. Close your eyes and picture yourself on the course, standing over the ball with confidence. Imagine the feel of your grip, the sound of the club striking the ball, and the perfect trajectory as it soars toward the target. By vividly visualizing these scenarios, you train your brain to recognize success, allowing it to become a part of your muscle memory. This technique not only boosts your confidence but also prepares you mentally for real-game situations.

**Mindfulness**, on the other hand, helps you stay grounded and focused, especially during those moments of pressure. Practice being present in the moment, whether it’s while you’re swinging in your backyard or during a meditation session. Take deep breaths, clear your mind of distractions, and concentrate fully on your technique or even the rhythm of your practice. This can help you manage anxiety and maintain composure when facing challenging shots on the course.

Incorporating these mental techniques into your golf routine can lead to significant improvements in your performance. Consider setting aside a few minutes each day to engage in visualization exercises or mindfulness meditation. As you cultivate a strong mental game, you’ll find yourself not only swinging the club better but also enjoying the game more fully. With these powerful tools at your disposal, you’re well on your way to swinging into success.

11. Incorporating Fitness: Exercises to Improve Your Golf Game

Incorporating fitness into your golf practice routine is a game-changer that can significantly enhance your performance on the course. Golf may seem like a leisurely sport, but it demands a unique blend of strength, flexibility, and endurance. By integrating specific exercises into your at-home training regimen, you can build the physical foundation necessary to swing with power and precision.

Start with core-strengthening exercises, as a strong core is crucial for maintaining balance and stability throughout your swing. Planks, Russian twists, and medicine ball rotations can help you develop a robust midsection, allowing for more powerful turns during your backswing. Don’t overlook your legs either—squats and lunges not only build strength but also improve your stability, which is essential for a consistent swing.

Flexibility is another key component of a successful golf game. Incorporating stretching routines focused on your shoulders, hips, and back can enhance your range of motion, allowing for a smoother, more effective swing. Yoga or Pilates can be particularly beneficial, helping to improve both flexibility and mental focus.

Lastly, don’t forget cardiovascular fitness. While golf is not an intense cardio workout, having good endurance will help you stay energized throughout your rounds, especially during those long tournaments. Whether it’s a brisk walk, cycling, or jumping rope, aim for at least 30 minutes of aerobic exercise a few times a week.

By dedicating time to these fitness components, you’ll not only improve your golf game but also enjoy the added benefits of increased overall health and well-being. So, grab your workout gear and get ready to swing into success—your body will thank you, and your game will too!

12. Tracking Your Progress: Keeping a Practice Journal

Tracking Your Progress: Keeping a Practice Journal

One of the most effective ways to enhance your golf practice at home is by keeping a detailed practice journal. This simple yet powerful tool allows you to monitor your progress, identify patterns, and set achievable goals, ultimately propelling you toward success on the course.

Start by dedicating a notebook or a digital document specifically for your golf practice. Each entry should include the date, duration of practice, and specific drills or exercises you worked on. For instance, note the number of putts made from different distances, the accuracy of your drives, or the consistency of your swing. This will not only help you recognize areas that need improvement but also celebrate the milestones you achieve along the way, no matter how small.

Incorporate reflections into your entries. After each practice session, jot down your thoughts on what went well and what didn’t. Did you struggle with your short game? Did a particular drill feel especially rewarding? These insights will help you adjust your practice routine to focus on weaknesses, ensuring that you are always progressing in the right direction.

Additionally, set short-term and long-term goals within your journal. Short-term goals might include increasing the number of successful putts in a session or improving your swing speed, while long-term goals could involve lowering your handicap or mastering a specific technique. By breaking your larger aspirations into manageable steps, you can track your journey and stay motivated as you see your skills evolve.

Finally, don’t forget to review your journal regularly. Reflecting on your past entries will provide valuable context for your progress and help you stay accountable to the goals you’ve set. It’s a rewarding process that allows you to visualize your growth as a golfer, making each practice session feel purposeful and productive.

By maintaining a practice journal, you’re not just logging hours; you’re building a roadmap to success that will guide you through your golf journey, ensuring that every swing at home leads you closer to your goals on the course.

13. Finding Online Resources: Videos, Tutorials, and Communities

In the digital age, access to a wealth of golfing knowledge is just a click away. Finding online resources—such as videos, tutorials, and communities—can significantly enhance your practice sessions at home and elevate your game to new heights.

YouTube, for instance, is a treasure trove of golf content. From swing analysis to putting drills, there are countless channels dedicated to teaching various aspects of the game. Look for videos by renowned golf instructors or professional players who break down techniques and provide tips that cater to all skill levels. Watching slow-motion replays of professional swings can help you visualize the mechanics involved, allowing you to replicate those movements in your practice.

Additionally, online tutorials and structured courses can provide a more comprehensive learning experience. Websites like Skillshare or Udemy offer in-depth classes that cover everything from the fundamentals for beginners to advanced strategies for seasoned players. These platforms often feature interactive components, allowing you to ask questions and receive feedback directly from instructors.

Don’t underestimate the power of community, either! Joining online forums or social media groups dedicated to golf can connect you with fellow enthusiasts who share your passion. Platforms like Reddit or Facebook have groups where you can exchange tips, share your progress, and even engage in friendly competitions. Being part of a community not only keeps you motivated but also provides valuable insights from others who are on the same journey.

By tapping into these online resources, you’ll not only enhance your skills but also create a supportive network to keep you engaged and excited about your practice. So grab your clubs and start exploring the vast digital landscape of golf training; your future self will thank you!

14. Setting Goals: Short-Term and Long-Term Objectives

Setting goals is a vital component of any successful practice routine, especially when it comes to honing your golf skills at home. By establishing both short-term and long-term objectives, you create a roadmap that guides your practice sessions and keeps you motivated along the way.

**Short-Term Goals** are your stepping stones. These are the manageable targets you can achieve within a few weeks or even days. For instance, you might aim to improve your putting accuracy by dedicating 15 minutes daily to practicing putts from different distances. You could also focus on perfecting your grip or stance over a weekend, ensuring that your fundamentals are solid before moving on to more complex techniques. Short-term goals provide immediate feedback and a sense of accomplishment, which can be incredibly motivating as you see your skills develop.

On the other hand, **Long-Term Goals** serve as your guiding vision. What do you aspire to achieve in your golf journey over the next year or few years? Perhaps your ambition is to lower your handicap by a specific number or to build the consistency needed to break 80 in your next round. Long-term goals require deeper commitment and a strategic approach, as they often encompass various aspects of your game, from physical fitness to mental resilience.

To effectively set your goals, consider employing the SMART criteria—Specific, Measurable, Achievable, Relevant, and Time-bound. This method ensures that your goals are clearly defined and attainable within your personal context. For example, instead of saying, “I want to get better at golf,” a SMART goal would be, “I will reduce my average putts per round from 36 to 30 over the next three months by practicing my short game twice a week.”

Having both short-term and long-term objectives not only keeps your practice sessions focused and productive but also instills a sense of purpose in your golfing journey. As you check off your short-term goals, you’ll find yourself inching closer to your long-term aspirations, leading to a more fulfilling and successful practice experience at home. So grab your clubs, set your sights on those targets, and swing into success with clarity and determination!

15. Conclusion: Swing into Success with Dedicated Practice at Home

In conclusion, mastering the art of golf doesn’t have to be confined to the pristine fairways and manicured greens of your local course. With the right mindset, tools, and commitment to practice, you can swing into success right from the comfort of your own home. By incorporating the techniques and drills outlined in this guide, you’ll create a tailored practice routine that not only enhances your skills but also fits seamlessly into your lifestyle.

Whether you’re perfecting your grip, honing your swing mechanics, or working on your short game, the key is consistency. Set aside dedicated time each week to focus on your practice, and don’t shy away from utilizing technology—whether that’s a swing analyzer or instructional videos—to refine your technique further.

Remember, golf is as much a mental game as it is a physical one. Visualize your shots, maintain a positive attitude, and celebrate your progress, no matter how small. The more you practice, the more confident you’ll become, translating to better performance on the course when you return.

So grab your clubs, carve out a space in your living room or backyard, and embrace the journey of improvement. With dedication and the right approach, you’ll find that your home practice sessions can propel you to new heights in your golfing prowess. Swing into success and watch as your game transforms, one practice session at a time!

As we wrap up our ultimate guide to practicing golf at home, we hope you feel inspired and equipped to take your game to the next level without ever stepping foot on a course. From creating a dedicated practice space to incorporating innovative drills and exercises, the tips and strategies we’ve shared can help you refine your swing and enhance your overall skills right from the comfort of your living room or backyard. Remember, consistency is key, and with a little creativity and dedication, you can turn your home into a hub of golfing excellence. So grab your clubs, set your goals, and swing into success—your next round on the green will be all the more rewarding! Happy practicing!

How Can I Break 100 (or 90, or 80) in Golf?

Golf is a game of skill, strategy, and mental fortitude, and for many enthusiasts, breaking the elusive barrier of 100, 90, or even 80 strokes can feel like a distant dream.

Whether you’re a novice just starting out or an experienced player looking to refine your game, the journey to lower scores is filled with challenges and triumphs. In this comprehensive guide, we will explore proven strategies that can help you unlock your full golf potential. From mastering your swing mechanics and honing your short game to developing a winning mindset and effective practice routines, we’ll delve into the essential techniques that can transform your approach to the course. Get ready to elevate your game, gain confidence, and enjoy the thrill of seeing your scores drop as you embark on this exciting journey towards golfing excellence!

1. Understanding Your Current Game: Self-Assessment

How Can I Break 100 (or 90, or 80) in Golf?
Credit : whatcanu.com

Understanding your current game through self-assessment is the foundational step on your journey to unlocking your golf potential. Before you can improve your score, you must first take a comprehensive look at where you stand. This involves more than just glancing at your scorecard; it requires an honest evaluation of your skills, strengths, and weaknesses.

Start by keeping track of your scores over several rounds, noting not just the final tally but also the specific areas where you struggle. Are your drives consistently off the fairway? Do you find yourself three-putting more often than not? Perhaps your short game needs fine-tuning, or maybe course management decisions are leading to unnecessary strokes. By identifying these patterns, you can begin to formulate a targeted practice plan.

Consider recording your practice sessions and rounds of golf. Video analysis can be a revealing tool, allowing you to see your swing mechanics and stance from different angles. This visual feedback can highlight issues you might not notice in real-time, such as poor posture or an inconsistent grip. Additionally, solicit feedback from trusted playing partners or consider working with a coach who can provide professional insights.

Self-assessment also involves mental aspects of the game. Reflect on your course management strategies: Are you taking unnecessary risks, or are you too conservative in your play? Assess your emotional resilience on the course. Do you let a bad hole affect the rest of your game? Understanding your mental approach can be just as crucial as refining your physical skills.

In summary, a thorough self-assessment sets the stage for effective improvement. By being honest about your current game, you can create a focused plan that addresses your specific needs, leading you one step closer to breaking that elusive barrier of 100, 90, or even 80. Embrace this crucial first step, and watch as your game transforms!

2. Setting Realistic Goals: Breaking 100, 90, and 80

Setting realistic goals is a crucial part of your journey to unlocking your golf potential and breaking those significant score barriers of 100, 90, or even 80. While it might be tempting to aim for a dramatic leap in performance, the most effective strategy involves a series of incremental, achievable goals that build your confidence and skill over time.

Start by assessing your current game. If you consistently score around 110, setting a goal to break 100 is both challenging and attainable. This target provides a clear focus for your practice sessions and rounds, allowing you to track your progress and celebrate small victories along the way. For instance, aim to reduce your strokes on the front nine first, or work on improving your putting, which often has the most significant impact on your score.

Once you hit that coveted score of 99, it’s time to shift your sights to breaking 90. This level of play requires a deeper understanding of course management, shot selection, and mental discipline. Set specific goals such as hitting a certain percentage of fairways or greens in regulation, or reducing your average putts per round. Each of these mini-goals will contribute to your overall performance and keep you motivated.

For those with aspirations to crack the 80s, the strategy becomes even more nuanced. This level demands precision, consistency, and a solid short game. Focus on refining your skills in areas like chipping, pitching, and bunker play, as well as honing your course strategy. Setting realistic goals at this level may include practicing specific drills, engaging in regular lessons with a golf professional, or even participating in competitive rounds to simulate high-pressure situations.

Remember, the journey to improving your golf game is not a sprint but a marathon. By setting realistic, incremental goals, you create a roadmap that keeps you motivated, engaged, and ultimately leads you to unlock your true golfing potential. Celebrate every achievement, no matter how small, and enjoy the process of becoming the golfer you aspire to be.

3. The Importance of a Strong Mental Game

How Can I Break 100 (or 90, or 80) in Golf?
Credit : whatcanu.com

In the pursuit of lowering your golf scores, the significance of a strong mental game cannot be overstated. Golf is as much a battle of the mind as it is a test of physical skill. When you step onto the tee, your mental state can influence every aspect of your performance—from your swing mechanics to your decision-making on the course.

A golfer with a sharp mental game approaches each shot with confidence and focus, free from the distractions of past mistakes or future worries. It’s about cultivating a mindset that embraces challenges and maintains composure under pressure. Visualization techniques can be particularly effective; imagine yourself executing the perfect shot before you even address the ball. This mental rehearsal primes your body and mind for success.

Equally important is the ability to manage emotions. Golf can be an emotional rollercoaster, with highs of a great shot and the lows of a frustrating miss. Developing resilience and staying calm during challenging situations can help you avoid the mental pitfalls that lead to poor performance. Techniques such as deep breathing, positive affirmations, and mindfulness can help keep your thoughts centered and focused.

Moreover, setting realistic and specific goals can enhance your mental approach. Instead of simply aiming to break 100, focus on incremental improvements: hitting a certain number of fairways, reducing three-putts, or perfecting a specific aspect of your short game. Celebrating small victories along the way can bolster your confidence and keep your motivation high.

Incorporating mental training into your practice routine is paramount. Consider dedicating time in your practice sessions to work on your mental game, whether through visualization exercises, simulating high-pressure situations, or simply reflecting on your performance afterward. By sharpening your mental skills, you’ll not only enhance your enjoyment of the game but also unlock your true potential, making those elusive scores of 100, 90, or even 80 well within your reach.

4. Essential Golf Fundamentals: Grip, Stance, and Alignment

Mastering the fundamentals of golf is akin to laying a solid foundation for a house; without it, everything else can crumble. The trio of grip, stance, and alignment forms the bedrock of a successful swing and can significantly influence your performance on the course.

**Grip**: Your grip is the first point of contact with the club, and it can make or break your swing. A proper grip should feel comfortable yet firm, allowing for control and power. Most players opt for one of three basic grips: the overlapping grip, the interlocking grip, or the ten-finger grip. Each has its advantages, so experiment to find what feels best for you. The key is to maintain a relaxed hold — gripping too tightly can lead to tension and negatively affect your swing mechanics.

**Stance**: Your stance sets the stage for your swing, and it should be both stable and athletic. Stand with your feet shoulder-width apart for balance, bending slightly at the knees and hips. Your weight should be evenly distributed, ready to shift as you swing. Pay attention to the ball’s position in relation to your stance: for shorter clubs, the ball should be positioned more toward your back foot; for longer clubs, move it closer to your front foot. This simple adjustment can help ensure a more consistent strike.

**Alignment**: Proper alignment is critical for ensuring that your shots travel in the intended direction. When addressing the ball, your body — from your feet to your shoulders — should be parallel to the target line. A common mistake is to align your body too far left or right, which can lead to unwanted hooks or slices. Use an alignment stick or even a club laid on the ground to help visualize this line during practice. Once you align yourself correctly, trust your swing and let muscle memory take over.

By honing these essential fundamentals, you’ll not only improve your consistency but also build the confidence needed to tackle the challenges of the course. As you practice your grip, stance, and alignment, remember that these elements are interconnected; refining one will inevitably enhance the others, unlocking the potential to break through those elusive scoring barriers.

5. Improving Your Short Game: Chipping and Putting Techniques

How Can I Break 100 (or 90, or 80) in Golf?
Credit : whatcanu.com

Improving Your Short Game: Chipping and Putting Techniques

When it comes to shaving strokes off your score, the short game is where the magic happens. Many players focus heavily on their drives and long irons, but neglecting the chipping and putting aspects of the game can prevent you from breaking that elusive score barrier. To truly unlock your golf potential, honing your skills around the greens is essential.

**Chipping Techniques:**
Chipping is an art that requires finesse, precision, and a keen understanding of the terrain. Start by adopting the right stance—position your feet close together, and distribute your weight slightly forward. This will help you maintain a stable base as you make crisp, controlled contact with the ball. Utilize a variety of clubs for your chips; the pitching wedge, 9-iron, and even a 7-iron can all serve different purposes depending on the distance and lie of the ball. Practice using the bounce of the club to your advantage, allowing the club to slide under the ball and create a soft landing on the green.

An effective drill to improve your chipping is the “ladder drill.” Set up several targets at varying distances and work on chipping to each one, gradually increasing your distance. This not only sharpens your accuracy but also instills a sense of touch and control as you learn how to adjust your swing for different scenarios.

**Putting Techniques:**
Once you’ve navigated the challenges of the short grass, it’s time to focus on putting—the final hurdle before that coveted score. A solid putting stance is vital; ensure your feet are shoulder-width apart and your grip is relaxed yet firm. Develop a consistent routine that helps you visualize your putt before you step up to the ball. This mental preparation can greatly enhance your focus and confidence.

One popular technique to improve your putting is the “gate drill.” Set up two tees slightly wider than your putter head, creating a gate through which your ball must travel. This exercise helps you develop a straight stroke and reinforces the importance of alignment. Additionally, don’t underestimate the power of speed control—practice putts of varying lengths, focusing on the distance to the hole and how the speed of your stroke affects your accuracy.

Ultimately, the key to mastering your short game lies in practice and patience. By dedicating time to refine your chipping and putting techniques, you’ll not only lower your scores but also enhance your overall enjoyment of the game. Remember, in golf, every stroke counts, and the short game is where you can gain the edge needed to break 100, 90, or even 80!

6. Mastering Course Management: Playing Smart Golf

Mastering course management is one of the most crucial yet often overlooked aspects of improving your golf game. It’s not just about hitting the ball long and straight; it’s about playing smart and making strategic decisions that can significantly lower your score. To play smart golf, you need to develop a keen understanding of the course layout, your strengths and weaknesses, and the importance of risk versus reward.

Start by studying the course before you even step onto the first tee. Familiarize yourself with each hole’s layout, paying close attention to hazards, greens, and potential landing areas. Use a course map or a reliable golf GPS app to gather insights on distances and obstacles. This knowledge will help you make informed decisions on club selection, shot placement, and when to play conservatively versus aggressively.

During your round, always have a plan for each shot. For example, if you’re faced with a long par 4, assess whether reaching the green in two is realistic or if it’s wiser to lay up and leave yourself a manageable approach shot. This approach not only minimizes risk but can also boost your confidence as you make smarter choices.

Additionally, learn to play to your strengths. If you’re more comfortable with a short game than a long drive, focus on positioning yourself for a good wedge shot rather than taking unnecessary risks on the tee. Conversely, if you excel at driving, leverage that strength to set yourself up for easier approach shots.

Lastly, don’t forget to consider course conditions. Wind, rain, and even the speed of the greens can impact your strategy. Adapting your game to these variables can make all the difference in achieving your scoring goals.

By mastering course management and playing smart golf, you’ll not only enhance your skills but also develop a deeper appreciation for the game. With practice and thoughtful decision-making, you’ll find yourself consistently breaking 100, 90, or even 80, unlocking your true golfing potential!

7. The Role of Physical Fitness in Golf Performance

How Can I Break 100 (or 90, or 80) in Golf?
Credit : whatcanu.com

### 7. The Role of Physical Fitness in Golf Performance

When it comes to excelling on the golf course, many players focus primarily on swing mechanics, club selection, and mental strategy. However, one crucial aspect that is often overlooked is physical fitness. Just as athletes in other sports dedicate time to conditioning, golfers too can significantly enhance their performance through a tailored fitness regimen.

Physical fitness in golf isn’t just about building muscle; it’s about developing strength, flexibility, and endurance. A strong core is essential for generating power in your swing, while flexibility allows for a fuller range of motion, ensuring you can achieve optimal swing mechanics without injury. Strength training can help you hit the ball farther, while a focus on cardiovascular endurance ensures that you maintain your energy levels throughout an entire round, especially during those hot summer days.

Incorporating exercises that mimic the movements used in golf can be particularly beneficial. For instance, rotational exercises, such as medicine ball twists or cable woodchoppers, can enhance your ability to generate torque during your swing. Likewise, stretching routines that focus on the hips, shoulders, and lower back can improve your flexibility, leading to a more fluid and powerful swing.

Moreover, physical fitness can have a profound impact on your mental game. A well-conditioned body contributes to better focus and concentration, allowing you to make smarter decisions on the course. You’ll find that with improved fitness, you can manage stress better and maintain a positive attitude, even when faced with challenging situations.

To get started, consider working with a fitness professional who understands the demands of golf. Tailored fitness programs, along with proper nutrition, can set you on the path not just to breaking 100, 90, or even 80, but to enjoying the game more fully. Remember, making physical fitness a priority is not just an investment in your golf game, but in your overall health and well-being. Embrace the holistic approach, and you may just unlock your true golfing potential!

8. Practice Drills to Enhance Your Skills

To truly unlock your golf potential and lower your scores, incorporating targeted practice drills into your routine is essential. These drills are designed not only to sharpen your technique but also to build muscle memory, instill confidence, and enhance your overall performance on the course. Here are a few proven practice drills that can help you refine specific skills and elevate your game.

**1. The Ladder Drill for Putting:** Set up a series of tees or markers at various distances from the hole, starting from three feet and extending to ten feet. Your goal is to make a series of putts from each distance, moving back only after you successfully sink a set number of consecutive putts. This drill helps develop your precision and feel for distance, which are crucial for lowering your scores.

**2. The 100-100 Pitching Drill:** Find a comfortable area near the green, and take 100 golf balls. Your objective is to pitch the balls to a target, ideally a specific spot on the green or a practice hole. Focus on your technique, ensuring that each shot is consistent in terms of stance, grip, and follow-through. This exercise not only hones your short game but also builds confidence when approaching the green.

**3. The 5-10-15 Drill for Chipping:** This drill focuses on your chipping skills. Place a target (like a towel or a hula hoop) at five, ten, and fifteen yards from your chipping area. Aim for each target in succession, adjusting your technique and club choice as you progress. This will enhance your ability to judge distance and trajectory, key components in successful chipping.

**4. The Alignment Stick Drill:** Use alignment sticks or any straight object to help improve your alignment and stance. Place one stick on the ground for your feet and another pointing toward your target. This visual aid will help you understand proper alignment and body positioning, which are essential for consistent ball striking.

**5. The Pressure Putting Drill:** To simulate the pressure of a real game, set up a series of putts within three to five feet. Each time you miss, add an additional putt to the next round. This drill helps you practice under pressure and reinforces the importance of focus and composure during crucial moments on the course.

By incorporating these targeted practice drills into your routine, you’ll not only see improvement in your skills but also gain the confidence needed to break through those scoring barriers. Remember, consistency is key—dedicate time each week to practice these drills, and you’ll be well on your way to unlocking your full golf potential!

9. Analyzing Your Swing: Tips for Improvement

Analyzing your swing is one of the most effective ways to unlock your golf potential and lower your scores. Many golfers go through the motions without truly understanding the mechanics of their swing, leading to persistent mistakes and missed opportunities on the course. By taking a step back and critically evaluating your technique, you can make significant strides toward breaking that elusive barrier—be it 100, 90, or even 80.

Start by recording your swing from different angles. Use your smartphone or a dedicated camera to capture your swing in action, focusing on the takeaway, the backswing, and the follow-through. Watching yourself swing can be enlightening; you’ll often spot flaws that you weren’t aware of during play. Look for common issues such as an overly steep angle, an open clubface at impact, or uneven weight distribution.

Consider enlisting the help of technology. Golf simulators and swing analysis apps can break down your swing mechanics with precision, offering insights into swing speed, angle of attack, and club path. This data can reveal specific areas for improvement that might not be visible to the naked eye.

Additionally, don’t hesitate to consult with a professional instructor. A qualified pro can provide personalized feedback and drills tailored to your unique swing dynamics. They can help you develop a practice routine that focuses on reinforcing positive habits and eliminating detrimental ones.

Finally, remember that improvement takes time and patience. Set realistic goals for yourself, and track your progress over weeks and months. Celebrate small victories—like a smoother follow-through or a more consistent impact position—because each step forward brings you closer to unlocking your full golfing potential. By dedicating time to analyze and refine your swing, you’ll not only enhance your skills but also deepen your enjoyment of the game.

10. Learning from the Pros: What the Best Golfers Do

When it comes to improving your golf game, there’s no better inspiration than the professionals who consistently dominate the sport. Learning from the pros offers invaluable insights into the strategies, mentalities, and techniques that can help elevate your performance on the course.

One of the first things you’ll notice about top golfers is their unwavering focus and dedication to practice. They don’t just hit balls aimlessly; every swing is intentional and analyzed for improvement. Consider incorporating structured practice sessions into your routine, focusing on specific skills such as putting, chipping, or driving. Just as pros have a plan, so should you—set clear, achievable goals for each session to ensure your practice is purposeful.

Additionally, the best golfers understand the importance of physical fitness and flexibility. Many of them incorporate strength training, cardiovascular exercises, and stretching into their regimen, which not only enhances their power and distance but also helps prevent injuries. You can begin by integrating simple workout routines that target your core, legs, and upper body, ultimately leading to a more powerful and controlled swing.

Mental game is another area where professionals excel. They employ visualization techniques, practice mindfulness, and develop routines that help them remain calm and focused under pressure. You can start by visualizing your shots before you take them, creating a mental picture of the ball’s trajectory and landing spot. This practice can significantly improve your confidence and decision-making on the course.

Finally, don’t underestimate the value of learning from professionals through lessons, videos, and books. Analyzing their swings—how they grip the club, their stance, and their follow-through—can provide you with practical tips that can be immediately applied to your game. Watching your favorite golfers in action not only motivates you but also serves as a learning tool to understand what works best.

By adopting the habits and strategies of the best golfers, you’ll not only unlock your potential but also gain a deeper appreciation for the game itself. Remember, every champion was once a beginner; it’s your turn to embrace the journey and strive for greatness!

11. Utilizing Technology: Apps and Tools for Improvement

In today’s digital age, technology has become an invaluable ally in the quest to improve your golf game. Utilizing apps and tools specifically designed for golfers can provide you with insights and feedback that were once only available through personal coaching or extensive practice. Whether you’re looking to break 100, 90, or even 80, these resources can unlock your potential and help you reach your goals faster.

Golf swing analysis apps, for instance, allow you to record your swing from various angles and provide detailed breakdowns of your mechanics. By comparing your technique to that of professional golfers, you can identify areas for improvement with pinpoint accuracy. Some apps even offer slow-motion playback to help you visualize your movements and make necessary adjustments.

GPS and rangefinder apps are another essential resource, helping you understand the course like never before. These tools provide precise measurements from your current location to the hole, allowing you to choose the right club and strategy for each shot. Moreover, many of these apps come equipped with course management features, enabling you to track your strokes, analyze your performance, and develop a tailored practice plan.

Additionally, fitness and conditioning apps designed for golfers can aid in improving your physical strength, flexibility, and overall fitness. By incorporating golf-specific exercises into your routine, you can enhance your swing power and reduce the risk of injury, ensuring that you’re always at the top of your game.

Lastly, don’t overlook the power of social platforms and online communities. Engaging with fellow golfers through forums or social media can provide valuable tips, inspiration, and accountability. Sharing your progress and challenges can motivate you to stay committed to your improvement journey.

By harnessing the power of technology, you can gain a deeper understanding of your game, establish effective practice routines, and ultimately unlock your true golfing potential. With the right tools at your fingertips, breaking through those scoring barriers is not just a dream; it’s an achievable goal.

12. Building a Consistent Routine: Pre-Round Preparation

Building a consistent routine for pre-round preparation is one of the most effective strategies to unlock your golf potential and lower your scores. Just like any athlete, golfers thrive on a solid routine that primes both the body and mind for performance. A well-structured pre-round ritual not only helps to alleviate nerves but also sets a positive tone for the game ahead.

Start your preparation by arriving at the course with ample time to spare. Rushing through your warm-up can lead to a chaotic mindset right from the first tee. Aim to arrive at least an hour before your tee time. Use this time wisely to shake off any stress or tension. Begin with some light stretching to loosen up your muscles—focusing on your shoulders, back, and hips, which are crucial for a fluid swing.

Once you feel physically prepared, migrate to the driving range. Here, you can gradually work through your bag, starting with wedges before progressing to your longer clubs. This allows you to establish a rhythm while also fine-tuning your feel for distance. Pay attention to your grip and stance, and take the time to visualize your shots. Hit a few practice balls with your driver to get the feel of launching the ball with confidence.

Don’t forget to incorporate putting into your routine as well. Spend at least 10-15 minutes on the putting green, concentrating on both short and longer putts. This not only sharpens your touch but also builds confidence before you step onto the course. As you practice, visualize each putt as if it were a crucial shot during your round, which can help simulate game-day pressure.

Lastly, take a moment for mental preparation. This could mean visualizing your best round, setting achievable goals, or simply taking a few deep breaths to center your thoughts. A calm and focused mind can be just as impactful as a perfect swing.

By establishing this consistent pre-round routine, you’ll not only enhance your physical readiness but also develop a mental framework that fosters confidence and composure—a combination that can be the key to breaking through those score barriers and unlocking your true golf potential.

13. Staying Motivated: Overcoming Plateaus and Setbacks

Golf is as much a mental game as it is a physical one. As you strive to break through that elusive barrier of 100, 90, or even 80, encountering plateaus and setbacks is not just common—it’s part of the journey. Staying motivated during these challenging times is crucial for your growth as a golfer.

When you hit a plateau, it can feel discouraging, especially when you’ve put in countless hours practicing swings, perfecting your short game, and analyzing your technique. You might find yourself stuck in a cycle of disappointing rounds, where every chip shot feels off and every putt seems to slide by the hole. It’s easy to feel like you’re going backward rather than progressing.

To combat this, it’s essential to shift your mindset. Instead of viewing plateaus as failures, interpret them as opportunities for reflection and growth. Take the time to assess your game honestly. Are there specific areas where you can improve? Perhaps your driving distance has plateaued, but your putting is steadily getting better. Celebrate those small victories and focus on incremental improvements.

Additionally, setting realistic short-term goals can reignite your passion for the game. Instead of solely aiming to break 100, 90, or 80, consider setting goals like improving your putting average, reducing the number of three-putts, or working on your course management. These smaller milestones can help you stay engaged and motivated, even when your overall scores aren’t reflecting the hard work you’ve put in.

In times of setbacks, remember that every great golfer has faced adversity. Use these moments to learn rather than to discourage yourself. Embrace the process—take a lesson, change up your practice routine, or even take a short break to reset your mind. Surround yourself with supportive friends or fellow golfers who can motivate and inspire you to keep pushing through the tough times.

Ultimately, staying motivated in golf is about finding joy in the journey. Reconnect with why you fell in love with the game in the first place. Whether it’s the camaraderie of playing with friends, the tranquility of being on the course, or the thrill of hitting a perfect drive, remember that every round is an opportunity to enjoy the sport. By maintaining a positive outlook and staying persistent, you’ll find yourself breaking through those barriers and unlocking your true golfing potential.

14. Seeking Professional Help: When to Hire a Coach

When it comes to elevating your golf game, knowing when to seek professional help can make all the difference. Many golfers struggle with the temptation to tackle every problem on their own, convinced they can self-correct through trial and error. However, this approach often leads to frustration and stagnation. Recognizing the signs that it’s time to hire a coach can be pivotal in your journey to breaking 100, 90, or even 80.

A seasoned golf coach brings a wealth of knowledge and experience that can provide you with structured guidance and tailored strategies. If you find yourself consistently hitting the same wall—whether it’s a stubborn slice, poor putting performance, or inability to improve your short game—it may be time to enlist the help of a professional. Coaches can quickly identify technical flaws in your swing, stance, or grip that you might overlook, offering immediate, actionable feedback that helps you refine your skills.

Additionally, if you’re preparing for a specific event or tournament and feel overwhelmed by the pressure or expectations, a coach can offer not only technical skill-building but also mental strategies to enhance your focus and confidence on the course. They can help you develop a personalized practice plan that targets your weaknesses while also building on your strengths, ensuring a more efficient path to improvement.

Hiring a coach is an investment in your game that can yield significant returns. Don’t hesitate to seek professional help when you feel stuck or are aiming to reach a new level of play. With the right coach by your side, you can unlock your full potential and progress toward your golfing goals more effectively. After all, even the best players in the world rely on coaches to refine their skills and enhance their performance. Embrace the journey, and consider bringing a coach into your corner when you’re ready to take your game to the next level.

15. Celebrating Your Progress: Tracking Improvements and Milestones

Celebrating your progress is a crucial aspect of any journey toward improvement, and golf is no exception. As you embark on the quest to break 100, 90, or even 80, tracking your improvements and milestones can significantly enhance your motivation and commitment.

Start by maintaining a detailed golf journal where you can record your scores, note specific challenges you faced during each round, and highlight the strategies that worked for you. This not only allows you to see your progress over time but also helps you identify patterns in your play. Did you consistently improve your putting or find a reliable driver off the tee? Documenting these details will provide you with tangible evidence of your growth.

In addition to your scores, consider setting smaller, achievable milestones along the way. For example, aim to reduce your average score by a certain number of strokes over the course of a month or focus on improving a specific aspect of your game, such as your short game or approach shots. As you hit these milestones, take the time to celebrate. Whether it’s treating yourself to a new golf accessory, playing a round at a new course, or simply sharing your success with friends and fellow golfers, acknowledging your achievements can invigorate your passion for the game and keep you motivated to continue pushing your limits.

Moreover, utilizing technology can further enhance your progress tracking. There are numerous apps and devices available that can provide valuable insights into your game statistics, enabling you to analyze your performance in real-time. By leveraging these tools, you can gain a deeper understanding of your game and celebrate improvements that may not be immediately visible in your scores alone.

Remember, the journey to breaking your personal best is just as important as the destination. By consistently tracking your progress and celebrating each milestone, you’ll not only build confidence in your abilities but also cultivate a deeper appreciation for the game of golf itself. So, grab your journal, set your goals, and get ready to celebrate every step of your journey!

As we wrap up our exploration of strategies to unlock your golf potential, it’s clear that breaking through those elusive score barriers—whether it’s 100, 90, or even 80—is within your reach. By implementing the proven techniques and tips shared in this post, from refining your swing mechanics to honing your mental game, you can transform your performance on the course. Remember, progress takes time and patience, so celebrate every small victory along the way. We encourage you to take these insights to heart, practice diligently, and most importantly, enjoy the journey of becoming the golfer you aspire to be. Here’s to lower scores and more enjoyable rounds ahead—may your next game be your best yet!

Tennis – What are the best tips for playing in different weather conditions?

Tennis is a game that thrives on precision, agility, and strategy, but when unpredictable weather conditions come into play, even the most skilled athletes can find themselves challenged.

Whether it’s the sweltering heat of summer, the biting chill of winter, or the unexpected drizzle on an otherwise sunny day, mastering the elements is essential for any serious player. In this blog post, we’ll equip you with top tips to ensure you can ace your game, no matter the weather. From choosing the right gear and adjusting your techniques to understanding how different conditions affect the court and your performance, we’ll guide you through strategies that will keep you competitive and comfortable. So grab your racquet, and let’s dive into the essential tactics for thriving on the tennis court, rain or shine!

1. Understanding the Impact of Weather on Tennis Performance

Tennis - What are the best tips for playing in different weather conditions?
Credit : whatcanu.com

When it comes to tennis, the weather can be as pivotal as the players themselves. Understanding how different weather conditions impact your performance on the court is essential for adapting your game and maintaining an edge over your opponents.

**Sunshine and Heat:** Playing under a blazing sun can lead to dehydration and fatigue. The heat not only affects your physical stamina but can also impact your focus and decision-making. It’s crucial to stay hydrated and consider wearing light, breathable clothing to help regulate your body temperature. Taking regular breaks and utilizing sunscreen can help you remain comfortable while playing in bright conditions.

**Windy Conditions:** wind can be both a challenge and an opportunity. It can distort the flight of the ball, making serves and volleys more unpredictable. To adjust your game, focus on stabilizing your stance and employing more topspin to keep the ball from sailing off course. Embrace the wind as a factor to strategize around, using it to your advantage by altering your shot selection and timing.

**Rain and Humidity:** Damp conditions can make the court slippery and affect the ball’s behavior, often leading to a slower pace of play. It’s important to wear appropriate footwear with excellent traction and to be cautious with your movements to avoid injury. Additionally, be mindful of how the humidity can impact your grip on the racket; consider using a grip enhancer to maintain control over your shots.

**Cold Weather:** Playing in chilly temperatures can stiffen your muscles, making warming up even more crucial than usual. Layering up with moisture-wicking materials can help keep you warm without sacrificing movement. Cold air can also affect ball bounce and speed, so be prepared to adjust your playing style accordingly.

By recognizing the effects of various weather conditions on your tennis performance, you can develop strategies to adapt your game effectively, ensuring that you remain competitive no matter the forecast. Embrace the elements, and you’ll find that every match, regardless of the weather, presents an opportunity to improve your skills and resilience on the court.

2. Playing in the Heat: Tips for Staying Cool and Hydrated

Playing tennis in the heat can be both exhilarating and challenging. As the sun blazes overhead, it’s crucial to prioritize your comfort and performance to ensure a successful match without succumbing to the sweltering conditions. Here are some essential tips to help you stay cool and hydrated while you ace your game under the sun.

first and foremost, hydration is key. Drinking water before, during, and after your match is vital for maintaining your body’s temperature and energy levels. Aim to drink at least 8 ounces of water every 20 minutes, and consider incorporating electrolyte-rich drinks to replenish lost salts. A well-hydrated body not only enhances your performance but also helps prevent heat-related illnesses.

Timing your play can also make a significant difference. If possible, schedule your matches during the cooler parts of the day, such as early morning or late afternoon. This can help you avoid the peak heat hours, which typically occur between 10 a.m. and 4 p.m. If you must play during these times, seek out shaded areas for breaks and take advantage of any available cooling stations on the court.

Dressing appropriately is another critical factor in staying cool. Opt for lightweight, breathable fabrics that wick moisture away from your skin. Light-colored clothing can also help reflect the sun’s rays, keeping your body temperature lower. Don’t forget a good hat or visor to shield your face from direct sunlight, and wearing sunglasses can protect your eyes while improving visibility on the court.

Lastly, listen to your body. Pay attention to signs of heat exhaustion, such as excessive sweating, dizziness, or nausea. Taking regular breaks to cool down and rehydrate is essential. Remember, it’s better to take a moment to recuperate than to risk your health for the sake of a match. By following these tips, you can enjoy your time on the court without the discomfort of the scorching heat, allowing you to focus on your game and play your best!

3. Mastering the Art of Playing in the Rain

Tennis - What are the best tips for playing in different weather conditions?
Credit : whatcanu.com

**3. Mastering the Art of Playing in the Rain**

Playing tennis in the rain can be both a challenge and a thrilling experience. The sound of raindrops tapping against the court, the fresh scent of wet earth, and the cool breeze can create an invigorating atmosphere. However, it’s essential to approach this unique condition with the right mindset and preparation to truly ace your game.

First and foremost, consider the type of court you’re playing on. Clay courts tend to absorb water, which can make them a sloshy mess during rain. If you’re lucky enough to have access to a hard court, the surface will dry faster, allowing for a quicker return to play. Always assess the court conditions before stepping out; safety should be your priority. Slippery surfaces can lead to injuries, so if the rain is heavy or the ground is too slick, it may be best to postpone your match.

When it comes to gear, invest in a good-quality rain jacket that is both lightweight and breathable. This will keep you dry without overheating, allowing you to maintain your agility and comfort on the court. Waterproof tennis shoes with good traction are also crucial, as they will help prevent slips and falls. Additionally, consider using moisture-absorbent grips for your racquet to maintain control and avoid mishaps during play.

Technique is key when playing in wet conditions. The ball will behave differently; it may feel heavier and slower, so adjust your swing and strategy accordingly. Focus on making cleaner contact with the ball, and be prepared for unpredictable bounces. Embrace a more conservative playing style by opting for steady groundstrokes over aggressive shots that require precision. This will help you maintain consistency and reduce errors.

Lastly, don’t forget the mental aspect of playing in the rain. It can be easy to become frustrated with the conditions, but maintaining a positive attitude can turn a challenging situation into an exciting adventure. Embrace the elements, and remember that every drop of rain is an opportunity to develop your skills and resilience as a player. With the right preparation and mindset, you can transform a rainy day into a memorable and productive tennis experience!

4. Adapting Your Strategy for Windy Conditions

Wind can be one of the most challenging elements to contend with on the tennis court, often turning a routine match into a test of skill and adaptability. When gusts whip across the playing surface, your usual shots may not land where you intend, and the ball can behave unpredictably. To excel in windy conditions, it’s crucial to adjust your strategy to accommodate these changes.

First and foremost, consider modifying your shot selection. In heavy winds, high, loopy shots can be easily pushed off course, so opt for flatter strokes to maintain control. By hitting the ball with a lower trajectory, you can reduce the likelihood of the wind disrupting your shot’s path. Additionally, keeping your swings compact will help you generate more consistent power while minimizing the impact of the wind.

Next, pay close attention to your positioning. Stay alert and ready to adapt your footwork to account for shifting wind directions. Use the wind to your advantage by serving or returning with the breeze at your back, which can add extra speed to your shots. Conversely, when facing into the wind, embrace a more patient approach; this is the time to construct points carefully rather than going for outright winners.

Communication with your doubles partner is also key in windy conditions. Ensure you’re both aware of each other’s movements and intentions, as wind can frequently alter ball trajectories and cause miscommunication. A quick shout or hand signal can help prevent misunderstandings and keep your teamwork seamless.

Lastly, don’t forget to stay mentally strong. Windy weather can be frustrating, but maintaining a calm and focused mindset will help you navigate the unique challenges it presents. Embrace the unpredictability of the game—after all, adapting to the elements is what makes tennis an exciting and dynamic sport. By honing your strategy for windy conditions, you’ll not only survive the bluster but potentially thrive, turning what could be a disadvantage into an opportunity to showcase your resilience and skill.

5. Gear Up: Choosing the Right Equipment for Different Weather

Tennis - What are the best tips for playing in different weather conditions?
Credit : whatcanu.com

When it comes to playing tennis, the right equipment can make all the difference—especially when the weather takes a turn. Each season brings its own challenges, and being prepared can enhance your performance and keep you comfortable on the court.

**Warm Weather:** In the sweltering heat, lightweight, breathable clothing is essential. Look for moisture-wicking fabrics that allow for better airflow and help keep you dry. A good pair of sunglasses can shield your eyes from the sun, while a wide-brimmed hat or a visor can protect your face and neck from harmful UV rays. Don’t forget to apply sunscreen generously to prevent sunburn. As for your racquet, consider using a grip that provides excellent traction even when your hands get sweaty—it can make all the difference in your swing.

**Rainy Days:** Playing in the rain can be challenging, but with the right gear, it can be manageable. Opt for water-resistant or quick-drying clothing to keep you as comfortable as possible. A good pair of tennis shoes with excellent grip is crucial on slippery courts; specialized rain shoes can provide the extra traction you need. Additionally, choosing a racquet that performs well in humid conditions can help maintain your control and power, so be sure to consult with your local pro shop for recommendations on strings and grips that resist moisture.

**Cold Weather:** As temperatures drop, layering becomes your best friend. Start with a moisture-wicking base layer to keep sweat away from your skin, followed by an insulating layer to trap warmth, and finish with a windproof outer layer to shield yourself from biting winds. Thermal gloves can improve your grip and keep your hands warm, while a headband or ear warmers can help retain heat and ensure optimum focus. When it comes to your racquet, consider using a softer string tension to enhance comfort, as cold weather can stiffen your muscles and joints.

By carefully selecting your equipment based on the weather conditions, you’ll not only boost your performance but also ensure that you enjoy every moment on the court, no matter what Mother Nature throws your way!

6. Dressing for Success: The Best Attire for Varying Climates

When it comes to tennis, the right attire can be the difference between a game well played and a match fraught with discomfort. Dressing for success means aligning your outfit with the weather conditions to ensure maximum performance and comfort on the court.

**Hot Weather:** On scorching summer days, breathable, moisture-wicking fabrics are your best friends. Lightweight tank tops and shorts made from synthetic materials can help keep you cool by allowing sweat to evaporate quickly. Don’t forget a wide-brimmed hat and UV-protective sunglasses to shield yourself from the sun’s rays. Additionally, consider wearing lightweight, breathable socks and shoes with good ventilation to prevent overheating.

**Cold Weather:** As the temperature drops, layering becomes essential. Start with a moisture-wicking base layer to keep sweat away from your skin, followed by an insulating mid-layer for warmth. A lightweight, windproof jacket can provide protection against chilly breezes without weighing you down. Opt for long pants or capris that offer mobility while keeping your legs warm. Don’t overlook accessories like gloves and beanies, which can prevent heat loss and keep your hands nimble for those crucial serves and volleys.

**Rainy Weather:** Playing in the rain can be a slippery affair, so your attire should focus on staying dry and maintaining grip. Waterproof jackets are a must, alongside quick-dry shorts or pants. Avoid cotton, as it retains moisture, and instead opt for synthetic materials that repel water. A good pair of tennis shoes with excellent grip will help you navigate the court without slipping. Consider wearing a moisture-wicking headband to keep sweat and raindrops out of your eyes, ensuring you stay focused on the game.

In every weather condition, the right clothing can significantly impact your performance and enjoyment of the game. By dressing appropriately, you’ll not only feel more comfortable but also be able to focus on what truly matters: playing your best tennis, regardless of the elements!

7. Mental Preparation: Staying Focused in Challenging Conditions

Tennis - What are the best tips for playing in different weather conditions?
Credit : whatcanu.com

Mental Preparation: Staying Focused in Challenging Conditions

Playing tennis in varying weather conditions can be as much a mental game as it is physical. Windy days, sudden rain showers, or scorching heat can shake even the most seasoned player’s confidence, leading to distractions and mistakes on the court. To excel in these challenging environments, mental preparation is key.

First and foremost, cultivate a strong mindset that embraces the unpredictability of the elements. Visualization techniques can be immensely helpful; picture yourself executing perfect serves and volleys despite the wind howling or the sun beating down. By mentally rehearsing your game plan amidst potential disruptions, you equip yourself to handle real-time challenges with grace and confidence.

Additionally, practice mindfulness techniques to enhance your focus. Take a few moments before each match to breathe deeply and center your thoughts. This not only calms your nerves but also sharpens your awareness, allowing you to remain present in the moment rather than worrying about external factors. A mantra or phrase, such as “flow with the game,” can serve as a powerful reminder to adapt and stay focused, no matter what nature throws your way.

It’s also crucial to set realistic expectations according to the weather conditions. Acknowledge that playing in the rain may affect your grip or that extreme heat can drain your energy faster than usual. Adjusting your strategy to accommodate these factors will not only help maintain your performance but also alleviate the frustration that comes from trying to play as you normally would.

Finally, remember that every player faces the same elements. Use this shared experience to foster camaraderie with your opponents, whether it’s sharing a laugh about a gust of wind that sent a ball astray or a mutual nod of respect when the sun blazes overhead. This connection can help shift your perspective from a struggle against the conditions to an opportunity to connect and engage with the sport—and your fellow players—in a whole new way. By honing your mental preparation skills, you’ll find yourself not only surviving but thriving in any weather on the tennis court.

8. Techniques for Playing on Different Surface Types

When it comes to tennis, the surface you play on can dramatically influence your game. Each type of court—whether it’s clay, grass, or hard court—comes with its unique characteristics and requires specific techniques to excel. Understanding how to adapt your playstyle can mean the difference between victory and defeat, regardless of the weather.

**Clay Courts**: A favorite among many professional players, clay courts are known for their slower surface and high bounce. When playing on clay, it’s essential to adjust your footwork to accommodate the slippery surface. Focus on sliding into your shots rather than stopping abruptly, which will help maintain your balance. Additionally, construct your points thoughtfully; patience is key on clay, as rallies tend to be longer. Use topspin to your advantage, as it allows the ball to bounce higher, giving you more control over your shots.

**Grass Courts**: On the flip side, grass courts can be quite unpredictable, especially when wet. The ball tends to skid and bounce lower, so you’ll want to adopt a more aggressive approach. Be ready to take the ball early and aim for precision with your volleys. Strong serve-and-volley tactics can be exceptionally effective on grass, allowing you to put pressure on your opponent and control the net. Remember to keep your feet light and agile, as quick shifts in weight can help you navigate the unpredictable bounces.

**Hard Courts**: Perhaps the most versatile surface, hard courts offer a balanced mix between speed and bounce. When playing on this surface, you can utilize a variety of playing styles, but consistency is crucial. Focus on maintaining a strong baseline game; your footwork should be explosive yet controlled. Be mindful of the court temperature—on hot days, the surface can become fast and unforgiving, while cooler conditions can slow the ball down. Adjust your strategies accordingly: mix up your shots with slices and topspin to keep your opponent guessing.

Regardless of the surface, always be prepared for changing weather conditions. If it’s windy, focus on stabilizing your stance and playing with a more compact swing to reduce the impact of gusts. On hot days, keep hydrated and consider adjusting your warm-up routine to avoid heat exhaustion. By mastering techniques suited for each surface type, you’ll not only enhance your game but also enjoy the thrill of playing tennis, come rain or shine!

9. Adjusting Your Warm-Up Routine Based on Weather

When it comes to tennis, your warm-up routine is your first line of defense against the elements. The weather can drastically affect your performance, and tailoring your warm-up accordingly can make all the difference. Whether it’s the sweltering heat of summer, the biting chill of winter, or the unpredictability of rain, adjusting your warm-up routine not only prepares your body but also sharpens your mental focus.

**In Hot Weather**, begin with shorter, more dynamic stretches to prevent overheating. Engage in activities that get your heart rate up without overexerting yourself. Incorporate drills that simulate match play, such as quick footwork exercises and shadow swings, to acclimatize your body to the heat and humidity. Hydration is key, so sip water consistently throughout your warm-up to maintain optimal performance levels.

**On Chilly Days**, it’s crucial to prioritize warming up your muscles and joints. Start with a longer, more gradual warm-up, focusing on static and dynamic stretches to increase your flexibility and blood flow. Incorporate movements that target your core and legs, such as lunges and torso twists, to combat the cold and ensure your muscles are ready for the intensity of a match. Wearing layers that you can peel off as you heat up is essential, as it helps maintain body temperature while preventing stiffness.

**In Wet or Windy Conditions**, you’ll want to be particularly mindful of your footing and stability. Begin with gentle mobility exercises to ensure your joints are loose but also incorporate balance drills to prepare for potentially slippery surfaces. Spend extra time on your footwork, practicing movements that allow you to adjust to the unpredictable nature of the court. Remember to wear appropriate footwear with good traction, and consider using moisture-wicking clothing to stay comfortable as you navigate the elements.

Regardless of the weather, a well-adjusted warm-up routine sets the stage for a successful match. By listening to your body and adapting your approach, you not only enhance your performance but also minimize the risk of injury, ensuring you can ace the game no matter what Mother Nature throws your way!

10. Nutrition Tips for Weather-Dependent Performance

When it comes to playing tennis, the weather can significantly impact your performance on the court, making nutrition an essential aspect of your game-day strategy. proper fueling not only prepares your body to handle the elements but also enhances your endurance, stamina, and focus. Here are some crucial nutrition tips tailored for various weather conditions.

**Hot and Humid Conditions:** In sweltering heat, staying hydrated is paramount. Begin your day with plenty of water and consider incorporating electrolyte-rich sports drinks to replenish lost minerals. Snack on easily digestible foods like bananas, which provide potassium, or energy bars that are low in fat and high in carbohydrates to keep your energy levels consistent. Avoid heavy meals before playing; instead, opt for light salads or smoothies that will keep you refreshed without weighing you down.

**Cold and Windy Conditions:** When the temperature drops, your body requires more energy to maintain its core temperature, so it’s vital to fuel up with hearty meals that include complex carbohydrates and healthy fats. Think whole grain pasta, oatmeal, or brown rice paired with lean proteins like chicken or fish. Additionally, warm beverages such as herbal tea or broth can help keep you cozy and hydrated. Don’t forget to snack strategically on nuts or seeds, which are energy-dense and can provide a quick boost when you need it most.

**Rainy or Damp Conditions:** When the weather is unpredictable, having a balanced meal pre-match can set you up for success. Focus on proteins and carbs to fuel your performance while remaining mindful of hydration, as rain doesn’t negate the need for fluids. Staying properly hydrated can help you maintain focus and enhance your reaction times, which is critical when the court conditions become slippery. A good pre-match snack can be a peanut butter sandwich on whole-grain bread or a yogurt parfait with fruits and granola, both of which will provide sustained energy.

Regardless of the weather, maintaining a nutrition plan that adapts to the conditions will keep you performing at your best. Remember to listen to your body’s cues and adjust your intake as needed—after all, the right nutrition can make all the difference in conquering the elements and dominating the court!

11. Learning to Embrace the Elements: Positive Mindset Strategies

When it comes to playing tennis in varying weather conditions, your mindset can be just as crucial as your physical skills. Embracing the elements starts with cultivating a positive outlook that allows you to adapt and thrive, regardless of whether the sun is shining or the rain is pouring. Here are some strategies to help you develop that resilient mentality.

Firstly, **reframe the situation**. Instead of viewing rain as a nuisance or heat as a challenge, try to see these elements as unique opportunities to enhance your game. Wet courts can teach you to adjust your footwork and develop better control, while playing under the sun can improve your stamina and focus. By focusing on the benefits, you can transform potential frustrations into valuable learning experiences.

Next, practice **mindfulness techniques**. Before heading out to the court, take a moment to ground yourself. Whether it’s through deep breathing, visualization, or a quick meditation session, these practices can help clear your mind and center your thoughts. Picture yourself successfully navigating challenging weather conditions, and remind yourself that every match is a chance to grow, no matter the circumstances.

Another effective strategy is to **set realistic goals** based on the weather conditions. Instead of aiming for a perfect game, focus on specific aspects of your play that you can improve on that day. For example, if it’s windy, challenge yourself to work on your serve or adjust your grip to better handle the gusts. By setting attainable goals, you’ll build confidence and create a sense of accomplishment, regardless of the weather’s impact on your overall performance.

Finally, surround yourself with a supportive community. Engage with fellow players who share your enthusiasm for the sport, even in less-than-ideal conditions. Sharing experiences and tips can foster a sense of camaraderie and motivate you to keep pushing forward, no matter Mother Nature’s mood.

By implementing these positive mindset strategies, you not only prepare yourself to handle the unpredictable nature of outdoor tennis but also enhance your overall enjoyment of the game, ensuring that you embrace the elements with open arms and a winning spirit!

12. The Importance of Flexibility: Adapting to Changing Conditions

When it comes to playing tennis, the weather is an ever-changing factor that can significantly impact your game. Flexibility, both in your physical practice and your mental approach, is essential for adapting to these fluctuating conditions. Whether you’re facing the sweltering heat of a summer afternoon or the chilling winds of autumn, being prepared to adjust your strategies and techniques can make all the difference between winning and losing.

On a sunny day, for instance, the glare can affect your visibility. Wearing a visor or sunglasses not only protects your eyes but also helps you maintain focus on the ball. On the flip side, when rain clouds roll in, surfaces can become slippery and unpredictable. This is when flexibility in your footwork and balance is crucial. Developing a lower center of gravity and practicing quick lateral movements can keep you agile and responsive, even on a wet court.

Wind presents another unique challenge. Adjusting your grip and swing to account for gusts can help you maintain control over your shots. In such scenarios, becoming more adaptable with your shot selection—opting for more topspin or flatter shots depending on the wind direction—can lead to greater precision and effectiveness.

Mentally, embracing the unpredictability of weather conditions can also enhance your performance. Instead of allowing frustration to take over when the sun hides behind clouds or when a sudden gust disrupts your serve, focus on the aspects you can control. Develop a pre-match routine that includes mental exercises, such as visualization techniques that prepare you for varying conditions. This mental flexibility will not only boost your confidence but also help you remain calm and focused, regardless of what Mother Nature throws your way.

By fostering a mindset of adaptability and honing your physical skills to meet the demands of any weather, you not only improve your game but also deepen your love for tennis. Remember, every condition presents its own set of challenges and opportunities; embrace them, and you’ll ace your game in any weather!

13. Drills to Practice for Various Weather Scenarios

When it comes to mastering the game of tennis, adaptability is key, especially when the weather conditions are less than ideal. Incorporating specific drills tailored to various weather scenarios can not only enhance your skills but also boost your confidence when facing unpredictable elements on the court. Here are some effective drills to practice, ensuring you’re prepared for whatever Mother Nature throws your way.

**Rainy Day Resilience:** When the courts are slick and wet, focus on footwork drills that emphasize balance and stability. Set up cones or markers to create a zigzag pattern. As you navigate this course, practice quick lateral movements while maintaining your center of gravity. This will help you develop agility and prevent slips, allowing you to stay light on your feet even in challenging conditions.

**Windy Day Warrior:** Wind can dramatically affect your shots, so it’s crucial to train specifically for it. Find an open court and set up targets at various depths and angles. Practice hitting forehands and backhands while deliberately adjusting your swing and follow-through to account for the wind. Aim for precision rather than power; this will help you learn to control your shots and anticipate wind changes during a match.

**Hot and Humid Hustle:** When playing in extreme heat, hydration and stamina are essential. Incorporate drills that focus on endurance, such as a series of mini-matches where you play short sets against a partner with minimal breaks. This will not only improve your cardiovascular fitness but also teach you how to manage your energy levels and maintain focus when the temperature rises.

**Cold and Crisp Conundrums:** Chilly weather can lead to stiffness and slower reaction times. To combat this, include dynamic stretching in your warm-up routine, focusing on your shoulders, hips, and wrists. Once warmed up, practice serving and volleying drills to get your blood pumping. Emphasize quick bursts of movement to acclimate your body to the chill, ensuring you remain agile and responsive during gameplay.

By incorporating these weather-specific drills into your training regimen, you’ll be better prepared to handle any conditions that come your way. Remember, the most successful players are those who can adapt their game—not just to their opponents, but to the environment as well. So, no matter the forecast, lace up your shoes and hit the court with confidence!

14. Staying Safe: Recognizing Weather-Related Risks

When it comes to playing tennis, the thrill of the game can sometimes overshadow the potential risks posed by unpredictable weather. However, ensuring your safety should always take precedence over your desire to play. Here are some key weather-related risks to be aware of, along with tips to help you stay safe on the court.

**Sun Exposure:** Playing under the blazing sun can lead to sunburn, dehydration, and heat exhaustion. Always check the UV index before heading out, and on particularly sunny days, seek out shaded areas when possible. Wearing a wide-brimmed hat, UV-protective clothing, and high-SPF sunscreen can shield your skin from harmful rays. Hydration is paramount—keep a water bottle close by and sip regularly to maintain your body’s fluid balance.

**Rain and Wet Conditions:** While a light drizzle might seem harmless, wet courts can be slippery and dangerous. Water accumulation on the surface can affect your footing, increasing the risk of falls and injuries. If you see dark clouds gathering, consider postponing your session. If you must play in the rain, opt for specialized footwear that provides better grip and always prioritize your safety.

**Windy Conditions:** Wind can be an unexpected adversary on the tennis court, impacting your game and potentially causing injuries. Strong gusts can make the ball unpredictable, leading to mishits and frustration. To adapt, practice adjusting your stance and shot timing, focusing on stability and control. If winds are particularly fierce, it may be wise to call it a day and return when conditions are more favorable.

**Extreme Temperatures:** Whether it’s the scorching heat of summer or the biting chill of winter, extreme temperatures can pose serious health risks. In hot weather, recognize the signs of heat-related illnesses—persistent headaches, dizziness, or unusual fatigue. In cold conditions, watch for symptoms of hypothermia or frostbite, such as shivering or numbness in extremities. Dress in layers during colder months, and don’t hesitate to take breaks indoors if you feel uncomfortable.

By staying aware of these weather-related risks and taking proactive steps to protect yourself, you can enjoy playing tennis no matter the conditions. Remember, the goal is to have fun and stay safe, so listen to your body and don’t hesitate to adapt your game to the elements.

15. Conclusion: Finding Joy in Tennis, No Matter the Weather

In conclusion, the beauty of tennis lies not just in the competition or the thrill of the game, but in the sheer joy it brings, regardless of the weather conditions. Whether you’re battling the sweltering heat of summer, dodging raindrops on a drizzly day, or braving the biting chill of winter, each element can offer a unique experience that enriches your love for the sport.

Embracing the challenges posed by different weather conditions can help you grow as a player. Each match played under the sun or amidst the breeze teaches resilience, adaptability, and creativity in your gameplay. Remember, the best players are those who can adjust their strategies and maintain their enthusiasm, no matter what Mother Nature throws their way.

So, don’t let a little rain or some gusty winds deter you from hitting the courts. Equip yourself with the right gear, tweak your techniques, and approach each game with an open heart and a positive mindset. By finding joy in every match, you’ll not only enhance your skills but also cultivate a deeper passion for tennis. After all, it’s not just about winning; it’s about the love of the game and the memories created along the way. So grab your racket, embrace the elements, and let the game bring you happiness, come rain or shine!

As we wrap up our exploration of how to ace the elements while playing tennis, we hope you feel empowered and ready to face any weather conditions that come your way on the court. Whether it’s mastering your grip in the rain, adjusting your strategy on windy days, or embracing the heat with proper hydration techniques, these tips will help you adapt and thrive, no matter the forecast. Remember, every match is an opportunity to improve your skills and resilience, so don’t let a little weather deter your passion for the game. Grab your racket, embrace the challenge, and get out there—because great players aren’t made in perfect conditions; they’re forged in the face of adversity. Happy playing!

Tennis – How do I recover properly after a tennis match?

The thrill of a tennis match, with its intense rallies and strategic volleys, can leave players exhilarated yet physically drained.

After giving your all on the court, it’s crucial to prioritize recovery to ensure your body is primed for the next challenge. Proper post-match recovery not only helps alleviate soreness and fatigue but also enhances overall performance, allowing players to bounce back stronger and more resilient than ever. In this blog post, we will explore essential recovery tips tailored specifically for tennis players, covering everything from effective stretching techniques and hydration strategies to nutrition that fuels muscle repair. Whether you’re a seasoned competitor or a weekend warrior, these insights will equip you with the knowledge to optimize your recovery routine and elevate your game to new heights. Get ready to serve up your best performance by mastering the art of post-match recovery!

1. Understanding the Importance of Post-Match Recovery

Tennis - How do I recover properly after a tennis match?
Credit : whatcanu.com

Understanding the importance of post-match recovery is crucial for any tennis player aiming to maintain peak performance and longevity in their career. After a grueling match, your body has undergone significant physical exertion, leading to potential muscle fatigue, dehydration, and even microscopic injuries to your muscle fibers. This is where effective recovery strategies come into play.

Post-match recovery is not merely about resting; it encompasses a holistic approach to restoring your body and mind. Proper recovery can enhance your subsequent performance by reducing the risk of injury, alleviating soreness, and improving overall flexibility and strength. It allows your muscles to repair and rebuild, ensuring you can return to the court stronger and more resilient.

Additionally, the psychological aspect of recovery should not be overlooked. Taking the time to reflect on your performance, celebrate your victories, and acknowledge areas for improvement can contribute to a positive mindset, fueling your motivation for training and competition.

Incorporating specific recovery techniques, such as hydration, nutrition, stretching, and rest, is essential. For instance, replenishing lost fluids and electrolytes is crucial to combat dehydration, while consuming protein-rich foods can aid in muscle repair. Gentle stretching or foam rolling can help alleviate tension and improve flexibility, while adequate sleep rejuvenates your body and mind.

By prioritizing post-match recovery, you not only safeguard your physical health but also cultivate a disciplined approach that sets you apart from your competitors. Embracing these recovery practices can significantly enhance your overall performance and contribute to a successful and sustainable tennis journey.

2. The Physiological Impact of Tennis on the Body

Tennis is a demanding sport that combines explosive movements, endurance, and agility, placing significant stress on the body. The fast-paced nature of the game requires players to engage in quick sprints, sharp lateral movements, and powerful strokes, all of which can lead to fatigue and muscle soreness. Understanding the physiological impact of tennis is crucial for effective post-match recovery.

During a match, your muscles undergo intense contractions, particularly in the legs, shoulders, and core, which can result in micro-tears. This is a natural part of building strength, but it also means that your body needs time and proper care to heal. Additionally, the cardiovascular system is pushed to its limits, with players often reaching high heart rates and experiencing elevated levels of lactic acid build-up, which can contribute to feelings of exhaustion and stiffness.

Hydration plays a vital role in counteracting these effects. As you sweat during a match, you lose not only water but also essential electrolytes that help maintain muscle function and prevent cramps. Replenishing fluids post-match is essential to restore balance in the body.

Moreover, the mental toll of a competitive match shouldn’t be overlooked. The focus and concentration required during play can lead to cognitive fatigue, which adds another layer to the recovery process. Engaging in relaxation techniques, such as deep breathing or light yoga, can help restore mental clarity.

In summary, recognizing the physiological demands of tennis can help players develop a more effective recovery routine. By addressing muscle soreness, rehydrating, and allowing for mental recovery, tennis players can ensure they bounce back stronger and more prepared for their next match.

3. Hydration: Replenishing Fluids and Electrolytes

Tennis - How do I recover properly after a tennis match?
Credit : whatcanu.com

Hydration is a crucial component of post-match recovery for tennis players, as it plays a vital role in replenishing fluids and electrolytes lost during intense physical exertion. During a match, players can sweat profusely, losing not only water but also essential minerals such as sodium, potassium, and magnesium. These electrolytes are critical for maintaining optimal muscle function and preventing cramps, so addressing hydration immediately after play is essential.

To effectively replenish fluids, players should start by drinking water, aiming to consume at least 500-750 milliliters within the first hour after the match. However, plain water might not be enough for optimal recovery. For longer matches or those played in particularly hot conditions, consider incorporating sports drinks or electrolyte-infused beverages. These drinks are specifically formulated to restore lost electrolytes and provide a quick source of energy, helping to stave off fatigue and promote recovery.

Additionally, players can benefit from consuming hydrating foods rich in water content, such as fruits and vegetables. Items like watermelon, cucumber, and oranges not only provide hydration but also offer vitamins and nutrients that support overall recovery.

It’s important to listen to your body and respond to its hydration needs. Signs of dehydration, such as dizziness, fatigue, or dark-colored urine, can hinder recovery and negatively impact future performance. By prioritizing hydration, tennis players can ensure they bounce back stronger and ready to tackle their next challenge on the court. Remember, proper hydration isn’t just a post-match necessity; it’s a crucial part of your overall training regimen that contributes to long-term success.

4. Nutrition for Recovery: What to Eat After a Match

Nutrition plays a pivotal role in the recovery process for tennis players, serving as the foundation upon which your body can rebuild and rejuvenate. After an intense match, your muscles are not only fatigued but also depleted of vital nutrients that are crucial for optimal recovery. The right post-match meal can significantly enhance your body’s ability to recover, reduce soreness, and prepare you for future competitions.

First and foremost, aim to consume a balanced meal that includes a combination of carbohydrates, proteins, and healthy fats. Carbohydrates are essential for replenishing glycogen stores that have been exhausted during play. Foods like whole grain pasta, quinoa, or a hearty sweet potato are excellent choices to help restore your energy levels. Pair these with a source of lean protein, such as grilled chicken, fish, or plant-based options like lentils and chickpeas, which aid in muscle repair and growth.

Don’t overlook the importance of hydration as well. During a match, you lose fluids and electrolytes through sweat, and it’s crucial to rehydrate effectively. Water is good, but consider adding sports drinks or coconut water to replace lost electrolytes, especially after a long and grueling match.

Incorporating fruits and vegetables into your post-match meal can provide essential vitamins and antioxidants that help combat inflammation and support your immune system. A smoothie packed with spinach, banana, and berries can be a delicious and nutrient-dense way to refuel.

Timing is also a critical factor. Aim to eat within 30 to 60 minutes post-match, as this is when your body is most receptive to nutrient absorption. This prompt intake of food will accelerate your recovery process, allowing you to bounce back stronger for your next challenge.

Ultimately, understanding what to eat after a match is about more than just fueling up; it’s about creating a recovery routine that supports your long-term performance and overall health. Prioritizing nutrition will not only help you feel better after a tough match but will also enhance your training efficacy, setting you on the path to becoming a more resilient player on the court.

5. Stretching and Mobility Exercises: Enhancing Flexibility

Tennis - How do I recover properly after a tennis match?
Credit : whatcanu.com

### 5. Stretching and Mobility Exercises: Enhancing Flexibility

After an intense match, your muscles may be feeling tight and fatigued, making it crucial to prioritize stretching and mobility exercises during your post-match recovery. These practices are not just about easing discomfort; they play a vital role in enhancing your overall flexibility, which can significantly improve your game on the court.

Begin with static stretching, focusing on major muscle groups used during play—such as your hamstrings, quadriceps, shoulders, and hips. Holding each stretch for 20 to 30 seconds allows your muscles to gradually relax and lengthen, helping to alleviate soreness and prevent injuries. For instance, the seated hamstring stretch not only helps to relieve tightness in the back of your legs but also promotes better movement patterns for your next match.

Incorporating dynamic mobility exercises can further enhance your recovery process. Movements such as leg swings, arm circles, and torso twists increase blood flow, stimulate joint mobility, and prepare your body for the next day’s training. These exercises encourage a greater range of motion, which is essential for executing those powerful serves and swift court movements that tennis demands.

Adding foam rolling to your routine can also benefit your muscle recovery. By targeting knots and tension in your muscles, foam rolling helps to release fascia, improve circulation, and promote faster recovery. Spend a few minutes rolling out your calves, glutes, and back, which are often the most strained areas after an intense match.

Lastly, don’t underestimate the power of yoga or Pilates sessions in your recovery journey. These practices not only enhance flexibility but also improve core strength and balance—two key components for any successful tennis player. A few sessions each week can complement your stretching routine, leaving you feeling rejuvenated and ready to hit the court again.

By integrating targeted stretching and mobility exercises into your post-match recovery, you’re not only enhancing flexibility but also setting yourself up for better performance in future matches. Embrace these practices, and watch as they transform your game, ensuring that you bounce back stronger after every match.

6. Rest and Sleep: The Cornerstones of Recovery

Rest and sleep are often overlooked yet vital components of effective post-match recovery for tennis players. While the adrenaline of competition can make it tempting to jump right back into training or social activities, understanding the critical role of rest in your recovery routine can make all the difference in how your body and mind bounce back.

After an intense match, your muscles undergo significant stress, and micro-tears occur in the fibers due to the rigorous movements involved in tennis. This is where rest becomes essential. Giving your body the time it needs to repair itself is crucial for preventing injuries and ensuring optimal performance in future matches. Incorporating strategic rest periods into your schedule allows your muscles to recover, replenish energy stores, and ultimately strengthen.

Equally important is the quality of your sleep. During deep sleep, your body performs most of its healing and repair processes. Growth hormone is released, aiding in muscle recovery, and your brain consolidates memories and strategies learned during the match. Aim for 7-9 hours of quality sleep each night to maximize these benefits. Creating a sleep-friendly environment—dark, cool, and quiet—can significantly enhance your sleep quality.

Additionally, consider implementing a post-match wind-down routine. This could involve light stretching, meditation, or even enjoying a warm bath to help relax your muscles and prepare your body for sleep. By prioritizing rest and sleep, you’ll not only recover faster but also enhance your mental clarity and focus for your next match, allowing you to return to the court feeling refreshed and ready to compete at your best. Remember, in the world of tennis, recovery is just as crucial as the training and competition themselves. Embrace the power of rest; your body will thank you for it.

7. Active Recovery: Low-Intensity Activities to Aid Healing

Tennis - How do I recover properly after a tennis match?
Credit : whatcanu.com

Active recovery is a crucial aspect of post-match recovery that many tennis players overlook. While it might seem counterintuitive to engage in physical activity after an intense match, incorporating low-intensity exercises can significantly aid in healing and rejuvenation. The key is to keep the body moving without adding stress, allowing muscles to recover while promoting blood flow and flexibility.

After a demanding match, consider activities like light jogging, cycling, or swimming. These exercises should be performed at a gentle pace, ensuring that you don’t push your limits but rather allow your body to ease back into a more relaxed state. A leisurely bike ride around the park or a session of swimming laps at a comfortable speed can be particularly beneficial. These activities help flush out lactic acid build-up, reduce muscle soreness, and enhance the delivery of nutrients to fatigued muscles.

In addition to aerobic activities, yoga and stretching sessions are excellent for promoting flexibility and reducing stiffness. Engaging in restorative yoga poses can enhance blood circulation and provide a calming effect on the mind and body, making it the perfect addition to your recovery routine. Focus on deep breathing and mindful movements to help release any tension accumulated during the match.

Another effective low-intensity option is walking. A brisk walk around your neighborhood or along the beach allows you to gather your thoughts, reflect on your performance, and enjoy the fresh air. This simple yet effective exercise keeps your body engaged while providing a mental break from the rigors of competition.

Remember, active recovery is not about intensity; it’s about listening to your body and treating it with the care it deserves. By incorporating these low-intensity activities into your post-match regimen, you’ll not only speed up your recovery but also return to the court feeling refreshed and ready to take on your next challenge. Prioritize active recovery as part of your overall training routine, and watch as your performance on the court flourishes.

8. Ice Baths vs. Heat Therapy: When to Use Each

When it comes to post-match recovery, the debate between ice baths and heat therapy is a hot topic among tennis players. Understanding when to use each method can significantly impact your recovery and performance on the court.

**Ice Baths:** After an intense match, your muscles may feel sore and inflamed. This is where ice baths come into play. Submerging your body in cold water for 10-15 minutes can help constrict blood vessels, reducing inflammation and numbing sharp pain. Ice baths are particularly beneficial during the initial hours post-match, especially if you’ve played a grueling five-setter or experienced any injuries. The cold helps flush out metabolic waste from the muscles and can alleviate delayed onset muscle soreness (DOMS), allowing you to hit the practice courts sooner rather than later.

**Heat Therapy:** On the flip side, heat therapy is ideal for muscle relaxation and increasing blood flow. After the initial inflammation has subsided, typically 24-48 hours post-match, applying heat can help ease tightness and stiffness in your muscles. Warm baths, heating pads, or even a sauna session can encourage blood circulation, facilitating the delivery of oxygen and nutrients crucial for muscle repair. Heat therapy is particularly beneficial for chronic muscle pain or tightness and can be a great way to prepare your body for the next day’s training.

**Finding Balance:** Ultimately, the key is to know your body and listen to its signals. While ice baths are fantastic for immediate recovery following a strenuous match, heat therapy comes into play during the later stages of recovery. A combination of both methods, when used appropriately, can enhance your overall recovery strategy, helping you bounce back stronger and ready to take on your next challenge on the tennis court. So, whether you prefer a refreshing plunge into icy waters or a soothing soak in warmth, mastering the timing of these recovery techniques can be a game-changer for your performance.

9. The Role of Massage and Foam Rolling in Recovery

Massage and foam rolling play crucial roles in the post-match recovery routine of tennis players, offering significant benefits that can enhance performance and prevent injury. After an intense match, your muscles are often fatigued and may accumulate tension, leading to stiffness and soreness. This is where the therapeutic touch of massage can work wonders.

A professional massage can help increase blood circulation, which in turn promotes faster healing by delivering essential nutrients to the affected muscle tissues. It also aids in the removal of metabolic waste, reducing muscle soreness and enhancing overall recovery. Techniques such as deep tissue massage or sports massage specifically target the areas most affected by the physical demands of tennis—such as your legs, shoulders, and back—helping to alleviate tightness and improve flexibility.

On the other hand, foam rolling is a practical and effective self-myofascial release technique that every tennis player should incorporate into their cooldown routine. Using a foam roller allows players to apply pressure to specific muscle groups, effectively breaking down knots and adhesions that can develop after strenuous activity. This not only helps in relieving muscle soreness but also enhances range of motion, making it easier to return to the court with optimal performance.

Incorporating both massage and foam rolling into your recovery routine sends a strong message to your body: you value its resilience and are committed to maintaining its peak condition. By prioritizing these recovery techniques, you not only enhance your physical well-being but also equip yourself to bounce back stronger, ready to face your next match with renewed energy and vigor.

10. Mental Recovery: Reflecting on Performance and Staying Positive

Mental recovery is an often-overlooked but crucial aspect of bouncing back after a match, especially in the high-pressure world of tennis. The emotional toll of competition can leave players feeling drained, frustrated, or even disheartened, regardless of the outcome. To cultivate a resilient mindset, it’s vital to take the time to reflect on your performance in a constructive manner.

Start by analyzing your match objectively. Identify key moments that shaped the outcome—both positive and negative. What worked well? What didn’t? Instead of dwelling on mistakes, focus on the learning opportunities they present. This mindset shift not only enhances your skills but also fosters a growth-oriented approach, allowing you to view challenges as stepping stones rather than setbacks.

Equally important is the practice of positive affirmation. After a match, take a moment to acknowledge your efforts and the progress you’ve made. Remind yourself of your strengths and achievements, no matter how small they may seem. This self-affirmation can help build confidence and combat negative self-talk that often creeps in after a loss.

Incorporating mental recovery techniques such as visualization can also be beneficial. Spend a few minutes imagining yourself performing well in future matches. Picture the techniques you want to improve and the emotions you want to feel—confidence, focus, and joy. This mental rehearsal not only prepares you for what’s next but reinforces a positive mindset.

Finally, engage in mindfulness practices such as meditation or deep-breathing exercises to help clear your mind and reduce anxiety. These techniques can promote relaxation and help you regain mental clarity, allowing you to approach your next practice or match with renewed energy and focus. By prioritizing mental recovery, you not only recover from setbacks more effectively but also set a solid foundation for future success on the court.

11. Recovery Tools: Utilizing Technology for Enhanced Healing

In the fast-paced world of tennis, where every match can take a toll on your body, recovery is just as crucial as the training itself. One of the most effective ways to speed up recovery is by harnessing the power of technology. Recovery tools designed specifically for athletes have become increasingly sophisticated, offering innovative solutions to enhance healing and rejuvenation.

First on the list are compression garments, which have gained popularity for their ability to improve circulation and reduce muscle soreness. By applying targeted pressure, these garments help flush out lactic acid and minimize swelling, allowing players to feel fresher much sooner after intense matches. Look for options that are specially designed for your specific muscle groups, as this can make a significant difference in recovery times.

Next, consider incorporating cryotherapy into your routine. This cutting-edge recovery technique involves exposing your body to extremely cold temperatures for a short duration, which can drastically reduce inflammation and alleviate pain. Many athletes swear by cryotherapy chambers, but portable devices like cryo packs or ice baths can also deliver similar benefits at home.

Another technological marvel worth exploring is electrical stimulation therapy. Devices that use electrical impulses to stimulate muscles can promote faster healing by increasing blood flow and reducing muscle spasms. These tools are particularly beneficial for tennis players who experience muscle fatigue or stiffness after grueling matches.

Don’t overlook the benefits of massage guns, which have become a staple in many athletes’ recovery kits. These handheld devices provide deep tissue massage, helping to relieve tension, break up knots, and enhance flexibility. Using a massage gun post-match can significantly speed up recovery, allowing you to get back on the court sooner.

Lastly, keep an eye on wearable technology that tracks your recovery metrics. Devices like smartwatches and fitness trackers can provide real-time feedback on your heart rate, sleep quality, and overall physical readiness. By leveraging this data, you can adjust your recovery strategies accordingly, ensuring you’re always at your peak performance.

Investing in these recovery tools not only aids in faster healing but also enhances your overall performance on the court. Embrace technology as a vital partner in your post-match recovery strategy, and watch as you bounce back stronger and more resilient than ever.

12. Setting Up a Post-Match Recovery Routine

Setting up a post-match recovery routine is crucial for tennis players who want to bounce back stronger and enhance their overall performance. Recovery is not just about resting; it’s a strategic process that involves various key elements to help your body heal, replenish, and prepare for the next challenge on the court.

Start by establishing a cool-down routine immediately after your match. Dedicate 10-15 minutes to gentle stretching and mobility exercises that focus on the major muscle groups used during play. This helps to prevent stiffness and aids in muscle recovery. Incorporate dynamic stretches that target the legs, shoulders, and back, as these areas often bear the brunt of intense matches.

Hydration plays a vital role in recovery, so make sure to rehydrate with water or an electrolyte-rich drink right after your match. This will help restore the fluids lost through sweat and support muscle recovery. Aim to follow this up with a well-balanced meal or snack within 30 minutes, emphasizing protein for muscle repair and carbohydrates to replenish energy stores. Think of options like a protein shake with fruit, a turkey sandwich on whole-grain bread, or a quinoa salad packed with veggies.

Additionally, consider incorporating foam rolling or massage therapy into your routine. These techniques can alleviate muscle soreness and improve circulation, allowing for quicker recovery. If possible, schedule a session with a sports massage therapist who understands the demands of tennis and can target specific areas of tension.

Sleep cannot be overlooked in the recovery process. Prioritize getting quality sleep each night, as this is when your body does the majority of its healing and rebuilding. Aim for 7-9 hours of restful sleep and create a calming bedtime routine to help signal to your body that it’s time to recover.

Lastly, reflect on your performance in a journal. Take note of what worked well and what areas need improvement. This not only aids in your mental recovery but also prepares you for future matches by allowing you to set specific goals and strategies.

By establishing a comprehensive post-match recovery routine that incorporates cooldowns, hydration, nutrition, rest, and self-reflection, you’ll not only bounce back from your matches but also set the stage for continuous improvement and success on the court. Remember, recovery is just as important as training, and investing time in it will pay off in your performance and longevity in the sport.

13. Tips for Long-Term Injury Prevention

Long-term injury prevention is a cornerstone of sustained success in tennis, and it requires a proactive approach that goes beyond just recovery after matches. Here are some essential tips to help you stay on the court and minimize the risk of injuries over the long haul.

**1. Prioritize Proper Warm-Up and Cool Down:**
Before hitting the court, always invest time in a thorough warm-up that engages both your muscles and joints. Dynamic stretches and sport-specific drills can enhance your performance and reduce the chance of strains. Equally important is a cooling-down routine that involves static stretching to help maintain flexibility and aid recovery.

**2. Focus on Strength Training:**
A well-rounded strength training program that targets key muscle groups—especially those used in tennis, such as the shoulders, arms, core, and legs—can significantly reduce injury risk. Incorporate exercises that build not only strength but also stability and endurance, as these qualities are essential for the fast-paced movements required in tennis.

**3. Listen to Your Body:**
Pay attention to the signals your body sends you. If you experience pain or discomfort, don’t push through it. Early intervention can prevent minor issues from developing into serious injuries. Regularly assess your physical condition and be honest about your limits.

**4. Maintain Good Hydration and Nutrition:**
Proper hydration and nutrition play vital roles in injury prevention. Dehydration can lead to muscle cramps and fatigue, while a balanced diet rich in vitamins and minerals supports overall bodily function and recovery. Consider working with a nutritionist to tailor a diet plan that meets your training demands and recovery needs.

**5. Schedule Regular Rest and Recovery Days:**
Incorporating rest days into your training schedule allows your body to repair and rejuvenate. It’s during these periods of rest that your muscles rebuild, leading to improved performance and reduced risk of overuse injuries.

**6. Invest in Proper Equipment:**
Wearing the right footwear is critical in preventing tennis-related injuries. Choose shoes that provide adequate support and cushioning for the playing surface. Additionally, ensure your racquet is suited to your playing style and physical capabilities to reduce strain on your joints.

**7. Work with Professionals:**
Regular check-ups with a sports physiotherapist or trainer can help identify any potential imbalances or weaknesses that may predispose you to injury. They can guide you in tailoring a prevention plan that is uniquely suited to your needs.

By implementing these strategies, tennis players can significantly reduce their risk of injury, ensuring they remain on the court for as long as possible. Remember, the goal is not just to recover but to build a foundation that supports long-term health and peak performance. Stay proactive, and your commitment to injury prevention will pay off in your game and your overall enjoyment of tennis.

14. Listening to Your Body: Recognizing Signs of Overtraining

Listening to your body is one of the most crucial aspects of post-match recovery, especially for tennis players who often push their limits during intense matches and practice sessions. Overtraining can creep up on even the most dedicated athletes, manifesting through a variety of physical and psychological signs that, if ignored, can lead to burnout or injury.

Recognizing these signs is key to maintaining peak performance and ensuring longevity in the sport. Common physical indicators include persistent fatigue, decreased performance, and unexplained muscle soreness that lingers longer than usual. You might find yourself feeling unusually irritable or unmotivated, which are psychological symptoms that often accompany physical stress. Changes in sleep patterns—such as insomnia or excessive sleepiness—can also signal that your body is struggling to recover.

To effectively listen to your body, consider keeping a training journal. Documenting your workouts, how you feel before and after matches, and any signs of fatigue or soreness can help you identify patterns over time. Additionally, scheduling regular check-ins with yourself allows you to assess your energy levels and make adjustments as needed. If you notice consistent signs of overtraining, it’s vital to take a step back—this might mean reducing the intensity of your training sessions or incorporating more rest days.

Ultimately, prioritizing recovery and respecting your body’s signals can lead to more productive training and improved performance on the court. By tuning in to what your body is telling you, you’ll be better equipped to bounce back stronger and continue thriving in your tennis journey.

15. Conclusion: Building Resilience Through Effective Recovery Practices

In conclusion, building resilience through effective recovery practices is not just about bouncing back after a match; it’s about laying the groundwork for long-term success in your tennis career. Recovery is an often-overlooked aspect of training that can significantly influence your performance on the court. By prioritizing recovery strategies such as proper nutrition, hydration, stretching, and mental relaxation techniques, you empower your body to heal and your mind to refocus.

As you incorporate these practices into your post-match routine, remember that resilience is cultivated over time. Each match presents an opportunity to learn and grow, both physically and mentally. Embrace the recovery process as an essential part of your training regimen, helping you to not only recover from fatigue and injury but also to build a stronger, more durable version of yourself.

Ultimately, the path to becoming a better tennis player is paved with intentional recovery practices that enhance your resilience. By committing to these habits, you not only improve your performance but also develop the mental toughness required to face the challenges of the sport. So, whether you’re a seasoned professional or an enthusiastic amateur, ensure that recovery is a key component of your tennis journey, allowing you to bounce back stronger, ready to conquer the next match.

In conclusion, effective post-match recovery is crucial for tennis players looking to enhance their performance and maintain their overall well-being. By incorporating these essential tips into your routine, such as proper hydration, nutrition, stretching, and rest, you’ll not only bounce back stronger but also reduce the risk of injury and fatigue. Remember, recovery is just as important as your training; it’s the key to unlocking your full potential on the court. As you implement these strategies, you’ll find yourself feeling rejuvenated and ready to take on your next match with renewed energy and focus. So, embrace the power of recovery, and watch as it transforms your game!

What are the most common injuries in American football and how can they be prevented?

For athletes and fans alike, football is more than just a game; it’s a passion that unites communities and ignites fierce rivalries.

However, the thrill of the sport is often accompanied by the risk of injuries, which can sideline players and diminish their performance. From sprains and strains to fractures and concussions, understanding the common injuries that plague football players is crucial not only for recovery but also for prevention. In this comprehensive guide, we will delve into the most frequently occurring injuries in football, explore their causes, and provide effective strategies to minimize the risk of injury on the field. Whether you’re a seasoned player, a weekend warrior, or a concerned parent of a young athlete, this post will equip you with the knowledge you need to tackle injuries head-on and keep the game alive and thriving. Join us as we break down these challenges and pave the way for safer play!

1. Introduction to Football Injuries

What are the most common injuries in American football and how can they be prevented?
Credit : whatcanu.com

Football is a dynamic and exhilarating sport, characterized by its intensity, speed, and physical contact. While it offers unmatched excitement and a sense of camaraderie among players, it also comes with its fair share of risks. Injuries in football can range from minor sprains and strains to more severe conditions like fractures and concussions. Understanding the nature of these injuries is paramount for players, coaches, and parents alike, as it can significantly influence training methods, game strategies, and overall safety on the field.

Each season, countless athletes face the unfortunate reality of sidelining injuries, which can not only affect performance but also lead to long-term health issues. Common injuries include ankle sprains, knee injuries (such as ACL tears), hamstring strains, and shoulder dislocations, among others. The fast-paced nature of the game, coupled with sudden changes in direction and the physicality of tackles, contributes to this risk.

However, the good news is that many football injuries can be prevented with proper training, conditioning, and awareness. By focusing on strength training, flexibility exercises, and safe playing techniques, players can bolster their resilience against injuries. Additionally, keeping an eye on equipment—ensuring proper footwear and protective gear—can make a significant difference.

In this blog post, we will delve deeper into the most common football injuries, explore their causes, and provide actionable tips on how to prevent them, ensuring that players can enjoy the beautiful game while minimizing the risk of injury. Whether you’re a seasoned athlete, a weekend warrior, or a concerned parent, understanding these aspects can help foster a safer and more enjoyable football experience.

2. Understanding Common Football Injuries

Understanding common football injuries is crucial for both players and coaches, as it enables better preparedness and proactive measures to mitigate risks. Football is a high-impact sport that demands agility, speed, and strength, making players susceptible to a range of injuries.

**Sprains and Strains:** These are among the most frequent injuries on the field, often occurring in the ankles, knees, and hamstrings. A sprain refers to the stretching or tearing of ligaments, while a strain involves muscles or tendons. The sudden twists and turns during gameplay can lead to these injuries, particularly if players are not conditioned properly.

**Fractures:** Football players face a significant risk of fractures, particularly in the fingers, arms, or legs, during tackles or falls. The jarring impacts can lead to both stress fractures and complete breaks, which often require extensive recovery time and rehabilitation.

**Knee Injuries:** Conditions like ACL (anterior cruciate ligament) tears are alarmingly common in football. The ACL is vital for stability in the knee, and its injury can occur from sudden stops, jumps, or changes in direction. Recovery can be lengthy and may involve surgery, making prevention strategies critical.

**Concussions:** Head injuries, including concussions, are a growing concern in football. These injuries can result from direct hits to the head or whiplash-like movements. Symptoms can vary and may not be immediately apparent, making it essential for players to communicate openly about any potential head trauma.

**Achilles Tendon Injuries:** The Achilles tendon, which connects the calf muscles to the heel bone, can become inflamed or torn from repetitive strain. These injuries can be particularly debilitating and require a significant amount of time for healing.

**Preventive Measures:** Understanding these common injuries is the first step to prevention. Implementing a comprehensive training program that emphasizes strength, flexibility, and proper techniques can greatly reduce the risk. Regular conditioning, warm-up exercises, and cooldowns should be integral parts of every practice. Additionally, educating players about the importance of using the right protective gear, such as shin guards and helmets, can further safeguard against potential injuries.

By staying informed about these common football injuries and their prevention strategies, players can enhance their performance while minimizing the risk of sidelining injuries.

– 2.1 Sprains and Strains

What are the most common injuries in American football and how can they be prevented?
Credit : whatcanu.com

Sprains and strains are among the most common injuries in football, affecting players at all levels—from weekend warriors to professional athletes. A sprain occurs when the ligaments, the tough bands of tissue that connect bones at a joint, are stretched or torn. This type of injury often happens when a player lands awkwardly or twists their ankle during a tackle. On the other hand, a strain involves the muscles or tendons, which are the tissues that connect muscles to bones. Strains can result from overexertion or sudden movements, such as sprinting or kicking the ball.

Symptoms of sprains can include swelling, bruising, and limited mobility, particularly around joints like the ankle or knee. Strains may present with similar symptoms but can also cause muscle spasms or a sharp pain in the affected area. Both injuries can sideline players for significant periods, affecting not only their performance but also their overall enjoyment of the sport.

Preventing sprains and strains requires a multifaceted approach. First and foremost, proper warm-up routines are essential. Engaging in dynamic stretches and sport-specific drills prepares the muscles and joints for the demands of the game. Strengthening exercises that focus on the legs, core, and stabilizing muscles can also provide additional support, reducing the risk of injury.

Moreover, players should pay attention to their footwear. Wearing appropriate shoes with proper traction can help prevent slips and falls, which often lead to sprains. It’s also crucial to maintain a high level of fitness throughout the season, as fatigue can lead to a higher likelihood of injury. Finally, educating players on the importance of technique—whether it’s how to tackle safely or land properly after a jump—can significantly decrease the chances of sprains and strains.

In summary, while sprains and strains are a common part of football, understanding their causes and implementing preventative strategies can help players stay on the field and reduce the risk of these injuries.

– 2.2 Fractures

Fractures are one of the most serious injuries in football, often resulting from high-impact collisions, falls, or awkward landings. These breaks can occur in various parts of the body, with the most common fractures being in the arms, wrists, collarbones, and legs. The sheer intensity of the game, coupled with the physical nature of tackles and sudden movements, increases the risk of these injuries significantly.

A fracture can manifest as a sharp pain, swelling, or even an inability to use the affected limb. In some cases, the bone may break through the skin, a condition known as an open fracture, which requires immediate medical attention to prevent infection and further complications.

Preventing fractures involves a combination of proper training, conditioning, and safety precautions. Players should focus on building strength and flexibility through targeted exercises that enhance bone density and muscle support. Warm-up routines, including stretching and mobility exercises, are crucial to prepare the body for the rigors of a match.

Additionally, wearing well-fitted protective gear, such as shin guards and supportive footwear, can significantly reduce the risk of fractures. Coaches and players should also emphasize the importance of safe tackling techniques to minimize the impact during play. By fostering a culture of safety and preparedness, teams can help protect their players from the debilitating effects of fractures, allowing them to enjoy the game they love while minimizing the risk of injury.

– 2.3 Concussions

What are the most common injuries in American football and how can they be prevented?
Credit : whatcanu.com

### 2.3 Concussions

Concussions are one of the most concerning injuries in football, often referred to as the “invisible injury” due to the subtlety of their symptoms. They occur when a player experiences a blow to the head or a sudden jolt that causes the brain to move rapidly within the skull. This injury can disrupt normal brain function, leading to a range of symptoms that can affect a player’s performance, health, and safety.

The signs of a concussion may not always be immediately apparent, which is why education and awareness are crucial for players, coaches, and parents. Symptoms can include dizziness, confusion, headaches, nausea, sensitivity to light or noise, and even memory loss. In some cases, players may experience changes in mood or behavior, making it difficult to recognize the injury at first glance.

Preventing concussions begins with educating players on safe tackling techniques and the importance of playing within their limits. Utilizing proper protective equipment, such as well-fitted helmets and mouthguards, can also help mitigate the risk of head injuries. Coaches should enforce strict rules about aggressive play and ensure that players understand the significance of reporting any head impacts immediately.

Moreover, implementing comprehensive concussion protocols is essential. Schools and teams should have trained personnel to monitor players for signs of concussion and establish a clear return-to-play policy that prioritizes safety over competition. By fostering an environment that emphasizes awareness and care, teams can significantly reduce the occurrence of concussions and protect the long-term health of their athletes.

In the ever-evolving landscape of football, understanding and addressing the threat of concussions is paramount. A proactive approach not only enhances player safety but also contributes to a culture of respect and responsibility within the sport.

– 2.4 ACL Injuries

### 2.4 ACL Injuries

The anterior cruciate ligament (ACL) is one of the key stabilizing ligaments in the knee, and injuries to this ligament are among the most common and serious in football. ACL injuries typically occur during high-impact activities that involve sudden stops, jumps, or changes in direction—movements that are integral to the game. They can be devastating, not only sidelining players for an extended period but also increasing the risk of future knee problems.

ACL injuries can manifest as a sudden, sharp pain in the knee, often accompanied by a popping sound at the moment of injury. Swelling usually follows, and most players find it difficult to bear weight on the affected leg. Recovery from an ACL tear often requires surgical intervention and a long rehabilitation process, involving physical therapy to restore strength and mobility.

Preventing ACL injuries involves a combination of proper training techniques, conditioning, and awareness. Incorporating strength training exercises that focus on the muscles around the knee—such as quadriceps, hamstrings, and calf muscles—can help improve stability and reduce the risk of injury. Additionally, agility drills that emphasize proper landing techniques can significantly decrease the likelihood of ACL tears.

Education is also crucial; players should be aware of their body mechanics during play. Coaches and trainers should prioritize warm-up routines that include flexibility exercises and sport-specific drills to prepare the body for the physical demands of football.

Ultimately, while ACL injuries can be serious and often require a lengthy recovery, a proactive approach to training and awareness can help players stay on the field and away from the operating room.

– 2.5 Achilles Tendon Injuries

What are the most common injuries in American football and how can they be prevented?
Credit : whatcanu.com

Achilles tendon injuries are among the most common and potentially debilitating issues faced by football players at all levels. The Achilles tendon, which connects the calf muscles to the heel bone, plays a crucial role in movements such as sprinting, jumping, and pivoting—actions that are essential in the fast-paced environment of football. When subjected to the intense strain and repetitive motion often experienced on the field, this tendon can become overstressed, leading to conditions such as tendinitis or even ruptures.

Achilles tendinitis, characterized by inflammation and pain along the tendon, typically manifests gradually. Players may initially notice stiffness or discomfort in the back of the ankle, especially after long periods of inactivity or following intense training sessions. If left unaddressed, this condition can progress, resulting in sharp pain, swelling, and a significant loss of mobility. In severe cases, an Achilles tendon rupture can occur, resulting in an abrupt and painful tearing sensation, often requiring surgical intervention and a long recovery period.

Preventing Achilles tendon injuries starts with a solid foundation of proper training and conditioning. Players should prioritize a comprehensive warm-up routine that includes dynamic stretches focusing on the calf muscles, as well as strength exercises that target the lower leg. Incorporating exercises such as calf raises and eccentric heel drops can build strength and resilience in the tendon. Additionally, proper footwear is critical; cleats should provide adequate support and cushioning to minimize strain on the Achilles.

Moreover, players should listen to their bodies and avoid pushing through pain. Gradually increasing training intensity, allowing for rest and recovery, and integrating cross-training activities can all help in reducing the risk of injury. Being mindful of these preventive measures can keep players agile on the field and help them avoid the frustrating setbacks associated with Achilles tendon injuries.

3. Risk Factors for Football Injuries

Understanding the risk factors for football injuries is crucial for players, coaches, and parents alike. Football, while exhilarating and rewarding, is inherently a high-contact sport that demands physical endurance, agility, and strategic thinking. The thrill of a well-executed play comes at a cost, as certain factors can significantly increase the likelihood of injuries on the field.

One of the primary risk factors is the level of physical conditioning. Players who neglect their fitness routines or fail to engage in sport-specific training may find themselves more susceptible to strains and sprains. Maintaining a robust strength and conditioning program not only enhances performance but also fortifies muscles and joints, creating a solid defense against potential injuries.

Another crucial aspect is the age and experience of the players. Younger athletes, particularly those in their formative years, often lack the body awareness and technique that come with experience. This can lead to improper tackling forms or risky maneuvers that heighten their risk of injury. Conversely, older athletes may face age-related declines in flexibility, balance, and recovery time, making them more vulnerable to injuries, especially as the intensity of the game escalates.

Environmental factors also play a significant role. Weather conditions, such as extreme heat or cold, can adversely affect player performance and increase the likelihood of heat-related illnesses or frostbite. Similarly, inadequate playing surfaces—whether too hard, uneven, or slippery—can contribute to falls and collisions that result in injury.

Finally, equipment is a critical factor that should never be overlooked. Properly fitting helmets, pads, and footwear are essential for reducing the risk of traumatic injuries. Worn-out or ill-fitting gear can exacerbate the impact of collisions and falls, making it imperative for players to regularly inspect and replace their equipment when necessary.

By recognizing these risk factors, players and coaches can take proactive steps to mitigate their impact. Developing a comprehensive training and conditioning program, ensuring appropriate gear, and fostering an awareness of environmental conditions can create a safer playing environment and help players stay on the field longer.

4. Importance of Proper Training Techniques

Proper training techniques are crucial in the realm of football, not just for enhancing performance but also for significantly reducing the risk of injuries. When players engage in football training, they must focus on a regimen that emphasizes strength, flexibility, and coordination. This multi-faceted approach not only prepares the body for the physical demands of the game but also helps in developing muscle memory, which is essential for executing movements safely and effectively.

Inadequate training can lead to a range of injuries, from sprains and strains to more severe conditions like torn ligaments or muscle tears. For instance, improper stretching or neglecting warm-up routines can leave muscles tight and unprepared for the explosive movements required during play. Incorporating dynamic stretches and sport-specific drills into training can enhance flexibility, improve joint stability, and prime the body for the quick sprints and sudden changes in direction that football demands.

Additionally, proper technique during training can help reinforce correct posture and movement patterns. Coaches should prioritize teaching players the fundamentals of tackling, blocking, and running, ensuring that each movement is executed with precision. This focus on technique not only helps prevent injuries but also contributes to overall team performance, allowing players to execute plays with confidence and efficiency.

Moreover, it’s essential to tailor training programs to each player’s individual needs, taking into account their position, physical condition, and past injuries. Personalized training regimens that incorporate strength training, cardiovascular conditioning, and agility drills can create a robust foundation that minimizes injury risks while maximizing on-field performance.

In summary, prioritizing proper training techniques in football is not just about building a stronger team; it’s about creating a culture of safety and resilience. By investing time and effort into comprehensive training programs, players can enjoy the game they love while significantly reducing their chances of injury.

5. Warm-Up and Cool-Down Routines

### Warm-Up and Cool-Down Routines

In the fast-paced world of football, the excitement of the game can sometimes lead players to overlook one crucial aspect: the importance of a proper warm-up and cool-down routine. These essential practices not only prepare the body for the physical demands of the sport but also play a vital role in injury prevention and recovery.

**The Warm-Up: Setting the Stage for Performance**

A well-structured warm-up routine should last at least 15 to 20 minutes and include a combination of dynamic stretching, light aerobic activity, and sport-specific drills. Start with light jogging or skipping to increase your heart rate and get the blood flowing to your muscles. Follow this with dynamic stretches, such as leg swings, arm circles, and torso twists, which help improve flexibility and mobility in the joints. Incorporate sport-specific movements, like lateral shuffles or quick footwork drills, to mimic the actions you’ll perform during the game. This comprehensive approach not only enhances your performance but also reduces the risk of strains and sprains by preparing your muscles and joints for the intensity of play.

**The Cool-Down: A Critical Component of Recovery**

Equally important is the cool-down routine, which often gets overlooked in the heat of competition. Taking just 10 to 15 minutes post-game to engage in light jogging or walking allows your heart rate to gradually decrease, preventing blood from pooling in your extremities. Follow this with static stretching, focusing on the major muscle groups used during the match. Hold each stretch for at least 20-30 seconds to promote flexibility and help alleviate muscle tightness. This practice aids in the recovery process by flushing out lactic acid buildup and reducing muscle soreness, allowing you to bounce back more quickly for your next training session or match.

By incorporating these warm-up and cool-down routines into your football practice, you not only enhance your performance but also significantly reduce the risk of common injuries. Remember, a few extra minutes dedicated to these essential practices can make a world of difference in keeping you on the field and performing at your best.

6. The Role of Proper Equipment in Injury Prevention

When it comes to preventing injuries on the football field, one of the most critical yet often overlooked factors is the role of proper equipment. From helmets to cleats, each piece of gear plays an essential part in safeguarding players and enhancing their performance.

A well-fitted helmet is paramount; it acts as the first line of defense against concussions and head injuries, which have become a significant concern in the sport. Modern helmets are designed with advanced materials that absorb impact and reduce the force transmitted to the skull. It’s crucial for players to ensure their helmets meet safety standards and fit comfortably, as a loose or poorly fitted helmet can compromise protection.

Equally important are shoulder pads, which shield players from shoulder injuries and impacts during tackles. The right type of shoulder pads, tailored to the player’s position and body type, can significantly reduce the risk of strains and dislocations. Additionally, wearing thigh and knee pads can help protect against contusions and serious joint injuries, providing an extra layer of cushioning during those high-impact moments.

Footwear is another essential aspect of equipment that can’t be neglected. Cleats should provide adequate traction and support, tailored to the playing surface—whether it’s grass, turf, or mud. Wearing the wrong type of cleats can lead to slips, falls, and potentially severe ankle injuries. Players should also consider the fit of their footwear, as poorly fitting shoes can cause blisters and exacerbate existing foot issues.

Finally, ongoing education about equipment maintenance is vital. Players should regularly inspect their gear for wear and tear, replace worn-out items, and stay informed about advancements in protective technologies. By prioritizing proper equipment and ensuring it is well maintained and appropriately fitted, players can significantly reduce their risk of injury, allowing them to focus on what they love—playing the game.

7. Nutrition and Hydration for Injury Prevention

Proper nutrition and hydration play a crucial role in injury prevention for football players. The intense physical demands of the game require athletes to fuel their bodies with the right nutrients while maintaining optimal hydration levels to support performance and recovery.

**Nutrition**: A well-balanced diet rich in carbohydrates, proteins, healthy fats, vitamins, and minerals is essential. Carbohydrates are the primary energy source for high-intensity activities, so football players should focus on whole grains, fruits, and vegetables to provide sustained energy. Proteins, found in lean meats, fish, dairy, and legumes, are vital for muscle repair and recovery, especially after intense training sessions or matches. Healthy fats, such as those from avocados, nuts, and olive oil, support overall health and can help reduce inflammation in the body.

In addition to macronutrients, micronutrients—such as calcium, vitamin D, and magnesium—are critical for bone health and muscle function. A deficiency in these nutrients can lead to increased susceptibility to injuries like fractures and strains. Therefore, incorporating a variety of colorful fruits and vegetables into meals ensures that players receive a broad spectrum of vitamins and minerals necessary for optimal performance.

**Hydration**: Staying hydrated is equally as important as nutrition. Dehydration can impair performance, reduce concentration, and increase the risk of cramps and other injuries. Players should aim to drink water consistently throughout the day, especially before, during, and after practice or games. Sports drinks can be beneficial during intense training sessions, as they help replenish electrolytes lost through sweat. However, it’s essential to read labels and choose options with lower sugar content to avoid unnecessary calories.

To promote effective hydration habits, teams can implement strategies such as providing water bottles during practice, encouraging regular breaks for hydration, and educating players on the signs of dehydration. By prioritizing proper nutrition and hydration, football players can significantly reduce their risk of injury while enhancing their overall performance on the field.

8. The Importance of Rest and Recovery

Rest and recovery are often the unsung heroes in the realm of sports, and football is no exception. Amidst the adrenaline of intense matches and rigorous training sessions, players can easily overlook the critical role that rest plays in their overall performance and long-term health. Neglecting recovery not only increases the risk of injury but can also hinder progress and diminish athletic potential.

When players push their bodies to the limit week after week, muscles become fatigued, and performance can suffer. Rest allows the body to repair itself, replenishing energy stores, healing tissues, and rebuilding muscle fibers that may have been damaged during high-intensity play. This process is vital for maintaining peak physical condition and for preventing common injuries such as strains, sprains, and stress fractures, which can occur when the body is not given adequate time to recover.

Incorporating structured rest periods into a training regimen can significantly enhance a player’s resilience. This doesn’t merely mean taking a day off; active recovery days, where lighter activities like stretching, yoga, or swimming are introduced, can promote circulation and reduce stiffness without putting excessive strain on the body. Additionally, prioritizing sleep is essential, as it is during deep sleep that the body undergoes the most restorative processes.

Moreover, players should be attuned to their bodies and recognize the signs of fatigue or discomfort. Pushing through pain often leads to more severe injuries that could sideline an athlete for an extended period. By embracing the importance of rest and recovery, players can ensure they remain at the top of their game, ready to face whatever challenges the season may bring. Ultimately, a well-rested athlete is not just a healthier one; they are also a more effective competitor, equipped to tackle the rigors of football with vigor and agility.

9. Recognizing the Signs of Injury

Recognizing the signs of injury is crucial for any football player, whether you’re a seasoned athlete or just starting out. Early detection can make all the difference in the severity of an injury and the length of recovery time. Understanding the subtle body cues that signal something might be off can help prevent a minor issue from escalating into a serious problem.

Common signs to watch for include persistent pain or discomfort, unusual swelling, and decreased range of motion in a joint or muscle. If you experience a sharp pain during play, especially if it’s accompanied by a popping sound, it’s essential to stop immediately and assess the situation. Ignoring these signals can lead to further damage, potentially sidelining you for the entire season.

Additionally, fatigue and weakness are often overlooked indicators of injury. If you find that you’re struggling to perform at your usual level or if certain movements become increasingly difficult, it may be time to evaluate your physical condition. This could be a sign of overuse, inadequate recovery, or an underlying injury that has yet to manifest fully.

As a player, staying attuned to your body is paramount. Engage in open conversations with coaches, trainers, and teammates about how you’re feeling. Creating an environment where discussing discomfort is normalized can lead to quicker interventions and better outcomes. Remember, recognizing the signs of injury early not only protects your physical health but also ensures that you can continue to enjoy the game you love.

10. Immediate First Aid for Football Injuries

When it comes to football, the thrill of the game is often accompanied by the risk of injuries. Knowing how to provide immediate first aid can make a significant difference in the recovery process and the overall wellbeing of an injured player. In the heat of the moment, quick and effective action not only alleviates pain but can also prevent further damage.

The most common injuries on the field include sprains, strains, fractures, and contusions. In the event of an injury, the first step is to assess the situation. If the player is conscious and able to communicate, determine the nature and severity of the injury. For minor injuries, the R.I.C.E. method—Rest, ice, Compression, Elevation—is highly effective. Encourage the player to rest the injured area, apply ice wrapped in a cloth to reduce swelling, use compression bandages to provide support, and elevate the limb above the heart to minimize swelling.

In cases of more serious injuries, such as suspected fractures or severe sprains, it’s crucial to seek professional medical assistance immediately. Avoid moving the injured player unless absolutely necessary, as movement can exacerbate the injury. If a player loses consciousness, is unable to move, or experiences excessive bleeding, call for emergency medical help right away.

Furthermore, having a well-stocked first aid kit on hand is essential. This kit should include sterile gauze, adhesive bandages, athletic tape, antiseptic wipes, ice packs, and a basic first aid manual. Familiarizing yourself with the contents and usage of the kit can save valuable time during an emergency.

Finally, educating players on the importance of reporting injuries, no matter how minor they may seem, can help prevent long-term complications. Immediate attention and proper care can ensure that players get back on the field sooner and safer, empowering them to continue enjoying the sport they love.

11. Long-Term Rehabilitation Strategies

When it comes to recovering from a football injury, long-term rehabilitation strategies play a crucial role in ensuring athletes not only heal but also regain their strength, flexibility, and confidence. A well-structured rehabilitation program goes beyond immediate recovery; it focuses on restoring functionality and preventing future injuries.

The first step in any effective rehabilitation plan is a thorough assessment by a healthcare professional. This assessment helps determine the extent of the injury, the specific needs of the athlete, and the most suitable rehabilitation exercises. Tailoring the program to the individual ensures that all aspects of their recovery are addressed, from physical therapy to psychological support.

One essential component of long-term rehabilitation is a gradual return to activity. This means progressing through various stages, starting with gentle mobility exercises and advancing to strength training and sport-specific drills. For instance, an athlete recovering from an ankle sprain may begin with range-of-motion exercises before moving on to resistance training and eventually incorporating agility drills that mimic the demands of football.

In addition to physical exercises, rehabilitation should also include education on proper biomechanics and techniques. Teaching athletes about body mechanics can help them understand how to move safely and efficiently, reducing the risk of re-injury. Furthermore, incorporating flexibility and conditioning programs can enhance overall athletic performance and resilience.

Mental conditioning is another often-overlooked aspect of long-term rehabilitation. Injuries can take a toll on an athlete’s confidence, so incorporating mental health strategies—such as visualization techniques or working with a sports psychologist—can help athletes regain their self-assurance and focus.

Finally, maintaining open lines of communication between therapists, coaches, and athletes is vital for a successful rehabilitation journey. Regular check-ins and adjustments to the rehabilitation plan ensure that athletes feel supported and empowered throughout their recovery process. By implementing these long-term strategies, football players can not only heal effectively but also bounce back stronger than ever, ready to tackle their next challenge on the field.

12. Mental Health and Injury Recovery

In the high-pressure world of football, physical injuries are often accompanied by an equally significant mental toll. Athletes are not just faced with the challenges of physical rehabilitation; they must also navigate the emotional hurdles that come with being sidelined from the game they love. Mental health plays a crucial role in injury recovery, influencing both the speed of physical healing and the athlete’s overall well-being.

When a player is injured, feelings of frustration, anxiety, and isolation can quickly set in. The fear of losing their place on the team, the pressure to recover quickly, and the uncertainty of their future performance can weigh heavily on an athlete’s mind. It’s essential to recognize that mental health is just as important as physical care during this vulnerable time.

To support mental health during recovery, open communication is key. Athletes should feel encouraged to express their feelings and concerns with coaches, teammates, and mental health professionals. Engaging in supportive conversations can help alleviate feelings of isolation and build a sense of community, reminding injured players that they are not alone in their journey.

Incorporating mental wellness strategies into the recovery process can also be beneficial. Techniques such as mindfulness meditation, visualization exercises, and positive self-talk can help athletes stay focused and motivated. Setting small, achievable goals throughout the recovery process not only helps foster a sense of accomplishment but also aids in maintaining a positive outlook.

Additionally, staying connected with the sport during recovery can enhance an athlete’s mental resilience. Watching games, attending training sessions, and being involved with the team in non-playing capacities can help maintain a sense of belonging and passion for the game.

Ultimately, addressing mental health alongside physical rehabilitation creates a holistic approach to injury recovery. By fostering a supportive environment and prioritizing mental well-being, athletes can emerge from their injuries not only physically stronger but also mentally fortified, ready to tackle the challenges that lie ahead on the field.

13. Tips for Coaches and Parents on Injury Prevention

Coaches and parents play a pivotal role in ensuring the safety and well-being of young athletes on the football field. With the right strategies and awareness, they can significantly reduce the risk of injuries while fostering a positive and supportive environment for the players. Here are some essential tips for both coaches and parents to enhance injury prevention:

1. **Prioritize Education and Training**: Coaches should educate themselves on common football injuries and the best practices for preventing them. This includes understanding proper techniques for tackling, blocking, and running. Organizing workshops or clinics can also empower coaches with the latest knowledge in sports safety.

2. **Ensure Proper Warm-Up and Cool-Down**: Before each practice and game, a thorough warm-up routine should be implemented, focusing on stretching and mobility exercises to prepare muscles and joints for the physical demands of football. Similarly, a cool-down session post-activity helps in muscle recovery and reduces stiffness.

3. **Encourage Use of Proper Gear**: Parents and coaches must ensure that all players are equipped with high-quality, sport-specific protective gear, including helmets, shoulder pads, and mouthguards. Regular checks for wear and tear should be a routine practice, as faulty equipment can increase the risk of injury.

4. **Promote Hydration and Nutrition**: Proper hydration is crucial, especially during hot weather. Coaches should emphasize the importance of drinking water before, during, and after practices and games. Additionally, educating players about balanced nutrition can aid in their overall performance and recovery.

5. **Implement Progressive Training**: Gradually increasing the intensity and duration of training sessions can help players adapt to the physical stresses of the game. Coaches should be vigilant about avoiding overtraining, which can lead to fatigue and increase the likelihood of injuries.

6. **Monitor Player Fatigue and Pain**: Coaches and parents should encourage open communication about any discomfort or pain players may experience. Creating an environment where players feel safe to express their concerns can help identify potential injuries before they worsen.

7. **Foster a Team Culture of Safety**: Cultivating a culture that prioritizes safety over competition can significantly impact injury rates. Coaches should emphasize the importance of playing smart and protecting oneself and teammates, while parents can reinforce these values at home.

By implementing these proactive strategies, coaches and parents can play a crucial part in minimizing injury risks, ensuring that young athletes can enjoy the game they love while staying safe and healthy. In doing so, they contribute not just to the players’ physical well-being but also to their long-term enjoyment and passion for football.

14. Conclusion: Prioritizing Safety in Football

As we conclude our exploration of common football injuries and their prevention, it’s essential to underscore the paramount importance of safety in the sport. Football, while an exhilarating and unifying experience, carries inherent risks that can lead to significant injuries if not approached with caution and awareness.

Prioritizing safety begins with education—players, coaches, and parents must understand the types of injuries that can occur, from concussions and sprains to fractures and overuse injuries. Recognizing the signs and symptoms of these injuries early can make a substantial difference in treatment outcomes and recovery times.

Preventative measures, such as proper training techniques, the use of appropriate protective gear, and conditioning programs, play a crucial role in minimizing injury risks. Emphasizing warm-up routines, cool-down stretches, and strength training can enhance physical resilience, helping players withstand the demands of the game.

Moreover, fostering a culture of safety within teams and leagues is vital. Encouraging open communication about injury concerns, promoting adherence to safety protocols, and prioritizing player well-being over competition can help create an environment where athletes feel supported and protected.

In the end, football should be a source of joy, camaraderie, and personal growth. By prioritizing safety, we can ensure that players not only enjoy the thrill of the game but also maintain their health and well-being for seasons to come. Let’s commit to smarter practices and a culture of safety that allows athletes to thrive on the field while minimizing the risk of injury.

15. Resources for Further Reading and Support

When it comes to tackling football injuries, knowledge is your best defense. Understanding the common injuries that players face and the best practices for prevention can significantly enhance your safety on the field. However, the journey toward injury prevention doesn’t end here. To further equip yourself with essential information and support, it’s vital to explore a variety of resources tailored to athletes, coaches, and parents alike.

**Books and Guides:** Numerous publications delve into the science of sports injuries, offering insights on biomechanics, training techniques, and rehabilitation. Titles such as “The Sports Injury Handbook” and “Preventing Sports Injuries” are excellent starting points for anyone looking to deepen their understanding of injury prevention strategies.

**Online Courses and Webinars:** Many organizations offer online courses focused on sports injury prevention. The National Athletic Trainers’ Association (NATA) and similar bodies often provide valuable resources, including webinars led by experts in sports medicine. These courses can be particularly beneficial for coaches seeking to enhance their knowledge and help their players stay safe.

**Community and Support Groups:** Connecting with fellow athletes and coaches can provide valuable support and shared experiences. Online forums and local community groups often discuss injury prevention tips and recovery strategies. Engaging with these communities can foster a sense of camaraderie and offer practical advice from those who have faced similar challenges.

**Professional Resources:** Don’t hesitate to leverage the expertise of sports medicine professionals. Many clinics and hospitals offer injury prevention programs specifically for football players. Seeking advice from physical therapists, athletic trainers, or sports physicians can provide personalized strategies tailored to your specific needs and playing style.

By actively seeking out these resources, you can empower yourself with knowledge and support, ultimately reducing your risk of injury and enhancing your performance on the field. Staying informed and connected is key to ensuring that you not only play the game you love but do so with confidence and resilience.

In conclusion, understanding common football injuries and their prevention strategies is crucial for players, coaches, and parents alike. By being aware of the most frequent injuries and implementing proper training techniques, warm-up routines, and safety measures, you can significantly reduce the risk of injury on the field. Remember, prevention is always better than cure, and a proactive approach not only enhances performance but also ensures that athletes can enjoy the game they love without the setbacks of injury. We hope this guide empowers you to take action, prioritize safety, and foster a healthier football environment. Stay safe, play smart, and keep the passion for the game alive!

How to build a simple bookshelf?

Welcoming a furry friend into your home is an exciting journey filled with love, companionship, and a few challenges along the way.

One of the most significant hurdles new dog owners face is potty training, particularly when it comes to mastering the litter box. While traditionally associated with our feline friends, litter box training for dogs is an effective and practical solution, especially for those living in apartments or with limited outdoor access. In this comprehensive guide, we’ll walk you through each step of the process—from choosing the right litter box and materials to establishing a consistent routine and reinforcing positive behavior. Whether you’re a first-time dog owner or looking to refine your pup’s training, this guide will provide you with the tools and confidence you need to ensure a smooth and successful litter box experience for both you and your beloved canine companion. Say goodbye to accidents and hello to a cleaner, stress-free home!

1. Understanding Your Dog’s Natural Instincts

How to build a simple bookshelf?
Credit : whatcanu.com

Understanding your dog’s natural instincts is the foundation of successful litter box training. Dogs, like their wild ancestors, have inherent behaviors that dictate their approach to elimination. In the wild, animals instinctively seek out specific areas to relieve themselves, often choosing spots that are away from their living and sleeping spaces. This instinct is deeply rooted and can be harnessed to facilitate the training process.

Take a moment to observe your dog’s behavior during walks or when they are outside. You may notice them sniffing the ground, circling, and even scratching at certain spots before they go. This is their way of assessing the environment and signaling that it’s time to do their business. By tapping into these natural tendencies, you can create a comfortable and appealing litter box experience for your furry friend.

Additionally, it’s crucial to consider their age and breed. Puppies, for instance, may not have full control over their bladders yet, making patience and frequent opportunities for elimination essential. On the other hand, older dogs may have developed preferences based on past experiences. Understanding these nuances will help you tailor your approach to your dog’s specific needs.

When introducing the litter box, choose a location that mimics the privacy they would seek in nature. A quiet corner of your home, away from loud noises and foot traffic, will help your dog feel secure and more inclined to use the box. Pay attention to their body language and cues; recognizing when they are about to relieve themselves can help you guide them to the box at the right moment.

By aligning your training methods with your dog’s instinctual behaviors, you can foster a positive association with the litter box, paving the way for a successful transition. Remember, it’s all about understanding your canine companion and working with, rather than against, their natural inclinations.

2. Choosing the Right Location for the Litter Box

Choosing the right location for the litter box is crucial in ensuring your dog feels comfortable and confident using it. Dogs thrive in environments that are quiet, safe, and easily accessible, so selecting the perfect spot requires careful consideration.

Start by observing your dog’s usual bathroom habits. Does your furry friend prefer secluded areas for their business? If so, placing the litter box in a corner of a low-traffic room may be ideal. Avoid high-traffic areas like hallways or rooms where family members frequently gather, as these can create distractions that deter your dog from using the box.

Moreover, ensure the litter box is located near the door to the outside if you have a backyard. This proximity helps reinforce the idea that the litter box is an acceptable place to relieve themselves, while also providing a quick exit to the outdoors when needed. If you’re using a specific type of litter, make sure to keep it consistent and place the box in an area where it won’t be disturbed by other pets or children.

Light is also an important factor; choose a location that is well-lit but not harshly illuminated. Your dog should feel relaxed and secure in their chosen spot, so consider placing the litter box in a spot where they can feel at ease without feeling exposed.

Lastly, be mindful of any scents or odors that may be present in the area. Dogs are sensitive to smells, and a location that is too close to their food or sleeping areas may deter them from using the litter box. By thoughtfully selecting the right location, you’re setting the stage for successful litter box training and creating a positive experience for your canine companion.

3. Selecting the Best Litter for Dogs

How to build a simple bookshelf?
Credit : whatcanu.com

When it comes to training your dog to use a litter box, selecting the right litter is a crucial step that can make all the difference in your success. Unlike traditional cat litter, dog litter needs to cater to your canine’s unique habits and instincts. As you embark on this journey, consider the various options available and their specific benefits to ensure a comfortable and inviting environment for your furry friend.

First and foremost, look for dog-specific litter formulations. These litters are typically made from materials that are safe and appealing to dogs, such as recycled paper, wood pellets, or even natural grass. Many pet owners find that paper-based litters are an excellent choice because they are absorbent, non-toxic, and gentle on a dog’s paws. Furthermore, they often come in unscented varieties, which can be a relief for dogs sensitive to strong odors.

Another option is the use of biodegradable litters, which not only provide a safe space for your dog to relieve themselves but also minimize environmental impact. Products made from corn, wheat, or other plant-based materials can effectively absorb moisture and control odors while being kind to the planet.

Consider your dog’s preferences, too. Some dogs may have a preference for softer textures, while others might enjoy the crunch of a wood-based litter. If you’re unsure, you can conduct a simple experiment by introducing a couple of different types of litter and observing your dog’s reactions.

Finally, pay attention to the litter’s clumping ability and odor control features. A litter that clumps well makes clean-up easier and helps maintain a fresher environment, which is especially important when training your dog to use the box consistently.

In summary, selecting the best litter for your dog goes beyond mere functionality; it’s about creating a positive experience that encourages them to return to the litter box time and time again. By choosing wisely, you’ll pave the way for a successful litter box training journey, turning what could be a daunting task into a manageable and rewarding process.

4. Introducing Your Dog to the Litter Box

Introducing your dog to the litter box can be a pivotal moment in your training journey, and it sets the stage for successful litter box habits. Begin this process in a calm and quiet environment where your dog feels safe and secure. Choose a litter box that is appropriately sized for your dog—one that they can easily enter and exit. Consider a box with low sides for small breeds or puppies, and make sure it’s placed in a designated area that is easily accessible yet private enough to encourage your dog to use it.

Once you have the litter box set up, it’s time to pique your dog’s curiosity. You can do this by placing a few treats or a favorite toy inside the box. Allow them to explore it at their own pace, as this will help them associate the box with positive experiences. Use encouraging words and a cheerful tone to reinforce their curiosity. If they show interest or even step inside, offer plenty of praise and a treat to create a positive association.

Next, establish a routine. Dogs thrive on consistency, so incorporate regular bathroom breaks into their daily schedule. After meals, playtime, or waking up from a nap are ideal moments to lead your dog to the litter box. Always use the same command or cue, such as “Go potty,” to signal that it’s time to use the box. If your dog successfully uses the litter box, reward them immediately with praise and a treat to reinforce the behavior.

Patience is key during this introduction phase. Some dogs may take a little longer to understand the concept of a litter box. If accidents happen outside the box, remain calm and avoid punishment, as this can create anxiety. Instead, gently guide them back to the box and encourage them to use it. Over time, with consistent training and positive reinforcement, your dog will learn to embrace the litter box as their designated spot for bathroom breaks, making the entire process smoother for both you and your furry friend.

5. Establishing a Routine for Litter Box Training

How to build a simple bookshelf?
Credit : whatcanu.com

Establishing a routine for litter box training is one of the most crucial steps in ensuring your dog learns to use the designated area effectively. Just like humans, dogs thrive on structure and predictability, and a consistent schedule can significantly aid in the training process. Start by choosing specific times throughout the day to take your dog to the litter box, such as after meals, playtime, or naps. This helps your dog associate those moments with the need to relieve themselves.

Begin by observing your dog’s natural habits. Pay attention to when they typically show signs of needing to go, such as sniffing around, circling, or whining. When you notice these behaviors, promptly guide them to the litter box. Consistency is key; by taking them to the same spot each time, you reinforce the idea that this is their bathroom.

During the initial training phase, it can be beneficial to use a command phrase, such as “Go potty,” every time you take them to the litter box. This verbal cue will help your dog learn to associate the phrase with the action, making it easier for them to understand what is expected.

Don’t forget to celebrate successes! When your dog uses the litter box correctly, offer plenty of praise and perhaps a small treat. This positive reinforcement will encourage them to repeat the behavior. Conversely, if an accident occurs, avoid scolding; instead, clean up thoroughly to eliminate any lingering scents that might tempt them to return to the same spot.

Lastly, be patient. Just like any training process, litter box training may take time and persistence. By establishing a routine and remaining committed, you’ll foster a successful environment for your dog to learn, creating a harmonious living space for both of you. Remember, consistency and positive reinforcement are your best tools in this endeavor!

6. Positive Reinforcement Techniques

Positive reinforcement techniques are a cornerstone of successful dog training, particularly when it comes to mastering the litter box. This method leverages the power of rewards to encourage desirable behaviors, making your dog more eager to learn and adapt. Instead of scolding your furry friend for accidents, focus on celebrating their successes, no matter how small.

Begin by selecting a high-value treat that your dog adores—this could be a piece of chicken, a small bit of cheese, or a favorite commercial dog treat. Whenever your dog uses the litter box correctly, immediately reward them with the treat and shower them with praise. Use a cheerful tone and enthusiastic body language to convey your excitement. Phrases like “Good job!” or “What a smart pup!” can reinforce their positive behavior.

Timing is crucial in positive reinforcement. Ensure that your dog receives their reward within seconds of them using the litter box, so they can connect the dots between the action and the reward. Consistency is key, too; make sure all family members follow the same protocol to avoid confusing your dog.

Additionally, consider using clicker training as part of your positive reinforcement strategy. A clicker is a small device that makes a distinct sound when pressed. When your dog uses the litter box correctly, click the device instantly, followed by a treat. This method helps establish a clear association between the behavior and the reward, helping your dog understand what you expect from them.

As your dog becomes more reliable with their litter box habits, gradually reduce the frequency of treats but continue to offer praise. This helps maintain their motivation while reinforcing your bond. Remember, patience is essential; every dog learns at their own pace. By employing positive reinforcement techniques, you’ll create a supportive environment that makes mastering the litter box a rewarding experience for both you and your dog.

7. Common Mistakes to Avoid

How to build a simple bookshelf?
Credit : whatcanu.com

Training your dog to use a litter box can be a rewarding experience, but it’s essential to navigate the process carefully to avoid common pitfalls that can hinder progress. Being aware of these mistakes can save you time, frustration, and help ensure a smoother training journey.

One of the most prevalent mistakes pet owners make is underestimating the importance of patience. Dogs, much like humans, need time to adjust to new routines. Rushing the training process can lead to confusion and setbacks. Remember, consistency is key. If you frequently change the location of the litter box or the type of litter, your dog may struggle to adapt. Establish a designated spot and stick with it to help your furry friend understand where they should go.

Another common error is using harsh disciplinary methods when accidents happen. It’s crucial to remember that dogs do not respond well to punishment; it can create fear and anxiety, ultimately leading to more accidents. Instead of scolding, focus on positive reinforcement. Celebrate small victories with treats and praise when your dog uses the litter box correctly. This encourages repeat behavior and strengthens your bond.

Additionally, neglecting the cleanliness of the litter box can create a barrier to success. Dogs are naturally clean animals and may refuse to use a dirty box. Regularly clean the litter box and refresh the litter to maintain an inviting environment. Make sure to also choose the right type of litter, as some dogs may have preferences that can impact their willingness to use the box.

Lastly, a lack of routine can throw your training off course. Dogs thrive on predictability, so establishing a consistent schedule for bathroom breaks can help reinforce the habit of using the litter box. Whether it’s first thing in the morning, after meals, or before bedtime, sticking to a routine will set your dog up for success.

By avoiding these common mistakes and approaching the training process with patience, consistency, and positivity, you can help your dog master the litter box and create a more harmonious living environment for both of you. Your efforts will pay off as your dog learns to embrace this new behavior, leaving you both feeling accomplished and ready to tackle the next training challenge together.

8. Dealing with Accidents: What to Do

Accidents are an inevitable part of the litter box training process, and how you handle them can make a significant difference in your dog’s learning curve. First and foremost, it’s essential to remain calm and composed when you discover an accident. Remember, your dog is still learning, and scolding them will only instill fear and confusion rather than promote understanding.

When you find an accident, avoid punishment. Instead, focus on cleaning up thoroughly to eliminate any lingering scents that might encourage your dog to repeat the behavior in the same spot. Use an enzymatic cleaner specifically designed for pet messes, as it breaks down the odors that regular cleaners might leave behind. This ensures that your dog won’t be tempted to return to that area for another “visit.”

After cleaning, assess the situation to identify the possible triggers that led to the accident. Was your dog left alone for too long? Did they show signs of needing to go but were ignored? By pinpointing the cause, you can adjust your training methods accordingly.

If accidents become frequent, it may be beneficial to revisit your training routine. Consider increasing the frequency of bathroom breaks, especially after meals, playtime, or naps. This not only reinforces the routine but also gives your dog ample opportunity to succeed in using the litter box.

Lastly, celebrate the successes! When your dog uses the litter box correctly, offer plenty of praise and a treat to reinforce the behavior. Positive reinforcement is key in creating lasting habits. With patience and consistency, your dog will learn the ropes, and accidents will become a thing of the past. Remember, every step forward is a step toward mastering the litter box!

9. Transitioning from Litter Box to Outdoor Potty

Transitioning your dog from a litter box to outdoor potty is a significant step in their training journey, and it requires patience and consistency. As your dog becomes accustomed to using the litter box, it’s essential to gradually introduce them to the idea of going outdoors for bathroom breaks. This process not only helps your furry friend understand where to relieve themselves but also encourages them to embrace the great outdoors.

Start by choosing a specific outdoor potty spot, preferably in a quiet area of your yard or nearby park. This location should be consistent, as dogs thrive on routine and familiarity. Each time you take your dog outside, use a command phrase like “go potty” to signal what you expect from them. This will help them associate the phrase with the action of relieving themselves outdoors.

To make the transition smoother, reduce the availability of the litter box gradually. Begin by limiting access to it, allowing your dog to use it only during specific times of the day. For example, you may want to remove the litter box during the day and only allow access during the night. This encourages your dog to rely on outdoor potty breaks instead.

Reward your dog with praise or treats immediately after they relieve themselves outside. This positive reinforcement will reinforce the behavior you want to encourage, making them more likely to repeat it. Additionally, be on the lookout for signs that your dog needs to go out, such as sniffing, circling, or whining. Promptly taking them outside when you observe these behaviors will help establish a strong connection between the need to go and the outdoor potty spot.

Keep in mind that accidents are a normal part of the training process, so remain patient and avoid scolding your dog. Instead, clean up any messes thoroughly to eliminate lingering odors that might attract them back to the old litter box. With time, consistency, and encouragement, your dog will transition smoothly to outdoor potty habits, making your home cleaner and fostering a healthier relationship with their environment.

10. Monitoring Your Dog’s Progress

Monitoring your dog’s progress is a crucial step in mastering the litter box training process. Just like any other training regimen, observing your dog’s behavior and responses will provide insights into what’s working and what might need adjusting. Begin by keeping a detailed record of your dog’s habits. Note when they use the litter box, how often they go, and any accidents that occur outside of it. This data will help you identify patterns in their behavior, allowing you to tailor your training approach accordingly.

Pay close attention to your dog’s body language and signals. Dogs are creatures of habit, and they often exhibit specific behaviors before needing to relieve themselves—sniffing around, circling, or searching for a quiet spot. By becoming attuned to these signs, you can proactively guide your furry friend to the litter box, reinforcing the idea that this is the appropriate place to go.

Additionally, consider using positive reinforcement to encourage your dog’s successes. Every time they use the litter box correctly, offer praise, treats, or playtime. This not only builds a positive association with the litter box but also fosters a trusting bond between you and your pet.

Lastly, be patient and flexible. Each dog is unique, and some may take longer to adjust than others. If you notice setbacks, don’t be discouraged; instead, reassess your strategies and make necessary adjustments. Through consistent monitoring and support, you’ll pave the way for a smoother training experience, ultimately leading to a well-trained dog who understands the importance and convenience of using the litter box.

11. Troubleshooting Behavioral Issues

Training your dog to use the litter box can be a rewarding experience, but it’s not without its challenges. As with any behavior modification, you may encounter some hiccups along the way. Troubleshooting behavioral issues is an essential part of the process, as it helps you understand your dog’s needs and adjust your training methods accordingly.

First, consider the environment. Dogs are creatures of habit and can be sensitive to changes around them. If your dog suddenly refuses to use the litter box, take a moment to assess their surroundings. Are there new sounds or smells? Have there been changes in the household, like the arrival of a new pet or a recent move? Addressing these environmental stressors may help your dog feel more comfortable and secure in their designated space.

Next, evaluate the type of litter you are using. Some dogs are particular about texture and scent, so experimenting with different types of litter may yield better results. Opt for unscented, natural options to see if your dog shows a preference. Also, ensure the litter box itself is the right size and easily accessible. A box that’s too tall or too small can deter your dog from using it.

If your dog has accidents outside the litter box, it’s crucial to remain patient and avoid punishment. Instead, focus on positive reinforcement. When your dog successfully uses the litter box, reward them with praise and treats to reinforce the behavior. If they have an accident, clean it thoroughly with an enzymatic cleaner to eliminate lingering odors that might encourage repeat offenses.

Monitoring your dog’s bathroom habits can also provide valuable insights. Keep a log of when they go, how often, and any changes in behavior. This information can help you identify patterns and adjust your training strategy. If accidents continue despite your best efforts, consider consulting with a veterinarian to rule out any underlying medical issues that could be affecting your dog’s ability to control their urges.

Finally, remember that consistency is key. Stick to a routine for feeding and bathroom breaks to establish a predictable schedule. With time, patience, and a little troubleshooting, you can help your dog master the litter box and create a harmonious living environment for both of you.

12. Maintaining a Clean Litter Box Environment

Maintaining a clean litter box environment is crucial for both your dog’s comfort and your household hygiene. Just as we appreciate a tidy restroom, dogs also prefer a clean space for their business. A well-kept litter box not only encourages your furry friend to use it consistently but also helps prevent odors and potential health issues.

Start by establishing a regular cleaning routine. Aim to scoop the litter box at least once a day, removing waste and clumps to keep the area fresh. Depending on your dog’s size and habits, you may need to clean it more frequently. A dirty litter box can deter your dog from using it, leading to accidents around the house.

In addition to daily scooping, perform a thorough cleaning of the box weekly. Empty out the old litter, wash the box with warm, soapy water, and rinse it well to remove any lingering odors or bacteria. This step is essential to provide a hygienic environment for your dog and prolong the life of your litter box.

Choosing the right litter can also play a significant role in maintaining cleanliness. Opt for high-quality, clumping, and odor-absorbing litter to make your life easier. Some litters are specifically designed to control odors effectively, while others may offer added benefits like being eco-friendly or low dust, which is particularly important for indoor air quality.

Lastly, consider the location of the litter box. It should be placed in a quiet, easily accessible area away from your dog’s food and water bowls. This can help your dog feel more comfortable and secure when using it. A clean, well-maintained litter box in a suitable location will encourage your dog to use it regularly, helping to solidify their training and keep your home clean. By prioritizing cleanliness, you not only create a pleasant experience for your dog but also foster a harmonious living environment for both of you.

13. Using Crate Training Alongside Litter Box Training

Combining crate training with litter box training can create a seamless and effective system for teaching your dog where to relieve themselves. Crate training provides a safe and secure environment, capitalizing on your dog’s natural instinct to keep their sleeping area clean. By introducing your dog to a crate, you can establish a routine that reinforces positive behaviors while also facilitating litter box training.

Start by acclimating your dog to the crate, ensuring that it’s a comfortable space filled with their favorite blanket and toys. Keep the crate in a quiet area of your home, allowing your dog to explore it at their own pace. Gradually increase the time they spend inside, always rewarding them with praise or treats for being calm and relaxed. This will help your dog associate the crate with safety and comfort rather than as a punishment.

Once your dog is comfortable in the crate, begin the litter box training process. Place the litter box in a designated spot that is easily accessible to your dog. When you notice signs that your dog needs to go—sniffing, circling, or whining—gently guide them to the litter box. Use positive reinforcement by offering treats and praise when they successfully use it, reinforcing the connection between the crate, the litter box, and the reward.

Additionally, during crate training, take your dog outside frequently, especially after they’ve been in the crate for a while. This will help them learn the difference between outdoor and indoor relief spots. With time, patience, and consistency, you’ll create a harmonious training routine that empowers your dog to feel secure in their crate while confidently using their litter box. This dual approach not only enhances their understanding of where to go but also strengthens your bond as a team working towards a common goal.

14. FAQs About Dog Litter Box Training

### 14. FAQs About Dog Litter Box Training

As dog owners embark on the journey of litter box training, it’s common to have a plethora of questions. After all, transitioning a canine companion to use a litter box isn’t something that comes naturally to them. To help you navigate this process with ease, we’ve compiled a list of frequently asked questions that may provide clarity and confidence as you train your dog.

**1. What breed of dog is best suited for litter box training?**
While any breed can be trained to use a litter box, smaller breeds and puppies tend to adapt more easily due to their size. However, with patience and consistency, larger breeds can also learn this behavior.

**2. At what age can I start litter box training my dog?**
Puppies can begin learning as early as eight weeks old. At this age, they are curious and eager to explore new habits. Adult dogs can also be trained, though it may take a bit longer depending on their previous habits.

**3. What type of litter should I use?**
Choose a litter that is safe for dogs, such as paper-based, wood-based, or artificial turf. Avoid clay or clumping litters, which can be harmful if ingested. Experiment to find the texture your dog prefers, as comfort plays a role in their willingness to use the box.

**4. How long does it typically take to train a dog to use a litter box?**
The training duration varies based on the individual dog’s temperament and previous habits. On average, expect the process to take anywhere from a few days to several weeks. Consistency and positive reinforcement are key to achieving success.

**5. What should I do if my dog refuses to use the litter box?**
If your dog is hesitant, reassess the setup. Ensure the box is in a quiet, accessible location and that the litter is appealing. Consider using treats or praise to encourage them when they approach the box. If issues persist, consult a professional trainer for additional guidance.

**6. Can I still take my dog outside for potty breaks if they are litter box trained?**
Absolutely! Litter box training is not meant to replace outdoor potty breaks. It provides a convenient option for times when you can’t take your dog outside, such as during inclement weather or late at night.

**7. Will litter box training affect my dog’s outdoor potty training?**
Not at all. Many dogs can successfully adapt to using both a litter box and going outside. Just be consistent with your command cues and expectations for both scenarios to prevent any confusion.

By addressing these frequently asked questions, we hope to demystify the litter box training process and empower you to create a positive experience for both you and your dog. Remember, patience and consistency are your best allies on this journey!

15. Celebrating Success: Tips for Continued Maintenance

Celebrating your dog’s success in mastering the litter box is not just about acknowledging their achievement; it’s a crucial step in ensuring that this positive behavior continues. Just as we humans thrive on recognition and rewards, our canine companions benefit greatly from similar reinforcement. Here are some tips for continued maintenance that will help you keep the momentum going.

First and foremost, celebrate each successful litter box use with enthusiasm! Use a cheerful tone, offer a treat, or engage in a fun game. This positive reinforcement will solidify the behavior in your dog’s mind and encourage them to repeat it. Remember, the goal is to create a positive association with the litter box, so make these moments special and frequent.

Consistency is key in maintaining your dog’s litter box training. Keep a routine by taking your dog to their designated area at the same times each day. Dogs thrive on predictability, so establishing a schedule that includes regular feeding times, potty breaks, and playtime will help your dog understand what’s expected of them. Gradually, they will become accustomed to the routine and learn to anticipate their litter box use as part of their daily activities.

Monitoring your dog’s behavior is also essential in this phase. Pay attention to any signs of confusion or anxiety regarding the litter box. If accidents occur, don’t scold or punish—this can lead to fear and regression. Instead, calmly redirect them to the litter box and reward them when they respond correctly. Mistakes are part of the learning process, and patience is vital.

Lastly, keep the litter box clean and inviting. Regularly remove waste and refresh the litter to maintain a pleasant environment. A clean and well-maintained area will encourage your dog to use the box consistently and feel comfortable doing so.

By celebrating successes, staying consistent, and fostering a positive environment, you’ll not only reinforce your dog’s litter box training but also deepen the bond between you and your furry friend. With these strategies, you can ensure that your dog continues to feel confident and secure in their litter box habits for years to come.

In conclusion, mastering the litter box training for your dog can transform your home into a harmonious haven for both you and your furry friend. By following the step-by-step guide outlined in this post, you’ll empower yourself with the knowledge and techniques needed to make this process smooth and successful. Remember, patience and consistency are key, and every dog learns at their own pace. Celebrate the small victories along the way, and don’t hesitate to reach out for support if challenges arise. With dedication and love, you’ll create a positive experience for both you and your dog, ensuring that your home remains clean and comfortable. Happy training, and may your journey to litter box mastery be filled with joy and tail wags!