astronomy – What are the different phases of the moon?

The moon, with its silvery glow and captivating presence, has fascinated humanity for centuries, inspiring poets, scientists, and dreamers alike.

As it gracefully orbits our planet, the moon undergoes a mesmerizing transformation, revealing a captivating dance of light and shadow that has a profound impact on our lives. From the enchanting crescent that heralds new beginnings to the full, radiant orb that illuminates the night sky, each phase tells a unique story of celestial beauty and cosmic rhythms. In this blog post, we will embark on a journey through the moon’s phases, exploring the science behind its cyclical changes, the cultural significance they hold, and how these stunning transformations have influenced art, folklore, and our very perception of time. Join us as we delve into the ethereal world of the moon, celebrating its phases and the wonder they continue to inspire in all of us.

1. Introduction to the Moon and Its Significance

astronomy -  What are the different phases of the moon?
Credit : whatcanu.com

The Moon, our planet’s faithful satellite, has captivated humanity since the dawn of time. Its luminous presence in the night sky has not only guided ancient navigators but has also influenced art, culture, and mythology across civilizations. From the soothing glow that lights up a dark night to the awe-inspiring sight of a full moon casting silvery shadows on Earth, the Moon holds a special place in our hearts and imaginations.

The significance of the Moon extends far beyond its visual beauty. It plays a crucial role in the natural world, affecting tides, animal behaviors, and even agricultural practices. For centuries, farmers have relied on the Moon’s cycles to determine the best times for planting and harvesting, attuning their lives to its rhythm. In literature and folklore, the Moon often symbolizes change, mystery, and the passage of time, embodying the ebb and flow of human emotions and experiences.

As we embark on this journey through the phases of the Moon, we invite you to explore the enchanting transformations it undergoes from the slender crescent to the majestic full moon, and back again. Each phase tells its own story, reflecting the delicate dance between the Moon, Earth, and Sun. By understanding these phases, we not only deepen our appreciation for this celestial body but also connect more profoundly to the natural rhythms that govern our lives. Join us as we delve into the Moon’s phases and uncover the magic behind its beautiful transformation.

2. Understanding Moon Phases: The Basics

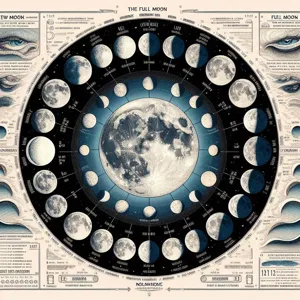
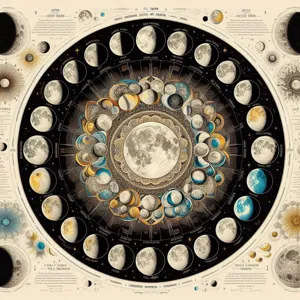
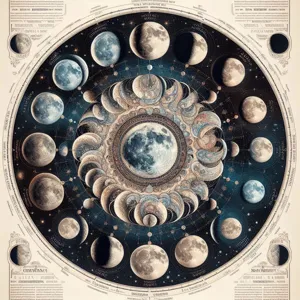
To truly appreciate the beauty of the Moon’s transformation, we first need to understand its phases. The Moon doesn’t emit its own light; instead, it reflects sunlight, and its position relative to the Earth and the Sun creates the stunning cycle of illumination we witness each month. This cycle is broken down into eight distinct phases, each offering a unique perspective that delights stargazers and casual observers alike.

The journey begins with the **New Moon**, a phase when the Moon is positioned between the Earth and the Sun, rendering it almost invisible to our eyes. This phase symbolizes new beginnings, setting the stage for what’s to come. As the days pass, the Moon waxes, leading us to the **Waxing Crescent** phase. Here, a sliver of light begins to grace the Moon’s surface, gently illuminating the darkness.

Continuing along its celestial path, the Moon reaches the **First Quarter** phase, characterized by a half-lit Moon. This moment is akin to a teenager coming into their own, full of potential and promise. As the Moon waxes further, it enters the **Waxing Gibbous** phase, where more than half of its surface is illuminated, creating an almost magical glow in the night sky.

The climax of the cycle is the **Full Moon**, a breathtaking spectacle where the entire face of the Moon is brilliantly lit. This phase has captivated humanity for centuries, inspiring countless myths, legends, and romantic musings. Following the full illumination, the Moon begins its descent into darkness, transitioning into the **Waning Gibbous** phase, where the light starts to wane but remains captivating.

Next, we witness the **Last Quarter**, another half-lit appearance, signaling the Moon’s gradual retreat from the spotlight. The final phase is the **Waning Crescent**, where only a delicate crescent remains visible, heralding the approach of the New Moon once again.

Understanding these phases not only enriches our appreciation for the Moon but also connects us to the natural rhythms of our universe. Each phase tells a story, inviting us to pause, reflect, and marvel at the celestial dance that has fascinated humanity since time immemorial.

3. The Science Behind Moon Phases: How They Occur

astronomy -  What are the different phases of the moon?
Credit : whatcanu.com

To truly appreciate the beauty of the Moon’s phases, one must first understand the fascinating science that governs their occurrence. The Moon, Earth’s loyal satellite, undergoes a series of transformations throughout the month, creating a mesmerizing display in the night sky. These phases are the result of the interplay between the Moon’s position, the Earth, and the Sun.

At its core, the phenomenon of moon phases is a matter of geometry. As the Moon orbits the Earth, it reflects sunlight at varying angles, giving rise to the different phases we observe. The cycle begins with the New Moon, when the Moon is positioned between the Earth and the Sun, causing the illuminated side to face away from us. This marks a period where the Moon is virtually invisible in the night sky, inviting the anticipation of its re-emergence.

As the Moon continues its orbit, it gradually shifts to the First Quarter phase. Here, half of the Moon’s surface is illuminated, creating a stunning semi-circular shape that is easy to recognize. This phase is often celebrated for its clarity, as it symbolizes a time of growth and potential.

The transition continues to the Full Moon, where the entire face of the Moon is illuminated, casting a silvery glow that captivates stargazers. This phase is often associated with folklore, rituals, and a sense of magic, as the Moon appears at its most glorious. Following the Full Moon, the light begins to wane, leading us back to the Last Quarter phase, where again only half of the Moon is visible but in reverse orientation.

Finally, we return to the New Moon, completing the lunar cycle. Understanding this intricate dance of celestial bodies not only deepens our appreciation for the Moon but also connects us to the larger rhythm of the cosmos. Each phase, whether it be waxing or waning, serves as a reminder of the natural cycles that govern our world, inspiring awe and curiosity in all who gaze skyward.

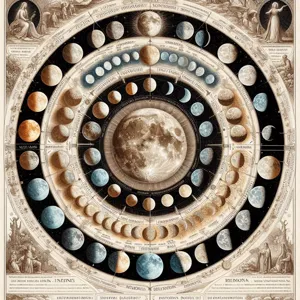
4. The Eight Primary Phases of the Moon

The Moon’s transformation is a captivating spectacle, comprising eight primary phases that each tell a unique story in the celestial dance between Earth, the Moon, and the Sun. Understanding these phases not only deepens our appreciation of the Moon’s beauty but also connects us to the rhythms of nature.

1. **New Moon**: The journey begins with the New Moon, a phase where the Moon is positioned between the Earth and the Sun, rendering it nearly invisible to the naked eye. This is a time of new beginnings and potential, as the dark sky invites stargazers to reflect and set intentions for the month ahead.

2. **Waxing Crescent**: As the Moon begins to emerge, a delicate sliver of light appears, creating the Waxing Crescent phase. This phase symbolizes growth and development, much like the budding leaves of spring. It’s an ideal time for planting seeds of ideas and nurturing them into fruition.

3. **First Quarter**: Upon reaching the First Quarter, half of the Moon is illuminated, showcasing its bright, bold presence. This phase represents a time of action and decision-making, as we assess our progress and make adjustments to our plans.

4. **Waxing Gibbous**: As the illumination increases further, we enter the Waxing Gibbous phase, where the Moon appears almost full. This stage is characterized by anticipation and momentum, urging us to push forward and bring our projects to completion.

5. **Full Moon**: The Full Moon is a breathtaking sight, a luminous orb glowing brightly against the night sky. This phase represents culmination and clarity, illuminating areas of our lives that require attention. It’s a time for celebration and reflection, as we acknowledge our achievements and the efforts that brought us to this peak.

6. **Waning Gibbous**: Following the full illumination, the Moon begins to wane, entering the Waning Gibbous phase. This is a time for gratitude and release, as we begin to let go of what no longer serves us, creating space for new opportunities.

7. **Last Quarter**: In the Last Quarter phase, the Moon again appears half-illuminated but in reverse. This is a moment for introspection and evaluation, urging us to reflect on our experiences and learn from them as we prepare for the next cycle.

8. **Waning Crescent**: Finally, we arrive at the Waning Crescent, where only a thin crescent of light remains. This phase invites us to rest and recharge, closing out the lunar cycle with a sense of peace and readiness for what lies ahead.

Each of these eight phases weaves a rich tapestry of time, inviting us to observe and connect with the natural world. By tuning into the Moon’s cycles, we can find inspiration and guidance, enriching our lives as we navigate our own journeys of transformation.

5. The New Moon: A Time for New Beginnings

astronomy -  What are the different phases of the moon?
Credit : whatcanu.com

The New Moon marks a profound moment in the lunar cycle, symbolizing new beginnings and fresh starts. As the moon disappears from view—its silvery surface cloaked in shadow—there’s a sense of quiet anticipation in the air. This phase, lasting only a day, invites reflection and introspection, encouraging us to turn inward and assess our goals and aspirations.

In many cultures, the New Moon is seen as a powerful time for setting intentions. Just as the moon begins to wax and grow more visible, we too can harness this energy to manifest our desires. It’s a perfect opportunity to jot down resolutions, create vision boards, or engage in rituals that resonate with your personal beliefs. Think of it as planting seeds in fertile soil—though they may be hidden from sight, these intentions will take root and flourish as the moon waxes.

Astrologically, the New Moon is often associated with a sense of renewal, making it an ideal time to let go of the past and embrace the possibilities of the future. During this phase, the night sky becomes a canvas of darkness, allowing us to appreciate the stars and the potential they hold. The absence of the moon’s light serves as a reminder that even in moments of darkness, there is always a path forward.

As you navigate through this transformative phase, consider engaging in activities that promote personal growth. Whether it’s journaling your thoughts, meditating, or embarking on a new project, the New Moon is a celestial invitation to embark on a journey of self-discovery and reinvention. Embrace the stillness, honor the darkness, and prepare for the illuminating journey ahead as the moon begins its ascent into the next cycle.

6. The Waxing Crescent: Growth and Potential

The waxing crescent moon, often described as a delicate sliver of light against the vast, dark canvas of the night sky, embodies a sense of growth and potential that captivates stargazers and dreamers alike. Just after the new moon phase, this enchanting crescent begins to emerge, symbolizing new beginnings and the promise of what is to come.

As the moon waxes, it gradually reveals more of its illuminated surface, transitioning from a thin arc to a more pronounced shape. This transformation not only mirrors the natural cycles of growth in our own lives but also invites us to reflect on our aspirations and goals. The gentle glow of the waxing crescent serves as a reminder that just like the moon, we too can evolve and expand, embracing the opportunities and challenges that lie ahead.

Throughout history, cultures around the world have revered this phase as a time for setting intentions and planting the seeds of future endeavors. Whether it’s starting a new project, embarking on a personal journey, or nurturing relationships, the waxing crescent moon encourages us to take that first step toward realization. As its light brightens night by night, we are reminded that patience and persistence are key to growth, and that each small advancement brings us closer to our fullest potential.

So, the next time you gaze up at the night sky and spot the waxing crescent, take a moment to appreciate the beauty of its transformation and what it represents. Let it inspire you to embrace growth, nurture your dreams, and honor the potential that lies within you, just waiting to be illuminated.

7. The First Quarter: Balance and Decision-Making

astronomy -  What are the different phases of the moon?
Credit : whatcanu.com

The First Quarter phase, occurring roughly a week after the New Moon, is a striking sight in the night sky, showcasing the Moon as a brilliant half-circle illuminated on its right side. This phase symbolizes a moment of balance and pivotal decision-making, mirroring the dynamic interplay between light and darkness. As the Moon waxes toward its full glory, it invites us to reflect on our own journeys and the choices that shape our paths.

During this phase, the Moon is positioned at a 90-degree angle to the Earth and Sun, creating a visual representation of equilibrium. The illuminated half serves as a reminder that just as the Moon is transitioning, we too are in a state of flux, faced with opportunities and challenges. This is the point in the lunar cycle where intentions set during the New Moon phase begin to take form, urging us to assess our progress and make crucial decisions about our direction.

Astrologically, the First Quarter is often associated with tension and growth. Just as the Moon pushes toward its full phase, we are encouraged to confront obstacles and make necessary adjustments. It prompts a period of action—whether that involves overcoming hurdles, refining goals, or taking calculated risks. Embracing this energy can lead us to clarity and renewed determination, allowing us to harness the potential of our aspirations.

As you gaze up at the Moon during the First Quarter, take a moment to appreciate its beauty and the symbolism it carries. Let it inspire you to evaluate your own journey, encouraging you to find the balance necessary to make informed decisions that will guide you toward your desired outcomes. Whether it’s a small adjustment in your daily routine or a significant life choice, the First Quarter serves as a celestial nudge to embrace change and move forward with confidence.

8. The Waxing Gibbous: Anticipation and Progress

As we transition from the first quarter to the full moon, we encounter the enchanting phase known as the waxing gibbous. During this period, the moon appears more than half illuminated but not yet fully visible, captivating skywatchers with its sublime glow. The waxing gibbous moon serves as a bridge between the anticipation of the approaching fullness and the reflective moments of the waning phases.

Visually, the waxing gibbous is a magnificent sight, casting a soft, silvery light that bathes the landscape in a tranquil hue. The shadows and craters on its surface become more prominent, creating a stunning canvas that invites amateur astronomers and enthusiasts alike to gaze through telescopes and binoculars. This phase symbolizes growth and progression, not just of the moon, but also within ourselves. It represents a time when ideas are being nurtured and ambitions are steadily advancing towards fruition.

In many cultures, the waxing gibbous is associated with manifestation and preparation. It is a powerful reminder to harness the energy of this phase to set intentions and take actionable steps toward our goals. Just as the moon grows brighter each night, we too can embrace this time to reflect on our aspirations and cultivate the momentum needed to achieve them.

As you witness the waxing gibbous, take a moment to appreciate the beauty of its transformation. Embrace the feelings of anticipation and excitement it evokes, knowing that, much like the moon, your own journey is unfolding beautifully and steadily, inching closer to the fullness of your potential.

9. The Full Moon: Celebration and Illumination

The Full Moon, a celestial spectacle that has captivated humanity for centuries, symbolizes culmination and enlightenment. As the moon reaches its fullest phase, it bathes the Earth in a silvery glow, illuminating the night sky and creating a breathtaking backdrop that invites both celebration and reflection. This radiant orb hangs majestically overhead, casting shadows and lighting pathways, inspiring poets, artists, and dreamers alike.

Throughout history, countless cultures have embraced the Full Moon as a time of festivity and reverence. Many ancient civilizations celebrated lunar cycles with rituals and gatherings, honoring the moon’s powerful presence. festivals like the Harvest Moon, which occurs in September, signal the time to gather crops and celebrate abundance, while the Winter Solstice Full Moon often marks a time for reflection and the welcoming of new beginnings.

Under the enchanting glow of the Full Moon, the world transforms. Nature seems to come alive; nocturnal creatures stir, flowers bloom in the moonlight, and the air is filled with a palpable sense of magic. For stargazers and moon enthusiasts, this phase offers the perfect opportunity to witness the moon’s surface features, such as craters and maria, with increased clarity. Many choose to venture outside, armed with telescopes or simply their curiosity, to marvel at the moon’s surface, creating a connection that transcends time and space.

But the Full Moon is not just about its visual splendor; it also holds a deeper significance. Many believe that the heightened energy during this phase can amplify emotions, making it an ideal time for setting intentions, releasing negativity, or engaging in creative pursuits. Whether it’s gathering with friends for a moonlit picnic, participating in a spiritual ceremony, or simply taking a moment to gaze up in awe, the Full Moon provides a unique opportunity to connect with the universe and with oneself.

As we explore the beauty and significance of the Full Moon, we discover that its light not only illuminates the dark but also inspires connection, celebration, and a sense of wonder in our everyday lives. So next time the Full Moon graces the night sky, take a moment to revel in its glow and embrace the magic it brings.

10. The Waning Gibbous: Reflection and Gratitude

As the moon transitions into the waning gibbous phase, its luminous glow begins to soften, casting a serene light across the night sky. This phase, which follows the full moon, is a time of reflection and gratitude, inviting us to pause and take stock of our thoughts and experiences. With three-quarters of the lunar disc still illuminated, the waning gibbous serves as a gentle reminder of the beauty of completion and the lessons learned along the way.

During this phase, the moon’s light becomes less intense, encouraging introspection and contemplation. It’s the perfect opportunity to reflect on the goals we’ve accomplished under the full moon’s brilliant glow and to express gratitude for the journey thus far. Whether it’s appreciating the small victories in daily life or acknowledging the larger milestones we’ve reached, the waning gibbous invites us to celebrate our achievements while also recognizing areas where we can grow and improve.

This period is also significant for letting go. As the moon begins its descent towards the last quarter, it symbolizes a natural cycle of release. Just as the moon sheds its light, we can take this time to release any negativity or burdens that weigh us down. Journaling or meditative practices can be particularly powerful during the waning gibbous phase, helping us articulate our thoughts and clear space for new intentions as the lunar cycle progresses.

Moreover, the waning gibbous serves as a beautiful metaphor for life’s continuous ebb and flow. Just as the moon transforms from fullness to darkness, we, too, experience phases of abundance and scarcity, joy and melancholy. Embracing this cycle can foster a deeper appreciation for the present moment, reminding us that every phase has its purpose and beauty.

So, as you gaze up at the waning gibbous, take a moment to reflect on your own journey. What have you accomplished? What are you grateful for? And what, perhaps, do you wish to release? Let the moon’s gentle light guide you through this introspective phase, illuminating the path toward your next adventure.

11. The Last Quarter: Release and Letting Go

The Last Quarter phase, often characterized by its half-lit appearance, represents a time of introspection and release. As the moon wanes from its full brightness, it invites us to reflect on our own lives and consider what we need to let go of. This phase, which occurs when the moon is three-quarters of the way through its cycle, symbolizes a natural turning point—a moment to release the old and make way for the new.

As the silvery orb hangs in the night sky, only half illuminated by the sun’s rays, it serves as a reminder that just as the moon must shed its light, we too must occasionally shed the burdens that weigh us down. Whether it’s a habit that no longer serves us, a relationship that holds us back, or even unfulfilled dreams that keep us tethered to the past, the Last Quarter calls for a conscious decision to let go.

During this phase, the energy is perfect for decluttering not just our physical space but also our emotional landscape. It’s an ideal time for journaling or meditating on what you wish to release, allowing the moon’s energy to guide you through the process. As the moon gradually fades in brightness, it encourages us to embrace the idea of impermanence and to find peace in the act of letting go.

As you gaze up at the Last Quarter moon, take a moment to honor this transformative phase. Consider what you can release to create space for new growth and opportunities in your life. Just as the moon will soon begin its journey toward renewal, so too can you embark on a path of rejuvenation and clarity, empowered by the beauty of the night sky.

12. The Waning Crescent: Preparation for Renewal

As the moon transitions into the waning crescent phase, it gracefully retreats from its luminous full form, leaving behind a delicate crescent shape that hangs in the night sky like a silvery sliver of hope. This phase, which occurs just before the new moon, is marked by a gentle dimming of light, symbolizing a time of reflection and introspection. The waning crescent is not merely an astronomical event; it serves as a reminder of the cyclical nature of existence and the beauty that lies in letting go.

During this phase, the moon appears to be slowly disappearing, casting a soft glow that illuminates the night with an ethereal quality. Shadows deepen, and the landscape takes on a more mysterious ambiance, inviting stargazers to pause and contemplate. The waning crescent encourages us to consider what we might need to release in our own lives—old habits, lingering doubts, or unfulfilled goals. It is a period ripe for decluttering both the physical and emotional spaces we inhabit.

As we gaze up at the waning crescent, we are reminded of the importance of preparation for renewal. Just as the moon prepares for its rebirth with the coming new moon, we too can take this time to assess our intentions and set the stage for new beginnings. Journaling, meditating, or engaging in creative pursuits can be particularly fulfilling during this phase, allowing us to channel our thoughts into a productive outlet.

In essence, the waning crescent is a gentle nudge from the universe to embrace the quiet moments of transition. With its serene beauty, it invites us to appreciate the subtle changes around us and within ourselves, offering a sense of calm as we prepare for the cycle of renewal that lies ahead. As the moon fades into darkness, it whispers promises of light and growth, reminding us that every ending holds the seeds of a new beginning.

13. Cultural Significance of Moon Phases Across Civilizations

The moon’s phases have long been a source of fascination and inspiration across cultures and civilizations, woven into the very fabric of human history. From the ancient Sumerians to modern societies, the moon has profoundly influenced myths, calendars, rituals, and art.

In many indigenous cultures, the lunar cycle is revered as a powerful symbol of the natural world, representing cycles of life, death, and rebirth. For instance, the Native American tribes often used the phases of the moon to guide their agricultural practices, with each phase signaling the ideal time for planting or harvesting. The full moon, in particular, was celebrated with various ceremonies, believed to bring abundance and prosperity.

Across the globe, the moon has also played a pivotal role in religion and spirituality. In Hinduism, the waxing and waning of the moon are closely linked with the festivals of Karva Chauth and Diwali, where the full moon signifies the culmination of rituals and the blessings of prosperity. Meanwhile, in Islamic tradition, the lunar calendar dictates the timing of Ramadan, as the sighting of the crescent moon marks the beginning of the holy month.

The moon’s phases have inspired countless works of art and literature, from the haunting verses of Shakespeare to the captivating paintings of Van Gogh. The serene glow of a waxing crescent or the haunting beauty of a waning gibbous has prompted artists and poets to capture the essence of the moon’s transformations, reflecting human emotions and experiences.

Even in modern times, the moon continues to hold cultural significance. Many societies celebrate the full moon with festivals, gathering communities together under its luminous glow. In Asian cultures, the Mid-Autumn Festival celebrates the harvest moon with lanterns, mooncakes, and familial reunions, reinforcing the moon’s role as a symbol of unity and gratitude.

Exploring the cultural significance of the moon’s phases reveals not just our historical relationship with this celestial body but also highlights a universal connection to nature that transcends time and geography. As we continue to gaze up at the moon, we are reminded of the stories, traditions, and meanings attributed to its ever-changing face, a testament to our enduring fascination with the night sky.

14. Observing the Moon: Tips for Stargazers

Observing the Moon can be a mesmerizing experience, allowing stargazers to engage with our closest celestial neighbor in a profound way. To make the most of your lunar observations, here are some tips that will enhance your stargazing adventures.

**1. Choose the Right Time:** The Moon’s phases offer varying viewing experiences. For detailed observations of the lunar surface, aim for the days just after the New Moon or just before the Full Moon. During this time, the shadows cast by the sun on the craters and mountains provide stunning contrasts, revealing intricate details that are often lost in the bright light of a Full Moon.

**2. Find a Dark Location:** Light pollution can significantly hinder your ability to see the Moon’s finer features. Seek out a location away from city lights, such as parks or open fields. Not only will the Moon appear more vibrant, but you’ll also enjoy a clearer view of the surrounding stars and constellations.

**3. Use Binoculars or a telescope:** While the Moon is visible to the naked eye, using binoculars or a telescope can bring its craters, valleys, and maria (the dark, flat plains) into sharp relief. For beginners, binoculars are a great starting point due to their portability and ease of use. As you become more experienced, consider investing in a telescope to unlock even deeper details.

**4. Keep a Moon Journal:** Documenting your observations can deepen your appreciation for the Moon’s transformations. Sketch its phases, note the details you see, and track how the landscape changes over time. This practice not only enhances your observational skills but also creates a personal archive of your lunar journey.

**5. Stay Informed:** Familiarize yourself with lunar terminology and features. Websites, apps, and books dedicated to lunar observations can provide valuable information about what to look for on specific nights. Knowing the names of prominent craters and seas can make your observations more engaging and educational.

**6. Embrace the Atmosphere:** The experience of observing the Moon is not just about the celestial body itself; it’s also about the environment around you. Take a blanket, invite friends or family, and make an evening of it. Share stories, enjoy the serenity of the night sky, and let the beauty of the Moon ignite your sense of wonder.

By following these tips, you’ll not only enhance your observation skills but also foster a deeper connection with the Moon and the universe. So grab your binoculars, find a quiet spot, and embark on your lunar adventure!

15. Conclusion: Embracing the Beauty of the Moon’s Transformation

As we conclude our celestial journey through the captivating phases of the Moon, it’s essential to embrace the beauty of its transformation and the profound impact it has on our lives. The Moon, with its ever-changing visage, serves as a reminder of the cycles of life, reflecting the ebb and flow of our own experiences. From the delicate crescent that hints at new beginnings to the radiant full Moon that bathes the night in silvery light, each phase invites us to pause and appreciate the wonders of the universe.

The Moon’s transformation is not merely a scientific phenomenon; it is a source of inspiration, creativity, and contemplation. Poets and artists have long drawn from its enchanting presence, capturing its essence in countless works that resonate with our deepest emotions. As we look up at the night sky, we are reminded that just like the Moon, we too go through cycles of growth, change, and renewal.

In embracing the beauty of the Moon’s phases, we find an opportunity for reflection and mindfulness. Each cycle encourages us to connect with nature, celebrate the rhythms of life, and acknowledge the small moments of magic that often go unnoticed. Whether you choose to observe the Moon with friends on a clear night or meditate under its glow, take a moment to appreciate this celestial wonder and the intricate dance it performs in the cosmos.

As we close this exploration of the Moon’s phases, let us carry forward the lessons it imparts: that change can be beautiful, that every phase has its purpose, and that there is always light, even in the darkest of times. So, the next time you gaze up at the night sky, let the Moon remind you of the beauty that surrounds us and the transformative power inherent in every moment.

As we conclude our journey through the mesmerizing phases of the Moon, we hope you’ve gained a deeper appreciation for this celestial body that has captivated humanity for centuries. From the slender crescent that whispers of new beginnings to the luminous full Moon that illuminates our nights, each phase tells a unique story of transformation and wonder. Whether you find solace in stargazing or inspiration in lunar cycles, understanding the Moon’s phases allows us to connect more profoundly with the rhythms of nature and the universe. So, the next time you gaze up at the night sky, take a moment to reflect on the beauty and magic of the Moon’s journey—an ever-changing reminder of the constancy of change itself. Thank you for joining us on this enlightening exploration, and may your nights be filled with wonder and inspiration under the glowing Moon.

astronomy – What are the different types of nebulae?

The cosmos is a vast and mysterious expanse, filled with wonders that ignite our curiosity and inspire our imaginations.

Among its most captivating phenomena are nebulae—vast clouds of gas and dust that serve as the birthplaces of stars and the remnants of stellar explosions. From the vibrant hues of emission nebulae to the delicate structures of planetary nebulae, each type tells a unique story about the life cycle of stars and the dynamic processes that shape our universe. In this blog post, we will embark on a journey through the cosmos, unveiling the different types of nebulae and exploring their significance in the grand tapestry of space. whether you’re a seasoned astronomer or a casual stargazer, join us as we delve into the stunning beauty and intricate details of these celestial wonders, illuminating the secrets they hold and the role they play in the ongoing saga of the universe.

1. Introduction to Nebulae: What Are They?

astronomy -  What are the different types of nebulae?
Credit : whatcanu.com

Nebulae are among the most captivating and enigmatic objects in the universe, serving as the celestial nurseries where stars are born and the remnants of stellar death. Derived from the Latin word for “cloud,” nebulae are vast clouds of gas and dust that float in the vast expanse of space. These cosmic formations can be found throughout the Milky Way and beyond, each with its unique characteristics and significance in the life cycle of stars.

At their core, nebulae consist primarily of hydrogen, helium, and other trace elements, forming intricate structures that can stretch for light-years. Some nebulae are illuminated by the light of nearby stars, creating breathtaking displays of color and luminosity, while others remain dark and invisible to the naked eye, only revealing their secrets through the instruments of modern astronomy.

Nebulae play a crucial role in the cosmic ecosystem. They are the sites where gas and dust coalesce to form new stars, a process that can take millions of years. Conversely, when massive stars exhaust their nuclear fuel, they explode in spectacular supernovae, dispersing their material across the cosmos, enriching the interstellar medium and allowing new nebulae to form.

In this blog post, we will embark on a journey through the cosmos, exploring the different types of nebulae—emission, reflection, planetary, and dark nebulae—each contributing to our understanding of the universe’s evolution and the life cycles of stars. As we delve into the fascinating world of these celestial clouds, we’ll uncover not only their beauty but also the vital roles they play in the grand tapestry of the cosmos.

2. The Importance of Nebulae in the Universe

Nebulae are not just beautiful cosmic clouds; they play a crucial role in the grand tapestry of the universe. These celestial formations serve as both nurseries and graveyards for stars, marking the cycles of stellar life and death that govern the cosmos. The importance of nebulae can be understood through several key functions they perform.

Firstly, nebulae are the birthplaces of stars. Comprised of gas and dust, these vast regions of space are where gravity begins to pull materials together, leading to the formation of new stars. The dense areas within a nebula, known as stellar nurseries, ignite the process of nuclear fusion, giving rise to brilliant new stars that will illuminate the universe for millions, if not billions, of years. The famous Orion Nebula is a prime example, showcasing vibrant colors and intricate structures as new stars emerge from its depths.

Conversely, nebulae also represent the remnants of stellar death. When massive stars exhaust their nuclear fuel, they undergo spectacular supernova explosions, ejecting their outer layers into space. This material becomes a new nebula, enriching the interstellar medium with heavy elements forged in the heart of the star. These elements are essential for the formation of planets, moons, and even life itself, illustrating how nebulae facilitate the recycling of cosmic material.

Furthermore, nebulae are vital for astronomical research. They provide insights into the physical processes that govern star formation and evolution. By studying the light emitted from nebulae, astronomers can glean information about the composition, temperature, density, and motion of these clouds, enhancing our understanding of the universe’s structure and dynamics.

In essence, nebulae are a fundamental part of the cosmic ecosystem—bridging the gap between stellar birth and death, offering a glimpse into the life cycles of the universe, and serving as a canvas for scientific discovery. As we continue to explore these magnificent structures, we uncover not only the secrets of star formation but also the very origins of the elements that make up our world.

3. Types of Nebulae: An Overview

astronomy -  What are the different types of nebulae?
Credit : whatcanu.com

Nebulae, the stunning clouds of gas and dust scattered throughout our galaxy, come in a variety of forms, each playing a unique role in the cosmic tapestry. Understanding the different types of nebulae not only enriches our appreciation of their beauty but also sheds light on the processes of star formation and the lifecycle of celestial bodies.

### 1. Emission Nebulae
Emission nebulae are vibrant, glowing clouds that radiate their own light, primarily due to the ionization of gas within them. Often found in regions of active star formation, these nebulae are typically composed of hydrogen and helium, illuminated by the intense radiation from nearby young, hot stars. The Orion Nebula, one of the most studied emission nebulae, showcases a breathtaking array of colors, revealing the intricate structures formed by gas and dust.

### 2. Reflection Nebulae
In contrast to emission nebulae, reflection nebulae do not emit their own light but instead shine by reflecting the light of nearby stars. These nebulae often appear blue due to the scattering of light, similar to how the Earth’s atmosphere gives the sky its color. The Pleiades star cluster, with its delicate blue haze, is a perfect example of a reflection nebula, highlighting the interplay between starlight and cosmic dust.

### 3. Dark Nebulae
Dark nebulae are the elusive shadows of the cosmos, dense clouds of dust and gas that block the light from stars and other celestial objects behind them. These nebulae create striking silhouettes against the backdrop of brighter stars, giving them a mysterious appearance. The Horsehead Nebula, located in the constellation Orion, is one of the most iconic dark nebulae, captivating astronomers and stargazers alike with its unique shape and the secrets it holds within.

### 4. Planetary Nebulae
Despite their name, planetary nebulae have nothing to do with planets. Instead, they represent a late stage in the life of a star similar to our sun. As these stars exhaust their nuclear fuel, they expel their outer layers, creating a shell of glowing gas around a hot core. This process results in the formation of intricate and colorful structures, such as the Helix Nebula, often referred to as the “Eye of God.”

### 5. Supernova Remnants
Supernova remnants are the spectacular aftermath of a massive star’s explosion. When a star reaches the end of its life cycle, it can explode in a cataclysmic event, dispersing its outer layers into space. The Crab Nebula is one of the most studied supernova remnants, providing invaluable insights into the dynamics of stellar explosions and the recycling of materials in the universe.

Each type of nebula offers a glimpse into the complex processes that shape our universe, from the birth of stars to their explosive deaths. As we continue to explore and understand these celestial wonders, we not only expand our knowledge of the cosmos but also deepen our connection to the vast and intricate universe we inhabit.

4. Emission Nebulae: The Birthplaces of Stars

Emission nebulae are truly the celestial nurseries of the universe, vibrant and dynamic regions where stars are born. These stunning formations shine with a spectrum of colors, primarily reds and pinks, created by the ionization of gas—predominantly hydrogen—when it is energized by the intense radiation emitted from nearby young, hot stars. The process is a mesmerizing dance of light, where the ultraviolet rays from these nascent stars excite the surrounding gas, causing it to glow with an ethereal luminescence.

One of the most famous examples of emission nebulae is the Orion Nebula, located just 1,344 light-years away in the Orion constellation. This magnificent cloud of gas and dust is not only a visual delight but also a hotspot for stellar formation, harboring countless stars in various stages of their life cycles. As you gaze upon images of the Orion Nebula, the striking pink and red hues serve as a reminder of the cosmic forces at play, creating new stars that will one day illuminate the cosmos.

Emission nebulae are often found in regions where the interstellar medium—the matter that exists in the space between stars—is dense enough to facilitate the gravitational collapse needed for star formation. As these clouds of gas and dust condense, they gather into clumps, eventually forming protostars. Over millions of years, these protostars will continue to evolve, igniting nuclear fusion at their cores and ultimately becoming the stars that light up our night sky.

Beyond their role as stellar nurseries, emission nebulae also contribute to the richness of the universe’s chemical diversity. When massive stars reach the end of their life cycles and explode as supernovae, they disperse heavy elements back into the surrounding nebulae, enriching the interstellar medium with the building blocks for future generations of stars and planets. This cyclical nature of stellar birth and death underscores the interconnectedness of cosmic phenomena, revealing the intricate tapestry woven throughout the universe.

As we continue to explore these vibrant regions, astronomers are gaining new insights into the processes that govern star formation and the evolution of galaxies. Emission nebulae serve as a reminder of the beauty and complexity of the cosmos, inviting us to ponder our place within it and the myriad stars that illuminate the night sky.

5. Reflection Nebulae: Light from Nearby Stars

astronomy -  What are the different types of nebulae?
Credit : whatcanu.com

Reflection nebulae are one of the most captivating celestial phenomena in our universe, showcasing a beautiful interplay of light and dust. Unlike emission nebulae, which glow with their own light due to ionized gases, reflection nebulae do not produce light; instead, they reflect the light of nearby stars, creating a stunning canvas of colors and textures across the cosmos.

These ethereal clouds of gas and dust are often found surrounding young, hot stars, which emit a brilliant glow that illuminates the surrounding material. The light from these stars is scattered by the dust particles within the nebula, resulting in a soft, diffused glow that can range from pale blue to deep violet. The bluish hue often observed in reflection nebulae arises from Rayleigh scattering, the same phenomenon that makes our sky appear blue.

One of the most famous examples of a reflection nebula is the Witch Head Nebula, located in the constellation Eridanus. This striking formation is bathed in the light of the nearby star Rigel, showcasing a breathtaking display of shimmering dust and intricate structures. Another well-known example is the reflection nebula found within the Orion Nebula, where the interplay of light from the region’s young stars creates a mesmerizing and dynamic environment.

Exploring reflection nebulae not only reveals the beauty of the universe but also provides valuable insights into the processes of star formation. As dust and gas coalesce under gravity, they often give birth to new stars, making these nebulae a crucial part of the cosmic lifecycle. By studying these phenomena, astronomers can better understand the conditions that lead to star formation and the intricate relationships between stars and their surrounding environments.

In essence, reflection nebulae serve as both a visual feast for stargazers and a window into the dynamic processes that shape our universe. Their delicate beauty is a reminder of the complexity and wonder that exists beyond our planet, inviting us to ponder the mysteries of the cosmos and our place within it.

6. Dark Nebulae: The Cosmic Clouds of Dust

Dark nebulae, often described as the cosmos’ shadowy veils, are fascinating celestial structures composed primarily of dense clouds of gas and dust. These enigmatic formations are called “dark” because they absorb and block the light from stars and other luminous objects that lie behind them, creating striking contrasts against the backdrop of the universe.

Imagine gazing into the night sky and spotting a patch of darkness amidst the twinkling stars; that patch could very well be a dark nebula. These nebulae can be colossal, spanning many light-years, and their intricate shapes are often sculpted by the gravitational forces of nearby stars or the dynamic behavior of the interstellar medium.

One of the most famous examples is the Horsehead Nebula, a dark silhouette against the bright backdrop of the Orion constellation. Its distinct shape resembles a horse’s head, captivating astronomers and stargazers alike. Dark nebulae are not just beautiful to behold; they also play a crucial role in the formation of new stars. Within their dense cores, regions of gas and dust can collapse under their own gravity, eventually leading to the birth of new stars, planets, and even entire solar systems.

Studying dark nebulae allows astronomers to gain insights into the processes of stellar formation and the chemical evolution of the cosmos. These cosmic clouds serve as a reminder of the universe’s complexity, showcasing the delicate balance between light and darkness and the intricate dance of creation that continues to unfold in the depths of space. As we explore the cosmos, dark nebulae invite us to ponder the mysteries of the universe, challenging us to look beyond the visible and uncover the hidden wonders that lie in the shadows.

7. Planetary Nebulae: The Final Stage of Stellar Evolution

astronomy -  What are the different types of nebulae?
Credit : whatcanu.com

Planetary nebulae are one of the most enchanting phenomena in the cosmos, embodying the final act of a star’s life cycle. Contrary to what their name might suggest, these celestial wonders have nothing to do with planets; instead, they are the remnants of medium-sized stars like our Sun, which have reached the end of their nuclear burning phase. As these stars exhaust their nuclear fuel, they shed their outer layers into space, creating a stunning shell of gas and dust that glows with vibrant colors, often showcasing intricate structures and patterns.

The formation of a planetary nebula begins when a star like our Sun expands into a red giant, a stage characterized by its dramatic increase in size and brightness. During this phase, the star’s core contracts and heats up, eventually causing the outer layers to be expelled into the surrounding interstellar medium. This ejection of material can happen in pulses, resulting in a symmetrical structure or, in some cases, a more chaotic shape, depending on various factors such as magnetic fields and stellar winds.

What makes planetary nebulae particularly captivating is the interplay of light and color. The gas expelled from the star is ionized by the intense ultraviolet radiation emitted from the hot core that remains—known as the white dwarf. This ionization causes the gas to emit light across a spectrum of colors, creating breathtaking displays that can range from delicate blues and greens to fiery reds and oranges. Some of the most famous examples, like the Ring Nebula (M57) in the constellation Lyra or the Helix Nebula (NGC 7293) in Aquarius, showcase these vibrant hues, making them favorite targets for both amateur and professional astronomers.

As these nebulae evolve, they gradually disperse into the surrounding space, enriching it with the elements forged in the star’s core. This process plays a crucial role in the cosmic cycle of matter, contributing essential materials to the formation of new stars and planets. Thus, planetary nebulae are not just the end of one star’s life; they are a vital part of the ongoing story of the universe, illustrating the beauty and complexity of stellar evolution. Observing these intricate structures offers a glimpse into the past and a hint of the future, reminding us of the interconnectedness of all celestial bodies in the vast expanse of space.

8. Supernova Remnants: The Aftermath of Stellar Explosions

Supernova remnants are one of the most breathtaking phenomena in the cosmos, showcasing the dramatic aftermath of a star’s explosive death. When a massive star reaches the end of its life cycle, it detonates in a spectacular supernova event, ejecting its outer layers into space. This cataclysmic explosion not only marks the star’s demise but also gives rise to a vibrant and complex nebula—a cosmic tapestry woven with the remnants of stellar material.

These remnants are composed of a wide variety of elements, including carbon, oxygen, nitrogen, and even heavier elements like iron and gold, which were forged in the star’s core during its lifetime. As the stellar material expands and cools, it interacts with the surrounding interstellar medium, creating intricate structures of gas and dust. The colors we see in images of supernova remnants—bright reds, blues, and greens—are the result of different elements emitting light at specific wavelengths, painting a vivid picture of the star’s explosive legacy.

One of the most famous examples of a supernova remnant is the Crab Nebula, the result of a supernova observed in 1054 AD. The Crab Nebula is a stunning showcase of swirling gas and filaments, with pulsar activity at its center, a rapidly rotating neutron star that emits beams of radiation. This remnant continues to be a focal point for astronomers, offering insights into the life cycles of stars and the dynamics of cosmic explosions.

Supernova remnants play a crucial role in the universe’s ecosystem, enriching the interstellar medium with heavy elements that will eventually contribute to the formation of new stars and planets. They serve as cosmic recycling centers, reminding us that in the vastness of space, destruction and creation are inextricably linked. As we explore these remnants, we not only witness the beauty of the universe but also gain a deeper understanding of the processes that govern stellar evolution and the life cycles of galaxies.

9. The Role of Nebulae in Galaxy Formation

Nebulae play a crucial role in the grand tapestry of galaxy formation, acting as both the nursery and the structured framework for stars and planetary systems. These vast clouds of gas and dust, often referred to as the building blocks of the universe, are where the magic of stellar birth takes place. Within the dense regions of a nebula, gravitational forces begin to dominate, causing particles to clump together and form protostars. This process is not instantaneous; it can take millions of years, highlighting the patience and elegance inherent in cosmic evolution.

As new stars ignite in a nebula, they emit intense radiation and stellar winds, which can impact the surrounding material in profound ways. The energy released by these young stars can trigger further star formation in adjacent areas of the nebula, creating a chain reaction that contributes to the dynamic architecture of galaxies. Moreover, the remnants of stars that have reached the end of their life cycles—through supernova explosions, for instance—inject heavy elements back into the nebula, enriching the interstellar medium. This process not only replenishes the nebula but also sets the stage for the formation of future generations of stars and planets, contributing to the ongoing cycle of cosmic creation.

The intricate interplay between nebulae and galaxy formation also reveals the diverse structures that galaxies can take. Spiral galaxies, for example, are often rich in nebulae, with their arms serving as regions of active star formation. In contrast, elliptical galaxies tend to have fewer nebulae and, as a result, fewer new stars, illustrating how different environments can shape the evolutionary paths of galaxies over billions of years. In essence, nebulae are not just beautiful cosmic phenomena; they are vital components of the universe’s architecture, influencing the birth, life, and death of stars, and ultimately, the evolution of galaxies themselves.

As we continue to explore the cosmos, understanding the role of nebulae will deepen our appreciation for the complexity and interconnectivity of the universe, reminding us that within these celestial clouds lies a story of creation, destruction, and rebirth that has unfolded over eons.

10. Famous Nebulae: A Tour of Notable Examples

When it comes to celestial wonders, nebulae stand out as some of the most intriguing and visually stunning formations in the cosmos. These clouds of gas and dust are not only beautiful but also serve as the birthplaces of stars and planets, playing a crucial role in the lifecycle of the universe. Join us as we embark on a tour of some of the most famous nebulae, each with its unique characteristics and captivating stories.

**1. The Orion Nebula (M42)**
Located in the Orion constellation, the Orion Nebula is one of the brightest nebulae visible to the naked eye and is a favorite among amateur astronomers. It lies about 1,344 light-years away from Earth and is a stellar nursery, where new stars are born from the dense clouds of gas and dust. With its vibrant hues of pink and blue, the Orion Nebula is a magnificent sight captured in countless photographs, showcasing the intricate details of its gaseous filaments and young stars.

**2. The Crab Nebula (M1)**
A remnant of a supernova explosion that was observed by Chinese astronomers in 1054 AD, the Crab Nebula is a fascinating example of a supernova remnant. Situated in the constellation Taurus, this nebula is notable for its complex structure and the pulsar at its center, which emits beams of radiation as it rotates. The Crab Nebula is a rich source of information for astronomers studying the life cycles of stars and the mechanics of supernova explosions, making it an essential object of research in astrophysics.

**3. The Ring Nebula (M57)**
Found in the constellation Lyra, the Ring Nebula is a stunning example of a planetary nebula. Its characteristic doughnut shape and striking colors are the result of a dying star shedding its outer layers, while its core collapses into a white dwarf. Situated about 2,000 light-years from Earth, the Ring Nebula offers a glimpse into the final stages of stellar evolution, making it a crucial piece of the cosmic puzzle.

**4. The Lagoon Nebula (M8)**
The Lagoon Nebula is a vast and vibrant region of star formation located in the constellation Sagittarius. Spanning about 110 by 50 light-years, this emission nebula is home to a stellar nursery where new stars are forming, surrounded by glowing gas and dark dust lanes. The Lagoon Nebula is particularly striking in astronomical images, showcasing a variety of colors that highlight the different elements present within the gas.

**5. The Horsehead Nebula (B33)**
Perhaps one of the most iconic nebulae, the Horsehead Nebula is renowned for its distinctive silhouette resembling a horse’s head. Nestled in the Orion constellation, this dark nebula is a region of dense dust and gas, obscuring the stars behind it. It captures the imagination of stargazers and photographers alike, serving as a reminder of the beauty and mystery that the universe holds.

These famous nebulae not only serve as breathtaking sights in the night sky but also provide valuable insights into the processes of star formation and the evolution of the universe. Each nebula tells a story—of creation and destruction, of birth and death—reminding us of the dynamic and ever-changing nature of the cosmos. As we continue to explore these celestial wonders, we deepen our understanding of our place in the universe and the remarkable phenomena that surround us.

11. Observing Nebulae: Tips for Amateur Astronomers

Observing nebulae can be an awe-inspiring experience, offering a glimpse into the vast and mysterious universe that surrounds us. For amateur astronomers eager to explore these celestial wonders, a few tips can significantly enhance your observations and deepen your understanding of these cosmic formations.

First and foremost, choose the right equipment. While some nebulae can be admired with the naked eye on particularly clear nights, a good pair of binoculars or a telescope will provide a much more detailed view. Telescopes with at least an aperture of 4 inches (100 mm) are ideal for capturing the intricate details and colors of brighter nebulae. Consider using a filter, like a UHC or OIII, to enhance contrast and bring out the faint structures of the nebulae against the night sky.

Timing is also crucial for successful nebula observation. Plan your stargazing outings around the lunar cycle; a new moon or a period of minimal moonlight will provide darker skies, allowing fainter nebulae to shine more brightly. Additionally, the best time to observe is often during the winter months when the air is crisper and clearer, revealing more celestial detail.

Familiarize yourself with the constellations that house the nebulae you wish to observe. The Orion Nebula, for example, can be easily found in the famous constellation Orion, making it a perfect starting point for beginners. Using star charts or astronomy apps can help you locate not only prominent nebulae but also lesser-known ones that are hidden gems waiting to be discovered.

Lastly, patience and practice are key. Nebulae can be elusive and may require multiple observing sessions to fully appreciate their beauty. Take the time to soak in the experience, and don’t hesitate to join local astronomy clubs or online communities. Engaging with fellow enthusiasts can provide valuable insights, tips, and camaraderie as you embark on your cosmic journey.

By following these tips, amateur astronomers can unlock the mesmerizing beauty of nebulae, transforming their backyard into a portal to the cosmos and nurturing a lifelong passion for the wonders of the universe. Happy stargazing!

12. The Future of Nebula Research: Upcoming Missions and Technologies

As we stand on the brink of a new era in astronomical research, the future of nebula exploration is set to be transformed by a wave of innovative missions and advanced technologies. These advancements promise to deepen our understanding of these mesmerizing cosmic structures, providing insights into their formation, evolution, and the role they play in the broader tapestry of the universe.

One of the most anticipated missions is NASA’s James Webb Space Telescope (JWST), which, launched in late 2021, is already revolutionizing our view of the cosmos. Equipped with state-of-the-art infrared capabilities, JWST allows astronomers to peer through the dust clouds of nebulae, revealing previously hidden details of star formation and the intricate processes that govern these celestial nurseries. Its ability to capture high-resolution images and spectra will enable researchers to study the chemical compositions of nebulae, shedding light on the building blocks of stars and planets.

Looking further ahead, missions such as the European Space Agency’s Euclid telescope aim to explore the mysterious dark energy that influences the expansion of the universe, while also capturing the essential role nebulae play in cosmic evolution. Additionally, advancements in ground-based observatories, such as the Extremely Large Telescope (ELT) in Chile, are set to provide unprecedented views of nebulae with its advanced adaptive optics and massive aperture, allowing for sharper images and detailed studies.

Moreover, the integration of artificial intelligence and machine learning is poised to revolutionize nebula research. These technologies can sift through vast amounts of observational data, identifying patterns and anomalies that would be impossible for human researchers to detect alone. This could lead to new discoveries about the lifecycle of nebulae and their interactions with surrounding cosmic environments.

In conclusion, the future of nebula research is bright, fueled by ambitious missions and cutting-edge technologies. As we continue to explore these captivating regions of space, we can expect to unlock secrets that not only enhance our understanding of nebulae but also offer profound insights into the origin and evolution of the universe itself. The cosmos beckons, and with each new venture, we are one step closer to unraveling its mysteries.

13. Cultural Significance of Nebulae in Art and Literature

Nebulae, with their awe-inspiring beauty and enigmatic presence, have long captivated the imagination of artists and writers throughout history. These celestial wonders, often depicted as colorful clouds of gas and dust illuminated by the light of stars, serve as a rich source of inspiration in art and literature, reflecting humanity’s quest to understand the universe and our place within it.

In art, nebulae have been portrayed in various forms, from the swirling patterns of abstract paintings to the intricate details of digital renderings. Artists have sought to capture the ethereal quality of nebulae, often using vibrant colors that mirror the actual hues observed in astronomical images. The romantic notion of the cosmos has led many to create pieces that evoke a sense of wonder and exploration, inviting viewers to ponder the vastness of space and the mysteries it holds. The iconic “Starry Night” by Vincent van Gogh, for instance, while not a direct representation of a nebula, embodies the swirling motion and emotional depth that such celestial phenomena inspire.

In literature, nebulae often symbolize the unknown and the limitless possibilities of existence. Writers have drawn parallels between the beauty of nebulae and themes of creation, transformation, and the vastness of human experience. Science fiction, in particular, has embraced nebulae as backdrops for epic tales, serving as the setting for spacefaring adventures or as metaphors for the protagonists’ journeys into the unknown. authors like Arthur C. Clarke and Isaac Asimov have woven these cosmic clouds into their narratives, using them to explore profound philosophical questions about life, intelligence, and the universe.

Moreover, in many cultures, nebulae have been intertwined with mythology and symbolism. They often represent creation myths, the birth of stars, or the souls of the departed traveling through the cosmos. Indigenous cultures and ancient civilizations viewed the night sky as a canvas of stories, with nebulae playing a significant role in their cosmologies, guiding their beliefs about existence and the afterlife.

As we delve deeper into the mysteries of nebulae through astronomy, we also uncover the profound impact they have had on human creativity and thought. Their cultural significance in art and literature not only reflects our fascination with the cosmos but also serves as a reminder of our shared pursuit of knowledge, beauty, and understanding in a universe that is, at times, beyond comprehension.

14. Conclusion: The Wonders of Nebulae and Their Impact on Our Understanding of the Universe

In conclusion, nebulae are not merely beautiful cosmic phenomena; they are vital to our understanding of the universe and our place within it. These vast clouds of gas and dust serve as the birthplace of stars and planets, creating an intricate tapestry of celestial evolution that has fascinated astronomers for centuries. Each type of nebula, from the vibrant emission nebulae to the ethereal beauty of reflection and the ghostly remnants of planetary nebulae, tells a unique story about the life cycle of stars and the dynamic processes that shape our cosmos.

By studying nebulae, scientists glean critical insights into the fundamental processes of stellar formation and the chemical enrichment of the interstellar medium. They reveal the complex interplay between gravity, radiation, and the elements that forge the very building blocks of life. Moreover, nebulae challenge our perceptions and inspire curiosity, encouraging us to look deeper into the mysteries of the universe.

As we gaze at these distant wonders through our telescopes, we are reminded of the vastness of space and time, and the intricate dance of creation and destruction that defines our universe. Each nebula is a testament to the beauty and complexity of cosmic phenomena, urging us to explore further and expand our understanding of the universe. The wonders of nebulae not only enrich our scientific knowledge but also ignite our imagination, fostering a sense of wonder that connects us all to the cosmos. As we continue to explore these celestial marvels, we unlock the secrets of the universe, one nebula at a time.

As we conclude our journey through the captivating world of nebulae, we hope you’ve gained a deeper appreciation for these stunning cosmic phenomena. From the vibrant colors of emission nebulae to the intricate structures of planetary nebulae and the haunting beauty of dark nebulae, each type tells a unique story of stellar evolution and the birth of new celestial bodies. By understanding the intricacies of these majestic clouds of gas and dust, we not only enhance our knowledge of the universe but also ignite our imagination about the vastness of space. So, whether you’re an aspiring astronomer or simply a curious stargazer, we encourage you to continue exploring the cosmos. The skies above are filled with wonders waiting to be discovered—keep looking up!

astronomy – How do astronomers measure the distance to stars?

In the vast expanse of the universe, stars twinkle like distant gems scattered across a cosmic tapestry, each harboring mysteries waiting to be unraveled.

But have you ever wondered how astronomers measure the staggering distances to these celestial bodies? The task is no small feat, as the universe is incomprehensibly large, and the methods used to gauge these distances are as fascinating as the stars themselves. From the ancient techniques of parallax to the groundbreaking discoveries of standard candles and redshift, this blog post will take you on a journey through the innovative approaches that astronomers employ to measure the cosmos. Join us as we explore the science behind determining how far away stars truly are and uncover the profound implications these measurements have on our understanding of the universe and our place within it.

1. Introduction to Cosmic Distances

astronomy -  How do astronomers measure the distance to stars?
Credit : whatcanu.com

When we gaze up at the night sky, we’re not just admiring twinkling points of light; we’re peering into the vast and intricate universe that surrounds us. The stars that dot the heavens are not merely decorations—they are distant suns, each with its own story, composition, and distance from Earth. Understanding how far away these celestial bodies are is a fundamental question in astronomy, one that helps us unravel the mysteries of the cosmos and our place within it.

Measuring cosmic distances is a complex challenge, akin to trying to gauge the size of an ocean from a single grain of sand. The vastness of space presents unique obstacles, and because stars are so far away, traditional measuring techniques simply won’t suffice. Instead, astronomers employ a variety of innovative methods to determine the distances to these luminous giants, each method suited for different ranges and types of celestial objects.

In this exploration of cosmic distances, we’ll delve into the key techniques that astronomers use, from the ancient methods of parallax to the cutting-edge technology of standard candles and redshift measurements. By dissecting these approaches, we’ll gain insight into how our understanding of the universe’s structure and scale has evolved over time. So, let’s embark on this enlightening journey through the cosmos, where every measurement not only reveals the distance to stars but also helps illuminate the vast tapestry of our universe.

2. The Importance of Measuring Stellar Distances

Understanding the distances to stars is fundamental to our grasp of the cosmos. Just as knowing the distance between two cities is essential for navigation on Earth, measuring the distances to celestial bodies is crucial for astronomers to map the universe accurately. Stellar distances provide context for the vastness of space, allowing us to understand the scale and structure of our galaxy and beyond.

One of the primary reasons measuring these distances is so important is that it enables astronomers to determine the luminosity of stars. By knowing how far a star is from Earth, scientists can differentiate between a dim star that is relatively close and a bright star that is much farther away. This luminosity information is vital for classifying stars, understanding their life cycles, and studying the processes that govern stellar evolution.

Moreover, the distances to stars are key to understanding the dynamics of our galaxy. They help astronomers piece together the motion of stars and the gravitational influences at play. This knowledge contributes to our comprehension of galactic structures and phenomena, such as the presence of dark matter and the formation of star clusters.

Additionally, measuring stellar distances plays a pivotal role in cosmic distance scales. By establishing accurate distances to nearby stars through methods like parallax, astronomers can extend their measurements to more distant objects using standard candles, such as Cepheid variables. This chain of distance measurements ultimately allows us to gauge the scale of the universe and investigate its expansion.

In summary, measuring stellar distances is not merely an academic exercise; it is a cornerstone of modern astronomy that enriches our understanding of the universe. Each measurement opens new avenues of inquiry and enhances our appreciation of the intricate cosmic tapestry in which we reside.

3. Historical Methods of Measuring Distances

astronomy -  How do astronomers measure the distance to stars?
Credit : whatcanu.com

The quest to measure the vast distances between stars has fascinated astronomers for centuries, leading to the development of several ingenious historical methods that laid the groundwork for modern astronomy. One of the earliest and most influential techniques is parallax, which relies on the apparent shift of a star’s position against more distant background stars as observed from different points in Earth’s orbit around the Sun. This method was first effectively employed in the 19th century by astronomers like Friedrich Bessel, who successfully measured the distance to the star 61 Cygni. By observing the star six months apart and calculating the angle of the shift, he could determine its distance in parsecs, marking a monumental step in stellar measurement.

Another notable approach was the use of standard candles, particularly Cepheid variable stars. Discovered by Henrietta Swan Leavitt in the early 1900s, these stars exhibit a consistent relationship between their brightness and the time it takes for them to pulsate. By observing the period of a Cepheid’s variability, astronomers can determine its intrinsic brightness and, by comparing it to its observed brightness, calculate its distance. This method became instrumental for measuring distances to far-off galaxies, significantly expanding our understanding of the cosmos.

Furthermore, the use of spectroscopic parallax offered another layer to historical distance measurement. By analyzing the spectrum of a star, astronomers could ascertain its temperature and luminosity, allowing them to classify it within the Hertzsprung-Russell diagram. This classification facilitated distance estimation by comparing the star’s known luminosity to its apparent brightness. Each of these methods, though limited by the observational technology of their time, contributed invaluable knowledge and paved the way for the sophisticated techniques we utilize today. As we delve deeper into the cosmos, it’s essential to appreciate these foundational techniques that have shaped our understanding of distance in the universe.

4. Parallax: The Foundation of Distance Measurement

Parallax is a fundamental technique in the field of astronomy, serving as the cornerstone for measuring the vast distances to stars. At its core, parallax involves observing the apparent shift in position of a nearby star against the backdrop of distant celestial objects as Earth orbits the Sun. This method harnesses the principles of geometry and triangulation, allowing astronomers to calculate distances with remarkable precision.

Imagine standing in a field and viewing a tree that is relatively close to you, while a mountain looms far in the distance. If you shift your position to the left or right, the tree appears to move against the mountain, which remains static. This phenomenon is the essence of parallax – as you change your viewpoint, nearby objects seem to shift more dramatically than those that are far away.

Astronomers apply this concept on a cosmic scale, measuring the angle of this apparent shift, known as the parallax angle, which is typically expressed in arcseconds. The formula used is relatively straightforward: the distance to a star in parsecs is equal to 1 divided by the parallax angle in arcseconds. For instance, if a star has a parallax angle of 0.1 arcseconds, it is located 10 parsecs away, or about 32.6 light-years.

The advent of space-based telescopes, such as the European Space Agency’s Gaia mission, has revolutionized the accuracy of parallax measurements. By eliminating the distortions caused by Earth’s atmosphere and providing a stable observational platform, these missions can measure parallax angles with unprecedented precision, enabling astronomers to chart the distances to millions of stars across our galaxy.

Understanding parallax is not only pivotal for measuring distance but also for constructing a cosmic map that reveals the structure of our Milky Way and beyond. By employing this technique, astronomers can unlock the secrets of the universe, shedding light on the nature of stars, their formation, and their evolution. In the grand tapestry of the cosmos, parallax stands as a vital thread, connecting us to the celestial wonders that lie beyond our reach.

5. The Role of Triangulation in Astronomy

astronomy -  How do astronomers measure the distance to stars?
Credit : whatcanu.com

Triangulation, a method that has roots in basic geometry, plays a pivotal role in the field of astronomy, enabling astronomers to measure the vast distances to stars with remarkable precision. At its core, triangulation involves creating a triangle by measuring the distance between two points on Earth and then observing a star from those two locations. This technique capitalizes on the principles of parallax—a phenomenon where the position of an object appears to shift against a distant background when viewed from different angles.

To illustrate this process, imagine standing at two distinct points on Earth, separated by a known distance, say one astronomical unit (the average distance from Earth to the Sun). As you observe a nearby star, you note its position relative to the more distant backdrop of other stars. By measuring the angle of the star from both vantage points, you create two sides of a triangle. The base of this triangle is the distance between your two observation points, while the angles allow you to calculate the distance to the star using trigonometric principles.

This method is particularly effective for measuring nearby stars, typically up to a few hundred light-years away. The closer a star is, the more pronounced the parallax effect, making it easier to determine its distance accurately. The precision of triangulation is further enhanced by modern technology, which utilizes high-resolution telescopes and advanced imaging techniques to capture the subtle shifts in a star’s position.

Triangulation not only provides a way to measure distances, but it also helps establish a reliable cosmic distance scale. By determining how far away nearby stars are, astronomers can then apply these measurements to more distant celestial objects, leading to a deeper understanding of the structure and scale of our universe. Thus, triangulation serves as an essential tool in the astronomer’s toolkit, bridging the vast expanses of space and enabling us to comprehend the distances that separate us from the stars.

6. Standard Candles: Using Known Luminosities

Standard candles are a fascinating tool in the astronomer’s toolkit, allowing them to measure vast distances in the universe with remarkable precision. The principle behind this method hinges on the relationship between a star’s intrinsic brightness, known as luminosity, and its observed brightness from Earth. By identifying specific types of stars—such as Cepheid variables or Type Ia supernovae—that have a well-established luminosity, astronomers can effectively gauge their distance from us.

When a standard candle is observed, its brightness can be measured. If we know how bright it truly is (its luminosity), we can apply a fundamental property of light: as distance increases, the light from an object spreads out, making it appear dimmer. This allows astronomers to utilize the inverse square law of light, which states that the brightness of a light source decreases with the square of the distance from the observer. By comparing the known luminosity with the observed brightness, they can calculate how far away the star—or the supernova—really is.

For example, Cepheid variables are special types of stars that pulsate at regular intervals, and their luminosity correlates directly with their pulsation period. This relationship provides a reliable means to determine their intrinsic brightness. Once the intrinsic brightness is established, astronomers can derive the distance by measuring how dim the star appears from Earth. This method has not only facilitated our understanding of nearby stars but also laid the groundwork for measuring distances to galaxies and the expansion of the universe itself.

In the grand cosmic landscape, standard candles serve as reliable beacons, illuminating the path to understanding our universe’s vastness. By mastering this technique, astronomers continue to unravel the mysteries of the cosmos, one star at a time.

7. The Cepheid Variable Stars Method

astronomy -  How do astronomers measure the distance to stars?
Credit : whatcanu.com

The Cepheid Variable Stars method is one of the most reliable techniques astronomers use to measure distances to stars, and it hinges on a fascinating characteristic of certain stars: their pulsation. Cepheid variables are a special class of stars that expand and contract in a regular cycle, leading to a predictable change in their brightness. This rhythmic variation occurs over a set period, which can range from just a few days to several weeks.

What makes Cepheid variables so valuable for distance measurement is the direct relationship between their pulsation period and intrinsic brightness, also known as luminosity. Henrietta Swan Leavitt, an American astronomer, was the first to recognize this relationship in the early 20th century. By observing a Cepheid’s pulsation period, astronomers can determine its absolute magnitude—the true brightness of the star if it were placed at a standard distance of 10 parsecs (about 32.6 light-years) from Earth.

Once the absolute magnitude is known, astronomers compare it to the apparent magnitude—the brightness of the star as seen from Earth. This comparison allows them to calculate the distance to the star using the distance modulus formula. The beauty of this method lies in its accuracy, as Cepheid variables can be observed in distant galaxies, providing a crucial stepping stone for measuring the vast distances of the universe.

Additionally, the Cepheid Variable method has played a pivotal role in establishing the cosmic distance ladder. By calibrating distances to various celestial objects, astronomers have been able to map out the scale of the universe, refining our understanding of its size and expansion rate. In essence, Cepheid variables are not just stars; they are cosmic beacons, illuminating the path for astronomers as they seek to unravel the mysteries of our universe.

8. Tying Distances Together: The Cosmic Distance Ladder

In the vast expanse of the universe, measuring the distance to celestial objects can feel like an insurmountable challenge. However, astronomers have developed a sophisticated methodology known as the Cosmic Distance Ladder, a hierarchical system that allows them to tie together various distance measurement techniques to create a comprehensive understanding of the universe’s scale.

At its foundation, the Cosmic Distance Ladder relies on parallax, a method that measures the apparent shift in position of nearby stars against the backdrop of more distant stars as Earth orbits the Sun. This technique is effective for stars within a few hundred light-years from Earth and serves as the first rung of the ladder. As we ascend, we encounter various other methods that extend our reach into the cosmos.

Next, we utilize standard candles, such as Cepheid variable stars, whose intrinsic brightness is known. By observing their brightness and comparing it to how dim they appear from Earth, astronomers can calculate their distance. This technique is pivotal for measuring distances to galaxies that are millions of light-years away.

As we climb higher, we encounter the Tying of Distances through supernovae, particularly Type Ia supernovae, which explode at a consistent brightness and act as beacons across the universe. By calibrating these supernovae with the distances obtained from Cepheid variables, astronomers can measure distances to much farther galaxies, effectively extending the reach of the Cosmic Distance Ladder into the depths of the universe.

With each successive rung, astronomers not only refine their distance measurements but also piece together the larger tapestry of the cosmos. By integrating various methods and calibrating them through overlapping observations, they create a coherent and reliable framework for understanding the scale of the universe, guiding us toward a deeper appreciation of our place within it. The Cosmic Distance Ladder thus stands as a testament to human ingenuity and curiosity, bridging the gaps between the stars and allowing us to measure the immeasurable.

9. Redshift and the Expanding Universe

The concept of redshift is a cornerstone in our understanding of the expanding universe, providing astronomers with a powerful tool to measure distances to faraway stars and galaxies. At its core, redshift refers to the phenomenon where light emitted from an object in space shifts toward the red end of the electromagnetic spectrum as the object moves away from us. This shift occurs due to the Doppler effect, which similarly alters the pitch of a sound as a source moves relative to an observer.

As the universe expands, distant galaxies recede from us, and their light stretches, increasing its wavelength. By measuring the degree of this redshift, astronomers can determine how quickly a galaxy is moving away. The greater the redshift, the faster the galaxy is receding, which in turn provides a direct correlation to its distance from Earth. This relationship is described by Hubble’s Law, which states that the velocity of a galaxy is proportional to its distance—a revolutionary discovery that has reshaped our understanding of the cosmos.

In practical terms, astronomers utilize spectrometers to analyze the light emitted by stars and galaxies. These instruments break down the light into its constituent colors, revealing the characteristic spectral lines of elements within the object. When the spectral lines are shifted toward the red, the extent of this shift can be measured with precision. Armed with this data, astronomers can calculate not only distance but also gain insights into the universe’s rate of expansion.

Understanding redshift also opens the door to exploring critical questions about the universe’s age and evolution. By observing the redshift of light from the most distant galaxies, scientists can peer back in time, witnessing the universe in its infancy. This remarkable ability to measure the cosmos and comprehend its dynamic nature underscores the profound relationship between light and distance, illuminating the vastness of space and our place within it.

10. Advanced Techniques: Gravitational Lensing

Gravitational lensing is one of the most fascinating and advanced techniques astronomers use to measure the distance to stars and other celestial objects. This phenomenon occurs when a massive object, such as a galaxy or a cluster of galaxies, lies between an observer and a distant light source. The immense gravitational field of the foreground object bends and distorts the light from the background source, creating a lensing effect. This bending of light results in multiple images of the same distant object or an enhanced brightness, allowing astronomers to glean valuable information about both the lensing object and the background source.

There are two primary types of gravitational lensing: strong lensing and weak lensing. Strong lensing occurs when the foreground mass is substantial enough to create distinct, multiple images of the background star or galaxy, often forming arcs or rings known as Einstein rings. These striking formations enable astronomers to not only measure the distance to the background object but also to estimate the mass of the lensing object based on the degree of light bending.

Weak lensing, on the other hand, involves subtler distortions that are not easily visible at first glance. Instead of producing multiple images, weak lensing results in slight elongations of galaxies in the background. By analyzing these distortions across large surveys of the sky, astronomers can infer the distribution of dark matter in the universe, as this elusive substance contributes significantly to the overall mass of lensing clusters.

Both strong and weak lensing provide crucial data that enhance our understanding of the cosmos. They offer a unique opportunity to probe the universe’s large-scale structure and help refine the cosmic distance ladder. By leveraging the properties of gravitational lensing, astronomers can extend their reach beyond what traditional methods allow, unveiling the mysteries of distant stars and galaxies while simultaneously illuminating the gravitational forces at play in the universe. As technology advances, the use of gravitational lensing will continue to evolve, offering deeper insights into the fabric of spacetime itself.

11. Space Telescopes: Enhancing Distance Measurements

Space telescopes have revolutionized our understanding of the universe, particularly in measuring the distance to stars and celestial objects. Unlike ground-based observatories, which grapple with the distortion of Earth’s atmosphere, space telescopes operate above this interference, offering a pristine view of the cosmos. This clarity allows astronomers to collect more accurate data about the light emitted by distant stars, making distance measurements more reliable.

One of the most prominent space telescopes, the Hubble Space Telescope, has significantly advanced our ability to calculate stellar distances through its high-resolution imaging and spectroscopy capabilities. By analyzing the light from stars, astronomers can determine their brightness, a crucial factor in the distance calculation process. For instance, using the technique of parallax—a method that involves measuring the apparent movement of a star against the background of more distant stars from different positions of Earth’s orbit—Hubble can achieve incredibly precise measurements.

Moreover, space telescopes are equipped with advanced instruments that can detect different wavelengths of light, from ultraviolet to infrared. This capability allows astronomers to study various types of stars, including those that are too faint or obscured by cosmic dust when observed from the ground. By utilizing these observations, scientists can employ methods such as the Cepheid variable stars technique, which uses the predictable brightness variations of these stars as a cosmic yardstick to measure distances.

In addition to Hubble, the upcoming James Webb Space Telescope promises to push the boundaries even further. With its advanced infrared capabilities, Webb will be able to observe the faintest and most distant stars and galaxies, providing even more data for refining distance measurements throughout the universe. As these space-based observatories continue to gather and analyze data, our understanding of the cosmos will deepen, allowing us to map the universe with unprecedented precision and accuracy. The work of space telescopes is vital not just for gauging distances but for piecing together the intricate puzzle of how our universe has evolved over billions of years.

12. Challenges in Measuring Stellar Distances

Measuring the distances to stars is a fundamental yet intricate task in the field of astronomy, fraught with various challenges that test the limits of our technology and understanding. Despite the remarkable advancements in observational techniques, astronomers face several hurdles that can complicate the measurement process.

One significant challenge is the vastness of space itself. The immense distances involved mean that even the closest stars are light-years away, making direct measurement methods, such as parallax, less effective over larger scales. Parallax relies on observing a star’s apparent movement against a more distant background as the Earth orbits the Sun. While this method is highly effective for nearby stars, it becomes increasingly difficult to apply as the target stars get farther away, leading to a greater margin of error.

Another complication arises from the atmospheric turbulence experienced when observing from Earth. Variations in air density can distort the light coming from distant stars, making them appear fuzzy or shifted. This atmospheric interference can hinder precise measurements and necessitate the use of space-based telescopes, which, although powerful, come with their own set of logistical and financial challenges.

Furthermore, the intrinsic brightness of a star—its luminosity—plays a crucial role in distance calculations. However, not all stars are created equal; some are variable stars that change brightness over time, complicating the process of determining accurate distances. Additionally, the presence of interstellar dust can obscure light from stars, leading to further miscalculations in distance due to the attenuation of light.

Finally, the expansion of the universe adds another layer of complexity. As galaxies move away from us, the light from distant stars is redshifted, altering the perceived distance to these celestial objects. Understanding and accounting for this redshift is essential for astronomers to ensure that their distance measurements remain accurate and reliable.

In summary, while astronomers have developed sophisticated methods and tools to measure stellar distances, they must continuously navigate a landscape filled with challenges—from the vastness of space and atmospheric conditions to variable star brightness and cosmic expansion. Each obstacle demands innovative solutions and highlights the ongoing quest for precision in our understanding of the universe.

13. The Future of Cosmic Distance Measurement

As we stand on the precipice of a new era in astronomy, the future of cosmic distance measurement promises to be both exciting and transformative. With advancements in technology and innovative methodologies, astronomers are poised to refine our understanding of the universe’s vast expanse like never before.

One of the most significant developments on the horizon is the deployment of next-generation space telescopes, such as the James Webb Space Telescope (JWST). Equipped with cutting-edge instruments capable of capturing unprecedented details in the infrared spectrum, JWST will allow astronomers to observe distant stars and galaxies with remarkable precision. This capability will not only enhance our ability to measure distances through traditional methods like parallax but will also aid in calibrating the cosmic distance ladder, providing a more accurate framework for understanding the scale of the universe.

Moreover, the advent of gravitational wave astronomy is set to revolutionize distance measurement. By observing the ripples in spacetime caused by the collision of massive objects, such as neutron stars or black holes, astronomers can infer distances based on the properties of the detected waves. This groundbreaking technique promises to provide new insights into the distances of objects that are otherwise challenging to measure, particularly those located in the far reaches of the cosmos.

In addition, the rise of artificial intelligence and machine learning is beginning to impact astronomical research significantly. These technologies can analyze vast datasets at unparalleled speeds, identifying patterns and making predictions that would be impossible for humans alone. By employing AI algorithms to process data from various telescopes and observatories, researchers can enhance the accuracy of distance measurements and uncover new celestial phenomena.

As we look to the future, the collaboration between international space agencies, observatories, and research institutions will play a crucial role in advancing our cosmic measurements. Together, they will continue to develop innovative techniques and technologies that will not only refine our current understanding but also inspire future generations to explore the mysteries of the universe. With each leap in measurement accuracy, we inch closer to answering fundamental questions about the structure and evolution of the cosmos, ultimately deepening our appreciation for the vastness that surrounds us.

14. Key Discoveries from Distance Measurements

The art and science of measuring cosmic distances have led to several groundbreaking discoveries that have profoundly shaped our understanding of the universe. These measurements, often requiring sophisticated techniques and advanced technology, have unveiled secrets that were once beyond our grasp.

One of the most significant discoveries stemming from distance measurements is the realization that our universe is expanding. Edwin Hubble’s observations, which correlated the distance of galaxies from Earth to their redshift, revealed that galaxies are moving away from us at speeds proportional to their distances. This finding not only confirmed the expansion of the universe but also provided evidence for the Big Bang theory, fundamentally changing our understanding of cosmic evolution.

Furthermore, distance measurements have allowed astronomers to assess the scale of the Milky Way and its place within the cosmos. Through parallax techniques and the use of standard candles—like Cepheid variables—scientists have been able to refine the size of our galaxy and map its spiral arms. This has led to a more accurate understanding of the Milky Way’s composition and structure, as well as its interactions with neighboring galaxies.

Another pivotal discovery made possible by precise distance calculations is the determination of the Hubble constant, which measures the rate of expansion of the universe. This constant has important implications for cosmology, influencing theories related to dark energy and the ultimate fate of the universe. Discrepancies in its estimated values have sparked debates and further research, emphasizing the dynamic nature of our understanding of cosmic phenomena.

Moreover, measuring distances has illuminated the life cycles of stars, providing insights into their formation and evolution. By determining how far away a star is, astronomers can better understand its intrinsic brightness and thus infer its age and chemical composition. This knowledge not only helps in tracing the life paths of individual stars but also contributes to our understanding of the evolution of galaxies and stellar populations.

In summary, the key discoveries resulting from distance measurements are not merely academic; they have profound implications for our understanding of the universe. From the expansion of the cosmos to the intricate lifecycle of stars, these measurements serve as the backbone of modern astronomy, continually pushing the boundaries of what we know about the universe we inhabit.

15. Conclusion: The Significance of Understanding Our Universe

In conclusion, understanding the vast distances that separate us from the stars is not merely an exercise in academic curiosity; it is a profound gateway to appreciating our place in the cosmos. As we peel back the layers of our universe, measuring these distances allows astronomers to unlock the stories written in the light of distant stars and galaxies. Each calculation, whether through parallax, standard candles, or redshift, adds a piece to the intricate puzzle of cosmic evolution, shedding light on the life cycles of stars, the dynamics of galaxies, and the very structure of the universe itself.

Moreover, grasping the scale of the universe instills a sense of humility and wonder. It reminds us that our planet is but a tiny speck in an expansive cosmos filled with mysteries yet to be unraveled. This understanding fuels scientific inquiry and inspires future generations of astronomers and explorers to push the boundaries of what we know.

As we continue to refine our techniques and develop new technologies, the distances we once thought insurmountable become more accessible, allowing us to connect with the universe on a deeper level. The quest to measure the cosmos not only enhances our scientific knowledge but also enriches our human experience, inviting us to ponder the questions that lie beyond our world and to celebrate the beauty of the night sky. Understanding our universe is not just about distances; it is about developing a richer, more profound appreciation for the intricate tapestry of existence that surrounds us.

In conclusion, measuring the vast distances to stars is a remarkable testament to human ingenuity and the relentless pursuit of knowledge. Through techniques like parallax, standard candles, and redshift, astronomers have unveiled the secrets of our universe, transforming the seemingly unfathomable into comprehensible data. As we continue to refine these methods and develop new technologies, our understanding of the cosmos will only deepen, opening doors to new discoveries and insights about the nature of our universe. We hope this exploration has ignited your curiosity about the stars above and inspired you to look to the night sky with a newfound appreciation for the incredible science that helps us understand our place in the cosmos. Thank you for joining us on this celestial journey—may your fascination with the universe continue to grow!

What are the best ways to create a bright and cheerful kitchen?

The kitchen is often considered the heart of the home—a space where culinary creations come to life and cherished memories are made around the dinner table.

However, if your kitchen feels more drab than fab, it might be time for a revitalizing makeover that sparks joy and creativity. In this blog post, we’ll explore ten inspiring ideas to transform your kitchen into a bright and cheerful haven. From vibrant color palettes and playful patterns to innovative storage solutions and charming decor, these fresh concepts will not only breathe new life into your cooking space but also enhance its functionality. Whether you’re a seasoned chef or a casual cook, these transformative ideas will inspire you to roll up your sleeves and create a kitchen that reflects your personality and invites warmth and happiness into your home. Get ready to embrace the beauty of a kitchen that truly energizes and delights!

1. Embrace Bold Colors: Choosing the Right Palette

What are the best ways to create a bright and cheerful kitchen?
Credit : whatcanu.com

When it comes to transforming your kitchen into a vibrant and inviting space, embracing bold colors is an exhilarating first step. The right palette can infuse your kitchen with personality, energy, and warmth, making it a place where family and friends love to gather. Start by assessing the mood you want to create: are you aiming for a lively and playful atmosphere, or perhaps a more serene and sophisticated environment?

Consider colors like sunny yellows, rich teals, or bold coral to instantly brighten your kitchen. These hues can be introduced through various elements — think vibrant cabinetry, eye-catching backsplashes, or even statement appliances. If you’re hesitant to commit to an entire wall in a daring color, you can opt for smaller accents like bar stools, dishware, or decorative accessories that can easily be swapped out as trends change.

Additionally, don’t shy away from mixing and matching colors! A well-curated combination of complementary shades can create depth and visual interest. For instance, pairing a deep navy with soft mint green can add a fresh yet sophisticated vibe to the space. Use a color wheel to explore complementary and analogous colors that resonate with your style.

Remember, lighting plays a crucial role in how colors appear in your kitchen. Natural light can enhance brighter shades, while warm artificial lighting can soften bold colors, making them feel cozy and inviting. To make the most of your kitchen’s layout, consider where the light hits and how it interacts with your chosen palette throughout the day.

In summary, embracing bold colors in your kitchen makeover is about more than just aesthetics; it’s about creating a space that reflects your personality and inspires joy. With the right palette, you’ll transform your kitchen into a cheerful hub of creativity and connection, where every meal becomes a celebration!

2. Optimizing Natural Light: Window Treatments and Layout

One of the most effective ways to infuse your kitchen with brightness and cheer is by optimizing natural light. The right window treatments can make all the difference, allowing sunlight to pour in while maintaining privacy and style. Consider sheer curtains or light-filtering shades that gently diffuse sunlight, creating a soft and inviting atmosphere. These treatments can be layered with heavier drapes for evenings when you want to block out the world but still allow that sun-kissed glow during the day.

When it comes to layout, think about how your kitchen is structured in relation to the windows. If possible, arrange your workspaces near the light source. Positioning the sink or prep area by the window not only allows you to soak in the natural beauty outside but also brightens up your cooking experience. If your kitchen has limited windows, consider adding reflective surfaces like glossy backsplashes or mirrors strategically placed to bounce light around the room.

Don’t overlook the color scheme, either. Light, airy colors such as soft whites, pale yellows, or delicate pastels can enhance the effect of natural light, making the space feel larger and more open. Complement this with bright accents—think vibrant dishware or cheerful wall art—that can inject personality and warmth into the space.

By thoughtfully selecting window treatments and optimizing your kitchen layout to harness natural light, you can create a bright and cheerful environment that invites creativity and joy into your culinary adventures.

3. Creative Backsplash Ideas: Adding Personality to Your Space

What are the best ways to create a bright and cheerful kitchen?
Credit : whatcanu.com

The backsplash in your kitchen serves as more than just a practical barrier against spills and splatters; it’s an opportunity to infuse your personality and style into the heart of your home. A creative backsplash can transform a mundane kitchen into a vibrant culinary haven, setting the tone for the entire space. Here are some inspiring ideas to help you elevate your kitchen’s aesthetic and functionality.

**1. Mosaic Masterpieces:** Embrace the charm of mosaic tiles to create an intricate and colorful backsplash. With an array of patterns and colors at your disposal, you can design a unique work of art that reflects your personality. Consider a geometric pattern for a modern touch or a floral design for a more whimsical feel.

**2. Bold Wallpaper:** For a striking yet temporary solution, try removable wallpaper designed for kitchen use. This allows for easy updates to your backsplash without the commitment of tiles. Choose bold prints, such as vibrant florals or funky geometrics, to create a lively backdrop that can easily be changed as trends evolve.

**3. Shimmering glass:** Glass tiles can add a sleek, contemporary vibe to your kitchen. Available in various colors and finishes, glass backsplashes can reflect light, making your space feel larger and more inviting. Opt for iridescent tiles that catch the light and change hues throughout the day for a captivating effect.

**4. Reclaimed Wood:** For those who love a rustic aesthetic, consider a reclaimed wood backsplash. This organic material adds warmth and texture to your kitchen, creating a cozy atmosphere. Pair it with modern appliances and sleek countertops for an appealing contrast that balances rustic charm with contemporary elegance.

**5. Chalkboard Paint:** Turn your backsplash into a functional space with chalkboard paint. This versatile option allows you to jot down recipes, create shopping lists, or showcase your latest culinary creations. Choose a vibrant color for the chalkboard finish to add a playful element to your kitchen.

**6. Colorful Ceramic Tiles:** Inject a burst of color into your kitchen with handcrafted ceramic tiles. Opt for bright, bold hues or intricate patterns that tell a story. These tiles can be arranged in various configurations, from classic subway patterns to elaborate designs that create visual interest.

Incorporating these creative backsplash ideas into your kitchen makeover will not only enhance the space’s aesthetic appeal but also make it a true reflection of your style and personality. A well-chosen backsplash can serve as a focal point, drawing the eye and inspiring conversations, making your kitchen a welcoming hub for family and friends alike.

4. The Power of Plants: Incorporating Greenery in Your Kitchen

When it comes to transforming your kitchen into a bright and cheerful space, one of the most effective and refreshing strategies is to harness the power of plants. Incorporating greenery not only adds a vibrant splash of color but also infuses your cooking area with life and vitality. Imagine stepping into your kitchen, greeted by the lush greens of herbs, succulents, or flowering plants that not only beautify the space but also enhance the air quality.

Start by choosing the right plants for your kitchen environment. Consider placing small pots of fresh herbs like basil, parsley, and mint on your windowsill. Not only do they look beautiful, but they also provide the freshest ingredients for your culinary creations. If you’re short on space, opt for vertical planters or hanging pots that can cascade down the walls, creating a delightful green wall that draws the eye upward.

For a pop of color, consider flowering plants like African violets or orchids, which can thrive in the humid kitchen atmosphere. Their blooms can serve as exquisite focal points on countertops or dining tables, bringing a cheerful vibe and a sense of tranquility to your cooking sanctuary.

Additionally, using plant stands or decorative pots can elevate your greenery game. Choose vibrant ceramic pots or chic baskets that complement your kitchen’s color palette. The contrasts of textures and hues can create a visually appealing environment, making your kitchen feel more inviting.

Lastly, don’t forget about the practicality of your plant choices. Opt for low-maintenance varieties if you have a hectic schedule, or consider a small indoor vegetable garden for those who want to combine aesthetics with functionality. As you cultivate your green space, you’ll notice how the presence of plants transforms your kitchen into a cheerful haven, encouraging you to whip up delicious meals with newfound inspiration. Embrace the beauty of nature and let your kitchen flourish with greenery!

5. Functional and Fun: Choosing Cheerful Kitchen Accessories

What are the best ways to create a bright and cheerful kitchen?
Credit : whatcanu.com

When it comes to transforming your kitchen into a space that radiates positivity and joy, the right accessories can make all the difference. Functional and fun, these cheerful kitchen accessories not only serve a purpose but also infuse your cooking space with personality and vibrancy.

Start with kitchen textiles—brightly colored dish towels, playful pot holders, and whimsical aprons can all add a pop of color and character. Opt for patterns that evoke a sense of cheer, such as polka dots, florals, or stripes, which can instantly lift your mood while you whip up your favorite meals. Don’t shy away from mixing and matching these textiles to create a delightful visual tapestry.

Next, consider your kitchen gadgets and utensils. Why settle for mundane when you can select items that spark joy? Look for measuring cups shaped like cute animals or colorful mixing bowls that resemble a rainbow. These functional tools not only make cooking more enjoyable but also serve as charming decor when displayed on your countertops.

Storage solutions can also play a role in your cheerful kitchen makeover. Clear jars filled with colorful pasta, beans, or spices can turn your pantry into a vibrant display. You might even choose to label these jars with playful, handwritten tags for an added personal touch.

Don’t forget about wall art and decor! A cheerful wall clock, a quirky fruit bowl, or a collection of colorful magnets can all contribute to the upbeat atmosphere of your kitchen. Consider hanging a chalkboard where you can write inspirational quotes or fun daily menus; it’s a simple yet effective way to inspire creativity and positivity.

Ultimately, choosing cheerful kitchen accessories is all about expressing your personality and creating an environment that feels welcoming and lively. With the right combination of functionality and fun, your kitchen can become not just a place for cooking, but a joyful sanctuary where memories are made and shared.

6. Lighting Matters: Selecting Fixtures for a Bright Environment

When it comes to creating a bright and cheerful kitchen, lighting is one of the most essential elements to consider. The right fixtures can dramatically transform the ambiance of the space, making it feel more inviting and open. Start by evaluating the natural light in your kitchen. If you’re blessed with large windows or a sunlit corner, you can enhance that brightness with fixtures that complement the available light.

Consider layering your lighting with three key types: ambient, task, and accent. Ambient lighting provides overall illumination and sets the mood for the room. A chic chandelier or a series of pendant lights over an island can add a touch of elegance while brightening the entire area. Opt for fixtures in light, airy colors or metallic finishes to reflect light and create a sense of spaciousness.

Task lighting is essential for areas where you prepare meals or engage in other activities. Under-cabinet lights are a fantastic option, illuminating your countertops and ensuring you have adequate visibility for chopping, mixing, and cooking. LED strips or puck lights can be both sleek and functional, providing a modern touch that enhances your kitchen’s aesthetic.

Finally, don’t underestimate the power of accent lighting. This type of lighting focuses on highlighting specific features in your kitchen, such as artwork, decorative shelves, or beautiful cabinetry. A well-placed spotlight or a small LED fixture can draw attention to these elements, adding personality and warmth to your kitchen.

In addition to the types of lighting, consider the color temperature of your bulbs. Warmer tones can create a cozy, inviting feel, while cooler tones evoke a clean, modern vibe. Striking the right balance in your lighting choices will not only brighten your kitchen but also create a cheerful atmosphere that invites family and friends to gather and enjoy the space together. Embrace the transformative power of lighting, and watch your kitchen shine like never before!

7. Open Shelving vs. Cabinets: Creating an Airy Feel

What are the best ways to create a bright and cheerful kitchen?
Credit : whatcanu.com

When it comes to designing a bright and cheerful kitchen, the choice between open shelving and traditional cabinets can make a significant impact on the overall atmosphere of the space. Open shelving is increasingly popular for those looking to create an airy, inviting feel. By removing the visual weight of solid cabinet doors, open shelves allow light to flow freely, making the kitchen appear larger and more open. They also provide an opportunity to showcase your favorite dishware, colorful cookbooks, and charming decorative items, adding personality and warmth to the room.

However, open shelving does come with its considerations. It requires a commitment to organization and cleanliness, as every dish and item is on display. This can be a wonderful chance to curate a collection that reflects your style—think artfully arranged plates, vibrant bowls, and even hanging plants for a touch of greenery. To enhance the cheerful vibe, consider using colorful dishes or containers that pop against the backdrop of your walls.

On the flip side, traditional cabinets offer a more streamlined and tidy appearance, providing a place to hide away kitchen clutter. If you prefer a more minimalistic approach or have a busy kitchen that requires easy access to tools and ingredients, cabinets might be your best bet. You can still infuse brightness and cheerfulness into your kitchen through the choice of cabinet colors or finishes. Light, neutral shades or cheerful pastels can keep the space feeling fresh and lively.

Ultimately, whether you opt for open shelving or cabinets, think about combining both elements for an eclectic yet cohesive look. Perhaps you can incorporate open shelves for select items while keeping the bulk of your storage in cabinets. This balance not only creates visual interest but also allows you to enjoy the benefits of both styles, fostering an atmosphere that is as functional as it is inviting. Whichever route you choose, ensuring that your kitchen reflects your personal style will create a space that you love to spend time in, making every meal prep a cheerful experience.

8. Revamping Countertops: Materials that Brighten Your Kitchen

When it comes to transforming your kitchen into a bright and cheerful space, revamping your countertops is a game changer. The right material not only enhances the aesthetic appeal of your kitchen but also sets the tone for the entire room. Here are some materials that can infuse light and vibrancy into your culinary haven.

**Quartz:** Known for its durability and versatility, quartz countertops come in an array of colors and patterns that can mimic the look of natural stone while offering a more uniform appearance. Opt for lighter shades like soft whites or pale grays with subtle veining to create a clean, bright look that reflects light beautifully. The non-porous surface also makes it easy to maintain, ensuring that your kitchen remains as cheerful as it is functional.

**Marble:** If you’re aiming for an elegant touch, marble is a classic choice. Its natural beauty and unique veining patterns add character to your kitchen. White marble with gray or gold veining can exude a fresh, airy vibe, making the space feel open and inviting. Though it requires a bit more maintenance, the stunning aesthetic it brings can be well worth the effort.

**Butcher Block:** For a warm, inviting atmosphere, consider butcher block countertops. Made from hardwood, these surfaces add a rustic charm and can easily brighten up your kitchen, particularly in lighter wood finishes like maple or ash. They provide a cozy, homey feel while being highly functional for food preparation. Pair them with bright cabinetry or colorful accessories to create a balanced, cheerful environment.

**Laminate:** If you’re looking for budget-friendly options, laminate countertops have come a long way in design and durability. Available in a variety of bright colors and patterns, laminate can mimic the look of more expensive materials while adding a splash of color to your kitchen. Choose bold hues or playful prints to create a lively atmosphere that reflects your personality.

**Glass:** For a sleek, modern look, consider glass countertops. They are not only striking but also reflect light, making your kitchen feel spacious and bright. Available in frosted or polished finishes, glass can be an eye-catching centerpiece. Pair it with contrasting elements like dark cabinetry or vibrant backsplash tiles to create a stunning visual impact.

By selecting the right countertop material, you can significantly brighten your kitchen, creating a space that is not only functional but also a joy to spend time in. Whether you prefer the elegance of marble, the warmth of butcher block, or the modernity of glass, revamping your countertops can breathe new life into your kitchen makeover, making it a cheerful gathering place for family and friends.

9. Adding a Splash of Art: Decor Ideas for Personal Touches

A kitchen makeover isn’t just about new cabinets and countertops; it’s also about infusing your personal style and creativity into the space. One of the most effective ways to achieve this is by adding a splash of art. Artwork can transform the kitchen from a purely functional area into a vibrant and inspiring hub where culinary magic happens.

Begin by selecting pieces that resonate with you—whether it’s a bold abstract painting, a whimsical print of vegetables, or a gallery wall showcasing family photos in eclectic frames. A large canvas can serve as a stunning focal point above the kitchen island, while smaller pieces can be arranged around the cooking area or on open shelving. Don’t shy away from incorporating three-dimensional art, such as a decorative ceramic bowl or a handmade wooden clock, which can add depth and texture to your kitchen.

Consider creating a dedicated art corner with a small easel that showcases rotating artwork or seasonal decorations. This not only keeps the space feeling fresh but also invites guests to engage with your creativity. If you have children, involve them in the process by displaying their artwork or creating a fun chalkboard wall where they can unleash their artistic flair.

Furthermore, practical art can also enhance your kitchen’s functionality. Hang a set of colorful, decorative utensils or a vibrant spice rack that doubles as a statement piece. Choose wall decals or murals that reflect your love for cooking or your favorite culinary quotes; these can easily be changed out for a quick refresh.

By integrating art into your kitchen design, you not only elevate its aesthetic appeal but also create a warm and inviting atmosphere that reflects your unique personality. Every meal prepared in a space adorned with personal touches becomes a joyful experience, making your kitchen not just a place to cook, but a canvas for your life and creativity.

10. Innovative Storage Solutions: Keeping Your Kitchen Organized

In any kitchen makeover, innovative storage solutions are essential for creating a space that is not only bright and cheerful but also functional and organized. A clutter-free kitchen allows for easier meal prep, enhances your cooking experience, and keeps the joyful energy flowing as you whip up your favorite dishes. Here are some creative ideas to inspire you.

Start by maximizing vertical space with open shelving. Floating shelves can showcase your beautiful dishware, cookbooks, or even potted herbs, adding both charm and accessibility. Opt for colorful or patterned plates that pop against the wall, bringing an artistic flair to your kitchen.

Consider incorporating pull-out drawers or baskets in your cabinets. These can be particularly handy for storing pots and pans, making it easy to access what you need without having to dig through a pile. You can even label each drawer or basket to streamline your cooking process further.

Don’t overlook the power of magnetic boards or strips. These can be used to hold knives, spices, or utensils, freeing up counter space while adding a sleek, modern look. Similarly, a pegboard can serve as a versatile solution, allowing you to hang pots, pans, and even kitchen tools in a visually appealing manner.

Finally, think about utilizing the often-overlooked areas in your kitchen, such as under the sink or in corners. Installing tiered shelves or lazy Susans can make these spaces more accessible and efficient. By creatively organizing and maximizing every inch of your kitchen, you not only enhance its functionality but also contribute to a bright and cheerful atmosphere that invites you to enjoy the art of cooking.

With these innovative storage solutions, your kitchen makeover will not only inspire joy but also promote a sense of order and efficiency, making it a delightful space for culinary creativity.

11. The Impact of Textiles: Bright Curtains, Rugs, and Towels

The impact of textiles in your kitchen makeover cannot be overstated. While walls and cabinets form the bones of the space, it’s the fabrics that breathe life and character into your culinary haven. Bright curtains, vibrant rugs, and cheerful towels can transform an ordinary kitchen into a delightful and inviting environment.

Start with the curtains; they frame your windows and set the tone for the entire room. Opt for bold patterns or vivid colors that reflect your personality and style. Floral prints, geometric designs, or even cheerful stripes can add an upbeat touch. Light, airy fabrics like cotton or linen will allow natural light to filter through, creating a warm and welcoming atmosphere. For an extra pop, consider layering sheer curtains with solid drapes for depth and dimension.

Next, turn your attention to rugs. A lively area rug can anchor the space while providing a splash of color and texture underfoot. Choose a durable, easy-to-clean material that can withstand the hustle and bustle of a kitchen. Think about playful patterns or bright hues that complement your existing décor. A striking rug can also serve as a focal point, drawing the eye and elevating the overall aesthetic of the kitchen.

Don’t forget the towels—these everyday essentials are an opportunity to express your style. Bright, patterned dish towels or aprons can add a cheerful touch and make mundane chores feel a little more enjoyable. You can coordinate these textiles with your curtains and rugs for a cohesive look or mix and match for a more eclectic vibe.

Lastly, consider the small details: pot holders, oven mitts, and table linens can all contribute to the cheerful ambiance you’re aiming for. By carefully selecting textiles that resonate with your vision, you can create a kitchen that not only looks stunning but also feels warm and inviting, encouraging family gatherings and culinary adventures alike. A bright kitchen is not just about aesthetics; it’s about creating a space that inspires joy and creativity every time you step inside.

12. DIY Projects: Personalizing Your Kitchen on a Budget

When it comes to transforming your kitchen into a bright and cheerful space, DIY projects offer an unbeatable combination of creativity, personalization, and budget-friendliness. Embracing a do-it-yourself approach not only allows you to infuse your unique personality into your kitchen but also helps you save money while making impactful changes.

Start by considering simple yet effective projects that can elevate the aesthetic of your kitchen. One popular idea is to paint your cabinets in a vibrant hue. A fresh coat of paint can breathe new life into worn-out cabinetry, creating an inviting atmosphere. Choose colors like sunny yellows or soft mint greens to evoke a sense of warmth and cheer.

Another fun project is creating a unique backsplash using peel-and-stick tiles or even repurposed materials. Whether you opt for colorful ceramic tiles or a mosaic of reclaimed wood, this element can serve as a focal point, adding character and charm to your space.

For those who enjoy crafting, consider making your own kitchen decor. Handmade wall art, personalized recipe boards, or even a herb garden planted in repurposed jars can add a touch of whimsy and practicality. Not only do these projects beautify your kitchen, but they also give you a sense of accomplishment and ownership over your space.

Additionally, swapping out hardware like cabinet knobs and drawer pulls is an easy and inexpensive way to update your kitchen’s look. Choose bright, playful designs or quirky shapes that reflect your style—these small changes can have a significant impact on the overall feel of your kitchen.

Finally, don’t forget about organization! DIY custom shelves or colorful storage solutions can help declutter your space while providing a cheerful, organized environment. Use baskets in vibrant colors or patterned bins to store utensils, cookbooks, or pantry items, keeping everything within reach and visually appealing.

By embarking on these DIY projects, you can create a kitchen that not only looks bright and cheerful but also feels like a true reflection of you. So gather your supplies, unleash your creativity, and watch as your kitchen transforms into a delightful hub of warmth and joy!

13. The Role of Appliances: Choosing Colors and Styles that Shine

When it comes to a kitchen makeover, appliances play a pivotal role—not just in functionality but also in setting the tone for the entire space. Choosing the right colors and styles for your appliances can transform your kitchen from mundane to magnificent, infusing it with brightness and cheer that resonates with your personal style.

Start by considering the color palette of your kitchen. If you’re aiming for a bright and cheerful atmosphere, opt for vibrant hues like sunny yellows, refreshing greens, or playful blues. These lively colors can be reflected in your appliances, whether you choose a bold stand mixer in a juicy tangerine or a retro-style refrigerator in mint green. Such choices don’t just serve a practical purpose; they become statement pieces that invite warmth and personality into the heart of your home.

For a more cohesive look, you might consider matching your appliances to your cabinetry. Sleek stainless steel offers a modern touch and pairs beautifully with white or pastel cabinets, creating a luminous effect that brightens up the space. If you prefer a more classic vibe, opt for matte black appliances that create a striking contrast against light-colored cabinets, grounding the room while keeping it stylish.

Don’t forget about the style of the appliances themselves! A vintage-inspired design can evoke nostalgia and charm, while a minimalist, contemporary style can keep the space feeling fresh and uncluttered. Whatever aesthetic you choose, make sure it aligns with the overall theme of your kitchen. By selecting appliances that shine in both color and style, you not only enhance the visual appeal of your kitchen but also create an inviting environment that makes cooking and gathering a joyous experience.

In this kitchen makeover journey, let your appliances be more than just tools; let them be a vibrant expression of your culinary creativity and personal flair!

14. Creating a Cozy Nook: Designing a Relaxing Eating Area

Transforming a corner of your kitchen into a cozy nook can significantly enhance both its functionality and ambiance, making it a delightful spot for meals, morning coffee, or casual conversations. To design a relaxing eating area, start by selecting a small table that fits well within the space, ensuring that it complements your kitchen’s overall style—whether that be rustic farmhouse, modern minimalist, or vibrant eclectic.

Next, consider the seating. Soft, cushioned chairs or a charming banquette can create an inviting atmosphere. Upholster the seating with cheerful fabrics, perhaps in bright florals or warm, solid colors that echo the hues around your kitchen. Adding layered throw pillows can bring an extra touch of comfort, inviting you to sink in and linger a little longer over breakfast or an afternoon snack.

Lighting plays a crucial role in establishing a cozy nook. Opt for pendant lights with a soft glow or a vintage-inspired chandelier to create warmth and intimacy. If natural light floods in, maximize it by keeping window treatments light and airy—think sheer curtains or bamboo shades that allow sunlight to filter through while maintaining privacy.

Don’t forget the finishing touches. Incorporate greenery with potted plants or herbs that can double as decor and functional kitchen aids. A little artwork on the walls—perhaps framed prints of culinary themes or local landscapes—can personalize the space and spark conversation.

Lastly, a small bookshelf or a display of cookbooks can enhance the nook’s character while also providing inspiration for your next culinary adventure. By thoughtfully curating this corner, you not only create a relaxing eating area but also a cherished retreat within your home, inviting family and friends to gather and enjoy life’s simple pleasures together.

15. Final Touches: How to Maintain Brightness and Cheerfulness Long-term

Once you’ve transformed your kitchen into a bright and cheerful haven, the next step is to ensure that its vibrancy lasts over time. Maintaining the uplifting atmosphere of your newly revamped space involves a few thoughtful final touches and regular upkeep.

First and foremost, consider investing in durable, easy-to-clean materials for countertops and cabinetry. Not only do these choices help maintain the pristine look of your surfaces, but they also contribute to a brighter environment. Glossy finishes reflect light, enhancing the overall brightness of the kitchen, while materials like quartz or laminate can withstand the rigors of daily use without losing their charm.

Next, don’t overlook the importance of plants. Incorporating some lush greenery into your kitchen not only adds color but also improves air quality and creates a more inviting atmosphere. Choose low-maintenance varieties like succulents or herbs, which can thrive in the bright, cheerful setting you’ve created. For a pop of color, consider vibrant pots that complement your kitchen’s palette.

Regular cleaning is essential to uphold the cheerful vibe of your kitchen. Schedule weekly deep cleans focusing on surfaces, appliances, and the floors to keep your space looking fresh and inviting. Additionally, consider implementing a seasonal refresh—swap out decor items, update dishware, or change table linens to reflect the current season. This practice keeps the kitchen feeling dynamic and engaging.

Lastly, consider your lighting. To maintain that bright and cheerful ambiance, ensure that your kitchen is well-lit at all times. Utilize a combination of ambient, task, and accent lighting to create layers of brightness. Dimmable options can help adjust the mood from lively gatherings to cozy dinners, ensuring your kitchen remains a cheerful place no matter the occasion.

By integrating these final touches into your kitchen routine, you’ll not only preserve the vibrancy of your makeover but also create a space that continuously inspires joy and creativity—a true reflection of the heart of your home.

As we wrap up our exploration of inspiring ideas for a bright and cheerful kitchen makeover, we hope you feel energized and ready to transform your culinary space into a vibrant hub of creativity and joy. Whether it’s through vibrant color palettes, innovative storage solutions, or playful decor accents, the possibilities for revitalizing your kitchen are endless. Remember, a well-designed kitchen not only enhances your cooking experience but also serves as a warm gathering place for family and friends. So, roll up your sleeves, unleash your creativity, and embark on this exciting journey to create a kitchen that truly reflects your personality and brings a smile to your face. We can’t wait to see your stunning transformations—be sure to share your before-and-after photos with us! Happy decorating!

How to choose the right paint color for your kitchen?

The kitchen is often regarded as the heart of the home, a bustling hub where culinary creations come to life and memories are made over shared meals.

As the backdrop to countless family gatherings and intimate dinners, choosing the perfect paint color for this vital space can significantly influence its ambiance and functionality. With an overwhelming array of hues and shades to consider, from serene pastels to bold, vibrant tones, the decision can feel daunting. But fear not! In this ultimate guide, we’ll navigate the intricate world of color selection, exploring how light, space, and your personal style can harmonize to create a kitchen that is not only visually stunning but also a true reflection of your taste. Whether you’re aiming for a cozy farmhouse feel or a sleek modern aesthetic, join us as we uncover tips, tricks, and inspiration to help you make the right choice and transform your kitchen into a space you’ll love for years to come.

1. Understanding Color Psychology in the Kitchen

How to choose the right paint color for your kitchen?
Credit : whatcanu.com

When it comes to selecting the perfect paint color for your kitchen, understanding color psychology is essential. Colors can evoke emotions, influence moods, and even affect our appetite, making them a crucial element in a space where we gather to cook, eat, and socialize.

In the kitchen, warm colors such as reds, oranges, and yellows stimulate energy and enthusiasm. These vibrant hues are often associated with warmth and comfort, making them ideal for fostering an inviting atmosphere. A splash of red can enhance appetite and conversation, while sunny yellows can inspire a cheerful ambiance, perfect for morning breakfasts or family dinners.

On the other hand, cooler colors like blues and greens promote calmness and relaxation. Soft blues can create a serene environment, making your kitchen a peaceful place to unwind after a long day. Greens, reminiscent of nature, can add a refreshing touch and bring a sense of balance to the space. These colors can be particularly appealing in open-plan homes where the kitchen flows into other areas of the house.

Neutral colors, such as whites, grays, and beiges, provide a timeless backdrop that allows for versatility. They can make your kitchen feel spacious and airy, while also serving as a blank canvas for colorful accents and decor. Choosing a neutral palette can be an excellent option if you prefer to change up your decor frequently or want to highlight special features in your kitchen.

Ultimately, the key to harnessing color psychology in your kitchen is to consider the atmosphere you want to create. Do you envision a vibrant, lively space or a calm, serene retreat? By thoughtfully selecting colors that align with your desired mood, you can transform your kitchen into not just a functional area, but a welcoming and emotionally resonant part of your home.

2. Assessing Your Kitchen’s Lighting

When it comes to choosing the perfect paint color for your kitchen, one of the most critical factors to consider is the lighting. The way light interacts with paint can dramatically alter the hue and ambiance of your space, so taking the time to evaluate your kitchen’s lighting is essential.

Begin by observing the natural light that floods into your kitchen throughout the day. Is your kitchen bathed in warm, golden sunlight in the morning, or does it receive cooler, bluish tones in the late afternoon? The direction your windows face plays a significant role; south-facing kitchens tend to be brighter and warmer, while north-facing ones can feel cooler and more subdued. By analyzing these variations, you can better predict how different colors will appear at different times of the day.

Next, consider your artificial lighting options. The type of bulbs you use—whether incandescent, fluorescent, or LED—can influence the paint color’s perception. Incandescent bulbs emit a warm, inviting glow that can enhance warmer paint shades, making them feel cozy and inviting. In contrast, fluorescent lighting tends to cast a cooler, more clinical light that can wash out warmer tones and accentuate cooler hues.

To truly understand how a color will look in your space, it’s advisable to test paint samples under various lighting conditions. Apply swatches of your chosen colors on the walls and observe them at different times of the day and under different lighting scenarios. This simple yet effective step will help you see how the paint interacts with your kitchen’s unique lighting, ensuring that you select a shade that not only complements your style but also enhances the overall atmosphere of the room.

By carefully assessing your kitchen’s lighting, you’re one step closer to achieving a harmonious and inviting space that reflects your personal taste and lifestyle.

3. Considering Your Kitchen Size and Layout

How to choose the right paint color for your kitchen?
Credit : whatcanu.com

When it comes to selecting the perfect paint color for your kitchen, understanding the size and layout of your space is crucial. The dimensions and configuration of your kitchen can dramatically influence how colors are perceived and how they interact with the overall design.

In smaller kitchens, light and airy colors can create an illusion of space, making the area feel larger and more welcoming. Soft whites, pale blues, or gentle pastels reflect light and open up the room, providing a fresh, clean aesthetic. Consider using a satin or eggshell finish to enhance the light reflection, which can further brighten up cramped quarters.

On the other hand, larger kitchens offer more freedom in color choices. This is an opportunity to explore bolder hues that can add depth and character to the space. Rich shades like deep navy, forest green, or even vibrant reds can create a dramatic focal point, especially if the kitchen features an island or a unique architectural detail. However, it’s essential to balance these bold colors with lighter accents—perhaps in the form of cabinetry or backsplash—to maintain an inviting atmosphere.

Additionally, the layout of your kitchen can dictate how color transitions throughout the space. If you have an open-concept design that flows into adjacent rooms, consider how your chosen color will harmonize with neighboring areas. A seamless transition can enhance the overall flow of your home, while contrasting colors can define spaces but may require careful coordination to avoid clashing.

Finally, don’t forget about the natural light that enters your kitchen. A color that looks stunning in the afternoon sun may appear entirely different in the evening’s artificial lighting. Taking the time to test paint samples in various lighting conditions can provide a clearer picture of how your choices will ultimately look in your kitchen’s unique environment. By thoughtfully considering the size and layout of your kitchen, you can select a paint color that not only beautifies the space but also enhances its functionality and ambiance.

4. Exploring Current Kitchen Trends

When it comes to selecting the ideal paint color for your kitchen, keeping an eye on current trends can provide refreshing inspiration and help you create a space that feels modern and inviting. As you explore the latest kitchen design trends, you’ll find a dynamic range of color palettes and styles that cater to various tastes and aesthetics.

One of the hottest trends in kitchen design is the use of bold, deep hues. Rich colors like navy blue, forest green, and charcoal gray are making waves, adding an element of sophistication and warmth to the heart of the home. These darker shades can create a stunning contrast against white cabinetry or light countertops, offering a dramatic yet inviting ambiance.

On the flip side, soft pastels are also gaining popularity, providing a gentle touch that evokes a sense of calmness. Colors like mint green, blush pink, and pale yellow can brighten up your kitchen, making it feel airy and cheerful. These lighter shades work beautifully in smaller spaces, helping them feel larger and more open.

Another noteworthy trend is the return of earthy tones. Shades inspired by nature, such as terracotta, sage green, and sandy beige, are perfect for creating a rustic, organic feel in your kitchen. These colors not only connect your space to the outdoors but also work harmoniously with natural materials like wood and stone.

Additionally, don’t forget about the impact of two-tone kitchens, where contrasting colors are used to define different areas of the space. For instance, pairing a dark color on the lower cabinets with a lighter hue on the upper cabinets can add depth and interest, while allowing you to experiment with multiple shades without overwhelming the room.

As you consider your options, take time to browse design magazines, visit home decor websites, or even explore social media platforms like Pinterest and Instagram for the latest kitchen color inspirations. By staying attuned to current trends, you can choose a paint color that not only reflects your personal style but also positions your kitchen as a chic, contemporary gathering place for family and friends.

5. Choosing a Color Palette: Warm, Cool, or Neutral

How to choose the right paint color for your kitchen?
Credit : whatcanu.com

When it comes to selecting the right color palette for your kitchen, one of the most crucial decisions is whether to opt for warm, cool, or neutral tones. Each category offers distinct vibes and can significantly influence the overall atmosphere of your cooking space.

**Warm Colors**: Warm hues like reds, oranges, and yellows evoke feelings of comfort and energy. They can create a cozy environment that invites family and friends to gather. Imagine a rich terracotta for your walls paired with creamy white cabinetry, which not only encourages conversation but also stimulates appetite—the perfect recipe for a bustling kitchen. These colors are ideal for homes with a rustic or traditional decor style, as they harmonize beautifully with wooden accents and natural materials.

**Cool Colors**: On the other hand, cool tones such as blues, greens, and purples can introduce a sense of calm and tranquility to your kitchen. A soft sage green or a refreshing sky blue can make your space feel airy and spacious, perfect for smaller kitchens that may benefit from an illusion of openness. These colors work wonderfully in modern or minimalist designs, providing a serene backdrop against sleek appliances and contemporary fixtures. Additionally, cool colors can balance out warmer elements in your kitchen, creating a harmonious blend that feels both inviting and refreshing.

**Neutral Colors**: If you prefer a more understated approach, neutral colors like whites, grays, and beiges offer versatility and timelessness. A classic white kitchen exudes cleanliness and sophistication, while a warm beige can add a touch of coziness without overwhelming the senses. Neutrals provide a blank canvas that allows for easy experimentation with decorative elements, such as colorful dishware or vibrant artwork. This flexibility makes them an excellent choice for those who enjoy changing their decor frequently or want to ensure their kitchen remains stylish for years to come.

In choosing a color palette, consider not only your personal preferences but also the size and layout of your kitchen, the amount of natural light it receives, and how the chosen colors will complement your overall home decor. Each palette has its advantages, and the right choice can transform your kitchen from a simple cooking space into a welcoming hub of creativity and connection.

6. The Role of Cabinet and Countertop Colors

When it comes to choosing the perfect paint color for your kitchen, the hues of your cabinets and countertops play a crucial role in the overall aesthetic. These elements serve as the foundation of your kitchen’s design, influencing not only the mood but also the perceived size and lighting of the space.

Begin by considering the existing colors of your cabinetry and countertops. If you have dark wood cabinets or rich, textured countertops, lighter paint colors can create a beautiful contrast, making the room feel more open and inviting. Think soft creams, pale grays, or even a fresh mint green to brighten up the space and draw attention to your cabinetry’s natural beauty.

On the other hand, if your cabinets are painted a bright white or a light pastel, you might want to opt for bolder paint colors on the walls to add depth and character. A deep navy blue, a vibrant coral, or even a sophisticated charcoal can bring a modern flair to your kitchen while framing your cabinetry beautifully.

Additionally, consider the undertones of your countertops. A countertop with warm undertones works harmoniously with warm wall colors, such as buttery yellows or earthy terracotta shades. Conversely, cooler-toned countertops pair well with colors like soft blues or crisp whites, maintaining a cohesive and stylish look.

Don’t forget about texture, either. Glossy finishes on cabinets will reflect light and can enhance lighter wall colors, while matte finishes can soften the overall vibe.

Ultimately, the synergy between cabinet and countertop colors and your chosen paint can transform your kitchen into a cohesive space that feels both functional and inviting. Take the time to explore color swatches alongside your cabinet and countertop samples to visualize how they work together. This thoughtful approach will ensure your kitchen is not only beautiful but uniquely yours.

7. Testing Paint Samples: How to Do It Right

How to choose the right paint color for your kitchen?
Credit : whatcanu.com

When it comes to selecting the perfect paint color for your kitchen, testing paint samples is an essential step that can make all the difference in achieving the look you desire. However, it’s not just about slapping a few swatches on the wall and calling it a day; there’s a method to the madness that can help you make the most informed decision.

First, choose a selection of colors that resonate with you, keeping in mind the overall theme and feel you want for your kitchen. Whether it’s a modern, sleek aesthetic or a cozy, farmhouse vibe, narrowing down your options will make the testing process more manageable.

Once you have your colors, purchase sample pots of your top choices. It’s best to opt for small quantities to avoid waste and unnecessary expense. Now, here comes the important part: application. Instead of painting a small swatch in one area, consider painting a larger rectangle—about two feet by two feet—on different walls or sections of your kitchen. This allows you to see how the color interacts with various lighting conditions throughout the day.

Observe how the paint looks in both natural light and artificial lighting. Colors can change dramatically depending on the time of day and the type of bulbs in your kitchen. Take note of how the color feels at different times—does it appear warm and inviting in the morning sunlight, or does it take on a cooler tone in the late afternoon?

Additionally, don’t forget to consider the other elements in your kitchen. Take a step back and assess how your chosen colors play off your cabinetry, countertops, and flooring. It can be helpful to have these materials on hand when testing so you can visualize the entire space cohesively.

Finally, be patient and give yourself the time to really see the colors in action. Live with the samples for a few days, or even a week, to truly understand how they fit into your lifestyle and routine. By taking the time to test paint samples thoughtfully, you’ll be better equipped to choose a color that you’ll love for years to come—one that reflects your style and enhances the heart of your home.

8. Coordinating with Adjacent Spaces

When selecting the perfect paint color for your kitchen, it’s crucial to consider how it will coordinate with adjacent spaces. The kitchen is often the heart of the home, acting as a bridge between living areas, dining rooms, and hallways. A well-thought-out color scheme can create a seamless flow throughout your home, enhancing the overall aesthetic and making every space feel connected.

Begin by assessing the colors and styles of the rooms that adjoin your kitchen. If your dining room is painted a deep, rich navy, you might want to choose a lighter shade of blue or a complementary color that harmonizes with it, such as soft gray or crisp white. This will not only create visual continuity but also ensure that each room feels inviting and cohesive.

Additionally, consider the materials and finishes in adjacent spaces. For instance, if your living room features warm wooden tones, you may want to opt for a warm, earthy paint color for your kitchen—think terracotta or creamy beige—to echo that warmth and create a welcoming atmosphere. If you have an open-concept layout, remember that the kitchen color will be more visible and can impact the perception of space, so keep transitions in mind.

You can also experiment with colors that create contrast—like a bold kitchen color that pops against neutral tones in the living area—while maintaining a balance that feels intentional rather than jarring. Using color swatches to see how different shades interact with the light and surrounding colors at various times of day will help you make an informed choice.

Lastly, don’t forget about the decorative elements, such as artwork and furniture, that will be seen in both areas. These pieces can help tie your color choices together, allowing you to strike the perfect balance between individuality and coherence across your home. By thoughtfully coordinating your kitchen paint color with adjacent spaces, you’ll create an atmosphere that feels curated and harmonious, inviting family and friends to gather and enjoy the warmth of your home.

9. The Importance of Finish: Matte vs. Gloss

When it comes to selecting the perfect paint color for your kitchen, the finish you choose can be just as crucial as the color itself. The finish not only affects the overall aesthetic but also influences durability, maintenance, and the way light interacts with your space. Understanding the differences between matte and gloss finishes can help you make an informed decision that aligns with both your style and practical needs.

**Matte Finish:** Matte paints offer a soft, velvety appearance that can create a warm, inviting atmosphere in your kitchen. They excel at hiding imperfections in walls, making them a popular choice for older homes or those with textured surfaces. However, while matte finishes can contribute to a cozy vibe, they may not be the best option for high-traffic areas like kitchens. They tend to be less washable and can show stains more easily, requiring more frequent touch-ups. If you lean toward a matte finish, consider using it in areas that are less prone to splatters, such as on upper cabinets or accent walls.

**Gloss Finish:** On the other hand, gloss paints are known for their reflective qualities, which can brighten up a space by bouncing light around the room. This finish is highly durable and easy to clean, making it an excellent choice for kitchens where spills and splatters are a part of daily life. Glossy surfaces can withstand scrubbing and are less likely to retain stains, making them ideal for lower cabinets, trim, or even the walls around your cooking area. However, they can highlight imperfections, so proper wall preparation is essential before application.

Ultimately, the choice between matte and gloss finishes will depend on your kitchen’s design, your lifestyle, and the overall vibe you want to create. Many homeowners choose to combine finishes, using matte for a serene backdrop while incorporating gloss on cabinetry or trim for a touch of sophistication. Whatever you decide, understanding the characteristics of each finish will empower you to create a kitchen that not only looks beautiful but also stands the test of time.

10. Tips for Small Kitchens: Making Colors Work

When it comes to small kitchens, the right color choice can make all the difference between a cramped, claustrophobic space and a bright, airy haven. The key is to opt for hues that create an illusion of space while still reflecting your personal style. Here are some essential tips for making colors work in your small kitchen.

**1. Embrace Light Colors:** Lighter shades, such as soft whites, pale grays, and gentle pastels, can significantly enhance the sense of space. These hues reflect more natural light, making your kitchen feel larger and more open. Consider a creamy off-white for the walls paired with crisp white cabinetry to create a seamless, expansive look.

**2. Use a Monochromatic Palette:** A monochromatic color scheme—where you choose varying shades of a single color—can also work wonders in small spaces. This approach creates a cohesive and harmonious environment. For instance, a palette of soft blues can range from a delicate sky blue on the walls to deeper navy accents in your kitchen accessories.

**3. Add Depth with Dark Accents:** While light colors are essential, incorporating darker accents can add depth and character to your small kitchen. Think about using a navy or charcoal gray for an accent wall, or opt for darker cabinetry to create a focal point that draws the eye. Just remember to balance darker hues with lighter elements to maintain a sense of openness.

**4. Create Contrast with Hardware and Accessories:** Incorporating contrasting colors through your kitchen hardware and accessories can bring both interest and personality to your small kitchen. For example, sleek black handles on white cabinets or colorful dishware on neutral shelves can provide visual intrigue without overwhelming the space.

**5. Consider Reflective Surfaces:** Glossy finishes, such as high-gloss paint or mirrored backsplashes, can amplify light and create a more spacious feel. These reflective surfaces not only brighten the area but also add a touch of elegance and sophistication, making your small kitchen feel more upscale.

**6. Use Accent Colors Wisely:** If you’re eager to incorporate bold colors, do so strategically. Choose one or two accent colors to highlight specific areas, like a cheerful yellow for your kitchen island or vibrant green for your bar stools. This way, you can inject personality into your space without overwhelming it.

By thoughtfully selecting your color scheme and utilizing these tips, you can transform your small kitchen into a stylish and inviting space that feels larger than life. Embrace the challenge of working with limited square footage, and let your creativity shine through with a color palette that perfectly suits your taste and lifestyle.

11. Incorporating Bold Colors vs. Subtle Shades

When it comes to choosing the perfect paint color for your kitchen, the decision often boils down to a captivating tug-of-war between bold colors and subtle shades. Each approach brings its own unique advantages and can fundamentally alter the atmosphere of the space.

**Incorporating Bold Colors:**

Daring to embrace bold colors can transform your kitchen into a vibrant focal point of your home. Shades like fiery reds, deep blues, or radiant yellows can inject personality and energy into the room, making it a lively place to gather and create. Bold colors can evoke feelings of warmth and excitement, sparking creativity in your culinary endeavors. Imagine a bright citrusy orange accent wall paired with sleek white cabinetry; the result is a kitchen that feels both modern and invigorating. However, it’s important to balance these vivid hues with neutral tones in your furnishings or decor to avoid overwhelming the space.

**Opting for Subtle Shades:**

On the other hand, subtle shades offer a calming and timeless elegance that can make your kitchen feel spacious and serene. Soft pastels, muted grays, and gentle earth tones can create a soothing backdrop, allowing for versatility in accessorizing and styling. These colors serve as a blank canvas, enabling you to experiment with bolder kitchen accessories, such as colorful dishware or striking artwork, without clashing. For instance, a pale sage green paired with natural wood accents can bring a touch of the outdoors inside, creating a fresh and inviting atmosphere. Subtle shades also tend to be more forgiving and can easily adapt to changing trends, ensuring your kitchen remains stylish for years to come.

Ultimately, the choice between bold and subtle colors should reflect your personality, lifestyle, and the overall aesthetic you wish to achieve. Whether you decide to make a statement with vibrant tones or cultivate an oasis with soft hues, the right paint color will breathe new life into your kitchen, making it a place where memories are made and shared.

12. DIY vs. Hiring a Professional: What to Consider

When it comes to choosing the perfect paint color for your kitchen, one of the most significant decisions you’ll face is whether to tackle the project yourself or bring in a professional. Each option has its merits and pitfalls, so let’s break down what to consider before making your choice.

**DIY: The Creative Freedom and Cost Savings**
If you’re a hands-on kind of person or simply looking to save some money, a DIY approach can be incredibly rewarding. Choosing to paint your kitchen yourself allows you to experiment with colors and techniques, providing the opportunity to express your personal style without the constraints of someone else’s vision. You can take your time, test various shades on the wall, and make adjustments as inspiration strikes. Plus, you’ll have the satisfaction of knowing you completed the project with your own two hands.

However, DIY painting isn’t without its challenges. It can be physically demanding, requiring you to move furniture, tape edges, and spend hours applying paint. For those without experience, achieving a polished finish can be tricky, and what starts as a fun project may turn into a stressful ordeal. Also, consider the time commitment; painting a kitchen can take longer than expected, especially if you’re new to the process.

**Hiring a Professional: The Expertise and Efficiency**
On the other hand, hiring a professional painter can take the weight off your shoulders. Professionals bring a wealth of experience, ensuring that the job is done efficiently and to a high standard. They’re familiar with different types of paint finishes, know how to handle tricky areas like cabinets and trim, and often have access to better quality tools and materials that can result in a more durable and attractive finish.

While hiring a pro may come with a higher upfront cost, think of it as an investment in your home. A beautifully painted kitchen can significantly boost your property value, making it a worthwhile expense. Moreover, professionals can often work around your schedule, ensuring minimal disruption to your daily life.

**Final Thoughts**
Ultimately, the decision between DIY and hiring a professional depends on your budget, time constraints, and confidence in your painting skills. If you choose to go the DIY route, be sure to arm yourself with the right tools and take your time to achieve the desired outcome. Conversely, if you opt for a professional, do your research, read reviews, and select someone whose style aligns with your vision. Whichever path you take, the right paint color will transform your kitchen into a space you love, so consider all angles before making your choice!

13. Common Mistakes to Avoid When Choosing Paint Colors

When it comes to selecting the perfect paint color for your kitchen, avoiding common pitfalls can save you time, money, and the dreaded regret that often comes with hasty decisions. One of the most frequent mistakes is neglecting to test colors in your space. Lighting plays a crucial role in how a color appears; a shade that looks stunning on a paint chip may look entirely different on your walls. Always sample a few swatches and observe how they change throughout the day as natural light shifts.

Another common blunder is failing to consider the kitchen’s existing elements, such as cabinetry, countertops, and appliances. Choosing a color that clashes with these features can create a disjointed look. Instead, aim for a palette that complements or contrasts harmoniously with your kitchen’s permanent fixtures, creating a cohesive and inviting atmosphere.

Overlooking the impact of emotion is yet another mistake. Color influences mood, so think carefully about the experience you want to create. Do you envision a calm and soothing space for family gatherings, or a vibrant and energizing environment for entertaining guests? Lastly, don’t shy away from going bold. Many homeowners opt for safe, neutral choices out of fear of making a mistake. However, incorporating an unexpected pop of color can add personality and flair to your kitchen, transforming it into the heart of your home.

By being mindful of these common mistakes, you can confidently navigate the world of paint colors and achieve a beautiful, functional kitchen that reflects your personal style.

14. Final Touches: Accessories and Decor that Complement Your Color Choice

Once you’ve settled on the perfect paint color for your kitchen, it’s time to elevate the space with thoughtfully chosen accessories and decor that harmonize with your color palette. The right finishing touches can transform a simple kitchen into a stunning culinary haven, enhancing both functionality and aesthetic appeal.

Start with the essentials: consider your kitchenware and appliances. If you’ve opted for a soft, pastel hue, complement it with vibrant, colorful accents—think striking red dish towels or bright yellow canisters. Conversely, if your walls are painted in a bold, dark shade, lighter accessories can create a beautiful contrast. Metallic finishes—like copper, brass, or stainless steel—can also add a touch of elegance and warmth, particularly against deep colors.

Next, don’t forget about textiles. The right curtains, table linens, or even chair cushions can play a significant role in your kitchen’s overall feel. Choose patterns that incorporate your wall color or go for complementary shades that add depth. For instance, if your kitchen features a serene blue, soft beige or cream accents can evoke a tranquil coastal vibe.

Wall art and decorative items should also be considered. Open shelving provides the perfect opportunity to display vibrant dishware or artful cookbooks that echo your chosen colors. Adding plants—whether it’s a vibrant herb garden on the windowsill or a striking centerpiece—can breathe life into the space while tying in natural elements that enhance your color scheme.

Finally, lighting is crucial. A well-placed pendant light or a stylish chandelier can not only illuminate your kitchen but also serve as a statement piece that ties together your color choices. Pay attention to the type of light bulbs you use, as they can dramatically influence how your paint color appears throughout the day. Warm bulbs can soften a stark palette, while cooler tones can enhance brighter shades.

By carefully selecting accessories and decor that complement your paint color, you can create a cohesive and inviting atmosphere that reflects your personal style, ensuring that your kitchen is not only a place for cooking but also a warm and welcoming space for gathering and entertaining.

15. Conclusion: Creating a Cohesive Look for Your Kitchen

In conclusion, creating a cohesive look for your kitchen is not just about selecting the right paint color; it’s about weaving together a harmonious blend of design elements that reflect your personal style and enhance the functionality of the space. The kitchen is often the heart of the home, where family and friends gather, so it’s essential that the atmosphere feels inviting and well thought out.

As you consider your paint choices, think about how they interact with your cabinetry, countertops, and flooring. A successful color palette should not only complement these features but also create a flow that extends into adjacent rooms, especially in open-concept designs. Whether you lean towards soothing neutral tones, vibrant hues, or a combination of both, your color selection should evoke the mood you desire—be it calm and serene or energetic and lively.

Don’t forget to factor in the natural light your kitchen receives throughout the day. Colors can shift dramatically under different lighting conditions, so it’s crucial to test your chosen shades at various times to ensure they maintain their appeal. Sample swatches can help you visualize how the colors will interact with the space and the overall aesthetic.

Finally, remember that layering textures and adding accents—such as backsplashes, hardware, and decorative elements—can further enhance the cohesive look you’re striving for. By thoughtfully selecting your paint color as part of a larger design strategy, you’ll create a kitchen that not only looks stunning but also feels like a true reflection of your home and lifestyle. Happy painting!

As we conclude our ultimate guide to choosing the perfect paint color for your kitchen, we hope you feel inspired and equipped to embark on this transformative journey. The right color can breathe new life into your space, reflecting your personal style while creating an inviting atmosphere for family and friends. Remember to consider the natural light, existing elements, and the overall mood you want to evoke as you make your selection. Whether you opt for a bold statement or a serene backdrop, your kitchen will not only be a culinary haven but also a reflection of your taste and creativity. So grab those swatches, envision your dream space, and get ready to unleash your inner designer—your perfect kitchen awaits!

What are the different types of light fixtures and their uses?

Lighting is more than just a functional necessity; it’s a key element that sets the mood, enhances aesthetics, and transforms the atmosphere of any space.

With a myriad of light fixtures available on the market, choosing the right one can feel overwhelming. From the soft glow of pendant lights that create an intimate dining experience to the bright, focused illumination of recessed lighting perfect for workspaces, each type of fixture serves a distinct purpose and style. In this comprehensive guide, we will explore various types of light fixtures, their unique features, and ideal applications, helping you make informed decisions that not only brighten your home but also reflect your personal style. Whether you’re redesigning a room, upgrading your lighting scheme, or simply seeking inspiration, this guide will illuminate your path to creating a beautifully lit environment that caters to your needs and enhances your everyday living.

1. Introduction to Lighting and Its Importance

What are the different types of light fixtures and their uses?
Credit : whatcanu.com

Lighting is often an overlooked aspect of interior design, yet it plays a pivotal role in shaping the ambiance, functionality, and overall aesthetic of any space. The right lighting can transform an ordinary room into an inviting haven, enhance productivity in a workspace, or create a cozy atmosphere for intimate gatherings. It sets the mood and can influence emotions, making it an essential element in both residential and commercial environments.

Understanding the importance of lighting goes beyond mere illumination. It involves recognizing how different types of light fixtures can serve various purposes, from providing task lighting for focused activities to creating ambient light that envelops a space in warmth. The strategic use of lighting can highlight architectural features, artwork, and decor, drawing attention to the elements you want to showcase while downplaying areas that may not be as visually appealing.

As we delve into this guide, we will explore the diverse types of light fixtures available, each with its unique characteristics and applications. From elegant chandeliers that serve as statement pieces to sleek recessed lights that offer a clean, modern look, each fixture has a specific role to play in enhancing the atmosphere of your home or workplace. Whether you’re redesigning a room, renovating a space, or simply seeking to improve the lighting in your environment, understanding these options will empower you to make informed choices that reflect both your style and functional needs. Join us as we illuminate the world of lighting, helping you navigate the myriad of choices available and discover how to effectively harness the power of light to enhance your daily life.

2. Understanding the Basics: Types of Light Fixtures

When it comes to lighting your space, understanding the different types of light fixtures available is essential for creating a well-lit, functional, and aesthetically pleasing environment. Each fixture serves a specific purpose and brings its unique charm to a room. Here’s a closer look at the primary types of light fixtures and how they can enhance your home or office.

### 1. **Ambient Lighting Fixtures**
Ambient lighting provides the foundational layer of light in any space, establishing a soft glow that illuminates the entire room. Common options include ceiling-mounted fixtures, chandeliers, and wall sconces. These fixtures are designed to offer general illumination, ensuring that every corner of the room is bright enough for day-to-day activities. When selecting ambient lighting, consider the height of your ceilings and the size of your space; larger rooms might benefit from a statement chandelier, while smaller areas may be better suited for flush-mount or semi-flush fixtures.

### 2. **Task Lighting Fixtures**
When you need focused light for specific tasks, task lighting is your go-to solution. These fixtures include desk lamps, under-cabinet lights, and pendant lights, which direct light where it’s needed most. For instance, a well-placed desk lamp can enhance your productivity while working, while under-cabinet lighting can transform a kitchen workspace into a chef’s paradise. Choose adjustable fixtures that allow you to direct light precisely where it’s needed, reducing strain on your eyes and enhancing functionality.

### 3. **Accent Lighting Fixtures**
Accent lighting is all about highlighting features within your space, such as artwork, architectural details, or beautiful plants. Track lighting, spotlights, and wall-mounted picture lights are all excellent choices for creating visual interest and depth. By strategically placing accent lighting, you can draw attention to your favorite decor items and create a layered lighting effect that adds warmth and character to your rooms.

### 4. **Decorative Lighting Fixtures**
While functionality is key, decorative lighting can also serve as a focal point in your design scheme. These fixtures range from ornate chandeliers and artistic pendant lights to whimsical table lamps. They not only provide illumination but also contribute to the overall aesthetic of your space, showcasing your style and personality. When selecting decorative lighting, consider the color, material, and shape to ensure it complements your decor while being a conversation starter.

### 5. **outdoor Lighting Fixtures**
Don’t forget about lighting for the exterior of your home! Outdoor lighting fixtures, such as garden lights, path lights, and wall sconces, enhance your curb appeal while providing safety and security. They allow you to enjoy your outdoor spaces at night, creating an inviting atmosphere for gatherings, barbecues, or quiet evenings under the stars. Look for weather-resistant options to ensure durability and longevity.

By understanding these basic types of light fixtures and their uses, you can make informed decisions that enhance the functionality and beauty of your space. Whether you’re renovating, redecorating, or simply looking to refresh your lighting, the right fixtures can transform your environment and illuminate your lifestyle.

3. Ambient Lighting: Creating a Warm Atmosphere

What are the different types of light fixtures and their uses?
Credit : whatcanu.com

Ambient lighting serves as the foundation of any well-designed space, creating a warm and inviting atmosphere that enhances the overall comfort of a room. This type of lighting is essential for providing a soft, overall glow that fills the area without overwhelming the senses. Think of it as the gentle embrace of light that welcomes you home after a long day.

When selecting ambient lighting, consider fixtures that diffuse light evenly, such as ceiling-mounted flush or semi-flush lights, chandeliers, or even large floor lamps. These fixtures can be strategically placed to eliminate harsh shadows and create a balanced illumination that softens the edges of furniture and architectural features.

For instance, a stylish pendant light hung over a dining table not only provides functional light for meals but also adds a touch of elegance, encouraging conversation and connection. Similarly, wall sconces can be used to accentuate the architecture of a hallway or living area, casting a warm glow that invites exploration.

In addition to traditional fixtures, consider incorporating other sources of ambient light, such as LED strips placed behind furniture or along shelves, to create a subtle, modern touch. Dimmers are also a fantastic addition, allowing you to adjust the brightness according to the time of day or the mood you want to set, whether it’s a cozy movie night or a lively gathering with friends.

Ultimately, ambient lighting is about establishing a sense of balance and tranquility within your space. By thoughtfully selecting the right fixtures and layers of light, you can transform any room into a welcoming retreat, ensuring that your home feels as inviting as it looks.

4. Task Lighting: Illuminating Workspaces Effectively

Task lighting plays a crucial role in creating functional and efficient workspaces, ensuring that you can focus on the task at hand without straining your eyes. Unlike ambient lighting, which sets the overall mood of a room, task lighting is specifically designed to illuminate areas where precise activities occur, such as reading, writing, cooking, or crafting.

When choosing task lighting, consider fixtures that provide direct, concentrated light to reduce shadows and enhance visibility. Desk lamps with adjustable arms or headlamps are perfect for home offices or study areas, allowing you to direct the light exactly where it’s needed. In kitchens, under-cabinet lighting brightens countertops, making meal prep safer and easier. Similarly, pendant lights hung over a dining table or island not only serve as a stylish statement but also provide focused illumination for meals and gatherings.

The color temperature of task lighting is also essential to consider. Cooler tones, typically in the range of 4000K to 5000K, mimic daylight and are ideal for stimulating productivity, making them perfect for workspaces. Warmer tones, on the other hand, can create a cozy atmosphere in areas where relaxation is key, like reading nooks or lounges.

With the right task lighting, you can significantly enhance your productivity and comfort, transforming any workspace into an inviting and efficient haven. Whether it’s through sleek desk lamps, stylish wall sconces, or practical under-cabinet fixtures, the goal remains the same: illuminate your activities effectively, so you can work smarter, not harder.

5. Accent Lighting: Highlighting Your Home’s Features

What are the different types of light fixtures and their uses?
Credit : whatcanu.com

Accent lighting serves as the cherry on top of your home’s lighting design, providing the perfect opportunity to showcase your favorite features and create an inviting atmosphere. Unlike general lighting, which fills a space with overall illumination, accent lighting is all about highlighting specific areas or objects, such as artwork, architectural details, or beautiful plants.

When you think of accent lighting, think of it as a spotlight that draws the eye to what makes your home unique. Wall sconces can frame a painting, while adjustable track lighting can illuminate a sculpture or a cherished family heirloom displayed on a shelf. Table lamps with unique designs can serve as both functional lighting and decorative pieces, adding character to a room.

In addition to enhancing aesthetics, accent lighting contributes to the overall mood of a space. Warm, soft lights can create a cozy ambiance in a living room, while brighter, focused beams can energize a workspace or kitchen. Consider using dimmers to adjust the intensity of your accent lights, allowing you to change the atmosphere based on the occasion—whether it’s a lively dinner party or a quiet evening spent reading.

Moreover, accent lighting can significantly impact how we perceive a room’s size and depth. By strategically placing lights at varying heights, you can create layers of light that add dimension to your space, making it feel more inviting and expansive.

Incorporating accent lighting into your home doesn’t have to be complicated. Simple additions, such as LED strip lights under cabinets or behind furniture, can create an ethereal glow that elevates the design of your space. Whether you opt for dramatic lighting to make a bold statement or subtle fixtures to add a touch of elegance, accent lighting is an invaluable tool in crafting a home that not only looks good but feels inviting and lived-in. Embrace the art of highlighting your home’s best features and watch as your spaces transform into beautiful showcases of your personal style.

6. Chandeliers: Elegance and Style for Any Room

Chandeliers have long been synonymous with elegance and grandeur, often gracing the ceilings of opulent ballrooms and lavish dining rooms. However, their versatility has allowed them to find a place in a variety of settings, making them an excellent choice for anyone looking to add a touch of sophistication to their home. Available in an array of styles—from traditional crystal-laden designs to sleek, modern fixtures—chandeliers can enhance the aesthetic of any room, transforming an ordinary space into something extraordinary.

In dining rooms, a well-placed chandelier serves not only as a functional source of light but also as a stunning focal point that sets the tone for gatherings and special occasions. Imagine a beautifully designed chandelier casting a warm, inviting glow over a sumptuous dinner, its crystals shimmering like stars—a perfect backdrop for memorable moments.

Living rooms benefit from chandeliers as well, where they can contribute to the overall ambiance of the space. A contemporary chandelier with clean lines can complement modern decor, while an antique piece can add character to a more traditional setting. Additionally, chandeliers can be used in unexpected places; hanging one in a bedroom can create a romantic atmosphere, while a bold, colorful fixture in a playroom can spark joy and creativity.

When selecting a chandelier, consider the scale of your room. A large chandelier can be a statement piece in a spacious entryway, while smaller fixtures work best in cozy nooks or intimate spaces. The key is to strike a balance; ensure that your chandelier harmonizes with the surrounding decor without overwhelming it.

Beyond aesthetics, chandeliers also offer flexibility in lighting options. Many designs come equipped with dimmer switches, allowing you to adjust the brightness to suit your mood—be it a bright, lively gathering or a soft, intimate dinner.

In essence, chandeliers are more than just light fixtures; they are artistic expressions that elevate the style of any room. Whether you opt for the classic charm of crystal or the sleek sophistication of modern designs, incorporating a chandelier into your home is a surefire way to illuminate your space with elegance and flair.

7. Pendant Lights: Versatility and Design Options

What are the different types of light fixtures and their uses?
Credit : whatcanu.com

Pendant lights are a shining example of versatility in the world of lighting design. Suspended from the ceiling by a cord, chain, or rod, these fixtures can dramatically transform the ambiance of any space while serving practical lighting needs. Their unique ability to blend functionality with artistic flair makes them a popular choice for various settings, from cozy homes to bustling restaurants.

One of the most appealing aspects of pendant lights is the vast array of design options available. Whether you prefer the sleek lines of modern minimalism or the intricate details of vintage-inspired fixtures, there’s a pendant light to match every aesthetic. For a contemporary look, consider geometric shapes crafted from metal or glass, which can add an air of sophistication to dining areas or kitchens. On the other hand, if you’re aiming for a rustic or industrial feel, pendant lights made from reclaimed wood or exposed Edison bulbs can create an inviting, warm atmosphere.

In terms of functionality, pendant lights can be used in a multitude of ways. Hang a cluster of smaller pendants at varying heights above a kitchen island to create a focal point that doubles as task lighting. A single, oversized pendant can make a bold statement in an entryway or living room, drawing the eye upward and enhancing the sense of space. Additionally, pendant lights work beautifully in dining rooms, providing soft, direct illumination that encourages conversation and connection during meals.

For those who want to experiment with layering light, pendant fixtures can be combined with other sources, such as wall sconces or floor lamps, to create depth and dimension in a room. Consider using dimmable options for added flexibility, allowing you to adjust the brightness according to the occasion, whether it’s a lively dinner party or a quiet evening at home.

In summary, pendant lights are not just a source of illumination—they are a design statement that can enhance the style and functionality of any area. With their diverse styles and adaptable uses, they illuminate the path toward creating inviting, beautifully lit spaces that resonate with your personal taste.

8. Floor and Table Lamps: Functional Decor

When it comes to blending functionality with aesthetic appeal, floor and table lamps are the unsung heroes of interior design. These versatile light fixtures not only illuminate your space but also serve as striking decor pieces that can elevate the overall ambiance of a room.

Floor lamps, with their towering presence, can create drama in a living area or cozy up a reading nook. Available in various styles—from sleek and modern to rustic and industrial—they can complement any décor theme. Imagine a minimalist, angular floor lamp casting a warm glow over a stylish sofa, or a vintage arc lamp creating a soft, inviting corner in a family room. The height of floor lamps allows them to fill the vertical space in a room, drawing the eye upward and creating a sense of openness.

Table lamps, on the other hand, offer a more intimate lighting option, perfect for bedside tables, desks, or side tables in a living room. Their compact design allows them to fit seamlessly into smaller spaces while providing much-needed task lighting for reading, working, or enjoying a cup of tea. With countless designs—from classic ceramic bases to contemporary glass finishes—table lamps can act as statement pieces that reflect your personality and style. A beautifully crafted lamp can serve as a focal point, drawing attention and sparking conversation.

Both types of lamps can be enhanced with various shades, allowing you to control the mood and intensity of the light. A soft, fabric shade diffuses light, creating a warm and cozy atmosphere, while a sleek, metallic shade can provide a more directed beam, perfect for reading or focusing tasks.

Incorporating floor and table lamps into your decor strategy not only enhances the functionality of your spaces but also gives you the opportunity to express your individual style. By thoughtfully choosing these fixtures, you can create a layered lighting design that is both beautiful and practical, ensuring that your home feels warm, inviting, and effortlessly stylish.

9. Wall Sconces: Space-Saving Solutions

Wall sconces are the unsung heroes of lighting design, offering both functionality and flair without consuming precious floor space. These elegant fixtures are mounted directly onto the wall, making them perfect for rooms where space is at a premium or where you want to create a cozy, intimate atmosphere.

Available in a myriad of styles, from sleek modern designs to ornate vintage looks, wall sconces can complement any decor theme. They serve a variety of purposes, whether you need task lighting for reading in a nook, ambient light to soften a room’s overall brightness, or accent lighting to highlight artwork or architectural features.

Imagine a hallway lined with stylish sconces, casting a warm glow that invites guests to explore further. Or picture flanking a mirror in your entryway, where the soft illumination enhances your space while providing practical lighting for last-minute touch-ups before heading out. In living rooms, wall sconces can replace bulky table lamps, freeing up surfaces and allowing for a more streamlined design.

Moreover, many wall sconces are designed to be adjustable, with some featuring swing arms that allow you to direct light exactly where it’s needed. This versatility makes them ideal for bedrooms, where they can be positioned above nightstands for reading without taking up valuable bedside real estate.

Incorporating wall sconces into your lighting plan not only maximizes your space but also adds a layer of sophistication and depth to your home’s ambiance. With their myriad styles, sizes, and functionalities, these fixtures are the perfect solution for anyone looking to enhance their home’s lighting while maintaining a clean and uncluttered aesthetic.

10. Recessed Lighting: Sleek and Modern Choices

Recessed lighting, often hailed as the epitome of sleek and modern design, has become a staple in contemporary interiors. These unobtrusive fixtures, embedded into ceilings, provide a clean and sophisticated aesthetic, making them ideal for various settings — from upscale homes to commercial spaces.

One of the standout features of recessed lighting is its versatility. Available in a range of sizes, shapes, and beam angles, these fixtures can be tailored to suit any room’s needs. Whether you’re aiming to create a warm, inviting atmosphere in your living room or need focused illumination for a kitchen countertop, recessed lights can achieve it all. They can be used to highlight architectural details, artwork, or even specific areas such as a reading nook, seamlessly blending functionality with style.

In addition to their aesthetic appeal, recessed lights are known for their energy efficiency. Many modern options utilize LED technology, which not only consumes less power but also boasts a longer lifespan compared to traditional bulbs. This means you can enjoy beautiful lighting without the hefty energy bills.

Installation is another key aspect of recessed lighting. Though it may require some ceiling modifications, once installed, the fixtures offer a streamlined look that can make a room feel more spacious. With dimmable options available, you can effortlessly adjust the light intensity to suit different occasions, transforming your living space from a bright, lively area for entertaining to a cozy retreat for a quiet evening.

In summary, recessed lighting embodies a sleek and modern choice for illuminating your spaces. Its ability to combine aesthetic elegance with practical benefits makes it an excellent addition to any lighting plan, ensuring your home not only looks stunning but feels inviting and functional.

11. Outdoor Lighting: Enhancing Curb Appeal and Safety

Outdoor lighting serves as a pivotal element in transforming your home’s exterior, seamlessly blending aesthetic appeal with practical safety. When thoughtfully designed, outdoor lighting can boost your home’s curb appeal, making it inviting and warm as dusk falls. Whether you’re illuminating a pathway, accentuating architectural features, or creating cozy outdoor spaces for gatherings, the right light fixtures can work wonders.

**Pathway Lights** are essential for guiding guests safely to your front door. These fixtures, often installed along sidewalks or garden paths, not only enhance safety by illuminating potential trip hazards but also add a charming touch to your landscape. Choose fixtures that are low to the ground, with warm bulbs that create a welcoming glow, and consider solar-powered options for an eco-friendly twist.

**Wall Sconces** and **Floodlights** can accentuate the structure of your home, drawing attention to unique architectural details while providing additional security. Wall sconces mounted on either side of your front door can create a symmetrical and inviting entrance, while floodlights can deter intruders by illuminating dark corners of your property.

**String Lights** and **Lanterns** bring a whimsical touch to patios and gardens. These fixtures create an enchanting atmosphere for outdoor dining or evening socializing, casting a soft, warm light that encourages relaxation and conversation. Consider using dimmable options or smart lighting systems to adjust the ambiance based on the occasion.

In addition to enhancing aesthetics, outdoor lighting plays a crucial role in safety. **Motion Sensor Lights** can automatically illuminate your driveway or yard when someone approaches, providing a sense of security and deterring unwanted visitors. Moreover, well-lit outdoor spaces deter accidents by ensuring that walkways, stairs, and entrances are visible.

Ultimately, outdoor lighting serves a dual purpose: it enhances the beauty of your home while ensuring safety for you and your guests. By carefully selecting and strategically placing your light fixtures, you can create a stunning exterior that beckons visitors while providing peace of mind.

12. Smart Lighting Solutions: The Future of Illumination

In an age where technology seamlessly integrates into our daily lives, smart lighting solutions are emerging as a transformative force in the world of illumination. These innovative fixtures do more than just light up a room; they offer an unparalleled level of control, convenience, and customization that caters to the dynamic needs of modern living.

Imagine entering your home and having the lights automatically adjust to your preferred brightness and color temperature, all thanks to sensors and smart technology that respond to your presence. Smart lighting systems can be controlled via smartphone apps, voice commands, or even automated schedules, allowing homeowners to create the perfect ambiance for any occasion. Whether you’re hosting a dinner party, winding down for the evening, or waking up in the morning, you can easily set the mood with a simple tap or voice prompt.

Moreover, smart lighting solutions are not just about aesthetics; they are also designed with energy efficiency in mind. Many of these fixtures utilize LED technology, which consumes significantly less power than traditional bulbs. With features like dimming capabilities and the ability to turn lights off remotely, smart lighting can help reduce your energy costs while also contributing to a more sustainable environment.

Additionally, smart lighting can enhance your home’s security. Many systems offer features like motion detection and the ability to simulate occupancy by scheduling lights to turn on and off at specific times. This deters potential intruders and provides peace of mind when you’re away from home.

As the future of illumination unfolds, embracing smart lighting solutions can transform your living spaces into intelligent environments that adapt to your lifestyle. Whether you’re looking to increase efficiency, enhance security, or simply enjoy customizable lighting experiences, smart fixtures are a worthwhile investment for any modern home. So, step into the future of lighting and illuminate your spaces with the brilliance of technology.

13. Choosing the Right Bulbs: LED vs. Incandescent

When it comes to illuminating your space, the choice of light bulbs can have a significant impact on both the ambiance and energy efficiency of your home. The two most popular options on the market today are LED (Light Emitting Diode) and incandescent bulbs, each offering distinct advantages and characteristics that cater to different needs and preferences.

**LED Bulbs** have surged in popularity over the past decade, and for good reason. These energy-efficient powerhouses consume up to 80% less energy than traditional incandescent bulbs, translating into substantial savings on your electricity bill over time. Additionally, LED bulbs boast an impressive lifespan, often lasting up to 25,000 hours compared to the mere 1,000 hours typical of incandescent options. This means fewer trips to the store and less waste, making LEDs a more environmentally friendly choice. Furthermore, LEDs are available in a range of color temperatures, from the warm glow of a candle to the bright white light reminiscent of midday sun, allowing for versatility in creating the desired mood in any room.

On the other hand, **Incandescent Bulbs**, though less energy-efficient, offer a warmth and quality of light that many people find appealing. The soft, inviting glow of incandescent lighting can create a cozy atmosphere, making it a popular choice for living rooms and bedrooms. They are also typically less expensive upfront than their LED counterparts, which can be attractive for those looking to make quick, budget-friendly lighting decisions. However, it’s essential to consider that these bulbs have a shorter lifespan and higher energy costs in the long run, which may offset their initial affordability.

Ultimately, the decision between LED and incandescent bulbs comes down to your specific lighting needs, budget, and preferences. If you prioritize energy efficiency, longevity, and versatility, LEDs are the clear winner. Conversely, if you’re seeking a warm, traditional glow for your home, incandescent bulbs may be your go-to choice. Whichever you choose, understanding the benefits and limitations of each will empower you to make informed decisions that enhance your space’s beauty and functionality.

14. Tips for Layering Light in Your Space

Layering light in your space is an art that can transform the ambiance and functionality of any room. By combining different types of lighting—ambient, task, and accent—you create a dynamic environment that meets various needs while enhancing the aesthetic appeal of your home. Here are some practical tips to help you master the art of layered lighting.

**Start with Ambient Lighting**: Ambient lighting serves as the foundation of your lighting scheme, providing general illumination for the entire room. Consider ceiling-mounted fixtures, chandeliers, or recessed lighting to establish a warm, inviting glow. Dimmers can be your best friend here, allowing you to adjust the brightness depending on the time of day or the mood you wish to create.

**Incorporate Task Lighting**: Once the ambient layer is set, it’s time to focus on task lighting—fixtures that provide direct light for specific activities. Think desk lamps for reading, under-cabinet lights in the kitchen for food prep, or wall sconces beside your bed for nighttime reading. Task lighting should be strategically placed to reduce shadows and enhance visibility where it’s most needed.

**Add Accent Lighting**: To further elevate the atmosphere, introduce accent lighting to highlight features of your space. This could be a stylish pendant light over a dining table, LED strip lights illuminating shelves of decorative items or artwork, or spotlights that draw attention to architectural details like a fireplace or a textured wall. Accent lighting adds depth and character, making your space feel more curated and inviting.

**Consider the Color Temperature**: The color temperature of your light fixtures plays a crucial role in the overall feel of the room. Warmer lights (around 2700K-3000K) create a cozy and intimate ambiance, ideal for living rooms and bedrooms, while cooler lights (4000K or higher) are perfect for workspaces or kitchens where clarity and focus are essential. Mixing different color temperatures within your layered lighting design can create a balanced and interesting visual effect.

**Use Dimmer Switches Wisely**: Installing dimmer switches can significantly enhance the versatility of your lighting. By adjusting the intensity of each layer of light, you can easily transition from a bright, energetic environment during the day to a soft, relaxing glow at night. This adaptability ensures that your space feels comfortable and inviting, regardless of the occasion.

**Keep Scale and Proportion in Mind**: Finally, remember that the size and scale of your light fixtures should complement the dimensions of the room. A large chandelier can serve as a stunning focal point in a grand dining room, while a cluster of smaller pendant lights might work better in a cozy kitchen nook. Ensuring that your lighting choices are proportional to the space will help create a harmonious design.

By thoughtfully layering different types of lighting, you can effortlessly enhance both the functionality and aesthetic charm of your home, creating spaces that are not only well-lit but also warm, inviting, and uniquely yours.

15. Conclusion: Making Informed Choices for Your Lighting Needs

In conclusion, making informed choices for your lighting needs is essential to create the perfect ambiance and functionality in your spaces. As we’ve explored throughout this guide, the variety of light fixtures available today can cater to an array of styles, preferences, and practical requirements. From the sleek elegance of pendant lights that illuminate kitchen islands, to the warm glow of table lamps that enhance cozy reading nooks, each fixture plays a pivotal role in shaping the atmosphere of your home or office.

Understanding the purpose of each type of light fixture—whether it’s task lighting for focused activities, ambient lighting for overall illumination, or accent lighting to highlight artwork—empowers you to select the right pieces that align with your vision. Consider the scale of your rooms, the color schemes, and the specific needs of each area before making a decision. Additionally, don’t overlook the significance of energy efficiency and the latest innovations in LED technology, which offer longevity and sustainability without sacrificing style.

Ultimately, the choices you make in lighting affect not just the aesthetics of your space but also its functionality and your overall well-being. By taking the time to assess your lighting needs and exploring the myriad of options available, you can create an inviting, well-lit environment that enhances both comfort and productivity. Illuminate your life with thoughtful lighting choices that reflect your personal style and meet the demands of your everyday activities.

In conclusion, we hope this guide to different types of light fixtures has illuminated your understanding of how to enhance your spaces with the perfect lighting solutions. From the warm ambiance of pendant lights to the task-oriented brilliance of recessed fixtures, each type serves a unique purpose and can dramatically transform the atmosphere of any room. As you embark on your lighting journey, remember to consider both functionality and aesthetics, ensuring that your choices not only meet your practical needs but also reflect your personal style. With the right fixtures, you can create inviting, dynamic environments that brighten up your home and elevate your daily experiences. Thank you for joining us on this exploration of light—may your choices be inspired and your spaces beautifully lit!

How to install a new light fixture?

Transforming the ambiance of your home can be as simple as changing a light fixture.

Whether you’re looking to brighten up a dim corner, create a cozy atmosphere in your living room, or add a touch of elegance to your dining area, the right lighting can make all the difference. In this comprehensive guide, we’ll walk you through the entire process of installing a new light fixture, from selecting the perfect design that complements your decor to the practical steps of wiring and mounting. With just a few tools and a little bit of patience, you’ll be able to enhance your space with a fresh glow. So grab your toolkit, and get ready to illuminate your home as we delve into the art of light fixture installation—your space is about to shine brighter than ever!

1. Introduction: The Importance of Lighting in Your Space

How to install a new light fixture?
Credit : whatcanu.com

Lighting plays a crucial role in defining the ambiance and functionality of any space. Whether you’re transforming a cozy corner in your living room or enhancing the workspace in your kitchen, the right light fixture can make all the difference. It’s not just about illumination; it’s about creating an atmosphere that reflects your personal style and meets your everyday needs.

Good lighting can elevate the aesthetics of a room, highlighting its best features while providing essential illumination for tasks at hand. It can make a small room feel larger, a dull space feel vibrant, and a stark area feel warm and inviting. Think about how the soft glow of a pendant light can create an intimate dining experience, or how a bright chandelier can add a touch of elegance to a foyer.

Moreover, effective lighting has practical benefits as well. It can increase safety and security by eliminating dark corners that may hide potential hazards or intruders. By strategically placing light fixtures, you can enhance visibility and comfort, allowing you to navigate your space with ease at any hour of the day.

In this guide, we’ll take you through the steps of installing a new light fixture, empowering you to harness the transformative power of lighting. Whether you’re a seasoned DIY enthusiast or a first-time installer, our clear instructions and helpful tips will ensure that you can illuminate your space with confidence and flair. Let’s dive in and brighten up your home!

2. Choosing the Right Light Fixture for Your Room

Choosing the right light fixture for your room is a vital step in illuminating your space effectively and enhancing its overall aesthetic. The light fixture you select should not only complement the existing decor but also serve the practical purposes of the room. Start by considering the function of the space. For example, a cozy living room may benefit from warm, ambient lighting, while a kitchen requires bright, focused light for meal prep and cooking.

Next, think about the style that resonates with you and fits the room’s theme. Are you drawn to modern minimalism, rustic charm, or perhaps a vintage flair? Chandeliers can add a touch of elegance to dining areas, while sleek pendant lights work beautifully over kitchen islands. Additionally, wall sconces can contribute to the ambiance without taking up valuable floor space in smaller rooms.

Size matters, too. A fixture that is too large can overwhelm a small space, while one that is too small can get lost in a larger room. As a rule of thumb, consider the dimensions of your room when selecting a fixture: the diameter of the chandelier or light fixture in inches should equal the sum of the room’s length and width in feet. This simple formula helps ensure that your choice will be visually proportional.

Finally, don’t overlook the importance of the light bulb itself. The type of bulb you choose—whether LED, incandescent, or fluorescent—will impact not only the quality of light but also energy efficiency and longevity. Pay attention to the color temperature as well; warmer tones create a cozy atmosphere, while cooler tones can invigorate and energize.

Taking the time to thoughtfully select the right light fixture will transform your room into a beautifully illuminated space that reflects your personal style while meeting your lighting needs.

3. Tools and Materials Needed for Installation

How to install a new light fixture?
Credit : whatcanu.com

Before diving into the exciting world of light fixture installation, it’s essential to gather the right tools and materials to ensure a smooth and safe process. Here’s a detailed list of what you’ll need, along with some handy tips to help you prepare for the task ahead.

**Tools:**

1. **Screwdriver Set**: Both flathead and Phillips screwdrivers are indispensable for removing old fixtures and securing the new ones. Consider using a magnetic screwdriver to prevent screws from falling during installation.

2. **Wire Strippers**: These are crucial for exposing the ends of the wires if they are covered with insulation. A good pair will make your connections clean and secure.

3. **Voltage Tester**: Safety first! Before you start working with electrical components, use a voltage tester to ensure that the power is off in the wiring area. This tool will provide peace of mind while you work.

4. **Drill and Drill Bits**: A power drill can simplify the process of mounting your new fixture, especially if you need to create pilot holes for screws.

5. **Ladder**: Depending on the height of your ceiling, a sturdy ladder will help you reach the fixture safely and comfortably.

6. **Pliers**: Needle-nose pliers are helpful for tightening wire connectors or securing any loose wires.

**Materials:**

1. **New Light Fixture**: Choose a fixture that complements your space and meets your lighting needs. Make sure it’s compatible with your existing electrical setup.

2. **Wire Connectors**: These small but vital components will help you securely connect the wires from your new fixture to the existing wiring. It’s often recommended to use wire nuts for a safe and effective connection.

3. **Electrical Tape**: This is a handy safety measure for wrapping exposed wires and ensuring that your connections are insulated.

4. **Mounting Hardware**: Most light fixtures come with the necessary mounting hardware, but make sure you have everything you need, including screws and anchors, especially if you’re mounting on drywall or other materials.

5. **Instruction Manual**: Don’t forget to have the manual for your new light fixture on hand! It typically contains specific instructions for installation, including wiring diagrams and safety warnings.

With these tools and materials at your disposal, you’re well-equipped to tackle the installation of your new light fixture. Remember to take your time, follow safety protocols, and enjoy the transformative effect your new lighting will have on your space!

4. Safety First: Preparing for Installation

Before diving into the exciting process of installing your new light fixture, it’s crucial to prioritize safety. Proper preparation can prevent accidents and ensure a smooth installation. Start by gathering the necessary tools and materials: a screwdriver, wire strippers, electrical tape, a voltage tester, and your new fixture, of course. A sturdy ladder is also essential if the fixture is mounted high on the ceiling.

Once you have your tools at hand, the very first step is to turn off the power at the circuit breaker. This might seem like a no-brainer, but it’s a critical step that ensures no electricity is flowing to the existing fixture while you work. Take a moment to confirm that the power is indeed off by using a voltage tester on the wires; this little device will give you peace of mind and help you avoid any electrical shocks.

Next, protect your workspace by laying down a drop cloth or old towels beneath the area where you’ll be working. This will catch any debris or dust that may fall during the installation, keeping your space tidy. If you’re working in a particularly high or hard-to-reach place, consider having a friend or family member nearby to assist you, ensuring you have someone to help stabilize your ladder or hand you tools as needed.

Lastly, don’t forget to wear safety goggles and gloves. While it may seem excessive, these small precautions can protect you from any unexpected accidents, such as falling debris or sharp edges. With safety measures firmly in place, you’re now ready to embark on the installation journey, armed with the knowledge that you’ve taken the necessary steps to keep yourself safe.

5. Turning Off the Power: How to Find Your Circuit Breaker

How to install a new light fixture?
Credit : whatcanu.com

Before diving into the installation of your new light fixture, ensuring your safety is paramount. The first step in this crucial process is turning off the power to the existing fixture, and that begins with locating your circuit breaker. This may sound straightforward, but a little guidance can make all the difference, especially if you’re unfamiliar with your home’s electrical layout.

Start by making your way to your home’s electrical panel, usually found in a basement, garage, or utility room. The panel may be a metal box mounted on the wall, often with a door that swings open to reveal rows of circuit breakers. Take a moment to familiarize yourself with the panel’s layout. Each breaker is labeled, indicating which area of the house it controls. If you’re unsure which breaker powers the old fixture, you may need to do a bit of detective work.

To identify the correct breaker, you can turn on the existing light fixture and then head to the panel. As you flip each breaker off, pay attention to the light – when it goes dark, you’ve found the right one! Once you’ve identified the correct circuit, switch it to the off position and confirm that the fixture is no longer receiving power.

For added safety, it’s wise to label your breaker box if it isn’t already labeled. This will save you time and effort in future projects and ensure you can quickly find the right breaker when needed. After you’ve confidently turned off the power, it’s a good practice to test the fixture with a voltage tester to guarantee there is no electricity flowing to the wires. With the power securely off, you can proceed with your installation, knowing you’ve taken the necessary precautions to work safely.

6. Removing the Old Light Fixture: Step-by-Step Instructions

Removing the old light fixture can seem daunting, but with the right approach, it’s a straightforward task that paves the way for your stunning new addition. Before you begin, ensure you have the necessary tools at hand: a screwdriver, a voltage tester, and possibly a pair of wire cutters. Safety is paramount, so let’s dive into the step-by-step process.

**Step 1: Turn Off the Power**
Safety first! Head to your circuit breaker and switch off the power to the light fixture you’ll be replacing. It’s a good idea to double-check that the power is off by using a voltage tester on the wires. This will give you peace of mind while you work.

**Step 2: Remove the Light Bulbs**
Once you’ve confirmed that the electricity is off, carefully remove any light bulbs from the fixture. This will lighten the load and make handling the fixture easier. Store the bulbs in a safe place to avoid breakage.

**Step 3: Detach the Fixture from the Ceiling**
Most light fixtures are secured with screws or mounting brackets. Using your screwdriver, carefully unscrew the fixture from the ceiling. If there’s any resistance, make sure you haven’t overlooked any hidden screws. Once the fixture is loose, gently lower it to inspect the wiring.

**Step 4: Disconnect the Wires**
You’ll typically find three wires connected to the fixture: a black (or red) wire, a white wire, and a green or bare wire. Carefully disconnect these wires by either unscrewing the wire nuts or loosening the screws that hold them in place. It’s a good practice to take a photo of the wiring setup before you disconnect anything, as this will help you when you install the new fixture.

**Step 5: Remove the Mounting Bracket**
After disconnecting the wires, you’ll need to take down the mounting bracket attached to the electrical box in the ceiling. This is often held in place by screws, so use your screwdriver to remove it.

**Step 6: Clean Up**
With the old fixture removed, take this opportunity to clean the area around the electrical box. Dust and debris can accumulate over time, and a clean space will ensure better installation of the new fixture.

Congratulations! You’ve successfully removed the old light fixture and are one step closer to transforming your space with a new, stylish illumination. As you prepare to install the new fixture, keep these steps in mind to ensure a smooth transition.

7. Understanding Electrical Wiring: A Beginner’s Guide

How to install a new light fixture?
Credit : whatcanu.com

### 7. Understanding Electrical Wiring: A Beginner’s Guide

Before diving into the installation of your new light fixture, it’s crucial to grasp the basics of electrical wiring. While it may seem intimidating at first, understanding a few key concepts can empower you to approach the task with confidence and safety.

Start by familiarizing yourself with the essential components of your home’s electrical system. The most common wiring colors you’ll encounter include black (or red) for hot wires, white for neutral wires, and green or bare copper for ground wires. These colors are not just for aesthetics; they serve important functions that ensure your electrical system operates safely.

Next, take a moment to locate your circuit breaker panel. It’s your first line of defense against electrical mishaps. Before you begin any work, turn off the circuit that powers the existing light fixture. This step is non-negotiable; safety should always come first. Use a non-contact voltage tester to double-check that the power is truly off.

Once the power is disconnected, inspect the wiring in the existing fixture. You might find a combination of wires: the hot wire, neutral wire, and possibly a ground wire. Take note of how they are connected, as this will guide you when installing your new fixture. If you’re unsure, don’t hesitate to take a photo for reference.

When you’re ready to proceed, carefully remove the old fixture, ensuring that you untwist the wire connections gently. This is where your confidence will grow—by seeing how the wires are connected and realizing that it’s just a matter of connecting like with like. The new fixture will typically come with instructions, so follow those closely for any specific wiring requirements.

Finally, once your new light fixture is secured and connected correctly, restore power at the circuit breaker and flip the switch. The moment the new fixture illuminates your space is not just a reward for your hard work; it’s a testament to your newfound understanding of electrical wiring. Remember, if you ever feel uncertain or overwhelmed, consulting a professional electrician is always a wise choice. Your safety is paramount, and sometimes it’s best to leave complex tasks to the experts.

8. Installing the New Light Fixture: A Detailed Process

Once you’ve selected the perfect light fixture to elevate your space, it’s time to get into the nitty-gritty of installation. This stage is where your vision truly comes to life, transforming the ambiance of your room. Follow these detailed steps to ensure a smooth installation process:

1. **Prepare Your Workspace**: Start by clearing the area beneath the existing light fixture. Lay down a drop cloth to protect your flooring and ensure that you have ample space to work. Gather all necessary tools, including a screwdriver, wire stripper, voltage tester, and ladder. Always double-check that your new fixture comes with all the required mounting hardware.

2. **Turn Off the Power**: Safety first! Locate your circuit breaker and switch off the power to the existing light fixture. To ensure there’s no electrical hazard, use a voltage tester to confirm that the wires are not live. This step is crucial for preventing any potential accidents or shocks while you work.

3. **Remove the Old Fixture**: Carefully detach the old light fixture from the ceiling. This typically involves unscrewing the mounting bracket and disconnecting the wires. As you remove the fixture, take note of how the wires are connected—this will help guide you in connecting the new fixture. If you’re unsure, a quick photo with your phone can serve as a handy reference.

4. **Prepare the New Fixture**: Before installation, assemble your new light fixture according to the manufacturer’s guidelines. This may involve attaching bulbs, shades, or other decorative elements. Make sure everything is secure and ready for mounting.

5. **Connect the Wires**: Following the instructions that came with your new fixture, connect the wires from the fixture to the corresponding wires in the ceiling. Typically, this involves twisting the black (live) wire from the fixture to the black wire in the ceiling, the white (neutral) wires together, and grounding it with the green or bare wire. Use wire nuts to secure each connection and ensure that no bare wire is exposed.

6. **Mount the New Fixture**: Once the wiring is secured, it’s time to mount the fixture to the ceiling. Align it with the mounting bracket, and gently push any excess wiring back into the electrical box. Use screws to secure the fixture in place, following the manufacturer’s instructions for proper installation.

7. **Install Light Bulbs and Test**: With the fixture securely mounted, insert the appropriate light bulbs. Once everything is in place, return to your circuit breaker and switch the power back on. Test your new light fixture to ensure it’s working correctly. If it doesn’t illuminate, double-check your wiring connections to troubleshoot any issues.

8. **Final Touches**: With the light fixture functioning properly, take a moment to clean up your workspace. Dispose of any packaging materials and tools, and enjoy the fresh glow of your newly installed light fixture. Consider adjusting the brightness with dimmable bulbs or smart lighting options for added versatility.

By following these detailed steps, you’ll not only enhance the aesthetic of your space but also gain a sense of accomplishment from your DIY project. Enjoy your beautifully illuminated room!

9. Connecting Wires: Tips for Safe and Secure Connections

Connecting wires is a crucial step in the installation of your new light fixture, and it’s essential to approach this task with both care and precision to ensure safety and functionality. Before diving into the process, it’s imperative to turn off the power at the circuit breaker to avoid any electrical hazards. Once you’ve confirmed that the power is off, gather your tools: a wire stripper, a voltage tester, and some wire nuts.

Begin by removing the existing fixture and carefully inspecting the wiring. You should see three types of wires: the hot wire (usually black or red), the neutral wire (typically white), and the ground wire (green or bare copper). It’s helpful to organize these wires visually so you can clearly identify which ones need to be connected to your new fixture.

When connecting wires, always follow the color-coded system: twist the hot wires together, pairing the black from your fixture with the black from the ceiling. Then, do the same for the neutral wires, connecting white to white. Ground wires are connected last; secure them to the fixture’s ground wire or a grounding screw on the mounting bracket. Ensure that each twist connection is tight and secure, as loose connections can lead to flickering lights or, worse, electrical fires.

After making your connections, it’s a good idea to use a voltage tester to double-check that everything is safe before powering the circuit back on. Once you’ve verified that there are no exposed wires and that all connections are insulated with wire nuts, you can gently tuck the wires into the electrical box and mount your new light fixture according to the manufacturer’s instructions.

Remember, if at any point you feel uncertain about the wiring process, it’s always wise to consult with or hire a professional electrician to ensure that your installation is safe and up to code. With the right approach, your new light fixture will not only brighten your space but will also be installed securely and safely.

10. Securing the Fixture: Ensuring Stability and Safety

Securing your new light fixture is a crucial step that ensures both stability and safety in your home. After you’ve successfully connected the wiring, it’s time to focus on mounting the fixture securely to the ceiling or wall. Begin by aligning the fixture with the mounting bracket, ensuring that any screws or clips designed to hold it in place are easily accessible.

Before you proceed, double-check that the mounting bracket is firmly attached to the electrical box. If the electrical box wobbles or feels loose, it’s imperative to address this issue first. A sturdy mount is essential for preventing accidents or damage, particularly for heavier fixtures.

Once you are confident that everything is secure, carefully position the fixture against the ceiling. If it has a canopy, make sure it covers the electrical box completely to prevent any exposed wiring. Use the included screws to fasten the fixture to the mounting bracket, ensuring that they are tightened adequately but not overly so, as this could strip the threads or damage the fixture.

As you work, it’s important to keep your hands steady and check for level alignment. An uneven fixture can not only look unappealing but can also place undue stress on the wiring, leading to potential electrical issues down the line. Use a level tool if necessary to ensure that everything is straight.

After the fixture is secured, take a moment to gently tug on it to confirm that it is firmly in place. If it holds steady, you’ve successfully completed this phase of the installation! This attention to detail will not only enhance the aesthetic appeal of your space but also provide peace of mind knowing that your light fixture is safe and secure. With the fixture now in place, you’re just a switch flick away from illuminating your space beautifully!

11. Restoring Power: How to Turn the Electricity Back On

Restoring power after installing a new light fixture is a crucial step that marks the culmination of your hard work. Once you’ve ensured that the fixture is securely mounted and all electrical connections are properly made, it’s time to breathe life back into your newly illuminated space.

Start by locating your circuit breaker panel, which is typically found in a basement, utility room, or closet. Before you flip the switch back on, take a moment to double-check that all tools and materials are cleared from the installation area. It’s essential to ensure that everything is clean and free of any debris, as this will help prevent any accidents when the power is restored.

Identify the circuit breaker that corresponds to the area where you installed your new light fixture. Most panels are clearly labeled, but if yours isn’t, you may need to turn off and on a few breakers to find the correct one. Once you’ve identified the right breaker, firmly switch it back to the ‘on’ position.

As you do this, remain vigilant for any unusual sounds or smells. If you hear a pop or notice any burning odors, turn the breaker off immediately and double-check your connections. A simple mistake can lead to a short circuit, so it’s better to be cautious.

Now, with the power restored, it’s time to test your new light fixture. Flip the wall switch and bask in the glow of your hard work. If the light illuminates as intended, you’ve successfully completed the installation! If not, revisit your wiring connections to ensure everything is in order.

Lastly, take a moment to tidy up your workspace and dispose of any old fixtures or packaging materials. Enjoy the fresh ambiance your new light fixture brings to your space, and revel in the satisfaction of having accomplished this illuminating task!

12. Testing Your New Light Fixture: What to Look For

Once you’ve successfully installed your new light fixture, it’s time for the moment of truth: testing it to ensure everything is functioning as it should. This step is crucial, as it not only confirms that your hard work has paid off but also ensures that the fixture is safe and effective in illuminating your space.

Start by flipping the switch to turn on your new fixture. Observe the light closely. Is it illuminating the room as you envisioned? Take note of the brightness and the quality of the light. Does it cast a warm, inviting glow, or is it harsh and unflattering? If the light seems dim or overly bright, you may need to consider swapping out the bulb for a different wattage or type to achieve the desired ambiance.

Next, check for any flickering or unusual noises. Flickering could indicate a loose connection or the need for a different bulb, while buzzing sounds might suggest an issue with the fixture itself or the electrical wiring. If you notice any of these issues, it’s best to turn the power off and double-check your connections to ensure everything is secure.

Additionally, pay attention to the fixture’s placement. Walk around the room to see how the light interacts with the space. Are there any dark corners that could benefit from additional lighting? Does the fixture create any unwanted shadows? This is your opportunity to adjust the height or angle of the fixture if it’s adjustable, or to consider adding supplementary lights for a more balanced illumination.

Lastly, allow your fixture to run for a short period and monitor how it behaves over time. This will help you identify any potential overheating issues. If everything checks out, congratulations! You’ve successfully illuminated your space and created a beautiful focal point in your home. With your new light fixture shining brightly, you can now enjoy the enhanced atmosphere and style it brings to your environment.

13. Troubleshooting Common Installation Issues

Even the most meticulous DIY enthusiasts can encounter a few bumps in the road when installing a new light fixture. Troubleshooting common installation issues is essential to ensure your lighting project goes smoothly and safely. Here are some of the most frequent problems you might face, along with tips to resolve them.

**1. The Light Fixture Won’t Turn On:**
If your new light fixture isn’t illuminating, the first step is to check the power supply. Ensure that the circuit breaker is switched on and that you have replaced any blown fuses. Next, verify that all connections are secure—loose wires can easily disrupt the flow of electricity. If you’ve done all this and the fixture still doesn’t work, consider testing the bulb in a different fixture to rule out a faulty light bulb.

**2. Flickering Lights:**
A flickering light can be more than just an annoyance; it could indicate a deeper electrical issue. Check to make sure the bulb is tightly screwed in. If that doesn’t resolve the flicker, inspect the wiring connections in the junction box. Corroded or loose connections can cause fluctuations in power. If your fixture is compatible with a dimmer switch, ensure the bulb type is compatible as well, as some LED bulbs don’t work well with older dimmer systems.

**3. Uneven Lighting:**
If your new fixture isn’t providing the desired amount of light, it may be positioned incorrectly or the wrong type of fixture for the space. Consider the wattage and lumens of the bulb you’re using—an underpowered bulb could be the culprit. Additionally, assess the height and angle of the fixture; sometimes simply adjusting its position can enhance light distribution.

**4. Noise from the Fixture:**
Humming or buzzing sounds from your fixture can be frustrating. This is often caused by incompatible dimmer switches or a faulty ballast in fluorescent fixtures. If you suspect the dimmer is the issue, try replacing it with a compatible one or switch to standard switches to see if that eliminates the noise. If the problem persists with a fluorescent fixture, you may need to replace the ballast.

**5. Incorrect Fixture Size:**
Sometimes, the size of your new fixture can feel out of place, either dwarfing the room or overwhelming it. If you find that your new light fixture isn’t proportional to the space, take a moment to evaluate the room’s dimensions. Consider swapping it out for a size that better complements your decor and the scale of the room.

By addressing these common issues head-on, you can ensure that your new light fixture not only shines brightly but also enhances the beauty and functionality of your space. Remember, safety is paramount, so if you encounter complex wiring problems or persistent issues, don’t hesitate to consult a professional electrician. With a little patience and problem-solving, you’ll have your space illuminated just the way you envision!

14. Final Touches: Enhancing Your Space with Light

Once your new light fixture is securely installed and shining bright, it’s time to consider the final touches that will truly enhance your space. Lighting is not just about functionality; it plays a pivotal role in setting the mood and atmosphere of a room. Here are some simple yet effective ways to elevate your newly illuminated area.

First, think about the color of your bulbs. Soft white or warm LED bulbs create a cozy ambiance, perfect for living rooms and bedrooms, while bright white or daylight bulbs work well in kitchens and workspaces, promoting clarity and focus. Experiment with different bulb options to find the perfect hue that complements your decor and personal style.

Next, consider adding dimmers. A dimmer switch allows you to adjust the brightness of your new fixture, giving you control over the ambiance depending on the time of day or the occasion. Whether you want bright light for a lively gathering or a soft glow for a romantic dinner, dimmers give you that versatile flexibility.

Additionally, think about layering your lighting. While your new fixture may serve as the centerpiece, incorporating other light sources can create depth and interest. Table lamps, floor lamps, or even wall sconces can provide supplementary light, enhancing the overall aesthetic and functionality of the space.

Don’t forget to consider decorative elements that can enhance the light itself. Mirrors can reflect light, making your space feel larger and brighter. Placing a strategically positioned mirror across from your light fixture can double the effect of your new installation.

Finally, add personal touches that resonate with your style. Whether it’s a beautiful lampshade, decorative bulbs, or even a few accents around the base of your fixture, these details will tie your design together and make the space feel uniquely yours.

By focusing on these final touches, you can transform your newly installed light fixture from a mere necessity into a stunning focal point that enhances both your space and your experience within it. Happy illuminating!

15. Conclusion: Enjoying Your Newly Illuminated Room

Congratulations! After following the steps outlined in this guide, you have successfully transformed your space with a new light fixture. Stepping back to appreciate your handiwork is not just a moment of pride; it’s the beginning of a new chapter in how you experience your room. The gentle glow of your freshly installed fixture creates an inviting atmosphere that enhances both the aesthetics and functionality of the space.

As you bask in the warm light, take a moment to notice how the illumination has altered the dynamics of the room. Perhaps the colors on your walls now shine brighter, or the texture of your furniture becomes more pronounced under the new lighting. Whether it’s a cozy dining area, a vibrant living room, or a serene bedroom, your choice of fixture has undoubtedly added a personal touch that reflects your style.

Moreover, consider the various ways you can maximize your new lighting. Experiment with dimmers to adjust the ambiance according to the time of day or occasion. Layer your lighting by adding complementary sources, such as floor lamps or wall sconces, to create depth and warmth. You may even find joy in arranging your decor to highlight the new fixture, turning it into a focal point that draws the eye.

Lastly, don’t forget to share your achievement! Showcase your newly illuminated room on social media or with friends and family. Your project may inspire others to embark on their own lighting upgrades. So, sit back, relax, and enjoy the transformed atmosphere that your new light fixture brings—because a well-lit room is not just about visibility; it’s about setting the mood for countless memories to come.

As we wrap up our guide on installing a new light fixture, we hope you feel empowered to transform your space with newfound brilliance. Whether you’re looking to create a cozy ambiance in your living room or a bright workspace in your home office, the right lighting can truly elevate the atmosphere of any room. By following our step-by-step instructions, you can confidently tackle this DIY project and enjoy the satisfaction of a job well done. Remember, the process may take a little time and patience, but the end result—a beautifully illuminated space that reflects your personal style—will be well worth the effort. So gather your tools, unleash your creativity, and let your home shine with warmth and elegance! Happy illuminating!

How to choose the right paint color for your bedroom?

The bedroom is more than just a place to sleep; it’s a sanctuary where we retreat at the end of a long day, a personal oasis that reflects our individuality and nurtures our well-being.

The color of your walls plays a pivotal role in shaping the atmosphere of this intimate space, influencing your mood, energy levels, and overall sense of tranquility. With a kaleidoscope of paint colors available, choosing the perfect hue can feel overwhelming. should you go for calming blues that evoke serenity, warm earth tones that bring comfort, or bold shades that inspire creativity? In this blog post, we’ll explore the psychology of color and how different shades can transform your bedroom into a harmonious retreat tailored to your personal style and emotional needs. Dive into the art of color selection with practical tips, expert insights, and inspiring ideas to help you master the mood of your sleeping space and create the bedroom of your dreams.

1. Understanding the Psychology of Color

How to choose the right paint color for your bedroom?
Credit : whatcanu.com

When it comes to selecting the perfect paint color for your bedroom, understanding the psychology of color is crucial. Colors evoke emotions, influence moods, and can significantly impact how we feel in a space. Each hue carries its own meaning and can either uplift or calm the spirit, making the choice of color a powerful tool in shaping the ambiance of your sanctuary.

Warm colors like reds, oranges, and yellows can generate feelings of warmth and energy, but they may not be the best choice for a bedroom meant for relaxation. Instead, consider cooler tones like soft blues and greens, which are known for their calming effects. These colors can create a serene environment, promoting tranquility and restful sleep.

Neutrals, such as soft grays, beiges, and whites, offer versatility and can serve as a perfect backdrop for layering textures and accents. They can make a space feel more open and airy, while enabling you to experiment with bolder decor elements without overwhelming the senses.

It’s also important to consider how lighting affects color perception in your bedroom. Natural light can enhance colors, making them appear brighter, while artificial lighting can alter their appearance in unexpected ways. Test swatches on your walls at different times of the day to see how the color transforms from morning to evening.

Ultimately, the key to mastering mood through paint color lies in aligning your choices with the feelings you wish to cultivate in your space. By understanding the psychology of color, you can create a bedroom that not only looks stunning but also nourishes your well-being and invites restful nights.

2. The Importance of Mood in Bedroom Design

When it comes to creating a sanctuary within your home, the mood of your bedroom plays a pivotal role in your overall well-being. The hues that envelop you upon entering the space can influence your emotions, affect your sleep quality, and even shape your daily mindset. Choosing the right paint color is not merely an aesthetic decision; it’s a powerful tool that can transform your bedroom into a serene retreat or an energizing haven.

Warm tones such as soft yellows and gentle peaches tend to evoke feelings of comfort and happiness, making them ideal for creating a cozy atmosphere that feels inviting at all times. These colors can mimic the warmth of sunlight, promoting a sense of cheerfulness that can uplift your spirits as you begin or end your day. On the other hand, cooler shades like tranquil blues and soothing greens are known for their calming effects. These colors can reduce anxiety and stress, fostering a peaceful environment conducive to relaxation and restful sleep.

Moreover, the saturation and brightness of a color can also affect the mood. Bright, bold colors can energize and inspire creativity, making them perfect for mornings, while muted and pastel shades can create a soft, nurturing atmosphere that encourages unwinding. The key is to consider the purpose of your bedroom — is it a space for restful sleep or a creative workspace? By aligning your color choices with your intended mood, you can significantly enhance your bedroom’s functionality.

In essence, understanding the psychological impact of color allows you to craft an environment that resonates with your personal style and emotional needs. As you embark on the journey of selecting the perfect paint color for your bedroom, remember that it’s not just about aesthetics; it’s about creating a mood that nurtures your spirit and enhances your quality of life. Whether you seek tranquility, vibrancy, or a balance of both, the right color palette can be the foundation for a harmonious bedroom retreat.

3. Factors to Consider Before Choosing a Color

How to choose the right paint color for your bedroom?
Credit : whatcanu.com

Choosing the perfect paint color for your bedroom is not just about aesthetics; it’s about creating an atmosphere that resonates with your personal style and emotional well-being. Before you dive into swatches and samples, there are several key factors to consider that can significantly influence your final decision.

**1. Room size and Lighting:** The dimensions of your bedroom and the quality of natural light it receives can dramatically affect how a color appears. Lighter shades can make a small space feel larger and more open, while deeper hues can create a cozy, intimate vibe. Pay attention to how the light shifts throughout the day—colors can look drastically different in morning light versus the warm glow of the evening. If your room is bathed in bright sunlight, consider colors that will complement this natural brightness, such as soft whites or pastel shades. Conversely, if your space lacks natural light, you might want to lean towards warmer tones to create a welcoming atmosphere.

**2. Personal Taste and Emotional Response:** Your own preferences play a pivotal role in your choice. Think about the colors that resonate with you personally. Do you feel calm and serene surrounded by cool blues and greens, or do you thrive in the energy of vibrant yellows and reds? Consider the emotional impact of colors—while blues and greens evoke tranquility, warm colors like reds and oranges can energize the space. It’s essential to select hues that not only align with your taste but also promote the mood you want to foster in your bedroom.

**3. Existing Decor and Furniture:** Take inventory of your bedroom’s existing decor, furnishings, and textiles. The color you choose should harmonize with these elements to create a cohesive look. If you have a statement piece, such as a colorful rug or a bold headboard, use that as your anchor while selecting a complementary wall color. Additionally, consider the finish of your furniture; for instance, a sleek modern bedroom set may be best paired with a contemporary palette, while vintage pieces could shine against softer, more muted tones.

**4. Trends vs. Timelessness:** While it’s tempting to jump on the latest color trends, think about how long you plan to keep your bedroom looking fresh. Trendy colors can quickly become outdated, so it might be wiser to choose a timeless palette that you won’t tire of after a season. If you want to incorporate trendy shades, consider using them as accents through accessories like throw pillows or artwork, allowing you the freedom to update your space without a complete overhaul.

By thoughtfully considering these factors, you’ll be better equipped to choose a paint color that not only beautifies your bedroom but also nurtures your overall well-being. Remember, the goal is to create a sanctuary—a space that reflects who you are and fosters relaxation and rejuvenation.

4. Assessing Your Personal Style and Preferences

When it comes to choosing the perfect paint color for your bedroom, understanding and embracing your personal style and preferences is essential. Your bedroom should be a sanctuary—a reflection of who you are and how you want to feel when you step inside. Take a moment to consider the elements that resonate with you: Are you drawn to the tranquility of soft pastels, or does the bold vibrancy of jewel tones speak to your adventurous spirit?

Begin by exploring your existing decor and furnishings. What colors dominate your space? If you have a favorite piece of art or a comfortable throw blanket that you adore, these can serve as excellent anchors for your color palette. Consider the textures and patterns in your room as well; a rich, textured fabric can create a striking contrast against a muted wall, adding depth and dimension to your design.

Next, think about the mood you want to create. Do you envision a serene retreat that promotes relaxation and restful sleep, or a vibrant, energizing space that inspires creativity? Colors can evoke powerful emotions, so take the time to experiment with different hues. For instance, soft blues and greens can foster calmness, while warm yellows and oranges can inject a sense of warmth and cheer.

Consider also how your personal style translates into color preferences. Are you a minimalist who prefers a neutral palette, or do you embrace a more eclectic approach with bold, contrasting colors? Use platforms like Pinterest to curate mood boards, or create physical swatches that reflect your style. By visualizing your ideas, you’ll be better equipped to choose a color that not only suits your personal taste but also harmonizes with the overall aesthetic of your bedroom.

Ultimately, the key is to trust your instincts. Your bedroom is a personal haven, and the colors you choose should resonate with you on a deep level. Spend time in your space with paint swatches, observing how each color interacts with the light at different times of the day. The right shade will not only enhance the beauty of your room but also create a nurturing environment where you can retreat, recharge, and find peace.

5. The Impact of Natural Light on Paint Colors

How to choose the right paint color for your bedroom?
Credit : whatcanu.com

When it comes to choosing the perfect paint color for your bedroom, one of the most crucial factors to consider is the impact of natural light. The way a color appears can drastically change depending on the time of day, the direction your windows face, and the quality of natural light that filters through.

Morning light, often soft and warm, can breathe life into light blues or soft yellows, making them feel inviting and serene. On the other hand, harsh afternoon sun can wash out lighter shades, leaving them looking drab and unappealing. If your bedroom faces north, the light tends to be cooler and more subdued, which can make colors appear muted and less vibrant. In spaces with southern exposure, colors may seem more vivid and saturated due to the abundance of sunlight, while eastern-facing rooms may benefit from brighter hues in the morning light.

To truly understand how a paint color will behave in your bedroom, it’s essential to observe how it changes throughout the day. Test swatches on different walls and watch them during different times—early morning, midday, and late afternoon—to see how the interplay of light affects your chosen shade. Also, consider the type of light fixtures you use at night; incandescent bulbs can give a warm glow, while LED lights may render colors cooler.

Ultimately, the goal is to create a harmonious atmosphere that complements both the natural light and your personal style. By being mindful of how light interacts with your paint choices, you can craft a bedroom sanctuary that feels perfectly balanced and inviting at all hours of the day.

6. Popular Color Schemes for Bedroom Serenity

When it comes to creating a serene bedroom sanctuary, choosing the right color scheme is essential. Popular color schemes can significantly influence the mood of the space, promoting relaxation and tranquility. Here are a few timeless palettes that evoke a sense of peace and harmony:

**1. Soft Neutrals:** Shades of beige, taupe, and soft gray create a soothing backdrop that allows for versatility in decor. These colors are not only calming but also serve as a perfect canvas for layering textures, from plush linens to woven baskets. Adding a few accent pieces in darker hues can provide depth without overwhelming the senses.

**2. Cool Blues:** Inspired by the tranquility of the ocean and sky, soft blues and aquas work wonders in a bedroom setting. These shades are known for their calming effects and can help lower blood pressure, making them ideal for a restful retreat. Consider complementing light blue walls with white or sandy-colored accents to enhance the fresh, airy feel.

**3. Gentle Greens:** Nature-inspired greens, like sage or mint, can bring a refreshing touch to your bedroom. Green is associated with renewal and growth, and when applied in soft tones, it invites a sense of balance and harmony. Pairing these colors with natural wood elements or botanical prints can deepen the connection to the outdoors.

**4. Warm Earth Tones:** Rich browns, terracotta, and muted rust create a cozy ambiance, reminiscent of autumn. These colors are perfect for creating a warm, inviting space. When used thoughtfully, they can evoke feelings of comfort and stability. Combining these hues with soft textiles in creams or whites can help keep the atmosphere light and inviting.

**5. Serene Pastels:** Soft pastels like lavender, blush pink, or buttery yellow can infuse a sense of serenity and warmth into your bedroom. These playful yet calming colors offer a gentle touch that encourages relaxation. Consider using pastel shades for accent walls or in decorative accessories to create a dreamy environment without overwhelming the space.

Each of these color schemes provides a unique approach to achieving bedroom serenity. When selecting your palette, think about the emotions you want to evoke and how each color resonates with you personally. The goal is to create a space where you can unwind, recharge, and escape from the hustle and bustle of daily life.

7. Warm vs. Cool Colors: What Works Best?

How to choose the right paint color for your bedroom?
Credit : whatcanu.com

When it comes to selecting the perfect paint color for your bedroom, understanding the distinction between warm and cool colors is crucial, as each can dramatically influence the ambiance and mood of your personal sanctuary.

Warm colors—think soft reds, sunny yellows, and rich oranges—tend to evoke feelings of comfort and coziness. They can make a space feel inviting and energizing, perfect for those who want their bedroom to be a lively retreat. A warm-toned palette can mimic the glow of a sunset, creating a serene yet stimulating environment where you can unwind after a long day. For instance, painting your walls a warm peach or a muted terracotta can infuse your room with a sense of warmth, making it feel both intimate and welcoming.

On the other hand, cool colors like blues, greens, and purples instill a sense of calm and tranquility. These hues are reminiscent of nature—think of the soothing blue of the sky or the refreshing green of a forest. Cool colors can help create a peaceful atmosphere, making them ideal for a bedroom where relaxation is the priority. A serene light blue or a soft lavender can transform your space into a calming oasis, promoting restfulness and reflection, which is essential for a good night’s sleep.

When deciding between warm and cool colors, consider not only your personal preferences but also the overall mood you want to achieve. If your bedroom is a space for relaxation and rejuvenation, leaning towards cooler tones might be the best option. However, if you prefer a more vibrant, energizing atmosphere, warm colors could be your go-to choice. Remember, the lighting in your room will also play a significant role in how these colors appear; warm colors can appear more vibrant in natural light, while cool colors can enhance a cozy feel in dimmer settings.

Ultimately, the choice between warm and cool colors is about creating a bedroom that reflects your personality and meets your lifestyle needs. By understanding the emotional impact of these color families, you can make an informed decision that transforms your bedroom into the perfect retreat.

8. Using Accent Walls to Enhance Mood

Accent walls are a powerful design tool that can significantly enhance the mood of your bedroom while showcasing your personal style. By strategically selecting one wall to feature a bold or contrasting color, you can create a stunning focal point that draws the eye and sets the overall tone of the space. This technique allows for the introduction of vibrant hues without overwhelming the entire room, making it an ideal choice for those who may feel hesitant about fully committing to a bright color palette.

When considering your accent wall, think about the emotions you want to evoke. For instance, deep blues and greens can instill a sense of calm and tranquility, making them perfect for a restful retreat. On the other hand, warm tones like rich terracotta or sunny yellows can infuse your space with energy and positivity, perfect for those mornings when you need a little extra motivation.

Texture can also play a role in enhancing the mood of your accent wall. Consider using materials like reclaimed wood, textured wallpaper, or even a creative mural to add depth and interest. These elements not only add visual appeal but also contribute to the overall ambiance of the room, inviting warmth and a sense of comfort.

Finally, don’t forget to consider the surrounding decor and furnishings when choosing your accent wall color. A thoughtfully selected hue can complement existing pieces, bringing the entire room together in a cohesive and harmonious way. By using accent walls effectively, you can transform your bedroom into a sanctuary that reflects your personality and sets the perfect mood for relaxation and rejuvenation.

9. Testing Paint Samples: How and Why

Choosing the perfect paint color for your bedroom is no small feat, and testing paint samples is a crucial step in this transformative journey. The colors you envision in your mind may not always translate as expected once applied to your walls. This is where testing comes into play—giving you the opportunity to see how various shades interact with your space, lighting, and existing decor.

**How to Test Paint Samples**

Start by selecting a handful of colors that resonate with your vision for the room. Many paint stores offer sample pots, which are a cost-effective way to experiment without committing to a full gallon. Once you’ve narrowed it down, apply swatches of each color directly onto the walls you plan to paint. It’s best to paint a square foot or two of each sample to get a true sense of how the color will look in your space.

When applying the samples, consider the light in your room. Natural sunlight, artificial lighting, and even the time of day can dramatically alter how a color appears. That vibrant blue you loved in the store may seem icy in the morning light but warm and inviting during the golden hour. For the best results, observe the samples at different times of the day and in various lighting conditions.

**Why Testing Paint Samples is Essential**

Testing paint samples is not just about visual appeal; it also engages your emotional connection to color. Colors can evoke feelings and set the tone for your bedroom sanctuary. A calming lavender might make you feel relaxed and serene, while a lively coral could invigorate the space. By testing, you can hone in on not just any color, but the *right* color that will contribute to the atmosphere you wish to create.

Additionally, this step helps to mitigate the risk of buyer’s remorse. There’s nothing worse than investing time and money into painting your bedroom, only to find that the chosen color doesn’t deliver the desired effect. By taking the time to test samples, you empower yourself with knowledge and confidence in your decision.

In summary, paint samples are an invaluable tool in your quest for the perfect bedroom color. They allow you to visualize, experiment, and ultimately choose a shade that not only enhances the beauty of your space but also aligns with your personal style and emotional needs. So grab those sample pots, roll up your sleeves, and let the testing begin!

10. The Role of Texture and Finish in Color Perception

When it comes to selecting the perfect paint color for your bedroom, it’s essential to consider not just the hue itself but also the texture and finish that accompany it. The interplay between color and finish can dramatically influence the overall mood and atmosphere of your space.

A matte finish, for instance, often lends a soft, cozy feel to a room, absorbing light and creating a more intimate ambiance. This is particularly effective when using deeper, richer colors like navy blue or forest green, which can envelop a room in a serene embrace. Conversely, a satin or glossy finish reflects light, enhancing brighter shades such as crisp whites or sunny yellows, making your space feel more open and airy. This reflective quality can add a layer of vibrancy and energy, perfect for those who want to invigorate their mornings.

Texture also plays a crucial role in how we perceive color. A smooth, even surface can make colors appear more uniform and true to their essence, while a textured wall can introduce depth and complexity to the shade. For example, a lightly textured finish can soften a bold color, making it feel more approachable and warm.

Moreover, consider the materials in your bedroom—furniture, linens, and decor. A rich, velvety fabric can complement a soft pastel, while a sleek, modern finish can enhance bolder, contemporary colors. By thoughtfully combining paint finishes and textures, you not only craft a visually stunning environment but also curate a specific emotional response, ensuring that your bedroom is a true reflection of your personal style and mood.

So, as you embark on your journey to transform your bedroom, remember that the role of texture and finish is just as vital as the color choice itself. Together, they create an immersive experience that can either soothe you to sleep or energize you for the day ahead.

11. Complementary Colors: Coordinating with Furnishings

When it comes to transforming your bedroom into a serene sanctuary, understanding the art of complementary colors is crucial. This technique involves selecting colors that enhance and harmonize with the existing furnishings in your space, creating a cohesive and inviting atmosphere. The key is to find a balance between your wall color and the tones of your furniture, bedding, and decor.

Start by taking stock of the main colors in your room. If your furnishings are predominantly neutral—think soft grays, beiges, or whites—you have a versatile canvas to work with. In this case, you might opt for a muted pastel like a soft lavender or a gentle seafoam green, which will add a touch of color without overwhelming your space. These hues can evoke a sense of calm and relaxation, making them ideal for a bedroom.

On the other hand, if your furniture features bold colors, such as deep blues or rich woods, consider choosing a paint color that complements these shades. For example, a warm gold or a creamy ivory can beautifully offset darker tones, creating a warm, inviting feel. This approach not only enhances the visual appeal but also contributes to a balanced and harmonious environment.

Don’t forget about the power of accent walls! If you want to create a focal point in your bedroom while still maintaining a sense of harmony, consider painting one wall in a complementary color that draws the eye without clashing with your furnishings. For instance, if you have a deep mahogany dresser, a soft blush or muted teal wall can serve as a stunning backdrop, allowing the furniture to shine as a statement piece.

Ultimately, the goal is to ensure that your chosen paint color seamlessly blends with your bedroom’s existing elements while also reflecting your personal style. By thoughtfully considering the interplay between your wall color and furnishings, you’ll create a space that feels not only cohesive but also uniquely yours—perfect for restful nights and rejuvenating mornings.

12. Seasonal Considerations for Paint Choices

When it comes to selecting the perfect paint color for your bedroom, it’s essential to factor in the changing seasons. Each season brings with it a unique atmosphere and emotional resonance, which can significantly influence your choice of color. By aligning your paint selection with the seasonal shifts, you can create a space that feels harmonious and inviting year-round.

In the warmer months, consider lighter, airier colors that evoke a sense of freshness and vitality. Soft pastels, gentle creams, and pale blues can enhance the natural light flooding your space, making your bedroom feel more expansive and breezy. These colors can mirror the lush greenery outside and create a serene retreat that feels connected to nature.

As autumn approaches, you might find yourself drawn to warmer, earthier tones. Rich terracotta, deep olive greens, and warm taupes can create a cozy sanctuary that reflects the beauty of falling leaves and the crispness in the air. These colors invite a sense of warmth and comfort, perfect for snuggling in as the temperatures drop.

Winter often calls for deeper, more dramatic hues that instill a sense of calm and tranquility. Deep blues, charcoal grays, or even moody jewel tones can create an intimate atmosphere, ideal for restful nights during the cold winter months. Pair these with soft textiles and warm lighting to enhance the cozy vibe.

As spring blossoms, consider refreshing your space with vibrant and invigorating colors. Bright yellows, soft greens, or lively corals can breathe new life into your bedroom, echoing the rejuvenation of the season. These colors can uplift your mood and inspire a sense of creativity and renewal as nature awakens.

By consciously thinking about how the seasons affect your mood and the ambience in your bedroom, you can choose paint colors that not only complement the changing environment but also enhance your overall well-being. Embrace the cyclical nature of your surroundings and let it guide your palette for a bedroom that feels just right, no matter the time of year.

13. The Influence of Trends vs. Timeless Choices

When it comes to selecting the perfect paint color for your bedroom, it’s essential to navigate the delicate balance between the allure of current trends and the comfort of timeless choices. Trends can be captivating, offering a fresh perspective and an air of modernity that can transform your space. Think of the soothing greens of biophilic design or the serene beachy blues that evoke a sense of calm and relaxation. These colors can feel invigorating and inspire creativity, making them enticing options for a bedroom makeover.

However, trends can also be fleeting. What’s in vogue today might feel outdated tomorrow, leaving you with a color scheme that no longer resonates with your personal aesthetic. This is where timeless choices come into play. Classic hues like soft whites, muted grays, and gentle beiges have a way of fostering a serene atmosphere that transcends the whims of fashion. These shades create a neutral backdrop, allowing your personal decor style to shine through and evolve over time without the need for frequent repainting.

When choosing a color for your sanctuary, it’s vital to consider both the immediate appeal of trendy shades and the enduring quality of timeless options. Ask yourself how a particular color makes you feel and whether it aligns with your vision for relaxation and restfulness. Picture your bedroom a few years down the line—will you still love that bold, trendy shade, or will you be yearning for the comfort of a classic? By thoughtfully weighing these factors, you can create a space that feels both current and enduring, giving your bedroom a lasting sense of harmony and tranquility.

14. Tips for Maintaining Your Chosen Color

Once you’ve selected the perfect paint color for your bedroom, the journey doesn’t end there. Maintaining that vibrant hue and ensuring it continues to evoke the desired mood is crucial for creating a serene sanctuary. Here are some essential tips to help you preserve your chosen color and enhance the overall ambiance of your space.

**1. Regular Cleaning:** Over time, dust and grime can dull your paint’s finish, making it appear lackluster. To keep your walls looking fresh, gently wipe them down with a soft, damp cloth or a sponge. For deeper cleaning, use a mild soap solution, ensuring you test a small area first to avoid any discoloration.

**2. Touch Ups:** Life happens—accidental scratches, dings, or stains can occur. Keep a small can of your paint on hand for quick touch-ups. Before you start, make sure to stir the paint well and use a quality brush or roller to blend the new paint with the old for a seamless finish.

**3. Consider Lighting:** The way your paint color interacts with light can change throughout the day. To maintain your desired mood, be mindful of how natural and artificial light affects your walls. If you notice your color looking different at various times, consider adding sheer curtains or adjusting your light fixtures to create a more consistent atmosphere.

**4. Avoid Excessive Moisture:** Humidity can lead to mold and mildew, which can damage your walls and alter your paint’s appearance. To prevent this, ensure proper ventilation in your bedroom. Use exhaust fans when needed, and consider a dehumidifier if your space tends to be particularly damp.

**5. Seasonal Refresh:** Sometimes, a simple refresh can breathe new life into your chosen color. Consider swapping out bedding, curtains, or decorative accessories to complement your wall color seasonally. This not only keeps your bedroom feeling fresh but can also enhance the overall aesthetic without the need for a complete repaint.

By taking these simple steps, you can ensure that your chosen paint color remains vibrant, inviting, and aligned with the mood you envisioned for your bedroom retreat. Remember, a little maintenance goes a long way in preserving the beauty of your space.

15. Real-Life Examples: Successful Bedroom Color Transformations

When it comes to choosing the perfect paint color for your bedroom, sometimes seeing is believing. Real-life transformations can provide inspiration and insight into how different hues can dramatically alter the atmosphere of a space. Here are a few successful bedroom color transformations that showcase the power of paint.

**1. Serene Sanctuary with Soft Blues:** One couple decided to revamp their stark white bedroom by incorporating a tranquil shade of soft blue. The transformation was astounding; the once sterile room evolved into a serene sanctuary. The cool tones not only made the space feel larger but also promoted a calming effect, perfect for relaxation. Complemented by white bedding and light wooden furniture, the room now radiates peace, making it an ideal retreat after a long day.

**2. Cozy Warmth with Earthy Tones:** A small, dimly lit bedroom was brought to life with the introduction of warm earthy tones, such as deep terracotta and rich taupe. The new color palette created an inviting and cozy atmosphere, transforming the space into a snug haven. This couple added layered textures with throws and cushions in complementary shades, enhancing the warm vibe. The result was a bedroom that felt both intimate and stylish, encouraging them to spend more time enjoying their cozy escape.

**3. Bold Statements with Jewel Tones:** For those who dare to be bold, a vibrant jewel-toned transformation can turn a mundane bedroom into a striking focal point. One homeowner opted for a deep emerald green accent wall, complemented by luxurious gold accents and white trim. The bold color added depth and intrigue, making the bed the centerpiece of the room. By balancing the richness of the green with lighter bedding and decor, the space felt both dramatic and sophisticated, proving that a little risk can lead to stunning results.

**4. Minimalist Elegance with Soft Grays:** Another striking example featured a minimalist approach with soft grays that created an air of sophisticated elegance. The couple chose a pale gray for the walls, paired with crisp white furniture and pops of black for contrast. The transformation was subtle yet impactful, making the small room feel more expansive and airy. By incorporating natural light through sheer curtains, they created a bright and inviting environment that felt modern and fresh.

These real-life examples demonstrate that the right paint color can completely transform a bedroom, impacting not just the aesthetic but also the overall mood of the space. Whether you’re seeking tranquility, warmth, boldness, or minimalist elegance, drawing inspiration from these successful transformations can guide you on your journey to mastering mood through color. So grab your paintbrush and let your creativity flow, knowing that your dream bedroom is just a color choice away!

In conclusion, selecting the perfect paint color for your bedroom is a powerful way to create a sanctuary that reflects your personal style and enhances your mood. By considering the psychological effects of colors, experimenting with different hues, and taking into account the natural light in your space, you can transform your bedroom into a serene retreat that promotes relaxation and restful sleep. Whether you opt for soft pastels, bold jewel tones, or calming neutrals, remember that the right color can significantly influence the ambiance of your room. So, don’t hesitate to explore your creativity and make your bedroom a true reflection of you. Happy painting, and may your newly transformed space bring you comfort and joy for years to come!

What are the best ways to create a spacious feeling in a small room?

Living in a small space can often feel constricting, but it doesn’t have to be a compromise on style or comfort.

With the right techniques, you can transform your cozy quarters into a spacious and inviting haven. Whether you’re in an apartment, a studio, or simply dealing with a compact room, the challenge lies in maximizing every inch without sacrificing aesthetic appeal. In this blog post, we’ll share ten expert tips that reveal how to create an illusion of space while enhancing the overall ambiance of your small room. From smart furniture choices and strategic color palettes to clever storage solutions and lighting tricks, these insights will empower you to cultivate a serene and welcoming atmosphere that feels anything but cramped. Get ready to embrace the charm of your small space and unlock its full potential!

1. Understanding the Psychology of Space

What are the best ways to create a spacious feeling in a small room?
Credit : whatcanu.com

When it comes to small rooms, the way we perceive and interact with our space plays a crucial role in how spacious and inviting it feels. Understanding the psychology of space involves recognizing that our environment can significantly influence our mood, behavior, and sense of comfort. A well-designed small room should feel like a cozy retreat rather than a cramped enclosure.

One key element of this psychology is the concept of openness. Rooms that feel airy and expansive often incorporate light colors, reflective surfaces, and strategic furniture placement. Light hues, such as soft whites, pastels, or gentle grays, can create an illusion of a larger area, allowing walls to recede visually. Complementing this with mirrors can enhance the effect, as they reflect light and create depth, tricking the eye into perceiving a larger space.

Moreover, the arrangement of furniture is paramount. Choosing multi-functional pieces can not only save space but also contribute to the overall flow of the room. For instance, a well-placed ottoman can serve as both a footrest and extra seating, while a wall-mounted desk frees up floor space. It’s essential to maintain clear pathways and avoid overcrowding, as clutter can stifle movement and create a sense of chaos.

The layout should also consider the vertical space. Utilizing shelves and wall-mounted storage can draw the eye upward, creating a sense of height and spaciousness. This upward dimension can be further enhanced by hanging artwork or decorative elements at varying heights, which adds visual interest and prevents the room from feeling flat.

Ultimately, understanding the psychology of space is about creating a harmonious balance between functionality and aesthetics. By making conscious design choices that promote openness, clarity, and comfort, you can transform your small room into a sanctuary that feels both spacious and inviting.

2. Choosing the Right Color Palette

When it comes to making a small room feel spacious and inviting, color plays a pivotal role. The right color palette can transform a cramped space into a serene retreat, creating an illusion of roominess and openness. Start with light colors, as they naturally reflect more light and can make walls appear further away. Soft whites, pale blues, gentle greens, and light grays are excellent choices that evoke a sense of calm and tranquility.

Consider painting the ceiling a shade lighter than the walls; this trick draws the eye upward, creating an airy effect that can make even the smallest rooms feel more expansive. For a touch of warmth, you can introduce pastel accents or muted tones through decor elements like cushions, throws, or artwork. This adds depth without overwhelming the space, maintaining that airy feel.

Furthermore, opting for monochromatic schemes can create a seamless flow, letting the eye move effortlessly across the room. If you’re feeling adventurous, incorporate one or two bolder hues for visual interest—think an accent wall or colorful furniture pieces. Just remember to balance these with lighter tones to prevent the space from feeling cramped.

Lastly, don’t shy away from incorporating reflective surfaces, such as mirrors or glossy finishes, which can enhance natural light and further amplify the sense of space. Choosing the right color palette is not just about aesthetics; it’s about crafting an environment that feels open, inviting, and comfortable. By carefully selecting your colors, you can create a harmonious sanctuary that charms and uplifts anyone who steps inside.

3. Maximizing Natural Light

What are the best ways to create a spacious feeling in a small room?
Credit : whatcanu.com

Maximizing natural light is one of the most effective strategies to transform a small room into a bright, airy sanctuary. Sunlight has an incredible ability to open up spaces, creating an illusion of expansiveness that can make even the coziest of rooms feel inviting. To harness the power of natural light, start by assessing your windows. Keep window treatments light and breezy—opt for sheer curtains or blinds that can be easily raised to allow sunlight to stream in. Avoid heavy drapes that can block light and make the space feel cramped.

In addition to window treatments, consider the placement of mirrors in your room. Strategically placing a large mirror opposite a window can reflect light back into the room, amplifying the effects of sunlight and adding depth to your space. You can also experiment with lighter paint colors on the walls, as soft whites, pastels, or light grays can enhance the brightness and make the room feel more open.

Moreover, think about the furniture and decor you choose. Select pieces that are low-profile and streamlined, allowing light to flow freely throughout the room. Glass furniture or items with reflective surfaces can further contribute to a sense of openness. Finally, don’t overlook the importance of keeping the space uncluttered. A tidy room not only feels larger but also allows the natural light to shine through unobstructed, creating a warm and welcoming atmosphere. By thoughtfully maximizing natural light, you can turn your small room into a spacious haven that radiates comfort and style.

4. Smart Furniture Selection

When it comes to making a small room feel spacious and inviting, smart furniture selection is key. The right pieces can transform a cramped space into a comfortable and aesthetically pleasing retreat. Start by opting for multi-functional furniture that serves more than one purpose. For instance, a chic ottoman that doubles as storage can keep clutter at bay while providing extra seating. Similarly, a bed with built-in drawers or a coffee table that can extend into a dining table maximizes utility without overwhelming the space.

Additionally, consider the scale and style of your furniture. Choosing items that are proportionate to the room can create a sense of harmony. Avoid bulky, oversized pieces that can make the room feel even smaller. Instead, look for sleek, streamlined designs that draw the eye upward, creating the illusion of height. Furniture with legs, such as sofas and chairs, can also foster a sense of openness by allowing light to flow underneath.

Color plays a crucial role in furniture selection as well. Light, neutral tones can blend seamlessly into the room, making the space feel airy and expansive. If you want to incorporate color, choose accent pieces that can easily be moved or replaced, such as cushions or throws, allowing for flexibility without compromising the overall spacious feel.

Lastly, don’t underestimate the power of transparency. Furniture made from glass or acrylic can create an unobtrusive effect, allowing light to filter through and maintaining an open atmosphere. By thoughtfully selecting your furniture, you can cultivate a small room that feels inviting, lively, and surprisingly expansive.

5. The Power of Mirrors

What are the best ways to create a spacious feeling in a small room?
Credit : whatcanu.com

Mirrors are a small room’s best friend, wielding the power to transform confined spaces into airy, inviting retreats. By strategically placing mirrors within your room, you can create an illusion of depth and openness, making even the coziest areas feel more expansive.

Consider hanging a large mirror on one wall; this not only reflects light, making the space feel brighter, but also visually doubles the area, drawing the eye outward. A well-placed mirror across from a window can amplify natural light, bringing in the outside world and enhancing the overall ambiance.

Additionally, mirrored furniture, such as a coffee table or dresser, can contribute to this effect. These reflective surfaces add a touch of elegance while seamlessly blending into the decor, allowing the room to breathe rather than feel weighed down by bulky furniture.

For a more dynamic approach, try arranging a collage of smaller mirrors in varying shapes and sizes. This not only adds visual interest but also invites curiosity, encouraging guests to explore the nuances of the space.

Ultimately, the strategic use of mirrors can enhance the flow of a small room, creating a harmonious balance between style and functionality. By harnessing their reflective magic, you can turn your intimate quarters into a spacious sanctuary that feels both welcoming and expansive.

6. Creating Multi-Functional Spaces

Creating multi-functional spaces is a game-changer when it comes to maximizing the potential of a small room. In a world where square footage is often at a premium, the ability to repurpose areas for various uses can make all the difference between feeling cramped and cozy.

Start by identifying the activities you want to accommodate within the room. Perhaps it’s a cozy reading nook that doubles as a workspace, or a guest bedroom that can transform into a home office. Consider furniture pieces that serve multiple purposes, such as a sofa bed or an ottoman with hidden storage. A stylish coffee table can also double as a desk if you opt for a slim design that can be easily pushed aside when not in use.

Utilize vertical space by installing shelves that can hold both decorative items and practical essentials, such as books or office supplies. This not only helps declutter surfaces but also draws the eye upward, creating the illusion of higher ceilings. Foldable furniture, like wall-mounted desks or collapsible dining tables, can be a fantastic way to create flexible spaces that adapt to your needs throughout the day.

Lighting plays a pivotal role in multi-functional spaces as well. Bright, well-placed lighting can enhance the functionality of each area, while softer, ambient lighting can create a warm, inviting atmosphere for relaxation. Use layered lighting techniques—overhead fixtures, floor lamps, and accent lights—to ensure each part of your room serves its purpose without overwhelming the senses.

By thoughtfully designing a room that can easily transition between functions, you’ll not only maximize your available space but also create a dynamic environment that feels both spacious and inviting. With a little creativity and strategic planning, your small room can become a versatile haven tailored to your lifestyle.

7. Utilizing Vertical Space

What are the best ways to create a spacious feeling in a small room?
Credit : whatcanu.com

When it comes to maximizing the space in a small room, utilizing vertical space can be a game-changer. Instead of focusing solely on the floor area, think about how you can draw the eye upward and make the most of your walls. This approach not only creates an illusion of height but also adds an element of style and functionality to your space.

Start by installing tall bookshelves that reach up to the ceiling. These towering structures can store books, decorative items, and even plants, making use of every inch available. Arrange items in a visually appealing way, mixing taller objects with shorter ones to create a dynamic look. Floating shelves are another fantastic option; they allow you to display art, photographs, or collectibles without taking up valuable floor space.

Consider adding hooks or pegboards for hanging items like bicycles, bags, or even kitchen utensils, transforming your walls into functional storage solutions. In the bedroom, opt for a lofted bed to create a cozy nook underneath for a desk or reading area.

Don’t overlook the power of vertical patterns, too. Choose wallpapers or paint techniques that draw the eye upward, such as vertical stripes or tall, slim prints. Mirrors can also be strategically placed to enhance this effect, reflecting light and creating an airy feel throughout the room.

By embracing verticality, you can turn a small room into a stylish and inviting sanctuary that feels much larger than it is. With a little creativity, you’ll not only maximize your space but also create a visually stunning environment that reflects your personal style.

8. Keeping Clutter at Bay

A small room can quickly feel cramped and overwhelming if clutter starts to pile up. One of the most effective ways to create a spacious and inviting atmosphere is to adopt a clutter-free mindset. Begin by assessing your belongings and determining what you truly need versus what can be tucked away or discarded. Invest in smart storage solutions that blend seamlessly with your décor—think stylish baskets, multi-functional furniture, or floating shelves that utilize vertical space without sacrificing style.

Regularly declutter your space, setting aside time each week to tidy up and evaluate items that may have outlived their usefulness. Remember, less is more when it comes to small rooms. A few well-chosen decorative pieces can make a significant impact, while too many items can create visual chaos.

Incorporate organizational tools that keep your essentials accessible but out of sight, such as under-bed storage boxes or decorative bins for everyday items. This not only helps maintain a clean look but also enables you to enjoy your space fully without the distraction of disarray.

Additionally, encourage a minimalistic approach to your décor. Opt for a few statement pieces rather than overwhelming your walls with a gallery of pictures or excessive knick-knacks. By keeping clutter at bay, you’ll foster an environment that feels open, airy, and welcoming—one where you can truly relax and unwind.

9. Incorporating Open Shelving

Incorporating open shelving into your small room design is a clever way to create an illusion of space while also adding functionality and style. Unlike traditional closed cabinets that can feel bulky and confining, open shelves allow for a more airy aesthetic, making the walls feel less cluttered and more inviting.

When executed thoughtfully, open shelving can serve as a stunning focal point in any room. For instance, in a living area, floating shelves adorned with carefully curated books, plants, and decorative items can draw the eye upward, giving the space a sense of height and openness. In a kitchen, open shelving can showcase your favorite dishware, cookbooks, or unique collectibles, transforming everyday items into beautiful displays that enhance the room’s decor.

To maximize the benefits of open shelving, consider using light-colored materials or transparent glass for the shelves themselves. This will help maintain an unobstructed view and contribute to a more expansive feel. Additionally, alternating between decorative items and functional ones ensures that your shelves not only look good but are also useful, striking a balance between form and function.

Another tip is to install the shelves at different heights. This not only adds visual interest but also allows you to utilize vertical space effectively, drawing the eye upward and creating the illusion of a taller room. When styling your shelves, remember to leave some spaces empty; a bit of negative space can be just as important as the items you display, as it allows the eye to rest and prevents the area from feeling overcrowded.

In summary, open shelving is a versatile and stylish solution for small rooms. By thoughtfully curating what you display and considering the materials and arrangements, you can create an inviting atmosphere that feels spacious and well-organized, making the most of every inch in your home.

10. Using Light Fabrics and Textures

When it comes to creating an illusion of space in a small room, the choice of fabrics and textures plays a pivotal role. Opting for light fabrics can significantly enhance the overall ambiance, making the area feel more open and airy. Think sheer curtains that gently filter sunlight, allowing natural light to flood the room without overwhelming it with heavy drapery. Light-colored linens, like whites, soft pastels, or even delicate patterns, can also contribute to a sense of spaciousness, adding a fresh and inviting feel.

Incorporating a variety of textures can further enrich your small space without weighing it down. Light, woven textiles like cotton or linen for throw pillows and blankets add depth while maintaining a breezy vibe. Consider layering these fabrics—pairing a soft, lightweight throw over a light sofa, or using textured cushions against a smooth, light-colored backdrop. This not only creates visual interest but also encourages a cozy atmosphere that invites relaxation.

Additionally, using light fabrics on furniture can contribute to a more spacious feel. Upholstering chairs or sofas in lighter shades or fabrics with subtle patterns can prevent them from visually dominating the space. If you’re working with a small bedroom, consider light bedding that complements your walls and furniture; the consistent color palette can create a seamless flow, making the room appear larger.

Finally, don’t underestimate the power of reflective surfaces. Incorporating light-colored textures alongside mirrors can amplify the effect of natural light, further enhancing the open feel of your room. Whether it’s a mirrored bedside table or decorative elements that catch the light, these small touches can make a significant difference in how spacious and inviting your small room feels. By thoughtfully selecting light fabrics and textures, you can transform your space into a serene retreat that feels expansive and welcoming.

11. Strategic Artwork Placement

### 11. Strategic Artwork Placement

Artwork has an incredible power to transform the ambiance of a room, and when it comes to small spaces, thoughtful placement can make all the difference. Instead of overcrowding your walls with multiple pieces, consider curating a few select artworks that resonate with your personal style and enhance the room’s overall aesthetic.

Start by choosing larger pieces that draw the eye and create a focal point. A bold painting or an oversized photograph can add depth and interest to a small room, making the space feel more expansive. Hang it at eye level to ensure it captures attention without overwhelming the viewer. Positioning art above furniture, like a sofa or a console table, can also create a sense of height, drawing the eye upward and making the room feel taller.

Additionally, consider the use of mirrors as artwork. A well-placed mirror not only reflects light but also creates the illusion of additional space. By incorporating a decorative mirror into your display, you can double the impact of your artwork while enhancing the room’s brightness and openness.

Don’t shy away from experimenting with different arrangements. A gallery wall with a mix of framed art, photographs, and even decorative objects can add personality without feeling cluttered. To maintain a sense of balance, use a consistent frame style or color palette throughout the collection. This creates a cohesive look that ties the room together.

Lastly, pay attention to the colors in your artwork. Lighter, brighter pieces can open up a space, while darker, heavier colors might feel more constricting. Choose artworks that complement your room’s color scheme to create harmony and make the area feel inviting. By strategically placing your artwork, you can create an illusion of spaciousness, transforming your small room into a stylish and welcoming retreat.

12. Adding Greenery for Freshness

Adding greenery to your small space can transform it into a fresh, inviting oasis. Plants have an incredible ability to breathe life into any room, creating a sense of vibrancy and warmth that instantly uplifts the atmosphere. Whether you choose a single statement plant or a collection of smaller ones, the right greenery can make your space feel larger and more open.

Start with versatile options like snake plants, pothos, or peace lilies, which thrive in various lighting conditions and require minimal maintenance. These hardy plants not only purify the air but also add texture and color, drawing the eye across the room. For a more dramatic effect, consider taller plants like a fiddle leaf fig or a rubber plant, which can create vertical lines and give the illusion of height in your small room.

If floor space is at a premium, don’t fret! Hanging plants or wall-mounted planters are excellent alternatives that can add depth without consuming valuable square footage. You might also consider using plant stands to elevate your greenery, which not only adds visual interest but also makes it easier to care for your plants.

Incorporating greenery doesn’t just enhance your room’s aesthetics; it invites a sense of tranquility and wellness into your home. Studies show that being surrounded by nature can reduce stress and promote a sense of calm, making your small room not just feel bigger but also more enjoyable to inhabit. So, whether you’re nurturing a vibrant monstera or a delicate fern, remember that a touch of greenery is a simple yet powerful way to create an inviting and spacious atmosphere.

13. Designing with Scale in Mind

When it comes to maximizing the potential of a small room, designing with scale in mind is a crucial strategy that can significantly enhance the perception of space. Scale refers to the size of furniture and decor relative to the dimensions of the room, and making thoughtful choices in this area can transform a cramped area into an inviting sanctuary.

First and foremost, consider the proportions of your furniture. Opt for pieces that are appropriately sized for your space; oversized sofas or bulky armoires can overwhelm a room, making it feel even smaller. Instead, look for streamlined furniture that offers functionality without dominating the visual landscape. For example, a sleek, low-profile sofa paired with a glass coffee table can create an airy feel, allowing for uninterrupted sightlines and an open atmosphere.

Additionally, vertical space is your ally. Tall bookshelves or cabinets can draw the eye upward, creating the illusion of height in the room. This not only encourages the perception of spaciousness but also provides ample storage for books, decor, and other items, keeping the floor clutter-free. Incorporating wall-mounted shelves can further optimize vertical space while showcasing decorative elements that reflect your personal style.

Color choice also plays a pivotal role in scaling a room. Light, neutral colors tend to reflect light, making a space feel larger and more open, while darker hues can cocoon a room, making it feel cozy but potentially smaller. If you love bold colors, consider using them as accents rather than the primary palette, allowing them to pop against a backdrop of lighter shades.

Finally, don’t overlook the power of mirrors. Strategically placing mirrors can create depth and reflect light, enhancing the sense of openness. A large mirror on one wall can act as a visual portal, giving the illusion of an extended space beyond the confines of your small room.

By designing with scale in mind, you can create a harmonious environment that feels spacious and inviting, allowing you to enjoy your small room to the fullest while showcasing your unique style.

14. Creating Zones with Rugs

Creating zones with rugs is a clever and stylish way to delineate spaces within a small room, adding both functionality and an inviting atmosphere. Rugs can serve as visual anchors that help define different areas, making your space feel more organized and purposeful. For instance, in a studio apartment, a plush area rug can create a cozy living nook while separating it from the sleeping area.

When selecting a rug, consider its size and shape—opting for larger rugs can help unify a space, making it appear more expansive. A round rug, for instance, can soften sharp corners and create a more relaxed vibe, while a rectangular rug can define dining or work areas, guiding the flow of movement.

Color and pattern also play crucial roles in creating zones. Lighter colors can make a room feel airy and spacious, while bold patterns can add character and interest. Just be sure to choose designs that complement each other; cohesive color palettes can enhance the feeling of continuity and openness. Layering rugs can also add depth and texture, allowing you to create intimate spaces without overwhelming the room.

Additionally, consider the placement of furniture in relation to the rug. Ideally, the front legs of your furniture should rest on the rug, helping to visually tie the pieces together and establish a sense of cohesion. By thoughtfully using rugs to create zones, you can transform your small room into a beautifully organized retreat that feels both spacious and welcoming.

15. Personal Touches for Inviting Warmth

When it comes to transforming a small room into a welcoming oasis, personal touches play a pivotal role in creating an inviting atmosphere. Infusing your space with elements that reflect your personality and experiences not only adds warmth but also makes the room truly feel like home.

Start by displaying cherished photographs in stylish frames. Choose a few key images that evoke positive memories, such as family gatherings, travel adventures, or milestones. Arrange them in a gallery wall format to add visual interest while keeping the room feeling cohesive. Consider varying the frame sizes and colors to create a playful yet curated look.

Textiles are another powerful way to introduce warmth and comfort. Incorporate soft throws and decorative cushions in rich textures and inviting colors. Opt for fabrics that beckon you to sink into your space, like plush velvets or cozy knits. Layering different textiles can add depth and create a sense of comfort, making your small room feel more inviting.

Plants are essential for breathing life into your small space. Choose a few low-maintenance indoor plants to incorporate greenery and bring a touch of nature indoors. Not only do plants purify the air, but they also create a calming ambiance. Consider hanging plants, small succulents on shelves, or even a larger statement plant in a corner to maximize your available space.

Finally, don’t underestimate the power of scent in making a room feel warm and welcoming. Introduce inviting aromas through scented candles, essential oil diffusers, or fresh flowers. Choose scents that evoke feelings of comfort and relaxation, like vanilla, lavender, or citrus.

By adding these personal touches, you’ll create a small room that feels spacious not just in terms of physical space, but also in the warmth and comfort it exudes. Your unique personality will shine through, making it a delightful haven that you and your guests will love to spend time in.

As we wrap up our exploration of expert tips to make your small room feel spacious and inviting, we hope you’re inspired to transform your space into a serene oasis that reflects your personal style. From strategic furniture placement to the clever use of color and light, each suggestion offers a unique way to enhance the sense of openness while maintaining warmth and comfort. Remember, it’s not just about the size of the space, but how you choose to utilize it. Embrace these tips, experiment with your decor, and watch your small room flourish into a welcoming haven. We’d love to see your transformations, so don’t hesitate to share your before-and-after photos or any additional tips you discover along the way! Happy decorating!

How to choose the right paint color for your dining room?

Choosing the perfect paint color for your dining room can be both an exciting and overwhelming task.

This space is more than just a room; it’s where memories are made over shared meals, laughter, and conversation. The right color can set the tone for these cherished moments, influencing the ambiance and feel of the entire home. With countless hues, shades, and finishes to consider, it’s easy to feel lost in the sea of options. Do you want a warm, inviting atmosphere that encourages long dinners, or a fresh, modern look that sparks creativity? In this ultimate guide, we’ll explore the psychology of color, offer expert tips on how to select a palette that complements your style, and provide inspiration to help you transform your dining room into a vibrant gathering space that reflects your personality and enhances your dining experience. Get ready to unleash your inner designer and create a backdrop for unforgettable moments!

1. Understanding the Psychology of Color

How to choose the right paint color for your dining room?
Credit : whatcanu.com

When it comes to selecting the ideal paint color for your dining room, understanding the psychology of color is paramount. Colors have a profound impact on our emotions and behavior, influencing the ambiance of a space and the experiences we have within it. For instance, warm shades like reds, oranges, and yellows tend to evoke feelings of warmth and comfort, making them perfect for creating a cozy atmosphere that encourages conversation and connection. These colors can stimulate the appetite and create an inviting environment for gatherings and family dinners.

On the other hand, cooler tones such as blues and greens can foster a sense of calm and tranquility, making them suitable for more relaxed dining experiences. These hues can help to create a serene backdrop for intimate dinners or quiet family meals, allowing for a peaceful dining experience. Additionally, neutral colors like soft grays and beiges offer versatility and elegance, providing a timeless backdrop that allows your furniture and decor to shine.

Consider the emotions you want to evoke in your dining room. Do you envision lively family dinners filled with laughter and chatter, or serene evenings with soft conversations over candlelight? By selecting a paint color that aligns with your vision, you can create a space that not only reflects your style but also enhances the overall dining experience.

Ultimately, understanding the psychology of color is about more than just aesthetics; it’s about crafting an atmosphere that resonates with your lifestyle and preferences. Take the time to explore the emotional implications of different colors, and let that guide your choices as you embark on the journey of transforming your dining room into the perfect gathering space.

2. Assessing Your Dining Room’s Natural Light

Assessing your dining room’s natural light is a pivotal step in choosing the perfect paint color. The amount and quality of light your space receives can dramatically influence how colors appear on your walls. Begin by observing the light throughout different times of the day—morning, midday, and evening—to understand how the shifting sunlight interacts with your room’s dimensions and architecture.

If your dining room boasts large windows or faces south, it will likely receive an abundance of bright, warm light, which can bring out the vibrancy in hues like buttery yellows, soft whites, or even bold jewel tones. Conversely, a north-facing room typically lacks direct sunlight, often resulting in cooler, muted lighting. In such cases, consider warm tones that can evoke coziness—think soft taupes or warm greys that can help brighten the space without sacrificing depth.

Additionally, consider the type of artificial lighting you’ll be using. The warmth of your dining room’s bulbs can alter how your chosen paint color looks at night. If you plan to use warm lighting, opt for shades that harmonize with that glow, while cooler lighting may require a more neutral or cooler palette to prevent clashing.

Take the time to test paint samples on your walls, observing them under different lighting conditions before making your final decision. Painting swatches on poster boards and moving them around the room can also help you visualize how each color interacts with the light and other elements in the space. By carefully assessing your dining room’s natural light, you can select a color that not only enhances the aesthetic of your dining area but also sets the perfect mood for memorable gatherings.

3. Considering the Size and Shape of the Space

How to choose the right paint color for your dining room?
Credit : whatcanu.com

When it comes to selecting the perfect paint color for your dining room, understanding the size and shape of the space is crucial. Each room tells its own story, and the dimensions and layout play a significant role in how that narrative unfolds. A spacious dining area invites bold, rich hues that can create a dramatic and inviting atmosphere, while smaller rooms benefit from lighter, airy colors that help to visually expand the space.

Start by assessing the proportions of your dining room. If the ceilings are high, darker colors can add warmth and coziness, making the room feel more intimate. Conversely, if you’re working with lower ceilings, light shades can help to lift the space and create an illusion of height. Consider the room’s shape as well; long, narrow dining rooms may benefit from painting the shorter walls a vibrant color to draw the eye and create a sense of balance.

In addition, think about how the layout impacts the flow and functionality of the room. If your dining area opens up into other spaces, you might want to choose colors that complement adjacent rooms to create a cohesive look throughout your home. Pay attention to natural light, too—rooms that receive ample sunlight can handle deeper tones without feeling cramped, while those with limited light may thrive in softer pastels or whites that reflect whatever light is available.

Ultimately, understanding the size and shape of your dining room is about more than just aesthetics; it’s about creating an environment that feels comfortable and inviting. Whether you aim for a modern, minimalist vibe or a rich, traditional ambiance, the right paint color can transform your dining space into the heart of your home.

4. Defining Your Dining Room Style

Defining your dining room style is a crucial step in the process of selecting the perfect paint color. The dining room serves as more than just a place to eat; it is often the heart of the home, a space where family and friends gather to share meals, celebrate special occasions, and create memories. Therefore, the atmosphere you want to cultivate in this room should guide your color choices.

Start by considering the overall aesthetic of your home. Is it modern and minimalist, with sleek lines and a neutral palette? Or perhaps it leans towards a cozy, rustic vibe with warm woods and vintage accents? Identifying your design style will help you choose a paint color that complements the existing elements in your home. For a contemporary space, you might opt for bold, vibrant hues that deliver a punch of energy, whereas a traditional setting might benefit from classic shades like soft creams or muted greens.

Next, think about the mood you want to evoke in your dining room. Warm colors such as reds, oranges, and yellows can create a lively and inviting atmosphere, perfect for encouraging conversation and a sense of warmth during gatherings. On the other hand, cooler colors like blues and greens can instill a sense of calm, making them ideal for more intimate dinners or family meals.

Additionally, consider the furniture and decor you already have or plan to incorporate. The color of your dining table, chairs, and even your tableware can significantly influence your paint choice. If you have dark wood furniture, lighter wall colors can create a beautiful contrast, while a bright, modern table might pair well with a darker, bolder wall color.

Finally, don’t forget about the lighting in your dining room. Natural light can dramatically change how a paint color appears throughout the day. A color that looks stunning in the morning sun may feel entirely different under the warm glow of evening lights. Be sure to test your chosen color swatches at various times of the day to see how they interact with your space.

By clearly defining your dining room style, you’ll not only narrow down your color options but also ensure that the final choice reflects your personal taste and the ambiance you want to create. In this way, your dining room will become a beautiful backdrop for the meaningful moments that happen around the table.

5. Popular Color Trends for Dining Rooms

How to choose the right paint color for your dining room?
Credit : whatcanu.com

When it comes to selecting the perfect paint color for your dining room, staying attuned to current color trends can provide inspiration and direction. In 2023, a blend of bold statements and soft, inviting tones is shaping the dining room aesthetic, creating spaces that are both stylish and comfortable for gatherings with family and friends.

One of the standout trends this year is the resurgence of earthy tones. Warm terracotta and muted olive greens are making waves, evoking a sense of nature and tranquility. These colors not only create a cozy atmosphere but also pair beautifully with natural wood furnishings and plants, enhancing the overall dining experience.

Another popular choice is deep, moody hues like navy blue and emerald green. These rich colors add drama and sophistication, making your dining room feel like an upscale restaurant or an intimate bistro. When used thoughtfully, they can create a striking backdrop for artwork and decor, drawing attention to your personal style and the unique character of the space.

For those who prefer a more classic approach, soft neutrals like creamy whites, warm beiges, and light grays continue to be a timeless favorite. These shades provide a versatile canvas that can easily adapt to seasonal decor changes and allow for bold accents through table settings and artwork.

Lastly, pastels are making a comeback, with soft blush pinks and gentle sky blues bringing a fresh, airy feel to dining spaces. These colors can evoke a sense of calm and approachability, perfect for casual dinners and family gatherings.

Embracing these popular color trends not only elevates the aesthetic of your dining room but also sets the mood for memorable meals and meaningful conversations. As you consider your options, remember to visualize how the color will interact with your dining room’s lighting, furniture, and overall style. The right shade can transform your dining area into a welcoming haven that invites guests to linger long after the last bite has been served.

6. How to Use Color Theory to Your Advantage

Color theory is a powerful tool that can transform your dining room into an inviting and harmonious space. By understanding the basics of color theory, you can effectively choose hues that not only reflect your personal style but also create the desired atmosphere for dining and entertaining.

Start by considering the color wheel, which is divided into primary, secondary, and tertiary colors. Colors that are opposite each other on the wheel, known as complementary colors, can create a vibrant contrast that energizes the space. For instance, pairing a rich navy blue with a warm orange can add a dynamic and lively feel to your dining area, making it perfect for lively gatherings.

On the other hand, if you’re looking for a more serene and calming environment, explore analogous colors—those that sit next to each other on the wheel, such as soft greens, blues, and yellows. These colors blend seamlessly and create a cohesive look that invites relaxation, making them ideal for intimate family dinners or quiet weekend brunches.

Additionally, pay attention to the psychological effects of colors. Warm tones like reds, yellows, and oranges can stimulate appetite and conversation, making them great choices for a dining room. Cool colors, such as blues and greens, evoke tranquility and can help slow down the pace of a meal, fostering a more relaxed dining experience.

Don’t forget the importance of lighting, which can significantly alter how colors are perceived. Natural light can bring out the true vibrancy of your chosen palette, while warmer artificial lights can soften and enhance the coziness of deeper hues. Test your color choices in different lighting throughout the day to ensure they resonate with the ambiance you wish to create.

Incorporating color theory into your decorating process not only enriches the aesthetic appeal of your dining room but also enhances the overall experience for you and your guests. By thoughtfully selecting colors that complement each other and align with your dining goals, you can create a space that feels both inviting and visually stunning.

7. Testing Paint Samples: Best Practices

How to choose the right paint color for your dining room?
Credit : whatcanu.com

When it comes to selecting the perfect paint color for your dining room, testing paint samples is an essential step that can make all the difference. This is not just about picking a color from a swatch; it’s about experiencing how that color interacts with your space, lighting, and furnishings. Here are some best practices to ensure you choose wisely.

First, invest in sample pots of your top color choices. Most paint brands offer small containers at a reasonable price, allowing you to experiment without committing to a full gallon. Once you have your samples, apply swatches on different walls in your dining room. This is crucial because the way a color looks can vary significantly depending on the wall it’s on and the surrounding elements.

Consider the lighting in your dining room throughout the day. Natural light can change a paint color dramatically, so observe how your samples look in both the morning sun and the evening glow. If your dining room only receives limited natural light, you might want to test your colors on walls that receive the most sunlight as well as those that don’t.

Another effective method is to use large poster boards painted with your sample colors. This way, you can move the boards around the room to see how they interact with different angles of light and against your furniture and decor. It’s also helpful to observe the colors at different times of day to see how they shift under varying light conditions.

Don’t forget to take into account the existing elements of your dining room, such as your dining table, chairs, and any artwork on the walls. The right color should not only complement these pieces but also create a cohesive and inviting atmosphere.

Finally, after thorough testing, take a step back and evaluate how each color makes you feel in the space. The dining room is a gathering place, so it’s important that the color you choose fosters warmth and comfort. By following these best practices for testing paint samples, you’ll ensure that the color you ultimately select will enhance your dining experience for years to come.

8. The Role of Accent Walls in Color Selection

When it comes to choosing the perfect paint color for your dining room, accent walls play a transformative role that can enhance both the aesthetic and ambiance of the space. An accent wall—typically one that is painted a bolder or contrasting color compared to the other walls—serves as a focal point, drawing the eye and adding depth to your dining area.

Imagine stepping into a room where three walls are painted in a soft, neutral hue. The fourth wall, however, bursts with a vibrant navy blue or a rich burgundy, instantly creating an inviting atmosphere. This strategic use of color can highlight architectural features like a beautiful mantel, a stunning piece of artwork, or even a buffet table, making your dining room feel both stylish and cohesive.

When selecting your accent wall color, consider the overall mood you wish to evoke. Warm tones like terracotta or mustard yellow can create a cozy, welcoming environment, perfect for family gatherings and intimate dinners. In contrast, cooler shades like teal or olive green can instill a sense of tranquility, making your dining space feel serene and sophisticated.

Furthermore, the color of your accent wall can influence the choice of decor and furnishings. A bold accent wall can serve as a canvas, allowing you to play with complementary colors in your table settings, artwork, and even dining chairs. For instance, a deep charcoal accent wall pairs beautifully with crisp white tableware and warm wood tones, creating a chic and modern vibe.

Additionally, lighting plays a crucial role in how your chosen accent color appears throughout the day. Natural light can enhance the vibrancy of the hue, while softer, ambient lighting can create a more subdued and intimate feel in the evening. Be sure to test paint samples in different lighting throughout the day to see how the colors interact with each other and the overall space.

Incorporating an accent wall into your dining room design not only allows for playful experimentation with color but also provides an opportunity to express your personal style. Whether you opt for a bold statement or a subtle enhancement, the right accent wall can elevate your dining room, making it a space where memories are created and shared.

9. Harmonizing with Existing Furniture and Décor

When it comes to selecting the perfect paint color for your dining room, harmonizing with existing furniture and décor is crucial for creating a cohesive and inviting atmosphere. Your dining room isn’t just a place to eat; it’s a space that reflects your personal style and sets the tone for gatherings with family and friends. To achieve a seamless look, consider the hues, materials, and textures already present in your dining space.

Begin by assessing the color palette of your furniture—dining tables, chairs, and sideboards often serve as focal points in the room. If your furniture boasts rich, dark woods or bold upholstery, softer, lighter paint colors can provide a beautiful contrast, creating a balanced and welcoming feel. Conversely, if your furnishings are in light tones, consider deeper, more saturated shades to add depth and sophistication.

Next, take stock of the décor elements in your dining room, such as artwork, curtains, and decorative accessories. These items can serve as inspiration for your paint choice. For instance, if you have a vibrant piece of artwork that you cherish, pull colors from that piece to create a harmonious link between the walls and your décor. This approach not only enhances visual interest but also ensures that every element in the room feels interconnected.

Don’t forget about the texture of your items as well. A glossy finish on your dining table or a plush rug may inspire you to choose a paint that complements or contrasts with these textures. If your décor leans towards rustic or farmhouse styles, warm, earthy tones can enhance that vibe, while sleek modern furniture might call for cooler, more contemporary shades.

Finally, lighting plays a significant role in how colors appear in your space. Test your paint samples in different lighting conditions—natural light, evening light, and with your overhead fixtures—to see how they interact with your furniture and decor throughout the day. This will help you visualize the final effect and ensure that your chosen color harmonizes beautifully with everything in the room.

By carefully considering how your paint color interacts with your existing furniture and décor, you can create a dining room that feels unified and inviting—one that encourages memorable meals and cherished moments shared around the table.

10. The Impact of Finish: Matte vs. Glossy

When it comes to selecting the perfect paint color for your dining room, the finish you choose can have as much impact as the color itself. The two primary categories—matte and glossy—each offer unique characteristics that can dramatically influence the ambiance and functionality of the space.

**Matte finishes** are known for their soft, non-reflective surfaces. They create a warm, inviting atmosphere, making them ideal for dining rooms where comfort and intimacy are paramount. A matte finish is excellent for hiding imperfections on the walls, as it absorbs light rather than reflecting it. This can be particularly beneficial in older homes with textured walls or uneven surfaces. However, it’s important to note that matte paint can be less durable and more challenging to clean than its glossy counterpart. If you have young children or frequent dinner parties, consider that a matte finish may require more upkeep to maintain its fresh appearance.

On the other hand, **glossy finishes** bring a vibrant energy to any space. These paints reflect light, which can make a room feel larger and brighter, an attractive quality if your dining room lacks natural light. Glossy finishes are also highly durable and easy to wipe clean, making them ideal for high-traffic areas. However, their reflective nature can accentuate imperfections in your walls, so it’s advisable to ensure your surfaces are smooth and well-prepared before applying a glossy coat.

In addition to aesthetics and practicality, consider how the finish interacts with your chosen color. A deep navy blue in a matte finish can evoke a cozy, sophisticated vibe, while the same color in a glossy finish might create a bold, contemporary look. Experimenting with different combinations can help you achieve the desired effect, ensuring your dining room not only looks stunning but also feels inviting during every meal.

Ultimately, the choice between matte and glossy should align with your personal style, the mood you want to create, and the practical needs of your dining area. By carefully considering the impact of finish alongside your color selection, you can transform your dining room into a space that is both beautiful and functional, perfect for every gathering.

11. Seasonal Colors: When to Make a Change

When it comes to painting your dining room, considering seasonal colors can breathe new life into your space and create a dynamic atmosphere that reflects the changing moods of the year. As the seasons shift, so do the colors around us, influencing not only the interior aesthetics but also the emotional ambience of your home.

Spring, with its gentle pastels and fresh, vibrant hues, invites a sense of renewal and warmth. Soft greens, blush pinks, and sunlit yellows can transform your dining area into a cheerful gathering place, perfect for hosting brunches with friends or family feasts. As you transition into summer, you might opt for brighter, bolder colors that echo the vibrancy of the season. Think of sunny oranges and deep blues that evoke the joy of warm evenings spent outdoors.

As the leaves begin to change in autumn, deeper, richer tones become more appealing. Warm terracotta, burnt sienna, and earthy olive greens can create a cozy, inviting atmosphere that complements the harvest season. These colors not only enhance the dining experience but also create a comforting backdrop for those intimate gatherings as the days become shorter.

When winter arrives, consider cooler, more subdued palettes. Soft grays, icy blues, and deep charcoal can evoke a serene and elegant setting, perfect for cozy dinners by candlelight. By aligning your paint choices with the seasons, you can create an environment that feels both relevant and refreshing, ensuring your dining room remains a beloved space throughout the year.

Remember, transitioning your dining room colors seasonally doesn’t have to mean a complete overhaul; small accents like a fresh coat of paint on an accent wall or new decor elements can make a significant impact. Embrace the changing seasons, and let your dining room reflect the beauty of nature outside your window.

12. Creating a Cohesive Flow with Adjacent Rooms

When it comes to selecting the perfect paint color for your dining room, considering the adjacent spaces is crucial for creating a harmonious and inviting atmosphere throughout your home. The dining room often serves as a central gathering place, and its color scheme can significantly impact the overall flow and aesthetic of your living areas. To achieve a cohesive look, start by evaluating the colors of nearby rooms—your kitchen, living room, or hallway.

For instance, if your kitchen boasts warm, earthy tones, such as terracotta or soft beige, you might want to carry those hues into your dining room with a complementary shade that enhances the warm palette. Think of colors that transition smoothly from one space to another; a subtle gradient can create a serene environment that feels intentional and well thought out.

Additionally, consider the architectural elements and furnishings in adjacent rooms. If your living room features a bold accent wall or vibrant artwork, a more subdued shade in the dining room can help balance the visual weight, allowing each space to shine in its own right while still feeling connected.

Another effective technique is to choose a common color that recurs throughout your home, perhaps in different shades or finishes. This could be a soft blue, a muted green, or even a classic neutral that ties everything together, creating a seamless transition and a sense of unity in your home’s design.

Ultimately, the goal is to create a cohesive flow that invites guests to move effortlessly from one area to another. By thoughtfully considering the colors in adjacent rooms, you can achieve a beautifully coordinated look that enhances your dining experience and reflects your personal style.

13. Expert Tips for Small Dining Rooms

### Expert Tips for Small Dining Rooms

When it comes to selecting the perfect paint color for a small dining room, the challenge lies in creating an inviting and spacious atmosphere without overwhelming the space. Here are some expert tips to help you make the most of your compact dining area.

**1. Choose Light and Airy Hues:** Soft, light colors such as pale blues, soft grays, and creamy whites can make a small room feel larger and more open. These hues reflect light, creating a bright and airy vibe. They also provide a neutral backdrop that allows your dining furniture and decor to shine.

**2. Consider Monochromatic Schemes:** Using varying shades of a single color can create a sense of harmony and depth. For example, painting the walls in a light shade of sage green and using slightly darker accents in the decor can add visual interest without making the room feel cluttered. This technique can also elongate the walls, giving the illusion of height.

**3. Use Accent Walls Wisely:** If you’re looking to add a pop of color, consider creating an accent wall. Choose one wall to paint in a bold color while keeping the other walls light. This strategy draws the eye and can make the room feel more dynamic without overwhelming the entire space.

**4. Test with Samples:** Before committing to a color, always test samples on the walls of your small dining room. Paint swatches can look vastly different in varying light conditions, so take the time to observe how the colors change throughout the day. This step is vital in ensuring that you choose a color that complements your room’s natural lighting.

**5. Incorporate Reflective Surfaces:** To enhance the sense of space, consider incorporating reflective elements such as mirrors or glossy finishes. Painting the dining room with a high-gloss finish or adding a mirror on the opposite wall can help bounce light around the room, making it feel more expansive.

**6. Don’t Forget the Ceiling:** Often overlooked, the ceiling is an important surface that can contribute to the room’s overall feel. A lighter ceiling color can create an illusion of height, while a slightly darker or contrasting color can add warmth and coziness.

By following these expert tips, you can transform your small dining room into a stylish and inviting space that feels larger than life. Remember, the right paint color can set the mood for countless gatherings, so choose wisely and enjoy the process!

14. Common Mistakes to Avoid When Choosing Paint Colors

Choosing the perfect paint color for your dining room can transform the space into a welcoming haven, but it’s all too easy to make missteps along the way. Here are some common mistakes to avoid that can save you time, money, and frustration.

**1. Ignoring the Lighting:** One of the most significant factors in how a paint color looks is the lighting in your dining room. Natural light can make colors appear different at different times of the day, while artificial lighting can alter shades dramatically. Before committing to a color, test it in various lighting conditions. Swatch samples on your walls and observe how they change as the sun rises and sets.

**2. Skipping the Samples:** A small paint chip or digital color preview can be misleading. Always invest time in purchasing sample pots and painting larger swatches on your walls. This allows you to see how the color interacts with your furniture, decor, and even the food you serve. Balancing hues can make a world of difference, so take the time to visualize the color in the full context of the room.

**3. Overlooking the Size of the Space:** Lighter colors can make a small room feel more spacious, while darker shades can create a cozy atmosphere. However, using a dark color in a cramped space may make it feel even smaller. Conversely, very bright colors can be overwhelming in larger rooms. Consider the dimensions of your dining room when selecting shades, aiming for a balance that complements both size and function.

**4. Not Considering the Flow of Your Home:** Your dining room is just one part of your home’s overall aesthetic. Choosing a color that clashes with adjacent rooms can disrupt the visual flow of your home. When selecting a paint color, consider the hues in nearby spaces and strive for a cohesive palette that seamlessly connects the rooms, creating a harmonious environment.

**5. Rushing the Decision:** Choosing a paint color should be a thoughtful process, not a hasty decision made on a whim. Take your time to research, explore different palettes, and visualize how each color will affect your dining room’s mood and functionality. Remember, paint is not just a color; it’s an expression of your style and can significantly impact your dining experience.

By avoiding these common pitfalls, you can confidently select a paint color that enhances your dining room’s beauty and creates an inviting atmosphere for family and friends to gather. Embrace the journey of color selection, and enjoy the transformation that awaits!

15. Finalizing Your Color Choice: How to Make the Decision

Finalizing your color choice for your dining room can often feel like a daunting task, especially with the plethora of options available. However, narrowing it down can be made simpler by following a few key steps. Start by reflecting on the mood you want to create. Dining rooms are typically places of warmth and connection, so consider colors that evoke feelings of comfort and hospitality. Warm neutrals like soft taupes or creamy whites can create an inviting backdrop, while muted shades of blue or green can bring a sense of tranquility.

Once you have a general idea of the mood, gather samples of your top contenders and apply them to the walls. This is crucial because colors can look drastically different under various lighting conditions throughout the day. Observe how each hue interacts with the natural light coming into the room, as well as how it complements your existing furniture and decor.

Next, enlist the help of friends or family for their opinions, but remember to trust your instincts. Sometimes, the perfect color is the one that resonates with you the most. Visualize how each shade will look with your dining table set up and consider how it will harmonize during gatherings and family dinners.

As you weigh your options, don’t forget to think about the longevity of your choice. Trends come and go, but timeless colors tend to withstand the test of time, offering a classic look that won’t feel outdated in a couple of years.

Finally, when you’re ready to make the decision, take a step back and envision the completed space. Imagine celebrating milestones, sharing meals, and creating lasting memories within those walls painted in the color you’ve chosen. Ultimately, the right paint color should reflect your personal style and enhance the overall ambiance of your dining room, making it a welcoming haven for every guest that walks through your door.

As we wrap up this ultimate guide to choosing the perfect paint color for your dining room, we hope you feel inspired and equipped to make a decision that reflects your style and enhances your dining experience. The right paint color can transform the atmosphere of your space, setting the tone for memorable meals and cherished gatherings with family and friends. Remember to consider factors like lighting, room size, and your personal preferences as you embark on this creative journey. Whether you opt for a calming hue or a bold statement color, trust your instincts and have fun with the process. Your dining room is not just a place to eat; it’s a canvas for connection and conversation. Happy painting!