
How to install a new light fixture?

Swapping out a light fixture is the fastest way to modernize a room. While the process is straightforward, the hidden challenge lies in the variety of electrical boxes and mounting systems you will encounter. This guide walks you through the technical process, from identification to final securement.
The Essential Tool Kit for Success
Don’t start until your workbench is ready. Using the wrong tool turns a simple task into a frustrating struggle. Keep these items within reach:
- Non-contact voltage tester: Your primary safety filter. Think of this like a smoke detector—it warns you of danger before you see it.
- Wire strippers: Needed to refresh ends if the existing copper is oxidized or brittle.
- Combination pliers: Essential for twisting wires firmly together.
- Assorted mounting hardware: Keep extra #8-32 screws, as box threads often strip over time.
- Step ladder: Ensure it is on level ground to maintain your balance while looking upward.
Step 1: Identifying Your Ceiling Box Type
Before you touch the wiring, look at the mounting point. The ceiling box dictates how you anchor the new unit. If you do not identify the box type, your fixture may eventually sag or pull away from the ceiling.
- Old-work plastic boxes: These are often held by metal tabs or screws anchored into the drywall itself. They have low weight capacities. If your new fixture is heavy, you must replace the box with a fan-rated or heavy-duty box anchored to the joist.
- New-work metal boxes: Usually secured directly to a ceiling joist. These are highly reliable. If you encounter a metal box, ensure you use the green grounding screw provided on the box itself to maintain continuity.
- Pancake boxes: These are shallow, round, and thin. They leave almost no room for wire management. If you have this type, avoid fixtures with bulky internal drivers.
Step 2: Establishing a Fail-Safe Power Cut
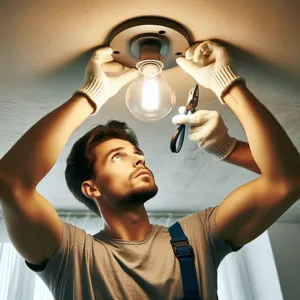
Never rely on a wall switch. A wall switch only interrupts the live wire, but the circuit remains dangerous if you touch the wrong point. Go to your electrical panel and flip the circuit breaker to the OFF position.
Use your non-contact voltage tester on the fixture wires. If it beeps, move back to the panel and identify the correct breaker. Do not proceed until you have confirmed a zero-voltage reading on every single wire inside the box.
Step 3: Removing the Old Fixture
Remove all glass covers and bulbs first. Removing the weight prevents accidental damage or dropping the unit. Once the fixture is light, unscrew the canopy. You will see wires held by wire nuts. Before disconnecting anything, snap a photo. This photo is your map if the house wiring colors are non-standard or confusing.
Step 4: Wiring Techniques for Professional Results

Connecting wires is about physical contact and insulation. If the connection is loose, heat builds up. This is a fire hazard. Use this procedure for every connection:
- Strip about 3/4 inch of insulation off the wire ends.
- Align the ends of the two wires so they are even.
- Twist them together clockwise using your pliers.
- Screw the wire nut on tightly over the twisted pair.
- Give each wire a firm tug. If a wire slips out, redo the connection immediately.
For grounding, always connect the bare or green fixture wire to the bare copper wire coming from the box. If your house is older and lacks a ground wire, you are essentially driving without a seatbelt. In this case, consult a professional to ensure your circuit is protected by a GFCI breaker at the panel.
Step 5: Managing Space and Mounting
The most common error is forcing a large fixture into a shallow or crowded box. Gently fold your wires in an accordion pattern to tuck them behind the mounting bracket. If you push too hard, you risk pinching the insulation, which causes a short circuit and trips your breaker instantly.

Secure the canopy using the provided screws. If the holes do not align perfectly, adjust the mounting bracket rather than forcing the canopy. Overtightening here can crack the finish or strip the screw threads.
Troubleshooting and Pro Tips
Even with careful work, issues can arise. Here is how to handle them like a pro:
- The Buzzing Effect: If you installed an LED fixture and hear a buzz, your wall dimmer is likely incompatible. Older dimmers are designed for high-wattage bulbs and struggle with low-power LEDs. You need an LED-compatible dimmer switch.
- The Flicker Problem: A flickering light almost always indicates a loose wire nut. Turn the power off at the breaker, remove the fixture, and tighten every wire nut connection.
- Installation Gap: If the canopy does not sit flush against the ceiling, it is usually because the mounting screws are too long or the wires are bunched. Use a file to shorten screws if necessary, but never crush the wires.
- Protect Your Floor: Place a thick towel or cardboard directly beneath the ladder. It saves your floor from dropped tools and prevents glass domes from shattering if they slip during the mounting phase.
Follow these steps methodically. If a connection does not feel right or if you encounter wiring that does not match these descriptions, stop and call a licensed professional. Precision ensures safety, and safety is the only standard that matters in residential electricity.
Content updated on 2026-10-10