How can I improve my basketball ball-handling?

Basketball is more than just a game; it’s a thrilling dance of agility, precision, and strategy played out on the hardwood court.

At the heart of this dynamic sport lies one essential skill that can make or break a player’s performance: ball-handling. Whether you’re a beginner looking to dribble with confidence or an experienced player aiming to refine your technique, mastering the art of ball-handling is crucial for elevating your game. The ability to control the basketball not only enhances your offensive capabilities but also empowers you to navigate through defenders with finesse and create scoring opportunities. In this comprehensive guide, we will explore seven essential tips designed to transform your ball-handling skills, helping you to dazzle on the court and outsmart your opponents. Get ready to break through your limits and elevate your basketball game to new heights!

1. Understanding the Importance of Ball Handling in Basketball
How can I improve my basketball ball-handling?
Credit : whatcanu.com

When it comes to basketball, mastering the fundamentals is crucial, and one of the most critical skills every player must develop is ball handling. Understanding the importance of ball handling goes beyond simply dribbling the ball; it encompasses the ability to control the game, create scoring opportunities, and maintain possession under pressure. Strong ball-handling skills can be the difference between a good player and a great one.

At its core, ball handling allows a player to navigate the court with confidence and poise. It enables you to change directions quickly, evade defenders, and make precise passes—all essential elements for executing plays effectively. A player who possesses excellent ball-handling skills can dictate the pace of the game, orchestrate offensive strategies, and create spacing for teammates, making them invaluable on the court.

Moreover, ball handling is not just about individual prowess; it’s about elevating the entire team’s performance. When you can handle the ball with finesse, you can draw defenders in, open up lanes, and facilitate scoring for your teammates. This versatility is particularly crucial in high-pressure situations where decision-making and quick reflexes are paramount.

Additionally, ball handling fosters a sense of rhythm and flow in your gameplay. The more comfortable you become with the ball, the more natural your movements will feel. This fluidity allows you to focus on other aspects of the game, such as reading defenses and anticipating plays, thereby enhancing your overall basketball IQ.

In summary, understanding the importance of ball handling in basketball means recognizing it as foundational to your success on the court. It is a skill that requires dedication and practice, but the rewards—greater confidence, improved performance, and the ability to elevate your game—are well worth the effort. Whether you are a beginner or looking to refine your skills, prioritizing ball handling is the first step toward mastering the court.

2. Assessing Your Current Skill Level

Before you can embark on the journey to elevate your basketball ball-handling skills, it’s crucial to take a step back and assess your current skill level. This self-evaluation is the foundation upon which you’ll build your improvement, allowing you to identify strengths, weaknesses, and specific areas that need focus.

Start by setting aside some time on the court with a basketball in hand. Engage in a series of fundamental drills that highlight different aspects of ball-handling—dribbling, passing, and footwork. Observe how comfortable you feel while performing basic moves like crossovers, behind-the-back dribbles, and in-and-out dribbles. Are your movements fluid and controlled, or do you find yourself struggling to maintain possession?

Next, consider recording yourself during these drills. Watching the footage can provide invaluable insight into your technique, revealing habits that may be hindering your progress. Pay attention to your body posture, hand placement, and dribble height. Are your eyes up, scanning the court for potential plays, or are they glued to the ball? A successful ball handler always maintains awareness of their surroundings.

Additionally, seek feedback from coaches or experienced players. They can offer a fresh perspective on your skill level, pinpointing areas that are working well and those that require improvement. Be open to constructive criticism; it’s a vital part of the learning process.

Finally, take stock of your basketball IQ. Understanding the game goes hand in hand with ball-handling skills. Assess your knowledge of plays, defensive strategies, and teamwork dynamics. The more you know about how the game operates, the better you can adapt your ball-handling to various situations on the court.

By thoroughly evaluating your current skill level, you’ll set a clear path for your development. This foundation will empower you to implement targeted drills and strategies, ultimately enhancing your ball-handling ability and boosting your overall performance on the court.

3. Tip 1: Focus on Fundamentals – Dribbling Techniques

How can I improve my basketball ball-handling?
Credit : whatcanu.com

When it comes to mastering basketball, the foundation of your skills lies in the fundamentals, particularly in the art of dribbling. Dribbling is not just about bouncing the ball; it’s a dynamic dance that requires precision, control, and awareness. To elevate your ball-handling skills, begin by honing your dribbling techniques, as they will serve as the bedrock for your overall game.

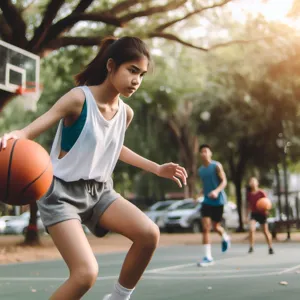
Start with the basics: ensure that you’re using your fingertips to control the ball rather than your palms. This grip offers better tactile feedback and allows for quicker reactions as you maneuver on the court. Practice dribbling the ball low and close to the ground, which increases your control and makes it harder for defenders to steal the ball. As you become comfortable, experiment with different heights and angles, learning to adapt your dribbling to various game situations.

Incorporate drills that emphasize both stationary and dynamic dribbling. Set up cones in a zigzag pattern and practice dribbling around them, focusing on keeping your head up to maintain court awareness. This drill not only sharpens your ball-handling skills but also trains you to read the defense and make split-second decisions. As you progress, include changes of pace and direction; learning to accelerate or decelerate while maintaining control can give you a significant edge during games.

Finally, don’t overlook the importance of practicing with both hands. A versatile player who can dribble proficiently with either hand is much harder to defend against. Dedicate time to strengthening your non-dominant hand, gradually incorporating it into your dribbling drills. By focusing on these fundamental techniques, you’ll not only improve your ball-handling skills but also build the confidence needed to take your game to the next level. Remember, every great player started with mastering the basics; solid dribbling techniques will pave the way for your success on the court.

4. Tip 2: Practice with Both Hands – Ambidextrous Dribbling

When it comes to basketball, being proficient with one hand can only take you so far. To truly elevate your ball-handling skills, it’s essential to practice with both hands. This ambidextrous approach not only enhances your versatility on the court but also keeps defenders guessing and off-balance.

Start by incorporating simple drills that force you to use your non-dominant hand. Begin with stationary dribbling—bounce the ball up and down while focusing solely on your weaker hand. This may feel awkward at first, but with consistent practice, it will gradually become more natural. As you gain confidence, progress to dribbling while walking or jogging, then to more dynamic movements like crossovers or behind-the-back dribbles.

Incorporating cones or markers into your routine can further challenge your skills. Set up a series of obstacles and practice weaving through them while using your non-dominant hand. This not only improves your dribbling but also enhances your ability to change direction quickly, a critical component of effective ball handling in game situations.

Moreover, don’t forget to integrate shooting drills that require you to finish with your weaker hand. Layups and jump shots from various angles will help solidify your overall skill set, allowing you to attack the basket confidently from either side.

The more you train your non-dominant hand, the more balanced and unpredictable your game will become. Remember, even the greatest players, like Stephen Curry and LeBron James, emphasize the importance of being proficient with both hands. So, embrace the challenge—your future self on the court will thank you!

5. Tip 3: Incorporate Dribbling Drills into Your Routine

How can I improve my basketball ball-handling?
Credit : whatcanu.com

Incorporating dribbling drills into your routine is a game-changer when it comes to mastering basketball ball-handling skills. consistency is key, and dedicating time to focused practice can significantly enhance your dexterity, control, and agility on the court.

Start by integrating a variety of drills that target different aspects of dribbling. For instance, begin with stationary ball-handling exercises like the “figure-eight” drill, where you weave the ball in a figure-eight pattern between your legs. This drill not only improves your hand coordination but also enhances your ability to protect the ball from defenders. As you become more comfortable, elevate the intensity by transitioning into movement drills. The “Zig-Zag” drill, where you dribble in a zig-zag pattern while changing speeds and directions, is excellent for developing agility and understanding how to maneuver around defenders.

Another effective drill is the “two-ball” drill, where you dribble two basketballs simultaneously. This not only challenges your hand-eye coordination but also forces you to focus on maintaining control with both hands, a crucial skill for any player seeking to elevate their game.

Don’t forget to incorporate game-like scenarios into your drills. Set up cones or markers to simulate defenders, allowing you to practice your moves in a realistic context. This will help you build muscle memory and improve your decision-making skills as you learn to read the defense and react accordingly.

Lastly, consider tracking your progress. Set specific goals for each practice session, whether it’s a certain number of successful crossovers or maintaining a dribble without losing control under pressure. By holding yourself accountable and regularly challenging your skills, you’ll notice significant improvements over time.

By making dribbling drills an integral part of your training regimen, you’ll not only refine your skills but also gain the confidence needed to handle the ball like a pro when it matters most on the court.

6. Tip 4: Improve Your Footwork for Better Control

Footwork is the foundation of effective basketball ball-handling, and improving it can significantly elevate your game. Great ball handlers aren’t just defined by their dribbling skills; they also possess quick, agile foot movement that allows them to navigate the court with ease. By honing your footwork, you can create space, evade defenders, and maintain better control of the ball.

Start by practicing basic footwork drills that focus on your agility and balance. Simple exercises like ladder drills or cone drills can enhance your foot speed and coordination. As you improve, incorporate these movements into your dribbling practice. For instance, try performing crossovers or behind-the-back dribbles while constantly shifting your feet in different directions. This will help you develop a sense of rhythm and flow, allowing you to react quicker during games.

Additionally, pay attention to your stance. A low, balanced position allows for better control and quicker movements. When you’re dribbling, keep your knees slightly bent and your weight distributed evenly on the balls of your feet. This stance will not only help you maintain balance but also make it easier to pivot or change direction at a moment’s notice.

Remember to practice with purpose. Incorporate game-like scenarios into your training sessions, such as simulating defensive pressure while focusing on your footwork. This will not only improve your ball-handling skills but also build your confidence in real-game situations.

By dedicating time to refine your footwork, you’ll find that your overall control of the ball improves dramatically. This essential skill will enable you to maneuver past defenders, create scoring opportunities, and elevate your performance on the court.

7. Tip 5: Use Cones and Obstacles for Enhanced Agility

How can I improve my basketball ball-handling?
Credit : whatcanu.com

In the world of basketball, agility is as crucial as ball-handling skills, and one of the most effective ways to sharpen both is by incorporating cones and obstacles into your training regimen. This tip might seem simple, but the benefits it brings to your game can be transformative.

To get started, set up a series of cones or other obstacles in varying patterns across your court. You can arrange them in straight lines, zigzags, or even create more complex shapes that require rapid direction changes. The key here is to challenge yourself—vary the distances between the cones and the angles at which you approach them.

As you navigate through these obstacles, focus on maintaining control of the ball while executing dribble moves such as crossovers, behind-the-back dribbles, and spin moves. This not only enhances your ball-handling skills but also simulates the unpredictable nature of a real game, where defenders can come at you from all angles.

Moreover, working with cones sharpens your footwork. As you weave in and out, your ability to pivot and change direction quickly will improve, allowing for smoother transitions when you need to evade defenders on the court. Incorporate speed drills, where you sprint to the next cone, then slow down to execute a dribble move before accelerating again. This will help you develop both speed and control.

Don’t forget to challenge yourself further by timing your runs or competing with a friend. Setting personal bests can add an element of fun and motivation to your practice sessions. By consistently integrating cones and obstacles into your drills, you’ll build the agility needed to navigate through defenses with ease, making you a more formidable player on the court.

8. Tip 6: Develop Your Awareness – Head Up Dribbling

When it comes to basketball, the ability to dribble with your head up is a game-changer. It’s not just about moving the ball; it’s about enhancing your court awareness and making smarter decisions in real time. Developing your awareness through head-up dribbling means training yourself to keep your eyes scanning the court, rather than fixating on the ball. This skill allows you to read the defense, locate open teammates, and spot potential passing lanes, giving you a significant advantage during gameplay.

To cultivate this essential skill, start by practicing dribbling drills that encourage you to focus on your surroundings. Set up cones or markers around the court and navigate through them while maintaining your head up. Challenge yourself to call out the names of your teammates or identify defensive players as you weave through the obstacles. This exercise not only reinforces your dribbling technique but also sharpens your ability to process information quickly.

Additionally, incorporate vision training into your routine. Use tools like vision cones or contrast cards during your dribbling practice. These will help you train your peripheral vision and improve your ability to spot opportunities without needing to look directly at the ball.

Remember, the best ball-handlers in the game are those who can maintain control while keeping their heads up. This dual focus on dribbling and awareness will enhance your overall gameplay, allowing you to make quicker decisions, execute plays more effectively, and elevate your performance on the court. With consistent practice, you’ll soon find that dribbling with your head up becomes second nature, transforming you into a more dynamic and unpredictable player.

9. Tip 7: Work on Change of Pace and Direction

Mastering the art of change of pace and direction is one of the most effective ways to elevate your basketball ball-handling skills and leave defenders guessing. In the fast-paced game of basketball, being able to shift gears seamlessly can create space for your shot, open up passing lanes, and ultimately keep your opponents on their toes.

To develop this skill, start by practicing your dribbling at varying speeds. Begin with a controlled pace, maintaining a low center of gravity and keeping your eyes up to survey the court. As you become comfortable, gradually increase your speed, focusing on maintaining ball control. The key is to make your movements unpredictable; a sudden burst of speed or a quick slow-down can throw off even the most seasoned defenders.

Incorporate changes of direction into your practice regimen. This can be done through a series of drills that emphasize crossovers, behind-the-back dribbles, and hesitation moves. For example, try the “Zigzag Drill,” where you dribble in a zigzag pattern, alternating your pace and direction at each change of angle. This not only enhances your handling skills but also helps you develop a sense of timing and rhythm.

Another effective technique is the “Change of Speed Drill.” Start dribbling at a slow pace, then explode into a sprint for a few dribbles before transitioning back to a slow, controlled dribble. This drill mimics real-game situations where you’ll need to react quickly and adapt your speed based on the defender’s position.

Finally, don’t forget to practice these skills while incorporating defensive pressure. partner up with a teammate or coach who can play defense, forcing you to make quick decisions on the fly. This simulates game scenarios and helps you learn to read the defender’s movements, allowing you to exploit weaknesses in their positioning.

By mastering change of pace and direction, you’ll not only enhance your overall ball-handling skills, but you’ll also become a more formidable offensive player—one who can create opportunities for both yourself and your teammates. Remember, the best players are those who can keep defenders guessing, so embrace these techniques and watch your game elevate to new heights!

10. The Role of Conditioning in Ball Handling

Conditioning plays a pivotal role in elevating your basketball ball-handling skills, often serving as the unsung hero behind a player’s performance on the court. To truly master ball handling, it’s essential to recognize that skillful dribbling and precise control don’t just come from technique; they also stem from physical readiness and endurance.

When you’re conditioned, your body can move fluidly and efficiently, allowing you to execute complex dribbling maneuvers without the burden of fatigue. Imagine breaking down a defender with a series of swift crossovers and behind-the-back dribbles, only to find your legs giving out midway through—frustrating, right? That’s where conditioning comes in to save the day. It enhances your stamina, ensuring that you maintain peak performance throughout the game, even in the most intense moments.

Incorporating a robust conditioning regimen into your training routine can significantly improve your ball-handling abilities. Focus on exercises that build both aerobic and anaerobic fitness, such as sprints, agility drills, and plyometrics. These exercises not only improve your cardiovascular health but also increase your muscle strength and explosiveness—both crucial for quick, decisive movements with the ball.

Moreover, conditioning is about more than just physicality; it also sharpens your mental focus. When you’re physically fit, you can think clearly under pressure, allowing you to make split-second decisions that can change the game. Whether you’re navigating through a crowded lane or executing a no-look pass, your conditioning helps keep your mind sharp and your body responsive.

In summary, to elevate your ball-handling skills, prioritize conditioning as a foundational element of your training. By blending physical endurance with your technical skills, you’ll not only enhance your dribbling prowess but also transform into a more formidable player on the court. So lace up your sneakers, hit the gym, and prepare to see your ball-handling abilities soar!

11. Analyzing Professional Players’ Ball-Handling Skills

One of the most effective ways to elevate your own basketball ball-handling skills is to analyze the techniques of professional players. Watching the pros can provide invaluable insights into the nuances of ball handling that may not be as obvious during practice or casual play. Start by selecting a few of your favorite players known for their exceptional dribbling—think of stars like Kyrie Irving, Stephen Curry, or Chris Paul.

Begin by studying their movements: notice the way they create space from defenders, the rhythm of their dribble, and how they use their body to shield the ball. Slow-motion replays can be particularly helpful, allowing you to dissect each action frame by frame. Focus on how they read the defense and react accordingly, adapting their dribble to the flow of the game.

You can also find instructional videos or breakdowns online where analysts dissect specific plays or moves. Pay attention to the footwork involved; many elite ball handlers possess an understanding of angles and positioning that allows them to perform complex maneuvers with ease.

After observing these techniques, try incorporating them into your own practice sessions. Set up drills that mimic the moves you’ve analyzed, gradually increasing speed and intensity. By imprinting these professional skills into your muscle memory, you’ll not only enhance your ball-handling abilities but also develop a deeper understanding of the game. Remember, every great player started as a student of the game; by analyzing and learning from the best, you too can master the art of ball handling.

12. Creating a Personalized Ball-Handling Practice Plan

Creating a personalized ball-handling practice plan is a game-changer for any aspiring basketball player looking to elevate their skills. Just like any other athlete, you must tailor your training to suit your unique strengths, weaknesses, and goals. Begin by assessing your current ball-handling abilities; take note of which moves come naturally and which ones feel clumsy or awkward. This self-assessment will serve as your foundation.

Once you have a clear understanding of your skill level, outline specific objectives. Perhaps you want to improve your crossover dribble or develop a more fluid behind-the-back move. Setting measurable goals will help you stay focused and motivated throughout your training sessions.

Next, structure your practice plan to include a variety of drills that target these objectives. Start with fundamental exercises, such as stationary dribbling and figure-eight patterns, to build your foundational skills. Gradually incorporate more complex movements like spin dribbles, hesitation moves, and change-of-pace drills. Remember to balance your practice between both hands, as this will enhance your overall versatility on the court.

Duration and frequency are also key elements when designing your plan. Aim for short, intense practice sessions that maintain your energy and focus—around 30 to 45 minutes is ideal. Try to practice at least three to four times a week, allowing for rest days to prevent burnout and injury.

In addition to individual drills, consider integrating game-like scenarios into your practice. This could involve dribbling against a defender or setting up cones to simulate defensive pressure. By replicating the conditions you’ll face during a game, you’ll develop the ability to perform under pressure.

Finally, don’t shy away from tracking your progress. Keep a journal of your practice sessions, noting improvements, areas that still need work, and any insights you gain. Regularly revisiting your plan and adjusting it as you evolve will ensure that your training remains relevant and effective.

A well-crafted, personalized ball-handling practice plan not only sharpens your skills but also instills confidence. With commitment and consistency, you’ll master the court, leaving defenders scrambling in your wake as you weave your way to success.

13. Tracking Your Progress: Setting Goals and Milestones

Tracking your progress is a vital component of mastering basketball ball-handling skills. Just as players measure their shooting percentages, rebounds, or assists, setting specific goals and milestones for your ball-handling can provide the focus and motivation needed to elevate your game.

Start by defining clear, achievable goals. Instead of vaguely aiming to “get better,” specify what that means for you—whether it’s mastering a particular dribble move, improving your speed with the ball, or increasing your ability to handle pressure during games. Aim for SMART goals: Specific, Measurable, Achievable, Relevant, and Time-bound. For instance, you could set a goal of executing a behind-the-back dribble flawlessly 50 times in a row within two weeks.

Once you’ve established your goals, break them down into smaller milestones. These bite-sized achievements can act as stepping stones that keep you motivated along your journey. Perhaps aim to improve a certain skill each week, like enhancing your crossover dribble or your ability to switch hands seamlessly. Document your progress through a training journal or a digital app, noting not just what you accomplished but also how you felt during the practice sessions. This reflection can provide valuable insights into your growth and areas that need more attention.

Regularly reassess your goals and milestones. This allows you to adapt your training plan based on your evolving skills and any challenges you encounter. Celebrate your milestones—no matter how small. Recognizing these achievements will boost your confidence and reinforce your commitment to continuous improvement. By diligently tracking your progress, you’ll not only sharpen your ball-handling skills but also cultivate a mindset of discipline and perseverance that can significantly enhance your overall basketball performance.

14. Common Mistakes to Avoid While Practicing

When it comes to mastering ball-handling skills in basketball, practice is essential—but not all practice is created equal. Avoiding common mistakes during your training sessions can make the difference between merely going through the motions and truly elevating your game. Here are some pitfalls to watch out for:

1. **Neglecting Fundamentals**: It’s easy to get caught up in flashy moves and advanced techniques, but neglecting the basics can severely hinder your progress. Always start with foundational drills, such as stationary dribbling, and focus on maintaining proper hand placement and body posture. Mastering these fundamentals will provide a solid base for more complex skills.

2. **Overlooking Weaknesses**: Many players gravitate toward practicing their strengths, but this can lead to an imbalanced skill set. Identify your weaknesses—whether it’s weak hand dribbling, crossovers, or hesitation moves—and dedicate time to improving them. Embracing your shortcomings will make you a more versatile player on the court.

3. **Practicing Without Purpose**: Randomly dribbling the ball or executing moves without a clear goal can lead to ineffective practice sessions. Set specific objectives for each training session, whether it’s improving your speed, control, or the effectiveness of your change of pace. This focused approach will help you track your progress and ensure that every minute spent practicing counts.

4. **Ignoring Footwork**: Ball-handling is not just about your hands; footwork is equally important. Failing to integrate footwork drills into your practice can limit your ability to create space and navigate through defenders. Incorporate agility and footwork exercises to enhance your overall control and movement on the court.

5. **Practicing in Isolation**: While individual practice is crucial, neglecting to simulate game scenarios can hinder your development. Incorporate drills that mimic real-game situations, such as practicing against a defender or executing moves while on the move. This will help you build confidence and adaptability when facing opponents during actual games.

6. **Lack of Consistency**: Progress in ball-handling skills requires consistent practice. Skipping sessions or practicing sporadically can stall your improvement. Develop a regular training schedule and stick to it, treating each session as an important step in your journey to becoming a better player.

7. **Forgetting to Have Fun**: Finally, amidst all the drills and focused efforts, don’t forget to enjoy the game. Practicing ball-handling should be a fun and rewarding experience. Incorporate games and challenges into your practice sessions to keep your motivation high and your skills sharp.

By being mindful of these common mistakes, you can make the most of your practice time and take your ball-handling skills to new heights. Remember, the road to mastery is paved with dedication, focus, and a willingness to learn from your missteps.

15. Conclusion: The Journey to Mastering Ball Handling

As we wrap up our exploration of the essential tips to elevate your basketball ball-handling skills, it’s important to remember that mastery is not an overnight achievement. The journey to becoming a proficient ball-handler is filled with dedication, practice, and a willingness to learn from both successes and failures. Just like the greats of the game, your path will be marked by countless hours on the court, honing your skills, and pushing your limits.

Every dribble, pass, and move you make is a building block in your basketball repertoire. Embrace the process—celebrate the small victories, whether it’s nailing that tricky crossover or perfecting your behind-the-back dribble. The more you practice, the more instinctual these movements will become, allowing you to play with confidence and creativity when the game is on the line.

Moreover, don’t forget the importance of feedback. Whether it’s from a coach, a teammate, or even video analysis, constructive criticism can provide invaluable insights into areas for improvement. Keep an open mind and be willing to adapt your techniques; basketball is a dynamic game, and the best players are those who can evolve with it.

Finally, maintain your passion for the sport. Your love for basketball will serve as the fuel that drives you through the challenging days when the ball doesn’t bounce your way. Surround yourself with fellow basketball enthusiasts, engage in friendly competitions, and keep the joy of the game at the forefront of your journey.

With commitment and the right mindset, you’ll not only elevate your ball-handling skills but also deepen your appreciation for the game itself. So lace up your sneakers, hit the court, and enjoy the journey to mastering ball handling—your future self will thank you.

As you embark on your journey to mastering the court, remember that improving your basketball ball-handling skills is a gradual process that requires dedication, practice, and a positive mindset. The seven essential tips we’ve outlined serve as a solid foundation to elevate your game, whether you’re a beginner honing your craft or an experienced player looking to refine your technique. Embrace the drills, challenge yourself with new moves, and, most importantly, enjoy the process of growth and improvement. With perseverance, you’ll not only enhance your ball-handling skills but also gain confidence and agility on the court. So lace up your sneakers, hit the practice court, and let your passion for the game shine through as you implement these strategies—your teammates and fans will surely notice the difference!

What are the best ways to practice basketball at home?

As the sun sets on another busy day, there’s nothing quite like the satisfying sound of a basketball swishing through the net, echoing in the quiet of your driveway or backyard.

Whether you’re a seasoned player looking to sharpen your skills or a beginner eager to learn the ropes, practicing at home offers the perfect opportunity to elevate your game without the pressure of a crowded gym. In this post, we’ll explore the top seven basketball drills designed for skill development that you can easily incorporate into your home training routine. From perfecting your shooting technique to enhancing your ball-handling skills, these drills will not only boost your confidence but also prepare you to dominate on the court. So grab your basketball, lace up your sneakers, and get ready to shoot some hoops while honing your skills in the comfort of your own space!

1. Introduction: Why Practicing at Home is Important

What are the best ways to practice basketball at home?
Credit : whatcanu.com

Practicing basketball at home is an invaluable aspect of skill development for players of all ages and skill levels. In the hustle and bustle of daily life, it can be challenging to find the time to make it to the gym or attend organized practices. However, creating a dedicated space at home for basketball drills not only ensures that you can practice whenever it fits your schedule but also allows for consistency in training—an essential component of improvement.

Home practice provides a unique opportunity to focus on personal skill sets without the pressure of competition. It’s a time to experiment, make mistakes, and refine techniques in a low-stress environment. Whether you’re a beginner looking to learn the basics or an advanced player striving for that extra edge, engaging in drills at home can significantly bolster your on-court performance.

Moreover, practicing at home helps build discipline and self-motivation. With the right mindset, you can transform your living room, driveway, or backyard into a personal training ground. This not only encourages a deeper connection with the game but also empowers you to take control of your own development. By committing to regular home practice, you’ll find that your skills—be it shooting, dribbling, or defensive maneuvers—will improve dramatically, setting the stage for success when you hit the court with teammates or during competitive play. Now, let’s dive into the top seven basketball drills you can incorporate into your home practice routine to elevate your game!

2. Choosing the Right Space for Your Drills

When it comes to honing your basketball skills at home, the space you choose for your drills can make a significant difference in your development. Selecting the right environment not only enhances your practice experience but also maximizes your performance gains.

Begin by assessing your available options—whether it’s a driveway, garage, backyard, or even a local park. Ideally, your chosen space should have a flat, hard surface that allows for smooth movement and consistent ball bounce. If you’re practicing in your driveway, ensure there are no cracks or loose gravel that could disrupt your footing or throw off your shots.

Consider the height of your basketball hoop, too. A standard hoop is 10 feet high, but if you’re training younger players or newcomers to the game, you might opt for adjustable hoops that can be lowered to accommodate different skill levels. This flexibility allows for a more tailored practice session, making it easier to focus on specific techniques like layups or jump shots.

Lighting is another crucial aspect. Natural daylight can enhance visibility, but if you’re practicing in the evening or in a shaded area, ensure you have adequate lighting. Poor visibility can lead to mishaps or hinder your ability to accurately assess your shooting form.

Lastly, think about the surroundings. A clutter-free area is essential not only for safety but also to eliminate distractions that could disrupt your focus. If you’re practicing in a public space, be mindful of pedestrians or other players, and choose times when the area is less crowded to allow for uninterrupted practice.

By carefully selecting the right space for your basketball drills, you’ll create an environment that fosters concentration, creativity, and skill development—key ingredients for shooting hoops at home like a pro!

3. Essential Equipment for Home Basketball Practice

What are the best ways to practice basketball at home?
Credit : whatcanu.com

To maximize your home basketball practice, having the right equipment is crucial. While you don’t need a full gym to develop your skills, investing in a few essential items can make a world of difference in your training routine.

First and foremost, a quality basketball is a must. Look for a ball that suits your playing style and feels comfortable in your hands. Whether you prefer an indoor, outdoor, or composite ball, having a reliable basketball allows you to practice your dribbling, shooting, and passing with confidence.

Next, consider a portable basketball hoop if you have the space. Adjustable hoops can be set to various heights, accommodating players of all ages and skill levels. This flexibility enables you to practice shooting from different angles and distances, essential for developing a well-rounded game.

Another valuable piece of equipment is a rebounder. This device is particularly helpful for solo practice, as it returns the ball to you after a shot, allowing you to work on your shooting accuracy and consistency without having to chase down rebounds. Some rebounders are adjustable, giving you the ability to simulate different angles and shot types.

Additionally, investing in cones or markers can help you create an effective training space. These items are perfect for setting up dribbling drills or agility exercises. Use them to outline your practice area and set specific targets for your movements, improving your footwork and coordination.

Finally, don’t overlook the importance of a good pair of basketball shoes. Proper footwear not only enhances your performance but also helps prevent injuries. Look for shoes that provide the right support and traction for your playing surface, whether you’re practicing indoors or outdoors.

By equipping yourself with these essential tools, you’ll create a conducive environment for honing your skills, ensuring that every practice session at home is both productive and enjoyable.

4. Warm-Up: Preparing Your Body for Drills

Before diving into the heart of your basketball drills, it’s crucial to dedicate time to warming up your body. A proper warm-up not only enhances your performance but also significantly reduces the risk of injury, ensuring you can shoot hoops with confidence and vigor.

Start with dynamic stretches to increase blood flow to your muscles and improve your overall flexibility. Simple exercises like arm circles, leg swings, and torso twists can get your joints moving and your muscles prepped for action. Aim for at least 5–10 minutes of these movements, focusing on areas that are heavily engaged during basketball, like your legs, shoulders, and core.

Next, incorporate some light cardiovascular activity. Jogging in place or performing high knees will get your heart rate up and your body ready to go. This elevated heart rate plays a key role in preparing your muscles for the explosive movements common in basketball, such as sprinting down the court or making quick lateral movements.

Once you’re warmed up, transition into basketball-specific drills to further prepare for your skill development. Dribble around cones or markers to get a feel for the ball while building your agility. Practice shooting from different spots on the court, starting with layups and moving to mid-range jump shots, ensuring your shooting form is solid.

Finally, don’t forget to include some defensive slides and footwork drills. Good basketball performance demands agility and balance, so practicing these movements will set a solid foundation for the drills that follow. By taking the time to properly warm up, you’ll not only improve your skill development but also enhance your overall enjoyment of the game. So lace up those sneakers, get your body moving, and prepare to elevate your basketball skills to new heights!

5. Drill 1: The Spot Shot Challenge

What are the best ways to practice basketball at home?
Credit : whatcanu.com

The Spot Shot Challenge is a fantastic way to hone your shooting accuracy while adding an element of fun and competition to your training sessions. This drill is all about focusing on specific spots on the court and mastering your ability to sink shots from those key positions.

To set up the Spot Shot Challenge, begin by marking five distinct shooting spots around the perimeter of the three-point line. These spots should be evenly spaced and can be chosen based on your shooting preferences or the areas where you feel you need the most improvement. A common configuration includes the corners, the wings, and the top of the key.

Once you have your spots marked, grab your basketball and get ready to shoot! The objective is simple: take a set number of shots—typically 5 to 10—from each designated spot. Keep track of how many shots you make out of the total attempts. As you progress, challenge yourself by increasing the number of shots or reducing the time allowed to complete the drill.

To add a competitive edge, invite a friend or family member to join you. You can take turns shooting from each spot, competing to see who can make the most baskets. This not only makes the drill more enjoyable but also simulates the pressure of game situations where every shot counts.

Remember, form and technique are crucial during this drill. Focus on your footwork, balance, and follow-through to ensure you’re developing consistent shooting habits. The Spot Shot Challenge is an excellent way to build muscle memory and confidence in your shot, which will ultimately translate to better performance during games. So grab your ball, find your spots, and start shooting!

6. Drill 2: Dribble Relays for Ball Handling

Dribble relays are a fun and competitive way to enhance your ball handling skills while also incorporating speed and agility. These drills not only build your confidence with the basketball but also improve your ability to control the ball while moving. To set up the drill, you’ll need a flat surface—ideally a driveway or a backyard—and a couple of cones or markers to create a course.

Begin by dividing players into two or more teams, positioning them at opposite ends of your dribbling course. Each player will need a basketball. On the signal, the first player from each team will dribble towards the designated marker, weaving in and out of the cones set up along the way. This encourages the development of agility as players must navigate around obstacles while maintaining control of the ball.

As players reach the end of the course, they will make a quick turnaround and sprint back to tag the next teammate, who will then repeat the process. Variations can be added to keep the drill interesting, such as implementing different dribbling styles—like crossing over, behind-the-back, or using only the dominant hand.

Not only does this drill foster teamwork and camaraderie among players, but it also challenges them to improve their speed and dexterity. By regularly incorporating dribble relays into your practice routine, you’ll find that your ball handling will become second nature, allowing you to maneuver with greater finesse during games. Plus, the competitive element of relays adds an exciting twist that keeps everyone engaged while working hard to enhance their skills. So gather your teammates or family members, set up your course, and get ready to dribble your way to success!

7. Drill 3: Layup Variations for Finishing Skills

What are the best ways to practice basketball at home?
Credit : whatcanu.com

When it comes to mastering the art of finishing at the rim, Layup Variations are an essential drill that can elevate your scoring ability and confidence during games. This drill not only hones your technique but also helps you adapt to various game situations where creativity and precision are key.

To begin, set up your layup routine by choosing one side of the basket. Start with a simple right-hand layup, emphasizing proper footwork and technique. Approach the basket with a controlled speed, using the last two steps to gather momentum. As you leap toward the hoop, focus on using the backboard to your advantage, angling your shot for a soft touch. Repeat this for a set number of repetitions before switching to left-hand layups, reinforcing your overall finishing skills.

Once you’re comfortable with the basics, introduce variations. Try performing reverse layups, where you finish on the opposite side of the basket, or implement a spin move before your layup to throw off defenders. Adding a dribble hesitation before driving to the hoop can also simulate game-like scenarios, helping you practice your decision-making and body control under pressure.

For an extra challenge, incorporate a defender or a teammate to simulate real game situations. This will force you to read the defense and adjust your finishing technique accordingly, whether that means using a floater to evade a shot-blocker or a quick Euro step to navigate through traffic.

By regularly practicing these layup variations, you’ll develop not only your finishing skills but also your overall basketball IQ, making you a more versatile player when it counts. Remember, the key to becoming a better scorer is repetition and confidence, so get out there, shoot some hoops, and have fun refining your skills!

8. Drill 4: Free Throw Routine for Consistency

### Drill 4: Free Throw Routine for Consistency

Perfecting your free throw is essential for any basketball player looking to elevate their game, and establishing a consistent routine is key to mastering this skill. The free throw line represents both a pivotal moment in the game and a chance for players to showcase their shooting prowess under pressure. To develop that much-needed consistency, consider incorporating this free throw routine into your practice sessions.

Start by defining your routine—create a sequence of movements that you will perform before each shot. This may include dribbling the ball a couple of times, taking a deep breath, and visualizing the ball swishing through the net. The repetition of this routine not only helps to calm your nerves but also sets a rhythm that can enhance your shooting accuracy.

Begin by standing at the free throw line and take a moment to focus. With the ball in hand, visualize your target: the center of the hoop. Bend your knees slightly, and as you rise up for the shot, follow through with your shooting arm, ensuring that your wrist is relaxed and your fingers are pointing towards the basket. This follow-through is crucial; it not only reinforces your shooting form but also helps to build muscle memory.

To track your progress, set a goal for each practice session. Start with shooting ten consecutive free throws, aiming for at least 70% accuracy. As you become more comfortable with your routine, gradually increase the number of shots or challenge yourself to shoot under simulated pressure, such as after a set of rigorous drills. This will mimic game situations, helping to prepare you for those high-stakes moments when the pressure is on.

Remember, the key to consistency lies in repetition and focus. By dedicating time to your free throw routine, you’ll notice an increase in your confidence at the line, ultimately transforming those critical moments into scoring opportunities. So grab your basketball, find your rhythm, and watch your free throw percentage soar as you cultivate the consistency necessary for success on the court.

9. Drill 5: The Two-Ball Dribbling Drill

The Two-Ball Dribbling Drill is an excellent way to elevate your ball-handling skills while simultaneously improving your coordination and focus. This drill challenges you to control two basketballs at once, forcing you to engage both hands and develop ambidexterity—an essential trait for any serious player.

To set up, find a spacious area, whether in your driveway or a local court, and grab two basketballs. Start by dribbling one ball with your dominant hand at a comfortable height while simultaneously dribbling the second ball with your non-dominant hand. Initially, focus on maintaining a consistent rhythm; aim for a steady bounce with both balls. As you gain confidence, experiment with different dribbling patterns—alternate between high and low dribbles, or incorporate crossovers and behind-the-back moves.

To increase the drill’s intensity, challenge yourself by adding movement. Begin by dribbling in place, then progress to moving laterally across the court. Pay attention to your body positioning; keep your knees bent and your head up, which will help you maintain awareness of your surroundings, an essential skill in actual game situations.

As you master the drill, try increasing your speed while maintaining control. This will not only enhance your ball-handling skills but also build your stamina and confidence on the court. The Two-Ball Dribbling Drill is a fantastic way to break the monotony of typical practice routines, ensuring that you’re developing the necessary skills to take your game to the next level. Whether you’re a seasoned player or just starting out, incorporating this drill into your training regimen will undoubtedly yield significant improvements in your overall performance.

10. Drill 6: Shooting from Different Angles

### Drill 6: Shooting from Different Angles

One of the most crucial skills for any basketball player is the ability to shoot accurately from various angles on the court. This drill focuses on enhancing your shooting versatility and helps to mimic real-game scenarios where you may find yourself in less-than-ideal shooting positions.

To begin this drill, position yourself at different spots around the three-point line and the key. Start at the corners, then move to the wings, and finally to the top of the key. As you work through each position, take a series of shots, aiming to establish a rhythm and consistency from each angle. Use a combination of set shots and off-the-dribble shots to challenge yourself further and simulate game-like situations.

Incorporate footwork into your practice by pivoting and taking a few dribbles before shooting. This will not only improve your shooting form but also enhance your ability to create space against defenders. As you become comfortable shooting from each spot, increase the difficulty by adding a defender (real or imaginary) to simulate pressure. You can even set a timer to push yourself to make a certain number of shots within a limited time frame.

Keep track of your shooting percentage from each angle to monitor your progress over time. This drill not only builds your shooting confidence but also prepares you for a variety of playing scenarios, ensuring that when the game is on the line, you’re ready to take that crucial shot from anywhere on the court.

11. Drill 7: Defensive Slides and Footwork

Defensive slides and footwork are essential skills that can make or break a player on the court. Mastering this drill not only enhances your defensive capabilities but also improves your overall agility and balance—two key attributes for any aspiring basketball star.

To begin, find a clear space, ideally on your driveway or in a spacious backyard, where you can mark out a distance of about 10 to 15 feet. Using cones, chalk, or even small objects, create a straight line or a rectangular area to serve as your defensive lane.

Start in a low, athletic stance with your feet shoulder-width apart, knees bent, and your back straight. Your hands should be up and ready, as if anticipating an opponent’s next move. From this ready position, push off with your outside foot and slide laterally towards the left, keeping your feet low and your body balanced. It’s crucial to keep your hips down and maintain a wide base as you move. Your feet should never cross; instead, focus on short, quick slides that allow you to stay light on your toes.

Perform this movement for about 10 to 15 feet, then reverse direction and slide to the right. Repeat this process multiple times, gradually increasing the speed of your slides. To add variety and intensity, incorporate quick shuffles or backpedals between slides to simulate the unpredictable movements of a game.

As you become more comfortable with the basic slides, introduce advanced elements such as changing directions or performing a jab step before sliding. This mimics the real defensive situations you’ll face during an actual game, helping you to read the offensive player’s moves more effectively.

Finally, remember to practice your footwork without the ball at first. Once you feel confident, grab a basketball and incorporate dribbling as you slide to simulate defending against a player with the ball. This drill not only builds your defensive skills but also enhances your stamina and coordination, ensuring that you can stay in front of your opponent, no matter how fast they move.

By consistently practicing these defensive slides and footwork drills, you’ll develop the quickness and agility needed to become a formidable presence on the court, making it difficult for opponents to shake you off their trail.

12. Incorporating Strength and Conditioning

Incorporating strength and conditioning into your basketball training regimen is essential for developing a well-rounded skill set that goes beyond just shooting and dribbling. While ball-handling drills and shooting practice are critical, the physical demands of basketball require players to be agile, strong, and resilient. By integrating strength and conditioning exercises, you can enhance your overall athleticism, improve your performance on the court, and reduce the risk of injury.

Start with bodyweight exercises such as push-ups, squats, and lunges to build a solid foundation of strength. These functional movements not only strengthen the major muscle groups but also promote stability and balance—key attributes for any basketball player. As you progress, consider incorporating resistance bands or weights to add intensity and challenge your muscles further. Exercises like deadlifts, bench presses, and overhead presses can help build the upper and lower body strength necessary for explosive movements.

Conditioning is equally crucial. Incorporate high-intensity interval training (HIIT) sessions that mimic the stop-and-go nature of a basketball game. Drills like shuttle runs, ladder drills, and sprints improve your speed and endurance, allowing you to maintain your performance throughout the game. Additionally, agility drills—such as cone drills or zig-zag sprints—help enhance your footwork, making you quicker on your feet during defensive plays or when driving to the hoop.

Lastly, don’t overlook the importance of flexibility and mobility exercises. Stretching routines and dynamic warm-ups can prepare your muscles for rigorous activity, while yoga or Pilates can improve your core strength and flexibility, both of which are pivotal for effective movement on the court. By focusing on strength and conditioning, you not only elevate your basketball skills but also cultivate a holistic approach to your training that will serve you well in every aspect of the game.

13. Tracking Progress: How to Measure Improvement

Tracking progress is a crucial component of any skill development regimen, especially in basketball, where precision and consistency can make all the difference on the court. To truly understand how far you’ve come and where you need to focus your efforts, it’s essential to establish a clear framework for measuring improvement.

Start by setting specific, measurable goals for each aspect of your game. Whether it’s your shooting percentage, dribbling speed, or defensive agility, having quantifiable benchmarks allows you to track your performance over time. For example, you might aim to increase your free throw shooting percentage by 10% over the course of a month. Keep a dedicated training journal to record your stats after each session, noting the number of shots made, time spent on drills, or any personal bests achieved. This not only helps you remain accountable but also provides a clear visual representation of your growth.

Incorporating technology can further enhance your tracking efforts. Utilize apps or devices that can measure various metrics, such as shot accuracy or dribble speed, allowing you to gain insights into your performance that might not be immediately apparent. Video analysis is another powerful tool; recording your drills can help you identify areas for improvement, from your shooting form to your footwork.

Additionally, consider periodic assessments every few weeks. This could be a set of skill drills performed under timed conditions or a friendly scrimmage with friends to gauge your on-court application of skills. By comparing your results over time, you can celebrate your improvements and recalibrate your training focus where necessary.

Remember, the journey of skill development in basketball is as much about the process as it is about the end result. Tracking your progress not only keeps you motivated but also instills a sense of achievement, propelling you to shoot hoops with renewed passion and purpose.

14. Creating a Practice Schedule

Creating a practice schedule is essential for maximizing your basketball skill development at home. Just like any athlete, consistency is key when it comes to improving your game. A well-structured schedule helps you stay focused, motivated, and accountable to your training goals.

Start by assessing your current skill level and identifying the areas where you want to improve—be it shooting, ball handling, defense, or fitness. Once you have a clear understanding of your focus areas, you can begin to allocate specific times during the week dedicated to each skill.

For instance, consider breaking your schedule into daily themes. Mondays could be for shooting drills, where you practice various techniques like free throws, layups, and jump shots. Tuesdays might focus on ball handling—working on dribbling drills, crossovers, and in-and-out moves. Midweek could be dedicated to defensive strategies and positioning, while the weekend can be reserved for scrimmaging or incorporating strength and conditioning sessions.

Keep your schedule flexible but structured, allowing for rest and recovery, which are just as vital for skill development. Aim for shorter, more intense practice sessions rather than lengthy, unfocused workouts. A 30-minute practice filled with targeted drills can often yield better results than a two-hour session lacking direction.

Track your progress! Maintain a journal or digital log of your sessions, noting what drills you completed and any improvements you noticed. This will not only help keep you motivated but also allow you to adjust your practice schedule as you evolve as a player. By committing to a regular practice schedule, you’ll find that your skills will sharpen, your confidence will grow, and you’ll be well on your way to shooting hoops like a pro right from your driveway or backyard!

15. Conclusion: Staying Motivated in Your Home Practice

In conclusion, maintaining motivation during your home practice is crucial for continuous improvement in your basketball skills. The journey of skill development is often filled with ups and downs, and it’s essential to cultivate a mindset that embraces persistence and resilience. Here are some strategies to keep your spirits high while you’re shooting hoops at home.

First, set specific, achievable goals for each practice session. Whether it’s perfecting your free throw technique or mastering a new dribbling drill, having clear objectives will give you a sense of direction and accomplishment. Documenting your progress can also be tremendously motivating; consider keeping a practice journal where you note your successes, challenges, and areas for improvement.

Incorporating variety into your drills can make practice feel fresh and exciting. Experiment with different drills that target various skills, like shooting, ball-handling, or defensive movements. This not only helps prevent monotony but also ensures that you’re developing a well-rounded skill set. You might even challenge yourself to try new drills you’ve seen online or ask a friend to join you for a friendly competition, adding an element of fun and camaraderie.

Another effective way to stay motivated is to visualize your goals and the path to achieving them. Spend a few moments each day imagining yourself executing perfect shots in a game scenario or reflecting on your improvement over time. Visualization can enhance your mental game and instill a deeper commitment to your practice routine.

Lastly, remember to celebrate your achievements, big or small. Whether it’s hitting a new personal best in shooting percentage or finally nailing that tricky move, take the time to acknowledge your progress. Rewarding yourself can be a great motivator to keep pushing forward.

By keeping these strategies in mind, you can cultivate an engaging and productive home practice environment. So lace up those sneakers, grab your ball, and keep shooting—your journey to becoming a better basketball player starts at home!

As we wrap up our exploration of the top seven basketball drills for skill development at home, we hope you feel inspired to lace up your sneakers and hit the court, whether it’s your driveway, backyard, or a local park. Practicing these drills not only enhances your shooting, dribbling, and defensive skills but also fosters discipline and confidence that can translate into game-time performance. Remember, consistency is key—dedicate a little time each day to refine your techniques, push your limits, and watch your game elevate to new heights. So grab your basketball, invite a friend or family member for some friendly competition, and most importantly, have fun while honing your craft! Happy hooping!

Basketball – What are the best drills to improve your footwork?

In the fast-paced world of basketball, where split-second decisions can make the difference between victory and defeat, mastering footwork is an essential skill that all players must prioritize.

whether you’re a seasoned athlete or just starting your journey on the court, honing your footwork can significantly enhance your agility, balance, and overall performance. From swift pivots to explosive first steps, the right footwork drills can transform your game and give you the competitive edge you need. In this blog post, we’ll explore the top five footwork drills every basketball player should master. These drills are designed to build muscle memory, improve coordination, and ensure you’re always one step ahead of your opponents. Get ready to elevate your game and take your skills to new heights!

1. Introduction to the Importance of Footwork in Basketball

Basketball - What are the best drills to improve your footwork?
Credit : whatcanu.com

Footwork is the foundation upon which the game of basketball is built. Every dribble, pass, and shot hinges on how well a player can position their feet for balance, speed, and agility. Whether you’re a seasoned player or just starting, mastering footwork can elevate your performance on the court and set you apart from your competition.

In basketball, footwork plays a crucial role in both offensive and defensive strategies. On offense, effective footwork allows players to create space, make quick cuts, and execute shooting techniques with precision. A well-timed jab step or a pivot can leave defenders off-balance and open up scoring opportunities. Conversely, on defense, solid footwork is vital for staying in front of your opponent, maintaining good positioning, and contesting shots without committing fouls.

Moreover, footwork is not just about speed; it also encompasses balance and body control. A player with excellent footwork can navigate through tight spaces, absorb contact, and maintain their composure even in the heat of the game. Practicing footwork drills not only strengthens these skills but also builds muscle memory, ensuring that your feet instinctively know what to do when the pressure is on.

In this post, we’ll delve into five essential footwork drills that every basketball player should master. These drills are designed to enhance your agility, improve your shooting stance, and refine your defensive techniques, ultimately transforming your game. Let’s lace up our sneakers and get ready to elevate our footwork to the next level!

2. Drill 1: The Defensive Slide Drill

The Defensive Slide Drill is a fundamental exercise that every aspiring basketball player should master to enhance their lateral movement and defensive agility. This drill focuses on improving footwork, balance, and the ability to stay low and engaged while guarding an opponent.

To set up, find a clear area on the court and imagine a straight line between two cones or markers about 10 to 15 feet apart. Start at one cone, assuming a low defensive stance with your knees bent, back straight, and feet shoulder-width apart. The key to success in this drill is maintaining a low center of gravity, which allows for quicker reactions and better balance.

From the starting point, push off with your outside foot and slide laterally towards the opposite cone, ensuring that your feet don’t cross over. Keep your head up to maintain awareness of your surroundings, as if you were tracking an opponent on the court. As you slide, your hands should be active, ready to contest a shot or intercept a pass.

Once you reach the second cone, push off again, returning to the starting position. To maximize the effectiveness of this drill, aim for speed without sacrificing form. Practicing this drill regularly will help develop muscle memory, allowing you to react instinctively during games.

As you become more comfortable with the basic slide, you can add variations such as changing directions, incorporating quick pivots, or adding a basketball for ball-handling practice. The Defensive Slide Drill not only enhances your footwork but also builds endurance and strengthens the muscles used for effective lateral movement, making it an essential component of any player’s training regimen. By mastering this drill, you’ll be better equipped to lock down your opponents and contribute to your team’s defensive strategy.

3. Drill 2: The Jab Step and V-Cut Drill

Basketball - What are the best drills to improve your footwork?
Credit : whatcanu.com

The Jab Step and V-Cut Drill is a fundamental exercise that not only enhances a player’s footwork but also sharpens their ability to create space and read defensive movements. This drill is crucial for players looking to improve their offensive game and develop effective scoring options.

To begin, position yourself at the three-point line, facing the basket. Start with your feet shoulder-width apart, knees slightly bent, and a basketball in your hands. The first part of the drill focuses on the jab step. Take a quick, explosive step forward with one foot, while simultaneously planting the opposite foot. This jab should be sharp and decisive, simulating a drive toward the basket. The goal here is to sell the move to your imaginary defender, forcing them to react and potentially opening up space for further movement.

Once you’ve executed the jab step, seamlessly transition into the V-cut. This involves pushing off the foot opposite your jab, taking a hard step back to create separation from the defender, and then cutting sharply at an angle back toward the basket. The key to a successful V-cut is to maintain a low center of gravity and explode out of the cut, making sure to quickly reposition your feet for a potential shot or pass.

As you practice this drill, focus on your foot placement, body control, and the fluidity of your movements. Incorporate variations by changing the speed of your jab steps or the direction of your cuts. This will not only improve your agility but also help you become more unpredictable on the court.

By mastering the Jab Step and V-Cut Drill, players can enhance their ability to create scoring opportunities and keep defenders guessing—an essential skill for any aspiring basketball player. Make this drill a regular part of your training routine, and watch as your footwork and offensive game elevate to new heights.

4. Drill 3: The Cone Shuffle Drill

The Cone Shuffle Drill is an essential exercise for any basketball player looking to enhance their lateral movement and overall agility on the court. This drill focuses on developing quick footwork and improving your ability to respond to opponents’ movements, making it a vital addition to your training regimen.

To set up the Cone Shuffle Drill, start by placing three cones in a straight line, each about three to five feet apart. Stand at the center cone, facing either direction, and get into a low athletic stance with your knees slightly bent, feet shoulder-width apart, and your weight balanced on the balls of your feet.

The objective is simple yet challenging: shuffle laterally from the center cone to the left cone, touching it lightly before shuffling back to the center, and then immediately shuffling to the right cone. Maintain a low center of gravity, keeping your hips low and your feet light as you move side to side. The key is to avoid crossing your feet; instead, push off from your outside foot with every shuffle. This will help you build strength in your legs and improve your stability as you change directions quickly.

To increase the intensity of the drill, you can add variations such as incorporating a dribble while shuffling or increasing your speed with each repetition. Aim for quick, explosive movements—your goal is to be as fast and efficient as possible. Performing this drill for 30 seconds at a time, followed by short breaks, will challenge your endurance while honing your footwork skills.

Incorporating the Cone Shuffle Drill into your regular practice routine can significantly enhance your defensive capabilities and offensive maneuverability. Mastering this drill will not only improve your agility but also give you a competitive edge during games, allowing you to stay one step ahead of your opponents.

5. Drill 4: The Reverse Pivot Drill

Basketball - What are the best drills to improve your footwork?
Credit : whatcanu.com

The Reverse Pivot Drill is a fundamental exercise that every basketball player should master, regardless of their position on the court. This drill focuses on enhancing footwork, agility, and the ability to make quick decisions while maintaining a strong offensive stance.

To start, find a space where you have enough room to move freely. Position yourself with your back to the basket, imagining the defender is right behind you. Begin the drill by receiving a pass or simulating a catch. As you receive the ball, plant your pivot foot firmly on the ground.

From this position, practice your reverse pivot by turning your body 180 degrees, using your pivot foot to maintain balance and control. As you pivot, keep your other foot light, ready to explode in any direction. This movement not only helps you protect the ball from a defender but also creates space for a jump shot or a drive to the basket.

To add complexity, incorporate a defender into the drill. Have a teammate apply light pressure as you perform the reverse pivot. This added resistance will help simulate game conditions, allowing you to practice your footwork under pressure. Focus on maintaining your balance and keeping your dribble low while assessing your shooting or passing options.

The Reverse Pivot Drill can be repeated multiple times, gradually increasing the speed and intensity. Incorporating this essential drill into your training regimen will enhance your ability to navigate tight defenses, making you a more versatile and unpredictable player on the court. Mastering this technique not only boosts your footwork but also builds your confidence in high-pressure situations, ensuring you’re always ready to make that game-winning play.

6. Drill 5: The Two-Ball Dribbling Footwork Drill

The Two-Ball Dribbling Footwork Drill is an advanced exercise that simultaneously develops your dribbling skills and footwork, making it an essential part of any serious basketball player’s training regimen. This drill not only enhances your ball-handling abilities but also reinforces coordination and agility—key components in navigating the court effectively.

To perform the drill, start by standing with your feet shoulder-width apart, holding a basketball in each hand. Begin dribbling both balls simultaneously, ensuring that your knees are slightly bent and your posture is low. The key here is to maintain control of both basketballs while keeping your head up to improve your court awareness.

As you become more comfortable with the dual dribble, incorporate different movements. Start by moving laterally—side to side—while maintaining your dribble. This helps simulate the quick lateral movements needed to evade defenders. Once you’ve mastered lateral movement, challenge yourself by adding forward and backward dribbling. This variation will enhance your ability to change direction quickly, crucial for breaking past defenders during a game.

To increase the drill’s intensity, incorporate footwork patterns such as crossover steps, jab steps, or even a series of quick pivots. This will not only work on your foot speed but also your ability to make quick decisions on the court. You can also set up cones to weave in and out of, further developing your dribbling control while maneuvering around obstacles.

Aim to perform this drill for several minutes at a time, gradually increasing your speed as you become more proficient. The Two-Ball Dribbling Footwork Drill is not just about repetition; it’s about instilling muscle memory and ensuring that your footwork becomes second nature, allowing you to focus on your overall gameplay when it counts the most. By mastering this drill, you position yourself to outmaneuver opponents and elevate your performance on the court.

7. How to Incorporate Footwork Drills into Your Practice Routine

Basketball - What are the best drills to improve your footwork?
Credit : whatcanu.com

Incorporating footwork drills into your practice routine is essential for developing a solid foundation in basketball. Mastering your footwork can elevate your game, allowing you to move with agility, maintain balance, and react swiftly to opponents. Here’s how to seamlessly integrate these vital drills into your training sessions.

**Start with a Warm-Up:** Before diving into footwork drills, ensure you warm up properly to avoid injury. Engaging in dynamic stretches and light jogging will prepare your muscles for the explosive movements that lie ahead.

**Set Specific Goals:** Identify what aspects of your footwork you want to improve. Are you looking to enhance your defensive slides, increase your agility for quick cuts, or perfect your pivoting technique? Setting clear goals will allow you to focus your practice and track your progress effectively.

**Create a Structured Routine:** Dedicate a portion of your practice time specifically to footwork. This could be a 15- to 20-minute segment where you rotate through various drills. For example, you might start with ladder drills for quickness, followed by cone drills for directional changes, and finish with post moves that emphasize footwork under pressure.

**Use Visualization Techniques:** As you practice your footwork, visualize game scenarios where these movements would be crucial. Whether it’s envisioning a defender closing in or a teammate setting a pick, this mental rehearsal can enhance your on-court performance.

**Incorporate Partner Drills:** Practicing footwork with a partner can simulate real-game situations. Work on defensive slides while one player acts as the ball-handler, forcing you to adjust your footwork based on their movements. This not only improves your footwork but also builds chemistry with teammates.

**Review and Reflect:** After each practice, take a moment to reflect on what you learned. Did certain drills feel more challenging than others? Were there specific movements that felt unnatural? Keeping a journal of your practice sessions can help you identify areas for improvement and adjust your routine accordingly.

By diligently incorporating these footwork drills into your practice routine, you’ll cultivate a more versatile and effective playing style. Remember, footwork is the backbone of successful basketball play; the more time you invest in honing it, the sharper your skills will become on the court.

8. Common Mistakes to Avoid During Footwork Drills

When it comes to honing your footwork in basketball, mastering the fundamentals is crucial, but avoiding common pitfalls can be just as important. Many players unknowingly fall into habits that hinder their development, so let’s explore some of the frequent mistakes to steer clear of during footwork drills.

**1. Neglecting proper Stance**
A solid foundation begins with your stance. Many players overlook the significance of keeping their feet shoulder-width apart and their knees slightly bent. This posture not only provides balance but also prepares you for quick movements. Avoid the temptation to stand flat-footed or too rigid, as it can limit your agility and responsiveness on the court.

**2. Overlooking Coordination with Upper Body Movement**
Footwork isn’t just about your feet; your upper body plays a vital role too. A common mistake is failing to synchronize your foot movements with your hands and shoulders. Whether you’re pivoting, cutting, or setting up for a shot, ensure that your upper body is engaged and aligned with your lower body. This coordination will enhance your overall effectiveness and fluidity in movement.

**3. Rushing Through Drills**
In the pursuit of speed, many players rush through footwork drills, sacrificing technique for quickness. Remember, precision trumps speed. Focus on executing each movement correctly before increasing your pace. By taking the time to master the intricacies of footwork, you’ll develop muscle memory that will serve you well during game situations.

**4. Forgetting About Conditioning**
Footwork drills can be physically demanding, and it’s easy to neglect conditioning while focusing solely on technique. However, fatigue can lead to sloppy movements and poor decision-making. Incorporate conditioning elements into your footwork drills—think sprinting between cones or adding lateral movements—to build endurance and maintain sharpness even in the late stages of a game.

**5. Ignoring Feedback**
Finally, one of the biggest mistakes players make is ignoring feedback from coaches or peers. Constructive criticism is essential for growth. Record your drills or practice in front of a mirror to observe your form and identify areas for improvement. Welcome input from experienced players, as their insights can provide valuable perspectives on your technique.

By avoiding these common mistakes, you can ensure that your footwork drills are not only effective but also a stepping stone to becoming a more skilled and agile basketball player. Remember, consistency and mindfulness in practice will lead to significant improvements on the court.

9. Tips for Improving Agility and Speed

Agility and speed are crucial components of effective footwork in basketball. They can mean the difference between a successful drive to the hoop and being easily defended, or between getting open for a shot and being shut down by an opponent. Here are some tips to help you enhance your agility and speed on the court:

1. **Incorporate Ladder Drills**: Agility ladders are fantastic tools for improving foot speed and coordination. Practice various patterns—like the one-foot in, one-foot out, lateral shuffles, and the Ickey shuffle—to develop quicker, more precise foot movements. The more you challenge your footwork, the more naturally it will translate to your gameplay.

2. **Plyometric Exercises**: Engaging in plyometric workouts, such as box jumps, lateral hops, or jump squats, can significantly increase your explosiveness on the court. These drills condition your muscles to react quickly, helping you accelerate faster and change directions with ease.

3. **Strength Training**: Building strength in your legs isn’t just about bulk; it’s about functional strength that translates to on-court performance. Focus on exercises like squats, lunges, and calf raises. Not only will these improve your overall power, but they will also enhance your stability, allowing for quicker pivots and better balance.

4. **Interval Sprints**: Incorporate sprinting drills that simulate game conditions. Short bursts of speed, followed by brief periods of rest or lower-intensity movement, will improve your cardiovascular fitness and teach your body to recover quickly. This is crucial for maintaining high levels of performance throughout the game.

5. **Dynamic Stretching**: Before every practice or game, ensure you warm up with dynamic stretching. Movements like high knees, butt kicks, and leg swings not only prepare your muscles for action but also improve your range of motion and responsiveness. This can lead to quicker reactions and a lower risk of injury.

By integrating these strategies into your training regimen, you’ll see noticeable improvements in your agility and speed, translating to better performance on the basketball court. Remember, consistency is key—dedicate time each week to focus on these areas, and soon you’ll find yourself outmaneuvering opponents with ease.

10. The Role of Footwork in Game Situations

Footwork is often the unsung hero of basketball, yet it plays a pivotal role in determining a player’s effectiveness on the court. Whether you’re executing a smooth crossover, finding space for a jump shot, or maintaining defensive pressure, the agility and precision of your footwork can make all the difference in high-pressure game situations.

In a fast-paced environment where split-second decisions can lead to victory or defeat, mastering footwork allows players to react quickly and efficiently. For instance, when driving to the basket, a player needs to utilize a quick jab step to create separation from their defender. This small but impactful movement can open up lanes for an easy layup or a kick-out pass to an open teammate.

Defensively, proper footwork can prevent players from getting beat off the dribble. By adopting a low stance and using quick lateral movements, defenders can stay in front of their opponents, making it difficult for them to penetrate the lane. Additionally, footwork is crucial during closeouts; a well-timed approach can alter a shooter’s rhythm and potentially lead to a missed shot.

Moreover, footwork is not limited to offensive and defensive plays. In transition, a player’s ability to pivot and reposition can dictate the pace of the game. Whether it’s sprinting back on defense or quickly shifting gears to launch a fast break, effective footwork enhances overall team dynamics and fluidity.

Ultimately, understanding the role of footwork in game situations is essential for any aspiring basketball player. By incorporating footwork drills into your training regimen and honing your skills, you’ll not only elevate your individual performance but also contribute to your team’s success on the court. Remember, in basketball, being light on your feet can lead to heavy rewards.

11. Tracking Progress: Measuring Improvement in Footwork

Tracking progress is essential for any basketball player dedicated to mastering footwork. Improvement in this fundamental skill doesn’t happen overnight; it requires commitment, practice, and a keen eye for detail. One of the best ways to measure your advancement is by establishing clear benchmarks and regularly assessing your performance against them.

Start by recording your footwork drills—be it agility ladders, cone drills, or defensive slides. Use a stopwatch to time how quickly you can complete each drill, and aim to reduce those times with each session. Documenting your times not only provides a tangible measure of improvement but also motivates you to beat your previous records. Additionally, try filming yourself during drills. Watching the footage can reveal subtleties in your technique that you might not notice in real-time. Look for areas where you can enhance your speed, balance, and precision.

Another effective method is to set specific goals for each practice. For instance, if you’re working on pivoting, aim to execute a certain number of successful pivots in various situations during a game simulation. After a set period, review your performance—have you become more agile? Are you able to change directions more quickly without losing balance?

Moreover, consider seeking feedback from coaches or experienced players. They can provide valuable insights on your footwork technique, highlighting strengths and areas for improvement that you may overlook. Keeping a training journal can also help; jot down thoughts on what works, what doesn’t, and what you plan to focus on next.

Ultimately, the key to tracking progress is consistency. By regularly measuring your footwork skills, you’ll not only see tangible improvements but also build confidence in your abilities. Remember, proficiency in footwork is a cornerstone of a successful basketball game, and being aware of your progress will fuel your dedication to becoming the best player you can be.

12. Conclusion: The Path to Becoming a Better Basketball Player

In conclusion, mastering footwork is a critical component in the journey of any basketball player aspiring to elevate their game. The drills outlined in this post are not just exercises; they are foundational skills that empower players to enhance their agility, balance, and overall performance on the court. By consistently practicing these footwork drills, you will develop the quickness needed to navigate through defenders, maintain control during high-pressure situations, and create space for your shots.

As you integrate these drills into your training regimen, remember that improvement takes time and dedication. Embrace the process, and don’t shy away from pushing your limits. Each repetition brings you one step closer to becoming a more versatile and effective player. Moreover, as your footwork improves, so will your confidence, allowing you to perform at your best during games and make those critical plays that can change the outcome.

Ultimately, becoming a better basketball player is a journey of commitment, practice, and perseverance. Stay focused on your goals, keep honing your skills, and watch as your hard work pays off on the court. With determination and the right footwork drills in your arsenal, you are well on your way to not only enhancing your individual performance but also contributing to the success of your team. So lace up your sneakers, hit the gym, and let your footwork be the foundation of your basketball prowess!

13. Additional Resources for Basketball Training

As you embark on your journey to refine your footwork on the basketball court, it’s essential to equip yourself with a variety of resources that can enhance your training experience. Whether you’re a beginner looking to develop foundational skills or an advanced player seeking to perfect your technique, there are numerous valuable materials available to help you reach your goals.

**Online Video Tutorials**: Platforms like YouTube are teeming with instructional videos from seasoned coaches and professional players. Channels dedicated to basketball training often break down complex footwork drills into easy-to-follow segments. Watching these tutorials can provide you with visual cues that are vital for proper execution and can inspire variations on drills you may already know.

**Books and E-books**: There are countless books written by basketball legends and coaches that delve into the nuances of footwork and overall game strategy. Titles that focus specifically on skill development can offer insights into not only the mechanics of footwork but also the mental aspects of the game. E-books make it convenient to access this information on the go, allowing you to read and learn during downtime.

**Mobile Apps**: The digital age has given rise to a variety of apps that cater to basketball training. These apps often include customizable workout plans, video demonstrations, and even community features that allow you to connect with other players. Some apps allow you to track your progress and set specific goals, making it easier to stay motivated and accountable.

**Local Clinics and Camps**: Participating in basketball camps or clinics can provide you with hands-on coaching and feedback from experienced trainers. These events often focus on skill development and can be a great opportunity to practice footwork drills in a competitive environment. Not to mention, they allow you to network with other players and coaches who share your passion for the game.

**Forums and Online Communities**: Engaging with fellow players in online forums or social media groups can be a treasure trove of information. These communities often share tips, drills, and personal experiences that can provide new perspectives on training methods. You can ask questions, seek advice, and even find local workout partners to keep you motivated.

By leveraging these additional resources, you can enrich your basketball training regimen and ensure that your footwork is sharp, agile, and game-ready. Remember, mastering footwork is not just about repetition; it’s about understanding the principles behind it and continuously seeking knowledge that will help you excel on the court.

14. Encouragement for Persistence and Consistency

Basketball is as much a mental game as it is a physical one, and the path to mastering footwork drills is paved with persistence and consistency. Every great player has faced challenges, whether it’s struggling with a specific move or simply feeling overwhelmed by the complexity of the game. It’s essential to remember that improvement doesn’t happen overnight. Just like perfecting a jump shot or nailing a three-pointer, mastering your footwork requires dedication and regular practice.

Encouragement for persistence means embracing the ups and downs of the training process. When you hit a plateau or feel frustrated, remind yourself that every professional player has been in your shoes. The difference lies in their unwavering commitment to showing up day after day, putting in the work, and refining their skills. Set realistic goals for yourself and celebrate small victories along the way, whether that’s executing a drill flawlessly or improving your speed.

Consistency is the backbone of any successful training regimen. Design a training schedule that incorporates footwork drills multiple times a week, ensuring you stick to it even when motivation wanes. Consider tracking your progress in a journal, noting what works and what needs improvement. This not only keeps you accountable but also allows you to reflect on your journey and recognize how far you’ve come.

Remember, in basketball, as in life, the key to success is not just talent but the relentless pursuit of excellence. So lace up your sneakers, hit the court, and commit to those footwork drills. With persistence and consistency, you’ll not only enhance your skills but also build the confidence that comes from knowing you’ve put in the effort to be the best player you can be. Keep pushing yourself, and before long, you’ll see the fruits of your labor manifest in your on-court performance.

In conclusion, mastering footwork is essential for any basketball player looking to elevate their game, and the drills we’ve outlined in this post serve as a solid foundation for developing agility, balance, and quickness on the court. By incorporating these top five footwork drills into your regular practice routine, you’ll not only enhance your individual skills but also improve your overall performance during games. Remember, consistent practice and dedication are key to making these techniques second nature. So lace up your sneakers, hit the court, and watch as your newfound footwork translates into more effective plays and a stronger presence in every game. Happy training!

What are the Best Golf Drills to Improve My Short Game?

As any seasoned golfer knows, the short game can often be the deciding factor between a good round and a great one.

Whether you’re facing tricky chip shots, delicate pitches, or challenging putts, mastering these skills can dramatically lower your scores and enhance your overall performance on the course. In this blog post, we’ll delve into a selection of top golf drills specifically designed to elevate your short game to new heights. From improving your touch around the greens to honing your accuracy on the putting surface, these effective drills will provide instant feedback and measurable results. So, grab your clubs and get ready to transform your approach to the short game, ensuring that every stroke counts and every round is an opportunity for improvement!

1. Introduction to the Short Game: Why It Matters

What are the Best Golf Drills to Improve My Short Game?
Credit : whatcanu.com

The short game is often the unsung hero of golf, yet it holds the key to lowering your scores and enhancing your overall performance on the course. While many players obsess over their drives, believing that distance equates to success, the truth is that mastering the art of chipping, pitching, and putting can be far more impactful. In fact, statistics show that a significant portion of strokes during a round is taken within 100 yards of the hole. This highlights the importance of honing your short game skills—it’s not just a supplementary aspect of your play; it’s a crucial foundation for scoring well.

Why does the short game matter? For starters, it allows you to recover from less-than-ideal tee shots, giving you the ability to salvage par or even better. A well-executed chip or a confident putt can easily turn a potential bogey into a birdie, transforming your round and boosting your morale. Furthermore, the short game requires a unique blend of finesse, touch, and creativity. Unlike the long game, where power and technique dominate, the short game challenges you to think strategically and adapt to varying lies and course conditions.

In this section, we will explore the elements that make the short game so vital to your overall success in golf. We’ll discuss how mastering these skills can not only shave strokes off your score but also build your confidence on the course. So, whether you’re a seasoned player looking to fine-tune your finesse or a beginner eager to establish a solid foundation, understanding and improving your short game is essential. Let’s delve into the drills that will set you on the path to becoming a short game wizard!

2. Understanding the Key Components of the Short Game

To truly master the short game in golf, it’s essential to grasp the key components that make up this critical aspect of the sport. The short game typically encompasses any shots played from around the green, usually within 100 yards, where precision and finesse are paramount. Understanding these components can dramatically enhance your performance and lower your scores.

**Chipping:** This involves executing short, controlled shots from just off the green. A successful chip requires a solid technique, focusing on ball position, stance, and the angle of the clubface. The objective is to get the ball onto the green and rolling towards the hole with minimal air time, which is best achieved through a smooth, pendulum-like motion.

**Pitching:** Unlike chipping, pitching entails hitting the ball with a longer, more lofted club to achieve greater height and distance. It’s ideal for situations where you need the ball to carry over obstacles, like bunkers or thick grass, and land softly on the green. Mastering the pitch shot involves developing a feel for the right amount of backswing and follow-through, as well as how to utilize the bounce of the club effectively.

**Putting:** Often considered the most crucial skill in the short game, putting requires a combination of technique, visualization, and touch. Understanding how to read the green—recognizing slopes, grain, and speed—can significantly enhance your ability to sink putts. Practicing your stance, grip, and alignment will help you develop a consistent stroke that can translate to improved accuracy on the greens.

**Distance Control:** This is perhaps the unsung hero of the short game. Whether chipping, pitching, or putting, the ability to control how far the ball travels is essential. This skill can be honed through various drills that emphasize feel and rhythm, allowing you to gauge the necessary force for each shot.

By focusing on these key components—chipping, pitching, putting, and distance control—you can build a robust foundation for your short game. Incorporating focused practice on each of these elements into your routine will not only enhance your skills but also instill a newfound confidence as you navigate the challenges around the green. Remember, in golf, it often isn’t the long drives that win the game, but the short game that can turn an average round into an exceptional one.

3. Setting Goals for Your Short Game Improvement

What are the Best Golf Drills to Improve My Short Game?
Credit : whatcanu.com

Setting goals for your short game improvement is not just about envisioning a better score; it’s about creating a roadmap that guides your practice and keeps you motivated. When you approach your short game with clear, achievable objectives, you’re more likely to see tangible improvements in your performance on the course.

Start by assessing your current skill level. Are you struggling with chipping, putting, or bunker shots? Identify your weaknesses and set specific goals related to each area. For instance, if your putting accuracy needs work, aim to reduce the number of three-putts per round. A measurable goal might be to make 80% of your short putts within 5 feet over a series of practice sessions.

Next, break your goals down into smaller, manageable milestones. Instead of overwhelming yourself with the desire to become a putting ace overnight, consider focusing on one aspect at a time, such as perfecting your alignment or mastering the art of distance control. Celebrate each small victory—whether it’s sinking a few consecutive putts or successfully executing a chip shot that lands within a designated distance from the hole.

Additionally, keep a practice journal to track your progress. Document your drills, results, and feelings after each session. Reflecting on your improvement not only boosts your confidence but also helps you stay accountable to your goals.

Finally, revisit and adjust your goals periodically. As you improve, your objectives should evolve, pushing you to reach new heights. By setting clear, actionable goals for your short game, you’ll cultivate a focused practice routine that leads to instant improvements on the course, setting you up for success in your overall game. Remember, mastering the short game is a journey, and each step you take brings you closer to becoming the golfer you aspire to be.

4. Essential Equipment for Effective Short Game Drills

To truly refine your short game, having the right equipment is crucial. The short game encompasses a variety of shots, including chips, pitches, and putts, each requiring specific tools to practice effectively. Here’s a rundown of essential equipment that can help you elevate your short game performance and ensure you’re making the most out of your practice sessions.

**1. Quality Golf Balls:** While it may seem obvious, the type of golf balls you use can significantly impact your practice. Opt for balls that closely mimic the ones you use on the course, as this will give you a realistic feel for how they react on different surfaces. Additionally, consider using specialized practice balls designed for short game drills; these often have different characteristics that can help you focus on specific aspects of your technique.

**2. Chipping Net:** A chipping net is an invaluable tool for honing your chipping skills. Portable and easy to set up, these nets come in various sizes and target zones, allowing you to practice your accuracy and control from different distances. Incorporating a chipping net into your practice routine can help you visualize your targets and improve your focus during real games.

**3. Putting Mat:** For indoor practice, a putting mat can be a game-changer. Look for a mat that simulates the speed and feel of real greens, complete with markings to help you work on alignment and distance control. Many premium mats also come with built-in targets, allowing you to set up various drills that mimic on-course scenarios.

**4. Alignment Stick:** Simple yet effective, alignment sticks can help you establish proper stance and alignment for both chipping and putting. Use them to set up your target line or to ensure your body is aligned correctly throughout your swing. They can also be useful for practicing your swing path, offering a visual guide to improve your consistency.

**5. Short Game Practice Aids:** Various training aids specifically designed for the short game can enhance your practice sessions. Tools like swing trainers, chipping pads, and putting aids help you develop muscle memory and improve your technique. Some products even provide instant feedback, allowing you to make adjustments in real time.

By investing in this essential equipment, you’ll create an effective practice environment that fosters improvement in your short game. Remember, consistent practice with the right tools will lead to greater confidence and performance on the course. So gear up, hit the practice area, and watch your short game skills soar!

5. Drill #1: Chipping Basics – The Two-Tee Drill

What are the Best Golf Drills to Improve My Short Game?
Credit : whatcanu.com

When it comes to mastering your short game, the chipping area is where subtle nuances can lead to significant improvements. One of the best drills to enhance your chipping skills is the Two-Tee Drill. This simple yet effective exercise focuses on developing precision and consistency, which are crucial for successful chips around the green.

To set up the Two-Tee Drill, you’ll need two tees and a flat area of turf near the practice green. Start by placing one tee in the ground at a distance of about three to four feet from where you’ll be chipping. This tee will serve as your target landing zone. Next, position the second tee about a foot behind the first tee, creating a small barrier that your ball needs to clear. The goal is to chip the ball over the second tee and land it softly on or near the first tee.

As you practice, pay close attention to your technique. Focus on your stance, grip, and the smoothness of your swing. Ideally, you want to maintain a steady tempo, using a pendulum-like motion to control the distance and trajectory of your chip. Start with shorter chips to build confidence, and gradually increase the distance as you refine your skills.

The Two-Tee Drill not only helps with distance control but also encourages you to visualize your landing spot and the trajectory of your shot. As you progress, challenge yourself by adjusting the height of the tees or varying the distance between them. This drill is versatile and can be done anywhere with just a few tees and a practice ball, making it a perfect addition to your routine.

With consistent practice of the Two-Tee Drill, you’ll find that your chipping game improves dramatically. You’ll develop a better feel for the club, enhance your accuracy, and gain the confidence needed to tackle those tricky chips on the course. So grab your clubs, head to the practice area, and start mastering those chipping basics!

6. Drill #2: The Ladder Drill for Distance Control

The Ladder Drill for Distance Control is a fantastic exercise designed to enhance your short game precision and improve your ability to control the distance of your putts. Imagine standing on the practice green, where you have set up a series of targets at varying distances—each target representing a rung on a metaphorical ladder. This drill not only sharpens your focus but also helps you develop a keen sense of touch, which is crucial for executing delicate shots around the greens.

To begin, use multiple alignment sticks or some form of markers to create a ladder effect on the ground, spacing them out at intervals of two to five feet. Start with the closest target and take a few practice swings, focusing on your stance, grip, and the rhythm of your stroke. As you step up to the first target, concentrate solely on distance control rather than sinking the putt. This shift in mindset allows you to gauge how far you need to hit the ball to reach each subsequent rung.

As you become more comfortable, progressively move back along the ladder, challenging yourself with longer distances. Remember, it’s not just about getting the ball to the hole; it’s about mastering the feel of each stroke. Pay attention to your body movements, the angle of your putter, and how you transfer your weight during each swing. This awareness will translate into better control on the course.

After you’ve successfully navigated through each rung, reflect on your performance. Did you notice any patterns in your strokes? Were there specific distances that felt more challenging? By identifying these areas, you can focus your practice efforts in the future. The Ladder Drill is not only effective for enhancing your distance control but also instills confidence, allowing you to approach the greens with a newfound assurance. So grab your putter, set up your ladder, and prepare to see significant improvements in your short game!

7. Drill #3: The 3-Ball Drill for Consistency

What are the Best Golf Drills to Improve My Short Game?
Credit : whatcanu.com

The 3-Ball Drill is a fantastic exercise designed to enhance your consistency around the greens, a crucial aspect of mastering the short game. This drill not only helps reinforce your chipping and putting technique but also builds confidence by providing immediate feedback on your performance.

To set up, you’ll need three golf balls and a target, such as a hole or a designated landing area on the green. Begin by selecting a chipping area approximately 10 to 15 yards from your target. The beauty of this drill lies in its simplicity: focus on executing three consecutive shots with each ball, aiming for the same target area.

As you start, take a moment to visualize your shot and establish a routine. This could include a practice swing or aligning your body to the target. After each shot, take note of where the ball landed. Did it roll past the hole, come up short, or land to the side? This immediate feedback allows you to adjust your technique on the fly, honing your ability to gauge distance and trajectory accurately.

The key to the 3-Ball Drill is to maintain a consistent approach with each shot. Challenge yourself to improve your accuracy with every set of three balls. As you progress, try varying your lies, distances, and target locations to simulate real on-course scenarios. This will not only build your skill set but also mentally prepare you for the unpredictability of a round of golf.

By incorporating the 3-Ball Drill into your practice routine, you will find yourself becoming more comfortable and consistent in your short game. As your confidence grows, so too will your ability to sink those crucial chips and putts, leading to lower scores and a more enjoyable golfing experience. Remember, mastery comes with practice, so dedicate time to this drill, and watch your short game transform!

8. Drill #4: Putting Alignment Drill for Accuracy

The Putting Alignment Drill is an essential exercise designed to refine your accuracy on the greens, helping you develop a consistent stroke that will lower your scores. This drill emphasizes the importance of alignment, which is crucial for sinking those challenging putts.

To get started, find a flat section of the putting green and set up a few alignment aids—these could be alignment sticks, clubs, or even a simple piece of string stretched across the ground, parallel to your target line. Position yourself behind the ball and take a moment to visualize your intended line to the hole. This mental preparation is key to building a successful routine.

Next, set up your ball so that it’s just behind your alignment aid. As you step into your stance, ensure that your feet, knees, hips, and shoulders are all parallel to the target line. This may take a bit of adjustment, but remember that proper alignment will help you send the ball on the right path.

Once you’re set, practice your stroke. Focus on keeping your head still and your eyes over the ball as you make your stroke, ensuring that your putter follows the path dictated by your alignment aid. Repeat this process multiple times, making minor adjustments as needed until you consistently find your rhythm.

To add an extra layer of challenge, vary the distance of your putts and practice from different angles. This will not only help solidify your alignment but will also build your confidence in reading greens and adjusting to different slopes.

Incorporating the Putting Alignment Drill into your practice routine will enhance your ability to aim accurately and improve your overall performance on the course. With dedicated practice, you’ll find that those once-elusive putts become much more manageable, leading to lower scores and a more enjoyable game.

9. Drill #5: The Bump-and-Run Drill for Versatility

The Bump-and-Run drill is a cornerstone exercise designed to enhance your chipping and approach skills, and it’s an absolute game-changer when it comes to versatility around the greens. This drill focuses on teaching you how to execute a low, controlled shot that can navigate various lies and conditions, giving you the confidence to tackle different scenarios on the course.

To set up the drill, find a practice area where you can simulate real course conditions. Ideally, you want a flat surface that transitions into a slight incline or a rough area. Place a target—like a hole or a designated spot on the green—about 15 to 20 yards away, and grab your 7-iron or an 8-iron. The key to the bump-and-run lies in your stance and grip; you’ll want to adopt a slightly open stance with your weight favoring your front foot.

As you make your swing, focus on keeping the clubhead low and making a smooth, controlled motion. The goal is to allow the ball to roll out towards the target, mimicking a putt once it lands on the green. This drill teaches you to control both distance and trajectory, enabling you to handle various situations, from tight lies to grassy fringes, with finesse.

Practicing the Bump-and-Run drill not only sharpens your short game but also helps you develop a better feel for distance control. As you become more comfortable with this technique, you’ll find yourself making more confident decisions on the course, knowing that you have a reliable shot in your arsenal to save par or better. Embrace the versatility of the bump-and-run, and watch your short game transform from a source of anxiety to a powerful weapon in your golfing toolkit!

10. Incorporating Short Game Drills into Your Practice Routine

Incorporating short game drills into your practice routine isn’t just about improving your technique; it’s about embedding precision and confidence into your overall game. The short game is where strokes can be saved or lost, and by dedicating time to focused drills, you can transform your performance on the green.

Start by setting aside a specific time during your practice sessions dedicated solely to short game drills. Consider breaking this time into segments that focus on different aspects such as chipping, pitching, and putting. For instance, spend the first 15 minutes working on chip shots from various lies around the green, experimenting with different clubs to see how they affect trajectory and spin. Use alignment sticks or targets to enhance your focus and ensure you’re honing your aim.

Next, transition to pitching by selecting a distance and practicing different shot types. Work on delicate flop shots versus controlled pitch shots, and pay close attention to your follow-through. Recording your practice with a smartphone can provide valuable insights into your form and technique, allowing you to make adjustments on the fly.

Finally, no short game practice routine is complete without a solid putting drill. Set up a series of putts at varying distances, incorporating pressure scenarios to mimic on-course situations. For example, start with three-foot putts and gradually increase the distance, aiming for a specific number of makes in a row before moving back. This not only builds consistency but also helps develop a mental edge as you learn to trust your stroke under pressure.

Additionally, consider incorporating gamified elements into your practice. Challenge yourself to complete certain drills within a set number of tries or against a clock. This not only keeps practice engaging but also mirrors the competitive nature of actual play.

By systematically integrating these drills into your routine, you’ll develop a strong short game that can significantly lower your scores and provide a more enjoyable experience on the course. Remember, consistency is key; regular practice will lead to noticeable improvements and, ultimately, greater confidence in your game.

11. Common Mistakes to Avoid in Short Game Practice

When it comes to improving your short game, recognizing and avoiding common mistakes can be just as crucial as honing your skills. Many golfers, both novice and experienced, inadvertently develop habits that hinder their progress. Here are some of the most prevalent pitfalls to watch out for during your practice sessions:

1. **Neglecting Fundamentals**: The short game is all about precision and control, yet many golfers overlook the basics. Ensure that your grip, stance, and posture are consistent and correct. Without a solid foundation, even the best drills can fall flat.

2. **Rushing Through Drills**: Speed may be important in other aspects of the game, but in short game practice, taking your time is essential. Rushing through drills can lead to poor technique and reinforce bad habits. Focus on the quality of your shots rather than the quantity.

3. **Lack of Variety**: Sticking to the same drills can lead to stagnation. While repetition is key to mastering specific shots, incorporating a variety of drills will help you adapt to different scenarios on the course. Change up your routine regularly to challenge yourself and enhance your versatility.

4. **Ignoring Feedback**: Whether it’s video analysis or feedback from a coach, ignoring input can stifle improvement. Take the time to review your practice sessions and seek constructive criticism. Understanding your weaknesses is the first step to overcoming them.

5. **Setting Unrealistic Goals**: Improvement takes time, and setting overly ambitious goals can lead to frustration. Instead, focus on small, achievable milestones that will keep you motivated and provide a sense of accomplishment along the way.

6. **Failing to Practice Under Pressure**: One of the biggest mistakes is failing to simulate on-course conditions. Practice your short game in scenarios that mimic actual play, such as putting on a slope or chipping from different lies. This will prepare you for the pressures of a real game.

By being mindful of these common mistakes, you can refine your practice routine and make significant strides in your short game. Remember, the path to improvement is a journey—not a race. With patience, perseverance, and a clear focus on these essentials, you’ll find yourself mastering the short game in no time!

12. Tracking Your Progress: Tools and Techniques

Tracking your progress is essential in the journey to mastering your short game. Golf is a sport where precision and consistency are key, and having a reliable way to measure improvement can make all the difference. Fortunately, there are numerous tools and techniques available to help you monitor your performance and identify areas for enhancement.

One of the simplest methods is to keep a detailed scorecard during your practice sessions. Note down your strokes, misses, and any specific challenges you faced on particular holes or shots. This will not only help you visualize your progress but also give you insights into patterns in your game that you might not have noticed otherwise.

Additionally, consider utilizing golf apps that allow you to log your rounds, track your short game stats, and analyze your performance over time. Many of these applications come equipped with features that provide personalized feedback, helping you understand your strengths and weaknesses better. Look for apps that offer shot tracking, which can help you pinpoint discrepancies in your chipping and putting accuracy.

For a more tactile approach, invest in a short game training aid. Devices like alignment sticks, putting mats, or chipping nets can offer real-time feedback on your technique, allowing you to see immediate results from your practice. By incorporating these tools into your routine, you’ll be able to assess your improvement in various aspects of your short game, from distance control to accuracy.

Finally, consider keeping a journal dedicated to your golfing journey. Document your goals, practice routines, and reflections after each session. This not only serves as a motivational tool but also allows you to trace your evolution as a golfer. You’ll be amazed at how revisiting your past entries can reveal just how far you’ve come and what adjustments you need to make moving forward.

By tracking your progress with these tools and techniques, you’ll not only enhance your short game but also cultivate a deeper understanding of your golfing capabilities, ultimately leading to a more enjoyable and successful experience on the course.

13. Mental Strategies for Short Game Success

When it comes to honing your short game, the right mental strategies can be just as crucial as the physical drills. Golf is as much a mental sport as it is a physical one, and cultivating a strong mindset can lead to transformative improvements in your performance around the greens.

First and foremost, visualization is a powerful tool. Before you even step up to the ball, take a moment to picture the shot you want to execute. Imagine the trajectory of the ball, the landing spot, and how it will roll towards the hole. By creating a mental image of success, you can increase your confidence and focus, allowing your body to execute the shot more naturally.

Another essential mental strategy is developing a pre-shot routine. This routine serves as a calming ritual that helps you to center your thoughts and focus on the task at hand. Whether it’s taking a deep breath, making a practice swing, or visualizing your shot, a consistent routine can help you block out distractions and reduce anxiety, ensuring that you’re in the right headspace before each chip or putt.

Additionally, cultivating a positive mindset is key. Golf can be frustrating, especially when you’re faced with challenging lies or tricky greens. Instead of dwelling on mistakes, remind yourself of past successes and the progress you’ve made. Celebrate the small victories, whether it’s a well-executed chip or a putt that just grazes the edge of the hole. Maintaining a positive attitude not only boosts your confidence but also enhances your enjoyment of the game.

Lastly, practice mindfulness on the course. Take a moment to be present and aware of your surroundings. Notice the feel of the club in your hands, the sound of the grass underfoot, and the breeze on your face. Embracing the moment can help you let go of any tension or frustration, allowing you to approach each shot with clarity and poise.

By integrating these mental strategies into your practice and play, you’ll not only improve your short game but also enhance your overall experience on the course. Remember, golf is not just about the physical skills; it’s about mastering the mind as well. So, cultivate your mental game, and watch as your short game success follows suit!

14. Testimonials: Success Stories from Fellow Golfers

One of the most powerful tools you can leverage as you work on mastering your short game is the insight and experiences of fellow golfers. Testimonials and success stories not only serve as a source of inspiration but also paint a realistic picture of what dedication and practice can achieve. When you hear about someone who struggled with their short game, only to transform their skills through specific drills and techniques, it can ignite your motivation and provide you with a roadmap for your own improvement.

Imagine a seasoned golfer sharing their journey from consistently three-putting on the greens to achieving a remarkable reduction in their handicap, all thanks to targeted drills. They might recount how focusing on chipping around the greens elevated their confidence, allowing them to approach each shot with assurance. These stories often include practical advice—like the importance of developing a consistent pre-shot routine or the effectiveness of specific drills that helped them refine their touch and distance control.

Moreover, testimonials can highlight the diverse paths golfers take to improvement. Whether it’s a weekend warrior honing their skills during casual rounds or a competitive player fine-tuning their game for tournaments, these narratives remind us that the journey in golf is uniquely personal. By incorporating lessons learned from others’ experiences, you can tailor your practice regimen, adopt new techniques, and ultimately find your own success story on the course.

So, as you embark on your quest to master the short game, take the time to seek out and reflect on these testimonials. They are not just stories; they are a collective goldmine of wisdom and encouragement that can help you navigate the challenges of golf with renewed vigor and purpose. Remember, every great golfer was once a beginner, and their successes can be the spark that ignites your own journey toward excellence!

15. Conclusion: Your Path to Mastering the Short Game!

As we wrap up our exploration of the top golf drills for mastering the short game, it’s important to remember that improvement doesn’t come overnight. The journey to refining your skills around the greens requires dedication, practice, and a positive mindset. Each drill discussed in this article is designed to enhance your precision, touch, and confidence, making those crucial putts and chips less daunting.

Embrace the fundamentals: consistency is key. By committing to regular practice and incorporating these drills into your routine, you’ll find yourself developing a more intuitive feel for the ball, which is essential for executing those delicate shots. Whether it’s honing your putting stroke, mastering your chipping technique, or learning to read the greens, every minute spent practicing will pay dividends on the course.

Moreover, don’t forget the importance of mental preparation. Visualization and a strong focus can elevate your performance significantly. Picture yourself sinking that putt or executing the perfect chip as you prepare for your next round. By combining physical practice with mental fortitude, you will build not just skill, but also the resilience and confidence needed to tackle any challenge that the course presents.

As you step onto the green, remember that every professional golfer started where you are now. Embrace the process, celebrate your progress, and keep striving for excellence. With these drills in your arsenal, you’re well on your way to mastering the short game and lowering your scores. So grab your clubs, get out there, and enjoy every swing on the path to becoming a better golfer!

In conclusion, mastering the short game is essential for any golfer looking to shave strokes off their score and elevate their overall performance on the course. The drills we’ve shared in this blog post are not only practical but also enjoyable, allowing you to develop your skills while having fun. By incorporating these exercises into your practice routine, you’ll cultivate precision, confidence, and finesse around the greens. Remember, improvement comes with consistency and dedication, so make these drills a regular part of your game. We can’t wait to hear about your progress and the amazing rounds you’ll play as a result. Grab your clubs, head to the practice green, and get ready to impress yourself and your playing partners with your newfound skills! Happy golfing!

Tennis – What are the best ways to practice my lob returns?

In the world of tennis, the lob return can be a game-changer, transforming a defensive play into an offensive opportunity with just the right touch.

Whether you’re facing a towering opponent at the net or trying to escape a tight spot on the court, mastering this essential shot can elevate your game to new heights. But perfecting the lob return requires more than just a keen eye and quick reflexes; it demands a blend of technique, strategy, and practice. In this comprehensive guide, we’ll delve into top techniques and drills designed to enhance your lob return skills. From understanding the nuances of timing and angle to incorporating targeted drills that sharpen your precision and control, this post is your roadmap to tennis success. Get ready to turn those challenging moments into opportunities and leave your opponents scrambling with your newfound prowess!

1. Understanding the Lob Return: What It Is and Why It Matters

Tennis - What are the best ways to practice my lob returns?
Credit : whatcanu.com

Understanding the lob return is essential for any tennis player looking to elevate their game. The lob return is a strategic shot that involves hitting the ball high over your opponent’s head, aiming to land it deep in their court. It’s not just a defensive maneuver; it’s a powerful tool that can shift the momentum of a match. By mastering this technique, you can effectively counter aggressive players who like to attack the net, forcing them into a position of retreat and giving yourself the opportunity to regain control of the point.

Why does the lob return matter? In tennis, positioning and shot selection are pivotal to success. When faced with a hard serve or an opponent who frequently approaches the net, relying solely on traditional returns can limit your options and leave you vulnerable. The lob return allows you to exploit your opponent’s positioning, particularly if they are too close to the net. By sending the ball high and deep, you can disrupt their rhythm and create opportunities for your own offensive plays.

Moreover, the lob return can be a game-changer in doubles play, where opponents often crowd the net. A well-executed lob can not only clear the net-rushers but also create confusion and hesitation in the opposing team, opening up the court for your partner to seize control.

In essence, understanding the lob return is about recognizing its strategic importance and its potential to enhance your overall gameplay. As we delve deeper into techniques and drills, you’ll learn how to integrate the lob return into your arsenal, transforming it from a rarely-used shot into a reliable weapon that keeps your opponents guessing and enhances your chances of success on the court.

2. Key Elements of a Successful Lob Return

When it comes to mastering the lob return in tennis, understanding the key elements that contribute to a successful execution is essential. The lob return is not merely a defensive shot; it can also be a powerful weapon to disrupt your opponent’s rhythm and take control of the point. Here are the crucial components to focus on:

**1. Anticipation and Positioning:** The first step in executing an effective lob return is to anticipate your opponent’s serve. Watch their body language and racket position to gauge the type of serve they are about to deliver. Position yourself accordingly in the court, ideally on your toes, ready to spring into action. Being in the right place at the right time allows for better timing and execution of your lob return.

**2. Grip and Racket Angle:** A comfortable grip is vital when preparing to hit a lob return. While a continental grip is commonly recommended for versatility, feel free to adjust based on your comfort level and the ball’s trajectory. The angle of your racket face should be slightly open, allowing the ball to ascend into the air. This will help you lift the ball over your opponent’s head and provide the necessary arc for a successful lob.

**3. Swing Path and follow-Through:** Your swing should be smooth and fluid, starting low and following through high. A low-to-high swing path is crucial for generating the lift needed for a lob. As you make contact with the ball, focus on pushing through it with your racket, then let your follow-through naturally finish above your shoulder. This motion not only helps in getting the ball over the net but also adds depth to your lob return.

**4. Depth and Placement:** A successful lob return should not only clear the net but also land deep in your opponent’s court, ideally near the baseline. This forces them to retreat, giving you a better chance to regain control of the rally. Experiment with different placements—aim for the corners or the middle of the court—to keep your opponent guessing and off-balance.

**5. Mental Focus:** Lastly, a successful lob return requires mental clarity and focus. Visualize the shot before execution and trust your instincts. Staying calm under pressure will help you maintain your composure and make better decisions during fast-paced exchanges.

By honing in on these key elements, you can elevate your lob return from a mere defensive tactic to a strategic shot that disrupts your opponent’s game plan and enhances your overall performance on the court. Remember, practice is key! Engage in targeted drills that emphasize these components, and soon you’ll find yourself executing lob returns with confidence and precision.

3. Grip and Stance: Setting Up for Success

Tennis - What are the best ways to practice my lob returns?
Credit : whatcanu.com

In the world of tennis, mastering the lob return starts long before the ball leaves your opponent’s racket. The foundation of a successful lob return lies in the grip and stance, two critical elements that can significantly enhance your performance on the court.

**Grip**: For effective lob returns, the grip you choose can make all the difference. A continental grip is often recommended, as it allows for versatility in shot-making. This grip not only facilitates a smooth transition between defensive and offensive plays but also helps in generating the necessary lift on the ball. When you hold the racket, ensure that your grip is firm yet relaxed, allowing for quick adjustments as the ball approaches. Practice switching between grips during your drills to build muscle memory, so you’re ready to respond instinctively during a match.

**Stance**: Equally important is your stance. A solid, athletic position sets the stage for an effective lob return. Start with your feet shoulder-width apart and knees slightly bent, ready to spring into action. Position yourself just behind the baseline, allowing ample time to read your opponent’s shot. As the lob is launched, pivot on your back foot and rotate your hips towards the net, preparing to engage your upper body in the shot. This weight transfer will help you generate power and height in your return.

Incorporating these elements into your training will enhance your ability to respond to high balls effectively. Regularly practicing your grip and stance through specialized drills can lead to increased confidence and precision during matches. Remember, the key to a successful lob return lies in the details; when you set up correctly, you’re already one step closer to mastering this essential skill in tennis.

4. Timing and Anticipation: Reading Your Opponent

Timing and anticipation are crucial skills in mastering the lob return. Understanding your opponent’s body language, shot preparation, and even the subtle nuances of their grip can provide you with the insights needed to position yourself effectively and execute a successful return.

To develop these skills, start by observing your opponent during warm-ups. Watch how they handle their racket and the type of shots they favor. Are they consistently looking to hit aggressive groundstrokes, or do they have a tendency to play more defensively? Recognizing these patterns early on can set the tone for your strategy throughout the match.

During the game, pay close attention to your opponent’s stance and the angle of their racket. Are they leaning forward, suggesting an impending aggressive shot, or are they squared up, indicating a more defensive play? This split-second analysis can make all the difference when preparing to return a lob.

Drills that focus on reaction time can significantly enhance your timing and anticipation. For example, practice with a partner who alternates between high lobs and low drives. This will help you learn to gauge the trajectory of the ball and adjust your positioning accordingly. Additionally, incorporate footwork drills to improve your agility, ensuring you can move quickly into position to intercept the ball with precision.

Lastly, remember that anticipation isn’t just about reading your opponent’s next move; it’s also about trusting your instincts. The more matches you play and the more situations you encounter, the better you will become at predicting your opponent’s actions. With practice, you’ll find yourself not only reacting faster but also positioning yourself more strategically, turning what was once a defensive return into an offensive opportunity. Mastering timing and anticipation will elevate your game and make you a formidable opponent on the court.

5. Technique Breakdown: Executing the Perfect Lob Return

Tennis - What are the best ways to practice my lob returns?
Credit : whatcanu.com

Executing the perfect lob return is an art that combines precision, timing, and an understanding of your opponent’s positioning. To truly master this essential skill, let’s break down the technique step by step.

**1. Anticipation and Positioning:**
Before the ball even reaches you, it’s crucial to anticipate your opponent’s shot. Assess their body language and racket angle to gauge whether they’re setting up for a powerful serve or a more strategic play. Position yourself a few steps behind the baseline, ready to react to the incoming ball. This extra space allows you to generate the necessary height and depth for your lob return.

**2. Grip and Stance:**
Utilize an eastern or semi-western grip for your forehand lob return, as this will provide you with the necessary lift. Stand with your feet shoulder-width apart and your knees slightly bent, allowing for a balanced and athletic stance. Your non-dominant hand should point towards the ball, helping you track its trajectory.

**3. The Backswing:**
As the server begins their motion, prepare your racket by pulling it back smoothly. Keep your racket head slightly above the handle to maintain control and generate power. Be careful not to overdo your backswing; a compact motion will help you respond quickly and effectively.

**4. The Swing:**
As the ball approaches, step into the shot by shifting your weight from your back foot to your front foot. Aim to make contact with the ball at its highest point, which maximizes lift. Your racket should follow a low-to-high motion, brushing up against the ball to create the necessary spin. Focus on the follow-through, ensuring your racket finishes high, which will further enhance the height of the lob.

**5. The Target:**
When executing a lob return, always have a target in mind. Aim for the deep corners of the court, ideally over your opponent’s head. This not only forces them to retreat but also minimizes the chances of an effective volley.

**6. Practice Drills:**
Incorporating specific drills can enhance your lob return technique. Work with a partner to practice lobbing back and forth, focusing on height and accuracy. Alternatively, set up targets on the court to aim for during your practice sessions, reinforcing your aim and control.

Mastering the lob return requires patience and practice, but by breaking down the technique and focusing on each component, you’ll find yourself effortlessly executing this impressive shot in no time. Remember, the key to success lies in consistent practice and a willingness to adapt your strategy based on your opponent’s playstyle. With dedication, you’ll become a formidable force on the court, using the lob return as a powerful weapon in your tennis arsenal.

6. Common Mistakes to Avoid

When it comes to mastering the lob return in tennis, avoiding common pitfalls can significantly enhance your performance on the court. Many players, especially beginners, fall into a few traps that hinder their ability to execute this vital shot effectively.

One of the most prevalent mistakes is failing to assess the opponent’s position. Before you attempt a lob return, take a moment to gauge how far back your opponent is standing. If they’re positioned close to the net, a lob might not be the best choice. Instead, opt for a more aggressive shot that can keep them on their toes. Conversely, if they’re too far behind the baseline, a well-placed lob can catch them off guard, but only if you recognize the opportunity.

Another common error is improper timing. Many players rush their lob returns, leading to poorly executed shots that lack height and depth. It’s crucial to find the right moment to make your move. Ensure you’re set and balanced, allowing yourself to make a smooth, controlled swing. A rushed shot often results in a flat, ineffective lob that can easily be capitalized on by your opponent.

Additionally, neglecting your footwork can severely impact your lob return. If you’re not positioned correctly, you’ll struggle to generate the necessary power and precision. Focus on maintaining a solid stance, and remember that good footwork not only helps you reach the ball but also enables you to set up for the shot effectively.

Lastly, many players underestimate the importance of spin. A lob that lacks topspin can easily fall short or sail out of bounds. Practicing your spin technique can add a new dimension to your lob return, making it tougher for your opponent to predict and respond.

By being aware of these common mistakes—failing to assess your opponent’s position, rushing your shot, neglecting footwork, and underestimating spin—you can refine your lob return technique. Avoiding these pitfalls will not only enhance your overall game but also instill confidence, allowing you to execute this challenging shot with finesse and precision.

7. Drills to Improve Your Lob Return Skills

Tennis - What are the best ways to practice my lob returns?
Credit : whatcanu.com

When it comes to mastering the lob return in tennis, focused practice is essential. Here are some effective drills that will sharpen your skills and boost your confidence on the court.

**1. Partner Lob Drills:**
Pair up with a partner and take turns lobbing the ball over the net from the baseline. Start slowly, aiming to place the lob in specific areas of the court. As you progress, increase the pace and challenge each other with deeper, more angled shots. This drill enhances your ability to read your opponent’s positioning and prepare for the return.

**2. Wall Rebound Lobs:**
Find a flat wall and stand about ten feet away. Using a tennis ball, practice lobbing the ball against the wall and returning it with a quick overhead. Focus on your footwork as you move into position to hit the ball after it rebounds. This solo drill will help you develop the muscle memory needed for quick reflexes and precise lobs.

**3. Target Practice:**
Set up targets in various sections of the court, such as cones or hula hoops. Have a partner or coach lob balls towards you from the opposite side. Your objective is to return the lobs while aiming for the targets. This drill not only improves your accuracy but also enhances your decision-making skills as you learn to assess which target to aim for in real match situations.

**4. Lob and Dash:**
In this drill, practice returning a lob while also working on your foot speed. Have a partner lob the ball to you, and as you hit the return, sprint towards the net. This simulates the pressure of a real match where you must quickly transition from defense to offense. Focus on your footwork and ensure you’re ready to capitalize on any short returns.

**5. Reaction Ball Returns:**
Using a reaction ball can significantly enhance your reflexes. Have a partner hit lobs at you using a reaction ball that bounces unpredictably. Your goal is to react quickly and return the ball effectively. This drill hones your ability to anticipate and react to varying lob heights and angles.

By incorporating these drills into your practice routine, you’ll see a significant improvement in your lob return skills. The key is consistency—regular practice will help you develop the finesse and timing necessary to master this crucial aspect of your game. With dedication and the right techniques, you’ll find yourself confidently returning lobs and gaining an edge over your opponents on the court.

8. Shadow Swinging: Practicing Technique Without a Ball

Shadow swinging is a powerful training technique that allows players to refine their strokes and improve their technique without the distraction of a ball. This method focuses on the mechanics of your swing, helping to build muscle memory and enhance your overall form. By visualizing the ball’s trajectory and your movements in relation to it, you can hone your skills in a pressure-free environment.

To effectively incorporate shadow swinging into your practice, find a space where you can move freely—preferably on the court itself. Start by assuming your ready position, then visualize an incoming lob. As you prepare to execute your shot, concentrate on your footwork, grip, and the angles of your racket. Move through the entire motion as if you were making contact with the ball, paying close attention to your follow-through and balance.

One benefit of shadow swinging is the ability to break down your swing into individual components. Focus on your grip first, ensuring that it’s correct for the type of shot you’re practicing. Then, concentrate on your stance and footwork, as proper positioning is crucial for a successful lob return. Once you feel comfortable with these elements, integrate them into a fluid motion, emphasizing a smooth, controlled swing.

To make the most of this technique, set aside dedicated time in each practice session for shadow swinging. You can even incorporate it into your warm-up routine. Aim to perform several repetitions, gradually increasing your speed as your confidence and muscle memory grow. Remember, the goal is not just to mimic the swing, but to internalize the mechanics so that they become second nature when you’re on the court facing live balls.

Lastly, don’t hesitate to record yourself while shadow swinging. Analyzing your form on video can provide valuable insights into areas for improvement that you might not notice in real-time. By regularly incorporating shadow swinging into your training regimen, you’ll not only master your technique but also enhance your performance when it counts, ensuring you’re always ready to return that lob with precision and power.

9. Partner Drills: Enhancing Accuracy and Consistency

Partner drills are an essential component of mastering the lob return in tennis, providing an invaluable opportunity to enhance both accuracy and consistency in your game. Practicing with a partner not only allows you to simulate match conditions, but it also introduces an element of competition and camaraderie that can significantly elevate your training sessions.

To start, set up a drill where one player consistently lobs the ball over the net while the other focuses on returning it with precision. As the lobber, aim for different targets within the court—deep corners, the baseline, and the service boxes—to challenge your partner’s ability to read the ball’s trajectory and adjust their positioning accordingly. This variation encourages the returner to hone their footwork and strategic thinking, essential skills for a successful lob return.

As you progress, increase the intensity by having your partner mix in volleys and groundstrokes, simulating the unpredictability of a real match. The returner must remain agile and adaptable, developing the quick reflexes necessary to respond effectively to a variety of shots. Consider introducing a scoring system, where points are awarded for successful returns that land within specific areas of the court, fostering a competitive edge that can motivate both players to improve.

Moreover, incorporate feedback into your drills. After each session, take a moment to discuss what worked well and what could be improved. This kind of reflection helps solidify the skills learned during practice and reinforces the importance of communication and teamwork in tennis.

By committing to regular partner drills, you’ll not only cultivate your ability to return lobs with accuracy and consistency but also strengthen your overall game. As you build this skill set, you’ll find yourself more confident at the baseline, ready to take on any challenge that comes your way on the court.

10. Solo Drills: Building Muscle Memory

When it comes to mastering the lob return in tennis, solo drills are an invaluable tool for building muscle memory and refining your technique. These drills allow you to practice without the pressure of a match, giving you the freedom to focus on your form, footwork, and timing. By incorporating a variety of solo drills into your training regimen, you can develop the consistency needed to successfully execute a lob return during competitive play.

One effective drill is the **shadow swing**. Stand in your usual court position and visualize an opponent hitting a lob over you. As you mimic the movement of your racket swing, pay close attention to your grip, stance, and follow-through. This exercise not only reinforces proper technique but also helps you internalize the motion of returning a lob, making it feel natural when the time comes to perform in a match.

Another beneficial drill is the **target practice** exercise. Set up cones or targets on the opposite side of the court where you would ideally want your lob returns to land. Using a ball machine or simply tossing balls to yourself, aim for these targets as you practice your lob return. This not only hones your accuracy but also allows you to experiment with different angles and heights, further enhancing your adaptability during matches.

Incorporating footwork drills into your solo practice can also significantly impact your lob return. Set up markers on the court to simulate different positions from which you might need to return a lob. Practicing quick lateral movements and explosively pushing off your back foot will help improve your court coverage and positioning, ensuring you’re in the best possible spot to execute your return.

Finally, don’t underestimate the power of **video analysis**. Record your solo drills and review the footage to identify areas for improvement. This self-assessment can provide valuable insights into your technique, helping you make necessary adjustments and reinforcing positive habits.

By diligently practicing these solo drills, you’ll build the muscle memory necessary to handle lobs with confidence and poise, setting yourself up for success when faced with this challenging shot on the court.

11. Incorporating the Lob Return into Match Play

Incorporating the lob return into your match play is a strategic move that can elevate your game to new heights. This technique is not just a flashy shot; it’s a tactical weapon that can disrupt your opponent’s rhythm and keep them on their toes. When executed correctly, the lob return can turn the tables, especially when facing aggressive net players who thrive on volleying.

To effectively integrate the lob return into your match play, begin by recognizing the right moments to deploy it. Typically, the ideal scenario arises when your opponent is positioned too close to the net, creating an opportunity for you to send the ball high and deep over their head. Timing is crucial; you want to make your move when they commit to their forward position, making it difficult for them to react quickly enough to intercept the lob.

Practice is essential for mastering the lob return. Incorporating drills that simulate match conditions will help you develop the necessary touch and precision. One effective drill involves pairing up with a practice partner. Have them serve to you while you focus on returning the serve with a lob. Start from a stationary position, then gradually introduce movement to mimic the dynamic nature of a real match. This will not only improve your lob technique but also enhance your ability to read your opponent’s positioning.

Additionally, watch professional players who excel at the lob return; their decision-making and execution can provide valuable insights. Observe how they utilize the shot to counteract their opponents’ tactics and incorporate those strategies into your own game. Remember, the lob return is not just a defensive maneuver; it can be an offensive strategy that puts pressure on your opponent and opens up the court for winning opportunities.

Incorporating the lob return into your match play will require practice and patience, but once you’ve mastered it, you’ll find it to be an indispensable part of your tennis toolkit. Your opponents won’t know what hit them the next time you send a perfectly placed lob soaring over their heads, leaving them scrambling to regain control of the point.

12. Analyzing Professional Players: Learning from the Best

One of the most effective ways to elevate your tennis game is by analyzing the techniques of professional players. These athletes have dedicated years to mastering their craft, and their performances offer a treasure trove of insights that can help you refine your skills. Watching matches not only allows you to observe the mechanics of a perfect lob return but also reveals the strategic decisions that accompany it.

Start by selecting a few standout players known for their exceptional lob returns, such as Novak Djokovic or Rafael Nadal. Pay close attention to their footwork, positioning, and timing. Notice how they anticipate their opponent’s shots and how they adjust their stance to prepare for a successful return. Take notes on their grip and swing mechanics—these can vary significantly from player to player, and understanding these nuances can help you find what works best for you.

Moreover, consider breaking down specific match highlights. Slow-motion replays are incredibly useful for dissecting movements that happen in the blink of an eye. Analyze the players’ body language and decision-making processes in high-pressure situations. How do they maintain composure? What cues do they pick up from their opponents? This level of analysis can provide invaluable lessons that you can apply to your own game.

Finally, don’t forget to engage with tennis coaching videos or tutorials that focus on these professionals. Many experienced coaches create content that breaks down the techniques of top players and translates them into drills that you can practice. By integrating these insights into your training regimen, you’ll not only improve your lob return but also gain a deeper understanding of the game itself. Remember, learning from the best is one of the fastest paths to success on the court!

13. Mental Strategies for Confident Lob Returns

When it comes to executing a successful lob return in tennis, mental fortitude is just as crucial as physical skill. Confidence can often make or break your performance on the court, especially when facing a powerful opponent who frequently employs lobs as a strategy. Cultivating a strong mental game can help you not only anticipate these shots but also respond to them with precision and poise.

First, visualization is a powerful tool. Before stepping onto the court, take a moment to imagine yourself successfully returning lob shots. Picture the trajectory of the ball and your body’s movement as you prepare to hit it back. This mental rehearsal can boost your confidence and help you develop a clearer understanding of the right positioning and timing needed for an effective return.

Another critical aspect is staying calm under pressure. When you see your opponent wind up for a lob, it can be tempting to rush your preparation. Instead, remind yourself to breathe deeply and focus on the fundamentals of your technique. Emphasize your footwork—stay light on your feet and be ready to move quickly. A composed mindset will allow you to react more effectively, making it easier to identify whether to hit a defensive lob or take the initiative with an aggressive return.

Additionally, embrace positive self-talk. Replace any negative thoughts with affirmations of your skills. Remind yourself of past successful lob returns or reinforce your ability to read your opponent’s game. Phrases like “I can handle this” or “I know what to do” can create a mental framework that encourages consistency and resilience.

Finally, practice mindfulness during your matches. Stay present and focused on the current point rather than dwelling on previous mistakes or worrying about future outcomes. By anchoring yourself in the moment, you’ll enhance your decision-making ability and remain adaptable to your opponent’s strategy.

Incorporating these mental strategies into your training routine will not only strengthen your lob return but also improve your overall performance on the court. With a confident mindset, you’re more likely to seize control of the game and keep your opponent guessing.

14. Tracking Progress: Assessing Your Improvement

Tracking your progress is an essential component of mastering the lob return in tennis. Improvement doesn’t happen overnight, and being able to measure your advancements can provide not only motivation but also valuable insights into your training regimen. Start by setting clear, achievable goals focused on specific aspects of the lob return, such as improving your reaction time, height of your lob, or accuracy in placement.

One effective method to assess your improvement is to maintain a practice journal. Document the drills you perform, noting the number of successful lob returns, the types of shots you faced, and how you felt during each session. This will allow you to identify patterns in your performance and recognize areas that require additional focus.

In addition to keeping a journal, consider recording your practice sessions or match play. Video analysis can be an eye-opening experience, revealing subtleties in your technique that may not be apparent in the moment. Review your footage to evaluate your footwork, racket positioning, and timing on the lob return. This visual feedback can guide your adjustments and help solidify the correct form.

Another valuable tool for tracking progress is to enlist the help of a coach or experienced partner. Regularly seeking feedback can provide you with external perspectives on your growth and areas for improvement that you might have overlooked. Schedule periodic assessments where you can focus specifically on the lob return, allowing your coach to give you targeted drills and adjustments tailored to your evolving skills.

Finally, celebrate your achievements along the way, no matter how small. Whether it’s consistently landing your lob returns in the targeted area or feeling more confident in challenging situations, acknowledging these milestones can keep your motivation high and propel you toward mastery of the lob return. By diligently tracking your progress, you’ll gain a clearer understanding of your development, allowing you to refine your techniques and ultimately find greater success on the court.

15. Conclusion: Embracing the Lob Return for Tennis Success

As we wrap up our exploration of the lob return, it’s clear that mastering this nuanced technique can significantly elevate your game. The lob return is not just a defensive maneuver; when executed properly, it can turn the tides of a match, catching your opponent off guard and shifting the momentum in your favor. Embracing the lob return means integrating it into your overall strategy, making it an essential part of your arsenal.

Throughout this guide, we’ve delved into various techniques and drills designed to hone your lob return skills. From understanding the optimal positioning on the court to refining your timing and angle, each element plays a crucial role in your success. Remember, practice makes perfect. Regularly incorporating these drills into your training routine will not only enhance your technique but also build the confidence needed to employ the lob return in high-pressure situations.

Moreover, embracing the lob return requires a shift in mindset. It’s about viewing challenges as opportunities. When faced with aggressive opponents or tricky serves, instead of retreating, harness the power of the lob to reclaim control of the point. As you become more comfortable with this tactic, you’ll likely find that your overall court awareness and decision-making improve, leading to a more dynamic and resilient game.

In conclusion, making the lob return a staple of your play will not only enhance your performance but also add a new layer of strategy to your matches. So, get out there, practice diligently, and watch as your newfound lob return skills become a game-changer on the court. Embrace the challenge, enjoy the process, and let your confidence soar as you elevate your game to new heights. Happy swinging!

In conclusion, mastering the lob return is a pivotal skill that can elevate your tennis game to new heights. By incorporating the techniques and drills outlined in this post into your practice routine, you’ll not only enhance your ability to counter aggressive shots but also develop a more strategic approach on the court. Remember, consistency and practice are key, so take the time to refine your skills and build your confidence. Whether you’re aiming to impress in your next match or simply want to enjoy the game more, these insights will guide you toward achieving your tennis goals. Now, grab your racket, hit the courts, and start implementing these strategies – your opponents won’t know what hit them!

Tennis – What are the best ways to practice my inside-out shots?

Tennis is a game of finesse, strategy, and precise execution, and one of the most game-changing shots in a player’s arsenal is the inside-out shot.

This powerful stroke not only allows you to dictate the pace of the match but also keeps your opponent on their toes, forcing them to adapt to your unpredictable play. Whether you’re a beginner eager to elevate your skills or a seasoned player looking to refine your technique, mastering the inside-out shot can significantly enhance your performance on the court. In this blog post, we’ll delve into the essential drills designed to help you perfect this dynamic shot. From footwork fundamentals to timing and placement exercises, we’ll provide you with a comprehensive guide to developing the muscle memory and confidence needed to execute the inside-out shot like a pro. Get ready to transform your game and leave your competition in awe!

1. Understanding the Inside-Out Shot: Definition and Importance

Tennis - What are the best ways to practice my inside-out shots?
Credit : whatcanu.com

The inside-out shot is a fundamental yet powerful weapon in a tennis player’s arsenal, and understanding its nuances can significantly elevate your game. At its core, the inside-out shot refers to a cross-court stroke that is executed from the player’s forehand side but directed to the opposite corner of the opponent’s court. This shot allows players to change the angle of the rally, pulling their opponent off the court and opening up space for subsequent shots.

The importance of mastering the inside-out shot cannot be overstated. It not only adds versatility to your gameplay but also strategically disrupts your opponent’s rhythm. When executed effectively, this shot can force your opponent into a defensive position, giving you the upper hand in the rally. Additionally, it can create opportunities for easier put-away shots, particularly if your opponent is stretched and scrambling to recover.

Understanding the mechanics behind the inside-out shot is crucial. It requires a blend of proper footwork, timing, and the ability to read your opponent’s positioning. When you can anticipate where the ball will land and adjust your stance accordingly, you increase your chances of hitting a powerful, targeted inside-out shot. Furthermore, practicing this shot in drills enhances your confidence and consistency, ultimately contributing to your overall performance on the court.

In essence, the inside-out shot is more than just a stroke; it’s a strategic movement that reshapes the dynamics of a match. By incorporating it into your training regimen, you not only improve your technical skills but also gain a tactical edge that can make all the difference in high-pressure situations. As we delve deeper into specific drills designed to hone this skill, keep in mind the crucial role that the inside-out shot plays in transforming a good player into a great one.

2. The Mechanics of a Successful Inside-Out Shot

Mastering the inside-out shot is a game-changer in tennis, allowing players to dictate the pace and direction of the match. Understanding the mechanics behind this powerful stroke is crucial for any aspiring player looking to elevate their game.

First and foremost, positioning is key. As the ball approaches, ensure you’re set up with your feet shoulder-width apart, allowing for a stable base. Your non-dominant foot should be slightly ahead, angled towards the sideline where you intend to direct the shot. This stance not only provides balance but also prepares your body to generate optimal power and control.

Next comes the grip. While many players opt for the semi-western grip for topspin, experimenting with the eastern grip can also yield impressive results, particularly for flatter shots. Whichever grip you choose, ensure your hand is relaxed yet firm, as tension can hinder fluidity.

As you prepare to strike, your racket should be pulled back, with your elbow at a comfortable height. This is where the magic begins. As the ball approaches, pivot your hips and shoulders towards the net, creating a coiling motion that stores energy. This rotational movement is essential; it not only enhances your shot’s power but also improves accuracy by allowing your body to face your target as you make contact with the ball.

Timing is another critical factor. Ideally, you want to hit the ball at its peak, when it’s at the highest point of its bounce. This allows you to take advantage of gravity, driving the ball with more authority. Focus on making contact slightly in front of your body, which will facilitate a more natural follow-through.

Finally, the follow-through should be smooth and controlled. After striking the ball, allow your racket to travel across your body, finishing at shoulder height. This not only ensures that you maintain good form but also prepares you for the next shot.

By honing these mechanics through dedicated practice, you’ll find that your inside-out shot becomes a formidable weapon in your tennis arsenal, capable of outmaneuvering opponents and swinging the momentum in your favor. Remember: mastery comes with repetition, so keep drilling and watch your game transform!

3. Essential Grip Techniques for the Inside-Out Shot

Tennis - What are the best ways to practice my inside-out shots?
Credit : whatcanu.com

The grip you choose can make all the difference in executing a successful inside-out shot. Mastering essential grip techniques not only enhances your control and power but also allows for greater spin and precision, ultimately elevating your game. Here’s how to refine your grip to set the foundation for hitting that winning inside-out shot.

First, let’s discuss the **Eastern Grip**, which is often the go-to for players looking to hit powerful groundstrokes. To adopt this grip, hold your racquet as if you were shaking hands with it, placing the base knuckle of your index finger on the third bevel of the handle. This grip offers a balanced blend of power and spin, making it particularly effective for inside-out shots. With the Eastern grip, you can generate ample topspin while maintaining the flat trajectory necessary for a sharp angle.

If you’re looking for a bit more spin and versatility, consider the **Semi-Western Grip**. This grip involves turning the racquet slightly more than the Eastern grip, placing the base knuckle on the fourth bevel. The Semi-Western allows for greater topspin, making it easier to lift the ball over the net while still targeting the corners of the court. It’s particularly useful for players who like to engage in baseline rallies, giving you the ability to whip the ball with a natural upward motion.

Now, let’s not forget about the **Western Grip**, which is ideal for those who favor heavy topspin and aggressive play. With your index knuckle resting on the fifth bevel, this grip requires a more extreme wrist motion, enabling you to brush up on the ball. While it may take some time to adjust to this grip, mastering it can add an exciting dynamic to your inside-out shots, allowing you to dictate the pace and direction of the game.

As you practice these grips, pay close attention to your hand position and how it affects your stroke mechanics. Incorporate drills that focus on transitioning from one grip to another while hitting inside-out shots. For example, practice hitting with each grip against a wall or with a partner, focusing on consistency and accuracy. Over time, you’ll develop a natural feel for the grip that works best for you, solidifying your ability to execute that powerful inside-out shot with confidence. By honing these essential grip techniques, you’ll be well on your way to mastering the art of the inside-out shot and achieving tennis success.

4. Key Footwork Drills to Enhance Your Shot

In tennis, mastering the inside-out shot is not just about technique; it’s equally about footwork. Quick and precise footwork allows you to position yourself optimally for each shot, ensuring that your swing is both powerful and accurate. Here are some key footwork drills designed to enhance your inside-out shot and elevate your overall game.

**1. Ladder Drills:** Start with a speed ladder placed on the court. Perform a variety of footwork patterns, such as one-foot hops, lateral shuffles, and in-and-out steps. These movements increase your agility and coordination, which are crucial for quickly adjusting your position as the ball approaches.

**2. Shadow Swinging:** Without a ball, practice your inside-out shot by simulating the swings you would make during a match. Focus on your foot placement as you pivot and step into the shot. This drill helps to engrain the correct footwork patterns into your muscle memory, allowing you to execute them seamlessly during gameplay.

**3. Cone Drills:** Set up cones in a pattern that forces you to move laterally and diagonally. Start at the center of the court, sprint to a cone, and practice your inside-out shot from that position. By varying the distance and angles of the cones, you’ll develop the ability to hit your shot from different positions on the court while maintaining balance and control.

**4. Split Step Practice:** The split step is a critical movement in tennis that sets the stage for any shot. Practice this by having a partner hit balls to different areas of the court while you focus on executing a perfect split step to prepare for your inside-out shot. This drill enhances your reaction time and ensures you’re always ready to respond quickly to your opponent’s moves.

Incorporating these footwork drills into your training routine will not only improve your inside-out shot but also boost your overall agility and court coverage. Consistent practice will ensure that when the game is on the line, you’ll be ready to hit that powerful inside-out shot with precision and confidence.

5. Top Drills to Practice the Inside-Out Shot

Tennis - What are the best ways to practice my inside-out shots?
Credit : whatcanu.com

Mastering the inside-out shot in tennis can significantly enhance your game by allowing you to dictate play and control the court. Here are some top drills designed to help you refine this powerful stroke and integrate it seamlessly into your overall strategy.

**1. Shadow Swings**
Before diving into live ball drills, begin with shadow swings to focus on your technique. Stand in your ready position and visualize an opponent hitting the ball to your forehand side. Practice your footwork, taking a few steps to your left (for right-handed players) or right (for left-handed players) to position yourself perfectly for the shot. Emphasize a full swing, proper grip, and follow-through. This drill will help you internalize the mechanics of the inside-out shot without the pressure of hitting a live ball.

**2. Partner Feed Drill**
once you feel comfortable with the shadow swings, move on to a partner feed drill. Have your partner stand on the opposite side of the net, feeding you balls to your forehand side. Focus on stepping into the shot and generating power while maintaining control. Aim to hit the ball cross-court into the opposite corner of the court. This drill will help you practice timing and placement, allowing you to develop consistency in your inside-out shot.

**3. Target Practice**
Set up targets in the corners of your court to add an element of precision to your training. Use cones, hula hoops, or other markers to create specific spots where you want your shots to land. As you practice hitting inside-out shots, aim for these targets, adjusting your angle and power as needed. This drill not only hones your accuracy but also builds confidence in your ability to control the ball during matches.

**4. Cone Drill for Footwork**
Effective footwork is crucial for executing a successful inside-out shot. Set up cones in a zig-zag pattern on the court, simulating the movement required to hit the shot. Start at one end and sprint to the first cone, then shuffle to the next while keeping your eyes on an imaginary ball. As you reach each cone, practice your swing as if you were hitting an inside-out shot, focusing on your foot placement and body positioning. This drill will improve your agility and readiness to strike the ball effectively.

**5. Live Ball Games**
Lastly, incorporate your inside-out shot into live ball games or practice matches. Challenge your partner to hit the ball towards your forehand side, encouraging you to utilize the inside-out shot strategically during rallies. This real-game scenario helps you adapt to the rhythm of a match and reinforces the importance of using this shot to exploit your opponent’s weaknesses.

By diligently practicing these drills, you’ll develop the muscle memory, accuracy, and confidence needed to master the inside-out shot. As you refine this skill, you’ll find that it not only enhances your overall game but also puts you in a stronger position to outmaneuver your opponents on the court. Happy practicing!

– a. Shadow Swinging

### a. Shadow Swinging

Shadow swinging is one of the most effective drills for mastering the inside-out shot in tennis, and it’s an exercise that can be done virtually anywhere, making it both convenient and versatile. This drill focuses on perfecting your swing mechanics without the added pressure of a ball or opponent, allowing you to concentrate solely on your form.

Begin by finding a clear space where you can move freely. Visualize the court in front of you, picturing the baseline, service boxes, and the positioning of your opponent. Start by standing in your ready position, knees slightly bent and holding your racket comfortably. As you initiate your shadow swing, channel your energy into making smooth, controlled movements.

Focus on your footwork, ensuring that you step into your shot just as you would during a real match. Practicing your foot placement is crucial for generating power and accuracy. As you perform the inside-out swing, pay attention to the swing path: start low and move upward, following through completely to create that perfect finishing position. This not only helps with muscle memory but also reinforces proper technique.

Incorporate a variety of scenarios into your shadow swings. Imagine hitting an inside-out forehand from different positions on the court—close to the net, further back, and even from wide angles. Practicing these variations will enhance your adaptability during actual play.

To maximize the benefits of this drill, consider recording yourself. Watching your form in action can provide insights into areas for improvement, such as your grip, stance, and follow-through.

By incorporating shadow swinging into your training regimen, you’ll build the confidence and skill required to execute precise inside-out shots when it matters most. This foundational work allows you to approach your next practice session or match with a clearer mind and a more refined technique, setting the stage for success on the court.

– b. Cross-Court Rally Drills

Tennis - What are the best ways to practice my inside-out shots?
Credit : whatcanu.com

### Cross-Court Rally Drills

Cross-court rallies are fundamental to developing your precision and consistency on the tennis court. These drills focus on hitting the ball diagonally across the net, which not only helps improve your accuracy but also enhances your court coverage and shot placement strategies. A well-executed cross-court rally can create angles that keep your opponent off-balance, giving you the upper hand in a match.

To start, partner up with a fellow player or find a wall to practice against. Stand on opposite sides of the court, ensuring you have enough space to maneuver. Begin by rallying the ball back and forth, focusing on hitting it cross-court. Aim for the corners of the court, as this will train your eye to gauge distance and trajectory. Start with slower-paced shots, allowing both players to establish a rhythm. Gradually increase the intensity, incorporating topspin and slice to add variety to your strokes.

As you become more comfortable, implement specific goals for each session. For instance, set a target number of successful rallies before missing a shot. This will encourage focus and promote a competitive spirit. You can also introduce movement into the drill by incorporating footwork patterns, requiring players to shift laterally after each shot. This simulates real-match scenarios, where positioning plays a crucial role in executing successful shots.

For added complexity, consider introducing a third player who can join the drill as a net player. This adds an element of pressure, forcing you to adjust your shots while anticipating potential volleys. Cross-court rally drills not only sharpen your technical skills but also build confidence, ensuring you’re well-prepared to dominate the court in your next match. With regular practice, you’ll notice improved shot accuracy, better court awareness, and a more strategic approach to your gameplay.

– c. Target Practice on the Court

### Target Practice on the Court

One of the most effective ways to master the inside-out shot in tennis is through targeted practice. This drill not only hones your precision but also builds your confidence in executing shots with purpose. To set up a target practice session, you’ll need a few markers—these can be cones, hula hoops, or even towels placed strategically on the court.

Begin by placing your targets in the corners of the opposite court, where you typically aim for your inside-out shots. Start at the baseline and focus on hitting the ball with depth and accuracy, aiming for the designated targets. As you rally, concentrate on your footwork, positioning yourself to hit the ball as you would in a real match. Aim to place the ball just inside the lines of your designated target areas.

To add variety and challenge to your practice, try adjusting the distance from which you hit the ball. Begin close to the baseline, gradually moving back to test your range and control. Incorporate both forehand and backhand strokes, as mastering the inside-out shot will require versatility in your game.

As you progress, consider timing your shots in conjunction with a partner. Have them feed you balls at varying speeds and angles, mimicking the unpredictable nature of a real match. This not only improves your accuracy but also enhances your adaptability, allowing you to react quickly while maintaining your focus on the target.

Keep track of your success rate—this will help you gauge your progress and identify areas needing improvement. Set goals for each practice session: hitting a certain number of successful shots in a row or achieving a specific percentage of successful targets hit. By incorporating target practice into your routine, you’ll build the muscle memory necessary for executing precise inside-out shots when it counts the most during a match.

6. Incorporating Spin: How to Add Topspin and Slice

In the world of tennis, mastering the art of spin can drastically elevate your game, giving you an edge over your opponents. Incorporating topspin and slice into your shots not only enhances your control but also adds an element of unpredictability to your play. Let’s delve into how you can effectively add these spins to your arsenal.

**Topspin** is generated by brushing up on the ball at contact, which creates that signature arc that allows for higher bounces. To practice topspin, try the following drill: Start from the baseline and focus on your grip. Use an eastern or semi-western grip, and as you prepare to hit the ball, position your racket low and behind you. As the ball approaches, swing your racket upward, brushing the ball with a firm wrist motion. Aim to finish high, with your racket above your shoulder, which will create that beautiful topspin trajectory. You can practice this drill with a partner or against a wall, gradually increasing your swing speed and accuracy.

**Slice**, on the other hand, is about finesse and can be a powerful tool for disrupting your opponent’s rhythm. To incorporate slice into your shots, use a continental grip. Begin by positioning yourself sideways to the net, and as you prepare to hit the ball, angle your racket slightly downward. Instead of hitting through the ball, think of slicing underneath it, brushing across the side. This action will impart backspin, causing the ball to stay low and skid upon landing. A great drill for practicing slice involves cross-court rallies with a partner, focusing on the precision and spin of your slices to see how they affect your opponent’s response.

Combining both topspin and slice into your game not only enhances your shot variety but also helps you dictate the pace of the match. By continually practicing these techniques, you’ll find that you’re able to control the ball with greater finesse and keep your opponents guessing, making your game not just more effective but also more enjoyable. Remember, the key to incorporating spin is consistency; the more you practice, the more second nature these shots will become, leading you to tennis success!

7. Drills for Consistency and Accuracy

Consistency and accuracy are the cornerstones of a successful tennis game, particularly when executing the inside-out shot. To master these skills, integrating specific drills into your practice routine can make a significant difference. Here are some effective drills that focus on building both consistency and accuracy:

**1. Target Practice:**
Set up targets on the court—these can be cones, hula hoops, or even chalk marks. Position them in various locations, such as the corners of the service box and along the baselines. As you rally with a partner, aim for these targets, challenging yourself to hit them consistently. This drill not only sharpens your aim but also helps you develop a sense of spatial awareness on the court.

**2. Crosscourt Consistency Drill:**
Begin at the baseline and rally with a partner, but restrict your shots to crosscourt only. The goal is to maintain the rally for as long as possible, focusing on keeping the ball within the boundaries of the court. This drill encourages you to work on your form and footwork while reinforcing the importance of accuracy in your shot placement. As you improve, challenge yourself by introducing specific target areas within the crosscourt.

**3. Inside-Out Forehand Drill:**
This drill hones in specifically on the inside-out shot. Start by placing a cone or marker in the corner of the opposite court. Rally with a partner, but when you receive the ball, focus on executing an inside-out forehand aimed at the target. To further enhance your consistency, vary the pace and spin of your shots, which will help you adapt to different match situations.

**4. Shadow Swinging:**
Without a ball, practice your inside-out shot mechanics through shadow swinging. Stand in your ready position and visualize an incoming ball. As you prepare to hit, go through the motions of your stroke, focusing on your grip, footwork, and follow-through. This drill reinforces muscle memory and helps you internalize the correct technique without the pressure of an actual rally, ensuring that your stroke is both consistent and accurate when it counts.

**5. One-on-One Accuracy Challenge:**
With a partner, take turns serving and receiving while focusing on accuracy and consistency. The server aims to hit specific areas within the service box, while the receiver practices returning those shots with precision. After several rounds, switch roles. This competitive aspect adds an element of fun while reinforcing the importance of hitting targeted areas consistently.

By integrating these drills into your practice routine, you’ll not only enhance your consistency and accuracy but also build the confidence needed to execute your inside-out shots effectively during matches. Remember, the key to success in tennis lies in the details—focused practice will yield significant improvements in your game.

8. Strategies for Using the Inside-Out Shot in Matches

When it comes to mastering the inside-out shot, understanding how to leverage it strategically during matches can significantly elevate your game. This versatile stroke not only allows you to dictate the pace and direction of the rally but can also put your opponent on the defensive, creating opportunities for winning points. Here are some key strategies to effectively utilize the inside-out shot in your matches.

**1. Use it to Open Up the Court:**
One of the most effective ways to implement the inside-out shot is by using it to create space on the court. By targeting the opposite corner, particularly when your opponent is positioned towards the net or leaning to one side, you can stretch them out and open up the court for your next shot. This tactic not only enhances your chances of hitting a winner but also sets you up for a more advantageous position in the rally.

**2. Mix Up Your Shots:**
Consistency is important, but predictability can be your worst enemy. Varying the frequency of your inside-out shots can keep your opponent guessing. If you’ve been primarily hitting cross-court, introducing the inside-out shot can disrupt their rhythm. Use it judiciously to surprise your opponent, especially after establishing a pattern in your shot placement.

**3. Set Up Off-Balance Opportunities:**
The inside-out shot is particularly effective when your opponent is out of position. When you have them on the run, seize the moment to execute an inside-out shot that targets their weaker side. This not only increases the likelihood of a successful point but also can demoralize your opponent by showcasing your ability to capitalize on their mistakes.

**4. Create Angles and Use the Sidelines:**
Utilizing the inside-out shot allows you to create sharp angles that can catch your opponent off guard. By hitting close to the sidelines, you can force them to either stretch for the ball or make a rushed play, increasing your chances of winning the point. Practicing your angles during drills will help you feel more confident in executing this strategy during matches.

**5. Be Mindful of Court Positioning:**
It’s essential to be aware of your own positioning when employing the inside-out shot. Make sure you’re balanced and positioned correctly to strike the ball effectively. A well-timed inside-out shot can become a powerful weapon, but if your footwork is off, it can lead to unforced errors. Work on your footwork drills to ensure that you can consistently set yourself up for this powerful stroke.

**6. Watch for Your Opponent’s Reaction:**
During matches, pay attention to how your opponent reacts to your inside-out shots. Are they struggling to return them? Are they adjusting their position based on your shot placement? Use this information to adapt your strategy as the match progresses, ensuring you remain one step ahead.

Mastering the inside-out shot is not just about perfecting the technique; it’s about integrating it into your overall match strategy. By implementing these strategies, you’ll not only enhance your skill set but also increase your chances of clinching victory on the court. Keep practicing, stay attentive, and watch your game transform with this powerful stroke!

9. Video Analysis: Learning from the Pros

In the pursuit of mastering the inside-out shot in tennis, one of the most effective tools at your disposal is video analysis. This modern approach allows players to dissect their technique and strategy by learning from the best in the game. By watching footage of professional players executing inside-out shots with precision and power, you can gain invaluable insights into the mechanics and decision-making involved.

Start by recording your own practice sessions or match play. Capture a variety of angles to assess your footwork, swing path, and follow-through. Once you have your footage, set aside some time to sit down with it—preferably alongside a coach or a knowledgeable friend who can provide constructive feedback. Compare your movements to that of top players like Rafael Nadal or Serena Williams, who are renowned for their exceptional shot-making.

Pay close attention to the specifics: how they position their bodies, the angle of their racquets, and the way they prepare for the shot. Notice their court awareness and how they anticipate their opponent’s next move. This critical observation can help you understand not just the physical aspects of the inside-out shot, but also the tactical elements that inform when and how to use it effectively during a match.

In addition to analyzing your performances, consider watching match footage from major tournaments. look for moments when players opt for the inside-out shot in high-pressure situations. Reflecting on how they execute these shots under stress can provide context for your training, helping you to replicate that mental fortitude.

By integrating video analysis into your training regimen, you not only enhance your understanding of the inside-out shot but also cultivate a mindset geared toward continuous improvement. With each session, you’ll find yourself better equipped to make adjustments, refine your technique, and elevate your game to new heights.

10. Common Mistakes to Avoid with the Inside-Out Shot

When it comes to mastering the inside-out shot in tennis, avoiding common pitfalls can significantly enhance your performance on the court. Many players, especially beginners, fall into a few traps that can hinder their effectiveness.

One of the most prevalent mistakes is neglecting footwork. The inside-out shot requires precise positioning, and players often find themselves caught off-balance or too far from the ball. It’s crucial to anticipate the ball’s placement and move your feet accordingly. Practice your footwork drills to ensure you can get into the optimal position to execute the shot with power and accuracy.

Another frequent error is lacking the proper grip and swing technique. Some players instinctively use a grip that is more suited for flat shots rather than the topspin required for an effective inside-out shot. Ensure you’re using the right grip—typically the semi-western or eastern grip—allowing for a full, fluid swing. Focus on a low-to-high motion to impart the necessary topspin, giving your shot the arc it needs to clear the net while still dipping into the court.

Additionally, be mindful of your shot selection. Often, players rush to execute the inside-out shot without assessing whether it’s the best option. This can lead to unforced errors. Take a moment to evaluate your opponent’s position and the dynamics of the rally. Sometimes, a more straightforward shot may be the smarter choice.

Lastly, don’t underestimate the importance of mental focus. Many players become overly fixated on trying to hit a perfect inside-out shot, leading to tension and hesitation. Instead, approach each shot with a relaxed mindset, trusting your training and instincts. By being aware of these common mistakes and actively working to correct them, you’ll be well on your way to mastering the inside-out shot and elevating your game to new heights.

11. Mental Preparation: Staying Focused During Play

Mental preparation is an often-overlooked aspect of tennis that can significantly impact your performance on the court. While physical skills and techniques are crucial, the ability to maintain focus and composure during matches can be the deciding factor between winning and losing. Staying mentally sharp involves cultivating a mindset that allows you to respond to the challenges of the game with clarity and poise.

One effective drill to enhance your mental preparation is visualization. Before stepping onto the court, take a few moments to close your eyes and vividly imagine yourself executing perfect shots, strategically outmaneuvering your opponent, and celebrating your victories. This mental imagery not only builds confidence but also conditions your mind to perform under pressure.

Another powerful technique is the use of mindfulness and breathing exercises. During practice sessions, take brief pauses to focus on your breath—inhale deeply through your nose, hold for a moment, and exhale slowly through your mouth. This simple practice can ground you, reduce anxiety, and help you maintain an even temperament throughout the match. When you find your attention drifting or your mind racing with thoughts about the score, these breathing techniques can serve as quick resets to bring you back into the game.

In addition to these drills, it’s essential to establish a routine that you follow before and during matches. This could include specific stretches, mental affirmations, or a consistent pre-serve ritual. Such routines help create a sense of familiarity and control, allowing you to channel your energy positively when facing pressure situations.

Finally, learning to accept mistakes as part of the game is vital for maintaining focus. Instead of dwelling on errors, develop the habit of quickly refocusing on the next point. Practice saying affirmations like, “I learn from every shot,” or “I am in control,” to reinforce a growth mindset. By training your mind to stay focused and resilient, you’ll find yourself not only mastering the inside-out shot but also becoming a more formidable competitor on the court.

12. Building Endurance for Sustained Success

Endurance is the backbone of a successful tennis match, allowing players to maintain their performance, focus, and agility throughout long rallies and grueling sets. Building endurance goes beyond simply hitting the courts; it requires a strategic approach that combines physical conditioning, mental resilience, and on-court practice.

To enhance your endurance, incorporate a variety of drills into your training regimen. Start with interval running, which mimics the stop-and-go nature of tennis. Sprint for a set distance or time, followed by a brief recovery period, then repeat. This not only boosts cardiovascular fitness but also trains your body to recover quickly, a crucial skill during those intense match moments.

On-court, incorporate high-intensity drills that challenge your stamina while simulating match scenarios. For instance, practice rallying with a partner for extended periods, gradually increasing the duration to build your stamina. Focus on maintaining consistent strokes while keeping the ball in play; this will help you develop both endurance and shot accuracy under pressure.

Additionally, consider adding circuit training to your routine. This can include a combination of strength exercises—such as squats, lunges, and push-ups—interspersed with short bursts of cardio, like jumping rope or burpees. Such workouts not only enhance your muscular endurance but also improve your overall agility and speed on the court.

Don’t forget about the mental aspect of endurance. Developing a strong mindset is essential when fatigue sets in during a match. Techniques such as visualization and breathing exercises can help you stay calm and focused, allowing you to push through challenging moments with determination.

Ultimately, building endurance for tennis success is a holistic endeavor. By combining physical drills with mental strategies, you will not only enhance your performance but also cultivate a relentless spirit that keeps you competitive, match after match. As you master your endurance, you’ll find yourself not just surviving the long rallies, but thriving in them, leading to sustained success on the court.

13. The Role of Conditioning in Mastering Your Shot

Conditioning plays a pivotal role in mastering the inside-out shot in tennis, as it not only enhances your physical capabilities but also sharpens your mental focus during the game. The demands of this particular shot require players to maintain agility, speed, and endurance while executing precise movements. Therefore, a well-rounded conditioning program is essential for success on the court.

To begin with, cardiovascular fitness is crucial. A strong aerobic base allows players to maintain their energy levels throughout long matches, reducing fatigue that can lead to sloppy shots. Incorporating activities like running, cycling, or swimming into your training routine can significantly improve your stamina. Additionally, interval training can simulate the bursts of energy needed for quick sprints across the court, mimicking the stop-and-go nature of a tennis match.

Strength training also plays a vital role in conditioning. Developing core strength is particularly important, as it stabilizes your body during the execution of the inside-out shot, allowing for greater power and control. Exercises such as planks, medicine ball twists, and resistance band drills can help build the necessary strength. Furthermore, focusing on lower body strength will enhance your ability to push off and pivot, essential elements of executing this dynamic shot.

Flexibility should not be overlooked either. Incorporating regular stretching routines can help prevent injuries and improve your range of motion, making it easier to reach for those wide balls and execute the inside-out shot with finesse. Yoga or dynamic stretching sessions can be particularly beneficial.

Finally, don’t underestimate the mental aspect of conditioning. Your ability to stay composed under pressure is just as important as your physical readiness. Techniques such as visualization and mindfulness can help you maintain focus and confidence when it matters most, especially during critical points in a match.

In summary, a comprehensive conditioning program that includes cardiovascular fitness, strength training, flexibility, and mental preparation is crucial in mastering the inside-out shot. By investing time and effort into your overall conditioning, you’ll not only enhance your performance but also increase your confidence on the court, setting yourself up for success in every match.

14. Tracking Progress: Setting Goals and Measuring Improvement

Tracking your progress in tennis is essential for mastering the inside-out shot and enhancing your overall performance on the court. Setting specific, measurable goals is the first step in this journey. Rather than simply aiming to “play better,” consider breaking down your objectives into tangible milestones, such as increasing your inside-out shot accuracy by a certain percentage or improving your footwork speed.

To effectively measure your improvement, maintain a dedicated training journal where you can log your practice sessions, noting the drills you’ve completed, the number of successful shots, and any challenges encountered. This reflective practice not only provides a clear record of your development but also helps you identify patterns in your performance. For instance, you might find that your inside-out shot is more consistent when practiced with a partner compared to solo drills, prompting you to adjust your training accordingly.

Additionally, utilizing technology can further enhance your tracking process. Many apps and wearable devices can analyze your shot placement, swing speed, and even your footwork patterns. By reviewing this data regularly, you can gain insights into your strengths and areas that need improvement, allowing you to tailor your practice sessions more effectively.

Finally, don’t forget to celebrate your successes, no matter how small. Recognizing your achievements — whether it’s hitting ten consecutive inside-out shots or executing a perfect footwork pattern — reinforces your commitment to the process and keeps you motivated. By setting clear goals and regularly measuring your progress, you’ll not only master the inside-out shot but also cultivate a growth mindset that will serve you well in every aspect of your tennis journey.

15. Conclusion: Making the Inside-Out Shot a Weapon in Your Game

In conclusion, mastering the inside-out shot can be a game-changer for any tennis player looking to elevate their performance on the court. This powerful stroke not only enhances your ability to dictate points but also keeps your opponents guessing and off-balance. By incorporating the drills outlined above into your training routine, you’ll build the muscle memory and confidence necessary to execute this shot with precision and power during crucial match moments.

Remember, the inside-out shot is more than just a tactical move; it’s an opportunity to showcase your skill and strategic thinking. As you practice, focus on your footwork, timing, and follow-through to ensure that each shot is executed with intention. Whether you’re a beginner or an advanced player, dedication to refining this technique will undoubtedly lead to better court coverage, increased shot variety, and ultimately, more victories.

So, as you step onto the court for your next practice or match, embrace the inside-out shot as a vital part of your arsenal. With consistent effort and an unwavering mindset, you can transform this stroke into a formidable weapon that keeps your opponents on their toes and propels you toward tennis success. Keep pushing your limits, and soon, you’ll find that the inside-out shot becomes a hallmark of your playing style.

In conclusion, mastering the inside-out shot can be a game-changer for your tennis performance, and with the drills outlined in this article, you’re well on your way to adding this powerful weapon to your arsenal. Remember, practice is key—consistency and dedication will lead to improvement. As you integrate these drills into your training routine, you’ll not only enhance your shot accuracy and power but also gain greater confidence on the court. Embrace the challenge, stay motivated, and watch as your tennis skills soar to new heights. Now, grab your racket, hit the court, and start practicing—your future self will thank you!

Tennis – What are the best ways to practice my half volleys?

In the dynamic world of tennis, mastering every shot is essential for elevating your game, and few skills are as crucial as the half volley.

This unique stroke, often executed in the heat of the moment, requires not only precision but also a solid understanding of timing, balance, and technique. Whether you’re facing a challenging opponent or simply looking to enhance your practice sessions, honing your half volley can dramatically improve your overall performance on the court. In this blog post, we’ll delve into the art of half volleys, providing you with expert tips and targeted drills that cater to players of all levels. From correcting your stance to perfecting your swing, prepare to transform this often overlooked shot into a powerful weapon in your tennis arsenal. Join us as we explore the key elements of mastering half volleys and unlocking your true potential on the court!

1. Understanding the Half Volley: Definition and Importance

Tennis - What are the best ways to practice my half volleys?
Credit : whatcanu.com

Before diving into the drills and techniques that will elevate your half volley game, it’s essential to grasp what a half volley truly is and why it holds a pivotal place in tennis. A half volley occurs when a player hits the ball just after it has bounced, but before it rises fully off the ground. This shot is typically executed close to the baseline and involves a delicate balance of timing, positioning, and stroke mechanics.

The half volley is not merely a defensive maneuver; rather, it serves as a crucial tool for maintaining momentum in a rally and can be an effective way to counter aggressive opponents. In many scenarios, the opponent may hit a low ball that requires immediate action, leaving little time for preparation. Mastering this shot allows you to stay in control of the point, turning a potentially disadvantageous situation into an opportunity for offensive play.

Understanding the importance of the half volley extends beyond just successfully executing the shot; it also involves recognizing when to use it. This skill can open up new avenues for strategy, allowing you to keep your opponent guessing and create openings for powerful shots. By integrating the half volley into your repertoire, you not only enhance your overall game but also develop a greater confidence in handling a variety of on-court situations.

As we move forward, we will explore practical drills and tips designed to refine your technique and elevate your performance, ensuring that the half volley becomes a formidable weapon in your tennis arsenal.

2. The Mechanics of a Half Volley: Key Techniques

Mastering the half volley requires a keen understanding of its mechanics, as this shot can often make or break your performance on the court. Unlike a traditional groundstroke, the half volley is executed just after the ball has bounced, requiring precise timing, footwork, and technique. Here are some key techniques to help you perfect this vital shot.

First and foremost, positioning is crucial. As your opponent strikes the ball, anticipate its trajectory and prepare to move swiftly into position. Ideally, you should be slightly behind the ball, allowing you to make contact as it rebounds from the court. Your knees should be slightly bent, which helps you maintain balance and react quickly to any changes in the ball’s direction.

Grip plays a significant role as well. Many players prefer using the continental grip for half volleys, as it allows for versatility in shot-making. This grip enables you to transition seamlessly between forehands and backhands while maintaining control over the ball’s trajectory.

When it comes to contact, aim to strike the ball with the racquet face slightly open. This will impart a gentle lift, allowing the ball to clear the net while still maintaining a controlled descent towards your opponent’s side. Focus on making contact with the ball in front of your body; this positioning not only provides better control but also sets you up for your next shot.

Footwork is another essential element. Quick, light footwork allows you to adjust your position efficiently, ensuring you can reach the ball in time to execute the half volley effectively. Practice moving off the court laterally and forward, as well as maintaining a low center of gravity to facilitate a quick response.

Lastly, keep your eyes on the ball until the moment of contact. This focus will help you gauge the speed and spin of the incoming shot, allowing for a more precise response. Consistent practice of these mechanics will build muscle memory and boost your confidence, making the half volley a reliable weapon in your tennis arsenal.

3. Common Mistakes to Avoid When Executing a Half Volley

Tennis - What are the best ways to practice my half volleys?
Credit : whatcanu.com

Executing a half volley can be one of the most challenging yet rewarding skills in tennis. However, even seasoned players can fall prey to a few common mistakes that can hinder their performance. Recognizing and addressing these pitfalls is crucial for mastering this technique and enhancing your overall game.

One of the most prevalent mistakes is positioning. Many players underestimate the importance of being in the right place at the right time. A half volley requires quick reflexes and precise footwork, so make sure to anticipate the ball’s trajectory and adjust your position accordingly. If you’re too far back or too close to the net, you may find it difficult to make solid contact or direct the ball effectively.

Another common error is the grip. Players often grip the racket too tightly in a bid to exert control, which can lead to a stiff wrist and a lack of fluidity in your shot. Instead, focus on maintaining a relaxed grip, allowing for a more natural and effective follow-through. This will not only improve your shot’s power but also enhance your ability to place the ball accurately.

Timing is also critical in executing a successful half volley. Waiting too long to make contact can result in a mishit or an unforced error. Conversely, hitting too early can cause you to lose control over the shot. Aim to meet the ball just after it has bounced, using the momentum from its natural descent to guide your racket through the shot.

Finally, many players neglect their follow-through. A common mistake is to simply stab at the ball without completing the swing. A proper follow-through is essential not only for control but also for generating spin and power. Make sure to finish your swing high, extending your racket through the shot to maintain balance and prepare for the next move.

By being mindful of these common mistakes, you can refine your half volley technique and improve your performance on the court. Remember, practice makes perfect, and a little attention to detail can make a significant difference in your game.

4. Essential Equipment for Practicing Half Volleys

When it comes to mastering half volleys, having the right equipment can make all the difference in your practice sessions. While tennis may seem like a straightforward game, the nuances of half volleys require specific tools to enhance your skills effectively. Here’s a breakdown of the essential equipment you’ll need to elevate your half volley game.

**1. Tennis Racket:**
Your choice of racket is fundamental. Opt for a racket that feels comfortable and provides the right balance of power and control. A mid-plus racket is often recommended for players looking to develop precision in their half volleys, as its larger sweet spot can help maintain consistency even when returning low balls.

**2. Tennis Balls:**
Using high-quality tennis balls is crucial for effective practice. Opt for balls that provide a consistent bounce, such as regular-duty balls for indoor play and extra-duty balls for outdoor sessions. Consider incorporating a mix of new and slightly worn balls in your drills; the variety can simulate real match conditions and help you adapt to different spin and speed.

**3. Cones or Markers:**
Set up cones or markers on the court to create specific targets for your half volley drills. This visual aid can help you focus on your footwork and positioning, ensuring that you’re always ready to respond effectively. Place them in strategic locations on the court to encourage movement and accuracy in your shots.

**4. Rebounder or Ball Machine:**
Investing in a rebounder or a ball machine can significantly enhance your training. These tools allow for repetitive practice, helping you refine your timing and technique without needing a partner. A rebounder can simulate unpredictable ball trajectories, while a ball machine can be programmed to deliver a variety of spins and speeds, giving you the chance to practice half volleys under different conditions.

**5. Training Aids:**
Consider using training aids such as half volley trainers or net targets. These specialized tools can help you focus on your stroke mechanics and follow-through. They provide immediate feedback, which is invaluable for improving your technique and building muscle memory.

**6. Comfortable Tennis Attire and Footwear:**
Lastly, don’t underestimate the importance of comfortable tennis attire and appropriate footwear. Proper shoes will give you the support and grip needed to move quickly and position yourself effectively for those challenging half volleys. Wearing moisture-wicking fabrics can also help you stay comfortable during intense practice sessions.

With the right equipment in hand, you’re well on your way to mastering the art of the half volley. Remember, consistent practice with these tools will not only improve your technique but will also boost your confidence on the court. So gear up, hit the practice courts, and watch your half volley game soar!

5. Top Drills to Master Half Volleys

Tennis - What are the best ways to practice my half volleys?
Credit : whatcanu.com

Mastering half volleys is essential for any tennis player looking to elevate their game. These shots often occur during fast-paced rallies when the ball is coming in low and requires quick reflexes combined with precise technique. To help you hone this critical skill, here are some top drills that can enhance your half volley game.

**1. Wall Drills:** Find a solid wall and stand about 10-15 feet away. Begin by hitting groundstrokes against the wall, gradually increasing the speed of your shots. As the ball rebounds back to you, practice your half volleys by catching it just before it bounces again. Focus on your footwork and timing, ensuring that you stay low and balanced. This drill helps reinforce your reaction time and allows you to experiment with different angles and spins.

**2. Partner Drill:** Team up with a practice partner and stand on opposite sides of the net. Start with a standard rally, but every few shots, your partner should hit a low ball that you need to half volley back. This drill simulates match conditions and helps you develop the instinct to react quickly to low balls while maintaining control over your shot.

**3. Target Practice:** Set up targets—such as cones or hula hoops—on the court. Have a partner feed you low balls while you practice half volleys aimed at these targets. This drill will not only improve your accuracy but also challenge you to focus on your placement under pressure. As you progress, increase the speed of the feeds and vary the trajectory to simulate different game situations.

**4. Movement Drills:** Incorporate movement into your half volley practice by setting up cones or markers on the court. Start at the baseline and move forward to intercept a low ball. Execute a half volley while on the run, focusing on maintaining balance and proper footwork. This drill helps you adapt to real-game scenarios where you may not always be perfectly positioned.

**5. Match Situation Drills:** Finally, incorporate half volleys into your regular match play. Set a specific point during the match where you must attempt a half volley, such as when your opponent hits a low shot. This not only reinforces the skill but also builds your confidence in using it during competitive play.

By integrating these drills into your practice routine, you will develop the quick reflexes and finesse needed to master half volleys. Remember, consistent practice leads to improvement, so dedicate time to perfecting this vital shot. With patience and determination, you’ll find that half volleys become a powerful asset in your tennis arsenal, enabling you to seize control of the game and keep your opponents on their toes.

– 5.1. Wall Drills for Consistency

### 5.1. Wall Drills for Consistency

When it comes to mastering the half volley, few training methods are as effective as wall drills. This practice not only hones your timing and precision but also reinforces muscle memory, allowing you to react instinctively during match play. The beauty of wall drills lies in their simplicity; with just a racquet and a wall, you can create an endless variety of scenarios to challenge your skills.

To get started, find a solid wall that can handle the impact of the ball. Stand about six to ten feet away from the wall, depending on your skill level and comfort. Begin by tossing the ball slightly in front of you and letting it bounce once before it hits the wall. As the ball returns, aim to make contact just after the bounce, utilizing a fluid motion to strike it with a half volley. Focus on keeping your racquet face angled correctly to control the ball’s trajectory and direction.

As you develop confidence with this drill, increase the intensity by altering the speed and angle of your toss. Try varying your stance—practice from both the forehand and backhand sides to ensure well-rounded development. You can also challenge yourself by adding spinning the ball or hitting it at different heights, which replicates the unpredictable nature of real matches.

To track your progress, count the number of successful half volleys you can execute in a row without making an error. Set goals for yourself, aiming to beat your previous records each session. This not only boosts your consistency but also keeps your practice engaging and enjoyable.

Incorporating wall drills into your routine will significantly enhance your half volley skills, allowing you to respond effectively when faced with low balls during a match. With persistence and dedication, you’ll find that not only have you improved your ability to handle half volleys, but your overall game will also benefit from the heightened consistency and confidence that these drills instill.

– 5.2. Partner Drills for Realistic Scenarios

Tennis - What are the best ways to practice my half volleys?
Credit : whatcanu.com

When it comes to mastering half volleys, engaging in partner drills can significantly elevate your practice sessions by simulating real match scenarios. These drills not only enhance your technique but also improve your reaction time and decision-making on the court.

One effective partner drill involves alternating half volleys from the baseline. One player starts by hitting groundstrokes to the other, who will focus on consistently returning the ball with half volleys. The key is to maintain a steady rhythm, allowing both players to develop a feel for the timing and placement required for effective half volleys. As the drill progresses, the player feeding the balls can vary the speed and angle, challenging the receiving player to adapt quickly and stay engaged.

Another excellent drill is the “volley and half volley” exercise. In this drill, one player stands at the net while the other remains at the baseline. The baseline player hits a groundstroke, which the net player returns with a volley. After the volley, the net player then transitions back to the baseline to receive the next ball as a half volley. This not only develops the half volley technique but also reinforces the importance of maintaining position and footwork around the net.

For a more dynamic approach, incorporate movement into your partner drills. Have one player feed balls at various heights and angles while the other player practices half volleys while moving laterally. This simulates the unpredictability of match play and helps build agility and coordination, essential components of effective half volleying.

Lastly, don’t forget to communicate with your partner throughout these drills. Discussing what worked well and what didn’t can provide valuable insights and foster a collaborative learning environment. By consistently practicing these partner drills, you’ll not only improve your half volley skills but also build confidence in your overall game, setting you up for success in competitive play.

– 5.3. Target Practice Drills

### 5.3. Target Practice Drills

Target practice drills are essential for honing your half-volley skills and transforming them into a reliable weapon on the court. The essence of these drills is to not only improve your accuracy but also to develop your ability to judge the bounce and timing of the ball—both critical aspects when executing a successful half-volley.

**Setting Up Your Targets**
To begin, set up targets at various spots on the court. Use cones, hula hoops, or any markers you have on hand to designate specific areas where you want the ball to land. Aim for a mix of targets, including the corners of the court, the service box, and the mid-court area. This variation will help mimic real-match scenarios where your opponents will place the ball in different locations.

**Drill Execution**
Start by having a partner feed you balls that bounce just above the ground. As you approach the ball, focus on your footwork and positioning, ensuring you’re balanced and ready to make contact. Aim to hit the ball cleanly as it rises, driving it toward your designated targets. If you’re practicing solo, consider using a wall for ball rebounds or a tennis machine that can simulate half-volley conditions.

**Progressive Challenges**
As you become more comfortable, increase the difficulty. Limit the time you have to react, or move the targets further away. Introduce variations by changing the pace and spin of the balls being fed to you. You can even add pressure by keeping score—each time you hit a target, earn a point. This will not only make the drill more engaging but also simulate the pressure of a competitive match.

**Feedback and Adjustment**
After each round of target practice, take a moment to reflect on your performance. Were you consistently hitting the targets? Did you find yourself off-balance or misjudging the bounce? Utilize feedback from your partner or coach, and don’t hesitate to make adjustments to your stance, swing, or follow-through. The key to mastering half-volleying lies in incremental improvements and consistent practice.

By incorporating targeted drills into your training routine, you’ll develop the precision and confidence needed to excel at half-volleying. Remember, as with any skill in tennis, repetition is vital, so keep practicing, and soon you’ll find yourself executing half-volleys with finesse and accuracy in your matches.

6. Incorporating Half Volleys into Your Game Strategy

Incorporating half volleys into your game strategy can be a game-changer, transforming the way you respond to your opponent’s shots and enhancing your overall performance on the court. The half volley, which occurs when the ball is struck just after it has bounced, requires quick reflexes and precise timing. Mastering this technique not only adds a versatile weapon to your arsenal but also enables you to maintain control during fast-paced exchanges.

To effectively integrate half volleys into your strategy, begin by recognizing the situations where they can be most beneficial. For instance, when your opponent hits a deep shot that pushes you back, rather than retreating to the baseline, stepping in and executing a half volley allows you to take control of the point. This proactive approach can catch your opponent off guard, forcing them to adjust to your aggression.

In practice, set up drills that simulate match scenarios. One effective drill involves a partner feeding balls to you from various depths. As you develop comfort with the stroke, focus on different shot placements—forehand, backhand, and angled half volleys. Incorporate movement into these drills, as half volleys often require you to be on your feet, ready to respond to the trajectory and spin of the ball.

Another essential aspect of incorporating half volleys is mental preparation. Anticipate your opponent’s shots by reading their body language and positioning. This awareness will enable you to step in confidently and strike the ball with precision.

Remember, the key to mastering half volleys lies in practice and strategic application. By recognizing opportunities to use this skill and committing to drills that enhance your timing and placement, you will not only boost your confidence but also elevate your match play to new heights. Embrace the half volley as a dynamic tool in your game strategy, and watch as it opens up new avenues for success on the court.

7. Tips for Developing Quick Reflexes

Developing quick reflexes is essential for mastering half volleys, as these shots often demand split-second decision-making and rapid response times. Here are some targeted tips to enhance your reflexes on the court:

1. **Reaction Drills**: Incorporate reaction drills into your practice routine. Use a tennis ball machine or have a partner feed balls at varying speeds and angles. Focus on your reaction time by trying to hit the ball as soon as it crosses the net. You can also practice with a partner tossing balls at you from different distances, encouraging you to quickly gauge the trajectory and respond accordingly.

2. **Shadow Swings**: Engage in shadow swings to improve muscle memory and hand-eye coordination. Stand in front of a mirror or just visualize where the ball would be, and mimic the half volley motion without actually hitting a ball. This helps to reinforce the correct form and quickens your reflexes when it comes time to execute the shot.

3. **Footwork Exercises**: Good footwork is integral to quick reflexes. Incorporate agility drills such as ladder drills, cone sprints, and lateral shuffles into your training. These exercises not only improve your foot speed but also enhance your overall court positioning, making it easier to respond to fast-moving balls.

4. **Ball Toss Games**: Use simple ball toss games to sharpen your reflexes. Have a friend toss tennis balls towards you at varying heights and speeds, and practice catching them before they hit the ground. This exercise will train your reaction time and help you anticipate the ball’s movement during actual play.

5. **Play Reaction-Based Games**: Engaging in games that focus on quick reactions can also be beneficial. Consider playing games that involve catching or returning balls thrown at you unexpectedly, such as “King of the Court” or “Reaction Ball.” These playful competitions can significantly enhance your ability to respond swiftly during matches.

6. **Mindfulness and Focus**: Lastly, practice mindfulness techniques to improve your mental alertness. Simple breathing exercises or focusing on the ball during practice can enhance your concentration, allowing you to react more quickly to incoming shots. The more attuned you are to the game, the better your reflexes will become.

By integrating these tips into your training regimen, you’ll not only enhance your quick reflexes but also elevate your overall performance on the court, making half volleys feel more natural and instinctive. Remember, consistent practice and commitment are key to mastering this challenging yet rewarding skill!

8. Building Footwork for Better Half Volleys

Building footwork for better half volleys is a fundamental aspect of developing your overall tennis game. The half volley, often regarded as one of the most challenging shots to execute, requires not just precision with your racquet but also a strong foundation of movement and positioning. To master this technique, you must first focus on your footwork, as it sets the stage for a successful strike.

Start by incorporating lateral movement drills into your training routine. Quick side-to-side sprints, like the ladder drill or cone drills, help improve your agility and reaction time. As you practice these movements, pay attention to your stance. Maintaining a low center of gravity will allow you to adjust your position more swiftly when the ball approaches at varying heights.

Next, practice the split step — a crucial movement that prepares you for incoming shots. As your opponent hits the ball, a well-timed split step will enable you to spring into action, positioning yourself optimally to respond.

Combine these footwork drills with half volley-specific exercises. Set up with a partner or against a wall, and have them hit groundstrokes at varying speeds and angles. Your goal is to anticipate the ball’s trajectory, react quickly, and execute the half volley while maintaining proper foot positioning. Focus on keeping your feet active and ready to pivot; this will help you develop the instinct to move into the correct spot and execute the shot with confidence.

Lastly, don’t overlook the importance of conditioning. Strong leg muscles and core stability will not only enhance your footwork but also improve your overall performance on the court. Incorporate strength training exercises like lunges, squats, and agility drills into your routine to build endurance and power in your movements.

By dedicating time to building your footwork, you’ll find that your ability to execute half volleys will improve dramatically, leading to more successful rallies and a more formidable presence on the court. Remember, great footwork is the unsung hero of tennis – master it, and you’ll transform your game.

9. Analyzing Professional Players’ Half Volley Techniques

One of the most effective ways to elevate your half volley skills is by analyzing the techniques employed by professional players. The beauty of tennis lies in its diversity of styles, and each player brings their own unique flair to the half volley—a crucial shot that can turn the tide of a match. By studying the pros, you can glean insights into their footwork, positioning, and the subtle nuances that make their half volleys so effective.

Take a moment to watch matches featuring players renowned for their exceptional half volley skills, such as Roger Federer or Novak Djokovic. Observe how they anticipate the ball’s trajectory, often positioning themselves with their knees slightly bent and their weight balanced on the balls of their feet. This readiness allows them to react swiftly and execute the shot with precision. Pay attention to their grip as well; many pros opt for a continental grip, which provides versatility and control for half volleys.

Next, focus on their follow-through. Notice how they maintain a fluid motion, ensuring that their racket face is angled appropriately to direct the ball where they intend. Professional players often exhibit a seamless connection between their upper and lower body, demonstrating how a strong core can aid in generating power and stability during the shot.

Incorporate video analysis into your practice routine. Record your own half volleys and compare them to your favorite players. Look for differences in technique, such as racket positioning, body alignment, and follow-through. Identifying these discrepancies can provide valuable feedback and help you refine your own approach.

Finally, don’t overlook the mental aspect of the game. Watch how top players remain composed and focused during high-pressure moments. Their ability to read the game and predict their opponent’s next move allows them to position themselves effectively for a half volley, turning a challenging situation into a scoring opportunity. By integrating these observations into your training, you can develop a more comprehensive understanding of the half volley, ultimately enhancing your overall game and boosting your confidence on the court.

10. How to Adjust Your Grip for Different Situations

Adjusting your grip appropriately for various situations on the court is crucial for mastering half volleys and elevating your overall tennis game. The grip you choose can significantly influence your shot’s precision, power, and spin, making it essential to adapt your technique based on the circumstances you face.

When preparing to hit a half volley, it is often beneficial to employ the continental grip. This grip allows for a quick transition between different strokes while providing the versatility needed to tackle balls coming at various angles. To execute this grip, hold the racket as if you were shaking hands with it, with the base knuckle of your index finger resting on the third bevel of the racket handle. This grip enables you to scoop the ball up from the ground and maintain control, even when you are forced to react quickly.

In situations where you anticipate a lower ball, such as during a fast-paced rally, consider shifting to an eastern grip. This adjustment helps generate more topspin, enabling you to lift the ball over the net with greater ease. Simply rotate the racket slightly counterclockwise, placing the base knuckle of your index finger on the second bevel. The added topspin can also help keep the ball in play during tight exchanges, giving you a tactical edge over your opponent.

Conversely, if you find yourself dealing with a high bouncing ball, such as one that comes from your opponent’s powerful topspin shot, switching to a semi-western grip can be beneficial. This grip allows you to strike down on the ball, maximizing your power and depth while maintaining control. To achieve this grip, rotate the racket further until the base knuckle of your index finger rests on the fourth bevel, allowing for a more aggressive angle of attack that can send the ball deep into your opponent’s court.

Remember, the key to effectively adjusting your grip lies in practice and awareness. Spend time during your training sessions working on these grips and experimenting with how they affect your half volleys in various game scenarios. The more comfortable you become with each grip, the more instinctively you will be able to apply them during matches, leading to enhanced performance and a greater chance of success on the court.

11. Mental Preparation: Staying Focused During Half Volleys

Mental preparation is a crucial aspect of mastering half volleys in tennis, as the execution of this shot requires not only physical skill but also razor-sharp focus and quick decision-making. The half volley, a shot played just after the ball bounces, can be one of the most challenging and rewarding techniques in a player’s arsenal. To excel in this area, it’s essential to cultivate a mindset that allows you to remain composed and attentive during high-pressure moments.

Begin by incorporating visualization techniques into your practice routine. Before stepping onto the court, take a moment to close your eyes and picture yourself successfully executing half volleys. Imagine the feel of the racket in your hand, the sound of the ball striking the strings, and the fluidity of your movements. This mental rehearsal can help create muscle memory and build confidence, making it easier to replicate the shot in actual gameplay.

During practice, focus on staying present and mindful. Half volleys demand quick reflexes, so it’s important to develop the ability to tune out distractions and hone in on the ball. Utilize breathing exercises to center yourself before each drill. Inhale deeply as you prepare for the shot and exhale as you make contact with the ball, allowing yourself to remain relaxed and focused.

Additionally, consider setting specific goals for your training sessions. Whether it’s achieving a certain number of successful half volleys in a row or reducing errors, having clear objectives can help maintain your concentration. Tracking your progress not only boosts motivation but also reinforces a positive mental attitude.

Finally, remember to embrace the learning process. Mistakes are inevitable, especially with a challenging shot like the half volley. Cultivating resilience in the face of setbacks will strengthen your mental game and enhance your overall performance on the court. By prioritizing mental preparation, you’ll find that your half volleys become more instinctive, effective, and a reliable part of your tennis strategy.

12. Tracking Your Progress: Setting Goals for Improvement

Tracking your progress in mastering half volleys is essential for continuous improvement and skill enhancement. Setting clear, achievable goals helps you stay focused and motivated on your journey to becoming a more proficient player. Start by identifying specific areas within your half volley technique that need work. This could include aspects such as footwork, timing, or racket angle.

Once you’ve pinpointed these areas, establish measurable goals. For instance, you might aim to hit a certain number of successful half volleys during practice sessions or improve your accuracy by a specific percentage over the course of a month. Keeping a training journal can be invaluable here; document your sessions, noting the drills you performed, the number of successful hits, and any challenges you faced. This record not only serves as a motivational tool but also helps you recognize patterns and track improvements over time.

In addition to personal benchmarks, consider incorporating video analysis into your practice routine. Recording your half volley sessions allows you to visually assess your technique and identify areas for improvement. Watching yourself play can provide insights that you might not notice in the moment, helping you make necessary adjustments more effectively.

Regularly review your goals and celebrate your achievements, no matter how small. Progress in tennis, especially with a challenging skill like the half volley, can sometimes feel slow. Acknowledging improvements boosts morale and encourages persistence. Whether it’s hitting five more successful volleys in a row or feeling more confident in your timing, each milestone is a step toward becoming a half volley master. By tracking your progress and setting meaningful goals, you’ll not only enhance your skills but also deepen your love for the game.

13. The Role of Physical Conditioning in Mastering Half Volleys

Physical conditioning plays a critical role in mastering half volleys, as this skill demands not only technical precision but also the physical agility and endurance to execute it effectively during match play. A half volley requires a player to react quickly, positioning themselves optimally to intercept the ball just after it has bounced. This swift movement and reaction time are greatly enhanced by a well-rounded fitness regimen.

To excel at half volleys, focus on developing the following areas of physical conditioning:

1. **Agility Training**: Incorporate agility drills such as cone sprints, ladder exercises, and lateral shuffles into your routine. These drills will improve your footwork and quickness, allowing you to get into the right position for a half volley with greater ease.

2. **Core Strength**: A strong core is essential for maintaining balance and stability during rapid movements. Incorporate exercises like planks, Russian twists, and medicine ball throws to build a robust core. This strength will help you generate power in your shots while maintaining control.

3. **Endurance**: Half volleys often occur in the heat of intense rallies, requiring sustained energy and stamina. Engage in aerobic conditioning through activities like running, cycling, or swimming to enhance your overall endurance. Additionally, interval training can simulate the bursts of energy needed during a match.

4. **Flexibility**: A flexible body can help prevent injuries and improve your range of motion. Incorporate dynamic stretching before workouts and static stretching afterward to keep your muscles limber. Yoga can also be a great way to enhance flexibility while fostering mental focus.

5. **Strength Training**: Building overall strength, particularly in the legs, arms, and shoulders, will boost your shot power and stability. Incorporate weight training exercises such as squats, lunges, and shoulder presses into your weekly routine.

By prioritizing physical conditioning alongside technical practice, you’ll develop the agility, strength, and endurance required to master half volleys. This holistic approach to your training will not only enhance your performance on the court but also contribute to your overall longevity as a player. Remember, the more conditioned you are, the more confident you’ll feel when faced with those challenging half volley situations.

14. Conclusion: The Path to Becoming a Half Volley Expert

In conclusion, mastering half volleys is not just about the physical execution of the shot; it’s a journey that encompasses mental preparation, technical precision, and consistent practice. As you work through the drills and tips outlined in this guide, you will find that patience and persistence are your greatest allies. Every player, regardless of skill level, can improve their half volley technique with dedication.

To become a half volley expert, start by integrating the drills into your regular practice routine. Focus on footwork, positioning, and the delicate balance between aggression and control. Remember, the half volley is often a reactionary shot, so cultivating your ability to read the game will significantly enhance your effectiveness on the court.

As you refine your skills, seek feedback from coaches or experienced players, and don’t shy away from recording your sessions to analyze your form. Celebrating small victories along the way will keep you motivated and eager to learn more.

Ultimately, becoming proficient in half volleys will not only elevate your overall game but will also boost your confidence under pressure. So, embrace the challenge, stay committed to your practice, and enjoy the fruits of your labor as you navigate the exciting world of tennis with newfound finesse. The path to becoming a half volley expert is paved with determination, and each step you take brings you closer to your goal.

15. Additional Resources for Continued Learning and Practice

To truly master the half volley in tennis, it’s essential to supplement your practice with a variety of resources that cater to different learning styles and levels of play. Whether you’re a beginner looking to grasp the fundamentals or an advanced player seeking to refine your technique, the right resources can make all the difference in your training regimen.

**Books and Guides**: Start with instructional books dedicated to tennis techniques. Titles like “The Inner Game of Tennis” by W. Timothy Gallwey not only focus on the mechanics of the game but also delve into the mental aspects of play, which can be invaluable when working on shots like the half volley. Look for books that feature detailed diagrams, step-by-step instructions, and drills specifically targeting the half volley to bolster your understanding.

**Online Video Tutorials**: Platforms like YouTube host a treasure trove of instructional videos from experienced coaches and professional players. Search for half volley drills, and you’ll find a range of tutorials that visually demonstrate the correct form, footwork, and timing needed to execute this challenging shot effectively. Watching these guides can provide you with a clearer understanding of the nuances involved and offer tips that you can incorporate into your practice sessions.

**Tennis Apps**: In this digital age, leveraging technology can take your training to the next level. There are several tennis apps available that offer drills, personalized coaching tips, and even video analysis features. Apps like “Tennis Buddy” and “Coach’s Eye” allow you to track your progress, receive feedback on your technique, and access a community of fellow players for support and motivation.

**Local Clinics and Workshops**: Engaging in local clinics or workshops is a fantastic way to receive hands-on instruction from qualified coaches. These sessions often focus on specific skills, including the half volley, and provide an opportunity for immediate feedback. Additionally, practicing alongside fellow players can enhance your learning experience through friendly competition and camaraderie.

**Practice Partners**: Lastly, don’t underestimate the power of practicing with a partner. Whether you’re hitting with a friend or joining a local tennis group, having someone to practice half volleys with can simulate match conditions and improve your reaction time. Challenge each other with drills, set goals, and hold one another accountable for consistent practice to maximize your learning experience.

By tapping into these additional resources for continued learning and practice, you’ll be well on your way to mastering the half volley. Remember, the journey to improvement is ongoing, and the more you immerse yourself in various learning opportunities, the more confident and skilled you’ll become on the court.

In conclusion, mastering half volleys can significantly elevate your tennis game, transforming your ability to respond to unpredictable shots and keeping your opponents on their toes. By incorporating the drills and tips outlined in this post into your practice routine, you’ll develop precision, footwork, and confidence that will shine through in your matches. Remember, the key to improvement is consistency and patience—so don’t hesitate to revisit these techniques regularly. As you continue to refine your skills, you’ll find that half volleys become a powerful weapon in your arsenal. Get out on the court, put these strategies into action, and watch your game reach new heights! Happy playing!

Tennis – What are the best ways to practice my smash shots?

Tennis is a sport that demands precision, agility, and strategy, and one of the most exhilarating shots in the game is the smash.

Perfecting this powerful move can be the difference between winning and losing a match, as it allows players to capitalize on their opponent’s mistakes and seize control of the court. Whether you’re a budding enthusiast looking to refine your skills or an experienced player aiming to elevate your game to new heights, mastering the smash is essential. In this blog post, we will explore a selection of top drills designed specifically to enhance your technique, improve your timing, and build your confidence with this dynamic shot. Get ready to take your tennis game to the next level and leave your opponents in awe as you unleash your newfound smashing prowess!

1. Introduction to the Smash in Tennis

Tennis - What are the best ways to practice my smash shots?
Credit : whatcanu.com

The smash is one of the most exhilarating shots in tennis, embodying the perfect blend of power, precision, and tactical finesse. Often regarded as the ultimate finishing move, the smash allows players to capitalize on their opponent’s mistakes, delivering a decisive blow that can turn the tide of a match. Whether you’re a seasoned player or just starting out, mastering the smash can significantly elevate your game, adding a formidable weapon to your arsenal.

At its core, the smash is a vertical shot executed overhead, typically in response to a high ball that has been lobbed over you. The objective is simple: hit the ball with maximum force, sending it crashing down into the opponent’s court, ideally out of their reach. However, the smash is not just about raw power; it requires a keen sense of timing, proper footwork, and an understanding of court positioning.

In this section, we’ll explore the fundamental mechanics of the smash, including grip, stance, and swing technique. You’ll learn how to read the trajectory of the ball and anticipate your opponent’s movements, allowing you to set up for the perfect execution. By honing this critical skill, you can not only improve your overall performance on the court but also instill fear in your opponents, knowing they must defend against your powerful overhead strikes. Get ready to take your tennis game to new heights as we delve into the essential drills and practices designed to master the smash!

2. Importance of a Strong Smash in Your Game

A strong smash can be a game-changer on the tennis court, transforming a defensive rally into an offensive opportunity in an instant. This powerful overhead shot not only showcases your athleticism but also instills fear in your opponents. When executed correctly, a smash can demoralize your rival, send them scrambling, and put you firmly in control of the point.

The importance of mastering the smash goes beyond just scoring points; it’s about dictating the pace and rhythm of the match. A well-timed smash can break the momentum of an opponent, shifting the energy of the game in your favor. It serves as a psychological weapon, reminding your rival of your presence and skill every time they volley back to you.

Moreover, the smash is a critical shot in various match situations — whether you’re closing in on the net after a well-placed volley or responding to a high ball that begs to be put away. It’s a shot that can become a hallmark of your playing style, reflecting your confidence and ability to capitalize on scoring opportunities.

In addition to its offensive prowess, a strong smash can enhance your overall gameplay strategy. It encourages you to adopt a more aggressive playing style, allowing you to seize control of points rather than waiting for your opponent to make a mistake. By incorporating the smash into your arsenal, you elevate not just your individual performance but also your team dynamics in doubles play, as your strong overhead can complement your partner’s game.

Ultimately, investing time in refining your smash can lead to significant improvements in your overall game. With the right drills, you can ensure that this powerful shot becomes a reliable weapon in your tennis toolkit, ready to propel you to victory in critical match moments.

3. Understanding the Mechanics of a Perfect Smash

Tennis - What are the best ways to practice my smash shots?
Credit : whatcanu.com

The smash is one of the most exhilarating shots in tennis—a powerful strike that can turn the tide of a match in an instant. But to truly master this shot, players must first grasp the underlying mechanics that make a perfect smash possible. Understanding these mechanics not only enhances your technique but also instills a sense of confidence when the opportunity arises to deliver that game-changing blow.

To begin with, positioning is key. As the ball approaches, your feet should be shoulder-width apart, allowing for proper balance and stability. The ideal stance involves slightly bending your knees and keeping your weight on the balls of your feet, ready to spring into action. As you track the ball, make sure to use your non-dominant hand to point toward it, helping you gauge its trajectory and prepare for your swing.

Once in position, it’s essential to focus on your grip and racket angle. A continental grip is often recommended for a smash, as it allows for both power and control. As you prepare to strike, raise your racket above your head, keeping your elbow bent and your wrist firm. The angle of your racket face should be slightly open, creating the ideal conditions for a clean, powerful hit.

Timing is another crucial aspect of executing a successful smash. As the ball reaches its apex, you should initiate your swing. Engage your core and use your legs to propel yourself upward, generating upward momentum. The follow-through is equally important; extend your racket fully after contact, allowing your arm to complete a natural arc. This not only adds power to your shot but also helps maintain control.

Finally, don’t underestimate the mental aspect of the smash. Visualize the shot before it happens, anticipating where you want the ball to land. This mental preparation, coupled with physical practice, will ensure that when the moment comes, you’re not only ready but also confident in your ability to execute a perfect smash. By understanding and practicing these mechanics, you’ll elevate your game and leave your opponents awestruck as you deliver breathtaking volleys from above.

4. Essential Equipment for Practicing Smashes

To truly master the smash, having the right equipment is just as crucial as practicing the technique itself. Whether you’re a beginner just starting out or an advanced player looking to refine your skills, investing in the right tools can make all the difference in your training sessions.

**1. Tennis Racket:** The most fundamental piece of equipment is, of course, your racket. Look for a racket that is lightweight yet sturdy, offering a good balance between power and control. A racket with a larger head size can provide a larger sweet spot, making it easier to connect with the ball during practice. Many players prefer rackets that have a good grip and are designed specifically for power shots, which is essential for executing a powerful smash.

**2. High-Quality Tennis Balls:** The type of tennis balls you use can greatly affect your practice experience. Opt for high-quality, durable balls that maintain their bounce over time. Consider using practice balls that are specifically designed for drills, as these tend to have a consistent performance, allowing you to focus on perfecting your technique without the distraction of erratic ball behavior.

**3. Training Aids:** Incorporating training aids into your practice can help elevate your smash game. Consider using a ball machine or a rebounder to practice your timing and footwork. These tools allow you to hit numerous balls in succession, helping you develop muscle memory and precision. Additionally, a hitting target can help you focus on accuracy, ensuring that you’re not only smashing the ball but also placing it strategically on the court.

**4. Court Shoes:** Don’t underestimate the importance of proper footwear. Court shoes designed for tennis provide the necessary support and traction to help you move swiftly and safely on the court. A good pair of shoes will enhance your stability during explosive movements, which is crucial for executing a powerful smash. Look for shoes that offer cushioning and lateral support, allowing you to pivot and spring into action without fear of slipping.

**5. Practice Partner:** Lastly, while not a physical piece of equipment, having a reliable practice partner can significantly enhance your training sessions. A partner can feed you balls, challenge you to improve your accuracy, and provide constructive feedback. Plus, practicing with someone else adds an element of fun and competition, keeping your motivation high.

Equipped with the right gear and resources, you’ll be well on your way to mastering the smash. Remember, consistent practice with the proper equipment will lead to improvement, enhancing both your confidence and your performance on the court. So gear up, hit the courts, and get ready to elevate your game!

5. Warm-Up Drills to Prepare for Smashing

Tennis - What are the best ways to practice my smash shots?
Credit : whatcanu.com

Before diving into the intensity of smashing drills, it’s crucial to properly warm up your body. Warming up not only helps prevent injuries but also enhances your performance on the court. Here are some effective warm-up drills designed to get your muscles ready for those explosive smashes.

**Dynamic Stretching**: Start with a series of dynamic stretches to activate your muscles and increase blood flow. Focus on your shoulders, arms, and legs—key players in executing a powerful smash. Arm circles, leg swings, and torso rotations are excellent choices. Spend about 5-10 minutes on this, gradually increasing the range of motion for each movement.

**Shadow Swings**: Once your body feels loose, move on to shadow swings. Without a ball, practice your smashing motion, focusing on your footwork, body positioning, and follow-through. Pay attention to your grip and ensure that your non-dominant hand is aiding in the swing. This drill helps reinforce muscle memory and sets a solid foundation for when you hit the court.

**Footwork Drills**: Smashing is as much about footwork as it is about technique. Incorporate footwork drills such as lateral shuffles and quick sprints to improve your agility. Set up cones or markers on the court and practice moving quickly between them, mimicking the movements you’ll need to make when approaching the net for a smash.

**Ball Toss Drills**: To simulate the smashing motion more closely, practice tossing the ball into the air with your dominant hand and preparing to swing as if you were hitting a smash. Focus on timing and rhythm, ensuring that you make contact at the highest point possible. This not only warms up your shoulder and arm but also helps you get accustomed to the feel of the swing.

**Reaction Drills**: Finally, engage in some reaction drills with a partner or a coach. Have them toss balls at varying heights and speeds, encouraging you to react quickly and adjust your positioning accordingly. This will not only warm up your muscles but also sharpen your reflexes, preparing you for the unpredictability of a real match.

By incorporating these warm-up drills into your routine, you’ll ensure that your body is primed for smashing, allowing you to execute those powerful shots with confidence and precision. So, before you step onto the court, take the time to warm up properly—it’s the first step to mastering the art of the smash!

6. Footwork Drills to Enhance Positioning

When it comes to mastering the art of the smash in tennis, footwork is often the unsung hero of a powerful and effective shot. Without the right positioning, even the strongest player can fall short of executing a perfect smash. Footwork drills are essential for improving your movement on the court, ensuring you’re in the ideal spot to unleash your powerful overhead shots.

One effective drill to enhance your footwork is the **Ladder Drill**. By using an agility ladder, you can focus on quick, precise movements that will improve your foot speed and coordination. Start by placing the ladder flat on the ground and practice various foot patterns, such as lateral shuffles or single-leg hops, moving through the rungs as quickly as possible. This exercise not only builds speed but also helps you develop the agility needed to reposition yourself quickly during a match.

Another valuable drill is the **Cone Drill**. Set up a series of cones in a zigzag pattern on the court and practice sprinting from one cone to the next, working on both your forward and lateral movements. This drill mimics the unpredictable nature of a game, helping you become comfortable with rapid direction changes. Focus on maintaining a low center of gravity and using short, quick steps to maintain balance as you approach each cone, simulating the movement required when preparing for a smash.

Lastly, don’t overlook the importance of shadowing your shots. Stand at the baseline and visualize an opponent’s shot coming toward you. As you move to intercept the imaginary ball, practice your footwork and positioning. This drill helps reinforce muscle memory and prepares you to react instinctively during actual play.

Incorporating these footwork drills into your training routine will not only boost your overall agility but will also position you perfectly for those critical moments on the court. With improved footwork, you’ll find that your smashes become more powerful and more accurate, giving you the edge you need to dominate your matches.

7. The Toss: Perfecting Your Ball Placement

Tennis - What are the best ways to practice my smash shots?
Credit : whatcanu.com

The toss is often the unsung hero of a successful serve in tennis, yet mastering it can significantly elevate your game. An accurate toss sets the foundation for a powerful and precise serve, and understanding its mechanics is crucial for players at all levels.

To perfect your ball placement, start by establishing a consistent toss height. Ideally, the ball should be released at a height that allows you to make contact at the apex of your swing. For many players, this means tossing the ball slightly in front of your body and at the height of your outstretched arm. A good rule of thumb is to aim for a toss that’s around a foot above your intended contact point.

Next, consider the angle of your toss. A common mistake is tossing the ball too far to the side or back, which can lead to awkward positioning and decreased power. Instead, focus on a straight vertical toss, maintaining a consistent trajectory that allows you to strike the ball cleanly. Practicing your toss without hitting serves can help develop this muscle memory—stand at the baseline and toss the ball up repeatedly, ensuring that each placement is identical.

Another vital component is your grip and stance. Your grip should feel comfortable and secure, while your stance should be balanced and ready to pivot. As you toss the ball, keep your eyes focused on it, allowing you to track its movement and make any necessary adjustments. This awareness will not only enhance your confidence but also improve your timing as you prepare to strike.

Finally, incorporate drills that emphasize your toss. Set up a target area on the court to aim for with your toss and practice consistently until you can consistently land the ball in that zone. This can be done with a partner who can feed balls to you after you toss, or simply by practicing your serve against a wall.

Perfecting your toss may seem like a small detail, but it can be the difference between a strong, confident serve and a frustrating miss. By focusing on your toss, you’re laying the groundwork for a more effective serve and ultimately taking your tennis game to new heights.

8. Top Drills for Practicing the Overhead Smash

The overhead smash is one of the most powerful shots in a tennis player’s arsenal, often marking the turning point in a match. To master this formidable move, incorporating specific drills into your practice routine is crucial. Here are some top drills designed to refine your technique, boost your confidence, and elevate your tennis game.

**1. Shadow Swings:** Start by visualizing the ball being served high above you without any actual ball involved. Stand in your ready position, pivot into your backswing, and practice your overhead motion in slow motion. Focus on your footwork, body rotation, and follow-through. This drill helps build muscle memory without the distraction of a ball.

**2. Partner Toss Drill:** Team up with a partner who can assist you in honing your overhead smash. Have them toss the ball high into the air, aiming directly in your hitting zone. As you anticipate the toss, position yourself under the ball, use your non-dominant hand to guide it, and execute your overhead smash. This drill emphasizes timing and positioning, critical elements for a successful smash.

**3. Target Practice:** Set up targets on the court—these could be cones, towels, or specific areas marked with tape. Have your partner or coach feed you balls that you must smash towards these targets. This drill not only enhances your accuracy but also encourages you to vary your shot placement, making you a more versatile player.

**4. Reaction Drills:** Overheads often come in response to a lob, so practicing your reaction time is essential. Have a partner stand at the opposite baseline and lob balls to you at varying heights and angles. This drill will help you develop quick reflexes and the ability to assess the situation rapidly, ensuring you’re always ready to execute that powerful smash.

**5. Wall Practice:** If you’re practicing alone, find a solid wall where you can hit against. Stand a few feet away and hit overhead smashes against the wall, focusing on your form and follow-through. This drill allows you to work on your timing and technique repeatedly without needing a partner.

Incorporating these drills into your routine will not only improve your overhead smash but also instill a greater sense of confidence during matches. Remember, consistency is key—dedicate time to these drills, and you’ll find that mastering the smash is within your reach!

9. Incorporating Target Practice into Your Drills

Incorporating target practice into your drills is an essential step in elevating your tennis game to new heights. It’s not just about hitting the ball back and forth; it’s about honing your precision and accuracy, which are vital skills for any competitive player. Target practice transforms your routine from mere repetition into a focused exercise that sharpens your aim and enhances your overall court strategy.

To begin, set up targets at various points on the court. You can use cones, hula hoops, or even specialized targets designed for tennis training. Position them in the corners of the service box, along the baseline, or at the net to simulate real match scenarios. As you practice, aim to hit these targets consistently, adjusting your stance and swing to improve your accuracy.

Start with stationary targets, then progress to moving targets as you become more comfortable. This could involve a partner who volleys balls back to you while you aim for specific spots. Incorporating movement into your target practice not only challenges your footwork but also mimics the dynamic nature of a real match, preparing you for the unpredictable nature of your opponent’s shots.

Additionally, keep track of your progress. Create a scoring system based on how many targets you hit within a set time frame or during a particular number of rallies. This adds an element of competition and motivation to your practice, pushing you to improve with each session.

By regularly integrating target practice into your training regimen, you’ll develop a sharper eye and a more strategic mindset. Over time, you’ll find that your confidence on the court skyrockets, allowing you to place shots with precision and put your opponent on the defensive, ultimately leading to more wins and a deeper understanding of the game.

10. Partner Drills for Real-Game Scenarios

When it comes to refining your tennis skills, nothing beats the dynamic energy of partner drills that simulate real-game scenarios. These drills not only enhance your individual technique but also help you develop the crucial ability to read your opponent’s moves and respond effectively under pressure. Engaging with a training partner allows for a more interactive experience, fostering communication and strategic thinking that you might not achieve while practicing solo.

One effective drill to start with is the **Cross-Court Rally**. Set up a game where you and your partner rally back and forth, focusing on hitting the ball cross-court. This emphasizes accuracy and consistency, pushing you to improve your shot placement while also forcing you to cover the court efficiently. As you grow more comfortable, challenge yourselves by mixing up the pace and spin of your shots, simulating different match situations.

Next, try the **Volleys and Lobs Drill**. Stand at the net and have your partner hit groundstrokes to you from the baseline. Your objective is to volley the ball back, forcing your partner to adjust their position and respond with either a lob or a passing shot. This drill sharpens your reflexes and sharpens your net play while also providing invaluable practice in anticipating your partner’s next move.

For a more competitive edge, incorporate a **Point-Play Drill**. Set up points by starting with a serve or a feed from the baseline. Play out the points just as you would in a match, focusing on strategic play rather than just winning. This can include practicing your serve and return strategies, which can be tailored based on your opponent’s strengths and weaknesses.

Finally, don’t forget to add a **Game Scenario Drill** where you simulate specific match situations, such as playing in a tiebreaker or defending against a break point. This not only helps you practice your mental toughness but also reinforces your ability to perform under pressure, a critical aspect of competitive tennis.

By integrating these partner drills into your training regimen, you’re not just honing your skills in isolation; you’re preparing yourself for the unpredictability of real matches. The synergy of practicing with a partner will elevate your game, providing the necessary experience to master the art of tennis.

11. Analyzing Professional Players’ Smashes

Analyzing professional players’ smashes can provide invaluable insights that can elevate your own game. Watching the best in the sport, such as Rafael Nadal or Serena Williams, execute their smashes is not just about admiring their power; it’s about understanding the technique and strategy behind each movement.

Start by focusing on their footwork—notice how they position themselves to the ball, ensuring they are balanced and ready to generate maximum power. Professionals often use a combination of lateral quickness and explosive upward movement, allowing them to reach high balls with grace and precision. Pay attention to their grip as well; many pros utilize the continental grip for smashes, which facilitates a strong, versatile finish.

Next, observe their swing mechanics. The fluid motion from preparation to follow-through is a dance of coordination and timing. Watch how they lead with their non-dominant hand, opening their body to generate torque, before unleashing the racket head with incredible speed. This technique not only adds power but also enhances control over the placement of the shot.

Finally, consider the mental aspect: professional players often exhibit a calm confidence when executing their smashes. They assess their position on the court, the opponent’s location, and the trajectory of the ball before committing to the shot. This level of situational awareness is crucial; it’s what separates an average smash from a game-changing one.

To effectively incorporate these insights, consider recording your own practice sessions. Compare your technique with the pros, identifying areas for improvement in footwork, grip, swing, and mental focus. By analyzing professional players’ smashes and integrating those lessons into your practice, you’ll not only enhance your skills but also develop a deeper appreciation for the artistry of the game.

12. Mental Strategies for Building Confidence in Your Smash

When it comes to mastering the smash in tennis, physical prowess alone isn’t enough; the right mental strategies can make all the difference in elevating your game. Building confidence in your smash requires a focused mindset that turns potential anxiety into assertiveness. Here are some effective mental strategies to consider:

**Visualization Techniques:** Before stepping onto the court, take a few moments to visualize yourself executing the perfect smash. Imagine the ball soaring through the air, the sound of your racket making solid contact, and the triumphant feeling of scoring a point. This mental rehearsal can create neural pathways that enhance your physical performance, making the act of smashing feel more familiar and achievable.

**Positive Self-Talk:** Replace negative thoughts with empowering affirmations. Remind yourself of previous successful smashes and the hard work you’ve put in to hone your skills. Phrases like “I have the strength and technique to nail this shot” or “I trust my training” can help reinforce a confident mindset during matches.

**Mindfulness and Presence:** Practice mindfulness techniques to stay present in the moment. Rather than dwelling on past mistakes or worrying about future points, focus on the current play. Engaging fully with each rally can reduce anxiety and enhance your overall performance, allowing you to approach the smash with clarity and confidence.

**Set Small Goals:** Instead of overwhelming yourself with the pressure of perfection, break your skill development into achievable goals. Focus on mastering one aspect of your smash at a time, whether it’s your footwork, timing, or follow-through. Celebrating these small victories can build your confidence incrementally, leading to a more assured overall performance.

**Embrace Mistakes:** Understand that mistakes are a natural part of the learning process. Rather than viewing them as failures, treat them as opportunities to learn and grow. Embracing a growth mindset will help you bounce back from errors with resilience, ensuring that your confidence remains intact, even when the game doesn’t go as planned.

By incorporating these mental strategies into your training routine, you’ll not only improve your smash but also cultivate a resilient mindset that empowers you to perform your best under pressure. Remember, confidence is not just about skill; it’s about believing in yourself and your ability to rise to the occasion, game after game.

13. Common Mistakes and How to Avoid Them

Mastering the smash in tennis can be a thrilling endeavor, but it’s important to recognize that even the most experienced players can fall into the trap of common mistakes. Understanding these pitfalls is the first step in mastering this powerful shot and elevating your game to new heights.

One of the most frequent errors players make is failing to properly position themselves beneath the ball. A strong smash begins with excellent footwork, so always strive to get into position early. If you find yourself reaching for the ball awkwardly or taking off-balance swings, you’re likely sacrificing power and accuracy. To avoid this, practice your footwork drills to enhance your agility and ensure you’re in the optimal position to strike.

Another common mistake is over-swinging. It’s easy to get caught up in the excitement of hitting a powerful shot, but too much force can lead to loss of control. Instead, focus on maintaining a smooth, fluid motion. Visualize the ball’s trajectory and concentrate on striking it cleanly rather than simply trying to hit it as hard as possible. Incorporating drills that focus on technique over power will help you develop a more controlled smash.

Moreover, many players neglect to follow through after making contact with the ball. A proper follow-through not only adds more spin and depth to your shot but also helps you prepare for the next move. Practice your smash with an emphasis on completing your swing and transitioning smoothly into your next position on the court.

Lastly, don’t overlook the mental aspect of the game. Anxiety or pressure can cause players to rush their smashes or second-guess their shot selection. To combat this, engage in visualization techniques and mindfulness exercises that allow you to focus on the moment, keeping your composure even in high-stakes situations.

By recognizing these common mistakes and actively working to avoid them, you can transform your smash from a hit-or-miss shot into a reliable weapon in your tennis arsenal. Remember, improvement comes with practice and a keen awareness of your game—so keep refining your technique, and soon enough, you’ll be smashing your way to victory!

14. Tracking Your Progress: Tips for Improvement

Tracking your progress is an essential component of mastering your tennis game. Improvement doesn’t happen overnight, but with dedication and the right approach to monitoring your development, you can see significant strides in your skills and overall performance. Here are some effective tips for tracking your progress and ensuring continuous improvement.

First and foremost, consider maintaining a detailed training journal. In this journal, document each practice session, noting the drills you performed, the techniques you focused on, and any specific goals you aimed to achieve. Recording your thoughts will not only help solidify your learning but also allow you to reflect on your progression over time. Include metrics such as the number of successful serves, forehands, or backhands you executed, as well as any challenges you faced. This will give you clear benchmarks to measure against in future sessions.

In addition to your training journal, leverage technology to your advantage. Many tennis apps and wearable devices can track your performance metrics, such as ball speed, shot accuracy, and court coverage. These tools can provide valuable insights into your strengths and weaknesses, allowing you to make informed adjustments to your training regimen. For example, if your app reveals that your serve speed has plateaued, it might be time to focus on specific drills that enhance your serve technique and power.

Another effective method for tracking your progress is to set specific, measurable goals. Whether you aim to improve your serve percentage, reduce unforced errors, or enhance your footwork speed, having clear objectives will give your practice sessions purpose and direction. Break these goals down into smaller, achievable milestones, and celebrate your successes along the way. This not only keeps you motivated but also helps you see the tangible results of your hard work.

Finally, don’t underestimate the power of feedback. Consider working with a coach or a more experienced player who can provide constructive criticism on your technique and strategy. Regularly seeking input from others can illuminate areas for improvement that you may not recognize on your own. Additionally, video analysis can be a powerful tool; recording your matches or practice sessions allows you to visually assess your performance and make necessary adjustments.

By implementing these tracking methods, you create a structured approach to your improvement, ensuring that every practice session brings you one step closer to mastering the smash and elevating your overall tennis game. Progress is a journey, and with the right tools and mindset, you’ll find yourself continuously growing and excelling on the court.

15. Conclusion: Integrating the Smash into Your Overall Game Strategy

In conclusion, mastering the smash is not just about perfecting a single stroke; it’s about integrating this powerful shot into your overall game strategy to elevate your tennis performance. The smash can be a game-changer, creating opportunities to win points and assert dominance on the court. However, its effectiveness hinges on your ability to seamlessly incorporate it with your other skills, such as footwork, positioning, and shot selection.

As you practice the drills outlined in this guide, focus on how the smash complements your baseline game and net play. Work on your awareness of when to execute the smash—recognizing high balls that are ripe for the taking can make all the difference. Additionally, consider how your opponents play; understanding their tendencies will allow you to anticipate moments when a well-timed smash can turn the tide in your favor.

Moreover, don’t overlook the mental aspect of the game. Confidence in your smash will come from repeated practice, so maintaining a positive mindset is crucial. Visualize successful smashes during your training sessions, and remind yourself that every practice is an opportunity to sharpen this valuable skill.

Remember, tennis is a dynamic sport, and the best players are those who can adapt and adjust their strategies. By integrating the smash into your overall game plan, you not only enhance your arsenal of shots but also develop a more aggressive and unpredictable style of play. So, step onto the court with confidence, let your smash shine, and watch as you transform your game into one that keeps your opponents on their toes. Happy smashing!

In conclusion, mastering the smash is not just about power; it’s about precision, timing, and strategy. By incorporating the top drills we’ve outlined in this post into your practice routine, you’ll develop the skills and confidence needed to elevate your tennis game to new heights. Remember, consistent practice and a focused mindset are key to transforming your smashes into game-changers on the court. So grab your racket, hit the courts, and watch as your opponents struggle to return your powerful strikes. We can’t wait to hear about your progress and how these drills have impacted your performance. Keep smashing it!

Tennis – What are the best ways to improve my hand-eye coordination for tennis?

In the fast-paced world of tennis, where split-second decisions can make the difference between victory and defeat, hand-eye coordination is paramount.

Whether you’re a seasoned player looking to refine your skills or a beginner eager to improve your game, mastering the delicate dance between your eyes and your hands is essential for success on the court. This blog post will delve into the top techniques and drills that can elevate your hand-eye coordination to new heights, enabling you to anticipate your opponent’s moves, react with precision, and execute your shots with confidence. From targeted exercises to innovative training tools, we’ll explore dynamic methods that not only enhance your reflexes but also contribute to your overall athletic performance. Join us as we unlock the secrets to becoming a more agile and focused player, ensuring that every match is not just a challenge, but a showcase of your refined skills.

1. Understanding Hand-Eye Coordination in Tennis

Tennis - What are the best ways to improve my hand-eye coordination for tennis?
Credit : whatcanu.com

Hand-eye coordination is the cornerstone of tennis mastery, serving as the bridge between a player’s intentions and the precise execution of their shots. At its essence, this skill involves the brain’s ability to process visual information and translate it into coordinated physical movements. In tennis, where the ball moves at lightning speed and angles vary wildly, honing your hand-eye coordination becomes crucial to consistently connecting your racket with the ball.

To grasp this concept fully, picture yourself on the court. As your opponent serves, your eyes lock onto the ball, tracking its trajectory and speed. In that split second, your mind is not only calculating where the ball will land but also determining the optimal stance and swing to return it effectively. This intricate dance between what you see and how your body responds is what sets apart skilled players from novices.

Understanding the nuances of hand-eye coordination can also illuminate why certain drills and exercises are so effective. For instance, repetitive practices like volleying against a wall or engaging in reaction drills can enhance your reflexes, enabling you to anticipate and react to fast-moving balls with greater precision. Moreover, tennis requires a unique blend of focus and timing—two elements that are deeply intertwined with your hand-eye coordination. By committing to regular practice and incorporating specific exercises that challenge this skill, you can build a foundation that not only improves your accuracy but also boosts your overall performance on the court.

In the following sections, we will delve into practical techniques and drills designed to sharpen your hand-eye coordination, setting you on the path to tennis success. Whether you’re a seasoned player looking to refine your game or a beginner eager to develop essential skills, mastering hand-eye coordination will undoubtedly elevate your performance and enjoyment of the sport.

2. The Importance of Hand-Eye Coordination for Tennis Players

Hand-eye coordination is the cornerstone of a successful tennis game, acting as the silent force that drives every powerful serve, precise volley, and strategic return. In tennis, players are constantly required to track fast-moving balls, anticipate their trajectory, and respond with lightning-quick reflexes. This intricate dance between visual perception and physical action not only determines the outcome of individual points but ultimately shapes the entire match.

When a player possesses exceptional hand-eye coordination, they can effectively gauge the speed and angle of an incoming ball, allowing them to position themselves optimally on the court. This skill is what enables players to execute those stunning cross-court shots, deft drop shots, and powerful baseline rallies that leave spectators in awe. Furthermore, hand-eye coordination is crucial in adapting to your opponent’s style of play, enabling you to predict their next move and counter it effectively.

Moreover, the benefits of honing this vital skill extend beyond just hitting the ball. Enhanced hand-eye coordination contributes to overall athleticism, improving balance, agility, and timing—key elements that can elevate a player’s game to new heights. Therefore, developing this ability should be a fundamental aspect of any training regimen. Engaging in specific drills and exercises tailored to strengthen hand-eye coordination can lead to marked improvements in performance and confidence on the court.

In essence, mastering hand-eye coordination is not merely a technique but a vital element of a comprehensive strategy for tennis success. Whether you’re a beginner or a seasoned player, understanding its importance can help you focus your training efforts and ultimately achieve your goals in the sport.

3. Key Skills that Depend on Hand-Eye Coordination

Tennis - What are the best ways to improve my hand-eye coordination for tennis?
Credit : whatcanu.com

Hand-eye coordination is the backbone of athletic performance, especially in a sport as dynamic as tennis. Mastering this skill not only enhances your game but also lays the foundation for several key techniques that are crucial for success on the court.

First and foremost, **ball tracking** is an essential skill that relies heavily on hand-eye coordination. As the opponent serves or rallies, the ability to visually follow the ball’s trajectory and speed is paramount. Players who can accurately judge the ball’s path can position themselves effectively, allowing for optimal swing preparation and shot execution.

Next, consider **timing**. This skill is vital when it comes to hitting the ball at the right moment. A well-timed shot can mean the difference between a powerful winner and a weak return. Hand-eye coordination enables players to synchronize their movements with the ball’s arrival, resulting in cleaner hits and more consistent performance.

Additionally, **reaction speed** plays a significant role in hand-eye coordination. In tennis, points can change in an instant, and having the ability to react quickly to your opponent’s shots can give you a competitive edge. A player with sharp hand-eye coordination can anticipate plays, respond to unexpected shots, and capitalize on every opportunity that arises during the match.

Finally, **shot accuracy** is directly influenced by your hand-eye coordination. Whether it’s executing a precise serve, a backhand slice, or a forehand drive, the ability to align your racket with the ball is crucial for maintaining control and directing your shots. Improved hand-eye coordination allows for greater precision, enabling you to hit targeted spots on the court and outmaneuver your opponent.

By honing these key skills that hinge on hand-eye coordination, you’ll not only elevate your game but also enjoy a more strategic and confident approach to tennis. Embrace the process of developing this vital skill set, and watch as your performance on the court transforms.

4. Exercises to Enhance Your Reaction Time

Enhancing your reaction time is a crucial aspect of mastering hand-eye coordination, especially in a fast-paced sport like tennis. When you’re on the court, the ability to quickly respond to your opponent’s shots can be the difference between a winning rally and a missed opportunity. Incorporating specific exercises into your training regimen can significantly boost your reflexes and overall performance.

One of the most effective ways to improve reaction time is through agility drills. Set up a series of cones or markers on the court and practice sprinting between them in various patterns—forward, backward, and side-to-side. This not only increases your speed but also conditions your body to react swiftly to changes in direction, mimicking the dynamic movements required during a match.

Another excellent exercise is the use of reaction balls. These small, bouncy balls are designed to bounce unpredictably, making them perfect for training your hand-eye coordination. Simply toss the ball against a wall and focus on catching it as it ricochets back at different angles. This drill sharpens your ability to anticipate and react, closely simulating the unpredictability of a tennis game.

Incorporating partner drills can also elevate your reaction time. Have a friend or coach randomly toss tennis balls towards you from different angles and distances. Your goal is to return the ball as quickly as possible, forcing your body and mind to work in tandem. This not only improves your reflexes but also enhances your overall game awareness.

Lastly, don’t underestimate the power of visual training. Simple exercises like tracking moving objects—whether it’s a ball rolling down a ramp or a shuttlecock in the air—can sharpen your focus and improve your ability to judge speed and distance. By combining these exercises into your routine, you’ll find yourself not only reacting faster but also making more precise shots, ultimately leading to greater success on the tennis court.

5. Drills for Improving Racket Control

Tennis - What are the best ways to improve my hand-eye coordination for tennis?
Credit : whatcanu.com

Racket control is a cornerstone of effective tennis play, directly influencing your ability to place shots accurately and respond swiftly to your opponent’s movements. Mastering this skill requires focused practice, and incorporating specific drills into your training regimen can significantly enhance your hand-eye coordination and overall racket finesse.

One of the most effective drills for improving racket control is the **wall drill**. Find a solid wall and stand about five to ten feet away. Hit the ball against the wall, focusing on controlling the angle and speed of your shots. Start with forehands and backhands, then incorporate volleys and overheads. The key here is to pay attention to the bounce and trajectory of the ball as it returns to you, which will sharpen your reflexes and improve your timing.

Another excellent exercise is the **cone drill**. Set up a series of cones or markers on the court, spaced about a meter apart. As you practice, aim to strike the ball so it lands precisely on or near each cone. This drill forces you to concentrate on your placement and encourages a smooth, controlled swing. To increase the challenge, you can vary the distance between the cones or change your position after every shot.

**Shadow swings** are also a valuable tool for developing racket control. Without a ball, practice your swings and movements in a controlled manner. Focus on your grip, stance, and follow-through. Visualize hitting the ball as you move through your strokes, which will help reinforce muscle memory and increase your awareness of your racket’s position relative to your body.

Lastly, consider incorporating **partner drills** into your routine. Having a partner toss balls to you from different angles will simulate real-game scenarios and require you to adjust your stance and racket position dynamically. This not only sharpens your control but also enhances your ability to anticipate and react to varying shot types.

By committing to these focused drills, you’ll develop a better feel for your racket, improve your precision, and elevate your performance on the court. As you refine your racket control, you’ll find that your hand-eye coordination strengthens, paving the way for greater success in your matches.

6. Incorporating Visual Training Techniques

Incorporating visual training techniques is a game-changer for enhancing hand-eye coordination in tennis. While physical drills are crucial, the ability to anticipate and react to the ball’s trajectory relies heavily on your visual processing skills. By honing your visual acuity, you can significantly elevate your performance on the court.

One effective approach is to engage in exercises that sharpen your tracking abilities. For instance, use a ball on a string or a reaction ball, which moves unpredictably and challenges your eyes to follow its path. This drill not only improves your focus but also trains your brain to process visual information more efficiently, allowing you to respond faster during a match.

Another powerful technique is practicing with different colored balls or using balls of varying sizes. This variation forces your eyes to adapt and enhances your ability to differentiate between objects quickly—a skill that proves invaluable when you’re facing a powerful serve or a tricky spin shot.

Additionally, consider integrating software or apps designed for visual training. These tools often feature exercises that train depth perception, peripheral awareness, and reaction time. By dedicating just a few minutes each day to these exercises, you can build a sharper visual system that complements your physical skills, enabling you to read the game better and react more fluidly.

Ultimately, visual training should be viewed as an integral part of your practice regimen. By committing to these techniques, you’ll not only enhance your hand-eye coordination but also gain a competitive edge on the court, positioning yourself for greater success in every match.

7. The Role of Footwork in Hand-Eye Coordination

Tennis - What are the best ways to improve my hand-eye coordination for tennis?
Credit : whatcanu.com

Footwork is often considered the unsung hero of tennis, playing a pivotal role in enhancing hand-eye coordination and overall performance on the court. Unlike many sports where the focus is solely on upper body strength or technique, tennis demands a seamless integration of movement, balance, and timing. As the saying goes, “Good footwork is the key to good tennis.”

When you move efficiently, you position yourself optimally to make contact with the ball, allowing your hand-eye coordination to shine. Quick lateral movements, powerful sprints, and agile pivots not only keep you in the game but also set the stage for precise shots. The better your footwork, the more time you have to react, adjust your stance, and prepare your body to execute a stroke effectively.

Imagine a scenario where you’re waiting for a serve. As the ball comes toward you, the first step is crucial—if you’re off-balance or too far from the baseline, your shot will likely suffer. However, with well-practiced footwork, you can glide into position, aligning your body perfectly to meet the ball at the ideal angle. This harmony between your feet and hands lays the groundwork for a powerful forehand or a deft backhand, making your movements feel more fluid and controlled.

Incorporating footwork drills into your training routine can significantly enhance your hand-eye coordination. Simple exercises like ladder drills or cone sprints sharpen your agility and speed, while shadow swings—where you practice your swings without a ball—help reinforce the connection between your foot placement and your stroke mechanics. Ultimately, investing time in developing your footwork will not only elevate your hand-eye coordination but also transform your entire game, making you a more formidable opponent on the court.

8. Using Technology: Apps and Tools for Practice

In today’s tech-savvy world, leveraging technology can dramatically enhance your training regimen and supercharge your hand-eye coordination for tennis. With a myriad of apps and tools available, players of all levels can access resources that make practice not just effective, but also engaging and fun.

First and foremost, consider incorporating specialized training apps designed specifically for tennis. These apps often feature drills tailored to improve your reflexes and reaction times, giving you instant feedback on your performance. For example, apps like **TennisTribe** offer interactive drills that help you simulate real match situations, allowing you to practice your shots while honing your coordination.

Additionally, there are numerous general fitness apps that include exercises aimed at improving hand-eye coordination. Apps like **Fitbod** or **Nike Training Club** provide workout plans with agility drills that can translate well onto the court. Engaging in these exercises not only enhances your physical fitness but also sharpens your cognitive response times, which are crucial for anticipating your opponent’s moves.

Moreover, consider investing in smart tennis equipment. Devices like the **Zepp Tennis 2** or the **Babolat Pop** wristband can track your swings, providing valuable insights into your performance. By analyzing data such as swing speed and accuracy, you can identify areas for improvement and refine your hand-eye coordination with precision.

Virtual reality (VR) training tools are also making waves in the tennis world. Programs that simulate match play can immerse you in realistic scenarios where you must react quickly, thereby enhancing your hand-eye coordination in a controlled environment. These tools can not only improve your response times but also build confidence as you prepare for live matches.

Lastly, don’t overlook the power of video analysis. Recording your practice sessions and reviewing them can help you identify patterns in your movements, allowing you to make necessary adjustments. This self-reflection is a key component of improvement, as it bridges the gap between physical practice and cognitive awareness.

By integrating these technological advancements into your training routine, you’ll find that mastering hand-eye coordination for tennis becomes a more structured, effective, and enjoyable process. Embrace these tools, and watch as your skills on the court soar to new heights!

9. Mindfulness and Focus: Mental Techniques for Success

In the fast-paced world of tennis, where split-second decisions can make or break a match, honing your mental game is just as crucial as refining your physical skills. Mindfulness and focus are foundational elements that can significantly enhance your hand-eye coordination and overall performance on the court. Integrating mental techniques into your training regimen can help you develop a sharper, more agile mind, allowing you to anticipate your opponent’s moves and react with precision.

One effective technique is visualization. Before stepping onto the court, take a few moments to close your eyes and picture yourself in action. Imagine every movement, from your grip on the racket to the follow-through of your swing. Visualize the ball as it approaches, and see yourself making the perfect shot. This mental rehearsal not only boosts your confidence but also reinforces the neural pathways associated with the physical skills required in tennis.

Another powerful tool is breath awareness. Focusing on your breath can ground you in the present moment, helping to eliminate distractions and enhance concentration. Before each serve or return, practice taking a deep breath, inhaling through your nose and exhaling slowly through your mouth. This simple act can calm your nerves, clear your mind, and sharpen your focus, enabling you to better track the ball and respond effectively.

Incorporating mindfulness into your practice sessions can also yield significant benefits. Spend a few minutes before each practice focusing on your sensations—feel the grip of the racket, the texture of the court beneath your feet, and the rhythm of your breath. By cultivating a heightened awareness of your body and the environment, you can improve your ability to react instinctively during matches, where every second counts.

Utilizing these mental techniques will not only enhance your hand-eye coordination but also build a resilient mindset that can withstand the pressures of competition. As you master the art of mindfulness and focus, you’ll find yourself more attuned to the game, poised to seize every opportunity on the court, and ultimately, more successful in your tennis endeavors.

10. Tactical Awareness: Reading Your Opponent’s Moves

Tactical awareness is a game-changer when it comes to enhancing your hand-eye coordination on the tennis court. It goes beyond simply reacting to the ball; it involves a keen understanding of your opponent’s tendencies, body language, and shot selection. Being able to read your opponent’s moves is akin to predicting the next play in a chess match.

Start by observing your opponent’s stance and grip. A subtle shift in their weight or the angle of their racket can signal the type of shot they are about to make. For instance, if you notice your opponent leaning back, they may be preparing to execute a powerful top-spin shot, while a forward lean might indicate a drop shot. Recognizing these cues can give you a crucial split second to position yourself appropriately, increasing your chances of making a successful return.

Additionally, pay attention to your opponent’s patterns throughout the match. Do they favor cross-court shots or tend to play down the line? By identifying their preferred plays, you can anticipate their next move and prepare your body and racket accordingly. This not only boosts your hand-eye coordination but also builds your confidence on the court.

Another effective technique is to engage in drills that simulate match scenarios, allowing you to practice reading your partner’s movements. For example, during practice, have a partner hit balls to different areas of the court while you focus on predicting and responding quickly to their shots. Over time, these drills will sharpen your instincts and improve your overall tactical awareness.

In the fast-paced world of tennis, being able to read your opponent’s moves is essential. By cultivating your tactical awareness, you’ll not only enhance your hand-eye coordination but also elevate your overall performance, giving you a competitive edge in every match you play.

11. The Impact of Nutrition on Coordination

Nutrition plays a pivotal role in enhancing your hand-eye coordination, especially for a dynamic sport like tennis. What you fuel your body with directly affects your physical performance, mental clarity, and overall coordination. The right balance of nutrients can sharpen your reflexes, improve your focus, and sustain your energy levels throughout intense matches.

For starters, carbohydrates are essential, as they serve as your body’s primary energy source. Complex carbs, such as whole grains, fruits, and vegetables, provide sustained energy, allowing you to remain agile and responsive on the court. Pairing these with lean proteins, like chicken, fish, and legumes, aids in muscle repair and recovery, ensuring that your body is primed for the quick, explosive movements that tennis demands.

Don’t forget about the importance of healthy fats, which are crucial for optimal brain function. Incorporate sources like avocados, nuts, and fatty fish into your diet to enhance cognitive skills and maintain sharp hand-eye coordination. Staying hydrated is equally vital; dehydration can lead to decreased concentration and slower reflexes, so ensure you’re drinking plenty of water before, during, and after your matches.

Furthermore, certain vitamins and minerals can bolster your coordination. For instance, omega-3 fatty acids found in fish oil can enhance brain function, while antioxidants from colorful fruits and vegetables can combat oxidative stress, keeping your muscles and nerves functioning at their best.

In conclusion, mastering the match requires more than just practice and technique; it demands a holistic approach that includes attentive nutritional choices. By understanding the impact of what you eat on your hand-eye coordination, you can make informed decisions that elevate your game and help you reach your full potential on the court.

12. Consistency: Building a Training Routine

Consistency is the cornerstone of effective training, especially when it comes to honing your hand-eye coordination for tennis. To truly master this skill, establishing a training routine is essential. Think of your routine as the framework that supports your progress—like the foundation of a sturdy house. Without it, your efforts may feel scattered or ineffective.

Start by setting aside regular time slots each week dedicated solely to coordination drills. It doesn’t have to be hours on end; even 30 minutes a day can yield significant improvements if practiced consistently. The key is to create a schedule that fits seamlessly into your lifestyle, making it easy to commit and stick with it. Whether you prefer early morning sessions to help you start the day on a productive note or evening workouts to unwind, find the time that works best for you.

Incorporate a variety of drills into your routine to keep things fresh and engaging. Simple exercises such as tossing a ball against a wall and catching it, practicing with a reaction ball, or using a tennis ball on a string can all enhance your reflexes and tracking skills. Don’t forget to include specific tennis drills, like hitting against a wall or practicing your serves, to translate that improved coordination directly onto the court.

Tracking your progress can also add motivation and reinforce your commitment to consistency. Keep a training journal where you log your drills, noting improvements and areas that need work. This not only allows you to see how far you’ve come but also helps identify patterns in your performance, making it easier to adjust your routine as needed.

Remember, the journey to mastering hand-eye coordination is a marathon, not a sprint. By building a training routine that prioritizes consistency, you’ll lay the groundwork for success. Over time, you’ll notice that your timing improves, your reactions become sharper, and ultimately, your performance on the court will reach new heights. Consistency is not just about showing up; it’s about showing up with purpose and dedication, day after day.

13. Real-World Examples: Successful Players and Their Techniques

When it comes to mastering hand-eye coordination in tennis, there’s no better source of inspiration than the professionals who have turned this skill into an art form. Let’s take a closer look at some renowned players and the techniques they use to enhance their performance on the court.

**Roger Federer** is often hailed as one of the greatest tennis players of all time, and his extraordinary hand-eye coordination is a significant factor in his success. Federer employs a unique practice technique where he focuses on hitting targets during practice sessions. By aiming for specific spots on the court, he sharpens his ability to judge distance and speed, translating this precision into match play. His fluid footwork also allows him to position himself optimally to make contact with the ball, further refining his exceptional hand-eye coordination.

**Serena Williams**, known for her powerful serve and aggressive play, emphasizes the importance of visualization in her training regimen. Before hitting the court, she spends time imagining the trajectory of the ball and the movement required to return it. This mental exercise not only sharpens her focus but also enhances her reaction time and ability to anticipate her opponent’s shots. By combining visualization with rigorous practice, Williams consistently showcases remarkable timing and accuracy during matches.

Another exemplary player is **Novak Djokovic**, who integrates multi-sensory training into his routine. He often uses reaction balls—small, irregularly shaped balls that bounce unpredictably—to improve his reflexes and adaptability on the court. This unconventional training method challenges his brain and body to work together in real-time, enhancing his hand-eye coordination under pressure. Djokovic’s ability to respond swiftly to his opponent’s shots has made him a formidable competitor, illustrating the importance of innovative techniques in developing coordination skills.

By studying these athletes, aspiring players can glean valuable insights into effective training strategies. Whether it’s setting specific targets, engaging in visualization techniques, or incorporating reaction drills, learning from their experiences can guide you on your journey to tennis success. As you implement these techniques into your practice, remember that consistent effort and a focus on hand-eye coordination will elevate your game and help you master the match.

14. Monitoring Progress: How to Measure Improvement

monitoring your progress is a crucial element in mastering hand-eye coordination for tennis success. It’s not just about feeling the difference in your game; it’s about quantifying your improvements with tangible metrics that keep you motivated and informed. Begin by setting specific, measurable goals that align with your training regimen. For instance, you might aim to increase your accuracy in serves or improve your reaction time during volleys.

Utilizing technology can also enhance your ability to track your development. Many apps are designed to log your practice sessions, offering insights into your performance statistics, such as the number of accurate shots versus misses, or the speed of your serves. Consider keeping a journal to record your daily or weekly achievements. Write down what drills you practiced, how you felt during each session, and any noticeable changes in your reaction times or shot accuracy. This not only helps you see your progress over time but also identifies areas requiring further improvement.

Incorporate regular assessments into your training regimen, such as timed drills or match play scenarios where you can evaluate your coordination under pressure. For example, practice drills that require rapid ball exchanges with a partner or against a wall, and then time how long it takes you to complete a set number of shots accurately. Over weeks and months, you should be able to observe a significant enhancement in your abilities.

Lastly, don’t shy away from seeking feedback. Engaging with a coach or a more experienced player can provide valuable insights into your technique and coordination. They can help you spot nuances in your play that you may not notice yourself, offering constructive criticisms that will further guide your training. By consistently measuring your progress, you turn improvement into a tangible journey, empowering you to stay committed and enthusiastic about your development in tennis.

15. Conclusion: Putting It All Together for Tennis Success

In conclusion, mastering the art of hand-eye coordination is not just a technical skill but a vital component of achieving success on the tennis court. By integrating the techniques discussed throughout this blog, from targeted drills to mental focus exercises, you can elevate your game to new heights. Remember, the journey to improved coordination is a gradual process that requires patience and dedication.

Start by incorporating simple drills into your practice routine, such as wall rebounds and reaction ball drills, which can significantly enhance your reflexes and timing. Embrace the importance of visualization techniques, allowing your mind to sync with your body in preparation for the fast-paced nature of a tennis match. Additionally, consider cross-training with sports that challenge your coordination, such as table tennis or basketball, to further develop your skills in a fun and engaging way.

As you put these strategies into action, track your progress and celebrate small victories along the way. Seek feedback from coaches and peers, and don’t hesitate to adjust your methods as you discover what works best for you. Remember that every great tennis player has faced challenges, but by honing your hand-eye coordination, you’re not just preparing to hit the ball; you’re setting the stage for a more confident and successful performance on the court.

With perseverance, practice, and a commitment to continual improvement, you’ll find that your enhanced coordination will not only improve your gameplay but also boost your overall enjoyment of the sport. So, lace up your shoes, grab your racket, and get ready to unleash your full potential—success on the tennis court awaits you!

As we wrap up our exploration of mastering hand-eye coordination for tennis success, it’s clear that the techniques outlined in this post can serve as a game-changing foundation for players at any level. By integrating drills, focused practice, and mindfulness into your training routine, you can enhance your reflexes, improve your timing, and elevate your overall performance on the court. Remember, consistent practice is key, and the journey to refining your coordination will undoubtedly translate into more confident and powerful play. So, lace up your shoes, grab your racket, and get ready to implement these strategies. Your next match could be the one where you truly shine! We can’t wait to hear about your progress and victories—share your experiences with us as you take your game to the next level!

Tennis – How do I improve my foot speed on the court?

In the fast-paced world of tennis, the ability to move swiftly and efficiently around the court can make all the difference between victory and defeat.

Whether you’re a seasoned player looking to refine your skills or a novice eager to elevate your game, foot speed is a crucial component that often determines your performance. Imagine chasing down every shot with agility, executing quick lateral movements, and positioning yourself perfectly to deliver that winning serve. In this blog post, we’ll explore a series of proven drills designed to enhance your foot speed, helping you become quicker on your feet and more competitive in matches. From agility ladder exercises to cone drills, these techniques are not only effective but also fun, ensuring that you’ll look forward to incorporating them into your training regimen. Get ready to unlock your potential and take your tennis game to the next level!

1. Introduction to Tennis Foot Speed

Tennis - How do I improve my foot speed on the court?
Credit : whatcanu.com

Tennis is a game of quick reactions, agile movements, and explosive bursts of energy, all of which hinge on one crucial element: foot speed. The ability to move swiftly around the court, change directions with precision, and position yourself optimally for each shot can significantly influence your performance and overall game strategy. Unlike many sports, where linear sprints dominate, tennis demands a unique combination of lateral agility, acceleration, and deceleration.

At its core, tennis foot speed is not merely about how fast you can run; it’s about how effectively you can respond to your opponent’s shots, anticipate the ball‘s trajectory, and maintain balance while executing your strokes. The faster you can get to the ball, the more time you have to prepare your shot, which often translates into a higher success rate on the court.

Improving your foot speed involves more than just endurance training; it requires specialized drills that enhance your agility, coordination, and explosiveness. Whether you’re a beginner aiming to improve your game or an advanced player looking to sharpen your skills, focusing on foot speed will elevate your overall tennis performance. In this section, we’ll explore the fundamentals of tennis foot speed and lay the groundwork for the drills that will help you become quicker on your feet, allowing you to dominate the court with confidence and finesse.

2. The Importance of Foot Speed in Tennis

Foot speed is a crucial element in the sport of tennis, serving as the foundation for nearly every aspect of gameplay. Unlike many sports that may prioritize strength or endurance, tennis demands a unique combination of agility, quickness, and precision. When you’re on the court, your ability to move swiftly from one side to the other, to approach the net, or to reposition after a powerful serve can make the difference between winning and losing a point.

The dynamic nature of tennis requires players to react to a constantly changing environment. Whether it’s a powerful forehand coming your way or a soft drop shot that demands a sudden burst of speed, your footwork dictates your positioning and readiness. Players with superior foot speed can cover the court more efficiently, allowing them to reach balls earlier and set up for optimal shot execution. This not only enhances your ability to return shots but also provides a psychological edge over your opponent, as they may perceive you as a more formidable competitor.

Moreover, improved foot speed contributes to better balance and stability. When your feet are agile, you can adjust your stance more effectively, enabling you to maintain control during rapid exchanges. This control helps reduce the risk of injury, as your body is better equipped to handle the demands of sudden movements.

In essence, developing foot speed is not just about moving quickly; it’s about enhancing overall performance on the court. By focusing on drills that boost your foot speed, you’re investing in your ability to play at a higher level, covering the court with confidence and grace. In the following sections, we will explore specific drills that can help you achieve this goal, transforming your footwork into one of your greatest assets in your tennis arsenal.

3. Assessing Your Current Foot Speed

Tennis - How do I improve my foot speed on the court?
Credit : whatcanu.com

Before you can embark on a journey to enhance your foot speed on the tennis court, it’s crucial to first assess where you stand. Understanding your current foot speed will not only provide a baseline for your progress but also help you identify specific areas that need improvement.

Begin by conducting a simple yet effective series of tests. Set up a 10-meter distance on a flat surface, and with a stopwatch in hand, time how long it takes you to sprint from one end to the other. Repeat this drill three times, recording your best time to ensure accuracy. This sprint test will give you a clear indication of your current speed and explosiveness.

Next, incorporate lateral movement into your assessment. Tennis requires quick side-to-side movements, so a lateral shuffle drill is essential. Mark two points five meters apart and time how long it takes to shuffle back and forth between them for 30 seconds. This drill will help you gauge your agility and ability to change direction quickly, both crucial aspects of foot speed in tennis.

Additionally, consider evaluating your reaction time, as it plays a significant role in how quickly you can move in response to your opponent’s shots. You can do this by having a partner throw tennis balls at varying angles, measuring how long it takes you to reach and return each shot.

Once you have gathered these metrics, you’ll have a clearer picture of your current foot speed and the areas that need the most attention. This baseline assessment will serve as a valuable reference point as you implement the drills and training techniques in the following sections, ultimately helping you to refine your footwork and elevate your game on the court. Remember, the journey to becoming quicker on your feet starts with honest self-evaluation.

4. Dynamic Warm-Up Exercises

Dynamic warm-up exercises are essential for preparing your body for the fast-paced movements required in tennis. Unlike static stretches, which can leave your muscles feeling tight and unresponsive, dynamic warm-ups actively engage your muscles and improve your range of motion while elevating your heart rate. This not only enhances your overall performance but also reduces the risk of injury.

Start with a series of leg swings, where you stand next to a wall or support and swing one leg forward and backward, gradually increasing the range as you loosen up. This movement targets your hip flexors and hamstrings, crucial for explosive footwork on the court. Follow this with high knees and butt kicks—two exercises that engage your core while also emphasizing the quick lifting and planting of your feet, mimicking the movements you’ll make during a match.

Incorporate lateral lunges and carioca drills to activate your side-to-side movement. These exercises help to develop agility and quick lateral response, ensuring that you can dart across the court to return those tricky shots. As you perform each drill, focus on maintaining an athletic stance: knees slightly bent, weight balanced on the balls of your feet, ready to spring into action.

Finally, add some skips and quick sprints to your warm-up routine. These drills not only stimulate your cardiovascular system but also reinforce the muscle memory necessary for quick starts and stops. By dedicating time to these dynamic warm-up exercises, you’ll not only boost your foot speed but also enhance your overall agility on the court, allowing you to react faster and play more confidently in your matches.

5. Ladder Drills for Agility

Tennis - How do I improve my foot speed on the court?
Credit : whatcanu.com

Ladder drills are a staple in the training routines of many athletes, and for good reason—they are incredibly effective at enhancing agility and foot speed, which are crucial for success on the tennis court. These drills involve a simple agility ladder, which can be laid flat on any surface, making it easy to incorporate into your practice sessions, whether at home, on the court, or at the gym.

To get started, position the ladder on the ground and begin with the most basic drill: the two-foot hop. Stand at the beginning of the ladder and hop into the first square with both feet landing simultaneously. Move quickly through the rungs, focusing on keeping your knees high and landing softly to maintain balance. As you progress, try variations like the lateral shuffle, where you move sideways through the ladder, or the in-and-out drill, where you alternate stepping in and out of the squares.

These drills not only improve your footwork but also enhance your coordination and overall body awareness. As you weave through the ladder, concentrate on your rhythm and speed—your goal is to complete the sequence as quickly as possible without tripping over the rungs. To maximize the benefits, incorporate these drills into your regular training routine, aiming for at least three sessions per week. Over time, you’ll notice a significant improvement in your ability to change direction quickly and react to your opponent’s movements on the court.

Ladder drills also provide a dynamic warm-up option, getting your heart rate up while engaging the muscles you rely on during a match. By adding this simple yet effective tool to your training arsenal, you’ll not only boost your foot speed but also gain a competitive edge in your game. So grab a ladder, lace up your shoes, and get ready to elevate your agility to new heights!

6. Cone Drills for Directional Speed

Cone drills are a fantastic way to enhance your directional speed on the court, allowing you to move swiftly and efficiently in response to your opponent’s shots. These drills not only improve your footwork but also develop your agility, coordination, and overall court awareness. The beauty of cone drills lies in their versatility; you can customize the layout and intensity to fit your skill level and training goals.

To get started, set up a series of cones in various configurations on the court. A common setup is to place five cones in a star shape, with one cone in the center and the others spaced evenly around it. This formation allows you to practice moving in different directions—forward, backward, and laterally—while maintaining your balance and focus on foot placement.

One effective exercise is the “Cone Sprint.” Begin at the center cone and sprint to the first cone, touch it, and then quickly pivot to the next cone. Repeat this pattern, emphasizing quick, explosive movements and sharp turns. This drill mimics the rapid changes in direction you’ll encounter during a match, helping you develop muscle memory and increase your reaction time.

Another great variant is the “Zig-Zag Drill.” Arrange your cones in a zig-zag pattern and practice sprinting from one cone to the next, focusing on quick, light steps as you change directions. This drill is particularly beneficial for improving your lateral movement, which is crucial for reaching those tricky shots near the sidelines.

As you become more comfortable with the drills, you can increase the intensity by incorporating a tennis ball, either by tossing it in the air to catch as you move between cones or having a partner hit balls to you while you navigate the layout. This added challenge will simulate the unpredictability of a real match and sharpen your foot speed even further.

Incorporating cone drills into your regular training routine will not only boost your foot speed but also instill a greater sense of control over your body movements on the court. With consistent practice, you’ll find yourself darting to the ball with newfound agility, giving you a significant advantage in your game.

7. Shadow Tennis: Practicing Movement without the Ball

Tennis - How do I improve my foot speed on the court?
Credit : whatcanu.com

Shadow tennis is a unique and highly effective drill that allows players to focus on their footwork and court movement without the distraction of a ball. This technique encourages you to visualize the game, honing your agility and speed as you move around the court.

To begin, find a spacious area, preferably on a court, where you can move freely. Start by imagining a rally, picturing an opponent hitting the ball to various parts of the court. As you engage in this exercise, simulate the footwork required for each shot—whether it’s a forehand, backhand, or volley. Concentrate on your foot positioning, balance, and the quickness of your movements.

As you practice, pay attention to your body mechanics; ensure that your knees are slightly bent, your feet are light on the ground, and your movements are explosive yet controlled. You can incorporate different patterns to mimic match scenarios: sprint to the net for a volley, drop back for a deep return, or slide sideways to reach a wide shot.

For added intensity, set a timer and challenge yourself to maintain a high level of energy. This can be a great way to work on your endurance as well. Shadow tennis not only builds your foot speed but also enhances your court awareness and reaction time, enabling you to be more agile and responsive during actual matches. Plus, it’s a fantastic way to practice your technique and refine your strokes without needing a partner or a ball.

By dedicating time to shadow tennis in your training routine, you’ll develop the quickness and agility necessary to outmaneuver your opponents on the court, giving you a competitive edge when it counts.

8. Plyometric Exercises to Enhance Explosiveness

Plyometric exercises are a game-changer when it comes to enhancing explosiveness on the tennis court. These high-intensity movements focus on the rapid stretching and contracting of muscles, allowing players to develop the power and speed crucial for sprinting to the net or chasing down a deep baseline shot. Incorporating plyometric exercises into your training regimen can significantly improve your foot speed and overall agility.

One effective plyometric drill is the **Box Jump**. Find a sturdy platform or a plyometric box and stand in front of it with your feet shoulder-width apart. Bend your knees slightly, then explode upward, landing softly on the box with your knees slightly bent to absorb the impact. This drill not only builds leg strength but also trains your body to generate quick bursts of power, mimicking the explosive movements needed in tennis.

Another excellent exercise is the **Lateral Bounds**. Begin by standing on one leg, then push off laterally, landing on the opposite leg. Focus on maintaining balance and control as you leap side-to-side, which replicates the lateral movements required during a match. To increase difficulty, you can add a jump at the peak of each bound, enhancing your explosiveness further.

Finally, don’t overlook the **Depth Jump**. This drill involves stepping off a box and immediately jumping as high as possible upon landing. The key is to minimize ground contact time, training your muscles to react quickly and efficiently—perfect for those split-second decisions on the court.

Incorporating these plyometric exercises into your training not only boosts your foot speed but also enhances your overall athletic performance, making you a more formidable opponent on the tennis court. Remember to warm up properly and focus on form to maximize benefits and reduce the risk of injury. With consistent practice, you’ll notice a significant improvement in your explosiveness, giving you the edge you need during high-stakes matches.

9. Resistance Training for Improved Strength

When it comes to boosting your foot speed on the tennis court, resistance training is a game-changer. Unlike typical cardio exercises, resistance training focuses on building the strength of your muscles, allowing you to move quicker and more explosively. This type of training engages not only your legs but also your core, which plays a crucial role in your overall agility and stability during matches.

Incorporate exercises like squats, lunges, and deadlifts into your routine. These foundational movements target the major muscle groups in your lower body, enhancing your power and endurance. To add an extra challenge, consider using resistance bands or weighted vests. These tools create additional tension, forcing your muscles to work harder, which translates into greater strength and speed on the court.

Another effective method is plyometric training, which involves explosive movements such as box jumps and lateral hops. These drills develop fast-twitch muscle fibers, essential for quick sprints and sharp changes in direction—the very movements that can make or break a point in tennis.

Don’t forget to focus on your upper body as well. Strong shoulders and arms contribute to your overall balance and stability, allowing for quicker recovery between shots. Incorporate exercises like push-ups and shoulder presses to ensure your entire body is conditioned for peak performance.

By committing to a structured resistance training program, you’ll not only see improvements in your foot speed but also in your overall game. The combination of strength and agility will give you the competitive edge needed to outmaneuver your opponents and dominate the court.

10. Incorporating Interval Sprints into Your Routine

Incorporating interval sprints into your training routine is a game-changing strategy for enhancing your tennis foot speed. The essence of interval sprints lies in their ability to mimic the explosive bursts of energy required during a match, where quick, sharp movements can make the difference between winning a point and losing it.

To start, find a suitable area—like a tennis court, track, or open field—where you can safely sprint. Begin with a proper warm-up to prepare your muscles and reduce the risk of injury. Once you’re warmed up, set up a distance of around 20 to 30 meters for your sprints.

The drill is simple yet effective: sprint at maximum effort for 10 to 15 seconds, pushing yourself to reach top speed. Follow this with a rest period—around 30 to 45 seconds—where you can walk or lightly jog to allow your heart rate to recover. Repeat this cycle for 15 to 20 minutes. As you progress, you can adjust the sprint duration and recovery time to keep challenging yourself.

What makes interval sprints particularly beneficial is their focus on building both speed and endurance. The high-intensity bursts develop your fast-twitch muscle fibers, crucial for those rapid direction changes on the court. Meanwhile, the rest periods give your body a chance to recover, simulating the stop-and-go nature of a tennis match.

To elevate your training further, consider integrating lateral sprints or diagonal runs into your intervals. This variation will enhance your agility and mimic the movement patterns you use during actual gameplay. As your foot speed improves, you’ll find yourself quicker to the net, faster to reach deep shots, and more adept at returning serves—all essential skills for a successful tennis player. Incorporating interval sprints into your routine not only boosts your foot speed; it also builds mental toughness and prepares you for the dynamic demands of the sport.

11. The Role of Footwear in Performance

When it comes to enhancing your foot speed on the tennis court, one cannot overlook the crucial role of footwear in performance. The right pair of tennis shoes can serve as your invisible ally, providing both support and agility as you dart across the court. Unlike regular sneakers, tennis shoes are designed specifically for the dynamic movements of the sport—think lateral sprints, quick pivots, and explosive acceleration.

Look for shoes that offer a combination of lightweight materials and robust traction. A well-cushioned midsole is essential for absorbing the shock of hard landings, while a durable outsole with a herringbone or multidirectional tread pattern ensures that you maintain your grip during those intense rallies. High-quality shoes not only protect your feet from potential injuries but also enhance your overall stability, allowing you to push off more powerfully and maneuver more swiftly.

Additionally, consider the fit of your footwear. A snug fit allows for better control and less slippage inside the shoe, which can be detrimental during rapid movements. Spend time trying on different brands and styles to find the perfect match for your foot shape and playing style. Remember, the right footwear can make all the difference; it can turn a good performance into a great one, keeping you quick on your feet as you chase down every shot and outpace your opponents. Investing in the right tennis shoes is not just about comfort—it’s about optimizing your game and unlocking your full potential on the court.

12. Cool Down and Stretching Techniques

After an intense session of footwork drills and agility exercises, it’s vital to give your body the attention it deserves through a proper cool down and stretching routine. This crucial phase not only aids in recovery but also enhances flexibility, helping to prevent injuries that could sideline your training.

Start your cool down with a gentle jog or brisk walk on the court for about five minutes. This gradual decrease in activity allows your heart rate to return to normal while promoting blood circulation, which helps flush out lactic acid accumulated in your muscles during the drills. Once your heart rate stabilizes, transition into static stretching to target the key muscle groups used in tennis.

Focus on the calves, hamstrings, quadriceps, and hip flexors, holding each stretch for at least 15-30 seconds. For instance, to stretch your calves, lean against a wall with one foot behind the other and gently press the back heel into the ground. For your hamstrings, sit on the ground with one leg extended and reach towards your toes, feeling that satisfying stretch along the back of your thigh.

Don’t forget to include some dynamic stretches as well; these can be beneficial for maintaining mobility. Leg swings, ankle circles, and gentle lunges can keep your muscles limber and ready for your next training session.

Incorporating this cool down and stretching protocol into your routine will not only enhance your foot speed on the court but also promote overall athleticism and longevity in your tennis journey. Remember, the work doesn’t stop when you finish a drill; proper recovery is just as important as the training itself!

13. Tracking Your Progress: How to Measure Improvements

Tracking your progress is an essential component of enhancing your tennis foot speed. Without a clear understanding of where you started and how far you’ve come, it’s easy to become discouraged or complacent. Here are some effective methods to measure your improvements and keep your motivation levels high.

**1. Timing Your Drills:** Start by timing specific footwork drills, such as cone sprints or ladder exercises. record your times and aim to complete the drills faster over weeks or months. For instance, if you initially complete a set of ladder drills in 30 seconds, strive to reduce that time to 25 seconds. This clear metric not only helps you gauge improvement but also provides you with a tangible target to aim for.

**2. Video Analysis:** Technology can be your best friend when it comes to assessing progress. Use your smartphone or a camera to record your footwork during drills or practice matches. Analyzing these videos can reveal subtle improvements in your speed, agility, and overall technique. Compare your movements over time to see how your foot speed has evolved, focusing on your reaction times and the efficiency of your foot placement.

**3. Performance Benchmarks:** Establish benchmarks during practice matches to assess your foot speed in real-time scenarios. Keep track of how quickly you can reach the ball after your opponent strikes it and how often you can get into the optimal position for your shots. This will not only highlight your foot speed but also show how well you’re integrating that speed into your game.

**4. Fitness Assessments:** Regularly conduct fitness assessments that include agility tests, such as the T-Test or Illinois Agility Test. These tests are designed to measure how quickly you can change direction, which is crucial for tennis. By recording your scores and aiming to improve them, you can objectively track your agility and foot speed progress over time.

**5. Monitor Match Performance:** Finally, keep a record of your match play statistics. Pay attention to how often you find yourself out of position versus how often you can successfully chase down balls. Keep a journal noting your observations after each match or practice session, focusing on moments where your improved foot speed made a difference.

By actively tracking your progress using these methods, you’ll not only maintain motivation but also gain a better understanding of the areas where you excel and where you may need further improvement. Celebrating small victories along the way will keep you engaged in your training and push you to reach new heights in your tennis performance.

14. Tips for Consistency in Training

When it comes to improving your foot speed on the tennis court, consistency is key. Developing a routine that incorporates specific drills is essential for building muscle memory and enhancing your agility. Here are some practical tips to help you stay consistent in your training and make the most of your practice sessions.

**Set a Schedule:** One of the easiest ways to ensure consistency is to establish a training schedule that fits seamlessly into your weekly routine. Whether you dedicate certain days for footwork drills or integrate them into your regular practice, having a set time will help you stay committed. Consider using a calendar or planner to mark your training days, making it easier to track your progress.

**Start Small and Build Gradually:** If you’re new to foot speed drills or returning after a break, it’s important to start small. Focus on mastering a few basic drills, such as ladder drills or cone sprints, before gradually increasing the complexity and intensity. This approach not only helps prevent injury but also builds your confidence as you see improvement over time.

**Incorporate Variety:** While repetition is vital for consistency, incorporating a variety of drills can keep your training engaging and prevent burnout. Mix in different exercises that target various aspects of foot speed, such as lateral movement, explosive starts, and quick direction changes. This diversity will enhance your overall agility and make each session more enjoyable.

**Track Your Progress:** Keeping a training journal or using a fitness app to monitor your sessions can provide valuable insights into your development. Record the drills you perform, the duration, and any personal bests you achieve. This not only helps you stay motivated but also allows you to identify areas that need more focus.

**Stay Accountable:** Find a training partner or join a local tennis group to help keep you accountable. Sharing your goals with someone else can provide motivation and encouragement. Plus, practicing drills together can create a fun and competitive atmosphere that pushes you to improve.

**Listen to Your Body:** Consistency should never come at the expense of your health. Pay attention to how your body feels during and after training. If you experience fatigue or discomfort, don’t hesitate to adjust your training intensity or take a rest day. Recovery is just as important as the training itself in building a strong foundation for speed.

By implementing these tips and maintaining a consistent training regimen, you’ll not only enhance your foot speed but also develop the mental fortitude needed to excel on the court. With dedication and perseverance, you’ll be quick on your feet and ready to outmaneuver your opponents in no time.

15. Conclusion: Putting It All Together for Game Day

As we wrap up our exploration of the essential drills to enhance your tennis foot speed, it’s crucial to remember that success on the court doesn’t just stem from isolated practice but from integrating these techniques into your overall game strategy. The drills we’ve discussed—from ladder exercises to cone sprints—are not merely about speed; they are about developing agility, reaction time, and the ability to position yourself effectively for each shot.

To put it all together for game day, consider establishing a routine that incorporates these drills into your regular training sessions. Dedicating specific days to focus on footwork will not only improve your speed but also build muscle memory, allowing you to instinctively move with precision during matches.

It’s equally important to maintain a balanced approach. While speed is vital, don’t neglect other aspects of your game—strength, endurance, and tactical awareness should also be part of your preparation. Incorporate dynamic warm-ups before practice and matches to ensure your muscles are primed for the explosive movements required in tennis.

Remember, the improvements you make in practice will shine through when you step onto the court. Visualize your movements, anticipate your opponent’s shots, and rely on the footwork skills you’ve developed. With commitment and consistency, you’ll not only boost your foot speed but also enhance your overall performance, making you a formidable opponent come game day. Get ready to seize the moment and let your feet do the talking!

In conclusion, enhancing your foot speed on the tennis court is essential for improving your overall game, and the drills outlined in this post are designed to do just that. By incorporating these proven exercises into your training routine, you’ll not only develop quicker footwork but also gain the agility and confidence needed to outmaneuver your opponents. Remember, consistency is key—dedicate time to practice these drills regularly, and you’ll soon notice a significant difference in your performance. So lace up your shoes, hit the court, and embrace the journey to becoming a faster, more agile player. Your future matches will thank you!