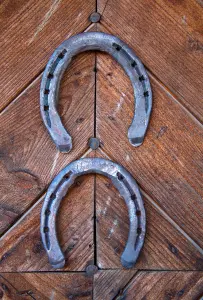
How to hang a horseshoe: Professional installation guide
Hanging a horseshoe is more than a cultural tradition. It is a mounting project that requires attention to surface integrity and hardware selection. Whether you want to fix a piece of decor on wood or brick, the principles of mechanical anchoring remain the same. This guide provides a professional framework to ensure your horseshoe stays secure without damaging your property.
Preparation: Safety and Equipment
Before touching your walls, prioritize personal safety. If you are drilling into masonry, always wear impact-resistant safety glasses to protect your eyes from flying stone shards. Ensure your ladder is placed on a level, stable surface before attempting any work at height.
Gather the following tools to ensure a precise installation:
A spirit level for accurate alignment.
A power drill with appropriate bits for masonry or wood.
High-quality galvanized or stainless steel screws.
Wall anchors suited to your specific wall material.
A center punch or a small nail to start your pilot holes.
Mounting on Wooden Surfaces
Wood is forgiving, but using the wrong nail can split the grain or cause the hardware to pull out over time. If your horseshoe has pre-drilled holes, do not just drive a nail through them. Use high-quality wood screws instead.
Screw threads provide significantly more pull-out resistance than smooth shank nails. Drill a pilot hole slightly smaller than the diameter of your screw shank. This prevents the wood from splitting while allowing the threads to bite firmly into the material. If the horseshoe is antique or heavy, use at least two fixing points to distribute the weight evenly.
Anchoring into Brick and Masonry
Never drive nails directly into mortar joints. Mortar is brittle; it will crumble under the weight of the metal and the vibration of a door closing. Always drill directly into the center of the brick itself.
Use a masonry drill bit designed for hammer drills. Set your drill to the rotation-only mode initially to start the hole cleanly, then switch to hammer mode if the brick is particularly dense. Insert a high-grade nylon expansion anchor into the hole before driving your screw. This anchor acts like an octopus; it expands inside the brick to create a friction-based grip that won’t loosen over time.
Orientation and Structural Stability
The orientation of your horseshoe is a personal choice, but the mechanical stability is a technical necessity. Always ensure the center of gravity is supported. If the horseshoe is heavy, do not rely on a single screw at the top.
Field experience shows that vibration is the enemy of wall decor. Every time a door closes, the wall experiences a micro-vibration. If the horseshoe is not flush against the wall, it will eventually loosen the fasteners. Use a thin rubber washer or a small piece of clear silicone adhesive behind the mounting points. This acts as a shock absorber, similar to the suspension system in your car, protecting the wall finish and keeping the hardware tight.
Avoiding Common Installation Failures
The most common mistake is over-tightening. Metal horseshoes are often rigid, but masonry surfaces are rarely perfectly flat. If you force the horseshoe flush by over-tightening the screw, you risk stripping the anchor or cracking the brick.
If you encounter a gap between the shoe and the wall, accept it. Use a slightly longer screw if necessary, but prioritize the integrity of the anchor over a perfectly flat fit. Another pitfall is ignoring corrosion. If you use standard steel screws in an outdoor environment, they will rust and eventually stain your wall. Always use stainless steel or hot-dipped galvanized fasteners to prevent galvanic corrosion.
Maintenance and Long-Term Security
Check your installation once every six months, especially if the horseshoe is installed on an exterior wall. Temperature fluctuations cause metal to expand and contract, which can slowly back screws out of their anchors.
If you notice the horseshoe wiggling, do not simply tighten the screw. Remove the fastener, inspect the anchor for damage, and verify that the hole has not enlarged. Prevention is straightforward: keep the metal protected with a clear outdoor sealant to avoid rust bleeding, and ensure your hardware remains tight. A well-installed horseshoe should last for years without requiring further intervention.