How to build a raised garden bed?

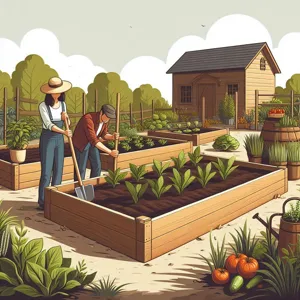
Transforming your outdoor space into a flourishing oasis begins with a simple yet rewarding project: building your dream raised garden bed.

Whether you’re an experienced gardener or a beginner with a budding green thumb, raised garden beds offer numerous benefits, from improved soil drainage to easier access for planting and harvesting. They not only enhance the aesthetic appeal of your garden but also provide a controlled environment for your plants to thrive. In this step-by-step guide, we will walk you through the entire process—from selecting the perfect location and materials to planting your favorite flowers, herbs, or vegetables. With our detailed instructions and helpful tips, you’ll be well on your way to creating a vibrant garden that reflects your personal style and brings joy to your gardening experience. Let’s dig in and get started on your journey to cultivating your dream garden!

1. Introduction to Raised Garden Beds

How to build a raised garden bed?
Credit : whatcanu.com

Raised garden beds are a fantastic way to cultivate a thriving garden, offering a multitude of benefits for both novice and seasoned gardeners alike. By elevating your planting area, these beds create an ideal growing environment that maximizes space, improves drainage, and enhances soil quality. Whether you’re looking to grow vibrant vegetables, fragrant herbs, or stunning flowers, a raised garden bed can be tailored to fit your specific needs and aesthetic preferences.

One of the key advantages of raised garden beds is their ability to provide better control over soil conditions. By filling your bed with a custom soil mix, you can ensure that your plants receive the optimal nutrients, moisture retention, and aeration they require for healthy growth. Additionally, the height of the beds often makes gardening more accessible, reducing the strain on your back and knees.

Beyond functionality, raised garden beds also offer a visually appealing element to your outdoor space. They can be constructed in various shapes, sizes, and materials, allowing you to create a personalized garden that complements your home and landscape. From rustic wooden frames to sleek metal designs, the options are endless.

In this step-by-step guide, we will walk you through the process of building your dream raised garden bed, from selecting the right materials to planting your first seeds. Whether you have a sprawling backyard or a cozy balcony, it’s time to roll up your sleeves and embark on an exciting gardening adventure!

2. Benefits of a Raised Garden Bed

When it comes to gardening, raised garden beds offer a multitude of benefits that can transform your gardening experience from the ground up. One of the primary advantages is improved soil quality. By elevating your plants above the natural ground level, you have complete control over the soil composition. This allows you to create a nutrient-rich environment tailored to the specific needs of your plants, whether they thrive in sandy loam or a more clay-like structure.

Additionally, raised garden beds facilitate better drainage. Traditional gardening can often lead to waterlogged soil, but with a raised structure, excess water can easily flow away, ensuring that your roots stay healthy and well-aerated. This is especially beneficial in areas prone to heavy rainfall, as it minimizes the risk of root rot and other moisture-related issues.

Moreover, the height of a raised garden bed can reduce the strain on your back and knees. No more bending down or crouching to tend to your plants—simply stand and enjoy your gardening tasks. This ergonomic advantage makes gardening accessible for everyone, from the seasoned gardener to those who may have mobility challenges.

Raised beds can also help deter pests. The elevation makes it more challenging for certain critters, like rabbits and groundhogs, to access your plants. Plus, you can easily incorporate protective measures such as row covers or netting without disrupting the surrounding landscape.

Finally, let’s not overlook the aesthetic appeal of raised garden beds. They create clean lines and structured spaces in your yard, enhancing its overall visual appeal. You can customize the design and materials to match your style, whether it’s rustic wooden frames or sleek metal containers.

In summary, raised garden beds are more than just a gardening trend; they are a practical solution that offers enhanced soil quality, better drainage, ergonomic benefits, pest deterrence, and a touch of beauty to your garden. With these advantages in mind, you’ll be eager to embark on your journey to build the perfect raised garden bed!

3. Choosing the Right Location

How to build a raised garden bed?
Credit : whatcanu.com

Choosing the right location for your raised garden bed is a critical step in ensuring a thriving garden that yields a bountiful harvest. The ideal spot will be influenced by several factors, including sunlight, accessibility, and soil drainage.

**Sunlight:** Most vegetables and flowering plants crave sunlight, so it’s essential to select a location that receives at least six to eight hours of direct sunlight each day. Observe your yard throughout the day to identify sunny spots, and take note of any areas that may be shaded by trees, fences, or buildings. If you have limited sun exposure, consider opting for shade-tolerant plants that can thrive in lower light conditions.

**Accessibility:** Your garden should be easily accessible for regular maintenance, watering, and harvesting. Choose a location that is convenient for you to reach, ideally close to your kitchen or living area. This proximity will not only make it easier to tend to your plants but also encourage you to engage with your garden more frequently. Ensure that the path to your garden bed is clear and that you can easily maneuver tools or watering cans without obstruction.

**Soil Drainage:** Good drainage is vital for healthy plant growth, as standing water can lead to root rot and other issues. To assess drainage, watch how water behaves in the area after a rainfall. If you notice puddles forming or the ground remains soggy for an extended period, you may need to consider elevating your garden bed further or amending the existing soil with organic matter to improve its drainage capabilities.

Take the time to carefully evaluate these factors before finalizing your garden bed’s location. A well-placed raised garden bed not only enhances the aesthetics of your outdoor space but also sets the stage for a successful gardening experience. With the right location secured, you’ll be well on your way to growing your dream garden!

4. Selecting Materials for Your Garden Bed

Choosing the right materials for your raised garden bed is a crucial step that will significantly influence the longevity, aesthetics, and overall health of your garden. The materials you select will not only define the structure of your garden bed but also contribute to the growing environment for your plants. Here are some options to consider, along with their pros and cons.

**wood:**
Wood is the most popular choice for building raised garden beds, thanks to its natural appearance and ease of use. Cedar and redwood are excellent options due to their resistance to rot and insects, which can help your garden bed last for many years. However, softer woods like pine can be more affordable but may require replacement sooner. When using wood, it’s essential to ensure that it’s untreated, as chemicals in treated wood can leach into the soil and harm your plants.

**Metal:**
For a modern look and extreme durability, consider using metal, such as galvanized steel or aluminum. These materials are resistant to weathering and pests, making them a long-lasting choice. Metal beds can also retain heat, which may benefit certain plants that thrive in warmer soil. However, be cautious of the potential for metal to heat up in direct sunlight, which could lead to overheating roots in extreme climates.

**Bricks or Concrete Blocks:**
If you’re looking for a more permanent solution, bricks or concrete blocks can create a sturdy and aesthetically pleasing raised garden bed. While these materials are durable and provide excellent drainage, they can be more labor-intensive to install. Additionally, ensure that any concrete blocks are free from harmful chemicals, as some can leach into the soil.

**Composite Materials:**
Recycled plastic or composite materials are becoming increasingly popular for raised garden beds. These materials mimic the look of wood without the risk of rotting or splintering, making them a low-maintenance option. They are typically more expensive but offer excellent durability and environmental benefits.

As you select materials, consider the size and design of your raised garden bed, as well as your personal style and budget. Ensure that whatever you choose will provide a safe and healthy environment for your plants to thrive. With the right materials in hand, you’re one step closer to creating the garden of your dreams!

5. Designing Your Garden Bed: Size and Shape Considerations

How to build a raised garden bed?
Credit : whatcanu.com

Designing your garden bed is one of the most exciting steps in the process of creating your dream raised garden. The size and shape of your garden bed play a crucial role in not only its functionality but also its aesthetic appeal. Before you dive into construction, take a moment to envision the space you have available and how you want it to look in your outdoor environment.

First, consider the size of your garden bed. A common width for raised beds is 4 feet, as this allows easy access to the center without the need to step into the bed itself. This width facilitates maintenance tasks like weeding, harvesting, and watering while also ensuring that plants grow healthily without overcrowding. The length can vary based on your available space; however, keeping it between 4 to 8 feet is ideal for managing the garden comfortably.

Next, think about the height of your raised bed. Taller beds, usually between 12 to 24 inches, can be easier on your back and help with drainage in heavy soils. However, if you’re planting deep-rooted vegetables like tomatoes or carrots, consider a deeper bed to accommodate their growth.

Once you’ve settled on size, it’s time to decide on the shape. Traditional rectangular beds are popular, but don’t be afraid to get creative! Curved edges can soften the look of your garden and blend seamlessly into a more natural landscape, while tiered designs can add depth and visual interest. Circular or hexagonal beds can also be a striking focal point in your yard, allowing you to plant in a way that maximizes sun exposure and airflow.

Finally, think about how your garden design fits into your overall landscape. Will it be a standalone feature, or will it complement existing paths, patios, or flower beds? Drawing a simple sketch can help you visualize your ideas and ensure that your raised bed will harmonize with the surrounding environment.

In summary, the size and shape of your raised garden bed are foundational elements that can significantly impact your gardening experience. Take the time to plan thoughtfully, and you’ll create a space that not only meets your gardening needs but also enhances the beauty of your outdoor area. Happy gardening!

6. Tools You’ll Need for the Project

Before diving into the construction of your dream raised garden bed, it’s essential to gather the right tools to ensure a smooth and efficient building process. Having the appropriate equipment on hand not only saves you time but also helps you achieve a professional finish. Here’s a comprehensive list of tools you’ll need for this project:

1. **Measuring Tape**: Accurate measurements are crucial when planning your raised garden bed. A reliable measuring tape will help you determine the length, width, and height, ensuring your dimensions are spot on.

2. **Level**: To create a stable and even garden bed, a level is indispensable. This tool will help you ensure that your frame sits perfectly flat on the ground, preventing any water drainage issues and ensuring your plants grow evenly.

3. **Saw**: Depending on the materials you choose, you may need a hand saw or a power saw to cut your wood to the desired lengths. A miter saw is particularly effective for making precise angle cuts, while a circular saw can handle longer boards easily.

4. **Drill**: A cordless drill is a must-have for assembling your raised garden bed. It will allow you to easily bore holes and drive screws into your wood, ensuring your structure is sturdy and secure.

5. **Screwdriver**: While a drill can do most of the heavy lifting, a good screwdriver is helpful for tightening screws that may not be fully flush with the wood or for any adjustments that need to be made during assembly.

6. **Wood Screws**: Opt for weather-resistant wood screws that can withstand the elements and ensure the longevity of your garden bed. A length of 2.5 to 3 inches is typically ideal for securing the corners and joints.

7. **Hammer**: A hammer will come in handy for driving in stakes, if you’re using them to reinforce the corners of your bed or to attach other materials.

8. **Garden Trowel**: Once your raised bed is built, a garden trowel will be useful for digging and planting your flowers or vegetables directly into the soil.

9. **Gloves**: Protect your hands from splinters and dirt by wearing sturdy gardening gloves. They’ll help you maintain grip while working with tools and materials.

10. **Safety Goggles**: Always prioritize safety. Wearing safety goggles will protect your eyes from dust and debris, especially when cutting wood or drilling.

By gathering these tools and materials beforehand, you’ll set yourself up for success as you embark on the rewarding journey of building your raised garden bed. Each tool plays a vital role in crafting a structure that will not only enhance your garden but also serve as a functional and beautiful space for your plants to thrive. Happy building!

7. Step 1: Preparing the Site

How to build a raised garden bed?
Credit : whatcanu.com

Preparing the site is a crucial first step in building your dream raised garden bed. The success of your gardening venture hinges on the foundation you create, so it’s important to take the time to lay the groundwork properly.

Start by selecting a suitable location that receives ample sunlight—ideally, at least six to eight hours of direct sunlight each day. Observe your yard throughout the day to note the shifts in light and shade. Look for a spot that is relatively level and free from debris, including rocks, roots, and weeds. A clear space not only makes construction easier but also minimizes competition for nutrients and water.

Once you’ve identified the perfect spot, it’s time to clear the area. Use a shovel or hoe to remove any grass and weeds, ensuring that you dig down a few inches to get rid of any invasive roots. This will prevent them from creeping back into your garden bed and competing with your plants. If you’re particularly cautious about weeds, consider laying down landscaping fabric or cardboard to smother any remaining foliage before you build.

Next, assess the soil quality. While raised beds allow you to control the soil composition, starting with good-quality native soil can provide a solid base. If the existing soil is compacted or poor, consider loosening it with a garden fork or tiller to encourage healthy drainage and root growth.

Finally, outline the dimensions of your raised garden bed on the ground using stakes and twine or marking paint. This visual guide will help you understand how much space you have to work with and will ensure that your bed is properly positioned according to your plan. With the site prepared, you’re ready to move on to the next step: constructing your raised garden bed and filling it with the perfect soil mix for your plants to thrive.

8. Step 2: Building the Frame

Once you’ve selected the perfect spot for your raised garden bed, it’s time to dive into the heart of your project: building the frame. This step is crucial, as the frame will serve as the structural foundation for your garden, ensuring it remains sturdy and functional throughout the growing season.

### Materials Needed

Before you start, gather your materials. For a standard raised garden bed, you’ll need rot-resistant wood such as cedar or redwood, which can withstand the elements without warping or decaying. Common dimensions for a raised bed are 4 feet wide, 8 feet long, and 12 to 24 inches deep, but feel free to adjust based on your available space and gardening needs.

### Constructing the Frame

1. **Cut the Wood**: Begin by cutting your wood to the desired lengths. For a basic rectangular bed, you will need four pieces for the sides—two long pieces (8 feet) and two shorter ones (4 feet). If you’re using a power saw, take necessary safety precautions, and ensure your cuts are straight for a snug fit.

2. **Assemble the Corners**: Position the long pieces parallel to each other, then attach the shorter pieces at each end to form a rectangle. You can use wood screws or corner brackets for a secure hold. If you prefer a more rustic look, consider using untreated wooden stakes in the corners, which can be hammered into the ground for reinforcement.

3. **Reinforce the Structure**: To ensure your raised bed can withstand the weight of soil and plants, add cross supports. Cut two additional pieces of wood to fit diagonally from corner to corner inside the frame. This will help prevent any bowing of the sides as the bed fills up with soil.

4. **Level the Frame**: Once your frame is assembled, it’s crucial to ensure that it sits level on the ground. Use a level to check each side, making adjustments as necessary by digging out or adding soil beneath the frame. A level bed will promote even drainage and healthy plant growth.

### Finishing Touches

After your frame is built and leveled, consider giving it a protective finish. Applying a non-toxic wood sealant or stain can help prolong the life of your garden bed while ensuring that no harmful chemicals leach into the soil where your plants will grow.

With the frame complete, you’re now one step closer to turning your gardening dreams into reality. The next phase will focus on filling your raised bed with the right soil mix that promotes optimal growth. Stay tuned for that essential step in the journey to your thriving garden!

9. Step 3: Adding Drainage and Soil

Once your raised garden bed is securely assembled in its chosen spot, it’s time to turn your attention to an essential element for thriving plants: drainage and soil. Proper drainage ensures that excess water can escape, preventing root rot and promoting healthy growth.

Start by adding a layer of drainage material to the bottom of your garden bed. This could include gravel, small stones, or even broken pottery pieces. Aim for a depth of about 2-3 inches. This layer allows water to flow freely away from the roots while also providing aeration, which is crucial for a healthy root system.

Next, you’ll want to fill the bed with a well-balanced soil mixture. A good rule of thumb is to use one-third topsoil, one-third compost, and one-third organic material like peat moss or coconut coir. This blend provides the nutrients your plants need while ensuring proper drainage and moisture retention. As you fill the bed, gently tamp down the soil to eliminate air pockets, but be careful not to compact it too much, as this can hinder root growth.

Once your raised bed is filled, give it a good watering. This helps settle the soil and provides moisture for the beneficial microorganisms that will aid in breaking down the organic material. After watering, you may notice that the soil level has dropped slightly; don’t hesitate to add a bit more soil to bring it back up to the top of the frame.

With the drainage layer in place and your soil mixture settled, your raised garden bed is now primed and ready for planting. This step is crucial for setting the stage for a bountiful garden; a well-drained, nutrient-rich environment will help your plants flourish and produce a vibrant harvest. So take a moment to admire your hard work before moving on to the next step in building your dream garden oasis!

10. Step 4: Planting Your Seeds or Plants

Now that you’ve prepared your raised garden bed, it’s time for the most exciting part: planting your seeds or plants! This step is where your vision begins to take root—quite literally.

Before you dive in, take a moment to consider what you want to grow. Whether you’re aiming for vibrant flowers, fresh vegetables, or aromatic herbs, it’s essential to select plants that thrive in your local climate and soil conditions. Research the specific needs of each plant, including sunlight, watering requirements, and spacing, to ensure a flourishing garden.

As you approach the planting process, start by marking out your garden layout. Use a garden twine or small stakes to create rows or blocks, depending on the type of plants you’re sowing. This helps you visualize the space and ensures each plant has enough room to grow. For seeds, follow the recommended planting depth found on the seed packets; typically, you’ll want to plant them two to three times deeper than the seed’s diameter. Gently press the soil over the seeds, ensuring they are adequately covered.

If you’re planting seedlings, carefully remove them from their containers, taking care not to damage the roots. Dig a small hole in the soil, place the seedling in, and cover the roots with soil, gently patting it down to eliminate air pockets. Make sure the crown of the plant is level with the soil surface to prevent rot.

Once everything is in the ground, give your new plants a good drink of water to help them settle in. This not only hydrates them but also encourages the soil to firm around their roots. Take a moment to admire your handiwork—you’ve transformed a simple raised bed into a thriving potential habitat for growth!

As you nurture your garden in the coming days and weeks, keep an eye on your plants’ progress. Be attentive to their needs, adjusting water, and light as necessary, and soon enough, you’ll witness the fruits of your labor blossoming beautifully in your raised garden bed. Happy planting!

11. Step 5: Implementing a Watering System

Implementing a watering system is a crucial step in ensuring your raised garden bed thrives throughout the growing season. Proper hydration not only supports plant health but also reduces the time you spend manually watering, allowing you to enjoy your garden rather than labor over it. Here are some effective methods to consider when designing your watering system.

### Drip Irrigation
One of the most efficient ways to water your raised garden bed is by installing a drip irrigation system. This method delivers water directly to the plant roots through a network of tubing and emitters, minimizing evaporation and runoff. To set this up, you’ll need a main hose to connect to your water source, drip tubing to run through your bed, and emitters strategically placed near the base of each plant. This system allows you to customize the amount of water each plant receives, ensuring that your vegetables and flowers get the hydration they need without waste.

### Soaker Hoses
If you’re looking for a simpler option, soaker hoses can be an excellent alternative. These porous hoses allow water to seep out slowly along their length, providing even moisture to the soil. Lay the soaker hose in your raised bed, weaving it around your plants to ensure thorough coverage. Connect it to a water source, and you can easily water your garden by turning on the tap. Soaker hoses are particularly beneficial for maintaining consistent moisture levels, which is vital for preventing plant stress.

### Manual Watering
For those who enjoy a hands-on approach, traditional manual watering with a garden hose or watering can is always an option. However, to make this method more efficient, consider using a spray nozzle with adjustable settings. This allows you to switch from a gentle shower for seedlings to a more powerful stream for established plants. To make watering easier, set a routine that aligns with the weather conditions—more frequent watering during hot spells and less when it’s rainy.

### Rainwater Collection
To create a more sustainable watering system, consider incorporating a rainwater collection setup. Position a rain barrel near your garden to capture runoff from your roof. This not only provides an eco-friendly source of water but also reduces your water bill. You can connect a soaker hose or drip irrigation system directly to the rain barrel, ensuring your plants receive the hydration they need without relying solely on municipal water.

### Scheduled Watering
Regardless of the watering method you choose, establishing a watering schedule is essential. Early morning or late afternoon are ideal times to water, as these periods minimize evaporation loss and allow plants to absorb moisture effectively. If you opt for an automated system, you can program it to run during these optimal times, ensuring your garden remains hydrated without daily effort.

By implementing a smart watering system tailored to your raised garden bed, you’ll set the stage for a flourishing garden that yields bountiful harvests all season long. Whether you choose a high-tech drip irrigation setup or a simple rainwater collection system, staying ahead of your plants’ hydration needs is key to nurturing your dream garden into reality.

12. Step 6: Mulching and Maintaining Your Garden Bed

Mulching and maintaining your garden bed is a crucial step in ensuring the longevity and productivity of your planted oasis. Once your garden bed is built and you’ve sown your seeds or planted your seedlings, it’s time to pay close attention to the next layer of care that will help your garden thrive.

Start by applying a generous layer of organic mulch—about three to four inches deep—around your plants. This could be straw, shredded leaves, wood chips, or even grass clippings. Mulch serves multiple purposes: it helps retain soil moisture, suppresses weeds, and adds nutrients back into the soil as it breaks down. Choose a mulch that complements your garden’s aesthetic and is suitable for the plants you’re growing.

As you mulch, be mindful not to pile it directly against the stems of your plants, as this can encourage rot and pests. Instead, create a small buffer zone around each plant to ensure they remain healthy and vigorous.

Maintenance doesn’t end with mulching. Regularly check your garden bed for signs of pests or disease, which can quickly spread if left unchecked. Implementing companion planting can naturally deter unwanted insects, while also promoting healthy growth among your plants. Additionally, keep an eye on moisture levels; raised beds tend to dry out faster than traditional gardens, so be prepared to water more frequently during hotter months.

Fertilizing is another key component of maintaining your garden bed. Depending on the type of plants you’re growing, you may need to reapply organic fertilizers throughout the growing season. Compost is an excellent choice, providing a steady supply of nutrients while enhancing soil structure.

Finally, consider rotating your crops each season. This practice helps prevent soil depletion and reduces the risk of disease. By following these mulching and maintenance tips, you’ll ensure that your raised garden bed remains a flourishing and productive space, providing you with bountiful harvests and a wonderful place to relax and enjoy nature. Happy gardening!

13. Tips for Companion Planting and Crop Rotation

Companion planting and crop rotation are two essential techniques that can significantly enhance the health and productivity of your raised garden bed. By understanding how different plants interact and support one another, you can create a thriving ecosystem right in your backyard.

**Companion Planting:** This method involves strategically placing certain plants next to each other to promote growth, deter pests, and improve flavor. For instance, planting marigolds alongside your vegetables can help repel harmful insects, while basil is known to enhance the growth and taste of tomatoes. Consider mixing root vegetables, which grow below ground, with leafy greens that thrive above ground. This not only maximizes space but also helps to balance nutrient levels in the soil. Remember to research specific plant combinations that work well together, as some plants can inhibit each other’s growth.

**Crop Rotation:** This practice is vital for maintaining soil health and preventing the buildup of pests and diseases. By changing the location of your plants each season, you allow the soil to replenish its nutrients and reduce the risk of crop-specific ailments. For example, if you planted tomatoes in one section of your raised bed this year, consider planting legumes, such as beans or peas, in that same spot next year. Legumes fix nitrogen in the soil, enriching it for the next round of crops.

As you plan your garden layout, take the time to create a simple rotation schedule. This might involve dividing your garden into sections and rotating plant families—such as nightshades (tomatoes and peppers), brassicas (cabbage and broccoli), and leafy greens—throughout the seasons. By implementing these strategies, you’ll not only boost your harvest but also create a more sustainable gardening practice that benefits both your plants and the environment.

With companion planting and crop rotation, your raised garden bed will flourish, offering you a bountiful supply of fresh produce season after season. Happy gardening!

14. Troubleshooting Common Raised Bed Issues

Even the most meticulously planned raised garden beds can encounter a few bumps along the way. Understanding how to troubleshoot common issues will empower you to maintain a thriving garden and enjoy the fruits (and vegetables) of your labor. Here are some prevalent concerns you may encounter and effective solutions to address them.

**1. Poor Drainage:** If you notice water pooling in your raised bed after heavy rain, it may indicate inadequate drainage. To rectify this, check the bed’s base. Adding a layer of gravel or small stones at the bottom can improve drainage significantly. Additionally, ensure that the soil mix includes amendments like perlite or sand to enhance aeration and drainage.

**2. Soil Compaction:** Over time, soil in raised beds may become compacted, restricting root growth and water absorption. To combat this, gently turn the soil with a garden fork to aerate it. You can also add organic matter, such as compost or well-rotted manure, to improve soil structure and ensure that nutrients are readily available to your plants.

**3. Pest Problems:** Pests can be a gardener’s worst nightmare. If you notice signs of nibbling or damage on your plants, take action quickly. Implement natural deterrents like neem oil or insecticidal soap, and consider introducing beneficial insects such as ladybugs to help control pest populations. Additionally, installing physical barriers like row covers can protect your crops from hungry critters.

**4. Nutrient Deficiencies:** Yellowing leaves or stunted growth may signal nutrient deficiencies in your garden bed. Regularly testing your soil can help identify what nutrients may be lacking. Incorporate a balanced organic fertilizer or specific amendments (like bone meal for phosphorus or fish emulsion for nitrogen) to replenish the necessary nutrients.

**5. Weeds Out of Control:** Weeds can quickly take over a raised bed if not kept in check. To prevent them, ensure you use a thick layer of mulch to smother weed growth. When you do notice weeds popping up, pull them out by hand before they have a chance to establish deep roots. Regular maintenance is key to keeping your raised bed weed-free.

By addressing these common issues proactively, you can ensure your raised garden bed remains a flourishing oasis of growth. Remember, every gardener faces challenges, but with the right strategies in place, you can turn obstacles into learning experiences that contribute to your gardening success!

15. Conclusion and Next Steps for Your Garden Journey

As we draw the curtains on this comprehensive guide to building your dream raised garden bed, it’s essential to reflect on the journey ahead. You’ve not only equipped yourself with the knowledge to construct a sturdy and aesthetically pleasing garden bed, but you’ve also embraced the spirit of cultivation and connection with nature.

Now that your raised garden bed is complete, the next steps are both exciting and rewarding. Start by selecting the right soil mix—choose a blend rich in nutrients, such as a combination of compost, peat moss, and vermiculite, to ensure your plants thrive. Consider what you want to grow: whether vibrant vegetables, fragrant herbs, or colorful flowers, planning your planting layout can help maximize space and yield.

Don’t forget about ongoing maintenance! Regular watering, mulching, and monitoring for pests will keep your garden flourishing. As you watch your plants grow, take the time to learn about companion planting and crop rotation, which can enhance your garden’s health and productivity.

Lastly, share your journey! Document the progress of your garden with photos or journal entries, and consider joining local gardening communities or online forums for support and inspiration. By connecting with fellow gardeners, you can exchange tips, trade plants, and foster friendships rooted in a shared passion for gardening.

Embrace the process, celebrate small victories, and remember that every garden is a unique reflection of its gardener. Now, go forth and cultivate the garden of your dreams! Happy gardening! 🌱✨

As you embark on the journey of building your dream raised garden bed, we hope this step-by-step guide has provided you with the inspiration and practical knowledge to turn your gardening vision into a reality. Creating a raised garden bed not only enhances the aesthetic of your outdoor space but also offers numerous benefits for your plants, such as improved drainage, easier access, and better soil management. With the right materials, a little elbow grease, and the tips we’ve shared, you’re well on your way to cultivating a thriving garden that flourishes with color and life. So, gather your supplies, roll up your sleeves, and get ready to dig into the rewarding experience of gardening. We can’t wait to see the bountiful harvests and beautiful blooms that await you in your new raised garden bed! Happy gardening!

What are the best ways to prevent pests in your home?

As the seasons change and the weather warms up, the unwelcome arrival of pests can turn your peaceful home into a battleground.

From tiny ants marching across your kitchen counter to stealthy rodents scurrying in the walls, these intruders can compromise your comfort and peace of mind. But fear not! With the right strategies in place, you can reclaim your space and keep these pesky invaders at bay for good. In this blog post, we’ll explore ten effective and practical strategies that will empower you to proactively guard your home against pests. From sealing entry points and maintaining cleanliness to utilizing natural deterrents and understanding pest behavior, these tips will not only help you create a pest-free environment but also enhance your overall living experience. Get ready to take charge and protect your home with a robust defense against unwanted visitors!

1. Understanding Common Household Pests

What are the best ways to prevent pests in your home?
Credit : whatcanu.com

Understanding common household pests is the crucial first step in keeping your home pest-free. Each type of pest brings its own set of challenges, behaviors, and preferred habitats, making it essential to familiarize yourself with the most prevalent offenders.

Let’s start with the notorious cockroach, a resilient survivor often found in warm, humid areas of your home, such as kitchens and bathrooms. These quick movers are not just a nuisance; they can also pose health risks, spreading allergens and diseases. Next on the list are ants, which can invade your space in search of food or water, often forming long, winding trails that can be both fascinating and irritating to observe.

Then there are rodents like mice and rats, who can squeeze through the tiniest of openings, leaving behind droppings and gnaw marks that can lead to structural damage and contamination of food supplies. And let’s not forget about the ever-annoying mosquitoes, attracted to standing water and capable of ruining a peaceful evening outdoors with their incessant buzzing and itchy bites.

Understanding the habits and preferences of these pests is essential for effective prevention. For instance, knowing that cockroaches thrive in dark, damp places can lead you to target cleaning efforts in basements and under sinks, while recognizing that ants are drawn to sugary substances can prompt you to store food properly and clean up spills immediately.

By educating yourself about these common household pests and their behaviors, you’ll be better equipped to identify early signs of an infestation and take proactive measures to protect your home. Awareness is your first line of defense in this ongoing battle against unwanted invaders.

2. The Importance of Prevention

When it comes to pest control, the old adage rings true: an ounce of prevention is worth a pound of cure. Understanding the importance of prevention is crucial for maintaining a pest-free home. It’s not just about eliminating pests once they’ve invaded; it’s about taking proactive steps to ensure they never gain entry in the first place.

The first line of defense begins with a thorough inspection of your home’s exterior. Look for cracks and crevices in walls, gaps around windows and doors, and openings around utility lines. These seemingly small entry points can serve as gateways for a variety of pests, from ants and spiders to rodents and termites. Sealing these vulnerabilities with caulk or weatherstripping not only keeps pests at bay but also helps improve energy efficiency in your home.

Next, consider the landscaping around your property. Overhanging tree branches, dense shrubbery, and piles of mulch can create ideal habitats for pests. Keep branches trimmed and maintain a clear perimeter of at least a few feet around your home’s foundation. This not only discourages pests but also makes it easier to spot any potential infestations before they escalate.

Another key aspect of prevention is proper sanitation. Many pests are attracted to food sources, so maintaining a clean living environment is essential. Store food in airtight containers, promptly clean up spills, and ensure that garbage bins are securely closed. Regularly vacuuming and decluttering your home can also eliminate hiding spots for pests, making it less inviting for unwanted guests.

By prioritizing prevention, you can save yourself time, money, and stress in the long run. Implementing these simple yet effective strategies will create a strong barrier against pests, allowing you to enjoy a tranquil, pest-free living space. Remember, a little effort now can lead to lasting peace of mind in the future.

3. Seal Entry Points: A Comprehensive Guide

What are the best ways to prevent pests in your home?
Credit : whatcanu.com

Sealing entry points is one of the most effective and proactive strategies to keep pests out of your home for good. It involves more than just a quick glance around; it requires a thorough inspection and a keen eye for detail. Pests, from tiny ants to larger rodents, are notorious for finding even the smallest gaps and cracks to infiltrate your living space. By identifying and sealing these vulnerabilities, you can create an impenetrable barrier that protects your home.

**Start with a Thorough Inspection**
Begin your sealing journey by conducting a comprehensive inspection of your home’s exterior. Pay special attention to areas such as windows, doors, and the foundation. Look for gaps around window frames, gaps in door seals, and cracks in the foundation. Remember, pests can squeeze through openings as small as a quarter of an inch, so nothing should be overlooked.

**Utilize Quality Sealants**
Once you’ve identified potential entry points, it’s time to take action. Use high-quality sealants, caulk, and weather stripping to fill gaps and cracks. For larger openings, such as those around pipes or vents, consider using expandable foam insulation. This not only seals the space but also provides additional insulation, which can help with energy efficiency. When sealing openings around windows and doors, ensure that the weather stripping is intact and replace any damaged or worn pieces to create a snug fit.

**Don’t Forget the Roof and Gutters**
While the ground level is crucial, pests can also enter from above. Inspect your roof for damaged shingles or gaps that could provide access. Pay attention to chimneys and vents as well, ensuring they are properly capped and screened. Clogged gutters can create standing water, attracting pests like mosquitoes, so make sure your gutters are clean and in good repair to prevent water buildup.

**Landscaping Matters**
Your landscaping can also play a role in pest entry. Trim back trees and shrubs that touch your home, as they can serve as bridges for pests. Ensure that mulch and soil are not piled against your foundation, as this can create a moist environment that attracts insects. By maintaining a tidy perimeter around your home, you reduce the number of potential pathways for pests to find their way inside.

**Regular Maintenance**
Sealing entry points is not a one-time task; it requires regular maintenance. Schedule routine checks of your home’s exterior, especially after severe weather that could cause new gaps or damage. By staying vigilant and proactive, you not only enhance your home’s defenses against pests but also contribute to its overall longevity and comfort.

By dedicating time to seal entry points effectively, you can significantly reduce the likelihood of pests invading your space, keeping your home safe and sound for years to come.

4. Maintain Cleanliness: Cleaning Tips to Deter Pests

Maintaining cleanliness is a cornerstone strategy in the battle against pests. A tidy home not only enhances your living environment but also serves as a formidable barrier to unwanted intruders. Pests are attracted to food sources, clutter, and moisture, so by implementing a few simple yet effective cleaning habits, you can significantly reduce the likelihood of an infestation.

Start by routinely sweeping and vacuuming floors to eliminate crumbs and food particles that may be lying in wait for pesky critters. Pay special attention to high-traffic areas like the kitchen and dining room, where spills and leftovers are more likely to occur. Don’t forget to clean under appliances such as the refrigerator and stove, as these hidden spaces can harbor food debris and create a perfect sanctuary for pests.

Next, ensure that countertops and tables are wiped down regularly. A mixture of soap and water or a mild vinegar solution can effectively remove sticky residues and deter insects. As you clean, be mindful of any open containers that might attract bugs; store all food items in airtight containers and promptly dispose of garbage to eliminate potential nesting sites.

In addition to food cleanliness, consider decluttering your home. Pests love to hide in piles of magazines, cardboard boxes, and clothing. By keeping your living spaces organized and clutter-free, you reduce the number of hiding spots available for pests. Regularly donate or recycle items you no longer need, and keep storage areas tidy to deter unwelcome guests.

Lastly, don’t underestimate the importance of moisture control in your cleaning routine. Pests such as cockroaches and silverfish thrive in damp environments. Ensure that bathrooms, kitchens, and basements are well-ventilated and dry. Fix any leaky pipes or faucets, and use a dehumidifier if necessary to keep the humidity levels low.

By adopting these cleanliness practices, you’ll not only create a pleasant and inviting home but also establish a pest-resistant fortress that keeps unwelcome critters at bay. Remember, a clean home is a happy home, and it’s your first line of defense against the invasion of pests!

5. Proper Food Storage: Best Practices

What are the best ways to prevent pests in your home?
Credit : whatcanu.com

Proper food storage is one of the most effective yet often overlooked strategies for keeping pests out of your home. It’s not just about organizing your pantry; it’s about creating an environment that is uninviting to unwanted visitors. Pests like ants, roaches, and rodents are often attracted to food sources, and if they find even the smallest crumb or open package, they will quickly set up camp in your kitchen.

To start, invest in airtight containers for all dry goods such as grains, cereals, pasta, and snacks. Glass or heavy-duty plastic containers with tight-sealing lids not only keep your food fresh but also prevent pests from accessing their favorite treats. Label each container clearly, and practice a first-in, first-out system to ensure older items are used before newer purchases.

Refrigeration is another critical aspect of proper food storage. Make sure your fridge is set to the appropriate temperature—below 40°F (4°C)—to inhibit bacterial growth and deter pests. Store leftovers in sealed containers and consume them within a reasonable timeframe to prevent attracting pests. Additionally, don’t forget the importance of regularly checking your refrigerator for expired items that can attract unwanted guests.

Beyond pantry and fridge storage, consider how you store pet food. Just like human food, pet food can attract pests if not stored properly. Keep it in a secure, airtight container, and avoid leaving food out for extended periods.

Finally, regular cleaning is essential. Wipe down countertops, sweep floors, and take out the trash frequently to eliminate crumbs and spills that can lure pests. By adopting these best practices for food storage, you create a fortress against pests, ensuring your home remains a safe and welcoming haven for you and your family.

6. Landscaping Tips to Reduce Pest Attraction

When it comes to keeping pests at bay, the exterior of your home plays a crucial role in creating an inviting environment—or a repelling one. Strategic landscaping can act as a formidable first line of defense against unwanted guests. Here are some effective landscaping tips that can significantly reduce pest attraction around your property.

**1. Choose the Right Plants:** Opt for pest-resistant plants that are less likely to attract unwanted insects. Native plants, for instance, are often more resilient to local pests and diseases. Additionally, incorporating aromatic herbs like rosemary, basil, and lavender can deter common nuisances such as mosquitoes and ants, thanks to their strong scents.

**2. Maintain Proper Plant Spacing:** Overcrowded gardens can create a humid environment that encourages pest populations to thrive. Ensure that your plants are spaced adequately to promote airflow and reduce moisture retention. This simple adjustment can make a big difference in keeping pests away.

**3. Create Barriers with Mulch:** While mulch can enhance the aesthetic appeal of your garden, it can also serve as a pest deterrent when used wisely. Opt for cedar or pine mulch, as the natural oils in these materials repel insects. Additionally, keep mulch away from the foundation of your home to prevent pests from finding a cozy entry point.

**4. Trim Overhanging Branches:** Tree branches that dangle over your roof or near windows can provide a convenient highway for pests to access your home. Regularly trim back any overhanging limbs to eliminate this pathway and minimize the chances of infestations.

**5. Eliminate Standing Water:** Pests like mosquitoes are attracted to stagnant water sources. Conduct regular checks around your yard for any standing water in plant pots, bird baths, or clogged gutters. By keeping your landscape dry and water-free, you can significantly reduce the likelihood of mosquito breeding.

**6. Use Rock Gardens:** Incorporating rock gardens can reduce the amount of soil and organic material that pests love to burrow into. These low-maintenance landscapes not only provide a unique look but also discourage pests like ants and spiders from settling in.

By implementing these landscaping strategies, you not only beautify your outdoor space but also create an inhospitable environment for pests. Remember, a well-maintained landscape is not just visually appealing; it’s a critical aspect of a comprehensive pest management plan that can help keep your home pest-free for the long haul.

7. Utilizing Natural Repellents: What Works?

What are the best ways to prevent pests in your home?
Credit : whatcanu.com

When it comes to pest control, many homeowners are seeking alternatives to chemical solutions that may pose risks to their families, pets, and the environment. Enter natural repellents—an effective and eco-friendly option that can help keep unwanted guests at bay.

First on the list is **essential oils**. Scents like peppermint, lavender, and tea tree oil are not only delightful for humans but are also powerful deterrents for pests. Simply mix a few drops of your chosen oil with water in a spray bottle and mist areas where you’ve noticed activity. Not only will your home smell great, but you’ll also create an unwelcoming environment for insects and rodents.

Another tried-and-true natural repellent is **vinegar**. Its strong odor drives away ants, spiders, and even flies. A mixture of equal parts vinegar and water can be sprayed around entry points, windowsills, and countertops to keep these nuisances at bay. Plus, it’s a fantastic cleaner, making it a dual-purpose ally in your pest control arsenal.

**Citrus peels** can also be surprisingly effective. The scent of citrus is known to repel spiders and ants. Simply place fresh lemon or orange peels around your home, particularly in corners or entryways, to enjoy a natural barrier against these critters. As an added bonus, they’ll give your home a fresh aroma!

For those dealing with garden pests, consider **herbs** like basil, mint, and rosemary. These not only enhance your cooking but can also deter insects when planted around your home or in pots on your windowsills. Their strong fragrances mask the scents that attract pests, making your garden a less inviting place for unwelcome visitors.

Lastly, **diatomaceous earth** is a natural powder made from crushed fossils. It works by dehydrating insects that come into contact with it, making it a safe solution for both indoor and outdoor use. Simply sprinkle it around your home’s perimeter or in areas where pests are known to congregate, and watch as it effectively lowers their population.

By utilizing these natural repellents, you embrace a holistic approach to pest control that is beneficial for both your home and the planet. Not only will you keep your space pest-free, but you’ll also create a healthier living environment for your family. Say goodbye to harmful chemicals and hello to the power of nature in your pest prevention strategy!

8. When to Call in the Professionals

Sometimes, despite our best efforts, pests can outsmart even the most diligent homeowner. Knowing when to call in the professionals is crucial for tackling a pest problem effectively and preventing future infestations. If you notice signs of a significant pest invasion—such as droppings, nests, or chewed wiring—that you can’t manage on your own, it may be time to call for help.

Look for indicators that your DIY measures aren’t working. For instance, if traps are consistently full or if you spot live pests scurrying around during the day, this suggests that the problem has escalated beyond what can be solved with store-bought solutions. Additionally, certain pests, like termites or bedbugs, require specialized treatment methods that are best handled by trained professionals.

Don’t hesitate to reach out if you’re unsure about identifying the pest or assessing the severity of the infestation. Pest control experts can conduct thorough inspections, pinpoint the source of the problem, and implement targeted solutions that not only eliminate pests but also protect your home from future invasions.

Investing in professional pest control services not only saves you time and stress but also ensures that the job is done correctly and safely. After all, your home is your sanctuary, and keeping it pest-free is essential for your comfort and peace of mind.

9. Regular Inspections: Staying Proactive

When it comes to pest control, an ounce of prevention is truly worth a pound of cure. Regular inspections of your home are a crucial strategy in keeping unwanted guests at bay. By adopting a proactive mindset, you can identify potential pest entry points and signs of infestations before they escalate into more substantial problems.

Start by scheduling routine inspections of both the interior and exterior of your home. Check for cracks and gaps around windows, doors, and foundations—these are prime gateways for pests eager to escape the great outdoors. Pay attention to areas that are often overlooked, such as basements, attics, and crawl spaces, where moisture and clutter can create a haven for insects and rodents.

During your inspections, look for common signs of infestations, including droppings, gnaw marks, or nesting materials. Early detection is key; if you spot even the faintest hint of a pest problem, take immediate action to address it. This could involve sealing cracks, removing food sources, or calling a professional pest control service for advice or treatment.

Additionally, consider keeping a checklist of what to look for during each inspection. This systematic approach not only helps you stay thorough but also reinforces the habit of regularly checking your home. With a little diligence and attention, you can maintain a pest-free environment, ensuring that your home remains a sanctuary for you and your family. Regular inspections empower you to stay one step ahead, making it much easier to keep those pesky intruders away for good.

10. Essential Tools for Pest Control

When it comes to maintaining a pest-free home, having the right tools at your disposal can make all the difference. Investing in essential pest control tools not only empowers you to tackle infestations effectively but also equips you with preventative measures to keep unwanted guests at bay.

First and foremost, a high-quality **insecticide spray** is a must-have. Look for products that are designed for the specific pests you want to eliminate and are safe for indoor use. Additionally, **bait stations** can be incredibly effective for targeting pests like ants and cockroaches. These discreet traps contain attractants that lure pests in and deliver a lethal dose, ensuring a more targeted approach to pest management.

Don’t underestimate the power of **sealing tools** either. A good caulking gun, coupled with a high-quality sealant, is your frontline defense against pests trying to breach your home’s barriers. Inspect windows, doors, and any cracks or crevices around your home, and seal them up to create an impenetrable fortress.

Another essential tool is a **trap or glue board**. These are particularly useful for monitoring and controlling rodent populations. Place them in areas where you suspect rodent activity, and check them regularly to gauge the level of infestation.

Lastly, consider investing in a **long-lasting insect repellent** for outdoor use. Spraying your yard or garden can create a protective barrier that keeps pests at bay, making your outdoor space more enjoyable and less prone to infestations.

By equipping yourself with these essential pest control tools, you not only enhance your ability to fight current infestations but also fortify your home against future pest problems. Remember, a proactive approach is key to maintaining a comfortable, pest-free living environment.

11. Eco-Friendly Pest Control Solutions

As concerns about environmental impact and health hazards continue to rise, many homeowners are turning to eco-friendly pest control solutions to keep their living spaces pest-free. These alternatives not only effectively manage pest populations but also promote a safer environment for your family and pets.

One of the most popular methods is the use of natural repellents made from essential oils, such as peppermint, lavender, or eucalyptus. These oils can deter a variety of pests, from ants to spiders, while providing a pleasant aroma in your home. Simply mix a few drops of essential oil with water in a spray bottle and apply it around entry points and affected areas.

Another effective eco-friendly solution is the use of diatomaceous earth, a natural powder made from the fossilized remains of tiny aquatic organisms. When pests like cockroaches or bed bugs come into contact with it, the powder damages their exoskeletons, leading to dehydration and death. Sprinkle it in areas where pests are likely to roam, but remember to keep it away from pets and children.

Companion planting is also a powerful strategy for those with gardens. Certain plants, such as marigolds and basil, naturally repel pests, making them great allies in your fight against unwanted visitors. Strategically placing these plants around your home can create a natural barrier to insects.

Moreover, maintaining a clean and clutter-free environment plays a crucial role in pest prevention. Regularly disposing of food waste, sealing entry points, and keeping your yard tidy can significantly reduce the likelihood of attracting pests.

By choosing eco-friendly pest control solutions, you’re not only safeguarding your home but also contributing to a healthier planet. These strategies reflect a commitment to sustainability and can help you maintain a pest-free sanctuary for years to come. Embracing these methods not only protects your home but also empowers you as a conscientious consumer looking to make a positive impact on the environment.

12. Educating Your Family about Pest Prevention

Educating your family about pest prevention is a crucial step in maintaining a pest-free home. It’s not just about setting traps or calling an exterminator when you spot an unwelcome critter; it’s about fostering an environment of awareness and proactive behavior among all household members. Begin by discussing the various types of pests that can invade your home, from ants and cockroaches to rodents and spiders. Understanding the behavior and habits of these pests can help your family recognize signs of an infestation before it spirals out of control.

Involve everyone in ongoing pest prevention efforts by establishing simple household rules. For instance, make it a habit to clean up spills promptly and store food in airtight containers, as these practices can significantly reduce attractants. Encourage your children to dispose of trash properly and not to leave food out, as even the smallest crumbs can lure pests into your home.

Additionally, teach your family the importance of maintaining the home’s exterior. This includes regularly inspecting for cracks and gaps in windows and doors and ensuring that screens are intact and fitted securely. By involving your family in these preventive measures, you’re creating a sense of shared responsibility that not only empowers them but also strengthens your home against pests.

Consider organizing family workshops or fun educational sessions where everyone can learn about DIY pest control methods using natural ingredients. This not only makes the learning process engaging but also reinforces the idea that pest prevention is a collective effort. By educating your family about pest prevention, you’re equipping them with the knowledge and skills needed to protect your home effectively, ultimately fostering a healthier, pest-free environment for everyone.

13. Seasonal Strategies for Pest Control

To effectively keep pests at bay, it’s essential to adapt your strategies to the changing seasons. Each time of year brings its own array of potential invaders, and understanding their habits can empower you to take proactive measures.

**Spring:** As the weather warms up, pests like ants, termites, and wasps become more active. To prepare, conduct a thorough inspection of your home and yard. Look for cracks in your foundation, gaps around windows and doors, and any moisture-prone areas that could attract these pests. Seal any entry points with caulk or weather stripping, and keep your landscaping well-trimmed to prevent pest nests from forming.

**Summer:** With the heat rising, the likelihood of pests such as mosquitoes and flies increases. To safeguard your home, eliminate standing water where mosquitoes breed, such as bird baths or clogged gutters. Employ screens on windows and doors to keep flies out, and consider using natural repellents like citronella candles during outdoor gatherings. Regularly cleaning outdoor areas also reduces the chances of attracting unwanted visitors.

**Fall:** As temperatures begin to drop, rodents and spiders often seek warmth indoors. This is the perfect time to inspect your home for any potential entryways—think gaps around pipes and vents, as well as cracks in walls. Additionally, declutter your home and yard to eliminate hiding spots. Store firewood away from the house and keep your garage tidy to deter these critters from making themselves at home.

**Winter:** Although many pests become dormant, some, like cockroaches and mice, remain active and can seek refuge in your cozy living spaces. Ensure that food is stored in airtight containers and that crumbs are promptly cleaned up to avoid attracting these pests. Consider using traps or baits during this time, and maintain a vigilant eye on areas like basements and attics where pests may find shelter.

By tailoring your pest control strategies to the seasons, you not only address current infestations but also create a strong defense against future invasions. Consistent upkeep and awareness can make a significant difference in keeping your home pest-free all year round.

14. Creating a Pest-Resistant Environment

Creating a pest-resistant environment is a proactive approach that goes beyond simply reacting to infestations. It involves making deliberate changes to your home and surroundings to deter pests before they even think about moving in. By implementing a few strategic practices, you can significantly reduce the likelihood of unwelcome guests taking up residence in your space.

Start by sealing any cracks and crevices around your home. Pests such as ants, spiders, and rodents can squeeze through surprisingly small openings. Inspect your foundation, windows, and doors for gaps, and use high-quality caulk or sealant to close these entry points. Pay particular attention to areas where utility lines and pipes enter your home, as these can be common access points for pests.

Next, consider the landscaping around your home. A well-maintained yard not only enhances curb appeal but also minimizes pest habitats. Keep shrubs and trees trimmed back and away from the exterior walls of your home to reduce the chances of pests using them as bridges to gain access. Additionally, remove any standing water in your garden or yard, as stagnant water can attract mosquitoes and other water-loving pests.

Storage practices play a crucial role in pest prevention as well. Store food items in airtight containers to keep them safe from hungry critters, and regularly clean up spills or crumbs that may attract pests. In the garage or shed, avoid keeping piles of clutter where pests can hide; instead, maintain an organized space to eliminate potential nesting sites.

Lastly, consider incorporating natural deterrents into your routine. Certain plants, like lavender and peppermint, are known for their pest-repelling properties. Placing these around your home can create an unwelcoming environment for pests while adding a pleasant fragrance to your space.

By taking the initiative to create a pest-resistant environment, you not only safeguard your home but also contribute to a healthier, more comfortable living space free from the stress of pest problems. Remember, an ounce of prevention is worth a pound of cure, and these simple strategies can go a long way in ensuring your home remains pest-free for the long term.

15. Conclusion: Building Long-Term Pest Management Habits

In conclusion, building long-term pest management habits is essential for maintaining a pest-free home. While it may be tempting to rely solely on quick fixes or seasonal treatments, a proactive and consistent approach will yield far better results in the long run. Start by integrating the strategies discussed throughout this blog into your daily routine. Simple actions like sealing entry points, keeping your living spaces clean, and regularly inspecting your property can create a formidable barrier against unwanted invaders.

Moreover, consider educating yourself and your family about the types of pests that are common in your area and the conditions that attract them. Knowledge is a powerful tool that empowers you to recognize potential threats before they become full-blown infestations. Regularly scheduled maintenance, such as seasonal inspections and treatments, can help you stay a step ahead of pests, ensuring they don’t have the opportunity to settle in.

Finally, don’t hesitate to enlist the help of professionals when necessary. A reputable pest control service can provide tailored solutions and ongoing support, giving you peace of mind and freeing you to focus on enjoying your home. By committing to these long-term pest management habits, you can protect your home and create a comfortable, safe environment for you and your loved ones—one where pests simply can’t find a foothold. With diligence and a proactive mindset, you can effectively keep pests out of your home for good.

In conclusion, safeguarding your home from pests requires a proactive and multifaceted approach, and we hope our 10 effective strategies empower you to take charge of your living space. By implementing these practical tips—from sealing entry points to maintaining a clean environment—you can create an inhospitable atmosphere for unwelcome guests. Remember, consistency is key; regular maintenance and vigilance will go a long way in ensuring that your home remains pest-free. As you embark on this journey to protect your sanctuary, we encourage you to share your experiences and any additional tips in the comments below. Here’s to a happier, healthier home without the nuisance of pests!

How to fix a broken door handle?

A broken door handle may seem like a minor inconvenience, but it can quickly become a frustrating obstacle in your daily routine.

Whether it’s a stubborn handle that won’t turn, a loose knob that jiggles unnervingly, or a completely detached mechanism, dealing with a malfunctioning door handle can disrupt the flow of your home. Thankfully, you don’t need to call in a professional or invest in costly replacements to restore functionality. With just a few common tools and a little bit of know-how, you can tackle this DIY project and have your door handle working like new in no time. In this guide, we’ll walk you through five easy steps that will not only empower you to fix your door handle efficiently but also enhance your overall home repair skills. Say goodbye to those pesky door handle dilemmas and hello to newfound confidence in your DIY abilities!

1. Introduction: Why Fixing a Broken Door Handle Matters

How to fix a broken door handle?
Credit : whatcanu.com

A broken door handle might seem like a minor inconvenience, but its impact can resonate throughout your home. Think about it: every time you encounter a door that won’t open smoothly, you’re faced with frustration, and that can disrupt the flow of your day. A functioning door handle is not just about convenience; it’s a fundamental aspect of security and privacy. A broken handle can leave your home vulnerable, compromise your peace of mind, and even lead to larger issues if left unaddressed.

Moreover, a faulty door handle can detract from the overall aesthetic of your space. Whether it’s a sleek modern design or a vintage charm, door handles play a significant role in your home’s decor. Fixing a broken handle not only restores functionality but also enhances the visual appeal of your doors, making them inviting and polished.

In this DIY guide, we’ll walk you through five easy steps to repair your broken door handle, empowering you to take control of your home maintenance. With just a few tools and a bit of time, you’ll find that fixing your door handle is not only achievable but also rewarding. Let’s dive into the details and get your doors back in working order!

2. Tools and Materials Needed for the Repair

Before diving into the repair process, it’s essential to gather all the necessary tools and materials to ensure a smooth and efficient fix. Here’s a handy list of what you’ll need:

**Tools:**
1. **Screwdriver**: Depending on your door handle, you’ll likely need either a Phillips or flathead screwdriver. A multi-bit screwdriver can be particularly useful, as it allows you to switch between different types of screws without needing multiple tools.

2. **Pliers**: A pair of pliers can help you grasp and manipulate small components, especially if they’re tightly fitted or difficult to reach.

3. **Utility Knife**: This can be useful for cutting away any old adhesive or seals, should your door handle be held in place by sticky materials.

4. **Drill**: If you need to replace screws or install a new handle, a drill will save you time and effort. Make sure to have the correct drill bits on hand.

**Materials:**
1. **Replacement Handle**: Ensure you have a handle that matches the style and size of your existing one. You can find suitable replacements at your local hardware store or online.

2. **Screws**: If your handle came without screws, or if the old screws are stripped or damaged, it’s wise to have a few extra screws of the correct size.

3. **Lubricant**: A silicone-based lubricant can help ensure smooth operation once your repair is complete, particularly if the handle mechanism feels stiff.

4. **Cleaning Supplies**: A cloth and some mild cleaner will help you tidy up the area around the door handle before and after the repair.

By gathering these tools and materials in advance, you’ll set yourself up for success, making the repair process as straightforward and hassle-free as possible. Once you have everything ready, you’ll be just a few steps away from restoring your door handle to its former glory!

3. Step 1: Identify the Type of Door Handle

How to fix a broken door handle?
Credit : whatcanu.com

Before diving into repairs, the first crucial step is to identify the type of door handle you’re dealing with. Door handles come in various styles and mechanisms, each requiring a different approach for repair. Start by examining your door handle closely. Is it a traditional knob, a lever, or a more modern pull handle? Understanding the design can help you determine the tools and techniques you’ll need.

Next, pay attention to the mechanism itself. Is it a simple passage handle that allows free entry and exit, or does it have a locking mechanism that adds a layer of complexity? If it’s a lockable handle, you’ll want to check if the key is still functioning properly or if the lock cylinder is contributing to the problem.

Additionally, consider the material of the door handle. Is it made of metal, plastic, or perhaps wood? Different materials may require specific repair methods or replacement parts. For instance, a plastic handle may break more easily and could require a different approach than a robust metal one.

Once you’ve identified the type and mechanism of your door handle, you’re ready to move on to the next steps. Having a clear understanding of what you’re working with not only sets the stage for a smoother repair process but also saves you time and frustration down the line. So, take a moment to analyze your door handle—it’s a small but vital step in ensuring a successful fix!

4. Step 2: Remove the Broken Door Handle

Once you’ve gathered your tools and assessed the situation, it’s time to remove the broken door handle—a crucial step that sets the stage for a successful repair. Start by inspecting the handle itself; if it’s equipped with visible screws, grab your screwdriver and gently unscrew them. Be sure to keep these screws in a safe place, as you’ll need them later for reassembly.

If the handle is held in place by a decorative cover plate, you may need to pry it off carefully using a flathead screwdriver. Take your time with this step to avoid damaging the surrounding door surface. Once the cover is off, you’ll have clear access to the screws anchoring the handle.

In cases where the handle is stuck or the screws are stripped, a little finesse is required. Try wiggling the handle gently while turning the screws counterclockwise; this can sometimes help loosen stubborn components. If the handle is broken beyond repair, it might be necessary to apply a bit of force—just be cautious not to damage the door itself.

Once you’ve successfully unscrewed the handle, gently pull it away from the door. If you encounter resistance, double-check for any hidden screws or clips that may be holding it in place. With the broken handle removed, take a moment to clean the area around the door latch and inspect it for any damage that may need attention. Now you’re one step closer to restoring functionality to your door!

5. Step 3: Inspect the Mechanism for Damage

How to fix a broken door handle?
Credit : whatcanu.com

Once you’ve removed the door handle, it’s time to take a closer look at the internal mechanism. This step is crucial, as it allows you to identify any underlying issues that may be causing the malfunction. Start by inspecting the latch and the surrounding components for any signs of wear, rust, or misalignment. A damaged latch might be the reason your door handle isn’t functioning properly, so give it a thorough examination.

Next, check the screws and springs within the mechanism. Sometimes, a simple tightening of screws can resolve the issue, while other times, a spring might be broken or dislodged, requiring replacement. If you notice any components that are cracked or bent, it’s essential to replace them before reassembling the handle.

Additionally, take note of how the mechanism operates. If it feels stiff or doesn’t engage smoothly, it may need lubrication. A quick application of a silicone-based lubricant can often restore fluidity to the movement and enhance the overall performance of the door handle.

By carefully inspecting the mechanism and addressing any damage or wear, you set the foundation for a successful repair. This step ensures that when you reassemble the handle, it will function like new, allowing your door to open and close seamlessly once again. After completing this inspection, you’ll be ready to move on to the next step, where you’ll make any necessary repairs or replacements before putting everything back together.

6. Step 4: Replace or Repair the Broken Parts

In Step 4, you’ll tackle the heart of the repair process: replacing or repairing the broken parts of your door handle. This step is crucial since the functionality of your door handle hinges on the condition of its components. Start by examining the damaged parts closely. If the handle is cracked or the mechanism is jammed, you may need to replace the entire handle or just specific components, like screws, springs, or the latch.

If you’re opting for a replacement, head to your local hardware store with the old handle in hand. This will ensure you find a compatible replacement that matches both the style and size of your existing setup. Look for durable materials that can withstand daily use, such as stainless steel or brass, which not only offer longevity but also add a touch of elegance to your door.

However, if you prefer to repair, clean the broken parts thoroughly to remove any debris or rust that may be contributing to the malfunction. For minor cracks, a strong adhesive or epoxy can work wonders, providing a sturdy fix once it dries. For stripped screws or fittings, consider using a thread repair kit or larger screws that can hold the components firmly in place.

Once you have either replaced or repaired the parts, reassemble the handle carefully, ensuring everything is aligned correctly. As you reattach the screws, don’t overtighten them, as this may cause additional damage. Finally, give the handle a few test turns to ensure it operates smoothly. With these steps completed, you’ll be well on your way to restoring functionality to your door handle and enhancing the overall security of your space.

7. Step 5: Reinstall the Door Handle

How to fix a broken door handle?
Credit : whatcanu.com

After you’ve successfully replaced the broken components and ensured everything is in working order, it’s time for the final step: reinstalling the door handle. This is where your efforts truly come together, and you can take a moment to appreciate the progress made throughout the repair process.

Begin by aligning the handle with the door’s edge, ensuring that any screws or mounting holes line up correctly. Gently push the handle into place, taking care not to force anything, as this could damage both the handle and the door. If your door handle includes a spindle—a metal rod that connects the two handles—make sure it fits snugly through the hole in the door.

Next, grab your screws and a screwdriver, and secure the handle by tightening the screws—be careful not to over-tighten, as this can strip the holes or cause the handle to misalign. If your handle has a decorative cover or plate, now is the time to attach it, giving the handle a polished finish and concealing any visible screws.

Once everything is securely in place, test the handle by turning it several times to ensure it operates smoothly and without resistance. If you notice any sticking or unevenness, double-check that all screws are properly fastened and that the handle is aligned correctly.

Finally, take a step back and admire your handiwork! Reinstalling the door handle not only restores functionality but also enhances the overall aesthetic of your door. With just a few simple steps, you’ve successfully fixed a common household issue, saving time and money while boosting your confidence in DIY repairs. Now, go ahead and open that door with pride!

8. Tips for Ensuring a Secure Fit

When it comes to fixing a broken door handle, ensuring a secure fit is crucial for both functionality and safety. A wobbly or loose handle can lead to frustration and even compromise the security of your home. Here are some essential tips to guarantee that your newly installed handle is snug, secure, and ready for daily use.

**1. Choose the Right Size:** Before you begin, ensure that the replacement handle you’ve selected is the correct size for your door. Measure the diameter of the existing holes and the thickness of the door to avoid any surprises during installation. A properly sized handle not only fits better but also enhances the overall aesthetic of your door.

**2. Use Quality Hardware:** Investing in high-quality screws and fittings is vital. Cheap or worn-out screws can strip easily and lead to a loose handle over time. Opt for stainless steel or brass screws, which provide durability and resist corrosion, ensuring that your handle stays firmly in place even in varying weather conditions.

**3. Align Components Properly:** As you assemble the handle, take extra care to align the internal components accurately. Misalignment can lead to unnecessary strain on the handle, resulting in premature wear or breakage. Use a level or a guide to ensure everything is straight and properly aligned before tightening any screws.

**4. Tighten Securely but Not Overly:** As you fasten the screws, aim for a firm but gentle grip. Over-tightening can strip the screw holes or damage the door material, compromising the integrity of the installation. A well-secured handle should feel solid without excessive force.

**5. Test the Handle:** Once your handle is installed, give it a few test turns and pushes. Check for any wobbling or looseness. If you notice any movement, double-check your installation steps. It may be necessary to adjust the screws or realign the components to achieve that perfect, secure fit.

By following these tips, you can ensure that your door handle not only looks great but functions flawlessly, providing you with peace of mind and years of reliable use. With a little attention to detail, you’ll have a secure fit that allows you to open and close your door with confidence.

9. Common Mistakes to Avoid During the Repair

When tackling the task of fixing a broken door handle, it’s easy to overlook some crucial details that can lead to frustration or even further damage. Here are some common mistakes to avoid during your repair process, ensuring a smoother and more effective experience.

**1. Skipping the Diagnostic Step:**
Before you grab your tools, take a moment to thoroughly assess the door handle and the surrounding mechanism. Failing to identify the specific issue—whether it’s a loose screw, a broken latch, or a misaligned plate—can lead to unnecessary repairs or the wrong replacement parts being purchased.

**2. Using Incorrect Tools:**
Using the right tools is essential for a successful repair. Many DIYers might try to make do with whatever is on hand, but this can lead to stripped screws or damaged components. Ensure you have the correct screwdriver, pliers, and any other necessary tools specific to your door handle type.

**3. Over-tightening Screws:**
While it might seem logical to tighten the screws as much as possible to secure the handle, over-tightening can actually cause damage to the handle or the door itself. Instead, find a comfortable snugness—just enough to hold the handle securely without straining the material.

**4. Neglecting Lubrication:**
After you’ve successfully reattached your door handle, it’s easy to overlook lubrication. A bit of grease or a silicone spray can go a long way in ensuring the handle operates smoothly and prolongs its lifespan. Skipping this step can lead to future sticking or squeaking.

**5. Ignoring Aesthetic Details:**
A repair isn’t just functional; it should also look good. After completing the fix, take a moment to clean up any smudges or dirt around the handle and door area. This attention to detail not only improves the appearance but can also add a finishing touch that makes your DIY effort stand out.

By being mindful of these common pitfalls during your door handle repair, you can streamline the process and achieve a professional-looking fix with ease.

10. Maintenance Tips for Preventing Future Breakages

Maintaining your door handles is essential for ensuring their longevity and functionality. Just like any other part of your home, door handles require attention and care to prevent future breakages. Here are some simple yet effective maintenance tips to keep your door handles in top condition.

**1. Regular Cleaning:** Dust and debris can accumulate around door handles, leading to wear and tear over time. Use a soft, damp cloth to wipe down the handles regularly. For metal handles, consider using a mild detergent to remove any grime, followed by a quick dry with a clean cloth to prevent rust.

**2. Lubrication is Key:** To ensure smooth operation, apply a few drops of lubricant to the handle’s moving parts, particularly if you notice any squeaking or stiffness. A silicone-based lubricant is ideal as it doesn’t attract dust and dirt like oil-based options.

**3. Check for Loose Screws:** Periodically inspect the screws and bolts that secure the door handle. Vibrations from daily use can loosen these attachments, leading to instability. Tighten any loose screws with a screwdriver to maintain a secure fit.

**4. Avoid Excessive Force:** Educate family members and guests about using door handles gently. Yanking or applying excessive force can lead to breakages, especially in older or more delicate handles. A gentle push or pull is all that’s needed for proper operation.

**5. Replace Worn Parts Promptly:** If you notice any signs of wear, such as cracks or chips in the handle, address them immediately. Replacing worn parts before they fail completely can save you time and money in the long run.

By incorporating these maintenance tips into your routine, you can significantly extend the life of your door handles, ensuring they continue to function smoothly and efficiently for years to come. A little proactive care goes a long way in preventing those frustrating breakages from occurring again!

11. When to Call a Professional

While many door handle repairs can be tackled with a bit of DIY enthusiasm and basic tools, there are certain situations when calling in a professional is the best course of action. If your door handle is part of a complex locking system, for instance, or if it’s integrated into a high-security door, it might be wise to seek expert help. Professionals possess the technical know-how to handle intricate mechanisms that can be easily damaged by inexperienced hands.

Additionally, if you encounter persistent issues such as a door that won’t latch, a handle that feels loose despite your best efforts, or if the entire door frame seems out of alignment, these could be signs of underlying structural problems that require a skilled eye to assess.

Another indicator is if you find yourself without the proper tools or materials to complete the job safely and effectively. Sometimes, the right tools make all the difference in achieving a repair that is not only functional but also aesthetically pleasing.

Lastly, if you simply don’t feel confident tackling the repair or if the thought of disassembling a door handle sends shivers down your spine, there’s no shame in reaching out for professional assistance. Remember, a door handle is a crucial component of your home’s security, and ensuring it’s fixed correctly is paramount for your peace of mind. By knowing when to call a professional, you can avoid further complications and ensure your door handle is repaired safely and efficiently.

12. Conclusion: Enjoy Your Repaired Door Handle!

Congratulations! You’ve successfully navigated the journey of repairing your broken door handle, and now it’s time to revel in the satisfaction of a job well done. As you stand back and admire your handiwork, take a moment to appreciate the small but significant transformation you’ve achieved in your space. A functioning door handle not only enhances the aesthetics of your door but also restores a sense of security and ease of access to your home.

With just a few tools and a little bit of patience, you’ve learned how to diagnose the issue, gather the right materials, and execute a straightforward repair. Whether you opted for a simple tightening, a complete replacement, or a creative workaround, you’ve empowered yourself with the skill to tackle similar issues in the future. This newfound confidence in your DIY abilities extends beyond just door handles; it opens the door (pun intended!) to tackling other small home repairs and projects.

Now, every time you open or close that door, you can take pride in knowing you handled the situation yourself. So go ahead, give your repaired door handle a test run, and enjoy the smooth operation. And remember, the next time something breaks or needs fixing around your home, don’t hesitate to roll up your sleeves and dive in—after all, there’s nothing quite like the feeling of turning a problem into a solution with your own two hands!

In conclusion, fixing a broken door handle doesn’t have to be a daunting task. With just a few simple tools and our easy-to-follow five-step guide, you can restore functionality to your door in no time. Not only will you save money by tackling this DIY project yourself, but you’ll also gain the satisfaction of knowing you’ve enhanced the safety and accessibility of your home. Whether it’s a pesky knob that won’t turn or a handle that’s come loose, we hope this guide empowers you to take control of your home repairs. So gather your tools, roll up your sleeves, and let your newfound skills shine—your doors will thank you! If you found this guide helpful, be sure to share your success stories or any questions you may have in the comments below!

What are the different types of insulation and their effectiveness?

As energy costs continue to rise and environmental concerns become more pressing, the importance of proper insulation in our homes has never been more critical.

Insulation not only plays a pivotal role in maintaining comfortable indoor temperatures year-round but also significantly impacts energy efficiency and utility bills. With a plethora of options available, ranging from traditional fiberglass to innovative spray foam and eco-friendly alternatives, selecting the right insulation can feel overwhelming. In this comprehensive guide, we’ll explore the various types of insulation—each with its own unique characteristics and effectiveness—empowering you to make informed decisions tailored to your specific home needs. Whether you’re renovating an older space or building new, understanding your insulation options is the first step toward creating a cozy, energy-efficient sanctuary. Join us as we delve into the world of insulation, equipping you with the knowledge to create a comfortable and sustainable living environment.

1. Introduction to Home Insulation: Why It Matters

What are the different types of insulation and their effectiveness?
Credit : whatcanu.com

When it comes to maintaining a comfortable and energy-efficient home, insulation plays a pivotal role that often goes overlooked. As the first line of defense against the elements, proper insulation helps regulate indoor temperatures, keeping your home warm in the winter and cool during the hot summer months. But insulation is not just about comfort; it’s also a crucial factor in energy efficiency. By minimizing heat transfer, effective insulation reduces the demand on heating and cooling systems, leading to lower energy bills and a reduced carbon footprint.

In an era where sustainability is increasingly important, understanding your insulation options can empower you to make informed choices that benefit both your home and the environment. From traditional fiberglass batts to modern spray foam and cellulose, each type of insulation has unique properties that can impact its effectiveness and suitability for different areas of your home.

Moreover, insulation serves as a sound barrier, dampening noise from the outside world and providing a quieter living space. It also helps prevent moisture buildup, which can lead to mold growth and structural damage over time. Given these considerations, investing in the right insulation is not merely a cosmetic choice; it’s a fundamental aspect of home maintenance that enhances comfort, efficiency, and longevity.

As we delve deeper into the various types of insulation available, their effectiveness, and how to choose the right fit for your home, you’ll gain valuable insights that can help you create a more comfortable, cost-effective, and sustainable living environment. Let’s explore the world of insulation and uncover the best solutions for your home!

2. Understanding R-Value: What It Is and Why It’s Important

When it comes to insulation, understanding R-value is crucial for making informed choices that will affect your home’s energy efficiency and comfort. R-value is a measure of thermal resistance, indicating how well a material can resist the transfer of heat. The higher the R-value, the better the insulation performs in keeping heat in during the winter and out during the summer, which can lead to significant savings on your energy bills.

R-value is determined by several factors, including the type of insulation material, its thickness, and its density. For example, fiberglass batts typically have an R-value ranging from 2.9 to 3.8 per inch, while spray foam insulation can achieve R-values between 5.0 and 6.5 per inch. This variance highlights the importance of choosing not only the right type of insulation but also the appropriate thickness to meet your specific climate needs and building codes.

Understanding R-value also involves recognizing its impact on your overall home energy efficiency. An insulated home with a high R-value will require less energy for heating and cooling, leading to a reduced carbon footprint and a more sustainable living environment. Moreover, a well-insulated home can create a more comfortable indoor atmosphere by minimizing drafts and temperature fluctuations.

When selecting insulation for your home, consider the R-value recommendations for your region. For example, colder climates typically require higher R-values to combat heat loss, while warmer areas may prioritize ventilation and lower R-values to prevent overheating. Consulting with a professional can help you determine the ideal R-value based on your local climate conditions, your home’s design, and your personal comfort preferences.

In summary, R-value is not just a number; it’s a key factor in your home’s energy efficiency, comfort, and environmental impact. By understanding what R-value means and how it applies to different insulation materials, you’ll be better equipped to choose the right fit for your home and ensure that you’re making a sound investment in your living space.

3. Types of Insulation Materials: An Overview

What are the different types of insulation and their effectiveness?
Credit : whatcanu.com

When it comes to insulating your home, understanding the various types of insulation materials available is crucial for making an informed decision. Each material has its own unique properties, benefits, and drawbacks that can significantly impact your home’s energy efficiency, comfort level, and overall cost.

**Fiberglass Insulation**
One of the most common insulation materials, fiberglass insulation is composed of tiny glass fibers and is available in batts, rolls, or loose-fill. It is non-combustible, resistant to moisture, and offers excellent thermal performance. However, it can be irritating to the skin and lungs, so proper safety gear should be worn during installation. Fiberglass insulation is generally cost-effective and widely available, making it a popular choice for both DIY projects and professional installations.

**Foam Board Insulation**
Foam board insulation is a rigid panel made from polystyrene, polyisocyanurate, or polyurethane. This type of insulation is known for its high insulating value relative to its thickness, making it an effective choice for areas with limited space. It’s especially useful for insulating basement walls, exterior walls, and even roofs. While foam board insulation provides excellent moisture resistance, it can be more expensive than fiberglass and requires careful handling to avoid damage.

**Spray Foam Insulation**
Spray foam insulation is a versatile and highly effective option that expands upon application, filling gaps and creating an airtight seal. This type of insulation is available in two varieties: open-cell and closed-cell. Open-cell foam is softer and less dense, offering soundproofing benefits, while closed-cell foam is denser, providing superior insulation and moisture resistance. Although spray foam insulation generally comes with a higher price tag, its ability to reduce air leaks can lead to significant energy savings over time.

**Cellulose Insulation**
Made from recycled paper products, cellulose insulation is an eco-friendly option that offers excellent thermal performance. It is typically treated with a fire-retardant chemical and can be installed as loose-fill or dense-packed in walls and attics. Cellulose insulation is effective at reducing noise transmission, making it a great choice for soundproofing. While it may be more susceptible to moisture and settling over time compared to other materials, its sustainability and effectiveness make it an appealing option for environmentally conscious homeowners.

**Mineral Wool (Rock Wool) Insulation**
Mineral wool, also known as rock wool, is made from natural stone and recycled steel slag. It is fire-resistant, water-repellent, and offers excellent sound absorption properties. This type of insulation is available in batts or loose-fill and is particularly effective in areas exposed to high temperatures. However, it can be more expensive than fiberglass and may require special handling during installation.

When choosing the right insulation material for your home, consider factors such as your budget, the specific areas you need to insulate, climate conditions, and your personal preferences regarding sustainability and ease of installation. Each insulation type brings its own strengths to the table, and understanding these options will help you create a more energy-efficient and comfortable living space.

– Fiberglass

### Fiberglass

Fiberglass insulation is one of the most popular choices among homeowners and builders alike, thanks to its excellent thermal performance, versatility, and cost-effectiveness. Composed of fine strands of glass fibers, this insulation material is available in batts, rolls, and loose-fill forms, making it adaptable for various applications throughout the home.

One of the standout features of fiberglass insulation is its ability to resist heat transfer, helping to keep your home warm in the winter and cool in the summer. It boasts a high R-value, which measures the material’s resistance to heat flow; the higher the R-value, the better the insulation’s effectiveness. Typically, fiberglass insulation has an R-value ranging from 2.9 to 4.3 per inch, depending on the product and installation method, making it an efficient choice for both walls and attics.

Another appealing aspect of fiberglass is its fire resistance. Since it is made from glass, fiberglass insulation does not burn, offering an added layer of safety to your home. Additionally, it is resistant to moisture, which helps prevent the growth of mold and mildew—a critical factor in maintaining a healthy indoor environment.

However, while fiberglass insulation has many benefits, proper installation is essential to maximize its effectiveness. Gaps, compressions, or improper fitting can significantly reduce its insulating properties. It’s also important to wear protective gear when handling fiberglass, as the tiny glass fibers can irritate the skin and respiratory system.

When choosing fiberglass insulation, consider the specific needs of your home. Factors such as climate, construction type, and budget all play a role in determining the right fit. For instance, in colder climates, thicker batts with higher R-values are recommended, while in milder areas, a standard roll may suffice.

In summary, fiberglass insulation remains a top contender in the world of home insulation options. With its strong thermal performance, fire resistance, and adaptability, it can be a smart investment for improving energy efficiency while enhancing comfort in your home. Whether you’re building new or renovating, fiberglass insulation might just be the right fit for your needs.

– Foam Board

What are the different types of insulation and their effectiveness?
Credit : whatcanu.com

### Foam Board

Foam board insulation, known for its impressive thermal resistance and versatility, is a go-to choice for many homeowners looking to enhance their energy efficiency. Composed of rigid panels made from materials like polystyrene or polyisocyanurate, foam board insulation provides a solid barrier against heat flow, making it particularly effective in both new constructions and retrofitting projects.

One of the standout features of foam board is its high R-value per inch, which measures its resistance to heat transfer. This means that even a relatively thin layer of foam board can offer significant insulation, helping to keep your home warm in winter and cool in summer. Its lightweight nature makes it easy to handle and install, whether you’re insulating foundation walls, basement areas, or even the roof.

Another advantage of foam board insulation is its moisture resistance. Unlike traditional fiberglass or cellulose insulation, which can absorb water and lose effectiveness, foam board remains stable in damp conditions. This property makes it an excellent choice for areas prone to moisture, such as bathrooms, kitchens, and basements. Additionally, foam board can be used in combination with other insulation types to maximize energy efficiency and create a more comfortable living environment.

When choosing foam board insulation, it’s essential to consider the specific needs of your home. Different types of foam boards, such as expanded polystyrene (EPS), extruded polystyrene (XPS), and polyisocyanurate, offer varying levels of thermal resistance, moisture protection, and fire ratings. Be sure to evaluate the R-value requirements for your climate zone and the areas you’re insulating to select the right product.

Overall, foam board insulation presents a practical and effective solution for homeowners looking to improve their home’s energy efficiency. By understanding its benefits and options, you can make an informed decision that meets your insulation needs while contributing to a more comfortable and sustainable living space.

– Spray Foam

### Spray Foam

Spray foam insulation has rapidly gained popularity among homeowners and builders alike for its unique properties and impressive performance. Composed of two main components—polyurethane and isocyanate—this insulation type is applied as a liquid that expands to fill gaps and cavities, creating an airtight seal that is difficult to achieve with traditional insulation materials.

One of the standout benefits of spray foam insulation is its exceptional R-value, which measures thermal resistance. With an R-value ranging from 6.5 to 7 per inch, spray foam provides superior insulation compared to fiberglass or cellulose, making it an effective choice for energy efficiency. This high R-value not only helps keep your home warmer in the winter and cooler in the summer but also reduces your heating and cooling costs, leading to significant savings over time.

Another advantage of spray foam is its ability to act as a moisture barrier. By sealing off cracks and crevices, it prevents air leaks and moisture infiltration, which can lead to mold growth and structural damage. This characteristic is particularly beneficial in attics, basements, and crawl spaces, where humidity can be a concern.

However, while spray foam insulation offers remarkable benefits, it’s essential to consider the installation process. It requires professional application due to the technical nature of the materials and the need for proper safety measures. Additionally, upfront costs can be higher than other insulation options; however, many homeowners find that the long-term energy savings and durability make it a worthwhile investment.

When choosing spray foam for your home, you’ll typically find two types: open-cell and closed-cell foam. Open-cell foam is lighter and more flexible, making it ideal for interior applications where soundproofing is a priority. In contrast, closed-cell foam is denser and provides a higher R-value, making it preferable for areas exposed to moisture.

In summary, spray foam insulation could be the right fit for your home if you value energy efficiency, moisture resistance, and durability. By sealing your home effectively, it not only enhances comfort but also contributes to a healthier living environment. As you explore insulation options, consider how spray foam can play a pivotal role in enhancing your home’s overall energy performance.

– Cellulose

What are the different types of insulation and their effectiveness?
Credit : whatcanu.com

Cellulose insulation is a popular choice among homeowners seeking an eco-friendly and effective solution for their insulation needs. Made primarily from recycled paper products, such as newspapers and cardboard, cellulose is treated with fire retardants to enhance its safety and durability. This sustainable option is not only a responsible choice for the environment but also a highly effective insulator, boasting an impressive R-value—typically ranging from 3.2 to 3.8 per inch of thickness.

One of the standout features of cellulose insulation is its ability to fill gaps and crevices, making it an ideal choice for retrofitting existing homes. When blown into attics, walls, and crawl spaces, cellulose settles into every nook, providing a snug barrier against air leaks and minimizing drafts. This characteristic ensures that your home remains comfortably warm in the winter and refreshingly cool in the summer, ultimately leading to significant energy savings on heating and cooling costs.

Moreover, cellulose is known for its excellent sound-dampening properties. The dense material absorbs sound waves, making it an exceptional option for those looking to create a quieter living environment. This feature is particularly beneficial in multi-story homes or in urban areas where noise pollution can be a concern.

When considering cellulose insulation, it’s essential to work with a qualified professional who can assess your specific needs and install the insulation correctly. Proper installation is crucial, as any gaps or voids can compromise its effectiveness. Additionally, cellulose is treated to be resistant to pests, mold, and fire, but regular maintenance and inspections are still advisable to ensure long-lasting performance.

In summary, cellulose insulation offers a blend of environmental sustainability, energy efficiency, and soundproofing capabilities, making it a compelling option for homeowners looking to enhance their home’s comfort and reduce their ecological footprint. As you explore your insulation options, consider the numerous benefits that cellulose can bring to your living space.

– Mineral Wool

### Mineral Wool

Mineral wool, also known as rock wool or stone wool, is a popular insulation choice renowned for its exceptional thermal performance and fire-resistant properties. Made from volcanic rock or industrial byproducts, this versatile material is spun into fibers, creating a lightweight, fluffy substance that is easy to handle and install.

One of the standout features of mineral wool is its ability to provide superior thermal insulation. It effectively traps air pockets, minimizing heat transfer and helping to maintain a comfortable indoor climate year-round. This thermal efficiency contributes not only to a cozy living environment but also to reduced energy bills, as your heating and cooling systems will operate more efficiently.

In addition to thermal properties, mineral wool is incredibly fire-resistant. With a melting point of around 1,500 degrees Celsius (approximately 2,732 degrees Fahrenheit), it can help slow the spread of flames in the event of a fire, providing additional safety for your home and peace of mind for your family. This makes it an excellent choice for areas where fire safety is a concern, such as attics or near chimneys.

Moreover, mineral wool is also soundproofing champion. Its dense structure dampens sound waves, making it an ideal insulation option for homes located in noisy environments or for those looking to create a quieter indoor space. Whether it’s blocking out street noise or minimizing sound between rooms, mineral wool can significantly enhance your comfort.

When considering mineral wool insulation, it’s essential to pay attention to the installation process. While it can be installed by homeowners with some DIY experience, hiring a professional is often recommended to ensure optimal results and safety, especially in complex areas. Additionally, it’s important to use appropriate protective gear, as the fibers can irritate the skin and lungs during installation.

Overall, mineral wool insulation is a robust, multi-functional option that not only improves your home’s energy efficiency but also enhances safety and comfort. Whether you’re building new or renovating an existing space, this insulation type deserves serious consideration for its myriad benefits.

4. Comparing Insulation Effectiveness: Pros and Cons of Each Type

When it comes to insulation, understanding the effectiveness of different types is crucial in making an informed decision for your home. Each insulation material comes with its own set of advantages and disadvantages, impacting not only energy efficiency but also installation, cost, and environmental footprint. Let’s dive into the most common insulation options available and weigh their pros and cons.

**Fiberglass Insulation**
**Pros:** Fiberglass insulation is one of the most popular choices due to its affordability and ease of installation. It is non-combustible and resistant to moisture, making it a great option for various climates. Additionally, fiberglass has a high R-value, meaning it provides excellent thermal resistance.
**Cons:** On the downside, fiberglass can irritate the skin, eyes, and lungs if proper protective gear is not used during installation. It also may settle over time, potentially reducing its effectiveness.

**Foam Board Insulation**
**Pros:** Foam board insulation offers superior thermal resistance and is highly effective for basement walls, foundation slabs, and even exterior walls. It is lightweight, easy to cut, and provides a continuous layer of insulation that minimizes thermal bridging.
**Cons:** However, foam board can be more expensive upfront compared to other insulation options. Additionally, it is vulnerable to damage from sunlight and may require additional protective measures.

**Spray Foam Insulation**
**Pros:** Spray foam insulation is renowned for its superior air-sealing capabilities. It expands to fill gaps and cracks, providing an airtight barrier that helps prevent drafts and heat loss. This can lead to significant energy savings over time.
**Cons:** The cost of spray foam can be on the higher side, and professional installation is usually required, adding to the initial investment. Moreover, some types of spray foam may emit volatile organic compounds (VOCs) during and after installation, which can be a concern for indoor air quality.

**Cellulose Insulation**
**Pros:** Made from recycled paper products, cellulose insulation is an eco-friendly choice that offers excellent soundproofing qualities. It is also treated with fire retardants and can be blown into hard-to-reach spaces, making it versatile for various applications.
**Cons:** However, cellulose can settle over time, reducing its effectiveness. It is also more susceptible to moisture and pests if not properly installed or maintained.

**Mineral Wool (Rock Wool) Insulation**
**Pros:** Mineral wool insulation is fire-resistant, water-repellent, and provides excellent soundproofing. It can also withstand high temperatures, making it ideal for areas such as attics and around heating systems.
**Cons:** The main drawbacks include its higher price point and the fact that it can be heavier and more difficult to install compared to lighter materials.

Each insulation type has its unique strengths and weaknesses, making it vital to consider your specific needs, budget, and climate when deciding. A thorough understanding of these options will empower you to choose the insulation that best fits your home, ultimately leading to improved comfort and energy efficiency.

5. Insulation Installation Methods: DIY vs. Professional Help

When it comes to insulating your home, one of the most critical decisions you’ll face is whether to tackle the installation yourself or hire a professional. Each option has its own set of advantages and considerations that can significantly impact both the effectiveness of the insulation and your overall experience.

**DIY Installation:** For the savvy homeowner who enjoys hands-on projects, a DIY approach can be both rewarding and cost-effective. With a plethora of resources available online—from video tutorials to detailed guides—you can become well-versed in the various insulation methods, whether you’re working with batts, rolls, foam boards, or spray foam. DIY insulation allows you to customize the process according to your specific needs, and it grants you complete control over the materials used. However, it’s essential to be aware of potential pitfalls, such as improper installation that could lead to air leaks and reduced effectiveness. Additionally, safety should always be a priority: make sure you’re equipped with the right protective gear and tools.

**Professional Installation:** On the other hand, enlisting the help of insulation professionals can save you time and ensure a high-quality installation. Experts are trained to assess your home’s unique needs and recommend the best insulation type and method for optimal energy efficiency. Their experience often translates to a quicker, more precise installation, minimizing the risk of errors that could compromise the insulation’s performance. While hiring professionals may involve a higher upfront cost, the long-term savings on energy bills and the peace of mind that comes with a job well done can outweigh the initial expense.

Ultimately, the choice between DIY and professional help hinges on your comfort level with home improvement tasks, your budget, and the complexity of the insulation project. By carefully weighing these factors, you can determine the best path forward and ensure your home is adequately insulated for years to come.

6. Factors to Consider When Choosing Insulation

When it comes to selecting the right insulation for your home, there are several critical factors to consider that go beyond just R-value or material type. Understanding these elements will help you make a more informed choice tailored to your specific needs.

**1. Climate Zone:** Your local climate plays a significant role in determining the type of insulation that will be most effective. For instance, homes in colder areas typically benefit from insulation materials that offer higher thermal resistance, while those in warmer climates may require insulation that also reflects heat to keep indoor spaces comfortable.

**2. Energy Efficiency Goals:** Consider your long-term energy efficiency goals. Are you looking to reduce your heating and cooling costs significantly? A higher R-value insulation may be necessary, but you should also evaluate how it fits into your overall energy efficiency plan, including windows, doors, and HVAC systems.

**3. Installation Method:** Different insulation types come with various installation requirements. While some materials, like spray foam, can be applied by professionals and create an airtight seal, others, like fiberglass batts, might be easier for DIY enthusiasts to install. Your comfort level with installation and whether you prefer to hire professionals can influence your choice.

**4. Environmental Impact:** If sustainability is important to you, you might want to consider insulation options made from recycled materials or those that are renewable. Look for certifications that indicate an insulation product is environmentally friendly, like the Forest Stewardship Council (FSC) label.

**5. Budget:** The cost of insulation materials and installation can vary widely. While higher-quality insulation might have a steeper upfront cost, consider the long-term savings on energy bills. It’s essential to strike a balance between initial investment and future savings.

**6. Soundproofing Needs:** If noise reduction is a priority—perhaps you live in a busy urban area or have a home office—a denser insulation material may help dampen sound. Acoustic insulation products can be particularly beneficial in these scenarios.

**7. Local Building Codes:** Be sure to check if there are any local building codes or regulations that dictate the type of insulation you can use. Compliance with these codes is crucial not only for safety but also for ensuring your home’s value and resale potential.

By carefully considering these factors, you can make a more informed decision that not only enhances your home’s comfort but also optimizes energy efficiency and aligns with your personal values. Remember, insulation is an investment in your home’s future, so take the time to weigh your options thoughtfully.

– Climate and Weather Conditions

When it comes to insulating your home, understanding the climate and weather conditions in your area is paramount. Different regions experience varying temperatures, humidity levels, and even precipitation patterns, all of which can significantly impact the effectiveness of insulation materials.

For instance, if you live in a colder climate, you may want to prioritize insulation types that offer high thermal resistance, such as spray foam or fiberglass batts. These materials create a robust barrier against the frigid outdoor temperatures, helping to keep your home warm and energy-efficient during those biting winter months. In contrast, those residing in warmer, more humid environments might benefit from reflective insulation or radiant barriers that not only help keep your home cooler but also mitigate moisture issues that can lead to mold growth.

Moreover, understanding the specific weather patterns in your area can guide you in selecting the right insulation for your home. For example, regions prone to heavy rainfall may require insulation with moisture-resistant properties, while areas that experience extreme temperature fluctuations might necessitate insulation that can adapt to those changes and maintain a stable indoor climate.

Before making a decision, take into account how your home’s orientation—such as its exposure to sunlight—can influence temperature control and comfort. By aligning your insulation choices with your local climate and weather conditions, you can ensure that your home remains comfortable year-round while also optimizing energy efficiency and reducing utility costs. Choosing the right insulation not only enhances your living space but also contributes to a more sustainable future.

– Home Design and Structure

When considering insulation options for your home, it’s crucial to take into account the overall design and structure of your space. The architecture of your home plays a significant role in determining which insulation types will be most effective and efficient. For instance, a contemporary open-concept design may have different insulation needs compared to a traditional multi-story home with numerous nooks and crannies.

In modern homes, where large windows and high ceilings are common, thermal insulation must be carefully selected to manage heat loss and gain effectively. Insulation types like spray foam or rigid foam boards can be particularly useful in these scenarios, as they provide superior thermal resistance and air sealing capabilities. On the other hand, older homes with unique structural features, such as plaster walls or wood framing, may benefit more from traditional insulation materials like fiberglass batts or cellulose, which can be fitted into existing cavities without extensive renovation.

Furthermore, the climate in which your home is situated is another crucial factor tied to its design. Homes in colder regions will require insulation that offers high R-values to retain heat, while those in warmer climates may opt for reflective insulation or radiant barriers to keep spaces cool.

Additionally, think about accessibility. If your home has hard-to-reach spaces, such as crawl spaces or attics, you’ll want to select insulation that can be easily installed in those areas. For example, blown-in insulation can be ideal for attics where maneuverability is limited, providing coverage without the need for extensive physical access.

Ultimately, understanding your home’s design and structure will guide you in making informed decisions about insulation types, ensuring that you achieve the best energy efficiency and comfort while enhancing your home’s overall performance. Each choice you make will contribute to a more sustainable living environment and long-term savings on energy bills.

– Environmental Impact

When considering insulation options for your home, it’s essential to look beyond just performance and cost; the environmental impact of your choices plays a significant role in creating a sustainable living space. Insulation materials vary considerably in their ecological footprints, from their production processes to their longevity and recyclability.

For instance, traditional fiberglass insulation, while effective in thermal resistance, is derived from non-renewable resources and can pose health risks during installation. In contrast, natural insulation materials like sheep’s wool, cotton, or cellulose, made from recycled paper, are not only biodegradable but also offer excellent thermal performance while reducing energy consumption in the production process.

Additionally, some insulation options are treated with fire retardants or other chemicals that may release harmful VOCs (volatile organic compounds) into your home environment. Understanding these factors can help you choose materials that enhance indoor air quality, contributing to a healthier home.

Another consideration is the lifespan of the insulation. Many modern products come with extended warranties, indicating durability and long-term effectiveness, which can reduce waste and the need for replacement. By opting for recyclable or biodegradable insulation, homeowners can significantly lessen their environmental impact, ensuring that when it eventually reaches the end of its life, it won’t contribute to landfill overflow.

Ultimately, choosing insulation with a minimal environmental footprint not only contributes to a sustainable lifestyle but also enhances the overall energy efficiency of your home, leading to lower utility bills and a smaller carbon footprint. By prioritizing sustainability in your insulation choices, you can create a cozy, efficient home while doing your part to protect the planet.

7. Common Insulation Mistakes to Avoid

When it comes to insulating your home, even the smallest misstep can lead to significant energy loss and increased utility bills. To ensure you maximize the effectiveness of your insulation project, here are some common mistakes to avoid:

**1. Overlooking Air Leaks:** One of the most critical errors homeowners make is neglecting to seal air leaks before installing insulation. Gaps around windows, doors, and utility penetrations can drastically reduce insulation effectiveness. Always conduct a thorough inspection and use caulk or weatherstripping to seal any leaks.

**2. Choosing the Wrong Type of Insulation:** With various insulation materials available—fiberglass, foam, cellulose, and more—it’s essential to select the right type for your specific needs. Each material has its own R-value (a measure of thermal resistance) and suitability depending on the area being insulated. For example, spray foam is ideal for hard-to-reach spaces, while fiberglass batts are great for walls and attics.

**3. Ignoring R-Value Requirements:** Each part of your home has recommended R-values based on your climate zone. Failing to adhere to these guidelines can result in inadequate insulation. Be sure to research the recommended R-values for your area and assess whether your current insulation meets those standards.

**4. Installing Insulation Too Tightly:** While it might seem logical to fill every gap with insulation, compressing it too tightly can reduce its effectiveness. Insulation works best when it has room to expand and trap air. Always follow the manufacturer’s guidelines regarding installation techniques.

**5. Skipping Attic and Basement Insulation:** Many homeowners focus solely on walls and forget about attics and basements, which can be significant sources of heat loss. Properly insulating these areas can lead to drastic improvements in energy efficiency. Make sure to assess these spaces and add insulation as needed.

**6. Not Considering Moisture Control:** Insulation can trap moisture, leading to mold and mildew growth if not properly managed. Be sure to use vapor barriers in areas prone to moisture, such as basements and crawl spaces, to protect your insulation and your home.

**7. Failing to Seek Professional Help:** If insulation installation seems overwhelming, don’t hesitate to call in the experts. A professional can help you navigate your options, ensure proper installation, and even conduct an energy audit to identify problem areas in your home.

By avoiding these common insulation mistakes, you can enhance your home’s comfort, improve energy efficiency, and save money on your utility bills. A well-insulated home is not just about comfort; it’s an investment in the longevity and sustainability of your living space.

8. How to Assess Your Home’s Insulation Needs

Assessing your home’s insulation needs is a crucial step in ensuring maximum energy efficiency and comfort. It begins with a thorough evaluation of your current insulation, which can often be done with a few simple checks. Start by identifying the areas in your home that require insulation, such as the attic, walls, floors, and crawl spaces.

**Visual Inspection**: Look for visible signs of inadequate insulation. In the attic, check for low insulation levels or any gaps where insulation may be missing. If you notice uneven temperatures in different rooms or ice dams forming on your roof during winter, these are indicators that your insulation may not be performing effectively.

**Energy Audits**: Consider conducting a professional energy audit. Auditors use tools like blower door tests and thermal imaging cameras to pinpoint air leaks and areas of heat loss that might not be visible to the naked eye. This can provide a comprehensive understanding of how well your home is insulated and where improvements are necessary.

**Assessing Climate**: Take into account your local climate conditions. Homes in colder areas may require thicker insulation levels and different materials than those in warmer climates. Research the recommended R-values for insulation in your region to determine if your current setup meets or exceeds these standards.

**Energy Bills**: Review your energy bills for fluctuations that could indicate poor insulation. A sudden increase in heating or cooling costs may signal that your insulation is failing to maintain comfortable indoor temperatures.

**Consulting Professionals**: If you’re uncertain about conducting an assessment yourself, consulting insulation professionals can provide tailored insights. They can help you understand your unique needs and recommend the best insulation types and solutions that suit your home’s architecture and your budget.

By taking these steps, you can accurately assess your home’s insulation needs and make informed decisions that will enhance your home’s energy efficiency, improve comfort levels, and potentially save you money on utility bills in the long run.

9. The Role of Insulation in Energy Efficiency and Cost Savings

When it comes to creating a comfortable and cost-effective living environment, insulation plays a pivotal role in energy efficiency and long-term savings. Proper insulation acts as a barrier, preventing heat transfer between the interior of your home and the outside elements. In the winter, it keeps the warmth generated by your heating system from escaping, while in the summer, it slows down the influx of heat from the sun, allowing your air conditioning to work more efficiently.

The effectiveness of insulation is often measured by its R-value, which indicates its resistance to heat flow; the higher the R-value, the better the insulation’s performance. Different materials, including fiberglass, foam, cellulose, and mineral wool, offer varying R-values and properties, making it essential to choose the right type based on your climate, home design, and budget.

Making the investment in quality insulation can lead to significant cost savings on your energy bills. Homeowners often report reductions of 20% to 30% in heating and cooling costs after upgrading their insulation. Additionally, a well-insulated home can improve indoor comfort by maintaining consistent temperatures, reducing draftiness, and minimizing noise pollution from outside.

Choosing the right insulation involves more than just selecting a material with a high R-value. Considerations such as moisture control, installation method, and the specific areas of your home that need insulation—like attics, walls, or basements—are crucial for maximizing efficiency and savings. By understanding the role of insulation and its impact on your energy consumption, you can make informed decisions that lead to a more sustainable and cost-effective home.

10. Insulation Maintenance: Tips for Longevity

Maintaining your insulation is crucial for ensuring its longevity and effectiveness in keeping your home comfortable and energy-efficient. While insulation is designed to last for many years, neglecting its upkeep can lead to deterioration and reduced performance over time. Here are some essential tips to help you maintain your insulation and maximize its lifespan.

**1. Regular Inspections:** Schedule routine inspections of your insulation, particularly in areas prone to moisture, such as attics and basements. Look for signs of wear and tear, such as sagging, dampness, or mold growth. Catching these issues early can prevent more extensive damage.

**2. Manage Moisture Levels:** Insulation’s greatest enemy is moisture. Ensure that your home is properly ventilated to minimize humidity levels. Use dehumidifiers in damp areas, and consider installing vapor barriers in spaces like crawl spaces to keep moisture at bay.

**3. Seal Air Leaks:** Conduct a thorough check for gaps and cracks around windows, doors, and vents. Air leaks can compromise your insulation’s effectiveness, making your heating and cooling systems work harder. Use caulk or weatherstripping to seal these areas and improve your overall insulation performance.

**4. Keep it Clean:** Dust and debris can accumulate on insulation and reduce its effectiveness. If you have exposed insulation, such as in an attic, ensure it remains clean and unobstructed. Be cautious when cleaning, though; use appropriate protective gear and follow safety guidelines to avoid disturbing the insulation material.

**5. Mind the Pests:** Rodents and insects can wreak havoc on insulation. Regularly inspect your insulation for signs of pest activity. If you notice droppings or chewed materials, contact a pest control professional to address the issue promptly.

**6. Know When to Replace:** While most insulation materials have a long lifespan, they do degrade over time. If you notice significant damage, such as mold, large gaps, or compression, it may be time to replace your insulation. Consult with a professional to assess the condition and determine the best course of action.

By implementing these maintenance tips, you can help ensure that your insulation continues to perform optimally, keeping your home comfortable and your energy bills in check. Remember that a little proactive care goes a long way in preserving your investment and enhancing the overall energy efficiency of your home.

11. Innovations in Insulation Technologies

In recent years, the insulation industry has experienced a surge of innovation, leading to the development of advanced materials and technologies that enhance both energy efficiency and environmental sustainability. Modern insulation options go beyond traditional fiberglass or foam; they now include high-performance solutions designed to meet the evolving needs of homeowners.

One of the most exciting advancements is the use of aerogel, a lightweight material known for its remarkable insulating properties. Often referred to as “frozen smoke,” aerogel is made from silica and can achieve insulation values significantly higher than conventional materials, making it an excellent choice for those seeking to maximize energy efficiency in limited space, like in attics or wall cavities.

Another innovative option is spray foam insulation, which not only provides a superior R-value but also creates an airtight seal that helps prevent air leaks. This is particularly beneficial in older homes where gaps and cracks may exist, allowing for energy loss. Recent formulations have improved the sustainability of spray foam, with options that utilize renewable resources and are free from harmful chemicals, making them safer for both occupants and the environment.

Reflective or radiant barrier insulation is gaining popularity, especially in warmer climates. This technology reflects heat away from living spaces, significantly reducing cooling costs during hot months. It works effectively in attics and can be combined with other insulation types for enhanced performance.

Lastly, the rise of smart insulation systems is revolutionizing how we think about temperature regulation in our homes. These systems can adjust their properties based on external temperatures, providing optimal insulation when it’s needed most. Coupled with smart home technology, these solutions allow homeowners to monitor and control their energy consumption in real time.

As you explore insulation options for your home, consider these cutting-edge technologies. They not only promise improved comfort and lower energy bills but also reflect a growing commitment to sustainability in building practices. By choosing innovative insulation solutions, you can enhance your home’s energy efficiency while contributing to a greener future.

12. Real-Life Case Studies: Successful Insulation Upgrades

When it comes to understanding the true impact of insulation upgrades, nothing speaks louder than real-life case studies. These narratives provide tangible insights into the effectiveness of various insulation materials and techniques, revealing how homeowners have transformed their living spaces while significantly enhancing energy efficiency.

Take, for instance, the Johnson family, who opted for spray foam insulation in their older, drafty home. Living in a climate with harsh winters and sweltering summers, they found their utility bills skyrocketing. After conducting thorough research, they decided to invest in spray foam, which not only sealed gaps and cracks but also provided superior thermal resistance. The result? A remarkable 30% reduction in their energy costs within the first year, along with a noticeable improvement in the comfort level of their home.

Another compelling story comes from the Martinez household, who chose to upgrade their attic insulation with fiberglass batts. Initially hesitant due to budget constraints, they were pleasantly surprised to find that this relatively affordable option yielded significant results. Not only did they experience a more consistent indoor temperature, but the improved insulation also reduced noise from outside, creating a serene environment for their family. Within just a few months, the Martinez family began to notice a significant decrease in heating and cooling expenses, affirming that even small changes can make a big difference.

These case studies illustrate not just the direct benefits of insulation upgrades, but also the broader impact on home comfort and energy efficiency. By examining the experiences of others, homeowners can make informed decisions about which insulation options might work best for their unique situations, ultimately paving the way for a more sustainable and cost-effective living environment. Whether you’re considering foam, fiberglass, cellulose, or another material, these real-world examples serve as a valuable resource in your insulation journey, providing inspiration and guidance as you work to create a more energy-efficient home.

13. Financial Incentives and Rebates for Insulation Improvements

When considering insulation upgrades for your home, it’s essential to explore the financial incentives and rebates that can significantly reduce your overall costs. Many homeowners are surprised to learn that various local, state, and federal programs exist to promote energy efficiency, and taking advantage of these financial incentives can make a substantial difference in your renovation budget.

Tax credits, for example, may be available for specific types of insulation materials, such as spray foam or cellulose, which are known for their superior energy-saving capabilities. These credits can offset a portion of the installation costs, allowing you to recoup some of your investment come tax season. Additionally, some utility companies offer rebates for homeowners who enhance their insulation, particularly if it leads to reduced energy consumption. These rebates can vary widely, so it’s worth researching what programs are available in your area.

Furthermore, energy efficiency programs often provide free or discounted energy audits, allowing you to assess your home’s insulation needs more accurately. These assessments can identify areas where heat loss is most significant, guiding you toward the most effective insulation solutions while also qualifying you for potential rebates.

Before embarking on your insulation project, take the time to investigate these financial incentives. Check with your local government’s energy office, utility providers, and even the IRS to uncover what rebates or credits you might be eligible for. By leveraging these opportunities, you can not only insulate your home effectively but also save money in the process, making your investment in comfort and efficiency more manageable and rewarding.

14. Conclusion: Making an Informed Decision for Your Home

In conclusion, selecting the right insulation for your home is a crucial step in ensuring energy efficiency, comfort, and long-term sustainability. With a variety of insulation types available—each offering distinct advantages and varying levels of effectiveness—it’s essential to consider your specific needs, local climate, and budget.

As we’ve explored throughout this guide, options such as fiberglass, foam, cellulose, and mineral wool come with their own unique properties and installation requirements. Take into account factors like R-value, moisture resistance, and soundproofing capabilities when making your choice.

Moreover, don’t overlook the importance of professional advice. Consulting with insulation experts can provide valuable insights tailored to your home’s design and your personal preferences. They can assess your space, recommend the most effective materials, and ensure proper installation, which is vital for maximizing the benefits of your insulation.

Ultimately, the goal is to create a comfortable living environment while minimizing energy costs and reducing your carbon footprint. By being informed and proactive in your decision-making process, you can enhance your home’s energy efficiency and create a space that is not only more comfortable but also more sustainable for years to come. Take the time to research, ask questions, and weigh your options—your home deserves the best insulation possible.

15. Resources for Further Learning and Assistance

When it comes to making informed decisions about insulation options for your home, having access to reliable resources is crucial. Fortunately, there’s a wealth of information available that can guide you through the intricacies of insulation types, their effectiveness, and how to select the right fit for your specific needs.

**1. Government Websites:** Many government agencies, such as the U.S. Department of Energy (DOE) and the Environmental Protection Agency (EPA), provide extensive resources on energy efficiency, including insulation. Their websites often feature guides on the benefits of various insulation materials, tips on improving your home’s energy performance, and information on local incentives or rebates for insulation upgrades.

**2. Professional Associations:** Organizations like the Insulation Contractors Association of America (ICAA) and the North American Insulation Manufacturers Association (NAIMA) offer valuable insights into best practices for insulation installation and maintenance. These associations often publish technical documents, case studies, and research findings that can deepen your understanding of insulation effectiveness and safety measures.

**3. Home Improvement Blogs and Websites:** Numerous blogs and websites focus on home improvement topics, including insulation. Trusted sources like This Old House or HomeAdvisor frequently publish articles that break down complex concepts into digestible information, complete with tips, cost comparisons, and DIY guides.

**4. Local Home Improvement Stores:** Many local hardware and home improvement stores have knowledgeable staff who can assist you in understanding your insulation options. They often host workshops or provide informational brochures that cover the different types of insulation available and their suitability for various climates and home styles.

**5. Online Forums and Community Groups:** Engaging with online communities, such as Reddit’s home improvement subreddit or dedicated Facebook groups, can provide firsthand experiences and recommendations from homeowners who have gone through similar processes. These platforms can be particularly helpful for asking specific questions and getting feedback on particular products or installation methods.

**6. Professional Consultations:** If you’re feeling overwhelmed or uncertain, consider reaching out to a local insulation contractor for a consultation. They can assess your home’s current insulation, offer tailored recommendations, and provide insights into the latest insulation technologies that might be perfect for your home.

By leveraging these resources, you can equip yourself with the knowledge necessary to make informed decisions about insulation, ensuring your home remains comfortable, energy-efficient, and well-protected against the elements. Whether you’re a DIY enthusiast or prefer to leave it to the professionals, the right information can make all the difference in your insulation journey.

In conclusion, choosing the right insulation for your home is a crucial step toward enhancing energy efficiency, comfort, and sustainability. We’ve explored various insulation options, each with its unique benefits, effectiveness, and suitability for different climates and building structures. By understanding the types of insulation available and assessing your specific needs, you can make informed decisions that not only improve your home’s thermal performance but also contribute to significant cost savings over time. As you embark on this journey to insulate your home, remember to consider factors such as R-value, installation methods, and environmental impact. With the right insulation, you can create a cozy, energy-efficient sanctuary that stands the test of time. Happy insulating!

How to create a stylish and functional mudroom?

Your entryway is the first impression of your home, and it sets the tone for what lies beyond.

Yet, it often becomes a cluttered catch-all for shoes, bags, jackets, and everything in between. Enter the mudroom—a stylish and functional solution that not only enhances your home’s aesthetic but also streamlines everyday living. Imagine a dedicated space where organization meets design, offering a perfect blend of practicality and elegance. In this blog post, we will explore innovative ideas and essential tips for transforming your entryway into a welcoming mudroom. From chic storage solutions to eye-catching decor, discover how to create a space that captures your personal style while keeping chaos at bay. Say goodbye to the disarray and hello to a beautifully organized space that greets you with warmth and functionality every time you step through the door!

1. Understanding the Purpose of a Mudroom

How to create a stylish and functional mudroom?
Credit : whatcanu.com

When it comes to designing a stylish and functional mudroom, the first step is to understand its purpose and how it can serve your household. A mudroom is more than just a transitional space; it’s the first line of defense against the chaos that can accompany daily life. This area acts as a buffer zone between the outdoors and your home, providing a designated spot for shoes, coats, bags, and other items that can clutter your living space.

At its core, a mudroom is a practical solution to organizing your family’s essentials. It’s where muddy boots can be shed, wet umbrellas can be hung, and the dog can be wiped down after a romp in the rain. However, the mudroom can also be an inviting and stylish space that reflects your personal aesthetic. Consider how you want this area to function based on your lifestyle: will it need to accommodate sports equipment, children’s backpacks, or even pet supplies?

A well-designed mudroom can include features such as built-in benches for comfortable seating while putting on or removing shoes, ample storage options like cabinets and cubbies for easy access to frequently used items, and durable materials that can withstand the wear and tear of daily use.

By understanding the unique role a mudroom plays in your home, you can create a space that not only meets your practical needs but also enhances your overall entryway aesthetic. This thoughtful design approach will ensure that your mudroom becomes a harmonious blend of functionality and style, making it a welcoming space for family and guests alike.

2. Essential Features of a Functional Mudroom

When designing a mudroom, the goal is to create a space that is not only stylish but also highly functional, catering to the needs of your household while standing up to the demands of daily life. Here are some essential features that will elevate your mudroom from a simple entryway to a pivotal part of your home.

**1. Ample Storage Solutions:**
At the heart of any functional mudroom is storage. Consider incorporating built-in cabinetry, open shelving, and hooks at varying heights to accommodate everyone in the family. A designated space for shoes, coats, bags, and sports equipment helps keep clutter at bay. Bench seating with hidden storage compartments can provide a convenient spot to sit and put on or remove shoes while keeping essentials organized.

**2. Durable Flooring:**
Mudrooms see a lot of traffic and can quickly become dirty or worn. Opt for durable flooring materials that can withstand mud, water, and heavy foot traffic. Tiles, vinyl, or luxury vinyl planks are excellent choices since they are easy to clean and can resist stains. Additionally, consider adding a large area rug or runner that can be easily washed to enhance comfort and style.

**3. Easy-to-Clean Surfaces:**
Choose materials that are easy to maintain. For example, wall panels or beadboard can add charm while protecting your walls from scuffs and dirt. Select paint finishes that are washable, and consider using a backsplash behind storage areas to make clean-up simple.

**4. Hooks and Racks:**
Incorporate a variety of hooks and racks to simplify the process of putting items away. Wall-mounted hooks can offer a designated space for coats and bags, while pegboards can hold hats, scarves, and other accessories. Think about adding a chalkboard or whiteboard for reminders and notes—a small touch that can make a big difference in organization.

**5. Good Lighting:**
A well-lit mudroom is essential, especially during the darker months of the year. Natural light is ideal, so if possible, include a window or a glass door to brighten the space. Additionally, overhead lighting combined with task lighting can ensure all corners are well-illuminated, making it easier to locate items and navigate the area, even on the dreariest days.

**6. Personal Touches:**
Finally, don’t forget to add personal touches that reflect your style and make the space welcoming. Consider decorative storage bins, a stylish mirror, or artwork that complements your home’s overall aesthetic. These details will not only enhance the functionality of your mudroom but also make it a pleasant entry point that sets the tone for your home.

By integrating these essential features into your mudroom design, you’ll create a space that is not only practical but also a stylish reflection of your personal taste. A well-thought-out mudroom can streamline your daily routine, making it easier for you and your family to transition from the great outdoors to the comfort of home.

3. Choosing the Right Location for Your Mudroom

How to create a stylish and functional mudroom?
Credit : whatcanu.com

Selecting the ideal location for your mudroom is a pivotal step in achieving both style and functionality in your entryway transformation. The right placement can significantly enhance the efficiency of your home’s flow while providing a seamless transition from the outdoors to the indoors.

First, consider the foot traffic patterns in your home. A mudroom situated near the main entrance or garage is often the most practical choice, allowing for easy access when coming in from outdoor activities or errands. This placement minimizes the mess that can accumulate in other areas of your home, creating a dedicated space for dropping off shoes, coats, and sports gear.

If you have a busy household with children or pets, a mudroom near the kitchen or laundry room can be particularly advantageous. This setup allows for quick clean-ups and makes it easier to manage laundry and storage needs. Additionally, incorporating a separate entrance for guests can help maintain cleanliness within your main living areas, ensuring that muddy shoes and wet umbrellas don’t disrupt your home’s aesthetic.

Consider the natural light available in your chosen spot, too. A mudroom with windows can create an inviting atmosphere, making it a pleasant space to enter after a long day. If natural light is limited, thoughtful lighting design—such as pendant lights or wall sconces—can create a warm and welcoming environment.

Finally, think about your home’s overall layout and design. The mudroom should harmonize with your existing decor while providing a functional area that meets your family’s specific needs. Whether you envision a rustic charm with wooden benches and hooks or a sleek modern design with built-in storage, the location of your mudroom sets the stage for the aesthetic and functionality you desire.

By carefully selecting the right location, you’ll ensure that your mudroom not only serves its purpose effectively but also enhances the overall appeal of your entryway, making it a stylish and welcoming introduction to your home.

4. Design Styles: Traditional vs. Modern Mudrooms

When it comes to mudroom design, the choice between traditional and modern styles can significantly influence the overall aesthetic and functionality of your entryway. Understanding the nuances of both styles will help you create a space that not only meets your practical needs but also complements your home’s architecture and interior decor.

**Traditional Mudrooms** exude warmth and charm, often characterized by rich wood finishes, classic moldings, and an inviting color palette. These spaces typically feature built-in benches with plush cushions, ornate cabinetry, and decorative hooks for hanging coats and bags. To enhance the traditional vibe, consider incorporating wainscoting, beadboard details, and vintage-inspired lighting fixtures. Accessories like woven baskets or antique storage trunks can add an extra layer of character, making your mudroom feel like a cozy extension of your home. The overall effect is a space that welcomes guests and family alike, providing a sense of nostalgia and comfort.

On the other hand, **Modern Mudrooms** focus on sleek lines, minimalism, and functionality. This style often employs a neutral color scheme with pops of bold accents, utilizing materials such as metal, glass, and smooth finishes. Open shelving, modular storage units, and built-in benches with hidden compartments are hallmark features of a modern mudroom, designed to maximize space and organization. Large windows or glass doors can enhance natural light, making the area feel more open and airy. Incorporating smart technology, like automated lighting or climate control, can also elevate the functionality of a modern mudroom, catering to the needs of today’s busy lifestyles.

Ultimately, the choice between traditional and modern mudroom designs comes down to personal preference and the overall style of your home. Whether you lean towards the timeless elegance of traditional aesthetics or the sleek, functional appeal of modern design, both styles offer unique opportunities to create a welcoming and efficient entryway that sets the tone for the rest of your living space. Embrace your individual style and let your mudroom reflect who you are, while also serving as a practical hub for everyday life.

5. Color Schemes and Materials for a Stylish Entryway

How to create a stylish and functional mudroom?
Credit : whatcanu.com

When it comes to transforming your entryway into a stylish and functional mudroom, choosing the right color schemes and materials plays a pivotal role in setting the tone of the space. The entryway is the first impression guests receive of your home, so it’s essential to create an inviting and cohesive look that reflects your personal style.

Start by considering a color palette that harmonizes with the rest of your home. Soft, neutral shades—such as warm whites, gentle grays, or soothing beiges—can create a serene atmosphere, allowing natural light to bounce around the space. For those who crave a bit more personality, pops of color in accents like bold hooks or a vibrant runner can make a striking statement without overwhelming the area. Deep blues or rich greens can evoke a sense of calm, while sunny yellows or cheerful corals can inject energy into the space.

Materials also play a crucial role in both aesthetics and functionality. Opt for durable and easy-to-clean surfaces that can withstand the wear and tear of daily use. For flooring, consider options like ceramic tiles or luxury vinyl planks that mimic wood but offer superior durability against mud and moisture. If you prefer warmth underfoot, natural wood can add a rustic charm, but be sure to treat it with a water-resistant finish.

Walls provide another opportunity to express style; shiplap or beadboard can add texture and character, while washable paint allows for easy maintenance. For storage solutions, select materials that blend seamlessly with your design scheme. Woven baskets or fabric bins can add a cozy, casual touch, while metal shelving units provide a modern edge.

Ultimately, a well-thought-out color scheme paired with practical materials will not only enhance the beauty of your entryway but also create a welcoming and functional space that makes a lasting impression. Whether you opt for a minimalist design or a bold and eclectic mix, the right choices will ensure your mudroom is as stylish as it is practical.

6. Maximizing Space: Storage Solutions for Small Mudrooms

When it comes to small mudrooms, every square inch counts. Maximizing space while maintaining a stylish aesthetic can be a delightful challenge that enhances both functionality and design. To begin with, consider vertical storage solutions that draw the eye upward and utilize wall space effectively. Tall shelving units or floating shelves can provide ample room for hats, gloves, and seasonal accessories, while also showcasing decorative elements like plants or framed photos.

Incorporate multifunctional furniture to make the most out of limited space. A bench with built-in storage can serve as both a place to sit while removing shoes and a discreet spot for storing boots, bags, or sports equipment. Look for stylish bins or baskets that fit neatly underneath the bench, keeping clutter at bay while adding a touch of texture and warmth.

Hooks are another essential element in a small mudroom. Opt for an array of hooks at different heights to accommodate family members of all ages, and consider installing a stylish pegboard or a magnetic board for even more versatility. You can personalize this space with colorful hooks or fun designs that reflect your style.

Don’t forget about the importance of lighting in making a small space feel larger and more inviting. A well-placed mirror can help to bounce light around the room, creating an illusion of depth, while pendant lights or wall sconces can add both style and functionality.

Finally, embrace a cohesive color palette and decorative elements that unify the space. Soft, light colors can open up the area, while thoughtful accents like a chic rug or artwork can inject personality.

By thoughtfully integrating these storage solutions and design strategies, your small mudroom can become a stylish and functional entryway that welcomes you home while keeping the chaos of daily life organized and at bay.

7. Must-Have Furniture and Accessories

How to create a stylish and functional mudroom?
Credit : whatcanu.com

When it comes to designing a mudroom that is both stylish and functional, selecting the right furniture and accessories is key. A well-curated selection can elevate your entryway from a mere transitional space to a welcoming and organized hub for your home. Here are some must-have items that blend practicality with aesthetics.

**1. Storage Benches:** A storage bench is a versatile piece that serves multiple purposes. It provides a comfortable spot to sit while putting on or taking off shoes, while also offering hidden compartments for stashing away miscellaneous items like gloves, scarves, or dog leashes. Opt for a bench with a cushion in a durable fabric to ensure it withstands daily use while adding a touch of comfort.

**2. Hooks and Racks:** Wall-mounted hooks or racks are essential for keeping coats, bags, and hats easily accessible. Choose hooks that complement your décor style—rustic wooden hooks for a farmhouse vibe or sleek metal designs for a modern look. A combination of various hook sizes can accommodate items of different shapes and lengths, maximizing your storage potential.

**3. Baskets and Bins:** Incorporating stylish baskets and bins can help maintain order in your mudroom. Use them to corral items like shoes, sports equipment, or outdoor gear. Woven baskets in natural fibers offer a cozy, textured look, while sleek plastic or fabric bins can provide a more contemporary feel. Labeling each basket not only enhances organization but also adds a personal touch.

**4. Shelving Units:** Open shelving can showcase decorative items while providing additional storage space. Use shelves to display potted plants, family photos, or decorative boxes. They can also serve as a perfect spot for items you need to grab on the go, such as sunglasses or keys. If space allows, consider a tall shelving unit that draws the eye upward, making the entryway feel larger and more inviting.

**5. Area Rugs:** A stylish area rug can anchor your mudroom, adding warmth and color to the space. Choose a durable, easy-to-clean material that can handle dirt and moisture. A patterned rug can also help camouflage stains, while solid colors can create a clean, modern look. Make sure it fits well within the space, allowing easy movement in and out.

**6. Mirror:** A mirror is not just a functional item; it can also make your mudroom feel larger and brighter. Adding a mirror above the storage bench or hooks can give a quick check before heading out the door, ensuring you always look your best. Choose a frame that complements the overall design theme of your home—whether it’s rustic, modern, or traditional.

By thoughtfully selecting these key furniture pieces and accessories, you can design a mudroom that is not only stylish but also serves as an efficient gateway into your home. This space can become a seamless blend of function and design, inviting both family and guests to feel at ease as they step inside.

8. Practical Flooring Options for High-Traffic Areas

When designing a mudroom, choosing the right flooring is crucial, especially in high-traffic areas where dirt, moisture, and wear and tear are inevitable. You want flooring that not only enhances the aesthetic appeal of your entryway but also withstands the daily hustle and bustle of family life. Here are some practical flooring options that strike the perfect balance between style and functionality.

**1. Luxury Vinyl Plank (LVP):** One of the most popular choices for mudrooms, luxury vinyl planks mimic the look of hardwood but offer superior durability and water resistance. They are easy to clean, resistant to scratches, and can withstand the scuffs and stains that come with muddy shoes and wet umbrellas, making them an ideal option for busy households.

**2. Porcelain Tile:** Known for its durability and water resistance, porcelain tile is another excellent choice for high-traffic areas. Available in a plethora of colors, sizes, and patterns, it can be styled to suit any decor—from rustic farmhouse to sleek modern. Additionally, tiles can be placed with a textured finish to provide extra grip, enhancing safety in case of spills.

**3. Laminate Flooring:** Offering a budget-friendly option, laminate flooring is designed to mimic hardwood or stone while providing a robust surface that resists scratches and stains. With advancements in technology, laminate can now provide a realistic wood look while being easy on the wallet. It’s also quick to install, making it a practical choice for a swift remodel.

**4. Natural Stone:** For those looking to add a touch of luxury, natural stone such as slate or travertine can create a stunning entryway. While they offer high durability, it’s important to consider that they require proper sealing to protect against moisture and stains. The unique textures and colors of natural stone can elevate the look of your mudroom, making it a statement piece in your home.

**5. Rubber Flooring:** Ideal for those who prioritize functionality, rubber flooring is exceptionally durable and easy to clean. It offers excellent traction, making it a safe choice in wet conditions. Available in various colors and patterns, rubber flooring can add a fun and vibrant touch to your mudroom while being practical for everyday use.

**6. Carpet Tiles:** If you desire a softer feel, consider carpet tiles that are designed for high-traffic areas. They can absorb moisture and provide warmth, making your mudroom more inviting. Plus, if a tile gets stained or damaged, you can easily replace it without needing to redo the entire floor.

When selecting flooring for your mudroom, consider the balance between aesthetics and practicality. Each of these options offers unique advantages, ensuring that your entryway remains stylish while standing up to the demands of everyday life. Choose wisely, and your mudroom will not only serve as a functional space but also a welcoming introduction to your home.

9. Lighting Ideas to Brighten Your Mudroom

When it comes to designing a stylish and functional mudroom, lighting plays a pivotal role in creating an inviting and practical space. A well-lit mudroom not only enhances the aesthetic appeal but also improves functionality, making it easier to navigate your daily routines. Here are some lighting ideas to brighten your mudroom and elevate its overall design.

**1. Layered Lighting:** Consider incorporating a mix of ambient, task, and accent lighting to achieve a well-balanced atmosphere. Start with a central overhead fixture that provides general illumination. Pendant lights or a stylish chandelier can add a touch of elegance while ensuring the room is adequately lit.

**2. Task Lighting:** Since the mudroom often serves as a transition space for activities like shoe removal or coat hanging, adding task lighting can be incredibly beneficial. Wall sconces or LED strip lights under cabinets can illuminate specific areas where you need extra light, making it easier to find what you need when you’re in a hurry.

**3. Natural Light:** If your mudroom has windows, make the most of them! Use sheer curtains or blinds that can be easily opened to allow natural light to flood the space. Sunlight not only brightens the room but also brings warmth and a sense of openness. If natural light is limited, consider installing a skylight to create a brighter and more airy feel.

**4. Decorative Fixtures:** Don’t underestimate the impact of decorative lighting. Unique light fixtures can serve as statement pieces, setting the tone for your mudroom’s design. From rustic lanterns to modern geometric designs, choose fixtures that reflect your personal style and complement the overall decor.

**5. Dimmer Switches:** For added flexibility, consider installing dimmer switches for your lighting. This allows you to adjust the brightness according to the time of day or mood, creating a cozy atmosphere when you need it, while still providing bright light when you’re engaged in tasks.

By thoughtfully selecting and layering your lighting, you can transform your mudroom into a bright, welcoming space that not only looks great but also supports your everyday activities. Whether you’re coming in from a rainy day or prepping for a busy outing, a well-lit mudroom will make every entrance a pleasant one.

10. Incorporating Personal Touches and Decor

Incorporating personal touches and decor into your mudroom is the icing on the cake that transforms it from a mere functional space into a welcoming entryway that reflects your unique personality and style. This is your opportunity to make a statement right at the threshold of your home, where practicality meets creativity.

Start by considering artwork that speaks to you—whether it’s a bold abstract piece, a collection of family photos, or a charming vintage sign, these elements can infuse the space with character. A gallery wall can be a delightful focal point, showcasing your favorite memories and adding a personal narrative to the area.

Textiles also play a crucial role in adding warmth and charm. Think about colorful area rugs, cozy throws, or stylish cushions for your seating area. These not only enhance visual appeal but also create a comfortable atmosphere for you and your guests. Opt for fabrics that are durable and easy to clean, ensuring your mudroom remains practical without sacrificing style.

Natural elements can bring a fresh and inviting vibe to your mudroom. Consider incorporating greenery with potted plants or hanging planters that thrive in lower light conditions. The vibrant touch of plants can liven up the area, making it feel more welcoming. Don’t forget practical decor items like stylish hooks for coats and bags, or decorative baskets for shoes, which can help maintain order while complementing your design theme.

Finally, personal touches like monogrammed items or custom storage solutions can add a unique flair that sets your mudroom apart. Whether it’s a bench with your family name on it or personalized labels on storage bins, these small details create a sense of belonging and make the space truly yours.

By thoughtfully incorporating decor and personal touches, your mudroom can evolve into a stylish and functional entryway that not only welcomes you home but also tells your story to all who enter.

11. Keeping It Organized: Tips for Maintenance

Once you’ve successfully designed your dream mudroom, the next step is to ensure it remains a stylish and functional space. Maintaining an organized mudroom is crucial for keeping the chaos of daily life at bay and for ensuring that it continues to serve its purpose effectively. Here are some practical tips to help you uphold the order in your mudroom while keeping it looking its best.

**1. Establish Zones:** Divide your mudroom into designated areas for different activities—like a shoe zone, a coat hanging area, and a storage zone for bags and sports gear. Clearly defining these zones helps family members know where to place items, reducing clutter and confusion.

**2. Regular Decluttering:** Schedule regular intervals, perhaps once a month, to go through your mudroom and remove items that no longer belong. This practice keeps unnecessary clutter from piling up and makes it easier to find what you need when you need it.

**3. Invest in Quality Storage Solutions:** Choose durable bins, baskets, and hooks that can withstand the wear and tear of daily use. Labeling these storage solutions can also help everyone remember where items belong, making it easier to maintain order.

**4. Use Vertical Space:** Don’t forget about the vertical space in your mudroom! Wall-mounted shelves and hooks can be fantastic for storing items off the ground. Consider installing a pegboard for hanging tools, bags, or seasonal accessories for quick access.

**5. Encourage Good Habits:** Educate your family members on the importance of keeping the mudroom tidy. Simple practices like taking off shoes at the door or hanging up coats immediately can make a significant difference in maintaining an organized space.

**6. Routine Cleanliness:** Develop a cleaning schedule that includes sweeping or vacuuming the floor, wiping down surfaces, and checking for any items that need to be returned to their rightful places. A clean mudroom not only looks good but also sets a positive tone for the rest of your home.

By implementing these maintenance tips, you can ensure that your mudroom remains a stylish and functional entryway that welcomes you and your guests with open arms—transforming the sometimes chaotic ritual of coming home into a seamless and enjoyable experience.

12. Seasonal Considerations: Adapting Your Mudroom

When it comes to designing a mudroom, seasonal considerations play a crucial role in ensuring the space remains both stylish and functional throughout the year. As the seasons change, so do the needs and activities of your household, and your mudroom should reflect these shifts accordingly.

**Spring and Summer:** During these warmer months, your mudroom can transform into a refreshing space that welcomes the outdoors. Consider incorporating lighter colors and airy fabrics to create a bright and inviting atmosphere. Use this time to add elements like wicker baskets for storing gardening tools, or hooks for hanging hats and sunglasses. You might also want to include a small bench where family members can sit while removing shoes after playing outside. A well-placed indoor plant can add a touch of life, bridging the gap between your home and nature.

**Fall:** As the weather begins to cool, it’s time to prepare your mudroom for the hustle and bustle of back-to-school activities and the impending winter. This is the perfect season to introduce cozier textiles, such as warm-toned cushions and throws for your seating area. Adding extra shoe racks or bins can help manage the influx of boots and sneakers, keeping the space organized. A dedicated area for umbrellas and raincoats will ensure that your family is ready to tackle those unpredictable autumn showers.

**Winter:** Once the cold weather sets in, your mudroom becomes a sanctuary for winter gear. Prioritize functionality by adding sturdy hooks for heavy coats, and consider investing in a boot dryer or mat to keep wet shoes from spreading mud throughout your home. This is also a great time to incorporate a decorative touch—perhaps some festive seasonal decor or a warm rug that invites guests to wipe their feet before entering. Think about adding a small table or shelf for gloves and scarves, ensuring everything has a dedicated spot and is easy to access.

By thoughtfully adapting your mudroom to reflect seasonal changes, you’ll create a space that is not only functional but also a stylish reflection of your home’s aesthetic. With careful planning, your mudroom can smoothly transition through the seasons while maintaining its purpose as the first line of defense against the elements.

13. Budgeting for Your Mudroom Transformation

Transforming your entryway into a stylish and functional mudroom is an exciting venture, but it’s essential to approach it with a well-thought-out budget. A well-planned budget not only ensures that you stay within financial limits but also allows you to allocate resources effectively for each element of your mudroom design.

Begin by assessing the available space and determining the extent of your transformation. Will you be doing a complete overhaul, or is a refresh of your existing entryway sufficient? Take the time to create a detailed list of everything you want to include—storage solutions like cubbies and hooks, seating options, flooring, lighting fixtures, and decorative elements.

Once you have your wish list, research the costs associated with each item. Consider both high-end options and budget-friendly alternatives to find a balance that suits your needs. For instance, while custom cabinetry can elevate the overall aesthetic, ready-made storage solutions or DIY options can also provide functional space without breaking the bank.

Don’t forget to factor in additional costs such as paint, hardware, and any professional services you may need, like carpentry or electrical work. Setting aside a contingency fund—typically around 10-15% of your total budget—can also be a lifesaver for unexpected expenses that may arise during the project.

By carefully budgeting for your mudroom transformation, you’ll not only create a welcoming and organized entryway but also enjoy the satisfaction of completing the project within your financial means. With a clear financial plan in place, you can focus on transforming your mudroom into a stylish and functional space that enhances your home’s overall appeal.

14. Real-Life Mudroom Makeover Examples

When it comes to mudroom makeovers, real-life transformations can serve as both inspiration and a practical guide for your own project. Let’s explore some stunning examples that beautifully blend style and functionality, showcasing how a well-designed mudroom can elevate your home’s entryway experience.

Take the Smith family’s mudroom, for instance. Once a cluttered catch-all space, they transformed it into a bright and airy haven with a coastal theme. They installed shiplap walls painted in a soft seafoam green, which instantly added a refreshing vibe. A built-in bench with cushioned seating provides a comfortable spot to slip on shoes, while open shelving above displays colorful baskets for storage. This not only keeps the space organized but also adds a pop of personality.

In another example, the Johnsons opted for a more rustic approach, incorporating reclaimed wood elements. Their mudroom features a stunning barn door that swings open to reveal a practical yet stylish area. A large wooden bench, paired with vintage hooks for coats and bags, creates an inviting atmosphere. To increase functionality, they included a durable tile floor that stands up to muddy boots while adding a chic touch with a patterned area rug.

Meanwhile, the Garcia family’s mudroom is a masterclass in maximizing limited space. Utilizing vertical storage solutions, they installed tall cabinets that reach up to the ceiling, allowing for ample storage without overcrowding the area. A narrow but stylish console table serves as a landing spot for keys and mail, while a chalkboard wall offers a space for reminders and family messages.

These real-life mudroom makeovers illustrate how thoughtful design choices can transform a utilitarian space into a stylish entryway that sets the tone for your home. Whether you’re drawn to modern minimalism, rustic charm, or practical organization, these examples provide a wealth of ideas to inspire your own mudroom transformation. Remember, the key is to blend aesthetics with functionality, ensuring your mudroom is as beautiful as it is practical for everyday use.

15. Conclusion: Creating an Inviting First Impression

In conclusion, transforming your entryway into a stylish and functional mudroom is an investment not just in your home’s aesthetics, but in the overall experience of your daily life. This often-overlooked space serves as the first point of contact for guests and family alike, setting the tone for your entire home. By carefully considering design elements such as color, materials, and layout, you can create an inviting atmosphere that welcomes visitors and provides a sense of comfort.

Imagine stepping through the door into a beautifully organized space, where every item has its place—coats hung neatly, shoes tucked away, and bags easily accessible. A well-designed mudroom enhances functionality, making those busy mornings a little less chaotic and keeping clutter at bay. It allows you to maintain a sense of order and cleanliness, even during the most hectic times.

To leave a lasting impression on your guests, incorporate personal touches like artwork, family photos, or decorative storage solutions that reflect your style and personality. Consider adding elements of greenery with indoor plants or a fresh bouquet to bring life into the space. Stylish lighting can also play a crucial role in creating a warm and inviting ambiance.

Ultimately, your mudroom should be more than just a transitional area; it should evoke a sense of welcome and harmony. As you embark on this design journey, remember that every detail counts. A well-thought-out mudroom not only enhances the functionality of your home but also elevates your entryway into a statement space that leaves a memorable first impression. Embrace the opportunity to create a mudroom that reflects your unique style while serving the practical needs of your family, ensuring that every arrival feels like a warm embrace.

In conclusion, transforming your entryway into a stylish and functional mudroom can significantly enhance both the aesthetic and practicality of your home. By carefully considering elements such as storage solutions, organization systems, and design choices, you can create a welcoming space that not only keeps clutter at bay but also reflects your personal style. Whether you opt for a minimalist approach or a cozy, family-friendly design, the key is to find a balance between form and function. As you embark on this exciting project, remember that your mudroom is the first impression your home makes, so let it shine with creativity and purpose. We can’t wait to see how you bring your vision to life—share your transformation journey with us, and let’s inspire others to create their own beautiful entryways!

What are the best ways to declutter your home?

In a world overflowing with possessions, the idea of a clutter-free home often feels like a distant dream.

The piles of unused items, scattered belongings, and overstuffed closets can create an overwhelming sense of chaos, making it difficult to relax and enjoy your living space. But fear not! Reclaiming your home doesn’t have to be an insurmountable task. In this blog post, we’ll explore ten proven strategies that will help you declutter your home effectively, allowing you to create a serene and inviting environment. From adopting minimalist principles to implementing practical organizational techniques, these strategies will empower you to sift through the clutter and find peace in your surroundings. Whether you’re tackling a single room or your entire house, these tips will guide you on your journey to a more organized, harmonious living space. Get ready to breathe new life into your home and experience the freedom that comes with a decluttered sanctuary!

1. Understanding the Benefits of Decluttering

What are the best ways to declutter your home?
Credit : whatcanu.com

Decluttering is more than just a trendy buzzword; it’s a transformative practice that can significantly enhance your quality of life. At its core, decluttering means simplifying your living space by removing unnecessary items, which can lead to a myriad of benefits that extend beyond mere aesthetics.

First and foremost, decluttering can create a sense of physical and mental space. When you clear out the clutter, you pave the way for a more organized environment, allowing for easier navigation through your home. This newfound order can lead to reduced stress and anxiety levels, as studies have shown that a tidy space can promote a sense of calm and control.

Moreover, decluttering can enhance your productivity. A clean and organized environment fosters focus and creativity, making it easier to accomplish tasks without the distraction of unnecessary items vying for your attention. Imagine sitting down to work in a serene space, where everything you need is readily accessible, and nothing feels overwhelming. This streamlined approach can boost your efficiency and inspire you to tackle projects you may have been putting off.

Decluttering also offers a unique opportunity for self-reflection. As you sift through your belongings, you may discover items that no longer serve you or reflect who you are today. This process encourages you to evaluate your values and priorities, leading to more intentional living. By letting go of things that hold you back, you can make room for new experiences, relationships, and opportunities.

Additionally, a decluttered home can also improve your overall well-being. When your space is organized and free of excess, it can lead to a healthier lifestyle. For instance, you might find it easier to maintain cleanliness and hygiene, as surfaces are less cluttered and easier to clean. This can contribute to better air quality and a more peaceful atmosphere, ultimately supporting both your physical and emotional health.

Lastly, decluttering can be financially beneficial. By selling or donating items you no longer need, you can free up space and potentially make some extra cash. This practice not only reduces what you own but also fosters a sense of gratitude for what you have, encouraging more mindful purchasing in the future.

In summary, understanding the benefits of decluttering is the first step toward reclaiming your space. From reducing stress and enhancing productivity to promoting self-reflection and improving overall well-being, the advantages of a clutter-free home are numerous. As you embark on this journey, remember that each item you let go of is a step toward a more harmonious and fulfilling living environment.

2. Set Clear Decluttering Goals

Setting clear decluttering goals is the foundation for a successful and stress-free decluttering journey. Without specific objectives, the task can feel overwhelming, leading to frustration and stagnation. Start by envisioning what a decluttered space looks like for you—imagine an inviting living room free from clutter, a kitchen with organized cabinets, or a bedroom that offers a serene escape. These visions will serve as your guiding light.

Begin by breaking down your decluttering journey into manageable goals. Instead of saying, “I need to declutter my entire home,” focus on smaller, achievable targets such as “I will declutter my closet this weekend” or “I will tackle the kitchen drawers by the end of the month.” This approach not only makes the task feel less daunting but also allows for a sense of accomplishment as you check off each goal.

Consider using the SMART criteria—Specific, Measurable, Achievable, Relevant, and Time-bound—to help shape your goals. For instance, instead of setting a vague goal of “getting rid of clothes,” aim for “donating three bags of clothes I haven’t worn in the last year by the end of the month.” By setting clear, actionable goals, you will maintain focus and motivation throughout the decluttering process.

Additionally, write down your goals and place them in visible areas around your home to keep them top of mind. This constant reminder will encourage you to stay on track and reignite your commitment when the going gets tough. Remember, decluttering isn’t just about creating space; it’s about creating a sanctuary where you can thrive. With clear goals in place, you’re well on your way to reclaiming your space and fostering a more peaceful, organized home environment.

3. The 10-Second Rule: Quick Decisions for Items

What are the best ways to declutter your home?
Credit : whatcanu.com

The 10-Second Rule is a simple yet effective strategy that can revolutionize the way you tackle clutter in your home. The premise is straightforward: when faced with an item, give yourself just ten seconds to decide its fate. This time constraint encourages swift decision-making, preventing you from succumbing to indecision or sentimentality that often leads to clutter accumulation.

As you hold each item in your hands, ask yourself a series of quick questions: Do I use it? Do I love it? Does it serve a purpose in my life? If the answer is no, then it’s time to let it go. This method promotes a mindset of practicality and clarity, steering you away from the emotional attachments that can cloud your judgment.

For instance, standing in front of a stack of books, the clock starts ticking. You’ve enjoyed some of them, but do you really need to keep every volume? Ten seconds later, you might find yourself placing three books in a donation pile, realizing that they can bring joy to someone else.

Applying the 10-Second Rule can instantly transform daunting decluttering tasks into manageable, bite-sized decisions. As you move through your space with this newfound efficiency, you’ll feel empowered by each choice you make, gradually reclaiming your environment from the grips of clutter. It’s a small change that can yield significant results, making your home not just more organized, but a space where you can truly thrive.

4. One Room at a Time: Creating a Focused Plan

When it comes to decluttering your home, the idea of tackling the entire space can feel overwhelming, often leading to procrastination and frustration. That’s why adopting a one-room-at-a-time strategy is not just practical—it’s transformative. By creating a focused plan, you can channel your energy and attention into a single area, allowing for a more thorough and satisfying decluttering process.

Start by selecting the room that feels most cluttered or the one that you spend the most time in. This could be your living room, kitchen, or bedroom—wherever you feel the most chaos. Once you’ve made your choice, set aside dedicated time to work in that space. It’s important to approach this with a clear mindset; aim for quality over quantity.

Break down the room into smaller sections—perhaps starting with a closet, a drawer, or a single shelf. This will help you avoid feeling overwhelmed by the sheer volume of items that need sorting. As you go through each section, ask yourself critical questions: Do I use this item regularly? Does it bring me joy? Is it functional? This reflective process not only helps you decide what to keep but also reinforces your relationship with the items that truly matter.

As you sort through your belongings, create designated piles: keep, donate, and discard. This visual representation of your decisions can be incredibly motivating. For items you’re unsure about, consider using the “30-day rule”—if you haven’t used it in the last month, it’s likely you won’t miss it.

After successfully decluttering one room, take a moment to revel in your accomplishment. Celebrate the newfound space and clarity that you’ve created. This sense of achievement will fuel your motivation to move onto the next room, making the entire process feel less daunting and more manageable. By focusing on one room at a time, you’ll not only reclaim your space but also cultivate a more intentional and harmonious living environment.

5. The Four-Box Method: Keep, Donate, Sell, Trash

What are the best ways to declutter your home?
Credit : whatcanu.com

The Four-Box Method is a powerful and straightforward strategy that can transform the overwhelming task of decluttering into a manageable and efficient process. This method involves designating four distinct boxes, each with a specific purpose: Keep, Donate, Sell, and Trash. By categorizing your belongings in this way, you can quickly assess what you truly value and what is simply taking up space in your home.

**Keep Box:** Start by gathering items that you use regularly or have sentimental value. This box should contain essentials that contribute to your daily life and happiness. As you sort through your belongings, take a moment to reflect on each item’s significance. If it doesn’t spark joy or serve a purpose, it’s time to consider other options.

**Donate Box:** Next, focus on items that are in good condition but no longer serve you. These could be clothes that no longer fit, books you’ve read and won’t revisit, or kitchen gadgets collecting dust. By placing these items in the Donate box, you not only clear your space but also provide an opportunity for someone else to benefit from what you no longer need. Research local charities or shelters that accept donations, and feel good knowing your items will be put to good use.

**Sell Box:** This box is for items that have value and could be sold for a profit. Think of gently used electronics, furniture, or collectibles that are still in demand. Selling these items online through platforms like eBay, Facebook Marketplace, or local classifieds can help you recoup some of your expenses while decluttering your space. Plus, the extra cash can be a nice incentive to let go of the items you no longer want.

**Trash Box:** Finally, don’t forget to address the items that have outlived their usefulness. Broken appliances, expired products, or damaged goods belong in the Trash box. Disposing of these items responsibly is crucial—recycle whenever possible to reduce waste and help the environment.

As you work through the Four-Box Method, you’ll not only regain physical space in your home but also experience a profound sense of mental clarity. By being intentional about what you keep, donate, sell, and throw away, you pave the way for a more organized and peaceful living environment. This strategy isn’t just about decluttering; it’s about creating a home that truly reflects your lifestyle and values.

6. Digital Decluttering: Organizing Your Virtual Spaces

In today’s technology-driven world, our homes aren’t the only spaces that need decluttering; our digital lives often require just as much attention. Digital decluttering is the process of organizing your virtual spaces—be it your computer, smartphone, or social media profiles—to create a more streamlined and stress-free environment.

Start with your email inbox, which can quickly become a chaotic jumble of unread messages and promotional newsletters. Unsubscribe from anything that no longer serves you, and utilize folders or labels to categorize important emails. Setting aside just a few minutes each day to tackle your inbox can lead to a significant reduction in digital clutter over time.

Next, turn your attention to your files and folders stored on your devices. Take the time to delete duplicate files, outdated documents, and unnecessary downloads. Create a logical folder structure that makes it easy to find what you need when you need it. Consider using cloud storage solutions for easy access and backup; not only does this free up space on your devices, but it also provides peace of mind knowing your important files are secure.

Social media can also contribute to digital clutter. Review your friend and follow lists, removing accounts that no longer resonate with your values or interests. Curate your feeds to ensure they inspire, motivate, and inform you rather than overwhelm you with noise.

Finally, don’t forget about your smartphone apps. Regularly assess the apps you have installed—delete those you rarely use, and organize the remaining ones into folders based on categories like productivity, entertainment, or health. This simple step can make navigating your device more efficient and pleasant.

By taking the time to declutter your digital spaces, you’ll not only enhance your productivity but also create a sense of calmness and control in your life. A tidy digital environment will help you reclaim your focus and make your home feel more spacious and organized in every sense of the word.

7. The 30-Day Declutter Challenge: Daily Tasks to Follow

What are the best ways to declutter your home?
Credit : whatcanu.com

The 30-Day Declutter Challenge is a structured yet flexible approach designed to help you tackle clutter systematically, one day at a time. Each day of the month focuses on a specific area or type of item, allowing you to break down the seemingly overwhelming task of decluttering into manageable daily tasks. By dedicating just a few minutes to each challenge, you’ll find that you can significantly transform your space without feeling overwhelmed.

On Day 1, start with your closet. Pull out items you haven’t worn in the past year and make decisions about what to keep, donate, or discard. Day 2 might focus on your kitchen junk drawer—empty it out and sort through the odds and ends, keeping only what you truly need. As the days progress, you’ll tackle specific categories like books, papers, bathroom products, or even that ever-mysterious “catch-all” space in your home.

The beauty of the 30-Day Declutter Challenge lies in its simplicity and the sense of accomplishment that comes with each completed task. By the end of the month, you’ll not only have a more organized space but also a renewed sense of clarity and peace in your home. Additionally, you’ll cultivate a mindset geared towards maintaining a clutter-free environment, making it easier to uphold these new habits long after the challenge is over. So grab a calendar, commit to the journey, and watch as each small step leads to a significant transformation in your living space!

8. Utilizing Storage Solutions: Bins, Baskets, and Shelves

When it comes to decluttering your home, effective storage solutions are your best allies. Bins, baskets, and shelves can transform chaotic spaces into organized havens, making it easier to reclaim your space and establish a sense of order.

**Bins** are fantastic for storing items out of sight while keeping your home neat. Available in various sizes, colors, and materials, bins can be tailored to suit any room’s aesthetic. Use clear plastic bins to easily identify contents, or opt for decorative fabric bins to add a touch of style. Designate specific bins for different categories—seasonal decorations, sports gear, or craft supplies—and label them for quick access. This not only keeps your belongings organized but also helps streamline your cleaning routine.

**Baskets** offer a charming and versatile storage solution. They can be placed in living rooms to hold blankets, in bathrooms for toiletries, or even in kids’ playrooms to corral toys. The natural textures of woven baskets can add warmth to your decor, making them a perfect choice for those who wish to blend functionality with aesthetics. Plus, baskets are easy to move around, so you can rearrange your space as needed without much hassle.

**Shelves** serve as both functional and decorative elements in any room. Floating shelves can be installed in corners or above furniture to utilize vertical space effectively, while bookcases can provide ample storage for everything from books to decorative items. Consider incorporating shelves into your storage strategy by using them to display family photos, plants, or your favorite books. This not only declutters your surfaces but also adds personality to your home.

By thoughtfully incorporating bins, baskets, and shelves into your organizational strategy, you can create a more manageable and visually pleasing environment. These storage solutions not only help you keep your belongings in check but also foster a sense of calm and tranquility in your living space, making it a joy to come home to.

9. Creating a Maintenance Routine to Prevent Clutter

Creating a maintenance routine is essential for preventing clutter from creeping back into your home after you’ve invested time and effort into decluttering. Think of it as establishing a system that keeps your space organized and harmonious, allowing you to fully enjoy the tranquility of your newly reclaimed areas.

Start by dedicating a few minutes each day to tidy up—this could be as simple as putting items back in their designated places or doing a quick surface clean in high-traffic areas. Incorporate a weekly “reset” day where you tackle specific tasks: dusting, vacuuming, and reorganizing any spaces that may have started to gather odds and ends.

To ensure that you stick to this routine, consider setting reminders on your phone or incorporating these tasks into your daily schedule. Involving other household members can also make this process more manageable and turn it into a fun bonding activity. Create a chore chart to keep everyone accountable, and reward your family for their efforts.

Don’t forget to assess your belongings regularly—perhaps every month or season. This proactive approach allows you to evaluate what’s still serving you and what can be let go of, preventing the buildup of unnecessary items. By establishing a maintenance routine, you not only sustain the decluttered state of your home but also cultivate a mindset of mindfulness and intentionality around your possessions, ensuring that your living space remains a serene sanctuary.

10. Mindset Shifts: Overcoming Emotional Attachments

Decluttering your home isn’t just a physical task; it’s also a mental and emotional journey. One of the most significant barriers to an organized space is the emotional attachment we often develop toward our belongings. It’s common to hold onto items that evoke memories, even if they no longer serve a purpose in our lives. To successfully reclaim your space, you must first navigate these emotional hurdles and adopt a mindset that prioritizes your well-being over sentimental value.

Begin by recognizing that the memories associated with objects can exist independently of the items themselves. Consider taking photographs of cherished items instead of keeping the physical objects. This way, you preserve the memory without the clutter. When faced with a difficult decision about an item, ask yourself questions like, “Does this enhance my life?” or “Would I buy this again today?” This shift in perspective can help you assess your belongings with a more objective lens.

Moreover, embrace the concept of “letting go” as a form of self-care. Understand that by decluttering, you’re creating space not only in your home but also in your mind. Each item you release is an opportunity to welcome new experiences and possibilities into your life. Celebrate small victories along the way, whether it’s clearing out a single drawer or an entire room; these achievements reinforce the positive impact of your decluttering efforts.

Finally, surround yourself with support. Share your decluttering goals with friends or family who can offer encouragement and accountability. Their fresh perspectives can help you see the benefits of letting go, making the process feel less daunting. By shifting your mindset from attachment to liberation, you’ll find that decluttering becomes not just a chore, but a transformative experience that leads to a more peaceful and organized home. Embrace the journey, and watch as your space—and your mind—begin to flourish.

11. Involving Family: Making Decluttering a Team Effort

Decluttering can often feel like a daunting task, especially when you’re facing years’ worth of accumulated items. However, involving your family in the process can transform it from a solitary chore into an engaging team effort. This approach not only lightens the load but also fosters a sense of shared responsibility and unity within the household.

Start by organizing a family meeting to discuss the decluttering plan. Set clear goals together, such as which rooms need the most attention or how much time you can devote each weekend. This collaborative spirit will motivate everyone to pitch in and contribute their ideas on how to create a more organized and harmonious living space.

Assign specific roles for each family member based on their strengths and interests. Perhaps one person excels at sorting through books, while another enjoys tackling the toy bin. Encourage everyone to be involved in the decision-making process—after all, their input can be invaluable when deciding what to keep, donate, or toss. This not only makes decluttering more efficient but also ensures that everyone feels a sense of ownership over the final outcome.

To make the experience enjoyable, turn it into a game. Set a timer and challenge each other to see who can sort the most items in a given timeframe, or create a ‘treasure hunt’ for items that can be donated or recycled. Play some upbeat music to energize the atmosphere, and don’t forget to celebrate your achievements together, no matter how small. After a long day of decluttering, reward yourselves with a family movie night or a special meal to reinforce the idea that teamwork leads to success.

By involving your family in the decluttering process, you not only make the task more manageable but also create lasting memories and strengthen your family bond. As you reclaim your space together, you’ll find that the journey of decluttering can be just as rewarding as the clean, organized home that awaits you at the end.

12. Sustainable Decluttering: Eco-Friendly Disposal Options

As we navigate the journey of decluttering, it’s essential to consider not just the tidiness of our homes, but also the impact of our disposal choices on the environment. Sustainable decluttering focuses on eco-friendly methods that allow us to part with our belongings without contributing to landfill overflow or harming our planet.

Start by evaluating the items you’re ready to let go of. Instead of tossing them in the trash, consider donating gently used items to local charities or thrift stores, where they can find new life and benefit those in need. Many organizations welcome clothing, furniture, and household goods, offering a sense of purpose to your decluttering efforts.

For items that are no longer usable, recycling is a sustainable alternative that helps reduce waste. Check for local recycling programs that accept electronics, plastics, and other materials. Many cities offer designated drop-off points or curbside pickup for recyclable items, making it easier than ever to dispose of them responsibly.

If you’re dealing with larger items like old furniture or appliances, look into consignment shops or buy-back programs that can give your belongings a second chance while also putting a little extra cash in your pocket. Additionally, consider reaching out to community groups or online platforms dedicated to freecycling, where you can offer items to others in your area who may be in need.

Finally, for those items that simply cannot be reused or recycled, investigate eco-friendly waste disposal services that prioritize sustainability. Many of these companies focus on minimizing landfill contributions and may offer composting services or specialized disposal for hazardous materials.

By implementing these eco-friendly disposal options, you not only declutter your space but also contribute to a healthier planet. Adopting sustainable practices during your decluttering journey transforms the process into a responsible, feel-good experience—one that aligns with your values while creating a serene and organized home environment.

13. Celebrating Your Progress: Rewarding Yourself

Decluttering can often feel like an overwhelming task, but celebrating your progress is a powerful motivator that keeps the momentum alive. As you tackle the various spaces in your home, it’s essential to acknowledge the efforts you’ve put in and the milestones you’ve achieved, no matter how small they may seem.

Start by setting achievable goals for each decluttering session. Once you complete a designated area, like your kitchen countertops or a cluttered closet, take a moment to appreciate the transformation. Snap a before-and-after photo to visually document the difference. This simple act not only highlights your hard work but also serves as a reminder of how far you’ve come in the decluttering journey.

Rewards can take many forms, and it’s important to choose ones that resonate with you. Perhaps indulge in a favorite treat, take a well-deserved relaxing bath, or enjoy a night out with friends. If you prefer something more tangible, consider investing in a small home accessory or decorative item that complements your newly organized space.

Additionally, think about creating a “declutter diary,” where you jot down your achievements and feelings throughout the process. This journal can be a source of inspiration and motivation, reminding you of the liberation that comes with a clutter-free environment.

Remember, the journey to reclaim your space is not just about the end result; it’s about the experience along the way. By celebrating your progress and rewarding yourself, you create positive associations with decluttering, making it a more enjoyable and sustainable practice in your life. Embrace the joy of your accomplishments, and let that enthusiasm propel you to tackle the next project with renewed vigor!

14. A Minimalist Approach: Embracing Simplicity in Your Space

A minimalist approach is more than just a trend; it’s a lifestyle choice that promotes simplicity and intentionality in your home. Embracing minimalism means stripping away the excess to focus on what truly matters, creating a serene environment that enhances both your physical space and mental clarity. Imagine walking into a room where every object has a purpose, and every piece of decor is chosen with care—this is the essence of minimalism.

Start by evaluating each room in your home and asking yourself: Does this item serve a purpose? Does it bring me joy? If the answer is no, it may be time to let it go. This process doesn’t have to be daunting; tackle one area at a time and celebrate your progress. As you begin to declutter, you’ll notice a shift in your space. Surfaces become clearer, colors feel more vibrant, and the overall aesthetic transforms into one of calm and balance.

Incorporate functional furniture that serves dual purposes—think of an ottoman that doubles as storage or a coffee table that can transform into a workstation. This not only maximizes your space but also keeps clutter at bay. Additionally, consider adopting a neutral color palette with a few carefully selected accent pieces. This will create a cohesive look that feels open and airy, allowing your home to breathe.

Ultimately, embracing a minimalist approach is about making conscious choices that reflect your values and lifestyle. By prioritizing simplicity, you’ll create a sanctuary that fosters peace and promotes a more fulfilling way of living. As you reclaim your space, you’ll find that less truly is more, leading to a home that feels both inviting and invigorating.

15. Final Thoughts: Maintaining Your Decluttered Home

As you bask in the newfound serenity of your decluttered home, it’s crucial to remember that the journey doesn’t end here. Maintaining a tidy, organized space requires consistent effort and mindful habits. Start by establishing a daily routine that includes a few simple tasks: make your bed each morning, wash dishes immediately after meals, and allocate just ten minutes each day to put items back in their designated places. These small actions can make a significant difference in keeping clutter at bay.

Additionally, consider adopting the “one in, one out” rule—each time you bring a new item into your home, make it a habit to remove an old one. This strategy not only curbs excess accumulation but also encourages thoughtful purchasing decisions. To further reinforce your decluttered lifestyle, regularly reassess your belongings. Schedule seasonal decluttering sessions to evaluate whether certain items still serve a purpose or bring you joy.

Lastly, involve your family in the process. Encourage everyone to embrace minimalism and take responsibility for their personal spaces. Creating a collective commitment to maintain a clutter-free home will foster a sense of ownership and pride in your shared environment.

By integrating these habits into your daily life, you’ll not only preserve the peace and clarity you’ve achieved but also cultivate a home that reflects your values and enhances your well-being. Embrace the ongoing journey of decluttering, and your home will remain a sanctuary of tranquility for years to come.

As we wrap up our exploration of the 10 proven strategies to declutter your home and reclaim your space, we hope you feel inspired and empowered to take action. Remember, decluttering is not just about tidying up; it’s about creating a living environment that fosters peace, creativity, and well-being. Whether you choose to tackle one room at a time or embrace the process as a holistic lifestyle change, each step you take brings you closer to a more organized and serene home. So gather your supplies, set your intentions, and start your decluttering journey today. Your refreshed, inviting living space awaits, ready to support you in all your pursuits. Happy decluttering!

How to choose the right paint color for a small bedroom?

In the world of interior design, color has the remarkable ability to shape our environment and influence our emotions, especially in the intimate confines of a small bedroom.

As urban living spaces shrink in size, the challenge of creating a cozy yet stylish sanctuary has never been more pertinent. The right paint color can breathe life into your tiny space, making it feel larger, brighter, and more inviting. However, with an overwhelming array of hues and shades to choose from, selecting the perfect color can feel daunting. In this ultimate guide, we will explore the art of color selection tailored specifically for small bedrooms, offering expert tips, creative techniques, and inspiring ideas to help you craft a space that reflects your personal style while maximizing its potential. Whether you crave a serene oasis or a vibrant retreat, join us as we embark on this transformative journey to redefine your small bedroom with the power of paint.

1. Understanding the Impact of Color on Perception

How to choose the right paint color for a small bedroom?
Credit : whatcanu.com

When it comes to transforming a small bedroom, the color you choose can significantly influence not only the mood of the space but also the perception of its size. Color has the power to create illusions; it can make a room feel more open and airy or cozy and intimate, depending on your selection. Understanding the psychology of color is crucial for maximizing the potential of your tiny haven.

Light colors, such as soft whites, delicate pastels, and gentle grays, tend to reflect more light, which can create an illusion of expansiveness. These hues can make walls seem to recede, giving your small bedroom an airy, open feel. For instance, a crisp white can make the ceilings appear higher, while a pale blue can evoke a sense of calm, reminiscent of a vast sky. These shades not only enhance the perception of space but also contribute to a serene atmosphere, promoting relaxation and restful sleep.

On the other hand, darker colors can add depth and sophistication to a small room, but they require a careful approach. Deep blues, rich greens, and even bold charcoal can create a cozy, enveloping ambiance. However, if overused, these colors can make a small bedroom feel even tighter. To strike a balance, consider using darker shades on an accent wall or in combination with lighter furnishings and decor to maintain a sense of openness while still enjoying the depth that darker colors can offer.

Moreover, the finish of your paint can also influence how color is perceived in a small space. Glossy finishes reflect light and can help brighten a room, while matte finishes absorb light, which may amplify the feeling of snugness. By paying attention to both color and finish, you can create a harmonious environment that feels both inviting and spacious.

In the end, understanding the impact of color on perception is the first step toward crafting the perfect atmosphere in your small bedroom. Whether you prefer a light, airy retreat or a cozy, intimate nook, the right color choice will help you create a space that feels just right for you. So, before you pick up that paintbrush, take a moment to consider how different colors will shape your tiny sanctuary.

2. Assessing Your Small Bedroom’s Lighting

When it comes to transforming a tiny bedroom, one of the most crucial factors to consider is lighting. The type and quality of light that enters your space can dramatically affect how colors appear and how they influence the overall atmosphere of the room. Start by evaluating both natural and artificial lighting.

**Natural Light:** Observe how much sunlight your bedroom receives throughout the day. South-facing rooms typically bask in warm, direct sunlight, which can enhance the vibrancy of colors. Conversely, north-facing bedrooms tend to receive cooler, diffused light, making softer, muted colors a better choice to counterbalance the chill. Take note of the time of day when the light shines bright and how it changes as the sun moves across the sky. This will help you understand the best times to enjoy your newly painted space.

**Artificial Light:** Next, consider the types of light fixtures you have and the bulbs used. Incandescent bulbs emit a warm glow that can make colors appear richer, while fluorescent lights cast a cooler, sometimes harsh light that can wash out hues. LED bulbs, available in a spectrum of color temperatures, can also impact how your chosen paint colors look in the evening. Experiment with different bulbs to find the perfect match for your palette.

**Testing Colors:** To truly understand how a paint color will look in your bedroom, always test samples on your walls. Paint swatches in various areas of the room to see how colors interact with the light at different times of the day. Observe how they change with the shifting light, and don’t hesitate to move around the room, viewing the colors from various angles and distances.

By carefully assessing and understanding your small bedroom’s lighting, you can make informed decisions about paint colors that will not only enhance the space but also create an inviting atmosphere conducive to relaxation and rest. Remember, the right color can make your tiny bedroom feel larger and more dynamic, so take the time to explore your lighting conditions thoroughly before making a final choice.

3. Choosing the Right Color Palette: Warm vs. Cool Tones

How to choose the right paint color for a small bedroom?
Credit : whatcanu.com

When it comes to transforming a small bedroom, selecting the right color palette can make all the difference in creating a sense of space and ambiance. The choice between warm and cool tones is not merely a matter of preference; it can significantly influence how your room feels and functions.

**Warm tones**, such as soft yellows, gentle oranges, and warm reds, evoke feelings of coziness and intimacy. These colors can create a welcoming atmosphere, making your bedroom feel like a snug retreat. However, it’s essential to use them judiciously in a tiny space. Too many warm hues can make a small room feel smaller and more enclosed. Instead, consider pairing warm tones with lighter shades or neutrals to balance the warmth while still maintaining an airy feel. For instance, a pale cream backdrop accented with terracotta pillows and warm wood elements can instill a sense of warmth without overwhelming the space.

On the flip side, **cool tones**—think soothing blues, calming greens, and tranquil purples—are fantastic for creating an illusion of spaciousness. These colors tend to recede visually, making walls appear further away and enhancing the sense of depth in your small bedroom. A soft lavender or a serene seafoam green can evoke tranquility and promote relaxation, perfect for winding down at the end of the day. To ensure these colors don’t feel too cold or sterile, consider incorporating warm accent pieces, such as brass fixtures or cozy textiles, to infuse some warmth into the overall aesthetic.

Ultimately, the key is balance. A harmonious blend of warm and cool tones can create a beautifully layered effect, allowing you to enjoy the benefits of both while also ensuring your bedroom feels inviting and spacious. When choosing your color palette, think about how you want to feel in the space, and don’t hesitate to experiment with swatches to find the perfect balance that reflects your personality and enhances your tiny sanctuary.

4. The Psychology of Color: Creating Ambiance and Mood

When it comes to transforming tiny spaces, the power of color cannot be underestimated. The psychology of color plays a significant role in how we perceive our surroundings and can profoundly influence our mood and overall ambiance. In a small bedroom, where tranquility and comfort are paramount, choosing the right paint color is essential for fostering a serene environment.

Warm tones, such as soft yellows and gentle oranges, can evoke feelings of warmth and coziness, making a small bedroom feel inviting and intimate. These hues can mimic the sun’s glow, creating a cheerful atmosphere that energizes the space during the day while maintaining a calming effect at night. On the other hand, cooler tones like blues and greens can instill a sense of peace and relaxation, transforming your tiny sanctuary into a restful retreat. These colors are reminiscent of nature, promoting a tranquil vibe that can help you unwind after a long day.

Consider also the psychological impact of neutrals. Shades of beige, soft grays, or crisp whites can create an airy illusion, making the room appear larger while providing a versatile backdrop for your decor. Neutrals allow for easy integration of accent pieces, such as colorful bedding or artwork, without overwhelming the space. Furthermore, they can help reflect light, enhancing the room’s brightness and making it feel more open.

When selecting your paint color, think about the mood you want to cultivate in your small bedroom. Do you envision a space that is invigorating and lively, or one that is calm and restful? The right color choice can not only complement your design aesthetic but also create a personal oasis that aligns with your lifestyle. By understanding the psychology of color, you can make informed decisions that will ultimately enhance your overall living experience within your tiny sanctuary.

5. Light Colors to Make a Space Feel Bigger

How to choose the right paint color for a small bedroom?
Credit : whatcanu.com

When it comes to transforming tiny spaces, the color palette you choose can significantly impact the perception of size and openness in your small bedroom. Embracing light colors is one of the most effective strategies to create an airy and expansive feel. Soft hues, such as pastel shades, creamy whites, and gentle grays, can work wonders in making a confined space feel more inviting and spacious.

Light colors reflect natural light, which is a crucial element in any small bedroom. Walls painted in soft whites or pale blues will bounce sunlight around the room, enhancing brightness and creating an illusion of depth. This illusion can make walls appear to recede, effectively opening up the space. For instance, a delicate mint green can evoke a sense of tranquility while simultaneously amplifying the room’s dimensions, creating a serene retreat that feels larger than it is.

In addition to walls, consider incorporating light colors in your furnishings and decor. Choosing light-colored bedding, curtains, and rugs can further enhance the airy vibe, providing a cohesive look that minimizes visual clutter. When selecting your color scheme, aim for a monochromatic palette or a combination of light shades that harmonize beautifully. This approach not only maintains continuity but also prevents the room from feeling disjointed, which can occur with darker, more contrasting colors.

To add depth without compromising the feeling of spaciousness, consider using slightly darker accents through accessories or furniture pieces. A light gray bed frame paired with pastel pillows can create a layered look that adds interest while keeping the overall aesthetic open and light.

Ultimately, the key to choosing the perfect paint color for your small bedroom lies in understanding how light interacts with color. By opting for light shades and thoughtfully integrating them into your design, you can transform even the coziest of spaces into a bright, welcoming haven that feels much larger than its square footage suggests.

6. Dark Colors: Embracing Coziness in Small Spaces

When it comes to painting small bedrooms, the conventional wisdom often leans towards light and airy palettes to create a sense of openness. However, embracing dark colors can transform a tiny space into a cozy retreat that feels both intimate and inviting. Dark hues, like deep navy, rich charcoal, or warm forest green, have the remarkable ability to envelop a room, providing a sense of safety and comfort that can be incredibly appealing in a bedroom.

Imagine stepping into a small bedroom painted in a luscious midnight blue. The color wraps around you like a warm blanket, creating a serene and restful atmosphere that encourages relaxation. Dark shades can also enhance architectural features, adding depth and character to the space. For instance, a charming wooden beam or a unique window shape can be accentuated against a dark backdrop, drawing the eye and adding interest.

Furthermore, using dark colors can create an illusion of depth, making the room feel less like a small box and more like a comforting cave—a perfect sanctuary for rest. To prevent the space from feeling too enclosed, consider balancing dark walls with lighter furnishings, such as crisp white bedding or soft pastel accents. Incorporating metallic accents or reflective surfaces, like a sleek mirror or glossy decor, can also add a touch of brightness and help bounce light around the room.

Adding layered lighting is crucial in a dark-themed bedroom. Think about using warm-toned bedside lamps, wall sconces, and fairy lights to create a soft, inviting ambiance. This combination of lighting and color will not only enhance the coziness factor but will also ensure that your small bedroom remains functional and stylish.

In essence, don’t shy away from dark colors when decorating your tiny bedroom. Instead, embrace their potential to create an enveloping atmosphere that invites you to unwind and escape from the world outside. With the right balance and thoughtful decor choices, your small space can become a beautifully cozy haven that feels just right for peaceful slumbers and tranquil moments.

7. Accent Walls: Adding Depth and Interest

How to choose the right paint color for a small bedroom?
Credit : whatcanu.com

When it comes to small bedrooms, one of the most effective ways to create a sense of depth and intrigue is through the use of accent walls. An accent wall serves as a focal point, drawing the eye and breaking up the monotony of a single color throughout the room. This technique can be particularly beneficial in small spaces, where a splash of color or a bold pattern can transform the ambiance without overwhelming the room.

Choosing the right wall to accentuate is crucial. Typically, the wall behind your bed or a striking architectural feature draws the eye best. Consider using a darker or more vibrant shade for this wall; it can create an illusion of depth, making the room feel more spacious while adding a touch of sophistication. Popular choices include rich navy blues, deep forest greens, or even a warm terracotta, depending on the vibe you wish to create.

To further enhance the impact of your accent wall, consider incorporating texture. A matte finish can soften a bold color, while a glossy sheen reflects light, creating an illusion of airiness. You can also explore wallpaper options—geometric patterns, floral designs, or textured materials like wood or stone can add layers of interest.

Decorating the accent wall with art or framed photographs can also elevate the aesthetic. Choose pieces that resonate with your personality and harmonize with the color scheme. This not only personalizes the space but also adds visual intrigue, making your small bedroom feel like a curated retreat.

Ultimately, accent walls are a powerful tool in small bedroom design. They allow you to express your style, create a sense of depth, and breathe life into the space, ensuring that every corner reflects your unique taste while maximizing the potential of your tiny sanctuary.

8. Exploring Textures and Finishes

When it comes to transforming a small bedroom, the choice of paint color is just the beginning. Exploring textures and finishes can elevate your design beyond mere aesthetics, creating a more dynamic and inviting atmosphere. In a confined space, the way paint interacts with light and the surfaces around it can make all the difference.

Start by considering the finish of your paint. Matte finishes tend to absorb light, giving a cozy, warm feel, which can be perfect for creating an intimate ambiance. However, if you want to add a touch of brightness and dimension, semi-gloss or satin finishes reflect light, making walls appear more expansive. These reflective surfaces can also serve a dual purpose; they’re easier to clean, which is a vital consideration in smaller spaces where dust and fingerprints can accumulate more readily.

Texture is another powerful tool in your paint arsenal. Incorporating techniques like sponging, rag rolling, or even a subtle stucco finish can add depth and interest to your walls. For instance, a soft, textured wall can lead the eye upward, drawing attention to your ceiling—an often overlooked aspect of small rooms. Consider using a textured wallpaper in combination with your paint for an added layer of visual intrigue. This can introduce patterns that play with scale, further enhancing the sense of space.

Don’t forget about the impact of accents. Using a contrasting texture on one wall, such as a chalkboard or metallic finish, can create a focal point that distracts from the room’s size. This not only adds character but also provides a functional element—imagine a wall where you can jot down notes or display art.

Incorporating different textures and finishes allows you to be creative while making your small bedroom feel more personalized and inviting. By carefully selecting how your paint interacts with light and space, you can transform your tiny sanctuary into a stylish retreat that feels both spacious and cozy.

9. The Role of Furniture and Decor in Color Choice

When it comes to selecting the perfect paint color for your small bedroom, the role of furniture and decor cannot be overstated. The hues you choose for your walls should harmoniously interact with the existing furnishings and decorative elements in the room, creating a cohesive and inviting atmosphere.

Start by taking a close look at the furniture pieces you have. If your bed frame, dressers, or nightstands are dark wood, for example, consider lighter wall colors to create a pleasing contrast that opens up the space. Soft whites, pale grays, or muted pastels can make a room feel airy and expansive, offsetting the weight of darker furniture. On the other hand, if you have lighter furniture, don’t shy away from deeper shades that can add drama and sophistication. Rich jewel tones like emerald green or deep sapphire can create a stunning backdrop that elevates the overall aesthetic.

In addition to furniture, consider the decor elements in your small bedroom. Are there vibrant throw pillows, patterned bedding, or an eye-catching piece of artwork? These accents can inform your color choice significantly. If you have a bold piece of art that you love, you might want to select a wall color that draws out its most prominent tones. Alternatively, if your decor is more subdued, a bolder wall color can act as a statement piece, providing a fresh focal point that breathes life into the room.

Don’t forget about the textures and materials in your space, as well. Natural fabrics like linen and cotton or materials like wood and metal can influence how color is perceived. For instance, a warm wood grain can enhance the warmth of a soft, creamy wall color, while sleek metallics can add a modern touch to brighter shades.

Ultimately, the interplay between your wall color and the furniture and decor in your small bedroom should create a harmonious balance. By thoughtfully considering these elements, you can transform your tiny space into a beautifully curated retreat that feels both personal and expansive. Remember, it’s not just about the color you choose; it’s about how that color interacts with everything else in the room.

10. Testing Paint Colors: Sample Swatches and Lighting Conditions

When it comes to transforming a tiny bedroom, selecting the perfect paint color can make all the difference. However, before committing to a shade, it’s essential to test your options effectively. This is where sample swatches come into play. Rather than relying solely on color chips from the store, invest in small sample pots of your top choices. Apply these paints directly to your walls in patches, allowing you to visualize how they will look in the actual space.

But remember, the appearance of paint can drastically change based on lighting conditions. Natural light, artificial light, and even the time of day can impact how a color looks. For instance, a vibrant blue may appear soothing and serene in morning light, but shift to a more intense tone under the warm glow of a bedside lamp in the evening. To ensure you’re making an informed decision, observe your sample swatches at different times of the day.

Also, consider how the color interacts with other elements in the room, such as furniture, bedding, and décor. A color that seems lovely in isolation may clash with your existing palette, so take the time to see how it complements your entire space. By carefully testing paint colors under various lighting conditions and in conjunction with your bedroom’s unique features, you’ll be well-equipped to choose a hue that not only enhances the smallness of the room but also creates a cozy, inviting atmosphere.

11. Incorporating Patterns: Stripes, Florals, and More

When it comes to transforming tiny spaces, incorporating patterns can add personality and depth to your small bedroom, making it feel more expansive and visually interesting. Stripes, florals, and other patterns can serve as powerful design elements that draw the eye and create focal points.

**Stripes** are a classic choice for small bedrooms. Horizontal stripes can visually widen a room, while vertical stripes can create an illusion of height, making your ceilings feel taller. Consider a subtle color palette with soft tones to avoid overwhelming the space. A striped accent wall behind your bed can add a touch of sophistication and make for a striking backdrop without feeling too busy.

**Florals** bring a sense of warmth and life to a small bedroom. Opt for delicate, small-scale floral prints to maintain an airy feel. These can be incorporated through wallpaper, bedding, or decorative pillows. A floral accent wall can create an inviting atmosphere, but be mindful of the colors you choose; light, pastel tones can brighten the space, while darker florals may feel heavy.

**Geometric patterns** can also be a fantastic option, adding a modern twist to your décor. These patterns can create visual interest without overwhelming the space. Choose a geometric rug or artwork that complements the overall color scheme of the room.

When mixing patterns, use a cohesive color palette to unify the look. For example, pairing striped curtains with a floral duvet cover in complementary shades can create a harmonious balance. Remember to keep larger patterns limited to one or two elements to maintain a sense of spaciousness.

Incorporating patterns into your small bedroom can elevate the design, making it feel more personalized and dynamic. With careful selection and placement, you can create a space that feels both cozy and expansive, inviting you to unwind and recharge in your beautifully adorned sanctuary.

12. Tips for Painting Techniques that Enhance Space

When it comes to transforming a small bedroom, the right painting techniques can make all the difference in creating an illusion of space and maximizing your area’s potential. Here are some expert tips to help you make the most of your paint job:

1. **Opt for Vertical Stripes**: One of the most effective techniques for making a room appear taller is to use vertical stripes. Whether you choose bold, contrasting colors or subtle, muted tones, vertical lines draw the eye upward, creating an airy, elongated effect. Consider using painter’s tape to create clean lines, or even try wallpaper with a striped design for a quick transformation.

2. **Use Light Colors for Walls**: Light colors reflect natural light and can make a space feel larger and more open. Soft whites, pastel hues, and pale grays are excellent choices for walls. Consider painting the ceiling in a slightly lighter shade than the walls to create a seamless transition that further enhances the feeling of height.

3. **Accent Walls with Depth**: While light colors help open up a space, a well-placed accent wall can add depth and interest without overwhelming the room. Choose a darker or bolder color for one wall, preferably the one that draws attention, such as the wall behind the bed. This technique can create a focal point while still keeping the overall room feeling spacious.

4. **Paint the Trim and Doors**: To create a cohesive look and make your room feel more expansive, consider painting the trim and doors the same color as the walls or a slightly lighter shade. This technique eliminates visual barriers and creates a flow that makes the room feel more unified and open.

5. **Incorporate Glossy Finishes**: Using a satin or semi-gloss finish can amplify light in your small bedroom. Glossy surfaces reflect light, making the room feel brighter and more open. This is particularly effective on trims, moldings, and even furniture pieces that you choose to paint.

6. **Create an Ombre Effect**: For a playful yet sophisticated look, try an ombre effect that gradually transitions from a darker hue at the bottom to a lighter shade at the top. This technique not only adds visual interest but also draws the eye upward, giving the illusion of higher ceilings.

7. **Strategic Use of Color Blocking**: Color blocking involves painting blocks of color in specific areas of the room. This can create a sense of depth and dimension, especially when using contrasting colors. By defining areas within the room, you can make it feel more organized and spacious.

By implementing these painting techniques, you can effectively enhance the space in your small bedroom, turning it into a cozy yet open sanctuary. Remember, the key is to create a harmonious balance between color and light, allowing your tiny space to feel inviting and expansive.

13. DIY vs. Professional Painting: Making the Right Choice

When it comes to refreshing the walls of your small bedroom, the decision between a DIY approach and hiring a professional painter can significantly impact both the process and the final outcome. Each option has its own set of advantages and considerations, making it essential to weigh your circumstances carefully before diving in.

**DIY Painting: The Hands-On Approach**
Opting for DIY painting can be an incredibly rewarding experience. Not only does it allow you to take full control of the color selection and application process, but it also offers a sense of personal achievement once you see the final result. With the right tools and a little preparation, you can transform your space to reflect your unique style. Plus, DIY painting typically comes at a fraction of the cost compared to hiring a professional, which is a significant consideration, especially when working with a budget. However, it’s important to be realistic about your skills. If you’re not confident in your painting abilities or if time is a constraint, the DIY route may not yield the results you desire.

**Professional Painting: The Expert Touch**
On the other hand, hiring a professional painter can take the stress out of the equation. Professionals bring a wealth of experience and expertise, ensuring a smooth application and a flawless finish that can elevate the aesthetic of your small bedroom. They are equipped to handle tricky angles, uneven surfaces, and other challenges that may arise during the painting process. Moreover, professional painters often have access to high-quality materials and techniques that can enhance durability and appearance, making it a worthwhile investment if you’re looking for longevity. The downside, of course, is the cost, which can vary significantly based on the complexity of the job and the painter’s expertise.

Ultimately, the decision between DIY and professional painting should hinge on your budget, skill level, and how much time you can dedicate to the project. Whether you choose to don your DIY hat or seek the assistance of a pro, the right paint color can transform your small bedroom into a cozy and inviting retreat. Embrace the journey, and remember that every stroke of paint brings you one step closer to creating the sanctuary you envision.

14. Maintenance and Longevity of Paint in Small Rooms

When it comes to small bedrooms, the choice of paint color isn’t just about aesthetics; it also involves considering the maintenance and longevity of your paint job. In confined spaces where every detail counts, the right paint can make all the difference in ensuring that your bedroom remains a serene retreat for years to come.

First and foremost, the paint finish you select will play a crucial role in the room’s upkeep. Matte finishes, while trendy and sophisticated, can be more susceptible to scuffs and stains, making them less ideal for high-traffic areas. In contrast, satin or eggshell finishes offer a subtle sheen that not only enhances the color but also stands up better to cleaning—perfect for small spaces where walls might take a beating from furniture or daily wear and tear.

Next, consider the type of paint you choose. High-quality, washable paints can be a game changer in maintaining your small bedroom’s fresh appearance. Look for paints labeled as “washable” or “scrubbable,” which allow you to easily clean any marks, fingerprints, or smudges that may accumulate over time. This is especially important in small bedrooms where space is limited, and you want to keep the room looking polished and inviting.

Additionally, pay attention to the color’s ability to hide imperfections. Lighter hues can create an illusion of spaciousness, but they may also highlight flaws in the wall’s surface. Choosing a paint with good coverage and a slight texture can help disguise minor imperfections while still reflecting light beautifully.

Finally, don’t underestimate the power of touch-ups. Keep a small can of the leftover paint handy, as it will allow you to quickly address any scratches or dings that occur over time. Regular maintenance not only keeps your bedroom looking sharp but also extends the life of your paint job, ensuring your small sanctuary remains a cozy haven for years to come.

In summary, selecting the right paint color for your small bedroom involves a balance of aesthetic appeal and practicality. By focusing on durability, ease of maintenance, and the ability to conceal imperfections, you can create a charming and lasting space that feels both inviting and well-cared-for.

15. Final Touches: Accessorizing a Colorful Small Bedroom

Once you’ve chosen the perfect paint color for your small bedroom, it’s time to bring the space to life with thoughtful accessories that enhance and complement your chosen palette. Accessories play a crucial role in transforming a beautifully painted room into an inviting sanctuary, and they allow you to express your personality while maximizing visual interest.

Start with textiles. Soft furnishings like throw pillows, blankets, and rugs can introduce texture and layers to the space. If your walls are painted in a bold hue, opt for neutral or soft-toned fabrics to create balance. Conversely, if your walls are light and airy, don’t shy away from vibrant patterns and colors in your accessories to create a lively contrast. A plush area rug can anchor the room, adding warmth underfoot and providing a cozy spot for your toes to land in the morning.

Artwork is another powerful way to accessorize your small bedroom. Choose pieces that resonate with you and tie into your color scheme. A gallery wall featuring a mix of framed prints, photographs, and even wall-mounted shelves can draw the eye upward, giving the illusion of height and making your space feel larger. Just be sure to keep the frames and matting cohesive to maintain a streamlined look.

Lighting also plays a pivotal role in accessorizing your bedroom. Consider layering your lighting with a combination of ambient, task, and accent lights. A stylish pendant light or a chic bedside lamp can not only illuminate your space but also serve as a decorative element that enhances your overall theme. Opt for warm light bulbs to create a soothing atmosphere, perfect for unwinding after a long day.

Finally, don’t forget about plants! Indoor greenery can breathe life into your small bedroom, adding a pop of color and improving air quality. Choose low-maintenance options like succulents or snake plants that thrive in various light conditions. Place them on windowsills, hang them in macramé planters, or group them on a shelf to create a fresh, inviting environment.

By carefully selecting accessories that complement your paint color and reflect your personal style, you can create a cohesive and inviting small bedroom that feels both stylish and comfortable. Remember, the key is to curate a space that feels uniquely yours while making the most of every inch.

In conclusion, transforming a tiny bedroom into a cozy and inviting sanctuary begins with the right paint color. By considering factors such as natural light, room dimensions, and your personal style, you can select hues that not only maximize space but also create an atmosphere of tranquility and warmth. Whether you opt for soft pastels, bold accents, or classic neutrals, the paint color you choose sets the tone for your entire room. We hope this guide has inspired you to embrace the potential of your small space and embark on a delightful painting journey. Remember, a well-chosen color can truly redefine the essence of your bedroom, making it a reflection of your unique personality and a haven of comfort. Happy painting!

What are the different types of windows and their benefits?

Windows are more than just openings to the outside world; they are key architectural elements that can dramatically influence the aesthetic and functionality of your home.

Whether you’re building a new house or renovating an existing one, understanding the various window styles available is essential to making informed decisions that enhance your living space. From classic double-hung windows that evoke timeless charm to sleek casement designs that invite fresh air, each style offers unique benefits that cater to different needs and preferences. Not only do the right windows improve energy efficiency and natural lighting, but they also contribute to your home’s overall curb appeal and character. In this blog post, we will delve into the diverse types of window styles, highlight their advantages, and provide practical tips for selecting the perfect fit for your home, ensuring you create a space that is both beautiful and functional.

1. Introduction to Window Styles

What are the different types of windows and their benefits?
Credit : whatcanu.com

Windows are more than just functional elements of a home; they are a fundamental part of its aesthetic and architectural identity. Each window style tells a unique story, reflecting the character of the house while also serving practical purposes such as light, ventilation, and energy efficiency. When thoughtfully chosen, the right window style enhances curb appeal, adds value to your property, and contributes to a comfortable living environment.

In this exploration of window styles, we will delve into the various types available on the market, each with its distinct features and benefits. From traditional double-hung windows that evoke a classic charm to sleek modern casement windows that maximize views and airflow, the options are vast and varied. We will discuss how different styles cater to differing architectural designs and personal preferences, ensuring that every homeowner can find a perfect match for their unique space.

Moreover, we will highlight the importance of considering factors such as climate, energy efficiency, and maintenance when selecting the right window style for your home. Understanding these elements will empower you to make informed decisions that not only enhance your home’s beauty but also improve its functionality. Whether you’re renovating an older property or designing a new build, this guide will serve as a helpful resource in navigating the captivating world of window styles. Join us as we explore the rich diversity of options available and discover how the right windows can transform your living space.

2. The Importance of Choosing the Right Windows

Choosing the right windows for your home is not merely an aesthetic decision; it is a crucial factor that influences energy efficiency, comfort, and overall property value. Windows serve as the eyes of your home, allowing natural light to flood in and providing a view of the outside world. However, they also play a vital role in insulation and climate control. Selecting the appropriate window style can enhance your home’s energy efficiency by reducing heating and cooling costs, thereby saving you money in the long run.

Consider, for example, double-glazed windows, which provide excellent insulation by trapping air between two layers of glass. This design minimizes heat loss during winter and keeps your home cooler in summer, ensuring a comfortable environment year-round. Furthermore, the right windows can significantly boost your home’s curb appeal. From classic casement windows to modern sliding designs, the style you choose can reflect your personality and complement your home’s architecture.

Additionally, choosing windows with the right materials is essential. Vinyl windows offer durability and low maintenance, while wooden frames add warmth and character. Each material comes with its own set of benefits and considerations, such as cost, longevity, and appearance. Properly selected windows can also enhance security, keeping your home safe while providing a sense of openness and connection to the outside environment.

Ultimately, the right windows can transform your living space, improve energy efficiency, and increase property value. As you explore your options, consider not only the visual impact of your choices but also the long-term benefits they can bring. Taking the time to select windows that align with your needs and preferences is an investment that pays off in comfort, style, and savings.

3. Overview of Different Window Styles

What are the different types of windows and their benefits?
Credit : whatcanu.com

When it comes to enhancing the aesthetic appeal and functionality of your home, selecting the right window style is paramount. Each design not only plays a crucial role in the overall architecture but also contributes to energy efficiency, natural light, and ventilation. Here’s an overview of some popular window styles to consider:

**1. Double-Hung Windows:** These timeless classics feature two sashes that slide vertically, allowing for excellent airflow and easy cleaning. They work well in both traditional and contemporary homes due to their versatile design. When opened from the top or bottom, they create a natural convection current, keeping your home fresh and airy.

**2. Casement Windows:** Hinged on one side and opening outward, casement windows offer an unobstructed view and maximum ventilation. They are often favored for their energy efficiency, as the tight seal they create when closed helps to minimize air leakage. Ideal for hard-to-reach areas, these windows can be opened effortlessly with a simple crank.

**3. Sliding Windows:** With one or more sashes that glide horizontally, sliding windows are easy to operate and provide wide openings for fresh air. They are perfect for modern homes where space-saving designs are essential. Their sleek look and expansive glass area also allow ample natural light to flood into your living spaces.

**4. Bay and Bow Windows:** These stunning architectural features protrude from the exterior wall, creating a cozy nook inside. Bay windows typically consist of three panes, while bow windows are made up of four or more. Both styles are perfect for creating a focal point in a room, offering panoramic views and enhancing the sense of space.

**5. Awning Windows:** Hinged at the top and opening outward, awning windows are perfect for rainy climates, as they allow for ventilation while keeping rainwater out. Their unique design makes them an excellent choice for hard-to-reach areas, and they can be combined with other window styles for added interest.

**6. Picture Windows:** Designed to frame stunning outdoor views, picture windows are fixed panes that do not open. This style is ideal for letting in maximum light and creating a seamless connection between your indoor and outdoor spaces. Their large glass area is perfect for showcasing beautiful landscapes or gardens.

**7. Skylights:** Bringing the outdoors in, skylights are installed in the roof of your home, flooding your interiors with natural light. They can dramatically enhance the ambiance of a room, making it feel more spacious and inviting. Skylights are great for areas that may lack sufficient wall space for traditional windows.

Understanding the various window styles available can help you make informed decisions that align with your aesthetic preferences and functional needs. Each style offers unique benefits, so consider your home’s architecture, the views you want to capture, and your ventilation requirements when choosing the perfect fit for your living space.

– 3.1 Double-Hung Windows

### 3.1 Double-Hung Windows

Double-hung windows are a beloved classic in the world of residential architecture, combining timeless aesthetics with practical functionality. Characterized by two vertically sliding sashes, both of which can be opened to allow for optimal ventilation, double-hung windows offer a versatile solution for homeowners looking to enhance their living spaces.

One of the primary benefits of double-hung windows is their ease of use. With both the top and bottom sashes operating independently, you can choose to open just the top for a gentle breeze while maintaining privacy, or open both for maximum airflow. This feature is particularly advantageous in warmer months, allowing heat to escape from the upper part of the window while inviting cooler air from below.

In addition to their functionality, double-hung windows are renowned for their energy efficiency. Most modern double-hung windows are equipped with advanced insulating glass and weatherstripping technologies, which help to minimize air leakage and reduce energy costs. This makes them a great investment for homeowners looking to improve their home’s energy performance, especially in climates with extreme temperatures.

Aesthetic versatility is another hallmark of double-hung windows. They can be easily customized to suit various architectural styles—from traditional to contemporary—by choosing different materials, finishes, and grille patterns. Whether you prefer the warm look of wood or the low-maintenance durability of vinyl, there are options available to match your home’s exterior and interior decor seamlessly.

Moreover, double-hung windows are designed with safety and maintenance in mind. Many models come equipped with tilt-in sashes, allowing for easy cleaning from within your home—a feature that is particularly useful for upper-story windows. This combination of safety, ease of maintenance, and aesthetic appeal makes double-hung windows a popular choice among homeowners.

In summary, double-hung windows offer a harmonious blend of style, functionality, and energy efficiency, making them an excellent choice for any home. Whether you’re renovating an existing space or building a new one, these windows can enhance both the beauty and comfort of your living environment.

– 3.2 Casement Windows

What are the different types of windows and their benefits?
Credit : whatcanu.com

### 3.2 Casement Windows

Casement windows are a timeless choice for homeowners seeking both functionality and aesthetic appeal. These windows are hinged on one side and open outward, either to the left or the right, providing a versatile design that allows for maximum ventilation. Unlike traditional sliding windows, casement windows are typically operated with a simple crank mechanism, making them easy to open and close even in hard-to-reach places.

One of the most significant benefits of casement windows is their ability to capture breezes. When opened, they can catch the wind from any direction, funneling fresh air into your home, which is especially advantageous in areas with mild climates. This feature not only enhances comfort but can also reduce reliance on air conditioning, contributing to energy savings over time.

In terms of design, casement windows offer a sleek, modern look that complements a variety of architectural styles, from contemporary to traditional homes. They come in a wide range of materials, including wood, vinyl, and aluminum, allowing homeowners to select a finish that aligns with their home’s decor. Additionally, casement windows can be customized with various grille patterns and sizes, enabling a tailored fit for any space.

Another advantage is the security these windows provide. When closed, the sash presses tightly against the frame, making it more difficult for potential intruders to gain access. This secure seal can also enhance the thermal efficiency of your home, helping to maintain consistent indoor temperatures year-round.

When considering casement windows for your home, it’s essential to assess the overall layout and style of your space. They work beautifully in areas that allow for outward opening, such as above sinks or in tight corners, and can be used in combination with fixed windows to create stunning panoramic views. Ultimately, casement windows represent a harmonious blend of style, functionality, and efficiency, making them a worthy consideration for any homeowner looking to upgrade their living space.

– 3.3 Sliding Windows

Sliding windows are a versatile and stylish choice for homeowners looking to enhance their living spaces. Characterized by their horizontal movement, these windows glide smoothly along a track, allowing for easy operation and maximum ventilation. One of the standout features of sliding windows is their expansive glass surface, which provides an unobstructed view of the outdoors and floods interior spaces with natural light. This makes them an ideal option for rooms where you want to create a seamless connection with your garden, patio, or stunning landscapes.

One of the primary benefits of sliding windows is their space-saving design. Unlike traditional hinged windows that require clearance to open, sliding windows can be positioned in tighter spaces without compromising functionality. This makes them perfect for smaller rooms or areas where you want to maintain an unobstructed flow of movement. Additionally, because they are constructed with fewer moving parts than other window styles, they tend to require less maintenance and are generally more durable over time.

Energy efficiency is another key advantage of sliding windows, particularly when paired with double or triple glazing options. With proper sealing and insulation, sliding windows can help reduce energy bills by minimizing heat loss during colder months and keeping interiors cooler in the summer. This not only contributes to a more comfortable living environment but also aligns with eco-friendly practices.

When choosing sliding windows for your home, consider the style and architecture of your space. These windows are available in various materials, including vinyl, wood, and aluminum, allowing you to select the perfect match for your aesthetic preferences. Opt for a color and finish that complements your home’s exterior and interior design, enhancing curb appeal and creating a cohesive look.

In summary, sliding windows offer a blend of functionality, style, and energy efficiency, making them an excellent choice for any home. Their ability to provide expansive views and natural light, coupled with their space-saving features, make them a popular option for homeowners looking to enhance their living spaces while maintaining practicality.

– 3.4 Awning Windows

What are the different types of windows and their benefits?
Credit : whatcanu.com

Awning windows are a unique choice that combines functionality with aesthetic appeal, making them an excellent option for various home designs. Characterized by their hinged top and outward-opening design, these windows create a practical solution for ventilation while also providing protection from the elements. When opened, the awning-style window allows fresh air to flow in while keeping rain and debris out, making it an ideal choice for rainy climates or for placement above doors and patios.

One of the standout benefits of awning windows is their versatile placement. They can be installed in hard-to-reach areas, such as above kitchen sinks or higher walls, where traditional windows might be impractical. Their sleek and modern look complements contemporary homes, while still fitting seamlessly into more traditional designs. Available in various materials, including vinyl, wood, and aluminum, awning windows can be customized to match your home’s aesthetic perfectly.

In terms of energy efficiency, awning windows tend to score high marks. When closed, they create a tight seal against drafts, helping to regulate indoor temperatures and potentially lowering energy bills. Additionally, they can be designed with double or triple glazing for even better insulation.

Choosing awning windows for your home means opting for a blend of style and functionality. They not only enhance the visual appeal of your space but also contribute to a more comfortable and energy-efficient living environment. Whether you’re looking to improve ventilation in a specific room or simply want to add an architectural feature to your home, awning windows are a stylish and practical choice that can elevate your living space.

– 3.5 Bay and Bow Windows

Bay and bow windows are stunning architectural features that can dramatically enhance the aesthetics and functionality of your home. Both styles project outward from the main walls, creating a sense of depth and inviting natural light into your living space. However, they each possess unique characteristics that set them apart.

**Bay Windows** typically consist of three sections: a large center window flanked by two smaller windows at an angle. This angled design not only offers panoramic views of the outdoors but also provides a cozy nook perfect for a reading corner or a small seating area. The flat surface of the central window allows for decorative touches, such as plants or personal items, adding a touch of personality to your space. Additionally, bay windows can create an illusion of a larger room, making them a popular choice for smaller living areas.

On the other hand, **Bow Windows** are a series of four or more windows that curve outward, forming a gentle arc. This design provides a more expansive view and allows for even more natural light to flood into your home. Bow windows create a soft, elegant look that complements a variety of architectural styles, from traditional to contemporary. The curvature of bow windows can also give the impression of a larger space, providing a more open and inviting atmosphere.

Both bay and bow windows offer practical benefits as well. They can improve energy efficiency by enhancing ventilation when opened and providing an additional layer of insulation when closed. Furthermore, these window styles can increase your home’s value, as they are often seen as desirable features by prospective buyers.

When deciding between bay and bow windows, consider the architectural style of your home, the amount of space available, and how you intend to use the area created by the windows. Whether you choose the angular charm of a bay window or the soft curve of a bow window, either option will undoubtedly elevate your home’s design while offering numerous functional benefits.

– 3.6 Picture Windows

### 3.6 Picture Windows

Picture windows stand as a testament to the beauty of simplicity and elegance in home design. Unlike traditional windows that open and close, picture windows are fixed panes that provide unobstructed views of the outdoors, making them a popular choice for homeowners who wish to embrace natural light and scenic vistas. Their expansive glass surface allows for a seamless connection between the interior of your home and the outside world, bringing in an abundance of sunlight and warmth.

One of the most significant benefits of picture windows is their ability to enhance the aesthetic appeal of a home. They create a focal point in a room, drawing the eye outside and inviting the vibrant colors of nature into your living space. Whether you’re overlooking a lush garden, a tranquil lake, or a bustling cityscape, a picture window frames the view like a piece of art, transforming the way you experience your surroundings.

Moreover, picture windows offer excellent energy efficiency. Since they do not open, there are fewer gaps for air to escape, which helps maintain your home’s temperature. Many modern picture windows are designed with advanced glazing technologies that provide insulation and reduce energy costs, making them a practical option for environmentally conscious homeowners.

When choosing a picture window, consider the placement and size. A large picture window can serve as a stunning centerpiece in a living room or dining area, while smaller versions can complement other windows or architectural features. Additionally, think about the style of your home; picture windows can be customized in various shapes, sizes, and frame materials to align perfectly with your overall aesthetic.

In summary, picture windows are more than just openings in your walls; they are a gateway to the outside world that brings beauty, light, and energy efficiency into your home. If you’re seeking a window style that encapsulates both functionality and design, a picture window may just be the perfect fit for your dwelling.

4. Benefits of Each Window Style

When it comes to selecting the perfect window style for your home, understanding the unique benefits of each option is crucial. Each window style not only contributes to the aesthetic appeal of your space but also offers distinct advantages that can enhance functionality, energy efficiency, and overall comfort.

**Double-Hung Windows**: These classic windows feature two sashes that move vertically, allowing for versatile ventilation. One of their key benefits is easy cleaning; you can tilt the sashes inward for effortless access to both sides. Additionally, double-hung windows are excellent at maintaining airflow, making them ideal for rooms that require good ventilation, such as kitchens and bathrooms.

**Casement Windows**: Known for their modern appeal, casement windows are hinged on one side and open outward, providing an unobstructed view and maximum airflow. Their tight seal when closed makes them highly energy-efficient, minimizing drafts and reducing heating and cooling costs. They are perfect for hard-to-reach areas, such as above sinks, where you can simply crank them open with ease.

**Sliding Windows**: These windows glide horizontally, making them a great option for contemporary homes. Their large glass panes allow ample natural light to flood your space while also providing expansive views of the outdoors. Sliding windows are easy to operate and can be particularly advantageous in larger openings, such as patios or balconies, where traditional styles might not fit.

**Bay and Bow Windows**: These styles extend beyond the exterior wall, creating a charming nook inside your home. Bay and bow windows are not only visually striking but also enhance your interior space by adding extra seating or storage options. They also improve the amount of natural light that enters a room, making it feel more open and inviting.

**Awning Windows**: Hinged at the top, awning windows open outward, allowing fresh air to circulate even during light rain. This makes them a practical choice for areas prone to inclement weather. Their design promotes ventilation while protecting against the elements, making them suitable for bathrooms or basements.

**Picture Windows**: If you have a stunning view that you want to showcase, picture windows are the ideal choice. These large, fixed windows do not open, but they provide an unobstructed view of the outdoors and fill your home with natural light. They are often used in conjunction with other window styles to create a dramatic focal point.

In summary, each window style brings a unique set of benefits to your home. Whether you prioritize aesthetics, energy efficiency, or functionality, understanding these advantages will help you make an informed decision that enhances both your home’s beauty and your living experience. As you explore your options, consider how each style aligns with your needs and complements your overall design vision.

5. Factors to Consider When Choosing Window Styles

When it comes to selecting the perfect window styles for your home, several key factors come into play that can significantly influence your choice. Understanding these elements will not only help you achieve aesthetic appeal but also enhance functionality and energy efficiency.

**1. Architectural Style of Your Home:**
The design of your home is perhaps the most crucial factor in determining the right window style. Whether you reside in a charming cottage, a modern minimalist abode, or a classic Victorian home, your windows should complement your home’s architectural features. For instance, tall, slender windows may be ideal for a contemporary design, while intricately framed casement or double-hung windows might suit a traditional setting.

**2. Climate and Energy Efficiency:**
Your local climate plays a vital role in deciding the window styles that will perform best in your area. If you live in an area with extreme temperatures, consider energy-efficient options like double or triple-pane windows, which provide better insulation. Additionally, window styles that allow for ample natural light while minimizing heat gain—such as awning or slider windows—can help maintain a comfortable indoor environment year-round.

**3. Functionality and Purpose:**
Think about how you intend to use your windows. Do you want them primarily for ventilation, natural light, or aesthetic appeal? For example, casement windows can be opened fully for maximum airflow and are perfect for hard-to-reach areas. In contrast, picture windows, while offering stunning views, are fixed and do not open, making them less suitable for rooms that require ventilation.

**4. Maintenance Requirements:**
Different window materials come with varying maintenance needs. Vinyl and fiberglass windows are often low-maintenance and resistant to fading or warping, while wood windows may require regular painting or sealing to maintain their appearance. Assess your willingness and ability to maintain the windows you choose, as this will impact their longevity and performance.

**5. Budget:**
Finally, your budget will undoubtedly influence your decision. Window styles can vary significantly in price based on materials, sizes, and energy-efficient features. It’s essential to balance your desire for aesthetic appeal and functionality with realistic financial considerations. Sometimes, investing a little more in high-quality windows can lead to significant savings on energy bills in the long run.

By carefully considering these factors, you can make an informed decision that enhances not only the beauty of your home but also its comfort and efficiency. Choosing the right window styles is not just about looks; it’s about creating a harmonious balance between design, functionality, and sustainability.

– 5.1 Architectural Style of Your Home

When it comes to selecting the perfect window style for your home, one of the most critical factors to consider is the architectural style of your residence. The windows you choose should not only enhance the aesthetic appeal of your home but also complement its overall design and character.

For instance, a charming Craftsman-style home often benefits from double-hung windows or casement windows that feature intricate woodwork and decorative details. These styles echo the craftsmanship and natural materials synonymous with the Craftsman movement, creating a cohesive look that resonates with this architectural genre.

On the other hand, if you reside in a modern or contemporary home, sleek, minimalist windows such as floor-to-ceiling glass panels or large picture windows could be the ideal choice. These designs maximize natural light and create an open feel, reflecting the clean lines and functional aspects of modern architecture.

Additionally, if your home boasts a traditional Colonial style, consider classic double-hung windows with divided light panes. These windows not only adhere to the historical aesthetic but also provide a timeless elegance that enhances the charm of your home.

It’s essential to assess the architectural elements, including rooflines, siding, and existing trim, to ensure that your window choice harmonizes with the overall look of your property. Remember, the right windows can accentuate the beauty of your home’s architecture while providing energy efficiency and functionality. By thoughtfully considering your home’s style, you can select windows that not only serve a practical purpose but also elevate your home’s curb appeal and character.

– 5.2 Energy Efficiency and Insulation

When considering window styles for your home, energy efficiency and insulation are paramount factors that can significantly impact both your comfort and your utility bills. Modern advancements in window technology have led to a plethora of options designed to enhance insulation, reduce energy consumption, and ultimately create more sustainable living spaces.

Energy-efficient windows are typically constructed with multiple panes of glass, often featuring inert gases like argon or krypton sandwiched between them. These gases act as insulators, reducing heat transfer and maintaining a stable indoor temperature regardless of the season. For instance, double or triple-glazed windows can effectively minimize the flow of hot air in the summer and retain warmth during the winter, making your home more comfortable year-round.

Another critical aspect of energy-efficient windows is their frame material. Options like vinyl, fiberglass, and wood-clad frames offer superior insulation compared to traditional aluminum frames, which can conduct heat and cold more readily. Additionally, many window styles now come with low-emissivity (Low-E) coatings that reflect heat back into your home during the winter and keep it out during the summer, further enhancing their energy-saving capabilities.

Beyond immediate energy savings, investing in high-quality, energy-efficient windows can lead to long-term financial benefits, including lower heating and cooling costs and potential tax credits. Moreover, homes with enhanced energy efficiency often have higher resale values, making them an attractive option for future homeowners.

When choosing the right windows for your home, consider not only the style and aesthetic appeal but also how well they perform in terms of insulation and energy efficiency. By prioritizing these features, you can create a more comfortable living environment while contributing to a greener planet.

– 5.3 Maintenance Requirements

When it comes to choosing the right window style for your home, understanding the maintenance requirements is crucial. Different materials and designs come with varying levels of upkeep, which can significantly impact both your budget and your lifestyle.

**Vinyl Windows** are celebrated for their durability and low maintenance needs. These windows resist fading, peeling, and warping, making them an excellent choice for homeowners who prefer a “set it and forget it” approach. Typically, a simple wash with soap and water is all that’s needed to keep them looking fresh and clean.

**Wood Windows**, on the other hand, present a more involved maintenance routine. While they offer unmatched beauty and warmth, they require regular painting or staining to protect against moisture and pests. If you live in an area with high humidity or severe weather, investing time in maintaining these windows is essential to prevent rot and decay. This style can be well worth the effort if you’re looking for a classic aesthetic that adds character to your home.

**Aluminum Windows** are another option, known for their sleek, modern look and strength. They are fairly low maintenance, but they can be prone to oxidation over time, especially in coastal areas. Regular cleaning and occasional touch-ups can help maintain their appearance and functionality.

**Fiberglass Windows** are among the most durable and energy-efficient, requiring minimal upkeep. They can withstand extreme weather conditions without warping or cracking. A routine cleaning schedule is usually sufficient to keep them looking great, making them a practical choice for busy homeowners.

Finally, consider the **style of window** as well—some designs may be more challenging to clean than others. For instance, double-hung windows allow for easy access to both the interior and exterior panes, while casement windows may require more effort to reach.

As you explore your options, factor in the time and resources you are willing to invest in maintenance. This consideration not only influences the longevity of your windows but also impacts your overall satisfaction with your home’s aesthetic and functionality. By choosing the right style with maintenance in mind, you can enjoy your windows without the constant worry of upkeep.

– 5.4 Budget Considerations

When exploring window styles for your home, budget considerations play a crucial role in the decision-making process. Windows are not just functional elements; they are integral to your home’s aesthetic and energy efficiency, making it essential to strike the right balance between quality and affordability.

First and foremost, identify your budget range. The cost of windows can vary significantly based on factors such as materials, style, size, and installation. For instance, vinyl windows are often more budget-friendly than wood or fiberglass options, yet they still provide durability and energy efficiency. If you’re leaning towards a more luxurious option, like custom wooden windows, be prepared for a higher upfront investment.

Additionally, consider the long-term savings associated with energy-efficient windows. While they may come with a higher initial price tag, these windows can significantly reduce your energy bills over time by providing better insulation and reducing the need for heating and cooling. Look for windows with Energy Star ratings, as they meet strict energy efficiency guidelines set by the U.S. Environmental Protection Agency.

Don’t forget to factor in installation costs, which can vary based on your location and the complexity of the installation. It’s wise to obtain multiple quotes from licensed contractors to ensure you’re getting a fair price. Some companies may offer deals or financing options that can help ease the financial burden.

Lastly, remember to set aside a portion of your budget for maintenance and potential repairs. Windows require care to maintain their appearance and functionality, so ensuring you have funds allocated for upkeep can save you from unexpected expenses down the road.

By considering these budget factors, you can make a more informed decision, ensuring you select the right window style that meets both your aesthetic desires and financial constraints, making your investment worthwhile for years to come.

6. Understanding Window Materials

When it comes to selecting the perfect windows for your home, understanding the various materials available is essential. Each material has its own unique characteristics, benefits, and aesthetic appeal that can significantly influence both the style and energy efficiency of your home. Here’s a closer look at some of the most common window materials and what they can offer:

**Vinyl Windows**
Vinyl windows have surged in popularity due to their affordability and low maintenance requirements. Made from polyvinyl chloride (PVC), they resist moisture and won’t warp, crack, or peel like wood. Available in a variety of colors and styles, vinyl windows are energy-efficient, often equipped with multiple chambers to improve insulation. They are ideal for homeowners seeking a budget-friendly option without compromising on performance.

**Wood Windows**
Renowned for their natural beauty and classic appeal, wood windows can enhance the charm of any home. They provide excellent insulation and can be customized with a range of stains and paints to match your interior décor. However, wood windows do require regular maintenance to prevent rot and warping, particularly in areas with high humidity. If you prioritize aesthetics and are willing to invest time in upkeep, wood windows may be the right choice for you.

**Aluminum Windows**
Aluminum windows are known for their strength and durability. They are resistant to corrosion and are generally more affordable than wood. While they tend to conduct heat, modern aluminum windows often come with thermal breaks to improve their energy efficiency. With a sleek, contemporary look, aluminum frames can be a great fit for modern architectural designs.

**Fiberglass Windows**
Fiberglass windows are gaining traction for their outstanding durability and energy efficiency. They can mimic the appearance of wood and are resistant to warping, cracking, and fading, making them a long-lasting investment. Fiberglass frames have excellent insulation properties, which can lead to reduced energy bills. Although they may come at a higher initial cost, their longevity can make them a wise choice in the long run.

**Composite Windows**
Combining the best features of wood and vinyl, composite windows are made from a blend of materials, offering enhanced durability and performance. They typically require less maintenance than wood windows while providing a similar aesthetic appeal. Composite windows are often designed to resist moisture and are less prone to warping or cracking, making them suitable for various climates.

When choosing window materials, consider factors such as your budget, the architectural style of your home, local climate conditions, and the level of maintenance you’re willing to undertake. By understanding the pros and cons of each material, you can make an informed decision that enhances your home’s beauty, comfort, and energy efficiency.

– 6.1 Vinyl

Vinyl windows have gained immense popularity in recent years, and for good reason. Made from polyvinyl chloride (PVC), these windows offer a perfect blend of durability, energy efficiency, and low maintenance, making them an excellent choice for homeowners looking to enhance both the aesthetic and performance of their homes.

One of the most significant benefits of vinyl windows is their exceptional resistance to moisture, rot, and corrosion. Unlike wood windows, which can warp or swell with changes in humidity, vinyl maintains its shape and integrity over time. This makes them particularly well-suited for areas with high humidity or harsh weather conditions. Additionally, vinyl windows are available in a variety of colors and finishes, allowing homeowners to choose styles that complement their home’s architecture while avoiding the need for regular painting or staining.

Energy efficiency is another hallmark of vinyl windows. With their multi-chambered frames and energy-efficient glass options, they help keep your home comfortable throughout the year, reducing reliance on heating and cooling systems. Many vinyl windows are also equipped with features like low-emissivity (Low-E) coatings and argon gas fills, which further enhance their insulation properties. This not only contributes to a more comfortable living environment but can also lead to significant savings on energy bills.

When choosing vinyl windows, it’s essential to consider the quality of the materials and the manufacturing process. High-quality vinyl windows are engineered to withstand fading from UV exposure and are designed with strong frames that won’t sag or bend over time. Look for windows that come with a robust warranty, which is often a good indicator of their longevity and performance.

In summary, vinyl windows are a smart investment for homeowners seeking a stylish, durable, and energy-efficient window solution. With their myriad of benefits, they not only enhance the overall look of your home but also contribute to a more sustainable living environment.

– 6.2 Wood

### 6.2 Wood

When it comes to window styles, wood stands out as a timeless choice that combines beauty with functionality. Known for its natural elegance and versatility, wood windows can seamlessly enhance the aesthetic appeal of any home, whether it’s a rustic cabin or a modern urban dwelling. Crafted from various species, including oak, pine, and mahogany, wood windows offer a wide range of finishes and colors, allowing homeowners to customize their look to match their unique style.

One of the primary benefits of wood windows is their exceptional insulation properties. Wood is a natural insulator, which helps maintain a comfortable indoor temperature year-round. This can lead to reduced energy costs, making wood windows an environmentally friendly option as well. Additionally, they provide excellent sound insulation, ensuring a peaceful living environment by blocking out unwanted noise from outside.

Another advantage of wood windows is their durability and longevity. With proper maintenance, including regular painting or staining and sealing, wood windows can last for decades. This commitment to upkeep not only preserves their stunning appearance but also protects against rot and weather damage.

However, it’s essential to consider the maintenance aspect when choosing wood windows. Unlike vinyl or fiberglass options, wood requires more care to keep it looking its best. Homeowners should be prepared for occasional refinishing, especially in areas with extreme weather conditions.

When selecting wood windows for your home, it’s crucial to choose high-quality materials and construction. Look for windows made from solid wood or engineered wood products, which can provide added stability and resistance to warping.

In summary, wood windows offer a beautiful and energy-efficient solution that can elevate the character of your home. With a commitment to maintenance and care, they can become a lasting feature that not only enhances your living space but also adds value to your property. Whether you prefer the classic charm of traditional styles or the sleek lines of contemporary design, wood windows can provide the perfect fit for your home.

– 6.3 Aluminum

### 6.3 Aluminum

Aluminum windows have cemented themselves as a popular choice among homeowners and builders alike, thanks to their sleek design and remarkable durability. These windows are crafted from a lightweight yet robust material that offers a modern aesthetic, making them a perfect fit for contemporary homes and renovations. Available in a variety of styles and finishes, aluminum windows can easily complement any architectural design, from industrial lofts to minimalist abodes.

One of the most significant benefits of aluminum windows is their resistance to the elements. Unlike wood, which can warp or rot over time, aluminum is impervious to moisture and harsh weather conditions, ensuring that your windows maintain their integrity and appearance for years to come. This resilience translates to lower maintenance costs, as you won’t have to worry about regular painting or sealing.

In addition to their practical benefits, aluminum windows are also highly energy-efficient, especially when paired with thermal breaks or double-glazed options. These features help to reduce heat transfer, keeping your home comfortable year-round and lowering energy bills. Plus, with advancements in technology, aluminum frames can now be designed with improved insulation, further enhancing their energy-saving capabilities.

When choosing aluminum windows for your home, consider the color and finish options available. The ability to powder coat aluminum in virtually any color gives you the flexibility to match your windows with your home’s exterior palette, creating a cohesive look. Furthermore, aluminum windows can be customized with various hardware and glazing choices to enhance both style and functionality.

In summary, aluminum windows combine durability, low maintenance, and aesthetic versatility, making them an excellent choice for almost any home. Whether you’re building a new property or updating an existing one, aluminum windows can provide a stylish and functional solution that stands the test of time.

7. The Role of Window Style in Natural Light and Ventilation

The style of windows you choose for your home plays a significant role in determining the quality and quantity of natural light and ventilation that fills your living spaces. Each window design comes with its unique characteristics that cater to different lighting and airflow needs, ultimately influencing the ambiance and comfort of your home.

For instance, large picture windows are an excellent choice for maximizing natural light. Their expansive glass panes offer unobstructed views of the outdoors while flooding the interior with sunlight, creating a warm and inviting atmosphere. This style not only brightens up a room but also helps to create a seamless connection between your indoor and outdoor spaces. However, they are fixed and do not provide ventilation, which is where other window styles come into play.

Casement windows, often hinged on one side and opening outward, are perfect for enhancing both light and airflow. When fully opened, they allow for maximum ventilation, making them ideal for areas that require fresh air, such as kitchens and bathrooms. Additionally, their design can capture breezes, directing them into your home, which is particularly beneficial on warm days.

Double-hung windows, featuring two movable sashes, offer versatility. You can open both the top and bottom sections to promote cross-ventilation, ensuring that fresh air circulates throughout your home. This style allows for effective airflow control, making it easier to maintain a comfortable indoor environment.

Skylights are another innovative option for introducing natural light, particularly in rooms with limited wall space for traditional windows. They not only illuminate dark corners but also contribute to passive ventilation when designed to open. By harnessing the natural rise of warm air, skylights can help regulate indoor temperatures and reduce reliance on artificial lighting.

Ultimately, the right window style is a balance of aesthetics and functionality. Consider your home’s layout, the specific areas that need light and air, and how each style can enhance your space. By thoughtfully selecting window styles that promote natural light and ventilation, you can create a harmonious living environment that feels open and inviting.

8. Enhancing Curb Appeal with the Right Windows

When it comes to enhancing your home’s curb appeal, the right windows can make all the difference. Windows are not just functional elements; they are also key visual components that contribute to the overall aesthetic of your property. Choosing the right style and design can elevate your home’s exterior, making it more inviting and visually appealing to both passersby and potential buyers.

Consider the architecture of your home when selecting window styles. Classic styles such as double-hung or casement windows can complement traditional homes, while sleek, modern designs like picture or sliding windows may be better suited for contemporary builds. The material of the windows also plays a significant role in curb appeal. Vinyl windows offer durability and low maintenance, while wood windows bring warmth and character, often enhancing the charm of historic homes.

Color is another critical factor in window selection. A bold color can create a stunning contrast against the siding, while a neutral tone can provide a more cohesive and understated look. Additionally, decorative features such as grids or mullions can add a touch of elegance and sophistication, drawing the eye and enhancing architectural details.

Don’t forget about functionality; energy-efficient windows not only contribute to aesthetic appeal but also offer practical benefits. High-performance windows can reduce energy costs and improve indoor comfort, making them a smart choice that aligns beauty with sustainability.

Ultimately, the right windows not only beautify your home but also reflect your personal style. Investing time in selecting windows that enhance your home’s curb appeal can yield impressive returns, increasing its value and making it a welcoming space that stands out in the neighborhood. By carefully considering style, material, color, and energy efficiency, you can create a captivating exterior that invites admiration and appreciation.

9. Tips for Measuring and Installing Windows

Measuring and installing windows may seem like a daunting task, but with the right guidance, it can be a straightforward process that enhances both the aesthetic and functional aspects of your home. Proper measurements are crucial; even a minor error can lead to significant issues down the line, such as drafts or water leaks. Here are some essential tips to ensure your window installation goes smoothly.

**1. Gather Your Tools:** Before you begin, make sure you have all the necessary tools at your disposal. A tape measure, pencil, level, and a straight edge are your best friends in this process. Depending on your window style, you might also need a drill, screws, and caulking for sealing.

**2. Measure Accurately:** Start by measuring the width and height of the existing window frame. For the most accurate results, measure at three different points: the top, middle, and bottom for width, and the left, center, and right for height. Use the smallest measurement to determine the size of your new window. This ensures a snug fit and minimizes gaps.

**3. Account for Depth:** Different window styles may require varying depths. Be sure to measure the depth of the existing frame to ensure your new windows will fit properly without protruding or being too recessed.

**4. Consider Adjustments:** If you’re replacing old windows, be prepared for any adjustments that might be necessary with the frame. Old frames may be warped or damaged, which could affect how your new windows will fit. It’s essential to assess the condition of the existing frame before proceeding.

**5. Installation Steps:** once you’ve got your measurements, it’s time to install. Start by removing the old window carefully to avoid damaging the surrounding area. Then, prepare the new window by applying a bead of caulk along the frame to create a waterproof seal. Place the new window into the opening, ensuring it’s level and plumb. Secure it in place with screws, and fill any gaps with insulation foam.

**6. Finishing Touches:** Once your window is installed, finish off by applying more caulk around the edges to seal any potential leaks. Inside, you can add trim to give the window a polished look and enhance your home’s interior design.

By following these tips, you can ensure that your window installation is not only accurate but also enhances the beauty and efficiency of your home. With the right approach, your new windows will serve you well for years to come, letting in light and providing comfort while adding value to your property.

10. Common Mistakes to Avoid When Choosing Windows

Choosing the right windows for your home is a crucial decision that can impact not only the aesthetics but also the energy efficiency and overall comfort of your living space. However, it’s easy to make missteps in the selection process that can lead to costly regrets down the line. Here are some common mistakes to avoid when choosing windows, ensuring you make a choice that enhances your home rather than detracts from it.

**1. Skipping the Research:** One of the biggest errors homeowners make is rushing into window selection without adequate research. Take the time to understand the different window styles, materials, and energy ratings available. Familiarize yourself with terms like double-glazing, Low-E coatings, and U-values to make informed decisions.

**2. Not Considering the Climate:** Your local climate should heavily influence your window choices. For instance, if you live in a region with harsh winters, opting for single-pane windows can lead to increased heating bills and discomfort. Conversely, homes in warmer climates may benefit from windows designed to reflect heat and reduce glare. Tailoring your selection to your environment is essential for maintaining comfort and efficiency.

**3. Overlooking Aesthetic Harmony:** Windows are a significant architectural feature of your home. Choosing styles that clash with the existing design can detract from your home’s curb appeal. Be mindful of the architectural style of your house—whether it’s modern, traditional, or somewhere in between—and select window styles that complement that aesthetic.

**4. Ignoring Energy Efficiency:** Windows play a pivotal role in your home’s energy efficiency. Many homeowners overlook the importance of energy ratings, which can lead to higher energy costs over time. Look for windows with ENERGY STAR certification or those that boast high R-values for insulation to ensure you’re making an investment that pays off in the long run.

**5. Failing to Plan for Maintenance:** Different window materials require varying levels of maintenance. Wood windows may offer timeless beauty but typically need regular painting or staining to protect against the elements. Vinyl windows, on the other hand, provide durability with minimal upkeep. Consider how much maintenance you’re willing to commit to when selecting window materials.

**6. Not Consulting Professionals:** Finally, attempting to navigate the window selection process without professional guidance can lead to oversight of key details. Engaging with a knowledgeable contractor or window specialist can provide insights into the best options for your specific needs, ensuring you avoid potential pitfalls.

By steering clear of these common mistakes, you can select windows that not only enhance the beauty and comfort of your home but also contribute to its energy efficiency and long-term value. Take your time, do your homework, and don’t hesitate to seek expert advice to ensure your window choices are the right fit for your home.

11. Conclusion: Finding the Perfect Window Style for Your Home

In conclusion, selecting the perfect window style for your home is a multifaceted decision that blends aesthetic appeal with functionality. Each type of window, from the classic charm of double-hung windows to the sleek lines of contemporary casements, offers unique benefits that can enhance your living space. As you consider the architectural style of your home, the natural light you wish to invite in, and your energy efficiency goals, it’s essential to weigh these factors carefully.

The right window style can uplift your home’s overall appearance while providing practical advantages such as improved ventilation, insulation, and noise reduction. Moreover, the choice of materials—be it traditional wood, low-maintenance vinyl, or sturdy aluminum—can significantly impact both the durability and maintenance of your windows.

As you embark on this journey of exploration, take the time to envision how different window styles can transform your interiors and exteriors. Don’t forget to factor in your budget, local climate conditions, and personal style preferences. Consulting with a window specialist can provide invaluable insights tailored to your needs, helping you navigate the myriad of options available.

Ultimately, the perfect window style will not only complement your home’s design but also create an inviting atmosphere where light, air, and beauty converge. Embrace the process, and soon enough, you’ll find the ideal windows that reflect your vision and enhance your living experience for years to come.

12. Additional Resources for Homeowners

When embarking on the journey of selecting the perfect window style for your home, it’s essential to equip yourself with a wealth of knowledge that goes beyond the basics. This is where additional resources for homeowners come into play, offering guidance, inspiration, and expert advice to ensure you make informed decisions.

Start by exploring online platforms dedicated to home improvement, such as Houzz and This Old House, which provide comprehensive articles, design ideas, and real-life project showcases. These sites often feature user-generated content, allowing you to see how different window styles look in actual homes, complete with reviews and feedback from fellow homeowners.

Additionally, consider joining local home improvement groups or forums on social media platforms like Facebook or Reddit. These communities can be invaluable, as they allow you to ask questions, share experiences, and gain insights from others who have already navigated the window selection process. You may find recommendations for trustworthy contractors or suppliers in your area, along with tips on what to look for in terms of quality and installation.

Don’t overlook the power of home improvement shows and YouTube channels that focus on renovations and DIY projects. These visual resources can help you better understand the installation process, maintenance tips, and the benefits of various window styles. They often include expert interviews and before-and-after transformations that can ignite your creativity and guide your choices.

Finally, consider consulting with professionals, such as architects and window specialists, who can offer personalized advice tailored to your home’s unique architectural style and your specific needs. Many manufacturers also provide educational resources on their websites, detailing the advantages of their products, energy efficiency ratings, and warranty information.

By leveraging these additional resources, you’ll be well-equipped to choose the right windows that not only enhance your home’s aesthetic appeal but also improve energy efficiency and overall comfort. Remember, the right windows can transform your living space, so take the time to research and gather insights that will lead you to the perfect fit for your home.

In conclusion, selecting the perfect window style for your home is not just about aesthetics; it’s about enhancing your living space and maximizing functionality. With a variety of options available, from classic double-hung windows to sleek casement designs, each style offers unique benefits that can improve energy efficiency, natural light, and ventilation. By understanding the characteristics of each type and considering your home’s architecture and your personal preferences, you can make a well-informed decision that elevates both the beauty and comfort of your environment. As you embark on this exciting journey of exploration, remember that the right windows can transform your home into a sanctuary of style and practicality. Happy window shopping!

How to install a ceiling fan?

Installing a ceiling fan can seem like a daunting task, but with the right guidance, you can transform your living space while enhancing comfort and style.

Imagine breezy days and cozy evenings, all while adding that perfect touch to your home’s decor. This step-by-step guide is designed to empower you with the knowledge and confidence needed to install your ceiling fan like a pro. From selecting the ideal fan for your space to understanding the necessary tools and safety precautions, we’ll walk you through every aspect of the installation process. Whether you’re looking to improve energy efficiency or simply want to create a more inviting atmosphere, this article will equip you with all the tips and tricks to ensure a smooth and successful installation. Get ready to elevate your home with the cool comfort of a ceiling fan!

1. Introduction: Why Install a Ceiling Fan?

How to install a ceiling fan?
Credit : whatcanu.com

Ceiling fans are more than just stylish accents in a room; they serve a multitude of practical benefits that can transform your living space. With the rising costs of energy and a growing emphasis on sustainability, ceiling fans offer an efficient way to maintain comfort in your home without over-relying on air conditioning. They circulate air effectively, helping to create a gentle breeze that can make warm summer days feel cooler and refreshing. In the colder months, reversing the fan’s direction can help distribute warm air that rises to the ceiling, allowing you to save on heating costs.

Moreover, ceiling fans come in various designs, colors, and styles, making them an excellent way to enhance your home’s decor. Whether your aesthetic leans towards modern minimalism, rustic charm, or classic elegance, there’s a ceiling fan that can complement your space beautifully.

Installing a ceiling fan is a highly rewarding DIY project that not only elevates your home’s comfort level but also adds value to your property. With just a few tools and a bit of time, you can achieve professional-looking results that will impress your family and friends. In this guide, we’ll walk you through the step-by-step process of installing your ceiling fan like a pro, ensuring you enjoy all the benefits without the hassle. So, let’s dive in and get started on this exciting home improvement journey!

2. Tools and Materials Needed for Installation

Before diving into your ceiling fan installation, gathering the necessary tools and materials is crucial for a smooth and efficient process. Having everything on hand will minimize interruptions and ensure you can complete the job like a pro.

**Tools Needed:**

1. **Screwdrivers:** A Phillips head and a flathead screwdriver are essential for tightening screws and securing the fan to the mounting bracket.
2. **Drill:** An electric drill will make the process of installing the mounting bracket and securing the wires much easier. Make sure to have the appropriate drill bits for your ceiling type.
3. **Wire Strippers:** These handy tools are necessary for stripping the insulation off the ends of the electrical wires, allowing for a secure connection.
4. **Ladder:** A sturdy ladder will provide the height you need to reach the ceiling safely while installing your fan. Make sure it’s stable and tall enough for the height of your ceiling.
5. **Voltage Tester:** This essential tool helps ensure that the power is off before you begin working with any electrical connections, keeping you safe throughout the installation.

**Materials Needed:**

1. **Ceiling Fan Kit:** Ensure your fan comes with all the necessary components, including blades, light kit (if applicable), mounting bracket, and instructional manual. Check that your fan is compatible with your ceiling height and style.
2. **Electrical Wire:** Depending on your specific installation, you may need additional wire to connect the fan to the existing electrical box. Make sure to use wire that meets local electrical codes.
3. **Mounting Bracket:** Often included with the fan, this bracket is crucial for securely attaching the fan to the ceiling. If your fan doesn’t come with one, ensure you purchase a compatible model.
4. **Wire Nuts:** These small connectors are used to secure the electrical connections. They help keep your wiring safe and tidy, preventing any potential hazards.

By gathering these tools and materials ahead of time, you’ll set yourself up for success as you embark on your ceiling fan installation journey. With everything in place, you can proceed with confidence, transforming your space into a cool, breezy haven!

3. Safety First: Preparing for Your Installation

How to install a ceiling fan?
Credit : whatcanu.com

Before diving into the installation of your ceiling fan, it’s crucial to prioritize safety. This step is not just a precaution—it’s an essential part of ensuring a smooth and secure installation process. Here’s how to prepare for your ceiling fan installation like a pro.

First and foremost, turn off the power to the existing light fixture or ceiling outlet from which you’ll be installing the fan. Locate your circuit breaker and switch off the appropriate circuit to eliminate any risk of electric shock. It’s always better to be safe than sorry, so double-check that the power is indeed off by testing the fixture with a voltage tester.

Next, gather all necessary tools and materials. You’ll typically need a ladder to reach the ceiling, a screwdriver, wire connectors, electrical tape, and possibly a drill, depending on the installation requirements. Having everything at hand will prevent you from making unnecessary trips, keeping the momentum flowing.

If you’re replacing an existing light fixture, take a moment to carefully remove it. Be sure to support the fixture as you unscrew it, and gently lower it to avoid any damage. As you do this, take note of how the wires are connected; this will serve as a handy reference when you connect your new fan.

Inspect the ceiling box to ensure it is fan-rated, meaning it can support the weight and movement of the fan. If it’s not, you’ll need to replace it with a box specifically designed to hold ceiling fans. This is a critical step, as an inadequate support system can lead to safety hazards down the line.

Lastly, don’t forget to wear appropriate safety gear. Safety goggles will protect your eyes from dust and debris, while a dust mask can help you avoid inhaling any particles. With these preparations complete, you’re ready to move on to the installation phase—confident, safe, and fully equipped. Remember, taking the time to prepare properly will make the entire process smoother and ensure that your new ceiling fan can be enjoyed for years to come!

4. Choosing the Right Location for Your Ceiling Fan

Choosing the right location for your ceiling fan is crucial to maximizing its effectiveness and ensuring it enhances your space aesthetically. Start by considering the room’s layout and purpose. A ceiling fan is most effective when positioned in the center of the room, allowing for optimal airflow and cooling. Measure the dimensions of the room and the height of the ceiling to determine the appropriate size and type of fan you need.

Next, take note of any obstructions that could interfere with the fan’s operation, such as light fixtures, beams, or low-hanging furniture. Ideally, the bottom of the fan blades should be at least 7 feet above the floor to ensure safety and comfort while still allowing for efficient air circulation. If your ceilings are particularly high, you may need a longer downrod to achieve the perfect height.

Additionally, consider the fan’s direction. Most fans have a switch that allows you to reverse the blade rotation. In warmer months, a counterclockwise rotation creates a cooling breeze, while in winter, a clockwise rotation pushes warm air down, making your space feel cozy and inviting.

Lastly, think about the fan’s aesthetic appeal. Choose a style and finish that complements your existing décor and fits seamlessly into the room. Whether you prefer a sleek modern design or a rustic farmhouse vibe, the right ceiling fan can serve as both a functional appliance and a stunning focal point in your space. By carefully selecting the perfect location, you’ll not only enhance the comfort of your room but also elevate its overall charm.

5. Removing Your Old Light Fixture or Ceiling Fan

How to install a ceiling fan?
Credit : whatcanu.com

Before you can install your new ceiling fan and bask in the refreshing breeze it provides, you’ll need to safely remove the old light fixture or ceiling fan that’s currently in place. This step is crucial and requires your full attention to ensure both your safety and the integrity of your electrical system.

Start by turning off the power to the light fixture or fan at the circuit breaker. This not only protects you from potential electric shocks but also prevents any damage to your tools or the new fan during installation. Once the power is off, use a voltage tester to double-check that the wires are indeed not live.

Next, it’s time to remove the fixture. If you’re dealing with a light fixture, gently unscrew any decorative elements or shades to access the mounting screws. For a ceiling fan, you may need to remove the blades first. Most blades can be detached with a simple screwdriver; just be sure to place them safely aside to avoid any unnecessary accidents.

With the blades removed (if applicable), locate the mounting bracket or canopy. This is typically secured to the ceiling with screws. Carefully unscrew the bracket, and let the fixture hang down. You’ll see the wiring that connects your fixture to the electrical box. Before disconnecting any wires, take a moment to note how they are connected—taking a photo can be especially helpful for reference later.

Once you have the connections documented, carefully disconnect the wires. Most fixtures will have a standard color-coding system: black (hot), white (neutral), and green or bare copper (ground). Use wire nuts to secure the ends of each wire once they’re detached to prevent any accidental contact.

As you lower the old fixture down, keep an eye out for any loose parts or screws that might drop. With everything safely removed, take a moment to clean the area around the electrical box to prepare for your new ceiling fan installation.

Remember, if at any point you feel unsure or uncomfortable, don’t hesitate to contact a professional electrician. Safety should always be your top priority as you embark on this home improvement project!

6. Understanding Ceiling Fan Wiring Basics

Before diving into the installation process, it’s crucial to understand the basics of ceiling fan wiring. Knowledge of wiring not only empowers you to tackle the installation with confidence but also ensures safety throughout the project.

First, familiarize yourself with the primary components involved in the wiring of a ceiling fan. Most ceiling fans come with three key wires: the black wire (or sometimes red), which connects to the power supply; the white wire, which is the neutral wire; and the green or bare copper wire, which serves as the ground wire. Understanding these wires will help you make the right connections.

Next, turn off the power at the circuit breaker to avoid any electrical hazards. Use a voltage tester to double-check that there is no electricity flowing to the wires you’ll be working with. Safety should always be your number one priority!

If you are replacing an existing light fixture with a ceiling fan, you may find that the previous installation has different color wires or configurations. Take a moment to document the existing connections before removing the fixture. This will serve as a reference for reconnecting the new fan.

For new installations, ensure that the electrical box in the ceiling is fan-rated and capable of supporting the weight and motion of the fan. If you’re unsure, consult a professional or check local building codes.

Once you’re clear on the wiring system, you can start connecting the fan. Typically, the black wire from the ceiling connects to the black fan wire, and the white wire connects to the white fan wire. The green or bare wire from the ceiling should be attached to the ground wire of the fan. Secure all connections with wire nuts, and for extra safety, wrap them with electrical tape.

In summary, understanding ceiling fan wiring basics not only prepares you for a successful installation but also ensures your ceiling fan operates safely and efficiently. With this foundational knowledge, you’re one step closer to enjoying the cool breeze from your newly installed fan!

7. Installing the Ceiling Fan Mounting Bracket

How to install a ceiling fan?
Credit : whatcanu.com

Once you have ensured that the power is turned off and have gathered all your tools, it’s time to move on to the crucial step of installing the ceiling fan mounting bracket. This bracket is the unsung hero of your ceiling fan, providing the sturdy foundation needed for your fan to operate safely and efficiently.

Start by locating the electrical box in the ceiling, which is where your fan will eventually be mounted. Before proceeding, double-check that the box is rated for ceiling fan use—this is essential, as standard light fixture boxes may not be strong enough to support the weight and movement of a ceiling fan. If the box is not suitable, you’ll need to replace it with a fan-rated box.

Once you’ve confirmed the box’s compatibility, line up your mounting bracket with the holes in the electrical box. Most mounting brackets come with a variety of holes to accommodate different box types, so ensure you choose the right configuration. Using the provided screws, secure the bracket firmly to the box, making sure it is level and tight to prevent any wobbling or movement once the fan is installed.

After securing the bracket, take a moment to inspect it. A properly installed mounting bracket should feel solid and unyielding. If there is any play or looseness, recheck your screws and ensure everything is tightened correctly. This step is critical as it not only affects the fan’s performance but also ensures safety for everyone in the room.

With the mounting bracket firmly in place, you are now ready for the exciting part—attaching your new ceiling fan! Take a moment to appreciate your work so far; you’re one step closer to enjoying a refreshing breeze in your space!

8. Connecting the Wires: Step-by-Step Instructions

Connecting the wires of your ceiling fan may seem daunting, but with a little guidance, you can do it like a pro. This step is crucial, as it ensures that your fan will operate safely and efficiently. Here’s a detailed breakdown of how to make those electrical connections confidently.

**Step 1: Safety First**
Before you begin, ensure your safety by turning off the power at the circuit breaker. This will prevent any accidental shocks while you’re working. Use a voltage tester to confirm that the power is indeed off at the ceiling fan box.

**Step 2: Identify the Wires**
In most ceiling fan installations, you will encounter several wires: black (or red), white, and green (or bare). The black wire is typically for the fan motor, the white is for the neutral connection, and the green or bare wire is the ground. If your ceiling fan has additional wires for lights, they may be color-coded differently, so refer to the fan’s manual for clarity.

**Step 3: Making the Connections**
1. **Connect the Ground Wire**: Start by twisting the green or bare ground wire from the ceiling with the ground wire from the fan. Secure them together with a wire nut, ensuring that no copper is exposed.

2. **Connect the Neutral Wires**: Next, take the white wire from the ceiling and connect it to the white wire from the fan. Again, twist them together and secure with a wire nut.

3. **Connect the Hot Wires**: Now, it’s time to connect the hot wires. If your fan has a light kit, you may have more than one black wire. Generally, connect the black wire from the ceiling to the black wire from the fan. If there’s a separate wire for the light, connect it to the blue wire (if present) from the fan.

**Step 4: Secure All Connections**
After making all your connections, ensure that each wire nut is tight and that no bare wire is showing. Use electrical tape to wrap around the wire nuts for added security.

**Step 5: Tuck Wires Neatly**
Gently tuck all the wires back into the ceiling box. This will help prevent any pinching when you mount the fan.

**Step 6: Final Check**
Before you proceed to mount the fan, double-check all connections to ensure that everything is secure. Once satisfied, you can proceed to attach the fan to the mounting bracket, following the manufacturer’s instructions.

By following these step-by-step instructions, you’ll have successfully connected the wires for your ceiling fan. With everything in place, you’re now ready to restore power and enjoy the cool breeze your new fan provides!

9. Attaching the Fan Blades and Light Kit

Once your ceiling fan is securely mounted and the electrical connections are in place, it’s time to add the finishing touches: attaching the fan blades and light kit. This step is crucial in ensuring both functionality and aesthetics, as they significantly influence the overall look and performance of your fan.

Start by carefully unpacking the fan blades and checking for any damage. Most ceiling fans come with a set of blades that may vary in design and color, so take a moment to choose the configuration that best suits your space. Lay them out in the order they will be attached, as many fans require a specific sequence to ensure balance — this is particularly important for larger models.

Using the screws provided, attach each blade to the mounting brackets on the fan’s motor assembly. It’s best to loosely secure each blade first before fully tightening them down. This allows for slight adjustments, ensuring that all blades are aligned correctly and will spin smoothly. Once you’re satisfied with their positioning, go ahead and tighten the screws securely, but be cautious not to overtighten, as this could damage the blades.

Next, move on to the light kit. If your ceiling fan includes a light fixture, this is the moment to enhance your space with some illumination. Refer to the manufacturer’s instructions for specific wiring details, as they can vary between models. Typically, you will need to connect the light kit wires to the fan’s wires using wire connectors, ensuring that the colors match: black to black (or blue), white to white, and ground to ground.

Once the wiring is complete, attach the light kit to the fan, making sure it’s securely fastened. This step often involves aligning it with the mounting bracket and tightening screws. Finally, install the light bulbs, and if your fan has a glass shade, carefully attach it to complete the look.

With the fan blades and light kit securely attached, step back and admire your work! You’ve not only enhanced your room’s ambiance but also ensured that your ceiling fan is ready to provide comfort and style for years to come.

10. Securing the Ceiling Fan and Testing Stability

Once you’ve assembled the fan and ensured that all the wiring is properly connected, it’s time to secure the ceiling fan to its mounting bracket. This step is crucial for both safety and functionality, so take your time and do it right.

Begin by carefully lifting the fan into place, aligning it with the mounting bracket that you installed earlier. Most ceiling fans come with screws specifically designed for this purpose—typically, these are provided in the same packet as the fan’s assembly instructions. Using your screwdriver, carefully secure the fan by tightening these screws until they are snug. It’s important not to overtighten, as this can lead to damage or misalignment.

After securing the fan, give it a gentle shake to test its stability. It should feel firmly attached, with no wobbling or movement. If you notice any instability, double-check that all screws are tightened properly and that the mounting bracket is securely anchored in the ceiling. For added peace of mind, it’s a good idea to check that the fan blades are level and evenly spaced, as an unbalanced fan can lead to noise and reduced efficiency.

Once you’re satisfied with the installation, it’s time to test the fan. Turn the power back on at the circuit breaker, and use the remote control or wall switch to power up the fan. Observe its operation carefully: listen for any unusual noises and monitor its movement. A well-installed ceiling fan should run smoothly and quietly.

If everything checks out, congratulations! You’ve successfully installed your ceiling fan like a pro. Enjoy the comfort of your new ceiling fan, and take a moment to appreciate the satisfaction of your DIY accomplishment!

11. Installing the Remote Control or Wall Switch

Installing the remote control or wall switch for your ceiling fan is a crucial step that can significantly enhance your user experience, providing the convenience of controlling your fan from the comfort of your couch or bed. There are two primary options for controlling your ceiling fan: a handheld remote control or a wall-mounted switch, each offering unique benefits.

### Installing the Remote Control

If you’ve chosen to go with a remote control, start by ensuring you have the necessary batteries for the remote itself. Most remotes require AA or AAA batteries, which are usually included in the package. Next, locate the receiver, a small device that connects to your fan’s wiring. It’s typically found in the canopy of the fan, where it connects directly to the fan’s motor and power supply.

Begin by carefully following the manufacturer’s instructions to wire the receiver. This usually involves connecting the wires from the receiver to the corresponding wires from the ceiling fan – typically black to black (power), white to white (neutral), and green or bare to green or bare (ground). Once wired, secure the receiver within the fan canopy. Ensure that the wires are neatly tucked away to avoid any obstructions when mounting the fan.

After securing everything, attach the canopy back to the ceiling and install the batteries in the remote. Test the remote to make sure it’s communicating with the fan—turning it on and off, adjusting speeds, and controlling the light (if applicable) should all function seamlessly.

### Installing the Wall Switch

If you prefer a wall switch, start by turning off the power at the circuit breaker to ensure safety. You’ll need to replace your existing switch with a compatible fan switch, which may have additional functionalities like speed control or light dimming. Carefully remove the old switch from the wall box and disconnect the wiring.

Connect the new wall switch following the manufacturer’s wiring diagram. Generally, this involves connecting the hot wire to the switch and the ground wire to the grounding screw. Once wired, secure the switch back into the wall box and attach the cover plate.

Turn the power back on at the circuit breaker and test your new wall switch. Make sure it effectively controls the fan’s operation and any integrated lighting features.

### Final Touches

Whether you opted for a remote control or wall switch, ensure that all components are securely installed and functioning correctly. This step not only enhances your ceiling fan’s usability but also adds a polished, professional touch to your installation. A well-installed remote or switch means you can easily adjust your ceiling fan’s settings without hassle, allowing you to enjoy your newly installed fan to its fullest potential!

12. Final Touches: Balancing the Fan Blades

Once you’ve successfully installed your ceiling fan and it’s ready to spin, it’s time for the final touch: balancing the fan blades. This step is crucial, as an unbalanced fan can lead to wobbling, excessive noise, and even potential damage over time. Fortunately, balancing your fan is a straightforward process that can enhance its performance and longevity.

Start by turning on the fan and observing its movement. If you notice any wobbling or irregular motion, it’s a sign that the blades may need adjustment. Begin by checking the blade screws to ensure they are all tight. Loose screws can cause the blades to sag or flutter, leading to an imbalance.

Next, you’ll want to use a blade balancing kit, which usually includes a few adhesive weights and instructions. Most kits come with small clips that you can temporarily attach to the blades to determine where the imbalance lies. Begin by attaching one weight to the center of one blade, then turn the fan on again to see if the wobbling persists. If it does, try moving the weight along the blade or adding additional weights until the fan runs smoothly.

Remember to repeat this process for each blade, ensuring that they are all equally balanced. Once you’ve achieved a wobble-free spin, remove any temporary weights and secure the final balancing weights in place with their adhesive backing.

Finally, take a step back and admire your handiwork! With the fan balanced and running smoothly, you can enjoy the cool airflow it provides without the distraction of annoying noises or unsteady movement. This final touch not only enhances your fan’s performance but also ensures a peaceful atmosphere in your home. Congratulations! You’ve successfully installed your ceiling fan like a pro!

13. Troubleshooting Common Installation Issues

Installing a ceiling fan can feel like a straightforward task, but even the most seasoned DIYers sometimes encounter unexpected hiccups along the way. Whether you’re a first-timer or a seasoned pro, it’s essential to know how to troubleshoot common installation issues to ensure your ceiling fan operates safely and efficiently.

One of the most frequent problems arises when your fan wobbles or shakes during operation. This can often be attributed to uneven blade installation or loose screws. To remedy this, turn off the power, carefully check each blade for proper alignment, and tighten any loose screws. If the wobbling persists, consider using a blade balancing kit, which usually includes small weights to attach to the blades for balance.

Another issue might involve the fan not turning on at all. Start by checking your circuit breaker to ensure power is flowing to the fixture. If the breaker is fine, inspect your wiring connections within the fan and switch box. It’s vital that all wires are securely connected and that the power supply is correctly configured. If you’re still having trouble, a quick check of the pull chain (if applicable) can help; sometimes, it may not be set to the “on” position.

You may also encounter issues with the fan’s remote control if your model includes one. If the remote isn’t functioning as expected, check the batteries first, as dead batteries are a common culprit. If the remote still fails to work, ensure that the receiver unit inside the fan is properly connected. Sometimes a simple reset of the remote can do the trick, so refer to your user manual for specific instructions on resetting the device.

Lastly, if your fan is running but producing an unpleasant noise—like grinding or clicking—this could indicate that the motor or blades are misaligned. Make sure all components are securely fastened, and check for any debris that might be obstructing the fan’s movement.

By familiarizing yourself with these common installation issues and their solutions, you’ll not only boost your confidence in installing ceiling fans but also enhance your overall DIY skills. With a little patience and persistence, you can troubleshoot any problems that arise, ensuring your ceiling fan operates smoothly and effectively for years to come. Happy installing!

14. Maintenance Tips for Your Ceiling Fan

Maintaining your ceiling fan is essential to ensure it operates efficiently and prolongs its lifespan. Regular upkeep not only helps you enjoy a comfortable environment but also keeps your energy bills in check. Here are some practical maintenance tips to keep your ceiling fan running smoothly for years to come.

First and foremost, dusting your fan blades should be a regular part of your cleaning routine. Dust and grime can accumulate quickly, especially if your fan is used frequently. Use a microfiber cloth or an extendable duster to gently wipe the blades, ensuring you reach the hidden corners. For a deeper clean, a mixture of mild soap and water can be applied to a cloth, followed by a thorough drying to prevent moisture damage.

Next, check the balance of your fan. An unbalanced fan can lead to wobbling, noise, and even potential damage over time. To balance your fan, you can use a simple balance kit, which typically includes weights to attach to the blades. Make adjustments as needed, and your fan will operate smoothly once again.

Don’t forget to inspect the fan’s motor and pull chain. Over time, the motor can accumulate dust, leading to overheating. Carefully vacuum the motor housing, ensuring that you don’t disturb any wiring. Also, check if the pull chain is functioning correctly. If it feels loose or is stuck, it might need a little lubrication or adjustment.

Finally, consider the seasonality of your fan use. Many ceiling fans come with a switch that allows you to change the direction of blade rotation. In the summer, set your fan to spin counterclockwise to create a cool breeze, while in the winter, switch it to clockwise to circulate warm air. This simple adjustment can significantly enhance your comfort and help you save on heating and cooling costs.

By following these maintenance tips, you’ll not only keep your ceiling fan in peak condition but also enhance its performance, ensuring that your home remains a comfortable haven all year round. Regular care will go a long way in making your ceiling fan a reliable companion in your quest for the perfect indoor climate.

15. Conclusion: Enjoying Your New Ceiling Fan!

Congratulations! You’ve successfully installed your ceiling fan, and now it’s time to enjoy the fruits of your labor. A well-placed ceiling fan not only enhances the aesthetic appeal of your space but also provides a refreshing breeze, improves air circulation, and can even help reduce your energy bills. As you step back and admire your handiwork, take a moment to appreciate the way your new fan complements your room’s decor, whether it’s a sleek modern design or a rustic farmhouse style.

Before you flip the switch, ensure your fan is operating smoothly. Check the settings and make necessary adjustments to the speed and direction of the blades—the reversible motor option allows you to tailor airflow to your preferences, whether you want a cool breeze in the summer or warm air circulation in the winter.

Once everything is set, sit back and relish in the comfort your new ceiling fan brings. Perhaps you’ll enjoy a cozy evening reading a book under its gentle glow, or gather with friends for lively conversations in the cool breeze it creates. Don’t forget to take a moment to marvel at how your DIY skills have transformed your living space!

As you bask in the satisfaction of your accomplishment, remember to maintain your fan regularly. Dust the blades, check for any loose screws, and ensure it runs efficiently for years to come. With your ceiling fan installed like a pro, the perfect blend of style and comfort is now just a switch away. Enjoy your new ceiling fan and all the delightful breezes it will bring!

In conclusion, we hope our step-by-step guide has empowered you to tackle the installation of your ceiling fan with confidence and ease. Whether you’re updating your home’s aesthetic, improving air circulation, or simply seeking a more energy-efficient solution, installing a ceiling fan can be a rewarding DIY project. By following the detailed instructions and tips shared in this post, you can transform your space while saving on installation costs. Remember to take your time, double-check your work, and enjoy the satisfaction of completing the task yourself. Now, go ahead and enjoy the refreshing breeze of your new ceiling fan, and don’t hesitate to share your installation success stories with us! Happy DIY-ing!

What are the latest trends in home design?

As we step into 2023, the world of home design is bursting with fresh ideas and innovative concepts that promise to transform ordinary spaces into extraordinary sanctuaries.

This year, homeowners and design enthusiasts alike are embracing a blend of functionality, sustainability, and aesthetic appeal, crafting environments that reflect personal style while prioritizing comfort and well-being. From bold color palettes and textured materials to biophilic designs that incorporate nature, the hottest trends are all about creating harmonious spaces that resonate with our evolving lifestyles. In this blog post, we will explore the most captivating home design trends of 2023, offering insights and inspiration to help you revitalize your living space, whether you’re redesigning a single room or embarking on a complete home makeover. Get ready to discover how the latest trends can breathe new life into your home and elevate your everyday living experience!

1. Introduction to Home Design Trends in 2023

What are the latest trends in home design?
Credit : whatcanu.com

As we step into 2023, the world of home design is brimming with fresh ideas and innovative concepts that reflect our evolving lifestyles and values. This year, the emphasis is on creating spaces that are not only visually stunning but also functional and sustainable. Homeowners are increasingly seeking to transform their living environments into havens of comfort and style, where every detail speaks to their personal aesthetic and promotes well-being.

In 2023, we’re witnessing a harmonious blend of nature-inspired elements and cutting-edge technology, as biophilic design takes center stage. This trend emphasizes the connection between indoor spaces and the natural world, encouraging the use of organic materials, greenery, and natural light to create serene atmospheres. Additionally, the rise of eco-consciousness is pushing homeowners to prioritize sustainable practices, from energy-efficient appliances to upcycled furnishings.

Color palettes are shifting as well, with earthy tones and soft pastels making a powerful return. These hues evoke a sense of tranquility and warmth, making them perfect for creating inviting spaces. Meanwhile, bold statement pieces and eclectic décor are gaining traction, allowing individuals to express their unique identities through their home designs.

As we explore the hottest trends shaping our living spaces this year, we will delve into the innovative ideas that are redefining comfort and style. Whether you’re planning a complete renovation or simply looking to refresh a room, these trends will inspire you to transform your space into a stylish sanctuary that reflects the spirit of 2023. Get ready to embrace the future of home design and unleash your creativity!

2. Embracing Sustainable and Eco-Friendly Materials

As we step into 2023, one of the most compelling trends in home design is the embrace of sustainable and eco-friendly materials. Homeowners are increasingly prioritizing the health of the planet, and this shift is transforming living spaces into havens of both style and sustainability. From reclaimed wood and bamboo to recycled metals and organic textiles, the materials we choose play a pivotal role in our design choices and environmental impact.

Imagine walking into a living room adorned with furniture crafted from sustainably sourced wood, its natural grains and imperfections telling a story of responsible craftsmanship. Upholstered in organic cotton or linen, the seating not only exudes comfort but also contributes to a healthier indoor air quality. Beyond aesthetics, these materials are often more durable and require less energy to produce, making them a wise investment for the long haul.

The trend extends to flooring as well, where eco-friendly options like cork and reclaimed hardwood are making waves. These materials not only provide a unique visual appeal but also minimize the environmental footprint associated with traditional flooring options. Even in the kitchen, countertops made from recycled glass or sustainable stone are gaining popularity, offering both beauty and resilience while aligning with the ethos of eco-conscious living.

Incorporating indoor plants further enhances this sustainable design approach, as they purify the air and bring a touch of nature indoors. From vertical gardens to biophilic design elements, the connection to nature is stronger than ever, providing a soothing escape from the chaos of modern life.

By embracing sustainable and eco-friendly materials, homeowners in 2023 are not just making a design choice; they are making a statement about their values. This trend goes beyond mere aesthetics, fostering a sense of responsibility and care for the environment in our living spaces. Transform your home into a sanctuary that reflects your commitment to sustainability, and watch as it becomes a source of inspiration for those who enter.

3. The Rise of Biophilic Design: Bringing Nature Indoors

What are the latest trends in home design?
Credit : whatcanu.com

As we navigate an increasingly urbanized world, the rise of biophilic design has emerged as a refreshing antidote, seamlessly blending the boundaries between the indoors and the natural environment. In 2023, this trend is not just a fleeting fascination; it’s a movement that emphasizes our intrinsic connection to nature and the profound impact it has on our well-being.

Imagine stepping into a living room where sunlight filters through expansive glass windows, illuminating lush greenery that spills from every nook and cranny. Biophilic design encourages the incorporation of natural elements—like plants, water features, and natural light—into our everyday spaces. This trend advocates for the use of organic materials such as wood, stone, and even living walls, creating an atmosphere that soothes the senses and promotes relaxation.

Incorporating biophilic design goes beyond just aesthetics; it’s about fostering a healthier lifestyle. Studies have shown that exposure to natural elements can reduce stress, enhance mood, and boost productivity. As homeowners increasingly seek sanctuaries that promote wellness, designs featuring indoor gardens, large potted plants, and natural color palettes are becoming staples in modern homes.

Moreover, furniture designs are shifting to accommodate this trend, with more pieces made from sustainable materials and featuring nature-inspired motifs. Think chairs that mimic the curves of tree branches or tables crafted from reclaimed wood. As we embrace this trend, it becomes clear that bringing nature indoors is not only a style choice but a lifestyle commitment that transforms our living spaces into havens of tranquility and rejuvenation.

In 2023, biophilic design is more than a trend; it’s a thoughtful approach to creating spaces that nourish the soul while enhancing the beauty of our homes. So, whether you’re adding a few houseplants or embarking on a complete renovation, consider how nature can rejuvenate your space and elevate your everyday living experience.

4. Bold Colors: How to Use Vibrant Hues Effectively

As we dive into 2023, one of the most exciting home design trends is the resurgence of bold colors. Gone are the days of muted palettes and safe neutrals; this year, it’s all about making a statement with vibrant hues that breathe life and personality into your space. But how can you effectively incorporate these eye-catching colors without overwhelming your home? Here are some tips to harness the power of bold colors in your design.

Start by selecting a primary color that speaks to you—perhaps a rich emerald green, a fiery coral, or a sunny yellow. This will serve as your focal point. To balance the intensity of your chosen hue, consider integrating it through accent pieces like throw pillows, rugs, or artwork. For instance, a striking cobalt blue sofa can be beautifully complemented by soft, neutral walls and vibrant patterned cushions, creating a harmonious yet dynamic look.

Another effective technique is to create color zones in open spaces. This involves using bold colors to delineate different areas of a room, making it feel more cohesive. Imagine a kitchen painted in a deep navy paired with a cheerful lemon yellow dining area; this intentional separation not only adds visual interest but also allows each space to shine in its own right.

Don’t shy away from patterns, either! Incorporating bold prints—be it geometric, floral, or abstract—can add depth and a playful element to your decor. A feature wall adorned with a large-scale wallpaper in a striking design can serve as a stunning backdrop, allowing you to keep the rest of the room more subdued.

Finally, when using bold colors, it’s essential to maintain balance. Pair vibrant shades with natural materials—think wooden furniture or woven textiles—to ground the design and create a sense of warmth. This contrast not only elevates the color but also brings a touch of nature indoors, fostering a tranquil environment amidst the vibrancy.

By thoughtfully integrating bold colors into your home, you can create a space that reflects your personality and invites creativity. Embrace the trend, and watch as your living areas transform into vibrant, engaging environments that inspire and energize!

5. Minimalism vs. Maximalism: Finding Your Balance

What are the latest trends in home design?
Credit : whatcanu.com

In the ever-evolving world of interior design, the debate between minimalism and maximalism continues to capture the imagination of homeowners and designers alike. The year 2023 invites you to explore this dynamic contrast, encouraging you to discover a harmonious balance that reflects your personal style.

Minimalism, with its focus on simplicity and functionality, offers a serene aesthetic that champions clean lines, neutral color palettes, and decluttered spaces. This trend promotes a sense of tranquility, making it ideal for those looking to create a peaceful retreat within their homes. Think airy living rooms adorned with a few carefully curated pieces of art, open spaces filled with natural light, and furniture that serves a dual purpose—each element thoughtfully chosen to enhance both style and utility.

On the other end of the spectrum lies maximalism, a bold celebration of color, texture, and individuality. This trend encourages homeowners to embrace layers of patterns, an eclectic mix of furnishings, and vibrant color schemes. Maximalism allows for personal expression and creativity, transforming spaces into a vivid tapestry that tells a story. Picture a cozy reading nook furnished with a plush, oversized chair covered in a kaleidoscope of fabrics, surrounded by an array of decorative objects that reflect your travels and passions.

The key to navigating this dichotomy in 2023 lies in finding your unique balance. You don’t have to strictly adhere to one philosophy; instead, consider blending elements from both styles. Perhaps you start with a minimalist foundation—neutral walls and sleek furniture—and then sprinkle in maximalist touches, such as bold accent pillows or an eye-catching gallery wall. This fusion allows you to create a space that feels both inviting and personal, striking a harmonious chord between simplicity and vibrancy.

As you embark on your design journey this year, take the time to reflect on what resonates with you. Are you drawn to the calming embrace of minimalism, or does the expressive nature of maximalism speak to your soul? By thoughtfully integrating aspects of both trends, you can transform your space into a sanctuary that not only looks stunning but also reflects who you are.

6. Multi-Functional Spaces: Design for Versatility

In a world where space is often at a premium, the trend of multi-functional spaces has emerged as a beacon of practicality and creativity in home design for 2023. Homeowners are increasingly seeking ways to maximize their living areas, blending functionality with style to create environments that cater to diverse needs. Gone are the days of rigid room assignments; contemporary designs embrace versatility, allowing spaces to serve multiple purposes seamlessly.

Picture a cozy living room that effortlessly transforms into a home office by day, complete with a stylish desk that blends harmoniously with plush seating. Innovative furniture solutions, such as foldable desks and modular sofas, are at the forefront of this trend. These adaptable pieces not only save space but also elevate the aesthetic appeal of your home. Imagine a coffee table that can be raised to dining height or a murphy bed that tucks away to reveal a chic reading nook—these elements embody the essence of modern living.

Furthermore, the rise of open-concept layouts continues to dominate, promoting a free flow of movement and interaction between spaces. By using design elements like sliding doors or decorative room dividers, you can create distinct areas that can be closed off when privacy is needed, yet opened up for gatherings and socializing.

Color palettes also play a crucial role in multi-functional spaces. Warm, neutral tones can create a calming atmosphere, while strategically placed pops of color can define different zones within a room. Soft lighting can enhance the mood, allowing you to switch from a bright, energetic environment for work to a cozy, intimate setting for relaxation.

In 2023, the focus is on making the most of every square foot without sacrificing style. Multi-functional spaces embody this philosophy, allowing you to adapt to your lifestyle’s ebb and flow while creating a home that is not only practical but also beautifully designed. Embrace this trend, and watch as your space transforms into a versatile haven that meets all your needs.

7. Smart Home Technology Integration

What are the latest trends in home design?
Credit : whatcanu.com

As we navigate through 2023, one of the defining elements of modern home design is the seamless integration of smart home technology. Gone are the days when gadgets were merely accessories; today, they are essential components that enhance both functionality and aesthetic appeal. Smart home technology encompasses a broad range of devices that offer convenience, efficiency, and security, fundamentally transforming how we interact with our living spaces.

Imagine walking into a home where the lights automatically adjust to your mood, the thermostat learns your preferences, and the security system can be managed from the palm of your hand. This level of sophistication is now attainable and is becoming a staple in contemporary design. Whether it’s smart speakers that control your entire home environment with a simple voice command or smart appliances that optimize energy use while providing modern convenience, these technologies are designed to streamline daily tasks and improve overall quality of life.

Incorporating smart technology into your home doesn’t mean sacrificing style. In fact, many of these devices come in sleek, minimalist designs that complement modern decor. From hidden smart speakers built into furniture to stylish smart lighting fixtures that blend seamlessly with your interior design, technology is no longer a distraction but rather a harmonious extension of your home’s aesthetic.

Moreover, the rise of smart home ecosystems means that various devices can communicate with one another, creating a cohesive and efficient home environment. Imagine a scenario where your smart blinds automatically close as the sun sets, reducing glare on your screens while keeping your home cooler—a perfect example of technology enhancing comfort without compromising design.

As you transform your space this year, consider how smart home technology can elevate not just functionality, but also the overall ambiance of your home. By integrating these innovative tools, you can create a living environment that is not only on-trend but also tailored to your lifestyle, making your home a true reflection of the future.

8. Vintage and Retro Influences in Modern Design

As we navigate through 2023, one of the most captivating trends in home design is the resurgence of vintage and retro influences. This style not only adds character to contemporary spaces but also tells a story, weaving nostalgia into the fabric of modern living. Designers and homeowners alike are embracing the charm of bygone eras, seamlessly integrating pieces that evoke a sense of history and warmth.

Imagine stepping into a living room adorned with mid-century modern furniture—think sleek lines, rich woods, and pops of bold colors. A vintage coffee table, perhaps inherited from a grandparent or discovered at a local flea market, can serve as a striking centerpiece, sparking conversations and admiration. Pair it with retro-inspired accessories, like a sunburst wall clock or a patterned area rug, and you’ve created a space that feels both timeless and fresh.

Moreover, vintage-inspired wallpaper with intricate floral or geometric prints is making a comeback, transforming walls into stunning focal points. These patterns not only add depth and texture but also serve as a perfect backdrop for minimalist furniture, creating a harmonious balance between old and new. In the kitchen, retro appliances—think pastel-colored refrigerators and classic stovetops—bring a playful touch while offering modern efficiency.

Lighting, too, is embracing a vintage flair. Consider pendant lights with Edison bulbs or chandeliers reminiscent of the Art Deco era, casting a warm glow that invites relaxation and enjoyment. The interplay of vintage and contemporary elements creates a layered aesthetic, where each piece complements the other, resulting in a cohesive and visually appealing environment.

Incorporating vintage and retro influences into your home design allows you to express your individuality while celebrating the past. It’s a trend that encourages creativity, enabling you to curate a space that reflects your personality and values. So, as you transform your home this year, don’t shy away from mixing eras—embrace the charm of vintage and watch as your space comes alive with character and style.

9. The Popularity of Textured Surfaces

In 2023, textured surfaces have emerged as a defining trend in home design, captivating homeowners and designers alike with their ability to add depth, warmth, and a tactile dimension to interiors. Gone are the days of flat, uninspired walls; today’s spaces embrace a rich tapestry of textures that invite touch and intrigue the eye.

From walls adorned with hand-troweled plaster to ceilings featuring reclaimed wood beams, the variety of materials and finishes available is virtually endless. Textured wallpaper is making a significant comeback, offering everything from subtle fabric weaves to bold patterns that can transform a space with just one application. Additionally, natural materials such as stone, brick, and clay are being integrated into modern designs, providing an organic feel that connects the indoors with the natural world outside.

In kitchens and bathrooms, textured surfaces are taking center stage with the introduction of three-dimensional tiles and mixed materials. These surfaces not only serve a functional purpose but also act as statement pieces that elevate the overall aesthetic of the room. Imagine a backsplash composed of intricately patterned tiles or a shower wall that features a stunning mosaic of natural stone; these elements create visual interest and make a lasting impression.

Moreover, furniture is also getting the textured treatment. Upholstered pieces in bouclé or velvet fabrics add a layer of comfort and luxury, while wooden furniture with a live edge invites a rustic charm into contemporary settings. By mixing various textures—smooth alongside rough, soft next to hard—designers are crafting spaces that feel dynamic and inviting.

As you consider your own home design this year, think about how you can incorporate textured surfaces to create a more layered and engaging environment. Whether you opt for a bold feature wall or subtle accents throughout your space, embracing this trend will undoubtedly enhance the visual narrative of your home in 2023.

10. Open Concept Living: Pros and Cons

Open concept living has taken the home design world by storm, becoming a hallmark of modern residential architecture. This style, characterized by the seamless flow between multiple living spaces, is more than just a trend—it’s a lifestyle choice that reflects a desire for connectivity and functionality in our homes. However, while the allure of spaciousness and light is undeniably appealing, it’s essential to weigh the pros and cons before committing to an open layout.

**Pros:**

One of the most significant advantages of open concept living is the enhanced sense of space and light. By removing walls, natural light floods the area, creating a bright and airy atmosphere that can make even smaller homes feel expansive. This layout encourages interaction, making it an ideal choice for families and those who love to entertain. Imagine cooking in the kitchen while engaging with guests in the living room or keeping an eye on children playing in the adjacent play area—open concept living fosters togetherness and inclusivity.

Moreover, the versatility of open spaces allows for creative design possibilities. Homeowners can experiment with various furniture arrangements, color schemes, and decor styles without the constraints of defined rooms. This flexibility not only enhances the aesthetic appeal but also allows for easier flow during gatherings and events.

**Cons:**

However, open concept living isn’t without its challenges. One notable drawback is the potential for noise and lack of privacy. Without the barriers of walls, sounds can easily travel between spaces, which may be disruptive, especially in households with varying schedules or when entertaining guests. The kitchen, in particular, can become a hub of activity that might overwhelm those seeking a quieter environment.

Additionally, the absence of defined rooms can make it difficult to create a cohesive design. Without walls to separate spaces, homeowners may struggle to delineate areas for different activities, leading to visual clutter and a lack of organization. This can be particularly challenging in smaller homes where multifunctional spaces are necessary.

Ultimately, choosing an open concept layout requires careful consideration of your lifestyle, preferences, and the dynamics of your household. While it offers a modern, spacious feel, it also demands thoughtful planning to ensure that it meets your needs for comfort, functionality, and style. As you explore the hottest home design trends of 2023, weigh these pros and cons to determine if open concept living is the right fit for your transformed space.

11. Outdoor Living Spaces: Designing for Al Fresco Enjoyment

As we step into 2023, the trend of transforming outdoor spaces into luxurious extensions of our homes continues to gain momentum. Outdoor living spaces are no longer just an afterthought; they’ve become a focal point for design, relaxation, and socialization. The desire to embrace nature, enjoy fresh air, and entertain guests has led homeowners to invest in well-designed outdoor areas that reflect their personal style while providing comfort and functionality.

Imagine a sun-drenched patio adorned with stylish furniture, where plush cushions invite you to sink into a good book or enjoy a glass of wine with friends. This year, the emphasis is on creating seamless transitions between indoor and outdoor environments. Large sliding glass doors and expansive windows blur the lines, allowing natural light to flood in while providing stunning views of your landscape.

In terms of design, think beyond traditional seating arrangements. Incorporate multi-functional pieces like storage ottomans, cozy fire pits, and statement lighting that sets the mood as the sun sets. Outdoor kitchens are also gaining popularity, allowing culinary enthusiasts to whip up gourmet meals while enjoying the great outdoors. Built-in grills, bar areas, and weather-resistant cabinets make entertaining a breeze, turning your backyard into a culinary haven.

Landscaping plays a crucial role in enhancing these outdoor spaces. This year, sustainability takes center stage with the rise of native plants and drought-resistant gardens that require minimal upkeep. Incorporating natural elements such as stone pathways, wooden decks, and water features can create a serene atmosphere that invites relaxation.

Finally, don’t forget about the importance of ambiance. Layered lighting, from string lights to lanterns, can transform your outdoor space into a magical retreat come evening. Add touches of greenery with potted plants, and consider cozy textiles like outdoor rugs and throw blankets to create a warm, welcoming environment.

Whether you’re hosting summer barbecues or enjoying quiet evenings under the stars, the trend of outdoor living spaces is all about creating a harmonious blend of comfort and nature. Embrace this trend in 2023, and watch your outdoor areas become the highlight of your home.

12. Statement Lighting: Making a Bold Impression

In the world of interior design, lighting has always played a crucial role, but this year, it has taken center stage as a powerful tool for making a bold statement. Statement lighting fixtures—be it oversized chandeliers, sculptural pendant lights, or eye-catching floor lamps—are transforming spaces and becoming focal points in homes across the globe.

Imagine walking into a room where a magnificent, geometric chandelier cascades from the ceiling, its intricate design casting playful shadows on the walls and ceiling. These lighting pieces don’t just illuminate; they create an ambiance that sets the mood for the entire space. Whether your style leans toward the modern, eclectic, or even vintage, there’s a statement light fixture that can enhance your decor while reflecting your personal style.

In 2023, expect to see a rich variety of materials and finishes taking the spotlight—think matte black metals, warm brass, and even bold colors like deep emerald or vibrant terracotta. The trend is all about mixing textures and shapes to create visual intrigue. For instance, a sleek, minimalist space can be beautifully complemented by a dramatic, multi-tiered chandelier, while a cozy, rustic room could benefit from a large, wrought iron lantern that adds warmth and character.

Positioning statement lighting strategically can also enhance architectural features, drawing the eye upward and adding depth to your space. Consider placing a striking pendant above a dining table or a pair of dramatic sconces flanking a fireplace. Not only do these lighting choices provide functional illumination, but they also serve as conversation starters, showcasing your unique taste and elevating the overall aesthetic of your home.

As you embark on your home transformation journey, don’t underestimate the power of statement lighting. It’s more than just a source of light; it’s an artistic expression that can elevate your space and leave a lasting impression on anyone who walks through your door. Embrace this trend and watch as your home radiates style and sophistication, one luminous fixture at a time.

13. Personalization: Customizing Your Space

In 2023, personalization has emerged as a powerful trend in home design, allowing homeowners to infuse their unique identities into every corner of their spaces. Gone are the days of cookie-cutter interiors; today, individuality reigns supreme. Homeowners are embracing the opportunity to customize their environments, creating homes that truly reflect their personalities, values, and lifestyles.

One of the most exciting aspects of personalization is the ability to blend styles and elements that resonate with you. Whether it’s an eclectic mix of vintage finds and contemporary pieces, or a harmonious palette of colors that evoke cherished memories, customization enables you to curate a space that tells your story. Think about incorporating family heirlooms or art pieces from local artists that speak to your heritage or experiences—these touches can transform ordinary rooms into extraordinary reflections of who you are.

Moreover, personalization extends beyond aesthetics; it also encompasses functionality. Homeowners are increasingly seeking out smart home technology that caters to their specific needs, such as automated lighting systems that adjust based on mood or energy-efficient appliances that align with their commitment to sustainability. Custom furniture, tailored to fit unique layouts or specific purposes, allows for both style and practicality, ensuring that every piece serves a purpose while enhancing the overall design.

Textiles are another canvas for personalization; consider layering unique patterns and textures through cushions, throws, and rugs that resonate with your taste. A bold, graphic print can become a conversation starter, while soft pastels may evoke a sense of calm—each choice adds a layer of complexity and warmth to your home.

Ultimately, the trend of personalization invites you to take ownership of your space, making it a sanctuary that not only looks beautiful but feels like a true reflection of you. As you explore the hottest home design trends of 2023, remember that the most impactful designs are those infused with personal significance, allowing your home to be a canvas for self-expression and creativity.

14. The Role of Art and Decor in Home Design

Art and decor play a pivotal role in home design, serving as the soul of any living space. In 2023, the emphasis on artistic expression and curated decor has never been more pronounced. Homeowners are increasingly embracing the philosophy that their surroundings should reflect their personality and values, leading to spaces that are not only functional but also deeply personal.

The trend towards bold, statement pieces is making waves this year. Large-scale artwork, whether it’s a vibrant painting, a striking sculpture, or an eye-catching wall mural, commands attention and sets the tone for the entire room. These focal points are often complemented by thoughtfully selected decor items—think unique vases, handcrafted textiles, and vintage finds—that add layers of interest and storytelling to a space.

Additionally, there’s a growing appreciation for local artists and artisans, as consumers shift towards supporting small businesses and sustainable practices. This movement encourages the use of one-of-a-kind pieces that bring character and a sense of authenticity to home interiors. The combination of art and decor allows homeowners to express their individuality while also creating an inviting atmosphere that sparks conversation and connection.

Incorporating art and decor is not merely about aesthetics; it’s about curating an experience. As you transform your space this year, consider how each piece contributes to the overall narrative of your home. From serene landscapes that evoke calm to dynamic abstracts that inspire energy, let your walls and surfaces tell your story, making your home a true reflection of who you are.

15. Conclusion: How to Incorporate These Trends in Your Home

As we wrap up our exploration of the hottest home design trends of 2023, it’s essential to consider how you can integrate these styles into your own space effectively. The key to a successful transformation is to start small and build upon your existing decor.

Begin by identifying the trends that resonate most with you—whether it’s the earthy tones of biophilic design, the sleek lines of minimalism, or the bold patterns of maximalism. Once you have a clear vision, you can gradually introduce elements that reflect these styles. For instance, if you’re drawn to natural materials, consider swapping out a few accent pieces for handmade ceramics, wooden decor, or organic textiles.

Color is another powerful tool in your design arsenal. A fresh coat of paint can dramatically alter the mood of a room. Opt for colors that align with this year’s popular palettes—think soft greens, warm neutrals, or vibrant jewel tones. If a full repaint feels daunting, try incorporating these colors through accessories like cushions, rugs, or artwork.

Don’t overlook the importance of lighting and furniture arrangement. Layering lighting sources and rethinking the layout can breathe new life into your space. Consider statement light fixtures that serve as focal points or rearranging furniture to create a more open and inviting atmosphere.

Lastly, remember that your home should be a reflection of you. While trends are an excellent source of inspiration, the ultimate goal is to create a space that feels authentic and comfortable. Mix and match elements from various trends to curate a look that’s uniquely yours, ensuring that your home not only looks stylish but also feels inviting and personal. By thoughtfully incorporating these trends, you’ll transform your space into a sanctuary that embraces the spirit of 2023, while remaining true to your individual style.

As we wrap up our exploration of the hottest home design trends of 2023, it’s clear that transforming your space is all about embracing creativity and personal expression. From the warm embrace of earthy tones to the chic sophistication of multi-functional furniture, this year’s trends invite you to curate an environment that resonates with your unique style and lifestyle. Whether you’re planning a complete overhaul or simply looking to refresh a room, these trends offer inspiration to help you create a home that feels both contemporary and inviting. We encourage you to take these ideas and make them your own—let your space reflect who you are and how you live. Happy decorating, and may your home be a true sanctuary of style and comfort!