How to create a functional home office?

As the lines between home and work continue to blur, creating a functional home office has become a necessity for many.

A well-designed workspace not only boosts productivity but also enhances your overall well-being by fostering a sense of balance and comfort. Imagine stepping into a serene environment where every element is thoughtfully curated to support your work habits, from ergonomic furniture to inspiring decor. Whether you’re setting up a cozy nook in your living room or converting a spare bedroom into a full-fledged office, the right design can transform your space into a haven of creativity and efficiency. In this blog post, we will explore ten essential tips for designing your perfect functional home office, offering practical advice and innovative ideas to help you create a workspace that suits your unique style and needs. Get ready to elevate your remote work experience and turn your home office into a space that truly inspires!

1. Assessing Your Needs: Understanding Your Work Style

How to create a functional home office?
Credit : whatcanu.com

Designing a functional home office starts with a clear understanding of your unique work style and needs. Before you dive into the aesthetics or equipment, take a moment to reflect on how you work best. Are you a creative thinker who thrives in open, collaborative spaces, or do you prefer a quiet, secluded area where you can focus deeply on tasks?

Consider the nature of your work. If your job requires frequent video calls, you’ll need a setup that minimizes distractions and offers a clean background. On the other hand, if you’re a hands-on creator or a meticulous organizer, your office may require ample surface area for projects, as well as storage solutions to keep everything tidy and accessible.

Next, think about your daily routine. Do you work best in short, focused bursts, or do you prefer longer, uninterrupted sessions? This will help determine the type of furniture that suits you—whether it’s a standing desk for those who like to move around or a comfortable ergonomic chair for those who spend hours at their computers.

Don’t forget about the tools and technology that support your workflow. Are there specific software or equipment that you rely on? Make a list of essential items, from monitors and keyboards to notebooks and pens, and envision how they will fit into your space.

By taking the time to assess your needs, you’ll create a home office environment tailored to your work style, enhancing not only your productivity but also your overall comfort and satisfaction while you work. Understanding your workflow is the foundation upon which all other design decisions will be built, ensuring that your home office is as functional as it is inviting.

2. Choosing the Right Location for Your Home Office

Choosing the right location for your home office is one of the most critical decisions you’ll make in creating a functional and inspiring workspace. The location you select can significantly influence your productivity, focus, and overall well-being while working from home.

Begin by assessing your living space. Ideally, your home office should be situated in a quiet area, away from the hustle and bustle of everyday household activities. If you have a spare room, consider transforming it into your office sanctuary. A dedicated space will help you mentally segregate work from personal life, making it easier to switch on and off as needed.

If a separate room isn’t an option, think about carving out a corner in a less-trafficked area of your home, such as a quiet nook in the living room or a bright spot near a window. Natural light can work wonders for your mood and concentration, so try to position your desk near a source of daylight to keep your energy levels up throughout the day.

Consider the proximity to essential resources, too. Ensure your workspace is close to reliable Wi-Fi, power outlets, and any equipment you’ll need, such as printers or scanners. If you anticipate frequent video calls, avoid locations with distracting backgrounds or high foot traffic that could lead to interruptions.

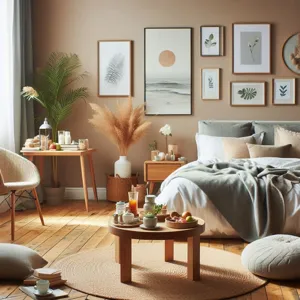
Finally, don’t overlook the importance of ambiance. Choose a location that allows you to personalize your space with decor, plants, or inspiring artwork, creating an environment that fosters creativity and motivation. By thoughtfully selecting the right location for your home office, you can cultivate a space that not only enhances your productivity but also reflects your personal style and comforts.

3. Selecting a Functional Layout: Ergonomics and Flow

How to create a functional home office?
Credit : whatcanu.com

When it comes to creating a functional home office, selecting the right layout is crucial for both productivity and comfort. A well-thought-out design that prioritizes ergonomics and flow can transform your workspace into a haven of efficiency and creativity. Start by assessing the space available to you—consider the size of the room, the placement of windows, and existing furniture.

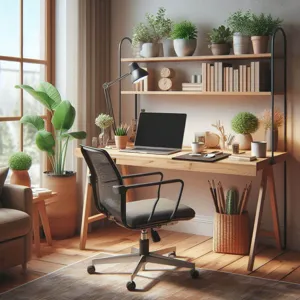
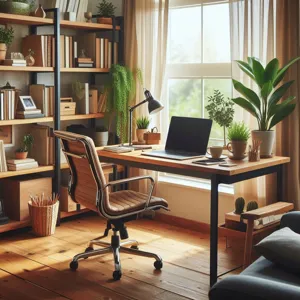
Begin with your desk, the centerpiece of your office. Ideally, it should be positioned to allow natural light to brighten your workspace while minimizing glare on your screens. An L-shaped desk can be an excellent choice for maximizing corner spaces, offering ample surface area without feeling cramped. Ensure that your chair is adjustable, allowing you to maintain a proper posture with your feet flat on the ground and your arms at a 90-degree angle when typing.

Next, think about the flow of the room. A clutter-free environment is essential for maintaining focus, so strategically arrange your essentials within arm’s reach. Use shelving, storage bins, and organizers to keep your desk tidy, and consider a layout that encourages movement. For instance, place your printer or filing cabinet slightly away from your main work area to create an intentional workflow that requires you to get up occasionally—this not only helps break up long periods of sitting but also encourages a healthy routine.

Finally, don’t forget about the importance of personal touches. Integrate elements like plants, artwork, or motivational quotes to inspire creativity and make your workspace feel inviting. By carefully selecting a layout that combines ergonomics with a seamless flow, you’ll set the stage for a productive and comfortable home office that meets all your functional needs.

4. Essential Furniture: Desks, Chairs, and Storage Solutions

When it comes to designing your perfect functional home office, choosing the right furniture is paramount. The foundation of a productive workspace lies in its essential pieces: desks, chairs, and storage solutions. Each of these elements plays a vital role in not only aesthetic appeal but also in enhancing your workflow and comfort.

**Desks:** The desk is the centerpiece of your home office and should reflect both your personal style and your work needs. Consider the size of your space and choose a desk that fits comfortably without overwhelming the room. A standing desk or an adjustable model can offer versatility, allowing you to switch between sitting and standing throughout the day, which can boost energy levels and reduce the risk of health issues associated with prolonged sitting. Look for a desk with ample surface area to accommodate your computer, documents, and any other tools of your trade, ensuring that everything you need is within arm’s reach.

**Chairs:** Comfort is key when it comes to your office chair. An ergonomic chair is an investment that pays off in the long run by supporting your posture and reducing strain on your back and neck. Look for features such as adjustable height, lumbar support, and breathable materials to keep you comfortable during long hours of work. It’s worth trying out a few options to find the one that fits you best—after all, a happy worker is a productive worker.

**Storage Solutions:** Clutter can be a significant distraction, so implementing effective storage solutions is essential for maintaining an organized workspace. Depending on your needs, consider a combination of shelving units, filing cabinets, and desk organizers. Open shelving can showcase inspiring books or decor while keeping frequently used items easily accessible. On the other hand, closed cabinets can hide away paperwork or office supplies, creating a clean and streamlined look. Don’t underestimate the value of vertical space; wall-mounted storage can maximize your area and keep your desktop free from distractions.

By carefully selecting and arranging these essential pieces of furniture, you can create a home office that not only looks great but also functions seamlessly to support your productivity and creativity. Remember, your workspace should inspire you, so choose furniture that speaks to your style and meets your practical needs!

5. Optimizing Lighting: Natural vs. Artificial Light

How to create a functional home office?
Credit : whatcanu.com

Optimizing lighting is a crucial aspect of creating a functional home office that enhances productivity and comfort. The right balance between natural and artificial light can significantly affect your mood, focus, and overall well-being while you work.

**Natural Light**: Whenever possible, harness the power of natural light. Research has shown that exposure to daylight can improve mood and energy levels, making you feel more alert and engaged. Position your desk near windows to take advantage of sunlight during the day. However, be mindful of glare on your computer screen; using sheer curtains or adjustable blinds can help diffuse harsh light while still allowing the beauty of the outdoors to filter in. Adding plants to your workspace can also enhance the experience of natural light, creating a calming, refreshing atmosphere that promotes creativity and reduces stress.

**Artificial Light**: As the day wanes or on overcast days, having appropriate artificial lighting becomes essential. Opt for a mix of ambient, task, and accent lighting to create a well-rounded environment. A stylish desk lamp with adjustable brightness is ideal for focused tasks, providing direct light for reading or working without straining your eyes. Consider using LED bulbs with a color temperature that mimics daylight—these bulbs can help reduce fatigue, improve concentration, and make your workspace feel more inviting. Additionally, overhead lighting should complement your desk setup; a dimmable ceiling fixture allows you to adjust the brightness to suit your needs throughout the day.

By thoughtfully combining natural and artificial light, you can create a workspace that not only looks beautiful but also supports your productivity and mental clarity. Remember, a well-lit home office is not just about visibility—it’s about crafting an environment that inspires you to thrive.

6. Creating a Distraction-Free Environment

Creating a distraction-free environment is paramount for enhancing productivity in your home office. In our increasingly connected world, distractions lurk around every corner, from the pull of social media notifications to the tempting allure of household chores. To truly maximize your focus, it is essential to cultivate a workspace that minimizes these interruptions and fosters a serene atmosphere conducive to deep work.

Start by choosing a dedicated space that is separate from the hustle and bustle of daily life. This could be a spare room, a corner of your bedroom, or even a nook in the living room—whatever suits your lifestyle best. Once you’ve selected your spot, make a conscious effort to declutter. A clean and organized workspace can significantly impact your mental clarity, allowing you to concentrate fully on the tasks at hand.

Consider the layout of your office as well. Position your desk in a way that limits visual distractions; facing a wall or a window with a view of nature can help keep your focus on your work instead of what’s happening in the rest of the house. If noise is a concern, invest in noise-canceling headphones or a white noise machine to drown out background sounds. Alternatively, you might find that playing soft instrumental music enhances your concentration.

Lighting plays a crucial role in creating a distraction-free environment too. Aim for natural light if possible, as it not only brightens your space but also boosts mood and energy levels. If that’s not viable, opt for warm, adjustable lighting that reduces eye strain and creates a cozy atmosphere.

Finally, put boundaries in place with family or housemates. Communicate your work hours and the importance of minimizing interruptions during these times. Consider using visual cues, like a “do not disturb” sign, to indicate when you are in deep work mode. By establishing a distraction-free environment, you’ll cultivate a sanctuary where creativity and productivity can flourish, bringing you one step closer to achieving your work-from-home goals.

7. Incorporating Technology: Tools and Gadgets for Efficiency

How to create a functional home office?
Credit : whatcanu.com

In the modern age, a functional home office is not just about a desk and a chair; it’s about creating an environment that harnesses the power of technology to enhance productivity and streamline your workflow. When designing your perfect home office, incorporating the right tools and gadgets can make all the difference in achieving efficiency and comfort.

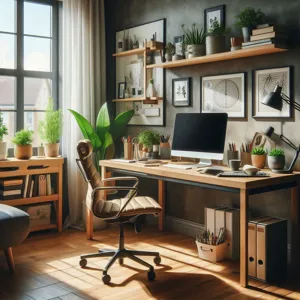
Start with a high-quality computer or laptop that meets your specific needs, whether it’s for graphic design, programming, or simple administrative tasks. Pair it with a larger monitor to reduce eye strain and expand your digital workspace, allowing you to multitask with ease. Consider investing in a detachable keyboard and mouse, which can help you maintain an ergonomic setup and create a more flexible work environment.

Don’t overlook the importance of reliable internet access. A high-speed router can eliminate frustrating lag times during video conferences or when uploading large files. For those who thrive on organization, smart storage solutions like digital filing systems or cloud-based applications can help you keep your files accessible yet clutter-free.

In addition to these essentials, think about the little gadgets that can boost your productivity. Noise-canceling headphones can create a focused atmosphere, blocking out distractions and allowing you to concentrate fully on your tasks. A smart speaker or virtual assistant can help manage your schedule, set reminders, and control smart devices in your office, making your workspace even more efficient.

Lighting is another critical aspect of a functional home office. Smart lighting systems can adjust based on the time of day or your specific tasks, helping to reduce eye strain and create a more inspiring work environment. Consider adding plants or digital photo frames that can be controlled via your smartphone; these elements not only personalize your space but also contribute to a more positive and motivating atmosphere.

By thoughtfully incorporating these technological tools and gadgets into your home office design, you can create a space that not only looks good but also works harmoniously with your workflow, setting the stage for ultimate productivity and creativity. Embrace technology as your ally, and watch your home office transform into the efficient workspace you’ve always dreamed of.

8. Personalizing Your Space: Decor and Inspiration

Creating a home office that reflects your personality is essential for fostering creativity and productivity. Personalizing your space goes beyond simply choosing a desk and chair; it involves curating an environment that inspires you every day. Start by selecting a color palette that resonates with you—soft pastels can evoke calmness, while bold hues might energize and stimulate your creativity.

Incorporate decor that speaks to your interests and passions. Think about displaying artwork that inspires you, whether it’s a striking painting, motivational quotes, or photographs of cherished moments. Consider adding a vision board where you can pin images, articles, and goals that motivate you. This tactile representation of your aspirations can serve as a daily reminder of what drives you.

Plants can also play a pivotal role in personalizing your office. Not only do they add a touch of nature, but studies show that greenery can enhance mood and productivity. Choose low-maintenance plants like succulents or pothos if you’re concerned about upkeep, or opt for larger leafy varieties for a more substantial impact.

Make sure to include elements that cater to your comfort and workflow. A cozy throw blanket draped over your chair, a cup that holds your favorite pens, or a scented candle can transform your workspace into a haven. Additionally, keep an eye on ergonomics; personalized adjustments like a standing desk or a chair with lumbar support can enhance your comfort and focus.

Finally, don’t forget about organization. Utilize stylish storage solutions—think decorative boxes or artistic shelves—to keep clutter at bay while still expressing your unique style. By thoughtfully personalizing your home office with decor that inspires and comforts you, you’ll create a functional space that not only looks good but feels good to work in.

9. Designing for Comfort: Temperature and Acoustics

When it comes to creating the perfect functional home office, comfort should be at the forefront of your design considerations. Two critical elements that significantly impact your workspace’s comfort level are temperature and acoustics.

**Temperature** plays a pivotal role in your ability to focus and maintain productivity. An overly hot or cold environment can lead to distractions and discomfort, ultimately hindering your work performance. Aim for a temperature range between 68°F and 72°F (20°C to 22°C), which is generally considered ideal for most people. Consider investing in a programmable thermostat that allows you to adjust the temperature based on your daily schedule, ensuring a consistently pleasant work environment. Additionally, utilizing fans or space heaters can provide localized comfort without needing to alter the entire home’s climate.

**Acoustics** are equally important in fostering a conducive working atmosphere. Noise pollution from outside can easily disrupt your concentration and diminish your productivity. To address this, assess the acoustics of your home office space and explore options for soundproofing. Adding heavy curtains, rugs, or acoustic panels can absorb sound and reduce echoes, creating a quieter, more serene environment. Moreover, consider incorporating white noise machines or soft background music to mask distracting sounds and help you maintain focus.

By carefully curating the temperature and soundscape of your home office, you can create a space where comfort reigns supreme, making it easier for you to dive into your work and remain engaged throughout the day. Remember, a comfortable environment is not just about aesthetics but also about enhancing your overall efficiency and well-being as you navigate your professional tasks.

10. Organizing Your Workspace: Decluttering and Maintenance

A well-organized workspace is crucial for maintaining productivity and fostering creativity, especially in a home office environment where distractions can easily creep in. Decluttering is the first step in this process; it involves not just tidying up your physical space but also creating a system that allows for efficient workflow. Begin by evaluating your desk and surrounding areas: remove any items that do not serve a distinct purpose or that you haven’t used in the last few months. Consider adopting a minimalist approach—less is often more when it comes to creating an environment that feels open and inspiring.

Once you’ve decluttered, it’s essential to implement a maintenance routine to keep your workspace in optimal condition. Set aside time at the end of each week to reassess your organization. Ask yourself if there are new items that need a designated space or if there are still items lingering that could be discarded or donated. Invest in storage solutions that suit your style—whether it be sleek, modern shelving or charming, rustic bins—to keep essential documents and supplies within reach yet out of sight.

Additionally, don’t forget to organize your digital workspace. Regularly declutter your computer files and emails to prevent digital overload. Create folders for different projects and set reminders to back up important documents—this not only saves you time but also reduces stress.

By prioritizing decluttering and maintenance, you create a sanctuary of productivity that allows you to focus on your work without the mental burden of chaos. An organized workspace is more than just visually appealing; it’s a critical element in boosting your efficiency and effectiveness in your home office. Embrace the peace that comes from a clean and orderly environment, and watch your productivity soar!

11. Balancing Aesthetics and Functionality

When designing your perfect functional home office, finding the sweet spot between aesthetics and functionality is key to creating an environment that inspires productivity while also reflecting your personal style. A beautifully designed space can enhance your mood and motivation, but if it lacks the necessary elements for effective work, it can quickly become a source of frustration.

Start by selecting a color palette that resonates with you and promotes focus. Soft, neutral tones can create a calming atmosphere, while pops of vibrant colors can invigorate your creativity. Consider incorporating artwork or decorative elements that inspire you—these can serve as visual reminders of your goals and aspirations.

However, aesthetics shouldn’t come at the expense of functionality. Choose furniture that not only looks good but also supports your workflow. An ergonomic chair and a spacious desk are essential for comfort during long working hours. Ensure that your layout promotes easy movement and access to essential tools, like your computer, printer, and reference materials.

Lighting is another critical consideration; a well-lit space can significantly impact your productivity. Natural light is ideal, so position your desk near a window if possible. Complement this with adjustable task lighting that can help reduce eye strain during evening hours.

Lastly, don’t forget about organization. A clutter-free space enhances both aesthetics and functionality. Invest in stylish storage solutions—like decorative baskets, shelving, and filing systems—that keep your workspace tidy while adding to the overall design.

By striking this balance between beauty and usability, you can create a home office that not only looks inviting but also supports your work habits, making it a space you’ll love spending time in every day.

12. Setting Boundaries: Defining Work-Life Separation

Creating a functional home office goes beyond just choosing the right desk or finding the perfect ergonomic chair; it also involves establishing clear boundaries to demarcate your work life from your personal life. In the fluid environment of remote work, where the lines between professional and personal spaces can easily blur, setting these boundaries is essential for maintaining productivity and mental well-being.

Start by designating a specific area in your home exclusively for work. This doesn’t have to be an entire room; it could simply be a corner of your living room or a nook in your bedroom. The key is to make this space distinct and recognizable as your workspace. Use physical markers, such as a room divider or even a simple curtain, to separate your office area from other living spaces. This visual cue can help signal to both you and your family when you are “at work” and when you are available for personal interactions.

Next, establish a consistent work schedule. Communicate your working hours to those you live with, so they understand when you should not be disturbed. By adhering to a routine, you not only foster a sense of professionalism but also create a rhythm that helps you transition into and out of work mode. Consider using a timer or a digital calendar to structure your day, allowing for breaks and personal time that can rejuvenate your focus.

In addition to physical separation and scheduling, consider implementing digital boundaries. For example, try to keep your work-related apps and files organized in a dedicated section of your devices, separate from personal content. Turn off work notifications outside of your designated hours, allowing you to fully engage in your personal life without the distractions of emails and messages.

Finally, be mindful of your mental space. Address the emotional aspects of working from home by creating rituals that help you switch between work and personal life. This could be as simple as a short walk after work hours, a brief meditation session, or even a specific playlist that signals the end of your workday. By consciously defining these boundaries, you not only enhance your productivity but also create a healthier work-life balance that nurtures both your career and your personal happiness.

13. Tips for Maintaining Productivity in Your Home Office

Maintaining productivity in your home office can be a challenging task, especially with the myriad of distractions that come with working from home. However, with the right strategies in place, you can create an environment that fosters focus and efficiency. Here are some essential tips to help you stay productive throughout your workday.

First and foremost, establish a dedicated workspace that is free from distractions. Whether it’s a separate room or a well-defined corner in your living space, having a designated area for work signals to your brain that it’s time to focus. Personalize this space with inspiring decor, but keep it clutter-free to minimize distractions.

Next, establish a consistent daily routine. Set regular start and end times for your workday, just as you would in a traditional office. This routine helps create a sense of structure and discipline, making it easier to transition into a productive mindset. Incorporate short breaks to recharge—consider the Pomodoro Technique, which involves working in focused bursts followed by brief breaks to maintain energy levels.

Additionally, leverage technology to your advantage. Use productivity apps and tools to keep your tasks organized and prioritize your workload. Tools like Trello or Asana can help you track your projects, while time management apps like Toggl can assist in monitoring how you spend your working hours.

Furthermore, consider your physical well-being. Invest in an ergonomic chair and desk setup to support your posture during long hours of work. Staying hydrated and incorporating movement into your day—be it through stretching, quick workouts, or a brisk walk—also plays a crucial role in maintaining your energy and focus.

Lastly, limit digital distractions by creating a focused work environment. Silence non-essential notifications on your phone and computer, and consider using website blockers to prevent you from straying into social media or other distracting sites during work hours.

By implementing these tips, you can cultivate a home office that not only supports your productivity but also contributes to your overall well-being. Remember, a well-structured and thoughtfully designed workspace is key to achieving your work-from-home goals.

14. Adapting Your Space for Future Needs

As you design your perfect functional home office, it’s crucial to adopt a forward-thinking approach that prepares your workspace for future needs. The nature of work is evolving, and the demands placed on your home office may shift over time due to changes in your job responsibilities, personal interests, or even technological advancements.

Start by considering flexible furniture options that can adapt to varying tasks. For instance, an adjustable desk can easily switch between sitting and standing positions, promoting healthier work habits while accommodating different workflows. Additionally, multipurpose storage solutions, such as modular shelving or mobile carts, allow you to reorganize your space as your needs change without the hassle of a complete redesign.

Think about incorporating technology that can grow with you. Investing in a robust Wi-Fi system and versatile power outlets will ensure that your office can support the latest gadgets as they emerge. Furthermore, consider integrating smart home features, like voice-activated assistants or automated lighting, which can enhance efficiency and streamline your workspace.

Don’t forget the importance of personalization. As your career progresses and your interests evolve, your home office should reflect who you are. Leaving space for personal touches—like art, photographs, or inspirational quotes—can help create an atmosphere that motivates and inspires you, making it easy to update your space as your style and preferences change.

Finally, maintain a mindset of adaptability. Regularly assess your office setup and be open to making changes, whether that’s rearranging furniture for a fresh perspective or updating your decor to keep the environment stimulating. By planning for future needs today, you can create a home office that not only meets your current requirements but also evolves seamlessly with you over time.

15. Final Touches: Adding Personal and Motivational Elements

Creating a functional home office goes beyond just setting up a desk and chair; it’s also about infusing your workspace with elements that inspire and motivate you. Final touches can transform a sterile workspace into a personal sanctuary, making it a place where creativity flows and productivity thrives.

Start by adding personal items that reflect your individuality. This could be a collection of framed photographs featuring cherished moments with family and friends, or artwork that resonates with your personality—a vibrant painting, a motivational poster, or even a vision board that keeps your goals front and center. Each piece should evoke positive emotions, reminding you of your aspirations and the life you’re building.

Incorporate motivational quotes or affirmations in your decor. Whether displayed on a corkboard, printed on a wall, or even as a screensaver on your computer, these reminders can uplift your spirits during challenging days. Choose words that resonate deeply with you—phrases that remind you of your ambitions or the reasons you chose to work from home.

Don’t forget about the role of plants in your workspace. Bringing in a touch of nature not only enhances the aesthetic appeal but also boosts your mood and productivity. Consider low-maintenance options like succulents or snake plants, which can thrive in various lighting conditions. The presence of greenery can create a calming atmosphere, reducing stress and improving focus.

Finally, personalize your workspace with items that enhance your comfort and well-being. Whether it’s a cozy throw blanket draped over your chair, an aromatic diffuser with your favorite essential oils, or even a custom mug for your morning coffee, these small touches can make a significant difference in how you feel in your workspace.

By thoughtfully curating these personal and motivational elements, you’ll not only create a visually appealing environment but also foster a sense of belonging and inspiration that encourages you to bring your best self to your work each day. Your home office should be more than just a place to work; it should be a reflection of you, designed to inspire and energize as you navigate your professional journey.

In conclusion, crafting your perfect functional home office is not just about aesthetics; it’s about creating an environment that fosters productivity, creativity, and comfort. By implementing the ten essential tips outlined in this post, you can transform any space into a seamless blend of style and functionality tailored to your unique needs. From optimizing your layout and selecting ergonomic furniture to incorporating personal touches that inspire you, every detail matters in enhancing your work experience. As you embark on this journey, remember that your home office should reflect who you are while facilitating your professional goals. We’d love to hear about your own home office design experiences, so feel free to share your photos and ideas in the comments below! Happy designing!

What are the best ways to increase curb appeal?

First impressions matter, especially when it comes to your home.

Whether you’re planning to sell or simply want to enhance the beauty of your space, boosting your home’s curb appeal is a transformative endeavor that pays off in more ways than one. The exterior of your home is the first thing guests and potential buyers see, and it sets the tone for their entire experience. With just a few strategic updates, you can elevate your home’s aesthetic, create a welcoming atmosphere, and increase its overall value. From vibrant landscaping and fresh paint colors to stylish outdoor lighting and inviting entryways, there are countless ways to make your home stand out in the neighborhood. In this blog post, we’ll explore the top strategies to instantly boost your home’s curb appeal, providing you with practical tips and creative ideas to help your property shine and reflect the warmth of the life within. Get ready to transform your home into the envy of the block!

1. Understanding Curb Appeal: What It Is and Why It Matters

What are the best ways to increase curb appeal?
Credit : whatcanu.com

Curb appeal is more than just a buzzword in real estate; it’s the first impression your home makes on visitors, potential buyers, and even passersby. It encompasses everything from the condition of your lawn and the color of your front door to the overall architecture of your property. Curb appeal is the visual allure of your home as seen from the street, and it plays a crucial role in how your property is perceived.

Imagine a potential buyer driving down your street. Their eyes are drawn to homes that stand out for the right reasons. A well-maintained exterior, vibrant landscaping, and thoughtful design elements can spark interest and intrigue, making them more likely to want to explore what’s inside. Conversely, a lackluster façade with peeling paint, overgrown shrubs, or an unkempt driveway can deter even the most enthusiastic home shoppers.

But curb appeal isn’t solely about selling your home; it’s also about enhancing your enjoyment of your personal space. A beautiful exterior creates a welcoming atmosphere for family and friends, providing a sense of pride and ownership. It reflects your style and sets the tone for the warmth and comfort that awaits inside.

Investing time and resources into improving your home’s curb appeal can yield substantial benefits, whether you’re planning to sell or simply want to create a more inviting environment for yourself and your guests. Understanding what curb appeal truly is and why it matters lays the foundation for the transformative strategies to follow. So, let’s delve deeper into the effective ways you can elevate your home’s exterior and create an instant impact!

2. First Impressions: The Importance of a Welcoming Entrance

When it comes to curb appeal, the entrance of your home serves as the first impression for visitors and passersby alike. A welcoming entrance not only enhances the aesthetic appeal of your property but also sets the tone for what lies beyond the front door. Imagine stepping into a home that exudes warmth and charm right from the moment you approach it. This is the magic of an inviting entrance that can transform your home’s exterior and make it stand out in the neighborhood.

Start by evaluating your front door—it’s the centerpiece of your entrance. A fresh coat of paint in a bold yet complementary color can breathe new life into an otherwise dull facade. Consider hues like a rich navy, vibrant red, or even a soft sage that harmonizes with your home’s overall color scheme. Don’t forget to polish or replace the hardware; new handles and locks can work wonders in enhancing the door’s appeal.

Flanking your entrance with well-maintained plants or flowers can also elevate the space. Choose a mix of perennials and seasonal blooms for year-round interest. Potted plants or hanging baskets add a vibrant touch, while classic lanterns or well-placed outdoor lighting can create a cozy, inviting atmosphere, especially during the evening hours.

Additionally, a clean, well-kept walkway leading to your door is essential. Power washing your path, adding decorative stones, or even simple lighting along the way can guide guests to your entrance while making the journey feel delightful. A welcome mat that reflects your personality can be the perfect finishing touch, inviting guests to step inside and enjoy the warmth that awaits.

By investing in these small yet impactful details, you can create an entrance that not only boosts your home’s curb appeal but also makes a lasting impression on everyone who visits. Remember, the entrance is the gateway to your home, and a little effort here can go a long way in showcasing the beauty that lies within.

3. Landscaping Tips for Instant Transformation

What are the best ways to increase curb appeal?
Credit : whatcanu.com

When it comes to boosting your home’s curb appeal, few strategies yield results as quickly and dramatically as enhancing your landscaping. A well-manicured yard can transform an ordinary home into a stunning masterpiece that invites admiration from passersby. Here are some landscaping tips that can help you achieve that instant transformation.

**1. Define Your Edges:** Start by defining the borders of your garden beds and pathways. Crisp edges create a neat appearance and make your landscaping look intentional. You can use brick, stone, or even simple edging materials to delineate areas, giving your yard a polished look.

**2. Add Color with Flowers:** Introduce vibrant blooms that complement your home’s exterior. Seasonal flowers like marigolds, petunias, or geraniums can add pops of color that draw the eye and create a welcoming atmosphere. Planting perennials can also provide long-lasting beauty year after year with minimal maintenance.

**3. Invest in Mulch:** Fresh mulch not only enhances the aesthetics of your garden but also helps retain moisture and suppress weeds. Opt for organic mulch in rich colors that contrast nicely with your plants and the surrounding greenery. A fresh layer of mulch can instantly rejuvenate the look of your garden beds.

**4. Create Symmetry:** Symmetrical landscaping can create a sense of order and balance that is visually pleasing. Consider flanking your front door with identical planters or using matching shrubs on either side of a pathway. These symmetrical elements lead the eye and lend a sophisticated touch to your home’s facade.

**5. Incorporate Hardscape Features:** Adding hardscape elements like walkways, patios, or stone features can elevate your landscaping design. A charming stone path leading to your front door or a welcoming patio area can enhance the overall aesthetic and provide functional outdoor spaces for relaxation and entertainment.

**6. Maintain Your Lawn:** A lush, green lawn is the foundation of appealing landscaping. Regular mowing, fertilizing, and watering will keep your grass healthy and vibrant. If you’re starting from scratch, consider reseeding or sodding for an instant green upgrade.

**7. Add Lighting:** Outdoor lighting can work wonders for your curb appeal, especially in the evening. Illuminate pathways, highlight architectural features, or showcase beautiful trees with strategically placed lights. This not only enhances the beauty of your landscaping but also ensures safety and security.

By focusing on these landscaping tips, you can create a stunning first impression that enhances your home’s curb appeal and invites guests to step inside. Remember, a little effort in your outdoor space can have a tremendous impact, making your home not just a place to live, but a visual delight in your neighborhood.

4. Choosing the Right Color Palette for Your Home’s Exterior

Choosing the right color palette for your home’s exterior can dramatically enhance its curb appeal and create a welcoming atmosphere that reflects your personal style. The exterior color scheme is often the first impression visitors and passersby will have of your home, making it essential to select hues that harmonize with the surrounding environment while also standing out in a tasteful way.

Start by considering the architectural style of your home. Traditional homes may benefit from classic color combinations—think soft whites, muted grays, and earthy tones—that emphasize their timeless appeal. On the other hand, contemporary homes can embrace bolder colors, such as deep blues or vibrant greens, which can give a modern twist to their design.

Another crucial factor to consider is the neighborhood. While you want your home to stand out, it’s also important to maintain a level of cohesion with surrounding houses. Take note of the colors used in your area; this can provide inspiration and help you avoid combinations that may clash with neighboring properties.

Pay attention to the undertones of the colors you choose. Warm hues, like creamy yellows or warm taupes, can create an inviting and cozy feel, while cool tones such as slate blues or soft greens can evoke a sense of calm and tranquility. Additionally, consider how the color will interact with natural light at different times of day, as the appearance of colors can shift dramatically with the sun’s movement.

Don’t forget about the accents! The color of your front door, shutters, and trim can complement your primary color choice and add layers of depth to your façade. A bold door color can serve as a statement piece, drawing the eye and inviting guests to explore further.

Finally, always test your color selections with samples on the actual surface of your home. This allows you to see how the colors work together in different lighting conditions, ensuring that your final choice is one you’ll love for years to come. With the right color palette, you can create an exterior that not only highlights your home’s unique character but also enhances its overall curb appeal, making it a true reflection of your style.

5. Upgrading Your Front Door: Styles and Hardware Choices

What are the best ways to increase curb appeal?
Credit : whatcanu.com

When it comes to elevating your home’s curb appeal, the front door serves as the inviting focal point that sets the tone for your entire property. An upgraded front door not only enhances aesthetics but can also increase your home’s overall value. With a myriad of styles and hardware choices available, selecting the right combination can make a significant difference.

### Styles to Consider

**1. Classic Wood Doors:** Nothing exudes warmth and charm quite like a beautifully crafted wooden door. Available in various finishes, wood doors offer versatility, allowing you to choose between traditional styles with intricate paneling or sleek, modern designs. Consider a rich mahogany or a painted option in a bold color to create a striking contrast against your home’s exterior.

**2. Fiberglass Doors:** Looking for durability without sacrificing style? Fiberglass doors are an excellent choice. They mimic the appearance of wood while providing enhanced resistance to weather elements, scratches, and dents. Many come pre-finished or can be painted, ensuring you have a door that suits your specific taste.

**3. Glass and Iron Doors:** For a touch of elegance, consider a glass and iron door. These doors allow natural light to flow into your entryway while providing a grand, designer look. The intricate ironwork can be customized to match your home’s architectural style, making it a true statement piece.

### Hardware Choices

Once you’ve chosen the perfect door style, it’s time to focus on hardware. The right doorknob, handle, and lock not only enhance the door’s functionality but also complement its overall design.

**1. Bold Knobs and Handles:** Opt for oversized knobs or sleek handles in finishes like matte black, brushed nickel, or antique brass. These elements can elevate even the simplest door, providing a modern or classic touch depending on your selection.

**2. Decorative Hinges:** Don’t overlook the hinges! Decorative hinges can add a charming detail that draws the eye. Choose a style that matches your hardware for a cohesive look.

**3. Smart Locks:** For a blend of style and security, consider upgrading to a smart lock. These modern devices not only provide keyless entry for convenience but also come in various stylish designs that can seamlessly integrate with your door’s aesthetic.

### Final Touches

To complete the look, consider adding a fresh coat of paint, a decorative wreath, or vibrant potted plants flanking your doorway. These thoughtful details can transform your front entrance into a welcoming haven, captivating visitors and enhancing your home’s curb appeal instantly. Remember, your front door is not just an entryway; it’s the first impression you make—make it count!

6. The Power of Lighting: Enhancing Your Home’s Exterior

When it comes to boosting your home’s curb appeal, lighting plays an often-overlooked yet transformative role. The right lighting can not only illuminate your exterior but also create a welcoming atmosphere that draws the eye and enhances the overall aesthetic of your property.

Consider your entryway: a well-lit porch with stylish sconces flanking the door can make a striking first impression. Opt for fixtures that complement your home’s architectural style—whether it’s a sleek modern design or charming vintage flair. Don’t shy away from experimenting with colors; warm tones can envelop your home in a cozy glow, while cooler hues can add a contemporary edge.

Pathway lighting is another fantastic way to enhance safety while showcasing your landscaping. Solar-powered lights or low-voltage fixtures can guide guests from the street to your door, creating a sense of invitation. Strategically placed lights can highlight your garden features, trees, or architectural elements, adding depth and character to your outdoor space.

Remember, it’s not just about adding more light; it’s about creating ambiance. Dimmer switches on exterior fixtures can help you adjust the mood for different occasions, whether it’s a lively gathering or a quiet evening at home.

Lastly, don’t forget about the impact of outdoor string lights or lanterns. They can infuse your space with charm and whimsy, perfect for creating an enchanting outdoor retreat. By leveraging the power of lighting, you can instantly elevate your home’s exterior, making it not just more visually appealing but also a warm and inviting haven for all who pass by.

7. Adding Outdoor Decor: Furniture, Planters, and More

What are the best ways to increase curb appeal?
Credit : whatcanu.com

Enhancing your home’s curb appeal is all about creating an inviting and aesthetically pleasing exterior that draws the eye and welcomes visitors. One of the most effective ways to achieve this is by adding outdoor decor, including stylish furniture, vibrant planters, and charming accents that reflect your personality and taste.

Start by selecting outdoor furniture that complements the style of your home. Whether you opt for a cozy bistro set on your porch or a chic lounge area in your backyard, the right furniture can transform your outdoor space into a relaxing oasis. Choose weather-resistant materials that can withstand the elements while providing comfort and durability. Consider adding colorful cushions or throws to create a warm and inviting atmosphere.

Next, don’t underestimate the power of planters. Incorporating lush greenery and vibrant flowers can breathe life into your outdoor space. Choose planters in various shapes, sizes, and colors to create visual interest. Grouping different plants together can create a lively display, while tall planters can frame your entryway and guide the eye toward your front door. Opt for seasonal flowers for a fresh look throughout the year, and consider using plants that thrive in your local climate for easy maintenance.

Beyond furniture and plants, think about additional decorative elements that can enhance the overall look of your exterior. Wind chimes, garden sculptures, or decorative lanterns can add character and charm, while outdoor rugs can define spaces and provide a pop of color. String lights or solar-powered garden lights can create a magical ambiance in the evenings, making your home feel warm and welcoming after the sun sets.

Remember that the key to effective outdoor decor is to create a cohesive look that ties all elements together. By thoughtfully selecting furniture, planters, and decorative accents, you can instantly boost your home’s curb appeal and create an inviting atmosphere that makes a lasting impression on guests and passersby alike. Transform your exterior into a beautiful extension of your home, and watch as it elevates your property’s overall appeal.

8. Maintaining Your Lawn: Tips for a Lush Look

Maintaining your lawn is essential for creating a welcoming first impression and enhancing your home’s overall curb appeal. A lush, vibrant lawn not only adds to the aesthetics of your property but also signifies care and attention to detail. Here are some tips to help you achieve that pristine green look that will make your home stand out in the neighborhood.

**1. Regular Mowing:** Keeping your grass at the optimal height is crucial. Aim to mow your lawn once a week during the growing season. This not only promotes healthier grass but also prevents the lawn from looking overgrown. Different grass types have varying height preferences, so research the ideal cutting length for your specific type.

**2. Watering Wisely:** Deep, infrequent watering encourages the roots of your grass to grow deeper and stronger. Aim for about an inch of water per week, either from rainfall or irrigation. Early morning is the best time to water, as it minimizes evaporation and reduces the risk of fungal diseases.

**3. Fertilization:** Feeding your lawn with the right nutrients can make a noticeable difference. Use a balanced fertilizer in early spring and again in late summer. Look for slow-release options that will nourish your lawn gradually, promoting even growth and a rich, green color.

**4. Aeration:** Over time, soil can become compacted, which restricts water and nutrients from reaching the roots. Aerating your lawn—by perforating it with holes—allows for better airflow, moisture, and nutrient absorption. This is best done in the fall or spring when the grass is actively growing.

**5. Weed Control:** Weeds can quickly detract from a well-maintained lawn. Regularly inspect your yard for any invasive species and remove them promptly. Consider using mulch in flower beds and along pathways to suppress weed growth and retain moisture.

**6. Edging and Trimming:** Clean edges enhance the overall appearance of your lawn and give it a polished look. Use a lawn edger or trimmer to create neat lines around walkways, gardens, and driveways. This simple task can make a significant difference in the perceived care and upkeep of your property.

By following these tips for maintaining your lawn, you can achieve a lush, healthy landscape that not only boosts your home’s curb appeal but also creates an inviting atmosphere for friends, family, and potential buyers. A vibrant lawn is the foundation of any great exterior transformation, so invest the time and effort to make it shine!

9. Window Treatments that Elevate Curb Appeal

When it comes to enhancing your home’s curb appeal, the power of window treatments cannot be underestimated. They serve not only a functional purpose but also play a pivotal role in defining the exterior aesthetic of your home. Selecting the right window treatments can instantly elevate your home’s appearance, making it more inviting and stylish.

Start by considering the style of your home. Are you working with a charming cottage, a sleek modern design, or a classic Victorian? Each architectural style has window treatment options that can either complement or clash with your home’s character. For instance, wooden shutters can add a rustic charm to a country-style home, while sheer drapes in a contemporary design can provide a sleek and airy look to more modern facades.

Color is another critical factor. Opt for window treatments that harmonize with your home’s color palette. Neutral shades generally work well, as they won’t compete with the overall design but instead enhance it. However, don’t shy away from bolder colors that could serve as a fun pop against a muted exterior, particularly if they reflect other accents around your home, such as your front door or garden accessories.

In addition to aesthetics, consider the practicality of your window treatments. Outdoor roll-up shades or stylish awnings can offer shade and protection from the elements while also adding an extra layer of visual interest. Meanwhile, window boxes filled with vibrant flowers or greenery can frame your windows beautifully, creating an attractive focal point that draws the eye upward.

Lastly, don’t forget about maintenance. Choose materials that are durable and easy to clean, ensuring that your window treatments continue to look fresh and appealing. Whether you decide on elegant curtains, rustic shutters, or modern blinds, the right window treatments can significantly enhance your home’s curb appeal, transforming it into a space that is not only beautiful but also welcoming. Invest in these details, and you’ll find that passersby can’t help but take a second look at your stunning abode!

10. Addressing and Repairing Exterior Damage

When it comes to boosting curb appeal, one of the most crucial yet often overlooked aspects is addressing and repairing exterior damage. Your home’s exterior is its first impression, and any visible wear and tear can significantly impact how it’s perceived, both by passersby and potential buyers.

Start by conducting a meticulous inspection of your home’s exterior. Look for cracks in the foundation, peeling paint, rotting wood, or damaged siding. These issues not only detract from your home’s aesthetic but can also lead to more severe problems if left unattended. For instance, a small crack can quickly escalate into a significant structural issue, resulting in costly repairs down the line.

Once you’ve identified the problem areas, prioritize repairs based on urgency and visibility. For minor cracks in the walls or sidewalk, a simple patching compound can do wonders to restore a smooth finish. For more significant damage, such as broken shingles or severe wood rot, consider enlisting the help of a professional. Fresh paint can also work magic—choosing a modern, appealing color can instantly uplift the entire façade of your home.

Don’t forget about the smaller details, like the mailbox, front door, and window frames. A fresh coat of paint or a thorough cleaning can rejuvenate these elements and tie your home’s appearance together. Addressing these repairs not only enhances your home’s visual appeal but also demonstrates care and maintenance, fostering a sense of pride in your property.

By taking the time to repair exterior damage, you’re not just enhancing curb appeal; you’re also ensuring your home remains a safe and welcoming space for years to come. The more inviting your home looks, the more likely it is to attract admiration and interest from neighbors and visitors alike.

11. The Role of Fencing and Gates in Curb Appeal

When it comes to enhancing your home’s curb appeal, fencing and gates play a pivotal role that often goes overlooked. Imagine approaching a property with a beautifully designed fence framing the front yard, guiding the eye toward an inviting entrance. A well-chosen fence not only defines the boundaries of your space but also adds an element of sophistication and charm that can elevate your home’s exterior from ordinary to extraordinary.

Consider the materials and styles available. A classic white picket fence evokes a sense of nostalgia and warmth, perfect for traditional homes. In contrast, a sleek modern metal fence can impart a contemporary flair, appealing to those who favor minimalist aesthetics. Wooden fences, with their natural textures and tones, bring an organic touch that complements lush landscaping, creating a harmonious balance with nature.

Gates, too, serve as the threshold between the public and private realms of your home, making a statement about what lies beyond. A beautifully designed gate can serve as a focal point that draws attention and invites curiosity. Whether you opt for a simple, unadorned design or a grand, ornate piece, the right gate can enhance the overall aesthetic while also providing security and privacy.

Additionally, the color and condition of your fencing and gates matter significantly. Fresh paint or stain can breathe new life into weathered wood, while a clean, rust-free metal fence speaks volumes about your home’s upkeep. Incorporating decorative elements, such as climbing plants or stylish hardware, can also add character and charm, making your fencing and gates not just functional barriers, but beautiful extensions of your home’s personality.

Incorporating fencing and gates into your curb appeal strategy is not merely about aesthetics; it’s about creating an inviting atmosphere that reflects your style and welcomes guests. So, as you embark on your journey to transform your home, don’t underestimate the impact that well-designed fencing and gates can have on the overall charm and appeal of your property.

12. Creating an Inviting Pathway: Walkways and Driveways

Creating an inviting pathway is one of the most impactful strategies for enhancing your home’s curb appeal. The journey to your front door should be a delightful experience, and a well-designed walkway or driveway can set the tone for what lies beyond.

Start by assessing the current state of your existing path. Is it cracked and uneven, or perhaps overgrown with weeds? A clean, well-maintained pathway not only guides visitors to your door but also speaks volumes about the care you put into your home. Consider using materials that complement your home’s architecture—be it classic cobblestones, sleek concrete, or charming brick.

Incorporate curves and gentle slopes to create a more inviting feel, rather than a straight, utilitarian path. Add some visual interest with borders of flowering plants or decorative stones that lead the eye along the way. Lighting is another essential aspect; strategically placed lanterns or solar-powered stakes can illuminate the pathway, making it both safe and welcoming after dark.

Don’t forget about the driveway! A clean, well-sealed surface not only enhances visual appeal but also prolongs the life of the material. If your driveway is in need of repair, consider resurfacing or adding decorative elements such as patterned pavers or gravel for a more upscale look.

By investing time and thought into your walkways and driveways, you create a warm welcome that entices guests and boosts the overall charm of your home. Remember, first impressions matter, and an inviting pathway is a key element in making yours unforgettable!

13. Seasonal Decor: Keeping Your Home Fresh Year-Round

Seasonal decor is one of the simplest yet most effective strategies to maintain your home’s curb appeal throughout the year. It breathes life into your exterior, making it feel vibrant and welcoming, no matter the season. By thoughtfully adjusting your decor to reflect the changing seasons, you can create a fresh look that captivates attention and showcases your home’s personality.

As winter gives way to spring, consider swapping out heavy wreaths for bright, floral arrangements. Hanging a cheerful, pastel-colored wreath on your front door can immediately brighten the entrance. Potted tulips and daffodils lining your walkway will invite guests with their pops of color, signaling the arrival of warmer days.

When summer rolls around, embrace the outdoors by incorporating cheerful colors and textures. Adorn your porch with colorful cushions, a whimsical hanging chair, or a vibrant outdoor rug. Adding potted plants or a small herb garden can create a lively atmosphere, making your home feel more inviting.

Come autumn, you can evoke the cozy charm of fall with rich hues of oranges, browns, and golds. A rustic pumpkin display on your porch, along with a warm plaid throw draped over your rocking chair, can create a welcoming vibe. Don’t forget to add a festive wreath adorned with autumn leaves and berries, framing your door beautifully.

Finally, winter presents the perfect opportunity to create a serene and magical ambiance. Consider stringing fairy lights along your porch railing or adding festive decorations that reflect the holiday spirit. A simple evergreen garland can bring a touch of nature to your entryway while offering a classic charm.

By thoughtfully curating your seasonal decor, you’re not only enhancing your home’s curb appeal but also expressing your creativity and warmth to all who pass by. This ever-evolving decor approach ensures that your home remains fresh and inviting, making it a joy for both you and your visitors year-round.

14. Sustainable Practices for Curb Appeal Improvement

In today’s eco-conscious world, integrating sustainable practices into your home improvement projects not only enhances curb appeal but also reflects your commitment to the environment. By choosing green solutions, you can create a stunning exterior that stands out while promoting sustainability.

Start with native plants in your landscaping. These plants are naturally adapted to your local climate and soil, requiring less water and maintenance than non-native varieties. A well-planned garden featuring diverse, native flora not only provides a vibrant and inviting look but also supports local wildlife, including birds and pollinators.

Next, consider using recycled materials for pathways, patios, or garden borders. Reclaimed bricks or stones can add character and charm while reducing the need for new resources. Not only does this approach lower your environmental footprint, but it also tells a story about your home’s unique style and commitment to sustainability.

When it comes to exterior paint, opt for low-VOC (volatile organic compounds) or zero-VOC options. These eco-friendly paints are better for the environment and your health, providing a fresh look without the harmful emissions commonly associated with traditional paints. A fresh coat in a trendy, welcoming color can dramatically increase your home’s appeal without compromising your values.

Lastly, consider implementing energy-efficient lighting to illuminate your home’s exterior. Solar-powered garden lights or LED fixtures not only reduce your energy consumption but also create a warm ambiance that invites guests to linger. By combining functionality with aesthetic appeal, these sustainable choices enhance your home’s charm while showcasing your dedication to an eco-friendly lifestyle.

By incorporating these sustainable practices into your curb appeal strategy, you can create a beautiful and inviting home that resonates with both your personal style and a commitment to preserving the planet. Embrace the opportunity to make a statement that’s not just visually stunning but also environmentally responsible.

15. Final Touches: How to Keep Your Curb Appeal Consistent Over Time

Once you’ve invested time and effort into enhancing your home’s curb appeal, the last thing you want is for that initial sparkle to fade. Consistency is key in maintaining the alluring exterior that attracts compliments and potential buyers alike. Here are some final touches to ensure your curb appeal remains vibrant and inviting over time.

First, establish a routine for regular maintenance. Create a seasonal checklist that includes tasks like cleaning gutters, power washing walkways, and trimming hedges. A well-maintained lawn speaks volumes; consider mowing bi-weekly in the growing season and implementing a plan for fertilization and weed control. If you have flower beds, rotate seasonal plants to keep your landscape looking fresh and colorful throughout the year.

Next, invest in quality outdoor lighting. Not only does it enhance the beauty of your home at night, but it also adds a layer of safety. Strategically placed lights along pathways or highlighting architectural features can create a warm, welcoming ambiance. Consider solar-powered fixtures for easy installation and minimal upkeep.

Don’t forget about the small details that make a big impact. Regularly clean and paint your front door, as it’s often the focal point of your home’s exterior. Update house numbers and add a stylish mailbox that coordinates with your home’s aesthetic. Even replacing worn-out outdoor furniture can elevate your porch or patio, making it an inviting space for family and friends.

Lastly, consider the changing seasons. In the fall, arrange pumpkins and autumn leaves; in winter, hang garlands and twinkling lights. By adapting your decor to the seasons, you keep your home feeling current and inviting, maintaining that coveted curb appeal year-round.

By implementing these strategies and keeping up with maintenance, you’ll ensure that your home’s façade remains as stunning as the day you first transformed it, creating a lasting impression that draws in admirers and potential buyers alike.

In conclusion, transforming your home and boosting its curb appeal doesn’t have to be a daunting task or a massive investment. With the strategies outlined in this post, from simple landscaping tweaks to fresh paint and inviting entryways, you can create a welcoming façade that reflects your style and enhances your neighborhood. Remember, first impressions matter, and your home’s exterior is the first thing guests and passersby will notice. So, take these tips to heart, unleash your creativity, and watch as your home transforms into a stunning showcase that not only elevates your property value but also brings you joy every time you pull into your driveway. Happy transforming!

How to choose the right kitchen countertop material?

Choosing the perfect kitchen countertop material is a crucial step in creating a functional and stylish culinary space.

With countless options available, from timeless natural stones to modern engineered materials, the decision can feel overwhelming. Your countertop is not only a workhorse for meal prep and entertaining but also a focal point that can enhance the overall aesthetic of your kitchen. In this ultimate guide, we will explore the various countertop materials available, highlighting their unique benefits, maintenance requirements, and design potential. Whether you’re seeking durability, elegance, or budget-friendly options, our comprehensive insights will empower you to make an informed choice that aligns with your lifestyle and personal taste. Join us as we delve into the world of kitchen countertops, helping you transform your kitchen into the heart of your home.

1. Introduction to Kitchen Countertop Materials

How to choose the right kitchen countertop material?
Credit : whatcanu.com

When it comes to designing the heart of your home, the kitchen countertop is a pivotal element that marries functionality with style. Not only do countertops serve as a durable work surface for meal prep and entertaining, but they also play a significant role in the overall aesthetic of your kitchen. With a plethora of options available, choosing the perfect countertop material can feel overwhelming.

From the timeless elegance of granite to the modern sheen of quartz and the rustic warmth of butcher block, each material brings its own unique character and benefits. Your choice will affect not just the look and feel of your kitchen, but also how you use the space day-to-day. Durability, maintenance requirements, and resistance to stains and heat are critical factors to consider as you navigate through the options.

Additionally, your personal style and the overall design theme of your kitchen should guide your selection. Whether you envision a contemporary minimalist space or a cozy farmhouse aesthetic, the right countertop can enhance your vision and tie the entire room together.

In this guide, we will explore various kitchen countertop materials, highlighting their pros and cons, maintenance tips, and ideal design applications. By the end, you’ll be equipped with the knowledge necessary to make an informed decision and create a kitchen that is not only beautiful but also functional for your culinary adventures.

2. Factors to Consider When Choosing Countertop Materials

When it comes to selecting the ideal countertop material for your kitchen, several key factors come into play. Each decision you make can significantly impact both the aesthetics and functionality of your space, so it’s essential to approach this choice with careful consideration.

**1. Durability:** One of the foremost considerations is how well the material will stand up to daily wear and tear. Countertops are subjected to heat, scratches, spills, and stains, so durability is paramount. For instance, granite and quartz are renowned for their resilience, while softer materials like marble may require more maintenance and care to prevent damage.

**2. Maintenance:** Different materials require varying levels of upkeep. Natural stones, such as granite and marble, often need to be sealed regularly to protect against stains and moisture. On the other hand, solid surfaces like Corian or laminate are typically easier to clean and maintain, making them ideal for busy households.

**3. Aesthetic Appeal:** Your kitchen countertop serves as a focal point, contributing significantly to the overall design and feel of the space. Consider the color, pattern, and texture of the materials. For a modern look, sleek quartz or polished concrete might be a fit, while warm wood or rustic butcher block can bring a cozy, inviting vibe.

**4. Budget:** Countertop materials vary widely in price, so it’s important to establish a budget before you start shopping. Natural stones can be more expensive due to quarrying and fabrication costs, while laminate offers an affordable alternative without compromising style.

**5. Functionality:** Think about how you use your kitchen. If you love to cook, you’ll want a surface that can handle heavy use, while someone who primarily uses their kitchen for entertaining might prioritize style over toughness. Additionally, consider if you need extra features like an integrated cutting board or a sink.

**6. Environmental Impact:** As sustainability becomes increasingly important, many homeowners seek materials that are eco-friendly. Bamboo, recycled glass, and sustainably sourced wood are excellent choices for those looking to minimize their environmental footprint.

By weighing these factors carefully, you can ensure that the countertop material you choose not only complements your kitchen’s style but also meets the demands of your lifestyle. Taking the time to evaluate these aspects will lead you to a countertop that you’ll love for years to come.

3. Overview of Popular Countertop Materials

How to choose the right kitchen countertop material?
Credit : whatcanu.com

When it comes to selecting the ideal kitchen countertop, the sheer variety of materials available can feel overwhelming. Each option comes with its unique benefits, aesthetics, and maintenance requirements. Here’s a brief overview of some of the most popular countertop materials to help you make an informed choice:

**1. Granite:** Known for its timeless beauty and durability, granite countertops are a favorite among homeowners. Each slab is unique, showcasing natural variations in color and pattern. Highly resistant to heat and scratches, granite requires periodic sealing to maintain its luster and prevent stains.

**2. Quartz:** Engineered for consistency and strength, quartz countertops combine natural quartz crystals with resins, resulting in a non-porous surface that is both beautiful and practical. Available in a myriad of colors and patterns, quartz is easy to maintain and doesn’t require sealing, making it a top choice for busy kitchens.

**3. Marble:** If you desire elegance and luxury, marble is a worthy contender. Renowned for its stunning veining and rich textures, marble adds a sophisticated touch to any kitchen. However, it is softer than granite and quartz, which makes it more susceptible to scratches and stains, necessitating careful maintenance and sealing.

**4. Laminate:** For those on a budget, laminate countertops offer a wide variety of colors and designs, including options that mimic more expensive materials. While they are relatively inexpensive and easy to install, laminate can be less durable and more prone to damage from heat and sharp objects.

**5. Butcher Block:** Ideal for those who enjoy cooking, butcher block countertops provide a warm, inviting look and a functional surface for food prep. They are made from strips of wood glued together and can be refinished as needed. However, regular oiling is essential to prevent warping and maintain their appearance.

**6. Concrete:** For a modern, industrial feel, concrete countertops are a bold choice. They can be customized in terms of color and finish, providing a unique look. While they are incredibly durable, they require sealing to prevent stains and scratches, and they can be heavy, necessitating proper support.

**7. Solid Surface:** Composed of acrylic and other materials, solid surface countertops are versatile, easy to clean, and available in a wide range of colors and patterns. They can be seamlessly integrated into sinks and backsplashes, but can be susceptible to scratching and heat damage.

As you consider these popular materials, think about your kitchen’s style, your cooking habits, and the level of maintenance you’re willing to undertake. Each material has its own charm and functionality, so take the time to weigh your options before making a decision that enhances both the beauty and practicality of your kitchen.

– 3.1. Granite

### 3.1. Granite

Granite is a timeless choice for kitchen countertops, revered not only for its stunning aesthetic appeal but also for its unmatched durability. This natural stone, formed from molten rock, boasts a unique blend of colors and patterns, ensuring that no two slabs are exactly alike. With its rich speckles and swirling hues, granite can add a touch of luxury to any kitchen, whether your style leans towards rustic farmhouse or sleek modern.

One of granite’s standout features is its resilience. It is highly resistant to scratches and heat, making it an ideal surface for cooking and food preparation. You can set down a hot pan straight from the oven without worrying about damaging the surface. Additionally, granite’s non-porous quality, when properly sealed, helps to prevent stains from coffee, wine, and other common kitchen spills. This means that not only does it look great, but it’s also practical for everyday use.

However, it’s essential to note that while granite is durable, it does require some maintenance. Regular sealing—typically every one to two years—helps to maintain its beauty and protective properties. Moreover, while some homeowners may be intimidated by the prospect of sealing, it is a relatively straightforward process that can be easily managed with a few simple steps.

Granite countertops are available in a wide variety of colors, ranging from deep blacks and bright whites to vibrant greens and browns, allowing you to find the perfect match for your kitchen’s color scheme. Whether you prefer a polished finish that reflects light beautifully or a honed finish that offers a more matte look, granite can be tailored to suit your personal style.

In conclusion, if you’re looking for a countertop material that combines elegance, functionality, and durability, granite is an exceptional choice. Its natural beauty and resilience can elevate your kitchen, making it a space that is not only beautiful but also highly practical for everyday living.

– 3.2. Quartz

How to choose the right kitchen countertop material?
Credit : whatcanu.com

### 3.2. Quartz

When it comes to choosing a kitchen countertop material that seamlessly blends durability with elegance, quartz stands out as an exceptional option. This engineered stone, made from a combination of about 90% crushed natural quartz crystals and resins, offers a stunningly versatile surface that can suit any kitchen style, from contemporary to traditional.

One of the most compelling features of quartz countertops is their resilience. Unlike natural stones such as granite or marble, quartz is non-porous, which means it doesn’t harbor bacteria or absorb stains. This characteristic not only enhances its hygiene but also makes maintenance a breeze. A simple wipe with warm, soapy water is often all that’s needed to keep your quartz countertop looking pristine.

Moreover, quartz countertops are available in a vast array of colors and patterns, allowing homeowners to express their unique style. Whether you prefer the look of classic white, deep black, or vibrant hues, there’s a quartz countertop that can perfectly match your kitchen’s aesthetic. Many manufacturers even offer designs that mimic the intricate veining of natural stone, providing the beauty of marble or granite without the associated upkeep.

Another advantage of quartz is its durability. It is resistant to scratching and chipping, making it an ideal choice for busy kitchens where culinary creativity is a daily occurrence. Additionally, quartz can withstand heat to a certain degree, but using trivets for hot pots and pans is still advisable to prolong its lifespan.

In terms of investment, quartz countertops may come with a higher upfront cost compared to some other materials. However, their longevity and low maintenance requirements often make them a cost-effective choice in the long run. When you choose quartz, you’re not just enhancing the visual appeal of your kitchen; you’re also investing in a functional and enduring surface that can withstand the rigors of daily life.

Overall, quartz countertops provide a perfect balance of beauty, functionality, and ease of care, making them a top contender for anyone looking to elevate their kitchen space. Whether you’re cooking, entertaining, or simply enjoying a quiet moment with your morning coffee, a quartz countertop will serve as a stunning centerpiece that enhances your culinary experience.

– 3.3. Marble

### 3.3. Marble

Marble countertops are the epitome of elegance and timeless beauty, making them a favored choice for homeowners looking to elevate their kitchen’s aesthetic. With their stunning veining and unique patterns, no two slabs of marble are alike, which means your kitchen will truly be one-of-a-kind. The luxurious appearance of marble can instantly transform a space, adding a touch of sophistication that is particularly appealing in both traditional and modern designs.

Beyond their visual appeal, marble countertops are known for their cool surface, making them an ideal workspace for pastry chefs and bakers who require a chilled area for dough preparation. However, this beautiful stone does come with some considerations. Marble is softer and more porous than other materials, which means it can be prone to scratching and staining if not properly cared for. It’s essential to seal your marble countertops regularly to protect them from spills—especially acidic liquids like lemon juice or vinegar, which can etch the surface.

In terms of maintenance, a gentle cleanser and a soft cloth can keep your marble looking stunning. While it may require a bit more attention than granite or quartz, the allure of marble is undeniable. Its ability to blend seamlessly with various color palettes and textures makes it a versatile option for any kitchen style, from classic white marble with gray veining to vibrant colored marbles that can serve as a statement piece.

If you’re seeking to create a kitchen that is both functional and breathtakingly beautiful, marble countertops may just be the perfect choice, combining artistic flair with culinary practicality. Just remember, investing in marble is not just about the initial appeal; it’s about embracing a material that tells a story of elegance and history with every use.

– 3.4. Laminate

How to choose the right kitchen countertop material?
Credit : whatcanu.com

### 3.4. Laminate

Laminate countertops have long been a favorite choice for homeowners seeking an affordable yet stylish option for their kitchens. Available in an extensive array of colors, patterns, and textures, laminate surfaces can mimic the appearance of more expensive materials like granite or marble, allowing you to achieve the look you desire without breaking the bank.

One of the standout features of laminate is its versatility. With options ranging from vibrant hues to subtle earth tones, you can easily find a laminate that complements your kitchen’s design aesthetic. Modern laminate finishes can even replicate the natural veining of stone, offering a contemporary twist on traditional materials. This flexibility makes laminate an excellent choice for both retro and modern kitchens alike.

In addition to aesthetics, laminate countertops are known for their practicality. They are non-porous, which means they resist stains and won’t harbor bacteria, making them a hygienic option for food preparation. Routine cleaning is a breeze—often requiring just a damp cloth and mild soap to maintain their appearance. However, it is worth noting that while laminate is resistant to stains, it is not as durable as stone or solid surface materials. Sharp knives and hot pans can damage the surface, so using cutting boards and trivets is essential to prolonging its lifespan.

Affordability is another significant advantage of laminate countertops. They typically cost a fraction of what you would pay for natural stone, making them an ideal choice for budget-conscious homeowners or those looking to renovate without a hefty investment. Plus, the installation process is generally straightforward, which can translate to savings on labor costs if you decide to take the DIY route.

In summary, laminate countertops offer a winning combination of style, affordability, and practicality. Whether you’re renovating an entire kitchen or simply looking to update your workspace, laminate is a material worth considering for its diverse options and ease of maintenance.

– 3.5. Butcher Block

### 3.5. Butcher Block

Butcher block countertops are a warm and inviting choice for any kitchen, blending functionality with a rustic charm that can elevate the aesthetic of your space. Made from straight cuts of wood glued together into a thick slab, these countertops offer a natural beauty that is hard to replicate with other materials. The rich grains and varied hues of wood bring a sense of warmth and coziness, making your kitchen feel like the heart of your home.

One of the standout features of butcher block is its versatility. Whether you opt for maple, oak, walnut, or cherry, each type of wood has its unique character and can complement various design styles—from modern to farmhouse chic. The surface is not only visually appealing but also incredibly practical, providing a durable work area for chopping, slicing, and dicing. Unlike some harder surfaces that can dull your knives, butcher block is gentle on blades, ensuring they remain sharp longer.

However, potential buyers should be aware that butcher block does require a bit more maintenance than other materials. Regular oiling is necessary to keep the wood hydrated and prevent it from cracking or warping over time. Additionally, wood is susceptible to scratches and dents, but many homeowners appreciate that these imperfections can add to the character of the countertop. A light sanding can often restore its original luster, making it a relatively simple process to keep it looking its best.

When it comes to hygiene, butcher block countertops can be a safe choice if properly cared for. Wood has natural antimicrobial properties that can help resist bacteria, but it’s essential to clean up spills promptly and maintain a regular cleaning schedule. With the right care, butcher block countertops can last for years, becoming a cherished part of your kitchen that tells a story of culinary adventures and family gatherings.

In summary, if you’re looking for a countertop material that combines beauty, functionality, and a touch of warmth, butcher block is an exceptional choice. It invites creativity into the kitchen and provides a welcoming space for cooking and entertaining, making it a worthy contender in your search for the perfect kitchen countertop.

– 3.6. Concrete

### 3.6. Concrete

Concrete countertops are rapidly gaining traction in the world of kitchen design, and for good reason. Not only do they exude a modern, industrial vibe, but they also offer unparalleled durability and versatility. Available in a wide array of finishes, colors, and textures, concrete can be tailored to fit any aesthetic—from sleek and contemporary to rustic and organic.

One of the standout features of concrete countertops is their ability to be molded into custom shapes and sizes, allowing for unique designs that can perfectly complement your kitchen layout. Unlike traditional materials, concrete can be cast directly into place, creating seamless surfaces that enhance both functionality and visual appeal. This flexibility makes it an ideal choice for homeowners looking to make a statement or accommodate unconventional spaces.

Moreover, concrete is inherently heat-resistant, making it a practical choice for avid cooks who often place hot pots and pans directly on their countertops. Additionally, with proper sealing, concrete surfaces can be resistant to stains and moisture, although maintenance is crucial to ensure longevity. Regular sealing helps protect the surface from wear, ensuring that your investment remains beautiful and functional over the years.

Another intriguing aspect of concrete countertops is the opportunity for personalization. You can incorporate colorful aggregates, glass chips, or even embedded items like shells or stones to create a one-of-a-kind surface that reflects your personality and style. This level of customization allows homeowners to showcase their creativity and design flair, turning their kitchen into a true work of art.

However, potential buyers should be aware that concrete countertops can be heavy, requiring sturdy cabinetry and professional installation. Additionally, while they can be incredibly durable, they are not impervious to cracking if not properly cared for.

In conclusion, if you’re looking for a countertop material that combines strength, style, and individuality, concrete is an excellent choice. With its modern aesthetic and customizable options, it can elevate your kitchen from ordinary to extraordinary, making it a perfect fit for those who dare to think outside the box.

– 3.7. Soapstone

### 3.7. Soapstone

Soapstone is a natural stone that has captured the hearts of many homeowners and designers alike, thanks to its unique aesthetic appeal and practical benefits. This metamorphic rock is composed primarily of talc, giving it a soft, smooth texture that feels luxurious under the fingertips. The color palette of soapstone ranges from soft grays and blues to deep greens and browns, often featuring stunning veining that adds character and depth to any kitchen.

One of the standout qualities of soapstone is its remarkable durability. Unlike some other natural stones, soapstone is non-porous, which means it won’t stain or harbor bacteria, making it an excellent choice for culinary spaces. Its ability to withstand heat is another plus; you can place hot pots and pans directly on the surface without fear of damage. While it may scratch more easily than harder stones like granite or quartz, these scratches can be easily sanded out, allowing the countertop to maintain its beauty over time.

Maintenance is relatively straightforward with soapstone. A simple application of mineral oil can enhance its color and luster, while regular cleaning with mild soap and water keeps it looking fresh. This low-maintenance requirement is a significant advantage for busy households that value both aesthetics and functionality.

In terms of style, soapstone brings a rustic yet sophisticated ambiance to the kitchen. Its natural variations in color and pattern ensure that no two slabs are exactly alike, giving each installation a unique charm. Whether you’re aiming for a contemporary, farmhouse, or traditional design, soapstone can seamlessly complement your vision.

With its blend of beauty, practicality, and timeless appeal, soapstone stands out as a superb choice for kitchen countertops, offering a perfect balance of luxury and functionality. If you’re seeking a surface that embodies both elegance and durability, consider embracing the allure of soapstone for your culinary haven.

4. Pros and Cons of Each Material

When it comes to selecting the perfect kitchen countertop material, understanding the pros and cons of each option is essential for making an informed decision. Each material brings its own unique set of characteristics, advantages, and potential drawbacks, which can significantly impact your kitchen’s functionality and aesthetics.

**Granite:**
Pros: Renowned for its durability and heat resistance, granite countertops offer a classic elegance with a unique natural pattern that can enhance any kitchen’s aesthetic. They are also relatively low-maintenance, requiring only periodic sealing to protect against stains.
Cons: However, the initial cost can be quite high, and heavier slabs may necessitate additional structural support. Additionally, while durable, granite can crack or chip if subjected to extreme force.

**Quartz:**
Pros: Engineered for perfection, quartz countertops boast a non-porous surface that is resistant to staining and bacterial growth, making them extremely hygienic. They come in a variety of colors and patterns, allowing for greater design flexibility.
Cons: Despite their durability, quartz surfaces can be sensitive to heat, and prolonged exposure to high temperatures can cause damage. Furthermore, they can be somewhat expensive, similar to granite, which might not fit every budget.

**Marble:**
Pros: Marble exudes luxury and sophistication, often regarded as the choice for high-end kitchens. Its unique veining patterns and soft colors can make a striking statement in any space.
Cons: On the downside, marble is more porous and prone to scratching and staining than other materials. It requires regular sealing and careful maintenance to keep it looking pristine, which might not suit every homeowner’s lifestyle.

**Laminate:**
Pros: Affordable and available in a myriad of colors and styles, laminate countertops are a versatile option for budget-conscious homeowners. They are easy to clean and can mimic the appearance of more expensive materials.
Cons: However, laminate is less durable than other options and can be susceptible to scratching and heat damage. Once damaged, it’s often difficult to repair, which could lead to the need for a complete replacement.

**Wood (Butcher Block):**
Pros: Wood countertops offer warmth and a natural aesthetic that can create a cozy kitchen environment. They are great for food preparation and can be sanded down and refinished when they wear over time.
Cons: On the flip side, wood is susceptible to scratches, dents, and water damage if not properly maintained. Regular oiling is required to keep the wood in good condition, and it may not be suitable for all cooking styles, especially if you frequently work with raw meats.

In summary, the choice of countertop material is influenced not only by your aesthetic preferences but also by how much maintenance you’re willing to undertake, your cooking habits, and your budget. By weighing the pros and cons of each option, you can select a countertop that perfectly aligns with your lifestyle and enhances the heart of your home.

5. Cost Comparison of Different Countertop Materials

When it comes to selecting the perfect kitchen countertop, understanding the cost implications of different materials is crucial. Your choice not only impacts your budget but also affects the overall aesthetic and functionality of your kitchen. Here’s a comparative breakdown of some popular countertop materials to help you navigate your options.

**Granite**: Known for its durability and natural beauty, granite countertops typically range from $40 to $100 per square foot, depending on the quality and rarity of the stone. While the initial investment might be higher, granite’s resistance to heat and scratches makes it a long-lasting choice, often adding significant value to your home.

**Quartz**: Engineered from natural stone and resin, quartz countertops offer a range of colors and patterns, mimicking the look of more expensive materials. Prices generally fall between $50 to $150 per square foot. Though slightly pricier than granite, quartz is non-porous and requires less maintenance, making it an appealing choice for busy kitchens.

**Marble**: With its timeless elegance, marble countertops are often favored for their luxurious appearance. However, they come with a steeper price tag, often ranging from $50 to $200 per square foot. The beauty of marble is undeniable, but be mindful that it is softer and more prone to scratching and staining, which may result in higher maintenance costs over time.

**Laminate**: For those on a tighter budget, laminate countertops present a cost-effective option, ranging from $10 to $50 per square foot. Available in a myriad of colors and designs, laminate offers versatility but lacks the durability of stone materials. It’s a suitable choice for individuals who prioritize budget over longevity.

**Butcher Block**: If you love the warmth of wood, butcher block countertops can be a charming addition to your kitchen. Prices typically range from $30 to $150 per square foot, depending on the type of wood and finish. While they provide a rustic appeal and are great for food preparation, they require regular oiling and can be susceptible to scratches and water damage.

**Concrete**: For a modern and industrial look, concrete countertops are gaining popularity. Prices generally start around $65 per square foot and can go up significantly depending on the design and finish. Concrete is incredibly durable but requires sealing to prevent stains and damage from moisture.

When comparing costs, it’s essential to factor in not just the price per square foot, but also the long-term maintenance and durability of the material. Each option comes with its own set of pros and cons, so consider how each will fit into your lifestyle and budget before making a decision. By carefully evaluating these elements, you can choose a countertop material that not only meets your aesthetic desires but also falls within your financial comfort zone.

6. Durability and Maintenance Requirements

When selecting the perfect kitchen countertop material, durability and maintenance requirements should be at the forefront of your decision-making process. After all, your kitchen is one of the most used spaces in your home, and your countertop endures a multitude of daily tasks—from chopping vegetables to rolling out dough and holding hot pots straight from the stove.

Durability varies significantly among countertop materials. For instance, granite and quartz are renowned for their strength and resistance to scratches and heat, making them ideal for bustling kitchens. Conversely, softer stones like limestone or marble, while undeniably beautiful, can be susceptible to etching and staining, requiring more careful handling and regular sealing to maintain their appearance.

Maintenance is another critical factor to consider. Some materials, like laminate or solid surface countertops, offer low-maintenance options that only require simple cleaning with soap and water. In contrast, natural stones often demand more upkeep, including periodic resealing and specialized cleaners to preserve their luster and integrity.

Think about your lifestyle and cooking habits when evaluating durability and maintenance. If you frequently entertain or have a busy family kitchen, a robust and lower-maintenance option may serve you better in the long run. On the other hand, if you’re looking for a countertop that showcases elegance and are willing to invest time in care, materials like marble could be a stunning centerpiece for your culinary haven.

Ultimately, understanding the balance between durability and maintenance can help you choose a countertop that not only enhances your kitchen’s aesthetic appeal but also withstands the test of time and everyday use. Prioritize your kitchen needs, and you’ll find a countertop that perfectly aligns with your lifestyle.

7. Aesthetic Considerations: Color and Texture

When it comes to selecting the perfect kitchen countertop material, aesthetic considerations such as color and texture play a pivotal role in defining the overall look and feel of your culinary space. The countertop is often the centerpiece of the kitchen, and its visual appeal can dramatically influence the ambiance of the room.

Start by considering the color palette you envision for your kitchen. Are you leaning towards a modern, minimalist vibe with sleek whites and grays, or do you prefer the warmth of earthy tones that evoke a rustic charm? The right color can either complement your existing décor or serve as a bold statement piece. For example, a deep navy or emerald green granite can add a luxurious touch, while a bright white quartz surface can create an airy, spacious look.

Texture is another vital element that should not be overlooked. The surface finish of your countertops can range from smooth and glossy to textured or honed, each offering a distinct character and feel. A polished granite countertop radiates elegance and is easy to clean, making it ideal for a chic, contemporary kitchen, while a matte-finished soapstone can lend a more organic, artisanal appeal.

Additionally, consider how the texture interacts with the other materials in your kitchen. A rough, natural stone can provide a beautiful contrast against sleek cabinetry or smooth appliances. On the other hand, if your kitchen features a lot of intricate tile work or bold backsplashes, opting for a more subdued countertop can help maintain a balanced aesthetic.

Ultimately, the key is to choose colors and textures that resonate with your personal style and harmonize with the overall design of your kitchen. By thoughtfully considering these aesthetic elements, you can create a kitchen space that not only functions beautifully but also reflects your unique taste and enhances the joy of cooking and gathering with loved ones.

8. Eco-Friendly Countertop Options

As sustainability becomes a focal point for many homeowners, eco-friendly countertop options are gaining traction in kitchen design. Choosing environmentally friendly materials not only benefits our planet but often enhances the aesthetic and functional qualities of your kitchen.

Recycled glass countertops, for example, are a stunning choice that combines beauty and sustainability. These surfaces are made from post-consumer glass, which is crushed and mixed with resins to create a vibrant and unique finish. The kaleidoscope of colors and patterns not only reduces waste but also adds a modern flair to your kitchen.

Another excellent choice is bamboo, a rapidly renewable resource that is both durable and stylish. Bamboo countertops have a rich, warm appearance and are less likely to harbor bacteria, making them a hygienic option for food preparation. Their natural look complements a variety of design styles, from rustic to contemporary.

For a truly timeless and sustainable solution, consider using reclaimed wood. With its rich history and character, reclaimed wood brings a unique story to your kitchen. By repurposing materials that would otherwise end up in landfills, you’re making an environmentally responsible choice while enjoying the beauty of natural wood grains and textures.

Lastly, consider using concrete, which can be made with eco-friendly aggregates and can be colored and shaped to fit your design preferences. Concrete is incredibly durable and, when sealed properly, can withstand heat and moisture, making it a long-lasting option.

Opting for eco-friendly countertops not only allows you to create a stunning kitchen but also aligns your choices with a commitment to sustainability. By selecting materials that are kind to the Earth, you can enjoy a space that reflects your values while providing functionality and beauty.

9. Trends in Kitchen Countertops for Modern Homes

The world of kitchen design is ever-evolving, and keeping up with the latest trends in countertops can transform your culinary space into a modern masterpiece. As homeowners increasingly prioritize style alongside functionality, several key trends have emerged that are defining the contemporary kitchen aesthetic.

One of the most prominent trends is the rise of natural materials, particularly quartzite and granite, which offer durability while showcasing the unique veining and patterns found in nature. These stones not only add a touch of luxury but also provide a timeless appeal that can seamlessly blend with various design styles, from rustic to sleek and modern.

Another trend gaining traction is the use of bold colors and dramatic finishes. Homeowners are moving away from the traditional monochromatic palettes and opting for vibrant hues like deep blues, emerald greens, and even striking blacks. This shift allows for a stunning focal point in the kitchen, encouraging creativity and personal expression in design. Matte finish surfaces are also becoming increasingly popular, as they offer a contemporary look and are less prone to showing fingerprints and smudges compared to glossy finishes.

Sustainability is another critical factor shaping countertop choices in modern homes. Many homeowners are opting for eco-friendly materials, such as recycled glass or sustainably sourced wood, which not only reduce environmental impact but also add a unique flair to the kitchen. These materials often come with intriguing textures and colors, making each countertop a conversation piece.

Lastly, the integration of technology in kitchen countertops is on the rise. Features such as built-in wireless charging stations or smart surfaces that can change color or display information are becoming more commonplace. These innovations not only enhance functionality but also cater to the tech-savvy homeowner’s desire for a seamless, modern lifestyle.

By staying attuned to these trends, you can choose a countertop material that not only fits your personal style but also enhances the overall functionality and aesthetic of your kitchen, making it a true reflection of modern living.

10. How to Match Countertops with Your Kitchen Design

When it comes to selecting the ideal kitchen countertop material, harmonizing it with your overall kitchen design is paramount. The countertop is often the focal point of the kitchen, influencing not only the aesthetic but also the functionality of the space. Here are some practical tips on how to achieve that perfect match.

First, consider the color palette of your kitchen. If you have a modern design with sleek cabinetry and minimalist decor, a solid surface countertop in a neutral hue like white or gray can enhance that clean, contemporary look. On the other hand, if your kitchen features rustic elements, such as reclaimed wood or farmhouse-style cabinetry, a richly veined granite or a warm butcher block can add that touch of earthiness that complements the overall theme.

Next, pay attention to the textures and finishes. A glossy quartz countertop can provide a striking contrast against matte cabinetry, creating a vibrant visual dynamic. Conversely, if your kitchen embraces a softer, more organic feel, opting for a honed or brushed finish can impart warmth and approachability, ensuring a cohesive flow throughout the space.

Don’t forget about the shape and layout of your kitchen! In open-concept designs, where the kitchen flows into living or dining areas, it’s essential to choose a countertop that aligns with adjacent spaces. For instance, if your dining room features dark wood, consider a countertop that echoes that tone, whether through color or material, to create a seamless transition.

Finally, think about your kitchen’s functionality. If you frequently entertain or cook, durability should be a priority. Materials like granite or quartz not only provide aesthetic appeal but also withstand the rigors of daily use. Meanwhile, if your kitchen is more of a casual space, a softer material like laminate might suffice, allowing for playful designs that can easily be updated.

In essence, matching your countertops with your kitchen design involves a delicate balance of color, texture, and functionality. By taking the time to consider these elements, you can create a kitchen that not only looks stunning but also serves as a welcoming hub for family and friends.

11. Real-Life Examples and Case Studies

When it comes to choosing the perfect kitchen countertop material, sometimes the best insights come from real-life examples and case studies. These narratives not only illustrate the practical applications of various materials but also highlight the unique challenges and triumphs homeowners have experienced in their kitchen renovations.

Take, for instance, the Johnson family, who opted for a stunning quartz countertop in their newly remodeled kitchen. Initially drawn to the durability and low maintenance of quartz, they found that it not only stood up to daily wear and tear but also became the focal point of their space. The vibrant veining and rich color palette complemented their modern aesthetic beautifully. However, they quickly learned the importance of choosing a finish that matched their lifestyle; the polished surface required regular cleaning to maintain its shine. Their experience emphasizes the need to consider not just the look but the upkeep involved in your choice.

On the other hand, the Ramirez household decided to go with a classic granite countertop, drawn by its natural beauty and variety. They faced a challenge during installation when they discovered that the stone had a particularly porous surface, leading them to invest in a high-quality sealant to protect against stains. Their proactive approach paid off, as years later, the granite remained a striking feature of their kitchen, proving that with proper care, a natural stone can withstand the test of time.

In a contrasting scenario, a young couple chose butcher block countertops for their cozy, farmhouse-style kitchen. This decision was influenced by their love for cooking and the warmth that wood brings to a space. However, they soon realized that the surface demanded more attention than they anticipated. Regular oiling and careful maintenance became part of their routine, but they were rewarded with a unique, inviting surface that only improved with age. Their journey highlights the beauty and practicality of wood, while underscoring the commitment required to keep it looking its best.

These case studies reveal invaluable lessons: the importance of aligning your countertop choice with your personal style, cooking habits, and maintenance preferences. By learning from the experiences of others, you can navigate the vast array of options available and choose a material that not only enhances your kitchen’s aesthetic but also fits seamlessly into your lifestyle. From the practicalities of installation to the realities of everyday use, these stories serve as guiding beacons for anyone embarking on their countertop selection journey.

12. Tips for Installation and Professional Help

When it comes to installing your new kitchen countertop, understanding the nuances of the process is crucial for achieving a flawless finish. While some daring DIY enthusiasts might consider tackling the installation themselves, it’s important to weigh the complexities of the project against your skill level and experience. Here are some essential tips to ensure a successful installation, whether you choose to go the DIY route or hire a professional.

First and foremost, always measure your space accurately. Precise measurements will help you avoid costly mistakes and ensure that your new countertop fits perfectly. If you’re opting for a material that requires cutting, such as granite or quartz, it’s advisable to leave the cutting and shaping to the professionals. These materials can be unforgiving, and a single slip can lead to a damaged piece that is not only unsightly but also expensive to replace.

If you decide to hire a professional, do your research. Look for contractors who specialize in countertop installation and check their reviews, portfolios, and credentials. Ask for recommendations from friends or family who have recently completed similar projects. A skilled professional will not only ensure that the installation is done correctly but will also provide valuable insight into the best practices for maintaining your countertop once it’s in place.

Additionally, consider the timeline of your project. Countertop installation can take anywhere from a few hours to a couple of days, depending on the material and the complexity of the job. Be sure to coordinate with your contractor to set a schedule that works for both parties and allows for any necessary adjustments.

Lastly, don’t overlook the importance of post-installation care. Make sure to ask your installer about the best ways to care for your new countertop, including recommended cleaning products and maintenance routines. By taking the time to properly install and care for your countertop, you’ll ensure that it remains a stunning centerpiece in your kitchen for years to come.

13. Common Mistakes to Avoid When Choosing Countertops

When embarking on the journey to choose the perfect kitchen countertop, it’s easy to get swept up in the excitement of colors, patterns, and finishes. However, avoiding common pitfalls can save you both time and money while ensuring your kitchen remains functional and stylish for years to come. Here are some of the most prevalent mistakes to steer clear of:

**1. Ignoring Practicality:** One of the biggest missteps is focusing solely on aesthetics without considering how the material will hold up to daily use. For instance, while natural stone like marble can provide a stunning visual appeal, it is prone to scratches and stains, making it less ideal for high-traffic kitchens. Always balance beauty with durability based on your cooking habits.

**2. Overlooking Maintenance Requirements:** Each countertop material has its own set of maintenance needs. Some materials, like butcher block, require regular oiling and sealing to maintain their appearance, while others, such as quartz, are relatively low-maintenance. Failing to consider how much time and effort you’re willing to invest in upkeep can lead to regret down the line.

**3. Neglecting the Overall Design:** Your countertop is a significant component of your kitchen’s aesthetic, but it shouldn’t be the sole focus. Be sure to consider how your chosen material complements the cabinetry, flooring, and overall design theme of your kitchen. A countertop that clashes with the rest of the space can create a disjointed look.

**4. Misjudging Budget Constraints:** High-end materials can be tempting, but they often come with a price tag that may not fit into your budget, especially when you factor in installation costs. It’s important to set a realistic budget beforehand and explore options within that range. Remember, there are many cost-effective materials that can mimic the look of more expensive options without sacrificing quality.

**5. Failing to Test Samples:** Don’t rush the decision-making process. Always request samples of your top choices and take the time to see how they look in your kitchen’s lighting. The appearance of a countertop can change dramatically from showroom to home, so testing samples against your cabinets and appliances is crucial.

By steering clear of these common mistakes, you can make a well-informed decision that ensures your kitchen countertop not only enhances the beauty of your space but also meets your functional needs, ultimately creating a harmonious and inviting kitchen environment.

14. Conclusion: Finding the Right Fit for Your Kitchen

In conclusion, choosing the perfect kitchen countertop material is a decision that extends far beyond aesthetics; it impacts functionality, maintenance, and overall kitchen enjoyment. With a plethora of options available—from the timeless elegance of granite and the sleek modernity of quartz to the warmth of wood and the unique character of concrete—each material brings its own set of advantages and considerations.

As you embark on this journey, take the time to assess your cooking habits, lifestyle, and personal taste. Consider how much wear and tear your countertops will endure, how often you entertain guests, and your preferences for maintenance. It’s essential to balance beauty with practicality; a stunning countertop should not only enhance your kitchen’s visual appeal but also serve you well in daily use.

Involve your family in the decision-making process, as they will be the ones interacting with the space just as much as you are. Don’t forget to explore samples in person, as colors and textures can differ dramatically under various lighting conditions.

Ultimately, the right countertop will harmonize with your kitchen’s design while meeting your functional needs, creating a space where culinary creativity flourishes and memories are made. With careful consideration and a clear understanding of your options, you can confidently select a countertop that reflects your style and stands the test of time. Happy countertop hunting!

15. Additional Resources and Next Steps

As you embark on the journey to select the perfect kitchen countertop material, it’s essential to arm yourself with all the right resources and knowledge to make an informed decision. The landscape of countertop options is vast, each material offering unique benefits, aesthetics, and price points. To guide you through this process, we’ve compiled a list of additional resources that can help deepen your understanding and refine your choices.

First, consider visiting showrooms and home improvement stores where you can see and feel the materials in person. Experiencing the texture, color, and finish of various options like granite, quartz, laminate, or butcher block can provide invaluable insight that photographs simply can’t convey. Additionally, many suppliers offer samples that you can take home, allowing you to visualize how a particular material will look in your kitchen’s lighting and alongside your cabinetry and flooring.

Next, delve into online platforms and forums dedicated to home improvement. Websites like Houzz and Pinterest are treasure troves of design inspiration, featuring real-life kitchens that can spark ideas for your own space. Engaging with communities on these platforms can also connect you with others who have gone through the same process, offering tips and recommendations based on their experiences.

Don’t overlook the importance of professional advice. Consulting with a kitchen designer or a contractor can provide you with personalized recommendations tailored to your specific needs and lifestyle. They can help assess your space, suggest layouts, and guide you toward materials that align with your budget and preferences.

Finally, as you weigh your options, take advantage of resources that detail the maintenance and longevity of each material. Understanding how each countertop will wear over time will help you choose one that not only looks great but also stands the test of time.

In conclusion, the journey to find the perfect kitchen countertop is a blend of personal taste, practical considerations, and a wealth of information at your fingertips. By leveraging these resources and taking the time to evaluate your choices carefully, you’ll be well on your way to transforming your kitchen into a beautiful and functional space that reflects your unique style. Happy countertop hunting!

In conclusion, selecting the perfect kitchen countertop material is an exciting yet significant decision that can greatly impact both the functionality and aesthetic of your space. By considering factors such as durability, maintenance, style, and budget, you can confidently navigate through the myriad of options available. Whether you gravitate toward the timeless elegance of granite, the sleek sophistication of quartz, or the warm charm of wood, remember that the best choice aligns with your lifestyle and personal taste. We hope this ultimate guide has equipped you with the knowledge needed to make an informed decision that will elevate your kitchen for years to come. Happy countertop hunting, and may your new surface inspire countless culinary creations and cherished memories!

What are the different types of flooring and their pros and cons?

Choosing the right flooring for your home is a decision that can significantly impact both the aesthetics and functionality of your living space.

With a myriad of options available, from classic hardwood and cozy carpet to sleek tile and durable laminate, it can be overwhelming to navigate the pros and cons of each type. Each flooring choice brings its own unique blend of benefits and drawbacks, influencing not only the look and feel of your rooms but also your budget, maintenance routine, and long-term satisfaction. In this comprehensive guide, we’ll delve into the distinctive characteristics of various flooring types, exploring the advantages that make them appealing as well as the potential downsides to consider. Whether you’re renovating your home or building anew, this post will equip you with the essential insights needed to make an informed decision that perfectly aligns with your lifestyle and aesthetic goals.

1. Introduction to Flooring Types

What are the different types of flooring and their pros and cons?
Credit : whatcanu.com

When it comes to home design, few decisions are as impactful as choosing the right flooring. The floor beneath our feet serves not only as a functional surface but also as a foundational element that can influence the overall aesthetic and feel of a space. With a myriad of flooring options available today, homeowners and designers alike are often faced with the delightful yet daunting task of navigating these choices.

From the timeless appeal of hardwood to the practicality of vinyl, each flooring type comes with its own set of characteristics, benefits, and drawbacks. Understanding these can help you make an informed decision that aligns with your lifestyle, aesthetic preferences, and budget.

In this comprehensive guide, we will explore the primary flooring types, including hardwood, laminate, tile, carpet, and vinyl, breaking down their unique qualities and helping you weigh the pros and cons of each. Whether you’re embarking on a renovation project, building a new home, or simply looking to refresh your existing space, our insights will equip you with the knowledge you need to choose the perfect flooring that harmonizes with your vision and needs. Join us as we delve into the world of flooring and uncover the options that best suit your home.

2. Hardwood Flooring: Timeless Beauty and Durability

When it comes to flooring that exudes elegance and longevity, hardwood flooring stands as a premier choice for many homeowners. The rich, natural beauty of hardwood adds warmth and character to any space, transforming a house into a home. With a variety of species, finishes, and stains available, hardwood floors can be tailored to fit any aesthetic—from rustic charm to modern sophistication. Each plank tells a story, with unique grain patterns and colors that bring an organic feel to your interiors.

In addition to its stunning appearance, hardwood flooring is renowned for its durability. With proper care and maintenance, hardwood floors can last a lifetime, making them a worthwhile investment. They are less prone to wear and tear compared to other flooring options, resisting scratches and dents when treated with a protective finish. Furthermore, hardwood can be refinished multiple times, allowing you to restore its original luster and adapt to changing design trends without needing a full replacement.

However, it’s important to consider the potential downsides of hardwood flooring. One of the primary concerns is its susceptibility to moisture. While hardwood can handle some humidity, excessive moisture can lead to warping or swelling, making it less ideal for areas like bathrooms or basements. Additionally, hardwood floors can be more expensive upfront compared to alternatives like laminate or vinyl. The installation process may also require professional assistance, which adds to the overall cost.

Another factor to consider is the upkeep. Although hardwood is relatively easy to clean, it does require regular maintenance, such as refinishing and polishing, to keep it looking its best. For homes with pets or young children, this may pose a challenge, as spills and scratches can become more frequent.

In summary, hardwood flooring offers timeless beauty and exceptional durability, making it a top contender for those looking to enhance their living spaces. However, potential buyers should weigh the pros and cons, considering factors such as moisture exposure, cost, and maintenance needs, to determine if it’s the right fit for their home.

3. Laminate Flooring: Affordable and Versatile

What are the different types of flooring and their pros and cons?
Credit : whatcanu.com

Laminate flooring has surged in popularity over the years, and for good reason. This flooring option strikes a perfect balance between affordability and versatility, making it an appealing choice for a wide range of spaces.

One of the standout features of laminate flooring is its cost-effectiveness. Unlike hardwood or natural stone, laminate provides the aesthetic appeal of these premium materials at a fraction of the price. Homeowners can achieve the look of rich oak or sleek slate without breaking the bank. This affordability makes laminate an excellent option for budget-conscious renovations, especially in areas prone to wear and tear, such as entryways and kitchens.

In terms of versatility, laminate flooring is available in a multitude of designs, colors, and finishes, allowing you to find the perfect match for your home’s decor. Whether you prefer the rustic charm of distressed wood or the modern elegance of polished stone, there’s a laminate option that can fit seamlessly into your vision. Additionally, laminate is relatively easy to install, making it a favorite among DIY enthusiasts. Many products feature a click-lock installation system, allowing homeowners to transform their spaces with minimal fuss.

However, it’s important to consider the potential downsides of laminate flooring. While it mimics the look of natural materials, it lacks the authenticity and warmth that comes with genuine wood or stone. Additionally, laminate is not as durable as some other flooring options; it can be prone to scratches and moisture damage if not properly maintained. Once damaged, it’s often challenging to repair, as individual planks may need to be replaced entirely rather than refinished.

In summary, laminate flooring offers a budget-friendly and stylish solution for many homeowners. Its versatility and ease of installation make it a popular choice, especially for those looking to enhance their space without a significant investment. However, it’s essential to weigh these benefits against the potential drawbacks to determine if laminate is the right fit for your needs.

4. Vinyl Flooring: Water-Resistant and Low-Maintenance

Vinyl flooring has rapidly gained popularity among homeowners and designers alike, and for good reason. This versatile flooring option combines practicality with style, making it an excellent choice for various spaces in your home. One of the standout features of vinyl flooring is its impressive water resistance. Unlike traditional hardwood or laminate, vinyl can withstand spills and moisture, making it a perfect fit for areas prone to humidity, such as kitchens, bathrooms, and basements. With advanced manufacturing techniques, modern vinyl flooring mimics the appearance of natural materials, like wood or stone, offering aesthetic appeal without the hefty price tag.

Another significant advantage of vinyl flooring is its low-maintenance nature. Unlike other flooring types that may require polishing, refinishing, or extensive cleaning routines, vinyl is incredibly easy to care for. A simple sweep or vacuum followed by a damp mop is usually all that’s needed to keep it looking pristine. This makes vinyl a fantastic choice for busy households, pet owners, or anyone who prefers a hassle-free cleaning regimen.

However, it’s essential to weigh these benefits against some potential drawbacks. While vinyl flooring is durable and resistant to water, it can be susceptible to scratches and dents from heavy furniture or sharp objects. Additionally, while high-quality vinyl can last for many years, it generally doesn’t match the longevity of materials like hardwood or tile. Homeowners should also consider the environmental impact; while many vinyl products are now made with recycled materials, it is still a synthetic material that may not appeal to those seeking eco-friendly options.

In summary, vinyl flooring offers a compelling mix of water resistance and low maintenance, making it an attractive option for many homeowners. Just be sure to consider your specific needs and the long-term implications of your flooring choice before making a decision.

5. Tile Flooring: A Stylish Choice for Any Room

What are the different types of flooring and their pros and cons?
Credit : whatcanu.com

Tile flooring stands out as a stylish choice for any room, seamlessly blending aesthetics with practicality. Available in a plethora of designs, colors, and textures, tile can mimic the look of natural stone, wood, or even intricate mosaics, giving homeowners the flexibility to express their personal style. Whether you’re aiming for a sleek, modern kitchen or a rustic, cozy bathroom, there’s a tile option that perfectly complements your vision.

One of the most significant advantages of tile flooring is its durability. Resistant to scratches, dents, and moisture, tiles can withstand the rigors of daily life, making them an ideal choice for high-traffic areas like entryways and living rooms. Additionally, tile is easy to clean; spills can be swiftly wiped away, and regular maintenance involves little more than sweeping and mopping. This practicality extends to its hypoallergenic nature, as tile doesn’t harbor dust mites or allergens, promoting a healthier indoor environment.

However, tile flooring does come with its considerations. While it is incredibly durable, it can be cold and hard underfoot, making it less comfortable for prolonged standing or walking compared to softer flooring options. In colder climates, this can be particularly uninviting, requiring the addition of area rugs or underfloor heating systems for added comfort. Furthermore, the installation process can be labor-intensive and costly, especially if intricate patterns or layouts are desired.

In summary, tile flooring offers a stylish and versatile option for any room, combining beauty with durability. With careful consideration of its pros and cons, you can make an informed choice that enhances your home’s aesthetic and functionality, creating spaces that are not only visually appealing but also practical for everyday living.

6. Carpet Flooring: Comfort and Warmth Underfoot

When it comes to creating a cozy and inviting atmosphere in your home, carpet flooring is often the go-to choice for many homeowners. With its plush texture and luxurious feel, carpet offers unparalleled comfort underfoot, making it the perfect option for bedrooms, living rooms, and play areas. Imagine sinking into a soft, warm carpet after a long day – it’s a sensation that instantly promotes relaxation and ease.

One of the standout advantages of carpet flooring is its exceptional insulation properties. Not only does it keep your feet warm during colder months, but it also helps to regulate the overall temperature of a room. This can lead to lower energy costs, as carpets can trap heat and create a more comfortable living environment. Additionally, carpet acts as a natural sound barrier, reducing noise levels and enhancing the tranquility of your space – a significant benefit for busy households or multi-story homes.

However, while the comfort of carpet flooring is undeniable, it does come with its own set of drawbacks. Carpets can be prone to staining and require regular maintenance, including vacuuming and professional cleaning, to keep them looking their best. Allergens and dust mites can also accumulate in the fibers, which may pose issues for those with allergies or respiratory sensitivities. Furthermore, carpets have a limited lifespan compared to hard flooring options, and they may need to be replaced more frequently, adding to long-term costs.

Ultimately, carpet flooring offers a unique blend of comfort and warmth, making it a popular choice for many spaces. However, it’s important to weigh these benefits against the maintenance and longevity considerations to determine if it’s the right fit for your home. By understanding the pros and cons of carpet flooring, you can make an informed decision that aligns with your lifestyle and design preferences.

7. Bamboo Flooring: Eco-Friendly and Sustainable

What are the different types of flooring and their pros and cons?
Credit : whatcanu.com

Bamboo flooring has garnered significant attention in recent years, and for good reason. As homeowners increasingly prioritize eco-friendliness and sustainability, bamboo emerges as a top contender in the flooring market. This natural material, derived from fast-growing bamboo grass, not only boasts a unique aesthetic appeal but also offers an impressive range of benefits.

One of the standout features of bamboo flooring is its sustainability. Unlike traditional hardwood trees, which can take decades to mature, bamboo can reach maturity in just three to five years. This rapid growth means that bamboo can be harvested without depleting natural resources, making it a renewable choice for those looking to minimize their environmental impact. Additionally, many bamboo flooring options are harvested from sustainable forests, ensuring that the harvesting process protects the ecosystem.

From a durability perspective, bamboo flooring is surprisingly strong. It is often compared to oak in terms of hardness, making it an excellent choice for high-traffic areas in the home. With proper care, bamboo can withstand daily wear and tear, maintaining its beauty for years to come. Available in a range of colors and finishes—from light, natural hues to rich, dark stains—bamboo can complement various interior design styles, adding a touch of elegance to any space.

However, it’s essential to consider the drawbacks of bamboo flooring as well. One significant concern is its susceptibility to moisture. Bamboo is not as water-resistant as some other flooring types, which can lead to warping or damage in humid environments. Therefore, it’s crucial to avoid installing bamboo flooring in areas prone to moisture, such as bathrooms or basements. Additionally, while bamboo is generally resistant to scratches, it may require regular maintenance to preserve its finish and prevent wear over time.

In summary, bamboo flooring presents an eco-friendly and visually appealing option for homeowners looking to reduce their carbon footprint without sacrificing style or durability. By weighing the pros and cons, you can make an informed decision about whether this sustainable flooring choice is the right fit for your home.

8. Cork Flooring: Unique Benefits and Considerations

Cork flooring is an increasingly popular choice for homeowners seeking a unique blend of style, sustainability, and comfort. Harvested from the bark of cork oak trees, this eco-friendly material offers several distinct benefits, as well as a few considerations to keep in mind.

One of the standout advantages of cork flooring is its natural insulating properties. Cork acts as a thermal barrier, helping to maintain a comfortable temperature in your home while also providing sound insulation. This means that cork floors can keep your space warmer in the winter and cooler during the summer, all while dampening noise—an ideal feature for homes with bustling families or open-concept layouts.

In addition to its thermal and acoustic benefits, cork is also a soft and resilient material underfoot. Walking on cork feels cushioned, which can be particularly beneficial in high-traffic areas or for individuals with joint issues. Its inherent elasticity reduces the impact on your feet and joints, making it a comfortable choice for kitchens and living rooms.

However, cork flooring does come with some considerations. While it is resistant to mold and mildew, it is not waterproof, meaning spills should be cleaned up promptly to prevent damage. Additionally, cork can be sensitive to direct sunlight, which may cause it to fade over time. To protect its vibrant color and prolong its lifespan, it is advisable to use area rugs in sun-drenched spots and to maintain a consistent cleaning routine.

Lastly, while cork flooring can be an attractive investment, it tends to be on the pricier side compared to other flooring options like laminate or vinyl. However, its unique aesthetic appeal, coupled with its sustainability and comfort, can make it a worthwhile addition to your home if you seek a distinctive and practical flooring solution.

In summary, cork flooring offers a unique blend of benefits, from its eco-friendly credentials to its comfort underfoot. By weighing these advantages against the considerations of maintenance and cost, you can make a well-informed decision about whether cork is the right fit for your space.

9. Concrete Flooring: Industrial Aesthetic and Longevity

Concrete flooring has surged in popularity over recent years, particularly among homeowners and businesses seeking a blend of modern aesthetics and durability. This flooring type, often associated with an industrial look, provides a unique and versatile foundation for a variety of design styles, from minimalist to rustic. Its natural gray hue offers a neutral backdrop that can complement various color schemes and furnishings, while the option to stain or polish the surface opens up a world of creative possibilities.

One of the standout features of concrete flooring is its longevity. Unlike softer flooring materials that can succumb to wear and tear over time, concrete is incredibly tough and resistant to scratching, denting, and staining. This makes it an excellent choice for high-traffic areas, whether it’s a bustling entryway or a lively family room. Additionally, concrete is inherently moisture-resistant, making it suitable for basements and other areas prone to dampness.

However, potential buyers should also consider the drawbacks of concrete flooring. While it’s undoubtedly durable, concrete can be unforgiving underfoot, often feeling cold and hard, which may not be the most comfortable option for standing or walking for long periods. This can be mitigated with the addition of area rugs or cushioned mats, but it’s an important factor to keep in mind. Furthermore, installation can be labor-intensive and costly, especially if you opt for decorative finishes, which can add to the overall expense.

In summary, concrete flooring presents a striking industrial aesthetic and remarkable longevity that appeals to many. Yet, it’s essential to weigh these advantages against its potential downsides, ensuring that it aligns with your lifestyle and design vision. Whether you’re renovating a home or outfitting a commercial space, concrete flooring could be the perfect fit if you appreciate its unique characteristics and are willing to invest in the right enhancements for comfort and style.

10. Factors to Consider When Choosing Flooring

Choosing the right flooring for your space is a decision that encompasses a variety of factors, each playing a pivotal role in ensuring your selection not only meets aesthetic desires but also functional needs. To navigate this process effectively, consider the following key aspects:

**1. Purpose of the Space:** The intended use of the room dramatically influences your flooring choice. High-traffic areas, such as hallways and living rooms, may require durable materials like hardwood or tile that can withstand wear and tear, while cozy spaces like bedrooms might benefit from softer options like carpet or cork that provide warmth and comfort.

**2. Maintenance Requirements:** Every flooring type comes with its own upkeep needs. For instance, while hardwood floors can add timeless elegance, they often require regular polishing and care to maintain their luster. On the other hand, luxury vinyl plank is not only stylish but also easy to clean and maintain, making it an attractive option for busy households.

**3. Climate Considerations:** Your local climate can affect the longevity and performance of your flooring. In humid areas, for example, opt for moisture-resistant options like tile or vinyl, as hardwood can warp under excessive moisture. Conversely, in dryer climates, carpets may trap dust and allergens, requiring more frequent cleaning.

**4. Budget Constraints:** Flooring can range from budget-friendly options to high-end materials. It’s essential to balance your aesthetic preferences with your financial capabilities. While investing in premium materials may yield long-term benefits, there are also plenty of cost-effective solutions that provide beauty and durability without breaking the bank.

**5. Environmental Impact:** Sustainable choices are increasingly important for many homeowners. Consider flooring options made from renewable resources, such as bamboo or reclaimed wood, which not only contribute to a healthier planet but can also elevate the unique character of your space.

**6. Aesthetic Appeal:** Finally, the look and feel of your flooring should resonate with your personal style and complement existing decor. From the rich tones of hardwood to the sleek finish of polished concrete, the visual impact of your flooring choice can set the tone for the entire room.

By carefully weighing these factors, you can make a well-informed decision that aligns with both your practical needs and design aspirations, ultimately creating a flooring solution that enhances your living space for years to come.

11. Cost Comparisons: Budgeting for Your Flooring Project

When embarking on a flooring project, one of the most critical considerations is your budget. Different flooring types come with varying price tags, and understanding these cost comparisons can help you make an informed decision that aligns with your financial plan.

First, let’s break down some of the most common flooring options. **Hardwood flooring**, while undeniably beautiful and durable, can be on the higher end of the spectrum, often costing between $8 to $14 per square foot, depending on the type of wood and finish. However, its timeless appeal and longevity can make it a worthwhile investment for many homeowners.

On the other hand, **laminate flooring** offers a budget-friendly alternative, typically ranging from $1 to $5 per square foot. With advancements in technology, laminate can mimic the look of hardwood or tile while being more resistant to scratches and moisture, making it a smart choice for families with pets or young children. Just be mindful that while laminate is cost-effective, it may not add the same resale value as hardwood.

**Vinyl flooring** is another budget-conscious option that has gained popularity for its versatility and ease of installation. Prices generally fall between $2 to $7 per square foot. Vinyl is available in planks, tiles, and sheets, making it suitable for a variety of spaces, including kitchens and bathrooms, where moisture resistance is crucial.

For those seeking a more luxurious feel, **carpet** can range from $2 to $10 per square foot, depending on the fiber and pile. While it offers warmth and comfort underfoot, keep in mind that maintenance costs, such as cleaning and potential replacement due to wear and tear, should be factored into your overall budget.

Lastly, **natural stone**, like marble or granite, can elevate any space but comes with a hefty price tag, often ranging from $5 to $25 per square foot. While stunning, its high cost and the need for professional installation can be a significant investment.

When budgeting for your flooring project, consider not only the initial costs but also the long-term value, maintenance, and potential for replacement. Creating a well-rounded budget that includes the price of materials, labor, and any necessary underlayment or preparation work will yield a clearer picture of what you can afford. By weighing the pros and cons of each flooring type alongside your budget, you can navigate the many options available and choose the perfect flooring solution for your home.

12. Maintenance Requirements for Different Flooring Types

When it comes to choosing the right flooring for your home, understanding the maintenance requirements of various types can be a game-changer. Each flooring option has its own set of care needs, which can significantly impact your long-term satisfaction and the overall upkeep of your space. Here’s a closer look at the maintenance demands of popular flooring types to help you make an informed decision.

**Hardwood Flooring**
Hardwood floors are a timeless choice known for their beauty and longevity. However, they require regular maintenance to keep them looking pristine. Routine sweeping or vacuuming is essential to remove dust and debris, while periodic mopping with a pH-balanced cleaner helps prevent scratches and dullness. Additionally, hardwood floors need to be refinished every few years to restore their luster and protect against wear. While this maintenance requires an investment of time and resources, the result is a stunning and durable flooring option that can last for generations.

**Laminate Flooring**
Laminate flooring offers the aesthetic appeal of hardwood or stone without the hefty price tag. One of its biggest advantages is its low maintenance requirements. Regular sweeping and occasional damp mopping will keep laminate floors looking fresh and clean. Unlike hardwood, laminate doesn’t require refinishing; however, it’s crucial to avoid excessive moisture, as it can warp the material. This makes laminate an excellent option for those seeking a beautiful floor with minimal upkeep.

**Tile Flooring**
Tile flooring, whether ceramic or porcelain, is highly durable and resistant to moisture, making it a popular choice for kitchens and bathrooms. While tile is relatively easy to clean—requiring just regular sweeping and mopping—it does have grout lines that can accumulate dirt and mildew. To maintain tile floors, periodic grout cleaning is necessary, and sealing the grout can help prevent staining. While tile can be a bit more labor-intensive in terms of maintenance, its longevity and resistance to wear make it a worthwhile investment.

**Vinyl Flooring**
Vinyl flooring is celebrated for its versatility and ease of maintenance. It’s resistant to moisture, stains, and scratches, requiring little more than regular sweeping and occasional mopping to keep it looking its best. Unlike some other flooring types, vinyl doesn’t need refinishing or sealing, making it a hassle-free option for busy households. However, it’s important to avoid harsh chemicals that can damage the surface over time.

**Carpet**
Carpet offers warmth and comfort, but it comes with its own set of maintenance challenges. Regular vacuuming is essential to reduce dust and allergens, and professional deep cleaning is recommended every 12 to 18 months to maintain its appearance and hygiene. Carpets can be susceptible to stains, so prompt action is necessary to treat spills and accidents. While carpet can provide a cozy atmosphere, be prepared for a little more effort in keeping it clean and fresh.

Ultimately, the choice of flooring type should align with your lifestyle, aesthetic preferences, and willingness to engage in maintenance. By weighing the pros and cons of each option, you can select the flooring that best meets your needs while ensuring a beautiful and functional space for years to come.

13. Environmental Impact of Flooring Choices

When it comes to choosing the right flooring for your space, one of the most significant factors to consider is the environmental impact of your options. As sustainability becomes an increasingly important consideration for homeowners and builders alike, understanding how different flooring materials affect the planet is essential to making an informed decision.

**Sustainable Choices**
Many modern flooring options prioritize eco-friendliness. For instance, bamboo and cork are often hailed as sustainable choices due to their rapid growth rates and renewability. Bamboo, which can grow several feet in just a single day, is a grass rather than a tree, making it a highly renewable resource. Similarly, cork is harvested from the bark of cork oak trees, which can regenerate their bark, allowing for repeated harvests without causing harm to the tree.

Reclaimed wood flooring is another environmentally responsible option. By repurposing old wood, you’re not only minimizing waste but also preserving the history and character of the material. Additionally, many manufacturers are now producing flooring made from recycled materials, such as rubber and vinyl, which reduces landfill waste and promotes a circular economy.

**The Downsides**
However, not all flooring materials are created equal when it comes to environmental impact. Traditional hardwood flooring often involves deforestation, which can lead to habitat loss and increased carbon emissions. The production processes for certain materials, like laminate or vinyl, can also involve harmful chemicals and contribute to pollution.

Even seemingly green choices can have hidden environmental costs. For example, while bamboo is a rapidly renewable resource, its widespread popularity has led to unsustainable harvesting practices in some regions. Furthermore, the long-distance transportation of materials can contribute to a larger carbon footprint, negating some of the benefits of choosing a sustainable option.

**Making Informed Choices**
Ultimately, navigating the environmental impact of flooring choices requires a balanced approach. Research the sourcing and production practices of the materials you’re considering, and look for certifications that indicate sustainability, such as the Forest Stewardship Council (FSC) label or GREENGUARD certification. By prioritizing eco-friendly options while remaining mindful of potential downsides, you can select flooring that not only enhances your space but also aligns with your values for a healthier planet.

14. Making the Right Choice for Your Lifestyle

Choosing the right flooring for your home is not just about aesthetics; it’s about aligning your selection with your lifestyle and needs. The perfect flooring option should complement how you live, work, and play in your space. Here are some key considerations to help you make the right choice.

**Consider Your Daily Routine:** If you have a bustling household with kids and pets, durability should be at the forefront of your decision-making process. Options like luxury vinyl or laminate flooring are both resilient and easy to clean, standing up to spills and scratches with ease. On the other hand, if you lead a quieter lifestyle or live alone, you might prioritize comfort and style, making hardwood or carpet a more suitable choice.

**Evaluate Maintenance Needs:** Different flooring types come with varying levels of maintenance. For instance, natural stone and hardwood may require regular sealing and polishing to maintain their beauty, while tile and vinyl are generally more forgiving. If you have a busy schedule and prefer a low-maintenance solution, opting for materials that require less upkeep can save you time and hassle in the long run.

**Climate Considerations:** Your geographical location and climate can significantly impact your flooring choice as well. In areas with high humidity, such as coastal regions, materials like bamboo or treated engineered wood can be more stable and resistant to moisture damage. Conversely, in dry climates, you may want to avoid certain types of hardwood that are prone to warping.

**Your Budget:** Finally, budget plays a crucial role in your decision-making process. While it’s tempting to go for the most luxurious options, remember that there are high-quality flooring materials available at various price points. Consider the long-term value and durability of your investment. Sometimes, spending a bit more upfront on a durable option can save money on repairs and replacements later.

Ultimately, the right flooring choice for your lifestyle will harmonize with your daily life, enhance your home’s functionality, and reflect your personal taste. Take your time to weigh the pros and cons of each flooring type, and you’ll be on your way to creating a space that truly feels like home.

15. Conclusion: Finding the Perfect Flooring for Your Space

Choosing the right flooring for your space is no small feat. With an array of options available—from the natural warmth of hardwood to the sleek sophistication of tile, and the cozy embrace of carpet to the low-maintenance allure of vinyl—finding the perfect fit can feel overwhelming. However, by weighing the pros and cons of each type and considering the specific needs of your lifestyle and aesthetic preferences, you can make an informed decision that enhances both the functionality and beauty of your home.

As you assess your options, think about the environment in which the flooring will be used. For high-traffic areas, durable materials like laminate or tile may be better suited, while softer options like carpet could be ideal for cozy bedrooms. Don’t forget about maintenance and care; some flooring types require more effort to keep them looking their best, while others offer a hassle-free experience.

Budget considerations also play a crucial role. While the initial investment in hardwood or luxury vinyl may be higher, the long-term benefits—such as durability and resale value—might make them worth every penny. Conversely, if you’re looking for something more affordable, options like laminate or carpet can still provide style without breaking the bank.

Ultimately, the perfect flooring for your space should reflect your personal style, cater to your family’s needs, and fit your budget. Take the time to explore samples, envision how each option will harmonize with your existing decor, and consult with flooring experts if necessary. With thoughtful consideration, you’ll find a flooring solution that not only meets your practical requirements but also transforms your space into a welcoming sanctuary that you and your guests will love for years to come.

As we conclude our exploration of the various flooring types, we hope you feel empowered to make a well-informed decision that aligns with your lifestyle and aesthetic preferences. Each flooring option we discussed comes with its unique set of advantages and drawbacks, allowing you to weigh them against your specific needs and budget. Whether you lean toward the warmth of hardwood, the durability of laminate, or the elegance of tile, understanding the pros and cons is crucial for creating a space that reflects your style while standing the test of time. Remember, selecting the right flooring is not just about appearance—it’s about enhancing your home’s comfort and functionality. We encourage you to take this newfound knowledge to heart, explore your options, and choose the flooring that will lay the foundation for years of joy and memories in your home. Happy flooring!

How to build a simple backyard fire pit?

Imagine a serene evening in your backyard, the sun gently setting and the air filled with the comforting crackle of a fire, as friends and family gather around to share stories and laughter.

A backyard fire pit not only enhances your outdoor space but also creates a warm and inviting atmosphere perfect for making cherished memories. However, building your own fire pit may seem daunting at first, but with the right guidance and a little creativity, it can be a rewarding DIY project that transforms your yard into a cozy retreat. In this ultimate guide, we will walk you through a step-by-step approach to designing and constructing your own fire pit, covering everything from selecting the perfect location and choosing materials, to safety tips and maintenance. Get ready to ignite your outdoor living experience and enjoy countless evenings under the stars with your very own fire pit!

1. Introduction: Why Build a Backyard Fire Pit?

How to build a simple backyard fire pit?
Credit : whatcanu.com

Imagine a crisp evening under a starlit sky, the soft crackle of burning wood mingling with laughter and conversation. A backyard fire pit transforms an ordinary outdoor space into an inviting haven, perfect for creating cherished memories with family and friends. But why should you consider building one? The reasons are as varied as the designs you can choose from, each offering a unique blend of functionality and aesthetic appeal.

First and foremost, a backyard fire pit serves as a focal point for gatherings, encouraging people to come together and enjoy each other’s company. whether you’re roasting marshmallows for s’mores, sharing stories, or simply enjoying the warmth of the flames, a fire pit fosters an atmosphere of relaxation and camaraderie. It extends the usability of your outdoor space, allowing you to enjoy your yard well into the cooler months.

Moreover, fire pits are not just for socializing; they can enhance your outdoor decor, adding a touch of charm and sophistication to your landscape. With countless styles and materials available, from rustic stone to sleek modern designs, you can create a fire pit that perfectly complements your home’s aesthetics.

Additionally, a fire pit can serve practical purposes beyond relaxation and beauty. It can provide warmth on chilly evenings, light for nighttime activities, and even an outdoor cooking option for those who love to experiment with grilling or cooking over an open flame.

Finally, building a fire pit can be a rewarding DIY project. It allows you to engage with your outdoor space creatively, learning new skills while investing time and effort into something that will bring joy for years to come. In the following sections, we’ll explore how to embark on this exciting journey, from choosing the right location to selecting materials and design. So grab your tools, and let’s get started on creating a centerpiece that will light up your backyard and your life!

2. Choosing the Right Location for Your Fire Pit

Choosing the right location for your fire pit is a crucial step that can make or break your outdoor experience. It’s not just about aesthetics; safety and functionality play significant roles in your decision-making process. Start by envisioning how you want to use your fire pit—will it be a cozy gathering spot for family and friends, a place for quiet reflection, or a focal point for outdoor entertaining? This vision will guide you in determining the most suitable location.

Begin your search at least 10 to 20 feet away from any structures, including your home, fences, and overhanging branches. This distance is important to prevent any fire hazards. Consider a flat, stable surface that is easily accessible, as you don’t want guests struggling to navigate uneven terrain in the dark. Ideally, a spot sheltered from the wind will enhance the comfort of your gathering while preventing smoke from blowing directly into guests’ faces.

Also, take into account the sun’s path. If you plan to use your fire pit during the day, a location with some natural shade will be beneficial. Conversely, if you envision evenings spent around the flames, a spot that captures the sunset can create a stunning backdrop for your gatherings.

Lastly, think about the views. Positioning your fire pit to overlook a scenic area in your yard, like a garden, pond, or even a distant landscape, can elevate the ambiance and make those evenings around the fire even more magical. By thoughtfully selecting the location, you’ll create a welcoming environment that invites you and your guests to relax and enjoy the warmth and glow of your backyard fire pit.

3. Understanding Local Regulations and Safety Guidelines

How to build a simple backyard fire pit?
Credit : whatcanu.com

Before you dive into the exciting project of building your own backyard fire pit, it’s crucial to understand the local regulations and safety guidelines that govern outdoor fires in your area. Different municipalities have varying rules regarding fire pits, including size restrictions, materials, and safety distances from structures and property lines. Ignoring these regulations can lead to hefty fines or, worse, unsafe situations that could endanger you and your neighbors.

Start by checking with your local government or fire department for any specific permits you might need. Some areas require permits for any open flame, while others may have designated fire seasons that restrict outdoor burning altogether. Additionally, familiarize yourself with guidelines on the types of materials you can use for your fire pit. Some regions may prohibit the use of certain materials due to fire hazards, while others may mandate specific construction methods to ensure safety.

Safety guidelines are equally important to consider. It’s vital to maintain a safe distance between your fire pit and any flammable structures, such as fences, trees, or your home. Generally, a clearance of at least 10 to 15 feet is recommended to prevent any accidental fires. Moreover, consider wind direction and how it might affect the smoke and heat produced by your fire.

Finally, equip yourself with essential fire safety tools. A fire extinguisher, a bucket of water, or a garden hose should always be readily available when enjoying your fire pit. By understanding and adhering to local regulations and safety guidelines, you not only ensure a delightful experience for yourself and your guests but also contribute to the safety and well-being of your community. With this groundwork laid, you can confidently move forward in creating a cozy and safe space to gather around the warm glow of your new backyard fire pit.

4. Selecting the Fire Pit Design that Fits Your Style

Choosing the right fire pit design is not just about functionality; it’s about creating a space that reflects your personal style and enhances the overall aesthetic of your backyard. As you embark on this exciting journey, consider the various design options available to you, each with its unique charm and character.

First, think about the materials you want to use. Do you envision a rustic stone fire pit that harmonizes with a natural landscape, or are you drawn to a sleek, modern steel design that makes a bold statement? Stone fire pits offer a timeless appeal, seamlessly blending into gardens and wooded areas, while metal fire pits can provide a contemporary touch that complements modern architecture.

Next, consider the shape and size of your fire pit. Round fire pits are traditional and create a cozy atmosphere, perfect for gathering around with friends and family. Square or rectangular designs, on the other hand, can add a more structured look to your outdoor space and may offer additional seating options. Think about how you’ll use the space—will it be for intimate gatherings or larger parties? This will help you determine the right dimensions.

Don’t forget to reflect on the surrounding elements of your yard. A fire pit surrounded by comfortable seating, such as adirondack chairs or a built-in stone bench, invites relaxation and conversation. You might also want to incorporate a surrounding patio area or decorative gravel for a polished finish. Adding features like built-in shelving for wood storage, or even a small bar area nearby, can enhance the functionality of your fire pit and make it the ultimate gathering spot.

Lastly, think about safety and local regulations. Make sure your design adheres to any guidelines regarding fire pit placement and construction materials in your area. This not only ensures compliance but also gives you peace of mind as you enjoy those warm evenings by the fire.

By taking the time to select a fire pit design that truly fits your style, you’ll create a stunning focal point in your backyard that invites warmth, connection, and unforgettable memories for years to come.

5. Essential Tools and Materials You’ll Need

How to build a simple backyard fire pit?
Credit : whatcanu.com

When embarking on the exciting journey of building your own backyard fire pit, having the right tools and materials is crucial to ensure a smooth and successful project. Let’s explore the essentials you’ll need to gather before you break ground.

**Tools:**

1. **Shovel:** A sturdy shovel is indispensable for digging out the area where your fire pit will reside. Opt for a flat-bladed shovel for easy excavation of dirt and grass.

2. **Level:** Maintaining a level surface is key to a stable fire pit. A standard bubble level or a long level will help you ensure that your pit is perfectly balanced.

3. **Trowel:** For finer work, like smoothing out the edges of your fire pit, a trowel is a great tool to have on hand. It’s particularly useful if you’re working with stones or bricks.

4. **Rubber Mallet:** If you’re using pavers or stones, a rubber mallet will help you fit them together tightly without risking damage.

5. **Measuring Tape:** Accurate measurements are essential for a well-proportioned fire pit. A measuring tape will help you determine the right dimensions and spacing.

6. **Safety Gear:** Don’t forget your gloves, goggles, and a dust mask. Safety should always be your top priority when working with heavy materials and tools.

**Materials:**

1. **Fire Pit Ring:** You can choose a metal fire pit ring or create a stone or brick enclosure. Metal rings are durable and provide a sleek, modern look, while stone and brick can give a rustic, traditional feel.

2. **Bricks or Pavers:** If you’re building a stone fire pit, gather fire-rated bricks or pavers specifically designed for high temperatures. This will not only enhance safety but also add aesthetic appeal to your backyard.

3. **Gravel:** A layer of gravel at the bottom of your fire pit aids in drainage, preventing water from pooling and keeping your fire pit dry.

4. **Sand:** A layer of sand can also be used beneath your fire pit to provide stability and help with drainage.

5. **Firewood:** Of course, you’ll need a good supply of seasoned firewood to keep those flames roaring. Choose hardwoods like oak or maple for a longer burn and less smoke.

6. **Fire Starter:** Whether you prefer kindling, fire starters, or lighter fluid, make sure to have a reliable method for igniting your fire pit.

By gathering these essential tools and materials, you’ll be well on your way to creating a beautiful and functional fire pit that can serve as the perfect gathering spot for family and friends. With everything in hand, you’ll be ready to dive into the next steps of your backyard transformation!

6. Preparing the Ground: Clearing and Leveling the Site

Before you can enjoy the warmth and ambiance of your backyard fire pit, you’ll need to start with a solid foundation. Preparing the ground is a crucial step that lays the groundwork—quite literally—for the success of your fire pit project.

Begin by selecting the perfect location for your fire pit, ideally situated away from overhanging branches, structures, and any flammable materials. Once you’ve decided on the spot, it’s time to clear the area. Remove any grass, weeds, and debris, including rocks and sticks. This not only creates a clean slate but also prevents unwanted vegetation from creeping into your fire pit area as time goes on.

After clearing the site, the next task is leveling the ground. An uneven surface can lead to instability, which can be dangerous when you’re dealing with fire. Use a shovel to dig down any high spots and fill in any low areas with soil or gravel, ensuring the surface is as flat as possible. For added precision, you might consider using a level or a long board to check the evenness of the ground.

If your fire pit will feature a stone or brick surround, it’s important to create a base that can support the weight. You might want to pack down the earth or lay down a layer of sand or gravel for drainage and stability. Compacting the ground will provide a sturdy foundation that will help prevent shifting or sinking over time, ensuring that your fire pit remains both functional and aesthetically pleasing.

Taking the time to properly prepare the ground will pay off immensely when you finally gather around the fire with friends and family. A well-prepared site not only enhances safety but also contributes to the overall enjoyment of your backyard oasis, making your fire pit a welcoming and inviting space for years to come.

7. Building the Fire Pit Base: Materials and Techniques

How to build a simple backyard fire pit?
Credit : whatcanu.com

Creating a sturdy base for your fire pit is one of the most critical steps in ensuring its longevity and safety. The foundation not only supports the fire pit structure but also plays a significant role in preventing unwanted fires and preserving the surrounding landscape. Here’s a closer look at the materials you’ll need and the techniques to master this essential phase of your fire pit project.

### Materials:
1. **Gravel**: A layer of gravel provides excellent drainage, preventing water from pooling around the base of the fire pit. Aim for a depth of about 4-6 inches, ensuring that the gravel is evenly distributed.
2. **Sand**: After laying down the gravel, a layer of sand—approximately 1 inch thick—creates a smooth and level surface for the fire pit. Sand also helps with heat retention and reduces the risk of cracking in the fire pit materials.
3. **Fireproof Bricks or Stones**: Choose durable, heat-resistant materials like fire bricks, pavers, or natural stones that can withstand high temperatures. These will form the perimeter of your fire pit and should be arranged tightly to prevent any gaps.
4. **Steel or Cast Iron Ring**: For added safety and longevity, consider using a steel or cast iron fire ring. This will help maintain the shape of your pit and protect the surrounding materials from the intense heat.

### Techniques:
1. **Site Preparation**: Start by marking the area where your fire pit will sit. Dig out the designated space, ensuring it’s roughly 2-3 feet in diameter and deep enough to accommodate the gravel and sand layers.
2. **Layering**: Begin with the gravel, spreading it evenly and compacting it down to create a solid base. Next, add the sand layer, using a rake or board to ensure it’s level. This preparation will help prevent any shifting or settling over time.
3. **Arranging the Fire Pit**: Once your base is set, begin placing your chosen fireproof bricks or stones in a circular pattern. Use a level to ensure that the top of each brick is even, making adjustments as necessary. If you’re using a fire ring, set it in place at this stage.
4. **Finishing Touches**: After your fire pit walls are complete, backfill around the outside with dirt or gravel to secure the structure further. This additional layer will help with stabilization while enhancing the overall aesthetics of your backyard.

By taking the time to build a strong, well-prepared base, you’re not just constructing a fire pit; you’re creating a safe and inviting gathering space for family and friends to enjoy for years to come. Remember, a well-built fire pit base is the foundation of countless memorable evenings spent under the stars.

8. Constructing the Fire Pit Walls: Stone, Brick, or Metal?

When it comes to constructing the fire pit walls, one of the most crucial decisions you’ll make is selecting the right material. Each option—stone, brick, or metal—offers unique benefits and aesthetic appeal, allowing you to customize your fire pit to perfectly suit your backyard design.

**Stone:** Natural stone is a popular choice for fire pit walls, bringing an organic beauty that blends seamlessly with outdoor environments. Whether you opt for rugged fieldstone or sleek granite, the variations in color and texture can create a stunning visual effect. Stone is also incredibly durable, resisting the heat and elements over time. The installation process may require more effort, as you’ll need to fit the stones together securely, but the result is a rustic, timeless look that enhances your backyard’s charm.

**Brick:** If you’re looking for a classic, structured appearance, brick might be your best bet. Available in a myriad of colors and finishes, bricks can be arranged in various patterns, allowing for creative designs. They are easy to work with and can be stacked without the need for mortar, making construction straightforward for DIY enthusiasts. However, be sure to select fire-rated bricks specifically designed to withstand high heat, ensuring that your fire pit maintains its integrity over time.

**Metal:** For a modern, sleek aesthetic, consider using metal as your fire pit material. Steel or cast iron options not only provide a contemporary look but are also lightweight, making them easier to move if needed. Metal fire pits often come in pre-fabricated styles, simplifying installation. However, keep in mind that metal can heat up quickly and may require additional safety measures to prevent burns. It’s also essential to choose rust-resistant materials to ensure longevity, particularly if your fire pit will be exposed to the elements.

Ultimately, the choice between stone, brick, or metal will depend on your personal style, budget, and the overall theme of your backyard. Take the time to think about how each material will look and function in your space, and you’ll be well on your way to constructing a fire pit that becomes the heart of your outdoor gatherings.

9. Installing a Fire Pit Ring and Ventilation

Installing a fire pit ring and ensuring proper ventilation are crucial steps in creating a safe and enjoyable backyard fire pit experience. The fire pit ring acts as a barrier, containing the flames and protecting the surrounding area from heat and sparks. To start, choose a fire pit ring that suits your design aesthetic and is made from fire-resistant materials such as steel, stone, or brick. Measure the diameter of your fire pit to ensure a perfect fit—typically, a diameter of 36 to 44 inches works well for most backyard setups.

Once you’ve selected your fire pit ring, it’s time to prepare the base. Dig out the area where your fire pit will sit, making sure to remove any grass, rocks, or debris. The depth should be about 6 inches to accommodate a gravel base, which will aid in drainage and stability. Fill the hole with gravel, leveling it out to create a solid foundation for your fire pit ring.

With the base established, carefully position the fire pit ring in the center of the gravel area. Use a level to ensure it sits evenly, adjusting as needed. If you’re using bricks or stones, lay them out in a circular pattern, making sure to leave gaps for ventilation. Proper airflow is essential for maintaining a healthy fire, so consider including vents or gaps between the stones to allow oxygen to circulate.

While installing the fire pit ring, think about the height and design. A lower ring creates a more intimate atmosphere, while a taller one can help contain a larger fire. Once the ring is in place, backfill any gaps with additional gravel or sand to secure it further.

After the installation, take a moment to assess the ventilation. Ensure that there are enough openings to promote airflow without compromising the safety of the fire pit. This will help prevent smoke from billowing into your yard and allow for a more enjoyable experience for you and your guests.

With your fire pit ring securely installed and ventilation properly accounted for, you are one step closer to enjoying cozy evenings around your backyard fire pit. Remember to always prioritize safety by keeping a water source nearby and never leaving the fire unattended.

10. Choosing the Right Fuel: Wood, Gas, or Propane?

When it comes to selecting the right fuel for your backyard fire pit, understanding the pros and cons of wood, gas, and propane is essential to creating the perfect ambiance for your outdoor gatherings. Each fuel type offers a unique experience, and your choice will influence not only the warmth and light of your fire but also the ease of use and maintenance.

**Wood**: The classic choice for a fire pit, wood delivers a charming, rustic atmosphere that many homeowners crave. The crackling of burning logs and the dance of the flames create a mesmerizing backdrop for any evening. However, wood fires require more effort. You’ll need to source, store, and handle the wood, and the smoke produced can be a nuisance, especially for neighbors. If you go this route, consider using seasoned hardwoods like oak or maple, which burn hotter and cleaner than softwoods.

**Gas**: If you’re seeking convenience and consistency, a gas fire pit may be the best option. Propane or natural gas provides an instant flame with just the turn of a knob, allowing you to enjoy a fire at a moment’s notice. Gas fire pits are generally cleaner, producing little to no smoke, and they require less cleanup compared to wood-burning options. However, they may lack the rustic charm and crackle of a traditional fire. Additionally, you’ll need to ensure proper installation and safety measures, particularly with natural gas, which requires a direct line from your home.

**Propane**: A subset of gas fire pits, propane offers mobility and flexibility. Portable propane fire pits can be a great option for those who want to keep their outdoor space versatile. They can easily be moved for picnics or camping trips and don’t require a permanent installation. However, keep in mind that you’ll need to regularly refill your propane tank, which can lead to added costs and inconvenience over time.

Ultimately, the right fuel for your fire pit depends on your lifestyle, preferences, and the kind of experience you want to create in your backyard. Whether you choose the traditional allure of wood, the convenience of gas, or the flexibility of propane, each option will help set the stage for cozy evenings spent around the fire with family and friends.

11. Adding Safety Features: Fire Pit Screens and Surrounds

When it comes to enjoying your backyard fire pit, safety should always be a top priority. While the enchanting glow of flickering flames can create a cozy atmosphere, it’s essential to implement certain safety features to ensure a worry-free experience for you and your guests. Two effective additions to your fire pit setup are fire pit screens and surrounds, which not only enhance safety but also add an aesthetic touch to your outdoor space.

**Fire Pit Screens**
A fire pit screen is a mesh cover that fits over your fire pit, designed to contain sparks and embers that can unexpectedly pop out during a roaring fire. These screens are typically made from durable materials like steel or wrought iron, and they come in various styles and sizes to match your fire pit and overall backyard decor. When the flames dance within the confines of a sturdy screen, you can enjoy the warmth and ambiance without the concern of stray sparks causing harm to nearby guests or flammable materials. Many screens also feature a hinged design, allowing for easy access when adding logs or adjusting the fire, making them both a practical and stylish addition to your setup.

**Surrounds**
In addition to screens, a well-defined fire pit surround is another effective safety feature. Fire pit surrounds can be made from a variety of materials, including stone, brick, or heat-resistant paving stones, and they serve a dual purpose: enhancing safety and defining the area of your fire pit. By creating a barrier around the fire pit, you reduce the risk of accidental contact with the flames while also providing a clear boundary that helps keep children and pets at a safe distance. Additionally, a beautifully crafted surround can elevate the visual appeal of your fire pit, turning it into a focal point of your backyard. Consider incorporating seating around the surround to create an inviting gathering space where friends and family can sit comfortably while enjoying the warmth and glow of the fire.

By integrating fire pit screens and surrounds into your backyard setup, you can create a safer, more enjoyable environment for all. These features not only protect against potential hazards but also enhance the overall ambiance, allowing you to make the most of your outdoor evenings around the fire. Remember, a little preparation goes a long way when it comes to safety and enjoyment, so take the time to invest in these essential features as you create your ideal backyard retreat.

12. Designing the Surrounding Area: Seating and Landscaping Ideas

Creating a cozy and inviting atmosphere around your backyard fire pit is essential for maximizing your outdoor enjoyment. The right design can transform your fire pit into the focal point of your garden, making it a perfect spot for gatherings, relaxation, or simply enjoying a quiet evening under the stars. Here are some seating and landscaping ideas to enhance the area around your fire pit.

**Seating Options:** Start by considering the seating arrangements that will best suit your space and lifestyle. Comfortable seating is key to encouraging guests to linger around the fire. You can opt for built-in benches made from stone or wood, which can provide a rustic charm while seamlessly integrating with the natural surroundings. Alternatively, consider using a mix of lounge chairs, hammocks, or even oversized poufs for a more casual vibe. For added comfort, incorporate weather-resistant cushions in colors that complement your landscape design, ensuring your seating is as inviting as it is functional.

**Landscaping Ideas:** Surrounding your fire pit with beautiful landscaping can elevate the overall aesthetic of your backyard. Incorporate native plants and flowers that thrive in your climate, creating a vibrant tapestry of colors and textures. Low-maintenance options like ornamental grasses or perennials can provide year-round interest without the hassle of constant upkeep. If space allows, consider adding a few outdoor lanterns or string lights overhead to create a magical ambiance during evening gatherings. Additionally, using natural stone or gravel paths leading to your fire pit can help define the area while providing a rustic, organic feel.

**Creating Intimacy:** To foster a sense of intimacy around your fire pit, think about how to position your seating. Arranging chairs in a circular or semi-circular formation encourages conversation and connection among guests. You might also incorporate a small table or a firewood holder in the center, serving as a functional piece that brings the group together. If you have room, consider adding a small outdoor bar cart or a side table for snacks and drinks, making it easy for guests to help themselves.

By thoughtfully designing the surrounding area of your fire pit with comfortable seating and lush landscaping, you can create a welcoming outdoor retreat that invites friends and family to gather and enjoy warm evenings together. Whether it’s a summer soirée or a chilly autumn night, your backyard fire pit will be the perfect spot for unforgettable memories.

13. Maintenance Tips for Your Fire Pit

Maintaining your fire pit is crucial for ensuring its longevity and functionality, as well as for maximizing your enjoyment during those cozy outdoor evenings. While the thrill of gathering around the flames is often the highlight, a little TLC goes a long way in preserving the beauty and safety of your fire pit.

First and foremost, regular cleaning is essential. After each use, allow the fire pit to cool completely before removing any ash or debris. Use a sturdy metal scoop or a vacuum designed for ash to make this task easier. A clean fire pit not only looks better but also promotes better airflow, which leads to a more efficient burn in future fires.

Next, inspect your fire pit regularly for any signs of wear or damage. Look for cracks, rust, or loose components, especially if your fire pit is made of metal or stone. Addressing these issues promptly can prevent more significant repairs down the line. If you notice rust forming, consider applying a high-heat paint or sealant specifically designed for fire pit materials to restore its protective layer.

If your fire pit features a stone or brick structure, consider resealing it annually to protect against weather elements. This not only enhances its appearance but also protects against water damage and stains. Similarly, if your fire pit has a gas line, ensure that all connections are tight and check for leaks periodically, using a solution of soap and water to look for bubbles that indicate escaping gas.

Lastly, when the fire pit is not in use, consider covering it with a durable, weather-resistant cover. This will shield it from rain, snow, and debris, keeping it clean and ready for your next gathering. Proper maintenance not only enhances safety but also ensures that your backyard fire pit remains a cherished centerpiece for years to come, ready to create warmth and memories for you and your loved ones.

14. Enjoying Your Fire Pit: Tips for Safe Use and Fun Gatherings

Once you’ve built your backyard fire pit, it’s time to enjoy the warmth and ambiance it brings to your outdoor space. However, safety and enjoyment should go hand in hand. Here are some essential tips to ensure your fire pit gatherings are both fun and safe.

**Safety First: Setting the Stage**
Before inviting friends and family over for a cozy evening by the fire, take a moment to assess your surroundings. Clear the area of any flammable materials, such as dry leaves, overhanging branches, or garden furniture that could catch fire. Ensure your fire pit is a safe distance from your home, fences, and any structures. Always keep a bucket of water, sand, or a fire extinguisher nearby—just in case the flames get a little too lively.

**Choosing the Right Fuel**
Select the proper fuel for your fire pit to maintain control over the flames. Natural wood is a popular choice, providing a traditional campfire experience, but ensure it’s seasoned and dry to reduce excessive smoke. Alternatively, you can opt for propane or natural gas, which offer a cleaner burn and more controlled flames. Whichever fuel you choose, familiarize yourself with its burning characteristics to enjoy a safe and comfortable fire.

**Creating a Cozy Atmosphere**
To elevate your fire pit experience, set the mood with comfortable seating and soft lighting. Arrange chairs or benches around the fire pit, ensuring everyone has a clear view of the flames. Consider incorporating outdoor pillows and blankets for added comfort, especially on cooler evenings. String lights or lanterns can create a magical ambiance, illuminating the area without overpowering the fire’s glow.

**S’mores and Snacks: Fire Pit Favorites**
No fire pit gathering is complete without delicious snacks! Prepare classic s’mores with graham crackers, marshmallows, and chocolate for a sweet treat. You can also explore other fire pit-friendly foods like roasted corn, hot dogs, or even pizza cooked on a grill grate. Encourage guests to bring their favorite snacks, turning your gathering into a fun culinary adventure.

**Engaging Activities**
While the crackling fire provides a natural centerpiece, keep the energy flowing with engaging activities. Share stories, play acoustic music, or organize fun games like charades or card games. Encourage guests to bring their musical instruments for a lively sing-along under the stars. The key is to foster a sense of community and connection around the fire, making memories that will last long after the flames have died down.

By following these tips for safe use and enjoyable gatherings, your backyard fire pit can become the heart of your outdoor space—a place where laughter, warmth, and friendship come together. So gather your loved ones, ignite the fire, and create unforgettable moments around your newly built fire pit!

15. Conclusion: Your Backyard Oasis Awaits!

As you stand back and admire your newly constructed backyard fire pit, it’s hard not to feel a sense of accomplishment and excitement. You’ve transformed a simple patch of grass into an inviting oasis, a gathering place for friends and family to share stories, laughter, and warmth. The flickering flames dance in the night, casting a soft glow that beckons everyone to come closer, while the crackling of the fire creates a soothing soundtrack that eases the mind and spirit.

Remember, the journey doesn’t end here. Your fire pit is just the beginning of countless evenings filled with cozy conversations, marshmallow roasting, and starlit nights. As you plan your gatherings, consider adding comfortable seating, ambient lighting, and perhaps even a few cozy blankets to enhance the experience. Personal touches, like outdoor cushions or decorative lanterns, can further elevate your backyard space, making it uniquely yours.

Moreover, don’t forget to prioritize safety! Keep a fire extinguisher nearby, ensure proper ventilation, and be mindful of local regulations regarding outdoor fires. Taking these precautions will allow you to fully enjoy your fire pit without worry.

So go ahead, gather your loved ones around the flames, and let the stories unfold. With your fire pit as the centerpiece, your backyard has become a sanctuary, a place to unwind and connect. Your backyard oasis awaits—embrace it, enjoy it, and let it inspire memories that will last a lifetime. Happy fireside gatherings!

As we wrap up our ultimate guide to building your own backyard fire pit, we hope you feel inspired and equipped to create a cozy gathering spot right in your outdoor space. By following our step-by-step approach, from planning and design to construction and safety considerations, you can transform your backyard into a welcoming retreat where friends and family can come together to share stories and enjoy the warmth of a crackling fire. Remember, the journey doesn’t end once the fire pit is built; it’s just the beginning of countless memorable evenings under the stars. So grab your tools, gather your loved ones, and embark on this exciting project — your perfect backyard oasis awaits!

What are the best plants for a low-maintenance garden?

Creating a vibrant garden can be one of life’s most rewarding experiences, but for many, the time and effort required to maintain it can feel overwhelming.

Enter low-maintenance plants—the perfect solution for busy individuals who yearn to enjoy the beauty of nature without the constant labor. Whether you’re a seasoned gardener looking to simplify your routine or a novice hoping to cultivate a lush outdoor space with minimal fuss, this ultimate guide will introduce you to a selection of resilient plants that thrive with little care. From drought-tolerant succulents to hardy perennials that bloom year after year, we’ll explore the most forgiving flora that suits any climate and garden style. So, roll up your sleeves and get ready to transform your outdoor oasis into a low-maintenance paradise that allows you to savor your weekends instead of spending them in the garden!

1. Introduction to Low-Maintenance Gardening

What are the best plants for a low-maintenance garden?
Credit : whatcanu.com

Gardening can be an incredibly rewarding hobby, providing a sanctuary of tranquility and beauty right in your own backyard. However, the often time-consuming tasks of planting, watering, pruning, and weeding can become overwhelming, especially for those with busy schedules or limited gardening experience. This is where low-maintenance gardening comes into play—a practical solution that allows you to enjoy the benefits of a lush garden without the stress and extensive labor typically associated with traditional gardening.

Low-maintenance gardening focuses on selecting plants that thrive with minimal intervention, making it an ideal choice for novice gardeners or those looking to simplify their gardening routine. These plants are generally hardy, drought-resistant, and less susceptible to pests and diseases, allowing them to flourish with minimal care. By choosing the right varieties, you can create a vibrant, sustainable garden that requires less time and effort, enabling you to spend more time enjoying the fruits of your labor rather than toiling in the dirt.

In this guide, we’ll explore the best low-maintenance plants for your garden, providing you with insights on how to create a beautiful, hassle-free outdoor space. Whether you’re aiming for a serene retreat, a colorful flower bed, or a functional vegetable patch, low-maintenance gardening can help you achieve your vision while keeping your workload light. Let’s dig into the world of effortless gardening and discover the perfect plants that will thrive with ease!

2. Benefits of Choosing Low-Maintenance Plants

When it comes to gardening, the allure of vibrant blooms and lush greenery can sometimes be overshadowed by the demands of upkeep. This is where low-maintenance plants step in, offering a plethora of benefits that can transform your gardening experience into one of joy rather than toil.

First and foremost, low-maintenance plants are a boon for busy individuals or those new to gardening. They require less frequent watering, pruning, and fertilization, freeing up your time to enjoy your outdoor space rather than labor over it. Imagine having a garden that flourishes with minimal effort—this is the reality that low-maintenance options can provide. Plants like succulents, ornamental grasses, and native perennials thrive in a variety of conditions, adapting seamlessly to their environment while demanding very little from you.

Moreover, these plants are often more resilient to pests and diseases, meaning less time spent battling unwanted invaders. This resilience not only leads to a healthier garden but also reduces the need for chemical treatments, making your garden an eco-friendlier space. As a result, you can cultivate a thriving ecosystem that attracts beneficial insects and pollinators, enhancing the overall biodiversity of your garden.

Low-maintenance plants also contribute to cost savings. With their hardy nature, you’ll find yourself purchasing fewer replacement plants and spending less on gardening supplies. Additionally, their drought-resistant qualities mean lower water bills, particularly in regions where water conservation is a priority.

Finally, the aesthetic appeal of low-maintenance plants cannot be overlooked. Many of these varieties boast stunning foliage and striking flowers that can provide year-round interest, ensuring that your garden remains beautiful without the constant effort. By choosing low-maintenance plants, you can create a stunning and serene outdoor oasis that complements your lifestyle, allowing you to relax and enjoy the fruits of your labor—without the labor.

3. Understanding Your Garden’s Conditions

What are the best plants for a low-maintenance garden?
Credit : whatcanu.com

Understanding your garden’s conditions is the cornerstone of cultivating a thriving low-maintenance garden. Before diving into the selection of plants, take a moment to assess the unique environment of your outdoor space.

Begin by observing the sunlight throughout the day. Is your garden drenched in bright, direct sunlight for most of the day, or is it shaded by nearby trees and structures? Plants vary greatly in their light requirements; for instance, succulents and many herbs thrive in full sun, while ferns and certain shade-loving perennials flourish in cooler, dimly lit spots.

Next, consider the soil type and drainage. Is your soil sandy and quick to drain, or is it heavy clay that retains moisture? Conduct a simple soil test by taking a handful of soil and squeezing it. If it crumbles easily, you likely have sandy soil; if it holds its shape and feels sticky, you might be dealing with clay. Some low-maintenance plants, such as lavender and sedums, prefer well-draining soil, while others, like astilbes and hostas, appreciate the moisture retention of clay.

Also, take note of your climate zone. Understanding your local climate, including average rainfall, temperature fluctuations, and seasonal changes, will help you choose plants that can thrive with minimal intervention. Native plants are often the best candidates for low-maintenance gardens, as they are adapted to your region’s specific conditions and require less water and care once established.

Lastly, remember to consider your garden’s exposure to wind and potential pests. Windy areas may benefit from hardy, wind-resistant plants, while gardens prone to insects might require the selection of pest-repellent varieties. By taking these factors into account, you can create a harmonious garden that not only enhances your outdoor space but also requires minimal effort to maintain. Understanding your garden’s conditions is your blueprint for selecting the right low-maintenance plants that will flourish effortlessly year after year.

4. Top Low-Maintenance Perennial Flowers

When it comes to creating a vibrant garden that requires minimal upkeep, perennial flowers are a gardener’s best friend. These hardy beauties return year after year, offering a burst of color without the need for constant attention. Here are some top low-maintenance perennial flowers that can transform your garden into a stunning oasis with little effort.

**1. Daylilies (Hemerocallis)**
Daylilies are a favorite among gardeners for their resilience and adaptability. These cheerful blooms come in a myriad of colors and are incredibly easy to grow, thriving in various soil types and light conditions. Once established, they require little more than occasional watering and pruning, making them perfect for those who want a lush garden without the hassle.

**2. Sedum (Sedum spp.)**
Sedums, or stonecrops, are succulent perennials that add unique texture and interest to your garden. With their fleshy leaves and star-shaped flowers, these plants are drought-tolerant and thrive in poor soil—ideal for rock gardens or borders. They require minimal watering and can withstand hot, sunny conditions, making them a low-maintenance choice for busy gardeners.

**3. Black-eyed Susans (Rudbeckia hirta)**
These iconic yellow flowers are not only stunning but also incredibly resilient. Black-eyed Susans bloom from mid-summer to fall, attracting pollinators and adding a splash of color to any landscape. They thrive in full sun and are drought-resistant once established, requiring very little intervention aside from occasional deadheading to encourage more blooms.

**4. Lavender (Lavandula)**
Known for its soothing scent and beautiful purple blooms, lavender is a perennial herb that thrives in sunny, well-drained soil. Once established, it is incredibly drought-tolerant and requires minimal pruning. Lavender is perfect for adding a touch of elegance to your garden while also attracting bees and butterflies, enhancing the overall ecosystem of your outdoor space.

**5. Coneflower (Echinacea)**
With their striking petals and central cones, coneflowers are a staple in low-maintenance gardens. They are hardy, drought-tolerant, and thrive in poor soil conditions. These flowers bloom from summer to fall, providing long-lasting beauty and attracting a variety of pollinators. The only care they require is occasional deadheading and division every few years to keep them healthy and vigorous.

By incorporating these low-maintenance perennial flowers into your garden, you can enjoy a colorful and vibrant landscape with minimal effort. These resilient plants not only beautify your outdoor space but also provide essential support for local wildlife, all while allowing you to relax and enjoy your garden without the stress of constant upkeep.

5. Best Low-Maintenance Shrubs for Your Garden

What are the best plants for a low-maintenance garden?
Credit : whatcanu.com

When it comes to creating a beautiful garden without the constant upkeep, choosing the right shrubs is essential. Low-maintenance shrubs not only add structure and greenery to your outdoor space but also provide a perfect backdrop for flowering plants and ornamental grasses. Here are some of the best low-maintenance shrubs that will thrive in your garden with minimal effort.

**1. Boxwood (Buxus spp.)**
Boxwoods are a favorite among gardeners due to their versatility and classic appeal. These evergreen shrubs can be easily shaped into hedges or topiaries, making them perfect for formal gardens. They tolerate a range of soil conditions and are drought-resistant once established. With their rich green foliage, boxwoods provide year-round interest without demanding much attention.

**2. Spirea (Spiraea spp.)**
With an array of species to choose from, spireas are known for their stunning spring blooms and vibrant fall foliage. These deciduous shrubs are incredibly resilient, thriving in various soil types and weather conditions. Most spirea varieties require little pruning and are resistant to pests and diseases, making them an ideal choice for busy gardeners looking to add a splash of color.

**3. Barberry (Berberis spp.)**
Barberries are hardy shrubs that offer both beauty and practicality. Their thorny branches can act as natural barriers, deterring unwanted visitors while providing a striking display of colorful foliage—ranging from deep reds to bright yellows. Barberries are drought-tolerant and require minimal pruning, making them a favorite for low-maintenance landscapes.

**4. Juniper (Juniperus spp.)**
Junipers are an excellent choice for gardeners seeking a low-maintenance evergreen shrub. With their wide variety of shapes, sizes, and colors, these hardy plants can fit into almost any garden design. They thrive in well-drained soil and are remarkably drought-resistant, ensuring they remain steadfast in your garden with little more than a yearly trim.

**5. Hydrangea (Hydrangea spp.)**
While some hydrangeas may need a bit of pruning, many varieties, like the panicle and smooth hydrangeas, are low-maintenance and offer stunning blooms throughout the summer. They can flourish in partial shade and adapt well to different soil types. With their large, showy flowers, hydrangeas provide a breathtaking focal point without the need for constant care.

Incorporating these low-maintenance shrubs into your garden will not only enhance its beauty but also grant you more time to relax and enjoy your outdoor oasis. With the right selection, you can create a stunning landscape that requires minimal upkeep, leaving you with more time to appreciate the simple joys of gardening.

6. Drought-Resistant Plants for Low Water Needs

When it comes to creating a beautiful garden that thrives even in the hottest months, drought-resistant plants are your best allies. These resilient varieties are not only low-maintenance but also remarkably forgiving, allowing you to enjoy a vibrant outdoor space without the constant worry of watering.

Drought-resistant plants have adapted over time to survive in arid conditions, developing deep root systems that access moisture buried beneath the surface. This means they can go longer stretches without water, making them ideal for those who may not have the time or resources for regular irrigation.

Consider incorporating succulents like agave and sedum into your landscape. These fleshy plants store water in their leaves, making them incredibly hardy and visually striking with their unique shapes and colors. Ornamental grasses, such as blue fescue and feather reed grass, also excel in dry conditions while adding texture and movement to your garden.

For a splash of color, look to drought-tolerant flowering plants like echinacea (coneflower) and rudbeckia (black-eyed Susan). These perennials not only bring life to your garden but also attract pollinators, enhancing your garden’s ecosystem.

When choosing your drought-resistant plants, it’s essential to consider your local climate and soil conditions. Native plants, such as lavender or salvia, are often the best choices, as they are naturally adapted to thrive in your environment. By selecting the right plants and grouping them according to their water needs, you can create a stunning, low-water garden that requires minimal upkeep while still providing a lush, inviting space to enjoy.

Incorporating drought-resistant plants into your garden not only conserves water but also promotes sustainability and resilience in your landscape. With these low-water beauties, you can cultivate a thriving garden that stands the test of time, regardless of the weather.

7. Ground Covers That Require Minimal Care

What are the best plants for a low-maintenance garden?
Credit : whatcanu.com

When it comes to creating a beautiful garden that doesn’t demand constant attention, ground covers are your best friend. These hardy plants serve as a living carpet, effortlessly filling in bare patches and suppressing weeds, all while adding texture and color to your outdoor space. Here are a few standout options that require minimal care, allowing you to enjoy a vibrant landscape without the hassle.

**Creeping Thyme** is a fragrant perennial that thrives in sunny spots. Its tiny, purple flowers attract pollinators, making it not only a low-maintenance choice but also a boon for local wildlife. Once established, this resilient plant can tolerate dry conditions, needing little more than the occasional trim to stay tidy.

**Ajuga**, or bugleweed, is another excellent ground cover that flourishes in partial shade. With its striking foliage that ranges from deep green to rich burgundy, Ajuga provides a stunning backdrop for any garden. It also sports charming spikes of blue flowers in spring, adding a pop of color without the need for extensive care. Just be mindful of its spread; a little periodic pruning will keep it in check.

For a more exotic look, consider **Creeping Jenny**. This vibrant ground cover showcases brilliant golden leaves that turn a fiery red in the fall. Thriving in both sun and shade, Creeping Jenny is incredibly forgiving and requires little watering once established. Its trailing habit makes it perfect for cascading over rocks or edging pathways.

Finally, don’t overlook **Sedum** varieties, especially those that are low-growing and mat-forming. These succulent plants are drought-tolerant and come in a range of colors and textures. Their fleshy leaves retain moisture, allowing them to thrive in poor soils with minimal upkeep. Plus, their star-shaped flowers attract beneficial insects while adding visual interest throughout the growing season.

Incorporating these low-maintenance ground covers into your garden will not only enhance its beauty but also free up your time, allowing you to enjoy the outdoors without the constant worry of upkeep. With the right selection, your garden can be a lush, inviting space that requires little more than an occasional glance and a smile.

8. Low-Maintenance Indoor Plants for Home Gardens

Creating a green oasis within your home doesn’t have to involve hours of upkeep. Low-maintenance indoor plants are perfect for anyone looking to add a touch of nature without the hassle of extensive care routines. These resilient beauties not only enhance your living space but also improve air quality and bring a sense of serenity to your surroundings.

One of the star performers of low-maintenance indoor gardening is the **Snake Plant (Sansevieria)**. With its striking upright leaves that come in various shades of green and yellow, the Snake Plant thrives on neglect. It tolerates low light and can go weeks without water, making it an ideal choice for busy individuals or those who might forget to check on their plants regularly.

Another fantastic option is the **ZZ Plant (Zamioculcas zamiifolia)**. Known for its shiny, waxy leaves that reflect light, this plant is virtually indestructible. It can flourish in low-light conditions and requires minimal watering, making it perfect for dimly lit corners of your home. The ZZ Plant serves as both a decorative piece and a conversation starter, thanks to its unique appearance.

For those who appreciate a bit of color, consider the **Pothos (Epipremnum aureum)**. This trailing vine can be placed on a shelf or hung in a basket, with its vibrant green and yellow variegation adding a lively touch to any room. Pothos is exceptionally forgiving; it can adapt to various lighting conditions and will bounce back quickly even after a missed watering session.

Finally, the **Spider Plant (Chlorophytum comosum)** is a classic choice for low-maintenance indoor gardening. Known for its arching leaves and “baby” plant offshoots, the Spider Plant is not only easy to care for but also fun to propagate. It thrives in indirect sunlight and can tolerate a wide range of temperatures, making it suitable for almost any indoor environment.

By incorporating these low-maintenance indoor plants into your home garden, you can enjoy the benefits of greenery without the stress of constant upkeep. Each plant offers unique qualities that can elevate your indoor space, making it a haven of tranquility and beauty. Whether you’re a seasoned plant parent or a novice gardener, these resilient companions can thrive alongside you, adding life and vibrancy to your everyday surroundings.

9. How to Create a Low-Maintenance Landscape Design

Creating a low-maintenance landscape design is an art that balances beauty with practicality, allowing you to enjoy your garden without the constant upkeep. The first step in this process is to assess your space and understand the climate, soil type, and sunlight exposure in your garden. This knowledge will guide you in selecting plants that thrive in your specific conditions while requiring minimal intervention.

Start by incorporating native plants, as they are naturally adapted to your local environment and typically demand less water and care once established. These hardy plants often attract local wildlife and promote biodiversity, adding vibrancy to your landscape. Consider drought-resistant species such as lavender, sedum, or ornamental grasses that not only add texture but also bloom with minimal irrigation.

Next, think about the layout of your garden. Group plants with similar watering and light needs together to simplify your care routine. Use mulch generously around your plants to suppress weeds, retain moisture, and reduce the need for frequent watering. A well-designed hardscape, including pathways, patios, and retaining walls, can also minimize the amount of lawn space that requires mowing and maintenance.

Incorporating evergreen shrubs and perennials can provide structure and color year-round, ensuring that your landscape remains visually appealing in every season. Additionally, consider adding focal points such as ornamental rocks, garden sculptures, or low-maintenance water features that require little upkeep while enhancing the aesthetic appeal of your garden.

Finally, don’t forget the power of planning. Creating a garden layout that considers the growth habits and spacing of your chosen plants will help prevent overcrowding and the need for constant pruning. By thoughtfully designing your landscape with low-maintenance principles in mind, you’ll cultivate a beautiful garden oasis that allows you to relax and enjoy nature without the stress of relentless upkeep.

10. Tips for Planting and Caring for Low-Maintenance Plants

When it comes to planting and caring for low-maintenance plants, simplicity is key. These resilient beauties are perfect for busy gardeners or those who may not have a green thumb. Here are some essential tips to ensure your low-maintenance garden thrives with minimal effort.

**1. Choose the Right Location:** Before you plant, consider the sunlight and moisture levels in your garden. Many low-maintenance plants thrive in specific conditions, so select a spot that matches their needs. For example, succulents love bright, sunny areas, while ferns prefer shaded corners with moist soil.

**2. Prepare the Soil:** Good soil is the foundation of any successful garden. For low-maintenance plants, focus on improving the soil with organic matter such as compost. This not only provides nutrients but also enhances drainage, which is crucial for preventing root rot in plants that can’t tolerate soggy conditions.

**3. Water Wisely:** One of the most common mistakes gardeners make is overwatering. Low-maintenance plants often require less frequent watering than traditional garden plants. Invest in a moisture meter to help you track the soil’s moisture levels and only water when necessary. In many cases, a deep watering every couple of weeks is sufficient, depending on the plant and weather conditions.

**4. Mulch for Moisture and Weed Control:** Applying a layer of mulch around your plants can conserve moisture, suppress weeds, and regulate soil temperature. Organic mulches, such as wood chips or straw, break down over time, adding nutrients back into the soil while providing a tidy appearance.

**5. Minimal Pruning:** Unlike high-maintenance plants that require frequent pruning and deadheading, many low-maintenance varieties are self-cleaning and only need an occasional trim to remove dead leaves or spent blooms. Learn the specific needs of your plants, but in general, a simple tidy-up once or twice a year will suffice.

**6. Embrace Companion Planting:** Some low-maintenance plants can benefit from growing alongside others. For instance, planting drought-resistant herbs like lavender with succulents can create a stunning display while minimizing watering needs. Additionally, certain plants can deter pests naturally, reducing the need for chemical interventions.

**7. Monitor for Pests and Diseases:** While low-maintenance plants are often more resilient, it’s still wise to keep an eye out for any signs of trouble. Regularly inspect your plants for pests or disease and act quickly if you notice any issues. Many low-maintenance plants have natural resistances, but catching problems early can save you time and effort.

By following these straightforward tips, you can create a beautiful, vibrant garden filled with low-maintenance plants that require minimal effort yet reward you with stunning blooms and lush foliage year after year. Embrace the beauty of simplicity and let your garden thrive with these easy-care selections!

11. Common Mistakes to Avoid with Low-Maintenance Gardening

When venturing into the world of low-maintenance gardening, it’s easy to fall prey to a few common pitfalls that can undermine your efforts and turn your garden dreams into a maintenance nightmare. Being aware of these mistakes can save you time, effort, and frustration, ensuring that your garden thrives with minimal fuss.

**1. Underestimating Plant Needs:** Just because a plant is labeled as low-maintenance doesn’t mean it’s entirely carefree. Many gardeners mistakenly assume that such plants require no attention at all. It’s essential to familiarize yourself with their specific light, water, and soil requirements. For instance, while succulents thrive in bright light, they can quickly rot if overwatered. Research is your best friend here—knowing the unique needs of each plant will help you avoid the temptation to neglect them entirely.

**2. Ignoring Soil Quality:** Even low-maintenance plants can struggle in poor soil. Many beginners overlook the importance of starting with a healthy growing medium, believing that low-maintenance means low-effort in all aspects. Investing time in enriching your soil with organic matter or mulch can drastically enhance drainage and nutrient availability, leading to a more successful garden.

**3. Overcrowding:** Planting too many low-maintenance varieties too closely together is a common mistake. While it may seem like a great way to maximize space and create an instant garden, overcrowding can lead to competition for resources, increased pests, and diseases. Always refer to the spacing recommendations for each plant and allow them room to grow and breathe.

**4. Neglecting Seasonal Changes:** Low-maintenance doesn’t mean no maintenance at all. Many gardeners forget that even the hardiest plants require some seasonal care. This includes things like pruning spent blooms, removing dead leaves, or preparing your garden for winter. Being aware of seasonal tasks can help keep your garden looking its best throughout the year.

**5. Disregarding Local Climate:** One of the biggest mistakes is choosing plants without considering your local climate and hardiness zone. A plant deemed low-maintenance in one region might struggle in another due to temperature variances, humidity levels, or rainfall patterns. Always select plants that are well-suited to your specific environment to ensure they thrive with minimal intervention.

By avoiding these common mistakes, you can cultivate a beautiful and serene garden space that requires less time and effort while still providing joy and tranquility in your outdoor oasis. Remember, the key to low-maintenance gardening lies not in neglect but in thoughtful planning and occasional care. Happy gardening!

12. Seasonal Considerations for Low-Maintenance Plants

When it comes to selecting low-maintenance plants for your garden, seasonal considerations are crucial in ensuring that your greenery thrives with minimal effort. Understanding how different plants respond to seasonal changes can help you choose varieties that not only survive but flourish throughout the year.

In spring, many low-maintenance perennials, such as sedums and daylilies, awaken from their winter slumber, bringing vibrant colors and life to your garden. These hardy plants often require little more than a refreshing drink of water and occasional weeding to stay healthy. As the temperatures begin to rise in summer, consider incorporating drought-tolerant species like lavender and succulents. These plants thrive in the heat and can withstand dry spells, making them perfect for busy gardeners looking to minimize watering tasks.

As autumn approaches, your garden can still showcase fantastic color with low-maintenance options such as ornamental grasses and asters. These plants not only provide stunning visuals as their leaves change but also require minimal care during the cooler months. Moreover, many of them attract beneficial wildlife, such as birds and pollinators, ensuring your garden remains a lively ecosystem.

Winter, often seen as a time when gardens go dormant, can still be beautiful with the right choices. Evergreen shrubs like boxwood or holly maintain their foliage and provide structure to your landscape, while winter-blooming plants such as hellebores add a touch of color amidst the chill.

By considering seasonal factors when selecting your low-maintenance plants, you can create a garden that remains visually appealing and easy to care for, no matter the time of year. The right plant choices will not only save you time and effort but will also enhance the beauty of your outdoor space throughout the changing seasons.

13. Resources for Finding Low-Maintenance Plant Varieties

When venturing into the world of low-maintenance gardening, it’s crucial to equip yourself with the right resources to ensure you select the best plants for your space. Fortunately, a wealth of information exists to guide you in your journey toward creating a thriving, hassle-free garden.

Start with local extension services or botanical gardens, which often provide region-specific recommendations tailored to your climate and soil conditions. These organizations are treasure troves of knowledge, offering workshops, plant sales, and expert advice on the best low-maintenance varieties suited for your area.

Online forums and gardening communities are also invaluable resources. Websites like Reddit’s gardening subreddits or dedicated gardening forums allow you to connect with experienced gardeners who share their personal insights and successes with low-maintenance plants. Users often post photos, experiences, and tips that can inspire your own garden choices.

Additionally, check out plant databases and apps like PlantSnap or Gardenia, which offer extensive catalogs of plant species. These platforms often include filters for maintenance levels, allowing you to easily identify suitable options. You can also find detailed care instructions, ensuring that you’re well-prepared to care for your new green companions, even if they’re low-maintenance.

Lastly, consider visiting local nurseries and garden centers. They not only stock a variety of low-maintenance plants but also have knowledgeable staff who can provide tailored recommendations based on your gardening style and preferences. Engaging with local experts can help you discover unique plants that thrive in your specific environment.

With these resources at your disposal, you’ll be well-equipped to curate a beautiful, low-maintenance garden that brings you joy without demanding excessive time or effort. Happy planting!

14. Conclusion: Enjoying Your Stress-Free Garden

As we conclude our journey through the world of low-maintenance plants, it’s time to reflect on the beauty and tranquility they can bring to your outdoor space. Imagine stepping into your garden, where vibrant greens, soft blossoms, and delightful textures weave together in a harmonious display, all without the overwhelming burden of constant upkeep.

Low-maintenance plants are not just a practical choice; they are a gateway to a more relaxed gardening experience. By selecting species that thrive with minimal intervention, you create an inviting sanctuary that allows you to enjoy nature’s splendor without the stress of a demanding chore list. Whether it’s the resilient succulents basking in the sun, the hardy perennials that return year after year, or the aromatic herbs sprouting effortlessly in your garden, each plant contributes to a serene and flourishing environment.

Take a moment to appreciate the simplicity of your stress-free garden. Spend lazy afternoons sipping tea in the shade of your favorite flowering shrub, or host gatherings with friends amidst a backdrop of lush foliage. With less time dedicated to weeding, watering, and worrying, you’ll have more opportunities to connect with nature, unwind, and embrace the joy that gardening can bring.

Incorporate the tips and plant suggestions from this guide, and watch as your garden transforms into a low-maintenance paradise that reflects your personal style and love for the outdoors. So go ahead, embrace the beauty of simplicity, and enjoy the peaceful retreat that your low-maintenance garden offers. After all, a garden should be a source of joy, not a source of stress. Happy gardening!

15. Additional Tips for Sustainable Gardening Practices

Sustainable gardening practices not only contribute to a healthier planet but also enhance the longevity and beauty of your garden. Here are some additional tips to help you cultivate a thriving, low-maintenance garden while being kind to the environment.

**1. Embrace Native Plants**: Native plants are adapted to your local climate and soil conditions, requiring less water and fewer resources to thrive. By incorporating these plants into your garden, you’ll create a resilient ecosystem that supports local wildlife, such as pollinators and birds, while reducing the need for chemical fertilizers and pesticides.

**2. Practice Water Conservation**: Implementing efficient watering practices is essential for sustainable gardening. Use drip irrigation systems or soaker hoses to deliver water directly to the roots, minimizing evaporation and runoff. Additionally, consider installing rain barrels to collect rainwater, which can be used to hydrate your plants during dry spells.

**3. Composting**: Transforming kitchen scraps and yard waste into compost is one of the simplest yet most impactful practices you can adopt. Compost enriches the soil with nutrients, improves soil structure, and helps retain moisture, reducing the need for synthetic fertilizers. Plus, it’s an excellent way to recycle organic materials that would otherwise end up in landfills.

**4. Mulching**: Applying a layer of organic mulch around your plants is a game-changer for reducing maintenance. Mulch suppresses weeds, conserves moisture, and gradually adds nutrients to the soil as it breaks down. Materials like straw, wood chips, or shredded leaves not only look great but also contribute to a healthier garden environment.

**5. Crop Rotation and Companion Planting**: If you grow vegetables, consider rotating your crops each season. This practice helps prevent soil depletion and minimizes pest and disease problems. Similarly, companion planting—where you grow different plants in proximity for mutual benefits—can enhance growth, repel pests, and improve yields.

**6. Limit Lawn Areas**: Lawns require significant maintenance, including regular mowing and watering. Consider replacing large expanses of grass with ground covers, native plants, or hardscaping elements like stones and pathways. These alternatives not only reduce maintenance but also create visually interesting spaces that can enhance your garden’s overall aesthetic.

By incorporating these sustainable practices into your gardening routine, you’ll create a flourishing, low-maintenance garden that benefits both you and the environment. Remember, sustainable gardening is a journey—start small, and you’ll soon see the fruits of your labor while contributing to a greener future.

As we wrap up our ultimate guide to low-maintenance plants for your garden, we hope you feel inspired and empowered to create a vibrant, lush outdoor space that requires minimal effort. Gardening should be a joy, not a chore, and with the right selection of hardy, resilient plants, you can enjoy the beauty of nature without the constant upkeep. From the striking succulents to the elegant perennials, each plant offers a unique charm that can transform your garden into a serene oasis. So, roll up your sleeves, dig in, and let your garden flourish with these low-maintenance gems. Happy gardening, and may your green thumb grow stronger with every season!

How to fix a leaky faucet?

A leaky faucet may seem like a minor inconvenience, but those constant drips can lead to a significant waste of water and an uptick in your utility bills.

If you’ve found yourself frustrated by the incessant sound of dripping water or the unsightly puddles forming in your sink, fear not! Tackling this common household issue can be simpler than you think. In this DIY guide, we’ll walk you through five straightforward steps to fix that leaky faucet and restore peace to your kitchen or bathroom. Armed with just a few basic tools and a little bit of patience, you’ll not only save money but also gain the satisfaction of completing a home repair on your own. So roll up your sleeves, and let’s get started on making that drippy faucet a thing of the past!

1. Introduction: Why Fixing a Leaky Faucet Matters

How to fix a leaky faucet?
Credit : whatcanu.com

A leaky faucet may seem like a minor inconvenience, but it can lead to significant issues if left unaddressed. The incessant drip-drip-drip can be more than just an annoyance; it can waste an astonishing amount of water over time, potentially driving up your utility bills and harming the environment. In fact, a single faucet that drips just once every second can waste more than 3,000 gallons of water a year—enough to fill a swimming pool!

Beyond the financial implications, a leaky faucet can also indicate underlying plumbing problems that require immediate attention. The constant moisture can lead to mold growth, damaging your home and impacting your health. Furthermore, if the leak is severe, it may cause water to pool around the base of the faucet, leading to corrosion or even structural damage to your cabinetry.

By fixing a leaky faucet, you not only save water and money but also contribute to a more sustainable lifestyle and protect your home’s integrity. Plus, the satisfaction of resolving a home maintenance issue yourself can be incredibly rewarding. In this DIY guide, we will take you through five simple steps to help you tackle that leaky faucet and restore peace to your household. Let’s get started!

2. Tools and Materials You’ll Need

Before diving into the repair process, it’s essential to gather all the necessary tools and materials to ensure a smooth and efficient fix. Having everything at your fingertips will save you time and frustration, allowing you to stay focused on the task at hand. Here’s a handy list of what you’ll need:

### Tools:
1. **Adjustable Wrench**: This versatile tool will help you grip and turn various nuts and bolts securely, making it easier to disassemble the faucet.
2. **Screwdriver Set**: Depending on the type of faucet, you’ll likely need both flathead and Phillips head screwdrivers. These will assist in removing screws that secure the faucet handle and other components.
3. **Pliers**: A good pair of pliers will be invaluable for gripping and twisting stubborn components that may be difficult to handle with your fingers alone.
4. **Allen Wrench**: If you have a faucet with a hex screw, an Allen wrench will be necessary to remove the handle.

### Materials:
1. **Replacement Washers or O-Rings**: These small yet crucial components often wear out and are common culprits behind leaks. Be sure to check your faucet type to purchase the correct size.
2. **Plumber’s Grease**: This lubricant is perfect for ensuring a smooth operation of moving parts and can help extend the life of your faucet components.
3. **Drop Cloth or Towels**: Having a drop cloth or some old towels handy will protect your countertop from scratches and absorb any water that spills during the repair process.

With your tools and materials assembled, you’re now ready to tackle that leaky faucet! Each item plays a vital role in ensuring that your repair goes off without a hitch, so double-check that you have everything before proceeding to the next step. With a little preparation, you’ll not only fix that pesky leak but also gain confidence in your DIY skills.

3. Step 1: Turn Off the Water Supply

How to fix a leaky faucet?
Credit : whatcanu.com

Before you dive into the intricate world of faucet repairs, the very first step—perhaps the most crucial one—is to turn off the water supply. This simple yet essential action will save you from a potential deluge and allow you to work without the constant worry of water spraying unexpectedly.

To locate the water supply, look beneath your sink for the shut-off valves. These are typically two knobs or lever handles, one for hot water and another for cold. Turn them clockwise until they stop to fully close the valves. If your faucet is connected to a separate shut-off valve, ensure that it is also turned off.

After shutting off the water, it’s wise to open the faucet to relieve any remaining pressure and drain any leftover water in the lines. This step not only keeps your workspace dry but also minimizes the mess you’ll have to deal with later.

Once you’ve ensured that the water is completely off and the faucet is dry, you can confidently proceed with the next steps of your repair, knowing that you’ve set a solid foundation for a successful fix. Remember, safety first—taking the time to properly turn off the water supply will make your DIY experience smoother and more efficient.

4. Step 2: Plug the Drain

Before diving into the intricate workings of your faucet, it’s essential to create a clean and manageable workspace. Step 2: Plug the Drain may seem like a minor detail, but it’s actually a crucial step in preventing any small parts or debris from disappearing into the abyss of your sink.

To begin, gather a clean rag or a purpose-made sink plug. If your sink has a built-in stopper, ensure it’s securely closed. For those without one, simply take the rag and wad it up tightly; then, place it in the drain opening. This acts as a safeguard, blocking any screws, washers, or other components from slipping away during your repair.

While this may feel like a small task, it’s a foundational step that can save you a significant amount of frustration later on. Imagine reaching the end of your fix only to realize a vital screw has vanished down the drain! By taking this extra precaution, you’ll maintain control over your workspace and ensure a smooth and efficient repair process. With the drain securely plugged, you can now confidently proceed to the next step in fixing that pesky leak.

5. Step 3: Disassemble the Faucet

How to fix a leaky faucet?
Credit : whatcanu.com

Once you’ve gathered your tools and turned off the water supply, it’s time to tackle the heart of the problem: disassembling the faucet. This step is crucial for accessing the inner components that may be causing the leak.

Begin by placing a cloth or towel beneath the faucet to catch any residual water that might spill during this process. Using a screwdriver, carefully remove any decorative caps or handles that are covering the screws. If your faucet features a lever, you may need to look for a small set screw located at the back or underside, which can often be loosened with an Allen wrench.

With the handles removed, you’ll need to unscrew the packing nut. This nut can be tightly fitted, so employ your adjustable wrench to gently loosen it. Be mindful not to apply too much force, as excessive pressure can damage the faucet body. Once the packing nut is loose, carefully lift it off to expose the stem or cartridge inside.

At this stage, take a moment to examine the parts you’ve disassembled. Look for worn-out washers, O-rings, or other components that may need replacing. Keeping these parts organized will save you hassle when it’s time to reassemble. Documenting the order of disassembly with your phone or a notepad can also be incredibly helpful, ensuring you can easily put everything back together once you’ve made your repairs.

Disassembling the faucet might seem intimidating, but with patience and attention to detail, you’ll be well on your way to fixing that leaky faucet and restoring peace to your home.

6. Step 4: Identify the Problem: Washer, O-ring, or Cartridge

Once you have the faucet disassembled and laid out in front of you, it’s time to diagnose the issue. This is a crucial step in your DIY journey, as identifying whether the culprit is a worn washer, a faulty O-ring, or a damaged cartridge will dictate your next moves and ensure a successful repair.

**Washer Problems:** If your faucet is dripping from the spout, the most common offender is often the washer. The washer is a rubber component that provides a tight seal when the faucet is turned off. Over time, regular use can wear down this component, leading to leaks. Inspect the washer for any signs of cracks, fraying, or compression. If it looks worn, it’s likely time for a replacement.

**O-ring Issues:** O-rings are small circular gaskets that help prevent leaks around the handle of the faucet. If you notice water pooling around the faucet handle itself, the O-ring may be to blame. Check for signs of wear or deterioration. If it seems to be losing its elasticity or has developed hard spots, replacing it can resolve the issue and restore your faucet’s functionality.

**Cartridge Dilemmas:** If your faucet is still leaking despite having replaced the washer and O-ring, the problem may lie in the cartridge. Cartridges are more commonly found in cartridge faucets, and they can wear out over time, leading to leaks. Look for any visible cracks or damage, and if necessary, take the cartridge to a hardware store to find an exact match for replacement.

Understanding these components and their roles is essential for diagnosing and addressing the leak effectively. Once you’ve identified the problem, you can move forward with the appropriate replacements, confident in your ability to restore your faucet to its drip-free state. This step not only empowers you as a DIYer but also saves you money and the hassle of calling in a professional.

7. Step 5: Replace the Damaged Parts

How to fix a leaky faucet?
Credit : whatcanu.com

### Step 5: Replace the Damaged Parts

Once you’ve successfully disassembled the faucet and identified the culprit behind the leak, it’s time to replace the damaged parts. This is a crucial step in ensuring your repair is effective and long-lasting. Depending on the type of faucet you have—be it compression, cartridge, ball, or ceramic disc—the parts you need to replace may vary.

First, carefully inspect the components you’ve removed. Look for worn-out washers, O-rings, or seals, as these are often the primary suspects in leaks. If they appear cracked, frayed, or misshapen, it’s time to swap them out. Many hardware stores offer repair kits that include all the necessary parts for your specific faucet model, making it easy to find replacements.

Before purchasing new parts, bring the old ones with you as a reference. This will ensure you get the right size and type for a proper fit. Once you have your new components, follow the manufacturer’s instructions to install them. Make sure to seat the washers and O-rings snugly, as a proper seal is essential to prevent future leaks.

As you reassemble the faucet, take care not to overtighten any screws or nuts, as this can cause damage to the new parts. Instead, aim for a firm but gentle tightening to ensure everything is secure without compromising the integrity of the fittings.

Replacing the damaged parts is a straightforward yet vital step in your faucet repair journey. Doing it correctly will not only stop the leak but also extend the life of your faucet, giving you peace of mind and a fully functional kitchen or bathroom fixture. With the new parts in place, you’re now one step closer to enjoying a leak-free experience!

8. Reassemble the Faucet

After you’ve successfully replaced the faulty components, it’s time to reassemble the faucet to restore it to its original state. This step is crucial, as a proper reassembly not only ensures functionality but also prevents future leaks.

Start by carefully placing the faucet handle back onto its base, aligning any screws or fasteners as needed. If your faucet has a decorative cap, don’t forget to secure it back in place; this is often a simple twist-on piece that can enhance the overall appearance of your fixture.

Next, use your screwdriver to tighten any screws that hold the handle in position. Be cautious not to overtighten, as this could cause damage to the faucet or its components. If your faucet has multiple handles or levers, repeat this process for each one, ensuring they all fit snugly and operate smoothly.

Once the handles are secure, it’s time to reattach any decorative elements or covers that you removed earlier. These parts not only contribute to the aesthetics of your faucet but also provide additional protection against moisture and dust.

Finally, turn the water supply back on and check for leaks. With everything reassembled, run the faucet for a few moments to ensure that water flows freely and that no drips or leaks are present. If all looks good, congratulations—you’ve successfully reassembled your faucet! Enjoy the satisfaction of knowing you tackled this DIY project with skill and precision, and relish in the quiet of a leak-free home.

9. Step 6: Turn the Water Supply Back On

Once you’ve reassembled the faucet and ensured that all components are securely in place, it’s time to turn the water supply back on. This step marks a significant moment in your DIY journey, as it will reveal whether your repairs have been successful. Start by locating the shut-off valves beneath the sink; they are typically positioned on the wall or the cabinet floor.

Carefully turn the valves counterclockwise to restore the water flow. As you do this, listen for the sound of rushing water—this is a good sign that you’re on the right track! However, immediate caution is warranted: keep an eye on the faucet to check for any signs of leaks.

Once the water is flowing, turn the faucet handle to test its operation. Run the water for a moment to ensure a steady stream without spluttering or drips. Feel the temperature of the water to confirm that hot and cold are functioning correctly. If everything seems to be in order, congratulations! You’ve successfully tackled the leaky faucet. But don’t get too comfortable just yet—take a few moments to wipe down any excess water around the sink area and double-check your work. If all looks good, you can pat yourself on the back for a job well done and enjoy the satisfaction of having fixed the issue yourself!

10. Step 7: Test for Leaks

After you’ve meticulously reassembled your faucet and tightened all the screws and fittings, it’s time for the moment of truth: testing for leaks. This crucial step ensures that your hard work has paid off and that your faucet is working as it should.

Start by turning the water supply back on, gradually opening the valves to avoid any sudden bursts of water. As the flow begins, pay close attention to the area around the faucet itself and the joints where you’ve made adjustments. Look for any signs of dripping or pooling water. A small leak can often be fixed with a simple twist of a screw or a minor adjustment, so don’t be discouraged if you see a little moisture at first.

To get a comprehensive check, run the faucet through its various settings—hot, cold, and mixed. This will help you identify any leaks that might only occur under certain conditions. If you do notice any leaks, it’s essential to turn the water supply off again and revisit your work. Check the O-rings, washers, and any seals you might have changed; sometimes, a misaligned component is all it takes to create a leak.

Once you’re confident that everything is secure and there are no leaks, take a moment to admire your handiwork. Not only have you just saved yourself some money by avoiding a plumber, but you’ve also gained valuable skills in home maintenance. With a little patience and attention to detail, you’ve turned a potentially frustrating problem into a successful DIY project!

11. Common Mistakes to Avoid

When tackling a DIY project like fixing a leaky faucet, it’s crucial to be aware of common mistakes that can turn a simple repair into a frustrating endeavor. Here are some pitfalls to steer clear of as you embark on your plumbing adventure:

1. **Neglecting to Turn Off the Water Supply**: It may seem obvious, but many DIYers forget this essential step. Failing to shut off the water supply can lead to a messy situation, with water gushing out as you start disassembling the faucet. Always locate the shut-off valves under the sink and turn them off before you begin.

2. **Skipping the Preparation**: Jumping right into the repair without gathering the necessary tools and materials can lead to interruptions and confusion. Ensure you have everything you need—like wrenches, screwdrivers, replacement parts, and a cloth to catch any drips—before you start.

3. **Using the Wrong Tools**: Each faucet type requires specific tools for repair. Using the wrong tools can damage the faucet or make it difficult to complete the repair. Invest in or borrow the right tools, such as basin wrenches, pliers, and screwdrivers, to ensure you can work effectively and avoid stripping screws or damaging fittings.

4. **Ignoring the Manufacturer’s Instructions**: Each faucet brand and model may have unique components and assembly methods. Failing to consult the manufacturer’s instructions can lead to confusion during reassembly or the use of incorrect replacement parts. Always refer to the manual or look up the model online for guidance.

5. **Over-Tightening**: It’s easy to think that cranking down on screws and bolts will ensure a watertight seal, but over-tightening can cause damage to the components, leading to future leaks or breakage. Use a gentle hand and tighten just enough to create a good seal.

By being mindful of these common mistakes, you’ll set yourself up for a successful faucet repair. With a little patience and the right approach, you can effectively fix that leaky faucet and enjoy the satisfaction of a job well done!

12. Tips for Preventing Future Faucet Leaks

While fixing a leaky faucet can save you money and water, taking proactive steps to prevent future leaks is equally important. Here are some essential tips to keep your faucet in top condition and avoid the hassle of leaks down the line.

**1. Regular Maintenance:** Schedule routine checks on your faucets and fixtures. Inspect for signs of wear, such as corrosion or loose parts, and replace washers or O-rings as needed. A little preventive care can go a long way in extending the life of your faucet.

**2. Use the Right Tools:** When working on your faucet, always use the appropriate tools for the job. Using the wrong size wrench or screwdriver can strip screws or damage components, leading to leaks. Invest in a good set of plumbing tools to ensure you have what you need.

**3. Avoid Over-Tightening:** It may be tempting to crank down on screws or nuts to prevent leaks, but over-tightening can cause more harm than good. This can lead to cracks in hardware or misalignment, ultimately creating new leaks. Tighten only until snug.

**4. Check Water Pressure:** High water pressure can put unnecessary stress on your faucet and its components, leading to leaks. Use a pressure gauge to check your home’s water pressure, and if it’s above the recommended range (generally 40-60 psi), consider installing a pressure regulator.

**5. Choose Quality Fixtures:** When replacing faucets or fixtures, invest in high-quality products from reputable brands. While they might carry a higher upfront cost, quality fixtures are often built to last longer and withstand wear and tear better than cheaper alternatives.

By adopting these simple practices, you can significantly reduce the likelihood of future leaks and enjoy a well-functioning faucet for years to come. Remember, a little attention today can save you time, money, and the frustration of unexpected repairs tomorrow.

13. When to Call a Professional

While many leaky faucet repairs can be successfully tackled by enthusiastic DIYers, there are times when calling a professional is the wisest course of action. Knowing when to hand the wrench over to an expert can save you time, money, and frustration down the line.

If you’ve followed the previous steps and your faucet is still leaking, it may be a sign of a more complex issue. Sometimes, the problem might stem from deeper within your plumbing system, such as high water pressure or corroded pipes, which aren’t easily fixable without specialized knowledge and tools. Additionally, if you notice water pooling around the base of the faucet or under the sink, this could indicate a more serious leak that requires an experienced plumber’s intervention.

Another situation where a professional’s help is warranted is if you’re dealing with a faucet type that is particularly intricate or outdated. Vintage or specialty faucets may have unique components that are hard to find or require specific expertise to repair correctly. In these cases, a professional can ensure that repairs are done without damaging your faucet further.

Finally, if you feel overwhelmed or uncertain at any point during your repair attempts, it’s perfectly okay to reach out for help. Plumbing can be tricky, and the last thing you want is to inadvertently create a bigger problem that leads to costly repairs. Trust your instincts—if a task feels beyond your skill level, calling a licensed plumber is a smart and responsible decision. They can provide peace of mind, ensure the job is done right, and ultimately save you from the headache of future complications.

14. Conclusion: Enjoying Your Leak-Free Faucet!

Congratulations! You’ve successfully tackled the task of fixing your leaky faucet, and now it’s time to sit back, relax, and enjoy the fruits of your labor. There’s something immensely satisfying about resolving a household issue with your own hands, and a leak-free faucet is a testament to your DIY skills. No more drips, no more annoying water sounds in the night, and certainly no more wasted water sneaking through those faulty seals.

As you turn on the faucet and hear the smooth flow of water, take a moment to appreciate the quietude of your kitchen or bathroom—free from the persistent drip-drip that once interrupted your peace. Not only have you saved yourself money on potential plumbing bills, but you’ve also contributed to water conservation, which is essential for our planet.

Remember, maintaining your faucet is key to ensuring its longevity. Regular checks for wear and tear, cleaning out aerators, and replacing washers can prevent future leaks. Should you encounter any further issues, don’t hesitate to refer back to this guide or consult a professional if needed.

By embracing the DIY spirit, you’ve not only fixed a problem but also gained valuable skills that empower you to handle similar repairs in the future. So, go ahead, enjoy that leak-free faucet, and let the water flow freely—without the worry of unwanted puddles beneath!

15. Additional Resources and References

When tackling a DIY project like fixing a leaky faucet, having the right resources at your fingertips can make all the difference. Here are some additional materials and references that can help you along the way, ensuring your repair is successful and stress-free.

1. **Online Tutorials and Videos:** Websites like YouTube are treasure troves of DIY content. Search for specific faucet types or brands for step-by-step video guides that visually walk you through the repair process. Seeing the steps in action can help clarify complex instructions and give you the confidence to proceed.

2. **Manufacturer’s Manuals:** If you still have the manual that came with your faucet, it’s worth a look. These manuals often include troubleshooting sections that can point you directly to the source of the leak, as well as specific diagrams and parts lists that are invaluable during repairs.

3. **DIY Forums and Communities:** Online forums such as Reddit’s r/HomeImprovement or DIY Network can be excellent resources. Here, you can ask questions, share your experiences, and learn from others who have tackled similar projects. Community members often provide tips and tricks that can save you time and frustration.

4. **Home Improvement Books:** If you prefer a more traditional approach, consider picking up a home improvement book from your local library or bookstore. Many of these guides offer comprehensive chapters on plumbing and faucet repairs, complete with illustrations and troubleshooting advice.

5. **Local Hardware Store Workshops:** Some hardware stores offer free workshops or classes on home repairs, including plumbing. Check with your local store to see if they have any upcoming sessions where you can gain hands-on experience and ask questions from knowledgeable staff.

By utilizing these additional resources, you can enhance your understanding of faucet repairs and gain the confidence to tackle even the trickiest plumbing issues. Remember, every DIY project is a learning opportunity, so don’t hesitate to seek out information that can help refine your skills. With the right guidance, you’ll not only fix that leaky faucet but also feel empowered to take on future home improvement challenges!

In conclusion, fixing a leaky faucet doesn’t have to be an overwhelming task. With the straightforward steps outlined in our DIY guide, you can tackle this common household issue with confidence and ease. Not only will you save money by avoiding costly plumber fees, but you’ll also gain a sense of accomplishment by successfully completing the repair yourself. Remember, every drop counts—both in conserving water and in preserving your home’s plumbing health. We encourage you to gather your tools, roll up your sleeves, and embark on this simple yet rewarding project. Happy fixing, and may your faucet be forever drip-free!

What are the essential steps to a successful bathroom remodel?

Transforming your bathroom into a serene oasis or a stylish sanctuary is more than just a home improvement project; it’s an opportunity to enhance your daily routine and elevate your home’s aesthetic.

A well-executed bathroom remodel can significantly increase your property’s value while creating a space that reflects your personal style and meets your functional needs. Whether you envision a sleek modern look with clean lines and minimalist features or a cozy retreat adorned with rustic charm, the key to achieving your dream bathroom lies in careful planning and thoughtful execution. In this comprehensive guide, we’ll walk you through the essential steps for a successful bathroom remodel, from assessing your current layout and setting a realistic budget to selecting the right materials and fixtures. Get ready to unlock the full potential of your space and master the art of bathroom remodeling!

1. Introduction: The Importance of a Well-Designed Bathroom

What are the essential steps to a successful bathroom remodel?
Credit : whatcanu.com

When it comes to home design, the bathroom is often overlooked, yet it plays a crucial role in our daily lives. A well-designed bathroom is more than just a functional space; it serves as a sanctuary for relaxation and rejuvenation. Whether it’s the first place you visit each morning to prepare for the day or a calming retreat at the end of a long evening, a thoughtfully remodeled bathroom can significantly enhance your overall quality of life.

Imagine stepping into a serene oasis, where soft lighting casts a warm glow on beautifully tiled walls, and the gentle sound of water from a modern faucet creates a soothing atmosphere. A well-designed bathroom not only elevates the aesthetic appeal of your home but also adds value to your property. Potential buyers are often drawn to homes with stylish and functional bathrooms, making it a wise investment for those considering resale in the future.

Moreover, a well-planned bathroom remodel can improve functionality, making daily routines more efficient and enjoyable. From adding additional storage solutions to selecting fixtures that cater to your needs, every choice can contribute to a more organized and user-friendly space. In this blog post, we will explore essential steps to ensure your bathroom remodel not only meets your personal style but also enhances the overall functionality and comfort of your home. Let’s dive in and discover how to transform your bathroom into a space that reflects your taste and serves your lifestyle.

2. Setting Your Budget: How Much Should You Spend?

Setting your budget is one of the most critical steps in a successful bathroom remodel, yet it can also be the most daunting. Before you dive headfirst into selecting tiles, fixtures, and finishes, it’s essential to define how much you are willing to spend. A well-thought-out budget not only keeps your project on track financially but also helps you make informed decisions throughout the renovation process.

Start by evaluating your current financial situation. Consider how much you can comfortably allocate without straining your finances. Generally, a bathroom remodel can range from a few thousand dollars for a simple facelift to tens of thousands for a complete overhaul. On average, homeowners can expect to spend between $10,000 and $15,000 for a mid-range remodel, but this can vary widely based on factors such as location, size of the bathroom, and the extent of the changes you plan to make.

Next, identify your priorities. Are you looking to simply update the aesthetics, or do you need to address functional issues like plumbing or electrical hazards? Create a list of must-haves versus nice-to-haves. This approach will help you allocate funds more effectively and determine where you can splurge versus where you might need to save. For example, investing in high-quality fixtures can enhance both the look and longevity of your bathroom, while opting for less expensive materials in areas like cabinetry or decor can help you stay within your budget.

Don’t forget to include a contingency fund, typically around 10-20% of your total budget. Renovations often come with unexpected expenses, and having this cushion can prevent stress and keep your project moving smoothly.

Finally, research and gather estimates from contractors and suppliers to gauge realistic costs for your remodel. This will provide you with valuable insights into the market rates for materials and labor, ensuring your budget is both informed and practical. By taking the time to thoughtfully set your budget at the outset, you’ll pave the way for a successful bathroom remodel that meets your needs and reflects your personal style, all while keeping your finances in check.

3. Defining Your Style: Choosing the Right Aesthetic

What are the essential steps to a successful bathroom remodel?
Credit : whatcanu.com

Defining the style of your bathroom is a crucial step in the remodeling process, as it sets the tone for the entire space and reflects your personal taste. The bathroom is not just a functional area; it can be a sanctuary where you unwind after a long day. Therefore, taking the time to choose the right aesthetic will ensure that your remodel not only meets your needs but also brings you joy every time you step inside.

Start by exploring different design styles that resonate with you. Are you drawn to the sleek lines and minimalism of modern design, or do you find comfort in the rustic charm of farmhouse aesthetics? Perhaps the elegance of traditional designs appeals to your sense of history, or you lean towards an eclectic mix that showcases your personality. Take inspiration from magazines, online platforms like Pinterest, or even visits to showrooms and model homes.

Once you have a clearer vision, consider the elements that contribute to your chosen style. For a modern look, think about incorporating clean finishes, bold colors, and high-tech fixtures. If a spa-like retreat is what you envision, opt for soft, muted tones, natural materials such as wood and stone, and soothing lighting. Don’t forget the details—accessories like mirrors, towels, and artwork can make a significant impact in pulling the whole aesthetic together.

Additionally, keep practicality in mind. Your style should harmonize with the layout and functionality of the space. For instance, if you have a smaller bathroom, lighter colors and minimal clutter can create an illusion of more space. On the other hand, a larger bathroom might benefit from bolder color choices and statement pieces to fill the area effectively.

Ultimately, defining your style is about creating a cohesive vision that not only elevates the aesthetics of your bathroom but also enhances your daily routine. By thoughtfully selecting the right aesthetic, you’ll ensure that your remodel is not just beautiful but also a true reflection of who you are.

4. Planning the Layout: Maximizing Functionality and Flow

When it comes to a successful bathroom remodel, planning the layout is paramount. A well-thought-out layout not only enhances the aesthetic appeal of your space but also maximizes functionality and flow, ensuring that your bathroom meets the needs of everyone who uses it. Begin by assessing the current layout: take note of the existing plumbing, electrical outlets, and natural light sources. This foundational knowledge will help you make informed decisions about relocating fixtures, which can be costly and time-consuming.

Next, consider the traffic patterns within the bathroom. Aim for a design that allows for easy movement, preventing any bottlenecks where multiple users might converge. For instance, if you have a double vanity, ensure there is enough space between sinks to avoid crowding during busy mornings. Think about how often you’ll be using the space and what activities will take place. Will you need a separate area for applying makeup, or do you envision a luxurious soaking tub as the centerpiece? These considerations will guide your decisions on fixture placement.

Utilize design tools and software to visualize your layout options. Many programs allow you to drag and drop elements into a virtual space, giving you a clearer idea of how everything will fit together. Additionally, consider the height and accessibility of your fixtures. A lower countertop may be ideal for children, while higher vanities can accommodate taller users.

Don’t forget the importance of storage in your layout. Incorporate cabinets, shelving, or even built-in nooks to keep essentials organized and out of sight. A clutter-free environment not only looks better but also enhances the overall functionality of the bathroom.

Ultimately, the goal of planning your layout is to create a harmonious balance between form and function. By carefully considering the flow of the space, the needs of its users, and the practical elements involved, you can design a bathroom that is not only visually stunning but also a joy to use each day. With the right planning, your remodel can transform a basic bathroom into a serene retreat that perfectly suits your lifestyle.

5. Selecting the Right Materials: Durability vs. Design

What are the essential steps to a successful bathroom remodel?
Credit : whatcanu.com

When embarking on a bathroom remodel, one of the most critical decisions you’ll face is selecting the right materials. This choice often boils down to a delicate balance between durability and design, and it’s essential to find materials that not only elevate the aesthetic of your space but also withstand the rigors of daily use.

First, consider the environment of your bathroom. With high humidity levels, materials need to be moisture-resistant to prevent mold and mildew. For flooring, porcelain or ceramic tiles are excellent options due to their water resistance and durability, available in a myriad of styles to mimic the look of natural stone or wood. Additionally, these materials are easy to clean, making them a practical choice for busy households.

Next, think about countertops. While natural stones like granite and marble offer stunning visual appeal, they may require more maintenance and sealing to protect against water damage. On the other hand, engineered stones or quartz can provide a similar look with added durability, as they are non-porous and resistant to stains. This makes them ideal for a bathroom environment where spills are inevitable.

Don’t forget about cabinetry. Solid wood may have an elegant, timeless appeal, but it can warp in high humidity. Instead, opt for materials like plywood or medium-density fiberboard (MDF) that have been treated to resist moisture. These options offer the structural integrity needed while allowing for a variety of finishes that suit your design vision.

Lastly, select fixtures made from high-quality metals or finishes that are designed to resist corrosion and tarnishing. Chrome, brushed nickel, and oil-rubbed bronze can add a stylish touch without sacrificing longevity.

Ultimately, the materials you choose will set the tone for your bathroom’s design while ensuring that it stands the test of time. By thoughtfully considering both durability and design, you’ll create a sanctuary that is not only beautiful but also functional for years to come.

6. Choosing Fixtures and Fittings: The Heart of Your Bathroom

Choosing fixtures and fittings is arguably the most critical step in your bathroom remodel, as these elements serve as the heartbeat of the space, blending functionality with style. The right fixtures not only enhance the overall aesthetic but also make a significant impact on the usability of your bathroom.

Start with the sink and vanity. These are often the focal points of the room, so consider a design that reflects your personal style—whether it’s a sleek, modern look with a minimalist undermount sink or a more traditional vibe with a charming pedestal sink. Pay attention to the materials and finishes, as these will influence both the durability and the visual appeal. For instance, a quartz countertop can provide a contemporary touch while ensuring longevity.

Next, think about the toilet. While it may seem like a purely practical choice, today’s market offers a plethora of options that combine efficiency with elegance. From wall-mounted models that save space to eco-friendly designs that reduce water usage, the right toilet can elevate your bathroom’s functionality while contributing to its overall design theme.

Don’t overlook the importance of your shower and bathtub fixtures. A luxurious rainfall showerhead or a freestanding soaking tub can transform an ordinary bathroom into a spa-like retreat. Choose finishes that complement your other fixtures, whether you lean towards polished chrome for a modern edge or brushed nickel for a more timeless feel.

Finally, consider the smaller fittings, such as towel bars, cabinet handles, and lighting fixtures. These might seem like minor details, but they can significantly influence the overall cohesion of your design. Opt for styles and finishes that tie together all elements of your bathroom, creating a harmonious environment that is not only inviting but also functional.

By carefully selecting your fixtures and fittings, you not only enhance the aesthetic appeal of your bathroom but also ensure that it serves as a practical space for your daily routines. This thoughtful approach will leave you with a beautifully remodeled bathroom that feels both luxurious and personalized, making it a haven you’ll want to return to time and again.

7. Lighting Options: Brightening Up Your Space

What are the essential steps to a successful bathroom remodel?
Credit : whatcanu.com

When it comes to transforming your bathroom, lighting plays a pivotal role in creating the right ambiance and functionality. A well-lit bathroom not only enhances the aesthetic appeal but also improves the overall user experience. To truly master your space, consider a layered lighting approach that combines different types of fixtures, each serving a unique purpose.

Start with ambient lighting, which provides overall illumination for the room. Ceiling-mounted fixtures, such as flush mounts or chandeliers, are excellent options for this foundational layer. Select fixtures that complement your design style—whether it’s sleek and modern or rustic and charming. Opt for LED bulbs that mimic natural daylight to create a bright, welcoming atmosphere.

Next, incorporate task lighting around key areas, particularly near the vanity or mirror. Wall sconces flanking the mirror can eliminate harsh shadows and provide even lighting for grooming tasks. If space allows, consider adding a pendant light above the vanity for a touch of elegance. Remember to choose fixtures with adjustable brightness or install dimmer switches, allowing you to customize the light intensity based on the time of day or mood.

Finally, don’t overlook accent lighting to highlight architectural features or decorative elements. LED strip lights under shelves, backlit mirrors, or recessed lighting can add depth and drama to your bathroom design. This subtle lighting not only draws attention to specific areas but also creates a soothing atmosphere perfect for unwinding after a long day.

By thoughtfully selecting and layering your lighting options, you can brighten up your bathroom and elevate its overall design. With the right lighting, your space will not only be functional but also a serene sanctuary where you can relax and rejuvenate.

8. DIY vs. Hiring Professionals: What’s Best for You?

When it comes to a bathroom remodel, one of the most pressing decisions you’ll face is whether to tackle the project yourself or hire professionals. The choice between DIY and professional help can profoundly impact not only the final outcome of your remodel but also the journey you take to get there.

If you’re considering a DIY approach, take a moment to assess your skills and experience. Are you a seasoned handyman comfortable with plumbing and electrical work? Perhaps you’ve tackled smaller home improvement projects before and are ready to challenge yourself with a bathroom upgrade. The allure of saving money while infusing your personal touch into the space can be incredibly tempting. You have the freedom to choose materials that resonate with your style, plan your timeline, and work at your own pace. However, be prepared for the potential pitfalls: unexpected complications can arise, such as outdated plumbing, unforeseen structural issues, or a lack of proper tools that could turn a simple project into a lengthy, frustrating endeavor.

On the flip side, hiring professionals can alleviate stress and provide a level of expertise that’s hard to match. Experienced contractors and designers bring a wealth of knowledge about current trends, codes, and best practices, ensuring that your remodel not only looks great but is also functional and safe. They can help you navigate the complexities of permits, timelines, and budgets, allowing you to focus on the vision for your new space. While this option generally involves a higher upfront cost, the investment can pay off in both the quality of the work and the long-term durability of the remodel.

Ultimately, the decision between DIY and hiring professionals boils down to a careful consideration of your budget, skill set, and the scope of the project. If you’re leaning towards DIY, start with smaller tasks to build your confidence and gauge your comfort level. If you opt for professionals, be sure to research and select reputable contractors who align with your vision and have a proven track record. Whichever path you choose, remember that a successful bathroom remodel is about creating a space that reflects your style and meets your needs while also being functional and enduring.

9. Permits and Regulations: Navigating the Legalities

When embarking on a bathroom remodel, one of the most crucial yet often overlooked steps is navigating the maze of permits and regulations. Before you dive headfirst into demolition or design, it’s essential to familiarize yourself with the legal requirements that govern home renovations in your area.

Every region has its own set of building codes and regulations that dictate everything from plumbing and electrical work to structural changes. Failing to secure the necessary permits can lead to costly fines, delays, or even the need to undo completed work that doesn’t meet code. Start by researching local building departments or municipal websites to understand what permits are required for your specific project.

For instance, if you plan to relocate plumbing fixtures or install new electrical systems, you may need to apply for specific permits. In some cases, a licensed contractor may be required to sign off on your plans, ensuring that all work is up to code and inspected properly. This is especially important for safety and insurance purposes.

Additionally, some homeowners’ associations (HOAs) may have their own guidelines governing renovations. It’s wise to check with them to avoid any conflicts or violations.

While the prospect of permits may seem daunting, think of them as a roadmap to a successful remodel. They provide a framework that ensures your project not only complies with safety standards but also enhances the value of your home. By taking the time to understand and navigate these legalities, you can embark on your bathroom transformation with confidence, knowing that you are building a space that is both beautiful and compliant.

10. Sustainable Choices: Eco-Friendly Upgrades for Your Bathroom

In today’s world, making eco-friendly choices is not just a trend; it’s a responsibility. When it comes to bathroom remodeling, integrating sustainable upgrades can significantly reduce your environmental footprint while enhancing the overall aesthetics and functionality of your space. One of the simplest yet most impactful changes you can make is to opt for water-efficient fixtures. Low-flow toilets, showerheads, and faucets can dramatically cut water consumption without sacrificing performance, helping you save on utility bills while conserving this precious resource.

Next, consider the materials you choose for your remodel. Look for sustainable options such as bamboo or reclaimed wood for cabinetry and shelving. These materials not only add a unique, natural charm to your bathroom but also ensure that your renovations are eco-conscious. Similarly, selecting tiles made from recycled materials can help minimize waste while adding a stylish touch to your design.

Ventilation is another crucial aspect of a sustainable bathroom. Installing energy-efficient exhaust fans can improve air quality and prevent moisture buildup, which in turn reduces the risk of mold and mildew. Additionally, opting for LED lighting can brighten your space while using a fraction of the energy compared to traditional bulbs, creating a more sustainable atmosphere.

Finally, don’t overlook the importance of eco-friendly paints and finishes. Many modern paints are low in volatile organic compounds (VOCs), making them safer for your health and the environment. By choosing these products, you contribute to a more sustainable home while creating a fresh, vibrant space.

Incorporating these eco-friendly upgrades not only benefits the planet but also enhances your bathroom’s comfort and style. With thoughtful planning and sustainable choices, your bathroom remodel can be a reflection of your commitment to environmental stewardship.

11. Adding Storage Solutions: Keeping Clutter at Bay

When it comes to bathroom remodels, one of the most pivotal aspects to consider is storage. A beautifully designed bathroom can quickly become a cluttered mess if you don’t have the right solutions in place to keep it organized. Adding innovative storage options not only enhances the functionality of your space but also contributes to a serene and aesthetically pleasing environment.

Start by assessing your current bathroom layout and identifying areas where storage can be maximized. Consider incorporating built-in shelving, which can seamlessly blend into the wall design, offering a place to showcase decorative items or store everyday essentials without taking up valuable floor space. Wall-mounted cabinets are another smart choice; they provide ample storage while allowing you to maintain an open, airy feel.

Don’t overlook the potential of underutilized spaces, such as the area beneath the sink. Installing pull-out drawers or baskets can transform this often-neglected zone into a convenient storage haven for toiletries, cleaning supplies, and extra linens. Floating shelves can also serve as stylish solutions, providing both functionality and a platform for personal touches like plants or candles.

Additionally, think about incorporating multi-functional furniture. For instance, a stylish bench or stool can double as a storage box, perfect for stashing away towels or bath toys. Remember, the goal is to create a cohesive design that meets your storage needs while reflecting your personal style.

By thoughtfully integrating these storage solutions into your bathroom remodel, you’ll not only keep clutter at bay but also elevate the overall ambiance of your sanctuary. A well-organized bathroom helps create a calming atmosphere, making your daily routines feel more enjoyable and less chaotic.

12. Final Touches: Decor and Accessories to Enhance Your Space

As you approach the final stages of your bathroom remodel, the allure of the space is often determined by the decor and accessories you choose to incorporate. These finishing touches are not merely aesthetic; they can transform a utilitarian area into a personal sanctuary that reflects your unique style and enhances overall functionality.

Start by selecting a color palette that harmonizes with your bathroom’s existing features. Soft, muted hues can create a serene atmosphere, while bold colors can inject energy and personality into the space. Consider the impact of wall art, such as framed prints or canvas pieces that evoke a sense of calm or inspiration. A well-placed mirror can also serve as both a decorative element and a functional necessity, amplifying light and making the space feel more expansive.

Next, think about your choice of accessories. Luxurious towels, chic soap dispensers, and stylish storage solutions can elevate the everyday experience. Opt for materials that are not only visually appealing but also practical; for instance, consider moisture-resistant options for towels and decorative items. Incorporate greenery with small potted plants or fresh flowers to breathe life into the room while improving air quality.

Lighting is another critical component in the final touches of your bathroom remodel. Layered lighting, including ambient, task, and accent lights, can create a warm and inviting atmosphere. Dimmable fixtures allow for flexibility, enabling you to adjust the brightness based on the time of day or the mood you wish to create.

Lastly, don’t underestimate the power of scent. Candles, essential oil diffusers, or beautifully crafted soaps can provide a sensory experience that elevates your bathroom from a mere functional space to a personal retreat. By thoughtfully curating your decor and accessories, you’ll not only enhance the visual appeal of your newly remodeled bathroom but also create an environment that promotes relaxation and rejuvenation. Embrace these final touches, and watch as your bathroom transforms into a harmonious blend of style and comfort.

13. Common Mistakes to Avoid: Learning from Others’ Experiences

When embarking on a bathroom remodel, it’s easy to get caught up in the excitement of design possibilities and forget the lessons learned by those who have gone before you. Acknowledging common mistakes can save you not only time and money but also the frustration of dealing with issues that could have been avoided. Here are some key pitfalls to steer clear of, culled from the experiences of countless remodelers.

**Neglecting the Importance of Planning**
One of the most frequent missteps is diving into a remodel without thorough planning. Many homeowners underestimate the importance of taking the time to sketch out a detailed layout, measure dimensions, and consider the flow of the space. An ill-conceived design can lead to cramped quarters or awkwardly placed fixtures, making your once-dreamy bathroom feel more like a claustrophobic cave.

**Ignoring Budget Realities**
Budget overruns are another common hurdle in bathroom renovations. It’s easy to get swept up in high-end finishes and trendy fixtures, forgetting that every addition adds to the bottom line. Before you start shopping, set a realistic budget that includes not only materials and labor but also a buffer for unexpected costs. Stick to it as closely as possible, and keep track of expenditures throughout the project to avoid financial surprises.

**Overlooking Ventilation Needs**
A critical, yet often overlooked aspect of bathroom design is ventilation. Poor air circulation can lead to mold and mildew growth, especially in a humid environment. Homeowners may fail to install adequate exhaust fans or neglect to position them correctly, resulting in a space that deteriorates faster than anticipated. Prioritize ventilation during your remodel to maintain a healthy, fresh atmosphere.

**Choosing Style Over Functionality**
While aesthetics are undeniably important, never sacrifice functionality for the sake of style. A beautiful bathtub that barely fits in your space or a trendy faucet that is difficult to operate can lead to daily frustration. Aim for a balance between design and practical use; think about how you and your family will interact with the space daily.

**Skimping on Quality**
Lastly, the temptation to cut corners on materials can be a significant miscalculation. While it might seem cost-effective to purchase cheaper tiles or fixtures, these items often wear out more quickly and can result in higher replacement costs down the line. Invest in quality materials that will withstand the test of time and frequent use, ensuring your remodel not only looks good but stands up to everyday life.

By learning from the experiences of others, you can navigate your bathroom remodel with greater confidence and awareness. Avoiding these common mistakes will pave the way for a successful transformation that not only meets your aesthetic desires but also enhances the functionality and longevity of your bathroom space.

14. Staying Organized During the Remodel: Tips for a Smooth Process

Undertaking a bathroom remodel can feel like a daunting task, but staying organized is the key to a smooth and successful process. From the initial planning stages to the final touches, a well-structured approach will help you navigate the complexities of your project with confidence.

Start by creating a detailed checklist that outlines every step of the remodel. Break down the process into manageable tasks, such as selecting materials, scheduling contractors, and setting a timeline. This list will serve as your roadmap, keeping you focused and on track as you progress. Consider using project management apps or traditional planners to keep everything in one place.

Next, designate a specific area in your home to serve as a command center for your remodel. This space can house your materials, samples, and tools, making it easier to access everything you need without rummaging through different rooms. Keeping your workspace tidy will minimize chaos and improve efficiency as the project unfolds.

Communication is also crucial during a remodel. If you’re working with contractors, establish clear lines of communication and set regular check-ins to discuss progress and address any concerns. Don’t hesitate to share your vision and expectations—it’s vital that everyone is on the same page to avoid misunderstandings.

As the remodel progresses, maintain a running inventory of your supplies. Document what you have on hand and what needs to be ordered to prevent last-minute trips to the store or delays due to missing materials. This attention to detail can save you both time and money.

Finally, remember to be flexible. While organization is essential, unexpected challenges can arise during any remodel. Having a backup plan can help you stay calm and adapt to any changes without losing sight of your end goal.

By staying organized throughout your bathroom remodel, you’ll not only reduce stress but also create an environment that allows your vision to flourish—resulting in a beautifully transformed space that you’ll enjoy for years to come.

15. Conclusion: Enjoying Your Newly Remodeled Bathroom

As you step into your newly remodeled bathroom, the air is filled with a sense of satisfaction that comes from seeing your vision come to life. The transformation you’ve worked tirelessly to achieve is now a reality—a space that not only meets your functional needs but also reflects your personal style and taste. The fresh paint glistens under the soft glow of stylish fixtures, and the carefully chosen tiles create a harmonious flow that welcomes you.

This is more than just a renovation; it’s an investment in your daily routine and overall well-being. Imagine starting your day in a sanctuary that exudes relaxation and tranquility, where each element, from the plush towels to the soothing color palette, has been chosen with care. The new layout enhances not only the aesthetics but also the efficiency of your space, making even the simplest tasks feel like a luxury.

As you soak in the ambiance, take a moment to appreciate the little details—perhaps the way the morning light filters through a beautifully framed window or the gentle sound of water cascading from a modern faucet. These thoughtful touches create an inviting atmosphere that encourages you to unwind after a long day.

Moreover, your remodeled bathroom is a conversation starter, a showcase of your exquisite taste for guests who visit. It stands as a testament to your commitment to improving your home and enhancing your lifestyle.

In the end, a successful bathroom remodel is not just about the materials or design; it’s about creating a space that feels like an escape, a personal retreat where you can rejuvenate and recharge. So, embrace your new oasis and enjoy the countless moments of peace and comfort it will bring to your life for years to come.

In conclusion, embarking on a bathroom remodel can be an exciting yet daunting journey, but with the right approach, it can also be a highly rewarding experience. By following the essential steps outlined in this guide, from careful planning and budgeting to selecting the perfect fixtures and finishes, you can transform your bathroom into a sanctuary that reflects your style and meets your needs. Remember, every detail counts, and taking the time to consider layout, functionality, and aesthetics will ensure that your newly remodeled space is not only beautiful but also practical for years to come. We hope you’re inspired to take the plunge and start creating the bathroom of your dreams. Happy remodeling!

How to create a cozy and inviting bedroom?

Your bedroom should be more than just a place to sleep; it should be a serene sanctuary where you can escape the hustle and bustle of daily life.

A well-designed bedroom can transform your nightly routine into a soothing ritual, allowing you to recharge and rejuvenate. Whether you’re starting from scratch or looking to refresh your existing space, creating a cozy and inviting bedroom retreat is all about blending comfort with personal style. From selecting the perfect color palette and furnishings to incorporating soft textures and ambient lighting, each element plays a crucial role in crafting a warm atmosphere. In this blog post, we’ll explore ten essential tips that will help you design a calming haven tailored to your tastes, ensuring that your bedroom becomes the ultimate place to unwind and embrace tranquility at the end of a long day. Get ready to turn your bedroom into a cozy retreat that invites relaxation and rejuvenation!

1. Understanding the Importance of a Cozy Bedroom

How to create a cozy and inviting bedroom?
Credit : whatcanu.com

The bedroom is more than just a place to sleep; it’s a sanctuary where you retreat from the chaos of the world, a personal haven designed for rest and relaxation. Understanding the importance of a cozy bedroom is the first step in creating your ideal space. A well-designed bedroom can significantly impact your mood, productivity, and overall well-being.

Imagine stepping into a room that envelops you in warmth and comfort—a space that invites you to unwind after a long day. The right ambiance can enhance your sleep quality, reduce stress, and foster a sense of tranquility. A cozy bedroom provides not only a place to lay your head but also a setting for intimate moments, quiet reflections, or late-night reading sessions.

A cozy atmosphere is achieved through a combination of elements, such as soft textiles, gentle lighting, and thoughtful decor. Each choice contributes to creating a nurturing environment where you feel safe and at ease. Incorporating layers of blankets, plush pillows, and soothing colors can transform a stark room into a warm embrace that beckons you to relax.

Moreover, a cozy bedroom reflects your personality and style, making it a true reflection of you. This personal touch can create a deeper emotional connection to your space, making it even more inviting. As you embark on the journey to design your bedroom retreat, remember that this is your personal oasis—a place meant to recharge your spirit and inspire restful nights. Embracing the importance of a cozy bedroom will set the foundation for a space that rejuvenates you both physically and mentally.

2. Choosing the Right Color Palette

Choosing the right color palette is one of the most crucial steps in creating a cozy and inviting bedroom retreat. Colors have the power to influence our emotions and set the overall tone of the space, so selecting hues that promote relaxation and comfort is essential.

Start by considering soft, muted tones like pastel blues, gentle greens, or warm neutrals. These colors evoke a sense of calm and serenity, making them perfect for a restful haven. If you prefer a touch of personality, incorporate deeper shades like navy blue or forest green as accent colors; these can add depth and sophistication without overwhelming the room.

Don’t shy away from textures, either. Layering colors with various materials can enhance the cozy vibe. Think plush throw pillows in rich burgundy against a soft cream backdrop or a chunky knit blanket draped over a pastel-colored duvet. This interplay of colors and textures invites warmth and comfort, encouraging you to unwind after a long day.

Additionally, consider the natural light in your bedroom. The way colors appear can change dramatically depending on the amount of light a room receives. Test paint samples on your walls and observe how they look at different times of the day. You want colors that feel inviting both in bright daylight and soft evening glow.

Remember, your bedroom is your personal sanctuary, so let your color choices reflect your individual style while still fostering a soothing atmosphere. With the right palette, you can transform your bedroom into an inviting retreat that beckons you to relax and recharge.

3. Selecting Comfortable Bedding and Textiles

How to create a cozy and inviting bedroom?
Credit : whatcanu.com

When it comes to crafting a cozy and inviting bedroom retreat, the selection of bedding and textiles plays a pivotal role in establishing an atmosphere of warmth and relaxation. Imagine sinking into a bed adorned with layers of plush comfort—this is the essence of a well-designed sanctuary. Start with high-quality sheets, ideally made from breathable materials like cotton or linen, which not only feel luxurious against the skin but also help regulate temperature throughout the night. Opt for a thread count that balances softness with durability; around 300 to 600 is often considered ideal.

Next, consider the blanket and duvet options. A fluffy down comforter or a weighted blanket can add that sumptuous touch you crave, while a soft throw draped across the foot of the bed adds both texture and a pop of color. Choose colors and patterns that resonate with your personal style, whether you prefer calming neutrals or vibrant hues that energize the space. Don’t forget about layering—mixing different textiles like velvet, knit, and cotton can create a visually rich and tactile experience.

Pillows also deserve special attention. A variety of sizes and shapes not only enhance the design but also provide the perfect support for a restful night’s sleep. Incorporate a mix of firm and soft options, and consider including decorative pillows that reflect your aesthetic. Finally, the right bed frame and mattress can significantly influence comfort, so invest in quality that suits your sleeping style. By carefully selecting your bedding and textiles, you’ll create an inviting atmosphere that beckons you to unwind and recharge, turning your bedroom into the ultimate retreat.

4. Incorporating Soft Lighting Options

Incorporating soft lighting options is one of the most transformative elements you can introduce to your bedroom, creating an atmosphere that invites relaxation and tranquility. The harsh glare of overhead fluorescent lights can be off-putting, disrupting the serene ambiance that a cozy retreat should embody. Instead, consider layering your lighting to achieve that perfect glow.

Start with soft, adjustable bedside lamps that can provide a gentle illumination, ideal for reading or winding down at the end of the day. Look for lampshades made of fabric or those that diffuse light, softening the intensity and casting a warm hue across your space. Sconces can also be an excellent addition, offering both style and functionality while freeing up precious nightstand space.

Don’t overlook the magic of accent lighting. String lights, fairy lights, or LED strips can be artfully draped along headboards or around windows, adding a whimsical touch that enchants the room without overwhelming it. For a more sophisticated look, consider using dimmable fixtures that allow you to control the brightness according to your mood and time of day.

Candles are another wonderful option for soft lighting. The flickering flame not only emits a warm glow but also provides a sense of calm and comfort. For added safety, opt for battery-operated LED candles that mimic the glow of real flames without the worry of fire hazards.

Lastly, consider the color temperature of your bulbs. Soft white or warm white (2700K – 3000K) light bulbs create a cozy atmosphere, while cooler temperatures can feel too stark and clinical. By thoughtfully selecting and layering your lighting options, you will create a soothing sanctuary that beckons you to unwind and recharge, making your bedroom the ultimate retreat.

5. Furniture Arrangement for Maximum Comfort

How to create a cozy and inviting bedroom?
Credit : whatcanu.com

The arrangement of furniture in your bedroom is crucial for creating a cozy and inviting atmosphere. Thoughtful placement can transform a space from merely functional to a serene retreat. Start by considering the flow of the room; you want to ensure that movement feels natural and unencumbered. Avoid placing large pieces of furniture in pathways, which can create a sense of clutter and overwhelm.

Begin with the bed as the focal point, ideally positioned against a solid wall, which not only provides stability but also enhances the feeling of security. Flank your bed with nightstands to create balance, and make sure they’re at a comfortable height for easy access to lamps, books, or a glass of water. The choice of nightstands, whether minimalist or ornate, can also reflect your style while contributing to the overall comfort of the space.

Consider adding seating options, like a comfortable chair or a plush ottoman, to create a nook for reading or relaxing. This invites a sense of leisure, encouraging you to spend more time unwinding in your sanctuary. If space allows, a small bench at the foot of the bed can serve both aesthetic and functional purposes, providing a spot to sit while you put on shoes or a place to lay out clothes for the next day.

Also, think about the importance of soft, inviting materials in your furniture choices. Rounded edges can make a space feel more welcoming, while soft upholstery adds an extra layer of comfort. Incorporating a mix of textures—such as a chunky knit throw draped over a chair or plush cushions on your bed—can create visual interest and enhance the cozy vibe.

Lastly, be mindful of your bedroom’s lighting. The arrangement should allow for both natural and artificial light to play a role in the ambiance. Positioning lamps and overhead fixtures to illuminate different areas can help create a warm glow, perfect for winding down in the evenings. By thoughtfully arranging your furniture, you cultivate an inviting atmosphere where comfort reigns supreme, making your bedroom a true retreat from the outside world.

6. Adding Personal Touches and Decor

Personal touches and decor are what truly transform a bedroom from a simple sleeping space into a cozy retreat that reflects your unique personality and style. When designing your sanctuary, consider incorporating items that evoke fond memories or bring you joy. This could include family photographs in stylish frames, travel souvenirs that remind you of your adventures, or even artwork that resonates with your spirit.

Textiles play a significant role in creating warmth and comfort. Choose bedding that speaks to you—whether it’s a luxurious quilt, a soft fleece throw, or an eye-catching duvet cover. Layering different textures can add depth to your design; think about mixing knits, cottons, and silks to create an inviting tactile experience. Don’t forget to accentuate your space with decorative cushions and plush rugs that invite relaxation.

Plants can also breathe life into your bedroom while enhancing air quality. Consider adding a couple of low-maintenance indoor plants, like succulents or snake plants, to infuse a refreshing touch of nature. Their vibrant green leaves can create a sense of calm and tranquility, making your space feel more alive and welcoming.

Lighting should not be overlooked in your quest for personalization. Opt for warm, soft lighting to create a serene atmosphere. Incorporate bedside lamps with unique designs or fairy lights strung across shelves to add a whimsical touch. Candles can also enhance the cozy ambiance, providing both soft light and soothing scents that promote relaxation.

Ultimately, the key to adding personal touches and decor lies in choosing elements that resonate with you and make you feel at home. By curating a space filled with meaningful items, you’ll not only create an inviting environment but also a bedroom retreat that tells your story and offers a sense of peace at the end of each day.

7. Utilizing Natural Elements and Plants

How to create a cozy and inviting bedroom?
Credit : whatcanu.com

Incorporating natural elements and plants into your bedroom design can transform it from a simple sleeping space into a serene retreat that nurtures your well-being. Imagine waking up to the gentle rustle of leaves and the sight of vibrant greenery just beyond your bedside, creating a peaceful oasis that feels alive and fresh.

Start by selecting a variety of indoor plants that thrive in low-light conditions, such as snake plants, pothos, or peace lilies. These hardy companions not only purify the air but also add a burst of color and texture to your decor. Place a tall potted plant in a corner to draw the eye upwards, creating an illusion of spaciousness, or cluster smaller pots on your windowsill for a charming, layered effect.

Natural elements can extend beyond plants. Consider incorporating materials like wood, stone, and woven textiles to evoke a sense of tranquility. A reclaimed wood bed frame or a bedside table made from natural timber can add warmth and character to your space. Pair these with soft, organic cotton or linen bedding in earthy tones to enhance the room’s coziness.

Don’t forget about the power of natural light. Use sheer curtains to allow soft sunlight to filter in, creating an inviting glow that dances across your room throughout the day. This simple touch can significantly elevate your mood and energy levels, making your bedroom feel more connected to the outside world.

Lastly, consider adding elements like a small water feature or a bowl of pebbles and shells collected from nature. These subtle touches serve as reminders of the natural world, fostering a calming atmosphere that encourages relaxation and rejuvenation. By weaving together plants and natural materials, you can create a bedroom retreat that feels both inviting and restorative, a perfect sanctuary to escape the hustle and bustle of everyday life.

8. Creating a Clutter-Free Space

Creating a clutter-free space is essential for transforming your bedroom into a cozy and inviting retreat. A serene environment fosters relaxation and tranquility, allowing you to unwind after a long day. Start by assessing your belongings—keep only those items that bring you joy or serve a practical purpose. A minimalist approach not only enhances the aesthetic appeal of your bedroom but also promotes mental clarity and calmness.

Consider investing in storage solutions that are both functional and stylish. Under-bed storage boxes, decorative baskets, and built-in shelves can help you organize your belongings while maintaining a clean appearance. Utilize every nook and cranny: mount shelves above your nightstands, or use wall hooks for accessories, keeping surfaces clear and open.

In addition to physical clutter, pay attention to digital distractions. Limit the number of devices in your bedroom, creating a sanctuary free from notifications and screens. If you enjoy reading before bedtime, designate a small bookshelf or a cozy reading nook that doesn’t contribute to clutter but rather invites you into a peaceful state of mind.

Finally, embrace the concept of “less is more” when it comes to decor. Choose a few statement pieces—such as a beautiful piece of art or a stunning lamp—that reflect your personality and style, rather than overwhelming the space with numerous items. By cultivating a clutter-free environment, you not only enhance the aesthetics of your bedroom but also create a soothing atmosphere that encourages rest and rejuvenation.

9. The Role of Aromatherapy in Creating Ambiance

Aromatherapy is a powerful yet often overlooked element in crafting a cozy and inviting bedroom retreat. The scents that fill your space can significantly influence your mood, relaxation levels, and overall sleep quality. By incorporating essential oils and fragrant elements, you can transform your bedroom into a sanctuary that soothes the senses and enhances tranquility.

Imagine stepping into your bedroom and being greeted by the calming aroma of lavender, known for its sleep-inducing properties. A diffuser gently disperses the soothing scent into the air, enveloping you in a serene ambiance that signals your mind and body to unwind. Alternatively, a blend of chamomile and bergamot can create a refreshing atmosphere, perfect for easing stress after a long day.

To effectively utilize aromatherapy in your bedroom, consider integrating scented candles, essential oil diffusers, or even potpourri. Each of these options allows you to customize the scent experience to match your personal preferences. For those who prefer a more natural approach, fresh flowers or herb plants like jasmine or rosemary can add both beauty and fragrance to your space.

Moreover, pairing specific scents with certain activities can enhance your bedroom’s functionality. For example, diffusing uplifting citrus scents like orange or lemon can invigorate your morning routine, while earthy scents like sandalwood or cedar can ground you in the evening, promoting relaxation and restful sleep.

As you curate your bedroom retreat, remember that the olfactory experience is as important as the visual aesthetics. By thoughtfully selecting and integrating aromas that resonate with you, you can elevate your space into a cozy haven that not only looks inviting but feels harmonious and rejuvenating. With the right scents wafting through the air, your bedroom will become a true refuge—a place where you can escape the chaos of the outside world and embrace a deep sense of calm.

10. Incorporating Functional and Cozy Seating

When it comes to creating a cozy and inviting bedroom retreat, incorporating functional and cozy seating is a game-changer. Imagine having a peaceful corner where you can unwind with a good book, sip your morning coffee, or simply gaze out of the window. A well-chosen chair or small loveseat can transform your bedroom into a multi-functional haven.

Start by considering the space you have available. If your bedroom is on the smaller side, opt for a compact accent chair or a stylish ottoman that can double as a footrest or additional seating when needed. Look for designs that are visually appealing, yet comfortable, with soft fabrics like plush velvet or breathable linen that invite you to sink in and relax. A chair with a high back or ample cushioning can provide that extra layer of comfort, making it the perfect spot to curl up after a long day.

Don’t forget about the placement! Ideally, position your seating near a source of natural light, like a window, to create a warm and inviting atmosphere. Add a small side table to hold your favorite reads or a steaming cup of tea, ensuring that everything you need is within arm’s reach. You could also drape a soft throw blanket over the chair or add decorative cushions in complementary colors to enhance the coziness factor.

For those with larger bedrooms, consider creating a dedicated reading nook. A pair of armchairs flanking a small coffee table can foster an intimate space perfect for conversation or quiet reflection. Layer in some ambient lighting, such as a stylish floor lamp or wall sconces, to elevate the mood, making it a welcoming retreat at any hour of the day.

Incorporating functional and cozy seating in your bedroom not only enhances the aesthetic appeal but also encourages relaxation and comfort, turning your personal space into a true sanctuary where you can recharge and unwind.

11. Layering Rugs for Warmth and Texture

Layering rugs is an often-overlooked yet transformative design technique that can elevate your bedroom into a warm and inviting retreat. By combining different types of rugs, you can create a rich tapestry of textures and colors that not only enhance the aesthetic appeal but also offer warmth underfoot, making your space feel cozy and welcoming.

Start with a larger, foundational rug that defines the space, such as a plush area rug in a neutral tone or a soft, woven piece that adds a touch of organic charm. This base layer sets the stage and can help anchor your bedroom furniture, providing a cohesive look. Next, consider adding a smaller, statement rug on top. A vibrant Persian rug or a contemporary geometric design can inject personality and flair into the room, serving as a focal point that draws the eye.

The key to successful layering is to ensure that the rugs complement each other in terms of color, pattern, and texture. For instance, pairing a soft, shaggy rug with a more structured, flat-weave option can create a delightful contrast that adds depth to the space. This layering not only enhances the visual interest but also adds a comforting tactile experience, inviting you to sink your toes into the plush materials.

In addition to aesthetic benefits, layered rugs can also contribute to insulation, helping to keep your bedroom warm during colder months. By strategically placing rugs near the bed or in seating areas, you can create cozy nooks that encourage relaxation and comfort.

Ultimately, layering rugs is about expressing your personal style while enhancing the cozy ambiance of your bedroom. Mix and match sizes, textures, and colors to curate a space that feels uniquely yours, where every step feels like a warm embrace. With the right combination, your bedroom will transform into a serene sanctuary that beckons you to unwind and rejuvenate.

12. Tips for Soundproofing Your Bedroom

Creating a serene and peaceful environment in your bedroom is crucial for promoting relaxation and restful sleep, and soundproofing is a key aspect of achieving that tranquil retreat. Noise pollution, whether from bustling streets, loud neighbors, or even the hum of household appliances, can disrupt your peaceful sanctuary. Here are some effective soundproofing tips to transform your bedroom into a quiet haven.

**1. Choose the Right Windows:** Start with your windows, as they are often the weakest link when it comes to sound insulation. Opt for double or triple-pane windows that create an air gap, effectively dampening external noise. If replacing windows isn’t an option, consider applying soundproof window inserts or heavy drapes that can help absorb sound.

**2. Insulate the Walls:** Adding insulation to your walls can significantly reduce noise transmission. If you’re in the midst of a renovation, consider using soundproofing materials like acoustic panels or mass-loaded vinyl. For existing walls, hanging thick tapestries or decorative quilts can add an extra layer of sound absorption while enhancing your room’s aesthetic.

**3. Carpeting and Rugs:** Hard flooring can amplify noise, so laying down plush carpets or area rugs can help absorb sound. Opt for thick, high-pile carpets that not only provide comfort underfoot but also act as a barrier against noise. Adding a layer of padding beneath the carpet can further enhance soundproofing.

**4. Seal Gaps and Cracks:** Small gaps and cracks in walls, around windows, and even doors can let noise seep in. Use weather stripping or caulk to seal these openings effectively. For doors, consider installing a door sweep to minimize sound leakage from hallways or other rooms.

**5. Incorporate Soft Furnishings:** Soft furnishings such as cushions, throws, and upholstered furniture not only add comfort but also absorb sound. Layering your space with various textures can enhance the cozy feel and create a quieter environment.

**6. White Noise Machines:** If external noise is unavoidable, consider using a white noise machine or a fan to help mask disruptive sounds. The gentle hum can create a soothing atmosphere, making it easier to drift off to sleep without distractions.

By implementing these soundproofing strategies, you can create a bedroom retreat that envelops you in peace and tranquility. A quiet space is essential for relaxation, so take the time to invest in these improvements. With a little effort, your bedroom can become the ultimate sanctuary, inviting you to unwind and rejuvenate each day.

13. Strategies for Maintaining a Cozy Temperature

Creating a cozy and inviting bedroom retreat goes beyond aesthetic touches; it also hinges on ensuring a comfortable temperature year-round. A well-maintained climate can transform your space into a sanctuary for rest and relaxation. Here are some effective strategies to help you maintain that perfect cozy temperature.

First, consider the power of layering your bedding. Invest in high-quality sheets, a plush comforter, and a soft throw blanket. During colder months, opt for heavier fabrics like flannel or fleece. In the warmer months, lighter cotton and linen will keep you cool without sacrificing comfort. Don’t forget to include a breathable mattress protector that helps regulate temperature and wick away moisture.

Next, pay attention to your window treatments. Heavy curtains not only add a touch of elegance but also serve as excellent insulators. During hot summer days, close them to block out the sun and keep your room cool. Conversely, during chilly evenings, draw them closed to keep the heat in and create a cocoon-like atmosphere.

Investing in a quality fan or air conditioner can also make a significant difference. A ceiling fan, for instance, can circulate air and create a gentle breeze, which is especially refreshing during warmer months. In winter, a space heater can provide targeted warmth without raising the overall temperature of your home.

Additionally, consider adding a programmable thermostat or smart home devices that allow you to control the temperature remotely. This way, you can set the perfect climate before you even step foot in your bedroom.

Finally, don’t underestimate the power of personal comfort. Adjust your sleepwear to match the season—light cotton pajamas in the summer and cozy flannel in the winter. These small changes can make a big impact on how cozy you feel in your sanctuary.

By implementing these strategies, you can create a bedroom that not only looks inviting but also feels just right, no matter the season. After all, the ultimate goal is to ensure your bedroom remains a haven of comfort and tranquility.

14. Personalizing with Art and Photography

When it comes to designing a cozy and inviting bedroom retreat, personalizing the space with art and photography can make all the difference. Art is not just decor; it’s a reflection of your personality, experiences, and emotions. By carefully selecting pieces that resonate with you, you can transform your bedroom into a sanctuary that evokes comfort and warmth.

Start by curating a collection of artworks that speak to your soul—whether it’s vibrant paintings that inspire energy and creativity, serene landscapes that evoke tranquility, or abstract pieces that spark intrigue. Consider the colors and themes in your chosen art; they should harmonize with your overall bedroom color palette to create a cohesive look. For instance, soft pastels can enhance a calm atmosphere, while bold and bright hues can energize the space.

Incorporating personal photography is another heartfelt way to personalize your retreat. Frame cherished snapshots from memorable moments—family vacations, celebrations with friends, or candid portraits of loved ones. These images not only tell your story but also create a sense of nostalgia and connection every time you enter the room. You might even consider a gallery wall, mixing art and photographs in an eclectic display that showcases your unique journey.

Don’t shy away from experimenting with different display methods. Leaning frames on shelves or dressers can add a relaxed vibe, while a traditional wall-mounted approach can lend a more polished look. Additionally, you can use varied frame styles and sizes to create visual interest, layering textures that invite touch and admiration.

Ultimately, personalizing your bedroom with art and photography allows you to express your individuality and cultivate an environment that feels truly yours. As you surround yourself with what you love, you create a warm, inviting space that encourages relaxation and rejuvenation after a long day.

15. Regularly Refreshing Your Space for Continued Comfort

A cozy and inviting bedroom retreat isn’t just about the initial design; it’s about maintaining that sanctuary feel over time. Just as seasons change, so too should your bedroom evolve to keep the atmosphere fresh and comforting. Regularly refreshing your space allows you to adapt to your evolving tastes and preferences while ensuring your bedroom remains a true haven.

Start by reassessing the color scheme. Subtle shifts can have a profound impact; consider swapping out heavier winter tones for lighter, breezier hues as the weather warms up. Soft pastels or serene neutrals can breathe new life into your space, making it feel open and inviting. Adding or swapping out throw pillows, blankets, and artwork can also provide a fresh perspective without a complete overhaul.

Plants are another wonderful way to refresh your bedroom. Not only do they add a splash of color, but they also improve air quality and create a sense of tranquility. Rotate seasonal blooms or introduce new greenery that resonates with the current season to keep your sanctuary lively.

Don’t underestimate the power of decluttering. Regularly removing items that no longer serve you or spark joy can create a more serene environment. Minimalism doesn’t have to mean starkness—curate your space with items that tell your story and evoke comfort.

Lastly, consider updating your bedding. Investing in new sheets, duvet covers, or pillowcases can transform your sleeping experience. Opt for fabrics that feel good against your skin and colors that evoke tranquility. A well-made bed with fresh linens instantly elevates the comfort level of your retreat.

By keeping your bedroom dynamic and reflective of your changing mood and lifestyle, you ensure that it remains a cozy, inviting sanctuary for years to come. Embrace the beauty of regular refreshes, and let your bedroom evolve into a space that continuously nurtures your well-being.

As we wrap up our exploration of creating a cozy and inviting bedroom retreat, we hope you feel inspired to transform your space into a personal sanctuary that reflects your style and promotes relaxation. From choosing the right color palette to selecting the perfect bedding and incorporating soft lighting, each tip is a stepping stone toward crafting a haven where you can unwind and recharge after a long day. Remember, your bedroom is more than just a place to sleep; it is a reflection of your personality and a space that should envelop you in comfort and warmth. We encourage you to take these tips to heart and start designing the bedroom of your dreams. Here’s to restful nights and rejuvenating mornings in your newly designed retreat!

What are the best tools for a beginner DIYer?

Embarking on the journey of DIY projects can be both exhilarating and intimidating, especially for beginners eager to unleash their creativity and craftsmanship.

Whether you’re looking to transform a room, tackle small repairs, or craft unique decor, having the right tools at your disposal is crucial to your success. In this comprehensive guide, we will explore the essential tools every beginner DIYer should own, ensuring you’re equipped to take on a variety of projects with confidence and ease. From the versatile hammer and trusty screwdriver to innovative gadgets that can elevate your handiwork, each tool serves as a building block in your DIY toolkit. Join us as we delve into the must-have items that will not only simplify your tasks but also inspire you to tackle your next project like a pro!

1. Introduction to DIY: Why Every Beginner Should Start

What are the best tools for a beginner DIYer?
Credit : whatcanu.com

In the world of home improvement and creative projects, the do-it-yourself (DIY) movement has gained remarkable traction, encouraging individuals to take control of their spaces and express their creativity. For beginners, diving into DIY can seem daunting at first, but the rewards are plentiful and well worth the effort. Not only does embracing DIY empower you to transform your home with personal touches, but it also cultivates a sense of accomplishment and self-sufficiency.

Starting your DIY journey opens the door to a wealth of opportunities. Whether you’re looking to spruce up your living room with a handmade shelf, tackle that long-overdue garden project, or even create personalized gifts for loved ones, the possibilities are endless. It’s about more than just home improvement; it’s about harnessing your creativity and learning new skills along the way. Each project completed, no matter how small, builds your confidence and enhances your problem-solving abilities, making you more equipped for future endeavors.

Moreover, DIY is a fantastic way to save money. Instead of hiring professionals for every little task, you can tackle many projects on your own with just a few essential tools and a bit of guidance. As you gain experience, you’ll discover that many projects can be completed for a fraction of the cost, allowing you to invest your savings into even more ambitious undertakings.

In this comprehensive guide, we’ll explore the essential tools every beginner DIYer should own, ensuring that you are well-equipped to embark on this rewarding journey. From the basic toolkit to specialized equipment, we’ll break down what you need to get started and help you build a solid foundation for your DIY adventures. So grab your safety goggles, roll up your sleeves, and let’s explore the exciting world of DIY!

2. Safety First: Essential Safety Gear for DIY Projects

When diving into the world of DIY, safety should always be your top priority. Whether you’re tackling small home repairs or embarking on ambitious renovation projects, investing in essential safety gear is crucial to protect yourself from potential hazards. Here’s a breakdown of the must-have safety equipment every beginner DIYer should own.

**1. Safety Glasses:** One of the simplest yet most effective pieces of safety gear, safety glasses shield your eyes from flying debris, dust, and harmful vapors. Look for a pair that fits comfortably and provides a snug seal around your eyes. Whether you’re drilling, sanding, or cutting, your eyes deserve protection.

**2. Hearing Protection:** Power tools can be loud, and prolonged exposure to high decibel levels can lead to hearing loss. Invest in a good pair of earplugs or earmuffs to minimize noise pollution, especially when using saws, drills, or other heavy machinery. Not only will this help preserve your hearing, but it will also allow you to focus better on your task.

**3. Dust Masks or Respirators:** Dust and fumes can pose serious health risks, particularly when working with materials like wood, drywall, or certain chemicals. A simple dust mask can filter out large particles, but for more toxic substances, consider a respirator that offers a higher level of filtration. Make sure it fits properly to ensure effective protection.

**4. Work Gloves:** Protecting your hands is essential when working with tools and materials. Choose work gloves that offer a good grip and are made from durable materials. Whether you’re handling rough wood, sharp tools, or hot surfaces, gloves provide the necessary barrier against cuts, scrapes, and burns.

**5. Steel-Toed Boots:** If you’re going to be moving heavy materials or using tools that could fall, steel-toed boots are a must. They protect your feet from heavy objects and provide additional support and stability, reducing the risk of injuries.

**6. First Aid Kit:** Accidents happen, even with the best precautions. Having a well-stocked first aid kit on hand ensures you’re equipped to handle minor injuries, from cuts and bruises to more serious mishaps. Make sure to include adhesive bandages, antiseptic wipes, gauze, and any personal medications you might need.

**7. High-Visibility Vest:** If you’re working outdoors or in low-light conditions, a high-visibility vest can help ensure you’re seen, especially if you’re sharing your workspace with others. This is particularly important during larger projects or when operating near traffic.

By equipping yourself with these essential safety tools, you’ll not only make your DIY experience safer but also more enjoyable. Always remember, taking the time to protect yourself allows you to focus on your projects with confidence and creativity!

3. Hand Tools Every Beginner Should Have

What are the best tools for a beginner DIYer?
Credit : whatcanu.com

When embarking on your DIY journey, having the right hand tools is essential to ensure not only efficiency but also the quality of your projects. A well-equipped toolbox can empower you to tackle a variety of tasks, from simple repairs to more intricate creations. Here’s a comprehensive list of hand tools every beginner should consider adding to their toolkit.

**1. Claw Hammer:** The backbone of any DIY toolkit, a claw hammer is indispensable for driving nails into wood and for removing them when necessary. Opt for a hammer that feels comfortable in your hand and has a good weight balance for optimal control.

**2. Screwdriver Set:** A versatile screwdriver set that includes both flathead and Phillips-head screwdrivers is crucial. Look for a set with varying sizes to accommodate different screws. Magnetic tips can also be a great feature, making it easier to hold screws in place while you work.

**3. Tape Measure:** Precision is key in DIY, and a sturdy tape measure ensures you take accurate measurements every time. A 25-foot tape is a common choice for beginners, as it strikes a balance between portability and reach.

**4. Utility Knife:** A reliable utility knife is a must-have for cutting various materials, from cardboard to rope. Look for a knife with a retractable blade for safety and ease of use, as well as a comfortable grip for those extended projects.

**5. Pliers:** A pair of pliers can provide a strong grip for holding, twisting, or cutting wires and small objects. Needle-nose pliers are particularly useful for reaching into tight spaces, while standard pliers can handle general tasks.

**6. Level:** Ensuring that your projects are straight and level is crucial for both aesthetics and functionality. A simple bubble level can help you achieve perfectly aligned shelves, frames, or fixtures.

**7. Adjustable Wrench:** An adjustable wrench is invaluable for loosening or tightening nuts and bolts of various sizes. Its versatility makes it a staple in any beginner’s toolkit, allowing you to tackle plumbing tasks or furniture assembly with ease.

**8. Safety Gear:** While not a traditional hand tool, investing in safety gear is essential. Safety goggles protect your eyes from debris, while gloves can prevent cuts and blisters during your DIY adventures.

By equipping yourself with these fundamental hand tools, you’ll be well-prepared to handle a wide range of projects, from minor repairs to creative endeavors. As you gain experience and confidence, you can expand your toolkit with specialized tools tailored to your specific interests, but starting with these essentials will set you on the right path to successful DIYing.

– 3.1. Hammer

A hammer is perhaps the quintessential tool in any DIY enthusiast’s arsenal, serving as both a symbol and a cornerstone of craftsmanship. Whether you’re hanging pictures, assembling furniture, or tackling home repairs, a reliable hammer is indispensable.

When selecting a hammer, consider the weight and type that best suits your projects. For general DIY tasks, a standard claw hammer—typically weighing between 16 and 20 ounces—is ideal. This versatile tool features a flat striking surface on one end for driving nails into wood and a curved claw on the other for pulling them out with ease. The balance of weight and usability makes it perfect for both beginners and seasoned DIYers alike.

The handle material also plays a crucial role in comfort and durability. Wooden handles offer a classic feel, while fiberglass or rubber grips provide shock absorption and a non-slip surface, reducing hand fatigue during extended use. Take the time to find a hammer that feels good in your hand, as this will make your DIY projects much more enjoyable.

As you embark on your DIY journey, remember that a hammer isn’t just a tool; it’s an extension of your creativity and capability. With the right hammer in hand, you’ll be empowered to transform your ideas into reality, one nail at a time. So, whether you’re crafting a beautiful piece of furniture or renovating a room, don’t underestimate the power of this simple yet essential tool.

– 3.2. Screwdrivers

What are the best tools for a beginner DIYer?
Credit : whatcanu.com

### 3.2 Screwdrivers

A sturdy and reliable set of screwdrivers is an absolute essential for any beginner DIYer. These versatile tools are not only crucial for assembling furniture and tightening loose screws but also play a vital role in countless home improvement projects. When selecting screwdrivers, it’s important to consider both the variety and quality of the tools in your kit.

Start with a set that includes both flathead and Phillips screwdrivers in various sizes. Flathead screwdrivers, with their single flat blade, are perfect for slotted screws, while Phillips screwdrivers, characterized by their cross-shaped tip, provide better grip and torque. Investing in magnetic screwdrivers can also be a game-changer; the magnetic tip helps hold screws in place, making it easier to work in tight spaces without the frustration of dropped fasteners.

It’s also worth considering a ratcheting screwdriver, which allows for quick and efficient tightening and loosening of screws without the need to reposition the tool after each turn. For those who want to take their DIY skills to the next level, a multi-bit screwdriver can be incredibly handy. This tool features interchangeable bits, allowing you to tackle various screw sizes and types without cluttering your workspace with multiple tools.

Remember to pay attention to the handle design as well. Ergonomic handles provide a comfortable grip, reducing hand fatigue during longer projects. A well-balanced screwdriver not only enhances control but also makes it easier to apply the necessary force without straining your wrist.

Ultimately, having a reliable set of screwdrivers will empower you to tackle everything from simple repairs to complex installations with confidence. As you embark on your DIY journey, make sure to keep these essential tools within easy reach, and you’ll find that many of your projects will become far less daunting!

– 3.3. Pliers

### 3.3. Pliers

Pliers are a cornerstone of any DIY toolkit, offering versatility and grip that can handle a multitude of tasks. From bending and twisting wires to gripping and pulling objects, these handy tools come in various shapes and sizes, each designed for specific functions.

**Types of Pliers:**
1. **Needle-Nose Pliers:** With their long, tapered jaws, needle-nose pliers are perfect for reaching into tight spaces and manipulating small objects. Whether you’re working with delicate electronics or intricate jewelry designs, these pliers provide the precision needed for intricate tasks.

2. **Slip-Joint Pliers:** Often referred to as adjustable pliers, these feature a movable pivot point that allows you to adjust the jaw width, making them ideal for gripping items of different sizes. They are particularly useful for plumbing tasks or when you need a stronger grip on a larger object.

3. **Cutting Pliers:** Equipped with sharp edges, cutting pliers are designed for snipping wires and cables. They come in handy for electrical projects, allowing you to cleanly cut through materials without fraying or damaging them.

4. **Locking Pliers:** Also known as Vise-Grips, these pliers can lock onto an object, providing a secure grip without requiring constant pressure from your hand. They are excellent for clamping materials together or holding tight in awkward positions while you work on a project.

**Why You Need Pliers:**
Having pliers in your toolbox offers you the flexibility to tackle a wide range of DIY projects with confidence. They empower you to handle tasks that require precision, strength, or a delicate touch. Whether you’re assembling furniture, fixing appliances, or crafting your next home décor project, pliers can be the unsung heroes of your toolkit.

**Care and Maintenance:**
To ensure your pliers last for years, it’s essential to keep them clean and lubricated. After each use, wipe down the jaws and joints to remove debris and prevent rust. Regularly check for any signs of wear, and if you notice any rust, use a wire brush or rust remover to clean them up. Properly maintaining your tools not only extends their life but also enhances their performance, helping you get the job done seamlessly.

In summary, pliers are an indispensable tool for any beginner DIYer. Their ability to grip, twist, cut, and hold makes them a must-have in your growing collection, paving the way for successful and enjoyable projects.

– 3.4. Measuring Tape

What are the best tools for a beginner DIYer?
Credit : whatcanu.com

### 3.4. Measuring Tape

A measuring tape is an indispensable tool for any DIY enthusiast, serving as the backbone of every successful project. Whether you’re hanging shelves, laying flooring, or crafting custom furniture, precise measurements are crucial to achieving a professional finish, and a measuring tape is your best ally in ensuring accuracy.

Typically extending up to 25 feet or more, a standard measuring tape features a flexible metal or fiberglass blade, allowing you to easily navigate around corners and awkward spaces. The markings on the tape are usually in both inches and centimeters, making it versatile for various projects and user preferences. Look for a model with a locking mechanism, which will hold your measurement in place, providing you with the stability needed when marking cuts or drilling holes.

Moreover, the durability of a measuring tape is an essential factor to consider. Opt for one that’s sturdy and can withstand the wear and tear of frequent use. Some tapes even come with added features like a magnetic hook or an easy-to-read standout, which can make measuring larger distances much easier.

In addition to its primary function, a measuring tape can also spark creativity. As you measure out spaces and envision your projects, you may discover new possibilities for layout, design, and functionality. Whether you’re a weekend warrior or diving into more ambitious home improvement projects, having a reliable measuring tape on hand will not only save you time but will also prevent costly mistakes. So, make sure this versatile tool is part of your essential DIY toolkit, and watch your projects come to life with precision and flair!

4. Power Tools for the Aspiring DIYer

When it comes to tackling more ambitious projects, power tools are game changers for the aspiring DIYer. These tools not only save time and effort but also expand the range of tasks you can confidently undertake. As you venture into the realm of home improvement, having the right power tools can make all the difference in achieving professional-looking results.

**1. Cordless Drill/Driver:** This versatile tool should be at the top of your list. Whether you’re assembling furniture, hanging shelves, or performing minor renovations, a cordless drill makes drilling holes and driving screws a breeze. Opt for a model with adjustable speed settings and a range of drill bits for added flexibility.

**2. Circular Saw:** Perfect for cutting lumber, plywood, and other materials with precision, a circular saw is indispensable for larger projects. Its portability allows you to work both indoors and outdoors, and its ability to make straight cuts quickly can save you hours of manual labor.

**3. Jigsaw:** For intricate cuts and curves, a jigsaw is the tool to have. This handheld saw allows you to create detailed shapes and designs in wood, plastic, or metal. With various blade types available, you can tackle a wide variety of materials, making it a must-have for creative DIY projects.

**4. Sander:** Achieving a smooth finish is essential in any DIY project. A power sander, whether it’s a belt sander for large surfaces or a palm sander for finer details, will help you eliminate rough edges and prepare your materials for painting or staining.

**5. Impact Driver:** When it comes to driving long screws or tackling tough materials, an impact driver is a powerhouse. It delivers high torque and rapid bursts of power, making it easier to drive screws without stripping them. This tool is particularly useful for outdoor projects or heavy-duty applications.

**6. Oscillating Multi-Tool:** This multi-functional tool can cut, sand, scrape, and grind, making it remarkably versatile. It’s perfect for tight spaces and detailed work, such as removing grout or trimming door frames. The oscillating motion reduces the risk of damaging surrounding materials, making it a safe choice for beginners.

As you begin your DIY journey, investing in these essential power tools will not only enhance your efficiency but also empower you to take on a broader range of projects. With practice and the right tools in hand, you’ll find that your confidence and skills will grow, transforming your home and projects one task at a time.

– 4.1. Cordless Drill

### 4.1. Cordless Drill

A cordless drill is an indispensable tool that every DIY beginner should consider as a cornerstone of their toolkit. Versatile and easy to use, this powerful device simplifies a variety of tasks, from assembling furniture and installing shelves to drilling holes in walls and tightening screws. The freedom of movement that a cordless drill provides—without the hassle of tangled cords or needing to find a power outlet—makes it an ideal companion for both indoor and outdoor projects.

When selecting a cordless drill, look for a model that strikes a balance between power and weight. A lightweight drill will be easier to handle for extended periods, while one with sufficient torque will ensure that it can tackle tougher jobs without straining. Many models come with adjustable speed settings, allowing you to switch between a slow speed for precise drilling and a higher speed for faster tasks.

Another key feature to consider is the battery life. Opt for a drill with a lithium-ion battery, which offers a longer lifespan and faster charging times compared to traditional batteries. Some drills come with interchangeable battery packs, ensuring you won’t be left stuck mid-project with a dead battery.

Additionally, a cordless drill often includes a variety of drill bits and driver heads, expanding its usability for different materials and tasks. Investing in a set with multiple attachments will enhance your toolkit and enable you to tackle a wider range of projects right from the start.

In summary, a cordless drill is not just a tool; it’s a gateway to unlocking your DIY potential. With its ease of use and multifunctionality, it empowers you to take on projects with confidence and creativity, ensuring that you can efficiently bring your ideas to life. Whether you’re hanging art, assembling that bookshelf you’ve been eyeing, or tackling home repairs, having a reliable cordless drill by your side will make all the difference.

– 4.2. Circular Saw

### 4.2 Circular Saw

A circular saw is an essential tool that every beginner DIYer should have in their arsenal. Renowned for its versatility and power, this tool can make quick work of a variety of cutting tasks, from lumber and plywood to metal and plastic. The circular saw is designed with a toothed blade that spins rapidly, allowing it to slice through materials with precision and ease.

For the novice, the circular saw might seem intimidating at first glance, but its user-friendly design makes it accessible to all skill levels. Most models feature a comfortable grip and lightweight construction, which can help reduce fatigue during extended use. Additionally, many circular saws come with adjustable cutting depths and angles, offering you the flexibility to tackle different projects, whether you’re building a deck, crafting furniture, or simply making home repairs.

When selecting a circular saw, consider the size of blade you need. Typically, a 7 1/4-inch blade is the most common and offers a good balance between power and portability. Furthermore, look for features like a laser guide or LED light, which can greatly improve accuracy when cutting.

Safety is paramount when using a circular saw, so ensure you invest in protective gear, such as safety goggles and hearing protection. Before you begin any project, always be sure to read the manufacturer’s instructions and familiarize yourself with the tool’s settings and controls.

By incorporating a circular saw into your DIY toolkit, you’ll not only enhance your cutting capabilities but also open the door to a world of creative possibilities. Whether you’re planning ambitious renovations or simple home improvements, this tool is sure to become a go-to favorite in your DIY endeavors.

– 4.3. Sander

### 4.3. Sander

A sander is an indispensable tool for any DIY enthusiast looking to achieve that flawless finish on their projects. Whether you’re working with wood, metal, or even plastic, a sander can make all the difference in the quality of your work. For beginners, investing in a versatile sander can save you a considerable amount of time and effort while ensuring a professional-looking result.

There are several types of sanders available, but two of the most beginner-friendly options are the orbital sander and the detail sander. An orbital sander is perfect for larger surfaces, like tabletops or cabinets, as it uses circular sanding pads to smooth out rough areas and prepare surfaces for painting or staining. Its random orbit motion helps to prevent swirl marks, making it ideal for achieving a smooth finish on all kinds of wood.

On the other hand, a detail sander is designed for those hard-to-reach corners and intricate areas. Its triangular shape allows you to navigate tight spaces with ease, making it perfect for sanding furniture edges, intricate moldings, or the seams of your DIY projects. With the right sandpaper grits, you can transition from rough sanding to fine finishing, ensuring every nook and cranny is perfectly smooth.

When using a sander, remember to wear appropriate safety gear, such as a dust mask and goggles, to protect yourself from fine particles. Additionally, always follow the manufacturer’s instructions for optimal performance and safety. As you become more experienced, you’ll find that a sander is not just a tool, but an extension of your creative vision, allowing you to transform raw materials into beautiful finished pieces. Embrace the power of sanding, and watch as your DIY projects come to life with a polished touch!

5. Essential Hardware and Fasteners

When embarking on your DIY journey, having the right hardware and fasteners at your fingertips is crucial for ensuring your projects are sturdy, safe, and aesthetically pleasing. These small yet mighty components often make the difference between a well-finished project and a flimsily assembled piece that falls apart at the slightest touch.

**Nails and Screws:** Start with a diverse collection of nails and screws in various sizes and types. Common wood screws, drywall screws, and finishing nails are essential for a range of tasks, from assembling furniture to securing wall fixtures. Consider investing in a screw organizer to keep them sorted and accessible.

**Anchors and Wall Fasteners:** For projects that require mounting items to walls, such as shelves or picture frames, wall anchors are indispensable. They provide extra support and prevent screws from pulling out of the wall. Choose between plastic, metal, or toggle bolts, depending on the weight of the items you’re hanging.

**Brackets and Hangers:** These hardware pieces are essential for adding strength and support to your projects. Corner brackets and L-brackets can reinforce joints, while shelf brackets can help you create sturdy shelving solutions. Don’t overlook the importance of picture hangers and ceiling hooks for your decorative needs.

**Adhesives and Sealants:** Sometimes, hardware alone isn’t enough. A good adhesive can be a game-changer. Wood glue, epoxy, and super glue each have their uses, allowing for strong bonds in different materials. Sealants, such as caulking, are perfect for filling gaps and providing a finished look, especially in kitchen and bathroom projects.

**Organizational Tools:** Lastly, invest in a sturdy toolbox or a rolling organizer to keep all your hardware and fasteners neatly stored. An organized workspace not only saves you time when searching for supplies but also contributes to a more efficient and enjoyable DIY experience.

By equipping yourself with these essential hardware and fasteners, you’ll have the foundational tools necessary to tackle a wide variety of DIY projects with confidence and skill. Whether you’re assembling a bookshelf or hanging a new mirror, the right hardware will ensure your hard work stands the test of time.

6. Storage Solutions for DIY Tools

When diving into the world of DIY, having the right tools is only part of the equation; how you store and organize those tools can significantly impact your efficiency and enjoyment of projects. Proper storage solutions for DIY tools not only keep your workspace tidy but also ensure that you can easily find what you need when creativity strikes.

Start by assessing the types and quantities of tools you have. A portable toolbox is an excellent first step, allowing you to transport your essential tools to various locations around the house or even off-site projects. Look for one with a sturdy handle and compartments to keep smaller items like screwdrivers and pliers organized. For larger tools, such as power drills and saws, consider investing in a rolling tool chest. These come with multiple drawers and can easily be moved around, providing convenient access to your tools while keeping them secure and protected.

Magnetic strips and pegboards are fantastic for wall storage, enabling you to display frequently-used tools within arm’s reach. Simply mount a pegboard above your workbench, and use hooks and shelves to hang everything from hammers to tape measures. This not only maximizes vertical space but also adds a touch of organization and aesthetic appeal to your workspace.

Don’t overlook the importance of labeling. Clearly labeling boxes and bins can save you time and frustration, especially when you’re knee-deep in a project and need to grab the right tool quickly. Use clear containers for small parts like screws and nails, and make sure they are easy to see through.

Finally, consider modular storage solutions that can be customized to fit your specific needs. Whether you’re stacking bins or using interlocking storage units, modular systems allow you to adapt your storage as your tool collection grows.

In essence, having a well-thought-out storage strategy will not only help you maintain an organized workspace but also enhance your overall DIY experience, making each project more enjoyable and less stressful. With these storage solutions in place, you’ll be ready to tackle any challenge that comes your way!

7. Organizing Your Workspace

A well-organized workspace is the cornerstone of any successful DIY project, especially for beginners who may feel overwhelmed by the variety of tools and materials at their disposal. An organized workspace not only enhances productivity but also promotes safety and fosters creativity. To create an efficient environment, begin by designating a specific area in your home for your DIY projects. This space should be well-lit and have enough room to accommodate your tools, materials, and any projects you’re currently working on.

Once you have your designated area, it’s time to tackle the organization. Start with a sturdy workbench or table where you can comfortably perform your tasks. Invest in storage solutions such as toolboxes, pegboards, or shelving units to keep your tools easily accessible and neatly arranged. Categorize your tools by type—hand tools in one section, power tools in another, and smaller items like screws and nails in labeled containers. Consider using clear bins or jars for visibility, allowing you to quickly find what you need without rummaging through clutter.

Don’t forget about the importance of maintaining a clean and tidy workspace. Regularly declutter and remove any unused items that might distract you from your current project. Implement a ‘clean as you go’ policy, where you put tools back in their designated spots immediately after use. This habit not only keeps your workspace organized but also helps prevent accidents caused by misplaced tools.

Finally, personalize your workspace to inspire creativity. Add a splash of color with wall art or motivational quotes, and incorporate plants to bring a bit of nature indoors. An organized and inviting workspace will not only make your DIY endeavors more enjoyable but will also encourage you to tackle more ambitious projects as your skills grow. Remember, a little organization goes a long way in turning your DIY dreams into reality!

8. Must-Have Materials for Various Projects

When embarking on your DIY journey, having a well-stocked arsenal of materials can make all the difference in the success and enjoyment of your projects. Beyond just tools, the right materials serve as the foundation for everything you create. Here are some must-have materials that every beginner DIYer should consider keeping on hand for a variety of projects:

**1. Wood:** Whether you’re building a simple shelf, crafting a birdhouse, or constructing furniture, having a selection of wood types—like pine for its affordability and versatility, or plywood for those larger projects—will give you the flexibility to tackle numerous tasks.

**2. Paint and Stains:** A fresh coat of paint or a beautiful stain can transform any project. Stock up on a range of colors and finishes, including primers, spray paints, and sealants to protect your finished work. Remember that samples can be a great way to test colors before committing to a larger purchase!

**3. Adhesives:** From wood glue for furniture construction to super glue for quick fixes, a variety of adhesives is essential. Don’t forget about specialty glues like epoxy for tougher materials or fabric glue for textile projects.

**4. Fasteners:** Keep a supply of screws, nails, and anchors in various sizes. These small but mighty components are crucial for joining pieces together securely. A handy organizer can help keep them sorted and easy to find.

**5. Fabrics and Textiles:** If you’re venturing into sewing or upholstery, a selection of fabrics ranging from cottons to heavier materials like canvas will allow you to experiment with different projects, from curtains to cushions.

**6. Duct Tape and Painter’s Tape:** These are often overlooked but incredibly useful in countless scenarios. Duct tape is perfect for quick repairs, while painter’s tape helps achieve clean lines when painting or staining.

**7. Safety Gear:** While technically not a “material” in the traditional sense, safety gear such as gloves, goggles, and masks is essential for protecting yourself during any DIY project. Always prioritize safety to ensure that your creative endeavors are enjoyable and hazard-free.

With these essential materials at your fingertips, you’ll be well-prepared to embark on a wide variety of DIY projects. The right materials not only enhance your capabilities but also inspire creativity, allowing you to bring your unique ideas to life with confidence. Happy crafting!

9. Resources for Learning DIY Skills

As a beginner DIYer, one of the most empowering steps you can take is to invest in your knowledge. The world of DIY is vast and full of possibilities, and understanding the foundations of various skills can turn a daunting project into a rewarding experience. Fortunately, a wealth of resources is available to help you hone your DIY skills and gain confidence in your abilities.

One of the best ways to start is by exploring online tutorials and videos. Platforms like YouTube are treasure troves of DIY content, featuring step-by-step guides for everything from basic carpentry to complex plumbing. Many seasoned DIY enthusiasts share their tips, tricks, and even mistakes, offering invaluable insights that can save you time and frustration. Look for channels with high ratings and substantial followings, as these creators have often refined their methods through experience.

In addition to video content, online forums and community groups can be incredibly beneficial. Websites like Reddit and DIY-specific forums allow you to connect with other DIYers who can provide advice, share their experiences, and answer your burning questions. Engaging in these communities not only enhances your knowledge but can also inspire you to tackle new projects you might have previously thought were beyond your capabilities.

Books and magazines dedicated to DIY projects are also excellent resources. They often cover a wide range of topics, from basic home repairs to intricate craft projects, and can serve as a handy reference guide as you work. Look for books that are highly rated and come with clear illustrations and easy-to-follow instructions.

Lastly, don’t underestimate the power of local workshops or classes. Many hardware stores, community colleges, and even craft supply shops offer hands-on sessions where you can learn directly from experienced instructors. These opportunities allow you to practice your skills in a supportive environment, ask questions in real-time, and connect with fellow DIY enthusiasts.

By leveraging these diverse resources, you’ll equip yourself with the knowledge and confidence needed to tackle any project that comes your way. As you learn and grow, you’ll find that each new skill opens the door to even more complex and fulfilling DIY endeavors. So gather your tools, dive into these resources, and get ready to unleash your inner DIY master!

10. Budgeting for Your DIY Toolkit

When it comes to embarking on your DIY journey, budgeting for your toolkit is just as crucial as selecting the right tools themselves. A well-planned budget not only helps you avoid overspending but also ensures that you acquire the essential items that will serve you well on countless projects to come.

Start by assessing the types of projects you’re most interested in tackling. Are you leaning towards woodworking, home repairs, or perhaps gardening? Identifying your primary focus will guide your spending and prevent you from purchasing tools that may end up collecting dust.

Next, create a list of must-have tools based on your project preferences. Essentials like a versatile drill, a set of screwdrivers, a reliable tape measure, and a sturdy hammer should be at the top of your list. As you compile your toolkit, consider investing in quality over quantity. High-quality tools are often more durable and effective, which can save you money in the long run by reducing the need for replacements.

It’s also wise to explore second-hand options or discounted tools to stretch your budget further. Local classifieds, garage sales, or dedicated online marketplaces can yield fantastic finds that might be just as good as new. Additionally, keep an eye out for seasonal sales or promotions at your local hardware store, which can provide opportunities to snag the critical tools you need at a lower cost.

Lastly, don’t forget to allocate some funds for maintenance supplies, such as oil for tool upkeep or storage solutions to keep your workspace organized. A well-maintained toolkit not only enhances your efficiency but also boosts your confidence as you dive into new projects.

By budgeting thoughtfully and prioritizing the right tools, you’ll set the stage for a fulfilling DIY experience filled with creativity and accomplishment. With every project you complete, you’ll find your toolkit evolving, reflecting your growing skills and aspirations as a DIY enthusiast.

11. Maintaining Your Tools for Longevity

Maintaining your tools for longevity is a critical aspect of any DIYer’s journey that often goes overlooked. After investing time and money into selecting the right tools, ensuring they remain in peak condition can save you from unnecessary expenses down the road and enhance your overall crafting experience.

First and foremost, keep your tools clean after each use. Whether it’s wiping down your hammer, sweeping debris from your saw, or cleaning paint off your brushes, a quick cleanup can prevent rust, corrosion, and buildup that can impair functionality. For power tools, consult the manufacturer’s guidelines for specifics on cleaning and maintenance, as each tool may have unique requirements.

Proper storage also plays a vital role in tool longevity. Create a dedicated space for your tools, using pegboards, toolboxes, or magnetic strips to keep them organized and easily accessible. This not only minimizes the risk of damage but also protects them from the elements. For instance, storing your tools in a dry environment prevents moisture from causing rust, while keeping them out of direct sunlight can protect plastic parts from fading or warping.

Moreover, regular inspections are essential. Make it a habit to check your tools periodically for any signs of wear and tear. Look for dull blades that need sharpening, screws that require tightening, or cords that show signs of fraying. Addressing these issues early can prevent more significant problems and potentially costly repairs.

Lastly, consider investing in a basic tool maintenance kit, which may include items such as lubricants, rust removers, and sharpening tools. These essentials make it easier to perform routine maintenance at home, ensuring that your tools are always ready for your next project.

By adopting these simple maintenance practices, you can extend the life of your tools, improve their performance, and ultimately enjoy your DIY endeavors to the fullest. Remember, a well-maintained tool is not just a tool; it’s a reliable partner in your creative journey!

12. Expanding Your Toolkit as You Grow

As you embark on your DIY journey, starting with a basic toolkit is essential. However, as your skills develop and your projects become more ambitious, expanding your toolkit will empower you to tackle a wider range of tasks with confidence and ease. Here are some key tools and equipment to consider adding to your arsenal as you grow in your DIY endeavors.

First, consider investing in a quality set of power tools. A cordless drill is a must-have for any DIYer, allowing you to effortlessly drive screws and drill holes in various materials. As you progress, a circular saw and a jigsaw can open up new possibilities for woodworking projects, enabling you to make precise cuts and intricate designs with ease.

Next, think about adding specialized hand tools that can enhance your capabilities. A chisel set is invaluable for fine woodworking, allowing you to carve and shape wood to your liking. Similarly, a good quality level ensures that your installations are straight and true, whether you’re hanging shelves or framing pictures.

Safety gear should also be a priority as you expand your toolkit. Investing in a sturdy pair of safety goggles and a quality dust mask will protect your eyes and lungs from debris and harmful particles, allowing you to work safely and comfortably.

Additionally, consider organization tools like a toolbox or pegboard. Keeping your tools neatly stored and easily accessible will save you time and frustration when tackling new projects. As you continue to grow, you might also explore specialty tools like a stud finder for wall projects or a heat gun for paint stripping, further enhancing your DIY skill set.

Remember, the key to expanding your toolkit is to invest in quality over quantity. Choose tools that are durable and versatile, allowing you to get the most out of your purchases. As you gain experience and tackle more complex projects, your growing toolkit will empower your creativity and transform the way you approach DIY tasks. Embrace the journey, and watch your skills flourish as your toolkit evolves alongside your passion for creating!

13. Conclusion: Taking the First Step in DIY

Embarking on your DIY journey can be both exciting and daunting, but with the right tools and a positive mindset, you’re well on your way to transforming your creative ideas into tangible projects. As we’ve explored in this guide, having a solid toolkit is essential for any beginner DIYer. From basic hand tools like hammers and screwdrivers to more specialized equipment like levelers and safety gear, each item plays a vital role in helping you achieve your goals.

Remember, the first step in any DIY project is not just gathering tools; it’s about embracing the learning process. Mistakes will happen, and that’s part of the journey. Each error offers you a valuable lesson, building your skills and confidence as you tackle more complex tasks. Don’t be afraid to start small—simple projects like building a bookshelf or creating custom wall art can provide a satisfying introduction to the world of DIY.

Moreover, take advantage of online resources, tutorials, and community forums to gather inspiration and advice. Sharing your projects and experiences with fellow DIY enthusiasts can not only enhance your skills but also keep you motivated along the way.

In conclusion, the world of DIY is open to anyone willing to take the plunge. Equip yourself with the essential tools outlined in this guide, cultivate a spirit of curiosity, and let your creativity flourish. With every project, you’ll not only add to your toolkit but also build a wealth of knowledge and experience that will serve you well in all your future endeavors. So grab those tools, roll up your sleeves, and start creating—your DIY adventure awaits!

14. Bonus: Recommended Brands and Where to Buy

When diving into the world of DIY, having the right tools can make all the difference in your projects’ success and enjoyment. While we’ve explored various essential tools, it’s equally important to know where to find high-quality products at reasonable prices. Here’s a curated list of recommended brands and where to purchase them, ensuring you get the best value for your investment.

**1. Tool Brands**

– **DeWalt:** Renowned for their durability and reliability, DeWalt offers a vast range of power tools and hand tools ideal for both beginners and seasoned DIYers. Their cordless drill and impact driver kits are especially popular for home improvement projects.

– **Stanley:** A trusted name in hand tools, Stanley provides a wide selection of reliable items like tape measures, hammers, and screwdrivers. Their tools are not only affordable but also designed for longevity, making them perfect for beginners.

– **Milwaukee:** Known for their innovative power tools, Milwaukee is a favorite among those looking for cutting-edge technology and performance. Their M18 battery platform is excellent for anyone who needs a versatile and powerful toolset for various projects.

– **Ryobi:** If you’re interested in a budget-friendly option with a solid range of tools, Ryobi is an excellent choice. Their One+ system allows you to use the same battery across a variety of tools, making it a cost-effective solution for DIY enthusiasts.

**2. Where to Buy**

– **Home Improvement Stores:** Chains like Home Depot and Lowe’s offer a wide selection of tools from all the major brands. They often have sales, and you can find both in-store and online shopping options.

– **Online Retailers:** Websites like Amazon provide a vast array of tools, often at competitive prices. You’ll find customer reviews that can help guide your purchase decisions. Additionally, they frequently have deals on bundles that can save you money.

– **Specialty Tool Retailers:** Stores such as Ace Hardware and Northern Tool carry a range of both popular and specialty brands. These retailers can provide knowledgeable staff who can help you choose the right tools for your specific needs.

– **Local Hardware Stores:** Don’t overlook local hardware stores! They often carry quality tools and can provide personalized service. Plus, supporting local businesses helps foster community ties.

By investing in reputable brands and knowing where to shop, you’ll be well-equipped to tackle any DIY project that comes your way. Remember, the right tools paired with the right knowledge can transform your creative ideas into tangible realities, making your DIY journey even more rewarding. Happy building!

As we wrap up our comprehensive guide on the essential tools every beginner DIYer should own, we hope you feel inspired and equipped to embark on your creative projects with confidence. From the trusty tape measure to the versatile power drill, each tool plays a vital role in transforming your ideas into reality. Remember, the right tools not only enhance your efficiency but also make your DIY journey safer and more enjoyable. Whether you’re tackling a simple home repair or crafting a personalized piece of decor, having these essentials on hand will empower you to unleash your inner handyman or handywoman. So gather your tools, embrace the learning curve, and enjoy the satisfaction that comes from creating something uniquely yours. Happy DIYing!