How to Choose the Right Car Seat for Your Child?

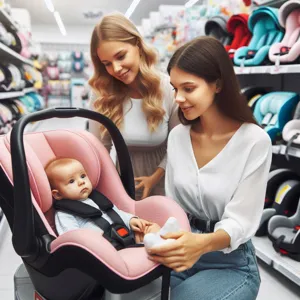
Navigating the world of car seats can feel overwhelming for new parents and seasoned caregivers alike.

With a dizzying array of options, safety ratings, and age-specific requirements, finding the perfect car seat for your child is crucial for their protection and your peace of mind. As the cornerstone of safe travel, a car seat not only ensures your little one is secure during every journey but also offers you the confidence to explore the world together. In this ultimate guide, we’ll break down the essentials of car seat selection, from understanding different types and safety features to installation tips and ongoing maintenance. Whether you’re preparing for a newborn, transitioning to a toddler seat, or getting ready for booster seats, this comprehensive resource will equip you with the knowledge you need to make an informed decision that prioritizes your child’s safety and comfort on the road.

1. Understanding the Importance of Car Seat Safety

How to Choose the Right Car Seat for Your Child?
Credit : whatcanu.com

When it comes to ensuring the safety of your child while traveling, understanding the importance of car seat safety is paramount. Car seats are not just a legal requirement; they are a crucial line of defense in the event of an accident. According to the Centers for Disease Control and Prevention (CDC), car accidents are a leading cause of injury and death for children aged 1 to 14. A properly installed and age-appropriate car seat can reduce the risk of serious injury by up to 71%.

The physics of a car crash is unforgiving, and children are particularly vulnerable due to their smaller size and developing bodies. A car seat is designed to absorb impact and secure your child in place, preventing them from being thrown around or ejected from the vehicle. Different types of car seats—infant seats, convertible seats, and booster seats—are engineered to provide optimal protection for children at various stages of growth.

Furthermore, understanding the nuances of car seat safety involves recognizing the importance of installation and usage. Many parents may not realize that a significant percentage of car seats are not installed correctly, which can significantly compromise their effectiveness. Regularly checking the installation and ensuring that your child is harnessed correctly can make all the difference in an emergency.

Ultimately, prioritizing car seat safety means committing to ongoing education and awareness. As regulations evolve and new safety technologies emerge, staying informed can empower you to make the best choices for your child’s protection. By recognizing the critical role of car seats, you’re taking the first step toward safeguarding your little one every time you hit the road.

2. Types of Car Seats: An Overview

When it comes to car seats, understanding the different types available is crucial for ensuring your child’s safety during every car ride. The vast array of options can be overwhelming, but breaking them down into their categories can simplify the selection process.

**Infant Car Seats:** Designed specifically for newborns and small infants, these seats are typically used rear-facing and provide a snug fit for your little one. They come with a convenient base that remains in your vehicle, allowing you to easily click the seat in and out. Most infant car seats have a weight limit of around 22 to 35 pounds, making them suitable for babies until they outgrow them. The portability of these seats is a huge plus, allowing parents to transition seamlessly from car to stroller.

**Convertible Car Seats:** As your child grows, a convertible car seat can adapt to their needs. These versatile seats can be used both rear-facing for younger children and then converted to forward-facing as they grow, often accommodating children up to 65 pounds or more. Many parents appreciate this type of seat for its longevity, as it can be used for several years, making it a cost-effective option.

**Booster Seats:** Once your child has outgrown their convertible seat, it’s time to consider a booster seat. These seats are designed to elevate your child, allowing the vehicle’s seat belt to fit properly across their lap and shoulder. Booster seats come in two main types: high-back boosters, which provide head and neck support, and backless boosters, which are more portable and lightweight. It’s essential to ensure your child meets the weight and height requirements for transitioning to a booster seat, typically around 40 pounds.

**All-in-One Car Seats:** For ultimate convenience, all-in-one car seats offer the flexibility of being used from infancy through to booster seat age. These seats can switch from rear-facing to forward-facing and finally to a booster, making them a long-term investment for families. While they can be bulkier than other options, their adaptability means you won’t have to purchase multiple seats as your child grows.

Understanding these different types of car seats will empower you to make an informed decision that prioritizes safety and comfort for your child. Always check the manufacturer’s guidelines and your vehicle’s compatibility before making a purchase, ensuring that your chosen car seat fits securely and meets safety standards. With the right car seat, you can enjoy peace of mind knowing that your little one is secure and protected during every journey.

3. Key Factors to Consider When Choosing a Car Seat

How to Choose the Right Car Seat for Your Child?
Credit : whatcanu.com

When it comes to selecting the perfect car seat for your child, safety and comfort are undeniably paramount. However, the process can be overwhelming with the myriad options available on the market. To make your decision easier, it’s essential to consider several key factors that will help you choose the right car seat tailored to your child’s needs.

**1. Age, Weight, and Height:** The first step in your car seat journey is understanding the specific requirements based on your child’s age, weight, and height. Car seats are generally categorized into three groups: rear-facing seats for infants, forward-facing seats for toddlers, and booster seats for older children. Each type is designed to accommodate varying stages of growth, ensuring maximum safety. Always refer to the manufacturer’s guidelines to select a car seat that fits your child perfectly, as this will ensure that they are securely restrained in the event of an accident.

**2. Safety Features:** In today’s market, car seats come with a plethora of safety features designed to keep your little one secure. Look for models that include a five-point harness system, side-impact protection, and energy-absorbing foam. Additionally, check for certifications such as the Federal Motor Vehicle Safety Standards (FMVSS) compliance, which guarantees that the car seat meets rigorous safety regulations. Advanced features like anti-rebound bars and adjustable headrests can offer added protection and comfort as your child grows.

**3. Ease of Installation:** A car seat is only as safe as it is properly installed. Therefore, choosing a model that boasts user-friendly installation features can make a significant difference. Look for car seats equipped with LATCH (Lower Anchors and Tethers for Children) systems, which simplify the installation process. Some models also provide visual indicators and audible clicks to confirm that the seat is securely installed. If you’re unsure about installation, many retailers offer resources or even in-store assistance to help you find the perfect fit.

**4. Comfort and Convenience:** Your child will likely spend long stretches of time in their car seat, so comfort is crucial. Look for seats with ample padding, breathable fabrics, and adjustable recline positions. Additionally, consider convenience features such as machine-washable covers, removable inserts for newborns, and cup holders for snacks and drinks. These elements can greatly enhance your child’s travel experience, making every car ride a pleasant one.

**5. Longevity and Versatility:** Lastly, consider the longevity of the car seat. Investing in a convertible car seat that transitions from rear-facing to forward-facing, and eventually to a booster seat, can save you money in the long run while accommodating your child’s growth. Additionally, some car seats feature adjustable harnesses and headrests that can be modified as your child matures, thus maximizing the seat’s usability.

By evaluating these key factors—age, safety features, ease of installation, comfort, and versatility—you’ll be well on your way to selecting the perfect car seat for your child. This thoughtful approach not only prioritizes safety but also enhances your family’s travel experience, creating a secure and enjoyable environment for your little one on every journey.

4. Age and Weight Guidelines for Car Seats

Choosing the right car seat for your child is a crucial step in ensuring their safety during every car ride. One of the most important factors to consider is the age and weight guidelines associated with different types of car seats. These guidelines are designed to provide the best protection for your child as they grow, and adhering to them can significantly reduce the risk of injury in the event of an accident.

Infants typically require a rear-facing car seat, which is specifically designed to support their fragile neck and spine. Most experts recommend keeping your baby in a rear-facing seat until they are at least 2 years old or until they reach the maximum height and weight limit set by the car seat manufacturer. This position helps to absorb the force of a collision and protects your child’s head and body more effectively.

As your child transitions from infancy to toddlerhood, you may consider a convertible car seat that can easily switch from rear-facing to forward-facing. Forward-facing seats are suitable for children who are at least 2 years old and weigh between 20 to 65 pounds, depending on the specific model. Always check the manufacturer’s guidelines to ensure you’re using the seat correctly.

Once your child outgrows the forward-facing car seat, typically around age 4 or when they reach the weight and height limits, they can move to a booster seat. Booster seats are designed to elevate your child so that the vehicle’s seat belt fits properly across their lap and shoulder. Children should remain in a booster seat until they are around 4 feet 9 inches tall and are between 8 to 12 years old, as this ensures they are adequately secured by the vehicle’s seat belt system.

It’s essential to regularly review and update your child’s car seat as they grow. Not only does this ensure their safety, but it also allows for comfort during travel. Always refer to your car seat’s manual for specific guidelines and recommendations, and remember that every child develops at their own pace. By staying informed on age and weight guidelines, you can make confident decisions that prioritize your child’s safety on the road.

5. The Difference Between Rear-Facing, Forward-Facing, and Booster Seats

How to Choose the Right Car Seat for Your Child?
Credit : whatcanu.com

When it comes to selecting the right car seat for your child, understanding the differences between rear-facing, forward-facing, and booster seats is crucial for ensuring safety and comfort during every car ride. Each type of seat serves a specific purpose and is designed to accommodate your child’s growth and developmental stages.

**Rear-Facing Car Seats** are the safest option for infants and toddlers. Designed to cradle your child and support their head, neck, and spine during a collision, these seats should be used for as long as possible, ideally until your child reaches the maximum weight or height limit specified by the manufacturer. Rear-facing seats distribute the force of a crash more evenly across the child’s body, significantly reducing the risk of serious injury. Many parents opt for infant car seats that are portable or convertible seats that can remain in the vehicle.

As your child grows, you’ll transition to a **Forward-Facing Car Seat**. These seats are designed for children who have outgrown their rear-facing seats, typically around age two or older. Forward-facing seats come with a harness system that secures your child in place, providing protection in the event of a collision. It’s essential to keep your child in a forward-facing seat with a harness for as long as possible before considering a booster seat, as this ensures they are safely restrained.

Finally, once your child has outgrown their forward-facing seat, it’s time to consider a **Booster Seat**. Booster seats are designed to elevate your child so that the vehicle’s seat belt fits correctly over their shoulder and lap. The goal is to ensure that the seat belt lies across the strongest parts of your child’s body, thus providing optimal protection. There are two types of booster seats: high-back and backless. High-back boosters are ideal for vehicles without headrests, while backless boosters are suitable for older children who can sit properly without additional support.

Understanding the distinctions between these types of car seats not only aids in compliance with safety regulations but also ensures that your child is as safe as possible during every journey. Keep in mind the recommended guidelines and always refer to the manufacturer’s instructions for the best use of each car seat type.

6. How to Install a Car Seat Properly

Installing a car seat properly is crucial to ensuring your child’s safety during every journey. While it may seem straightforward, the process requires careful attention to detail to guarantee that the seat is securely anchored and positioned correctly. Here’s how to navigate the installation process with confidence:

**1. Read the Manual:** Start by thoroughly reading both the car seat manual and your vehicle’s owner manual. Each car seat model has specific instructions that cater to its design, and different vehicles might have unique features that affect installation. Familiarizing yourself with these details will set the foundation for a secure installation.

**2. Choose the Right Location:** The back seat is the safest place for children under 13. If your vehicle has a center seat with a seatbelt, that is often the safest spot, as it provides the most distance from side-impact collisions. However, if the center seat doesn’t have a proper seatbelt or LATCH (Lower Anchors and Tethers for Children) system, choose one of the side positions that allow for a secure fit.

**3. Secure the Base:** If you’re using an infant car seat with a base, ensure that the base is level by utilizing the built-in indicators. Many bases have adjustable levels to help achieve the correct angle, which is critical for infants. Once the angle is correct, secure the base tightly using either the seatbelt or LATCH system—whichever your vehicle supports. The base should not move more than an inch from side to side or front to back when pulled at the belt path.

**4. Position the Car Seat:** Once the base is secure, attach the car seat itself. Ensure that any harness straps are threaded through the correct slots for your child’s height, and always check the harness for proper tightness. A snug harness should not allow any slack, and you should only be able to fit one finger between the harness and your child’s collarbone.

**5. Double-Check Your Work:** After installation, take a moment to double-check everything. Give the car seat a firm shake at the base—if it moves more than an inch, it needs to be re-evaluated. This is also a good time to ensure that the harness is adjusted correctly for your child’s comfort and safety.

**6. practice Periodic Checks:** Over time, car seats can come loose due to regular use, so it’s wise to inspect the installation periodically. Additionally, as your child grows, you may need to adjust the straps or even transition to a different car seat altogether. Keeping these checks in mind can help ensure that your child remains protected.

By following these steps and staying informed about the latest safety guidelines, you can ensure that your child is safely secured in their car seat, allowing you to drive with peace of mind. Remember, the right installation is just as important as choosing the right seat, so never rush through this vital process.

7. Features to Look for in a Car Seat

How to Choose the Right Car Seat for Your Child?
Credit : whatcanu.com

When it comes to selecting the perfect car seat for your child, understanding the essential features can make all the difference in ensuring both safety and comfort. Here are some key attributes to look for that will help you make an informed decision:

**1. Safety Ratings**: Always check for safety ratings provided by reputable organizations, such as the National Highway Traffic Safety Administration (NHTSA) or the Insurance Institute for Highway Safety (IIHS). These ratings give you a clear indication of how well a car seat performs in crash tests.

**2. Five-Point Harness System**: A five-point harness system is crucial for younger children. This feature secures your child at the shoulders, hips, and between the legs, providing maximum protection during a collision. Look for seats that offer easy adjustments for this harness as your child grows.

**3. Ease of Installation**: A car seat that is easy to install correctly is vital for safety. Look for models with clear instructions, color-coded installation paths, and features like LATCH (Lower Anchors and Tethers for Children) systems or built-in seat belt guides. Some seats also come with a level indicator to help you achieve the proper angle.

**4. Comfort Features**: Your child will likely spend considerable time in their car seat, so comfort is essential. Look for cushioned padding, breathable materials, and adjustable headrests. Some car seats even offer reclining features for better comfort during naps.

**5. Age and Weight Range**: Car seats are designed for specific age and weight ranges, so it’s crucial to choose one that accommodates your child’s current size and will grow with them. Convertible seats that transition from rear-facing to forward-facing and even booster seats can save you money in the long run.

**6. Removable and Washable Covers**: Kids can be messy, and spills are inevitable. Choose a car seat with removable, machine-washable covers to make cleaning easy and maintain a hygienic environment for your child.

**7. Extra Safety Features**: Look for additional safety features such as side-impact protection, anti-rebound bars for rear-facing seats, and energy-absorbing foam. These elements can provide an extra layer of protection in the event of an accident.

By focusing on these key features, you can confidently select a car seat that prioritizes your child’s safety and comfort during every journey. Remember, a well-researched choice not only protects your little one but also offers peace of mind for you as a parent.

8. The Role of Car Seat Ratings and Reviews

When it comes to selecting the ideal car seat for your child, understanding car seat ratings and reviews can significantly influence your decision-making process. These ratings, often issued by reputable organizations such as the National Highway Traffic Safety Administration (NHTSA) or independent consumer advocacy groups, provide crucial insights into the safety and performance of various car seats on the market.

Car seat ratings typically assess factors such as crash test results, ease of installation, and user-friendly features. A five-star rating from the NHTSA indicates that a car seat has performed exceptionally well in safety evaluations, giving parents confidence in their choice. But don’t stop at the numbers; delve deeper into customer reviews to gain a better understanding of real-world experiences.

Parents who have already navigated the complexities of car seat selection often share valuable insights about installation ease, comfort for their child, and the seat’s compatibility with different vehicles. You may discover, for example, that a particular model is lauded for its straightforward installation process, or conversely, that another may be cumbersome to secure properly.

Additionally, reviews can shed light on the longevity of a car seat, providing feedback on how well it holds up over time and whether it remains comfortable and safe as your child grows. Look for details about the quality of the materials, the adjustability of the harness, and how easily the seat can be cleaned, as these elements can significantly affect your overall satisfaction.

Incorporating car seat ratings and customer reviews into your research will empower you to make an informed choice that prioritizes your child’s safety while also meeting your family’s needs. By taking the time to explore these resources, you can ensure that the car seat you ultimately choose will not only keep your little one secure but also provide peace of mind for you as a parent.

9. Common Mistakes Parents Make with Car Seats

Choosing the right car seat for your child is a crucial decision that can significantly impact their safety on the road. However, even well-meaning parents can fall into traps that undermine their efforts to protect their little ones. Here are some common mistakes parents make with car seats, along with tips to help you navigate this essential aspect of child safety.

**1. Skipping the Manual:** One of the most frequent oversights is neglecting to thoroughly read the car seat manual. Each seat comes with specific installation instructions that vary based on its design and features. Familiarizing yourself with these guidelines ensures you secure the seat correctly and understand the weight and height limits for your child.

**2. Incorrect Installation:** A car seat that isn’t installed properly is a car seat that may not provide the necessary protection in the event of an accident. Many parents assume they can install the seat without additional guidance, but it’s important to use methods such as the LATCH system or seatbelt installation techniques as indicated in the manual. Consider getting a certified technician to check your installation for added peace of mind.

**3. Not Harnessing Properly:** Many parents are unaware that a child can be too loose in their harness, compromising their safety. The straps should be snug against your child’s shoulders, with no more than one finger able to fit between the harness and the child. Additionally, as your child grows, it’s essential to adjust the harness height and ensure it remains secured at all times.

**4. Outgrowing Their Seat Too Soon:** It’s easy to assume that once your child reaches the maximum weight limit of their car seat, they are ready for a booster seat. However, parents sometimes overlook height restrictions or the need for a transitional seat. Be sure to adhere to both height and weight limits specified for your car seat model to ensure optimal safety.

**5. Ignoring Expiration Dates:** Car seats come with expiration dates, typically ranging from six to ten years from the date of manufacture. Using an expired car seat can be dangerous, as materials can weaken over time, reducing their effectiveness during a collision. Always check the expiration date to ensure your child’s safety.

**6. Failing to Adjust the Seat for Growing Kids:** As your child grows, their needs will change. Parents often forget to adjust the seat’s recline angle or harness system accordingly. Regularly reassessing your child’s fit in their car seat will help you recognize when it’s time for updates or transitions to different types of seats.

By avoiding these common mistakes, you can ensure that your child is as safe as possible while traveling in a vehicle. Remember, staying informed and vigilant is key to making the best choices for your child’s car seat needs. Prioritizing their safety will not only provide peace of mind but also protect them on every journey.

10. Car Seat Maintenance and Care Tips

When it comes to ensuring your child’s safety on the road, proper car seat maintenance and care are just as crucial as choosing the right model in the first place. A well-maintained car seat not only lasts longer but also provides optimal protection for your little one. Here are some essential tips to keep your car seat in top-notch condition.

**Regular Inspections**: Start by routinely inspecting the car seat for any signs of wear and tear. Check for frayed straps, cracked plastic, or any missing components. If you notice anything concerning, consult the manufacturer’s guidelines for repair or replacement options.

**Cleaning**: Children can be messy, and car seats often bear the brunt of spills, crumbs, and sticky fingers. Most car seats come with removable covers that can be machine washed. Make sure to follow the manufacturer’s instructions for cleaning to avoid damaging the fabric or padding. For the plastic parts, a damp cloth with mild soap is usually sufficient to wipe away dirt and grime.

**Storage**: If you need to store the car seat for an extended period, keep it in a cool, dry place away from direct sunlight. Prolonged exposure to heat or UV rays can degrade the materials and affect the seat’s safety performance.

**Expiration Dates**: Just like food, car seats have expiration dates, typically ranging from six to ten years from the date of manufacture. Check the label on your car seat for its expiration date and be sure to replace it when that time comes. Using an expired car seat can pose serious safety risks in the event of an accident.

**Installation Checks**: Each time you install the car seat, whether moving it to another vehicle or adjusting its position, double-check that it is securely installed according to the manufacturer’s directions. A snug fit is vital for effective protection during a crash.

**Safety Recalls**: stay informed about any safety recalls that may affect your car seat. Check the National Highway Traffic Safety Administration (NHTSA) website or the manufacturer’s website regularly to ensure your seat is safe and up to date.

By following these maintenance and care tips, you can help extend the life of your child’s car seat while ensuring it remains a reliable protector for your little one on every journey. A well-cared-for car seat is a critical step in safeguarding your child’s safety, providing peace of mind for every trip you take together.

11. When to Transition Your Child to a New Car Seat

Transitioning your child to a new car seat is a significant milestone that comes with its own set of guidelines and considerations. It’s essential to pay close attention to your child’s growth and development as well as the specific recommendations provided by car seat manufacturers, as these can vary widely.

Most experts agree that children should remain in a rear-facing car seat for as long as possible, ideally until they reach the maximum weight or height limit set by the car seat manufacturer, which can be up to 40 pounds or more. This position is crucial as it provides the best protection for a child’s head, neck, and spine in the event of a collision. Once your little one outgrows their rear-facing seat, it’s time to transition to a forward-facing car seat, which should be equipped with a harness system for added safety.

Keep a close eye on your child’s age and size. Generally, children can switch to a forward-facing car seat between the ages of 2 and 4, but it’s best to follow the weight and height guidelines provided by your car seat’s manufacturer. After they’ve outgrown the forward-facing seat, you may consider moving them to a booster seat, typically when they reach around 4 years old and weigh at least 40 pounds.

It’s also crucial to assess your child’s maturity level when making these transitions. Ensure they can sit still and properly use the seat belt before transitioning to a booster seat. Remember, the goal is to keep your child safe and secure for as long as possible, so err on the side of caution and follow the guidelines to make informed decisions. Transitioning car seats may seem intimidating at first, but it’s all about ensuring your child’s safety while adapting to their growing needs.

12. Traveling with Car Seats: Tips for Air and Road Travel

Traveling with car seats can feel like a daunting task, but with the right preparation and knowledge, it can be a smooth process whether you’re hitting the road or taking to the skies. Here are some practical tips to ensure your child’s safety and comfort during your journeys.

### Air Travel Tips

When flying, the first consideration is understanding your airline’s policy regarding car seats. Most airlines allow you to bring a car seat for use on the plane, but you’ll want to confirm that your specific seat is approved for air travel. Look for labels indicating it meets Federal Aviation Administration (FAA) standards.

**Packing Smart:** When packing your car seat, consider using a protective travel bag. This not only keeps the seat safe from damage but often allows you to check it in without an additional fee. Some parents also opt for car seat carts, which make transporting the seat through the airport much easier.

**At the Airport:** Arrive early to give yourself ample time to navigate security. Car seats can complicate the process, so be patient and prepared to remove it for inspection. Once on board, ensure the seat is installed correctly according to the airline’s guidelines, and always keep your child buckled in during takeoff and landing.

### Road Travel Tips

For road trips, the focus shifts to ensuring both safety and comfort for your child. Before you hit the road, double-check that the car seat is properly installed in your vehicle following the manufacturer’s instructions. If you’re unsure, many local fire departments and hospitals offer free car seat checks.

**Comfort Essentials:** Long drives can be tough on little ones, so pack comfort items such as favorite blankets or toys. Regular stops every couple of hours for bathroom breaks and stretching can make a big difference in keeping your child happy and engaged during the journey.

**Safety Checks:** Always ensure that your child is securely strapped in, and periodically check to see that the straps are snug, especially if the child is wearing bulky clothing. If you’re traveling during hot weather, consider using sunshades for the windows to keep the car cooler and shield your child from direct sunlight.

By planning ahead and considering these tips, traveling with car seats can transform from a source of stress into an opportunity for memorable family adventures. Safety is paramount, but with a little foresight, you can ensure that your journeys are enjoyable for everyone involved.

13. Budgeting for a Car Seat: What to Expect

When it comes to budgeting for a car seat, it’s essential to understand that prices can vary significantly based on features, safety ratings, and brand reputation. On the lower end, you might find basic infant car seats starting around $50, which typically offer minimal features but can still meet essential safety standards. However, as you climb the price ladder, you’ll discover a wealth of options packed with advanced safety technology, added convenience features, and even stylish designs.

Mid-range car seats, generally priced between $100 and $300, often include features like extended rear-facing capabilities, easier installation systems, and superior comfort for your little one. These seats are designed to grow with your child, offering convertible options that transition from rear-facing to forward-facing, and even to booster seats as your child ages. Investing in a mid-range seat often strikes the perfect balance between safety and budget.

For parents willing to splurge, high-end car seats can range from $300 to $600 or more. These models frequently feature top-of-the-line safety technology, luxury fabrics, and customizable options. Brands in this category often invest heavily in research and development, ensuring that their seats meet or exceed the latest safety standards. Additionally, premium car seats typically offer excellent durability, meaning they can last through multiple children or be resold with ease.

Beyond the initial purchase price, it’s wise to consider potential ongoing costs. Some car seats require additional accessories or bases for installation in multiple vehicles, which can add to your budget. Furthermore, if you’re looking for a seat with a longer lifespan, be sure to consider the warranty and whether the seat can accommodate growing children, as this can save you money in the long run.

In summary, budgeting for a car seat is about finding the right balance between safety, functionality, and your financial limits. Assess your specific needs, research various options, and don’t forget to account for any additional costs that may arise. By doing so, you’ll be well on your way to selecting a car seat that not only fits your budget but also provides peace of mind as you transport your most precious cargo.

14. Recommended Car Seat Brands and Models

When it comes to selecting the right car seat for your child, the brand and model can make all the difference in ensuring safety, comfort, and ease of use. With so many options on the market, it can be overwhelming to figure out which one is best for your family. That’s why we’ve compiled a list of some of the most reputable car seat brands, along with specific models that have garnered positive reviews from parents and safety experts alike.

**1. Graco**
Graco is a household name in the world of car seats, known for its reliability and value. The Graco 4Ever DLX is a standout model that serves as a 4-in-1 car seat, transitioning from rear-facing to forward-facing, and finally to a booster seat. Its longevity, ease of installation, and user-friendly features make it a favorite among parents.

**2. Britax**
Britax is synonymous with safety, and their car seats often feature advanced safety technology. The Britax Boulevard ClickTight is a model worth considering, as it combines a high level of side impact protection with a simple installation system that makes securing the seat a breeze. Its plush padding and premium materials ensure your child’s comfort on every ride.

**3. Chicco**
Chicco is praised for its innovative designs and safety ratings. The Chicco KeyFit 30 is a top-rated infant car seat that offers a snug fit for newborns and is known for its easy installation and lightweight design. It’s perfect for parents on the go, making transitions between car and stroller effortless.

**4. Evenflo**
Evenflo provides budget-friendly options without compromising on safety. The Evenflo Symphony DLX All-In-One car seat is highly versatile, accommodating your child through all growth stages. Its unique SureSafe installation system takes the guesswork out of securing the seat, making it an appealing choice for busy parents.

**5. Nuna**
For those looking for a premium option, Nuna is a brand that stands out for its stylish aesthetics and safety features. The Nuna RAVA is an excellent convertible car seat that features a sleek design, high-quality fabrics, and an easy-to-use harness system. Its extended rear-facing capability makes it a favorite for safety-conscious families.

**6. Maxi-Cosi**
Maxi-Cosi has a strong reputation for comfort. The Maxi-Cosi Mico Max 30 is a lightweight infant car seat that offers exceptional padding and side impact protection. Its easy installation and compatibility with several strollers make it a convenient choice for parents who prioritize mobility.

When choosing a car seat, it’s important to consider factors such as your child’s age, weight, and developmental stage, as well as your vehicle’s compatibility. Always consult safety ratings and user reviews to ensure you’re making an informed decision. By investing in a trusted brand and model, you can rest assured that your child will be safe and secure on every journey.

15. Resources and Support for Parents on Car Seat Safety

Navigating the world of car seat safety can feel overwhelming for many parents, but thankfully, a wealth of resources and support is available to empower you in making informed decisions. Understanding the intricacies of car seat installation, maintenance, and usage is crucial for ensuring your child’s safety on the road, and numerous organizations are dedicated to assisting parents every step of the way.

One of the most reliable resources is the National Highway Traffic Safety Administration (NHTSA), which provides comprehensive guidelines on selecting the right car seat, installation tips, and safety checks. Their website features a user-friendly tool that helps you determine the appropriate seat for your child’s age, weight, and height, making it easier to find a suitable option.

Local hospitals and fire departments often host car seat inspection events, where certified technicians can provide hands-on assistance with installation and answer any questions you may have. These free services not only help ensure that your car seat is correctly installed but also offer peace of mind knowing that you are prioritizing your child’s safety.

Online communities and parenting forums can also be a treasure trove of information. Websites like BabyCenter and What to Expect host discussions where parents share their experiences, recommendations, and tips on car seat safety. Additionally, social media platforms feature dedicated groups focused on car seat safety, where you can engage with other parents and experts who can offer guidance and support.

Finally, consider reaching out to local child passenger safety advocates or organizations. Many communities have trained professionals who can conduct personalized safety checks and provide educational resources tailored to your specific needs.

By utilizing these resources, you can confidently navigate the complexities of car seat safety. Remember, staying informed and seeking support is key to ensuring your child’s safety during every journey, big or small. With the right tools and knowledge at your disposal, you can choose the perfect car seat for your child and keep them safe on the road.

In conclusion, selecting the right car seat for your child is a crucial decision that ensures their safety and comfort during every journey. We’ve explored essential factors such as age, weight, and safety features that will empower you to make an informed choice. Remember, investing time in researching and understanding the various options available can lead to peace of mind as you hit the road with your little one. As you navigate this important milestone, trust your instincts and prioritize your child’s needs above all. We hope this ultimate guide serves as a valuable resource for you, and we’re excited to hear about the car seat you choose. Safe travels and happy adventures ahead!

How to install a new dishwasher?

Installing a new dishwasher can seem like a daunting task, especially if you’re not particularly handy around the house.

However, with the right guidance and a little bit of confidence, you can transform this seemingly complex project into a straightforward and rewarding experience. In this step-by-step guide, we’ll walk you through everything you need to know to install your new dishwasher like a pro. From gathering the essential tools and materials to understanding the plumbing and electrical connections, we’ll equip you with practical tips and insider knowledge to ensure a smooth installation. Say goodbye to the hassle of waiting for a professional and hello to the satisfaction of tackling a home improvement project yourself. Get ready to enjoy the convenience of your new appliance while saving time and money with our comprehensive installation guide!

1. Introduction: Why DIY Dishwasher Installation?

How to install a new dishwasher?
Credit : whatcanu.com

Installing a new dishwasher may seem daunting to many homeowners, but taking the DIY route can be both rewarding and cost-effective. Why should you consider installing your dishwasher yourself? For starters, it empowers you to learn essential home improvement skills that can save you money on professional installation fees. In a world where convenience often comes at a premium, tackling this project on your own can provide a sense of accomplishment and independence.

Moreover, understanding the ins and outs of your kitchen appliances can lead to a better appreciation of how they function. You’ll gain valuable insights into plumbing, electrical connections, and the overall mechanics of your home, which can come in handy for future repairs or upgrades. DIY installation also allows for greater control over the process—choosing the right materials, customizing connections to suit your kitchen layout, and ensuring everything is set up to your exact specifications.

Additionally, with a plethora of resources available online, including instructional videos, forums, and detailed guides, learning how to install your dishwasher has never been easier. You can work at your own pace, revisit steps as necessary, and even ask questions from a community of fellow DIYers. So, roll up your sleeves and prepare to dive into this rewarding project—by the end, you’ll not only have a fully functional dishwasher, but you’ll also have the confidence and knowledge that comes with mastering a new skill. Let’s get started!

2. Safety First: Tools and Materials You’ll Need

Before diving into the installation process, it’s essential to prioritize safety and gather the right tools and materials. Taking the time to prepare ensures a smoother installation and minimizes potential hazards. Here’s a comprehensive list of what you’ll need to tackle the job like a pro.

**Essential Tools:**

1. **Screwdriver Set:** A mix of flathead and Phillips screwdrivers will help you tackle various screws that hold your dishwasher in place.

2. **Adjustable Wrench:** This tool is crucial for tightening and loosening the water supply line and other plumbing connections.

3. **Plumber’s Tape:** Also known as Teflon tape, this is vital for ensuring a watertight seal on all threaded connections.

4. **Level:** To make sure your dishwasher sits evenly, a level will help you avoid any unwanted tilting that can lead to leaks.

5. **Drill and Drill Bits:** If your installation requires new holes for mounting or securing the dishwasher, a power drill will be necessary.

6. **Pliers:** These are handy for gripping and turning various components, especially in tight spaces.

7. **Bucket or Towel:** In case of water spillage during the installation, having a bucket or towel on hand will save you from unwanted messes.

**Materials:**

1. **Water Supply Line:** Ensure you have a new, flexible water supply line that fits your dishwasher and is compatible with your plumbing.

2. **Drain Hose:** A proper drain hose is essential for allowing wastewater to flow from your dishwasher to the sink or disposal.

3. **Power Cord:** If your new dishwasher doesn’t come with a built-in power cord, you’ll need to purchase one that matches your electrical requirements.

4. **Mounting Brackets:** Some dishwashers come with these, but if not, you may need to buy them separately to secure your unit properly.

5. **Installation Manual:** While not a physical tool, your dishwasher’s installation manual will be your best friend during this process, providing specific instructions tailored to your model.

By ensuring you have the right tools and materials at your disposal, you set the stage for a successful and efficient dishwasher installation. Remember, safety always comes first—so put on your safety goggles, keep your workspace tidy, and prepare to transform your kitchen with your new appliance!

3. Preparing Your Kitchen: Clearing the Space

How to install a new dishwasher?
Credit : whatcanu.com

Before diving into the installation process of your new dishwasher, it’s essential to prepare your kitchen and clear the space effectively. A clutter-free environment not only makes the task easier but also ensures safety as you navigate around potentially sharp tools and heavy equipment.

Start by removing any obstacles from the area surrounding your old dishwasher. This includes emptying the appliance itself—ensure that all dishes, utensils, and cleaning supplies are removed, giving you a clear view of the space. Next, clear away any items from the countertops and adjacent cabinetry that might hinder movement. If your dishwasher is located under the counter, take the time to empty any cabinets below or beside it; this will provide ample room to maneuver and prevent accidental damage to your belongings.

Once the area is cleared, take a moment to sweep or vacuum the floor. Not only will this make the workspace more pleasant, but it will also help you avoid slipping on dust or debris as you work. If your kitchen floor is particularly slippery, consider laying down a non-slip mat to provide better traction during the installation process.

Additionally, gather all the tools and materials you’ll need for the installation. This might include a screwdriver, adjustable wrench, pliers, and a bucket to catch any water that may spill during disconnection. Having everything within arm’s reach will streamline the process and allow you to focus on the task at hand without unnecessary interruptions.

Lastly, ensure that you have access to the necessary plumbing and electrical connections. This may involve moving other appliances or furniture out of the way. If your new dishwasher requires additional electrical work or plumbing adjustments, it’s wise to consult a professional beforehand. With your kitchen prepared and a clear path to work, you’re ready to tackle the installation with confidence and ease.

4. Understanding Your Dishwasher: Key Components and Features

Before diving into the installation process, it’s essential to familiarize yourself with your dishwasher’s key components and features. Understanding these elements will not only ease your installation but also enhance your overall experience with the appliance.

First, let’s take a look at the **control panel**, usually located on the front or top edge of the door. This is where you’ll find buttons or a touchscreen to select wash cycles, adjust settings, and monitor the status of your dishwasher. Familiarizing yourself with these functions will help you navigate the machine effortlessly once it’s up and running.

Next, identify the **spray arms**. Most dishwashers have one or two spray arms that rotate to distribute water during the wash cycle. These arms are critical for ensuring your dishes come out sparkling clean, so check for any obstructions or debris before you start the installation.

Another important component is the **filter**. Located at the bottom of the dishwasher, the filter traps food particles and prevents them from recirculating onto your clean dishes. Understanding how to remove and clean the filter will not only extend the lifespan of your dishwasher but also maintain its cleaning efficiency.

The **drainage system** is another crucial feature. It usually consists of a drain pump and hose that expels dirty water after each cycle. Make sure to familiarize yourself with this system, as proper installation is key to preventing leaks or drainage issues in the future.

Lastly, don’t overlook the **power supply** and **water supply connections**. Knowing where these are located and how they interact with your dishwasher is vital for a successful installation. The electrical and plumbing connections must be secure and compatible with your home’s systems to ensure your dishwasher operates safely and efficiently.

By understanding these key components and features, you’ll not only simplify the installation process but also set yourself up for a successful and hassle-free experience with your new dishwasher.

5. Disconnecting the Old Dishwasher: Step-by-Step Instructions

How to install a new dishwasher?
Credit : whatcanu.com

Disconnecting your old dishwasher may seem daunting, but with a few simple steps, you can do it like a pro. Before diving in, ensure you have all necessary tools on hand: a screwdriver, adjustable wrench, bucket, and towels to catch any spills. Here’s a step-by-step guide to help you safely remove the old appliance.

**Step 1: Turn Off the Power and Water Supply**
Start by turning off the power to the dishwasher at your circuit breaker. This is crucial to avoid any electrical hazards during the disconnection process. Next, locate the water supply valve under your sink and turn it off as well.

**Step 2: Remove the Lower Dish Rack**
Take out the lower dish rack from the dishwasher to give yourself more space to work. This will also help prevent any accidental damage to your dishes during the disconnection.

**Step 3: Disconnect the Drain Hose**
Look for the drain hose, typically located at the back of the dishwasher. Using your screwdriver, loosen the clamp holding the hose in place, then gently pull the hose away from the dishwasher. Keep a bucket or towel handy to catch any residual water that may spill out.

**Step 4: Unscrew the Water Supply Line**
Next, locate the water supply line connected to the dishwasher. Using your adjustable wrench, carefully unscrew the line. Be prepared for a small amount of water to drip out; your bucket will be helpful here!

**Step 5: Remove the Mounting Brackets**
Most dishwashers are secured to the countertop or cabinets with mounting brackets. Open the dishwasher door and locate these brackets, which are generally found at the top. Use your screwdriver to remove any screws holding the brackets in place. Once detached, you can gently pull the dishwasher away from the cabinetry.

**Step 6: Disconnect the Electrical Wiring**
Finally, locate the electrical junction box, usually located at the bottom of the dishwasher. Carefully remove the cover plate and disconnect the wiring by unscrewing the wire nuts. Make sure to note how the wires are connected, as you’ll need this information for your new installation.

**Step 7: Safely Remove the Dishwasher**
With everything disconnected, it’s time to remove the dishwasher. Carefully slide it out from its position, taking care not to damage the surrounding cabinetry or flooring.

Once you’ve successfully removed the old dishwasher, you’re one step closer to installing your new appliance. Remember, patience and caution are your best friends in this process!

6. Inspecting Water and Electrical Connections

Before you can bring your new dishwasher to life, it’s crucial to inspect the water and electrical connections meticulously. This step is not just a formality; it’s a safeguard that ensures your appliance operates efficiently and safely.

Begin by locating the water supply line and shutoff valve, which is typically found under the kitchen sink. Turn on the water to check for any leaks or drips. A steady stream means you’re good to go, but if you spot any moisture around the fittings, it’s essential to tighten the connections or replace any worn-out gaskets. Remember, a small leak can lead to significant water damage over time, so it’s better to be cautious.

Next, turn your attention to the electrical connections. Ensure that the power supply is compatible with your new dishwasher’s requirements. Most modern dishwashers will need a dedicated circuit, so check the circuit breaker and confirm that it’s not overloaded. Use a voltage tester to verify that the outlet is working correctly before plugging in your appliance.

Additionally, take a moment to inspect the wiring and connections for any signs of fraying or damage. If you’re uncertain, don’t hesitate to consult a professional electrician to ensure everything is up to code. A little diligence now can save you a lot of headaches later, allowing you to enjoy the convenience of your new dishwasher with peace of mind.

With the water and electrical connections verified, you’ll be well on your way to completing the installation process like a pro!

7. Positioning Your New Dishwasher: Tips for Alignment

How to install a new dishwasher?
Credit : whatcanu.com

Positioning your new dishwasher correctly is crucial for both functionality and aesthetics, ensuring it operates efficiently while seamlessly integrating into your kitchen space. Start by carefully sliding the dishwasher into its designated space, typically located between the kitchen cabinets. Before doing so, check that all hoses and the power supply are readily accessible and not obstructed.

Once in position, use a level to check the alignment of the dishwasher. It should sit flush with the surrounding cabinetry without any noticeable gaps. If necessary, adjust the dishwasher’s legs to achieve the correct height. Most models feature adjustable feet that can be raised or lowered with ease, allowing you to achieve that coveted level alignment.

Next, ensure that the door swings open freely without hitting adjacent cabinets or countertops. This will not only enhance the usability of the appliance but also prevent potential damage to both the dishwasher and your kitchen fixtures. If your model includes customizable panels or trim kits, now is the time to install these to create a polished, integrated look.

Finally, take a step back and evaluate the overall appearance. A well-positioned dishwasher should look like a natural part of your kitchen, with smooth lines and a cohesive aesthetic. With these tips for alignment in mind, you’ll ensure that your new dishwasher is not just functional but also a stylish addition to your home!

8. Connecting the Water Supply Line

Connecting the water supply line is a crucial step in the installation process, and taking the time to do it correctly will ensure your dishwasher operates efficiently without leaks. To begin, you will need a few essential tools: an adjustable wrench, Teflon tape, and a bucket or towel for any potential spills.

First, locate the water supply valve, usually found under your kitchen sink. Before you start, make sure to turn off the water supply to avoid any surprises. It’s a good idea to place a bucket or towel beneath the valve to catch any residual water that may spill out when you disconnect the existing hose.

Next, use the adjustable wrench to loosen and remove the existing supply line from the valve. Once detached, inspect the connection point for any signs of wear or damage. If everything looks good, wrap Teflon tape around the threads of the new water supply line. This will create a watertight seal, preventing leaks once everything is connected.

Now, attach the new water supply line to the valve by hand, ensuring it’s snug but not overly tight. Follow this by reattaching the other end of the line to the dishwasher’s water inlet, which is typically located on the lower right side of the appliance. Again, use the adjustable wrench to secure this connection, taking care not to overtighten, as this could damage the fittings.

Once both connections are secure, it’s time to turn the water supply back on. Do this slowly and watch closely for any leaks at both connection points. If you see any water seeping out, turn off the valve immediately and double-check your connections.

With the water supply line securely connected and leak-free, you’re one step closer to enjoying the convenience of your new dishwasher. Make sure to take a moment to clean up any tools or spills before moving on to the next step in your dishwasher installation process!

9. Electrical Hookup: Hardwiring vs. Plugging In

When it comes to the electrical hookup for your new dishwasher, understanding the difference between hardwiring and plugging in is essential for a successful installation. Both methods have their own set of advantages, and your choice will largely depend on your kitchen’s existing setup and local electrical codes.

**Hardwiring** involves connecting the dishwasher directly to your home’s electrical system. This method typically requires a dedicated circuit and can provide a more permanent solution. Hardwired dishwashers usually come with a flexible conduit that contains three wires: a hot wire, a neutral wire, and a ground wire. This setup is particularly beneficial for those who want a clean look without visible cords. However, it’s crucial to ensure that you meet the necessary electrical requirements and restrictions, so consulting a professional electrician may be wise if you are unsure.

On the other hand, **plugging in** your dishwasher is often the simpler and more straightforward option. Many modern dishwashers are designed to be connected to a standard three-prong outlet. This method allows for easy removal and replacement, making it ideal for renters or those who plan to change appliances frequently. If your dishwasher comes with a power cord, all you need to do is locate an accessible outlet that matches the voltage requirements of your appliance. Ensure that the outlet is in a convenient but safe location, typically within the cabinetry, so it remains hidden from view.

Regardless of the method you choose, ensure you follow safety precautions. Turn off the power at the circuit breaker before starting any electrical work and, if necessary, consult your dishwasher’s manual for specific instructions related to electrical connections. By understanding the implications of hardwiring versus plugging in, you can make an informed decision that ensures your new dishwasher operates safely and efficiently, setting the stage for many years of hassle-free dishwashing.

10. Securing the Dishwasher to the Cabinet

Securing your new dishwasher to the cabinet is a crucial step that ensures stability and prevents any unintended movement during operation. This process not only enhances safety but also contributes to the longevity of your appliance.

Begin by locating the mounting brackets, which are typically found at the top edges of the dishwasher. These brackets will be used to anchor the dishwasher securely to the underside of your countertop. Before you start, double-check that the dishwasher is leveled properly; this will prevent any vibrations that could lead to wear and tear.

Once you’ve confirmed that your dishwasher is level, align the mounting brackets with the countertop. Using a drill, carefully drive screws into the brackets, ensuring they penetrate the cabinet above without compromising the integrity of the wood. Be cautious not to overtighten, as this can warp the dishwasher frame or damage the cabinet.

For added security, consider using shims if there are any gaps between the dishwasher and the cabinet. These small, wedge-shaped pieces help to create a snug fit and provide extra support. After securing the brackets, give the dishwasher a gentle tug to ensure it’s firmly in place.

Finally, take a moment to inspect the surrounding area. Ensure that there are no water lines or electrical cords pinched between the appliance and the cabinet, as this could lead to future issues. By taking the time to secure your dishwasher properly, you can enjoy the peace of mind that comes with a well-installed appliance, ready to tackle your dishwashing needs efficiently and reliably.

11. Testing for Leaks: Ensuring a Proper Seal

Once your new dishwasher is securely installed and connected to the water supply, it’s time for one of the most crucial steps: testing for leaks. Ensuring a proper seal is essential not only for the longevity of your appliance but also for the protection of your kitchen from water damage. A small leak can lead to significant issues if left unchecked, so take this step seriously.

Start by turning on the water supply valve that connects to your dishwasher. Once you’ve done that, run a short cycle on your dishwasher while keeping a close eye on the area around the door and the connections at the back. Look for any signs of dripping or pooling water, which could indicate a faulty seal or a loose connection.

Don’t rush this process—allow the dishwasher to run through its cycle completely. After it finishes, check the floor beneath the appliance for any signs of moisture. A dry floor means you’ve installed your dishwasher correctly, while any wet spots may require your immediate attention. If you do spot a leak, you may need to tighten the hose connections or reapply sealing tape to ensure a snug fit.

Additionally, using a paper towel or cloth to wipe down the edges of the door can help you spot any leaks that might not be immediately visible. If you notice any dampness on the towel after running the cycle, that’s a clear signal that you need to inspect the door gasket for wear or misalignment.

By taking the time to thoroughly test for leaks, you can enjoy peace of mind knowing that your new dishwasher is working efficiently and safely. Remember, an ounce of prevention is worth a pound of cure; addressing any leaks now can save you from costly repairs down the line.

12. Leveling Your Dishwasher: Importance of Stability

Leveling your dishwasher is a crucial step that can significantly impact its performance and longevity. An unlevel dishwasher can lead to a host of problems, including improper drainage, leaks, and even damage to your kitchen cabinetry. When your dishwasher is not stable, it may wobble during operation, causing loud noises and vibrations that can be unsettling. Moreover, an unlevel unit can affect how effectively the spray arms distribute water, leading to poorly cleaned dishes.

To ensure your dishwasher functions optimally, start by checking the leveling legs located at the bottom of the appliance. Most dishwashers are equipped with adjustable legs that allow you to raise or lower each corner to achieve a perfectly level surface. Using a bubble level, place it on the top edge of the dishwasher door. If the bubble is off-center, adjust the legs accordingly. Turn the legs clockwise to raise the unit and counterclockwise to lower it.

After making adjustments, recheck the level until the bubble sits perfectly centered. Once you confirm your dishwasher is level from side to side and front to back, secure it to the countertop or cabinetry, if applicable, to prevent any movement over time. Remember, taking the time to properly level your dishwasher not only ensures better performance but also extends its lifespan, making this step a vital part of your installation process. In the end, a stable dishwasher means cleaner dishes and a hassle-free experience for years to come!

13. Final Connections: Drain Hose Installation

Once your dishwasher is securely positioned and leveled, it’s time to tackle the crucial task of connecting the drain hose. This step ensures that dirty water is efficiently removed from your dishwasher during the wash cycle, preventing any backflow or leaks that could cause a mess in your kitchen.

Begin by locating the drain hose, typically made of durable plastic. You’ll find one end of the hose connected to the dishwasher itself, while the other end will need to be attached to your kitchen’s plumbing system. If your dishwasher has an air gap—a small device mounted on the countertop or sink—it’s essential to connect the drain hose to the air gap before proceeding to the sink drain.

Next, check the manufacturer’s instructions for your specific model. Most dishwashers require the drain hose to be routed upwards, creating a “high loop” that helps prevent wastewater from siphoning back into the appliance. You can achieve this by securing the hose to the underside of your countertop with a zip tie or clamp, making sure it forms a gentle curve without any sharp bends.

Once the hose is positioned correctly, attach the free end to the sink drain or garbage disposal. If connecting to a garbage disposal, ensure that the knockout plug is removed before insertion. This will allow water to flow freely from your dishwasher into the disposal. Use a hose clamp to secure the connection tightly, ensuring there are no leaks.

After everything is connected, it’s time for a quick check. Run your dishwasher on a short cycle while monitoring the drain area for any signs of leaks. This step is crucial, as it allows you to address any issues before completing the installation. If everything looks good, congratulations—you’ve successfully completed the drain hose installation! Your dishwasher is now ready to tackle your dirty dishes, giving you one more reason to enjoy the convenience of modern kitchen appliances.

14. Running Your First Cycle: What to Watch For

After successfully installing your new dishwasher, the moment has finally arrived to run your first cycle. This is an exciting step, but it’s essential to approach it with care to ensure everything is functioning correctly. Before hitting the start button, take a moment to double-check a few key elements.

First, ensure that all connections—water supply, drainage, and power—are secure. A loose hose can lead to leaks, while improper electrical connections might pose safety risks. Once you’ve confirmed everything is in order, load the dishwasher according to the manufacturer’s instructions, placing items in a way that promotes optimal water flow and cleanliness.

As you set the cycle, choose a standard wash program to start. This will give you a good baseline for the machine’s performance. Pay attention to how the dishwasher sounds during the initial cycle. A few operational noises are normal, but any strange grinding, loud banging, or persistent beeping may indicate an issue that needs addressing.

While the dishwasher runs, it’s a good idea to keep an eye on the exterior for any leaks. Inspect around the base and under the sink where the drainage hose connects. If you see any water pooling or dripping, it’s crucial to stop the cycle immediately and troubleshoot the problem. Additionally, listen for abnormal vibrations that could signal an imbalanced load or improper installation.

Finally, once the cycle completes, open the door and check the cleanliness of your dishes. If everything comes out sparkling clean, you can breathe a sigh of relief and celebrate your successful installation! However, if you notice residual food particles or cloudy glassware, it may be time to adjust your loading technique or explore the dishwasher’s settings for optimized performance. Running your first cycle is a crucial step in ensuring your new appliance is ready to serve you well for years to come. Happy washing!

15. Conclusion: Troubleshooting Common Installation Issues

### Conclusion: Troubleshooting Common Installation Issues

Now that you’ve successfully navigated the installation of your new dishwasher, it’s essential to be prepared for any hiccups that might arise in the process. Even the most meticulous DIY enthusiasts can encounter challenges, and knowing how to troubleshoot these issues can save you time and frustration.

One common problem is the dishwasher not filling with water. If this occurs, double-check that the water supply valve is fully open and inspect the inlet hose for any kinks or blockages. A clogged filter can also prevent water from entering, so don’t hesitate to clean or replace it as necessary.

Another frequent issue is the dishwasher leaking. If you notice puddles forming around the base, take a moment to inspect the door seal for wear and tear, as well as ensuring that the drain hose is securely connected and not pinched. Additionally, verify that the dishwasher is level; an uneven installation can lead to unwanted leaks.

Finally, be attentive to unusual noises during operation. While some sound is normal, loud grinding or banging may indicate that something is amiss. Check to see if any utensils or items have been left inside that could be obstructing the spray arms, or ensure that the dishwasher is properly secured to the cabinetry to minimize vibrations.

By keeping these troubleshooting tips in mind, you can address common installation issues with confidence. Remember, even if things don’t go perfectly, a little patience and problem-solving can lead to a smoothly operating dishwasher that will serve you well for years to come. Enjoy the benefits of your new appliance, and take pride in knowing that you’ve tackled the installation like a pro!

In conclusion, installing your new dishwasher doesn’t have to be an overwhelming task—armed with the right tools and our step-by-step guide, you can tackle it like a pro! By following the outlined instructions, you not only save money on installation fees but also gain a sense of accomplishment that comes from completing a DIY project. Remember to take your time, double-check your connections, and consult the manufacturer’s manual for any specific requirements. Soon enough, you’ll be enjoying the convenience of a sparkling clean kitchen without the hassle. We’d love to hear about your installation experience, so feel free to share your tips or ask any questions in the comments below. Happy dishwashing!

How to install a new faucet?

Upgrading your kitchen or bathroom faucet can breathe new life into your space, making it not only more functional but also more stylish.

However, the thought of tackling a DIY plumbing project might seem daunting, especially if you’ve never attempted anything beyond a simple light bulb change. Fear not! With the right tools and a little guidance, you can install your new faucet like a seasoned professional. In this comprehensive, step-by-step guide, we’ll walk you through the entire process, from selecting the perfect faucet to ensuring a leak-free finish. Whether you’re a seasoned DIY enthusiast or a complete novice, our easy-to-follow instructions will empower you to take on this project with confidence. So roll up your sleeves and prepare to transform your sink area with a stunning new fixture that reflects your personal style and enhances your home!

1. Introduction: Why Install Your Own Faucet?

How to install a new faucet?
Credit : whatcanu.com

Installing your own faucet might seem like a daunting task reserved for seasoned DIYers, but with the right guidance, it can be a straightforward and rewarding project. Choosing to tackle this task on your own not only saves you money on plumbing costs, but it also gives you a sense of accomplishment and control over your home improvement efforts. Whether you’re looking to upgrade to a more modern style, replace a leaky unit, or simply refresh your kitchen or bathroom’s look, installing a new faucet can dramatically enhance both functionality and aesthetics.

Moreover, understanding the ins and outs of your plumbing fixtures empowers you to make informed decisions in the future. You’ll learn about your water supply lines, how to identify potential issues, and when it’s time to call in a professional. Plus, there’s something incredibly satisfying about stepping back and admiring a job well done, knowing that you’ve not only improved your space but also added a personal touch to your home.

In this step-by-step guide, we’ll break down the process of faucet installation into manageable parts, ensuring that you have the confidence and knowledge to complete the job like a pro. So, roll up your sleeves, gather your tools, and let’s get started on transforming your sink area into a stylish and functional space!

2. Tools and Materials You’ll Need

Before diving into the installation process, it’s essential to gather all the necessary tools and materials to ensure a smooth and efficient experience. Having everything on hand will save you time and frustration, allowing you to focus on achieving that professional finish.

**Tools:**
1. **Adjustable Wrench:** This versatile tool is perfect for loosening and tightening nuts and bolts on your faucet.
2. **Basin Wrench:** A must-have for reaching those hard-to-access nuts under your sink, the basin wrench provides the leverage you’ll need to secure fittings without straining your hands.
3. **Screwdriver Set:** Both flathead and Phillips screwdrivers are essential for securing mounting screws and making any necessary adjustments.
4. **Plumber’s Putty or Silicone Sealant:** Use this to create a watertight seal around the base of your new faucet, preventing leaks and ensuring longevity.
5. **Pipe Wrench:** If you encounter stubborn pipes, a pipe wrench will give you the grip and torque needed to turn them without damaging the fittings.

**Materials:**
1. **New Faucet:** Choose a faucet that fits your sink’s configuration and matches your style preferences. Read reviews and product details to ensure quality.
2. **Supply Lines:** These flexible hoses connect your faucet to the water supply. Ensure they are compatible with your faucet and sink.
3. **Tephlon Tape:** This handy tape is used to wrap threaded connections, ensuring a tight seal that helps prevent leaks.
4. **Cleaning Supplies:** Before installation, make sure you have some cloths or sponges to clean your workspace and remove any old putty or debris from your sink.
5. **Bucket or Towels:** It’s always a good idea to have a bucket or some towels nearby to catch any excess water that may spill during the installation process.

With your tools and materials assembled, you’re now ready to tackle the installation of your new faucet. This preparation will not only streamline the process but also instill confidence as you work towards achieving that pro-like result!

3. Choosing the Right Faucet for Your Space

How to install a new faucet?
Credit : whatcanu.com

Choosing the right faucet for your space is a crucial step that can significantly impact both the functionality and aesthetic of your kitchen or bathroom. With a myriad of styles, finishes, and functionalities available, selecting the perfect faucet can feel overwhelming. However, taking a moment to consider your space’s unique needs can make the decision-making process smoother and more enjoyable.

first, assess the overall style of your room. Are you aiming for a modern, sleek look with clean lines and polished chrome, or do you prefer a rustic vibe with a vintage-inspired design and matte bronze finish? Consider the existing fixtures and decor as well; your new faucet should complement and enhance the overall theme rather than clash with it.

Next, think about the functionality you need. Do you frequently cook and require a high-arc faucet that offers ample clearance for filling pots and pans? Or perhaps you need a pull-down sprayer for easy rinsing and washing? Identify the features that will best serve your daily tasks, such as single or dual handles, touchless technology, or water-saving options.

Also, don’t forget about the size and configuration of your sink. A large, farmhouse-style sink may benefit from a more substantial faucet that can hold its own against the expansive basin, while a smaller, undermount sink may call for a more streamlined option. Ensure that the faucet’s spout height and reach are appropriate for your sink’s dimensions to avoid any splashing or inconvenience.

Finally, consider the installation requirements. Some faucets come with complex mounting systems or require additional tools, while others are designed for easy DIY installation. If you’re not comfortable with plumbing tasks, it might be wise to choose a model that is straightforward to install or to consult with a professional.

By taking the time to thoughtfully choose a faucet that aligns with your space’s style, functionality, and installation needs, you’ll not only enhance the visual appeal of your kitchen or bathroom but also ensure a seamless and enjoyable experience for years to come.

4. Preparing Your Workspace

Before diving into the installation process, it’s crucial to prepare your workspace properly. A well-organized and clean area not only enhances your efficiency but also minimizes the risk of accidents or misplacing essential tools. Start by clearing the space beneath your sink and removing any items that may obstruct your work. This will give you ample room to maneuver and access all necessary parts during the installation.

Next, ensure that the plumbing area is dry and free from any leaks. If you notice any drips or moisture, take a moment to fix these issues before proceeding. It’s also wise to have a towel or sponge handy to wipe up any spills that may occur during the process.

Gather all the tools you’ll need for the job. Typically, this includes a basin wrench, adjustable pliers, a screwdriver, plumber’s tape, and possibly a bucket to catch any excess water. Having everything at arm’s reach will save you valuable time and prevent frustration.

Finally, don’t forget to turn off the water supply to the sink. Locate the shut-off valves under the sink and twist them clockwise to prevent any unexpected gushes while you’re working. By taking these preparatory steps, you’ll set yourself up for a smoother installation experience, allowing you to focus on the task at hand and achieve professional-level results!

5. Shutting Off the Water Supply

How to install a new faucet?
Credit : whatcanu.com

Before you dive into the world of plumbing and start removing your old faucet, it’s crucial to shut off the water supply. This step is often overlooked by novice DIYers, but it’s essential for preventing a mini waterfall in your kitchen or bathroom.

Locate the shut-off valves under your sink. These valves are typically positioned on the wall behind the sink or on the pipes leading to the faucet. You should see two valves—one for the hot water and one for the cold. To turn them off, simply twist the handles clockwise until they stop. If your sink doesn’t have individual shut-off valves, you may need to turn off the main water supply for your home. This can usually be found in your basement or near the perimeter of your home, often close to the water meter.

Once you’ve shut off the water supply, it’s a good idea to open the faucet to relieve any remaining pressure in the pipes. This will also help to drain any water left in the lines, making the installation process a lot cleaner and easier. Keep a towel handy, just in case there are any drips!

By ensuring that the water supply is completely turned off, you can proceed with confidence, knowing that you’ve taken the necessary precautions to avoid any mishaps. With this crucial step completed, you’re now ready to tackle the next phase of your faucet installation like a pro!

6. Removing the Old Faucet: A Step-by-Step Process

Removing the old faucet may seem daunting at first, but with a bit of patience and the right tools, you can tackle this task like a pro. Here’s a step-by-step process to make it as smooth as possible.

**Step 1: Gather Your Tools**
Before diving into the removal process, it’s essential to have the right tools on hand. You’ll need an adjustable wrench, a basin wrench (for those hard-to-reach spots), a screwdriver, a bucket to catch any water, and a cloth for any spills. Having everything ready will save you time and frustration.

**Step 2: Turn Off the Water Supply**
Locate the shutoff valves under your sink and turn them clockwise to stop the water flow. If you can’t find these valves, it may be necessary to shut off the main water supply for your home. Don’t forget to turn on the faucet to release any remaining pressure and drain the water from the lines.

**Step 3: Disconnect the Water Supply Lines**
Place your bucket underneath the sink to catch any water that may drip during the process. Using your adjustable wrench, carefully loosen the nuts that connect the water supply lines to the faucet. Once loosened, gently pull the lines away from the faucet and lay them aside.

**Step 4: Remove the Faucet Mounting Nuts**
Now it’s time to tackle the mounting nuts that secure the faucet to the sink. These may be located underneath the sink and can be tricky to reach. Use your basin wrench to grip and turn the nuts counterclockwise until they’re completely removed. If they’re particularly stubborn, a few drops of penetrating oil can help loosen them.

**Step 5: Take Out the Old Faucet**
With the mounting nuts removed, you should now be able to lift the old faucet out from the top of the sink. If it’s stuck, gently wiggle it back and forth to dislodge any remaining sealant or grime. Once freed, lift it out carefully and set it aside.

**Step 6: Clean the Sink Surface**
Before you install your new faucet, take a moment to clean the area where the old faucet was mounted. Remove any old putty, debris, or mineral buildup with a scrub brush and a suitable cleaner. This will ensure a tight seal for your new installation.

By following these steps, you’ll have successfully removed your old faucet, making way for a fresh and stylish upgrade. With a little effort, you’re one step closer to enjoying your new faucet and enhancing the heart of your home!

7. Cleaning the Sink Area and Preparing for Installation

How to install a new faucet?
Credit : whatcanu.com

Before diving into the installation of your new faucet, it’s essential to ensure that the sink area is clean and free of any debris. A tidy work environment not only makes the process smoother but also prevents any potential mishaps during installation. Start by removing any items from the countertop and clearing the area beneath the sink; this will give you ample space to work without obstruction.

Next, use a sponge or cloth along with a mild cleaner to wipe down the sink basin and surrounding countertops. Pay close attention to any buildup or residue, particularly around the existing faucet and sinkholes. A clean surface will allow for a better seal and help prevent any leaks once your new faucet is installed.

Additionally, check the plumbing connections and surrounding areas for any signs of corrosion or damage. If you notice anything amiss, it’s wise to address these issues before moving forward with the installation. This step not only ensures a better fit for your new faucet but also prolongs its lifespan.

Finally, gather all your tools and installation materials, including the new faucet, mounting hardware, and any additional supplies you might need. By organizing everything in advance, you’ll save time and keep your workspace efficient. With the sink area cleaned and prepped, you’re now ready to tackle the installation process like a pro!

8. Installing the New Faucet: A Detailed Guide

Installing a new faucet may seem like a daunting task, but with the right guidance, you can complete the job like a seasoned professional. This detailed guide will walk you through each step of the installation process, ensuring you achieve a seamless and efficient setup.

**Step 1: Gather Your Tools and Materials**
Before diving into the installation, it’s essential to have all the necessary tools and materials at your fingertips. You’ll need a basin wrench, adjustable wrench, plumber’s tape, a bucket to catch any excess water, and, of course, your new faucet. Having everything organized will save you time and frustration.

**Step 2: Shut Off the Water Supply**
The first critical step in any plumbing project is to turn off the water supply. Locate the shut-off valves under your sink and turn them clockwise until they are completely closed. If you can’t find them, you may need to shut off the main water supply for your home. Once the water is off, turn on the old faucet to drain any remaining water in the pipes.

**Step 3: Remove the Old Faucet**
Next, it’s time to detach the old faucet. Use your basin wrench to loosen and remove the nuts securing the faucet to the sink. Carefully disconnect the water supply lines, taking care to place a bucket underneath to catch any remaining water. If your old faucet is particularly stubborn, a bit of penetrating oil can help ease the removal process.

**Step 4: Prepare the Sink**
With the old faucet removed, take a moment to clean the sink surface thoroughly. Remove any old putty or debris that may interfere with the new installation. If your new faucet requires a gasket or mounting hardware, ensure these components are ready and in good condition.

**Step 5: Install the New Faucet**
Now comes the exciting part—installing your new faucet! Follow the manufacturer’s instructions closely. Typically, you’ll start by placing the faucet into the mounting holes of the sink. Secure it in place with the provided mounting nuts, tightening them with your adjustable wrench. Be careful not to overtighten, as this can damage the sink.

**Step 6: Connect the Water Supply Lines**
With the faucet securely in place, it’s time to connect the water supply lines. Attach the hot and cold water lines to the corresponding connections on the faucet, using plumber’s tape to ensure a tight seal. Make sure to connect them correctly—hot to hot and cold to cold—to avoid any mix-ups.

**Step 7: Turn on the Water Supply**
Once everything is connected, it’s time to turn the water supply back on. Go back to the shut-off valves and turn them counterclockwise to restore water flow. As you do this, check for any leaks around the connections. If you notice any, tighten the connections gently until the leak stops.

**Step 8: Test Your New Faucet**
With everything in place, turn on your new faucet to test its operation. Allow the water to run for a minute to clear any air bubbles and sediment. Check for leaks again during this process. If everything looks good, congratulations! You’ve successfully installed your new faucet.

By following these steps, you can transform your kitchen or bathroom with a new faucet without the need for professional help. Enjoy the satisfaction of your handiwork and the enhanced functionality of your space!

9. Connecting the Water Supply Lines

Connecting the water supply lines is a crucial step in the faucet installation process, and it’s one that can make or break your entire project. With the faucet securely mounted and all the necessary tools within reach, it’s time to turn your attention to those water supply lines—the veins that will bring life to your new fixture.

Start by ensuring that the water supply valves beneath your sink are turned off. This is essential to prevent any sudden sprays or floods when you begin working. Once you’ve confirmed the valves are closed, it’s a good idea to place a bucket or a towel under the sink to catch any residual water that may spill out during the connection process.

Next, locate the supply lines that will connect to your faucet. Most faucets require both hot and cold water lines, which will be clearly marked. If your new faucet didn’t come with supply lines, you can purchase flexible stainless steel or braided nylon lines that are designed to withstand high pressure and resist corrosion.

Carefully thread the supply line nuts onto the corresponding faucet inlets, ensuring that you match the hot line to the hot inlet and the cold line to the cold inlet. When tightening the connections, use a wrench, but be cautious not to overtighten—this can lead to stripped threads or cracked fittings. A snug fit is all you need; think of it like a firm handshake—strong but not overbearingly tight.

Once the connections are secure, it’s time to turn the water supply back on. Do so slowly, allowing the lines to fill with water gradually. As the pressure builds, keep an eye on the newly connected lines for any signs of leaks. If you spot any drips, it may be necessary to tighten the connections slightly more or check the washers and seals to ensure they’re properly seated.

With the water supply lines securely connected and leak-free, you’re one step closer to enjoying your new faucet. Take a moment to admire your handiwork; you’re well on your way to completing a professional-quality installation right in your own home!

10. Sealing and Securing the Faucet

Once your new faucet is in place, the final step—sealing and securing it—ensures that it operates smoothly and prevents any leaks. This crucial phase not only guarantees that your installation is watertight but also enhances the longevity and performance of your faucet.

Start by applying a bead of plumber’s putty or silicone sealant around the base of the faucet where it meets the sink. This step is essential for creating a reliable seal that will keep water from seeping underneath the faucet and causing damage over time. If you’re using plumber’s putty, roll it into a rope-like shape and lay it down evenly. If you prefer silicone, apply a neat line around the edge, ensuring it’s not too thick, as excess sealant can be squeezed out when the faucet is pressed down.

Next, carefully lower the faucet into position, aligning it with the mounting holes. Once it’s seated correctly, secure it from underneath the sink using the mounting nuts provided with your faucet. Tighten these nuts by hand, and then use a wrench for a snug fit—just be cautious not to overtighten, as this could damage the sink or the faucet itself.

Finally, to add an extra layer of security, check the alignment of the faucet and adjust as necessary. Ensure that the handles are positioned correctly and that the spout is centered. After making any adjustments, give everything a final tightening, and wipe away any excess sealant that may have oozed out during installation.

With the faucet securely in place and properly sealed, you’re ready to reconnect the water supply. Turn on the valves slowly and check for any leaks around the connections. If you notice any, it may be an indication that you need to tighten the connections or reapply sealant. Once everything is secure and leak-free, take a moment to admire your handiwork—your new faucet is now ready to serve you in style!

11. Turning the Water Supply Back On

Once you’ve successfully installed your new faucet and double-checked all the connections, it’s time for one of the most crucial steps: turning the water supply back on. This moment is not just about restoring functionality to your sink; it’s the moment of truth that will determine if your installation was a success.

Before you proceed, ensure that you have towels or a sponge handy to catch any unexpected drips. Begin by locating the shut-off valves under your sink. These valves are typically situated on the wall or the floor, and they control the water flow to your faucet. With a gentle twist, turn the valves counterclockwise to open them.

As you do this, listen for the faint sound of water rushing back into the pipes. It’s an exhilarating moment, but don’t get too excited just yet! Once the valves are fully open, it’s time to check for leaks. Turn on your new faucet to its full flow and observe closely around the base and the connections you’ve just made. If you spot any drips or moisture, it may indicate that a connection wasn’t tightened properly or that a washer needs to be adjusted.

While the water is running, take a moment to check the temperature. Adjust the hot and cold levers to ensure that both are functioning smoothly and that the water temperature is to your liking. This step not only confirms that your installation was successful but also allows you to familiarize yourself with the faucet’s controls.

If all looks good—no leaks, and the water flows beautifully—you can take a deep breath and revel in your accomplishment. You’ve just turned your kitchen or bathroom into a more functional space, all while developing your DIY skills! Don’t forget to clean up any residual water around the sink. Congratulations, you’ve officially crossed the finish line of your faucet installation project!

12. Testing for Leaks and Proper Functioning

Once you’ve successfully installed your new faucet, the moment of truth arrives: it’s time to test for leaks and ensure that everything is functioning as it should. This crucial step not only confirms that your hard work has paid off but also prevents future water damage and costly repairs.

Start by turning on the water supply valves beneath your sink. As you do this, keep a close eye on the connections you made during the installation process. Look for any signs of water seeping from the joints or under the sink. If you spot a leak, don’t panic! Tighten the connections gradually, but be careful not to overtighten, as this could cause damage.

Next, turn on the faucet and let the water run for a minute or so. Observe the flow; it should be steady and consistent. Move the handle through its full range of motion to ensure it operates smoothly. Pay attention to the temperature control as well—make sure that both hot and cold water are functioning correctly and that the temperature adjusts as expected.

While the water is running, check for any unusual noise or vibration that might indicate an issue with the installation. If everything sounds perfect, take a moment to inspect the area around the sink for any signs of dripping water or dampness.

Finally, don’t forget to test the sprayer, if your faucet has one. Activate it and check for proper operation and any leaks at the connection point.

By thoroughly testing your faucet, you can be confident that you’ve completed the installation like a pro. This attention to detail not only enhances your experience but ensures that your new fixture will serve you well for years to come.

13. Final Touches: Cleaning Up and Maintenance Tips

Once you’ve successfully installed your new faucet, it’s time to focus on the final touches that ensure everything looks pristine and operates smoothly. A clean work area not only enhances the aesthetic appeal of your newly installed faucet but also cements your accomplishment as a DIY champion!

**Cleaning Up:** Start by wiping down the surrounding area of the sink with a damp cloth to remove any dust, debris, or fingerprints that may have accumulated during the installation process. Pay special attention to the base of the faucet and the countertop—these spots can often be overlooked but are crucial for maintaining a polished look. If there are any water spots or mineral deposits, a gentle cleanser or a mixture of vinegar and water can work wonders. Just be sure to avoid abrasive cleaners that might scratch the surface.

**Check for Leaks:** Before you call it a day, turn on the faucet and let the water run for a minute. Keep an eye out for any leaks around the connections. If you notice any drips, double-check that the nuts and connections are tightened properly. It’s always better to address leaks now rather than waiting until they become a bigger problem later.

**Maintenance Tips:** Now that your faucet is installed and gleaming, regular maintenance will help keep it in top condition. Consider setting a reminder to clean the faucet every couple of weeks. Use a soft cloth and a mild soap solution to wipe it down, preventing buildup and keeping it shiny. For those pesky mineral deposits, a routine application of vinegar can help maintain the faucet’s finish.

Additionally, inspect the faucet aerator regularly. Over time, it can accumulate debris or mineral buildup that affects water flow. Unscrew it from the tip of the faucet, rinse it out, and clean it with a brush if necessary, ensuring optimal performance.

By taking these final steps to clean up and maintain your new faucet, you’ll not only enjoy its functionality but also extend its lifespan. A little care goes a long way, turning your installation success into a long-lasting triumph!

14. Troubleshooting Common Installation Issues

Even the most skilled DIYers can encounter challenges during a faucet installation, so it’s essential to be prepared for potential hiccups along the way. Here are some common issues you might face and how to troubleshoot them effectively:

**1. Leaky Connections:** One of the most frequent problems after installation is a leak at the connections. If you find water dripping from the faucet or underneath the sink, start by checking the tightness of the connections. Use an adjustable wrench to ensure that the nuts are snug but not overtightened, which can cause damage. If the leak persists, inspect the rubber washers or O-rings; they may need replacing or may not have been seated correctly.

**2. Low Water Pressure:** If your new faucet isn’t delivering water at the expected pressure, first check the aerator. Mineral deposits can accumulate over time, restricting water flow. Remove the aerator and soak it in vinegar to dissolve any buildup. If cleaning doesn’t help, ensure that the shut-off valves under the sink are fully open and that there are no kinks in the water supply hoses.

**3. No Hot Water:** Sometimes, a newly installed faucet may only deliver cold water. This could be due to a few reasons: ensure that the hot water supply line is properly connected and that the shut-off valve for hot water is open. If everything looks good but you still have no hot water, the issue might stem from your water heater or plumbing system.

**4. Noisy Faucet:** If your faucet is making strange noises—like whistling or banging—when water flows, it could indicate air in the pipes or improper installation. Start by turning off the water supply and then open the faucet to release any trapped air. If the noise persists, check for loose fittings or vibrations in the supply lines that may need to be secured.

**5. Difficulty Turning the Faucet Handle:** If the handle feels stiff or is hard to turn, it could be due to improper installation or misalignment. Inspect all components to ensure they are properly seated and aligned according to the manufacturer’s instructions. Sometimes, a little lubrication on the handle mechanism can make a significant difference.

By keeping these troubleshooting tips in mind, you can tackle common installation issues with confidence. Remember, patience is key—take your time to identify and resolve any problems, and soon enough, you’ll have a perfectly functioning faucet that enhances your kitchen or bathroom beautifully!

15. Conclusion: Enjoying Your New Faucet!

Congratulations! You’ve successfully navigated the installation process and now it’s time to sit back and enjoy the fruits of your labor. A new faucet not only enhances the aesthetics of your kitchen or bathroom, but it also brings functionality and ease to your daily routine.

As you turn on the tap for the first time, listen to the gentle flow of water and feel the smoothness of the handle. Whether you’ve chosen a sleek modern design or a classic vintage style, your new fixture is sure to be a centerpiece in your space. Take a moment to appreciate the transformation you’ve achieved—imagine how much more enjoyable washing dishes or brushing your teeth will be with this upgraded feature.

Remember to keep an eye out for any leaks over the next few days and ensure that everything is functioning as it should. Familiarize yourself with any special features your faucet may have, such as touchless activation or temperature control, and enjoy the convenience they provide.

Lastly, don’t forget to maintain your faucet regularly to prolong its life and ensure it continues to perform flawlessly. A simple routine of cleaning and checking for wear and tear will keep your faucet looking great and functioning well for years to come.

Now, go ahead and celebrate your accomplishment! You’ve not only upgraded your home but also gained a valuable DIY skill. So raise a glass (or a mug) under your brand-new faucet, and toast to your success—here’s to many more projects in the future!

In conclusion, we hope this step-by-step guide has empowered you to tackle your faucet installation project with confidence and ease. With the right tools, a little patience, and the techniques outlined in this post, you can achieve professional-level results without the hefty price tag of hiring a plumber. Remember, each step is an opportunity to enhance not just your plumbing skills but also your home’s functionality and aesthetic appeal. So, roll up your sleeves, enjoy the process, and take pride in your accomplishment. Happy plumbing, and don’t hesitate to share your success stories or ask questions in the comments below!

How to install a new shower head?

Upgrading your shower head can transform your daily routine into a luxurious spa-like experience, but the thought of installation might seem daunting.

Fear not! With the right tools and a bit of guidance, you can easily install your new shower head like a pro, saving both time and money while elevating your bathroom’s style and functionality. In this step-by-step guide, we’ll walk you through the entire process—from gathering necessary tools and selecting the perfect shower head to removing the old fixture and installing the new one with confidence. Whether you’re a seasoned DIY enthusiast or a first-time homeowner, our clear instructions and helpful tips will ensure your shower upgrade is smooth and hassle-free. Get ready to enjoy a refreshing shower experience that feels just right!

1. Introduction: Why Upgrade Your Shower Head?

How to install a new shower head?
Credit : whatcanu.com

Upgrading your shower head might seem like a small change, but it can have a significant impact on your daily routine and overall bathroom experience. Imagine stepping into the shower each morning and being greeted by a revitalizing cascade of water that washes away fatigue and stress. Investing in a new shower head can transform an ordinary shower into a luxurious spa-like retreat, elevating your home’s comfort and functionality.

Not only does a new shower head enhance your bathing experience, but it can also contribute to water efficiency, helping you save on utility bills while being environmentally conscious. Modern shower heads come equipped with innovative features, such as adjustable spray settings, built-in water-saving technology, and even Bluetooth connectivity for a truly immersive experience.

Furthermore, a stylish shower head can serve as a statement piece, adding a touch of elegance to your bathroom decor. With a variety of designs and finishes available—from sleek chrome to rustic bronze—you can easily find a model that complements your personal style and elevates the aesthetic of your space.

In this step-by-step guide, we’ll walk you through the process of installing your new shower head like a pro, ensuring you not only enjoy the benefits of this upgrade but also gain the satisfaction of completing the project yourself. Whether you’re a seasoned DIY enthusiast or a first-time homeowner, you’ll find that with the right tools and guidance, transforming your shower has never been easier. So, let’s dive in and discover how a simple upgrade can lead to a more enjoyable and efficient showering experience!

2. Tools and Materials You’ll Need

Before diving into the installation process, it’s essential to gather all the necessary tools and materials. Having everything on hand not only streamlines the installation but also ensures that you won’t have to make any last-minute trips to the hardware store. Here’s a comprehensive list to help you get started:

**1. Adjustable Wrench:** This versatile tool will help you easily tighten or loosen the nuts and bolts that secure your shower head in place. A wrench with a rubber grip can also provide better leverage and prevent damage to the fittings.

**2. Plumber’s Tape (Teflon Tape):** This handy tape is crucial for creating a watertight seal around the threads of your shower arm. It prevents leaks and ensures that your new shower head functions smoothly.

**3. Screwdriver:** Depending on your shower head model, you may need a Phillips or flathead screwdriver. This will help you remove the old shower head and secure the new one properly.

**4. Bucket or Towel:** To catch any remaining water that may drip from the shower arm during the installation process, have a bucket or towel ready. This will help keep your bathroom dry and free from puddles.

**5. Cleaning Cloth:** A clean cloth or rag will come in handy for wiping down the shower arm and ensuring a clean surface for the new shower head. This step is essential for maintaining a good seal and preventing any debris from interfering with the installation.

**6. New Shower Head:** Of course, you’ll need the star of the show—the new shower head! Whether you’ve chosen a sleek rain shower head or a versatile handheld option, make sure it’s compatible with your existing setup.

By having these tools and materials ready before you begin, you’ll set yourself up for a smooth and successful installation process. Now that you’re equipped with everything you need, you’re one step closer to enjoying your luxurious new shower experience!

3. Choosing the Right Shower Head for Your Needs

How to install a new shower head?
Credit : whatcanu.com

Choosing the right shower head for your needs is a crucial step in ensuring an enjoyable and satisfying shower experience. With a plethora of options available, it can be overwhelming to decide which one best suits your preferences and lifestyle. Start by considering the type of shower head that will work best for your space. Are you looking for a fixed shower head, which is mounted to the wall and offers a sleek, minimalist design? Or perhaps a handheld shower head, which provides flexibility and ease of use, making it perfect for rinsing off after a workout or for bathing children and pets.

Next, think about the water pressure in your home. If you have high water pressure, a rain shower head might be an ideal choice, providing a luxurious downpour that mimics a gentle rainfall. However, if your water pressure is on the lower side, you may want to opt for a shower head designed to conserve water while still delivering a powerful spray. Look for models that feature air-infusion technology, which can enhance the flow while using less water.

Don’t forget to consider the spray patterns! Many modern shower heads come with adjustable settings, allowing you to switch between a soft mist, invigorating massage, or a refreshing power spray. This versatility can enhance your shower experience, making it more enjoyable and tailored to your mood.

Lastly, check for additional features that might appeal to you. Some shower heads come with built-in water filters to remove harmful contaminants, while others boast easy-clean nozzles to prevent limescale buildup. By taking the time to evaluate your needs and preferences, you can select a shower head that not only meets your practical requirements but also transforms your daily routine into a rejuvenating escape. With the right choice in hand, you’ll be well on your way to enjoying a shower experience that feels like a spa retreat in your own home!

4. Preparing Your Workspace: Safety First!

Before diving into the installation process, it’s essential to prioritize safety and prepare your workspace effectively. A well-organized area not only enhances efficiency but also minimizes the risk of accidents. Start by gathering all the necessary tools and supplies. You’ll need an adjustable wrench, plumber’s tape, and a bucket or towel to catch any stray water.

Next, clear the area around your shower to create ample space for movement. Remove any items from the shower shelf or surrounding surfaces, such as toiletries, loofahs, or bath mats. This step not only prevents clutter but also protects your belongings from water splashes or accidental damage during installation.

Now, let’s talk about safety measures. Before you begin, ensure that the water supply to your shower is turned off. This will prevent any unwanted water flow during the installation, which can lead to slippery surfaces and potential falls. Additionally, it’s a good idea to lay down a non-slip mat to provide extra traction while you’re working in the shower.

If your new shower head requires any specific tools or adjustments, read through the manufacturer’s instructions beforehand. Understanding the requirements will help you anticipate any challenges that may arise during installation.

Lastly, consider wearing safety goggles to protect your eyes from any debris or water that may splash up as you work. By taking these preparatory steps and putting safety first, you’ll set yourself up for a smooth and successful shower head installation, ensuring that you can enjoy your new fixture without worry!

5. Step 1: Turn Off the Water Supply

How to install a new shower head?
Credit : whatcanu.com

Before diving into the installation process, the very first step—arguably one of the most crucial—is to turn off the water supply. This precaution not only ensures your safety but also prevents a cascade of water from flooding your bathroom during the installation.

To begin, locate the main water shutoff valve for your home, which is typically found in the basement, crawl space, or near the water meter. In some cases, you may find a dedicated shutoff valve for your bathroom located beneath the sink or close to the shower itself. Once you’ve identified the correct valve, twist it clockwise until it stops. This action halts the flow of water, giving you peace of mind as you proceed.

After you’ve turned off the water supply, it’s a good idea to release any remaining pressure in the pipes. Simply turn on the shower faucet and allow it to run until the water stops flowing. This step will help minimize any surprise splashes when you remove the old shower head.

With the water supply now securely off and pressure relieved, you’re ready to tackle the next steps in the installation process. This careful preparation sets the stage for a smooth and professional-looking shower head upgrade. Remember, taking your time with these initial steps will pay off in the long run, ensuring a hassle-free installation experience.

6. Step 2: Remove the Old Shower Head

Once you’ve gathered your tools and prepared the area, it’s time to tackle the second step: removing the old shower head. This process is straightforward, but it’s essential to approach it with care to avoid any mishaps.

Begin by ensuring that the water supply to the shower is turned off. This is typically done at the main water valve, but if you have individual shut-off valves for the shower, those will work just as well. After confirming that the water is off, it’s a good idea to place a towel or bucket beneath the shower head to catch any residual water that might spill out during the removal process.

Next, locate the connection point where the shower head is attached to the arm. Most shower heads are screwed on, so you’ll want to use an adjustable wrench or pliers to grip the base of the shower head securely. If it’s stuck, applying a gentle rocking motion can help loosen it. Be cautious not to apply too much pressure, as this could damage the shower arm or the plumbing.

If the old shower head has been in place for a while, you may encounter mineral buildup or corrosion that makes it challenging to remove. In such cases, a penetrating oil can be sprayed around the connection point. Let it sit for a few minutes to work its magic before attempting to unscrew the shower head again.

As you unscrew the old fixture, it’s advisable to turn it counterclockwise while supporting the shower arm with your other hand to prevent any twisting or bending. Once it’s detached, inspect the threads on the shower arm for any debris or damage. Cleaning the threads with a cloth will ensure a proper seal when you install your new shower head.

With the old shower head removed and the area clean, you’re now ready to proceed to the next step in your installation journey. This stage lays the groundwork for a smooth and successful upgrade, setting you up for a refreshing shower experience with your new fixture!

7. Step 3: Clean the Shower Arm Threads

How to install a new shower head?
Credit : whatcanu.com

Before you can attach your shiny new shower head, it’s essential to ensure that the shower arm threads are clean and free from any debris or old plumber’s tape. This step is crucial for achieving a watertight seal and preventing leaks down the line.

Start by inspecting the threads of the shower arm, which is the pipe protruding from the wall. Over time, mineral deposits, soap scum, and remnants of old tape can accumulate, creating a rough surface that can hinder a secure fit. To clean it effectively, grab a clean cloth or an old toothbrush and gently scrub the threads, removing any buildup.

If you notice stubborn residue, a mixture of vinegar and water can work wonders. Soak a cloth in the solution and wrap it around the threaded area for a few minutes to dissolve any grime. Once the threads are clean, dry them thoroughly with a clean towel.

For an added layer of protection against leaks, consider applying a fresh layer of plumber’s tape (also known as Teflon tape) around the threads. This tape not only helps create a tight seal but also makes it easier to unscrew the shower head in the future if needed. Simply wrap the tape around the threads in a clockwise direction, ensuring it’s snug but not overly thick. With clean threads prepped and ready, you’re one step closer to transforming your shower experience!

8. Step 4: Apply Teflon Tape for a Tight Seal

Now that you’ve removed the old shower head and cleaned the threaded pipe, it’s time to ensure a leak-free connection with a simple yet crucial step: applying Teflon tape. This special tape, often referred to as plumber’s tape, is designed to create a watertight seal that prevents leaks and drips, making it a must-have for any plumbing project.

Start by taking a length of Teflon tape—about three to four inches should suffice. Hold the tape in one hand and begin wrapping it around the threaded end of the shower arm (the pipe that sticks out from the wall) in a clockwise direction. It’s important to wrap it in the same direction that you will be screwing on the new shower head; this way, the tape won’t unravel as you tighten the fitting.

Be mindful not to overdo it; around two to three complete wraps are usually adequate. Too much tape can actually hinder the connection and make it difficult to screw the shower head on securely. As you wrap, ensure the tape adheres smoothly and evenly without any overlaps or bulges. This attention to detail will help to create a solid barrier against leaks.

Once you’ve finished applying the tape, give it a gentle press to secure it in place. You’re now ready to move on to the next step—attaching your new shower head. With the Teflon tape in place, you can proceed with confidence, knowing you’ve taken the right measures to achieve a tight seal and prevent any unwanted waterwork mishaps!

9. Step 5: Install the New Shower Head

Once you’ve successfully removed the old shower head, it’s time for the exciting part: installing your new shower head! This step is where your efforts truly begin to pay off, transforming your bathroom’s look and feel.

Before diving in, make sure you have your new shower head and the necessary tools ready—typically, you’ll need an adjustable wrench, plumber’s tape, and a microfiber cloth. Start by taking a moment to inspect the threads on the shower arm; they should be clean and free of debris. If you notice any old tape or residue, gently clean it off with your cloth to ensure a tight seal.

Next, take your plumber’s tape and wrap it around the threads of the shower arm. This step is crucial as it creates a watertight seal, preventing any leaks once you turn the water back on. Be sure to wrap the tape in the direction of the threads, usually clockwise, and apply about two to three layers for added security.

Now, it’s time to attach the new shower head. Carefully screw it onto the shower arm by hand, turning it clockwise until it feels snug. Avoid using excessive force at this stage; overtightening can damage the shower head or the arm. Once it’s hand-tight, use your adjustable wrench to make a slight turn—just enough to secure it, but be cautious not to overdo it.

Finally, step back and admire your handiwork! Before you declare victory, it’s wise to test for leaks. Turn on the water and check around the connection for any drips. If you notice any, gently tighten the shower head a little more until the leak stops.

With your new shower head securely in place, you’re ready to enjoy a refreshing shower experience that will make you feel like you’re stepping into a spa every day!

10. Step 6: Adjust the Angle and Position

Once your new shower head is securely installed, it’s time to fine-tune its angle and position for the ultimate shower experience. This step is crucial because a well-angled shower head can make all the difference in how water flows and how comfortably you can bathe.

Begin by standing in your shower and mimicking your usual bathing stance. This will help you determine the optimal height and direction for your shower head. Using your hands, gently swivel the shower arm or adjustable mount to align the head with your desired angle. If your shower head is fixed, you might need to loosen the mounting nut slightly to adjust its position before retightening it.

Consider factors like your height and personal preferences—some people prefer a more direct spray, while others enjoy a wider, more diffused flow. If your shower head features different spray settings, take a moment to experiment with each one to find the perfect angle for each mode.

Once you’ve configured the angle, turn on the water to test the flow. Observe how the water hits you and adjust accordingly until you achieve the ideal position. A slight tweak can make a significant difference, ensuring that you enjoy a refreshing experience every time you step into your shower. This careful attention to detail not only enhances your comfort but also optimizes the efficiency of your new shower head. With this final adjustment complete, you’re all set to enjoy a spa-like experience right in the comfort of your own home!

11. Step 7: Turn the Water Supply Back On

After you’ve successfully installed your new shower head, it’s time to turn your attention to the final step: turning the water supply back on. This is a moment of anticipation, as you’re about to reveal the fruits of your labor. Start by locating the water supply valve, which is typically found under the sink or near the shower itself.

Before flipping the valve open, take a moment to double-check your work. Ensure that all connections are tight and secure, and that no tools or materials are left in the shower area. This little precaution can save you from any potential mishaps when the water starts flowing.

Once you’re satisfied everything is in order, slowly turn the valve back to the open position. You may hear the rush of water as it courses back through the pipes, and this is where the excitement builds. It’s advisable to let the water run for a minute or two to flush out any debris that may have accumulated during your installation process.

As the water begins to flow, observe closely for any leaks around the fittings. If you notice any drips, it may indicate that adjustments are necessary—tightening the connection or reapplying plumber’s tape can often resolve minor issues. Once you’re confident that everything is sealed properly, it’s time to test your new shower head.

Turn on the shower and revel in the refreshing spray of water, adjusting the settings to your liking. Not only will you feel a sense of accomplishment for completing the installation yourself, but you’ll also enjoy the satisfaction of a new shower experience that enhances your daily routine. Congratulations! You’ve successfully installed your new shower head like a pro!

12. Step 8: Test for Leaks and Adjust as Necessary

After you’ve successfully attached your new shower head, the moment of truth arrives—it’s time to test for leaks and make any necessary adjustments. This step is crucial not just for ensuring a watertight fit, but also for preventing future water damage and maintaining the efficiency of your plumbing system.

Begin by turning on the water at a moderate pressure. As the water flows through the shower head, closely examine the connection between the shower arm and the head itself. Look for any signs of dripping or pooling water—this is an indication that you may need to tighten the connection or add more plumber’s tape to create a better seal.

If you notice any leaks, don’t panic! Simply turn off the water and use a wrench to gently tighten the shower head. Be cautious not to overtighten, as this can lead to damage or cracks. If leaks persist, it might be a sign that the rubber washer inside the shower head needs replacement or that the threads aren’t aligned correctly.

Once you’ve made your adjustments, turn the water back on and conduct a thorough check again. Listen for any unusual sounds, such as hissing or dripping, and watch for any water escape. If everything looks good, you can relax knowing your installation was successful. A well-fitted shower head not only enhances your bathing experience but also ensures that your bathroom remains dry and damage-free.

Completing this step with diligence will leave you with a shower head that operates flawlessly and provides years of refreshing showers—just like a pro!

13. Tips for Maintaining Your New Shower Head

Once you’ve successfully installed your new shower head, the key to ensuring it continues to perform beautifully lies in proper maintenance. With a few simple tips, you can keep your shower head in top condition for years to come, enhancing both its functionality and your shower experience.

First and foremost, regular cleaning is essential. Over time, mineral deposits from hard water can accumulate and clog the nozzles of your shower head, leading to reduced water flow and a less satisfying shower. To prevent this, consider a routine cleaning schedule—every few weeks is a good starting point. You can easily tackle buildup by filling a plastic bag with equal parts vinegar and water, then securing it around the shower head with a rubber band. Let it soak for a few hours, then remove the bag and run the shower for a minute to flush out any loosened debris.

Additionally, always check the water pressure. If you notice a sudden change in your shower’s performance, it could be worth investigating your home’s plumbing. High water pressure can lead to leaks or even damage your shower head, while low pressure can result in a disappointing shower experience. If necessary, consult a plumber to adjust the pressure to a safe and effective level.

Another important aspect of maintenance is inspecting the shower head for leaks. Regularly check the connections for any signs of dripping or moisture. If you notice a leak, tightening the fittings can often solve the problem. However, if that doesn’t work, you may need to replace the washer or consult a professional.

Lastly, consider the longevity of your shower head. While many modern shower heads are designed to be durable, keeping the manufacturer’s recommendations in mind for usage and cleaning will help preserve its lifespan. If your shower head has a filter, be sure to clean or replace it as directed, ensuring that your water remains clean and enjoyable.

By following these maintenance tips, you’ll not only extend the life of your new shower head but also enjoy a consistently invigorating shower experience that keeps you refreshed day after day. With just a little attention and care, your shower head can continue to be a source of relaxation and rejuvenation for years to come.

14. Common Installation Mistakes to Avoid

When it comes to installing your new shower head, even the most well-intentioned DIY enthusiasts can make a few blunders along the way. To ensure your shower upgrade goes off without a hitch, it’s crucial to be aware of common installation mistakes that can lead to frustration and even costly repairs. Here are some pitfalls to avoid:

**1. Skipping the Prep Work:** One of the biggest mistakes is diving straight into installation without prepping the area. Take the time to remove the old shower head carefully, ensuring you have the right tools on hand. Cleaning the threads of the shower arm is essential for a proper seal. Failing to do so can lead to leaks down the line.

**2. Over-tightening Connections:** It might seem logical to tighten your new shower head as much as possible to prevent leaks, but over-tightening can lead to damage. Use a wrench if necessary, but apply just enough pressure to create a snug fit. A little plumber’s tape on the threads can help ensure a leak-free seal without the need for excessive force.

**3. Neglecting to Check for Compatibility:** Not all shower heads are created equal. Before purchasing your new fixture, ensure it’s compatible with your existing plumbing. Read the product specifications carefully and confirm the thread sizes match. Installing an incompatible shower head can lead to leaks or a poor fit.

**4. Ignoring Flow rate and Pressure:** While you may be excited about your new shower head, don’t forget to consider the water flow rate and pressure. Some shower heads offer a luxurious rain-like experience, but if the flow rate exceeds your plumbing system’s capacity, you may end up with frustratingly low water pressure. Research the specifications to avoid disappointment.

**5. Forgetting to Test for Leaks:** After installation, it can be tempting to jump right into a refreshing shower, but it’s crucial to take a moment to test for leaks. Turn on the water and check all the connections carefully. If you notice any drips, turn off the water, tighten the connections, or readjust the plumber’s tape as needed.

By being aware of these common mistakes, you can navigate your shower head installation with confidence and ease. With just a little attention to detail, you’ll be able to enjoy your new shower fixture without the headaches that come from avoidable errors. Happy installing!

15. Conclusion: Enjoy Your Upgraded Shower Experience!

Congratulations! You’ve successfully installed your new shower head, and now it’s time to revel in the fruits of your labor. Imagine stepping into your bathroom and being greeted by a refreshing cascade of water that transforms your daily routine into a luxurious spa-like experience. Whether your new shower head features adjustable settings, a rainfall effect, or water-saving technology, each option enhances your shower in ways that can elevate your mood and rejuvenate your body.

As you turn on the water and feel the flow, take a moment to appreciate the satisfaction of having done it yourself. No more waiting for a plumber or dealing with the frustration of an outdated fixture. You’ve taken control of your home improvement project, and what better reward than the invigorating sensation of a perfectly functioning shower?

Remember to periodically check your installation to ensure everything is functioning smoothly. Regular maintenance, such as cleaning the shower head to prevent mineral buildup, will help maintain the performance and longevity of your new purchase.

In conclusion, enjoy the upgraded shower experience you’ve created! It’s not just about the aesthetics or the functionality; it’s about the daily moments of joy that come from your new routine. So go ahead, indulge in that long, relaxing shower you’ve been dreaming of—you’ve earned it!

Congratulations! You’re now equipped with all the knowledge you need to install your new shower head like a pro. By following our step-by-step guide, you can transform your bathroom experience with ease and confidence. Whether you opted for a sleek modern design or a classic style, the satisfaction of completing this DIY project yourself is unmatched. Not only will you enjoy the upgraded functionality and aesthetics of your new shower head, but you’ll also save time and money by bypassing the need for a plumber. So go ahead—turn on the water, bask in your handiwork, and revel in the soothing shower experience you’ve created. We’d love to hear about your installation journey, so feel free to share your tips or photos in the comments below!

How to install a new door?

Installing a new door may seem like a daunting task, but with the right guidance, it can be a rewarding DIY project that transforms the look and function of your space.

Whether you’re upgrading for aesthetics, improving energy efficiency, or enhancing security, knowing how to properly install a door can save you time and money while giving you the satisfaction of a job well done. In this comprehensive step-by-step guide, we’ll take you through the entire process—from selecting the perfect door for your home to the final touches that ensure a flawless fit. With practical tips, essential tools, and expert advice, you’ll be equipped to tackle this project with confidence, making your new door installation feel like a professional achievement. So roll up your sleeves and get ready to elevate your home’s entrance with our easy-to-follow instructions!

1. Introduction: Why Installing a Door Yourself is a Great Idea

How to install a new door?
Credit : whatcanu.com

Installing a new door might seem like a daunting task, but taking it on yourself can be a rewarding and cost-effective endeavor. There are several compelling reasons why installing a door yourself is not only practical but also a fantastic opportunity to enhance your home.

First and foremost, DIY door installation allows you to save money. Hiring a professional can quickly add up in costs, with labor charges often exceeding the price of the door itself. By rolling up your sleeves and tackling the project on your own, you not only gain financial savings but also the satisfaction of knowing you accomplished it yourself.

Additionally, installing a door gives you complete control over the design and materials used. You can select the perfect style, color, and finish that complements your home’s aesthetic. Whether you prefer a classic wooden door, a sleek modern design, or a sturdy steel option, the choice is entirely yours. This personal touch can greatly enhance your home’s curb appeal and overall value.

Moreover, the sense of accomplishment that comes with completing a home improvement project cannot be overstated. Each step in the installation process, from measuring and cutting to hanging the door and securing the hardware, provides an opportunity to learn new skills and boost your confidence as a DIYer.

Lastly, the process of installing a door yourself fosters a deeper connection with your home. Each time you pass through that newly installed entrance, you’ll be reminded of your hard work and dedication. You’ll appreciate the time and effort you put into creating a welcoming space for family and friends.

In this guide, we’ll walk you through the step-by-step process of installing your new door like a pro, ensuring you have all the information you need to achieve a flawless finish. So grab your tools, roll up your sleeves, and let’s get started on this exciting home improvement journey!

2. Tools and Materials You’ll Need

Before diving into the installation process, it’s crucial to gather all the necessary tools and materials to ensure a smooth and efficient project. Having everything at your fingertips will not only save you time but also prevent frustration mid-installation. Here’s a comprehensive list of what you’ll need:

**Tools:**
1. **Tape Measure:** A reliable tape measure is essential for ensuring precise measurements of your new door and the frame.
2. **Level:** A level will help you confirm that your door is perfectly aligned, preventing any unwanted gaps or misalignment.
3. **Screwdriver Set:** Both flathead and Phillips screwdrivers will be needed for various screws throughout the installation.
4. **Drill:** A power drill with drill bits is critical for creating pilot holes and securing screws efficiently.
5. **Hammer:** A good hammer will be useful for tapping in shims or prying out old door frames if you’re replacing an existing door.
6. **Chisel:** If your new door requires mortising for hinges, a sharp chisel will ensure clean and precise cuts.
7. **Utility Knife:** This will come in handy for various cutting tasks, such as trimming shims or removing old weather stripping.

**Materials:**
1. **New Door:** Choose a door that fits your style and the dimensions of your door frame. Don’t forget to check if it comes pre-hung or as a slab!
2. **Hinges:** Be sure to select sturdy, high-quality hinges that can support the weight of your new door.
3. **Door Handle/Lockset:** Depending on your preference, choose a handle and lockset that complements your door and enhances security.
4. **Shims:** These small, wedge-shaped pieces will help you adjust the door frame for a perfect fit and level installation.
5. **Weather Stripping:** If you’re replacing an exterior door, weather stripping will help improve energy efficiency by blocking drafts.
6. **Wood Glue or Construction Adhesive:** This will be useful for securing shims in place or reinforcing joints.

With these tools and materials ready, you’ll be well-equipped to tackle your door installation with confidence. Remember, preparation is key to achieving a professional finish, so take the time to gather everything you need before you start. Happy installing!

3. Choosing the Right Door for Your Space

How to install a new door?
Credit : whatcanu.com

Choosing the right door for your space is a pivotal step in your installation journey, as it sets the tone for both aesthetics and functionality. Before you head to the store or browse online, consider the following factors to ensure you select a door that complements your home and meets your needs.

First and foremost, assess the style of your home. Whether you have a modern, traditional, or eclectic design, the door should harmonize with the overall aesthetic. For a contemporary space, sleek and minimalistic designs work wonders, while a classic home may benefit from a solid wood door with intricate details.

Next, think about the material. Doors come in various materials, each offering unique benefits. Solid wood doors exude warmth and durability, while fiberglass doors provide insulation and are resistant to the elements. Steel doors are incredibly secure and great for exterior use, while hollow-core doors are a budget-friendly option for interior spaces. Consider your climate and the level of maintenance you’re willing to commit to when making your choice.

Don’t forget to measure your door frame carefully! A door that’s too large or too small can lead to installation headaches and can compromise energy efficiency. Make sure to note the height, width, and thickness of your existing door frame, and double-check these measurements against the specifications of your chosen door.

Finally, think about the door’s functionality. Do you want a door that swings open, slides, or even folds? Each option has its advantages depending on the space you are working with. For narrow hallways, pocket doors can save space, while traditional swinging doors are ideal for larger openings.

By taking the time to carefully select the right door for your space, you’ll ensure that your installation goes smoothly and that the final result enhances the beauty and functionality of your home. With the right door in hand, you’ll be one step closer to a professional-looking installation!

4. Measuring Your Door Frame Accurately

Measuring your door frame accurately is a crucial step that can make or break the success of your installation. Even the slightest miscalculation can lead to gaps, drafts, or an ill-fitting door that could compromise both aesthetics and functionality. To begin, gather your tools: a tape measure, a level, and a pencil for marking your measurements.

Start by measuring the width of the door frame. Place your tape measure at the inside edge of one side of the frame and extend it to the inside edge of the opposite side. Jot down this measurement; it’s essential to take at least three width measurements at different heights—top, middle, and bottom—to account for any irregularities in the frame. The smallest of these measurements will determine the width of your new door.

Next, measure the height of the door frame. Again, measure from the top inside edge down to the bottom inside edge at both the left and right sides of the frame. Just like with the width, take multiple measurements here to ensure accuracy; the shortest measurement will be your final height.

Additionally, check the squareness of the frame using a level. Place the level diagonally from one corner of the frame to the opposite corner. If the level does not sit evenly, this indicates that your frame may be out of square, which can affect the fit of your new door.

Lastly, don’t forget to note the thickness of the frame and any other relevant details, such as the presence of molding or trim. Accurate measurements are the foundation of a successful door installation, so take your time and double-check your figures. A well-measured door frame sets the stage for a smooth installation process and ensures that your new door will function perfectly for years to come.

5. Preparing the Old Door Frame for Installation

How to install a new door?
Credit : whatcanu.com

Preparing the old door frame for installation is a crucial step that can make or break your project. Before you dive into the installation of your new door, take a moment to assess the condition of the existing frame. look for any signs of damage, such as warping, rot, or cracks, which could compromise the integrity of your new door. If you notice any issues, it may be wise to repair or replace the frame to ensure a snug fit and long-lasting performance.

Once the frame’s condition is confirmed, it’s time to clean it thoroughly. Remove any dust, debris, or old paint that may have accumulated over the years. A clean surface is key to achieving a smooth installation. Use a putty knife to scrape away any peeling paint, and a vacuum or a damp cloth to pick up the remnants. If you encounter stubborn old caulk or adhesive, a heat gun can help soften it for easier removal.

Next, check the level and plumb of the door frame. Use a spirit level to make sure the frame is straight and aligned correctly; this will help prevent any future issues with your new door not closing properly or getting stuck. If the frame is out of square, you may need to shim it with small pieces of wood to correct its alignment.

Finally, take the time to measure the door frame accurately. Use a tape measure to determine the height and width of the frame, noting down these dimensions. It’s always best to double-check your measurements to ensure a proper fit for your new door. With the old door frame prepped and ready, you’re now set to bring in your new door and transform your space with ease!

6. Removing the Old Door Safely

Removing the old door safely is a crucial step in the installation process, and it requires a bit of care and precision. Begin by gathering your tools: a screwdriver, a pry bar, and a utility knife. Before you start, ensure you have someone to assist you, as doors can be heavy and cumbersome, making it easier to handle with an extra set of hands.

First, close the door and inspect the hinges. Using your screwdriver, carefully remove the screws from the hinges, working from the bottom hinge to the top. This method helps to relieve the weight gradually, minimizing the risk of the door falling unexpectedly. As you remove each screw, place them in a small container to avoid losing them, as you may need them later for your new door.

Once the hinges are detached, gently push the door towards you and lift it off the frame. If the door feels stuck, check for any additional screws that may be holding it in place, or use a utility knife to cut through any paint or caulk that may be sealing it. When you finally have the door free, set it aside safely so it won’t fall or get damaged.

Next, inspect the door frame for any lingering hardware, like strike plates or latches. Removing these components will ensure a clean and smooth installation for your new door. If necessary, use your pry bar to carefully remove any nails or screws that may have been left behind.

Taking your time during this process is vital. Rushing can lead to accidents or damage, so be mindful of your surroundings and the materials you’re working with. With the old door safely removed, you’re one step closer to transforming your entryway with a fresh, new door that will enhance both the functionality and aesthetic of your home.

7. Unpacking and Inspecting Your New Door

How to install a new door?
Credit : whatcanu.com

Unpacking and inspecting your new door is a crucial step that sets the stage for a smooth installation process. Once your door arrives, take a moment to find a clean, spacious area where you can safely unbox it. Gently remove the packaging, being careful not to damage the door itself. Most doors come wrapped in protective materials like cardboard or foam, so handle everything with care as you peel back these layers.

As you unveil your new door, conduct a thorough inspection. Start by checking for any visible damage, such as dents, scratches, or warping. It’s essential to catch these issues early, as they may affect the door’s functionality and aesthetic appeal. Don’t just rely on a cursory glance—run your hands over the surface to feel for any imperfections that might not be immediately visible.

Next, confirm that all components of your door are included in the package. This typically includes the door itself, hinges, a handle or knob, and any additional hardware necessary for installation. Refer to the manufacturer’s instructions to ensure you have everything you need. If something is missing or damaged, reach out to the supplier promptly to arrange for replacements.

Lastly, take a moment to familiarize yourself with the door’s features, whether it’s a solid wood door with intricate designs or a sleek, modern fiberglass model. Knowing the specifics can help you make informed decisions during the installation process, ensuring that you not only install the door correctly but also appreciate its design and functionality to the fullest.

By taking the time to unpack and inspect your new door carefully, you’re ensuring a successful installation ahead. This diligence will save you time and potential headaches down the road, allowing you to enjoy your new door with confidence.

8. Installing Door Hinges: Step-by-Step

Installing door hinges may seem like a small detail, but it’s a crucial step that ensures your door functions smoothly and securely. Follow this step-by-step guide to install your new door hinges like a pro!

**Step 1: Gather Your Tools and Materials**
Before you begin, make sure you have everything you need at hand. You’ll require a drill, a screwdriver, a measuring tape, a chisel, and, of course, your door hinges. Most hinges come with screws, but double-check to ensure you have the correct size for your door.

**Step 2: Mark the Hinge Placement**
Using your measuring tape, measure down from the top of the door to where you want the top hinge to go—typically around 7 inches from the top edge. Mark this spot with a pencil. Repeat this process for the bottom hinge, generally placed about 11 inches from the bottom. If you’re adding a third hinge, position it halfway between the top and bottom hinges.

**Step 3: Create the Hinge Recesses**
Place the hinge flat against the door where you marked it. Using your chisel, carefully carve out a shallow recess for the hinge to sit flush with the door surface. This step is crucial for a clean, professional look and ensures the door swings smoothly.

**Step 4: Attach the Hinges to the Door**
Align the hinge with the recess you created. Using your drill, insert the screws provided with the hinge into the pre-drilled holes. Tighten them securely but avoid overtightening, as this could strip the screws or damage the wood.

**Step 5: Position the Door in the Frame**
With the hinges attached to the door, it’s time to position the door in the frame. You may need a helper for this step to hold the door steady. Align the hinges with the corresponding plates in the door frame.

**Step 6: Secure the Hinges to the Frame**
Once the door is in place, attach the other half of the hinge to the door frame by drilling screws into the hinge plates. Make sure the door swings freely and check for alignment. If it’s too tight or doesn’t close properly, you may need to adjust the hinges slightly or add shims to the frame.

**Step 7: Test the Door**
After everything is secured, give the door a few test swings. It should open and close smoothly without any sticking or rubbing. If there are issues, revisit the hinge placements and make minor adjustments as needed.

**Step 8: Final Touches**
Once you’re satisfied with the installation, clean any dust or debris from the installation process. If your hinges are visible, consider applying a coat of lubricant to ensure they remain functional and quiet.

By carefully following these steps, you’ll have installed your door hinges like a pro, ensuring your new door not only looks fantastic but operates seamlessly in your space! Happy DIY-ing!

9. Hanging the New Door: Tips for Alignment

Hanging a new door can seem daunting, but with a few expert tips on alignment, you can ensure that your installation goes off without a hitch. Proper alignment is crucial not only for aesthetics but also for functionality; a misaligned door can lead to issues such as sticking, gaps, or even security concerns. Here’s how to get it just right.

First, before you even attempt to hang the door, make sure your hinges are properly installed on the door frame. Use a level to check that the hinge side of the frame is plumb, adjusting as necessary with shims. If the frame isn’t square, you may find that your door doesn’t fit correctly, so take the time to get this step right.

Once your hinges are secured, it’s time to position the door. Hold the door in place with the help of a friend or use a door jig to support it temporarily. Begin by securing the top hinge first. This will help anchor the door and allow you to check its alignment without it swinging open or closed unexpectedly.

Next, check the gap between the door and the frame on both the hinge and latch sides. Ideally, you want a consistent gap of about 1/8 inch. If you notice that the door is leaning or there are uneven gaps, adjust the lower hinge by adding or removing shims until the door hangs evenly. It may take a bit of trial and error, but patience is key.

Once you’re satisfied with the alignment, secure the bottom hinge. Before closing the door completely, open and shut it a few times to ensure it swings smoothly without dragging. If you encounter any resistance, it’s likely a sign that further adjustments are needed.

Finally, after confirming that the door is properly aligned and functions smoothly, you can drive in the screws fully and install any additional hardware, such as doorknobs or locks. A well-hung door not only enhances the aesthetic appeal of your space but also contributes to the overall security and efficiency of your home. With these alignment tips, you’ll be hanging doors like a pro in no time!

10. Securing the Door Frame: Shims and Screws

Securing the door frame is a crucial step that ensures your new door operates smoothly and stands the test of time. This process involves using shims and screws to create a sturdy, level framework that can withstand daily use.

Begin by inserting shims—small, wedge-like pieces of wood—into the gaps between the door frame and the rough opening of the wall. Shims are essential for adjusting the alignment of the door; they help fill any uneven spaces, ensuring that the door hangs straight and operates without obstruction. Start at the bottom hinge side and gently tap the shim into place, checking frequently with a level to ensure the frame is perfectly plumb. You want the door to swing effortlessly, so this step cannot be rushed.

Once the shims are in position, it’s time to secure the frame with screws. Using a power drill, fasten screws through the frame into the wall studs. Place screws approximately every 12 to 16 inches along the sides and top of the frame, ensuring they penetrate the studs for maximum stability. Be careful not to over-tighten the screws, as this can warp the frame and affect the door’s functionality.

After securing the frame, double-check the door’s alignment and operation. Open and close the door to make sure it swings freely without sticking or dragging. If adjustments are necessary, you can easily add or remove shims as needed. By carefully securing the door frame with shims and screws, you’ll create a solid base that will enhance the longevity and performance of your new door, giving it the professional finish you desire.

11. Installing the Door Handle and Lockset

Once your door is hung securely in its frame, it’s time to add the finishing touches that not only enhance its functionality but also add to its aesthetic appeal: the door handle and lockset. Installing these components may seem like a straightforward task, but a careful approach ensures smooth operation and a polished look.

Start by selecting the right handle and lockset that matches your door style and complements your home decor. Before you dive into installation, gather your tools: a tape measure, screwdriver, chisel, and a level. Having everything on hand will streamline the process and minimize interruptions.

Begin by determining the correct height for your door handle. A common standard is around 36 inches from the floor, but you can adjust based on your preference or the specific ergonomic needs of your household. Mark the spot lightly with a pencil.

Next, position the lockset, which typically consists of two main components: the latch and the deadbolt (if applicable). Use your chisel to create a mortise for the latch, following the manufacturer’s instructions for depth and width. This step is crucial; a snug fit will prevent any wobbling and ensure the latch operates smoothly.

Once the mortises are cut, insert the latch into the side of the door. Secure it with screws, ensuring that it is flush with the door’s edge. Then, place the strike plate in the door frame, marking the location where it will fit. Chisel out a small recess if necessary to accommodate it, and screw it into place.

Now, it’s time to install the door handle. Align the handle’s spindle with the latch and push it through the hole you’ve prepared. Attach the outer handle by securing it with the provided screws. Make sure both handles are aligned properly and turn smoothly.

Finally, if your lockset includes a deadbolt, repeat the process for this component. Mark the position for the deadbolt, drill the necessary holes, and secure it in place. Once everything is installed, test the lock and handle to ensure they function correctly, making any adjustments as needed.

With the handle and lockset securely in place, you can step back and admire your handiwork. Not only have you successfully enhanced the functionality of your door, but you’ve also added a stylish touch that will welcome guests and provide security for your home.

12. Adjusting the Door for a Perfect Fit

Once your new door is securely hung and you’ve taken a moment to admire your handiwork, it’s time to ensure it fits perfectly within its frame. Proper adjustment is crucial for both aesthetics and functionality, as a misaligned door can lead to operational issues and compromise security.

Start by checking the gaps between the door and the frame. Ideally, there should be an even space of about 1/8 inch on the top and sides, allowing for smooth operation and easy opening and closing. If you notice uneven gaps, it may be necessary to adjust the hinges. Loosen the screws on the hinge plate slightly, use a shim to raise or lower the door as needed, and then retighten the screws. This might take a few attempts, so don’t be discouraged if it takes a bit of tweaking to achieve that perfect alignment.

Next, check how the door swings. It should open and close without catching or scraping against the frame or floor. If the door drags on the floor, you may need to trim the bottom edge. Measure from the floor to the bottom of the door, and then mark where the cut will be. Using a circular saw or hand saw, make a clean cut, and be sure to sand down the edges to prevent splintering.

Finally, test the latch and strike plate. Close the door and ensure that the latch easily engages with the strike plate without excessive force. If the latch doesn’t align properly, you may need to reposition the strike plate. Mark the new position, drill pilot holes, and install it at the adjusted height.

Once you’ve made these adjustments, step back and appreciate your efforts. A well-fitted door not only enhances the overall look of your home but also ensures that it functions seamlessly for years to come. With a little patience and attention to detail, you can achieve a professional finish that reflects your hard work and dedication.

13. Finishing Touches: Painting or Staining Your Door

Once your new door is securely installed and all adjustments have been made, it’s time to focus on the finishing touches that will elevate its appearance and protect it from the elements. Painting or staining your door not only enhances its aesthetic appeal but also adds a layer of protection against wear and tear, moisture, and sunlight.

Before you start, ensure the surface of the door is clean and free of dust. If you’ve just installed a wooden door, consider sanding it lightly to create a smooth surface that will better absorb your chosen finish. For painted doors, a primer may be necessary, especially if you’re transitioning from a darker color to a lighter one or if the door has never been painted before.

When it comes to choosing between paint and stain, consider the look you want to achieve. Paint offers a vibrant, opaque finish that can complement the color scheme of your home, while stain highlights the natural grain of the wood, providing a warm and timeless appearance. If you opt for stain, be sure to select a high-quality product that’s designed for exterior use to ensure durability.

Apply your chosen finish using a high-quality brush or roller for a smooth, even application. For paint, start with the edges and grooves before moving to the flat surfaces, making sure to apply multiple thin coats rather than one thick coat for the best results. If staining, work in the direction of the wood grain and wipe off any excess with a clean cloth to avoid blotches.

Allow ample drying time between coats, and don’t forget to finish with a clear sealant if you chose stain, as this will provide additional protection against moisture and UV damage. Once everything is dry and set, step back and admire your handiwork—your newly installed door not only looks professional but is now ready to withstand the elements while adding curb appeal to your home.

14. Troubleshooting Common Installation Issues

Installing a new door can be a rewarding DIY project, but it’s not without its challenges. Encountering issues during installation is common, and knowing how to troubleshoot these problems can save you time, frustration, and potentially costly repairs. Here are some typical installation issues you might face and how to resolve them like a pro.

**1. Door Doesn’t Fit Properly:**
If your door doesn’t seem to fit in the frame correctly, start by checking the measurements. Ensure that the door is aligned with the hinges and that the frame is square. Use a level to check for evenness; if the frame is out of square, shimming may be necessary. Adjust or trim the door edges slightly if it’s too large, but be cautious—removing too much material can lead to gaps.

**2. Alignment Issues with Hinges:**
Misalignment of hinges can cause your door to sag or not close properly. Check that the screws are tight and that the hinges are mounted flush against the door and the frame. If the door is still misaligned, consider repositioning the hinge plates or using additional shims to elevate the door back into proper alignment.

**3. The Door Sticks or Gets Jammed:**
A sticking door can be a major annoyance. This issue often arises from humidity causing wood to swell or an improper installation. Inspect the door and frame for any obstructions or debris that might be causing the sticking. Sanding down the edges of the door slightly can help alleviate this issue. If the door is swelling due to moisture, consider applying a sealant to protect it from humidity in the future.

**4. Gaps Around the Door:**
If you notice gaps between the door and the frame, it could affect energy efficiency and security. Check that the door is hung evenly and make adjustments as needed. Weather stripping can also be an effective solution for sealing these gaps, as it not only improves insulation but also enhances the overall appearance of your installation.

**5. Difficulty With Lock Mechanism:**
Sometimes, the lock may not align properly, which can be frustrating. Ensure that the strike plate is correctly positioned and that the hole in the door is drilled at the right depth. If the lock cylinder is sticking, lubricate it with graphite or a silicone spray to ensure smooth operation.

By anticipating these common installation issues and knowing how to troubleshoot them, you’ll not only save time but also ensure that your new door functions perfectly for years to come. Remember, every challenge you face is an opportunity to learn and improve your DIY skills!

15. Conclusion: Enjoying Your New Door and Final Thoughts

Congratulations on successfully installing your new door! As you step back and admire your handiwork, take a moment to appreciate not just the aesthetic upgrade but also the functional benefits it brings to your home. A new door can enhance your home’s energy efficiency, improve security, and elevate curb appeal, making it an investment that pays off in more ways than one.

Now that your door is in place, it’s time to revel in the satisfaction of a job well done. Enjoy the fresh look and feel it adds to your space, and take note of how it complements your interior and exterior design. Whether you chose a sleek modern style or a classic wooden finish, your new door serves as a testament to your DIY skills and attention to detail.

Remember, the journey doesn’t end here. Regular maintenance is key to keeping your door looking and functioning at its best. Periodically check the hinges and hardware, clean the surface, and apply any necessary treatments to protect against the elements. Establishing a routine will ensure that your door remains a stunning feature for years to come.

As you close this chapter of your home improvement project, consider sharing your experience with others. Post pictures of your newly installed door on social media, or share tips and tricks with friends and family who may be considering a similar upgrade. Your insights could inspire someone else to take the plunge into their own home improvement journey.

In conclusion, installing your new door is not just about the end result; it’s about the pride you feel in transforming your space. So, enjoy the beauty and functionality it brings, and let it be a reminder of your ability to tackle DIY projects like a pro! Happy home improving!

In conclusion, we hope this step-by-step guide has empowered you with the knowledge and confidence to install your new door like a pro! From selecting the right tools to ensuring a perfect fit, each step is crucial in achieving a polished and professional finish. Remember, patience and precision are your best friends throughout this process. As you stand back and admire your handiwork, take pride in knowing you transformed your space with your own two hands. Whether you’re upgrading for aesthetic appeal, energy efficiency, or security, your new door will undoubtedly enhance your home. We encourage you to share your installation experience and photos with us; we’d love to celebrate your achievement! Happy DIYing!

How to install a new dishwasher?

Bringing home a new dishwasher can be an exciting upgrade for your kitchen, promising to save you time and effort on the never-ending chore of dishwashing.

However, the thought of installation can often feel daunting, leaving many to hire professionals or postpone the process altogether. Fear not! With the right guidance and a little bit of confidence, you can tackle this task like a pro. In this step-by-step guide, we’ll walk you through everything you need to know to install your new dishwasher seamlessly. From gathering the necessary tools and preparing your kitchen to connecting water lines and ensuring proper drainage, you’ll learn how to transform this potentially overwhelming project into a manageable and rewarding experience. Get ready to roll up your sleeves and dive into the world of DIY home improvement, all while elevating the convenience of your kitchen!

1. Introduction: Why Installing Your Dishwasher Yourself is a Great Idea

How to install a new dishwasher?
Credit : whatcanu.com

Installing your dishwasher yourself can be a rewarding and cost-effective project that not only saves you money on professional installation fees but also gives you a sense of accomplishment. Imagine the satisfaction of standing back to admire your handiwork, knowing you’ve added convenience to your kitchen without relying on outside help.

In today’s DIY culture, many homeowners are discovering that tackling household projects can be both easy and fulfilling. Installing a dishwasher is one of those tasks that, with the right guidance and tools, can be completed within a single afternoon. Not only does this allow you to take control of your kitchen renovation, but it also offers an opportunity to learn valuable skills that can be applied to future home improvement endeavors.

Moreover, undertaking this project yourself provides a unique perspective on your appliance, allowing you to familiarize yourself with its components and maintenance needs. You’ll gain a deeper understanding of how your dishwasher operates, empowering you to troubleshoot minor issues down the line. Plus, the time you invest in this task pays off every time you load and run your new appliance, knowing you did it all yourself.

In this step-by-step guide, we’ll walk you through everything you need to know to install your new dishwasher like a pro. From gathering the necessary tools to making the final connections, you’ll find that with a little preparation and confidence, this project is not only doable but truly enjoyable! So roll up your sleeves, and let’s get started on transforming your kitchen with a brand-new dishwasher!

2. Tools and Materials You’ll Need

Before diving into the installation process, it’s crucial to gather all the necessary tools and materials to ensure a smooth and efficient setup. Having everything ready at hand not only saves time but also minimizes frustrations mid-installation. Here’s a comprehensive list of what you’ll need:

### Tools:
1. **Screwdriver Set**: A mix of Phillips and flat-head screwdrivers will come in handy for various screws and fittings.
2. **Adjustable Wrench**: This versatile tool is essential for tightening and loosening plumbing connections.
3. **Level**: To ensure your dishwasher is perfectly aligned, a level is indispensable. This will help prevent excess noise and ensure proper function.
4. **Pliers**: A pair of pliers will assist in gripping and manipulating small parts and hoses.
5. **Drill**: If your installation requires new holes for mounting brackets, a drill will make this task easier.
6. **Tape Measure**: Accurate measurements are key to fitting your new appliance snugly into its designated space.
7. **Bucket or Towels**: Water spills can happen, especially when disconnecting the old unit, so keep a bucket or towels handy for quick clean-ups.

### Materials:
1. **Dishwasher Installation Kit**: Most new dishwashers come with an installation kit that includes essential components like hoses and electrical connectors. Check your model to ensure you have everything required.
2. **Water Supply Line**: If the existing line is old or damaged, you may need to purchase a new one.
3. **Drain Hose**: Ensure your drain hose is in good condition; if not, replacing it will prevent leaks and clogs.
4. **Electrical Wiring**: Depending on your setup, you might need specific wiring or a power cord to connect your dishwasher to the power supply.
5. **Mounting Brackets**: These may not come with the dishwasher but are necessary to secure your appliance under the countertop.

Having these tools and materials ready before you begin will not only streamline the installation process but also equip you with everything you need to tackle any unexpected challenges. With your workspace organized and all your equipment at your fingertips, you’ll be well on your way to installing your new dishwasher with confidence and ease!

3. Safety First: Preparing Your Kitchen for Installation

How to install a new dishwasher?
Credit : whatcanu.com

Before diving into the installation process, ensuring your kitchen is prepared for the task at hand is crucial—safety first! A well-prepared workspace not only streamlines the installation but also minimizes the risk of accidents. start by clearing the area around your old dishwasher and the path to your kitchen sink. Remove any clutter, such as pots, pans, or kitchen gadgets that may obstruct your movement. This creates a safe space for you to work and prevents any unnecessary damage to your belongings.

Next, turn off the power supply to the dishwasher at the circuit breaker. It’s essential to avoid any electrical hazards while working on the appliance. If your dishwasher has a water shut-off valve, locate it and turn it off as well to prevent leaks during the installation process. Remember to test the water flow by turning on the tap to ensure that the line is completely shut off.

Once your workspace is clear and safe, consider laying down a protective covering, such as a drop cloth or old towels, on the floor to catch any spills or scratches that may occur. This added layer of protection will preserve your flooring and make cleanup easier once the job is done.

Lastly, gather all the necessary tools and materials you’ll need for installation—such as a wrench, screwdriver, and level—within arm’s reach. Having everything organized beforehand not only saves time but also reduces the risk of accidents caused by searching for tools in the middle of the project. By taking these safety precautions and preparing your kitchen, you’ll set the stage for a smooth and successful dishwasher installation.

4. Understanding Your Dishwasher: Key Components Explained

Before diving into the installation process, it’s crucial to familiarize yourself with the key components of your new dishwasher. Understanding how each part works will not only make the installation smoother but will also equip you with the knowledge to troubleshoot any issues in the future.

**1. **Control Panel:** This is where the magic begins. The control panel allows you to set wash cycles, adjust temperature settings, and activate special features such as delay start or sanitize options. It can be a simple console or a digital touchscreen, but knowing how to navigate it is essential for optimal performance.

**2. **Water Inlet Valve:** This vital component connects your dishwasher to the water supply. When you start a wash cycle, the water inlet valve opens to let water flow into the appliance. It’s important to ensure that this valve is securely connected and functioning properly to avoid leaks.

**3. **Spray Arms:** The spray arms are responsible for distributing water throughout the dishwasher. Located at the bottom and sometimes the middle or top of the unit, these arms rotate during the wash cycle to ensure every dish is thoroughly cleaned. Double-check that they are free of obstructions and are able to spin freely.

**4. **Filter System:** A clean filter is key to maintaining the efficiency of your dishwasher. This component traps food particles and debris to prevent them from clinging to your clean dishes. Your dishwasher might have multiple filters, so familiarize yourself with how to remove and clean them regularly.

**5. **Draining System:** After washing, your dishwasher needs to expel the dirty water. The draining system, which includes the drain hose and pump, is crucial in this process. Make sure the drain hose is properly positioned to avoid any kinks or clogs, which can lead to water backup.

**6. **Racks and Baskets:** Understanding the layout of your dishwasher is vital for efficient loading. Most units come with adjustable racks and specialized compartments for silverware, pots, and pans. Properly utilizing these features will maximize space and ensure thorough cleaning.

By taking the time to learn about these key components, you’ll not only simplify the installation process but also set yourself up for years of hassle-free dishwashing. With this knowledge in hand, you’ll be ready to roll up your sleeves and start your dishwasher installation like a pro!

5. Step 1: Removing the Old Dishwasher

How to install a new dishwasher?
Credit : whatcanu.com

Before you can revel in the convenience of your brand-new dishwasher, you’ll need to bid farewell to the old one. Removing the old dishwasher may seem daunting, but with a little preparation and the right tools, you can tackle this step like a pro.

**Safety First**: Start by ensuring your kitchen is ready for the task at hand. Disconnect the power supply by switching off the circuit breaker dedicated to your dishwasher. This crucial step prevents any electrical mishaps as you work. Next, turn off the water supply to the dishwasher—usually located under the sink—by twisting the valve clockwise.

**Gather Your Tools**: Equip yourself with a few essential tools: a screwdriver (both Phillips and flathead), pliers, a towel or sponge, and a bucket. These will help you navigate the nuts and bolts of this process seamlessly.

**Disconnecting the Dishwasher**: Begin by removing the kick plate or toe panel at the bottom front of the dishwasher. This will expose the mounting screws. Use your screwdriver to loosen and remove these screws, which are typically found on either side of the appliance. Once loose, carefully slide the dishwasher out from its cabinet space—a little pull may be necessary, but be cautious not to damage surrounding cabinetry.

**Plumbing and Electrical Connections**: With the dishwasher now partially freed, you’ll need to disconnect the water supply line. Place your bucket underneath the connection to catch any residual water. Use your pliers to loosen the nuts on the supply line; once removed, be prepared for a small trickle of water. After this, locate the drain hose, which is often secured with a clamp. Loosen the clamp and slide the hose off, ensuring you have that towel handy for any spills.

Finally, check for any electrical connections that may need to be detached. If you see a power cord, simply unplug it. If wired directly, carefully unscrew the wire nuts and separate the wires—just make sure you remember their connections for when you install the new unit.

**Final Steps**: Once everything is disconnected, gently pull the dishwasher out of its space and make sure to clear any debris from the area. You’re now ready to move on to the next exciting step—installing your new dishwasher! This initial phase may seem labor-intensive, but with careful execution, you’ll be well on your way to enjoying the benefits of modern dishwashing technology in no time.

6. Step 2: Preparing the Installation Area

Before diving into the actual installation of your new dishwasher, it’s essential to prepare the installation area properly. A well-prepared space not only simplifies the process but also ensures that your dishwasher operates efficiently for years to come.

Start by clearing out the area around your existing dishwasher. Remove any dishes, pots, or clutter that may obstruct your progress. If you’re replacing an old unit, carefully disconnect it and move it out of the way, taking care not to damage any plumbing or electrical connections. This is also a great time to inspect the area for any signs of wear or damage, such as leaks or mold, which might need your attention before you install the new appliance.

Next, ensure that the space is clean and free of debris. Sweep up any dust or dirt, and wipe down surfaces to create a welcoming environment for your new dishwasher. Check the floor for any unevenness; if needed, use shims to level the dishwasher once it’s in place.

Don’t forget to gather your tools and materials before you start. You’ll typically need a wrench, screwdriver, pliers, and possibly a level. Having everything within reach will save you time and prevent interruptions. Additionally, review the manufacturer’s installation instructions to familiarize yourself with any specific requirements or recommendations unique to your model.

Lastly, assess your plumbing and electrical connections. Make sure the water supply valve is easily accessible and the electrical outlet is in good condition. If you’re unsure about the safety or functionality of these connections, it might be wise to consult a professional before proceeding.

By preparing the installation area thoughtfully, you’ll set the stage for a smooth and successful dishwasher installation, making you feel like a pro in no time!

7. Step 3: Connecting the Water Supply

How to install a new dishwasher?
Credit : whatcanu.com

Connecting the water supply to your new dishwasher is a crucial step that ensures your appliance has the necessary resources to function effectively. Before you dive into this process, make sure you have all the required tools at hand — a wrench or adjustable pliers, a bucket to catch any spills, and a towel for quick cleanups.

Begin by locating the water supply line, which is usually found beneath your kitchen sink. If it’s not already in place, you’ll need to install a shut-off valve specifically for the dishwasher. This valve allows you to easily control water flow and is an essential safety feature. Once the valve is securely installed, it’s time to connect the water supply line to your dishwasher.

Carefully position the dishwasher so that the water supply line can reach it without any tension or bends. Next, take the plastic or copper supply line and attach it to the dishwasher’s inlet valve, which is typically located at the bottom left corner of the unit. Ensure that the connection is tight but avoid over-tightening, as this can damage the fittings.

As you make this connection, be mindful of the placement of the rubber washer, which helps create a watertight seal. If the washer is missing or damaged, it can lead to leaks, so double-check that it’s in good condition before securing the connection.

Once everything is connected, turn the shut-off valve on and check for any leaks. It’s a good idea to have your bucket nearby to catch any water that might spill during this process. If you notice any dripping or leaking, you may need to adjust the connections or replace the washer. Taking the time to ensure a secure and leak-free connection will save you from potential water damage and costly repairs down the line.

With the water supply successfully connected, you’re one step closer to enjoying the convenience of your new dishwasher!

8. Step 4: Installing the Drain Hose

Once you’ve secured the dishwasher in its designated space and connected the water supply, it’s time to tackle the crucial task of installing the drain hose. This step is vital for ensuring that dirty water is properly expelled during the wash cycle, preventing any mess or potential damage.

Start by locating the drain hose that came with your dishwasher. It is usually a flexible plastic tube designed to fit snugly into the drain connection. Your first task is to determine the ideal attachment point. Typically, this will either be a dedicated drain outlet under your sink or a standpipe that leads to your household plumbing system.

Before you make any connections, ensure that the drain hose is free of kinks or obstructions. If it appears bent or twisted, carefully straighten it out to allow for smooth water flow. Next, slide the end of the hose onto the drain connection, ensuring that it fits securely. Use a hose clamp, which is often included with your dishwasher, to tighten the connection. This is a critical step as it prevents leaks that could lead to water damage.

If your setup involves a high loop or air gap, make sure the hose is elevated accordingly. This means positioning the hose so that it rises to a higher point before it connects to the drain. This configuration helps prevent wastewater from siphoning back into the dishwasher, maintaining the hygiene of your kitchen.

Once everything is connected, double-check your work. Ensure that the hose is not pinched and that the connections are tight. Now, it’s time to test your installation. With the dishwasher still pulled out slightly from the wall, run a short cycle and keep an eye on the drain hose for any leaks. If you spot any issues, it’s better to address them now rather than waiting until after the dishwasher is fully installed.

With the drain hose securely in place and functioning as it should, you’re one step closer to enjoying your new appliance! Next up, you’ll finalize your installation by securing the dishwasher to the countertop and checking all connections for a seamless setup.

9. Step 5: Electrical Connections: Hardwired vs. Plugged In

When it comes to connecting your new dishwasher, the choice between hardwired and plugged-in installations can significantly impact both functionality and convenience. Understanding the distinctions between these two methods is crucial for a seamless setup and safety compliance.

**Hardwired Connections**
If your dishwasher is hardwired, it will be directly connected to your home’s electrical system. This method typically involves using a junction box and requires you to connect the dishwasher’s wiring directly to your home’s wiring. Hardwiring provides a clean, permanent solution, eliminating the need for visible outlets and reducing the risk of someone accidentally unplugging the unit. However, this method can be more complex and may require professional assistance, especially if you’re not familiar with electrical work. Always ensure to turn off the power at the circuit breaker before attempting any connections, and double-check that your dishwasher’s voltage matches your home’s electrical specifications.

**Plugged-In Connections**
Conversely, if your dishwasher is designed to be plugged in, it comes with a power cord that connects directly to a standard electrical outlet. This option is often more user-friendly and allows for easier removal or replacement of the unit in the future. A plugged-in dishwasher can be beneficial for those who prefer flexibility, as it offers the option to simply unplug the appliance if needed. However, it’s crucial to ensure that the outlet is properly grounded and that it can handle the dishwasher’s power requirements.

Regardless of the connection type you choose, remember to follow the manufacturer’s instructions carefully. Take the time to secure all connections and check for any potential electrical issues before turning the power back on. Doing so will not only ensure the safety and efficiency of your appliance but also give you peace of mind as you enjoy the convenience of your new dishwasher!

10. Step 6: Positioning and Leveling the Dishwasher

Positioning and leveling your new dishwasher is a crucial step that ensures optimal performance and a seamless integration into your kitchen. Begin by carefully sliding the dishwasher into the designated space, making sure to connect the water supply and drain lines without pinching or damaging them. Gently push the unit back until it is flush with the cabinetry, ensuring that there is enough clearance for the door to open fully.

Once the dishwasher is in place, it’s time to check its level. Using a carpenter’s level, place it on the top edge of the appliance. Ideally, the bubble should be centered between the lines. If the dishwasher isn’t level, adjust the feet located at the bottom of the unit. Most dishwashers come with adjustable leveling legs that can be twisted to raise or lower the appliance as needed.

Take your time with leveling; an uneven dishwasher can lead to improper drainage, which might result in leaks or poor cleaning performance. After adjusting, double-check the level from both side to side and front to back. Once you’re satisfied that the dishwasher is perfectly level, secure it to the cabinetry by using screws provided in the installation kit. This will help stabilize the unit and prevent any movement during use, ensuring a long-lasting and trouble-free operation.

With the dishwasher properly positioned and leveled, you’re one step closer to enjoying the convenience of your new appliance!

11. Step 7: Securing the Dishwasher in Place

Once your dishwasher is properly connected to the water supply and drainage system, it’s time to secure it in place. This step is crucial to ensure your appliance functions efficiently and remains stable during use.

Begin by locating the mounting brackets that usually come with your dishwasher. These brackets are typically found on the top edges of the appliance and are designed to anchor the dishwasher to the underside of your countertop. Using a level, make sure your dishwasher is perfectly aligned, so it sits flush with the surrounding cabinetry. An uneven installation can lead to functional issues and may even result in water leaks over time.

With the dishwasher positioned correctly, take your drill and carefully screw the mounting brackets into the countertop. If your countertop is made of a softer material like laminate, be cautious not to overtighten, as this can cause damage. For sturdier surfaces such as granite or quartz, you might need to use a masonry bit to pre-drill holes before inserting screws.

Next, locate the leveling legs at the bottom of the dishwasher. Adjust these legs as necessary to ensure the dishwasher is level from front to back and side to side. You can do this by turning the legs clockwise to raise them or counterclockwise to lower them. A level dishwasher not only enhances performance but also helps prevent leaks and ensures that the door seals properly.

Finally, double-check that there are no gaps between the dishwasher and the cabinetry. This will help prevent any potential vibrations during operation, which could lead to wear and tear over time. Once everything is secured and aligned, you can step back and admire your handiwork—you’re one step closer to enjoying the convenience of your new dishwasher!

12. Step 8: Testing for Leaks and Proper Function

After your new dishwasher is securely installed and connected, it’s time for the crucial step of testing for leaks and ensuring everything functions as it should. This phase is not just about double-checking; it’s about safeguarding your home from potential water damage and ensuring your appliance operates efficiently.

Start by turning on the water supply and checking for any immediate leaks around the connections. Look closely at the water inlet hose where it connects to the dishwasher, as well as the drain hose and any other joints. If you notice any dripping or pooling water, turn off the supply and tighten the connections, or use additional plumbing tape if necessary.

Next, run a short cycle on your dishwasher without any dishes inside. This initial run serves multiple purposes: it allows you to observe the appliance in action, check for leaks during operation, and assess the sound levels. Listen for any unusual noises that could indicate a problem, such as grinding or excessive rattling.

While the cycle runs, keep an eye on the floor beneath the dishwasher. A dry floor is a good sign that your connections are secure. If you do spot any water, shut off the dishwasher immediately and investigate further. It’s better to catch issues early on than to risk a larger problem down the line.

Once the cycle is complete, open the dishwasher and inspect the interior. Ensure that the spray arms are rotating freely and that water has reached every corner. Check for any leftover detergent, which might indicate that the dishwasher isn’t draining properly.

Finally, take a moment to familiarize yourself with the control panel and features. Run through the settings and options to ensure everything is functioning correctly. If all checks out, congratulations! You’ve successfully installed your dishwasher like a pro, and you’re now ready to enjoy the convenience of clean dishes at the touch of a button.

13. Step 9: Final Touches: Adjusting the Dishwasher Door

Once your dishwasher is securely installed and connected, it’s time to add the finishing touches by adjusting the dishwasher door. This step is crucial not only for aesthetics but also for ensuring optimal functionality and longevity of your appliance. A properly aligned door will close seamlessly, preventing leaks and ensuring efficient operation.

Start by checking the alignment of the door. Open and close the dishwasher a few times to see if it operates smoothly. If you notice any resistance or if the door doesn’t close evenly, you may need to make some adjustments. Most dishwashers come with adjustable hinges or leveling legs that allow you to fine-tune the positioning.

To adjust the door, first, locate the hinge adjustment screws, which are typically found on the inside of the door. Using a screwdriver, make slight turns on the screws to raise or lower the door as needed. Aim for a snug fit when the door is closed—there should be no gaps along the edges, but it shouldn’t be so tight that it’s difficult to operate.

Next, check the top of the door for proper spacing. The dishwasher door should align flush with the surrounding cabinetry for a clean, polished look. If necessary, adjust the leveling legs at the bottom of the dishwasher to help achieve this alignment. Turn them clockwise to raise the appliance or counterclockwise to lower it until you reach the desired height.

Finally, test the door one last time. Make sure it opens and closes effortlessly, and that there are no obstructions in the way. If everything looks good, you’ve successfully completed the installation process!

With the door properly adjusted, you can now enjoy the peace of mind that comes with knowing your new dishwasher is perfectly positioned and ready to tackle your dirty dishes. Congratulations on your accomplishment—now it’s time to load it up and experience the convenience of your new appliance!

14. Troubleshooting Common Installation Issues

When it comes to installing your new dishwasher, encountering issues can feel daunting, but fear not! Troubleshooting common installation problems can often be a straightforward process, and with a little patience and persistence, you can resolve them like a pro.

First, let’s talk about water supply issues. If your dishwasher isn’t filling up, check to ensure that the water supply valve is fully opened. Sometimes, it may appear open but isn’t allowing water to flow due to debris or mineral buildup. A quick inspection of the hose connections can also reveal whether there are kinks or blockages impeding water flow.

Next, look out for drainage problems. If your dishwasher is not draining properly, check the drain hose for any clogs or bends. Ensure that it’s installed at the right height—ideally, the top of the hose should reach the underside of your countertop to prevent backflow. If you notice standing water at the bottom of the tub, inspect the filter and drain area for food particles or debris that may be obstructing proper drainage.

Another common issue is noise during operation. If your dishwasher sounds louder than expected, it could be due to improper leveling. Make sure that all four feet are adjusted evenly and that the appliance is stable to minimize vibrations. Additionally, ensure that items inside the dishwasher are arranged properly, as loose cutlery or dishes can rattle against each other and create unwanted noise.

Lastly, keep an eye out for leaks. If you notice water pooling around the base of the dishwasher, double-check all connections, including the water supply line and drain hose. Tighten any loose fittings and inspect the door seal for wear and tear. If the seal is compromised, replacing it might be necessary to prevent future leaks.

By systematically addressing these common installation issues, you can not only ensure that your dishwasher operates effectively but also gain confidence in your DIY skills. Remember, every problem has a solution, and with each challenge you conquer, you’ll be one step closer to mastering appliance installation!

15. Conclusion: Enjoying Your New Dishwasher and Maintenance Tips

Congratulations! You’ve successfully installed your new dishwasher, and now it’s time to enjoy the convenience and efficiency it brings to your kitchen. No more endless hours spent scrubbing pots and pans by hand; instead, you can relax while your new appliance takes care of the dirty dishes. As you bask in the ease of this modern marvel, it’s essential to remember that proper maintenance will ensure your dishwasher remains in top-notch condition for years to come.

To keep your dishwasher running smoothly, make it a habit to regularly clean the filter, as food particles can accumulate and hinder performance. Simply remove the filter, rinse it under warm water, and scrub away any stubborn debris. This small step can significantly enhance the efficiency of your machine.

Additionally, consider running a maintenance cycle every few months. You can achieve this by placing a cup of vinegar or a dishwasher cleaner on the top rack and running a hot water cycle. This process helps eliminate grime, odors, and buildup, leaving your dishwasher fresh and clean.

Don’t forget to check the spray arms, too! Ensure they are free of obstructions and can rotate freely to distribute water effectively. If you notice any debris stuck in the nozzles, use a toothpick to clear it out gently.

Lastly, remember to keep the door seals clean and intact. Wipe them down with a damp cloth regularly to prevent mold and mildew buildup, ensuring a tight seal during operation.

By following these simple maintenance tips, you can extend the lifespan of your dishwasher and continue to enjoy its benefits. So, sit back, relax, and let your new kitchen companion handle the dirty work—after all, you’ve earned it!

In conclusion, installing your new dishwasher doesn’t have to be an intimidating task reserved for the professionals. With the right tools, a little patience, and the step-by-step guidance provided in this article, you can confidently tackle this home improvement project and achieve professional-looking results. Remember to take your time during each stage, from preparing the space to connecting the plumbing and electrical components, ensuring that everything is secure and properly aligned. Soon enough, you’ll be enjoying the convenience of your new appliance, while also taking pride in the fact that you completed the installation yourself. So roll up your sleeves, gather your tools, and get ready to transform your kitchen experience—happy dishwashing!

How to install a new light fixture?

Lighting can transform a room from ordinary to extraordinary, setting the mood and enhancing the overall aesthetic of your space.

Whether you’re looking to brighten up a dim corner, create a cozy atmosphere for evenings in, or showcase your personal style with a stunning new light fixture, the right lighting can make all the difference. However, the thought of installing a new fixture might seem daunting, especially if you’re not well-versed in home improvement projects. Fear not! In this step-by-step guide, we will walk you through the process of selecting the perfect light fixture and provide you with clear, practical instructions for installation. From understanding the types of fixtures and their intended spaces to ensuring safety and achieving a seamless finish, you’ll be equipped with all the knowledge you need to illuminate your space with confidence and flair. Get ready to brighten your home and unleash your inner interior designer!

1. Introduction: The Importance of Lighting in Home Design

How to install a new light fixture?
Credit : whatcanu.com

When it comes to home design, lighting is often an unsung hero, wielding the power to transform a space from ordinary to extraordinary. The right light fixture not only illuminates a room but also sets the tone and ambiance, influencing how we feel and interact within our environments. Imagine stepping into a room bathed in soft, warm light, where shadows dance gently along the walls, creating a cozy and inviting atmosphere. Conversely, stark overhead lighting can render a space cold and unwelcoming, dulling the vibrancy of your carefully chosen decor.

Incorporating effective lighting design goes beyond mere functionality; it is an art form that can enhance the aesthetic appeal of your home. Whether it’s a statement chandelier that becomes the focal point of your dining area or understated sconces that provide a warm glow in a hallway, each light fixture plays a crucial role in defining the character of your space.

Moreover, the right lighting can accentuate architectural features, highlight artwork, and even affect the perceived size of a room, creating the illusion of openness or intimacy as needed. It can guide the eye and draw attention to the areas you want to showcase, while also providing the necessary illumination for everyday tasks.

As we delve into this step-by-step guide on installing a new light fixture, remember that lighting is not just a functional necessity; it’s an opportunity to express your unique style and enhance the atmosphere of your home. Let’s embark on this illuminating journey together, ensuring that every room shines as brightly as your vision for it.

2. Choosing the Right Light Fixture for Your Space

Choosing the right light fixture for your space is a crucial step that can transform the ambiance and functionality of any room. With a myriad of styles, shapes, and sizes available, it can be overwhelming to narrow down your options. Start by considering the purpose of the room—different spaces require different types of lighting. For example, a warm, inviting chandelier might be perfect for a dining area, while a sleek, modern pendant light could enhance the aesthetic of a minimalist kitchen.

Next, think about the size of the fixture in relation to your space. A large, statement piece can become a stunning focal point in a spacious living room, while a smaller, more understated fixture might be ideal for a cozy bedroom. It’s also essential to consider the height at which the light will hang. A fixture that’s too low can obstruct views and movement, while one that’s too high may fail to illuminate the area effectively.

Don’t forget to take into account the overall design theme of your home. Whether your style is contemporary, rustic, or eclectic, the light fixture should complement the existing décor. Materials and finishes play a significant role here; for example, a brushed nickel finish might lend a modern touch, while a vintage brass fixture could add a hint of nostalgia.

Finally, consider the type of bulbs you’ll be using. LED bulbs are energy-efficient and long-lasting, perfect for everyday use, while dimmable options can create a versatile lighting scheme that adjusts to your needs. By thoughtfully selecting a light fixture that aligns with your space’s purpose, style, and lighting requirements, you’ll not only enhance the aesthetic appeal of your room but also create a welcoming and functional environment.

3. Tools You’ll Need for the Installation

How to install a new light fixture?
Credit : whatcanu.com

Before diving into the installation of your new light fixture, it’s essential to gather the right tools. Having everything you need on hand will not only streamline the process but also ensure a safe and effective installation. Here’s a detailed list of tools you’ll require:

1. **Screwdriver Set**: A basic set of screwdrivers, both flat-head and Phillips, is crucial for loosening and tightening screws on your light fixture. Depending on the fixture, you might also need a torque screwdriver for specific screws.

2. **Wire Cutters/Strippers**: These handy tools are vital for preparing your wiring. Wire cutters will help you trim any excess wire, while wire strippers will strip the insulation from the ends of the wires, ensuring a clean connection.

3. **Voltage Tester**: Safety first! A non-contact voltage tester will help you confirm that the power is off in the circuit you’ll be working on. This tool is invaluable for preventing electrical shocks.

4. **Pliers**: Needle-nose pliers are particularly useful for grasping and twisting wires together. They provide the leverage needed to secure wire nuts tightly.

5. **Ladder**: Depending on the height of your ceiling, a sturdy ladder will give you safe access to the area where the light fixture will be installed. Ensure it’s stable and positioned on a level surface.

6. **Tape Measure**: To ensure your new light fixture is installed at the right height and distance from walls or furniture, a tape measure is indispensable. Proper measurements will enhance both functionality and aesthetics.

7. **Level**: For fixtures that need to be hung in a straight line or at a specific angle, a level is essential. This tool helps you achieve that perfect alignment that makes a significant difference in the overall look.

8. **Safety Goggles and Gloves**: Protecting yourself during installation is paramount. Safety goggles will shield your eyes from debris, while gloves can prevent cuts and scrapes when handling tools and fixtures.

With these tools in hand, you’re well-equipped to tackle the installation of your new light fixture. Take a moment to familiarize yourself with each tool before you begin, ensuring that the installation process goes as smoothly as possible. Remember, preparation is key to a successful and safe lighting upgrade!

4. Safety First: Precautions Before You Start

Before diving into the exciting process of installing your new light fixture, it’s crucial to prioritize safety. Working with electricity can pose risks, but with the right precautions, you can ensure a smooth and safe installation. Here’s how to prepare yourself and your workspace.

### Turn Off the Power

The first step is to locate your circuit breaker and turn off the power to the area where you’ll be working. This is non-negotiable. No matter how tempting it may be to just “get it done quickly,” working with live wires is dangerous. After you’ve flipped the switch, double-check your work by testing the existing light fixture with a voltage tester to confirm that the power is indeed off.

### Gather the Right Tools

Having the proper tools on hand not only makes the job easier but also safer. Ensure you have a sturdy ladder, screwdrivers (both flathead and Phillips), wire strippers, pliers, and electrical tape. A safety goggles and rubber-soled shoes can also provide added protection, helping you to avoid slips and falls while working at height.

### Wear Protective Gear

Consider wearing protective gear such as gloves and safety glasses. Gloves will help prevent any cuts or scrapes from sharp edges, while safety glasses will protect your eyes from dust and debris. If you’re sensitive to dust or allergens, a mask can also come in handy, especially if you’re working in an older home.

### Assess Your Environment

Take a moment to assess your workspace. Make sure the area is well-lit, free of clutter, and that you have enough space to maneuver safely. If you’re using a ladder, ensure it’s placed on stable ground and is fully extended. A clean and organized environment will help you focus on the task at hand and reduce the risk of accidents.

### Read the Instructions

Before you start, carefully read the manufacturer’s instructions that come with your new light fixture. These guidelines often include specific safety tips and installation procedures tailored to the product, ensuring that you’re following the best practices for your particular fixture.

By taking these safety precautions seriously, you set the stage for a successful lighting installation. With the power off and your workspace prepared, you’re ready to transform your space and brighten your home with that stunning new fixture!

5. Turning Off the Power: Locating Your Circuit Breaker

How to install a new light fixture?
Credit : whatcanu.com

Before you embark on the journey of installing your new light fixture, one crucial step stands between you and a successful installation: turning off the power. Ensuring your safety is paramount, and the first order of business is to locate your circuit breaker. This compact yet powerful box, often found in a basement, utility room, or closet, is the heart of your home’s electrical system.

To find your circuit breaker, start by identifying the area of your home where the electrical panel resides. It’s typically a gray or metallic box mounted on the wall, featuring a door that swings open to reveal a series of switches or breakers. Each of these controls a specific area or circuit in your home, so it’s important to take a moment to familiarize yourself with its layout.

Once you’ve located your circuit breaker, open the door and inspect the switches. Look for a switch labeled for the room or area where you’ll be working—often, the labels will indicate which lights or outlets each breaker controls. If your circuit breaker doesn’t have clear labels, don’t worry; you can always turn off the main power switch to ensure all electricity is cut off, although this will affect the entire house.

After identifying the correct breaker, firmly switch it to the “off” position. It’s a good idea to keep a flashlight handy in case your workspace becomes dark during this process. To further ensure your safety, use a voltage tester to double-check that the power is indeed off before proceeding with the installation. By taking these precautions, you’re not only protecting yourself but also setting the foundation for a smooth and successful light fixture installation. Now that you’ve responsibly turned off the power, you’re ready to move on to the next steps in illuminating your space!

6. Removing the Old Light Fixture: Step-by-Step Instructions

Removing the old light fixture is a crucial step in your lighting upgrade journey. To begin, ensure your safety by turning off the power at the circuit breaker. This eliminates the risk of electric shock while you work. Once the power is off, it’s time to gather your tools—typically, you’ll need a screwdriver, a voltage tester, and possibly a ladder if the fixture is out of reach.

Next, use the voltage tester to double-check that the power is indeed off. Test the wires connected to the old fixture; if the tester lights up, turn off the power again and revisit your connections. Safety first!

Now, carefully remove the light bulb(s) from the old fixture. If your fixture has a globe or shade, gently unscrew or unclip it to avoid any breakage. With the shade removed, you should have clear access to the fixture’s mounting screws. Loosen these screws with your screwdriver, being cautious not to drop them.

Once the screws are removed, you can gently pull the fixture away from the ceiling. As you do so, take a moment to examine the wiring. You’ll typically find two or three wires: a black (or red) wire for the hot connection, a white wire for the neutral, and a green or bare wire for the ground. Carefully detach these wires by unscrewing the wire nuts or by unclipping them, making sure to note where each wire was connected to facilitate the installation of your new fixture.

After removing all connections, set the old fixture aside. Take a moment to clean the area around the electrical box, as dust and debris can accumulate over time. With the old fixture out of the way, you’re now ready to move on to the next step—installing your brand-new light fixture and transforming your space!

7. Preparing the Electrical Wiring for the New Fixture

How to install a new light fixture?
Credit : whatcanu.com

Before diving into the installation of your stunning new light fixture, it’s crucial to ensure that the electrical wiring is properly prepared. This step is foundational for the safety and functionality of your lighting, so take your time and follow these guidelines closely.

First, turn off the power at the circuit breaker to prevent any accidents while you work. It’s wise to use a voltage tester to double-check that the power is indeed off before touching any wires. Safety first!

Once you’ve confirmed the power is off, remove the old fixture, taking care to document how the existing wiring is connected. This will serve as a reference when you install the new fixture. With the old fixture detached, you’ll need to assess the existing wiring. Look for any signs of fraying, discoloration, or damage; if you notice anything concerning, it’s best to call a professional electrician to address these issues.

Next, prepare the wires for your new fixture. Strip about half an inch of insulation from the ends of the wires using wire strippers, being careful not to cut into the copper strands. You should see three types of wires: the hot wire (typically black or red), the neutral wire (usually white), and the ground wire (green or bare). If your new fixture comes with a ground wire, ensure it’s securely connected to the fixture’s ground point.

Finally, if your new light fixture requires a different setup (like a different number of wires or connections), refer to the manufacturer’s instructions. Each fixture may have unique requirements, so it’s essential to follow their guidelines for optimal performance and safety.

With the electrical wiring properly prepared, you’re now ready to proceed to the installation of your new light fixture, bringing you one step closer to illuminating your space beautifully!

8. Installing the New Light Fixture: A Detailed Guide

Now that you’ve safely removed the old fixture and prepared the electrical connections, it’s time to dive into the exciting part: installing your new light fixture! This step is where your vision for an illuminated space truly begins to take shape. Follow these detailed instructions to ensure a smooth installation process.

**1. Gather Your Tools and Materials:**
Before you start, make sure you have all the necessary tools at hand. You’ll need a screwdriver (both flat-head and Phillips), wire strippers, pliers, and a voltage tester. Additionally, have your new light fixture, mounting hardware, and wire nuts ready. It’s always a good idea to double-check that you have everything within reach so you won’t be scrambling mid-installation.

**2. Prepare the Fixture:**
Unbox your new light fixture and read through the manufacturer’s instructions. Many fixtures come with specific mounting hardware and installation guides tailored to their design. Familiarize yourself with these details and ensure you have all the components needed for assembly. If your fixture has adjustable arms or shades, now is the time to set them up according to your design preference.

**3. Connect the Wiring:**
Carefully lift the new fixture up to the ceiling bracket, aligning it with the electrical box. The colors of the wires will guide you: typically, the black or red wire is the hot wire, the white wire is neutral, and the green or bare wire is the ground. Using wire strippers, strip about half an inch of insulation off the ends of each wire. Twist together the corresponding wires—black to black, white to white, and ground to ground—using wire nuts to secure them firmly. Make sure there are no exposed wire ends, as this can cause a short circuit.

**4. Secure the Fixture:**
Once the wiring is connected, carefully tuck the wires back into the electrical box, ensuring they are not pinched or strained. Line up the fixture with the mounting bracket and secure it in place using the provided screws. If your fixture has a canopy, ensure it covers the junction box neatly and is level for a polished look.

**5. Attach Bulbs and Shades:**
After securing the fixture, it’s time to attach any light bulbs and shades as per your design. Be sure to use the correct wattage as specified by the manufacturer. If your fixture includes decorative elements or diffusers, follow the included instructions to attach these components seamlessly.

**6. Turn On the Power:**
With everything securely in place, it’s time to restore power to the circuit. Head back to your circuit breaker and switch the power back on. Before flipping the switch to test your new light fixture, double-check that everything is securely installed to avoid any accidents.

**7. Enjoy Your New Illumination:**
Finally, flip the switch and bask in the glow of your newly installed light fixture! Take a moment to admire how it transforms your space, creating both functionality and style. If necessary, adjust the fixture’s positioning or shades to achieve the desired ambiance.

By following these detailed steps, you can confidently install your new light fixture, bringing a fresh brilliance to your home. Remember, the right lighting can dramatically affect your space, enhancing both its beauty and functionality. Happy illuminating!

9. Connecting the Wires: Color-Coding and Techniques

When it comes to connecting the wires of your new light fixture, understanding color-coding and employing proper techniques is crucial for both functionality and safety. Before diving into the process, ensure you have the right tools at hand: wire strippers, electrical tape, and a voltage tester.

Begin by identifying the wires in your ceiling and the ones attached to your new fixture. Typically, you’ll encounter three types: black (or red) for the hot wire, white for the neutral wire, and green or bare for the ground wire. The black wire carries electricity from the power source, while the white wire returns the current back to the panel. The ground wire is a safety feature, redirecting any stray electricity to prevent shocks.

Once you’ve confirmed the proper identification of each wire, it’s time to prepare them for connection. Use your wire strippers to carefully remove about half an inch of insulation from the ends of each wire. Be cautious not to nick the wire itself, as this could compromise its integrity.

Next, align the corresponding wires from your fixture with those from the ceiling. Start with the black (or red) wires—twist them together clockwise until they are tightly secured. Follow this by connecting the white wires in the same manner. For the ground wires, if your fixture has a green or bare wire, connect it to the ground wire in the ceiling. If there is no ground wire present, you can attach the ground wire from the fixture to the mounting bracket of the light fixture, ensuring it has a solid connection.

After making all the connections, wrap each twisted pair with electrical tape to provide an extra layer of insulation and protection. This step is vital; it not only safeguards against potential short circuits but also ensures longevity for your connections.

Once everything is securely fastened and taped, gently tuck the wires back into the electrical box, taking care not to pinch or strain any of the connections. Finally, attach the light fixture to the mounting bracket according to the manufacturer’s instructions. With the wiring complete, you’re ready to restore power and see your new light fixture illuminate your space beautifully!

10. Securing the Fixture: Ensuring Stability and Safety

Securing the fixture is a crucial step in the installation process, as it directly impacts both the stability and safety of your new lighting. A well-mounted fixture not only enhances the aesthetic appeal of your space but also prevents potential hazards, such as electrical malfunctions or falling fixtures.

Begin by carefully positioning the fixture against the ceiling, aligning it with the electrical box. Make sure you have a clear view of the mounting bracket, which will serve as the anchor for your light. Most fixtures come with a mounting plate that requires you to attach it securely to the electrical box using the provided screws. It’s essential to use the correct screws that match the size and type of your electrical box—typically, these will be either 1″ or 2″ screws for standard installations.

Once the plate is in place, gently pull the fixture’s wiring through the center opening of the mounting bracket. Before proceeding, double-check that all wires are properly connected and insulated to avoid any risk of short-circuiting. Follow the manufacturer’s instructions to ensure that each wire is attached correctly: black to black (or live), white to white (or neutral), and green or copper to the grounding wire.

After securing the wiring, it’s time to attach the fixture to the mounting bracket. Depending on your light fixture, you may need to tighten screws or use clips to hold it firmly in place. Be sure to give the fixture a gentle tug once it’s installed to confirm that it is securely fastened.

Finally, always take a moment to step back and visually inspect your work, ensuring that the fixture is level and appropriately aligned. A well-secured light fixture not only looks professional but also contributes to a well-lit, safe environment in your home. With your fixture firmly in place, you are now ready to restore power and enjoy the warm glow of your newly installed lighting.

11. Turning the Power Back On: Testing Your New Light Fixture

After you’ve diligently followed each step of the installation process, it’s finally time for the moment of truth: turning the power back on and testing your new light fixture. This is where all your hard work pays off, and the excitement of seeing your space illuminated in a fresh, new way comes to life.

Before flipping the switch, take a moment to ensure everything is in order. Double-check that all wires are securely connected, and the fixture is firmly mounted. Safety first! Once you’re satisfied that everything looks good, it’s time to restore power. Head back to your circuit breaker and flip the switch for the corresponding room.

With your heart racing in anticipation, return to the light fixture. Take a deep breath, and reach for the light switch. As you flick it on, pay close attention to how the new fixture responds. Does it illuminate instantly with a warm glow, or is there a flicker of hesitation? If the light turns on as expected, you’ll likely feel a rush of satisfaction.

However, if it doesn’t light up, don’t panic! This could simply be a matter of a loose connection or an incorrect wiring setup. Turn the power off again, and carefully revisit your wiring connections, ensuring that each wire is tightly secured and in the right place.

Once you’ve confirmed that everything is as it should be, restore the power once more. When you finally flip that switch again, and the room is bathed in beautiful light, relish in your accomplishment. You’ve successfully transformed your space and created a welcoming atmosphere with your new light fixture! Take a moment to appreciate how the fixture enhances the overall aesthetic of the room and consider how it will impact your daily life. Whether it’s brightening up a cozy reading nook or providing essential light in a functional workspace, your new fixture is sure to make a significant difference.

12. Adjusting Light Levels: Dimming Options and Bulb Choices

When it comes to setting the perfect ambiance in your space, adjusting light levels is a pivotal consideration that should not be overlooked. The right lighting can dramatically transform a room, setting the mood for relaxation, productivity, or social gatherings. To achieve this, you have a variety of dimming options and bulb choices at your disposal.

**Dimming Options:**
Installing a dimmer switch is one of the simplest ways to gain control over your lighting. These devices allow you to adjust the brightness of your fixtures, giving you the flexibility to create the perfect environment for any occasion. Modern dimmers come in various styles, including rotary, slide, and smart dimmers that can be controlled via smartphone apps or voice commands. When choosing a dimmer, ensure it is compatible with the type of bulbs you plan to use, as traditional incandescent bulbs work well with most dimmers, while LED and CFL bulbs may require specific dimmable versions.

**Bulb Choices:**
The next step in adjusting light levels is selecting the right bulbs for your fixtures. LED bulbs are a popular choice due to their energy efficiency and long lifespan. They come in a variety of color temperatures, ranging from warm white (2700K) to cool daylight (5000K), allowing you to tailor the light to suit your space. For a cozy atmosphere, opt for warm white bulbs in living rooms and bedrooms. Conversely, brighter, cooler bulbs work well in kitchens and workspaces where clarity and focus are essential.

You might also explore smart bulbs that allow you to change colors and dimming levels directly from your smartphone or through voice commands. This versatility not only adds convenience but also allows for dynamic changes in your space, making it easy to adapt to different activities or moods.

By thoughtfully selecting your dimming options and bulb choices, you can illuminate your space in a way that enhances its beauty and functionality, bringing warmth and life to your home. With this combination, you’re well on your way to creating a lighting scheme that is both practical and visually appealing, ensuring that your new light fixture becomes a stunning focal point for years to come.

13. Common Mistakes to Avoid During Installation

When embarking on the journey of installing a new light fixture, it’s essential to be aware of potential pitfalls that can turn an exciting project into a frustrating ordeal. Here are some common mistakes to avoid, ensuring your installation goes smoothly and safely.

**1. Skipping the Safety Check:** Before you even think about unscrewing that old fixture, make sure to turn off the power at the circuit breaker. Many DIY enthusiasts underestimate the importance of this step. Forgetting to shut off the power could lead to serious injuries or even electrocution. Always double-check with a voltage tester to confirm that the wires are dead before touching them.

**2. Ignoring the Weight Limit:** Every light fixture has a weight limit determined by the mounting hardware and ceiling structure. Overloading can lead to sagging, or worse, the entire fixture falling off the ceiling. Always check the specifications of both your light fixture and the mounting bracket to ensure they are compatible and secure.

**3. Neglecting the Right Tools:** Using the wrong tools can lead to stripped screws, damaged wires, or even injury. Ensure you have all the necessary tools on hand—screwdrivers, wire strippers, pliers, and a ladder—and that they are in good condition. Investing in a quality toolkit can save you time and headaches during the installation process.

**4. Poor Wire Connections:** One of the most critical aspects of installing a light fixture is making secure wire connections. Many DIYers make the mistake of simply twisting wires together without properly securing them with wire nuts or electrical tape. Loose connections can lead to flickering lights, short circuits, or fire hazards. Always ensure that your wires are tightly twisted and that wire nuts are firmly in place.

**5. Not Considering Placement:** Before you mount your new light fixture, take a moment to think about its placement. Is it centered over a dining table, or is it providing adequate illumination for a workspace? Failing to consider the fixture’s functionality and aesthetics can leave your space poorly lit or looking unbalanced.

**6. Overlooking the Final Touches:** Once your fixture is installed, don’t rush to turn on the power. Take a moment to tidy up any visible wires, making sure everything is neatly tucked away and secured. Then, step back and admire your work. A well-installed fixture not only illuminates your space but can also serve as a stunning focal point.

By steering clear of these common mistakes, you’ll set yourself up for a successful light fixture installation. With careful planning and attention to detail, you’ll create a beautifully lit space that enhances your home’s ambiance.

14. Maintaining Your Light Fixture: Tips for Longevity

Once you’ve successfully installed your new light fixture, the next crucial step is ensuring its longevity through proper maintenance. A well-cared-for light fixture not only enhances the aesthetic of your space but also functions efficiently over time. Here are some practical tips to keep your fixture shining bright for years to come.

### Regular Dusting and Cleaning

Dust and grime can accumulate on light fixtures, dulling their shine and affecting their performance. Make it a habit to dust your fixture regularly with a soft, dry cloth. For more thorough cleaning, turn off the power and use a damp cloth or sponge with mild soap to gently wipe down surfaces. Be sure to avoid harsh chemicals that can damage finishes or materials. For intricate designs, a soft-bristle brush can help reach those tricky crevices.

### Check and Replace Bulbs as Needed

Regularly check the bulbs in your light fixture to ensure they are functioning correctly. If you notice any flickering or dimming, it might be time to replace them. When replacing bulbs, opt for those recommended by the manufacturer to maintain compatibility. Consider energy-efficient LED bulbs, which not only last longer but also reduce your energy consumption.

### Inspect Electrical Connections

While you shouldn’t need to frequently tamper with the electrical components, it’s wise to conduct periodic inspections. Look for signs of wear, such as frayed wires or loose connections. If you’re unsure, don’t hesitate to call a professional electrician to ensure everything is safe and secure.

### Avoid Overloading Circuits

Be mindful of the wattage limitations specified for your fixture. Overloading can lead to overheating, potentially causing damage to both the fixture and your home’s electrical system. Always adhere to the manufacturer’s recommendations and consider the total wattage of all bulbs used.

### Store Seasonal Decorations Safely

If your light fixture accommodates seasonal decorations, like hanging ornaments or garlands, ensure they’re stored safely when not in use. Avoid placing heavy items that could stress the fixture or wires. When decorating, use lightweight materials that won’t compromise the integrity of the fixture.

### Schedule Professional Maintenance

For complex fixtures, especially those that require specialized cleaning or maintenance, consider scheduling an annual check-up with a professional. They can offer insights and services that ensure your fixture remains in top condition.

By incorporating these maintenance tips into your routine, you’ll not only enhance the beauty of your space but also extend the lifespan of your light fixture. A little care goes a long way in keeping your lighting sparkling and functional!

15. Conclusion: Enjoying Your Newly Illuminated Space

As you stand back and admire your newly installed light fixture, there’s a palpable sense of satisfaction that envelops the room. The warm glow fills the space, transforming dull corners into inviting areas, and highlighting the unique features of your décor. Whether you chose a sleek modern pendant light or a vintage-inspired chandelier, the right fixture not only serves a functional purpose but also acts as a statement piece that reflects your personal style.

Now that the installation process is behind you, take a moment to revel in this achievement. Consider how the new lighting enhances the ambiance of your home — perhaps it creates a cozy reading nook in the living room, a stimulating workspace in your office, or a romantic setting in your dining area. The possibilities are endless, and the impact of good lighting cannot be overstated.

Don’t forget to experiment with different bulb types and brightness levels to find the perfect balance for your space. Dimming capabilities can further elevate the atmosphere, allowing you to adjust the mood according to the time of day or occasion. Plus, with the right maintenance, your fixture will continue to shine brightly for years to come.

In conclusion, installing a new light fixture is more than just a home improvement task; it’s an opportunity to express your creativity and enhance your living environment. Enjoy the newfound brightness and warmth in your space, and let your beautifully illuminated home inspire you and your guests for many gatherings to come. Embrace the change, and let the light guide you through those cozy evenings and vibrant days ahead.

As we conclude our step-by-step guide to installing a new light fixture, we hope you feel empowered to transform your space with the perfect illumination. Whether you’re updating a single room or enhancing your entire home, the right light fixture can dramatically alter the ambiance and functionality of your environment. By following the tips and techniques outlined in this post, you can confidently tackle this DIY project, bringing both style and brightness to your living areas. Remember, lighting is more than just a practical necessity; it’s an opportunity to express your personal taste and create a welcoming atmosphere. So gather your tools, unleash your creativity, and let your space shine like never before! We can’t wait to see the stunning results of your efforts—don’t forget to share your transformation with us!

What are the different types of insulation and their effectiveness?

As energy costs continue to rise and environmental concerns become more pressing, the importance of proper insulation in our homes has never been more critical.

Insulation not only plays a pivotal role in maintaining comfortable indoor temperatures year-round but also significantly impacts energy efficiency and utility bills. With a plethora of options available, ranging from traditional fiberglass to innovative spray foam and eco-friendly alternatives, selecting the right insulation can feel overwhelming. In this comprehensive guide, we’ll explore the various types of insulation—each with its own unique characteristics and effectiveness—empowering you to make informed decisions tailored to your specific home needs. Whether you’re renovating an older space or building new, understanding your insulation options is the first step toward creating a cozy, energy-efficient sanctuary. Join us as we delve into the world of insulation, equipping you with the knowledge to create a comfortable and sustainable living environment.

1. Introduction to Home Insulation: Why It Matters

What are the different types of insulation and their effectiveness?
Credit : whatcanu.com

When it comes to maintaining a comfortable and energy-efficient home, insulation plays a pivotal role that often goes overlooked. As the first line of defense against the elements, proper insulation helps regulate indoor temperatures, keeping your home warm in the winter and cool during the hot summer months. But insulation is not just about comfort; it’s also a crucial factor in energy efficiency. By minimizing heat transfer, effective insulation reduces the demand on heating and cooling systems, leading to lower energy bills and a reduced carbon footprint.

In an era where sustainability is increasingly important, understanding your insulation options can empower you to make informed choices that benefit both your home and the environment. From traditional fiberglass batts to modern spray foam and cellulose, each type of insulation has unique properties that can impact its effectiveness and suitability for different areas of your home.

Moreover, insulation serves as a sound barrier, dampening noise from the outside world and providing a quieter living space. It also helps prevent moisture buildup, which can lead to mold growth and structural damage over time. Given these considerations, investing in the right insulation is not merely a cosmetic choice; it’s a fundamental aspect of home maintenance that enhances comfort, efficiency, and longevity.

As we delve deeper into the various types of insulation available, their effectiveness, and how to choose the right fit for your home, you’ll gain valuable insights that can help you create a more comfortable, cost-effective, and sustainable living environment. Let’s explore the world of insulation and uncover the best solutions for your home!

2. Understanding R-Value: What It Is and Why It’s Important

When it comes to insulation, understanding R-value is crucial for making informed choices that will affect your home’s energy efficiency and comfort. R-value is a measure of thermal resistance, indicating how well a material can resist the transfer of heat. The higher the R-value, the better the insulation performs in keeping heat in during the winter and out during the summer, which can lead to significant savings on your energy bills.

R-value is determined by several factors, including the type of insulation material, its thickness, and its density. For example, fiberglass batts typically have an R-value ranging from 2.9 to 3.8 per inch, while spray foam insulation can achieve R-values between 5.0 and 6.5 per inch. This variance highlights the importance of choosing not only the right type of insulation but also the appropriate thickness to meet your specific climate needs and building codes.

Understanding R-value also involves recognizing its impact on your overall home energy efficiency. An insulated home with a high R-value will require less energy for heating and cooling, leading to a reduced carbon footprint and a more sustainable living environment. Moreover, a well-insulated home can create a more comfortable indoor atmosphere by minimizing drafts and temperature fluctuations.

When selecting insulation for your home, consider the R-value recommendations for your region. For example, colder climates typically require higher R-values to combat heat loss, while warmer areas may prioritize ventilation and lower R-values to prevent overheating. Consulting with a professional can help you determine the ideal R-value based on your local climate conditions, your home’s design, and your personal comfort preferences.

In summary, R-value is not just a number; it’s a key factor in your home’s energy efficiency, comfort, and environmental impact. By understanding what R-value means and how it applies to different insulation materials, you’ll be better equipped to choose the right fit for your home and ensure that you’re making a sound investment in your living space.

3. Types of Insulation Materials: An Overview

What are the different types of insulation and their effectiveness?
Credit : whatcanu.com

When it comes to insulating your home, understanding the various types of insulation materials available is crucial for making an informed decision. Each material has its own unique properties, benefits, and drawbacks that can significantly impact your home’s energy efficiency, comfort level, and overall cost.

**Fiberglass Insulation**
One of the most common insulation materials, fiberglass insulation is composed of tiny glass fibers and is available in batts, rolls, or loose-fill. It is non-combustible, resistant to moisture, and offers excellent thermal performance. However, it can be irritating to the skin and lungs, so proper safety gear should be worn during installation. Fiberglass insulation is generally cost-effective and widely available, making it a popular choice for both DIY projects and professional installations.

**Foam Board Insulation**
Foam board insulation is a rigid panel made from polystyrene, polyisocyanurate, or polyurethane. This type of insulation is known for its high insulating value relative to its thickness, making it an effective choice for areas with limited space. It’s especially useful for insulating basement walls, exterior walls, and even roofs. While foam board insulation provides excellent moisture resistance, it can be more expensive than fiberglass and requires careful handling to avoid damage.

**Spray Foam Insulation**
Spray foam insulation is a versatile and highly effective option that expands upon application, filling gaps and creating an airtight seal. This type of insulation is available in two varieties: open-cell and closed-cell. Open-cell foam is softer and less dense, offering soundproofing benefits, while closed-cell foam is denser, providing superior insulation and moisture resistance. Although spray foam insulation generally comes with a higher price tag, its ability to reduce air leaks can lead to significant energy savings over time.

**Cellulose Insulation**
Made from recycled paper products, cellulose insulation is an eco-friendly option that offers excellent thermal performance. It is typically treated with a fire-retardant chemical and can be installed as loose-fill or dense-packed in walls and attics. Cellulose insulation is effective at reducing noise transmission, making it a great choice for soundproofing. While it may be more susceptible to moisture and settling over time compared to other materials, its sustainability and effectiveness make it an appealing option for environmentally conscious homeowners.

**Mineral Wool (Rock Wool) Insulation**
Mineral wool, also known as rock wool, is made from natural stone and recycled steel slag. It is fire-resistant, water-repellent, and offers excellent sound absorption properties. This type of insulation is available in batts or loose-fill and is particularly effective in areas exposed to high temperatures. However, it can be more expensive than fiberglass and may require special handling during installation.

When choosing the right insulation material for your home, consider factors such as your budget, the specific areas you need to insulate, climate conditions, and your personal preferences regarding sustainability and ease of installation. Each insulation type brings its own strengths to the table, and understanding these options will help you create a more energy-efficient and comfortable living space.

– Fiberglass

### Fiberglass

Fiberglass insulation is one of the most popular choices among homeowners and builders alike, thanks to its excellent thermal performance, versatility, and cost-effectiveness. Composed of fine strands of glass fibers, this insulation material is available in batts, rolls, and loose-fill forms, making it adaptable for various applications throughout the home.

One of the standout features of fiberglass insulation is its ability to resist heat transfer, helping to keep your home warm in the winter and cool in the summer. It boasts a high R-value, which measures the material’s resistance to heat flow; the higher the R-value, the better the insulation’s effectiveness. Typically, fiberglass insulation has an R-value ranging from 2.9 to 4.3 per inch, depending on the product and installation method, making it an efficient choice for both walls and attics.

Another appealing aspect of fiberglass is its fire resistance. Since it is made from glass, fiberglass insulation does not burn, offering an added layer of safety to your home. Additionally, it is resistant to moisture, which helps prevent the growth of mold and mildew—a critical factor in maintaining a healthy indoor environment.

However, while fiberglass insulation has many benefits, proper installation is essential to maximize its effectiveness. Gaps, compressions, or improper fitting can significantly reduce its insulating properties. It’s also important to wear protective gear when handling fiberglass, as the tiny glass fibers can irritate the skin and respiratory system.

When choosing fiberglass insulation, consider the specific needs of your home. Factors such as climate, construction type, and budget all play a role in determining the right fit. For instance, in colder climates, thicker batts with higher R-values are recommended, while in milder areas, a standard roll may suffice.

In summary, fiberglass insulation remains a top contender in the world of home insulation options. With its strong thermal performance, fire resistance, and adaptability, it can be a smart investment for improving energy efficiency while enhancing comfort in your home. Whether you’re building new or renovating, fiberglass insulation might just be the right fit for your needs.

– Foam Board

What are the different types of insulation and their effectiveness?
Credit : whatcanu.com

### Foam Board

Foam board insulation, known for its impressive thermal resistance and versatility, is a go-to choice for many homeowners looking to enhance their energy efficiency. Composed of rigid panels made from materials like polystyrene or polyisocyanurate, foam board insulation provides a solid barrier against heat flow, making it particularly effective in both new constructions and retrofitting projects.

One of the standout features of foam board is its high R-value per inch, which measures its resistance to heat transfer. This means that even a relatively thin layer of foam board can offer significant insulation, helping to keep your home warm in winter and cool in summer. Its lightweight nature makes it easy to handle and install, whether you’re insulating foundation walls, basement areas, or even the roof.

Another advantage of foam board insulation is its moisture resistance. Unlike traditional fiberglass or cellulose insulation, which can absorb water and lose effectiveness, foam board remains stable in damp conditions. This property makes it an excellent choice for areas prone to moisture, such as bathrooms, kitchens, and basements. Additionally, foam board can be used in combination with other insulation types to maximize energy efficiency and create a more comfortable living environment.

When choosing foam board insulation, it’s essential to consider the specific needs of your home. Different types of foam boards, such as expanded polystyrene (EPS), extruded polystyrene (XPS), and polyisocyanurate, offer varying levels of thermal resistance, moisture protection, and fire ratings. Be sure to evaluate the R-value requirements for your climate zone and the areas you’re insulating to select the right product.

Overall, foam board insulation presents a practical and effective solution for homeowners looking to improve their home’s energy efficiency. By understanding its benefits and options, you can make an informed decision that meets your insulation needs while contributing to a more comfortable and sustainable living space.

– Spray Foam

### Spray Foam

Spray foam insulation has rapidly gained popularity among homeowners and builders alike for its unique properties and impressive performance. Composed of two main components—polyurethane and isocyanate—this insulation type is applied as a liquid that expands to fill gaps and cavities, creating an airtight seal that is difficult to achieve with traditional insulation materials.

One of the standout benefits of spray foam insulation is its exceptional R-value, which measures thermal resistance. With an R-value ranging from 6.5 to 7 per inch, spray foam provides superior insulation compared to fiberglass or cellulose, making it an effective choice for energy efficiency. This high R-value not only helps keep your home warmer in the winter and cooler in the summer but also reduces your heating and cooling costs, leading to significant savings over time.

Another advantage of spray foam is its ability to act as a moisture barrier. By sealing off cracks and crevices, it prevents air leaks and moisture infiltration, which can lead to mold growth and structural damage. This characteristic is particularly beneficial in attics, basements, and crawl spaces, where humidity can be a concern.

However, while spray foam insulation offers remarkable benefits, it’s essential to consider the installation process. It requires professional application due to the technical nature of the materials and the need for proper safety measures. Additionally, upfront costs can be higher than other insulation options; however, many homeowners find that the long-term energy savings and durability make it a worthwhile investment.

When choosing spray foam for your home, you’ll typically find two types: open-cell and closed-cell foam. Open-cell foam is lighter and more flexible, making it ideal for interior applications where soundproofing is a priority. In contrast, closed-cell foam is denser and provides a higher R-value, making it preferable for areas exposed to moisture.

In summary, spray foam insulation could be the right fit for your home if you value energy efficiency, moisture resistance, and durability. By sealing your home effectively, it not only enhances comfort but also contributes to a healthier living environment. As you explore insulation options, consider how spray foam can play a pivotal role in enhancing your home’s overall energy performance.

– Cellulose

What are the different types of insulation and their effectiveness?
Credit : whatcanu.com

Cellulose insulation is a popular choice among homeowners seeking an eco-friendly and effective solution for their insulation needs. Made primarily from recycled paper products, such as newspapers and cardboard, cellulose is treated with fire retardants to enhance its safety and durability. This sustainable option is not only a responsible choice for the environment but also a highly effective insulator, boasting an impressive R-value—typically ranging from 3.2 to 3.8 per inch of thickness.

One of the standout features of cellulose insulation is its ability to fill gaps and crevices, making it an ideal choice for retrofitting existing homes. When blown into attics, walls, and crawl spaces, cellulose settles into every nook, providing a snug barrier against air leaks and minimizing drafts. This characteristic ensures that your home remains comfortably warm in the winter and refreshingly cool in the summer, ultimately leading to significant energy savings on heating and cooling costs.

Moreover, cellulose is known for its excellent sound-dampening properties. The dense material absorbs sound waves, making it an exceptional option for those looking to create a quieter living environment. This feature is particularly beneficial in multi-story homes or in urban areas where noise pollution can be a concern.

When considering cellulose insulation, it’s essential to work with a qualified professional who can assess your specific needs and install the insulation correctly. Proper installation is crucial, as any gaps or voids can compromise its effectiveness. Additionally, cellulose is treated to be resistant to pests, mold, and fire, but regular maintenance and inspections are still advisable to ensure long-lasting performance.

In summary, cellulose insulation offers a blend of environmental sustainability, energy efficiency, and soundproofing capabilities, making it a compelling option for homeowners looking to enhance their home’s comfort and reduce their ecological footprint. As you explore your insulation options, consider the numerous benefits that cellulose can bring to your living space.

– Mineral Wool

### Mineral Wool

Mineral wool, also known as rock wool or stone wool, is a popular insulation choice renowned for its exceptional thermal performance and fire-resistant properties. Made from volcanic rock or industrial byproducts, this versatile material is spun into fibers, creating a lightweight, fluffy substance that is easy to handle and install.

One of the standout features of mineral wool is its ability to provide superior thermal insulation. It effectively traps air pockets, minimizing heat transfer and helping to maintain a comfortable indoor climate year-round. This thermal efficiency contributes not only to a cozy living environment but also to reduced energy bills, as your heating and cooling systems will operate more efficiently.

In addition to thermal properties, mineral wool is incredibly fire-resistant. With a melting point of around 1,500 degrees Celsius (approximately 2,732 degrees Fahrenheit), it can help slow the spread of flames in the event of a fire, providing additional safety for your home and peace of mind for your family. This makes it an excellent choice for areas where fire safety is a concern, such as attics or near chimneys.

Moreover, mineral wool is also soundproofing champion. Its dense structure dampens sound waves, making it an ideal insulation option for homes located in noisy environments or for those looking to create a quieter indoor space. Whether it’s blocking out street noise or minimizing sound between rooms, mineral wool can significantly enhance your comfort.

When considering mineral wool insulation, it’s essential to pay attention to the installation process. While it can be installed by homeowners with some DIY experience, hiring a professional is often recommended to ensure optimal results and safety, especially in complex areas. Additionally, it’s important to use appropriate protective gear, as the fibers can irritate the skin and lungs during installation.

Overall, mineral wool insulation is a robust, multi-functional option that not only improves your home’s energy efficiency but also enhances safety and comfort. Whether you’re building new or renovating an existing space, this insulation type deserves serious consideration for its myriad benefits.

4. Comparing Insulation Effectiveness: Pros and Cons of Each Type

When it comes to insulation, understanding the effectiveness of different types is crucial in making an informed decision for your home. Each insulation material comes with its own set of advantages and disadvantages, impacting not only energy efficiency but also installation, cost, and environmental footprint. Let’s dive into the most common insulation options available and weigh their pros and cons.

**Fiberglass Insulation**
**Pros:** Fiberglass insulation is one of the most popular choices due to its affordability and ease of installation. It is non-combustible and resistant to moisture, making it a great option for various climates. Additionally, fiberglass has a high R-value, meaning it provides excellent thermal resistance.
**Cons:** On the downside, fiberglass can irritate the skin, eyes, and lungs if proper protective gear is not used during installation. It also may settle over time, potentially reducing its effectiveness.

**Foam Board Insulation**
**Pros:** Foam board insulation offers superior thermal resistance and is highly effective for basement walls, foundation slabs, and even exterior walls. It is lightweight, easy to cut, and provides a continuous layer of insulation that minimizes thermal bridging.
**Cons:** However, foam board can be more expensive upfront compared to other insulation options. Additionally, it is vulnerable to damage from sunlight and may require additional protective measures.

**Spray Foam Insulation**
**Pros:** Spray foam insulation is renowned for its superior air-sealing capabilities. It expands to fill gaps and cracks, providing an airtight barrier that helps prevent drafts and heat loss. This can lead to significant energy savings over time.
**Cons:** The cost of spray foam can be on the higher side, and professional installation is usually required, adding to the initial investment. Moreover, some types of spray foam may emit volatile organic compounds (VOCs) during and after installation, which can be a concern for indoor air quality.

**Cellulose Insulation**
**Pros:** Made from recycled paper products, cellulose insulation is an eco-friendly choice that offers excellent soundproofing qualities. It is also treated with fire retardants and can be blown into hard-to-reach spaces, making it versatile for various applications.
**Cons:** However, cellulose can settle over time, reducing its effectiveness. It is also more susceptible to moisture and pests if not properly installed or maintained.

**Mineral Wool (Rock Wool) Insulation**
**Pros:** Mineral wool insulation is fire-resistant, water-repellent, and provides excellent soundproofing. It can also withstand high temperatures, making it ideal for areas such as attics and around heating systems.
**Cons:** The main drawbacks include its higher price point and the fact that it can be heavier and more difficult to install compared to lighter materials.

Each insulation type has its unique strengths and weaknesses, making it vital to consider your specific needs, budget, and climate when deciding. A thorough understanding of these options will empower you to choose the insulation that best fits your home, ultimately leading to improved comfort and energy efficiency.

5. Insulation Installation Methods: DIY vs. Professional Help

When it comes to insulating your home, one of the most critical decisions you’ll face is whether to tackle the installation yourself or hire a professional. Each option has its own set of advantages and considerations that can significantly impact both the effectiveness of the insulation and your overall experience.

**DIY Installation:** For the savvy homeowner who enjoys hands-on projects, a DIY approach can be both rewarding and cost-effective. With a plethora of resources available online—from video tutorials to detailed guides—you can become well-versed in the various insulation methods, whether you’re working with batts, rolls, foam boards, or spray foam. DIY insulation allows you to customize the process according to your specific needs, and it grants you complete control over the materials used. However, it’s essential to be aware of potential pitfalls, such as improper installation that could lead to air leaks and reduced effectiveness. Additionally, safety should always be a priority: make sure you’re equipped with the right protective gear and tools.

**Professional Installation:** On the other hand, enlisting the help of insulation professionals can save you time and ensure a high-quality installation. Experts are trained to assess your home’s unique needs and recommend the best insulation type and method for optimal energy efficiency. Their experience often translates to a quicker, more precise installation, minimizing the risk of errors that could compromise the insulation’s performance. While hiring professionals may involve a higher upfront cost, the long-term savings on energy bills and the peace of mind that comes with a job well done can outweigh the initial expense.

Ultimately, the choice between DIY and professional help hinges on your comfort level with home improvement tasks, your budget, and the complexity of the insulation project. By carefully weighing these factors, you can determine the best path forward and ensure your home is adequately insulated for years to come.

6. Factors to Consider When Choosing Insulation

When it comes to selecting the right insulation for your home, there are several critical factors to consider that go beyond just R-value or material type. Understanding these elements will help you make a more informed choice tailored to your specific needs.

**1. Climate Zone:** Your local climate plays a significant role in determining the type of insulation that will be most effective. For instance, homes in colder areas typically benefit from insulation materials that offer higher thermal resistance, while those in warmer climates may require insulation that also reflects heat to keep indoor spaces comfortable.

**2. Energy Efficiency Goals:** Consider your long-term energy efficiency goals. Are you looking to reduce your heating and cooling costs significantly? A higher R-value insulation may be necessary, but you should also evaluate how it fits into your overall energy efficiency plan, including windows, doors, and HVAC systems.

**3. Installation Method:** Different insulation types come with various installation requirements. While some materials, like spray foam, can be applied by professionals and create an airtight seal, others, like fiberglass batts, might be easier for DIY enthusiasts to install. Your comfort level with installation and whether you prefer to hire professionals can influence your choice.

**4. Environmental Impact:** If sustainability is important to you, you might want to consider insulation options made from recycled materials or those that are renewable. Look for certifications that indicate an insulation product is environmentally friendly, like the Forest Stewardship Council (FSC) label.

**5. Budget:** The cost of insulation materials and installation can vary widely. While higher-quality insulation might have a steeper upfront cost, consider the long-term savings on energy bills. It’s essential to strike a balance between initial investment and future savings.

**6. Soundproofing Needs:** If noise reduction is a priority—perhaps you live in a busy urban area or have a home office—a denser insulation material may help dampen sound. Acoustic insulation products can be particularly beneficial in these scenarios.

**7. Local Building Codes:** Be sure to check if there are any local building codes or regulations that dictate the type of insulation you can use. Compliance with these codes is crucial not only for safety but also for ensuring your home’s value and resale potential.

By carefully considering these factors, you can make a more informed decision that not only enhances your home’s comfort but also optimizes energy efficiency and aligns with your personal values. Remember, insulation is an investment in your home’s future, so take the time to weigh your options thoughtfully.

– Climate and Weather Conditions

When it comes to insulating your home, understanding the climate and weather conditions in your area is paramount. Different regions experience varying temperatures, humidity levels, and even precipitation patterns, all of which can significantly impact the effectiveness of insulation materials.

For instance, if you live in a colder climate, you may want to prioritize insulation types that offer high thermal resistance, such as spray foam or fiberglass batts. These materials create a robust barrier against the frigid outdoor temperatures, helping to keep your home warm and energy-efficient during those biting winter months. In contrast, those residing in warmer, more humid environments might benefit from reflective insulation or radiant barriers that not only help keep your home cooler but also mitigate moisture issues that can lead to mold growth.

Moreover, understanding the specific weather patterns in your area can guide you in selecting the right insulation for your home. For example, regions prone to heavy rainfall may require insulation with moisture-resistant properties, while areas that experience extreme temperature fluctuations might necessitate insulation that can adapt to those changes and maintain a stable indoor climate.

Before making a decision, take into account how your home’s orientation—such as its exposure to sunlight—can influence temperature control and comfort. By aligning your insulation choices with your local climate and weather conditions, you can ensure that your home remains comfortable year-round while also optimizing energy efficiency and reducing utility costs. Choosing the right insulation not only enhances your living space but also contributes to a more sustainable future.

– Home Design and Structure

When considering insulation options for your home, it’s crucial to take into account the overall design and structure of your space. The architecture of your home plays a significant role in determining which insulation types will be most effective and efficient. For instance, a contemporary open-concept design may have different insulation needs compared to a traditional multi-story home with numerous nooks and crannies.

In modern homes, where large windows and high ceilings are common, thermal insulation must be carefully selected to manage heat loss and gain effectively. Insulation types like spray foam or rigid foam boards can be particularly useful in these scenarios, as they provide superior thermal resistance and air sealing capabilities. On the other hand, older homes with unique structural features, such as plaster walls or wood framing, may benefit more from traditional insulation materials like fiberglass batts or cellulose, which can be fitted into existing cavities without extensive renovation.

Furthermore, the climate in which your home is situated is another crucial factor tied to its design. Homes in colder regions will require insulation that offers high R-values to retain heat, while those in warmer climates may opt for reflective insulation or radiant barriers to keep spaces cool.

Additionally, think about accessibility. If your home has hard-to-reach spaces, such as crawl spaces or attics, you’ll want to select insulation that can be easily installed in those areas. For example, blown-in insulation can be ideal for attics where maneuverability is limited, providing coverage without the need for extensive physical access.

Ultimately, understanding your home’s design and structure will guide you in making informed decisions about insulation types, ensuring that you achieve the best energy efficiency and comfort while enhancing your home’s overall performance. Each choice you make will contribute to a more sustainable living environment and long-term savings on energy bills.

– Environmental Impact

When considering insulation options for your home, it’s essential to look beyond just performance and cost; the environmental impact of your choices plays a significant role in creating a sustainable living space. Insulation materials vary considerably in their ecological footprints, from their production processes to their longevity and recyclability.

For instance, traditional fiberglass insulation, while effective in thermal resistance, is derived from non-renewable resources and can pose health risks during installation. In contrast, natural insulation materials like sheep’s wool, cotton, or cellulose, made from recycled paper, are not only biodegradable but also offer excellent thermal performance while reducing energy consumption in the production process.

Additionally, some insulation options are treated with fire retardants or other chemicals that may release harmful VOCs (volatile organic compounds) into your home environment. Understanding these factors can help you choose materials that enhance indoor air quality, contributing to a healthier home.

Another consideration is the lifespan of the insulation. Many modern products come with extended warranties, indicating durability and long-term effectiveness, which can reduce waste and the need for replacement. By opting for recyclable or biodegradable insulation, homeowners can significantly lessen their environmental impact, ensuring that when it eventually reaches the end of its life, it won’t contribute to landfill overflow.

Ultimately, choosing insulation with a minimal environmental footprint not only contributes to a sustainable lifestyle but also enhances the overall energy efficiency of your home, leading to lower utility bills and a smaller carbon footprint. By prioritizing sustainability in your insulation choices, you can create a cozy, efficient home while doing your part to protect the planet.

7. Common Insulation Mistakes to Avoid

When it comes to insulating your home, even the smallest misstep can lead to significant energy loss and increased utility bills. To ensure you maximize the effectiveness of your insulation project, here are some common mistakes to avoid:

**1. Overlooking Air Leaks:** One of the most critical errors homeowners make is neglecting to seal air leaks before installing insulation. Gaps around windows, doors, and utility penetrations can drastically reduce insulation effectiveness. Always conduct a thorough inspection and use caulk or weatherstripping to seal any leaks.

**2. Choosing the Wrong Type of Insulation:** With various insulation materials available—fiberglass, foam, cellulose, and more—it’s essential to select the right type for your specific needs. Each material has its own R-value (a measure of thermal resistance) and suitability depending on the area being insulated. For example, spray foam is ideal for hard-to-reach spaces, while fiberglass batts are great for walls and attics.

**3. Ignoring R-Value Requirements:** Each part of your home has recommended R-values based on your climate zone. Failing to adhere to these guidelines can result in inadequate insulation. Be sure to research the recommended R-values for your area and assess whether your current insulation meets those standards.

**4. Installing Insulation Too Tightly:** While it might seem logical to fill every gap with insulation, compressing it too tightly can reduce its effectiveness. Insulation works best when it has room to expand and trap air. Always follow the manufacturer’s guidelines regarding installation techniques.

**5. Skipping Attic and Basement Insulation:** Many homeowners focus solely on walls and forget about attics and basements, which can be significant sources of heat loss. Properly insulating these areas can lead to drastic improvements in energy efficiency. Make sure to assess these spaces and add insulation as needed.

**6. Not Considering Moisture Control:** Insulation can trap moisture, leading to mold and mildew growth if not properly managed. Be sure to use vapor barriers in areas prone to moisture, such as basements and crawl spaces, to protect your insulation and your home.

**7. Failing to Seek Professional Help:** If insulation installation seems overwhelming, don’t hesitate to call in the experts. A professional can help you navigate your options, ensure proper installation, and even conduct an energy audit to identify problem areas in your home.

By avoiding these common insulation mistakes, you can enhance your home’s comfort, improve energy efficiency, and save money on your utility bills. A well-insulated home is not just about comfort; it’s an investment in the longevity and sustainability of your living space.

8. How to Assess Your Home’s Insulation Needs

Assessing your home’s insulation needs is a crucial step in ensuring maximum energy efficiency and comfort. It begins with a thorough evaluation of your current insulation, which can often be done with a few simple checks. Start by identifying the areas in your home that require insulation, such as the attic, walls, floors, and crawl spaces.

**Visual Inspection**: Look for visible signs of inadequate insulation. In the attic, check for low insulation levels or any gaps where insulation may be missing. If you notice uneven temperatures in different rooms or ice dams forming on your roof during winter, these are indicators that your insulation may not be performing effectively.

**Energy Audits**: Consider conducting a professional energy audit. Auditors use tools like blower door tests and thermal imaging cameras to pinpoint air leaks and areas of heat loss that might not be visible to the naked eye. This can provide a comprehensive understanding of how well your home is insulated and where improvements are necessary.

**Assessing Climate**: Take into account your local climate conditions. Homes in colder areas may require thicker insulation levels and different materials than those in warmer climates. Research the recommended R-values for insulation in your region to determine if your current setup meets or exceeds these standards.

**Energy Bills**: Review your energy bills for fluctuations that could indicate poor insulation. A sudden increase in heating or cooling costs may signal that your insulation is failing to maintain comfortable indoor temperatures.

**Consulting Professionals**: If you’re uncertain about conducting an assessment yourself, consulting insulation professionals can provide tailored insights. They can help you understand your unique needs and recommend the best insulation types and solutions that suit your home’s architecture and your budget.

By taking these steps, you can accurately assess your home’s insulation needs and make informed decisions that will enhance your home’s energy efficiency, improve comfort levels, and potentially save you money on utility bills in the long run.

9. The Role of Insulation in Energy Efficiency and Cost Savings

When it comes to creating a comfortable and cost-effective living environment, insulation plays a pivotal role in energy efficiency and long-term savings. Proper insulation acts as a barrier, preventing heat transfer between the interior of your home and the outside elements. In the winter, it keeps the warmth generated by your heating system from escaping, while in the summer, it slows down the influx of heat from the sun, allowing your air conditioning to work more efficiently.

The effectiveness of insulation is often measured by its R-value, which indicates its resistance to heat flow; the higher the R-value, the better the insulation’s performance. Different materials, including fiberglass, foam, cellulose, and mineral wool, offer varying R-values and properties, making it essential to choose the right type based on your climate, home design, and budget.

Making the investment in quality insulation can lead to significant cost savings on your energy bills. Homeowners often report reductions of 20% to 30% in heating and cooling costs after upgrading their insulation. Additionally, a well-insulated home can improve indoor comfort by maintaining consistent temperatures, reducing draftiness, and minimizing noise pollution from outside.

Choosing the right insulation involves more than just selecting a material with a high R-value. Considerations such as moisture control, installation method, and the specific areas of your home that need insulation—like attics, walls, or basements—are crucial for maximizing efficiency and savings. By understanding the role of insulation and its impact on your energy consumption, you can make informed decisions that lead to a more sustainable and cost-effective home.

10. Insulation Maintenance: Tips for Longevity

Maintaining your insulation is crucial for ensuring its longevity and effectiveness in keeping your home comfortable and energy-efficient. While insulation is designed to last for many years, neglecting its upkeep can lead to deterioration and reduced performance over time. Here are some essential tips to help you maintain your insulation and maximize its lifespan.

**1. Regular Inspections:** Schedule routine inspections of your insulation, particularly in areas prone to moisture, such as attics and basements. Look for signs of wear and tear, such as sagging, dampness, or mold growth. Catching these issues early can prevent more extensive damage.

**2. Manage Moisture Levels:** Insulation’s greatest enemy is moisture. Ensure that your home is properly ventilated to minimize humidity levels. Use dehumidifiers in damp areas, and consider installing vapor barriers in spaces like crawl spaces to keep moisture at bay.

**3. Seal Air Leaks:** Conduct a thorough check for gaps and cracks around windows, doors, and vents. Air leaks can compromise your insulation’s effectiveness, making your heating and cooling systems work harder. Use caulk or weatherstripping to seal these areas and improve your overall insulation performance.

**4. Keep it Clean:** Dust and debris can accumulate on insulation and reduce its effectiveness. If you have exposed insulation, such as in an attic, ensure it remains clean and unobstructed. Be cautious when cleaning, though; use appropriate protective gear and follow safety guidelines to avoid disturbing the insulation material.

**5. Mind the Pests:** Rodents and insects can wreak havoc on insulation. Regularly inspect your insulation for signs of pest activity. If you notice droppings or chewed materials, contact a pest control professional to address the issue promptly.

**6. Know When to Replace:** While most insulation materials have a long lifespan, they do degrade over time. If you notice significant damage, such as mold, large gaps, or compression, it may be time to replace your insulation. Consult with a professional to assess the condition and determine the best course of action.

By implementing these maintenance tips, you can help ensure that your insulation continues to perform optimally, keeping your home comfortable and your energy bills in check. Remember that a little proactive care goes a long way in preserving your investment and enhancing the overall energy efficiency of your home.

11. Innovations in Insulation Technologies

In recent years, the insulation industry has experienced a surge of innovation, leading to the development of advanced materials and technologies that enhance both energy efficiency and environmental sustainability. Modern insulation options go beyond traditional fiberglass or foam; they now include high-performance solutions designed to meet the evolving needs of homeowners.

One of the most exciting advancements is the use of aerogel, a lightweight material known for its remarkable insulating properties. Often referred to as “frozen smoke,” aerogel is made from silica and can achieve insulation values significantly higher than conventional materials, making it an excellent choice for those seeking to maximize energy efficiency in limited space, like in attics or wall cavities.

Another innovative option is spray foam insulation, which not only provides a superior R-value but also creates an airtight seal that helps prevent air leaks. This is particularly beneficial in older homes where gaps and cracks may exist, allowing for energy loss. Recent formulations have improved the sustainability of spray foam, with options that utilize renewable resources and are free from harmful chemicals, making them safer for both occupants and the environment.

Reflective or radiant barrier insulation is gaining popularity, especially in warmer climates. This technology reflects heat away from living spaces, significantly reducing cooling costs during hot months. It works effectively in attics and can be combined with other insulation types for enhanced performance.

Lastly, the rise of smart insulation systems is revolutionizing how we think about temperature regulation in our homes. These systems can adjust their properties based on external temperatures, providing optimal insulation when it’s needed most. Coupled with smart home technology, these solutions allow homeowners to monitor and control their energy consumption in real time.

As you explore insulation options for your home, consider these cutting-edge technologies. They not only promise improved comfort and lower energy bills but also reflect a growing commitment to sustainability in building practices. By choosing innovative insulation solutions, you can enhance your home’s energy efficiency while contributing to a greener future.

12. Real-Life Case Studies: Successful Insulation Upgrades

When it comes to understanding the true impact of insulation upgrades, nothing speaks louder than real-life case studies. These narratives provide tangible insights into the effectiveness of various insulation materials and techniques, revealing how homeowners have transformed their living spaces while significantly enhancing energy efficiency.

Take, for instance, the Johnson family, who opted for spray foam insulation in their older, drafty home. Living in a climate with harsh winters and sweltering summers, they found their utility bills skyrocketing. After conducting thorough research, they decided to invest in spray foam, which not only sealed gaps and cracks but also provided superior thermal resistance. The result? A remarkable 30% reduction in their energy costs within the first year, along with a noticeable improvement in the comfort level of their home.

Another compelling story comes from the Martinez household, who chose to upgrade their attic insulation with fiberglass batts. Initially hesitant due to budget constraints, they were pleasantly surprised to find that this relatively affordable option yielded significant results. Not only did they experience a more consistent indoor temperature, but the improved insulation also reduced noise from outside, creating a serene environment for their family. Within just a few months, the Martinez family began to notice a significant decrease in heating and cooling expenses, affirming that even small changes can make a big difference.

These case studies illustrate not just the direct benefits of insulation upgrades, but also the broader impact on home comfort and energy efficiency. By examining the experiences of others, homeowners can make informed decisions about which insulation options might work best for their unique situations, ultimately paving the way for a more sustainable and cost-effective living environment. Whether you’re considering foam, fiberglass, cellulose, or another material, these real-world examples serve as a valuable resource in your insulation journey, providing inspiration and guidance as you work to create a more energy-efficient home.

13. Financial Incentives and Rebates for Insulation Improvements

When considering insulation upgrades for your home, it’s essential to explore the financial incentives and rebates that can significantly reduce your overall costs. Many homeowners are surprised to learn that various local, state, and federal programs exist to promote energy efficiency, and taking advantage of these financial incentives can make a substantial difference in your renovation budget.

Tax credits, for example, may be available for specific types of insulation materials, such as spray foam or cellulose, which are known for their superior energy-saving capabilities. These credits can offset a portion of the installation costs, allowing you to recoup some of your investment come tax season. Additionally, some utility companies offer rebates for homeowners who enhance their insulation, particularly if it leads to reduced energy consumption. These rebates can vary widely, so it’s worth researching what programs are available in your area.

Furthermore, energy efficiency programs often provide free or discounted energy audits, allowing you to assess your home’s insulation needs more accurately. These assessments can identify areas where heat loss is most significant, guiding you toward the most effective insulation solutions while also qualifying you for potential rebates.

Before embarking on your insulation project, take the time to investigate these financial incentives. Check with your local government’s energy office, utility providers, and even the IRS to uncover what rebates or credits you might be eligible for. By leveraging these opportunities, you can not only insulate your home effectively but also save money in the process, making your investment in comfort and efficiency more manageable and rewarding.

14. Conclusion: Making an Informed Decision for Your Home

In conclusion, selecting the right insulation for your home is a crucial step in ensuring energy efficiency, comfort, and long-term sustainability. With a variety of insulation types available—each offering distinct advantages and varying levels of effectiveness—it’s essential to consider your specific needs, local climate, and budget.

As we’ve explored throughout this guide, options such as fiberglass, foam, cellulose, and mineral wool come with their own unique properties and installation requirements. Take into account factors like R-value, moisture resistance, and soundproofing capabilities when making your choice.

Moreover, don’t overlook the importance of professional advice. Consulting with insulation experts can provide valuable insights tailored to your home’s design and your personal preferences. They can assess your space, recommend the most effective materials, and ensure proper installation, which is vital for maximizing the benefits of your insulation.

Ultimately, the goal is to create a comfortable living environment while minimizing energy costs and reducing your carbon footprint. By being informed and proactive in your decision-making process, you can enhance your home’s energy efficiency and create a space that is not only more comfortable but also more sustainable for years to come. Take the time to research, ask questions, and weigh your options—your home deserves the best insulation possible.

15. Resources for Further Learning and Assistance

When it comes to making informed decisions about insulation options for your home, having access to reliable resources is crucial. Fortunately, there’s a wealth of information available that can guide you through the intricacies of insulation types, their effectiveness, and how to select the right fit for your specific needs.

**1. Government Websites:** Many government agencies, such as the U.S. Department of Energy (DOE) and the Environmental Protection Agency (EPA), provide extensive resources on energy efficiency, including insulation. Their websites often feature guides on the benefits of various insulation materials, tips on improving your home’s energy performance, and information on local incentives or rebates for insulation upgrades.

**2. Professional Associations:** Organizations like the Insulation Contractors Association of America (ICAA) and the North American Insulation Manufacturers Association (NAIMA) offer valuable insights into best practices for insulation installation and maintenance. These associations often publish technical documents, case studies, and research findings that can deepen your understanding of insulation effectiveness and safety measures.

**3. Home Improvement Blogs and Websites:** Numerous blogs and websites focus on home improvement topics, including insulation. Trusted sources like This Old House or HomeAdvisor frequently publish articles that break down complex concepts into digestible information, complete with tips, cost comparisons, and DIY guides.

**4. Local Home Improvement Stores:** Many local hardware and home improvement stores have knowledgeable staff who can assist you in understanding your insulation options. They often host workshops or provide informational brochures that cover the different types of insulation available and their suitability for various climates and home styles.

**5. Online Forums and Community Groups:** Engaging with online communities, such as Reddit’s home improvement subreddit or dedicated Facebook groups, can provide firsthand experiences and recommendations from homeowners who have gone through similar processes. These platforms can be particularly helpful for asking specific questions and getting feedback on particular products or installation methods.

**6. Professional Consultations:** If you’re feeling overwhelmed or uncertain, consider reaching out to a local insulation contractor for a consultation. They can assess your home’s current insulation, offer tailored recommendations, and provide insights into the latest insulation technologies that might be perfect for your home.

By leveraging these resources, you can equip yourself with the knowledge necessary to make informed decisions about insulation, ensuring your home remains comfortable, energy-efficient, and well-protected against the elements. Whether you’re a DIY enthusiast or prefer to leave it to the professionals, the right information can make all the difference in your insulation journey.

In conclusion, choosing the right insulation for your home is a crucial step toward enhancing energy efficiency, comfort, and sustainability. We’ve explored various insulation options, each with its unique benefits, effectiveness, and suitability for different climates and building structures. By understanding the types of insulation available and assessing your specific needs, you can make informed decisions that not only improve your home’s thermal performance but also contribute to significant cost savings over time. As you embark on this journey to insulate your home, remember to consider factors such as R-value, installation methods, and environmental impact. With the right insulation, you can create a cozy, energy-efficient sanctuary that stands the test of time. Happy insulating!

How to install a ceiling fan?

Installing a ceiling fan can seem like a daunting task, but with the right guidance, you can transform your living space while enhancing comfort and style.

Imagine breezy days and cozy evenings, all while adding that perfect touch to your home’s decor. This step-by-step guide is designed to empower you with the knowledge and confidence needed to install your ceiling fan like a pro. From selecting the ideal fan for your space to understanding the necessary tools and safety precautions, we’ll walk you through every aspect of the installation process. Whether you’re looking to improve energy efficiency or simply want to create a more inviting atmosphere, this article will equip you with all the tips and tricks to ensure a smooth and successful installation. Get ready to elevate your home with the cool comfort of a ceiling fan!

1. Introduction: Why Install a Ceiling Fan?

How to install a ceiling fan?
Credit : whatcanu.com

Ceiling fans are more than just stylish accents in a room; they serve a multitude of practical benefits that can transform your living space. With the rising costs of energy and a growing emphasis on sustainability, ceiling fans offer an efficient way to maintain comfort in your home without over-relying on air conditioning. They circulate air effectively, helping to create a gentle breeze that can make warm summer days feel cooler and refreshing. In the colder months, reversing the fan’s direction can help distribute warm air that rises to the ceiling, allowing you to save on heating costs.

Moreover, ceiling fans come in various designs, colors, and styles, making them an excellent way to enhance your home’s decor. Whether your aesthetic leans towards modern minimalism, rustic charm, or classic elegance, there’s a ceiling fan that can complement your space beautifully.

Installing a ceiling fan is a highly rewarding DIY project that not only elevates your home’s comfort level but also adds value to your property. With just a few tools and a bit of time, you can achieve professional-looking results that will impress your family and friends. In this guide, we’ll walk you through the step-by-step process of installing your ceiling fan like a pro, ensuring you enjoy all the benefits without the hassle. So, let’s dive in and get started on this exciting home improvement journey!

2. Tools and Materials Needed for Installation

Before diving into your ceiling fan installation, gathering the necessary tools and materials is crucial for a smooth and efficient process. Having everything on hand will minimize interruptions and ensure you can complete the job like a pro.

**Tools Needed:**

1. **Screwdrivers:** A Phillips head and a flathead screwdriver are essential for tightening screws and securing the fan to the mounting bracket.
2. **Drill:** An electric drill will make the process of installing the mounting bracket and securing the wires much easier. Make sure to have the appropriate drill bits for your ceiling type.
3. **Wire Strippers:** These handy tools are necessary for stripping the insulation off the ends of the electrical wires, allowing for a secure connection.
4. **Ladder:** A sturdy ladder will provide the height you need to reach the ceiling safely while installing your fan. Make sure it’s stable and tall enough for the height of your ceiling.
5. **Voltage Tester:** This essential tool helps ensure that the power is off before you begin working with any electrical connections, keeping you safe throughout the installation.

**Materials Needed:**

1. **Ceiling Fan Kit:** Ensure your fan comes with all the necessary components, including blades, light kit (if applicable), mounting bracket, and instructional manual. Check that your fan is compatible with your ceiling height and style.
2. **Electrical Wire:** Depending on your specific installation, you may need additional wire to connect the fan to the existing electrical box. Make sure to use wire that meets local electrical codes.
3. **Mounting Bracket:** Often included with the fan, this bracket is crucial for securely attaching the fan to the ceiling. If your fan doesn’t come with one, ensure you purchase a compatible model.
4. **Wire Nuts:** These small connectors are used to secure the electrical connections. They help keep your wiring safe and tidy, preventing any potential hazards.

By gathering these tools and materials ahead of time, you’ll set yourself up for success as you embark on your ceiling fan installation journey. With everything in place, you can proceed with confidence, transforming your space into a cool, breezy haven!

3. Safety First: Preparing for Your Installation

How to install a ceiling fan?
Credit : whatcanu.com

Before diving into the installation of your ceiling fan, it’s crucial to prioritize safety. This step is not just a precaution—it’s an essential part of ensuring a smooth and secure installation process. Here’s how to prepare for your ceiling fan installation like a pro.

First and foremost, turn off the power to the existing light fixture or ceiling outlet from which you’ll be installing the fan. Locate your circuit breaker and switch off the appropriate circuit to eliminate any risk of electric shock. It’s always better to be safe than sorry, so double-check that the power is indeed off by testing the fixture with a voltage tester.

Next, gather all necessary tools and materials. You’ll typically need a ladder to reach the ceiling, a screwdriver, wire connectors, electrical tape, and possibly a drill, depending on the installation requirements. Having everything at hand will prevent you from making unnecessary trips, keeping the momentum flowing.

If you’re replacing an existing light fixture, take a moment to carefully remove it. Be sure to support the fixture as you unscrew it, and gently lower it to avoid any damage. As you do this, take note of how the wires are connected; this will serve as a handy reference when you connect your new fan.

Inspect the ceiling box to ensure it is fan-rated, meaning it can support the weight and movement of the fan. If it’s not, you’ll need to replace it with a box specifically designed to hold ceiling fans. This is a critical step, as an inadequate support system can lead to safety hazards down the line.

Lastly, don’t forget to wear appropriate safety gear. Safety goggles will protect your eyes from dust and debris, while a dust mask can help you avoid inhaling any particles. With these preparations complete, you’re ready to move on to the installation phase—confident, safe, and fully equipped. Remember, taking the time to prepare properly will make the entire process smoother and ensure that your new ceiling fan can be enjoyed for years to come!

4. Choosing the Right Location for Your Ceiling Fan

Choosing the right location for your ceiling fan is crucial to maximizing its effectiveness and ensuring it enhances your space aesthetically. Start by considering the room’s layout and purpose. A ceiling fan is most effective when positioned in the center of the room, allowing for optimal airflow and cooling. Measure the dimensions of the room and the height of the ceiling to determine the appropriate size and type of fan you need.

Next, take note of any obstructions that could interfere with the fan’s operation, such as light fixtures, beams, or low-hanging furniture. Ideally, the bottom of the fan blades should be at least 7 feet above the floor to ensure safety and comfort while still allowing for efficient air circulation. If your ceilings are particularly high, you may need a longer downrod to achieve the perfect height.

Additionally, consider the fan’s direction. Most fans have a switch that allows you to reverse the blade rotation. In warmer months, a counterclockwise rotation creates a cooling breeze, while in winter, a clockwise rotation pushes warm air down, making your space feel cozy and inviting.

Lastly, think about the fan’s aesthetic appeal. Choose a style and finish that complements your existing décor and fits seamlessly into the room. Whether you prefer a sleek modern design or a rustic farmhouse vibe, the right ceiling fan can serve as both a functional appliance and a stunning focal point in your space. By carefully selecting the perfect location, you’ll not only enhance the comfort of your room but also elevate its overall charm.

5. Removing Your Old Light Fixture or Ceiling Fan

How to install a ceiling fan?
Credit : whatcanu.com

Before you can install your new ceiling fan and bask in the refreshing breeze it provides, you’ll need to safely remove the old light fixture or ceiling fan that’s currently in place. This step is crucial and requires your full attention to ensure both your safety and the integrity of your electrical system.

Start by turning off the power to the light fixture or fan at the circuit breaker. This not only protects you from potential electric shocks but also prevents any damage to your tools or the new fan during installation. Once the power is off, use a voltage tester to double-check that the wires are indeed not live.

Next, it’s time to remove the fixture. If you’re dealing with a light fixture, gently unscrew any decorative elements or shades to access the mounting screws. For a ceiling fan, you may need to remove the blades first. Most blades can be detached with a simple screwdriver; just be sure to place them safely aside to avoid any unnecessary accidents.

With the blades removed (if applicable), locate the mounting bracket or canopy. This is typically secured to the ceiling with screws. Carefully unscrew the bracket, and let the fixture hang down. You’ll see the wiring that connects your fixture to the electrical box. Before disconnecting any wires, take a moment to note how they are connected—taking a photo can be especially helpful for reference later.

Once you have the connections documented, carefully disconnect the wires. Most fixtures will have a standard color-coding system: black (hot), white (neutral), and green or bare copper (ground). Use wire nuts to secure the ends of each wire once they’re detached to prevent any accidental contact.

As you lower the old fixture down, keep an eye out for any loose parts or screws that might drop. With everything safely removed, take a moment to clean the area around the electrical box to prepare for your new ceiling fan installation.

Remember, if at any point you feel unsure or uncomfortable, don’t hesitate to contact a professional electrician. Safety should always be your top priority as you embark on this home improvement project!

6. Understanding Ceiling Fan Wiring Basics

Before diving into the installation process, it’s crucial to understand the basics of ceiling fan wiring. Knowledge of wiring not only empowers you to tackle the installation with confidence but also ensures safety throughout the project.

First, familiarize yourself with the primary components involved in the wiring of a ceiling fan. Most ceiling fans come with three key wires: the black wire (or sometimes red), which connects to the power supply; the white wire, which is the neutral wire; and the green or bare copper wire, which serves as the ground wire. Understanding these wires will help you make the right connections.

Next, turn off the power at the circuit breaker to avoid any electrical hazards. Use a voltage tester to double-check that there is no electricity flowing to the wires you’ll be working with. Safety should always be your number one priority!

If you are replacing an existing light fixture with a ceiling fan, you may find that the previous installation has different color wires or configurations. Take a moment to document the existing connections before removing the fixture. This will serve as a reference for reconnecting the new fan.

For new installations, ensure that the electrical box in the ceiling is fan-rated and capable of supporting the weight and motion of the fan. If you’re unsure, consult a professional or check local building codes.

Once you’re clear on the wiring system, you can start connecting the fan. Typically, the black wire from the ceiling connects to the black fan wire, and the white wire connects to the white fan wire. The green or bare wire from the ceiling should be attached to the ground wire of the fan. Secure all connections with wire nuts, and for extra safety, wrap them with electrical tape.

In summary, understanding ceiling fan wiring basics not only prepares you for a successful installation but also ensures your ceiling fan operates safely and efficiently. With this foundational knowledge, you’re one step closer to enjoying the cool breeze from your newly installed fan!

7. Installing the Ceiling Fan Mounting Bracket

How to install a ceiling fan?
Credit : whatcanu.com

Once you have ensured that the power is turned off and have gathered all your tools, it’s time to move on to the crucial step of installing the ceiling fan mounting bracket. This bracket is the unsung hero of your ceiling fan, providing the sturdy foundation needed for your fan to operate safely and efficiently.

Start by locating the electrical box in the ceiling, which is where your fan will eventually be mounted. Before proceeding, double-check that the box is rated for ceiling fan use—this is essential, as standard light fixture boxes may not be strong enough to support the weight and movement of a ceiling fan. If the box is not suitable, you’ll need to replace it with a fan-rated box.

Once you’ve confirmed the box’s compatibility, line up your mounting bracket with the holes in the electrical box. Most mounting brackets come with a variety of holes to accommodate different box types, so ensure you choose the right configuration. Using the provided screws, secure the bracket firmly to the box, making sure it is level and tight to prevent any wobbling or movement once the fan is installed.

After securing the bracket, take a moment to inspect it. A properly installed mounting bracket should feel solid and unyielding. If there is any play or looseness, recheck your screws and ensure everything is tightened correctly. This step is critical as it not only affects the fan’s performance but also ensures safety for everyone in the room.

With the mounting bracket firmly in place, you are now ready for the exciting part—attaching your new ceiling fan! Take a moment to appreciate your work so far; you’re one step closer to enjoying a refreshing breeze in your space!

8. Connecting the Wires: Step-by-Step Instructions

Connecting the wires of your ceiling fan may seem daunting, but with a little guidance, you can do it like a pro. This step is crucial, as it ensures that your fan will operate safely and efficiently. Here’s a detailed breakdown of how to make those electrical connections confidently.

**Step 1: Safety First**
Before you begin, ensure your safety by turning off the power at the circuit breaker. This will prevent any accidental shocks while you’re working. Use a voltage tester to confirm that the power is indeed off at the ceiling fan box.

**Step 2: Identify the Wires**
In most ceiling fan installations, you will encounter several wires: black (or red), white, and green (or bare). The black wire is typically for the fan motor, the white is for the neutral connection, and the green or bare wire is the ground. If your ceiling fan has additional wires for lights, they may be color-coded differently, so refer to the fan’s manual for clarity.

**Step 3: Making the Connections**
1. **Connect the Ground Wire**: Start by twisting the green or bare ground wire from the ceiling with the ground wire from the fan. Secure them together with a wire nut, ensuring that no copper is exposed.

2. **Connect the Neutral Wires**: Next, take the white wire from the ceiling and connect it to the white wire from the fan. Again, twist them together and secure with a wire nut.

3. **Connect the Hot Wires**: Now, it’s time to connect the hot wires. If your fan has a light kit, you may have more than one black wire. Generally, connect the black wire from the ceiling to the black wire from the fan. If there’s a separate wire for the light, connect it to the blue wire (if present) from the fan.

**Step 4: Secure All Connections**
After making all your connections, ensure that each wire nut is tight and that no bare wire is showing. Use electrical tape to wrap around the wire nuts for added security.

**Step 5: Tuck Wires Neatly**
Gently tuck all the wires back into the ceiling box. This will help prevent any pinching when you mount the fan.

**Step 6: Final Check**
Before you proceed to mount the fan, double-check all connections to ensure that everything is secure. Once satisfied, you can proceed to attach the fan to the mounting bracket, following the manufacturer’s instructions.

By following these step-by-step instructions, you’ll have successfully connected the wires for your ceiling fan. With everything in place, you’re now ready to restore power and enjoy the cool breeze your new fan provides!

9. Attaching the Fan Blades and Light Kit

Once your ceiling fan is securely mounted and the electrical connections are in place, it’s time to add the finishing touches: attaching the fan blades and light kit. This step is crucial in ensuring both functionality and aesthetics, as they significantly influence the overall look and performance of your fan.

Start by carefully unpacking the fan blades and checking for any damage. Most ceiling fans come with a set of blades that may vary in design and color, so take a moment to choose the configuration that best suits your space. Lay them out in the order they will be attached, as many fans require a specific sequence to ensure balance — this is particularly important for larger models.

Using the screws provided, attach each blade to the mounting brackets on the fan’s motor assembly. It’s best to loosely secure each blade first before fully tightening them down. This allows for slight adjustments, ensuring that all blades are aligned correctly and will spin smoothly. Once you’re satisfied with their positioning, go ahead and tighten the screws securely, but be cautious not to overtighten, as this could damage the blades.

Next, move on to the light kit. If your ceiling fan includes a light fixture, this is the moment to enhance your space with some illumination. Refer to the manufacturer’s instructions for specific wiring details, as they can vary between models. Typically, you will need to connect the light kit wires to the fan’s wires using wire connectors, ensuring that the colors match: black to black (or blue), white to white, and ground to ground.

Once the wiring is complete, attach the light kit to the fan, making sure it’s securely fastened. This step often involves aligning it with the mounting bracket and tightening screws. Finally, install the light bulbs, and if your fan has a glass shade, carefully attach it to complete the look.

With the fan blades and light kit securely attached, step back and admire your work! You’ve not only enhanced your room’s ambiance but also ensured that your ceiling fan is ready to provide comfort and style for years to come.

10. Securing the Ceiling Fan and Testing Stability

Once you’ve assembled the fan and ensured that all the wiring is properly connected, it’s time to secure the ceiling fan to its mounting bracket. This step is crucial for both safety and functionality, so take your time and do it right.

Begin by carefully lifting the fan into place, aligning it with the mounting bracket that you installed earlier. Most ceiling fans come with screws specifically designed for this purpose—typically, these are provided in the same packet as the fan’s assembly instructions. Using your screwdriver, carefully secure the fan by tightening these screws until they are snug. It’s important not to overtighten, as this can lead to damage or misalignment.

After securing the fan, give it a gentle shake to test its stability. It should feel firmly attached, with no wobbling or movement. If you notice any instability, double-check that all screws are tightened properly and that the mounting bracket is securely anchored in the ceiling. For added peace of mind, it’s a good idea to check that the fan blades are level and evenly spaced, as an unbalanced fan can lead to noise and reduced efficiency.

Once you’re satisfied with the installation, it’s time to test the fan. Turn the power back on at the circuit breaker, and use the remote control or wall switch to power up the fan. Observe its operation carefully: listen for any unusual noises and monitor its movement. A well-installed ceiling fan should run smoothly and quietly.

If everything checks out, congratulations! You’ve successfully installed your ceiling fan like a pro. Enjoy the comfort of your new ceiling fan, and take a moment to appreciate the satisfaction of your DIY accomplishment!

11. Installing the Remote Control or Wall Switch

Installing the remote control or wall switch for your ceiling fan is a crucial step that can significantly enhance your user experience, providing the convenience of controlling your fan from the comfort of your couch or bed. There are two primary options for controlling your ceiling fan: a handheld remote control or a wall-mounted switch, each offering unique benefits.

### Installing the Remote Control

If you’ve chosen to go with a remote control, start by ensuring you have the necessary batteries for the remote itself. Most remotes require AA or AAA batteries, which are usually included in the package. Next, locate the receiver, a small device that connects to your fan’s wiring. It’s typically found in the canopy of the fan, where it connects directly to the fan’s motor and power supply.

Begin by carefully following the manufacturer’s instructions to wire the receiver. This usually involves connecting the wires from the receiver to the corresponding wires from the ceiling fan – typically black to black (power), white to white (neutral), and green or bare to green or bare (ground). Once wired, secure the receiver within the fan canopy. Ensure that the wires are neatly tucked away to avoid any obstructions when mounting the fan.

After securing everything, attach the canopy back to the ceiling and install the batteries in the remote. Test the remote to make sure it’s communicating with the fan—turning it on and off, adjusting speeds, and controlling the light (if applicable) should all function seamlessly.

### Installing the Wall Switch

If you prefer a wall switch, start by turning off the power at the circuit breaker to ensure safety. You’ll need to replace your existing switch with a compatible fan switch, which may have additional functionalities like speed control or light dimming. Carefully remove the old switch from the wall box and disconnect the wiring.

Connect the new wall switch following the manufacturer’s wiring diagram. Generally, this involves connecting the hot wire to the switch and the ground wire to the grounding screw. Once wired, secure the switch back into the wall box and attach the cover plate.

Turn the power back on at the circuit breaker and test your new wall switch. Make sure it effectively controls the fan’s operation and any integrated lighting features.

### Final Touches

Whether you opted for a remote control or wall switch, ensure that all components are securely installed and functioning correctly. This step not only enhances your ceiling fan’s usability but also adds a polished, professional touch to your installation. A well-installed remote or switch means you can easily adjust your ceiling fan’s settings without hassle, allowing you to enjoy your newly installed fan to its fullest potential!

12. Final Touches: Balancing the Fan Blades

Once you’ve successfully installed your ceiling fan and it’s ready to spin, it’s time for the final touch: balancing the fan blades. This step is crucial, as an unbalanced fan can lead to wobbling, excessive noise, and even potential damage over time. Fortunately, balancing your fan is a straightforward process that can enhance its performance and longevity.

Start by turning on the fan and observing its movement. If you notice any wobbling or irregular motion, it’s a sign that the blades may need adjustment. Begin by checking the blade screws to ensure they are all tight. Loose screws can cause the blades to sag or flutter, leading to an imbalance.

Next, you’ll want to use a blade balancing kit, which usually includes a few adhesive weights and instructions. Most kits come with small clips that you can temporarily attach to the blades to determine where the imbalance lies. Begin by attaching one weight to the center of one blade, then turn the fan on again to see if the wobbling persists. If it does, try moving the weight along the blade or adding additional weights until the fan runs smoothly.

Remember to repeat this process for each blade, ensuring that they are all equally balanced. Once you’ve achieved a wobble-free spin, remove any temporary weights and secure the final balancing weights in place with their adhesive backing.

Finally, take a step back and admire your handiwork! With the fan balanced and running smoothly, you can enjoy the cool airflow it provides without the distraction of annoying noises or unsteady movement. This final touch not only enhances your fan’s performance but also ensures a peaceful atmosphere in your home. Congratulations! You’ve successfully installed your ceiling fan like a pro!

13. Troubleshooting Common Installation Issues

Installing a ceiling fan can feel like a straightforward task, but even the most seasoned DIYers sometimes encounter unexpected hiccups along the way. Whether you’re a first-timer or a seasoned pro, it’s essential to know how to troubleshoot common installation issues to ensure your ceiling fan operates safely and efficiently.

One of the most frequent problems arises when your fan wobbles or shakes during operation. This can often be attributed to uneven blade installation or loose screws. To remedy this, turn off the power, carefully check each blade for proper alignment, and tighten any loose screws. If the wobbling persists, consider using a blade balancing kit, which usually includes small weights to attach to the blades for balance.

Another issue might involve the fan not turning on at all. Start by checking your circuit breaker to ensure power is flowing to the fixture. If the breaker is fine, inspect your wiring connections within the fan and switch box. It’s vital that all wires are securely connected and that the power supply is correctly configured. If you’re still having trouble, a quick check of the pull chain (if applicable) can help; sometimes, it may not be set to the “on” position.

You may also encounter issues with the fan’s remote control if your model includes one. If the remote isn’t functioning as expected, check the batteries first, as dead batteries are a common culprit. If the remote still fails to work, ensure that the receiver unit inside the fan is properly connected. Sometimes a simple reset of the remote can do the trick, so refer to your user manual for specific instructions on resetting the device.

Lastly, if your fan is running but producing an unpleasant noise—like grinding or clicking—this could indicate that the motor or blades are misaligned. Make sure all components are securely fastened, and check for any debris that might be obstructing the fan’s movement.

By familiarizing yourself with these common installation issues and their solutions, you’ll not only boost your confidence in installing ceiling fans but also enhance your overall DIY skills. With a little patience and persistence, you can troubleshoot any problems that arise, ensuring your ceiling fan operates smoothly and effectively for years to come. Happy installing!

14. Maintenance Tips for Your Ceiling Fan

Maintaining your ceiling fan is essential to ensure it operates efficiently and prolongs its lifespan. Regular upkeep not only helps you enjoy a comfortable environment but also keeps your energy bills in check. Here are some practical maintenance tips to keep your ceiling fan running smoothly for years to come.

First and foremost, dusting your fan blades should be a regular part of your cleaning routine. Dust and grime can accumulate quickly, especially if your fan is used frequently. Use a microfiber cloth or an extendable duster to gently wipe the blades, ensuring you reach the hidden corners. For a deeper clean, a mixture of mild soap and water can be applied to a cloth, followed by a thorough drying to prevent moisture damage.

Next, check the balance of your fan. An unbalanced fan can lead to wobbling, noise, and even potential damage over time. To balance your fan, you can use a simple balance kit, which typically includes weights to attach to the blades. Make adjustments as needed, and your fan will operate smoothly once again.

Don’t forget to inspect the fan’s motor and pull chain. Over time, the motor can accumulate dust, leading to overheating. Carefully vacuum the motor housing, ensuring that you don’t disturb any wiring. Also, check if the pull chain is functioning correctly. If it feels loose or is stuck, it might need a little lubrication or adjustment.

Finally, consider the seasonality of your fan use. Many ceiling fans come with a switch that allows you to change the direction of blade rotation. In the summer, set your fan to spin counterclockwise to create a cool breeze, while in the winter, switch it to clockwise to circulate warm air. This simple adjustment can significantly enhance your comfort and help you save on heating and cooling costs.

By following these maintenance tips, you’ll not only keep your ceiling fan in peak condition but also enhance its performance, ensuring that your home remains a comfortable haven all year round. Regular care will go a long way in making your ceiling fan a reliable companion in your quest for the perfect indoor climate.

15. Conclusion: Enjoying Your New Ceiling Fan!

Congratulations! You’ve successfully installed your ceiling fan, and now it’s time to enjoy the fruits of your labor. A well-placed ceiling fan not only enhances the aesthetic appeal of your space but also provides a refreshing breeze, improves air circulation, and can even help reduce your energy bills. As you step back and admire your handiwork, take a moment to appreciate the way your new fan complements your room’s decor, whether it’s a sleek modern design or a rustic farmhouse style.

Before you flip the switch, ensure your fan is operating smoothly. Check the settings and make necessary adjustments to the speed and direction of the blades—the reversible motor option allows you to tailor airflow to your preferences, whether you want a cool breeze in the summer or warm air circulation in the winter.

Once everything is set, sit back and relish in the comfort your new ceiling fan brings. Perhaps you’ll enjoy a cozy evening reading a book under its gentle glow, or gather with friends for lively conversations in the cool breeze it creates. Don’t forget to take a moment to marvel at how your DIY skills have transformed your living space!

As you bask in the satisfaction of your accomplishment, remember to maintain your fan regularly. Dust the blades, check for any loose screws, and ensure it runs efficiently for years to come. With your ceiling fan installed like a pro, the perfect blend of style and comfort is now just a switch away. Enjoy your new ceiling fan and all the delightful breezes it will bring!

In conclusion, we hope our step-by-step guide has empowered you to tackle the installation of your ceiling fan with confidence and ease. Whether you’re updating your home’s aesthetic, improving air circulation, or simply seeking a more energy-efficient solution, installing a ceiling fan can be a rewarding DIY project. By following the detailed instructions and tips shared in this post, you can transform your space while saving on installation costs. Remember to take your time, double-check your work, and enjoy the satisfaction of completing the task yourself. Now, go ahead and enjoy the refreshing breeze of your new ceiling fan, and don’t hesitate to share your installation success stories with us! Happy DIY-ing!

Can you install sunroof to a car ?

A sunroof is a great way to add some natural light and fresh air to your car. But can you install a sunroof on an existing car ?

Installing a sunroof to a car can be a great way to add a touch of luxury to your vehicle. This roof panel that can be opened to let in natural light and fresh air, giving you a more open and airy driving experience.

sunroof
Credit : Patrick

However, not all cars come with a sunroof factory-installed. The good news is that you can have it installed aftermarket.

“Aftermarket sunroof installation” is the process of having a sunroof installed in a car that did not come with one from the factory. This can be done by a professional auto shop that specializes in such installation.

Choose the type you want

Before you get your sunroof installed, there are a few things to consider. First, you’ll need to decide on the type you want. There are several types of sunroofs, including pop-up sunroofs, sliding sunroofs, and even a panoramic sunroofs.

Pop-up sunroofs are the most basic type, they can be opened and closed manually by a lever or button. A sliding sunroof is a more advanced version of pop-up sunroofs, they can be opened and closed by a motor. Panoramic sunroofs are the most advanced type, which allows you to enjoy the open-air experience like never before.

Another thing to consider is the size of the sunroof. make sure to choose the size that best fits your car and your personal preferences. A smaller one will be less expensive to install, but it might not provide as much light or fresh air as a larger one.

Select the right shop

Once you’ve decided on the type and size of sunroof you want, you can begin looking for a reputable auto shop to install it. Be sure to check for customer reviews and ask for references.

The installation process typically takes a few hours, and the cost will depend on the type and size of sunroof you choose, as well as the cost of labor at the auto shop you choose.

In conclusion, a sunroof can be a great addition to your car, and it is possible to have one installed aftermarket. It’s important to consider the type, size, and cost before moving forward with the installation. It is always best to do your research and find a reputable auto shop for professional installation. Finally, enjoy the sunlight in your car !