
Mastering Kitchen Island Design: Efficiency and Aesthetics

A kitchen island is an architectural tool, not just a decorative piece. If it does not streamline your workflow, it is merely an obstacle in the middle of your kitchen. To build an island that is both high-functioning and visually coherent, you must prioritize the ergonomics of the workspace over superficial design trends.
Strategic Planning and Spatial Ergonomics
Before selecting materials, you must master the layout. The most common error is ignoring the ‘work triangle’—the path between your stove, sink, and refrigerator. Your island should support, not disrupt, this flow.
- Clearance Zones: Maintain at least 42 inches of walkway around the island. Think of this like an aisle in a busy restaurant kitchen; if you have less, two people cannot pass each other comfortably.
- Floor Mapping: Use painter’s tape to mark the footprint on your floor. Live with it for three days. Walk around it while carrying laundry or groceries to ensure the dimensions feel natural.
- Task Zoning: Determine the primary purpose. Is it for heavy prep (requiring a butcher block or durable stone) or social seating? A dual-purpose island requires a multi-level surface to separate the messy prep zone from the clean dining area.
Technical Requirements for Utility
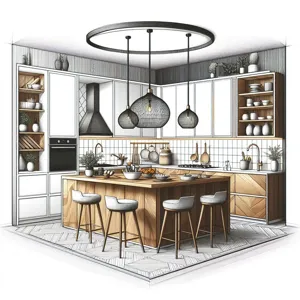
A stylish island is useless if it lacks the power to support your culinary tasks. Integrate technical essentials early in the framing stage.
- Electrical Integration: You need at least two GFI-protected outlets for appliances like mixers or blenders. Install these on the ends or recessed into the cabinetry for a clean look.
- Plumbing Logistics: Moving a sink to an island is expensive and requires precise drainage slope calculations. If you choose this, ensure your island is large enough to house the plumbing stack and still leave room for storage.
- Ventilation: If your stove is on the island, a downdraft vent is mandatory. It works like a vacuum, pulling smoke and grease down before they disperse into your living space.
Selecting Durable Materials
Your countertop choice dictates your maintenance routine. Do not select materials based solely on appearance.
- Quartz: The gold standard for busy kitchens. It is non-porous, meaning it does not stain like natural marble, and it does not require sealing.
- Butcher Block: An excellent prep surface that is gentle on knife blades. Treat it like a large cutting board; it requires regular oiling to prevent cracking and bacteria buildup.
- Concrete: Offers a modern aesthetic but is prone to hairline cracks and staining. It is a high-maintenance choice that requires professional-grade sealant every six months.
Storage Architecture
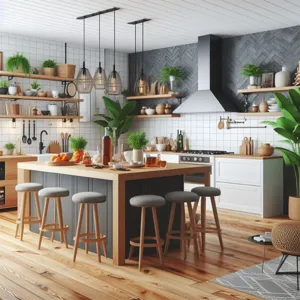
The interior of your island should be organized by frequency of use. Use the ‘prime real estate’ logic: items you use daily must be at waist level.
- Deep Drawers: Forget standard lower cabinets with doors. They force you to kneel and hunt. Use wide, deep drawers with full-extension glides to store pots and pans.
- Vertical Dividers: Dedicate a slim cabinet section for baking sheets and cutting boards. Storing them vertically is like filing papers in a cabinet; it stops the ‘avalanche effect’ when you reach for one item.
- Pull-Out Trash/Recycling: Integrate this near the prep area. It hides odors and keeps the kitchen floor clear of loose bins.
Lighting for Functionality
Lighting is the most ignored element of island design. Relying on general ceiling lights creates shadows exactly where you are working.
- Pendant Positioning: Hang pendants 30 to 36 inches above the countertop. This height ensures the light hits the work surface, not your eyes.
- Layering: Pair overhead pendants with under-counter LED strips. This creates depth and highlights the island structure during evening hours.
- Dimmer Switches: Install dimmers on all island lights. You need bright task lighting for cooking but soft, warm light for entertaining.
Field Lessons and Common Mistakes

Avoid these recurring pitfalls to ensure your investment pays off.
- The ‘Island Creep’: Avoid making the island so large that you cannot reach the center for cleaning. If your island exceeds 4 feet in width, you will struggle to wipe the middle without climbing on it.
- Seating Clutter: Do not crowd bar stools. Leave 24 to 30 inches of space per person so diners don’t bump elbows.
- Ignoring Baseboard Overhang: Ensure your base cabinetry is recessed by 3 to 4 inches at the floor level. This acts as ‘toe space,’ allowing you to stand closer to the counter without hitting your feet against the cabinets.
Conclusion
A functional kitchen island requires balancing technical infrastructure with your specific daily habits. Measure twice, prioritize workflow over aesthetics, and invest in durable surfaces that can withstand heavy use. If you build it with these constraints in mind, the island will naturally become the most productive asset in your home.
Content updated on 2026-10-12