How Can I Teach My Dog to Walk on a Leash?

Walking your dog should be an enjoyable experience, a time for bonding and exploration, but for many pet owners, it can quickly turn into a chaotic struggle.

Whether you have an exuberant puppy bursting with energy or a more stubborn adult dog, leash training is a crucial skill that lays the foundation for a harmonious relationship between you and your furry friend. In this comprehensive guide, “Leash Training 101,” we will take you through a step-by-step process to teach your dog how to walk calmly by your side, transforming those daily walks into a relaxing and enjoyable adventure. From understanding the right equipment and choosing the perfect treats to employing positive reinforcement techniques, we’ll equip you with everything you need to turn your dog into a well-mannered walking companion. Say goodbye to pulling and lunging, and hello to peaceful strolls filled with wagging tails and happy hearts!

1. Understanding the Importance of Leash Training

How Can I Teach My Dog to Walk on a Leash?
Credit : whatcanu.com

Leash training is a fundamental skill that every dog owner should prioritize, not just for the sake of obedience, but for the overall well-being of both the dog and the owner. A well-trained dog on a leash enhances the walking experience, making outings enjoyable rather than chaotic. Understanding the importance of leash training goes beyond teaching your dog to follow commands; it fosters a deeper bond between you and your furry companion while ensuring safety in various environments.

Imagine walking through a bustling park or navigating a busy sidewalk without the worry of your dog pulling you in every direction or lunging at every distraction. Proper leash training provides the tools to manage your dog’s behavior, allowing for smoother interactions with other dogs and people. This not only prevents potentially dangerous situations but also helps your dog develop confidence and social skills in unfamiliar settings.

Moreover, leash training can significantly reduce stress for both you and your pet. A dog that walks calmly by your side is less likely to encounter accidents or become overly excited, leading to a more relaxed atmosphere during walks. This sense of calm can be especially beneficial for reactive dogs, who may struggle with anxiety or aggression in crowded spaces.

In addition, leash training is a critical part of responsible dog ownership. It demonstrates your commitment to ensuring a safe and enjoyable environment for your dog, other pets, and the community at large. By investing time and effort into this essential skill, you contribute to a culture of well-behaved dogs, making public spaces more pleasant for everyone.

Ultimately, understanding the importance of leash training is the first step in creating a positive walking experience that strengthens your relationship with your dog, promotes safety, and enhances your overall enjoyment of your time together. As we delve deeper into the steps of effective leash training, keep in mind that patience and consistency are key, and every small victory counts toward achieving that perfect stroll by your side.

2. Choosing the Right Equipment for Leash Training

When it comes to leash training, the right equipment can make all the difference in ensuring a smooth and effective learning process for both you and your dog. The choices you make in selecting leashes, collars, or harnesses can either facilitate a positive experience or create unnecessary challenges. Here’s a breakdown of what to consider when choosing the best gear for your training sessions.

**Leashes**: Opt for a sturdy, non-retractable leash that provides you with full control over your dog. A standard 4 to 6-foot leash is ideal, offering enough length for your dog to explore while still allowing you to maintain a firm grip. Avoid retractable leashes, as they can encourage pulling and make it difficult to communicate effectively with your dog.

**Collars**: For many dogs, a flat collar works well, but if your pup is prone to pulling, consider a front-clip harness. These harnesses discourage tugging by redirecting your dog’s movement when they pull, making it easier for them to learn proper walking behavior. Ensure that the harness fits snugly without being too tight, as comfort is key to keeping your dog focused during training.

**Training Tools**: Some pet owners find it helpful to use additional training aids, such as head halters, especially for larger or more energetic dogs. Head halters gently guide your dog’s head, which in turn leads the body, making it easier to control their movements. However, introducing a head halter requires patience, as it may take some time for your dog to adjust to wearing it.

**Comfort Considerations**: Regardless of what equipment you choose, comfort is paramount. Look for padded collars and harnesses that won’t irritate your dog’s skin. The last thing you want is for your pet to associate leash training with discomfort, which could lead to resistance or anxiety during walks.

In summary, investing in the right equipment lays the foundation for successful leash training. By selecting sturdy, comfortable, and appropriate tools, you create an environment conducive to learning, allowing your dog to thrive as they master the art of walking calmly by your side.

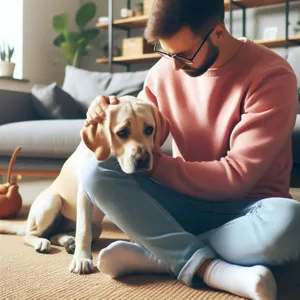
3. Preparing Your Dog for Training: Basic Commands

How Can I Teach My Dog to Walk on a Leash?
Credit : whatcanu.com

Before diving into leash training, it’s essential to equip your dog with a solid foundation of basic commands. These commands not only enhance communication between you and your furry friend but also build their confidence and responsiveness, making the training process smoother and more enjoyable for both of you.

Start with the fundamental commands: **“sit,” “stay,” and “come.”** Teaching your dog to sit on command is a crucial first step—it establishes a sense of calm and focus. Use treats to encourage them; hold a treat close to their nose, then slowly raise it above their head. As their head follows the treat, their bottom will naturally lower. When they sit, reward them with praise and the treat. Repeat this until they can sit reliably with just your verbal command.

Next, introduce the **“stay”** command. With your dog in a sitting position, take a step back while saying “stay.” If they remain in place, return to them and reward them. Gradually increase the distance and duration before rewarding. This command is vital for keeping your dog stationary during walks, especially in busy environments.

The **“come”** command is equally important, as it ensures your dog returns to you when called. Start indoors or in a secure area. Use a cheerful tone and say “come” while gently pulling on the leash or backing away from your dog. When they reach you, celebrate their success with treats and affection. This positive reinforcement builds a strong association with returning to you.

Incorporate these commands into your daily routine, practicing them several times a day. Consistency is key, so ensure that everyone in your household uses the same commands and techniques. By establishing these basic commands, you’ll not only enhance your dog’s obedience but also lay the groundwork for effective leash training, making those walks a pleasurable experience for both of you.

4. Setting Up Your Training Environment

Creating the right training environment is crucial for your dog’s success in leash training. A well-prepared space helps minimize distractions and sets the stage for a focused learning experience. Start by selecting a quiet area free from loud noises, other pets, and bustling foot traffic; this could be your backyard, a quiet park, or even a spacious room in your home. The goal is to provide a serene atmosphere where your dog can concentrate on you and the training exercises.

Next, ensure you have the right equipment on hand. A sturdy, comfortable leash and a properly fitted harness or collar are essential. Opt for a leash that is approximately six feet long; this length gives your dog enough freedom to explore while still allowing you to maintain control. Avoid retractable leashes during training sessions, as they can lead to inconsistent communication and reinforce pulling behavior.

In addition to the physical environment, consider the timing of your training sessions. Choose a time when your dog is alert but not overly energetic or tired. Early morning or late afternoon walks can be ideal, as your dog is likely to be more attentive and responsive. each training session should be kept short—about 10 to 15 minutes—so your dog remains engaged without becoming overwhelmed.

Finally, remember to keep your own energy positive and calm. Dogs are highly attuned to their owner’s emotions and body language. By exuding a relaxed but assertive demeanor, you’ll create a reassuring environment that encourages your dog to learn and adapt. With these elements in place, you’ll be well on your way to successful leash training, paving the way for enjoyable walks together!

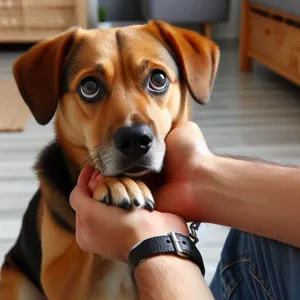
5. Step 1: Introducing the Leash and Collar

How Can I Teach My Dog to Walk on a Leash?
Credit : whatcanu.com

Introducing your dog to the leash and collar is a pivotal first step in leash training, setting the foundation for a successful walking experience. Begin this process in a calm, distraction-free environment—perhaps inside your home or in your backyard. Here’s how to make this initial introduction as smooth and positive as possible.

Start by allowing your dog to sniff and explore the collar and leash. Use a soft tone and soothing body language to communicate that these new items are not something to fear. If your dog seems hesitant, give them plenty of time to acclimate; patience is key here. Once they’re comfortable, gently place the collar around their neck, ensuring it fits snugly but not too tightly—you should be able to fit two fingers between the collar and your dog’s neck.

Next, attach the leash and let it dangle for a moment, allowing your dog to feel the weight and movement without any pressure. This step is crucial in helping them associate the leash with positive experiences. You can even reward them with treats and praise during this process to create a positive connection.

Once your dog seems relaxed with the collar and leash, take a few steps around the room while holding the leash. Keep the sessions short and enjoyable; you want your dog to associate the leash with fun rather than restriction. If your dog begins to pull or resist, stop walking and call them back to you, rewarding them for returning. This reinforces the idea that staying close to you is beneficial.

As your dog becomes more comfortable, gradually increase the duration of the leash exposure and begin practicing gentle leash handling. Remember, this initial step is all about building trust and creating a positive association with the leash and collar. With a little patience and encouragement, you’ll set the stage for confident leash walking in the steps to come.

6. Step 2: Getting Your Dog Comfortable with Walking on a Leash

Before you embark on your journey of leash training, it’s crucial to ensure that your dog feels comfortable and safe while wearing a leash. This step lays the foundation for a successful walking experience and helps your furry friend associate the leash with positive experiences.

Begin by introducing the leash in a relaxed environment, free from distractions. Allow your dog to sniff and explore the leash, letting them become familiar with its texture and weight. You might even toss in a treat or two to create a positive association. Once they seem relaxed, gently clip the leash onto their collar or harness. Don’t rush this process; take your time to let your dog adjust to the sensation of having something attached to them.

Once your dog is wearing the leash comfortably, it’s time to practice walking around your home or backyard. Start by encouraging them to move alongside you, using treats and praise to reinforce desired behavior. If they pull or try to dart away, stop walking and wait for them to return to your side. This teaches them that the leash only allows movement when they’re walking calmly beside you.

As they get more comfortable, gradually increase the length of your walks and introduce them to different surfaces, sounds, and smells. This desensitization will help your dog build confidence, making them less likely to become anxious or overwhelmed during future walks. Remember, patience is key. By ensuring that your dog feels secure and happy with the leash, you’re setting the stage for a smooth transition to more structured leash training in the upcoming steps.

7. Step 3: Teaching Basic Loose-Leash Walking

How Can I Teach My Dog to Walk on a Leash?
Credit : whatcanu.com

Teaching your dog the art of loose-leash walking is a pivotal step in ensuring enjoyable strolls together, free from the tug-of-war that often leads to frustration for both you and your furry friend. In this step, we’ll delve into the techniques that can transform your walks from chaotic to calm, allowing your dog to meander by your side with ease and composure.

Start in a quiet area with minimal distractions, such as your backyard or a tranquil park. Equip yourself with a comfortable and well-fitted harness or collar and a sturdy leash—preferably one that is around six feet long. The key to loose-leash walking lies in creating a positive association with the leash and the space around you. Begin by holding the leash loosely in your hand, ensuring that there’s enough slack for your dog to move without feeling restricted.

Next, use treats to engage your dog’s attention. With a few tasty morsels in your pocket, call your dog to your side using a cheerful tone. When your dog is walking alongside you, shower them with praise and rewards. This positive reinforcement will help them understand that staying close to you is a desirable behavior.

If your dog starts to pull ahead, stop immediately. Stand still and ignore any attempts they make to tug you forward. Once they return to your side or loosen the tension on the leash, reward them with a treat and resume walking. This teaches them that pulling will only delay their progress and that calmness is the key to moving forward.

Consistency is essential, so practice this routine regularly. As your dog becomes more comfortable with loose-leash walking, gradually introduce slight distractions, like other people or pets, to help them learn to maintain focus even in busier environments. Remember to be patient; mastering loose-leash walking can take time, but with persistence and a positive attitude, you’ll both enjoy the fruits of your labor—peaceful walks filled with exploration and connection.

8. Step 4: Implementing Positive Reinforcement Techniques

Once you’ve established a consistent routine and your dog is beginning to understand what is expected of them during walks, it’s time to introduce positive reinforcement techniques. This crucial step not only fosters a stronger bond between you and your furry companion but also creates a more enjoyable walking experience for both of you.

Positive reinforcement is rooted in the principle of rewarding desired behaviors to encourage their repetition. When your dog walks calmly by your side, the key is to acknowledge that behavior immediately. Use treats, praise, or a favorite toy to reward your dog when they maintain a loose leash and stay close to you. For instance, if your dog walks beside you for a few steps without pulling, stop, kneel down, and offer a treat along with enthusiastic praise. This creates a clear association in their mind: walking calmly is a behavior that earns them rewards.

It’s important to ensure the rewards are enticing enough to capture your dog’s attention. High-value treats, like small pieces of chicken or cheese, can be particularly effective at this stage, especially if your dog tends to get distracted by the sights and sounds around them. As you progress, you can begin to fade the treats, transitioning from frequent rewards to intermittent ones. This helps maintain your dog’s interest and encourages them to continue walking calmly without relying solely on treats.

Additionally, consider using a clicker to mark the exact moment your dog exhibits the desired behavior. The sound of the clicker is a clear signal that they’ve done something right, followed by a reward. This technique not only enhances your dog’s understanding but also adds an element of fun to the training process.

Remember, patience is key during this stage. If your dog becomes distracted or starts to pull, gently redirect them back to your side using a calm voice and a treat. Avoid harsh corrections or frustration; instead, focus on consistency and encouragement. With time and practice, your dog will learn that walking calmly by your side leads to positive outcomes, making each outing a delightful adventure for both of you.

9. Step 5: Handling Distractions and Interruptions

### 9. Step 5: Handling Distractions and Interruptions

As you progress in your leash training journey, you’ll soon realize that the world is full of distractions—other dogs, moving vehicles, intriguing scents, and even the occasional squirrel darting by. Learning to navigate these interruptions without losing focus is a crucial step in ensuring your dog walks calmly by your side. Here’s how to tackle this challenge effectively.

Start by establishing a solid foundation of focus and attention during your training sessions. Use a quiet environment at first, where distractions are minimal. As your dog becomes more comfortable walking calmly beside you, gradually introduce mild distractions. This could mean training in a busier park or on a sidewalk with more foot traffic.

When distractions occur, the focus is on your dog’s reaction. If they pull or lunge towards the distraction, calmly redirect their attention back to you. Use treats or their favorite toy to regain focus, rewarding them for maintaining their attention on you rather than on the distraction. Phrases like “look at me” or “focus” can become cues that reinforce this behavior.

Consistency is key. If your dog is particularly reactive to certain distractions, practice desensitizing them in a controlled manner. For example, if they get overly excited by other dogs, find a distance where your dog can observe without becoming overwhelmed. Reward them for staying calm and gradually decrease that distance over time, reinforcing positive behavior as they learn to remain focused on you.

Additionally, practice leash handling techniques that help manage interruptions. If a distraction approaches, use a short leash to keep your dog close and prevent sudden lunges. This not only gives you better control but also helps your dog understand that they should remain close to you, reinforcing the idea that you are their primary focus.

Remember, patience is paramount. Distractions are a natural part of any walk, and each dog will respond differently. With time, practice, and a little creativity, you’ll teach your furry friend how to navigate the world without losing their cool or straying from your side. Embrace the process, and soon enough, your dog will be a model of calmness, even in the face of the most tempting interruptions.

10. Step 6: Practicing in Different Environments

Once your dog has mastered walking calmly on a leash in a familiar setting, it’s time to take the training up a notch by practicing in different environments. This step is crucial for reinforcing your dog’s good behavior while introducing them to new distractions. After all, a calm walk through a quiet neighborhood is one thing, but you want your furry friend to maintain that composure even amidst the bustle of a busy park or the chaos of a pet-friendly outdoor market.

Start by choosing a variety of settings that will challenge your dog in different ways. For instance, the local park, a busy street, or even a pet store can provide a rich tapestry of sounds, sights, and smells that may tempt your dog to pull or become overly excited. Begin with environments that are moderately stimulating; this could mean visiting a park during off-peak hours when there are fewer people and dogs around. Allow your dog to acclimate to the new surroundings before you begin walking.

As you walk, keep your leash loose and maintain a steady pace, rewarding your dog with treats and praise for staying by your side. If they become distracted or start to pull, gently redirect their attention back to you. Use this opportunity to reinforce the commands you’ve been practicing, such as “heel” or “let’s go.” Be patient and consistent, as it may take several sessions in each new environment for your dog to feel comfortable and focused.

Gradually increase the level of distraction by visiting busier places. This is where the real training begins! Your dog will encounter other dogs, people, bicycles, and even the occasional squirrel. Each new challenge is an opportunity for growth, as you teach your canine companion how to remain calm and relaxed despite the excitement around them.

Consistency is key—make these outings a regular part of your routine. Not only will this help your dog adapt to various environments, but it will also strengthen your bond as you navigate the world together. By the time your dog confidently walks by your side in a variety of settings, you’ll both feel a sense of accomplishment, paving the way for enjoyable adventures to come.

11. Troubleshooting Common Issues (Pulling, Lunging, etc.)

Leash training can sometimes feel like a game of tug-of-war, especially when faced with common challenges such as pulling, lunging, or excessive barking. But don’t worry—every dog owner encounters these hurdles, and with patience and the right approach, you can address them effectively.

**Pulling** is one of the most frequent issues dog owners encounter. When your pup sees a squirrel dart past or catches a whiff of something intriguing, the instinct to bolt forward can easily take over. To combat this, consider using a front-clip harness or a head collar, which can help redirect their attention back to you. When your dog begins to pull, stop walking immediately. This teaches them that pulling doesn’t lead to progress. Once they relax and the leash slackens, reward them with treats or praise, and continue walking. Consistency is key here; the more they learn that calm behavior leads to movement, the more they’ll be willing to walk beside you.

**Lunging** can be more challenging, especially if your dog is excited about other animals or people nearby. When you notice your dog gearing up to lunge, try to redirect their focus with a quick command or treat. Practicing desensitization is also beneficial—expose your dog to the stimulus at a distance where they remain calm, rewarding them for staying composed. Gradually decrease the distance over time, reinforcing positive behavior as you get closer to the trigger.

**Barking** on a leash can be another frustration, often stemming from excitement or fear. If your dog barks at passing cars, joggers, or other dogs, it can be helpful to desensitize them to these distractions. Use treats to create a positive association with the stimulus. For example, if your dog sees another dog and barks, calmly redirect their attention to you and offer a treat when they stop barking. Over time, they’ll learn that remaining calm yields the best rewards.

Remember, patience is essential in leash training. Celebrate small victories, and don’t hesitate to seek professional guidance if needed. With consistent practice and positive reinforcement, you’ll transform your walks from chaotic to calm, creating a more enjoyable experience for both you and your furry friend.

12. Consistency and Patience: Key Components of Success

When it comes to leash training your dog, consistency and patience are not just buzzwords; they are the cornerstones of a successful training journey. Imagine embarking on this adventure with your furry friend, and remember that just like humans, dogs thrive on routine and clear expectations. This means setting aside dedicated time each day to practice walking together, regardless of how busy life gets. Consistency in your training schedule—whether it’s a short session every morning or an evening stroll—reinforces good behavior and helps your dog understand what is expected.

Patience, on the other hand, is crucial. Dogs, much like people, have their own learning curves. Some may pick up commands and cues quickly, while others may require more time to grasp the concept of walking calmly by your side. It’s essential to remain calm and composed during training sessions. If your dog pulls on the leash, instead of yanking them back or showing frustration, take a deep breath and gently guide them back to your side. Celebrate small victories, like a few steps of walking together without pulling, to build their confidence and encourage progress.

Incorporating positive reinforcement, such as treats and praise, further emphasizes the behaviors you want to encourage. Remember, every dog is unique, and what works for one may not work for another. By maintaining a consistent routine and exercising patience, you’ll foster a trusting relationship with your dog and create a calm, enjoyable walking experience for both of you. Embrace the journey, and soon enough, you’ll find that your dog is not only walking calmly by your side but also enjoying every moment spent together.

13. Gradually Increasing Duration and Distance

Once your dog has mastered the basics of leash training and is responding well to your cues, it’s time to gradually increase the duration and distance of your walks. This step is crucial as it helps build your dog’s stamina and reinforces the idea that walking calmly on a leash is not just a short-lived activity but a regular part of their routine.

Start by extending your walks by just a few minutes at a time. If your dog is comfortable with a 10-minute walk, try adding two or three more minutes to this. Pay close attention to their behavior during these longer sessions. Are they still focused on you, or are distractions starting to pull them away? If you notice your dog becoming overly excited or distracted, it’s a sign that you might be pushing too hard too soon. In this case, shorten the duration and gradually work back up to longer walks.

When it comes to distance, gradually explore new routes that offer varying sights and smells. Start with familiar areas where your dog feels secure, then slowly introduce them to new environments. Remember, the goal is to keep the experience positive, so don’t rush; let your dog acclimate to each new distance and location at their own pace.

Throughout this process, continue to reward your dog with praise, treats, or even their favorite toy when they walk calmly beside you. This positive reinforcement will help solidify their good behavior and encourage them to remain focused, even as the scenery changes. By gradually increasing duration and distance, you’ll not only enhance your dog’s leash manners but also strengthen the bond between you two, making walks an enjoyable experience for both of you.

14. Maintaining Good Behavior: Ongoing Training Tips

Once your dog has mastered the basics of leash training, the journey doesn’t end there. Maintaining good behavior requires ongoing commitment and consistent reinforcement. Just like us, dogs thrive on routine and can easily forget their training if it’s not regularly practiced. Here are some essential tips to ensure your pup remains a well-mannered walking companion.

**1. Reinforce Positive Behavior:** Consistently reward your dog for walking calmly by your side. Use treats, praise, or even playtime as incentives. The more positive reinforcement they receive, the more likely they are to repeat those good behaviors. Consider having a few high-value treats on hand during walks to keep their motivation high.

**2. Incorporate Short Training Sessions:** Incorporate short training sessions into your daily routine. Spend a few minutes each day practicing loose-leash walking in your backyard or a quiet area. These short bursts of training help reinforce the desired behavior without overwhelming your dog.

**3. Vary Your Routes:** To keep things interesting for your dog and prevent boredom, vary your walking routes. New sights, sounds, and smells can help maintain their engagement and excitement during walks. This variety also allows you to practice leash manners in different environments, which enhances their adaptability.

**4. Be Patient and Consistent:** Training is a marathon, not a sprint. Be patient with your dog as they continue to learn and grow. Consistency is key; make sure everyone in your household is on the same page with commands and expectations. This unified approach will help your dog understand what’s required of them, no matter who is holding the leash.

**5. Address Setbacks Promptly:** If you notice any undesirable behavior creeping back in, such as pulling or lunging, address it immediately. Go back to your training basics, reinforcing good behavior and redirecting any negative actions. This proactive approach will help prevent bad habits from becoming ingrained.

**6. socialization Opportunities:** Regularly expose your dog to new environments and other dogs. Socialization plays a crucial role in reinforcing good behavior on the leash. The more opportunities your dog has to encounter distractions in a controlled manner, the better they will learn to focus on you despite the excitement around them.

In conclusion, maintaining good behavior while leash training your dog is an ongoing process that requires patience, consistency, and plenty of positive reinforcement. By incorporating these ongoing training tips into your routine, you’ll not only keep your dog well-behaved during walks but also strengthen the bond you share with your furry friend. With time and dedication, those peaceful strolls by your side will become a cherished part of your daily life together.

15. Celebrating Milestones: Building a Stronger Bond with Your Dog

Celebrating milestones in your leash training journey is not just a way to acknowledge progress; it’s an opportunity to deepen the bond you share with your dog. Every small victory is a testament to the hard work, patience, and dedication that you both invest in this process. Whether it’s successfully navigating a busy street without pulling, mastering the “heel” command, or simply enjoying a calm walk in the park, each milestone deserves recognition.

Begin by setting achievable goals throughout your training. Maybe it’s walking a certain distance without distractions or practicing in new environments. Once you and your dog reach a milestone, take a moment to celebrate it! This could be as simple as showering your dog with praise, giving a tasty treat, or enjoying an extra-long play session. Positive reinforcement not only rewards your dog but also reinforces the behaviors you want to see in the future.

Consider creating a “training diary” to document your dog’s progress. This can be a fun way to track achievements and reflect on how far you’ve come together. Include dates, notes on your training sessions, and even photos of your adventures. The act of recording these moments will help you appreciate the journey and provide a tangible reminder of your dog’s growth.

Additionally, don’t forget to celebrate the bond you’re building. Training is a collaborative effort, and recognizing the effort both you and your dog put in fosters trust and companionship. Spend time engaging in activities your dog loves outside of training, like playing fetch or exploring new trails. These shared experiences will not only reinforce your training but also create cherished memories that strengthen your relationship.

In essence, by celebrating milestones, you transform the training process into a shared adventure. You’re not just teaching your dog to walk calmly by your side; you’re also building a lifelong partnership based on trust, respect, and love. Each celebration, big or small, lays another stone in the foundation of that bond, making every step of the journey worthwhile.

In conclusion, leash training your dog is not just about getting them to walk calmly by your side; it’s about building a strong bond of trust and communication between you and your furry friend. By following the step-by-step techniques outlined in this guide, you can transform your walks from chaotic struggles into enjoyable adventures. Remember, patience and consistency are key—celebrate each small victory along the way, and don’t hesitate to revisit earlier steps if needed. With time and dedication, you’ll not only enhance your dog’s walking experience but also strengthen your relationship, making every outing a joyous occasion. Now, grab that leash, head out the door, and embark on a new chapter of peaceful strolls together!

How Can I Help My Dog Cope With Separation Anxiety?

As a loving pet owner, there’s nothing quite as heartbreaking as witnessing your furry friend struggle with separation anxiety.

The telltale signs—uncontrollable barking, destructive behavior, and signs of distress—can leave you feeling helpless and worried about your dog’s well-being whenever you leave the house. Fortunately, you’re not alone in this journey, and there are effective strategies to help your canine companion feel more secure and at ease. In this blog post, we’ll explore ten practical and compassionate techniques to help your dog overcome separation anxiety. From creating a comforting environment to gradually acclimating them to your departures, these strategies are designed to foster resilience and confidence, allowing both you and your pup to enjoy a more peaceful and happy life together. So, let’s dive in and discover how to transform those anxious moments into a more relaxed and enjoyable experience for your beloved dog!

1. Understanding Separation Anxiety in Dogs

How Can I Help My Dog Cope With Separation Anxiety?
Credit : whatcanu.com

Separation anxiety in dogs is a complex emotional issue that can significantly impact both the pet and their owner. It manifests when a dog becomes overly distressed when left alone or separated from their human companions. This isn’t just a case of being a little sad when you leave; dogs with separation anxiety may exhibit a range of behaviors that can be troubling to witness. Common signs include excessive barking, destructive chewing, pacing, and even attempts to escape from the home in search of their owner.

Understanding the root causes of this anxiety is essential for effective management. Factors such as past traumatic experiences, changes in routine, or even genetic predispositions can contribute to a dog’s anxiety levels. For instance, a rescue dog who has endured abandonment may carry deep-seated fears that make them particularly susceptible to anxiety when left alone. Additionally, certain breeds, like Labrador Retrievers and German Shepherds, may be more prone to separation anxiety due to their strong bonds with their owners.

Recognizing that your dog’s behavior is not simply mischief or disobedience, but a genuine emotional response, is the first step toward helping them overcome this challenge. By taking the time to understand the nuances of separation anxiety, you can approach the situation with compassion and develop effective strategies to ease your dog’s distress. This understanding lays the groundwork for the solutions that follow, ensuring that you and your furry friend can work together toward a calmer, more confident future.

2. Recognizing the Symptoms of Separation Anxiety

Recognizing the symptoms of separation anxiety in dogs is the first crucial step in addressing this distressing condition. Dogs, much like humans, can exhibit a range of behaviors that signal their discomfort when left alone. Understanding these signs will not only help you identify if your furry friend is struggling but also guide you in implementing effective strategies for relief.

One of the most common signs is excessive barking or howling when the owner is away. This vocalization can often escalate into a relentless chorus, signaling their frustration and fear. You might also notice destructive behaviors, such as chewing on furniture, digging at doors, or even attempting to escape from their confines. These actions are not merely mischievous; they stem from a deeper emotional turmoil caused by their anxiety.

Additionally, physical symptoms can manifest, such as drooling, panting, or pacing. Some dogs may become unusually clingy or hyper-attached to their owners, following them from room to room, while others might display signs of depression, such as lethargy or a lack of interest in activities they usually enjoy.

Another notable symptom is house soiling, where a previously house-trained dog may urinate or defecate indoors when left alone. This can be particularly distressing for both the dog and owner, as it often signifies a high level of stress.

By being vigilant and observant, you can identify these signs early on, allowing you to take proactive measures. If you suspect your dog is suffering from separation anxiety, don’t hesitate to consult with a veterinarian or a certified dog trainer. Understanding these symptoms not only fosters a deeper bond with your pet but also paves the way for effective strategies to help them feel secure and comfortable, even when you are away.

3. Creating a Safe and Comfortable Space

How Can I Help My Dog Cope With Separation Anxiety?
Credit : whatcanu.com

Creating a safe and comfortable space for your dog is a crucial step in alleviating separation anxiety. This sanctuary should feel like a personal haven where your pet can retreat and relax, helping to ease their worries when you’re not around. Start by selecting a quiet corner of your home, away from the hustle and bustle of daily activities.

Furnish this area with your dog’s favorite blankets, a cozy bed, and some cherished toys. Incorporating items that carry your scent, like an old t-shirt or a worn blanket, can provide additional comfort, as the familiar smell can be soothing.

Consider investing in a crate, if your dog is crate-trained, as many dogs find security in their own enclosed space. Make this environment even more inviting by adding soft, calming music or a white noise machine to drown out external sounds that might trigger anxiety.

To further enhance their comfort, try using anxiety-reducing products such as pheromone diffusers or calming collars that release soothing scents designed to relax your dog. Additionally, interactive toys or puzzle feeders can help keep your dog mentally stimulated and engaged, making the time apart feel shorter and less daunting.

By thoughtfully crafting a sanctuary that caters to your dog’s needs, you’re not only helping to alleviate their anxiety but also fostering a sense of security and trust that can make all the difference when it’s time for you to leave the house.

4. Gradual Desensitization Techniques

Gradual desensitization techniques are a cornerstone approach to helping your dog overcome separation anxiety. This method relies on the principle of slowly acclimating your furry friend to the experience of being alone, thereby reducing their emotional response over time. The key is to start small and gradually build up to longer periods of separation.

Begin by creating a safe, comfortable space for your dog, filled with their favorite toys and blankets. Start with short absences; leave the room for just a few minutes while your dog remains behind. During these initial separations, observe their behavior. If they remain calm, gradually extend the time you spend away. Each successful step will reinforce their sense of security and help them understand that when you leave, you will always return.

As you work through this process, it’s essential to maintain a calm demeanor. Dogs are incredibly perceptive to their owners’ emotions, so if you express anxiety about leaving, your dog may pick up on it and become more agitated. Instead, keep your departures and arrivals low-key—avoid lengthy goodbyes or overly excited reunions. This will help your dog view separations as a normal part of life rather than a distressing event.

Incorporating positive reinforcement during this training is also vital. Reward your dog with treats and praise when they exhibit calm behavior during your absences. This not only makes the experience more enjoyable for them but also strengthens the association between being alone and receiving rewards.

Ultimately, gradual desensitization is about patience and consistency. Each dog is unique, so the time it takes will vary. Stay committed to the process, and soon enough, your dog will learn that being alone is not something to fear, but rather a part of the routine that can lead to a happy reunion.

5. Establishing a Consistent Routine

How Can I Help My Dog Cope With Separation Anxiety?
Credit : whatcanu.com

Establishing a consistent routine is a cornerstone strategy in helping your dog overcome separation anxiety. Just like humans, dogs thrive on predictability and structure. When their daily activities are scheduled, dogs feel a sense of security and stability, which can significantly reduce anxiety levels.

Begin by creating a daily schedule that includes set times for feeding, walks, playtime, and rest. For instance, if you typically feed your dog at 8 AM and take them for a walk at 5 PM, stick to those times as closely as possible. This not only helps your dog know what to expect each day but also aligns their internal clock to your routine.

Incorporate pre-departure rituals that signal it’s time for you to leave. This could be as simple as putting on your shoes or grabbing your keys. If your dog associates these actions with your absence, it may heighten their anxiety. By establishing a calm and consistent departure routine, you can help mitigate these negative associations.

Additionally, consider incorporating quiet time into your dog’s routine. This allows them to learn how to relax independently and become accustomed to being alone. Start with short periods of separation, gradually extending the time as your dog becomes more comfortable.

Remember, consistency is key. The more predictable the routine, the more secure your dog will feel, ultimately leading to a decrease in anxiety and a more confident, relaxed pup. By fostering this sense of stability, you’re not just helping your dog cope; you’re also building a stronger bond based on trust and understanding.

6. Practicing Short Departures

Practicing short departures is a pivotal strategy in helping your dog overcome separation anxiety. The key to this technique lies in gradual exposure and positive reinforcement. Begin by leaving your dog alone for just a few minutes—perhaps while you step outside to grab the mail or take a quick walk around the block. This initial separation should be brief and low-stress, allowing your dog to adjust to the idea of being alone without overwhelming them.

Before you leave, engage in a calm and relaxed routine to signal the beginning of your departure. Avoid lengthy goodbyes, as this can heighten your dog’s anxiety. Instead, offer a favorite toy or a special treat to distract them as you head out the door. Over time, gradually increase the duration of your absences, always returning before your dog becomes distressed.

During these practice sessions, observe your dog’s behavior. If they remain calm during your departures and returns, reward them with praise or a small treat, reinforcing the positive outcome of your absence. Conversely, if they exhibit signs of anxiety, it’s important to adjust your approach and perhaps shorten the time you’re away.

This method not only helps your dog learn that you will always return, but it also builds their confidence in being alone. By consistently practicing short departures, you’ll foster a sense of security in your furry friend, paving the way for longer separations in the future. Your patience and consistency will ultimately create a more relaxed and resilient companion, ready to face the world—one short departure at a time.

7. Using Interactive Toys and Puzzles

How Can I Help My Dog Cope With Separation Anxiety?
Credit : whatcanu.com

When it comes to easing your dog’s separation anxiety, interactive toys and puzzles can be game-changers. These engaging tools stimulate your dog’s mind while keeping them occupied during those times when you’re away. The beauty of interactive toys lies in their ability to transform your dog’s anxiety into excitement and curiosity.

Imagine your furry friend discovering a treat-dispensing puzzle toy for the first time. As they nudge, paw, and bite at the device, their focus shifts from the worry of separation to the rewarding challenge of uncovering hidden treasures. This natural engagement not only diverts their attention but also provides mental stimulation that can alleviate stress.

There are numerous options available, from simple treat balls that encourage rolling and chasing to more complex puzzles that require problem-solving skills. Look for toys that can be adjusted for difficulty, allowing you to increase the challenge as your dog becomes more adept at solving them. Some toys even come with timers, releasing treats at intervals to keep your pup guessing and engaged longer.

Incorporating these toys into your dog’s routine can also help create positive associations with your absence. By introducing the toy during calm moments and gradually associating it with your departures, your dog learns that this is a special time for exploration and fun, rather than a signal of loneliness.

Remember to rotate the toys to maintain your dog’s interest and keep their environment stimulating. By using interactive toys and puzzles, you not only provide a distraction but also empower your dog to tackle their anxiety with confidence, making those moments apart a little easier for both of you.

8. Introducing Calming Aids and Products

Introducing calming aids and products can be a game-changer in helping your dog cope with separation anxiety. Just like humans, dogs can benefit from various tools designed to create a soothing environment and alleviate stress. The market is brimming with options, from natural remedies to high-tech solutions, ensuring that you can find the right fit for your furry friend.

One popular option is calming collars, which are infused with pheromones that mimic the comforting scents produced by mother dogs. These collars can help create a sense of security for your pup, especially during stressful times. Additionally, consider investing in anxiety wraps or vests, which provide gentle, constant pressure around your dog’s body, akin to a comforting hug. This pressure can help reduce anxiety and promote a sense of calm.

For those seeking natural solutions, herbal supplements, such as valerian root or chamomile, can be effective in promoting relaxation. Always consult with your veterinarian before introducing any new supplements to ensure they are safe and appropriate for your dog’s specific needs.

If your dog responds well to music or sound, there are specialized playlists and sound machines designed to soothe anxious pets. These calming sounds can help mask the noise of the outside world and create a tranquil atmosphere while you’re away.

Lastly, puzzle toys or interactive feeders can also serve as excellent distractions, keeping your dog mentally engaged while you’re not home. These toys can help alleviate boredom and reduce the likelihood of stress-related behaviors.

By exploring and introducing these calming aids and products, you can provide your dog with the support they need to feel more secure and comfortable in your absence, ultimately helping them overcome their separation anxiety.

9. Training Commands for Relaxation

Training commands for relaxation can be a powerful tool in your arsenal against your dog’s separation anxiety. Just as humans benefit from mindfulness and calming techniques, dogs can learn to associate specific commands with relaxation, helping them manage their stress levels when you’re not around.

Begin by introducing commands like “settle” or “relax” in a calm environment where your dog feels secure. Use a gentle tone and reward them with treats or praise when they respond positively. Gradually increase the difficulty by practicing these commands in different settings, eventually incorporating them into your pre-departure routine. For instance, before leaving the house, ask your dog to “settle” on their bed or mat while you put on your shoes and grab your keys. This helps create a mental association between your departure and a cue for relaxation.

In addition to specific commands, consider incorporating deep breathing exercises into your training sessions. Dogs are highly perceptive and may mirror your emotional state. Demonstrating calmness through your own breathing can help your furry friend learn to relax. Pair this with a soothing voice and gentle petting to reinforce the idea that they can feel safe and at ease, even when you’re preparing to leave.

Consistency is key. Regular practice of relaxation commands will not only bolster your dog’s confidence but also create a predictable routine that can significantly reduce anxiety over time. By embedding these commands into your daily life, you’ll help your dog transform their anxious energy into a state of calm, paving the way for a more relaxed experience when you have to part ways.

10. Seeking Professional Help: When to Consult a Veterinarian or Trainer

When all your efforts to alleviate your dog’s separation anxiety seem to fall short, it may be time to consider seeking professional help. Just as humans benefit from the guidance of therapists or counselors, our canine companions can greatly benefit from the expertise of veterinarians and certified trainers who specialize in behavioral issues.

If you notice that your dog’s anxiety manifests in severe ways—such as destructive behavior, excessive barking, or signs of distress that persist despite your interventions—consulting a veterinarian is crucial. They can assess whether your dog’s anxiety is rooted in an underlying medical condition or if it warrants a discussion about medication options that can help ease their symptoms. Medications, when used appropriately, can be a valuable tool in conjunction with behavior modification techniques to help your dog feel more secure and relaxed when left alone.

In addition to veterinary guidance, working with a professional dog trainer or a certified animal behaviorist can provide you with tailored strategies to address your dog’s specific needs. These experts can analyze your dog’s behavior, offer personalized training plans, and teach you effective techniques that promote confidence and independence in your furry friend.

It’s important to remember that seeking professional help is not a sign of failure; rather, it shows your commitment to your dog’s well-being. By collaborating with experienced professionals, you can equip both yourself and your dog with the tools necessary to overcome separation anxiety, paving the way for a happier, more confident pet.

11. The Role of Exercise in Reducing Anxiety

exercise plays a pivotal role in alleviating separation anxiety in dogs, serving as both a physical outlet for pent-up energy and a mental stimulus that promotes a sense of calm. Just as humans benefit from regular physical activity to reduce stress and anxiety levels, our canine companions thrive on movement and engagement.

Taking your dog for brisk walks, engaging in spirited games of fetch, or exploring new trails can significantly decrease anxiety levels. A well-exercised dog is not only healthier but also more content and relaxed. The physical exertion helps tire out their bodies while boosting the production of endorphins—the natural mood enhancers. This is especially crucial for high-energy breeds that may struggle with being left alone if they haven’t had sufficient activity.

Incorporating structured playtime and interactive activities, such as agility training or obedience exercises, can also enrich your dog’s environment and keep their mind sharp. A mentally stimulated dog is less likely to focus on the anxiety of being alone; instead, they’ll channel their energy into positive behaviors.

Moreover, establishing a consistent routine that incorporates exercise before your departure can set a positive tone for the time spent apart. A good romp in the yard or a long walk can help ease your dog’s transition from a lively state to a more relaxed one, making them less likely to experience panic when you leave. Ultimately, exercise is not just a physical necessity for your furry friend; it’s a powerful tool in building resilience against separation anxiety, ensuring that they remain calm and happy, even when you’re not home.

12. Building Your Dog’s Confidence

Building your dog’s confidence is a vital step in alleviating separation anxiety. Just like humans, dogs thrive on positive experiences and the sense of security that comes with knowing they can navigate their world with ease. By focusing on confidence-building activities, you can help your furry friend feel more secure when left alone.

Start with basic training exercises that reinforce positive behavior. Teaching commands like “sit,” “stay,” and “come” not only establishes your role as a leader but also gives your dog a sense of accomplishment. Use plenty of treats and praise to create a positive association with these commands. Over time, as your dog masters these skills, their self-esteem will grow, making them feel more capable and secure.

Incorporate socialization into their routine as well. Exposing your dog to new environments, people, and other dogs can significantly boost their confidence. Consider enrolling them in a puppy class or arranging playdates with friendly canines. Each new experience helps to desensitize them to the fear of being alone, as they learn that the world is a safe and enjoyable place.

Additionally, engage in confidence-boosting activities like agility training or scent work. These exercises provide mental stimulation and challenge your dog to think and problem-solve, all while fostering a sense of achievement. The more your dog feels competent and self-assured, the less likely they are to succumb to anxiety when you’re not around.

Finally, ensure your dog has a secure space where they can retreat when they feel anxious. This could be a cozy bed in a quiet corner or a crate that they see as their personal sanctuary. Fill this space with their favorite toys and blankets, creating an environment that feels safe and comforting.

By actively working to build your dog’s confidence, you empower them to face the world with assurance, which can significantly reduce their separation anxiety and make your time apart more manageable for both of you.

13. Positive Reinforcement Techniques

Positive reinforcement techniques are a cornerstone of effective training, especially when it comes to helping your dog overcome separation anxiety. The principle is simple yet powerful: by rewarding your dog for calm behavior and progressively desensitizing them to your departures, you can foster a sense of security and trust.

Start by identifying a reward that your dog finds irresistibly motivating, whether it’s their favorite treat, a beloved toy, or even a game of fetch. Whenever you prepare to leave, create a positive association with your exit routine. For instance, practice picking up your keys or putting on your shoes—signals that you’re about to leave—while simultaneously offering treats or engaging in a quick play session. This helps your dog learn that your upcoming departure isn’t something to fear, but rather a precursor to fun or tasty rewards.

Additionally, practice short departures to help your dog acclimate to being alone. Begin by leaving the room for just a few seconds and gradually increasing the time you’re away. When you return, be sure to greet your dog in a calm manner, avoiding overly excited reunions that could heighten their anxiety. If they manage to stay calm while you’re gone, reward them generously upon your return.

Consistency is key—make sure all household members are on the same page with the positive reinforcement approach to avoid mixed signals. Over time, your dog will begin to associate your departures with positive experiences rather than anxiety, cultivating a sense of independence and confidence. With patience and perseverance, positive reinforcement can transform your dog’s anxiety into a calm demeanor, allowing both of you to enjoy your time apart and together without distress.

14. Monitoring Progress and Adjusting Strategies

Monitoring progress and adjusting strategies is a crucial aspect of helping your dog overcome separation anxiety. Just like humans, dogs are unique individuals, and what works for one may not be effective for another. To ensure you’re on the right path, it’s essential to regularly assess your dog’s behavior and emotional responses as you implement your training strategies.

Start by keeping a detailed journal of your dog’s reactions during your absences. Note any signs of anxiety, such as excessive barking, destructive behavior, or attempts to escape. Pay attention to how long these behaviors last and any changes in intensity over time. This record will help you identify patterns and triggers, allowing you to adapt your approach as needed.

For instance, if you’re using crate training as a strategy, observe how your dog reacts to being crated for shorter periods. If you notice improvement, gradually increase the duration. However, if your dog seems to be getting more anxious, it may be time to reassess your training methods. Perhaps a different approach, such as desensitization techniques or even seeking the assistance of a professional trainer, would be more beneficial.

Additionally, consider integrating positive reinforcement into your monitoring process. Reward your dog for calm behavior during your departures and arrivals. This will not only reinforce the desired behavior but also build their confidence over time. As you track progress, don’t hesitate to adjust your strategies based on what you learn; flexibility is key.

Remember, overcoming separation anxiety is often a gradual process, and celebrating small victories along the way can help keep both you and your dog motivated. By staying attentive to their needs and adapting your techniques, you can create a more supportive environment that fosters security and confidence, ultimately leading to a happier, more relaxed dog.

15. Conclusion: The Journey to Overcoming Separation Anxiety

As we reach the conclusion of our exploration into effective strategies for helping your dog overcome separation anxiety, it’s important to recognize that this journey is not a sprint but a marathon. Every dog is unique, and the process may vary significantly depending on your pet’s temperament, past experiences, and the severity of their anxiety.

Understanding and addressing separation anxiety requires patience, empathy, and a commitment to gradual change. It’s essential to celebrate the small victories along the way, whether it’s a successful solo play session or a peaceful moment spent alone in their space. By implementing the strategies discussed—such as desensitization training, establishing a routine, and providing mental stimulation—you are not only helping your dog develop resilience but also strengthening the bond of trust between you.

Remember, the goal is not just to alleviate anxiety but to enhance your dog’s overall well-being and confidence. Seek support from professional trainers or veterinarians if you find yourself struggling, as they can offer tailored advice and additional resources.

Ultimately, your dedication to understanding your dog’s needs and creating a supportive environment will lead to a happier, more secure pet. Through love, patience, and persistence, you can guide your furry friend toward a more relaxed and confident state, allowing both of you to enjoy a fulfilling life together, free from the shadows of anxiety. The journey may have its challenges, but the rewards—a happier dog and a more harmonious home—are undoubtedly worth it.

In conclusion, helping your dog overcome separation anxiety is a journey that requires patience, understanding, and the right strategies. By implementing the ten effective approaches we’ve discussed, from gradual desensitization to creating a comforting environment, you can make a significant difference in your furry friend’s well-being. Remember, every dog is unique, so it may take time to find the methods that work best for your pet. Celebrate the small victories along the way and nurture a bond built on trust and love. Armed with these strategies, you can help your dog feel more secure and happy, allowing both of you to enjoy your time apart with confidence. Thank you for joining us on this journey to support our beloved companions—here’s to many happy, stress-free moments for you and your dog!

How Can I Train My Cat to Use a Scratching Post?

Cats are notorious for their love of scratching, and while it’s a natural behavior, it can often lead to frustration for their owners when furniture and carpets fall victim to those sharp claws.

Fortunately, training your feline friend to use a scratching post is not only possible but can also be a rewarding experience for both you and your kitty. In this comprehensive guide, “Pawsitively perfect,” we will walk you through each step of the training process, from selecting the right type of scratching post to implementing positive reinforcement techniques that will entice your cat to make the switch. With a little patience and consistency, you’ll not only save your furniture but also provide your cat with a satisfying outlet for their scratching instincts. Get ready to transform your home into a scratching haven that both you and your cat will appreciate!

1. Understanding Your Cat’s Scratching Instincts

How Can I Train My Cat to Use a Scratching Post?
Credit : whatcanu.com

Understanding your cat’s scratching instincts is the first crucial step in training them to use a scratching post. Scratching is a natural and essential behavior for cats, serving multiple purposes that go beyond mere playfulness. It’s an instinct deeply rooted in their biology, acting as a way for them to keep their claws healthy and sharp. When cats scratch, they shed the outer layer of their claws, revealing the fresh, sharp claws underneath—much like a manicure for humans!

Moreover, scratching is a form of communication for cats. They have scent glands in their paws, and when they scratch, they leave behind both visual and olfactory marks. This marks their territory, signaling to other cats that this is their space. Understanding this instinct can help you appreciate why your feline friend might choose your favorite armchair over that brand-new scratching post you just bought.

Additionally, scratching serves as an excellent way for cats to stretch their muscles and relieve stress. After a long nap or a particularly thrilling bout of play, your cat might feel the urge to scratch as a way to rejuvenate and re-energize. By recognizing these instincts, you can better meet your cat’s needs and redirect their behavior toward appropriate scratching surfaces.

Creating an environment that respects and accommodates these natural impulses will go a long way in making the transition to a scratching post smoother. Choose a scratching post that is tall enough for a full stretch and sturdy enough to withstand their enthusiastic scratching. By understanding your cat’s scratching instincts, you equip yourself with the knowledge to guide them toward using their post instead of your furniture, ultimately fostering a harmonious living space for both you and your furry companion.

2. Choosing the Right Scratching Post

Choosing the right scratching post is crucial to ensuring your feline friend embraces this essential piece of furniture. Cats have unique preferences, and understanding these can make all the difference in their training and satisfaction. Start by considering the height of the scratching post. Cats love to stretch their bodies as they scratch, so a post that is tall enough for them to fully extend their limbs is ideal. Look for options that are at least two to three feet high, especially for larger breeds or particularly active cats.

Next, examine the material of the scratching post. Cats typically prefer either sisal rope or carpet for scratching. Sisal is durable and provides a satisfying texture for cats to dig their claws into, while carpet can be appealing for those who enjoy a softer surface. Some cats may even prefer cardboard or wood, so it might be worth experimenting with a few different types to see what your cat gravitates toward.

Stability is another key factor. A scratching post should be sturdy enough to withstand vigorous scratching without toppling over. If the post wobbles or falls, your cat may become discouraged and seek out less appropriate surfaces for their scratching needs. A solid base will give your cat the confidence to scratch freely and happily.

Finally, consider the design and aesthetics of the scratching post. While functionality is essential, you also want to choose a post that complements your home decor. With a wide variety of styles available—from sleek modern designs to rustic wooden options—you’re sure to find a scratching post that fits both your cat’s needs and your home’s aesthetic.

By carefully selecting a scratching post that meets these criteria, you’ll set the stage for successful training and encourage your cat to use their designated scratching area rather than your furniture or carpets. And remember, patience is key; it may take some time for your cat to adjust to their new scratching post, but with the right choice, you’ll be well on your way to a pawsitively perfect scratching routine!

3. Preparing Your Home for Scratching Success

How Can I Train My Cat to Use a Scratching Post?
Credit : whatcanu.com

Creating an environment that encourages your cat to embrace the scratching post is crucial for successful training. Start by strategically placing the scratching post in areas where your cat loves to spend time. Cats naturally gravitate towards places they feel comfortable and secure, so observe their favorite lounging spots and position the post nearby. This proximity increases the likelihood that your cat will investigate and use the post regularly.

Consider the type of scratching post you choose as well. Cats have different preferences—some may prefer vertical surfaces for a good stretch, while others might favor horizontal ones for a more relaxed scratch. Invest in a variety that caters to these preferences, and don’t shy away from experimenting with different materials like sisal, cardboard, and carpet. Each texture offers a unique scratching experience that can appeal to your feline friend.

To further entice your cat, enhance the scratching post with a sprinkle of catnip or a few enticing toys. This aromatic herb is a natural attractant for many cats and can create a sense of curiosity and excitement around the post. You might also consider using treats to reward your cat for using the scratching post, reinforcing positive behavior and making the experience more enjoyable.

Lastly, keep your home clutter-free and ensure that the scratching post stands out as a distinct option among your cat’s playthings. If your furniture or carpets are already bearing the brunt of your cat’s scratching tendencies, be proactive by covering those areas with protective mats or double-sided tape until your cat learns to redirect their scratching behavior. By thoughtfully preparing your home for scratching success, you’ll create an inviting space that encourages your cat to engage with their post, helping to save your furniture and fostering healthy habits along the way.

4. Introducing the Scratching Post to Your Cat

Introducing the scratching post to your cat is a crucial step in ensuring they embrace it as their go-to outlet for scratching. Cats are naturally inclined to scratch, as it helps them keep their claws healthy, mark their territory, and stretch their muscles. However, if they don’t immediately recognize the scratching post as a suitable option, they may resort to your furniture or carpets instead.

Start by placing the scratching post in a location where your cat spends a lot of time, ideally near their favorite resting spots or close to the furniture they usually scratch. This makes it more likely for them to notice and investigate the new addition. To pique their curiosity, consider sprinkling a little catnip on or around the post. The enticing aroma can be irresistible and may encourage your cat to explore and engage with it.

Observe your cat’s reactions. If they show interest, you might even want to gently guide their paws to the post, mimicking the motion they would use while scratching. This hands-on approach can help them associate the scratching post with a positive experience. Additionally, if your cat begins to scratch the post, offer plenty of praise, treats, or affection to reinforce the behavior.

If your cat seems hesitant or indifferent, don’t fret. It may take time for them to warm up to their new scratching post. Patience is key. You can also try different types of scratching posts—some cats prefer vertical posts, while others like horizontal surfaces. By experimenting with various materials and styles, you’ll find the perfect fit for your feline friend. With a little time and encouragement, your cat will likely come to see the scratching post not just as a tool, but as an essential part of their territory and daily routine.

5. Creating a Positive Association with the Scratching Post

How Can I Train My Cat to Use a Scratching Post?
Credit : whatcanu.com

Creating a positive association with the scratching post is a pivotal step in ensuring your cat embraces this new addition to your home. Cats are naturally inclined to scratch, not just for their physical health but also as a form of communication and stress relief. By transforming the scratching post into a desirable destination, you can effectively guide your feline friend to use it instead of your beloved furniture.

Start by placing the scratching post in a location where your cat already enjoys spending time. This could be near their favorite sunny spot by the window or close to where they often play. Familiarity is key; your cat is more likely to explore and use the scratching post if it’s in a comfortable environment.

Next, enhance the appeal of the scratching post with enticing elements. Consider sprinkling a bit of catnip on or around the post. This aromatic herb can stimulate your cat’s senses and create an irresistible attraction. You can also dangle a few of their favorite toys from the top of the post, encouraging them to play and scratch simultaneously. The goal is to make the scratching post a fun and engaging space, so they associate it with positive experiences.

As your cat begins to show interest, reward them with praise or treats when they use the scratching post. This positive reinforcement helps to build a strong connection between the action of scratching and the joy of receiving attention or a tasty reward. Consistency is crucial here; be sure to celebrate every small victory, whether it’s a gentle pawing or a full-bodied scratch.

Lastly, be patient. It might take some time for your cat to fully embrace the scratching post, especially if they have been accustomed to scratching other surfaces. Avoid scolding or punishing them for not using it; instead, redirect their attention with toys or playtime if you catch them scratching an inappropriate surface. Over time, with your encouragement and the right positive associations, your cat will likely come to view the scratching post as their designated scratching haven, helping to protect your furniture and keep your feline friend happy and healthy.

6. Using Catnip and Toys to Encourage Usage

Using catnip and toys to encourage usage of the scratching post can be a game changer in your training routine. Cats are naturally curious and playful creatures, and incorporating enticing elements like catnip can make the scratching post an irresistible attraction.

Start by sprinkling a generous amount of catnip on the surface of the scratching post. This aromatic herb is known for its stimulating effect on many felines, often eliciting playful antics or a blissful calm. Watch as your cat approaches the post, drawn in by the tantalizing scent. This initial introduction can spark their interest and increase the likelihood of them using the post instead of your furniture or carpets.

In addition to catnip, utilizing toys can further enhance the appeal of the scratching post. Dangle a feather toy or a string from the top of the post, allowing your cat to pounce and bat at it while also engaging with the post itself. This not only encourages them to scratch but also provides a fun and interactive playtime experience. You can even attach a ball or a small plush toy to the post, making it a dual-purpose structure for scratching and play.

Consistency is key—engage your cat regularly with these enticing elements. Create a routine where playtime revolves around the scratching post, reinforcing its importance in their environment. Over time, your cat will associate the post with positive experiences, leading to a natural inclination to use it.

Remember to be patient and give your feline friend time to adjust. With a little creativity and encouragement, you’ll transform your scratching post into an appealing playground, ensuring your cat scratches in style while keeping your home fur-free and furniture intact!

7. Training Techniques: Steps to Get Your Cat to Scratch

How Can I Train My Cat to Use a Scratching Post?
Credit : whatcanu.com

Training your cat to use a scratching post can be a rewarding experience for both you and your feline friend. However, it requires patience, consistency, and a bit of creativity. Here are some effective techniques to encourage your cat to embrace their new scratching post.

**1. Choose the Right Scratching Post:** Start by selecting a scratching post that appeals to your cat’s preferences. Cats typically enjoy posts that are tall, sturdy, and covered in materials like sisal or carpet. Observe your cat’s current scratching habits—do they prefer horizontal or vertical surfaces? This insight will help you make the best choice.

**2. Placement is Key:** Position the scratching post in a location where your cat already likes to scratch. Cats often scratch after waking up or when they’re feeling playful, so placing the post near their favorite resting spot or play area can significantly increase the likelihood of them using it.

**3. Use Attractants:** To entice your cat to the scratching post, consider using catnip or feline pheromone sprays. Gently rubbing the post with catnip can pique their interest and encourage them to explore. You might also try playing with your cat near the post, using toys to draw them closer and create positive associations.

**4. Demonstrate Scratching:** Sometimes, your cat may need a little guidance. Gently scratch the post with your own hands or use a toy to interact with it, showcasing how to use it. Cats are naturally curious, and seeing you engage with the post can spark their interest.

**5. Reward and Reinforce:** Positive reinforcement is crucial in training. When your cat uses the scratching post, immediately offer praise or a small treat. This association between scratching the post and receiving rewards will encourage them to repeat the behavior.

**6. Redirect Unwanted Scratching:** If your cat begins scratching furniture or other inappropriate surfaces, gently redirect them to the scratching post. Use a firm but calm voice to say “no” and guide them to the post. Consistency is vital here—every time you catch them in the act, gently redirect them without scaring or punishing them.

**7. Be Patient:** Remember that training takes time. Some cats may take to the scratching post instantly, while others might need a bit longer to adjust. Keep the environment positive, and don’t get discouraged if progress is slow. With persistence and encouragement, your cat will soon scratch happily on their designated post, saving your furniture and ensuring they have an outlet for their natural instincts.

By employing these techniques and remaining patient, you’ll create a harmonious environment where your cat can satisfy their scratching urges while keeping your home intact. Happy training!

8. Redirecting Unwanted Scratching Behavior

Redirecting unwanted scratching behavior is a crucial aspect of training your cat to embrace the scratching post while keeping your furniture and belongings safe from those sharp claws. Cats have a natural instinct to scratch; it helps them stretch their muscles, mark their territory, and maintain their claws. Therefore, understanding this instinct is key to effective training.

Start by observing your cat’s favorite scratching spots. If it’s your sofa or a cozy rug, you can strategically place the scratching post nearby. This proximity makes it easier for your feline friend to transition from the forbidden zones to their designated scratching haven. Use enticing materials like sisal or cardboard for the scratching post, as these textures are often more appealing to cats.

To further encourage your cat to use the scratching post, you can sprinkle catnip on it or use catnip-infused toys to create a positive association. Cats are naturally drawn to catnip, and this scent can entice them to investigate the new post. When you catch your cat scratching the post, praise them enthusiastically or offer a small treat, reinforcing this positive behavior.

If your cat continues to scratch unwanted surfaces, consider using double-sided tape or a spray deterrent on those areas. Cats dislike the sticky texture and will soon learn to avoid scratching there. Additionally, be patient and consistent. Training takes time, and with persistence, your cat will learn that the scratching post is their go-to spot for satisfying their scratching needs.

Remember, every cat is unique, so tailor your approach to suit your pet’s personality. With a little creativity and lots of encouragement, you’ll create an environment where both your cat and your furniture can coexist happily!

9. Maintaining the Scratching Post: Care and Upkeep

Maintaining your cat’s scratching post is essential for ensuring it remains an enticing and functional part of your feline friend’s environment. Regular care not only prolongs the life of the post but also encourages your cat to continue using it instead of your furniture or walls.

Start by inspecting the scratching post weekly for any signs of wear and tear. Look for frayed edges or loose sisal rope, as these can deter your cat from using it. If you notice any damage, consider repairing it promptly; a little bit of glue can go a long way in sticking down any loose materials, and a quick trim of frayed bits can refresh the post’s appearance.

Cleaning is another critical aspect of upkeep. Cats have a knack for leaving behind fur and dander, which can accumulate over time. A simple vacuuming every few weeks can help remove hair and dirt, making the post more appealing. For deeper cleaning, wipe down wooden or plastic parts with a damp cloth, and use a pet-safe cleaner to disinfect the fabric or sisal areas.

Additionally, consider your cat’s preferences when it comes to the scratching post’s location. If you notice your cat is scratching elsewhere, it might be time to reposition the post to a more prominent spot, perhaps near their favorite resting area or in a room where they spend most of their time.

Lastly, don’t forget to keep the scratching post interesting! Cats can get bored easily, so occasionally sprinkle catnip on the post or attach new toys that dangle from it. This small change can reinvigorate your cat’s interest and keep them coming back for more. By committing to regular maintenance and updates, you’ll not only extend the life of your scratching post but also create a welcoming environment for your cat to stretch, scratch, and satisfy their natural instincts.

10. Reinforcing Good Habits with Rewards

Reinforcing good habits with rewards is an essential component of successfully training your cat to use a scratching post. Cats, like many animals, respond positively to rewards, which can significantly enhance their learning experience and encourage the behaviors you want to cultivate.

Start by selecting a reward that your cat finds irresistible. This could be their favorite treat, a small piece of cooked chicken, or even a bit of catnip. The key is to ensure that the reward is something your cat truly enjoys, as this will motivate them to engage with the scratching post.

When your cat uses the scratching post correctly, immediately offer the reward. Timing is critical here; the praise and treat should be given right after they scratch the post to create a clear connection between the action and the positive reinforcement. You might say a cheerful “Good job!” or “Yes!” in a high-pitched voice to convey your excitement. This not only reinforces the behavior but also builds a bond between you and your feline friend.

Consistency is vital. Make sure to reward your cat every time they use the scratching post correctly, especially in the initial training stages. As they begin to understand that scratching the post leads to a treat, you can gradually decrease the frequency of rewards, eventually transitioning to a more intermittent reinforcement schedule. This method keeps your cat motivated and engaged, as they will continue to seek out the scratching post in hopes of receiving a reward.

Additionally, consider incorporating playtime as a reward. Engaging your cat in a fun game with a feather wand or laser pointer after they use the scratching post can also help reinforce the behavior. This approach not only encourages scratching in the right place but also enriches their environment, making the training process enjoyable for both of you.

Remember, patience is key. Training your cat to use a scratching post may take time, but with consistent rewards and positive reinforcement, you’ll be well on your way to a pawsitively perfect scratching routine!

11. Troubleshooting Common Training Challenges

Training your cat to use a scratching post can be a rewarding experience, but it doesn’t come without its challenges. If you find yourself facing some roadblocks along the way, don’t fret! Here are some common training challenges and effective strategies to overcome them.

**1. Reluctance to Use the Scratching Post:**
If your cat seems completely uninterested in the scratching post, consider its location. Cats are instinctively drawn to areas where they feel secure. Placing the post near their favorite resting spot or by a window where they can watch the world outside can entice them to give it a try. Moreover, the texture of the post matters! Ensure you’re using a material that appeals to your cat—some cats prefer carpet, while others might favor sisal or cardboard.

**2. Preference for Furniture:**
If your feline friend is still opting for the couch or your favorite chair instead of the scratching post, it may be time to reevaluate the post’s appeal. Try rubbing a little catnip on the post to make it more enticing. Additionally, you might want to create a “no-scratch zone” around your furniture by using double-sided tape or specialized furniture protectors. This helps communicate to your cat that the scratching post is the designated scratching area.

**3. Over-scratching:**
Sometimes, a cat can become overly enthusiastic about scratching, leading to damage to the scratching post or surrounding furniture. To mitigate this, monitor your cat’s scratching habits and encourage breaks. You can also provide multiple scratching surfaces to redirect their energy. If your cat is particularly vigorous, consider investing in a more robust scratching post designed to withstand heavy use.

**4. Stress-related Scratching:**
If your cat is scratching excessively, it may be a sign of stress or anxiety. Changes in the environment, such as moving to a new home or the introduction of new pets, can trigger this behavior. Create a calm and stable environment by providing plenty of hiding spots and vertical spaces for your cat to retreat to. Consider using calming pheromone diffusers or sprays to help reduce anxiety levels.

**5. Patience is Key:**
Lastly, remember that every cat is unique. Some may take to the scratching post immediately, while others require more time and encouragement. Be patient and consistent with your training efforts. Celebrate small victories, and don’t hesitate to adjust your approach as you learn more about your cat’s preferences and behaviors.

By troubleshooting these common challenges with care and creativity, you can foster a positive training experience that benefits both you and your feline companion. With persistence and understanding, your cat will soon be happily scratching away at their designated post, keeping your furniture safe and their claws healthy!

12. Why Scratching Posts Are Essential for Cat Health

When it comes to feline well-being, scratching posts are not just a luxury; they are an essential component of a cat’s physical and mental health. Cats have an innate instinct to scratch, and providing them with a designated area to do so is crucial for several reasons.

Firstly, scratching is a natural behavior that allows cats to maintain their claws. The action of scratching helps to remove the outer sheath of their claws, revealing the sharp, healthy claws underneath. This is particularly important for indoor cats, who may not have the opportunity to naturally wear down their claws through outdoor activities. Regular claw maintenance prevents overgrowth and reduces the risk of painful snagging or injury.

Moreover, scratching serves as an important form of exercise. Cats are natural hunters, and their bodies are designed for movement and play. Engaging with a scratching post encourages your feline friend to stretch, jump, and engage their muscles, promoting physical fitness. This is especially vital for indoor cats, who may not get enough exercise without the stimulation of the great outdoors.

In addition to physical benefits, scratching is also a way for cats to mark their territory. Cats have scent glands in their paws, and when they scratch, they leave behind their scent, signaling to other animals that this is their space. Providing a scratching post offers your cat an outlet for this instinctual behavior, reducing the likelihood of them scratching furniture or other household items in an attempt to establish their territory.

Lastly, scratching can be a significant stress-reliever for cats. Just like humans may unwind with a good stretch or a bit of physical activity, scratching allows cats to release pent-up energy and anxiety. By giving your cat an appropriate outlet for scratching, you can help prevent behavioral issues that stem from stress or frustration.

In summary, scratching posts are essential for cat health as they promote claw maintenance, provide exercise, help establish territory, and alleviate stress. By investing in a high-quality scratching post and encouraging its use, you’re not only protecting your furniture but also ensuring your furry companion leads a happy, healthy life.

13. Alternative Options: Other Types of Scratching Surfaces

While traditional scratching posts are a staple in feline training, it’s essential to recognize that cats can be quite particular about their scratching preferences. To keep your furry friend engaged and satisfied, consider introducing a variety of alternative scratching surfaces. These options not only add excitement to your cat’s environment but also cater to their natural instincts.

**1. Scratching Pads:** These flat surfaces, often made from cardboard or sisal, can be placed on the floor or mounted on walls. Their design encourages cats to stretch and scratch at different angles, providing a delightful change of pace from a standard post.

**2. Scratching Loungers:** Combining a scratching surface with a cozy place to lounge, these loungers cater to your cat’s desire to scratch while also giving them a comfortable spot to relax. Look for loungers made from durable materials that can withstand enthusiastic scratching.

**3. Climbing Trees with Built-in Scratching Areas:** Cat trees are not just for climbing; many come with integrated scratching surfaces. These multifunctional structures provide your cat with a playground while satisfying their scratching needs, making them an excellent addition to any feline-friendly home.

**4. Wall-Mounted Scratching Boards:** For a space-saving solution, consider wall-mounted scratching boards. These can be installed at various heights, allowing your cat to scratch while standing or stretching. Plus, they offer a unique way to incorporate scratching surfaces into your home decor.

**5. Natural Elements:** If you have the space, consider introducing natural scratching elements such as tree branches or logs. Cats are drawn to the texture and scent of wood, making these a delightful alternative that connects them with their wild instincts.

By diversifying the scratching surfaces available to your cat, you’re not only preventing potential destruction of your furniture but also enriching their environment. Experiment with different options to discover which surfaces your cat loves the most, ensuring that their scratching habits remain both positive and productive. Remember, a happy cat is a well-scratched cat!

14. The Benefits of Creating a Scratching Routine

Creating a scratching routine for your cat is not just a matter of keeping your furniture safe; it’s an essential aspect of feline well-being that can lead to a happier and healthier pet. Cats are instinctive scratchers, and establishing a routine around this natural behavior can provide numerous benefits for both you and your furry friend.

First and foremost, a scratching routine helps satisfy your cat’s innate scratching instincts. By encouraging them to scratch at designated posts rather than your couch or curtains, you’re allowing them to stretch their muscles, sharpen their claws, and mark their territory in a way that’s both satisfying and safe. Cats have scent glands in their paws, and scratching is a way for them to communicate their presence to other felines. By having a dedicated scratching routine, you create a designated space for these behaviors, which can help reduce stress and anxiety.

Additionally, regular scratching can aid in your cat’s physical health. It promotes good claw health by removing the outer sheath of the claw, which can help prevent overgrowth and related issues. A well-scratched post can also contribute to the overall fitness of your cat, as the act of stretching and scratching can improve flexibility and muscle tone.

To create a successful scratching routine, designate specific times in the day when you engage with your cat at the scratching post. This could be part of your daily playtime or a calming evening ritual. Encourage your cat to scratch by using treats or interactive toys near the post, reinforcing the behavior with positive reinforcement. Over time, your cat will associate the scratching post with fun and reward, making it their preferred outlet for those instinctive scratching urges.

Moreover, a well-established scratching routine can enhance your bond with your cat. Engaging in this activity together allows for quality time spent, fostering trust and understanding. You’ll not only be protecting your belongings but also creating a nurturing environment that respects your cat’s natural behaviors. A little consistency goes a long way in ensuring that your feline friend enjoys their scratching routine, leading to a more harmonious home for both of you.

15. Final Thoughts: Patience and Consistency in Training

As we reach the conclusion of this comprehensive guide, it’s essential to underscore a cornerstone principle of cat training: patience and consistency. Training your feline friend to embrace the scratching post is not merely a task to be checked off your list; it’s a journey that requires dedication and understanding of your cat’s unique personality and instincts.

Cats are creatures of habit, and they thrive within a stable environment. This means that the more consistent you are with your training methods, the more effectively your cat will learn to associate the scratching post with positive experiences. Establish a routine that incorporates regular interactions with the post, ensuring it’s always accessible and enticing.

Remember, every cat learns at its own pace. Some may take to the scratching post immediately, while others might need a bit longer to warm up to the idea. Celebrate the small victories along the way, whether it’s a curious sniff, a tentative paw swipe, or an enthusiastic scratch. Each positive interaction reinforces the behavior you want to encourage.

Moreover, maintaining a calm demeanor during training is crucial. Frustration can easily transfer to your cat, making them anxious or resistant. Instead, approach each training session with a sense of playfulness and encouragement. Use treats, praise, and gentle guidance to create an inviting atmosphere that fosters learning.

In conclusion, transforming your cat into a dedicated scratching post user is a rewarding endeavor that enhances both your home environment and your pet’s well-being. With patience, consistency, and a sprinkle of creativity, you can cultivate a positive scratching habit that keeps your furniture safe and your cat happy. Embrace the process, and enjoy the bonding moments that arise as you both navigate this journey together. Happy training!

In conclusion, training your cat to use a scratching post can transform both your feline’s behavior and your home environment, turning potential chaos into a harmonious coexistence. By following the step-by-step guide outlined in this post, you can create a positive and rewarding experience for both you and your cat. Remember, patience and consistency are your best allies in this journey. Celebrate the small victories along the way, and soon you’ll witness your furry friend happily honing their scratching skills on the designated post. With a little effort and understanding, you’ll foster a loving bond while ensuring your furniture stays safe and sound. Happy scratching!

How Can I Help My Cat Adjust to a New Home?

Moving to a new home can be a significant life change, not just for humans but for our feline friends as well.

Cats are creatures of habit, and the sudden shift in their environment can lead to stress and anxiety. As a devoted pet owner, it’s essential to ensure that your cat feels safe and secure during this transition. In this blog post, we’ll explore practical and effective tips to help your kitty acclimate to a new space, from creating a cozy sanctuary to introducing them gradually to their surroundings. Whether it’s their favorite blanket or a familiar toy, we’ll cover all the essentials to make their move as smooth as possible. Join us on this journey to create a pawsitive transition for your beloved pet, ensuring they quickly feel at home in their new sanctuary.

1. Understanding Your Cat’s Behavior During Transitions

How Can I Help My Cat Adjust to a New Home?
Credit : whatcanu.com

Understanding your cat’s behavior during transitions is crucial to ensuring a smooth adjustment to their new home. Cats are creatures of habit, and any significant change can trigger a range of emotions, from anxiety and stress to curiosity and excitement. Each cat is unique, with their own personality traits and sensitivities, so it’s important to observe their behavior closely throughout this process.

When you first bring your cat into their new surroundings, they may exhibit signs of apprehension. This could manifest as hiding in corners, under furniture, or within the confines of their carrier. It’s a natural defense mechanism; your cat is assessing their new environment and determining if it feels safe. Allowing them the space to explore at their own pace is essential. Rushing them out into the open can lead to further stress.

You may also notice changes in their typical behavior. Some cats might become more vocal, expressing their discomfort with meows or yowls, while others might retreat into silence. It’s important to recognize these signals as your cat’s way of communicating their feelings. Providing a quiet, cozy spot where they can retreat if they feel overwhelmed can help ease their anxiety.

Additionally, keep an eye on their eating and litter box habits. A change in appetite or litter box usage can indicate that your cat is feeling unsettled. It’s not uncommon for cats to refuse food or water for a short period after a move, but if this behavior persists, it may be worth consulting a veterinarian.

Finally, remember that patience is key. Every cat will adjust at their own pace, and giving them time to acclimate to their new surroundings will pay off in the long run. By understanding and responding to your cat’s behavior during this transitional period, you can foster a sense of security and comfort, paving the way for a happy and harmonious life in their new home.

2. Preparing Your Home Before the Move

Preparing your home before the move is a crucial step in ensuring that your cat feels comfortable and secure in their new environment. Cats are creatures of habit, and any disruption to their routine can lead to stress and anxiety. To make the transition as smooth as possible, start by creating a designated space for your feline friend in your new home. This area should be quiet and free from the commotion of unpacking, providing a safe haven where your cat can retreat and acclimate.

Begin by setting up a cozy corner with their favorite bed, some familiar toys, and a litter box. Familiar scents can work wonders in soothing your cat’s nerves, so consider bringing along a blanket or a piece of your clothing to help them feel more at home. Additionally, ensure that the space is cat-proofed—remove any potential hazards like dangling cords, toxic plants, or small items that could be swallowed.

Before the move, declutter and organize your belongings to minimize chaos on moving day. Cats can be sensitive to changes in their environment, so keeping things tidy will help reduce their anxiety. If possible, introduce your cat to the new home gradually. Allow them to explore one room at a time, giving them a chance to adjust at their own pace. By taking these thoughtful steps to prepare your home, you’ll create a welcoming environment that makes your cat’s transition smoother and more enjoyable, setting the stage for a happy life in your new space.

3. Creating a Safe Space for Your Cat

How Can I Help My Cat Adjust to a New Home?
Credit : whatcanu.com

Creating a safe space for your cat is one of the most essential steps in helping them transition smoothly into their new home. Cats are creatures of habit, and the unfamiliar sights, sounds, and smells of a new environment can be overwhelming. To ease this transition, designate a quiet, cozy area that will be solely theirs—a sanctuary where they can retreat and feel secure.

Start by selecting a room that is away from the hustle and bustle of everyday life. A bedroom, a quiet study, or even a spacious bathroom can serve well. Furnish this space with their essentials: a comfortable bed or blanket, a litter box, food and water dishes, and some of their favorite toys. Incorporate familiar items from their previous home, such as a cherished toy or a piece of your clothing, to provide comfort through recognizable scents.

Once the space is set up, allow your cat to explore at their own pace. Avoid overwhelming them with too much attention right away. Instead, let them come to you when they feel ready. Soft lighting, soothing sounds, and minimal traffic will help create a calm atmosphere that encourages relaxation. You might consider using a pheromone diffuser, which can help reduce stress and anxiety, creating a more inviting environment.

Remember to check in on your cat regularly, offering gentle encouragement and treats to foster a sense of trust. Over time, as they gain confidence, you can gradually allow them access to other areas of the home. By thoughtfully crafting a safe space, you not only provide a sanctuary for your cat but also lay the foundation for a loving bond that will flourish in your new life together.

4. Choosing the Right Moving Day Strategy

Choosing the right moving day strategy is crucial for ensuring a smooth transition for your cat into their new home. Cats are creatures of habit, and the upheaval of moving can be particularly stressful for them. To ease this transition, it’s essential to have a well-thought-out plan in place.

First, consider the timing of your move. If possible, try to schedule the move when your cat can be kept in a safe and quiet space away from the chaos of packing and loading. This could be a separate room in your current home or even a trusted friend’s house. By keeping your cat out of the fray, you minimize their exposure to the loud noises, unfamiliar faces, and constant movement that can heighten their anxiety.

Next, prepare a comfortable travel setup for your cat. Invest in a sturdy, well-ventilated carrier, and place familiar items inside, such as their favorite blanket or a beloved toy. This familiarity will provide them with a sense of security during the journey. If your cat tends to get anxious in the car, consider using calming aids, such as pheromone sprays or calming treats, to help soothe their nerves.

Once you arrive at your new home, take the time to create a designated safe space for your cat. Set up a cozy corner with their litter box, food and water dishes, and a few toys. This will give your cat a place to retreat to while they adjust to their new surroundings. It’s also wise to keep them confined to this space initially, allowing them to explore gradually rather than overwhelming them with the entire house at once.

Finally, remember that patience is key. Allow your cat to acclimate at their own pace. While some cats may be curious and ready to explore right away, others may take a little longer to emerge from their safe haven. Be there to offer reassurance and comfort, and gradually introduce them to different areas of the house as they seem ready.

By carefully planning your moving day strategy and providing your cat with the security and comfort they need, you can help them transition into their new home with as little stress as possible.

5. Introduction Techniques for New Spaces

How Can I Help My Cat Adjust to a New Home?
Credit : whatcanu.com

Introducing your cat to a new home can be a delicate process, as felines are creatures of habit that thrive on familiarity and security. To help ease the transition, it’s essential to employ gentle introduction techniques that make your cat feel safe and comfortable in their new environment.

Start by designating a quiet, cozy space in your home where your cat can retreat to feel secure. This room should contain all the essentials: food and water bowls, a litter box, a scratching post, and their favorite toys. By providing a safe haven, you allow your cat to acclimate at their own pace, gradually exploring their new surroundings without feeling overwhelmed.

When it’s time to introduce them to the rest of the house, take it slow. Allow your cat to venture out on their own terms, offering treats and gentle encouragement to build their confidence. Keep in mind that every cat is different; some may be curious and eager to explore, while others might prefer to stay hidden for a while.

Using familiar scents can also be beneficial. Bring items from your previous home, such as bedding or toys, that carry their scent. This can provide a sense of comfort and stability in an otherwise unfamiliar space. Additionally, consider using feline pheromone diffusers, which can help reduce anxiety by mimicking the natural pheromones that cats release when they feel safe.

Remember, patience is key. Allow your cat as much time as they need to adjust, and be observant of their behavior. If they seem stressed or overwhelmed, give them space and time to settle in. With these thoughtful introduction techniques, you can help your furry friend feel more at home, ensuring a smoother transition into their new life.

6. Gradual Exploration: Allowing Your Cat to Adjust

When introducing your cat to a new home, patience is key, and one of the most effective strategies is to allow for gradual exploration. Cats, by nature, are creatures of habit, and the sudden upheaval of their environment can be overwhelming. The process of settling into a new space should unfold at a pace that respects your feline friend’s comfort levels.

Start by confining your cat to a single room—ideally, a quiet space that has familiar items such as their bed, toys, and litter box. This safe zone will help your cat acclimate to their new surroundings without the stress of too much stimulation. Spend time with them in this space, offering gentle reassurance and allowing them to explore at their own pace.

Once your cat appears calm and comfortable in their designated room, gradually introduce them to adjacent areas of the house. Leave doors open so they can choose to venture out when they feel ready. Be mindful of their behavior; if they seem hesitant or anxious, give them the time they need to adjust before encouraging further exploration.

Use treats and toys to create positive associations with new areas of the home. A gentle coaxing with a favorite plaything can spark curiosity and help your cat feel more at ease. Additionally, consider placing familiar scents—like a blanket they’ve used in their previous environment—around the house to provide a sense of familiarity amidst the change.

Remember, every cat is unique, and some may take longer than others to navigate their new domain. Monitor their body language closely; a relaxed posture, slow blinking, and purring indicate comfort, while hiding or flattened ears may suggest stress. By allowing your cat the opportunity to explore their new home gradually, you’re fostering a sense of security and helping to build a strong foundation for a happy, harmonious life together. With time, patience, and understanding, your cat will feel at home in no time.

7. Establishing a Routine for Comfort

How Can I Help My Cat Adjust to a New Home?
Credit : whatcanu.com

Establishing a routine for your cat is one of the most effective ways to create a sense of stability and comfort in their new environment. Cats are creatures of habit, and they thrive on predictability. When moving to a new home, everything is unfamiliar, which can lead to anxiety and stress. By introducing a consistent daily routine, you can help your feline friend adjust more smoothly to their new surroundings.

Start by setting regular feeding times. Cats often feel more secure when they know exactly when to expect their meals. Choose a quiet spot in your home for their food and water bowls, away from high-traffic areas, to create a safe dining experience. This will not only help your cat anticipate mealtimes but also encourage them to develop a sense of ownership over their designated space.

In addition to feeding, incorporating playtime into your routine is essential. Schedule specific times for interactive play with toys, laser pointers, or feather wands. This not only helps to expend energy but also strengthens the bond between you and your cat. Be attentive to their preferences—some cats may enjoy chasing after toys, while others might prefer a good scratch or cuddle session.

Another critical aspect of establishing a routine is setting aside time for quiet moments. Create a cozy nook with their bed or a soft blanket where they can retreat when they need solitude. This safe space will allow them to recharge and feel secure, especially during the initial adjustment period.

Lastly, be patient and flexible. While routines are beneficial, remember that your cat may need time to adapt. Monitor their behavior and adjust your schedule as necessary to accommodate their comfort and needs. With a little time and consistency, your cat will come to feel at home in their new environment, making the transition a pawsitive experience for both of you.

8. Using Familiar Items to Ease the Transition

When moving to a new home, the transition can be particularly stressful for your feline friend. Cats are creatures of habit, and the sudden change in their environment can lead to anxiety and confusion. One of the most effective ways to ease this transition is by incorporating familiar items from their previous home into their new space.

Start by bringing along your cat’s favorite blanket or bed. The comforting scent of their own bedding can provide a sense of security and familiarity in an otherwise unfamiliar environment. It’s like a little piece of home that they can curl up in when they feel overwhelmed. Additionally, consider keeping their usual litter box, food dishes, and toys in the same configuration as they were in your previous residence. This continuity helps your cat feel more at ease, as they can recognize their belongings and routines amidst the chaos of moving.

Cat trees, scratching posts, or any other interactive items they frequently use can also be beneficial. These familiar structures not only offer comfort but also encourage natural behaviors, helping your cat feel more at home. If they have a particular toy they love, make sure to have it easily accessible in the new space so they can engage with it when they need to unwind.

Moreover, the first few days in the new home can be particularly daunting, so consider creating a designated “safe space” for your cat. This area should be stocked with their beloved items, a cozy bed, and some of their favorite treats. By providing a safe haven filled with familiar scents and objects, your cat will have a retreat they can rely on as they gradually acclimate to their new surroundings.

Remember, patience is key during this transitional phase. By surrounding your cat with familiar items, you’re not only helping to ease their anxiety but also fostering a sense of belonging in their new home. With time, love, and a few cherished possessions, your cat will soon feel comfortable and ready to explore their new territory.

9. Ensuring Proper Nutrition and Hydration

Ensuring proper nutrition and hydration is essential for helping your cat settle into a new home. Just like humans, cats thrive when they have access to a balanced diet and fresh water, especially during the stress of transitioning to a new environment.

When moving to a new home, your feline friend may experience a range of emotions, from excitement to anxiety. This can affect their eating and drinking habits, so it’s crucial to establish a consistent routine as soon as possible. Start by providing your cat with the same food they ate in their previous home. Sudden changes to their diet can lead to digestive upset and further stress, so it’s best to maintain continuity during this period of adjustment.

Create a designated feeding area that is quiet and free from the hustle and bustle of daily activities. This safe space will allow your cat to eat and drink without feeling threatened or overwhelmed. Make sure their bowls are clean and filled with high-quality food that meets their dietary needs, whether it’s wet, dry, or a combination of both. Don’t forget to provide fresh water daily; cats can be notoriously picky about their hydration, so consider using a pet water fountain to encourage them to drink more.

Monitor your cat’s eating and drinking patterns closely during the first few weeks in your new home. If they show signs of stress, such as refusing to eat or drink, consult your veterinarian for advice. In some cases, introducing calming supplements or stress-relief products specifically designed for cats can help ease their anxiety and restore their appetite.

Lastly, consider incorporating mealtime into your bonding activities. Engage with your cat during feeding times by gently talking to them or sitting nearby, creating positive associations with their new environment. This can help them feel secure and encourage a healthy relationship with their new home. By prioritizing proper nutrition and hydration, you’ll not only support your cat’s physical well-being but also contribute to their emotional adjustment, helping them settle in and feel at home in no time.

10. Keeping Stress at Bay: Calming Aids and Techniques

Moving to a new home can be a stressful experience for your feline friend. Cats thrive on routine and familiarity, so introducing them to a new environment can lead to anxiety and unease. To help keep stress at bay during this transition, consider incorporating calming aids and techniques into your cat’s settling-in process.

One effective method is to create a cozy sanctuary within your new home. Choose a quiet room where your cat can retreat when feeling overwhelmed. Fill it with their favorite bed, toys, and litter box, ensuring it’s a safe space free from the chaos of unpacking and unfamiliar noises. You might also consider using feline pheromone diffusers or sprays, which can mimic the calming scents that cats naturally produce, helping to instill a sense of security in their new surroundings.

Additionally, incorporating calming music or specific soundtracks designed for cats can work wonders. Research has shown that certain types of music can have a soothing effect on felines, reducing stress-induced behaviors. Playing this gentle background sound can create a peaceful atmosphere that encourages relaxation.

Don’t overlook the power of routine, either. Maintaining feeding schedules, playtimes, and interactions can help your cat feel more secure as they navigate their new space. Gradually introducing them to different areas of the home, rather than overwhelming them all at once, allows for a slow exploration that can ease anxiety.

For particularly anxious cats, consider consulting your veterinarian about natural calming supplements or remedies. Options like herbal calming treats or anxiety-reducing medications can provide additional support during this transitional period.

By employing these calming aids and techniques, you can help your cat adjust more smoothly to their new home, allowing them the time and space they need to feel at ease in their new surroundings. Remember, patience is key; with your love and support, your furry friend will soon feel right at home.

11. Monitoring Your Cat’s Health During the Transition

Monitoring your cat’s health during the transition to a new home is essential for ensuring their well-being and comfort. Just like humans, cats can experience stress when faced with change, and this stress can manifest in various ways, from changes in appetite to behavioral shifts.

Start by keeping a close eye on their eating habits. A decrease in food intake could be a sign of anxiety, while excessive eating might indicate stress-induced overeating. It’s crucial to provide a consistent feeding routine, using the same food they were accustomed to in their previous home. This familiarity can help ease their anxiety and encourage them to eat regularly.

Next, pay attention to their litter box habits. Changes in urination or defecation patterns can be indicators of stress or health issues. If your cat suddenly starts avoiding the litter box or shows signs of discomfort while using it, it may be time to consult a veterinarian. Additionally, monitor any signs of excessive grooming or changes in coat condition, as these can also signal underlying stress or health problems.

Behaviorally, you might notice your cat becoming more withdrawn or unusually aggressive. Give them space to acclimate to their new environment but also engage in gentle playtime to help them feel more relaxed. Providing a safe, quiet space where they can retreat when feeling overwhelmed is crucial during this period.

Regular vet check-ups are also advisable, especially if your cat has pre-existing health conditions. Keeping your veterinarian informed about the transition can lead to tailored advice and preventive measures to help your furry friend adjust smoothly.

By being attentive to your cat’s physical and emotional well-being throughout this transition, you can identify and address any potential health issues early on, ensuring they feel secure and happy in their new home. Remember, patience is key; give your cat the time they need to adapt, and soon enough, they’ll feel right at home.

12. Encouraging Play and Engagement in the New Environment

When welcoming a cat into a new home, one of the most effective ways to help them adjust is by encouraging play and engagement in their new environment. Cats are naturally curious creatures, and providing them with opportunities for exploration and interaction can significantly ease their transition.

Start by setting up a dedicated play area that includes a variety of toys—think feather wands, laser pointers, and puzzle feeders that stimulate their minds and instincts. Rotate the toys regularly to keep their interest piqued. Interactive play sessions not only provide physical exercise but also create a bond between you and your feline friend, helping them feel more secure in their new surroundings.

Incorporating scratching posts and climbing structures can also enhance their sense of safety and comfort. Cats love to observe their territory from elevated spots, so providing shelves or cat trees will allow them to survey their new domain from a height, boosting their confidence.

Additionally, consider engaging with your cat during quiet moments. Sit on the floor with them, gently encouraging them to explore their new space while you’re nearby. This calm approach fosters trust and reminds them that they are not alone in this unfamiliar territory.

Don’t forget about the power of a cozy environment. Create safe spaces where your cat can retreat and feel secure. Cardboard boxes, soft blankets, or even a secluded corner will provide them with a sense of ownership over their new home.

By promoting play and engagement, you not only help your cat acclimate to their new environment but also enrich their lives, making the transition a pawsitive experience for both of you!

13. Socialization Tips for Cats in a New Home

When it comes to helping your cat settle into a new home, socialization plays a crucial role in ensuring their comfort and happiness. Cats are creatures of habit, and uprooting their familiar environment can lead to stress and anxiety. To ease this transition and encourage your feline friend to embrace their new surroundings, consider the following socialization tips.

**1. Create a Safe Space:** Start by designating a quiet, cozy area in your home where your cat can retreat when feeling overwhelmed. This space should be equipped with their favorite blanket, toys, and a litter box, providing a sanctuary where they can feel secure. Allow them to explore this space at their own pace, ensuring they have a safe haven to return to.

**2. Gradual Introductions:** If you have other pets or household members, introduce them to your cat gradually. Allow your new cat to acclimatize to their surroundings without overwhelming them. You can use scent swapping techniques, where you exchange bedding or toys between your pets, helping them get used to each other’s scents before face-to-face meetings.

**3. Keep Interactions Positive:** Encourage positive interactions by engaging with your cat using treats, toys, and gentle play. This not only helps build trust between you and your cat but also creates positive associations with their new environment. Interactive toys, such as feather wands or laser pointers, can stimulate play while fostering a bond between you and your feline companion.

**4. Observe Body Language:** Pay close attention to your cat’s body language. Signs of stress, such as flattened ears, hissing, or a swishing tail, indicate that your cat may need more time to adjust. Be patient and allow them to take the lead when it comes to socializing. If they seek out affection or play, reciprocate with gentle attention.

**5. Provide Vertical Space:** Cats are natural climbers, and providing vertical spaces, such as cat trees or shelves, can make them feel more secure. Elevation allows them to survey their surroundings from a safe distance, giving them confidence as they explore their new home.

**6. Establish a Routine:** Cats thrive on routine, so try to establish a consistent feeding, play, and cuddle schedule. Routine helps your cat feel more secure and understand their new environment, making it easier for them to adjust.

By focusing on these socialization tips, you can help your cat transition smoothly into their new home. Remember, patience is key—every cat is unique, and some may take longer to adjust than others. With time, love, and understanding, your furry friend will soon feel right at home, ready to explore, play, and create new memories with you.

14. Patience is Key: Understanding the Adjustment Period

Moving to a new home can be just as overwhelming for our feline friends as it is for us. Cats are creatures of habit, and sudden changes to their environment can lead to stress and anxiety. This is where patience becomes invaluable. Understanding that your cat will need time to adjust is crucial for ensuring a smooth transition.

Typically, the adjustment period can last anywhere from a few days to several weeks, depending on your cat’s personality and previous experiences. During this time, your kitty may exhibit behaviors such as hiding, vocalizing more than usual, or even showing signs of reluctance to explore their new surroundings. It’s important to remember that these behaviors are completely normal.

To help facilitate this adjustment, create a safe and cozy space for your cat—a quiet room with their bed, litter box, and favorite toys can work wonders. Allow them to explore at their own pace, offering gentle encouragement but never forcing them out of their comfort zone.

Additionally, maintaining a consistent routine can provide a sense of stability amid the chaos of moving. Regular feeding times, play sessions, and even quiet moments can help ground your cat, making the new environment feel more familiar over time.

While it might be tempting to rush the process, giving your cat the time they need will ultimately foster a deeper bond as they learn to trust their new surroundings and you as their caregiver. Remember, patience is not just a virtue—it’s a vital component in creating a pawsitive transition for your beloved feline companion.

15. When to Seek Professional Help for Behavioral Issues

Moving to a new home can be a challenging experience for your feline friend, and while many cats adjust well, some may display behavioral issues that need extra attention. Recognizing when to seek professional help is crucial for ensuring your cat’s well-being and helping them acclimate to their new environment.

If your cat exhibits signs of persistent anxiety, such as excessive hiding, refusal to eat, or litter box issues, it may be time to consult a veterinarian or a certified animal behaviorist. These professionals can assess your cat’s behavior in the context of their new surroundings, identifying underlying issues that may require intervention. For example, if your cat is overly aggressive or becomes withdrawn, these behaviors can be indicators of stress that, if left unaddressed, could lead to long-term emotional challenges.

Furthermore, if your attempts to provide comfort and stability—such as creating a safe space, using calming pheromones, or engaging in interactive play—do not yield positive changes over time, do not hesitate to reach out for expert guidance. A professional can offer tailored strategies and behavioral modification techniques that align with your cat’s unique personality and needs.

Additionally, if you notice that your cat’s behavior is affecting your household dynamics or the well-being of other pets, a professional can provide insights on how to create a harmonious environment. Remember, seeking help is not a sign of failure; rather, it demonstrates your commitment to your cat’s happiness and health during this transitional period. With the right support, your cat can flourish in their new home, transforming what could be a stressful experience into a pawsitive journey of adaptation and growth.

As we conclude our exploration of helping your feline friend adjust to a new home, we hope you feel empowered with practical strategies to ensure a smooth transition for your cat. The journey of moving can be overwhelming, but by creating a familiar environment, establishing routines, and offering plenty of love and patience, you can ease their stress and make them feel safe and secure. Remember, every cat is unique, and it may take time for them to adapt, so celebrate the small victories along the way. With your care and understanding, your cat will soon find their footing in their new space, turning it into a cozy haven filled with joy and companionship. Here’s to many happy moments in your new home together!

What are the Best Ways to Groom a Long-Haired Cat?

Grooming a long-haired cat can often feel like a daunting task, but it’s essential for maintaining their health and beauty.

These fluffy companions, with their luxurious coats and endearing personalities, require a little extra TLC to prevent mats, tangles, and skin issues. As a devoted cat owner, you want nothing but the best for your feline friend, and mastering the art of grooming is key to keeping them looking and feeling their best. In this comprehensive guide, we’ll share essential tips and tricks that will empower you to groom your long-haired cat like a pro. From choosing the right tools and understanding proper brushing techniques to tackling those tricky knots and promoting a stress-free grooming experience, you’ll be equipped with everything you need to turn grooming time into a bonding moment filled with love and care. So grab your grooming supplies, and let’s dive into the world of feline pampering!

1. Understanding Your Long-Haired Cat’s Coat

What are the Best Ways to Groom a Long-Haired Cat?
Credit : whatcanu.com

Understanding your long-haired cat’s coat is the first step toward mastering the art of grooming. Unlike their short-haired counterparts, long-haired cats boast a luxurious, flowing mane that can be both stunning and demanding. Their coats come in a variety of textures and colors, from silky Persians to fluffy Maine Coons, each requiring a tailored grooming approach.

The coat of a long-haired cat consists of multiple layers, typically featuring an undercoat and a topcoat. The undercoat is soft and dense, providing insulation, while the topcoat consists of longer, guard hairs that protect against dirt and moisture. This unique structure can make long-haired cats prone to matting, tangles, and excessive shedding if not addressed regularly.

Regular brushing is essential to prevent these issues. Ideally, you should aim for at least two to three grooming sessions each week, using a high-quality slicker brush or a wide-toothed comb to delicately detangle any knots and remove loose fur. Pay special attention to the areas behind the ears, under the chin, and around the hindquarters, where mats often form.

Additionally, understanding your cat’s specific grooming needs can help you choose the right tools and products. Some long-haired breeds may benefit from specialized shampoos or conditioners designed to enhance their coat’s shine and manageability. Observing your cat’s behavior and coat condition will guide you in developing a grooming routine that keeps their fur healthy and vibrant.

By investing time to understand your long-haired cat’s coat, you’ll not only enhance their beauty but also contribute to their overall health and happiness, ensuring they feel as fabulous as they look!

2. The Importance of Regular Grooming

Regular grooming is not just a luxury for long-haired cats; it’s a vital aspect of their overall health and well-being. For these majestic felines, their flowing coats are a point of pride, but they also require a commitment to maintenance that goes beyond the occasional brush. Long-haired cats are particularly prone to matting, tangles, and hairballs, which can lead to discomfort and even health issues if not addressed promptly.

When you groom your cat regularly—ideally several times a week—you prevent knots from forming in their fur. These mats can pull on the skin and create painful hotspots or even lead to skin infections if left unattended. Moreover, brushing your cat helps to distribute natural oils throughout their coat, promoting a shiny, healthy appearance that showcases their beauty.

But grooming isn’t just about the practical aspects; it also fosters a deeper bond between you and your feline friend. The act of grooming can be a soothing ritual for both of you, allowing your cat to relax as you gently work through their fur. This close contact not only reassures your pet but also gives you the opportunity to check for any unusual signs, like lumps or skin irritations, that may require veterinary attention.

Additionally, regular grooming reduces shedding and minimizes the amount of hair that ends up on your furniture and clothing—an added bonus for maintaining a clean home! By establishing a consistent grooming routine, you’re not only investing in your cat’s health but also enhancing your shared living environment. So grab your brush, find a cozy spot, and make grooming a delightful part of your long-haired cat’s life!

3. Essential Grooming Tools for Long-Haired Cats

What are the Best Ways to Groom a Long-Haired Cat?
Credit : whatcanu.com

When it comes to grooming your long-haired cat, having the right tools can make all the difference between a pleasant experience and a frustrating one. Here are the essential grooming tools you should have in your arsenal to ensure your feline friend looks and feels their best.

**1. High-Quality Slicker Brush:**
A slicker brush is a must-have for any long-haired cat owner. Its fine, short wires help untangle knots and remove loose fur without damaging your cat’s delicate skin. Regular brushing with a slicker brush not only prevents matting but also reduces shedding, keeping your home fur-free.

**2. Wide-Toothed Comb:**
Once you’ve tackled the tangles with a slicker brush, follow up with a wide-toothed comb. This tool is perfect for gently detangling any remaining knots, especially around sensitive areas like the ears and underbelly. The wide teeth help to glide through the fur smoothly, reducing breakage and discomfort.

**3. De-shedding Tool:**
For those particularly fluffy cats, a de-shedding tool is invaluable. These specialized tools reach beneath the topcoat to remove loose undercoat fur, helping to minimize shedding and hairballs. Use it during your regular grooming sessions to keep your cat’s coat healthy and reduce the amount of fur floating around your home.

**4. Nail Clippers:**
Don’t forget about those claws! Keeping your cat’s nails trimmed is essential for their health and comfort. Invest in a high-quality pair of cat nail clippers or a nail grinder designed for feline paws. Regular nail maintenance will prevent scratching and keep your kitty comfortable as they roam around.

**5. Cat-Safe Shampoo:**
Bath time may not be your cat’s favorite activity, but having a good cat-safe shampoo on hand can make it easier. Look for gentle, hypoallergenic formulas that cater specifically to long-haired cats. Regular bathing can help keep their coat clean and free of allergens, especially if they spend time outdoors.

**6. Grooming Gloves:**
For those cats who are a bit skittish about traditional grooming tools, grooming gloves can be a game-changer. These gloves allow you to groom your cat while petting them, providing a gentle touch that feels more like a cuddle than a chore. The rubber tips help to remove loose fur and can also stimulate your cat’s skin, promoting healthy circulation.

By equipping yourself with these essential grooming tools, you’ll not only make the grooming process smoother but also strengthen the bond between you and your long-haired companion. Regular grooming is a key component of their overall well-being, ensuring they feel comfortable and look fabulous every day!

4. Creating a Comfortable Grooming Environment

Creating a comfortable grooming environment is crucial for both you and your long-haired feline companion. Cats, especially those with luxurious coats, can be sensitive to their surroundings, and a stress-free atmosphere can make all the difference in their grooming experience. Start by selecting a quiet, well-lit area where you can work without distractions. A cozy corner of your living room or a calm space in a sunlit bathroom can serve as the perfect grooming station.

Consider using a non-slip mat or a soft blanket on the surface where you’ll be grooming your cat. This not only provides a secure footing for your pet but also adds a touch of comfort. Cats love warmth, so if your cat enjoys cozy spots, placing a heated pad or a warm towel underneath can help them feel more relaxed and at ease.

Next, ensure that all your grooming tools are within arm’s reach. Having everything organized will minimize movement and potential stress for your furry friend. Tools like brushes, combs, nail clippers, and even treats should be at the ready to keep the session smooth and enjoyable.

Incorporate calming elements into your grooming routine as well. Soft background music or the gentle sound of a white noise machine can create a soothing atmosphere that helps reduce anxiety. Additionally, consider using pheromone sprays or diffusers designed for cats to help promote a sense of calm during grooming.

Lastly, never underestimate the power of positive reinforcement. Before you begin grooming, spend a few moments petting and soothing your cat, letting them know that this experience will be enjoyable. Offer treats or gentle praise throughout the session to reinforce good behavior and create a positive association with grooming. By cultivating a comfortable environment, you’ll transform grooming from a chore into a bonding experience that your long-haired cat will look forward to!

5. Step-by-Step Grooming Process

What are the Best Ways to Groom a Long-Haired Cat?
Credit : whatcanu.com

Grooming your long-haired cat may seem daunting, but with a structured step-by-step approach, you can transform the experience into an enjoyable bonding session for both you and your feline friend. Here’s how to master the art of cat grooming like a pro!

**Step 1: Gather Your Supplies**
Before diving into the grooming process, make sure you have all the necessary tools at your disposal. You’ll need a quality slicker brush, a wide-toothed comb, cat-safe scissors for trimming, nail clippers, and a gentle shampoo if you’re planning on giving your kitty a bath. Having everything ready will make the grooming session smoother and more efficient.

**Step 2: Create a Calm Environment**
Choose a quiet, comfortable space where your cat feels safe. This could be a cozy corner of your living room or a designated grooming area. Consider using a non-slip mat to provide traction for your cat. Before you begin, take a moment to pet your cat and let them settle into the space, ensuring they are relaxed and ready for the grooming session.

**Step 3: Brush to Remove Tangles and Mats**
Start by gently brushing your cat’s coat with the slicker brush. Begin at the head and work your way toward the tail, using short, gentle strokes. Pay extra attention to areas prone to matting, such as behind the ears, under the legs, and around the collar. If you encounter any mats, hold the base of the fur to avoid pulling on the skin, and carefully work them out with the wide-toothed comb. For stubborn mats, you may need to use the scissors, but be extremely cautious to avoid harming your cat.

**Step 4: Inspect and Trim**
Once you’re satisfied with the brushing, take a close look at your cat’s coat and skin. Look for any signs of irritation, parasites, or unusual lumps. If you spot any issues, consult your veterinarian. If your cat has excessively long fur around their paws or rear end, gently trim the hair to keep it manageable and hygienic. Always use cat-specific scissors and work slowly to prevent accidents.

**Step 5: Nail Care**
Next, it’s time to tackle the nails. Gently hold one paw at a time and press slightly on the pad to extend the claw. Trim only the sharp tip of the claw, avoiding the pink area known as the quick. If your cat is anxious, consider using a cat nail grinder instead of clippers, as this can be less stressful for them.

**Step 6: Bath Time (Optional)**
If your cat is particularly dirty or has a strong odor, consider giving them a bath. Use lukewarm water and a cat-safe shampoo, lathering gently while avoiding their face. Rinse thoroughly and wrap them in a soft towel to dry.

**Step 7: Reward and Bond**
After grooming, reward your cat with treats or engage in playtime to create a positive association with the grooming process. This not only reinforces good behavior but also strengthens the bond between you and your furry companion.

By following these steps, grooming your long-haired cat can become a simple and enjoyable routine. With patience and practice, you’ll not only keep your cat looking fabulous but also ensure they feel loved and cared for!

6. Brushing Techniques for Different Coat Types

When it comes to grooming your long-haired cat, understanding the specific brushing techniques tailored to their unique coat type can make all the difference. Each coat type has its own set of needs, and mastering these techniques ensures that your feline friend remains comfortable, healthy, and looking fabulous.

**1. Silky and Fine Coats:** For cats with silky, fine fur, a wide-toothed comb is your best friend. Start by gently detangling any knots, working from the tips of the fur towards the roots. This approach minimizes pulling on the skin, which can be uncomfortable for your cat. Once you’ve removed any tangles, switch to a soft-bristle brush to smooth the coat and enhance its natural shine. A light touch is key, as too much pressure can irritate their sensitive skin.

**2. Thick and Dense Coats:** For those cats boasting a thick, plush coat, a slicker brush is essential. Begin by using the slicker brush to reach through the dense fur, removing loose hair and mats. Be sure to work in sections, starting from the back and moving towards the head. After addressing tangles and mats, follow up with a wide-toothed comb to ensure a thorough grooming session. This technique not only keeps their coat looking pristine but also reduces shedding around your home.

**3. Wavy or Curly Coats:** If your cat has a wavy or curly coat, consider using a comb specifically designed for curly fur. These combs have longer teeth that can glide through the curls without disrupting their natural wave. Start from the base of the fur and work your way up, gently separating the curls to avoid breakage. After combing, a bristle brush can help smooth out the fur and give it a polished finish.

**4. Mats and Tangles:** Regardless of the coat type, mats can be a common issue for long-haired cats. Always approach mats with caution. Use your fingers to gently loosen the fur, and if you encounter a stubborn mat, a dematting tool can work wonders. For particularly tough tangles, consider applying a small amount of cat-safe detangling spray to ease the process. Remember, patience is crucial; never yank or pull on mats, as this can cause pain and stress.

By tailoring your brushing techniques to your cat’s specific coat type, you not only enhance their coat’s appearance but also contribute to their overall well-being. Regular grooming sessions help reduce the risk of skin issues, keep your home hair-free, and strengthen the bond between you and your furry companion. With the right tools and techniques, you’ll be well on your way to grooming your long-haired cat like a pro!

7. Dealing with Mats and Tangles

What are the Best Ways to Groom a Long-Haired Cat?
Credit : whatcanu.com

Grooming a long-haired cat can be a labor of love, especially when it comes to tackling those pesky mats and tangles that seem to spring up out of nowhere. The first step in this delicate dance is to remain calm and gentle, as your furry friend can easily become stressed during grooming sessions. Start by assessing the extent of the tangles. If you spot a small mat, you may be able to work it out with your fingers or a wide-toothed comb. Gently tease the mat apart, starting from the outer edges and working your way in, being careful not to pull on your cat’s skin.

For more stubborn mats or those that have formed closer to the skin, a specialized dematting tool can be your best ally. These tools are designed to cut through the matting without causing discomfort to your pet. However, if you encounter a particularly large or tight mat, it might be worth considering a visit to a professional groomer. They have the experience and tools to safely remove the matting without causing pain or stress to your cat.

Preventative care is just as important as the treatment of existing tangles. Regular brushing is essential for long-haired cats, ideally a few times a week or even daily, depending on your cat’s coat type. Use a slicker brush or a pin brush to help prevent mats from forming in the first place. Pay special attention to areas where mats tend to develop, such as behind the ears, under the legs, and around the collar area. Additionally, incorporating a healthy diet rich in omega fatty acids can promote a smoother coat, reducing the likelihood of tangling.

Finally, remember that grooming should be a positive experience for your cat. Reward them with treats and praise throughout the process to create a sense of comfort and trust. With patience and regular care, you can keep your long-haired feline looking fabulous and free of mats, ensuring they feel as good as they look!

8. Bathing Your Long-Haired Cat: When and How

Bathing your long-haired cat is a topic that often stirs up a mix of apprehension and curiosity among feline owners. Unlike our canine companions, cats are generally self-groomers, but there are times when a bath becomes necessary—especially for long-haired breeds that are prone to matting, tangles, and occasional skunk encounters. So, when should you consider giving your furry friend a bath?

Ideally, you should bathe your long-haired cat only when absolutely needed. This could be after they’ve rolled in something unsavory, or if they have developed mats that can’t be gently brushed out. It’s also worth considering a bath during shedding seasons, as this can help remove loose fur and minimize hairballs. Generally, a good rule of thumb is to bathe your cat every 4 to 6 months, but always pay attention to their individual grooming needs.

Now, let’s talk about the “how.” Prepare the bathing area in advance, ensuring you have all your supplies within arm’s reach. You’ll need a cat-friendly shampoo, a non-slip mat for the bottom of the sink or tub, towels for drying, and perhaps a handheld sprayer or cup for rinsing. It’s crucial to use a shampoo specifically formulated for cats, as human products can irritate their skin.

When it’s time to bathe, fill the tub or sink with a few inches of lukewarm water—just enough to submerge your cat’s feet without overwhelming them. Gently place your cat in the water, supporting their body with one hand to help them feel secure. Use the other hand to wet their fur gradually, avoiding their face. Lather the shampoo into their coat, taking care to massage it well into any matted areas, but be gentle to avoid causing stress or discomfort.

Rinse thoroughly, ensuring that no shampoo residue remains, as this can lead to skin irritation. Once they’re clean, wrap your cat in a towel and gently pat them dry—avoid vigorous rubbing, which can tangle their fur further. If your cat tolerates it, you might consider using a low-heat setting on a pet-safe blow dryer from a distance, but many cats prefer to air dry in a cozy, warm spot.

Remember, patience is key! Some cats will adapt to baths better than others, so take your time, talk soothingly to your feline friend, and turn bath time into a bonding experience. With the right approach, bathing your long-haired cat can be a manageable task that leaves them not just looking, but feeling their absolute best.

9. Nail Trimming Tips for Long-Haired Cats

Nail trimming can be a daunting task for many cat owners, especially when it comes to long-haired breeds. However, keeping your feline’s claws in check is essential for their health and well-being, not to mention the safety of your furniture and skin! Here are some pro tips to ensure the process goes smoothly for both you and your fluffy companion.

**1. Choose the Right Tools:** Start by investing in a pair of high-quality cat nail clippers or guillotine-style trimmers specifically designed for pets. A pair of human nail clippers can be too large and unwieldy for your cat’s delicate claws. Additionally, having a nail file or grinder on hand can help smooth out any sharp edges after clipping.

**2. Create a Calm Environment:** Set up a quiet, comfortable space free from distractions. This will help both you and your cat feel more relaxed during the grooming session. Consider using a cozy blanket or their favorite spot, as it can offer a sense of security.

**3. handle with Care:** Before you even bring out the clippers, spend some time handling your cat’s paws to get them used to the sensation. Gently press on their paws to expose the claws and reward them with treats or praise for their cooperation. This will help reduce anxiety during the actual trimming process.

**4. Trim Wisely:** When trimming, look for the pink area within the claw known as the quick. Avoid cutting into this sensitive part, as it can cause pain and bleeding. If your cat has dark claws and the quick is not visible, trim just the sharp tip. If you’re uncertain, it’s better to err on the side of caution and trim less.

**5. Take Breaks as Needed:** If your cat becomes agitated or restless, take a break and allow them to relax. You can always split the session into smaller segments over a few days, especially if your cat is particularly sensitive or unaccustomed to nail trimming.

**6. Reward and Praise:** After each successful trim, shower your cat with affection and treats. This positive reinforcement will help them associate nail trimming with a pleasant experience, making future grooming sessions easier and more enjoyable.

By following these nail trimming tips, you’ll ensure that your long-haired cat remains comfortable and well-groomed. Not only will this contribute to their overall health, but it will also strengthen the bond between you and your feline friend. With a little patience and practice, you’ll become a pro at keeping those adorable paws perfectly pampered!

10. Ear and Eye Care Basics

When it comes to grooming your long-haired cat, ear and eye care are often overlooked but are crucial aspects of maintaining your feline’s overall health and comfort. Regular attention to these areas not only keeps your cat looking its best but also prevents potential health issues that can arise from neglect.

**Ear Care:** Start with your cat’s ears, which can accumulate dirt, wax, and debris over time. Gently inspect the inner ear for any signs of excessive wax buildup, redness, or foul odors, as these could indicate infections that require veterinary attention. To clean your cat’s ears, use a soft, damp cloth or a veterinarian-recommended ear cleaning solution. Avoid inserting anything deep into the ear canal; instead, focus on gently wiping the outer ear and the area where the ear meets the head. If your cat resists this process, consider incorporating it into a regular routine, rewarding them with treats or praise to create a positive association.

**Eye Care:** Next, turn your attention to your cat’s eyes. Long-haired breeds are particularly prone to tear staining, which can affect their beautiful appearance. Use a soft, damp cloth or a specialized eye wipe to gently wipe away any discharge that may accumulate around the eyes. Be sure to use a different section of the cloth for each eye to prevent cross-contamination. If you notice persistent tearing or changes in your cat’s eye health, such as redness or cloudiness, consult your veterinarian for further evaluation.

By incorporating these simple ear and eye care routines into your grooming sessions, you’ll not only keep your long-haired cat looking fabulous but also ensure they feel their best. A well-groomed cat is a happy cat, and your diligent care will strengthen the bond you share with your furry companion.

11. Identifying Skin Issues and Allergies

Grooming a long-haired cat goes beyond brushing and trimming; it also involves keen observation of your feline friend’s skin health. Identifying skin issues and allergies early on can prevent discomfort and more serious health complications down the line. As you groom your cat, take the time to inspect their skin closely. Look for signs such as redness, inflammation, or unusual bumps that could indicate underlying issues.

Pay attention to areas where matting may occur, as the skin underneath can be prone to irritation and infections if not properly cared for. If you notice excessive scratching, biting, or grooming in specific areas, this could be a sign of allergies or skin conditions that may require veterinary attention. Common culprits include fleas, food allergies, or environmental allergens like pollen and dust mites.

Additionally, keep an eye out for any changes in the texture or smell of your cat’s fur, as these can also signal skin problems. A healthy coat should be sleek and shiny, while excessive oiliness or a dull appearance may indicate an issue. Remember, grooming sessions can double as a valuable opportunity for bonding with your cat while ensuring they remain healthy and comfortable. If you suspect any skin issues or allergies, consult with a veterinarian to discuss potential treatments or dietary adjustments. By being proactive and attentive, you can help your long-haired cat maintain not just their beautiful coat, but their overall well-being, too.

12. Incorporating Grooming into Your Cat’s Routine

Incorporating grooming into your long-haired cat’s routine is essential for both their health and happiness. Cats thrive on consistency, and when grooming becomes a regular part of their daily life, it fosters trust and reduces anxiety around the process. Start by establishing a comfortable environment; choose a quiet spot with minimal distractions where your cat feels secure, perhaps a favorite sunny window perch or a cozy blanket.

Begin with short grooming sessions, gradually increasing the duration as your cat becomes accustomed to the activity. Use high-quality grooming tools, such as a slicker brush for detangling and a wide-toothed comb for smoothing out the fur. Introduce these tools slowly, allowing your cat to sniff and explore them before use. You can make grooming a positive experience by offering treats and praise throughout the process, reinforcing good behavior and creating a sense of reward.

To further integrate grooming into your cat’s routine, consider setting specific days or times for grooming sessions, such as every Wednesday and Saturday afternoon. This not only helps you stay organized but also allows your cat to anticipate the routine. By associating grooming with pleasant experiences, you’ll help your feline friend view it as a bonding time rather than a chore.

Additionally, keep an eye on your cat’s skin and coat condition during grooming. Look for signs of mats, skin irritations, or parasites. Early detection can prevent more significant issues down the line. Regular grooming not only keeps your cat looking fabulous but also contributes to their overall well-being, making it a win-win for both of you. With patience and persistence, you’ll soon be grooming your long-haired companion like a pro!

13. Positive Reinforcement During Grooming

When it comes to grooming your long-haired feline friend, incorporating positive reinforcement can transform the experience from a potential struggle into a delightful bonding activity. Cats, especially those with long, flowing coats, can be quite sensitive to grooming sessions, often associating them with stress or discomfort. However, by using positive reinforcement techniques, you can help your furry companion learn to enjoy the process.

Start by creating a calm and inviting atmosphere. Choose a quiet space free from distractions, and make sure your cat feels secure. As you begin to groom, keep a stash of their favorite treats nearby—these will be your secret weapon. Each time you gently brush a section of their coat or successfully detangle a knot, offer a small treat along with plenty of praise. This not only rewards good behavior but also helps your cat associate grooming with something positive.

Be mindful of your cat’s body language throughout the grooming process. If you notice signs of distress—such as twitching tails, flattened ears, or attempts to escape—take a step back. Respect their boundaries by allowing breaks and giving them a chance to relax. During these pauses, offer gentle petting and soothing words, reinforcing the idea that grooming is a nurturing experience.

Consistency is key; make grooming a regular part of your cat’s routine, gradually increasing the duration as they become more comfortable. Over time, your long-haired companion will begin to look forward to these sessions, eagerly anticipating the treats and affection that come with them. By employing positive reinforcement, you’ll not only keep your cat’s coat healthy and tangle-free but also strengthen the bond between you, making grooming a cherished time for both of you.

14. Professional Grooming: When to Consider It

While regular grooming at home is essential for maintaining your long-haired cat’s luscious coat, there are times when seeking the expertise of a professional groomer can make all the difference. If you find yourself overwhelmed by your feline’s grooming needs, or if your cat exhibits any anxiety or resistance to being groomed, it may be time to consider professional help.

Professional groomers possess specialized tools and techniques that can address issues beyond the reach of standard home grooming. For instance, if your cat has developed mats or tangles that are too stubborn to remove, a groomer can carefully detangle or shave those areas, ensuring your cat’s comfort and appearance. Additionally, if your furry friend has specific health conditions, such as arthritis or obesity, a groomer can accommodate their needs, providing a gentler grooming experience that you may not be able to replicate at home.

Moreover, if you notice excessive shedding or changes in your cat’s coat quality, a professional groomer can offer insights and treatments that may enhance your cat’s overall coat health. They can also provide valuable advice on the best grooming products tailored for your cat’s unique fur type, as well as tips on maintaining a regular grooming routine at home.

Ultimately, professional grooming can be a fantastic complement to your at-home efforts, ensuring that your long-haired companion stays looking fabulous and feeling comfortable. If your cat’s grooming needs are beyond your expertise—or if you simply want the peace of mind that comes from knowing they are in skilled hands—don’t hesitate to book a session with a trusted groomer. It’s an investment in your cat’s health and happiness that can pay off in spades!

15. Final Thoughts: Building a Bond Through Grooming

Grooming your long-haired cat is about so much more than just maintaining a beautiful coat; it’s an opportunity to forge a deeper connection with your feline friend. As you spend time brushing, bathing, and caring for their fur, you also create moments of trust and affection that can enhance your relationship. Cats, despite their reputation for independence, thrive on routine and familiarity. By incorporating grooming into your regular interactions, you signal to your cat that they are loved and cared for, fostering a sense of security.

Take a moment to observe your cat’s reactions during grooming sessions. Pay attention to their body language—do they lean into the brush, purr softly, or settle comfortably in your lap? These cues indicate that they appreciate the attention and the bonding experience. Use this time to speak softly to them, offering gentle praise and treats to reinforce positive associations with grooming.

Additionally, grooming can be a form of play. Introduce toys or engage in light games before or after grooming sessions to keep the mood light and enjoyable. This not only makes grooming less of a chore but also turns it into a rewarding experience for both of you.

Remember that patience is key—some cats may be more sensitive or resistant to grooming than others. Take your time, and be mindful of your cat’s comfort level. As you both grow accustomed to this ritual, you’ll find that these moments become cherished part of your daily routine, strengthening the bond you share. So, grab that brush, take a deep breath, and enjoy the journey of grooming together. Your long-haired companion will thank you with every purr and nuzzle!

In conclusion, grooming your long-haired cat doesn’t have to be a daunting task; with the right techniques and tools, you can transform this necessity into a bonding experience for both you and your feline companion. By following the essential tips outlined in this post—whether it’s mastering the art of detangling, selecting the right brushes, or establishing a calming grooming routine—you’ll not only keep your cat looking fabulous but also enhance their overall health and happiness. Remember, patience and consistency are key, so take your time and enjoy these moments of connection. We encourage you to share your grooming successes and any additional tips you might have learned along the way. Happy grooming, and may your cat’s coat shine as brightly as their personality!

How Often Should I Bathe My Dog?

Bathing your furry friend can often feel like a daunting task, but it’s an essential part of maintaining their health and happiness.

With so many different breeds, fur types, and lifestyles, finding the right bathing routine for your dog can be a bit of a puzzle. Too frequent baths can strip their coat of natural oils, leading to dryness and skin issues, while not bathing them enough can result in odors and dirt buildup. So, how do you strike the perfect balance? In this ultimate guide to dog bathing, we’ll explore the factors that influence how often your dog should be bathed, including their breed, activity level, and skin condition. Packed with expert tips and insights, this comprehensive resource will empower you to create a bathing schedule that keeps your pup clean, comfortable, and healthy. Whether you’re a new pet parent or a seasoned dog owner, you’ll discover everything you need to know to make bath time a breeze for both you and your beloved companion!

1. Introduction: The Importance of Regular Baths for Dogs

How Often Should I Bathe My Dog?
Credit : whatcanu.com

When it comes to dog ownership, few responsibilities are as vital yet overlooked as regular bathing. Just like humans, dogs require a clean environment to thrive, and a proper bath is a cornerstone of their hygiene and overall well-being. While it might seem like just an indulgent ritual or a chore to tackle, bathing your furry friend plays a crucial role in maintaining their health, comfort, and happiness.

Regular baths help remove dirt, debris, and allergens that can accumulate in your dog’s coat, providing relief from skin irritations and preventing infections. Many dog breeds are prone to certain skin conditions, and a well-timed wash can help manage these issues effectively. Beyond physical cleanliness, bathing is an opportunity to inspect your dog for any unusual lumps, bumps, or skin irritations that may require a vet’s attention.

Moreover, baths can significantly reduce odors that are common in dogs, especially those with long or thick coats. This not only keeps your home smelling fresh but also enhances your relationship with your pet. Dogs are social creatures, and a clean dog is often a happier dog, leading to more quality time together without the worry of unpleasant smells.

In this ultimate guide, we will delve into the nuances of dog bathing schedules, exploring factors such as breed, activity level, and skin type to help you determine how often your dog should enjoy a bath. Understanding the importance of regular baths is the first step in ensuring your canine companion leads a happy, healthy life, so let’s explore the best practices for keeping your dog clean and content.

2. Factors Affecting Bathing Frequency

Determining how often to give your dog a bath isn’t a one-size-fits-all decision; it hinges on several factors that can significantly influence your dog’s bathing frequency. Here are the key elements to consider:

**1. Breed and Coat Type**: The breed of your dog plays a crucial role in how often they need a bath. For instance, dogs with long, thick, or curly coats, such as Poodles or Golden Retrievers, may require more frequent grooming and bathing to prevent matting and to keep their coats clean. On the other hand, short-haired breeds like Dachshunds or Beagles may only need a bath every few months, as their coats shed dirt more easily.

**2. Activity Level**: Is your dog an adventurous explorer or a laid-back couch potato? A highly active dog that loves to romp through mud puddles, roll in the grass, or swim in lakes will likely need more baths than a dog that prefers lounging indoors. If your furry friend spends a significant amount of time outdoors or tends to get dirty easily, you might find yourself reaching for the shampoo more often.

**3. Skin Condition**: Dogs with sensitive skin or specific skin conditions may require a specialized bathing routine. Certain breeds are prone to skin issues that necessitate medicated baths at regular intervals. If your dog has allergies or skin irritation, consult with your veterinarian about the best bathing frequency and products to use.

**4. Environmental Factors**: The environment in which your dog lives can also impact bathing frequency. Dogs that live in dusty, sandy, or muddy areas may accumulate dirt and debris more quickly, necessitating more frequent baths. Additionally, if your dog spends a lot of time in the water, whether at the beach or a dog-friendly lake, you might need to bathe them more often to remove salt or chlorine.

**5. Personal Preference**: Lastly, your preference and your dog’s tolerance for baths matter. Some dogs absolutely love splashing around, while others might dread bath time. Finding a balance that keeps your pet comfortable while maintaining their hygiene is key.

By considering these factors, you can create a personalized bathing schedule that keeps your dog healthy, happy, and looking their best. Remember, the goal is not just to keep them clean but to ensure that their bathing routine enhances their overall well-being.

– Dog Breed and Coat Type

How Often Should I Bathe My Dog?
Credit : whatcanu.com

When it comes to determining how often your dog should be bathed, one of the most critical factors to consider is their breed and coat type. Different breeds have distinct grooming needs that correlate with their unique fur characteristics, and understanding these can help you maintain your dog’s hygiene and health effectively.

**Short-Haired Breeds**: For dogs like Beagles, Boxers, or Dachshunds, a bath every few months is generally sufficient. Their short, sleek coats don’t trap dirt and debris as readily, which means they can often go longer between baths. However, regular brushing—every week or so—helps remove loose hair and skin flakes, keeping their coat shiny and healthy.

**Long-Haired Breeds**: Breeds such as Golden Retrievers, Shih Tzus, and Collies require more frequent bathing, usually every 4 to 6 weeks. Their beautiful, flowing coats can easily collect dirt, oils, and matting, which can lead to skin irritations if not addressed. Regular baths, combined with thorough brushing, help keep their fur manageable and reduce the risk of painful tangles.

**Curly and Wavy Coats**: Breeds like Poodles and Portuguese Water Dogs possess unique coat types that require special attention. These dogs benefit from baths every 3 to 4 weeks, as their curls can trap dirt and moisture, leading to odors and potential skin issues. Regular grooming is crucial to prevent matting, and using a gentle, moisturizing shampoo can help maintain coat health.

**Double-Coated Breeds**: Breeds such as Huskies, German Shepherds, and Labrador Retrievers have a thick double coat that sheds seasonally. While they may not need frequent baths—typically every 2 to 3 months—brushing should be done regularly to manage shedding and keep their coat in top condition. When these breeds do bathe, using a high-quality shampoo designed for their coat type can help maintain its natural oils.

**Skin Conditions and Allergies**: Regardless of breed, if your dog suffers from skin conditions or allergies, you may need to adjust their bathing schedule. Your veterinarian can recommend specific bathing routines and products to alleviate symptoms and maintain skin health.

By considering your dog’s breed and coat type, you can create a bathing schedule that meets their grooming needs while ensuring their comfort and well-being. Keeping these factors in mind will help you find that perfect balance, ensuring your furry friend stays clean, healthy, and happy.

– Age and Health Considerations

When determining how often to bathe your dog, age and health considerations play a crucial role. Puppies, for instance, have sensitive skin and a natural protective coat that can be disrupted by frequent bathing. Generally, it’s advised to bathe them only when necessary—perhaps after playtime in the mud or an unfortunate encounter with a skunk. Their skin is still developing, so using mild, puppy-specific shampoos and limiting baths to once every few months can help maintain the natural oils that keep their coat healthy.

On the other hand, senior dogs may require more frequent baths due to changes in their skin and coat health. As dogs age, they can develop skin conditions, become less active in grooming themselves, or experience incontinence, all of which can necessitate more regular washing. Be gentle during bath time, using warm water and a soft brush to help soothe any discomfort they may have. Always keep an eye out for signs of skin irritation or unusual odors, as these could indicate underlying health issues that warrant a trip to the veterinarian.

For dogs with specific health concerns, such as allergies, skin infections, or other dermatological issues, the bathing schedule may need to be tailored further. Your vet can recommend medicated shampoos and an appropriate bathing frequency that aligns with your dog’s unique needs. Keeping a close watch on your dog’s coat and skin condition will help ensure that you strike the right balance, allowing them to stay clean and comfortable while promoting their overall health and well-being.

– Activity Level and Lifestyle

How Often Should I Bathe My Dog?
Credit : whatcanu.com

When it comes to determining how often to bathe your dog, one of the key factors to consider is their activity level and lifestyle. Dogs that lead an active life—frequently running, playing, and exploring the great outdoors—are likely to accumulate dirt, mud, and odors more quickly than their more sedentary counterparts. If your furry friend is a spirited adventurer, you might find yourself needing to schedule baths more frequently to keep their coat clean and fresh.

For instance, if your dog enjoys long hikes in the woods or romps at the beach, it’s not uncommon for them to return home covered in grime. In such cases, a bath every 2 to 4 weeks might be ideal to remove any accumulated debris and prevent skin issues caused by trapped dirt and moisture. On the other hand, for dogs who enjoy a calmer lifestyle—think couch companions and low-energy lapdogs—a bath every 6 to 8 weeks might suffice, as they are less likely to get dirty.

Additionally, consider the breed and coat type: long-haired dogs or those with dense fur may require more frequent bathing and grooming to prevent matting and to maintain a healthy coat. Meanwhile, short-haired breeds may only need a bath when they start to smell or if they’ve rolled in something particularly unpleasant.

Ultimately, tailoring your bathing routine to fit your dog’s unique lifestyle will not only keep them clean but also contribute to their overall well-being. Regular grooming, coupled with the right bathing schedule, can help ensure that your dog’s coat remains healthy, vibrant, and free of irritants.

3. General Guidelines for Bathing Frequency

When it comes to determining how often you should bathe your dog, there are several general guidelines to keep in mind. While every dog is unique, these foundational principles can help you establish a bathing routine that keeps your furry friend clean, comfortable, and healthy.

**Coat Type Matters**: The type of coat your dog has plays a significant role in how often they should be bathed. Breeds with long, flowing fur, like Golden Retrievers or Afghan Hounds, may require more frequent baths to prevent matting and tangling. In contrast, short-haired breeds, such as Beagles or Boxers, often need less frequent bathing, perhaps every 8-12 weeks.

**Activity Level**: Consider your dog’s daily activities. An active dog that loves to romp through the dirt or splash in puddles may need more frequent baths than a couch potato. If your pup enjoys outdoor adventures, you might find yourself bathing them every few weeks to keep them fresh and odor-free.

**Skin Health**: Dogs with skin conditions or allergies may need special attention when it comes to bathing frequency. Consult with your veterinarian to determine the best bathing schedule and products to use for your dog’s specific skin needs. Some dogs may benefit from medicated shampoos and more regular baths, while others might require a gentler approach.

**Seasonal Changes**: Don’t forget to adjust your bathing routine based on the seasons. During warmer months, dogs may appreciate more frequent baths to wash away dirt and sweat, while in colder months, it’s often best to bathe them less frequently to prevent dry skin.

**Odor and Dirt Levels**: Finally, trust your nose! If your dog starts to develop an odor or has visible dirt buildup, it’s time for a bath regardless of the timeline you’ve set. Regular grooming and brushing can also help manage dirt and loose fur between baths, extending the time between washings.

By considering these general guidelines, you can tailor a bathing schedule that suits your dog’s specific needs, ensuring they stay clean and comfortable without stripping their skin and coat of natural oils. Ultimately, a well-groomed dog is a happy dog!

– Puppies vs. Adult Dogs

How Often Should I Bathe My Dog?
Credit : whatcanu.com

When it comes to bathing, the age of your dog plays a significant role in determining how often they should be pampered with a scrub and rinse. Puppies and adult dogs have different needs, sensitivities, and lifestyles that influence their bathing schedules.

**Puppies** are often cute bundles of energy, exploring their world with an insatiable curiosity. While they may not have the same level of dirt accumulation as their adult counterparts, they can find themselves in a variety of messes—muddy puddles, sticky grass, and even some unexpected surprises! Due to their delicate skin and developing immune systems, it’s essential to approach puppy bathing with care. Most veterinarians recommend bathing puppies every 3 to 4 weeks, using a gentle, pet-safe shampoo that doesn’t strip their coat of essential oils. This regular bathing helps familiarize them with the process, making future baths easier and more enjoyable as they grow.

On the other hand, **adult dogs** typically require a different bathing frequency. Depending on their breed, lifestyle, and coat type, adult dogs may only need a bath once a month or even every couple of months. Dogs that spend more time outdoors, roll in the dirt, or have oily coats may need to be bathed more frequently. It’s crucial to observe your dog’s coat and skin condition; if they start to smell or their fur appears greasy, it’s probably time for a bath. For breeds with longer hair, regular brushing can help reduce the need for frequent baths by controlling tangles and dirt accumulation.

Overall, understanding the differences between puppies and adult dogs can help you establish a suitable bathing routine that keeps your furry friends clean, comfortable, and happy. Whether your dog is a playful puppy or a wise adult, finding the right balance will ensure they feel their best while promoting healthy skin and a shiny coat.

– Indoor vs. Outdoor Dogs

When it comes to determining how often to bathe your dog, one of the most significant factors to consider is whether your furry friend is an indoor or outdoor dog. each environment presents unique challenges and influences on your dog’s hygiene needs.

**Indoor Dogs:**
For dogs that primarily reside indoors, bathing might be required less frequently, typically every 4 to 6 weeks. These dogs usually enjoy a controlled environment free from the dirt and grime of the great outdoors. However, they can still accumulate dust, dander, and odors from household activities. Regular brushing is essential for indoor pups to minimize shedding and keep their coat healthy and clean. Pay attention to specific factors such as breed, coat type, and overall health. Long-haired breeds might need more frequent grooming to prevent matting, while short-haired dogs might only need a bath if they roll in something unsavory or start to develop an odor.

**Outdoor Dogs:**
On the other hand, outdoor dogs tend to be more exposed to the elements, leading to a messier coat and potentially more frequent bathing requirements—sometimes as often as every 2 to 4 weeks. These dogs engage in playtime that often involves mud, grass, and other outdoor elements, which can lead to dirtier fur. Depending on the season and their activities, you might find yourself giving your outdoor dog a quick rinse after a particularly muddy romp or a more thorough wash after a day of exploration. Keep in mind that if your outdoor dog has a thick or water-resistant coat, you may need to balance their bathing schedule with their natural oils to avoid drying out their skin.

Ultimately, understanding your dog’s lifestyle and environment will guide you in establishing a bathing routine that promotes cleanliness without compromising their skin health. By tailoring your approach based on whether your dog spends more time indoors or outdoors, you can ensure they remain fresh, healthy, and happy.

4. Signs Your Dog Needs a Bath

Bathing your dog can often feel like a daunting task, but being in tune with your furry friend’s needs can make it much easier. Recognizing the signs that your dog needs a bath is crucial for maintaining their health and comfort. Here are some key indicators to watch for:

1. **Odor**: One of the most obvious signs that your dog is due for a wash is an unpleasant odor. If your pup starts to smell less like sunshine and more like a wet dog, it’s time for a bath. Dogs can accumulate dirt, oils, and even food particles in their fur, leading to an unmistakable scent that signals it’s time for a scrub.

2. **Dirt and Debris**: After a romp through the mud or a playful day at the park, your dog’s coat may be laden with dirt, leaves, or even grass clippings. If you notice visible dirt or debris clinging to their fur, it’s a clear sign that they could use a good bath to restore cleanliness and comfort.

3. **Skin Irritation**: Pay close attention to your dog’s skin. If you notice excessive scratching, biting, or licking, it might be time for a bath. Sometimes, dirt and allergens can irritate their skin, leading to discomfort. A thorough wash can help remove these irritants and soothe their skin, especially if you use a hypoallergenic or soothing shampoo.

4. **Greasy or Oily Fur**: Some breeds, especially those with longer or thicker coats, can develop a greasy texture over time. If your dog’s fur feels slick to the touch or looks unkempt, it’s likely time for a cleansing bath. Regular washing can help maintain a healthy coat and prevent matting.

5. **Behavior Changes**: If your dog suddenly becomes more withdrawn or appears uncomfortable, it may be a sign that they need a bath. Dogs often feel better after a wash, as it can remove irritants from their fur and give them a fresh start.

By tuning into these signs, you can create a bathing schedule that keeps your dog looking great and feeling even better. Remember, a clean dog is a happy dog, and regular baths not only enhance your pet’s appearance but also promote their overall well-being.

5. How to Bathe Your Dog: Step-by-Step Guide

Bathing your dog can be a bonding experience, but it requires careful preparation and execution to ensure it’s enjoyable for both of you. Here’s a step-by-step guide to make the process smooth and effective.

### Step 1: Gather Your Supplies
Before you start, assemble everything you’ll need. This includes dog shampoo (specifically formulated for pets), a non-slip mat to prevent slipping, towels, a brush, and a detachable showerhead or a cup for rinsing. Having everything close at hand will minimize stress for both you and your pup.

### Step 2: Choose the Right Location
Select a bathing area that suits your dog’s size and comfort level. For smaller breeds, a sink or bathtub might work best, while larger dogs may need a garden hose outside or a bathtub. Ensure the temperature of the water is lukewarm—too hot or too cold can be uncomfortable for your furry friend.

### Step 3: Brush Your Dog
Before getting them wet, brush your dog’s coat to remove loose fur and knots. This step is especially important for long-haired breeds, as it helps prevent matting and makes the bathing process easier. Plus, it’s a great way to check for any skin issues or irritations.

### Step 4: Wet Your Dog
Using the showerhead or a cup, gently wet your dog’s coat, starting from the neck down. Be cautious around the head and ears, as these areas can be sensitive. If your dog seems anxious about water, speak to them in a calming voice to help them relax.

### Step 5: Apply Shampoo
Once your dog is thoroughly wet, apply a small amount of dog shampoo, working it into a lather. Avoid getting shampoo in their eyes, ears, and mouth. Focus on the body, legs, and tail, making sure to clean any areas that tend to get dirty, such as under the belly and around the paws.

### Step 6: Rinse Thoroughly
Rinse your dog completely, ensuring that all shampoo is washed away. leftover shampoo can irritate their skin, so take your time with this step. Use the showerhead or cup again, starting from the neck and working your way down.

### Step 7: Dry Your Dog
After rinsing, gently wring out excess water from your dog’s coat. Use a towel to dry them off, especially in colder weather. If your dog tolerates it, you can also use a pet-safe blow dryer on a low setting to help speed up the drying process.

### Step 8: Reward Your Dog
Once the bath is over, reward your dog with treats, praise, or playtime. This positive reinforcement helps them associate bath time with a pleasant experience, making the next bath easier for both of you.

By following these steps, you can make bath time a stress-free and enjoyable routine for your dog, ensuring they stay clean and healthy while also deepening your bond.

6. Choosing the Right Dog Shampoo

Choosing the right dog shampoo is a crucial step in your dog bathing routine that can significantly impact your pup’s coat health and overall well-being. With a myriad of options available on the market, it’s essential to select a shampoo that caters to your dog’s specific needs.

First and foremost, consider your dog’s skin type and coat condition. If your furry friend has sensitive skin, look for a hypoallergenic shampoo that is free of fragrances, dyes, and harsh chemicals. These gentle formulas help prevent irritation and maintain the natural oils in the skin. For dogs with dry or flaky skin, a moisturizing shampoo enriched with ingredients like aloe vera or oatmeal can provide the necessary hydration and soothe discomfort.

For those with a more adventurous lifestyle—think playful pups who love to roll in mud or splash through puddles—a deep-cleaning or deodorizing shampoo might be the perfect fit. These products are designed to eliminate stubborn odors and dirt while still being safe for regular use.

If your dog has specific health concerns, such as allergies or skin conditions, it’s advisable to consult your veterinarian before making a selection. They can recommend medicated shampoos that address issues like hot spots, dermatitis, or flea and tick infestations.

Lastly, don’t forget about the power of convenience! Many shampoos now come in convenient formulas with built-in conditioners, making the bathing process quicker and easier. When selecting a shampoo, always read the label to ensure it is formulated specifically for dogs, as human shampoos can disrupt the natural pH balance of their skin.

In summary, investing a little time and care into choosing the right dog shampoo will not only enhance your dog’s bathing experience but also contribute to a healthy, shiny coat and a happy pup. Happy bathing!

7. Tips for a Stress-Free Bathing Experience

Bathing your dog should be a bonding experience rather than a battle, and with a few thoughtful strategies, you can ensure it’s stress-free for both of you. Here are some tips to make bath time a positive routine:

**1. Choose the Right Location:** Select a bathing area that your dog feels comfortable in. Whether it’s a bathtub, a shower stall, or even a backyard setup with a kiddie pool, ensure that it’s a space where your dog can feel secure. Some dogs may prefer the outdoors, while others might feel more at ease inside.

**2. Gather Your Supplies in Advance:** Before bringing your dog into the bathing area, have all your supplies at the ready. This includes dog shampoo (preferably one that’s gentle and formulated specifically for their coat type), towels, a brush, and perhaps a non-slip mat to prevent slipping. Having everything on hand will help streamline the process and reduce anxiety.

**3. Brush Before the Bath:** Giving your dog a good brush before bathing helps remove loose fur, dirt, and tangles, making the washing process easier. Plus, it’s a great way to calm your dog and help them relax before the bath.

**4. Use Lukewarm Water:** Dogs can be sensitive to temperature, so always test the water before getting started. Use lukewarm water to ensure it’s comfortable for your pup. Avoid using too much water pressure, which can startle them.

**5. Keep It Short and Sweet:** Especially for younger or more anxious dogs, keeping the bathing session brief can help alleviate stress. Focus on essential areas like the body, paws, and behind the ears, and save the full grooming for when your dog is more comfortable with the routine.

**6. Offer Treats and Praise:** Positive reinforcement can work wonders. Use treats and praise generously throughout the process to create a positive association with bathing. This encourages your dog to relax and may even make them look forward to it.

**7. Drying Off:** After the bath, gently towel-dry your dog to remove excess water. If they’re comfortable with the sound, you can also use a low-heat hairdryer. Always keep it at a distance and avoid their face to prevent any fear or discomfort.

By following these tips, bath time can transform from a dreaded chore into a pleasant routine that both you and your dog can enjoy. With patience and understanding, you can create a bathing experience that fosters trust and strengthens your bond.

8. Tools and Accessories for Successful Bathing

Bathing your dog can be a delightful bonding experience, but having the right tools and accessories at your disposal can make all the difference in ensuring a smooth and enjoyable process for both you and your furry friend. Here’s a roundup of essential items that will set you up for success and transform bath time into a stress-free ritual.

**1. High-Quality Shampoo:** Selecting the right shampoo is paramount. Look for a formula that is specifically designed for dogs, as human shampoos can be too harsh on their skin. Opt for gentle, natural ingredients that cater to your dog’s specific needs—whether they have sensitive skin, a thick coat, or a tendency to get dirty quickly. Consider a conditioner as well, especially for breeds with longer fur, to keep their coat soft and manageable.

**2. Non-Slip Bath Mat:** Dogs can be a bit wobbly on wet surfaces, making a non-slip bath mat a wise addition. This will not only help your dog feel secure in the tub but also prevent accidents from slips and falls. Choose one that is easy to clean and dries quickly to maintain hygiene.

**3. Dog Grooming Brush:** Before the bath, a good brushing is essential to remove loose hair and tangles. A grooming brush appropriate for your dog’s coat type will help keep their fur in great condition, enhancing the effectiveness of the bath and preventing mats from forming when wet.

**4. Hose or Handheld Sprayer:** Whether you’re bathing your dog indoors or outdoors, having a hose or a handheld sprayer can make rinsing much easier. Adjustable nozzles allow you to control the water pressure, ensuring a gentle rinse that won’t frighten your pet.

**5. Towels:** Keep a few absorbent towels nearby to dry your dog off after the bath. Microfiber towels are a fantastic option as they absorb water quickly and minimize shedding mess. You might also consider a drying coat, particularly for breeds that take longer to dry.

**6. Treats and Toys:** Bath time doesn’t have to be a chore! Bring along some treats or waterproof toys to keep your dog entertained and comfortable during the process. Positive reinforcement can turn bath time into something they look forward to, rather than dread.

**7. Nail Clippers and Ear Cleaning Solution:** While you have your dog in the bath, it’s a perfect opportunity to tackle other grooming tasks. Keep nail clippers and an ear cleaning solution handy to give them a complete grooming session. Just be sure to use these tools gently to avoid any discomfort.

Having these tools and accessories at your fingertips will not only streamline the bathing process but also enhance the overall experience for your dog. With the right preparation and equipment, you can make dog bathing a routine that both you and your pet will enjoy, fostering a strong bond and keeping your furry friend clean and happy!

9. Common Mistakes to Avoid When Bathing Your Dog

Bathing your dog can be a delightful bonding experience, but it can also go awry if you’re not careful. To ensure your pup enjoys the process and remains healthy, it’s crucial to avoid some common bathing blunders.

One of the most frequent mistakes is using human shampoo. While it might be tempting to reach for what’s already in your shower, human shampoos can disrupt your dog’s skin pH balance, leading to irritation and dryness. Instead, invest in a high-quality dog shampoo formulated specifically for their skin type.

Another pitfall is neglecting to brush your dog before the bath. Bathing a dirty, matted coat can make tangles worse and create a frustrating experience for both of you. Brushing out loose fur and mats beforehand not only makes washing easier but also helps remove dirt and debris.

Additionally, many pet owners underestimate the importance of water temperature. Using water that’s too hot can scald your dog’s sensitive skin, while water that’s too cold may leave them shivering and uncomfortable. Aim for lukewarm water, which is gentle and soothing for your furry friend.

Don’t forget about your dog’s ears, either. Water getting trapped in the ears can lead to infections, so be cautious when rinsing around that area. Using a cotton ball to gently block their ears while bathing can help prevent this issue.

Lastly, timing is key! Bathing your dog too frequently can strip their coat of natural oils, leading to dryness and irritation. Stick to a bathing schedule that suits your dog’s breed, activity level, and overall health. By avoiding these common mistakes, you’ll not only make bath time more enjoyable but also contribute to your dog’s overall well-being.

10. Alternatives to Traditional Baths: Wipes and Waterless Shampoo

For many dog owners, the thought of giving their furry friend a bath can evoke images of slippery floors, splashing water, and an inevitable showdown with a soggy pup. Fortunately, there are alternatives to traditional baths that can make this grooming task easier and less stressful for both you and your dog. Enter dog wipes and waterless shampoos—two convenient options that can keep your dog’s coat clean and fresh without the hassle of a full bath.

**Dog Wipes:** These handy, pre-moistened wipes are like a quick spa treatment for your canine companion. Designed specifically for pets, dog wipes are gentle, hypoallergenic, and safe for regular use. They’re perfect for cleaning muddy paws after a romp in the park, wiping down a dog that has rolled in something unpleasant, or simply giving your pooch a refreshing clean between baths. With a variety of formulas available—some infused with soothing ingredients like aloe or oatmeal—you can choose the best option for your dog’s skin type. Plus, the convenience of wipes means you can easily toss a pack in your bag for on-the-go clean-ups, making them a must-have for any dog owner.

**Waterless Shampoo:** If your dog is particularly resistant to baths or if you’re short on time, waterless or dry shampoos can be a game-changer. These innovative products come in spray or foam form, allowing you to clean your dog’s coat without the need for water. Simply apply the product according to the instructions, massage it into your dog’s fur, and then use a towel or brush to remove any excess. Waterless shampoos are great for spot cleaning and can help neutralize odors while leaving your dog’s coat looking shiny and feeling soft. Look for formulas that are specifically crafted for dogs, as they will be pH-balanced and free from harsh chemicals.

Incorporating these alternatives into your dog grooming routine can help maintain your dog’s hygiene while saving you time and effort. Whether you opt for wipes or waterless shampoo, you can keep your pup looking and smelling great between those full bathing sessions. Remember, a clean dog is a happy dog, and with these options at your disposal, keeping your furry friend fresh has never been easier!

11. Seasonal Considerations: Bathing in Different Weather

When it comes to bathing your dog, seasonal considerations play a crucial role in determining the best frequency and approach for keeping your furry friend clean and comfortable. Each season presents unique challenges and opportunities that can influence your dog’s bathing routine.

**Spring** often brings an explosion of allergens as flowers bloom and trees regain their leaves. If your dog spends a lot of time outdoors, you may find them coming back from walks covered in pollen or mud. During this time, consider bathing them more frequently to help alleviate allergies and remove any debris that might irritate their skin. Opt for a gentle, hypoallergenic shampoo to ensure their sensitive skin is cared for.

**Summer**, with its sweltering heat, can lead to increased dirt and grime, especially for dogs who love to play outdoors. Regular baths during this season not only help to keep your dog clean but also provide a refreshing respite from the heat. However, be cautious of bathing them too often, as this can strip their coat of natural oils. Instead, focus on brushing them regularly to remove loose fur and dirt, and bathe them as needed, perhaps once every couple of weeks or after particularly messy playdates.

As the **leaves fall** in **autumn**, your dog may have a new challenge: the accumulation of leaves, twigs, and even mud from rainy days. This is a great time to reassess your dog’s bathing routine. If you notice they are rolling in piles of leaves or getting muddy on walks, it might be worth scheduling a bath after those excursions. Additionally, as the weather cools, you might want to ensure that their coat remains healthy and insulated, so consider using moisturizing shampoos that won’t strip their natural oils.

Finally, in **winter**, bathing frequency may decrease as dogs tend to spend more time indoors. However, if your dog enjoys playing in the snow or if they get muddy from slush and rain, they may still require a bath. Just be mindful of the temperature—avoid bathing them with cold water in chilly weather. Instead, consider using lukewarm water and drying them thoroughly afterward to prevent them from getting cold. Also, keep in mind that winter can lead to dry skin for many dogs, so look for moisturizing shampoos that can help soothe and hydrate their skin.

By adapting your dog bathing routine to the changing seasons, you not only ensure that your pet is clean and comfortable but also promote a healthy coat and skin year-round. Remember, each dog is unique, so observe your furry friend’s needs and adjust accordingly for the best results.

12. Grooming Beyond Bathing: Brushing and Dental Care

When it comes to dog grooming, bathing is just the tip of the iceberg. To ensure that your furry friend remains healthy, happy, and looking their best, you must also prioritize brushing and dental care as essential components of their grooming routine.

Brushing your dog’s coat is not only a great way to keep their fur looking clean and shiny, but it also promotes healthy skin by distributing natural oils and reducing the risk of matting. Depending on your dog’s breed, their coat type may require different brushing techniques and frequencies. For instance, long-haired breeds, like Golden Retrievers or Shih Tzus, may need to be brushed several times a week to prevent tangles and mats, while short-haired breeds, such as Beagles or Boxers, might only need to be brushed weekly. Regular brushing sessions can also be a bonding experience between you and your pup, making it a wonderful opportunity for some extra affection and attention.

Dental care is another critical aspect of grooming that is often overlooked. Just like humans, dogs can suffer from dental issues if their teeth are not properly cared for. Plaque and tartar buildup can lead to serious health problems, including gum disease and even heart issues. To maintain your dog’s dental hygiene, aim to brush their teeth at least two to three times a week using dog-specific toothpaste. Additionally, dental chews and toys can help freshen breath and reduce plaque buildup. Regular veterinary check-ups should also include dental examinations to ensure your dog’s mouth remains healthy.

Incorporating brushing and dental care into your dog grooming routine not only enhances their appearance but also contributes significantly to their overall health and well-being. A well-groomed dog is a happy dog, and with a little time and effort, you can ensure they stay comfortable, clean, and healthy between baths. Remember, grooming is about more than just keeping up appearances; it’s an integral part of your dog’s care and happiness.

13. The Benefits of Regular Bathing for Your Dog’s Health

Regular bathing is more than just a beauty routine for your furry friend; it’s a critical component of their overall health and well-being. When you cleanse your dog’s coat, you’re not only washing away dirt and odors but also removing dead hair, dander, and allergens that can irritate their skin or exacerbate allergies. This simple act can significantly reduce the presence of these irritants in your home, creating a healthier environment for both you and your pet.

Moreover, bathing provides a unique opportunity to inspect your dog’s skin and coat closely. As you lather up, you can easily spot any unusual lumps, bumps, or skin irritations that might need veterinary attention. Regular baths can also help in the early detection of parasites like fleas and ticks, which can lead to more serious health issues if left unchecked.

Additionally, the right shampoo can work wonders for your dog’s skin condition. For dogs prone to certain skin issues, medicated shampoos can help alleviate symptoms and maintain skin health. Even for those without specific issues, a good wash can promote a shiny coat and healthy skin, keeping your dog looking and feeling their best.

Finally, bathing can be a bonding experience between you and your dog. The gentle scrubbing and soothing water can help calm anxious pups, making it a wonderful time for affection and trust-building. With all these benefits in mind, establishing a regular bathing routine can contribute significantly to your dog’s health, happiness, and overall quality of life.

14. Frequently Asked Questions About Dog Bathing

When it comes to dog bathing, pet owners often have a myriad of questions that swirl around their minds, reflecting their desire to provide the best care for their furry companions. Understanding the nuances of dog bathing can help you maintain your dog’s health and happiness, and we’re here to clarify some of the most commonly asked questions.

**How often should I bathe my dog?**
The answer to this question can vary significantly based on your dog’s breed, coat type, and lifestyle. Generally, dogs with short coats may only need a bath every few months, while those with longer hair or who spend a lot of time outdoors might require more frequent baths. Always consider your dog’s specific needs and consult your veterinarian for personalized advice.

**Is it safe to bathe my dog too often?**
Absolutely! Overbathing can strip your dog’s skin of its natural oils, leading to dryness and irritation. This is especially true for breeds with sensitive skin or those prone to allergies. Stick to a bathing routine that suits your dog’s unique requirements, and remember: less can often be more.

**What kind of shampoo should I use?**
Choosing the right shampoo is crucial. Always opt for a product specifically formulated for dogs, as human shampoos can disrupt their skin’s pH balance. Look for gentle, hypoallergenic formulas if your dog has sensitive skin, and consider natural or organic options for a more eco-friendly approach.

**Can I bathe my dog outside?**
Absolutely! Bathing your dog outside can be a fun experience for both of you, especially on warm days. Just ensure you have a safe, enclosed space where your dog feels comfortable. Use a hose with a gentle spray, and be mindful of the water temperature to avoid your pup getting too cold.

**What if my dog hates baths?**
Many dogs are not fans of bath time, and that’s perfectly normal! To make the experience more enjoyable, start by introducing your dog to the bathing area gradually. Use treats and praise to create positive associations, and consider using a non-slip mat to help them feel secure. With patience and practice, bath time can become a more pleasant routine.

By addressing these frequently asked questions, you can navigate the sometimes-challenging waters of dog bathing with confidence and ease. Remember, a clean dog is not only a happy dog but also a healthier one! So, equip yourself with the right knowledge and techniques, and enjoy the bonding experience that comes with keeping your furry friend fresh and clean.

15. Conclusion: Finding the Right Bathing Routine for Your Dog

In conclusion, finding the right bathing routine for your dog is a nuanced endeavor that hinges on a variety of factors including breed, activity level, skin condition, and environmental exposure. Just as no two dogs are alike, their bathing needs can vary significantly. Some breeds, like the water-loving Labrador Retriever, may require more frequent baths, while others, such as the low-maintenance Beagle, may thrive with less frequent grooming.

It’s essential to pay attention to your dog’s individual behavior and coat condition. If they begin to develop an unpleasant odor or their coat appears dull and dirty, it may be time for a bath. Conversely, over-bathing can strip natural oils from their skin, leading to dryness and irritation. Aim for a balanced approach, incorporating baths into a broader grooming routine that includes regular brushing, nail trimming, and ear cleaning.

Ultimately, the key is to observe your dog’s response to bathing. Some dogs may revel in splash time, while others may find it stressful. Gradual acclimatization, combined with positive reinforcement, can turn bath time into a bonding experience rather than a chore. By establishing a consistent, gentle bathing schedule, you not only keep your furry friend clean and healthy, but you also foster a trusting relationship that enhances their overall well-being. With the right routine, you’ll ensure your dog feels fresh, happy, and ready to take on the world—one wag at a time!

As we wrap up our ultimate guide to dog bathing, it’s clear that finding the right balance in your dog’s grooming routine is essential for their health and happiness. Remember, the frequency of baths can vary based on your dog’s breed, coat type, and lifestyle; paying attention to your furry friend’s individual needs will help you determine the perfect bathing schedule. By following the tips and insights shared in this post, you can ensure that bath time is a positive experience for both you and your dog, reinforcing your bond and keeping them clean and comfortable. So grab that shampoo and a cozy towel, and get ready to make bath time a delightful ritual! Your pup will thank you for it!

What Are The Best Dog Breeds for First-Time Owners?

Bringing a dog into your home is one of life’s most rewarding experiences, but for first-time owners, it can also be a bit daunting.

With so many breeds to choose from, finding the perfect furry companion that aligns with your lifestyle, energy level, and experience can feel overwhelming. Fortunately, some dog breeds are renowned for their friendly temperaments, adaptability, and ease of training—making them ideal choices for those new to pet ownership. In this ultimate guide, we’ll explore the top 10 dog breeds that are perfect for first-time owners, highlighting their unique characteristics, care requirements, and what makes them the perfect addition to your family. Whether you’re dreaming of a playful pup to join you on adventures or a cuddly companion to relax with at home, this guide will help you find the perfect match and set you on a path to a joyful and fulfilling journey with your new best friend.

1. Introduction: Why Choosing the Right Dog Breed Matters

What Are The Best Dog Breeds for First-Time Owners?
Credit : whatcanu.com

Choosing the right dog breed is one of the most significant decisions a first-time owner can make. Dogs are not just pets; they become beloved family members who will share your life for many years. Selecting a breed that aligns with your lifestyle, living situation, and personal preferences can lead to a harmonious relationship filled with joy, companionship, and understanding.

Understanding the unique characteristics and needs of different breeds is essential. Some dogs require high levels of exercise and mental stimulation, while others are content with a leisurely stroll around the block. Considerations such as size, grooming needs, temperament, and energy levels can greatly influence your experience as a new dog owner. A breed that thrives in an active household may not be suited for a quieter, more laid-back environment, and vice versa.

Moreover, the right breed can help alleviate the common challenges faced by first-time dog owners, such as training difficulties or behavioral issues. By choosing a breed known for its adaptability and ease of training, you can foster a more positive experience for both you and your new furry friend.

In this guide, we will explore ten dog breeds that are particularly well-suited for first-time owners. Each breed comes with its own set of attributes that make them easier to care for, train, and bond with, ensuring you embark on this rewarding journey with the right companion by your side. Let’s dive in and discover the perfect canine match for you!

2. Factors to Consider When Selecting a Dog for First-Time Owners

Selecting the right dog breed as a first-time owner is a crucial step that can significantly impact your experience as a pet parent. Here are some important factors to consider when making this decision:

**1. Energy Level:** Different breeds come with varying energy levels. If you’re an active individual or family who enjoys outdoor activities, you might lean towards a high-energy breed that can keep up with your lifestyle. Conversely, if you prefer a more laid-back life, look for breeds that are content with moderate exercise and enjoy relaxing at home.

**2. Size:** The size of your living space can dictate the best breed for you. Larger breeds may require more space to roam and play, while smaller breeds can thrive in apartments or homes with limited square footage. Additionally, consider the size of your yard—if you have one—when thinking about how much room your dog will need to play and explore.

**3. Grooming Needs:** Some breeds have coats that require regular grooming, while others are relatively low maintenance. First-time owners may find it easier to manage a dog with minimal grooming needs, which can save both time and money. Research the coat types and grooming requirements of different breeds to ensure you choose one that fits your lifestyle.

**4. Temperament:** Each breed has its unique disposition. Some dogs are more independent and can entertain themselves, while others thrive on companionship and may become anxious if left alone for long periods. First-time owners should consider breeds known for their friendly, easy-going nature, making the training and bonding process smoother.

**5. Trainability:** If you’re new to dog ownership, it’s essential to consider how easily a breed can be trained. Some breeds are more eager to please and respond well to training, while others may be more stubborn. Look for breeds that are known for their intelligence and willingness to learn, as this can make your experience more enjoyable and help you establish an obedient companion.

**6. Lifespan and Health Considerations:** Different breeds can have various health concerns that may affect their longevity and quality of life. Research common health issues associated with potential breeds and consider how their lifespan fits into your long-term plans.

By taking these factors into consideration, first-time dog owners can make informed choices that lead to fulfilling and happy relationships with their furry friends. Remember, choosing the right breed is about aligning their needs with your lifestyle, ensuring a harmonious home for both you and your new canine companion.

3. Overview of the Top 10 Dog Breeds

What Are The Best Dog Breeds for First-Time Owners?
Credit : whatcanu.com

When it comes to choosing the perfect companion for first-time dog owners, it’s essential to consider breeds that are not only friendly and trainable but also adaptable to various living situations. Here’s a closer look at our top 10 dog breeds that embody these qualities, ensuring a rewarding experience for both you and your new furry friend.

1. **Labrador Retriever**: Renowned for their friendly disposition and intelligence, Labradors make excellent family pets. They’re highly trainable, love to play, and thrive on social interaction, making them perfect for first-time owners who want a loyal companion.

2. **Golden Retriever**: Similar to Labradors, Golden Retrievers are affectionate, intelligent, and eager to please. Their gentle nature and patience make them ideal for families with children, and their love for outdoor activities ensures fun-filled adventures together.

3. **Beagle**: With their curious and friendly personalities, Beagles are a delightful choice for novice owners. They’re small to medium in size, have a strong sense of smell, and love to explore, making them perfect for those who enjoy outdoor outings.

4. **Bulldog**: Bulldogs have a calm demeanor that can be particularly appealing for those living in apartments or smaller homes. Their low exercise needs and affectionate nature make them great companions for first-time owners who prefer a more laid-back lifestyle.

5. **Poodle**: Available in standard, miniature, and toy sizes, Poodles are intelligent and highly trainable. Their hypoallergenic coat also makes them suitable for families with allergies. With a playful spirit, they adapt well to various living situations.

6. **Cavalier King Charles Spaniel**: This breed is known for its affectionate and gentle temperament. Cavaliers are small, making them perfect for apartment living, and they thrive on companionship, forming strong bonds with their owners.

7. **Shih Tzu**: Shih Tzus are friendly, adaptable, and known for their charming personalities. They don’t require extensive exercise, making them ideal for first-time owners who may prefer shorter walks and indoor playtime.

8. **Boxer**: Energetic and playful, Boxers are known for their boundless enthusiasm and loyalty. They thrive on interaction and playtime, making them a fantastic choice for active families looking for a lively companion.

9. **Bichon Frise**: With their cheerful disposition and fluffy coats, Bichon Frises are delightful companions for first-time owners. They’re easy to train, love to cuddle, and their small size makes them manageable in various living environments.

10. **Dachshund**: These charming little dogs are known for their unique shape and playful personalities. Dachshunds are friendly, curious, and adapt well to different living spaces, making them great companions for first-time dog owners.

Each of these breeds offers unique qualities that cater to the diverse lifestyle and preferences of first-time owners. With the right breed, you’ll not only enjoy the companionship of a loyal friend but also embark on a fulfilling journey of love, training, and adventure.

4. Breed #1: Labrador Retriever

### 4. Breed #1: Labrador Retriever

When it comes to selecting the perfect dog for first-time owners, the Labrador Retriever stands out as a quintessential choice. Known for their friendly disposition and unwavering loyalty, Labradors are often hailed as one of the most beloved breeds in the world. Their exuberant personalities and gentle nature make them fantastic companions for families, singles, and seniors alike.

Labs are highly trainable and eager to please, which makes them ideal for novice dog owners. They respond well to positive reinforcement training methods, and their intelligence allows them to quickly grasp commands and tricks. Whether you’re teaching them basic obedience or more advanced skills, their willingness to learn is both impressive and rewarding.

Not only are Labs affectionate, but they also thrive on social interaction. They enjoy being part of the family and are known to get along exceptionally well with children and other pets. Their playful demeanor can turn any ordinary day into an adventure, whether it’s a game of fetch at the park or a splash in the pool.

Moreover, Labrador Retrievers are versatile and adaptable. They can be just as content lounging on the couch as they are exploring the great outdoors. However, it’s essential to remember that they are high-energy dogs that require regular exercise to keep them happy and healthy. Daily walks, play sessions, and mental stimulation are crucial to preventing boredom and ensuring your Lab remains a well-rounded companion.

In terms of grooming, Labs have a short, dense coat that requires minimal maintenance. Regular brushing helps to manage shedding, especially during seasonal changes, but overall, they are relatively low-maintenance in this department. Their robust health and longevity further contribute to their appeal, making them a great investment for first-time dog owners.

Choosing a Labrador Retriever means welcoming a loving, loyal, and lively friend into your home. Their unyielding enthusiasm and gentle spirit will undoubtedly enrich your life and provide countless cherished moments together. If you’re looking for a breed that will be a steadfast companion and a source of joy, the Labrador Retriever is an exceptional choice to kick off your journey into dog ownership.

5. Breed #2: Golden Retriever

What Are The Best Dog Breeds for First-Time Owners?
Credit : whatcanu.com

### 5. Breed #2: Golden Retriever

When it comes to finding the perfect dog for first-time owners, the Golden Retriever consistently shines as a top contender. Known for their friendly demeanor and unwavering loyalty, Golden Retrievers are not just a popular breed; they’re a beloved family member in countless households. With their beautiful golden coats that gleam in the sunlight and their expressive, soulful eyes, these dogs are as charming to look at as they are to be around.

Golden Retrievers are incredibly intelligent and eager to please, making training a breeze for novice owners. They thrive on social interactions and enjoy being part of family activities, whether it’s a game of fetch in the backyard or a leisurely walk in the park. This breed is known for their gentle temperament, which makes them excellent companions for children and other pets. Their playful and affectionate nature means they’ll quickly become a cherished part of the family.

Moreover, Golden Retrievers are highly adaptable, thriving in various living situations—from bustling suburban homes to quieter rural settings. They do require regular exercise to keep them healthy and happy, so first-time owners should be prepared for daily walks and playtime. However, their love for outdoor activities means you’ll never feel alone on your adventures!

In addition to their friendly nature and trainability, Golden Retrievers are also known for their incredible loyalty and protective instincts. They naturally bond with their families and are quick to alert you to any unusual happenings around your home. This makes them not just a pet, but a reliable companion and protector as well.

For first-time dog owners, choosing a Golden Retriever means embracing a journey filled with love, laughter, and the joy of companionship. Their unwavering spirit and loving nature make them an excellent choice for anyone looking to add a furry friend to their family. Just be ready for plenty of tail wags and slobbery kisses along the way!

6. Breed #3: Beagle

### Breed #3: Beagle

Beagles are delightful companions that bring a blend of joy and playfulness to any household, making them an excellent choice for first-time dog owners. With their friendly disposition and curious nature, Beagles are known for their signature floppy ears and expressive, soulful eyes that can melt even the sternest of hearts. Standing at around 13 to 15 inches tall, they are a compact breed that fits well in both apartments and spacious homes alike.

One of the standout features of Beagles is their social nature. They thrive on companionship, whether it’s with humans or other pets, making them a great addition to families and those living alone. Their affectionate temperament means they are generally good with children, displaying patience and playfulness that can keep kids entertained for hours.

In addition to their charming personality, Beagles are also known for their intelligence and strong sense of smell, which can lead to some mischievous behavior. It’s not uncommon for a Beagle to follow a scent trail, leading them on unexpected adventures if they catch a whiff of something intriguing. For this reason, consistent training and socialization from a young age are crucial. Positive reinforcement techniques work wonders with this breed, as they respond well to rewards and praise.

Beagles require daily exercise to keep them physically and mentally stimulated, so regular walks, playtime, and even trips to the dog park are essential. Their friendly demeanor and playful energy make them excellent companions for outdoor activities, whether it’s hiking, running, or simply enjoying a game of fetch.

Overall, Beagles are a lovable, spirited breed that can bring endless joy to first-time dog owners. With their loyalty, affectionate nature, and zest for life, they make every day an adventure—perfect for those ready to embrace the rewarding journey of dog ownership!

7. Breed #4: Poodle (Standard, Miniature, and Toy)

What Are The Best Dog Breeds for First-Time Owners?
Credit : whatcanu.com

When it comes to intelligent, adaptable, and delightful companions, the Poodle stands out as a top choice for first-time dog owners. Available in three distinct sizes—Standard, Miniature, and Toy—this breed offers versatility that caters to various living situations and lifestyles.

Poodles are renowned for their exceptional intelligence, ranking among the most trainable dog breeds. Their eagerness to learn and please makes them an excellent choice for first-time owners who may not have extensive experience with dog training. Whether you opt for the slightly larger Standard Poodle, the charming Miniature Poodle, or the pint-sized Toy Poodle, you’ll find that their quick learning abilities allow for easy house training and obedience. Plus, they thrive on positive reinforcement, which helps build a strong bond between you and your furry friend.

Beyond their trainability, Poodles are known for their hypoallergenic coats, making them a fantastic option for individuals or families with allergies. Their curly fur traps dander and hair, significantly reducing shedding and keeping your home cleaner. However, this does mean that regular grooming is essential to maintain their trademark look and prevent matting. Luckily, Poodles enjoy grooming sessions, often turning them into a special bonding time between you and your dog.

Poodles also boast an adaptable personality, making them suitable for various living environments—from bustling city apartments to spacious homes with yards. They are playful and energetic, requiring regular exercise to keep them happy and healthy. Daily walks, interactive play sessions, and mental stimulation through puzzle toys or training exercises are essential to keep their minds sharp and their bodies fit.

Lastly, Poodles are known for their friendly demeanor and sociability. They typically get along well with children, other pets, and even strangers, making them a great addition to any family. With their affectionate nature and boundless energy, a Poodle can bring joy, companionship, and love into your life, making them a perfect choice for first-time dog owners looking for a loyal and loving friend.

8. Breed #5: Shih Tzu

### 8. Breed #5: Shih Tzu

The Shih Tzu, with its regal appearance and charming personality, is an ideal companion for first-time dog owners. Known for their luxurious, flowing coat and adorable pushed-in face, these small dogs exude a sense of elegance while being incredibly affectionate. Originally bred as lap dogs for Chinese royalty, Shih Tzus thrive on human companionship and create strong bonds with their families.

One of the most appealing traits of the Shih Tzu is their manageable size. Weighing between 9 to 16 pounds, they are perfect for both apartments and homes with limited space. Their cheerful disposition makes them excellent family pets, and they typically get along well with children and other animals. Despite their lively nature, Shih Tzus are not excessively energetic, making them suitable for owners who may not have a lot of time for extensive exercise.

Grooming is an important aspect of caring for a Shih Tzu, given their long, flowing coat. Regular brushing is essential to prevent tangles and mats, and many owners opt for professional grooming every few months to keep their pup looking its best. However, these grooming sessions can also be a delightful way to bond with your furry friend.

Shih Tzus are known for their playful and loving nature, often displaying a silly side that keeps their owners entertained. They have a tendency to be a bit stubborn, so early training and socialization are crucial. Positive reinforcement methods work wonders with this breed, reinforcing good behavior while building a harmonious relationship.

In summary, if you’re looking for a delightful companion who is loving, loyal, and easy to manage, the Shih Tzu could be your perfect match. With their captivating looks and charming personality, they will quickly become a cherished member of your family, ensuring that your journey into dog ownership is a joyful and rewarding experience.

9. Breed #6: Bulldog

### 9. Breed #6: Bulldog

The Bulldog, with its unmistakable wrinkled face and stocky build, is a breed that exudes charm and character. These gentle giants may look tough, but they have a heart of gold and a disposition that makes them ideal companions for first-time dog owners. Bulldogs are known for their friendly demeanor and easy-going nature, which contributes to their status as one of the most beloved dog breeds.

One of the most appealing aspects of Bulldogs is their relatively low energy levels. They enjoy short bursts of playtime but are equally content lounging on the couch by your side. This makes them perfect for those who might not have the time or space for a highly active dog. Their calm temperament means they are usually good with children, making them a fantastic addition to a family setting.

Training a Bulldog can be a breeze, as they are eager to please their owners. However, it’s important to remember that they can also be a bit stubborn at times. Consistent, positive reinforcement methods work wonders with this breed, helping them learn commands and good behavior while fostering a strong bond with their owner.

In terms of health, Bulldogs are prone to certain breed-specific issues, particularly respiratory and skin conditions, due to their distinctive facial structure. Regular vet check-ups and a healthy diet are essential to keeping them in top shape.

Overall, the Bulldog’s affectionate nature, combined with their manageable size and relatively low exercise needs, makes them a perfect choice for first-time dog owners. If you’re looking for a loyal companion who will greet you with a wagging tail and a goofy grin, the Bulldog could be the pup for you!

10. Breed #7: Cavalier King Charles Spaniel

### 10. Breed #7: Cavalier King Charles Spaniel

If you’re searching for a dog that effortlessly combines elegance with a loving demeanor, look no further than the Cavalier King Charles Spaniel. Known for their expressive eyes and charming personality, these small, affectionate companions are ideal for first-time dog owners. Their gentle disposition makes them a perfect fit for families, singles, or seniors alike.

Cavaliers are renowned for their friendly nature. They thrive on human interaction and are eager to shower their owners with love and attention. With their playful spirit, they can easily adapt to various lifestyles, whether you live in a bustling urban environment or a quiet suburban neighborhood. Their moderate energy levels mean they enjoy both playtime in the yard and snuggling on the couch, ensuring a comfortable balance for any new pet parent.

Training a Cavalier is a delightful experience. They are intelligent and eager to please, making them relatively easy to train. Positive reinforcement works wonders with this breed, and they respond well to treats and praise, which can make the training process feel more like a bonding activity than a chore. Early socialization is essential, so exposing them to different environments, people, and other pets will help them grow into well-rounded dogs.

One of the most appealing aspects of the Cavalier King Charles Spaniel is their minimal grooming needs. Their silky, medium-length coat does require regular brushing to prevent tangles, but they are not heavy shedders, making them a manageable choice for first-time owners who may be intimidated by high-maintenance grooming routines.

In addition to their manageable grooming and training needs, Cavaliers are generally healthy dogs, though they can be prone to certain hereditary health issues, such as heart problems and hip dysplasia. Regular veterinary check-ups, a balanced diet, and proper exercise can help ensure that your Cavalier remains happy and healthy throughout their life.

In summary, the Cavalier King Charles Spaniel is a perfect companion for first-time dog owners. Their affectionate nature, trainability, and adaptability make them a delightful addition to any home. If you’re looking for a loving friend who will bring joy and companionship into your life, this breed might just be the perfect match for you!

11. Breed #8: Bichon Frise

### Breed #8: Bichon Frise

The Bichon Frise is a delightful companion that perfectly suits first-time dog owners, combining charm with an easygoing temperament. Known for their fluffy, white coats that resemble cotton candy, these small dogs are not only adorable but also incredibly affectionate. Their playful nature and cheerful disposition make them an ideal choice for families, singles, and seniors alike.

One of the standout traits of the Bichon Frise is their sociability. They thrive on human interaction and love to be part of the family activities, making them a wonderful addition to a household that values companionship. Their friendly demeanor also means they generally get along well with children and other pets, fostering a harmonious home environment.

In terms of care, the Bichon Frise is relatively low-maintenance. They don’t shed much, which is a boon for first-time owners concerned about allergies or cleaning up fur. However, regular grooming is essential to keep their coat looking its best and to prevent matting. A simple routine of brushing a few times a week and occasional trips to a professional groomer will keep their fluffy coats in top shape.

Training a Bichon Frise is usually a breeze due to their intelligence and eagerness to please. They respond well to positive reinforcement techniques, making obedience training both fun and rewarding. Early socialization is crucial, as it helps them grow into well-adjusted adults who are comfortable in various situations.

Overall, the Bichon Frise is an excellent choice for first-time dog owners looking for a loving, playful, and relatively easy-to-care-for companion. With their charming personality and minimal grooming requirements, they embody the perfect blend of joy and companionship that every new dog owner hopes to find.

12. Breed #9: Boxer

### Breed #9: Boxer

Boxers are a dynamic and affectionate breed that perfectly embodies the spirit of playfulness and loyalty, making them an excellent choice for first-time dog owners. With their muscular build and boundless energy, Boxers are known for their exuberant personality and are often described as having a “puppy-like” demeanor well into adulthood. This breed is particularly loved for its playful antics and silly nature, which can bring endless joy to any household.

One of the standout features of Boxers is their friendly disposition. They are naturally sociable and thrive on human interaction, making them fantastic companions for families, singles, and seniors alike. Boxers are also known to be great with children, often forming strong bonds with kids and becoming their playful playmates, all while being protective guardians of the home. Their innate loyalty means they tend to be very attached to their owners, making them feel like true family members.

Boxers require regular exercise to channel their energy and maintain their health. Daily walks, play sessions, and mental stimulation through training or interactive games will keep them happy and well-adjusted. They are intelligent and eager to please, making training relatively easy—though consistency and positive reinforcement are key to shaping their behavior.

While Boxers have a short, sleek coat that requires minimal grooming, they are prone to certain health issues, such as heart conditions and hip dysplasia. Therefore, it’s essential for first-time owners to be aware of their health needs and ensure regular check-ups with a veterinarian.

In summary, if you’re looking for a loyal, affectionate, and playful companion, the Boxer could be the perfect breed for you. Their energetic spirit and loving nature make them not just a pet, but a cherished member of the family, ready to provide years of joy and companionship to first-time dog owners.

13. Breed #10: Dachshund

### 13. Breed #10: Dachshund

The Dachshund, affectionately known as the “wiener dog,” is a delightful addition to our list of dog breeds perfect for first-time owners. With their unique elongated bodies and short legs, these charming canines are not just easy on the eyes; they also possess a playful and affectionate personality that makes them an ideal companion for novice pet parents.

Dachshunds come in two sizes—standard and miniature—and they can sport three different coat types: smooth, long-haired, and wire-haired. This variety allows potential owners to choose the look that best suits their personal style and home environment. Their friendly and curious nature means they are always eager to explore, making daily walks a fun adventure for both you and your furry friend.

One of the most appealing aspects of the Dachshund is their adaptability. They thrive in various living situations, whether you’re in a cozy apartment or a larger home with a yard. Additionally, their moderate exercise needs make them manageable for first-time owners who may not have the time or energy for breeds requiring extensive physical activity. A couple of daily walks and some playtime will keep these energetic little dogs happy and healthy.

Dachshunds are known for their loyalty and affection towards their families, forming strong bonds with their human companions. They may be small, but they have a big personality, often displaying a playful stubbornness that can lead to amusing antics. Early training and socialization are essential to curb any potential stubbornness, but with patience and positive reinforcement, you’ll find your Dachshund eager to learn and impress.

Moreover, their protective nature makes them excellent watchdogs, alerting you to any unusual activity around your home. While they may be small, their bark is mighty, ensuring that you’ll always be aware of who is at the door.

In summary, the Dachshund is a wonderful breed for first-time owners seeking a loving, adaptable, and spirited companion. With the right care and training, you’ll enjoy a fulfilling relationship with this unique and charming breed that is bound to bring joy and laughter into your home.

14. Tips for Introducing a New Dog to Your Home

Bringing a new dog into your home is an exciting yet pivotal moment for both you and your furry friend. The transition can be filled with anticipation, but it’s essential to approach this introduction thoughtfully to ensure a smooth adjustment for everyone involved. Here are some tips to help you set the stage for a harmonious homecoming.

**Create a Safe Space:** Before your new dog arrives, prepare a designated area that will serve as their safe haven. This could be a cozy corner with a comfortable bed, toys, and fresh water. Having a quiet space allows your dog to acclimate to their new surroundings without feeling overwhelmed. It’s important that they have a retreat where they can feel secure, especially during those first few days.

**Establish Routine:** Dogs thrive on routine, so setting a consistent schedule for feeding, walks, and playtime from the get-go helps your new pet understand what to expect. This not only aids in their adjustment but also fosters a sense of stability in their new environment. Be patient as they learn the ropes; it might take time for them to settle into a rhythm.

**Introduce Family Gradually:** If you have other pets or children, introduce them to your new dog slowly. Allow your existing pets to approach at their own pace, and supervise the interactions to ensure everyone feels comfortable. For children, it’s crucial to teach them how to interact with the new dog gently and respectfully. This can help prevent overwhelming the new arrival and promote positive relationships right from the start.

**Maintain a Calm Atmosphere:** Dogs are highly perceptive to their surroundings and the emotions of those around them. When your new pet arrives, try to keep the environment calm and quiet. Avoid loud noises, sudden movements, or a flurry of visitors. This helps your dog feel more at ease and allows them to explore their new home without added stress.

**Patience is Key:** Every dog has its own unique personality and background, which means the adjustment period can vary. Some may adapt quickly, while others may take a bit longer to feel comfortable. Be patient and understanding during this transition phase. Offer plenty of love, encouragement, and positive reinforcement to help build their confidence and trust.

By following these tips, you can create a welcoming home environment that allows your new dog to thrive. Remember, patience and understanding are your best allies in this journey, turning the initial challenges into cherished moments as you build a lifelong bond with your furry friend.

15. Conclusion: Finding the Perfect Match for Your Lifestyle

In conclusion, choosing the right dog breed is a pivotal decision for first-time owners, one that will shape your daily life and companionship for years to come. Each breed has its unique characteristics, temperaments, and care requirements, and understanding these traits is crucial for ensuring a harmonious relationship between you and your new furry friend.

As you reflect on the options presented in this guide, consider your living situation, activity level, and personal preferences. Are you looking for a playful companion to join you on hikes, or a calm, cuddly buddy to curl up with on the couch? Perhaps you live in a bustling urban environment and need a smaller breed that adapts well to apartment life.

Take the time to assess your lifestyle and how much time you can realistically dedicate to training, exercise, and socialization. Remember, the goal is to find a breed that not only fits your lifestyle but also enhances it, bringing joy, loyalty, and love to your home.

As you embark on this exciting journey, remember that every dog—regardless of breed—has the potential to be an incredible companion with proper care, training, and love. With the right preparation and mindset, you’ll be well on your way to welcoming a four-legged friend who will become an irreplaceable part of your family. Happy dog hunting!

In conclusion, choosing the right dog breed as a first-time owner is a crucial step toward creating a harmonious and fulfilling companionship. With the top 10 breeds we’ve explored in this guide, you now have a wealth of information to help you make an informed decision that aligns with your lifestyle and preferences. Each of these breeds brings unique qualities that can enrich your life and provide unwavering loyalty and love. As you embark on this exciting journey into dog ownership, remember that patience, training, and understanding are key to building a strong bond with your new furry friend. We can’t wait to hear about your experiences and the joy your new companion brings to your home! Happy dog parenting!

How Do I Introduce My New Dog to My Resident Cat?

Introducing a new dog into a home with a resident cat can feel like navigating a delicate dance—one filled with excitement, anxiety, and the promise of new friendships.

As pet parents, we often dream of harmonious household dynamics where our furry friends coexist peacefully. However, the realities of pet personalities, territorial instincts, and varied temperaments can complicate this vision. In “Paws and Claws: The Ultimate Guide to Introducing Your new Dog to Your Resident Cat,” we delve into the essential steps and strategies to ensure a smooth and successful introduction. From understanding your cat’s signals to choosing the right approach for your dog, this guide will equip you with the knowledge and tools to foster a loving relationship between your pets. Prepare to embark on a journey of patience and understanding, as we pave the way for a joyful and peaceful multi-pet household!

1. Understanding Canine and Feline Behaviors

How Do I Introduce My New Dog to My Resident Cat?
Credit : whatcanu.com

When it comes to introducing a new dog to your resident cat, the first step is to understand the fundamental differences in their behaviors and instincts. Dogs and cats are wired differently, which can lead to misunderstandings and, at times, conflict.

Dogs are pack animals by nature, often seeking companionship and approval from their human family members. They communicate through barks, growls, and body language, displaying emotions like excitement and anxiety openly. A wagging tail, for instance, typically signals happiness, while raised hackles can indicate alertness or aggression. This enthusiasm, however, can sometimes be misinterpreted by cats, who tend to be more solitary and territorial creatures.

Cats, on the other hand, are more nuanced in their communication. They rely heavily on body language, vocalizations, and scent marking to convey their feelings. A cat may arch its back or hiss when feeling threatened, and their slow-blinking gaze is a sign of trust and affection. While they can be social, cats prefer to maintain a sense of control over their environment, making them more cautious around newcomers.

Understanding these differences is crucial for a successful introduction. For instance, a dog’s playful energy might be interpreted as a threat by a cat, causing the latter to retreat or lash out. Conversely, a cat’s subtle signals could be lost on an eager dog, leading to frustration and confusion.

By recognizing these distinct behaviors, you can create a harmonious environment for both pets. Prepare to facilitate their introductions with patience, ensuring that each animal feels safe and secure. This understanding will not only ease the transition but also help foster a positive relationship between your new dog and your resident cat as they navigate their shared space.

2. Preparing Your Home for the Introduction

When it comes to introducing a new dog to your resident cat, preparation is key. Setting the stage for a harmonious relationship between your furry friends can make all the difference in ensuring a smooth transition. Start by creating a designated space for your new dog. This should be a comfortable area equipped with their own bed, toys, and food and water bowls. It’s essential that your dog has a safe haven where they can retreat, especially in those first few days when everything feels new and overwhelming.

Next, focus on the cat’s territory. Cats are creatures of habit, and sudden changes can be stressful for them. Make sure your cat has access to their favorite spots, whether it’s a high perch, a cozy nook, or their litter box. It’s wise to ensure that these areas are off-limits to the dog, at least until they’re more familiar with each other. Consider using baby gates or barriers to create safe zones where your cat can observe the new addition without feeling threatened.

Additionally, take the time to remove any items that could become potential hazards during their initial meetings. Keep small toys, food, and anything valuable out of reach to prevent any unwanted altercations. It’s also a good idea to have scratch posts or climbing towers available for your cat, as these can provide both a distraction and an escape route if they feel overwhelmed.

Lastly, scent plays a crucial role in how animals perceive one another. Before the introduction, swap bedding or toys between the two to help them become familiar with each other’s scent. This simple step can ease tension and create a sense of familiarity before they ever meet face to face.

By taking the time to thoughtfully prepare your home for the introduction, you set the foundation for a peaceful coexistence between your new dog and your resident cat, fostering an environment of safety and comfort for both pets.

3. Choosing the Right Time to Introduce Them

How Do I Introduce My New Dog to My Resident Cat?
Credit : whatcanu.com

When it comes to introducing your new dog to your resident cat, timing can make all the difference. The right moment can set the stage for a harmonious relationship, while the wrong timing can lead to stress and anxiety for both pets. Start by considering your cat’s routine and natural behavior. Cats are creatures of habit, often preferring a calm and predictable environment. Introducing a new dog during a time of day when your cat is most relaxed—perhaps after a morning nap or during their evening wind-down—can yield better results.

Additionally, think about the dog’s energy level. If you have a high-energy puppy who’s eager to play and explore, introducing them during a quiet moment might overwhelm your cat. Opt for a time when your dog is calm, perhaps after a long walk or play session, so they are more likely to be relaxed and less inclined to chase or bark at your cat.

Also, consider any significant changes in your household. If you’ve recently moved, experienced changes in family dynamics, or if your cat is going through a stressful period, it might be best to wait until things have settled. A chaotic environment can heighten anxiety for both pets, making introductions more difficult.

By carefully choosing the right time to introduce your new dog to your resident cat, you create a more favorable environment for initial interactions, helping to foster a peaceful coexistence from the start. Remember, patience is key; rushing the process can lead to resistance and fear, so take your time to ensure both animals feel safe and comfortable during this crucial transition.

4. Initial Separation: Creating Safe Spaces

When introducing a new dog to your resident cat, the initial separation is crucial for a smooth transition and harmonious coexistence. This phase is all about creating safe spaces where both pets can feel secure and comfortable as they adjust to each other’s presence.

Start by designating specific areas of your home for each pet. Your cat should have its own sanctuary—perhaps a cozy nook high up on a shelf or a quiet room where it can retreat with its favorite toys and bedding. Cats often feel safest when they can observe their surroundings from an elevated position, so consider setting up a perch or a cat tree. This space should be off-limits to the new dog, allowing your cat to explore and relax without the stress of an unfamiliar canine nearby.

Meanwhile, the dog should have its own designated area, equipped with a comfortable bed, toys, and food and water bowls. This is where the dog can unwind and feel secure, especially during the initial introductions. Utilize baby gates to create a physical barrier while still allowing them to see and hear one another. This way, they can slowly acclimate to each other’s scents and sounds without the immediate pressure of face-to-face interactions.

During this period of separation, it’s essential to maintain a calm atmosphere. Use positive reinforcement techniques to reward both pets for calm behavior when they are near the barrier. This will help them associate each other with positive experiences, making future interactions less daunting.

Remember, patience is key. Allow your cat and dog to set the pace for their introductions. As they become more comfortable with each other’s presence, you can gradually increase their time together under supervision. Creating these safe spaces not only protects your pets during this transitional period but also lays the foundation for a peaceful and loving relationship in the future.

5. The Scent Exchange: Getting Familiar with Each Other

How Do I Introduce My New Dog to My Resident Cat?
Credit : whatcanu.com

The scent exchange is a crucial step in the process of introducing your new dog to your resident cat. Animals rely heavily on their sense of smell to gather information about their environment and the creatures within it. By facilitating a scent exchange, you can help both your dog and cat become familiar with each other’s presence before they meet face-to-face.

Start by collecting items that have the scent of each animal. For your cat, this could be their favorite blanket, a toy, or even a piece of clothing that carries their unique scent. For your dog, consider using a towel or toy they frequently use. Place these items in the other animal’s space—your cat’s blanket in the dog’s area, and vice versa. This allows them to explore and investigate the foreign scents at their own pace, without the pressure of an immediate introduction.

While they are sniffing these items, observe their reactions. You might notice your cat becoming curious or your dog showing interest. It’s important to reassure them during this process, offering gentle words or treats to create a positive association with the new scent. Continue this exchange over several days, gradually swapping more items and increasing the time they spend with the scents.

This initial scent exchange sets the stage for a smoother transition when they finally meet. By the time you do introduce them face-to-face, both your dog and cat will have a basic familiarity with each other, reducing the likelihood of fear or aggression. This step is all about creating a sense of comfort and curiosity—two essential elements for a harmonious household where paws and claws can coexist peacefully.

6. Gradual Introduction: First Impressions

When it comes to introducing your new dog to your resident cat, the first impressions are crucial. A gradual introduction can set the tone for a harmonious household and help prevent potential conflicts between your furry friends. Start by allowing each pet to get accustomed to the other’s scent before they meet face-to-face. You can achieve this by swapping bedding or using a soft cloth to gently rub each animal and then letting the other sniff it. This subtle exchange can help ease the tension and curiosity that often accompanies such introductions.

Next, create a safe space for your cat—a retreat where they can observe the new dog from a distance without feeling threatened. This space could be a high perch, a separate room, or even a cozy cat tree where they can feel secure. Allow your dog to explore their new surroundings, but keep them on a leash during the initial encounters to maintain control over the situation.

Once both pets seem calm and comfortable with each other’s scents, it’s time for the first face-to-face meeting. Choose a quiet, neutral space free from distractions, and keep the dog on a leash while allowing the cat to roam freely. Monitor their body language closely: your dog should be calm and non-aggressive, while your cat might display a mix of curiosity and caution. Be prepared to intervene if either pet shows signs of stress or aggression.

Keep these initial meetings brief and positive, gradually increasing their duration as they become more comfortable with each other. Reward both pets with treats and praise for calm behavior, reinforcing the idea that being around each other is a positive experience. Remember, patience is key; rushing the process can lead to anxiety and hostility, making it harder for your pets to coexist peacefully. With time, care, and gradual introductions, you’ll pave the way for a loving and balanced relationship between your dog and cat.

7. Supervised Meetings: Tips for a Successful Encounter

How Do I Introduce My New Dog to My Resident Cat?
Credit : whatcanu.com

Introducing a new dog to your resident cat can be a delicate process, and supervised meetings play a crucial role in ensuring a harmonious relationship between the two. Taking the time to facilitate these encounters with care can set the tone for their future interactions. Here are some tips to make those initial meetings successful.

First and foremost, choose a neutral space for the introduction. This prevents either pet from feeling territorial and allows both the dog and cat to approach the situation with less anxiety. A room where neither has established a strong claim is ideal. Ensure the dog is on a leash during these first meetings to maintain control while allowing the cat the freedom to explore at her own pace.

Create a calm environment by minimizing distractions. Keep the noise level low, and consider using calming aids like pheromone diffusers or sprays designed to ease pet stress. Before the meeting, engage both pets in some form of relaxation—play with the dog to expend some energy and offer treats or engage your cat in a quiet activity to help her feel more secure.

When it’s time for the introduction, allow the cat to enter the space first. Cats often prefer to take the lead, and letting her explore the area on her terms can help her feel more comfortable. Once she seems at ease, gradually bring in the dog, keeping him on a loose leash. Watch for body language—an erect tail, flattened ears, or hissing from the cat indicates discomfort, while a relaxed posture and slow movements signal curiosity.

Be patient and prepared for a range of reactions. It’s normal for the dog to be excited and curious, while the cat may display wariness or even defensive behavior. If either pet becomes overly stressed, don’t hesitate to separate them and try again later. Short, positive sessions are more beneficial than long, tense encounters. Reward both pets with treats for calm behavior during the meetings, reinforcing the idea that good things happen when they are together.

Lastly, gradually increase the duration of these supervised meetings as they grow more comfortable with each other. Over time, you can introduce elements like toys and treats to encourage positive interactions, paving the way for a peaceful coexistence in your home. Remember, every pet is unique, and some may take longer than others to adjust. With patience and persistence, you’ll create a welcoming environment where your new dog and resident cat can thrive together.

8. Reading Body Language: Signs of Stress or Comfort

When introducing a new dog to your resident cat, understanding body language is crucial in ensuring a smooth transition. Both animals communicate their feelings non-verbally, and being attuned to their signals can help you gauge their comfort levels and reduce stress.

For your dog, watch for signs such as a wagging tail, relaxed ears, and an open mouth—these indicate a friendly disposition. However, if the tail is tucked, ears are pinned back, or the dog is panting excessively, it may be feeling anxious or threatened. Similarly, a dog that is fixated on the cat, with stiff body posture, could be exhibiting predatory behavior, which requires immediate intervention.

On the other hand, your cat’s body language is equally telling. A cat that feels secure will display soft, slowly blinking eyes, a relaxed body, and a tail held high. If you notice your cat hissing, swatting, or puffing up its fur, it’s clearly feeling stressed or defensive. Cats may also seek higher ground when they feel threatened, so observing where your cat chooses to position itself can provide insight into its comfort level during the introduction process.

By keenly observing these signs, you can tailor your approach to ensure both your new dog and resident cat feel safe and secure. Create a calm environment, allowing each pet to retreat to their safe spaces if needed, and always supervise their interactions until you’re sure they’ve established a sense of mutual respect and comfort. This careful attention to body language can make all the difference in helping your pets coexist peacefully.

9. Managing Jealousy and Competition for Attention

When introducing a new dog to a resident cat, managing jealousy and competition for attention becomes a crucial aspect of ensuring a harmonious household. Both pets seek love and validation, and it’s natural for them to feel threatened when they perceive a shift in their owner’s affections. To navigate this delicate situation, it’s essential to establish a balanced approach that fosters a sense of security for both your furry companions.

Start by being mindful of how you distribute your attention. Dogs, with their exuberance and eagerness to please, often demand more immediate interaction. This can inadvertently lead to feelings of neglect in your cat. To prevent this, set aside dedicated time for each pet. Designate moments in your day for one-on-one play, cuddles, or simply quiet companionship. This way, both your dog and cat will feel valued and loved, reducing the potential for jealousy.

Create a routine that incorporates both pets without making either feel sidelined. For instance, during playtime with your dog, allow your cat to be nearby, engaging them with toys or treats. This not only helps your cat feel included but also allows them to observe the dog in a non-threatening environment. Gradually, they may become more comfortable with each other’s presence.

Additionally, be vigilant about body language. Cats can be particularly sensitive to changes in their environment and may react defensively to what they perceive as competition. If you notice your cat displaying signs of stress—such as hiding, hissing, or swatting—intervene calmly. Redirect their attention with a favorite toy or treat, reinforcing a positive association with the dog’s presence.

Lastly, consider providing separate spaces for your pets. Having distinct areas for each can help alleviate tension and give both pets a safe retreat when they need a break from each other. With time, patience, and consistent attention, you can help your new dog and resident cat coexist peacefully, transforming potential rivalry into a bond that enriches your home.

10. Establishing Boundaries: Safe Zones for Each Pet

When introducing a new dog to your resident cat, establishing boundaries is crucial for fostering a harmonious household. Both pets need their own safe spaces where they can retreat and feel secure, especially as they navigate this new dynamic. Safe zones not only give your cat a sense of control but also help your dog understand where they are welcome and where they should tread lightly.

Start by designating specific areas in your home for each pet. For your cat, this could be a high perch, such as a cat tree or a shelf, where they can observe the new dog from a distance. Cats often feel safest when they have the option to escape or hide, so ensure they have access to cozy nooks or rooms equipped with their favorite toys, litter box, and food bowls.

For your dog, create a comfortable space that reflects their needs. A crate or a designated dog bed in a quiet corner can serve as their sanctuary. Encourage your dog to view this area as their own by rewarding them with treats and praise whenever they settle down there. This will help them learn to respect the boundaries you’ve set and create a positive association with their safe zone.

During the initial introductions, keep the dog on a leash and allow the cat to explore the dog’s space from a safe distance. If the new dog gets too excited or aggressive, gently redirect them back to their safe zone. Use baby gates or screen doors to create physical barriers that allow both pets to see and hear each other without direct contact, helping them to acclimate at their own pace.

Establishing these boundaries is not just about physical space; it also involves setting clear rules for behavior. Consistently reinforce commands with your dog, such as “leave it” or “stay,” whenever they approach the cat’s area. This will teach them to respect the cat’s boundaries and reduce the likelihood of any aggressive or overly playful interactions.

By prioritizing safe zones for both your dog and cat, you create an environment that supports their comfort and well-being, making the transition smoother for everyone involved. With patience and consistency, you’ll be on your way to a peaceful coexistence between your furry companions.

11. Training Techniques for a Smooth Transition

Introducing a new dog to your resident cat can be a delicate process, but with the right training techniques, you can ensure a smoother transition for both furry friends. Start by establishing a controlled environment where both animals can feel safe. This means creating separate spaces for your cat and dog, allowing them to acclimate to each other’s scents before any face-to-face meetings.

Utilize positive reinforcement training for your new dog. Reward them with treats and praise when they display calm behavior in the presence of your cat. This helps to create a positive association with the cat rather than triggering a chase instinct. Likewise, reinforce your cat’s positive behavior when they remain calm—offering treats or affection can go a long way in encouraging them to feel secure.

Consider employing basic commands like “sit,” “stay,” and “leave it” with your dog, as these can be invaluable during initial introductions. When the time comes for them to meet, keep your dog on a leash and allow your cat to roam freely, controlling the pace of the encounter. If the dog becomes too excited or fixates on the cat, gently redirect their attention or remove them from the situation to avoid overwhelming your cat.

It’s also essential to manage your dog’s energy levels. Regular exercise and mental stimulation can help reduce hyperactivity, making your dog less likely to chase your cat. Incorporate training sessions, playtime, and walks into your routine to give your dog an outlet for their energy.

Finally, remain patient throughout the process. Each animal will adjust at their own pace, and it may take time for them to feel comfortable in each other’s presence. By employing consistent training techniques and offering plenty of love and reassurance to both your dog and cat, you can foster a harmonious household where both pets thrive together.

12. Monitoring Their Relationship Over Time

Introducing a new dog to your resident cat is just the beginning of a journey that requires ongoing attention and care. Monitoring their relationship over time is crucial to ensuring that both pets feel safe, secure, and happy in their shared environment. After the initial introductions, it’s important to observe their interactions closely—even when they seem to be getting along well.

Watch for body language cues from both the dog and the cat. Signs of stress in cats can include flattened ears, hissing, or retreating to high perches, while dogs may display overexcitement, barking, or even possessiveness over toys and space. Create a safe space for your cat where they can escape if things get a bit too overwhelming. Cat trees, shelves, or even separate rooms can serve as great sanctuaries.

Regularly assess their behavior with each other. Are they playing together, or is there tension when they share the same space? It may take weeks or even months for them to establish a comfortable relationship. Be patient and allow them to set the pace. If you notice any signs of aggression or anxiety, it may be necessary to go back a few steps in your introduction process, giving each pet more time to adjust.

Additionally, consider scheduling regular check-ins during playtime or feeding. Supervise these moments to ensure that they remain positive. Incorporate joint training sessions, where both pets can learn to follow commands together, fostering a sense of teamwork and harmony.

By continuously monitoring your pets’ relationship over time and being responsive to their needs, you’ll not only help them coexist but also foster a unique bond that can enrich both their lives. With patience, love, and careful observation, your new dog and resident cat can become the best of friends, sharing your home—and your heart—for years to come.

13. Dealing with Backward Steps: What to Do if Things Go Wrong

Introducing a new dog to a resident cat can sometimes feel like navigating a minefield, and despite your best preparations, things may not go as smoothly as hoped. It’s essential to remember that setbacks are a natural part of the process, and understanding how to deal with these backward steps can make all the difference in achieving harmony in your home.

First, observe the dynamics closely. If your cat is exhibiting signs of distress—such as hissing, swatting, or hiding—it’s crucial to take a step back. This reaction doesn’t mean you’ve failed; rather, it’s an indication that your cat needs more time and space to adjust. Reinforce the idea that both pets should feel safe in their environment. Create separate spaces where each animal can retreat to feel secure. For your cat, this could be a high perch or a secluded nook, while your dog may benefit from a cozy crate or a designated area where they can relax without feeling overwhelmed.

Next, consider revisiting the introduction process. Sometimes, it’s necessary to slow down and go back to square one. Reintroduce them using scent swapping—allow your cat and dog to explore each other’s bedding or toys to familiarize themselves with one another’s scent without direct interaction. Gradually progress to supervised meetings, using a leash for the dog and allowing the cat to approach at their own pace.

Additionally, positive reinforcement can be a powerful tool in redirecting their behaviors. Rewarding both your dog and cat with treats and praise during calm interactions can reinforce good behavior. Similarly, if either pet displays unwanted behavior, gently redirect them without punishment. For instance, if your dog gets too excited and lunges towards the cat, redirect their attention to a toy or command.

Lastly, patience is key. Each pet has its own timeline for adjustment, and it’s important to remain calm and understanding throughout the process. If tensions persist, consider consulting a professional animal behaviorist who can provide tailored advice to help harmonize your household. Remember, with time, patience, and a bit of strategy, your dog and cat can learn to coexist peacefully, transforming your home into a happy haven for both paws and claws.

14. The Importance of Patience and Consistency

When it comes to introducing a new dog into a home with a resident cat, patience and consistency are your greatest allies. This transition period can be filled with excitement, anxiety, and a whirlwind of emotions for both animals, and rushing the process can lead to unnecessary stress and conflict. Understanding that each pet has their own unique personality and comfort level is crucial.

Patience means allowing your new dog to acclimate to their surroundings at their own pace. Some dogs may be eager to explore, while others might feel overwhelmed and seek refuge. Similarly, your cat may react with curiosity, fear, or even territorial behavior. It’s vital to observe their reactions and provide a safe space for both pets to retreat to when they feel anxious.

Consistency, on the other hand, involves establishing a routine that reinforces positive interactions and behaviors. Regular feeding times, designated play sessions, and structured training can help your pets feel secure in their new dynamics. Use consistent commands and cues for both animals, and reward them for calm behavior when they are near each other.

Additionally, consider using scent swapping as a gentle introduction technique. Allow your dog and cat to become familiar with each other’s scents before any face-to-face meetings. You can do this by swapping their bedding or using a soft cloth to rub one pet and then letting the other sniff it.

Remember, the goal is to create a harmonious household where both your new dog and resident cat can thrive. By embracing patience and maintaining consistency, you’re not just managing their introduction; you’re nurturing the relationship that will ultimately lead to a peaceful, loving environment for all.

15. Celebrating Success: Bonding Activities for Your Pets

Once your new dog and resident cat have settled into their routine and shown signs of comfort with each other, it’s time to celebrate their progress with some bonding activities. These activities not only reinforce their growing relationship but also create joyful experiences that can help solidify their companionship.

Start with interactive play sessions that involve both pets. Choose toys that can be enjoyed together, like a feather wand for your cat that your dog can chase or a soft ball that encourages both to engage. Supervised play allows them to associate positive feelings with each other’s presence, turning what might have been a tense situation into a fun adventure.

Another great bonding activity is shared training sessions. Teach your dog simple commands or tricks, and encourage your cat to join in by rewarding both with treats. Cats may not fetch like dogs, but you can train them to respond to their name or perform small tricks like “high five.” This shared experience can create a sense of teamwork and build a positive atmosphere in your home.

Consider utilizing scent enrichment to deepen their connection. Allow your dog to sniff your cat’s blanket or toys, and vice versa, in a controlled manner. This can help both pets become familiar with each other’s scents, reinforcing their bond.

Lastly, don’t underestimate the power of relaxation time spent together. Create a cozy space with a soft bed or blanket where they can lounge side by side. Play calming music or use pet-safe pheromone diffusers to create a serene environment. This low-pressure setting encourages your pets to relax in each other’s company, helping to foster a sense of security and friendship.

Celebrating these milestones with bonding activities not only enriches their lives but also strengthens the connection between your new dog and resident cat, paving the way for a harmonious household filled with love and companionship.

In conclusion, successfully introducing a new dog to your resident cat requires patience, understanding, and a well-thought-out plan. By following the steps outlined in our ultimate guide, you can create a harmonious home where both pets feel safe and comfortable. Remember, each animal has its own personality and pace, so take the time to observe their interactions and adjust your approach as necessary. With love, consistency, and a little bit of effort, your furry friends can learn to coexist peacefully, enriching each other’s lives in the process. We hope this guide has provided you with the insights and confidence to embark on this exciting journey, and we can’t wait to hear about the heartwarming bond that blossoms between your new dog and your beloved cat! Happy pet parenting!

What are the best ways to cook for one person?

Cooking for one can often feel like a chore, leading to repetitive meals or, worse, those last-minute takeout orders that leave you unsatisfied.

But what if we told you that dining solo can be an opportunity for culinary exploration and personal indulgence? In this blog post, we’ll take you on a delightful journey into the world of solo suppers, where creativity meets convenience. Discover how cooking for one can be a chance to experiment with flavors, try new recipes, and embrace the joy of personalized dining. From vibrant stir-fries packed with fresh vegetables to comforting single-serving casseroles, we’ll share innovative ideas that make mealtime a pleasure rather than a task. Say goodbye to boring leftovers and hello to a table set just for you, where every bite is a celebration of your unique tastes and preferences. Get ready to elevate your solo dining experience with these creative and delicious ways to cook for one!

1. Embracing the Solo Dining Experience

What are the best ways to cook for one person?
Credit : whatcanu.com

Dining alone doesn’t have to be a lonely affair; in fact, it can be a delightful celebration of self-care and culinary creativity. Embracing the solo dining experience allows you to explore your tastes, experiment with flavors, and enjoy the intimacy of preparing a meal just for you. Picture this: the kitchen is your canvas, and each ingredient is a brushstroke waiting to come together in a masterpiece that reflects your unique palate.

When you cook for one, you have the freedom to choose exactly what you want to eat without compromise. Fancy a spicy stir-fry with vibrant vegetables and fragrant herbs? Go for it! Craving a comforting bowl of homemade soup with all your favorite ingredients? It’s all yours. There’s no need to please anyone else’s preferences; this is your time to indulge in what makes you happy.

Taking the time to set the scene can enhance your solo dining experience as well. Light a candle, play your favorite music, or pour yourself a glass of wine to elevate the atmosphere. Dining alone can be a moment of mindfulness, allowing you to savor each bite and truly appreciate the flavors you’ve created. Consider it a mini getaway from the rush of everyday life, a chance to reconnect with yourself and enjoy the simple pleasure of good food.

Additionally, cooking for one can lead to newfound culinary skills. With fewer mouths to feed, you can experiment with new recipes and techniques without the pressure of pleasing a crowd. Try your hand at that intricate dish you’ve always wanted to tackle or explore cuisines from around the world; the kitchen is your playground, and every dish is a new adventure waiting to be tasted.

So, as you dive into the world of solo supper, remember that this is a time to celebrate you. Embrace the joy of cooking, the art of presentation, and the satisfaction of a meal crafted entirely to your liking. Whether it’s a vibrant salad, a hearty pasta, or a decadent dessert, the solo dining experience is an opportunity to nourish not just your body, but also your spirit.

2. Benefits of Cooking for One

Cooking for one might seem like a daunting task, but it comes with a plethora of benefits that can transform your dining experience. First and foremost, it allows for complete culinary freedom. With no one else to please, you can experiment with ingredients, flavors, and recipes that tickle your fancy. Whether it’s trying that exotic spice you’ve been curious about or whipping up a dish that you love but your friends and family might not, cooking solo gives you the ultimate license to explore your palate.

Additionally, cooking for one can be a significant time-saver. You can streamline your meal prep, avoiding the long hours spent in the kitchen preparing large quantities of food. Instead, you can whip up a quick, satisfying meal in no time, allowing you to focus on other aspects of your life, whether that’s catching up on reading, watching your favorite show, or simply relaxing after a long day.

Moreover, cooking for one can also be a healthier choice. You have complete control over your ingredients and portion sizes, making it easier to choose nutritious options that cater to your dietary preferences. You can prioritize fresh vegetables, lean proteins, and wholesome grains, crafting meals that nourish your body without the temptation of unhealthy leftovers that often come with cooking for a crowd.

Lastly, cooking for one fosters a wonderful sense of independence and self-care. It encourages you to take the time to prepare a meal that caters specifically to your tastes, elevating the act of eating from a mundane task to a delightful ritual. Whether you’re enjoying a quiet dinner at your kitchen table or savoring a meal in front of your favorite movie, cooking for one can be a rewarding experience that celebrates your individuality and creativity in the kitchen.

3. Essential Kitchen Tools for Solo Cooking

What are the best ways to cook for one person?
Credit : whatcanu.com

When embarking on your solo cooking journey, having the right kitchen tools can make all the difference. Cooking for one doesn’t mean you need to sacrifice quality or creativity in your meals; it simply means you need to adapt your toolkit to fit your needs. Here are some essential kitchen tools that will elevate your solo cooking experience and inspire you to whip up delightful dishes with ease.

**1. A Good Chef’s Knife:**
A sharp, versatile chef’s knife is the cornerstone of any kitchen, and it becomes even more crucial when cooking for one. With the ability to chop, slice, and dice, a well-maintained knife will not only save you time but also enhance your cooking precision. Investing in a quality chef’s knife will allow you to tackle everything from finely chopping herbs to dicing vegetables for a stir-fry.

**2. A Small Cutting Board:**
When cooking solo, a compact cutting board is a practical choice. It’s easy to handle, fits snugly in your kitchen space, and simplifies the cleanup process. Opt for a wooden or bamboo board, which not only looks great but is also gentle on your knife’s edge.

**3. Non-Stick Skillet:**
A non-stick skillet is an invaluable tool for quick and easy meals. Whether you’re sautéing veggies, frying an egg, or cooking a single chicken breast, this versatile pan allows for effortless cooking and cleanup. Choose a medium-sized skillet that’s easy to maneuver and perfect for one-person portions.

**4. A Medium Saucepan:**
A medium saucepan is essential for boiling pasta, simmering sauces, or steaming vegetables. Look for one with a lid to help retain heat and moisture, making your cooking more efficient. It’s the perfect size for preparing one-pot meals that pack a flavorful punch without the fuss.

**5. Baking Sheet:**
Don’t underestimate the power of a good baking sheet! It’s not just for cookies—roasting vegetables, baking a single portion of fish, or even making a mini pizza can all be done on a baking sheet. Line it with parchment paper for easy cleanup and discover how versatile this tool can be in your solo cooking repertoire.

**6. Measuring Cups and Spoons:**
Precision is key, even when cooking for one. A set of measuring cups and spoons will help you accurately portion ingredients, ensuring your dishes turn out perfect every time. Look for compact, easy-to-store options that won’t take up much space in your kitchen.

**7. Food Storage Containers:**
Finally, invest in a few quality food storage containers. Cooking for one often results in leftovers, and having the right containers allows you to store and enjoy your meals later without compromising freshness. Choose containers in various sizes, preferably microwave-safe and stackable, to make your meal prep and storage a breeze.

With these essential kitchen tools at your disposal, cooking for one can be an exciting and enjoyable experience. Embrace the freedom of solo cooking, experiment with flavors, and savor the delicious meals you create, all while keeping your kitchen efficient and clutter-free. Happy cooking!

4. Planning Your Meals: Tips for One

When it comes to cooking for one, planning your meals is essential for both efficiency and enjoyment. Nobody wants to spend hours in the kitchen for a single meal, and with a bit of foresight, you can transform solitary dining into a delightful culinary adventure.

Start by dedicating a little time each week to map out your meals. Consider incorporating a variety of proteins, grains, and vegetables to keep your palate excited. For instance, roast a batch of seasonal vegetables on Sunday, which can be added to different dishes throughout the week—think salads, grain bowls, or pasta. This not only saves time but also minimizes food waste, as you can use leftovers creatively in subsequent meals.

Another tip is to invest in versatile ingredients. A small batch of quinoa, for example, can serve as a base for a hearty salad one day and a warm, comforting bowl of grain and veggies the next. Likewise, a rotisserie chicken can provide delicious meat for sandwiches, soups, and stir-fries, stretching your meal options without requiring extensive cooking each time.

Don’t forget about portion control! Cooking in small quantities not only helps you avoid leftovers but also allows you to experiment with new recipes without the fear of wasting food. Consider using portioned containers to store single-serving meals, making it easy to grab something nutritious on busy days without resorting to takeout.

Lastly, embrace the joy of spontaneity! Although planning is beneficial, leave room for creativity. If you find an interesting ingredient at the market or a recipe that piques your interest, don’t hesitate to incorporate it into your week. Cooking for one can be an opportunity to explore new flavors and techniques at your own pace, making each meal a unique experience. With these planning tips, you’ll transform your solo supper into a delicious celebration of culinary creativity.

5. Creative Recipes for Solo Suppers

What are the best ways to cook for one person?
Credit : whatcanu.com

When it comes to cooking for one, the possibilities are endless, and the joy of creating a meal that caters solely to your tastes is unmatched. Embracing the art of solo supper means you can experiment without the pressure of pleasing anyone but yourself. Here are some creative recipes that are not only simple to prepare but also tantalizingly delicious, ensuring that dining alone becomes a delightful experience.

**1. One-Pan Mediterranean Quinoa Bowl:** Start with a base of fluffy quinoa, cooked to perfection. Toss in cherry tomatoes, olives, and spinach, then drizzle with a zesty lemon-tahini dressing. This vibrant dish is packed with flavors and nutrients, satisfying your hunger while transporting your taste buds to the sunny shores of the Mediterranean.

**2. Stuffed Sweet Potato:** Bake a sweet potato until tender, then slice it open and fill it with a medley of black beans, corn, diced tomatoes, and avocado. Top it off with a sprinkle of feta cheese and a dollop of Greek yogurt. This hearty yet healthy meal is not only colorful but also rich in fiber and protein, making it an ideal solo supper.

**3. Creamy Garlic Mushroom Risotto for One:** Risotto often seems like a labor-intensive dish, but it can easily be adapted for a single serving. Sauté fresh mushrooms and garlic in olive oil, then stir in Arborio rice and gradually add vegetable broth until creamy and al dente. Finish with a handful of grated Parmesan and fresh parsley for a comforting bowl that feels indulgent yet is surprisingly easy to whip up.

**4. Veggie-Packed Omelette:** Eggs are a solo cook’s best friend. Whip up an omelette filled with your favorite vegetables—think bell peppers, spinach, and mushrooms—and a sprinkle of cheese. Pair it with a side of whole-grain toast for a quick yet satisfying meal that can be enjoyed any time of day.

**5. Asian-inspired Ramen Bowl:** Elevate your instant ramen by adding fresh ingredients. Start with the noodles, then toss in sautéed bok choy, sliced green onions, and a soft-boiled egg. Finish with a drizzle of soy sauce and a sprinkle of sesame seeds for a warm, comforting bowl that rivals takeout.

Cooking for one opens up a world of creativity, allowing you to explore flavors and combinations that you love. With these simple and delightful recipes, solo suppers can transform from a mundane necessity into a culinary adventure that nourishes both body and soul. So grab your apron and get ready to savor the art of cooking for yourself!

6. Building a Versatile Pantry for One

Building a versatile pantry for one is an essential step in transforming solo cooking from a chore into an exciting culinary adventure. When you’re cooking for yourself, having a well-stocked pantry can be the difference between a quick, uninspired meal and a flavorful dish that feels like a true indulgence.

Start by selecting a few staple items that can serve as the foundation for a variety of meals. Opt for grains like quinoa, rice, or pasta that can be easily cooked in small batches and pair well with numerous ingredients. Canned beans and legumes are not only nutritious but also provide a hearty protein source that can elevate any meal.

Don’t forget to include a selection of spices and herbs; they can dramatically change the flavor profile of a dish without taking up much space. A simple collection of garlic powder, cumin, chili flakes, and dried oregano can offer the versatility needed to create anything from a comforting stew to a zesty stir-fry.

Fresh ingredients, such as seasonal vegetables and herbs, should also be a priority. When shopping, consider buying only what you’ll use in a week or two to avoid waste. Think about easy-to-store options like carrots, bell peppers, and sweet potatoes, which can be incorporated into a variety of dishes.

Lastly, invest in a few high-quality condiments—soy sauce, balsamic vinegar, olive oil, and hot sauce can add depth to your meals and keep your cooking exciting. With a well-rounded pantry, you’ll find that cooking for one doesn’t have to be dull or repetitive; instead, it opens up a world of creative possibilities, allowing you to explore new flavors and cuisines right from your kitchen. So, stock up wisely and let your solo supper adventures begin!

7. Time-Saving Cooking Techniques

What are the best ways to cook for one person?
Credit : whatcanu.com

When cooking for one, time is often of the essence, and mastering time-saving techniques can transform your solo dining experience from a chore into a delightful culinary adventure. Here are some of the most effective strategies to streamline your cooking while still enjoying delicious meals.

**1. One-Pan Wonders:** Simplify your meal prep by embracing one-pan dishes. Whether it’s a stir-fry, sheet pan dinner, or a cozy casserole, cooking everything in a single vessel not only cuts down on cleanup time but allows flavors to meld beautifully as they cook together. Imagine tossing your favorite vegetables, protein, and spices onto a sheet pan, then letting the oven do the work while you relax with a book or catch up on your favorite show.

**2. Batch Cooking:** Prepare larger quantities of base ingredients that can be easily repurposed throughout the week. Spend an hour or two on the weekend cooking up a big batch of grains, like quinoa or brown rice, and roasting a mix of seasonal vegetables. These versatile components can be quickly transformed into salads, grain bowls, or even soups, saving you precious time on busy weeknights.

**3. Instant Pot Magic:** If you haven’t yet welcomed an Instant Pot into your kitchen, now is the time. This multifunctional appliance can pressure cook, slow cook, sauté, and more, significantly reducing cooking times. Imagine tossing in your ingredients for a hearty stew and having it ready in a fraction of the time it would take on the stovetop. Plus, the ability to set it and forget it means you can attend to other tasks while your meal cooks.

**4. Pre-Chopped Ingredients:** While cooking from scratch is rewarding, sometimes you just need a shortcut. Many grocery stores now offer pre-chopped vegetables, pre-marinated proteins, and ready-to-use sauces. While this may come at a slight premium, the time saved in preparation can be invaluable, allowing you to whip up a delicious meal in minutes.

**5. Freezer-Friendly Meals:** Take advantage of your freezer by preparing and storing meals in advance. Soups, stews, and casseroles freeze exceptionally well and can be portioned out for quick reheating. Label each container with the date and contents so you can easily pull out a homemade meal on those days when cooking feels like too much effort.

By incorporating these time-saving techniques into your cooking routine, you can enjoy a variety of creative and delicious meals without spending hours in the kitchen. Cooking for one doesn’t have to feel isolating or time-consuming—embrace the simplicity and savor every bite!

8. Utilizing Leftovers and Batch Cooking

When it comes to cooking for one, embracing the power of leftovers and batch cooking can transform your culinary experience from mundane to magnificent. Rather than viewing leftovers as mere remnants of past meals, think of them as culinary building blocks that can spark creativity in the kitchen. With a little ingenuity, yesterday’s roast chicken can become today’s zesty chicken salad, while leftover vegetables can serve as the base for a hearty soup or stir-fry.

Batch cooking is not just a time-saver; it’s a strategic way to ensure you have a variety of meals at your fingertips without the daily grind of cooking from scratch. Imagine spending a few hours on a Sunday preparing a big pot of chili or a fragrant curry, portioning it out into individual servings, and stowing them away in your freezer. On those busy weeknights when you’re tempted to reach for takeout, simply pop a container in the microwave, and voilà! You have a homemade meal ready in minutes.

To maximize your batch cooking efforts, choose versatile recipes that can be easily adapted. For example, a large batch of quinoa can be used as a side dish, a base for salads, or even mixed into a savory breakfast bowl with eggs and sautéed greens. Similarly, roasted vegetables can elevate a simple pasta dish or be tossed into a grain bowl topped with your favorite dressing.

Don’t forget the power of seasoning! A sprinkle of fresh herbs, a dash of hot sauce, or a drizzle of balsamic glaze can completely change the flavor profile of your leftovers, ensuring that each meal feels fresh and exciting. By utilizing leftovers and embracing batch cooking, cooking for one can become not just a necessity, but a delightful exploration of flavors and textures that you look forward to each day.

9. Exploring International Dishes for Solo Dining

When it comes to solo dining, why limit yourself to the familiar comforts of home cooking? Exploring international dishes can elevate your meal experience, transforming a simple dinner for one into a culinary adventure. With the world at your fingertips, you can embark on a flavorful journey right from your kitchen, experimenting with spices, techniques, and ingredients that harken back to distant lands.

Consider the vibrant aromas of a Moroccan tagine, where tender chicken or chickpeas are simmered with fragrant spices like cumin and cinnamon, served alongside fluffy couscous. Not only is this dish easy to prepare in a single serving, but it also invites you to indulge in the rich flavors of North Africa, all while savoring the communal essence of a shared meal, albeit enjoyed solo.

Or perhaps the comforting warmth of a classic Italian risotto, rich and creamy, can be your next solo creation. With just a handful of ingredients—arborio rice, broth, and your choice of fresh vegetables or proteins—you can craft a dish that’s both satisfying and sophisticated. The slow stirring of the risotto offers a meditative cooking experience, allowing you to connect with the food and the moment, making your dining experience feel special.

Don’t overlook the simplicity and freshness of a Japanese donburi, a rice bowl adorned with ingredients like teriyaki chicken or sautéed vegetables, topped with a perfectly fried egg. This dish is not only easy to customize based on what you have on hand, but it also embodies the beautiful balance of flavors and textures that Japanese cuisine is known for.

By embracing international dishes when cooking for one, you’re not just feeding your body; you’re also feeding your curiosity and creativity. So grab your apron, dive into a new recipe, and let each meal transport you to a different corner of the globe, making your solo supper not just a necessity, but a delightful journey of taste and culture.

10. Healthy Eating Tips for One

Eating healthy while cooking for one can be a delightful journey rather than a daunting task. When you’re the sole diner at your table, it’s easy to let convenience take precedence over nutrition. However, with a few thoughtful strategies, you can create meals that are both nourishing and satisfying.

First, embrace the idea of batch cooking. Prepare larger portions of versatile base ingredients like quinoa, brown rice, or roasted vegetables at the beginning of the week. These staples can be stored in the fridge and easily transformed into various dishes. For instance, add some beans and salsa to your rice for a quick burrito bowl, or toss roasted veggies with a handful of leafy greens for a vibrant salad.

Next, focus on incorporating a rainbow of fruits and vegetables into your meals. Not only do they add color and flavor, but they also provide essential vitamins and minerals. Try to include at least three different colors on your plate each time you eat. This can be as simple as adding cherry tomatoes and spinach to your scrambled eggs in the morning or mixing berries into your yogurt for a refreshing snack.

Don’t shy away from experimenting with spices and herbs. They can transform a simple dish into a culinary masterpiece without adding extra calories. A sprinkle of cumin can elevate a vegetable stir-fry, while fresh basil can brighten up a tomato salad.

Lastly, plan for leftovers! While cooking for one, it might be tempting to scale down your recipes, but making a little extra can save you time and effort on busier days. Leftovers can be reinvented; think of yesterday’s roasted chicken as today’s chicken salad or a hearty soup.

By employing these healthy eating tips, you’ll not only nourish your body but also discover the joy of cooking for yourself. Embrace the freedom that comes with solo supper, and let your kitchen become a canvas for your culinary creativity!

11. Enhancing Your Meal with Simple Pairings

Cooking for one doesn’t mean you have to sacrifice flavor or creativity. In fact, enhancing your meal with simple pairings can elevate a solitary dining experience to something truly special. Think of pairings as your secret weapon, turning basic ingredients into a culinary delight.

Start with a base component – perhaps a perfectly cooked piece of salmon or a warm bowl of quinoa. From there, let your imagination run wild with complementary flavors. A squeeze of fresh lemon juice and a sprinkle of dill can brighten a fish dish, while a drizzle of olive oil and a dash of balsamic vinegar can transform a simple grain into a flavorful side.

Don’t underestimate the power of textures either. Consider adding crunchy roasted chickpeas to your salad for an unexpected twist, or topping your soup with a dollop of creamy yogurt and a handful of fresh herbs. These little touches can make a world of difference, adding depth and interest to your plate.

Additionally, think about how you can incorporate seasonal produce. A handful of sautéed spinach can add a pop of color and nutrients to a pasta dish, while a few slices of ripe avocado can lend creaminess to a grain bowl. Remember, the goal is to create a well-rounded meal that satisfies both your palate and your hunger.

So, the next time you find yourself cooking for one, don’t settle for a mundane meal. Embrace the art of simple pairings and watch as your dining experience transforms into a delightful feast that celebrates the joy of eating well, even when you’re flying solo.

12. Mindful Eating: Enjoying Your Own Company

In a world that often prioritizes multitasking and constant connectivity, the practice of mindful eating can be a refreshing and enriching experience, especially when dining solo. Rather than viewing a meal for one as a lonely affair, embrace it as an opportunity to savor not only the flavors on your plate but also the joy of your own company.

Set the scene for your meal: dim the lights, play soft music, or even light a candle to create a cozy atmosphere that transforms your dining space into a personal sanctuary. As you prepare your dish, take your time to appreciate the colors, textures, and aromas of the ingredients. Consider the nutritional benefits of what you’re cooking, and how each element contributes to your well-being.

When it’s time to eat, put away distractions. This means no scrolling through your phone or catching up on your favorite show. Instead, focus on each bite. Notice the way the flavors mingle on your palate, the crunch of fresh vegetables, or the warmth of a comforting broth. Eating slowly allows you to fully experience your food, making every meal a small celebration of the moment.

Mindful eating is not just about the food; it’s also about reflection. Use this time to think about your day, set intentions for tomorrow, or simply appreciate the present moment. Enjoying your own company can be a powerful reminder of self-love and acceptance. When you treat your solo meals as an occasion to nourish both body and spirit, you cultivate a deeper relationship with food while fostering a sense of independence and fulfillment.

So, the next time you find yourself cooking for one, remember that it’s not just a meal; it’s an experience to be cherished. Embrace the tranquility of your solo supper and let each bite remind you of the pleasure that comes from being at peace with yourself.

13. Incorporating Seasonal Ingredients

Incorporating seasonal ingredients into your solo meals can elevate your cooking game, transforming a simple dish into something truly special. Seasonal produce is not only fresher and more flavorful, but it also allows you to experiment with a variety of tastes and textures throughout the year. Imagine the sweet, juicy tomatoes of summer, bursting with flavor, or the earthy, comforting squashes that signal the arrival of fall.

Start by visiting your local farmers’ market or grocery store to see what’s in season. You’ll find vibrant greens in the spring, robust root vegetables in the winter, and an array of colorful fruits and vegetables that change with the seasons. For example, a spring meal could feature asparagus and peas sautéed with lemon and garlic, while in the autumn, you might enjoy a hearty soup made with pumpkin and sage.

When planning your meals, think about the flavors that complement each other and how you can incorporate a variety of seasonal items. A simple stir-fry can be transformed by using crisp, fresh vegetables that are at their peak, while a classic pasta dish can be brightened with the addition of seasonal herbs or a drizzle of homemade pesto made with spring basil.

Not only does cooking with seasonal ingredients make your meals more exciting, but it also supports local farmers and reduces your carbon footprint. Plus, the satisfaction of creating a dish that celebrates the colors and flavors of the season adds a delightful touch to your solo supper experience. So, gather those seasonal treasures and let your creativity flow, knowing that each bite is a celebration of the time and place in which you live!

14. Quick and Easy One-Pot Meals

When it comes to cooking for one, quick and easy one-pot meals are the ultimate solution for those busy weeknights or lazy weekends. These meals not only minimize the number of dishes you have to wash but also allow you to experiment with flavors and textures without the fuss of complex recipes. Imagine a warm, comforting dish that requires minimal effort yet delivers maximum satisfaction – that’s the beauty of one-pot cooking.

Consider the classic risotto, a creamy rice dish that can be prepared in just one pot. Start by sautéing some onions and garlic in a splash of olive oil, then add Arborio rice and gradually stir in your favorite broth, allowing it to absorb the liquid to create a rich, velvety texture. You can elevate this dish with seasonal vegetables or protein, such as peas, mushrooms, or shrimp, making it as vibrant and hearty as you desire.

Another fantastic option is a hearty one-pot pasta dish. Simply toss your pasta of choice into a pot with diced tomatoes, garlic, spinach, and your favorite herbs, then cover with just enough water or broth to cook the pasta. In under 20 minutes, you’ll have a delicious, steaming bowl of pasta that captures the essence of Italian comfort food, all while keeping the cleanup to a minimum.

For those craving something with a kick, a one-pot chili can be both filling and flavorful. Brown some ground meat or opt for a plant-based protein, then add canned beans, diced tomatoes, bell peppers, and spices. Let it simmer away while you unwind, and you’ll have a robust meal that’s perfect for any night of the week.

These one-pot wonders not only save time and effort but also leave room for creativity. Feel free to mix and match ingredients based on what you have on hand. The beauty of cooking for one is that you can tailor each meal to your taste, ensuring that every bite is perfectly suited to your cravings. So grab your favorite pot, embrace the simplicity, and enjoy the satisfaction of delicious, home-cooked meals made just for you.

15. Conclusion: Finding Joy in Solo Suppers

In conclusion, cooking for one can be a delightful and fulfilling experience that sparks creativity in the kitchen and invites a sense of mindfulness into your daily routine. As we’ve explored throughout this journey into solo suppers, preparing meals just for yourself offers an opportunity to experiment with flavors, try new techniques, and indulge in your personal preferences without compromise. It’s a chance to reconnect with the joy of cooking, where every dish becomes a reflection of your unique taste and style.

Embracing this solo culinary adventure means you can thoughtfully select ingredients, craft meals that excite your palate, and take the time to savor each bite. Whether you’re whipping up a simple pasta dish infused with fresh herbs or experimenting with vibrant seasonal vegetables in a hearty stir-fry, each meal is a step toward celebrating your individuality.

Moreover, the act of preparing your own food allows you to create a sanctuary of comfort, where you can unwind after a long day, nourish your body, and celebrate the simple pleasures of life. So, the next time you find yourself cooking for one, remember that it’s more than just a meal; it’s an opportunity to embrace your creativity, foster self-care, and truly enjoy the art of cooking. Finding joy in solo suppers not only enriches your dining experience but also paves the way for a deeper appreciation of the time spent in your kitchen, transforming each solitary meal into a delicious celebration of you.

As we wrap up our exploration of creative and delicious ways to cook for one, we hope you feel inspired to embrace the joy of solo suppers. Cooking for yourself can be a delightful experience, allowing you to experiment with flavors, try new recipes, and savor each bite at your own pace. Remember, dining alone doesn’t mean sacrificing taste or creativity; rather, it’s an opportunity to indulge in meals that cater to your unique preferences. So, gather your favorite ingredients, unleash your culinary imagination, and make every solo supper a celebration of you. Share your culinary creations with us, and let’s continue to inspire each other on this flavorful journey!

What are the best ways to cook for a family?

In today’s fast-paced world, finding the time to prepare nutritious meals for your family can feel like a daunting task.

Balancing work, school, and the myriad of daily responsibilities often leaves little room for the creativity and care that cooking requires. Yet, nourishing your loved ones with healthy, home-cooked meals is one of the most rewarding things you can do. Imagine serving up delicious dishes that not only satisfy picky eaters but also contribute to their well-being—all without spending hours in the kitchen. In this blog post, we’ll explore 10 time-saving tips that will revolutionize your cooking routine. From meal prepping strategies to simple ingredient swaps, these practical solutions will empower you to whip up wholesome family meals that everyone will love, allowing you to savor both the cooking process and the precious moments around the dinner table. Get ready to reclaim your evenings and transform mealtime into a delightful experience for the whole family!

1. Plan Your Meals for the Week

What are the best ways to cook for a family?
Credit : whatcanu.com

Planning your meals for the week is a game-changer when it comes to saving time in the kitchen while ensuring your family enjoys nutritious meals. Start by dedicating a bit of time each weekend to map out your meals for the upcoming week. This doesn’t have to be a daunting task; in fact, it can be quite fun! Gather your family for a brainstorming session where everyone can contribute their favorite dishes. This collaborative approach not only ensures that meals cater to everyone’s tastes but also fosters a sense of excitement about the week’s menu.

Once you have a list of meals, create a shopping list based on the recipes you’ve chosen. This will help you avoid last-minute trips to the grocery store and the temptation to grab unhealthy snacks or takeout. Opt for meals that share similar ingredients to minimize waste and cut down on prep time. For instance, if you plan to use spinach in a salad one night, consider incorporating it into a pasta dish or smoothie later in the week.

Additionally, take advantage of batch cooking. Prepare larger portions of meals that can be easily reheated or transformed into different dishes. For instance, a big pot of chili can be served with rice one night, then turned into chili quesadillas or mixed into a taco salad later in the week.

By planning your meals ahead of time, you eliminate the stress of daily decisions, reduce the risk of resorting to unhealthy options, and ensure that nutritious, homemade meals are always on the table. This simple yet effective strategy not only saves time but also brings your family closer together around the dinner table, making mealtime an occasion to look forward to.

2. Make a Grocery List and Stick to It

Creating a grocery list is a fundamental step in streamlining your meal prep and ensuring that you have everything you need on hand. Before you head to the store, take a moment to plan your meals for the week. Gather your family’s favorites and any new recipes you’ve been itching to try. As you compile your list, aim for a balanced variety of fruits, vegetables, proteins, and whole grains that will not only nourish your family but also keep mealtime exciting.

Once you have your list, stick to it like glue! This discipline will save you time wandering the aisles, help you avoid impulse buys, and ensure you purchase only what you truly need. If you’re shopping on a budget, sticking to your list can also keep costs down, allowing for more nutritious choices without breaking the bank.

To make the grocery shopping experience even more efficient, consider organizing your list by category—produce, dairy, grains, etc. This way, you can navigate the store more swiftly, minimizing the time spent on each trip. And if you’re feeling adventurous, you might even include items that can be batch-cooked or frozen for future meals.

By making a grocery list and adhering to it, you’ll not only save time during your shopping trips but also set the stage for a week of delicious, home-cooked meals that everyone in the family will love. With everything you need at your fingertips, you’ll find that cooking nutritious meals becomes a delightful rather than daunting task.

3. Embrace Batch Cooking

What are the best ways to cook for a family?
Credit : whatcanu.com

Embracing batch cooking is a game changer for busy families looking to save time in the kitchen while still serving up nutritious meals. The concept is simple: dedicate a few hours once or twice a week to prepare large quantities of food that can be portioned and stored for later use. This not only streamlines your cooking process but also reduces the stress of daily meal prep.

Imagine a Sunday afternoon filled with the comforting aromas of simmering soups, roasting vegetables, and sizzling proteins. As you chop, stir, and season, you’re not just cooking for one meal; you’re creating a treasure trove of ready-to-eat dishes that can be easily reheated throughout the week. From hearty casseroles and flavorful stews to grain bowls and marinated proteins, the possibilities are endless.

The beauty of batch cooking lies in its versatility. You can tailor meals to suit your family’s tastes and dietary preferences. For instance, make a big pot of quinoa that can serve as a base for various meals—paired with roasted vegetables one night, transformed into a salad the next, and even stirred into a comforting soup later in the week. By mixing and matching ingredients, you can keep meals exciting while ensuring they remain nutritious.

Additionally, batch cooking aids in reducing food waste. By planning meals around what you already have in your pantry or fridge, you can minimize leftovers and ensure every ingredient is utilized. Store individual portions in clear, labeled containers in the fridge or freezer, making it easy to grab a meal when time is tight.

Not only does batch cooking save you time, but it also fosters a sense of togetherness. Involve your family in the process—assign tasks, share recipes, and enjoy the culinary journey together. This not only makes meal prep more enjoyable but also teaches valuable cooking skills to your little ones. Embrace batch cooking, and watch as it transforms your weeknight dinners from chaotic to calm, ensuring that nutritious meals are always within reach.

4. Use Time-Saving Kitchen Tools

In the fast-paced world we live in, having the right kitchen tools can be a game-changer when it comes to whip up nutritious meals for your family. Investing in time-saving kitchen gadgets not only streamlines your cooking process but also enhances your culinary creativity.

Consider incorporating a slow cooker into your meal prep routine. With this handy appliance, you can toss in your ingredients in the morning, set it to cook, and come home to a hearty, healthy dinner that’s ready to serve. Imagine the delightful aroma of a savory stew wafting through your home as you walk in after a long day!

Another invaluable tool to consider is the pressure cooker, which can drastically cut down cooking times for grains, beans, and tough cuts of meat. A meal that would typically take hours can be ready in a fraction of the time, freeing you up for more quality moments with your family.

Don’t overlook the benefits of food processors and blenders, either. These gadgets make quick work of chopping vegetables, pureeing soups, and even whipping up smoothies packed with nutrients. With a few pulses, you can have your ingredients prepped and ready to go, allowing you to focus on the cooking rather than the chopping.

Lastly, think about investing in a quality set of kitchen knives. A sharp knife not only speeds up your prep time but also ensures safer cutting, giving you the confidence to tackle meal prep with efficiency.

By equipping your kitchen with these time-saving tools, you can transform the way you prepare meals, making it easier to serve up nutritious dishes that your family will love, without sacrificing precious time. Embrace the convenience of modern kitchen technology and watch how it elevates your cooking experience!

5. Prep Ingredients in Advance

What are the best ways to cook for a family?
Credit : whatcanu.com

When it comes to preparing nutritious family meals, one of the most effective strategies is to prep your ingredients in advance. This simple yet impactful practice can transform your cooking routine, making it not only quicker but also more enjoyable.

Imagine stepping into your kitchen and finding everything you need ready to go—vegetables washed and chopped, grains measured, and proteins marinated. By dedicating a little time during the weekend or the night before to prepare these ingredients, you set yourself up for success during the busy week ahead.

Start by selecting a few recipes for the week and create a shopping list. Once you’ve gathered your ingredients, wash and chop vegetables like bell peppers, carrots, and onions, placing them in airtight containers in the fridge. You can also cook larger portions of grains such as quinoa or brown rice, and store them in the refrigerator for easy access. Proteins like chicken, tofu, or fish can be marinated ahead of time, allowing flavors to meld beautifully, ready to be cooked with minimal effort when it’s time to eat.

This preparation not only saves you time on hectic weeknights but also encourages healthier eating choices. With everything on hand, you’re less likely to reach for takeout or unhealthy snacks. Plus, involving your family in the prep process can turn it into a fun and educational activity, teaching kids about nutrition and cooking skills along the way.

By prepping ingredients in advance, you create a streamlined cooking experience that allows for creativity and spontaneity. The best part? You’ll find that mealtime becomes less of a chore and more of a cherished family moment, with delicious, home-cooked meals everyone will love.

6. Choose Quick-Cooking Proteins

When it comes to preparing nutritious family meals, choosing quick-cooking proteins can be a game changer in your kitchen. Proteins are essential for growth, repair, and overall health, but they can often require lengthy cooking times that can derail your meal prep plans. Fortunately, there are several protein options that can be ready to serve in no time, allowing you to whip up delicious dishes without spending hours in front of the stove.

Consider lean meats like chicken breasts or turkey cutlets, which can be cooked in under 20 minutes when sliced thin or marinated for quick flavor absorption. Fish is another excellent choice; varieties like salmon or tilapia can be pan-seared in just 10-12 minutes. For plant-based options, canned beans or pre-cooked lentils are not only convenient but also packed with protein and fiber. Simply rinse and toss them into salads, soups, or stir-fries to boost nutritional value without the need for lengthy preparation.

Eggs are another versatile and swift protein source. Scrambled, poached, or made into an omelet, they can be prepared in mere minutes and provide a satisfying meal for any time of day. Additionally, consider incorporating deli meats or rotisserie chicken into your meals. These ready-to-eat options can be effortlessly added to sandwiches, wraps, or salads, ensuring that you can serve a hearty dish without extensive cooking.

By selecting quick-cooking proteins, you not only streamline your meal prep process but also keep your family nourished and satisfied. With these time-saving strategies, you’ll find that enjoying healthy, home-cooked meals together becomes an effortless and enjoyable routine.

7. Incorporate One-Pan or One-Pot Recipes

What are the best ways to cook for a family?
Credit : whatcanu.com

In the hustle and bustle of family life, the last thing you want is a mountain of dishes waiting for you after dinner. This is where the beauty of one-pan or one-pot recipes shines through, not only simplifying your cooking process but also packing a nutritional punch that the whole family will appreciate.

Imagine a vibrant stir-fry, where colorful vegetables and lean proteins come together in a single skillet, sizzling to perfection while retaining their natural flavors and nutrients. Or consider the comforting allure of a hearty stew simmering gently in one pot, where the melding of spices and ingredients creates a rich tapestry of taste that warms the soul. With these recipes, you can minimize prep and cleanup time, allowing more moments to connect with your loved ones around the dinner table.

Moreover, one-pan and one-pot meals are incredibly versatile. You can easily swap ingredients based on what you have on hand, making them perfect for using up leftovers or seasonal produce. This adaptability not only helps reduce food waste but also encourages creativity in the kitchen, allowing you to experiment with flavors and textures that your family will love.

From a creamy risotto that cooks all in one pot to a sheet pan dinner featuring your favorite proteins and roasted vegetables, these recipes can be both nutritious and delightful. In just one cooking vessel, you can create a balanced meal that includes lean proteins, whole grains, and a variety of colorful veggies, ensuring everyone leaves the table satisfied and nourished. So, embrace the simplicity and deliciousness of one-pan or one-pot cooking, and watch as mealtime transforms into an easy, enjoyable family affair.

8. Utilize Frozen and Pre-Cut Vegetables

When it comes to preparing nutritious family meals, one of the smartest strategies to save time in the kitchen is to utilize frozen and pre-cut vegetables. Not only do these options cut down on your prep work significantly, but they also deliver a wealth of nutritional benefits that make mealtime both convenient and wholesome.

Frozen vegetables are often harvested at their peak ripeness and flash-frozen, locking in essential vitamins and minerals, so you don’t have to compromise on nutrition. Whether it’s a vibrant mix of bell peppers, broccoli florets, or sweet corn, simply grab a bag from your freezer, and you’re halfway to a delicious dish. They cook quickly and can be easily added to stir-fries, soups, casseroles, or even tossed into pasta for an instant flavor and nutrition boost.

On the other hand, pre-cut vegetables can save you the hassle of chopping and peeling, allowing you to get dinner on the table in record time. Many grocery stores offer a variety of ready-to-use options, such as diced onions, sliced mushrooms, or spiralized zucchini. These time-savers not only reduce your prep time but also minimize cleanup, making your cooking experience less daunting and more enjoyable.

Moreover, incorporating frozen and pre-cut vegetables encourages variety in your meals. With the wide array of options available, you can easily mix and match to create colorful, nutrient-dense dishes that appeal to even the pickiest of eaters. Throw in some frozen peas for sweetness, or add pre-cut carrots for a satisfying crunch—your family will never get bored!

By embracing the convenience of frozen and pre-cut vegetables, you can streamline your cooking process while ensuring your family enjoys balanced, nutritious meals every day of the week. It’s a win-win solution that proves that healthy eating doesn’t have to be time-consuming!

9. Keep a Stock of Pantry Staples

Keeping a well-stocked pantry is one of the simplest yet most effective strategies for saving time in the kitchen while still preparing nutritious meals for your family. When your pantry is filled with essential staples, you can whip up a delicious dish in no time, even on the busiest of days.

Start by stocking up on versatile ingredients like whole grains—think brown rice, quinoa, and whole wheat pasta—which serve as the foundation for many wholesome meals. Canned goods, such as beans, tomatoes, and vegetables, not only have a long shelf life but can also be the perfect add-ins for soups, stews, and casseroles. Don’t forget about healthy fats like olive oil and nut butters, which can enhance both flavor and nutrition.

Herbs and spices are another important category; they can transform even the simplest of ingredients into something spectacular. A sprinkle of dried oregano, a dash of cumin, or a pinch of cayenne can elevate your dishes, ensuring that family meals are never boring.

Additionally, consider keeping frozen vegetables and fruits on hand. They’re just as nutritious as their fresh counterparts and can be a lifesaver when you’re short on time or produce. Toss frozen spinach into a pasta dish or blend frozen berries into a smoothie for a quick and healthy meal option.

By having these pantry staples readily available, you’ll not only cut down on meal prep time but also have the flexibility to create a variety of meals without the stress of last-minute grocery shopping. The key is to be intentional about what you stock—focus on nutrient-dense options that your family enjoys, and you’ll find yourself cooking up wholesome, delicious meals in a flash!

10. Get the Family Involved in Cooking

Getting the family involved in cooking is not just a way to save time; it’s a fantastic opportunity to bond, educate, and create cherished memories together. When everyone pitches in, not only does meal prep become more efficient, but it also transforms into a fun and collaborative event that everyone looks forward to.

Start by assigning age-appropriate tasks to each family member. Little ones can wash vegetables, mix ingredients, or set the table, while older kids and teens can take on more complex roles like chopping, measuring, and even cooking on the stovetop. This not only lightens your workload but also teaches valuable life skills, instilling confidence and a sense of accomplishment in the kitchen.

Involve them in the planning process as well. Let them help choose recipes or pick out ingredients during grocery shopping. This not only makes them feel invested in the meals being prepared but also encourages them to be more adventurous eaters. When children help create a dish, they’re often more excited to try it, opening up new possibilities for nutritious family meals.

Consider themed cooking nights where everyone can bring their favorite dish to the table, or try new cuisines together. You can turn it into a cooking competition or even a fun family cooking show—complete with judging and prizes. Not only will this save you time in the kitchen, but it will also foster creativity and teamwork.

Finally, don’t forget to enjoy the fruits of your labor together. Make mealtime a family event where everyone can share stories, laugh, and appreciate the effort that went into creating the meal. By getting the family involved in cooking, you not only save time but also create a deeper connection to the food you’re serving, ensuring that your family meals are not just nutritious, but cherished experiences as well.

11. Create a Rotateable Recipe Library

Creating a rotateable recipe library is a game changer for busy families looking to streamline their meal preparation while keeping things fresh and exciting. Imagine having a curated collection of your family’s favorite recipes, all organized and ready to go. This not only saves time but also reduces the stress of daily meal planning.

Start by compiling a list of tried-and-true recipes that everyone in the family enjoys. Consider meals that are quick to prepare, nutritious, and versatile enough to adapt with seasonal ingredients or whatever you have on hand. You can categorize your library by themes, such as ‘Meatless Mondays,’ ‘Quick 30-Minute Meals,’ or ‘One-Pot Wonders,’ making it easy to find inspiration based on your schedule or pantry contents.

To make your recipe library even more efficient, use digital tools like apps or online platforms where you can store and easily access your recipes. This way, you can quickly search for options based on the ingredients you need to use up or the time you have available. Alternatively, if you prefer a more tactile approach, consider a dedicated binder or a rotating recipe box filled with printed cards.

Once you have your library established, rotate through the recipes weekly or biweekly to keep meal times interesting. You can assign specific days for certain categories, ensuring that your family doesn’t tire of the same meals. By creating a rotateable recipe library, you not only simplify your cooking process but also cultivate a sense of anticipation at the dinner table, as everyone looks forward to their favorites returning to the menu. This method not only saves time but also fosters family bonding over shared meals that everyone loves.

12. Use Leftovers Creatively

Using leftovers creatively is a game-changer for any busy family looking to save time in the kitchen while still enjoying delicious meals. Instead of viewing leftovers as a mere afterthought, consider them a treasure trove of culinary potential. With a little imagination, last night’s dinner can be transformed into something entirely new and exciting.

For instance, leftover roasted chicken can be the star of a hearty chicken salad, tossed with fresh greens, crunchy nuts, and a zesty dressing for a refreshing lunch option. You could also shred the chicken and mix it with barbecue sauce for a quick and flavorful sandwich filling. Similarly, a simple stir-fry can breathe new life into yesterday’s grilled vegetables and rice, allowing you to create a colorful, nutrient-packed dish in mere minutes.

Don’t forget about grains! Leftover quinoa or brown rice can easily be turned into a vibrant grain bowl. Just add some fresh veggies, a protein of your choice, and a drizzle of your favorite sauce for a satisfying meal that feels fresh and exciting. Even breakfast can benefit from leftovers; mix up a savory frittata with any remaining vegetables and proteins for a hearty start to the day.

Embracing your leftovers not only minimizes food waste but also streamlines your cooking process, allowing you to whip up nutritious meals in no time. Plus, it’s a fantastic way to keep your family’s taste buds engaged and excited about dinner, transforming what might seem mundane into something remarkable. So next time you finish a meal, think creatively—your leftovers are just waiting to shine!

13. Set a Timer for Efficiency

Setting a timer while cooking is an invaluable strategy that can transform your meal preparation from chaotic to efficient. Time is often the most precious resource in a busy household, and harnessing it effectively can make all the difference in getting nutritious meals on the table without the stress.

Begin by breaking down your recipes into key stages—chopping vegetables, boiling pasta, or simmering sauces—and assign a timer to each task. For instance, if you’re roasting vegetables while cooking grains, set separate timers for each to ensure they finish simultaneously. This not only helps you stay organized but also allows you to multitask effectively, as you can focus on one task while keeping an eye on the time for the others.

Timers can also help you resist the temptation to wander away from the kitchen. It’s easy to get distracted by a phone call, a child needing attention, or even a tempting television show. By setting a timer, you create a structured environment where you’re consistently engaged in the cooking process.

Moreover, don’t hesitate to use your smartphone or kitchen gadgets to your advantage. Many apps come with customizable timers and features that can alert you with a gentle chime or vibration, ensuring you’re on track without being tethered to the kitchen.

Incorporating this simple practice of timing will not only enhance your cooking efficiency but also foster a sense of accomplishment as you watch the clock and your meals come together seamlessly. Before you know it, you’ll be serving up delicious, nutritious meals that the whole family will love—all while reclaiming your valuable time.

14. Streamline Cleanup with Organized Workspaces

When it comes to cooking nutritious family meals, the joy of creating delicious dishes can quickly be overshadowed by the often daunting task of cleanup. However, by streamlining your cleanup process with organized workspaces, you can save time and make the overall cooking experience much more enjoyable.

Begin by setting up your cooking area with clear organizational systems in place. Use labeled containers or baskets to keep utensils, spices, and ingredients sorted and easily accessible. This not only minimizes the time spent rummaging through drawers and cupboards but also ensures that everything you need is at your fingertips as you cook. A clean, tidy workspace encourages a focused and efficient cooking environment, reducing the chances of spills and messes that can complicate cleanup later.

As you cook, adopt the habit of practicing “clean as you go.” This means washing and drying utensils, cutting boards, and bowls as you finish using them, rather than letting them pile up in the sink. Keep a designated area for dirty dishes, and remind yourself to toss any scraps into a compost bin or trash bag immediately. By maintaining the cleanliness of your workspace throughout the cooking process, you’ll find that the final cleanup is far less overwhelming.

Additionally, consider investing in multifunctional kitchen tools that can reduce the number of items you need to wash. For example, a food processor can chop vegetables, blend sauces, and even knead dough, which means fewer dishes to clean afterward. By minimizing the number of utensils and cookware required, you can spend more time enjoying your family meal and less time scrubbing pots and pans.

Ultimately, an organized workspace fosters a more enjoyable cooking experience, allowing you to focus on creating nutritious meals without the stress of a messy kitchen weighing you down. With these small but impactful adjustments, you’ll find that you can whip up healthy dishes quickly, leaving plenty of time for family moments around the dinner table.

15. Share the Love: Encourage Family Feedback on Meals

Encouraging family feedback on meals is not just about gathering opinions; it’s a vital step in creating a nourishing and enjoyable cooking experience that brings everyone together. When you invite your family to share their thoughts on the dishes you prepare, you open the door to a collaborative environment that fosters communication and connection.

As you gather around the dinner table, take a moment to ask your loved ones what they think about the meal. Was the spaghetti sauce too tangy, or did they wish for a little more spice in the stir-fry? Perhaps one family member loved the creamy mashed potatoes while another would prefer a healthier alternative, like cauliflower mash. By actively seeking their input, you show that their preferences matter, paving the way for future meals that cater to their tastes.

Make the feedback process fun! You could create a simple rating system with stars or emojis, or even have a family meal journal where everyone can jot down their likes, dislikes, and suggestions. This not only encourages honest dialogue but also gives your family a sense of ownership over meal planning and preparation. The next time you whip up a dish, refer to their previous feedback to refine your recipe or introduce new flavors.

Additionally, celebrating their contributions reinforces that cooking is a family affair. Whether it’s through cooking together or simply discussing meal ideas, engaging your family in the culinary process builds anticipation for the next meal, making them more likely to appreciate and enjoy what’s on their plates. So, share the love around the dinner table, and watch as your family’s enthusiasm for nutritious meals grows, saving you time and effort in the kitchen while creating lasting memories together.

We hope you found inspiration in our guide to cooking nutritious family meals that save you time without sacrificing flavor or health. Balancing the demands of a busy schedule with the desire to serve wholesome dishes can be challenging, but with these ten time-saving tips, you can streamline your cooking process and create meals that everyone at the table will enjoy. From efficient meal prepping to clever ingredient swaps, each strategy is designed to make your cooking experience more enjoyable and less stressful. Remember, the key to family meals is not just in the food itself but in the moments shared around the table. So gather your loved ones, put these tips into practice, and watch as mealtime transforms into a delightful experience for all. Happy cooking!