How Can I Stop My Dog From Barking At Everything?

For dog owners, the joyful sound of a wagging tail and playful barks can quickly turn into a source of frustration when excessive barking disrupts the peace of your home and neighborhood.

While barking is a natural form of communication for dogs, incessant noise can signal underlying issues such as anxiety, boredom, or a lack of proper training. Understanding the reasons behind your dog’s vocalizations is key to addressing the problem effectively. In this blog post, we’ll explore practical and humane strategies to help you curb your dog’s excessive barking, allowing you to foster a calmer environment for both you and your furry friend. From identifying triggers and implementing training techniques to creating a stimulating atmosphere, these tips will empower you to manage your dog’s barking and enhance your cherished bond. Say goodbye to sleepless nights and hello to tranquility as we dive into the world of canine communication!

1. Understanding the Reasons Behind Excessive Barking

How Can I Stop My Dog From Barking At Everything?
Credit : whatcanu.com

Before you can effectively curb your dog’s excessive barking, it’s essential to understand the motivations behind their vocalizations. Dogs bark for a variety of reasons, each rooted in instinctual behaviors and environmental triggers. By identifying the specific cause of your dog’s barking, you can tailor your approach to address the root of the issue rather than merely silencing them.

One common reason dogs bark excessively is to communicate. This could be their way of expressing excitement when a family member arrives home, or it may be a signal of distress when they are left alone. In some cases, barking serves as an alert mechanism, warning you of perceived threats or unusual happenings in their surroundings. This protective instinct can be particularly strong in certain breeds, leading them to bark at anything that moves—be it a squirrel passing by or a neighbor walking their dog.

Another factor to consider is boredom or lack of exercise. Dogs are energetic creatures that require physical and mental stimulation. An under-stimulated dog may resort to barking as a way to release pent-up energy or to seek attention. This is especially true for high-energy breeds that thrive on activity and engagement.

Additionally, fear or anxiety can trigger excessive barking. If your dog is frightened by loud noises, unfamiliar environments, or the presence of strangers, they may bark as a way to cope with their anxiety. Understanding your dog’s body language during these episodes can provide insight into their emotional state, allowing you to address any fears or insecurities.

Finally, some dogs develop a habit of barking due to learned behaviors. If barking has consistently resulted in attention—whether positive or negative—your dog may learn to use it as a tool for communication. This is where consistent training and reinforcement become crucial in breaking the cycle.

By taking the time to observe your dog’s barking patterns and understanding the motivations behind them, you can create a more effective strategy to reduce excessive barking. Once you pinpoint the cause, you can implement targeted solutions, leading to a more peaceful environment for both you and your furry companion.

2. Assessing Your Dog’s Barking Triggers

Understanding the reasons behind your dog’s barking is the first crucial step in curbing this behavior. Every dog is unique, and their barks can be influenced by a myriad of factors—ranging from environmental stimuli to emotional states. Begin by observing your dog closely. Keep a journal to note the specific situations that trigger barking. Is it the sound of the mailman arriving? The sight of other dogs passing by? Or perhaps it’s when someone rings the doorbell or when they hear unfamiliar noises outside?

Take note of the context: what time of day does the barking occur? How does your dog’s body language change when they bark? For example, if your dog barks and stands rigid by the window, they may be reacting to something they see outdoors, indicating a territorial instinct. Conversely, if they bark while wagging their tail or jumping around, it could be a signal of excitement or playfulness.

Also, consider the frequency and intensity of the barking. Is it a sharp, high-pitched bark that suggests anxiety or fear, or is it a low, steady bark that seems more like a warning? Identifying whether the barking is motivated by boredom, fear, excitement, or a desire for attention is essential in figuring out the most effective response.

Once you’ve gathered this information, you’ll be better equipped to address the root causes. For instance, if your dog barks out of boredom, implementing more physical exercise and mental stimulation can help alleviate the behavior. If it’s fear-based, creating a more secure environment or desensitizing your dog to the specific triggers could be the key. By thoroughly assessing your dog’s barking triggers, you can tailor your approach and set both you and your furry friend on the path to a quieter, more harmonious home.

3. The Importance of Training and Socialization

How Can I Stop My Dog From Barking At Everything?
Credit : whatcanu.com

Training and socialization play a crucial role in managing your dog’s barking behavior. Just like humans, dogs thrive on structure and clear boundaries. Establishing a solid training routine not only helps curb excessive barking but also strengthens the bond between you and your furry friend.

Start with basic commands like “sit,” “stay,” and “quiet.” These commands lay the groundwork for good behavior and help your dog understand what is expected of them. Positive reinforcement is key; reward your dog with treats, praise, or playtime every time they respond correctly. This approach not only motivates them to obey but also builds their confidence.

Socialization is equally important. Exposing your dog to different environments, people, and other animals can significantly reduce anxiety and fear—common triggers for excessive barking. Arrange playdates with other dogs, visit pet-friendly parks, or take them on walks in bustling areas. The more experiences your dog has, the more comfortable they will become in various situations, diminishing the likelihood of barking in response to unfamiliar stimuli.

Consistency is vital in both training and socialization. Make sure everyone in your household applies the same commands and training methods. This uniformity reinforces the desired behavior and eliminates confusion for your dog. Over time, with patience and persistence, you’ll notice a marked improvement in your dog’s barking habits, leading to a more harmonious home environment for both you and your beloved pet.

4. Positive Reinforcement Techniques

When it comes to managing excessive barking, positive reinforcement techniques are among the most effective and humane strategies you can employ. This approach focuses on rewarding desired behaviors rather than punishing undesirable ones, creating a positive learning environment for your furry friend. The principle is simple: when your dog remains quiet in situations that would typically trigger barking, you immediately provide a reward. This reward can be a treat, verbal praise, or even a favorite toy—anything that your dog finds motivating.

Start by identifying the specific triggers that lead to your dog’s barking. Is it the mailman approaching your home, the sound of other dogs barking nearby, or perhaps the excitement of seeing other people? Once you know the triggers, you can work on desensitizing your dog to these stimuli. For example, if your dog barks at the doorbell, practice ringing the doorbell while keeping your dog on a leash. When your dog remains calm and quiet, shower him with praise and a tasty treat. Repeat this exercise until your dog begins to associate the doorbell sound with positive reinforcement rather than a reason to bark.

Consistency is key in this process. Make sure everyone in your household is on the same page and uses similar commands and rewards. Over time, your dog will learn that remaining quiet brings more rewards than barking. Additionally, incorporating training sessions into your daily routine will not only strengthen your bond but also provide mental stimulation for your dog, making them less likely to bark out of boredom or frustration.

Remember, patience is essential. Changing behavior takes time, and there may be setbacks along the way. Celebrate the small victories, and keep reinforcing the calm, quiet behavior you want to see. With dedication and love, you can effectively curb your dog’s excessive barking, leading to a more peaceful home for both of you.

5. Implementing the ‘Quiet’ Command

How Can I Stop My Dog From Barking At Everything?
Credit : whatcanu.com

Implementing the ‘Quiet’ command is a powerful and effective strategy to curb excessive barking in dogs. This simple yet essential command can transform the way your furry friend communicates and can lead to a more peaceful home environment.

To begin, it’s crucial to introduce the ‘Quiet’ command in a calm and controlled setting. Choose a time when your dog is likely to bark—perhaps during a delivery at the door or while playing with other dogs at the park. Once your dog starts barking, remain patient and wait for a natural pause in the barking. As soon as they stop, calmly and confidently say “Quiet” in a firm yet gentle tone.

When your dog responds to the command, even if it’s just for a brief moment, reward them immediately with a treat or praise. This positive reinforcement connects the command with a desirable outcome, making it more likely that your dog will respond appropriately in the future. Consistency is key; practice the command regularly, and always be consistent with your tone and rewards.

If your dog continues to bark after the initial command, avoid yelling or showing frustration, as this may inadvertently encourage more barking. Instead, wait for another moment of silence, repeat the command, and reward them once again. Over time, your dog will learn to associate the command with quiet behavior, leading to a significant decrease in excessive barking.

Remember, patience and repetition are vital when teaching the ‘Quiet’ command. With persistence and love, you can help your furry companion understand that sometimes, silence is golden. This command not only enhances communication but also fosters a stronger bond between you and your dog, creating a more harmonious living environment for everyone.

6. Creating a Calm Environment

Creating a calm environment is essential for managing your dog’s barking tendencies. Dogs, like humans, respond to their surroundings, and a serene atmosphere can significantly reduce their urge to vocalize excessively. Begin by evaluating your home for potential stressors that could trigger barking. Loud noises, such as traffic, construction, or even a bustling household, can agitate your furry friend. If possible, try to minimize these disturbances by using soundproofing techniques, such as heavy curtains or noise-canceling devices, to create a quieter sanctuary.

Additionally, consider the layout of your living space. Dogs are naturally curious and may bark at stimuli they can see or hear from windows or doors. You can block their view of distractions by using frosted window film or strategically placing furniture to create a more enclosed area. Incorporating calming elements into your home can also be beneficial. Soft lighting, soothing music, and comfortable resting spots can help your dog feel more at ease.

Moreover, establishing a consistent routine—complete with regular exercise, playtime, and quiet periods—can provide your dog with the structure they crave. A well-exercised dog is less likely to engage in excessive barking out of boredom or pent-up energy. Finally, introduce calming aids such as pheromone diffusers or anxiety wraps, which can promote a sense of security and tranquility. By fostering a peaceful environment, you can help your dog feel secure, reducing their need to bark and creating a more harmonious home for both of you.

7. Providing Enough Physical and Mental Stimulation

How Can I Stop My Dog From Barking At Everything?
Credit : whatcanu.com

One of the most effective strategies to curb excessive barking in dogs is to ensure they receive adequate physical and mental stimulation. A bored dog is often a noisy dog, using barking as an outlet for their pent-up energy. Engaging your furry friend in regular exercise not only promotes their physical health but also helps alleviate stress and anxiety, two common triggers for excessive barking.

Start by establishing a routine that includes daily walks, playtime, and opportunities for exploration. Aim for at least 30 minutes of vigorous exercise each day, adjusting based on your dog’s breed, age, and energy levels. Activities like fetching a ball, agility training, or even swimming can provide a fantastic release for their energy. Not only does this physical exertion help calm your dog, but it also strengthens the bond between you and your pet.

In addition to physical activity, mental stimulation is equally crucial. Dogs thrive on challenges that engage their minds. Invest in puzzle toys that dispense treats, or create scavenger hunts around your home or yard to encourage problem-solving skills. Training sessions that teach new tricks or reinforce commands can also provide mental enrichment while establishing your authority as the leader of the pack.

Remember, a well-stimulated dog is less likely to bark out of boredom or frustration. By integrating a balanced mix of physical and mental activities into your dog’s daily routine, you’ll not only help reduce excessive barking but also foster a happier, healthier, and more content companion.

8. Using Anti-Bark Collars: Pros and Cons

When it comes to managing excessive barking, anti-bark collars can be a controversial yet effective tool for many dog owners. These devices come in several forms—including citronella spray collars, ultrasonic collars, and static correction collars—and each offers a unique approach to curbing your furry friend’s vocalizations. However, before deciding to use an anti-bark collar, it’s vital to weigh both the pros and cons to ensure it aligns with your training goals and your dog’s temperament.

**Pros:**

One of the most significant advantages of anti-bark collars is their ability to deliver immediate feedback to your dog. For many pets, the sensation of a gentle spray, sound, or static correction can be enough to interrupt the barking cycle and signal that excessive noise leads to an unpleasant experience. This swift response can help dogs learn more quickly when to cease barking, particularly in situations where they might feel triggered or overly excited.

Additionally, anti-bark collars can be a convenient option for busy pet owners. With these collars, you can manage barking even when you’re not physically present to intervene. This can be especially useful for dogs that bark at distractions while you’re away from home, providing a degree of peace for both you and your neighbors.

**Cons:**

On the flip side, anti-bark collars are not a one-size-fits-all solution and may not be appropriate for every dog. Some pets may become anxious or fearful of the collar, leading to increased stress or behavioral issues. Additionally, if not used correctly, these collars can reinforce negative associations and make barking a problematic behavior rather than addressing the root cause.

Moreover, anti-bark collars don’t address the underlying reasons for barking. If your dog is barking due to boredom, anxiety, or other behavioral triggers, it’s essential to tackle those issues alongside any collar use. Failing to do so could lead to further frustration for both you and your dog, as they may continue to bark despite the collar being in place.

In summary, while anti-bark collars can be an effective tool for some dog owners, they should be used thoughtfully and in conjunction with a comprehensive training plan. Always consider your dog’s unique personality and needs, and consult with a professional trainer or veterinarian if you have any doubts about incorporating this approach into your barking management strategy. By doing so, you’ll ensure a well-rounded solution that promotes both effective communication and a positive relationship with your furry companion.

9. Desensitization Techniques for Barking Triggers

Desensitization techniques can be a powerful tool in addressing your dog’s excessive barking by gradually exposing them to the stimuli that trigger their vocalizations. The key to success lies in patience and consistency, as this process helps your dog learn to remain calm in the face of their usual barking triggers.

Begin by identifying the specific situations that provoke your dog’s barking. Common triggers include doorbells, passing cars, or other barking dogs. Once you’ve pinpointed these stimuli, you can create a controlled environment where you can manage the exposure. For instance, if your dog barks at the doorbell, have a friend ring the bell while you keep your dog on a leash in a separate room. Start with the volume turned down or use a recording of the doorbell at a low volume, so the sound is just audible but not overwhelming.

As your dog begins to notice the sound without reacting, reward them for their calm behavior with treats and praise. Gradually increase the volume over time, continuing to reward your dog for remaining quiet. This step-by-step approach helps your dog associate the trigger with positive experiences rather than feeling the need to bark excessively.

Incorporating this technique into your training regime not only fosters a sense of security in your dog but also strengthens your bond with them. Over time, as your dog’s confidence grows, they will learn to trust that there’s no need to bark at every little sound, leading to a more peaceful home environment for both of you. Remember, consistency is key, and while it may take time, the results will be well worth the effort.

10. Seeking Professional Help: When to Consult a Trainer

While many dog owners can successfully manage their pet’s barking issues through patience and consistent training, there are times when the situation might feel overwhelming. If you find yourself struggling to curb your dog’s excessive barking despite your best efforts, it may be time to seek professional help. Consulting a dog trainer can provide valuable insights and tailored strategies that address not only the barking but also the underlying causes.

Understanding when to reach out for professional assistance is crucial. If your dog’s barking seems to stem from anxiety, fear, or aggression, a trainer with expertise in behavioral issues can guide you through the process of modification. Additionally, if your dog barks at specific triggers—be it other dogs, strangers, or loud noises—a trainer can help you desensitize your pet to these stimuli, teaching them more appropriate responses.

Look for trainers who use positive reinforcement methods, as these approaches are not only effective but also foster a strong, trusting relationship between you and your dog. A skilled trainer will assess your dog’s behavior in person, allowing them to develop a customized training plan that suits your pet’s unique personality and needs.

Moreover, a trainer can equip you with practical tools and techniques to employ at home, ensuring that you feel confident in managing your dog’s barking long after the training sessions are over. Remember, seeking professional help is not a sign of failure; rather, it demonstrates your commitment to your dog’s well-being and your desire to create a harmonious living environment. Investing in professional guidance can lead to a happier, quieter home and a deeper bond with your furry companion.

11. The Role of Breed Characteristics in Barking

When it comes to understanding your dog’s barking habits, breed characteristics play a significant role. Different breeds were developed for various purposes, and their barking tendencies often reflect their original functions. For instance, herding breeds like Border Collies or Australian Shepherds were bred to communicate with livestock, and as such, they tend to be more vocal. Their instinct to alert and guide can manifest in excessive barking if not properly channeled.

On the other hand, breeds like the Basenji are known as “barkless dogs” because they have a unique vocalization that doesn’t resemble traditional barking. Instead, they produce a sound often described as a yodel, which is a testament to how breed traits can influence vocal behavior. Understanding these inherent tendencies can help you tailor your training approaches.

If you have a breed known for its barking tendencies, such as a Dachshund or a Beagle, it’s essential to consider their natural instincts in your training regime. These breeds may require more structured activities and mental stimulation to curb their barking. Engaging them in interactive games, obedience training, or even agility exercises can provide an outlet for their energy and reduce the likelihood of excessive vocalization.

Moreover, it’s crucial to recognize that some breeds may bark due to anxiety or fear, especially if they are not properly socialized. Take the time to assess your dog’s breed characteristics and individual personality traits. By aligning your training strategies with their natural inclinations, you can create a more harmonious environment where barking is minimized, and your dog’s needs are met. Understanding the interplay between breed characteristics and barking can ultimately strengthen your bond with your canine companion while fostering a quieter home.

12. Managing Separation Anxiety to Reduce Barking

Managing separation anxiety is a crucial step in curbing your dog’s excessive barking. Many dogs bark excessively when left alone due to fear and anxiety, and understanding this behavior is key to addressing it effectively. When your furry friend feels insecure or abandoned, barking becomes their primary method of expressing distress.

To begin, it’s essential to create a positive association with your departures. Start with short absences—just a few minutes at first—and gradually increase the duration as your dog becomes more comfortable being alone. Use engaging toys or puzzle feeders to keep them occupied during your absence, directing their focus away from the worry of being alone.

Training your dog to settle in a specific area while you’re away can also be beneficial. Designate a cozy spot with their favorite blanket or bed, and encourage them to relax there with treats and praise. This way, they learn that your absence doesn’t signal a time for panic but rather an opportunity for a cozy nap.

Additionally, consider incorporating calming aids like anxiety wraps or pheromone diffusers, which can help soothe their nerves. Regular physical exercise and mental stimulation are also vital; a tired dog is less likely to bark out of boredom or anxiety. Engage in daily walks, play sessions, and even training exercises to expend their energy.

Finally, if your dog’s barking due to separation anxiety persists despite your efforts, don’t hesitate to consult a professional dog trainer or a veterinarian. They can provide tailored strategies or recommend behavioral therapies to help your pup feel more secure when left alone. By managing separation anxiety effectively, you not only reduce excessive barking but also foster a deeper bond of trust and security with your beloved companion.

13. The Impact of Routine on Your Dog’s Behavior

Establishing a consistent routine for your dog can be a game-changer when it comes to curbing excessive barking. Dogs thrive on structure and predictability, and a well-defined daily schedule can significantly reduce anxiety and the urge to bark. By creating a routine that includes regular feeding times, walks, play sessions, and quiet time, you provide your dog with a sense of security. This predictability helps them feel more grounded and less likely to bark out of stress or boredom.

For example, if your dog knows that they will be taken for a walk every morning at 8 AM, they are less likely to bark out of excitement or frustration during the day. Similarly, incorporating designated playtime and training sessions can channel their energy into productive activities, leaving less room for unwanted barking.

Moreover, routines can help you identify triggers that lead to barking. If your dog consistently barks at the mailman at the same time each day, you can anticipate this behavior and implement strategies to manage it, such as redirecting their attention with treats or toys during that time.

Consistency is key. The more you stick to a routine, the more your dog will adapt to it, leading to a calmer demeanor. As their anxiety levels decrease, so will their tendency to bark excessively. Thus, a well-structured routine not only enriches your dog’s life but also fosters a peaceful home environment for everyone.

14. Success Stories: Real-Life Examples of Barking Solutions

### 14. Success Stories: Real-Life Examples of Barking Solutions

When it comes to curbing excessive barking, there’s nothing quite as inspiring as hearing real-life success stories. These accounts not only showcase effective strategies but also offer hope to dog owners who are wrestling with the challenges of a noisy pup.

Take, for instance, the story of Bella, a spirited Beagle who would bark incessantly at passing cars, neighborhood cats, and even the mailman. Her owner, Sarah, was at her wit’s end, worried about the growing tension with her neighbors. After researching various techniques, she decided to implement a combination of positive reinforcement and the “quiet” command. Each time Bella barked, Sarah would wait for a moment of silence before rewarding her with a treat. It took patience and consistency, but within a few weeks, Bella learned to associate quiet moments with positive outcomes. Now, she’s a calmer companion who only barks occasionally, and the neighborhood is much happier for it.

Another success story comes from Tom and his German Shepherd, Max. Max had a tendency to bark at anything that moved, from squirrels to fellow joggers. After consulting with a professional dog trainer, Tom learned the importance of providing Max with adequate physical and mental stimulation. He began taking Max on daily runs and introduced interactive toys that kept him engaged. With his energy redirected, Max’s barking diminished significantly. Now, their early morning runs are a highlight of both their days, and their bond has never been stronger.

Lastly, consider the case of Daisy, a Chihuahua who had a habit of barking at strangers entering her home. Her owner, Lisa, recognized that Daisy’s behavior stemmed from fear rather than aggression. To tackle this, Lisa enlisted the help of a desensitization technique. She invited friends over, starting with just one person, and rewarded Daisy for remaining calm. Gradually, Daisy learned that visitors were not threats but rather friends, leading to her newfound tranquility. Lisa’s dedication transformed Daisy into a more confident dog, and their home became a welcoming place for guests.

These success stories highlight that with the right strategies, patience, and commitment, barking problems can be effectively managed. Whether it’s through training, mental stimulation, or addressing underlying fears, each dog is unique, and finding the right solution can lead to a more peaceful environment for both pets and their owners. If you’re struggling with your dog’s barking, remember that change is possible—it just takes a little time and effort.

15. Maintaining Consistency and Patience in Training

Consistency and patience are the cornerstones of successful dog training, especially when it comes to curbing excessive barking. Just like humans, dogs thrive on routine and clear expectations. If your training methods fluctuate or if different family members apply varying rules, your dog can become confused, leading to even more barking. Therefore, establish a consistent training schedule, using the same commands and signals, and ensure that everyone in your household is on the same page. This uniformity helps your dog understand what behaviors are acceptable and which are not.

Patience is equally crucial. Training a dog is not a swift process; it requires time and dedication. Celebrate small victories along the way, and remember that setbacks are a normal part of the learning journey. If your dog barks in response to a particular trigger, take a step back and assess the situation rather than reacting in frustration. Reinforce positive behavior with treats, praise, or playtime, rather than focusing solely on the negative. Over time, your dog will learn that quiet behavior earns rewards, while excessive barking does not.

Additionally, be aware that every dog is unique, with its own personality and learning pace. Some may grasp concepts quickly, while others might need extra time to adjust. By maintaining a calm demeanor and remaining steadfast in your training efforts, you will foster a trusting relationship with your dog. This bond will not only make the training process more effective but also enhance your overall connection, leading to a quieter, happier home for both you and your furry companion.

In conclusion, addressing your dog’s excessive barking can be a rewarding journey that strengthens the bond between you and your furry friend. By implementing the effective strategies outlined in this post, you can create a more harmonious environment for both your dog and your household. Remember, patience and consistency are key—each dog is unique, and finding the right approach may take time. Celebrate the small victories along the way, and soon you’ll be enjoying quieter moments together. We hope these tips empower you to transform barking into a more peaceful coexistence, allowing your dog’s true personality to shine through. Happy training!


What are the best ways to organize your home office?

In today’s fast-paced digital world, a well-organized home office is more than just a luxury—it’s a necessity for maximizing productivity and maintaining focus.

As remote work becomes increasingly prevalent, the importance of creating a workspace that fosters creativity and efficiency cannot be overstated. From managing clutter to optimizing your layout, the right strategies can transform your office into a sanctuary of productivity. In this blog post, we’ll explore ten essential tips that will help you streamline your work environment, enhance your workflow, and ultimately elevate your performance. Whether you’re a seasoned remote worker or new to the home office setup, these practical insights will guide you in crafting a space that not only inspires productivity but also brings you peace of mind as you tackle your daily tasks. Get ready to unlock your full potential with a home office that works as hard as you do!

1. Assessing Your Space: Understanding Your Needs

What are the best ways to organize your home office?
Credit : whatcanu.com

Before diving into the exciting world of home office organization, it’s crucial to start with a thorough assessment of your space and a clear understanding of your unique needs. Take a moment to step back and examine the area you’ll be working in. Is it a dedicated room, a nook in your living space, or perhaps a corner of your dining room? Each configuration comes with its own set of challenges and opportunities.

Begin by considering how you use your workspace. Do you require a large desk for multiple monitors, or do you prefer a minimalist setup with just a laptop? Think about the nature of your work: Are you frequently on calls, requiring a quiet environment, or do you thrive in a bustling atmosphere? Understanding these nuances will help you create an environment that fuels your productivity rather than stifles it.

Next, take stock of your current furniture and equipment. Is your chair ergonomic, supporting long hours of sitting, or does it leave you feeling strained? Does your desk have enough surface area for your essential tools, or is clutter a constant battle? Don’t hesitate to jot down what works for you and what doesn’t. This self-reflection will guide your decisions as you curate your ideal workspace.

Finally, consider the elements that inspire you. Do you find motivation in plants, art, or personal mementos? Incorporating these items into your design can enhance your creativity and create an environment that you genuinely enjoy spending time in. By thoughtfully assessing your space and understanding your needs, you’ll set the foundation for a home office that not only maximizes productivity but also feels uniquely yours.

2. Choosing the Right Location for Your Home Office

Choosing the right location for your home office is a crucial step in fostering an environment that promotes productivity and focus. The ideal spot should be a place where you feel comfortable, inspired, and free from distractions. Begin by evaluating your home layout: look for areas that receive ample natural light, as studies show that exposure to sunlight can enhance mood and energy levels. A well-lit space can also reduce eye strain, making it easier for you to concentrate on your tasks.

Consider the noise level in different rooms. If you have a bustling household, it might be wise to choose a room away from the main living areas, where children or pets may create interruptions. A quieter space can help you maintain a strong focus and minimize distractions. If a separate room isn’t available, think about utilizing a corner of a larger area, such as a living room or bedroom, and use strategic dividers or plants to create a sense of separation.

Additionally, think about how the location aligns with your work habits. Do you thrive in a cozy nook or do you prefer a more open area? Do you need access to specific resources like a printer or filing cabinet? Your workspace should cater to your workflow, allowing for easy access to essential tools and materials.

Lastly, personalization is key. Once you’ve identified the perfect location, make it your own. Infuse your workspace with elements that inspire you—whether it’s artwork, motivational quotes, or plants. This personal touch not only makes the space more inviting but can also boost your creativity and enthusiasm for the tasks at hand. By thoughtfully selecting the right location for your home office, you lay the foundation for a productive work environment that supports your goals and enhances your overall work experience.

3. Decluttering: The First Step to an Organized Office

What are the best ways to organize your home office?
Credit : whatcanu.com

Decluttering is the cornerstone of creating an organized home office, and it’s often the first step toward maximizing your productivity. Picture this: a workspace overflowing with papers, outdated gadgets, and miscellaneous items can be overwhelming, making it challenging to focus on the tasks at hand. The clutter not only distracts the mind but can also drain your motivation.

To begin your decluttering journey, set aside dedicated time to assess your workspace. Start with a thorough evaluation of every item on your desk and in your drawers. Ask yourself, “Do I use this? Does it serve a purpose?” If the answer is no, it’s time to let it go. Create three categories: keep, donate, and toss. Be ruthless—if an item hasn’t been used in the last six months and doesn’t hold sentimental value, it likely doesn’t belong in your office.

Once you’ve sorted through your belongings, implement an efficient filing system for important documents. Invest in labeled folders, binders, or digital tools that help you easily access what you need without sifting through piles of paper. For items that you frequently use, consider storage solutions that keep them within arm’s reach yet neatly organized, such as drawer organizers or decorative boxes.

Don’t forget to declutter your digital workspace as well. A disorganized desktop filled with files and applications can be just as distracting as a messy physical space. Take some time to organize your digital files into clearly labeled folders, delete what you no longer need, and create a streamlined system that enhances your workflow.

By prioritizing decluttering, you’ll not only clear the physical space around you but also create a mental environment conducive to focus and creativity. With a fresh, organized office, you’ll find that you can tackle your tasks with renewed energy and clarity, leading to increased productivity and success in your work.

4. Essential Furniture for Comfort and Productivity

When it comes to creating an efficient home office, the right furniture is not just a luxury; it’s a necessity. Comfort and productivity go hand in hand, and investing in quality furniture can make all the difference in your work-from-home experience.

Start with an ergonomic chair that supports your posture throughout long hours of sitting. Look for features like adjustable height, lumbar support, and breathable material to ensure you stay comfortable and focused. A well-designed chair will prevent fatigue and discomfort, allowing you to concentrate on your tasks without distraction.

Next, consider your desk space. A sturdy, spacious desk can significantly enhance your workflow. Whether you prefer a traditional style or a modern standing desk, ensure it accommodates all your essential tools—like your computer, documents, and stationery—without feeling cluttered. If you’re short on space, opting for a wall-mounted desk can help you maximize your area while still providing a dedicated workspace.

Don’t forget about additional furniture pieces that promote organization and ease. Storage solutions like shelves, cabinets, or filing systems are invaluable for keeping your workspace tidy and efficient. A clean environment fosters a clear mind, so have a designated place for everything, from books and supplies to important paperwork.

Finally, consider the overall aesthetic of your office. Incorporating elements like a cozy reading nook, decorative plants, or personal touches can create a warm and inviting atmosphere that inspires creativity. A well-thought-out office layout, paired with the right furniture, will not only enhance your comfort but also elevate your productivity, making it easier to tackle your daily tasks with enthusiasm.

5. Effective Desk Setup: Ergonomics Matter

What are the best ways to organize your home office?
Credit : whatcanu.com

Creating an effective desk setup is pivotal for enhancing productivity and maintaining your well-being while working from home. Ergonomics, the science of designing your workspace to fit your body, plays a crucial role in this equation. The right ergonomic setup not only helps prevent discomfort and injury but also boosts your focus and efficiency.

Begin with your chair, as it serves as the cornerstone of your workspace. Opt for an adjustable chair that supports your lower back and encourages good posture. Ideally, your feet should rest flat on the floor, with your knees at a 90-degree angle. Consider using a footrest if your chair is too high, or adjusting your desk height to accommodate your seated position.

Next, pay attention to your desk height. Your elbows should rest comfortably at a 90-degree angle when typing, with your wrists straight and hands slightly above the keyboard. If your desk is too high or too low, it can lead to fatigue and strain over time. An adjustable desk or a standing desk converter can offer flexibility, allowing you to alternate between sitting and standing throughout the day.

Monitor placement is another critical aspect of an effective desk setup. Position your monitor at eye level, approximately an arm’s length away, to reduce neck strain and promote better posture. If you use multiple monitors, ensure they are aligned and at the same height to avoid awkward neck movements.

Don’t overlook the importance of keyboard and mouse placement, either. These should be situated close enough that you can use them without stretching your arms, and your wrists should remain in a neutral position. Consider using wrist supports if you find yourself frequently experiencing discomfort.

Finally, take the time to personalize your workspace with elements that inspire and motivate you, such as plants, artwork, or motivational quotes. A visually appealing environment can enhance your mood and keep you engaged in your work.

By prioritizing ergonomics in your desk setup, you’ll create a workspace that not only caters to your physical needs but also fosters a productive atmosphere, allowing you to focus on what truly matters—getting the job done efficiently and comfortably.

6. Smart Storage Solutions: Maximizing Vertical and Horizontal Space

In the quest for an organized home office, utilizing smart storage solutions can make all the difference in enhancing your productivity. When space is limited, it’s essential to think creatively about how to maximize both vertical and horizontal areas to keep your workspace tidy and efficient.

Start by taking advantage of vertical space. Wall-mounted shelves, pegboards, and floating cabinets provide ample room for books, office supplies, and decorative items without encroaching on your desk area. By elevating your storage, you not only free up valuable surface space but also draw the eye upward, creating an illusion of a larger, more open environment. Consider installing a corkboard or magnetic board above your desk to keep important reminders and documents within easy reach while maintaining a clutter-free workspace.

On the horizontal front, think about multi-functional furniture. A desk with built-in drawers or shelves can house essential items while keeping your workspace clear. Utilize under-desk storage solutions, such as rolling carts or file cabinets, to keep files and materials organized yet accessible. Slim, stackable bins can be a game-changer for organizing miscellaneous items like chargers, stationery, or paperwork that tends to pile up.

Additionally, use baskets or decorative boxes to corral smaller items. Labeling these containers not only aids in quick identification but also encourages a habit of returning items to their designated spots. With a focus on both vertical and horizontal organization, you can create a home office that fosters creativity and focus, empowering you to tackle tasks with renewed energy and enthusiasm. Embrace these smart storage solutions, and watch your productivity soar as you transform your workspace into a well-organized haven.

7. Organizing Digital Files and Documents

What are the best ways to organize your home office?
Credit : whatcanu.com

In the digital age, a cluttered digital workspace can be just as distracting as a messy physical desk. Organizing your digital files and documents is crucial for maximizing productivity and ensuring that you can find what you need when you need it. Start by creating a logical folder structure that mirrors the way you think and work. For instance, categorize your files into main folders such as “Projects,” “Clients,” “Finance,” and “Resources.” Within each main folder, create subfolders to further organize your documents. This hierarchical approach not only streamlines access but also helps you maintain focus on the task at hand.

Another essential aspect of digital organization is naming conventions. Use clear, descriptive file names that include relevant dates or project details. This way, a quick glance will tell you exactly what a file contains without needing to open it. Consider using date formats (e.g., YYYY-MM-DD) to ensure that your files are sorted chronologically, making it easier to find the latest version of any document.

Regularly decluttering your digital space is equally important. Set aside time each month to review your files, delete duplicates, and archive outdated documents. Utilizing cloud storage solutions can also enhance your organization efforts, as they often come equipped with robust search functions that allow you to locate files quickly. Plus, cloud storage ensures that your documents are accessible from anywhere, making remote work seamless.

Finally, consider using productivity tools and apps designed for file management. Tools like Trello or Asana can help you keep track of projects, while Google Drive or Dropbox can keep your files organized and easily shareable. By investing time in organizing your digital files and documents, you’ll create a streamlined workflow that fosters focus and efficiency, setting you up for success in your home office.

8. Creating a Distraction-Free Environment

Creating a distraction-free environment is essential for fostering maximum productivity in your home office. In today’s fast-paced world, it’s all too easy to get sidetracked by the myriad of potential interruptions, from the allure of social media notifications to the tempting siren call of household chores. To combat these distractions, the first step is to establish a dedicated workspace that is solely dedicated to your professional tasks. Ideally, this space should be separate from personal areas in your home, allowing you to mentally shift gears when you enter.

Next, consider the layout and organization of your office. Keep your desk clear of clutter, and only display items that are necessary for your work. Invest in storage solutions like filing cabinets, shelves, and desk organizers to keep paperwork and supplies neatly stowed away. A clean workspace can significantly enhance focus, allowing your mind to concentrate on the task at hand rather than getting lost in disarray.

Lighting plays a crucial role in creating a distraction-free environment. Natural light is ideal, as it can boost mood and energy levels, but if that’s not an option, opt for soft, adjustable lighting that reduces glare and eye strain. Additionally, consider using noise-canceling headphones or playing soft background music to drown out ambient noises that may disrupt your concentration.

Lastly, set boundaries with those around you. Clearly communicate your work hours and the importance of minimizing interruptions during this time. By establishing these guidelines, you signal to others that your work is a priority, helping you maintain focus and productivity throughout your day. By implementing these strategies, you can transform your home office into a sanctuary of concentration, empowering you to achieve your goals while enjoying the flexibility of remote work.

9. Incorporating Personal Touches for Inspiration

Creating a home office that fosters productivity often requires more than just a functional layout and the right technology; it also involves infusing your workspace with personal touches that inspire and motivate you. Personalization can transform a sterile environment into a creative sanctuary, reflecting your personality and igniting your passion for work.

Start by displaying items that hold sentimental value or inspire you daily. This could be photographs of loved ones, artwork that resonates with you, or mementos from memorable trips. Each item serves as a reminder of what you value most, helping to cultivate a positive mindset as you tackle your tasks. Consider a vision board filled with quotes, images, and goals that speak to your aspirations—this visual reminder can spark creativity and keep you focused on your objectives.

Incorporating plants into your office is another effective way to bring life and energy into your workspace. Studies have shown that greenery can enhance mood, reduce stress, and increase overall productivity. Choose low-maintenance plants like succulents or snake plants if you’re not confident in your gardening skills. Their vibrant presence will not only purify the air but will also create a calming atmosphere conducive to deep concentration.

Additionally, don’t underestimate the power of color. Choose a color scheme that energizes you. Perhaps you prefer the calming effects of blues and greens, or maybe you thrive in a more vibrant space with pops of yellow or orange. Use desk accessories, wall art, or even the paint on your walls to create an environment that resonates with your style and boosts your motivation.

Ultimately, your home office should be a reflection of who you are, a space that welcomes you each day and encourages your best work. By incorporating personal touches that inspire you, you’ll not only enhance your productivity but also create a workspace that feels uniquely yours—where creativity flows effortlessly and work feels less like a chore and more like a rewarding endeavor.

10. Utilizing Office Supplies Wisely

Utilizing office supplies wisely is crucial for maintaining an organized and productive home office. A well-stocked workspace doesn’t just mean having an abundance of supplies; it means strategically choosing and arranging them to enhance your workflow and minimize clutter. Start with the basics: pens, notepads, sticky notes, and highlighters. Invest in quality items that will last longer and perform better, reducing the need for constant replacements.

Consider implementing a system for your supplies that promotes easy access and efficient use. Use drawer organizers or desktop caddies to keep frequently used items within reach while reserving larger storage solutions for less commonly needed supplies. Categorize your materials—keep all writing tools together, and designate a section for paper products like notebooks and sticky notes. Clear labeling can further streamline your process, ensuring you know exactly where everything is at a glance.

To maximize your space, think beyond traditional supplies. Utilize digital tools such as project management apps and cloud storage to minimize physical paperwork. Not only does this declutter your desk, but it also ensures that important documents are readily accessible without the risk of misplacement. Additionally, consider incorporating multifunctional items, such as a printer that scans and copies, to reduce the need for various devices and save space.

Finally, don’t forget about the aesthetic appeal of your office supplies. Choose items that resonate with your personal style, whether they are sleek and modern or colorful and fun. This not only makes your workspace more inviting but also keeps you motivated and engaged throughout the day. By utilizing office supplies wisely, you can create a streamlined, efficient, and inspiring environment that sets the stage for maximum productivity.

11. Establishing a Routine for Maintenance

Establishing a routine for maintenance is crucial in ensuring that your home office remains a productive haven rather than a chaotic workspace. Just like any other aspect of our lives, consistency is key. Set aside a specific time each week dedicated to tidying up your office—this could be a quiet Sunday morning or a mid-week refresh during your lunch break. During this time, tackle clutter, file away important documents, and ensure that your workspace is not just functional but also inviting.

Incorporate small habits into your daily routine that help maintain order. For instance, commit to a “clean desk” policy by taking a few minutes at the end of each workday to clear your desk of unnecessary items. This could mean putting away papers, wiping down surfaces, or organizing your digital files. Invest in organizational tools like drawer dividers, file organizers, or cable management solutions to streamline this process and make it easier to maintain your workspace.

Additionally, consider establishing a monthly deep-clean schedule. This can involve decluttering your office supplies, dusting surfaces, and reorganizing furniture for optimal comfort and functionality. By making maintenance a regular part of your routine, you’ll not only create a more pleasant working environment but also boost your productivity in the long run. A well-organized space fosters clarity of thought and helps to minimize distractions, enabling you to focus on what truly matters—getting the job done.

12. Tips for Managing Time and Tasks Efficiently

Managing time and tasks efficiently is crucial for creating a productive home office environment. In a space where distractions abound and the lines between work and home life can blur, having a robust time management strategy is essential. Here are some practical tips to help you stay organized and focused throughout your workday.

**1. Prioritize Your Tasks:** Start each day by identifying your most important tasks. Use tools like the Eisenhower Matrix to distinguish between what’s urgent and what’s important, allowing you to focus on high-impact activities that drive results.

**2. Set Specific Goals:** Break down larger projects into manageable, bite-sized goals. This not only makes daunting tasks feel achievable but also provides a sense of accomplishment as you tick them off your list. Consider using SMART criteria—specific, measurable, achievable, relevant, and time-bound—to formulate your goals.

**3. Use a Digital Planner or Task Manager:** Embrace technology by utilizing digital planners or task management apps like Trello, Asana, or Todoist. These tools help you visualize your tasks, set deadlines, and remind you of upcoming priorities, ensuring nothing slips through the cracks.

**4. Implement Time Blocking:** Allocate specific blocks of time for different tasks or types of work. For example, designate mornings for creative tasks when your mind is fresh and afternoons for meetings or administrative work. This structured approach can enhance focus and reduce decision fatigue.

**5. Establish a Routine:** Creating a consistent daily routine helps signal to your brain when it’s time to work and when it’s time to relax. Start your day with a morning ritual that prepares you for productivity—whether it’s a cup of coffee, a quick workout, or quiet reflection.

**6. Limit Distractions:** Identify your biggest distractions and take proactive steps to minimize them. This might mean turning off social media notifications, setting boundaries with family members during work hours, or using noise-canceling headphones to block out background noise.

**7. Schedule Breaks:** Don’t forget to incorporate short breaks into your day. Techniques like the Pomodoro Technique—working for 25 minutes followed by a 5-minute break—can boost your productivity while preventing burnout. Use these breaks to stretch, grab a snack, or practice mindfulness.

**8. Reflect and Adjust:** At the end of each week, take a moment to reflect on what worked and what didn’t. Adjust your strategies as necessary, experimenting with different time management techniques until you find the perfect fit for your workflow.

By implementing these time and task management tips, you’ll create a home office environment that fosters productivity and keeps you focused on your goals. With a little planning and discipline, you can turn your workspace into a powerhouse of efficiency, making the most of your time and minimizing stress.

13. The Role of Lighting in Productivity

Lighting plays a pivotal role in shaping the atmosphere of your home office, directly influencing your productivity, mood, and overall well-being. A well-lit workspace can transform a dreary corner into an inspiring hub of creativity, while insufficient or harsh lighting can lead to fatigue and decreased focus.

Natural light is often the gold standard when it comes to home office illumination. Studies have shown that exposure to daylight can enhance your mood, boost energy levels, and improve concentration. If possible, position your desk near a window to take advantage of this natural resource. The warm glow of sunlight can invigorate your work sessions, making tasks feel less daunting. Additionally, consider using sheer curtains that allow diffused light to flood the space without causing glare on your computer screen.

However, not everyone is fortunate enough to have a sun-drenched office. In those cases, artificial lighting becomes essential. Opt for a combination of ambient, task, and accent lighting to create a well-balanced environment. Ambient lighting serves as the overall illumination, ensuring the room is bright enough to work in. Task lighting, such as desk lamps with adjustable brightness, provides targeted light for specific activities—ideal for reading documents or writing notes. Accent lighting, like wall sconces or decorative fixtures, can add a touch of personality to your space while enhancing the overall ambiance.

When selecting light bulbs, consider their color temperature. Warmer tones (around 2700K to 3000K) create a cozy, inviting atmosphere, while cooler tones (4000K and above) promote alertness and clarity, making them ideal for focus-intensive tasks. Investing in smart lighting solutions can also allow you to adjust brightness and color temperature according to your needs throughout the day.

Finally, don’t underestimate the importance of reducing glare and reflections, especially if you spend long hours in front of a screen. Position your monitor away from direct light sources and use anti-glare screens if necessary. By thoughtfully considering your lighting choices, you can create a home office that not only looks good but also fosters productivity, creativity, and a sense of well-being.

14. Technology Tools to Keep You Organized

In today’s fast-paced world, leveraging technology is essential for creating an organized and efficient home office. With the right digital tools at your fingertips, you can streamline your workflow, manage tasks effortlessly, and keep your workspace clutter-free. Here are some must-have technology tools that can help you stay organized and boost your productivity.

**1. Project Management Software:** Tools like Trello, Asana, or Monday.com allow you to break down your projects into manageable tasks, set deadlines, and track your progress. These platforms offer visual boards and lists that can help you prioritize your workload and ensure nothing falls through the cracks.

**2. Digital Note-Taking Apps:** Gone are the days of scribbling notes on sticky pads. Apps like Evernote, OneNote, or Notion enable you to capture ideas, create to-do lists, and organize your thoughts in one central location. With features like tagging and powerful search capabilities, you can easily retrieve important information when you need it.

**3. Cloud Storage Solutions:** Services like Google Drive, Dropbox, or Microsoft OneDrive provide a safe space for your documents and files. By storing your work in the cloud, you can access it from anywhere, collaborate with others in real-time, and ensure that your important files are backed up and secure.

**4. Time Management Tools:** Keep track of how you spend your time with tools like Toggl or RescueTime. These apps help you identify productivity patterns, manage distractions, and allocate your hours effectively, allowing you to create a schedule that maximizes your output.

**5. Communication Platforms:** Staying connected with team members or clients is crucial for a productive home office. Utilize platforms like Slack, Microsoft Teams, or Zoom for seamless communication and collaboration. These tools facilitate quick discussions, video meetings, and file sharing, helping you stay in sync with your colleagues.

**6. Task Automation Tools:** Simplify repetitive tasks with automation tools like Zapier or IFTTT. These platforms allow you to create workflows that automatically trigger actions between different apps, saving you time and reducing manual effort.

By integrating these technology tools into your home office, you can create a structured environment that fosters productivity and minimizes distractions. Embrace the digital age and watch as your organization skills and efficiency soar to new heights.

15. Regularly Reviewing and Adjusting Your Setup for Optimal Performance

Creating a productive home office isn’t a one-and-done task; it requires ongoing attention and refinement. Regularly reviewing and adjusting your setup is essential to ensure that your workspace continues to meet your evolving needs and preferences. Start by setting aside time—perhaps monthly or quarterly—to evaluate the effectiveness of your current arrangement. Are you still comfortable in your chair, or has it begun to feel less supportive? Is your desk height still ideal for long hours of work, or are you finding yourself slouching or straining your neck?

Consider the tools and technology you use daily. Are there new apps or gadgets that could enhance your workflow? Perhaps you’ve discovered that a standing desk would better suit your working style, allowing for healthier posture and increased energy levels throughout the day. Additionally, take a moment to assess your organization systems. Are your files cluttered, or is your digital workspace in disarray? Streamlining these areas can significantly reduce distractions and enhance your focus.

Don’t forget to seek feedback from your own experiences and, if applicable, from colleagues or family members who share the space with you. They might offer insights into what works well and what could be improved. By making it a habit to regularly review and adjust your home office setup, you not only promote optimal performance but also create an environment that reflects your personal style and supports your productivity goals. A well-tuned workspace can lead to greater inspiration, increased efficiency, and ultimately, a more fulfilling work experience.

In conclusion, creating an organized home office is a vital investment in your productivity and overall well-being. By implementing the 10 essential tips we’ve shared, you can transform your workspace into a haven of focus and efficiency. From decluttering and establishing a designated workspace to incorporating inspiring decor and ergonomic furniture, each step plays a crucial role in fostering a productive environment. Remember, a well-organized office not only enhances your workflow but also promotes a sense of calm and clarity. As you embark on this journey, take the time to personalize your space and create an atmosphere that inspires creativity and motivation. Happy organizing, and may your newfound productivity lead to great success in all your endeavors!

How to install a new faucet?

Upgrading your kitchen or bathroom faucet can breathe new life into your space, making it not only more functional but also more stylish.

However, the thought of tackling a DIY plumbing project might seem daunting, especially if you’ve never attempted anything beyond a simple light bulb change. Fear not! With the right tools and a little guidance, you can install your new faucet like a seasoned professional. In this comprehensive, step-by-step guide, we’ll walk you through the entire process, from selecting the perfect faucet to ensuring a leak-free finish. Whether you’re a seasoned DIY enthusiast or a complete novice, our easy-to-follow instructions will empower you to take on this project with confidence. So roll up your sleeves and prepare to transform your sink area with a stunning new fixture that reflects your personal style and enhances your home!

1. Introduction: Why Install Your Own Faucet?

How to install a new faucet?
Credit : whatcanu.com

Installing your own faucet might seem like a daunting task reserved for seasoned DIYers, but with the right guidance, it can be a straightforward and rewarding project. Choosing to tackle this task on your own not only saves you money on plumbing costs, but it also gives you a sense of accomplishment and control over your home improvement efforts. Whether you’re looking to upgrade to a more modern style, replace a leaky unit, or simply refresh your kitchen or bathroom’s look, installing a new faucet can dramatically enhance both functionality and aesthetics.

Moreover, understanding the ins and outs of your plumbing fixtures empowers you to make informed decisions in the future. You’ll learn about your water supply lines, how to identify potential issues, and when it’s time to call in a professional. Plus, there’s something incredibly satisfying about stepping back and admiring a job well done, knowing that you’ve not only improved your space but also added a personal touch to your home.

In this step-by-step guide, we’ll break down the process of faucet installation into manageable parts, ensuring that you have the confidence and knowledge to complete the job like a pro. So, roll up your sleeves, gather your tools, and let’s get started on transforming your sink area into a stylish and functional space!

2. Tools and Materials You’ll Need

Before diving into the installation process, it’s essential to gather all the necessary tools and materials to ensure a smooth and efficient experience. Having everything on hand will save you time and frustration, allowing you to focus on achieving that professional finish.

**Tools:**
1. **Adjustable Wrench:** This versatile tool is perfect for loosening and tightening nuts and bolts on your faucet.
2. **Basin Wrench:** A must-have for reaching those hard-to-access nuts under your sink, the basin wrench provides the leverage you’ll need to secure fittings without straining your hands.
3. **Screwdriver Set:** Both flathead and Phillips screwdrivers are essential for securing mounting screws and making any necessary adjustments.
4. **Plumber’s Putty or Silicone Sealant:** Use this to create a watertight seal around the base of your new faucet, preventing leaks and ensuring longevity.
5. **Pipe Wrench:** If you encounter stubborn pipes, a pipe wrench will give you the grip and torque needed to turn them without damaging the fittings.

**Materials:**
1. **New Faucet:** Choose a faucet that fits your sink’s configuration and matches your style preferences. Read reviews and product details to ensure quality.
2. **Supply Lines:** These flexible hoses connect your faucet to the water supply. Ensure they are compatible with your faucet and sink.
3. **Tephlon Tape:** This handy tape is used to wrap threaded connections, ensuring a tight seal that helps prevent leaks.
4. **Cleaning Supplies:** Before installation, make sure you have some cloths or sponges to clean your workspace and remove any old putty or debris from your sink.
5. **Bucket or Towels:** It’s always a good idea to have a bucket or some towels nearby to catch any excess water that may spill during the installation process.

With your tools and materials assembled, you’re now ready to tackle the installation of your new faucet. This preparation will not only streamline the process but also instill confidence as you work towards achieving that pro-like result!

3. Choosing the Right Faucet for Your Space

How to install a new faucet?
Credit : whatcanu.com

Choosing the right faucet for your space is a crucial step that can significantly impact both the functionality and aesthetic of your kitchen or bathroom. With a myriad of styles, finishes, and functionalities available, selecting the perfect faucet can feel overwhelming. However, taking a moment to consider your space’s unique needs can make the decision-making process smoother and more enjoyable.

first, assess the overall style of your room. Are you aiming for a modern, sleek look with clean lines and polished chrome, or do you prefer a rustic vibe with a vintage-inspired design and matte bronze finish? Consider the existing fixtures and decor as well; your new faucet should complement and enhance the overall theme rather than clash with it.

Next, think about the functionality you need. Do you frequently cook and require a high-arc faucet that offers ample clearance for filling pots and pans? Or perhaps you need a pull-down sprayer for easy rinsing and washing? Identify the features that will best serve your daily tasks, such as single or dual handles, touchless technology, or water-saving options.

Also, don’t forget about the size and configuration of your sink. A large, farmhouse-style sink may benefit from a more substantial faucet that can hold its own against the expansive basin, while a smaller, undermount sink may call for a more streamlined option. Ensure that the faucet’s spout height and reach are appropriate for your sink’s dimensions to avoid any splashing or inconvenience.

Finally, consider the installation requirements. Some faucets come with complex mounting systems or require additional tools, while others are designed for easy DIY installation. If you’re not comfortable with plumbing tasks, it might be wise to choose a model that is straightforward to install or to consult with a professional.

By taking the time to thoughtfully choose a faucet that aligns with your space’s style, functionality, and installation needs, you’ll not only enhance the visual appeal of your kitchen or bathroom but also ensure a seamless and enjoyable experience for years to come.

4. Preparing Your Workspace

Before diving into the installation process, it’s crucial to prepare your workspace properly. A well-organized and clean area not only enhances your efficiency but also minimizes the risk of accidents or misplacing essential tools. Start by clearing the space beneath your sink and removing any items that may obstruct your work. This will give you ample room to maneuver and access all necessary parts during the installation.

Next, ensure that the plumbing area is dry and free from any leaks. If you notice any drips or moisture, take a moment to fix these issues before proceeding. It’s also wise to have a towel or sponge handy to wipe up any spills that may occur during the process.

Gather all the tools you’ll need for the job. Typically, this includes a basin wrench, adjustable pliers, a screwdriver, plumber’s tape, and possibly a bucket to catch any excess water. Having everything at arm’s reach will save you valuable time and prevent frustration.

Finally, don’t forget to turn off the water supply to the sink. Locate the shut-off valves under the sink and twist them clockwise to prevent any unexpected gushes while you’re working. By taking these preparatory steps, you’ll set yourself up for a smoother installation experience, allowing you to focus on the task at hand and achieve professional-level results!

5. Shutting Off the Water Supply

How to install a new faucet?
Credit : whatcanu.com

Before you dive into the world of plumbing and start removing your old faucet, it’s crucial to shut off the water supply. This step is often overlooked by novice DIYers, but it’s essential for preventing a mini waterfall in your kitchen or bathroom.

Locate the shut-off valves under your sink. These valves are typically positioned on the wall behind the sink or on the pipes leading to the faucet. You should see two valves—one for the hot water and one for the cold. To turn them off, simply twist the handles clockwise until they stop. If your sink doesn’t have individual shut-off valves, you may need to turn off the main water supply for your home. This can usually be found in your basement or near the perimeter of your home, often close to the water meter.

Once you’ve shut off the water supply, it’s a good idea to open the faucet to relieve any remaining pressure in the pipes. This will also help to drain any water left in the lines, making the installation process a lot cleaner and easier. Keep a towel handy, just in case there are any drips!

By ensuring that the water supply is completely turned off, you can proceed with confidence, knowing that you’ve taken the necessary precautions to avoid any mishaps. With this crucial step completed, you’re now ready to tackle the next phase of your faucet installation like a pro!

6. Removing the Old Faucet: A Step-by-Step Process

Removing the old faucet may seem daunting at first, but with a bit of patience and the right tools, you can tackle this task like a pro. Here’s a step-by-step process to make it as smooth as possible.

**Step 1: Gather Your Tools**
Before diving into the removal process, it’s essential to have the right tools on hand. You’ll need an adjustable wrench, a basin wrench (for those hard-to-reach spots), a screwdriver, a bucket to catch any water, and a cloth for any spills. Having everything ready will save you time and frustration.

**Step 2: Turn Off the Water Supply**
Locate the shutoff valves under your sink and turn them clockwise to stop the water flow. If you can’t find these valves, it may be necessary to shut off the main water supply for your home. Don’t forget to turn on the faucet to release any remaining pressure and drain the water from the lines.

**Step 3: Disconnect the Water Supply Lines**
Place your bucket underneath the sink to catch any water that may drip during the process. Using your adjustable wrench, carefully loosen the nuts that connect the water supply lines to the faucet. Once loosened, gently pull the lines away from the faucet and lay them aside.

**Step 4: Remove the Faucet Mounting Nuts**
Now it’s time to tackle the mounting nuts that secure the faucet to the sink. These may be located underneath the sink and can be tricky to reach. Use your basin wrench to grip and turn the nuts counterclockwise until they’re completely removed. If they’re particularly stubborn, a few drops of penetrating oil can help loosen them.

**Step 5: Take Out the Old Faucet**
With the mounting nuts removed, you should now be able to lift the old faucet out from the top of the sink. If it’s stuck, gently wiggle it back and forth to dislodge any remaining sealant or grime. Once freed, lift it out carefully and set it aside.

**Step 6: Clean the Sink Surface**
Before you install your new faucet, take a moment to clean the area where the old faucet was mounted. Remove any old putty, debris, or mineral buildup with a scrub brush and a suitable cleaner. This will ensure a tight seal for your new installation.

By following these steps, you’ll have successfully removed your old faucet, making way for a fresh and stylish upgrade. With a little effort, you’re one step closer to enjoying your new faucet and enhancing the heart of your home!

7. Cleaning the Sink Area and Preparing for Installation

How to install a new faucet?
Credit : whatcanu.com

Before diving into the installation of your new faucet, it’s essential to ensure that the sink area is clean and free of any debris. A tidy work environment not only makes the process smoother but also prevents any potential mishaps during installation. Start by removing any items from the countertop and clearing the area beneath the sink; this will give you ample space to work without obstruction.

Next, use a sponge or cloth along with a mild cleaner to wipe down the sink basin and surrounding countertops. Pay close attention to any buildup or residue, particularly around the existing faucet and sinkholes. A clean surface will allow for a better seal and help prevent any leaks once your new faucet is installed.

Additionally, check the plumbing connections and surrounding areas for any signs of corrosion or damage. If you notice anything amiss, it’s wise to address these issues before moving forward with the installation. This step not only ensures a better fit for your new faucet but also prolongs its lifespan.

Finally, gather all your tools and installation materials, including the new faucet, mounting hardware, and any additional supplies you might need. By organizing everything in advance, you’ll save time and keep your workspace efficient. With the sink area cleaned and prepped, you’re now ready to tackle the installation process like a pro!

8. Installing the New Faucet: A Detailed Guide

Installing a new faucet may seem like a daunting task, but with the right guidance, you can complete the job like a seasoned professional. This detailed guide will walk you through each step of the installation process, ensuring you achieve a seamless and efficient setup.

**Step 1: Gather Your Tools and Materials**
Before diving into the installation, it’s essential to have all the necessary tools and materials at your fingertips. You’ll need a basin wrench, adjustable wrench, plumber’s tape, a bucket to catch any excess water, and, of course, your new faucet. Having everything organized will save you time and frustration.

**Step 2: Shut Off the Water Supply**
The first critical step in any plumbing project is to turn off the water supply. Locate the shut-off valves under your sink and turn them clockwise until they are completely closed. If you can’t find them, you may need to shut off the main water supply for your home. Once the water is off, turn on the old faucet to drain any remaining water in the pipes.

**Step 3: Remove the Old Faucet**
Next, it’s time to detach the old faucet. Use your basin wrench to loosen and remove the nuts securing the faucet to the sink. Carefully disconnect the water supply lines, taking care to place a bucket underneath to catch any remaining water. If your old faucet is particularly stubborn, a bit of penetrating oil can help ease the removal process.

**Step 4: Prepare the Sink**
With the old faucet removed, take a moment to clean the sink surface thoroughly. Remove any old putty or debris that may interfere with the new installation. If your new faucet requires a gasket or mounting hardware, ensure these components are ready and in good condition.

**Step 5: Install the New Faucet**
Now comes the exciting part—installing your new faucet! Follow the manufacturer’s instructions closely. Typically, you’ll start by placing the faucet into the mounting holes of the sink. Secure it in place with the provided mounting nuts, tightening them with your adjustable wrench. Be careful not to overtighten, as this can damage the sink.

**Step 6: Connect the Water Supply Lines**
With the faucet securely in place, it’s time to connect the water supply lines. Attach the hot and cold water lines to the corresponding connections on the faucet, using plumber’s tape to ensure a tight seal. Make sure to connect them correctly—hot to hot and cold to cold—to avoid any mix-ups.

**Step 7: Turn on the Water Supply**
Once everything is connected, it’s time to turn the water supply back on. Go back to the shut-off valves and turn them counterclockwise to restore water flow. As you do this, check for any leaks around the connections. If you notice any, tighten the connections gently until the leak stops.

**Step 8: Test Your New Faucet**
With everything in place, turn on your new faucet to test its operation. Allow the water to run for a minute to clear any air bubbles and sediment. Check for leaks again during this process. If everything looks good, congratulations! You’ve successfully installed your new faucet.

By following these steps, you can transform your kitchen or bathroom with a new faucet without the need for professional help. Enjoy the satisfaction of your handiwork and the enhanced functionality of your space!

9. Connecting the Water Supply Lines

Connecting the water supply lines is a crucial step in the faucet installation process, and it’s one that can make or break your entire project. With the faucet securely mounted and all the necessary tools within reach, it’s time to turn your attention to those water supply lines—the veins that will bring life to your new fixture.

Start by ensuring that the water supply valves beneath your sink are turned off. This is essential to prevent any sudden sprays or floods when you begin working. Once you’ve confirmed the valves are closed, it’s a good idea to place a bucket or a towel under the sink to catch any residual water that may spill out during the connection process.

Next, locate the supply lines that will connect to your faucet. Most faucets require both hot and cold water lines, which will be clearly marked. If your new faucet didn’t come with supply lines, you can purchase flexible stainless steel or braided nylon lines that are designed to withstand high pressure and resist corrosion.

Carefully thread the supply line nuts onto the corresponding faucet inlets, ensuring that you match the hot line to the hot inlet and the cold line to the cold inlet. When tightening the connections, use a wrench, but be cautious not to overtighten—this can lead to stripped threads or cracked fittings. A snug fit is all you need; think of it like a firm handshake—strong but not overbearingly tight.

Once the connections are secure, it’s time to turn the water supply back on. Do so slowly, allowing the lines to fill with water gradually. As the pressure builds, keep an eye on the newly connected lines for any signs of leaks. If you spot any drips, it may be necessary to tighten the connections slightly more or check the washers and seals to ensure they’re properly seated.

With the water supply lines securely connected and leak-free, you’re one step closer to enjoying your new faucet. Take a moment to admire your handiwork; you’re well on your way to completing a professional-quality installation right in your own home!

10. Sealing and Securing the Faucet

Once your new faucet is in place, the final step—sealing and securing it—ensures that it operates smoothly and prevents any leaks. This crucial phase not only guarantees that your installation is watertight but also enhances the longevity and performance of your faucet.

Start by applying a bead of plumber’s putty or silicone sealant around the base of the faucet where it meets the sink. This step is essential for creating a reliable seal that will keep water from seeping underneath the faucet and causing damage over time. If you’re using plumber’s putty, roll it into a rope-like shape and lay it down evenly. If you prefer silicone, apply a neat line around the edge, ensuring it’s not too thick, as excess sealant can be squeezed out when the faucet is pressed down.

Next, carefully lower the faucet into position, aligning it with the mounting holes. Once it’s seated correctly, secure it from underneath the sink using the mounting nuts provided with your faucet. Tighten these nuts by hand, and then use a wrench for a snug fit—just be cautious not to overtighten, as this could damage the sink or the faucet itself.

Finally, to add an extra layer of security, check the alignment of the faucet and adjust as necessary. Ensure that the handles are positioned correctly and that the spout is centered. After making any adjustments, give everything a final tightening, and wipe away any excess sealant that may have oozed out during installation.

With the faucet securely in place and properly sealed, you’re ready to reconnect the water supply. Turn on the valves slowly and check for any leaks around the connections. If you notice any, it may be an indication that you need to tighten the connections or reapply sealant. Once everything is secure and leak-free, take a moment to admire your handiwork—your new faucet is now ready to serve you in style!

11. Turning the Water Supply Back On

Once you’ve successfully installed your new faucet and double-checked all the connections, it’s time for one of the most crucial steps: turning the water supply back on. This moment is not just about restoring functionality to your sink; it’s the moment of truth that will determine if your installation was a success.

Before you proceed, ensure that you have towels or a sponge handy to catch any unexpected drips. Begin by locating the shut-off valves under your sink. These valves are typically situated on the wall or the floor, and they control the water flow to your faucet. With a gentle twist, turn the valves counterclockwise to open them.

As you do this, listen for the faint sound of water rushing back into the pipes. It’s an exhilarating moment, but don’t get too excited just yet! Once the valves are fully open, it’s time to check for leaks. Turn on your new faucet to its full flow and observe closely around the base and the connections you’ve just made. If you spot any drips or moisture, it may indicate that a connection wasn’t tightened properly or that a washer needs to be adjusted.

While the water is running, take a moment to check the temperature. Adjust the hot and cold levers to ensure that both are functioning smoothly and that the water temperature is to your liking. This step not only confirms that your installation was successful but also allows you to familiarize yourself with the faucet’s controls.

If all looks good—no leaks, and the water flows beautifully—you can take a deep breath and revel in your accomplishment. You’ve just turned your kitchen or bathroom into a more functional space, all while developing your DIY skills! Don’t forget to clean up any residual water around the sink. Congratulations, you’ve officially crossed the finish line of your faucet installation project!

12. Testing for Leaks and Proper Functioning

Once you’ve successfully installed your new faucet, the moment of truth arrives: it’s time to test for leaks and ensure that everything is functioning as it should. This crucial step not only confirms that your hard work has paid off but also prevents future water damage and costly repairs.

Start by turning on the water supply valves beneath your sink. As you do this, keep a close eye on the connections you made during the installation process. Look for any signs of water seeping from the joints or under the sink. If you spot a leak, don’t panic! Tighten the connections gradually, but be careful not to overtighten, as this could cause damage.

Next, turn on the faucet and let the water run for a minute or so. Observe the flow; it should be steady and consistent. Move the handle through its full range of motion to ensure it operates smoothly. Pay attention to the temperature control as well—make sure that both hot and cold water are functioning correctly and that the temperature adjusts as expected.

While the water is running, check for any unusual noise or vibration that might indicate an issue with the installation. If everything sounds perfect, take a moment to inspect the area around the sink for any signs of dripping water or dampness.

Finally, don’t forget to test the sprayer, if your faucet has one. Activate it and check for proper operation and any leaks at the connection point.

By thoroughly testing your faucet, you can be confident that you’ve completed the installation like a pro. This attention to detail not only enhances your experience but ensures that your new fixture will serve you well for years to come.

13. Final Touches: Cleaning Up and Maintenance Tips

Once you’ve successfully installed your new faucet, it’s time to focus on the final touches that ensure everything looks pristine and operates smoothly. A clean work area not only enhances the aesthetic appeal of your newly installed faucet but also cements your accomplishment as a DIY champion!

**Cleaning Up:** Start by wiping down the surrounding area of the sink with a damp cloth to remove any dust, debris, or fingerprints that may have accumulated during the installation process. Pay special attention to the base of the faucet and the countertop—these spots can often be overlooked but are crucial for maintaining a polished look. If there are any water spots or mineral deposits, a gentle cleanser or a mixture of vinegar and water can work wonders. Just be sure to avoid abrasive cleaners that might scratch the surface.

**Check for Leaks:** Before you call it a day, turn on the faucet and let the water run for a minute. Keep an eye out for any leaks around the connections. If you notice any drips, double-check that the nuts and connections are tightened properly. It’s always better to address leaks now rather than waiting until they become a bigger problem later.

**Maintenance Tips:** Now that your faucet is installed and gleaming, regular maintenance will help keep it in top condition. Consider setting a reminder to clean the faucet every couple of weeks. Use a soft cloth and a mild soap solution to wipe it down, preventing buildup and keeping it shiny. For those pesky mineral deposits, a routine application of vinegar can help maintain the faucet’s finish.

Additionally, inspect the faucet aerator regularly. Over time, it can accumulate debris or mineral buildup that affects water flow. Unscrew it from the tip of the faucet, rinse it out, and clean it with a brush if necessary, ensuring optimal performance.

By taking these final steps to clean up and maintain your new faucet, you’ll not only enjoy its functionality but also extend its lifespan. A little care goes a long way, turning your installation success into a long-lasting triumph!

14. Troubleshooting Common Installation Issues

Even the most skilled DIYers can encounter challenges during a faucet installation, so it’s essential to be prepared for potential hiccups along the way. Here are some common issues you might face and how to troubleshoot them effectively:

**1. Leaky Connections:** One of the most frequent problems after installation is a leak at the connections. If you find water dripping from the faucet or underneath the sink, start by checking the tightness of the connections. Use an adjustable wrench to ensure that the nuts are snug but not overtightened, which can cause damage. If the leak persists, inspect the rubber washers or O-rings; they may need replacing or may not have been seated correctly.

**2. Low Water Pressure:** If your new faucet isn’t delivering water at the expected pressure, first check the aerator. Mineral deposits can accumulate over time, restricting water flow. Remove the aerator and soak it in vinegar to dissolve any buildup. If cleaning doesn’t help, ensure that the shut-off valves under the sink are fully open and that there are no kinks in the water supply hoses.

**3. No Hot Water:** Sometimes, a newly installed faucet may only deliver cold water. This could be due to a few reasons: ensure that the hot water supply line is properly connected and that the shut-off valve for hot water is open. If everything looks good but you still have no hot water, the issue might stem from your water heater or plumbing system.

**4. Noisy Faucet:** If your faucet is making strange noises—like whistling or banging—when water flows, it could indicate air in the pipes or improper installation. Start by turning off the water supply and then open the faucet to release any trapped air. If the noise persists, check for loose fittings or vibrations in the supply lines that may need to be secured.

**5. Difficulty Turning the Faucet Handle:** If the handle feels stiff or is hard to turn, it could be due to improper installation or misalignment. Inspect all components to ensure they are properly seated and aligned according to the manufacturer’s instructions. Sometimes, a little lubrication on the handle mechanism can make a significant difference.

By keeping these troubleshooting tips in mind, you can tackle common installation issues with confidence. Remember, patience is key—take your time to identify and resolve any problems, and soon enough, you’ll have a perfectly functioning faucet that enhances your kitchen or bathroom beautifully!

15. Conclusion: Enjoying Your New Faucet!

Congratulations! You’ve successfully navigated the installation process and now it’s time to sit back and enjoy the fruits of your labor. A new faucet not only enhances the aesthetics of your kitchen or bathroom, but it also brings functionality and ease to your daily routine.

As you turn on the tap for the first time, listen to the gentle flow of water and feel the smoothness of the handle. Whether you’ve chosen a sleek modern design or a classic vintage style, your new fixture is sure to be a centerpiece in your space. Take a moment to appreciate the transformation you’ve achieved—imagine how much more enjoyable washing dishes or brushing your teeth will be with this upgraded feature.

Remember to keep an eye out for any leaks over the next few days and ensure that everything is functioning as it should. Familiarize yourself with any special features your faucet may have, such as touchless activation or temperature control, and enjoy the convenience they provide.

Lastly, don’t forget to maintain your faucet regularly to prolong its life and ensure it continues to perform flawlessly. A simple routine of cleaning and checking for wear and tear will keep your faucet looking great and functioning well for years to come.

Now, go ahead and celebrate your accomplishment! You’ve not only upgraded your home but also gained a valuable DIY skill. So raise a glass (or a mug) under your brand-new faucet, and toast to your success—here’s to many more projects in the future!

In conclusion, we hope this step-by-step guide has empowered you to tackle your faucet installation project with confidence and ease. With the right tools, a little patience, and the techniques outlined in this post, you can achieve professional-level results without the hefty price tag of hiring a plumber. Remember, each step is an opportunity to enhance not just your plumbing skills but also your home’s functionality and aesthetic appeal. So, roll up your sleeves, enjoy the process, and take pride in your accomplishment. Happy plumbing, and don’t hesitate to share your success stories or ask questions in the comments below!

How to install a new shower head?

Upgrading your shower head can transform your daily routine into a luxurious spa-like experience, but the thought of installation might seem daunting.

Fear not! With the right tools and a bit of guidance, you can easily install your new shower head like a pro, saving both time and money while elevating your bathroom’s style and functionality. In this step-by-step guide, we’ll walk you through the entire process—from gathering necessary tools and selecting the perfect shower head to removing the old fixture and installing the new one with confidence. Whether you’re a seasoned DIY enthusiast or a first-time homeowner, our clear instructions and helpful tips will ensure your shower upgrade is smooth and hassle-free. Get ready to enjoy a refreshing shower experience that feels just right!

1. Introduction: Why Upgrade Your Shower Head?

How to install a new shower head?
Credit : whatcanu.com

Upgrading your shower head might seem like a small change, but it can have a significant impact on your daily routine and overall bathroom experience. Imagine stepping into the shower each morning and being greeted by a revitalizing cascade of water that washes away fatigue and stress. Investing in a new shower head can transform an ordinary shower into a luxurious spa-like retreat, elevating your home’s comfort and functionality.

Not only does a new shower head enhance your bathing experience, but it can also contribute to water efficiency, helping you save on utility bills while being environmentally conscious. Modern shower heads come equipped with innovative features, such as adjustable spray settings, built-in water-saving technology, and even Bluetooth connectivity for a truly immersive experience.

Furthermore, a stylish shower head can serve as a statement piece, adding a touch of elegance to your bathroom decor. With a variety of designs and finishes available—from sleek chrome to rustic bronze—you can easily find a model that complements your personal style and elevates the aesthetic of your space.

In this step-by-step guide, we’ll walk you through the process of installing your new shower head like a pro, ensuring you not only enjoy the benefits of this upgrade but also gain the satisfaction of completing the project yourself. Whether you’re a seasoned DIY enthusiast or a first-time homeowner, you’ll find that with the right tools and guidance, transforming your shower has never been easier. So, let’s dive in and discover how a simple upgrade can lead to a more enjoyable and efficient showering experience!

2. Tools and Materials You’ll Need

Before diving into the installation process, it’s essential to gather all the necessary tools and materials. Having everything on hand not only streamlines the installation but also ensures that you won’t have to make any last-minute trips to the hardware store. Here’s a comprehensive list to help you get started:

**1. Adjustable Wrench:** This versatile tool will help you easily tighten or loosen the nuts and bolts that secure your shower head in place. A wrench with a rubber grip can also provide better leverage and prevent damage to the fittings.

**2. Plumber’s Tape (Teflon Tape):** This handy tape is crucial for creating a watertight seal around the threads of your shower arm. It prevents leaks and ensures that your new shower head functions smoothly.

**3. Screwdriver:** Depending on your shower head model, you may need a Phillips or flathead screwdriver. This will help you remove the old shower head and secure the new one properly.

**4. Bucket or Towel:** To catch any remaining water that may drip from the shower arm during the installation process, have a bucket or towel ready. This will help keep your bathroom dry and free from puddles.

**5. Cleaning Cloth:** A clean cloth or rag will come in handy for wiping down the shower arm and ensuring a clean surface for the new shower head. This step is essential for maintaining a good seal and preventing any debris from interfering with the installation.

**6. New Shower Head:** Of course, you’ll need the star of the show—the new shower head! Whether you’ve chosen a sleek rain shower head or a versatile handheld option, make sure it’s compatible with your existing setup.

By having these tools and materials ready before you begin, you’ll set yourself up for a smooth and successful installation process. Now that you’re equipped with everything you need, you’re one step closer to enjoying your luxurious new shower experience!

3. Choosing the Right Shower Head for Your Needs

How to install a new shower head?
Credit : whatcanu.com

Choosing the right shower head for your needs is a crucial step in ensuring an enjoyable and satisfying shower experience. With a plethora of options available, it can be overwhelming to decide which one best suits your preferences and lifestyle. Start by considering the type of shower head that will work best for your space. Are you looking for a fixed shower head, which is mounted to the wall and offers a sleek, minimalist design? Or perhaps a handheld shower head, which provides flexibility and ease of use, making it perfect for rinsing off after a workout or for bathing children and pets.

Next, think about the water pressure in your home. If you have high water pressure, a rain shower head might be an ideal choice, providing a luxurious downpour that mimics a gentle rainfall. However, if your water pressure is on the lower side, you may want to opt for a shower head designed to conserve water while still delivering a powerful spray. Look for models that feature air-infusion technology, which can enhance the flow while using less water.

Don’t forget to consider the spray patterns! Many modern shower heads come with adjustable settings, allowing you to switch between a soft mist, invigorating massage, or a refreshing power spray. This versatility can enhance your shower experience, making it more enjoyable and tailored to your mood.

Lastly, check for additional features that might appeal to you. Some shower heads come with built-in water filters to remove harmful contaminants, while others boast easy-clean nozzles to prevent limescale buildup. By taking the time to evaluate your needs and preferences, you can select a shower head that not only meets your practical requirements but also transforms your daily routine into a rejuvenating escape. With the right choice in hand, you’ll be well on your way to enjoying a shower experience that feels like a spa retreat in your own home!

4. Preparing Your Workspace: Safety First!

Before diving into the installation process, it’s essential to prioritize safety and prepare your workspace effectively. A well-organized area not only enhances efficiency but also minimizes the risk of accidents. Start by gathering all the necessary tools and supplies. You’ll need an adjustable wrench, plumber’s tape, and a bucket or towel to catch any stray water.

Next, clear the area around your shower to create ample space for movement. Remove any items from the shower shelf or surrounding surfaces, such as toiletries, loofahs, or bath mats. This step not only prevents clutter but also protects your belongings from water splashes or accidental damage during installation.

Now, let’s talk about safety measures. Before you begin, ensure that the water supply to your shower is turned off. This will prevent any unwanted water flow during the installation, which can lead to slippery surfaces and potential falls. Additionally, it’s a good idea to lay down a non-slip mat to provide extra traction while you’re working in the shower.

If your new shower head requires any specific tools or adjustments, read through the manufacturer’s instructions beforehand. Understanding the requirements will help you anticipate any challenges that may arise during installation.

Lastly, consider wearing safety goggles to protect your eyes from any debris or water that may splash up as you work. By taking these preparatory steps and putting safety first, you’ll set yourself up for a smooth and successful shower head installation, ensuring that you can enjoy your new fixture without worry!

5. Step 1: Turn Off the Water Supply

How to install a new shower head?
Credit : whatcanu.com

Before diving into the installation process, the very first step—arguably one of the most crucial—is to turn off the water supply. This precaution not only ensures your safety but also prevents a cascade of water from flooding your bathroom during the installation.

To begin, locate the main water shutoff valve for your home, which is typically found in the basement, crawl space, or near the water meter. In some cases, you may find a dedicated shutoff valve for your bathroom located beneath the sink or close to the shower itself. Once you’ve identified the correct valve, twist it clockwise until it stops. This action halts the flow of water, giving you peace of mind as you proceed.

After you’ve turned off the water supply, it’s a good idea to release any remaining pressure in the pipes. Simply turn on the shower faucet and allow it to run until the water stops flowing. This step will help minimize any surprise splashes when you remove the old shower head.

With the water supply now securely off and pressure relieved, you’re ready to tackle the next steps in the installation process. This careful preparation sets the stage for a smooth and professional-looking shower head upgrade. Remember, taking your time with these initial steps will pay off in the long run, ensuring a hassle-free installation experience.

6. Step 2: Remove the Old Shower Head

Once you’ve gathered your tools and prepared the area, it’s time to tackle the second step: removing the old shower head. This process is straightforward, but it’s essential to approach it with care to avoid any mishaps.

Begin by ensuring that the water supply to the shower is turned off. This is typically done at the main water valve, but if you have individual shut-off valves for the shower, those will work just as well. After confirming that the water is off, it’s a good idea to place a towel or bucket beneath the shower head to catch any residual water that might spill out during the removal process.

Next, locate the connection point where the shower head is attached to the arm. Most shower heads are screwed on, so you’ll want to use an adjustable wrench or pliers to grip the base of the shower head securely. If it’s stuck, applying a gentle rocking motion can help loosen it. Be cautious not to apply too much pressure, as this could damage the shower arm or the plumbing.

If the old shower head has been in place for a while, you may encounter mineral buildup or corrosion that makes it challenging to remove. In such cases, a penetrating oil can be sprayed around the connection point. Let it sit for a few minutes to work its magic before attempting to unscrew the shower head again.

As you unscrew the old fixture, it’s advisable to turn it counterclockwise while supporting the shower arm with your other hand to prevent any twisting or bending. Once it’s detached, inspect the threads on the shower arm for any debris or damage. Cleaning the threads with a cloth will ensure a proper seal when you install your new shower head.

With the old shower head removed and the area clean, you’re now ready to proceed to the next step in your installation journey. This stage lays the groundwork for a smooth and successful upgrade, setting you up for a refreshing shower experience with your new fixture!

7. Step 3: Clean the Shower Arm Threads

How to install a new shower head?
Credit : whatcanu.com

Before you can attach your shiny new shower head, it’s essential to ensure that the shower arm threads are clean and free from any debris or old plumber’s tape. This step is crucial for achieving a watertight seal and preventing leaks down the line.

Start by inspecting the threads of the shower arm, which is the pipe protruding from the wall. Over time, mineral deposits, soap scum, and remnants of old tape can accumulate, creating a rough surface that can hinder a secure fit. To clean it effectively, grab a clean cloth or an old toothbrush and gently scrub the threads, removing any buildup.

If you notice stubborn residue, a mixture of vinegar and water can work wonders. Soak a cloth in the solution and wrap it around the threaded area for a few minutes to dissolve any grime. Once the threads are clean, dry them thoroughly with a clean towel.

For an added layer of protection against leaks, consider applying a fresh layer of plumber’s tape (also known as Teflon tape) around the threads. This tape not only helps create a tight seal but also makes it easier to unscrew the shower head in the future if needed. Simply wrap the tape around the threads in a clockwise direction, ensuring it’s snug but not overly thick. With clean threads prepped and ready, you’re one step closer to transforming your shower experience!

8. Step 4: Apply Teflon Tape for a Tight Seal

Now that you’ve removed the old shower head and cleaned the threaded pipe, it’s time to ensure a leak-free connection with a simple yet crucial step: applying Teflon tape. This special tape, often referred to as plumber’s tape, is designed to create a watertight seal that prevents leaks and drips, making it a must-have for any plumbing project.

Start by taking a length of Teflon tape—about three to four inches should suffice. Hold the tape in one hand and begin wrapping it around the threaded end of the shower arm (the pipe that sticks out from the wall) in a clockwise direction. It’s important to wrap it in the same direction that you will be screwing on the new shower head; this way, the tape won’t unravel as you tighten the fitting.

Be mindful not to overdo it; around two to three complete wraps are usually adequate. Too much tape can actually hinder the connection and make it difficult to screw the shower head on securely. As you wrap, ensure the tape adheres smoothly and evenly without any overlaps or bulges. This attention to detail will help to create a solid barrier against leaks.

Once you’ve finished applying the tape, give it a gentle press to secure it in place. You’re now ready to move on to the next step—attaching your new shower head. With the Teflon tape in place, you can proceed with confidence, knowing you’ve taken the right measures to achieve a tight seal and prevent any unwanted waterwork mishaps!

9. Step 5: Install the New Shower Head

Once you’ve successfully removed the old shower head, it’s time for the exciting part: installing your new shower head! This step is where your efforts truly begin to pay off, transforming your bathroom’s look and feel.

Before diving in, make sure you have your new shower head and the necessary tools ready—typically, you’ll need an adjustable wrench, plumber’s tape, and a microfiber cloth. Start by taking a moment to inspect the threads on the shower arm; they should be clean and free of debris. If you notice any old tape or residue, gently clean it off with your cloth to ensure a tight seal.

Next, take your plumber’s tape and wrap it around the threads of the shower arm. This step is crucial as it creates a watertight seal, preventing any leaks once you turn the water back on. Be sure to wrap the tape in the direction of the threads, usually clockwise, and apply about two to three layers for added security.

Now, it’s time to attach the new shower head. Carefully screw it onto the shower arm by hand, turning it clockwise until it feels snug. Avoid using excessive force at this stage; overtightening can damage the shower head or the arm. Once it’s hand-tight, use your adjustable wrench to make a slight turn—just enough to secure it, but be cautious not to overdo it.

Finally, step back and admire your handiwork! Before you declare victory, it’s wise to test for leaks. Turn on the water and check around the connection for any drips. If you notice any, gently tighten the shower head a little more until the leak stops.

With your new shower head securely in place, you’re ready to enjoy a refreshing shower experience that will make you feel like you’re stepping into a spa every day!

10. Step 6: Adjust the Angle and Position

Once your new shower head is securely installed, it’s time to fine-tune its angle and position for the ultimate shower experience. This step is crucial because a well-angled shower head can make all the difference in how water flows and how comfortably you can bathe.

Begin by standing in your shower and mimicking your usual bathing stance. This will help you determine the optimal height and direction for your shower head. Using your hands, gently swivel the shower arm or adjustable mount to align the head with your desired angle. If your shower head is fixed, you might need to loosen the mounting nut slightly to adjust its position before retightening it.

Consider factors like your height and personal preferences—some people prefer a more direct spray, while others enjoy a wider, more diffused flow. If your shower head features different spray settings, take a moment to experiment with each one to find the perfect angle for each mode.

Once you’ve configured the angle, turn on the water to test the flow. Observe how the water hits you and adjust accordingly until you achieve the ideal position. A slight tweak can make a significant difference, ensuring that you enjoy a refreshing experience every time you step into your shower. This careful attention to detail not only enhances your comfort but also optimizes the efficiency of your new shower head. With this final adjustment complete, you’re all set to enjoy a spa-like experience right in the comfort of your own home!

11. Step 7: Turn the Water Supply Back On

After you’ve successfully installed your new shower head, it’s time to turn your attention to the final step: turning the water supply back on. This is a moment of anticipation, as you’re about to reveal the fruits of your labor. Start by locating the water supply valve, which is typically found under the sink or near the shower itself.

Before flipping the valve open, take a moment to double-check your work. Ensure that all connections are tight and secure, and that no tools or materials are left in the shower area. This little precaution can save you from any potential mishaps when the water starts flowing.

Once you’re satisfied everything is in order, slowly turn the valve back to the open position. You may hear the rush of water as it courses back through the pipes, and this is where the excitement builds. It’s advisable to let the water run for a minute or two to flush out any debris that may have accumulated during your installation process.

As the water begins to flow, observe closely for any leaks around the fittings. If you notice any drips, it may indicate that adjustments are necessary—tightening the connection or reapplying plumber’s tape can often resolve minor issues. Once you’re confident that everything is sealed properly, it’s time to test your new shower head.

Turn on the shower and revel in the refreshing spray of water, adjusting the settings to your liking. Not only will you feel a sense of accomplishment for completing the installation yourself, but you’ll also enjoy the satisfaction of a new shower experience that enhances your daily routine. Congratulations! You’ve successfully installed your new shower head like a pro!

12. Step 8: Test for Leaks and Adjust as Necessary

After you’ve successfully attached your new shower head, the moment of truth arrives—it’s time to test for leaks and make any necessary adjustments. This step is crucial not just for ensuring a watertight fit, but also for preventing future water damage and maintaining the efficiency of your plumbing system.

Begin by turning on the water at a moderate pressure. As the water flows through the shower head, closely examine the connection between the shower arm and the head itself. Look for any signs of dripping or pooling water—this is an indication that you may need to tighten the connection or add more plumber’s tape to create a better seal.

If you notice any leaks, don’t panic! Simply turn off the water and use a wrench to gently tighten the shower head. Be cautious not to overtighten, as this can lead to damage or cracks. If leaks persist, it might be a sign that the rubber washer inside the shower head needs replacement or that the threads aren’t aligned correctly.

Once you’ve made your adjustments, turn the water back on and conduct a thorough check again. Listen for any unusual sounds, such as hissing or dripping, and watch for any water escape. If everything looks good, you can relax knowing your installation was successful. A well-fitted shower head not only enhances your bathing experience but also ensures that your bathroom remains dry and damage-free.

Completing this step with diligence will leave you with a shower head that operates flawlessly and provides years of refreshing showers—just like a pro!

13. Tips for Maintaining Your New Shower Head

Once you’ve successfully installed your new shower head, the key to ensuring it continues to perform beautifully lies in proper maintenance. With a few simple tips, you can keep your shower head in top condition for years to come, enhancing both its functionality and your shower experience.

First and foremost, regular cleaning is essential. Over time, mineral deposits from hard water can accumulate and clog the nozzles of your shower head, leading to reduced water flow and a less satisfying shower. To prevent this, consider a routine cleaning schedule—every few weeks is a good starting point. You can easily tackle buildup by filling a plastic bag with equal parts vinegar and water, then securing it around the shower head with a rubber band. Let it soak for a few hours, then remove the bag and run the shower for a minute to flush out any loosened debris.

Additionally, always check the water pressure. If you notice a sudden change in your shower’s performance, it could be worth investigating your home’s plumbing. High water pressure can lead to leaks or even damage your shower head, while low pressure can result in a disappointing shower experience. If necessary, consult a plumber to adjust the pressure to a safe and effective level.

Another important aspect of maintenance is inspecting the shower head for leaks. Regularly check the connections for any signs of dripping or moisture. If you notice a leak, tightening the fittings can often solve the problem. However, if that doesn’t work, you may need to replace the washer or consult a professional.

Lastly, consider the longevity of your shower head. While many modern shower heads are designed to be durable, keeping the manufacturer’s recommendations in mind for usage and cleaning will help preserve its lifespan. If your shower head has a filter, be sure to clean or replace it as directed, ensuring that your water remains clean and enjoyable.

By following these maintenance tips, you’ll not only extend the life of your new shower head but also enjoy a consistently invigorating shower experience that keeps you refreshed day after day. With just a little attention and care, your shower head can continue to be a source of relaxation and rejuvenation for years to come.

14. Common Installation Mistakes to Avoid

When it comes to installing your new shower head, even the most well-intentioned DIY enthusiasts can make a few blunders along the way. To ensure your shower upgrade goes off without a hitch, it’s crucial to be aware of common installation mistakes that can lead to frustration and even costly repairs. Here are some pitfalls to avoid:

**1. Skipping the Prep Work:** One of the biggest mistakes is diving straight into installation without prepping the area. Take the time to remove the old shower head carefully, ensuring you have the right tools on hand. Cleaning the threads of the shower arm is essential for a proper seal. Failing to do so can lead to leaks down the line.

**2. Over-tightening Connections:** It might seem logical to tighten your new shower head as much as possible to prevent leaks, but over-tightening can lead to damage. Use a wrench if necessary, but apply just enough pressure to create a snug fit. A little plumber’s tape on the threads can help ensure a leak-free seal without the need for excessive force.

**3. Neglecting to Check for Compatibility:** Not all shower heads are created equal. Before purchasing your new fixture, ensure it’s compatible with your existing plumbing. Read the product specifications carefully and confirm the thread sizes match. Installing an incompatible shower head can lead to leaks or a poor fit.

**4. Ignoring Flow rate and Pressure:** While you may be excited about your new shower head, don’t forget to consider the water flow rate and pressure. Some shower heads offer a luxurious rain-like experience, but if the flow rate exceeds your plumbing system’s capacity, you may end up with frustratingly low water pressure. Research the specifications to avoid disappointment.

**5. Forgetting to Test for Leaks:** After installation, it can be tempting to jump right into a refreshing shower, but it’s crucial to take a moment to test for leaks. Turn on the water and check all the connections carefully. If you notice any drips, turn off the water, tighten the connections, or readjust the plumber’s tape as needed.

By being aware of these common mistakes, you can navigate your shower head installation with confidence and ease. With just a little attention to detail, you’ll be able to enjoy your new shower fixture without the headaches that come from avoidable errors. Happy installing!
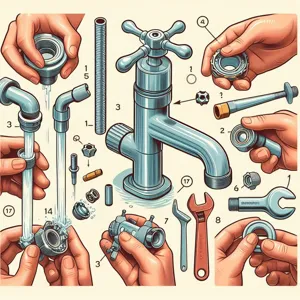
15. Conclusion: Enjoy Your Upgraded Shower Experience!

Congratulations! You’ve successfully installed your new shower head, and now it’s time to revel in the fruits of your labor. Imagine stepping into your bathroom and being greeted by a refreshing cascade of water that transforms your daily routine into a luxurious spa-like experience. Whether your new shower head features adjustable settings, a rainfall effect, or water-saving technology, each option enhances your shower in ways that can elevate your mood and rejuvenate your body.

As you turn on the water and feel the flow, take a moment to appreciate the satisfaction of having done it yourself. No more waiting for a plumber or dealing with the frustration of an outdated fixture. You’ve taken control of your home improvement project, and what better reward than the invigorating sensation of a perfectly functioning shower?

Remember to periodically check your installation to ensure everything is functioning smoothly. Regular maintenance, such as cleaning the shower head to prevent mineral buildup, will help maintain the performance and longevity of your new purchase.

In conclusion, enjoy the upgraded shower experience you’ve created! It’s not just about the aesthetics or the functionality; it’s about the daily moments of joy that come from your new routine. So go ahead, indulge in that long, relaxing shower you’ve been dreaming of—you’ve earned it!

Congratulations! You’re now equipped with all the knowledge you need to install your new shower head like a pro. By following our step-by-step guide, you can transform your bathroom experience with ease and confidence. Whether you opted for a sleek modern design or a classic style, the satisfaction of completing this DIY project yourself is unmatched. Not only will you enjoy the upgraded functionality and aesthetics of your new shower head, but you’ll also save time and money by bypassing the need for a plumber. So go ahead—turn on the water, bask in your handiwork, and revel in the soothing shower experience you’ve created. We’d love to hear about your installation journey, so feel free to share your tips or photos in the comments below!

How to install a new door?

Installing a new door may seem like a daunting task, but with the right guidance, it can be a rewarding DIY project that transforms the look and function of your space.

Whether you’re upgrading for aesthetics, improving energy efficiency, or enhancing security, knowing how to properly install a door can save you time and money while giving you the satisfaction of a job well done. In this comprehensive step-by-step guide, we’ll take you through the entire process—from selecting the perfect door for your home to the final touches that ensure a flawless fit. With practical tips, essential tools, and expert advice, you’ll be equipped to tackle this project with confidence, making your new door installation feel like a professional achievement. So roll up your sleeves and get ready to elevate your home’s entrance with our easy-to-follow instructions!

1. Introduction: Why Installing a Door Yourself is a Great Idea

How to install a new door?
Credit : whatcanu.com

Installing a new door might seem like a daunting task, but taking it on yourself can be a rewarding and cost-effective endeavor. There are several compelling reasons why installing a door yourself is not only practical but also a fantastic opportunity to enhance your home.

First and foremost, DIY door installation allows you to save money. Hiring a professional can quickly add up in costs, with labor charges often exceeding the price of the door itself. By rolling up your sleeves and tackling the project on your own, you not only gain financial savings but also the satisfaction of knowing you accomplished it yourself.

Additionally, installing a door gives you complete control over the design and materials used. You can select the perfect style, color, and finish that complements your home’s aesthetic. Whether you prefer a classic wooden door, a sleek modern design, or a sturdy steel option, the choice is entirely yours. This personal touch can greatly enhance your home’s curb appeal and overall value.

Moreover, the sense of accomplishment that comes with completing a home improvement project cannot be overstated. Each step in the installation process, from measuring and cutting to hanging the door and securing the hardware, provides an opportunity to learn new skills and boost your confidence as a DIYer.

Lastly, the process of installing a door yourself fosters a deeper connection with your home. Each time you pass through that newly installed entrance, you’ll be reminded of your hard work and dedication. You’ll appreciate the time and effort you put into creating a welcoming space for family and friends.

In this guide, we’ll walk you through the step-by-step process of installing your new door like a pro, ensuring you have all the information you need to achieve a flawless finish. So grab your tools, roll up your sleeves, and let’s get started on this exciting home improvement journey!

2. Tools and Materials You’ll Need

Before diving into the installation process, it’s crucial to gather all the necessary tools and materials to ensure a smooth and efficient project. Having everything at your fingertips will not only save you time but also prevent frustration mid-installation. Here’s a comprehensive list of what you’ll need:

**Tools:**
1. **Tape Measure:** A reliable tape measure is essential for ensuring precise measurements of your new door and the frame.
2. **Level:** A level will help you confirm that your door is perfectly aligned, preventing any unwanted gaps or misalignment.
3. **Screwdriver Set:** Both flathead and Phillips screwdrivers will be needed for various screws throughout the installation.
4. **Drill:** A power drill with drill bits is critical for creating pilot holes and securing screws efficiently.
5. **Hammer:** A good hammer will be useful for tapping in shims or prying out old door frames if you’re replacing an existing door.
6. **Chisel:** If your new door requires mortising for hinges, a sharp chisel will ensure clean and precise cuts.
7. **Utility Knife:** This will come in handy for various cutting tasks, such as trimming shims or removing old weather stripping.

**Materials:**
1. **New Door:** Choose a door that fits your style and the dimensions of your door frame. Don’t forget to check if it comes pre-hung or as a slab!
2. **Hinges:** Be sure to select sturdy, high-quality hinges that can support the weight of your new door.
3. **Door Handle/Lockset:** Depending on your preference, choose a handle and lockset that complements your door and enhances security.
4. **Shims:** These small, wedge-shaped pieces will help you adjust the door frame for a perfect fit and level installation.
5. **Weather Stripping:** If you’re replacing an exterior door, weather stripping will help improve energy efficiency by blocking drafts.
6. **Wood Glue or Construction Adhesive:** This will be useful for securing shims in place or reinforcing joints.

With these tools and materials ready, you’ll be well-equipped to tackle your door installation with confidence. Remember, preparation is key to achieving a professional finish, so take the time to gather everything you need before you start. Happy installing!

3. Choosing the Right Door for Your Space

How to install a new door?
Credit : whatcanu.com

Choosing the right door for your space is a pivotal step in your installation journey, as it sets the tone for both aesthetics and functionality. Before you head to the store or browse online, consider the following factors to ensure you select a door that complements your home and meets your needs.

First and foremost, assess the style of your home. Whether you have a modern, traditional, or eclectic design, the door should harmonize with the overall aesthetic. For a contemporary space, sleek and minimalistic designs work wonders, while a classic home may benefit from a solid wood door with intricate details.

Next, think about the material. Doors come in various materials, each offering unique benefits. Solid wood doors exude warmth and durability, while fiberglass doors provide insulation and are resistant to the elements. Steel doors are incredibly secure and great for exterior use, while hollow-core doors are a budget-friendly option for interior spaces. Consider your climate and the level of maintenance you’re willing to commit to when making your choice.

Don’t forget to measure your door frame carefully! A door that’s too large or too small can lead to installation headaches and can compromise energy efficiency. Make sure to note the height, width, and thickness of your existing door frame, and double-check these measurements against the specifications of your chosen door.

Finally, think about the door’s functionality. Do you want a door that swings open, slides, or even folds? Each option has its advantages depending on the space you are working with. For narrow hallways, pocket doors can save space, while traditional swinging doors are ideal for larger openings.

By taking the time to carefully select the right door for your space, you’ll ensure that your installation goes smoothly and that the final result enhances the beauty and functionality of your home. With the right door in hand, you’ll be one step closer to a professional-looking installation!

4. Measuring Your Door Frame Accurately

Measuring your door frame accurately is a crucial step that can make or break the success of your installation. Even the slightest miscalculation can lead to gaps, drafts, or an ill-fitting door that could compromise both aesthetics and functionality. To begin, gather your tools: a tape measure, a level, and a pencil for marking your measurements.

Start by measuring the width of the door frame. Place your tape measure at the inside edge of one side of the frame and extend it to the inside edge of the opposite side. Jot down this measurement; it’s essential to take at least three width measurements at different heights—top, middle, and bottom—to account for any irregularities in the frame. The smallest of these measurements will determine the width of your new door.

Next, measure the height of the door frame. Again, measure from the top inside edge down to the bottom inside edge at both the left and right sides of the frame. Just like with the width, take multiple measurements here to ensure accuracy; the shortest measurement will be your final height.

Additionally, check the squareness of the frame using a level. Place the level diagonally from one corner of the frame to the opposite corner. If the level does not sit evenly, this indicates that your frame may be out of square, which can affect the fit of your new door.

Lastly, don’t forget to note the thickness of the frame and any other relevant details, such as the presence of molding or trim. Accurate measurements are the foundation of a successful door installation, so take your time and double-check your figures. A well-measured door frame sets the stage for a smooth installation process and ensures that your new door will function perfectly for years to come.

5. Preparing the Old Door Frame for Installation

How to install a new door?
Credit : whatcanu.com

Preparing the old door frame for installation is a crucial step that can make or break your project. Before you dive into the installation of your new door, take a moment to assess the condition of the existing frame. look for any signs of damage, such as warping, rot, or cracks, which could compromise the integrity of your new door. If you notice any issues, it may be wise to repair or replace the frame to ensure a snug fit and long-lasting performance.

Once the frame’s condition is confirmed, it’s time to clean it thoroughly. Remove any dust, debris, or old paint that may have accumulated over the years. A clean surface is key to achieving a smooth installation. Use a putty knife to scrape away any peeling paint, and a vacuum or a damp cloth to pick up the remnants. If you encounter stubborn old caulk or adhesive, a heat gun can help soften it for easier removal.

Next, check the level and plumb of the door frame. Use a spirit level to make sure the frame is straight and aligned correctly; this will help prevent any future issues with your new door not closing properly or getting stuck. If the frame is out of square, you may need to shim it with small pieces of wood to correct its alignment.

Finally, take the time to measure the door frame accurately. Use a tape measure to determine the height and width of the frame, noting down these dimensions. It’s always best to double-check your measurements to ensure a proper fit for your new door. With the old door frame prepped and ready, you’re now set to bring in your new door and transform your space with ease!

6. Removing the Old Door Safely

Removing the old door safely is a crucial step in the installation process, and it requires a bit of care and precision. Begin by gathering your tools: a screwdriver, a pry bar, and a utility knife. Before you start, ensure you have someone to assist you, as doors can be heavy and cumbersome, making it easier to handle with an extra set of hands.

First, close the door and inspect the hinges. Using your screwdriver, carefully remove the screws from the hinges, working from the bottom hinge to the top. This method helps to relieve the weight gradually, minimizing the risk of the door falling unexpectedly. As you remove each screw, place them in a small container to avoid losing them, as you may need them later for your new door.

Once the hinges are detached, gently push the door towards you and lift it off the frame. If the door feels stuck, check for any additional screws that may be holding it in place, or use a utility knife to cut through any paint or caulk that may be sealing it. When you finally have the door free, set it aside safely so it won’t fall or get damaged.

Next, inspect the door frame for any lingering hardware, like strike plates or latches. Removing these components will ensure a clean and smooth installation for your new door. If necessary, use your pry bar to carefully remove any nails or screws that may have been left behind.

Taking your time during this process is vital. Rushing can lead to accidents or damage, so be mindful of your surroundings and the materials you’re working with. With the old door safely removed, you’re one step closer to transforming your entryway with a fresh, new door that will enhance both the functionality and aesthetic of your home.

7. Unpacking and Inspecting Your New Door

How to install a new door?
Credit : whatcanu.com

Unpacking and inspecting your new door is a crucial step that sets the stage for a smooth installation process. Once your door arrives, take a moment to find a clean, spacious area where you can safely unbox it. Gently remove the packaging, being careful not to damage the door itself. Most doors come wrapped in protective materials like cardboard or foam, so handle everything with care as you peel back these layers.

As you unveil your new door, conduct a thorough inspection. Start by checking for any visible damage, such as dents, scratches, or warping. It’s essential to catch these issues early, as they may affect the door’s functionality and aesthetic appeal. Don’t just rely on a cursory glance—run your hands over the surface to feel for any imperfections that might not be immediately visible.

Next, confirm that all components of your door are included in the package. This typically includes the door itself, hinges, a handle or knob, and any additional hardware necessary for installation. Refer to the manufacturer’s instructions to ensure you have everything you need. If something is missing or damaged, reach out to the supplier promptly to arrange for replacements.

Lastly, take a moment to familiarize yourself with the door’s features, whether it’s a solid wood door with intricate designs or a sleek, modern fiberglass model. Knowing the specifics can help you make informed decisions during the installation process, ensuring that you not only install the door correctly but also appreciate its design and functionality to the fullest.

By taking the time to unpack and inspect your new door carefully, you’re ensuring a successful installation ahead. This diligence will save you time and potential headaches down the road, allowing you to enjoy your new door with confidence.

8. Installing Door Hinges: Step-by-Step

Installing door hinges may seem like a small detail, but it’s a crucial step that ensures your door functions smoothly and securely. Follow this step-by-step guide to install your new door hinges like a pro!

**Step 1: Gather Your Tools and Materials**
Before you begin, make sure you have everything you need at hand. You’ll require a drill, a screwdriver, a measuring tape, a chisel, and, of course, your door hinges. Most hinges come with screws, but double-check to ensure you have the correct size for your door.

**Step 2: Mark the Hinge Placement**
Using your measuring tape, measure down from the top of the door to where you want the top hinge to go—typically around 7 inches from the top edge. Mark this spot with a pencil. Repeat this process for the bottom hinge, generally placed about 11 inches from the bottom. If you’re adding a third hinge, position it halfway between the top and bottom hinges.

**Step 3: Create the Hinge Recesses**
Place the hinge flat against the door where you marked it. Using your chisel, carefully carve out a shallow recess for the hinge to sit flush with the door surface. This step is crucial for a clean, professional look and ensures the door swings smoothly.

**Step 4: Attach the Hinges to the Door**
Align the hinge with the recess you created. Using your drill, insert the screws provided with the hinge into the pre-drilled holes. Tighten them securely but avoid overtightening, as this could strip the screws or damage the wood.

**Step 5: Position the Door in the Frame**
With the hinges attached to the door, it’s time to position the door in the frame. You may need a helper for this step to hold the door steady. Align the hinges with the corresponding plates in the door frame.

**Step 6: Secure the Hinges to the Frame**
Once the door is in place, attach the other half of the hinge to the door frame by drilling screws into the hinge plates. Make sure the door swings freely and check for alignment. If it’s too tight or doesn’t close properly, you may need to adjust the hinges slightly or add shims to the frame.

**Step 7: Test the Door**
After everything is secured, give the door a few test swings. It should open and close smoothly without any sticking or rubbing. If there are issues, revisit the hinge placements and make minor adjustments as needed.

**Step 8: Final Touches**
Once you’re satisfied with the installation, clean any dust or debris from the installation process. If your hinges are visible, consider applying a coat of lubricant to ensure they remain functional and quiet.

By carefully following these steps, you’ll have installed your door hinges like a pro, ensuring your new door not only looks fantastic but operates seamlessly in your space! Happy DIY-ing!

9. Hanging the New Door: Tips for Alignment

Hanging a new door can seem daunting, but with a few expert tips on alignment, you can ensure that your installation goes off without a hitch. Proper alignment is crucial not only for aesthetics but also for functionality; a misaligned door can lead to issues such as sticking, gaps, or even security concerns. Here’s how to get it just right.

First, before you even attempt to hang the door, make sure your hinges are properly installed on the door frame. Use a level to check that the hinge side of the frame is plumb, adjusting as necessary with shims. If the frame isn’t square, you may find that your door doesn’t fit correctly, so take the time to get this step right.

Once your hinges are secured, it’s time to position the door. Hold the door in place with the help of a friend or use a door jig to support it temporarily. Begin by securing the top hinge first. This will help anchor the door and allow you to check its alignment without it swinging open or closed unexpectedly.

Next, check the gap between the door and the frame on both the hinge and latch sides. Ideally, you want a consistent gap of about 1/8 inch. If you notice that the door is leaning or there are uneven gaps, adjust the lower hinge by adding or removing shims until the door hangs evenly. It may take a bit of trial and error, but patience is key.

Once you’re satisfied with the alignment, secure the bottom hinge. Before closing the door completely, open and shut it a few times to ensure it swings smoothly without dragging. If you encounter any resistance, it’s likely a sign that further adjustments are needed.

Finally, after confirming that the door is properly aligned and functions smoothly, you can drive in the screws fully and install any additional hardware, such as doorknobs or locks. A well-hung door not only enhances the aesthetic appeal of your space but also contributes to the overall security and efficiency of your home. With these alignment tips, you’ll be hanging doors like a pro in no time!

10. Securing the Door Frame: Shims and Screws

Securing the door frame is a crucial step that ensures your new door operates smoothly and stands the test of time. This process involves using shims and screws to create a sturdy, level framework that can withstand daily use.

Begin by inserting shims—small, wedge-like pieces of wood—into the gaps between the door frame and the rough opening of the wall. Shims are essential for adjusting the alignment of the door; they help fill any uneven spaces, ensuring that the door hangs straight and operates without obstruction. Start at the bottom hinge side and gently tap the shim into place, checking frequently with a level to ensure the frame is perfectly plumb. You want the door to swing effortlessly, so this step cannot be rushed.

Once the shims are in position, it’s time to secure the frame with screws. Using a power drill, fasten screws through the frame into the wall studs. Place screws approximately every 12 to 16 inches along the sides and top of the frame, ensuring they penetrate the studs for maximum stability. Be careful not to over-tighten the screws, as this can warp the frame and affect the door’s functionality.

After securing the frame, double-check the door’s alignment and operation. Open and close the door to make sure it swings freely without sticking or dragging. If adjustments are necessary, you can easily add or remove shims as needed. By carefully securing the door frame with shims and screws, you’ll create a solid base that will enhance the longevity and performance of your new door, giving it the professional finish you desire.

11. Installing the Door Handle and Lockset

Once your door is hung securely in its frame, it’s time to add the finishing touches that not only enhance its functionality but also add to its aesthetic appeal: the door handle and lockset. Installing these components may seem like a straightforward task, but a careful approach ensures smooth operation and a polished look.

Start by selecting the right handle and lockset that matches your door style and complements your home decor. Before you dive into installation, gather your tools: a tape measure, screwdriver, chisel, and a level. Having everything on hand will streamline the process and minimize interruptions.

Begin by determining the correct height for your door handle. A common standard is around 36 inches from the floor, but you can adjust based on your preference or the specific ergonomic needs of your household. Mark the spot lightly with a pencil.

Next, position the lockset, which typically consists of two main components: the latch and the deadbolt (if applicable). Use your chisel to create a mortise for the latch, following the manufacturer’s instructions for depth and width. This step is crucial; a snug fit will prevent any wobbling and ensure the latch operates smoothly.

Once the mortises are cut, insert the latch into the side of the door. Secure it with screws, ensuring that it is flush with the door’s edge. Then, place the strike plate in the door frame, marking the location where it will fit. Chisel out a small recess if necessary to accommodate it, and screw it into place.

Now, it’s time to install the door handle. Align the handle’s spindle with the latch and push it through the hole you’ve prepared. Attach the outer handle by securing it with the provided screws. Make sure both handles are aligned properly and turn smoothly.

Finally, if your lockset includes a deadbolt, repeat the process for this component. Mark the position for the deadbolt, drill the necessary holes, and secure it in place. Once everything is installed, test the lock and handle to ensure they function correctly, making any adjustments as needed.

With the handle and lockset securely in place, you can step back and admire your handiwork. Not only have you successfully enhanced the functionality of your door, but you’ve also added a stylish touch that will welcome guests and provide security for your home.

12. Adjusting the Door for a Perfect Fit

Once your new door is securely hung and you’ve taken a moment to admire your handiwork, it’s time to ensure it fits perfectly within its frame. Proper adjustment is crucial for both aesthetics and functionality, as a misaligned door can lead to operational issues and compromise security.

Start by checking the gaps between the door and the frame. Ideally, there should be an even space of about 1/8 inch on the top and sides, allowing for smooth operation and easy opening and closing. If you notice uneven gaps, it may be necessary to adjust the hinges. Loosen the screws on the hinge plate slightly, use a shim to raise or lower the door as needed, and then retighten the screws. This might take a few attempts, so don’t be discouraged if it takes a bit of tweaking to achieve that perfect alignment.

Next, check how the door swings. It should open and close without catching or scraping against the frame or floor. If the door drags on the floor, you may need to trim the bottom edge. Measure from the floor to the bottom of the door, and then mark where the cut will be. Using a circular saw or hand saw, make a clean cut, and be sure to sand down the edges to prevent splintering.

Finally, test the latch and strike plate. Close the door and ensure that the latch easily engages with the strike plate without excessive force. If the latch doesn’t align properly, you may need to reposition the strike plate. Mark the new position, drill pilot holes, and install it at the adjusted height.

Once you’ve made these adjustments, step back and appreciate your efforts. A well-fitted door not only enhances the overall look of your home but also ensures that it functions seamlessly for years to come. With a little patience and attention to detail, you can achieve a professional finish that reflects your hard work and dedication.

13. Finishing Touches: Painting or Staining Your Door

Once your new door is securely installed and all adjustments have been made, it’s time to focus on the finishing touches that will elevate its appearance and protect it from the elements. Painting or staining your door not only enhances its aesthetic appeal but also adds a layer of protection against wear and tear, moisture, and sunlight.

Before you start, ensure the surface of the door is clean and free of dust. If you’ve just installed a wooden door, consider sanding it lightly to create a smooth surface that will better absorb your chosen finish. For painted doors, a primer may be necessary, especially if you’re transitioning from a darker color to a lighter one or if the door has never been painted before.

When it comes to choosing between paint and stain, consider the look you want to achieve. Paint offers a vibrant, opaque finish that can complement the color scheme of your home, while stain highlights the natural grain of the wood, providing a warm and timeless appearance. If you opt for stain, be sure to select a high-quality product that’s designed for exterior use to ensure durability.

Apply your chosen finish using a high-quality brush or roller for a smooth, even application. For paint, start with the edges and grooves before moving to the flat surfaces, making sure to apply multiple thin coats rather than one thick coat for the best results. If staining, work in the direction of the wood grain and wipe off any excess with a clean cloth to avoid blotches.

Allow ample drying time between coats, and don’t forget to finish with a clear sealant if you chose stain, as this will provide additional protection against moisture and UV damage. Once everything is dry and set, step back and admire your handiwork—your newly installed door not only looks professional but is now ready to withstand the elements while adding curb appeal to your home.

14. Troubleshooting Common Installation Issues

Installing a new door can be a rewarding DIY project, but it’s not without its challenges. Encountering issues during installation is common, and knowing how to troubleshoot these problems can save you time, frustration, and potentially costly repairs. Here are some typical installation issues you might face and how to resolve them like a pro.

**1. Door Doesn’t Fit Properly:**
If your door doesn’t seem to fit in the frame correctly, start by checking the measurements. Ensure that the door is aligned with the hinges and that the frame is square. Use a level to check for evenness; if the frame is out of square, shimming may be necessary. Adjust or trim the door edges slightly if it’s too large, but be cautious—removing too much material can lead to gaps.

**2. Alignment Issues with Hinges:**
Misalignment of hinges can cause your door to sag or not close properly. Check that the screws are tight and that the hinges are mounted flush against the door and the frame. If the door is still misaligned, consider repositioning the hinge plates or using additional shims to elevate the door back into proper alignment.

**3. The Door Sticks or Gets Jammed:**
A sticking door can be a major annoyance. This issue often arises from humidity causing wood to swell or an improper installation. Inspect the door and frame for any obstructions or debris that might be causing the sticking. Sanding down the edges of the door slightly can help alleviate this issue. If the door is swelling due to moisture, consider applying a sealant to protect it from humidity in the future.

**4. Gaps Around the Door:**
If you notice gaps between the door and the frame, it could affect energy efficiency and security. Check that the door is hung evenly and make adjustments as needed. Weather stripping can also be an effective solution for sealing these gaps, as it not only improves insulation but also enhances the overall appearance of your installation.

**5. Difficulty With Lock Mechanism:**
Sometimes, the lock may not align properly, which can be frustrating. Ensure that the strike plate is correctly positioned and that the hole in the door is drilled at the right depth. If the lock cylinder is sticking, lubricate it with graphite or a silicone spray to ensure smooth operation.

By anticipating these common installation issues and knowing how to troubleshoot them, you’ll not only save time but also ensure that your new door functions perfectly for years to come. Remember, every challenge you face is an opportunity to learn and improve your DIY skills!

15. Conclusion: Enjoying Your New Door and Final Thoughts

Congratulations on successfully installing your new door! As you step back and admire your handiwork, take a moment to appreciate not just the aesthetic upgrade but also the functional benefits it brings to your home. A new door can enhance your home’s energy efficiency, improve security, and elevate curb appeal, making it an investment that pays off in more ways than one.

Now that your door is in place, it’s time to revel in the satisfaction of a job well done. Enjoy the fresh look and feel it adds to your space, and take note of how it complements your interior and exterior design. Whether you chose a sleek modern style or a classic wooden finish, your new door serves as a testament to your DIY skills and attention to detail.

Remember, the journey doesn’t end here. Regular maintenance is key to keeping your door looking and functioning at its best. Periodically check the hinges and hardware, clean the surface, and apply any necessary treatments to protect against the elements. Establishing a routine will ensure that your door remains a stunning feature for years to come.

As you close this chapter of your home improvement project, consider sharing your experience with others. Post pictures of your newly installed door on social media, or share tips and tricks with friends and family who may be considering a similar upgrade. Your insights could inspire someone else to take the plunge into their own home improvement journey.

In conclusion, installing your new door is not just about the end result; it’s about the pride you feel in transforming your space. So, enjoy the beauty and functionality it brings, and let it be a reminder of your ability to tackle DIY projects like a pro! Happy home improving!

In conclusion, we hope this step-by-step guide has empowered you with the knowledge and confidence to install your new door like a pro! From selecting the right tools to ensuring a perfect fit, each step is crucial in achieving a polished and professional finish. Remember, patience and precision are your best friends throughout this process. As you stand back and admire your handiwork, take pride in knowing you transformed your space with your own two hands. Whether you’re upgrading for aesthetic appeal, energy efficiency, or security, your new door will undoubtedly enhance your home. We encourage you to share your installation experience and photos with us; we’d love to celebrate your achievement! Happy DIYing!

What are the different types of home security systems?

In an era where safety and peace of mind are paramount, understanding the various home security systems available is more essential than ever.

With the rise in smart technology and innovative solutions, homeowners are faced with a plethora of options designed to protect their sanctuaries. Whether you’re a first-time homeowner looking to enhance your security, or someone seeking to upgrade an outdated system, navigating the landscape of home security can feel overwhelming. From traditional alarm systems and modern smart devices to comprehensive surveillance setups, each option presents its own unique benefits and features. In this comprehensive guide, we will explore the different types of home security systems, their functionalities, and how to choose the right one to suit your specific needs. Join us as we delve into the world of home protection, ensuring that you can make informed decisions to safeguard your home and loved ones.

1. Introduction to Home Security

What are the different types of home security systems?
Credit : whatcanu.com

In an increasingly unpredictable world, the importance of home security cannot be overstated. Our homes are not just physical structures; they are sanctuaries where we create memories, find comfort, and seek refuge from the outside chaos. However, as crime rates fluctuate and new security technologies emerge, homeowners face the pressing challenge of ensuring the safety of their living spaces.

Understanding the various types of home security systems available is the first step in effectively protecting your home and loved ones. From traditional alarm systems to cutting-edge smart home technology, the options are abundant and often overwhelming. Each system comes with its own set of features, advantages, and price points, making it essential to identify the best fit for your unique needs and lifestyle.

In this comprehensive guide, we will delve into the myriad of home security solutions, exploring everything from basic alarm systems to sophisticated surveillance cameras, smart locks, and integrated home automation systems. We’ll discuss how each type can enhance your home’s security, provide peace of mind, and ultimately, help you create a safe haven for you and your family. Whether you’re a first-time homeowner or looking to upgrade your existing setup, this guide will equip you with the knowledge you need to make informed decisions about safeguarding your home. Let’s embark on this journey to explore the world of home security together.

2. The Importance of Home Security Systems

In today’s world, the importance of home security systems cannot be overstated. As our lives become increasingly intertwined with technology, so too do the risks associated with our personal safety and property. A home security system serves as both a deterrent and a safeguard, ensuring that our sanctuaries remain safe havens for our families.

The primary function of a home security system is to protect against intrusions. Studies have shown that homes without security measures are significantly more likely to be targeted by burglars. Just the presence of security cameras or alarm signs can discourage potential intruders, as they are often searching for easy targets. A comprehensive system not only dissuades criminals but also provides peace of mind for homeowners, knowing that they have taken proactive steps to protect their belongings and loved ones.

Moreover, home security systems have evolved far beyond simple alarms. Today’s systems can include smart technology that allows homeowners to monitor their properties remotely via smartphones or tablets. Features such as real-time alerts, video surveillance, motion detection, and smart locks provide a multi-layered approach to security. This flexibility enables homeowners to customize their systems according to their specific needs, whether they require monitoring for a bustling household or a more understated solution for a quieter residence.

In addition to protecting against theft, many modern systems also provide safeguards against other threats, such as fire, carbon monoxide, and water damage. Integrated sensors can alert homeowners to these dangers, potentially saving lives and preventing extensive damage to the home.

Ultimately, investing in a home security system is about more than just theft prevention; it’s about creating a sense of security and control in an unpredictable world. It empowers homeowners, allowing them to protect what matters most and create a safe environment for their families to thrive. As we explore the various types of home security systems available, it’s essential to recognize that the right system can significantly enhance not only your property’s safety but also your overall quality of life.

3. Overview of Different Types of Home Security Systems

What are the different types of home security systems?
Credit : whatcanu.com

When it comes to safeguarding your home, understanding the various types of security systems available is crucial. Each system offers unique features and benefits, catering to different needs and preferences. Here’s a comprehensive overview of the most popular home security systems to help you determine which one is right for you.

**1. Monitored Security Systems**
Monitored security systems are professionally managed services that provide round-the-clock surveillance of your home. These systems include alarms, cameras, and sensors that alert a central monitoring station in case of a breach. If an alarm is triggered, trained personnel can promptly contact local authorities, ensuring rapid response times. This option is ideal for those who want peace of mind knowing that their home is being monitored even when they are away.

**2. Unmonitored Security Systems**
Unmonitored systems operate independently, allowing homeowners to take charge of their security. They typically include alarms and cameras that activate when triggered, notifying the homeowner via text or app alerts. While these systems can be more cost-effective, they require a proactive approach from the homeowner to respond quickly to alerts. This option suits those who prefer hands-on management of their security.

**3. Wireless Security Systems**
Wireless security systems have gained popularity due to their ease of installation and flexibility. These systems utilize Wi-Fi or cellular connections to communicate, eliminating the need for cumbersome wiring. Homeowners can easily install cameras, motion sensors, and alarms without professional assistance. Additionally, many wireless systems offer mobile app integration, allowing users to monitor their homes remotely from their smartphones.

**4. Wired Security Systems**
Wired security systems consist of hardwired connections between various components, such as cameras, alarms, and control panels. While they often require professional installation, wired systems are typically more reliable and less susceptible to interference than their wireless counterparts. This option is ideal for homeowners looking for a robust and stable security solution, particularly in larger properties.

**5. Smart Home Security Systems**
The rise of smart technology has transformed the home security landscape. Smart home security systems integrate with devices like smart locks, doorbell cameras, and smart lights, allowing for a fully connected security experience. Through a single app, homeowners can control all aspects of their security system and receive real-time alerts. This option is perfect for tech-savvy individuals looking for a modern, customizable solution.

**6. DIY Security Systems**
For those who prefer a more hands-on approach, DIY security systems offer customizable solutions that homeowners can install and manage themselves. These systems often come with user-friendly interfaces and modular components, allowing you to tailor your security setup according to your specific needs. DIY systems can be a cost-effective choice and provide the flexibility to expand or adjust your security measures as necessary.

Understanding the various types of home security systems is essential for making an informed decision that aligns with your lifestyle and safety needs. Whether you opt for a monitored system for peace of mind or a DIY setup for flexibility, the right security solution can protect your home and provide reassurance for you and your family.

4. Traditional Alarm Systems: Pros and Cons

When it comes to home security, traditional alarm systems have long been a staple for homeowners seeking peace of mind. These systems typically consist of a series of sensors placed at entry points, such as doors and windows, along with a central control panel that communicates with a monitoring service. However, like any security solution, traditional alarm systems come with their own set of advantages and drawbacks.

**Pros:**

One of the most significant benefits of traditional alarm systems is their reliability. These systems are designed to trigger an alarm when unauthorized access is detected, alerting both homeowners and monitoring services. This immediate response can deter potential intruders and significantly reduce response times in emergencies. Additionally, traditional systems often come with a straightforward installation process and can be easily integrated with existing home infrastructure.

Another major advantage is the peace of mind they provide. Knowing that your home is monitored around the clock can alleviate stress, especially for families or individuals living in areas with higher crime rates. Many homeowners appreciate the simplicity of a direct connection to a professional monitoring service that can contact authorities if an alarm is triggered.

**Cons:**

However, traditional alarm systems are not without their limitations. One notable drawback is the reliance on landline connections. While many modern systems have adapted to use cellular connections or internet protocols, older models may still depend on phone lines, which can be cut by intruders to disable the security system. Additionally, while monitoring services provide a sense of safety, they can come at a cost. Monthly fees for professional monitoring can add up over time, making it a less appealing option for budget-conscious homeowners.

Furthermore, traditional alarm systems often lack the flexibility and advanced features of more modern security technologies. For instance, they may not offer smartphone integration, real-time alerts, or the ability to remotely control your system. This can leave homeowners feeling disconnected from their security measures, particularly if they travel frequently or spend long hours away from home.

In conclusion, traditional alarm systems offer a proven and reliable method for securing your home, but it’s essential to weigh their pros and cons against your specific needs and preferences. By understanding these factors, you can make an informed decision that best suits your lifestyle and enhances your overall home security strategy.

5. Wireless Security Systems: Benefits and Features

What are the different types of home security systems?
Credit : whatcanu.com

Wireless security systems have gained immense popularity in recent years, revolutionizing the way we think about home protection. These systems offer a host of benefits that make them an attractive option for homeowners looking to enhance their security measures without the hassle of complicated wiring and installations.

One of the most significant advantages of wireless security systems is their ease of installation. Unlike traditional wired systems, which often require professional installation and extensive modifications to your home, wireless systems can be set up quickly and easily by the homeowner. Most systems come with user-friendly manuals and all the necessary components, allowing you to have your security in place within a few hours. This convenience is especially appealing for renters or those who may not want to make permanent changes to their property.

Another compelling feature of wireless security systems is their flexibility and scalability. You can easily add or remove components such as cameras, motion detectors, and door/window sensors as your security needs change. This adaptability means that whether you’re moving to a new home or simply want to upgrade your system, wireless solutions can grow with you. Additionally, many wireless systems offer mobile app integration, enabling you to monitor your home from anywhere. With real-time alerts and notifications sent directly to your smartphone, you can keep an eye on your property no matter where you are.

Furthermore, wireless security systems often come equipped with advanced features, including high-definition video surveillance, two-way audio, and smart home integration. This means you can not only view live feeds from your cameras but also communicate with visitors or potential intruders through your system. Many modern wireless systems even support compatibility with voice-activated assistants like Amazon Alexa or Google Assistant, allowing for seamless control and automation.

Lastly, the aesthetic appeal of wireless systems shouldn’t be overlooked. Without the need for visible wires and bulky equipment, these systems can blend more seamlessly into your home’s décor. Many devices are designed to be discreet and stylish, maintaining the look and feel of your living space while providing top-notch security.

In summary, wireless security systems offer an array of benefits, including easy installation, flexibility, advanced features, and a sleek design. As you explore your options in home security, consider how these systems can provide peace of mind while keeping your home safe and secure.

6. Smart Home Security Systems: What You Need to Know

In today’s technology-driven world, smart home security systems are revolutionizing the way we protect our homes. These systems integrate seamlessly with your existing smart devices, offering a level of convenience and control that traditional security solutions simply can’t match. Imagine being able to monitor your home from anywhere in the world, adjusting settings, and receiving real-time alerts all from the palm of your hand. This is the promise of smart home security.

Smart home security systems typically include a combination of cameras, motion sensors, smart locks, and alarms, all interconnected via your Wi-Fi network. Many systems allow you to access live video feeds through a mobile app, enabling you to keep an eye on your property while you’re away. Some even offer advanced features such as facial recognition technology and night vision capabilities, providing an extra layer of security and peace of mind.

One of the key benefits of these systems is their adaptability. You can customize your setup to fit your specific needs, whether that means adding more cameras to cover blind spots or integrating smart lighting to deter intruders. Moreover, many smart security devices also work with voice assistants like Amazon Alexa or Google Assistant, allowing you to control your home security with simple voice commands.

However, it’s essential to consider the potential drawbacks. Smart home security systems rely heavily on your Wi-Fi connection, which means that if your internet goes down, so does your security. Additionally, the convenience of connectivity can make these systems vulnerable to hacking if not properly secured. Therefore, investing in strong passwords and keeping your software updated is crucial.

When exploring your options, look for systems that offer robust encryption and consider those that provide professional monitoring services as an additional layer of protection. Ultimately, smart home security systems can offer unparalleled convenience and peace of mind, making them an excellent choice for anyone looking to enhance their home security strategy. Whether you’re a tech enthusiast or simply seeking a more efficient way to protect your home, understanding the ins and outs of smart security can help you make an informed decision that best fits your lifestyle.

7. Video Surveillance Systems: Types and Uses

What are the different types of home security systems?
Credit : whatcanu.com

Video surveillance systems have become an integral part of modern home security, offering a visual deterrent to intruders and peace of mind to homeowners. These systems come in various types, each tailored to meet specific needs and preferences, ranging from basic setups to sophisticated networks equipped with advanced features.

**1. Analog Cameras:** Traditionally, many homes were equipped with analog cameras that transmit video signals to a digital video recorder (DVR). While these cameras can still provide reliable monitoring, their resolution is often lower compared to newer technologies. However, they remain a cost-effective option for those seeking to enhance their security without breaking the bank.

**2. IP Cameras:** Internet Protocol (IP) cameras have revolutionized the surveillance landscape. These digital cameras connect directly to the internet, allowing for high-definition video quality and remote access via smartphones or computers. This capability not only enables homeowners to monitor their property in real time but also to store footage in the cloud, providing easy retrieval and longer storage durations.

**3. Wireless Cameras:** For those seeking a hassle-free installation process, wireless cameras are the perfect solution. Without the need for extensive wiring, these cameras can be placed virtually anywhere around your home, making them highly versatile. Many wireless options also come equipped with battery power, ensuring they continue to operate during power outages.

**4. Dome Cameras:** Designed for both indoor and outdoor use, dome cameras are known for their discreet design. Typically mounted on ceilings, these cameras deter vandalism while providing a wide field of view. Their sleek appearance makes them a popular choice for residential settings, especially in areas like porches or living rooms.

**5. Bullet Cameras:** Recognizable by their elongated shape, bullet cameras are ideal for outdoor surveillance. Their focused lens allows for precise monitoring of specific areas, such as driveways or entryways. Many models also come with weatherproof casings, ensuring durability against the elements.

**6. PTZ Cameras:** Pan-Tilt-Zoom (PTZ) cameras offer dynamic monitoring capabilities, allowing users to move the camera remotely and zoom in on specific activities. This flexibility is particularly useful for larger properties or areas requiring comprehensive coverage, as it enables a single camera to monitor multiple angles.

**7. Smart Cameras:** With the rise of smart home technology, many homeowners are now opting for smart cameras that integrate seamlessly with their existing home automation systems. These cameras can send alerts to your phone, recognize faces, and even activate other smart devices, providing a comprehensive security solution at your fingertips.

Video surveillance systems not only enhance your home’s security but also provide valuable evidence in the event of an incident. By understanding the various types available and their specific uses, you can make an informed decision that best suits your home’s security needs, ensuring that your property remains safe and secure.

8. Monitored vs. Unmonitored Security Systems

When it comes to choosing a home security system, one of the most critical decisions you’ll face is whether to opt for a monitored or unmonitored setup. Each type offers distinct advantages and drawbacks that can significantly influence your home’s safety and your peace of mind.

**Monitored Security Systems** operate with a direct connection to a professional monitoring service. This means that if your alarm is triggered, a team of trained professionals is immediately alerted and can respond swiftly to any potential threats. They can contact local authorities on your behalf, ensuring that help arrives as quickly as possible. This level of vigilance is particularly beneficial for those who may be away from home for extended periods or for individuals who want the reassurance that someone is always watching over their property. Furthermore, many monitored systems come equipped with mobile apps that allow you to check your home’s status in real-time, receive alerts, and even control your system remotely.

On the other hand, **Unmonitored Security Systems** function independently, typically relying on audible alarms or notifications sent directly to the homeowner’s mobile device. While they can deter potential intruders with loud alarms, there’s no professional oversight to respond to incidents. This option may appeal to those who prefer a more hands-on approach to security or those who are comfortable being their own first line of defense. Unmonitored systems usually come with a lower upfront cost and can be easier to install, making them an attractive choice for budget-conscious homeowners. However, they require a more proactive stance from the homeowner, who must be prepared to respond to alerts and potential threats.

Ultimately, the choice between monitored and unmonitored security systems will depend on your lifestyle, budget, and personal preferences. Some homeowners even choose to combine both methods, utilizing a monitored system for peace of mind while employing unmonitored elements for additional layers of security. Whichever path you choose, understanding the differences between these two types of systems is essential in crafting a security strategy that best protects your home and loved ones.

9. DIY Home Security Solutions: Is It Right for You?

In today’s tech-savvy world, DIY home security solutions have gained immense popularity, allowing homeowners to take security into their own hands. But before you rush to purchase the latest gadgets, it’s essential to evaluate whether a DIY approach aligns with your specific needs and lifestyle.

DIY security systems generally come equipped with user-friendly interfaces and smartphone compatibility, enabling you to monitor your home from anywhere at any time. For the tech enthusiasts among us, the idea of customizing a system with motion sensors, door/window alarms, and security cameras can be enticing. These systems often allow you to pick and choose components based on your home’s unique layout, which can be both empowering and economical.

However, take a moment to consider your comfort level with technology and installation. While many systems boast easy setup processes, not everyone may feel confident in handling wires, configurations, and software downloads. If you’re someone who prefers a hands-off approach, a professionally installed system might be a more suitable option. Additionally, remember that with DIY systems, you are often responsible for monitoring and responding to alerts, which can be a significant commitment.

Another important factor to consider is the level of security you require. For instance, if you live in a neighborhood with a history of break-ins or have valuable possessions that need extra protection, a professional system may offer the comprehensive coverage and rapid response capabilities that DIY solutions typically lack. On the other hand, if your home is in a low-risk area and you’re seeking basic protection, a DIY system may be just what you need.

Ultimately, the right choice hinges on your specific situation. Weigh the pros and cons, assess your comfort with technology, and determine the level of security you desire. DIY home security solutions can be a fantastic way to ensure peace of mind, but only if they fit seamlessly into your lifestyle and security needs.

10. Key Features to Look for in a Home Security System

When it comes to selecting the right home security system for your needs, understanding the key features available can make all the difference in ensuring your home is well-protected. Here are some essential elements to consider:

1. **Monitoring Options**: One of the fundamental aspects of any security system is how it is monitored. Look for options that offer professional monitoring, which provides 24/7 surveillance by trained experts who can respond quickly in case of an emergency. Additionally, consider self-monitoring capabilities that allow you to receive alerts on your smartphone, giving you control over your home’s security even when you’re away.

2. **Smart Home Integration**: In today’s digital age, the ability to integrate your security system with other smart devices is crucial. Look for systems that are compatible with smart home technology, allowing you to control lights, locks, and cameras from a single app. This seamless integration not only enhances convenience but also enables you to create automated routines for added security.

3. **Camera Quality and Features**: High-definition cameras are a must-have for any home security system. Look for systems that offer 1080p resolution or higher, with features such as night vision, motion detection, and two-way audio. These capabilities allow you to monitor your property in real-time, communicate with visitors, and receive alerts when unusual activity is detected.

4. **Alarm System**: An effective alarm system serves as a deterrent to potential intruders. When evaluating your options, ensure the system includes a robust array of sensors—door/window sensors, glass break sensors, and motion detectors. The alarm should also be loud enough to alert you and your neighbors in the event of a break-in, providing an additional layer of protection.

5. **Ease of Installation and Use**: The best security systems are those that are user-friendly and easy to install. Many modern systems offer DIY installation options with clear instructions and online support. Additionally, intuitive mobile apps make it simple for you to monitor your home and adjust settings on the go.

6. **Battery Backup**: Power outages can leave your home vulnerable, so it’s important to choose a security system with battery backup. This feature ensures that your system remains operational during electrical failures, providing peace of mind even in unexpected situations.

7. **Customer Support and Warranty**: Finally, consider the level of customer support offered by the security provider. Reliable customer service can be invaluable when you encounter issues or have questions about your system. Additionally, look for warranties that cover both equipment and service, ensuring that you are protected against defects and unexpected problems.

By keeping these key features in mind, you can choose a home security system that not only meets your specific needs but also provides comprehensive protection for your home and loved ones. In a world where safety is paramount, investing time in selecting the right security features can safeguard your peace of mind for years to come.

11. Integrating Home Security with Smart Home Devices

Integrating home security with smart home devices is not just a trend; it’s a strategic move that enhances both convenience and safety. As technology continues to advance, homeowners have the unique opportunity to create a seamless and interconnected environment that fortifies their security measures while simplifying their daily routines.

Imagine arriving home after a long day, where your smart doorbell greets you with a video feed of who has been at your door, while your smart locks automatically disengage as you approach. This level of integration ensures that you are always aware of who is entering your space, bolstering your security system and providing peace of mind.

Smart security cameras, equipped with motion detection and real-time alerts, can be synchronized with your home automation system. This means you can monitor your property from anywhere through your smartphone, receiving instant notifications if any unusual activity is detected. Some advanced systems even allow for two-way audio communication, enabling you to interact with visitors or deter potential intruders directly from your device.

Moreover, integrating your security system with smart lighting can further enhance your home’s security. For example, you can program your outdoor lights to turn on automatically when motion is detected or schedule them to illuminate at specific times, creating the illusion that someone is home even when you’re away. This not only deters potential burglars but also adds an extra layer of safety as you navigate your home in the dark.

Additionally, voice-controlled assistants like Amazon Alexa or Google Assistant can be a valuable part of your smart home security setup. With simple voice commands, you can monitor your security cameras, lock doors, or turn on alarms without lifting a finger. This hands-free approach ensures that you can manage your home security effortlessly, whether you’re entertaining guests or simply relaxing on the couch.

As you explore various home security options, consider how integrating smart devices can create a cohesive and responsive system that adapts to your lifestyle. By leveraging these technologies, you can not only protect your home but also enhance your overall living experience, making home security an integral part of your smart home ecosystem.

12. Tips for Choosing the Right Home Security System

Choosing the right home security system can feel overwhelming, given the multitude of options available today. However, a well-informed decision can provide peace of mind and ensure your home is adequately protected. Here are some essential tips to guide you through the selection process:

1. **Assess Your Security Needs**: Start by evaluating your specific security requirements. Consider factors such as the size of your home, the number of entry points, and your neighborhood’s crime rate. A larger home may necessitate a comprehensive system with multiple cameras and sensors, while a smaller apartment might only need a basic setup.

2. **Research Different Types of Systems**: Familiarize yourself with various security systems available on the market. Wired systems, wireless systems, and smart home integrations each have their advantages and disadvantages. Wireless systems are generally easier to install and expand, while wired systems may offer more reliability. Smart home systems can provide added convenience but might require a more substantial initial investment.

3. **Look for Scalability**: When investing in a home security system, consider whether it can grow with your needs. A scalable system allows you to add new components, such as cameras or sensors, as your security requirements change or as your home expands.

4. **Evaluate Monitoring Options**: Decide whether you prefer a self-monitored system or one that comes with professional monitoring services. Professional monitoring can provide an added layer of security, as trained personnel will respond to alerts and notify authorities if necessary. On the other hand, self-monitored systems can save you money but require you to be vigilant about monitoring your home.

5. **Consider Integration with Other Smart Devices**: If you already have smart home devices, look for a security system that can seamlessly integrate with them. This could include smart locks, doorbell cameras, or smart lighting, allowing you to control everything from a single app and enhancing your overall home automation experience.

6. **Read Customer Reviews**: Before making a final decision, take the time to read customer reviews and testimonials. This can give you insights into the performance and reliability of different systems, helping you avoid common pitfalls or poorly rated products.

7. **Compare Costs**: Finally, establish a budget and compare the costs of different systems. Keep in mind that the initial price isn’t the only factor—consider ongoing costs such as subscription fees for monitoring services or replacement parts for maintenance.

By following these tips, you can make an informed choice when selecting a home security system that best fits your lifestyle and ensures the safety of your home and loved ones. Remember, investing in the right security measures today can save you from potential threats tomorrow.

13. Common Home Security Myths Debunked

When it comes to home security, misinformation can lead to poor decisions and increased vulnerability. In this section, we’ll explore some of the most common myths surrounding home security systems and debunk them, providing clarity that can help you make informed choices to protect your home.

**Myth 1: Home Security Systems Are Only for the Wealthy**
One of the biggest misconceptions is that security systems are a luxury reserved for affluent homeowners. In reality, a vast range of affordable options exists today, making security accessible to everyone. With DIY systems and smart technology, protecting your home can fit any budget.

**Myth 2: Security Systems Are Complicated to Use**
Many people believe that home security systems are too complex to operate, which deters them from investing in one. However, modern security solutions are designed with user-friendliness in mind. From intuitive mobile apps to easy setup processes, today’s systems are more straightforward than ever, allowing homeowners to monitor their properties with ease.

**Myth 3: Dogs Are Enough to Deter Burglars**
While having a dog can provide a sense of security, relying solely on a pet for protection is a myth. Many burglars are undeterred by barking dogs, especially if they know the home is left unoccupied. A comprehensive security system that includes alarms, cameras, and motion detectors is crucial for effective protection.

**Myth 4: Security Cameras Are Only for the Outside**
Another common myth is that security cameras are only necessary for outdoor surveillance. In truth, interior cameras can be just as important, especially to monitor vulnerable areas like entryways or hallways. They can help deter intruders and provide valuable evidence in case of a breach.

**Myth 5: Alarms Are Enough on Their Own**
Many homeowners believe that having a loud alarm is sufficient to protect their property. While alarms are a vital component of a security system, they work best when paired with monitoring services. Professional monitoring ensures rapid response to alarms, increasing the likelihood of preventing theft or damage.

By debunking these myths, homeowners can better understand the importance of a comprehensive security strategy. Empower yourself with accurate information and take the necessary steps to safeguard your home effectively!

14. Maintenance and Upgrades for Your Home Security System

When it comes to home security systems, the initial installation is just the beginning of your safety journey. Regular maintenance and timely upgrades are crucial to ensuring that your system continues to function optimally and effectively protects your home. Think of your security system as a living entity that requires ongoing care and attention.

First and foremost, routine maintenance checks are essential. Just like any technology, security systems can experience wear and tear over time. It’s important to inspect all components—cameras, sensors, alarms, and locks—to make sure they are operational and free from obstructions. For instance, outdoor cameras should be cleaned regularly to prevent dirt and debris from obstructing their view, while sensors must be tested to ensure they are sensitive enough to detect potential intruders.

Another key aspect of maintaining your home security system is software updates. Many modern security solutions come equipped with smart technology that relies on software to function effectively. Keeping this software updated not only enhances performance but also eliminates vulnerabilities that could be exploited by cybercriminals. Take the time to check for updates from your security provider and implement them promptly.

Upgrades are also an important consideration in advancing your security measures. As technology evolves, new features and capabilities are introduced that can significantly enhance your home’s safety. For example, you might consider upgrading to a system that integrates smart home technology, allowing you to control lights, locks, and cameras all from a single app. Additionally, the integration of artificial intelligence can improve your system’s ability to distinguish between regular activity and potential threats, reducing false alarms and increasing your overall peace of mind.

Lastly, don’t forget to reassess your security needs periodically. As your lifestyle changes—whether due to a new family member, a move, or even a change in neighborhood dynamics—so too should your security strategy. Regularly revisiting your home security plan ensures that it remains effective and relevant, keeping you one step ahead of potential threats.

By prioritizing maintenance and proactive upgrades for your home security system, you not only extend its lifespan but also bolster your peace of mind, knowing that your home is continually protected against evolving risks.

15. Conclusion: Finding the Best Security Solution for Your Home

In conclusion, selecting the best security solution for your home is a nuanced process that requires careful consideration of various factors, including your lifestyle, budget, and specific security needs. As we’ve explored throughout this guide, there are a multitude of options available, from traditional alarm systems to sophisticated smart home integrations. Each type of system comes with its own set of features, benefits, and potential drawbacks, making it essential to assess what aligns best with your personal circumstances.

Before making a final decision, take the time to evaluate the layout of your home, identify vulnerable areas, and consider the level of monitoring you desire. For instance, a simple DIY system may suffice for a small apartment, while a larger home might benefit from a professionally installed and monitored solution. Additionally, don’t overlook the importance of user-friendly technology—after all, the best security system is one that you can easily manage and maintain.

As you weigh your options, remember to read reviews, seek recommendations, and, if possible, consult with security professionals who can provide insights tailored to your unique situation. Investing in the right home security system not only protects your property and loved ones but also provides peace of mind, allowing you to enjoy your home fully.

Ultimately, the goal is to create a secure environment that meets your needs while fitting seamlessly into your lifestyle. By taking the time to research and reflect on your choices, you’ll be well-equipped to make an informed decision and find the perfect security solution to safeguard your home for years to come. Your safety is paramount—choose wisely and take the first step toward a more secure future.

As we conclude our exploration of home security systems, we hope this comprehensive guide has illuminated the diverse options available to protect your home and loved ones. From traditional alarm systems to advanced smart home integrations, understanding the various types of security measures empowers you to make informed decisions tailored to your unique needs. Remember, investing in a reliable security system is not just about safeguarding your property; it’s about creating peace of mind for you and your family. As you embark on this important journey, take the time to evaluate your priorities, budget, and lifestyle to find the perfect solution. Your home deserves the best protection, and we’re excited for you to take the next steps toward a safer living environment. Stay vigilant, stay safe, and don’t hesitate to reach out with any questions or share your experiences in the comments below!

How to install a new dishwasher?

Bringing home a new dishwasher can be an exciting upgrade for your kitchen, promising to save you time and effort on the never-ending chore of dishwashing.

However, the thought of installation can often feel daunting, leaving many to hire professionals or postpone the process altogether. Fear not! With the right guidance and a little bit of confidence, you can tackle this task like a pro. In this step-by-step guide, we’ll walk you through everything you need to know to install your new dishwasher seamlessly. From gathering the necessary tools and preparing your kitchen to connecting water lines and ensuring proper drainage, you’ll learn how to transform this potentially overwhelming project into a manageable and rewarding experience. Get ready to roll up your sleeves and dive into the world of DIY home improvement, all while elevating the convenience of your kitchen!

1. Introduction: Why Installing Your Dishwasher Yourself is a Great Idea

How to install a new dishwasher?
Credit : whatcanu.com

Installing your dishwasher yourself can be a rewarding and cost-effective project that not only saves you money on professional installation fees but also gives you a sense of accomplishment. Imagine the satisfaction of standing back to admire your handiwork, knowing you’ve added convenience to your kitchen without relying on outside help.

In today’s DIY culture, many homeowners are discovering that tackling household projects can be both easy and fulfilling. Installing a dishwasher is one of those tasks that, with the right guidance and tools, can be completed within a single afternoon. Not only does this allow you to take control of your kitchen renovation, but it also offers an opportunity to learn valuable skills that can be applied to future home improvement endeavors.

Moreover, undertaking this project yourself provides a unique perspective on your appliance, allowing you to familiarize yourself with its components and maintenance needs. You’ll gain a deeper understanding of how your dishwasher operates, empowering you to troubleshoot minor issues down the line. Plus, the time you invest in this task pays off every time you load and run your new appliance, knowing you did it all yourself.

In this step-by-step guide, we’ll walk you through everything you need to know to install your new dishwasher like a pro. From gathering the necessary tools to making the final connections, you’ll find that with a little preparation and confidence, this project is not only doable but truly enjoyable! So roll up your sleeves, and let’s get started on transforming your kitchen with a brand-new dishwasher!

2. Tools and Materials You’ll Need

Before diving into the installation process, it’s crucial to gather all the necessary tools and materials to ensure a smooth and efficient setup. Having everything ready at hand not only saves time but also minimizes frustrations mid-installation. Here’s a comprehensive list of what you’ll need:

### Tools:
1. **Screwdriver Set**: A mix of Phillips and flat-head screwdrivers will come in handy for various screws and fittings.
2. **Adjustable Wrench**: This versatile tool is essential for tightening and loosening plumbing connections.
3. **Level**: To ensure your dishwasher is perfectly aligned, a level is indispensable. This will help prevent excess noise and ensure proper function.
4. **Pliers**: A pair of pliers will assist in gripping and manipulating small parts and hoses.
5. **Drill**: If your installation requires new holes for mounting brackets, a drill will make this task easier.
6. **Tape Measure**: Accurate measurements are key to fitting your new appliance snugly into its designated space.
7. **Bucket or Towels**: Water spills can happen, especially when disconnecting the old unit, so keep a bucket or towels handy for quick clean-ups.

### Materials:
1. **Dishwasher Installation Kit**: Most new dishwashers come with an installation kit that includes essential components like hoses and electrical connectors. Check your model to ensure you have everything required.
2. **Water Supply Line**: If the existing line is old or damaged, you may need to purchase a new one.
3. **Drain Hose**: Ensure your drain hose is in good condition; if not, replacing it will prevent leaks and clogs.
4. **Electrical Wiring**: Depending on your setup, you might need specific wiring or a power cord to connect your dishwasher to the power supply.
5. **Mounting Brackets**: These may not come with the dishwasher but are necessary to secure your appliance under the countertop.

Having these tools and materials ready before you begin will not only streamline the installation process but also equip you with everything you need to tackle any unexpected challenges. With your workspace organized and all your equipment at your fingertips, you’ll be well on your way to installing your new dishwasher with confidence and ease!

3. Safety First: Preparing Your Kitchen for Installation

How to install a new dishwasher?
Credit : whatcanu.com

Before diving into the installation process, ensuring your kitchen is prepared for the task at hand is crucial—safety first! A well-prepared workspace not only streamlines the installation but also minimizes the risk of accidents. start by clearing the area around your old dishwasher and the path to your kitchen sink. Remove any clutter, such as pots, pans, or kitchen gadgets that may obstruct your movement. This creates a safe space for you to work and prevents any unnecessary damage to your belongings.

Next, turn off the power supply to the dishwasher at the circuit breaker. It’s essential to avoid any electrical hazards while working on the appliance. If your dishwasher has a water shut-off valve, locate it and turn it off as well to prevent leaks during the installation process. Remember to test the water flow by turning on the tap to ensure that the line is completely shut off.

Once your workspace is clear and safe, consider laying down a protective covering, such as a drop cloth or old towels, on the floor to catch any spills or scratches that may occur. This added layer of protection will preserve your flooring and make cleanup easier once the job is done.

Lastly, gather all the necessary tools and materials you’ll need for installation—such as a wrench, screwdriver, and level—within arm’s reach. Having everything organized beforehand not only saves time but also reduces the risk of accidents caused by searching for tools in the middle of the project. By taking these safety precautions and preparing your kitchen, you’ll set the stage for a smooth and successful dishwasher installation.

4. Understanding Your Dishwasher: Key Components Explained

Before diving into the installation process, it’s crucial to familiarize yourself with the key components of your new dishwasher. Understanding how each part works will not only make the installation smoother but will also equip you with the knowledge to troubleshoot any issues in the future.

**1. **Control Panel:** This is where the magic begins. The control panel allows you to set wash cycles, adjust temperature settings, and activate special features such as delay start or sanitize options. It can be a simple console or a digital touchscreen, but knowing how to navigate it is essential for optimal performance.

**2. **Water Inlet Valve:** This vital component connects your dishwasher to the water supply. When you start a wash cycle, the water inlet valve opens to let water flow into the appliance. It’s important to ensure that this valve is securely connected and functioning properly to avoid leaks.

**3. **Spray Arms:** The spray arms are responsible for distributing water throughout the dishwasher. Located at the bottom and sometimes the middle or top of the unit, these arms rotate during the wash cycle to ensure every dish is thoroughly cleaned. Double-check that they are free of obstructions and are able to spin freely.

**4. **Filter System:** A clean filter is key to maintaining the efficiency of your dishwasher. This component traps food particles and debris to prevent them from clinging to your clean dishes. Your dishwasher might have multiple filters, so familiarize yourself with how to remove and clean them regularly.

**5. **Draining System:** After washing, your dishwasher needs to expel the dirty water. The draining system, which includes the drain hose and pump, is crucial in this process. Make sure the drain hose is properly positioned to avoid any kinks or clogs, which can lead to water backup.

**6. **Racks and Baskets:** Understanding the layout of your dishwasher is vital for efficient loading. Most units come with adjustable racks and specialized compartments for silverware, pots, and pans. Properly utilizing these features will maximize space and ensure thorough cleaning.

By taking the time to learn about these key components, you’ll not only simplify the installation process but also set yourself up for years of hassle-free dishwashing. With this knowledge in hand, you’ll be ready to roll up your sleeves and start your dishwasher installation like a pro!

5. Step 1: Removing the Old Dishwasher

How to install a new dishwasher?
Credit : whatcanu.com

Before you can revel in the convenience of your brand-new dishwasher, you’ll need to bid farewell to the old one. Removing the old dishwasher may seem daunting, but with a little preparation and the right tools, you can tackle this step like a pro.

**Safety First**: Start by ensuring your kitchen is ready for the task at hand. Disconnect the power supply by switching off the circuit breaker dedicated to your dishwasher. This crucial step prevents any electrical mishaps as you work. Next, turn off the water supply to the dishwasher—usually located under the sink—by twisting the valve clockwise.

**Gather Your Tools**: Equip yourself with a few essential tools: a screwdriver (both Phillips and flathead), pliers, a towel or sponge, and a bucket. These will help you navigate the nuts and bolts of this process seamlessly.

**Disconnecting the Dishwasher**: Begin by removing the kick plate or toe panel at the bottom front of the dishwasher. This will expose the mounting screws. Use your screwdriver to loosen and remove these screws, which are typically found on either side of the appliance. Once loose, carefully slide the dishwasher out from its cabinet space—a little pull may be necessary, but be cautious not to damage surrounding cabinetry.

**Plumbing and Electrical Connections**: With the dishwasher now partially freed, you’ll need to disconnect the water supply line. Place your bucket underneath the connection to catch any residual water. Use your pliers to loosen the nuts on the supply line; once removed, be prepared for a small trickle of water. After this, locate the drain hose, which is often secured with a clamp. Loosen the clamp and slide the hose off, ensuring you have that towel handy for any spills.

Finally, check for any electrical connections that may need to be detached. If you see a power cord, simply unplug it. If wired directly, carefully unscrew the wire nuts and separate the wires—just make sure you remember their connections for when you install the new unit.

**Final Steps**: Once everything is disconnected, gently pull the dishwasher out of its space and make sure to clear any debris from the area. You’re now ready to move on to the next exciting step—installing your new dishwasher! This initial phase may seem labor-intensive, but with careful execution, you’ll be well on your way to enjoying the benefits of modern dishwashing technology in no time.

6. Step 2: Preparing the Installation Area

Before diving into the actual installation of your new dishwasher, it’s essential to prepare the installation area properly. A well-prepared space not only simplifies the process but also ensures that your dishwasher operates efficiently for years to come.

Start by clearing out the area around your existing dishwasher. Remove any dishes, pots, or clutter that may obstruct your progress. If you’re replacing an old unit, carefully disconnect it and move it out of the way, taking care not to damage any plumbing or electrical connections. This is also a great time to inspect the area for any signs of wear or damage, such as leaks or mold, which might need your attention before you install the new appliance.

Next, ensure that the space is clean and free of debris. Sweep up any dust or dirt, and wipe down surfaces to create a welcoming environment for your new dishwasher. Check the floor for any unevenness; if needed, use shims to level the dishwasher once it’s in place.

Don’t forget to gather your tools and materials before you start. You’ll typically need a wrench, screwdriver, pliers, and possibly a level. Having everything within reach will save you time and prevent interruptions. Additionally, review the manufacturer’s installation instructions to familiarize yourself with any specific requirements or recommendations unique to your model.

Lastly, assess your plumbing and electrical connections. Make sure the water supply valve is easily accessible and the electrical outlet is in good condition. If you’re unsure about the safety or functionality of these connections, it might be wise to consult a professional before proceeding.

By preparing the installation area thoughtfully, you’ll set the stage for a smooth and successful dishwasher installation, making you feel like a pro in no time!

7. Step 3: Connecting the Water Supply

How to install a new dishwasher?
Credit : whatcanu.com

Connecting the water supply to your new dishwasher is a crucial step that ensures your appliance has the necessary resources to function effectively. Before you dive into this process, make sure you have all the required tools at hand — a wrench or adjustable pliers, a bucket to catch any spills, and a towel for quick cleanups.

Begin by locating the water supply line, which is usually found beneath your kitchen sink. If it’s not already in place, you’ll need to install a shut-off valve specifically for the dishwasher. This valve allows you to easily control water flow and is an essential safety feature. Once the valve is securely installed, it’s time to connect the water supply line to your dishwasher.

Carefully position the dishwasher so that the water supply line can reach it without any tension or bends. Next, take the plastic or copper supply line and attach it to the dishwasher’s inlet valve, which is typically located at the bottom left corner of the unit. Ensure that the connection is tight but avoid over-tightening, as this can damage the fittings.

As you make this connection, be mindful of the placement of the rubber washer, which helps create a watertight seal. If the washer is missing or damaged, it can lead to leaks, so double-check that it’s in good condition before securing the connection.

Once everything is connected, turn the shut-off valve on and check for any leaks. It’s a good idea to have your bucket nearby to catch any water that might spill during this process. If you notice any dripping or leaking, you may need to adjust the connections or replace the washer. Taking the time to ensure a secure and leak-free connection will save you from potential water damage and costly repairs down the line.

With the water supply successfully connected, you’re one step closer to enjoying the convenience of your new dishwasher!

8. Step 4: Installing the Drain Hose

Once you’ve secured the dishwasher in its designated space and connected the water supply, it’s time to tackle the crucial task of installing the drain hose. This step is vital for ensuring that dirty water is properly expelled during the wash cycle, preventing any mess or potential damage.

Start by locating the drain hose that came with your dishwasher. It is usually a flexible plastic tube designed to fit snugly into the drain connection. Your first task is to determine the ideal attachment point. Typically, this will either be a dedicated drain outlet under your sink or a standpipe that leads to your household plumbing system.

Before you make any connections, ensure that the drain hose is free of kinks or obstructions. If it appears bent or twisted, carefully straighten it out to allow for smooth water flow. Next, slide the end of the hose onto the drain connection, ensuring that it fits securely. Use a hose clamp, which is often included with your dishwasher, to tighten the connection. This is a critical step as it prevents leaks that could lead to water damage.

If your setup involves a high loop or air gap, make sure the hose is elevated accordingly. This means positioning the hose so that it rises to a higher point before it connects to the drain. This configuration helps prevent wastewater from siphoning back into the dishwasher, maintaining the hygiene of your kitchen.

Once everything is connected, double-check your work. Ensure that the hose is not pinched and that the connections are tight. Now, it’s time to test your installation. With the dishwasher still pulled out slightly from the wall, run a short cycle and keep an eye on the drain hose for any leaks. If you spot any issues, it’s better to address them now rather than waiting until after the dishwasher is fully installed.

With the drain hose securely in place and functioning as it should, you’re one step closer to enjoying your new appliance! Next up, you’ll finalize your installation by securing the dishwasher to the countertop and checking all connections for a seamless setup.

9. Step 5: Electrical Connections: Hardwired vs. Plugged In

When it comes to connecting your new dishwasher, the choice between hardwired and plugged-in installations can significantly impact both functionality and convenience. Understanding the distinctions between these two methods is crucial for a seamless setup and safety compliance.

**Hardwired Connections**
If your dishwasher is hardwired, it will be directly connected to your home’s electrical system. This method typically involves using a junction box and requires you to connect the dishwasher’s wiring directly to your home’s wiring. Hardwiring provides a clean, permanent solution, eliminating the need for visible outlets and reducing the risk of someone accidentally unplugging the unit. However, this method can be more complex and may require professional assistance, especially if you’re not familiar with electrical work. Always ensure to turn off the power at the circuit breaker before attempting any connections, and double-check that your dishwasher’s voltage matches your home’s electrical specifications.

**Plugged-In Connections**
Conversely, if your dishwasher is designed to be plugged in, it comes with a power cord that connects directly to a standard electrical outlet. This option is often more user-friendly and allows for easier removal or replacement of the unit in the future. A plugged-in dishwasher can be beneficial for those who prefer flexibility, as it offers the option to simply unplug the appliance if needed. However, it’s crucial to ensure that the outlet is properly grounded and that it can handle the dishwasher’s power requirements.

Regardless of the connection type you choose, remember to follow the manufacturer’s instructions carefully. Take the time to secure all connections and check for any potential electrical issues before turning the power back on. Doing so will not only ensure the safety and efficiency of your appliance but also give you peace of mind as you enjoy the convenience of your new dishwasher!

10. Step 6: Positioning and Leveling the Dishwasher

Positioning and leveling your new dishwasher is a crucial step that ensures optimal performance and a seamless integration into your kitchen. Begin by carefully sliding the dishwasher into the designated space, making sure to connect the water supply and drain lines without pinching or damaging them. Gently push the unit back until it is flush with the cabinetry, ensuring that there is enough clearance for the door to open fully.

Once the dishwasher is in place, it’s time to check its level. Using a carpenter’s level, place it on the top edge of the appliance. Ideally, the bubble should be centered between the lines. If the dishwasher isn’t level, adjust the feet located at the bottom of the unit. Most dishwashers come with adjustable leveling legs that can be twisted to raise or lower the appliance as needed.

Take your time with leveling; an uneven dishwasher can lead to improper drainage, which might result in leaks or poor cleaning performance. After adjusting, double-check the level from both side to side and front to back. Once you’re satisfied that the dishwasher is perfectly level, secure it to the cabinetry by using screws provided in the installation kit. This will help stabilize the unit and prevent any movement during use, ensuring a long-lasting and trouble-free operation.

With the dishwasher properly positioned and leveled, you’re one step closer to enjoying the convenience of your new appliance!

11. Step 7: Securing the Dishwasher in Place

Once your dishwasher is properly connected to the water supply and drainage system, it’s time to secure it in place. This step is crucial to ensure your appliance functions efficiently and remains stable during use.

Begin by locating the mounting brackets that usually come with your dishwasher. These brackets are typically found on the top edges of the appliance and are designed to anchor the dishwasher to the underside of your countertop. Using a level, make sure your dishwasher is perfectly aligned, so it sits flush with the surrounding cabinetry. An uneven installation can lead to functional issues and may even result in water leaks over time.

With the dishwasher positioned correctly, take your drill and carefully screw the mounting brackets into the countertop. If your countertop is made of a softer material like laminate, be cautious not to overtighten, as this can cause damage. For sturdier surfaces such as granite or quartz, you might need to use a masonry bit to pre-drill holes before inserting screws.

Next, locate the leveling legs at the bottom of the dishwasher. Adjust these legs as necessary to ensure the dishwasher is level from front to back and side to side. You can do this by turning the legs clockwise to raise them or counterclockwise to lower them. A level dishwasher not only enhances performance but also helps prevent leaks and ensures that the door seals properly.

Finally, double-check that there are no gaps between the dishwasher and the cabinetry. This will help prevent any potential vibrations during operation, which could lead to wear and tear over time. Once everything is secured and aligned, you can step back and admire your handiwork—you’re one step closer to enjoying the convenience of your new dishwasher!

12. Step 8: Testing for Leaks and Proper Function

After your new dishwasher is securely installed and connected, it’s time for the crucial step of testing for leaks and ensuring everything functions as it should. This phase is not just about double-checking; it’s about safeguarding your home from potential water damage and ensuring your appliance operates efficiently.

Start by turning on the water supply and checking for any immediate leaks around the connections. Look closely at the water inlet hose where it connects to the dishwasher, as well as the drain hose and any other joints. If you notice any dripping or pooling water, turn off the supply and tighten the connections, or use additional plumbing tape if necessary.

Next, run a short cycle on your dishwasher without any dishes inside. This initial run serves multiple purposes: it allows you to observe the appliance in action, check for leaks during operation, and assess the sound levels. Listen for any unusual noises that could indicate a problem, such as grinding or excessive rattling.

While the cycle runs, keep an eye on the floor beneath the dishwasher. A dry floor is a good sign that your connections are secure. If you do spot any water, shut off the dishwasher immediately and investigate further. It’s better to catch issues early on than to risk a larger problem down the line.

Once the cycle is complete, open the dishwasher and inspect the interior. Ensure that the spray arms are rotating freely and that water has reached every corner. Check for any leftover detergent, which might indicate that the dishwasher isn’t draining properly.

Finally, take a moment to familiarize yourself with the control panel and features. Run through the settings and options to ensure everything is functioning correctly. If all checks out, congratulations! You’ve successfully installed your dishwasher like a pro, and you’re now ready to enjoy the convenience of clean dishes at the touch of a button.

13. Step 9: Final Touches: Adjusting the Dishwasher Door

Once your dishwasher is securely installed and connected, it’s time to add the finishing touches by adjusting the dishwasher door. This step is crucial not only for aesthetics but also for ensuring optimal functionality and longevity of your appliance. A properly aligned door will close seamlessly, preventing leaks and ensuring efficient operation.

Start by checking the alignment of the door. Open and close the dishwasher a few times to see if it operates smoothly. If you notice any resistance or if the door doesn’t close evenly, you may need to make some adjustments. Most dishwashers come with adjustable hinges or leveling legs that allow you to fine-tune the positioning.

To adjust the door, first, locate the hinge adjustment screws, which are typically found on the inside of the door. Using a screwdriver, make slight turns on the screws to raise or lower the door as needed. Aim for a snug fit when the door is closed—there should be no gaps along the edges, but it shouldn’t be so tight that it’s difficult to operate.

Next, check the top of the door for proper spacing. The dishwasher door should align flush with the surrounding cabinetry for a clean, polished look. If necessary, adjust the leveling legs at the bottom of the dishwasher to help achieve this alignment. Turn them clockwise to raise the appliance or counterclockwise to lower it until you reach the desired height.

Finally, test the door one last time. Make sure it opens and closes effortlessly, and that there are no obstructions in the way. If everything looks good, you’ve successfully completed the installation process!

With the door properly adjusted, you can now enjoy the peace of mind that comes with knowing your new dishwasher is perfectly positioned and ready to tackle your dirty dishes. Congratulations on your accomplishment—now it’s time to load it up and experience the convenience of your new appliance!

14. Troubleshooting Common Installation Issues

When it comes to installing your new dishwasher, encountering issues can feel daunting, but fear not! Troubleshooting common installation problems can often be a straightforward process, and with a little patience and persistence, you can resolve them like a pro.

First, let’s talk about water supply issues. If your dishwasher isn’t filling up, check to ensure that the water supply valve is fully opened. Sometimes, it may appear open but isn’t allowing water to flow due to debris or mineral buildup. A quick inspection of the hose connections can also reveal whether there are kinks or blockages impeding water flow.

Next, look out for drainage problems. If your dishwasher is not draining properly, check the drain hose for any clogs or bends. Ensure that it’s installed at the right height—ideally, the top of the hose should reach the underside of your countertop to prevent backflow. If you notice standing water at the bottom of the tub, inspect the filter and drain area for food particles or debris that may be obstructing proper drainage.

Another common issue is noise during operation. If your dishwasher sounds louder than expected, it could be due to improper leveling. Make sure that all four feet are adjusted evenly and that the appliance is stable to minimize vibrations. Additionally, ensure that items inside the dishwasher are arranged properly, as loose cutlery or dishes can rattle against each other and create unwanted noise.

Lastly, keep an eye out for leaks. If you notice water pooling around the base of the dishwasher, double-check all connections, including the water supply line and drain hose. Tighten any loose fittings and inspect the door seal for wear and tear. If the seal is compromised, replacing it might be necessary to prevent future leaks.

By systematically addressing these common installation issues, you can not only ensure that your dishwasher operates effectively but also gain confidence in your DIY skills. Remember, every problem has a solution, and with each challenge you conquer, you’ll be one step closer to mastering appliance installation!

15. Conclusion: Enjoying Your New Dishwasher and Maintenance Tips

Congratulations! You’ve successfully installed your new dishwasher, and now it’s time to enjoy the convenience and efficiency it brings to your kitchen. No more endless hours spent scrubbing pots and pans by hand; instead, you can relax while your new appliance takes care of the dirty dishes. As you bask in the ease of this modern marvel, it’s essential to remember that proper maintenance will ensure your dishwasher remains in top-notch condition for years to come.

To keep your dishwasher running smoothly, make it a habit to regularly clean the filter, as food particles can accumulate and hinder performance. Simply remove the filter, rinse it under warm water, and scrub away any stubborn debris. This small step can significantly enhance the efficiency of your machine.

Additionally, consider running a maintenance cycle every few months. You can achieve this by placing a cup of vinegar or a dishwasher cleaner on the top rack and running a hot water cycle. This process helps eliminate grime, odors, and buildup, leaving your dishwasher fresh and clean.

Don’t forget to check the spray arms, too! Ensure they are free of obstructions and can rotate freely to distribute water effectively. If you notice any debris stuck in the nozzles, use a toothpick to clear it out gently.

Lastly, remember to keep the door seals clean and intact. Wipe them down with a damp cloth regularly to prevent mold and mildew buildup, ensuring a tight seal during operation.

By following these simple maintenance tips, you can extend the lifespan of your dishwasher and continue to enjoy its benefits. So, sit back, relax, and let your new kitchen companion handle the dirty work—after all, you’ve earned it!

In conclusion, installing your new dishwasher doesn’t have to be an intimidating task reserved for the professionals. With the right tools, a little patience, and the step-by-step guidance provided in this article, you can confidently tackle this home improvement project and achieve professional-looking results. Remember to take your time during each stage, from preparing the space to connecting the plumbing and electrical components, ensuring that everything is secure and properly aligned. Soon enough, you’ll be enjoying the convenience of your new appliance, while also taking pride in the fact that you completed the installation yourself. So roll up your sleeves, gather your tools, and get ready to transform your kitchen experience—happy dishwashing!

How to fix a clogged drain?

Dealing with a clogged drain can be a frustrating ordeal that disrupts your daily routine and causes unnecessary stress.

Whether it’s the slow trickle of water in your sink or a complete blockage in your shower, these pesky plumbing issues can quickly escalate if not addressed promptly. Fortunately, you don’t always have to call in a professional to resolve the problem. With a little know-how and some handy household items, you can tackle minor clogs right from the comfort of your home. In this blog post, we’ll explore ten effective methods to unclog your drain, ranging from simple DIY techniques to natural remedies that are safe for your plumbing. Say goodbye to the hassle of standing water and hello to smooth-flowing drains as we guide you through these practical solutions that every homeowner should have in their toolkit!

1. Understanding the Common Causes of Clogged Drains

How to fix a clogged drain?
Credit : whatcanu.com

Understanding the common causes of clogged drains is essential for addressing the issue effectively and preventing future blockages. While it may seem like an inconvenience that comes out of nowhere, clogged drains often result from a series of predictable culprits that can build up over time.

One of the most common offenders is hair. Whether it’s long strands from a shower or tiny strands from a bathroom sink, hair can easily accumulate in your pipes, creating a tangled mess that restricts water flow. In kitchens, food debris is a frequent culprit. Small bits of grease, oil, and leftover food particles can combine to create a sticky sludge that clings to the insides of your pipes, gradually narrowing the passageway until water can no longer flow freely.

Another hidden menace is soap scum, particularly in bathrooms. Traditional soaps can leave behind residues that collect over time, especially when mixed with minerals found in hard water. Similarly, mineral buildup from hard water can create scale deposits, further constricting your pipes.

Roots from nearby trees are another common cause of drain issues, as they can invade your home’s plumbing system in search of moisture and nutrients. Once roots find their way into the pipes, they can grow and cause significant blockages.

Lastly, foreign objects—like cotton swabs, dental floss, and even toys—often make their way into drains, leading to unexpected clogs. Understanding these common causes is the first step in taking proactive measures to keep your drains clear and flowing smoothly. By being aware of what can lead to blockage, you can implement preventive practices and be better prepared to tackle any issues that arise.

2. Method 1: Boiling Water to the Rescue

When faced with a sluggish drain, the simplest solution may often be the most effective: boiling water. This time-honored method is not only easy but also requires no special tools or expensive products. Here’s how it works.

Start by bringing a large pot of water to a rolling boil. The ideal temperature is just below boiling point—around 212°F (100°C)—which will help dissolve the grease and grime that often contribute to drain clogs. Carefully pour the boiling water directly into the drain in a slow, steady stream. This allows the heat to penetrate deeper into the blockage, breaking down any stubborn buildups of soap scum, hair, or food particles.

For optimal results, repeat this process two or three times, allowing a few moments in between each pour. The heat from the water will not only melt away the debris but also help flush it through the pipes, promoting a clearer flow.

While boiling water can be a great first step for minor clogs, it’s essential to use caution, especially if you have PVC pipes, as excessive heat may cause damage. If you suspect your clog is more severe or has been lingering for an extended period, it might be time to explore additional methods. However, in many cases, this simple technique can work wonders, leaving your drains flowing freely and your home feeling fresh. So, before reaching for harsher chemicals, give boiling water a chance to work its magic—your drains will thank you!

3. Method 2: Baking Soda and Vinegar Solution

How to fix a clogged drain?
Credit : whatcanu.com

When it comes to tackling stubborn clogs, the dynamic duo of baking soda and vinegar is a powerful, eco-friendly solution that many homeowners swear by. This method not only helps clear your drains but also offers a gentle cleanse for your plumbing system, making it an ideal choice for regular maintenance.

To begin, gather your materials: a box of baking soda, a bottle of white vinegar, and a kettle of boiling water. This simple household combination works as a natural chemical reaction that can dissolve grime, grease, and debris.

Start by pouring about a cup of baking soda directly into the clogged drain. Ensure it’s as close to the source of the blockage as possible. Follow this with a cup of white vinegar; you’ll hear a satisfying fizzing sound as the two ingredients react. This effervescent reaction creates bubbles that work to break down stubborn build-up within the pipes, loosening anything that might be causing the blockage.

Allow the mixture to sit undisturbed for about 30 minutes. During this time, the powerful combination of baking soda and vinegar is doing its job, breaking down clogs and deodorizing your pipes. For particularly stubborn clogs, you can let it sit for up to an hour for maximum effect.

After the waiting period, boil a kettle of water and carefully pour it down the drain. This final step flushes away the loosened debris, leaving your pipes clear and fresh. Not only is this method effective, but it’s also safe for your plumbing and the environment, making it a go-to for those looking to maintain a healthy home without resorting to harsh chemicals.

So, next time you face a sluggish drain, remember this baking soda and vinegar solution—it’s a simple, natural remedy that can save you time and money while keeping your plumbing system in top shape.

4. Method 3: The Power of a Plunger

When it comes to tackling stubborn clogs, few tools are as iconic and effective as the trusty plunger. Often overlooked, this simple device can be your first line of defense against blocked drains, whether in the kitchen sink, bathroom, or even the toilet.

To use a plunger effectively, begin by ensuring there’s enough water in the basin to cover the rubber cup completely. This water creates the necessary seal for maximum suction. Position the plunger over the drain, aligning it so that the cup fully envelops the opening. Apply firm, steady pressure as you push down to expel air, followed by an equally vigorous pull to create suction. Repeat this motion several times—typically, a good rhythm of 15 to 20 plunges should suffice.

The power of a plunger lies in its ability to generate pressure that can dislodge stubborn blockages. Whether it’s a buildup of hair, grease, or food particles, the force created can often break up the clog, allowing water to flow freely once again. After several attempts, remove the plunger and watch as the water begins to drain away; if it does, you’ve successfully cleared the blockage!

However, if the water doesn’t budge, don’t despair. Sometimes, stubborn clogs require a bit more finesse. Consider using the plunger in conjunction with hot water or a mixture of baking soda and vinegar for a more robust approach. Nonetheless, the plunger remains a vital tool in your plumbing arsenal, embodying the essence of DIY home remedies—simple, effective, and always ready to tackle the unexpected hiccups of household maintenance.

5. Method 4: Using a Drain Snake

How to fix a clogged drain?
Credit : whatcanu.com

When it comes to clearing stubborn clogs, a drain snake is one of the most effective tools in your arsenal. A drain snake, also known as a plumber’s snake or auger, is a long, flexible tool designed to navigate the twists and turns of your plumbing system, reaching deep into the pipes to dislodge blockages that simple plungers can’t reach.

To use a drain snake, start by removing the drain cover or stopper from the affected sink or tub. Insert the end of the snake into the drain, and gently push it down the pipe while rotating the handle. You’ll want to apply slight pressure as you maneuver the snake deeper, feeling for resistance that indicates the location of the clog. Once you encounter the blockage, continue twisting the snake to break it up or hook it, pulling it back toward you.

It’s important to be patient during this process; sometimes, you may need to repeat the insertion and rotation several times before you fully clear the debris. Once you believe the clog has been dislodged, run hot water down the drain to flush any remaining particles and ensure proper flow.

Using a drain snake can be a bit messy, so be sure to have towels or a bucket handy to catch any residual water or debris that may spill out during the process. With a little persistence and the right technique, a drain snake can save you from costly plumbing bills and restore peace to your home’s drainage system.

6. Method 5: Wet/Dry Vacuum Magic

When it comes to tackling stubborn clogs, the wet/dry vacuum proves to be an unsung hero in the realm of home maintenance. This versatile tool, often hiding in garages or utility rooms, can work wonders for your drains when traditional methods fail.

To harness the magic of a wet/dry vacuum, start by ensuring it’s set to the liquid setting. If your vacuum has a filter, make sure it’s designed for wet use; otherwise, you might find yourself with a messy cleanup. Next, create a tight seal over the drain. This can often be achieved by using the vacuum hose to cover the opening completely, ensuring no air escapes. If the clog is located in a sink or shower, you might find it helpful to use a wet cloth or duct tape to further seal the edges—this will enhance the vacuum’s suction power.

Once everything is set, turn the vacuum on to its highest setting. The suction should pull the obstruction up and out of the drain, making it a surprisingly effective solution for hair, food particles, and other debris that tends to build up over time. For deeper clogs, you may need to alternate between the vacuum’s suction and a bit of water, allowing the powerful pull to break loose and extract the blockage.

Remember to empty the vacuum reservoir as needed, especially if the clog is particularly large or the tank fills quickly. Once you’ve successfully removed the blockage, follow up with a hot water rinse down the drain to flush away any lingering residue.

Using a wet/dry vacuum not only saves you from harsh chemicals but also offers a quick and environmentally friendly method to reclaim your drains. So next time you find yourself facing a stubborn clog, don’t underestimate the power of this handy tool—it might just work magic in restoring your plumbing flow!

7. Method 6: Salt and Hot Water Treatment

How to fix a clogged drain?
Credit : whatcanu.com

Method 6: Salt and Hot Water Treatment

If you’re facing a stubborn clog, the combination of salt and hot water may just be the remedy your drains need. This simple yet effective method harnesses the natural properties of salt to break down buildup in your pipes while the hot water acts as a catalyst to enhance the process.

To start, gather about half a cup of coarse salt—table salt will work in a pinch, but coarse salt is preferable due to its larger granules, which can provide a scrubbing effect. Pour the salt directly down the drain, ensuring it reaches the areas where the clog is most likely situated. Next, heat a pot of water until it reaches a rolling boil.

Once the water is hot, carefully pour it down the drain over the salt. You’ll want to do this in stages, allowing the hot water to work its magic on the salt before adding more. The heat helps dissolve grease and food particles, while the salt aids in breaking apart stubborn debris clinging to the sides of your pipes.

This method is especially effective for kitchens where greasy buildup is common. After pouring the hot water and salt mixture, let it sit for about 15 minutes to allow the solution to penetrate and break down the clog. Follow this with a final flush of hot water to rinse away any remaining debris and salt.

This treatment is not only eco-friendly but also an inexpensive alternative to chemical drain cleaners. Regularly using this method can help maintain clear drains and prevent future clogs, ensuring that your plumbing system remains in good health. So, the next time you notice slow drainage, reach for the salt and hot water—it might just be the perfect solution!

8. Method 7: Enzyme Cleaners Explained

When it comes to tackling stubborn clogs, enzyme cleaners offer a powerful, eco-friendly alternative to traditional chemical drain cleaners. These unique products harness the natural power of enzymes and bacteria to break down organic material, such as hair, grease, soap scum, and food particles, that often contribute to blockages in your plumbing system.

Unlike harsh chemicals that can corrode your pipes and release toxic fumes into your home, enzyme cleaners are gentle yet effective. They work by introducing specific strains of bacteria into your drain that feed on the organic waste, effectively digesting it and clearing the obstruction over time. This means that while you might not see immediate results as you would with a chemical cleaner, enzyme cleaners provide a more sustainable solution that can help maintain the health of your plumbing.

Using enzyme cleaners is simple. Just pour the recommended amount down your drain, and let it sit for several hours or overnight, allowing the enzymes to get to work. For best results, it’s beneficial to use these cleaners regularly—perhaps once a month—to prevent buildup and keep your drains flowing smoothly.

In addition to being safe for your pipes and the environment, enzyme cleaners are also a great option for homes with septic systems, as they help maintain the balance of beneficial bacteria essential for proper septic function. So, if you’re looking for an effective and responsible way to unclog your drains, consider giving enzyme cleaners a try. They not only clear your drains but also promote a healthier plumbing system, making them an invaluable tool in your home maintenance arsenal.

9. Method 8: Cleaning the Trap

Cleaning the trap is often an overlooked yet vital step in unclogging your drain. The trap, a U-shaped pipe located beneath your sink, plays a crucial role in preventing sewer gases from entering your home. However, it can also become a catch-all for debris, food particles, hair, and soap scum, leading to frustrating clogs.

To begin, gather your supplies: a bucket or large bowl, a pair of gloves, and a wrench or pliers. Place the bucket beneath the sink to catch any water or debris that may spill out when you remove the trap. Once you’ve prepared your workspace, carefully unscrew the trap using your wrench or pliers, being cautious not to apply too much force, as this could damage the plumbing.

As you detach the trap, you’ll likely encounter a mix of unpleasant odors and a buildup of grime. This is normal, and it’s a clear indicator that it’s time for a thorough cleaning. Use an old toothbrush or a small scrub brush to remove any stubborn residue stuck to the interior surfaces. For a deeper clean, soak the trap in hot, soapy water for a few minutes before scrubbing.

Once you’ve cleaned the trap thoroughly, rinse it with hot water to wash away any remaining soap. Reattach the trap securely, ensuring all connections are tight to prevent leaks. After everything is back in place, run some hot water through the sink to verify that the flow has improved and that no leaks are present.

Cleaning the trap not only helps to eliminate clogs but also enhances the overall hygiene of your kitchen or bathroom, reducing odors and preventing future build-up. By incorporating this simple method into your regular home maintenance routine, you can keep your drains flowing freely and avoid more serious plumbing issues down the line.

10. Method 9: Chemical Drain Cleaners: Pros and Cons

When it comes to tackling stubborn clogs, chemical drain cleaners can often seem like a quick and convenient solution. These powerful formulations are designed to break down hair, grease, and other debris that can accumulate in your pipes, making them a tempting option for many homeowners. However, before you reach for that bottle, it’s essential to weigh the pros and cons of using chemical drain cleaners in your home.

**Pros:**

One of the most significant advantages of chemical drain cleaners is their effectiveness. They can work wonders on tough clogs, often dissolving blockages within minutes. This speed can be a lifesaver when you’re in a pinch and need immediate results. Additionally, chemical drain cleaners are widely available at most grocery stores and home improvement centers, making them an accessible option for many.

Another benefit is that these products can reach areas that manual methods may struggle with, penetrating deep into your plumbing system. With just a pour and a wait, many homeowners find that they can achieve results without the need for elaborate tools or professional help.

**Cons:**

Despite their convenience, chemical drain cleaners come with notable drawbacks that shouldn’t be overlooked. First and foremost, these products contain harsh chemicals, which can be harmful to both your plumbing and the environment. Over time, they can corrode pipes, leading to leaks and costly repairs. If used excessively, they can even contribute to more severe plumbing issues.

Moreover, chemical drain cleaners can pose health risks. The fumes emitted during use can be toxic, and if any residue remains in your pipes, it can lead to exposure during future plumbing work. It’s crucial to prioritize safety by wearing gloves and ensuring good ventilation when using these products.

Lastly, while chemical drain cleaners can be effective for many clogs, they aren’t a universal solution. Some blockages may be too severe for these chemicals to handle, requiring more manual methods or professional assistance.

In conclusion, while chemical drain cleaners can offer a quick fix for minor clogs, it’s essential to consider their potential risks and impact on your plumbing system. Weighing the pros and cons can help you make an informed decision on whether this method is right for your home, ensuring that you maintain a healthy and functional drainage system in the long run.

11. Method 10: Preventative Tips to Avoid Future Clogs

While it’s essential to know how to tackle a clogged drain when it happens, the best approach is to prevent clogs from forming in the first place. By implementing a few simple habits and maintenance routines, you can keep your drains flowing smoothly and avoid the hassle of future blockages.

### Regular Maintenance

Start by making regular drain maintenance a part of your cleaning routine. Pouring a mixture of baking soda and vinegar down your drains once a month creates a natural fizzing reaction that helps break down buildup. Follow this with hot water to flush away any remaining debris. This not only keeps your drains clear but also helps combat any unpleasant odors.

### Mind What Goes Down the Drain

Be mindful of what you put down your sinks and toilets. Avoid disposing of grease, coffee grounds, and food scraps in the kitchen sink, as these can easily accumulate and cause clogs. Instead, use a compost bin for food waste and allow grease to cool and solidify before throwing it away. In the bathroom, use a mesh strainer over your drain to catch hair and soap scum, which are common culprits in shower and sink clogs.

### Invest in Drain Screens

Installing drain screens or guards is an easy and effective way to prevent larger particles from entering your plumbing system. These simple devices can catch hair, food particles, and other debris, preventing them from causing blockages. Make it a habit to clean these screens regularly to ensure they are functioning properly.

### Educate Your Family and Guests

Make sure everyone in your household understands the importance of keeping drains clear. Educate family members—and inform guests—about what can and cannot go down the sink or toilet. A little communication can go a long way in preventing costly plumbing issues.

### Schedule Professional Inspections

Finally, consider scheduling periodic professional inspections of your plumbing system. A qualified plumber can identify potential issues before they become serious problems, ensuring that your drains remain clear and functional. Regular maintenance checks can provide peace of mind and save you from emergency repairs down the line.

By incorporating these preventative tips into your routine, you can significantly reduce the risk of clogs and keep your drains flowing freely. Remember, a little proactive care goes a long way in maintaining a healthy plumbing system!

12. When to Call a Professional Plumber

While many clogged drains can be tackled with DIY methods and household remedies, there comes a time when the situation is beyond your expertise and equipment. Knowing when to call a professional plumber is crucial for preventing further damage to your plumbing system and ensuring a safe, effective resolution to the problem.

If you’ve tried multiple attempts at unclogging your drain with no success—whether it’s plunging, using a drain snake, or pouring in a mixture of vinegar and baking soda—it may be time to reach for the phone. Persistent clogs can indicate deeper issues within your plumbing, such as tree root invasions, pipe corrosion, or major blockages further down the line. These require specialized tools and knowledge that only a licensed plumber can provide.

Moreover, if you notice strange signs like water backing up in multiple drains simultaneously, foul odors emanating from your pipes, or unusual sounds (like gurgling) coming from your plumbing, it’s a strong signal that professional intervention is needed. Ignoring these symptoms may lead to more severe problems, including pipe bursts or sewage backups, which can be costly and hazardous to your health.

Additionally, if you’re dealing with a clogged toilet that won’t budge despite your best efforts, it’s wise to call a plumber. Toilets can be particularly tricky; a wrong move can lead to overflow and messy situations. A professional will have the right tools and techniques to handle the task efficiently and safely.

In short, while it’s empowering to handle minor clogs on your own, recognizing the limits of your DIY abilities is essential. When in doubt, don’t hesitate to enlist the expertise of a professional plumber to ensure your plumbing system remains in excellent condition and to give you peace of mind.

13. Safety Precautions While Unclogging Drains

When it comes to unclogging drains, safety should always be your top priority. While the DIY approach can save you time and money, it can also expose you to a range of hazards if not done carefully. Before you embark on any drain-clearing mission, consider these essential safety precautions.

First and foremost, always wear protective gear. Gloves are a must, as they not only shield your hands from dirt and bacteria but also protect you from harsh chemicals if you choose to use commercial drain cleaners. Opt for sturdy rubber gloves that provide a good grip and are resistant to spills. Additionally, consider wearing safety goggles to protect your eyes from splashes, especially when dealing with chemical solutions or when using tools that could inadvertently send debris flying.

If you’re using chemical drain cleaners, read the labels carefully and follow the manufacturer’s instructions. Ensure that the area is well-ventilated by opening windows or using fans, as fumes can be harmful. Never mix different cleaning agents, as this can lead to dangerous reactions. For example, combining bleach with ammonia can produce toxic gases that are hazardous to your health.

When using tools like plungers or snakes, ensure that you’re familiar with their proper use to avoid injury. Always maintain a firm grip and use controlled movements to prevent slipping. If you’re working beneath a sink or in tight spaces, be cautious of sharp edges and potential hazards in the area. Clear the workspace of any obstructions to avoid tripping or falling.

Lastly, if the clog is severe or you feel uncomfortable tackling the issue yourself, don’t hesitate to call in a professional. Unclogging drains can sometimes lead to unexpected complications, and it’s better to err on the side of caution. By taking these safety precautions, you can effectively address your clogged drains while keeping yourself safe and sound.

14. Eco-Friendly Alternatives for Drain Cleaning

In an age where sustainability is a growing concern, many homeowners are seeking eco-friendly alternatives for drain cleaning that are both effective and gentle on the environment. Traditional chemical drain cleaners can be harsh, not only on your pipes but also on the planet, often containing toxic substances that can harm aquatic life and pollute water sources. Fortunately, there are several natural solutions that can help you tackle clogs without the environmental impact.

One of the most popular eco-friendly methods is the combination of baking soda and vinegar. This dynamic duo creates a natural fizzing reaction that can help break down grease and grime in your pipes. To use this method, start by pouring a pot of boiling water down the drain to loosen any debris. Next, add about half a cup of baking soda, followed by the same amount of vinegar. Cover the drain with a cloth or plug to keep the reaction concentrated in the pipe, allowing it to sit for 30 minutes before flushing it with more hot water. This simple yet effective approach not only clears clogs but also deodorizes your pipes, leaving them fresh and clean.

Another excellent eco-friendly option is using salt and boiling water. Salt acts as a natural abrasive, helping to dislodge stubborn clogs, while the hot water aids in breaking down fats and oils. Just pour half a cup of salt down the drain, followed by a kettle of boiling water, and watch as the combination works its magic.

If you’re looking for something even more straightforward, consider utilizing a plunger or a plumber’s snake. These tools are entirely mechanical, requiring no chemicals at all. With a little elbow grease, you can often dislodge clogs that are causing blockages without resorting to harmful substances.

Lastly, regular maintenance is key to preventing clogs in the first place. Using a mixture of hot water and a few drops of biodegradable dish soap can help keep your drains clear over time. Pour this mixture down your drains once a month to break down any buildup before it becomes a problem.

By opting for these eco-friendly alternatives, you not only maintain a healthy plumbing system but also contribute to a healthier planet. With these methods at your disposal, you can confidently tackle drain issues while being kind to the earth.

15. Conclusion: Maintaining Healthy Drains for a Hassle-Free Home

In conclusion, maintaining healthy drains is essential for a hassle-free home experience. Regular care and preventative measures can save you from the headaches of clogs and costly plumbing repairs down the line. By adopting simple habits, such as using drain screens, avoiding grease disposal, and conducting periodic maintenance checks, you can ensure that your plumbing system functions smoothly.

Furthermore, leveraging natural drain cleaners and being mindful of what goes down your sinks and toilets can significantly reduce the risk of blockages. Remember, a little attention goes a long way in preserving the integrity of your drainage system.

Incorporate these effective methods into your routine, and you’ll not only enjoy the convenience of efficient drains but also contribute to a healthier home environment. With proactive measures in place, you can rest easy knowing that your drains are clear and functioning as they should. So, take the time to care for your drains today, and embrace the peace of mind that comes with a hassle-free home!

In conclusion, unclogging your drain doesn’t have to be a daunting task, nor does it require expensive professional help every time. With the ten effective methods outlined in this article, you now have a toolkit of practical solutions at your fingertips to tackle clogs swiftly and efficiently. From the trusty combination of baking soda and vinegar to the more hands-on approach of using a plumber’s snake, these techniques empower you to maintain your plumbing and keep your home running smoothly. Remember, regular maintenance is key to preventing future blockages, so incorporate these methods into your home care routine. We hope you feel inspired to take action and reclaim the flow in your drains. Happy unclogging!

How to fix a broken door handle?

A broken door handle may seem like a minor inconvenience, but it can quickly become a frustrating obstacle in your daily routine.

Whether it’s a stubborn handle that won’t turn, a loose knob that jiggles unnervingly, or a completely detached mechanism, dealing with a malfunctioning door handle can disrupt the flow of your home. Thankfully, you don’t need to call in a professional or invest in costly replacements to restore functionality. With just a few common tools and a little bit of know-how, you can tackle this DIY project and have your door handle working like new in no time. In this guide, we’ll walk you through five easy steps that will not only empower you to fix your door handle efficiently but also enhance your overall home repair skills. Say goodbye to those pesky door handle dilemmas and hello to newfound confidence in your DIY abilities!

1. Introduction: Why Fixing a Broken Door Handle Matters

How to fix a broken door handle?
Credit : whatcanu.com

A broken door handle might seem like a minor inconvenience, but its impact can resonate throughout your home. Think about it: every time you encounter a door that won’t open smoothly, you’re faced with frustration, and that can disrupt the flow of your day. A functioning door handle is not just about convenience; it’s a fundamental aspect of security and privacy. A broken handle can leave your home vulnerable, compromise your peace of mind, and even lead to larger issues if left unaddressed.

Moreover, a faulty door handle can detract from the overall aesthetic of your space. Whether it’s a sleek modern design or a vintage charm, door handles play a significant role in your home’s decor. Fixing a broken handle not only restores functionality but also enhances the visual appeal of your doors, making them inviting and polished.

In this DIY guide, we’ll walk you through five easy steps to repair your broken door handle, empowering you to take control of your home maintenance. With just a few tools and a bit of time, you’ll find that fixing your door handle is not only achievable but also rewarding. Let’s dive into the details and get your doors back in working order!

2. Tools and Materials Needed for the Repair

Before diving into the repair process, it’s essential to gather all the necessary tools and materials to ensure a smooth and efficient fix. Here’s a handy list of what you’ll need:

**Tools:**
1. **Screwdriver**: Depending on your door handle, you’ll likely need either a Phillips or flathead screwdriver. A multi-bit screwdriver can be particularly useful, as it allows you to switch between different types of screws without needing multiple tools.

2. **Pliers**: A pair of pliers can help you grasp and manipulate small components, especially if they’re tightly fitted or difficult to reach.

3. **Utility Knife**: This can be useful for cutting away any old adhesive or seals, should your door handle be held in place by sticky materials.

4. **Drill**: If you need to replace screws or install a new handle, a drill will save you time and effort. Make sure to have the correct drill bits on hand.

**Materials:**
1. **Replacement Handle**: Ensure you have a handle that matches the style and size of your existing one. You can find suitable replacements at your local hardware store or online.

2. **Screws**: If your handle came without screws, or if the old screws are stripped or damaged, it’s wise to have a few extra screws of the correct size.

3. **Lubricant**: A silicone-based lubricant can help ensure smooth operation once your repair is complete, particularly if the handle mechanism feels stiff.

4. **Cleaning Supplies**: A cloth and some mild cleaner will help you tidy up the area around the door handle before and after the repair.

By gathering these tools and materials in advance, you’ll set yourself up for success, making the repair process as straightforward and hassle-free as possible. Once you have everything ready, you’ll be just a few steps away from restoring your door handle to its former glory!

3. Step 1: Identify the Type of Door Handle

How to fix a broken door handle?
Credit : whatcanu.com

Before diving into repairs, the first crucial step is to identify the type of door handle you’re dealing with. Door handles come in various styles and mechanisms, each requiring a different approach for repair. Start by examining your door handle closely. Is it a traditional knob, a lever, or a more modern pull handle? Understanding the design can help you determine the tools and techniques you’ll need.

Next, pay attention to the mechanism itself. Is it a simple passage handle that allows free entry and exit, or does it have a locking mechanism that adds a layer of complexity? If it’s a lockable handle, you’ll want to check if the key is still functioning properly or if the lock cylinder is contributing to the problem.

Additionally, consider the material of the door handle. Is it made of metal, plastic, or perhaps wood? Different materials may require specific repair methods or replacement parts. For instance, a plastic handle may break more easily and could require a different approach than a robust metal one.

Once you’ve identified the type and mechanism of your door handle, you’re ready to move on to the next steps. Having a clear understanding of what you’re working with not only sets the stage for a smoother repair process but also saves you time and frustration down the line. So, take a moment to analyze your door handle—it’s a small but vital step in ensuring a successful fix!

4. Step 2: Remove the Broken Door Handle

Once you’ve gathered your tools and assessed the situation, it’s time to remove the broken door handle—a crucial step that sets the stage for a successful repair. Start by inspecting the handle itself; if it’s equipped with visible screws, grab your screwdriver and gently unscrew them. Be sure to keep these screws in a safe place, as you’ll need them later for reassembly.

If the handle is held in place by a decorative cover plate, you may need to pry it off carefully using a flathead screwdriver. Take your time with this step to avoid damaging the surrounding door surface. Once the cover is off, you’ll have clear access to the screws anchoring the handle.

In cases where the handle is stuck or the screws are stripped, a little finesse is required. Try wiggling the handle gently while turning the screws counterclockwise; this can sometimes help loosen stubborn components. If the handle is broken beyond repair, it might be necessary to apply a bit of force—just be cautious not to damage the door itself.

Once you’ve successfully unscrewed the handle, gently pull it away from the door. If you encounter resistance, double-check for any hidden screws or clips that may be holding it in place. With the broken handle removed, take a moment to clean the area around the door latch and inspect it for any damage that may need attention. Now you’re one step closer to restoring functionality to your door!

5. Step 3: Inspect the Mechanism for Damage

How to fix a broken door handle?
Credit : whatcanu.com

Once you’ve removed the door handle, it’s time to take a closer look at the internal mechanism. This step is crucial, as it allows you to identify any underlying issues that may be causing the malfunction. Start by inspecting the latch and the surrounding components for any signs of wear, rust, or misalignment. A damaged latch might be the reason your door handle isn’t functioning properly, so give it a thorough examination.

Next, check the screws and springs within the mechanism. Sometimes, a simple tightening of screws can resolve the issue, while other times, a spring might be broken or dislodged, requiring replacement. If you notice any components that are cracked or bent, it’s essential to replace them before reassembling the handle.

Additionally, take note of how the mechanism operates. If it feels stiff or doesn’t engage smoothly, it may need lubrication. A quick application of a silicone-based lubricant can often restore fluidity to the movement and enhance the overall performance of the door handle.

By carefully inspecting the mechanism and addressing any damage or wear, you set the foundation for a successful repair. This step ensures that when you reassemble the handle, it will function like new, allowing your door to open and close seamlessly once again. After completing this inspection, you’ll be ready to move on to the next step, where you’ll make any necessary repairs or replacements before putting everything back together.

6. Step 4: Replace or Repair the Broken Parts

In Step 4, you’ll tackle the heart of the repair process: replacing or repairing the broken parts of your door handle. This step is crucial since the functionality of your door handle hinges on the condition of its components. Start by examining the damaged parts closely. If the handle is cracked or the mechanism is jammed, you may need to replace the entire handle or just specific components, like screws, springs, or the latch.

If you’re opting for a replacement, head to your local hardware store with the old handle in hand. This will ensure you find a compatible replacement that matches both the style and size of your existing setup. Look for durable materials that can withstand daily use, such as stainless steel or brass, which not only offer longevity but also add a touch of elegance to your door.

However, if you prefer to repair, clean the broken parts thoroughly to remove any debris or rust that may be contributing to the malfunction. For minor cracks, a strong adhesive or epoxy can work wonders, providing a sturdy fix once it dries. For stripped screws or fittings, consider using a thread repair kit or larger screws that can hold the components firmly in place.

Once you have either replaced or repaired the parts, reassemble the handle carefully, ensuring everything is aligned correctly. As you reattach the screws, don’t overtighten them, as this may cause additional damage. Finally, give the handle a few test turns to ensure it operates smoothly. With these steps completed, you’ll be well on your way to restoring functionality to your door handle and enhancing the overall security of your space.

7. Step 5: Reinstall the Door Handle

How to fix a broken door handle?
Credit : whatcanu.com

After you’ve successfully replaced the broken components and ensured everything is in working order, it’s time for the final step: reinstalling the door handle. This is where your efforts truly come together, and you can take a moment to appreciate the progress made throughout the repair process.

Begin by aligning the handle with the door’s edge, ensuring that any screws or mounting holes line up correctly. Gently push the handle into place, taking care not to force anything, as this could damage both the handle and the door. If your door handle includes a spindle—a metal rod that connects the two handles—make sure it fits snugly through the hole in the door.

Next, grab your screws and a screwdriver, and secure the handle by tightening the screws—be careful not to over-tighten, as this can strip the holes or cause the handle to misalign. If your handle has a decorative cover or plate, now is the time to attach it, giving the handle a polished finish and concealing any visible screws.

Once everything is securely in place, test the handle by turning it several times to ensure it operates smoothly and without resistance. If you notice any sticking or unevenness, double-check that all screws are properly fastened and that the handle is aligned correctly.

Finally, take a step back and admire your handiwork! Reinstalling the door handle not only restores functionality but also enhances the overall aesthetic of your door. With just a few simple steps, you’ve successfully fixed a common household issue, saving time and money while boosting your confidence in DIY repairs. Now, go ahead and open that door with pride!

8. Tips for Ensuring a Secure Fit

When it comes to fixing a broken door handle, ensuring a secure fit is crucial for both functionality and safety. A wobbly or loose handle can lead to frustration and even compromise the security of your home. Here are some essential tips to guarantee that your newly installed handle is snug, secure, and ready for daily use.

**1. Choose the Right Size:** Before you begin, ensure that the replacement handle you’ve selected is the correct size for your door. Measure the diameter of the existing holes and the thickness of the door to avoid any surprises during installation. A properly sized handle not only fits better but also enhances the overall aesthetic of your door.

**2. Use Quality Hardware:** Investing in high-quality screws and fittings is vital. Cheap or worn-out screws can strip easily and lead to a loose handle over time. Opt for stainless steel or brass screws, which provide durability and resist corrosion, ensuring that your handle stays firmly in place even in varying weather conditions.

**3. Align Components Properly:** As you assemble the handle, take extra care to align the internal components accurately. Misalignment can lead to unnecessary strain on the handle, resulting in premature wear or breakage. Use a level or a guide to ensure everything is straight and properly aligned before tightening any screws.

**4. Tighten Securely but Not Overly:** As you fasten the screws, aim for a firm but gentle grip. Over-tightening can strip the screw holes or damage the door material, compromising the integrity of the installation. A well-secured handle should feel solid without excessive force.

**5. Test the Handle:** Once your handle is installed, give it a few test turns and pushes. Check for any wobbling or looseness. If you notice any movement, double-check your installation steps. It may be necessary to adjust the screws or realign the components to achieve that perfect, secure fit.

By following these tips, you can ensure that your door handle not only looks great but functions flawlessly, providing you with peace of mind and years of reliable use. With a little attention to detail, you’ll have a secure fit that allows you to open and close your door with confidence.

9. Common Mistakes to Avoid During the Repair

When tackling the task of fixing a broken door handle, it’s easy to overlook some crucial details that can lead to frustration or even further damage. Here are some common mistakes to avoid during your repair process, ensuring a smoother and more effective experience.

**1. Skipping the Diagnostic Step:**
Before you grab your tools, take a moment to thoroughly assess the door handle and the surrounding mechanism. Failing to identify the specific issue—whether it’s a loose screw, a broken latch, or a misaligned plate—can lead to unnecessary repairs or the wrong replacement parts being purchased.

**2. Using Incorrect Tools:**
Using the right tools is essential for a successful repair. Many DIYers might try to make do with whatever is on hand, but this can lead to stripped screws or damaged components. Ensure you have the correct screwdriver, pliers, and any other necessary tools specific to your door handle type.

**3. Over-tightening Screws:**
While it might seem logical to tighten the screws as much as possible to secure the handle, over-tightening can actually cause damage to the handle or the door itself. Instead, find a comfortable snugness—just enough to hold the handle securely without straining the material.

**4. Neglecting Lubrication:**
After you’ve successfully reattached your door handle, it’s easy to overlook lubrication. A bit of grease or a silicone spray can go a long way in ensuring the handle operates smoothly and prolongs its lifespan. Skipping this step can lead to future sticking or squeaking.

**5. Ignoring Aesthetic Details:**
A repair isn’t just functional; it should also look good. After completing the fix, take a moment to clean up any smudges or dirt around the handle and door area. This attention to detail not only improves the appearance but can also add a finishing touch that makes your DIY effort stand out.

By being mindful of these common pitfalls during your door handle repair, you can streamline the process and achieve a professional-looking fix with ease.

10. Maintenance Tips for Preventing Future Breakages

Maintaining your door handles is essential for ensuring their longevity and functionality. Just like any other part of your home, door handles require attention and care to prevent future breakages. Here are some simple yet effective maintenance tips to keep your door handles in top condition.

**1. Regular Cleaning:** Dust and debris can accumulate around door handles, leading to wear and tear over time. Use a soft, damp cloth to wipe down the handles regularly. For metal handles, consider using a mild detergent to remove any grime, followed by a quick dry with a clean cloth to prevent rust.

**2. Lubrication is Key:** To ensure smooth operation, apply a few drops of lubricant to the handle’s moving parts, particularly if you notice any squeaking or stiffness. A silicone-based lubricant is ideal as it doesn’t attract dust and dirt like oil-based options.

**3. Check for Loose Screws:** Periodically inspect the screws and bolts that secure the door handle. Vibrations from daily use can loosen these attachments, leading to instability. Tighten any loose screws with a screwdriver to maintain a secure fit.

**4. Avoid Excessive Force:** Educate family members and guests about using door handles gently. Yanking or applying excessive force can lead to breakages, especially in older or more delicate handles. A gentle push or pull is all that’s needed for proper operation.

**5. Replace Worn Parts Promptly:** If you notice any signs of wear, such as cracks or chips in the handle, address them immediately. Replacing worn parts before they fail completely can save you time and money in the long run.

By incorporating these maintenance tips into your routine, you can significantly extend the life of your door handles, ensuring they continue to function smoothly and efficiently for years to come. A little proactive care goes a long way in preventing those frustrating breakages from occurring again!

11. When to Call a Professional

While many door handle repairs can be tackled with a bit of DIY enthusiasm and basic tools, there are certain situations when calling in a professional is the best course of action. If your door handle is part of a complex locking system, for instance, or if it’s integrated into a high-security door, it might be wise to seek expert help. Professionals possess the technical know-how to handle intricate mechanisms that can be easily damaged by inexperienced hands.

Additionally, if you encounter persistent issues such as a door that won’t latch, a handle that feels loose despite your best efforts, or if the entire door frame seems out of alignment, these could be signs of underlying structural problems that require a skilled eye to assess.

Another indicator is if you find yourself without the proper tools or materials to complete the job safely and effectively. Sometimes, the right tools make all the difference in achieving a repair that is not only functional but also aesthetically pleasing.

Lastly, if you simply don’t feel confident tackling the repair or if the thought of disassembling a door handle sends shivers down your spine, there’s no shame in reaching out for professional assistance. Remember, a door handle is a crucial component of your home’s security, and ensuring it’s fixed correctly is paramount for your peace of mind. By knowing when to call a professional, you can avoid further complications and ensure your door handle is repaired safely and efficiently.

12. Conclusion: Enjoy Your Repaired Door Handle!

Congratulations! You’ve successfully navigated the journey of repairing your broken door handle, and now it’s time to revel in the satisfaction of a job well done. As you stand back and admire your handiwork, take a moment to appreciate the small but significant transformation you’ve achieved in your space. A functioning door handle not only enhances the aesthetics of your door but also restores a sense of security and ease of access to your home.

With just a few tools and a little bit of patience, you’ve learned how to diagnose the issue, gather the right materials, and execute a straightforward repair. Whether you opted for a simple tightening, a complete replacement, or a creative workaround, you’ve empowered yourself with the skill to tackle similar issues in the future. This newfound confidence in your DIY abilities extends beyond just door handles; it opens the door (pun intended!) to tackling other small home repairs and projects.

Now, every time you open or close that door, you can take pride in knowing you handled the situation yourself. So go ahead, give your repaired door handle a test run, and enjoy the smooth operation. And remember, the next time something breaks or needs fixing around your home, don’t hesitate to roll up your sleeves and dive in—after all, there’s nothing quite like the feeling of turning a problem into a solution with your own two hands!

In conclusion, fixing a broken door handle doesn’t have to be a daunting task. With just a few simple tools and our easy-to-follow five-step guide, you can restore functionality to your door in no time. Not only will you save money by tackling this DIY project yourself, but you’ll also gain the satisfaction of knowing you’ve enhanced the safety and accessibility of your home. Whether it’s a pesky knob that won’t turn or a handle that’s come loose, we hope this guide empowers you to take control of your home repairs. So gather your tools, roll up your sleeves, and let your newfound skills shine—your doors will thank you! If you found this guide helpful, be sure to share your success stories or any questions you may have in the comments below!

How to fix a leaky faucet?

A leaky faucet may seem like a minor inconvenience, but those constant drips can lead to a significant waste of water and an uptick in your utility bills.

If you’ve found yourself frustrated by the incessant sound of dripping water or the unsightly puddles forming in your sink, fear not! Tackling this common household issue can be simpler than you think. In this DIY guide, we’ll walk you through five straightforward steps to fix that leaky faucet and restore peace to your kitchen or bathroom. Armed with just a few basic tools and a little bit of patience, you’ll not only save money but also gain the satisfaction of completing a home repair on your own. So roll up your sleeves, and let’s get started on making that drippy faucet a thing of the past!

1. Introduction: Why Fixing a Leaky Faucet Matters

How to fix a leaky faucet?
Credit : whatcanu.com

A leaky faucet may seem like a minor inconvenience, but it can lead to significant issues if left unaddressed. The incessant drip-drip-drip can be more than just an annoyance; it can waste an astonishing amount of water over time, potentially driving up your utility bills and harming the environment. In fact, a single faucet that drips just once every second can waste more than 3,000 gallons of water a year—enough to fill a swimming pool!

Beyond the financial implications, a leaky faucet can also indicate underlying plumbing problems that require immediate attention. The constant moisture can lead to mold growth, damaging your home and impacting your health. Furthermore, if the leak is severe, it may cause water to pool around the base of the faucet, leading to corrosion or even structural damage to your cabinetry.

By fixing a leaky faucet, you not only save water and money but also contribute to a more sustainable lifestyle and protect your home’s integrity. Plus, the satisfaction of resolving a home maintenance issue yourself can be incredibly rewarding. In this DIY guide, we will take you through five simple steps to help you tackle that leaky faucet and restore peace to your household. Let’s get started!

2. Tools and Materials You’ll Need

Before diving into the repair process, it’s essential to gather all the necessary tools and materials to ensure a smooth and efficient fix. Having everything at your fingertips will save you time and frustration, allowing you to stay focused on the task at hand. Here’s a handy list of what you’ll need:

### Tools:
1. **Adjustable Wrench**: This versatile tool will help you grip and turn various nuts and bolts securely, making it easier to disassemble the faucet.
2. **Screwdriver Set**: Depending on the type of faucet, you’ll likely need both flathead and Phillips head screwdrivers. These will assist in removing screws that secure the faucet handle and other components.
3. **Pliers**: A good pair of pliers will be invaluable for gripping and twisting stubborn components that may be difficult to handle with your fingers alone.
4. **Allen Wrench**: If you have a faucet with a hex screw, an Allen wrench will be necessary to remove the handle.

### Materials:
1. **Replacement Washers or O-Rings**: These small yet crucial components often wear out and are common culprits behind leaks. Be sure to check your faucet type to purchase the correct size.
2. **Plumber’s Grease**: This lubricant is perfect for ensuring a smooth operation of moving parts and can help extend the life of your faucet components.
3. **Drop Cloth or Towels**: Having a drop cloth or some old towels handy will protect your countertop from scratches and absorb any water that spills during the repair process.

With your tools and materials assembled, you’re now ready to tackle that leaky faucet! Each item plays a vital role in ensuring that your repair goes off without a hitch, so double-check that you have everything before proceeding to the next step. With a little preparation, you’ll not only fix that pesky leak but also gain confidence in your DIY skills.

3. Step 1: Turn Off the Water Supply

How to fix a leaky faucet?
Credit : whatcanu.com

Before you dive into the intricate world of faucet repairs, the very first step—perhaps the most crucial one—is to turn off the water supply. This simple yet essential action will save you from a potential deluge and allow you to work without the constant worry of water spraying unexpectedly.

To locate the water supply, look beneath your sink for the shut-off valves. These are typically two knobs or lever handles, one for hot water and another for cold. Turn them clockwise until they stop to fully close the valves. If your faucet is connected to a separate shut-off valve, ensure that it is also turned off.

After shutting off the water, it’s wise to open the faucet to relieve any remaining pressure and drain any leftover water in the lines. This step not only keeps your workspace dry but also minimizes the mess you’ll have to deal with later.

Once you’ve ensured that the water is completely off and the faucet is dry, you can confidently proceed with the next steps of your repair, knowing that you’ve set a solid foundation for a successful fix. Remember, safety first—taking the time to properly turn off the water supply will make your DIY experience smoother and more efficient.

4. Step 2: Plug the Drain

Before diving into the intricate workings of your faucet, it’s essential to create a clean and manageable workspace. Step 2: Plug the Drain may seem like a minor detail, but it’s actually a crucial step in preventing any small parts or debris from disappearing into the abyss of your sink.

To begin, gather a clean rag or a purpose-made sink plug. If your sink has a built-in stopper, ensure it’s securely closed. For those without one, simply take the rag and wad it up tightly; then, place it in the drain opening. This acts as a safeguard, blocking any screws, washers, or other components from slipping away during your repair.

While this may feel like a small task, it’s a foundational step that can save you a significant amount of frustration later on. Imagine reaching the end of your fix only to realize a vital screw has vanished down the drain! By taking this extra precaution, you’ll maintain control over your workspace and ensure a smooth and efficient repair process. With the drain securely plugged, you can now confidently proceed to the next step in fixing that pesky leak.

5. Step 3: Disassemble the Faucet

How to fix a leaky faucet?
Credit : whatcanu.com

Once you’ve gathered your tools and turned off the water supply, it’s time to tackle the heart of the problem: disassembling the faucet. This step is crucial for accessing the inner components that may be causing the leak.

Begin by placing a cloth or towel beneath the faucet to catch any residual water that might spill during this process. Using a screwdriver, carefully remove any decorative caps or handles that are covering the screws. If your faucet features a lever, you may need to look for a small set screw located at the back or underside, which can often be loosened with an Allen wrench.

With the handles removed, you’ll need to unscrew the packing nut. This nut can be tightly fitted, so employ your adjustable wrench to gently loosen it. Be mindful not to apply too much force, as excessive pressure can damage the faucet body. Once the packing nut is loose, carefully lift it off to expose the stem or cartridge inside.

At this stage, take a moment to examine the parts you’ve disassembled. Look for worn-out washers, O-rings, or other components that may need replacing. Keeping these parts organized will save you hassle when it’s time to reassemble. Documenting the order of disassembly with your phone or a notepad can also be incredibly helpful, ensuring you can easily put everything back together once you’ve made your repairs.

Disassembling the faucet might seem intimidating, but with patience and attention to detail, you’ll be well on your way to fixing that leaky faucet and restoring peace to your home.

6. Step 4: Identify the Problem: Washer, O-ring, or Cartridge

Once you have the faucet disassembled and laid out in front of you, it’s time to diagnose the issue. This is a crucial step in your DIY journey, as identifying whether the culprit is a worn washer, a faulty O-ring, or a damaged cartridge will dictate your next moves and ensure a successful repair.

**Washer Problems:** If your faucet is dripping from the spout, the most common offender is often the washer. The washer is a rubber component that provides a tight seal when the faucet is turned off. Over time, regular use can wear down this component, leading to leaks. Inspect the washer for any signs of cracks, fraying, or compression. If it looks worn, it’s likely time for a replacement.

**O-ring Issues:** O-rings are small circular gaskets that help prevent leaks around the handle of the faucet. If you notice water pooling around the faucet handle itself, the O-ring may be to blame. Check for signs of wear or deterioration. If it seems to be losing its elasticity or has developed hard spots, replacing it can resolve the issue and restore your faucet’s functionality.

**Cartridge Dilemmas:** If your faucet is still leaking despite having replaced the washer and O-ring, the problem may lie in the cartridge. Cartridges are more commonly found in cartridge faucets, and they can wear out over time, leading to leaks. Look for any visible cracks or damage, and if necessary, take the cartridge to a hardware store to find an exact match for replacement.

Understanding these components and their roles is essential for diagnosing and addressing the leak effectively. Once you’ve identified the problem, you can move forward with the appropriate replacements, confident in your ability to restore your faucet to its drip-free state. This step not only empowers you as a DIYer but also saves you money and the hassle of calling in a professional.

7. Step 5: Replace the Damaged Parts

How to fix a leaky faucet?
Credit : whatcanu.com

### Step 5: Replace the Damaged Parts

Once you’ve successfully disassembled the faucet and identified the culprit behind the leak, it’s time to replace the damaged parts. This is a crucial step in ensuring your repair is effective and long-lasting. Depending on the type of faucet you have—be it compression, cartridge, ball, or ceramic disc—the parts you need to replace may vary.

First, carefully inspect the components you’ve removed. Look for worn-out washers, O-rings, or seals, as these are often the primary suspects in leaks. If they appear cracked, frayed, or misshapen, it’s time to swap them out. Many hardware stores offer repair kits that include all the necessary parts for your specific faucet model, making it easy to find replacements.

Before purchasing new parts, bring the old ones with you as a reference. This will ensure you get the right size and type for a proper fit. Once you have your new components, follow the manufacturer’s instructions to install them. Make sure to seat the washers and O-rings snugly, as a proper seal is essential to prevent future leaks.

As you reassemble the faucet, take care not to overtighten any screws or nuts, as this can cause damage to the new parts. Instead, aim for a firm but gentle tightening to ensure everything is secure without compromising the integrity of the fittings.

Replacing the damaged parts is a straightforward yet vital step in your faucet repair journey. Doing it correctly will not only stop the leak but also extend the life of your faucet, giving you peace of mind and a fully functional kitchen or bathroom fixture. With the new parts in place, you’re now one step closer to enjoying a leak-free experience!

8. Reassemble the Faucet

After you’ve successfully replaced the faulty components, it’s time to reassemble the faucet to restore it to its original state. This step is crucial, as a proper reassembly not only ensures functionality but also prevents future leaks.

Start by carefully placing the faucet handle back onto its base, aligning any screws or fasteners as needed. If your faucet has a decorative cap, don’t forget to secure it back in place; this is often a simple twist-on piece that can enhance the overall appearance of your fixture.

Next, use your screwdriver to tighten any screws that hold the handle in position. Be cautious not to overtighten, as this could cause damage to the faucet or its components. If your faucet has multiple handles or levers, repeat this process for each one, ensuring they all fit snugly and operate smoothly.

Once the handles are secure, it’s time to reattach any decorative elements or covers that you removed earlier. These parts not only contribute to the aesthetics of your faucet but also provide additional protection against moisture and dust.

Finally, turn the water supply back on and check for leaks. With everything reassembled, run the faucet for a few moments to ensure that water flows freely and that no drips or leaks are present. If all looks good, congratulations—you’ve successfully reassembled your faucet! Enjoy the satisfaction of knowing you tackled this DIY project with skill and precision, and relish in the quiet of a leak-free home.

9. Step 6: Turn the Water Supply Back On

Once you’ve reassembled the faucet and ensured that all components are securely in place, it’s time to turn the water supply back on. This step marks a significant moment in your DIY journey, as it will reveal whether your repairs have been successful. Start by locating the shut-off valves beneath the sink; they are typically positioned on the wall or the cabinet floor.

Carefully turn the valves counterclockwise to restore the water flow. As you do this, listen for the sound of rushing water—this is a good sign that you’re on the right track! However, immediate caution is warranted: keep an eye on the faucet to check for any signs of leaks.

Once the water is flowing, turn the faucet handle to test its operation. Run the water for a moment to ensure a steady stream without spluttering or drips. Feel the temperature of the water to confirm that hot and cold are functioning correctly. If everything seems to be in order, congratulations! You’ve successfully tackled the leaky faucet. But don’t get too comfortable just yet—take a few moments to wipe down any excess water around the sink area and double-check your work. If all looks good, you can pat yourself on the back for a job well done and enjoy the satisfaction of having fixed the issue yourself!

10. Step 7: Test for Leaks

After you’ve meticulously reassembled your faucet and tightened all the screws and fittings, it’s time for the moment of truth: testing for leaks. This crucial step ensures that your hard work has paid off and that your faucet is working as it should.

Start by turning the water supply back on, gradually opening the valves to avoid any sudden bursts of water. As the flow begins, pay close attention to the area around the faucet itself and the joints where you’ve made adjustments. Look for any signs of dripping or pooling water. A small leak can often be fixed with a simple twist of a screw or a minor adjustment, so don’t be discouraged if you see a little moisture at first.

To get a comprehensive check, run the faucet through its various settings—hot, cold, and mixed. This will help you identify any leaks that might only occur under certain conditions. If you do notice any leaks, it’s essential to turn the water supply off again and revisit your work. Check the O-rings, washers, and any seals you might have changed; sometimes, a misaligned component is all it takes to create a leak.

Once you’re confident that everything is secure and there are no leaks, take a moment to admire your handiwork. Not only have you just saved yourself some money by avoiding a plumber, but you’ve also gained valuable skills in home maintenance. With a little patience and attention to detail, you’ve turned a potentially frustrating problem into a successful DIY project!

11. Common Mistakes to Avoid

When tackling a DIY project like fixing a leaky faucet, it’s crucial to be aware of common mistakes that can turn a simple repair into a frustrating endeavor. Here are some pitfalls to steer clear of as you embark on your plumbing adventure:

1. **Neglecting to Turn Off the Water Supply**: It may seem obvious, but many DIYers forget this essential step. Failing to shut off the water supply can lead to a messy situation, with water gushing out as you start disassembling the faucet. Always locate the shut-off valves under the sink and turn them off before you begin.

2. **Skipping the Preparation**: Jumping right into the repair without gathering the necessary tools and materials can lead to interruptions and confusion. Ensure you have everything you need—like wrenches, screwdrivers, replacement parts, and a cloth to catch any drips—before you start.

3. **Using the Wrong Tools**: Each faucet type requires specific tools for repair. Using the wrong tools can damage the faucet or make it difficult to complete the repair. Invest in or borrow the right tools, such as basin wrenches, pliers, and screwdrivers, to ensure you can work effectively and avoid stripping screws or damaging fittings.

4. **Ignoring the Manufacturer’s Instructions**: Each faucet brand and model may have unique components and assembly methods. Failing to consult the manufacturer’s instructions can lead to confusion during reassembly or the use of incorrect replacement parts. Always refer to the manual or look up the model online for guidance.

5. **Over-Tightening**: It’s easy to think that cranking down on screws and bolts will ensure a watertight seal, but over-tightening can cause damage to the components, leading to future leaks or breakage. Use a gentle hand and tighten just enough to create a good seal.

By being mindful of these common mistakes, you’ll set yourself up for a successful faucet repair. With a little patience and the right approach, you can effectively fix that leaky faucet and enjoy the satisfaction of a job well done!

12. Tips for Preventing Future Faucet Leaks

While fixing a leaky faucet can save you money and water, taking proactive steps to prevent future leaks is equally important. Here are some essential tips to keep your faucet in top condition and avoid the hassle of leaks down the line.

**1. Regular Maintenance:** Schedule routine checks on your faucets and fixtures. Inspect for signs of wear, such as corrosion or loose parts, and replace washers or O-rings as needed. A little preventive care can go a long way in extending the life of your faucet.

**2. Use the Right Tools:** When working on your faucet, always use the appropriate tools for the job. Using the wrong size wrench or screwdriver can strip screws or damage components, leading to leaks. Invest in a good set of plumbing tools to ensure you have what you need.

**3. Avoid Over-Tightening:** It may be tempting to crank down on screws or nuts to prevent leaks, but over-tightening can cause more harm than good. This can lead to cracks in hardware or misalignment, ultimately creating new leaks. Tighten only until snug.

**4. Check Water Pressure:** High water pressure can put unnecessary stress on your faucet and its components, leading to leaks. Use a pressure gauge to check your home’s water pressure, and if it’s above the recommended range (generally 40-60 psi), consider installing a pressure regulator.

**5. Choose Quality Fixtures:** When replacing faucets or fixtures, invest in high-quality products from reputable brands. While they might carry a higher upfront cost, quality fixtures are often built to last longer and withstand wear and tear better than cheaper alternatives.

By adopting these simple practices, you can significantly reduce the likelihood of future leaks and enjoy a well-functioning faucet for years to come. Remember, a little attention today can save you time, money, and the frustration of unexpected repairs tomorrow.

13. When to Call a Professional

While many leaky faucet repairs can be successfully tackled by enthusiastic DIYers, there are times when calling a professional is the wisest course of action. Knowing when to hand the wrench over to an expert can save you time, money, and frustration down the line.

If you’ve followed the previous steps and your faucet is still leaking, it may be a sign of a more complex issue. Sometimes, the problem might stem from deeper within your plumbing system, such as high water pressure or corroded pipes, which aren’t easily fixable without specialized knowledge and tools. Additionally, if you notice water pooling around the base of the faucet or under the sink, this could indicate a more serious leak that requires an experienced plumber’s intervention.

Another situation where a professional’s help is warranted is if you’re dealing with a faucet type that is particularly intricate or outdated. Vintage or specialty faucets may have unique components that are hard to find or require specific expertise to repair correctly. In these cases, a professional can ensure that repairs are done without damaging your faucet further.

Finally, if you feel overwhelmed or uncertain at any point during your repair attempts, it’s perfectly okay to reach out for help. Plumbing can be tricky, and the last thing you want is to inadvertently create a bigger problem that leads to costly repairs. Trust your instincts—if a task feels beyond your skill level, calling a licensed plumber is a smart and responsible decision. They can provide peace of mind, ensure the job is done right, and ultimately save you from the headache of future complications.

14. Conclusion: Enjoying Your Leak-Free Faucet!

Congratulations! You’ve successfully tackled the task of fixing your leaky faucet, and now it’s time to sit back, relax, and enjoy the fruits of your labor. There’s something immensely satisfying about resolving a household issue with your own hands, and a leak-free faucet is a testament to your DIY skills. No more drips, no more annoying water sounds in the night, and certainly no more wasted water sneaking through those faulty seals.

As you turn on the faucet and hear the smooth flow of water, take a moment to appreciate the quietude of your kitchen or bathroom—free from the persistent drip-drip that once interrupted your peace. Not only have you saved yourself money on potential plumbing bills, but you’ve also contributed to water conservation, which is essential for our planet.

Remember, maintaining your faucet is key to ensuring its longevity. Regular checks for wear and tear, cleaning out aerators, and replacing washers can prevent future leaks. Should you encounter any further issues, don’t hesitate to refer back to this guide or consult a professional if needed.

By embracing the DIY spirit, you’ve not only fixed a problem but also gained valuable skills that empower you to handle similar repairs in the future. So, go ahead, enjoy that leak-free faucet, and let the water flow freely—without the worry of unwanted puddles beneath!

15. Additional Resources and References

When tackling a DIY project like fixing a leaky faucet, having the right resources at your fingertips can make all the difference. Here are some additional materials and references that can help you along the way, ensuring your repair is successful and stress-free.

1. **Online Tutorials and Videos:** Websites like YouTube are treasure troves of DIY content. Search for specific faucet types or brands for step-by-step video guides that visually walk you through the repair process. Seeing the steps in action can help clarify complex instructions and give you the confidence to proceed.

2. **Manufacturer’s Manuals:** If you still have the manual that came with your faucet, it’s worth a look. These manuals often include troubleshooting sections that can point you directly to the source of the leak, as well as specific diagrams and parts lists that are invaluable during repairs.

3. **DIY Forums and Communities:** Online forums such as Reddit’s r/HomeImprovement or DIY Network can be excellent resources. Here, you can ask questions, share your experiences, and learn from others who have tackled similar projects. Community members often provide tips and tricks that can save you time and frustration.

4. **Home Improvement Books:** If you prefer a more traditional approach, consider picking up a home improvement book from your local library or bookstore. Many of these guides offer comprehensive chapters on plumbing and faucet repairs, complete with illustrations and troubleshooting advice.

5. **Local Hardware Store Workshops:** Some hardware stores offer free workshops or classes on home repairs, including plumbing. Check with your local store to see if they have any upcoming sessions where you can gain hands-on experience and ask questions from knowledgeable staff.

By utilizing these additional resources, you can enhance your understanding of faucet repairs and gain the confidence to tackle even the trickiest plumbing issues. Remember, every DIY project is a learning opportunity, so don’t hesitate to seek out information that can help refine your skills. With the right guidance, you’ll not only fix that leaky faucet but also feel empowered to take on future home improvement challenges!

In conclusion, fixing a leaky faucet doesn’t have to be an overwhelming task. With the straightforward steps outlined in our DIY guide, you can tackle this common household issue with confidence and ease. Not only will you save money by avoiding costly plumber fees, but you’ll also gain a sense of accomplishment by successfully completing the repair yourself. Remember, every drop counts—both in conserving water and in preserving your home’s plumbing health. We encourage you to gather your tools, roll up your sleeves, and embark on this simple yet rewarding project. Happy fixing, and may your faucet be forever drip-free!