pc gaming – How to fix common PC gaming problems?

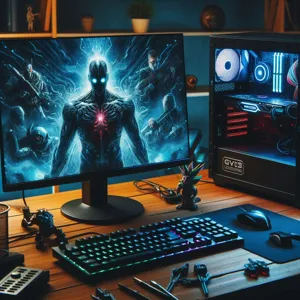
In the exhilarating world of PC gaming, few things are more frustrating than encountering technical glitches that disrupt your immersive experience.

Whether you’re battling enemies in a highly competitive online match or exploring vast digital landscapes, unexpected issues can arise at any moment, leaving you feeling defeated before the game even begins. From lag spikes and crashing games to hardware compatibility woes and driver dilemmas, these common pitfalls can sap the joy from even the most anticipated gaming sessions. But fear not! In this comprehensive guide, we’ll delve into the top 10 common PC gaming problems that players often face, offering practical solutions and expert tips to get you back in the game quickly. Say goodbye to the headaches of troubleshooting and hello to uninterrupted gaming bliss as we empower you to tackle these challenges head-on!

1. Introduction to Common PC Gaming Problems

pc gaming -  How to fix common PC gaming problems?
Credit : whatcanu.com

In the dynamic world of PC gaming, players often find themselves caught in a web of technical challenges that can disrupt their immersive experience. Whether you’re a casual gamer or a seasoned pro, encountering issues with your gaming rig can be both frustrating and perplexing. From hardware mishaps to software glitches, these common problems can hinder your gameplay and leave you feeling stuck in a digital quagmire.

As the demand for high-performance gaming continues to grow, so too does the complexity of the technology that supports it. With an ever-evolving landscape of graphics cards, processors, and game titles, it’s no wonder that many gamers face hurdles along the way. Understanding these common issues is the first step toward troubleshooting and ultimately enhancing your gaming experience.

In this blog post, we will explore the top ten common PC gaming problems that players encounter, along with practical solutions to help you get back in the game. Whether it’s dealing with lag, crashes, or compatibility woes, we’ve got you covered with insights and tips to ensure your gaming setup runs smoothly. So gear up as we dive into the world of PC gaming challenges—because every gamer deserves a seamless adventure!

2. Poor Performance: Lag and Frame Rate Issues

When it comes to PC gaming, nothing can be more frustrating than experiencing poor performance characterized by lag and frame rate issues. Imagine finally sitting down to dive into an intense gaming session, only to find your character stuttering across the screen or the action halting just as you’re about to make that crucial move. The smooth flow of gameplay transforms into an unpredictable mess, diminishing the immersive experience that gaming promises.

Lag and frame rate drops can stem from a variety of sources, ranging from hardware limitations to software conflicts. First, ensure your PC meets the game’s minimum system requirements. If your hardware is outdated, it may struggle to keep up with demanding graphics and processing tasks. upgrading components like your graphics card, RAM, and CPU can yield significant improvements in performance.

Another common culprit for performance issues is background applications consuming valuable system resources. Before launching your game, check your task manager and close any unnecessary programs that may be running. This simple step can free up resources and lead to smoother gameplay.

Updating your graphics drivers is another crucial fix. Manufacturers regularly release updates that optimize performance for new games, so make it a habit to check for the latest drivers from your GPU manufacturer’s website. Additionally, adjusting the in-game graphics settings can make a world of difference. Lowering the resolution or turning off resource-hungry features like anti-aliasing and shadows can help stabilize your frame rates without sacrificing too much visual quality.

Lastly, consider checking your internet connection if you’re playing online. Lag can often be attributed to poor connectivity. Using a wired connection instead of Wi-Fi, or upgrading your internet plan, can enhance your gaming experience significantly.

Addressing lag and frame rate issues might require some trial and error, but with a little patience and the right adjustments, you can reclaim the fluidity and excitement that gaming is meant to deliver.

3. Game Crashes and Freezes: Diagnosing the Causes

pc gaming -  How to fix common PC gaming problems?
Credit : whatcanu.com

Game crashes and freezes can be a frustrating experience for any PC gamer, often interrupting your epic battles or immersive storylines at the most critical moments. Understanding the root causes of these issues is essential for keeping your gaming experience smooth and enjoyable.

First and foremost, one of the most common culprits is hardware incompatibility or insufficient specifications. If your system doesn’t meet the recommended requirements for a game, you may find yourself facing unexpected crashes. Take a moment to review your PC’s specifications, including the CPU, GPU, and RAM, against the game’s requirements. Upgrading your hardware might be necessary, especially if you’re attempting to run graphically demanding titles.

Another potential cause could be outdated drivers. Graphics drivers are crucial for optimal game performance, and running on outdated versions can lead to instability. Regularly check for updates from your GPU manufacturer—NVIDIA, AMD, or Intel—and ensure you’re using the latest drivers to enhance compatibility and fix bugs.

Additionally, background applications can create conflicts with your games, leading to crashes and freezes. Programs that hog resources or interfere with game processes should be minimized or closed before launching your game. Use Task Manager to identify and terminate unnecessary applications running in the background.

Lastly, corrupted game files can also be a significant factor in game instability. Many gaming platforms, like Steam or Epic Games, offer built-in tools to verify the integrity of game files. Running this verification can help identify and repair any corrupted files, allowing you to dive back into your gaming adventure without further interruptions.

By diagnosing these common issues—hardware inadequacies, outdated drivers, conflicting applications, and corrupted files—you can take proactive steps to ensure a smoother gaming experience and reduce the likelihood of crashes and freezes. After all, the only thing that should freeze is your character during an intense moment of gameplay!

4. Graphics Glitches: Fixing Visual Artifacts

Graphics glitches can be some of the most frustrating issues a PC gamer can encounter. These visual artifacts can manifest in numerous ways, from strange textures and flickering screens to bizarre character models that seem to defy the laws of physics. Such glitches not only disrupt immersion but can also hinder gameplay, making it essential to address them promptly.

To start tackling graphics glitches, first ensure that your graphics drivers are up to date. Outdated drivers can lead to compatibility issues with the latest games, so visit the website of your graphics card manufacturer—whether it’s NVIDIA, AMD, or Intel—and download the latest versions. Many manufacturers also offer software that can automatically detect and install updates for you, saving you time and ensuring your drivers are always current.

Next, check your in-game settings. Sometimes, graphics settings that are too high for your hardware can lead to glitches. Lowering settings like texture quality, shadows, and anti-aliasing can improve stability and eliminate artifacts. Experimenting with these settings can help you find a sweet spot where the visuals remain appealing while performance is optimized.

Another potential cause of graphics glitches is overheating. When your GPU gets too hot, it may struggle to render images correctly. Ensure that your computer is well-ventilated and that fans are functioning properly. Cleaning dust from vents and components can also aid in maintaining optimal temperatures. If overheating continues to be a problem, consider investing in better cooling solutions or even reapplying thermal paste to your GPU.

Lastly, if all else fails, it might be worth verifying the integrity of your game files. Many gaming platforms, such as Steam, have built-in features that allow you to check for corrupted files and automatically repair them. This step can resolve issues that stem from improper installations or updates, providing a straightforward solution to persistent graphics problems.

By following these steps, you can tackle and resolve graphics glitches effectively, ensuring that your gaming experience remains smooth and visually stunning. Don’t let visual artifacts ruin your adventures—take action and get back to enjoying the immersive worlds that PC gaming has to offer!

5. Audio Problems: No Sound or Distorted Audio

pc gaming -  How to fix common PC gaming problems?
Credit : whatcanu.com

Audio problems can be one of the most frustrating issues PC gamers encounter, often disrupting the immersive experience that gaming provides. Whether it’s complete silence or distorted sound resembling a garbled mess, these audio glitches can turn even the most thrilling gameplay into a frustrating endeavor.

First and foremost, check your physical connections. Ensure that your speakers or headphones are securely plugged into the correct audio jack. Sometimes a loose connection can cause sound to drop out or distort. If you’re using a headset, double-check that the mute button isn’t accidentally engaged.

Next, dive into your computer’s audio settings. Right-click the speaker icon in the system tray and select “Playback devices.” Here, make sure the correct output device is set as default. If you’re using multiple audio devices, such as an HDMI monitor along with standard speakers, your PC might be sending the audio signal to the wrong device.

If you’ve confirmed your connections and settings are correct but still face audio issues, it might be time to update your audio drivers. Outdated or corrupted drivers can lead to a multitude of sound-related problems. Visit the manufacturer’s website for your sound card or use Device Manager to search for updates.

In some cases, it may be a game-specific issue. Check the in-game audio settings to ensure the volume levels are appropriately adjusted and that sound isn’t muted. Additionally, verify that the game files are intact—most platforms, like Steam, offer a function to verify the integrity of game files, which can resolve any corruption that may be causing audio issues.

Lastly, if all else fails, consider checking for system updates or even reinstalling the game as a last resort. Audio problems can be vexing, but with a methodical approach to troubleshooting, you can often resolve these issues and get back to enjoying your gaming experience to the fullest.

6. Connectivity Issues: Troubleshooting Online Play

Connectivity issues can be one of the most frustrating barriers to enjoying your favorite online games. Whether you’re in the heat of battle or trying to complete a challenging quest, lag, disconnections, and other network problems can quickly ruin the experience. Understanding how to troubleshoot these connectivity issues is crucial for every gamer.

Start by checking your internet connection. Ensure that your Wi-Fi signal is strong or, better yet, consider using a wired Ethernet connection for more stability. A weak signal can lead to lag spikes and frequent disconnections, making it almost impossible to enjoy multiplayer games. If you’re using Wi-Fi, try moving closer to the router or eliminating any physical barriers that could interfere with the signal.

Next, restart your modem and router. Sometimes, simply power cycling these devices can resolve underlying issues. Unplug them for about 30 seconds, plug them back in, and wait for the lights to stabilize before testing your connection again.

If you’re still experiencing issues, check for any bandwidth hogs on your network. Streaming services, downloads, or other devices connected to your internet can consume significant bandwidth, leading to slower connectivity for gaming. Pausing or limiting these activities while you play can help improve your gaming experience.

Additionally, consider checking your game’s server status. Sometimes, the issue isn’t on your end at all; the game’s servers might be experiencing outages or maintenance. You can usually find this information on the game’s official website or social media channels.

Lastly, ensure your firewall and antivirus settings aren’t interfering with your gameplay. Sometimes, these security measures can mistakenly block game data. Adding your game to the exceptions list or temporarily disabling them can help identify if they are the cause of your connectivity woes.

By following these troubleshooting steps, you can minimize connectivity issues and focus on what truly matters: enjoying your gaming adventures with friends and fellow players.

7. Compatibility Problems: Running Games on Older Hardware

pc gaming -  How to fix common PC gaming problems?
Credit : whatcanu.com

When diving into the world of PC gaming, one of the most frustrating hurdles players encounter is compatibility issues, particularly when trying to run games on older hardware. As game developers push the boundaries of graphics and processing power, the requirements for new titles often leave older systems struggling to keep up. If you’re still gaming on a legacy setup, you may find that your favorite game stutters, crashes, or refuses to launch altogether due to outdated components.

The first step in addressing compatibility problems is to check the minimum system requirements for the game you want to play. These specifications are typically found on the game’s packaging or its digital storefront page. If your hardware falls short, consider upgrading your components where possible. For instance, adding more RAM or upgrading your graphics card can significantly improve performance and compatibility with newer titles.

If upgrading isn’t an option, there are still strategies to enhance your gaming experience. Lowering the graphics settings in the game’s options menu can alleviate some strain on older hardware. Disabling features like shadow effects, anti-aliasing, and reducing the resolution can help boost frame rates and make the game more playable.

Additionally, compatibility mode settings in Windows can also be a lifesaver. By right-clicking on the game executable, navigating to the properties, and selecting the compatibility tab, you can run the game as if it were being played on an older version of Windows. This sometimes resolves issues that arise from newer operating systems not fully supporting older software.

Lastly, consider reaching out to gaming forums or communities. Many seasoned gamers have faced similar compatibility issues and can offer valuable insights or workarounds that may not be immediately obvious. With a little patience and creativity, you can often find a way to keep the gaming experience alive on your older hardware, ensuring that you can continue to enjoy your favorite titles without the headache of constant compatibility problems.

8. Overheating: Managing Your PC’s Temperature

Overheating is a common enemy for PC gamers, often leading to frustrating performance drops, unexpected shutdowns, and even hardware damage. As your gaming rig powers through graphics-intensive titles, the components can generate substantial heat, making it crucial to keep temperatures in check.

To manage your PC’s temperature effectively, start by ensuring that your gaming setup is well-ventilated. place your PC in an open area, away from walls or obstructions that might restrict airflow. Dust buildup can also hinder cooling performance, so make it a habit to clean your PC regularly. Use compressed air to blow out dust from fans, heatsinks, and filter screens, ensuring unobstructed airflow.

Consider upgrading your cooling solution if you find your temperatures still run high. Aftermarket CPU coolers, additional case fans, or even liquid cooling systems can significantly enhance your rig’s cooling efficiency. Ensure that the thermal paste between your CPU and its cooler is properly applied; over time, the thermal paste can dry out and lose its effectiveness.

Monitoring software can be a gamer’s best friend. Tools like MSI Afterburner or HWMonitor can help you keep an eye on your system’s temperatures in real-time. This way, you can take proactive measures before things get too hot to handle. If you notice consistent overheating even after these adjustments, it may be time to evaluate the workload of your components or consider underclocking for a more stable gaming experience.

By addressing overheating issues head-on, you can significantly extend the life of your gaming PC and ensure that your gaming sessions remain smooth and enjoyable. Don’t let overheating be the reason you miss out on epic victories—take control and keep your PC cool!

9. Input Lag: Improving Mouse and Keyboard Response

Input lag can be a gamer’s worst nightmare, transforming smooth gameplay into a frustrating experience filled with missed shots and delayed reactions. This frustrating delay between your commands and your on-screen character’s actions can stem from various factors, but the good news is that there are effective solutions to enhance your mouse and keyboard response.

First and foremost, ensure that your gaming peripherals are of high quality and designed for performance. Invest in a gaming mouse and keyboard that have lower latency and faster polling rates. A polling rate of 1000 Hz is ideal, as it allows your devices to communicate with your PC every millisecond, translating into quicker response times.

Next, consider adjusting your in-game settings. Many games allow players to tweak sensitivity and input settings. Increasing the sensitivity can help you react faster to on-screen events, reducing the perceived lag. Additionally, turning off V-Sync can help eliminate input lag caused by synchronization issues between your monitor’s refresh rate and the frame rate of the game.

Another critical aspect to evaluate is your display settings. A higher refresh rate monitor can significantly reduce input lag. Aim for a monitor that supports at least 144Hz, as this will provide smoother visuals and quicker response times compared to standard 60Hz displays.

Lastly, keep your drivers up to date. Manufacturers frequently release updates that optimize performance and compatibility, which can significantly reduce input lag. Regularly check for updates for your mouse, keyboard, and graphics card to ensure you’re getting the best performance out of your hardware.

By addressing these factors, you can dramatically improve your input response time in PC gaming, allowing you to enjoy a more fluid and competitive gaming experience. Remember, in the world of gaming, every millisecond counts!

10. Software Conflicts: Identifying and Resolving Issues

In the dynamic world of PC gaming, software conflicts can often rear their ugly heads, leading to frustrating interruptions mid-game or performance issues that can diminish your overall experience. Understanding how to identify and resolve these conflicts is crucial for any gamer looking to maintain an optimal gaming environment.

Software conflicts typically arise when multiple programs attempt to use the same resources or when incompatible software is installed on your system. This can manifest in various ways, including crashes, stuttering, or even failure to launch games altogether. One of the first steps in troubleshooting these issues is to ensure that all your software, including the operating system, drivers, and the game itself, is up to date. Developers frequently release patches to address compatibility issues, and having the latest version can often resolve many glitches.

If updating doesn’t do the trick, consider running your game in a clean boot environment. This boot mode starts Windows with a minimal set of drivers and startup programs, allowing you to determine if a background program is causing the conflict. To do this, access the System Configuration tool (msconfig), disable non-Microsoft services, and restart your PC. Once in this clean state, launch your game and see if the issues persist. If the game runs smoothly, you can gradually enable services to identify the culprit.

Another useful tip is to monitor your system’s task manager while gaming. Sometimes, resource-hungry applications running in the background can clash with your gaming performance. Close unnecessary applications that may be consuming CPU, memory, or GPU resources. Additionally, check for any overlay software that may interfere with your game, such as recording or streaming tools—these can often cause unexpected behavior.

Finally, if you’re still facing issues, don’t underestimate the power of community forums and support channels. Many gamers share similar experiences and can provide insights into specific software conflicts related to particular games. By systematically identifying and resolving these software conflicts, you can ensure a smoother gaming experience and get back to enjoying your favorite titles without interruption.

11. Driver Issues: Updating and Rolling Back Drivers

Driver issues can be one of the most frustrating obstacles in the world of PC gaming. Graphics cards, sound cards, and other essential components rely on drivers to communicate effectively with your operating system and gaming software. When these drivers are outdated or malfunctioning, it can lead to a myriad of problems, from poor game performance to complete crashes.

To address driver issues, the first step is to ensure that your drivers are up to date. Manufacturers frequently release updates to improve performance, add new features, and fix bugs. To update your drivers, you can visit the manufacturer’s website or use dedicated software utilities that automatically check for updates. For graphics cards, tools like NVIDIA GeForce Experience or AMD Radeon Software can simplify this process by notifying you of new versions and facilitating easy installation.

However, not all driver updates are beneficial. Occasionally, a new driver might introduce glitches or compatibility issues with specific games. In such cases, rolling back to a previous version can be a lifesaver. Most operating systems allow you to revert to an earlier driver through the Device Manager. Simply locate the device, right-click, and choose the “Properties” option. Under the “Driver” tab, you’ll find the option to roll back to a previous version. This can restore stability and functionality to your gaming setup.

In conclusion, maintaining a close eye on your drivers is crucial for a seamless gaming experience. Regularly checking for updates and knowing how to roll back when necessary will help you troubleshoot issues before they escalate. With the right driver management, you can ensure your games run smoothly and enjoyably, keeping you immersed in the gaming world without interruptions.

12. Storage Problems: Optimizing Disk Space for Games

When it comes to enjoying a seamless gaming experience, storage problems can quickly become a significant roadblock. With modern games demanding more and more disk space, many gamers find themselves grappling with limited storage, leading to frustrating load times and even crashes. Optimizing your disk space is crucial, not just for playing your favorite titles but also for maintaining your PC’s overall performance.

First and foremost, it’s essential to assess your current storage situation. Take a moment to check how much space each game occupies and determine which titles you actively play versus those collecting digital dust. Tools like Windows Storage Sense can help you identify large files and applications that might be hogging precious space.

Once you’ve pinpointed space-hoggers, consider cleaning up your hard drive. Uninstalling games you’ve completed or lost interest in can free up a significant amount of space, allowing you to make room for new releases. Additionally, temporary files, caches, and even old save data can accumulate over time. Cleaning utilities, such as CCleaner, can help you efficiently remove these unnecessary files and optimize your disk space.

For those with more extensive gaming libraries, investing in additional storage can be a game-changer. Solid-state drives (SSDs) offer faster load times and improved performance over traditional hard drives. If upgrading your hardware is an option, consider adding an ssd for your most-played games, while storing less frequently accessed titles on a larger hard drive.

Cloud gaming and external drives are also viable solutions. Services like Xbox Game Pass and Steam Cloud allow you to play and store games without taking up local disk space, making them perfect for gamers with limited storage. Meanwhile, external hard drives provide an easy way to expand your storage without needing to open up your PC.

In summary, addressing storage problems is vital for any gamer looking to optimize their setup. By regularly cleaning your hard drive, assessing your game library, and considering hardware upgrades, you can ensure that you always have enough space to enjoy the latest titles without the headache of disk space issues. Remember, a well-organized storage system not only enhances your gaming experience but also prolongs the lifespan of your PC.

13. Malware and Security: Keeping Your System Safe

In the exhilarating world of PC gaming, the last thing you want is to encounter malware or security issues that derail your gaming experience. Unfortunately, as the popularity of gaming has surged, so too have the threats posed by malicious software. From pesky adware that clutters your screen to more damaging ransomware that can lock you out of your entire system, protecting your rig is paramount.

To keep your gaming experience smooth and secure, start by investing in a reputable antivirus program. This software acts as your first line of defense, scanning for and eliminating threats before they can wreak havoc on your system. Regular updates are crucial, as new malware variants emerge daily. Make it a habit to run full system scans and keep your software up to date for optimal protection.

Moreover, practicing safe browsing habits can significantly reduce your risk of encountering malware. Avoid clicking on suspicious links or downloading unknown files, especially from unverified sources. Always verify the authenticity of any game updates or mods before installation. Your favorite games might come with enticing add-ons, but they could also carry hidden risks.

Additionally, consider enabling a firewall on your PC. A firewall acts as a barrier between your computer and potential threats from the internet, monitoring incoming and outgoing traffic to ensure that only legitimate connections are allowed. This can be particularly effective against malicious attacks that aim to exploit vulnerabilities in your system.

Finally, regularly back up your data. In the unfortunate event that your system is compromised, having a recent backup ensures you won’t lose progress in your gaming adventures. Use cloud services or external hard drives to store copies of your essential files and game saves.

By implementing these measures, you can create a fortified gaming environment that allows you to focus on what truly matters: enjoying your favorite games without the lurking fear of malware. Keeping your system secure not only enhances your gaming experience but also provides peace of mind, letting you dive headfirst into the virtual worlds you love.

14. Conclusion: Best Practices for Preventing Future Problems

In the world of PC gaming, where immersive experiences and high-performance graphics reign supreme, encountering issues can be frustrating. However, the good news is that many of these problems can be prevented with a few best practices. Adopting a proactive approach not only enhances your gaming experience but also minimizes the likelihood of disruptive issues down the line.

First and foremost, regular maintenance is crucial. Keep your system updated—this includes your operating system, drivers, and game software. Updates often come with performance enhancements and bug fixes that can prevent many common problems. Furthermore, consider investing in quality hardware. A powerful graphics card, ample RAM, and a reliable power supply can make a significant difference in your gaming performance and stability.

Another preventive measure is to optimize your system’s cooling. Overheating can lead to serious problems, including unexpected shutdowns and reduced performance. Ensure that your PC is well-ventilated, clean out dust from fans and components regularly, and consider using additional cooling solutions if you frequently play resource-intensive games.

Additionally, keep an eye on your storage space. Running low on disk space can lead to sluggish performance and crashes. Regularly clean up unnecessary files and consider using tools that help manage your storage effectively. Backing up your data is equally essential, as it protects you from potential data loss due to hardware failures or software issues.

Lastly, engage with the gaming community. Forums, social media groups, and gaming subreddits can be excellent resources for troubleshooting advice and recommendations. By staying informed and connected, you can share your experiences and learn from others, further enhancing your ability to tackle potential problems.

In conclusion, while encountering gaming issues can be part of the PC gaming journey, implementing these best practices can significantly reduce their frequency and impact. By staying proactive and maintaining your system, you can ensure that your gaming experience remains enjoyable and uninterrupted, allowing you to dive into your favorite worlds with confidence.

15. Additional Resources for PC Gamers

In the ever-evolving world of PC gaming, having access to reliable resources can make all the difference between a seamless experience and a frustrating one. Whether you’re a novice player looking to enhance your skills or a seasoned gamer wanting to troubleshoot a specific issue, there are countless resources available at your fingertips.

First and foremost, online forums such as Reddit’s r/pcgaming or dedicated gaming communities like PC Gamer’s forums offer a treasure trove of shared experiences. These platforms allow gamers to connect, share tips, and provide support for one another. Engaging in these discussions can introduce you to innovative solutions that you might not find in official guides.

YouTube is another invaluable resource. With thousands of channels dedicated to gaming, tutorials, and troubleshooting, you can find step-by-step walkthroughs for resolving common problems such as graphics issues, lag, or game crashes. Visual learners will particularly benefit from the detailed demonstrations that many creators provide.

Don’t overlook the power of official support pages from game developers and hardware manufacturers. Websites like NVIDIA, AMD, and Steam have extensive knowledge bases filled with troubleshooting guides, FAQs, and firmware updates that can help you address specific issues related to your setup or the games you’re playing.

Additionally, consider subscribing to gaming blogs and websites that regularly publish articles on the latest trends, tips, and fixes. Sites like Tom’s Hardware and IGN often feature in-depth reviews and guides that can help you optimize your gaming rig or improve your gameplay.

Lastly, social media platforms can serve as real-time resources. Following industry leaders, game developers, and gaming influencers can keep you informed about updates, patches, and community events, ensuring you’re always in the loop.

By leveraging these additional resources, you can not only enhance your gaming experience but also become a part of a larger community that shares your passion. Stay informed, stay engaged, and most importantly, keep gaming!

In conclusion, addressing common PC gaming problems doesn’t have to be a daunting task. We hope that our guide to the top 10 issues has empowered you with the knowledge and tools necessary to troubleshoot and resolve these challenges effectively. Whether you’re grappling with performance issues, connectivity problems, or software glitches, the solutions we’ve provided can help you get back to your gaming adventures with minimal disruption. Remember, every gamer encounters hurdles along the way; it’s how you tackle them that sets you apart. So, take a deep breath, roll up your sleeves, and dive back into your favorite virtual worlds! Happy gaming, and may your next session be free of technical hiccups!

How to Handle Car Maintenance for Different Car Types?

Owning a vehicle is not just about the thrill of the open road; it’s also about ensuring that your ride runs smoothly and lasts for years to come.

Car maintenance is a crucial aspect of vehicle ownership, yet it can often feel overwhelming with the myriad of makes, models, and maintenance requirements out there. From sedans and SUVs to trucks and hybrids, each type of vehicle comes with its own set of needs that must be addressed to keep it in peak condition. In this ultimate guide, we will delve into tailored maintenance tips designed specifically for every vehicle type, helping you navigate the intricacies of oil changes, tire care, brake inspections, and more. Whether you’re a seasoned car enthusiast or a first-time owner, this comprehensive resource will empower you to protect your investment and enjoy every journey with confidence. Join us as we explore the essential steps to ensure your vehicle remains a reliable companion on all your adventures!

1. Introduction to Car Maintenance

How to Handle Car Maintenance for Different Car Types?
Credit : whatcanu.com

Car maintenance is a crucial aspect of vehicle ownership that transcends mere convenience; it is a commitment to ensuring safety, performance, and longevity. Whether you drive a compact sedan, a robust SUV, or a classic vintage car, understanding the unique needs of your vehicle is essential for keeping it in optimal condition. Just as each car has its own personality and set of features, the approach to maintenance should be tailored to its type, age, and usage.

In this guide, we will explore the various facets of car maintenance, breaking them down into actionable insights that cater to every vehicle owner. From routine checks and seasonal care to specific tips for electric cars versus gas-powered vehicles, our aim is to equip you with the knowledge needed to keep your car running smoothly and efficiently.

Regular maintenance not only enhances your driving experience but also helps prevent costly repairs down the line. By fostering a proactive attitude toward care and upkeep, you can extend the life of your vehicle, maintain its resale value, and most importantly, ensure your safety on the road. So, whether you’re a seasoned car enthusiast or a first-time owner, let’s dive into the essential practices and considerations that will keep your vehicle in top shape for years to come.

2. Understanding Different Types of Vehicles

Understanding the diverse types of vehicles on the road today is crucial for tailoring your car maintenance approach effectively. Each vehicle type comes with its own unique set of specifications, requirements, and quirks that demand attention.

**Sedans** are the most common passenger vehicles, known for their fuel efficiency and comfort. Regular checks on oil levels, tire pressure, and brake performance are essential to ensure they operate at their best. Given their widespread use, many manufacturers provide detailed maintenance schedules, making it easier for owners to keep track of necessary services.

**SUVs and Crossovers**, with their larger size and robust build, often require different care. The added weight can put extra strain on components like brakes and suspension systems, so it’s crucial to monitor these closely. Additionally, if you venture off-road, regular inspections of the undercarriage and drivetrain can prevent costly repairs down the line.

**Trucks**, whether for personal use or commercial purposes, demand attention to their heavier-duty components. These vehicles often experience wear and tear more rapidly due to their capacity for hauling and towing. Routine checks on the engine, transmission, and tires are imperative, especially if the truck is used for heavy-duty tasks.

**Electric vehicles (EVs)** represent a growing segment of the automotive market, requiring a distinctly different maintenance approach. While they typically have fewer moving parts than traditional combustion engines, EVs require specific attention to their battery systems and charging infrastructure. Understanding how to maintain the battery’s health can significantly extend the lifespan of the vehicle and enhance its performance.

**Hybrids** combine elements of both traditional engines and electric motors, and their maintenance needs can be quite unique. Owners should familiarize themselves with the dual systems to ensure that both the gasoline engine and the electric components receive proper care.

By understanding the specific requirements and maintenance needs of these various vehicle types, you can tailor your approach to car care, ensuring longevity and performance. This knowledge not only saves you money but also enhances safety and reliability on the road, making it a fundamental aspect of responsible vehicle ownership.

3. Essential Maintenance Tasks for All Vehicles

How to Handle Car Maintenance for Different Car Types?
Credit : whatcanu.com

No matter the make or model, every vehicle requires a set of essential maintenance tasks to ensure optimal performance and longevity. These tasks form the backbone of routine car care and should be part of every driver’s maintenance checklist.

**1. Regular Oil Changes:**
One of the most critical aspects of car maintenance is changing the oil at regular intervals. Oil lubricates the engine, reduces friction, and helps prevent overheating. Depending on your vehicle and the type of oil used, this could mean changing the oil every 3,000 to 7,500 miles. Always refer to your owner’s manual for specific recommendations.

**2. Tire Care:**
Your tires are the only point of contact between your vehicle and the road, making their maintenance vital for safety and efficiency. Regularly check tire pressure, tread depth, and overall condition. Rotate your tires every 5,000 to 7,500 miles to ensure even wear, and don’t forget to align your wheels to prevent premature deterioration.

**3. Brake Inspections:**
Brakes are crucial for safe driving, so regular inspections are non-negotiable. Listen for unusual noises when braking, and pay attention to any changes in responsiveness. Have your brake pads and rotors checked at least once a year, or more frequently if you do a lot of stop-and-go driving.

**4. Fluid Checks:**
Beyond engine oil, several other fluids play a key role in your vehicle’s operation. Regularly check and top off coolant, brake fluid, transmission fluid, power steering fluid, and windshield washer fluid. Each of these fluids works to keep your car running smoothly and safely.

**5. Battery Maintenance:**
A well-maintained battery is essential for reliable starts and overall vehicle performance. Check the battery terminals for corrosion and ensure the connections are tight. If your battery is more than three years old, consider having it tested, as it may be nearing the end of its life.

**6. air Filter Replacement:**
A clean air filter is vital for optimal engine performance and fuel efficiency. Clogged filters can restrict airflow, leading to decreased power and increased fuel consumption. Check your air filter every 12,000 miles or as recommended in your owner’s manual, and replace it as needed.

By consistently attending to these essential maintenance tasks, you can keep your vehicle in top shape and avoid costly repairs down the line. Remember, a little proactive care goes a long way in enhancing your driving experience and extending the life of your car.

4. Tailoring Maintenance for Sedans

Sedans, known for their comfort and efficiency, require a specific approach to maintenance that emphasizes their unique engineering and driving dynamics. These vehicles typically feature a lower profile and a balanced weight distribution, which can enhance handling but also necessitates particular attention to specific components.

**Regular Oil Changes**: For sedans, maintaining the engine’s health is paramount. Changing the oil every 5,000 to 7,500 miles, depending on the manufacturer’s recommendations, is essential to ensure the engine runs smoothly and efficiently. Use high-quality synthetic oil that helps reduce engine wear and improves fuel efficiency.

**Tire Care**: Sedans often come equipped with all-season tires, which should be rotated every 6,000 to 8,000 miles to promote even wear. Regularly check tire pressure and tread depth to ensure optimal handling and fuel efficiency. Proper alignment is also crucial; misaligned wheels can lead to premature tire wear and affect the vehicle’s performance.

**Brake System**: The braking system on a sedan requires particular attention due to its everyday use in urban settings. Regularly inspect brake pads, rotors, and fluid levels. Most manufacturers recommend replacing brake pads every 30,000 to 70,000 miles, but it’s wise to listen for any unusual sounds or feel for vibrations when braking, which might indicate it’s time for a check-up.

**Fluid Levels**: Beyond oil, sedans have several vital fluids that need monitoring and regular replacement. Keep an eye on the coolant, transmission fluid, brake fluid, and power steering fluid. Each of these should be flushed and replaced according to your owner’s manual to prevent overheating and maintain optimal performance.

**Battery Maintenance**: Sedans generally have compact engine bays, which means battery maintenance can sometimes be overlooked. Regularly check the battery terminals for corrosion and ensure a secure connection. It’s wise to test the battery’s charge twice a year, especially before winter months when cold weather can significantly impact battery performance.

By tailoring your maintenance routine specifically for sedans, you not only extend the life of your vehicle but also enhance its performance and safety on the road. Making these adjustments will help ensure that your sedan remains a reliable and enjoyable mode of transportation for years to come.

5. Tailoring Maintenance for SUVs

How to Handle Car Maintenance for Different Car Types?
Credit : whatcanu.com

When it comes to maintaining an SUV, a tailored approach is essential to keep these robust vehicles performing at their best. SUVs are designed to tackle a variety of terrains, from city streets to rugged off-road paths, which means their maintenance needs can differ significantly from those of standard sedans or compact cars.

First and foremost, regular inspections of the drivetrain and suspension system are crucial. Given the weight and larger size of SUVs, components such as shocks, struts, and differentials endure more stress compared to lighter vehicles. Look for any signs of wear or damage, especially after extensive off-road adventures, as these can lead to costly repairs if left unchecked.

Tire maintenance is another critical aspect to consider. SUVs often come equipped with all-terrain or larger tires that require proper inflation and alignment to ensure optimal performance and safety. Regularly check the tire pressure and tread depth to promote even wear and enhance fuel efficiency. Additionally, consider rotating your tires more frequently than recommended for standard vehicles, especially if you frequently traverse uneven terrain.

Fluid levels also require special attention. SUVs generally require larger quantities of engine oil, transmission fluid, and coolant, so keeping these fluids topped off is essential for maintaining engine health and overall performance. Be sure to adhere to the manufacturer’s guidelines for fluid changes, as these intervals may differ from those of traditional cars.

Finally, don’t overlook the importance of routine checks on your SUV’s brakes. Given their size and weight, SUVs require more robust braking systems, and the wear on brake pads and rotors can be more pronounced. Regular brake inspections can help ensure that your stopping power remains reliable, which is especially crucial when navigating steep hills or towing heavy loads.

By following these tailored maintenance tips, you can ensure that your SUV remains a dependable companion for all your adventures, providing comfort, safety, and performance no matter where the road takes you.

6. Tailoring Maintenance for Trucks

When it comes to vehicle maintenance, trucks require a unique approach that reflects their specific needs and demands. Unlike smaller cars, trucks are built to handle heavier loads and often face harsher driving conditions, making tailored care essential for optimal performance and longevity.

First and foremost, regular inspections of the truck’s drivetrain components are crucial. This includes checking the transmission fluid levels, inspecting the transfer case, and ensuring that the differential fluid is clean and adequately filled. Given that trucks are frequently used for towing and hauling, these elements endure greater stress and need to be maintained diligently to prevent breakdowns.

Tire maintenance is another critical aspect unique to trucks. Due to their larger size and weight, truck tires experience more wear, particularly if the vehicle is used for heavy-duty tasks. Regularly checking tire pressure, tread depth, and alignment can prevent uneven wear and improve fuel efficiency. Additionally, it’s essential to rotate the tires regularly to ensure even distribution of wear, extending their lifespan significantly.

Brake systems in trucks also require careful monitoring. Heavy-duty trucks often come equipped with larger brakes to manage the increased stopping power needed for their size and load capacity. Regular inspections of brake pads, rotors, and fluid levels will ensure that your truck remains safe and responsive on the road, especially when carrying heavy cargo.

Furthermore, don’t forget about the engine. Trucks often operate in more demanding conditions, so it’s vital to adhere to a strict oil change schedule using high-quality oil suitable for heavy-duty vehicles. Additionally, regularly replacing air filters and fuel filters can help maintain engine efficiency, ensuring your truck runs smoothly and delivers the power you need.

Lastly, consider the importance of keeping the truck’s exterior and interior in top shape. Regular washing and waxing not only enhance the vehicle’s appearance but also protect the paint and prevent rust, particularly in regions where roads are treated with salt during winter months. Inside, maintaining cleanliness and functionality can enhance the overall driving experience and the longevity of upholstery and interiors.

By tailoring your maintenance routine to meet the specific needs of your truck, you can ensure that it remains reliable and efficient, ready to tackle any job that comes its way. Proper care is not just about keeping your truck running; it’s about maximizing its potential and safeguarding your investment for the long haul.

7. Tailoring Maintenance for Electric Vehicles

How to Handle Car Maintenance for Different Car Types?
Credit : whatcanu.com

As the automotive landscape shifts towards sustainability, electric vehicles (EVs) have emerged as a popular choice among environmentally conscious drivers. However, the maintenance of EVs presents unique challenges that differ significantly from traditional gasoline-powered cars. Tailoring maintenance for electric vehicles involves understanding their distinct components and operational needs to ensure optimal performance and longevity.

One of the most crucial aspects of EV maintenance is battery care. The battery is the heart of any electric vehicle, and its health directly influences the vehicle’s range and efficiency. Regularly monitoring the battery’s state of charge and avoiding complete discharges can prolong its lifespan. Additionally, many manufacturers recommend periodic inspections to check for any signs of wear or damage to the battery cells, ensuring that drivers are always aware of their vehicle’s health.

Another key area of focus is the electric motor and regenerative braking system. Unlike traditional vehicles, which rely heavily on friction brakes, EVs utilize regenerative braking to convert kinetic energy back into stored energy. This system requires less frequent brake pad replacements; however, it’s essential to have the braking system inspected regularly to ensure it functions optimally. Technicians should check for any software updates as well, as manufacturers often release updates that can enhance performance and efficiency.

Tire maintenance is also critical for electric vehicles. Due to the instant torque and weight of most EVs, tires can wear out more quickly than in conventional cars. Regular tire rotations, alignments, and checks for proper inflation can help improve tire longevity and ensure safety on the road. Additionally, consider investing in tires specifically designed for electric vehicles, which can offer better performance and energy efficiency.

Lastly, don’t overlook software updates! Many electric vehicles come equipped with advanced technology and software that require periodic updates to improve functionality and security. Staying up-to-date with these updates not only enhances your driving experience but can also optimize the vehicle’s performance.

By tailoring maintenance practices specifically for electric vehicles, owners can enjoy the benefits of their eco-friendly cars while ensuring they remain reliable and efficient for years to come. Embracing these specialized maintenance tips will not only help you protect your investment but will also contribute to a more sustainable driving experience.

8. Tailoring Maintenance for Hybrids

When it comes to hybrids, tailoring maintenance is essential for ensuring optimal performance and longevity. Hybrid vehicles combine a traditional internal combustion engine with an electric motor, which means their maintenance needs differ significantly from those of conventional cars.

First and foremost, understanding the battery system is key. Hybrid batteries are designed to last for many years, often exceeding 100,000 miles, but they do require specific care. Regularly checking the battery’s cooling system is crucial, as overheating can lead to premature failure. Ensure that the cooling vents are clear of debris and that the battery is functioning within its optimal temperature range.

Next, focus on the brake system. Hybrids are equipped with regenerative braking, which helps recharge the battery when you slow down. This feature can extend the life of brake pads, but it’s still important to monitor their condition regularly. Listen for unusual sounds when braking and pay attention to any changes in braking performance. If your brakes feel less responsive, it may be time for a professional inspection.

Furthermore, oil changes should not be overlooked. While hybrids often require less frequent oil changes than traditional vehicles due to their efficient engine operation, it’s essential to adhere to the manufacturer’s guidelines. Using the right type of oil—typically a low-viscosity, high-quality synthetic—is vital to ensure the engine runs smoothly and efficiently.

Lastly, keep an eye on the tires. Hybrid vehicles can sometimes be heavier due to the additional components like the battery, which can affect tire wear. Regularly checking tire pressure and alignment will not only enhance fuel efficiency but also improve safety on the road.

In summary, maintaining a hybrid vehicle involves a blend of standard car care practices and specific attention to the unique components that hybrid technology introduces. By tailoring your maintenance routine to meet these needs, you can enjoy a reliable, efficient, and eco-friendly driving experience for years to come.

9. Seasonal Maintenance Tips

Seasonal maintenance is essential for keeping your vehicle in prime condition, as different weather conditions can significantly impact its performance and longevity. Whether you’re transitioning into the icy grip of winter or preparing for the sweltering heat of summer, following tailored maintenance tips can help you navigate the challenges each season presents.

**Winter Maintenance Tips:**
As the temperatures drop, it’s crucial to make sure your vehicle is prepared for cold weather. Begin by checking your battery, as cold temperatures can diminish its effectiveness. Ensure that your battery terminals are clean and consider testing the battery’s voltage, especially if it’s more than three years old.

Next, inspect your tires. Winter weather often brings snow and ice, making adequate tread depth vital for traction. If you live in an area prone to harsh winters, consider investing in a set of winter tires. Additionally, ensure your wiper blades are in good condition and use winter-specific washer fluid that won’t freeze.

Lastly, don’t forget about your vehicle’s fluids. Antifreeze is key to preventing your engine from freezing, so check the levels and top off as necessary. A thorough inspection of the brake system is also advisable, as stopping distances can increase significantly on slick roads.

**Summer Maintenance Tips:**
As temperatures rise, your vehicle faces different challenges. Start by checking your cooling system, including the radiator and hoses, to prevent overheating. Ensure the coolant level is adequate and look for any leaks or cracks in the hoses.

Next, pay attention to your air conditioning system. A functioning A/C is essential for comfort during the hot months, so have it serviced if you notice any issues. Also, inspect your tires again, as heat can cause tires to wear more quickly or even blow out. Keeping them properly inflated and checking the tread can enhance safety and fuel efficiency.

Lastly, remember that summer can be tough on your vehicle’s paint and interior. Regularly wash and wax your car to protect it from UV rays and dirt buildup. Investing in sunshades for the interior can also help preserve the dashboard and upholstery from fading.

By implementing these seasonal maintenance tips, you can ensure that your vehicle remains reliable and safe throughout the year, tailored to withstand the specific challenges posed by each season. Taking the time to prepare your car for the changing weather not only enhances its performance but also contributes to your peace of mind as you hit the road.

10. Common Car Problems and Solutions

When it comes to car maintenance, being aware of common problems and their solutions is essential for any vehicle owner. Understanding these issues not only helps you save time and money but also ensures your safety on the road. Here, we’ll explore some of the most frequently encountered car problems and provide practical solutions that you can implement.

**1. Overheating Engine**
An overheating engine can lead to severe damage if not addressed promptly. This issue is often caused by a low coolant level, a malfunctioning thermostat, or a leaking radiator. To solve this, regularly check and top off your coolant levels. If the problem persists, inspect the thermostat and radiator for any leaks or blockages. If you’re not comfortable diagnosing it yourself, visiting a mechanic is wise.

**2. Dead Battery**
A dead battery is one of the most common issues drivers face, especially in extreme temperatures. Signs of a failing battery include dimming headlights and difficulty starting the engine. To prevent this, check your battery’s charge regularly and clean any corrosion on the terminals. If your battery is older than three years or shows signs of wear, consider replacing it to avoid being stranded.

**3. Flat Tires**
Flat tires can happen unexpectedly, often due to punctures, slow leaks, or worn-out tread. Always keep a spare tire, jack, and tire iron in your vehicle for emergencies. Regularly inspect your tires for uneven wear and check the pressure monthly. If you do get a flat, ensure a safe location for changing it and drive cautiously afterward to a tire repair shop.

**4. Brake Issues**
Squealing or grinding noises when braking can indicate worn brake pads or other brake system problems. If you notice any changes in braking performance, it’s crucial to get your brakes checked immediately. Regular maintenance, including replacing brake pads and flushing brake fluid, can prevent more serious issues down the line.

**5. electrical Problems**
From malfunctioning lights to issues with power windows, electrical problems can be frustrating. Start by checking fuses and wiring connections. If the problem lies beyond simple fixes, consulting a professional is necessary to avoid further complications.

**6. Warning Lights**
Modern vehicles are equipped with various warning lights on the dashboard that alert you to potential issues. If a warning light appears, refer to your owner’s manual for guidance. Ignoring these signals can lead to larger problems, so it’s best to address them as soon as possible.

By being proactive and informed about these common car problems and their solutions, you can ensure your vehicle remains in top condition. Regular maintenance checks, coupled with swift responses to any issues, will not only extend the life of your car but also enhance your overall driving experience. Remember, your vehicle is an investment—taking care of it will pay off in the long run.

11. DIY Maintenance vs. Professional Services

When it comes to car maintenance, the age-old debate of DIY (Do It Yourself) versus professional services is one that every vehicle owner faces at some point. Each approach has its own merits and drawbacks, and understanding them can help you make the best choice for your specific needs and circumstances.

**DIY Maintenance** can be a rewarding and cost-effective way to keep your vehicle in top shape. For those who enjoy hands-on tasks and have a knack for mechanics, tackling routine maintenance like oil changes, tire rotations, and air filter replacements can be a fulfilling way to engage with your vehicle. Not only does it save you money on labor costs, but it also gives you an intimate understanding of your car’s inner workings. Additionally, there’s a certain pride that comes from knowing you’ve personally cared for your vehicle.

However, it’s crucial to recognize your limits. Some tasks require specialized knowledge, tools, and experience that the average car owner may not possess. For instance, engine repairs, brake system overhauls, and transmission services are complex and can be dangerous if not done correctly. Mistakes in these areas can lead to costly damage or even safety hazards. Therefore, if you’re considering the DIY route, make sure to thoroughly research each task, invest in the necessary tools, and don’t hesitate to consult with more experienced car enthusiasts or resources.

On the other hand, **Professional Services** offer the advantage of expertise and efficiency. Certified mechanics bring years of training and experience to the table, ensuring that your vehicle receives the highest standard of care. They have access to advanced diagnostic equipment and specialty tools that most DIY enthusiasts may not possess, allowing them to identify and rectify issues that might go unnoticed by the untrained eye.

Moreover, professional services often provide warranties on parts and labor, giving you peace of mind that your car is in good hands. For complex repairs or if you simply lack the time or inclination to perform maintenance yourself, turning to a reputable mechanic or service center can be a wise investment.

Ultimately, the choice between DIY maintenance and professional services depends on your confidence, skills, and the specific needs of your vehicle. A hybrid approach can also work wonders—tackling simpler tasks yourself while leaving the more complicated jobs to the professionals. By understanding the strengths of both methods, you can create a tailored maintenance plan that ensures your vehicle remains reliable and safe on the road for years to come.

12. Creating a Maintenance Schedule

Creating a maintenance schedule is crucial for keeping any vehicle in optimal condition, regardless of its type. A well-structured maintenance plan not only extends the life of your car but also enhances its performance and safety. To tailor a schedule that meets your vehicle’s specific needs, begin by consulting the owner’s manual. This document serves as a treasure trove of information, detailing manufacturer-recommended service intervals for key components such as oil changes, tire rotations, brake inspections, and fluid replacements.

Start with the basics: outline a timeline for regular maintenance tasks. For most vehicles, oil changes are essential every 5,000 to 7,500 miles, depending on the type of oil used and driving conditions. Tire rotations should follow every 5,000 to 10,000 miles to ensure even wear and prolong their lifespan. Don’t forget to check your brakes, wipers, and lights at least once a year, as these components are critical for safe driving.

Incorporate seasonal checks into your schedule as well. For instance, before winter, inspect your battery, antifreeze levels, and tire tread. Summer months may require air conditioning system checks and coolant levels. If you own a specialized vehicle, such as a hybrid or electric car, be aware that they may have unique maintenance needs, including battery health assessments that should be performed regularly.

To keep your schedule organized, consider using a digital calendar or a dedicated app that sends reminders for upcoming maintenance tasks. This not only ensures you stay on top of your vehicle’s needs but also helps you track when services were performed, creating a comprehensive maintenance history—a valuable asset if you ever decide to sell your vehicle.

Regular maintenance is like giving your car a spa day; it rejuvenates performance and keeps it running smoothly for years to come. By creating a thoughtful and personalized maintenance schedule, you are investing in the long-term health of your vehicle, ensuring that it remains reliable and enjoyable to drive.

13. Budgeting for Car Maintenance

When it comes to car maintenance, budgeting is a crucial aspect that every vehicle owner should prioritize. Whether you drive a compact sedan, a rugged SUV, or a high-performance sports car, understanding the financial commitment involved in keeping your vehicle in top shape can save you from unexpected expenses down the road.

Start by assessing the specific needs of your vehicle. Different types of cars have unique maintenance requirements. For example, luxury vehicles may demand specialized care, including premium parts and skilled technicians, which can lead to higher costs. On the other hand, an older model might require more frequent repairs due to wear and tear, and it’s wise to set aside a substantial portion of your budget for these inevitable expenses.

Create a comprehensive maintenance schedule based on your owner’s manual, which outlines recommended services at various mileage intervals. This could include oil changes, tire rotations, brake inspections, and fluid replacements. By planning these services ahead of time, you can allocate funds accordingly, preventing any sudden financial strain.

It’s also advisable to set up a dedicated savings account specifically for car maintenance. Contributing a small amount each month can help build a safety net, ensuring you have the funds available when it’s time for that unexpected repair or routine service. Don’t forget to leave some room in your budget for the occasional unforeseen issue; having a cushion can make all the difference when you face an unexpected repair bill or emergency service.

Investing in preventive maintenance can also play a significant role in budgeting. Regular check-ups can help catch issues early, often saving you money in the long run by avoiding major repairs. Plus, keeping your car in good condition can enhance its resale value, providing a financial return on your investment when it’s time to upgrade.

In summary, budgeting for car maintenance requires foresight and diligence. By understanding your vehicle’s specific needs, planning for regular services, and setting aside funds for unexpected repairs, you can ensure that your car remains reliable and safe, allowing you to enjoy the open road with peace of mind.

14. The Importance of Keeping Records

Keeping meticulous records of your vehicle’s maintenance is not just a good habit—it’s essential for ensuring longevity and optimal performance. Imagine your car as a living entity that thrives on attention; maintaining its health requires a diligent hand. Whether you drive a compact sedan, a rugged SUV, or a classic vintage car, documenting every oil change, tire rotation, brake inspection, and fluid refill creates a comprehensive history that can be invaluable down the line.

Why is this record-keeping so important? First and foremost, it provides a clear timeline of your vehicle’s maintenance history, allowing you to track when specific services were performed and when they are due again. This proactive approach helps prevent overlooked tasks and can save you from costly repairs that arise from neglect. Additionally, many manufacturers recommend service intervals based on mileage or time. Keeping accurate records ensures you meet these benchmarks, helping to maintain your vehicle’s warranty and resale value.

In the case of unexpected repairs, having a detailed record can simplify discussions with mechanics or dealerships. It provides proof that you’ve been diligent in maintenance, which can help you better understand any issues and potentially negotiate costs. Plus, if you choose to sell your vehicle, a well-organized maintenance history can act as a selling point, showcasing your commitment to care and enhancing buyer confidence.

To effectively keep these records, consider using a dedicated notebook, a spreadsheet, or even a vehicle maintenance app that allows you to log services and get reminders for upcoming maintenance. Include dates, mileage, the type of service performed, and any observations or recommendations from your mechanic. This habit not only keeps your vehicle running smoothly but also empowers you with knowledge about your investment. By understanding your vehicle’s needs, you’ll be better equipped to make informed decisions, ensuring that your car remains a reliable companion on every journey.

15. Conclusion: Keeping Your Vehicle in Top Shape

In conclusion, maintaining your vehicle is not just about fixing issues as they arise; it’s about adopting a proactive approach to ensure longevity and optimal performance. Each type of vehicle, whether it’s a compact sedan, a rugged SUV, or a high-performance sports car, has unique needs that require tailored care. By understanding these specific requirements and adhering to a regular maintenance schedule, you can prevent minor problems from escalating into costly repairs.

Regular checks on essential components such as the engine, brakes, tires, and fluids can make a world of difference. Simple actions like changing your oil at recommended intervals, rotating your tires, and monitoring your brakes will not only enhance safety but also improve fuel efficiency and overall driving experience. Additionally, don’t forget the importance of keeping your vehicle clean—both inside and out. A clean car not only looks good but also helps protect its value over time.

Staying informed about your vehicle’s specific maintenance needs and following the manufacturer’s guidelines will equip you to handle any issues effectively. Remember, a well-maintained vehicle is not just a means of transportation; it’s a reliable partner that can take you on countless adventures, safely and comfortably. So invest the time and effort into your car’s upkeep—it will pay off in the long run with peace of mind and driving enjoyment. Keep your vehicle in top shape, and it will reward you with years of dependable service. Safe travels!

In conclusion, we hope this ultimate guide to car maintenance empowers you to tailor your vehicle care to suit your specific needs, whether you drive a compact car, an SUV, or a classic model. By understanding the unique requirements of your vehicle and implementing the maintenance tips outlined in this post, you can enhance performance, extend lifespan, and ensure safety on the road. Regular upkeep not only saves you money in the long run but also provides peace of mind as you navigate your journeys. As you embark on this maintenance journey, remember that a little proactive care goes a long way. Here’s to many safe and enjoyable miles ahead—happy driving!

How to Handle Car Maintenance on a Road Trip?

As the sun rises over the horizon and the open road beckons, the promise of adventure awaits those ready to embark on a road trip.

However, before you pack your bags and hit the highway, it’s crucial to ensure that your vehicle is road-ready. Car maintenance is the unsung hero of any successful journey, playing a vital role in your safety, comfort, and overall experience. From checking tire pressure to inspecting fluid levels, each step in this maintenance checklist can mean the difference between a smooth ride and an unexpected roadside breakdown. In this ultimate guide to car maintenance, we’ll equip you with essential tips and tricks to prepare your car for the journey ahead, ensuring that your only concern is which scenic route to take next. Get ready to rev up your engine and explore the open road with confidence!

1. Introduction: Why Car Maintenance Matters for Road Trips

How to Handle Car Maintenance on a Road Trip?
Credit : whatcanu.com

Embarking on a road trip is often synonymous with freedom and adventure, offering the thrill of open roads and the allure of spontaneous detours. However, the excitement of hitting the highway can quickly turn into a nightmare if your vehicle isn’t in prime condition. This is where the importance of car maintenance comes into play. Proper upkeep of your vehicle not only ensures a smoother ride but also significantly reduces the risk of unexpected breakdowns, allowing you to focus on the journey rather than the mechanics.

Imagine cruising along scenic routes, the wind in your hair, and your favorite playlist filling the air—only to be interrupted by the ominous sound of a sputtering engine. Regular maintenance is your ticket to avoiding such scenarios. By performing essential checks and repairs before setting out, you can enhance your vehicle’s reliability and performance, ensuring it can handle the demands of long-distance travel.

Moreover, a well-maintained car contributes to your safety and the safety of your passengers. Flat tires, faulty brakes, and overheating engines are all preventable issues that can arise from neglecting routine maintenance. Prioritizing your vehicle’s health not only protects your investment but also provides peace of mind, allowing you to explore with confidence.

In this guide, we’ll delve into the critical aspects of car maintenance that are vital for a successful road trip. From essential pre-trip inspections to ongoing care during your travels, we’ll equip you with the knowledge you need to ensure your vehicle is ready for the adventure ahead. Buckle up, and let’s get started on the journey to a smooth and enjoyable road trip experience!

2. Preparing Your Vehicle: A Pre-Trip Checklist

Before hitting the open road for your much-anticipated adventure, taking the time to meticulously prepare your vehicle is crucial for a smooth and enjoyable journey. A pre-trip checklist acts as your roadmap to ensuring that every aspect of your car is ready to tackle the miles ahead. Here’s what you should include in your preparation process:

**1. Inspect the Fluids:** Start by checking your oil, coolant, brake fluid, transmission fluid, and windshield washer fluid. Low or dirty fluids can hinder your vehicle’s performance, potentially leading to costly repairs on the road. If necessary, top them off or schedule an oil change before your trip.

**2. Check the Tires:** Your tires are your car’s only contact with the road, so they must be in optimal condition. Inspect them for adequate tread depth and ensure they are properly inflated. Don’t forget to check the spare tire as well! Remember, a flat tire can quickly derail your travel plans.

**3. Test the Brakes:** Ensuring your braking system is functioning properly is vital for safety. Listen for any unusual sounds when braking and feel for any vibrations. If anything seems off, have a professional inspect your brakes to avoid potential hazards on your journey.

**4. Ensure Lights and Signals Work:** Check all your vehicle’s lights, including headlights, brake lights, turn signals, and hazard lights. Proper visibility is essential, especially if you plan to drive during the evening or in poor weather conditions.

**5. Review the Battery:** A dead battery can put a damper on your road trip before it even begins. Inspect the battery terminals for corrosion and ensure that it is securely fastened. If your battery is older than three years, consider having it tested to prevent unexpected failures.

**6. Prepare Emergency Supplies:** Equip your vehicle with essential emergency supplies, including a first-aid kit, flashlight, basic tools, jumper cables, and a spare tire kit. These items can be invaluable if you encounter an unexpected breakdown or roadside emergency.

**7. Clean and Organize the Interior:** A clutter-free space not only creates a more comfortable driving environment but also allows you to find essential items quickly. remove any unnecessary items, vacuum the interior, and ensure that all necessary travel documents, like your license and registration, are easily accessible.

By carefully working through this pre-trip checklist, you can rest assured that your vehicle is in peak condition, allowing you to focus on the excitement of your road trip. With your car prepared for the adventure ahead, you’re one step closer to making unforgettable memories on the open road!

3. Checking Your Fluids: Oil, Coolant, and More

How to Handle Car Maintenance on a Road Trip?
Credit : whatcanu.com

Before hitting the open road, one of the most crucial steps in preparing your vehicle for a smooth road trip adventure is to check your fluids. This might seem like a mundane task, but ensuring that your oil, coolant, and other vital fluids are at optimal levels can mean the difference between a carefree journey and a roadside emergency.

**Oil:** Start by checking your engine oil. This lubricant is essential for keeping your engine running smoothly, reducing friction, and preventing overheating. To check the oil level, simply pull out the dipstick, wipe it clean, reinsert it, and then pull it out again to see where the oil line falls. If it’s low, top it off with the recommended oil for your vehicle. Additionally, consider the oil’s color and consistency; if it’s dark and gritty, it may be time for an oil change.

**Coolant:** Next, turn your attention to the coolant. This fluid is vital for regulating your engine’s temperature and preventing overheating, especially during long drives in warm weather. Check the coolant reservoir for the appropriate level—ideally, it should be between the “low” and “full” marks. If it’s low, you can top it off with a mixture of antifreeze and distilled water, ensuring that you’re using the right type for your vehicle. Remember, never open the radiator cap while the engine is hot, as it can release steam and cause burns.

**Other Fluids:** Don’t forget about other essential fluids, such as brake fluid, transmission fluid, power steering fluid, and windshield washer fluid. Each plays a unique role in your vehicle’s operation. Brake fluid ensures your brakes function effectively, transmission fluid keeps your gears shifting smoothly, power steering fluid helps with maneuverability, and windshield washer fluid keeps your visibility clear. Check each of these fluids and top them off as necessary.

By taking the time to check and maintain your vehicle’s fluids before your road trip, you not only enhance your car’s performance but also secure peace of mind. Knowing that your vehicle is in top shape allows you to focus on the journey ahead, creating lasting memories without the worry of unexpected breakdowns. So grab your tools and give your fluids a thorough check—it’s a small step that promises a big payoff on the open road!

4. Tire Care: Pressure, Tread Depth, and Rotation

When it comes to ensuring a smooth and safe road trip, tire care is paramount. Your tires are the only point of contact between your vehicle and the road, making their condition critical not only for performance but also for safety. Let’s break down the essential components of tire care: pressure, tread depth, and rotation.

**Pressure:** Maintaining the correct tire pressure is crucial for optimal performance and fuel efficiency. Under-inflated tires can lead to sluggish handling and increased fuel consumption, while over-inflated tires may wear unevenly and increase the risk of a blowout. To find the recommended pressure for your tires, check the sticker located on the driver’s side door jamb or consult your vehicle’s owner manual. Before hitting the road, invest a few minutes to use a tire pressure gauge to check each tire’s pressure, including the spare. Ensure they are inflated to the recommended levels, adjusting as necessary.

**Tread Depth:** The tread on your tires provides the necessary grip and traction needed for safe driving, especially in wet or slippery conditions. As your tires wear down, the tread depth decreases, increasing the likelihood of hydroplaning or losing control. A simple way to check tread depth is to use the penny test: insert a penny into the tread grooves with Lincoln’s head facing down. If you can see the top of his head, it’s time to replace your tires. For optimal safety on your road trip, aim for a minimum tread depth of 2/32 of an inch.

**Rotation:** Tire rotation is the practice of moving your tires from one position to another on your vehicle at regular intervals. This helps to ensure even tire wear, prolonging the life of your tires and improving handling. Most experts recommend rotating your tires every 5,000 to 7,500 miles or as indicated in your vehicle’s maintenance schedule. By keeping your tires evenly worn, you not only enhance your vehicle’s performance but also contribute to a smoother, more comfortable ride during your adventure.

By paying attention to these key aspects of tire care, you’ll be better equipped to handle any road conditions that come your way. A little diligence in maintaining your tires can translate to a safer, more enjoyable road trip experience, allowing you to focus on the journey ahead rather than worrying about unexpected breakdowns. Remember, a well-maintained vehicle is the first step to an unforgettable road trip adventure!

5. Brake System Inspection: Ensuring Safety on the Road

How to Handle Car Maintenance on a Road Trip?
Credit : whatcanu.com

When preparing for a road trip, one of the most critical aspects of car maintenance often overlooked is the brake system inspection. Your brakes are your vehicle’s primary safety feature, and ensuring they are in optimal condition can mean the difference between a smooth journey and a potential disaster.

Start by checking the brake pads for wear and tear. If the pads are too thin, they may not provide adequate stopping power, especially on long descents or during sudden stops. A good rule of thumb is to replace them when they have about a quarter-inch of material left—any less, and you risk damaging the rotors, which can lead to costly repairs down the line.

Next, inspect the brake fluid. Low fluid levels can indicate a leak in the system, while dirty fluid can compromise braking efficiency. Brake fluid should be clear or slightly yellow; if it appears dark or gritty, it’s time for a flush. Don’t forget to check the brake lines and hoses for any signs of wear, cracks, or leaks, as these can also jeopardize your safety.

Finally, listen for any unusual sounds when applying the brakes—squeaking, grinding, or a pulsating feel can all signal underlying issues that need addressing before hitting the road. A thorough brake system inspection not only enhances your safety but also provides peace of mind, allowing you to enjoy the open road ahead. After all, the last thing you want on a road trip is to worry about your vehicle’s ability to stop when it matters most. So, before you embark on your adventure, make sure your brakes are ready to handle whatever the journey throws your way.

6. Battery Health: Tips for a Reliable Start

Battery health is a critical component of any successful road trip, as a reliable start is paramount to enjoying your journey. There’s nothing more frustrating than turning the key in the ignition and hearing that dreaded click instead of a smooth engine roar. To ensure your battery is up for the adventure ahead, follow these essential tips.

First, regularly check the battery terminals for corrosion, which can hinder electrical connections. A simple cleaning with a mixture of baking soda and water can do wonders for maintaining a solid link between the terminals and the battery. Make sure to wear gloves and eye protection while doing this, as the process can sometimes release harmful gases.

Next, it’s advisable to test your battery’s voltage regularly, especially if it’s older than three years. Many auto parts stores offer free battery testing, or you can invest in a multimeter to monitor its health at home. A fully charged battery should read around 12.6 volts or more, while anything below 12.4 volts indicates it’s time to recharge or replace the battery altogether.

Temperature fluctuations can also impact battery performance. If you’re embarking on a journey through hot or cold climates, be aware that extreme temperatures can reduce battery efficiency. If you’re heading into particularly sweltering conditions, consider using a battery insulation blanket to protect it from excessive heat. Conversely, for colder climates, make sure the battery is fully charged, as cold weather can diminish its capacity.

Lastly, always keep jumper cables in your car, just in case. Even with all precautions taken, unexpected situations can arise, and having a reliable set of jumper cables can be a lifesaver. Consider practicing how to jump-start a vehicle before you hit the road, so you’re prepared for any battery-related issues that may occur during your adventure.

By prioritizing battery health and following these tips, you can ensure that your vehicle starts reliably, allowing you to focus on the journey ahead and make the most of your road trip experience. Safe travels!

7. Lights and Signals: Visibility and Communication on the Road

How to Handle Car Maintenance on a Road Trip?
Credit : whatcanu.com

When it comes to a smooth road trip adventure, ensuring your vehicle’s lights and signals are in top condition is paramount. Visibility is not just about seeing the road; it’s about being seen by others. Before embarking on your journey, take the time to inspect all your vehicle’s lighting systems, including headlights, taillights, brake lights, and turn signals. A simple walk-around inspection can reveal burnt-out bulbs or hazy lenses that could reduce your visibility, especially during twilight or inclement weather.

Headlights are your primary source of illumination, so it’s crucial to make sure they are bright and properly aligned. Misaligned headlights can blind oncoming drivers or fail to adequately light the road ahead. Consider upgrading to LED or high-intensity discharge (HID) bulbs for improved brightness and longevity. Don’t forget about your fog lights, too; they can be a lifesaver when driving through fog, rain, or snow.

Equally important are your turn signals and brake lights. These lights are essential for communication with other drivers. A malfunctioning turn signal can lead to confusion and increase the risk of accidents. Regularly check that all indicators flash brightly and at the correct rate. If your vehicle is equipped with running lights, ensure they also function properly, as they enhance your vehicle’s visibility to others on the road.

Lastly, consider the impact of cleanliness on visibility. Dirty headlights can significantly impair the light output, so make sure to clean them regularly. A quick wash can make a world of difference, not just for headlights but for all exterior lights as well.

By making visibility and communication a priority before your road trip, you not only ensure your safety but also enhance the overall experience. After all, a smooth journey begins with a well-prepared vehicle, ready to light up the roads and signal your intentions with clarity.

8. Wiper Blades and Windshield Care: Clear Vision Ahead

When embarking on a road trip, having a clear vision ahead is paramount, and this begins with your wiper blades and windshield care. Often overlooked, these components are your first line of defense against rain, dirt, and debris that can obstruct your view while driving.

Start by assessing the condition of your wiper blades. If you notice streaks, skips, or an inability to adequately clear water from your windshield, it’s time for a replacement. Wiper blades should be replaced approximately every six months, or sooner if you live in an area with extreme weather conditions. Invest in high-quality blades that are designed for your specific vehicle; they’ll perform better and last longer.

Next, don’t forget about your windshield itself. Regularly cleaning it will not only enhance visibility but also prolong the life of your wiper blades. Use a glass cleaner that’s safe for automotive use, and consider a microfiber cloth to avoid scratching the surface. For added protection, a hydrophobic windshield treatment can be applied, repelling water and making it much easier to see in rain.

Lastly, check the windshield washer fluid. Fill it up with a suitable cleaning solution—especially one that combats bugs and road grime. Ensure that the washer jets are functioning properly; nothing is worse than being caught in a downpour with inadequate visibility and an empty washer fluid reservoir.

By taking the time to ensure your wiper blades and windshield are in top shape, you’ll enjoy a clearer view of the open road ahead, allowing you to focus on the adventure instead of the obstacles. With clear vision, you can navigate through varying weather conditions confidently, making your road trip not just a journey, but a safe and enjoyable experience.

9. Air Filter and HVAC System: Comfort During Your Journey

When embarking on a road trip adventure, comfort is key, and that’s where the air filter and HVAC (Heating, Ventilation, and Air Conditioning) system come into play. A clean air filter ensures that the air circulating in your vehicle is fresh and free from pollutants, dust, and allergens, creating a pleasant environment for everyone on board. Neglecting this simple yet vital component can lead to unpleasant odors, reduced air quality, and increased strain on your HVAC system, which ultimately affects its performance.

Before hitting the road, take a moment to inspect your air filter. A clogged or dirty filter can restrict airflow, making your HVAC system work overtime to maintain a comfortable temperature. This not only diminishes your comfort but can also lead to higher fuel consumption—a consideration that’s especially important when you’re planning an extended journey. Most manufacturers recommend checking or replacing the air filter every 12,000 to 15,000 miles, but your driving environment can dictate the frequency. If you often drive in dusty or polluted areas, you may need to do it more regularly.

In addition to the air filter, ensure that your HVAC system is functioning optimally. Check the coolant levels and make sure there are no leaks in the system. A well-maintained HVAC not only provides temperature control but also helps to defog your windows and improve visibility, which is crucial for safe driving. Consider performing a quick test of the system: turn on the air conditioning and heater to ensure they are operating as expected.

For those long stretches of highway or winding country roads, having a comfortable cabin environment makes all the difference. Whether it’s a refreshing blast of cool air on a hot summer day or the gentle warmth during chilly evenings, a reliable HVAC system coupled with a clean air filter ensures that your road trip is not just an adventure, but a comfortable one. So before you load up the car and set off, take the time to check these vital components; your passengers—and your driving experience—will thank you.

10. Emergency Kit Essentials: Be Prepared for the Unexpected

When it comes to embarking on a road trip, preparation is key, and one of the most crucial aspects is ensuring you have a well-stocked emergency kit. The open road can be exhilarating, but it also comes with its fair share of surprises, from flat tires and dead batteries to unexpected weather changes. An emergency kit can be your lifeline, providing peace of mind and the tools needed to handle unforeseen circumstances.

Start with the basics: a first aid kit equipped with bandages, antiseptics, pain relievers, and any personal medications you might need. Accidents can happen, so being prepared with medical supplies is essential. Next, include a flashlight with extra batteries, as it can help you navigate dark situations and signal for help if necessary.

Tire troubles are among the most common issues faced by travelers. Ensure your kit contains a tire inflator and a tire repair kit, which can help you get back on the road without the need for a tow. Don’t forget a sturdy jack and a lug wrench to assist in changing a flat tire. Additionally, consider adding a set of jumper cables; a dead battery can be a quick fix if you can connect with another vehicle.

Pack a basic tool kit with screwdrivers, pliers, and wrenches, which can come in handy for minor repairs. Include duct tape, zip ties, and a multi-tool, as these versatile items can solve a multitude of problems. For those unpredictable weather conditions, a space blanket, poncho, and non-perishable snacks can make a significant difference, keeping you warm and energized while you wait for assistance.

Lastly, don’t forget to bring along a printed map or an offline GPS device. While smartphones are incredibly reliable, they can run out of battery or lose signal in remote areas. Having a backup navigation method ensures you can always find your way.

By equipping your vehicle with these emergency kit essentials, you can embark on your road trip adventure with confidence, knowing that you’re prepared for whatever the journey throws your way. Remember, a little preparation goes a long way in ensuring a smooth and enjoyable travel experience.

11. Scheduling Routine Maintenance: When to Visit the Mechanic

Scheduling routine maintenance is a critical aspect of ensuring your vehicle is road trip ready. Regular visits to the mechanic can help catch potential issues before they escalate into major problems, providing you with peace of mind as you embark on your adventure. But when should you schedule these visits?

Start by following the manufacturer’s recommended maintenance schedule, which can typically be found in your owner’s manual. Most vehicles require an oil change every 5,000 to 7,500 miles, along with other essential services like tire rotations, brake inspections, and fluid top-offs. If you’re planning a long road trip, consider scheduling a comprehensive check-up about a month in advance. This allows enough time for any necessary repairs or adjustments to be made.

Pay attention to your vehicle’s warning lights and unusual sounds, as these can indicate that it’s time for an unscheduled visit. Additionally, keep an eye on your tire tread and pressure, as well as your windshield wipers and battery health. If you’re approaching a milestone—like a 30,000 or 60,000-mile service—make it a priority to visit your mechanic for a full inspection.

Lastly, don’t underestimate the importance of seasonal maintenance. Before summer road trips, ensure your air conditioning system is functioning properly, and before winter excursions, check your antifreeze levels and tire condition. By establishing a routine maintenance schedule and proactively addressing issues, you’ll not only enhance your vehicle’s performance but also ensure a smoother, safer journey on the open road.

12. Road Trip Ready: Packing Tips and Space Management

When it comes to embarking on the ultimate road trip adventure, effective packing and space management can make all the difference between a smooth journey and a chaotic one. Properly organizing your supplies ensures that everything you need is within easy reach, allowing you to enjoy the ride without the stress of rummaging through a cluttered car.

Start by considering the essentials: snacks, drinks, a first-aid kit, maps or a GPS device, and any necessary travel documents. Use clear plastic bins or packing cubes to categorize items, making it simpler to locate them when needed. Opt for soft-sided bags that can easily conform to the shape of your vehicle’s storage spaces, maximizing every inch of available room.

Don’t forget the power of a well-thought-out seating arrangement. Place heavier items at the bottom and toward the center of the trunk to maintain stability, while lighter and more frequently used items should be within arm’s reach, like in backseat pockets or on the floor next to you. If you’re traveling with kids or pets, make sure to pack entertainment options—games, tablets, or toys—to keep everyone engaged during the drive.

Lastly, consider the weather and activities you have planned. If you’ll be hiking, for example, pack gear neatly in a waterproof bag to prevent wet clothes from ruining the rest of your supplies. Keep a small, easy-access bag for emergency items like jumper cables, a flashlight, and basic tools, ensuring they’re at your fingertips if the unexpected arises.

By taking the time to plan your packing strategy and manage your space effectively, you’ll create a comfortable and enjoyable environment for everyone on board, leaving you free to focus on the open road and the adventures that await. Happy travels!

13. Planning Your Route: Navigation and Stops

When embarking on a road trip adventure, planning your route is just as crucial as preparing your vehicle for the journey ahead. A well-thought-out route not only ensures a smoother ride but also enhances the overall experience by allowing for exciting stops along the way. Start by selecting your main destination, but don’t overlook the beauty of the journey itself. Utilize navigation apps such as Google Maps or Waze, which provide real-time updates on traffic conditions, road closures, and alternate routes. This way, you can avoid unexpected delays and detours.

As you map out your path, take time to identify interesting landmarks, scenic viewpoints, or local attractions that align with your interests. Perhaps it’s a quirky roadside diner known for its legendary burgers or a stunning national park where you can stretch your legs and soak in nature’s beauty. Incorporating these stops into your itinerary not only breaks up the monotony of long stretches on the road but also creates wonderful opportunities for photos, stories, and memories that will last a lifetime.

Additionally, consider planning rest breaks every couple of hours to prevent fatigue and keep your energy levels up. A simple stop to grab a snack or take a short walk can do wonders for both your physical and mental well-being. Don’t forget to account for fuel stops, especially in remote areas where gas stations may be scarce. By plotting your route carefully and factoring in these essential stops, you’ll set the stage for a road trip that is not just about reaching your destination but enjoying every moment of the adventure along the way.

14. Fuel Efficiency Tips: Making the Most of Your Trip

When embarking on a road trip adventure, maximizing fuel efficiency is not just about saving money; it’s also about enjoying a smoother, more enjoyable journey. Implementing a few simple strategies can lead to significant savings at the pump while also reducing your environmental impact. Here are some essential fuel efficiency tips to keep your vehicle running optimally throughout your travels.

First and foremost, ensure your vehicle is well-maintained before hitting the road. Regular oil changes, air filter replacements, and spark plug checks can improve engine performance and fuel efficiency. A well-tuned engine runs smoother and uses fuel more efficiently, allowing you to cover more miles on less gas.

Next, consider your driving habits. Gradual acceleration and deceleration can make a substantial difference in fuel consumption. Instead of stomping on the gas pedal, aim for smooth, gentle movements. Maintaining a steady speed is crucial, especially on highways. Using cruise control can help maintain a constant speed, which not only enhances fuel efficiency but also makes for a more relaxing drive.

Tire pressure is another critical factor affecting fuel economy. Under-inflated tires create more rolling resistance, causing your engine to work harder and consume more fuel. Check your tire pressure regularly and ensure they are inflated to the manufacturer’s recommended levels, especially before a long journey.

Additionally, packing efficiently can contribute to better fuel efficiency. Heavy loads require more energy to move, so pack only what you need. Roof racks and cargo carriers can create wind resistance, which also impacts fuel consumption. If you don’t need them for your trip, consider removing them to improve aerodynamics.

Lastly, plan your route ahead of time. Using a GPS or a mapping app helps identify the quickest and most fuel-efficient paths, avoiding unnecessary detours and traffic congestion. The fewer stops and slowdowns you encounter, the more fuel you’ll save.

By incorporating these fuel efficiency tips into your road trip planning, you can ensure that your journey is not only smooth and enjoyable but also economical. With careful preparation, you’ll be able to focus on what truly matters: creating lasting memories on the open road. Safe travels!

15. Conclusion: Enjoying the Journey with Peace of Mind

As you wrap up your preparations for your road trip, it’s essential to remember that car maintenance is not just a task; it’s a vital part of ensuring your adventure is enjoyable and stress-free. By taking the time to check off every item on your maintenance checklist, you’re not only safeguarding your vehicle but also securing peace of mind for you and your passengers.

Imagine cruising down a sun-drenched highway, the windows down, and your favorite playlist setting the mood. The last thing you want is to be sidetracked by unexpected breakdowns or mechanical failures. With your car in tip-top shape, you can focus on the journey ahead—the breathtaking landscapes, the quirky roadside attractions, and the memorable moments shared with friends or family.

Embrace the joy of the open road knowing that you’ve done everything possible to prepare your vehicle. Regular oil changes, tire rotations, brake checks, and fluid top-offs may seem like small details, but they play a crucial role in your car’s performance. Moreover, being proactive about maintenance allows you to catch potential issues before they escalate, saving you both time and money.

So as you embark on your next adventure, remember that the journey is just as important as the destination. With your car well-maintained, you can relish every mile, every detour, and every laugh with loved ones, all while enjoying the peace of mind that comes with knowing you’ve taken the necessary steps to ensure a smooth ride. Here’s to countless road trip adventures filled with excitement, discovery, and the freedom of the open road! Safe travels!

As you prepare for your next road trip adventure, remember that a little proactive car maintenance can go a long way in ensuring a smooth and enjoyable journey. By following the tips outlined in our ultimate guide, you can confidently hit the road, knowing that your vehicle is in top shape to handle whatever the journey may bring. From checking your tire pressure to scheduling regular oil changes, these essential maintenance steps not only enhance your car’s performance but also contribute to your overall safety and peace of mind. So pack your bags, fuel up with excitement, and get ready to create unforgettable memories on the open road. Safe travels, and may your adventures be filled with joy and exploration!

How to Handle Car Maintenance in Different Weather Conditions?

Owning a car is a significant responsibility that extends far beyond the thrill of hitting the open road.

To ensure your vehicle remains reliable and safe throughout the year, mastering car maintenance is essential. Each season brings its own unique challenges, from blistering summer heat that can strain your engine to frigid winter temperatures that demand extra care for your battery and tires. In this comprehensive guide, we’ll explore essential car maintenance tips tailored for every season, empowering you with the knowledge to keep your vehicle in peak condition. Whether you’re a seasoned car enthusiast or a first-time car owner, our expert insights will help you navigate seasonal changes, prevent costly repairs, and ultimately enhance the longevity and performance of your beloved ride. Buckle up as we delve into the must-know strategies that will make car maintenance a breeze, no matter the weather!

1. Introduction to Car Maintenance

How to Handle Car Maintenance in Different Weather Conditions?
Credit : whatcanu.com

Car maintenance is not just a routine chore; it’s an essential practice that ensures your vehicle operates smoothly and safely throughout its lifespan. As the lifeblood of your daily commute, your car is subjected to various stresses, from fluctuating weather conditions to the wear and tear of everyday use. Understanding the fundamentals of car maintenance can save you from unexpected breakdowns, costly repairs, and even accidents down the line.

In this guide, we’ll explore the importance of regular maintenance, emphasizing how simple, proactive measures can lead to a more reliable driving experience. Whether you’re a seasoned car enthusiast or a new driver still finding your way, mastering the art of car maintenance can empower you to take control of your vehicle’s health.

From oil changes to tire rotations and everything in between, we’ll cover the essential tasks tailored for every season. Each season brings unique challenges and conditions that can impact your car’s performance—summer heat, winter snow, spring rains, and autumn leaves. By adapting your maintenance routine to the changing seasons, you can ensure that your car remains in peak condition, ready to tackle whatever the road throws your way. Join us as we delve into this vital aspect of vehicle ownership, equipping you with the knowledge and confidence to keep your car running like new.

2. Importance of Seasonal Maintenance Checks

When it comes to car maintenance, seasonal checks are not just another item on your to-do list—they are vital to ensuring your vehicle operates smoothly and safely throughout the year. Each season brings its own set of challenges and demands, affecting everything from tire performance to engine efficiency. By conducting thorough maintenance checks at the change of seasons, you can preemptively address potential issues and adapt your vehicle for the specific conditions ahead.

In the spring, for instance, as the weather warms up, it’s crucial to inspect your tires for wear and ensure they are properly inflated. This is also the ideal time to check your windshield wipers and fluid levels, as spring showers can obscure visibility. Transitioning into summer, overheating becomes a concern. A coolant flush and a thorough inspection of your cooling system will help prevent breakdowns during the hottest months.

As autumn arrives, it’s time to prepare your vehicle for the cold ahead. This includes checking your battery’s health, as battery performance can diminish in lower temperatures. Additionally, inspecting your brakes and ensuring your antifreeze levels are adequate will keep you safe as the roads become slick and icy.

Finally, winter demands a comprehensive approach to maintenance. Switching to winter tires can provide better traction on snow and ice, while checking your heater and defroster will ensure comfort and safety during frigid drives.

By making seasonal maintenance checks a priority, you not only enhance your vehicle’s longevity but also ensure the safety of yourself and your passengers. Each season brings unique challenges, and addressing them head-on will keep your car running at its best no matter what Mother Nature throws your way.

3. Winter Prep: Keeping Your Car Safe in Cold Weather

How to Handle Car Maintenance in Different Weather Conditions?
Credit : whatcanu.com

As the vibrant colors of autumn fade and the chill of winter sets in, ensuring your vehicle is ready for the harsher conditions ahead becomes paramount. Winter prep isn’t just about a warm coat for yourself; it’s about equipping your car to handle the challenges of snow, ice, and freezing temperatures.

Start with your tires—arguably the most critical component when it comes to winter driving. Consider investing in a set of winter tires, which are specifically designed to provide better traction on icy and snow-covered roads. These tires remain flexible in cold temperatures, offering improved grip compared to all-season tires. Don’t forget to check the tire pressure regularly, as it can drop with the temperature, leading to reduced performance and safety.

Next, take a close look at your battery. Cold weather can be particularly hard on batteries, causing them to lose their charge more quickly. If your battery is more than three years old, it’s wise to have it tested to ensure it can handle the demands of winter driving. Clean any corrosion from the terminals and make sure all connections are secure.

Additionally, don’t ignore your windshield wipers and fluids. Replace any worn wiper blades and fill up on windshield washer fluid that is specifically formulated for winter use. This helps maintain visibility during snowstorms and when roads are slushy.

Lastly, keep an emergency kit in your car that includes essentials like blankets, a flashlight, a first-aid kit, and non-perishable snacks. A shovel, ice scraper, and sand or kitty litter can also be invaluable should you find yourself stuck in snow.

By taking these proactive steps, you’ll ensure that your vehicle is not just ready for winter, but that you can navigate the season with confidence and peace of mind. Winter prep is all about preparation and awareness, so don’t wait until the first snowfall to get started!

4. Spring Tune-Up: Refreshing Your Vehicle After Winter

As winter recedes and the days grow longer, it’s time to give your vehicle the rejuvenating spring tune-up it deserves. After months of harsh weather, road salt, and frigid temperatures, your car may be feeling a little worse for wear. A thorough spring maintenance check not only revitalizes your vehicle but also ensures it’s ready to handle the demands of warmer driving conditions.

Start with a comprehensive inspection of your vehicle’s exterior. The winter months can leave behind a residue of salt and grime, which can corrode metal surfaces and damage the paint. Give your car a thorough wash, paying special attention to the undercarriage, where salt accumulation can lead to rusting. Once clean, consider applying a protective wax to shield your vehicle from spring showers and UV rays.

Next, turn your focus to the engine. Winter can be tough on your battery, so check for any signs of corrosion and ensure it has a strong charge. A fluid check is equally vital; top off your oil, coolant, and windshield washer fluid as needed. This is also the perfect time to replace your oil and oil filter, ensuring your engine runs smoothly as the temperatures rise.

Don’t overlook your tires, either. As the weather changes, so do the road conditions. Inspect your tires for wear and tear, and ensure they are properly inflated for optimal performance. If you’ve switched to winter tires, now is the time to swap them out for your all-season or summer tires, enhancing your car’s grip and handling as you navigate spring’s unpredictable weather.

Finally, give your brakes some attention. Listen for any unusual sounds or vibrations, and consider having a professional check their condition. The last thing you want is to compromise your safety as you embark on spring road trips and adventures.

By investing a little time and effort into a spring tune-up, you’ll not only refresh your vehicle but also extend its lifespan and enhance its performance. Embrace the season with confidence, knowing your car is in top shape for all the journeys ahead!

5. Summer Care: Protecting Your Car from Heat and UV Damage

How to Handle Car Maintenance in Different Weather Conditions?
Credit : whatcanu.com

As the summer sun beats down, it’s crucial to give your car some extra love and attention to protect it from the harsh elements of heat and UV rays. The soaring temperatures can wreak havoc on various components of your vehicle, so implementing a summer care routine will ensure your car remains in peak condition.

Start with the exterior; the sun’s UV rays can cause paint to fade and deteriorate, making your once vibrant car look dull. Consider applying a high-quality wax or sealant to create a protective barrier against the sun. This not only enhances your car’s shine but also helps to guard against harmful UV rays. Regularly washing your car is essential as well; a clean surface prevents dirt and grime from accumulating, which can scratch the paint and lead to further damage when exposed to intense sunlight.

Next, don’t overlook the importance of your tires. The heat can cause tire pressure to rise, leading to potential blowouts. Check your tire pressure regularly, ensuring it’s at the recommended levels, and inspect for any signs of wear or damage. Additionally, consider rotating your tires more frequently during the summer months to ensure even wear, especially if you plan to take long road trips.

Moving to the interior, protect your car’s upholstery from sun damage by using sunshades in the front and rear windows when parked. This simple step can significantly reduce the temperature inside your vehicle and prevent cracking and fading of your dashboard and seats. If possible, park in shaded areas or use a car cover to shield your car from direct sunlight.

Finally, don’t forget about your engine. High temperatures can lead to overheating, so checking your coolant levels is vital. Make sure that your cooling system is functioning optimally to avoid any costly repairs down the road. Regularly flush and replace the coolant as needed, and inspect belts and hoses for wear, as these can become brittle and cracked in extreme heat.

By taking these proactive steps, you’ll not only extend the life of your car but also enhance its appearance and performance throughout the summer months. A little effort goes a long way in safeguarding your vehicle against the sun’s relentless rays, ensuring that it remains your reliable companion on all your summer adventures.

6. Fall Check-Up: Preparing for Rain and Slippery Roads

As the vibrant hues of summer begin to fade and the air turns crisp, it’s time to shift gears and prepare your vehicle for the challenges that fall brings. With the arrival of rain-soaked roads and the potential for slippery conditions, a thorough check-up is essential to ensure your car is ready to handle the season’s unpredictability.

Start with your tires, as they are your first line of defense against wet pavement. Check the tread depth; a minimum of 2/32 of an inch is crucial for maintaining traction. Consider rotating your tires and ensuring they are properly inflated, as cold temperatures can lead to decreased tire pressure. If you live in an area prone to heavy rainfall, investing in tires designed for wet conditions can provide added safety and performance.

Next, turn your attention to your brakes. The autumn months can bring an increase in unpredictable weather, including sudden rainstorms. Ensure your brake pads are in good condition, and check for any signs of wear or unevenness. If your brakes are squeaking or the pedal feels soft, it may be time for a professional inspection.

Don’t forget to inspect your windshield wipers and fluid levels. Replacing worn wiper blades is a simple yet effective way to maintain visibility during downpours. Fill your windshield washer reservoir with a quality fluid that can tackle both dirt and grime, ensuring you can clear your view at a moment’s notice.

Lastly, pay attention to your car’s lights. Shorter days mean you’ll be relying more on your headlights. Check that all your lights are functioning properly, including brake lights and turn signals, to ensure you can see and be seen during those early evening drives.

By taking these proactive steps to prepare your vehicle for the fall, you can navigate rainy and slippery roads with confidence, ensuring a safer and more enjoyable driving experience as the seasons change.

7. Essential Fluids: Checking and Replacing Oil, Coolant, and Brake Fluid

How to Handle Car Maintenance in Different Weather Conditions?
Credit : whatcanu.com

Maintaining your vehicle’s essential fluids is like giving it a lifeline, ensuring it runs smoothly and efficiently through every season. Regularly checking and replacing oil, coolant, and brake fluid is not just a routine task; it’s a vital aspect of car care that can prevent significant and costly issues down the road.

**Oil** is the lifeblood of your engine. It lubricates the moving parts, reduces friction, and helps keep the temperature down. Over time, oil can become dirty and lose its effectiveness, leading to increased wear and tear on your engine. To keep your vehicle in top shape, check the oil level monthly and look for any changes in color or consistency. A healthy oil should be amber and slick, while dark or gritty oil indicates that it’s time for a change. Most vehicles require an oil change every 3,000 to 5,000 miles, but always refer to your owner’s manual for the specific recommendations for your car.

**Coolant**, or antifreeze, plays a crucial role in regulating your engine’s temperature, especially during the extremes of summer and winter. A well-functioning cooling system prevents overheating and enhances performance. To check your coolant levels, locate the reservoir in your engine bay and ensure it sits between the minimum and maximum markers. If it’s low, top it off with a mixture of coolant and water as specified in your manual. Regularly flushing the cooling system, typically every two years, can also prevent corrosion and build-up, extending the life of your engine.

**Brake fluid** is another critical fluid that cannot be overlooked. It is responsible for transmitting the force from your foot on the brake pedal to the brake components themselves. If the fluid is low, it can lead to a spongy brake pedal or even brake failure. Check your brake fluid level monthly and look out for any signs of leaks. The fluid should be clear or slightly yellow; if it appears dark or contaminated, it’s time for a replacement. Brake fluid should generally be replaced every two years to maintain optimal braking performance.

By regularly checking and replacing these essential fluids, you not only enhance your vehicle’s longevity but also ensure your safety on the road. Make it a part of your seasonal maintenance routine, and you’ll drive with confidence, knowing you’ve taken the necessary steps to keep your car performing at its best.

8. Tire Maintenance: Rotating, Balancing, and Seasonal Tire Changes

Tire maintenance is often an overlooked aspect of vehicle upkeep, yet it plays a crucial role in ensuring safety, performance, and longevity. Just like your car’s engine, tires require regular attention to perform optimally. The importance of rotating and balancing your tires cannot be overstated, as they help promote even wear and extend the life of your tires, ultimately saving you money in the long run.

Rotating your tires typically involves moving them from one position on the car to another—front to back, side to side, or a combination of both. This process helps to even out the wear patterns that can occur from differences in weight distribution and driving habits. Most manufacturers recommend rotating your tires every 5,000 to 7,500 miles, but it’s wise to consult your owner’s manual for specific guidelines.

Balancing your tires is equally essential. An unbalanced tire can lead to vibrations while driving, which can not only be uncomfortable but may also cause premature wear on your suspension system. Balancing involves adding small weights to your wheels to ensure they spin evenly. If you notice vibration at higher speeds or uneven tire wear, it’s a good indication that your tires need balancing.

In addition to regular rotations and balancing, seasonal tire changes are vital for safe driving. Depending on your region, switching between summer and winter tires can make a significant difference in handling and traction. Winter tires provide better grip in snowy and icy conditions due to their specialized tread patterns and rubber compounds, while summer tires are designed for optimal performance in warmer, dry conditions. Installing the proper tires for the season not only enhances safety but also improves fuel efficiency.

By prioritizing tire maintenance through rotation, balancing, and seasonal changes, you will ensure a smoother ride, better handling, and increased safety on the road. So, give your tires the attention they deserve and keep your vehicle performing at its best, no matter the season.

9. Battery Care: Keeping Your Battery Healthy Year-Round

Keeping your battery healthy year-round is crucial for maintaining the overall performance and reliability of your vehicle. A well-maintained battery not only ensures your car starts reliably each morning, but it also supports the electrical systems that power everything from your headlights to your infotainment system. Here are some essential tips to extend the lifespan of your battery through all seasons.

First and foremost, regular inspection is key. Check for corrosion around the battery terminals, which can inhibit the flow of electricity. If you spot any buildup, gently clean it with a mixture of baking soda and water, using a wire brush to scrub away the grime. This simple task can greatly enhance battery performance and longevity.

In colder months, temperatures can plummet, putting additional strain on your battery. To combat this, ensure your battery is fully charged before winter sets in. A weak battery is more likely to fail in freezing conditions. Additionally, consider investing in a battery warmer or insulating blanket if you live in particularly frigid climates; these can help maintain optimal battery temperature and prevent it from freezing.

As summer approaches, the heat can be just as damaging. High temperatures can accelerate the evaporation of the battery’s fluid, leading to deterioration. Make it a habit to check the fluid levels regularly and top them off with distilled water if necessary. If your battery is older than three years, it’s wise to have it tested by a professional, as heat can exacerbate existing weaknesses.

Finally, ensure that your battery is securely mounted. Vibration from driving can loosen connections and cause internal damage over time. A tight, secure fit will not only protect your battery but also enhance your vehicle’s overall performance.

By following these battery care tips throughout the year, you can help ensure that your vehicle starts reliably, no matter the season. A little attention goes a long way in preventing unwanted surprises and keeping you safely on the road.

10. Wiper Blades and Lights: Ensuring Visibility in Every Season

When it comes to car maintenance, ensuring optimal visibility is non-negotiable, regardless of the season. Your wiper blades and headlights play a crucial role in keeping you safe on the road, from snow-laden winter mornings to the sun-drenched drives of summer. Neglecting these components can lead to dangerous driving conditions, so it’s essential to give them the attention they deserve.

**Wiper Blades:** Over time, wiper blades can wear down, leaving streaks on your windshield or, worse, failing to clear away rain, snow, or road grime completely. As a best practice, inspect your wiper blades every few months and replace them at least once a year—more frequently if you live in a climate with heavy rainfall or snow. Look for signs of deterioration, such as cracking or splitting rubber, and consider investing in high-quality blades that can handle the challenges of each season. During winter, consider using winter-specific wiper blades designed to resist ice and snow buildup.

**Headlights and Taillights:** Dim or burnt-out headlights can severely reduce your visibility at night and during inclement weather. Regularly check your headlights and taillights for clarity and brightness. If you notice that your headlights appear cloudy or yellowed, use a headlight restoration kit to bring back their shine. Additionally, take a moment to test your turn signals and brake lights; these are essential for communicating with other drivers and ensuring your safety. Don’t hesitate to replace any burnt-out bulbs immediately, as this small step can make a significant difference in your visibility.

By committing to regular checks and timely replacements of your wiper blades and lights, you not only enhance your driving experience but also ensure that you’re prepared for whatever Mother Nature throws your way. Visibility is key in safe driving, so take these essential maintenance tips to heart and keep your car ready for any season.

11. Brake System: Importance of Regular Inspections

When it comes to vehicle safety, few components are as critical as the brake system. Regular inspections of your brakes are not just a good practice; they are essential for ensuring your safety and the safety of others on the road. Over time, brake pads wear down, rotors can become damaged, and fluid levels can drop, which can severely compromise braking performance.

Think of your brakes as the guardians of your driving experience. They are responsible for bringing your vehicle to a halt, whether you’re navigating city streets or cruising on the highway. Ignoring even minor issues can lead to more significant problems down the line, resulting in costly repairs and, more importantly, dangerous driving situations.

During a brake inspection, a professional mechanic will examine various components, including the brake pads, rotors, calipers, and brake fluid. They will check for signs of wear, such as unusual noises—like grinding or squeaking—vibrations when braking, or a warning light on your dashboard. It’s important to address these signs promptly; they are your vehicle’s way of communicating that something is amiss.

Additionally, seasonal changes can take a toll on your brake system. In winter, moisture can lead to rust on brake components, while summer heat can cause brake fluid to evaporate or become less effective. Scheduling regular inspections at the start of each season can help catch these issues before they escalate, ensuring that your brakes function at their best year-round.

By prioritizing brake inspections, you’re not only prolonging the life of your vehicle but also enhancing your peace of mind every time you hit the road. Remember, when it comes to brake maintenance, an ounce of prevention is worth a pound of cure. Keep your brake system in top shape, and you’ll enjoy a safer, smoother driving experience, no matter the season.

12. Belts and Hoses: Identifying and Replacing Worn Parts

### 12. Belts and Hoses: Identifying and Replacing Worn Parts

When it comes to car maintenance, the condition of your belts and hoses is essential for keeping your vehicle running smoothly. These components play a crucial role in the overall operation of your engine and other systems, so it’s important to stay vigilant about their health throughout the year.

Belts, such as the serpentine belt and timing belt, are responsible for powering essential engine accessories like the alternator, water pump, and air conditioning compressor. Over time, exposure to heat, friction, and the elements can cause these belts to wear down, leading to cracks, fraying, or even complete failure. A worn belt can not only lead to a breakdown but can also cause damage to other engine components.

Hoses, including coolant hoses and vacuum hoses, also endure significant stress. They transport vital fluids, maintain pressure, and ensure that your vehicle runs efficiently. Similar to belts, hoses are susceptible to wear and can develop leaks or weaken over time. Cracks or bulges in hoses can lead to catastrophic engine overheating or other malfunctions if left unchecked.

To identify worn belts and hoses, conduct a visual inspection regularly—ideally at the start of every season. Look for signs of wear, such as fraying edges, cracks, or shiny surfaces on belts. For hoses, check for leaks, bulges, or signs of corrosion at the clamps. A simple squeeze test can also help; if a hose feels brittle or collapses easily, it’s time for a replacement.

If you notice any issues during your inspection, replacing these components promptly is essential. Most belts and hoses are relatively inexpensive and easy to replace, especially if you follow your vehicle’s maintenance schedule. Regularly replacing worn belts and hoses can save you from costly repairs down the line and ensure your car operates at peak performance.

In summary, paying attention to the condition of your belts and hoses is a vital part of car maintenance. By identifying and replacing worn parts, you can enhance your vehicle’s reliability and longevity, keeping you safe and on the road for many miles to come.

13. Interior and Exterior Care: Cleaning and Protecting Your Vehicle

Keeping your vehicle in pristine condition goes beyond basic maintenance; it requires a commitment to regular cleaning and protection for both the interior and exterior. Just as a well-maintained engine ensures your car runs smoothly, a clean and protected vehicle enhances its aesthetic appeal and longevity.

**Exterior Care: The First Line of Defense**

Start with the exterior, as it’s your car’s first line of defense against the elements. Regularly washing your car helps remove dirt, grime, and road salt that can cause corrosion and damage over time. Aim to wash your vehicle every two weeks, or weekly during harsh weather seasons. Use a pH-balanced car soap to avoid harming the paint and finish. Don’t forget to clean the tires and wheel wells, as brake dust and dirt can build up and detract from your car’s overall appearance.

After washing, consider applying a high-quality wax or sealant. This creates a protective barrier against UV rays, rain, and contaminants. Waxing not only adds a glossy finish but also helps make future washes easier, as dirt is less likely to stick to a smooth surface. For added protection, especially in winter months, consider using a ceramic coating, which can offer long-lasting durability against harsh weather conditions.

**Interior Care: Comfort and Cleanliness**

The interior of your vehicle deserves just as much attention as the exterior. Start by regularly vacuuming the seats, carpets, and floor mats to remove dirt and debris. Pay special attention to crevices where crumbs and dust accumulate, using a crevice tool for those hard-to-reach areas. Consider investing in high-quality floor mats that can be easily removed and cleaned.

Next, treat your upholstery with care. If you have leather seats, use a specialized leather cleaner and conditioner to keep them supple and prevent cracking. For fabric seats, a fabric cleaner can help lift stains and keep the material looking fresh.

Don’t overlook the importance of cleaning the dashboard, steering wheel, and other surfaces. Use a microfiber cloth and an appropriate cleaner to avoid streaks and ensure a clean finish. Regularly cleaning these areas not only maintains the aesthetic but also contributes to a healthier driving environment by reducing allergens and bacteria.

**Protection from the Elements**

To maximize your efforts, consider investing in sunshades for your windshield to protect your interior from harmful UV rays that can fade surfaces and damage electronics. Additionally, using seat covers can safeguard against spills and wear, especially if you frequently transport pets or children.

By committing to a regular cleaning and protection routine for both the interior and exterior of your vehicle, you can enhance its appearance, maintain its value, and ensure a pleasant driving experience throughout the year. Remember, a clean car is not just about looks; it’s about taking pride in your investment and ensuring it serves you well for many miles to come.

14. DIY Maintenance vs. Professional Service: When to Seek Help

When it comes to car maintenance, the age-old debate of diy versus professional service can leave many drivers scratching their heads. On one hand, there’s the allure of saving money and the satisfaction of rolling up your sleeves to tackle tasks on your own. On the other, there’s the expertise and peace of mind that comes with trusting your vehicle to a professional. The key lies in knowing when to grab your toolbox and when to pick up the phone.

For minor tasks, such as changing your windshield wipers, checking tire pressure, or replacing cabin air filters, the DIY approach can be both economical and rewarding. With countless tutorial videos and step-by-step guides available online, even novice car owners can confidently complete these tasks with relative ease. Moreover, performing these simple maintenance checks regularly can help extend the life of your vehicle and keep it running smoothly.

However, as the complexity of car systems has evolved, so too has the necessity for professional intervention. Major repairs, such as brake replacements, engine diagnostics, or transmission work, require specialized tools, advanced knowledge, and experience that most car owners simply don’t possess. Attempting these tasks without the proper expertise can lead to further damage and costly repairs down the line.

Additionally, certain services, like wheel alignments or tire rotations, often benefit from professional equipment that ensures precision and safety. It’s crucial to recognize when a problem is beyond your skill set. If you encounter persistent issues, unusual noises, or warning lights on your dashboard, it’s a sign that it may be time to seek help from a trusted mechanic.

In essence, mastering car maintenance requires knowing your limits. Embrace the satisfaction of taking care of your vehicle, but don’t hesitate to lean on professionals when the job demands it. After all, a well-maintained car is not just about saving money; it’s about ensuring safety and reliability on the road.

15. Conclusion: Staying Proactive for a Longer-Lasting Vehicle

In conclusion, mastering car maintenance is not just about responding to issues as they arise; it’s about adopting a proactive approach that ensures your vehicle remains in peak condition through every season. Regularly scheduled maintenance checks, fluid level inspections, and tire rotations are just the tip of the iceberg. By committing to a maintenance routine, you can catch potential problems before they escalate, saving yourself time, money, and headaches down the road.

As the seasons change, so do the demands on your vehicle. Whether it’s preparing for the scorching heat of summer or the icy grip of winter, understanding the specific needs of your car during each season can significantly enhance its performance and longevity. This means not only adhering to manufacturer guidelines but also being attuned to your vehicle’s unique quirks and needs.

Remember, a well-maintained vehicle is not just about aesthetics; it’s about safety, efficiency, and reliability. By prioritizing car maintenance, you’re not just protecting your investment but also ensuring a smoother, more enjoyable driving experience. So, roll up your sleeves, gather your tools, and take charge of your car’s health—because a little effort today can lead to many miles of worry-free driving tomorrow. Embrace the journey of car ownership with confidence, knowing that your proactive maintenance will keep your vehicle running smoothly for years to come.

In conclusion, mastering car maintenance is an essential skill that can save you time, money, and stress throughout the year. By following the seasonal tips outlined in this post, you can ensure your vehicle remains in peak condition, ready to handle whatever the weather throws your way. From winterizing your car to prepping for summer road trips, these proactive measures not only enhance your safety but also extend the life of your vehicle. So, roll up your sleeves, embrace the joy of caring for your car, and take pride in knowing you’re keeping it running smoothly through every season. Here’s to many safe and enjoyable drives ahead!

How to Handle Car Maintenance During the Summer?

As the sun shines brighter and the days stretch longer, summer road trips and weekend getaways beckon, promising adventure and relaxation.

However, before you hit the open road, it’s crucial to ensure that your vehicle is ready for the journey ahead. The sweltering heat and changing driving conditions can take a toll on your car, making regular maintenance not just a good idea but an essential part of summer preparation. In this blog post, we will explore essential summer car maintenance tips that will help you keep your vehicle in top shape, from checking your tire pressure and coolant levels to ensuring your air conditioning system is functioning optimally. With these straightforward tips, you can enjoy a smooth and safe ride while making the most of the sunny season ahead!

1. Understanding the Importance of Summer Car Maintenance

How to Handle Car Maintenance During the Summer?
Credit : whatcanu.com

As the temperature rises and the days grow longer, summer brings with it not just sunshine and vacations but also a unique set of challenges for our vehicles. Understanding the importance of summer car maintenance is crucial to ensuring a smooth and safe ride throughout the season.

During the hotter months, your car endures increased stress from higher temperatures, intense sunlight, and more rigorous driving conditions. The heat can cause engine components to overheat, tires to wear unevenly, and battery life to diminish more rapidly. Without proper maintenance, these factors can lead to breakdowns or costly repairs at the most inconvenient times—think roadside emergencies during a family road trip or delays that can derail your plans.

Moreover, summer often means longer drives, whether it’s a weekend getaway or a daily commute under the sweltering sun. Keeping your vehicle in peak condition not only enhances performance but also ensures your safety and that of your passengers. Regular checks on fluid levels, tire pressure, and air conditioning systems can mitigate the risk of overheating or other summer-related issues.

By proactively addressing these concerns, you not only boost your vehicle’s longevity but also enhance your driving experience. Imagine gliding down the highway with the windows down, the air conditioning running smoothly, and your car performing flawlessly. Understanding and prioritizing summer car maintenance is the key to unlocking that perfect summer ride. So, let’s dive into the essential maintenance tips that will keep your vehicle in top shape all season long!

2. Checking Your Coolant Levels

As the summer sun blazes overhead, ensuring your vehicle’s engine remains cool is crucial for maintaining optimal performance and avoiding costly breakdowns. One of the simplest yet most vital tasks on your summer car maintenance checklist is checking your coolant levels.

Coolant, a mixture of antifreeze and water, regulates your engine’s temperature by absorbing heat and dissipating it through the radiator. An inadequate coolant level can lead to overheating, which can cause severe engine damage and leave you stranded on a hot day. To check your coolant levels, start by ensuring your engine is cool—never open a hot radiator cap, as it can lead to serious burns. Locate the coolant reservoir, which is typically a translucent plastic tank marked with minimum and maximum lines. If the level is below the minimum mark, it’s time to top it up with the appropriate coolant for your vehicle.

While you’re at it, inspect the condition of the coolant itself. It should be a bright, clear color—if it appears rusty or murky, it may be time for a complete coolant flush. Additionally, take a moment to examine the hoses and connections for any signs of cracks or leaks, as these can compromise your cooling system’s efficiency.

By proactively checking and maintaining your coolant levels, you can help ensure a smooth, trouble-free ride all summer long. Remember, a well-maintained cooling system not only enhances your vehicle’s performance but also extends its lifespan, allowing you to enjoy those long, sunny drives with peace of mind.

3. Inspecting and Replacing Air Filters

How to Handle Car Maintenance During the Summer?
Credit : whatcanu.com

As the temperatures rise and summer adventures beckon, ensuring your vehicle runs smoothly is paramount. One often-overlooked component that plays a crucial role in your car’s performance is the air filter. Over time, air filters can become clogged with dust, pollen, and debris, which not only affects engine efficiency but also impacts the quality of air circulating within your vehicle.

Start your summer maintenance by inspecting the air filter. If it appears dirty or discolored, it’s likely time for a replacement. A clean air filter allows for optimal airflow to the engine, enhancing performance and fuel efficiency. It also helps to protect sensitive engine components from harmful contaminants.

Replacing the air filter is a simple task that can usually be done at home with minimal tools. Refer to your owner’s manual for specific instructions on accessing the air filter compartment, and always opt for high-quality filters that meet or exceed manufacturer standards.

Additionally, don’t forget the cabin air filter, which ensures that the air you breathe inside the vehicle is clean and fresh. This is particularly important during summer when pollen counts soar and allergens are prevalent. A quick inspection of this filter can significantly enhance your driving comfort, especially during those long road trips.

By prioritizing the inspection and replacement of air filters, you’ll not only ensure a smoother ride but also contribute to the longevity of your vehicle, keeping it in peak condition for all your summer journeys.

4. Ensuring Your Tires are Summer Ready

As the temperatures rise and road trips beckon, ensuring your tires are summer-ready is a crucial step in maintaining your vehicle’s performance and safety. Hot weather can take a toll on tire integrity, making it essential to inspect and prepare them for the summer months ahead.

Start by checking the tire pressure, as heat can cause air to expand and increase pressure levels. Ideally, you should check your tire pressure in the morning when the tires are cool, and compare the readings to your vehicle’s recommended specifications found in the owner’s manual or on the driver’s side door jamb. Maintaining the correct tire pressure not only enhances fuel efficiency but also ensures better handling and reduces the risk of blowouts.

Next, inspect the tread depth of your tires. Adequate tread helps maintain traction on both dry and wet roads, which is vital during summer thunderstorms. You can easily check the tread depth using the penny test: insert a penny into the grooves of the tire with Lincoln’s head facing down; if you can see the top of his head, it’s time to replace your tires.

Additionally, examine your tires for any signs of wear or damage, such as cracks, blisters, or uneven wear patterns. These could indicate underlying issues that need addressing, such as misalignment or suspension problems. If you notice any abnormalities, consider consulting a tire professional for a thorough assessment.

Finally, don’t forget about tire rotation. Summer road trips can lead to uneven wear, especially if you’re heavily loading your vehicle for vacations. Rotating your tires every 5,000 to 7,000 miles helps to promote even wear and extend the life of your tires, ensuring you’re ready for whatever adventures lie ahead.

By taking the time to ensure your tires are summer ready, you not only enhance your vehicle’s performance but also your safety on the road, allowing you to enjoy those long, sunny drives with peace of mind.

5. Examining and Replacing Windshield Wipers

How to Handle Car Maintenance During the Summer?
Credit : whatcanu.com

As the summer sun shines brightly, it’s easy to forget about the often-overlooked components of your vehicle, like the windshield wipers. However, ensuring that your wipers are in top condition is crucial for maintaining visibility during unexpected summer rain showers and sudden thunderstorms. Start by inspecting the rubber blades for any signs of wear and tear—look for cracks, splits, or fraying edges that can hinder performance. If you notice any of these issues, it’s time to replace them.

Replacing your windshield wipers is a straightforward task that can save you from potentially dangerous driving conditions. Most wipers are designed for easy removal and installation, making it a project you can tackle yourself in just a few minutes. Opt for high-quality blades that offer durability and superior performance, particularly those designed to handle the unique challenges of summer weather, such as UV exposure and rapid temperature changes.

Additionally, while you’re at it, take a moment to clean your windshield thoroughly. Dirt, grime, and even old wiper fluid residue can create streaks that impair your visibility, especially during those bright summer days. A clean windshield combined with freshly replaced wipers will enhance your driving experience, providing a clear and unobstructed view of the road ahead. Don’t let poor visibility dampen your summer adventures—taking the time to examine and replace your windshield wipers will ensure a smooth and safe ride all season long.

6. Battery Health: Preparing for Summer Heat

As the summer sun blazes overhead, it’s crucial to ensure your car’s battery is ready to handle the heat. High temperatures can take a significant toll on battery performance, leading to decreased efficiency and, in some cases, unexpected failure. Begin your summer preparation by inspecting your battery for any signs of wear and tear. Look for corrosion around the terminals, which can disrupt the flow of electricity and hinder overall performance. A simple cleaning with a mixture of baking soda and water can help remove any buildup and improve connectivity.

Next, check the battery’s fluid levels, especially if you have a traditional lead-acid battery. If the fluid is low, carefully add distilled water to the appropriate level. This small step can make a big difference in how well your battery functions during the sweltering months ahead.

Don’t forget to test the battery’s charge. Many auto parts stores offer free battery testing, or you can invest in a multimeter to check the voltage yourself. A healthy battery should typically read around 12.6 volts or higher when the engine is off. If your battery is nearing the end of its lifespan—usually 3 to 5 years—consider replacing it before the heat exacerbates any existing issues.

Finally, parking in shaded areas or using a reflective windshield cover can help keep your battery cool and extend its life. Remember, a well-maintained battery is your car’s lifeline, ensuring a smooth and trouble-free ride throughout the summer adventures ahead. By taking the time to prepare your battery for the heat, you can enjoy peace of mind on the road, knowing your vehicle is ready for whatever summer brings.

7. Engine Oil: The Right Type and Timing for Change

How to Handle Car Maintenance During the Summer?
Credit : whatcanu.com

When it comes to maintaining a smooth and reliable ride during the sweltering summer months, one of the most crucial aspects to consider is your engine oil. Just as sunscreen protects your skin from harmful UV rays, the right engine oil acts as a shield for your car’s engine, especially under the intense heat of summer. It lubricates the engine components, prevents wear and tear, and helps to dissipate heat.

First and foremost, it’s essential to know the correct type of engine oil for your vehicle. Consult your owner’s manual to determine the manufacturer’s recommended viscosity, typically denoted by a combination of numbers and letters (e.g., 5W-30). This specification is designed to ensure optimal performance and protection based on your car’s engine design.

Timing is equally critical; summer heat can exacerbate the breakdown of engine oil, leading to decreased performance and potential engine damage. Generally, it’s advisable to change your engine oil every 5,000 to 7,500 miles, but during the summer months, consider checking your oil level and condition more frequently. If your oil appears dark and gritty or if it’s past its recommended mileage, don’t hesitate to perform an oil change.

Additionally, consider switching to synthetic oil during the hotter months. Synthetic oils offer superior heat resistance and can enhance your engine’s performance in extreme temperatures, providing that extra layer of protection against overheating.

Don’t forget about the oil filter, either. A clogged oil filter can hinder oil flow, causing your engine to work harder and run less efficiently. Ensure that you replace the oil filter whenever you change the oil, keeping your engine running smoothly and efficiently.

By paying close attention to your engine oil type and change schedule, you can significantly improve your vehicle’s longevity and performance, ensuring that every summer road trip is a smooth and enjoyable experience.

8. Brake System Inspection for Safety

### 8. Brake System Inspection for Safety

As the temperatures rise and summer adventures beckon, ensuring your vehicle’s brake system is in optimal condition is paramount for your safety on the road. The brake system is one of the most critical components of your car, responsible for bringing your vehicle to a halt and ensuring you can navigate steep hills or sudden stops without a hitch. With the hot summer sun beating down, brake components can be subjected to increased wear and tear, making regular inspection essential.

Start your brake system inspection by checking the brake pads for wear. If they appear thin or if you hear a squealing noise when you apply the brakes, it may be time for replacement. Worn-out pads can significantly reduce braking effectiveness, putting you and your passengers at risk. Additionally, inspect the brake rotors for any signs of warping or scoring; uneven surfaces can lead to vibrations and reduced stopping power.

Don’t forget to examine the brake fluid level in the reservoir. Low brake fluid can indicate a leak in the system, which could lead to brake failure. Make sure the fluid is clear and within the recommended range. If it appears dark or contaminated, it may be time for a complete brake fluid flush to maintain optimal performance.

Finally, pay attention to the brake lines. Look for any signs of wear, such as cracks or corrosion, as compromised lines could lead to brake failure. If you notice anything unusual, it’s best to consult a professional mechanic for a thorough inspection.

By prioritizing your brake system maintenance this summer, you can enjoy peace of mind on the road, knowing that you’re equipped to handle any situation that comes your way. Safe travels start with a reliable braking system—don’t overlook this essential aspect of your summer car care routine!

9. Keeping Your AC Running Smoothly

As temperatures rise during the summer months, ensuring that your vehicle’s air conditioning (AC) system is functioning optimally becomes a top priority. A well-maintained AC not only keeps you comfortable during those sweltering road trips but also plays a crucial role in the overall health of your vehicle. Here are some essential tips to help you keep your AC running smoothly all summer long.

First and foremost, it’s important to regularly check the AC system’s refrigerant levels. Low refrigerant can lead to poor cooling efficiency and may indicate a leak in the system. If you notice that your AC isn’t blowing cold air, consider having a professional technician inspect for leaks and recharge the system as needed.

Additionally, pay attention to the cabin air filter. A clogged filter can restrict airflow and reduce the system’s efficiency, making your AC work harder than necessary. Replacing the cabin air filter every 12,000 to 15,000 miles is a good rule of thumb, especially during the summer when dust and pollen are more prevalent.

Another crucial aspect of AC maintenance is the condenser. This component is often located at the front of the vehicle, making it susceptible to debris, dirt, and bugs. Regularly cleaning the condenser can help maintain its ability to dissipate heat effectively. A gentle rinse with water can help clear away any accumulated grime, allowing your AC to function at its best.

Finally, don’t forget to run your AC regularly, even during cooler months. This helps lubricate the AC components and prevents seals from drying out, ensuring that your system is ready to perform when you need it most.

By staying proactive about your vehicle’s air conditioning system, you can enjoy a comfortable and smooth ride throughout the scorching summer months. Remember, a little maintenance goes a long way in keeping you cool and your car running efficiently!

10. Cleaning and Protecting Your Car’s Exterior

As the summer sun beats down and the temperatures rise, it’s essential to give your car’s exterior the care it deserves. A thorough cleaning and protection routine not only enhances your vehicle’s appearance but also safeguards it against the harsh elements of the season.

Start with a comprehensive wash to remove dirt, grime, and any remnants of winter salt. Choose a pH-balanced car shampoo to ensure that you’re not damaging the paintwork. Pay special attention to the wheels and wheel wells, where brake dust and road debris can accumulate. A soft sponge or microfiber cloth will help lift dirt without scratching the surface.

Once your car is clean, it’s time to dry it properly. Using a microfiber drying towel helps prevent water spots that can mar your vehicle’s shine. After drying, consider applying a high-quality wax or sealant. This step is crucial for creating a protective barrier against UV rays, bird droppings, tree sap, and other summer hazards. Not only does wax enhance the shine, but it also makes future cleaning easier by creating a slick surface that repels dirt.

For an extra layer of protection, you might explore ceramic coatings, which offer long-lasting durability and a stunning glossy finish. These coatings bond with the paint, providing robust resistance against scratches and environmental contaminants.

Finally, don’t forget your windows! Clean them with a glass cleaner and consider applying a rain repellent treatment. This not only improves visibility during summer showers but also makes it easier to wipe away dirt and bugs.

By investing a little time in cleaning and protecting your car’s exterior, you ensure that it looks great and stays in peak condition, ready for all your summer adventures. With a sparkling finish, you’ll not only enjoy the ride but also maintain the value of your vehicle for years to come.

11. Checking and Maintaining Fluid Levels

Keeping your vehicle in optimal condition during the sweltering summer months requires diligent attention to its various fluid levels. As temperatures rise, so does the strain on your car’s systems, making it crucial to ensure that all essential fluids are topped off, clean, and functioning properly.

Start with your engine oil. This vital lubricant not only reduces friction among the engine’s moving parts but also aids in cooling the engine. In the heat of summer, engine oil can degrade faster, leading to potential overheating or engine wear. Check the oil level using the dipstick, and don’t forget to inspect its color and consistency. If it appears dark and gritty, it’s time for a change.

Next, turn your attention to the coolant. The last thing you want during a summer road trip is an overheated engine. Check the coolant reservoir regularly and ensure that the mixture is appropriate—typically a 50/50 mix of antifreeze and water. If the level is low, top it up, and consider a flush if it appears rusty or murky.

Don’t neglect the brake fluid, either. This fluid not only provides the necessary hydraulic pressure to your braking system but also absorbs moisture over time, which can lead to brake failure during high-stress summer driving conditions. Inspect the brake fluid reservoir, and if the fluid level is low or the color is cloudy, have it replaced.

Also, verify the transmission fluid and power steering fluid levels. These fluids may not require frequent checks, but ensuring they are at proper levels can prevent serious and costly repairs down the road.

Lastly, windshield washer fluid is often overlooked but is especially important during summer months when road trips and outdoor adventures increase. A clear view is essential, so top up your washer fluid reservoir before hitting the open road.

By regularly checking and maintaining these crucial fluid levels, you can ensure a smoother, safer ride throughout the summer, reducing the chances of unexpected breakdowns and maximizing your driving enjoyment. Taking these simple steps will not only extend the life of your vehicle but also give you peace of mind as you embark on your summer adventures.

12. Preparing for Road Trips: A Checklist

As summer approaches, the allure of the open road becomes irresistible, beckoning you to embark on adventures filled with sun-soaked landscapes and memorable experiences. However, before you rev up your engine and hit the highway, it’s essential to ensure that your vehicle is in tip-top shape. A well-prepared checklist can be your best friend, helping you avoid unexpected breakdowns and ensuring a smooth ride.

**1. Check Your Fluids:** Start by inspecting all essential fluids: engine oil, coolant, brake fluid, transmission fluid, and windshield washer fluid. Topping off fluids will not only keep your engine running efficiently but also help prevent overheating during those hot summer drives.

**2. Inspect the Tires:** Your tires are the contact point between your vehicle and the road, so it’s crucial to ensure they’re in good condition. Check for proper inflation, tread depth, and any signs of wear or damage. Don’t forget to check the spare tire and ensure you have all necessary tools for a tire change.

**3. Test the Battery:** Summer heat can be tough on car batteries, increasing the likelihood of failure. Inspect battery terminals for corrosion and ensure that the battery is securely mounted. If your battery is more than three years old, consider having it tested at a local auto shop.

**4. Examine the Brakes:** Safety is paramount, especially during road trips. Listen for any unusual sounds when braking and check the brake pads and rotors for wear. If you notice anything concerning, it’s best to have them inspected by a professional.

**5. Check the Air Conditioning:** There’s nothing worse than getting stuck in traffic on a hot summer day without a functioning A/C. Test your air conditioning system in advance to ensure it’s blowing cold air. If it’s not, consider having it serviced to avoid discomfort on your journey.

**6. Clean Your Windshield and Wipers:** Visibility is key for safe driving. Clean your windshield thoroughly and check the wiper blades for any signs of wear. Replace them if they’re streaking or not functioning well, ensuring you can handle unexpected summer rain showers.

**7. Emergency Kit:** Lastly, prepare an emergency kit containing first-aid supplies, a flashlight, road flares, a multi-tool, bottled water, and non-perishable snacks. Being prepared for any situation will provide peace of mind as you travel.

By following this checklist, you’ll not only enhance your vehicle’s performance but also ensure a safer and more enjoyable road trip experience. With your car in prime condition, all that’s left is to pack your bags, gather your favorite travel companions, and set off on the adventure of a lifetime!

13. The Benefits of Regular Professional Inspections

When it comes to summer car maintenance, one of the most crucial steps you can take is scheduling regular professional inspections. While many car owners may feel confident handling simple tasks like oil changes or tire rotations, there’s a wealth of knowledge and expertise that only trained mechanics can provide. A professional inspection goes beyond the superficial checks, offering a comprehensive evaluation of your vehicle’s overall health.

During these inspections, mechanics can identify potential issues that you might overlook, such as worn brake pads, fluid leaks, or developing electrical problems. This proactive approach not only ensures your safety on the road but also helps extend the lifespan of your vehicle. For instance, catching a minor issue early on can save you from a costly repair down the road, making it a wise investment in your car’s future.

Moreover, professional inspections often include a thorough examination of your cooling system, which is particularly important during the hot summer months. Overheating can lead to serious engine damage, but a qualified mechanic can check for leaks, ensure that your coolant levels are adequate, and inspect hoses for wear and tear, helping you avoid unexpected breakdowns.

In addition to safety and cost-effectiveness, regular inspections can also enhance your car’s performance and fuel efficiency. A well-maintained vehicle runs more smoothly, which means better gas mileage and a more enjoyable driving experience. So, as summer heats up and you hit the open road, make sure to prioritize professional inspections as a key part of your car maintenance routine. Your vehicle—and your peace of mind—will thank you for it.

14. Tips for Staying Cool During Hot Drives

When the sun blazes overhead and the temperature soars, staying cool during those long summer drives becomes a priority for both comfort and safety. Here are some essential tips to ensure your car remains a refreshing oasis, even on the hottest days.

**1. Start with the A/C:** Before hitting the road, give your air conditioning system a quick check. Ensure it’s functioning properly by turning it on and listening for any unusual noises. If you find that it’s not cooling effectively, consider having it serviced. A well-maintained A/C system is critical for keeping the cabin temperature down.

**2. Use the Recirculate Feature:** When you’re on the road and the heat is intense, engage the recirculate feature on your A/C. This function helps to cool the air already inside the vehicle rather than drawing in hot air from outside, allowing for a more efficient cooling process.

**3. Crack the Windows:** Before starting your journey, leave your windows cracked open for a few minutes while the car is parked. This allows hot air to escape and can help lower the interior temperature before you get in. Once you start driving, roll the windows up to keep the cool air in.

**4. Invest in Sunshades:** A sunshade for your windshield can be a game-changer. It prevents the sun’s rays from heating up your car’s interior while parked, making it much cooler when you return. Consider using reflective shades for your side windows as well to protect against glare.

**5. Hydrate Yourself:** Keep a cooler with ice-cold water or your favorite refreshing beverages on hand. Staying hydrated is essential during hot drives, not only for your comfort but also for your focus and reaction times.

**6. Plan Your Trips Wisely:** If possible, schedule your drives during the cooler parts of the day, such as early morning or late evening. This not only helps to avoid the peak heat but also makes for a more enjoyable driving experience.

By implementing these simple strategies, you can transform your car into a cool retreat, making every summer drive a breeze. Remember, safety and comfort go hand in hand, so ensure you prioritize your well-being on the road this season!

15. Conclusion: Enjoying a Safe and Smooth Summer Ride

As the summer sun shines brighter and the days grow longer, ensuring your vehicle is in top shape is essential for enjoying all the adventures this season has to offer. The culmination of our essential summer car maintenance tips leads us to the conclusion that proactive care will not only enhance your driving experience but also ensure your safety on the road.

Regular check-ups, tire maintenance, fluid checks, and battery inspections are crucial steps that can prevent unexpected breakdowns and costly repairs. By taking the time to inspect your vehicle and address any issues before they escalate, you’re setting yourself up for a stress-free journey. Remember, the heat can be particularly harsh on your car, affecting everything from your engine to your air conditioning system.

Moreover, planning ahead for road trips or long drives can make a significant difference. Having an emergency kit, knowing your route, and keeping your phone charged can provide peace of mind during your travels. Embrace the spirit of summer, whether it’s a scenic drive along the coast, a weekend camping trip in the mountains, or simply a joyride through the countryside.

By following these maintenance tips, you can rest easy knowing your car is ready for the road ahead. So, buckle up, enjoy the ride, and make the most of your summer adventures with confidence and joy, knowing that your vehicle is as ready for the journey as you are. Safe travels!

As summer approaches, ensuring your vehicle is in top shape is crucial for enjoying those sunny road trips and weekend getaways. We hope our essential summer car maintenance tips have equipped you with the knowledge needed to keep your ride smooth and safe during the warmer months. From checking your tire pressure to ensuring your cooling system is functioning optimally, taking these proactive steps can prevent unexpected breakdowns and enhance your driving experience. So, before you hit the road, take a moment to perform a quick check and enjoy the peace of mind that comes with knowing your vehicle is summer-ready. Here’s to a season filled with adventure, comfort, and the joy of the open road! Safe travels!

How to Prepare Your Car for a Long Drive?

As the allure of the open road beckons and the thrill of adventure awaits, ensuring your car is road-trip ready is the first step toward an unforgettable journey.

Whether you’re planning a weekend getaway or a cross-country expedition, the last thing you want is to encounter unexpected hiccups along the way. From checking your tires and fluids to packing the right emergency gear, having a well-prepared vehicle can make all the difference in creating a smooth and enjoyable experience. In this essential checklist, we’ll guide you through the crucial steps to prepare your car for an epic road trip, ensuring that you hit the highway with confidence and peace of mind. Get ready to buckle up, embrace the adventure, and make memories that will last a lifetime!

1. Introduction: The Importance of Preparation

How to Prepare Your Car for a Long Drive?
Credit : whatcanu.com

As the open road beckons and the thrill of adventure looms on the horizon, preparation becomes the unsung hero of any epic road trip. The journey ahead is not just about the destination; it’s about the experiences, memories, and stories that unfold along the way. However, a successful road trip begins long before you hit the gas pedal.

Preparation is paramount. It ensures that your vehicle is not just a means of transport, but a reliable companion on your travels. Imagine the freedom of cruising down scenic highways, exploring hidden gems, and making spontaneous stops without the nagging worry of unexpected vehicle troubles. A well-prepared car can transform your trip from a mere getaway into a seamless adventure filled with joy and excitement.

In this checklist, we’ll delve into the crucial steps to ensure your vehicle is road-ready. From performing essential maintenance checks to packing smartly, each item on this list is designed to enhance your safety and comfort while maximizing the fun factor of your journey. Whether you’re embarking on a weekend escape or a months-long expedition, investing time in preparation will pay off in peace of mind, allowing you to focus on the journey ahead. So buckle up as we explore how to get your car ready for the adventure of a lifetime!

2. Setting Your Road Trip Goals

Setting your road trip goals is a crucial step that can transform a simple journey into an unforgettable adventure. Before you even hit the open road, take a moment to envision what you want to achieve during your trip. Are you seeking a scenic escape, a cultural immersion, or perhaps a culinary adventure? Defining your goals will not only shape your itinerary but also enhance your overall experience.

Consider the type of experiences you want to have. Do you yearn for breathtaking views, quaint roadside diners, or vibrant cities? Are you hoping to visit national parks, historical landmarks, or local festivals? Make a list of must-see attractions and activities that align with your interests. This will help you create a roadmap that reflects your desires, ensuring that every stop along the way adds value to your adventure.

Additionally, think about the pace at which you want to travel. Are you an explorer at heart who thrives on spontaneity, or do you prefer a more structured schedule? Setting clear goals can help you find a balance between planned activities and the spontaneity that often leads to the best travel stories.

Lastly, don’t forget to factor in the people you’re traveling with. Consider their interests and preferences as you set your goals. A successful road trip should cater to everyone involved, fostering shared experiences that strengthen bonds and create lasting memories.

In summary, setting your road trip goals is about crafting a journey that resonates with your passions and aspirations. With a clear vision in mind, you’ll maximize every moment spent on the road, making your epic road trip truly unforgettable.

3. Creating a Comprehensive Vehicle Checklist

How to Prepare Your Car for a Long Drive?
Credit : whatcanu.com

Creating a comprehensive vehicle checklist is a crucial step in ensuring your road trip goes off without a hitch. This checklist serves as your pre-trip safety net, helping you avoid any unexpected surprises on the open road. Start by breaking down the essentials into categories: mechanical checks, fluid levels, and safety equipment.

Begin with a thorough inspection of your tires. Check for adequate tread depth and ensure they are properly inflated. Don’t forget to include your spare tire and the tools needed for a tire change. Next, turn your attention to the brakes. Listen for any unusual sounds while driving and pay attention to how your vehicle responds when you apply the brakes. If anything feels off, consult a mechanic before hitting the road.

Next, examine your vehicle’s fluid levels. This includes engine oil, coolant, transmission fluid, brake fluid, and windshield washer fluid. It’s wise to top off any fluids that are low and consider changing the oil if it’s been a while since the last service. Checking the battery is also essential; ensure the terminals are clean, and the connections are secure. If your battery is more than three years old, it might be worth having it tested to avoid any starting issues during your travels.

Safety equipment is often overlooked but can be a lifesaver in emergencies. Make sure your first-aid kit is well-stocked and includes essentials like band-aids, antiseptic wipes, and any personal medications. Additionally, ensure you have a flashlight with fresh batteries, jumper cables, and a roadside emergency kit that includes flares or reflective triangles.

Finally, don’t forget to verify your insurance and registration documents are up to date and easily accessible. A comprehensive vehicle checklist not only enhances your safety but also guarantees that you can focus on the joy of the journey ahead, rather than worrying about potential problems along the way. By taking the time to prepare your vehicle methodically, you set the stage for an unforgettable road trip filled with adventure and discovery.

4. Inspecting Your Tires: Tread, Pressure, and Alignment

When it comes to preparing your car for an epic road trip, one of the most crucial yet often overlooked elements is inspecting your tires. Your tires are the only point of contact between your vehicle and the road, making their condition paramount for both safety and performance. Start by checking the tread depth; this is vital for ensuring optimal grip, especially when navigating winding roads or wet conditions. A simple way to gauge tread wear is the penny test—insert a penny into the tread with Lincoln’s head down. If you can see the top of his head, it’s time for new tires.

Next, turn your attention to tire pressure. Proper inflation not only maximizes fuel efficiency but also extends the life of your tires and enhances handling. Refer to the manufacturer’s recommended pressure, typically found on a sticker inside the driver’s side door or in the owner’s manual. Use a reliable tire pressure gauge to check each tire, including the spare, and adjust as necessary. Remember that tire pressure can fluctuate with temperature changes, so aim to check it in the morning when the tires are cool.

Lastly, don’t forget about tire alignment. If your car pulls to one side or if you notice uneven wear on your tires, it’s a sign that your wheels may be misaligned. A proper alignment ensures that your vehicle handles correctly and that your tires wear evenly, providing a smoother ride and improving your overall safety on the road. If you suspect alignment issues, it’s worth scheduling a visit to your mechanic before setting off on your adventure.

By meticulously inspecting your tires—focusing on tread, pressure, and alignment—you’ll not only enhance your vehicle’s performance but also ensure a safer and more enjoyable road trip experience. Happy travels!

5. Checking Fluid Levels: Oil, Coolant, Brake, and Transmission Fluids

How to Prepare Your Car for a Long Drive?
Credit : whatcanu.com

Before hitting the open road, ensuring that your car’s vital fluids are at optimal levels is crucial for a smooth and trouble-free journey. Neglecting this essential step can lead to unforeseen breakdowns and costly repairs, dampening the excitement of your adventure.

Start with the **engine oil**—this is the lifeblood of your vehicle. Check the dipstick to assess the oil level, and look for any signs of contamination or unusual color changes that might indicate it’s time for an oil change. Fresh oil not only lubricates the engine but also helps in regulating temperature, so ensure you’re topped up with the right type for your vehicle.

Next, move on to the **coolant**. This fluid is vital for preventing your engine from overheating, especially during long stretches of driving. Check the coolant reservoir to make sure it’s filled to the appropriate level and inspect the hoses for any leaks or wear. If your coolant is low, it could be indicative of a larger issue, so take the time to investigate further if needed.

Don’t forget about the **brake fluid**. A well-functioning braking system is paramount for safety on the road. Open the brake fluid reservoir and ensure the fluid is clear and at the recommended level. If the fluid appears dark or murky, it might be time to have it flushed and replaced. Remember, your brakes are your first line of defense on any road trip.

Lastly, check the **transmission fluid**. This is often overlooked, but it plays a critical role in the smooth shifting of gears. Use the appropriate dipstick, usually marked with a bright color, to check its level and condition. The fluid should be a bright red and free from burnt odors. Low or dirty transmission fluid can lead to poor performance and potential transmission failure, so don’t skip this step.

Taking the time to check and top off these essential fluids will not only enhance your vehicle’s performance but will also provide peace of mind as you embark on your epic road trip. With your fluids in check, you can focus on enjoying the journey ahead, knowing your car is ready for the adventure that awaits!

6. Ensuring Your Battery is Ready for the Journey

When it comes to road trips, your car’s battery is one of the unsung heroes of your adventure. A reliable battery can be the difference between a smooth journey and an unexpected roadside breakdown. To ensure your battery is ready for the journey, start by checking its age; most batteries last around three to five years. If yours is nearing the end of this lifespan, consider replacing it before hitting the road.

Next, inspect the battery terminals and cables for any signs of corrosion, which can hinder performance. Clean any corrosion with a mixture of baking soda and water, and ensure that the connections are tight and secure. It’s also wise to test the battery’s voltage with a multimeter; a healthy battery should read between 12.4 and 12.7 volts when the engine is off.

If you’re unsure about the battery’s health, many auto parts stores offer free battery testing services. Additionally, consider investing in a battery maintainer or charger, especially if your trip will involve long stretches of disuse. This can help keep your battery charged and ready for action, especially if your journey includes a few stops where you might not be using the car regularly.

Lastly, familiarize yourself with the battery’s location and accessibility in case you need to jump-start your vehicle or address any issues on the go. With these preparation steps in place, you can hit the road with confidence, knowing that your battery is primed and ready for the epic adventures that await.

7. Testing Your Lights: Headlights, Brake Lights, and Turn Signals

How to Prepare Your Car for a Long Drive?
Credit : whatcanu.com

Before you hit the open road, ensuring that your vehicle’s lighting system is fully operational is crucial for both safety and compliance. Imagine cruising down the highway at dusk, the sun dipping below the horizon, only to realize your headlights are dim or, worse, non-functional. This is not only a recipe for disaster but can also attract the attention of law enforcement, resulting in fines or citations.

Start your lighting inspection with the headlights. Turn them on and stand in front of your car, checking for brightness and clarity. If the lenses are foggy or yellowed, it may be time for a cleaning or replacement to maximize visibility. Next, enlist a friend to help test your brake lights. With your foot on the brake, have them observe the lights from behind to ensure they illuminate brightly. Don’t forget to check your third brake light, as it can be easily overlooked but is vital for signaling when you’re coming to a stop.

Moving on to your turn signals, activate them one at a time while checking from the outside. The last thing you want on a road trip is to be caught in a lane change without functioning indicators. Faulty lights can lead to confusion and accidents, especially on busy highways.

In addition to functional checks, ensure that all bulbs are free from cracks and securely in place. If you find any issues, replace the burnt-out bulbs or invest in brighter options for increased visibility. Taking the time to test your lights before your road trip not only enhances your safety but also contributes to a more enjoyable journey, allowing you to focus on the adventure ahead rather than worrying about potential mishaps. So, before you rev up your engine, give your lights the attention they deserve and hit the road with confidence!

8. Reviewing Your Braking System: Pads and Rotors

Before you hit the open road, one of the most critical aspects of your vehicle to inspect is the braking system. Your brakes are your first line of defense when it comes to safety, and ensuring they are in top-notch condition can make all the difference during your epic road trip.

Start by checking your brake pads. These crucial components are designed to create friction against the rotors when you apply the brakes, allowing your vehicle to slow down or stop effectively. Look for any signs of wear and tear, such as thinning pads or uneven surfaces. If you notice that the pads are less than a quarter-inch thick, it’s time for a replacement. Additionally, listen for any squeaking or grinding noises while braking, which can indicate that your pads are worn down and may lead to more significant issues if left unaddressed.

Next, turn your attention to the rotors. These metal discs work in tandem with your brake pads, and if they are warped or damaged, they can compromise your braking performance. Inspect the rotors for any grooves, discoloration, or rust. A smooth, shiny surface is what you want to see. If you find any irregularities or if the rotors have become too thin, they may need resurfacing or replacement to ensure optimal braking efficiency.

Don’t forget to check your brake fluid level as well. Low fluid can lead to a spongy brake pedal and decreased stopping power. If the fluid is discolored or has a burnt smell, it’s essential to replace it to maintain the integrity of your braking system.

By reviewing your brake pads and rotors thoroughly, you can travel with the peace of mind that comes from knowing your vehicle is ready to handle whatever the road throws your way. Safety should always be your top priority, and a well-functioning braking system is a crucial part of that equation. So, before you embark on your journey, take the time to ensure your brakes are in excellent shape, allowing you to focus on the adventure ahead.

9. Packing an Emergency Kit: Essentials for the Road

When embarking on an epic road trip, packing an emergency kit is crucial to ensure your adventure is as safe and enjoyable as possible. While you may have your destinations mapped out and playlists curated, the unexpected can always arise on the open road. A well-stocked emergency kit can provide peace of mind and help you navigate any mishaps that may occur.

Start with the basics: a first aid kit stocked with band-aids, antiseptic wipes, and any necessary medications for you and your travel companions. Accidents can happen, and being prepared can make all the difference. Next, include a flashlight with extra batteries. Whether you find yourself in a dimly lit situation or need to inspect your vehicle at night, a reliable light source is indispensable.

Don’t forget about tools! A multi-tool or basic tool kit can come in handy for minor repairs, while jumper cables are essential for those moments when your car battery decides to take a vacation. Flat tires are another common road trip woe, so ensure you have a spare tire, a jack, and a tire iron easily accessible.

In addition to these items, pack a few non-perishable snacks and bottled water. Not only will these keep you energized and hydrated, but they can also be a lifesaver if you find yourself stranded for an extended period. Consider including a blanket for warmth and comfort, as well as flares or reflective triangles to signal for help if needed.

Lastly, be sure to have a physical map on hand, even if you plan to rely on GPS. In areas with poor reception, a paper map can guide you back on track. By preparing an emergency kit filled with these essentials, you’ll be ready to tackle any bumps in the road, allowing you to focus on the adventure ahead and create unforgettable memories along the way. Safe travels!

10. Organizing Your Route and Stops

Organizing your route and stops is a crucial step in ensuring a smooth and enjoyable road trip experience. Before you hit the open road, take the time to map out your journey, keeping in mind both your final destination and the exciting places you want to visit along the way.

Start by using a reliable GPS app or a traditional map to chart your course. Consider the scenic routes that may offer breathtaking views and unique experiences, rather than sticking solely to the fastest highways. Don’t forget to factor in the time it takes to travel each leg of your journey; this will help you avoid rushing through beautiful landscapes or missing out on charming small towns that beckon for a visit.

Next, identify key stops for fuel, food, and rest. Planning these breaks not only keeps your energy levels up but also allows for spontaneous adventures—like discovering a local diner renowned for its pie or a quirky roadside attraction that promises memorable photo ops. Aim to balance driving hours with leisurely stops to stretch, explore, and recharge.

Additionally, consider the interests of everyone in your travel party. Are there specific landmarks, parks, or museums that they would love to see? Incorporate these preferences into your route to keep spirits high and enthusiasm alive throughout the trip.

Lastly, be flexible. While it’s important to have a plan, the beauty of a road trip lies in its unpredictability. Sometimes the best memories come from unexpected detours or last-minute decisions to explore a hidden gem. So, grab your favorite travel playlist, buckle up, and get ready to make unforgettable memories on the open road!

11. Preparing Your Entertainment: Music, Podcasts, and Audiobooks

As you gear up for your epic road trip, one of the most enjoyable aspects of the journey lies in the entertainment you’ll bring along. After all, long hours on the road can feel endless without something to keep your mind engaged and your spirits high. Preparing your entertainment is not just about choosing what to listen to; it’s about curating an experience that enhances your journey.

Start by creating a playlist of your favorite songs that evoke memories or simply make you want to sing along. Consider including a mix of genres to cater to everyone in the car, from upbeat pop anthems to classic rock favorites and soothing acoustic tracks for those serene stretches of highway. Platforms like Spotify and Apple Music even offer curated road trip playlists, making it easier than ever to find the perfect soundtrack for your adventure.

Podcasts are another fantastic option for road trip entertainment, offering everything from true crime stories to educational content and light-hearted banter. Choose a few series that pique your interest and download episodes ahead of time, ensuring you have them ready even in areas with spotty reception. Engaging in a gripping podcast can create a shared experience, sparking conversations and laughter among passengers.

Audiobooks can transform your road trip into a literary adventure. Whether you prefer thrilling mysteries, captivating fantasy epics, or insightful non-fiction, there’s something for every taste. Select a few titles that everyone in the car can enjoy and delve into a story that carries you away from the humdrum of the road. Services like Audible offer a wide range of choices, making it easy to find the perfect book for your trip.

Finally, don’t forget to bring along a charging solution to keep your devices powered and ready to go. A car charger with multiple ports can be a lifesaver, ensuring everyone’s devices stay charged and the entertainment keeps flowing, no matter how long the journey lasts.

With a well-prepared entertainment lineup, you’ll transform your road trip into a memorable experience filled with music, stories, and laughter—making the miles fly by and creating lasting memories along the way. So buckle up, hit play, and let the adventure begin!

12. Making Sure Your Navigation System is Up to Date

In the age of technology, a reliable navigation system can be your best friend on the open road. Before you embark on your epic road trip, it’s crucial to ensure that your navigation system is up to date. This step can save you from potential headaches and detours, allowing for a smoother journey.

Start by checking for any available updates for your GPS device or app. Many navigation systems release periodic updates that include new maps, points of interest, and information about road conditions or closures. Ignoring these updates could mean missing out on the latest routes and shortcuts, potentially leading you into frustrating traffic or outdated pathways.

If you’re relying on a smartphone app, make sure you’ve downloaded the latest version, and check to see if you can download offline maps. This is particularly important for road trips through remote areas where cell service may be spotty. Offline capabilities ensure that you won’t be left stranded without directions when you need them most.

Additionally, familiarize yourself with the features of your navigation system. Take a moment to explore settings such as voice commands, alternate routes, and real-time traffic updates. Understanding how to use these features can enhance your driving experience and keep you informed about any potential delays along your route.

As a final precaution, consider bringing along a backup navigation option, whether it’s a paper map or a secondary GPS device. Technology can be unpredictable, and having a reliable fallback plan ensures you won’t lose your way, no matter what challenges the road may throw at you.

By taking the time to prepare your navigation system before your journey, you can focus on the adventure ahead—enjoying the sights, creating memories, and discovering hidden gems along the way.

13. Tips for Comfort: Packing Snacks and Travel Pillows

When embarking on an epic road trip, comfort is key to ensuring that both you and your passengers enjoy the journey as much as the destination. One of the simplest ways to enhance that comfort is by packing the right snacks and travel pillows.

Start with snacks: opt for a variety of options that cater to different tastes and dietary needs. Think beyond standard chips and candy—consider packing a mix of protein-rich nuts, dried fruits, and granola bars for sustained energy. Fresh fruits like apples or bananas can add a refreshing touch, while cheese sticks or yogurt can offer a creamy indulgence. Don’t forget about hydration; keep a cooler filled with bottled water or refreshing beverages to keep everyone hydrated throughout the drive. Having a range of snacks on hand not only prevents unnecessary pit stops but also keeps spirits high as you munch your way through the miles.

Now, let’s talk about travel pillows. A good travel pillow can make all the difference, especially during long stretches of driving or when you’re catching some Z’s in the passenger seat. Look for adjustable, inflatable, or memory foam options that provide adequate neck support while being compact enough to fit into your luggage. Consider including a blanket or a light throw as well; it can serve multiple purposes, from keeping warm during chilly nights to providing extra comfort during rest stops.

By carefully selecting snacks and travel pillows, you’re setting the stage for a cozy and delightful road trip experience. After all, the journey is just as important as the destination, and a little comfort goes a long way in creating lasting memories on the open road.

14. Final Checklist: Last-Minute Checks Before Departure

As the excitement of your upcoming road trip builds, it’s crucial to take a moment for those final checks that can make all the difference between a smooth journey and an unexpected detour. Before you hit the open road, go through this last-minute checklist to ensure your car is road-ready and to give yourself peace of mind.

**Fluid Levels:** Start with a quick inspection of your vehicle’s fluid levels. Check the engine oil, coolant, brake fluid, transmission fluid, and windshield washer fluid. Topping off any low levels can prevent overheating and ensure optimal performance.

**Tires:** Examine your tires for wear and proper inflation. Check the tread depth—using the penny test can help you determine if they’re still safe for the road. Don’t forget to inspect the spare tire as well; it should be properly inflated and in good condition.

**Lights and Signals:** Test all lights, including headlights, brake lights, turn signals, and hazard lights. Visibility is key, and ensuring that your lights are functioning will help keep you safe, especially during nighttime driving.

**Windshield Wipers:** Inspect your windshield wipers for any signs of wear or damage. If they’re streaking or skipping, it’s time to replace them. Clear visibility is essential, especially if you encounter unexpected rain.

**Emergency Kit:** Double-check your emergency kit. Ensure it contains essentials such as a first-aid kit, flashlight, water, basic tools, jumper cables, and flares. Being prepared for minor mishaps can save you from major headaches down the road.

**Documents:** Lastly, confirm that you have all necessary documents with you. This includes your driver’s license, registration, insurance information, and any roadside assistance details. Having these at your fingertips will come in handy should you need them.

Taking the time for these last-minute checks can mean the difference between a carefree adventure and a stressful situation on the road. With this checklist completed, you can confidently set out on your epic road trip, ready to create unforgettable memories along the way! Happy travels!

15. Conclusion: Enjoying the Journey Ahead!

As you prepare for your epic road trip, remember that the journey is just as important as the destination. With your checklist completed and your car ready to hit the open road, it’s time to embrace the adventure that lies ahead. Each mile driven is an opportunity to create unforgettable memories, whether you’re singing along to your favorite playlist, savoring local cuisine at roadside diners, or marveling at scenic vistas that unfold before you.

Take a moment to appreciate the beauty of spontaneity — the unplanned detours that lead to hidden gems, the chance encounters with fellow travelers, and the laughter shared with friends or family in the car. These moments often become the highlights of your trip, reminding you that travel isn’t solely about reaching a destination but about the experiences you gather along the way.

Ensure you have a camera or journal handy to document your adventures, and don’t forget to indulge in the little pleasures — stopping for ice cream on a hot day, taking photos with quirky roadside attractions, or simply enjoying a breathtaking sunset. As you buckle up and set off, keep an open mind, welcome the unexpected, and let the road guide you to new discoveries.

So, here’s to your upcoming road trip: may it be filled with laughter, adventure, and endless joy. Enjoy the journey ahead! Safe travels!

As you gear up for your next adventure, we hope this essential checklist for preparing your car for an epic road trip has provided you with the guidance you need to hit the open road with confidence. By taking the time to ensure your vehicle is in top shape, from routine maintenance checks to packing emergency supplies, you can focus on what truly matters—creating unforgettable memories along the way. Whether you’re embarking on a cross-country journey or a weekend getaway, remember that a little preparation can go a long way in ensuring a smooth and enjoyable ride. So buckle up, turn up the tunes, and get ready for the journey of a lifetime—your next great adventure awaits just beyond the horizon! Safe travels!

Car – How to Deal with a Flat Tire?

A flat tire can turn a smooth journey into a frustrating ordeal in an instant, leaving many drivers feeling helpless and anxious on the side of the road.

Yet, mastering the art of fixing a flat tire is a crucial skill that every driver should possess, not only to save time and money but also to boost confidence behind the wheel. In this comprehensive step-by-step guide, we’ll equip you with everything you need to know about diagnosing, repairing, and preventing flat tires, ensuring you’re always prepared for the unexpected. From the essential tools you’ll need to the safety precautions to take, we’ll walk you through the process in a clear and approachable manner, empowering you to tackle this common automotive challenge with ease. So, whether you’re a seasoned road warrior or a new driver just starting out, join us as we demystify the flat tire fix and help you get back on the road in no time!

1. Introduction: The Importance of Knowing How to Fix a Flat Tire

Car - How to Deal with a Flat Tire?
Credit : whatcanu.com

A flat tire can strike at the most inconvenient moments, often transforming a routine drive into a frustrating ordeal. Whether you’re embarking on a scenic road trip, commuting to work, or simply running errands, the prospect of a flat can leave you feeling vulnerable and anxious. However, knowing how to fix a flat tire is not just a handy skill; it’s an essential aspect of being a responsible driver.

Understanding the mechanics of a tire change empowers you to take control of the situation, save time, and avoid potentially costly roadside assistance fees. Imagine being stranded on a quiet country road, miles from the nearest service station, or stuck in a busy urban area with cars whizzing by. In these scenarios, the ability to swiftly and safely replace a flat tire can be a true game-changer.

Moreover, mastering this skill not only enhances your confidence behind the wheel but also fosters a sense of independence. You’ll no longer have to rely solely on others or feel helpless when faced with a flat. Additionally, it’s a valuable skill that can come in handy for family and friends, allowing you to lend a hand when they find themselves in a similar predicament.

In this guide, we will walk you through the entire process of fixing a flat tire, from the tools you’ll need to the step-by-step instructions for a successful repair. So, buckle up and get ready to empower yourself with the knowledge that can turn a stressful situation into a manageable task, ensuring you’re always road-ready.

2. Tools You’ll Need for the Job

Before you embark on your flat tire fix, it’s essential to gather the right tools to ensure a smooth and efficient process. Having the necessary equipment at your fingertips not only makes the task easier but also enhances your confidence as you tackle the repair. Here’s a list of the must-have tools that every driver should keep in their vehicle:

1. **Spare Tire**: This is your first line of defense against a flat. Make sure your spare is in good condition and properly inflated. Familiarize yourself with how to access it in your trunk or under your vehicle.

2. **Jack**: A sturdy jack is crucial for lifting your vehicle off the ground. Whether you opt for a scissor jack or a hydraulic jack, ensure it is rated for your vehicle’s weight and meets safety standards.

3. **Lug Wrench**: A lug wrench, or tire iron, is necessary for loosening and tightening the lug nuts that secure your tire. Consider a cross-shaped wrench for added leverage, making it easier to break free stubborn nuts.

4. **Tire Pressure Gauge**: Maintaining the correct tire pressure is vital for your vehicle’s safety and performance. A simple tire pressure gauge will help you check the pressure in your spare tire and ensure it’s ready for use.

5. **Gloves**: Protect your hands from dirt and grime by wearing a pair of work gloves. Not only will they keep your hands clean, but they also provide a better grip on tools and tires.

6. **Reflective Triangles or Road Flares**: Safety should always come first. Use reflective triangles or road flares to alert other drivers of your presence, especially if you’re changing a tire on a busy road.

7. **Flashlight**: If you find yourself dealing with a flat tire after dark, a reliable flashlight is invaluable. It will help you see what you’re doing and ensure you don’t overlook any important steps during the process.

8. **Tire Repair Kit**: For those who are more adventurous or want to cover all bases, a tire repair kit can be a lifesaver. This usually includes tire plugs, a reamer, and a plug insertion tool for quick fixes on tubeless tires.

Having these tools within reach not only prepares you for quick action when a flat tire strikes but also instills a sense of empowerment. With the right equipment at your disposal, you’ll be well-equipped to master the flat tire fix like a pro, ensuring you’re back on the road in no time.

3. Safety First: Preparing to Change a Tire

Car - How to Deal with a Flat Tire?
Credit : whatcanu.com

Changing a flat tire can be a daunting task, especially if you find yourself stranded on the side of the road. However, prioritizing safety before diving into the fix is crucial for your well-being and that of other road users. Here’s how to prepare yourself for the task ahead.

First and foremost, ensure that you are parked in a safe location. If possible, pull over to a flat, stable surface away from oncoming traffic. Ideally, find a well-lit area if you’re changing your tire at night. Once you’ve secured a safe spot, engage your hazard lights to alert other drivers of your presence and to signal that you’re stationary.

Next, it’s important to gather the necessary tools and equipment before you start the tire change. Make sure you have a spare tire, a jack, a lug wrench, and a wheel chock. If you’re in a particularly busy area, placing a wheel chock behind the opposite tire can help prevent the vehicle from rolling while you work. Double-check that your spare tire is properly inflated and in good condition—there’s nothing worse than discovering that your spare is flat when you need it most.

Before you begin, it’s wise to familiarize yourself with your vehicle’s owner manual. This manual will provide specific instructions and safety precautions unique to your vehicle model, including the proper jacking points and torque specifications for the lug nuts. Knowing this information will not only streamline the process but also ensure you’re working safely.

Finally, equip yourself with personal protective gear. Sturdy gloves can protect your hands from sharp objects and dirt, while safety glasses will shield your eyes from debris kicked up during the process. If the sun is shining bright, consider wearing a hat or sunglasses to shield your eyes from glare, as you’ll want to maintain focus while changing the tire.

By following these safety measures and preparing adequately, you’ll set yourself up for a smooth tire change experience. Remember, a little preparation goes a long way in ensuring your safety on the road!

4. Identifying the Flat Tire: Signs and Symptoms

Identifying a flat tire is the first crucial step in your repair journey, and being able to recognize the signs and symptoms early can save you time and prevent further damage to your vehicle. One of the most obvious indicators is a noticeable change in the tire’s appearance. If you observe that one tire looks significantly lower than the others or appears flat, it’s time to take a closer look.

As you approach your vehicle, listen for any hissing or leaking sounds that could suggest air escaping from a puncture. Sometimes, the telltale sign of a flat tire is a sudden drop in your car’s handling and stability. If you feel the steering wheel vibrating or pulling to one side while driving, this could indicate a deflated tire. Additionally, pay attention to unusual noises, such as thumping or banging, which may signal that the tire is not making proper contact with the road.

Another symptom to watch for is a warning light on your dashboard. Many modern vehicles are equipped with tire pressure monitoring systems (TPMS) that alert you when tire pressure drops below the recommended level. If you see this warning light, it’s essential to check your tires immediately.

When inspecting the tires, look for visible punctures, cracks, or bulges on the sidewalls or tread. These physical signs can help you pinpoint the issue more accurately. Finally, if you notice your vehicle is using more fuel than usual, this could also be a result of low tire pressure affecting your car’s efficiency.

By recognizing these signs and symptoms early, you can address the problem promptly and ensure a safer, smoother ride. Remember, the sooner you identify a flat tire, the easier and more effective your subsequent repair will be.

5. Loosening the Lug Nuts: The Right Technique

Car - How to Deal with a Flat Tire?
Credit : whatcanu.com

When it comes to changing a flat tire, loosening the lug nuts is a crucial step that requires both technique and caution. Begin by ensuring that your vehicle is on a stable, flat surface, ideally away from traffic. Once the car is secure, it’s time to grab your lug wrench.

Start with the lug nuts that hold the flat tire in place. It’s important to remember that these nuts are often tightened with considerable force, so you’ll need to apply a bit of muscle. Before you attempt to loosen them, it’s advisable to break the initial resistance while the tire is still on the ground. This prevents the tire from spinning and allows you to exert your full weight on the wrench.

Using a star pattern, begin with the nut located at the top, then move in a diagonal fashion to the one opposite it. This technique not only ensures even pressure but also reduces the risk of warping the wheel. If the lug nuts are particularly stubborn, consider using a breaker bar for added leverage. A quick tip: if you have a can of penetrating oil or WD-40, a light spray on the lug nuts can help ease their removal.

Remember to turn the wrench counterclockwise, and don’t be afraid to put your body into it; a firm stance and a little push can go a long way in loosening those tough nuts. Once you have them all loosened, you’re one step closer to replacing that flat tire and getting back on the road. Keeping the right technique in mind during this process not only saves time but also ensures your safety as you prepare to make the switch.

6. Lifting the Vehicle: Using a Jack Properly

Lifting your vehicle safely and effectively is a crucial step in the flat tire fix process, and using a jack properly is key to ensuring not only your safety but also the integrity of your vehicle. Begin by finding a flat, stable surface to park your car, as this will prevent any unwanted movement while you’re working. Engage the parking brake to secure the vehicle in place and turn on your hazard lights to alert other drivers.

Next, locate your vehicle’s jack and the manufacturer’s recommended lift points, usually found in the owner’s manual or on a sticker inside the driver’s door. These points are specifically designed to bear the weight of the vehicle and ensure stability. Using a jack that’s appropriate for your vehicle type—a scissor jack, bottle jack, or hydraulic jack—will dictate the method you’ll use.

Position the jack under the designated lift point, ensuring it’s directly aligned and stable. If you’re using a scissor jack, you’ll need to turn the handle in a clockwise direction to raise the vehicle. For hydraulic jacks, simply pump the handle until the vehicle begins to lift. As the vehicle ascends, keep a watchful eye to ensure that it remains steady and balanced. It’s essential to lift the vehicle high enough to remove the flat tire and replace it with the spare, typically by at least six inches off the ground.

Once the vehicle is lifted, never place any part of your body under the vehicle without additional support, such as jack stands. This extra precaution can prevent serious injury should the jack fail. If you’re working on a particularly heavy vehicle or in an uncertain environment, consider asking for assistance or using a more robust jacking system.

Mastering the art of lifting your vehicle with a jack not only empowers you to handle flat tires confidently but also instills a sense of independence that every driver should possess. So, take the time to familiarize yourself with your jack, practice safe lifting techniques, and you’ll be well-prepared for any roadside predicament.

7. Removing the Flat Tire: Step-by-Step Instructions

Car - How to Deal with a Flat Tire?
Credit : whatcanu.com

Removing a flat tire may seem daunting, but with a clear step-by-step approach, you can master this essential skill and get back on the road with confidence. Here’s how to do it safely and efficiently:

1. **Secure Your Vehicle**: Before you begin the tire removal process, ensure that your vehicle is parked on a flat, stable surface. Engage the parking brake to prevent any unintended movement. If you have wheel chocks, place them behind the rear tires to add extra stability.

2. **Gather Your Tools**: You’ll need a few essential tools: a jack, a lug wrench, and of course, your spare tire. If you have a tire repair kit, it can also come in handy. Make sure these tools are easily accessible before you start.

3. **Loosen the Lug Nuts**: Using the lug wrench, turn the lug nuts counterclockwise to loosen them. It’s easier to do this while the tire is still on the ground, as it prevents the wheel from spinning. Loosen each nut a little—aim for about a half turn—before proceeding to the next.

4. **Lift the Vehicle**: Position the jack under the vehicle’s jacking point—refer to your owner’s manual if you’re unsure where that is. Once in place, pump the jack to lift the vehicle until the flat tire is completely off the ground. Ensure the vehicle is stable before moving on.

5. **Remove the Lug Nuts**: Now that the tire is elevated, fully remove the loosened lug nuts. Keep them in a safe spot, as you’ll need them to attach the spare tire later.

6. **Take Off the Flat Tire**: With the lug nuts removed, grasp the flat tire with both hands and pull it straight towards you, off the wheel hub. It may require a bit of wiggling if it’s stuck, so don’t hesitate to give it a gentle nudge.

7. **Prepare the Spare Tire**: Before installing the spare, inspect it to ensure it’s in good condition, with adequate tread and properly inflated. If you’re using a full-sized spare, it should be ready to go. For a smaller temporary spare, check the recommended speed and distance limits.

With the flat tire safely removed and the spare tire at the ready, you’re now well on your way to completing the flat tire fix. Remember, practice makes perfect, so familiarize yourself with these steps to feel more confident during an unexpected roadside situation.

8. Inspecting the Tire: What to Look For

Inspecting the tire is a crucial step in the flat tire fix process, as it helps you determine the underlying cause of the flat and whether the tire can be repaired or needs replacement. Before you dive into the inspection, make sure you’re in a safe and well-lit area, ideally away from traffic. Here’s what to look for:

1. **Visual Inspection**: Start with a thorough visual check. Look for any obvious signs of damage, such as cuts, punctures, or bulges in the tire sidewall. These defects can indicate a more severe issue that may not be repairable. Run your fingers along the surface of the tire to feel for embedded objects like nails or screws, which might not be immediately visible.

2. **Tread Condition**: Examine the tread depth and pattern. Worn-out tires can lose grip and increase the likelihood of blowouts. Use the “penny test”—insert a penny into the tread with Lincoln’s head facing down. If you can see all of Lincoln’s head, it’s time to replace the tire. Uneven wear patterns can also indicate alignment or inflation issues that need addressing.

3. **Check for Leaks**: After identifying any punctures or holes, it’s important to check for air leaks. You can do this by spraying a mixture of soap and water over the suspect areas. If you see bubbles forming, you’ve found a leak that can often be repaired.

4. **Air Pressure**: Don’t forget to check the tire pressure. Use a tire pressure gauge to ensure that your tire is inflated to the manufacturer’s recommended pressure. Under-inflation can cause excessive wear and increase the risk of a flat, while over-inflation can lead to blowouts.

5. **Sidewall Inspection**: Pay special attention to the sidewalls of the tire. Look for any signs of cracking, bubbling, or separation. These issues are often signs of aging or damage from hitting curbs or potholes. A compromised sidewall may mean the tire cannot be safely repaired.

By carefully inspecting your tire and addressing any issues you find, you empower yourself to make informed decisions about repairs or replacements, ensuring your safety on the road. Remember, a little diligence during the inspection can save you from unexpected challenges down the line.

9. Installing the Spare Tire: Proper Alignment and Attachment

Installing the spare tire correctly is crucial for ensuring your safety and the optimal performance of your vehicle until you can get the flat tire repaired or replaced. Begin by carefully lifting the spare tire from your trunk, ensuring you have all the necessary tools at hand—typically, this includes a wrench and a jack.

Before you start, take a moment to inspect the spare tire for any visible damage. If it’s a full-size spare, check that it matches the specifications of your original tires. If it’s a compact spare, remember that it is generally designed for temporary use and may have restrictions on speed and distance.

Once you’ve confirmed that your spare is in good condition, position it near the wheel hub from which you’ve just removed the flat tire. As you lift the spare onto the wheel hub, align the holes in the tire with the wheel bolts. It’s important to ensure that the tire sits flat against the hub; any misalignment can lead to performance issues and potentially cause the lug nuts to loosen while driving.

Begin attaching the lug nuts by hand. Screw them onto the wheel bolts in a star pattern—this technique ensures that the tire is evenly seated against the hub. After all the lug nuts are hand-tightened, lower the vehicle back to the ground. Once it’s safely on the ground, use the wrench to securely tighten each lug nut in the same star pattern, applying firm pressure. This is essential to prevent any wobbling and to ensure the spare tire is securely attached.

Finally, double-check that everything is snug and in place. Storing your flat tire and tools back in the vehicle correctly will keep your trunk organized and ready for any future needs. With the spare tire properly installed, you’re now prepared to continue your journey, driving cautiously until you can have your original tire repaired or replaced.

10. Lowering the Vehicle Safely: Best Practices

Lowering your vehicle safely is a crucial step in the flat tire fix process, and it’s one that requires careful attention to detail. After you’ve ensured that the spare tire is securely in place and all tools are within reach, it’s time to bring your vehicle back down to the ground. Here are some best practices to follow to ensure a safe and efficient lowering process.

First and foremost, make sure you are on a flat, stable surface. If you’re on a sloped or uneven area, the vehicle could shift unexpectedly as you lower it. Check that your surroundings are clear of any obstacles and that you have ample space to work without interference.

Before you begin lowering, double-check that all your tools—like the jack handle and lug wrench—are positioned safely out of the way. With everything clear, slowly start to lower the vehicle by gently turning the jack handle in the reverse direction. It’s important to lower the vehicle gradually; don’t rush this process.

As your vehicle nears the ground, keep a watchful eye on the position of the spare tire and ensure it aligns properly with the wheel well. If you notice any misalignment, stop lowering immediately and adjust the tire as needed to prevent damage.

Once the vehicle is stable on the ground, give the tire a gentle shake to confirm that it is secure. Finally, remove the jack and gather your tools. Remember to replace everything in your vehicle so that you’re prepared for the next time you might need to perform a tire change.

By following these best practices for lowering your vehicle, you not only ensure your safety but also extend the life of your spare tire and the overall integrity of your vehicle. Mastering this step adds to your confidence as a driver, making you well-equipped to handle any tire emergencies that come your way.

11. Tightening the Lug Nuts: Ensuring a Secure Fit

Once your spare tire is in place, it’s crucial to ensure that it’s securely fastened to the wheel hub. This is where tightening the lug nuts comes into play. Properly securing the lug nuts not only guarantees that your tire won’t come loose while driving, but also enhances your safety on the road.

Start by taking your lug wrench and tightening each nut in a crisscross pattern. This method distributes the pressure evenly across the wheel, preventing any wobbling or misalignment. Begin with one lug nut, then skip to the opposite one, and continue this pattern until you’ve tightened all the nuts. This ensures a balanced fit, which is particularly important for maintaining even tire wear and optimal vehicle performance.

When tightening, aim for a snug fit, but be cautious not to overtighten. Most lug nuts require a torque specification, typically outlined in your vehicle’s owner manual. If you happen to have a torque wrench handy, now is the time to use it. This precision tool will allow you to apply the exact amount of force needed, avoiding any risk of stripping the threads or damaging the wheel.

Once you’ve completed this step, give each lug nut a final check, ensuring that they’re seated firmly and snug. After that, it’s wise to drive a short distance and then recheck the tightness. As the tire settles, the lug nuts can sometimes loosen slightly, so it’s better to be safe than sorry. With your lug nuts securely tightened, you’re now one step closer to getting back on the road with confidence!

12. Cleaning Up: Storing Tools and the Flat Tire

Once you’ve successfully fixed your flat tire and safely returned to the road, it’s crucial not to overlook the final step: cleaning up and storing your tools properly. This step might seem mundane, but it plays a vital role in ensuring that your equipment remains in good condition for future use and that your vehicle remains tidy.

Begin by carefully stowing away all the tools you’ve used. This includes your jack, lug wrench, and any other equipment that assisted you during the tire change. Make sure to wipe off any dirt or grease with a rag to prevent corrosion, especially if you live in an area where road salt is prevalent during winter months. Storing your tools in a dedicated compartment in your trunk or toolbox not only keeps them organized but also ensures you can easily access them next time a roadside emergency arises.

Next, you’ll want to deal with the flat tire itself. If the tire is repairable, it’s best to place it in a heavy-duty trash bag to contain any debris and avoid soiling your vehicle. If you plan to take it for repair, store it upright to maintain its shape. If the tire is beyond repair, dispose of it according to local regulations. Many tire shops will accept old tires for recycling, so take the opportunity to drop it off when you visit.

Finally, take a moment to inspect your spare tire. Ensure it is properly inflated and that it’s stowed securely. A spare tire can be a lifesaver in an emergency, but only if it’s ready for action. By tidying up after a flat tire fix, you’re not only preparing yourself for the next time you hit the road, but also fostering good habits as a responsible driver. A clean and organized vehicle reflects a mindful approach to driving, making you better prepared for whatever the road may throw your way.

13. When to Seek Professional Help: Beyond DIY Fixes

While mastering the art of fixing a flat tire can empower you as a driver, there are instances when seeking professional help is not only advisable but essential for your safety and vehicle integrity. Recognizing these moments can save you time, money, and potential hazards on the road.

First, if you find yourself with a flat tire that has a puncture larger than a quarter or a sidewall damage, it’s best to consult a professional. Tires are engineered to withstand significant stress, but substantial damage can compromise their structural integrity. A professional technician will assess whether the tire is salvageable or if a replacement is necessary, ensuring you don’t risk further damage or a blowout while driving.

Moreover, if you’re unable to locate the source of the leak after thorough inspection, don’t hesitate to reach out to an expert. Sometimes, the damage may be less visible, or the puncture could be in a tricky location, making it difficult to fix on your own. Professionals have the tools and expertise to identify issues that might elude the untrained eye.

Additionally, if you find yourself in a situation where you lack the proper tools or a safe environment to perform the fix, it’s wiser to call for help. Whether you’re on a busy highway or in a poorly lit area, attempting to change a tire without the right equipment can be risky. Roadside assistance services can provide you with the necessary support to ensure that you and your vehicle are safe.

Lastly, if you’re unsure about the correct tire pressure after a fix or feel uncomfortable with the process, enlisting a professional is a smart move. Proper tire pressure is crucial for safe driving and fuel efficiency, and a quick visit to a tire shop can provide peace of mind.

In summary, while DIY tire repair is a valuable skill, knowing when to seek professional assistance can enhance your safety on the road and ensure your vehicle remains in top condition. When in doubt, it’s always better to err on the side of caution—your safety is worth it.

14. Preventative Tips to Avoid Future Flats

Preventing flat tires is an essential skill every driver should master, ensuring not only your safety on the road but also saving you time and money in the long run. Here are some practical tips to help you avoid the frustration of a flat tire in the future.

First and foremost, regularly check your tire pressure. Under-inflated tires are more prone to punctures and blowouts, so invest in a reliable tire pressure gauge and make it a habit to check your tires at least once a month, and before long trips. Refer to your vehicle’s manual for the recommended pressure levels, and remember that tire pressure can fluctuate with temperature changes, so adjust accordingly.

Next, keep an eye on your tire tread. Worn-out tires are not only dangerous but also highly susceptible to flats. Use the “penny test” to assess tread depth: insert a penny into the tread with Lincoln’s head upside down. If you can see the full head, it’s time for a replacement. Regularly rotating your tires and ensuring they are properly aligned can also extend their lifespan and performance.

Additionally, be mindful of your driving habits. Avoid sudden stops and sharp turns that can put unnecessary stress on your tires. Steer clear of potholes, debris, and curbs whenever possible, and slow down when navigating rough roads. If you do encounter a pothole or bump, inspect your tires afterward for any visible damage.

Lastly, consider investing in high-quality tires that are designed for your specific driving conditions, whether it’s all-season, winter, or performance tires. A reputable tire retailer can guide you in choosing the best fit for your vehicle and driving style.

By incorporating these preventative measures into your routine, you can significantly reduce the likelihood of facing flat tires in the future, allowing you to enjoy a safer and more worry-free driving experience.

15. Conclusion: Empowering Yourself as a Driver

In conclusion, mastering the art of fixing a flat tire is not just about learning a new skill; it’s about empowering yourself as a driver. Imagine the confidence that washes over you when you realize that you can tackle this common roadside predicament without having to rely on a tow truck or a passerby. By equipping yourself with the knowledge and tools outlined in this guide, you take control of your driving experience and ensure that you’re prepared for the unexpected.

Understanding the steps involved—from identifying the flat to safely removing and replacing the tire—transforms what might seem like a daunting task into a manageable process. This newfound capability not only saves you time and money but also fosters a sense of independence on the road. Each successful repair reinforces your ability to handle emergencies, enhancing your overall driving experience.

Moreover, this empowerment extends beyond just fixing flat tires. It instills a greater awareness of your vehicle’s maintenance needs and encourages you to take a proactive stance in car care. You’ll find yourself more engaged with your vehicle, from checking tire pressure regularly to understanding when it’s time for a rotation or replacement.

So, as you tuck away this guide for future reference, remember that the journey to becoming a more skilled and confident driver doesn’t end here. Embrace every opportunity to learn and grow, whether it’s through hands-on practice or exploring additional automotive knowledge. After all, the open road is filled with adventures, and being equipped to handle the bumps along the way makes every drive that much more enjoyable. Safe travels!

In conclusion, mastering the flat tire fix equips you with essential skills that every driver should possess. By following our step-by-step guide, you’ve not only learned how to tackle this common roadside challenge with confidence but also empowered yourself to ensure your own safety and that of others on the road. With practice, the process will become second nature, allowing you to navigate unexpected situations with ease. We encourage you to share this knowledge with fellow drivers, fostering a community of prepared and self-sufficient road users. So, the next time you encounter a flat tire, remember: you’ve got the tools and the know-how to turn a frustrating moment into a seamless solution. Safe travels, and may your journeys be filled with only smooth roads ahead!

How to install a new dishwasher?

Installing a new dishwasher can seem like a daunting task, especially if you’re not particularly handy around the house.

However, with the right guidance and a little bit of confidence, you can transform this seemingly complex project into a straightforward and rewarding experience. In this step-by-step guide, we’ll walk you through everything you need to know to install your new dishwasher like a pro. From gathering the essential tools and materials to understanding the plumbing and electrical connections, we’ll equip you with practical tips and insider knowledge to ensure a smooth installation. Say goodbye to the hassle of waiting for a professional and hello to the satisfaction of tackling a home improvement project yourself. Get ready to enjoy the convenience of your new appliance while saving time and money with our comprehensive installation guide!

1. Introduction: Why DIY Dishwasher Installation?

How to install a new dishwasher?
Credit : whatcanu.com

Installing a new dishwasher may seem daunting to many homeowners, but taking the DIY route can be both rewarding and cost-effective. Why should you consider installing your dishwasher yourself? For starters, it empowers you to learn essential home improvement skills that can save you money on professional installation fees. In a world where convenience often comes at a premium, tackling this project on your own can provide a sense of accomplishment and independence.

Moreover, understanding the ins and outs of your kitchen appliances can lead to a better appreciation of how they function. You’ll gain valuable insights into plumbing, electrical connections, and the overall mechanics of your home, which can come in handy for future repairs or upgrades. DIY installation also allows for greater control over the process—choosing the right materials, customizing connections to suit your kitchen layout, and ensuring everything is set up to your exact specifications.

Additionally, with a plethora of resources available online, including instructional videos, forums, and detailed guides, learning how to install your dishwasher has never been easier. You can work at your own pace, revisit steps as necessary, and even ask questions from a community of fellow DIYers. So, roll up your sleeves and prepare to dive into this rewarding project—by the end, you’ll not only have a fully functional dishwasher, but you’ll also have the confidence and knowledge that comes with mastering a new skill. Let’s get started!

2. Safety First: Tools and Materials You’ll Need

Before diving into the installation process, it’s essential to prioritize safety and gather the right tools and materials. Taking the time to prepare ensures a smoother installation and minimizes potential hazards. Here’s a comprehensive list of what you’ll need to tackle the job like a pro.

**Essential Tools:**

1. **Screwdriver Set:** A mix of flathead and Phillips screwdrivers will help you tackle various screws that hold your dishwasher in place.

2. **Adjustable Wrench:** This tool is crucial for tightening and loosening the water supply line and other plumbing connections.

3. **Plumber’s Tape:** Also known as Teflon tape, this is vital for ensuring a watertight seal on all threaded connections.

4. **Level:** To make sure your dishwasher sits evenly, a level will help you avoid any unwanted tilting that can lead to leaks.

5. **Drill and Drill Bits:** If your installation requires new holes for mounting or securing the dishwasher, a power drill will be necessary.

6. **Pliers:** These are handy for gripping and turning various components, especially in tight spaces.

7. **Bucket or Towel:** In case of water spillage during the installation, having a bucket or towel on hand will save you from unwanted messes.

**Materials:**

1. **Water Supply Line:** Ensure you have a new, flexible water supply line that fits your dishwasher and is compatible with your plumbing.

2. **Drain Hose:** A proper drain hose is essential for allowing wastewater to flow from your dishwasher to the sink or disposal.

3. **Power Cord:** If your new dishwasher doesn’t come with a built-in power cord, you’ll need to purchase one that matches your electrical requirements.

4. **Mounting Brackets:** Some dishwashers come with these, but if not, you may need to buy them separately to secure your unit properly.

5. **Installation Manual:** While not a physical tool, your dishwasher’s installation manual will be your best friend during this process, providing specific instructions tailored to your model.

By ensuring you have the right tools and materials at your disposal, you set the stage for a successful and efficient dishwasher installation. Remember, safety always comes first—so put on your safety goggles, keep your workspace tidy, and prepare to transform your kitchen with your new appliance!

3. Preparing Your Kitchen: Clearing the Space

How to install a new dishwasher?
Credit : whatcanu.com

Before diving into the installation process of your new dishwasher, it’s essential to prepare your kitchen and clear the space effectively. A clutter-free environment not only makes the task easier but also ensures safety as you navigate around potentially sharp tools and heavy equipment.

Start by removing any obstacles from the area surrounding your old dishwasher. This includes emptying the appliance itself—ensure that all dishes, utensils, and cleaning supplies are removed, giving you a clear view of the space. Next, clear away any items from the countertops and adjacent cabinetry that might hinder movement. If your dishwasher is located under the counter, take the time to empty any cabinets below or beside it; this will provide ample room to maneuver and prevent accidental damage to your belongings.

Once the area is cleared, take a moment to sweep or vacuum the floor. Not only will this make the workspace more pleasant, but it will also help you avoid slipping on dust or debris as you work. If your kitchen floor is particularly slippery, consider laying down a non-slip mat to provide better traction during the installation process.

Additionally, gather all the tools and materials you’ll need for the installation. This might include a screwdriver, adjustable wrench, pliers, and a bucket to catch any water that may spill during disconnection. Having everything within arm’s reach will streamline the process and allow you to focus on the task at hand without unnecessary interruptions.

Lastly, ensure that you have access to the necessary plumbing and electrical connections. This may involve moving other appliances or furniture out of the way. If your new dishwasher requires additional electrical work or plumbing adjustments, it’s wise to consult a professional beforehand. With your kitchen prepared and a clear path to work, you’re ready to tackle the installation with confidence and ease.

4. Understanding Your Dishwasher: Key Components and Features

Before diving into the installation process, it’s essential to familiarize yourself with your dishwasher’s key components and features. Understanding these elements will not only ease your installation but also enhance your overall experience with the appliance.

First, let’s take a look at the **control panel**, usually located on the front or top edge of the door. This is where you’ll find buttons or a touchscreen to select wash cycles, adjust settings, and monitor the status of your dishwasher. Familiarizing yourself with these functions will help you navigate the machine effortlessly once it’s up and running.

Next, identify the **spray arms**. Most dishwashers have one or two spray arms that rotate to distribute water during the wash cycle. These arms are critical for ensuring your dishes come out sparkling clean, so check for any obstructions or debris before you start the installation.

Another important component is the **filter**. Located at the bottom of the dishwasher, the filter traps food particles and prevents them from recirculating onto your clean dishes. Understanding how to remove and clean the filter will not only extend the lifespan of your dishwasher but also maintain its cleaning efficiency.

The **drainage system** is another crucial feature. It usually consists of a drain pump and hose that expels dirty water after each cycle. Make sure to familiarize yourself with this system, as proper installation is key to preventing leaks or drainage issues in the future.

Lastly, don’t overlook the **power supply** and **water supply connections**. Knowing where these are located and how they interact with your dishwasher is vital for a successful installation. The electrical and plumbing connections must be secure and compatible with your home’s systems to ensure your dishwasher operates safely and efficiently.

By understanding these key components and features, you’ll not only simplify the installation process but also set yourself up for a successful and hassle-free experience with your new dishwasher.

5. Disconnecting the Old Dishwasher: Step-by-Step Instructions

How to install a new dishwasher?
Credit : whatcanu.com

Disconnecting your old dishwasher may seem daunting, but with a few simple steps, you can do it like a pro. Before diving in, ensure you have all necessary tools on hand: a screwdriver, adjustable wrench, bucket, and towels to catch any spills. Here’s a step-by-step guide to help you safely remove the old appliance.

**Step 1: Turn Off the Power and Water Supply**
Start by turning off the power to the dishwasher at your circuit breaker. This is crucial to avoid any electrical hazards during the disconnection process. Next, locate the water supply valve under your sink and turn it off as well.

**Step 2: Remove the Lower Dish Rack**
Take out the lower dish rack from the dishwasher to give yourself more space to work. This will also help prevent any accidental damage to your dishes during the disconnection.

**Step 3: Disconnect the Drain Hose**
Look for the drain hose, typically located at the back of the dishwasher. Using your screwdriver, loosen the clamp holding the hose in place, then gently pull the hose away from the dishwasher. Keep a bucket or towel handy to catch any residual water that may spill out.

**Step 4: Unscrew the Water Supply Line**
Next, locate the water supply line connected to the dishwasher. Using your adjustable wrench, carefully unscrew the line. Be prepared for a small amount of water to drip out; your bucket will be helpful here!

**Step 5: Remove the Mounting Brackets**
Most dishwashers are secured to the countertop or cabinets with mounting brackets. Open the dishwasher door and locate these brackets, which are generally found at the top. Use your screwdriver to remove any screws holding the brackets in place. Once detached, you can gently pull the dishwasher away from the cabinetry.

**Step 6: Disconnect the Electrical Wiring**
Finally, locate the electrical junction box, usually located at the bottom of the dishwasher. Carefully remove the cover plate and disconnect the wiring by unscrewing the wire nuts. Make sure to note how the wires are connected, as you’ll need this information for your new installation.

**Step 7: Safely Remove the Dishwasher**
With everything disconnected, it’s time to remove the dishwasher. Carefully slide it out from its position, taking care not to damage the surrounding cabinetry or flooring.

Once you’ve successfully removed the old dishwasher, you’re one step closer to installing your new appliance. Remember, patience and caution are your best friends in this process!

6. Inspecting Water and Electrical Connections

Before you can bring your new dishwasher to life, it’s crucial to inspect the water and electrical connections meticulously. This step is not just a formality; it’s a safeguard that ensures your appliance operates efficiently and safely.

Begin by locating the water supply line and shutoff valve, which is typically found under the kitchen sink. Turn on the water to check for any leaks or drips. A steady stream means you’re good to go, but if you spot any moisture around the fittings, it’s essential to tighten the connections or replace any worn-out gaskets. Remember, a small leak can lead to significant water damage over time, so it’s better to be cautious.

Next, turn your attention to the electrical connections. Ensure that the power supply is compatible with your new dishwasher’s requirements. Most modern dishwashers will need a dedicated circuit, so check the circuit breaker and confirm that it’s not overloaded. Use a voltage tester to verify that the outlet is working correctly before plugging in your appliance.

Additionally, take a moment to inspect the wiring and connections for any signs of fraying or damage. If you’re uncertain, don’t hesitate to consult a professional electrician to ensure everything is up to code. A little diligence now can save you a lot of headaches later, allowing you to enjoy the convenience of your new dishwasher with peace of mind.

With the water and electrical connections verified, you’ll be well on your way to completing the installation process like a pro!

7. Positioning Your New Dishwasher: Tips for Alignment

How to install a new dishwasher?
Credit : whatcanu.com

Positioning your new dishwasher correctly is crucial for both functionality and aesthetics, ensuring it operates efficiently while seamlessly integrating into your kitchen space. Start by carefully sliding the dishwasher into its designated space, typically located between the kitchen cabinets. Before doing so, check that all hoses and the power supply are readily accessible and not obstructed.

Once in position, use a level to check the alignment of the dishwasher. It should sit flush with the surrounding cabinetry without any noticeable gaps. If necessary, adjust the dishwasher’s legs to achieve the correct height. Most models feature adjustable feet that can be raised or lowered with ease, allowing you to achieve that coveted level alignment.

Next, ensure that the door swings open freely without hitting adjacent cabinets or countertops. This will not only enhance the usability of the appliance but also prevent potential damage to both the dishwasher and your kitchen fixtures. If your model includes customizable panels or trim kits, now is the time to install these to create a polished, integrated look.

Finally, take a step back and evaluate the overall appearance. A well-positioned dishwasher should look like a natural part of your kitchen, with smooth lines and a cohesive aesthetic. With these tips for alignment in mind, you’ll ensure that your new dishwasher is not just functional but also a stylish addition to your home!

8. Connecting the Water Supply Line

Connecting the water supply line is a crucial step in the installation process, and taking the time to do it correctly will ensure your dishwasher operates efficiently without leaks. To begin, you will need a few essential tools: an adjustable wrench, Teflon tape, and a bucket or towel for any potential spills.

First, locate the water supply valve, usually found under your kitchen sink. Before you start, make sure to turn off the water supply to avoid any surprises. It’s a good idea to place a bucket or towel beneath the valve to catch any residual water that may spill out when you disconnect the existing hose.

Next, use the adjustable wrench to loosen and remove the existing supply line from the valve. Once detached, inspect the connection point for any signs of wear or damage. If everything looks good, wrap Teflon tape around the threads of the new water supply line. This will create a watertight seal, preventing leaks once everything is connected.

Now, attach the new water supply line to the valve by hand, ensuring it’s snug but not overly tight. Follow this by reattaching the other end of the line to the dishwasher’s water inlet, which is typically located on the lower right side of the appliance. Again, use the adjustable wrench to secure this connection, taking care not to overtighten, as this could damage the fittings.

Once both connections are secure, it’s time to turn the water supply back on. Do this slowly and watch closely for any leaks at both connection points. If you see any water seeping out, turn off the valve immediately and double-check your connections.

With the water supply line securely connected and leak-free, you’re one step closer to enjoying the convenience of your new dishwasher. Make sure to take a moment to clean up any tools or spills before moving on to the next step in your dishwasher installation process!

9. Electrical Hookup: Hardwiring vs. Plugging In

When it comes to the electrical hookup for your new dishwasher, understanding the difference between hardwiring and plugging in is essential for a successful installation. Both methods have their own set of advantages, and your choice will largely depend on your kitchen’s existing setup and local electrical codes.

**Hardwiring** involves connecting the dishwasher directly to your home’s electrical system. This method typically requires a dedicated circuit and can provide a more permanent solution. Hardwired dishwashers usually come with a flexible conduit that contains three wires: a hot wire, a neutral wire, and a ground wire. This setup is particularly beneficial for those who want a clean look without visible cords. However, it’s crucial to ensure that you meet the necessary electrical requirements and restrictions, so consulting a professional electrician may be wise if you are unsure.

On the other hand, **plugging in** your dishwasher is often the simpler and more straightforward option. Many modern dishwashers are designed to be connected to a standard three-prong outlet. This method allows for easy removal and replacement, making it ideal for renters or those who plan to change appliances frequently. If your dishwasher comes with a power cord, all you need to do is locate an accessible outlet that matches the voltage requirements of your appliance. Ensure that the outlet is in a convenient but safe location, typically within the cabinetry, so it remains hidden from view.

Regardless of the method you choose, ensure you follow safety precautions. Turn off the power at the circuit breaker before starting any electrical work and, if necessary, consult your dishwasher’s manual for specific instructions related to electrical connections. By understanding the implications of hardwiring versus plugging in, you can make an informed decision that ensures your new dishwasher operates safely and efficiently, setting the stage for many years of hassle-free dishwashing.

10. Securing the Dishwasher to the Cabinet

Securing your new dishwasher to the cabinet is a crucial step that ensures stability and prevents any unintended movement during operation. This process not only enhances safety but also contributes to the longevity of your appliance.

Begin by locating the mounting brackets, which are typically found at the top edges of the dishwasher. These brackets will be used to anchor the dishwasher securely to the underside of your countertop. Before you start, double-check that the dishwasher is leveled properly; this will prevent any vibrations that could lead to wear and tear.

Once you’ve confirmed that your dishwasher is level, align the mounting brackets with the countertop. Using a drill, carefully drive screws into the brackets, ensuring they penetrate the cabinet above without compromising the integrity of the wood. Be cautious not to overtighten, as this can warp the dishwasher frame or damage the cabinet.

For added security, consider using shims if there are any gaps between the dishwasher and the cabinet. These small, wedge-shaped pieces help to create a snug fit and provide extra support. After securing the brackets, give the dishwasher a gentle tug to ensure it’s firmly in place.

Finally, take a moment to inspect the surrounding area. Ensure that there are no water lines or electrical cords pinched between the appliance and the cabinet, as this could lead to future issues. By taking the time to secure your dishwasher properly, you can enjoy the peace of mind that comes with a well-installed appliance, ready to tackle your dishwashing needs efficiently and reliably.

11. Testing for Leaks: Ensuring a Proper Seal

Once your new dishwasher is securely installed and connected to the water supply, it’s time for one of the most crucial steps: testing for leaks. Ensuring a proper seal is essential not only for the longevity of your appliance but also for the protection of your kitchen from water damage. A small leak can lead to significant issues if left unchecked, so take this step seriously.

Start by turning on the water supply valve that connects to your dishwasher. Once you’ve done that, run a short cycle on your dishwasher while keeping a close eye on the area around the door and the connections at the back. Look for any signs of dripping or pooling water, which could indicate a faulty seal or a loose connection.

Don’t rush this process—allow the dishwasher to run through its cycle completely. After it finishes, check the floor beneath the appliance for any signs of moisture. A dry floor means you’ve installed your dishwasher correctly, while any wet spots may require your immediate attention. If you do spot a leak, you may need to tighten the hose connections or reapply sealing tape to ensure a snug fit.

Additionally, using a paper towel or cloth to wipe down the edges of the door can help you spot any leaks that might not be immediately visible. If you notice any dampness on the towel after running the cycle, that’s a clear signal that you need to inspect the door gasket for wear or misalignment.

By taking the time to thoroughly test for leaks, you can enjoy peace of mind knowing that your new dishwasher is working efficiently and safely. Remember, an ounce of prevention is worth a pound of cure; addressing any leaks now can save you from costly repairs down the line.

12. Leveling Your Dishwasher: Importance of Stability

Leveling your dishwasher is a crucial step that can significantly impact its performance and longevity. An unlevel dishwasher can lead to a host of problems, including improper drainage, leaks, and even damage to your kitchen cabinetry. When your dishwasher is not stable, it may wobble during operation, causing loud noises and vibrations that can be unsettling. Moreover, an unlevel unit can affect how effectively the spray arms distribute water, leading to poorly cleaned dishes.

To ensure your dishwasher functions optimally, start by checking the leveling legs located at the bottom of the appliance. Most dishwashers are equipped with adjustable legs that allow you to raise or lower each corner to achieve a perfectly level surface. Using a bubble level, place it on the top edge of the dishwasher door. If the bubble is off-center, adjust the legs accordingly. Turn the legs clockwise to raise the unit and counterclockwise to lower it.

After making adjustments, recheck the level until the bubble sits perfectly centered. Once you confirm your dishwasher is level from side to side and front to back, secure it to the countertop or cabinetry, if applicable, to prevent any movement over time. Remember, taking the time to properly level your dishwasher not only ensures better performance but also extends its lifespan, making this step a vital part of your installation process. In the end, a stable dishwasher means cleaner dishes and a hassle-free experience for years to come!

13. Final Connections: Drain Hose Installation

Once your dishwasher is securely positioned and leveled, it’s time to tackle the crucial task of connecting the drain hose. This step ensures that dirty water is efficiently removed from your dishwasher during the wash cycle, preventing any backflow or leaks that could cause a mess in your kitchen.

Begin by locating the drain hose, typically made of durable plastic. You’ll find one end of the hose connected to the dishwasher itself, while the other end will need to be attached to your kitchen’s plumbing system. If your dishwasher has an air gap—a small device mounted on the countertop or sink—it’s essential to connect the drain hose to the air gap before proceeding to the sink drain.

Next, check the manufacturer’s instructions for your specific model. Most dishwashers require the drain hose to be routed upwards, creating a “high loop” that helps prevent wastewater from siphoning back into the appliance. You can achieve this by securing the hose to the underside of your countertop with a zip tie or clamp, making sure it forms a gentle curve without any sharp bends.

Once the hose is positioned correctly, attach the free end to the sink drain or garbage disposal. If connecting to a garbage disposal, ensure that the knockout plug is removed before insertion. This will allow water to flow freely from your dishwasher into the disposal. Use a hose clamp to secure the connection tightly, ensuring there are no leaks.

After everything is connected, it’s time for a quick check. Run your dishwasher on a short cycle while monitoring the drain area for any signs of leaks. This step is crucial, as it allows you to address any issues before completing the installation. If everything looks good, congratulations—you’ve successfully completed the drain hose installation! Your dishwasher is now ready to tackle your dirty dishes, giving you one more reason to enjoy the convenience of modern kitchen appliances.

14. Running Your First Cycle: What to Watch For

After successfully installing your new dishwasher, the moment has finally arrived to run your first cycle. This is an exciting step, but it’s essential to approach it with care to ensure everything is functioning correctly. Before hitting the start button, take a moment to double-check a few key elements.

First, ensure that all connections—water supply, drainage, and power—are secure. A loose hose can lead to leaks, while improper electrical connections might pose safety risks. Once you’ve confirmed everything is in order, load the dishwasher according to the manufacturer’s instructions, placing items in a way that promotes optimal water flow and cleanliness.

As you set the cycle, choose a standard wash program to start. This will give you a good baseline for the machine’s performance. Pay attention to how the dishwasher sounds during the initial cycle. A few operational noises are normal, but any strange grinding, loud banging, or persistent beeping may indicate an issue that needs addressing.

While the dishwasher runs, it’s a good idea to keep an eye on the exterior for any leaks. Inspect around the base and under the sink where the drainage hose connects. If you see any water pooling or dripping, it’s crucial to stop the cycle immediately and troubleshoot the problem. Additionally, listen for abnormal vibrations that could signal an imbalanced load or improper installation.

Finally, once the cycle completes, open the door and check the cleanliness of your dishes. If everything comes out sparkling clean, you can breathe a sigh of relief and celebrate your successful installation! However, if you notice residual food particles or cloudy glassware, it may be time to adjust your loading technique or explore the dishwasher’s settings for optimized performance. Running your first cycle is a crucial step in ensuring your new appliance is ready to serve you well for years to come. Happy washing!

15. Conclusion: Troubleshooting Common Installation Issues

### Conclusion: Troubleshooting Common Installation Issues

Now that you’ve successfully navigated the installation of your new dishwasher, it’s essential to be prepared for any hiccups that might arise in the process. Even the most meticulous DIY enthusiasts can encounter challenges, and knowing how to troubleshoot these issues can save you time and frustration.

One common problem is the dishwasher not filling with water. If this occurs, double-check that the water supply valve is fully open and inspect the inlet hose for any kinks or blockages. A clogged filter can also prevent water from entering, so don’t hesitate to clean or replace it as necessary.

Another frequent issue is the dishwasher leaking. If you notice puddles forming around the base, take a moment to inspect the door seal for wear and tear, as well as ensuring that the drain hose is securely connected and not pinched. Additionally, verify that the dishwasher is level; an uneven installation can lead to unwanted leaks.

Finally, be attentive to unusual noises during operation. While some sound is normal, loud grinding or banging may indicate that something is amiss. Check to see if any utensils or items have been left inside that could be obstructing the spray arms, or ensure that the dishwasher is properly secured to the cabinetry to minimize vibrations.

By keeping these troubleshooting tips in mind, you can address common installation issues with confidence. Remember, even if things don’t go perfectly, a little patience and problem-solving can lead to a smoothly operating dishwasher that will serve you well for years to come. Enjoy the benefits of your new appliance, and take pride in knowing that you’ve tackled the installation like a pro!

In conclusion, installing your new dishwasher doesn’t have to be an overwhelming task—armed with the right tools and our step-by-step guide, you can tackle it like a pro! By following the outlined instructions, you not only save money on installation fees but also gain a sense of accomplishment that comes from completing a DIY project. Remember to take your time, double-check your connections, and consult the manufacturer’s manual for any specific requirements. Soon enough, you’ll be enjoying the convenience of a sparkling clean kitchen without the hassle. We’d love to hear about your installation experience, so feel free to share your tips or ask any questions in the comments below. Happy dishwashing!

How to install a new light fixture?

Transforming the ambiance of your home can be as simple as changing a light fixture.

Whether you’re looking to brighten up a dim corner, create a cozy atmosphere in your living room, or add a touch of elegance to your dining area, the right lighting can make all the difference. In this comprehensive guide, we’ll walk you through the entire process of installing a new light fixture, from selecting the perfect design that complements your decor to the practical steps of wiring and mounting. With just a few tools and a little bit of patience, you’ll be able to enhance your space with a fresh glow. So grab your toolkit, and get ready to illuminate your home as we delve into the art of light fixture installation—your space is about to shine brighter than ever!

1. Introduction: The Importance of Lighting in Your Space

How to install a new light fixture?
Credit : whatcanu.com

Lighting plays a crucial role in defining the ambiance and functionality of any space. Whether you’re transforming a cozy corner in your living room or enhancing the workspace in your kitchen, the right light fixture can make all the difference. It’s not just about illumination; it’s about creating an atmosphere that reflects your personal style and meets your everyday needs.

Good lighting can elevate the aesthetics of a room, highlighting its best features while providing essential illumination for tasks at hand. It can make a small room feel larger, a dull space feel vibrant, and a stark area feel warm and inviting. Think about how the soft glow of a pendant light can create an intimate dining experience, or how a bright chandelier can add a touch of elegance to a foyer.

Moreover, effective lighting has practical benefits as well. It can increase safety and security by eliminating dark corners that may hide potential hazards or intruders. By strategically placing light fixtures, you can enhance visibility and comfort, allowing you to navigate your space with ease at any hour of the day.

In this guide, we’ll take you through the steps of installing a new light fixture, empowering you to harness the transformative power of lighting. Whether you’re a seasoned DIY enthusiast or a first-time installer, our clear instructions and helpful tips will ensure that you can illuminate your space with confidence and flair. Let’s dive in and brighten up your home!

2. Choosing the Right Light Fixture for Your Room

Choosing the right light fixture for your room is a vital step in illuminating your space effectively and enhancing its overall aesthetic. The light fixture you select should not only complement the existing decor but also serve the practical purposes of the room. Start by considering the function of the space. For example, a cozy living room may benefit from warm, ambient lighting, while a kitchen requires bright, focused light for meal prep and cooking.

Next, think about the style that resonates with you and fits the room’s theme. Are you drawn to modern minimalism, rustic charm, or perhaps a vintage flair? Chandeliers can add a touch of elegance to dining areas, while sleek pendant lights work beautifully over kitchen islands. Additionally, wall sconces can contribute to the ambiance without taking up valuable floor space in smaller rooms.

Size matters, too. A fixture that is too large can overwhelm a small space, while one that is too small can get lost in a larger room. As a rule of thumb, consider the dimensions of your room when selecting a fixture: the diameter of the chandelier or light fixture in inches should equal the sum of the room’s length and width in feet. This simple formula helps ensure that your choice will be visually proportional.

Finally, don’t overlook the importance of the light bulb itself. The type of bulb you choose—whether LED, incandescent, or fluorescent—will impact not only the quality of light but also energy efficiency and longevity. Pay attention to the color temperature as well; warmer tones create a cozy atmosphere, while cooler tones can invigorate and energize.

Taking the time to thoughtfully select the right light fixture will transform your room into a beautifully illuminated space that reflects your personal style while meeting your lighting needs.

3. Tools and Materials Needed for Installation

How to install a new light fixture?
Credit : whatcanu.com

Before diving into the exciting world of light fixture installation, it’s essential to gather the right tools and materials to ensure a smooth and safe process. Here’s a detailed list of what you’ll need, along with some handy tips to help you prepare for the task ahead.

**Tools:**

1. **Screwdriver Set**: Both flathead and Phillips screwdrivers are indispensable for removing old fixtures and securing the new ones. Consider using a magnetic screwdriver to prevent screws from falling during installation.

2. **Wire Strippers**: These are crucial for exposing the ends of the wires if they are covered with insulation. A good pair will make your connections clean and secure.

3. **Voltage Tester**: Safety first! Before you start working with electrical components, use a voltage tester to ensure that the power is off in the wiring area. This tool will provide peace of mind while you work.

4. **Drill and Drill Bits**: A power drill can simplify the process of mounting your new fixture, especially if you need to create pilot holes for screws.

5. **Ladder**: Depending on the height of your ceiling, a sturdy ladder will help you reach the fixture safely and comfortably.

6. **Pliers**: Needle-nose pliers are helpful for tightening wire connectors or securing any loose wires.

**Materials:**

1. **New Light Fixture**: Choose a fixture that complements your space and meets your lighting needs. Make sure it’s compatible with your existing electrical setup.

2. **Wire Connectors**: These small but vital components will help you securely connect the wires from your new fixture to the existing wiring. It’s often recommended to use wire nuts for a safe and effective connection.

3. **Electrical Tape**: This is a handy safety measure for wrapping exposed wires and ensuring that your connections are insulated.

4. **Mounting Hardware**: Most light fixtures come with the necessary mounting hardware, but make sure you have everything you need, including screws and anchors, especially if you’re mounting on drywall or other materials.

5. **Instruction Manual**: Don’t forget to have the manual for your new light fixture on hand! It typically contains specific instructions for installation, including wiring diagrams and safety warnings.

With these tools and materials at your disposal, you’re well-equipped to tackle the installation of your new light fixture. Remember to take your time, follow safety protocols, and enjoy the transformative effect your new lighting will have on your space!

4. Safety First: Preparing for Installation

Before diving into the exciting process of installing your new light fixture, it’s crucial to prioritize safety. Proper preparation can prevent accidents and ensure a smooth installation. Start by gathering the necessary tools and materials: a screwdriver, wire strippers, electrical tape, a voltage tester, and your new fixture, of course. A sturdy ladder is also essential if the fixture is mounted high on the ceiling.

Once you have your tools at hand, the very first step is to turn off the power at the circuit breaker. This might seem like a no-brainer, but it’s a critical step that ensures no electricity is flowing to the existing fixture while you work. Take a moment to confirm that the power is indeed off by using a voltage tester on the wires; this little device will give you peace of mind and help you avoid any electrical shocks.

Next, protect your workspace by laying down a drop cloth or old towels beneath the area where you’ll be working. This will catch any debris or dust that may fall during the installation, keeping your space tidy. If you’re working in a particularly high or hard-to-reach place, consider having a friend or family member nearby to assist you, ensuring you have someone to help stabilize your ladder or hand you tools as needed.

Lastly, don’t forget to wear safety goggles and gloves. While it may seem excessive, these small precautions can protect you from any unexpected accidents, such as falling debris or sharp edges. With safety measures firmly in place, you’re now ready to embark on the installation journey, armed with the knowledge that you’ve taken the necessary steps to keep yourself safe.

5. Turning Off the Power: How to Find Your Circuit Breaker

How to install a new light fixture?
Credit : whatcanu.com

Before diving into the installation of your new light fixture, ensuring your safety is paramount. The first step in this crucial process is turning off the power to the existing fixture, and that begins with locating your circuit breaker. This may sound straightforward, but a little guidance can make all the difference, especially if you’re unfamiliar with your home’s electrical layout.

Start by making your way to your home’s electrical panel, usually found in a basement, garage, or utility room. The panel may be a metal box mounted on the wall, often with a door that swings open to reveal rows of circuit breakers. Take a moment to familiarize yourself with the panel’s layout. Each breaker is labeled, indicating which area of the house it controls. If you’re unsure which breaker powers the old fixture, you may need to do a bit of detective work.

To identify the correct breaker, you can turn on the existing light fixture and then head to the panel. As you flip each breaker off, pay attention to the light – when it goes dark, you’ve found the right one! Once you’ve identified the correct circuit, switch it to the off position and confirm that the fixture is no longer receiving power.

For added safety, it’s wise to label your breaker box if it isn’t already labeled. This will save you time and effort in future projects and ensure you can quickly find the right breaker when needed. After you’ve confidently turned off the power, it’s a good practice to test the fixture with a voltage tester to guarantee there is no electricity flowing to the wires. With the power securely off, you can proceed with your installation, knowing you’ve taken the necessary precautions to work safely.

6. Removing the Old Light Fixture: Step-by-Step Instructions

Removing the old light fixture can seem daunting, but with the right approach, it’s a straightforward task that paves the way for your stunning new addition. Before you begin, ensure you have the necessary tools at hand: a screwdriver, a voltage tester, and possibly a pair of wire cutters. Safety is paramount, so let’s dive into the step-by-step process.

**Step 1: Turn Off the Power**
Safety first! Head to your circuit breaker and switch off the power to the light fixture you’ll be replacing. It’s a good idea to double-check that the power is off by using a voltage tester on the wires. This will give you peace of mind while you work.

**Step 2: Remove the Light Bulbs**
Once you’ve confirmed that the electricity is off, carefully remove any light bulbs from the fixture. This will lighten the load and make handling the fixture easier. Store the bulbs in a safe place to avoid breakage.

**Step 3: Detach the Fixture from the Ceiling**
Most light fixtures are secured with screws or mounting brackets. Using your screwdriver, carefully unscrew the fixture from the ceiling. If there’s any resistance, make sure you haven’t overlooked any hidden screws. Once the fixture is loose, gently lower it to inspect the wiring.

**Step 4: Disconnect the Wires**
You’ll typically find three wires connected to the fixture: a black (or red) wire, a white wire, and a green or bare wire. Carefully disconnect these wires by either unscrewing the wire nuts or loosening the screws that hold them in place. It’s a good practice to take a photo of the wiring setup before you disconnect anything, as this will help you when you install the new fixture.

**Step 5: Remove the Mounting Bracket**
After disconnecting the wires, you’ll need to take down the mounting bracket attached to the electrical box in the ceiling. This is often held in place by screws, so use your screwdriver to remove it.

**Step 6: Clean Up**
With the old fixture removed, take this opportunity to clean the area around the electrical box. Dust and debris can accumulate over time, and a clean space will ensure better installation of the new fixture.

Congratulations! You’ve successfully removed the old light fixture and are one step closer to transforming your space with a new, stylish illumination. As you prepare to install the new fixture, keep these steps in mind to ensure a smooth transition.

7. Understanding Electrical Wiring: A Beginner’s Guide

How to install a new light fixture?
Credit : whatcanu.com

### 7. Understanding Electrical Wiring: A Beginner’s Guide

Before diving into the installation of your new light fixture, it’s crucial to grasp the basics of electrical wiring. While it may seem intimidating at first, understanding a few key concepts can empower you to approach the task with confidence and safety.

Start by familiarizing yourself with the essential components of your home’s electrical system. The most common wiring colors you’ll encounter include black (or red) for hot wires, white for neutral wires, and green or bare copper for ground wires. These colors are not just for aesthetics; they serve important functions that ensure your electrical system operates safely.

Next, take a moment to locate your circuit breaker panel. It’s your first line of defense against electrical mishaps. Before you begin any work, turn off the circuit that powers the existing light fixture. This step is non-negotiable; safety should always come first. Use a non-contact voltage tester to double-check that the power is truly off.

Once the power is disconnected, inspect the wiring in the existing fixture. You might find a combination of wires: the hot wire, neutral wire, and possibly a ground wire. Take note of how they are connected, as this will guide you when installing your new fixture. If you’re unsure, don’t hesitate to take a photo for reference.

When you’re ready to proceed, carefully remove the old fixture, ensuring that you untwist the wire connections gently. This is where your confidence will grow—by seeing how the wires are connected and realizing that it’s just a matter of connecting like with like. The new fixture will typically come with instructions, so follow those closely for any specific wiring requirements.

Finally, once your new light fixture is secured and connected correctly, restore power at the circuit breaker and flip the switch. The moment the new fixture illuminates your space is not just a reward for your hard work; it’s a testament to your newfound understanding of electrical wiring. Remember, if you ever feel uncertain or overwhelmed, consulting a professional electrician is always a wise choice. Your safety is paramount, and sometimes it’s best to leave complex tasks to the experts.

8. Installing the New Light Fixture: A Detailed Process

Once you’ve selected the perfect light fixture to elevate your space, it’s time to get into the nitty-gritty of installation. This stage is where your vision truly comes to life, transforming the ambiance of your room. Follow these detailed steps to ensure a smooth installation process:

1. **Prepare Your Workspace**: Start by clearing the area beneath the existing light fixture. Lay down a drop cloth to protect your flooring and ensure that you have ample space to work. Gather all necessary tools, including a screwdriver, wire stripper, voltage tester, and ladder. Always double-check that your new fixture comes with all the required mounting hardware.

2. **Turn Off the Power**: Safety first! Locate your circuit breaker and switch off the power to the existing light fixture. To ensure there’s no electrical hazard, use a voltage tester to confirm that the wires are not live. This step is crucial for preventing any potential accidents or shocks while you work.

3. **Remove the Old Fixture**: Carefully detach the old light fixture from the ceiling. This typically involves unscrewing the mounting bracket and disconnecting the wires. As you remove the fixture, take note of how the wires are connected—this will help guide you in connecting the new fixture. If you’re unsure, a quick photo with your phone can serve as a handy reference.

4. **Prepare the New Fixture**: Before installation, assemble your new light fixture according to the manufacturer’s guidelines. This may involve attaching bulbs, shades, or other decorative elements. Make sure everything is secure and ready for mounting.

5. **Connect the Wires**: Following the instructions that came with your new fixture, connect the wires from the fixture to the corresponding wires in the ceiling. Typically, this involves twisting the black (live) wire from the fixture to the black wire in the ceiling, the white (neutral) wires together, and grounding it with the green or bare wire. Use wire nuts to secure each connection and ensure that no bare wire is exposed.

6. **Mount the New Fixture**: Once the wiring is secured, it’s time to mount the fixture to the ceiling. Align it with the mounting bracket, and gently push any excess wiring back into the electrical box. Use screws to secure the fixture in place, following the manufacturer’s instructions for proper installation.

7. **Install Light Bulbs and Test**: With the fixture securely mounted, insert the appropriate light bulbs. Once everything is in place, return to your circuit breaker and switch the power back on. Test your new light fixture to ensure it’s working correctly. If it doesn’t illuminate, double-check your wiring connections to troubleshoot any issues.

8. **Final Touches**: With the light fixture functioning properly, take a moment to clean up your workspace. Dispose of any packaging materials and tools, and enjoy the fresh glow of your newly installed light fixture. Consider adjusting the brightness with dimmable bulbs or smart lighting options for added versatility.

By following these detailed steps, you’ll not only enhance the aesthetic of your space but also gain a sense of accomplishment from your DIY project. Enjoy your beautifully illuminated room!

9. Connecting Wires: Tips for Safe and Secure Connections

Connecting wires is a crucial step in the installation of your new light fixture, and it’s essential to approach this task with both care and precision to ensure safety and functionality. Before diving into the process, it’s imperative to turn off the power at the circuit breaker to avoid any electrical hazards. Once you’ve confirmed that the power is off, gather your tools: a wire stripper, a voltage tester, and some wire nuts.

Begin by removing the existing fixture and carefully inspecting the wiring. You should see three types of wires: the hot wire (usually black or red), the neutral wire (typically white), and the ground wire (green or bare copper). It’s helpful to organize these wires visually so you can clearly identify which ones need to be connected to your new fixture.

When connecting wires, always follow the color-coded system: twist the hot wires together, pairing the black from your fixture with the black from the ceiling. Then, do the same for the neutral wires, connecting white to white. Ground wires are connected last; secure them to the fixture’s ground wire or a grounding screw on the mounting bracket. Ensure that each twist connection is tight and secure, as loose connections can lead to flickering lights or, worse, electrical fires.

After making your connections, it’s a good idea to use a voltage tester to double-check that everything is safe before powering the circuit back on. Once you’ve verified that there are no exposed wires and that all connections are insulated with wire nuts, you can gently tuck the wires into the electrical box and mount your new light fixture according to the manufacturer’s instructions.

Remember, if at any point you feel uncertain about the wiring process, it’s always wise to consult with or hire a professional electrician to ensure that your installation is safe and up to code. With the right approach, your new light fixture will not only brighten your space but will also be installed securely and safely.

10. Securing the Fixture: Ensuring Stability and Safety

Securing your new light fixture is a crucial step that ensures both stability and safety in your home. After you’ve successfully connected the wiring, it’s time to focus on mounting the fixture securely to the ceiling or wall. Begin by aligning the fixture with the mounting bracket, ensuring that any screws or clips designed to hold it in place are easily accessible.

Before you proceed, double-check that the mounting bracket is firmly attached to the electrical box. If the electrical box wobbles or feels loose, it’s imperative to address this issue first. A sturdy mount is essential for preventing accidents or damage, particularly for heavier fixtures.

Once you are confident that everything is secure, carefully position the fixture against the ceiling. If it has a canopy, make sure it covers the electrical box completely to prevent any exposed wiring. Use the included screws to fasten the fixture to the mounting bracket, ensuring that they are tightened adequately but not overly so, as this could strip the threads or damage the fixture.

As you work, it’s important to keep your hands steady and check for level alignment. An uneven fixture can not only look unappealing but can also place undue stress on the wiring, leading to potential electrical issues down the line. Use a level tool if necessary to ensure that everything is straight.

After the fixture is secured, take a moment to gently tug on it to confirm that it is firmly in place. If it holds steady, you’ve successfully completed this phase of the installation! This attention to detail will not only enhance the aesthetic appeal of your space but also provide peace of mind knowing that your light fixture is safe and secure. With the fixture now in place, you’re just a switch flick away from illuminating your space beautifully!

11. Restoring Power: How to Turn the Electricity Back On

Restoring power after installing a new light fixture is a crucial step that marks the culmination of your hard work. Once you’ve ensured that the fixture is securely mounted and all electrical connections are properly made, it’s time to breathe life back into your newly illuminated space.

Start by locating your circuit breaker panel, which is typically found in a basement, utility room, or closet. Before you flip the switch back on, take a moment to double-check that all tools and materials are cleared from the installation area. It’s essential to ensure that everything is clean and free of any debris, as this will help prevent any accidents when the power is restored.

Identify the circuit breaker that corresponds to the area where you installed your new light fixture. Most panels are clearly labeled, but if yours isn’t, you may need to turn off and on a few breakers to find the correct one. Once you’ve identified the right breaker, firmly switch it back to the ‘on’ position.

As you do this, remain vigilant for any unusual sounds or smells. If you hear a pop or notice any burning odors, turn the breaker off immediately and double-check your connections. A simple mistake can lead to a short circuit, so it’s better to be cautious.

Now, with the power restored, it’s time to test your new light fixture. Flip the wall switch and bask in the glow of your hard work. If the light illuminates as intended, you’ve successfully completed the installation! If not, revisit your wiring connections to ensure everything is in order.

Lastly, take a moment to tidy up your workspace and dispose of any old fixtures or packaging materials. Enjoy the fresh ambiance your new light fixture brings to your space, and revel in the satisfaction of having accomplished this illuminating task!

12. Testing Your New Light Fixture: What to Look For

Once you’ve successfully installed your new light fixture, it’s time for the moment of truth: testing it to ensure everything is functioning as it should. This step is crucial, as it not only confirms that your hard work has paid off but also ensures that the fixture is safe and effective in illuminating your space.

Start by flipping the switch to turn on your new fixture. Observe the light closely. Is it illuminating the room as you envisioned? Take note of the brightness and the quality of the light. Does it cast a warm, inviting glow, or is it harsh and unflattering? If the light seems dim or overly bright, you may need to consider swapping out the bulb for a different wattage or type to achieve the desired ambiance.

Next, check for any flickering or unusual noises. Flickering could indicate a loose connection or the need for a different bulb, while buzzing sounds might suggest an issue with the fixture itself or the electrical wiring. If you notice any of these issues, it’s best to turn the power off and double-check your connections to ensure everything is secure.

Additionally, pay attention to the fixture’s placement. Walk around the room to see how the light interacts with the space. Are there any dark corners that could benefit from additional lighting? Does the fixture create any unwanted shadows? This is your opportunity to adjust the height or angle of the fixture if it’s adjustable, or to consider adding supplementary lights for a more balanced illumination.

Lastly, allow your fixture to run for a short period and monitor how it behaves over time. This will help you identify any potential overheating issues. If everything checks out, congratulations! You’ve successfully illuminated your space and created a beautiful focal point in your home. With your new light fixture shining brightly, you can now enjoy the enhanced atmosphere and style it brings to your environment.

13. Troubleshooting Common Installation Issues

Even the most meticulous DIY enthusiasts can encounter a few bumps in the road when installing a new light fixture. Troubleshooting common installation issues is essential to ensure your lighting project goes smoothly and safely. Here are some of the most frequent problems you might face, along with tips to resolve them.

**1. The Light Fixture Won’t Turn On:**
If your new light fixture isn’t illuminating, the first step is to check the power supply. Ensure that the circuit breaker is switched on and that you have replaced any blown fuses. Next, verify that all connections are secure—loose wires can easily disrupt the flow of electricity. If you’ve done all this and the fixture still doesn’t work, consider testing the bulb in a different fixture to rule out a faulty light bulb.

**2. Flickering Lights:**
A flickering light can be more than just an annoyance; it could indicate a deeper electrical issue. Check to make sure the bulb is tightly screwed in. If that doesn’t resolve the flicker, inspect the wiring connections in the junction box. Corroded or loose connections can cause fluctuations in power. If your fixture is compatible with a dimmer switch, ensure the bulb type is compatible as well, as some LED bulbs don’t work well with older dimmer systems.

**3. Uneven Lighting:**
If your new fixture isn’t providing the desired amount of light, it may be positioned incorrectly or the wrong type of fixture for the space. Consider the wattage and lumens of the bulb you’re using—an underpowered bulb could be the culprit. Additionally, assess the height and angle of the fixture; sometimes simply adjusting its position can enhance light distribution.

**4. Noise from the Fixture:**
Humming or buzzing sounds from your fixture can be frustrating. This is often caused by incompatible dimmer switches or a faulty ballast in fluorescent fixtures. If you suspect the dimmer is the issue, try replacing it with a compatible one or switch to standard switches to see if that eliminates the noise. If the problem persists with a fluorescent fixture, you may need to replace the ballast.

**5. Incorrect Fixture Size:**
Sometimes, the size of your new fixture can feel out of place, either dwarfing the room or overwhelming it. If you find that your new light fixture isn’t proportional to the space, take a moment to evaluate the room’s dimensions. Consider swapping it out for a size that better complements your decor and the scale of the room.

By addressing these common issues head-on, you can ensure that your new light fixture not only shines brightly but also enhances the beauty and functionality of your space. Remember, safety is paramount, so if you encounter complex wiring problems or persistent issues, don’t hesitate to consult a professional electrician. With a little patience and problem-solving, you’ll have your space illuminated just the way you envision!

14. Final Touches: Enhancing Your Space with Light

Once your new light fixture is securely installed and shining bright, it’s time to consider the final touches that will truly enhance your space. Lighting is not just about functionality; it plays a pivotal role in setting the mood and atmosphere of a room. Here are some simple yet effective ways to elevate your newly illuminated area.

First, think about the color of your bulbs. Soft white or warm LED bulbs create a cozy ambiance, perfect for living rooms and bedrooms, while bright white or daylight bulbs work well in kitchens and workspaces, promoting clarity and focus. Experiment with different bulb options to find the perfect hue that complements your decor and personal style.

Next, consider adding dimmers. A dimmer switch allows you to adjust the brightness of your new fixture, giving you control over the ambiance depending on the time of day or the occasion. Whether you want bright light for a lively gathering or a soft glow for a romantic dinner, dimmers give you that versatile flexibility.

Additionally, think about layering your lighting. While your new fixture may serve as the centerpiece, incorporating other light sources can create depth and interest. Table lamps, floor lamps, or even wall sconces can provide supplementary light, enhancing the overall aesthetic and functionality of the space.

Don’t forget to consider decorative elements that can enhance the light itself. Mirrors can reflect light, making your space feel larger and brighter. Placing a strategically positioned mirror across from your light fixture can double the effect of your new installation.

Finally, add personal touches that resonate with your style. Whether it’s a beautiful lampshade, decorative bulbs, or even a few accents around the base of your fixture, these details will tie your design together and make the space feel uniquely yours.

By focusing on these final touches, you can transform your newly installed light fixture from a mere necessity into a stunning focal point that enhances both your space and your experience within it. Happy illuminating!

15. Conclusion: Enjoying Your Newly Illuminated Room

Congratulations! After following the steps outlined in this guide, you have successfully transformed your space with a new light fixture. Stepping back to appreciate your handiwork is not just a moment of pride; it’s the beginning of a new chapter in how you experience your room. The gentle glow of your freshly installed fixture creates an inviting atmosphere that enhances both the aesthetics and functionality of the space.

As you bask in the warm light, take a moment to notice how the illumination has altered the dynamics of the room. Perhaps the colors on your walls now shine brighter, or the texture of your furniture becomes more pronounced under the new lighting. Whether it’s a cozy dining area, a vibrant living room, or a serene bedroom, your choice of fixture has undoubtedly added a personal touch that reflects your style.

Moreover, consider the various ways you can maximize your new lighting. Experiment with dimmers to adjust the ambiance according to the time of day or occasion. Layer your lighting by adding complementary sources, such as floor lamps or wall sconces, to create depth and warmth. You may even find joy in arranging your decor to highlight the new fixture, turning it into a focal point that draws the eye.

Lastly, don’t forget to share your achievement! Showcase your newly illuminated room on social media or with friends and family. Your project may inspire others to embark on their own lighting upgrades. So, sit back, relax, and enjoy the transformed atmosphere that your new light fixture brings—because a well-lit room is not just about visibility; it’s about setting the mood for countless memories to come.

As we wrap up our guide on installing a new light fixture, we hope you feel empowered to transform your space with newfound brilliance. Whether you’re looking to create a cozy ambiance in your living room or a bright workspace in your home office, the right lighting can truly elevate the atmosphere of any room. By following our step-by-step instructions, you can confidently tackle this DIY project and enjoy the satisfaction of a job well done. Remember, the process may take a little time and patience, but the end result—a beautifully illuminated space that reflects your personal style—will be well worth the effort. So gather your tools, unleash your creativity, and let your home shine with warmth and elegance! Happy illuminating!

How to install a new door?

Installing a new door may seem like a daunting task, but with the right guidance, it can be a rewarding DIY project that transforms the look and function of your space.

Whether you’re upgrading for aesthetics, improving energy efficiency, or enhancing security, knowing how to properly install a door can save you time and money while giving you the satisfaction of a job well done. In this comprehensive step-by-step guide, we’ll take you through the entire process—from selecting the perfect door for your home to the final touches that ensure a flawless fit. With practical tips, essential tools, and expert advice, you’ll be equipped to tackle this project with confidence, making your new door installation feel like a professional achievement. So roll up your sleeves and get ready to elevate your home’s entrance with our easy-to-follow instructions!

1. Introduction: Why Installing a Door Yourself is a Great Idea

How to install a new door?
Credit : whatcanu.com

Installing a new door might seem like a daunting task, but taking it on yourself can be a rewarding and cost-effective endeavor. There are several compelling reasons why installing a door yourself is not only practical but also a fantastic opportunity to enhance your home.

First and foremost, DIY door installation allows you to save money. Hiring a professional can quickly add up in costs, with labor charges often exceeding the price of the door itself. By rolling up your sleeves and tackling the project on your own, you not only gain financial savings but also the satisfaction of knowing you accomplished it yourself.

Additionally, installing a door gives you complete control over the design and materials used. You can select the perfect style, color, and finish that complements your home’s aesthetic. Whether you prefer a classic wooden door, a sleek modern design, or a sturdy steel option, the choice is entirely yours. This personal touch can greatly enhance your home’s curb appeal and overall value.

Moreover, the sense of accomplishment that comes with completing a home improvement project cannot be overstated. Each step in the installation process, from measuring and cutting to hanging the door and securing the hardware, provides an opportunity to learn new skills and boost your confidence as a DIYer.

Lastly, the process of installing a door yourself fosters a deeper connection with your home. Each time you pass through that newly installed entrance, you’ll be reminded of your hard work and dedication. You’ll appreciate the time and effort you put into creating a welcoming space for family and friends.

In this guide, we’ll walk you through the step-by-step process of installing your new door like a pro, ensuring you have all the information you need to achieve a flawless finish. So grab your tools, roll up your sleeves, and let’s get started on this exciting home improvement journey!

2. Tools and Materials You’ll Need

Before diving into the installation process, it’s crucial to gather all the necessary tools and materials to ensure a smooth and efficient project. Having everything at your fingertips will not only save you time but also prevent frustration mid-installation. Here’s a comprehensive list of what you’ll need:

**Tools:**
1. **Tape Measure:** A reliable tape measure is essential for ensuring precise measurements of your new door and the frame.
2. **Level:** A level will help you confirm that your door is perfectly aligned, preventing any unwanted gaps or misalignment.
3. **Screwdriver Set:** Both flathead and Phillips screwdrivers will be needed for various screws throughout the installation.
4. **Drill:** A power drill with drill bits is critical for creating pilot holes and securing screws efficiently.
5. **Hammer:** A good hammer will be useful for tapping in shims or prying out old door frames if you’re replacing an existing door.
6. **Chisel:** If your new door requires mortising for hinges, a sharp chisel will ensure clean and precise cuts.
7. **Utility Knife:** This will come in handy for various cutting tasks, such as trimming shims or removing old weather stripping.

**Materials:**
1. **New Door:** Choose a door that fits your style and the dimensions of your door frame. Don’t forget to check if it comes pre-hung or as a slab!
2. **Hinges:** Be sure to select sturdy, high-quality hinges that can support the weight of your new door.
3. **Door Handle/Lockset:** Depending on your preference, choose a handle and lockset that complements your door and enhances security.
4. **Shims:** These small, wedge-shaped pieces will help you adjust the door frame for a perfect fit and level installation.
5. **Weather Stripping:** If you’re replacing an exterior door, weather stripping will help improve energy efficiency by blocking drafts.
6. **Wood Glue or Construction Adhesive:** This will be useful for securing shims in place or reinforcing joints.

With these tools and materials ready, you’ll be well-equipped to tackle your door installation with confidence. Remember, preparation is key to achieving a professional finish, so take the time to gather everything you need before you start. Happy installing!

3. Choosing the Right Door for Your Space

How to install a new door?
Credit : whatcanu.com

Choosing the right door for your space is a pivotal step in your installation journey, as it sets the tone for both aesthetics and functionality. Before you head to the store or browse online, consider the following factors to ensure you select a door that complements your home and meets your needs.

First and foremost, assess the style of your home. Whether you have a modern, traditional, or eclectic design, the door should harmonize with the overall aesthetic. For a contemporary space, sleek and minimalistic designs work wonders, while a classic home may benefit from a solid wood door with intricate details.

Next, think about the material. Doors come in various materials, each offering unique benefits. Solid wood doors exude warmth and durability, while fiberglass doors provide insulation and are resistant to the elements. Steel doors are incredibly secure and great for exterior use, while hollow-core doors are a budget-friendly option for interior spaces. Consider your climate and the level of maintenance you’re willing to commit to when making your choice.

Don’t forget to measure your door frame carefully! A door that’s too large or too small can lead to installation headaches and can compromise energy efficiency. Make sure to note the height, width, and thickness of your existing door frame, and double-check these measurements against the specifications of your chosen door.

Finally, think about the door’s functionality. Do you want a door that swings open, slides, or even folds? Each option has its advantages depending on the space you are working with. For narrow hallways, pocket doors can save space, while traditional swinging doors are ideal for larger openings.

By taking the time to carefully select the right door for your space, you’ll ensure that your installation goes smoothly and that the final result enhances the beauty and functionality of your home. With the right door in hand, you’ll be one step closer to a professional-looking installation!

4. Measuring Your Door Frame Accurately

Measuring your door frame accurately is a crucial step that can make or break the success of your installation. Even the slightest miscalculation can lead to gaps, drafts, or an ill-fitting door that could compromise both aesthetics and functionality. To begin, gather your tools: a tape measure, a level, and a pencil for marking your measurements.

Start by measuring the width of the door frame. Place your tape measure at the inside edge of one side of the frame and extend it to the inside edge of the opposite side. Jot down this measurement; it’s essential to take at least three width measurements at different heights—top, middle, and bottom—to account for any irregularities in the frame. The smallest of these measurements will determine the width of your new door.

Next, measure the height of the door frame. Again, measure from the top inside edge down to the bottom inside edge at both the left and right sides of the frame. Just like with the width, take multiple measurements here to ensure accuracy; the shortest measurement will be your final height.

Additionally, check the squareness of the frame using a level. Place the level diagonally from one corner of the frame to the opposite corner. If the level does not sit evenly, this indicates that your frame may be out of square, which can affect the fit of your new door.

Lastly, don’t forget to note the thickness of the frame and any other relevant details, such as the presence of molding or trim. Accurate measurements are the foundation of a successful door installation, so take your time and double-check your figures. A well-measured door frame sets the stage for a smooth installation process and ensures that your new door will function perfectly for years to come.

5. Preparing the Old Door Frame for Installation

How to install a new door?
Credit : whatcanu.com

Preparing the old door frame for installation is a crucial step that can make or break your project. Before you dive into the installation of your new door, take a moment to assess the condition of the existing frame. look for any signs of damage, such as warping, rot, or cracks, which could compromise the integrity of your new door. If you notice any issues, it may be wise to repair or replace the frame to ensure a snug fit and long-lasting performance.

Once the frame’s condition is confirmed, it’s time to clean it thoroughly. Remove any dust, debris, or old paint that may have accumulated over the years. A clean surface is key to achieving a smooth installation. Use a putty knife to scrape away any peeling paint, and a vacuum or a damp cloth to pick up the remnants. If you encounter stubborn old caulk or adhesive, a heat gun can help soften it for easier removal.

Next, check the level and plumb of the door frame. Use a spirit level to make sure the frame is straight and aligned correctly; this will help prevent any future issues with your new door not closing properly or getting stuck. If the frame is out of square, you may need to shim it with small pieces of wood to correct its alignment.

Finally, take the time to measure the door frame accurately. Use a tape measure to determine the height and width of the frame, noting down these dimensions. It’s always best to double-check your measurements to ensure a proper fit for your new door. With the old door frame prepped and ready, you’re now set to bring in your new door and transform your space with ease!

6. Removing the Old Door Safely

Removing the old door safely is a crucial step in the installation process, and it requires a bit of care and precision. Begin by gathering your tools: a screwdriver, a pry bar, and a utility knife. Before you start, ensure you have someone to assist you, as doors can be heavy and cumbersome, making it easier to handle with an extra set of hands.

First, close the door and inspect the hinges. Using your screwdriver, carefully remove the screws from the hinges, working from the bottom hinge to the top. This method helps to relieve the weight gradually, minimizing the risk of the door falling unexpectedly. As you remove each screw, place them in a small container to avoid losing them, as you may need them later for your new door.

Once the hinges are detached, gently push the door towards you and lift it off the frame. If the door feels stuck, check for any additional screws that may be holding it in place, or use a utility knife to cut through any paint or caulk that may be sealing it. When you finally have the door free, set it aside safely so it won’t fall or get damaged.

Next, inspect the door frame for any lingering hardware, like strike plates or latches. Removing these components will ensure a clean and smooth installation for your new door. If necessary, use your pry bar to carefully remove any nails or screws that may have been left behind.

Taking your time during this process is vital. Rushing can lead to accidents or damage, so be mindful of your surroundings and the materials you’re working with. With the old door safely removed, you’re one step closer to transforming your entryway with a fresh, new door that will enhance both the functionality and aesthetic of your home.

7. Unpacking and Inspecting Your New Door

How to install a new door?
Credit : whatcanu.com

Unpacking and inspecting your new door is a crucial step that sets the stage for a smooth installation process. Once your door arrives, take a moment to find a clean, spacious area where you can safely unbox it. Gently remove the packaging, being careful not to damage the door itself. Most doors come wrapped in protective materials like cardboard or foam, so handle everything with care as you peel back these layers.

As you unveil your new door, conduct a thorough inspection. Start by checking for any visible damage, such as dents, scratches, or warping. It’s essential to catch these issues early, as they may affect the door’s functionality and aesthetic appeal. Don’t just rely on a cursory glance—run your hands over the surface to feel for any imperfections that might not be immediately visible.

Next, confirm that all components of your door are included in the package. This typically includes the door itself, hinges, a handle or knob, and any additional hardware necessary for installation. Refer to the manufacturer’s instructions to ensure you have everything you need. If something is missing or damaged, reach out to the supplier promptly to arrange for replacements.

Lastly, take a moment to familiarize yourself with the door’s features, whether it’s a solid wood door with intricate designs or a sleek, modern fiberglass model. Knowing the specifics can help you make informed decisions during the installation process, ensuring that you not only install the door correctly but also appreciate its design and functionality to the fullest.

By taking the time to unpack and inspect your new door carefully, you’re ensuring a successful installation ahead. This diligence will save you time and potential headaches down the road, allowing you to enjoy your new door with confidence.

8. Installing Door Hinges: Step-by-Step

Installing door hinges may seem like a small detail, but it’s a crucial step that ensures your door functions smoothly and securely. Follow this step-by-step guide to install your new door hinges like a pro!

**Step 1: Gather Your Tools and Materials**
Before you begin, make sure you have everything you need at hand. You’ll require a drill, a screwdriver, a measuring tape, a chisel, and, of course, your door hinges. Most hinges come with screws, but double-check to ensure you have the correct size for your door.

**Step 2: Mark the Hinge Placement**
Using your measuring tape, measure down from the top of the door to where you want the top hinge to go—typically around 7 inches from the top edge. Mark this spot with a pencil. Repeat this process for the bottom hinge, generally placed about 11 inches from the bottom. If you’re adding a third hinge, position it halfway between the top and bottom hinges.

**Step 3: Create the Hinge Recesses**
Place the hinge flat against the door where you marked it. Using your chisel, carefully carve out a shallow recess for the hinge to sit flush with the door surface. This step is crucial for a clean, professional look and ensures the door swings smoothly.

**Step 4: Attach the Hinges to the Door**
Align the hinge with the recess you created. Using your drill, insert the screws provided with the hinge into the pre-drilled holes. Tighten them securely but avoid overtightening, as this could strip the screws or damage the wood.

**Step 5: Position the Door in the Frame**
With the hinges attached to the door, it’s time to position the door in the frame. You may need a helper for this step to hold the door steady. Align the hinges with the corresponding plates in the door frame.

**Step 6: Secure the Hinges to the Frame**
Once the door is in place, attach the other half of the hinge to the door frame by drilling screws into the hinge plates. Make sure the door swings freely and check for alignment. If it’s too tight or doesn’t close properly, you may need to adjust the hinges slightly or add shims to the frame.

**Step 7: Test the Door**
After everything is secured, give the door a few test swings. It should open and close smoothly without any sticking or rubbing. If there are issues, revisit the hinge placements and make minor adjustments as needed.

**Step 8: Final Touches**
Once you’re satisfied with the installation, clean any dust or debris from the installation process. If your hinges are visible, consider applying a coat of lubricant to ensure they remain functional and quiet.

By carefully following these steps, you’ll have installed your door hinges like a pro, ensuring your new door not only looks fantastic but operates seamlessly in your space! Happy DIY-ing!

9. Hanging the New Door: Tips for Alignment

Hanging a new door can seem daunting, but with a few expert tips on alignment, you can ensure that your installation goes off without a hitch. Proper alignment is crucial not only for aesthetics but also for functionality; a misaligned door can lead to issues such as sticking, gaps, or even security concerns. Here’s how to get it just right.

First, before you even attempt to hang the door, make sure your hinges are properly installed on the door frame. Use a level to check that the hinge side of the frame is plumb, adjusting as necessary with shims. If the frame isn’t square, you may find that your door doesn’t fit correctly, so take the time to get this step right.

Once your hinges are secured, it’s time to position the door. Hold the door in place with the help of a friend or use a door jig to support it temporarily. Begin by securing the top hinge first. This will help anchor the door and allow you to check its alignment without it swinging open or closed unexpectedly.

Next, check the gap between the door and the frame on both the hinge and latch sides. Ideally, you want a consistent gap of about 1/8 inch. If you notice that the door is leaning or there are uneven gaps, adjust the lower hinge by adding or removing shims until the door hangs evenly. It may take a bit of trial and error, but patience is key.

Once you’re satisfied with the alignment, secure the bottom hinge. Before closing the door completely, open and shut it a few times to ensure it swings smoothly without dragging. If you encounter any resistance, it’s likely a sign that further adjustments are needed.

Finally, after confirming that the door is properly aligned and functions smoothly, you can drive in the screws fully and install any additional hardware, such as doorknobs or locks. A well-hung door not only enhances the aesthetic appeal of your space but also contributes to the overall security and efficiency of your home. With these alignment tips, you’ll be hanging doors like a pro in no time!

10. Securing the Door Frame: Shims and Screws

Securing the door frame is a crucial step that ensures your new door operates smoothly and stands the test of time. This process involves using shims and screws to create a sturdy, level framework that can withstand daily use.

Begin by inserting shims—small, wedge-like pieces of wood—into the gaps between the door frame and the rough opening of the wall. Shims are essential for adjusting the alignment of the door; they help fill any uneven spaces, ensuring that the door hangs straight and operates without obstruction. Start at the bottom hinge side and gently tap the shim into place, checking frequently with a level to ensure the frame is perfectly plumb. You want the door to swing effortlessly, so this step cannot be rushed.

Once the shims are in position, it’s time to secure the frame with screws. Using a power drill, fasten screws through the frame into the wall studs. Place screws approximately every 12 to 16 inches along the sides and top of the frame, ensuring they penetrate the studs for maximum stability. Be careful not to over-tighten the screws, as this can warp the frame and affect the door’s functionality.

After securing the frame, double-check the door’s alignment and operation. Open and close the door to make sure it swings freely without sticking or dragging. If adjustments are necessary, you can easily add or remove shims as needed. By carefully securing the door frame with shims and screws, you’ll create a solid base that will enhance the longevity and performance of your new door, giving it the professional finish you desire.

11. Installing the Door Handle and Lockset

Once your door is hung securely in its frame, it’s time to add the finishing touches that not only enhance its functionality but also add to its aesthetic appeal: the door handle and lockset. Installing these components may seem like a straightforward task, but a careful approach ensures smooth operation and a polished look.

Start by selecting the right handle and lockset that matches your door style and complements your home decor. Before you dive into installation, gather your tools: a tape measure, screwdriver, chisel, and a level. Having everything on hand will streamline the process and minimize interruptions.

Begin by determining the correct height for your door handle. A common standard is around 36 inches from the floor, but you can adjust based on your preference or the specific ergonomic needs of your household. Mark the spot lightly with a pencil.

Next, position the lockset, which typically consists of two main components: the latch and the deadbolt (if applicable). Use your chisel to create a mortise for the latch, following the manufacturer’s instructions for depth and width. This step is crucial; a snug fit will prevent any wobbling and ensure the latch operates smoothly.

Once the mortises are cut, insert the latch into the side of the door. Secure it with screws, ensuring that it is flush with the door’s edge. Then, place the strike plate in the door frame, marking the location where it will fit. Chisel out a small recess if necessary to accommodate it, and screw it into place.

Now, it’s time to install the door handle. Align the handle’s spindle with the latch and push it through the hole you’ve prepared. Attach the outer handle by securing it with the provided screws. Make sure both handles are aligned properly and turn smoothly.

Finally, if your lockset includes a deadbolt, repeat the process for this component. Mark the position for the deadbolt, drill the necessary holes, and secure it in place. Once everything is installed, test the lock and handle to ensure they function correctly, making any adjustments as needed.

With the handle and lockset securely in place, you can step back and admire your handiwork. Not only have you successfully enhanced the functionality of your door, but you’ve also added a stylish touch that will welcome guests and provide security for your home.

12. Adjusting the Door for a Perfect Fit

Once your new door is securely hung and you’ve taken a moment to admire your handiwork, it’s time to ensure it fits perfectly within its frame. Proper adjustment is crucial for both aesthetics and functionality, as a misaligned door can lead to operational issues and compromise security.

Start by checking the gaps between the door and the frame. Ideally, there should be an even space of about 1/8 inch on the top and sides, allowing for smooth operation and easy opening and closing. If you notice uneven gaps, it may be necessary to adjust the hinges. Loosen the screws on the hinge plate slightly, use a shim to raise or lower the door as needed, and then retighten the screws. This might take a few attempts, so don’t be discouraged if it takes a bit of tweaking to achieve that perfect alignment.

Next, check how the door swings. It should open and close without catching or scraping against the frame or floor. If the door drags on the floor, you may need to trim the bottom edge. Measure from the floor to the bottom of the door, and then mark where the cut will be. Using a circular saw or hand saw, make a clean cut, and be sure to sand down the edges to prevent splintering.

Finally, test the latch and strike plate. Close the door and ensure that the latch easily engages with the strike plate without excessive force. If the latch doesn’t align properly, you may need to reposition the strike plate. Mark the new position, drill pilot holes, and install it at the adjusted height.

Once you’ve made these adjustments, step back and appreciate your efforts. A well-fitted door not only enhances the overall look of your home but also ensures that it functions seamlessly for years to come. With a little patience and attention to detail, you can achieve a professional finish that reflects your hard work and dedication.

13. Finishing Touches: Painting or Staining Your Door

Once your new door is securely installed and all adjustments have been made, it’s time to focus on the finishing touches that will elevate its appearance and protect it from the elements. Painting or staining your door not only enhances its aesthetic appeal but also adds a layer of protection against wear and tear, moisture, and sunlight.

Before you start, ensure the surface of the door is clean and free of dust. If you’ve just installed a wooden door, consider sanding it lightly to create a smooth surface that will better absorb your chosen finish. For painted doors, a primer may be necessary, especially if you’re transitioning from a darker color to a lighter one or if the door has never been painted before.

When it comes to choosing between paint and stain, consider the look you want to achieve. Paint offers a vibrant, opaque finish that can complement the color scheme of your home, while stain highlights the natural grain of the wood, providing a warm and timeless appearance. If you opt for stain, be sure to select a high-quality product that’s designed for exterior use to ensure durability.

Apply your chosen finish using a high-quality brush or roller for a smooth, even application. For paint, start with the edges and grooves before moving to the flat surfaces, making sure to apply multiple thin coats rather than one thick coat for the best results. If staining, work in the direction of the wood grain and wipe off any excess with a clean cloth to avoid blotches.

Allow ample drying time between coats, and don’t forget to finish with a clear sealant if you chose stain, as this will provide additional protection against moisture and UV damage. Once everything is dry and set, step back and admire your handiwork—your newly installed door not only looks professional but is now ready to withstand the elements while adding curb appeal to your home.

14. Troubleshooting Common Installation Issues

Installing a new door can be a rewarding DIY project, but it’s not without its challenges. Encountering issues during installation is common, and knowing how to troubleshoot these problems can save you time, frustration, and potentially costly repairs. Here are some typical installation issues you might face and how to resolve them like a pro.

**1. Door Doesn’t Fit Properly:**
If your door doesn’t seem to fit in the frame correctly, start by checking the measurements. Ensure that the door is aligned with the hinges and that the frame is square. Use a level to check for evenness; if the frame is out of square, shimming may be necessary. Adjust or trim the door edges slightly if it’s too large, but be cautious—removing too much material can lead to gaps.

**2. Alignment Issues with Hinges:**
Misalignment of hinges can cause your door to sag or not close properly. Check that the screws are tight and that the hinges are mounted flush against the door and the frame. If the door is still misaligned, consider repositioning the hinge plates or using additional shims to elevate the door back into proper alignment.

**3. The Door Sticks or Gets Jammed:**
A sticking door can be a major annoyance. This issue often arises from humidity causing wood to swell or an improper installation. Inspect the door and frame for any obstructions or debris that might be causing the sticking. Sanding down the edges of the door slightly can help alleviate this issue. If the door is swelling due to moisture, consider applying a sealant to protect it from humidity in the future.

**4. Gaps Around the Door:**
If you notice gaps between the door and the frame, it could affect energy efficiency and security. Check that the door is hung evenly and make adjustments as needed. Weather stripping can also be an effective solution for sealing these gaps, as it not only improves insulation but also enhances the overall appearance of your installation.

**5. Difficulty With Lock Mechanism:**
Sometimes, the lock may not align properly, which can be frustrating. Ensure that the strike plate is correctly positioned and that the hole in the door is drilled at the right depth. If the lock cylinder is sticking, lubricate it with graphite or a silicone spray to ensure smooth operation.

By anticipating these common installation issues and knowing how to troubleshoot them, you’ll not only save time but also ensure that your new door functions perfectly for years to come. Remember, every challenge you face is an opportunity to learn and improve your DIY skills!

15. Conclusion: Enjoying Your New Door and Final Thoughts

Congratulations on successfully installing your new door! As you step back and admire your handiwork, take a moment to appreciate not just the aesthetic upgrade but also the functional benefits it brings to your home. A new door can enhance your home’s energy efficiency, improve security, and elevate curb appeal, making it an investment that pays off in more ways than one.

Now that your door is in place, it’s time to revel in the satisfaction of a job well done. Enjoy the fresh look and feel it adds to your space, and take note of how it complements your interior and exterior design. Whether you chose a sleek modern style or a classic wooden finish, your new door serves as a testament to your DIY skills and attention to detail.

Remember, the journey doesn’t end here. Regular maintenance is key to keeping your door looking and functioning at its best. Periodically check the hinges and hardware, clean the surface, and apply any necessary treatments to protect against the elements. Establishing a routine will ensure that your door remains a stunning feature for years to come.

As you close this chapter of your home improvement project, consider sharing your experience with others. Post pictures of your newly installed door on social media, or share tips and tricks with friends and family who may be considering a similar upgrade. Your insights could inspire someone else to take the plunge into their own home improvement journey.

In conclusion, installing your new door is not just about the end result; it’s about the pride you feel in transforming your space. So, enjoy the beauty and functionality it brings, and let it be a reminder of your ability to tackle DIY projects like a pro! Happy home improving!

In conclusion, we hope this step-by-step guide has empowered you with the knowledge and confidence to install your new door like a pro! From selecting the right tools to ensuring a perfect fit, each step is crucial in achieving a polished and professional finish. Remember, patience and precision are your best friends throughout this process. As you stand back and admire your handiwork, take pride in knowing you transformed your space with your own two hands. Whether you’re upgrading for aesthetic appeal, energy efficiency, or security, your new door will undoubtedly enhance your home. We encourage you to share your installation experience and photos with us; we’d love to celebrate your achievement! Happy DIYing!