What are the best gluten-free recipes?

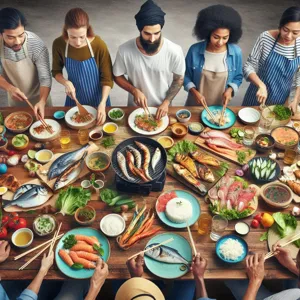
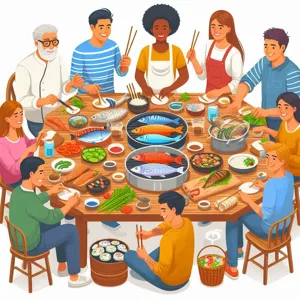
In a world where dietary preferences and restrictions are increasingly common, gluten-free eating has emerged as a popular lifestyle choice for many, whether for health reasons, allergies, or simply as a personal preference.

The good news is that going gluten-free doesn’t mean sacrificing flavor or creativity in the kitchen. In fact, it opens the door to a wealth of delicious possibilities! From hearty breakfasts to decadent desserts, there’s a whole universe of gluten-free recipes just waiting to be explored. In this blog post, we’ll present the top 10 mouthwatering gluten-free recipes that are not only easy to prepare but also guaranteed to delight your taste buds. Whether you’re a seasoned gluten-free cook or just starting to explore this culinary path, these delightful dishes will inspire you to whip up meals that everyone—gluten-free or not—will love. Get ready to savor the flavors of wholesome ingredients and innovative cooking techniques that prove gluten-free can be utterly delicious!

1. Introduction to Gluten-Free Cooking

What are the best gluten-free recipes?
Credit : whatcanu.com

In recent years, gluten-free cooking has transcended dietary necessity, blossoming into a vibrant culinary movement that celebrates flavor, creativity, and inclusivity. Whether you’re navigating celiac disease, gluten sensitivity, or simply exploring the benefits of a gluten-free lifestyle, the world of gluten-free cooking offers a diverse array of ingredients and recipes that promise to tantalize your taste buds without sacrificing texture or satisfaction.

At its core, gluten-free cooking revolves around the art of substituting traditional grains with gluten-free alternatives. Imagine the warm, nutty aroma of quinoa, the delicate sweetness of almond flour, or the earthy richness of buckwheat. These ingredients serve as the foundation for dishes that are not only wholesome but also bursting with flavors and nutrients. Gluten-free cooking encourages experimentation, allowing home chefs to explore new flavor profiles and cooking techniques while embracing a healthier lifestyle.

As we embark on this culinary journey, you’ll discover that gluten-free recipes can be just as indulgent and satisfying as their gluten-filled counterparts. From mouthwatering breakfasts to decadent desserts, the possibilities are endless. So, whether you’re a seasoned gluten-free enthusiast or just dipping your toes into this exciting world, get ready to elevate your kitchen game with our top 10 must-try gluten-free recipes. Let’s dive into a delicious adventure that proves gluten-free cooking is anything but bland!

2. Benefits of a Gluten-Free Diet

Adopting a gluten-free diet can offer a myriad of benefits beyond just avoiding gluten-containing foods. For individuals with celiac disease or gluten sensitivity, eliminating gluten is essential to maintain health and well-being. However, even those without diagnosed conditions may find that a gluten-free lifestyle can lead to positive changes in their overall health.

One of the most notable benefits is improved digestive health. Many people report reduced bloating, gas, and discomfort after cutting gluten from their diets. This can lead to a more pleasant eating experience and heightened energy levels throughout the day. Additionally, a gluten-free diet often encourages individuals to incorporate a wider variety of whole foods, such as fruits, vegetables, lean proteins, and gluten-free grains like quinoa and brown rice. This shift can contribute to a more balanced and nutrient-rich diet.

Moreover, a gluten-free diet can enhance mental clarity and focus. Some individuals notice improvements in mood and cognitive function once they eliminate gluten, attributing this change to reduced inflammation in the body. For those who previously experienced brain fog, this newfound mental sharpness can be a game changer.

Another significant advantage is the potential for weight management. By removing processed gluten-laden foods, many people naturally gravitate toward healthier options, leading to better portion control and an overall reduction in calorie intake. This, combined with increased awareness of food choices, can facilitate a healthier lifestyle.

Lastly, embracing a gluten-free diet can foster creativity in the kitchen. With an abundance of gluten-free flours and alternative ingredients available, home cooks can experiment with new flavors and textures, resulting in delicious meals that even gluten-eaters will love. Overall, the benefits of a gluten-free diet extend far beyond dietary restrictions, paving the way for a healthier, more vibrant lifestyle.

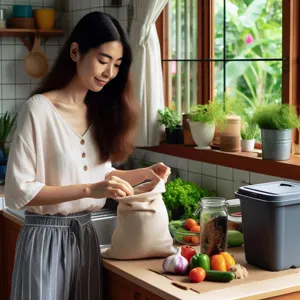
3. Essential Ingredients for Gluten-Free Baking

What are the best gluten-free recipes?
Credit : whatcanu.com

When embarking on your gluten-free baking journey, having the right ingredients is key to achieving that perfect texture and flavor that can often be a challenge without traditional flour. Here’s a rundown of essential ingredients that will transform your gluten-free baking experience from ordinary to extraordinary.

**1. Gluten-Free Flours:**
The foundation of any gluten-free recipe is, of course, the flour. A blend of gluten-free flours can yield the best results. Consider using almond flour for a nutty flavor and moist texture, or coconut flour for its lightness and fiber content. Other popular choices include brown rice flour, sorghum flour, and oat flour (ensure it’s certified gluten-free). Each type brings its unique characteristics, so don’t hesitate to experiment and find your favorite combinations!

**2. Starches:**
Incorporating starches like tapioca starch, potato starch, or cornstarch can help mimic the elasticity that gluten provides. These ingredients are pivotal in giving your baked goods a light and airy quality, making them rise beautifully. They also help bind the ingredients together, preventing crumbliness.

**3. Binding Agents:**
Without gluten, your baked goods need something to hold them together. Enter binding agents! Eggs are the most common choice, providing moisture and structure. If you’re looking for vegan options, consider flaxseed meal mixed with water or chia seeds, which create a gel-like consistency that works wonders in holding ingredients together.

**4. Sweeteners:**
While sugar is a staple in baking, experimenting with alternative sweeteners can enhance your gluten-free treats. Honey, maple syrup, and agave nectar can add depth of flavor and moisture, while also providing a natural sweetness. Don’t forget to account for the liquid content these add to your recipes!

**5. Flavor Enhancers:**
To elevate your gluten-free baked goods, consider adding flavor enhancers such as vanilla extract, cocoa powder, or spices like cinnamon and nutmeg. These ingredients can turn a simple recipe into a delightful masterpiece, ensuring your treats are as delicious as they are gluten-free.

**6. Dairy Alternatives:**
If you’re sensitive to lactose or following a dairy-free lifestyle, there are plenty of alternatives available. Almond milk, coconut milk, and cashew milk can seamlessly replace traditional milk without compromising flavor or texture. Similarly, dairy-free yogurts and creams can add richness to your recipes.

With these essential ingredients in your pantry, you’re well-equipped to create an array of gluten-free delights that everyone will love. Whether you’re baking soft cookies, fluffy cakes, or crusty breads, these components are your ticket to achieving deliciously satisfying results. So roll up your sleeves, grab your apron, and let the gluten-free baking adventures begin!

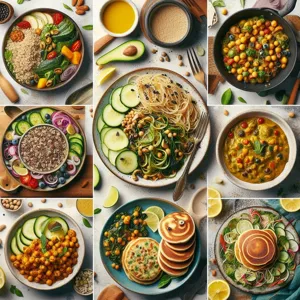
4. Recipe 1: Classic Gluten-Free Pancakes

There’s nothing quite like the smell of freshly cooked pancakes wafting through the kitchen on a lazy weekend morning. With this classic gluten-free pancake recipe, you can indulge in all the fluffy goodness without the worry of gluten. These pancakes are not only easy to make but also incredibly delicious, making them a perfect breakfast staple for everyone—gluten-free or not!

**Ingredients:**

– 1 cup gluten-free all-purpose flour blend
– 2 tablespoons sugar (or your preferred sweetener)
– 1 tablespoon baking powder
– 1/4 teaspoon salt
– 1 cup milk (dairy or non-dairy alternatives work beautifully)
– 1 large egg
– 2 tablespoons melted butter or coconut oil
– 1 teaspoon vanilla extract

**Instructions:**

1. **Mix the Dry Ingredients:** In a large bowl, whisk together the gluten-free flour, sugar, baking powder, and salt until well combined. This blend is the foundation for your light and fluffy pancakes.

2. **Combine the Wet Ingredients:** In a separate bowl, whisk together the milk, egg, melted butter (or coconut oil), and vanilla extract. The warm melted butter will create a lovely rich flavor, while the vanilla adds a touch of sweetness.

3. **Combine Wet and Dry:** Pour the wet ingredients into the dry ingredients, stirring gently until just combined. Be careful not to overmix; a few lumps are perfectly fine. Let the batter sit for a few minutes while you heat your skillet.

4. **Cook the Pancakes:** Heat a non-stick skillet or griddle over medium heat and lightly grease it with butter or oil. Pour about 1/4 cup of batter onto the skillet for each pancake. Cook until bubbles form on the surface and the edges look set, about 2-3 minutes. Flip and cook for another 1-2 minutes on the other side until golden brown.

5. **Serve and Enjoy:** Stack your pancakes high and serve them warm with your favorite toppings—fresh berries, maple syrup, a dollop of yogurt, or a sprinkle of powdered sugar.

These classic gluten-free pancakes are not only mouthwatering but also incredibly versatile. You can add chocolate chips, nuts, or even banana slices into the batter for a delightful twist. Whether you’re preparing a Sunday brunch or a quick weekday breakfast, these pancakes are sure to become a family favorite. Enjoy every fluffy bite, knowing you’re indulging in a delightful treat that everyone can savor!

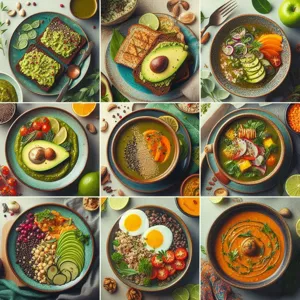
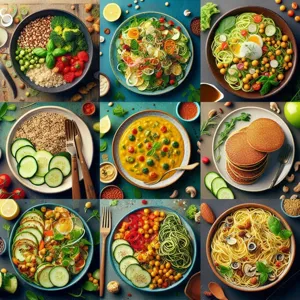
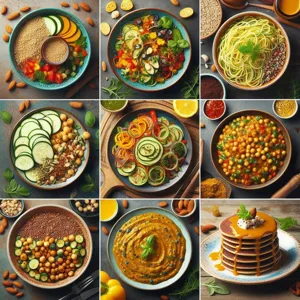
5. Recipe 2: Zucchini Noodles with Pesto

What are the best gluten-free recipes?
Credit : whatcanu.com

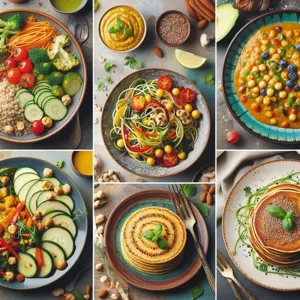
Zucchini noodles, or “zoodles” as they’re affectionately known, are a fantastic gluten-free alternative that brings a refreshing twist to your pasta dishes. This recipe for Zucchini Noodles with Pesto not only tantalizes the taste buds but also offers a vibrant, health-conscious option that’s perfect for any meal.

To start, you’ll need a spiralizer or a simple vegetable peeler to transform fresh zucchini into long, delicate strands. As you spiralize, you’ll marvel at the way the bright green zucchini transforms into a beautiful nest of noodles, ready to soak up the flavors of the accompanying pesto.

The pesto itself is a burst of flavor, made from fresh basil, garlic, pine nuts, Parmesan cheese, and a drizzle of olive oil. Simply blitz all the ingredients in a food processor until smooth, and you’ll have a creamy, aromatic sauce that dances on the palate. The nutty richness of the pine nuts complements the herbal brightness of the basil, creating a harmonious blend that elevates the dish.

Once your zoodles are prepared, sauté them lightly in a pan with a splash of olive oil until they’re just tender—this takes only a few minutes, ensuring they retain a delightful crunch. Then, toss them with the freshly made pesto until every strand is coated in the vibrant green sauce. The result is a dish that not only looks stunning but also bursts with fresh flavors and textures.

Serve your Zucchini Noodles with Pesto warm, topped with a sprinkle of extra Parmesan and a few pine nuts for added crunch. This dish is not only gluten-free—it’s also a low-carb delight that satisfies cravings without weighing you down. Perfect for a quick weeknight dinner or a fancy gathering, this recipe is bound to become a staple in your kitchen. So grab those zucchinis, and let’s get cooking!

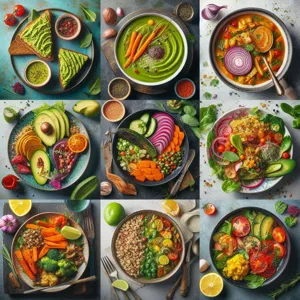
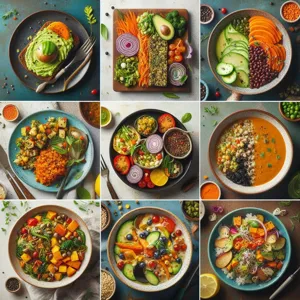
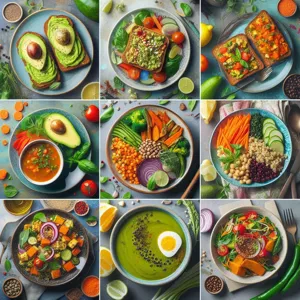
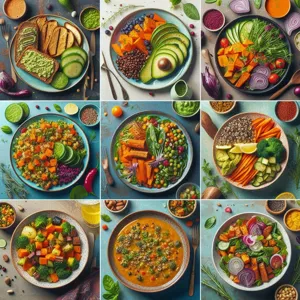
6. Recipe 3: Quinoa Salad with Roasted Vegetables

Elevate your meal prep with this vibrant Quinoa Salad with Roasted Vegetables, a dish that marries nutrition with flavor in every bite. Quinoa, a protein-packed superfood, serves as the perfect base, providing a nutty taste and fluffy texture that pairs beautifully with the colorful medley of roasted vegetables.

To create this delightful salad, start by preheating your oven to 400°F (200°C). Chop a mix of your favorite seasonal vegetables—think bell peppers, zucchini, and red onions—into bite-sized pieces. Toss them generously with olive oil, a sprinkle of salt, and a dash of your favorite herbs, such as thyme or rosemary, to enhance their natural sweetness. Spread the vegetables on a baking sheet and roast them for about 25-30 minutes, or until they’re tender and slightly caramelized.

While the vegetables are roasting, rinse one cup of quinoa under cold water to remove its natural coating, known as saponin, which can impart a bitter taste. Cook the quinoa in a pot with two cups of vegetable broth or water, bringing it to a boil, then reducing the heat and letting it simmer for about 15 minutes until the grains have absorbed all the liquid and are fluffy.

Once the quinoa and roasted vegetables are ready, combine them in a large bowl, adding a handful of fresh spinach or arugula for an extra pop of color and crunch. For an added layer of flavor, drizzle with a simple lemon vinaigrette made from fresh lemon juice, olive oil, a touch of Dijon mustard, and a pinch of salt and pepper. Toss everything together, and watch as the colors come alive.

This Quinoa Salad with Roasted Vegetables is not just a feast for the eyes; it’s a versatile dish that can be served warm or cold, making it perfect for meal prep, a light lunch, or as a stunning side dish for your next gathering. Packed with nutrients and bursting with flavors, it’s a gluten-free recipe that everyone—whether gluten intolerant or not—will love. Don’t be surprised when this salad becomes a staple in your kitchen!

7. Recipe 4: Gluten-Free Chocolate Chip Cookies

What are the best gluten-free recipes?
Credit : whatcanu.com

When it comes to comfort food, few treats can rival the classic chocolate chip cookie. This gluten-free version brings all the nostalgia of the original while accommodating those with dietary restrictions. Imagine biting into a warm cookie, the chocolate chips melting in your mouth, and the buttery flavor dancing on your taste buds—pure bliss!

To start, you’ll need a blend of gluten-free flours, such as almond flour and coconut flour, which not only keep the cookies soft and chewy but also add a delightful nuttiness. The magic begins when you cream together the butter and sugars, allowing the sweet aroma to fill your kitchen. A touch of vanilla extract enhances the flavor, while a pinch of salt balances the sweetness beautifully.

As you fold in the gluten-free chocolate chips, you’ll be tempted to sneak a taste of the dough—resist the urge, even though it’s incredibly tempting! Once the dough is ready, scoop generous portions onto a baking sheet, leaving room for the cookies to spread out and create that perfectly crisp edge.

Bake until golden brown, and let them cool for a few minutes before transferring to a wire rack. The first bite will reveal a crunchy exterior giving way to a soft, gooey center filled with melted chocolate. These gluten-free chocolate chip cookies are not just a substitute; they’re a delightful treat that stands on their own.

Serve them warm with a glass of cold milk or enjoy them as a midday snack. No one will ever guess they’re gluten-free, and you might just find these cookies becoming a new household favorite. Indulge in the joy of baking with this easy recipe, and watch as friends and family come back for seconds—because who can resist a freshly baked cookie?

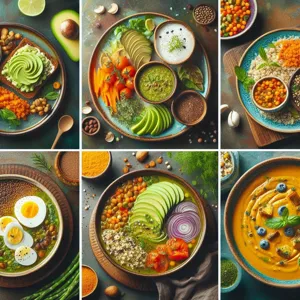
8. Recipe 5: Stuffed Bell Peppers

Prepare to indulge in a vibrant explosion of flavors with our gluten-free stuffed bell peppers! This dish not only looks stunning on your dinner table but is also packed with nutrients, making it a wholesome choice for any meal.

Begin with fresh, colorful bell peppers—red, yellow, and green—with their glossy skins glistening under the kitchen light. Slice the tops off and carefully remove the seeds, creating the perfect vessel for a savory filling. The aroma of sautéed onions and garlic fills your kitchen as you cook them to a golden brown in a splash of olive oil.

Next, mix in cooked quinoa or rice (both of which are naturally gluten-free), along with black beans for protein, sweet corn for a touch of sweetness, and diced tomatoes for juiciness. season your filling with cumin, paprika, and a dash of chili powder to give it a zesty kick. Don’t forget to fold in a handful of fresh herbs like cilantro or parsley for an added burst of freshness.

Once your filling is ready, generously spoon it into each bell pepper, packing it tightly to ensure every bite is bursting with flavor. Top each pepper with a sprinkle of shredded cheese or a dairy-free alternative, if you prefer, to create a delightful, melty topping.

Arrange the stuffed peppers in a baking dish, add a splash of vegetable broth at the bottom to keep them moist, and bake in a preheated oven until the peppers are tender and the cheese is bubbly—about 25-30 minutes. The anticipation builds as the delicious aroma wafts through your home.

Serve these colorful creations warm, garnished with a dollop of sour cream or a drizzle of avocado cilantro sauce for an extra layer of creaminess. Not only are these stuffed bell peppers a feast for the eyes, but they also offer a satisfying and healthy meal that even those without dietary restrictions will love. Perfect for family dinners or as a crowd-pleaser at gatherings, this recipe is sure to become a staple in your gluten-free repertoire!

9. Recipe 6: Creamy Gluten-Free Mac and Cheese

Indulging in a comforting bowl of mac and cheese doesn’t have to be off-limits just because you’re avoiding gluten. This creamy gluten-free mac and cheese recipe is a game-changer, delivering all the gooey, cheesy goodness you crave without sacrificing flavor or texture.

To start, choose gluten-free pasta like brown rice or chickpea pasta; both options hold their shape beautifully and provide a satisfying bite. As the pasta cooks to al dente perfection, whisk together a rich cheese sauce that combines sharp cheddar, creamy mozzarella, and a hint of nutty parmesan. The key to achieving that ultra-creamy consistency is incorporating a blend of milk and a touch of cream; this mixture creates a luscious sauce that coats every noodle.

But why stop there? Elevate your mac and cheese by adding sautéed garlic, chopped spinach, or crispy bacon for an extra layer of flavor and texture. For those who enjoy a bit of heat, a sprinkle of cayenne pepper or a dash of hot sauce can take this classic dish to a new level of deliciousness.

Once everything is combined, transfer the mixture to a baking dish and top it off with gluten-free breadcrumbs or crushed gluten-free crackers for that perfect crunchy topping. Bake until bubbly and golden, and prepare for a mouthwatering experience that will have everyone asking for seconds.

Whether it’s a cozy family dinner or a potluck gathering, this creamy gluten-free mac and cheese is sure to be a hit. With its rich flavors and comforting texture, it proves that gluten-free cooking doesn’t mean compromising on taste. So grab your forks and dig into this delightful dish that promises satisfaction in every bite!

10. Recipe 7: Flourless Chocolate Cake

When it comes to indulgent desserts, the Flourless Chocolate Cake reigns supreme, especially for those following a gluten-free lifestyle. This rich and decadent treat is a chocolate lover’s dream, boasting a velvety texture that melts in your mouth. Made with just a handful of high-quality ingredients, it’s a simple yet elegant option that will impress both gluten-free and gluten-loving guests alike.

The magic begins with premium dark chocolate, which is gently melted with butter to create a luxurious base. The addition of eggs gives the cake its structure, while sugar adds the perfect touch of sweetness. A hint of vanilla enhances the chocolate flavor, and a pinch of salt elevates the overall taste profile, balancing the sweetness beautifully.

What truly sets this cake apart is its ease of preparation. Simply combine your ingredients in a bowl, pour the luscious batter into a greased cake pan, and bake until it’s set but still slightly gooey in the center. The result is a cake that is not only gluten-free but also deeply satisfying, with a rich, fudgy interior and a slightly crisp exterior.

For an extra touch, dust the top with powdered sugar or cocoa powder before serving, and consider pairing it with a dollop of freshly whipped cream or a scoop of vanilla ice cream for a delightful contrast. This Flourless Chocolate Cake is perfect for special occasions or as a decadent treat any day of the week. Once you’ve tasted this heavenly dessert, you’ll find it hard to believe that something so rich and delicious can be made without flour!

11. Recipe 8: Gluten-Free Breakfast Muffins

Start your day on a delicious note with these incredibly moist and fluffy gluten-free breakfast muffins that are perfect for busy mornings or leisurely brunches. These muffins are not only gluten-free but also packed with wholesome ingredients that will keep you fueled throughout the day.

Imagine biting into a warm muffin, the golden-brown exterior giving way to a tender, airy crumb scented with hints of vanilla and cinnamon. Each muffin is a delightful explosion of flavor, with juicy blueberries or ripe bananas providing natural sweetness and added nutrition. The best part? They are incredibly easy to make, requiring just a few simple steps.

To create these breakfast delights, you’ll need a blend of gluten-free flour—such as almond or oat flour—which lends a nutty richness and light texture. Combined with a pinch of baking powder and soda, these muffins rise beautifully in the oven. Add in some Greek yogurt for a protein boost and an extra moist crumb, and you’ve got a base that’s both satisfying and nutritious.

Feel free to customize your muffins with your favorite add-ins—chocolate chips, nuts, or even a sprinkle of seeds for a delightful crunch. Bake them in a preheated oven until they’re golden and puffy, then let them cool just enough to avoid burning your tongue before diving in.

These gluten-free breakfast muffins are not just a treat for the taste buds; they also freeze wonderfully, allowing you to whip out a quick breakfast option whenever you need it. Whether enjoyed plain, slathered with a bit of almond butter, or paired with a cup of coffee, they are sure to become a staple in your gluten-free repertoire. So, preheat your oven, gather your ingredients, and treat yourself to a batch of these heavenly muffins that will have everyone begging for seconds!

12. Recipe 9: Savory Gluten-Free Pizza

Craving a slice of pizza without the gluten? Look no further than this Savory Gluten-Free Pizza recipe that is sure to satisfy your cheesy cravings while keeping your dietary needs in check! This delightful dish features a homemade gluten-free crust that perfectly balances crispiness and chewiness, providing the ideal foundation for your favorite toppings.

To create the crust, you’ll combine a blend of gluten-free flours—such as almond flour, brown rice flour, and tapioca starch—seasoning it with a sprinkle of garlic powder and Italian herbs for an aromatic kick. A touch of olive oil adds richness, while warm water brings everything together into a smooth dough that’s easy to work with.

Once your crust is prepped and baked to golden perfection, it’s time to unleash your creativity! Spread a generous layer of zesty marinara sauce across the surface, followed by a melty layer of mozzarella cheese. From there, the world is your oyster—top it with vibrant veggies like bell peppers, mushrooms, and red onions, or add protein-packed options such as pepperoni or grilled chicken. For an extra flavor boost, consider a drizzle of pesto or a sprinkle of red pepper flakes.

Bake your masterpiece in a preheated oven until the cheese is bubbly and the edges are beautifully crisp. The result? A savory gluten-free pizza that not only looks mouthwatering but tastes absolutely divine. Whether you’re hosting a casual dinner or just indulging in a treat for yourself, this recipe is bound to become a go-to favorite in your kitchen. Enjoy every cheesy, gluten-free bite!

13. Recipe 10: Easy Gluten-Free Tacos

Tacos are a beloved staple in many households, and the great news is that you can easily make them gluten-free without sacrificing any of the flavor that makes them so irresistible. These Easy Gluten-Free Tacos are not only quick to prepare but also customizable to suit your taste buds, making them the perfect weeknight meal or a fun addition to your next gathering.

**Ingredients:**
To start, gather your favorite taco fillings. For the base, you can use corn tortillas, which are naturally gluten-free and add a delightful corn flavor. Choose from a variety of proteins such as seasoned ground beef, shredded chicken, or black beans for a vegetarian option. Don’t forget to load up on fresh toppings like diced tomatoes, shredded lettuce, avocado slices, and a sprinkle of cheese. For a kick, consider adding jalapeños or a zesty salsa.

**Instructions:**
1. **Prepare the Protein:** In a skillet, brown your chosen protein over medium heat, adding taco seasoning (ensuring it’s gluten-free) and a splash of water. Stir until well combined and heated through.

2. **Warm the Tortillas:** While the protein is cooking, warm your corn tortillas in another skillet over low heat for about 30 seconds on each side until they are pliable and slightly charred.

3. **Assemble Your Tacos:** Layer the tortillas with a generous scoop of your protein, followed by your choice of toppings. Get creative! Add a dollop of sour cream or a drizzle of lime juice to enhance the flavors.

4. **Serve and Enjoy:** Arrange your tacos on a platter and serve them immediately, allowing everyone to build their own masterpiece.

**Why You’ll Love Them:**
These Easy Gluten-Free Tacos are not just simple; they are a canvas for creativity, allowing you to mix and match flavors and ingredients. The satisfying crunch of the corn tortillas paired with the savory filling and fresh toppings is bound to please any crowd. Plus, they are a fantastic way to introduce gluten-free eating to family and friends without them even noticing they’re missing out on gluten!

So, whether you’re preparing for Taco Tuesday or just need a quick and delicious meal, these tacos will quickly become a go-to recipe in your gluten-free arsenal. Enjoy every bite and watch as they disappear from the plate!

14. Tips for Cooking and Baking Gluten-Free

Cooking and baking gluten-free can feel like navigating a new culinary landscape, but with the right tips and tricks, you’ll find it’s a delicious adventure! Here are some essential guidelines to help you create mouthwatering gluten-free dishes that will satisfy everyone at the table, whether they have dietary restrictions or not.

**1. Choose the Right Flour:** Not all gluten-free flours are created equal. Familiarize yourself with a variety of gluten-free flours such as almond flour, coconut flour, brown rice flour, and chickpea flour. Each brings its unique flavor and texture to your recipes. A good tip is to blend different types of gluten-free flours to achieve the best results.

**2. Understand Gluten Substitutes:** When baking, gluten-free recipes often require additional binders to mimic the elasticity that gluten provides. Ingredients like xanthan gum or guar gum can help your baked goods hold together better. Typically, you’ll need about one teaspoon of xanthan gum per cup of gluten-free flour.

**3. Hydration is Key:** Gluten-free flours absorb more moisture than traditional wheat flour, so be prepared to adjust your liquid ingredients. You may find that adding a little extra water, milk, or eggs can make all the difference in achieving the perfect consistency.

**4. Don’t Skip the Resting Time:** Allowing your gluten-free dough or batter to rest for at least 30 minutes before baking can improve texture and flavor. This resting period allows the flours to fully hydrate and the flavors to meld, resulting in a more cohesive dish.

**5. Experiment with Flavorings:** Gluten-free cooking is the perfect opportunity to get creative with flavors. Add spices, herbs, citrus zest, or extracts to enhance your dishes. Ingredients like vanilla extract or citrus zest can elevate your baked goods, making them truly irresistible.

**6. Keep it Clean:** Always ensure your cooking utensils and surfaces are free of gluten contamination. If you’re cooking for someone with celiac disease or a severe gluten intolerance, consider designating specific tools and spaces for gluten-free cooking to prevent cross-contact.

**7. Taste as You Go:** Gluten-free recipes can sometimes differ in taste and texture from their gluten-filled counterparts. Don’t hesitate to taste your creations as you go along, adjusting seasonings and flavors until you achieve a perfect balance.

By following these tips, you’ll find that cooking and baking gluten-free can be both enjoyable and satisfying. With a little practice, you’ll be whipping up gluten-free dishes that are not just safe, but also scrumptious and memorable. So grab your apron and let the culinary creativity flow!

15. Conclusion: Embracing a Delicious Gluten-Free Lifestyle

As we wrap up our journey through these ten tantalizing gluten-free recipes, it’s clear that embracing a gluten-free lifestyle doesn’t mean sacrificing flavor or culinary delight. Instead, it opens up a world of creativity in the kitchen, where wholesome ingredients take center stage and every meal can be an exploration of taste and texture.

From hearty breakfast options that kick-start your day with energy to mouthwatering dinners that leave everyone at the table satisfied, each recipe serves as a reminder that gluten-free does not equate to flavor-free. The vibrant colors of fresh vegetables, the nutty undertones of gluten-free grains, and the sweet notes of naturally gluten-free desserts all come together to create dishes that are not just healthy, but also utterly delicious.

Moreover, the shift to a gluten-free diet can foster a deeper appreciation for the ingredients we choose. By exploring alternatives like almond flour, quinoa, and chickpea pasta, you may discover new favorites that will enrich your cooking repertoire. This journey is not just about dietary restrictions; it’s about embracing a lifestyle that prioritizes nourishment and well-being.

So whether you’re gluten-sensitive, have celiac disease, or simply wish to explore the bountiful benefits of gluten-free eating, these recipes are here to inspire you. Dive into the kitchen with confidence, experiment with flavors, and share your culinary creations with friends and family. Embrace this deliciously gluten-free lifestyle, and let every meal be a celebration of health, taste, and creativity!

As we wrap up our exploration of delicious gluten-free recipes, we hope you feel inspired to dive into the kitchen and create mouthwatering dishes that everyone can enjoy, regardless of dietary restrictions. Each recipe on our list is designed not only to satisfy your taste buds but also to showcase the incredible versatility of gluten-free ingredients. Whether you’re hosting a gathering or simply treating yourself to a cozy meal at home, these dishes are sure to impress. So gather your ingredients, invite your loved ones, and embark on a culinary adventure that celebrates flavor without compromise. Happy cooking, and don’t forget to share your delicious creations with us!

What are the best vegetarian recipes?

In a world where culinary creativity knows no bounds, vegetarian cooking has emerged as an exciting and vibrant avenue for food lovers to explore.

Whether you’re a lifelong vegetarian, a curious omnivore, or simply looking to incorporate more plant-based meals into your diet, this collection of delicious vegetarian recipes is sure to delight your taste buds and inspire your kitchen adventures. From hearty, flavor-packed dishes that make vegetables the star of the show to light and refreshing options perfect for any season, these ten recipes showcase the incredible versatility and richness of vegetarian cuisine. Join us on this mouthwatering journey as we uncover the top ten vegetarian recipes you absolutely need to try today—and discover how satisfying and delicious a meat-free lifestyle can be!

1. Introduction to Vegetarian Cooking

What are the best vegetarian recipes?
Credit : whatcanu.com

Vegetarian cooking is more than just a dietary choice; it’s a vibrant celebration of flavors, colors, and textures that can transform any meal into a culinary adventure. With the world increasingly embracing plant-based diets for health, environmental, and ethical reasons, vegetarian cooking has become a thriving, innovative field that invites everyone—regardless of dietary preferences—to explore the bountiful possibilities of fruits, vegetables, grains, and legumes.

Imagine walking through a sun-drenched farmers’ market, where the vivid hues of ripe tomatoes, earthy greens, and fragrant herbs beckon you to experiment in your kitchen. Vegetarian cooking invites you to harness the natural flavors found in seasonal produce and turn simple ingredients into extraordinary dishes. It’s about creativity and exploration, mixing and matching spices, and discovering new textures that can tantalize your taste buds.

From hearty stews brimming with nutritious legumes to fresh, crisp salads bursting with seasonal vegetables, vegetarian recipes offer something for everyone. Whether you are a lifelong vegetarian or someone just starting to dabble in plant-based cuisine, you’ll find that cooking without meat can be both satisfying and delicious. With the right recipes in hand, you can craft meals that not only please your palate but also nourish your body and soul.

In this post, we’ll delve into ten delectable vegetarian recipes that are not only easy to prepare but also packed with flavor and nutrition. Each recipe is designed to inspire and excite, showcasing the diversity of vegetarian cooking. So, roll up your sleeves, grab your favorite apron, and get ready to embark on a delightful culinary journey that will have you and your loved ones savoring every bite!

2. Benefits of a Vegetarian Diet

Adopting a vegetarian diet offers a myriad of benefits that extend beyond just health; it encompasses environmental, ethical, and culinary advantages that make it an appealing choice for many.

Firstly, from a health perspective, a vegetarian diet is often associated with a lower risk of chronic diseases. Rich in essential nutrients, vitamins, and fiber, a plant-based diet can lead to improved heart health, lower blood pressure, and reduced cholesterol levels. Studies have shown that those who follow a vegetarian diet tend to have healthier body weights and lower risks of type 2 diabetes. This is largely due to the abundance of fruits, vegetables, whole grains, and legumes that are staples in vegetarian cooking, providing essential nutrients while keeping calorie counts in check.

Moreover, choosing vegetarianism is a powerful way to make a positive impact on the planet. The production of plant-based foods generally requires fewer natural resources and results in lower greenhouse gas emissions compared to meat production. By opting for vegetarian meals, you’re contributing to a more sustainable food system and helping to reduce your carbon footprint, making it a choice that benefits both your body and the environment.

Ethically, adopting a vegetarian lifestyle aligns with a commitment to animal welfare. Many people choose to go vegetarian to avoid the inhumane practices often associated with factory farming. By reducing or eliminating meat from their diets, they take a stand against animal cruelty and support more humane farming practices.

Finally, the culinary world opens up with a vegetarian diet. It encourages creativity and exploration in the kitchen, pushing you to discover new ingredients and flavors you might not have considered before. From hearty lentil stews to vibrant vegetable stir-fries, the possibilities are endless, and you may find that your meals become more colorful and diverse.

In essence, the benefits of a vegetarian diet are multifaceted, enhancing your health, contributing positively to the planet, supporting ethical practices, and expanding your culinary horizons. If you haven’t yet explored this delicious lifestyle, now is the perfect time to dive in!

3. Recipe 1: Hearty Vegetable Stir-Fry

What are the best vegetarian recipes?
Credit : whatcanu.com

A Hearty Vegetable Stir-Fry is a colorful celebration of flavors and textures that will satisfy both vegetarians and meat-lovers alike. This quick and versatile dish allows you to showcase a vibrant medley of fresh vegetables, all while packing a nutritional punch. Imagine crisp broccoli florets, sweet bell peppers, tender snap peas, and juicy carrots, all sautéed to perfection in a zesty garlic and ginger sauce that awakens your taste buds.

To start, gather your favorite vegetables—feel free to mix and match based on what’s in season or what you have on hand. For the best results, aim for a variety of colors to create a visually appealing dish. The key to achieving that perfect stir-fry is high heat and constant motion; this ensures your veggies remain crunchy while developing a delightful caramelization.

As the vegetables sizzle away, prepare a simple yet flavorful sauce using soy sauce, sesame oil, and a splash of rice vinegar. You can also add a pinch of red pepper flakes for some heat or a drizzle of honey for a touch of sweetness. Once your vegetables are nearly cooked, toss in the sauce and let it coat every morsel, allowing the flavors to meld beautifully.

Serve your Hearty Vegetable Stir-Fry over a bed of fluffy jasmine rice or quinoa to soak up all that delicious sauce. Top it off with a sprinkle of sesame seeds and freshly chopped scallions for an extra layer of flavor and crunch. This dish not only nourishes the body but also delights the senses, making it an ideal choice for a quick weeknight dinner or a vibrant dish to impress guests. With its endless variations and fulfilling nature, you’ll find yourself making this stir-fry again and again. So grab your wok and get ready to stir up some culinary magic!

4. Recipe 2: Creamy Spinach and Ricotta Stuffed Shells

Creamy Spinach and Ricotta Stuffed Shells are the epitome of comfort food, combining velvety textures with vibrant flavors that will leave you craving more. This dish features large pasta shells generously filled with a rich mixture of creamy ricotta, fresh spinach, and a hint of nutmeg, all enveloped in a luscious marinara sauce.

To begin, cook the pasta shells until al dente, ensuring they maintain their shape for stuffing. While the shells are boiling, sauté fresh spinach until wilted, then mix it with ricotta cheese, grated Parmesan, garlic, and a sprinkle of salt and pepper. This filling is not only delicious but also packed with nutrients, making it a wholesome choice for any meal.

Once the shells are filled, arrange them in a baking dish, generously slathering them with your favorite marinara sauce. For an extra touch of indulgence, sprinkle a layer of mozzarella cheese on top before placing the dish in the oven. As it bakes, the cheese melts into a gooey, golden layer, harmonizing perfectly with the savory flavors of the filling.

After about 30 minutes in the oven, the aroma wafting through your kitchen will be irresistible. Serve these stuffed shells with a side of garlic bread and a fresh salad, and you have a complete meal that’s sure to impress both vegetarians and meat-lovers alike. Each bite offers a delightful combination of creamy, cheesy goodness and the earthy taste of spinach, making this dish a must-try for anyone looking to elevate their vegetarian repertoire. Enjoy the comfort of home-cooked goodness with every stuffed shell!

5. Recipe 3: Quinoa and Black Bean Salad

What are the best vegetarian recipes?
Credit : whatcanu.com

Quinoa and black Bean Salad is a vibrant dish that not only tantalizes the taste buds but also nourishes the body. This recipe showcases the versatility of quinoa—an ancient grain packed with protein and essential amino acids—paired harmoniously with hearty black beans, rich in fiber.

To start, rinse one cup of quinoa under cold water to remove its natural coating, known as saponin, which can impart a bitter flavor. Cook the quinoa in two cups of vegetable broth for a deeper taste, bringing it to a boil and then simmering until the grains are fluffy and translucent. While the quinoa cools, prepare the other ingredients: drain and rinse a can of black beans, chop a colorful medley of bell peppers, red onion, and fresh cilantro, and dice a ripe avocado for creaminess.

In a large bowl, combine the cooled quinoa and black beans, then fold in the chopped vegetables and avocado. For the dressing, whisk together fresh lime juice, olive oil, cumin, salt, and a pinch of cayenne pepper for a hint of heat. Drizzle this zesty mixture over the salad, tossing gently to ensure every bite is coated in flavor.

Serve this salad as a refreshing side dish or a satisfying main course. It’s perfect for meal prep, as the flavors deepen and meld beautifully when allowed to sit for a few hours in the fridge. Not only is this Quinoa and Black Bean Salad a feast for the eyes with its colorful display, but it also delivers a delightful crunch and a burst of flavors that will have you reaching for seconds. Enjoy this nutritious dish as part of your quest for delicious vegetarian recipes that will leave you feeling full and satisfied!

6. Recipe 4: Roasted Cauliflower Tacos

### 6. Recipe 4: Roasted Cauliflower Tacos

Prepare to embark on a flavor-packed journey with these Roasted Cauliflower Tacos! This dish transforms humble cauliflower into a smoky, savory delight that is sure to become a staple in your kitchen. The key to these tacos lies in the roasting process, which caramelizes the natural sugars in the cauliflower, enhancing its flavor and giving it a wonderful texture.

**Ingredients:**
– 1 medium head of cauliflower, cut into florets
– 2 tablespoons olive oil
– 1 teaspoon smoked paprika
– 1 teaspoon ground cumin
– Salt and pepper, to taste
– Corn or flour tortillas
– Fresh cilantro, for garnish
– Avocado slices, for serving
– Lime wedges, for that zesty finish

**Instructions:**
1. **Preheat the Oven:** Start by preheating your oven to 425°F (220°C). This high heat will help the cauliflower roast to perfection.

2. **Prepare the Cauliflower:** In a large bowl, toss the cauliflower florets with olive oil, smoked paprika, cumin, salt, and pepper until well-coated. The spices will add depth, while the olive oil ensures a crispy exterior.

3. **Roast:** Spread the seasoned cauliflower evenly on a baking sheet lined with parchment paper. Roast for about 25-30 minutes, flipping halfway through, until the edges are golden and crispy.

4. **Assemble the Tacos:** While the cauliflower is roasting, warm the tortillas in a skillet or directly over a flame for a few seconds on each side. Once the cauliflower is out of the oven, it’s time to build your tacos! Layer the roasted cauliflower on each tortilla, then top with fresh avocado slices and a sprinkle of cilantro.

5. **Finish with Lime:** A squeeze of fresh lime juice will elevate the flavors and add a bright contrast to the smoky cauliflower.

These Roasted Cauliflower Tacos are not only visually appealing with their vibrant colors but also packed with nutrients and flavor. Each bite is a delightful combination of crunchy, creamy, and zesty elements that make them irresistible. Perfect for a quick weeknight dinner or a weekend gathering with friends, they are sure to impress even the most devoted carnivores. Enjoy these tacos with a side of your favorite salsa or a refreshing slaw for an extra crunch!

7. Recipe 5: Chickpea Curry with Coconut Milk

What are the best vegetarian recipes?
Credit : whatcanu.com

Chickpea Curry with Coconut Milk is a delightful fusion of flavors that transports you to the heart of Indian cuisine with every bite. This comforting dish is not only quick and easy to prepare but also packed with nutrients, making it a perfect choice for both seasoned vegetarians and newcomers alike.

To start, gather your ingredients: canned chickpeas, creamy coconut milk, ripe tomatoes, onion, garlic, ginger, and a medley of spices, including cumin, coriander, turmeric, and garam masala. The chickpeas serve as the protein-packed base, while the coconut milk adds a luscious creaminess that perfectly balances the spices.

Begin by sautéing finely chopped onions, garlic, and ginger in a splash of oil until they become fragrant and golden. As the aroma envelops your kitchen, add in the spices to toast them lightly, releasing their essential oils and deepening their flavors. Next, stir in the tomatoes, allowing them to simmer until they soften and meld into a rich sauce.

Once the tomato mixture is bubbling happily, toss in the chickpeas and pour in the coconut milk. This is where the magic happens; the chickpeas absorb the coconut’s sweetness while the spices create a harmonious blend. Let the curry simmer gently, allowing all the ingredients to unite, and then finish it off with a sprinkle of fresh cilantro for a burst of freshness.

Serve your Chickpea Curry with Coconut Milk over a bed of fluffy basmati rice or alongside warm naan bread for the ultimate comfort meal. The combination of creamy coconut, hearty chickpeas, and aromatic spices will leave your taste buds dancing and your stomach satisfied. It’s not just a dish; it’s an experience that showcases the vibrant flavors of vegetarian cooking. Try it today, and you’ll find yourself reaching for seconds!

8. Recipe 6: Zucchini Noodles with Pesto

### Recipe 6: Zucchini Noodles with Pesto

If you’re looking for a fresh and vibrant dish that bursts with flavor, look no further than Zucchini Noodles with Pesto. This delightful recipe is not only a feast for the eyes but also a celebration of health and taste, making it a perfect addition to your vegetarian repertoire.

To start, spiralize your zucchini into beautiful, long noodles—think of them as a lighter, gluten-free alternative to traditional pasta. The key is to choose firm, fresh zucchinis that yield perfectly tender noodles without becoming mushy. You can use a spiralizer, a julienne peeler, or even a box grater to achieve your desired thickness. The vibrant green strands will instantly brighten your plate.

Next, it’s all about the pesto. You can whip up a homemade version using fresh basil, garlic, pine nuts, Parmesan cheese, and a good drizzle of extra virgin olive oil. Blend these ingredients until you reach a creamy consistency, adjusting with more olive oil or a splash of lemon juice for brightness, if needed. If you’re short on time, store-bought pesto works just as well—just make sure to choose a high-quality option to ensure maximum flavor.

Toss the zucchini noodles in the luscious pesto sauce until every strand is coated in that aromatic herbal goodness. For an added crunch and flavor, consider sprinkling some toasted pine nuts or walnuts on top, along with a few halved cherry tomatoes for a pop of color and sweetness. A sprinkle of grated Parmesan or nutritional yeast can enhance the umami factor, making this dish even more irresistible.

Serve your Zucchini Noodles with Pesto warm or chilled, depending on your preference. This dish is not only quick to prepare but also versatile—feel free to customize it with additional veggies like bell peppers, spinach, or even roasted chickpeas for added protein. Not only is it a delightful meal to enjoy, but it also embodies the essence of summer with its fresh ingredients and bright flavors.

This recipe is perfect for a light lunch, a quick dinner, or even a picnic in the park. Once you try these Zucchini Noodles with Pesto, you might just find your new go-to dish that keeps you coming back for more! Enjoy every bite of this delicious vegetarian delight!

9. Recipe 7: Sweet Potato and Kale Hash

### Recipe 7: Sweet Potato and Kale Hash

If you’re looking for a hearty and nutritious dish that bursts with flavor, look no further than this Sweet Potato and Kale Hash. This vibrant recipe combines the earthy sweetness of roasted sweet potatoes with the robust, slightly bitter notes of sautéed kale, creating a perfect harmony of flavors that’s both satisfying and wholesome.

**Ingredients:**
– 2 medium sweet potatoes, peeled and diced
– 1 bunch of kale, stems removed and chopped
– 1 small onion, finely diced
– 2 cloves of garlic, minced
– 1 tablespoon olive oil
– Salt and pepper to taste
– A pinch of red pepper flakes (optional)
– Fresh herbs (like thyme or parsley) for garnish

**Instructions:**

1. **Prepare the Sweet Potatoes:** Begin by preheating your oven to 400°F (200°C). Toss the diced sweet potatoes with a drizzle of olive oil, salt, and pepper, then spread them out evenly on a baking sheet. Roast for about 20–25 minutes, or until they are tender and golden, flipping halfway through to ensure even cooking.

2. **Sauté the Aromatics:** While the sweet potatoes are roasting, heat a tablespoon of olive oil in a large skillet over medium heat. Add the diced onion and sauté until translucent, about 5 minutes. Then, stir in the minced garlic and cook for an additional minute until fragrant.

3. **Add the Kale:** Once the onions and garlic are perfectly sautéed, add the chopped kale to the skillet. Sprinkle in a pinch of salt, pepper, and red pepper flakes if you like a bit of heat. Sauté the kale for 5–7 minutes, or until it’s wilted and tender, stirring occasionally.

4. **Combine:** When the sweet potatoes are ready, fold them gently into the skillet with the kale mixture. Stir everything together, allowing the flavors to meld for an additional 2–3 minutes. Taste and adjust the seasoning as needed.

5. **Serve:** Transfer the hash to a serving dish and garnish with fresh herbs for an added touch of color and flavor. This dish can be enjoyed as a wholesome breakfast topped with a fried or poached egg, as a delightful lunch alongside a crisp salad, or as a comforting dinner paired with your favorite protein.

The Sweet Potato and Kale Hash is not just visually appealing with its vibrant orange and green hues, but it’s also packed with nutrients. Sweet potatoes are rich in vitamins A and C, while kale offers a hearty dose of iron and fiber. This recipe is a perfect example of how delicious vegetarian cooking can be—simple, fresh, and utterly satisfying. So, grab your ingredients, and get ready to enjoy a dish that will keep you coming back for more!

10. Recipe 8: Lentil Soup with Fresh Herbs

**10. Recipe 8: Lentil Soup with Fresh Herbs**

Lentil soup is a hearty, nourishing dish that brings warmth and comfort, perfect for any time of the year. This particular recipe elevates the humble lentil with a symphony of fresh herbs, creating a delightful explosion of flavor that will tantalize your taste buds.

To start, gather your ingredients: luscious green or brown lentils, aromatic onions, garlic, and a medley of colorful vegetables such as carrots and celery. The base of this soup is further enhanced by the addition of ripe tomatoes, which lend a subtle sweetness and depth to the broth. As the ingredients simmer together, the earthy flavors of the lentils meld beautifully with the bright notes of fresh herbs.

Chop up a handful of fresh parsley, cilantro, or thyme and sprinkle them into the pot during the last few minutes of cooking. This not only adds vibrant color but also infuses the soup with a refreshing aroma that will have everyone eagerly awaiting their first bowl. For an extra layer of flavor, consider adding a touch of cumin or smoked paprika, which will offer a warm, smoky undertone.

Serve this comforting soup with a drizzle of good-quality olive oil and a squeeze of lemon juice to brighten the flavors even more. Pair it with crusty bread or a light salad for a complete meal. Whether you’re looking to impress dinner guests or simply enjoy a healthy weeknight meal, this lentil soup with fresh herbs is sure to become a staple in your kitchen. It’s wholesome, easy to prepare, and packed with protein, making it a delicious choice that you and your loved ones will come back to time and time again!

11. Recipe 9: Caprese Salad with Balsamic Glaze

### Recipe 9: Caprese Salad with Balsamic Glaze

When it comes to simple yet stunning vegetarian dishes, few can rival the classic Caprese salad. Originating from the sun-drenched shores of Italy, this salad is a vibrant celebration of fresh ingredients. Picture a plate adorned with luscious slices of ripe, juicy tomatoes, their red hues contrasting beautifully with creamy, fresh mozzarella. The addition of fragrant basil leaves adds a burst of green that not only enhances the aesthetic appeal but also infuses the dish with a delightful aroma.

To elevate this already exquisite salad, drizzle a generous amount of rich balsamic glaze over the top. This sweet and tangy reduction adds depth and complexity, transforming the Caprese into a truly gourmet experience. The glaze clings to each ingredient, intensifying the flavors and bringing out the natural sweetness of the tomatoes while complementing the creamy texture of the mozzarella.

To prepare, simply layer alternating slices of tomato and mozzarella on a serving platter, tucking whole basil leaves between each layer. Once assembled, drizzle with the balsamic glaze and a sprinkle of sea salt and freshly ground black pepper to taste. For an extra touch, a splash of extra virgin olive oil can enhance the richness further.

This Caprese salad is not only a feast for the eyes but also a refreshing dish that is perfect for warm afternoons, picnics, or as a light starter for dinner parties. Whether enjoyed as a standalone meal or as part of a larger spread, this recipe is sure to impress your guests and leave them craving more. So gather your freshest ingredients and indulge in this delicious vegetarian delight today!

12. Recipe 10: Chocolate Avocado Mousse

Indulging in a decadent dessert has never been easier or more guilt-free than with this luscious **Chocolate Avocado Mousse**. This recipe is the perfect blend of rich chocolate and creamy avocado, creating a velvety texture that will surprise even the most ardent chocolate lovers. Not only is this mousse delicious, but it’s also packed with healthy fats and nutrients, making it a delightful treat that you can feel good about.

### Ingredients:
– 2 ripe avocados
– 1/4 cup cocoa powder
– 1/4 cup maple syrup (or honey for a non-vegan option)
– 1/4 cup almond milk (or any plant-based milk)
– 1 teaspoon vanilla extract
– A pinch of salt
– Optional toppings: fresh berries, coconut flakes, or crushed nuts

### Instructions:
1. **Prep the Avocados**: Start by cutting the ripe avocados in half, removing the pit, and scooping the flesh into a blender or food processor. The creaminess of ripe avocados is what gives this mousse its silky texture.

2. **Blend it Together**: Add the cocoa powder, maple syrup, almond milk, vanilla extract, and a pinch of salt into the blender. Blend until the mixture is completely smooth and creamy, scraping down the sides as needed to ensure everything is well combined.

3. **Taste and Adjust**: This is the fun part! Taste your mousse and adjust the sweetness if necessary by adding more maple syrup or honey, depending on your preference. If you love a richer chocolate flavor, feel free to add a bit more cocoa powder.

4. **Chill**: Transfer the mousse into serving dishes or bowls and refrigerate for at least 30 minutes. This chilling time allows the flavors to meld and the mousse to firm up slightly.

5. **Serve and Enjoy**: Once chilled, take the mousse out of the refrigerator and garnish with your choice of toppings. Fresh berries add a pop of color and tartness, while coconut flakes bring a touch of tropical flair.

With its rich, chocolatey flavor and a hint of creaminess from the avocados, this Chocolate Avocado Mousse is sure to become a favorite in your dessert repertoire. It’s not only a delightful way to satisfy your sweet tooth, but it’s also a simple, wholesome recipe that showcases how delicious vegetarian desserts can be. Enjoy this treat any time you need a little indulgence!

13. Tips for Cooking Vegetarian Meals

Cooking vegetarian meals can be a delightful and rewarding experience, allowing you to explore a vibrant world of flavors, textures, and colors. Here are some essential tips to elevate your vegetarian cooking game and make every meal a celebration of plant-based goodness.

**1. Embrace Variety:** One of the most exciting aspects of vegetarian cooking is the sheer diversity of ingredients available. Don’t shy away from experimenting with different vegetables, grains, legumes, and spices. Seasonal produce can bring freshness to your dishes, while international cuisines can inspire new flavor combinations. Think beyond the salad—try roasted root vegetables, stuffed peppers, or hearty grain bowls.

**2. Master the Basics:** Understanding how to cook fundamental ingredients like grains, beans, and vegetables can greatly enhance your meals. Learn the best methods for preparing quinoa, lentils, or brown rice, and how to perfectly sauté, steam, or roast your favorite vegetables. With these skills in your toolkit, you can create satisfying and nutritious meals with ease.

**3. Layer Your Flavors:** Building layers of flavor is key to any great dish. Start with aromatics like garlic, onions, or ginger, then add herbs and spices at various stages of cooking to create depth. Don’t forget to season generously! Salt, acidity (like lemon juice or vinegar), and umami-rich ingredients (such as soy sauce or nutritional yeast) can transform a simple plate of vegetables into a gourmet experience.

**4. Don’t Skimp on Protein:** While vegetarian meals are often rich in carbohydrates and fiber, it’s important to include protein as well. Incorporate sources like beans, lentils, tofu, tempeh, nuts, and seeds to ensure your meals are balanced and filling. Combining different protein sources can also enhance the amino acid profile of your dishes.

**5. Get creative with Meat Alternatives:** If you’re transitioning from a meat-based diet or simply miss the texture of meat, explore various meat substitutes. From flavorful mushroom burgers to hearty jackfruit tacos, there are countless options that can satisfy those cravings while still being plant-based. Just remember to season and cook them well for the best results!

**6. Plan Ahead:** Meal prepping can save you time and ensure you always have delicious vegetarian options on hand. Spend a little time at the beginning of the week to chop vegetables, cook grains, or prepare sauces, so you can mix and match throughout the week. Having a well-stocked pantry and fridge will make whipping up a quick vegetarian meal a breeze.

With these tips in mind, you’ll be well-equipped to create mouthwatering vegetarian dishes that even the most devoted carnivores will love. Happy cooking!

14. Conclusion: Embracing Vegetarian Cuisine

As we conclude our culinary journey through these top 10 delicious vegetarian recipes, it’s clear that embracing vegetarian cuisine opens up a world of vibrant flavors, textures, and nutritional benefits. The shift towards plant-based eating isn’t just a trend; it’s a celebration of creativity in the kitchen and a commitment to a healthier lifestyle and planet.

Whether you’re a seasoned vegetarian or simply looking to incorporate more meat-free meals into your diet, these recipes offer something for everyone. From the hearty and comforting flavors of a creamy mushroom risotto to the refreshing zest of a Mediterranean quinoa salad, each dish showcases the versatility of vegetables and grains, proving that meat-free meals can be just as satisfying and indulgent.

Moreover, by opting for vegetarian recipes, you are not only treating your taste buds but also supporting sustainability and reducing your carbon footprint. The ingredients in these dishes are often more accessible, less expensive, and can be sourced locally, allowing you to enjoy fresh, seasonal produce while supporting your community.

So, gather your friends and family, and make mealtime a joyous occasion with these delightful vegetarian recipes. Don’t hesitate to experiment with spices, herbs, and seasonal vegetables—after all, cooking is all about discovery and enjoyment. Embrace this vibrant way of eating and watch as it transforms your meals, your health, and perhaps even your perspective on food. Happy cooking, and may your journey in vegetarian cuisine be filled with endless delicious discoveries!

15. Share Your Favorite Vegetarian Recipes!

Sharing your favorite vegetarian recipes is a wonderful way to connect with fellow food enthusiasts and inspire others to embrace the joys of plant-based cooking. Whether you’re a seasoned chef or just starting out in the kitchen, the act of sharing not only fosters a sense of community but also encourages creativity in the culinary arts.

Consider hosting a virtual recipe swap with friends, where each participant contributes their go-to vegetarian dish. This can be a fun, interactive way to discover new flavors and cooking techniques. You might find yourself sharing a zesty chickpea salad or a comforting lentil stew, while others may introduce you to unexpected delights like butternut squash tacos or a savory mushroom risotto.

Don’t forget to utilize social media platforms, where you can showcase your creations through vibrant photos and engaging captions. Use hashtags like #MeatlessMonday or #VeggieDelight to connect with a broader audience, and encourage others to tag you when they try your recipe. This not only amplifies your reach but also builds a network of like-minded individuals who share a passion for delicious vegetarian food.

Additionally, consider creating a blog or an online recipe collection to document your culinary journey. You can include tips for ingredient substitutions, cooking methods, and personal stories behind each recipe. By sharing your favorite vegetarian dishes, you not only nourish your own passion for cooking but also help others discover the rich and diverse world of plant-based cuisine. So go ahead—share that cherished recipe, inspire someone to try something new, and watch as your love for vegetarian cooking spreads like wildfire!

As we wrap up our exploration of the top 10 delicious vegetarian recipes you need to try today, we hope you’re feeling inspired to bring some vibrant flavors and wholesome ingredients into your kitchen. Each dish offers a unique way to celebrate the joys of plant-based cooking, whether you’re a seasoned vegetarian or just looking to incorporate more meatless meals into your diet. From hearty stews to refreshing salads, these recipes are not only satisfying but also showcase the incredible versatility of vegetables. So gather your ingredients, roll up your sleeves, and embark on a culinary adventure that promises to delight your taste buds. We can’t wait to hear about your cooking experiences—share your creations with us and let us know which recipes became your favorites! Happy cooking!

What are the best vegan recipes?

Embarking on a vegan journey doesn’t mean sacrificing flavor or satisfaction; in fact, it opens the door to a vibrant world of culinary creativity! As more people embrace plant-based diets for health, environmental, and ethical reasons, the appeal of delicious vegan meals continues to soar.

whether you’re a seasoned vegan, a curious flexitarian, or simply looking to incorporate more plant-based meals into your diet, this post is for you. We’ve curated a list of the top 10 vegan recipes that are not only packed with nutrition but also bursting with flavor. From hearty comfort foods to refreshing dishes perfect for any season, these recipes will tantalize your taste buds and nourish your body. Get ready to explore the delightful combinations of fresh ingredients and bold spices that make vegan cooking an exciting adventure you won’t want to miss!

1. Introduction to Vegan Cooking

What are the best vegan recipes?
Credit : whatcanu.com

Vegan cooking is not just a dietary choice; it’s a vibrant culinary adventure that celebrates the rich tapestry of plant-based ingredients. As more people seek healthier, sustainable lifestyles, the appeal of vegan cuisine has surged, and for good reason. Imagine a world where flavor and nutrition come together in harmony, where every meal is a canvas for creativity, and where the abundance of nature’s bounty takes center stage.

At its core, vegan cooking embraces the philosophy of using only plant-derived ingredients—fruits, vegetables, grains, legumes, nuts, and seeds—while excluding all animal products. This shift not only promotes better health but also contributes to environmental sustainability and animal welfare. From hearty stews to refreshing salads and indulgent desserts, vegan recipes offer a diverse range of tastes and textures that can satisfy even the most discerning palates.

As you delve into the world of vegan cooking, you’ll discover an exciting array of flavors. Think creamy cashew sauces, zesty avocado dressings, and rich, savory lentil curries bursting with aromatic spices. Each dish showcases the versatility of plant-based ingredients, transforming humble staples into culinary masterpieces. Whether you’re a seasoned vegan or just curious about incorporating more plant-based meals into your diet, this introduction to vegan cooking will inspire you to explore new ingredients and techniques.

In this blog post, we’ll guide you through ten of the most delicious and nutritious vegan recipes that you absolutely need to try. Get ready to expand your cooking repertoire and delight your taste buds with meals that are as satisfying as they are wholesome!

2. Benefits of a Vegan Diet

Embracing a vegan diet offers a multitude of benefits that extend beyond just the culinary realm. First and foremost, it can significantly improve your health. A well-planned vegan diet is rich in fruits, vegetables, whole grains, nuts, and seeds, all of which are packed with essential vitamins, minerals, and antioxidants. These nutrient-dense foods can help lower the risk of chronic diseases, including heart disease, diabetes, and certain cancers. Numerous studies have shown that vegans tend to have lower cholesterol levels, healthier blood pressure, and a reduced risk of obesity, thanks to the emphasis on whole, plant-based foods.

Beyond health, a vegan diet is also incredibly environmentally friendly. The production of plant-based foods generally requires fewer resources—such as land, water, and energy—compared to animal farming. By opting for a vegan lifestyle, you contribute to a reduction in greenhouse gas emissions and help lessen the environmental impact associated with meat and dairy production. This not only nurtures the planet but also promotes a more sustainable future for generations to come.

Moreover, the ethical considerations of a vegan diet cannot be overlooked. Choosing plant-based options aligns with a compassionate approach to living that seeks to minimize harm to animals. Many individuals turn to veganism as a way to express their values and advocate for animal rights, contributing to a movement that is gaining momentum worldwide.

Finally, a vegan diet opens up a world of culinary creativity. With an abundance of ingredients to explore, you can experiment with diverse flavors, textures, and cuisines. From hearty lentil stews to vibrant vegetable stir-fries, the possibilities are endless. So, not only are you nourishing your body and supporting the planet, but you’re also embarking on a delicious journey of discovery in the kitchen. Whether you’re a seasoned vegan or just curious about incorporating more plant-based meals into your life, the benefits of a vegan diet are well worth considering.

3. Tips for Cooking Delicious Vegan Meals

What are the best vegan recipes?
Credit : whatcanu.com

Cooking delicious vegan meals can be an exciting culinary adventure, full of vibrant flavors and textures that will leave your taste buds dancing. Here are some tried-and-true tips to elevate your vegan cooking game and ensure each dish is as satisfying as it is nutritious.

**1. Embrace Umami:** One of the keys to creating rich, delicious flavors in vegan dishes is to embrace umami—the savory taste that makes food crave-worthy. Ingredients like mushrooms, sun-dried tomatoes, nutritional yeast, miso paste, and tamari can add depth to your meals. For example, sautéing shiitake mushrooms or adding a sprinkle of nutritional yeast to your sauces can transform a simple dish into a flavor sensation.

**2. Experiment with Herbs and Spices:** The right combination of herbs and spices can elevate your dishes from bland to bursting with flavor. Don’t shy away from experimenting with fresh herbs like basil, cilantro, and parsley, or spices such as cumin, smoked paprika, and turmeric. A pinch of chili powder can bring warmth, while a hint of cinnamon can add a surprising twist to savory dishes.

**3. Utilize Whole Foods:** Focus on whole, unprocessed ingredients as much as possible. Fresh vegetables, legumes, whole grains, nuts, and seeds not only provide essential nutrients but also offer a variety of textures and flavors. Consider preparing a hearty quinoa salad with roasted veggies or a comforting lentil stew, where the natural flavors of the ingredients shine.

**4. Incorporate Healthy Fats:** Healthy fats enhance flavor and improve the absorption of fat-soluble vitamins. Avocado, coconut oil, nuts, and seeds can add creaminess and richness to your meals. Try blending avocado into your smoothies for a luscious texture or drizzling tahini over your roasted vegetables for a delectable finish.

**5. Experiment with Plant-Based Substitutes:** With the rise of plant-based cooking, there are now countless alternatives to traditional animal products. From cashew cream to chickpea flour, these substitutes can help recreate your favorite dishes. For instance, using lentils or jackfruit can give you the satisfying texture of meat in tacos or BBQ sandwiches, while cashew cheese can satisfy any cheese cravings.

**6. Balance Your Plate:** A well-rounded vegan meal should include a balance of protein, healthy fats, and carbohydrates. Pair beans or lentils with whole grains like brown rice or quinoa, and add a variety of colorful vegetables to ensure you’re getting a full spectrum of nutrients.

**7. Don’t Forget the Sweetness:** A touch of sweetness can enhance flavors, so don’t hesitate to add elements like maple syrup, agave nectar, or dates to your savory dishes. Caramelizing onions or roasting sweet potatoes can also bring out their natural sweetness and create a delightful contrast against savory ingredients.

By incorporating these tips into your cooking, you’ll not only make your vegan meals more delicious but also showcase the incredible variety and potential of plant-based eating. Whether you’re whipping up a comforting stew or a vibrant salad, these strategies will help you create dishes that are both satisfying and nourishing. Happy cooking!

4. Recipe 1: Creamy Vegan Pasta Alfredo

When you’re in the mood for comfort food that’s both indulgent and nourishing, look no further than this Creamy Vegan Pasta Alfredo. This recipe is a delightful twist on a classic favorite, proving that you don’t have to sacrifice flavor or texture when opting for a plant-based diet.

To start, select your favorite pasta—whether it’s spaghetti, fettuccine, or even gluten-free options, the choice is yours. The base of this luscious sauce is a blend of soaked cashews and nutritional yeast, which together create a rich, creamy consistency reminiscent of traditional Alfredo. Simply soak the cashews in water for a couple of hours or overnight, then blend them with garlic, lemon juice, and a splash of plant-based milk until smooth and velvety. The nutritional yeast adds a cheesy, umami flavor that elevates the dish to new heights.

As the pasta cooks to al dente perfection, sauté some fresh vegetables such as spinach, mushrooms, or broccoli in a splash of olive oil. This not only adds a pop of color but also packs in extra nutrients. Once the pasta is cooked, toss it in the creamy sauce and stir in the sautéed veggies for a hearty meal that’s bursting with flavor.

Finish it off with a sprinkle of fresh parsley and a dash of black pepper for a vibrant garnish. Whether you’re serving it for a cozy dinner at home or impressing guests at a gathering, this Creamy Vegan Pasta Alfredo is guaranteed to please everyone at the table. It’s a dish that showcases how easy it can be to whip up something deliciously satisfying while keeping it entirely plant-based. Enjoy this creamy delight and watch your friends and family fall in love with vegan cooking!

5. Recipe 2: Spicy Chickpea Tacos

What are the best vegan recipes?
Credit : whatcanu.com

### 5. Recipe 2: Spicy Chickpea Tacos

If you’re looking for a vibrant, flavor-packed meal that’s both satisfying and nutritious, look no further than these Spicy Chickpea Tacos. This dish brings together the hearty, protein-rich goodness of chickpeas with a fiery kick that will tantalize your taste buds.

To begin, you’ll want to sauté finely chopped onions and minced garlic in a splash of olive oil until they’re golden and aromatic. Next, add in your canned chickpeas (drained and rinsed) and season them with a robust blend of spices, including cumin, smoked paprika, and a touch of cayenne pepper for that extra heat. As the chickpeas cook, they soak up the spices, creating a wonderfully rich and savory filling that’s sure to impress.

While your chickpeas are sizzling away, prepare your taco shells. You can opt for traditional corn tortillas, warm them on a skillet, or try using lettuce wraps for a refreshing twist. Once your chickpeas are perfectly spiced and slightly crispy on the outside, it’s time to assemble your tacos.

Layer the chickpea mixture into your chosen shells and top them off with a medley of fresh ingredients. Imagine the crunch of diced cucumbers, the creaminess of avocado slices, and the zesty brightness of lime juice drizzled on top. For those who crave a little extra flavor, a dollop of homemade vegan sour cream or a sprinkle of chopped cilantro can elevate this dish to new heights.

These Spicy Chickpea Tacos are not only a feast for the senses but also a quick and easy option for weeknight dinners or a vibrant addition to a weekend gathering. They’re packed with protein, fiber, and a bounty of vitamins, making them a perfect choice for anyone seeking a healthy, plant-based meal. Trust us, once you take your first bite, you’ll be adding this recipe to your regular rotation!

6. Recipe 3: Hearty Lentil Soup

When the weather turns chilly or you simply crave a comforting bowl of goodness, there’s nothing quite like a hearty lentil soup to warm your soul. This vegan delight is not only packed with flavor but also brimming with nutrients, making it the perfect dish to nourish your body and satisfy your taste buds.

### Ingredients:
To create this deliciously rich soup, you’ll need a medley of wholesome ingredients:

– 1 cup of green or brown lentils, rinsed and drained
– 1 tablespoon olive oil
– 1 onion, diced
– 2 carrots, chopped
– 2 celery stalks, chopped
– 3 cloves of garlic, minced
– 1 can (14 oz) of diced tomatoes
– 6 cups vegetable broth
– 2 teaspoons ground cumin
– 1 teaspoon smoked paprika
– Salt and pepper to taste
– Fresh spinach or kale (optional, for added greens)
– Fresh parsley or cilantro, chopped (for garnish)

### Instructions:
1. **Sauté the Vegetables**: In a large pot, heat the olive oil over medium heat. Add the diced onion, carrots, and celery, sautéing until they soften and the onion becomes translucent, about 5-7 minutes. Stir in the minced garlic and cook for an additional minute until fragrant.

2. **Add the Lentils and Spices**: Toss in the rinsed lentils, diced tomatoes, cumin, and smoked paprika. Stir to combine, allowing the spices to infuse with the vegetables for a minute.

3. **Pour in the Broth**: Add the vegetable broth to the pot, bringing the mixture to a gentle boil. Once boiling, reduce the heat to low and let it simmer uncovered for about 30-35 minutes, or until the lentils are tender.

4. **Incorporate Greens**: If you’re adding spinach or kale, stir them in during the last 5 minutes of cooking. They should wilt nicely without losing their vibrant color.

5. **Season to Taste**: After simmering, taste and adjust the seasoning with salt and pepper.

6. **Serve and Garnish**: Ladle the soup into bowls and sprinkle with fresh parsley or cilantro for a burst of freshness. For an extra touch, consider a drizzle of olive oil or a squeeze of lemon juice.

### Why You’ll Love It:
This hearty lentil soup is not only incredibly satisfying but also a powerhouse of nutrition. Lentils are rich in protein, fiber, and essential minerals, making them a staple in vegan diets. The combination of vegetables adds color and a range of vitamins, while the warm spices create a cozy, aromatic experience.

Whether enjoyed as a warm lunch or a cozy dinner, this soup is sure to become a staple in your kitchen. Plus, it’s easy to make in large batches, allowing you to enjoy leftovers throughout the week or freeze some for later. Dive into this delicious and nutritious recipe, and let the comforting flavors embrace you!

7. Recipe 4: Quinoa and Black Bean Salad

What are the best vegan recipes?
Credit : whatcanu.com

Quinoa and Black Bean Salad is a vibrant dish that perfectly balances taste and nutrition, making it a must-try for anyone looking to embrace a healthier lifestyle. This salad is not only visually appealing with its colorful array of ingredients, but it’s also packed with protein, fiber, and essential vitamins.

To prepare this delightful dish, begin by cooking a cup of quinoa until it’s fluffy and has absorbed all of its water. As it cooks, rinse and drain a can of black beans, which adds a hearty texture and rich flavor to the salad. Next, chop up a medley of fresh vegetables: crisp bell peppers, sweet cherry tomatoes, and refreshing red onion. Toss in a handful of corn kernels for a pop of sweetness and a splash of color.

For the dressing, whisk together fresh lime juice, olive oil, cumin, and a pinch of salt and pepper to create a zesty marinade that brings all the components together. Combine the cooked quinoa, black beans, and chopped vegetables in a large bowl, then drizzle the dressing over the top. Gently toss everything until well coated, and let it sit for a few minutes to allow the flavors to meld.

Serve this salad chilled or at room temperature, and don’t forget to sprinkle some fresh cilantro on top for an extra burst of flavor. This Quinoa and Black Bean Salad can be a light lunch, a side dish for dinner, or a nutritious option for meal prep, making it incredibly versatile. With its delicious taste and impressive health benefits, it’s no wonder this recipe has earned a spot on our top ten list. Enjoy this wholesome dish that will keep you coming back for more!

8. Recipe 5: Vegan Mushroom Stroganoff

### Recipe 5: Vegan Mushroom Stroganoff

If you’re seeking a comforting and hearty dish that will leave you satisfied without sacrificing flavor, look no further than this Vegan Mushroom Stroganoff. This recipe transforms the classic creamy stroganoff into a plant-based delight, featuring earthy mushrooms and a rich, savory sauce that clings beautifully to your choice of pasta or grains.

To start, gather an assortment of mushrooms—cremini, shiitake, and portobello work wonderfully together, creating a depth of flavor that elevates the dish. Sauté the mushrooms in a splash of olive oil until they’re beautifully browned, releasing their umami essence. Next, add in garlic and onions, allowing their aromatic goodness to infuse the dish.

The magic truly happens when you incorporate a blend of vegetable broth, coconut cream or cashew cream, and a splash of soy sauce or tamari for a hint of saltiness. These ingredients meld together to create a luscious sauce that envelops the mushrooms and your choice of pasta, whether it be traditional egg noodles or gluten-free options like zucchini noodles or whole grain pasta.

For an extra layer of flavor, a sprinkle of nutritional yeast adds a cheesy, nutty taste, while a dash of smoked paprika gives the stroganoff a subtle warmth. Finally, finish with a generous handful of fresh parsley for a pop of color and freshness.

Serve your Vegan Mushroom Stroganoff hot, perhaps with a side of crusty whole-grain bread or a crisp green salad. This dish not only showcases the hearty texture of mushrooms but also packs a nutritional punch, offering protein, fiber, and a bounty of vitamins. Perfect for a cozy weeknight dinner or impressing guests at a dinner party, this Vegan Mushroom Stroganoff is sure to become a staple in your culinary repertoire. Enjoy every creamy, delicious bite!

9. Recipe 6: Roasted Vegetable Buddha Bowl

### Recipe 6: Roasted Vegetable Buddha Bowl

The Roasted Vegetable Buddha Bowl is a vibrant, nourishing meal that celebrates the simplicity and flavor of whole foods. This dish is not only visually appealing but also packed with nutrients to fuel your day. Picture a colorful mix of seasonal vegetables, roasted to perfection, their natural sweetness enhanced by a drizzle of olive oil and a sprinkle of your favorite spices.

Start with a base of fluffy quinoa or brown rice, which provides a hearty foundation for the bowl. As the grains soak up the flavors of the roasted veggies, you can prepare the star of the show: an assortment of vegetables such as sweet potatoes, bell peppers, zucchini, and Brussels sprouts. Roast them in the oven until they reach a golden-brown hue and develop a delicious caramelized texture.

To elevate this dish, add a handful of leafy greens like kale or spinach, which provide a fresh crunch and vibrant color. Top it all off with a creamy tahini dressing, made from tahini, lemon juice, garlic, and a hint of maple syrup for sweetness. This dressing brings everything together, adding a rich, nutty flavor that perfectly complements the roasted vegetables.

Finally, finish your Buddha Bowl with a sprinkle of sesame seeds or chopped nuts for a satisfying crunch and a boost of healthy fats. Enjoy it warm or cold; either way, this Roasted Vegetable Buddha Bowl is a versatile, wholesome meal that will leave you feeling satisfied and energized. Whether you’re meal prepping for the week or looking for a quick dinner option, this recipe is a must-try that embodies the deliciousness and nutrition of vegan cooking.

10. Recipe 7: Chocolate Avocado Mousse

### Recipe 7: Chocolate Avocado Mousse

Indulge in a rich and creamy dessert that defies the traditional notion of indulgence—meet the Chocolate Avocado Mousse! This decadent treat is not only a feast for the senses but also a powerhouse of nutrients that will leave you feeling satisfied without the guilt.

At first glance, the combination of chocolate and avocado might raise some eyebrows, but trust us, this is a match made in culinary heaven. Ripe avocados serve as the base, lending a silky texture that mimics the creaminess of traditional mousse while packing in healthy fats, fiber, and a wealth of vitamins. The natural richness of the avocado is perfectly complemented by the deep, luxurious flavor of high-quality cocoa powder.

To whip up this delightful mousse, simply blend together ripe avocados, cocoa powder, maple syrup or agave nectar for sweetness, a splash of vanilla extract, and a pinch of salt to enhance the flavors. The result is a luscious, velvety mousse that can be enjoyed straight from the blender or chilled for an even more indulgent experience.

For an extra touch of elegance, consider garnishing with fresh berries, a sprinkle of crushed nuts, or a dollop of coconut whipped cream. Not only does this add a beautiful visual element, but it also enhances the flavor and texture, making each bite a delightful surprise.

Perfect for parties, romantic dinners, or simply when you’re in the mood for a sweet treat, this Chocolate Avocado Mousse is a dessert that proves you can have your cake and eat it too—without compromising on health or flavor. Once you try this recipe, you’ll wonder how you ever lived without it!

11. Recipe 8: Vegan Pancakes with Maple Syrup

Fluffy, golden-brown, and drizzled with rich maple syrup, these vegan pancakes are a delightful way to start your day or enjoy a cozy brunch. Made with simple, wholesome ingredients, they offer a perfect balance of taste and nutrition that will have everyone coming back for seconds.

To make these delectable pancakes, you’ll need a combination of flour, plant-based milk, a touch of baking powder, and a natural sweetener like mashed bananas or agave syrup to give them that delightful sweetness without compromising the vegan ethos. The result is a batter that comes together effortlessly, creating pancakes that are light and airy yet hearty enough to satisfy your hunger.

As you pour the batter onto a hot skillet, watch as the surface bubbles gently, signaling the perfect moment to flip. The aroma that fills your kitchen is simply irresistible—warm, inviting, and reminiscent of lazy weekend mornings. Once cooked to a beautiful golden hue, serve these pancakes stacked high, topped with a generous drizzle of pure maple syrup, and perhaps some fresh berries or sliced bananas for an extra burst of flavor and nutrients.

These vegan pancakes are not just a treat for the taste buds but also a canvas for creativity. You can easily customize them by adding in your favorite ingredients such as chocolate chips, chopped nuts, or even a sprinkle of cinnamon for a warming spice. Whether you enjoy them for breakfast, dessert, or a quick snack, these pancakes are bound to become a staple in your vegan cooking repertoire. Indulge in the deliciousness and let these vegan pancakes redefine your breakfast experience!

12. Recipe 9: Zucchini Noodles with Pesto

Zucchini noodles, often referred to as “zoodles,” are a fantastic way to enjoy a low-carb, gluten-free alternative to traditional pasta, all while packing in the nutrients. This delightful dish not only satisfies your pasta cravings but also bursts with vibrant flavors that will keep you coming back for more.

To prepare this refreshing meal, start by spiralizing fresh zucchini into long, curly strands that resemble spaghetti. The key to achieving the perfect texture is to lightly sauté the zoodles for just a few minutes until they are tender yet still retain a slight crunch. This quick cooking method allows the zucchini to absorb the flavors of the accompanying sauce without becoming too soggy.

For the star of the dish, the pesto, you have the option to create your own or opt for a store-bought variety. Making your own is simple and rewarding: blend together fresh basil, pine nuts, garlic, nutritional yeast, and a splash of olive oil until smooth. This vibrant green sauce is rich in antioxidants and healthy fats, making it both a flavorful and nutritious addition to your zoodles.

Once your noodles are cooked and your pesto is ready, toss them together in a large bowl, ensuring each strand is coated in that aromatic sauce. To elevate the dish further, consider adding cherry tomatoes for a pop of color and sweetness, a sprinkle of toasted pine nuts for added crunch, and a squeeze of lemon juice to brighten the flavors.

Serve your Zucchini Noodles with Pesto warm or chilled, garnished with fresh basil or a sprinkle of red pepper flakes for an extra kick. This dish not only looks beautiful but is also a powerhouse of nutrients, providing a guilt-free yet satisfying meal that is sure to impress both vegans and non-vegans alike. Dive into this delicious recipe and discover how easy it is to enjoy a wholesome plant-based meal!

13. Recipe 10: Coconut Curry with Tofu

**Recipe 10: Coconut Curry with Tofu**

Indulge your taste buds with a vibrant and fragrant Coconut Curry with Tofu that embodies the essence of comfort food, all while being entirely plant-based. This recipe is a delightful fusion of spices, creamy coconut milk, and fresh vegetables, creating a dish that is not only visually appealing but also packed with nutrients.

Begin by pressing firm tofu to remove excess moisture, allowing it to absorb all the flavors of the curry. Once golden and crispy, the tofu becomes the perfect canvas for the rich, aromatic curry sauce. Sauté a medley of colorful vegetables—think bell peppers, zucchini, and snap peas—in a splash of olive oil, allowing them to retain their crunch and vibrant hues.

Next, introduce a blend of spices—cumin, coriander, and a hint of turmeric—into the pan, letting their natural fragrances bloom. The addition of garlic and ginger adds a zesty kick, while the star ingredient, coconut milk, creates a luscious and creamy base that ties all the flavors together. Simmering the mixture allows the spices to infuse, forming a harmonious balance of heat and sweetness.

Serve the curry over a bed of fluffy jasmine rice or quinoa, garnishing with fresh cilantro and a squeeze of lime for an extra zing. This Coconut Curry with Tofu not only delivers on flavor but also nourishes the body with plant-based protein and an array of vitamins. Perfect for weeknight dinners or meal prep, it’s a dish that promises to leave everyone at the table craving seconds. Dive into this delectable recipe and discover how easy and satisfying vegan cooking can be!

14. How to Customize and Adapt Recipes

When it comes to vegan cooking, one of the most exciting aspects is the ability to customize and adapt recipes to suit your tastes, dietary needs, and the ingredients you have on hand. Embracing creativity in the kitchen not only adds a personal touch to your meals but also makes the cooking process more enjoyable and intuitive.

**Start with the Basics:** Every recipe has a foundation, whether it’s a hearty vegetable stew or a refreshing smoothie. Begin by identifying the core components of the dish—these might include proteins, grains, and vegetables. Once you understand the base, you can easily swap ingredients based on what you have available or what flavors you prefer. For example, if a recipe calls for quinoa but you only have brown rice, go ahead and make that substitution; they both provide a similar texture and nutritional profile.

**Experiment with Flavors:** Don’t be afraid to play with spices and herbs. If a recipe suggests cumin but you’re more fond of smoked paprika, make that switch! Taste as you go and let your palate guide you. Adding a splash of lemon juice or a drizzle of balsamic vinegar can completely transform a dish, so keep your seasoning options varied and be bold in your choices.

**Consider Dietary Needs:** Whether you’re gluten-free, nut-free, or looking to lower your sodium intake, vegan recipes are incredibly adaptable. Use gluten-free grains like millet or buckwheat instead of traditional pasta or bread. If you’re avoiding nuts, substitute them with seeds or legumes to maintain crunch and protein without compromising on taste.

**Portion control and Meal Prep:** Adjust serving sizes and ingredient amounts based on your household needs. If you’re cooking for one, it’s easy to scale down a recipe or make a large batch for meal prep. Leftovers can often be transformed into new meals, like turning a roasted vegetable medley into a filling for tacos or a salad topping.

**Incorporate Seasonal Ingredients:** One of the joys of cooking vegan is the opportunity to embrace seasonal produce. Visit your local farmer’s market and let fresh fruits and vegetables inspire your meals. For example, substituting zucchini for pasta in summer or incorporating hearty root vegetables in winter can add a seasonal touch and enhance the dish’s nutritional value.

In essence, customizing and adapting vegan recipes is about embracing flexibility and creativity in the kitchen. With a willingness to experiment and a knack for substituting ingredients, you’ll find that deliciousness and nutrition can be tailored to fit any lifestyle or palate. So grab your apron, gather your ingredients, and start crafting your own unique vegan masterpieces!

15. Conclusion and Encouragement to Explore Vegan Cooking

In conclusion, the journey into vegan cooking is not just about substituting ingredients; it’s a vibrant exploration of flavors, textures, and colors that can invigorate your meals and your well-being. The ten recipes we’ve shared offer a delicious starting point for anyone, whether you’re a seasoned vegan or simply curious about incorporating more plant-based meals into your diet.

As you experiment with these dishes, don’t be afraid to make them your own. Swap out ingredients based on what’s in season, add your favorite spices, or try new plant-based ingredients that catch your eye. The beauty of vegan cooking lies in its versatility and the endless possibilities it presents.

Embrace the adventure of cooking with fresh vegetables, whole grains, and legumes, and you’ll find that preparing vegan meals can be both simple and rewarding. Not only will you enjoy the satisfaction of creating nourishing dishes, but you’ll also be contributing positively to your health and the environment.

So, gather your ingredients, roll up your sleeves, and dive into the world of vegan cooking. With each dish you create, you’ll discover that plant-based meals can be immensely satisfying and delicious. Remember, every meal is an opportunity to nourish your body while tantalizing your taste buds. Happy cooking!

As we wrap up our exploration of the top 10 delicious and nutritious vegan recipes, we hope you’re feeling inspired to embrace the vibrant world of plant-based cooking. Each recipe not only showcases the incredible flavors and textures that vegan cuisine has to offer but also highlights the health benefits of incorporating more plant-based meals into your diet. Whether you’re a seasoned vegan or simply looking to add more nutritious options to your meals, these recipes are sure to delight your taste buds and nourish your body. So gather your ingredients, roll up your sleeves, and embark on a culinary adventure that celebrates the beauty of vegan cooking. We can’t wait to hear about your experiences in the kitchen, so be sure to share your creations with us! Happy cooking!

——————————

What are the best ways to cook fish?

There’s something undeniably alluring about the ocean, and when it comes to culinary delights, fish embodies that allure with its fresh, delicate flavors and versatile textures.

Whether you’re a seasoned chef or a home cook looking to elevate your culinary repertoire, mastering the art of cooking fish can open up a world of gastronomic possibilities. However, the key to serving up a truly exceptional seafood dish lies in the techniques you employ. In this blog post, we’ll dive into the top techniques for cooking fish perfectly, from grilling and poaching to pan-searing and baking. Discover how to bring out the natural flavors of your catch while ensuring a tender and flaky texture that will impress even the most discerning palates. So, roll up your sleeves and get ready to savor the sea with these expert tips and mouthwatering ideas that will transform your fish dishes into ocean-inspired masterpieces!

1. Understanding Different Types of Fish

What are the best ways to cook fish?
Credit : whatcanu.com

When it comes to cooking fish perfectly, the first step is understanding the diverse array of fish available and how their unique characteristics influence cooking methods and flavor profiles. Fish can be broadly categorized into two main types: **lean fish** and **oily fish**, each offering a distinct culinary experience.

**Lean fish**, such as cod, halibut, and sole, are characterized by their mild flavor and firm texture. These fish are low in fat, which means they can easily dry out if overcooked. Cooking techniques that enhance their delicate nature include poaching, baking, and steaming, often complemented by light sauces or garnishes like lemon and herbs to accentuate their subtle taste.

On the other hand, **oily fish**, such as salmon, mackerel, and sardines, are rich in healthy fats, which contribute to their robust flavor and moist texture. These fish are incredibly versatile and can withstand high-heat cooking methods like grilling, broiling, or pan-searing, allowing the natural oils to caramelize and enhance their rich taste. When preparing oily fish, consider bold marinades or spices to elevate their flavor profile.

Additionally, it’s essential to recognize the importance of freshness. Fresh fish should have a clean, ocean-like smell, bright eyes, and firm flesh that bounces back when pressed. Understanding the differences between farmed and wild-caught fish is also crucial, as each type can have varying flavor profiles, textures, and environmental impacts.

By familiarizing yourself with these categories and the qualities of different fish, you’ll be well-equipped to make informed choices and employ the right cooking techniques that will bring out the best in your seafood dishes. Whether you prefer the gentle flavors of lean fish or the hearty richness of oily varieties, mastering how to cook fish perfectly begins with a solid understanding of what’s swimming in your kitchen.

2. Fresh vs. Frozen: What You Need to Know

When it comes to cooking fish perfectly, understanding the difference between fresh and frozen fish is essential. Many home cooks often find themselves torn between the two, unsure which option will yield the best flavor and texture. Let’s dive into the nuances of each to help you make an informed choice for your next seafood dish.

**Fresh Fish**: The allure of fresh fish is undeniable. When you purchase fish that has been recently caught, you benefit from its peak flavor and texture. Fresh fish boasts a delicate, flaky consistency that melts in your mouth and a subtle brininess that can elevate any dish. Look for clear, bright eyes and vibrant skin when selecting fresh fish; these indicators are signs of quality. However, keep in mind that fresh fish has a shorter shelf life, so it’s best consumed within a day or two of purchase. If you’re buying fresh fish, ensure you store it properly on ice or in the coldest part of your refrigerator to preserve its freshness.

**Frozen Fish**: On the other hand, frozen fish can be a game-changer in terms of convenience and availability. Many frozen fish products are flash-frozen immediately after being caught, which locks in their freshness and nutrients. This process often preserves the quality better than you might expect, making frozen fish a viable option. Additionally, frozen fish is readily available year-round, allowing you to enjoy a wider variety without the constraints of seasonal availability. When choosing frozen fish, look for products that are vacuum-sealed to prevent freezer burn, and opt for those that have been frozen without additives or preservatives for the healthiest choice.

Both fresh and frozen fish have their merits, and the best choice ultimately depends on your cooking needs and preferences. If you’re looking for a quick weeknight meal, frozen fish can save the day without sacrificing quality. On the other hand, if you’re preparing a special occasion dinner, fresh fish can provide that exquisite touch. Understanding these differences will empower you to make the best choice, ensuring every fish dish you create is nothing short of spectacular.

3. Essential Tools for Cooking Fish

What are the best ways to cook fish?
Credit : whatcanu.com

When it comes to cooking fish perfectly, having the right tools in your culinary arsenal can make all the difference. Here’s a look at some essential tools that every home cook should consider to elevate their fish cooking game.

**1. A High-Quality Fish Spatula**
A fish spatula is an indispensable tool for anyone who cooks fish regularly. Its thin, flexible design allows you to slide easily under delicate fillets without breaking them apart. Look for one with a slotted surface to help drain excess oil or juices as you lift the fish from the pan, ensuring a beautifully presented dish every time.

**2. A Reliable Instant-Read Thermometer**
Fish is notoriously tricky to cook just right, as it can go from perfectly flaky to overcooked in a matter of minutes. An instant-read thermometer takes the guesswork out of cooking, allowing you to check the internal temperature quickly. aim for 145°F (63°C) for most fish; this ensures that it’s safely cooked while retaining moisture and flavor.

**3. A Nonstick or Cast Iron Skillet**
The choice of skillet can greatly influence how your fish turns out. A nonstick skillet is ideal for cooking delicate fish like sole or tilapia, preventing it from sticking and breaking apart during the cooking process. On the other hand, a well-seasoned cast iron skillet is perfect for heartier fish like salmon or tuna, providing excellent heat retention and a beautiful sear.

**4. A Fish Cleaning Kit**
If you’re starting with whole fish, a fish cleaning kit is essential. Look for a set that includes a fillet knife, a scaler, and a cutting board. A sharp fillet knife will allow you to create clean cuts, while a scaler helps to remove scales without damaging the flesh. This preparation step is critical to ensuring that your fish is not only ready to cook but also that it tastes as fresh as possible.

**5. A Good Quality Steamer**
Steaming is a healthy and flavorful way to prepare fish, preserving its natural moisture and delicate flavors. A good quality steamer, whether it’s a bamboo steamer or a stainless steel multi-tiered model, can enhance your cooking experience. Add herbs, lemon slices, or aromatic vegetables to the steaming water for an infusion of flavor that will elevate your dish.

Equipping your kitchen with these essential tools will not only streamline the cooking process but also ensure that your fish dishes turn out perfectly every time. With the right equipment at your disposal, you’ll be well on your way to savoring the sea’s bounty like a pro!

4. Preparing Fish: Cleaning and Filleting Tips

Preparing fish for cooking is an art that can significantly enhance your culinary experience. The first step in this process is cleaning, which is crucial to ensure that your meal is not only delicious but also safe to eat. Start by rinsing the fish under cold running water to remove any slime or debris. It’s essential to use a clean surface and a sharp filleting knife to make the task smoother.

When it comes to gutting, make a shallow incision along the belly of the fish from the tail to the head. Be careful not to cut too deep, as you want to avoid puncturing the internal organs. With a steady hand, open the fish up and gently remove the entrails, discarding them properly. It’s wise to have a bowl or container ready for this purpose. Rinse the cavity thoroughly to remove any residual blood or impurities.

Next, we move on to filleting. Place the fish on a cutting board, belly side down, and secure it with a damp cloth to prevent slipping. Starting at the head and using your knife, cut along the back bone, applying light pressure to separate the flesh from the spine. Follow the rib cage with your knife to ensure you extract as much meat as possible. Once you have one fillet, flip the fish over and repeat the process on the other side.

As you work, keep an eye out for pin bones; these small, slender bones can be a nuisance when eating. Use tweezers to remove them carefully, ensuring a smooth dining experience. After filleting, rinse the fish fillets under cold water and pat them dry with paper towels. Properly cleaning and filleting your fish not only prepares it for cooking but also elevates the overall flavor and texture, setting the stage for a truly memorable meal. Now you’re ready to savor the sea with confidence!

5. The Importance of Marinating: Techniques and Recipes

What are the best ways to cook fish?
Credit : whatcanu.com

Marinating fish is not just a way to infuse flavor; it’s a technique that enhances the overall texture and tenderness of your catch, transforming a simple meal into a culinary masterpiece. The process of marinating involves soaking the fish in a seasoned liquid, typically composed of acidic ingredients like citrus juice or vinegar, combined with oils, herbs, and spices. This delightful combination not only penetrates the fish, imparting vibrant flavors, but also helps break down proteins, ensuring a moist and succulent result.

When marinating fish, the key is to strike the right balance between flavor and time. Depending on the type of fish, a marinade of 15 to 30 minutes is usually sufficient. Delicate fish like sole or flounder benefit from shorter marination times, allowing them to absorb the flavors without becoming overly mushy. Heartier fish, such as salmon or swordfish, can withstand a longer soak, typically up to an hour, allowing the flavors to permeate deeper.

To elevate your marinating game, consider experimenting with various ingredient combinations. A classic lemon-dill marinade can brighten up grilled salmon, while a soy-ginger mixture can add an Asian flair to your teriyaki tuna steaks. For a more adventurous twist, try a spicy harissa marinade for a bold flavor infusion or a tropical pineapple-coconut blend that transports your taste buds to a sunny beach.

Don’t forget to include aromatic herbs like cilantro, parsley, or basil, along with spices like cumin, paprika, or even a hint of chili for added depth. And for those looking to add a touch of sweetness, a drizzle of honey or maple syrup can create a beautifully balanced marinade that enhances the natural flavors of the fish.

Once marinated, your fish is ready for the grill, oven, or stovetop, and the result is sure to impress. With these techniques and recipes in your culinary arsenal, you’ll discover that marinating fish is not just an important step; it’s an essential part of creating delicious, restaurant-quality meals right in your own kitchen. Savor the flavors, and let the ocean’s bounty shine through in every bite!

6. Cooking Methods: Grilling, Baking, and Poaching

When it comes to cooking fish to perfection, the method you choose can make all the difference in flavor, texture, and presentation. Each technique brings out unique qualities in the fish, allowing you to explore a delightful spectrum of culinary possibilities. Let’s dive into three popular cooking methods: grilling, baking, and poaching.

**Grilling:** Grilling fish adds a smoky char that complements its natural flavors beautifully. The high heat of the grill caramelizes the fish’s exterior while sealing in moisture, resulting in a tender, flaky interior. For the best results, choose firm fish like salmon, tuna, or swordfish that can withstand the heat. Marinating the fish beforehand can enhance its flavor profile, while a simple seasoning of salt, pepper, and a squeeze of lemon can let the fish shine. Remember to oil the grill grates to prevent sticking and use a fish spatula for easy flipping.

**Baking:** Baking is an incredibly versatile method that allows for even cooking with minimal effort. Simply season your fish, place it on a baking sheet lined with parchment paper or foil, and let the oven work its magic. This method is ideal for delicate fish like sole or cod, which can easily fall apart on the grill. To elevate your baked fish, consider using aromatics such as garlic, herbs, and citrus slices, or even enclose it in parchment paper for a French “en papillote” technique. This not only locks in moisture but also infuses the fish with fragrant flavors as it steams in its own juices.

**Poaching:** For a gentle, healthy cooking method, poaching is a superb choice. This technique involves simmering fish in a flavored liquid—think broth, wine, or even water infused with herbs and spices—at a lower temperature. Poaching is particularly well-suited for delicate fish like trout or flounder, ensuring they remain moist and tender without the risk of drying out. Serve your poached fish with a drizzle of the poaching liquid or a light sauce for a dish that feels elegant yet effortless.

By mastering these cooking methods, you’ll unlock a world of flavor and delight in your fish dishes. Each technique offers its own set of advantages and can be tailored to your personal taste, ensuring that every meal is a celebration of the sea’s bounty. So fire up the grill, preheat the oven, or gently simmer your fish; with these methods, perfection is just a recipe away.

7. Mastering the Art of Pan-Searing Fish

What are the best ways to cook fish?
Credit : whatcanu.com

Pan-searing fish is a technique that not only enhances the natural flavors of the seafood but also creates a beautifully crisp exterior that contrasts wonderfully with the tender, flaky interior. To master this art, begin by selecting the right cut of fish—firm varieties like salmon, swordfish, or sea bass are ideal as they hold up well during cooking.

Start with a clean, dry fish fillet; moisture is the enemy of a good sear. Pat the fish dry with paper towels to remove any excess moisture, then season generously with salt and pepper, allowing the flavors to penetrate the flesh. The choice of skillet is crucial; a heavy, cast-iron or stainless-steel pan retains heat well, providing the ideal surface for achieving that coveted golden crust.

Heat your skillet over medium-high heat until it’s hot but not smoking. Add a splash of high-smoke-point oil, such as canola or grapeseed, and swirl it around the pan. Once the oil shimmers, it’s time to introduce the fish to the pan, placing it skin-side down (if applicable). This initial contact with the hot surface is what creates the delicious sear, so resist the urge to move the fish around too much—let it do its thing.

After a few minutes, you’ll notice the edges of the fish turning a beautiful golden brown. To ensure even cooking, gently flip the fish with a spatula, cooking the other side until it reaches your desired doneness. A handy tip is to use a meat thermometer; fish is perfectly cooked when it reaches an internal temperature of 145°F (63°C).

Once removed from the heat, let the fish rest for a couple of minutes before serving. This allows the juices to redistribute, resulting in a moist and flavorful bite every time. To elevate your dish, consider finishing with a squeeze of fresh lemon juice or a drizzle of herb-infused olive oil. Pan-seared fish is not just a meal; it’s an experience, one that brings the ocean’s bounty to your table with elegance and simplicity.

8. How to Achieve Perfectly Flaky Fish

Achieving perfectly flaky fish is both an art and a science, and it starts with understanding the properties of the fish you’re working with. The goal is to create a tender and moist texture that practically melts in your mouth, while still allowing those beautifully delicate flakes to separate effortlessly. Here are some essential techniques to help you master this culinary skill.

**1. Choose the Right Type of Fish**: Not all fish are created equal when it comes to flakiness. Fish like cod, haddock, and salmon are particularly known for their flaky texture when cooked properly. Look for fresh, high-quality fillets with vibrant color and a clean ocean smell.

**2. Temperature Matters**: Before cooking, allow your fish to come to room temperature for about 15-20 minutes. This helps it cook evenly, preventing the outside from overcooking while the inside remains underdone.

**3. Use the Right Cooking Method**: Different cooking methods yield varying results. Baking and poaching are excellent for achieving flaky fish. When baking, use a moderate temperature, around 375°F (190°C), and wrap the fish in parchment paper or foil to create a steaming effect. When poaching, keep the water just below boiling; this gentle heat allows the fish to cook slowly, preserving its moisture and encouraging flakiness.

**4. Don’t Overcook**: This is the golden rule when it comes to cooking fish. The moment fish reaches an internal temperature of 145°F (63°C), it’s done. Use a fork to gently prod the fish; if it flakes easily without resistance, it’s ready to come off the heat. Overcooking causes fish to dry out, resulting in a tough texture rather than the desired flakiness.

**5. Rest Your Fish**: Just like any protein, letting your fish rest for a few minutes after cooking allows the juices to redistribute, enhancing its flavor and texture.

**6. The Right Tools**: A good fish spatula is your best friend in the kitchen. Its thin, flexible design allows you to lift the delicate fillets without breaking them apart, ensuring that the beautiful, flaky texture remains intact as you serve.

By incorporating these techniques into your cooking routine, you’ll be well on your way to serving fish that not only looks appealing but also has that coveted flaky texture that keeps diners coming back for more. So, roll up your sleeves, and let the flavors of the sea shine through in each perfectly cooked bite!

9. Flavor Pairings: Herbs, Spices, and Sauces

When it comes to cooking fish, the right flavor pairings can elevate your dish from ordinary to extraordinary. Fish often has a delicate flavor profile that can be beautifully enhanced with the right combination of herbs, spices, and sauces. Understanding these pairings not only complements the inherent taste of the fish but also allows you to explore a world of culinary creativity.

**Herbs** are a classic choice for fish, with fresh options like dill, parsley, cilantro, and basil standing out for their ability to add brightness and freshness. Dill works particularly well with salmon, while parsley can enhance almost any white fish, lending a clean and crisp flavor. For a Mediterranean twist, try pairing fish with oregano and thyme, which provide earthy notes that can balance the dish perfectly.

**Spices**, on the other hand, can add depth and warmth to your seafood creations. A sprinkle of smoked paprika can introduce a subtle smokiness, while cumin adds a warm, nutty flavor that pairs beautifully with grilled fish. For those who enjoy a kick, a dash of cayenne or chili powder can spice things up, especially in dishes inspired by Latin or Asian cuisines.

**Sauces** are the final touch that can tie your entire dish together. A simple lemon butter sauce can brighten up a fillet, while a rich garlic and herb sauce can create a decadent experience. For a burst of flavor, consider a mango salsa or a zesty chimichurri, which not only add vibrant colors to the plate but also bring a fresh, tangy dimension to the meal.

Experimenting with different combinations of herbs, spices, and sauces opens up a treasure trove of possibilities, allowing you to customize your fish dishes to suit any palate. Whether you’re grilling, baking, or pan-searing, these flavor pairings will not only enhance the natural taste of the fish but will also make your culinary creations unforgettable. So, don’t shy away from experimenting—your taste buds will thank you!

10. Common Mistakes to Avoid When Cooking Fish

Cooking fish can be a delightful culinary adventure, but it’s easy to fall into some common pitfalls that can lead to disappointing results. To help you achieve that perfect fillet, here are a few mistakes to avoid when cooking fish.

Firstly, **overcooking** is perhaps the most prevalent error. Fish cooks quickly, and the difference between a moist, flaky texture and a dry, rubbery one can be mere seconds. A good rule of thumb is to cook fish for about 10 minutes per inch of thickness, flipping it halfway through. Using a meat thermometer can also be a lifesaver; fish is perfectly cooked when it reaches an internal temperature of 145°F (63°C).

Another mistake is **insufficient seasoning**. Fish has a delicate flavor that can be enhanced with the right herbs, spices, and marinades. Don’t shy away from experimenting with lemon juice, garlic, fresh herbs, or a sprinkle of sea salt to elevate your dish. Remember, a little seasoning goes a long way, so balance is key.

Additionally, many home cooks neglect **the importance of a hot pan**. Whether you’re grilling or pan-searing, starting with a hot surface ensures a beautiful sear and helps prevent sticking. If you’re using a non-stick skillet, preheat it before adding oil, and if you’re grilling, make sure the grates are preheated and well-oiled to avoid tearing the fish when flipping.

Finally, be mindful of **the quality of your fish**. Freshness matters tremendously when it comes to seafood. Always look for bright, clear eyes, firm flesh, and a mild ocean scent. Avoid purchasing fish that looks dull or has a strong, fishy odor. Sourcing your fish from reputable markets or local fishmongers can make a significant difference in your culinary creation.

By steering clear of these common mistakes, you’ll not only enhance your cooking techniques but also ensure that every fish dish you serve is a delectable masterpiece that will have everyone coming back for seconds!

11. Serving Suggestions: Creating Beautiful Fish Dishes

When it comes to serving fish, presentation is just as important as flavor. A beautifully plated dish not only enhances the dining experience but also elevates the appeal of your culinary creation. Here are some inspiring serving suggestions to help you create stunning fish dishes that will impress your guests and make your meals memorable.

**Colorful Accompaniments**: Start by incorporating a vibrant array of colors on the plate. Use seasonal vegetables such as roasted asparagus, sautéed bell peppers, or a medley of cherry tomatoes to add visual interest. Consider a fresh salad with mixed greens, radishes, and edible flowers to bring freshness and a pop of color to your dish.

**Garnishes and Sauces**: A well-chosen garnish can transform a simple plate into a work of art. Fresh herbs like dill, parsley, or cilantro add a burst of color and a hint of flavor. A drizzle of vibrant sauce, such as a bright green chimichurri or a tangy citrus beurre blanc, can complement the fish beautifully. Remember, a little goes a long way—aim for a delicate touch that enhances rather than overwhelms.

**Textural Contrast**: Introduce contrasting textures to create a more dynamic dish. Pair your flaky, tender fish with crispy elements like fried capers, toasted breadcrumbs, or a sprinkle of crushed nuts. This contrast adds an exciting crunch that will delight your diners and keep them coming back for more.

**Elegant Arrangements**: Pay attention to the arrangement on the plate. Position the fish slightly off-center for a more modern look, and consider using a ring mold for grains or vegetables to create height and structure. Layering elements can add depth, creating a visually appealing stack of flavors.

**Seasonal Themes**: Tailor your serving suggestions to the season or the occasion. In summer, a light, refreshing presentation with citrus and fresh herbs might be ideal. In contrast, a heartier, more comforting dish in winter could feature roasted root vegetables and a rich sauce.

By thoughtfully considering your serving suggestions, you can transform a simple fish dish into an impressive culinary experience. Remember, the goal is not just to satisfy the palate but also to delight the eyes, making every meal a feast for the senses. So, roll up your sleeves, get creative, and let your imagination guide you as you plate your next fish dish!

12. Sustainability in Seafood: Choosing Wisely

In today’s culinary landscape, the call for sustainability extends to every corner of the kitchen, and seafood is no exception. As we savor the ocean’s bounty, it’s essential to prioritize not just taste and freshness, but also the environmental impact of our choices. When selecting fish, consider sourcing options that are both sustainable and ethical. Look for labels such as Marine Stewardship Council (MSC) or Aquaculture Stewardship Council (ASC), which signify that the seafood has been harvested or farmed in ways that maintain healthy fish populations and minimize environmental damage.

Moreover, embracing seasonal seafood can elevate your dishes while supporting local fishing communities. Different species peak at various times of the year, and by aligning your cooking with these natural cycles, you contribute to the health of marine ecosystems.

It’s also beneficial to educate yourself about the fish you choose to cook. Some species, like bluefin tuna and certain shark varieties, are facing significant population declines, while others, such as farmed tilapia or Pacific sardines, are more abundantly available and can be enjoyed guilt-free. Utilize resources like the Seafood Watch app, which provides guidance on making environmentally conscious seafood choices based on your location.

By prioritizing sustainability in your seafood selection, you not only set the stage for flavorful, responsible meals but also play a part in preserving our oceans for future generations. Cooking fish perfectly is not just about technique; it’s also about being mindful of the impact your choices have on the world around you. Savor each bite knowing that you’ve made a wise decision for both your palate and the planet.

13. Fish Cooking Times: A Quick Reference Guide

When it comes to cooking fish, timing is everything. Overcooking can lead to dry, rubbery fillets, while undercooking can leave you with a dish that’s unsafe to eat. To help you master the art of cooking fish perfectly, we’ve put together a quick reference guide that outlines optimal cooking times based on various methods and types of fish.

**Grilling:** For firm, meaty fish such as salmon or swordfish, aim for about 6 to 8 minutes per side over medium heat. If you’re grilling delicate fish like flounder or tilapia, reduce the time to about 3 to 4 minutes per side, keeping a close watch to prevent it from breaking apart.

**Baking:** When baking fish in the oven, a good rule of thumb is to cook at 400°F (200°C) for approximately 10 minutes per inch of thickness. For example, a 1-inch thick piece of cod will need about 10 minutes, while a thicker, 2-inch piece may require up to 20 minutes. Always check for doneness by inserting a fork into the thickest part of the fish; it should flake easily and appear opaque.

**Poaching:** Poaching is a gentle cooking method that can be particularly beneficial for delicate fish. In simmering water or broth, cook fish fillets for about 10 minutes per inch of thickness. For instance, a 1-inch thick piece of sole will typically be ready in about 10 minutes.

**Searing:** Searing fish in a hot pan with a little oil will give you a crisp exterior while keeping the inside tender. Cook fish fillets for about 3 to 4 minutes on each side, depending on thickness. Keep an eye on the edges; when they turn opaque, it’s usually a sign that the fish is close to being done.

**Frying:** For deep-frying, fish should be cooked for about 4 to 6 minutes, depending on the thickness. The batter should be golden brown, and the fish should flake easily with a fork.

Remember, the key to perfect fish is not only timing but also quality. Always start with the freshest fish you can find and use a meat thermometer if you’re unsure. The FDA recommends an internal temperature of 145°F (63°C) for safely cooked fish. With this quick reference guide in hand, you’ll be well on your way to mastering fish cooking times, ensuring your seafood dishes are both delicious and perfectly cooked every time.

14. Pairing Fish with Sides and Wines

Pairing fish with the right sides and wines can elevate your seafood dish from a simple meal to an extraordinary culinary experience. The delicate flavors of fish can be complemented or contrasted beautifully with a variety of accompaniments, enhancing the overall dining experience.

When it comes to sides, consider the texture and flavor profile of the fish you are serving. For lighter, flaky fish like cod or sole, fresh salads or steamed vegetables can provide a refreshing counterbalance. Think of a citrusy arugula salad or sautéed asparagus drizzled with a light vinaigrette that will highlight the fish’s natural flavors without overwhelming them. On the other hand, heartier fish such as salmon or swordfish can stand up to richer sides. Creamy risottos, roasted root vegetables, or a savory potato gratin can create a satisfying harmony on the plate.

Now, let’s talk about wine, which plays a pivotal role in the overall presentation of your meal. A crisp white wine, such as Sauvignon Blanc or Pinot Grigio, pairs wonderfully with lighter fish, enhancing their fresh and delicate taste. These wines often have zesty acidity that can cut through richer sauces or complement a squeeze of lemon on your dish. For those rich, oily fish varieties, a light red like Pinot Noir or a robust white like Chardonnay can create a delightful contrast, bringing out the flavors of both the wine and the fish.

Don’t hesitate to experiment with various regional wines that correspond to the fish you’re cooking. For instance, serving a Mediterranean sea bass with a chilled glass of Verdicchio can transport your taste buds straight to the coastal towns of Italy. Similarly, pairing a spicy blackened catfish with a slightly sweet Riesling can create an exciting flavor explosion.

Ultimately, pairing fish with the right sides and wines is about balance, bringing together complementary flavors that create a memorable dining experience. So, the next time you prepare a fish dish, take a moment to consider the perfect accompaniments, and watch as your meal transforms into a delightful feast for the senses.

15. Conclusion: Embracing the Ocean’s Bounty in Your Kitchen

As we reach the conclusion of our culinary journey through the waves, it’s clear that cooking fish is not just a technique; it’s an art that embraces the essence of the ocean’s bounty. With every fillet, you have the opportunity to celebrate the delicate flavors, vibrant textures, and nutritional benefits that seafood offers. By mastering the techniques we’ve explored—whether it’s the subtle finesse of poaching, the crispy allure of pan-searing, or the smoky richness of grilling—you can unlock a world of culinary possibilities that will elevate your dishes and impress your guests.

But beyond the methods lies a deeper connection to the ingredients themselves. Embracing sustainable sourcing, understanding the seasonal availability of different types of fish, and respecting the environment from which they come is essential in today’s cooking landscape. Each time you prepare a fish dish, you are partaking in a tradition that spans cultures and generations, celebrating the ocean’s treasures and the communities that rely on them.

So, as you step into your kitchen, remember to savor every moment. Allow the fresh scents of the sea to inspire you, experiment with flavors, and don’t shy away from making mistakes—they are often the stepping stones to culinary mastery. Whether you’re preparing a simple weeknight dinner or an elaborate feast for friends, the ocean’s bounty is waiting to be embraced, inviting you to create delicious memories with every meal. Dive in, have fun, and let the magic of cooking fish transform your kitchen into a seaside haven!

As we conclude our culinary journey through the depths of the ocean, we hope you feel inspired and equipped to elevate your fish-cooking skills to new heights. Mastering the art of cooking fish perfectly is not just about technique; it’s about embracing the flavors of the sea and bringing them to life on your plate. Whether you choose to grill, steam, pan-sear, or bake, the techniques we’ve shared will help you create mouthwatering dishes that celebrate the freshness and versatility of seafood. So, gather your ingredients, unleash your creativity, and savor the delightful tastes of your culinary creations. Here’s to many delicious meals ahead—may each bite be a reminder of the ocean’s bounty! Happy cooking!

How can I cook the perfect steak?

There’s something undeniably satisfying about a perfectly cooked steak—the way it sizzles on the grill, the tantalizing aroma that fills the air, and that first succulent bite that melts in your mouth.

Whether you’re a seasoned grill master or a novice cook eager to impress, mastering the art of steak is a culinary journey worth embarking on. In this ultimate guide, we’ll delve into the secrets of selecting the finest cuts, understanding the ideal cooking techniques, and infusing flavors that elevate your steak to gourmet status. From the importance of resting your meat to the nuances of seasoning, every detail matters in achieving that perfect sear and juicy interior. Get ready to elevate your cooking skills and transform your kitchen into a steak lover’s paradise, as we unlock the keys to creating the perfect cut that will leave your family and friends craving more!

1. Understanding Different Cuts of Steak

How can I cook the perfect steak?
Credit : whatcanu.com

To master the art of cooking steak, the first step is to understand the different cuts available and what makes each one unique. Each cut comes from a specific part of the cow, and this influences not just the flavor but also the texture and cooking method that will yield the best results.

**Tender Cuts**: Cuts like the tenderloin and ribeye are often revered for their buttery tenderness and rich flavor. The tenderloin, also known as filet mignon, is taken from the loin and is the most tender cut of beef. It is lean with a subtle taste, making it ideal for those who prefer a milder flavor profile. The ribeye, on the other hand, comes from the rib section and is marbled with fat, which contributes to its robust, beefy flavor and juicy texture. This cut is particularly popular for grilling and pan-searing.

**Flavorful Cuts**: If you’re looking for a steak that packs a punch in terms of flavor, consider cuts like the sirloin or flank steak. The sirloin comes from the rear of the cow and offers a balance of tenderness and flavor, making it a versatile choice for various cooking methods. Flank steak, meanwhile, is lean and flavorful but can be tough if not cooked properly. It’s best when marinated and cooked at high temperatures quickly, then sliced against the grain to maximize tenderness.

**Budget-Friendly Options**: For those who want to enjoy steak without breaking the bank, cuts like skirt steak and chuck eye steak are excellent choices. The skirt steak, which comes from the diaphragm, is full of flavor and perfect for dishes like fajitas. Chuck eye steak, often referred to as the “poor man’s ribeye,” offers a similar taste profile to ribeye at a fraction of the price, making it a great option for everyday grilling.

**Understanding Marbling and Aging**: Besides the cut, it’s essential to consider marbling—the intramuscular fat that contributes to a steak’s flavor and juiciness. Look for steaks with a good amount of marbling for the best eating experience. Additionally, some steaks undergo dry aging, a process that intensifies the flavor and tenderness by allowing moisture to evaporate from the meat while enzymes break down muscle tissue. Aged steaks are often more expensive but worth the investment for special occasions.

By understanding the unique characteristics of each cut, you can select the right steak for your cooking method and personal taste preferences, setting you on the path to grilling perfection. Whether you’re preparing a cozy dinner for two or hosting a summer barbecue, knowing your cuts will elevate your steak game and ensure a memorable meal every time.

2. Choosing the Right Steak: Grass-Fed vs. Grain-Fed

When it comes to mastering the art of steak, one of the most crucial decisions you’ll make is choosing between grass-fed and grain-fed beef. Each type brings its unique flavor, texture, and nutritional profile to the table, influencing not only the taste of your dish but also the overall dining experience.

Grass-fed beef comes from cattle that graze on grass and forage throughout their lives. This diet leads to meat that is typically leaner, with a distinct, earthy flavor that reflects the natural diet of the animals. Many steak enthusiasts appreciate the robust taste and firmer texture of grass-fed cuts. Additionally, grass-fed beef is often touted for its health benefits, being lower in total fat and higher in omega-3 fatty acids and antioxidants such as vitamin E. However, the trade-off is that grass-fed steaks can sometimes be less tender than their grain-fed counterparts, requiring careful cooking to avoid overcooking.

On the other hand, grain-fed beef, which comes from cattle that are fed a diet rich in grains, usually results in a marbled cut that is tender, juicy, and rich in flavor. The marbling—small flecks of fat interspersed throughout the muscle—melts during cooking, imparting a buttery richness that many people love. Grain-fed beef tends to be more consistent in flavor and tenderness, making it a popular choice for those looking for a classic, indulgent steak experience. However, it’s worth noting that grain-fed beef can often have a higher fat content and fewer beneficial nutrients compared to its grass-fed counterpart.

Ultimately, the choice between grass-fed and grain-fed steak boils down to personal preference and cooking style. Consider what flavors you want to highlight and how you plan to prepare your steak. Whether you opt for the lean, complex notes of grass-fed or the familiar richness of grain-fed, making an informed choice will set the foundation for a truly masterful steak dinner.

3. Essential Tools for Cooking Steak

How can I cook the perfect steak?
Credit : whatcanu.com

Cooking the perfect steak is not just about choosing the right cut; it also requires the right tools to elevate your culinary experience. A well-equipped kitchen can make the difference between a good steak and a truly unforgettable one. Here are some essential tools every aspiring steak master should have in their arsenal.

**1. A High-Quality Chef’s Knife:**
Investing in a sharp, durable chef’s knife is crucial for trimming and cutting your steak. A good knife allows for precise cuts, ensuring even cooking and presentation. Look for a knife made from high-carbon stainless steel, which retains its sharpness and provides excellent control.

**2. A Cast Iron Skillet or Grill Pan:**
For an exceptional sear, a heavy cast iron skillet or grill pan is indispensable. These pans provide even heat distribution, allowing you to achieve that coveted crust while sealing in the juices. Preheat your skillet until it’s smoking hot for best results—this is the secret to a perfect steak.

**3. Instant-Read Meat Thermometer:**
Achieving the ideal doneness relies on precise temperature control. An instant-read meat thermometer is a game changer, allowing you to monitor your steak’s internal temperature accurately. For a medium-rare steak, aim for around 130°F (54°C). This tool takes the guesswork out of cooking, ensuring your steak is cooked to perfection every time.

**4. Tongs:**
When it comes to flipping and handling your steak, tongs are your best friend. Unlike forks, which can pierce the meat and release precious juices, tongs allow for gentle maneuvering. Opt for long-handled, heat-resistant tongs to keep your hands safe from splattering oil.

**5. A Good Cutting Board:**
After cooking your steak, it’s essential to let it rest before slicing. A sturdy cutting board will not only provide a stable surface but can also catch all the delicious juices that run off. Look for a board made from hardwood or bamboo, as these materials are gentle on your knife’s edge.

**6. A Quality Marinade or Spice Rub:**
While not a tool in the traditional sense, having a go-to marinade or spice rub is essential for enhancing flavor. Whether you prefer a simple blend of salt and pepper or a more complex marinade, these flavor enhancers can elevate your steak from ordinary to extraordinary.

By equipping yourself with these essential tools, you’ll be well on your way to mastering the art of steak. Each tool plays a vital role in the cooking process, ensuring that your steaks are not only delicious but also cooked to perfection every single time. So, gather your supplies, and get ready to impress your family and friends with mouthwatering steak dishes!

4. The Importance of Temperature: Bringing Steak to Room Temp

When it comes to cooking the perfect steak, one of the often-overlooked yet critical factors is temperature—specifically, the temperature of the meat before it hits the grill or pan. Bringing your steak to room temperature is an essential step that can make all the difference in achieving that mouthwatering, juicy result.

Why is this important? When you cook a steak straight from the refrigerator, the cold center can lead to uneven cooking. The outer layers may char beautifully while the inside remains stubbornly cool and undercooked. By allowing your steak to rest at room temperature for about 30 to 60 minutes before cooking, you’re ensuring that heat penetrates more evenly throughout the cut. This simple adjustment helps to create a more uniform cook, giving you that perfect medium-rare center while achieving a beautifully seared crust.

Furthermore, bringing your steak to room temperature enhances the flavor and texture. The heat from the pan or grill can better interact with the meat fibers, allowing for a more tender bite. This process also aids in maximizing the Maillard reaction— the chemical reaction that creates the savory, complex flavors we all crave in a grilled steak.

To get the best results, take your steak out of the fridge and unwrap it—allowing it to breathe—while you prepare your cooking setup. This time can also be used to season your steak generously with salt and pepper, allowing the seasoning to penetrate the meat as it warms.

Remember, patience is key. While it may be tempting to rush into cooking, taking a moment to let your steak acclimate to room temperature can elevate your steak game to new heights, ensuring each bite is as delightful as the last.

5. Seasoning Your Steak: Simple But Effective Techniques

How can I cook the perfect steak?
Credit : whatcanu.com

When it comes to cooking the perfect steak, seasoning is not just an afterthought; it’s an essential step that can elevate your dish from ordinary to extraordinary. While the quality of the meat is paramount, the right seasoning can enhance its natural flavors and create a mouthwatering crust that will have your guests coming back for seconds. Here are some simple but effective techniques to master the art of seasoning your steak.

**1. Keep It Simple:** The most classic approach to seasoning steak is to use just salt and pepper. A generous sprinkle of coarse sea salt and freshly cracked black pepper is often all you need to let the rich flavors of the meat shine through. The salt helps to draw out moisture and enhance the steak’s inherent taste, while the pepper adds a subtle heat that complements the overall profile.

**2. Use the Right Timing:** Timing is crucial when it comes to seasoning. For maximum flavor, it’s best to season your steak at least 30 minutes before cooking. This allows the salt to penetrate the meat, resulting in a more flavorful and juicy steak. If you’re short on time, season right before cooking, but avoid adding salt too far in advance, as it can draw out moisture and lead to a dry steak.

**3. Experiment with Marinades:** If you’re looking to add an extra layer of flavor, consider marinating your steak. A simple marinade can be made with olive oil, vinegar or citrus juice, garlic, and herbs. Allow your steak to soak in this flavorful concoction for at least an hour (or overnight for tougher cuts) to infuse it with deliciousness. Just remember to pat the steak dry before cooking to achieve that coveted sear.

**4. Play with Herbs and Spices:** Don’t be afraid to get creative with your seasonings! Fresh herbs like rosemary, thyme, and parsley can bring a delightful freshness to your steak. Alternatively, spices such as smoked paprika, cumin, or garlic powder can add depth and complexity. Just be mindful not to overpower the steak; a little goes a long way.

**5. Finish with Flavor:** For a gourmet touch, consider finishing your steak with a compound butter or a drizzle of high-quality olive oil right before serving. A pat of herb-infused butter melting over the top adds richness and an enticing aroma that elevates your dish to restaurant-quality status.

In the world of cooking, seasoning is an art form that requires balance and a touch of intuition. By mastering these simple yet effective techniques, you’ll ensure that each steak you cook is bursting with flavor, leaving a lasting impression on everyone lucky enough to share your meal. Happy cooking!

6. Cooking Methods: Grilling, Pan-Searing, and Broiling

When it comes to cooking the perfect steak, the method you choose can make all the difference. Each technique brings its own unique flavor and texture to your meat, so understanding the nuances of grilling, pan-searing, and broiling is essential for any steak enthusiast.

**Grilling** is perhaps the most iconic method, evoking images of summer barbecues and smoky flavors. The intense heat of the grill caramelizes the exterior of the steak, creating those coveted grill marks and a delicious char that enhances the meat’s natural flavors. To achieve the best results, preheat your grill to high heat and let your steak rest at room temperature for about 30 minutes before cooking. This ensures even cooking. For a juicy medium-rare, aim for about 4-5 minutes per side, depending on the thickness of your cut. Don’t forget to let your steak rest for a few minutes post-grill; this allows the juices to redistribute, resulting in a tender, flavorful bite.

**Pan-searing**, on the other hand, is a fantastic method for those who might not have outdoor grilling options. With a heavy skillet—preferably cast iron—you can achieve a beautiful crust on your steak while maintaining a juicy interior. Start by heating your skillet until it’s smoking hot and adding a splash of oil with a high smoke point, such as canola or grapeseed. Place your steak in the pan without crowding it, and let it cook undisturbed for several minutes. Flip it only when it’s developed a rich brown crust. For added flavor, you can introduce butter, garlic, and fresh herbs into the pan during the last few minutes of cooking, basting the steak for an aromatic finish.

**Broiling** is another excellent technique, particularly for those who want steakhouse-quality results without stepping outside. Utilizing your oven’s broiler, you can cook your steak at high temperatures that mimic grilling. Place your steak on a broiler pan to allow the fat to drip away, and position it close to the heating element. Keep a close eye on it, as broiling can cook your meat quickly. Broil for about 4-6 minutes per side for a perfect medium-rare, flipping once halfway through. Broiling is especially effective for thicker cuts, as the intense heat allows for a crispy exterior while keeping the inside tender and juicy.

Ultimately, whether you prefer the smoky charm of grilling, the rich depth of pan-searing, or the convenient intensity of broiling, each method has its merits. Experiment with these techniques to discover what fits your taste best, and soon you’ll be mastering the art of steak with every sizzle and sear.

7. The Perfect Sear: Achieving a Delicious Crust

How can I cook the perfect steak?
Credit : whatcanu.com

The perfect sear is the crown jewel of cooking a steak, transforming a good cut into an extraordinary one. A well-executed sear creates a tantalizing crust that locks in juices and enhances the flavor profile, delivering that mouthwatering experience that steak lovers crave. To achieve this culinary masterpiece, there are a few crucial steps you need to follow.

First, start with a high-quality steak. The thickness of your cut plays a vital role; ideally, you want a steak that is at least 1 inch thick. This allows the exterior to form a beautiful crust while keeping the interior tender and juicy. Before you even think about hitting the heat, let your steak sit at room temperature for about 30 minutes. This not only helps in even cooking but also ensures that the sear happens quickly without the meat cooling down.

Next, it’s time to season generously. A simple blend of kosher salt and freshly cracked black pepper works wonders, enhancing the natural flavors of the beef. Apply the seasoning on both sides and let it sit for a few minutes. This will create a delightful crust as the salt draws out moisture, leading to a better sear.

Now, the choice of cooking vessel is essential. A cast-iron skillet or a heavy stainless steel pan is ideal due to its excellent heat retention properties. Preheat your skillet over high heat until it’s smoking hot. This intensity is crucial for achieving that coveted Maillard reaction—the chemical process that gives seared meat its distinct flavor and color.

Once the pan is hot enough, add a splash of high smoke-point oil, such as canola or grapeseed oil, and carefully place the steak in the skillet. Resist the urge to move it around; let it sit undisturbed for a few minutes. This is where the magic happens! You’ll know it’s time to flip the steak when it releases easily from the pan and has developed a rich, golden-brown crust.

After flipping, don’t forget to baste! Tilt the pan slightly and use a spoon to drizzle the hot oil over the steak. This technique not only adds flavor but also helps cook the top of the steak, creating a beautifully even sear all around.

Finish cooking to your preferred doneness, using a meat thermometer for accuracy. Aim for an internal temperature of 130°F for medium-rare, and remember to let your steak rest for at least five minutes after cooking. This resting period allows the juices to redistribute, ensuring that each bite is succulent and full of flavor.

With these steps, you’ll achieve the perfect sear every time, turning your steaks into a culinary delight that will impress even the most discerning palates. So fire up that skillet and get ready to master the art of steak!

8. Monitoring Doneness: Using a Meat Thermometer

When it comes to achieving the perfect steak, monitoring doneness is a crucial step that can make or break your culinary masterpiece. While many home cooks rely on the age-old methods of touch or the infamous finger test, the most reliable and precise way to assess doneness is by using a meat thermometer. This simple tool takes the guesswork out of cooking, ensuring that your steak reaches the desired level of doneness every time.

To start, invest in a good-quality meat thermometer—preferably one with an instant-read capability. As your steak sizzles away on the grill or in the pan, insert the thermometer probe into the thickest part of the meat, avoiding bone and fat for the most accurate reading. Here’s a handy guide to the temperatures you should aim for based on your preferred doneness:

– **Rare**: 125°F (52°C) – warm and red in the center
– **Medium Rare**: 135°F (57°C) – warm and pink throughout, with a juicy bite
– **Medium**: 145°F (63°C) – slightly pink center, firmer texture
– **Medium Well**: 150°F (66°C) – mostly cooked through, with just a hint of pink
– **Well Done**: 160°F (71°C) and above – fully cooked, with no pink

As you monitor your steak’s temperature, keep in mind that it will continue to cook slightly after being removed from the heat, a phenomenon known as carryover cooking. To account for this, remove your steak from the heat when it’s about 5°F (3°C) below your target temperature. Let it rest for about 5 to 10 minutes, allowing the juices to redistribute and the flavors to intensify.

Using a meat thermometer not only elevates your cooking game but also brings peace of mind, allowing you to serve steaks that are perfectly cooked to your guests’ liking. With this tool in hand, you’ll not only master the art of cooking steak but also gain the confidence to explore various cuts and techniques, knowing that perfect doneness is just a thermometer reading away.

9. Resting Your Steak: Why It Matters

Resting your steak is a crucial yet often overlooked step in the cooking process that can elevate your dining experience from ordinary to extraordinary. After removing your steak from the heat, it’s tempting to dive right in, drawn by the tantalizing aroma and that perfect sear. However, allowing your steak to rest for at least five to ten minutes is essential to ensure that every bite is as flavorful and juicy as possible.

When steak cooks, the muscle fibers contract and push out moisture. By resting the meat, you give those fibers time to relax and reabsorb some of that precious juice. Imagine slicing into a perfectly cooked steak only to see a pool of juices escape onto your plate; that’s a waste of flavor and tenderness. Resting allows the juices to redistribute evenly throughout the cut, ensuring that each slice is packed with flavor.

Additionally, resting contributes to the overall texture of your steak. As it sits, the surface cools slightly, which helps to create a more pleasant mouthfeel. A well-rested steak also benefits from a slight carryover cooking effect; it continues to cook a little as it cools, allowing for a more consistent doneness throughout the cut.

To rest your steak effectively, place it on a cutting board or warm plate, loosely tented with aluminum foil to keep it warm without steaming the exterior. This simple yet vital step not only enhances the taste and texture but also showcases the care and attention you’ve put into your cooking. So, the next time you prepare a steak, remember to give it the time it deserves—your taste buds will thank you!

10. Slicing and Serving: The Right Techniques

Slicing and serving your perfectly cooked steak is as vital to the dining experience as the cooking itself. The way you cut and present this succulent piece of meat can elevate its appeal and enhance the overall flavor. First, let’s talk about slicing. The key to achieving tender, melt-in-your-mouth bites lies in the direction of your cut. Always slice against the grain. This means identifying the direction the muscle fibers run and cutting perpendicular to them. By doing this, you shorten the fibers, making each bite significantly easier to chew and more enjoyable.

When it comes to the thickness of your slices, aim for about half an inch for optimal tenderness and presentation. Thicker cuts may be visually impressive but can become unwieldy on the plate, while too-thin slices can dry out quickly and lose their juicy appeal.

Now, let’s discuss presentation. A beautifully arranged plate can make even the simplest of dishes feel gourmet. Start by fanning out your slices in a staggered line, allowing the juices to mingle while showcasing the steak’s beautiful crust. If you’re feeling adventurous, consider adding a drizzle of herb-infused oil or a vibrant chimichurri sauce over the top. This not only enhances flavor but adds a pop of color that catches the eye.

Don’t forget to pair your steak with complementary sides. Whether it’s a fresh arugula salad, creamy mashed potatoes, or grilled vegetables, the right accompaniments can elevate the entire meal. Finally, serve your steak alongside a good-quality steak knife, allowing your guests to savor every bite as they dig into the masterpiece you’ve created. With the right slicing and serving techniques, you’ll not only impress your guests but also turn a simple steak dinner into a memorable culinary experience.

11. Pairing Steak with Sides and Sauces

When it comes to elevating your steak experience, the right sides and sauces can make all the difference. A perfectly cooked steak deserves accompaniments that enhance its rich flavors and complement its texture.

Start with the sides: classic choices like creamy mashed potatoes or roasted garlic potatoes provide a comforting, hearty element that balances the meaty richness of your steak. For a fresher approach, consider pairing your steak with a vibrant arugula or spinach salad, dressed lightly with a tangy vinaigrette. The peppery greens cut through the fat of the steak, creating a delightful contrast that refreshes the palate.

Grilled vegetables, such as asparagus, zucchini, or bell peppers, not only add color to your plate but also bring a smoky flavor that harmonizes beautifully with the charred exterior of a well-seared steak. If you’re feeling adventurous, try a side of sautéed mushrooms in garlic and thyme; their earthy tones amplify the savory notes of the meat.

Now, let’s talk sauces. A traditional béarnaise, with its buttery texture and herbaceous notes, is a classic choice that elevates the dining experience to a gourmet level. For those who prefer a bolder flavor, a rich red wine reduction or a peppercorn sauce introduces a sumptuous depth that can transform even a simple steak into a fine dining dish.

Don’t overlook the power of chimichurri, a vibrant sauce made from parsley, garlic, vinegar, and olive oil. This zesty condiment, hailing from Argentina, not only adds a fresh kick but also complements the umami flavors of the steak beautifully.

In essence, the right combination of sides and sauces can take your steak from delicious to unforgettable. Experiment with flavors and textures, and don’t be afraid to mix and match until you find the perfect pairing that suits your palate. With the right accompaniments, your steak dinner will not only satisfy but also leave a lasting impression on anyone fortunate enough to share it with you.

12. Common Mistakes to Avoid When Cooking Steak

Cooking the perfect steak requires not only skill but also an awareness of the common pitfalls that can turn a prime cut into a culinary disappointment. Here are some mistakes to avoid that can be the difference between an average meal and a memorable feast.

**1. Skipping the Room Temperature Step:** One of the most frequent mistakes is cooking steak straight from the fridge. Cold meat doesn’t cook evenly, leading to a well-done exterior and an undercooked interior. Allow your steak to rest at room temperature for about 30 minutes before cooking to promote even cooking throughout.

**2. Not Seasoning Enough:** A sprinkle of salt and pepper might seem sufficient, but it’s often not enough to enhance the natural flavors of the steak. Generous seasoning before cooking is crucial. Don’t be afraid to season your steak liberally with salt to create a flavorful crust that locks in moisture.

**3. Overcrowding the Pan:** If you’re using a skillet or grill, resist the urge to cook multiple steaks at once. Overcrowding can lower the temperature of the cooking surface, resulting in steaming rather than searing. Cook in batches if necessary to maintain that ideal high heat, which creates a beautifully caramelized crust.

**4. Not Letting It Rest:** After cooking, it’s tempting to dive right into your delicious steak, but patience is key. Letting the steak rest for about 5-10 minutes allows the juices to redistribute, ensuring each bite is tender and flavorful. Cutting into it too soon will result in a loss of those precious juices.

**5. Using the Wrong Cooking Method:** Different cuts of steak require different cooking methods. For instance, tender cuts like filet mignon are best suited for quick, high-heat cooking methods like grilling or pan-searing, while tougher cuts like chuck benefit from lower heat and longer cooking times, such as braising. Understanding the best approach for each cut can elevate your steak game significantly.

By avoiding these common mistakes, you’ll not only improve your steak-cooking skills but also ensure that every meal is a delicious celebration of flavor. Mastering these fundamentals will have your guests raving about your steaks for years to come!

13. Tips for Cooking Steak Indoors vs. Outdoors

When it comes to cooking steak, the debate between indoor and outdoor methods can be as heated as a sizzling grill. Each approach has its own unique advantages and can yield mouthwatering results, but understanding the nuances of each environment is key to mastering the art of steak.

**Cooking Steak Indoors**
Indoor cooking allows for precise temperature control and a more consistent cooking environment. A heavy cast-iron skillet is your best friend here; it retains heat exceptionally well and can create a beautiful sear. Start by preheating the skillet until it’s smoking hot, then add a touch of oil with a high smoke point, like canola or avocado oil. For an added layer of flavor, toss in fresh herbs and garlic during the last minute of cooking, basting the steak for a rich finish. Don’t forget to let your steak rest after cooking; this ensures the juices redistribute, resulting in a tender and juicy bite.

**Cooking Steak Outdoors**
Outdoor cooking, on the other hand, brings a whole different vibe to the table. Whether you’re using a charcoal grill or a gas grill, the smoky flavor imparted by outdoor cooking is simply unbeatable. For charcoal grills, arrange the coals for direct and indirect heat, allowing for a perfect sear followed by gentle cooking. A good rule of thumb is to sear the steak over high heat for a few minutes on each side, then move it to a cooler part of the grill to finish cooking to your desired doneness. If using a gas grill, preheat it thoroughly and keep the lid closed as much as possible to maintain temperature. Consider adding wood chips for flavor enhancement; the smoke will elevate your steak to gourmet status.

**Key Considerations**
Regardless of your cooking method, always bring your steak to room temperature before cooking to ensure even doneness. Use a meat thermometer to check for doneness—aim for 130°F for medium-rare, 140°F for medium, and 160°F for well done. Finally, remember that resting your steak post-cooking is crucial, regardless of whether you cooked it indoors or outdoors. This small step can make a significant difference in achieving the perfect steak every time.

By understanding the strengths of both indoor and outdoor cooking, you’ll be well-equipped to tackle any steak recipe with confidence, delighting your taste buds and impressing your guests all year round.

14. Experimenting with Marinades and Rubs

When it comes to elevating your steak game, experimenting with marinades and rubs can be a game changer. Marinades introduce flavor and tenderness to your meat, while rubs create a delightful crust that enhances the steak’s natural juices. The beauty of marinades lies in their versatility; they can range from simple combinations of olive oil, vinegar, and herbs to complex blends featuring spices, citrus juices, or even soy sauce. A classic marinade might include garlic, rosemary, and red wine, infusing the steak with a rich depth of flavor that will tantalize your taste buds.

On the other hand, dry rubs are a fantastic way to add a burst of flavor without the need for marinating time. They can be as straightforward or as elaborate as you desire. A basic rub might consist of salt, pepper, and garlic powder, while a more adventurous blend might include smoked paprika, brown sugar, and cumin for a sweet and smoky kick. The key is to generously coat the steak, allowing the spices to create a mouthwatering crust once seared on high heat.

Don’t shy away from getting creative; consider blending various ingredients to craft your signature marinade or rub. Experiment with different herbs, spices, and even sweeteners to find the perfect balance that complements the cut of steak you’re using. Allowing your steak to soak in the flavors of the marinade for a few hours—or even overnight—can make a significant difference in the final taste.

Remember, the world of marinades and rubs is vast, and there’s no one-size-fits-all solution. Try different combinations and techniques, take notes on what works, and soon enough, you’ll find your culinary groove, ensuring that each steak you serve is not just a meal but an unforgettable experience. So grab those spices, unleash your creativity, and get ready to transform your steak into a flavor-packed masterpiece!

15. Conclusion: Elevating Your Steak Cooking Skills

As we reach the end of our culinary journey through the world of steak, it’s time to reflect on the key takeaways that will help elevate your steak cooking skills to new heights. Mastering the art of cooking steak is not merely about following a recipe; it’s about understanding the nuances of the meat, the science of heat, and the joy of experimentation.

Every cut of steak tells its own story, from the marbled richness of a ribeye to the lean elegance of a filet mignon. By familiarizing yourself with these differences and how they respond to various cooking methods, you can truly unlock the potential of each piece. Remember, the magic lies in techniques like searing, resting, and seasoning — each an essential component that transforms a simple cut of meat into a culinary masterpiece.

Don’t shy away from practice; cooking the perfect steak is as much an art as it is a science. Experiment with different marinades, rubs, and cooking times to discover what works best for your palate. And don’t forget to invest in quality tools— a great set of knives, a reliable meat thermometer, and a good steak pan can make all the difference.

As you continue to refine your skills, share your passion with friends and family. Host a steak night, where you can showcase your newfound expertise and delight your guests with perfectly cooked cuts. This not only enhances your confidence but also fosters a community of fellow steak enthusiasts who can share tips and celebrate successes together.

In conclusion, elevating your steak cooking skills is about more than just achieving the perfect sear; it’s about cultivating a deep appreciation for the craft. With patience, practice, and a willingness to learn, you’ll not only impress your taste buds but also create lasting memories around the dinner table. So grab your tools, fire up the grill, and embark on the delicious journey of mastering steak — the ultimate reward awaits!

In conclusion, mastering the art of cooking the perfect steak is a journey that combines technique, passion, and a little bit of experimentation. With the tips and insights shared in this ultimate guide, you now have the tools to elevate your steak-cooking game, whether you’re using a grill, stovetop, or oven. Remember, the key to a mouthwatering steak lies in the quality of the meat, the seasoning, and the cooking method, but most importantly, in the love you put into the process. So fire up your grill or preheat your skillet, gather your favorite sides, and prepare to impress your family and friends with a steak that’s tender, juicy, and bursting with flavor. Happy cooking, and may every bite be a delicious masterpiece!

——————————

What are the best ways to grill chicken?

As the warm sun beckons and the tantalizing aroma of sizzling meat fills the air, there’s nothing quite like the joy of gathering around the grill for a delicious feast.

Grilling chicken can be a delightful experience, but achieving that perfectly charred, juicy, and flavorful result often eludes even the most enthusiastic backyard chefs. Whether you’re preparing for a summer barbecue, a cozy family dinner, or just a casual weeknight meal, mastering the art of grilling chicken can elevate your culinary skills and impress your guests. In this post, we’ll unveil the top techniques to ensure your chicken turns out perfectly grilled every single time. From marinating and seasoning tips to temperature control and grilling methods, we’ll cover everything you need to know to become a grill master and create mouthwatering chicken dishes that will have everyone coming back for seconds. Get ready to fire up the grill and embark on a flavorful journey that will transform your cooking game!

1. Understanding Different Cuts of Chicken

What are the best ways to grill chicken?
Credit : whatcanu.com

When it comes to grilling chicken, understanding the various cuts and their unique characteristics is essential for achieving perfectly cooked results every time. Each cut of chicken brings its own flavor profile, texture, and cooking requirements, making it crucial to choose the right one for your grilling adventure.

**Chicken Breasts**: Often the go-to cut for many grill enthusiasts, chicken breasts are lean and cook relatively quickly. They can be boneless or bone-in, with the latter providing a bit more flavor and moisture. However, because they are so lean, they can easily dry out if overcooked. To combat this, consider marinating them beforehand or using techniques like brining to infuse moisture and flavor.

**Chicken Thighs**: For those who prefer a richer taste, chicken thighs are a perfect option. Dark meat is juicier than white meat due to its higher fat content, which makes it more forgiving on the grill. Thighs can be purchased boneless or bone-in, and they benefit from longer cooking times, allowing the fat to render out and the meat to become tender and flavorful.

**Drumsticks**: Another popular choice, drumsticks offer a fun, hands-on eating experience. They are also relatively inexpensive and packed with flavor. When grilling drumsticks, it’s best to cook them at a lower temperature initially to ensure that they cook through without burning on the outside. Once they’re nearly done, a quick sear over higher heat can create a deliciously crispy skin.

**Whole Chicken**: For the ultimate grilling experience, consider roasting a whole chicken on the grill. This method allows you to infuse flavors throughout the entire bird. Spatchcocking (removing the backbone) can help the chicken cook more evenly and reduce cooking time. With the right seasoning and a good grill setup, you can achieve crispy skin and succulent meat that will impress family and friends alike.

By understanding the different cuts of chicken and their specific grilling needs, you can tailor your cooking techniques to ensure each piece is flavorful, juicy, and perfectly grilled. Whether you choose tender breasts, flavorful thighs, or delightful drumsticks, knowing how to handle each cut will elevate your grilling game and ensure a delicious outcome every time.

2. Marinating: The Key to Flavorful Chicken

Marinating is the secret sauce to unlocking a world of flavor in your grilled chicken, transforming a simple piece of meat into a succulent masterpiece. The process of marination involves soaking your chicken in a mixture of acidic ingredients, oils, and seasonings, allowing it to absorb layers of taste and tenderness. The right marinade not only infuses flavor but also helps to break down the proteins in the chicken, resulting in a juicier and more tender bite.

To create a standout marinade, start with an acid base—think yogurt, vinegar, or citrus juice. These ingredients not only contribute tanginess but also help to tenderize the meat. Next, add a good-quality oil, such as olive oil or sesame oil, which acts as a carrier for the flavors and aids in the cooking process. Then, it’s time to get creative with your seasonings! fresh herbs like rosemary or thyme, spices like paprika or cumin, garlic, ginger, and even a touch of honey or brown sugar can elevate your marinade to new heights.

Once your marinade is ready, immerse the chicken, ensuring every crevice is coated. For optimal results, let it marinate for at least 30 minutes, but longer is often better—aim for four hours or even overnight for maximum flavor penetration. Keep in mind the type of chicken you’re working with; bone-in pieces may require more time than boneless cuts.

When it’s time to grill, remove the chicken from the marinade, allowing any excess liquid to drip off. This step is crucial to avoid flare-ups on the grill. As you place the chicken on the grill, you’ll immediately notice the enticing aroma of the marinated meat cooking, promising a flavor explosion with every bite.

By mastering the art of marinating, you not only ensure that your grilled chicken is bursting with flavor but also impress your guests with your culinary prowess. So gather your ingredients, unleash your creativity, and watch as simple chicken transforms into a flavorful delight that keeps everyone coming back for more!

3. The Importance of Temperature Control

What are the best ways to grill chicken?
Credit : whatcanu.com

When it comes to grilling chicken, mastering temperature control is the secret ingredient that can make or break your culinary masterpiece. Chicken is notoriously tricky; its lean meat can easily go from succulent to dry in a matter of moments if not cooked at the right temperature. This is why understanding and managing the heat of your grill is crucial.

first, let’s talk about preheating. Before you even place your chicken on the grill, it’s essential to preheat it to a steady, medium-high temperature, usually around 375°F to 450°F. This initial heat sears the surface of the chicken, locking in moisture and creating that coveted crispy skin. Use a grill thermometer to ensure accuracy; an improperly heated grill can lead to uneven cooking and undesirable textures.

Once your chicken is on the grill, it’s important to monitor the temperature of the chicken itself. The USDA recommends cooking chicken to an internal temperature of 165°F. Using a meat thermometer can help you achieve this without guesswork. Insert the thermometer into the thickest part of the chicken, avoiding the bone, to get an accurate reading.

Additionally, consider the concept of direct and indirect heat. For thicker cuts, such as bone-in breasts or whole chickens, start by searing them over direct heat to create those grill marks and then move them to a cooler part of the grill to finish cooking through indirect heat. This dual-zone cooking method allows you to control the temperature more effectively and prevents the outside from burning while the inside remains undercooked.

Lastly, don’t forget to let your chicken rest after grilling! Allowing it to sit for a few minutes will enable the juices to redistribute, resulting in a more flavorful and tender piece of meat. Mastering temperature control gives you the power to serve perfectly grilled chicken every time, impressing your friends and family with your grilling prowess. So fire up that grill, keep an eye on the heat, and get ready to savor the delicious results!

4. Preparing the Grill: Charcoal vs. Gas

When it comes to grilling chicken to perfection, one of the most crucial steps lies in the preparation of your grill. The choice between charcoal and gas can significantly influence the flavor, texture, and overall outcome of your meal. Each method has its unique advantages, and understanding these can help you make an informed decision that aligns with your grilling style.

**Charcoal Grilling**: For many aficionados, charcoal grilling is the gold standard. The unmistakable smoky flavor imparted by burning charcoal is difficult to replicate. When using a charcoal grill, start by arranging the charcoal into a mound and lighting it until the coals are covered with a light ash—this usually takes about 15-20 minutes. Once they’re glowing hot, spread them out evenly for direct grilling, or bank them to one side for indirect cooking. The key here is to control the heat: have a hot zone for searing and a cooler zone for cooking through. Don’t forget to add wood chips for an extra layer of flavor; hickory or applewood can elevate your chicken to new heights.

**Gas Grilling**: On the other hand, gas grills offer convenience and precision. With the simple turn of a knob, you can adjust the heat to your preferred level, making it easier to maintain a consistent temperature throughout the cooking process. Preheat your gas grill by lighting it and letting it reach the desired temperature before placing your chicken on the grates. The even heat distribution allows for perfect cooking without the need for constant monitoring. While gas grills may not impart the same smoky flavor as their charcoal counterparts, experimenting with smoker boxes filled with wood chips can introduce that beloved smokiness to your chicken.

Ultimately, the choice between charcoal and gas comes down to personal preference, convenience, and the flavors you desire. Whether you opt for the traditional charm of charcoal or the modern ease of gas, mastering the grill comes down to understanding how to prepare your cooking surface, ensuring your chicken turns out juicy and flavorful every time. So fire up those grills, and get ready to impress your taste buds!

5. Essential Tools for Grilling Chicken

What are the best ways to grill chicken?
Credit : whatcanu.com

When it comes to grilling chicken to perfection, having the right tools at your disposal can make all the difference between a lackluster meal and a mouthwatering masterpiece. Here’s a rundown of essential tools that every grilling enthusiast should consider for achieving juicy, flavorful chicken every time.

**1. Grill Thermometer:** Ensuring your chicken is cooked to the perfect internal temperature is crucial for both safety and flavor. A reliable grill thermometer takes the guesswork out of cooking. Opt for a digital instant-read thermometer for quick results, allowing you to check the doneness without losing valuable heat from the grill.

**2. Long-Handled Tongs:** When it comes to flipping and turning your chicken, a sturdy pair of long-handled tongs is indispensable. These allow you to maneuver chicken pieces easily while keeping your hands at a safe distance from the heat. Look for tongs with a good grip and a locking mechanism for easy storage.

**3. Grill Basket:** For those times when you’re grilling smaller cuts of chicken or marinated pieces that may fall through the grates, a grill basket is a lifesaver. These baskets provide a secure place for your chicken, allowing for even cooking and easy flipping without the fear of losing your dinner to the flames.

**4. Basting Brush:** To enhance the flavor of your grilled chicken, a basting brush is essential for applying marinades, sauces, or oils. Opt for a silicone brush that can withstand high temperatures and is easy to clean. Basting your chicken periodically keeps it moist and infuses it with layers of flavor.

**5. Aluminum Foil:** While it might not seem like a tool, aluminum foil is your friend when it comes to grilling chicken. Use it to create foil packets for marinated chicken or to cover the grill for indirect cooking. Foil can also be used to wrap leftover grilled chicken, preserving its moisture and flavor for future meals.

**6. Grill Brush:** Maintaining your grill is just as important as cooking on it. A grill brush will help you keep your grates clean and free from burnt residue, which can affect the taste of your chicken. Choose a sturdy brush with stainless steel bristles for durability and effectiveness.

By equipping yourself with these essential grilling tools, you’ll be well on your way to mastering the grill and serving perfectly grilled chicken that will impress family and friends alike. Each tool serves its purpose, ensuring that your grilling experience is not only enjoyable but also yields delicious results every time. Happy grilling!

6. The Art of Seasoning: Herbs and Spices to Use

When it comes to grilling chicken, the secret to achieving that mouthwatering flavor lies in the art of seasoning. A well-seasoned piece of chicken can elevate your dish from ordinary to extraordinary, transforming a simple meal into a culinary delight. The key is to strike a balance between enhancing the natural flavors of the chicken and introducing bold notes that tantalize the taste buds.

**Herbs:** Fresh herbs are a grill master’s best friend. Consider using classic staples like rosemary and thyme, which add an earthy depth to grilled chicken. For a brighter taste, sprinkle some fresh parsley or basil just before serving. A marinade that includes cilantro can also lend a refreshing twist, especially when paired with lime juice for a zesty kick. Don’t shy away from experimenting with herbs like tarragon or dill for a unique flavor profile that surprises and delights.

**Spices:** The world of spices opens up a realm of possibilities. Paprika, whether sweet or smoked, provides a warm, rich flavor and a beautiful color to your chicken. Cumin and coriander bring a subtle earthiness, while a pinch of cayenne can add just the right amount of heat for those who enjoy a bit of spice. For a more adventurous palate, try a blend of garam masala or za’atar to transport your taste buds on a flavor journey.

**Marinades and Rubs:** Combining herbs and spices into a marinade or rub can create a flavor-packed experience. A simple mixture of olive oil, lemon juice, garlic, and your choice of herbs can work wonders. Let your chicken soak in this blend for at least 30 minutes—or even overnight—to ensure the flavors penetrate the meat deeply. Alternatively, a dry rub made with your favorite spices can also create a beautifully caramelized crust on the grill, sealing in moisture while imparting rich flavor.

Remember, the art of seasoning is all about personal preference. Don’t be afraid to taste as you go and adjust according to your liking. With the right herbs and spices, you’ll unlock a world of flavor that will keep your guests coming back for more. So grab your favorite seasonings, unleash your creativity, and get ready to grill chicken that’s not just cooked, but perfectly seasoned and bursting with flavor!

7. Techniques for Even Cooking: Direct vs. Indirect Heat

What are the best ways to grill chicken?
Credit : whatcanu.com

When it comes to grilling chicken to perfection, understanding the difference between direct and indirect heat is crucial for achieving that coveted juicy, evenly cooked result. Both techniques serve distinct purposes, and mastering them can elevate your grilling game to new heights.

**Direct heat** is your go-to method for quick cooking and achieving those beautiful grill marks. This technique involves placing the chicken directly over the heat source, whether it’s charcoal or gas flames. Ideal for thinner cuts, like chicken breasts or wings, direct heat allows for a sear that locks in moisture and flavor. To utilize this method effectively, preheat your grill to a high temperature, then place the chicken on the grates for a few minutes on each side. Keep a close eye on it, as cooking times can vary based on the thickness of the pieces. The result? A tantalizingly charred exterior that contrasts beautifully with the tender, juicy meat inside.

On the other hand, **indirect heat** is your secret weapon for larger cuts, such as whole chickens or bone-in thighs. This method involves placing the chicken away from the direct flames, allowing it to cook slowly in a more controlled environment. To set up your grill for indirect heat, simply light one side and leave the other side off, creating a two-zone cooking area. This technique is perfect for ensuring that the chicken cooks evenly without burning the outside. Cover the grill to trap heat and smoke, resulting in a deliciously cooked bird that’s tender and infused with flavor. The key here is patience; slow cooking allows the interior to reach the desired temperature without compromising the exterior.

Combining these two techniques can also yield fantastic results. Start by searing the chicken over direct heat to develop a flavorful crust, and then move it to the cooler side of the grill for gentle cooking. This dual approach not only enhances the flavor but also ensures that your chicken is perfectly cooked through, eliminating the risk of dry, overcooked meat.

By skillfully employing direct and indirect heat, you can become a grill master, ensuring that every chicken dish you serve is nothing short of extraordinary. Whether you’re cooking up a casual backyard barbecue or an elegant dinner, understanding these techniques will make all the difference in delivering perfectly grilled chicken every time.

8. Using a Meat Thermometer for Perfect Doneness

When it comes to grilling chicken, achieving the perfect doneness can be a daunting task, but a meat thermometer is your ultimate ally in this culinary quest. Gone are the days of slicing into your chicken to check for that elusive, juicy pinkness at the bone, which can lead to dry, overcooked meat or, worse yet, undercooked poultry. Investing in a quality meat thermometer takes the guesswork out of grilling, ensuring that your chicken is cooked to perfection every single time.

To use a meat thermometer effectively, insert the probe into the thickest part of the chicken, avoiding the bone, which can give you an inaccurate reading. For chicken breasts, you’re aiming for an internal temperature of 165°F (74°C), while thighs can be safely enjoyed at 175°F (80°C). As the chicken cooks, monitor the temperature closely. As it approaches the target, reduce your grill’s heat, allowing for a gentle finish that locks in moisture and flavor.

Not only does using a meat thermometer help you achieve the ideal doneness, but it also grants you the confidence to experiment with different marinades and grilling techniques. Whether you’re going for a smoky barbecue glaze or a light herb-infused rub, knowing that your chicken is cooked accurately frees you to focus on the flavors and presentation.

Once your chicken reaches the desired temperature, remember to let it rest for a few minutes before slicing. This crucial step allows the juices to redistribute, resulting in tender, flavorful meat. So, grab that meat thermometer, and take your chicken grilling game to the next level—your taste buds will thank you!

9. Tips for Achieving Perfect Grill Marks

Achieving those coveted grill marks on your chicken is not just a matter of aesthetics; it’s a badge of honor that signifies a perfectly grilled piece of meat. Grill marks not only enhance the visual appeal of your dish but also contribute to the overall flavor by creating delicious caramelization on the surface. Here are some essential tips to ensure you achieve those iconic crosshatch patterns on your chicken every time.

**Preheat Your Grill:** The first step to perfect grill marks is to ensure your grill is hot enough. Preheat your grill to a high temperature, ideally around 400°F to 450°F. A properly heated grill will sear the chicken quickly, locking in moisture and flavor while creating those distinctive lines.

**Oil Your Grates:** To prevent sticking and ensure clean grill marks, oil your grates before placing your chicken on them. Use a paper towel dipped in vegetable oil and carefully wipe the grates, or use a grill-safe spray. This not only helps with the marks but also contributes to an even sear.

**Positioning is Key:** When placing your chicken on the grill, be deliberate with your positioning. For classic grill marks, set the chicken down at a 45-degree angle to the grates. After a few minutes, rotate the chicken 90 degrees without flipping it over. This technique will create the beautiful crosshatch pattern that makes grilled chicken look professionally done.

**Timing and Patience:** Don’t rush the process. Allow the chicken to sear undisturbed for about 4-5 minutes on each side, depending on the thickness. This waiting period is crucial for developing those grill marks—flipping too soon can lead to sticking and uneven marks.

**Flip with Care:** When it’s time to flip your chicken, use tongs instead of a fork, which can pierce the meat and release valuable juices. Gently lift the chicken and turn it over, ensuring you don’t disrupt the sear you’ve already created.

**Finishing Touches:** Once your chicken is cooked through and has those beautiful grill marks, consider adding a final touch. A light brush of marinade or glaze during the last few minutes on the grill can enhance both flavor and appearance, leaving you with a beautifully charred and enticing dish.

By following these tips, you’ll not only impress your guests with the visual appeal of your grilled chicken but also elevate its flavor, making each bite a true delight. Mastering the art of grill marks is just one step on your journey to becoming a grilling aficionado!

10. Resting the Chicken: Why It Matters

Resting the chicken after grilling is a crucial step that many home cooks overlook, but it can make all the difference in achieving perfectly juicy and flavorful results. When chicken is cooked, the proteins contract and the juices are pushed towards the center of the meat. If you cut into it immediately after grilling, all those delightful juices will escape, leaving you with a dry and less satisfying dish.

Allowing the chicken to rest for at least 5 to 10 minutes after it comes off the grill gives the juices time to redistribute throughout the meat. This resting period helps ensure that each bite is succulent and moist. The residual heat continues to cook the chicken slightly, bringing it to the optimal temperature without overcooking.

To rest your chicken properly, transfer it from the grill to a cutting board and loosely cover it with aluminum foil. This maintains warmth while allowing steam to escape, preventing the skin from becoming soggy. During this time, you can prepare any side dishes or sauces, making it a perfect moment to add the finishing touches to your meal.

Remember, patience is key. The few extra minutes you take to let your chicken rest will be rewarded with tender, juicy meat that’s bursting with flavor, making every bite a delightful experience. So, resist the urge to dive in too quickly—your taste buds will thank you!

11. Creative Sauce and Glaze Ideas

When it comes to grilling chicken, the sauce or glaze can elevate the dish from ordinary to extraordinary. The right combination of flavors not only enhances the natural juiciness of the chicken but also adds a delightful complexity that keeps taste buds tingling. Here are some creative sauce and glaze ideas that will make your grilled chicken the star of any BBQ.

**1. Zesty Citrus Marinade:** Combine fresh orange juice, lime juice, minced garlic, and a splash of olive oil for a bright, refreshing marinade. The acidity from the citrus not only tenderizes the chicken but also infuses it with a vibrant flavor. Let it marinate for at least an hour, and you’ll have a dish that bursts with sunshine in every bite.

**2. Smoky BBQ Honey Glaze:** Mix your favorite barbecue sauce with honey and a dash of smoked paprika for a sticky, sweet glaze that caramelizes beautifully on the grill. This combo allows the sugars to caramelize, forming a glossy finish that adds depth to your grilled chicken, making it irresistible.

**3. Spicy Sriracha and Lime:** For those who crave heat, a mixture of sriracha, lime juice, and a hint of brown sugar creates a fiery glaze that packs a punch. Brush it on during the last few minutes of grilling to achieve a sticky, spicy coating that will have your guests reaching for seconds.

**4. Herbed Yogurt Sauce:** For a refreshing twist, consider a herbed yogurt sauce made from Greek yogurt, fresh dill, mint, and a squeeze of lemon. This cooling sauce is perfect for grilled chicken, balancing the smoky flavors with its creamy texture and zesty notes.

**5. Teriyaki Soy Glaze:** Combine soy sauce, mirin, brown sugar, and sesame oil for a classic teriyaki glaze. Brush this on your chicken during the last few minutes of grilling for a sticky, savory finish that’s reminiscent of your favorite Asian takeout.

**6. Pineapple Salsa:** For a fruity flair, try a fresh pineapple salsa made with diced pineapple, red onion, cilantro, and jalapeño. This vibrant topping adds a refreshing crunch and a sweet-and-spicy kick that pairs perfectly with grilled chicken.

Experimenting with these sauces and glazes not only enhances flavor but also allows you to customize your chicken to suit various palates. Whether you prefer something tangy, sweet, spicy, or fresh, these creative ideas will help you master the grill and serve up perfectly grilled chicken every time. So fire up that grill, get creative, and let your culinary imagination run wild!

12. Troubleshooting Common Grilling Issues

Grilling chicken can be a delightful experience, but even the most seasoned grillers encounter challenges along the way. Troubleshooting common grilling issues is essential to ensure your chicken turns out perfectly every time. Here are some common problems and their solutions to keep your grilling game strong.

**1. Uneven Cooking:** If you find that some pieces of chicken are undercooked while others are overdone, it may be due to uneven heat distribution on your grill. To combat this, invest in a good quality grill thermometer to monitor the temperature accurately. Additionally, consider using the two-zone grilling method—create a hot side for searing and a cooler side for gentle cooking. This way, you can start with high heat to get those beautiful grill marks and then move the chicken to the cooler side to finish cooking without burning.

**2. Sticking to the Grill:** There’s nothing more frustrating than when your chicken skin sticks to the grill grates, tearing apart your beautifully marinated pieces. To prevent this, ensure your grill is preheated and properly oiled. Use a paper towel dipped in cooking oil and carefully wipe down the grates just before placing the chicken on them. This simple step creates a non-stick surface that allows for easy flipping and removal.

**3. Dry or Overcooked Chicken:** Achieving juicy and flavorful chicken can sometimes feel like a balancing act. If your chicken tends to come out dry, it may be due to cooking it at too high a temperature or for too long. Always aim for an internal temperature of 165°F (75°C) and use a meat thermometer to check. Additionally, consider brining your chicken beforehand or marinating it for a few hours. This infuses moisture and flavor, ensuring your chicken stays succulent even when cooked over high heat.

**4. Flavorless Chicken:** If your grilled chicken lacks flavor, it’s time to rethink your seasoning strategy. Don’t skimp on the marinade or rub! A good marinade should have a balance of acidity (like lemon juice or vinegar), oil, and plenty of spices. Allow your chicken to marinate for at least 30 minutes, but ideally, a few hours or overnight for maximum flavor infusion. For an extra kick, consider adding a dry rub right before grilling to enhance the exterior flavor.

**5. Burnt Outside, Raw Inside:** This common issue often arises from cooking chicken over flames that are too high. To avoid this, use indirect heat to cook your chicken through while still achieving a gorgeous char. Start by searing the chicken on direct heat for a few minutes on each side, then move it to the cooler side of the grill to finish cooking. This method allows the internal temperature to rise without burning the exterior.

By keeping these troubleshooting tips in mind, you can tackle common grilling issues head-on, ensuring that your chicken not only looks great but also tastes divine. Mastering these techniques will elevate your grilling skills, making every barbecue event a resounding success!

13. Pairing Sides and Drinks with Grilled Chicken

When it comes to mastering the grill, the chicken may take center stage, but the sides and drinks you choose can elevate your meal from ordinary to extraordinary. Pairing your perfectly grilled chicken with the right accompaniments not only enhances the overall flavor profile but also creates a well-rounded dining experience that will leave your guests raving.

**Sides that Sing:** Think about the textures and flavors that will complement your grilled chicken. A light and refreshing coleslaw can provide a crunchy contrast, while a creamy potato salad offers a rich comfort. Grilled vegetables, such as bell peppers, zucchini, and asparagus, bring vibrant colors and earthy flavors to your plate. Consider adding a zesty corn salad with lime and cilantro to bring a burst of freshness. For a more indulgent option, a creamy mac and cheese or buttery garlic bread can satisfy those craving something hearty.

**The Perfect Drink:** Don’t forget about beverages! The right drink can enhance the enjoyment of your meal. A crisp, chilled white wine like Sauvignon Blanc or a light red like Pinot Noir can beautifully complement the flavors of your grilled chicken, especially if you’ve marinated it with herbs or citrus. If you’re catering to a non-alcoholic crowd, consider refreshing iced teas or lemonades, perhaps infused with herbs like mint or basil to add an extra layer of flavor. For something fun, craft cocktails featuring fresh fruits or herbs can add a festive touch to your gathering.

**Balancing Act:** Remember, the key to a great meal is balance. If your grilled chicken has a spicy kick, consider serving it with cooling sides and refreshing drinks. Conversely, if your chicken is lightly seasoned, don’t shy away from bold, flavorful sides that can stand up to it. By thoughtfully pairing your sides and drinks with grilled chicken, you’ll create a harmonious meal that celebrates the art of grilling while tantalizing the taste buds of everyone at your table. Whether it’s a casual backyard barbecue or an elegant dinner party, these pairings will ensure your grilled chicken shines in the best possible light.

14. Cleaning and Maintaining Your Grill

Cleaning and maintaining your grill is an essential step that often gets overlooked amidst the excitement of cooking up a delicious meal. A well-maintained grill not only ensures better flavor and cooking performance but also extends the life of your grilling equipment. To start, make it a habit to clean your grill grates after every use. While the grill is still warm, use a stiff wire brush to scrub away any food residue or charred bits. For stubborn grime, a mixture of vinegar and baking soda works wonders—spray it on, let it sit for a few minutes, and then scrub away.

Don’t forget about the grease trap! Over time, grease can build up and create a fire hazard, so regularly check, empty, and clean it out to prevent flare-ups. For gas grills, inspect the burners and hoses for any clogs or leaks at the start of each grilling season. A simple soap and water solution can reveal any leaks; just apply it to the hoses and look for bubbles forming.

For charcoal grills, ensure that you remove leftover ash after each use. Ash can trap moisture, leading to rust and deterioration, so a quick cleanup will help keep your grill in prime condition. Additionally, every few months, consider giving your grill a deeper clean by disassembling components and washing them with warm, soapy water.

Finally, protect your investment by using a grill cover when it’s not in use. This simple step will shield your grill from the elements, preventing rust and fading while keeping it ready for your next barbecue. With consistent care and maintenance, you’ll ensure that your grill performs at its best, allowing you to master the art of grilling perfectly succulent chicken, time after time.

15. Experimenting with Different Grilling Methods: Smoking and Rotisserie

When it comes to grilling chicken, there’s a world of flavors waiting to be explored beyond the traditional direct heat method. Two techniques that can elevate your poultry game to new heights are smoking and rotisserie cooking. Both methods offer unique benefits, infusing your chicken with tantalizing flavors and creating a succulent texture that’s hard to resist.

**Smoking** is a technique that allows you to impart a rich, deep flavor through the slow infusion of wood smoke. Whether you choose hickory, applewood, or mesquite, each type of wood brings its own signature taste. To get started, you’ll want to use a dedicated smoker or a grill set up for indirect heat. Soak your wood chips in water for about 30 minutes and then add them to the heat source. The key is to maintain a low temperature, usually between 225°F to 250°F, allowing the chicken to cook slowly and absorb those smoky notes. This method is perfect for bone-in pieces like thighs and drumsticks, which benefit from the extended cooking time, resulting in tender, juicy meat with a delightful crust.

On the other hand, **rotisserie grilling** offers a mesmerizing way to cook chicken evenly while keeping it moist. This method involves skewering the chicken on a rotisserie spit, which rotates over the heat source. The constant rotation ensures that the chicken cooks uniformly, and the skin gets beautifully crispy while the meat remains juicy. If you have a gas or charcoal grill with a rotisserie attachment, this method is worth trying. To enhance the flavor, consider marinating your chicken beforehand or seasoning it generously with your favorite rub. The slow, even cooking allows the fat to render down, basting the chicken as it spins, creating a mouthwatering dish that’s perfect for impressing guests at your next barbecue.

By experimenting with these alternative grilling methods, you not only expand your culinary repertoire but also delight your taste buds with an array of flavors and textures. So fire up your grill and let your creativity soar—your perfectly grilled chicken awaits!

As we wrap up our guide on mastering the grill for perfectly grilled chicken every time, we hope you feel inspired and equipped to take your grilling skills to the next level. From selecting the right cut of chicken to mastering marinades, temperature control, and cooking techniques, you now have a toolkit filled with essential tips to ensure juicy, flavorful results. Remember, practice makes perfect, so don’t be afraid to experiment and find what works best for you. Whether you’re hosting a backyard barbecue or enjoying a quiet dinner at home, the satisfaction of serving up perfectly grilled chicken will surely delight your family and friends. So fire up that grill, embrace the smoke and sizzle, and enjoy the delicious journey of grilling! Happy grilling!

What are the healthiest cooking oils?

In the quest for healthier living, the oils we choose for cooking can make a significant difference in our overall well-being.

With a plethora of options lining supermarket shelves—from olive oil and avocado oil to coconut oil and canola oil—deciding which cooking oils to incorporate into your kitchen can be overwhelming. Each type of oil comes with its unique set of flavors, cooking properties, and health benefits, making it essential to understand their distinct characteristics. In this ultimate guide, we will demystify the world of cooking oils, diving into the healthiest options available, their nutritional profiles, and the best culinary uses for each. Whether you’re sautéing vegetables, baking a delectable dish, or dressing a fresh salad, this comprehensive resource will empower you to make informed choices that not only enhance your meals but also support a healthier lifestyle. Join us as we explore the rich, flavorful world of cooking oils and discover which ones truly deserve a place in your pantry.

1. Introduction to Cooking Oils: Why They Matter

What are the healthiest cooking oils?
Credit : whatcanu.com

Cooking oils are more than just a medium for frying or sautéing; they are an essential component of our culinary practices and play a significant role in our overall health. The types of oil we choose can affect not only the flavor and texture of our dishes but also our nutritional intake and long-term well-being. With the vast array of oils available on grocery store shelves—from the familiar olive and canola to the more exotic avocado and coconut—it’s crucial to understand the properties and benefits of each.

At their core, cooking oils are fats that provide energy and help our bodies absorb essential vitamins. They can be classified into two main categories: saturated and unsaturated fats. Unsaturated fats, often found in plant-based oils, are known for their heart-health benefits, while saturated fats, predominantly found in animal fats and certain tropical oils, should be consumed in moderation.

The smoke point of an oil—the temperature at which it begins to smoke and break down—also plays a crucial role in cooking. Using an oil beyond its smoke point can lead to the formation of harmful compounds and an unpleasant taste, making it vital to choose the right oil for the method of cooking, whether you’re frying, baking, or dressing a salad.

Moreover, the right cooking oil can enhance the nutritional profile of your meals. For instance, oils rich in omega-3 fatty acids, such as flaxseed oil, can support heart health, while oils packed with antioxidants, like extra virgin olive oil, can combat inflammation and improve overall health.

In this guide, we will explore various cooking oils, detailing their health benefits, ideal cooking methods, and tips on how to incorporate them into your daily meals. By the end, you’ll not only have a clearer understanding of the healthiest cooking oils available but also feel empowered to make informed choices that will enhance both your culinary creations and your well-being.

2. Understanding Smoke Points: What You Need to Know

When it comes to cooking oils, understanding smoke points is crucial for both health and flavor. The smoke point is the temperature at which an oil begins to break down and produce smoke, releasing harmful compounds and imparting a burnt taste to your dishes. Using oils past their smoke point can not only ruin the flavor of your food but also lead to the formation of free radicals, which may have negative health effects.

Different oils have different smoke points, so it’s essential to choose the right one for your cooking method. For example, oils with high smoke points, like avocado oil (around 520°F or 271°C) and refined grapeseed oil (approximately 420°F or 216°C), are excellent choices for high-heat cooking methods such as frying and searing. These oils can withstand intense temperatures without breaking down, allowing you to achieve that perfect golden-brown crust without compromising the health benefits.

On the other hand, oils with lower smoke points, such as extra virgin olive oil (around 375°F or 191°C) and flaxseed oil (approximately 225°F or 107°C), are better suited for dressings, dips, or low-heat cooking. Using them at high temperatures can not only lead to a less-than-ideal flavor but may also diminish their nutritional value.

In addition to temperature considerations, it’s important to remember that the freshness of your cooking oils can also affect their smoke points. Oils that have been sitting on the shelf for too long may oxidize and have lower smoke points, so always check the expiration date and store them in a cool, dark place to preserve their quality. Understanding smoke points helps you not only cook better but also make the healthiest choices in your culinary adventures. By selecting oils thoughtfully based on their smoke points, you can elevate your dishes while maintaining optimal health.

3. The Health Benefits of Using Quality Cooking Oils

What are the healthiest cooking oils?
Credit : whatcanu.com

When it comes to cooking oils, the quality you choose can significantly impact not only the flavor of your dishes but also your overall health. Quality cooking oils are rich in essential nutrients and beneficial compounds that can enhance your diet and promote wellness.

Firstly, many high-quality oils, such as extra virgin olive oil, avocado oil, and flaxseed oil, are packed with monounsaturated fats. These heart-healthy fats help lower bad cholesterol levels and reduce the risk of heart disease. Olive oil, in particular, is renowned for its anti-inflammatory properties, thanks to its high content of antioxidants like oleocanthal, which can mimic the effects of ibuprofen in reducing inflammation.

Moreover, some oils are excellent sources of omega-3 fatty acids, which are crucial for brain health and reducing inflammation throughout the body. Flaxseed oil and walnut oil are particularly rich in these fatty acids, making them excellent choices for salads and cold dishes, where their delicate flavors can shine without the need for heat.

In addition to these fats, quality oils often contain vitamins and phytonutrients that contribute to overall health. For instance, avocado oil is not only flavorful but also loaded with vitamin E, which is known for its skin-protective properties and its role as a powerful antioxidant that combats free radicals in the body.

Lastly, using quality cooking oils can enhance the absorption of fat-soluble vitamins (A, D, E, and K) from the foods you consume. This means that drizzling a good-quality oil over a salad or incorporating it into your cooking can help your body absorb these essential nutrients more effectively.

Incorporating high-quality cooking oils into your daily meal prep is a simple way to elevate not just the taste of your meals but also your nutritional intake. By choosing oils that are minimally processed and rich in beneficial compounds, you can reap the health benefits while savoring the flavors they bring to your dishes.

4. Olive Oil: A Mediterranean Staple

Olive oil has long been celebrated as a cornerstone of the Mediterranean diet, renowned not only for its rich flavor but also for its myriad health benefits. Pressed from the fruit of the olive tree, this golden liquid is a staple in kitchens around the world, and for good reason. Its versatility makes it an excellent choice for sautéing vegetables, drizzling over salads, or dipping with fresh bread.

At the heart of olive oil’s appeal is its high content of monounsaturated fats, which have been linked to a reduced risk of heart disease. This oil is also packed with antioxidants, particularly vitamin E and polyphenols, which help combat oxidative stress and inflammation in the body. Research suggests that regular consumption of olive oil can contribute to improved cholesterol levels and better overall cardiovascular health.

When selecting olive oil, quality matters. Extra virgin olive oil is the highest grade available, made from the first cold pressing of olives and characterized by its superior flavor and lower acidity. Look for labels that indicate “first cold pressed” and check for certifications that ensure authenticity and quality. The flavor can vary significantly depending on the type of olives used and the region in which they are grown, ranging from buttery and mild to peppery and robust.

To fully enjoy the health benefits of olive oil, consider incorporating it into your daily cooking. Use it as a base for salad dressings, a finishing touch on roasted vegetables, or even as a flavor enhancer for soups and stews. But remember, while olive oil is healthy, it’s still calorie-dense, so moderation is key.

In summary, olive oil isn’t just a cooking fat; it’s a health-boosting powerhouse that deserves a prominent place in your pantry. Embrace this Mediterranean staple, and savor the flavor and wellness benefits it brings to your meals.

5. Avocado Oil: Nutrient-Rich and Versatile

What are the healthiest cooking oils?
Credit : whatcanu.com

### 5. Avocado Oil: Nutrient-Rich and Versatile

When it comes to cooking oils, few can rival the impressive nutrient profile and versatility of avocado oil. Extracted from the flesh of ripe avocados, this oil is celebrated not just for its rich, buttery flavor but also for its numerous health benefits. With a high smoke point of around 520°F (271°C), avocado oil is perfect for a variety of cooking methods, from sautéing and frying to roasting and grilling, making it a kitchen staple for health-conscious chefs.

Rich in monounsaturated fats, particularly oleic acid, avocado oil supports heart health by promoting healthy cholesterol levels. Additionally, it boasts a wealth of essential vitamins, including E, D, and K, which are known for their antioxidant properties and role in maintaining healthy skin. This makes it an excellent choice not only for cooking but also for drizzling over salads or using as a dip for fresh bread.

One of the standout features of avocado oil is its versatility in flavor profiles. Its mild yet distinct taste complements both savory and sweet dishes, allowing it to shine in everything from creamy dressings to baked goods. Furthermore, avocado oil is a fantastic carrier for herbs and spices, enhancing the overall flavor of your meals while adding a nutritional punch.

Beyond the kitchen, avocado oil is increasingly finding its way into beauty regimens, thanks to its moisturizing properties. Used as a natural moisturizer, it can hydrate skin and hair, making it a valuable addition to your personal care routine.

Incorporating avocado oil into your diet not only aligns with a healthy lifestyle but also opens up a world of culinary creativity. Whether you’re drizzling it over a vibrant salad, using it as a base for marinades, or simply enjoying it as an everyday cooking oil, avocado oil is truly a superstar in the realm of healthy cooking fats. Embrace its richness and versatility, and watch as your meals transform into nutritious and delicious experiences.

6. Coconut Oil: Myths and Facts

Coconut oil has gained immense popularity in recent years, often touted as a superfood that can revolutionize your cooking and health. However, alongside its rise to fame, a plethora of myths and misconceptions have emerged, creating a cloud of confusion for consumers. In this section, we’ll sift through the noise to uncover the facts about coconut oil, helping you make informed decisions for your kitchen.

First and foremost, let’s address the myth that coconut oil is a miracle cure-all. While it does offer certain health benefits, such as antimicrobial properties and the potential to boost heart health when used in moderation, it’s essential to recognize that it is still a saturated fat. In fact, about 90% of the fat in coconut oil is saturated, which can raise LDL cholesterol levels if consumed in excess. This doesn’t mean you should eliminate it from your diet entirely, but rather use it thoughtfully, balancing it with healthier unsaturated oils like olive or avocado oil.

Another common belief is that coconut oil is the best choice for high-heat cooking. While it does have a relatively high smoke point (around 350°F or 177°C), it’s not the only option. Olive oil, for instance, has a smoke point of about 375-405°F (190-207°C) and is rich in heart-healthy monounsaturated fats, making it an excellent alternative for sautéing and roasting.

Coconut oil also boasts a unique flavor profile, lending a subtle sweetness to dishes, which can enhance certain recipes—think tropical curries or baked goods. However, this distinct taste isn’t universally loved; it can overpower more delicate flavors. Thus, it’s essential to consider the culinary context when using coconut oil.

Incorporating coconut oil into your diet can certainly have its place, especially in moderation and as part of a varied cooking repertoire. Whether you’re using it for frying, baking, or even as a natural moisturizer or hair conditioner, understanding the facts behind coconut oil ensures you reap its benefits without falling prey to its myths. Embrace coconut oil thoughtfully, and it can be a valuable addition to your cooking oil collection.

7. Canola Oil: Is it a Healthy Option?

What are the healthiest cooking oils?
Credit : whatcanu.com

Canola oil has long been a staple in kitchens around the world, celebrated for its versatility and mild flavor. Extracted from the seeds of the canola plant, this oil is often touted as a heart-healthy option due to its favorable fatty acid profile. Comprising a high percentage of monounsaturated fats, canola oil is known to help reduce bad cholesterol levels when used in moderation, potentially lowering the risk of heart disease.

However, the health attributes of canola oil are a topic of much debate. While its low saturated fat content makes it an appealing choice, the majority of canola oil on the market today is refined and often derived from genetically modified crops. This raises concerns for those cautious about GMOs or looking to avoid highly processed oils. Moreover, many brands use chemical solvents during extraction, which can lead to the presence of trace residues in the final product.

When considering canola oil as a cooking option, it’s essential to look for cold-pressed or organic varieties, which tend to retain more nutrients and minimize the presence of harmful chemicals. Additionally, canola oil has a relatively high smoke point, making it suitable for various cooking methods, from sautéing to baking.

In summary, while canola oil can be part of a healthy diet, it’s crucial to choose high-quality options and consume it in moderation. Balancing canola oil with other cooking oils, like olive or avocado oil, can offer a more diverse range of nutrients and flavors, ensuring that your culinary adventures are both delicious and health-conscious.

8. Grapeseed Oil: Pros and Cons

### Grapeseed Oil: Pros and Cons

Grapeseed oil, derived from the seeds of grapes—often a byproduct of winemaking—has gained popularity as a versatile cooking oil in recent years. Its light flavor and high smoke point make it an appealing choice for various culinary applications, from sautéing and frying to salad dressings and marinades. However, like any cooking oil, grapeseed oil has its pros and cons, and understanding them can help you make informed choices for your health and cooking needs.

**Pros:**

1. **High Smoke Point:** Grapeseed oil boasts a smoke point of around 420°F (216°C), making it suitable for high-heat cooking methods like frying and searing. This high tolerance means you can create crispy, golden-brown dishes without the worry of burning the oil.

2. **Rich in Polyunsaturated Fats:** Grapeseed oil is predominantly composed of polyunsaturated fats, particularly omega-6 fatty acids, which play a crucial role in cell structure and overall health when consumed in moderation.

3. **Vitamin E Content:** This oil is a good source of vitamin E, a powerful antioxidant that helps protect cells from damage caused by free radicals. This nutrient can also support skin health and improve immune function.

4. **Mild Flavor:** With its subtle, neutral taste, grapeseed oil enhances the flavors of your dishes without overpowering them. This makes it an excellent choice for salad dressings, marinades, and delicate sauces.

**Cons:**

1. **High in Omega-6 Fatty Acids:** While omega-6 fatty acids are essential for health, the typical Western diet is already rich in these fats. Overconsumption of omega-6s, especially without a balanced intake of omega-3 fatty acids, can lead to inflammation and health issues. It’s crucial to use grapeseed oil in moderation and balance it with omega-3 sources like flaxseed or fish oils.

2. **Refined Oil:** Most commercially available grapeseed oils are refined, which can strip away some of the beneficial nutrients and antioxidants. Choosing cold-pressed or minimally processed options can help retain more of their natural benefits.

3. **Potential Allergens:** For those with grape allergies, grapeseed oil may pose a risk, as it could potentially trigger allergic reactions. Always be cautious and check with a healthcare provider if you have food allergies.

4. **Sustainability Concerns:** The production of grapeseed oil can raise sustainability issues, particularly if it is sourced from conventionally grown grapes that may have been treated with pesticides. Opting for organic grapeseed oil can help mitigate this concern.

In conclusion, grapeseed oil can be a valuable addition to your cooking repertoire, offering both versatility and health benefits. However, it’s important to be mindful of its omega-6 content and sourcing practices. By using grapeseed oil wisely and in conjunction with other healthy fats, you can create delicious meals while supporting your overall well-being.

9. Peanut Oil: Flavor and Health Considerations

Peanut oil is a versatile cooking oil that has gained popularity not just for its high smoke point, but also for its unique flavor profile that can elevate a variety of dishes. With a nutty taste that complements stir-fries, sautés, and marinades, it’s a staple in many Asian cuisines and can bring a delightful richness to your favorite recipes.

From a health perspective, peanut oil boasts a favorable balance of fatty acids, primarily composed of monounsaturated fats, which are known to support heart health by helping to lower bad cholesterol levels. Additionally, peanut oil contains vitamin E, an antioxidant that can help protect your cells from oxidative stress. However, it’s important to consider that peanut oil is relatively high in omega-6 fatty acids, which, when consumed in excess, may contribute to inflammation if not balanced with omega-3 intake.

Another crucial consideration is allergies; peanut oil can trigger severe allergic reactions in sensitive individuals. While refined peanut oil is often considered safe for those with allergies, due to the high levels of processing that remove many of the allergenic proteins, it’s always best to err on the side of caution and consult with a healthcare provider if you have any concerns.

When using peanut oil in your cooking, opt for high-quality, cold-pressed versions when possible to maximize health benefits while enjoying its rich, nutty flavor. Whether you’re frying up a fresh batch of spring rolls or drizzling it over a vibrant salad, peanut oil can be a delicious and health-conscious addition to your culinary repertoire. Just remember to use it in moderation and as part of a balanced diet to fully reap its benefits.

10. Flaxseed Oil: Omega-3 Powerhouse

Flaxseed oil, often hailed as an Omega-3 powerhouse, is a nutritional gem that deserves a prominent place in your kitchen. Extracted from the tiny, nutrient-dense flaxseeds, this oil is packed with alpha-linolenic acid (ALA), a type of plant-based omega-3 fatty acid that offers a multitude of health benefits. Its impressive omega-3 content is known to support heart health, reduce inflammation, and even enhance skin vitality.

One of the most remarkable features of flaxseed oil is its delicate, nutty flavor, which can elevate a variety of dishes. It’s particularly delightful in salad dressings, where its rich taste can complement the freshness of greens and vegetables. Drizzle it over roasted vegetables or mix it into smoothies for a nutritional boost without overpowering the other ingredients. However, due to its low smoke point, it is best used unheated, making it perfect for cold dishes or as a finishing oil.

In addition to its culinary uses, flaxseed oil is also a fantastic source of lignans, a type of antioxidant that may contribute to hormonal balance and overall wellness. Incorporating this oil into your diet can be an excellent way to enhance your intake of essential fatty acids, especially if you follow a vegetarian or vegan lifestyle.

When purchasing flaxseed oil, look for cold-pressed, organic varieties stored in dark bottles to preserve its freshness and potency. Keep it refrigerated to prevent oxidation, as this oil is sensitive to heat and light. With its impressive health benefits and versatile applications, flaxseed oil is a simple yet powerful addition to your pantry, paving the way for healthier cooking and eating habits.

11. Sesame Oil: Nutritional Benefits and Uses

Sesame oil, a staple in many Asian cuisines, is not just prized for its distinctive nutty flavor but also for an impressive array of nutritional benefits. Extracted from sesame seeds, this oil is rich in polyunsaturated and monounsaturated fats, making it a heart-healthy choice. It boasts a high smoke point, around 410°F (210°C), which means it’s ideal for high-heat cooking methods like stir-frying and sautéing without breaking down and losing its beneficial properties.

One of the standout features of sesame oil is its wealth of antioxidants, particularly sesamol and sesamin, which have been shown to combat oxidative stress in the body. These powerful compounds may help reduce inflammation and lower the risk of chronic diseases such as heart disease and diabetes. Additionally, sesame oil contains a healthy dose of vitamin E and other essential nutrients, contributing to skin health and overall well-being.

In the kitchen, sesame oil is incredibly versatile. It can be used as a cooking oil, drizzled over salads for added flavor, or blended into marinades and dressings. Its robust flavor complements a variety of dishes, from Asian stir-fries and noodle soups to roasted vegetables and grilled meats. For those seeking to enhance their culinary repertoire, a touch of toasted sesame oil can elevate dishes with its rich, aromatic profile, imparting a depth of flavor that is hard to match.

Incorporating sesame oil into your diet is as simple as adding a splash to your next stir-fry or using it to enhance the flavor of your favorite dipping sauces. However, moderation is key, as with any oil. By choosing high-quality, cold-pressed sesame oil, you can ensure you’re getting the maximum health benefits while enjoying its delightful taste.

12. Comparing Oils: Fats, Flavor, and Functionality

When it comes to choosing the right cooking oil, understanding the nuances of fats, flavor, and functionality is essential. Each oil possesses a unique composition of fatty acids, which not only affects its health benefits but also its cooking properties and the overall taste it imparts to your dishes.

Starting with fats, oils can be broadly categorized into saturated, monounsaturated, and polyunsaturated fats. Saturated fats, found in oils like coconut and palm, tend to be solid at room temperature and can withstand high heat, making them ideal for frying. However, moderation is key, as excessive intake can raise cholesterol levels. On the other hand, oils rich in monounsaturated fats, such as olive and avocado oil, are celebrated for their heart-healthy benefits. They add a rich, buttery flavor to salads and roasted vegetables, enhancing dishes without overpowering them.

Polyunsaturated fats, including those found in canola and sunflower oil, are versatile and often used for baking or sautéing due to their high smoke points. These oils can be beneficial for heart health when used in moderation, but it’s essential to balance them with oils that have higher omega-3 fatty acids, like flaxseed or walnut oil, which are known for their anti-inflammatory properties.

Flavor is another critical aspect of oil selection. Some oils, like extra virgin olive oil, have a robust, fruity flavor that can elevate a simple dish, while others, like grapeseed oil, are more neutral and unobtrusive. When selecting an oil, consider how it will complement the ingredients in your recipe. For example, a delicate fish dish might be best paired with a light oil, whereas a hearty vegetable stir-fry could benefit from the richness of sesame oil.

Functionality is where your cooking needs come into play. Are you frying, sautéing, baking, or dressing? Each cooking method may require a different oil, based on its smoke point—the temperature at which an oil begins to smoke and break down. Oils with high smoke points, such as avocado and peanut oil, are perfect for high-heat cooking methods, while oils with lower smoke points, like flaxseed and pumpkin seed oil, are best used in dressings or drizzled over finished dishes to preserve their nutrients.

Ultimately, the key to mastering the art of cooking oils lies in understanding these three facets: fats, flavor, and functionality. By selecting the right oil for each culinary application, you can enhance the taste of your meals while also making healthier choices. So, next time you’re reaching for a bottle, consider what you’re cooking and how the oil can elevate your dish to new heights.

13. How to Choose the Right Oil for Different Cooking Methods

Choosing the right oil for various cooking methods is crucial not only for enhancing the flavor of your dishes but also for maximizing the health benefits of your meals. Different cooking techniques require oils with distinct characteristics, such as smoke points, flavor profiles, and nutritional content. Here’s a breakdown of how to select the best oil for your culinary needs.

**1. High-Heat Cooking (Searing, Stir-Frying, Deep-Frying):** When cooking at high temperatures, you need oils with high smoke points to prevent burning and the formation of harmful compounds. Oils like avocado oil, grapeseed oil, and peanut oil are excellent choices due to their stability under heat. Avocado oil, in particular, boasts a smoke point of around 520°F (271°C) and is rich in heart-healthy monounsaturated fats.

**2. Medium-Heat Cooking (Sautéing, Pan-Frying):** For methods that require moderate heat, oils like olive oil and canola oil work well. Extra virgin olive oil, with its robust flavor and rich antioxidants, is perfect for sautéing vegetables or cooking proteins. It has a smoke point of around 375°F (191°C), making it suitable for medium-heat applications while retaining its nutritional benefits.

**3. Low-Heat Cooking (Baking, Roasting):** When baking or roasting, you can opt for oils that may not have the highest smoke points but offer great flavor. Coconut oil and butter can enrich baked goods with a delightful taste and aroma. Coconut oil, with its unique profile, works well in various baked items, while butter adds a rich, creamy texture.

**4. Dressings and Finishing Oils:** When it comes to salads or finishing a dish, use oils that are flavorful and packed with nutrients. Oils like flaxseed oil, walnut oil, and sesame oil not only enhance taste but also offer a wealth of omega-3 fatty acids and antioxidants. These oils should not be heated, making them perfect for drizzling over dishes or incorporating into dressings for an extra layer of flavor.

**5. Specialty Oils:** Don’t overlook the unique profiles of specialty oils like truffle oil or chili oil. These oils can elevate your dishes with their distinct flavors. Use truffle oil sparingly as a finishing touch, while chili oil can add a spicy kick to stir-fries or marinades.

By understanding the properties of various cooking oils and their compatibility with different cooking methods, you can elevate your culinary creations while making health-conscious choices. Remember, the right oil not only enhances the taste of your meals but also contributes to a balanced diet. So, next time you reach for an oil, consider how it complements your cooking technique and the dish you’re preparing for a healthier and more delicious outcome.

14. Storage Tips for Keeping Cooking Oils Fresh

When it comes to cooking oils, proper storage is essential for maintaining their freshness and ensuring that you reap the full benefits of their nutritional value. Over time, exposure to light, heat, and air can lead to oxidation, resulting in rancidity and a decline in flavor and health benefits. Here are some practical storage tips to help keep your cooking oils fresh for longer.

First and foremost, choose the right container. glass bottles are the best option for storing cooking oils, as they are non-reactive and provide a barrier against environmental factors. If possible, opt for dark-colored glass, which helps to block out light, further protecting the oil from degradation. If you’re using plastic containers, ensure they are made from BPA-free materials and are specifically designed for oil storage.

Temperature plays a crucial role in oil preservation. Store your oils in a cool, dark place, away from heat sources such as stoves, ovens, or direct sunlight. A pantry or cupboard is ideal. For oils with a shorter shelf life, such as nut oils or oils infused with herbs, refrigeration can extend their freshness significantly. Just be mindful that some oils may become cloudy when chilled, but this won’t affect their quality.

Always be sure to tightly seal your oil containers after each use to minimize air exposure. If the original cap isn’t secure, consider transferring the oil to a pump bottle or a pour spout that has a tighter seal. Additionally, keeping oils away from strong-smelling substances can prevent them from absorbing unwanted flavors and aromas.

Lastly, be proactive about labeling your oils with the purchase date. Most cooking oils have a shelf life of about six months to a year, depending on the type. Regularly check for any off smells or unusual changes in appearance, which can indicate that the oil has gone bad. By implementing these storage tips, you can keep your cooking oils fresh and flavorful, enhancing your culinary creations while maximizing their health benefits.

15. Conclusion: Making Informed Choices for Your Cooking Oils

In conclusion, making informed choices for your cooking oils is essential for not only enhancing the flavors of your dishes but also for promoting your overall health. As we’ve explored throughout this guide, the variety of oils available can be overwhelming, each with its unique properties, smoke points, and health benefits. Understanding these factors empowers you to select the oil that best suits your cooking needs and dietary preferences.

Whether you prefer the rich, nutty flavor of sesame oil for your stir-fries, the light and fruity notes of extra virgin olive oil for your salads, or the high heat tolerance of avocado oil for frying, each option brings its own set of nutrients and potential health benefits. Prioritizing oils rich in monounsaturated fats and omega-3 fatty acids can contribute to heart health, while minimizing highly processed and saturated fats can lead to a more balanced diet.

As you navigate the grocery aisles, remember to read labels carefully, opting for cold-pressed or minimally processed oils whenever possible. Experimenting with different oils in your cooking can also add a new dimension to your culinary creations, allowing you to discover flavors and textures you may not have encountered before.

Ultimately, the key takeaway is to approach your cooking oil choices with mindfulness. By selecting quality oils and using them in moderation, you can elevate your meals while supporting your long-term health. So, the next time you reach for a bottle in your pantry, take a moment to consider its benefits and how it fits into your overall cooking strategy. Your body and taste buds will thank you!

As we wrap up our ultimate guide to the healthiest cooking oils, we hope you now feel empowered to make informed choices in your kitchen. With a variety of oils available, from heart-healthy olive oil to nutrient-rich avocado oil, understanding their unique benefits and best uses can transform your cooking and elevate your meals. Remember, the right oil not only enhances flavor but also contributes to your overall health and well-being. So whether you’re sautéing, roasting, or dressing a salad, choose wisely and enjoy the delicious results. We invite you to experiment with these oils, share your culinary creations, and embrace the journey toward healthier cooking!

How can I cook more sustainably?

In a world increasingly aware of the environmental impact of our daily choices, the kitchen presents a unique opportunity to make a difference.

Cooking sustainably not only benefits the planet but also encourages healthier eating habits and fosters a deeper appreciation for the ingredients we use. With climate change and resource depletion becoming more pressing issues, it’s essential to rethink how we prepare our meals. This blog post will guide you through 10 simple steps that can transform your cooking practices into eco-friendly habits. From selecting local and seasonal produce to minimizing food waste and exploring plant-based alternatives, these actionable tips will empower you to reduce your carbon footprint while enjoying delicious meals. Join us on this journey toward a more sustainable kitchen, where every bite counts in the fight for a healthier planet!

1. Understanding Sustainable Cooking: What It Means

How can I cook more sustainably?
Credit : whatcanu.com

Understanding sustainable cooking is the cornerstone of reducing your carbon footprint and making more environmentally conscious choices in the kitchen. At its core, sustainable cooking involves selecting ingredients and preparing meals in a way that minimizes harm to the planet while promoting health and well-being for both consumers and the environment. It’s about more than just choosing organic produce; it encompasses a holistic approach to food sourcing, preparation, and consumption.

Sustainable cooking begins with an awareness of where your food comes from. This means prioritizing local and seasonal ingredients, which not only supports local farmers and economies but also reduces the carbon emissions associated with transporting food over long distances. When you choose to shop at farmers’ markets or join a community-supported agriculture (CSA) program, you’re not just getting fresher produce; you’re also fostering a connection to your food and its origins.

Additionally, sustainable cooking promotes the idea of reducing waste. This can be achieved by utilizing every part of the ingredient—think of beet greens or broccoli stems that might otherwise be discarded. Creative meal planning and proper food storage techniques can help minimize leftovers and prevent food spoilage, ultimately reducing the amount of food that ends up in landfills.

Another vital aspect is being mindful of the cooking methods you use. Opting for energy-efficient appliances or cooking in batches can drastically cut down on energy consumption. Conscious choices, such as using pots and pans that retain heat well or turning off the oven a few minutes early, can lead to significant carbon savings over time.

In essence, understanding sustainable cooking is about integrating these principles into your daily routine. It encourages a shift in mindset from convenience and consumption to one of mindfulness and responsibility. By embracing sustainable cooking practices, you can not only enjoy delicious meals but also contribute to a healthier planet for future generations.

2. Step 1: Choose Local and Seasonal Ingredients

Choosing local and seasonal ingredients is one of the most impactful steps you can take toward cooking sustainably. When you source your produce, meats, and dairy from local farms, you not only support your community but also significantly reduce the carbon footprint associated with transporting food over long distances. Seasonal ingredients are typically fresher, tastier, and packed with nutrients, as they are harvested at their peak ripeness.

Imagine biting into a ripe tomato in the peak of summer; its flavor bursts with the essence of the sun and soil that nurtured it. In contrast, a tomato shipped from thousands of miles away may lack the same vitality and taste. By choosing local, you also encourage biodiversity and help maintain the unique agricultural practices of your region.

Visit your local farmers’ market or join a community-supported agriculture (CSA) program to discover what’s in season and available near you. Seasonal produce often includes a variety of fruits and vegetables that you may not usually consider, inspiring creativity in your cooking. Whether it’s vibrant squash in the fall, lush greens in the spring, or juicy berries in the summer, each season offers a bounty of flavors that can elevate your meals while being mindful of the environment.

By making a conscious effort to select local and seasonal ingredients, you’re not just feeding your family; you’re fostering a more sustainable food system that benefits the planet and supports local economies. This simple yet profound step can help set the foundation for a more eco-friendly kitchen, and as you explore the rich flavors of seasonal produce, you may just find that your meals become more satisfying and delicious than ever before.

3. Step 2: Incorporate More Plant-Based Meals

How can I cook more sustainably?
Credit : whatcanu.com

Incorporating more plant-based meals into your diet is not only a delicious way to diversify your culinary repertoire, but it’s also one of the most impactful steps you can take to reduce your carbon footprint. The production of plant-based foods generally requires fewer natural resources and emits fewer greenhouse gases compared to the production of animal-based products. By swapping even a few meals a week for plant-based options, you can significantly lessen your environmental impact.

Start by exploring the vibrant world of fruits, vegetables, legumes, grains, nuts, and seeds. These ingredients are not only packed with nutrients but also offer a multitude of flavors and textures that can make every meal exciting. Consider planning meatless Mondays or experimenting with “veganizing” your favorite recipes. For instance, replace ground beef with lentils or chickpeas in tacos, or use cauliflower as a base for a hearty pizza crust.

Don’t be afraid to try new ingredients and cuisines! Dive into the rich traditions of plant-based cooking from around the world—Indian dals, Mediterranean tabbouleh, or Thai curries can easily become staples in your kitchen. Additionally, focus on seasonal and local produce to further enhance the sustainability of your meals. This not only cuts down on the carbon emissions associated with transporting food long distances but also supports local farmers and encourages biodiversity.

As you explore plant-based cuisine, you may find that it fosters a deeper connection with your food. Engaging with the colors, aromas, and flavors of fresh ingredients can transform the way you cook and eat. By making this shift, you’re not just feeding yourself; you’re also contributing to a healthier planet. So grab your apron and get ready to create delicious, sustainable meals that everyone can enjoy!

4. Step 3: Reduce Food Waste: Tips for Better Planning

Reducing food waste is a pivotal step in cooking more sustainably and minimizing your carbon footprint. Not only does it help save resources and energy, but it also encourages better meal planning and thoughtful consumption. Here are some practical tips to get you started on your journey toward reducing waste in your kitchen.

Firstly, take a moment to assess what you already have in your pantry and refrigerator before making a grocery list. Understanding your existing inventory can help you avoid purchasing duplicate items and using up ingredients that might otherwise go bad. Create a meal plan based on what you have, incorporating these ingredients into your dishes throughout the week. This not only cuts down on waste but also inspires creativity in the kitchen as you experiment with different recipes.

Another effective strategy is to embrace “first in, first out” (FIFO) practices. When you bring new groceries home, place them behind older items in your pantry and refrigerator. This simple organizational tip encourages you to use older products first, ensuring that they don’t spoil before you have a chance to enjoy them.

Consider repurposing leftovers as well. Instead of letting yesterday’s meal languish in the fridge, think of inventive ways to transform it into something new. For instance, roasted vegetables can be tossed into a hearty soup, or last night’s grilled chicken can serve as a tasty filling for wraps or salads. Not only does this reduce waste, but it also saves you time and effort in preparing new meals.

Lastly, familiarize yourself with proper storage techniques to extend the shelf life of your produce. Certain fruits and vegetables thrive in specific environments; for example, keep apples in the fridge to maintain their crispness, while bananas do better at room temperature. Investing in good-quality storage containers can also help keep your food fresh longer and reduce spoilage.

By implementing these strategies, you can significantly reduce food waste in your kitchen, contributing to a more sustainable cooking routine. Remember, every small effort counts in the quest to lower our carbon footprint and promote a healthier planet.

5. Step 4: Embrace Whole Foods Over Processed Foods

How can I cook more sustainably?
Credit : whatcanu.com

When it comes to cooking sustainably, one of the most impactful changes you can make is to embrace whole foods over processed foods. Whole foods are those that are in their natural state or have undergone minimal processing, such as fresh fruits, vegetables, whole grains, legumes, nuts, and seeds. These foods not only provide essential nutrients but also come with a lower environmental footprint compared to their heavily processed counterparts.

Processed foods often require significant amounts of energy, water, and resources to produce, package, and transport. The manufacturing processes can generate substantial greenhouse gas emissions, which contribute to climate change. Moreover, these foods are frequently wrapped in layers of plastic and other materials that exacerbate waste issues. By choosing whole foods, you’re not only making healthier dietary choices but also reducing the demand for these environmentally taxing products.

Incorporating more whole foods into your meals can be both a delicious and rewarding experience. Picture this: a vibrant salad bursting with colorful, seasonal vegetables, a hearty grain bowl featuring brown rice or quinoa topped with roasted chickpeas, or a comforting vegetable stew simmered with aromatic herbs. These dishes showcase the flavors and textures of nature, allowing you to enjoy a rainbow of nutrients while minimizing your impact on the planet.

Additionally, shopping for whole foods often means supporting local farmers and markets, which can help reduce the carbon footprint associated with transportation. As you fill your cart with fresh produce, you’re not just investing in your health, but also contributing to a more sustainable food system. So, next time you’re planning your meals, consider reaching for whole foods and savor the satisfaction of cooking with ingredients that are both good for you and the planet.

6. Step 5: Learn to Preserve and Ferment Foods

Learning to preserve and ferment foods is not only a delicious way to reduce waste and extend the shelf life of your produce, but it also promotes a sustainable kitchen environment. By harnessing the art of preservation, you can enjoy seasonal ingredients year-round while minimizing your carbon footprint.

Preserving foods through methods like canning, pickling, and freezing allows you to take full advantage of fresh produce during its peak season. For example, when tomatoes are at their juiciest and most flavorful, can a batch of homemade salsa or sauce. This not only reduces reliance on store-bought products that may have traveled long distances but also cuts down on plastic waste from packaging.

Fermentation, on the other hand, is an ancient technique that transforms food into tangy, probiotic-rich delights while also enhancing flavors. Think of crunchy kimchi, zesty sauerkraut, or creamy yogurt. These foods not only add diversity to your meals but also contribute to a more resilient gut microbiome, making them a healthful addition to your diet.

Both preservation and fermentation are also fantastic ways to engage with your food. The process teaches you about seasonal cycles, the importance of local sourcing, and the joy of creating something from scratch. Plus, you’ll find that the final products often taste better than their store-bought counterparts, with a freshness and vibrancy that truly shine.

By embracing these techniques, you not only reduce food waste but also cultivate a deeper connection with your ingredients. So roll up your sleeves, dive into some jars, and start experimenting with flavors. Your taste buds—and the planet—will thank you!

7. Step 6: Use Energy-Efficient Cooking Methods

How can I cook more sustainably?
Credit : whatcanu.com

When it comes to cooking sustainably, one of the most impactful steps you can take is to adopt energy-efficient cooking methods. Not only do these techniques help minimize your carbon footprint, but they also save you money and time in the long run.

First, consider the appliances you use. Switching from traditional ovens to convection ovens can make a significant difference. Convection ovens circulate hot air, cooking food more evenly and quickly, which means you can lower the temperature and reduce energy consumption. Similarly, using induction cooktops, which heat pots and pans directly through magnetic fields, is not only faster but also more energy-efficient compared to gas or electric stovetops.

Next, embrace the art of batch cooking. Preparing multiple meals at once not only saves energy by using the oven or stove for extended periods but also minimizes food waste, a significant contributor to carbon emissions. Additionally, consider utilizing a slow cooker or pressure cooker. These appliances are designed to cook food thoroughly while consuming far less energy than conventional methods, with the added benefit of enhancing the flavors of your dishes.

Don’t forget about the power of simmering and steaming. Using these methods instead of boiling food can significantly reduce energy use, as they require less water and heat to achieve the desired results. Plus, steaming vegetables helps retain their nutrients, making your meals healthier.

Finally, always remember to use lids on pots and pans. This simple action traps heat and moisture, allowing food to cook faster and at lower temperatures. By being mindful of the cooking methods you choose, you can enjoy delicious meals while making a positive impact on the environment. Cooking sustainably is not just about the ingredients; it’s about how you prepare them too!

8. Step 7: Opt for Sustainable Seafood and Meat

When it comes to sustainable cooking, choosing the right proteins can make a significant impact on your carbon footprint and the health of our oceans and ecosystems. Opting for sustainable seafood and meat not only supports ethical farming and fishing practices but also helps preserve the delicate balance of our environment.

Sustainable seafood is sourced from fisheries that maintain fish populations and minimize environmental damage. Look for labels and certifications that indicate responsible practices, such as the Marine Stewardship Council (MSC) and the Aquaculture Stewardship Council (ASC). These organizations ensure that the seafood you choose has been harvested in a way that supports long-term ecological balance. By selecting fish like wild-caught salmon or sustainably farmed shrimp, you can enjoy your meals while contributing to the health of our oceans.

Similarly, when it comes to meat, consider sourcing from local farms that prioritize animal welfare and sustainable practices. Grass-fed beef, pasture-raised chicken, and heritage-breed pork not only taste better but are also produced with methods that reduce carbon emissions and promote biodiversity. You can often find these options at farmers’ markets or through community-supported agriculture (CSA) programs that connect you directly with producers.

Another excellent option is to incorporate more plant-based proteins into your meals. Lentils, beans, and chickpeas are not only packed with nutrients but also have a significantly lower carbon footprint compared to meat. By reducing your meat consumption and exploring sustainable seafood, you can create a more environmentally friendly diet that still satisfies your culinary cravings.

In summary, making conscious choices about the seafood and meat you consume is a crucial step toward cooking more sustainably. By supporting responsible practices and opting for local, high-quality sources, you can enjoy delicious meals while contributing to a healthier planet. Remember, every small change counts, and your choices in the kitchen can lead to a more sustainable future for generations to come.

9. Step 8: Composting: Turning Waste into Resource

One of the simplest yet most impactful ways to cook more sustainably is through composting. Imagine transforming your kitchen scraps—those peels, cores, and leftover bits—into a rich, nutrient-dense soil amendment that nourishes your garden. Composting isn’t just a way to reduce waste; it’s a powerful tool for creating a circular economy in your own home.

To start composting, you can use a designated compost bin or create a simple pile in your backyard. The key is to balance what you put in—combine green materials (like fruit and vegetable scraps, coffee grounds, and grass clippings) with brown materials (such as dried leaves, cardboard, and paper). This balance provides the necessary carbon and nitrogen needed for the composting process to thrive.

As microorganisms break down the organic matter, they create heat, which accelerates decomposition. Over time, you’ll be left with a dark, crumbly substance that’s rich in nutrients and free of chemicals. Not only does composting keep waste out of landfills—where it would release methane, a potent greenhouse gas—but it also enriches your soil, leading to healthier plants and better yields in your garden.

Additionally, composting encourages conscious cooking habits. When you become more aware of what your kitchen waste consists of, you may find yourself making more intentional choices about food preparation and consumption. Perhaps you’ll buy only what you need, or get creative with using up leftover ingredients, all while contributing to a sustainable cycle that benefits the environment.

By integrating composting into your cooking routine, you not only reduce your carbon footprint but also embrace a holistic approach to food that respects the earth’s resources. So grab that compost bin, and let your waste become a resource that fuels your garden and fosters a healthier planet.

10. Step 9: Grow Your Own Herbs and Vegetables

Growing your own herbs and vegetables is not just a rewarding hobby; it’s a powerful way to reduce your carbon footprint while enhancing your culinary experience. Imagine stepping into your garden or even a small balcony and plucking fresh basil or ripe tomatoes, rich with flavor and nutrients. With each bite, you can taste the love and care you put into nurturing your plants, and you’ll gain a deeper appreciation for the food on your plate.

Starting a small herb garden is incredibly accessible and can be done even in limited spaces. Herbs like basil, cilantro, and mint thrive in pots and require minimal care, making them perfect for beginners. As you watch them grow, you’ll find joy in the process, from sowing seeds to harvesting your very own crops. Plus, homegrown herbs are packed with flavor, often surpassing their store-bought counterparts in taste and aroma.

If you have a bit more room, consider expanding to vegetables. Start with easy-to-grow options like lettuce, radishes, or cherry tomatoes, which can flourish in a small patch or a few pots. The satisfaction of biting into a homegrown tomato, sun-ripened and bursting with flavor, is unmatched. Not only do you reduce the carbon footprint associated with transporting produce from farm to table, but you also avoid the pesticides and chemicals often found in commercially grown vegetables.

By cultivating your own herbs and vegetables, you contribute to a more sustainable food system while enjoying the freshest ingredients at your fingertips. Embrace the journey of growing your own food, and you’ll find it transforms not just your cooking but your connection to the environment and the food you consume. It’s a simple step that yields significant rewards—both for your taste buds and the planet.

11. Step 10: Be Mindful of Packaging and Plastics

When it comes to sustainable cooking, being mindful of packaging and plastics is a crucial step that can significantly reduce your carbon footprint. Every time you shop for groceries, the choices you make at the checkout can have a ripple effect on the environment. Start by assessing the packaging of the products you buy—opt for items with minimal or no plastic packaging. For example, choose fresh produce over pre-packaged fruits and vegetables, as these often come wrapped in layers of plastic that end up in landfills.

Consider bringing your own reusable bags to the store and using them not just for groceries, but also for bulk items. Many grocery stores now offer bulk bins where you can fill your own containers with grains, nuts, and spices, cutting down on both packaging waste and the amount of single-use plastics you bring home. Additionally, look for brands that prioritize eco-friendly packaging, such as compostable materials or glass containers that can be reused or recycled.

When it comes to food storage at home, swap out plastic wrap and disposable containers for glass jars, beeswax wraps, or silicone bags. Not only do these alternatives reduce plastic waste, but they also keep your food fresh without leaching harmful chemicals. By making conscious choices about packaging, you not only help the planet but also inspire others to rethink their consumption habits.

Incorporating these mindful practices into your cooking routine is a powerful way to contribute to a more sustainable food system. Each small step you take can lead to a significant positive impact on the environment, ensuring that you cook not just for yourself, but for the health of the planet as well.

12. Cooking with a Sustainable Mindset: Beyond the Kitchen

Cooking sustainably is not just about the ingredients you select or the methods you employ in your kitchen; it extends far beyond those boundaries. Embracing a sustainable mindset means considering the entire food journey—from farm to table and beyond. This holistic approach involves being aware of how your culinary choices impact the environment and the community, as well as how they can foster a more sustainable future.

Start by exploring local resources like farmers’ markets, where you can connect directly with producers and understand the practices behind your food. Supporting local farmers not only reduces the carbon footprint associated with transportation but also strengthens community ties and promotes biodiversity. By choosing seasonal produce, you further minimize the environmental impact since these items are grown at their natural peak, requiring less energy-intensive methods to cultivate and transport.

Beyond sourcing ingredients, think about your cooking techniques. Opt for energy-efficient appliances, such as pressure cookers or slow cookers, which use less energy compared to conventional ovens. When planning meals, try to utilize every part of the ingredient; for instance, vegetable scraps can be transformed into flavorful broths, and stale bread can be repurposed into croutons or breadcrumbs. These practices not only reduce waste but also encourage creativity in the kitchen.

Additionally, consider the larger implications of your culinary habits. Engage with initiatives that promote environmental stewardship, such as community gardens or local food cooperatives. By being part of these efforts, you can advocate for sustainable agriculture and food justice, lending your voice to the importance of environmentally friendly practices.

Ultimately, cooking with a sustainable mindset means fostering a sense of responsibility and awareness that transcends the kitchen. It’s about making conscious choices that contribute to a healthier planet, building a community centered around sustainability, and inspiring others to join in this vital movement. As you make these changes, you’ll not only reduce your carbon footprint but also enrich your cooking experience and cultivate a deeper connection with the food you prepare and consume.

13. Sharing Your Sustainable Cooking Journey

Sharing your sustainable cooking journey is not just about showcasing your culinary skills; it’s an invitation for others to join you in making a difference. In an era where social media dominates how we connect, sharing your experiences can inspire friends, family, and even strangers to adopt more environmentally friendly cooking practices. Start by documenting your journey through engaging blog posts, vibrant Instagram photos, or short TikTok videos that highlight your culinary creations, sourcing of local ingredients, and the challenges you face along the way.

Consider sharing recipes that emphasize sustainability—like those that utilize seasonal produce, or meals that creatively repurpose leftovers. Share insights into your shopping habits, such as choosing local farmers’ markets over grocery stores, or opting for organic and ethically sourced products. By engaging with your audience, you can spark conversations about the importance of sustainable cooking and encourage others to experiment with their own kitchen practices.

Moreover, create a community around your journey. Host virtual cooking classes, share tips for reducing food waste, or even start a local meet-up group focused on sustainable eating. The more you share, the more you foster a sense of accountability and support, paving the way for a collective movement towards sustainable cooking. Your passion can inspire others to rethink their habits and recognize that together, we can all contribute to a healthier planet—one recipe at a time.

14. Resources for Continued Learning on Sustainable Cooking

As you embark on your journey towards more sustainable cooking practices, it’s essential to equip yourself with reliable resources that can enhance your knowledge and inspire you to keep evolving. The world of sustainable cooking is ever-changing, and staying informed will help you make better choices in the kitchen that benefit both you and the planet.

Start by exploring reputable websites dedicated to sustainable food practices, such as the **Sustainable Food Trust** and **FoodPrint**. These platforms offer a wealth of information, from articles and guides to research papers that delve into the environmental impacts of various food choices. You can also subscribe to newsletters or blogs that focus on sustainable cooking, providing you with regular updates, tips, and recipes straight to your inbox.

Books can be an excellent source of in-depth knowledge. Consider titles like “The New Green Kitchen” by Alice Hart or “Eating on the Wild Side” by Jo Robinson, which not only share delicious recipes but also educate on the benefits of choosing seasonal and local ingredients. Furthermore, cookbooks that highlight plant-based recipes can inspire you to explore new culinary horizons while reducing your reliance on animal products.

Don’t overlook the power of community and discussion. Join local or online cooking classes that emphasize sustainability, where you can learn from experts and connect with like-minded individuals. Platforms such as **Skillshare** or **Udemy** often feature courses focused on sustainable cooking techniques, allowing you to expand your skills at your own pace.

Finally, social media can be a treasure trove of inspiration. Follow chefs, influencers, and organizations dedicated to sustainable cooking on platforms like Instagram and TikTok. They often share practical tips, innovative recipes, and valuable insights into reducing waste and making environmentally friendly choices.

By tapping into these resources, you’ll not only enhance your cooking skills but also cultivate a deeper understanding of the impact your food choices have on the environment. Remember, the journey toward sustainable cooking is ongoing, and each step you take brings you closer to a healthier planet and a more conscious culinary lifestyle.

15. Conclusion: The Impact of Cooking Sustainably on Our Planet

In conclusion, the impact of cooking sustainably extends far beyond our individual plates; it resonates throughout the very fabric of our planet. Each step we take toward more responsible culinary practices can contribute to a significant reduction in our carbon footprint, fostering a healthier environment for future generations. By embracing local, seasonal ingredients, minimizing food waste, and opting for plant-based meals, we not only nourish ourselves but also support our ecosystems and economies.

The choices we make in our kitchens can help preserve biodiversity, reduce greenhouse gas emissions, and conserve precious resources like water and energy. For instance, cooking with seasonal produce not only enhances the flavors of our dishes but also reduces the need for energy-intensive transportation and storage methods. Likewise, by adopting techniques that minimize waste—such as composting scraps or creatively repurposing leftovers—we can contribute to a circular economy that values every morsel.

As we collectively shift our mindset toward sustainable cooking practices, we can inspire others to join the movement, creating a ripple effect that amplifies our efforts. The choices we make today can redefine our relationship with food, illuminating the path toward a more sustainable future. So let’s continue to explore, innovate, and share our sustainable cooking journeys, knowing that with each meal, we hold the power to make a positive impact on our world. Together, we can cultivate a culinary culture that respects our planet and champions sustainability for all.

As we wrap up our exploration of sustainable cooking, we hope you feel inspired to take these 10 simple steps towards a more eco-friendly kitchen. By making mindful choices—whether it’s sourcing local ingredients, reducing food waste, or choosing plant-based options—you not only enhance your culinary experience but also contribute to a healthier planet. Each small change adds up, creating a ripple effect that extends far beyond your own home. Embrace the journey towards sustainable cooking, share your experiences, and encourage others to join in. Together, we can savor delicious meals while caring for the earth we all share. Happy cooking!

What are the best ways to use seasonal ingredients?

Embracing the rhythm of the seasons in your cooking not only enhances the flavors of your dishes but also fosters a deeper connection with the food you prepare.

As nature paints the landscape with vibrant colors and diverse produce throughout the year, there’s never been a better time to explore the bounty of fresh, seasonal ingredients. From the crisp greens of spring to the hearty root vegetables of winter, each season offers a unique palette of flavors waiting to be discovered. In this post, we’ll delve into top tips for selecting, preparing, and cooking with seasonal ingredients, ensuring that your meals are not only delicious but also bursting with freshness and nutrition. Whether you’re a seasoned chef or a culinary novice, join us on this flavorful journey to savor the seasons and transform your cooking into a celebration of nature’s finest offerings.

1. Understanding Seasonal Ingredients: What It Means

What are the best ways to use seasonal ingredients?
Credit : whatcanu.com

Understanding seasonal ingredients is the cornerstone of cooking with fresh produce and elevating your culinary creations. When we talk about seasonal ingredients, we refer to fruits, vegetables, and herbs that are at their peak ripeness and flavor during specific times of the year. This concept is deeply rooted in the natural rhythms of the earth, influenced by climate, geography, and local farming practices.

Cooking with seasonal ingredients means selecting produce that is not only abundant and flavorful but also more sustainable and often more affordable. For example, in the spring, you might find vibrant asparagus, tender peas, and fragrant herbs like chives and cilantro, all bursting with freshness after the winter months. Summer brings a cornucopia of colorful tomatoes, juicy berries, and crisp cucumbers, perfect for light, refreshing dishes. As autumn arrives, the bounty shifts to hearty root vegetables, apples, and pumpkins, inviting warmth and comfort into our meals. Finally, winter offers unique ingredients such as citrus fruits and cruciferous vegetables that can add brightness and nutrition to our colder-day recipes.

Embracing seasonal cooking not only enhances the taste and nutritional value of your meals but also supports local farmers and reduces the carbon footprint associated with transporting out-of-season produce. By understanding what’s in season, you can craft dishes that celebrate the flavors of each season, making your cooking experience not just a task, but a delightful exploration of nature’s offerings. It encourages creativity in the kitchen as you adapt your recipes to incorporate what’s fresh and available, allowing you to savor the true essence of each season.

2. The Benefits of Cooking with Seasonal Produce

Cooking with seasonal produce isn’t just a culinary trend; it’s a time-honored practice that brings a multitude of benefits to your kitchen and your palate. First and foremost, seasonal ingredients are at their peak in terms of flavor and freshness. When you choose to cook with fruits and vegetables that are in season, you’re guaranteed to experience their true taste—sweet, vibrant, and bursting with essential nutrients. Imagine biting into a sun-ripened tomato in the height of summer, its juices cascading down your chin, or savoring a crisp apple in the fall, its sweetness perfectly complementing the cooler weather.

Beyond flavor, seasonal produce is often more nutritious. Fruits and vegetables that are harvested at their peak ripeness are packed with vitamins and minerals, providing your body with the essential nutrients it craves. Moreover, these ingredients are typically grown closer to home, meaning they spend less time in transit and on grocery store shelves. This not only maximizes their nutritional value but also reduces the carbon footprint associated with food transport.

Cooking with what’s in season is also a more sustainable choice. By supporting local farmers and choosing ingredients that are abundant at a given time, you contribute to a more sustainable food system. This practice helps to reduce the demand for out-of-season produce, which often requires long-distance shipping, artificial ripening, and other environmentally taxing methods.

Additionally, embracing seasonal cooking can invigorate your culinary creativity. The changing seasons offer a delightful variety of ingredients to explore, encouraging you to experiment with new recipes and techniques. Whether it’s crafting a hearty winter stew with root vegetables or a refreshing summer salad with freshly-picked greens, each season presents a unique opportunity to showcase the flavors of the moment.

Finally, cooking with seasonal produce can be a wonderful way to connect with your community. Visiting local farmers’ markets or joining a community-supported agriculture (CSA) program allows you to build relationships with the people who grow your food. This connection not only enhances your appreciation for what’s on your plate but also fosters a sense of community and shared purpose in promoting local agriculture.

In summary, the benefits of cooking with seasonal produce extend far beyond mere taste. By choosing ingredients that are fresh, nutritious, and locally sourced, you can enhance your meals, support sustainable practices, and engage with your community—all while enjoying the rich tapestry of flavors that each season has to offer. So, next time you plan your meals, consider what’s in season and let nature guide your culinary journey.

3. How to Identify Fresh, Seasonal Ingredients

What are the best ways to use seasonal ingredients?
Credit : whatcanu.com

When it comes to cooking with fresh, seasonal ingredients, knowing how to identify them is key to unlocking vibrant flavors and maximizing the nutritional value of your meals. Start by familiarizing yourself with seasonal produce charts that outline what fruits and vegetables are at their peak during each season in your region. These resources can be invaluable, guiding your grocery shopping and helping you make informed decisions about what to buy.

A stroll through your local farmers’ market is one of the best ways to connect with seasonal ingredients. Engage with local farmers—they are passionate about their produce and can provide insights into what’s fresh, what’s in abundance, and even offer tips on preparation and cooking methods. Look for ingredients that showcase bright colors and firm textures; these are often indicators of freshness. For example, crisp, vibrant greens, plump tomatoes, and fragrant herbs signal that they were recently harvested.

Additionally, pay attention to the scent. Fresh ingredients emit distinct aromas that hint at their ripeness and flavor potential. For instance, a ripe peach will have a sweet, floral fragrance that signals it’s ready to be enjoyed, while fresh basil has a strong, peppery aroma that can elevate any dish.

Another useful tip is to observe the packaging. When purchasing from grocery stores, opt for loose produce rather than pre-packaged items, as this allows you to inspect each piece for freshness. Check for any signs of bruising, wilting, or discoloration, and choose items that are free from blemishes.

Finally, trust your instincts and embrace the adventure of seasonal cooking. Stay attuned to local food blogs, community-supported agriculture (CSA) programs, or even seasonal cookbooks that can introduce you to new ingredients and recipes. By honing your skills in identifying fresh, seasonal ingredients, you’ll not only enhance your cooking but also contribute to sustainable eating habits that celebrate the natural bounty of each season.

4. Seasonal Cooking: A Month-by-Month Guide

Cooking with seasonal ingredients not only enhances the flavors of your dishes but also supports local farmers and promotes sustainability. Each month brings a new bounty of fruits, vegetables, and herbs, allowing you to explore a diverse array of flavors throughout the year. Here’s a handy month-by-month guide to help you embrace the unique offerings of each season, ensuring your meals are both fresh and vibrant.

**January:** As winter settles in, root vegetables are plentiful. Think hearty dishes featuring carrots, potatoes, and parsnips. Experiment with stews and soups that warm the soul. Citrus fruits like oranges and grapefruits also make their appearance, adding brightness to your winter meals.

**February:** This month continues to focus on root vegetables, but don’t forget about winter greens like kale and spinach. These hardy greens can be incorporated into salads or sautéed as a side dish. Look for seasonal citrus to brighten up your recipes and add a splash of color.

**March:** With the arrival of spring, fresh herbs and early greens like asparagus and peas start to emerge. Use these vibrant ingredients to create light, refreshing salads and pastas that celebrate the season’s new growth.

**April:** As spring fully blooms, indulge in a variety of vegetables like radishes, artichokes, and spring onions. Pair these with fresh herbs such as dill and chives to enhance their natural flavors. This is also the time to start incorporating strawberries into your desserts, adding a sweet touch to your springtime treats.

**May:** May ushers in an abundance of fresh produce, including asparagus, rhubarb, and a variety of leafy greens. Consider grilling asparagus for a smoky flavor or making a tangy rhubarb compote to serve alongside meats or desserts.

**June:** Summer arrives, bringing a colorful array of ingredients. Tomatoes, zucchini, bell peppers, and fresh herbs like basil and cilantro are at their peak. Embrace vibrant salads, ratatouille, and refreshing salsas that showcase these seasonal gems.

**July:** The heat of summer means juicy peaches, sweet corn, and heirloom tomatoes. Use these to create simple, flavorful dishes like corn chowder or peach cobbler. Grilling is also a great way to enhance the flavors of summer veggies.

**August:** As the summer bounty continues, take advantage of the last of the stone fruits and an array of beans and peppers. This is a perfect time for making fresh salsas, canning, or enjoying a classic ratatouille as the flavors meld together beautifully.

**September:** With fall just around the corner, September brings a transition in produce. Think apples, squash, and late-season tomatoes. Begin incorporating heartier dishes into your repertoire, like roasted squash soups and apple crisps.

**October:** Autumn is in full swing, and it’s time for pumpkin, sweet potatoes, and hearty greens like collard greens and broccoli. Embrace the warmth of spices in your cooking, using cinnamon and nutmeg to create comforting fall dishes.

**November:** As the holiday season approaches, root vegetables, Brussels sprouts, and cranberries take center stage. These ingredients can be transformed into vibrant side dishes or used to elevate your holiday meals.

**December:** The final month of the year invites cozy cooking with winter staples like potatoes, kale, and citrus fruits. Think warming stews and bright salads that can balance the richness of holiday feasts.

By following this month-by-month guide, you can make the most of seasonal ingredients,

5. Tips for Shopping at Farmers’ Markets

What are the best ways to use seasonal ingredients?
Credit : whatcanu.com

Shopping at farmers’ markets can be a delightful experience that not only fills your kitchen with fresh, seasonal ingredients but also connects you directly with the local community. To make the most of your visit, here are some tips to enhance your farmers’ market experience:

**Arrive Early**: The early bird gets the freshest produce! Arriving at the market as it opens gives you first dibs on the best selections before they sell out. Plus, you’ll have a chance to chat with the farmers about their products, gaining insights that can inspire your cooking.

**Bring Reusable Bags**: Farmers’ markets often focus on sustainability, so be sure to bring your own reusable bags. This not only helps reduce plastic waste but also allows you to carry home your fresh finds in style. A sturdy tote can hold everything from ripe tomatoes to fragrant herbs without the risk of tearing.

**Ask Questions**: Don’t hesitate to engage with the vendors. Ask about their farming practices, how to store certain ingredients, or even for recipe suggestions. Many farmers are passionate about what they grow and are eager to share their knowledge, which can enhance your cooking adventures.

**Be Adventurous**: Farmers’ markets are the perfect place to step outside your culinary comfort zone. Try picking up an unfamiliar vegetable or fruit that catches your eye. You might just discover a new favorite ingredient. Seasonal produce can often inspire creativity, leading to exciting new dishes that highlight the flavors of the season.

**Inspect Before You Buy**: Take the time to examine the produce carefully. Look for vibrant colors, firm textures, and any signs of freshness. If you’re buying herbs, give them a gentle sniff to gauge their aroma. Quality is key when it comes to seasonal cooking, and farmers’ markets usually pride themselves on offering the best.

**Plan Your Meals**: While spontaneity is part of the charm of farmers’ markets, having a rough meal plan can help you make the most of your purchase. Consider what ingredients you want to highlight and plan a few meals around them. This not only reduces waste but also ensures you’re using your fresh ingredients at their peak.

By following these tips, you can fully embrace the vibrant and diverse offerings of your local farmers’ market, bringing home the essence of the season to your kitchen. Whether you’re whipping up a hearty stew or a fresh salad, cooking with seasonal ingredients will elevate your meals and support local farmers in the process. So grab your bags, head to the market, and savor the flavors of the season!

6. How to Store Seasonal Ingredients for Maximum Freshness

Storing seasonal ingredients properly is essential to preserving their freshness, flavor, and nutritional value. Each ingredient has its own unique requirements, and understanding these can make a significant difference in your culinary journey. Here are some key tips to help you store your seasonal bounty effectively:

1. **Herbs**: Fresh herbs can elevate any dish, but they tend to wilt quickly. For herbs like basil, cilantro, and parsley, consider treating them like flowers. Trim the stems and place them in a glass of water, covering the leaves with a plastic bag to create a mini greenhouse effect. Store them in the fridge, where they can last for several days, or keep them on the countertop for a more vibrant look. For hardier herbs like rosemary and thyme, wrapping them in slightly damp paper towels and placing them in a container can keep them fresh for weeks.

2. **Fruits**: Many seasonal fruits, such as berries and stone fruits, are sensitive to moisture. Store them in a breathable container, like a paper bag or a colander, to prevent mold. Keep them in the refrigerator, but make sure they are dry before storing. Apples and pears, on the other hand, can be stored at room temperature for a few days, but if you want to prolong their life, put them in a cool, dark place.

3. **Vegetables**: Leafy greens like spinach and kale thrive in moisture but can quickly spoil if not stored correctly. Wrap them in a damp paper towel and place them in a perforated plastic bag to maintain humidity. For root vegetables like carrots and potatoes, store them in a cool, dark place—ideally, in a breathable sack to prevent moisture build-up.

4. **Tomatoes**: These vibrant fruits should never go in the fridge, as the cold can affect their flavor and texture. Instead, keep them at room temperature, away from direct sunlight, and they will ripen beautifully.

5. **Onions and Garlic**: These kitchen staples prefer a cool, dry, and dark space. Store them in a mesh bag or a basket to ensure proper air circulation. Avoid storing them near potatoes, as this can lead to spoilage for both.

By following these simple storage tips, you can maximize the freshness of your seasonal ingredients, ensuring that every dish you prepare bursts with flavor. The longer these ingredients stay fresh, the more opportunities you have to create delicious, seasonal meals that truly celebrate the bounty of nature. Happy cooking!

7. Essential Cooking Techniques for Seasonal Ingredients

What are the best ways to use seasonal ingredients?
Credit : whatcanu.com

When it comes to cooking with fresh, seasonal ingredients, mastering essential cooking techniques can elevate your dishes and highlight the natural flavors of your produce. Each season brings its own bounty, and understanding how to prepare these ingredients can turn a simple meal into a culinary delight.

**1. Blanching and Shocking:** This technique is particularly useful for vibrant vegetables like spring asparagus or summer green beans. Blanching involves briefly boiling the vegetables, which enhances their color and texture, followed by plunging them into ice water to stop the cooking process. This method preserves the crunch and brightens the natural hues, making your dishes visually stunning and deliciously crisp.

**2. Roasting:** Roasting is a fantastic way to bring out the sweet, caramelized flavors of root vegetables like carrots, sweet potatoes, and beets, especially in the fall and winter months. Toss your seasonal veggies in olive oil, sprinkle with salt and herbs, and let the oven work its magic. The result is a dish that showcases the ingredients’ natural sweetness and deep, earthy flavors.

**3. Sautéing:** Quick and versatile, sautéing is ideal for delicate ingredients like summer squash or fresh greens. A hot skillet with a splash of olive oil allows you to cook these ingredients rapidly while retaining their freshness. Adding garlic or shallots during the sautéing process infuses the dish with aromatic depth, enhancing the overall flavor profile.

**4. Grilling:** For those warm summer evenings, grilling is a fantastic way to prepare seasonal ingredients like corn, zucchini, and bell peppers. The char from the grill adds a smoky, robust flavor that perfectly complements the sweetness of these ingredients. Plus, grilling can be done outdoors, allowing you to enjoy the beautiful weather while preparing your meal.

**5. Pickling:** When certain vegetables are at their peak, consider pickling them for a tangy, crunchy addition to your meals. Cucumbers, radishes, and green beans respond beautifully to this technique, allowing you to preserve their flavors while introducing a delightful acidity. Pickling not only extends the life of your produce but also adds a unique twist to salads, sandwiches, and charcuterie boards.

By incorporating these essential cooking techniques into your seasonal cooking repertoire, you can maximize the flavor and enjoyment of each ingredient. Embrace the natural rhythms of the seasons and let your dishes reflect the freshest offerings throughout the year!

8. Flavor Pairings: Matching Ingredients with the Season

When it comes to cooking with fresh, seasonal ingredients, understanding flavor pairings can elevate your culinary creations to new heights. The key to matching ingredients with the season lies in recognizing the natural harmony of flavors that blossom together during specific times of the year. Each season brings a unique array of produce, and with it, opportunities to explore complementary tastes that enhance your dishes.

In the spring, for example, tender asparagus pairs beautifully with bright citrus flavors. A light lemon vinaigrette drizzled over roasted asparagus can highlight its earthy sweetness while adding a refreshing zing. Fresh herbs like dill and mint emerge during this time, perfect for accentuating delicate flavors in salads and seafood.

As summer arrives, fruits and vegetables reach their peak ripeness, bursting with flavor. Juicy tomatoes and fragrant basil create an irresistible combination, ideal for a classic Caprese salad. Additionally, the sweetness of ripe peaches can be balanced with savory ingredients like prosciutto or tangy goat cheese, crafting a delightful summer appetizer that showcases the bounty of the season.

When autumn rolls around, hearty root vegetables take center stage. Think of the comforting combination of roasted carrots, parsnips, and sweet potatoes, all enhanced by the warm spices of cinnamon and nutmeg. Pair these with the tartness of apples or the richness of sage for a seasonal dish that warms the soul.

Winter may bring a chill, but it also heralds the arrival of robust flavors. Ingredients like kale, Brussels sprouts, and winter squash thrive in the colder months. These hearty vegetables can be beautifully complemented with rich, creamy cheeses or the smokiness of bacon, creating a satisfying contrast that warms both the palate and the heart.

By embracing seasonal flavor pairings, not only do you create dishes that reflect the essence of each time of year, but you also support local farmers and enjoy the freshest ingredients available. Experimenting with these combinations in your kitchen can lead to delightful discoveries, making each meal a celebration of the season’s best offerings. So, gather your fresh produce and let the vibrant flavors guide your cooking adventures!

9. Creative Recipes for Each Season

Cooking with fresh, seasonal ingredients not only enhances the flavors of your dishes but also invites the essence of each season into your kitchen. Each time of year brings a unique bounty, offering an opportunity to experiment with vibrant produce and create memorable meals. Here are some creative recipe ideas to inspire your seasonal cooking adventure.

**Spring: Asparagus and Lemon Risotto**
As spring heralds the arrival of tender asparagus, it’s the perfect time to whip up a creamy risotto infused with zesty lemon. Begin by sautéing finely chopped onions and garlic in olive oil until they become translucent. Gradually stir in Arborio rice, allowing it to toast before slowly adding vegetable broth. As the rice absorbs the liquid, fold in blanched asparagus and finish with a drizzle of fresh lemon juice and a sprinkle of Parmesan cheese. This dish not only highlights the crispness of asparagus but also celebrates the bright, rejuvenating flavors of spring.

**Summer: Heirloom Tomato Salad with Basil and Burrata**
When summer arrives, gardens burst with juicy heirloom tomatoes of every color. Create a refreshing salad by slicing a variety of these tomatoes and layering them with creamy burrata cheese. Drizzle with a high-quality olive oil, balsamic vinegar, and a handful of fresh basil leaves. The sweetness of the tomatoes paired with the richness of the burrata creates a perfect balance, capturing the laid-back, sun-soaked vibe of summer.

**Autumn: Pumpkin and Sage Pasta**
As the leaves begin to change and the air turns crisp, autumn beckons us to embrace the warmth of hearty flavors. A delightful pumpkin and sage pasta dish is perfect for this season. Start by roasting cubed pumpkin until caramelized, then blend it into a smooth purée. Toss cooked pasta with the pumpkin purée, sautéed garlic, and crispy sage leaves, finishing off with a touch of nutmeg and a sprinkle of toasted pine nuts for texture. This comforting dish encapsulates the essence of autumn and is sure to warm your soul.

**Winter: Root Vegetable and Quinoa Stew**
When winter rolls in, it’s time for hearty meals that nourish and warm. A root vegetable and quinoa stew is an excellent way to utilize seasonal produce like carrots, parsnips, and sweet potatoes. Sauté onions and garlic in a large pot, then add chopped root vegetables and vegetable broth. Stir in quinoa, thyme, and bay leaves, letting the stew simmer until everything is tender. This filling dish is not only packed with nutrients but also gives you a sense of cozy comfort on cold winter nights.

By embracing the seasonal ingredients available to you, these creative recipes will not only tantalize your taste buds but also connect you with the rhythm of nature throughout the year. So, gather your fresh produce and let the seasons inspire your culinary creations!

10. Preserving Seasonal Ingredients: Canning and Freezing Tips

As the seasons change and peak harvests bring a bounty of fresh fruits and vegetables, preserving these ingredients allows you to savor their flavors long after their prime has passed. Canning and freezing are two excellent methods for extending the shelf life of your seasonal finds, ensuring you can enjoy the taste of summer tomatoes or autumn squash in the depths of winter.

When it comes to canning, the process may seem daunting at first, but with a little preparation and the right equipment, you’ll find it rewarding and surprisingly straightforward. Start by gathering high-acid foods, such as fruits and pickled vegetables, which are ideal candidates for water bath canning. Proper sterilization of jars is crucial; immerse them in boiling water to eliminate bacteria and ensure your preserved goods remain safe to eat. As you fill each jar with your carefully prepared ingredients, leave enough headspace for expansion and seal them tightly. Once processed, stored in a cool, dark place, your canned treasures can last for up to a year, maintaining their bright flavors and nutrients.

Freezing, on the other hand, is an equally effective way to lock in freshness. Begin by washing and prepping your produce—peeling, chopping, or blanching as needed. Blanching, which involves briefly boiling vegetables before plunging them into ice water, helps preserve color, texture, and nutritional value. Once cooled and drained, spread your fruits and vegetables in a single layer on a baking sheet, allowing them to freeze individually before transferring them to airtight containers or freezer bags. This prevents clumping and makes it easier to grab the exact amount you need later. Most frozen produce can retain its quality for about six to twelve months, ensuring you have a taste of the season at your fingertips.

With these canning and freezing tips in your culinary arsenal, you can make the most of seasonal ingredients, transforming them into delicious dishes year-round. Embrace the flavors of each season, and let your creativity shine as you explore the endless possibilities that preserving fresh ingredients can offer.

11. Cooking with Herbs and Spices: Enhancing Seasonal Dishes

Cooking with herbs and spices is a delightful way to elevate your seasonal dishes, transforming simple ingredients into culinary masterpieces that burst with flavor. Fresh herbs, in particular, capture the essence of the season and can dramatically alter the taste profile of your meals. Whether you’re using the vibrant basil that thrives in summer or the earthy rosemary that complements fall dishes, each herb brings its own unique character to your cooking.

Start by considering the herbs that pair well with the seasonal ingredients you have on hand. For example, in the spring, the bright and peppery notes of arugula can be beautifully balanced with the refreshing taste of mint. As summer arrives, try tossing ripe tomatoes with fragrant basil and a drizzle of olive oil for a classic Caprese salad that highlights the season’s bounty. In the fall, hearty root vegetables can be enhanced with warm spices like cinnamon and nutmeg, creating a cozy and comforting dish that warms the soul.

Don’t forget the power of spices, either! Ground spices can add depth and warmth to your dishes, while whole spices can infuse subtle flavors over time. A sprinkle of smoked paprika can bring a smoky richness to grilled vegetables, while a pinch of cumin adds an exotic flair to roasted squash. Experimenting with spice blends, such as za’atar or garam masala, can transport your taste buds to far-off lands, allowing you to savor the season in new ways.

Remember, the key to cooking with herbs and spices is to start with a light hand, tasting as you go to ensure balance. Fresh herbs should be added towards the end of cooking to retain their vibrant flavors, while dried spices can be introduced earlier to allow their essences to unfold. By being mindful of how and when you use these flavor powerhouses, you’ll enhance your seasonal dishes and create memorable meals that celebrate the best of what each season has to offer. So, roll up your sleeves, embrace the aromas of fresh herbs, and let your creativity flourish in the kitchen!

12. How to Plan Seasonal Menus for Special Occasions

When it comes to planning seasonal menus for special occasions, the key is to embrace the bounty that each season offers while also creating a memorable dining experience for your guests. Start by considering the time of year and the specific ingredients that are at their peak. For instance, spring brings an array of vibrant vegetables like asparagus, peas, and radishes, perfect for a refreshing salad or a light entrée. In contrast, the fall invites heartier ingredients like squash, apples, and root vegetables, which lend themselves beautifully to warming soups and comforting casseroles.

To begin, create a thematic menu that reflects not just the season but also the occasion. For a summer garden party, think about incorporating fresh herbs, vibrant tomatoes, and grilled meats, allowing the natural flavors to shine. A winter holiday gathering might call for rich, warming dishes featuring root vegetables and cozy spices. Building your menu around a central theme will help unify the dishes and elevate the overall dining experience.

When selecting your ingredients, opt for those sourced locally when possible. Not only does this support local farmers and ensure freshness, but it also allows you to showcase the unique flavors of your region. Visit farmers’ markets or local co-ops to find inspiration and discover what’s available. This not only adds a personal touch to your menu but can also spark conversations with your guests about where the food comes from.

Don’t forget to consider the presentation of your dishes as well. Seasonal ingredients often come with stunning colors and textures, so take advantage of that by arranging your plates in a way that highlights their beauty. Fresh herbs can serve as both a garnish and an additional flavor layer, while edible flowers can add a pop of color and sophistication.

Finally, always be prepared for flexibility. Seasonal cooking is about embracing the natural ebb and flow of availability, so if you find that a key ingredient is unexpectedly out of stock, don’t hesitate to pivot and explore other options. This adaptability not only enhances your creativity in the kitchen but also ensures that your special occasion remains enjoyable for both you and your guests.

By thoughtfully planning seasonal menus that highlight fresh ingredients, you not only create delicious meals but also foster a deeper connection with nature’s rhythms and the joy of sharing good food with loved ones.

13. Sustainability and Supporting Local Farmers

In a world increasingly aware of the environmental impacts of our food choices, cooking with fresh, seasonal ingredients naturally aligns with sustainability efforts. One of the most rewarding aspects of embracing seasonal cooking is the opportunity to support local farmers. By sourcing your ingredients from nearby farms, you not only reduce your carbon footprint—minimizing the distance food travels to reach your plate—but also foster a stronger connection to the community.

When you purchase from local farmers’ markets or community-supported agriculture (CSA) programs, you’re investing in the local economy. These purchases help ensure that farmers can continue to cultivate their land sustainably, using practices that protect the environment and promote biodiversity. Seasonal produce is often grown with care, reflecting the rhythms of nature, which translates to fresher flavors and higher nutritional value.

Moreover, supporting local agriculture encourages the use of organic and regenerative farming practices, which contribute to healthier ecosystems. When you choose to buy seasonal ingredients, you’re not just enhancing your meals; you’re also advocating for practices that respect the land and its resources.

Consider engaging with your local farming community—visit farmers’ markets, attend farm-to-table events, or even participate in workshops that teach you about sustainable practices. By educating yourself about where your food comes from and how it’s grown, you can make informed choices that resonate with your values.

Ultimately, cooking with fresh, seasonal ingredients is about more than just taste; it’s a celebration of community, environmental stewardship, and the joy of nourishing yourself with the best nature has to offer. So, the next time you’re planning a meal, think about how your choices can ripple outwards, supporting local farmers and promoting a more sustainable food system for all.

14. Embracing Seasonal Cooking: A Mindful Approach

Embracing seasonal cooking is more than just a culinary trend; it’s a mindful approach to preparing food that connects us deeply with the rhythms of nature. When you choose to cook with ingredients that are in season, you’re not only enhancing the flavor and nutritional value of your meals but also cultivating a sustainable relationship with your environment. This practice invites you to slow down and appreciate the abundance offered by each season, from the vibrant greens of spring to the rich, hearty root vegetables of fall.

Begin by exploring local farmers’ markets or community-supported agriculture (CSA) programs. These venues are treasure troves of fresh produce, often harvested just hours before they reach your hands. As you wander through the stalls, take note of what’s available; the colors, textures, and aromas will inspire your culinary creativity. Imagine the sweet juiciness of ripe summer tomatoes, the crunch of autumn apples, or the earthy scent of winter squashes. Each ingredient tells a story of its season, waiting for you to bring it to life in your kitchen.

Incorporating seasonal ingredients into your meals encourages versatility in your cooking. Challenge yourself to experiment with new recipes that highlight the unique flavors of what’s currently available. For instance, a vibrant spring salad bursting with asparagus, peas, and herbs can transition into a comforting fall stew featuring root vegetables, lentils, and warming spices. These shifts not only make your meals more exciting but also foster a deeper connection to the cycles of nature.

Moreover, seasonal cooking often leads to a more mindful eating experience. By focusing on what is available in your region and at that particular time, you cultivate appreciation for the food on your plate. It encourages you to savor each bite, recognizing the effort of local farmers and the journey of each ingredient. This mindfulness transforms your meals into more than just sustenance; it becomes a celebration of the seasons and a gift to your body and spirit.

Incorporating this approach into your culinary routine will not only enhance your cooking skills but also create a lasting bond with the natural world. So, embrace the seasons and let them guide your cooking, leading to meals that are not only delicious but also deeply nourishing.

15. Share Your Seasonal Cooking Journey: Engaging with Your Community

Sharing your seasonal cooking journey is a delightful way to engage with your community and create a dynamic, interactive experience centered around the love of fresh ingredients. In an age where social media allows for instant connection, consider documenting your culinary adventures and inviting others to join in the fun.

Start by capturing the vibrant colors and textures of seasonal produce at your local farmers’ market or in your backyard garden. Share photos of your bounty, highlighting the unique flavors and textures of fruits and vegetables in their prime. Use platforms like Instagram or Facebook to post stories, reels, or live videos showcasing your cooking process, from the moment you chop fresh herbs to the final plating of your dish. Engaging visuals can inspire others to try their hand at seasonal cooking and spark conversations about favorite recipes and cooking tips.

Consider hosting seasonal cooking classes or workshops in your community, either in-person or virtually. This hands-on approach not only brings people together but also fosters a shared appreciation for seasonal ingredients. Encourage participants to bring their own seasonal finds and create dishes together, sharing the joy of cooking and tasting.

Additionally, leverage community forums or local cooking groups to share your seasonal experiences and advice. Start discussions about how to best utilize seasonal ingredients, exchange recipes, and even organize potlucks where everyone brings a dish made from in-season produce. This can create a sense of camaraderie and inspire others to embrace the joys of cooking with fresh ingredients, ultimately fostering a supportive community centered around food.

By sharing your journey, you not only enhance your own cooking experience but also help cultivate a community that values and celebrates the beauty of seasonal cooking. As you engage with fellow food enthusiasts, you’ll find that the passion for fresh ingredients is contagious, encouraging others to savor the seasons alongside you.

As we wrap up our exploration of cooking with fresh, seasonal ingredients, we hope you’re inspired to embrace the vibrant flavors that each season has to offer. By sourcing and utilizing local produce, you not only enhance the taste of your dishes but also support sustainable farming practices and foster a deeper connection to your food. Remember, cooking with the seasons is not just about nourishment; it’s an opportunity to celebrate the bounty of nature and bring a sense of joy and creativity into your kitchen. We encourage you to experiment with the tips we’ve shared, try new recipes, and let the changing seasons guide your culinary adventures. So grab your favorite seasonal ingredients, unleash your creativity, and savor the delightful tastes that each season brings! Happy cooking!

How to choose the right appliances for your kitchen?

The kitchen is the heart of every home, a space where culinary creativity flourishes and cherished memories are made around shared meals.

Yet, selecting the right kitchen appliances can often feel overwhelming, with an endless array of options available to suit every cooking style, aesthetic preference, and budget. From sleek refrigerators that keep your ingredients fresh to powerful ovens that inspire gourmet creations, the choices you make can significantly impact both the functionality and ambiance of your kitchen. In this ultimate guide, we’ll navigate the essential factors to consider when choosing the perfect kitchen appliances for your home, offering insights into energy efficiency, design, and innovative features. Whether you’re a seasoned chef or a casual cook, our comprehensive tips will help you create a kitchen that not only meets your culinary needs but also reflects your personal style and elevates your home’s overall charm. Get ready to transform your cooking space into a haven of efficiency and elegance!

1. Understanding Your Cooking Needs

How to choose the right appliances for your kitchen?
Credit : whatcanu.com

When it comes to choosing the perfect kitchen appliances for your home, the first step is to understand your cooking needs. This foundational assessment will not only guide your purchasing decisions but also ensure that your kitchen becomes a space that truly meets your culinary aspirations.

Begin by reflecting on your cooking habits. Are you a casual cook who enjoys preparing simple meals, or are you an enthusiastic home chef who loves experimenting with complex recipes? Take note of the types of dishes you frequently prepare. If you often find yourself whipping up hearty stews or baking artisan bread, you may require specific appliances that can handle these tasks with ease. On the other hand, if you prefer quick, healthy meals, consider investing in appliances that prioritize efficiency, such as a high-quality blender or a multi-cooker.

Next, think about the size of your household and the frequency with which you entertain. A family of five will have different appliance requirements compared to a single person or a couple. Larger families might need a bigger oven or a dishwasher with a higher capacity, while those who enjoy hosting dinner parties might benefit from an additional refrigerator or a wine cooler to keep beverages chilled for guests.

Don’t forget to factor in the available space in your kitchen. Measure your countertops, cabinets, and floor space to ensure that your new appliances will fit comfortably without crowding the room. Consider the aesthetic as well—do you prefer modern stainless steel finishes, classic white appliances, or perhaps a bold color that makes a statement? Your cooking needs should align with your kitchen’s design to create a harmonious cooking environment.

Lastly, take note of any dietary restrictions or specific cooking styles that may influence your choices. For instance, if you’re vegan or gluten-free, you might want appliances that offer versatility for preparing a wide range of plant-based dishes or specialized baking equipment for gluten-free recipes.

By taking the time to understand your cooking needs, you lay the groundwork for making informed decisions that will enhance your culinary experience and elevate your kitchen’s functionality. This thoughtful approach ensures that every appliance you choose serves a purpose and contributes to creating the perfect kitchen environment for you and your family.

2. Assessing Your Kitchen Space

Before diving into the world of kitchen appliances, it’s essential to take a step back and assess your kitchen space thoroughly. This initial evaluation is more than a mere formality; it lays the foundation for all your subsequent decisions. Your kitchen is not just a functional area; it’s the heart of your home, where culinary creativity meets daily life, making it crucial to ensure that your chosen appliances fit seamlessly.

Start by measuring your available space. Utilize a tape measure to gauge the length and width of counters, as well as the height of cabinets. Take note of any architectural features, such as windows, doors, and outlets, which can influence appliance placement. Create a scale drawing of your kitchen layout, marking the dimensions of the space and the current appliances you have. This visual representation will help you identify what can be replaced, what needs to stay, and where new appliances can be integrated without overcrowding the space.

Consider the flow of your kitchen. Is there enough room to move comfortably between the fridge, stove, and sink? The classic kitchen work triangle—comprising these three key areas—should be efficient to minimize unnecessary steps while cooking. If your kitchen is on the smaller side, look for compact appliances that maximize functionality without sacrificing style. For larger kitchens, you might have the luxury of opting for more substantial, multi-functional appliances that can add both form and flair.

Additionally, think about your cooking habits and lifestyle. Do you frequently entertain guests or cook large meals? If so, you may require larger appliances, such as a double oven or an oversized refrigerator. Conversely, if you prefer quick meals or often dine out, you might prioritize space-saving designs or smaller units.

Lastly, don’t forget about aesthetics. As you assess your kitchen space, consider how new appliances will complement your existing decor and color scheme. Whether you’re drawn to sleek stainless steel, retro chic, or vibrant colors, ensuring that your appliances harmonize with your kitchen’s overall design will create a cohesive and inviting atmosphere.

By meticulously assessing your kitchen space, you can choose the perfect appliances that not only meet your cooking needs but also enhance the overall functionality and style of your home. This thoughtful approach ensures that your kitchen remains a joyful and efficient space for years to come.

3. Types of Kitchen Appliances: An Overview

How to choose the right appliances for your kitchen?
Credit : whatcanu.com

When it comes to outfitting your kitchen, understanding the various types of kitchen appliances available is crucial to making informed decisions that suit your culinary needs and lifestyle. Kitchen appliances can be broadly categorized into three main types: major appliances, small appliances, and specialty appliances. Each category serves a distinct purpose and can significantly enhance your kitchen’s functionality.

**Major Appliances** are the backbone of any kitchen. These are the large, often built-in units that provide essential cooking, refrigeration, and cleaning functions. Think of your refrigerator, stove, oven, dishwasher, and microwave. These appliances are typically the most significant investment in your kitchen and should be chosen based on size, energy efficiency, and style. For instance, an energy-efficient refrigerator not only helps you save on utility bills but also contributes to a more sustainable home.

**Small Appliances** are the versatile tools that add convenience to your cooking and food preparation. These can range from blenders and toasters to coffee makers and food processors. Though smaller in size, they play a vital role in streamlining your cooking processes. When selecting small appliances, consider factors such as storage space, ease of use, and how frequently you plan to use them. If you’re a smoothie enthusiast, investing in a high-quality blender can elevate your morning routine.

**Specialty Appliances** cater to specific culinary tasks and can take your cooking skills to the next level. These include items like sous vide machines, bread makers, and air fryers, which allow you to prepare a variety of dishes with precision and creativity. While these appliances can be an indulgence, they can also inspire you to try new recipes and cooking techniques, making your kitchen a hub of culinary exploration.

In summary, understanding the different types of kitchen appliances is essential for creating a functional and efficient cooking environment. By carefully evaluating your needs and preferences, you can choose the perfect combination of major, small, and specialty appliances that will not only enhance your cooking experience but also add value to your home.

4. Energy Efficiency: Why It Matters

When selecting kitchen appliances, energy efficiency should be at the forefront of your decision-making process. Not only does an energy-efficient appliance reduce your carbon footprint, but it also translates into significant savings on your utility bills over time. With rising energy costs and increasing environmental concerns, the appeal of eco-friendly appliances is more relevant than ever.

Energy-efficient appliances are designed to use less electricity and water, minimizing waste without compromising performance. For instance, an Energy Star-rated refrigerator can consume up to 15% less energy than standard models, while energy-efficient dishwashers can save hundreds of gallons of water each year. This means that investing in these appliances not only benefits the planet but also contributes to a more sustainable home.

Moreover, many states and municipalities offer rebates and incentives for purchasing energy-efficient appliances, making them even more financially attractive. The initial investment may be slightly higher for these models, but the long-term savings and reduced environmental impact are well worth it.

When shopping for appliances, look for the Energy Star label or other certification marks that indicate energy performance. Additionally, consider the appliance’s size and capacity; an appliance that is too large for your needs can waste energy, while one that is too small may require more frequent use, defeating its purpose.

Incorporating energy-efficient appliances into your kitchen not only helps you save money and reduce your environmental impact but also enhances the overall functionality and comfort of your home. As you embark on your appliance shopping journey, remember that making energy-conscious choices today can lead to a healthier planet and a more economical lifestyle tomorrow.

5. Key Features to Look for in Major Appliances

How to choose the right appliances for your kitchen?
Credit : whatcanu.com

When it comes to selecting major kitchen appliances, understanding the key features that can enhance your cooking experience and meet your household needs is essential. These appliances are significant investments, and knowing what to prioritize can make all the difference in functionality, efficiency, and style.

**Energy Efficiency**: One of the first features to consider is energy efficiency. Look for appliances that come with the ENERGY STAR label, as they are designed to consume less energy without sacrificing performance. Energy-efficient models not only help reduce your utility bills but also contribute to a more sustainable environment.

**Size and Capacity**: The size of your appliances should align with the dimensions of your kitchen and your cooking habits. For example, if you frequently cook for large gatherings, a spacious refrigerator with ample storage or a double oven may be ideal. Conversely, if your kitchen is on the smaller side, compact models could provide the functionalities you need without overwhelming your space.

**Smart Technology**: Embracing the latest technology can significantly enhance your kitchen experience. Smart appliances allow you to control settings remotely via smartphone apps, making it easier to manage cooking times or check your refrigerator’s contents while you’re at the grocery store. Features like Wi-Fi connectivity, voice activation, and integrated sensors can streamline your cooking processes and add convenience to your daily routines.

**Durability and Build Quality**: Since kitchen appliances undergo daily use, investing in high-quality materials and reliable construction is crucial. Stainless steel finishes are not only stylish but also resistant to wear and tear, making them a popular choice for modern kitchens. Check for warranties and customer reviews to gauge the long-term durability of the appliances you’re considering.

**Ease of Use and Maintenance**: Look for appliances with user-friendly interfaces and intuitive controls. Features such as self-cleaning ovens, dishwasher cycles that are easy to navigate, and refrigerators with adjustable shelving can simplify your kitchen tasks. Additionally, consider how easy it is to clean and maintain each appliance, as this will save you time and effort in the long run.

**Aesthetic Appeal**: Finally, don’t overlook the aesthetic aspect of your kitchen appliances. They should complement your overall kitchen design and reflect your personal style. From sleek modern finishes to classic retro designs, there’s a wide range of options available to help you create the kitchen of your dreams.

By focusing on these key features when shopping for major kitchen appliances, you can ensure that your selections not only meet your practical needs but also enhance the beauty and functionality of your culinary space. Investing time in research will pay off in the long run, making your kitchen a more enjoyable place to cook and gather.

6. The Importance of Style and Design

When choosing kitchen appliances, the importance of style and design cannot be overstated. Your kitchen is often considered the heart of your home, a space where culinary creativity flourishes and family gatherings occur. As such, the appliances you select should not only be functional but also complement the overall aesthetic of your kitchen.

Start by considering the architectural style of your home. Whether you’re leaning towards a modern, minimalist vibe or a cozy, rustic charm, the design of your appliances should harmonize with your existing decor. For instance, sleek stainless steel appliances effortlessly enhance a contemporary kitchen, while retro-inspired models can add a touch of nostalgia to a vintage-themed space.

Color also plays a significant role in the impact of your kitchen’s design. Neutral shades like white, black, or stainless steel provide versatility, while bold colors like red or blue can serve as striking focal points. Think about how the appliance colors will interact with your cabinetry, countertops, and flooring. A well-coordinated palette can elevate your kitchen’s aesthetic and create a cohesive look.

Moreover, don’t overlook the details. The handles, knobs, and finishes of appliances can significantly influence the overall style. A brushed nickel finish might lend an air of sophistication, while a matte black surface can exude sleek modernity. Pay attention to these elements to ensure that every piece in your kitchen tells a cohesive story.

Finally, consider the scale and proportion of your appliances. Oversized models can dominate a small kitchen, while petite appliances may look lost in a spacious area. Striking the right balance can enhance both functionality and visual appeal, creating an inviting space that encourages cooking and entertaining.

In summary, the style and design of your kitchen appliances are crucial in creating an atmosphere that reflects your personal taste and enhances your home’s overall aesthetic. By carefully selecting appliances that harmonize with your kitchen’s design, you can achieve a beautiful and functional space that you’ll love for years to come.

7. Budgeting for Your Kitchen Appliances

How to choose the right appliances for your kitchen?
Credit : whatcanu.com

When it comes to choosing kitchen appliances, budgeting is a crucial step that sets the foundation for your shopping experience and ultimately determines the quality of the appliances you can invest in. Before you even step foot into a showroom or browse online retailers, take a moment to outline your financial parameters. This isn’t just about setting a total spending limit; it’s about categorizing your needs and wants to make informed decisions.

Start by listing the appliances you require. Are you looking for a refrigerator, oven, dishwasher, or a combination of these? Once you have your list, research the average costs associated with each item. Keep in mind the features that matter most to you—energy efficiency, size, and design. High-end models may come with a hefty price tag, but they often offer longer warranties, better performance, and advanced technology that can justify the initial investment.

Next, consider potential costs beyond just the purchase price. Installation fees, delivery charges, and even extended service plans can add to your overall expenditure. Don’t forget to factor in the cost of maintenance and operational expenses, like energy consumption and water usage, which can significantly impact your monthly budget.

Additionally, explore financing options if you find yourself drawn to a more expensive model. Many retailers offer payment plans that can make high-quality appliances more accessible. However, be cautious of interest rates and terms to ensure you’re making a sound financial decision.

Ultimately, budgeting for kitchen appliances requires a balanced approach—one that aligns your culinary dreams with your financial reality. By meticulously planning your budget, you’ll not only avoid overspending but also set the stage for creating a kitchen that is both functional and a joy to use for years to come.

8. Reading Reviews and Ratings

When it comes to selecting the perfect kitchen appliances for your home, reading reviews and ratings is an essential step that should never be overlooked. In today’s digital age, consumers have a wealth of information at their fingertips, and tapping into this collective wisdom can significantly influence your purchasing decision.

Start by exploring reputable websites that specialize in appliance reviews. These sites often provide detailed comparisons, expert insights, and user experiences, giving you a comprehensive overview of each product’s performance. Pay attention to both the star ratings and the written reviews; while a high rating might catch your eye, the comments can reveal potential drawbacks or standout features that numbers alone cannot convey.

Moreover, consider the context of the reviews. A five-star rating might reflect an appliance’s performance in a professional kitchen but could fall short in a home environment. Look for reviews from individuals who have similar cooking habits or kitchen sizes as yours. This can help ensure that the appliance will meet your specific needs.

Don’t forget to check multiple sources before making a decision. Consumer reviews on retail websites, social media feedback, and industry expert articles can vary widely, providing you with a well-rounded view. Engaging in conversations on forums or social media platforms can also yield valuable insights, as you can ask questions and get real-time feedback from other users.

Ultimately, reading reviews and ratings not only empowers you to make informed choices but also helps you identify appliances that are truly worth the investment. By doing your homework, you can avoid buyer’s remorse and select kitchen appliances that enhance your culinary experience and stand the test of time in your home.

9. The Benefits of Smart Appliances

In today’s fast-paced world, smart appliances are revolutionizing the way we interact with our kitchens, offering an incredible blend of convenience, efficiency, and innovation. These technologically advanced devices leverage the power of the internet and smart technology to enhance your cooking and food preparation experience, making them a worthy investment for any modern home.

One of the most significant benefits of smart appliances is their ability to streamline meal preparation. Imagine being able to preheat your oven remotely while you’re still at the grocery store, ensuring that dinner is ready the moment you walk through the door. With smart ovens and microwaves equipped with Wi-Fi connectivity, you can control cooking settings from your smartphone, access a plethora of recipes, and even receive notifications when your dish is done.

Energy efficiency is another key advantage. Smart refrigerators, for example, can monitor your food inventory and suggest recipes based on what you have at home, helping to minimize food waste and save you money. Many smart appliances are designed to optimize energy usage, allowing you to track consumption patterns and adjust settings for maximum efficiency. This not only benefits your wallet but also contributes to a more sustainable lifestyle.

Moreover, smart appliances often come with enhanced safety features. For instance, smart cooktops can automatically shut off when not in use or alert you if they detect overheating, providing peace of mind, especially in busy households. Some appliances even integrate with home security systems, allowing you to monitor your kitchen while you’re away.

Incorporating smart appliances into your kitchen also means embracing innovation and staying ahead of the curve. As technology continues to evolve, these devices are becoming increasingly intuitive, offering voice control capabilities and compatibility with virtual assistants like Alexa or Google Assistant. This hands-free approach to managing your kitchen tasks frees up time for you to focus on what truly matters—enjoying meals with family and friends.

Ultimately, the benefits of smart appliances extend far beyond mere convenience; they enhance your cooking experience, promote energy efficiency, and provide an extra layer of safety in the kitchen. As you consider the best appliances for your home, embracing smart technology could be the key to a more efficient, enjoyable, and connected culinary journey.

10. Compatibility with Existing Kitchen Décor

When selecting kitchen appliances, it’s crucial to consider their compatibility with your existing kitchen décor. After all, the kitchen is often the heart of the home, a space where aesthetics and functionality must come together harmoniously. Your choice of appliances can significantly influence the overall ambiance and style of the room, so it’s worth taking the time to ensure they complement your current setup.

Start by assessing the color palette of your kitchen. If you have a modern, sleek design with cool tones, stainless steel appliances may enhance the contemporary feel. Conversely, if your kitchen boasts warm wood accents and cozy, rustic elements, vintage-inspired appliances in soft hues or matte finishes can create a charming, cohesive look.

Next, consider the finishes of your cabinetry and countertops. Are they glossy, matte, or textured? The texture and sheen of your appliances should align with these surfaces to create a balanced aesthetic. For instance, if your countertops are made of natural stone with a rough finish, opting for appliances that feature a brushed or matte finish will create a more harmonious environment.

Additionally, think about the style of your kitchen—whether it’s traditional, industrial, farmhouse, or minimalist. Each style has its own set of design cues, and choosing appliances that echo these cues will help reinforce the theme. A farmhouse kitchen, for example, might benefit from large, retro-style refrigerators and traditional ranges, while an industrial kitchen may look better with bold, stainless steel appliances with visible mechanics.

Lastly, don’t forget the layout. Large appliances should not only fit in the designated spaces but also allow for easy movement and accessibility. If your kitchen has an open concept, ensure that your appliances look good from every angle and enhance the overall flow of the space.

By taking the time to choose appliances that align with your kitchen’s décor, you’ll not only enhance the visual appeal of the space but also create a cohesive environment that reflects your personal style and enhances your cooking experience.

11. Maintenance and Warranty Considerations

When selecting kitchen appliances, maintenance and warranty considerations are often overlooked yet play a pivotal role in ensuring the longevity and performance of your investments. After all, your kitchen is the heart of your home, and keeping it running smoothly requires more than just picking the shiniest, most feature-rich gadgets.

First, consider the maintenance needs of each appliance. Some models may require regular cleaning, descaling, or filter changes to maintain efficient operation. For instance, if you’re investing in a high-end espresso machine, be prepared for daily cleaning rituals and occasional deep cleans to keep it in peak condition. Conversely, simpler appliances like slow cookers may have minimal upkeep, making them easier to integrate into a busy lifestyle.

Next, turn your attention to warranties. A robust warranty can save you from unexpected repair costs and provide peace of mind. Examine the terms closely—look for coverage on parts and labor, the duration of the warranty, and what specific issues are included. Some brands even offer extended warranty options for an additional fee. If you’re purchasing a high-ticket item like a refrigerator or oven, it’s wise to invest in a model that comes with a comprehensive warranty, especially considering the complexity of these appliances.

Additionally, consider the manufacturer’s reputation for customer service. A brand with a history of responsive support can make all the difference when you encounter an issue. Read customer reviews to gauge the experiences others have had with warranty claims and maintenance support.

Finally, think ahead about how your chosen appliances will fit into your lifestyle. Are you someone who cooks daily and needs appliances that can stand up to heavy usage? Or do you prefer convenience and are looking for low-maintenance options? By aligning your choice of appliances with your maintenance preferences and understanding warranty protections, you can ensure that your kitchen remains both functional and enjoyable for years to come.

12. Where to Buy: Retail vs. Online Options

When it comes to purchasing kitchen appliances, one of the crucial decisions you’ll face is where to buy them—whether to venture into a retail store or to explore the vast world of online shopping. Each option presents its own set of advantages and challenges, making it essential to assess your needs and preferences before making a choice.

**Retail Stores: The Hands-On Experience**

Shopping at a physical retail store offers a unique experience that online shopping simply cannot replicate. Stepping into a showroom allows you to see and touch the appliances firsthand, giving you a better sense of their size, design, and functionality. You can open refrigerator doors, test the buttons on a range, and even observe how various finishes look under different lighting conditions. Furthermore, the opportunity to speak with knowledgeable sales staff can provide valuable insights and recommendations tailored to your specific cooking habits and kitchen space.

Additionally, buying from a retail store often means immediate availability. You can take your new appliance home the same day, avoiding the long wait times associated with online orders. Many retailers also offer delivery and installation services, ensuring that your new purchase is set up correctly and ready for use.

**Online Shopping: Convenience at Your Fingertips**

On the other hand, online shopping presents unparalleled convenience. You can browse an extensive selection of appliances from the comfort of your home, comparing prices, features, and customer reviews with just a few clicks. This freedom allows you to take your time and make informed decisions without the pressure of a sales environment.

E-commerce platforms often provide access to exclusive deals and discounts that you may not find in physical stores. Moreover, online retailers frequently have a broader selection of brands and models, including hard-to-find items that may not be available locally. However, purchasing online does come with its own challenges. You’ll need to rely on product descriptions and customer reviews, as you won’t have the chance to see the appliance in person before buying. Additionally, consider shipping costs and delivery times, which can vary significantly depending on the retailer.

**Making the Decision**

Ultimately, the choice between retail and online shopping boils down to your personal preferences and circumstances. If you value hands-on experience and immediate gratification, a retail store may be your best bet. However, if convenience, variety, and potentially better pricing are more important to you, then exploring online options might be the way to go. Whichever route you choose, taking the time to research and compare will ensure that you find the perfect kitchen appliances to elevate your culinary space.

13. Installation Tips for New Appliances

Installing new kitchen appliances can be an exciting yet daunting task. Proper installation is key not only to ensure optimal performance but also to prolong the lifespan of your appliances. Here are some essential tips to help you navigate the installation process smoothly.

**1. Read the Manual:** Before you even unbox your new appliance, take a moment to read the user manual. Each appliance comes with specific installation instructions, safety precautions, and installation requirements unique to that model. Familiarizing yourself with these guidelines can save you time and prevent potential mishaps.

**2. Gather the Right Tools:** Ensure you have all the necessary tools at hand. Depending on the appliance, you may need screwdrivers, a level, pliers, or even a drill. Having everything prepared beforehand will make the installation process more efficient and less stressful.

**3. Check for Compatibility:** Before installing, double-check that your new appliance is compatible with your current setup. For instance, if you’re replacing a dishwasher, ensure the plumbing and electrical connections are appropriate for the new model. Measure the space available to guarantee a proper fit, accounting for any additional clearance needed for opening doors or drawers.

**4. Prepare the Space:** Clear out the area where the new appliance will be installed. This not only gives you ample room to work but also protects your floors and existing cabinetry from scratches or damage during installation.

**5. Level It Up:** Once the appliance is in place, use a level to ensure it sits evenly. An unlevel appliance can lead to inefficient operation, especially for refrigerators and dishwashers. Adjust the legs or feet of the appliance as necessary to achieve a perfectly level position.

**6. Secure Connections:** For appliances that require plumbing or electrical connections, ensure everything is securely fastened. If you’re not confident in handling electrical or plumbing tasks, it’s wise to consult with a professional. A small mistake can lead to significant issues down the line.

**7. Test Functionality:** After installation, run a quick test to check that everything is functioning correctly. For example, turn on your oven or run a cycle on your dishwasher to ensure they operate as expected. This step can help you catch any potential issues early on.

**8. Keep Documentation:** Finally, store the user manual and any warranty information in an easily accessible location. This will be invaluable should you encounter any issues in the future or require maintenance.

By following these installation tips, you can enjoy your new kitchen appliances with confidence, knowing they are set up for optimal performance. A well-installed appliance not only enhances your cooking experience but also adds convenience and efficiency to your daily routine.

14. Eco-Friendly Appliance Options

In today’s environmentally conscious world, making sustainable choices in your kitchen is not just a trend—it’s a commitment to a healthier planet. Eco-friendly kitchen appliances are designed not only to reduce your carbon footprint but also to enhance energy efficiency and minimize waste. When selecting appliances for your home, consider options that are energy-efficient, water-saving, and made from sustainable materials.

Start by looking for appliances with the ENERGY STAR label, which indicates that they meet strict energy efficiency guidelines set by the U.S. Environmental Protection Agency. These appliances consume less electricity and water than their conventional counterparts, helping you save on utility bills while reducing greenhouse gas emissions. For example, ENERGY STAR-rated refrigerators use up to 15% less energy than standard models, and dishwashers can use as little as 3.5 gallons of water per cycle.

Another great eco-friendly option is induction cooktops. Unlike traditional electric or gas stoves, induction cooktops use electromagnetic energy to directly heat pots and pans, leading to faster cooking times and less wasted energy. Additionally, many manufacturers are now producing ovens that incorporate eco modes, allowing you to bake and roast using less energy without sacrificing performance.

Don’t forget about sustainable materials! Look for appliances made from recycled or recyclable materials, which can significantly reduce the environmental impact of manufacturing new products. Brands are increasingly prioritizing sustainability in their designs, so you can find stylish and modern appliances that are also environmentally responsible.

Lastly, consider appliances that promote zero-waste cooking. For instance, composting appliances can help you manage food scraps efficiently, turning waste into valuable fertilizer for your garden. By investing in eco-friendly kitchen appliances, not only do you enhance your cooking experience, but you also contribute to a more sustainable future. Embrace the green revolution in your kitchen, and make choices that reflect your commitment to the planet while enjoying the benefits of modern technology.

15. Final Thoughts: Making Your Choice with Confidence

As you embark on the exciting journey of selecting the perfect kitchen appliances for your home, it’s essential to remember that this decision is more than just a purchase—it’s an investment in your lifestyle and culinary experiences. The right appliances can transform your kitchen into a hub of creativity and efficiency, enhancing not only the way you cook but also how you enjoy time with family and friends.

Final thoughts on this process should center around the importance of thorough research and personal reflection. Take the time to assess your cooking habits, the size of your kitchen, and your budget. Consider how frequently you entertain guests. Do you need a double oven for those holiday gatherings, or perhaps a compact dishwasher for a smaller kitchen? Each choice should align with your unique needs and preferences.

Additionally, don’t underestimate the value of customer reviews and expert opinions. Hearing from fellow homeowners about their experiences can provide invaluable insights into the performance and reliability of different brands and models. And remember to consider energy efficiency; not only will it benefit the environment, but it will also save you money in the long run.

Finally, trust your instincts. While it’s important to take advice into account, your kitchen is a personal space that reflects your taste and lifestyle. Choose appliances that not only meet your functional requirements but also resonate with your aesthetic sensibilities. Whether you’re drawn to sleek modern designs or classic finishes, let your style shine through.

In closing, equip yourself with knowledge, listen to your intuition, and embrace the excitement of making your kitchen truly your own. With confidence in your choices, your kitchen will soon become a cherished space where delicious meals and lasting memories are made. Happy cooking!

As we conclude our ultimate guide to choosing the perfect kitchen appliances for your home, we hope you feel empowered and inspired to make informed decisions that elevate both your cooking experience and your kitchen’s aesthetic. From selecting energy-efficient models to balancing functionality with sleek design, each choice plays a pivotal role in creating a space that reflects your personal style and meets your culinary needs. Remember, investing in the right appliances not only enhances your kitchen’s functionality but also adds value to your home. So take your time, explore your options, and enjoy the journey of transforming your kitchen into the heart of your home. Happy cooking!