How to Clean Your Car Interior?

A clean car interior is more than just a matter of aesthetics; it’s about creating a comfortable and enjoyable driving experience.

After all, your vehicle is a personal sanctuary where many of life’s moments unfold, from daily commutes to weekend getaways. However, between spilled coffee, crumbs from snacks, and the inevitable dust and dirt that accumulate over time, keeping your car’s interior spotless can feel like a daunting task. Fear not! In this ultimate guide, we’ll share expert tips and tricks to transform your car’s interior into a pristine haven. Whether you’re a meticulous car enthusiast or just looking to tidy up for a special occasion, our comprehensive advice will help you tackle every nook and cranny, ensuring your ride not only looks great but feels great too. Get ready to roll in style and comfort as we dive into the essentials of car interior cleaning!

1. Introduction: The Importance of a Clean Car Interior

How to Clean Your Car Interior?
Credit : whatcanu.com

A clean car interior is more than just a matter of aesthetics; it plays a crucial role in enhancing your driving experience and maintaining the longevity of your vehicle. Picture this: you step into your car after a long day, and instead of being greeted by a fresh, inviting space, you find yourself surrounded by crumbs, stains, and a lingering odor. Not only can a cluttered environment be distracting, but it can also negatively impact your mood and overall comfort while driving.

A spotless interior gives a sense of pride and ownership, reflecting your personality and attention to detail. Moreover, regular cleaning can help preserve the materials in your car, preventing wear and tear that can lead to costly repairs down the line. Dust and dirt can accumulate on surfaces, leading to scratches and fading if left unchecked. By investing time in cleaning your car, you’re not only creating a pleasant environment for yourself but also safeguarding your investment.

Additionally, a clean car interior can improve your health. Dust, allergens, and bacteria can thrive in neglected spaces, potentially exacerbating allergies or respiratory issues. Keeping your car tidy helps create a healthier atmosphere, ensuring that every drive is not only enjoyable but also safe for you and your passengers.

In this ultimate guide, we’ll explore practical tips and tricks to help you achieve a spotless ride. From the best cleaning supplies to effective techniques for tackling even the messiest of interiors, we’ve got you covered. So, roll up your sleeves, and let’s transform your vehicle into a pristine sanctuary on wheels!

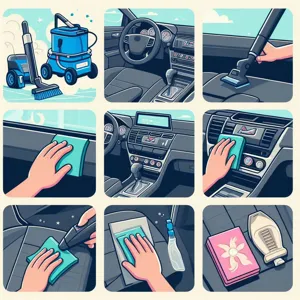
2. Essential Cleaning Supplies You Need

To achieve a spotless car interior, having the right cleaning supplies on hand is essential. Before you dive into the nitty-gritty of scrubbing and polishing, take a moment to gather these indispensable items that will make your cleaning process efficient and effective.

First on your list should be a high-quality vacuum cleaner. Opt for one with specialized attachments for reaching those tricky spots between seats and under mats. A handheld vacuum can be particularly handy for quick clean-ups, ensuring you can tackle dirt and crumbs as they accumulate.

Next, consider microfiber cloths, which are gentle on surfaces yet highly effective at picking up dust and grime. Unlike traditional rags, microfiber cloths won’t scratch your dashboard or windows, making them perfect for a variety of surfaces throughout your car. Stock up on several in different colors to designate specific uses—such as one for the dashboard, another for glass, and so on.

Don’t forget a good all-purpose cleaner or a specialized interior cleaner suited for your car’s materials. Whether your seats are leather, fabric, or vinyl, using the right product will help lift stains without causing damage. For those tough spots, a soft-bristle brush can work wonders, especially in fabric upholstery.

For the finishing touches, a glass cleaner is essential for achieving crystal-clear windows, and an air freshener will help keep your car smelling fresh after all your hard work. Lastly, consider a protective spray for your dashboard and other plastic surfaces to help repel dust and prevent fading from UV exposure.

With these essential supplies at your disposal, you’ll be well-equipped to tackle any mess and maintain a pristine car interior that you can be proud of. Happy cleaning!

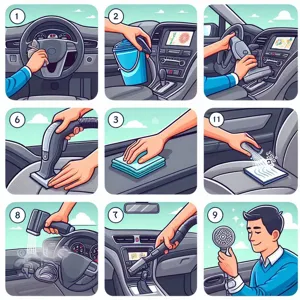
3. Preparing Your Car for Cleaning

How to Clean Your Car Interior?
Credit : whatcanu.com

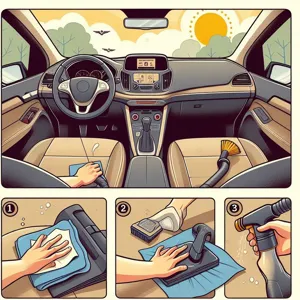
Before diving into the nitty-gritty of cleaning your car interior, it’s essential to prepare your vehicle properly. This initial step sets the stage for a more efficient and thorough cleaning experience. Start by removing any obvious clutter—think of it as decluttering your car’s living space. Remove personal items, trash, and any loose belongings that have settled into your vehicle over time. Don’t forget to check under the seats and in the glove compartment, as these are often overlooked areas where forgotten items accumulate.

Next, take the time to vacuum the interior, focusing on the carpets, seats, and floor mats. Use a handheld vacuum or a vacuum attachment with a crevice tool to reach those tricky spots between the seats and in the corners. This will help eliminate dirt, dust, and debris, ensuring a clean slate for the next steps. If your car has removable floor mats, take them out and give them a good shake or vacuum separately.

Once you’ve cleared out the clutter and debris, inspect the surfaces of your car’s interior. This includes the dashboard, steering wheel, door panels, and center console. Take a moment to assess any stains or specific problem areas that might require special attention, such as spills on the upholstery or scuff marks on the plastic. Having a clear idea of what needs addressing will allow you to tailor your cleaning strategy effectively.

Finally, gather all the cleaning supplies you’ll need. Depending on your car’s materials, you may require microfiber cloths, upholstery cleaner, glass cleaner, and a dedicated dashboard polish. By organizing your cleaning tools ahead of time, you’ll streamline the process and avoid unnecessary interruptions. With your car prepared and your supplies at the ready, you’re now set to transform your vehicle’s interior into a pristine haven.

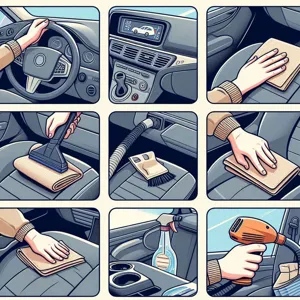
4. Vacuuming Your Car: Techniques for Maximum Cleanliness

Vacuuming your car might seem like a straightforward task, but employing the right techniques can make a world of difference in achieving that immaculate interior you desire. To start, ensure you have a powerful vacuum with multiple attachments—this will allow you to reach every nook and cranny of your vehicle. A handheld vacuum or one with a hose is particularly effective for getting into tight spaces, such as between seats and into cup holders.

Begin by removing any loose items from your car, such as trash, bags, and personal belongings. This will provide unobstructed access to the surfaces that need cleaning. Next, give the carpets and upholstery a good shake to dislodge any trapped debris. When you start vacuuming, begin from the top of the interior and work your way down. This approach ensures that any dust or crumbs that fall onto lower surfaces are picked up immediately, preventing the need for multiple passes.

As you vacuum, pay special attention to high-traffic areas—like the driver’s seat and floor mats—where dirt tends to accumulate. Use the crevice tool to tackle those hard-to-reach spots, such as the gap between the seats and the console. Don’t forget about the dashboard and door panels; a quick run over these surfaces can help remove dust and prevent it from settling back onto your freshly vacuumed seats.

For an extra touch, consider using an upholstery attachment to gently clean the fabric and a soft brush for leather surfaces. This not only removes dirt but also revives the texture and appearance of your upholstery. To finish off, take a moment to vacuum the trunk and any storage compartments, as these areas often trap unwanted debris as well.

With these techniques in mind, you’ll not only achieve maximum cleanliness but also maintain the overall value and aesthetics of your vehicle, leaving you with a ride that feels as good as new.

5. Cleaning the Dashboard and Console

How to Clean Your Car Interior?
Credit : whatcanu.com

Cleaning the dashboard and console is a crucial step in achieving a spotless car interior, as these surfaces often accumulate dust, grime, and fingerprints over time. To start, gather your supplies: a microfiber cloth, a soft-bristle brush, and a gentle cleaning solution. It’s essential to choose a cleaner that is safe for the materials in your car, whether they are plastic, vinyl, or metal.

Begin by removing any loose items from the dashboard and console to create a clear workspace. Use the soft-bristle brush to gently dislodge any dust or debris from the crevices and seams. This step is particularly important for areas around air vents and knobs, where dirt can easily build up and become difficult to reach.

Next, dampen the microfiber cloth with your chosen cleaning solution. Avoid saturating it; a lightly damp cloth will effectively pick up dirt without leaving excess moisture that could seep into electronics. Wipe the dashboard in a circular motion, ensuring that you cover every inch, from the instrument cluster to the glove compartment. Pay special attention to areas that are often overlooked, such as the edges and corners where dust tends to accumulate.

For the console, which may have more textured surfaces, use a brush to reach into the grooves and around buttons. After wiping down both the dashboard and console, take a dry section of the microfiber cloth to buff away any streaks or residue.

Finally, consider applying a protectant designed for automotive plastics and vinyl. This not only gives your surfaces a polished look but also adds a layer of UV protection to prevent fading and cracking over time. By following these steps, your dashboard and console will not only look pristine but will also enhance your overall driving experience, making every journey more enjoyable.

6. Upholstery Care: Tips for Cloth and Leather Seats

When it comes to maintaining a pristine car interior, upholstery care is essential, especially for cloth and leather seats. Each material requires a tailored approach to ensure longevity and aesthetic appeal.

**For Cloth Seats:** Start by vacuuming to eliminate crumbs, dust, and dirt particles that settle into the fibers. Use an upholstery attachment to reach the crevices and corners. Once the vacuuming is complete, treat stains with a fabric cleaner specifically designed for automotive use. Spray a small amount onto the stain and gently blot with a microfiber cloth, avoiding vigorous rubbing which can damage the fabric. For deeper cleaning, consider using a steam cleaner or a carpet cleaner with upholstery capabilities, which can lift embedded grime without harsh chemicals.

**For Leather Seats:** Leather requires a more delicate touch. Begin by vacuuming to remove debris, and then wipe down the surface with a soft, damp cloth to remove surface dust. Avoid soaking the leather; instead, use a gentle pH-balanced leather cleaner. Apply the cleaner to a microfiber cloth and work it into the seats using circular motions, paying special attention to seams and creases where dirt tends to accumulate. After cleaning, don’t forget to condition the leather with a quality leather conditioner to maintain its suppleness and prevent cracking. Conditioning should be done every three to six months, depending on your climate and usage.

By tailoring your cleaning routine to the specific needs of cloth and leather upholstery, you can keep your car interior looking fresh and inviting, making every drive a delightful experience. Regular maintenance not only enhances the visual appeal of your vehicle but also preserves its value over time. Remember, a clean interior is not just about aesthetics; it contributes significantly to your overall driving comfort.

7. How to Clean Windows and Mirrors

How to Clean Your Car Interior?
Credit : whatcanu.com

Cleaning your car windows and mirrors is an essential step in maintaining a spotless interior, not only for aesthetic reasons but also for safety. Dirty windows can obscure your view, especially in bright sunlight or inclement weather, so keeping them crystal clear should be a priority.

Start by choosing the right cleaning solution. While store-bought glass cleaners are effective, you can also create an eco-friendly DIY version by mixing equal parts of water and white vinegar in a spray bottle. This solution cuts through grime and leaves a streak-free finish.

Before you begin, gather your supplies: a microfiber cloth, a soft sponge, and a squeegee if you have one. Microfiber cloths are especially beneficial as they trap dust and dirt without scratching the glass surface. Avoid using paper towels, as they can leave lint behind and may scratch the glass.

Begin by rolling down your windows slightly to access the top edge, where dirt tends to accumulate. Spray your chosen cleaner onto the glass, starting from the top and working your way down. This method prevents any drips from running down onto already cleaned areas. Use the microfiber cloth to wipe the surface in a circular motion, ensuring you cover all corners and edges.

For a flawless finish, use a squeegee to remove any excess cleaner. Start at the top corner of the window and pull the squeegee down in a straight line, wiping the blade with the cloth after each pass to avoid spreading dirt back onto the glass. Don’t forget to clean the inside of the windows as well, as these can accumulate fingerprints and smudges over time.

For mirrors, use the same cleaning solution and technique. Make sure to tackle both the front and back of the mirrors, ensuring they’re free from streaks and smudges.

Finally, take a step back and admire your work. Clean windows and mirrors not only enhance the overall appearance of your car’s interior but also improve your visibility and safety on the road. Regularly cleaning these surfaces will keep your ride looking fresh and ensure that you enjoy a clear view every time you hit the road.

8. Detailing Your Car’s Carpets and Floor Mats

When it comes to achieving a truly spotless interior, detailing your car’s carpets and floor mats is a crucial step that often gets overlooked. These areas not only bear the brunt of everyday wear and tear but also accumulate dirt, grime, and spills that can detract from the overall cleanliness and appeal of your vehicle.

Start by removing the floor mats from your car. Shake them vigorously to dislodge any loose debris, and then give them a thorough vacuuming to capture the finer particles that may be lurking in the fibers. If your mats are rubber, don’t hesitate to use a hose with a gentle spray to wash away stubborn muck. For fabric mats, a specialized carpet cleaner can work wonders. Spray the cleaner evenly across the surface, allowing it to penetrate for a few minutes, then scrub with a soft-bristled brush to lift the dirt away. Rinse thoroughly and let them air dry completely before placing them back in your vehicle.

Once the mats are clean, turn your attention to the carpets. Begin by vacuuming the entire area, paying special attention to the corners, under the seats, and any crevices where dirt tends to hide. For deep cleaning, consider using a steam cleaner or a carpet cleaner machine, which can effectively target embedded stains and odors. If you encounter tough stains—like coffee spills or mud—apply a spot treatment designed for automotive carpets, and blot with a clean cloth until the stain lifts.

Don’t forget to finish with a fabric refresher or an odor-eliminating spray to leave your car smelling fresh. Detailing your carpets and floor mats not only enhances the appearance of your interior but also contributes to a more pleasant driving experience, ensuring that every ride feels as good as new.

9. Freshening Up Odors: Deodorizing Tips

A clean car interior is not just about the absence of dirt; it’s also about creating an inviting atmosphere free from unpleasant odors. Over time, your vehicle can accumulate a variety of smells—from lingering fast food wrappers to musty air fresheners. Fortunately, freshening up your car’s interior is simple and can make a world of difference in your driving experience. Here are some effective deodorizing tips to ensure your ride smells as good as it looks.

**1. Deep Clean Your Upholstery:** Start with a thorough cleaning of your seats and carpets. Use a vacuum to remove any crumbs and debris, then follow up with an appropriate cleaner for your upholstery type—be it fabric or leather. For fabric seats, consider using a steam cleaner or upholstery cleaner to lift stubborn stains and odors.

**2. Natural Deodorizers:** Harness the power of natural ingredients to combat odors. Baking soda is a fantastic odor absorber—sprinkle it on seats and carpets, let it sit for a few hours (or overnight), and then vacuum it away. Activated charcoal bags are another excellent option; they can absorb moisture and odors without any added fragrances.

**3. Air Out the Space:** Sometimes, all your car needs is a good airing out. On a dry day, park your vehicle in a shaded area with the windows rolled down. This allows fresh air to circulate and helps dissipate any stale smells that may have developed over time.

**4. Essential Oils and DIY Sprays:** If you prefer a pleasant scent, consider making a DIY air freshener with essential oils. Mix water with a few drops of your favorite essential oil (like lavender, lemon, or eucalyptus) in a spray bottle. Lightly mist the interior, avoiding sensitive areas like electronic components. This method allows you to customize the fragrance while avoiding artificial scents often found in commercial air fresheners.

**5. Replace or Clean Your Cabin Air Filter:** A clogged cabin air filter can contribute to unpleasant odors in your car. Check your vehicle’s manual for information on how to locate and replace the filter. Cleaning it periodically can also help maintain fresh air circulation within the cabin.

By implementing these deodorizing tips, you can effectively banish unwanted odors and elevate your car’s interior ambiance. A fresh-smelling vehicle not only enhances your driving experience but also leaves a lasting impression on passengers. So go ahead, give your ride the rejuvenation it deserves!

10. Organizing Your Car: Keeping It Clutter-Free

A cluttered car interior can quickly transform your once-pristine vehicle into a chaotic mess, making it difficult to enjoy your rides or find essential items when you need them. To maintain a spotless ride, it’s vital to prioritize organization within your car. Start by decluttering regularly—set aside a few minutes each week to remove unwanted items, such as old receipts, empty water bottles, and miscellaneous junk that tends to accumulate.

Investing in organizational accessories can significantly enhance your car’s tidiness. Consider utilizing seatback organizers, console trays, and trunk storage bins to create designated spaces for various items. For instance, a seatback organizer can hold everything from snacks to gadgets, keeping them easily accessible yet out of the way. Similarly, a trunk storage bin can neatly house emergency supplies, sports equipment, or groceries, preventing them from rolling around and creating further mess.

Additionally, develop the habit of implementing a ‘one in, one out’ rule—every time you bring something new into your car, make it a point to remove an existing item. This practice not only helps maintain a clutter-free environment but also encourages mindfulness about what you carry.

Lastly, consider setting up a routine cleaning schedule where you take a few minutes after each trip to tidy up. A quick sweep to dispose of trash and reorganize items can go a long way in preserving that fresh, clean feel of your car’s interior. By adopting these simple yet effective strategies, you can enjoy a clutter-free space that elevates your driving experience and keeps your car looking its best.

11. Maintaining a Clean Interior: Regular Cleaning Routines

Maintaining a clean interior is crucial for both the aesthetic appeal and longevity of your vehicle. Regular cleaning routines not only prevent dirt and grime from accumulating but also create a more pleasant driving environment. To establish an effective cleaning regimen, consider incorporating these simple yet impactful practices into your routine.

Start by setting aside a specific day each month dedicated to a thorough interior clean. During this time, remove all items from your car, including floor mats and any personal belongings. Vacuuming should be your first step—make sure to reach all the nooks and crannies, including under the seats and in between the cushions. A good vacuum will pick up dirt, crumbs, and pet hair that often go unnoticed in daily commutes.

Next, focus on wiping down surfaces. Use a microfiber cloth and an appropriate cleaner to tackle the dashboard, steering wheel, and door panels. These areas can accumulate dust and fingerprints quickly, so regular attention will keep them looking pristine. Don’t forget to clean your glass surfaces; a streak-free cleaner will enhance visibility and give your interior a polished look.

Consider developing a quick weekly routine to maintain that fresh feel between deep cleans. This could include a simple vacuum of the floor mats, a quick wipe of the dashboard, and a dusting of any storage compartments. If you frequently eat in your car, keep a small trash bag handy to dispose of wrappers and containers immediately, preventing clutter from building up.

Lastly, invest in protective products that help keep your interior in top shape. Leather conditioners can prevent cracking and fading, while fabric protectors can help repel stains on upholstery. By establishing these regular cleaning routines, you’ll not only maintain a spotless ride but also enhance your driving experience, ensuring your car feels just as good as it looks.

12. Eco-Friendly Cleaning Solutions and Alternatives

When it comes to cleaning your car interior, eco-friendly cleaning solutions and alternatives are not just trendy—they’re a responsible choice for both your vehicle and the environment. With growing awareness of the impact of harsh chemicals, many car owners are now seeking natural alternatives that are effective yet gentle on surfaces and the air we breathe.

One of the simplest and most effective eco-friendly cleaning solutions can be made right at home: a mixture of equal parts vinegar and water. This powerful combination acts as a natural disinfectant that can cut through grease and grime on dashboards, door panels, and console surfaces without leaving harmful residues. For a fresh scent, consider adding a few drops of your favorite essential oil, like lavender or lemon, to the mix.

Baking soda is another versatile ally in your quest for a spotless ride. Its natural abrasive qualities make it perfect for tackling stubborn stains on upholstery. Just sprinkle a generous amount onto the stained area, let it sit for about 15 minutes to absorb odors and moisture, and then vacuum it up for a refreshed look. For leather seats, a solution of olive oil and vinegar can help condition and clean without the need for commercial leather products that often contain harsh chemicals.

For those looking to clean their carpets or floor mats, look no further than your pantry. Cornstarch can be sprinkled onto the mats to absorb grease and dirt. After letting it sit for a few hours, simply vacuum it away for a clean finish. Additionally, steam cleaning is an excellent chemical-free method for deep cleaning your upholstery and carpets, eliminating bacteria and allergens while preserving the integrity of the materials.

By opting for these eco-friendly solutions, not only will you maintain a clean and inviting car interior, but you’ll also contribute to a healthier planet. Your car will not only look good; it will feel good knowing you’ve made choices that are kind to both your family and the environment. So, gather those natural ingredients, roll up your sleeves, and enjoy the process of transforming your vehicle into a spotless sanctuary!

13. Dealing with Stubborn Stains: Techniques and Products

Stubborn stains can be the bane of a car owner’s existence, transforming a pristine interior into a battlefield of unsightly marks and blemishes. Whether it’s a spilled coffee, a muddy footprint, or an errant snack crumble, these stains require a strategic approach to restore your vehicle’s interior to its former glory.

**Techniques to Tackle Tough Stains:**

1. **Blot, Don’t Rub:** The first rule of stain removal is to blot the affected area gently with a clean cloth or paper towel. Rubbing can spread the stain further or grind it deeper into the fabric or upholstery. Start from the outside of the stain and work your way in to contain it.

2. **Pre-Treatment:** For fabric seats, consider using a fabric cleaner or a mixture of warm water and mild dish soap. Apply it to the stain, let it sit for a few minutes, and then blot with a clean cloth. For leather, a specialized leather cleaner is your best bet—apply it with a soft cloth and follow up with a leather conditioner to keep the material supple.

3. **Steam Cleaning:** If you have access to a steam cleaner, this can be a powerful tool against stubborn stains. The heat and moisture help lift dirt and grime from both fabric and leather. Just make sure to test a small, inconspicuous area first to avoid damage.

**Products That Pack a Punch:**

1. **Enzyme Cleaners:** These are particularly effective for organic stains like food and pet messes. Enzyme cleaners break down the organic material, making it easier to lift the stain from your car’s interior.

2. **Vinegar and Baking Soda:** A classic combination, vinegar can help dissolve stains while baking soda acts as a gentle abrasive. Create a paste with these two ingredients, apply it to the stain, and let it sit for 15-20 minutes before gently scrubbing and rinsing.

3. **Commercial Stain Removers:** There are many products specifically formulated for automotive interiors. Look for ones designed for your specific type of upholstery—whether fabric, vinyl, or leather. Always follow the manufacturer’s instructions for the best results.

4. **Magic Erasers:** These handy foam pads can work wonders on various surfaces, particularly hard plastics and leather. Just dampen one slightly and gently rub the stained area; the melamine foam will lift dirt and grime away.

By combining effective techniques with the right products, you can confidently tackle stubborn stains and keep your car interior looking immaculate. Remember, the key is to act quickly and use the appropriate method for the type of stain and surface to achieve a spotless ride!

14. Final Touches: Adding Personal Flair to Your Clean Car

After putting in the elbow grease to thoroughly clean your car interior, it’s time to add those final touches that transform your vehicle from merely tidy to truly personalized. This is where you can infuse your own style and make your car a reflection of who you are.

Start with the scent; a clean car should not only look good but also smell inviting. Consider using air fresheners that align with your preferences, whether you gravitate towards fresh linen, citrusy notes, or rich vanilla. You can also opt for natural alternatives like essential oils or even a small sachet filled with dried lavender or cedar chips. These not only add a pleasant aroma but also contribute to a calming atmosphere during your drives.

Next, think about organization. Invest in stylish organizers that fit your car’s aesthetic. A sleek, fabric trunk organizer can help keep your essentials in check, while a chic visor pouch can hold your sunglasses and tickets without cluttering your dashboard.

Don’t forget about the little extras, such as seat covers or steering wheel wraps that reflect your taste. Choose colors and patterns that resonate with your style—whether it’s vibrant and fun or sleek and sophisticated.

Finally, consider the finishing touch of personal mementos. A small photograph or a quirky keychain can add warmth and character. Just be sure to keep them secured to avoid distractions while driving.

By adding these personal flair elements, you not only enhance your car’s visual appeal but also create a comfortable and inviting space that feels uniquely yours. After all, your car is more than just a mode of transportation; it’s an extension of your personality.

15. Conclusion: Enjoying Your Spotless Ride and the Benefits of a Clean Interior

As we wrap up this ultimate guide to cleaning your car interior, it’s important to recognize that maintaining a spotless ride is not just about aesthetics; it’s about creating an enjoyable and healthy environment for you and your passengers. The satisfaction that comes from stepping into a clean, fresh-smelling car is unparalleled. Imagine sliding into your vehicle, greeted by the gleam of well-polished surfaces and the inviting scent of a thorough clean—an instant mood booster that can transform even the longest commutes into a pleasurable experience.

A clean car interior also offers a host of practical benefits. Regular cleaning helps protect your investment by preserving the quality of your upholstery and surfaces, preventing stains, and minimizing wear and tear. It can also enhance your safety; a clutter-free space reduces distractions while driving, allowing you to focus on the road ahead. Plus, a tidy interior is particularly important for maintaining good air quality, as dust and allergens can accumulate quickly in enclosed spaces.

By incorporating the tips and tricks outlined in this guide—ranging from effective vacuuming techniques to the best cleaning products for various surfaces—you’re well-equipped to tackle the dirt and grime that inevitably accumulates over time. Remember, consistency is key; making regular cleaning a part of your routine will ensure your car remains a welcoming sanctuary, ready for any adventure.

So, grab those microfiber cloths and eco-friendly cleaners, roll up your sleeves, and enjoy the process of giving your vehicle the care it deserves. Embrace the feeling of pride that comes with a spotless ride, and let it inspire you to keep your car in tip-top shape for years to come. After all, a clean interior not only enhances your driving experience but also reflects your personal style and attention to detail. Happy cleaning!

In conclusion, maintaining a spotless car interior not only enhances your driving experience but also preserves the longevity of your vehicle. By following the tips and tricks outlined in this ultimate guide, you can transform your car from cluttered to pristine with minimal effort. From the essential tools to the most effective techniques, we’ve covered all the bases to ensure that your ride reflects your style and care. So, roll up your sleeves, put on your favorite playlist, and tackle that interior cleaning task with confidence. With a little time and dedication, you’ll be rewarded with a fresh, inviting space that makes every journey a pleasure. Happy cleaning, and here’s to enjoying the drive in your beautifully maintained car!

What are the Best Ways to Clean a Cat’s Litter Box?

For cat owners, maintaining a clean and fresh litter box is an essential part of ensuring a happy and healthy home for both feline and human inhabitants.

A clean litter box not only prevents unpleasant odors but also promotes good hygiene and encourages your cat to use it consistently. However, the task of litter box maintenance can often feel overwhelming, especially with the myriad of products and techniques available. In this blog post, we will delve into the art of litter box maintenance, providing you with top tips and tricks to keep your cat’s space pristine. From choosing the right litter type and box design to establishing a consistent cleaning routine, you’ll learn how to create an inviting environment for your furry friend while keeping your home smelling fresh and clean. Say goodbye to litter box woes and hello to a harmonious living space that both you and your cat will love!

1. Introduction: The Importance of a Clean Litter Box

What are the Best Ways to Clean a Cat's Litter Box?
Credit : whatcanu.com

When it comes to caring for our feline friends, one of the most crucial yet often overlooked aspects is maintaining a clean litter box. Imagine stepping into a space filled with unpleasant odors and unsightly messes—it’s enough to deter any cat from using their designated bathroom! A clean litter box is not just a matter of aesthetics; it plays a vital role in your cat’s health and well-being.

Cats are instinctively clean animals, and a dirty litter box can lead to stress and anxiety, resulting in undesirable behaviors such as inappropriate urination or defecation outside the box. Furthermore, a filthy litter box can become a breeding ground for bacteria and parasites, posing health risks not only to your cat but also to the entire household.

By mastering the art of litter box maintenance, you create a welcoming environment that promotes your cat’s natural behaviors and instincts. Regular cleaning not only helps to control odors but also fosters a sense of security for your pet, encouraging them to feel comfortable and safe in their space. Whether you’re a new cat owner or a seasoned pro, understanding the importance of a clean litter box is the first step toward nurturing a happy, healthy relationship with your furry companion. In the following sections, we will explore essential tips and tricks to ensure your cat’s litter box remains fresh, clean, and inviting, making both you and your pet happy!

2. Choosing the Right Litter Box for Your Cat

Choosing the right litter box for your cat is a fundamental step in ensuring their comfort and promoting good bathroom habits. Not all litter boxes are created equal, and finding the perfect fit for your feline friend can make all the difference in their litter box experience.

First and foremost, consider your cat’s size and age. Kittens may require a smaller, more accessible box, while larger breeds like Maine Coons will benefit from a spacious design that allows them to move around comfortably. Adult cats appreciate a box that offers ample room to turn around and dig, so opting for a larger option can help prevent messes outside the box.

Next, think about the type of litter box that best suits your cat’s personality. Some cats prefer covered litter boxes, which provide a sense of privacy and help contain odors and litter scatter. However, others may feel confined or anxious in a covered space, leading to avoidance of the box altogether. On the other hand, open litter boxes allow for easy access and ventilation, making them ideal for cats who value openness and visibility.

Don’t forget to consider the box’s height. Older cats or those with mobility issues may struggle with high sides, so a low-entry box can make a world of difference. Additionally, if you have multiple cats, a larger box or multiple boxes placed in different areas of your home can help reduce territorial disputes and ensure each cat has easy access.

Lastly, think about the materials. Plastic boxes are the most common and easy to clean, but there are also other options like biodegradable or more aesthetically pleasing designs that fit with your home decor. Ultimately, the right litter box should cater to your cat’s needs while also fitting seamlessly into your living space.

By taking the time to choose the right litter box, you’re setting the stage for a positive litter experience that can lead to better hygiene, less stress, and a happier cat overall. Remember, a well-maintained litter box is not just a necessity; it’s a sanctuary for your furry friend!

3. Types of Cat Litter: Finding the Best Fit

What are the Best Ways to Clean a Cat's Litter Box?
Credit : whatcanu.com

When it comes to keeping your cat’s litter box fresh and clean, one of the most crucial decisions you’ll make is choosing the right type of cat litter. With a myriad of options available, understanding the differences can help you find the best fit for both your feline friend and your household.

**Clumping Clay Litter** is a popular choice among cat owners for its excellent absorbency and ease of cleaning. Made from bentonite clay, this type forms solid clumps when wet, allowing for quick removal of waste and odors. It’s ideal for busy cat parents who appreciate the convenience of a tidy litter box. However, be mindful that it can be dusty and may not be suitable for cats with respiratory issues.

**Non-Clumping Clay Litter** is another option that absorbs moisture without forming clumps. While it requires more frequent changing to maintain freshness, it can be a more budget-friendly choice. This type is also less dusty than its clumping counterpart, making it a safer option for sensitive cats.

**Biodegradable Litters** are gaining popularity among environmentally conscious pet owners. Made from natural materials like corn, wheat, or recycled paper, these litters break down easily and can often be composted. They tend to be less dusty and have less chemical additives, providing a healthier option for both your cat and the planet.

**Crystal Litter** is made from small, absorbent crystals that allow moisture to evaporate and help control odors effectively. This litter requires less frequent changing, but some cats may not prefer the texture. It’s wise to observe your cat’s behavior to ensure they are comfortable using it.

**Scented vs. Unscented** is another consideration. While some scented litters can help mask odors, they may be overwhelming for your cat’s sensitive nose. Experimenting with both options can help you determine what your cat prefers.

Ultimately, the best litter is one that suits your cat’s preferences and your lifestyle. Don’t hesitate to try a few different types before settling on the one that keeps your litter box fresh and your kitty happy. Regular maintenance paired with the right litter choice will contribute significantly to a clean and enjoyable cat space.

4. Ideal Location for Your Litter Box

Choosing the ideal location for your litter box is a critical step in ensuring both your cat’s comfort and the cleanliness of your home. Cats are creatures of habit and can be quite particular about their bathroom habits, so the placement of the litter box can significantly influence their willingness to use it.

First and foremost, find a quiet, low-traffic area of your home. Cats prefer to have a sense of privacy while they attend to their business, so placing the litter box in a secluded corner or a less frequented room can help them feel secure. Avoid areas near loud appliances or high-activity zones, as the noise and commotion can deter your furry friend from using the box.

It’s also essential to keep the litter box away from their food and water bowls. Cats are naturally clean animals and instinctively seek to keep their eating areas separate from their elimination spots. A good rule of thumb is to place the litter box at least several feet away from their feeding area to respect their natural instincts.

Consider the accessibility of the litter box as well, especially if you have a kitten or an older cat. The box should be easy to enter and exit, which may mean choosing a box without high sides or a lid that could make it difficult for them to access. If you have multiple cats, it’s a good idea to have one litter box for each cat, plus one extra, to reduce territorial disputes and ensure everyone has a clean option available.

Lastly, keep an eye on the surrounding area. Make sure the spot you choose is well-ventilated to prevent odors from lingering. If necessary, consider placing an air purifier nearby to keep the air fresh.

By carefully selecting the right location for your litter box, you can create a welcoming and hygienic space for your cat, ultimately leading to a happier pet and a fresher home environment.

5. Daily Maintenance Routine: Keeping It Fresh

What are the Best Ways to Clean a Cat's Litter Box?
Credit : whatcanu.com

A consistent daily maintenance routine is essential for ensuring your cat’s litter box remains fresh and inviting. Cats are notoriously particular about their bathroom habits, and a clean litter box is vital not only for their health but also for their overall happiness. Start each day by scooping out any clumps of waste; this quick task takes only a few minutes and can significantly enhance the litter box experience for your feline friend. Aim for a clean sweep at least once a day, as this will help prevent odors from building up and discourage your cat from seeking alternative bathroom spots.

In addition to scooping, consider giving the litter box a full clean once a week. Empty the entire box, wash it with mild soap and warm water, and thoroughly dry it before adding fresh litter. This deep cleaning will eliminate any stubborn odors and bacteria that might linger, ensuring a hygienic environment for your cat. Choosing the right litter can also make a big difference. Opt for high-quality, clumping litter that absorbs moisture well and neutralizes odors effectively.

To further enhance your daily maintenance routine, keep a handy litter box cleaning kit nearby. Include a scoop, disposable bags for waste, and cleaning supplies. This convenience will encourage you to stick to your routine, making maintenance feel less like a chore and more like an easy part of your daily life. By committing to this simple daily practice, you’ll create a fresh and clean space that your cat will appreciate, leading to a happier and healthier home for both of you.

6. How Often Should You Change the Litter?

When it comes to maintaining a fresh and clean litter box, one of the most common questions cat owners ask is, “How often should I change the litter?” The answer isn’t one-size-fits-all; it largely depends on the type of litter you use, the number of cats in your household, and your cat’s individual habits. However, establishing a consistent routine is key to ensuring a pleasant environment for both you and your feline friend.

For clumping clay litters, a good rule of thumb is to scoop daily to remove waste and clumps. This not only keeps odors at bay but also encourages your cat to use the box regularly. Depending on the size of your litter box and how many cats use it, you should aim to completely change the litter every 1 to 2 weeks. During this time, empty the box, scrub it with warm, soapy water, and dry it thoroughly before adding fresh litter. This helps eliminate bacteria and odors that can build up over time.

If you prefer crystal or biodegradable litters, you may find that they need to be changed less frequently, sometimes every two to four weeks. However, always monitor the box for any signs of odor or mess, as these litters can sometimes mask issues until it’s too late.

Ultimately, the frequency of litter changes will depend on your cat’s habits. If you notice your cat avoiding the litter box or exhibiting signs of discomfort, it may be time to adjust your routine. Keeping an eye on your cat’s behavior, combined with a consistent cleaning schedule, will help ensure that their litter box remains a fresh and inviting space. A happy cat means a happy home!

7. Deep Cleaning Your Litter Box: Step-by-Step Guide

What are the Best Ways to Clean a Cat's Litter Box?
Credit : whatcanu.com

Deep cleaning your litter box is an essential part of maintaining a fresh and inviting space for your feline friend. While regular scooping is crucial for day-to-day cleanliness, a thorough deep clean should be performed at least once a month to eliminate odors and bacteria that can build up over time. Here’s a step-by-step guide to ensure your litter box is not only clean but also a sanctuary for your cat.

**Step 1: Gather Your Supplies**
Before diving in, collect all necessary supplies. You’ll need rubber gloves, a scoop, a bucket, warm soapy water, an unscented disinfectant (safe for pets), and a scrub brush or sponge. You might also want to have a fresh bag of litter ready for re-filling.

**Step 2: Empty the Litter Box**
Start by removing all the litter from the box. Use your scoop to transfer the used litter into a trash bag, ensuring you dispose of it properly. If your cat has a particularly smelly litter, consider sealing the bag tightly before throwing it away.

**Step 3: Rinse and Scrub the Box**
Once the litter box is empty, rinse it out with warm water. Use a sponge or scrub brush with a gentle, pet-safe soap to clean the interior and exterior surfaces. Pay special attention to the corners and edges, where residue tends to accumulate. This step not only removes dirt but also helps eliminate lingering odors.

**Step 4: Disinfect**
After scrubbing, it’s time to disinfect. Apply a pet-safe disinfectant to the litter box, making sure to follow the product instructions. Let it sit for the recommended amount of time to effectively kill any bacteria or germs that may be present. Rinse the box thoroughly with warm water to remove any remaining disinfectant.

**Step 5: Dry the Litter Box**
Once cleaned and rinsed, dry the litter box completely with a clean towel. This step is crucial as any remaining moisture can lead to mold growth or unwanted odors.

**Step 6: Refill with Fresh Litter**
Now that your litter box is sparkling clean, it’s time to fill it with fresh litter. Pour in a depth of about three to four inches, creating a comfortable environment for your cat.

**Step 7: Place It Back**
Finally, return the litter box to its designated spot, ensuring it’s in a quiet, accessible area for your cat. Take a moment to reward your furry friend with some extra pets or treats, reinforcing positive associations with their clean space.

By following this step-by-step guide, you can ensure that your cat’s litter box remains a clean and pleasant environment, ultimately promoting better hygiene for both you and your pet. A well-maintained litter box not only keeps odors at bay but also encourages your cat to use it consistently, fostering a happy and healthy home for your beloved companion.

8. Dealing with Odors: Tips and Tricks

Dealing with odors is an essential aspect of maintaining a fresh and clean litter box environment for your feline friend. Cats are notoriously sensitive to smells, and a stinky litter box can lead to litter box aversion and behavioral issues. Fortunately, there are several effective strategies you can employ to keep those unpleasant odors at bay.

**1. Choose the Right Litter:** Start with a high-quality, clumping litter that controls odors effectively. Look for litters made from natural materials, such as corn, wheat, or pine, which often have better odor-absorbing properties than traditional clay litters. Some brands even incorporate baking soda or activated charcoal to neutralize smells.

**2. Scoop Daily:** Consistency is key when it comes to litter box maintenance. Make it a habit to scoop out clumps and waste at least once a day. This simple task prevents waste from accumulating and significantly reduces odors. Consider investing in a sturdy scoop with a comfortable grip to make this daily chore easier and more efficient.

**3. Wash the Box Regularly:** While scooping is vital, it’s equally important to give the litter box a thorough cleaning every week or two. Empty the box completely, wash it with warm, soapy water, and rinse it well. Avoid using strong-smelling cleaners, as these can deter your cat from using the box. Instead, opt for mild dish soap or a vinegar and water solution.

**4. Use Deodorizing Agents:** There are various safe and effective deodorizing agents you can use alongside or instead of litter. Baking soda is a classic choice—sprinkling a thin layer at the bottom of the box before adding litter can help absorb odors. Some pet stores also offer specialized litter additives designed to neutralize smells without harming your cat.

**5. Mind the Location:** The placement of the litter box can impact odor control as well. Ensure it’s in a well-ventilated area to help disperse any lingering smells. Avoid placing the box near food and water bowls, as this can create an unpleasant environment for your cat.

**6. Monitor Your Cat’s Health:** Sometimes, persistent odors can signal underlying health issues. If your cat’s urine or feces has an unusually strong smell, or if you notice changes in their litter box habits, consult your veterinarian. Keeping an eye on your pet’s health will ensure their well-being and maintain a fresher environment.

**7. Consider Multiple Boxes:** If you have multiple cats, be mindful of their litter box needs. The general rule is to have one litter box per cat, plus one extra. This not only helps with odor control but also provides each cat with their own space, reducing territorial disputes.

By implementing these tips and tricks, you can effectively manage odors in your cat’s litter box, ensuring a clean and pleasant environment for both you and your furry companion. A fresh litter box not only keeps your home smelling great but also encourages your cat to use it consistently, promoting their overall health and happiness.

9. Common Litter Box Problems and Solutions

When it comes to maintaining a litter box, a few common problems can arise, but with the right strategies, you can easily troubleshoot and keep your feline friend’s space pristine. Here are some of the most prevalent issues cat owners face, along with effective solutions to ensure a fresh and clean environment.

**1. Odor Control**
One of the primary concerns with litter boxes is odor. If your litter box starts to emit unpleasant smells, it could be due to infrequent cleaning or the type of litter used. To combat this, make it a habit to scoop the box daily, removing clumps and waste. You might also want to consider using clumping litter or ones made from natural materials, which can help neutralize odors better than traditional clay litters. Additionally, placing an air purifier near the litter box can further enhance air quality, keeping your home smelling fresh.

**2. Litter Tracking**
Many cat owners find litter not only in the box but scattered around the house as well. This can be frustrating, but there are simple solutions. Using a litter mat that catches stray granules as your cat exits the box can significantly minimize tracking. You can also opt for a covered litter box, which often helps contain the mess. Regularly vacuuming the area around the litter box will also keep your home tidy.

**3. Refusal to Use the Litter Box**
If your cat suddenly decides to avoid the litter box, it could indicate a problem. First, ensure the box is clean and in a quiet, accessible location. If the issue persists, consider whether the type of litter or box style could be unappealing to your cat. Some cats prefer unscented litter or a more spacious box. If your cat is still hesitant, consult with your veterinarian to rule out any medical issues.

**4. Overfilled Litter Box**
An overfilled litter box can lead to messes outside the box as your cat digs around. To maintain a comfortable level, fill the box with about 2-3 inches of litter. This depth allows your cat to dig without making an excessive mess. Regularly check the box and refill as necessary, ensuring it’s always a pleasant space for your kitty.

**5. Litter Box Location**
Lastly, the location of the litter box can greatly influence its usage. Ideally, the box should be placed in a quiet, low-traffic area where your cat feels safe to do their business. Avoid placing it near their food or water bowls, as cats are instinctively drawn to keep these areas separate. If you notice your cat avoiding the box, it may be time to reassess its location.

By addressing these common litter box problems with thoughtful solutions, you can create a clean and inviting space for your cat that encourages them to return again and again. Remember, a well-maintained litter box not only benefits your cat’s health but also enhances the overall cleanliness of your home.

10. The Role of Litter Box Liners: Pros and Cons

When it comes to litter box maintenance, one often debated topic is the use of litter box liners. These plastic or fabric sheets are designed to line the bottom of the litter box, ostensibly to make cleaning simpler and to protect the box itself from scratches and odors. However, while liners can offer certain advantages, they also come with their own set of potential drawbacks.

**Pros of Using Litter Box Liners:**
One of the biggest benefits of using a liner is the ease of cleaning. With a liner, you can simply lift the entire sheet out, dispose of the waste, and replace it without having to scrub the litter box itself each time. This can save you time and effort, particularly if you’re juggling a busy schedule. Additionally, liners can help prevent litter from sticking to the bottom of the box, reducing the wear and tear on the container itself and extending its lifespan.

Liners can also act as an added barrier against odors. Many liners are designed to be odor-resistant, which can be beneficial in keeping your cat’s space smelling fresh between cleanings. This can be especially helpful in multi-cat households, where odors can build up quickly.

**Cons of Using Litter Box Liners:**
On the flip side, not all cats take kindly to liners. Some felines are particular about their bathroom habits and may avoid using a box with a liner altogether, preferring the feel of direct contact with the litter. This can lead to accidents outside the box, creating more mess and stress for both you and your pet.

Furthermore, if the liner is not secured properly, it can bunch up or slide around, making it difficult for your cat to dig and cover their waste—an instinctual behavior for most cats. Additionally, certain types of liners can retain odors, becoming a breeding ground for bacteria if not changed regularly.

Ultimately, the decision to use a litter box liner comes down to personal preference and your cat’s comfort. If you decide to try liners, observe your cat’s behavior closely to ensure they are adapting well. Regardless of your choice, maintaining a clean litter box is paramount to ensuring a happy and healthy environment for your feline friend!

11. Introducing Kittens to the Litter Box

Introducing kittens to the litter box is a crucial step in their early development and can set the tone for a lifetime of good habits. Begin this process as soon as your kitten arrives home, ideally around eight weeks of age. Choose a litter box that is low-sided to accommodate their small stature, making it easy for them to step in and out. Avoid covers at this stage, as kittens may feel trapped or scared inside a confined space.

When selecting litter, opt for a non-toxic, clumping variety that is soft on sensitive paws. Avoid using scented litters, as strong fragrances can deter kittens from using the box. Instead, a natural, unscented option will encourage exploration without overwhelming their delicate senses.

Place the litter box in a quiet, accessible location, away from their food and water dishes. Kittens are naturally inclined to seek out a clean place to relieve themselves, so keeping the box tidy is essential. If they have a favorite spot for elimination, gently place them in the litter box during playtime or after meals to reinforce the association.

Be patient and watch for signs that your kitten needs to go—sniffing around, circling, or meowing. It’s normal for kittens to have a few accidents as they learn, so don’t resort to scolding; instead, gently guide them back to the box. Consistency and positive reinforcement will go a long way—praise your kitten when they successfully use the litter box, and consider offering a small treat as a reward.

With time, patience, and a little encouragement, your kitten will become well-versed in using the litter box, setting them up for a clean and healthy transition into adulthood. Remember, a successful introduction to the litter box not only helps maintain a fresh environment but also strengthens the bond between you and your new furry friend, laying the foundation for a happy and harmonious home.

12. Multi-Cat Households: Managing Multiple Litter Boxes

In a multi-cat household, managing litter boxes can feel like a daunting task, but with a few strategic steps, you can maintain a fresh and clean environment for both your feline friends and yourself. The general rule of thumb is to have one litter box per cat, plus one extra. This means that if you have three cats, you should ideally have four litter boxes scattered around your home. This not only provides ample options for your kitties but also helps to reduce territorial disputes.

Placement is key when it comes to litter box management. Cats are creatures of habit and appreciate a quiet, private space. Position the boxes in various locations throughout your home—avoid placing them all in one area. Ideal spots include quiet corners, away from their food and water dishes, and in areas where they can easily find them without feeling cornered.

Regular cleaning is essential. In multi-cat settings, it’s recommended to scoop the litter boxes at least once a day—twice a day is even better. Cats are notoriously picky, and a dirty litter box can lead to accidents and stress. When you scoop, take the time to clean the entire box with soap and water weekly, and replace the litter to keep odors at bay.

Consider the type of litter you use as well. Some cats are particular about their litter, so trial and error may be necessary to find a type that satisfies all of your furry companions. Many cat owners find that clumping, unscented litter works well for multiple cats, as it effectively absorbs moisture and reduces odors without overwhelming sensitive noses.

Additionally, monitoring each cat’s behavior can provide insights into their litter box habits. If one cat consistently avoids a box, it could indicate a preference for another or even a potential health issue. Maintaining a calm and clean litter box environment will encourage your cats to use them consistently, helping to keep your home fresh and your beloved pets happy.

By following these tips, you can master the art of litter box maintenance, ensuring that your multi-cat household remains harmonious and odor-free, while keeping your feline family members content.

13. Signs Your Cat Is Unhappy with Their Litter Box

Understanding your cat’s behavior is crucial when it comes to litter box maintenance. Cats are creatures of habit and can be quite particular about their bathroom habits. If you notice any changes in their behavior, it might be a sign that they are unhappy with their litter box setup. Here are several indicators to watch for:

1. **Avoidance**: One of the most telling signs is if your cat starts avoiding the litter box altogether. If you find them choosing other areas of the house to relieve themselves, it’s a clear indication that something is amiss. This could be due to the litter box being too small, not clean enough, or placed in a location that feels unsafe or uncomfortable.

2. **Increased Scratching**: If your feline friend spends an unusual amount of time scratching at the sides of the litter box or digging excessively in the litter, they may be trying to communicate their dissatisfaction. This behavior can signal that they are either trying to cover up their waste or are unhappy with the type of litter being used.

3. **Frequent Meowing or Whining**: While cats are not known for being overly vocal, if your cat begins to meow or whine more than usual when approaching their litter box, it could express their frustration or discomfort. Pay attention to their vocalizations, as this can help you identify if they are struggling with their bathroom situation.

4. **Changes in Elimination Habits**: If your cat is urinating outside the box or showing signs of straining or discomfort while trying to go, it may indicate a deeper issue. This could be a result of stress related to the litter box or potential health concerns that need addressing.

5. **Litter Box Disinterest**: If your cat once happily used their litter box but now seems indifferent or even scared of it, this change in behavior warrants attention. It may be time to reassess the litter box’s cleanliness, the type of litter used, or even the box’s location.

By observing these signs closely, you can maintain a more harmonious relationship with your pet and ensure that their litter box remains a source of comfort rather than distress. A happy cat is a healthy cat, and keeping their litter box in top shape is essential for their overall well-being!

14. Eco-Friendly Litter Box Solutions

In an age where sustainability is becoming increasingly important, cat owners are seeking eco-friendly litter box solutions that not only keep their feline friends happy but also minimize their environmental footprint. Traditional clay litters, often made from non-renewable resources and frequently treated with harmful chemicals, can contribute to landfill waste and pollution. Fortunately, there are various more sustainable alternatives that cater to both your cat’s needs and the planet’s health.

One popular option is **biodegradable litter**, crafted from materials such as recycled paper, corn, wheat, or even coconut husks. These litters break down naturally, reducing waste and offering a guilt-free disposal method. For instance, wheat-based litters clump well, making cleaning a breeze, while paper litters are ultra-absorbent and gentle on your cat’s paws.

**Wood pellets** are another fantastic choice for eco-conscious cat owners. Made from compressed sawdust, these pellets are not only biodegradable but also have the added benefit of controlling odors effectively. When wet, they break down into sawdust, which can be easily scooped and composted.

If you’re leaning towards a more innovative approach, consider **reusable litter boxes** paired with washable liners. This system significantly cuts down on waste, as you can simply wash the liners and replace the litter without needing to dispose of an entire box. Some brands even offer compostable liners that can be added to your compost pile when worn out.

Finally, don’t forget to explore **natural litter additives**, such as baking soda or diatomaceous earth, which can help control odors without the need for synthetic fragrances or chemicals. These natural alternatives are not only safe for your cat but also gentle on the environment.

By choosing eco-friendly litter box solutions, you can create a comfortable and healthy space for your cat while playing your part in protecting the planet. Embracing these sustainable options not only ensures a fresh and clean litter box but also fosters a more conscious approach to pet care. Your furry friend will thank you, and so will the Earth!

15. Conclusion: Creating a Positive Litter Box Experience for Your Cat

In conclusion, creating a positive litter box experience for your cat is not just about maintaining cleanliness; it’s about fostering a healthy and stress-free environment for your feline friend. A well-kept litter box can significantly impact your cat’s overall well-being, encouraging good bathroom habits and reducing the likelihood of behavioral issues. Remember, cats are creatures of habit and highly sensitive to their surroundings.

By adhering to the tips outlined in this guide—such as choosing the right type of litter, ensuring the box is placed in a quiet and accessible location, and maintaining a consistent cleaning routine—you’ll create a space that your cat feels comfortable using. Regularly assessing the litter box setup and making adjustments based on your cat’s preferences will also go a long way in ensuring their satisfaction.

Ultimately, a clean and inviting litter box not only enhances your cat’s quality of life but also contributes to a harmonious home environment. So, roll up your sleeves and embrace the art of litter box maintenance. Your cat will thank you with every purr and playful leap, knowing they have a fresh and inviting space to call their own. A happy cat means a happy home!

In conclusion, mastering the art of litter box maintenance is essential for ensuring a fresh and inviting environment for both you and your feline companion. By implementing the top tips discussed in this blog post, such as regular scooping, choosing the right litter, and maintaining proper hygiene, you can create a litter box space that encourages good habits and keeps odors at bay. Remember, a clean litter box not only promotes your cat’s health and happiness but also enhances the overall atmosphere of your home. With a little dedication and the right strategies in place, you’ll find that maintaining a pristine litter box is not just a chore, but a rewarding part of cat ownership that leads to a harmonious living space for you and your beloved pet. Happy cleaning!

What are the Best Ways to Clean Up Pet Accidents?

As much joy as our furry companions bring into our lives, they can sometimes leave behind little surprises that remind us of their less-than-perfect moments.

Whether it’s a puddle on the carpet or an unfortunate mishap on the couch, dealing with pet accidents can be one of the less glamorous aspects of pet ownership. However, with the right strategies and tools at your disposal, cleaning up these messes can be far less stressful and more effective than you might think. In this ultimate guide, we’ll dive into practical tips and techniques that will not only help you tackle pet accidents swiftly but also ensure your home remains fresh and welcoming. From choosing the right cleaning products to implementing preventative measures, this comprehensive resource is designed to empower every pet owner to maintain a clean, loving environment for both pets and humans alike. Say goodbye to stains and odors, and hello to a harmonious home!

1. Understanding Common Pet Accidents

What are the Best Ways to Clean Up Pet Accidents?
Credit : whatcanu.com

Understanding common pet accidents is the first step toward effectively addressing and preventing them in your home. Whether you’re a seasoned pet owner or a new parent to a playful puppy or curious kitten, accidents are an inevitable part of the journey. Familiarizing yourself with the types of mishaps that commonly occur can help you respond swiftly and effectively, minimizing damage to your home and stress for both you and your furry friend.

The most prevalent accidents typically fall into a few categories: **urination**, **defecation**, and **vomiting**. Urination accidents often occur when pets are not yet fully house-trained or when they feel anxious or excited. Puppies, in particular, may struggle to hold their bladder, especially during playtime or after drinking water. On the other hand, older pets may have accidents due to medical issues, such as urinary tract infections or incontinence.

Defecation accidents can be equally frustrating and are frequently linked to dietary changes or digestive upset. If your pet has recently switched foods or is experiencing stomach issues, you may find unexpected messes in your home. Additionally, new environments can trigger anxiety in pets, leading to incidents that could have been avoided with proper acclimatization.

Vomiting, while not necessarily related to accidents in the traditional sense, can create just as much chaos. Pets may vomit due to a variety of reasons, ranging from eating too quickly to underlying health issues. Recognizing the signs of gastrointestinal distress can help you address the problem before it leads to further accidents in your living space.

By understanding these common pet accidents and their underlying causes, you can better equip yourself with the tools and strategies needed to manage them. Proactive measures, such as regular vet check-ups, consistent training, and an awareness of your pet’s habits, can drastically reduce the likelihood of accidents and ensure a harmonious living environment for both you and your beloved companion.

2. Immediate Steps to Take After an Accident

Accidents happen, and when they do, it’s essential to act quickly to minimize damage and maintain a clean environment. The first few moments after a pet accident are crucial, and knowing exactly what to do can save you time, stress, and a lot of scrubbing later on.

As soon as you discover the accident, the first step is to remain calm. Pets can sense our emotions, and reacting with frustration can make them anxious. Instead, approach the situation with a cool head. Grab some disposable gloves to protect your hands and minimize the spread of bacteria.

Next, quickly assess the type of accident. Whether it’s urine, feces, or vomit, each requires a slightly different approach. For urine, blot up as much of the liquid as possible with paper towels or an old cloth—avoid rubbing, as this can push the stain further into the fibers. For solid waste, carefully scoop it up using a plastic bag or a scoop, sealing it tightly to prevent odors from wafting into your home.

Once the bulk has been removed, it’s time to tackle the stain and odor. For urine, a mixture of white vinegar and water can work wonders. Spray the affected area liberally, allowing the solution to penetrate the fibers. Vinegar neutralizes ammonia and helps eliminate odors. After letting it sit for a few minutes, blot again with clean towels until the area feels dry. For feces or vomit, enzymatic cleaners are your best friend, as they break down the organic material and help eradicate any lingering smells.

If the accident occurred on carpet or upholstery, ensure that you thoroughly rinse the area with water after cleaning, as residue can attract dirt and lead to further staining. Finally, allow the area to air dry completely. If the odor persists, consider sprinkling baking soda over the area to absorb any remaining smells, letting it sit for a few hours before vacuuming it up.

By taking these immediate steps, you can effectively manage pet accidents and maintain a clean, healthy home for both you and your furry friends. Remember, the sooner you act, the easier the cleanup will be!

3. Essential Cleaning Supplies You Need

What are the Best Ways to Clean Up Pet Accidents?
Credit : whatcanu.com

When it comes to effectively tackling pet accidents, having the right cleaning supplies on hand is crucial. A well-stocked cleaning arsenal not only makes the cleanup process more efficient but also ensures that your home remains fresh and odor-free. Here’s a list of essential cleaning supplies you should consider:

**1. Enzymatic Cleaners:** These specialized cleaners are a game-changer when it comes to removing pet stains and odors. Unlike traditional cleaners, enzymatic formulas break down the organic matter found in urine, feces, and vomit, effectively eliminating the source of the smell rather than just masking it. Look for products specifically designed for pet messes for the best results.

**2. Absorbent Towels:** Keep a stash of highly absorbent towels or rags nearby. Microfiber towels work particularly well due to their ability to soak up moisture quickly. The sooner you can blot the stain, the easier it will be to remove, so having these on hand is essential.

**3. Baking Soda:** This versatile household staple is not only great for baking but also works wonders for neutralizing odors. After cleaning up a mess, sprinkle baking soda over the affected area to absorb any lingering smells. Leave it for a few hours or overnight before vacuuming it up for maximum effect.

**4. White Vinegar:** A natural deodorizer and cleaner, white vinegar can help break down pet stains while also neutralizing odors. A mixture of equal parts vinegar and water can be sprayed on the stain, blotted with a towel, and rinsed with water to help lift the mess.

**5. Pet-Safe Carpet Cleaner:** If you have carpets or rugs in your home, investing in a pet-safe carpet cleaner is a must. These products are designed to penetrate fibers and eliminate stains without introducing harmful chemicals that could affect your furry friend.

**6. Rubber Gloves:** Protect your hands while cleaning up accidents with a good pair of rubber gloves. Not only do they keep your hands clean, but they also provide a barrier against any lingering odors or bacteria.

**7. Spray Bottle:** A spray bottle is essential for mixing and applying your cleaning solutions. Whether you’re using vinegar and water or an enzymatic cleaner, having a dedicated spray bottle allows for easy application and thorough coverage of the affected area.

By equipping yourself with these essential cleaning supplies, you’ll be well-prepared to handle any pet accidents that come your way. With the right tools at your disposal, you can maintain a clean and pleasant home environment while ensuring your furry companions continue to feel welcome and loved.

4. Effective Techniques for Different Surfaces (Carpet, Hardwood, etc.)

When it comes to cleaning up pet accidents, one of the most crucial steps is understanding that different surfaces require different approaches. Each material has its own characteristics and nuances, and using the right technique can make all the difference in ensuring a thorough clean while also preserving the integrity of your flooring or upholstery.

**Carpet:** For carpets, quick action is key. Start by blotting the area with paper towels or a clean cloth to absorb as much liquid as possible—avoid rubbing, as this can push the mess deeper into the fibers. Follow up with a mixture of white vinegar and water (equal parts) or a specialized pet stain cleaner. Apply it to the stained area and let it sit for a few minutes before blotting again. Finish by rinsing with cold water and using a wet/dry vacuum if available, or simply blotting until the area is clean and dry. This technique not only removes stains but also helps neutralize odors.

**Hardwood Floors:** For hardwood, the approach is slightly different. Begin by immediately wiping up the mess with a damp cloth. Avoid soaking the floor, as excessive water can warp the wood. Once the surface is clean, you can use a solution of vinegar and water to disinfect the area. However, be cautious with the amount of vinegar, as it can dull the finish over time. For stubborn stains, a gentle scrub with a soft-bristle brush may help, but always test in a discreet area first to ensure it won’t damage the wood’s finish.

**Tile and Grout:** For tile surfaces, start by removing any solid waste and then cleaning the area with soapy water or a mild detergent. Pay special attention to the grout lines, as they can trap odors and stains. A mixture of baking soda and water can be effective for deep cleaning grout—apply it, let it sit for a few minutes, and scrub with a toothbrush to lift any stains before rinsing with water.

**Upholstery:** If your pet has had an accident on furniture, be sure to check the cleaning instructions for your specific upholstery. Typically, start by blotting the area with a clean cloth to absorb excess moisture. A solution of mild dish soap and water can be effective for most fabrics. Apply it gently with a cloth or sponge, then blot with a clean, damp cloth to rinse. For sensitive fabrics, consider using a commercial upholstery cleaner specifically designed to tackle pet stains.

By tailoring your cleaning techniques to the specific surface, you can effectively eliminate stains and odors, ensuring your home remains a clean and welcoming environment for both you and your beloved pets.

5. How to Remove Odors and Stains

What are the Best Ways to Clean Up Pet Accidents?
Credit : whatcanu.com

Removing odors and stains from pet accidents is crucial not only for maintaining a clean home but also for ensuring that your furry friends don’t return to the same spot to do their business again. The lingering smell of urine or feces can be an inviting signal to pets, prompting them to mark their territory once more. To effectively tackle these stubborn stains and odors, follow these comprehensive steps:

**Act Quickly:** The sooner you address an accident, the better your chances of completely eliminating the stain and odor. Blot up as much of the mess as possible with paper towels or an old cloth, applying gentle pressure to soak up the liquid without rubbing, which can push it further into the fibers.

**Choose the Right Cleaner:** While there are many commercial pet stain removers on the market, you may also opt for natural solutions. A mixture of white vinegar and water (in a 1:1 ratio) can neutralize odors effectively. Alternatively, an enzyme-based cleaner can break down the proteins in urine, helping to eliminate both the stain and the smell at the source.

**Test the Area:** Before applying any cleaner to your carpets or upholstery, it’s wise to test it on a small, inconspicuous area to ensure it won’t discolor or damage the fabric.

**Apply and Let It Sit:** Once you have your cleaning solution ready, apply it generously to the stained area. Allow it to sit for at least 10-15 minutes—this dwell time is essential for the cleaner to penetrate deeply.

**Blot Again:** After letting the solution sit, use a fresh cloth or paper towel to blot the area once more, lifting away the moisture along with the stain and odor. For particularly stubborn marks, you may need to repeat the application and blotting process.

**Rinse and Dry:** Once you feel confident that the stain is gone, lightly rinse the area with clean water and blot it dry. If possible, use a fan or open windows to increase airflow and speed up the drying process.

**Prevent Future Accidents:** To discourage your pet from returning to the scene of the crime, consider using pet-safe deterrent sprays or placing a clean, unscented area rug over the spot until you’re certain the odor is completely gone.

By following these steps, you’ll not only keep your home looking and smelling fresh but also create a more comfortable environment for both you and your beloved pets. Remember, patience and persistence are key—sometimes it takes a little extra effort to fully eradicate stubborn stains and odors, but the results will be well worth it.

6. Natural vs. Chemical Cleaners: What You Should Know

When it comes to cleaning up pet accidents, one of the most important decisions you’ll face is whether to use natural or chemical cleaners. Each option has its own benefits and drawbacks, and understanding these can help you make the best choice for your home, your pets, and the environment.

**Natural Cleaners**
Natural cleaners, often made from ingredients like vinegar, baking soda, and essential oils, provide a safe and eco-friendly alternative to traditional chemical cleaners. These solutions are generally non-toxic, making them a great choice for households with pets and children. For instance, a simple mixture of white vinegar and water can effectively neutralize odors and break down stains, while baking soda can absorb unpleasant smells. Additionally, many pet owners appreciate the subtle, pleasant scents of natural ingredients compared to the harsh chemical odors found in commercial products.

However, while natural cleaners can be effective for minor accidents, they may not always tackle tougher stains or odors as efficiently as their chemical counterparts. In some cases, you might find yourself needing to use more elbow grease or repeat applications to achieve the desired results.

**Chemical Cleaners**
On the other hand, chemical cleaners are specifically formulated to target tough stains and odors, often providing quicker and more potent results. These products can be particularly useful for deep-set stains or persistent odors that natural solutions might struggle to eliminate. Just a few sprays may be enough to tackle an accident left behind by your furry friend.

That said, chemical cleaners can contain harsh ingredients that may pose health risks to both pets and humans. It’s crucial to read labels carefully and select pet-safe options whenever possible. Furthermore, always ensure proper ventilation when using chemical cleaners and keep your pets away from treated areas until they are fully dry and the scent has dissipated.

**Finding the Right Balance**
Ultimately, the choice between natural and chemical cleaners depends on your specific needs, the severity of the accidents you’re dealing with, and the sensitivities of your household members. For everyday messes, a natural cleaner may suffice, while more serious accidents might warrant a chemical product. Many pet owners find success in using a combination of both—starting with natural solutions for regular cleanups and reaching for chemical cleaners when faced with particularly stubborn stains.

By weighing the pros and cons of each option, you can create a cleaning routine that effectively manages pet accidents while keeping your home safe and healthy for everyone.

7. Dealing with Accidents in the Litter Box Area

What are the Best Ways to Clean Up Pet Accidents?
Credit : whatcanu.com

Dealing with accidents in the litter box area can be one of the more challenging aspects of pet ownership, but with the right strategies, you can maintain a clean and odor-free environment. First and foremost, it’s essential to ensure that the litter box itself is kept clean and appealing to your pet. Regular scooping is a must—ideally, you should scoop at least once a day to remove waste and clumps of soiled litter. Not only does this help prevent odors, but it also encourages your cat to continue using the box.

If an accident occurs outside of the litter box, remain calm. Panicking can make the situation more stressful for both you and your pet. Start by assessing the area—check for any spots that may have been missed during cleaning. Use a pet-safe enzymatic cleaner specifically designed to neutralize the odors and stains associated with pet waste. These cleaners break down the proteins found in urine and feces, effectively eliminating lingering smells that may encourage your pet to revisit the area.

In addition to deep cleaning the litter box area, it’s important to evaluate the box’s placement and the type of litter you’re using. Some cats are particular about their surroundings; if the litter box is in a high-traffic area or near their food and water, they may be reluctant to use it. Consider moving the box to a quieter, more private location. Likewise, experimenting with different types of litter may also yield positive results; some cats prefer clumping litter, while others may favor non-clumping or crystal varieties.

Lastly, take time to observe your pet’s behavior. If accidents become frequent, it may indicate a larger issue, such as stress, a medical problem, or dissatisfaction with the litter box setup. Consulting with a veterinarian can help rule out any underlying health concerns. By addressing both the cleaning and environmental factors, you’ll create a comfortable space for your furry friend, reducing the likelihood of future accidents and ensuring a harmonious home.

8. Preventing Future Accidents: Training Tips

Preventing future accidents is an essential part of maintaining a clean and harmonious home, especially for pet owners. While accidents happen, proactive training can significantly reduce their occurrence and help your furry friends understand where it’s appropriate to relieve themselves. Here are some effective training tips to consider:

**1. Establish a Routine:** Dogs thrive on consistency, so establishing a regular schedule for feeding and bathroom breaks is crucial. Take your pet outside first thing in the morning, after meals, and before bedtime. Consistent timing helps them develop a predictable bathroom routine, making accidents less likely.

**2. Positive Reinforcement:** Reward your pets for doing their business outside. Use treats, praise, or playtime as a reward immediately after they relieve themselves in the designated area. This positive reinforcement encourages them to repeat the behavior. Remember, patience is key—celebrate their successes, no matter how small!

**3. Designate a Bathroom Spot:** Choose a specific outdoor location for your pet’s bathroom breaks. The scent will help them associate that area with relieving themselves, making it easier for them to understand where they should go. Be diligent about bringing them to this spot consistently.

**4. Monitor Their Behavior:** Pay close attention to signs that indicate your pet needs to go out, such as sniffing around, circling, or whining. If you notice these behaviors, take them outside immediately. This will help them learn to communicate their needs more effectively.

**5. Limit Access Indoors:** If your pet is still learning, consider restricting their access to certain areas of the house, especially those with carpets or rugs. When you can’t supervise your pet, confine them to a crate or a designated area where accidents will be easier to manage.

**6. Be Patient and Consistent:** Training takes time and requires a great deal of patience. If your pet has an accident, don’t punish them—clean it up without fuss and continue to reinforce positive behaviors. Consistency in your approach will help them learn faster.

By integrating these training tips into your routine, you’ll not only minimize the likelihood of future accidents but also strengthen the bond between you and your pet. A well-trained pet means a happier home for everyone, and with time and dedication, you’ll see progress and enjoy a cleaner, more harmonious living space.

9. The Role of Diet in Pet Accidents

When it comes to managing pet accidents in your home, it’s essential to recognize that diet plays a pivotal role in your furry friend’s bathroom behavior. The food you choose for your pet can significantly impact not only their overall health but also their bowel movements and urinary habits.

Pets, like humans, can have different sensitivities and reactions to various ingredients in their diet. High-quality, balanced nutrition is crucial; poor diet choices can lead to gastrointestinal issues, increased urination, or even urinary tract infections, all of which may result in accidents inside the house. For instance, a diet rich in fiber can help regulate your pet’s digestive system, reducing the likelihood of messy mishaps. Conversely, sudden changes in diet or overly rich foods can disturb their stomachs, leading to diarrhea and accidents.

It’s also vital to consider the hydration levels of your pet. Insufficient water intake can lead to concentrated urine, making accidents more likely if they can’t hold it. Ensure that your pet has constant access to fresh, clean water, and monitor their drinking habits. If you notice a significant change in their water consumption or urination patterns, it might be time to consult your veterinarian, as these could be signs of underlying health issues.

In addition, be mindful of treats and snacks you offer. Many commercial pet treats are high in fillers and artificial ingredients that may upset your pet’s stomach. Opt for healthy, natural treats that align with their dietary needs. By paying attention to your pet’s diet and making informed choices, you can help minimize the chances of accidents while promoting their overall well-being. Remember, a healthy pet is a happy pet—and a happy pet is less likely to leave surprises around the house!

10. When to Consult a Veterinarian

When it comes to your furry friends, accidents happen, and most pet owners can handle the occasional mishap with a bit of cleaning solution and some patience. However, there are certain situations when consulting a veterinarian is not just advisable, but essential. Recognizing these moments can help prevent potentially serious health issues for your pet.

First and foremost, if your pet displays any signs of distress or pain during or after an accident, it’s time to reach out to a vet. Whining, excessive licking of the affected area, or reluctance to move can indicate an underlying problem that needs professional attention. Moreover, if your pet has repeated accidents in the same location, especially if they are house-trained, it could signal a urinary tract infection or other medical condition that requires diagnosis and treatment.

Additionally, if the substance involved in the accident is unknown or potentially harmful—like if your dog ingested something toxic or your cat had an accident with a cleaning product—immediate vet consultation is crucial. Many common household items can be dangerous to pets, and knowing what to do in these situations can save their life.

Lastly, if your pet is a senior or has existing health issues, it’s wise to err on the side of caution. Aging pets can have more complex medical needs, and what seems like a simple accident may be indicative of a more significant concern.

In summary, while cleaning up after pet accidents is part of being a responsible pet owner, never hesitate to consult a veterinarian if you notice any alarming signs or if the situation seems beyond the ordinary. Your vet can provide peace of mind and ensure your beloved pet stays happy and healthy.

11. The Importance of Regular Cleaning Routines

When it comes to maintaining a clean and healthy home with pets, establishing regular cleaning routines is paramount. Pets, whether they’re playful puppies or curious kittens, can sometimes have accidents that lead to stains and odors, making it essential to incorporate consistent cleaning practices into your daily life. By doing so, you can prevent the buildup of messes and ensure that your living space remains fresh and inviting.

Regular cleaning not only helps to manage the immediate aftermath of accidents but also fosters a hygienic environment for both you and your furry friends. By setting aside specific times each week to deep clean areas where your pets spend the most time, you can significantly reduce the likelihood of lingering odors and stains. For instance, a weekly vacuuming session can help eliminate pet hair and dander, while a thorough mopping of hard floors can keep surfaces clean and safe.

In addition to scheduled cleaning, it’s beneficial to have a spot-cleaning routine in place for inevitable accidents. This means being prepared with the right tools—like enzymatic cleaners designed to break down pet waste—and knowing how to quickly address messes as they occur. Not only does this approach help in maintaining a clean environment, but it also trains your pets to associate their designated areas with cleanliness, ultimately leading to better behavior over time.

In essence, a proactive cleaning schedule not only keeps your home looking great but also contributes to your pets’ health and happiness. When pets feel comfortable and clean in their surroundings, they are less likely to repeat unwanted behaviors, creating a harmonious living space for both pets and their humans. So, grab that vacuum, stock up on cleaning supplies, and make regular cleaning routines a fundamental part of your pet care strategy. Your home—and your pets—will thank you!

12. How to Handle Pet Accidents in Rental Properties

Dealing with pet accidents in rental properties can be particularly challenging, especially if you want to preserve your security deposit and maintain a good relationship with your landlord. However, with the right approach, you can effectively manage these situations without causing lasting damage to the property.

First and foremost, **act quickly**. The sooner you can address the accident, the better your chances of preventing permanent stains or lingering odors. Start by blotting up any wet mess with paper towels or an absorbent cloth, applying gentle pressure to soak up as much liquid as possible without rubbing, which could spread the stain.

Next, **choose the right cleaning solution**. While many commercial pet stain removers are available, you can also opt for natural alternatives. A mixture of equal parts white vinegar and water can work wonders to neutralize odors and break down stains. Spray the solution onto the affected area, let it sit for a few minutes, then blot again. For more stubborn stains, consider enzymatic cleaners that specifically target pet messes, breaking down the proteins that cause odors.

Once the area is clean, **thoroughly ventilate the space**. Open windows and turn on fans to help dry the carpet and eliminate any residual smells. This step is crucial, as dampness can lead to mold and mildew, which can be particularly problematic in rental properties.

If the accident occurs on hard surfaces like tile or hardwood, make sure to clean and disinfect the area properly. Scrubbing with a mixture of mild soap and water followed by a thorough rinse will ensure that no traces of the mess remain.

Finally, **communicate with your landlord** if necessary. If the damage is extensive or if you’re unsure about the cleaning process, it’s always wise to inform your landlord or property manager. They may have specific cleaning protocols or preferred service providers to mitigate any issues.

By keeping these strategies in mind and acting promptly, you can handle pet accidents in rental properties efficiently, protecting both your living space and your relationship with your landlord. Remember, accidents happen, but with a little preparation and the right tools, you can keep your rental home clean and pet-friendly.

13. Tips for Maintaining a Clean Home with Pets

Maintaining a clean home with pets can feel like an uphill battle, but with a few strategic practices in place, you can keep your living space fresh and inviting. Here are some tried-and-true tips to help you manage pet-related messes while ensuring your home remains a haven for both you and your furry companions.

**1. Invest in Pet-Friendly Fabrics:** Start with choosing the right materials for your furniture and decor. Opt for durable, stain-resistant textiles that are easy to clean, such as microfiber or leather. These materials can withstand the wear and tear of curious paws and are less likely to trap odors.

**2. Create a Cleaning Schedule:** Establishing a regular cleaning routine can help you stay ahead of the mess. Set aside dedicated time each week for vacuuming, dusting, and mopping to combat pet hair and dander. Consider enlisting the help of a robotic vacuum to streamline the process and keep pet fur at bay.

**3. Designate Pet Zones:** To minimize chaos, create specific areas in your home where your pets are allowed. This not only helps contain messes but also protects your furniture and keeps your home organized. Use baby gates or pet barriers to restrict access to certain rooms.

**4. Use Area Rugs:** Place area rugs in high-traffic zones to protect your floors and make cleaning easier. Choose washable rugs or those made from synthetic fibers that can handle spills and accidents. This allows you to quickly remove and clean them when necessary.

**5. Stock Up on Cleaning Supplies:** Keep a well-stocked cleaning kit specifically for pet-related messes. Include enzyme-based cleaners that break down stains and odors, lint rollers for quick fur removal, and disposable paper towels for easy clean-up. Having these supplies readily available will make tackling accidents a breeze.

**6. Groom Regularly:** Regular grooming is essential for reducing shedding and keeping your home cleaner. Brush your pets frequently to remove loose fur and dander, and consider scheduling professional grooming sessions for long-haired breeds. This not only helps control mess but also keeps your pets looking their best.

**7. Train Your Pets:** Consistent training can significantly reduce accidents and messes. Teach your pets commands such as “sit,” “stay,” and “outside” to encourage good behavior. Positive reinforcement can help them learn where it’s appropriate to relieve themselves, leading to fewer incidents indoors.

By implementing these strategies, you can create a harmonious living environment that accommodates your pets while keeping your home clean and inviting. Remember, a little proactive effort goes a long way in maintaining a space where both you and your pets can thrive.

14. Encouraging Good Bathroom Habits in Pets

Encouraging good bathroom habits in pets is essential for maintaining a clean and comfortable home while fostering a healthy relationship between you and your furry companions. Just like humans, pets thrive on routine and positive reinforcement. Start by establishing a regular schedule for bathroom breaks, especially for puppies and kittens. Take them outside or to their designated bathroom area at consistent intervals—after meals, playtime, and first thing in the morning. This helps them develop a clear understanding of when and where it’s appropriate to relieve themselves.

Use positive reinforcement techniques to promote desired behaviors. When your pet successfully uses the bathroom in the right spot, shower them with praise, treats, or playtime as a reward. This encourages them to associate the behavior with positive outcomes, making them more likely to repeat it in the future.

For dogs, consider using a specific word or phrase, such as “go potty,” whenever you take them out. This verbal cue can help them connect the command with the action, making it easier for them to understand what is expected. With cats, providing a clean, accessible litter box in a quiet area encourages them to use it consistently. Be vigilant about cleaning the box regularly; a dirty litter box can deter your cat from using it.

In addition to establishing a routine, pay attention to your pet’s body language. Signs of restlessness, sniffing around, or circling can indicate that they need to go. Respond promptly to these signals to help prevent accidents in the house.

Lastly, patience and consistency are key. Pets may not get it right every time, and accidents are bound to happen, especially during training. When they do, avoid punishment; instead, calmly guide them back to the desired behavior. With time and dedication, you’ll see an improvement in your pet’s bathroom habits, leading to a happier home for both of you.

15. Conclusion: Building a Positive Relationship with Your Pet

In conclusion, building a positive relationship with your pet goes hand in hand with effective cleaning strategies. While accidents may be a part of pet ownership, it’s essential to approach these situations with understanding and compassion. Every cleaning session is an opportunity to reinforce your bond with your furry friend. By remaining calm and patient, you demonstrate to your pet that mistakes are a natural part of life, allowing them to feel safe and loved in their environment.

Taking the time to train your pet and establish a consistent routine can significantly reduce the likelihood of future accidents. Utilize positive reinforcement techniques, such as rewards and praise, to encourage good behavior and create a trusting atmosphere. Additionally, ensuring your pet has access to the outdoors and understands where to relieve themselves can foster a sense of responsibility and awareness.

Moreover, don’t overlook the importance of using pet-friendly cleaning products. Not only do they safeguard your pet’s health, but they also make the cleaning process less stressful for you both. As you tackle each incident with a proactive mindset, remember that your pet is learning and adapting alongside you. Embrace the journey and celebrate the small victories that come with training and bonding.

Ultimately, by focusing on building a positive relationship with your pet, you contribute to a harmonious household where both of you can thrive. With patience, love, and effective cleaning strategies, you can navigate the challenges of pet ownership while deepening the connection with your beloved companion.

In conclusion, managing pet accidents can feel overwhelming, but with the right strategies in place, you can turn those mishaps into manageable moments. We hope this ultimate guide has equipped you with effective techniques and practical solutions to tackle any mess your furry friends may leave behind. From choosing the right cleaning products to implementing preventative measures, each step is crucial in maintaining a clean and inviting home while ensuring your pet feels loved and cared for. Remember, patience and consistency are key as you navigate pet ownership. Share your own experiences and tips in the comments below, and let’s continue to support each other in creating harmonious spaces for both our pets and ourselves!

How often should you change your toothbrush ?

Proper oral hygiene is essential for maintaining a healthy mouth and preventing tooth decay and gum disease. But how often should you change your toothbrush?

As a general rule, it is recommended to change your toothbrush every three to four months. This may seem like a long time, but there are several reasons why it is important to stick to this schedule.

toothbrush
Credit : Marco Verch

First and foremost, your toothbrush is a tool that is used to clean your teeth and remove plaque and bacteria from your mouth. Over time, the bristles on your toothbrush will become worn down and less effective at performing this task. Additionally, bacteria can build up on the bristles, which can lead to an increased risk of infection. By regularly replacing your toothbrush, you can ensure that you are using a clean and effective tool to maintain good oral hygiene.

Another reason to change your toothbrush regularly is to avoid the spread of illness. If you or someone in your household has been sick, it is important to replace it to prevent the spread of germs. Similarly, if you have shared your toothbrush with someone else, it is a good idea to get a new one to avoid potential contamination.

Take care of it

In addition to changing your toothbrush every three to four months, it is also important to properly care for it in the meantime. This means rinsing it off after each use and storing it in an upright position to allow it to air dry. This will help prevent the growth of bacteria on the bristles.

Taking care of your toothbrush is just as important as taking care of your mouth. Some people may not think about this, but it’s easy to forget to clean it after every use. If you’re too busy or forgetful, use a bamboo holder to keep it from touching other brushes or make sure to store it in the lid of a jar or container that can keep it from touching anything else.

It is also a good idea to consider the type of toothbrush you are using. Most people should use soft-bristled toothbrushes, as they are gentle on the teeth and gums. If you have sensitive teeth or gums, you may want to consider using one with extra-soft bristles.

In conclusion, it is important to regularly replace your toothbrush every three to four months to maintain good oral hygiene and prevent the spread of illness. Proper care and consideration of the type of toothbrush you use can also help ensure that you are using an effective tool to clean your teeth and promote good oral health.

Best leather wipes in 2025

The 5 best leather wipes currently available on the market.

Leather wipes are a convenient and effective way to clean and maintain the appearance of leather items. They are specially formulated to gently remove dirt, grime, and other contaminants from the surface of leather without damaging the material. They are easy to use, and you can carry them for on-the-go cleaning.

leather wipes
Credit : Sebastiaan ter Burg

Leather is a durable and long-lasting material, but it does require some maintenance to keep it looking its best. Regular cleaning with a leather wipe can help to remove dirt and grime that can build up over time and cause the leather to look dull and worn. These wipes are also great for removing stains and spills that can occur on leather surfaces.

Using a leather wipe is simple. First, shake the wipe to ensure an even distribution of the cleaning solution. Then, gently wipe the surface of the leather in a circular motion. It is important to use a soft, lint-free cloth or sponge to avoid scratching the surface of the leather. Be sure to pay extra attention to areas that are prone to accumulating dirt and grime, such as the seams and creases.

Clean and protect the leather

After cleaning, allow the leather to air dry completely before using it again or applying a conditioner. It is important to avoid exposing the leather to direct heat or sunlight, as this can cause the material to fade or become stiff and brittle.

There are a few different types of leather wipes on the market, each designed for specific types of leather. For example, some are formulated for use on smooth leather, while others are designed for use on suede or nubuck. It is important to choose the right wipe for your specific type of leather to ensure the best possible results.

In addition to cleaning, you can protect and condition the leather by using leather wipes. Many brands offer wipes that contain a conditioner or protectant to help keep the leather soft and supple. They can help to prevent cracking and drying, and can also restore the natural shine of the leather.

Top 5 leather wipes in 2023

  1. Leather Conditioning wipes by Weiman

Weiman is a well-known brand in the leather care industry, and their Leather Conditioning Wipes are no exception. They contain a powerful, all-in-one formula that can clean, condition, and protect your leather from future damage. They are safe to use on all types of leather, including finished, aniline, and even suede. The wipes are also non-toxic and pH balanced, making them safe for both humans and pets.

  1. Leather Cleaner Wipes by Armor all

Armor All Leather Cleaner Wipes are another great option for keeping your leather items clean and conditioned. They contain a special blend of oils and polymers that can help restore the natural moisture balance of your leather, as well as protect it from cracking and fading. They are also safe to use on all types of leather and are free from harmful chemicals like silicones and waxes.

  1. MiracleWipes for Leather

MiracleWipes for Leather Wipes nourish and protect your leather. They also remove dirt and grime from the surface. These wipes contain a combination of natural oils and polymers that can help restore the natural shine and softness of your leather. They are also safe to use on all types of leather and are free from harsh chemicals and toxins.

  1. Air Jungles 3in1 Leather Cleaner Wipes

Air Jungles 3in1 Leather Cleaner Wipes are a top choice for those looking to keep their leather looking its best. They are formulated from a deep-penetrating formula that cleans and conditions leather in one step. They are easy to use and leave a matte finish that doesn’t attract dust and dirt.

  1. All Leather Quick Care Wipes by Lexol

These wipes are formulated with a blend of natural oils and conditioning agents that clean and nourish leather. They’re safe to use on all types of leather and are ideal for use on leather car seats, furniture, and accessories.

Overall, leather wipes are a quick and easy way to keep your leather items looking clean and well-maintained. Whether you are cleaning up a stain on your leather jacket or giving your leather shoes a quick once-over, these wipes are a handy tool to have on hand.

Can you cut wet grass ?

As a homeowner, you may have wondered if it is possible to cut wet grass.

You can cut wet grass, but it’s not necessarily recommended. Indeed, there are a few important factors to consider before doing so.

wet grass

First and foremost, wet grass can be heavy and difficult to maneuver. This can make it more challenging to cut evenly and can put extra strain on your lawn mower. It is important to use a mower with a powerful engine and a sharp blade to ensure a clean and efficient cut.

Additionally, cutting wet grass can create a mess. The moisture can cause clippings to stick to the blades and the underside of the mower, which can cause clumps of grass to be left behind on the lawn. It is important to clean your mower regularly to prevent this from happening.

Furthermore, cutting wet grass can create an uneven cut. The moisture can cause the blades of grass to lay flat, making it difficult for the mower to cut evenly. This can result in a patchy lawn, with areas that are shorter or longer than others.

Wait for the grass to dry

In general, it is best to avoid cutting wet grass if possible. Wait for the grass to dry before mowing to ensure a clean and even cut. If you must cut it, be sure to use a powerful mower with a sharp blade. Then, clean the mower regularly to prevent clumps of grass from being left behind.

However, there are some situations where cutting wet grass may be necessary. For example, if you have a large lawn, and it is forecast to rain, it may be best to mow the lawn before the rain to prevent the grass from getting too long and unmanageable. In this case, be prepared to clean the mower and deal with the potential uneven cut.

In conclusion, cutting wet grass is possible, but it is not always the best idea. It can be heavy and difficult to maneuver, it can create a mess, and it can result in an uneven cut. It is best to avoid cutting it if possible, but if it is necessary, be sure to use a powerful mower with a sharp blade and clean the mower regularly.