What are the different types of window blinds and their features?

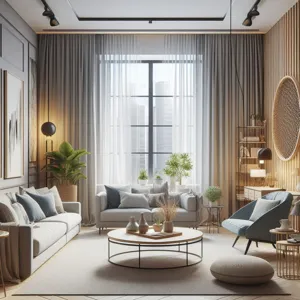
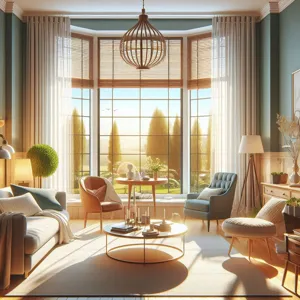
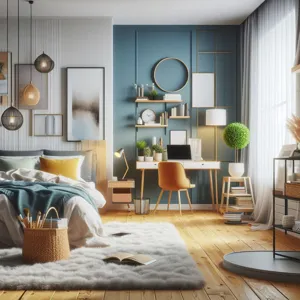
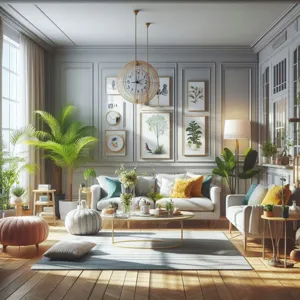
Window blinds are more than just functional elements that control light and privacy; they are an essential aspect of your home’s decor that can elevate the ambiance of any room.

With an impressive variety of styles, materials, and features available, choosing the right window blinds can feel overwhelming. Do you want the sleek elegance of wooden blinds, the modern appeal of roller shades, or the classic beauty of Roman shades? Each option not only serves a purpose but also offers its own unique aesthetic and functional benefits. In this comprehensive guide, we will delve into the different types of window blinds, explore their standout features, and provide you with practical tips for selecting the perfect blinds to match your home’s decor and meet your lifestyle needs. Whether you’re redecorating a single room or refreshing your entire home, this guide will help you navigate the world of window blinds with confidence and style.

1. Introduction to Window Blinds: An Overview

What are the different types of window blinds and their features?
Credit : whatcanu.com

When it comes to home decor, window treatments are often an overlooked aspect, yet they play a crucial role in enhancing both the functionality and aesthetic appeal of a space. Window blinds, in particular, are a versatile option that offers a perfect blend of style, privacy, and light control. They come in a wide variety of materials, designs, and mechanisms, making them suitable for any room in the house—from the cozy living room to the more humid kitchen or bathroom.

In this guide, we will delve into the different types of window blinds available on the market today, exploring their unique features and benefits. Whether you’re looking for the sleek finish of aluminum blinds, the warmth of wooden options, or the practicality of vinyl, understanding the distinct characteristics of each type will help you make an informed decision tailored to your needs.

Moreover, we’ll also touch on essential factors to consider when choosing window blinds, including your home’s decor style, the level of light control you desire, and the specific functionality you require. By the end of this comprehensive overview, you’ll be equipped with the knowledge to select the ideal window blinds that not only enhance your home’s interior but also contribute to your comfort and energy efficiency. So, let’s draw the curtains back and explore the world of window blinds!

2. Benefits of Installing Window Blinds

When it comes to enhancing your living space, window blinds are more than just a decorative element; they offer a myriad of benefits that can significantly improve both the functionality and aesthetics of your home.

First and foremost, window blinds provide exceptional light control. Whether you want to bask in natural sunlight during the day or create a cozy, dimly lit atmosphere for the evening, blinds can be easily adjusted to suit your needs. This versatility allows you to create the perfect ambiance in any room, helping to set the mood for relaxation or productivity.

In addition to light control, window blinds also offer privacy. They act as a barrier between your indoor sanctuary and the outside world, allowing you to enjoy your home without the worry of prying eyes. This is particularly beneficial for bedrooms and bathrooms, where privacy is paramount. With a variety of styles available, you can select blinds that offer full coverage or those that allow for some visibility while still maintaining a sense of seclusion.

Energy efficiency is another compelling reason to install window blinds. By effectively blocking out the sun’s rays during the hot summer months and retaining heat during the colder seasons, blinds can help regulate your home’s temperature. This contributes to lower energy bills, as your heating and cooling systems won’t have to work as hard to maintain a comfortable environment.

Moreover, window blinds are available in a wide array of materials, colors, and designs, making it easy to find the perfect match for your interior decor. From sleek aluminum Venetian blinds to elegant wooden plantation shutters, the options are endless. This variety allows you to express your personal style while also enhancing the overall look of your home.

Lastly, installing window blinds can enhance your home’s value. Potential buyers often view well-furnished homes with quality window treatments as more appealing. Investing in blinds can make your space more attractive, giving you a solid return on your investment.

In summary, the benefits of installing window blinds extend far beyond mere aesthetics. With their ability to control light, ensure privacy, enhance energy efficiency, and elevate your home’s design, they are a valuable addition to any living space. Whether you’re redecorating or simply looking to update your window treatments, consider how blinds can transform your home into a more functional and stylish haven.

3. Types of Window Blinds

What are the different types of window blinds and their features?
Credit : whatcanu.com

When it comes to window treatments, the variety of blinds available can be both exciting and overwhelming. Understanding the different types of window blinds is essential for choosing the right style that complements your home’s aesthetics while addressing your functional needs. Here’s a closer look at some of the most popular options:

**1. Vertical Blinds:**
Ideal for large windows and sliding glass doors, vertical blinds feature vertical slats that can be rotated to control light and privacy. They come in various materials, including fabric, vinyl, and aluminum, and are available in a range of colors and patterns, making them a versatile choice for any room.

**2. Horizontal Blinds:**
Often made from wood, faux wood, or aluminum, horizontal blinds are a classic choice for many homes. Their slats are positioned horizontally, allowing for easy light control when tilted. They are particularly suited for smaller windows and are available in different slat sizes, from mini to standard, catering to various design preferences.

**3. Roller Blinds:**
Sleek and minimalistic, roller blinds consist of a single piece of fabric that rolls up and down on a tube. They are available in a wide range of fabrics, from sheer to blackout, making them a perfect option for bedrooms, living rooms, or home offices. Their clean lines can enhance any modern décor.

**4. Roman Blinds:**
For those seeking a touch of elegance, Roman blinds are an excellent choice. Made from soft fabric, these blinds fold neatly when raised, creating a beautiful cascading effect. They come in various styles, including flat and hobbled, and can add warmth and texture to any room.

**5. Cellular (Honeycomb) Blinds:**
Designed with energy efficiency in mind, cellular blinds feature a unique honeycomb structure that traps air, providing insulation and helping to regulate indoor temperatures. They are available in both light-filtering and blackout options, making them a practical choice for multiple rooms in your home.

**6. Pleated Blinds:**
Similar to cellular blinds but without the insulating pockets, pleated blinds are made of a single piece of fabric that is gathered in pleats. They offer a soft, textured appearance and come in a variety of colors and patterns, perfect for adding visual interest to your windows.

**7. Sheer Blinds:**
Combining the benefits of blinds and drapes, sheer blinds feature lightweight fabric layers that allow diffused light to enter while maintaining privacy. They are ideal for living rooms or dining areas where soft, natural light is desired without sacrificing too much visibility.

**8. Faux Wood Blinds:**
For those who love the look of wood but want a more durable and moisture-resistant option, faux wood blinds are the way to go. Made from composite materials, they mimic the appearance of real wood while being easier to clean and maintain, making them a popular choice for kitchens and bathrooms.

When selecting the right type of window blinds for your home, consider factors such as the room’s purpose, the amount of light control needed, and your overall design aesthetic. By understanding the various types of blinds available, you can make an informed decision that enhances both the functionality and beauty of your living spaces.

– 3.1. Venetian Blinds

### 3.1. Venetian Blinds

Venetian blinds are a classic choice that seamlessly combines style and functionality, making them a popular option for homes and offices alike. Characterized by their horizontal slats, typically made from materials such as wood, aluminum, or PVC, these blinds offer exceptional versatility in light control and privacy.

One of the standout features of Venetian blinds is their adjustable slat mechanism, allowing you to tilt the slats to filter light while maintaining privacy. This control enables you to create the perfect ambiance in any room, whether you desire the soft glow of diffused sunlight in a living space or complete darkness for a cozy movie night. The ability to fully raise or lower the blinds adds to their practicality, letting in as much or as little light as you desire.

Venetian blinds come in a variety of materials and finishes, catering to diverse aesthetic preferences. Wooden Venetian blinds exude warmth and elegance, making them ideal for traditional or rustic interiors. On the other hand, aluminum blinds offer a sleek, modern look and are perfect for spaces that require lower maintenance, as they are resistant to warping and fading.

When choosing Venetian blinds for your home, consider the width of the slats as well. Wider slats provide a more contemporary feel and allow for better visibility when tilted, while narrower slats can create a more classic look and offer finer control over light entry. Additionally, various color options and textures allow you to customize the blinds to match your existing decor.

Installation is straightforward, and many homeowners opt for DIY setups, making Venetian blinds not only a stylish choice but also a practical one. With their timeless appeal and functional design, Venetian blinds can enhance any room, providing both visual interest and functional benefits that keep your living space both comfortable and stylish.

– 3.2. Roller Blinds

What are the different types of window blinds and their features?
Credit : whatcanu.com

### 3.2. Roller Blinds

Roller blinds are a popular choice for homeowners seeking a blend of simplicity, functionality, and style. These versatile window coverings consist of a single piece of fabric that rolls up and down along a horizontal tube, allowing for easy operation and a clean aesthetic. Available in an array of colors, patterns, and textures, roller blinds can seamlessly integrate into any room’s decor, enhancing both contemporary and traditional interiors.

One of the standout features of roller blinds is their adaptability. They can be customized to fit any window size, making them suitable for everything from expansive bay windows to petite dormer setups. Moreover, they come in various opacity levels, from sheer materials that gently filter natural light to blackout fabrics that provide complete privacy and darkness—ideal for bedrooms or media rooms.

Functionality extends beyond aesthetics; many roller blinds are equipped with advanced features such as motorization and smart home compatibility. This means you can control your blinds with the touch of a button or even through voice commands, elevating both convenience and luxury in your living space. Additionally, many roller blinds boast energy-efficient properties, helping to regulate indoor temperatures and reduce energy costs throughout the year.

When it comes to installation, roller blinds typically offer a straightforward process, whether you choose to mount them inside or outside the window frame. This flexibility allows homeowners to achieve the perfect fit and finish for their windows. Furthermore, maintenance is a breeze; most fabrics can be wiped clean with a damp cloth, making them a practical choice for busy households.

In summary, roller blinds are an excellent option for anyone looking to enhance their home with a stylish, functional, and adaptable window treatment. With their wide-ranging styles and features, they can meet the diverse needs of any room, ensuring that your space remains both beautiful and comfortable.

– 3.3. Roman Blinds

### 3.3. Roman Blinds

Roman blinds are a timeless window treatment that seamlessly blend elegance with functionality. Known for their soft fabric folds and classic designs, these blinds add a touch of sophistication to any room. Available in a wide array of materials, colors, and patterns, Roman blinds can complement various interior styles, from cozy traditional spaces to sleek modern aesthetics.

One of the standout features of Roman blinds is their ability to filter light while providing privacy. When raised, they stack neatly at the top of the window, allowing for an unobstructed view and maximum sunlight. Conversely, when lowered, they create a soft, warm ambiance, diffusing harsh sunlight and protecting your furnishings from UV damage. This versatility makes them an excellent choice for living rooms, bedrooms, and dining areas alike.

Installation is straightforward, with options for both inside and outside mount, ensuring a perfect fit for any window. Additionally, Roman blinds can be customized with different lining options. A blackout lining is ideal for bedrooms, promoting better sleep by blocking out light completely, while a light-filtering fabric can create a tranquil glow in a sunlit space.

For those interested in sustainability, many manufacturers offer eco-friendly materials, providing a guilt-free way to enhance your home decor. Care and maintenance are also easy, as most Roman blinds can be spot cleaned, ensuring they remain looking fresh and vibrant for years to come.

As you explore your options, consider how Roman blinds can not only enhance the aesthetic appeal of your home but also contribute to your comfort and privacy. With their adaptable style and practical benefits, Roman blinds are a delightful addition to any room, making them a favorite among homeowners and designers alike.

– 3.4. Vertical Blinds

What are the different types of window blinds and their features?
Credit : whatcanu.com

### 3.4. Vertical Blinds

Vertical blinds are a popular choice for both residential and commercial spaces, offering a unique blend of functionality and style. These blinds consist of long, vertical slats that can be adjusted to control light and privacy while also providing a contemporary aesthetic. Typically made from materials such as fabric, vinyl, or aluminum, vertical blinds are versatile and can complement a variety of interior designs, from modern minimalist to traditional decor.

One of the most significant advantages of vertical blinds is their ability to cover large windows and sliding glass doors effectively. The vertical orientation allows for easy operation; you can simply slide the slats to the side to open up your view or tilt them to control the amount of light entering the room. This feature is particularly beneficial in spaces where natural light is abundant, as you can customize the light levels to create the perfect ambiance throughout the day.

In addition to their practical benefits, vertical blinds come in a wide range of colors, patterns, and textures, allowing homeowners to express their personal style. Whether you prefer bold, vibrant hues or soft, neutral tones, there’s a vertical blind option to match your decor. Some variations even incorporate innovative designs, such as sheer vertical blinds, which offer a delicate balance of light diffusion and privacy.

Maintenance is also a key consideration when evaluating vertical blinds. They tend to be easier to clean than horizontal blinds, as dust and debris are less likely to accumulate on the vertical slats. A simple wipe down with a damp cloth is often all that’s needed to keep them looking fresh and new.

When choosing vertical blinds for your home, consider the size of your windows, the amount of light you wish to let in, and the overall decor of your space. With their sleek design and functional benefits, vertical blinds can enhance any room, making them a smart choice for homeowners looking to combine style with practicality.

– 3.5. Cellular Shades

Cellular shades, also known as honeycomb shades, are a popular choice for homeowners seeking both style and energy efficiency. Characterized by their unique design, these shades consist of two or more layers of fabric that form a series of air pockets, resembling a honeycomb structure. This design not only adds an aesthetic appeal to your windows but also serves a functional purpose—providing excellent insulation.

When drawn down, cellular shades trap air within the cells, creating a barrier that helps maintain your home’s temperature. In colder months, they keep warm air from escaping, while in warmer months, they help to block out the heat, potentially lowering your energy bills and enhancing comfort throughout your living spaces.

Available in a variety of colors, patterns, and opacity levels, cellular shades can suit any décor style, from minimalist to traditional. You can opt for sheer fabrics that allow diffused light to filter into your home, or blackout options for complete privacy and light control, making them ideal for bedrooms or media rooms.

Another advantage of cellular shades is their versatility in installation. They can be mounted inside or outside the window frame and are available in top-down/bottom-up configurations, allowing you to customize light control according to your needs. This feature is particularly valuable for those who want to let in natural light while maintaining privacy.

For those concerned about maintenance, cellular shades are relatively easy to clean. Most fabrics can be wiped down with a damp cloth or gently vacuumed, ensuring they remain looking fresh and vibrant. Additionally, many cellular shades come with cordless options, adding a layer of safety for homes with children and pets.

In summary, cellular shades provide an ideal combination of style, energy efficiency, and ease of use, making them an excellent choice for any room in your home. Whether you are looking to enhance your interior design or improve your energy efficiency, cellular shades are definitely worth considering.

– 3.6. Plantation Shutters

### 3.6. Plantation Shutters

Plantation shutters are a timeless and elegant choice that can elevate the aesthetic of any room while providing exceptional functionality. Characterized by their wide slats, usually measuring between 2.5 to 4.5 inches, these shutters offer a classic look that complements a variety of interior styles, from traditional to contemporary. Made from materials such as wood, composite, or vinyl, plantation shutters are as versatile as they are stylish.

One of the standout features of plantation shutters is their ability to control light and privacy with ease. The adjustable slats can be tilted to let in just the right amount of natural light, allowing you to create a warm and inviting atmosphere without sacrificing privacy. This adaptability makes them an excellent choice for rooms that require versatile lighting solutions, such as living rooms, bedrooms, and home offices.

In addition to their aesthetic appeal and light control, plantation shutters are also known for their durability and energy efficiency. Unlike traditional fabric window treatments that may fade or wear over time, well-made plantation shutters can last for years with minimal maintenance. Their solid construction helps insulate windows, keeping your home cooler in the summer and warmer in the winter, which can lead to lower energy bills.

Furthermore, plantation shutters are easy to clean—simply dust them with a soft cloth or use a damp sponge for a deeper clean. This practicality, combined with their elegant appearance, makes them a popular choice among homeowners looking for a long-term window treatment solution.

When considering plantation shutters for your home, think about the color and finish that will best complement your existing decor. Whether you opt for a classic white or a rich wood stain, these shutters can be customized to fit virtually any window shape and size, ensuring a perfect fit that enhances your home’s overall design.

In summary, plantation shutters are not just a window covering; they are an investment in style, functionality, and energy efficiency. Their timeless appeal and practical benefits make them an excellent choice for those looking to enhance their living spaces while enjoying the benefits of superior light control and insulation.

4. Key Features to Consider

When selecting window blinds, it’s essential to consider several key features that impact both functionality and aesthetics. Each feature plays a crucial role in ensuring that the blinds not only enhance your home’s decor but also meet your specific needs.

**1. Material:** The material of the blinds significantly affects their durability, maintenance, and appearance. Common materials include wood, faux wood, vinyl, and fabric. For a warm, classic look, wooden blinds are ideal but require more upkeep. Faux wood offers the same aesthetic with added moisture resistance, making it suitable for high-humidity areas like kitchens and bathrooms. Vinyl blinds are lightweight, easy to clean, and highly durable, while fabric blinds provide a soft, elegant touch but may require more maintenance.

**2. Light Control:** Consider how much light you want to allow into your space. Blinds come with various slat sizes and configurations that offer different levels of light filtration. For instance, sheer blinds allow gentle light to filter through while maintaining privacy, whereas blackout blinds are perfect for bedrooms or media rooms where complete darkness is needed.

**3. Energy Efficiency:** Energy-efficient blinds can help regulate the temperature in your home, potentially lowering your energy bills. Look for options with insulating properties or thermal linings that prevent heat loss in winter and keep spaces cooler in summer. Cellular shades, in particular, are known for their excellent insulation capabilities.

**4. Operation Mechanism:** The way your blinds operate can greatly affect convenience and ease of use. Traditional corded blinds may be familiar, but consider options like cordless, which are safer for children and pets. Motorized blinds offer the ultimate convenience, allowing you to control them with the touch of a button or even via smart home systems, making them an excellent choice for hard-to-reach windows.

**5. Customization Options:** Finally, consider how customizable the blinds are in terms of color, pattern, and size. Custom options allow you to match your blinds perfectly with your interior decor, ensuring they complement the overall design of your home. Whether you prefer bold prints or subtle shades, a wide range of choices is available to suit every taste.

By keeping these key features in mind, you will be well-equipped to choose window blinds that not only enhance your home’s beauty but also provide the functionality you need for your lifestyle.

– 4.1. Material Options

When it comes to selecting window blinds for your home, one of the most crucial factors to consider is the material from which they are made. The right material not only affects the aesthetics of your space but also impacts functionality, durability, and maintenance. Here’s a closer look at the most popular material options available for window blinds, each bringing its own unique benefits and style.

**1. Wood:**
Wood blinds exude timeless elegance and natural beauty, making them a popular choice for many homeowners. Available in various finishes, they can complement a wide range of interior design styles, from rustic to modern. Beyond their aesthetic appeal, wood blinds offer excellent insulation properties, helping to regulate indoor temperatures. However, it’s essential to keep in mind that real wood can be susceptible to warping in high-humidity areas, making them less ideal for kitchens or bathrooms unless properly treated.

**2. Faux Wood:**
For those who love the look of wood but need something more durable and moisture-resistant, faux wood blinds are an excellent alternative. Made from composite materials, these blinds mimic the appearance of real wood while being more resistant to humidity, making them suitable for any room in the house. Faux wood is also often less expensive than real wood, providing a budget-friendly option without sacrificing style.

**3. Vinyl:**
Vinyl blinds are renowned for their practicality and low maintenance requirements. They are incredibly versatile, available in a wide range of colors and styles, and are perfect for high-traffic areas or homes with children and pets. Their non-porous surface makes them resistant to moisture and easy to clean, making them a popular choice for kitchens and bathrooms. However, while vinyl blinds offer great functionality, they may lack the warmth and character of wood or faux wood options.

**4. Fabric:**
Fabric blinds, such as roller shades, Roman shades, or sheer blinds, add a soft and inviting touch to any space. They come in an array of colors, patterns, and textures, allowing for endless customization to match your décor. Fabric blinds can also provide varying degrees of light filtration and privacy, making them suitable for bedrooms, living rooms, and more. However, they typically require more maintenance than other materials, as they can attract dust and may need periodic washing or vacuuming.

**5. Aluminum:**
Aluminum blinds are a sleek and modern choice, often associated with contemporary or minimalist interiors. Lightweight and durable, they are perfect for spaces that require adjustable light control, such as offices or kitchens. Aluminum blinds are resistant to fading and are available in various finishes, including metallic and matte. However, while they offer practical benefits, they may not provide the same warmth and coziness as wooden or fabric options.

When choosing the right material for your window blinds, it’s essential to consider not only your aesthetic preferences but also the specific needs of each room in your home. By understanding the unique characteristics of each material, you can select blinds that enhance your living space, provide functionality, and reflect your personal style.

– 4.2. Light Control and Privacy

When it comes to selecting window blinds, two of the most significant factors to consider are light control and privacy. These elements not only influence the ambiance of a room but also play a crucial role in how comfortable and secure you feel in your space.

**Light Control:** Different types of window blinds offer varying levels of light filtration, allowing you to customize the amount of natural light that enters your home. For instance, sheer shades provide a soft diffusion of sunlight, creating a warm, inviting glow while still offering some level of visibility to the outside world. On the other hand, blackout blinds effectively block out nearly all external light, making them an excellent choice for bedrooms or media rooms where darkness is essential for relaxation or entertainment. For those who want the flexibility to adjust light levels throughout the day, adjustable slatted blinds, such as Venetian or vertical blinds, allow you to tilt the slats for precise control over both light and glare.

**Privacy:** Privacy is paramount in creating a comfortable living environment. Blinds can offer varying degrees of seclusion, depending on the material and design you choose. For instance, roller shades come in different opacities, allowing you to select a fabric that provides either complete coverage or a more translucent option that still maintains your view while keeping prying eyes at bay. Additionally, wood or faux wood blinds lend a classic touch while offering excellent privacy when fully closed. If you live in a densely populated area or have close neighbors, consider options that provide maximum coverage during the evening without sacrificing style.

Ultimately, the ideal window blinds for your home will strike a perfect balance between light control and privacy, reflecting your lifestyle and preferences while enhancing the beauty of your space. As you explore the various styles and functionalities available, keep your specific needs in mind to ensure that your choice contributes to a harmonious and inviting atmosphere.

– 4.3. Energy Efficiency

When it comes to home decor, window blinds do more than just enhance the aesthetic appeal of a room; they also play a crucial role in energy efficiency. In today’s eco-conscious world, homeowners are increasingly aware of how window treatments can contribute to energy savings, helping to reduce both their carbon footprint and utility bills.

Energy-efficient window blinds work by regulating the amount of heat that enters or escapes through your windows, which can significantly impact your home’s temperature. During the scorching summer months, blinds designed with reflective materials can deflect sunlight, keeping your interiors cooler and reducing the need for air conditioning. Conversely, in the winter, insulated blinds help trap warm air inside, preventing chilly drafts from seeping in and allowing you to rely less on heating systems.

When selecting blinds for energy efficiency, consider options such as cellular shades, which feature a honeycomb structure that provides excellent insulation. These shades trap air in their cells, creating a barrier that minimizes heat transfer. Similarly, roller shades with light-filtering materials can help manage glare while still allowing some natural light in, allowing you to enjoy a bright space without overheating.

In addition to the material, the proper installation and fit of your blinds are paramount to their energy-saving capabilities. Blinds that fit snugly within the window frame are more effective at blocking drafts and controlling light compared to those that hang loosely. For maximum efficiency, look for products that are specifically labeled as energy-efficient or that have received certifications, such as the ENERGY STAR rating.

Ultimately, choosing energy-efficient window blinds not only enhances your home’s comfort but also contributes to long-term savings and a more sustainable lifestyle. By carefully considering the types of blinds available and their insulating properties, you can make a choice that benefits both your home and the environment.

– 4.4. Style and Aesthetics

When it comes to window blinds, style and aesthetics play a pivotal role in enhancing the overall ambiance of your home. Beyond their functional purpose of controlling light and privacy, blinds are also an essential design element that can tie together your room’s decor and reflect your personal taste.

Consider the color palette and design of your space when selecting blinds. A minimalist, modern living room may benefit from sleek, neutral-colored roller blinds that blend seamlessly with the walls. In contrast, a bohemian bedroom could be beautifully complemented by vibrant, patterned Roman blinds that add a touch of whimsy and charm.

Material choice is another crucial aspect of style. Wooden blinds offer a classic, warm aesthetic that can evoke a sense of coziness, while aluminum or vinyl options provide a more contemporary, polished look. Textured fabrics can introduce depth and interest, making your windows a focal point in the room.

Furthermore, think about the shape and size of your windows. Custom-made blinds can ensure a perfect fit, allowing for a more tailored appearance that enhances your home’s architectural features. Layering different types of blinds—such as sheer shades underneath thicker blackout curtains—can create a sophisticated look while providing versatility in light control.

Ultimately, the right window blinds should not only complement your existing decor but also express your unique style. By carefully considering the aesthetics of your blinds alongside their functionality, you can create a harmonious atmosphere that elevates your living space.

– 4.5. Ease of Operation

When selecting window blinds for your home, ease of operation is a crucial factor that can significantly influence your overall satisfaction. After all, the primary purpose of blinds is not just to enhance privacy and aesthetics, but also to provide convenience in managing light and ventilation. Consider how you will interact with your blinds daily.

For those who prefer simplicity, traditional corded blinds may suffice, but they can sometimes be cumbersome and pose a safety risk, especially in households with young children or pets. In contrast, cordless options are an excellent choice for ease and safety; they feature a clean, streamlined look and allow you to effortlessly raise or lower the blinds with a gentle push or pull.

For the tech-savvy homeowner, motorized blinds offer the ultimate in convenience. With the touch of a button or a simple voice command through smart home devices, you can adjust your blinds from anywhere in the room—or even remotely. This feature not only adds a layer of luxury but also enhances energy efficiency by enabling you to control sunlight and heat without having to physically adjust the blinds.

When evaluating ease of operation, also consider the weight and materials of the blinds. Lighter materials tend to be easier to handle, while heavier ones may require more effort to operate, particularly on larger windows.

Ultimately, the right choice will depend on your lifestyle and preferences. Whether you opt for classic corded blinds, a safe and sleek cordless design, or the cutting-edge convenience of motorized options, ensuring your window treatments are easy to operate will enhance your daily routine and elevate your living space.

5. Measuring Your Windows for Blinds

Measuring your windows accurately is a crucial step in ensuring a perfect fit for your new blinds. An ill-fitting blind can not only detract from the aesthetic of your space but can also compromise functionality. To get started, gather your tools — a metal tape measure, a pencil, and a notepad are all you need to take precise measurements.

Begin by determining whether you want to install your blinds inside the window frame for a clean, streamlined look or outside the frame for a bolder statement. For inside mounts, carefully measure the width and height of your window at three different points: the top, middle, and bottom for width, and the left, center, and right for height. This helps account for any irregularities in your window’s dimensions. Record the smallest measurement for both width and height, as this will be your guide for ordering.

For outside mounts, measure the width and height of the entire area you want to cover. Be sure to add extra inches to both dimensions to allow for light control and to ensure complete coverage of the window. Generally, adding 1 to 3 inches on each side is recommended for width, while additional height can enhance the visual impact.

Once you’ve taken your measurements, double-check them to avoid any costly mistakes. If you’re unsure or uncomfortable with the process, many retailers offer professional measuring services to guarantee accuracy. Remember, precise measurements are the foundation for choosing the right blinds that enhance both the beauty and functionality of your space. With accurate dimensions in hand, you’ll be one step closer to transforming your windows into stunning focal points that reflect your personal style.

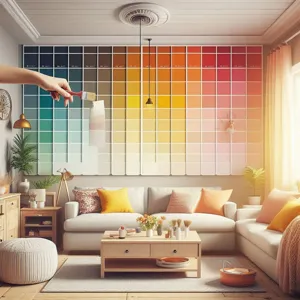
6. Choosing the Right Color and Pattern

When it comes to selecting the right color and pattern for your window blinds, the choices can seem endless, but this decision is crucial in defining the mood and aesthetic of your space. The right blinds can enhance your interior design, create a harmonious atmosphere, and even impact the overall light and temperature of the room.

Start by considering the existing color palette of the room. If you have bold or vibrant wall colors, you might want to opt for a neutral shade for your blinds to create balance and allow the walls to shine. Soft whites, grays, or beiges can serve as a perfect backdrop, allowing you the freedom to add colorful accessories without overwhelming the senses. On the other hand, if your walls are more muted, feel free to explore bolder patterns or darker colors to make a striking statement.

Patterns also play a significant role in setting the tone of your space. Geometric patterns can lend a modern and sophisticated look, while floral designs could add a touch of warmth and charm. Striped blinds can draw the eye upward, making a room feel taller, while larger prints can create a lively focal point. Think about the mood you want to convey: soft and inviting, sleek and contemporary, or eclectic and fun.

Additionally, consider the functionality of the blinds. If privacy and light control are top priorities, darker, solid colors may work best, as they can block light more effectively. If you’re looking to create an airy, light-filled space, translucent or light-colored blinds can allow soft natural light to filter through while maintaining a sense of openness.

Ultimately, choosing the right color and pattern should not just be about aesthetics but also about how the blinds will fit into your lifestyle. Take samples home to see how they look in different lighting throughout the day, and don’t hesitate to consult with design professionals who can provide insights tailored to your unique space. With the right color and pattern, your window blinds can transform your home into a beautifully cohesive sanctuary.

7. Installation Process: DIY vs. Professional Help

When it comes to installing window blinds, one of the first decisions you’ll need to make is whether to tackle the project yourself or enlist the help of a professional. Each option comes with its own set of advantages and challenges, so let’s break it down to help you make an informed choice.

**DIY Installation: A Hands-On Approach**

For those who love a good weekend project or enjoy the satisfaction of a job well done, DIY installation can be a rewarding experience. Most window blinds come with detailed instructions and all the necessary hardware, making it accessible even for novice DIYers. With some basic tools—like a drill, measuring tape, and level—you can save on installation costs while customizing the fit and placement to your exact preferences.

However, DIY installation requires careful attention to detail. Proper measurements are crucial; an error here can lead to blinds that are too short, too long, or misaligned. Additionally, the process can be time-consuming, especially if you’re installing multiple blinds. Patience and precision are key, but the sense of accomplishment when you pull that cord for the first time is truly unmatched.

**Professional Installation: Expertise at Your Service**

On the other hand, hiring a professional can alleviate the stress that comes with the installation process. Professionals have the experience and tools needed to ensure your window blinds are installed correctly and efficiently. They can address any unique challenges that might arise, such as tricky window shapes or unusual mounting conditions, providing a seamless finish that enhances your home’s aesthetic.

Moreover, many professional services offer guarantees or warranties on their work, giving you peace of mind that the job will be done right. While this option will incur an additional cost, the investment might be worth it for those who prefer a hassle-free experience or lack the time and tools to do it themselves.

**Making the Decision: What’s Right for You?**

Ultimately, the choice between DIY installation and professional help depends on your comfort level with home improvement projects, your budget, and the complexity of the installation. If you’re confident in your skills and enjoy working with your hands, a DIY approach can be both fun and cost-effective. However, if you prefer to leave it to the experts, hiring a professional can ensure your window blinds are installed with precision and care.

Consider your priorities, assess your skills, and choose the option that best fits your lifestyle and home improvement goals. No matter which route you choose, the end result will be beautifully functional window blinds that enhance your living space.

8. Maintenance and Care for Window Blinds

### 8. Maintenance and Care for Window Blinds

Caring for your window blinds is essential not only for their longevity but also for maintaining the aesthetic appeal of your home. Proper maintenance can help prevent dust and dirt buildup, keeping your blinds looking fresh and vibrant. Here are some key tips for maintaining various types of window blinds:

**1. Dust Regularly:**
For most blinds, a simple weekly dusting with a microfiber cloth or a duster will suffice. This is particularly important for horizontal blinds, where dust tends to accumulate on the slats. For vertical blinds, a gentle swipe from top to bottom will keep them looking pristine.

**2. Deep Cleaning:**
Depending on the material, your blinds will have different cleaning requirements. For faux wood or vinyl blinds, a damp cloth with mild detergent can remove stubborn stains. For fabric blinds, vacuuming with a brush attachment can help remove dust, but be sure to check the manufacturer’s instructions regarding washing. Some may be machine washable, while others require spot cleaning.

**3. Avoid Excessive Moisture:**
If you have wooden blinds, it’s crucial to keep them away from excessive moisture, which can cause warping or damage. In areas with high humidity, such as kitchens or bathrooms, consider using synthetic materials that can withstand these conditions.

**4. Repair and Replace:**
Inspect your blinds regularly for any signs of wear and tear. If a slat is bent or a mechanism is malfunctioning, address the issue promptly. Many blinds can be repaired with replacement parts, which can be more cost-effective than a full replacement.

**5. Seasonal Checks:**
As seasons change, so do the environmental factors that can affect your blinds. In winter, for instance, ensure that your blinds aren’t obstructing heating vents, and in summer, clean them more frequently to remove pollen and dust. Adjusting your cleaning routine according to seasonal needs can preserve the integrity and appearance of your blinds.

By integrating these maintenance tips into your routine, you’ll not only enhance the lifespan of your window blinds but also enjoy their beauty and functionality for years to come. Remember, well-maintained blinds contribute significantly to your home’s overall ambiance, ensuring that they remain a stylish and practical addition to your space.

9. Common Mistakes to Avoid When Choosing Blinds

When it comes to selecting the perfect window blinds for your home, avoiding common pitfalls can make all the difference between a well-finished look and a design disaster. Here are some frequent mistakes to steer clear of as you embark on your journey to find the ideal window treatments.

**1. Ignoring Measurements:** One of the most critical steps in the blinds selection process is accurate measurement. Many homeowners rush this part, leading to ill-fitting blinds that either leave gaps or are too tight. Always measure your windows carefully, considering both width and height, and remember to account for any obstructions like handles or moldings. If in doubt, consult a professional or use online measurement guides to ensure a perfect fit.

**2. Overlooking Functionality:** While aesthetics are essential, it’s equally important to consider how you will use the blinds. Are you looking for maximum light control, privacy, or insulation? For instance, sheer blinds can beautifully diffuse natural light but may not provide the privacy you need at night. Evaluate the function you want them to serve and choose accordingly.

**3. Disregarding Material and Maintenance:** The material you choose for your blinds can significantly influence their longevity and upkeep. Wooden blinds offer warmth and elegance but require more maintenance than vinyl or fabric options, which are often easier to clean and more resistant to moisture. Consider your lifestyle and the specific needs of each room—high-humidity areas like kitchens and bathrooms may require more durable materials.

**4. Matching Everything:** While coordinating your blinds with your interior decor is important, overly matching can create a monotonous look. Instead of opting for blinds that are an exact match to your wall color or furniture, consider introducing complementary shades or textures. This adds depth and visual interest to your space, making it feel more dynamic and inviting.

**5. Skipping the Sample Phase:** Don’t make the mistake of choosing your blinds based solely on online images or showroom displays. Colors and textures can vary drastically under different lighting conditions. Always request samples or swatches to see how they look in your home’s natural light at various times of the day. This can help you avoid the disappointment of a color that doesn’t translate well once installed.

**6. Neglecting to Think Long-Term:** Lastly, it’s easy to get caught up in trends, but remember to consider the longevity of your choice. While bold patterns or trendy colors may be appealing now, they might not be in a few years. Opt for timeless designs and colors that will continue to complement your home as styles evolve.

By being aware of these common mistakes, you can make more informed decisions, ensuring that your choice of window blinds enhances your home’s aesthetic while providing the functionality you need. Take your time, do your research, and you’ll find the perfect fit that keeps your spaces stylish and inviting for years to come.

10. Budgeting for Window Blinds: What to Expect

When it comes to outfitting your home with the perfect window blinds, understanding your budget is crucial to making an informed decision. The cost of window blinds can vary significantly based on several factors, including the type, material, size, and brand.

On the more economical end, basic roller blinds or simple fabric shades can start as low as $20 to $50 per window. These options are functional and can provide a decent level of privacy and light control without breaking the bank. However, if you’re looking for something more aesthetically pleasing or durable, prices can escalate quickly. Custom-made options, such as wooden blinds or intricate Roman shades, can run anywhere from $100 to $300 or more per window depending on the specifications.

It’s also important to factor in installation costs, particularly for complex setups or larger windows. While many blinds can be installed DIY-style with some basic tools and a bit of patience, hiring a professional can range from $50 to $150, depending on the complexity of the installation.

Additionally, consider the long-term investment aspects of your choices. Higher-quality materials may come with a larger upfront cost but often provide better durability and energy efficiency, ultimately saving you money on heating and cooling costs in the long run.

Lastly, it’s wise to keep an eye out for seasonal sales or promotions, as many retailers offer significant discounts during holiday seasons or clearance events. By planning ahead and understanding the various elements that contribute to the overall cost, you can confidently choose window blinds that not only fit your budget but also enhance the beauty and functionality of your home.

11. Eco-Friendly Options for Sustainable Living

As the world increasingly prioritizes sustainability, eco-friendly window blinds have emerged as a popular choice for environmentally conscious homeowners. These blinds not only enhance the aesthetic appeal of your space but also contribute positively to the planet. When considering eco-friendly options, look for materials that are either renewable, recycled, or sustainably sourced.

One of the most popular eco-friendly materials is bamboo, known for its rapid growth and minimal environmental impact. Bamboo blinds offer a beautiful, natural look while providing excellent light control and insulation. Similarly, shades made from organic cotton or linen are another sustainable choice, providing a soft, inviting texture without chemical treatments that can be harmful to both your health and the environment.

Another option to consider is cellular shades, which are designed to trap air and improve your home’s energy efficiency. Many manufacturers now produce cellular shades using recycled materials, allowing you to enjoy their insulating benefits while also supporting sustainability efforts. Additionally, look for blinds with low-VOC (volatile organic compounds) finishes, as these contribute to better indoor air quality.

When selecting eco-friendly blinds, consider the lifecycle of the product. Opt for those that are durable and made to last, reducing the need for replacements over time. Many brands offer warranties, which is a testament to their commitment to quality and sustainability.

By choosing eco-friendly window blinds, you’re not only making a stylish addition to your home but also taking a step toward sustainable living. These options can significantly reduce your carbon footprint while creating a healthier living environment for you and your family. Remember, every small choice can contribute to a larger change, and your window treatments are a perfect place to start.

12. Trends in Window Blinds: What’s Popular Now

As we step into a new era of interior design, window blinds have evolved beyond mere functional elements into stylish statements that enhance the overall aesthetic of our living spaces. Today, homeowners are increasingly opting for window treatments that not only provide privacy and light control but also contribute to the design narrative of their rooms. Here are some of the most popular trends in window blinds that are captivating homeowners in 2023.

### Natural Materials

One of the most significant trends is the shift towards eco-friendly, natural materials. Bamboo and wood blinds are making a strong comeback, celebrated for their warmth and organic appeal. These materials not only bring a touch of nature indoors but also help create a calming atmosphere. Homeowners appreciate the sustainability aspect, as well as the unique textures and hues that natural blinds provide.

### Smart Technology

In a world that’s becoming increasingly connected, smart window blinds are at the forefront of modernization. These innovative treatments can be controlled via smartphones or smart home systems, allowing for effortless adjustments of light and privacy at the touch of a button. From automated schedules to voice commands, the convenience of smart blinds is appealing to tech-savvy homeowners looking to enhance their living spaces while maximizing energy efficiency.

### Bold Patterns and Colors

Gone are the days of plain, neutral window treatments. This year, bold patterns and vibrant colors are taking center stage. Designers are encouraging homeowners to experiment with geometric prints, florals, and rich tones that add personality and flair to any room. Whether it’s a striking Roman shade in a jewel tone or roller blinds adorned with an eye-catching design, these choices can transform a mundane window into a focal point.

### Layering Treatments

Layering is another trend that’s gaining traction. Mixing and matching different types of blinds, such as pairing sheer roller shades with heavy drapes, allows for greater flexibility in controlling light and privacy. This approach not only enhances functionality but also adds depth and dimension to windows, creating a more curated and polished look.

### Minimalist Designs

On the opposite end of the spectrum, minimalist designs continue to resonate with many homeowners. Sleek, simple blinds that offer clean lines and subtle elegance are favored in modern and contemporary spaces. These designs often feature neutral colors and uncomplicated mechanisms that promote a clutter-free aesthetic, aligning perfectly with the principles of minimalism.

### Sustainability and Energy Efficiency

More homeowners are becoming conscious of their environmental impact, leading to a rise in demand for sustainable and energy-efficient window blinds. Options like thermal blinds that help regulate indoor temperatures and reduce energy costs are particularly popular. Additionally, many brands are now offering blinds made from recycled materials, combining style with eco-friendly practices.

In conclusion, the world of window blinds in 2023 is characterized by a blend of innovation, sustainability, and artistic expression. By staying informed about these trends, you can select window treatments that not only suit your functional needs but also elevate the overall ambiance of your home. Whether you prefer the warmth of natural materials, the convenience of smart technology, or the allure of bold designs, the perfect set of window blinds awaits to transform your space.

13. Conclusion: Finding the Perfect Window Blinds for Your Home

In conclusion, finding the perfect window blinds for your home is not just about aesthetics; it’s about enhancing your living space in a way that aligns with your lifestyle, preferences, and functional needs. With a plethora of options available—from classic wooden blinds to sleek roller shades and versatile cellular shades—there’s a style to suit every taste and requirement.

Consider the atmosphere you wish to create in each room: warm and inviting, modern and minimalist, or perhaps a blend of both. Think about the practical aspects, such as light control, privacy, and insulation, which are essential for comfort and energy efficiency. Don’t forget to factor in the maintenance and durability of the materials you choose, ensuring they can withstand daily wear while still looking fabulous.

As you embark on this journey of selecting window blinds, take the time to measure your windows accurately and explore the various features that each type offers. Whether you prefer the ease of a motorized option or the timeless charm of manual controls, the right choice will enhance your home’s functionality while reflecting your personal style.

Ultimately, the perfect window blinds will not only elevate your home’s décor but also create a sanctuary that caters to your unique needs. With careful consideration and a bit of research, you’ll find the ideal window treatment that balances beauty, practicality, and comfort, making your living space truly your own. Happy decorating!

14. Additional Resources and FAQs

As you embark on the journey of selecting the perfect window blinds for your home, having access to reliable resources and answers to common questions can greatly enhance your decision-making process. Below, we’ve compiled a list of additional resources and frequently asked questions to provide you with a comprehensive understanding of window blinds and help you make the best choice for your space.

### Additional Resources

1. **Online Design Tools**: Many home improvement websites offer interactive design tools that allow you to visualize different styles and colors of blinds in your space. Websites like Houzz or Pinterest can also inspire you with various design ideas and the latest trends in window treatments.

2. **Manufacturer Guides**: Reputable manufacturers often provide detailed guides on their websites that cover everything from installation instructions to maintenance tips. These guides can help you understand the specific features and benefits of the blinds you are considering.

3. **Home Decor Blogs**: Explore blogs dedicated to home decor and interior design, where experts share insights on choosing the right window treatments. These blogs often feature reviews, comparisons, and style tips to help you navigate your options.

4. **YouTube Tutorials**: Visual learners will appreciate the plethora of video tutorials available on platforms like YouTube, where you can watch step-by-step guides on measuring, installing, and even customizing your window blinds.

### Frequently Asked Questions

**Q: What are the best types of blinds for light control?**
A: For maximum light control, consider blackout roller shades or cellular shades. These options allow you to completely block out light when needed, ideal for bedrooms or media rooms.

**Q: How do I measure my windows for blinds?**
A: Start by measuring the width and height of your window frame. For inside mounts, subtract about 1/4 inch from both measurements to ensure a snug fit. For outside mounts, add a few inches to each measurement for better light coverage and aesthetic appeal.

**Q: Are there energy-efficient options for window blinds?**
A: Yes! Cellular shades are known for their energy efficiency due to their honeycomb structure that traps air, providing insulation. Additionally, some blinds come with reflective coatings that can help reduce heat gain in summer and heat loss in winter.

**Q: How can I maintain my blinds?**
A: Regular dusting with a soft cloth or a vacuum with a brush attachment is usually sufficient. For deeper cleaning, follow the manufacturer’s instructions, as some materials can be wiped down with a damp cloth while others may need special care.

With these resources and answers at your fingertips, you can confidently explore the world of window blinds, ensuring you select the perfect style that complements your home while meeting your functional needs. Whether you’re seeking aesthetic appeal, light control, or energy efficiency, the right blinds can transform your windows and enhance the overall ambiance of your living space.

In conclusion, we hope this comprehensive guide to window blinds has equipped you with the knowledge and confidence needed to make an informed decision for your home. With a multitude of types and features to choose from, selecting the perfect window treatment can significantly enhance both the aesthetics and functionality of your living space. Whether you opt for the sleek elegance of roller blinds, the classic charm of wooden shutters, or the versatility of vertical blinds, the right choice can transform your environment while providing privacy, light control, and energy efficiency. Remember to consider your personal style, the specific needs of each room, and your budget as you navigate this exciting home improvement journey. We encourage you to take the next step and explore your options, envisioning how the right window blinds can elevate your home’s comfort and beauty. Happy decorating!

How to choose the right window treatments for your living room?

Selecting the right window treatments for your living room can transform the ambiance of your space, blending functionality with style to create a warm and inviting atmosphere.

With countless options available—from elegant drapes and modern blinds to chic shades and artistic valances—navigating the vast landscape of window coverings can feel overwhelming. Yet, the perfect window treatments do more than just enhance your decor; they control light, ensure privacy, and contribute to energy efficiency, all while reflecting your personal aesthetic. In this ultimate guide, we will delve into the essential factors to consider when choosing window treatments, including fabric types, color schemes, and design styles, to help you make informed decisions that elevate your living room’s design and comfort. Whether you’re aiming for a cozy retreat or a sophisticated gathering space, we’ve got you covered with expert tips and inspiration to find the ideal window solutions that suit your lifestyle and taste.

1. Understanding the Importance of Window Treatments

How to choose the right window treatments for your living room?
Credit : whatcanu.com

When it comes to decorating your living room, window treatments are often one of the most impactful yet overlooked elements. They serve as more than just a functional accessory; they play a crucial role in setting the tone, enhancing the overall aesthetic, and influencing the mood of your space. Understanding the importance of window treatments is essential for creating a harmonious environment that reflects your personal style while addressing practical needs.

First and foremost, window treatments offer privacy and light control. Whether you prefer the gentle glow of natural light or require complete darkness for movie nights, the right window covering can help you achieve the perfect ambiance. From sheer curtains that softly diffuse sunlight to blackout shades that provide a cozy, cave-like atmosphere, the choices are plentiful and can be tailored to suit your lifestyle.

Beyond functionality, window treatments act as a vital design element within the room. They can complement your existing decor or serve as a bold statement piece that brings the entire look together. Imagine the difference between plain blinds and luxurious floor-to-ceiling drapes in a rich fabric. The latter not only adds elegance but also creates a sense of height and spaciousness, drawing the eye upward and making the room feel more expansive.

Moreover, window treatments can help with energy efficiency. Properly chosen and installed treatments can reduce heat loss in the winter and keep your living room cooler during the summer months. This not only helps you save on energy bills but also contributes to a more comfortable living environment year-round.

Finally, consider the emotional aspect of your living space. Your living room is often a gathering place for family and friends, a sanctuary for relaxation, and a reflection of your personality. The right window treatments can enhance this experience, evoking feelings of warmth and coziness while creating a welcoming atmosphere.

In summary, understanding the importance of window treatments goes far beyond aesthetic appeal. They are integral to privacy, light control, energy efficiency, and the overall ambiance of your living room. As you embark on the journey of selecting the perfect window treatments, keep these factors in mind to ensure your choices align with both your practical needs and your design vision.

2. Assessing Your Living Room’s Style

When it comes to choosing the perfect window treatments for your living room, the first step is to assess the existing style of the space. Your living room serves as the heart of your home—a gathering place for family and friends, a sanctuary for relaxation, and often a showcase for your personal style. Therefore, it’s crucial that your window treatments complement the overall aesthetic rather than clash with it.

Begin by examining the architectural features and color palette of your living room. Is it modern and sleek with clean lines and a neutral color scheme? Or perhaps it leans towards a cozy, traditional vibe with rich textures and warm tones? For modern spaces, consider treatments that reflect simplicity and minimalism, such as sheer roller shades or sleek wooden blinds that add an air of sophistication without overwhelming the design. On the other hand, if your living room radiates classic charm, opt for drapery in luxurious fabrics like silk or velvet, adorned with delicate patterns or embroidered details that echo the traditional elements of your space.

Next, think about the furniture and decor. Are your furnishings bold and colorful, or do they feature softer, muted tones? Choose window treatments that either harmonize with or serve as a striking contrast to these elements. For instance, if your living room is adorned with vibrant pieces, consider opting for neutral-toned curtains that let your furniture shine. Conversely, if your decor is subdued, a pop of color in your window treatments can add a playful touch and invigorate the space.

Finally, don’t forget to consider the function of your living room. Do you need light control, privacy, or insulation? The style of your window treatments should not only reflect your aesthetic preferences but also address these practical needs. For instance, layered treatments—such as combining sheer curtains with blackout panels—allow you to customize light and privacy throughout the day, ensuring that your beautiful living room remains both stylish and functional.

By thoughtfully assessing your living room’s style, you’ll be well on your way to selecting window treatments that not only enhance the beauty of your space but also create a warm and inviting atmosphere for all who enter.

3. Identifying Your Light Control Needs

How to choose the right window treatments for your living room?
Credit : whatcanu.com

When selecting window treatments for your living room, one of the most crucial factors to consider is your light control needs. The amount of natural light that enters your space can drastically affect its ambiance, comfort, and functionality. Start by assessing how much sunlight your living room receives throughout the day. Is it a sun-drenched haven bathed in morning light, or does it require a gentle filter to soften the harsh afternoon rays?

Different window treatments offer varying levels of light control, so it’s important to understand your preferences. For instance, sheer curtains allow soft light to filter through while maintaining a sense of openness, creating an inviting atmosphere. On the other hand, blackout shades provide complete darkness, ideal for those cozy movie nights or afternoon naps. If you’re looking for versatility, consider layering options such as combining sheer drapes with heavier curtains or blinds. This way, you can easily adjust the level of light based on the time of day or your mood.

Don’t forget to think about your living room’s overall design and how your choice of window treatments will complement it. For example, if your space features bright colors and vibrant décor, light-filtering fabrics can enhance those elements by providing a warm glow. Alternatively, if you prefer a more subdued and sophisticated look, consider rich, darker tones that can add depth and drama while effectively controlling light.

Ultimately, your light control needs will guide you toward the perfect window treatment solution. By carefully considering how you want to manage sunlight in your living room, you’ll ensure that your space remains not only beautifully designed but also comfortable and functional year-round.

4. Evaluating Privacy Requirements

When selecting window treatments for your living room, evaluating your privacy requirements is crucial to achieving both comfort and aesthetics in your space. The living room often serves as the heart of the home, a place for relaxation, entertainment, and social gatherings. However, it’s also a space where you’d want to balance openness and light with the need for privacy from the outside world.

Start by considering the location of your living room and the proximity of neighboring homes, streets, or public areas. If your windows face a busy street or are easily visible to passersby, you may want to opt for treatments that offer more coverage and seclusion. Curtains with a blackout lining or shades that can be adjusted to various heights allow you to control the level of visibility without sacrificing natural light during the day.

On the other hand, if your living room is set back from the street or surrounded by trees, you might have more flexibility in choosing sheer fabrics or lighter treatments that can filter light while still providing a sense of openness. Sheer drapes can create an airy, welcoming atmosphere while ensuring you maintain a degree of privacy from curious eyes.

Additionally, consider the time of day. During the day, you may want to let in as much light as possible, while in the evening, you may prefer complete privacy. Layering your window treatments can be an effective solution—pairing sheer curtains with heavier drapes allows you to customize your privacy levels at any time.

Don’t forget to think about the material and color of your chosen treatments. Darker hues and heavier materials can create a more closed-off feeling, while lighter colors and fabrics can enhance the sense of space and airiness. Ultimately, your choices should reflect your lifestyle needs and comfort levels, ensuring that your living room remains a sanctuary that balances both privacy and light. By carefully evaluating your privacy requirements, you can create a harmonious living environment that feels inviting and secure.

5. Choosing the Right Materials

How to choose the right window treatments for your living room?
Credit : whatcanu.com

When it comes to window treatments, the choice of materials can dramatically influence both the aesthetic and functional aspects of your living room. The right fabric or material not only enhances the overall design but also impacts light control, privacy, and insulation. Here’s a closer look at some popular options to consider:

**1. Fabrics:** Soft fabrics like cotton, linen, and velvet can create a warm and inviting atmosphere. Cotton is versatile and easy to clean, while linen offers a more textured, breezy look that allows light to filter softly into the room. Velvet, on the other hand, adds a touch of luxury and rich color, making it perfect for a more opulent feel.

**2. Blinds and Shades:** For a more contemporary look, consider materials like wood, faux wood, or aluminum. Wooden blinds bring a natural warmth and can be stained or painted to match your décor. Faux wood offers the same aesthetic but with added moisture resistance, making it ideal for humid environments. Aluminum blinds, while sleek and modern, are also lightweight and easy to adjust, giving you precise control over light and privacy.

**3. Sheer vs. Opaque:** The decision between sheer and opaque materials can significantly affect the ambiance of your living room. Sheer fabrics allow light to filter through while providing some privacy, creating an airy, open feel. Opaque materials, on the other hand, block out light completely, making them perfect for media rooms or spaces where you desire darkness.

**4. Layering:** Don’t hesitate to mix materials for a more dynamic look. Layering sheer curtains with heavier drapes can provide both style and functionality, giving you the option to adjust light levels throughout the day. This combination can also add depth and texture to your living room, creating a more inviting space.

**5. Sustainability:** With an increasing focus on eco-friendliness, consider choosing sustainable materials. Organic cotton, bamboo, and recycled polyester are excellent choices that not only look good but also help reduce your carbon footprint.

Ultimately, selecting the right materials for your window treatments is about more than just aesthetics; it’s about creating a living room that reflects your style while providing comfort and functionality. Take the time to explore your options, and don’t shy away from seeking samples to see how different materials interact with your space’s lighting and colors. The right choice will transform your living room into a harmonious retreat that keeps you cozy and stylish, no matter the time of day.

6. Exploring Different Types of Window Treatments

When it comes to choosing the perfect window treatments for your living room, the variety available can be both exciting and overwhelming. Understanding the different types of window treatments is essential for making an informed decision that enhances your space’s aesthetic and functionality.

**1. Curtains and Drapes:** These classic options come in a wide range of fabrics, colors, and patterns, allowing you to tailor them to your decor style. Light, airy sheers can create an ethereal vibe, while heavier drapes offer elegance and warmth. Consider layering styles for added depth and texture, combining sheer panels with heavier drapes that can be drawn back to let in light.

**2. Blinds:** Blinds are a versatile choice that can suit both modern and traditional decor. Available in materials such as wood, faux wood, aluminum, and vinyl, they offer precise light control and privacy. Vertical blinds work well for large windows and sliding doors, while horizontal blinds are ideal for standard windows.

**3. Shades:** Shades bring a softer touch to your living room, with options ranging from Roman shades to roller shades, each offering unique benefits. Roman shades provide a tailored look with their structured folds, while roller shades are sleek and minimal, perfect for a contemporary setting. Don’t forget to consider blackout shades if you want to block out light entirely for movie nights or afternoon naps.

**4. Shutters:** For a timeless and sophisticated option, consider plantation shutters. They not only provide excellent light control but also add a touch of elegance to your living room. Available in various materials, including wood and composite, shutters can be customized to fit any window size and shape, making them a practical and stylish long-term investment.

**5. Valances and Cornices:** These decorative elements can elevate your window treatments, adding a finishing touch that enhances your overall design. Valances are typically fabric swatches that hang over the top of your window, while cornices are more structured and can be upholstered for an added layer of sophistication.

**6. Layering:** Don’t hesitate to mix and match different types of window treatments to create a unique look that suits your style. Combining blinds with curtains, or layering shades with valances, can achieve both a functional and visually appealing design.

As you explore these various window treatment options, consider not only the aesthetic impact but also the practical aspects such as light control, privacy, and energy efficiency. Ultimately, the perfect window treatment will reflect your personal style while enhancing the comfort and ambiance of your living room.

7. Considering Energy Efficiency

How to choose the right window treatments for your living room?
Credit : whatcanu.com

When selecting window treatments for your living room, energy efficiency should be a top consideration. Not only can the right treatments enhance the aesthetic appeal of your space, but they can also contribute significantly to your home’s overall energy performance. In an era where sustainability and energy savings are paramount, choosing treatments that help regulate your home’s temperature can lead to substantial savings on your energy bills.

A variety of options exist that can help insulate your living room while also reflecting your personal style. For instance, cellular shades are designed with a unique honeycomb structure that traps air, providing excellent insulation and keeping your living room warm in the winter and cool in the summer. Similarly, Roman shades made from thicker fabrics can serve as an effective barrier against drafts while adding a touch of elegance to your decor.

If you’re looking for something that combines functionality with style, consider blackout curtains. These not only block out sunlight for those cozy movie nights but also provide an extra layer of insulation, reducing heat loss during colder months. Additionally, treatments with light-colored linings can reflect sunlight, helping to keep your space cooler during the summer while protecting your furniture from fading.

Don’t overlook the role of window films either. These transparent coatings can be applied to your glass panes to reduce heat gain and glare, allowing you to enjoy natural light without the unwanted heat. Moreover, they provide an additional layer of privacy without sacrificing your view.

Ultimately, taking energy efficiency into account when choosing window treatments means investing in products that serve a dual purpose: enhancing your living room’s aesthetic while contributing to a more sustainable and cost-effective home. By selecting the right treatments, you can create a comfortable environment that aligns with your lifestyle and promotes energy conservation.

8. Measuring Your Windows Accurately

Measuring your windows accurately is a crucial step in selecting the perfect window treatments for your living room. A precise measurement ensures that your chosen drapes, blinds, or shades fit flawlessly, enhancing both the aesthetic appeal and functionality of your space.

Start by gathering the right tools: a reliable tape measure, a notepad, and a pencil. If possible, it’s beneficial to enlist a second pair of hands to assist with the measuring process, making it easier to hold the tape in place and record figures accurately.

When measuring for width, take three measurements: one at the top, one in the middle, and one at the bottom of the window frame. Due to potential variations in the window structure, it’s wise to use the widest measurement to guarantee a perfect fit. For height, measure from the top of the window casing down to the desired length—this could be the sill, the floor, or even a few inches above the floor for a more dramatic look. Again, take three measurements to account for any inconsistencies.

If you’re considering hanging treatments outside the window frame for a more expansive appearance, be sure to add extra inches to your width and height measurements. This little adjustment creates an illusion of larger windows and allows more natural light to filter into your living room.

Lastly, don’t forget to jot down any additional details, such as the type of mounting hardware you’ll be using, as this may slightly alter your measurements. By taking the time to measure accurately, you set the stage for selecting window treatments that not only fit perfectly but also elevate the overall design and comfort of your living room.

9. Color and Pattern Selection Tips

Choosing the right colors and patterns for your window treatments can dramatically influence the overall ambiance of your living room. The color palette you select should harmonize with your existing decor, enhancing the aesthetic without overwhelming it. Here are some tips to guide you through this creative process.

**Consider Your Color Scheme**: Begin by taking a good look at your living room’s color palette. Are your walls painted in soft pastels, bold hues, or neutral tones? If your furnishings are already colorful or patterned, you might want to opt for solid-colored window treatments to create a sense of balance. Conversely, if your space is relatively muted, consider incorporating vibrant curtains or blinds to serve as a visual focal point.

**Think About Light and Mood**: Color can dramatically affect the mood of a room. Lighter shades such as whites, creams, and soft pastels can make a space feel airy and spacious, while deeper colors like navy, burgundy, or forest green can add a touch of sophistication and warmth. Additionally, consider how the fabric will interact with natural light. Some colors may appear different depending on the time of day, so it’s wise to test swatches in various lighting conditions.

**Patterns and Textures**: Patterns can breathe life into your living room, adding depth and character. If your space is predominantly solid colors, playful patterns like stripes, florals, or geometric designs can introduce a fun element. However, if your room already features patterned furniture or decor, stick to subtle textures or solid colors for your window treatments to avoid visual chaos. Fabrics like linen or velvet can bring an inviting texture that enhances the overall feel of the room.

**Scale Matters**: When choosing patterns, consider the scale of the print in relation to the size of your living room. Large-scale prints can make a bold statement in spacious areas, while smaller prints may be more suitable for cozier spaces. Remember, the goal is to create a balanced look that complements your furniture and decor while still making an impact.

Ultimately, the selection of colors and patterns for your window treatments should reflect your personal style and the atmosphere you want to create in your living room. By thoughtfully considering these elements, you can elevate your space into a harmonious, inviting retreat.

10. Budgeting for Window Treatments

When it comes to selecting window treatments for your living room, budgeting is a crucial step that can significantly influence your choices. It’s easy to get carried away by the allure of luxurious fabrics and intricate designs, but establishing a clear budget from the outset will help you navigate the myriad options without overspending.

Start by assessing the size and number of windows you plan to dress. Larger windows or multiple openings naturally require more material, which can drive up costs. Consider the type of window treatments you’re interested in—shades, blinds, drapes, or a combination of these—all of which come with varying price points. High-end custom drapery, for instance, can be a beautiful investment that elevates your space, but ready-made options can also deliver style and function at a fraction of the cost.

As you create your budget, don’t forget to factor in additional costs such as installation, hardware, and maintenance. If you’re leaning towards more complex treatments like motorized blinds, include the cost of the necessary electrical work. It’s also wise to set aside a portion of your budget for potential adjustments after installation—sometimes, the perfect look requires a few tweaks.

Lastly, explore sales, discounts, and seasonal promotions that can help you stretch your budget further. Many retailers offer significant savings during holiday sales, and you might find that your dream window treatments are more affordable than you initially thought. With thoughtful budgeting, you can achieve the ideal blend of functionality and aesthetics, ensuring your living room feels both inviting and stylish.

11. DIY vs. Professional Installation

When it comes to installing window treatments in your living room, a critical decision you’ll face is whether to tackle the project yourself (DIY) or to enlist the help of a professional. Both options have their merits, and understanding the nuances of each can help you make an informed choice that aligns with your style, budget, and skill level.

**DIY Installation:**
Opting for a DIY approach can be incredibly rewarding. Not only can it save you money on installation costs, but it also gives you the freedom to infuse your personal flair into the project. With a plethora of online tutorials and instructional videos available, you can easily learn how to measure, cut, and hang your chosen window treatments. This route allows you to work at your own pace, experimenting with different techniques and styles until you achieve the desired look. However, it’s important to consider your own capabilities. If you’re handy with tools and have a penchant for home improvement, DIY could be a fulfilling venture. On the other hand, if the thought of wielding a drill sends shivers down your spine, you may want to think twice.

**Professional Installation:**
If you’re looking for a polished finish with minimal hassle, hiring a professional installer might be the way to go. Experienced professionals can ensure that your window treatments are mounted securely and aligned perfectly, which is particularly important for larger or more complex installations. They can also provide valuable insights and recommendations based on their expertise, helping you avoid common pitfalls. While this option comes at a cost, the peace of mind that comes with knowing the job is done right can be worth every penny. Additionally, many companies offer guarantees on their work, ensuring that you’ll be covered should any issues arise post-installation.

Ultimately, the decision between DIY and professional installation hinges on your comfort level, budget, and the complexity of the window treatments you’ve chosen. Whichever path you choose, ensuring that your living room is adorned with the perfect window treatments will enhance both the beauty and functionality of your space.

12. Maintenance and Cleaning Considerations

When selecting window treatments for your living room, it’s crucial to factor in maintenance and cleaning considerations. While aesthetics are undoubtedly important, practicality can significantly influence your long-term satisfaction with your choice. Different materials and designs come with varying levels of upkeep, so understanding these requirements can save you time, effort, and potential frustration down the line.

For instance, sheer fabrics and light linens may create a beautiful, airy ambiance but are often more prone to collecting dust and stains. Regular gentle vacuuming or a light wash may be necessary to keep them looking fresh. On the other hand, heavier fabrics like velvet or brocade can withstand a bit more wear and tear, but they may require professional cleaning to maintain their luxurious appearance.

If you’re leaning towards wooden blinds or shutters, consider their finish. Natural wood adds warmth but can be susceptible to moisture and fading; thus, regular dusting and occasional polishing can keep them looking pristine. Meanwhile, vinyl or faux wood options are often more resistant to humidity and easier to wipe down, making them ideal for kitchens or bathrooms where moisture levels are higher.

Additionally, think about the mechanisms involved in your chosen treatments. Corded options may need occasional checks and adjustments for functionality, while cordless or motorized versions offer a sleek look with less maintenance but may require battery replacements or electrical upkeep.

Ultimately, it’s essential to choose window treatments that not only enhance the beauty of your living room but also fit seamlessly into your lifestyle. By considering maintenance and cleaning requirements during your selection process, you can ensure your windows remain a stunning focal point without turning into a chore.

13. Layering Window Treatments for Versatility

Layering window treatments is an artful approach that not only enhances the aesthetic appeal of your living room but also offers unparalleled versatility. By combining different types of window coverings, you can achieve a unique blend of style, functionality, and comfort that suits your specific needs and preferences.

Start with the basics—sheer curtains or lightweight drapes. These serve as an excellent foundation, allowing natural light to filter through while still providing a touch of privacy. Sheer fabrics come in a variety of colors and patterns, enabling you to set the tone for your living space. Whether you opt for crisp white for a clean, airy feel or soft pastels for a cozy vibe, these initial layers create a gentle backdrop.

Next, consider adding heavier drapes or curtains to complement your sheer layers. Plush velvet or sturdy cotton can offer a dramatic contrast while enhancing insulation and light control. This dual-layering effect not only brings depth to your windows but also allows you to adjust the light and ambiance of the room throughout the day. Imagine pulling back the heavier drapes during the day to let in sunlight, then drawing them closed in the evening for a snug, intimate atmosphere.

To take your layering a step further, think about incorporating blinds or shades. Roller blinds, Roman shades, or even classic wooden blinds can serve as a perfect middle layer, providing additional control over light and privacy. These can be adjusted independently of your curtains, giving you the flexibility to customize the amount of light entering your space.

Don’t forget to play with textures and patterns. Mixing velvet drapes with sheer linen curtains, or pairing wooden blinds with colorful prints, can create a visually interesting and inviting space. Additionally, this layering technique allows you to easily switch up your decor with the seasons—simply change out one layer for a fresh look without the need for a complete overhaul.

Finally, accessorizing with decorative rods and tiebacks can enhance the overall design and draw attention to your carefully crafted window treatments. Consider metallic finishes for a modern touch or wooden accents for a rustic feel.

Incorporating layered window treatments in your living room not only elevates the decor but also adapts to your lifestyle. Whether you’re looking for warmth on a chilly evening or bright light during the day, this versatile approach ensures your windows are as functional as they are beautiful.

14. Inspiring Living Room Window Treatment Ideas

When it comes to selecting window treatments for your living room, the possibilities are as diverse as your personal style. Here’s a collection of inspiring ideas that can elevate your space while enhancing both functionality and aesthetic appeal.

**1. Layered Elegance:** Consider layering sheer curtains with heavier drapes. Sheer fabrics allow natural light to filter through softly, creating a warm ambiance while maintaining privacy. Pair them with luxurious velvet drapes in rich hues for a sophisticated look. This combination not only adds depth but also offers versatility—open the drapes during the day for a light and airy feel, and close them in the evening for a cozy, intimate atmosphere.

**2. Roman Shades with a Twist:** Opt for custom Roman shades in a bold pattern or vibrant color to make a statement. These shades are not only practical, providing excellent light control, but they also add a touch of personality to your living room. Choose fabrics that complement your existing décor, or go wild with a geometric design that draws the eye and sparks conversation.

**3. Minimalist Blinds:** For a modern, sleek look, consider minimalist roller blinds. Available in a wide range of materials and colors, these blinds can seamlessly blend into your living space. Opt for a light-filtering option to maintain brightness while keeping your space private. When rolled up, they disappear completely, offering an unobstructed view of the outdoors.

**4. Bohemian Macramé:** If you’re drawn to a more eclectic vibe, macramé window hangings can introduce texture and artistry to your living room. These hand-crafted pieces can serve as a unique focal point, especially when paired with plants or other natural elements. Their intricate designs can soften the look of hard surfaces and bring a touch of warmth to your space.

**5. Classic Shutters:** For a timeless choice, consider plantation shutters. Not only do they provide excellent light control, but they also add a touch of elegance to any room. Available in various materials, including wood and composite, shutters can be painted or stained to match your décor. They work beautifully in both traditional and contemporary settings, maintaining their appeal across styles.

**6. Bold Patterns and Colors:** Don’t shy away from bold patterns or vibrant colors! Whether it’s a large floral print or a striking geometric design, window treatments can be the perfect canvas for expressing your personality. These eye-catching styles can tie together the color palette of your living room and add an unexpected pop of excitement.

**7. Eco-Friendly Options:** For those looking to embrace sustainability, consider window treatments made from organic materials or recycled fabrics. Bamboo shades, for instance, offer a natural aesthetic while providing excellent light control. Pair them with linen curtains for a fresh, eco-chic look that’s both stylish and environmentally friendly.

With these inspiring ideas, you can select window treatments that not only enhance your living room’s beauty but also reflect your personal style and meet your practical needs. Remember that the right window treatments can transform a space, creating a cozy retreat where you love to spend time.

15. Final Thoughts: Finding the Perfect Fit for Your Space

Choosing the right window treatments for your living room can be a transformative experience, both aesthetically and functionally. As we wrap up this comprehensive guide, it’s essential to reflect on the key factors that will help you find the perfect fit for your space.

First and foremost, consider the overall style and ambiance you wish to create. Whether you prefer modern minimalism, rustic charm, or a classic elegance, your window treatments should harmonize with your existing décor. Fabrics, colors, and patterns can dramatically influence the mood of your room, so take the time to visualize how different options can enhance your living area.

Next, think about the practical aspects. Do you need light control? Privacy? Energy efficiency? Each of these factors plays a significant role in your final decision. For instance, sheer curtains can invite natural light while offering a sense of openness, whereas blackout shades are ideal for those who enjoy a darkened space for movie nights or afternoon naps.

Additionally, don’t underestimate the importance of maintenance. Some materials require more care than others, and it’s crucial to choose options that align with your lifestyle. If you have pets or young children, durable and easy-to-clean fabrics may be your best bet.

Finally, remember that window treatments are not just a functional necessity but also an expression of your personal style. Take the time to explore various options, gather samples, and visualize how they will look in your living room. With careful consideration of your needs, preferences, and space, you can find window treatments that not only enhance the beauty of your home but also serve its purpose efficiently.

In the end, finding the perfect fit for your space is about balancing aesthetics with functionality, ensuring that your living room is both inviting and practical. Happy decorating!

As we conclude our ultimate guide to choosing the perfect window treatments for your living room, we hope you feel empowered and inspired to transform your space into a sanctuary of style and comfort. From understanding the various types of treatments available to considering factors like light control, privacy, and aesthetics, you now have the tools to make informed decisions that reflect your personal taste and enhance your home’s ambiance. Remember, the right window treatments not only elevate your decor but also contribute to the overall functionality of your living area. So, take your newfound knowledge, explore your options, and let your creativity shine as you select the perfect finishing touches for your windows. Happy decorating!

What are the different types of light bulbs and their advantages?

In an era where sustainability and energy efficiency are at the forefront of our daily choices, the humble light bulb has undergone a remarkable transformation.

Gone are the days of standard incandescent bulbs; today, a dazzling array of options exists that not only illuminate our spaces but also contribute to a healthier planet. From the warm glow of LED lights to the vintage charm of Edison bulbs, each type of light bulb offers unique benefits that cater to various needs and preferences. In this comprehensive guide, we’ll explore the different types of light bulbs available, delve into their distinctive features, and highlight the advantages they bring to your home and lifestyle. Whether you’re looking to reduce your energy bills, enhance your décor, or simply brighten your living space, understanding the benefits of these bright choices will empower you to make informed decisions that shine a light on both style and sustainability.

1. Introduction to Light Bulbs: An Overview

What are the different types of light bulbs and their advantages?
Credit : whatcanu.com

When it comes to illuminating our homes, workplaces, and public spaces, light bulbs play an essential role in our daily lives. They come in a variety of shapes, sizes, and technologies, each designed to serve specific needs and preferences. In this introductory section, we will explore the fascinating world of light bulbs, shedding light on their evolution, types, and the benefits they offer.

From the warm glow of incandescent bulbs that have graced our living rooms for over a century to the energy-efficient LED options rapidly becoming the standard in modern lighting, the choices are vast and varied. Incandescent bulbs provide a cozy ambiance, perfect for creating a relaxing environment, while compact fluorescent lamps (CFLs) offer greater efficiency, consuming less energy and lasting longer than their incandescent counterparts.

However, it’s the latest generation of light bulbs—LEDs—that truly revolutionize the lighting landscape. With their remarkable longevity, lower energy consumption, and versatility in design, LEDs have emerged as the go-to choice for environmentally conscious consumers looking to reduce their carbon footprint while still enjoying vibrant light options.

As we delve deeper into the different types of light bulbs, we’ll examine their unique characteristics and advantages, helping you make informed decisions about which lighting solutions best fit your lifestyle and aesthetic preferences. Whether you’re illuminating a cozy reading nook, brightening your workspace, or enhancing outdoor security, understanding the various light bulb options available can lead to brighter choices for your home and beyond.

2. Traditional Incandescent Bulbs: Pros and Cons

Traditional incandescent bulbs have been a staple in households for over a century, known for their warm glow and familiar aesthetic. These bulbs work by passing electricity through a thin filament, which heats up and produces light. While they may evoke a sense of nostalgia, it’s essential to weigh their pros and cons to determine if they are the right choice for your lighting needs.

**Pros:**

One of the most appealing aspects of incandescent bulbs is the quality of light they emit. The warm, inviting glow they provide creates a cozy atmosphere, making them ideal for living spaces and bedrooms. This type of lighting is particularly effective in accentuating colors and textures, adding a touch of warmth to any environment.

Another advantage is their affordability. Incandescent bulbs are typically less expensive to purchase upfront compared to their more energy-efficient counterparts. They also come in a variety of shapes and sizes, making them versatile for different fixtures and decor styles.

Additionally, incandescent bulbs light up instantly without any warm-up time, offering immediate brightness—perfect for situations where you need light right away.

**Cons:**

Despite their charm, incandescent bulbs have significant downsides. The most notable is their energy efficiency (or lack thereof). These bulbs convert only about 10% of the energy they consume into light, with the remaining 90% wasted as heat. This inefficiency not only leads to higher electricity bills but also contributes to a larger carbon footprint.

Moreover, incandescent bulbs have a relatively short lifespan, typically lasting around 1,000 hours. This means they require more frequent replacements compared to LED or CFL bulbs, which can last anywhere from 10,000 to 25,000 hours. The need for frequent replacement can add up both in cost and in waste, which may not align with environmentally conscious choices.

In summary, while traditional incandescent bulbs offer a warm ambiance and immediate brightness at a low initial cost, their inefficiency and shorter lifespan make them less desirable in the long run. As you explore your lighting options, consider how these factors play into your overall energy goals and aesthetic preferences.

3. Compact Fluorescent Lamps (CFLs): Energy Efficiency Explained

What are the different types of light bulbs and their advantages?
Credit : whatcanu.com

Compact Fluorescent Lamps (CFLs) have revolutionized the way we think about lighting, offering an eco-friendly alternative to traditional incandescent bulbs. These spiral-shaped fixtures are designed to be more energy-efficient, using up to 75% less electricity while producing the same amount of light. But how does this energy efficiency work?

At the heart of a CFL is a small amount of mercury vapor, which, when electrified, emits ultraviolet light. This ultraviolet light then interacts with a phosphor coating on the inside of the bulb, creating visible light. This process is significantly more efficient than the heat-based method used by incandescent bulbs, where much of the energy is wasted as heat rather than converted to light.

Choosing CFLs not only reduces your energy consumption but also lowers your electricity bills, making them a wise investment for both your wallet and the environment. In addition to being energy-efficient, CFLs have a longer lifespan, lasting up to ten times longer than traditional bulbs. This longevity means fewer replacements and less waste, further contributing to their sustainability.

Moreover, CFLs come in a variety of color temperatures, allowing you to select the perfect ambiance for any space—whether it’s the warm glow that mimics a cozy sunset or the bright daylight effect ideal for tasks requiring focus. While they may require a brief warm-up time to reach their full brightness, the benefits far outweigh this minor inconvenience.

In summary, Compact Fluorescent Lamps are an excellent choice for those looking to reduce their carbon footprint without sacrificing light quality. By making the switch to CFLs, you not only embrace a more sustainable lifestyle but also enjoy the financial perks that come with energy efficiency.

4. Light Emitting Diodes (LEDs): The Future of Lighting

Light Emitting Diodes (LEDs) have rapidly emerged as a transformative force in the lighting industry, heralding a new era of energy efficiency and sustainability. Unlike traditional incandescent bulbs that generate light through heating a filament, LEDs utilize a semiconductor to convert electricity into light, resulting in a significantly lower energy consumption—up to 80% less than their incandescent counterparts. This remarkable efficiency not only lowers electricity bills but also reduces the environmental impact associated with energy production.

One of the standout benefits of LEDs is their impressive lifespan. While a standard incandescent bulb may last around 1,000 hours, LED bulbs can shine brightly for over 25,000 hours or more, making them a cost-effective solution in the long run. This durability means fewer replacements, which translates to less waste in landfills and a smaller carbon footprint.

Moreover, LEDs are incredibly versatile, available in a variety of colors and brightness levels, allowing homeowners and businesses to customize their lighting to suit any mood or setting. Whether you’re looking for warm white light to create a cozy atmosphere or vibrant colors for festive occasions, LEDs can deliver.

Beyond functionality, LEDs also boast safety advantages. They generate very little heat during operation, reducing the risk of burns or fire hazards, and are free from hazardous materials like mercury, which is commonly found in fluorescent bulbs.

In an age where sustainability and energy efficiency are paramount, LEDs stand out as the future of lighting. With their myriad benefits, including longevity, versatility, and low environmental impact, it’s clear that making the switch to LEDs is not just a smart choice—it’s a bright one. Embrace this innovative lighting solution, and not only will you illuminate your spaces effectively, but you’ll also contribute to a greener planet.

5. Halogen Bulbs: A Bright Alternative

What are the different types of light bulbs and their advantages?
Credit : whatcanu.com

Halogen bulbs are often hailed as a bright alternative to traditional incandescent bulbs, offering energy efficiency and a crisp, white light that can elevate any space. Unlike their incandescent counterparts, which derive their light from heating a filament, halogen bulbs utilize a halogen gas that recycles heat within the bulb, resulting in a light that is not only brighter but also longer-lasting.

One of the standout features of halogen bulbs is their ability to produce an intense and focused beam of light, making them ideal for task lighting in kitchens, workspaces, and reading nooks. Their natural color rendering index (CRI) closely mimics daylight, bringing out the true colors of objects and enhancing the overall ambiance of a room. Whether you’re illuminating your artwork, showcasing your culinary masterpieces, or simply creating a cozy atmosphere, halogen bulbs deliver exceptional clarity and warmth.

In addition to their superior lighting quality, halogen bulbs are compact in design, allowing for versatile placement in various fixtures—from recessed lighting to decorative pendant lamps. They also reach full brightness instantly, eliminating the frustrating wait time that can sometimes accompany energy-saving options like CFLs and LEDs.

Moreover, halogen bulbs are more energy-efficient than traditional incandescent bulbs, using about 30% less electricity while still providing that familiar warm glow. This efficiency translates to savings on your energy bill, making them a wise choice for eco-conscious consumers looking to minimize their carbon footprint without sacrificing light quality.

However, it’s essential to consider that halogen bulbs can run hot during operation, so proper installation and usage are crucial for safety. With their striking brightness, excellent color rendering, and energy efficiency, halogen bulbs serve as a brilliant and practical lighting solution for any home or workspace. Embrace the brilliance of halogen lighting and transform your environment with its vibrant glow!

6. Smart Bulbs: The Rise of Smart Lighting Technology

In recent years, smart bulbs have emerged as a revolutionary innovation in the world of lighting, seamlessly blending convenience, efficiency, and technological advancement. These cutting-edge devices do more than just illuminate your spaces; they empower you to control your environment with the touch of a button or even the sound of your voice. With the integration of smart home technology, smart bulbs have rapidly gained popularity, and for good reason.

Imagine walking into your home and having the lights automatically adjust to your preferred brightness and color temperature based on the time of day or your mood. Smart bulbs can be programmed to create the perfect ambiance for any occasion—whether it’s a warm, cozy glow for movie night or bright, energizing light for a productive work session. Many models are compatible with home automation systems like Amazon Alexa, Google Assistant, or Apple HomeKit, allowing you to adjust your lighting settings hands-free.

But the benefits of smart bulbs extend beyond mere convenience. These bulbs are designed to be energy-efficient, consuming significantly less power than traditional incandescent bulbs while providing the same, if not better, level of brightness. This translates to lower energy bills and a reduced carbon footprint—an appealing prospect for environmentally conscious consumers.

Moreover, smart bulbs often come with a range of customizable features, including color-changing capabilities and dimming options. This versatility allows you to tailor your lighting to suit your specific needs and preferences, enhancing the overall aesthetic of your living space. Many models also offer scheduling functions, enabling you to program your lights to turn on or off at specific times, contributing to better home security by simulating occupancy when you’re away.

As the demand for smart home devices continues to rise, the market for smart bulbs is only expected to grow, with more brands and innovations emerging. By embracing this technology, you not only enhance your home’s functionality but also open the door to a more connected and efficient lifestyle. Whether you’re a tech enthusiast or simply looking to upgrade your lighting, smart bulbs represent a bright choice for modern living.

7. Understanding Color Temperature and Its Impact on Ambiance

What are the different types of light bulbs and their advantages?
Credit : whatcanu.com

Color temperature is a fascinating concept that plays a critical role in how we perceive our surroundings and the overall ambiance of a space. Measured in Kelvin (K), color temperature describes the hue of the light emitted by a bulb, influencing not only visibility but also the mood and functionality of a room. Understanding this can significantly enhance your lighting choices.

At the lower end of the color temperature spectrum, around 2700K to 3000K, you’ll find warm white light—often reminiscent of traditional incandescent bulbs. This cozy glow is perfect for creating inviting spaces, making it an ideal choice for living rooms, bedrooms, and dining areas where relaxation and comfort are paramount. It evokes a sense of warmth, fostering an atmosphere conducive to unwinding after a long day.

As you move up the scale to 3500K to 4100K, you enter the realm of neutral white light. This type of lighting strikes a balance between warm and cool tones, making it versatile for various settings. It’s an excellent option for kitchens and workspaces, where clarity and focus are essential. This range promotes alertness while still maintaining a welcoming feel.

For areas that require a more energetic and vibrant atmosphere, such as offices or retail environments, higher color temperatures—ranging from 5000K to 6500K—emit a cool, bluish-white light. This bright illumination mimics daylight, enhancing concentration and productivity. It’s particularly beneficial in spaces where attention to detail is critical, as it reduces eye strain and promotes alertness.

Incorporating the right color temperature into your lighting design can transform the essence of your home or workspace. By thoughtfully selecting bulbs based on their color temperature, you can create an ambiance that aligns perfectly with the intended use of each area, ultimately enhancing both comfort and functionality. So, whether you’re looking to unwind, focus, or engage customers, understanding color temperature is a vital step in illuminating your space with intention.

8. Choosing the Right Bulb for Different Spaces

Choosing the right bulb for different spaces in your home or office can significantly enhance both functionality and ambiance. Each area has its unique requirements, and understanding the nuances of light can help you create the perfect atmosphere.

In living rooms and bedrooms, where comfort and relaxation are key, consider using warm white LED bulbs. These bulbs emit a soft, inviting glow that promotes a cozy environment, perfect for winding down after a long day. Dimmers can also enhance this effect, allowing you to adjust the brightness to suit your mood or activity.

For kitchens and workspaces, bright white or daylight bulbs are ideal. These types of bulbs provide a crisp, clear light that makes tasks like chopping vegetables or reading documents much easier. Additionally, using bulbs with a higher Color Rendering Index (CRI) will ensure that colors appear more vibrant and true to life, which is especially important in areas where precision is critical.

In bathrooms, consider using bulbs that mimic natural daylight. This not only helps with grooming tasks but also creates a refreshing and energizing atmosphere. Remember to opt for moisture-resistant fixtures to ensure safety and longevity in these humid environments.

Finally, outdoor spaces benefit from robust and weather-resistant bulbs. LED floodlights or motion-sensor lights can enhance security while providing ample illumination for pathways and patios. Choosing the right light bulb can turn any space from mundane to magnificent, allowing you to tailor each room’s lighting to its specific purpose and mood. By thoughtfully selecting bulbs based on the unique needs of each area, you can create a harmonious and inviting environment throughout your home.

9. Environmental Impact of Various Light Bulb Types

As we become increasingly aware of our environmental footprint, the choice of light bulbs extends beyond mere brightness and style—it significantly impacts the planet as well. Different types of light bulbs present varying degrees of environmental benefits and drawbacks, making it essential for consumers to make informed choices.

**Incandescent Bulbs:** While these traditional bulbs are often favored for their warm glow and aesthetic appeal, they are notoriously inefficient. Incandescent bulbs convert a mere 10% of the energy they consume into visible light, with the remaining energy wasted as heat. This inefficiency not only leads to higher energy bills but also contributes to increased greenhouse gas emissions from power plants.

**Compact Fluorescent Lamps (CFLs):** A step up from incandescents, CFLs use about 70% less energy and can last up to ten times longer. However, they do contain a small amount of mercury, which poses environmental hazards if not disposed of properly. Fortunately, many recycling programs are now in place to ensure that used CFLs are handled responsibly, mitigating their potential negative impact.

**Light Emitting Diodes (LEDs):** Reigning supreme in the realm of eco-friendly lighting, LEDs are the champions of energy efficiency. Consuming 75% less energy than incandescent bulbs and lasting up to 25 times longer, LEDs significantly reduce energy consumption and waste. Moreover, they contain no toxic materials, making them an environmentally safe choice. The long lifespan of LEDs means fewer replacements, further reducing waste and the associated carbon footprint of manufacturing and transportation.

**Halogen Bulbs:** While they offer better efficiency than traditional incandescents, halogen bulbs still fall short of the energy savings provided by CFLs and LEDs. They emit a brighter light and have a longer lifespan compared to incandescents but still produce considerable heat and consume more energy than their more eco-friendly counterparts.

When considering the environmental impact of light bulbs, it’s clear that the choice is not just about illumination but about making responsible decisions that contribute to a healthier planet. By opting for energy-efficient bulbs like CFLs and especially LEDs, consumers can illuminate their spaces while minimizing their environmental impact, proving that bright choices can indeed lead to a brighter future for our planet.

10. Cost Comparison: Initial Investment vs. Long-term Savings

When considering the myriad options available in the world of light bulbs, one of the most crucial factors to weigh is the cost comparison between the initial investment and the long-term savings each type offers. At first glance, traditional incandescent bulbs seem to be the most budget-friendly choice, often available for just a few cents apiece. However, this initial affordability can be deceptive. Incandescent bulbs are notoriously inefficient, converting only about 10% of the energy they consume into visible light, while the rest is lost as heat. This inefficiency leads to higher energy bills over time, particularly in homes with extensive lighting needs.

In contrast, energy-efficient options such as compact fluorescent lamps (CFLs) and light-emitting diodes (LEDs) require a larger upfront investment but promise significant savings over their lifespan. A typical LED bulb, for instance, may cost anywhere from $5 to $15 initially, yet it can last up to 25,000 hours and consume up to 80% less energy than an incandescent bulb. This means that while you may spend more at checkout, the long-term savings on your electricity bill and the reduced frequency of replacements can result in a much lower total cost of ownership.

For example, if you replace ten 60-watt incandescent bulbs with ten 10-watt LED bulbs, you might spend $100 initially but save approximately $1,000 or more over the bulbs’ lifespan when considering energy costs alone. Moreover, the longevity of LEDs means fewer replacements and less waste, making them a more environmentally friendly choice as well.

In summary, while the initial price tag of energy-efficient bulbs might be higher, the long-term savings, combined with their durability and lower energy consumption, make them an investment worth considering. As you explore your lighting options, remember to look beyond the immediate costs and consider the bigger picture of your energy consumption and savings over time.

11. Health Considerations: Blue Light and Eye Strain

In our quest for optimal lighting solutions, one critical aspect often overlooked is the impact of different light sources on our health, particularly concerning blue light exposure. Blue light, emitted by many modern light bulbs—especially LEDs—has gained attention for its role in contributing to eye strain and disrupting our circadian rhythms. As we become increasingly reliant on screens and artificial lighting, understanding the effects of blue light becomes paramount.

Prolonged exposure to blue light can lead to digital eye strain, a condition characterized by symptoms such as dryness, irritation, and difficulty focusing. With the rise of remote work and increased screen time, many individuals find themselves feeling fatigued or experiencing headaches after long hours in front of their devices. This phenomenon is often exacerbated by the bright, harsh light emitted by traditional energy-efficient bulbs and certain LED fixtures that tend to emit higher levels of blue light.

To mitigate these health concerns, consider incorporating light bulbs designed with lower blue light emissions. For example, warm white LEDs or incandescent bulbs can create a softer ambiance that is easier on the eyes. Additionally, many manufacturers now offer specialized lighting options that filter out harmful blue light, providing a healthier environment for both work and relaxation.

Furthermore, being mindful of lighting in the evening can enhance your overall well-being. As the sun sets, opt for softer, warmer light sources that mimic natural light, aiding in the production of melatonin and promoting better sleep patterns. By making informed choices about the types of light bulbs you use, you can create a comfortable living space that supports both your visual health and your overall quality of life. In this age of artificial lighting, prioritizing your health through mindful lighting choices is not just beneficial—it’s essential.

12. How to Dispose of Light Bulbs Responsibly

When it comes to light bulb disposal, doing it responsibly is crucial for both environmental protection and public health. Different types of light bulbs require different disposal methods due to their unique compositions and potential hazards. Here’s a guide to help you navigate the process seamlessly.

**Incandescent Bulbs:** The traditional incandescent bulb is the easiest to dispose of. These bulbs can typically be thrown away in your regular trash, as they do not contain harmful materials. However, ensure the bulbs are cool and wrapped in a protective layer—like newspaper—before tossing them, as this prevents breakage that may pose a risk to sanitation workers.

**CFL Bulbs:** Compact Fluorescent Lamps (CFLs) are energy-efficient options that contain a small amount of mercury, making their disposal more complex. Never place them in the trash. Instead, seek out local recycling centers that accept CFLs. Many home improvement and hardware stores also offer recycling programs, allowing you to drop off used bulbs safely. Check your area’s hazardous waste disposal guidelines, as they may have designated collection days or locations.

**LED Bulbs:** Light Emitting Diodes (LEDs) are the most energy-efficient choice and have a long lifespan, but they also require responsible disposal. Currently, LED bulbs do not contain hazardous materials, so they can often be treated like regular trash. However, recycling is still recommended whenever possible. Look for electronic waste recycling programs in your community, as these facilities can help ensure that the components of LED bulbs are processed properly.

**Halogen Bulbs:** Similar to incandescent bulbs, halogen lights can typically be disposed of with regular household waste. However, it’s wise to check local regulations to ensure compliance, especially as some areas may have specific guidelines regarding glass waste.

Regardless of the type of bulb, always handle them with care to avoid breakage. If a bulb breaks, follow your local safety recommendations for cleaning up and disposing of broken glass. By taking the time to dispose of your light bulbs responsibly, you contribute to a healthier planet and promote sustainable practices in your community. Your commitment to responsible disposal reflects a growing awareness of our environmental impact, helping to foster a brighter, greener future for all.

13. Tips for Maximizing the Lifespan of Your Light Bulbs

When it comes to light bulbs, maximizing their lifespan not only saves you money but also reduces the frequency of replacements, contributing to a more sustainable home. Here are some practical tips to help you get the most out of your lighting solutions.

First and foremost, choose the right type of bulb for each fixture. For instance, LED bulbs are known for their longevity and energy efficiency, making them an excellent choice for frequently used spaces. In contrast, incandescent bulbs, while offering a warm glow, consume more energy and have shorter lifespans. By matching the bulb type to its intended use, you can significantly extend its life.

Another key tip is to avoid frequent on-and-off switching. Light bulbs, especially incandescent ones, undergo stress when they are turned on and off repeatedly. If possible, opt for dimmers or timers that allow for gradual ramping up and down of light, which can ease the strain on the bulb.

Proper installation is also crucial. Ensure that your bulbs are securely fitted in their sockets. Loose connections can lead to flickering and increased wear. Additionally, keeping bulb fixtures clean can help improve efficiency and heat dissipation. Dust and grime can accumulate over time, leading to overheating and reduced lifespan. A simple wipe with a damp cloth can make a significant difference.

Finally, consider the environment where your bulbs are used. Excessive heat can shorten the life of light bulbs, particularly LEDs. Make sure that fixtures are adequately ventilated and avoid placing bulbs in enclosed spaces unless they are specifically designed for such use.

By following these tips, you can enjoy brighter spaces for longer while being kind to your wallet and the environment!

14. Innovations in Lighting: Trends to Watch

As technology evolves at a breakneck pace, the world of lighting is not left behind. Innovations in lighting are rapidly transforming how we illuminate our spaces, presenting consumers with more options than ever before. Here are some trends to watch that are shaping the future of lighting and enhancing our daily lives.

**Smart Lighting Solutions**
One of the most significant trends in recent years is the rise of smart lighting. With the integration of Wi-Fi and Bluetooth technologies, smart bulbs allow users to control their lighting remotely through smartphones or voice-activated devices. These bulbs can change colors, dim or brighten, and even sync with music or movies, creating dynamic lighting experiences tailored to mood or occasion. Additionally, smart lighting systems can help save energy by allowing users to set schedules or turn off lights automatically when they leave a room.

**Energy-Efficient Options**
As sustainability becomes a critical focus for consumers, manufacturers are increasingly focused on producing energy-efficient lighting solutions. LED bulbs continue to dominate the market, using up to 80% less energy than traditional incandescent bulbs while providing a longer lifespan. Emerging technologies, such as organic light-emitting diodes (OLEDs), are also gaining traction due to their ability to produce a softer, more diffuse light while remaining energy-efficient. This trend not only helps reduce carbon footprints but also lowers electricity bills, making it a win-win for both the environment and consumers.

**Human-Centric Lighting**
Another exciting trend is the development of human-centric lighting, which emphasizes the impact of light on our health and well-being. research has shown that different light spectrums can affect our mood, productivity, and even sleep patterns. As a result, lighting designs are now being created to mimic natural daylight, adjusting color temperature throughout the day to enhance alertness during working hours and promote relaxation in the evening. This approach aligns with the growing awareness of the importance of mental health and overall wellness.

**Customized and Decorative Bulbs**
Gone are the days when light bulbs were merely functional. Today, decorative bulbs come in an array of shapes, sizes, and colors, allowing consumers to express their personal style through their lighting choices. Vintage-inspired Edison bulbs, playful globe designs, and artistic fixtures are just a few examples of how aesthetics are becoming an integral part of lighting innovation. This trend encourages creativity in home and commercial design, as people look for unique ways to enhance their spaces.

**Sustainable Materials**
Finally, as concerns about sustainability continue to rise, many manufacturers are exploring eco-friendly materials in their light bulb production. Innovations in recyclable and biodegradable materials are paving the way for more environmentally responsible lighting solutions. This trend not only appeals to eco-conscious consumers but also aligns with broader movements toward sustainable living.

In summary, the lighting industry is buzzing with innovations that are making our spaces more energy-efficient, healthier, and stylish. Staying informed about these trends will not only keep your home or business illuminated beautifully but also ensure that your choices reflect a commitment to sustainability and wellness. Whether you’re looking to upgrade your existing fixtures or explore the latest smart technologies, the future of lighting holds exciting possibilities that are worth exploring.

15. Conclusion: Making Informed Choices for Better Lighting

In conclusion, navigating the diverse world of light bulbs doesn’t have to be overwhelming; rather, it can be an enlightening experience that empowers you to make informed choices for your home or workspace. Understanding the differences between incandescent, LED, CFL, and halogen bulbs is essential in selecting the right type of lighting that meets your needs, preferences, and budget. Each bulb type offers unique benefits, from the warm ambiance of incandescent lights to the energy efficiency and longevity of LEDs.

As we become increasingly aware of our environmental impact, opting for energy-efficient lighting solutions like LEDs can significantly reduce energy consumption and lower utility bills, all while contributing to a more sustainable future. Additionally, considering factors such as brightness, color temperature, and the intended use of each space can further enhance your lighting experience, creating the perfect atmosphere whether you’re reading a book, hosting a dinner party, or simply unwinding after a long day.

By arming yourself with knowledge and carefully assessing your lighting needs, you can make brighter choices that not only illuminate your surroundings but also align with your lifestyle and values. So, as you venture into the realm of light bulbs, remember that the right choice can transform your space, elevate your mood, and illuminate your life in a myriad of ways.

In conclusion, choosing the right light bulb can significantly enhance both the ambiance and efficiency of your living or working space. As we’ve explored in this blog post, each type of light bulb—from the warm glow of incandescent to the energy-efficient LED—brings its own unique benefits tailored to different needs and preferences. By understanding the characteristics and advantages of each option, you can make informed decisions that not only illuminate your environment but also contribute to energy savings and sustainability. We encourage you to experiment with different types of bulbs to find the perfect lighting solutions that brighten your world while reflecting your personal style. Thank you for joining us on this illuminating journey—here’s to making brighter, smarter choices in your lighting endeavors!

How to choose the right lighting for your home?

Lighting is more than just a functional element of a home; it has the power to transform spaces, enhance moods, and create a welcoming atmosphere.

As the saying goes, “lighting can make or break a room,” and it’s true—how you illuminate your home can dramatically affect its style and ambiance. From cozy, warm tones that invite relaxation to bright, crisp lights that energize and inspire, the right lighting choices can elevate your interiors to new heights. Whether you’re revamping an entire room or simply looking for ways to enhance your existing decor, this comprehensive guide will walk you through the essentials of selecting the perfect lighting for every corner of your home. Discover the latest trends, practical tips, and expert insights to help you illuminate your space beautifully and effectively, ensuring that your home shines just as brightly as your personality!

1. Understanding the Importance of Lighting in Home Design

How to choose the right lighting for your home?
Credit : whatcanu.com

Lighting is often referred to as the unsung hero of home design, and for good reason. Its impact on the ambiance, functionality, and overall aesthetic of a space is profound. Imagine walking into a room drenched in natural light, where the sun’s rays dance off the walls, creating a warm and inviting atmosphere. Conversely, picture a dimly lit area that feels cramped and uninviting. The difference is stark, and it underscores the crucial role that lighting plays in shaping our living environments.

Understanding the importance of lighting goes beyond mere brightness; it’s about creating layers and moods that enhance each room’s purpose. Ambient lighting provides general illumination, ensuring that every corner is visible and accessible. Task lighting, on the other hand, focuses on specific areas where activities like reading, cooking, or working take place, providing the necessary brightness to perform these tasks efficiently. Accent lighting adds drama and character, highlighting artwork, architectural features, or cherished decor items, transforming an ordinary space into a showcase.

Moreover, lighting influences not just how we see our spaces, but how we feel in them. Warm tones can evoke feelings of relaxation and comfort, making a room feel cozy and inviting. In contrast, cooler tones can promote alertness and concentration, which is perfect for workspaces or study areas. By thoughtfully choosing different types of lighting, you can manipulate the emotional temperature of your home, guiding family and guests through a journey of comfort and inspiration.

Ultimately, mastering the art of lighting design is about more than just illuminating a space; it’s about painting with light to create a harmonious environment that reflects your style and meets your needs. As you embark on your journey to illuminate your space, remember that effective lighting can transform your home into a sanctuary, enhancing both its beauty and functionality.

2. Different Types of Lighting: Ambient, Task, and Accent

When it comes to transforming your living space, understanding the three fundamental types of lighting—ambient, task, and accent—is essential. Each serves a unique purpose and plays a crucial role in creating a harmonious environment that enhances both functionality and aesthetic appeal.

**Ambient Lighting** is the foundation of any well-lit room. Think of it as the general illumination that fills your space, providing a comfortable level of brightness without overwhelming the senses. Often achieved through ceiling fixtures, wall sconces, or floor lamps, ambient lighting sets the mood and ensures that every corner of your room is adequately lit. Soft, warm tones can create a cozy atmosphere, making it perfect for living rooms and bedrooms, while brighter, cooler lights can energize spaces like kitchens and home offices.

**Task Lighting**, on the other hand, is all about functionality. This type of lighting is specifically designed to illuminate areas where activities such as reading, cooking, or working take place. Desk lamps, under-cabinet lights, and pendant lights above kitchen islands are excellent examples of task lighting. By providing focused illumination, task lighting helps reduce eye strain and increases productivity, making it an essential component of any well-planned space. When selecting task lighting, consider the intensity and direction of the light to ensure it meets the specific needs of the activities you engage in.

Finally, **Accent Lighting** adds personality and flair to your home. This type of lighting is used to highlight specific features, such as artwork, architectural details, or decorative elements. Spotlights, track lighting, and decorative lamps can draw attention to these focal points, creating visual interest and depth in your space. Accent lighting allows you to express your style while enhancing the overall ambiance, making your home feel curated and inviting.

By thoughtfully incorporating ambient, task, and accent lighting into your design, you can create a well-balanced and inviting atmosphere that not only meets your practical needs but also reflects your personal taste. Embrace the transformative power of lighting and illuminate your space in a way that feels both functional and beautiful.

3. Assessing Your Space: Factors to Consider Before Choosing Lighting

How to choose the right lighting for your home?
Credit : whatcanu.com

When it comes to choosing the perfect lighting for your home, taking the time to assess your space is crucial. Different areas of your home have unique characteristics and purposes that influence the type of lighting that will work best. Start by considering the size and layout of the room. A large, open-concept living area may benefit from layered lighting, which combines ambient, task, and accent lighting to create a warm and inviting atmosphere. In contrast, a small, cozy bedroom might thrive on soft, diffused light, providing a tranquil haven for rest.

Next, evaluate the room’s color scheme and design aesthetic. Light can dramatically alter the perception of color—warm tones can enhance the coziness of a space, while cooler hues can make it feel more spacious and airy. Take note of the existing decor and furnishings: a rustic-style home might pair beautifully with vintage-inspired fixtures, while modern minimalist spaces may call for sleek, streamlined designs.

Additionally, consider the room’s functionality. A home office requires bright, focused lighting to enhance productivity, while a dining room might benefit from dimmable fixtures that set the mood for intimate gatherings. Don’t forget to factor in natural light; the amount and direction of sunlight your space receives throughout the day can affect how artificial lighting looks and feels.

Finally, think about the flexibility of your lighting choices. Adjustable fixtures, such as dimmers or swiveling lamps, can help you tailor the ambiance to suit various activities and moods. By carefully assessing these factors, you can create a harmonious and functional lighting plan that truly illuminates your space, enhancing both its beauty and utility.

4. How to Create a Lighting Plan for Each Room

Creating a lighting plan for each room in your home is an essential step in achieving both functionality and ambiance. A well-thought-out lighting strategy can transform the atmosphere of a space, making it feel warm and inviting or bright and energizing, depending on your needs. Here’s how to develop a comprehensive lighting plan that caters to the unique requirements of each room.

**1. Assess the Functionality of Each Space:**
Start by evaluating how each room will be used. A kitchen, for example, requires bright, focused lighting for cooking tasks, while a bedroom benefits from softer, ambient lighting for relaxation. Consider the activities that will take place in each area to determine the types and intensities of light needed.

**2. Layer Your Lighting:**
Effective lighting design involves layering different types of lighting: ambient, task, and accent. Ambient lighting provides overall illumination, task lighting focuses on specific work areas, and accent lighting highlights architectural features or décor. For instance, in a living room, ceiling fixtures might serve as ambient light, table lamps can provide task lighting for reading, and wall sconces could accentuate artwork.

**3. Choose the Right Fixtures:**
Select lighting fixtures that complement the room’s style and purpose. In a contemporary space, sleek, minimalist fixtures may be ideal, while a rustic-themed room might benefit from more textured, vintage-inspired options. Don’t forget to consider the size of the fixtures in relation to the space; a grand chandelier can become a stunning focal point in a large dining room, while smaller pendant lights may work better in a cozy nook.

**4. Consider Natural Light Sources:**
Take note of existing natural light sources in each room, such as windows and skylights. Position your lighting plan to enhance these features rather than compete with them. For example, sheer window treatments can allow daylight to fill a room, while strategically placed lamps can provide warmth during the evening.

**5. Create Zones:**
If a room serves multiple purposes—such as a home office that doubles as a guest room—consider creating zones with different lighting. Adjustable fixtures, dimmers, and smart lighting solutions can help you easily switch from a bright, productive environment to a cozy, relaxing atmosphere.

**6. Test and Adjust:**
Once you’ve installed your lighting, take the time to evaluate how it feels in practice. Live with it for a few days and be open to making adjustments. Sometimes, a simple reorientation of a lamp or the addition of a dimmer switch can dramatically enhance the experience of the space.

By meticulously crafting a lighting plan tailored to each room, you can elevate your home’s functionality while creating an inviting and aesthetically pleasing environment. Whether you prefer bold statements or subtle elegance, the right lighting can illuminate not only your spaces but also your lifestyle.

5. Choosing the Right Fixtures: Style and Functionality

How to choose the right lighting for your home?
Credit : whatcanu.com

When it comes to illuminating your home, the choice of lighting fixtures is pivotal—not just for the ambiance they create but also for the functionality they provide. The right fixtures can transform a space from mundane to magnificent, merging aesthetic appeal with practical utility.

Start by considering the overall style of your home. Are you drawn to a modern minimalist look, or do you prefer the warmth of rustic charm? Each style demands unique lighting elements. For a contemporary vibe, sleek pendant lights with clean lines can serve as stunning focal points in dining areas or kitchens, while industrial-style fixtures—think exposed bulbs and metal finishes—can add character to loft-like spaces. On the other hand, if your home leans toward traditional or vintage, consider chandeliers with ornate details or table lamps featuring classic designs to enhance the cozy vibe.

But style shouldn’t overshadow functionality. Assess the purpose of each room when selecting fixtures. In the kitchen, bright, direct lighting is essential for meal prep, so consider recessed lighting or under-cabinet lights that offer practicality without compromising style. For living areas, a combination of ambient lighting—like a beautiful floor lamp—and task lighting, such as wall sconces, can create a layered effect that allows for both relaxation and reading.

Don’t forget about the scale of your fixtures. A large chandelier can be stunning in a spacious foyer, but a small lamp can feel lost in a grand room. Conversely, oversized fixtures in a small space can make the area feel cramped. Aim for balance—select fixtures that complement the size and proportions of your rooms.

Lastly, think about the type of light each fixture will emit. Soft, warm light can create a cozy atmosphere in bedrooms and living rooms, while cooler, brighter light might be more appropriate for workspaces. Dimming options can also offer versatility, allowing you to adjust the mood as needed.

In the end, choosing the right fixtures is about finding the perfect marriage of style and functionality. By considering both elements thoughtfully, you can create a beautifully illuminated home that is as inviting as it is practical.

6. The Role of Natural Light in Your Home

Natural light is one of the most transformative elements in a home, playing a crucial role in both the aesthetics and functionality of your living spaces. Not only does it enhance the visual appeal of your interiors, but it also contributes to your overall well-being. Studies have shown that exposure to natural light can boost your mood, increase productivity, and even improve your sleep patterns. Therefore, understanding how to maximize natural light should be a priority when designing your home’s lighting scheme.

Start by assessing the layout of your home and the direction of your windows. South-facing rooms typically receive the most sunlight throughout the day, while north-facing spaces may benefit from reflective surfaces to amplify the light that enters. Consider the use of light, airy curtains that can allow sunlight to filter through while still providing some privacy. Additionally, the strategic placement of mirrors can help bounce light around the room, making even small spaces feel more expansive and inviting.

Incorporating natural elements into your decor can also enhance the impact of natural light. Light-colored walls and furnishings can reflect sunlight, creating a warm and welcoming atmosphere. Plants add a touch of nature and can thrive in well-lit areas, contributing to a healthier environment by purifying the air.

Finally, don’t forget to think about how you can create a seamless transition between indoors and outdoors. Large windows, sliding glass doors, or even skylights can open up your space to the outside world, allowing natural light to flood in while connecting you to your garden or patio. By thoughtfully considering the role of natural light in your home, you can create a vibrant, energizing environment that feels alive and welcoming.

7. Energy-Efficient Lighting Options: LED and Beyond

How to choose the right lighting for your home?
Credit : whatcanu.com

In today’s environmentally conscious world, selecting energy-efficient lighting options is not just a trend; it’s a responsible choice that can illuminate your home while conserving energy and reducing utility bills. Among the myriad of options available, LED (Light Emitting Diode) lighting stands out as a front-runner, offering a perfect blend of efficiency, longevity, and versatility.

LED lights are renowned for their impressive energy-saving capabilities. Consuming up to 80% less energy than traditional incandescent bulbs, LEDs produce the same amount of light while generating significantly less heat. This not only translates to lower electricity bills but also extends the lifespan of your lighting fixtures—often lasting 15,000 hours or more. Imagine the convenience of fewer bulb replacements and the peace of mind that comes with knowing you’re making a sustainable choice.

Beyond LEDs, the lighting market is brimming with additional energy-efficient options worth considering. Compact Fluorescent Lamps (CFLs) are another popular choice, using about 75% less energy than incandescent bulbs. Although they may contain a small amount of mercury, their long lifespan and reduced energy consumption make them a viable option for many households.

For those seeking an even greener alternative, consider solar-powered lights. Perfect for outdoor spaces, these fixtures harness sunlight to provide illumination at night, eliminating electricity costs altogether. Whether you’re lighting up a garden path or creating an inviting ambiance on your patio, solar lights are an excellent way to incorporate sustainable practices into your home.

Smart lighting solutions also deserve a mention, as they allow for greater control over your energy usage. With smart bulbs, you can adjust brightness, color temperature, and even set schedules from your smartphone or voice-activated assistant. This level of customization not only enhances your living environment but also encourages energy conservation by ensuring lights are only on when needed.

As you explore energy-efficient lighting options, consider the mood and functionality of each room in your home. From warm, inviting tones in the living area to bright, focused lighting in your workspace, the right choice can transform any space. By opting for LEDs and exploring other energy-efficient solutions, you’ll create a beautifully lit home while contributing to a more sustainable future—illuminating both your space and your commitment to the planet.

8. Color Temperature: How It Affects Mood and Atmosphere

The color temperature of your lighting plays a pivotal role in shaping the mood and atmosphere of your home. Measured in Kelvin (K), color temperature refers to the appearance of the light source, ranging from warm, inviting hues to cool, crisp tones. Understanding this concept is essential for creating spaces that resonate with your desired ambiance.

Warm white light, typically ranging from 2700K to 3000K, emits a cozy glow reminiscent of a sunset or a crackling fireplace. It’s perfect for spaces where relaxation is key, such as living rooms, bedrooms, or dining areas. This type of lighting encourages a sense of comfort and intimacy, making it ideal for gatherings with family and friends. Imagine curling up with a book under the soft glow of warm light, or sharing a candlelit dinner that feels both romantic and welcoming.

On the other end of the spectrum, cool white light, which can reach up to 5000K, mimics daylight and creates a bright, invigorating environment. This color temperature is best suited for areas where focus and productivity are paramount, like kitchens, home offices, or workshops. It enhances concentration and alertness, making it easier to tackle tasks or engage in creative endeavors. Picture yourself working effectively at a desk bathed in crisp, clear light, or preparing meals in a kitchen that feels fresh and energizing.

When selecting your lighting, consider how each room’s color temperature will influence the activities that take place within it. You can also use dimmers or smart lighting solutions to adjust the ambiance according to the time of day or your specific needs. By thoughtfully choosing the right color temperature for each space, you can create a harmonious flow throughout your home, enhancing both the atmosphere and your overall well-being. Ultimately, lighting is not just about illumination; it’s an art form that can transform your living environment into a sanctuary that reflects your style and meets your emotional needs.

9. Layering Your Lighting for Maximum Effect

Layering your lighting is essential for creating a dynamic and inviting atmosphere in your home. Rather than relying on a single overhead fixture, consider a combination of ambient, task, and accent lighting to achieve a well-rounded illumination scheme that enhances both function and aesthetics.

**Ambient lighting** serves as the foundation of your lighting design, providing a soft, general glow that fills the room. This can be achieved through ceiling-mounted fixtures, chandeliers, or wall sconces. Choose warm bulbs to create a cozy atmosphere that invites relaxation and comfort. The key is to ensure that this layer of light is balanced and evenly distributed, eliminating any harsh shadows or overly bright spots.

Next, **task lighting** addresses specific activities and needs throughout your space. Whether it’s a bright desk lamp for your home office, under-cabinet lighting in the kitchen for meal prep, or reading lamps in the living room, these dedicated light sources are crucial for functionality. When selecting task lighting, focus on adjustable fixtures that can be directed where needed, allowing for flexibility and precision in your lighting design.

Finally, **accent lighting** adds a touch of drama and interest to your home. Use this layer to highlight artwork, architectural features, or decorative objects. Picture lights, track lighting, or even strategically placed floor lamps can draw the eye to focal points, creating a sense of depth and dimension in your space.

To achieve the best results, think of your lighting as a three-dimensional canvas. Experiment with different heights, types, and placements of fixtures to create balance and harmony. Dimmers can also enhance this effect, allowing you to adjust the brightness according to the time of day or occasion. By thoughtfully layering your lighting, you can transform your home into a beautifully lit haven that effortlessly blends style and functionality.

10. Choosing Lighting for Specific Areas: Living Room, Kitchen, and Bedroom

When it comes to illuminating your home, understanding the unique lighting needs of each room is essential for creating an inviting atmosphere. Each space serves a different purpose and requires a tailored approach to lighting design. Let’s explore how to choose the perfect lighting for three of the most frequently used areas in your home: the living room, kitchen, and bedroom.

### Living Room

The living room is often the heart of the home, where family and friends gather to relax and socialize. To achieve a warm and inviting ambiance, consider a layered lighting approach. Start with ambient lighting, such as ceiling fixtures or chandeliers, to provide overall illumination. Next, add task lighting with table lamps or floor lamps in reading nooks or near seating areas, ensuring that everyone has adequate light for activities like reading or playing games. Don’t forget accent lighting to highlight artwork, plants, or architectural features; wall sconces or adjustable spotlights can create visual interest and depth. Opt for dimmable fixtures to easily transition from bright, lively gatherings to cozy, intimate evenings.

### Kitchen

The kitchen is a space of functionality and creativity, requiring a combination of bright task lighting and softer ambient options. Begin with overhead lighting, such as flush mounts or pendant lights over islands, to ensure clear visibility while cooking. Incorporate under-cabinet lighting to illuminate countertops, making meal prep safer and more efficient. For added ambiance, consider incorporating decorative fixtures that complement your kitchen’s style. Pendant lights can be both functional and aesthetic, adding a touch of personality above an island or dining area. Remember to prioritize energy-efficient options like LED bulbs, which not only brighten your space but also save on energy costs over time.

### Bedroom

The bedroom is your sanctuary—a place for rest and relaxation. The lighting here should promote tranquility and comfort. Start with soft, ambient light from ceiling fixtures or lamps placed strategically around the room. Bedside table lamps are essential for reading and provide a cozy glow for winding down in the evening. Consider incorporating adjustable lighting, such as dimmers or smart bulbs, to create the perfect mood for any time of day. Accent lighting, like wall sconces or LED strip lights along shelves, can add a touch of elegance while providing a gentle nightlight. And don’t forget to provide blackout curtains or shades to control natural light for a peaceful sleeping environment.

By thoughtfully selecting the right lighting for each area of your home, you can enhance both functionality and aesthetics, creating spaces that are not only beautifully illuminated but also tailored to your lifestyle. Whether you’re entertaining guests, whipping up a culinary masterpiece, or unwinding after a long day, the right lighting will make all the difference.

11. Smart Lighting Solutions: Technology for Modern Homes

In today’s fast-paced, tech-savvy world, smart lighting solutions have emerged as a game-changer for modern homes, blending functionality with convenience and style. These innovative systems allow you to control your lighting effortlessly—from adjusting brightness levels to changing colors and even setting schedules—right from your smartphone or through voice commands. Imagine walking into your home and having the lights automatically adjust to your preferred settings, creating the perfect ambiance tailored to your mood.

Smart lighting goes beyond mere convenience; it offers energy efficiency that can significantly reduce your utility bills. Many smart bulbs and systems are designed to use less energy than traditional options, and with features like motion sensors and timers, you can ensure that lights are only on when you need them. This not only helps the environment but also aligns with the sustainable living practices that many homeowners are now embracing.

Moreover, you can create unique lighting scenes to complement different activities or times of the day. Whether you’re hosting a dinner party, winding down with a book, or getting energized for a workout, smart lighting can adapt to your needs at the touch of a button. Some systems even allow for integration with other smart home devices, enabling seamless automation—like dimming the lights when your home theater setup is activated or brightening the kitchen as the sun sets.

When selecting smart lighting solutions, consider compatibility with your existing home automation system, the range of features offered, and user-friendliness. With options ranging from smart bulbs to sophisticated lighting systems that can be controlled via apps or voice-activated assistants, there’s a perfect fit for every home. Embrace the future of lighting and transform your space into a modern sanctuary that is not only beautifully illuminated but also intuitively responsive to your lifestyle.

12. Common Mistakes to Avoid When Selecting Lighting

When it comes to selecting the perfect lighting for your home, avoiding common pitfalls can make all the difference in creating a warm and inviting atmosphere. One prevalent mistake is underestimating the importance of layering your lighting. Many homeowners rely solely on overhead fixtures, neglecting the impact of ambient, task, and accent lighting. A well-lit room requires a harmonious blend of these elements to create depth and functionality. For instance, using a combination of ceiling lights, floor lamps, and wall sconces not only illuminates the space effectively but also enhances its visual appeal.

Another frequent error is failing to consider the scale of your lighting fixtures in relation to the room’s size. Oversized chandeliers in a small dining area can feel overwhelming, while tiny pendant lights in a spacious foyer can get lost in the vastness. It’s crucial to strike a balance; choosing fixtures that complement the scale of the room adds a sense of proportion and elegance.

Color temperature is another factor often overlooked. The wrong choice can alter the mood of your space significantly. Bright, cool white lights can create a sterile environment, while warm tones can foster a cozy and inviting atmosphere. Be sure to explore different bulbs and fixtures to find the perfect color temperature that suits your lifestyle and décor.

Finally, don’t forget about the placement of your fixtures. Poorly positioned lights can create harsh shadows or glaring spots, detracting from the overall aesthetic. Take the time to plan your lighting layout, ensuring that key areas are well-lit for both functionality and ambiance. By sidestepping these common mistakes, you’ll be well on your way to illuminating your space in a way that reflects your personal style and enhances the beauty of your home.

13. Maintenance Tips for Keeping Your Fixtures Bright

Once you’ve invested time and effort into selecting the perfect lighting fixtures for your home, it’s crucial to ensure they remain bright and beautiful for years to come. Proper maintenance not only extends the life of your fixtures but also enhances the overall ambiance of your spaces. Here are some essential tips to keep your lighting shining brightly.

**Regular Dusting:** Dust accumulation can dull the brilliance of your fixtures, creating a hazy effect that diminishes their aesthetic appeal. Make it a habit to dust your light fixtures regularly, using a soft microfiber cloth or a feather duster to gently remove any buildup. For more intricate designs, consider using a small paintbrush to reach into crevices and ensure every nook gets the attention it deserves.

**Cleaning Techniques:** Depending on the material of your fixtures, the cleaning process may vary. For glass and crystal fixtures, a mixture of warm water and mild dish soap works wonders. Use a soft sponge to gently wipe down surfaces, followed by a thorough rinse to avoid streaks. For metallic finishes, a specialized cleaner can help maintain shine without causing damage. Always consult the manufacturer’s guidelines for specific cleaning recommendations to avoid harsh chemicals that could tarnish or corrode your fixtures.

**Regular Bulb Replacement:** A dimly lit room can be a result of aging bulbs. Make it a point to check your light bulbs periodically and replace any that are flickering or have burnt out. Consider switching to LED bulbs for their longevity and energy efficiency, and remember to keep a few spare bulbs on hand to ensure that your lighting remains consistent.

**Check Wiring and Connections:** Over time, wiring can wear down or connections can loosen, leading to flickering or complete outages. Schedule routine checks of your fixtures, especially for those hard-to-reach areas. If you notice any issues, don’t hesitate to call in a professional electrician to ensure everything is safe and functioning properly.

**Seasonal Considerations:** Different seasons can bring various challenges to your lighting fixtures. For instance, if you live in a region with heavy snowfall, outdoor fixtures may need extra care to prevent ice build-up. In contrast, summer months might lead to increased dust and pollen that can quickly coat your interior lighting. Adjust your maintenance routine seasonally to address these specific needs.

By implementing these maintenance tips, you not only keep your lighting fixtures looking their best but also create a warm and inviting atmosphere in your home. Consistent care ensures that your chosen lights continue to illuminate your space beautifully, making every corner feel welcoming and vibrant.

14. DIY Lighting Projects to Enhance Your Space

When it comes to personalizing your home, few things can make as significant an impact as DIY lighting projects. These creative endeavors not only brighten up your space but also allow you to infuse your personality and style into every corner of your home. From elegant pendant lights to quirky table lamps, the options are endless, and the satisfaction of crafting something unique is unparalleled.

**Upcycled Jar Lanterns:** One popular project involves repurposing glass jars into charming lanterns. Simply gather some mason jars, twinkling fairy lights, and your favorite decorative elements—think pebbles, sand, or dried flowers. Fill the jars with your chosen materials, entwine the fairy lights inside, and watch as they cast a warm glow in your living space. These lanterns are perfect for accentuating shelves, creating a cozy atmosphere on a patio, or adding flair to a dining table.

**Rustic Wooden Sconces:** If you’re aiming for a farmhouse chic vibe, consider constructing wooden sconces. Using reclaimed wood, you can create a simple shelf or wall-mounted light fixture that holds a bulb or candle. Paint or stain the wood to match your decor, and add your favorite plants or decorative accents for a truly personalized touch. These sconces can transform an empty wall into a stunning focal point, providing both function and style.

**DIY Chandelier:** For those looking to make a bold statement, a DIY chandelier can be a showstopper. Using materials such as wire, beads, or even repurposed items like old wine bottles, you can design a unique piece that reflects your aesthetic. Hang it over a dining table or in a foyer to create an inviting atmosphere. Not only will this project enhance your space, but it will also serve as a conversation starter for your guests.

**Mood Lighting with Cordless Lamps:** If flexibility is key, consider crafting cordless lamps that can easily be moved around your home. Using battery-operated LED lights, you can create stylish lamp bases from materials like ceramic, wood, or even fabric. These lamps are perfect for adding ambiance to a cozy reading nook or illuminating a dark corner without the hassle of cords.

By embracing DIY lighting projects, you not only enhance your space but also engage in a fulfilling creative process. Each project allows you to experiment, learn, and ultimately design lighting that fits your personal style while making your home feel more inviting and uniquely yours. So gather your materials, unleash your imagination, and let your creativity shine!

15. Conclusion: Finding Your Unique Lighting Style

In conclusion, finding your unique lighting style is not just about choosing fixtures; it’s about creating an atmosphere that resonates with your personality and enhances the functionality of your space. Lighting plays a pivotal role in shaping our experiences at home, influencing everything from our mood to our productivity.

As you embark on this illuminating journey, take the time to explore different styles, from minimalist and modern to rustic and bohemian. Consider how each piece can transform a room, whether it’s a statement chandelier that draws the eye or subtle sconces that create a warm, inviting glow. Don’t shy away from mixing and matching various designs, as layering different types of lighting—ambient, task, and accent—can introduce depth and character to your home.

Remember, the right lighting can accentuate your decor, highlight architectural features, and provide the perfect backdrop for your daily life. So, whether you’re revamping a single room or redesigning your entire home, approach your lighting choices with creativity and intention. Allow your personal style to shine through, and let your home reflect not just how you live, but who you are. The perfect lighting is out there, waiting to illuminate your space and enhance your daily experiences. Embrace the journey, and watch as your home transforms into a beautifully lit sanctuary that truly feels like your own.

As we wrap up our guide on choosing the perfect lighting for your home, we hope you feel inspired and empowered to transform your spaces into inviting havens filled with warmth and ambiance. Remember, lighting is not just a functional element; it plays a crucial role in setting the mood, enhancing your décor, and showcasing your personal style. By considering factors such as the purpose of each room, the natural light available, and your unique aesthetic preferences, you can create a harmonious balance that elevates your home. So go ahead, experiment with different fixtures, layer your lighting, and let your creativity shine. Here’s to illuminating your space and making every corner of your home a reflection of you!

How to choose the right window treatments?

Choosing the right window treatments can seem like a daunting task, but it plays a crucial role in defining the ambiance and functionality of your living space.

From cascading drapes that evoke a sense of elegance to sleek blinds that offer modern minimalism, the options are both vast and varied. The perfect window treatments not only enhance the aesthetic appeal of your home but also provide essential benefits like privacy, light control, and energy efficiency. In this ultimate guide, we will navigate the myriad of styles, materials, and functionalities available, helping you to consider your unique needs, preferences, and the overall design of your rooms. Whether you’re aiming for a cozy, rustic feel or a bright, contemporary vibe, our comprehensive insights will empower you to make informed decisions that transform your windows into stunning focal points. Get ready to elevate your home decor with treatments that perfectly blend style and practicality!

1. Understanding Your Needs: Function vs. Aesthetics

How to choose the right window treatments?
Credit : whatcanu.com

When it comes to selecting window treatments for your home, the first step is to clearly understand your needs, weighing the balance between function and aesthetics. Each window serves not only as a portal to the outside world but also plays a crucial role in the overall ambiance of your living space. Therefore, defining your priorities is essential.

Start by considering the functional aspects of your window treatments. Do you need them primarily for privacy, light control, or insulation? For example, if your home is in a bustling urban area, privacy might be your top priority. In this case, you may lean towards thicker drapes or shades that block the view from outside while allowing some ambient light to filter through. Conversely, if you’re looking to enhance energy efficiency, blackout curtains or thermal shades could be your best bet, as they help regulate temperature and reduce energy costs.

On the other hand, aesthetics cannot be overlooked. The right window treatments can transform a room, adding a layer of elegance or a pop of color that complements your decor. Consider the fabric, texture, and pattern that align with your home’s style. Are you aiming for a modern minimalist look, or do you prefer a more traditional, cozy feel? Fabrics such as linen or cotton can add a casual charm, while silk or velvet can infuse a touch of luxury.

Ultimately, the ideal window treatment should harmoniously blend functionality with your desired aesthetic, creating a space that is both practical and visually appealing. Take the time to envision how each option will interact with your home’s natural light, view, and overall design scheme. By clearly understanding your needs, you can make informed choices that enhance both the utility and beauty of your living spaces.

2. Types of Window Treatments: An Overview

When it comes to selecting the ideal window treatments for your home, understanding the various types available is essential to making an informed decision. Window treatments can significantly influence the aesthetics, functionality, and comfort of your living spaces, and with an array of options on the market, it’s easy to feel overwhelmed. Here, we provide an overview of the most popular types of window treatments, each offering unique benefits and styles to suit your needs.

**1. Curtains and Drapes:**
These classic window treatments come in countless fabrics, patterns, and lengths, allowing for versatile styling options. Curtains are typically lighter and can add a breezy feel to a room, while drapes are more formal, often lined for additional insulation and light blocking. Whether you prefer sheer panels to let in soft light or heavy fabrics for a dramatic effect, curtains and drapes can transform any space.

**2. Blinds:**
Blinds offer a practical solution for light control and privacy. Available in materials like wood, faux wood, aluminum, and vinyl, blinds come in various styles, including horizontal and vertical options. Their adjustable slats allow for precise control over the amount of light entering your home, making them a popular choice for many homeowners.

**3. Shades:**
Shades provide a sleek and minimalist look, often made from fabric or woven materials. They come in several styles, such as roller shades, Roman shades, and cellular shades, each offering distinct features. Cellular shades, for instance, are known for their energy efficiency, trapping air to insulate your home. Shades can also be found in blackout options, ideal for bedrooms or media rooms.

**4. Shutters:**
Shutters are an elegant and durable choice that adds a touch of sophistication to any room. Available in plantation or traditional styles, shutters are typically made from wood or vinyl, offering excellent light control and insulation. They can be custom-fitted to your windows for a seamless look, enhancing both the exterior and interior of your home.

**5. Valances:**
For those looking to add a decorative touch without overwhelming the window, valances are a perfect choice. These short treatments are hung at the top of the window, providing an opportunity to introduce color and texture. Valances can be paired with blinds or shades to create a layered look that adds depth to your decor.

**6. Cornices:**
Similar to valances, cornices are structured, often upholstered treatments that cover the top of the window. They provide a more tailored finish and can be custom-made to match your interior design. Cornices are excellent for hiding hardware or providing an architectural element to your window decor.

Each type of window treatment has its unique advantages, so it’s essential to consider your personal style, budget, and the specific needs of each room when making your decision. By exploring these options, you can create a harmonious and inviting atmosphere in your home while enhancing its overall functionality.

3. Measuring Your Windows: Getting Accurate Dimensions

How to choose the right window treatments?
Credit : whatcanu.com

Measuring your windows accurately is a crucial step in selecting the perfect window treatments for your home. The right measurements ensure that your curtains, blinds, shades, or drapes will fit seamlessly, enhancing the aesthetic appeal of your space while also providing the functionality you need. Here’s how to get it right.

Start by gathering the necessary tools: a reliable measuring tape, a pencil, and a notepad to jot down your dimensions. It’s best to have a second person assist you, especially for larger windows, as this can make the process smoother and more accurate.

When measuring, you’ll want to consider both the width and height of the window. For the width, measure from the outer edges of the window frame—this will ensure that your treatments cover the entire window area, blocking out light effectively and providing privacy. If you plan to mount your treatments outside the frame, add an extra 2 to 4 inches on each side to create an illusion of a larger window and to allow for better light control.

Next, measure the height. Start from the top of the window frame to the desired length. You can choose to let your treatments hang just above the sill, below the sill, or even all the way to the floor, depending on the style you’re aiming for. If you’re considering floor-length curtains, be sure to also account for how they will sit on the floor—whether you prefer them to skim the surface, puddle slightly, or hang with a clean finish.

Lastly, if your windows have any architectural details, such as crown molding or decorative trim, take those into account as well. Your measurements should reflect the overall look you want to achieve, providing a polished finish that complements your home’s decor.

Taking the time to measure correctly will save you from the hassle of returns and exchanges later on. With accurate dimensions in hand, you’ll be well on your way to selecting window treatments that perfectly fit your style and window specifications, transforming your living space into a cozy and inviting haven.

4. Choosing the Right Fabric: Considerations for Style and Function

When it comes to selecting window treatments, the fabric you choose plays a pivotal role in defining both the aesthetic appeal and functionality of your space. The right fabric can enhance your home’s style, regulate light, and even contribute to energy efficiency. Here are some key considerations to keep in mind when choosing the perfect fabric for your window treatments.

**1. Aesthetic Harmony:** Start by considering the overall design of your room. The fabric should complement your existing decor, whether you favor a modern, minimalist look or a more traditional, cozy atmosphere. For a light and airy feel, sheer fabrics can create a soft, ethereal ambiance, while heavier materials like velvet or brocade add a touch of elegance and sophistication.

**2. Light Control:** Think about how much natural light you want to let in. Lightweight fabrics allow for generous light flow, making them ideal for spaces where you want to maintain a bright, open feel. On the other hand, if privacy is a priority, opt for thicker, blackout fabrics that can effectively block out sunlight and create a serene environment, perfect for bedrooms or media rooms.

**3. Durability and Maintenance:** Consider the practicalities of your lifestyle. If you have pets or small children, you may want to select fabrics that are more durable and easy to clean. Synthetic fabrics like polyester or blends can withstand wear and tear and are often stain-resistant, making them a smart choice for high-traffic areas. Additionally, consider whether the fabric is machine washable or requires professional cleaning to maintain its appearance.

**4. Insulation and Energy Efficiency:** Fabrics can also play a significant role in your home’s energy efficiency. Heavier fabrics can provide better insulation, helping to keep your home warm in the winter and cool in the summer. Look for energy-efficient fabrics, such as thermal-lined options, to help regulate indoor temperatures and reduce heating and cooling costs.

**5. Texture and Layering:** Don’t forget about texture! Mixing different fabric types can add depth and visual interest to your window treatments. Consider layering sheer and opaque materials to create a more dynamic look. For instance, a sheer curtain can soften the light while a heavier drape adds drama and warmth when drawn.

Ultimately, the fabric you choose for your window treatments should reflect your personal style while meeting the functional needs of your space. By carefully considering these factors, you can create window treatments that not only enhance the beauty of your home but also provide the comfort and practicality you desire.

5. Light Control Options: Sheer, Blackout, and Everything In Between

How to choose the right window treatments?
Credit : whatcanu.com

When it comes to window treatments, one of the most significant factors to consider is how much light control you desire in your spaces. The right choice can dramatically alter the ambiance of a room, influence energy efficiency, and even impact your mood. Understanding the various options available—sheer, blackout, and everything in between—will empower you to make an informed decision that enhances both functionality and aesthetics in your home.

**Sheer Treatments:** If your goal is to invite natural light while maintaining a sense of privacy, sheer window treatments are an ideal choice. These lightweight fabrics filter sunlight, creating a soft, diffused glow that brightens your space without the harsh glare. Sheer curtains are perfect for living rooms or dining areas where you want to enjoy the view outside while keeping prying eyes at bay. They lend an ethereal quality to your decor, making rooms feel airy and open. However, keep in mind that sheer options will do little to block out heat or cold, so pairing them with heavier drapes might be beneficial in extreme weather conditions.

**Blackout Treatments:** On the other end of the spectrum, blackout window treatments are designed to completely block out light, making them a fantastic choice for bedrooms, home theaters, or nurseries. These treatments not only provide complete darkness but also offer added insulation, helping to keep your home cooler in the summer and warmer in the winter. Available in various styles—from roller shades to curtains—blackout options come in a range of colors and patterns, allowing you to maintain your design aesthetic while ensuring a good night’s sleep or uninterrupted movie nights.

**Everything In Between:** For those who desire flexibility, consider options that strike a balance between sheer and blackout. Light-filtering shades allow some natural light to enter while still offering a degree of privacy and UV protection. Dual-layer treatments, featuring both sheer and blackout fabrics, let you easily transition between light and privacy depending on the time of day or your mood. Cellular shades, with their unique honeycomb structure, provide insulation while allowing soft light to filter through, making them a versatile choice for various rooms.

Ultimately, your choice in light control should align with your lifestyle, the specific needs of each room, and your personal style. By exploring the diverse range of window treatment options available, you can create spaces that are not only beautifully designed but also perfectly suited to your light and privacy preferences.

6. Insulation and Energy Efficiency: Keeping Your Home Comfortable

When it comes to window treatments, insulation and energy efficiency are crucial factors that can significantly influence the comfort of your home. Not only do well-chosen treatments enhance the aesthetic appeal of your space, but they can also play a vital role in regulating indoor temperatures, reducing energy costs, and creating a more sustainable living environment.

Consider the material and style of your window treatments carefully. For instance, thicker fabrics, such as blackout curtains or thermal drapes, can provide excellent insulation by blocking out cold drafts in the winter and keeping your home cool during the sweltering summer months. These dense materials trap air, creating a barrier that reduces heat loss, making them an ideal choice for energy-conscious homeowners.

Another option to explore is cellular shades, which feature a unique honeycomb structure that traps air within the cells, acting as an effective insulator. This innovative design helps maintain a consistent indoor temperature, allowing you to enjoy a cozy atmosphere without relying heavily on heating or cooling systems.

In addition to fabric choices, consider the installation and operation of your window treatments. Opting for custom-fit blinds or shades can minimize gaps that allow drafts to enter or conditioned air to escape, further enhancing energy efficiency. Furthermore, motorized window treatments can be programmed to open and close at specific times, maximizing natural light while minimizing heat gain.

By selecting window treatments that prioritize insulation and energy efficiency, you not only contribute to a comfortable and inviting home but also take meaningful steps towards reducing your carbon footprint and lowering your utility bills. In a world increasingly focused on sustainability, making informed choices about window coverings is an investment in both your home and the environment.

7. Style and Design: Complementing Your Home’s Décor

How to choose the right window treatments?
Credit : whatcanu.com

When it comes to selecting window treatments, style and design play a crucial role in tying together your home’s overall aesthetic. The right window coverings can accentuate your interior design, enhance your space’s functionality, and even elevate your mood. Think of your windows as a blank canvas; the treatments you choose can either make a bold statement or seamlessly blend into the background.

First, consider the existing décor of each room. Is your style modern and sleek, or do you lean more towards a cozy, traditional vibe? For contemporary spaces, you might opt for minimalist roller shades or chic sheer panels that allow light to filter through while maintaining a clean look. Conversely, if your home boasts classic charm, elegant drapes in rich fabrics or ornate valances can add an element of sophistication and warmth.

Color is another essential factor. Window treatments can either match or contrast with your wall colors and furnishings. If your room features a neutral palette, consider adding a pop of color with bright curtains or patterned blinds to create visual interest. Alternatively, for rooms filled with vibrant hues, soft-toned or muted treatments can provide balance and prevent overwhelming the senses.

Furthermore, texture should not be overlooked. Mixing materials, such as pairing soft linen curtains with sleek wooden blinds, can introduce depth to your space. The interplay of different textures can create a warm and inviting atmosphere, enticing guests to linger longer.

Lastly, don’t forget about the functionality of your chosen treatments. Think about how you want to control light and privacy in each room. Layering options, such as combining sheer and blackout curtains, can provide flexibility to adapt to varying needs throughout the day.

In essence, choosing window treatments is not just about functionality; it’s an opportunity to express your personal style while enhancing the beauty of your home. With the right selection, your windows can become a stunning focal point that complements every aspect of your décor.

8. Popular Window Treatment Styles: Curtains, Blinds, Shades, and More

When it comes to window treatments, the variety of options available can be both exciting and overwhelming. Each style offers its own unique aesthetic and functional benefits, allowing you to tailor your home’s ambiance to your personal taste and lifestyle needs. Here’s a closer look at some of the most popular window treatment styles that can transform your space.

**1. Curtains:**
Curtains are a classic choice that can add warmth and elegance to any room. Available in an endless array of fabrics, colors, and patterns, they can serve as a focal point or a subtle complement to your decor. From sheer, gauzy panels that filter light delicately to heavy drapes that block out sunlight and provide privacy, curtains can be tailored to suit any mood or purpose. Additionally, they can be hung high and wide to create the illusion of taller windows and a more spacious room.

**2. Blinds:**
For those who prefer a more structured look, blinds are an excellent option. Made from materials such as wood, faux wood, aluminum, or vinyl, they offer precise control over light and privacy. Horizontal or vertical slats can be adjusted to let in just the right amount of sunlight, making them ideal for spaces that require versatility. Blinds are particularly popular in modern and minimalist decor, as they can provide a clean, streamlined appearance.

**3. Shades:**
Shades offer a soft, sophisticated alternative to blinds. Available in various styles, including roller, Roman, and cellular shades, they come in numerous materials ranging from light-filtering fabrics to blackout options. Roller shades are a minimalistic choice, perfect for a sleek look, while Roman shades can add a touch of elegance with their fabric folds. Cellular shades are particularly notable for their energy efficiency, as their unique honeycomb design helps insulate your home against temperature fluctuations.

**4. Shutters:**
For a timeless and charming touch, consider plantation shutters. These sturdy, wooden or vinyl constructions allow for excellent control over light and temperature, making them a practical choice for any room. Their classic look adds architectural interest to windows and can even increase your home’s resale value. Shutters come in a variety of styles, including full-height, café-style, and tier-on-tier options, allowing for customizable coverage.

**5. Valances and Cornices:**
To add a decorative finishing touch, valances and cornices can be used in conjunction with other window treatments. These stylish accents can frame your windows beautifully and can be matched with curtains, blinds, or shades to create a cohesive look. Valances are typically softer and can be made from fabric, while cornices are more structured, often made from wood or upholstered materials.

Each of these window treatment styles offers unique benefits and can dramatically enhance the aesthetic and functionality of your home. When choosing the perfect window treatments, consider your specific needs, the style of your space, and the atmosphere you wish to achieve. With the right selection, you can create a beautiful, inviting environment that reflects your personality while providing comfort and light control.

9. Budgeting for Window Treatments: Cost-Effective Options

When it comes to choosing window treatments, budgeting is a crucial step that can make or break your design project. Fortunately, there are a plethora of cost-effective options that allow you to elevate your space without emptying your wallet.

First, consider the classic charm of ready-made curtains. Available in a variety of styles, colors, and lengths, these pre-assembled drapes can be a budget-friendly way to add a touch of elegance to any room. Look for sales or discounts at major retailers, or explore local shops for unique finds that won’t break the bank.

Another economical choice is blinds. Faux wood or vinyl blinds offer the appearance of high-end materials at a fraction of the cost. They provide excellent light control and privacy while being easy to clean and maintain. For a softer look, consider fabric shades that can filter light beautifully while still allowing you to stay within your budget.

If you’re a bit more DIY-savvy, making your own window treatments can be a fun and rewarding project. A simple sewing machine and some fabric can go a long way. There are countless tutorials available online to help you create everything from basic curtains to more elaborate Roman shades. This not only saves money but allows you to customize your treatments to perfectly match your decor.

Lastly, don’t overlook the power of layering. Combining sheer curtains with heavier drapes can create a luxurious look while allowing you to purchase each layer at a lower cost. This approach not only provides versatility in controlling light and privacy but also adds depth and texture to your windows.

Remember, it’s essential to balance aesthetics with functionality while keeping an eye on your budget. By exploring these cost-effective options, you can find the perfect window treatments that enhance your home’s style while keeping your finances intact.

10. DIY vs. Professional Installation: What You Need to Know

When it comes to window treatments, one of the biggest decisions you’ll face is whether to tackle the installation yourself or hire a professional. Each option offers its own set of advantages and potential drawbacks, making it essential to weigh your circumstances carefully.

**DIY Installation** can be an appealing choice for the budget-conscious homeowner. With an array of online tutorials and how-to videos at your fingertips, you can often find step-by-step guides that make the process manageable. The satisfaction of completing a project on your own can also add a personal touch to your home. Just consider your skill level; simple treatments like curtains or blinds may be easier to install, while more complex options, such as custom shades or motorized systems, can require more expertise and tools. Additionally, remember that a DIY approach may involve unexpected challenges, such as mismeasured windows or missing hardware, which can lead to frustration and additional costs.

On the other hand, **Professional Installation** brings a level of expertise that can save you time and ensure a polished finish. Experienced installers have the knowledge and skills to handle tricky measurements, challenging window shapes, and specific mounting requirements. They can also provide valuable advice on the best placement and operation of your chosen treatments, ensuring they function perfectly and look great. While hiring a professional does come with an added cost, it can ultimately save you the hassle of mistakes and the potential need for rework.

Ultimately, your decision should hinge on your comfort level with home improvement tasks, the complexity of the window treatments you’re considering, and the budget you have in mind. If you’re leaning towards a DIY approach, make sure to gather all necessary tools and materials beforehand and set aside ample time for the project. Conversely, if you choose to go the professional route, invest time in researching reputable installers and checking reviews to ensure your windows get the care they deserve. Whichever path you choose, understanding the pros and cons of each will help you achieve the beautiful, functional window treatments that elevate your home’s aesthetic.

11. Maintenance and Care: Keeping Your Window Treatments Looking Great

When it comes to window treatments, maintenance and care are essential to ensure they remain beautiful and functional for years to come. The right upkeep not only prolongs the life of your window coverings but also enhances the overall aesthetic of your home. Different materials and styles require varying levels of attention, so it’s important to tailor your cleaning routine to the specific type of treatments you choose.

For fabric curtains and drapes, regular dusting is crucial. Use a soft brush attachment on your vacuum cleaner to gently remove dust and allergens that may accumulate over time. If they need a deeper clean, consult the care label for washing instructions—many can be machine washed, while others may require a delicate cycle or professional cleaning. Avoid exposing delicate fabrics to direct sunlight for prolonged periods, as this can lead to fading.

Blinds and shades often require a different approach. For wooden or faux-wood blinds, a damp cloth is your best friend. Gently wipe down each slat to keep them free from dust and grime, and consider using a wood polish occasionally to maintain their luster. For vinyl or aluminum blinds, a simple wipe with a microfiber cloth can work wonders. If your shades are made of fabric, ensure they’re vacuumed regularly and spot-cleaned as necessary to prevent stains.

For more intricate treatments such as shutters or motorized shades, follow manufacturer’s guidelines carefully. Shutters often only need a light dusting, while motorized shades usually require attention to their mechanical components to ensure they operate smoothly.

In addition to regular cleaning, consider seasonal checks for any necessary repairs or adjustments. Tightening loose screws or replacing worn-out cords can make a significant difference in the longevity and functionality of your window treatments.

By investing a little time and effort into the maintenance and care of your window treatments, you can keep them looking great and ensure they continue to enhance the beauty and comfort of your home for years to come.

12. Trends in Window Treatments: What’s Hot Right Now

As we step into a new era of interior design, window treatments are no longer just functional elements in a room; they are pivotal design statements that can elevate the ambiance of your space. This year’s trends reflect a harmonious blend of aesthetics and practicality, catering to diverse tastes and lifestyles.

One of the most prominent trends is the shift towards natural materials. Organic fabrics like linen and cotton are gaining popularity, providing a warm, inviting feel while promoting sustainability. These materials allow for breathability, making them ideal for spaces where light control is essential. Expect to see earthy tones and textures that mimic the outdoors, creating a serene environment that connects your indoor spaces with nature.

Another hot trend is layering window treatments. Combining sheer curtains with heavier drapes not only adds depth to your decor but also enhances light control and privacy. This versatile approach allows homeowners to customize their ambiance, making it easy to transition from bright, airy days to cozy, intimate evenings.

In terms of colors, bold hues are making a comeback. Rich jewel tones, such as emerald green, sapphire blue, and deep burgundy, are being embraced as statement colors that can define a room’s aesthetic. When paired with neutral walls and furnishings, these vibrant shades can create a striking focal point that draws the eye.

Smart window treatments are also on the rise, merging technology with style. Motorized shades and smart blinds allow for effortless control, enabling you to adjust light levels and privacy with the touch of a button or even via voice commands. This trend not only elevates convenience but also appeals to the tech-savvy homeowner looking to enhance their living experience.

Lastly, vintage and retro styles are making waves, with many homeowners seeking out unique, nostalgic designs. From patterned Roman shades that harken back to the mid-century to ornate valances that recall classic elegance, these elements add character and charm to any room.

Whether you lean towards minimalist modernism or embrace eclectic vintage vibes, staying attuned to these current trends will help you choose window treatments that not only complement your home but also reflect your personal style. As you embark on this journey to transform your space, remember that the right window treatments can be both a functional necessity and a canvas for your creativity.

13. Eco-Friendly Options: Sustainable Choices for Your Home

As the world becomes increasingly aware of environmental issues, many homeowners are seeking ways to make sustainable choices in their decor and furnishings. When it comes to window treatments, there are a variety of eco-friendly options that not only enhance your home’s aesthetic but also minimize your ecological footprint.

Start by considering materials that are both sustainable and renewable. Bamboo shades, for instance, offer a chic, natural look while being one of the fastest-growing plants on the planet. Their durability and ability to filter light make them an excellent choice for living spaces, promoting both energy efficiency and a calming atmosphere.

Another great option is organic cotton or linen curtains. These fabrics are grown without toxic pesticides or synthetic fertilizers, making them a healthier choice for your home and the environment. Available in a range of colors and patterns, they can easily complement any interior design style. Plus, opting for fabrics dyed with natural, low-impact dyes reduces harmful chemicals in your home.

For those looking to maximize energy efficiency, consider thermal or blackout window treatments made from recycled materials. These options help regulate indoor temperatures, keeping your home cooler in the summer and warmer in the winter, which can ultimately reduce energy consumption and lower utility bills.

Additionally, many companies are now offering window treatments that contribute to a sustainable lifestyle through their manufacturing processes. Look for brands that prioritize ethical sourcing, fair labor practices, and environmentally friendly production methods.

Choosing eco-friendly window treatments not only reflects your commitment to sustainability but also enhances your home’s comfort and style. By making thoughtful decisions about your window coverings, you can create a beautiful space that aligns with your values and supports a healthier planet.

14. Layering Window Treatments: Maximizing Style and Functionality

Layering window treatments is a design strategy that not only enhances the aesthetic appeal of your space but also boosts its functionality. This method involves combining two or more types of window coverings, such as curtains, blinds, shades, or valances, to create a unique and versatile look. The result is a beautifully styled window that offers varying levels of light control, privacy, and insulation—making it a practical choice for any home.

Imagine a cozy living room where sheer curtains softly filter the sunlight while adding an ethereal brightness to the space. Behind them, rich, heavy drapes provide an elegant contrast and can be drawn closed to ensure complete privacy during the evenings. This layered approach allows you to easily adjust the ambiance of the room throughout the day, transitioning from bright and airy to warm and intimate with just a simple pull of the curtains.

Additionally, layering can help you express your personal style. Consider mixing textures and patterns to create a visually stunning focal point. For instance, pairing smooth, modern roller shades with soft, embroidered drapes can add depth and interest, elevating the overall design of your room. Don’t shy away from playing with colors—complementary or contrasting hues can make your windows a standout feature.

Functionality is another key benefit of layering. By choosing different materials, you can customize your window treatments to meet specific needs. For example, blackout shades beneath sheer curtains can provide a peaceful environment for sleep while still allowing you to enjoy natural light during the day. Moreover, layering also aids in temperature control, which can lead to energy savings; heavy drapes insulate your windows in winter, while lighter sheers can help cool down a space in the summer.

Ultimately, layering window treatments is about finding the perfect balance between style and practicality. By considering your needs and preferences, you can create a window treatment design that not only complements your home’s decor but also enhances your daily life. So, don’t hesitate to experiment with different combinations—your windows are a canvas waiting for your creative touch!

15. Final Tips for Choosing the Perfect Window Treatments

Choosing the perfect window treatments can feel like a daunting task, but with a few final tips in your arsenal, you can make the decision-making process smoother and more enjoyable. First and foremost, consider the overall aesthetic of your space. Think about how the fabrics, colors, and patterns of your window treatments will harmonize with your existing decor. For a cohesive look, opt for treatments that either complement or contrast effectively with your color palette—soft neutrals can bring warmth, while bold hues can serve as striking focal points.

Next, functionality is key. Evaluate how much light control you need in each room. For instance, sheer curtains may be perfect for a sunlit living room where you want to maintain brightness while still offering some privacy, whereas blackout shades are ideal for bedrooms to ensure a restful night’s sleep. Don’t forget to consider the seasonality of your window treatments, too. Lighter, airy fabrics can keep your home feeling cool during the hot summer months, while heavier materials can provide insulation and warmth in the winter.

Lastly, think about maintenance and longevity. Choose materials that not only fit your style but also align with your lifestyle. If you have kids or pets, durable and easy-to-clean options like faux wood blinds or machine-washable curtains might be the best choice. After all, window treatments should enhance your home’s beauty and comfort while being practical for your everyday life.

As you finalize your decision, remember to measure your windows accurately, as a perfect fit can make all the difference in the world. With these tips in mind, you’re well on your way to selecting window treatments that reflect your personal style, meet your functional needs, and transform your living space into a cozy sanctuary.

In conclusion, selecting the perfect window treatments for your home is a rewarding endeavor that balances aesthetics, functionality, and personal style. With the insights and tips shared in this ultimate guide, you are now equipped to navigate the diverse world of fabrics, styles, and designs that will enhance your living spaces. Remember to consider factors such as light control, privacy, and energy efficiency as you make your choices. Whether you opt for elegant drapes, sleek blinds, or charming shades, the right window treatments can transform your home into a cozy sanctuary. Embrace the process, trust your instincts, and enjoy creating a space that reflects your unique taste and lifestyle. Happy decorating!

How to install a new light fixture?

Lighting can transform a room from ordinary to extraordinary, setting the mood and enhancing the overall aesthetic of your space.

Whether you’re looking to brighten up a dim corner, create a cozy atmosphere for evenings in, or showcase your personal style with a stunning new light fixture, the right lighting can make all the difference. However, the thought of installing a new fixture might seem daunting, especially if you’re not well-versed in home improvement projects. Fear not! In this step-by-step guide, we will walk you through the process of selecting the perfect light fixture and provide you with clear, practical instructions for installation. From understanding the types of fixtures and their intended spaces to ensuring safety and achieving a seamless finish, you’ll be equipped with all the knowledge you need to illuminate your space with confidence and flair. Get ready to brighten your home and unleash your inner interior designer!

1. Introduction: The Importance of Lighting in Home Design

How to install a new light fixture?
Credit : whatcanu.com

When it comes to home design, lighting is often an unsung hero, wielding the power to transform a space from ordinary to extraordinary. The right light fixture not only illuminates a room but also sets the tone and ambiance, influencing how we feel and interact within our environments. Imagine stepping into a room bathed in soft, warm light, where shadows dance gently along the walls, creating a cozy and inviting atmosphere. Conversely, stark overhead lighting can render a space cold and unwelcoming, dulling the vibrancy of your carefully chosen decor.

Incorporating effective lighting design goes beyond mere functionality; it is an art form that can enhance the aesthetic appeal of your home. Whether it’s a statement chandelier that becomes the focal point of your dining area or understated sconces that provide a warm glow in a hallway, each light fixture plays a crucial role in defining the character of your space.

Moreover, the right lighting can accentuate architectural features, highlight artwork, and even affect the perceived size of a room, creating the illusion of openness or intimacy as needed. It can guide the eye and draw attention to the areas you want to showcase, while also providing the necessary illumination for everyday tasks.

As we delve into this step-by-step guide on installing a new light fixture, remember that lighting is not just a functional necessity; it’s an opportunity to express your unique style and enhance the atmosphere of your home. Let’s embark on this illuminating journey together, ensuring that every room shines as brightly as your vision for it.

2. Choosing the Right Light Fixture for Your Space

Choosing the right light fixture for your space is a crucial step that can transform the ambiance and functionality of any room. With a myriad of styles, shapes, and sizes available, it can be overwhelming to narrow down your options. Start by considering the purpose of the room—different spaces require different types of lighting. For example, a warm, inviting chandelier might be perfect for a dining area, while a sleek, modern pendant light could enhance the aesthetic of a minimalist kitchen.

Next, think about the size of the fixture in relation to your space. A large, statement piece can become a stunning focal point in a spacious living room, while a smaller, more understated fixture might be ideal for a cozy bedroom. It’s also essential to consider the height at which the light will hang. A fixture that’s too low can obstruct views and movement, while one that’s too high may fail to illuminate the area effectively.

Don’t forget to take into account the overall design theme of your home. Whether your style is contemporary, rustic, or eclectic, the light fixture should complement the existing décor. Materials and finishes play a significant role here; for example, a brushed nickel finish might lend a modern touch, while a vintage brass fixture could add a hint of nostalgia.

Finally, consider the type of bulbs you’ll be using. LED bulbs are energy-efficient and long-lasting, perfect for everyday use, while dimmable options can create a versatile lighting scheme that adjusts to your needs. By thoughtfully selecting a light fixture that aligns with your space’s purpose, style, and lighting requirements, you’ll not only enhance the aesthetic appeal of your room but also create a welcoming and functional environment.

3. Tools You’ll Need for the Installation

How to install a new light fixture?
Credit : whatcanu.com

Before diving into the installation of your new light fixture, it’s essential to gather the right tools. Having everything you need on hand will not only streamline the process but also ensure a safe and effective installation. Here’s a detailed list of tools you’ll require:

1. **Screwdriver Set**: A basic set of screwdrivers, both flat-head and Phillips, is crucial for loosening and tightening screws on your light fixture. Depending on the fixture, you might also need a torque screwdriver for specific screws.

2. **Wire Cutters/Strippers**: These handy tools are vital for preparing your wiring. Wire cutters will help you trim any excess wire, while wire strippers will strip the insulation from the ends of the wires, ensuring a clean connection.

3. **Voltage Tester**: Safety first! A non-contact voltage tester will help you confirm that the power is off in the circuit you’ll be working on. This tool is invaluable for preventing electrical shocks.

4. **Pliers**: Needle-nose pliers are particularly useful for grasping and twisting wires together. They provide the leverage needed to secure wire nuts tightly.

5. **Ladder**: Depending on the height of your ceiling, a sturdy ladder will give you safe access to the area where the light fixture will be installed. Ensure it’s stable and positioned on a level surface.

6. **Tape Measure**: To ensure your new light fixture is installed at the right height and distance from walls or furniture, a tape measure is indispensable. Proper measurements will enhance both functionality and aesthetics.

7. **Level**: For fixtures that need to be hung in a straight line or at a specific angle, a level is essential. This tool helps you achieve that perfect alignment that makes a significant difference in the overall look.

8. **Safety Goggles and Gloves**: Protecting yourself during installation is paramount. Safety goggles will shield your eyes from debris, while gloves can prevent cuts and scrapes when handling tools and fixtures.

With these tools in hand, you’re well-equipped to tackle the installation of your new light fixture. Take a moment to familiarize yourself with each tool before you begin, ensuring that the installation process goes as smoothly as possible. Remember, preparation is key to a successful and safe lighting upgrade!

4. Safety First: Precautions Before You Start

Before diving into the exciting process of installing your new light fixture, it’s crucial to prioritize safety. Working with electricity can pose risks, but with the right precautions, you can ensure a smooth and safe installation. Here’s how to prepare yourself and your workspace.

### Turn Off the Power

The first step is to locate your circuit breaker and turn off the power to the area where you’ll be working. This is non-negotiable. No matter how tempting it may be to just “get it done quickly,” working with live wires is dangerous. After you’ve flipped the switch, double-check your work by testing the existing light fixture with a voltage tester to confirm that the power is indeed off.

### Gather the Right Tools

Having the proper tools on hand not only makes the job easier but also safer. Ensure you have a sturdy ladder, screwdrivers (both flathead and Phillips), wire strippers, pliers, and electrical tape. A safety goggles and rubber-soled shoes can also provide added protection, helping you to avoid slips and falls while working at height.

### Wear Protective Gear

Consider wearing protective gear such as gloves and safety glasses. Gloves will help prevent any cuts or scrapes from sharp edges, while safety glasses will protect your eyes from dust and debris. If you’re sensitive to dust or allergens, a mask can also come in handy, especially if you’re working in an older home.

### Assess Your Environment

Take a moment to assess your workspace. Make sure the area is well-lit, free of clutter, and that you have enough space to maneuver safely. If you’re using a ladder, ensure it’s placed on stable ground and is fully extended. A clean and organized environment will help you focus on the task at hand and reduce the risk of accidents.

### Read the Instructions

Before you start, carefully read the manufacturer’s instructions that come with your new light fixture. These guidelines often include specific safety tips and installation procedures tailored to the product, ensuring that you’re following the best practices for your particular fixture.

By taking these safety precautions seriously, you set the stage for a successful lighting installation. With the power off and your workspace prepared, you’re ready to transform your space and brighten your home with that stunning new fixture!

5. Turning Off the Power: Locating Your Circuit Breaker

How to install a new light fixture?
Credit : whatcanu.com

Before you embark on the journey of installing your new light fixture, one crucial step stands between you and a successful installation: turning off the power. Ensuring your safety is paramount, and the first order of business is to locate your circuit breaker. This compact yet powerful box, often found in a basement, utility room, or closet, is the heart of your home’s electrical system.

To find your circuit breaker, start by identifying the area of your home where the electrical panel resides. It’s typically a gray or metallic box mounted on the wall, featuring a door that swings open to reveal a series of switches or breakers. Each of these controls a specific area or circuit in your home, so it’s important to take a moment to familiarize yourself with its layout.

Once you’ve located your circuit breaker, open the door and inspect the switches. Look for a switch labeled for the room or area where you’ll be working—often, the labels will indicate which lights or outlets each breaker controls. If your circuit breaker doesn’t have clear labels, don’t worry; you can always turn off the main power switch to ensure all electricity is cut off, although this will affect the entire house.

After identifying the correct breaker, firmly switch it to the “off” position. It’s a good idea to keep a flashlight handy in case your workspace becomes dark during this process. To further ensure your safety, use a voltage tester to double-check that the power is indeed off before proceeding with the installation. By taking these precautions, you’re not only protecting yourself but also setting the foundation for a smooth and successful light fixture installation. Now that you’ve responsibly turned off the power, you’re ready to move on to the next steps in illuminating your space!

6. Removing the Old Light Fixture: Step-by-Step Instructions

Removing the old light fixture is a crucial step in your lighting upgrade journey. To begin, ensure your safety by turning off the power at the circuit breaker. This eliminates the risk of electric shock while you work. Once the power is off, it’s time to gather your tools—typically, you’ll need a screwdriver, a voltage tester, and possibly a ladder if the fixture is out of reach.

Next, use the voltage tester to double-check that the power is indeed off. Test the wires connected to the old fixture; if the tester lights up, turn off the power again and revisit your connections. Safety first!

Now, carefully remove the light bulb(s) from the old fixture. If your fixture has a globe or shade, gently unscrew or unclip it to avoid any breakage. With the shade removed, you should have clear access to the fixture’s mounting screws. Loosen these screws with your screwdriver, being cautious not to drop them.

Once the screws are removed, you can gently pull the fixture away from the ceiling. As you do so, take a moment to examine the wiring. You’ll typically find two or three wires: a black (or red) wire for the hot connection, a white wire for the neutral, and a green or bare wire for the ground. Carefully detach these wires by unscrewing the wire nuts or by unclipping them, making sure to note where each wire was connected to facilitate the installation of your new fixture.

After removing all connections, set the old fixture aside. Take a moment to clean the area around the electrical box, as dust and debris can accumulate over time. With the old fixture out of the way, you’re now ready to move on to the next step—installing your brand-new light fixture and transforming your space!

7. Preparing the Electrical Wiring for the New Fixture

How to install a new light fixture?
Credit : whatcanu.com

Before diving into the installation of your stunning new light fixture, it’s crucial to ensure that the electrical wiring is properly prepared. This step is foundational for the safety and functionality of your lighting, so take your time and follow these guidelines closely.

First, turn off the power at the circuit breaker to prevent any accidents while you work. It’s wise to use a voltage tester to double-check that the power is indeed off before touching any wires. Safety first!

Once you’ve confirmed the power is off, remove the old fixture, taking care to document how the existing wiring is connected. This will serve as a reference when you install the new fixture. With the old fixture detached, you’ll need to assess the existing wiring. Look for any signs of fraying, discoloration, or damage; if you notice anything concerning, it’s best to call a professional electrician to address these issues.

Next, prepare the wires for your new fixture. Strip about half an inch of insulation from the ends of the wires using wire strippers, being careful not to cut into the copper strands. You should see three types of wires: the hot wire (typically black or red), the neutral wire (usually white), and the ground wire (green or bare). If your new fixture comes with a ground wire, ensure it’s securely connected to the fixture’s ground point.

Finally, if your new light fixture requires a different setup (like a different number of wires or connections), refer to the manufacturer’s instructions. Each fixture may have unique requirements, so it’s essential to follow their guidelines for optimal performance and safety.

With the electrical wiring properly prepared, you’re now ready to proceed to the installation of your new light fixture, bringing you one step closer to illuminating your space beautifully!

8. Installing the New Light Fixture: A Detailed Guide

Now that you’ve safely removed the old fixture and prepared the electrical connections, it’s time to dive into the exciting part: installing your new light fixture! This step is where your vision for an illuminated space truly begins to take shape. Follow these detailed instructions to ensure a smooth installation process.

**1. Gather Your Tools and Materials:**
Before you start, make sure you have all the necessary tools at hand. You’ll need a screwdriver (both flat-head and Phillips), wire strippers, pliers, and a voltage tester. Additionally, have your new light fixture, mounting hardware, and wire nuts ready. It’s always a good idea to double-check that you have everything within reach so you won’t be scrambling mid-installation.

**2. Prepare the Fixture:**
Unbox your new light fixture and read through the manufacturer’s instructions. Many fixtures come with specific mounting hardware and installation guides tailored to their design. Familiarize yourself with these details and ensure you have all the components needed for assembly. If your fixture has adjustable arms or shades, now is the time to set them up according to your design preference.

**3. Connect the Wiring:**
Carefully lift the new fixture up to the ceiling bracket, aligning it with the electrical box. The colors of the wires will guide you: typically, the black or red wire is the hot wire, the white wire is neutral, and the green or bare wire is the ground. Using wire strippers, strip about half an inch of insulation off the ends of each wire. Twist together the corresponding wires—black to black, white to white, and ground to ground—using wire nuts to secure them firmly. Make sure there are no exposed wire ends, as this can cause a short circuit.

**4. Secure the Fixture:**
Once the wiring is connected, carefully tuck the wires back into the electrical box, ensuring they are not pinched or strained. Line up the fixture with the mounting bracket and secure it in place using the provided screws. If your fixture has a canopy, ensure it covers the junction box neatly and is level for a polished look.

**5. Attach Bulbs and Shades:**
After securing the fixture, it’s time to attach any light bulbs and shades as per your design. Be sure to use the correct wattage as specified by the manufacturer. If your fixture includes decorative elements or diffusers, follow the included instructions to attach these components seamlessly.

**6. Turn On the Power:**
With everything securely in place, it’s time to restore power to the circuit. Head back to your circuit breaker and switch the power back on. Before flipping the switch to test your new light fixture, double-check that everything is securely installed to avoid any accidents.

**7. Enjoy Your New Illumination:**
Finally, flip the switch and bask in the glow of your newly installed light fixture! Take a moment to admire how it transforms your space, creating both functionality and style. If necessary, adjust the fixture’s positioning or shades to achieve the desired ambiance.

By following these detailed steps, you can confidently install your new light fixture, bringing a fresh brilliance to your home. Remember, the right lighting can dramatically affect your space, enhancing both its beauty and functionality. Happy illuminating!

9. Connecting the Wires: Color-Coding and Techniques

When it comes to connecting the wires of your new light fixture, understanding color-coding and employing proper techniques is crucial for both functionality and safety. Before diving into the process, ensure you have the right tools at hand: wire strippers, electrical tape, and a voltage tester.

Begin by identifying the wires in your ceiling and the ones attached to your new fixture. Typically, you’ll encounter three types: black (or red) for the hot wire, white for the neutral wire, and green or bare for the ground wire. The black wire carries electricity from the power source, while the white wire returns the current back to the panel. The ground wire is a safety feature, redirecting any stray electricity to prevent shocks.

Once you’ve confirmed the proper identification of each wire, it’s time to prepare them for connection. Use your wire strippers to carefully remove about half an inch of insulation from the ends of each wire. Be cautious not to nick the wire itself, as this could compromise its integrity.

Next, align the corresponding wires from your fixture with those from the ceiling. Start with the black (or red) wires—twist them together clockwise until they are tightly secured. Follow this by connecting the white wires in the same manner. For the ground wires, if your fixture has a green or bare wire, connect it to the ground wire in the ceiling. If there is no ground wire present, you can attach the ground wire from the fixture to the mounting bracket of the light fixture, ensuring it has a solid connection.

After making all the connections, wrap each twisted pair with electrical tape to provide an extra layer of insulation and protection. This step is vital; it not only safeguards against potential short circuits but also ensures longevity for your connections.

Once everything is securely fastened and taped, gently tuck the wires back into the electrical box, taking care not to pinch or strain any of the connections. Finally, attach the light fixture to the mounting bracket according to the manufacturer’s instructions. With the wiring complete, you’re ready to restore power and see your new light fixture illuminate your space beautifully!

10. Securing the Fixture: Ensuring Stability and Safety

Securing the fixture is a crucial step in the installation process, as it directly impacts both the stability and safety of your new lighting. A well-mounted fixture not only enhances the aesthetic appeal of your space but also prevents potential hazards, such as electrical malfunctions or falling fixtures.

Begin by carefully positioning the fixture against the ceiling, aligning it with the electrical box. Make sure you have a clear view of the mounting bracket, which will serve as the anchor for your light. Most fixtures come with a mounting plate that requires you to attach it securely to the electrical box using the provided screws. It’s essential to use the correct screws that match the size and type of your electrical box—typically, these will be either 1″ or 2″ screws for standard installations.

Once the plate is in place, gently pull the fixture’s wiring through the center opening of the mounting bracket. Before proceeding, double-check that all wires are properly connected and insulated to avoid any risk of short-circuiting. Follow the manufacturer’s instructions to ensure that each wire is attached correctly: black to black (or live), white to white (or neutral), and green or copper to the grounding wire.

After securing the wiring, it’s time to attach the fixture to the mounting bracket. Depending on your light fixture, you may need to tighten screws or use clips to hold it firmly in place. Be sure to give the fixture a gentle tug once it’s installed to confirm that it is securely fastened.

Finally, always take a moment to step back and visually inspect your work, ensuring that the fixture is level and appropriately aligned. A well-secured light fixture not only looks professional but also contributes to a well-lit, safe environment in your home. With your fixture firmly in place, you are now ready to restore power and enjoy the warm glow of your newly installed lighting.

11. Turning the Power Back On: Testing Your New Light Fixture

After you’ve diligently followed each step of the installation process, it’s finally time for the moment of truth: turning the power back on and testing your new light fixture. This is where all your hard work pays off, and the excitement of seeing your space illuminated in a fresh, new way comes to life.

Before flipping the switch, take a moment to ensure everything is in order. Double-check that all wires are securely connected, and the fixture is firmly mounted. Safety first! Once you’re satisfied that everything looks good, it’s time to restore power. Head back to your circuit breaker and flip the switch for the corresponding room.

With your heart racing in anticipation, return to the light fixture. Take a deep breath, and reach for the light switch. As you flick it on, pay close attention to how the new fixture responds. Does it illuminate instantly with a warm glow, or is there a flicker of hesitation? If the light turns on as expected, you’ll likely feel a rush of satisfaction.

However, if it doesn’t light up, don’t panic! This could simply be a matter of a loose connection or an incorrect wiring setup. Turn the power off again, and carefully revisit your wiring connections, ensuring that each wire is tightly secured and in the right place.

Once you’ve confirmed that everything is as it should be, restore the power once more. When you finally flip that switch again, and the room is bathed in beautiful light, relish in your accomplishment. You’ve successfully transformed your space and created a welcoming atmosphere with your new light fixture! Take a moment to appreciate how the fixture enhances the overall aesthetic of the room and consider how it will impact your daily life. Whether it’s brightening up a cozy reading nook or providing essential light in a functional workspace, your new fixture is sure to make a significant difference.

12. Adjusting Light Levels: Dimming Options and Bulb Choices

When it comes to setting the perfect ambiance in your space, adjusting light levels is a pivotal consideration that should not be overlooked. The right lighting can dramatically transform a room, setting the mood for relaxation, productivity, or social gatherings. To achieve this, you have a variety of dimming options and bulb choices at your disposal.

**Dimming Options:**
Installing a dimmer switch is one of the simplest ways to gain control over your lighting. These devices allow you to adjust the brightness of your fixtures, giving you the flexibility to create the perfect environment for any occasion. Modern dimmers come in various styles, including rotary, slide, and smart dimmers that can be controlled via smartphone apps or voice commands. When choosing a dimmer, ensure it is compatible with the type of bulbs you plan to use, as traditional incandescent bulbs work well with most dimmers, while LED and CFL bulbs may require specific dimmable versions.

**Bulb Choices:**
The next step in adjusting light levels is selecting the right bulbs for your fixtures. LED bulbs are a popular choice due to their energy efficiency and long lifespan. They come in a variety of color temperatures, ranging from warm white (2700K) to cool daylight (5000K), allowing you to tailor the light to suit your space. For a cozy atmosphere, opt for warm white bulbs in living rooms and bedrooms. Conversely, brighter, cooler bulbs work well in kitchens and workspaces where clarity and focus are essential.

You might also explore smart bulbs that allow you to change colors and dimming levels directly from your smartphone or through voice commands. This versatility not only adds convenience but also allows for dynamic changes in your space, making it easy to adapt to different activities or moods.

By thoughtfully selecting your dimming options and bulb choices, you can illuminate your space in a way that enhances its beauty and functionality, bringing warmth and life to your home. With this combination, you’re well on your way to creating a lighting scheme that is both practical and visually appealing, ensuring that your new light fixture becomes a stunning focal point for years to come.

13. Common Mistakes to Avoid During Installation

When embarking on the journey of installing a new light fixture, it’s essential to be aware of potential pitfalls that can turn an exciting project into a frustrating ordeal. Here are some common mistakes to avoid, ensuring your installation goes smoothly and safely.

**1. Skipping the Safety Check:** Before you even think about unscrewing that old fixture, make sure to turn off the power at the circuit breaker. Many DIY enthusiasts underestimate the importance of this step. Forgetting to shut off the power could lead to serious injuries or even electrocution. Always double-check with a voltage tester to confirm that the wires are dead before touching them.

**2. Ignoring the Weight Limit:** Every light fixture has a weight limit determined by the mounting hardware and ceiling structure. Overloading can lead to sagging, or worse, the entire fixture falling off the ceiling. Always check the specifications of both your light fixture and the mounting bracket to ensure they are compatible and secure.

**3. Neglecting the Right Tools:** Using the wrong tools can lead to stripped screws, damaged wires, or even injury. Ensure you have all the necessary tools on hand—screwdrivers, wire strippers, pliers, and a ladder—and that they are in good condition. Investing in a quality toolkit can save you time and headaches during the installation process.

**4. Poor Wire Connections:** One of the most critical aspects of installing a light fixture is making secure wire connections. Many DIYers make the mistake of simply twisting wires together without properly securing them with wire nuts or electrical tape. Loose connections can lead to flickering lights, short circuits, or fire hazards. Always ensure that your wires are tightly twisted and that wire nuts are firmly in place.

**5. Not Considering Placement:** Before you mount your new light fixture, take a moment to think about its placement. Is it centered over a dining table, or is it providing adequate illumination for a workspace? Failing to consider the fixture’s functionality and aesthetics can leave your space poorly lit or looking unbalanced.

**6. Overlooking the Final Touches:** Once your fixture is installed, don’t rush to turn on the power. Take a moment to tidy up any visible wires, making sure everything is neatly tucked away and secured. Then, step back and admire your work. A well-installed fixture not only illuminates your space but can also serve as a stunning focal point.

By steering clear of these common mistakes, you’ll set yourself up for a successful light fixture installation. With careful planning and attention to detail, you’ll create a beautifully lit space that enhances your home’s ambiance.

14. Maintaining Your Light Fixture: Tips for Longevity

Once you’ve successfully installed your new light fixture, the next crucial step is ensuring its longevity through proper maintenance. A well-cared-for light fixture not only enhances the aesthetic of your space but also functions efficiently over time. Here are some practical tips to keep your fixture shining bright for years to come.

### Regular Dusting and Cleaning

Dust and grime can accumulate on light fixtures, dulling their shine and affecting their performance. Make it a habit to dust your fixture regularly with a soft, dry cloth. For more thorough cleaning, turn off the power and use a damp cloth or sponge with mild soap to gently wipe down surfaces. Be sure to avoid harsh chemicals that can damage finishes or materials. For intricate designs, a soft-bristle brush can help reach those tricky crevices.

### Check and Replace Bulbs as Needed

Regularly check the bulbs in your light fixture to ensure they are functioning correctly. If you notice any flickering or dimming, it might be time to replace them. When replacing bulbs, opt for those recommended by the manufacturer to maintain compatibility. Consider energy-efficient LED bulbs, which not only last longer but also reduce your energy consumption.

### Inspect Electrical Connections

While you shouldn’t need to frequently tamper with the electrical components, it’s wise to conduct periodic inspections. Look for signs of wear, such as frayed wires or loose connections. If you’re unsure, don’t hesitate to call a professional electrician to ensure everything is safe and secure.

### Avoid Overloading Circuits

Be mindful of the wattage limitations specified for your fixture. Overloading can lead to overheating, potentially causing damage to both the fixture and your home’s electrical system. Always adhere to the manufacturer’s recommendations and consider the total wattage of all bulbs used.

### Store Seasonal Decorations Safely

If your light fixture accommodates seasonal decorations, like hanging ornaments or garlands, ensure they’re stored safely when not in use. Avoid placing heavy items that could stress the fixture or wires. When decorating, use lightweight materials that won’t compromise the integrity of the fixture.

### Schedule Professional Maintenance

For complex fixtures, especially those that require specialized cleaning or maintenance, consider scheduling an annual check-up with a professional. They can offer insights and services that ensure your fixture remains in top condition.

By incorporating these maintenance tips into your routine, you’ll not only enhance the beauty of your space but also extend the lifespan of your light fixture. A little care goes a long way in keeping your lighting sparkling and functional!

15. Conclusion: Enjoying Your Newly Illuminated Space

As you stand back and admire your newly installed light fixture, there’s a palpable sense of satisfaction that envelops the room. The warm glow fills the space, transforming dull corners into inviting areas, and highlighting the unique features of your décor. Whether you chose a sleek modern pendant light or a vintage-inspired chandelier, the right fixture not only serves a functional purpose but also acts as a statement piece that reflects your personal style.

Now that the installation process is behind you, take a moment to revel in this achievement. Consider how the new lighting enhances the ambiance of your home — perhaps it creates a cozy reading nook in the living room, a stimulating workspace in your office, or a romantic setting in your dining area. The possibilities are endless, and the impact of good lighting cannot be overstated.

Don’t forget to experiment with different bulb types and brightness levels to find the perfect balance for your space. Dimming capabilities can further elevate the atmosphere, allowing you to adjust the mood according to the time of day or occasion. Plus, with the right maintenance, your fixture will continue to shine brightly for years to come.

In conclusion, installing a new light fixture is more than just a home improvement task; it’s an opportunity to express your creativity and enhance your living environment. Enjoy the newfound brightness and warmth in your space, and let your beautifully illuminated home inspire you and your guests for many gatherings to come. Embrace the change, and let the light guide you through those cozy evenings and vibrant days ahead.

As we conclude our step-by-step guide to installing a new light fixture, we hope you feel empowered to transform your space with the perfect illumination. Whether you’re updating a single room or enhancing your entire home, the right light fixture can dramatically alter the ambiance and functionality of your environment. By following the tips and techniques outlined in this post, you can confidently tackle this DIY project, bringing both style and brightness to your living areas. Remember, lighting is more than just a practical necessity; it’s an opportunity to express your personal taste and create a welcoming atmosphere. So gather your tools, unleash your creativity, and let your space shine like never before! We can’t wait to see the stunning results of your efforts—don’t forget to share your transformation with us!

How to choose the right paint color for a small bedroom?

In the world of interior design, color has the remarkable ability to shape our environment and influence our emotions, especially in the intimate confines of a small bedroom.

As urban living spaces shrink in size, the challenge of creating a cozy yet stylish sanctuary has never been more pertinent. The right paint color can breathe life into your tiny space, making it feel larger, brighter, and more inviting. However, with an overwhelming array of hues and shades to choose from, selecting the perfect color can feel daunting. In this ultimate guide, we will explore the art of color selection tailored specifically for small bedrooms, offering expert tips, creative techniques, and inspiring ideas to help you craft a space that reflects your personal style while maximizing its potential. Whether you crave a serene oasis or a vibrant retreat, join us as we embark on this transformative journey to redefine your small bedroom with the power of paint.

1. Understanding the Impact of Color on Perception

How to choose the right paint color for a small bedroom?
Credit : whatcanu.com

When it comes to transforming a small bedroom, the color you choose can significantly influence not only the mood of the space but also the perception of its size. Color has the power to create illusions; it can make a room feel more open and airy or cozy and intimate, depending on your selection. Understanding the psychology of color is crucial for maximizing the potential of your tiny haven.

Light colors, such as soft whites, delicate pastels, and gentle grays, tend to reflect more light, which can create an illusion of expansiveness. These hues can make walls seem to recede, giving your small bedroom an airy, open feel. For instance, a crisp white can make the ceilings appear higher, while a pale blue can evoke a sense of calm, reminiscent of a vast sky. These shades not only enhance the perception of space but also contribute to a serene atmosphere, promoting relaxation and restful sleep.

On the other hand, darker colors can add depth and sophistication to a small room, but they require a careful approach. Deep blues, rich greens, and even bold charcoal can create a cozy, enveloping ambiance. However, if overused, these colors can make a small bedroom feel even tighter. To strike a balance, consider using darker shades on an accent wall or in combination with lighter furnishings and decor to maintain a sense of openness while still enjoying the depth that darker colors can offer.

Moreover, the finish of your paint can also influence how color is perceived in a small space. Glossy finishes reflect light and can help brighten a room, while matte finishes absorb light, which may amplify the feeling of snugness. By paying attention to both color and finish, you can create a harmonious environment that feels both inviting and spacious.

In the end, understanding the impact of color on perception is the first step toward crafting the perfect atmosphere in your small bedroom. Whether you prefer a light, airy retreat or a cozy, intimate nook, the right color choice will help you create a space that feels just right for you. So, before you pick up that paintbrush, take a moment to consider how different colors will shape your tiny sanctuary.

2. Assessing Your Small Bedroom’s Lighting

When it comes to transforming a tiny bedroom, one of the most crucial factors to consider is lighting. The type and quality of light that enters your space can dramatically affect how colors appear and how they influence the overall atmosphere of the room. Start by evaluating both natural and artificial lighting.

**Natural Light:** Observe how much sunlight your bedroom receives throughout the day. South-facing rooms typically bask in warm, direct sunlight, which can enhance the vibrancy of colors. Conversely, north-facing bedrooms tend to receive cooler, diffused light, making softer, muted colors a better choice to counterbalance the chill. Take note of the time of day when the light shines bright and how it changes as the sun moves across the sky. This will help you understand the best times to enjoy your newly painted space.

**Artificial Light:** Next, consider the types of light fixtures you have and the bulbs used. Incandescent bulbs emit a warm glow that can make colors appear richer, while fluorescent lights cast a cooler, sometimes harsh light that can wash out hues. LED bulbs, available in a spectrum of color temperatures, can also impact how your chosen paint colors look in the evening. Experiment with different bulbs to find the perfect match for your palette.

**Testing Colors:** To truly understand how a paint color will look in your bedroom, always test samples on your walls. Paint swatches in various areas of the room to see how colors interact with the light at different times of the day. Observe how they change with the shifting light, and don’t hesitate to move around the room, viewing the colors from various angles and distances.

By carefully assessing and understanding your small bedroom’s lighting, you can make informed decisions about paint colors that will not only enhance the space but also create an inviting atmosphere conducive to relaxation and rest. Remember, the right color can make your tiny bedroom feel larger and more dynamic, so take the time to explore your lighting conditions thoroughly before making a final choice.

3. Choosing the Right Color Palette: Warm vs. Cool Tones

How to choose the right paint color for a small bedroom?
Credit : whatcanu.com

When it comes to transforming a small bedroom, selecting the right color palette can make all the difference in creating a sense of space and ambiance. The choice between warm and cool tones is not merely a matter of preference; it can significantly influence how your room feels and functions.

**Warm tones**, such as soft yellows, gentle oranges, and warm reds, evoke feelings of coziness and intimacy. These colors can create a welcoming atmosphere, making your bedroom feel like a snug retreat. However, it’s essential to use them judiciously in a tiny space. Too many warm hues can make a small room feel smaller and more enclosed. Instead, consider pairing warm tones with lighter shades or neutrals to balance the warmth while still maintaining an airy feel. For instance, a pale cream backdrop accented with terracotta pillows and warm wood elements can instill a sense of warmth without overwhelming the space.

On the flip side, **cool tones**—think soothing blues, calming greens, and tranquil purples—are fantastic for creating an illusion of spaciousness. These colors tend to recede visually, making walls appear further away and enhancing the sense of depth in your small bedroom. A soft lavender or a serene seafoam green can evoke tranquility and promote relaxation, perfect for winding down at the end of the day. To ensure these colors don’t feel too cold or sterile, consider incorporating warm accent pieces, such as brass fixtures or cozy textiles, to infuse some warmth into the overall aesthetic.

Ultimately, the key is balance. A harmonious blend of warm and cool tones can create a beautifully layered effect, allowing you to enjoy the benefits of both while also ensuring your bedroom feels inviting and spacious. When choosing your color palette, think about how you want to feel in the space, and don’t hesitate to experiment with swatches to find the perfect balance that reflects your personality and enhances your tiny sanctuary.

4. The Psychology of Color: Creating Ambiance and Mood

When it comes to transforming tiny spaces, the power of color cannot be underestimated. The psychology of color plays a significant role in how we perceive our surroundings and can profoundly influence our mood and overall ambiance. In a small bedroom, where tranquility and comfort are paramount, choosing the right paint color is essential for fostering a serene environment.

Warm tones, such as soft yellows and gentle oranges, can evoke feelings of warmth and coziness, making a small bedroom feel inviting and intimate. These hues can mimic the sun’s glow, creating a cheerful atmosphere that energizes the space during the day while maintaining a calming effect at night. On the other hand, cooler tones like blues and greens can instill a sense of peace and relaxation, transforming your tiny sanctuary into a restful retreat. These colors are reminiscent of nature, promoting a tranquil vibe that can help you unwind after a long day.

Consider also the psychological impact of neutrals. Shades of beige, soft grays, or crisp whites can create an airy illusion, making the room appear larger while providing a versatile backdrop for your decor. Neutrals allow for easy integration of accent pieces, such as colorful bedding or artwork, without overwhelming the space. Furthermore, they can help reflect light, enhancing the room’s brightness and making it feel more open.

When selecting your paint color, think about the mood you want to cultivate in your small bedroom. Do you envision a space that is invigorating and lively, or one that is calm and restful? The right color choice can not only complement your design aesthetic but also create a personal oasis that aligns with your lifestyle. By understanding the psychology of color, you can make informed decisions that will ultimately enhance your overall living experience within your tiny sanctuary.

5. Light Colors to Make a Space Feel Bigger

How to choose the right paint color for a small bedroom?
Credit : whatcanu.com

When it comes to transforming tiny spaces, the color palette you choose can significantly impact the perception of size and openness in your small bedroom. Embracing light colors is one of the most effective strategies to create an airy and expansive feel. Soft hues, such as pastel shades, creamy whites, and gentle grays, can work wonders in making a confined space feel more inviting and spacious.

Light colors reflect natural light, which is a crucial element in any small bedroom. Walls painted in soft whites or pale blues will bounce sunlight around the room, enhancing brightness and creating an illusion of depth. This illusion can make walls appear to recede, effectively opening up the space. For instance, a delicate mint green can evoke a sense of tranquility while simultaneously amplifying the room’s dimensions, creating a serene retreat that feels larger than it is.

In addition to walls, consider incorporating light colors in your furnishings and decor. Choosing light-colored bedding, curtains, and rugs can further enhance the airy vibe, providing a cohesive look that minimizes visual clutter. When selecting your color scheme, aim for a monochromatic palette or a combination of light shades that harmonize beautifully. This approach not only maintains continuity but also prevents the room from feeling disjointed, which can occur with darker, more contrasting colors.

To add depth without compromising the feeling of spaciousness, consider using slightly darker accents through accessories or furniture pieces. A light gray bed frame paired with pastel pillows can create a layered look that adds interest while keeping the overall aesthetic open and light.

Ultimately, the key to choosing the perfect paint color for your small bedroom lies in understanding how light interacts with color. By opting for light shades and thoughtfully integrating them into your design, you can transform even the coziest of spaces into a bright, welcoming haven that feels much larger than its square footage suggests.

6. Dark Colors: Embracing Coziness in Small Spaces

When it comes to painting small bedrooms, the conventional wisdom often leans towards light and airy palettes to create a sense of openness. However, embracing dark colors can transform a tiny space into a cozy retreat that feels both intimate and inviting. Dark hues, like deep navy, rich charcoal, or warm forest green, have the remarkable ability to envelop a room, providing a sense of safety and comfort that can be incredibly appealing in a bedroom.

Imagine stepping into a small bedroom painted in a luscious midnight blue. The color wraps around you like a warm blanket, creating a serene and restful atmosphere that encourages relaxation. Dark shades can also enhance architectural features, adding depth and character to the space. For instance, a charming wooden beam or a unique window shape can be accentuated against a dark backdrop, drawing the eye and adding interest.

Furthermore, using dark colors can create an illusion of depth, making the room feel less like a small box and more like a comforting cave—a perfect sanctuary for rest. To prevent the space from feeling too enclosed, consider balancing dark walls with lighter furnishings, such as crisp white bedding or soft pastel accents. Incorporating metallic accents or reflective surfaces, like a sleek mirror or glossy decor, can also add a touch of brightness and help bounce light around the room.

Adding layered lighting is crucial in a dark-themed bedroom. Think about using warm-toned bedside lamps, wall sconces, and fairy lights to create a soft, inviting ambiance. This combination of lighting and color will not only enhance the coziness factor but will also ensure that your small bedroom remains functional and stylish.

In essence, don’t shy away from dark colors when decorating your tiny bedroom. Instead, embrace their potential to create an enveloping atmosphere that invites you to unwind and escape from the world outside. With the right balance and thoughtful decor choices, your small space can become a beautifully cozy haven that feels just right for peaceful slumbers and tranquil moments.

7. Accent Walls: Adding Depth and Interest

How to choose the right paint color for a small bedroom?
Credit : whatcanu.com

When it comes to small bedrooms, one of the most effective ways to create a sense of depth and intrigue is through the use of accent walls. An accent wall serves as a focal point, drawing the eye and breaking up the monotony of a single color throughout the room. This technique can be particularly beneficial in small spaces, where a splash of color or a bold pattern can transform the ambiance without overwhelming the room.

Choosing the right wall to accentuate is crucial. Typically, the wall behind your bed or a striking architectural feature draws the eye best. Consider using a darker or more vibrant shade for this wall; it can create an illusion of depth, making the room feel more spacious while adding a touch of sophistication. Popular choices include rich navy blues, deep forest greens, or even a warm terracotta, depending on the vibe you wish to create.

To further enhance the impact of your accent wall, consider incorporating texture. A matte finish can soften a bold color, while a glossy sheen reflects light, creating an illusion of airiness. You can also explore wallpaper options—geometric patterns, floral designs, or textured materials like wood or stone can add layers of interest.

Decorating the accent wall with art or framed photographs can also elevate the aesthetic. Choose pieces that resonate with your personality and harmonize with the color scheme. This not only personalizes the space but also adds visual intrigue, making your small bedroom feel like a curated retreat.

Ultimately, accent walls are a powerful tool in small bedroom design. They allow you to express your style, create a sense of depth, and breathe life into the space, ensuring that every corner reflects your unique taste while maximizing the potential of your tiny sanctuary.

8. Exploring Textures and Finishes

When it comes to transforming a small bedroom, the choice of paint color is just the beginning. Exploring textures and finishes can elevate your design beyond mere aesthetics, creating a more dynamic and inviting atmosphere. In a confined space, the way paint interacts with light and the surfaces around it can make all the difference.

Start by considering the finish of your paint. Matte finishes tend to absorb light, giving a cozy, warm feel, which can be perfect for creating an intimate ambiance. However, if you want to add a touch of brightness and dimension, semi-gloss or satin finishes reflect light, making walls appear more expansive. These reflective surfaces can also serve a dual purpose; they’re easier to clean, which is a vital consideration in smaller spaces where dust and fingerprints can accumulate more readily.

Texture is another powerful tool in your paint arsenal. Incorporating techniques like sponging, rag rolling, or even a subtle stucco finish can add depth and interest to your walls. For instance, a soft, textured wall can lead the eye upward, drawing attention to your ceiling—an often overlooked aspect of small rooms. Consider using a textured wallpaper in combination with your paint for an added layer of visual intrigue. This can introduce patterns that play with scale, further enhancing the sense of space.

Don’t forget about the impact of accents. Using a contrasting texture on one wall, such as a chalkboard or metallic finish, can create a focal point that distracts from the room’s size. This not only adds character but also provides a functional element—imagine a wall where you can jot down notes or display art.

Incorporating different textures and finishes allows you to be creative while making your small bedroom feel more personalized and inviting. By carefully selecting how your paint interacts with light and space, you can transform your tiny sanctuary into a stylish retreat that feels both spacious and cozy.

9. The Role of Furniture and Decor in Color Choice

When it comes to selecting the perfect paint color for your small bedroom, the role of furniture and decor cannot be overstated. The hues you choose for your walls should harmoniously interact with the existing furnishings and decorative elements in the room, creating a cohesive and inviting atmosphere.

Start by taking a close look at the furniture pieces you have. If your bed frame, dressers, or nightstands are dark wood, for example, consider lighter wall colors to create a pleasing contrast that opens up the space. Soft whites, pale grays, or muted pastels can make a room feel airy and expansive, offsetting the weight of darker furniture. On the other hand, if you have lighter furniture, don’t shy away from deeper shades that can add drama and sophistication. Rich jewel tones like emerald green or deep sapphire can create a stunning backdrop that elevates the overall aesthetic.

In addition to furniture, consider the decor elements in your small bedroom. Are there vibrant throw pillows, patterned bedding, or an eye-catching piece of artwork? These accents can inform your color choice significantly. If you have a bold piece of art that you love, you might want to select a wall color that draws out its most prominent tones. Alternatively, if your decor is more subdued, a bolder wall color can act as a statement piece, providing a fresh focal point that breathes life into the room.

Don’t forget about the textures and materials in your space, as well. Natural fabrics like linen and cotton or materials like wood and metal can influence how color is perceived. For instance, a warm wood grain can enhance the warmth of a soft, creamy wall color, while sleek metallics can add a modern touch to brighter shades.

Ultimately, the interplay between your wall color and the furniture and decor in your small bedroom should create a harmonious balance. By thoughtfully considering these elements, you can transform your tiny space into a beautifully curated retreat that feels both personal and expansive. Remember, it’s not just about the color you choose; it’s about how that color interacts with everything else in the room.

10. Testing Paint Colors: Sample Swatches and Lighting Conditions

When it comes to transforming a tiny bedroom, selecting the perfect paint color can make all the difference. However, before committing to a shade, it’s essential to test your options effectively. This is where sample swatches come into play. Rather than relying solely on color chips from the store, invest in small sample pots of your top choices. Apply these paints directly to your walls in patches, allowing you to visualize how they will look in the actual space.

But remember, the appearance of paint can drastically change based on lighting conditions. Natural light, artificial light, and even the time of day can impact how a color looks. For instance, a vibrant blue may appear soothing and serene in morning light, but shift to a more intense tone under the warm glow of a bedside lamp in the evening. To ensure you’re making an informed decision, observe your sample swatches at different times of the day.

Also, consider how the color interacts with other elements in the room, such as furniture, bedding, and décor. A color that seems lovely in isolation may clash with your existing palette, so take the time to see how it complements your entire space. By carefully testing paint colors under various lighting conditions and in conjunction with your bedroom’s unique features, you’ll be well-equipped to choose a hue that not only enhances the smallness of the room but also creates a cozy, inviting atmosphere.

11. Incorporating Patterns: Stripes, Florals, and More

When it comes to transforming tiny spaces, incorporating patterns can add personality and depth to your small bedroom, making it feel more expansive and visually interesting. Stripes, florals, and other patterns can serve as powerful design elements that draw the eye and create focal points.

**Stripes** are a classic choice for small bedrooms. Horizontal stripes can visually widen a room, while vertical stripes can create an illusion of height, making your ceilings feel taller. Consider a subtle color palette with soft tones to avoid overwhelming the space. A striped accent wall behind your bed can add a touch of sophistication and make for a striking backdrop without feeling too busy.

**Florals** bring a sense of warmth and life to a small bedroom. Opt for delicate, small-scale floral prints to maintain an airy feel. These can be incorporated through wallpaper, bedding, or decorative pillows. A floral accent wall can create an inviting atmosphere, but be mindful of the colors you choose; light, pastel tones can brighten the space, while darker florals may feel heavy.

**Geometric patterns** can also be a fantastic option, adding a modern twist to your décor. These patterns can create visual interest without overwhelming the space. Choose a geometric rug or artwork that complements the overall color scheme of the room.

When mixing patterns, use a cohesive color palette to unify the look. For example, pairing striped curtains with a floral duvet cover in complementary shades can create a harmonious balance. Remember to keep larger patterns limited to one or two elements to maintain a sense of spaciousness.

Incorporating patterns into your small bedroom can elevate the design, making it feel more personalized and dynamic. With careful selection and placement, you can create a space that feels both cozy and expansive, inviting you to unwind and recharge in your beautifully adorned sanctuary.

12. Tips for Painting Techniques that Enhance Space

When it comes to transforming a small bedroom, the right painting techniques can make all the difference in creating an illusion of space and maximizing your area’s potential. Here are some expert tips to help you make the most of your paint job:

1. **Opt for Vertical Stripes**: One of the most effective techniques for making a room appear taller is to use vertical stripes. Whether you choose bold, contrasting colors or subtle, muted tones, vertical lines draw the eye upward, creating an airy, elongated effect. Consider using painter’s tape to create clean lines, or even try wallpaper with a striped design for a quick transformation.

2. **Use Light Colors for Walls**: Light colors reflect natural light and can make a space feel larger and more open. Soft whites, pastel hues, and pale grays are excellent choices for walls. Consider painting the ceiling in a slightly lighter shade than the walls to create a seamless transition that further enhances the feeling of height.

3. **Accent Walls with Depth**: While light colors help open up a space, a well-placed accent wall can add depth and interest without overwhelming the room. Choose a darker or bolder color for one wall, preferably the one that draws attention, such as the wall behind the bed. This technique can create a focal point while still keeping the overall room feeling spacious.

4. **Paint the Trim and Doors**: To create a cohesive look and make your room feel more expansive, consider painting the trim and doors the same color as the walls or a slightly lighter shade. This technique eliminates visual barriers and creates a flow that makes the room feel more unified and open.

5. **Incorporate Glossy Finishes**: Using a satin or semi-gloss finish can amplify light in your small bedroom. Glossy surfaces reflect light, making the room feel brighter and more open. This is particularly effective on trims, moldings, and even furniture pieces that you choose to paint.

6. **Create an Ombre Effect**: For a playful yet sophisticated look, try an ombre effect that gradually transitions from a darker hue at the bottom to a lighter shade at the top. This technique not only adds visual interest but also draws the eye upward, giving the illusion of higher ceilings.

7. **Strategic Use of Color Blocking**: Color blocking involves painting blocks of color in specific areas of the room. This can create a sense of depth and dimension, especially when using contrasting colors. By defining areas within the room, you can make it feel more organized and spacious.

By implementing these painting techniques, you can effectively enhance the space in your small bedroom, turning it into a cozy yet open sanctuary. Remember, the key is to create a harmonious balance between color and light, allowing your tiny space to feel inviting and expansive.

13. DIY vs. Professional Painting: Making the Right Choice

When it comes to refreshing the walls of your small bedroom, the decision between a DIY approach and hiring a professional painter can significantly impact both the process and the final outcome. Each option has its own set of advantages and considerations, making it essential to weigh your circumstances carefully before diving in.

**DIY Painting: The Hands-On Approach**
Opting for DIY painting can be an incredibly rewarding experience. Not only does it allow you to take full control of the color selection and application process, but it also offers a sense of personal achievement once you see the final result. With the right tools and a little preparation, you can transform your space to reflect your unique style. Plus, DIY painting typically comes at a fraction of the cost compared to hiring a professional, which is a significant consideration, especially when working with a budget. However, it’s important to be realistic about your skills. If you’re not confident in your painting abilities or if time is a constraint, the DIY route may not yield the results you desire.

**Professional Painting: The Expert Touch**
On the other hand, hiring a professional painter can take the stress out of the equation. Professionals bring a wealth of experience and expertise, ensuring a smooth application and a flawless finish that can elevate the aesthetic of your small bedroom. They are equipped to handle tricky angles, uneven surfaces, and other challenges that may arise during the painting process. Moreover, professional painters often have access to high-quality materials and techniques that can enhance durability and appearance, making it a worthwhile investment if you’re looking for longevity. The downside, of course, is the cost, which can vary significantly based on the complexity of the job and the painter’s expertise.

Ultimately, the decision between DIY and professional painting should hinge on your budget, skill level, and how much time you can dedicate to the project. Whether you choose to don your DIY hat or seek the assistance of a pro, the right paint color can transform your small bedroom into a cozy and inviting retreat. Embrace the journey, and remember that every stroke of paint brings you one step closer to creating the sanctuary you envision.

14. Maintenance and Longevity of Paint in Small Rooms

When it comes to small bedrooms, the choice of paint color isn’t just about aesthetics; it also involves considering the maintenance and longevity of your paint job. In confined spaces where every detail counts, the right paint can make all the difference in ensuring that your bedroom remains a serene retreat for years to come.

First and foremost, the paint finish you select will play a crucial role in the room’s upkeep. Matte finishes, while trendy and sophisticated, can be more susceptible to scuffs and stains, making them less ideal for high-traffic areas. In contrast, satin or eggshell finishes offer a subtle sheen that not only enhances the color but also stands up better to cleaning—perfect for small spaces where walls might take a beating from furniture or daily wear and tear.

Next, consider the type of paint you choose. High-quality, washable paints can be a game changer in maintaining your small bedroom’s fresh appearance. Look for paints labeled as “washable” or “scrubbable,” which allow you to easily clean any marks, fingerprints, or smudges that may accumulate over time. This is especially important in small bedrooms where space is limited, and you want to keep the room looking polished and inviting.

Additionally, pay attention to the color’s ability to hide imperfections. Lighter hues can create an illusion of spaciousness, but they may also highlight flaws in the wall’s surface. Choosing a paint with good coverage and a slight texture can help disguise minor imperfections while still reflecting light beautifully.

Finally, don’t underestimate the power of touch-ups. Keep a small can of the leftover paint handy, as it will allow you to quickly address any scratches or dings that occur over time. Regular maintenance not only keeps your bedroom looking sharp but also extends the life of your paint job, ensuring your small sanctuary remains a cozy haven for years to come.

In summary, selecting the right paint color for your small bedroom involves a balance of aesthetic appeal and practicality. By focusing on durability, ease of maintenance, and the ability to conceal imperfections, you can create a charming and lasting space that feels both inviting and well-cared-for.

15. Final Touches: Accessorizing a Colorful Small Bedroom

Once you’ve chosen the perfect paint color for your small bedroom, it’s time to bring the space to life with thoughtful accessories that enhance and complement your chosen palette. Accessories play a crucial role in transforming a beautifully painted room into an inviting sanctuary, and they allow you to express your personality while maximizing visual interest.

Start with textiles. Soft furnishings like throw pillows, blankets, and rugs can introduce texture and layers to the space. If your walls are painted in a bold hue, opt for neutral or soft-toned fabrics to create balance. Conversely, if your walls are light and airy, don’t shy away from vibrant patterns and colors in your accessories to create a lively contrast. A plush area rug can anchor the room, adding warmth underfoot and providing a cozy spot for your toes to land in the morning.

Artwork is another powerful way to accessorize your small bedroom. Choose pieces that resonate with you and tie into your color scheme. A gallery wall featuring a mix of framed prints, photographs, and even wall-mounted shelves can draw the eye upward, giving the illusion of height and making your space feel larger. Just be sure to keep the frames and matting cohesive to maintain a streamlined look.

Lighting also plays a pivotal role in accessorizing your bedroom. Consider layering your lighting with a combination of ambient, task, and accent lights. A stylish pendant light or a chic bedside lamp can not only illuminate your space but also serve as a decorative element that enhances your overall theme. Opt for warm light bulbs to create a soothing atmosphere, perfect for unwinding after a long day.

Finally, don’t forget about plants! Indoor greenery can breathe life into your small bedroom, adding a pop of color and improving air quality. Choose low-maintenance options like succulents or snake plants that thrive in various light conditions. Place them on windowsills, hang them in macramé planters, or group them on a shelf to create a fresh, inviting environment.

By carefully selecting accessories that complement your paint color and reflect your personal style, you can create a cohesive and inviting small bedroom that feels both stylish and comfortable. Remember, the key is to curate a space that feels uniquely yours while making the most of every inch.

In conclusion, transforming a tiny bedroom into a cozy and inviting sanctuary begins with the right paint color. By considering factors such as natural light, room dimensions, and your personal style, you can select hues that not only maximize space but also create an atmosphere of tranquility and warmth. Whether you opt for soft pastels, bold accents, or classic neutrals, the paint color you choose sets the tone for your entire room. We hope this guide has inspired you to embrace the potential of your small space and embark on a delightful painting journey. Remember, a well-chosen color can truly redefine the essence of your bedroom, making it a reflection of your unique personality and a haven of comfort. Happy painting!

How to choose the right paint color for your living room?

Choosing the right paint color for your living room can feel like an artistic endeavor, filled with endless possibilities and potential pitfalls.

The living room is often the heart of the home, a space where friends gather, family bonds are strengthened, and memories are made. Thus, the color you select not only influences the ambiance but also reflects your personality and style. With an overwhelming palette of hues, from calming neutrals to vibrant statement shades, mastering color becomes an essential skill for any homeowner. In this comprehensive guide, we will explore the psychology of color, practical tips for harmonizing your space, and innovative ideas to help you transform your living room into a sanctuary that is both inviting and stylish. Whether you’re preparing for a complete makeover or simply looking to refresh your walls, this guide will equip you with the knowledge needed to make informed choices that will leave your living space looking stunning and feeling just right.

1. Understanding the Basics of Color Theory

How to choose the right paint color for your living room?
Credit : whatcanu.com

When it comes to selecting the perfect paint for your living room, a solid understanding of color theory can be your secret weapon. Color theory is the foundation that informs how colors interact, complement, and contrast with one another, influencing the mood and atmosphere of your space. At its core, color theory involves the color wheel, which organizes colors into primary, secondary, and tertiary groups. Primary colors (red, blue, and yellow) serve as the building blocks for all other colors, while secondary colors (green, orange, and purple) are created by mixing two primary colors. Tertiary colors, formed by combining a primary and a secondary color, add depth and complexity to your palette.

As you explore your options, consider the psychology of color—different hues evoke different emotions and feelings. For instance, warm colors like reds, oranges, and yellows can create a cozy, inviting atmosphere, making them ideal for social spaces where family and friends gather. On the other hand, cool colors such as blues and greens are known for their calming effects, perfect for a serene environment where relaxation is key.

Additionally, understanding the concepts of hue, saturation, and brightness is essential in making informed choices. Hue refers to the actual color, saturation indicates the intensity or purity of that color, and brightness denotes how light or dark the color appears. By manipulating these aspects, you can achieve the exact effect you desire, whether that’s a vibrant accent wall or a subtle, understated backdrop.

Finally, consider the context in which your chosen colors will be viewed. The amount of natural light your living room receives, the existing furniture and decor, and even the room’s size can all impact how a color appears once it’s on the walls. By grasping these foundational principles of color theory, you empower yourself to create a harmonious and visually stunning living room that reflects your personality and enhances your lifestyle.

2. The Psychology of Color: What Different Colors Mean

Color is not merely a visual experience; it is an emotional journey that can profoundly influence our feelings, behaviors, and even interactions. Understanding the psychology of color is essential when selecting the perfect paint for your living room, as each hue can evoke a distinct atmosphere and set the tone for your space.

**Warm Colors:** Shades like red, orange, and yellow are known for their energizing qualities. Red, often associated with passion and excitement, can create a vibrant and stimulating environment. Orange, with its friendly and cheerful vibe, invites warmth and creativity. Yellow, reminiscent of sunshine, brings a sense of happiness and optimism, making it an excellent choice for a lively gathering space.

**Cool Colors:** On the contrary, cool colors such as blue, green, and purple tend to have a calming effect. Blue is often linked to tranquility and stability, fostering a serene atmosphere that can promote relaxation. Green, evoking nature and renewal, brings a refreshing and restorative quality to your living room, making it feel harmonious and balanced. Purple, particularly in its lighter shades, can impart a sense of luxury and sophistication, perfect for creating a cozy yet elegant space.

**Neutrals:** Don’t underestimate the power of neutral colors like beige, gray, and white. These shades can serve as a blank canvas, allowing you to create a versatile backdrop that complements your furniture and decor. Neutrals can evoke feelings of simplicity and sophistication, and when paired with vibrant accents, they can enhance the overall aesthetic without overwhelming the senses.

**Accent Colors:** Finally, consider how accent colors can impact your living room’s mood. A bold accent wall in a striking color can energize the space, while soft pastel accents can create a gentle, inviting atmosphere. The key is balance; combining bold shades with softer tones can create a dynamic yet cohesive look.

By understanding the psychological implications of color, you can thoughtfully choose the perfect paint for your living room that not only reflects your personal style but also creates the desired emotional ambiance for you and your guests. So, as you embark on your painting journey, remember that every hue tells a story—make sure it’s one you want to share!

3. Assessing Your Living Room’s Natural Light

How to choose the right paint color for your living room?
Credit : whatcanu.com

When it comes to selecting the perfect paint for your living room, one of the most critical factors to consider is the natural light that filters into the space. Natural light can dramatically alter the appearance of paint colors throughout the day, influencing not only the hue but also the mood of the room. To make the best choice, take some time to assess how light interacts with your living room at different times.

Start by observing the direction your windows face. South-facing rooms typically bask in an abundance of warm, natural light, making them ideal for rich, vibrant colors that can really pop. In contrast, north-facing rooms tend to receive cooler, softer light, which may wash out brighter shades and call for warmer tones to create a more inviting atmosphere. Don’t forget to factor in the time of day; morning light may cast a different hue than the golden hour just before sunset.

Additionally, consider the size of your living room. Smaller spaces can benefit from lighter colors that reflect light and create an illusion of openness, while larger rooms can embrace deeper, more saturated shades for a cozy feel. You’ll also want to account for any architectural features, such as large windows, skylights, or overhangs that might impact light levels.

To truly grasp how your chosen colors will look, test samples on the walls and observe them in varying light conditions. This hands-on approach allows you to see how the color shifts throughout the day, helping you make an informed decision that complements your living space’s unique lighting. By thoughtfully assessing your living room’s natural light, you can choose a paint color that not only enhances the beauty of the room but also creates a welcoming and harmonious environment for you and your guests.

4. Choosing a Color Palette: Complementary vs. Analogous Colors

When it comes to choosing a color palette for your living room, understanding the interplay between complementary and analogous colors can elevate your design from ordinary to extraordinary. Each approach offers a distinct aesthetic that can dramatically affect the ambiance and mood of your space.

**Complementary Colors** are those that sit opposite each other on the color wheel, creating a vibrant contrast when paired together. For instance, a rich navy blue wall can be beautifully accented with mustard yellow decor, creating a dynamic and eye-catching environment. This method not only adds visual interest but can also draw attention to specific features in your living room, such as artwork or furniture. However, be mindful of balance; too much contrast can feel jarring, so consider using one color as a dominant shade while allowing the complementary hue to accentuate in smaller doses.

On the other hand, **Analogous Colors** are adjacent to each other on the color wheel, providing a more harmonious and serene look. For example, choosing shades of blue, teal, and green can create a tranquil oasis perfect for relaxation. This palette exudes cohesion and can make your living room feel inviting and comfortable. Analogous colors blend seamlessly, allowing for an effortless flow throughout the space. To maintain interest, consider incorporating variations in tone and texture, such as pairing a soft sage green with deeper forest hues, or mixing matte and glossy finishes.

Ultimately, the choice between complementary and analogous colors should reflect your personal style and the atmosphere you want to create in your living room. By thoughtfully considering the emotional impact of each palette, you can transform your space into a stunning reflection of your taste, making it a place where you and your guests feel at home.

5. The Importance of Neutrals: Balancing Bold with Subtle

How to choose the right paint color for your living room?
Credit : whatcanu.com

When it comes to creating a harmonious living room, the role of neutrals cannot be overstated. These understated shades serve as the backbone for any color palette, providing a perfect counterbalance to bolder hues. Think of neutrals as the unsung heroes of interior design; they establish a calming foundation that allows vibrant colors to shine without overwhelming the space.

Imagine walking into a living room painted in a rich emerald green. While captivating, if the entire room were drenched in this bold hue, it could easily feel stifling. However, introducing neutral tones—soft whites, warm beiges, or cool grays—can instantly transform the atmosphere. These shades create breathing room, allowing your eye to rest and your mind to relax. A neutral backdrop lets accent colors pop, whether it’s a striking piece of artwork, colorful throw pillows, or a statement rug.

Moreover, neutrals are incredibly versatile. They can adapt to your evolving style, allowing you to easily switch up your decor without the need for a complete repaint. If you decide to swap out your vibrant couch for a more subdued one or introduce new accessories, a neutral palette will seamlessly accommodate these changes.

Additionally, neutrals can enhance the natural light in your living room, making the space feel more open and inviting. Sunlight bouncing off soft, neutral walls can create a warm glow that enhances the overall ambiance. This is especially important in smaller living rooms where maximizing light can make a significant difference.

Incorporating neutrals into your color scheme doesn’t mean you have to sacrifice personality or vibrancy. Instead, think of them as a canvas that frames and elevates your unique style. By balancing bold colors with subtle, neutral tones, you can craft a living room that feels both lively and inviting—an ideal space to unwind, entertain, and enjoy life.

6. Considering Existing Furniture and Decor

When selecting the perfect paint color for your living room, it’s essential to take a close look at the existing furniture and decor. The hues and tones already present in your space can significantly influence the overall aesthetic and ambience you want to achieve. Start by assessing the dominant colors in your furnishings, from your sofa and chairs to your rugs and curtains. If your furniture features bold patterns or vibrant shades, you may want to opt for a more subdued wall color. This will create a harmonious balance, allowing the furniture to stand out without overwhelming the senses.

Conversely, if your living room is adorned with neutral or muted pieces, you might consider a more daring wall color to bring a fresh, modern vibe to the space. Rich jewel tones like emerald green or sapphire blue can add depth and sophistication, while softer pastels can create a light and airy feel. Additionally, think about the materials and textures of your furnishings. A sleek leather couch might pair beautifully with a glossy paint finish, while a cozy fabric sofa could benefit from a matte or eggshell sheen that enhances the warmth of the room.

Don’t forget about the decor elements, such as artwork, decorative pillows, and accessories. These can provide clues about complementary colors or accent shades to incorporate into your paint palette. By analyzing the interplay of colors in your living space, you can choose a paint that not only enhances your existing decor but also makes your living room feel cohesive and inviting. Ultimately, the goal is to create an environment that reflects your personal style while providing a backdrop that unifies all the elements in your room.

7. Testing Paint Samples: The Right Way to Sample Colors

How to choose the right paint color for your living room?
Credit : whatcanu.com

Choosing the right paint for your living room can feel like navigating a vibrant maze, especially with the plethora of shades available. To ensure you make the best choice, testing paint samples is paramount—and doing it the right way can make all the difference.

Start by selecting a few paint colors that catch your eye and align with your vision for the space. Purchase sample pots of each shade, as larger containers can be misleading when it comes to finding the perfect hue. When you’re ready to test, pick a section of your wall that receives a good amount of natural light, ideally a space that reflects the various lighting conditions throughout the day.

For accurate results, apply the paint in patches using a brush or roller, and allow each sample to dry completely. This step is crucial, as colors can drastically change depending on the lighting and surrounding decor. Observe how the paint looks at different times of the day; morning light is vastly different from the warm glow of evening.

Additionally, consider the room’s furnishings and décor in your evaluation. Hold up fabric swatches or furniture samples next to the painted patches to see how the colors interact. You might find that a shade you initially loved clashes with your beloved sofa or curtains, or perhaps it creates an unexpected harmony that enhances the overall aesthetic.

Lastly, don’t rush the decision. Live with the samples for a few days, allowing your eyes to adjust and your feelings to settle. After all, your living room is a space for relaxation and gatherings, so ensuring the color resonates with you is essential. By taking the time to test paint samples thoughtfully, you’ll guarantee that the final choice will bring warmth and personality into your home for years to come.

8. The Role of Texture in Color Perception

When it comes to mastering color in your living room, texture plays a crucial role in how we perceive and experience color. Texture can enhance, mute, or alter the visual impact of paint hues, making it an essential consideration in your color selection process.

Imagine entering a room with smooth, glossy walls painted in a vibrant shade of teal. The light reflects off the surface, creating an almost luminescent effect that vibrantly energizes the space. Conversely, a matte finish in the same color might absorb light, resulting in a softer, more subdued atmosphere that invites relaxation and comfort. This interplay between texture and color can dramatically influence the mood and ambiance of your living room.

Adding textured elements, such as a woven tapestry, a plush area rug, or even a statement piece of furniture, can further enrich your color choices. For instance, if you opt for a bold, warm hue like a deep coral on your walls, surrounding it with textured fabrics in complementary colors—think rich velvets or coarse linens—can create a layered, dynamic environment. This layering effect not only enhances the visual depth of the space but also draws the eye, making the colors seem more vibrant and alive.

Additionally, consider how different textures interact with natural and artificial light throughout the day. A rough or textured surface may scatter light in interesting ways, causing the color to change as the day progresses. For example, a textured plaster wall might appear warmer in the morning light, while in the evening, it may take on a cooler tone, depending on the light sources in your living room.

In conclusion, when choosing the perfect paint for your living room, don’t overlook the importance of texture. By thoughtfully combining color and texture, you can create a harmonious space that not only looks beautiful but also evokes the desired emotional response, making your living room a true reflection of your style and personality.

9. How Sheen Affects Color Appearance

When it comes to choosing the perfect paint for your living room, one aspect that often gets overlooked is the impact of sheen on color appearance. Sheen refers to the level of gloss in the paint finish, and it can dramatically alter the way a color is perceived in a space. Understanding this concept is crucial for achieving the look and feel you desire in your living room.

Paint sheens range from flat to high-gloss, each offering its unique characteristics. **Flat finishes** provide a soft, matte look that can create a cozy and intimate atmosphere. They are excellent for hiding imperfections on walls, but they may not reflect light well, which can sometimes make colors appear deeper or darker than intended. If you prefer a serene and understated vibe, a flat sheen might be your go-to choice.

On the other hand, **eggshell and satin finishes** strike a balance between flat and glossy. These finishes reflect a moderate amount of light, enhancing the color’s vibrancy without overwhelming the space. They are versatile and work well in living rooms, as they can withstand a bit of scrubbing while still providing a soft sheen that adds depth to the color.

For those seeking a more contemporary or dramatic effect, **semi-gloss and high-gloss finishes** can be game-changers. These finishes are highly reflective and can make colors pop, creating a striking visual interest. They are especially effective for highlighting architectural features, such as moldings or accent walls. However, it’s important to note that high-gloss finishes can also expose imperfections in the wall surface, so proper preparation is key.

Lighting plays a significant role in how sheen affects color appearance. A color may look completely different depending on the type of light—natural sunlight, incandescent bulbs, or fluorescent lighting can each alter the way a hue is perceived. A satin finish may appear warmer and richer in the golden glow of evening light, while the same color in a flat finish might look more subdued.

Ultimately, when choosing paint for your living room, consider not just the color but also the sheen. Test samples on your walls and observe how they interact with your space throughout the day. By understanding how sheen affects color appearance, you can create a living room that feels perfectly tailored to your style and mood. Happy painting!

10. Seasonal Trends: Choosing Timeless vs. Trendy Colors

When it comes to selecting the perfect paint for your living room, the decision between timeless and trendy colors can be both exciting and daunting. Seasonal trends often captivate our attention with their fresh palettes, promising to breathe new life into our spaces. However, it’s essential to consider how these fleeting trends align with your long-term vision for your home.

Timeless colors—like soft whites, warm beiges, and muted greys—serve as a solid foundation for your living room. These shades not only create an inviting atmosphere but also allow for flexibility in decor choices. Imagine a serene, creamy white that allows your vibrant artwork to shine or a classic taupe that pairs seamlessly with a range of furniture styles. Such neutral hues ensure that your living room remains stylish and adaptable, easily accommodating seasonal accents and decor changes.

On the flip side, trendy colors can infuse your space with personality and energy. Each year, new shades emerge, often inspired by fashion, nature, and design movements. For instance, earthy terracotta, soft sage greens, or bold cobalt blues may dominate the color forecasts. Incorporating these shades can be a fantastic way to express your individuality and keep your living room feeling current. However, it’s crucial to remain mindful of how these colors will age. Trendy hues can sometimes become dated quickly, leading to a need for frequent repaints.

One effective strategy is to blend both approaches. Consider using a timeless base color for your walls while introducing trendy shades through accessories like throw pillows, rugs, or artwork. This allows you to embrace the latest trends without the commitment of a full repaint. Additionally, you can easily swap out these accent pieces as trends evolve, keeping your living room fresh and inviting without sacrificing the underlying foundation.

Ultimately, the key is to strike a balance that reflects your personal style, lifestyle, and the ambiance you wish to create. By thoughtfully considering seasonal trends alongside timeless colors, you can master the art of choosing the perfect paint for your living room—creating a space that feels both current and enduring, inviting you and your guests to linger and enjoy for years to come.

11. Creating a Focal Point with Color

Creating a focal point with color is an artful way to elevate your living room and draw attention to the elements you want to highlight. A well-placed splash of color can transform an ordinary space into one that exudes personality and charm. Start by identifying the focal point of your room—this could be a striking piece of furniture, a fireplace, or a large window with a beautiful view. Once you’ve pinpointed this feature, you can choose a color that enhances its beauty and creates visual interest.

Consider using a bold hue to paint an accent wall behind a sofa or a piece of artwork. This creates a stunning backdrop that not only frames the focal point but also adds depth to the room. For example, a deep navy wall can make a light-colored sectional pop, while a vibrant coral can bring warmth and energy to a neutral space. Conversely, if you prefer a subtler approach, you might choose a softer shade that complements the existing color palette while still providing a gentle contrast.

Textures and finishes can also play a significant role in creating a focal point. A matte finish can add elegance, while a glossy sheen can make colors appear more vibrant. You might even consider using paint techniques, such as stenciling or sponging, to add dimension and intrigue to your focal area.

Remember that lighting is crucial when it comes to showcasing your chosen color. Natural light can enhance the vibrancy of your focal point during the day, while strategically placed lamps and fixtures can create an inviting ambiance in the evening.

Ultimately, the goal is to create a harmonious balance within your living room. By thoughtfully selecting and applying color to your focal point, you can craft a space that not only captures attention but also reflects your unique style and invites guests to linger and enjoy the atmosphere you’ve created.

12. Tips for Painting Technique: Brush vs. Roller

Choosing the right painting technique can significantly impact the final look of your living room, and understanding the strengths of both brushes and rollers is essential for achieving a flawless finish.

**Brushes** are ideal for precision work, making them perfect for edges, corners, and intricate details. They allow for greater control and can reach tight spaces that rollers might miss. When painting trim, moldings, or any area where you want to maintain clean lines, a high-quality angled brush is your best friend. For a smoother application, opt for a synthetic bristle brush if you’re working with latex paint, as it will hold the paint evenly and provide a uniform finish.

On the other hand, **rollers** are your go-to tool for covering large surfaces quickly and efficiently. They can hold a significant amount of paint, allowing you to apply it evenly across walls without leaving streaks. When selecting a roller, consider the nap length: a shorter nap (around 1/4 inch) works best on smooth surfaces, while a longer nap (3/4 inch to 1 inch) is suitable for textured walls, as it can reach into the crevices to deliver an even coat.

To combine the best of both worlds, start by using a brush to cut in around edges and corners, then switch to a roller for the expansive areas. This technique not only saves time but also ensures that those hard-to-reach spots are neatly finished. Remember to maintain a wet edge while rolling to prevent unsightly lap marks, and don’t overload your roller with paint to avoid drips and uneven texture.

Ultimately, the choice between brush and roller may depend on the specific needs of your living room and the desired finish. By mastering these techniques, you can elevate the transformation of your space, making it a true reflection of your style and personality.

13. Maintenance and Longevity: Choosing High-Quality Paint

When it comes to selecting the perfect paint for your living room, maintenance and longevity should be at the forefront of your decision-making process. While it may be tempting to opt for the cheapest option on the shelf, investing in high-quality paint can save you time, effort, and money in the long run. Quality paint not only enhances the overall aesthetic of your space but also ensures durability against wear and tear, making it an essential consideration for any homeowner.

High-quality paints often boast superior adhesion properties, which means they cling better to walls and resist peeling, chipping, and fading over time. This is particularly crucial in a living room, where the hustle and bustle of daily life can lead to scuffs and marks. Furthermore, premium paints are typically formulated with advanced technologies that offer washability and stain resistance, allowing you to clean surfaces without compromising the color or finish. Imagine hosting a family gathering and being able to wipe away accidental spills or smudges with ease—this convenience is one of the many perks of choosing a top-tier product.

Additionally, consider the finish of the paint as it directly impacts maintenance. Matte finishes may be preferable for their elegant look, but they can be more challenging to clean compared to eggshell or satin finishes, which offer a subtle sheen while being easier to wipe down. Each finish presents its own set of maintenance requirements, so think about your lifestyle and the level of upkeep you’re willing to commit to.

Lastly, don’t overlook the importance of color retention. Quality paints are often designed to resist fading, ensuring that your chosen shade remains vibrant and true over the years. This not only keeps your living room looking fresh but also maintains the integrity of your design vision.

By prioritizing high-quality paint, you’re not just making a choice for today; you’re investing in a long-lasting, beautiful living space that can withstand the test of time. Whether you envision a serene retreat or a lively entertainment hub, the right paint can elevate your living room while making maintenance a breeze.

14. Common Mistakes to Avoid When Choosing Paint Colors

Choosing the right paint color for your living room can feel like a daunting task, especially with the multitude of shades, tones, and finishes available today. While it’s easy to get swept away by trends or the latest interior design inspirations, avoiding common pitfalls can save you time, money, and frustration. Here are some key mistakes to steer clear of when selecting your paint colors.

One of the most prevalent mistakes is failing to test paint samples on your walls before making a final decision. Paint can look vastly different in the can, under fluorescent lighting, or when applied to a larger surface area. Always take the time to paint swatches and observe how the colors change throughout the day as natural light shifts. This will ensure that the hue you choose reflects your desired ambiance and complements your furnishings.

Another common error is neglecting the importance of the room’s size and natural light. Dark colors can create an intimate and cozy atmosphere, but in a small space with limited light, they can feel oppressive rather than inviting. Conversely, lighter colors can make a room feel more expansive and airy, but may also appear washed out if not balanced with adequate furnishings and decor. Consider the room’s dimensions and lighting conditions when selecting your palette.

Additionally, many homeowners overlook the impact of existing decor. Your paint choice should harmonize with your furniture, artwork, and fixtures. It’s a good idea to gather fabric swatches and other design elements to ensure that your selected color enhances the overall aesthetic rather than clashes with it. A well-coordinated palette can create a cohesive and inviting space.

Lastly, resist the urge to rush the decision. Color selection is a pivotal aspect of your living room’s character, and taking the time to explore options, seek inspiration, and visualize the final look will lead to a more satisfying outcome. By avoiding these common mistakes, you’ll be well on your way to mastering the art of color and creating a living room that reflects your unique style and personality.

15. Final Thoughts: Embracing Your Personal Style

As we draw this exploration of color to a close, it’s essential to remember that the most harmonious living room is one that reflects your unique personality and lifestyle. Choosing the perfect paint isn’t merely a matter of aesthetics; it’s an intimate expression of who you are and how you want to feel in your space. Take the time to consider what colors resonate with you on a deeper level. Perhaps you find solace in soft, muted tones that create a serene atmosphere, or maybe vibrant hues energize your spirit and spark joy.

Embrace the freedom to experiment—after all, painting is one of the most accessible ways to transform a space. Don’t shy away from bold decisions; they can lead to stunning results that you may not have initially imagined. Use samples to test colors in different lighting throughout the day, allowing you to see how they interact with your furniture and decor. Additionally, consider layering your chosen color with various textures and patterns to enhance depth and interest.

Ultimately, your living room should be a sanctuary that invites comfort and conversation, a place where memories are made and cherished. So, allow your personal style to shine through every brushstroke. Whether you opt for classic elegance, modern minimalism, or eclectic charm, the key is to create an environment that feels authentically you. Remember, there are no strict rules in the world of design—only possibilities. Embrace your creativity, trust your instincts, and watch as your living room becomes a true reflection of your essence.

As we conclude our guide to mastering color for your living room, we hope you feel empowered to embark on your painting journey with newfound confidence and creativity. Choosing the perfect paint is more than just a decision; it’s an opportunity to express your personality and set the tone for your living space. By considering factors such as lighting, mood, and the existing décor, you can transform your living room into a vibrant sanctuary that reflects your unique style. Remember, the right shade has the power to inspire and uplift, so take your time exploring options, testing samples, and envisioning the final result. Happy painting, and may your living room become a beautiful canvas for unforgettable memories!

What does service engine soon mean ?

A check engine light is a small yellow or orange light that looks like an engine.

Service Engine Soon is a warning light that appears on the dashboard of a vehicle. It is often abbreviated as “SES” or “Check Engine.” This light can indicate a variety of issues, ranging from minor problems to major malfunctions.

service engine
Credit : Lee Bennett

The purpose of the Service Engine Soon light is to alert the driver to a problem with the vehicle’s engine or emission control system. It is important to address any issue indicated by this light as soon as possible, as ignoring it can lead to further damage and costly repairs.

The exact meaning of the Service Engine Soon light can vary depending on the make and model of the vehicle. In general, however, it is an indication that the vehicle’s on-board diagnostics system has detected a problem with one or more of the vehicle’s components.

Service engine soon can be caused by many different issues

There are a number of different things that can trigger the Service Engine Soon light to come on. Some common issues that may cause this light to activate include:

  • A faulty oxygen sensor
  • A malfunctioning catalytic converter
  • A damaged or worn-out spark plug
  • A problem with the fuel system, such as a clogged fuel filter
  • A faulty mass airflow sensor

In some cases, the Service Engine Soon light may come on due to a problem with the vehicle’s emission control system. This could be caused by a malfunctioning evaporative emission control system, or a problem with the exhaust gas recirculation system.

Have the vehicle checked as soon as possible

When the Service Engine Soon light comes on, it is important to have the vehicle checked as soon as possible. Ignoring this warning can lead to further damage and costly repairs.

To diagnose the problem, a mechanic will typically use a diagnostic tool to read the codes stored in the vehicle’s on-board computer. This tool can help to identify the specific issue that is causing the Service Engine Soon light to come on.

once the problem has been identified, the mechanic can recommend the necessary repairs. These repairs may range from something as simple as replacing a faulty sensor or spark plug, to something more complex like replacing a faulty catalytic converter.

It is important to have any issues with the Service Engine Soon light addressed as soon as possible. Ignoring this warning can lead to further damage and costly repairs. If you see the light come on, be sure to have your vehicle checked by a mechanic as soon as possible.

Can you cut LED lights ?

LED lights are an increasingly popular lighting option for both residential and commercial settings. But can you cut LED strip lights?

LED lights are energy-efficient, long-lasting, and provide a bright, even light that is perfect for a wide range of applications.

The short answer is yes, you can cut LED strip lights in most cases. However, it is important to understand the limitations and potential risks associated with cutting LED lights.

First and foremost, not all LED lights can be cut. Many LED strip lights are designed to be installed in a specific way, with a certain number of lights per strip or segment. Cutting these lights can compromise their performance, reduce their lifespan, or even make them inoperable.

Do it correctly

LED lights
Credit : Whatcanu.com

Before cutting any LED lights, it is important to check the manufacturer’s instructions to see if they can be cut. If the instructions do not specifically state that the lights can be cut, it is best to err on the side of caution and not cut them.

If the LED lights can be cut, it is important to do so carefully and correctly. This typically involves using a pair of scissors or a sharp knife to carefully cut along the designated cut line. It is important to avoid damaging any of the internal wiring or components. This can also compromise the performance of the lights.

once the LED lights have been cut, it is important to properly seal the ends to prevent moisture or other contaminants from entering the lights. This typically involves using a heat-shrink tubing or silicone sealant to seal the ends.

While cutting LED strip lights can be a useful way to customize their installation, it is important to do so carefully and correctly. Improperly cutting LED lights can compromise their performance and reduce their lifespan, potentially leading to costly repairs or replacements. It is always best to carefully read the manufacturer’s instructions and follow them carefully to ensure the best possible performance from your LED lights.