How to pack for a motorbike adventure?

Embarking on a motorbike adventure is not just about the thrill of the ride; it’s also about the journey and the experiences that await you along the way.

However, the freedom of the open road comes with the challenge of packing efficiently for your trip. With limited space and the need for essentials, knowing how to pack smart can make all the difference in your adventure. In this blog post, we’ll dive into essential packing tips that will help you streamline your gear while ensuring you have everything you need for a comfortable and enjoyable ride. From selecting the right luggage to choosing versatile clothing and gear, discover how to ride smart and pack light so you can focus on the stunning vistas and the exhilarating freedom of the road ahead. Get ready to hit the asphalt with confidence and style, knowing you’re well-prepared for any challenge that comes your way!

1. Understanding Your Motorcycle’s Storage Capacity

How to pack for a motorbike adventure?
Credit : whatcanu.com

Before you set off on your next motorbike adventure, it’s vital to understand the storage capacity of your motorcycle. Unlike cars, which often boast ample trunk space and room for various gear, motorcycles come with their own set of limitations. Assessing your bike’s carrying capabilities will greatly influence how you pack for your journey.

Start by taking a close look at your motorcycle’s built-in storage options. Many bikes come equipped with saddlebags, top cases, or even tank bags that can accommodate essentials such as tools, spare clothing, and personal items. Knowing the dimensions and weight limits of these compartments will help you make informed decisions about what to take along.

For those riding touring bikes, you may have more built-in storage than a sport bike or cruiser, which might only have minimal space. If your bike lacks sufficient storage, consider investing in additional luggage solutions like soft panniers or a tail bag. These can expand your carrying capacity without sacrificing convenience or balance.

It’s also essential to understand the weight distribution on your motorcycle. Properly balancing your load will not only enhance your riding experience but also ensure safety on the road. Position heavier items closer to the center of the bike and distribute weight evenly to maintain stability. Avoid overloading your motorcycle, as this can affect handling and braking, especially on winding roads or during challenging weather conditions.

Lastly, keep in mind that packing light is key to a comfortable ride. Prioritize essentials and consider versatile items that can serve multiple purposes. By fully understanding your motorcycle’s storage capacity and packing smartly, you’ll be well on your way to an exhilarating adventure—free from the worry of excess baggage weighing you down!

2. Choosing the Right Luggage for Your Adventure

When it comes to selecting the right luggage for your motorbike adventure, the choices can feel overwhelming. However, the right gear can make all the difference in ensuring a smooth ride and an enjoyable experience. First and foremost, consider the type of riding you’ll be doing—whether it’s a weekend getaway, a cross-country trip, or an off-road escapade. This will help determine what type of luggage best suits your needs.

Soft saddlebags are a popular choice for their lightweight design and flexibility; they can easily adjust to fit the contours of your bike and can be packed tight without adding unnecessary bulk. On the other hand, hard cases provide superior protection for your gear, keeping it safe from the elements and potential impacts. Whichever option you choose, ensure the luggage is compatible with your motorbike model and securely fastened to prevent any swaying or shifting during your journey.

Next, think about the size and capacity of your luggage. While it might be tempting to opt for larger bags to accommodate everything you think you might need, it’s essential to strike a balance. Remember, the goal is to ride smart and pack light! Aim for a setup that allows you to carry the essentials without adding excess weight that could hinder your bike’s performance.

Don’t forget to explore additional storage solutions like tank bags or tail bags, which can provide quick access to items you need on the go, such as maps, snacks, or a camera for those stunning roadside vistas. Lastly, consider weather resistance; investing in waterproof bags or adding rain covers can save you from the hassle of soggy gear and help you stay focused on the road ahead.

In sum, choosing the right luggage is about functionality, compatibility, and clever packing strategies. With the right gear, you’ll be well-prepared for whatever your adventure throws your way, allowing you to embrace the freedom of the open road with confidence.

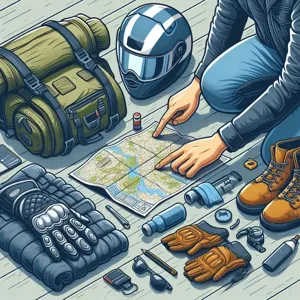
3. Essential Gear: What to Pack for Safety and Comfort

How to pack for a motorbike adventure?
Credit : whatcanu.com

When embarking on a motorbike adventure, the right gear can make all the difference between a smooth ride and a challenging experience. Prioritizing safety and comfort not only enhances your journey but also ensures that you’re prepared for any situation that may arise on the road. Here’s a concise guide on the essential gear you should pack for your next ride.

**Safety First:** Your safety should always come first, so investing in high-quality protective gear is non-negotiable. Start with a DOT-approved helmet that fits snugly yet comfortably. Look for one with features like a sun visor and ventilation to keep you cool during those long stretches under the sun. Next, don’t skimp on riding jackets and pants made from durable materials like leather or textile. These should come with built-in armor at the elbows, shoulders, and knees to protect against impacts and abrasions.

**Comfort Matters:** Comfort plays a crucial role in enjoying your ride. Consider packing moisture-wicking base layers to keep you dry and comfortable, along with a good pair of riding gloves that provide a firm grip on the handlebars. Sturdy, waterproof boots that offer ankle support are essential, especially if you encounter varied terrains or weather conditions.

**Tools and Essentials:** No adventure is complete without the right tools and emergency supplies. A basic toolkit should be on your packing list to handle minor repairs on the go, along with a tire repair kit and a first-aid kit for unforeseen emergencies. Don’t forget to bring along a portable phone charger or power bank to keep your navigation and communication devices powered up.

**Weather Preparedness:** Lastly, always be prepared for changing weather conditions. Pack a lightweight, waterproof rain suit to keep you dry in unexpected downpours, and a pair of thermal liners or extra layers to stay warm during chilly rides.

By carefully selecting your gear with an emphasis on safety and comfort, you can ride smart and pack light, allowing you to fully enjoy the freedom of the open road without unnecessary worries. Remember, the right preparation enhances not just your journey but also your overall experience on your motorbike adventure!

4. Clothing Choices for Varying Weather Conditions

When embarking on a motorbike adventure, the right clothing can make all the difference in ensuring a comfortable and enjoyable ride. Given the unpredictability of weather, it’s essential to pack wisely and prepare for varying climatic conditions.

Start with a multi-layered approach. Base layers made from moisture-wicking materials are ideal for keeping sweat at bay and providing thermal insulation in cooler temperatures. Choose lightweight, breathable fabrics that can be easily rolled up and stowed away when not in use. For the middle layer, opt for fleece or a light insulated jacket that can provide warmth without bulk.

Next, invest in a high-quality, waterproof outer layer. A good riding jacket not only protects you from wind and rain but also features ventilation zippers for warmer days. Look for pants that are both durable and weather-resistant; many options come with removable liners that adapt to changing temperatures.

Don’t forget about accessories! A sturdy pair of gloves is essential for grip and protection, but make sure they are suitable for different weather conditions. Consider packable rain gear, like a poncho or lightweight rain suit, which can be easily stored in your saddlebag.

Finally, remember that foot comfort is paramount. Choose sturdy, waterproof boots that provide adequate ankle support and are suitable for both riding and walking. If your adventure includes stops in warmer locales, a pair of breathable riding shoes or sandals can be a welcome change.

By carefully selecting your clothing options and being prepared for the elements, you can focus on the thrill of the ride, knowing you’re equipped for whatever Mother Nature throws your way. Pack light, ride smart, and enjoy every moment of your motorbike adventure!

5. The Importance of Lightweight and Compact Packing

How to pack for a motorbike adventure?
Credit : whatcanu.com

When embarking on a motorbike adventure, the mantra “ride smart, pack light” becomes paramount. The key to an enjoyable and hassle-free journey lies in understanding the importance of lightweight and compact packing. Unlike a car, a motorcycle has limited storage space and balancing your load is crucial for both handling and safety. Every item you carry should have a purpose, and every gram counts.

Imagine cruising down winding roads, the wind in your hair and the thrill of freedom at your fingertips. Now, picture the discomfort of a heavy, unbalanced load that hinders your movement or causes fatigue. Packing light not only enhances your riding experience but also affects your bike’s performance. A heavy ride can lead to sluggish acceleration, decreased fuel efficiency, and even difficulties in braking.

To achieve this balance, start by selecting versatile clothing that can be layered and mixed, allowing for multiple outfits in minimal space. Opt for compact camping gear, such as a lightweight tent, sleeping bag, and portable stove, all designed to minimize bulk without sacrificing comfort. Additionally, consider investing in high-quality, multi-functional tools that can serve several purposes, reducing the need for individual items.

Ultimately, lightweight and compact packing is about smart choices. It’s an art that allows you to embrace the adventure while maintaining the agility and freedom that motorbiking promises. With every item thoughtfully chosen and neatly stowed, you’ll be ready to hit the road with confidence, knowing you’ve packed efficiently for the journey ahead. So, gear up, pack light, and prepare for the thrill of the ride!

6. Packing Techniques: Rolling vs. Folding

When it comes to packing for your next motorbike adventure, the way you organize your gear can significantly impact your comfort and efficiency on the road. Two popular packing techniques that travelers often debate are rolling and folding. Each method has its advantages, so understanding how they work can help you make the best choice for your journey.

**Rolling**: This technique is a favorite among seasoned travelers for a reason. Rolling your clothes tightly not only saves space but also helps minimize wrinkles, allowing you to arrive at your destination looking fresh. By creating compact rolls, you can fit more items into your saddlebags or backpack, making it easier to manage weight distribution on your bike. Additionally, rolled clothing is easier to access; you can simply pull out a roll without disturbing the entire contents of your bag. For the ultimate efficiency, consider using packing cubes designed for rolling, which can further streamline your process.

**Folding**: While rolling has its perks, folding has its own benefits that shouldn’t be overlooked. For items like dress shirts or jackets that need to maintain a certain structure, traditional folding is still the way to go. It helps keep these garments sharp and presentable, particularly if you’re planning to stop at a nice restaurant along the route. Moreover, folded items can be stacked neatly, making it easier to find what you need without rummaging through your bag. For those who prefer a more organized approach, folding allows you to compartmentalize your gear, making it easier to locate specific items while on the go.

Ultimately, the best packing technique may involve a combination of both methods. Use rolling for casual wear and bulkier items like t-shirts and pants, while reserving folding for more delicate clothing. Experiment with both techniques prior to your trip to see what suits your style and needs best. Remember, the goal is to ride smart and pack light, ensuring you have everything you need without the bulk that can weigh you down. Happy travels!

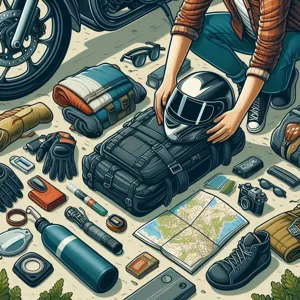
7. Creating a Packing List: What You Really Need

How to pack for a motorbike adventure?
Credit : whatcanu.com

Creating a packing list is a crucial step in ensuring a smooth and enjoyable motorbike adventure. With limited space on your bike, it’s essential to prioritize what you really need and avoid overloading yourself with unnecessary items. Start by breaking down your list into categories: clothing, tools, camping gear, food, and personal items. This will help you visualize your needs and keep everything organized.

When it comes to clothing, think layers. Opt for lightweight, moisture-wicking fabrics that can be easily mixed and matched. A good rule of thumb is to pack versatile pieces that can serve multiple purposes—like a jacket that keeps you warm during chilly mornings but can also be packed away for the afternoon sun. Don’t forget essential riding gear: a durable jacket, gloves, and riding pants are non-negotiable for your safety.

Next, consider the tools and maintenance items. A basic repair kit, including tire levers, a patch kit, and a multi-tool, can save you from getting stranded in the middle of nowhere. It’s also wise to bring along a small first aid kit for any minor scrapes or bumps along the way.

For camping gear, focus on lightweight options that are easy to pack. A compact tent, sleeping bag, and portable stove can create a home away from home without taking up too much space. Remember to bring non-perishable food items that are easy to prepare. Energy bars and dehydrated meals can be great options when you’re on the move.

Finally, consider personal items that will enhance your journey. A small notebook or journal can help you document your adventure, while a portable charger ensures that your devices remain powered for navigation and communication.

By carefully crafting your packing list and adhering to the mantra of “ride smart, pack light,” you can embark on your motorbike adventure with confidence, ready to soak in every moment without the burden of excess baggage. Happy riding!

8. Tools and Maintenance Items for the Road

When embarking on a motorbike adventure, the last thing you want is to be stranded due to a mechanical mishap. Packing the right tools and maintenance items is essential for ensuring a smooth journey and providing peace of mind as you hit the open road.

Start by curating a compact toolkit that includes the essentials: a multi-tool, a tire repair kit, and a set of basic wrenches. A tire repair kit, particularly, is a lifesaver; flats are one of the most common issues bikers face, and being prepared can mean the difference between a short delay and a long wait for assistance.

Don’t forget a portable air compressor as well – it will enable you to quickly inflate a flat tire and potentially avoid replacing it altogether. A set of spare fuses and a small roll of duct tape can also come in handy for quick fixes that might otherwise derail your ride.

Additionally, consider packing a small bottle of motor oil and a chain lubricant. Regularly checking and maintaining your bike’s chain not only prolongs its life but also enhances your ride’s efficiency. A few rags or shop towels can also be invaluable for cleaning up spills or wiping down components after repairs.

Lastly, remember to include a first aid kit. While it doesn’t fall under the traditional category of “tools,” having basic medical supplies can make a significant difference in case of minor accidents.

By thoughtfully packing these tools and maintenance items, you’ll be equipped to handle most roadside emergencies, allowing you to focus on the thrill of the ride and the beauty of the landscapes ahead. Ride smart, pack light, and keep those wheels turning smoothly!

9. Food and Hydration: Packing Light and Smart

When it comes to embarking on a motorbike adventure, ensuring you have the right provisions without overpacking can be a fine balancing act. Food and hydration are essential components of your journey, but they don’t have to weigh you down. The key is to think strategically about what you need and how to pack it effectively.

Start with hydration—this is non-negotiable. A lightweight, collapsible water bottle or a hydration reservoir can be a game-changer. These options not only save space but also allow you to carry ample water without adding unnecessary bulk. Consider investing in a water filtration system or purification tablets, especially if you’re venturing into remote areas where clean water may not be readily available. This way, you can refill your bottle from natural sources without concern.

For food, focus on lightweight, non-perishable items that pack a nutritional punch. Think energy-dense snacks like nuts, dried fruits, and jerky that provide the calories and sustenance you need without taking up too much space. Dehydrated meals are another excellent option; they are compact and can be easily prepared by adding hot water. Just remember to pack a lightweight stove or portable cooking system if you plan on cooking on the road.

When organizing your food supplies, use resealable plastic bags or small containers to keep portions manageable and easy to access. This not only minimizes waste but also allows you to quickly grab a snack without rummaging through your entire pack. Don’t forget to account for any necessary utensils—opt for a multi-tool or lightweight spork that can handle various tasks without taking up extra room.

Ultimately, packing light and smart in terms of food and hydration means making informed choices that prioritize convenience, nutrition, and weight. With the right approach, you can ensure that your body stays fueled and hydrated throughout your adventure, allowing you to focus on the thrill of the ride and the beauty of the open road.

10. First Aid and Emergency Supplies to Consider

When embarking on a motorbike adventure, the thrill of the open road is accompanied by the necessity of safety. Packing a well-thought-out first aid kit and emergency supplies can make all the difference in ensuring that your journey remains enjoyable and trouble-free. While the specifics may vary depending on your destination and the length of your trip, here are some essential items to consider.

Start with the basics: a compact first aid kit that includes adhesive bandages, sterile gauze pads, antiseptic wipes, and a roll of medical tape. These items form the foundation of your kit, ready to address minor cuts and scrapes that can occur while on the road. It’s also wise to include a pair of tweezers for removing splinters or ticks, and scissors for cutting tape or gauze.

Don’t forget to tailor your kit to your needs. If you have any specific medical conditions or allergies, include necessary medications or treatments, such as antihistamines for allergic reactions or pain relievers for headaches and muscle aches. A small emergency blanket can also be a lifesaver, providing warmth in unexpected cold conditions or after an accident.

In addition to first aid supplies, consider packing a multi-tool or a compact repair kit specifically designed for motorbikes. This should include essential tools like wrenches, screwdrivers, and tire repair kits. A portable air compressor or tire inflator can also be invaluable for those unexpected flat tires, allowing you to resume your journey without lengthy delays.

Lastly, don’t overlook the importance of communication. Carrying a fully charged portable phone charger or a power bank ensures that you can reach out for help in case of an emergency. If you’re traveling in remote areas, a satellite phone or a personal locator beacon can provide an added layer of security, allowing you to signal for assistance when needed.

By packing carefully and ensuring you have the right first aid and emergency supplies, you can ride smart and pack light, all while keeping your safety and well-being at the forefront of your motorbike adventure. After all, it’s better to be prepared for the unexpected, allowing you to fully enjoy the freedom of the road ahead.

11. Technology Gear: Staying Connected on Your Ride

In the digital age, staying connected while on your motorbike adventure is not just a luxury—it’s essential. When you’re out on the open road, the right technology gear can enhance your experience, ensuring you remain in touch with the world while enjoying the freedom of the ride. First and foremost, consider investing in a reliable smartphone that can act as your navigation system, music player, and communication device all in one. A sturdy phone mount is a must; it keeps your device securely in view, allowing you to navigate effortlessly without losing focus on the road.

Next, think about a high-quality pair of Bluetooth headphones or a helmet communication system. These gadgets allow for hands-free calls and music streaming, making your journey more enjoyable and safer. Many of these systems come with noise-cancellation features, ensuring that you can enjoy your favorite tunes or podcasts without the roar of the wind drowning them out.

Additionally, a portable power bank is invaluable for keeping your devices charged throughout your trip. Opt for a compact, lightweight model that can easily fit in your saddlebag, so you’re never caught with a dead battery when you need it most.

Don’t forget about the importance of protective gear that incorporates technology. Many modern jackets come with built-in pockets designed specifically for your tech, keeping devices safe and accessible. Some even have features like reflective materials for increased visibility at night.

Lastly, consider downloading useful apps before you hit the road. From navigation apps that offer real-time traffic updates to camping sites and gas station locators, these tools can make your adventure smoother and more enjoyable. By carefully selecting and packing the right technology gear, you’ll ensure that your motorbike adventure is not only about the ride but also about staying connected to the experiences and resources that enhance your journey. Ride smart, pack light, and let technology be your trusted companion on the road!

12. How to Organize Your Packing for Easy Access

When it comes to embarking on a motorbike adventure, efficient packing can make all the difference between a smooth ride and a frustrating experience. Organizing your gear for easy access is crucial, especially when you’re on the road and need to grab something quickly. Here are some essential tips to ensure that your packing is not only organized but also functional.

**Use Packing Cubes or Dry Bags:** Start by investing in a set of packing cubes or dry bags. These handy tools help compartmentalize your gear, making it easier to find what you need without rummaging through all your belongings. Assign different colors or labels to each cube—one for clothing, another for toiletries, and a third for tools or spare parts. This way, even at a glance, you’ll know exactly where everything is.

**Prioritize Accessibility:** Consider the order in which you’ll need your items. Frequently accessed gear, like your rain jacket or snacks, should be packed near the top or in a side pocket of your saddlebags. For items you might not need until you reach your destination, such as extra layers or camp tools, place them at the bottom or in less accessible spots. This strategic arrangement reduces the hassle of digging through your gear mid-journey.

**Utilize a Tank Bag:** A tank bag is a game-changer for easy access while riding. It’s perfect for storing essentials like your phone, maps, or a camera. Look for one with multiple pockets and compartments, so you can keep everything organized and within reach without having to stop and unpack.

**Keep a Personal Item Bag:** Designate a small bag or pouch for personal items that you might need regularly—think wallet, keys, and sunglasses. Stash this bag in a secure but easy-to-reach location, like a zipped side pocket or under your seat. This way, you can quickly grab what you need without disrupting your entire packing system.

**Label Everything:** If you’re traveling with multiple bags or compartments, labeling can make a world of difference. Use tags or waterproof markers to identify the contents of each bag. This simple step saves time and frustration when you’re on the move and need to locate something specific.

By following these organization tips, you can ensure that your packing is not only efficient but also tailored to your riding style. With everything in its place and easily accessible, you’ll be able to focus on the thrill of the ride and the beauty of the open road, making your motorbike adventure all the more enjoyable.

13. Tips for Packing Extra Space: What to Leave Behind

When it comes to packing for a motorbike adventure, the mantra “less is more” couldn’t be more applicable. Maximizing your bike’s storage capacity while ensuring that you have all the essentials requires a thoughtful approach to what you choose to leave behind. After all, every extra pound can affect your bike’s handling and your overall riding experience.

First and foremost, evaluate the necessity of each item on your packing list. Start by categorizing your gear into essentials, nice-to-haves, and items that can be left at home. For instance, while a multi-tool is extremely useful, consider whether you really need a full set of tools or just a few versatile options that can tackle the most common issues. Similarly, heavy cooking equipment can often be replaced with lightweight alternatives or even skipped altogether if you plan to dine on the road.

Clothing is another area where you can save both space and weight. Instead of packing multiple outfits, opt for quick-dry, moisture-wicking fabrics that can be layered. This not only reduces bulk but also provides versatility for changing weather conditions. Remember, a good pair of riding pants can double as casual wear, and a lightweight rain jacket can be packed easily and worn over various outfits.

Don’t forget about the power of compression bags and packing cubes. These ingenious tools can help you organize your gear while maximizing space. By tightly packing your clothing and soft items, you’ll be surprised at how much room you can create. Additionally, consider the use of saddlebag organizers or modular storage solutions that allow you to compartmentalize your gear efficiently.

Lastly, think about what you can acquire along the way. local stores and markets often have basic supplies that can lighten your load at the start of the journey. By adopting this minimalist mindset and strategically choosing what to leave behind, you’ll not only create extra space but also enhance your overall riding experience, allowing you to focus on the thrill of the open road rather than the weight of your luggage. So gear up wisely, ride smart, and enjoy every moment of your adventure!

14. Preparing for Overnight Stops: Essentials to Include

When embarking on an overnight motorbike adventure, the key to a successful trip lies in the details of your packing. It’s not just about fitting everything into your saddlebags—it’s about packing smartly and ensuring that you have all the essentials for a comfortable night away from home. Here are some must-have items to include in your overnight packing list.

**Sleeping Gear:** Depending on your preferences and the type of accommodation you anticipate, a lightweight sleeping bag or a compact camping blanket can make a world of difference. If you plan to camp, consider a portable sleeping pad for added comfort. If you’re staying in a hotel, don’t forget a travel pillow to ensure a good night’s rest.

**Clothing Layers:** Weather can change in an instant, especially when you’re on the open road. Pack versatile clothing that can be layered, including moisture-wicking base layers, an insulating mid-layer, and a waterproof outer layer. Don’t forget extra pairs of socks and underwear; nothing feels quite as refreshing as clean clothes after a long day of riding.

**Toiletries and Personal Items:** Keep your hygiene routine intact by packing travel-sized toiletries in a waterproof bag. Essentials like toothpaste, a toothbrush, deodorant, and a small towel are crucial. Additionally, consider including a first aid kit stocked with band-aids, antiseptic wipes, and any personal medications you may need.

**Snacks and Hydration:** Energy is key when you’re on the move, so pack non-perishable snacks like granola bars, nuts, or dried fruits that can easily be stashed in your bag. A collapsible water bottle or hydration pack will ensure you stay hydrated throughout your ride.

**Tech Gear:** In our digital age, it’s hard to disconnect completely. Bring along your phone and a portable charger, as well as any necessary cables or adapters. A small Bluetooth speaker can also enhance your evening by allowing you to unwind with your favorite tunes after a day on the bike.

**Emergency Essentials:** Safety should always be a priority, so include a small flashlight or headlamp, a multi-tool, and a basic repair kit for your bike. These items can be lifesavers if you find yourself in a pinch.

By thoughtfully preparing for overnight stops, you can simplify your journey and focus on what truly matters—enjoying the ride. Keep these essentials in mind as you plan your next motorbike adventure, and you’ll be set for a memorable trip, whatever the road may bring!

15. Final Checks: Ensuring Your Bike is Ready for the Journey

Before you hit the open road and embrace the thrill of adventure, taking the time for final checks on your motorbike is crucial. A well-prepared bike not only enhances your safety but also contributes to the enjoyment of your ride. Start by giving your motorcycle a thorough once-over, focusing on key components that ensure a smooth journey.

**Tires:** Inspect your tires for proper inflation and wear. Low tire pressure can affect handling and fuel efficiency, while worn-out treads can compromise your safety on slippery surfaces. Ensure that both front and rear tires meet the manufacturer’s recommended pressure levels and have adequate tread depth.

**Fluids:** Check all essential fluids, including engine oil, brake fluid, coolant, and chain lubricant. A well-lubricated chain and adequate oil levels will keep your engine running smoothly, reducing the risk of mechanical failure on the road. If you notice any fluid leaks or if levels are low, address these issues before departing.

**Brakes:** Test your brakes to ensure they are responsive. Inspect brake pads for wear and replace them if they’re nearing the end of their lifespan. Remember, reliable brakes are your first line of defense when navigating steep descents or unexpected stops.

**Lights and Signals:** Ensure all lights and signals are functioning correctly. This includes headlights, taillights, turn signals, and brake lights. Visibility is essential, especially during low-light conditions, so make sure you’re seen by others on the road.

**Gear and Accessories:** Finally, take a moment to organize your gear and accessories. Confirm that your luggage is securely fastened and that you have all essential items, such as your toolkit, first-aid kit, and any personal gear you might need. Double-check that your riding gear is in good condition—helmet, gloves, jacket, and boots should all be ready to protect you on your journey.

By performing these final checks, you set yourself up for a successful adventure. The open road awaits, and with your bike in top shape, you can ride smart and pack light, fully embracing the freedom of the journey ahead!

As you gear up for your next motorbike adventure, remember that the journey is just as important as the destination. With the essential packing tips we’ve shared, you can ride smart and pack light, ensuring that you have everything you need without the burden of excess weight. Embrace the freedom that comes with a well-organized bike and enjoy the thrill of the open road, knowing you’re equipped for whatever lies ahead. Whether you’re taking on winding mountain roads or cruising along serene coastlines, proper packing will enhance your experience, allowing you to focus on the joy of riding. So, rev up your engines, pack with purpose, and set out on the adventure of a lifetime—happy riding!

What are the best ways to organize your bathroom?

Imagine stepping into your bathroom and feeling an immediate sense of calm and order, rather than chaos and clutter.

The bathroom, often the most overlooked space in our homes, can become a sanctuary of relaxation and efficiency with just a few thoughtful changes. In this blog post, we’ll explore 10 clever tips to help you transform your bathroom into an organized oasis that not only looks inviting but also functions seamlessly for your daily routines. From creative storage solutions to strategic decluttering techniques, these practical ideas will empower you to reclaim this space, turning it into a personal retreat where every item has its place and every visit feels rejuvenating. Say goodbye to the stress of disarray and hello to a beautifully organized haven where you can unwind and refresh!

1. Assessing Your Bathroom Space: A Fresh Start

What are the best ways to organize your bathroom?
Credit : whatcanu.com

Before diving into the world of organizational strategies and stylish upgrades, the first step in transforming your bathroom into an organized oasis is to conduct a thorough assessment of your space. This process is not just about measuring dimensions; it’s about understanding how you currently use the bathroom and identifying the areas that need the most attention.

Start by decluttering every nook and cranny. Empty out cabinets, drawers, and shelves, and lay everything out in front of you. As you sift through your belongings, ask yourself what you truly need. Keep only the essentials—your favorite skincare products, the toiletries you use daily, and items that bring you joy. Discard expired products and consider donating those that are in good condition but no longer serve a purpose in your home.

Next, evaluate the layout of your bathroom. Is it cramped and chaotic, or does it have potential that you haven’t fully realized? Take note of how often you reach for specific items and where they are located. If your toothbrush is stashed in a drawer, for example, but you use it twice a day, it might make sense to give it a more accessible home. Consider the flow of movement within the space. Are there obstacles that make it difficult to navigate?

This assessment is the foundation upon which you’ll build your organized oasis. With a clearer vision of what you have, what you need, and how your bathroom functions, you’ll be better equipped to plan your next steps—whether that means reimagining storage solutions, choosing stylish containers, or even considering a fresh coat of paint to rejuvenate the atmosphere. Embrace this fresh start as an opportunity to create a serene and functional retreat that reflects your personal style while meeting your practical needs.

2. Declutter: The First Step to an Organized Oasis

When it comes to transforming your bathroom into an organized oasis, decluttering is the essential first step. A cluttered space can quickly become overwhelming, making it difficult to find what you need and diminishing the overall tranquility of the room. Start by emptying all cabinets, drawers, and countertop surfaces. This allows you to see everything you have and gives you a blank canvas to work with.

Once everything is out in the open, it’s time to sort through your items. Create designated piles: keep, toss, and donate. Be ruthless in your decision-making. If you haven’t used a product in the last year or if it has expired, it’s time to let it go. Pay particular attention to beauty products, toiletries, and towels—these can accumulate quickly and take up valuable space.

As you sort, consider the frequency of use for each item. Daily essentials like toothpaste and shampoo should be easily accessible, while seasonal items, such as thick towels or holiday-themed decor, can be stored out of sight. This process not only frees up space but also helps you become more mindful of what you truly need in your bathroom.

Once you’ve decluttered, take a moment to appreciate the newfound space. A clean slate allows you to visualize the organized oasis you’re about to create. With less clutter, the next steps—like implementing storage solutions and decorative elements—will feel far more achievable. Remember, decluttering is not just about removing items; it’s about creating a serene environment where you can unwind and rejuvenate. By starting with this crucial step, you’re laying the groundwork for a bathroom that not only looks beautiful but functions seamlessly as a personal retreat.

3. Maximize Vertical Space with Shelving Solutions

What are the best ways to organize your bathroom?
Credit : whatcanu.com

When it comes to bathroom organization, one of the most underutilized assets is vertical space. Often, we focus solely on floor space and neglect the potential that lies above our heads. By incorporating clever shelving solutions, you can transform your bathroom into a serene oasis that not only looks great but functions efficiently.

Start by assessing the available vertical space in your bathroom. Look for walls that are crying out for attention—areas above the toilet, behind the door, or even along the sides of cabinets. Floating shelves are an excellent choice for creating an airy feel while providing ample storage for essentials like towels, toiletries, and decorative accents. Choose sleek designs in light colors to maintain an open atmosphere, or go for rustic wooden shelves to add warmth and character.

Consider installing a tiered shelf unit or a tall, narrow bookcase for those compact corners that often go unused. These can be perfect for storing extra rolls of toilet paper, baskets of cosmetics, or even potted plants that bring a touch of nature indoors. Don’t shy away from using attractive containers or decorative jars to house smaller items—this not only keeps things tidy but also adds a personal touch to your space.

In addition to traditional shelving, think outside the box. Hooks and pegboards can be mounted on walls to hang towels, robes, or even accessories, saving valuable drawer and counter space. Magnetic strips can be affixed to the inside of cabinet doors to hold small metal items like tweezers and scissors, keeping them easily accessible yet out of sight.

By maximizing vertical space with creative shelving solutions, you can elevate your bathroom from a cluttered necessity to a stylish, organized retreat. With everything in its place, you’ll be amazed at how a few thoughtful adjustments can completely transform your daily routine into a rejuvenating experience.

4. Utilize Baskets and Containers for Easy Storage

Transforming your bathroom into an organized oasis is all about creating a serene and clutter-free environment, and one of the most effective ways to achieve this is by utilizing baskets and containers for easy storage. These versatile tools not only add a touch of style but also enhance the functionality of your space.

Imagine walking into your bathroom and immediately feeling a sense of calm as you see neatly arranged baskets that house everything from toiletries to towels. By using decorative baskets, you can turn everyday items into visually appealing components of your decor. Opt for woven baskets in natural fibers for a rustic look or sleek, modern containers to give your space a contemporary edge.

To maximize efficiency, categorize your belongings and assign each basket or container a specific purpose. For instance, keep all your hair care products in one basket, skincare essentials in another, and extra toiletries in a larger container. Labeling each basket can further streamline your routine, allowing you to find what you need at a glance without having to rummage through clutter.

Consider utilizing vertical space by installing shelves where you can place your containers. This not only organizes your items but also makes them easily accessible while freeing up counter space. Additionally, using clear containers for smaller items like cotton swabs, makeup brushes, or nail polishes provides visibility, ensuring that everything has its designated spot while maintaining a clean aesthetic.

Incorporating baskets and containers into your bathroom storage solutions not only promotes organization but also transforms your space into a tranquil retreat. With everything in its place, you can create a soothing atmosphere that invites relaxation and rejuvenation, making your bathroom not just a functional space, but a personal oasis.

5. Create a Product Inventory: Know What You Have

What are the best ways to organize your bathroom?
Credit : whatcanu.com

Creating a product inventory is a game-changer when it comes to transforming your bathroom into an organized oasis. Imagine stepping into a space where everything has its place, where you can effortlessly find your favorite shampoo or the perfect shade of lipstick without rummaging through clutter. A well-maintained inventory is key to achieving this level of order.

Start by taking stock of all the products currently residing in your bathroom. This doesn’t just mean jotting down names; it’s about understanding what you have and how often you use it. Categorize your items into groups—skincare, haircare, makeup, toiletries, and cleaning supplies. This logical organization will not only make it easier to locate items but will also highlight duplicates and expired products that need to be discarded.

Once you’ve compiled your inventory, consider creating a digital or physical checklist. Digital apps can help you track usage and expiration dates, sending reminders when it’s time to restock or replace. If you prefer a tactile approach, a simple spreadsheet or a beautifully designed notebook can serve just as well.

By keeping a current inventory, you can avoid the frustration of purchasing items you already own. You’ll also foster a mindful approach to your bathroom products, leading to less waste and more intentional purchases in the future. Ultimately, knowing what you have empowers you to curate a bathroom that reflects your personal style while maintaining an airy, uncluttered feel that invites relaxation and rejuvenation.

6. Implement a Daily Cleaning Routine for Maintenance

Implementing a daily cleaning routine for maintenance is one of the most effective ways to keep your bathroom looking pristine and organized. Think of your bathroom as a sanctuary—a space meant for relaxation and rejuvenation. However, without consistent upkeep, this haven can quickly become cluttered and chaotic.

Start by dedicating just 10-15 minutes each day to tackle quick cleaning tasks. This could include wiping down surfaces, such as sinks and countertops, to prevent the buildup of soap scum and grime. Use a gentle all-purpose cleaner for a refreshing scent and a sparkling finish. Don’t forget to give the mirrors a quick polish, as nothing feels more serene than a spotless reflection to greet you in the morning.

Next, implement a system for keeping clutter at bay. Each day, take a moment to return items to their designated places. Whether it’s your favorite moisturizer, a hairbrush, or a tube of toothpaste, having a specific spot for everything will help maintain an organized appearance. Consider using attractive baskets or trays to corral smaller items, making them easy to access yet concealed from view.

Finally, incorporate a weekly deep-cleaning schedule to complement your daily routine. This may involve scrubbing the shower, disinfecting the toilet, and mopping the floors. By breaking these tasks into manageable daily and weekly segments, you’re not only preserving cleanliness but also cultivating a serene atmosphere that invites relaxation.

By establishing a daily cleaning routine, you’re not just maintaining order; you’re transforming your bathroom into an organized oasis that reflects tranquility and care. So grab your cleaning supplies, set a timer, and enjoy the satisfaction of a bathroom that remains a peaceful retreat, day after day.

7. Organizing Cabinets: Tips for Efficient Use of Space

What are the best ways to organize your bathroom?
Credit : whatcanu.com

When it comes to transforming your bathroom into an organized oasis, the cabinets are often the unsung heroes of the space. Efficiently utilizing cabinet space can make a significant difference in keeping your bathroom clutter-free and functional. Here are some clever tips to help you maximize your cabinets and create a serene environment.

Start by decluttering your cabinets. Remove everything and assess what you truly need. Toss out expired products and items you haven’t used in the past year. This will not only free up space but also make it easier to see what you have and what you need. Once you’ve narrowed down your essentials, it’s time to get organized.

Invest in adjustable shelving or stackable bins to create vertical space. This allows you to customize the height of your shelves to accommodate taller bottles or smaller items, ensuring that every inch of space is utilized efficiently. Clear containers are particularly helpful because they provide visibility, allowing you to quickly find what you’re looking for without rummaging through drawers or shelves.

Consider using drawer dividers or small baskets to keep smaller items like toiletries, makeup, or hair accessories neatly compartmentalized. This prevents chaos and makes it easier to grab what you need without making a mess. Labeling your bins can also be a game changer, especially for shared bathrooms. Everyone will know exactly where to find their items, making it a breeze to maintain order.

Don’t forget about the inside of cabinet doors! Use adhesive hooks or small racks to hang items like hairdryers or styling tools, freeing up valuable shelf space. This simple addition not only organizes but also keeps your tools easily accessible when you need them.

With these tips, you can transform your bathroom cabinets into efficient storage solutions that enhance your space and make your daily routine a little more enjoyable. Remember, an organized oasis is just a well-planned cabinet away!

8. Stylish Storage Solutions: Combining Function with Aesthetics

When it comes to creating an organized oasis in your bathroom, stylish storage solutions are key to balancing function with aesthetics. In a space often limited by square footage and teeming with various essentials, the right storage can elevate both the look and feel of your bathroom.

Consider open shelving as a chic way to display towels, toiletries, and decorative items. Wooden shelves with a rustic finish can add warmth, while sleek glass or metal options lend a modern touch. To keep your items organized yet accessible, use decorative baskets or bins that complement your décor—think woven wicker or vibrant colored fabric that can infuse personality into the space.

Another clever approach is to utilize vertical space. Over-the-toilet shelving units or tall cabinets can dramatically increase your storage capacity without encroaching on precious floor space. These units can house everything from extra toilet paper to your favorite scented candles, all while providing a stylish backdrop.

Don’t forget about under-sink storage! With an array of attractive organizers, you can reclaim the chaos often lurking beneath the sink. Drawer dividers, stackable bins, and pull-out shelves ensure every item has its place, making it easy to find exactly what you need when you need it.

Finally, consider incorporating design elements that double as storage, such as a mirrored cabinet that reflects light while hiding your bathroom essentials, or a stylish ladder shelf that showcases potted plants and curated décor alongside practical items. By thoughtfully combining function with aesthetics, you can create a bathroom that is not only organized but also a true sanctuary where serenity and style coexist.

9. The Power of Labels: Simplifying Access to Essentials

In the quest for an organized bathroom, labels emerge as unsung heroes, wielding the power to transform chaos into calm. When you walk into a bathroom that has been thoughtfully labeled, everything seems to fall into place. The toothbrushes reside in their designated holder, the towels are neatly stacked and clearly marked, and the myriad of beauty products are grouped by function, each with a clear label guiding you to what you need in an instant.

Consider the sheer magic of a well-placed label. It not only enhances the aesthetics of your space but also streamlines your daily routines. Imagine opening a cabinet to find neatly organized bins, each one labeled with categories like “Hair Care,” “Skincare,” or “First Aid.” No more rummaging through cluttered drawers or forgetting where you stashed that elusive hair serum. Labels eliminate the guesswork, allowing you to access your essentials quickly and efficiently.

You can get creative with labeling materials, too. From chic chalkboard tags that can be rewritten as your inventory changes, to elegant printed labels that match your bathroom’s decor, the options are endless. Incorporate color coding for added visual appeal; for instance, use calming blues for bath products and soft greens for skincare. This not only makes your bathroom look more inviting but also adds a personal touch that reflects your style.

Moreover, the act of labeling encourages you to take stock of what you have, prompting a much-needed purge of expired products and unused items. By consciously curating your collection and labeling what remains, you create a space that is not just organized, but a true oasis of tranquility. As you step into your beautifully labeled bathroom, you’re greeted by a sense of order and clarity that sets a positive tone for your day. So, harness the power of labels, and watch as your bathroom transforms from a hectic space into a serene sanctuary where everything has its rightful place.

10. Designate a Towel Area: Keeping Linens Neat and Tidy

A designated towel area can be the cornerstone of a well-organized bathroom, transforming your space from chaotic to serene. Imagine stepping into your bathroom and being greeted by neatly folded towels, each one waiting to envelop you in comfort after a refreshing shower. To achieve this oasis of order, consider dedicating a specific shelf or cabinet to your linens, ensuring they have a home that’s both functional and aesthetically pleasing.

Start by decluttering your current towel collection. Assess which towels you actually use and consider donating or repurposing those that have seen better days. Once you have a streamlined selection, opt for uniform folding techniques—this not only enhances the visual appeal but also maximizes space. For added flair, consider using decorative baskets or bins to house your towels, keeping them easily accessible while adding a touch of style.

Labeling can also be beneficial, particularly in larger households where multiple family members may have their own towel preferences. Use chic tags or chalkboard labels to designate areas for each person’s towels, promoting a sense of ownership and encouraging everyone to keep their space tidy.

Finally, consider the location of your towel area. Placing it within arm’s reach of the shower or tub can elevate convenience, allowing for a seamless transition from bathing to drying off. By thoughtfully arranging your towel area, you’ll cultivate a sense of calm and organization in your bathroom—a true oasis for relaxation and self-care.

11. Incorporating a Relaxation Zone: Bath Accessories and Decor

Creating a relaxation zone within your bathroom is essential for transforming it into an organized oasis that promotes tranquility and rejuvenation. When you think of bath accessories and decor, envision a serene space that invites you to unwind after a long day. Begin by selecting a color palette that evokes calmness—soft hues like muted blues, gentle greens, or warm neutrals can create a soothing atmosphere.

Choose bath accessories that not only enhance functionality but also add to the aesthetic appeal. Opt for elegant storage solutions, such as woven baskets or decorative trays, to keep essentials like towels, bath products, and candles neatly arranged. Consider adding a plush bath mat and fluffy towels in complementary colors for a touch of luxury. These small details can make your bathroom feel like a high-end spa retreat.

Don’t overlook the power of scent in creating a relaxing environment. Incorporate scented candles, essential oil diffusers, or a beautiful bowl of potpourri to fill the air with calming fragrances like lavender, eucalyptus, or chamomile. These scents can enhance your bathing experience and set the mood for relaxation.

Additionally, consider incorporating natural elements into your decor. A potted plant or a small vase of fresh flowers can bring life and vibrancy to your space while improving air quality. Hanging artwork or photographs that resonate with your personal sense of peace can also contribute to a calming ambiance.

Finally, enhance your relaxation zone with thoughtful lighting. Soft, ambient lighting can make a significant difference in how your bathroom feels. Consider installing dimmer switches or adding candles for a warm glow that encourages relaxation during your baths. With these carefully chosen bath accessories and decor, you can create a harmonious sanctuary that not only keeps your space organized but also invites you to indulge in the ultimate self-care experience.

12. Eco-Friendly Organization: Sustainable Practices for Your Bathroom

In today’s world, transforming your bathroom into an organized oasis doesn’t just mean decluttering and maximizing space; it also involves embracing eco-friendly practices that contribute to a sustainable lifestyle. By incorporating eco-conscious organization methods, you can create a serene sanctuary while caring for the planet.

Start by assessing the materials of your storage solutions. Opt for bamboo shelves and sustainably sourced wood storage bins that not only add a touch of natural elegance but are also biodegradable. Consider glass containers for holding cotton balls, swabs, and other small items. Glass is both reusable and recyclable, making it a much greener alternative to plastic.

Next, embrace refillable products to minimize waste. Choose shampoo, conditioner, and body wash in bulk sizes or opt for brands that offer refill stations. Not only does this help reduce single-use plastic, but it also often saves you money in the long run. Pair these products with attractive dispensers that complement your bathroom decor, so even your essentials look stylish and organized.

Another tip is to create a designated space for eco-friendly cleaning supplies. Use natural ingredients like vinegar, baking soda, and essential oils for cleaning, and store them in labeled glass jars or reusable spray bottles. This not only keeps your cleaning supplies organized but also ensures that your bathroom remains a chemical-free zone, promoting a healthier environment for you and your family.

Lastly, embrace the concept of minimalism. Evaluate the items you truly need and donate or recycle those that no longer serve a purpose. This not only declutters your space but also encourages mindful consumption. By making thoughtful choices about what you keep in your bathroom, you can cultivate a peaceful atmosphere that reflects your commitment to sustainability.

By integrating these eco-friendly organization practices into your bathroom, you’ll not only create a visually appealing and functional space but also contribute to a more sustainable future, proving that caring for the environment can seamlessly blend with your personal style.

13. Personalize Your Oasis: Adding Your Unique Touch

Creating a bathroom that truly feels like your own oasis goes beyond just organization; it’s about infusing your personality and style into every corner. Personalization transforms a standard bathroom into a sanctuary that reflects who you are and how you want to feel in your space. Start by selecting a color palette that resonates with you—whether that’s calming blues and greens for a serene vibe or vibrant pops of color that energize the space.

One of the easiest ways to add your unique touch is through decor. Consider incorporating art that inspires you, such as framed prints or photographs that bring joy every time you step in. A simple shelf can be adorned with decorative items that tell your story, such as travel souvenirs, cherished books, or handmade pottery.

Textiles also play a crucial role in personalization. Choose towels and bath mats that are not only functional but also speak to your aesthetic. Opt for soft, luxurious fabrics in colors or patterns that bring you happiness. You might even want to add a statement shower curtain that serves as a focal point, making a bold statement about your style.

Plants can also breathe life into your bathroom, offering both a splash of color and a sense of tranquility. Select low-maintenance options like succulents or ferns that thrive in the humid environment, adding a touch of nature that promotes relaxation.

Lastly, don’t underestimate the power of scent. Introduce candles, essential oil diffusers, or potpourri that reflect your favorite aromas. Whether it’s the refreshing scent of eucalyptus or the warm embrace of vanilla, fragrances can evoke powerful feelings and enhance your oasis experience.

By incorporating these personalized elements, your bathroom will not only be organized but also a true reflection of you—an oasis where you can unwind, rejuvenate, and escape from the hustle and bustle of daily life.

14. Transitioning Seasonal Items: Keeping Your Space Relevant

Transitioning seasonal items in your bathroom is essential for creating an organized oasis that not only looks immaculate but feels relevant throughout the year. Just as you would swap out your wardrobe with the changing seasons, your bathroom can benefit from a thoughtful approach to seasonal decor and essentials.

As summer gives way to fall, consider swapping out bright, tropical bath towels for warm, earthy tones that evoke the coziness of autumn. Replace your lightweight, floral-scented body wash with richer, spicier fragrances that resonate with the season—think pumpkin spice or cinnamon. By making these simple changes, you not only refresh the aesthetic of your space but also enhance the sensory experience of your daily routines.

Utilize dedicated bins or baskets to store seasonal items neatly, making it easy to access them when needed. For instance, store your winter skincare products, such as heavier moisturizers and soothing balms, in a clearly labeled container that can be tucked away under the sink or on a bathroom shelf. Similarly, during the warmer months, make space for lighter lotions and refreshing sprays. This ensures that your bathroom remains a sanctuary tailored to the current climate.

Don’t forget to incorporate seasonal decorations, such as a small vase of fresh flowers in spring or a few autumn leaves in a decorative bowl. These elements add warmth and charm while keeping your space visually appealing. By thoughtfully transitioning seasonal items, you create a bathroom that feels not only organized but also inviting and relevant all year round.

15. Final Touches: Creating a Spa-Like Atmosphere

Creating a spa-like atmosphere in your bathroom is the perfect way to elevate your daily routine into a serene escape. The final touches can transform even the most utilitarian spaces into a calming oasis that invites relaxation and rejuvenation. Start by incorporating soft, ambient lighting; consider installing dimmable sconces or using warm-toned bulbs that create a soothing glow. Candles—whether flickering real ones or elegant LED options—can add an extra layer of tranquility, filling the air with gentle scents and casting a warm light.

Next, focus on textiles. Opt for plush, absorbent towels in calming colors like soft blues, muted grays, or earthy tones that evoke the peacefulness of nature. A luxurious bath mat underfoot adds warmth and comfort, while a coordinated shower curtain can provide a cohesive look. To further enhance the atmosphere, consider adding natural elements such as potted plants or fresh flowers. Plants like spider plants or peace lilies not only purify the air but also add a touch of greenery that enhances the spa-like feel.

Don’t forget about sound—consider incorporating a Bluetooth speaker that can play soft music or nature sounds to create a soothing auditory backdrop. Finally, add personal touches that resonate with you: a favorite piece of art, a beautifully arranged tray with your favorite skincare products, or a book you’ve been wanting to dive into. These final touches will not only beautify your space but also infuse it with a sense of peace and personal connection, making your bathroom a true sanctuary for relaxation.

As we wrap up our exploration of transforming your bathroom into an organized oasis, we hope you’ve discovered inspiring ideas and practical strategies to elevate this essential space in your home. From clever storage solutions to aesthetically pleasing arrangements, each tip is designed to help you create a serene and functional environment that caters to your daily routines. Remember, a well-organized bathroom not only enhances your overall experience but also promotes a sense of calm and relaxation. So, take these insights and start your journey toward a beautifully organized oasis today. Here’s to enjoying a stress-free, clutter-free sanctuary that reflects your unique style and meets your needs! Happy organizing!

What are the best ways to add storage space to your home?

In an age where minimalist living and maximizing space are more important than ever, effective storage solutions have become a necessity for every homeowner.

Whether you’re navigating the challenges of a cozy apartment or trying to bring order to a bustling family home, finding clever ways to store your belongings can transform your living environment from chaotic to serene. This blog post dives into a treasure trove of creative ideas that not only enhance your home’s functionality but also add a touch of style. From innovative furniture designs that double as storage to repurposed everyday items that can declutter your space, we’ll explore a variety of strategies that cater to every taste and necessity. Say goodbye to clutter and hello to an organized oasis, as we guide you through the art of maximizing your space with functional and aesthetically pleasing storage solutions!

1. Introduction: The Importance of Maximizing Space

What are the best ways to add storage space to your home?
Credit : whatcanu.com

In today’s fast-paced world, where the hustle and bustle of daily life often leaves little room for clutter, maximizing space in our homes has never been more critical. As living spaces shrink and the demand for multifunctional areas rises, the ability to cleverly utilize every square inch of our homes transforms from a mere preference into a necessity.

Imagine stepping into a space that feels both organized and functional, where every item has its place and chaos is kept at bay. The importance of maximizing space lies not just in storing belongings but in creating a sanctuary that promotes peace of mind and enhances our overall quality of life. A well-organized home can lead to increased productivity, reduced stress, and a greater sense of well-being.

Moreover, effective storage solutions can breathe new life into an area that may feel cramped or neglected. By thinking creatively about how we arrange our belongings, we can open up rooms, create inviting atmospheres, and ultimately cultivate a space that reflects our unique personalities. From innovative shelving to hidden compartments, the options for maximizing storage are limited only by our imagination.

In this blog post, we’ll explore a variety of creative strategies to add storage to your home, ensuring that you can enjoy both style and functionality in every corner. Let’s embark on this journey towards a more organized and spacious living environment together!

2. Assessing Your Storage Needs

Before diving into the world of storage solutions, it’s essential to take a step back and assess your unique storage needs. Every home is different, and understanding what you truly require will help you make informed decisions about the best ways to maximize your space. Start by walking through each room in your home with a critical eye. Take note of the areas that feel cluttered or disorganized—these are the spaces that could benefit from additional storage.

Consider the items you use regularly versus those that are seldom touched. Are there seasonal items, like holiday decorations or winter clothing, that could be stored away until needed? Create a list that categorizes your belongings—daily essentials, occasional use items, and things you can part with. This exercise will help you prioritize what needs to be easily accessible and what can be tucked away in less visible storage.

Additionally, take measurements of your available spaces. Whether it’s a narrow hallway, an underutilized corner, or even vertical wall space, knowing the dimensions will allow you to explore creative storage solutions that fit perfectly into your home. Assess how often you use certain items and where they are currently stored; this will give you insights into how to arrange and optimize your storage effectively.

By understanding your storage needs and the specific challenges you face, you can tailor your approach to transforming your home. This thoughtful assessment lays the groundwork for implementing innovative storage solutions that not only alleviate clutter but also enhance the overall functionality of your living space. As you progress through this journey, remember that efficient organization isn’t just about adding more storage—it’s about creating a harmonious environment that works for you and your lifestyle.

3. Creative Shelving Solutions

What are the best ways to add storage space to your home?
Credit : whatcanu.com

When it comes to maximizing your home’s storage potential, creative shelving solutions can be game-changers. Shelves are not just about functionality; they can also serve as stunning design elements that enhance your space. Here are some innovative ideas to consider:

**Floating Shelves:** These minimalist shelves create the illusion of more space by eliminating bulky brackets. Perfect for small rooms or narrow hallways, floating shelves can be used to display books, plants, or decorative items, adding both style and storage without overwhelming the area. Consider varying the lengths and heights to create an eye-catching visual effect.

**Corner Shelves:** Don’t let those unused corners go to waste! Corner shelves can turn awkward spaces into charming storage solutions. Whether you opt for a tiered design that cascades down the wall or a simple corner unit, these shelves can hold everything from plants to collectibles while adding depth to your room.

**Ladder Shelves:** A trendy option that marries functionality with a casual aesthetic, ladder shelves lean against the wall and provide ample space for books, knick-knacks, and more. They work particularly well in living rooms or bedrooms, where they can add height and dimension, inviting the eye to travel upwards.

**Open Cubby Shelves:** If you’re looking for a versatile storage solution, open cubby shelves allow for easy organization and accessibility. These shelves can double as room dividers in open-concept spaces, creating designated zones while providing ample storage for bins, boxes, and larger items.

**Under-Stair Shelving:** The space under your stairs is often overlooked; however, it can become a treasure trove of storage opportunities. With custom-built shelving or repurposed bookcases, this area can be transformed into a functional nook for books, games, or seasonal decor. This not only maximizes your storage but also adds a unique focal point to your home.

By embracing these creative shelving solutions, you can enhance your home’s storage capacity while adding character and charm. Remember, the key is to think outside the box and choose designs that not only serve a practical purpose but also reflect your personal style. With the right shelving, you can turn clutter into curated collections and make every inch of your space work for you.

4. Utilizing Under-Bed Storage

When it comes to maximizing space in your home, one of the most overlooked areas is the space lurking right beneath your bed. Under-bed storage offers a treasure trove of possibilities for reclaiming valuable square footage without sacrificing style or accessibility. Rather than letting this area gather dust bunnies, consider transforming it into a functional storage haven.

Start by assessing the items you need to store. Seasonal clothing, extra linens, shoes, and even sports equipment can all find a home beneath your bed. To keep things organized, invest in sleek, low-profile storage bins or vacuum-sealed bags that slide effortlessly under the bed. Choose clear plastic containers for easy visibility, or opt for decorative fabric bins that can add a touch of style while hiding clutter.

If you’re looking for a more permanent solution, consider a bed frame with built-in drawers or a lofted bed that elevates the sleeping space, leaving ample room underneath for shelves or storage units. This not only maximizes storage but also creates an airy, spacious feel in your bedroom.

Incorporating under-bed storage into your home can be both practical and aesthetically pleasing. By creatively utilizing this often-neglected space, you can keep your belongings organized and easily accessible, all while maintaining a clean and tidy environment. So, take a moment to explore what’s hiding under your bed—it just might be the key to unlocking more space in your home!

5. Multi-Functional Furniture Ideas

What are the best ways to add storage space to your home?
Credit : whatcanu.com

When it comes to maximizing your space, multi-functional furniture is a game changer. These innovative pieces not only serve their primary purpose but also provide additional storage and utility, making them perfect for small homes or apartments where every square foot counts.

Imagine a sleek coffee table that opens up to reveal hidden compartments for magazines, remote controls, and even board games, allowing your living area to stay tidy while still being functional. Or picture a stylish ottoman that doubles as a storage unit — perfect for stashing away blankets or children’s toys. With a flip of the lid, your living room transforms into an organized oasis, free from clutter.

Consider investing in a bed frame with built-in drawers or a lofted bed that creates a cozy workspace beneath it. This clever use of vertical space can turn a cramped bedroom into a multi-functional haven. In the dining area, choose a bench with storage underneath to not only provide extra seating but also keep linens and dishware neatly tucked away.

Don’t overlook the power of convertible furniture. Folding desks that can collapse against the wall after use or extendable dining tables that can comfortably host a small gathering but tuck away neatly when not in use are fantastic options for maximizing utility while minimizing your footprint.

By selecting multi-functional furniture, you can create a home that is not only stylish but also maximally efficient. Embrace the versatility of these pieces, and watch as your space transforms into an organized, welcoming environment that meets all your needs without sacrificing aesthetics.

6. Making the Most of Vertical Space

When it comes to maximizing storage in your home, one of the most underutilized resources is the vertical space that often goes unnoticed. By thinking upwards, you can transform even the smallest rooms into functional areas that offer ample storage solutions without sacrificing style.

Start by assessing your walls—are they bare and waiting to be adorned? Consider installing floating shelves to display books, plants, or decorative items, all while providing a convenient place to store everyday essentials. This simple addition not only draws the eye upwards, creating the illusion of higher ceilings, but also allows you to free up valuable floor space.

Another innovative way to utilize vertical real estate is by incorporating tall shelving units or bookcases. These pieces can be strategically placed in corners or along walls, maximizing every inch while offering a wealth of storage. Use the upper shelves for items you don’t frequently access, like seasonal decor or extra linens, reserving the lower shelves for everyday items that need to be easily reachable.

Don’t overlook the potential of your doors! Over-the-door organizers can be a game-changer in areas like kitchens and bathrooms, providing extra space for everything from cleaning supplies to pantry items. Hooks or racks can also be installed on the backs of doors, perfect for hanging bags, accessories, or even kitchen utensils.

Finally, consider vertical storage solutions in your closet. Adding tiered hangers, cascading hooks, or even a pegboard can transform a cluttered closet into a neatly organized space that makes the most out of every square foot.

By shifting your perspective and embracing the vertical dimensions of your home, you can create a stylish and functional living environment that keeps clutter at bay while enhancing your overall decor. So, take a moment to look up—your walls might just hold the key to a more organized and spacious home!

7. Innovative Closet Organization Tips

What are the best ways to add storage space to your home?
Credit : whatcanu.com

When it comes to maximizing your space, innovative closet organization can transform even the most chaotic of wardrobes into a beautifully curated collection. The closet is often one of the most underutilized areas in a home, but with a little creativity and strategic planning, it can serve as a functional oasis of order.

Start by evaluating your closet’s layout and consider using vertical space to your advantage. Installing shelves above hanging rods can provide additional storage for shoes, bags, or even seasonal clothing that you don’t need on a daily basis. Consider adding adjustable shelving units that can be customized to fit your needs as your wardrobe evolves.

Incorporating clear bins and labeled boxes can also enhance organization. Not only do they keep items visible and accessible, but they also create a clean, uniform look that makes it easy to see what you have. For a touch of flair, opt for stylish storage solutions—think woven baskets or decorative boxes that add a pop of color or texture while serving a practical purpose.

Another innovative approach is to use multi-functional hangers. These clever tools allow you to hang multiple pairs of pants or scarves in a single space, freeing up valuable real estate in your closet. Additionally, consider investing in cascading hangers to maximize hanging space for tops and dresses.

Don’t overlook the power of hooks and pegboards! They can be mounted on the inside of closet doors or on side walls to hold accessories, jewelry, or hats, making it easy to grab what you need while keeping everything neatly displayed.

Lastly, decluttering is an essential step in any organization project. Regularly assess your clothing and accessories, and consider donating items that no longer serve you. By streamlining your wardrobe, you create more space and make it easier to keep your closet organized.

With these innovative tips, your closet can become a functional and aesthetically pleasing part of your home, allowing you to maximize your space while simplifying your daily routine. Embrace the challenge of closet organization, and watch as your once-cluttered space transforms into a stylish sanctuary.

8. Repurposing Unused Areas (e.g., Hallways, Corners)

When it comes to maximizing storage in your home, one of the most effective yet often overlooked strategies is repurposing unused areas. Hallways and corners, for instance, are prime candidates for creative storage solutions that not only declutter your space but also add a unique flair to your decor.

**Hallways** are frequently just passageways, but with a little imagination, they can transform into functional storage areas. Consider installing floating shelves along the walls to display books, plants, or cherished photographs. This not only utilizes vertical space but also draws the eye, making the hallway feel more inviting. If you have a narrow hallway, slim cabinets or tall, narrow bookcases can fit snugly against the wall, providing hidden storage for shoes, bags, or even seasonal items.

**Corners**, on the other hand, are often the dark horses of home storage. Think about investing in corner shelving units that can fit into those awkward spaces. These shelves can be perfect for displaying decor or storing items like extra linens, craft supplies, or games. Corner cabinets with doors can also provide a tidy solution for concealing clutter while maximizing storage in a visually appealing way.

Another creative idea is to use the space above door frames. If you have high ceilings, consider adding shelves that can be accessed with a step stool. This is perfect for seldom-used items, like holiday decorations or family heirlooms, keeping them out of the way yet easily retrievable when needed.

By repurposing these often-ignored areas of your home, you can create functional and stylish storage solutions that enhance your living space. Not only do they make your home more organized, but they also add character and charm, proving that even the smallest nooks can make a big impact when it comes to storage!

9. The Benefits of Open Shelving

Open shelving has gained immense popularity in recent years, and for good reason. Not only does it offer a stylish and modern aesthetic, but it also serves as a practical solution for maximizing storage in your home. One of the primary benefits of open shelving is its ability to create an illusion of space. Unlike bulky cabinets that can make a room feel cramped, open shelves allow light to flow freely, making your area feel airy and expansive.

Moreover, open shelving encourages organization and accessibility. Items displayed on open shelves are easy to see and reach, reducing the time spent rummaging through closed cabinets. This can be particularly beneficial in a kitchen setting, where quick access to spices, utensils, and dishware can streamline your cooking process. By arranging your items thoughtfully, you can turn mundane kitchenware into a display of art, showcasing beautiful dishes, glassware, or even potted herbs.

In addition to practicality, open shelving offers a canvas for your creativity. You can mix and match various materials and styles, from rustic wooden shelves to sleek metal brackets, creating a personalized look that reflects your taste. Adorning the shelves with decorative items, such as picture frames, books, and plants, can add character to your space, making it feel warm and inviting.

Another significant advantage of open shelving is its cost-effectiveness. Compared to traditional cabinetry, shelves are often less expensive and easier to install, making them a great option for those looking to enhance their storage without breaking the bank. Plus, they can be a DIY project for those who enjoy hands-on home improvement.

However, it’s essential to consider the maintenance aspect of open shelving. Unlike closed cabinets, open shelves require regular cleaning and organization to maintain their visual appeal. Dust, fingerprints, and clutter can quickly diminish their charm, so committing to a routine of tidying up is crucial.

In conclusion, open shelving is a versatile storage solution that combines style and functionality. By embracing this trend, you can transform your home into a more organized, visually appealing space while enjoying the many benefits that come with it. So go ahead, unleash your creativity, and let your shelves tell your story!

10. Smart Storage Solutions for Small Kitchens

Kitchens often serve as the heart of the home, where culinary creativity and family gatherings come to life. However, when space is limited, maximizing every inch becomes essential. Here are some smart storage solutions that can transform your small kitchen into a functional and organized cooking haven.

**1. Vertical Space Utilization:** One of the most effective ways to enhance storage in any small kitchen is by looking upwards. Install floating shelves above countertops to display cookbooks, spices, or decorative jars. This not only frees up counter space but also adds a personal touch to your kitchen decor. Additionally, consider wall-mounted pot racks or magnetic strips for hanging knives, which keeps frequently used items within easy reach while saving drawer space.

**2. Under-Cabinet Storage:** The area beneath cabinets often goes underutilized. Install pull-out trays or baskets to store canned goods or kitchen gadgets that might otherwise clutter your countertops. Another great idea is to attach hooks or racks underneath cabinets for hanging mugs, utensils, or even a small dish towel.

**3. Multi-Functional Furniture:** Opt for kitchen islands or carts that offer additional storage and workspace. Many of these pieces come equipped with shelves or drawers, allowing you to store pots, pans, and other essentials right where you need them. Plus, they can easily be moved or tucked away when not in use, making them a versatile solution for compact kitchens.

**4. Creative Use of Cabinet Space:** Don’t overlook the power of organizers inside cabinets. Invest in tiered shelves to maximize vertical space inside your cupboards or use lazy Susans for easy access to spices and condiments. Drawer dividers can help keep utensils sorted and easy to find, while stackable bins can store small items without creating chaos.

**5. Door Storage:** The backs of cabinet doors are often a goldmine for extra storage. Attach racks or small bins to hold cutting boards, lids, or spices. This keeps items organized and prevents them from taking up valuable shelf space, ensuring everything has its place.

By implementing these smart storage solutions, even the smallest kitchens can feel spacious and efficient. With a little creativity and strategic planning, you can transform your culinary space into an organized oasis, making cooking and entertaining a joyful experience rather than a cluttered hassle. Embrace the challenge of small spaces and watch your kitchen flourish!

11. Bathroom Storage Hacks

When it comes to maximizing space in your home, the bathroom often presents unique challenges. Limited square footage combined with an array of toiletries, towels, and cleaning supplies can quickly turn this sanctuary into a cluttered mess. However, with a bit of creativity and clever organization, you can transform your bathroom into a functional and stylish oasis. Here are some ingenious bathroom storage hacks to help you reclaim that precious space.

**Utilize Vertical Space:** One of the most effective ways to create storage in a small bathroom is to think vertically. Install floating shelves above the toilet or sink area to store items like extra towels, decorative plants, or baskets filled with skincare products. This not only keeps your essentials within reach but also adds a decorative touch to your walls.

**Over-the-Door Organizers:** Don’t overlook the space behind your bathroom door! Over-the-door organizers can be a game-changer, providing additional storage for everything from hair tools to cleaning supplies. Look for clear pocket organizers for easy visibility or opt for a stylish fabric version that complements your decor.

**Magnetic Strips for Small Items:** For those tiny items that always seem to get lost, magnetic strips can be a lifesaver. Attach a strip to the inside of your bathroom cabinet door to hold bobby pins, tweezers, and other metal tools. This not only keeps them organized but also frees up drawer space for larger items.

**Utilize Baskets and Bins:** Embrace the power of baskets and bins to create a cohesive storage solution. Choose stylish wicker or fabric baskets to corral similar items together, such as bath products, first aid supplies, or makeup. Labeling each basket adds a personal touch while ensuring everyone in the household knows where to find and return items.

**Under-Sink Solutions:** The area under your sink is often underutilized. Consider installing a tiered shelving unit or stacking bins to maximize this space. You can store cleaning supplies, extra toilet paper, or even a small laundry basket for dirty towels. With a little creativity, this often-forgotten area can become a prime storage zone.

**Wall-Mounted Storage:** Wall-mounted baskets or racks can provide additional storage for frequently used items, keeping them easily accessible without taking up valuable counter space. Consider a wall-mounted hairdryer holder or a small shelf for skincare products to keep your bathroom looking tidy.

By implementing these bathroom storage hacks, you can create a more organized and functional space, allowing you to enjoy the tranquility of your bathroom without the stress of clutter. With a little ingenuity, even the smallest bathrooms can shine!

12. Outdoor Storage Ideas for Balconies and Patios

When it comes to maximizing your outdoor space, balconies and patios offer a unique challenge—and opportunity—for creative storage solutions. These areas often become catch-alls for gardening tools, outdoor furniture, and seasonal decorations, leaving little room for relaxation or enjoyment. However, with a bit of ingenuity, you can transform your balcony or patio into a stylish, functional oasis that accommodates both storage and leisure.

One of the most effective ways to create additional storage is through multifunctional furniture. Consider investing in benches with hidden compartments or storage ottomans that double as seating. These pieces allow you to stow away cushions, gardening supplies, or even children’s toys while maintaining a tidy appearance. Look for weather-resistant materials that can withstand the elements, ensuring your investment lasts for years.

Vertical space is often underutilized in outdoor areas, making vertical gardens or wall-mounted shelves a brilliant solution. Install floating shelves to display potted plants, decorative items, or even a mini herb garden. This not only adds a touch of greenery but also frees up valuable floor space. If you’re feeling adventurous, you could create a vertical garden using planters that hang from the wall—bringing nature closer while providing ample storage for your gardening tools and supplies.

Don’t forget about the power of decorative storage options! Wicker baskets or stylish storage bins can be placed in corners or on tabletops, adding both charm and functionality. These can hold anything from outdoor blankets to small gardening tools, all while enhancing the aesthetic of your outdoor space.

Finally, utilize the often-overlooked space under your balcony or patio. Consider installing a storage shed or using deck boxes to keep larger items like grill accessories, patio cushions, or sports equipment out of sight. These can also serve as seating if you choose the right design, adding even more utility to your outdoor area.

By implementing these creative outdoor storage solutions, you can transform your balcony or patio into a clutter-free retreat that invites relaxation and enjoyment, all while keeping your essentials easily accessible. Embrace the opportunity to maximize your space and make your outdoor area a true extension of your home!

13. Seasonal Storage: Tips for Organizing Your Belongings

When it comes to maximizing your space, seasonal storage is a game-changer that can help you reclaim valuable square footage in your home. As the seasons change, so do our storage needs, and being strategic about how you organize your belongings can make a significant difference. Here are some practical tips for tackling the clutter that comes with seasonal transitions.

**1. Assess and Purge:** Before diving into storage solutions, take the time to assess what you have. Go through your seasonal items—holiday decorations, winter clothing, summer gear—and decide what you really need. This is the perfect opportunity to declutter. Donate or discard items that haven’t been used in the past year, freeing up space and making your storage more efficient.

**2. Invest in Clear Bins:** Visibility is key when it comes to seasonal storage. Opt for clear plastic bins that allow you to see the contents without having to dig through each container. Label each bin clearly, specifying what’s inside and the season it belongs to. This will save you time and frustration when you need to access specific items.

**3. Utilize Vertical Space:** Make the most of your available space by thinking vertically. Install shelves in closets, use wall-mounted racks in garages, or consider over-the-door organizers for seasonal items that might otherwise clutter your living space. Vertical storage not only keeps items organized but also maximizes the square footage of any room.

**4. Create a Seasonal Rotation System:** Designate a specific area in your home for seasonal storage, whether it’s a closet, attic, or basement. As each season approaches, rotate items in and out of this space. For example, when spring arrives, swap out heavy winter coats and boots for lighter clothing and outdoor gear. This not only keeps your home organized but also ensures that you’re always ready for whatever the season brings.

**5. Think Outside the Box:** Consider unconventional storage solutions that could work for your space. Under-bed storage containers are perfect for stowing away off-season clothing or holiday decorations. Furniture with built-in storage, such as ottomans or benches, can also provide a dual function and keep your living areas tidy.

By implementing these seasonal storage tips, you can create a more organized home that evolves with your lifestyle. Not only will you maximize your available space, but you’ll also cultivate a sense of calm by minimizing clutter and making it easier to find what you need, exactly when you need it. Embrace the changing seasons and enjoy the newfound freedom that comes with a well-organized home!

14. DIY Storage Projects for the Creative Homeowner

If you’re a creative homeowner looking to add a personal touch to your space while maximizing storage, DIY storage projects offer an exciting avenue to explore. Not only do these projects allow you to tailor solutions that fit your specific needs, but they also provide a satisfying sense of accomplishment when you see your handiwork in action. Here are a few inspiring ideas to get your creative juices flowing:

**1. Repurposed Furniture:** Consider transforming an old dresser into a chic storage bench. With a little sanding, paint, and some cushions, you can create a stylish piece that serves as both seating and a place to stash shoes, blankets, or toys. Similarly, turn an unused wooden ladder into a unique bookshelf or display for plants and decorative items.

**2. Floating Shelves:** Floating shelves are an excellent way to make use of vertical space. You can build your own using reclaimed wood or purchase simple brackets and planks. Customize them in various lengths and colors to add visual interest to your walls while providing a perfect spot for books, picture frames, or collectibles.

**3. Under-Bed Storage:** Maximize the often-overlooked space under your bed by creating rolling storage bins. You can easily construct these from plywood or repurpose old drawers attached to wheels. This way, you can store seasonal clothing, shoes, or linens out of sight but still within easy reach.

**4. Wall-Mounted Organizers:** Get crafty with wall-mounted organizers made from pegboards or corkboards. These versatile boards can hold anything from crafts supplies to kitchen utensils, keeping your essentials organized and at hand. You can paint them to match your decor, adding both functionality and flair.

**5. Multi-Functional Ottomans:** Why not build your own ottoman that doubles as storage? By using a sturdy box and adding a padded top, you can create a stylish piece that provides both a footrest and a place to store blankets, magazines, or remote controls.

These DIY storage projects not only help you reclaim space but also allow you to express your creativity and style throughout your home. So gather your tools, unleash your imagination, and turn clutter into clever solutions that reflect your personality while keeping your home organized.

15. Conclusion: Embracing Minimalism and Smart Design

As we conclude our exploration of creative storage solutions, it’s essential to acknowledge that maximizing your space goes beyond merely adding shelves or cabinets. It is about embracing a mindset of minimalism paired with smart design principles that transform your home into a sanctuary of organization and tranquility.

Minimalism encourages us to declutter our lives, allowing only the items that bring us joy or serve a purpose to occupy our spaces. This approach not only frees up physical room but also contributes to a sense of mental clarity and calm. By reducing the number of possessions we own, we create an environment that feels more expansive and inviting, making it easier to maintain.

Smart design, on the other hand, leverages the principles of functionality and aesthetics to ensure that every inch of your home serves a dual purpose. Think about multi-functional furniture—like a coffee table that doubles as storage or a bed with built-in drawers. Incorporating vertical shelving or utilizing the often-overlooked areas under stairs can significantly enhance your storage capabilities without sacrificing style.

Together, minimalism and smart design create a harmonious living space that reflects your personal style while being practical. As you implement these creative storage solutions, remember that the ultimate goal is not just to store more, but to cultivate an environment that promotes a balanced, organized lifestyle. Embrace this journey, and you’ll find that the right balance between form and function can lead to a home that feels both spacious and serene.

As we wrap up our exploration of creative solutions for adding storage to your home, we hope you feel inspired to transform your spaces into organized, functional havens. Whether it’s utilizing vertical wall space, investing in multifunctional furniture, or embracing clever storage hacks, the possibilities are endless when it comes to maximizing your home’s potential. Remember, a well-organized space not only enhances your home’s aesthetic but also contributes to a more serene and stress-free living environment. So, roll up your sleeves and get started on these projects—your dream of a clutter-free home is just a few creative solutions away! We’d love to hear about your own storage transformations, so feel free to share your ideas and successes with us in the comments!

What are the best ways to organize your garage?

Your garage is often the unsung hero of your home—a multifaceted space that serves as a workshop, storage area, and sometimes even a gym or laundry room.

However, it can quickly become a chaotic catch-all for tools, seasonal decorations, and forgotten items, leaving you overwhelmed and frustrated. If you’re ready to reclaim this valuable space and transform it into an organized haven of efficiency, you’re in the right place! In this blog post, we’ll explore top tips and innovative strategies to help you streamline your garage organization, maximize storage potential, and create a functional environment that meets all your needs. Whether you’re looking to create a streamlined workspace for your DIY projects or simply want to find room for your car again, our comprehensive guide will empower you to take control and breathe new life into your garage. Get ready to roll up your sleeves and discover how a little planning and creativity can turn your cluttered garage into a beautifully organized space!

1. Assessing Your Garage Space: A Comprehensive Inventory

What are the best ways to organize your garage?
Credit : whatcanu.com

Before diving headfirst into the exciting world of garage organization, it’s essential to take a step back and conduct a thorough assessment of your available space. This comprehensive inventory will serve as the foundation for your transformation, ensuring that every inch of your garage is utilized efficiently and effectively.

Start by emptying your garage completely. This may seem daunting, but it’s a crucial step in understanding what you have and how best to arrange it. As you clear the clutter, take the opportunity to categorize your belongings into distinct groups: tools, seasonal decorations, sports equipment, gardening supplies, and more. This will not only help you visualize the items you own but will also highlight any duplicates or forgotten treasures that can be donated or discarded.

Once you’ve sorted through your items, create a detailed inventory list. Note down the quantity of each category and any specific items that need special attention, such as expensive tools that require secure storage or fragile decorations that need protective containers. This inventory will help you identify what needs to stay, what can go, and what storage solutions may be necessary to accommodate everything.

While you’re assessing your space, take a close look at the layout of your garage. Note the existing shelving, hooks, and cabinets, and consider how you can maximize these features. Pay attention to the flow of movement: how easy is it to access frequently used items? Are there areas that feel cramped or inefficient? Jot down ideas for optimizing your layout, such as moving bulky items to the back or using vertical space with wall-mounted storage options.

By completing a comprehensive inventory and assessing your garage space with a critical eye, you will not only gain clarity on what you own but will also set the stage for an organized, functional garage that meets your needs. Armed with this foundational knowledge, you’re ready to embark on the journey of transforming your garage into a well-organized sanctuary of efficiency and utility.

2. Setting Clear Goals for Your Garage Transformation

Setting clear goals for your garage transformation is the first and most crucial step in creating an organized and efficient space. Before diving into the physical work, take a moment to envision what you want your garage to look like and how you intend to use it. Are you aiming for a sleek workshop, an organized storage area, or perhaps a multifunctional space that accommodates both? By defining your objectives, you’ll be able to tailor your efforts to meet your specific needs.

Start by making a list of all the items currently cluttering your garage. Categorize them into groups—tools, sports equipment, seasonal decorations, or gardening supplies. This will help you identify what you really need to keep, what can be donated or discarded, and what might require a designated storage solution. For instance, if you find that your garage is mainly used for gardening, then your goal might be to create a dedicated potting station complete with shelving for soil and tools.

Once you have a clear vision, consider what changes will help you achieve that goal. This could involve investing in shelving units, pegboards, or storage bins to keep everything in its place. You might also want to think about the layout of your garage—ensuring that frequently used items are easily accessible while less-used items are stored out of the way.

Remember, setting goals also means establishing a timeline. Whether you plan to complete your transformation over a weekend or spread it out over several weeks, having deadlines will help keep you motivated and on track. By clearly defining your goals for the garage transformation, you’ll not only create a space that functions efficiently but also one that enhances your home’s overall utility. Embrace the process, and you’ll soon find your garage evolving into a well-organized sanctuary that meets all your needs.

3. Decluttering: The First Step to a Functional Garage

What are the best ways to organize your garage?
Credit : whatcanu.com

Before you embark on any organization project, the most crucial step is decluttering. A garage often becomes a catch-all for items that don’t have a designated space in your home, leading to a chaotic jumble of tools, seasonal decorations, sporting equipment, and forgotten treasures. To reclaim this valuable space, start by evaluating every item within your garage.

Begin by emptying the space entirely—this might seem daunting, but it allows you to see the full extent of what you’re working with. As you pull everything out, sort items into three distinct categories: keep, donate, and discard. Be honest with yourself; if you haven’t used something in the past year, it’s likely time to let it go. This is an excellent opportunity to donate items that are still in good condition but no longer serve a purpose in your life.

For those items that belong in the keep pile, consider their functionality and frequency of use. Group similar items together—tools with tools, sports gear with sports gear, and seasonal items with their counterparts. As you start to see the floor of your garage again, you’ll gain clarity on what you truly need to keep and what can be stored away or disposed of.

Decluttering isn’t just about tossing things out; it’s about creating a curated space that reflects your lifestyle and priorities. Once you’ve sifted through the clutter, you’ll lay the groundwork for a more organized garage, making it easier to implement the organizational systems that follow. With a clean slate, you can start thinking about smart storage solutions that optimize efficiency and ensure your garage remains a functional space for years to come.

4. Categorizing Your Items: Tools, Sports Equipment, and Seasonal Décor

When it comes to transforming your garage into a haven of organization and efficiency, categorizing your items is a crucial step that can simplify your space dramatically. Start by creating distinct zones for your belongings—this not only makes it easier to find what you need but also maximizes your available space.

**Tools**: Designate a specific area for your tools, which can often become a chaotic jumble if left unchecked. Utilize pegboards to hang frequently used tools within easy reach, and invest in shelving or tool cabinets to keep everything orderly. Group tools by type—hand tools, power tools, and gardening implements—so you can quickly grab what you need without rummaging through a disorganized mess. Consider using clear containers or labels to ensure every item has its place.

**Sports Equipment**: Next, tackle the sports equipment that often takes over garage floor space. Create a dedicated corner for bikes, balls, and other gear. Use wall-mounted racks for larger items like bicycles, and bins or baskets for smaller items, such as balls and gloves. This not only keeps everything tidy but also makes it easy to grab and go for spontaneous games or outdoor adventures.

**Seasonal Décor**: Seasonal items, such as holiday decorations, can also benefit from thoughtful categorization. Use opaque bins to store décor for each season, clearly labeled to simplify access when the time comes to deck the halls or celebrate a festive occasion. Stack these bins on high shelves to keep them out of the way during off-seasons, ensuring your garage remains uncluttered year-round.

By categorizing your items into these three key areas, you’ll create a functional garage that not only looks great but enhances your ability to find and use your possessions efficiently. Embrace the freedom of a well-organized space and enjoy the newfound ease it brings to your daily life!

5. Choosing the Right Storage Solutions: Shelving, Cabinets, and Bins

What are the best ways to organize your garage?
Credit : whatcanu.com

When it comes to transforming your garage into a functional and organized space, selecting the right storage solutions is crucial. The vast array of options available today can make the task feel overwhelming, but with a little guidance, you can create a system that works perfectly for your needs.

**Shelving** is a foundational element of garage organization. Open shelving units provide easy access to frequently used items, while heavier-duty shelves can handle the weight of larger tools and equipment. Consider adjustable shelves that can be repositioned as your storage needs change, allowing for flexibility as you accumulate more items over time. Metal or plastic shelves are both durable choices, but be sure to assess the weight capacity to avoid any mishaps.

**Cabinets** offer a sleek and tidy solution for stowing away tools, chemicals, and other equipment that you may not want on display. Opt for cabinets with lockable doors if you’re storing hazardous materials or valuable items. Look for options that include built-in drawers or sliding shelves for added convenience; these features can help maximize space and keep smaller items from getting lost in the clutter.

Don’t overlook the power of **bins**! Clear plastic bins are perfect for categorizing smaller items, such as nails, screws, and gardening tools. Labeling each bin will not only make it easier to find what you need at a glance but will also encourage the whole family to participate in keeping the garage organized. Stackable bins can help you make the most of vertical space, ensuring that every corner of your garage is utilized efficiently.

When selecting your storage solutions, consider the specific items you need to store and how often you access them. A combination of shelving, cabinets, and bins will create a harmonious system that enhances both the organization and efficiency of your garage. By investing a bit of time and thought into these choices, you’re setting the stage for a space that not only looks great but also works seamlessly for your lifestyle.

6. Maximizing Vertical Space: Wall Storage Ideas

When it comes to garage organization, one of the most effective strategies is to look up—literally! Maximizing vertical space can free up valuable floor area, allowing for a more efficient and organized garage. Utilizing your garage walls is not just a smart move; it’s an essential one, especially if you’re working with limited square footage.

Start by installing sturdy shelving units that can accommodate bins, boxes, and tools. Opt for adjustable shelves so you can customize the height according to your storage needs. Adding pegboards is another fantastic option; they can be easily customized with hooks and shelves to store everything from hand tools to gardening supplies. This not only keeps your tools visible and accessible but also adds a pop of visual interest to your garage walls.

Consider wall-mounted cabinets for a cleaner look. These can hide away clutter while still providing ample storage. Choose cabinets with transparent doors or labels to quickly identify contents, making it easier to find what you need without digging through piles of items.

Don’t forget about over-the-door storage solutions! Utilize the inside of your garage door with hanging organizers for smaller items like sports equipment, cleaning supplies, or even paint cans. This clever use of space can significantly declutter your garage while keeping everything within reach.

For those with bicycles or larger sporting gear, consider vertical bike racks or hooks that keep these items off the floor. Not only does this prevent them from becoming obstacles, but it also adds a touch of organization that showcases your gear.

By maximizing vertical space, you can transform your garage from a chaotic storage area into a highly functional workspace. Embrace the walls as your allies in organization, and you’ll find yourself enjoying a more efficient and pleasant garage environment.

7. The Importance of Zones: Creating Functional Areas in Your Garage

What are the best ways to organize your garage?
Credit : whatcanu.com

When it comes to transforming your garage into a well-organized, efficient space, the concept of zoning is paramount. Just as a well-designed home features distinct areas for living, cooking, and relaxing, your garage can benefit from clear, functional zones tailored to your specific needs. By creating designated areas for different activities or types of items, you’ll not only maximize space but also enhance your efficiency when accessing tools, sports equipment, or seasonal décor.

Start by assessing how you currently use your garage. Do you need a workshop area for your DIY projects? A designated space for gardening supplies? Or perhaps an organized section for your kids’ toys and outdoor gear? Once you’ve identified your primary functions, you can begin to allocate space accordingly.

For instance, consider establishing a “Workshop Zone” that includes pegboards for tools, a sturdy workbench, and storage bins for screws and nails—everything you need to keep your projects flowing smoothly. Next, a “Seasonal Zone” can house holiday decorations, camping gear, and winter sports equipment, clearly labeled and stored in easy-to-reach containers. By grouping like items together, you’ll eliminate the frustration of searching for misplaced tools or gear when you need them most.

Don’t forget about vertical space! Installing shelves and wall-mounted racks can help you take advantage of every inch of your garage. This allows you to keep the floor clear, making the space feel larger and more inviting. Additionally, incorporating rolling carts or mobile storage solutions can provide flexibility, allowing you to shift items around as your needs evolve.

Ultimately, creating functional areas in your garage is about more than just aesthetics; it’s about cultivating an environment that supports your daily activities and hobbies. With well-defined zones, you’ll find that not only does your garage become more visually appealing, but it also transforms into a practical, efficient hub that simplifies your life. Embrace the art of zoning, and watch as your garage transforms into a beautifully organized space that works for you.

8. Essential Tools for a DIY Garage Organization Project

When embarking on a DIY garage organization project, having the right tools at your disposal can make all the difference. A well-equipped garage isn’t just about aesthetics; it’s about creating a functional space that enhances efficiency and productivity. Here are some essential tools that will streamline your organization efforts and help you reclaim your garage from chaos.

**1. Tool Storage Solutions:** Start with storage solutions that suit your needs. Tool chests, pegboards, and wall-mounted shelves are invaluable for keeping your tools easily accessible yet neatly stored. Consider investing in stackable bins or clear containers for small items; they allow for easy visibility and prevent misplacement.

**2. Labeling Supplies:** A labeling system is crucial for any organized garage. Use a label maker or colorful adhesive labels to clearly mark boxes and shelves. This not only helps you find items swiftly but also encourages family members to return things to their rightful place.

**3. Measuring Tools:** Accurate measurements are key to optimizing your garage’s layout. Have a tape measure, level, and square handy to ensure everything fits perfectly and is aligned correctly, whether you’re installing shelves or arranging larger items.

**4. Cleaning Supplies:** Before you can organize, you need to clean. A broom, dustpan, shop vacuum, and microfiber cloths will help clear away dust, dirt, and debris. Consider using a degreaser for those tougher stains that often collect in a garage.

**5. Hooks and Racks:** Maximize vertical space by incorporating hooks and racks. They are perfect for hanging bikes, ladders, and garden tools, which free up floor space and make it easier to navigate your garage.

**6. Workbench:** A sturdy workbench provides a dedicated space for projects and repairs. Choose one that includes drawers or shelves for additional storage, keeping your tools and materials organized and within reach.

**7. Storage Cabinets:** Invest in weather-resistant storage cabinets to keep hazardous materials and lesser-used items out of sight. Look for cabinets with locking mechanisms for added safety, especially if children are around.

**8. Safety Gear:** Finally, don’t forget your safety gear. Gloves, goggles, and masks protect you while you work, ensuring that your DIY project is safe as well as productive.

Equipped with these essential tools, you’ll be well on your way to transforming your garage into an organized, efficient space that you can be proud of. With a little planning and the right equipment, you can create a garage that not only serves its purpose but also inspires creativity and productivity.

9. Tips for Maintaining Your Organized Garage

Once you’ve transformed your garage into a well-organized haven, the next challenge is maintaining that order. A well-maintained garage not only enhances efficiency but also extends the life of your belongings and maximizes your space. Here are some valuable tips to help you keep your organized garage in tip-top shape:

1. **Establish a Routine**: Set aside a specific time each month to assess your garage’s organization. Use this time to tidy up, put tools back in their designated spots, and remove any items that no longer belong. This habit will help prevent clutter from accumulating and ensure that everything remains in its place.

2. **Implement a “One In, One Out” Policy**: When you bring a new item into your garage—be it a tool, a storage box, or seasonal equipment—commit to removing one item. This practice not only keeps your space from becoming overcrowded but also encourages thoughtful purchasing.

3. **Utilize Clear Storage Solutions**: Invest in clear bins or containers for your items. Being able to see the contents at a glance helps you quickly identify what you need, reducing the likelihood of rummaging through multiple boxes. Label each container clearly to make retrieval even easier.

4. **Regularly Reassess Storage Systems**: As your needs change, so should your storage solutions. Evaluate your shelving, hooks, and bins every few months to ensure they are still serving their purpose. You might find that some areas need more organization, while others could benefit from a downsizing.

5. **Engage the Family**: Make garage maintenance a family affair. Assign each family member specific tasks, such as keeping their sports equipment organized or maintaining tool cleanliness. This shared responsibility not only lightens your load but also fosters a collective sense of ownership over the space.

6. **Embrace Seasonal Cleanouts**: Take advantage of seasonal changes to re-evaluate your garage’s contents. Before winter, check that your snow shovels and winter gear are accessible. In the spring, ensure that your gardening tools and outdoor equipment are ready for use. Seasonal checks can help you stay organized year-round.

By implementing these maintenance strategies, you’ll not only keep your garage organized but also create a functional space that enhances your daily life. A well-kept garage can be a source of pride, embodying a sense of order and efficiency that resonates throughout your home.

10. Incorporating Smart Solutions: Technology for Garage Efficiency

In today’s fast-paced world, incorporating smart solutions into your garage organization can elevate both efficiency and convenience to new heights. Imagine stepping into your garage and instantly knowing where everything is stored, thanks to a seamless integration of technology. From smart shelving units that adjust their height at the touch of a button to app-controlled lighting that illuminates your workspace, innovative technologies can transform your cluttered garage into a streamlined haven of productivity.

One of the most effective ways to incorporate technology is through the use of smart storage systems. These systems often come equipped with built-in sensors that can track inventory levels, alerting you when it’s time to restock supplies or when certain items are being used more frequently. Imagine having a digital inventory list accessible on your smartphone, allowing you to quickly find tools or equipment without digging through piles of boxes.

Additionally, consider integrating smart charging stations for your power tools and batteries. These stations not only keep your devices charged and ready for use but also feature organization solutions that prevent clutter. With designated spots for each tool, you’ll never have to waste time searching for a drill or a saw again.

Moreover, smart garage door openers equipped with mobile app controls can enhance the safety and accessibility of your space. No more fumbling for keys or worrying about whether you left the garage door open; you can control it from anywhere, ensuring peace of mind whether you’re home or away.

Finally, implement smart lighting solutions featuring motion sensors that automatically turn on when you enter. This not only saves energy but also provides a well-lit workspace, making it easier to tackle projects without fumbling in the dark.

Incorporating these cutting-edge technologies into your garage will not only optimize your organizational efforts but also create a more enjoyable and efficient environment. Embrace the future of garage organization, and watch as your space transforms into a well-oiled machine that works as hard as you do.

11. Creative Ideas for Repurposing Garage Items

When it comes to transforming your garage into a well-organized haven, one of the most rewarding approaches is to repurpose items you already have. Not only does this practice promote sustainability, but it also allows you to utilize your creativity and give new life to overlooked objects. Here are some inventive ideas for repurposing common garage items that can enhance both functionality and aesthetic appeal.

1. **Old Cans and Jars**: Instead of tossing out those empty paint cans or mason jars, consider using them for storage. Paint cans can be transformed into vibrant containers for tools or small garden supplies, while jars can neatly organize screws, nails, and other small hardware items. Label them for easy identification and stack them on shelves for a tidy look.

2. **Wood Pallets**: If you have wooden pallets lying around, they can be repurposed into a variety of useful items. Create a unique shelving unit by stacking pallets vertically, or use them as a base for a workbench. With a little sanding and finishing, they can add a rustic charm to your garage space.

3. **Unused Bike Racks**: Instead of letting an old bike rack gather dust, consider repurposing it as a tool holder. Hang it on the wall and use the hooks to store garden tools, brooms, or even extension cords. This frees up floor space and keeps your tools organized and easily accessible.

4. **Wine Crates**: Those sturdy wooden wine crates can be given a second life as stylish storage solutions. Stack them to create shelving for smaller items, or mount them on the wall for a more artistic display. They can also serve as rustic planters for your favorite herbs or flowers, adding a touch of greenery to your garage.

5. **Mismatched Hooks and Hangers**: If you have a collection of leftover hooks or hangers from various projects, don’t let them go to waste. Mix and match them to create a custom wall organizer for tools, gardening equipment, or sports gear. This eclectic display not only serves a practical purpose but also adds a quirky touch to your garage décor.

6. **Old Furniture**: Repurpose that old dresser or cabinet you no longer need. With a bit of creativity, it can become a fantastic storage solution for smaller items or even a workbench. Remove the drawers to create an open shelf for larger tools, or keep them intact to store paints and supplies out of sight.

By embracing these creative repurposing ideas, you can transform your garage into an organized, efficient space that reflects your personality and meets your storage needs. Not only will you declutter and maximize your space, but you’ll also find joy in the process of giving new life to items that might have otherwise been discarded. So gather those unused treasures and get creative—your dream garage awaits!

12. Safety First: Ensuring a Secure and Safe Garage Environment

When it comes to transforming your garage into a well-organized and efficient space, safety should always be your top priority. A cluttered garage not only creates a stressful environment but can also pose significant hazards. By taking proactive steps to ensure a secure and safe garage, you’re not just protecting your belongings but also safeguarding your family and pets.

Start by assessing your garage for any potential dangers. Look for sharp tools, heavy items that could fall, or hazardous materials like chemicals and paints that need proper storage. Invest in sturdy shelving units to elevate items off the floor, reducing tripping hazards and protecting your possessions from water damage in case of flooding. Clearly label all storage bins and containers, especially those that contain toxic substances, to prevent accidental exposure.

Another crucial aspect of garage safety is proper lighting. A well-lit space allows you to navigate easily and spot any hazards before they become an issue. Consider installing motion-sensor lights or bright LED fixtures to illuminate every corner of your garage. This not only enhances visibility but also adds an extra layer of security by discouraging unwanted visitors.

Furthermore, ensure that your garage door is functioning correctly. Regular maintenance checks can prevent accidents related to malfunctioning doors. If you have a garage door opener, keep the remote out of reach of children and ensure all family members understand how to operate it safely.

Lastly, create a clear pathway in your garage to facilitate easy movement. This involves regularly decluttering and re-evaluating what items you truly need. By maintaining an organized space, you reduce the risk of accidents and promote a more efficient workflow.

By prioritizing safety in your garage organization project, you’ll create not only an aesthetically pleasing space but also one that is functional and secure—allowing you to enjoy all the benefits your transformed garage has to offer.

13. Seasonal Maintenance: Keeping Your Garage Organized Year-Round

Seasonal maintenance is a crucial aspect of keeping your garage organized, ensuring that it remains a functional space all year round. As the seasons change, so do the items we store and the activities we enjoy. This means it’s important to regularly assess and adjust the organization of your garage based on seasonal needs.

In the spring, for instance, you might find gardening tools, lawn equipment, and sports gear coming to the forefront. Take this opportunity to declutter and clean, removing any items that are broken or no longer used. Consider implementing a designated area for gardening supplies, complete with shelves for pots and planters, hooks for tools, and bins for soil and fertilizer. This not only keeps everything handy but also encourages you to engage in your gardening projects with ease.

As summer rolls in, focus on outdoor gear like bicycles, camping equipment, and beach supplies. This is the ideal time to create a dedicated storage solution for these items, such as wall-mounted racks or overhead storage to free up floor space. Adding clear bins can help you easily identify seasonal items at a glance, making it simple to grab what you need for weekend adventures.

When fall approaches, your garage will likely become a hub for tools and decorations as you prepare for the harvest season and holidays. This is a perfect time to sort through your Halloween decorations, organize your tool collection for home improvements, and even set up a space for holiday storage. Consider investing in clear storage bins with labels to keep everything organized and easy to find, minimizing the chaos that often accompanies holiday prep.

Finally, winter necessitates a focus on snow removal tools, seasonal sports equipment, and other cold-weather gear. Ensure that shovels, snow blowers, and winter tires are easily accessible, and consider using wall hooks or pegboards to keep them off the ground. Additionally, use this season to review your inventory of items that can be donated or discarded, making way for fresh starts in the New Year.

By committing to seasonal maintenance, you not only keep your garage organized, but you also enhance its efficiency, making it a space that adapts to your changing needs throughout the year. Regularly revisiting your storage solutions and adjusting them as necessary will ensure that your garage remains a valuable, clutter-free area that you can rely on, no matter the season.

14. Inspiring Before-and-After Transformations: Case Studies

There’s nothing quite like witnessing a dramatic before-and-after transformation to fuel your own organizational dreams. In this section, we delve into some inspiring case studies that showcase the incredible potential of a well-organized garage. Each of these transformations not only maximizes space but also enhances functionality, turning cluttered chaos into an oasis of efficiency.

**Case Study 1: The Family Hub**

Meet the Johnsons, a family of four whose garage had become a dumping ground for everything from sports equipment to holiday decorations. Before the transformation, they struggled to find space for their car, let alone their bikes and gardening tools. After assessing their needs, we helped them implement a custom shelving system that utilized vertical space and labeled bins for easy access. The result? A garage that now serves as a family hub for activities. The kids can easily grab their bikes, and the family can access holiday decorations in a fraction of the time it once took.

**Case Study 2: The DIY Dream**

Next, we feature Mark, an avid DIYer whose garage was overrun with tools and materials. His before photo depicts a chaotic mix of saws, paints, and lumber strewn about, making it nearly impossible to work on projects. Together, we designed a pegboard wall to display tools prominently and included a mobile workbench for versatility. After the transformation, Mark can now focus on his projects without the distraction of disorder. The garage not only serves as a workspace but also inspires creativity, showcasing beautifully organized tools and materials.

**Case Study 3: The Minimalist Approach**

Lastly, we highlight Sarah, a minimalist who wanted her garage to reflect her lifestyle. Initially, her garage was cluttered with rarely used items, creating a sense of overwhelm. We proposed a radical decluttering session, which included donating items and finding new homes for others. With the remaining essentials, we introduced a sleek storage solution that melded form and function, such as stylish bins and a compact, multi-purpose shelving unit. The after photo reveals a serene space that epitomizes simplicity and calm – a true testament to the power of organization.

These case studies illustrate that with a bit of vision and the right organizational tools, any garage can be transformed into a well-ordered, efficient space. Whether you’re looking for functionality, creativity, or a minimalist aesthetic, these inspiring transformations can motivate you to embark on your own garage makeover journey. So grab your tools, roll up your sleeves, and get ready to turn your cluttered garage into a space you love!

15. Final Thoughts: Embracing an Organized Garage Lifestyle

As you stand in your freshly organized garage, it’s hard not to feel a sense of accomplishment and relief. The clutter that once consumed your space has been replaced with a sense of order and tranquility, allowing your garage to become a functional extension of your home rather than just a storage area. Embracing an organized garage lifestyle is more than just a one-time project; it’s a commitment to maintaining a space that promotes efficiency and peace of mind.

Imagine opening your garage door and stepping into a well-structured environment where everything has its place. Tools are neatly arranged on pegboards, seasonal decorations are stored in labeled bins, and your car has ample room to park without the threat of bumping into scattered boxes. This level of organization not only enhances the functionality of your garage but also simplifies your life. No more frantic searches for misplaced tools or forgotten items; instead, you’ll enjoy a seamless workflow every time you enter the space.

Embracing this organized lifestyle means establishing routines that prioritize tidiness and efficiency. Regularly reassess your storage solutions—what worked a few months ago might need adjusting as your needs evolve. Encourage family members to participate in maintaining this newfound organization, fostering a collective sense of responsibility. With everyone on board, your garage can remain a well-oiled machine, ready to serve you through every season and project.

Ultimately, an organized garage is about more than just aesthetics or storage solutions; it’s about creating a space that inspires creativity, productivity, and peace of mind. By committing to this organized lifestyle, you’ll not only enhance your garage’s functionality but also free up mental space, allowing you to focus on what truly matters – whether that’s tackling new projects, spending quality time with family, or simply enjoying the serenity of a clutter-free environment. So take a deep breath, step back, and embrace the organized garage lifestyle—you’ve earned it!

We hope you found our tips for transforming your garage into a well-organized and efficient space both inspiring and practical. A garage can be so much more than just a storage area; with the right strategies, it can become a functional extension of your home, tailored to meet your needs. By implementing the ideas we’ve shared—like decluttering, utilizing vertical space, and investing in smart storage solutions—you can create a garage that not only enhances your lifestyle but also adds value to your property. As you embark on this organizational journey, remember that every small step counts towards achieving the ultimate garage transformation. We’d love to hear about your progress, so feel free to share your before-and-after photos or any additional tips in the comments below. Happy organizing!

What are the best ways to declutter your home?

In a world overflowing with possessions, the idea of a clutter-free home often feels like a distant dream.

The piles of unused items, scattered belongings, and overstuffed closets can create an overwhelming sense of chaos, making it difficult to relax and enjoy your living space. But fear not! Reclaiming your home doesn’t have to be an insurmountable task. In this blog post, we’ll explore ten proven strategies that will help you declutter your home effectively, allowing you to create a serene and inviting environment. From adopting minimalist principles to implementing practical organizational techniques, these strategies will empower you to sift through the clutter and find peace in your surroundings. Whether you’re tackling a single room or your entire house, these tips will guide you on your journey to a more organized, harmonious living space. Get ready to breathe new life into your home and experience the freedom that comes with a decluttered sanctuary!

1. Understanding the Benefits of Decluttering

What are the best ways to declutter your home?
Credit : whatcanu.com

Decluttering is more than just a trendy buzzword; it’s a transformative practice that can significantly enhance your quality of life. At its core, decluttering means simplifying your living space by removing unnecessary items, which can lead to a myriad of benefits that extend beyond mere aesthetics.

First and foremost, decluttering can create a sense of physical and mental space. When you clear out the clutter, you pave the way for a more organized environment, allowing for easier navigation through your home. This newfound order can lead to reduced stress and anxiety levels, as studies have shown that a tidy space can promote a sense of calm and control.

Moreover, decluttering can enhance your productivity. A clean and organized environment fosters focus and creativity, making it easier to accomplish tasks without the distraction of unnecessary items vying for your attention. Imagine sitting down to work in a serene space, where everything you need is readily accessible, and nothing feels overwhelming. This streamlined approach can boost your efficiency and inspire you to tackle projects you may have been putting off.

Decluttering also offers a unique opportunity for self-reflection. As you sift through your belongings, you may discover items that no longer serve you or reflect who you are today. This process encourages you to evaluate your values and priorities, leading to more intentional living. By letting go of things that hold you back, you can make room for new experiences, relationships, and opportunities.

Additionally, a decluttered home can also improve your overall well-being. When your space is organized and free of excess, it can lead to a healthier lifestyle. For instance, you might find it easier to maintain cleanliness and hygiene, as surfaces are less cluttered and easier to clean. This can contribute to better air quality and a more peaceful atmosphere, ultimately supporting both your physical and emotional health.

Lastly, decluttering can be financially beneficial. By selling or donating items you no longer need, you can free up space and potentially make some extra cash. This practice not only reduces what you own but also fosters a sense of gratitude for what you have, encouraging more mindful purchasing in the future.

In summary, understanding the benefits of decluttering is the first step toward reclaiming your space. From reducing stress and enhancing productivity to promoting self-reflection and improving overall well-being, the advantages of a clutter-free home are numerous. As you embark on this journey, remember that each item you let go of is a step toward a more harmonious and fulfilling living environment.

2. Set Clear Decluttering Goals

Setting clear decluttering goals is the foundation for a successful and stress-free decluttering journey. Without specific objectives, the task can feel overwhelming, leading to frustration and stagnation. Start by envisioning what a decluttered space looks like for you—imagine an inviting living room free from clutter, a kitchen with organized cabinets, or a bedroom that offers a serene escape. These visions will serve as your guiding light.

Begin by breaking down your decluttering journey into manageable goals. Instead of saying, “I need to declutter my entire home,” focus on smaller, achievable targets such as “I will declutter my closet this weekend” or “I will tackle the kitchen drawers by the end of the month.” This approach not only makes the task feel less daunting but also allows for a sense of accomplishment as you check off each goal.

Consider using the SMART criteria—Specific, Measurable, Achievable, Relevant, and Time-bound—to help shape your goals. For instance, instead of setting a vague goal of “getting rid of clothes,” aim for “donating three bags of clothes I haven’t worn in the last year by the end of the month.” By setting clear, actionable goals, you will maintain focus and motivation throughout the decluttering process.

Additionally, write down your goals and place them in visible areas around your home to keep them top of mind. This constant reminder will encourage you to stay on track and reignite your commitment when the going gets tough. Remember, decluttering isn’t just about creating space; it’s about creating a sanctuary where you can thrive. With clear goals in place, you’re well on your way to reclaiming your space and fostering a more peaceful, organized home environment.

3. The 10-Second Rule: Quick Decisions for Items

What are the best ways to declutter your home?
Credit : whatcanu.com

The 10-Second Rule is a simple yet effective strategy that can revolutionize the way you tackle clutter in your home. The premise is straightforward: when faced with an item, give yourself just ten seconds to decide its fate. This time constraint encourages swift decision-making, preventing you from succumbing to indecision or sentimentality that often leads to clutter accumulation.

As you hold each item in your hands, ask yourself a series of quick questions: Do I use it? Do I love it? Does it serve a purpose in my life? If the answer is no, then it’s time to let it go. This method promotes a mindset of practicality and clarity, steering you away from the emotional attachments that can cloud your judgment.

For instance, standing in front of a stack of books, the clock starts ticking. You’ve enjoyed some of them, but do you really need to keep every volume? Ten seconds later, you might find yourself placing three books in a donation pile, realizing that they can bring joy to someone else.

Applying the 10-Second Rule can instantly transform daunting decluttering tasks into manageable, bite-sized decisions. As you move through your space with this newfound efficiency, you’ll feel empowered by each choice you make, gradually reclaiming your environment from the grips of clutter. It’s a small change that can yield significant results, making your home not just more organized, but a space where you can truly thrive.

4. One Room at a Time: Creating a Focused Plan

When it comes to decluttering your home, the idea of tackling the entire space can feel overwhelming, often leading to procrastination and frustration. That’s why adopting a one-room-at-a-time strategy is not just practical—it’s transformative. By creating a focused plan, you can channel your energy and attention into a single area, allowing for a more thorough and satisfying decluttering process.

Start by selecting the room that feels most cluttered or the one that you spend the most time in. This could be your living room, kitchen, or bedroom—wherever you feel the most chaos. Once you’ve made your choice, set aside dedicated time to work in that space. It’s important to approach this with a clear mindset; aim for quality over quantity.

Break down the room into smaller sections—perhaps starting with a closet, a drawer, or a single shelf. This will help you avoid feeling overwhelmed by the sheer volume of items that need sorting. As you go through each section, ask yourself critical questions: Do I use this item regularly? Does it bring me joy? Is it functional? This reflective process not only helps you decide what to keep but also reinforces your relationship with the items that truly matter.

As you sort through your belongings, create designated piles: keep, donate, and discard. This visual representation of your decisions can be incredibly motivating. For items you’re unsure about, consider using the “30-day rule”—if you haven’t used it in the last month, it’s likely you won’t miss it.

After successfully decluttering one room, take a moment to revel in your accomplishment. Celebrate the newfound space and clarity that you’ve created. This sense of achievement will fuel your motivation to move onto the next room, making the entire process feel less daunting and more manageable. By focusing on one room at a time, you’ll not only reclaim your space but also cultivate a more intentional and harmonious living environment.

5. The Four-Box Method: Keep, Donate, Sell, Trash

What are the best ways to declutter your home?
Credit : whatcanu.com

The Four-Box Method is a powerful and straightforward strategy that can transform the overwhelming task of decluttering into a manageable and efficient process. This method involves designating four distinct boxes, each with a specific purpose: Keep, Donate, Sell, and Trash. By categorizing your belongings in this way, you can quickly assess what you truly value and what is simply taking up space in your home.

**Keep Box:** Start by gathering items that you use regularly or have sentimental value. This box should contain essentials that contribute to your daily life and happiness. As you sort through your belongings, take a moment to reflect on each item’s significance. If it doesn’t spark joy or serve a purpose, it’s time to consider other options.

**Donate Box:** Next, focus on items that are in good condition but no longer serve you. These could be clothes that no longer fit, books you’ve read and won’t revisit, or kitchen gadgets collecting dust. By placing these items in the Donate box, you not only clear your space but also provide an opportunity for someone else to benefit from what you no longer need. Research local charities or shelters that accept donations, and feel good knowing your items will be put to good use.

**Sell Box:** This box is for items that have value and could be sold for a profit. Think of gently used electronics, furniture, or collectibles that are still in demand. Selling these items online through platforms like eBay, Facebook Marketplace, or local classifieds can help you recoup some of your expenses while decluttering your space. Plus, the extra cash can be a nice incentive to let go of the items you no longer want.

**Trash Box:** Finally, don’t forget to address the items that have outlived their usefulness. Broken appliances, expired products, or damaged goods belong in the Trash box. Disposing of these items responsibly is crucial—recycle whenever possible to reduce waste and help the environment.

As you work through the Four-Box Method, you’ll not only regain physical space in your home but also experience a profound sense of mental clarity. By being intentional about what you keep, donate, sell, and throw away, you pave the way for a more organized and peaceful living environment. This strategy isn’t just about decluttering; it’s about creating a home that truly reflects your lifestyle and values.

6. Digital Decluttering: Organizing Your Virtual Spaces

In today’s technology-driven world, our homes aren’t the only spaces that need decluttering; our digital lives often require just as much attention. Digital decluttering is the process of organizing your virtual spaces—be it your computer, smartphone, or social media profiles—to create a more streamlined and stress-free environment.

Start with your email inbox, which can quickly become a chaotic jumble of unread messages and promotional newsletters. Unsubscribe from anything that no longer serves you, and utilize folders or labels to categorize important emails. Setting aside just a few minutes each day to tackle your inbox can lead to a significant reduction in digital clutter over time.

Next, turn your attention to your files and folders stored on your devices. Take the time to delete duplicate files, outdated documents, and unnecessary downloads. Create a logical folder structure that makes it easy to find what you need when you need it. Consider using cloud storage solutions for easy access and backup; not only does this free up space on your devices, but it also provides peace of mind knowing your important files are secure.

Social media can also contribute to digital clutter. Review your friend and follow lists, removing accounts that no longer resonate with your values or interests. Curate your feeds to ensure they inspire, motivate, and inform you rather than overwhelm you with noise.

Finally, don’t forget about your smartphone apps. Regularly assess the apps you have installed—delete those you rarely use, and organize the remaining ones into folders based on categories like productivity, entertainment, or health. This simple step can make navigating your device more efficient and pleasant.

By taking the time to declutter your digital spaces, you’ll not only enhance your productivity but also create a sense of calmness and control in your life. A tidy digital environment will help you reclaim your focus and make your home feel more spacious and organized in every sense of the word.

7. The 30-Day Declutter Challenge: Daily Tasks to Follow

What are the best ways to declutter your home?
Credit : whatcanu.com

The 30-Day Declutter Challenge is a structured yet flexible approach designed to help you tackle clutter systematically, one day at a time. Each day of the month focuses on a specific area or type of item, allowing you to break down the seemingly overwhelming task of decluttering into manageable daily tasks. By dedicating just a few minutes to each challenge, you’ll find that you can significantly transform your space without feeling overwhelmed.

On Day 1, start with your closet. Pull out items you haven’t worn in the past year and make decisions about what to keep, donate, or discard. Day 2 might focus on your kitchen junk drawer—empty it out and sort through the odds and ends, keeping only what you truly need. As the days progress, you’ll tackle specific categories like books, papers, bathroom products, or even that ever-mysterious “catch-all” space in your home.

The beauty of the 30-Day Declutter Challenge lies in its simplicity and the sense of accomplishment that comes with each completed task. By the end of the month, you’ll not only have a more organized space but also a renewed sense of clarity and peace in your home. Additionally, you’ll cultivate a mindset geared towards maintaining a clutter-free environment, making it easier to uphold these new habits long after the challenge is over. So grab a calendar, commit to the journey, and watch as each small step leads to a significant transformation in your living space!

8. Utilizing Storage Solutions: Bins, Baskets, and Shelves

When it comes to decluttering your home, effective storage solutions are your best allies. Bins, baskets, and shelves can transform chaotic spaces into organized havens, making it easier to reclaim your space and establish a sense of order.

**Bins** are fantastic for storing items out of sight while keeping your home neat. Available in various sizes, colors, and materials, bins can be tailored to suit any room’s aesthetic. Use clear plastic bins to easily identify contents, or opt for decorative fabric bins to add a touch of style. Designate specific bins for different categories—seasonal decorations, sports gear, or craft supplies—and label them for quick access. This not only keeps your belongings organized but also helps streamline your cleaning routine.

**Baskets** offer a charming and versatile storage solution. They can be placed in living rooms to hold blankets, in bathrooms for toiletries, or even in kids’ playrooms to corral toys. The natural textures of woven baskets can add warmth to your decor, making them a perfect choice for those who wish to blend functionality with aesthetics. Plus, baskets are easy to move around, so you can rearrange your space as needed without much hassle.

**Shelves** serve as both functional and decorative elements in any room. Floating shelves can be installed in corners or above furniture to utilize vertical space effectively, while bookcases can provide ample storage for everything from books to decorative items. Consider incorporating shelves into your storage strategy by using them to display family photos, plants, or your favorite books. This not only declutters your surfaces but also adds personality to your home.

By thoughtfully incorporating bins, baskets, and shelves into your organizational strategy, you can create a more manageable and visually pleasing environment. These storage solutions not only help you keep your belongings in check but also foster a sense of calm and tranquility in your living space, making it a joy to come home to.

9. Creating a Maintenance Routine to Prevent Clutter

Creating a maintenance routine is essential for preventing clutter from creeping back into your home after you’ve invested time and effort into decluttering. Think of it as establishing a system that keeps your space organized and harmonious, allowing you to fully enjoy the tranquility of your newly reclaimed areas.

Start by dedicating a few minutes each day to tidy up—this could be as simple as putting items back in their designated places or doing a quick surface clean in high-traffic areas. Incorporate a weekly “reset” day where you tackle specific tasks: dusting, vacuuming, and reorganizing any spaces that may have started to gather odds and ends.

To ensure that you stick to this routine, consider setting reminders on your phone or incorporating these tasks into your daily schedule. Involving other household members can also make this process more manageable and turn it into a fun bonding activity. Create a chore chart to keep everyone accountable, and reward your family for their efforts.

Don’t forget to assess your belongings regularly—perhaps every month or season. This proactive approach allows you to evaluate what’s still serving you and what can be let go of, preventing the buildup of unnecessary items. By establishing a maintenance routine, you not only sustain the decluttered state of your home but also cultivate a mindset of mindfulness and intentionality around your possessions, ensuring that your living space remains a serene sanctuary.

10. Mindset Shifts: Overcoming Emotional Attachments

Decluttering your home isn’t just a physical task; it’s also a mental and emotional journey. One of the most significant barriers to an organized space is the emotional attachment we often develop toward our belongings. It’s common to hold onto items that evoke memories, even if they no longer serve a purpose in our lives. To successfully reclaim your space, you must first navigate these emotional hurdles and adopt a mindset that prioritizes your well-being over sentimental value.

Begin by recognizing that the memories associated with objects can exist independently of the items themselves. Consider taking photographs of cherished items instead of keeping the physical objects. This way, you preserve the memory without the clutter. When faced with a difficult decision about an item, ask yourself questions like, “Does this enhance my life?” or “Would I buy this again today?” This shift in perspective can help you assess your belongings with a more objective lens.

Moreover, embrace the concept of “letting go” as a form of self-care. Understand that by decluttering, you’re creating space not only in your home but also in your mind. Each item you release is an opportunity to welcome new experiences and possibilities into your life. Celebrate small victories along the way, whether it’s clearing out a single drawer or an entire room; these achievements reinforce the positive impact of your decluttering efforts.

Finally, surround yourself with support. Share your decluttering goals with friends or family who can offer encouragement and accountability. Their fresh perspectives can help you see the benefits of letting go, making the process feel less daunting. By shifting your mindset from attachment to liberation, you’ll find that decluttering becomes not just a chore, but a transformative experience that leads to a more peaceful and organized home. Embrace the journey, and watch as your space—and your mind—begin to flourish.

11. Involving Family: Making Decluttering a Team Effort

Decluttering can often feel like a daunting task, especially when you’re facing years’ worth of accumulated items. However, involving your family in the process can transform it from a solitary chore into an engaging team effort. This approach not only lightens the load but also fosters a sense of shared responsibility and unity within the household.

Start by organizing a family meeting to discuss the decluttering plan. Set clear goals together, such as which rooms need the most attention or how much time you can devote each weekend. This collaborative spirit will motivate everyone to pitch in and contribute their ideas on how to create a more organized and harmonious living space.

Assign specific roles for each family member based on their strengths and interests. Perhaps one person excels at sorting through books, while another enjoys tackling the toy bin. Encourage everyone to be involved in the decision-making process—after all, their input can be invaluable when deciding what to keep, donate, or toss. This not only makes decluttering more efficient but also ensures that everyone feels a sense of ownership over the final outcome.

To make the experience enjoyable, turn it into a game. Set a timer and challenge each other to see who can sort the most items in a given timeframe, or create a ‘treasure hunt’ for items that can be donated or recycled. Play some upbeat music to energize the atmosphere, and don’t forget to celebrate your achievements together, no matter how small. After a long day of decluttering, reward yourselves with a family movie night or a special meal to reinforce the idea that teamwork leads to success.

By involving your family in the decluttering process, you not only make the task more manageable but also create lasting memories and strengthen your family bond. As you reclaim your space together, you’ll find that the journey of decluttering can be just as rewarding as the clean, organized home that awaits you at the end.

12. Sustainable Decluttering: Eco-Friendly Disposal Options

As we navigate the journey of decluttering, it’s essential to consider not just the tidiness of our homes, but also the impact of our disposal choices on the environment. Sustainable decluttering focuses on eco-friendly methods that allow us to part with our belongings without contributing to landfill overflow or harming our planet.

Start by evaluating the items you’re ready to let go of. Instead of tossing them in the trash, consider donating gently used items to local charities or thrift stores, where they can find new life and benefit those in need. Many organizations welcome clothing, furniture, and household goods, offering a sense of purpose to your decluttering efforts.

For items that are no longer usable, recycling is a sustainable alternative that helps reduce waste. Check for local recycling programs that accept electronics, plastics, and other materials. Many cities offer designated drop-off points or curbside pickup for recyclable items, making it easier than ever to dispose of them responsibly.

If you’re dealing with larger items like old furniture or appliances, look into consignment shops or buy-back programs that can give your belongings a second chance while also putting a little extra cash in your pocket. Additionally, consider reaching out to community groups or online platforms dedicated to freecycling, where you can offer items to others in your area who may be in need.

Finally, for those items that simply cannot be reused or recycled, investigate eco-friendly waste disposal services that prioritize sustainability. Many of these companies focus on minimizing landfill contributions and may offer composting services or specialized disposal for hazardous materials.

By implementing these eco-friendly disposal options, you not only declutter your space but also contribute to a healthier planet. Adopting sustainable practices during your decluttering journey transforms the process into a responsible, feel-good experience—one that aligns with your values while creating a serene and organized home environment.

13. Celebrating Your Progress: Rewarding Yourself

Decluttering can often feel like an overwhelming task, but celebrating your progress is a powerful motivator that keeps the momentum alive. As you tackle the various spaces in your home, it’s essential to acknowledge the efforts you’ve put in and the milestones you’ve achieved, no matter how small they may seem.

Start by setting achievable goals for each decluttering session. Once you complete a designated area, like your kitchen countertops or a cluttered closet, take a moment to appreciate the transformation. Snap a before-and-after photo to visually document the difference. This simple act not only highlights your hard work but also serves as a reminder of how far you’ve come in the decluttering journey.

Rewards can take many forms, and it’s important to choose ones that resonate with you. Perhaps indulge in a favorite treat, take a well-deserved relaxing bath, or enjoy a night out with friends. If you prefer something more tangible, consider investing in a small home accessory or decorative item that complements your newly organized space.

Additionally, think about creating a “declutter diary,” where you jot down your achievements and feelings throughout the process. This journal can be a source of inspiration and motivation, reminding you of the liberation that comes with a clutter-free environment.

Remember, the journey to reclaim your space is not just about the end result; it’s about the experience along the way. By celebrating your progress and rewarding yourself, you create positive associations with decluttering, making it a more enjoyable and sustainable practice in your life. Embrace the joy of your accomplishments, and let that enthusiasm propel you to tackle the next project with renewed vigor!

14. A Minimalist Approach: Embracing Simplicity in Your Space

A minimalist approach is more than just a trend; it’s a lifestyle choice that promotes simplicity and intentionality in your home. Embracing minimalism means stripping away the excess to focus on what truly matters, creating a serene environment that enhances both your physical space and mental clarity. Imagine walking into a room where every object has a purpose, and every piece of decor is chosen with care—this is the essence of minimalism.

Start by evaluating each room in your home and asking yourself: Does this item serve a purpose? Does it bring me joy? If the answer is no, it may be time to let it go. This process doesn’t have to be daunting; tackle one area at a time and celebrate your progress. As you begin to declutter, you’ll notice a shift in your space. Surfaces become clearer, colors feel more vibrant, and the overall aesthetic transforms into one of calm and balance.

Incorporate functional furniture that serves dual purposes—think of an ottoman that doubles as storage or a coffee table that can transform into a workstation. This not only maximizes your space but also keeps clutter at bay. Additionally, consider adopting a neutral color palette with a few carefully selected accent pieces. This will create a cohesive look that feels open and airy, allowing your home to breathe.

Ultimately, embracing a minimalist approach is about making conscious choices that reflect your values and lifestyle. By prioritizing simplicity, you’ll create a sanctuary that fosters peace and promotes a more fulfilling way of living. As you reclaim your space, you’ll find that less truly is more, leading to a home that feels both inviting and invigorating.

15. Final Thoughts: Maintaining Your Decluttered Home

As you bask in the newfound serenity of your decluttered home, it’s crucial to remember that the journey doesn’t end here. Maintaining a tidy, organized space requires consistent effort and mindful habits. Start by establishing a daily routine that includes a few simple tasks: make your bed each morning, wash dishes immediately after meals, and allocate just ten minutes each day to put items back in their designated places. These small actions can make a significant difference in keeping clutter at bay.

Additionally, consider adopting the “one in, one out” rule—each time you bring a new item into your home, make it a habit to remove an old one. This strategy not only curbs excess accumulation but also encourages thoughtful purchasing decisions. To further reinforce your decluttered lifestyle, regularly reassess your belongings. Schedule seasonal decluttering sessions to evaluate whether certain items still serve a purpose or bring you joy.

Lastly, involve your family in the process. Encourage everyone to embrace minimalism and take responsibility for their personal spaces. Creating a collective commitment to maintain a clutter-free home will foster a sense of ownership and pride in your shared environment.

By integrating these habits into your daily life, you’ll not only preserve the peace and clarity you’ve achieved but also cultivate a home that reflects your values and enhances your well-being. Embrace the ongoing journey of decluttering, and your home will remain a sanctuary of tranquility for years to come.

As we wrap up our exploration of the 10 proven strategies to declutter your home and reclaim your space, we hope you feel inspired and empowered to take action. Remember, decluttering is not just about tidying up; it’s about creating a living environment that fosters peace, creativity, and well-being. Whether you choose to tackle one room at a time or embrace the process as a holistic lifestyle change, each step you take brings you closer to a more organized and serene home. So gather your supplies, set your intentions, and start your decluttering journey today. Your refreshed, inviting living space awaits, ready to support you in all your pursuits. Happy decluttering!

What are the Best Ways to Protect My Pet from Poison?

As pet owners, we cherish the joy and companionship our furry friends bring into our lives, but with that love comes the responsibility of keeping them safe from harm.

One of the most urgent concerns for any pet parent is the risk of poisoning, which can stem from everyday household items, common plants, and even human foods that are toxic to animals. understanding how to protect your pet from these hidden dangers is essential for their well-being. In this comprehensive guide, we’ll explore the top tips for safeguarding your beloved companion from poisoning, including preventative measures, first-aid steps for emergencies, and a rundown of the most common hazards to watch out for. With a little knowledge and preparation, you can ensure that your home remains a safe haven for your pets, allowing you to enjoy every moment together with peace of mind.

1. Understanding Common Household Poisons for Pets

What are the Best Ways to Protect My Pet from Poison?
Credit : whatcanu.com

Understanding common household poisons for pets is the first step in safeguarding your furry companions. Many seemingly benign items can pose serious risks to animals, often lurking in the very spaces where they roam freely. From everyday foods to cleaning supplies, it’s essential to recognize what can be hazardous.

Start with the kitchen, where a range of common foods can be highly toxic to pets. Chocolate, grapes, and onions are notorious culprits that can lead to severe health issues if ingested. Even seemingly harmless items like avocados and certain nuts, such as macadamia, can cause adverse reactions in dogs and cats. It’s vital to keep these items out of reach and educate household members about their dangers.

Next, consider the cleaning products you use. Many household cleaners, detergents, and disinfectants contain chemicals that are harmful to pets if ingested or even inhaled. Products like bleach, ammonia, and certain air fresheners can lead to respiratory issues, gastrointestinal distress, or worse, depending on the exposure. Opting for pet-safe cleaning alternatives or ensuring thorough ventilation and proper storage can mitigate these risks.

Additionally, keep an eye out for common plants that are toxic to pets. While some greenery can enhance your home’s aesthetic, many popular houseplants—like lilies, philodendrons, and poinsettias—can be harmful if chewed or ingested. Familiarize yourself with the plants in your home and yard, and consider replacing any that pose a threat.

Finally, be mindful of medications and supplements. Just a few pills left unattended can spell disaster for a curious pet. Always secure your medications in high cabinets and dispose of any expired or unused drugs safely.

By understanding these common household poisons and taking proactive measures to mitigate their risks, you can help ensure a safer environment for your beloved pets. awareness is key, and being informed empowers you to act swiftly in preventing potential poisoning incidents.

2. Identifying Toxic Plants and Flowers

When it comes to safeguarding your furry friends from the dangers of poisoning, one of the most crucial steps is identifying toxic plants and flowers that may be lurking in your home or garden. Many common household and garden plants can pose serious risks to pets if ingested, and being knowledgeable about these hazards can make all the difference.

Start by familiarizing yourself with a list of plants known to be toxic to dogs and cats. For example, the beautiful but deadly lily can cause kidney failure in cats, while the seemingly harmless sago palm is extremely toxic to both dogs and cats, leading to severe liver damage if consumed. Other notorious offenders include oleander, azaleas, and philodendrons, each with varying degrees of toxicity that can lead to symptoms ranging from mild gastrointestinal upset to life-threatening conditions.

Once you’re aware of these plants, take a thorough inventory of your living space and outdoor areas. If you have any of these toxic plants, consider removing them or placing them in areas that are completely inaccessible to your pets. Additionally, educate yourself about common ornamental flowers such as tulips and daffodils, which can also be hazardous if nibbled on by curious pets.

It’s not just about removing toxic plants; it’s equally essential to create a safe environment that encourages your pets to explore without the risk of poisoning. Opt for pet-friendly plants, such as spider plants, bamboo palms, or Boston ferns, which can add a touch of greenery to your home without endangering your beloved companions.

Finally, consider labeling any remaining plants and flowers in your home and garden. This can serve as a useful reminder for family and friends, ensuring they are mindful of your pets’ safety when visiting. By taking these proactive measures and being vigilant about the plants and flowers in your surroundings, you can create a safer haven for your pets, giving you peace of mind while they play and roam freely.

3. Foods That Are Dangerous for Pets

What are the Best Ways to Protect My Pet from Poison?
Credit : whatcanu.com

When it comes to keeping your furry friends safe, knowledge is your best ally, particularly regarding the foods that can pose serious health risks. While it might be tempting to share your snacks with your pets, many common human foods can be toxic or even lethal to them. Here’s a closer look at some of the most dangerous foods that should always be kept out of reach.

**Chocolate** is perhaps the most widely known pet poison. The theobromine and caffeine it contains can lead to increased heart rate, restlessness, and even seizures in pets. Dark chocolate and baking chocolate are particularly potent, so it’s crucial to keep all chocolate products stored securely.

**Grapes and raisins** are another surprising danger. While the exact toxin is still unknown, even small amounts can cause severe kidney damage in dogs. Symptoms can include vomiting, lethargy, and decreased appetite, and the effects can be severe, making it essential to avoid feeding these fruits to your pets altogether.

**Onions and garlic**, whether raw, cooked, or powdered, can damage red blood cells in both dogs and cats, leading to anemia. Symptoms may not appear immediately, but if you notice your pet becoming lethargic or exhibiting unusual behavior, it’s important to contact a veterinarian right away.

**Avocado** is a popular superfood for humans, but it contains persin, which can be harmful to pets. While birds are particularly susceptible, dogs can also experience stomach upset or more severe reactions if they ingest large amounts.

Finally, **alcohol** is incredibly dangerous for pets. Even small amounts can lead to drunkenness, difficulty breathing, and can be fatal. It’s essential to ensure that any alcoholic beverages are safely stored and that your pets are kept away from parties or gatherings where drinks may be left unattended.

By being aware of these hazardous foods, you can take proactive steps to ensure your pet’s safety. Always double-check what you’re feeding them, and remember that when it comes to treats, it’s best to stick to pet-specific options designed for their health and wellbeing. Your vigilance can make all the difference in keeping your pet safe from poisoning.

4. Safe vs. Toxic Human Medications

When it comes to keeping your pet safe from poisoning, understanding the distinction between safe and toxic human medications is crucial. Many pet owners may not realize that the very medications we rely upon for our health can pose serious risks to our furry companions. Common over-the-counter drugs like acetaminophen and ibuprofen, for instance, can be highly toxic to pets, causing severe damage to their liver and kidneys. Even seemingly harmless medications like cold and allergy treatments can contain ingredients that are harmful to animals.

It’s essential to keep all medications—prescription and over-the-counter—securely stored out of your pet’s reach. A curious dog or cat may easily knock over a bottle, or worse, chew through packaging to access the contents inside. For those who may need to administer medications to their pets, always consult with your veterinarian before giving any human drug, even if it’s something you believe to be mild or safe. Your vet can recommend appropriate dosages and alternatives specifically formulated for pets.

Another critical aspect is educating yourself about the signs of medication poisoning. Symptoms can vary widely depending on the substance ingested and may include vomiting, lethargy, loss of appetite, or unusual behaviors. If you suspect your pet has ingested a toxic medication, seek veterinary attention immediately. It’s always better to err on the side of caution when it comes to your beloved companion’s health. By being informed and proactive, you can significantly reduce the risk of accidental poisoning and ensure your pet remains safe and healthy in your care.

5. Cleaning Products and Chemicals to Avoid

What are the Best Ways to Protect My Pet from Poison?
Credit : whatcanu.com

When it comes to protecting your furry companions from poisoning, being mindful of the cleaning products and chemicals you use in your home is essential. Many household cleaners contain toxic ingredients that can be harmful, even in small amounts. It’s crucial to familiarize yourself with these dangers to keep your pet safe.

First and foremost, avoid using cleaning products that contain bleach or ammonia. These common ingredients are not only harsh on surfaces but also produce fumes that can irritate your pet’s respiratory system. If ingested, they can lead to severe gastrointestinal distress or worse. Opt instead for pet-safe alternatives, such as vinegar and baking soda, which can effectively clean while posing minimal risk.

Similarly, many multipurpose cleaners, disinfectants, and detergents contain surfactants and solvents that can be toxic if ingested. Products labeled as “fragrance-free” or “natural” may seem safer, but they can still contain harmful chemicals. Always check the labels and look for those specifically marked as non-toxic or pet-friendly.

Another category to watch out for is insecticides and pesticides. These chemicals are designed to kill pests, but they can also be lethal to pets. If you must use these products, ensure they are applied in areas your pets cannot access, and allow sufficient time for the area to ventilate before letting them back inside.

Lastly, don’t overlook the dangers posed by automotive products such as antifreeze, motor oil, and windshield washer fluid. Antifreeze, in particular, contains ethylene glycol, which has a sweet taste that can attract pets but is highly toxic and can lead to kidney failure.

By being proactive and selecting safer cleaning products, you can significantly reduce the risk of poisoning in your beloved pets. Always store cleaning supplies out of reach, and consider creating a dedicated, pet-free zone during your cleaning routines to ensure their safety. With a little diligence, you can maintain a clean home while providing a safe environment for your furry friends.

6. The Importance of Pet-Proofing Your Home

Pet-proofing your home is an essential step in safeguarding your furry companions from potential poisoning hazards. Just like childproofing, this process involves a thorough assessment of your living space to identify and eliminate risks that could be harmful to pets. Start by taking a close look at your household items — from cleaning supplies and medications to plants and food items. Many common household products contain toxic ingredients that, if ingested, can lead to serious health issues for your pets.

Begin by securing all cleaning agents, detergents, and other chemicals in high cabinets or locked storage areas. Ensure that all medications, both prescription and over-the-counter, are kept out of reach. Pets are notoriously curious, and even the most cautious animals can find a way to access these dangerous items. Additionally, be aware of the plants you have in your home; many popular houseplants, such as lilies, philodendrons, and azaleas, can be toxic to dogs and cats.

Don’t forget about food items that may seem harmless to us but can be deadly for pets. Chocolate, grapes, onions, and xylitol (a common sugar substitute found in gum and candies) are just a few examples of foods that should never be accessible to your pets. Make it a habit to store these items in secured containers or out of reach entirely.

Finally, consider the small items that may seem innocuous but can pose a choking hazard or cause intestinal blockage if swallowed. Things like rubber bands, coins, or even small toys can easily be ingested. Creating a safe environment for your pets involves vigilance and proactive measures, but the peace of mind that comes with knowing your home is a safe haven for your furry friends is worth every effort. By taking the time to pet-proof your space, you’re not just protecting them from poisoning; you’re also creating a nurturing environment that fosters their well-being and happiness.

7. Recognizing Symptoms of Poisoning in Pets

What are the Best Ways to Protect My Pet from Poison?
Credit : whatcanu.com

Recognizing the symptoms of poisoning in pets is crucial for prompt action and treatment. As a pet owner, being vigilant and informed about the signs that your furry friend may have ingested something harmful can be the difference between a swift recovery and a tragic outcome.

One of the first signs to watch for is sudden changes in behavior. If your typically lively dog seems lethargic or your curious cat is unusually withdrawn, it could be a signal that something is amiss. Alongside behavioral changes, keep an eye out for gastrointestinal distress, which may manifest as vomiting, diarrhea, or a lack of appetite. These symptoms are not only uncomfortable for your pet but also indicate that their body is reacting negatively to a toxin.

Physical symptoms can vary widely depending on the type of poison ingested. Common signs include drooling, excessive thirst, difficulty breathing, or seizures. You may also notice changes in your pet’s eyes, such as redness or dilated pupils, which can be indicative of poisoning. If your pet exhibits any of these symptoms, it’s essential to act quickly.

Additionally, consider monitoring for odd physical reactions, such as tremors, uncoordinated movements, or unusual vocalizations. These can often be overlooked but are significant indicators that your pet may have ingested something dangerous.

Remember, while recognizing these symptoms is important, it’s equally crucial to remain calm and take action. If you suspect your pet has been poisoned, contact your veterinarian or an emergency animal poison control hotline immediately. Quick intervention can greatly improve the chances of recovery and ensure that your beloved pet receives the care they need. Keeping a close eye on your pet’s behavior and being proactive about their health will go a long way in preventing tragedies related to poisoning.

8. First Aid Steps for Poison Exposure

When it comes to your pet’s safety, being prepared for a potential poisoning incident can make all the difference in the world. Knowing the first aid steps to take in the event of poison exposure is crucial and can save your furry friend’s life. Here’s a comprehensive guide to help you navigate this critical situation effectively.

**Assess the Situation:** The first step is to remain calm and evaluate your pet’s condition. Look for any signs of distress, such as vomiting, diarrhea, lethargy, or unusual behavior. If you suspect that your pet has ingested a toxic substance, try to identify what it is and how much your pet may have consumed. This information will be vital when you speak with your veterinarian or a poison control center.

**Do Not Induce Vomiting Without Guidance:** While inducing vomiting may seem like a logical first step, it’s essential not to do this without professional advice. Some substances can cause more harm if vomited, so always consult with a veterinary professional or a pet poison hotline before taking this action.

**Gather Information:** If possible, collect packaging or any remnants of the substance your pet may have ingested. This will help veterinary professionals determine the best course of action. Be sure to note the time of ingestion, as this information can be crucial for effective treatment.

**Contact a Veterinarian or Pet Poison Control:** Time is of the essence. Reach out to your veterinarian or, if they are unavailable, contact a pet poison control hotline. Provide them with all the information you’ve gathered about the exposure, as well as your pet’s weight and overall health condition. They will guide you on the next steps to take, which may include bringing your pet in for immediate treatment.

**Monitor Your Pet:** While you await further instructions, keep a close eye on your pet. Note any changes in behavior or symptoms, as this information can be valuable for your vet. Keep your pet comfortable and calm, as stress can exacerbate their condition.

**Prepare for Transport:** If advised to take your pet to the vet or an emergency clinic, ensure you have a safe means of transport. Keep your pet secure in a carrier or on a leash, and try to minimize movement to avoid additional stress or injury during transport.

By knowing these first aid steps, you can act quickly and effectively when faced with a potential poisoning situation. Remember, prevention is always better than cure, so be proactive in safeguarding your pet from toxic exposures. Regularly review common household items and plants that may pose a risk, and ensure your living space is as safe as possible for your beloved companion.

9. Creating an Emergency Contact List

Creating an emergency contact list is an essential step in safeguarding your pet against potential poisoning incidents. Imagine a scenario where your beloved furry friend accidentally ingests something toxic; in those crucial moments, having a well-organized list of contacts can mean the difference between timely help and a delayed response.

Start by listing your primary veterinarian’s contact information, ensuring you have their phone number, address, and hours of operation readily available. Next, include the nearest emergency veterinary clinic, as situations can arise outside regular office hours. Don’t forget to jot down the Poison Control Center hotline specifically for pets, which can provide immediate advice on how to handle various poisoning situations.

In addition to veterinary contacts, consider adding a few personal emergency contacts—friends or family members who can assist you in a crisis, whether that’s driving you to the vet or providing emotional support during a stressful time. It’s also wise to have a list of any medications your pet is currently taking, as this information will be vital for any health professional assessing your pet’s condition.

Make multiple copies of this contact list: keep one on your refrigerator, another in your wallet or purse, and perhaps even a digital version on your smartphone. This ensures that no matter where you are, you have access to critical information when you need it most.

Finally, take the time to familiarize yourself and your household members with this list. In a panic, you want everyone to know exactly where to find the information and what steps to take. By preparing this emergency contact list, you’ll not only enhance your pet’s safety but also bring yourself peace of mind, knowing you’re ready to respond swiftly in an emergency.

10. Keeping Your Pet Safe During Holidays and Gatherings

The holidays and family gatherings are times of joy and celebration, but they can also pose unique risks to our beloved pets. As enticing smells waft through the air and guests come and go, it’s essential to be vigilant about potential hazards that could lead to poisoning.

Start by being mindful of the foods that are often abundant during these times. Many holiday treats, such as chocolate, grapes, raisins, and certain baked goods containing xylitol, can be extremely toxic to pets. Ensure that all food is securely stored out of reach and that any leftovers are disposed of promptly. It’s all too easy for a curious pet to swipe a tasty morsel off the table or counter, so take precautions to keep tempting items well out of paw’s reach.

Additionally, be cautious with decorations. While glittering ornaments and twinkling lights set the festive mood, they can also attract pets, leading to potential ingestion of non-edible items. Tinsel, ribbon, and small decorative objects can cause serious gastrointestinal blockages or worse. Opt for pet-safe decorations and ensure that any fragile items are displayed in higher locations.

Moreover, gatherings can be overwhelming for pets, leading to stress or anxiety. Create a safe haven for your furry friends—a quiet room stocked with their favorite toys and bedding—where they can retreat if the festivities become too much. This not only provides a safe space but also minimizes the risk of accidental poisoning from guests who may unknowingly leave harmful items within reach.

Lastly, always be prepared for emergencies. Keep the contact information for your veterinarian and a local animal poison control center handy. In the event of accidental ingestion, quick access to expert advice can make all the difference. By being proactive and mindful, you can ensure that your pets enjoy the holiday season as much as you do—safe, happy, and healthy!

11. Educating Family and Friends about Pet Safety

Educating family and friends about pet safety is a crucial step in safeguarding your furry companions from potential poisoning. While you may be well-versed in the dangers that lurk in everyday household items, it’s essential to extend that knowledge to those who interact with your pets, whether they are visiting for a day or staying for an extended period.

Start by compiling a list of common household items that are toxic to pets, such as certain plants, foods, and cleaning products. Share this information in a simple, easy-to-understand format, like a printed handout or a digital infographic, that they can refer to at a glance. Consider hosting a small gathering or a virtual meeting where you can discuss pet safety, share personal experiences, and answer any questions they may have. This not only raises awareness but also fosters a community of support around pet care.

It’s also important to highlight the significance of pet-proofing the environment. Encourage friends and family to be mindful of where they place their belongings—this includes keeping their bags, medications, and snacks out of reach of curious pets. Additionally, if they have pets of their own, discuss the importance of keeping their pets away from items that could be harmful to your animals when they visit.

By empowering your loved ones with knowledge about pet safety, you create a safer environment for your pets. When everyone is on the same page, the chances of accidental poisoning decrease significantly. Remember, prevention is always better than cure, and with a little education, you can ensure that your pets remain safe and sound in the care of others.

12. Regular Veterinary Check-ups and Poison Control Resources

Regular veterinary check-ups are a cornerstone of ensuring your pet’s health and safety, particularly when it comes to preventing poisoning. During these appointments, your veterinarian can provide valuable insights into potential hazards in your home and outdoors, as well as assess your pet’s overall health. They are equipped to discuss the most common toxins that pets might encounter—ranging from household cleaning products to certain plants—and can recommend precautions specific to your pet’s needs.

In addition to routine visits, it’s essential to have poison control resources readily available. Keep the contact information for a 24-hour pet poison control hotline on hand, or save it in your phone for quick access. This proactive step can be crucial in an emergency. Familiarize yourself with your local emergency veterinary clinics as well, as they can provide immediate assistance should a poisoning incident occur.

Moreover, consider asking your veterinarian about any specific toxins that are prevalent in your area or common within your pet’s breed. For example, certain foods like grapes and chocolate are notoriously toxic to dogs, while cats can be particularly sensitive to lilies. Being informed about these dangers and having a plan in place can make all the difference in keeping your furry friends safe. By prioritizing regular veterinary care and maintaining access to poison control resources, you can help ensure that your pet remains healthy and protected from the dangers of poisoning.

13. How to Dispose of Hazardous Materials Properly

Proper disposal of hazardous materials is crucial not only for protecting the environment but also for safeguarding your pets from potential poisoning. Many common household items, such as cleaning supplies, medications, and even certain plants, can pose serious risks if not disposed of correctly. Here are some essential steps to ensure you’re disposing of these materials safely:

**1. Identify Hazardous Materials:** Start by conducting a thorough inventory of your home. Look for items such as expired medications, toxic cleaners, paints, batteries, and other chemicals that could be harmful to your pet if ingested. Familiarize yourself with the labels on these products, as they often contain important disposal instructions.

**2. Follow Local Guidelines:** Different regions have specific regulations for disposing of hazardous waste. Check with your local waste management authority for guidelines on how to dispose of these materials safely. Many communities offer designated drop-off days or facilities for hazardous waste, ensuring that these items are handled properly and do not end up in landfills.

**3. Securely Store Until Disposal:** Until you’re ready to dispose of hazardous materials, always keep them in a safe, locked area out of your pet’s reach. Use child-proof cabinets or containers to prevent accidental access. Ensure that any containers are tightly sealed to avoid leaks or spills.

**4. Utilize Take-Back Programs:** Many pharmacies and retailers offer take-back programs for unused or expired medications. Participating in these programs helps ensure that medications are disposed of safely and do not end up in the wrong hands—or paws!

**5. Use Safe Disposal Methods:** For items that can be thrown away, such as cleaning products, always follow the manufacturer’s disposal instructions. If you’re dealing with liquids, consider pouring them into absorbent materials (like cat litter or sawdust) before placing them in a sealed bag or container to prevent leaks.

**6. Educate Your Family:** Make sure everyone in your household understands the importance of proper disposal. Teach children about the dangers of hazardous materials and the need to keep them out of reach. Encourage responsible behaviors, such as returning unused medications to the pharmacy.

By taking these proactive steps to dispose of hazardous materials properly, you can significantly reduce the risk of accidental poisoning in your pets. Keeping your home safe is a shared responsibility, and with a little diligence, you can create a protective environment for your furry companions.

14. The Role of Nutrition in Preventing Poisoning

When it comes to safeguarding your pet from the dangers of poisoning, nutrition plays a crucial role that often gets overlooked. A well-balanced diet not only supports your pet’s overall health but also fortifies their immune system, making them less susceptible to toxins. High-quality pet food, rich in essential nutrients, helps maintain optimal organ function, particularly in the liver and kidneys, which are vital in detoxifying harmful substances.

Incorporating fresh fruits and vegetables, such as carrots or blueberries, into your pet’s diet can provide antioxidants that combat cellular damage and promote longevity. Moreover, ensuring that your pet receives the right amount of vitamins and minerals can enhance their ability to process and eliminate potential toxins more effectively.

It’s also important to be mindful of what not to include in your pet’s diet. Human foods like chocolate, grapes, onions, and certain artificial sweeteners can be extremely toxic. Familiarizing yourself with safe and unsafe foods will empower you to make better dietary choices for your furry friend, thereby reducing the risk of accidental poisonings.

Additionally, consulting with a veterinarian about the best nutritional practices for your specific pet can provide tailored recommendations that align with their unique needs, age, and lifestyle. By prioritizing nutrition, you not only promote a healthier, happier pet but also create a solid foundation for preventing poisoning incidents, ensuring that your beloved companion can lead an active and vibrant life.

15. Conclusion: Staying Vigilant for a Safer Pet Environment

In conclusion, the safety of your beloved pet is a responsibility that requires constant vigilance and proactive measures. As pet owners, we must acknowledge that our furry companions are naturally curious, often exploring their environment with an eagerness that can lead them into dangerous situations. By staying informed and adopting a proactive approach to pet safety, we can significantly reduce the risk of poisoning and ensure a healthier, happier life for our pets.

Regularly reviewing our homes for potential hazards—be it toxic plants, harmful household products, or even food items that are safe for humans but dangerous for pets—is essential. Familiarize yourself with common poisons and their symptoms, and always keep emergency contacts for your veterinarian and local animal poison control centers readily accessible.

Moreover, consider educating family members and visitors about what substances are harmful to pets and encourage them to maintain a pet-safe environment. Simple practices, such as storing hazardous materials out of reach and using pet-friendly cleaning products, can make a world of difference.

Ultimately, a proactive mindset combined with consistent education and awareness is your best line of defense against accidental poisoning. By committing to these practices, you not only safeguard your pet’s health but also foster a nurturing environment in which they can thrive. Remember, your vigilance today can lead to a safer and more vibrant life for your furry family members tomorrow.

In conclusion, ensuring the safety of your beloved pet from potential poisoning is a vital responsibility that every pet owner should take seriously. We hope this comprehensive guide has equipped you with valuable knowledge and practical tips to protect your furry family members from harmful substances. From understanding common household toxins to recognizing the signs of poisoning, being proactive can make all the difference in safeguarding their health. Remember, creating a safe environment is an ongoing commitment; regular checks around your home and staying informed about pet-safe products can go a long way. By being vigilant and informed, you can enjoy peace of mind knowing you’re doing everything possible to keep your pet safe and happy. Thank you for taking the time to read our guide—your dedication to your pet’s well-being is commendable, and together we can create a safer world for our cherished companions.

How to get to the Rold route in Elden Ring ?

To get to the Rold Route in Elden Ring, there are a few key steps to follow.

The Rold route may be challenging, but it is worth it for the rewards you will receive at the end. First, make sure you have the necessary equipment and supplies for the journey. This includes a sturdy pair of boots, a reliable weapon, and a good amount of healing items.

Rold route in Elden Ring

Next, start your journey by heading to the Rold Village. This is the starting point for the Rold Route, and is located in the northern region of the game’s map. From here, you will need to navigate through a series of winding paths and rugged terrain. Keep an eye out for any obstacles that may impede your progress, and be prepared to battle any enemies you may encounter along the way.

As you make your way deeper into the Rold Route, you will encounter a series of challenging boss battles. These will test your skills and require you to use all of your combat abilities to defeat them. Be sure to take advantage of any environmental hazards or weaknesses that the bosses may have, and use your healing items wisely.

As you progress through the Rold Route, you will also encounter a number of hidden secrets and hidden items. Be sure to explore every nook and cranny of the area, and keep an eye out for any suspicious looking areas that may contain valuable treasures.

Finally, make your way to the Rold Castle. This is the final destination of the Rold Route, and is home to the powerful final boss of the game. Be sure to take your time and prepare for this final battle, as it will be the most challenging one yet. With determination and skill, you will be able to defeat the final boss and claim victory !

Summary

The steps to get to the Rold Route in Elden Ring are:

  • Gather necessary equipment and supplies
  • Head to the Rold Village, located in the northern region of the map
  • Navigate through winding paths and rugged terrain while watching out for obstacles and enemies
  • Defeat challenging boss battles by exploiting their weaknesses and using healing items wisely
  • Explore hidden secrets and hidden items along the way
  • Make your way to the Rold Castle and prepare for the final battle
  • Defeat the final boss and claim victory on the Rold Route.