What are the different types of dishwashers and their features?

In the bustling heart of every home, the kitchen stands as a hub of activity, and at the center of it all is the humble dishwasher—a modern marvel that transforms the tedious chore of washing dishes into a breeze.

But with a plethora of options available, how do you choose the right dishwasher that suits your needs and lifestyle? From the sleek, energy-efficient built-in models to the versatile portable designs, each type comes packed with features that promise to enhance your dishwashing experience. In this comprehensive guide, we will delve into the various types of dishwashers, unravel their unique features, and provide you with the insights needed to make an informed decision. Whether you’re a culinary enthusiast or a busy parent seeking convenience, understanding the ins and outs of dishwashers will empower you to select the perfect appliance that not only complements your kitchen but also streamlines your daily routine. Join us as we navigate the world of dishwashers and help you find the ideal match for your home!

1. Introduction to Dishwashers: Why Choose One?

What are the different types of dishwashers and their features?
Credit : whatcanu.com

In today’s fast-paced world, where time is often a luxury, the humble dishwasher has transformed from a mere convenience to an essential household appliance. Imagine the relief of not having to spend precious moments scrubbing pots and pans, only to find yourself facing a mountain of dishes after every meal. With a dishwasher, you can reclaim that time for what truly matters—be it enjoying a leisurely dinner with family or catching up on your favorite shows.

Choosing a dishwasher is not just about selecting an appliance; it’s about enhancing your lifestyle. From energy-efficient models that help reduce your carbon footprint to smart dishwashers equipped with Wi-Fi capabilities for remote operation, the options available today cater to a wide array of needs and preferences. Whether you have a bustling household with a constant stream of dirty dishes or a cozy kitchen for two, there’s a dishwasher designed to fit seamlessly into your routine.

In this guide, we will explore the various types of dishwashers—some built to handle large loads with ease, while others are compact and perfect for smaller kitchens. We will also delve into essential features to consider, such as noise levels, wash cycles, and energy efficiency ratings. By the end of this article, you will not only understand the different options available but also be well-equipped to make an informed decision that perfectly suits your lifestyle and kitchen needs. So, let’s dive in and discover why choosing the right dishwasher can revolutionize your dishwashing experience!

2. Types of Dishwashers: Built-in, Portable, and Drawer Models

When it comes to selecting the right dishwasher for your home, understanding the different types available can significantly impact your decision. Dishwashers come in three main designs: built-in, portable, and drawer models, each catering to distinct needs and lifestyles.

**Built-in Dishwashers** are the most common type found in homes. These units are seamlessly installed under the countertop, providing a permanent solution for dishwashing. They usually come in standard sizes (24 inches is typical) and can hold a substantial amount of dishes, pots, and pans, making them ideal for families or anyone who frequently entertains guests. Built-in models often come equipped with advanced features such as multiple wash cycles, energy-efficient options, and smart technology that allows for remote operation via smartphones.

**Portable Dishwashers** offer a flexible alternative for those who may not have the space or plumbing for a built-in unit. These dishwashers typically sit on wheels, allowing you to move them wherever needed, and can be easily connected to a kitchen faucet when in use. This makes them perfect for renters or smaller kitchens that require versatility. Portable dishwashers generally have a smaller capacity than their built-in counterparts but still get the job done efficiently. With various styles and colors available, they can blend in with your kitchen decor while providing the functionality you need.

**Drawer Dishwashers** are a more modern and innovative option, featuring a unique design that allows for easier loading and unloading. These models consist of one or two separate drawers that can operate independently, making them great for smaller loads or quick clean-ups. Drawer dishwashers are particularly beneficial for those with limited kitchen space, as they can be installed in cabinets or countertops. Additionally, many drawer models come with advanced features like adjustable racks and specialized wash settings for delicate items.

By recognizing the advantages and limitations of each type of dishwasher, you can make an informed decision that aligns with your household needs, kitchen layout, and lifestyle. Whether you opt for the classic built-in, the versatile portable, or the innovative drawer model, choosing the right dishwasher will enhance your kitchen experience and streamline your dishwashing routine.

3. Key Features to Consider When Buying a Dishwasher

What are the different types of dishwashers and their features?
Credit : whatcanu.com

When embarking on the journey to choose the perfect dishwasher, understanding the key features available can significantly enhance your decision-making process. Modern dishwashers come packed with a variety of options designed to cater to diverse household needs, making it crucial to identify which features align with your lifestyle and preferences.

**1. Wash Cycles and Options:**
One of the first features to consider is the variety of wash cycles your dishwasher offers. Standard options include heavy, normal, and light cycles, but advanced models may also provide eco-friendly settings, quick wash options, and even specialized cycles for delicate glassware or pots and pans. Having multiple cycles allows you to customize the cleaning process based on your specific load requirements, ensuring that your dishes receive the appropriate care.

**2. Energy Efficiency:**
Energy-efficient dishwashers not only save you money on utility bills but also contribute to environmental sustainability. Look for models with the ENERGY STAR label, which indicates they meet rigorous energy efficiency standards. Additionally, consider features like soil sensors that adjust the wash cycle based on the dirtiness of the dishes, optimizing water and energy usage.

**3. Noise Level:**
For those who value peace and quiet, the noise level of a dishwasher is an essential feature to keep in mind. Measured in decibels (dB), a quieter dishwasher typically operates between 44-50 dB, allowing you to run it during the night or while entertaining guests without disruption. If your kitchen is open to your living space, investing in a quieter model can enhance your overall comfort.

**4. Interior Layout and Capacity:**
The layout of the dishwasher’s interior can greatly impact its usability. Look for adjustable racks, foldable tines, and designated spaces for utensils and larger items. A flexible configuration allows you to maximize capacity and accommodate various dish sizes, from oversized pots to delicate stemware. Assessing your typical load size and shape will help you determine the best interior design for your needs.

**5. Smart Features:**
As technology advances, many dishwashers now come equipped with smart features that can elevate your cleaning experience. Wi-Fi connectivity allows you to monitor and control your dishwasher remotely, receive alerts when cycles are complete, or even run diagnostic tests. Some models are compatible with voice assistants, making it easier to set cycles without lifting a finger.

**6. Build Quality and Design:**
Finally, consider the build quality and design aesthetics of the dishwasher. Stainless steel interiors are not only durable but also resist odors and stains, making them easier to clean. The exterior design should complement your kitchen decor, with options ranging from sleek, modern lines to classic finishes. A well-designed dishwasher can seamlessly integrate into your kitchen while providing lasting performance.

By carefully evaluating these key features, you’ll be well-equipped to select a dishwasher that not only meets your cleaning demands but also enhances your kitchen’s functionality and style. Whether you prioritize efficiency, noise reduction, or advanced technology, understanding these elements will lead you to a choice that keeps your dishes sparkling while fitting seamlessly into your home.

4. Energy Efficiency Ratings: What You Need to Know

When selecting a dishwasher, one of the most critical factors to consider is its energy efficiency rating. Not only does this metric highlight the appliance’s environmental impact, but it can also significantly influence your household utility costs. Dishwashers are assigned an energy efficiency rating based on their energy consumption during typical use, usually represented by the Energy Star label or the Federal Trade Commission (FTC) guidelines.

Energy Star-rated dishwashers, for instance, are designed to use less water and electricity compared to standard models, making them a sustainable choice for eco-conscious consumers. These dishwashers often incorporate advanced technologies, such as soil sensors and smart wash cycles, which optimize water and energy usage based on the load’s specific needs.

When perusing different models, look for the EnergyGuide label, which provides an estimated annual operating cost and energy consumption. This label is a valuable tool for comparing efficiency among various options, allowing you to weigh the potential savings against the initial purchase price.

Beyond just the numbers, consider how features like adjustable spray arms, energy-saving modes, and hybrid drying systems contribute to overall efficiency. Some dishwashers even allow you to run shorter cycles for lightly soiled dishes, minimizing water and energy usage.

By prioritizing energy efficiency, not only will you reduce your environmental footprint, but you’ll also enjoy long-term savings on your energy bills, making it a smart, cost-effective choice for any kitchen. As you navigate through your options, keep these energy efficiency ratings in mind to ensure you select a dishwasher that balances performance with sustainability.

5. Noise Levels and Their Importance in Choosing a Dishwasher

What are the different types of dishwashers and their features?
Credit : whatcanu.com

When it comes to selecting the perfect dishwasher for your home, noise levels should be a top consideration. After all, the last thing you want is to invest in a sleek, efficient appliance that disrupts the tranquility of your household with persistent clattering and whirring sounds. Modern dishwashers come with a range of noise levels, typically measured in decibels (dB), and understanding this measurement is crucial for making an informed choice.

Most dishwashers today operate between 40 dB and 60 dB. For reference, a quiet library registers at about 40 dB, while normal conversation can reach around 60 dB. If you have an open-concept living space or your kitchen is adjacent to your living area, opting for a model that operates below 50 dB will ensure a peaceful environment, allowing you to watch TV or have a conversation without raising your voice.

Additionally, many manufacturers now highlight their dishwashers’ noise levels prominently in their specifications, with terms like “ultra-quiet” or “whisper-quiet” often indicating models that operate at the lower end of the scale. Features such as sound insulation and a well-designed motor can contribute significantly to reducing noise levels, so it’s worth considering these aspects when shopping.

Moreover, pay attention to the dishwasher’s cycle types. Some cycles, like the heavy-duty or sanitize settings, may generate more noise due to increased water pressure and longer run times. Understanding when these louder cycles occur can help you plan your dishwashing schedule around them—perhaps running heavier loads at night when the household is quieter.

Ultimately, a dishwasher’s noise level can greatly influence your overall satisfaction with the appliance. By prioritizing this feature in your purchasing decision, you can enjoy the convenience of a dishwasher without the unwelcome distraction of excessive noise, creating a harmonious balance in your home.

6. Size and Capacity: Finding the Right Fit for Your Kitchen

When it comes to selecting the perfect dishwasher for your kitchen, size and capacity are crucial factors that can significantly impact both functionality and convenience. Dishwashers come in a variety of sizes, typically categorized as standard, compact, and portable models, each designed to cater to different kitchen layouts and household needs.

**Standard Size Dishwashers** typically measure around 24 inches wide and are built to accommodate a full load of dishes, making them ideal for larger families or those who frequently entertain guests. These models often offer adjustable racks and flexible loading options, allowing you to maximize their capacity for pots, pans, and tall items. If you find yourself cooking elaborate meals or accumulating a mountain of dishes after a gathering, a standard dishwasher could be your best bet.

On the other hand, **Compact Dishwashers**, generally around 18 inches wide, are designed for smaller kitchens or apartments where space is limited. Despite their size, many compact models don’t compromise on performance, offering efficient cleaning cycles and energy-saving features. They typically hold fewer dishes than standard models but can still handle everyday needs for singles or couples.

For those who are short on space but still want the convenience of a dishwasher, **Portable Dishwashers** may be the solution. These units can be wheeled into place and connected to the kitchen sink when needed, providing flexibility without the commitment of a permanent installation. Perfect for renters or anyone who is not ready for a full kitchen remodel, portable dishwashers come in various sizes and designs to suit any style.

In addition to the physical size, consider the **capacity** of the dishwasher. Most models list their capacity in terms of place settings, which is the standard measure of how many dishes, glasses, and utensils can be washed in one cycle. A typical standard-sized dishwasher holds about 12 to 16 place settings, while compact models usually accommodate 6 to 8. Choose a capacity that aligns with your household’s dishwashing habits—overestimating your needs can lead to a machine that’s underused, while underestimating can leave you washing dishes by hand more often than you’d like.

Ultimately, the right dishwasher for your kitchen is one that fits both your space and your lifestyle. Take the time to measure your available space, consider the size of your household, and think about how often you cook and entertain. By doing so, you’ll ensure that your new dishwasher not only fits seamlessly into your kitchen but also meets your dishwashing demands effectively.

7. Wash Cycle Options: Understanding Different Settings

What are the different types of dishwashers and their features?
Credit : whatcanu.com

When selecting a dishwasher, one of the most critical aspects to consider is the variety of wash cycle options available. These settings not only define how effectively your dishes will be cleaned but also enhance the appliance’s efficiency by allowing you to customize the wash according to your specific needs. Understanding these different settings can significantly impact your dishwashing experience and help you maintain optimal performance.

1. **Normal Cycle**: This is the standard setting most commonly used for everyday loads. It typically uses moderate water pressure and heat, making it suitable for a mix of lightly soiled and moderately dirty dishes. This cycle is perfect for day-to-day cleaning, ensuring your plates, utensils, and glasses come out sparkling without excessive energy use.

2. **Heavy Duty / Pots and Pans Cycle**: Designed for those stubborn, baked-on messes, this cycle employs higher water temperatures and extended wash times. It’s ideal for cleaning cookware, such as pots and pans, that require a little more elbow grease. If you frequently entertain or cook large meals, this setting will become one of your best friends in the kitchen.

3. **Quick Wash / Express Cycle**: For those times when you need clean dishes in a hurry, the quick wash cycle is a lifesaver. It significantly reduces the wash time, making it perfect for lightly soiled items or when you have a small load. However, it’s important to note that while convenient, this setting may not offer the thoroughness of a normal cycle.

4. **Eco Mode**: As sustainability becomes a priority for many households, the eco mode has gained popularity. This setting uses less water and energy by extending the wash duration and lowering the temperature. If you want to minimize your environmental footprint while still achieving clean dishes, this is the option for you.

5. **Sanitize Cycle**: If you’re particularly concerned about germs and bacteria, the sanitize cycle is a must-have feature. This setting raises the water temperature to a level that kills harmful microorganisms, making it an excellent choice for cleaning baby bottles, cutting boards, and other items that require thorough sanitization.

6. **Glassware Cycle**: Delicate items like wine glasses and crystal require special care to avoid chipping or breaking. The glassware cycle typically uses gentler water pressure and lower temperatures to protect these fragile pieces while still providing effective cleaning.

7. **Self-Cleaning Cycle**: While not a wash cycle for your dishes, this feature is worth mentioning. A self-cleaning cycle helps maintain the dishwasher itself by using high heat to eliminate built-up grime and odor, ensuring that your appliance runs efficiently and extends its lifespan.

In summary, understanding the wash cycle options available on your dishwasher can enhance your cleaning efficiency and ensure that your dishes are always spotless. By selecting the right cycle for your specific needs, you’ll not only save time and energy but also prolong the life of your dishware and your appliance. Consider your dishwashing habits and the types of items you frequently clean to choose the perfect dishwasher settings for your household.

8. Smart Technology: The Benefits of Smart Dishwashers

In the age of smart homes, dishwashers have evolved far beyond their traditional roles, thanks to the advent of smart technology. Smart dishwashers come equipped with innovative features that not only streamline the dishwashing process but also enhance convenience and efficiency. Imagine being able to control your dishwasher from your smartphone, allowing you to start or pause a cycle while you’re out grocery shopping or even at work.

One of the most significant benefits of smart dishwashers is their ability to connect to Wi-Fi, enabling you to receive alerts and notifications directly to your mobile device. This means you’ll know exactly when your dishes are clean and ready to be unloaded, eliminating the guesswork often associated with traditional models. Many smart dishwashers also offer diagnostic features that can alert you to potential issues before they become major problems, saving you time and repair costs down the line.

Additionally, smart dishwashers often include advanced sensors that optimize water and energy usage based on the load size and soil level of your dishes. This not only reduces your utility bills but also contributes to a more environmentally friendly home. Some models even allow you to customize wash cycles and settings through a dedicated app, so you can easily select the best program for your specific needs—whether that’s a quick wash for lightly soiled plates or a more intensive cycle for baked-on grime.

Moreover, many smart dishwashers come with integration features that allow them to work seamlessly with other smart home devices. For instance, you can set your dishwasher to run while you’re away, or sync it with your smart speaker to receive updates on its cycle status. With voice control capabilities, you can simply ask your smart assistant when it will be finished, ensuring that dishwashing fits effortlessly into your busy schedule.

In summary, investing in a smart dishwasher can transform your kitchen experience. With convenience, efficiency, and advanced technology at your fingertips, you can enjoy sparkling clean dishes without the hassle. As you evaluate your options, consider how these features can fit into your lifestyle and help you make an informed decision that will keep your kitchen running smoothly.

9. Interior Design: Racks, Tines, and Loading Flexibility

When it comes to choosing the right dishwasher, the interior design is just as crucial as the exterior finish. A well-thought-out interior layout can significantly enhance your dishwashing experience, making it easier and more efficient to load and unload your dishes.

First and foremost, consider the configuration of the racks and tines. Most modern dishwashers come equipped with adjustable racks, which allow you to customize the space according to your needs. This flexibility is particularly beneficial if you frequently wash larger items, such as pots and pans, or if you have a collection of delicate glassware that requires special handling. Some models even feature a third rack, which provides additional space for utensils and smaller items, maximizing every inch of available loading space.

The tines—the prongs that hold your dishes in place—also play a significant role in how effectively you can load your dishwasher. Look for models with fold-down tines that can be manipulated to accommodate awkwardly shaped items. This added versatility can make a world of difference when you’re trying to fit a variety of dishes in one load. Some dishwashers offer tines that are adjustable in height, allowing you to create more room for larger items without sacrificing the ability to wash smaller ones.

Another important aspect of interior design is the layout of the spray arms. A well-designed dishwasher will have multiple spray arms that reach every corner of the machine. This ensures that every dish is thoroughly cleaned, no matter where it’s placed inside the unit. Additionally, look for models that offer targeted spray zones, which provide extra cleaning power for heavily soiled dishes.

Ultimately, the right combination of racks, tines, and loading flexibility can not only simplify the process of loading and unloading your dishwasher but also enhance the overall effectiveness of the cleaning cycle. By prioritizing these features, you can choose a dishwasher that seamlessly fits into your kitchen routine, saving you time and effort after every meal.

10. Maintenance and Cleaning: What to Look For

When selecting a dishwasher, maintenance and cleaning should be at the forefront of your decision-making process. A dishwasher is an investment, and keeping it running efficiently requires a bit of attention. Therefore, understanding the maintenance requirements and ease of cleaning will save you time and headaches in the long run.

First, consider the interior design of the dishwasher. Models with stainless steel interiors are not only aesthetically pleasing, but they are also more resistant to stains and odors compared to plastic interiors. Stainless steel is easier to wipe down and is less likely to harbor bacteria, making it a hygienic choice.

Next, pay attention to the filter system. A dishwasher with a self-cleaning filter can save you the hassle of manually cleaning out food debris, which can accumulate and cause unpleasant odors or clogs. However, if you opt for a model with a manual filter, ensure it is easily accessible; a removable filter that can be quickly rinsed under running water will encourage regular maintenance.

Look for features that simplify cleaning, such as smooth racks and spray arms. Racks that can be adjusted or removed make cleaning the interior easier and allow you to fit larger items without obstruction. Additionally, spray arms that are easy to detach can facilitate thorough cleaning, ensuring that every nook and cranny of your dishwasher remains free from grime.

Don’t overlook the importance of user-friendly controls and indicators. A dishwasher with a clear, intuitive interface will help you identify when it’s time to clean the filter or run a maintenance cycle. Some modern dishwashers even feature self-diagnostic tools that alert you to potential issues before they become significant problems.

Finally, consider the noise level during operation. A quieter model not only makes for a more pleasant kitchen environment but also encourages you to run it more frequently without feeling like you’re disrupting your home. Look for dishwashers with sound insulation and a decibel level rating that suits your lifestyle.

In summary, when choosing your dishwasher, pay close attention to its maintenance and cleaning features. A model designed for easy upkeep will enhance your kitchen experience, ensuring that your investment remains in top-notch condition for years to come.

11. Price Range: Budgeting for Your Dishwasher Purchase

When it comes to choosing a dishwasher, understanding the price range is crucial to making a sound investment. Dishwashers can vary significantly in cost, from budget-friendly models to high-end machines laden with advanced features. Setting a budget beforehand will help streamline your options and ensure that you find a dishwasher that meets both your needs and financial constraints.

At the lower end of the spectrum, you’ll find basic models that typically range from $300 to $600. These dishwashers often focus on essential cleaning functions and may lack some of the bells and whistles that enhance convenience and efficiency. However, don’t underestimate these budget options; they can still deliver reliable performance for everyday dishwashing tasks.

Mid-range dishwashers, priced between $600 and $1,200, often come equipped with additional features such as multiple wash cycles, improved energy efficiency, and quieter operation. These models strike a balance between functionality and affordability, making them a popular choice for many households looking for a bit more sophistication without breaking the bank.

If you’re in the market for a high-end dishwasher, expect to invest $1,200 and up. These premium models boast advanced technology like smart connectivity, customizable wash cycles, and superior energy efficiency. They often come with sleek designs and premium materials that not only enhance their performance but also elevate the aesthetic of your kitchen. For those who frequently entertain or have larger families, the investment in a high-quality dishwasher can be well worth it, as it saves time and offers exceptional cleaning power.

As you consider your budget, also factor in potential long-term savings. Investing in a more efficient model may lead to lower utility bills over time, making certain higher-priced dishwashers more economical in the long run. Remember, whether you’re opting for a basic model or a top-of-the-line machine, careful budgeting will help you choose the right dishwasher that fits your lifestyle and ensures your dishes are always sparkling clean.

12. Brand Reputation: Which Brands Stand Out?

When it comes to choosing the right dishwasher, brand reputation can play a significant role in your decision-making process. A well-established brand often signifies reliability, quality, and customer support, all of which are crucial for such an essential kitchen appliance. With so many options available, it’s important to consider which brands stand out in the crowded market and what they bring to the table.

**Bosch** is consistently lauded for its innovative engineering and quiet operation. Renowned for their sleek designs and energy-efficient models, Bosch dishwashers often come equipped with advanced features like the MyWay rack system and the EasyGlide system for smooth loading and unloading. Their commitment to quality and performance has earned them a loyal customer base.

**KitchenAid** is another brand that shines in the realm of dishwashing. Known for their robust build and high-performance cleaning capabilities, KitchenAid dishwashers are a favorite among home chefs. Features like the ProWash cycle adjust the wash settings based on the soil level, ensuring your dishes receive the perfect clean every time. Additionally, their stylish designs often complement high-end kitchen aesthetics.

If you’re looking for value without sacrificing quality, **Whirlpool** might be the brand for you. Their dishwashers are celebrated for their straightforward functionality and durability. With options that range from budget-friendly to more advanced models, Whirlpool caters to a wide audience without compromising on cleaning power or efficiency.

**Miele**, a luxury brand, deserves mention for their commitment to longevity and excellence. With a reputation for being built to last, Miele dishwashers often come with advanced features such as the innovative AutoOpen drying function and impressive energy efficiency ratings. Though they come with a higher price tag, many users find the investment worthwhile due to their exceptional performance and durability.

Finally, **Samsung** has made a name for itself with its modern, tech-savvy dishwashers that offer smart features and connectivity. Their models often include options like the WaterWall technology for thorough cleaning and Wi-Fi connectivity for remote monitoring and control. This brand appeals to tech enthusiasts who appreciate the integration of smart home capabilities in their kitchen appliances.

When selecting a dishwasher, consider the reputation of these brands along with your specific needs and preferences. Research customer reviews and ratings to gain insight into the reliability and performance of different models. A reputable brand can provide not only a quality product but also peace of mind, ensuring that your investment is protected for years to come.

13. Customer Reviews: How to Use Feedback in Your Decision

When it comes to choosing the right dishwasher, customer reviews can be an invaluable resource in your decision-making process. These insights come directly from individuals who have used the products in real-life situations, offering a wealth of information that specifications alone cannot provide.

Start by searching for reviews on trusted retail websites, appliance forums, and social media platforms. Pay attention to both the positive and negative feedback—while a glowing review can point out the strengths of a model, critical comments often highlight potential shortcomings that you might not have considered.

Look for common themes in the reviews. Is there a recurring issue with noise levels? Are customers consistently praising the energy efficiency? Do several users mention that a particular brand offers exceptional customer service? These patterns can help you gauge whether a specific model will meet your needs.

Additionally, consider the context of the reviews. A dishwasher that works perfectly for a family of four may not be the best choice for a single-person household, and vice versa. Take note of the reviewer’s circumstances and how they align with your lifestyle and usage habits.

Also, don’t overlook the importance of verified purchase reviews. Many platforms label reviews from verified buyers, which can add a level of authenticity to the feedback you’re reading. This distinction helps ensure that you’re relying on opinions from actual users rather than fictitious accounts.

Lastly, engage with customer feedback by asking questions on forums or social media. Reach out to users who have reviewed the product to get a more nuanced understanding of their experiences. This proactive approach can provide you with a clearer picture of which dishwasher will truly suit your needs, ensuring that your final decision is informed, confident, and tailored to your home.

14. Conclusion: Making an Informed Choice for Your Kitchen

Choosing the right dishwasher for your kitchen is more than just a matter of preference; it’s an investment that can significantly enhance your daily routine and overall kitchen efficiency. As we’ve explored throughout this guide, the landscape of dishwashers is diverse, ranging from compact models perfect for small spaces to spacious, high-capacity machines designed for large households. Each type comes with its own set of features, such as energy efficiency ratings, noise levels, wash cycles, and smart technology integration, all of which can impact your decision.

In conclusion, making an informed choice requires careful consideration of your specific needs—think about the size of your family, your cooking habits, and your kitchen layout. Are you someone who frequently hosts gatherings and needs a machine that can handle heavy loads? Or perhaps you live alone and would benefit from a compact model that saves space without sacrificing performance?

Don’t forget to factor in the long-term costs associated with energy use and maintenance. While it may be tempting to opt for the cheapest model available, investing in a reliable, energy-efficient dishwasher can save you money in the long run. Additionally, consider the aesthetic and functional aspects of your kitchen design and how a new dishwasher can complement your existing appliances.

Ultimately, the right dishwasher should seamlessly integrate into your lifestyle, making cleanup a breeze and giving you more time to enjoy the moments that matter. By weighing the features discussed in this guide and aligning them with your personal preferences, you’ll be well on your way to choosing a dishwasher that not only meets your needs but also enhances the heart of your home. Happy dishwashing!

15. Frequently Asked Questions About Dishwashers

When embarking on the journey to choose the right dishwasher, you may find yourself grappling with a multitude of questions. Understanding these common queries can help demystify the selection process and ensure that you invest in a machine that suits your needs perfectly. Here are some frequently asked questions that often arise:

**1. What are the different types of dishwashers?**
Dishwashers come in various forms, including built-in, portable, and countertop models. Built-in dishwashers are installed under the counter and are the most common type, while portable dishwashers can be moved and connected to a faucet when needed. Countertop models are compact and ideal for smaller kitchens or limited spaces.

**2. How do I determine the right size for my dishwasher?**
Size is crucial for both functionality and space. Most full-sized dishwashers are 24 inches wide and can accommodate around 12 to 16 place settings. If space is limited, consider compact models, which are typically 18 inches wide and suitable for smaller households.

**3. What features should I look for?**
Key features can significantly enhance your dishwashing experience. Look for options like adjustable racks, multiple wash cycles, energy efficiency ratings (like ENERGY STAR certification), noise levels (measured in decibels), and drying options. Smart technology features are also becoming increasingly popular, allowing you to control your dishwasher remotely or receive alerts when your dishes are clean.

**4. How much water and energy do dishwashers use?**
Modern dishwashers are designed to be both water and energy-efficient. On average, a standard dishwasher uses about 3 to 5 gallons of water per cycle, whereas older models may consume up to 10 gallons. For energy usage, check the energy guide label to compare models and choose one that minimizes your utility costs.

**5. Do I really need to pre-rinse my dishes?**
This is a common misconception! Most modern dishwashers are equipped to handle food residues without pre-rinsing. However, it’s best to scrape off large food particles, as they can clog the filter and affect performance. Simply loading your dirty dishes directly into the dishwasher can save you time and water.

By addressing these frequently asked questions, you’ll be better equipped to make an informed decision when selecting the dishwasher that best fits your lifestyle and kitchen needs. Whether you prioritize size, features, or energy efficiency, understanding your options can lead you to the perfect machine that will make dishwashing a breeze for years to come.

In conclusion, selecting the right dishwasher for your home doesn’t have to be a daunting task. With the insights we’ve shared in this guide, you’re now equipped to navigate the myriad of options available, whether you’re drawn to the energy efficiency of a front-loader or the convenience of a portable model. By understanding the various types and features—from wash cycles and noise levels to smart technology and size considerations—you can make an informed decision that perfectly aligns with your kitchen needs and lifestyle. Remember, investing in a dishwasher is not just about convenience; it’s about enhancing your daily routine and creating a more efficient home. Happy dishwashing, and may your choice bring you years of sparkling clean dishes and joy in your kitchen!

How to install a new dishwasher?

Installing a new dishwasher can seem like a daunting task, especially if you’re not particularly handy around the house.

However, with the right guidance and a little bit of confidence, you can transform this seemingly complex project into a straightforward and rewarding experience. In this step-by-step guide, we’ll walk you through everything you need to know to install your new dishwasher like a pro. From gathering the essential tools and materials to understanding the plumbing and electrical connections, we’ll equip you with practical tips and insider knowledge to ensure a smooth installation. Say goodbye to the hassle of waiting for a professional and hello to the satisfaction of tackling a home improvement project yourself. Get ready to enjoy the convenience of your new appliance while saving time and money with our comprehensive installation guide!

1. Introduction: Why DIY Dishwasher Installation?

How to install a new dishwasher?
Credit : whatcanu.com

Installing a new dishwasher may seem daunting to many homeowners, but taking the DIY route can be both rewarding and cost-effective. Why should you consider installing your dishwasher yourself? For starters, it empowers you to learn essential home improvement skills that can save you money on professional installation fees. In a world where convenience often comes at a premium, tackling this project on your own can provide a sense of accomplishment and independence.

Moreover, understanding the ins and outs of your kitchen appliances can lead to a better appreciation of how they function. You’ll gain valuable insights into plumbing, electrical connections, and the overall mechanics of your home, which can come in handy for future repairs or upgrades. DIY installation also allows for greater control over the process—choosing the right materials, customizing connections to suit your kitchen layout, and ensuring everything is set up to your exact specifications.

Additionally, with a plethora of resources available online, including instructional videos, forums, and detailed guides, learning how to install your dishwasher has never been easier. You can work at your own pace, revisit steps as necessary, and even ask questions from a community of fellow DIYers. So, roll up your sleeves and prepare to dive into this rewarding project—by the end, you’ll not only have a fully functional dishwasher, but you’ll also have the confidence and knowledge that comes with mastering a new skill. Let’s get started!

2. Safety First: Tools and Materials You’ll Need

Before diving into the installation process, it’s essential to prioritize safety and gather the right tools and materials. Taking the time to prepare ensures a smoother installation and minimizes potential hazards. Here’s a comprehensive list of what you’ll need to tackle the job like a pro.

**Essential Tools:**

1. **Screwdriver Set:** A mix of flathead and Phillips screwdrivers will help you tackle various screws that hold your dishwasher in place.

2. **Adjustable Wrench:** This tool is crucial for tightening and loosening the water supply line and other plumbing connections.

3. **Plumber’s Tape:** Also known as Teflon tape, this is vital for ensuring a watertight seal on all threaded connections.

4. **Level:** To make sure your dishwasher sits evenly, a level will help you avoid any unwanted tilting that can lead to leaks.

5. **Drill and Drill Bits:** If your installation requires new holes for mounting or securing the dishwasher, a power drill will be necessary.

6. **Pliers:** These are handy for gripping and turning various components, especially in tight spaces.

7. **Bucket or Towel:** In case of water spillage during the installation, having a bucket or towel on hand will save you from unwanted messes.

**Materials:**

1. **Water Supply Line:** Ensure you have a new, flexible water supply line that fits your dishwasher and is compatible with your plumbing.

2. **Drain Hose:** A proper drain hose is essential for allowing wastewater to flow from your dishwasher to the sink or disposal.

3. **Power Cord:** If your new dishwasher doesn’t come with a built-in power cord, you’ll need to purchase one that matches your electrical requirements.

4. **Mounting Brackets:** Some dishwashers come with these, but if not, you may need to buy them separately to secure your unit properly.

5. **Installation Manual:** While not a physical tool, your dishwasher’s installation manual will be your best friend during this process, providing specific instructions tailored to your model.

By ensuring you have the right tools and materials at your disposal, you set the stage for a successful and efficient dishwasher installation. Remember, safety always comes first—so put on your safety goggles, keep your workspace tidy, and prepare to transform your kitchen with your new appliance!

3. Preparing Your Kitchen: Clearing the Space

How to install a new dishwasher?
Credit : whatcanu.com

Before diving into the installation process of your new dishwasher, it’s essential to prepare your kitchen and clear the space effectively. A clutter-free environment not only makes the task easier but also ensures safety as you navigate around potentially sharp tools and heavy equipment.

Start by removing any obstacles from the area surrounding your old dishwasher. This includes emptying the appliance itself—ensure that all dishes, utensils, and cleaning supplies are removed, giving you a clear view of the space. Next, clear away any items from the countertops and adjacent cabinetry that might hinder movement. If your dishwasher is located under the counter, take the time to empty any cabinets below or beside it; this will provide ample room to maneuver and prevent accidental damage to your belongings.

Once the area is cleared, take a moment to sweep or vacuum the floor. Not only will this make the workspace more pleasant, but it will also help you avoid slipping on dust or debris as you work. If your kitchen floor is particularly slippery, consider laying down a non-slip mat to provide better traction during the installation process.

Additionally, gather all the tools and materials you’ll need for the installation. This might include a screwdriver, adjustable wrench, pliers, and a bucket to catch any water that may spill during disconnection. Having everything within arm’s reach will streamline the process and allow you to focus on the task at hand without unnecessary interruptions.

Lastly, ensure that you have access to the necessary plumbing and electrical connections. This may involve moving other appliances or furniture out of the way. If your new dishwasher requires additional electrical work or plumbing adjustments, it’s wise to consult a professional beforehand. With your kitchen prepared and a clear path to work, you’re ready to tackle the installation with confidence and ease.

4. Understanding Your Dishwasher: Key Components and Features

Before diving into the installation process, it’s essential to familiarize yourself with your dishwasher’s key components and features. Understanding these elements will not only ease your installation but also enhance your overall experience with the appliance.

First, let’s take a look at the **control panel**, usually located on the front or top edge of the door. This is where you’ll find buttons or a touchscreen to select wash cycles, adjust settings, and monitor the status of your dishwasher. Familiarizing yourself with these functions will help you navigate the machine effortlessly once it’s up and running.

Next, identify the **spray arms**. Most dishwashers have one or two spray arms that rotate to distribute water during the wash cycle. These arms are critical for ensuring your dishes come out sparkling clean, so check for any obstructions or debris before you start the installation.

Another important component is the **filter**. Located at the bottom of the dishwasher, the filter traps food particles and prevents them from recirculating onto your clean dishes. Understanding how to remove and clean the filter will not only extend the lifespan of your dishwasher but also maintain its cleaning efficiency.

The **drainage system** is another crucial feature. It usually consists of a drain pump and hose that expels dirty water after each cycle. Make sure to familiarize yourself with this system, as proper installation is key to preventing leaks or drainage issues in the future.

Lastly, don’t overlook the **power supply** and **water supply connections**. Knowing where these are located and how they interact with your dishwasher is vital for a successful installation. The electrical and plumbing connections must be secure and compatible with your home’s systems to ensure your dishwasher operates safely and efficiently.

By understanding these key components and features, you’ll not only simplify the installation process but also set yourself up for a successful and hassle-free experience with your new dishwasher.

5. Disconnecting the Old Dishwasher: Step-by-Step Instructions

How to install a new dishwasher?
Credit : whatcanu.com

Disconnecting your old dishwasher may seem daunting, but with a few simple steps, you can do it like a pro. Before diving in, ensure you have all necessary tools on hand: a screwdriver, adjustable wrench, bucket, and towels to catch any spills. Here’s a step-by-step guide to help you safely remove the old appliance.

**Step 1: Turn Off the Power and Water Supply**
Start by turning off the power to the dishwasher at your circuit breaker. This is crucial to avoid any electrical hazards during the disconnection process. Next, locate the water supply valve under your sink and turn it off as well.

**Step 2: Remove the Lower Dish Rack**
Take out the lower dish rack from the dishwasher to give yourself more space to work. This will also help prevent any accidental damage to your dishes during the disconnection.

**Step 3: Disconnect the Drain Hose**
Look for the drain hose, typically located at the back of the dishwasher. Using your screwdriver, loosen the clamp holding the hose in place, then gently pull the hose away from the dishwasher. Keep a bucket or towel handy to catch any residual water that may spill out.

**Step 4: Unscrew the Water Supply Line**
Next, locate the water supply line connected to the dishwasher. Using your adjustable wrench, carefully unscrew the line. Be prepared for a small amount of water to drip out; your bucket will be helpful here!

**Step 5: Remove the Mounting Brackets**
Most dishwashers are secured to the countertop or cabinets with mounting brackets. Open the dishwasher door and locate these brackets, which are generally found at the top. Use your screwdriver to remove any screws holding the brackets in place. Once detached, you can gently pull the dishwasher away from the cabinetry.

**Step 6: Disconnect the Electrical Wiring**
Finally, locate the electrical junction box, usually located at the bottom of the dishwasher. Carefully remove the cover plate and disconnect the wiring by unscrewing the wire nuts. Make sure to note how the wires are connected, as you’ll need this information for your new installation.

**Step 7: Safely Remove the Dishwasher**
With everything disconnected, it’s time to remove the dishwasher. Carefully slide it out from its position, taking care not to damage the surrounding cabinetry or flooring.

Once you’ve successfully removed the old dishwasher, you’re one step closer to installing your new appliance. Remember, patience and caution are your best friends in this process!

6. Inspecting Water and Electrical Connections

Before you can bring your new dishwasher to life, it’s crucial to inspect the water and electrical connections meticulously. This step is not just a formality; it’s a safeguard that ensures your appliance operates efficiently and safely.

Begin by locating the water supply line and shutoff valve, which is typically found under the kitchen sink. Turn on the water to check for any leaks or drips. A steady stream means you’re good to go, but if you spot any moisture around the fittings, it’s essential to tighten the connections or replace any worn-out gaskets. Remember, a small leak can lead to significant water damage over time, so it’s better to be cautious.

Next, turn your attention to the electrical connections. Ensure that the power supply is compatible with your new dishwasher’s requirements. Most modern dishwashers will need a dedicated circuit, so check the circuit breaker and confirm that it’s not overloaded. Use a voltage tester to verify that the outlet is working correctly before plugging in your appliance.

Additionally, take a moment to inspect the wiring and connections for any signs of fraying or damage. If you’re uncertain, don’t hesitate to consult a professional electrician to ensure everything is up to code. A little diligence now can save you a lot of headaches later, allowing you to enjoy the convenience of your new dishwasher with peace of mind.

With the water and electrical connections verified, you’ll be well on your way to completing the installation process like a pro!

7. Positioning Your New Dishwasher: Tips for Alignment

How to install a new dishwasher?
Credit : whatcanu.com

Positioning your new dishwasher correctly is crucial for both functionality and aesthetics, ensuring it operates efficiently while seamlessly integrating into your kitchen space. Start by carefully sliding the dishwasher into its designated space, typically located between the kitchen cabinets. Before doing so, check that all hoses and the power supply are readily accessible and not obstructed.

Once in position, use a level to check the alignment of the dishwasher. It should sit flush with the surrounding cabinetry without any noticeable gaps. If necessary, adjust the dishwasher’s legs to achieve the correct height. Most models feature adjustable feet that can be raised or lowered with ease, allowing you to achieve that coveted level alignment.

Next, ensure that the door swings open freely without hitting adjacent cabinets or countertops. This will not only enhance the usability of the appliance but also prevent potential damage to both the dishwasher and your kitchen fixtures. If your model includes customizable panels or trim kits, now is the time to install these to create a polished, integrated look.

Finally, take a step back and evaluate the overall appearance. A well-positioned dishwasher should look like a natural part of your kitchen, with smooth lines and a cohesive aesthetic. With these tips for alignment in mind, you’ll ensure that your new dishwasher is not just functional but also a stylish addition to your home!

8. Connecting the Water Supply Line

Connecting the water supply line is a crucial step in the installation process, and taking the time to do it correctly will ensure your dishwasher operates efficiently without leaks. To begin, you will need a few essential tools: an adjustable wrench, Teflon tape, and a bucket or towel for any potential spills.

First, locate the water supply valve, usually found under your kitchen sink. Before you start, make sure to turn off the water supply to avoid any surprises. It’s a good idea to place a bucket or towel beneath the valve to catch any residual water that may spill out when you disconnect the existing hose.

Next, use the adjustable wrench to loosen and remove the existing supply line from the valve. Once detached, inspect the connection point for any signs of wear or damage. If everything looks good, wrap Teflon tape around the threads of the new water supply line. This will create a watertight seal, preventing leaks once everything is connected.

Now, attach the new water supply line to the valve by hand, ensuring it’s snug but not overly tight. Follow this by reattaching the other end of the line to the dishwasher’s water inlet, which is typically located on the lower right side of the appliance. Again, use the adjustable wrench to secure this connection, taking care not to overtighten, as this could damage the fittings.

Once both connections are secure, it’s time to turn the water supply back on. Do this slowly and watch closely for any leaks at both connection points. If you see any water seeping out, turn off the valve immediately and double-check your connections.

With the water supply line securely connected and leak-free, you’re one step closer to enjoying the convenience of your new dishwasher. Make sure to take a moment to clean up any tools or spills before moving on to the next step in your dishwasher installation process!

9. Electrical Hookup: Hardwiring vs. Plugging In

When it comes to the electrical hookup for your new dishwasher, understanding the difference between hardwiring and plugging in is essential for a successful installation. Both methods have their own set of advantages, and your choice will largely depend on your kitchen’s existing setup and local electrical codes.

**Hardwiring** involves connecting the dishwasher directly to your home’s electrical system. This method typically requires a dedicated circuit and can provide a more permanent solution. Hardwired dishwashers usually come with a flexible conduit that contains three wires: a hot wire, a neutral wire, and a ground wire. This setup is particularly beneficial for those who want a clean look without visible cords. However, it’s crucial to ensure that you meet the necessary electrical requirements and restrictions, so consulting a professional electrician may be wise if you are unsure.

On the other hand, **plugging in** your dishwasher is often the simpler and more straightforward option. Many modern dishwashers are designed to be connected to a standard three-prong outlet. This method allows for easy removal and replacement, making it ideal for renters or those who plan to change appliances frequently. If your dishwasher comes with a power cord, all you need to do is locate an accessible outlet that matches the voltage requirements of your appliance. Ensure that the outlet is in a convenient but safe location, typically within the cabinetry, so it remains hidden from view.

Regardless of the method you choose, ensure you follow safety precautions. Turn off the power at the circuit breaker before starting any electrical work and, if necessary, consult your dishwasher’s manual for specific instructions related to electrical connections. By understanding the implications of hardwiring versus plugging in, you can make an informed decision that ensures your new dishwasher operates safely and efficiently, setting the stage for many years of hassle-free dishwashing.

10. Securing the Dishwasher to the Cabinet

Securing your new dishwasher to the cabinet is a crucial step that ensures stability and prevents any unintended movement during operation. This process not only enhances safety but also contributes to the longevity of your appliance.

Begin by locating the mounting brackets, which are typically found at the top edges of the dishwasher. These brackets will be used to anchor the dishwasher securely to the underside of your countertop. Before you start, double-check that the dishwasher is leveled properly; this will prevent any vibrations that could lead to wear and tear.

Once you’ve confirmed that your dishwasher is level, align the mounting brackets with the countertop. Using a drill, carefully drive screws into the brackets, ensuring they penetrate the cabinet above without compromising the integrity of the wood. Be cautious not to overtighten, as this can warp the dishwasher frame or damage the cabinet.

For added security, consider using shims if there are any gaps between the dishwasher and the cabinet. These small, wedge-shaped pieces help to create a snug fit and provide extra support. After securing the brackets, give the dishwasher a gentle tug to ensure it’s firmly in place.

Finally, take a moment to inspect the surrounding area. Ensure that there are no water lines or electrical cords pinched between the appliance and the cabinet, as this could lead to future issues. By taking the time to secure your dishwasher properly, you can enjoy the peace of mind that comes with a well-installed appliance, ready to tackle your dishwashing needs efficiently and reliably.

11. Testing for Leaks: Ensuring a Proper Seal

Once your new dishwasher is securely installed and connected to the water supply, it’s time for one of the most crucial steps: testing for leaks. Ensuring a proper seal is essential not only for the longevity of your appliance but also for the protection of your kitchen from water damage. A small leak can lead to significant issues if left unchecked, so take this step seriously.

Start by turning on the water supply valve that connects to your dishwasher. Once you’ve done that, run a short cycle on your dishwasher while keeping a close eye on the area around the door and the connections at the back. Look for any signs of dripping or pooling water, which could indicate a faulty seal or a loose connection.

Don’t rush this process—allow the dishwasher to run through its cycle completely. After it finishes, check the floor beneath the appliance for any signs of moisture. A dry floor means you’ve installed your dishwasher correctly, while any wet spots may require your immediate attention. If you do spot a leak, you may need to tighten the hose connections or reapply sealing tape to ensure a snug fit.

Additionally, using a paper towel or cloth to wipe down the edges of the door can help you spot any leaks that might not be immediately visible. If you notice any dampness on the towel after running the cycle, that’s a clear signal that you need to inspect the door gasket for wear or misalignment.

By taking the time to thoroughly test for leaks, you can enjoy peace of mind knowing that your new dishwasher is working efficiently and safely. Remember, an ounce of prevention is worth a pound of cure; addressing any leaks now can save you from costly repairs down the line.

12. Leveling Your Dishwasher: Importance of Stability

Leveling your dishwasher is a crucial step that can significantly impact its performance and longevity. An unlevel dishwasher can lead to a host of problems, including improper drainage, leaks, and even damage to your kitchen cabinetry. When your dishwasher is not stable, it may wobble during operation, causing loud noises and vibrations that can be unsettling. Moreover, an unlevel unit can affect how effectively the spray arms distribute water, leading to poorly cleaned dishes.

To ensure your dishwasher functions optimally, start by checking the leveling legs located at the bottom of the appliance. Most dishwashers are equipped with adjustable legs that allow you to raise or lower each corner to achieve a perfectly level surface. Using a bubble level, place it on the top edge of the dishwasher door. If the bubble is off-center, adjust the legs accordingly. Turn the legs clockwise to raise the unit and counterclockwise to lower it.

After making adjustments, recheck the level until the bubble sits perfectly centered. Once you confirm your dishwasher is level from side to side and front to back, secure it to the countertop or cabinetry, if applicable, to prevent any movement over time. Remember, taking the time to properly level your dishwasher not only ensures better performance but also extends its lifespan, making this step a vital part of your installation process. In the end, a stable dishwasher means cleaner dishes and a hassle-free experience for years to come!

13. Final Connections: Drain Hose Installation

Once your dishwasher is securely positioned and leveled, it’s time to tackle the crucial task of connecting the drain hose. This step ensures that dirty water is efficiently removed from your dishwasher during the wash cycle, preventing any backflow or leaks that could cause a mess in your kitchen.

Begin by locating the drain hose, typically made of durable plastic. You’ll find one end of the hose connected to the dishwasher itself, while the other end will need to be attached to your kitchen’s plumbing system. If your dishwasher has an air gap—a small device mounted on the countertop or sink—it’s essential to connect the drain hose to the air gap before proceeding to the sink drain.

Next, check the manufacturer’s instructions for your specific model. Most dishwashers require the drain hose to be routed upwards, creating a “high loop” that helps prevent wastewater from siphoning back into the appliance. You can achieve this by securing the hose to the underside of your countertop with a zip tie or clamp, making sure it forms a gentle curve without any sharp bends.

Once the hose is positioned correctly, attach the free end to the sink drain or garbage disposal. If connecting to a garbage disposal, ensure that the knockout plug is removed before insertion. This will allow water to flow freely from your dishwasher into the disposal. Use a hose clamp to secure the connection tightly, ensuring there are no leaks.

After everything is connected, it’s time for a quick check. Run your dishwasher on a short cycle while monitoring the drain area for any signs of leaks. This step is crucial, as it allows you to address any issues before completing the installation. If everything looks good, congratulations—you’ve successfully completed the drain hose installation! Your dishwasher is now ready to tackle your dirty dishes, giving you one more reason to enjoy the convenience of modern kitchen appliances.

14. Running Your First Cycle: What to Watch For

After successfully installing your new dishwasher, the moment has finally arrived to run your first cycle. This is an exciting step, but it’s essential to approach it with care to ensure everything is functioning correctly. Before hitting the start button, take a moment to double-check a few key elements.

First, ensure that all connections—water supply, drainage, and power—are secure. A loose hose can lead to leaks, while improper electrical connections might pose safety risks. Once you’ve confirmed everything is in order, load the dishwasher according to the manufacturer’s instructions, placing items in a way that promotes optimal water flow and cleanliness.

As you set the cycle, choose a standard wash program to start. This will give you a good baseline for the machine’s performance. Pay attention to how the dishwasher sounds during the initial cycle. A few operational noises are normal, but any strange grinding, loud banging, or persistent beeping may indicate an issue that needs addressing.

While the dishwasher runs, it’s a good idea to keep an eye on the exterior for any leaks. Inspect around the base and under the sink where the drainage hose connects. If you see any water pooling or dripping, it’s crucial to stop the cycle immediately and troubleshoot the problem. Additionally, listen for abnormal vibrations that could signal an imbalanced load or improper installation.

Finally, once the cycle completes, open the door and check the cleanliness of your dishes. If everything comes out sparkling clean, you can breathe a sigh of relief and celebrate your successful installation! However, if you notice residual food particles or cloudy glassware, it may be time to adjust your loading technique or explore the dishwasher’s settings for optimized performance. Running your first cycle is a crucial step in ensuring your new appliance is ready to serve you well for years to come. Happy washing!

15. Conclusion: Troubleshooting Common Installation Issues

### Conclusion: Troubleshooting Common Installation Issues

Now that you’ve successfully navigated the installation of your new dishwasher, it’s essential to be prepared for any hiccups that might arise in the process. Even the most meticulous DIY enthusiasts can encounter challenges, and knowing how to troubleshoot these issues can save you time and frustration.

One common problem is the dishwasher not filling with water. If this occurs, double-check that the water supply valve is fully open and inspect the inlet hose for any kinks or blockages. A clogged filter can also prevent water from entering, so don’t hesitate to clean or replace it as necessary.

Another frequent issue is the dishwasher leaking. If you notice puddles forming around the base, take a moment to inspect the door seal for wear and tear, as well as ensuring that the drain hose is securely connected and not pinched. Additionally, verify that the dishwasher is level; an uneven installation can lead to unwanted leaks.

Finally, be attentive to unusual noises during operation. While some sound is normal, loud grinding or banging may indicate that something is amiss. Check to see if any utensils or items have been left inside that could be obstructing the spray arms, or ensure that the dishwasher is properly secured to the cabinetry to minimize vibrations.

By keeping these troubleshooting tips in mind, you can address common installation issues with confidence. Remember, even if things don’t go perfectly, a little patience and problem-solving can lead to a smoothly operating dishwasher that will serve you well for years to come. Enjoy the benefits of your new appliance, and take pride in knowing that you’ve tackled the installation like a pro!

In conclusion, installing your new dishwasher doesn’t have to be an overwhelming task—armed with the right tools and our step-by-step guide, you can tackle it like a pro! By following the outlined instructions, you not only save money on installation fees but also gain a sense of accomplishment that comes from completing a DIY project. Remember to take your time, double-check your connections, and consult the manufacturer’s manual for any specific requirements. Soon enough, you’ll be enjoying the convenience of a sparkling clean kitchen without the hassle. We’d love to hear about your installation experience, so feel free to share your tips or ask any questions in the comments below. Happy dishwashing!

What are the best ways to create a bright and cheerful kitchen?

The kitchen is often considered the heart of the home—a space where culinary creations come to life and cherished memories are made around the dinner table.

However, if your kitchen feels more drab than fab, it might be time for a revitalizing makeover that sparks joy and creativity. In this blog post, we’ll explore ten inspiring ideas to transform your kitchen into a bright and cheerful haven. From vibrant color palettes and playful patterns to innovative storage solutions and charming decor, these fresh concepts will not only breathe new life into your cooking space but also enhance its functionality. Whether you’re a seasoned chef or a casual cook, these transformative ideas will inspire you to roll up your sleeves and create a kitchen that reflects your personality and invites warmth and happiness into your home. Get ready to embrace the beauty of a kitchen that truly energizes and delights!

1. Embrace Bold Colors: Choosing the Right Palette

What are the best ways to create a bright and cheerful kitchen?
Credit : whatcanu.com

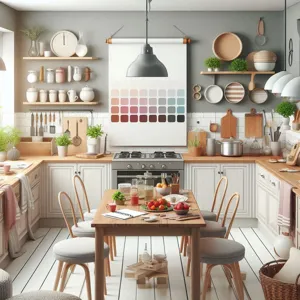
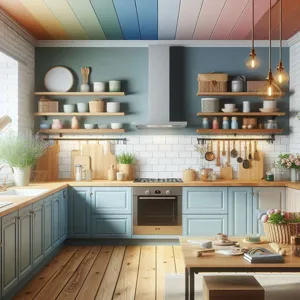
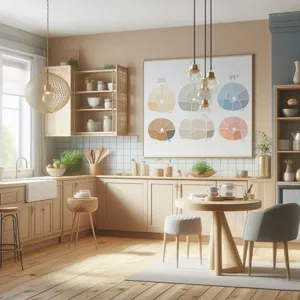
When it comes to transforming your kitchen into a vibrant and inviting space, embracing bold colors is an exhilarating first step. The right palette can infuse your kitchen with personality, energy, and warmth, making it a place where family and friends love to gather. Start by assessing the mood you want to create: are you aiming for a lively and playful atmosphere, or perhaps a more serene and sophisticated environment?

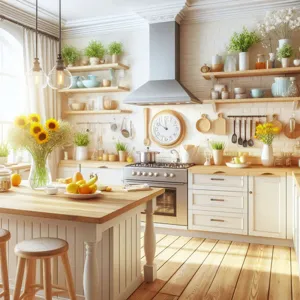
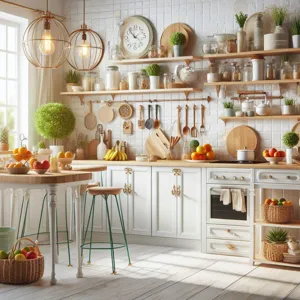
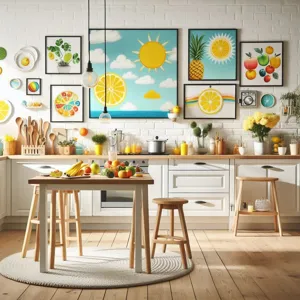
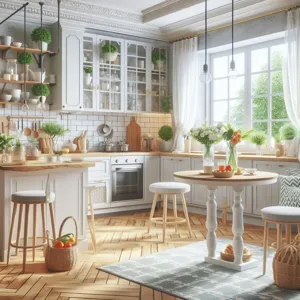
Consider colors like sunny yellows, rich teals, or bold coral to instantly brighten your kitchen. These hues can be introduced through various elements — think vibrant cabinetry, eye-catching backsplashes, or even statement appliances. If you’re hesitant to commit to an entire wall in a daring color, you can opt for smaller accents like bar stools, dishware, or decorative accessories that can easily be swapped out as trends change.

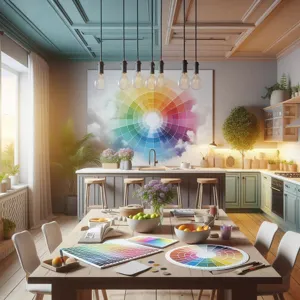
Additionally, don’t shy away from mixing and matching colors! A well-curated combination of complementary shades can create depth and visual interest. For instance, pairing a deep navy with soft mint green can add a fresh yet sophisticated vibe to the space. Use a color wheel to explore complementary and analogous colors that resonate with your style.

Remember, lighting plays a crucial role in how colors appear in your kitchen. Natural light can enhance brighter shades, while warm artificial lighting can soften bold colors, making them feel cozy and inviting. To make the most of your kitchen’s layout, consider where the light hits and how it interacts with your chosen palette throughout the day.

In summary, embracing bold colors in your kitchen makeover is about more than just aesthetics; it’s about creating a space that reflects your personality and inspires joy. With the right palette, you’ll transform your kitchen into a cheerful hub of creativity and connection, where every meal becomes a celebration!

2. Optimizing Natural Light: Window Treatments and Layout

One of the most effective ways to infuse your kitchen with brightness and cheer is by optimizing natural light. The right window treatments can make all the difference, allowing sunlight to pour in while maintaining privacy and style. Consider sheer curtains or light-filtering shades that gently diffuse sunlight, creating a soft and inviting atmosphere. These treatments can be layered with heavier drapes for evenings when you want to block out the world but still allow that sun-kissed glow during the day.

When it comes to layout, think about how your kitchen is structured in relation to the windows. If possible, arrange your workspaces near the light source. Positioning the sink or prep area by the window not only allows you to soak in the natural beauty outside but also brightens up your cooking experience. If your kitchen has limited windows, consider adding reflective surfaces like glossy backsplashes or mirrors strategically placed to bounce light around the room.

Don’t overlook the color scheme, either. Light, airy colors such as soft whites, pale yellows, or delicate pastels can enhance the effect of natural light, making the space feel larger and more open. Complement this with bright accents—think vibrant dishware or cheerful wall art—that can inject personality and warmth into the space.

By thoughtfully selecting window treatments and optimizing your kitchen layout to harness natural light, you can create a bright and cheerful environment that invites creativity and joy into your culinary adventures.

3. Creative Backsplash Ideas: Adding Personality to Your Space

What are the best ways to create a bright and cheerful kitchen?
Credit : whatcanu.com

The backsplash in your kitchen serves as more than just a practical barrier against spills and splatters; it’s an opportunity to infuse your personality and style into the heart of your home. A creative backsplash can transform a mundane kitchen into a vibrant culinary haven, setting the tone for the entire space. Here are some inspiring ideas to help you elevate your kitchen’s aesthetic and functionality.

**1. Mosaic Masterpieces:** Embrace the charm of mosaic tiles to create an intricate and colorful backsplash. With an array of patterns and colors at your disposal, you can design a unique work of art that reflects your personality. Consider a geometric pattern for a modern touch or a floral design for a more whimsical feel.

**2. Bold Wallpaper:** For a striking yet temporary solution, try removable wallpaper designed for kitchen use. This allows for easy updates to your backsplash without the commitment of tiles. Choose bold prints, such as vibrant florals or funky geometrics, to create a lively backdrop that can easily be changed as trends evolve.

**3. Shimmering Glass:** Glass tiles can add a sleek, contemporary vibe to your kitchen. Available in various colors and finishes, glass backsplashes can reflect light, making your space feel larger and more inviting. Opt for iridescent tiles that catch the light and change hues throughout the day for a captivating effect.

**4. Reclaimed Wood:** For those who love a rustic aesthetic, consider a reclaimed wood backsplash. This organic material adds warmth and texture to your kitchen, creating a cozy atmosphere. Pair it with modern appliances and sleek countertops for an appealing contrast that balances rustic charm with contemporary elegance.

**5. Chalkboard Paint:** Turn your backsplash into a functional space with chalkboard paint. This versatile option allows you to jot down recipes, create shopping lists, or showcase your latest culinary creations. Choose a vibrant color for the chalkboard finish to add a playful element to your kitchen.

**6. Colorful Ceramic Tiles:** Inject a burst of color into your kitchen with handcrafted ceramic tiles. Opt for bright, bold hues or intricate patterns that tell a story. These tiles can be arranged in various configurations, from classic subway patterns to elaborate designs that create visual interest.

Incorporating these creative backsplash ideas into your kitchen makeover will not only enhance the space’s aesthetic appeal but also make it a true reflection of your style and personality. A well-chosen backsplash can serve as a focal point, drawing the eye and inspiring conversations, making your kitchen a welcoming hub for family and friends alike.

4. The Power of Plants: Incorporating Greenery in Your Kitchen

When it comes to transforming your kitchen into a bright and cheerful space, one of the most effective and refreshing strategies is to harness the power of plants. Incorporating greenery not only adds a vibrant splash of color but also infuses your cooking area with life and vitality. Imagine stepping into your kitchen, greeted by the lush greens of herbs, succulents, or flowering plants that not only beautify the space but also enhance the air quality.

Start by choosing the right plants for your kitchen environment. Consider placing small pots of fresh herbs like basil, parsley, and mint on your windowsill. Not only do they look beautiful, but they also provide the freshest ingredients for your culinary creations. If you’re short on space, opt for vertical planters or hanging pots that can cascade down the walls, creating a delightful green wall that draws the eye upward.

For a pop of color, consider flowering plants like African violets or orchids, which can thrive in the humid kitchen atmosphere. Their blooms can serve as exquisite focal points on countertops or dining tables, bringing a cheerful vibe and a sense of tranquility to your cooking sanctuary.

Additionally, using plant stands or decorative pots can elevate your greenery game. Choose vibrant ceramic pots or chic baskets that complement your kitchen’s color palette. The contrasts of textures and hues can create a visually appealing environment, making your kitchen feel more inviting.

Lastly, don’t forget about the practicality of your plant choices. Opt for low-maintenance varieties if you have a hectic schedule, or consider a small indoor vegetable garden for those who want to combine aesthetics with functionality. As you cultivate your green space, you’ll notice how the presence of plants transforms your kitchen into a cheerful haven, encouraging you to whip up delicious meals with newfound inspiration. Embrace the beauty of nature and let your kitchen flourish with greenery!

5. Functional and Fun: Choosing Cheerful Kitchen Accessories

What are the best ways to create a bright and cheerful kitchen?
Credit : whatcanu.com

When it comes to transforming your kitchen into a space that radiates positivity and joy, the right accessories can make all the difference. Functional and fun, these cheerful kitchen accessories not only serve a purpose but also infuse your cooking space with personality and vibrancy.

Start with kitchen textiles—brightly colored dish towels, playful pot holders, and whimsical aprons can all add a pop of color and character. Opt for patterns that evoke a sense of cheer, such as polka dots, florals, or stripes, which can instantly lift your mood while you whip up your favorite meals. Don’t shy away from mixing and matching these textiles to create a delightful visual tapestry.

Next, consider your kitchen gadgets and utensils. Why settle for mundane when you can select items that spark joy? Look for measuring cups shaped like cute animals or colorful mixing bowls that resemble a rainbow. These functional tools not only make cooking more enjoyable but also serve as charming decor when displayed on your countertops.

Storage solutions can also play a role in your cheerful kitchen makeover. Clear jars filled with colorful pasta, beans, or spices can turn your pantry into a vibrant display. You might even choose to label these jars with playful, handwritten tags for an added personal touch.

Don’t forget about wall art and decor! A cheerful wall clock, a quirky fruit bowl, or a collection of colorful magnets can all contribute to the upbeat atmosphere of your kitchen. Consider hanging a chalkboard where you can write inspirational quotes or fun daily menus; it’s a simple yet effective way to inspire creativity and positivity.

Ultimately, choosing cheerful kitchen accessories is all about expressing your personality and creating an environment that feels welcoming and lively. With the right combination of functionality and fun, your kitchen can become not just a place for cooking, but a joyful sanctuary where memories are made and shared.

6. Lighting Matters: Selecting Fixtures for a Bright Environment

When it comes to creating a bright and cheerful kitchen, lighting is one of the most essential elements to consider. The right fixtures can dramatically transform the ambiance of the space, making it feel more inviting and open. Start by evaluating the natural light in your kitchen. If you’re blessed with large windows or a sunlit corner, you can enhance that brightness with fixtures that complement the available light.

Consider layering your lighting with three key types: ambient, task, and accent. Ambient lighting provides overall illumination and sets the mood for the room. A chic chandelier or a series of pendant lights over an island can add a touch of elegance while brightening the entire area. Opt for fixtures in light, airy colors or metallic finishes to reflect light and create a sense of spaciousness.

Task lighting is essential for areas where you prepare meals or engage in other activities. Under-cabinet lights are a fantastic option, illuminating your countertops and ensuring you have adequate visibility for chopping, mixing, and cooking. LED strips or puck lights can be both sleek and functional, providing a modern touch that enhances your kitchen’s aesthetic.

Finally, don’t underestimate the power of accent lighting. This type of lighting focuses on highlighting specific features in your kitchen, such as artwork, decorative shelves, or beautiful cabinetry. A well-placed spotlight or a small LED fixture can draw attention to these elements, adding personality and warmth to your kitchen.

In addition to the types of lighting, consider the color temperature of your bulbs. Warmer tones can create a cozy, inviting feel, while cooler tones evoke a clean, modern vibe. Striking the right balance in your lighting choices will not only brighten your kitchen but also create a cheerful atmosphere that invites family and friends to gather and enjoy the space together. Embrace the transformative power of lighting, and watch your kitchen shine like never before!

7. Open Shelving vs. Cabinets: Creating an Airy Feel

What are the best ways to create a bright and cheerful kitchen?
Credit : whatcanu.com

When it comes to designing a bright and cheerful kitchen, the choice between open shelving and traditional cabinets can make a significant impact on the overall atmosphere of the space. Open shelving is increasingly popular for those looking to create an airy, inviting feel. By removing the visual weight of solid cabinet doors, open shelves allow light to flow freely, making the kitchen appear larger and more open. They also provide an opportunity to showcase your favorite dishware, colorful cookbooks, and charming decorative items, adding personality and warmth to the room.

However, open shelving does come with its considerations. It requires a commitment to organization and cleanliness, as every dish and item is on display. This can be a wonderful chance to curate a collection that reflects your style—think artfully arranged plates, vibrant bowls, and even hanging plants for a touch of greenery. To enhance the cheerful vibe, consider using colorful dishes or containers that pop against the backdrop of your walls.

On the flip side, traditional cabinets offer a more streamlined and tidy appearance, providing a place to hide away kitchen clutter. If you prefer a more minimalistic approach or have a busy kitchen that requires easy access to tools and ingredients, cabinets might be your best bet. You can still infuse brightness and cheerfulness into your kitchen through the choice of cabinet colors or finishes. Light, neutral shades or cheerful pastels can keep the space feeling fresh and lively.

Ultimately, whether you opt for open shelving or cabinets, think about combining both elements for an eclectic yet cohesive look. Perhaps you can incorporate open shelves for select items while keeping the bulk of your storage in cabinets. This balance not only creates visual interest but also allows you to enjoy the benefits of both styles, fostering an atmosphere that is as functional as it is inviting. Whichever route you choose, ensuring that your kitchen reflects your personal style will create a space that you love to spend time in, making every meal prep a cheerful experience.

8. Revamping Countertops: Materials that Brighten Your Kitchen

When it comes to transforming your kitchen into a bright and cheerful space, revamping your countertops is a game changer. The right material not only enhances the aesthetic appeal of your kitchen but also sets the tone for the entire room. Here are some materials that can infuse light and vibrancy into your culinary haven.

**Quartz:** Known for its durability and versatility, quartz countertops come in an array of colors and patterns that can mimic the look of natural stone while offering a more uniform appearance. Opt for lighter shades like soft whites or pale grays with subtle veining to create a clean, bright look that reflects light beautifully. The non-porous surface also makes it easy to maintain, ensuring that your kitchen remains as cheerful as it is functional.

**Marble:** If you’re aiming for an elegant touch, marble is a classic choice. Its natural beauty and unique veining patterns add character to your kitchen. White marble with gray or gold veining can exude a fresh, airy vibe, making the space feel open and inviting. Though it requires a bit more maintenance, the stunning aesthetic it brings can be well worth the effort.

**Butcher Block:** For a warm, inviting atmosphere, consider butcher block countertops. Made from hardwood, these surfaces add a rustic charm and can easily brighten up your kitchen, particularly in lighter wood finishes like maple or ash. They provide a cozy, homey feel while being highly functional for food preparation. Pair them with bright cabinetry or colorful accessories to create a balanced, cheerful environment.

**Laminate:** If you’re looking for budget-friendly options, laminate countertops have come a long way in design and durability. Available in a variety of bright colors and patterns, laminate can mimic the look of more expensive materials while adding a splash of color to your kitchen. Choose bold hues or playful prints to create a lively atmosphere that reflects your personality.

**Glass:** For a sleek, modern look, consider glass countertops. They are not only striking but also reflect light, making your kitchen feel spacious and bright. Available in frosted or polished finishes, glass can be an eye-catching centerpiece. Pair it with contrasting elements like dark cabinetry or vibrant backsplash tiles to create a stunning visual impact.

By selecting the right countertop material, you can significantly brighten your kitchen, creating a space that is not only functional but also a joy to spend time in. Whether you prefer the elegance of marble, the warmth of butcher block, or the modernity of glass, revamping your countertops can breathe new life into your kitchen makeover, making it a cheerful gathering place for family and friends.

9. Adding a Splash of Art: Decor Ideas for Personal Touches

A kitchen makeover isn’t just about new cabinets and countertops; it’s also about infusing your personal style and creativity into the space. One of the most effective ways to achieve this is by adding a splash of art. Artwork can transform the kitchen from a purely functional area into a vibrant and inspiring hub where culinary magic happens.

Begin by selecting pieces that resonate with you—whether it’s a bold abstract painting, a whimsical print of vegetables, or a gallery wall showcasing family photos in eclectic frames. A large canvas can serve as a stunning focal point above the kitchen island, while smaller pieces can be arranged around the cooking area or on open shelving. Don’t shy away from incorporating three-dimensional art, such as a decorative ceramic bowl or a handmade wooden clock, which can add depth and texture to your kitchen.

Consider creating a dedicated art corner with a small easel that showcases rotating artwork or seasonal decorations. This not only keeps the space feeling fresh but also invites guests to engage with your creativity. If you have children, involve them in the process by displaying their artwork or creating a fun chalkboard wall where they can unleash their artistic flair.

Furthermore, practical art can also enhance your kitchen’s functionality. Hang a set of colorful, decorative utensils or a vibrant spice rack that doubles as a statement piece. Choose wall decals or murals that reflect your love for cooking or your favorite culinary quotes; these can easily be changed out for a quick refresh.

By integrating art into your kitchen design, you not only elevate its aesthetic appeal but also create a warm and inviting atmosphere that reflects your unique personality. Every meal prepared in a space adorned with personal touches becomes a joyful experience, making your kitchen not just a place to cook, but a canvas for your life and creativity.

10. Innovative Storage Solutions: Keeping Your Kitchen Organized

In any kitchen makeover, innovative storage solutions are essential for creating a space that is not only bright and cheerful but also functional and organized. A clutter-free kitchen allows for easier meal prep, enhances your cooking experience, and keeps the joyful energy flowing as you whip up your favorite dishes. Here are some creative ideas to inspire you.

Start by maximizing vertical space with open shelving. Floating shelves can showcase your beautiful dishware, cookbooks, or even potted herbs, adding both charm and accessibility. Opt for colorful or patterned plates that pop against the wall, bringing an artistic flair to your kitchen.

Consider incorporating pull-out drawers or baskets in your cabinets. These can be particularly handy for storing pots and pans, making it easy to access what you need without having to dig through a pile. You can even label each drawer or basket to streamline your cooking process further.

Don’t overlook the power of magnetic boards or strips. These can be used to hold knives, spices, or utensils, freeing up counter space while adding a sleek, modern look. Similarly, a pegboard can serve as a versatile solution, allowing you to hang pots, pans, and even kitchen tools in a visually appealing manner.

Finally, think about utilizing the often-overlooked areas in your kitchen, such as under the sink or in corners. Installing tiered shelves or lazy Susans can make these spaces more accessible and efficient. By creatively organizing and maximizing every inch of your kitchen, you not only enhance its functionality but also contribute to a bright and cheerful atmosphere that invites you to enjoy the art of cooking.

With these innovative storage solutions, your kitchen makeover will not only inspire joy but also promote a sense of order and efficiency, making it a delightful space for culinary creativity.

11. The Impact of Textiles: Bright Curtains, Rugs, and Towels

The impact of textiles in your kitchen makeover cannot be overstated. While walls and cabinets form the bones of the space, it’s the fabrics that breathe life and character into your culinary haven. Bright curtains, vibrant rugs, and cheerful towels can transform an ordinary kitchen into a delightful and inviting environment.

Start with the curtains; they frame your windows and set the tone for the entire room. Opt for bold patterns or vivid colors that reflect your personality and style. Floral prints, geometric designs, or even cheerful stripes can add an upbeat touch. Light, airy fabrics like cotton or linen will allow natural light to filter through, creating a warm and welcoming atmosphere. For an extra pop, consider layering sheer curtains with solid drapes for depth and dimension.

Next, turn your attention to rugs. A lively area rug can anchor the space while providing a splash of color and texture underfoot. Choose a durable, easy-to-clean material that can withstand the hustle and bustle of a kitchen. Think about playful patterns or bright hues that complement your existing décor. A striking rug can also serve as a focal point, drawing the eye and elevating the overall aesthetic of the kitchen.

Don’t forget the towels—these everyday essentials are an opportunity to express your style. Bright, patterned dish towels or aprons can add a cheerful touch and make mundane chores feel a little more enjoyable. You can coordinate these textiles with your curtains and rugs for a cohesive look or mix and match for a more eclectic vibe.

Lastly, consider the small details: pot holders, oven mitts, and table linens can all contribute to the cheerful ambiance you’re aiming for. By carefully selecting textiles that resonate with your vision, you can create a kitchen that not only looks stunning but also feels warm and inviting, encouraging family gatherings and culinary adventures alike. A bright kitchen is not just about aesthetics; it’s about creating a space that inspires joy and creativity every time you step inside.

12. DIY Projects: Personalizing Your Kitchen on a Budget

When it comes to transforming your kitchen into a bright and cheerful space, DIY projects offer an unbeatable combination of creativity, personalization, and budget-friendliness. Embracing a do-it-yourself approach not only allows you to infuse your unique personality into your kitchen but also helps you save money while making impactful changes.

Start by considering simple yet effective projects that can elevate the aesthetic of your kitchen. One popular idea is to paint your cabinets in a vibrant hue. A fresh coat of paint can breathe new life into worn-out cabinetry, creating an inviting atmosphere. Choose colors like sunny yellows or soft mint greens to evoke a sense of warmth and cheer.

Another fun project is creating a unique backsplash using peel-and-stick tiles or even repurposed materials. Whether you opt for colorful ceramic tiles or a mosaic of reclaimed wood, this element can serve as a focal point, adding character and charm to your space.

For those who enjoy crafting, consider making your own kitchen decor. Handmade wall art, personalized recipe boards, or even a herb garden planted in repurposed jars can add a touch of whimsy and practicality. Not only do these projects beautify your kitchen, but they also give you a sense of accomplishment and ownership over your space.

Additionally, swapping out hardware like cabinet knobs and drawer pulls is an easy and inexpensive way to update your kitchen’s look. Choose bright, playful designs or quirky shapes that reflect your style—these small changes can have a significant impact on the overall feel of your kitchen.

Finally, don’t forget about organization! DIY custom shelves or colorful storage solutions can help declutter your space while providing a cheerful, organized environment. Use baskets in vibrant colors or patterned bins to store utensils, cookbooks, or pantry items, keeping everything within reach and visually appealing.

By embarking on these DIY projects, you can create a kitchen that not only looks bright and cheerful but also feels like a true reflection of you. So gather your supplies, unleash your creativity, and watch as your kitchen transforms into a delightful hub of warmth and joy!

13. The Role of Appliances: Choosing Colors and Styles that Shine

When it comes to a kitchen makeover, appliances play a pivotal role—not just in functionality but also in setting the tone for the entire space. Choosing the right colors and styles for your appliances can transform your kitchen from mundane to magnificent, infusing it with brightness and cheer that resonates with your personal style.

Start by considering the color palette of your kitchen. If you’re aiming for a bright and cheerful atmosphere, opt for vibrant hues like sunny yellows, refreshing greens, or playful blues. These lively colors can be reflected in your appliances, whether you choose a bold stand mixer in a juicy tangerine or a retro-style refrigerator in mint green. Such choices don’t just serve a practical purpose; they become statement pieces that invite warmth and personality into the heart of your home.

For a more cohesive look, you might consider matching your appliances to your cabinetry. Sleek stainless steel offers a modern touch and pairs beautifully with white or pastel cabinets, creating a luminous effect that brightens up the space. If you prefer a more classic vibe, opt for matte black appliances that create a striking contrast against light-colored cabinets, grounding the room while keeping it stylish.

Don’t forget about the style of the appliances themselves! A vintage-inspired design can evoke nostalgia and charm, while a minimalist, contemporary style can keep the space feeling fresh and uncluttered. Whatever aesthetic you choose, make sure it aligns with the overall theme of your kitchen. By selecting appliances that shine in both color and style, you not only enhance the visual appeal of your kitchen but also create an inviting environment that makes cooking and gathering a joyous experience.

In this kitchen makeover journey, let your appliances be more than just tools; let them be a vibrant expression of your culinary creativity and personal flair!

14. Creating a Cozy Nook: Designing a Relaxing Eating Area

Transforming a corner of your kitchen into a cozy nook can significantly enhance both its functionality and ambiance, making it a delightful spot for meals, morning coffee, or casual conversations. To design a relaxing eating area, start by selecting a small table that fits well within the space, ensuring that it complements your kitchen’s overall style—whether that be rustic farmhouse, modern minimalist, or vibrant eclectic.

Next, consider the seating. Soft, cushioned chairs or a charming banquette can create an inviting atmosphere. Upholster the seating with cheerful fabrics, perhaps in bright florals or warm, solid colors that echo the hues around your kitchen. Adding layered throw pillows can bring an extra touch of comfort, inviting you to sink in and linger a little longer over breakfast or an afternoon snack.

Lighting plays a crucial role in establishing a cozy nook. Opt for pendant lights with a soft glow or a vintage-inspired chandelier to create warmth and intimacy. If natural light floods in, maximize it by keeping window treatments light and airy—think sheer curtains or bamboo shades that allow sunlight to filter through while maintaining privacy.

Don’t forget the finishing touches. Incorporate greenery with potted plants or herbs that can double as decor and functional kitchen aids. A little artwork on the walls—perhaps framed prints of culinary themes or local landscapes—can personalize the space and spark conversation.

Lastly, a small bookshelf or a display of cookbooks can enhance the nook’s character while also providing inspiration for your next culinary adventure. By thoughtfully curating this corner, you not only create a relaxing eating area but also a cherished retreat within your home, inviting family and friends to gather and enjoy life’s simple pleasures together.

15. Final Touches: How to Maintain Brightness and Cheerfulness Long-term

Once you’ve transformed your kitchen into a bright and cheerful haven, the next step is to ensure that its vibrancy lasts over time. Maintaining the uplifting atmosphere of your newly revamped space involves a few thoughtful final touches and regular upkeep.

First and foremost, consider investing in durable, easy-to-clean materials for countertops and cabinetry. Not only do these choices help maintain the pristine look of your surfaces, but they also contribute to a brighter environment. Glossy finishes reflect light, enhancing the overall brightness of the kitchen, while materials like quartz or laminate can withstand the rigors of daily use without losing their charm.

Next, don’t overlook the importance of plants. Incorporating some lush greenery into your kitchen not only adds color but also improves air quality and creates a more inviting atmosphere. Choose low-maintenance varieties like succulents or herbs, which can thrive in the bright, cheerful setting you’ve created. For a pop of color, consider vibrant pots that complement your kitchen’s palette.

Regular cleaning is essential to uphold the cheerful vibe of your kitchen. Schedule weekly deep cleans focusing on surfaces, appliances, and the floors to keep your space looking fresh and inviting. Additionally, consider implementing a seasonal refresh—swap out decor items, update dishware, or change table linens to reflect the current season. This practice keeps the kitchen feeling dynamic and engaging.

Lastly, consider your lighting. To maintain that bright and cheerful ambiance, ensure that your kitchen is well-lit at all times. Utilize a combination of ambient, task, and accent lighting to create layers of brightness. Dimmable options can help adjust the mood from lively gatherings to cozy dinners, ensuring your kitchen remains a cheerful place no matter the occasion.

By integrating these final touches into your kitchen routine, you’ll not only preserve the vibrancy of your makeover but also create a space that continuously inspires joy and creativity—a true reflection of the heart of your home.

As we wrap up our exploration of inspiring ideas for a bright and cheerful kitchen makeover, we hope you feel energized and ready to transform your culinary space into a vibrant hub of creativity and joy. Whether it’s through vibrant color palettes, innovative storage solutions, or playful decor accents, the possibilities for revitalizing your kitchen are endless. Remember, a well-designed kitchen not only enhances your cooking experience but also serves as a warm gathering place for family and friends. So, roll up your sleeves, unleash your creativity, and embark on this exciting journey to create a kitchen that truly reflects your personality and brings a smile to your face. We can’t wait to see your stunning transformations—be sure to share your before-and-after photos with us! Happy decorating!

How to choose the right paint color for your kitchen?

The kitchen is often regarded as the heart of the home, a bustling hub where culinary creations come to life and memories are made over shared meals.

As the backdrop to countless family gatherings and intimate dinners, choosing the perfect paint color for this vital space can significantly influence its ambiance and functionality. With an overwhelming array of hues and shades to consider, from serene pastels to bold, vibrant tones, the decision can feel daunting. But fear not! In this ultimate guide, we’ll navigate the intricate world of color selection, exploring how light, space, and your personal style can harmonize to create a kitchen that is not only visually stunning but also a true reflection of your taste. Whether you’re aiming for a cozy farmhouse feel or a sleek modern aesthetic, join us as we uncover tips, tricks, and inspiration to help you make the right choice and transform your kitchen into a space you’ll love for years to come.

1. Understanding Color Psychology in the Kitchen

How to choose the right paint color for your kitchen?
Credit : whatcanu.com

When it comes to selecting the perfect paint color for your kitchen, understanding color psychology is essential. Colors can evoke emotions, influence moods, and even affect our appetite, making them a crucial element in a space where we gather to cook, eat, and socialize.

In the kitchen, warm colors such as reds, oranges, and yellows stimulate energy and enthusiasm. These vibrant hues are often associated with warmth and comfort, making them ideal for fostering an inviting atmosphere. A splash of red can enhance appetite and conversation, while sunny yellows can inspire a cheerful ambiance, perfect for morning breakfasts or family dinners.

On the other hand, cooler colors like blues and greens promote calmness and relaxation. Soft blues can create a serene environment, making your kitchen a peaceful place to unwind after a long day. Greens, reminiscent of nature, can add a refreshing touch and bring a sense of balance to the space. These colors can be particularly appealing in open-plan homes where the kitchen flows into other areas of the house.

Neutral colors, such as whites, grays, and beiges, provide a timeless backdrop that allows for versatility. They can make your kitchen feel spacious and airy, while also serving as a blank canvas for colorful accents and decor. Choosing a neutral palette can be an excellent option if you prefer to change up your decor frequently or want to highlight special features in your kitchen.

Ultimately, the key to harnessing color psychology in your kitchen is to consider the atmosphere you want to create. Do you envision a vibrant, lively space or a calm, serene retreat? By thoughtfully selecting colors that align with your desired mood, you can transform your kitchen into not just a functional area, but a welcoming and emotionally resonant part of your home.

2. Assessing Your Kitchen’s Lighting

When it comes to choosing the perfect paint color for your kitchen, one of the most critical factors to consider is the lighting. The way light interacts with paint can dramatically alter the hue and ambiance of your space, so taking the time to evaluate your kitchen’s lighting is essential.

Begin by observing the natural light that floods into your kitchen throughout the day. Is your kitchen bathed in warm, golden sunlight in the morning, or does it receive cooler, bluish tones in the late afternoon? The direction your windows face plays a significant role; south-facing kitchens tend to be brighter and warmer, while north-facing ones can feel cooler and more subdued. By analyzing these variations, you can better predict how different colors will appear at different times of the day.

Next, consider your artificial lighting options. The type of bulbs you use—whether incandescent, fluorescent, or LED—can influence the paint color’s perception. Incandescent bulbs emit a warm, inviting glow that can enhance warmer paint shades, making them feel cozy and inviting. In contrast, fluorescent lighting tends to cast a cooler, more clinical light that can wash out warmer tones and accentuate cooler hues.

To truly understand how a color will look in your space, it’s advisable to test paint samples under various lighting conditions. Apply swatches of your chosen colors on the walls and observe them at different times of the day and under different lighting scenarios. This simple yet effective step will help you see how the paint interacts with your kitchen’s unique lighting, ensuring that you select a shade that not only complements your style but also enhances the overall atmosphere of the room.

By carefully assessing your kitchen’s lighting, you’re one step closer to achieving a harmonious and inviting space that reflects your personal taste and lifestyle.

3. Considering Your Kitchen Size and Layout

How to choose the right paint color for your kitchen?
Credit : whatcanu.com

When it comes to selecting the perfect paint color for your kitchen, understanding the size and layout of your space is crucial. The dimensions and configuration of your kitchen can dramatically influence how colors are perceived and how they interact with the overall design.

In smaller kitchens, light and airy colors can create an illusion of space, making the area feel larger and more welcoming. Soft whites, pale blues, or gentle pastels reflect light and open up the room, providing a fresh, clean aesthetic. Consider using a satin or eggshell finish to enhance the light reflection, which can further brighten up cramped quarters.

On the other hand, larger kitchens offer more freedom in color choices. This is an opportunity to explore bolder hues that can add depth and character to the space. Rich shades like deep navy, forest green, or even vibrant reds can create a dramatic focal point, especially if the kitchen features an island or a unique architectural detail. However, it’s essential to balance these bold colors with lighter accents—perhaps in the form of cabinetry or backsplash—to maintain an inviting atmosphere.

Additionally, the layout of your kitchen can dictate how color transitions throughout the space. If you have an open-concept design that flows into adjacent rooms, consider how your chosen color will harmonize with neighboring areas. A seamless transition can enhance the overall flow of your home, while contrasting colors can define spaces but may require careful coordination to avoid clashing.

Finally, don’t forget about the natural light that enters your kitchen. A color that looks stunning in the afternoon sun may appear entirely different in the evening’s artificial lighting. Taking the time to test paint samples in various lighting conditions can provide a clearer picture of how your choices will ultimately look in your kitchen’s unique environment. By thoughtfully considering the size and layout of your kitchen, you can select a paint color that not only beautifies the space but also enhances its functionality and ambiance.

4. Exploring Current Kitchen Trends

When it comes to selecting the ideal paint color for your kitchen, keeping an eye on current trends can provide refreshing inspiration and help you create a space that feels modern and inviting. As you explore the latest kitchen design trends, you’ll find a dynamic range of color palettes and styles that cater to various tastes and aesthetics.

One of the hottest trends in kitchen design is the use of bold, deep hues. Rich colors like navy blue, forest green, and charcoal gray are making waves, adding an element of sophistication and warmth to the heart of the home. These darker shades can create a stunning contrast against white cabinetry or light countertops, offering a dramatic yet inviting ambiance.

On the flip side, soft pastels are also gaining popularity, providing a gentle touch that evokes a sense of calmness. Colors like mint green, blush pink, and pale yellow can brighten up your kitchen, making it feel airy and cheerful. These lighter shades work beautifully in smaller spaces, helping them feel larger and more open.

Another noteworthy trend is the return of earthy tones. Shades inspired by nature, such as terracotta, sage green, and sandy beige, are perfect for creating a rustic, organic feel in your kitchen. These colors not only connect your space to the outdoors but also work harmoniously with natural materials like wood and stone.

Additionally, don’t forget about the impact of two-tone kitchens, where contrasting colors are used to define different areas of the space. For instance, pairing a dark color on the lower cabinets with a lighter hue on the upper cabinets can add depth and interest, while allowing you to experiment with multiple shades without overwhelming the room.

As you consider your options, take time to browse design magazines, visit home decor websites, or even explore social media platforms like Pinterest and Instagram for the latest kitchen color inspirations. By staying attuned to current trends, you can choose a paint color that not only reflects your personal style but also positions your kitchen as a chic, contemporary gathering place for family and friends.

5. Choosing a Color Palette: Warm, Cool, or Neutral

How to choose the right paint color for your kitchen?
Credit : whatcanu.com

When it comes to selecting the right color palette for your kitchen, one of the most crucial decisions is whether to opt for warm, cool, or neutral tones. Each category offers distinct vibes and can significantly influence the overall atmosphere of your cooking space.

**Warm Colors**: Warm hues like reds, oranges, and yellows evoke feelings of comfort and energy. They can create a cozy environment that invites family and friends to gather. Imagine a rich terracotta for your walls paired with creamy white cabinetry, which not only encourages conversation but also stimulates appetite—the perfect recipe for a bustling kitchen. These colors are ideal for homes with a rustic or traditional decor style, as they harmonize beautifully with wooden accents and natural materials.

**Cool Colors**: On the other hand, cool tones such as blues, greens, and purples can introduce a sense of calm and tranquility to your kitchen. A soft sage green or a refreshing sky blue can make your space feel airy and spacious, perfect for smaller kitchens that may benefit from an illusion of openness. These colors work wonderfully in modern or minimalist designs, providing a serene backdrop against sleek appliances and contemporary fixtures. Additionally, cool colors can balance out warmer elements in your kitchen, creating a harmonious blend that feels both inviting and refreshing.

**Neutral Colors**: If you prefer a more understated approach, neutral colors like whites, grays, and beiges offer versatility and timelessness. A classic white kitchen exudes cleanliness and sophistication, while a warm beige can add a touch of coziness without overwhelming the senses. Neutrals provide a blank canvas that allows for easy experimentation with decorative elements, such as colorful dishware or vibrant artwork. This flexibility makes them an excellent choice for those who enjoy changing their decor frequently or want to ensure their kitchen remains stylish for years to come.

In choosing a color palette, consider not only your personal preferences but also the size and layout of your kitchen, the amount of natural light it receives, and how the chosen colors will complement your overall home decor. Each palette has its advantages, and the right choice can transform your kitchen from a simple cooking space into a welcoming hub of creativity and connection.

6. The Role of Cabinet and Countertop Colors

When it comes to choosing the perfect paint color for your kitchen, the hues of your cabinets and countertops play a crucial role in the overall aesthetic. These elements serve as the foundation of your kitchen’s design, influencing not only the mood but also the perceived size and lighting of the space.

Begin by considering the existing colors of your cabinetry and countertops. If you have dark wood cabinets or rich, textured countertops, lighter paint colors can create a beautiful contrast, making the room feel more open and inviting. Think soft creams, pale grays, or even a fresh mint green to brighten up the space and draw attention to your cabinetry’s natural beauty.

On the other hand, if your cabinets are painted a bright white or a light pastel, you might want to opt for bolder paint colors on the walls to add depth and character. A deep navy blue, a vibrant coral, or even a sophisticated charcoal can bring a modern flair to your kitchen while framing your cabinetry beautifully.

Additionally, consider the undertones of your countertops. A countertop with warm undertones works harmoniously with warm wall colors, such as buttery yellows or earthy terracotta shades. Conversely, cooler-toned countertops pair well with colors like soft blues or crisp whites, maintaining a cohesive and stylish look.

Don’t forget about texture, either. Glossy finishes on cabinets will reflect light and can enhance lighter wall colors, while matte finishes can soften the overall vibe.

Ultimately, the synergy between cabinet and countertop colors and your chosen paint can transform your kitchen into a cohesive space that feels both functional and inviting. Take the time to explore color swatches alongside your cabinet and countertop samples to visualize how they work together. This thoughtful approach will ensure your kitchen is not only beautiful but uniquely yours.

7. Testing Paint Samples: How to Do It Right

How to choose the right paint color for your kitchen?
Credit : whatcanu.com

When it comes to selecting the perfect paint color for your kitchen, testing paint samples is an essential step that can make all the difference in achieving the look you desire. However, it’s not just about slapping a few swatches on the wall and calling it a day; there’s a method to the madness that can help you make the most informed decision.

First, choose a selection of colors that resonate with you, keeping in mind the overall theme and feel you want for your kitchen. Whether it’s a modern, sleek aesthetic or a cozy, farmhouse vibe, narrowing down your options will make the testing process more manageable.

Once you have your colors, purchase sample pots of your top choices. It’s best to opt for small quantities to avoid waste and unnecessary expense. Now, here comes the important part: application. Instead of painting a small swatch in one area, consider painting a larger rectangle—about two feet by two feet—on different walls or sections of your kitchen. This allows you to see how the color interacts with various lighting conditions throughout the day.

Observe how the paint looks in both natural light and artificial lighting. Colors can change dramatically depending on the time of day and the type of bulbs in your kitchen. Take note of how the color feels at different times—does it appear warm and inviting in the morning sunlight, or does it take on a cooler tone in the late afternoon?

Additionally, don’t forget to consider the other elements in your kitchen. Take a step back and assess how your chosen colors play off your cabinetry, countertops, and flooring. It can be helpful to have these materials on hand when testing so you can visualize the entire space cohesively.

Finally, be patient and give yourself the time to really see the colors in action. Live with the samples for a few days, or even a week, to truly understand how they fit into your lifestyle and routine. By taking the time to test paint samples thoughtfully, you’ll be better equipped to choose a color that you’ll love for years to come—one that reflects your style and enhances the heart of your home.

8. Coordinating with Adjacent Spaces

When selecting the perfect paint color for your kitchen, it’s crucial to consider how it will coordinate with adjacent spaces. The kitchen is often the heart of the home, acting as a bridge between living areas, dining rooms, and hallways. A well-thought-out color scheme can create a seamless flow throughout your home, enhancing the overall aesthetic and making every space feel connected.

Begin by assessing the colors and styles of the rooms that adjoin your kitchen. If your dining room is painted a deep, rich navy, you might want to choose a lighter shade of blue or a complementary color that harmonizes with it, such as soft gray or crisp white. This will not only create visual continuity but also ensure that each room feels inviting and cohesive.

Additionally, consider the materials and finishes in adjacent spaces. For instance, if your living room features warm wooden tones, you may want to opt for a warm, earthy paint color for your kitchen—think terracotta or creamy beige—to echo that warmth and create a welcoming atmosphere. If you have an open-concept layout, remember that the kitchen color will be more visible and can impact the perception of space, so keep transitions in mind.

You can also experiment with colors that create contrast—like a bold kitchen color that pops against neutral tones in the living area—while maintaining a balance that feels intentional rather than jarring. Using color swatches to see how different shades interact with the light and surrounding colors at various times of day will help you make an informed choice.

Lastly, don’t forget about the decorative elements, such as artwork and furniture, that will be seen in both areas. These pieces can help tie your color choices together, allowing you to strike the perfect balance between individuality and coherence across your home. By thoughtfully coordinating your kitchen paint color with adjacent spaces, you’ll create an atmosphere that feels curated and harmonious, inviting family and friends to gather and enjoy the warmth of your home.

9. The Importance of Finish: Matte vs. Gloss

When it comes to selecting the perfect paint color for your kitchen, the finish you choose can be just as crucial as the color itself. The finish not only affects the overall aesthetic but also influences durability, maintenance, and the way light interacts with your space. Understanding the differences between matte and gloss finishes can help you make an informed decision that aligns with both your style and practical needs.

**Matte Finish:** Matte paints offer a soft, velvety appearance that can create a warm, inviting atmosphere in your kitchen. They excel at hiding imperfections in walls, making them a popular choice for older homes or those with textured surfaces. However, while matte finishes can contribute to a cozy vibe, they may not be the best option for high-traffic areas like kitchens. They tend to be less washable and can show stains more easily, requiring more frequent touch-ups. If you lean toward a matte finish, consider using it in areas that are less prone to splatters, such as on upper cabinets or accent walls.

**Gloss Finish:** On the other hand, gloss paints are known for their reflective qualities, which can brighten up a space by bouncing light around the room. This finish is highly durable and easy to clean, making it an excellent choice for kitchens where spills and splatters are a part of daily life. Glossy surfaces can withstand scrubbing and are less likely to retain stains, making them ideal for lower cabinets, trim, or even the walls around your cooking area. However, they can highlight imperfections, so proper wall preparation is essential before application.

Ultimately, the choice between matte and gloss finishes will depend on your kitchen’s design, your lifestyle, and the overall vibe you want to create. Many homeowners choose to combine finishes, using matte for a serene backdrop while incorporating gloss on cabinetry or trim for a touch of sophistication. Whatever you decide, understanding the characteristics of each finish will empower you to create a kitchen that not only looks beautiful but also stands the test of time.

10. Tips for Small Kitchens: Making Colors Work

When it comes to small kitchens, the right color choice can make all the difference between a cramped, claustrophobic space and a bright, airy haven. The key is to opt for hues that create an illusion of space while still reflecting your personal style. Here are some essential tips for making colors work in your small kitchen.

**1. Embrace Light Colors:** Lighter shades, such as soft whites, pale grays, and gentle pastels, can significantly enhance the sense of space. These hues reflect more natural light, making your kitchen feel larger and more open. Consider a creamy off-white for the walls paired with crisp white cabinetry to create a seamless, expansive look.

**2. Use a Monochromatic Palette:** A monochromatic color scheme—where you choose varying shades of a single color—can also work wonders in small spaces. This approach creates a cohesive and harmonious environment. For instance, a palette of soft blues can range from a delicate sky blue on the walls to deeper navy accents in your kitchen accessories.

**3. Add Depth with Dark Accents:** While light colors are essential, incorporating darker accents can add depth and character to your small kitchen. Think about using a navy or charcoal gray for an accent wall, or opt for darker cabinetry to create a focal point that draws the eye. Just remember to balance darker hues with lighter elements to maintain a sense of openness.

**4. Create Contrast with Hardware and Accessories:** Incorporating contrasting colors through your kitchen hardware and accessories can bring both interest and personality to your small kitchen. For example, sleek black handles on white cabinets or colorful dishware on neutral shelves can provide visual intrigue without overwhelming the space.

**5. Consider Reflective Surfaces:** Glossy finishes, such as high-gloss paint or mirrored backsplashes, can amplify light and create a more spacious feel. These reflective surfaces not only brighten the area but also add a touch of elegance and sophistication, making your small kitchen feel more upscale.

**6. Use Accent Colors Wisely:** If you’re eager to incorporate bold colors, do so strategically. Choose one or two accent colors to highlight specific areas, like a cheerful yellow for your kitchen island or vibrant green for your bar stools. This way, you can inject personality into your space without overwhelming it.

By thoughtfully selecting your color scheme and utilizing these tips, you can transform your small kitchen into a stylish and inviting space that feels larger than life. Embrace the challenge of working with limited square footage, and let your creativity shine through with a color palette that perfectly suits your taste and lifestyle.

11. Incorporating Bold Colors vs. Subtle Shades

When it comes to choosing the perfect paint color for your kitchen, the decision often boils down to a captivating tug-of-war between bold colors and subtle shades. Each approach brings its own unique advantages and can fundamentally alter the atmosphere of the space.

**Incorporating Bold Colors:**

Daring to embrace bold colors can transform your kitchen into a vibrant focal point of your home. Shades like fiery reds, deep blues, or radiant yellows can inject personality and energy into the room, making it a lively place to gather and create. Bold colors can evoke feelings of warmth and excitement, sparking creativity in your culinary endeavors. Imagine a bright citrusy orange accent wall paired with sleek white cabinetry; the result is a kitchen that feels both modern and invigorating. However, it’s important to balance these vivid hues with neutral tones in your furnishings or decor to avoid overwhelming the space.

**Opting for Subtle Shades:**

On the other hand, subtle shades offer a calming and timeless elegance that can make your kitchen feel spacious and serene. Soft pastels, muted grays, and gentle earth tones can create a soothing backdrop, allowing for versatility in accessorizing and styling. These colors serve as a blank canvas, enabling you to experiment with bolder kitchen accessories, such as colorful dishware or striking artwork, without clashing. For instance, a pale sage green paired with natural wood accents can bring a touch of the outdoors inside, creating a fresh and inviting atmosphere. Subtle shades also tend to be more forgiving and can easily adapt to changing trends, ensuring your kitchen remains stylish for years to come.

Ultimately, the choice between bold and subtle colors should reflect your personality, lifestyle, and the overall aesthetic you wish to achieve. Whether you decide to make a statement with vibrant tones or cultivate an oasis with soft hues, the right paint color will breathe new life into your kitchen, making it a place where memories are made and shared.

12. DIY vs. Hiring a Professional: What to Consider

When it comes to choosing the perfect paint color for your kitchen, one of the most significant decisions you’ll face is whether to tackle the project yourself or bring in a professional. Each option has its merits and pitfalls, so let’s break down what to consider before making your choice.

**DIY: The Creative Freedom and Cost Savings**
If you’re a hands-on kind of person or simply looking to save some money, a DIY approach can be incredibly rewarding. Choosing to paint your kitchen yourself allows you to experiment with colors and techniques, providing the opportunity to express your personal style without the constraints of someone else’s vision. You can take your time, test various shades on the wall, and make adjustments as inspiration strikes. Plus, you’ll have the satisfaction of knowing you completed the project with your own two hands.

However, DIY painting isn’t without its challenges. It can be physically demanding, requiring you to move furniture, tape edges, and spend hours applying paint. For those without experience, achieving a polished finish can be tricky, and what starts as a fun project may turn into a stressful ordeal. Also, consider the time commitment; painting a kitchen can take longer than expected, especially if you’re new to the process.

**Hiring a Professional: The Expertise and Efficiency**
On the other hand, hiring a professional painter can take the weight off your shoulders. Professionals bring a wealth of experience, ensuring that the job is done efficiently and to a high standard. They’re familiar with different types of paint finishes, know how to handle tricky areas like cabinets and trim, and often have access to better quality tools and materials that can result in a more durable and attractive finish.

While hiring a pro may come with a higher upfront cost, think of it as an investment in your home. A beautifully painted kitchen can significantly boost your property value, making it a worthwhile expense. Moreover, professionals can often work around your schedule, ensuring minimal disruption to your daily life.

**Final Thoughts**
Ultimately, the decision between DIY and hiring a professional depends on your budget, time constraints, and confidence in your painting skills. If you choose to go the DIY route, be sure to arm yourself with the right tools and take your time to achieve the desired outcome. Conversely, if you opt for a professional, do your research, read reviews, and select someone whose style aligns with your vision. Whichever path you take, the right paint color will transform your kitchen into a space you love, so consider all angles before making your choice!

13. Common Mistakes to Avoid When Choosing Paint Colors

When it comes to selecting the perfect paint color for your kitchen, avoiding common pitfalls can save you time, money, and the dreaded regret that often comes with hasty decisions. One of the most frequent mistakes is neglecting to test colors in your space. Lighting plays a crucial role in how a color appears; a shade that looks stunning on a paint chip may look entirely different on your walls. Always sample a few swatches and observe how they change throughout the day as natural light shifts.

Another common blunder is failing to consider the kitchen’s existing elements, such as cabinetry, countertops, and appliances. Choosing a color that clashes with these features can create a disjointed look. Instead, aim for a palette that complements or contrasts harmoniously with your kitchen’s permanent fixtures, creating a cohesive and inviting atmosphere.

Overlooking the impact of emotion is yet another mistake. Color influences mood, so think carefully about the experience you want to create. Do you envision a calm and soothing space for family gatherings, or a vibrant and energizing environment for entertaining guests? Lastly, don’t shy away from going bold. Many homeowners opt for safe, neutral choices out of fear of making a mistake. However, incorporating an unexpected pop of color can add personality and flair to your kitchen, transforming it into the heart of your home.

By being mindful of these common mistakes, you can confidently navigate the world of paint colors and achieve a beautiful, functional kitchen that reflects your personal style.

14. Final Touches: Accessories and Decor that Complement Your Color Choice

Once you’ve settled on the perfect paint color for your kitchen, it’s time to elevate the space with thoughtfully chosen accessories and decor that harmonize with your color palette. The right finishing touches can transform a simple kitchen into a stunning culinary haven, enhancing both functionality and aesthetic appeal.

Start with the essentials: consider your kitchenware and appliances. If you’ve opted for a soft, pastel hue, complement it with vibrant, colorful accents—think striking red dish towels or bright yellow canisters. Conversely, if your walls are painted in a bold, dark shade, lighter accessories can create a beautiful contrast. Metallic finishes—like copper, brass, or stainless steel—can also add a touch of elegance and warmth, particularly against deep colors.

Next, don’t forget about textiles. The right curtains, table linens, or even chair cushions can play a significant role in your kitchen’s overall feel. Choose patterns that incorporate your wall color or go for complementary shades that add depth. For instance, if your kitchen features a serene blue, soft beige or cream accents can evoke a tranquil coastal vibe.

Wall art and decorative items should also be considered. Open shelving provides the perfect opportunity to display vibrant dishware or artful cookbooks that echo your chosen colors. Adding plants—whether it’s a vibrant herb garden on the windowsill or a striking centerpiece—can breathe life into the space while tying in natural elements that enhance your color scheme.

Finally, lighting is crucial. A well-placed pendant light or a stylish chandelier can not only illuminate your kitchen but also serve as a statement piece that ties together your color choices. Pay attention to the type of light bulbs you use, as they can dramatically influence how your paint color appears throughout the day. Warm bulbs can soften a stark palette, while cooler tones can enhance brighter shades.

By carefully selecting accessories and decor that complement your paint color, you can create a cohesive and inviting atmosphere that reflects your personal style, ensuring that your kitchen is not only a place for cooking but also a warm and welcoming space for gathering and entertaining.

15. Conclusion: Creating a Cohesive Look for Your Kitchen

In conclusion, creating a cohesive look for your kitchen is not just about selecting the right paint color; it’s about weaving together a harmonious blend of design elements that reflect your personal style and enhance the functionality of the space. The kitchen is often the heart of the home, where family and friends gather, so it’s essential that the atmosphere feels inviting and well thought out.

As you consider your paint choices, think about how they interact with your cabinetry, countertops, and flooring. A successful color palette should not only complement these features but also create a flow that extends into adjacent rooms, especially in open-concept designs. Whether you lean towards soothing neutral tones, vibrant hues, or a combination of both, your color selection should evoke the mood you desire—be it calm and serene or energetic and lively.

Don’t forget to factor in the natural light your kitchen receives throughout the day. Colors can shift dramatically under different lighting conditions, so it’s crucial to test your chosen shades at various times to ensure they maintain their appeal. Sample swatches can help you visualize how the colors will interact with the space and the overall aesthetic.

Finally, remember that layering textures and adding accents—such as backsplashes, hardware, and decorative elements—can further enhance the cohesive look you’re striving for. By thoughtfully selecting your paint color as part of a larger design strategy, you’ll create a kitchen that not only looks stunning but also feels like a true reflection of your home and lifestyle. Happy painting!

As we conclude our ultimate guide to choosing the perfect paint color for your kitchen, we hope you feel inspired and equipped to embark on this transformative journey. The right color can breathe new life into your space, reflecting your personal style while creating an inviting atmosphere for family and friends. Remember to consider the natural light, existing elements, and the overall mood you want to evoke as you make your selection. Whether you opt for a bold statement or a serene backdrop, your kitchen will not only be a culinary haven but also a reflection of your taste and creativity. So grab those swatches, envision your dream space, and get ready to unleash your inner designer—your perfect kitchen awaits!

What are the best ways to organize your home office?

In today’s fast-paced digital world, a well-organized home office is more than just a luxury—it’s a necessity for maximizing productivity and maintaining focus.

As remote work becomes increasingly prevalent, the importance of creating a workspace that fosters creativity and efficiency cannot be overstated. From managing clutter to optimizing your layout, the right strategies can transform your office into a sanctuary of productivity. In this blog post, we’ll explore ten essential tips that will help you streamline your work environment, enhance your workflow, and ultimately elevate your performance. Whether you’re a seasoned remote worker or new to the home office setup, these practical insights will guide you in crafting a space that not only inspires productivity but also brings you peace of mind as you tackle your daily tasks. Get ready to unlock your full potential with a home office that works as hard as you do!

1. Assessing Your Space: Understanding Your Needs

What are the best ways to organize your home office?
Credit : whatcanu.com

Before diving into the exciting world of home office organization, it’s crucial to start with a thorough assessment of your space and a clear understanding of your unique needs. Take a moment to step back and examine the area you’ll be working in. Is it a dedicated room, a nook in your living space, or perhaps a corner of your dining room? Each configuration comes with its own set of challenges and opportunities.

Begin by considering how you use your workspace. Do you require a large desk for multiple monitors, or do you prefer a minimalist setup with just a laptop? Think about the nature of your work: Are you frequently on calls, requiring a quiet environment, or do you thrive in a bustling atmosphere? Understanding these nuances will help you create an environment that fuels your productivity rather than stifles it.

Next, take stock of your current furniture and equipment. Is your chair ergonomic, supporting long hours of sitting, or does it leave you feeling strained? Does your desk have enough surface area for your essential tools, or is clutter a constant battle? Don’t hesitate to jot down what works for you and what doesn’t. This self-reflection will guide your decisions as you curate your ideal workspace.

Finally, consider the elements that inspire you. Do you find motivation in plants, art, or personal mementos? Incorporating these items into your design can enhance your creativity and create an environment that you genuinely enjoy spending time in. By thoughtfully assessing your space and understanding your needs, you’ll set the foundation for a home office that not only maximizes productivity but also feels uniquely yours.

2. Choosing the Right Location for Your Home Office

Choosing the right location for your home office is a crucial step in fostering an environment that promotes productivity and focus. The ideal spot should be a place where you feel comfortable, inspired, and free from distractions. Begin by evaluating your home layout: look for areas that receive ample natural light, as studies show that exposure to sunlight can enhance mood and energy levels. A well-lit space can also reduce eye strain, making it easier for you to concentrate on your tasks.

Consider the noise level in different rooms. If you have a bustling household, it might be wise to choose a room away from the main living areas, where children or pets may create interruptions. A quieter space can help you maintain a strong focus and minimize distractions. If a separate room isn’t available, think about utilizing a corner of a larger area, such as a living room or bedroom, and use strategic dividers or plants to create a sense of separation.

Additionally, think about how the location aligns with your work habits. Do you thrive in a cozy nook or do you prefer a more open area? Do you need access to specific resources like a printer or filing cabinet? Your workspace should cater to your workflow, allowing for easy access to essential tools and materials.

Lastly, personalization is key. Once you’ve identified the perfect location, make it your own. Infuse your workspace with elements that inspire you—whether it’s artwork, motivational quotes, or plants. This personal touch not only makes the space more inviting but can also boost your creativity and enthusiasm for the tasks at hand. By thoughtfully selecting the right location for your home office, you lay the foundation for a productive work environment that supports your goals and enhances your overall work experience.

3. Decluttering: The First Step to an Organized Office

What are the best ways to organize your home office?
Credit : whatcanu.com

Decluttering is the cornerstone of creating an organized home office, and it’s often the first step toward maximizing your productivity. Picture this: a workspace overflowing with papers, outdated gadgets, and miscellaneous items can be overwhelming, making it challenging to focus on the tasks at hand. The clutter not only distracts the mind but can also drain your motivation.

To begin your decluttering journey, set aside dedicated time to assess your workspace. Start with a thorough evaluation of every item on your desk and in your drawers. Ask yourself, “Do I use this? Does it serve a purpose?” If the answer is no, it’s time to let it go. Create three categories: keep, donate, and toss. Be ruthless—if an item hasn’t been used in the last six months and doesn’t hold sentimental value, it likely doesn’t belong in your office.

Once you’ve sorted through your belongings, implement an efficient filing system for important documents. Invest in labeled folders, binders, or digital tools that help you easily access what you need without sifting through piles of paper. For items that you frequently use, consider storage solutions that keep them within arm’s reach yet neatly organized, such as drawer organizers or decorative boxes.

Don’t forget to declutter your digital workspace as well. A disorganized desktop filled with files and applications can be just as distracting as a messy physical space. Take some time to organize your digital files into clearly labeled folders, delete what you no longer need, and create a streamlined system that enhances your workflow.

By prioritizing decluttering, you’ll not only clear the physical space around you but also create a mental environment conducive to focus and creativity. With a fresh, organized office, you’ll find that you can tackle your tasks with renewed energy and clarity, leading to increased productivity and success in your work.

4. Essential Furniture for Comfort and Productivity

When it comes to creating an efficient home office, the right furniture is not just a luxury; it’s a necessity. Comfort and productivity go hand in hand, and investing in quality furniture can make all the difference in your work-from-home experience.

Start with an ergonomic chair that supports your posture throughout long hours of sitting. Look for features like adjustable height, lumbar support, and breathable material to ensure you stay comfortable and focused. A well-designed chair will prevent fatigue and discomfort, allowing you to concentrate on your tasks without distraction.

Next, consider your desk space. A sturdy, spacious desk can significantly enhance your workflow. Whether you prefer a traditional style or a modern standing desk, ensure it accommodates all your essential tools—like your computer, documents, and stationery—without feeling cluttered. If you’re short on space, opting for a wall-mounted desk can help you maximize your area while still providing a dedicated workspace.

Don’t forget about additional furniture pieces that promote organization and ease. Storage solutions like shelves, cabinets, or filing systems are invaluable for keeping your workspace tidy and efficient. A clean environment fosters a clear mind, so have a designated place for everything, from books and supplies to important paperwork.

Finally, consider the overall aesthetic of your office. Incorporating elements like a cozy reading nook, decorative plants, or personal touches can create a warm and inviting atmosphere that inspires creativity. A well-thought-out office layout, paired with the right furniture, will not only enhance your comfort but also elevate your productivity, making it easier to tackle your daily tasks with enthusiasm.

5. Effective Desk Setup: Ergonomics Matter

What are the best ways to organize your home office?
Credit : whatcanu.com

Creating an effective desk setup is pivotal for enhancing productivity and maintaining your well-being while working from home. Ergonomics, the science of designing your workspace to fit your body, plays a crucial role in this equation. The right ergonomic setup not only helps prevent discomfort and injury but also boosts your focus and efficiency.

Begin with your chair, as it serves as the cornerstone of your workspace. Opt for an adjustable chair that supports your lower back and encourages good posture. Ideally, your feet should rest flat on the floor, with your knees at a 90-degree angle. Consider using a footrest if your chair is too high, or adjusting your desk height to accommodate your seated position.

Next, pay attention to your desk height. Your elbows should rest comfortably at a 90-degree angle when typing, with your wrists straight and hands slightly above the keyboard. If your desk is too high or too low, it can lead to fatigue and strain over time. An adjustable desk or a standing desk converter can offer flexibility, allowing you to alternate between sitting and standing throughout the day.

Monitor placement is another critical aspect of an effective desk setup. Position your monitor at eye level, approximately an arm’s length away, to reduce neck strain and promote better posture. If you use multiple monitors, ensure they are aligned and at the same height to avoid awkward neck movements.

Don’t overlook the importance of keyboard and mouse placement, either. These should be situated close enough that you can use them without stretching your arms, and your wrists should remain in a neutral position. Consider using wrist supports if you find yourself frequently experiencing discomfort.

Finally, take the time to personalize your workspace with elements that inspire and motivate you, such as plants, artwork, or motivational quotes. A visually appealing environment can enhance your mood and keep you engaged in your work.

By prioritizing ergonomics in your desk setup, you’ll create a workspace that not only caters to your physical needs but also fosters a productive atmosphere, allowing you to focus on what truly matters—getting the job done efficiently and comfortably.

6. Smart Storage Solutions: Maximizing Vertical and Horizontal Space

In the quest for an organized home office, utilizing smart storage solutions can make all the difference in enhancing your productivity. When space is limited, it’s essential to think creatively about how to maximize both vertical and horizontal areas to keep your workspace tidy and efficient.

Start by taking advantage of vertical space. Wall-mounted shelves, pegboards, and floating cabinets provide ample room for books, office supplies, and decorative items without encroaching on your desk area. By elevating your storage, you not only free up valuable surface space but also draw the eye upward, creating an illusion of a larger, more open environment. Consider installing a corkboard or magnetic board above your desk to keep important reminders and documents within easy reach while maintaining a clutter-free workspace.

On the horizontal front, think about multi-functional furniture. A desk with built-in drawers or shelves can house essential items while keeping your workspace clear. Utilize under-desk storage solutions, such as rolling carts or file cabinets, to keep files and materials organized yet accessible. Slim, stackable bins can be a game-changer for organizing miscellaneous items like chargers, stationery, or paperwork that tends to pile up.

Additionally, use baskets or decorative boxes to corral smaller items. Labeling these containers not only aids in quick identification but also encourages a habit of returning items to their designated spots. With a focus on both vertical and horizontal organization, you can create a home office that fosters creativity and focus, empowering you to tackle tasks with renewed energy and enthusiasm. Embrace these smart storage solutions, and watch your productivity soar as you transform your workspace into a well-organized haven.

7. Organizing Digital Files and Documents

What are the best ways to organize your home office?
Credit : whatcanu.com

In the digital age, a cluttered digital workspace can be just as distracting as a messy physical desk. Organizing your digital files and documents is crucial for maximizing productivity and ensuring that you can find what you need when you need it. Start by creating a logical folder structure that mirrors the way you think and work. For instance, categorize your files into main folders such as “Projects,” “Clients,” “Finance,” and “Resources.” Within each main folder, create subfolders to further organize your documents. This hierarchical approach not only streamlines access but also helps you maintain focus on the task at hand.

Another essential aspect of digital organization is naming conventions. Use clear, descriptive file names that include relevant dates or project details. This way, a quick glance will tell you exactly what a file contains without needing to open it. Consider using date formats (e.g., YYYY-MM-DD) to ensure that your files are sorted chronologically, making it easier to find the latest version of any document.

Regularly decluttering your digital space is equally important. Set aside time each month to review your files, delete duplicates, and archive outdated documents. Utilizing cloud storage solutions can also enhance your organization efforts, as they often come equipped with robust search functions that allow you to locate files quickly. Plus, cloud storage ensures that your documents are accessible from anywhere, making remote work seamless.

Finally, consider using productivity tools and apps designed for file management. Tools like Trello or Asana can help you keep track of projects, while Google Drive or Dropbox can keep your files organized and easily shareable. By investing time in organizing your digital files and documents, you’ll create a streamlined workflow that fosters focus and efficiency, setting you up for success in your home office.

8. Creating a Distraction-Free Environment

Creating a distraction-free environment is essential for fostering maximum productivity in your home office. In today’s fast-paced world, it’s all too easy to get sidetracked by the myriad of potential interruptions, from the allure of social media notifications to the tempting siren call of household chores. To combat these distractions, the first step is to establish a dedicated workspace that is solely dedicated to your professional tasks. Ideally, this space should be separate from personal areas in your home, allowing you to mentally shift gears when you enter.

Next, consider the layout and organization of your office. Keep your desk clear of clutter, and only display items that are necessary for your work. Invest in storage solutions like filing cabinets, shelves, and desk organizers to keep paperwork and supplies neatly stowed away. A clean workspace can significantly enhance focus, allowing your mind to concentrate on the task at hand rather than getting lost in disarray.

Lighting plays a crucial role in creating a distraction-free environment. Natural light is ideal, as it can boost mood and energy levels, but if that’s not an option, opt for soft, adjustable lighting that reduces glare and eye strain. Additionally, consider using noise-canceling headphones or playing soft background music to drown out ambient noises that may disrupt your concentration.

Lastly, set boundaries with those around you. Clearly communicate your work hours and the importance of minimizing interruptions during this time. By establishing these guidelines, you signal to others that your work is a priority, helping you maintain focus and productivity throughout your day. By implementing these strategies, you can transform your home office into a sanctuary of concentration, empowering you to achieve your goals while enjoying the flexibility of remote work.

9. Incorporating Personal Touches for Inspiration

Creating a home office that fosters productivity often requires more than just a functional layout and the right technology; it also involves infusing your workspace with personal touches that inspire and motivate you. Personalization can transform a sterile environment into a creative sanctuary, reflecting your personality and igniting your passion for work.

Start by displaying items that hold sentimental value or inspire you daily. This could be photographs of loved ones, artwork that resonates with you, or mementos from memorable trips. Each item serves as a reminder of what you value most, helping to cultivate a positive mindset as you tackle your tasks. Consider a vision board filled with quotes, images, and goals that speak to your aspirations—this visual reminder can spark creativity and keep you focused on your objectives.

Incorporating plants into your office is another effective way to bring life and energy into your workspace. Studies have shown that greenery can enhance mood, reduce stress, and increase overall productivity. Choose low-maintenance plants like succulents or snake plants if you’re not confident in your gardening skills. Their vibrant presence will not only purify the air but will also create a calming atmosphere conducive to deep concentration.

Additionally, don’t underestimate the power of color. Choose a color scheme that energizes you. Perhaps you prefer the calming effects of blues and greens, or maybe you thrive in a more vibrant space with pops of yellow or orange. Use desk accessories, wall art, or even the paint on your walls to create an environment that resonates with your style and boosts your motivation.

Ultimately, your home office should be a reflection of who you are, a space that welcomes you each day and encourages your best work. By incorporating personal touches that inspire you, you’ll not only enhance your productivity but also create a workspace that feels uniquely yours—where creativity flows effortlessly and work feels less like a chore and more like a rewarding endeavor.

10. Utilizing Office Supplies Wisely

Utilizing office supplies wisely is crucial for maintaining an organized and productive home office. A well-stocked workspace doesn’t just mean having an abundance of supplies; it means strategically choosing and arranging them to enhance your workflow and minimize clutter. Start with the basics: pens, notepads, sticky notes, and highlighters. Invest in quality items that will last longer and perform better, reducing the need for constant replacements.

Consider implementing a system for your supplies that promotes easy access and efficient use. Use drawer organizers or desktop caddies to keep frequently used items within reach while reserving larger storage solutions for less commonly needed supplies. Categorize your materials—keep all writing tools together, and designate a section for paper products like notebooks and sticky notes. Clear labeling can further streamline your process, ensuring you know exactly where everything is at a glance.

To maximize your space, think beyond traditional supplies. Utilize digital tools such as project management apps and cloud storage to minimize physical paperwork. Not only does this declutter your desk, but it also ensures that important documents are readily accessible without the risk of misplacement. Additionally, consider incorporating multifunctional items, such as a printer that scans and copies, to reduce the need for various devices and save space.

Finally, don’t forget about the aesthetic appeal of your office supplies. Choose items that resonate with your personal style, whether they are sleek and modern or colorful and fun. This not only makes your workspace more inviting but also keeps you motivated and engaged throughout the day. By utilizing office supplies wisely, you can create a streamlined, efficient, and inspiring environment that sets the stage for maximum productivity.

11. Establishing a Routine for Maintenance

Establishing a routine for maintenance is crucial in ensuring that your home office remains a productive haven rather than a chaotic workspace. Just like any other aspect of our lives, consistency is key. Set aside a specific time each week dedicated to tidying up your office—this could be a quiet Sunday morning or a mid-week refresh during your lunch break. During this time, tackle clutter, file away important documents, and ensure that your workspace is not just functional but also inviting.

Incorporate small habits into your daily routine that help maintain order. For instance, commit to a “clean desk” policy by taking a few minutes at the end of each workday to clear your desk of unnecessary items. This could mean putting away papers, wiping down surfaces, or organizing your digital files. Invest in organizational tools like drawer dividers, file organizers, or cable management solutions to streamline this process and make it easier to maintain your workspace.

Additionally, consider establishing a monthly deep-clean schedule. This can involve decluttering your office supplies, dusting surfaces, and reorganizing furniture for optimal comfort and functionality. By making maintenance a regular part of your routine, you’ll not only create a more pleasant working environment but also boost your productivity in the long run. A well-organized space fosters clarity of thought and helps to minimize distractions, enabling you to focus on what truly matters—getting the job done.

12. Tips for Managing Time and Tasks Efficiently

Managing time and tasks efficiently is crucial for creating a productive home office environment. In a space where distractions abound and the lines between work and home life can blur, having a robust time management strategy is essential. Here are some practical tips to help you stay organized and focused throughout your workday.

**1. Prioritize Your Tasks:** Start each day by identifying your most important tasks. Use tools like the Eisenhower Matrix to distinguish between what’s urgent and what’s important, allowing you to focus on high-impact activities that drive results.

**2. Set Specific Goals:** Break down larger projects into manageable, bite-sized goals. This not only makes daunting tasks feel achievable but also provides a sense of accomplishment as you tick them off your list. Consider using SMART criteria—specific, measurable, achievable, relevant, and time-bound—to formulate your goals.

**3. Use a Digital Planner or Task Manager:** Embrace technology by utilizing digital planners or task management apps like Trello, Asana, or Todoist. These tools help you visualize your tasks, set deadlines, and remind you of upcoming priorities, ensuring nothing slips through the cracks.

**4. Implement Time Blocking:** Allocate specific blocks of time for different tasks or types of work. For example, designate mornings for creative tasks when your mind is fresh and afternoons for meetings or administrative work. This structured approach can enhance focus and reduce decision fatigue.

**5. Establish a Routine:** Creating a consistent daily routine helps signal to your brain when it’s time to work and when it’s time to relax. Start your day with a morning ritual that prepares you for productivity—whether it’s a cup of coffee, a quick workout, or quiet reflection.

**6. Limit Distractions:** Identify your biggest distractions and take proactive steps to minimize them. This might mean turning off social media notifications, setting boundaries with family members during work hours, or using noise-canceling headphones to block out background noise.

**7. Schedule Breaks:** Don’t forget to incorporate short breaks into your day. Techniques like the Pomodoro Technique—working for 25 minutes followed by a 5-minute break—can boost your productivity while preventing burnout. Use these breaks to stretch, grab a snack, or practice mindfulness.

**8. Reflect and Adjust:** At the end of each week, take a moment to reflect on what worked and what didn’t. Adjust your strategies as necessary, experimenting with different time management techniques until you find the perfect fit for your workflow.

By implementing these time and task management tips, you’ll create a home office environment that fosters productivity and keeps you focused on your goals. With a little planning and discipline, you can turn your workspace into a powerhouse of efficiency, making the most of your time and minimizing stress.

13. The Role of Lighting in Productivity

Lighting plays a pivotal role in shaping the atmosphere of your home office, directly influencing your productivity, mood, and overall well-being. A well-lit workspace can transform a dreary corner into an inspiring hub of creativity, while insufficient or harsh lighting can lead to fatigue and decreased focus.

Natural light is often the gold standard when it comes to home office illumination. Studies have shown that exposure to daylight can enhance your mood, boost energy levels, and improve concentration. If possible, position your desk near a window to take advantage of this natural resource. The warm glow of sunlight can invigorate your work sessions, making tasks feel less daunting. Additionally, consider using sheer curtains that allow diffused light to flood the space without causing glare on your computer screen.

However, not everyone is fortunate enough to have a sun-drenched office. In those cases, artificial lighting becomes essential. Opt for a combination of ambient, task, and accent lighting to create a well-balanced environment. Ambient lighting serves as the overall illumination, ensuring the room is bright enough to work in. Task lighting, such as desk lamps with adjustable brightness, provides targeted light for specific activities—ideal for reading documents or writing notes. Accent lighting, like wall sconces or decorative fixtures, can add a touch of personality to your space while enhancing the overall ambiance.

When selecting light bulbs, consider their color temperature. Warmer tones (around 2700K to 3000K) create a cozy, inviting atmosphere, while cooler tones (4000K and above) promote alertness and clarity, making them ideal for focus-intensive tasks. Investing in smart lighting solutions can also allow you to adjust brightness and color temperature according to your needs throughout the day.

Finally, don’t underestimate the importance of reducing glare and reflections, especially if you spend long hours in front of a screen. Position your monitor away from direct light sources and use anti-glare screens if necessary. By thoughtfully considering your lighting choices, you can create a home office that not only looks good but also fosters productivity, creativity, and a sense of well-being.

14. Technology Tools to Keep You Organized

In today’s fast-paced world, leveraging technology is essential for creating an organized and efficient home office. With the right digital tools at your fingertips, you can streamline your workflow, manage tasks effortlessly, and keep your workspace clutter-free. Here are some must-have technology tools that can help you stay organized and boost your productivity.

**1. Project Management Software:** Tools like Trello, Asana, or Monday.com allow you to break down your projects into manageable tasks, set deadlines, and track your progress. These platforms offer visual boards and lists that can help you prioritize your workload and ensure nothing falls through the cracks.

**2. Digital Note-Taking Apps:** Gone are the days of scribbling notes on sticky pads. Apps like Evernote, OneNote, or Notion enable you to capture ideas, create to-do lists, and organize your thoughts in one central location. With features like tagging and powerful search capabilities, you can easily retrieve important information when you need it.

**3. Cloud Storage Solutions:** Services like Google Drive, Dropbox, or Microsoft OneDrive provide a safe space for your documents and files. By storing your work in the cloud, you can access it from anywhere, collaborate with others in real-time, and ensure that your important files are backed up and secure.

**4. Time Management Tools:** Keep track of how you spend your time with tools like Toggl or RescueTime. These apps help you identify productivity patterns, manage distractions, and allocate your hours effectively, allowing you to create a schedule that maximizes your output.

**5. Communication Platforms:** Staying connected with team members or clients is crucial for a productive home office. Utilize platforms like Slack, Microsoft Teams, or Zoom for seamless communication and collaboration. These tools facilitate quick discussions, video meetings, and file sharing, helping you stay in sync with your colleagues.

**6. Task Automation Tools:** Simplify repetitive tasks with automation tools like Zapier or IFTTT. These platforms allow you to create workflows that automatically trigger actions between different apps, saving you time and reducing manual effort.

By integrating these technology tools into your home office, you can create a structured environment that fosters productivity and minimizes distractions. Embrace the digital age and watch as your organization skills and efficiency soar to new heights.

15. Regularly Reviewing and Adjusting Your Setup for Optimal Performance

Creating a productive home office isn’t a one-and-done task; it requires ongoing attention and refinement. Regularly reviewing and adjusting your setup is essential to ensure that your workspace continues to meet your evolving needs and preferences. Start by setting aside time—perhaps monthly or quarterly—to evaluate the effectiveness of your current arrangement. Are you still comfortable in your chair, or has it begun to feel less supportive? Is your desk height still ideal for long hours of work, or are you finding yourself slouching or straining your neck?

Consider the tools and technology you use daily. Are there new apps or gadgets that could enhance your workflow? Perhaps you’ve discovered that a standing desk would better suit your working style, allowing for healthier posture and increased energy levels throughout the day. Additionally, take a moment to assess your organization systems. Are your files cluttered, or is your digital workspace in disarray? Streamlining these areas can significantly reduce distractions and enhance your focus.

Don’t forget to seek feedback from your own experiences and, if applicable, from colleagues or family members who share the space with you. They might offer insights into what works well and what could be improved. By making it a habit to regularly review and adjust your home office setup, you not only promote optimal performance but also create an environment that reflects your personal style and supports your productivity goals. A well-tuned workspace can lead to greater inspiration, increased efficiency, and ultimately, a more fulfilling work experience.

In conclusion, creating an organized home office is a vital investment in your productivity and overall well-being. By implementing the 10 essential tips we’ve shared, you can transform your workspace into a haven of focus and efficiency. From decluttering and establishing a designated workspace to incorporating inspiring decor and ergonomic furniture, each step plays a crucial role in fostering a productive environment. Remember, a well-organized office not only enhances your workflow but also promotes a sense of calm and clarity. As you embark on this journey, take the time to personalize your space and create an atmosphere that inspires creativity and motivation. Happy organizing, and may your newfound productivity lead to great success in all your endeavors!

How to create a functional and stylish home office?

In an era where remote work is becoming the new norm, creating a home office that balances functionality and style is more important than ever.

Your workspace should not only inspire productivity but also reflect your personal aesthetic, making it a comfortable sanctuary where creativity can flourish. Whether you’re a seasoned professional or a budding entrepreneur, the right environment can significantly enhance your focus and efficiency. From choosing the perfect desk and ergonomic chair to incorporating smart storage solutions and inviting decor, the design elements of your home office can make all the difference. In this blog post, we’ll explore ten essential tips to help you craft a workspace that is both practical and visually appealing, ensuring that you can tackle your to-do list in style while enjoying the comforts of home. Get ready to transform your workspace into a haven of productivity and inspiration!

1. Assessing Your Needs: Understanding Your Work Style

How to create a functional and stylish home office?
Credit : whatcanu.com

Designing a home office that strikes the perfect balance between functionality and style begins with a thorough assessment of your unique needs. Understanding your work style is crucial; it sets the foundation for every decision you’ll make in the design process. Are you a creative who thrives in a vibrant, inspiring environment, or do you prefer a minimalist setup that allows for focused productivity? Reflecting on how you work can guide you in selecting the right furniture, layout, and decor.

Start by examining your daily tasks. Do you spend hours on video calls, requiring a well-placed backdrop and great lighting? Or perhaps you need a large desk space for spreading out documents and brainstorming ideas? Take stock of the equipment you rely on—computers, printers, and other tools—and consider how much space they require.

Next, think about your workflow. Do you favor an open, airy layout that encourages movement and collaboration, or do you need a more enclosed space for privacy and concentration? Creating zones within your office can cater to different aspects of your work; for instance, a comfortable reading nook for research or a designated area for meetings.

Don’t forget to factor in your personal style. Your home office should reflect who you are, making it a place you enjoy spending time in. Whether you prefer bold colors or a neutral palette, incorporating elements that inspire you—such as artwork, plants, or personal mementos—can transform a functional workspace into a stylish retreat.

Ultimately, assessing your needs means taking the time to understand how you work best and what elements will enhance your productivity. By aligning your design choices with your work style, you’ll create a home office that not only serves its practical purpose but also fosters creativity and motivation, making it a true sanctuary for your professional endeavors.

2. Choosing the Right Location: Maximizing Space and Natural Light

Choosing the right location for your home office is pivotal in creating a space that is not only functional but also inspires creativity and productivity. Start by assessing your home layout and identifying areas that can accommodate your office setup without disrupting the flow of your daily life. Ideally, you want a space that is quiet and separate from high-traffic areas, allowing you to focus on your tasks without constant distractions.

Maximizing natural light is another crucial factor in designing your home office. A well-lit space can significantly enhance your mood and energy levels, making you feel more engaged and less fatigued throughout the day. Position your desk near windows to take advantage of sunlight, but also consider how the angle of the light changes throughout the day. If your workspace lacks sufficient natural light, incorporate bright, warm artificial lighting to create an inviting atmosphere.

Additionally, think about the layout of your chosen space. Open spaces can feel airy and less confined, while a cozy nook can provide a sense of comfort. Whatever your preference, ensure you have enough room to move around freely and that the setup allows for easy access to your tools, whether it’s your computer, notebooks, or creative supplies. Adding plants or greenery can also enhance the ambiance and improve air quality, making your office a refreshing retreat where you can thrive both functionally and stylistically.

By thoughtfully selecting your office’s location and maximizing natural light, you’ll cultivate a home office that not only looks great but also supports your productivity and well-being.

3. Selecting Functional Furniture: Ergonomics Meets Aesthetics

How to create a functional and stylish home office?
Credit : whatcanu.com

When it comes to designing a home office, the furniture you choose plays a pivotal role in both functionality and style. Selecting functional furniture means striking the perfect balance between ergonomics and aesthetics, ensuring that your workspace not only looks appealing but also supports your well-being and productivity throughout the day.

Start with the essential piece: your desk. Opt for a model that offers ample surface area for your computer, paperwork, and personal items while fitting seamlessly into your design scheme. A standing desk or an adjustable height option can provide versatility, allowing you to switch between sitting and standing, which can significantly enhance your comfort and focus. Pair it with an ergonomic chair that encourages good posture, featuring adjustable height, lumbar support, and breathable materials. This investment in your health pays off, as it helps prevent discomfort and fatigue during long work hours.

Next, consider storage solutions that blend seamlessly with your décor. Floating shelves, stylish filing cabinets, or multi-functional bookcases can keep your workspace organized while adding to the overall aesthetic. Choose furniture pieces that reflect your personal style—be it modern, rustic, or minimalist—to create a cohesive look that inspires creativity and motivation.

Don’t forget about the little touches that make a big impact. Incorporating decorative elements such as a chic desk lamp, vibrant wall art, or lush plants can brighten your space and enhance your mood. Select colors and textures that resonate with you, as they can influence your productivity and mindset.

In summary, when selecting functional furniture for your home office, prioritize ergonomics without sacrificing style. By creating a workspace that is both comfortable and visually pleasing, you’ll cultivate an environment that not only supports your work but also reflects your unique personality, making it a place where you can thrive.

4. Creating a Productive Layout: Zoning Your Space

When it comes to designing a home office that is both functional and stylish, creating a productive layout through effective zoning is key. Zoning refers to the practice of dividing your workspace into distinct areas that cater to different tasks, helping you to maintain focus and efficiency throughout your day.

Start by identifying the primary functions your home office will serve. Are you primarily working on a computer, holding video calls, or engaging in creative tasks like brainstorming or crafting? Once you have a clear understanding of your needs, you can designate specific zones. For instance, your main workstation should be positioned in a way that minimizes distractions while maximizing natural light. A dedicated area for meetings—whether virtual or in-person—should be equipped with comfortable seating and perhaps a visual backdrop that reflects your professionalism.

Consider adding a cozy reading nook or a brainstorming corner, complete with a comfortable chair and a small table for notes or sketches. This separate space can serve as a retreat when you need a break from screens, allowing your mind to wander and fostering creativity. Use rugs or furniture placement to visually differentiate these zones without creating physical barriers, maintaining an open and inviting atmosphere.

Don’t forget about the importance of organization within each area. Utilize shelves, storage bins, and desk organizers to keep clutter at bay. By creating a layout that clearly delineates work zones, you not only enhance your productivity but also create a visually appealing home office that reflects your personal style. With thoughtful zoning, your workspace can become a harmonious blend of functionality and aesthetic appeal, inspiring you to tackle each task with renewed energy and focus.

5. Color Psychology: Choosing the Right Palette for Focus and Inspiration

How to create a functional and stylish home office?
Credit : whatcanu.com

When it comes to designing a home office, the colors you choose can significantly impact your mood, productivity, and overall work experience. This is where the fascinating concept of color psychology comes into play. Different hues evoke various emotions and responses, making it crucial to select a palette that fosters focus and inspiration.

For a productive environment, consider opting for shades of blue. Known for its calming effects, blue can help reduce stress and enhance concentration, making it an ideal choice for tasks that require deep thinking and creativity. Pair it with crisp white accents to create a clean, fresh look that promotes clarity and organization.

If you’re looking to ignite creativity, consider incorporating pops of yellow. This cheerful color stimulates mental activity and encourages original thinking. A yellow accent wall or decorative elements—like a bright desk lamp or inspiring artwork—can add a burst of energy and creativity to your space without overwhelming it.

For those seeking a more grounded atmosphere, earthy tones like greens and browns can create a serene and balanced environment. Green, in particular, is associated with nature and can help reduce fatigue and improve overall well-being. A few potted plants can complement this palette beautifully, bringing a touch of nature indoors while enhancing air quality.

Lastly, don’t underestimate the power of neutrals. Grays and soft beiges provide a versatile backdrop that can be easily accented with colorful accessories and furniture. They create a sophisticated and timeless look while allowing you to switch up the decor as your style evolves.

Incorporating color psychology into your home office design not only enhances its aesthetic appeal but also plays a vital role in your productivity and creativity. So take the time to explore different color combinations and find the perfect palette that resonates with your personal style and work needs. Your ideal workspace is just a brushstroke away!

6. Incorporating Storage Solutions: Keeping Clutter at Bay

A well-organized home office is the backbone of productivity, allowing you to focus on your tasks without the distraction of clutter. Incorporating effective storage solutions is key to maintaining a clean and stylish workspace. Start by evaluating your specific storage needs—do you have a plethora of documents, supplies, or digital devices that require organization? Once you identify what you need to store, you can choose from a variety of stylish solutions that enhance both functionality and aesthetics.

Consider utilizing vertical space with wall-mounted shelves or cabinets, which not only save floor space but also provide a chic display for books and decorative items. Opt for modular shelving units that can be adjusted and reconfigured as your needs change. These can be a perfect canvas for personalizing your space while keeping essentials within easy reach.

In addition to shelves, think about multi-functional furniture. Desks with built-in drawers or side tables that double as storage can keep your workspace streamlined. Stylish storage boxes or baskets can help contain smaller items, while also adding a touch of decor. Choose colors and materials that complement your overall office theme—think wooden boxes for a rustic vibe or sleek metal containers for a modern touch.

Lastly, don’t forget about the power of hidden storage. Invest in furniture pieces that offer concealed compartments, like an ottoman or a coffee table with storage space, to keep less frequently used items out of sight. By thoughtfully incorporating these storage solutions, you’ll create a home office that is not only functional but also a reflection of your personal style, allowing you to work efficiently in an inviting environment.

7. Lighting Matters: Balancing Natural and Artificial Light

How to create a functional and stylish home office?
Credit : whatcanu.com

Lighting is one of the most crucial elements in creating a functional and stylish home office. It has the power to influence your mood, productivity, and overall well-being. Striking the right balance between natural and artificial light can transform your workspace from a dull corner to an inspiring hub of creativity.

Start by maximizing natural light. Position your desk near a window to take advantage of sunlight, which not only brightens your space but also boosts your energy levels. Natural light has been shown to enhance focus and reduce eye strain, making it an essential component of a productive work environment. Consider using sheer curtains or blinds that can filter harsh sunlight while still allowing ample light to flow in.

However, relying solely on natural light isn’t always practical, especially during the shorter days of winter or in rooms that don’t receive much sun. This is where artificial lighting comes into play. A combination of ambient, task, and accent lighting can create a well-rounded lighting scheme. Ambient lighting provides overall illumination, while task lighting—such as a desk lamp—focuses light on your work area, making it easier to read and write without straining your eyes.

When selecting light fixtures, opt for adjustable lamps that allow you to direct light where you need it most. Consider the color temperature of your bulbs, as warmer tones can create a cozy atmosphere, while cooler tones promote alertness. Aim for a mix of both to cater to different tasks and times of day.

Lastly, don’t forget about the aesthetic aspect of your lighting. Choose fixtures that complement your office décor and add a touch of style. Whether it’s a sleek modern lamp or a vintage-inspired pendant, the right lighting can enhance the overall design of your home office while providing the functionality you need to stay productive.

In summary, thoughtful consideration of your lighting choices can create a harmonious balance between style and practicality, ensuring your home office is a space where you can thrive.

8. Personalizing Your Workspace: Infusing Your Style and Personality

Creating a home office that reflects your unique style and personality is more than just an aesthetic choice; it’s a way to cultivate an environment that inspires productivity and creativity. Personalizing your workspace allows you to transform a standard office setup into a space that feels distinctly yours, making it a pleasure to spend hours working.

Start by incorporating colors that resonate with you. Whether it’s a bold accent wall, vibrant artwork, or a selection of colorful accessories, these elements can energize your space. For those who prefer a calming environment, consider softer hues or natural tones that promote focus and relaxation.

Next, think about the decor that speaks to your interests and passions. Displaying photographs of loved ones, artworks that inspire you, or items that represent your hobbies can create a more inviting atmosphere. Shelves filled with your favorite books or decorative items not only serve as a personal touch but can also spark conversations with visitors or clients.

Don’t forget about functional personalization. Invest in office supplies and furniture that not only look good but also fit your working style. Ergonomic chairs, stylish organizers, and sleek desk lamps can blend functionality with flair. Adding plants or succulents can also breathe life into your workspace, improving air quality and adding a touch of nature to your design.

Lastly, consider the little details—your choice of desk accessories, the type of lighting, and even the scent in the room can contribute to the overall feel of your office. Opt for candles or diffusers with scents that help you concentrate and feel energized. By thoughtfully infusing your personality into every aspect of your workspace, you’ll create a home office that motivates you to achieve your best work while feeling completely at ease.

9. Technology Integration: Ensuring Efficiency and Connectivity

In today’s fast-paced digital world, a home office that blends functionality with style must prioritize technology integration. Ensuring efficiency and connectivity is not just about having the latest gadgets; it’s about creating a cohesive environment that supports your workflow while reflecting your personal aesthetic.

Start by evaluating your core technological needs. Do you require multiple screens for multitasking? A high-quality webcam for virtual meetings? Or perhaps a robust printer to handle your printing needs? Once you’ve identified the essential tools, consider how they will fit into your design scheme. Choose sleek, modern devices that complement your decor, rather than clash with it. Wireless technology can be a game changer here, as it eliminates unsightly cords and creates a cleaner, more organized workspace.

Next, think about your internet connectivity. Reliable Wi-Fi is a must for any home office, so invest in a strong router or a mesh network system to ensure seamless connectivity throughout your space. Position your desk in a location that maximizes signal strength, avoiding corners or areas with thick walls that could block your connection.

Moreover, don’t forget about ergonomics when integrating technology. Adjustable monitor stands can help you achieve the perfect viewing angle, reducing strain on your neck and eyes. An ergonomic keyboard and mouse can enhance comfort during long working hours, ensuring that you stay productive without sacrificing your health.

Finally, consider the aesthetics of your tech setup. Use cable management solutions to keep cords organized and out of sight, creating a polished look that enhances your office’s overall design. Incorporating stylish storage solutions for your devices and accessories will keep your workspace tidy and visually appealing.

By thoughtfully integrating technology into your home office, you not only enhance efficiency and connectivity but also create a space that inspires creativity and productivity, making it a stylish sanctuary where you can thrive.

10. Adding Greenery: The Benefits of Plants in Your Home Office

Incorporating greenery into your home office is not just an aesthetic choice; it is a transformative element that can enhance both your workspace and your well-being. Research has shown that having plants in your office environment can significantly reduce stress levels, improve air quality, and boost productivity. The simple act of tending to a plant can provide a calming break from the demands of your work, allowing you to recharge and return to your tasks with renewed focus.

When selecting plants for your home office, consider low-maintenance options that thrive in indoor conditions. Succulents, snake plants, and pothos are popular choices due to their resilience and ability to adapt to varying light conditions. Not only do they require minimal care, but they also bring a touch of nature indoors, creating a more inviting atmosphere.

In addition to their psychological benefits, plants can also enhance the functionality of your workspace. Strategically placing greenery around your office can help define areas, improve acoustics, and reduce overall noise levels. A well-placed plant can serve as a natural divider, promoting a sense of separation between work zones and relaxation areas.

Moreover, the color green has been shown to evoke feelings of tranquility and balance, making it an ideal hue for a workspace. The presence of plants can inspire creativity and innovative thinking, helping you stay motivated throughout your workday.

Don’t forget to consider the overall design of your home office when selecting plants. Choose pots and containers that complement your décor and align with your personal style—whether that’s sleek and modern, rustic, or bohemian. By thoughtfully integrating greenery into your home office, you create a space that not only looks good but also feels good, fostering a productive and enjoyable work environment.

11. Minimizing Distractions: Tips for a Focused Environment

Creating a focused environment is crucial for maximizing productivity in your home office, and minimizing distractions plays a significant role in achieving that. In today’s fast-paced world, it’s all too easy to lose concentration amid the myriad of distractions vying for your attention. Here are some actionable tips to help you cultivate a serene workspace that fosters focus and creativity.

First and foremost, declutter your desk. A clean, organized workspace can work wonders for your mental clarity. Remove any items that don’t serve a purpose in your daily tasks, and keep only the essentials within reach. This not only helps in creating a visually appealing environment but also reduces the temptation to get sidetracked by items that remind you of chores or tasks outside of your work.

Next, consider your workspace location. If possible, choose a quiet area of your home that is separate from common living spaces. This physical separation can create a mental boundary, signaling to both you and those around you that when you’re in this space, you’re focused and unavailable for distractions. If you’re unable to find a completely quiet area, investing in noise-canceling headphones can be a game changer, allowing you to drown out background noise and concentrate more effectively.

Lighting also plays a crucial role in maintaining focus. Natural light is ideal, as it helps to regulate your mood and energy levels. Position your desk near a window if possible, and supplement with adjustable task lighting that can be tailored to your preferences. Bright lighting can keep you alert, while softer tones can help create a calming atmosphere—just find the balance that works best for you.

Additionally, establish a routine that signals the start and end of your workday. This might include setting specific hours, dressing for work, or creating pre-work rituals that help you transition into focus mode. Consistency is key; your brain will begin to recognize these cues and prepare itself for productivity.

Finally, limit digital distractions by utilizing tools and apps designed to enhance focus, such as website blockers or timers that encourage you to stay on task. Consider setting specific periods for checking emails or social media, rather than allowing them to interrupt your workflow sporadically throughout the day.

By implementing these strategies, you can create a home office environment that minimizes distractions and enhances your ability to concentrate. A well-designed workspace not only looks good but also serves as a sanctuary for productivity, allowing you to thrive in your professional endeavors.

12. Staying Organized: Tools and Tips for Effective Workflow

A well-organized home office is the backbone of productivity, transforming a cluttered space into a streamlined haven where creativity and efficiency thrive. To cultivate an effective workflow, it’s essential to implement a system that suits your personal style and work habits.

Start with the right tools: invest in desk organizers, filing systems, and digital tools that can help keep your workspace tidy. Consider using drawer dividers to separate office supplies, or floating shelves to maximize vertical space while keeping essentials within reach. A combination of labeled folders and digital filing systems can help you efficiently manage paperwork, ensuring that important documents are easy to find when you need them.

In addition to physical organization, incorporating technology can enhance your workflow tremendously. Tools like project management software, note-taking apps, and time-tracking programs can help you keep tabs on your tasks and deadlines efficiently. For instance, a Kanban board can visually represent your projects, making it easier to prioritize and track progress.

Don’t underestimate the power of a tidy desk. Regularly declutter your workspace to eliminate distractions. Set aside time each week to sort through papers, discard what’s no longer needed, and reorganize items to maintain a clean environment. Create a habit of returning items to their designated spots after use, which will prevent clutter from building up over time.

Finally, infuse your organization strategy with personal touches. Incorporating elements like a vision board, inspirational quotes, or plants can not only make your space more inviting but also keep you motivated. With a thoughtful approach to organization, you’ll find that your home office evolves into a functional and stylish sanctuary where productivity can flourish.

13. Creating a Comfortable Atmosphere: Temperature and Acoustics

Creating a comfortable atmosphere in your home office is crucial for enhancing productivity and overall well-being. Two key elements that dramatically influence your workspace experience are temperature and acoustics.

First, let’s talk about temperature. An environment that is too hot or too cold can lead to distractions and discomfort, making it challenging to focus on tasks. Aim to maintain a temperature that feels just right for you—typically between 68°F and 72°F (20°C to 22°C). If your workspace doesn’t naturally offer this level of comfort, consider investing in a programmable thermostat or portable heaters and fans. Additionally, adding insulation to windows and doors can help regulate temperature, ensuring a more stable and comfortable environment throughout the seasons.

Next, the acoustics of your home office play a significant role in your ability to concentrate. A noisy environment can hinder your focus and disrupt your workflow. To combat this, assess the noise levels in your workspace. If external sounds are infiltrating your office, consider soundproofing options such as heavy curtains, area rugs, or acoustic panels that not only absorb sound but can also add an element of style to your decor. If you prefer a more immersive experience, investing in high-quality noise-canceling headphones can help you tune out distractions while also allowing you to enjoy your favorite music or ambient sounds.

Combining optimal temperature control with thoughtfully curated acoustics will create a harmonious atmosphere conducive to productivity. By ensuring your home office is a sanctuary of comfort, you’ll find yourself more motivated and focused, allowing your creativity to flourish.

14. Refreshing Your Space: Knowing When and How to Update

Creating a home office that inspires productivity while reflecting your personal style is an evolving process. Just as your work habits and needs may change over time, so too should your workspace. Recognizing when it’s time to refresh your space is crucial for maintaining motivation and ensuring that your environment remains conducive to creativity and focus.

A good rule of thumb is to reassess your home office design every six months to a year. Look for signs like a lack of inspiration, discomfort during long work sessions, or even a buildup of clutter that seems unmanageable. These can indicate that your workspace is no longer serving you effectively.

When it comes to refreshing your space, consider small, impactful changes first. A new coat of paint can dramatically alter the mood of your office, while swapping out tired accessories for vibrant decor can breathe new life into your surroundings. Incorporate plants or artwork that resonates with you, as these personal touches can foster a sense of ownership and comfort.

Additionally, don’t underestimate the power of rearranging furniture. Sometimes, simply changing the layout can improve flow and functionality, making your workspace feel entirely new without the need for a major overhaul. If your desk setup feels cramped, explore ergonomic furniture options that promote better posture and comfort.

Finally, embrace technology upgrades as part of your refresh. Consider investing in a new monitor, a standing desk converter, or better organizational tools that streamline your workflow. As your tasks evolve, your tools should too. By staying attuned to your needs and making thoughtful updates, you can create a home office that continues to inspire productivity and reflects your unique style.

15. Maintaining Work-Life Balance: Defining Boundaries in Your Home Office

In the age of remote work, the lines between professional and personal life can blur, making it essential to establish clear boundaries in your home office. Achieving a harmonious work-life balance starts with being intentional about the space you create and the routines you establish.

First, designate specific areas for work and leisure within your home. Ideally, your home office should be a distinct space that signals to you—and anyone else in the household—that this is where work happens. Consider investing in room dividers or curtains if you’re working in a multi-purpose area. This physical separation can help you mentally detach from work tasks once the day is done.

Next, set a structured schedule that outlines your working hours. Consistency is key; try to start and finish work at the same times each day. This not only helps you stay productive but also creates a rhythm that your brain can recognize. When the clock strikes your quitting time, close your laptop, turn off work notifications, and step away from your workspace to signal the end of your workday.

Moreover, communicate your boundaries to those around you. Whether it’s family members or roommates, let them know when you’re “at work” and should not be disturbed unless it’s urgent. A simple sign on your office door or a specific signal can help reinforce these boundaries.

Lastly, don’t forget to incorporate moments of self-care into your daily routine. Use breaks to stretch, grab a healthy snack, or take a short walk outside. These small acts of self-care can recharge your mental state and help maintain your focus throughout the day.

By thoughtfully defining boundaries and creating a structured environment, you can cultivate a productive home office that supports both your professional ambitions and personal well-being. Embrace the balance, and your home office will become a space where creativity thrives, free from the stress of work infiltrating your home life.

As we wrap up our exploration of designing a functional and stylish home office, we hope you feel inspired to create a workspace that not only reflects your personal style but also enhances your productivity. By incorporating the ten essential tips we’ve discussed, you can transform your home office into a sanctuary that fosters creativity and focus. Remember, the key is to strike a balance between aesthetics and functionality, ensuring that every element serves a purpose while contributing to the overall ambiance. Whether you’re making minor adjustments or embarking on a complete redesign, your home office should be a space where you thrive. So, roll up your sleeves, unleash your creativity, and enjoy the process of crafting a workspace that’s uniquely yours. Happy designing!

What are the different types of light fixtures and their uses?

Lighting is more than just a functional necessity; it’s a key element that sets the mood, enhances aesthetics, and transforms the atmosphere of any space.

With a myriad of light fixtures available on the market, choosing the right one can feel overwhelming. From the soft glow of pendant lights that create an intimate dining experience to the bright, focused illumination of recessed lighting perfect for workspaces, each type of fixture serves a distinct purpose and style. In this comprehensive guide, we will explore various types of light fixtures, their unique features, and ideal applications, helping you make informed decisions that not only brighten your home but also reflect your personal style. Whether you’re redesigning a room, upgrading your lighting scheme, or simply seeking inspiration, this guide will illuminate your path to creating a beautifully lit environment that caters to your needs and enhances your everyday living.

1. Introduction to Lighting and Its Importance

What are the different types of light fixtures and their uses?
Credit : whatcanu.com

Lighting is often an overlooked aspect of interior design, yet it plays a pivotal role in shaping the ambiance, functionality, and overall aesthetic of any space. The right lighting can transform an ordinary room into an inviting haven, enhance productivity in a workspace, or create a cozy atmosphere for intimate gatherings. It sets the mood and can influence emotions, making it an essential element in both residential and commercial environments.

Understanding the importance of lighting goes beyond mere illumination. It involves recognizing how different types of light fixtures can serve various purposes, from providing task lighting for focused activities to creating ambient light that envelops a space in warmth. The strategic use of lighting can highlight architectural features, artwork, and decor, drawing attention to the elements you want to showcase while downplaying areas that may not be as visually appealing.

As we delve into this guide, we will explore the diverse types of light fixtures available, each with its unique characteristics and applications. From elegant chandeliers that serve as statement pieces to sleek recessed lights that offer a clean, modern look, each fixture has a specific role to play in enhancing the atmosphere of your home or workplace. Whether you’re redesigning a room, renovating a space, or simply seeking to improve the lighting in your environment, understanding these options will empower you to make informed choices that reflect both your style and functional needs. Join us as we illuminate the world of lighting, helping you navigate the myriad of choices available and discover how to effectively harness the power of light to enhance your daily life.

2. Understanding the Basics: Types of Light Fixtures

When it comes to lighting your space, understanding the different types of light fixtures available is essential for creating a well-lit, functional, and aesthetically pleasing environment. Each fixture serves a specific purpose and brings its unique charm to a room. Here’s a closer look at the primary types of light fixtures and how they can enhance your home or office.

### 1. **Ambient Lighting Fixtures**
Ambient lighting provides the foundational layer of light in any space, establishing a soft glow that illuminates the entire room. Common options include ceiling-mounted fixtures, chandeliers, and wall sconces. These fixtures are designed to offer general illumination, ensuring that every corner of the room is bright enough for day-to-day activities. When selecting ambient lighting, consider the height of your ceilings and the size of your space; larger rooms might benefit from a statement chandelier, while smaller areas may be better suited for flush-mount or semi-flush fixtures.

### 2. **Task Lighting Fixtures**
When you need focused light for specific tasks, task lighting is your go-to solution. These fixtures include desk lamps, under-cabinet lights, and pendant lights, which direct light where it’s needed most. For instance, a well-placed desk lamp can enhance your productivity while working, while under-cabinet lighting can transform a kitchen workspace into a chef’s paradise. Choose adjustable fixtures that allow you to direct light precisely where it’s needed, reducing strain on your eyes and enhancing functionality.

### 3. **Accent Lighting Fixtures**
Accent lighting is all about highlighting features within your space, such as artwork, architectural details, or beautiful plants. Track lighting, spotlights, and wall-mounted picture lights are all excellent choices for creating visual interest and depth. By strategically placing accent lighting, you can draw attention to your favorite decor items and create a layered lighting effect that adds warmth and character to your rooms.

### 4. **Decorative Lighting Fixtures**
While functionality is key, decorative lighting can also serve as a focal point in your design scheme. These fixtures range from ornate chandeliers and artistic pendant lights to whimsical table lamps. They not only provide illumination but also contribute to the overall aesthetic of your space, showcasing your style and personality. When selecting decorative lighting, consider the color, material, and shape to ensure it complements your decor while being a conversation starter.

### 5. **Outdoor Lighting Fixtures**
Don’t forget about lighting for the exterior of your home! Outdoor lighting fixtures, such as garden lights, path lights, and wall sconces, enhance your curb appeal while providing safety and security. They allow you to enjoy your outdoor spaces at night, creating an inviting atmosphere for gatherings, barbecues, or quiet evenings under the stars. Look for weather-resistant options to ensure durability and longevity.

By understanding these basic types of light fixtures and their uses, you can make informed decisions that enhance the functionality and beauty of your space. Whether you’re renovating, redecorating, or simply looking to refresh your lighting, the right fixtures can transform your environment and illuminate your lifestyle.

3. Ambient Lighting: Creating a Warm Atmosphere

What are the different types of light fixtures and their uses?
Credit : whatcanu.com

Ambient lighting serves as the foundation of any well-designed space, creating a warm and inviting atmosphere that enhances the overall comfort of a room. This type of lighting is essential for providing a soft, overall glow that fills the area without overwhelming the senses. Think of it as the gentle embrace of light that welcomes you home after a long day.

When selecting ambient lighting, consider fixtures that diffuse light evenly, such as ceiling-mounted flush or semi-flush lights, chandeliers, or even large floor lamps. These fixtures can be strategically placed to eliminate harsh shadows and create a balanced illumination that softens the edges of furniture and architectural features.

For instance, a stylish pendant light hung over a dining table not only provides functional light for meals but also adds a touch of elegance, encouraging conversation and connection. Similarly, wall sconces can be used to accentuate the architecture of a hallway or living area, casting a warm glow that invites exploration.

In addition to traditional fixtures, consider incorporating other sources of ambient light, such as LED strips placed behind furniture or along shelves, to create a subtle, modern touch. Dimmers are also a fantastic addition, allowing you to adjust the brightness according to the time of day or the mood you want to set, whether it’s a cozy movie night or a lively gathering with friends.

Ultimately, ambient lighting is about establishing a sense of balance and tranquility within your space. By thoughtfully selecting the right fixtures and layers of light, you can transform any room into a welcoming retreat, ensuring that your home feels as inviting as it looks.

4. Task Lighting: Illuminating Workspaces Effectively

Task lighting plays a crucial role in creating functional and efficient workspaces, ensuring that you can focus on the task at hand without straining your eyes. Unlike ambient lighting, which sets the overall mood of a room, task lighting is specifically designed to illuminate areas where precise activities occur, such as reading, writing, cooking, or crafting.

When choosing task lighting, consider fixtures that provide direct, concentrated light to reduce shadows and enhance visibility. Desk lamps with adjustable arms or headlamps are perfect for home offices or study areas, allowing you to direct the light exactly where it’s needed. In kitchens, under-cabinet lighting brightens countertops, making meal prep safer and easier. Similarly, pendant lights hung over a dining table or island not only serve as a stylish statement but also provide focused illumination for meals and gatherings.

The color temperature of task lighting is also essential to consider. Cooler tones, typically in the range of 4000K to 5000K, mimic daylight and are ideal for stimulating productivity, making them perfect for workspaces. Warmer tones, on the other hand, can create a cozy atmosphere in areas where relaxation is key, like reading nooks or lounges.

With the right task lighting, you can significantly enhance your productivity and comfort, transforming any workspace into an inviting and efficient haven. Whether it’s through sleek desk lamps, stylish wall sconces, or practical under-cabinet fixtures, the goal remains the same: illuminate your activities effectively, so you can work smarter, not harder.

5. Accent Lighting: Highlighting Your Home’s Features

What are the different types of light fixtures and their uses?
Credit : whatcanu.com

Accent lighting serves as the cherry on top of your home’s lighting design, providing the perfect opportunity to showcase your favorite features and create an inviting atmosphere. Unlike general lighting, which fills a space with overall illumination, accent lighting is all about highlighting specific areas or objects, such as artwork, architectural details, or beautiful plants.

When you think of accent lighting, think of it as a spotlight that draws the eye to what makes your home unique. Wall sconces can frame a painting, while adjustable track lighting can illuminate a sculpture or a cherished family heirloom displayed on a shelf. Table lamps with unique designs can serve as both functional lighting and decorative pieces, adding character to a room.

In addition to enhancing aesthetics, accent lighting contributes to the overall mood of a space. Warm, soft lights can create a cozy ambiance in a living room, while brighter, focused beams can energize a workspace or kitchen. Consider using dimmers to adjust the intensity of your accent lights, allowing you to change the atmosphere based on the occasion—whether it’s a lively dinner party or a quiet evening spent reading.

Moreover, accent lighting can significantly impact how we perceive a room’s size and depth. By strategically placing lights at varying heights, you can create layers of light that add dimension to your space, making it feel more inviting and expansive.

Incorporating accent lighting into your home doesn’t have to be complicated. Simple additions, such as LED strip lights under cabinets or behind furniture, can create an ethereal glow that elevates the design of your space. Whether you opt for dramatic lighting to make a bold statement or subtle fixtures to add a touch of elegance, accent lighting is an invaluable tool in crafting a home that not only looks good but feels inviting and lived-in. Embrace the art of highlighting your home’s best features and watch as your spaces transform into beautiful showcases of your personal style.

6. Chandeliers: Elegance and Style for Any Room

Chandeliers have long been synonymous with elegance and grandeur, often gracing the ceilings of opulent ballrooms and lavish dining rooms. However, their versatility has allowed them to find a place in a variety of settings, making them an excellent choice for anyone looking to add a touch of sophistication to their home. Available in an array of styles—from traditional crystal-laden designs to sleek, modern fixtures—chandeliers can enhance the aesthetic of any room, transforming an ordinary space into something extraordinary.

In dining rooms, a well-placed chandelier serves not only as a functional source of light but also as a stunning focal point that sets the tone for gatherings and special occasions. Imagine a beautifully designed chandelier casting a warm, inviting glow over a sumptuous dinner, its crystals shimmering like stars—a perfect backdrop for memorable moments.

Living rooms benefit from chandeliers as well, where they can contribute to the overall ambiance of the space. A contemporary chandelier with clean lines can complement modern decor, while an antique piece can add character to a more traditional setting. Additionally, chandeliers can be used in unexpected places; hanging one in a bedroom can create a romantic atmosphere, while a bold, colorful fixture in a playroom can spark joy and creativity.

When selecting a chandelier, consider the scale of your room. A large chandelier can be a statement piece in a spacious entryway, while smaller fixtures work best in cozy nooks or intimate spaces. The key is to strike a balance; ensure that your chandelier harmonizes with the surrounding decor without overwhelming it.

Beyond aesthetics, chandeliers also offer flexibility in lighting options. Many designs come equipped with dimmer switches, allowing you to adjust the brightness to suit your mood—be it a bright, lively gathering or a soft, intimate dinner.

In essence, chandeliers are more than just light fixtures; they are artistic expressions that elevate the style of any room. Whether you opt for the classic charm of crystal or the sleek sophistication of modern designs, incorporating a chandelier into your home is a surefire way to illuminate your space with elegance and flair.

7. Pendant Lights: Versatility and Design Options

What are the different types of light fixtures and their uses?
Credit : whatcanu.com

Pendant lights are a shining example of versatility in the world of lighting design. Suspended from the ceiling by a cord, chain, or rod, these fixtures can dramatically transform the ambiance of any space while serving practical lighting needs. Their unique ability to blend functionality with artistic flair makes them a popular choice for various settings, from cozy homes to bustling restaurants.

One of the most appealing aspects of pendant lights is the vast array of design options available. Whether you prefer the sleek lines of modern minimalism or the intricate details of vintage-inspired fixtures, there’s a pendant light to match every aesthetic. For a contemporary look, consider geometric shapes crafted from metal or glass, which can add an air of sophistication to dining areas or kitchens. On the other hand, if you’re aiming for a rustic or industrial feel, pendant lights made from reclaimed wood or exposed Edison bulbs can create an inviting, warm atmosphere.

In terms of functionality, pendant lights can be used in a multitude of ways. Hang a cluster of smaller pendants at varying heights above a kitchen island to create a focal point that doubles as task lighting. A single, oversized pendant can make a bold statement in an entryway or living room, drawing the eye upward and enhancing the sense of space. Additionally, pendant lights work beautifully in dining rooms, providing soft, direct illumination that encourages conversation and connection during meals.

For those who want to experiment with layering light, pendant fixtures can be combined with other sources, such as wall sconces or floor lamps, to create depth and dimension in a room. Consider using dimmable options for added flexibility, allowing you to adjust the brightness according to the occasion, whether it’s a lively dinner party or a quiet evening at home.

In summary, pendant lights are not just a source of illumination—they are a design statement that can enhance the style and functionality of any area. With their diverse styles and adaptable uses, they illuminate the path toward creating inviting, beautifully lit spaces that resonate with your personal taste.

8. Floor and Table Lamps: Functional Decor

When it comes to blending functionality with aesthetic appeal, floor and table lamps are the unsung heroes of interior design. These versatile light fixtures not only illuminate your space but also serve as striking decor pieces that can elevate the overall ambiance of a room.

Floor lamps, with their towering presence, can create drama in a living area or cozy up a reading nook. Available in various styles—from sleek and modern to rustic and industrial—they can complement any décor theme. Imagine a minimalist, angular floor lamp casting a warm glow over a stylish sofa, or a vintage arc lamp creating a soft, inviting corner in a family room. The height of floor lamps allows them to fill the vertical space in a room, drawing the eye upward and creating a sense of openness.

Table lamps, on the other hand, offer a more intimate lighting option, perfect for bedside tables, desks, or side tables in a living room. Their compact design allows them to fit seamlessly into smaller spaces while providing much-needed task lighting for reading, working, or enjoying a cup of tea. With countless designs—from classic ceramic bases to contemporary glass finishes—table lamps can act as statement pieces that reflect your personality and style. A beautifully crafted lamp can serve as a focal point, drawing attention and sparking conversation.

Both types of lamps can be enhanced with various shades, allowing you to control the mood and intensity of the light. A soft, fabric shade diffuses light, creating a warm and cozy atmosphere, while a sleek, metallic shade can provide a more directed beam, perfect for reading or focusing tasks.

Incorporating floor and table lamps into your decor strategy not only enhances the functionality of your spaces but also gives you the opportunity to express your individual style. By thoughtfully choosing these fixtures, you can create a layered lighting design that is both beautiful and practical, ensuring that your home feels warm, inviting, and effortlessly stylish.

9. Wall Sconces: Space-Saving Solutions

Wall sconces are the unsung heroes of lighting design, offering both functionality and flair without consuming precious floor space. These elegant fixtures are mounted directly onto the wall, making them perfect for rooms where space is at a premium or where you want to create a cozy, intimate atmosphere.

Available in a myriad of styles, from sleek modern designs to ornate vintage looks, wall sconces can complement any decor theme. They serve a variety of purposes, whether you need task lighting for reading in a nook, ambient light to soften a room’s overall brightness, or accent lighting to highlight artwork or architectural features.

Imagine a hallway lined with stylish sconces, casting a warm glow that invites guests to explore further. Or picture flanking a mirror in your entryway, where the soft illumination enhances your space while providing practical lighting for last-minute touch-ups before heading out. In living rooms, wall sconces can replace bulky table lamps, freeing up surfaces and allowing for a more streamlined design.

Moreover, many wall sconces are designed to be adjustable, with some featuring swing arms that allow you to direct light exactly where it’s needed. This versatility makes them ideal for bedrooms, where they can be positioned above nightstands for reading without taking up valuable bedside real estate.

Incorporating wall sconces into your lighting plan not only maximizes your space but also adds a layer of sophistication and depth to your home’s ambiance. With their myriad styles, sizes, and functionalities, these fixtures are the perfect solution for anyone looking to enhance their home’s lighting while maintaining a clean and uncluttered aesthetic.

10. Recessed Lighting: Sleek and Modern Choices

Recessed lighting, often hailed as the epitome of sleek and modern design, has become a staple in contemporary interiors. These unobtrusive fixtures, embedded into ceilings, provide a clean and sophisticated aesthetic, making them ideal for various settings — from upscale homes to commercial spaces.

One of the standout features of recessed lighting is its versatility. Available in a range of sizes, shapes, and beam angles, these fixtures can be tailored to suit any room’s needs. Whether you’re aiming to create a warm, inviting atmosphere in your living room or need focused illumination for a kitchen countertop, recessed lights can achieve it all. They can be used to highlight architectural details, artwork, or even specific areas such as a reading nook, seamlessly blending functionality with style.

In addition to their aesthetic appeal, recessed lights are known for their energy efficiency. Many modern options utilize LED technology, which not only consumes less power but also boasts a longer lifespan compared to traditional bulbs. This means you can enjoy beautiful lighting without the hefty energy bills.

Installation is another key aspect of recessed lighting. Though it may require some ceiling modifications, once installed, the fixtures offer a streamlined look that can make a room feel more spacious. With dimmable options available, you can effortlessly adjust the light intensity to suit different occasions, transforming your living space from a bright, lively area for entertaining to a cozy retreat for a quiet evening.

In summary, recessed lighting embodies a sleek and modern choice for illuminating your spaces. Its ability to combine aesthetic elegance with practical benefits makes it an excellent addition to any lighting plan, ensuring your home not only looks stunning but feels inviting and functional.

11. Outdoor Lighting: Enhancing Curb Appeal and Safety

Outdoor lighting serves as a pivotal element in transforming your home’s exterior, seamlessly blending aesthetic appeal with practical safety. When thoughtfully designed, outdoor lighting can boost your home’s curb appeal, making it inviting and warm as dusk falls. Whether you’re illuminating a pathway, accentuating architectural features, or creating cozy outdoor spaces for gatherings, the right light fixtures can work wonders.

**Pathway Lights** are essential for guiding guests safely to your front door. These fixtures, often installed along sidewalks or garden paths, not only enhance safety by illuminating potential trip hazards but also add a charming touch to your landscape. Choose fixtures that are low to the ground, with warm bulbs that create a welcoming glow, and consider solar-powered options for an eco-friendly twist.

**Wall Sconces** and **Floodlights** can accentuate the structure of your home, drawing attention to unique architectural details while providing additional security. Wall sconces mounted on either side of your front door can create a symmetrical and inviting entrance, while floodlights can deter intruders by illuminating dark corners of your property.

**String Lights** and **Lanterns** bring a whimsical touch to patios and gardens. These fixtures create an enchanting atmosphere for outdoor dining or evening socializing, casting a soft, warm light that encourages relaxation and conversation. Consider using dimmable options or smart lighting systems to adjust the ambiance based on the occasion.

In addition to enhancing aesthetics, outdoor lighting plays a crucial role in safety. **Motion Sensor Lights** can automatically illuminate your driveway or yard when someone approaches, providing a sense of security and deterring unwanted visitors. Moreover, well-lit outdoor spaces deter accidents by ensuring that walkways, stairs, and entrances are visible.

Ultimately, outdoor lighting serves a dual purpose: it enhances the beauty of your home while ensuring safety for you and your guests. By carefully selecting and strategically placing your light fixtures, you can create a stunning exterior that beckons visitors while providing peace of mind.

12. Smart Lighting Solutions: The Future of Illumination

In an age where technology seamlessly integrates into our daily lives, smart lighting solutions are emerging as a transformative force in the world of illumination. These innovative fixtures do more than just light up a room; they offer an unparalleled level of control, convenience, and customization that caters to the dynamic needs of modern living.

Imagine entering your home and having the lights automatically adjust to your preferred brightness and color temperature, all thanks to sensors and smart technology that respond to your presence. Smart lighting systems can be controlled via smartphone apps, voice commands, or even automated schedules, allowing homeowners to create the perfect ambiance for any occasion. Whether you’re hosting a dinner party, winding down for the evening, or waking up in the morning, you can easily set the mood with a simple tap or voice prompt.

Moreover, smart lighting solutions are not just about aesthetics; they are also designed with energy efficiency in mind. Many of these fixtures utilize LED technology, which consumes significantly less power than traditional bulbs. With features like dimming capabilities and the ability to turn lights off remotely, smart lighting can help reduce your energy costs while also contributing to a more sustainable environment.

Additionally, smart lighting can enhance your home’s security. Many systems offer features like motion detection and the ability to simulate occupancy by scheduling lights to turn on and off at specific times. This deters potential intruders and provides peace of mind when you’re away from home.

As the future of illumination unfolds, embracing smart lighting solutions can transform your living spaces into intelligent environments that adapt to your lifestyle. Whether you’re looking to increase efficiency, enhance security, or simply enjoy customizable lighting experiences, smart fixtures are a worthwhile investment for any modern home. So, step into the future of lighting and illuminate your spaces with the brilliance of technology.

13. Choosing the Right Bulbs: LED vs. Incandescent

When it comes to illuminating your space, the choice of light bulbs can have a significant impact on both the ambiance and energy efficiency of your home. The two most popular options on the market today are LED (Light Emitting Diode) and incandescent bulbs, each offering distinct advantages and characteristics that cater to different needs and preferences.

**LED Bulbs** have surged in popularity over the past decade, and for good reason. These energy-efficient powerhouses consume up to 80% less energy than traditional incandescent bulbs, translating into substantial savings on your electricity bill over time. Additionally, LED bulbs boast an impressive lifespan, often lasting up to 25,000 hours compared to the mere 1,000 hours typical of incandescent options. This means fewer trips to the store and less waste, making LEDs a more environmentally friendly choice. Furthermore, LEDs are available in a range of color temperatures, from the warm glow of a candle to the bright white light reminiscent of midday sun, allowing for versatility in creating the desired mood in any room.

On the other hand, **Incandescent Bulbs**, though less energy-efficient, offer a warmth and quality of light that many people find appealing. The soft, inviting glow of incandescent lighting can create a cozy atmosphere, making it a popular choice for living rooms and bedrooms. They are also typically less expensive upfront than their LED counterparts, which can be attractive for those looking to make quick, budget-friendly lighting decisions. However, it’s essential to consider that these bulbs have a shorter lifespan and higher energy costs in the long run, which may offset their initial affordability.

Ultimately, the decision between LED and incandescent bulbs comes down to your specific lighting needs, budget, and preferences. If you prioritize energy efficiency, longevity, and versatility, LEDs are the clear winner. Conversely, if you’re seeking a warm, traditional glow for your home, incandescent bulbs may be your go-to choice. Whichever you choose, understanding the benefits and limitations of each will empower you to make informed decisions that enhance your space’s beauty and functionality.

14. Tips for Layering Light in Your Space

Layering light in your space is an art that can transform the ambiance and functionality of any room. By combining different types of lighting—ambient, task, and accent—you create a dynamic environment that meets various needs while enhancing the aesthetic appeal of your home. Here are some practical tips to help you master the art of layered lighting.

**Start with Ambient Lighting**: Ambient lighting serves as the foundation of your lighting scheme, providing general illumination for the entire room. Consider ceiling-mounted fixtures, chandeliers, or recessed lighting to establish a warm, inviting glow. Dimmers can be your best friend here, allowing you to adjust the brightness depending on the time of day or the mood you wish to create.

**Incorporate Task Lighting**: Once the ambient layer is set, it’s time to focus on task lighting—fixtures that provide direct light for specific activities. Think desk lamps for reading, under-cabinet lights in the kitchen for food prep, or wall sconces beside your bed for nighttime reading. Task lighting should be strategically placed to reduce shadows and enhance visibility where it’s most needed.

**Add Accent Lighting**: To further elevate the atmosphere, introduce accent lighting to highlight features of your space. This could be a stylish pendant light over a dining table, LED strip lights illuminating shelves of decorative items or artwork, or spotlights that draw attention to architectural details like a fireplace or a textured wall. Accent lighting adds depth and character, making your space feel more curated and inviting.

**Consider the Color Temperature**: The color temperature of your light fixtures plays a crucial role in the overall feel of the room. Warmer lights (around 2700K-3000K) create a cozy and intimate ambiance, ideal for living rooms and bedrooms, while cooler lights (4000K or higher) are perfect for workspaces or kitchens where clarity and focus are essential. Mixing different color temperatures within your layered lighting design can create a balanced and interesting visual effect.

**Use Dimmer Switches Wisely**: Installing dimmer switches can significantly enhance the versatility of your lighting. By adjusting the intensity of each layer of light, you can easily transition from a bright, energetic environment during the day to a soft, relaxing glow at night. This adaptability ensures that your space feels comfortable and inviting, regardless of the occasion.

**Keep Scale and Proportion in Mind**: Finally, remember that the size and scale of your light fixtures should complement the dimensions of the room. A large chandelier can serve as a stunning focal point in a grand dining room, while a cluster of smaller pendant lights might work better in a cozy kitchen nook. Ensuring that your lighting choices are proportional to the space will help create a harmonious design.

By thoughtfully layering different types of lighting, you can effortlessly enhance both the functionality and aesthetic charm of your home, creating spaces that are not only well-lit but also warm, inviting, and uniquely yours.

15. Conclusion: Making Informed Choices for Your Lighting Needs

In conclusion, making informed choices for your lighting needs is essential to create the perfect ambiance and functionality in your spaces. As we’ve explored throughout this guide, the variety of light fixtures available today can cater to an array of styles, preferences, and practical requirements. From the sleek elegance of pendant lights that illuminate kitchen islands, to the warm glow of table lamps that enhance cozy reading nooks, each fixture plays a pivotal role in shaping the atmosphere of your home or office.

Understanding the purpose of each type of light fixture—whether it’s task lighting for focused activities, ambient lighting for overall illumination, or accent lighting to highlight artwork—empowers you to select the right pieces that align with your vision. Consider the scale of your rooms, the color schemes, and the specific needs of each area before making a decision. Additionally, don’t overlook the significance of energy efficiency and the latest innovations in LED technology, which offer longevity and sustainability without sacrificing style.

Ultimately, the choices you make in lighting affect not just the aesthetics of your space but also its functionality and your overall well-being. By taking the time to assess your lighting needs and exploring the myriad of options available, you can create an inviting, well-lit environment that enhances both comfort and productivity. Illuminate your life with thoughtful lighting choices that reflect your personal style and meet the demands of your everyday activities.

In conclusion, we hope this guide to different types of light fixtures has illuminated your understanding of how to enhance your spaces with the perfect lighting solutions. From the warm ambiance of pendant lights to the task-oriented brilliance of recessed fixtures, each type serves a unique purpose and can dramatically transform the atmosphere of any room. As you embark on your lighting journey, remember to consider both functionality and aesthetics, ensuring that your choices not only meet your practical needs but also reflect your personal style. With the right fixtures, you can create inviting, dynamic environments that brighten up your home and elevate your daily experiences. Thank you for joining us on this exploration of light—may your choices be inspired and your spaces beautifully lit!

How to install a new light fixture?

Transforming the ambiance of your home can be as simple as changing a light fixture.

Whether you’re looking to brighten up a dim corner, create a cozy atmosphere in your living room, or add a touch of elegance to your dining area, the right lighting can make all the difference. In this comprehensive guide, we’ll walk you through the entire process of installing a new light fixture, from selecting the perfect design that complements your decor to the practical steps of wiring and mounting. With just a few tools and a little bit of patience, you’ll be able to enhance your space with a fresh glow. So grab your toolkit, and get ready to illuminate your home as we delve into the art of light fixture installation—your space is about to shine brighter than ever!

1. Introduction: The Importance of Lighting in Your Space

How to install a new light fixture?
Credit : whatcanu.com

Lighting plays a crucial role in defining the ambiance and functionality of any space. Whether you’re transforming a cozy corner in your living room or enhancing the workspace in your kitchen, the right light fixture can make all the difference. It’s not just about illumination; it’s about creating an atmosphere that reflects your personal style and meets your everyday needs.

Good lighting can elevate the aesthetics of a room, highlighting its best features while providing essential illumination for tasks at hand. It can make a small room feel larger, a dull space feel vibrant, and a stark area feel warm and inviting. Think about how the soft glow of a pendant light can create an intimate dining experience, or how a bright chandelier can add a touch of elegance to a foyer.

Moreover, effective lighting has practical benefits as well. It can increase safety and security by eliminating dark corners that may hide potential hazards or intruders. By strategically placing light fixtures, you can enhance visibility and comfort, allowing you to navigate your space with ease at any hour of the day.

In this guide, we’ll take you through the steps of installing a new light fixture, empowering you to harness the transformative power of lighting. Whether you’re a seasoned DIY enthusiast or a first-time installer, our clear instructions and helpful tips will ensure that you can illuminate your space with confidence and flair. Let’s dive in and brighten up your home!

2. Choosing the Right Light Fixture for Your Room

Choosing the right light fixture for your room is a vital step in illuminating your space effectively and enhancing its overall aesthetic. The light fixture you select should not only complement the existing decor but also serve the practical purposes of the room. Start by considering the function of the space. For example, a cozy living room may benefit from warm, ambient lighting, while a kitchen requires bright, focused light for meal prep and cooking.

Next, think about the style that resonates with you and fits the room’s theme. Are you drawn to modern minimalism, rustic charm, or perhaps a vintage flair? Chandeliers can add a touch of elegance to dining areas, while sleek pendant lights work beautifully over kitchen islands. Additionally, wall sconces can contribute to the ambiance without taking up valuable floor space in smaller rooms.

Size matters, too. A fixture that is too large can overwhelm a small space, while one that is too small can get lost in a larger room. As a rule of thumb, consider the dimensions of your room when selecting a fixture: the diameter of the chandelier or light fixture in inches should equal the sum of the room’s length and width in feet. This simple formula helps ensure that your choice will be visually proportional.

Finally, don’t overlook the importance of the light bulb itself. The type of bulb you choose—whether LED, incandescent, or fluorescent—will impact not only the quality of light but also energy efficiency and longevity. Pay attention to the color temperature as well; warmer tones create a cozy atmosphere, while cooler tones can invigorate and energize.

Taking the time to thoughtfully select the right light fixture will transform your room into a beautifully illuminated space that reflects your personal style while meeting your lighting needs.

3. Tools and Materials Needed for Installation

How to install a new light fixture?
Credit : whatcanu.com

Before diving into the exciting world of light fixture installation, it’s essential to gather the right tools and materials to ensure a smooth and safe process. Here’s a detailed list of what you’ll need, along with some handy tips to help you prepare for the task ahead.

**Tools:**

1. **Screwdriver Set**: Both flathead and Phillips screwdrivers are indispensable for removing old fixtures and securing the new ones. Consider using a magnetic screwdriver to prevent screws from falling during installation.

2. **Wire Strippers**: These are crucial for exposing the ends of the wires if they are covered with insulation. A good pair will make your connections clean and secure.

3. **Voltage Tester**: Safety first! Before you start working with electrical components, use a voltage tester to ensure that the power is off in the wiring area. This tool will provide peace of mind while you work.

4. **Drill and Drill Bits**: A power drill can simplify the process of mounting your new fixture, especially if you need to create pilot holes for screws.

5. **Ladder**: Depending on the height of your ceiling, a sturdy ladder will help you reach the fixture safely and comfortably.

6. **Pliers**: Needle-nose pliers are helpful for tightening wire connectors or securing any loose wires.

**Materials:**

1. **New Light Fixture**: Choose a fixture that complements your space and meets your lighting needs. Make sure it’s compatible with your existing electrical setup.

2. **Wire Connectors**: These small but vital components will help you securely connect the wires from your new fixture to the existing wiring. It’s often recommended to use wire nuts for a safe and effective connection.

3. **Electrical Tape**: This is a handy safety measure for wrapping exposed wires and ensuring that your connections are insulated.

4. **Mounting Hardware**: Most light fixtures come with the necessary mounting hardware, but make sure you have everything you need, including screws and anchors, especially if you’re mounting on drywall or other materials.

5. **Instruction Manual**: Don’t forget to have the manual for your new light fixture on hand! It typically contains specific instructions for installation, including wiring diagrams and safety warnings.

With these tools and materials at your disposal, you’re well-equipped to tackle the installation of your new light fixture. Remember to take your time, follow safety protocols, and enjoy the transformative effect your new lighting will have on your space!

4. Safety First: Preparing for Installation

Before diving into the exciting process of installing your new light fixture, it’s crucial to prioritize safety. Proper preparation can prevent accidents and ensure a smooth installation. Start by gathering the necessary tools and materials: a screwdriver, wire strippers, electrical tape, a voltage tester, and your new fixture, of course. A sturdy ladder is also essential if the fixture is mounted high on the ceiling.

Once you have your tools at hand, the very first step is to turn off the power at the circuit breaker. This might seem like a no-brainer, but it’s a critical step that ensures no electricity is flowing to the existing fixture while you work. Take a moment to confirm that the power is indeed off by using a voltage tester on the wires; this little device will give you peace of mind and help you avoid any electrical shocks.

Next, protect your workspace by laying down a drop cloth or old towels beneath the area where you’ll be working. This will catch any debris or dust that may fall during the installation, keeping your space tidy. If you’re working in a particularly high or hard-to-reach place, consider having a friend or family member nearby to assist you, ensuring you have someone to help stabilize your ladder or hand you tools as needed.

Lastly, don’t forget to wear safety goggles and gloves. While it may seem excessive, these small precautions can protect you from any unexpected accidents, such as falling debris or sharp edges. With safety measures firmly in place, you’re now ready to embark on the installation journey, armed with the knowledge that you’ve taken the necessary steps to keep yourself safe.

5. Turning Off the Power: How to Find Your Circuit Breaker

How to install a new light fixture?
Credit : whatcanu.com

Before diving into the installation of your new light fixture, ensuring your safety is paramount. The first step in this crucial process is turning off the power to the existing fixture, and that begins with locating your circuit breaker. This may sound straightforward, but a little guidance can make all the difference, especially if you’re unfamiliar with your home’s electrical layout.

Start by making your way to your home’s electrical panel, usually found in a basement, garage, or utility room. The panel may be a metal box mounted on the wall, often with a door that swings open to reveal rows of circuit breakers. Take a moment to familiarize yourself with the panel’s layout. Each breaker is labeled, indicating which area of the house it controls. If you’re unsure which breaker powers the old fixture, you may need to do a bit of detective work.

To identify the correct breaker, you can turn on the existing light fixture and then head to the panel. As you flip each breaker off, pay attention to the light – when it goes dark, you’ve found the right one! Once you’ve identified the correct circuit, switch it to the off position and confirm that the fixture is no longer receiving power.

For added safety, it’s wise to label your breaker box if it isn’t already labeled. This will save you time and effort in future projects and ensure you can quickly find the right breaker when needed. After you’ve confidently turned off the power, it’s a good practice to test the fixture with a voltage tester to guarantee there is no electricity flowing to the wires. With the power securely off, you can proceed with your installation, knowing you’ve taken the necessary precautions to work safely.

6. Removing the Old Light Fixture: Step-by-Step Instructions

Removing the old light fixture can seem daunting, but with the right approach, it’s a straightforward task that paves the way for your stunning new addition. Before you begin, ensure you have the necessary tools at hand: a screwdriver, a voltage tester, and possibly a pair of wire cutters. Safety is paramount, so let’s dive into the step-by-step process.

**Step 1: Turn Off the Power**
Safety first! Head to your circuit breaker and switch off the power to the light fixture you’ll be replacing. It’s a good idea to double-check that the power is off by using a voltage tester on the wires. This will give you peace of mind while you work.

**Step 2: Remove the Light Bulbs**
Once you’ve confirmed that the electricity is off, carefully remove any light bulbs from the fixture. This will lighten the load and make handling the fixture easier. Store the bulbs in a safe place to avoid breakage.

**Step 3: Detach the Fixture from the Ceiling**
Most light fixtures are secured with screws or mounting brackets. Using your screwdriver, carefully unscrew the fixture from the ceiling. If there’s any resistance, make sure you haven’t overlooked any hidden screws. Once the fixture is loose, gently lower it to inspect the wiring.

**Step 4: Disconnect the Wires**
You’ll typically find three wires connected to the fixture: a black (or red) wire, a white wire, and a green or bare wire. Carefully disconnect these wires by either unscrewing the wire nuts or loosening the screws that hold them in place. It’s a good practice to take a photo of the wiring setup before you disconnect anything, as this will help you when you install the new fixture.

**Step 5: Remove the Mounting Bracket**
After disconnecting the wires, you’ll need to take down the mounting bracket attached to the electrical box in the ceiling. This is often held in place by screws, so use your screwdriver to remove it.

**Step 6: Clean Up**
With the old fixture removed, take this opportunity to clean the area around the electrical box. Dust and debris can accumulate over time, and a clean space will ensure better installation of the new fixture.

Congratulations! You’ve successfully removed the old light fixture and are one step closer to transforming your space with a new, stylish illumination. As you prepare to install the new fixture, keep these steps in mind to ensure a smooth transition.

7. Understanding Electrical Wiring: A Beginner’s Guide

How to install a new light fixture?
Credit : whatcanu.com

### 7. Understanding Electrical Wiring: A Beginner’s Guide

Before diving into the installation of your new light fixture, it’s crucial to grasp the basics of electrical wiring. While it may seem intimidating at first, understanding a few key concepts can empower you to approach the task with confidence and safety.

Start by familiarizing yourself with the essential components of your home’s electrical system. The most common wiring colors you’ll encounter include black (or red) for hot wires, white for neutral wires, and green or bare copper for ground wires. These colors are not just for aesthetics; they serve important functions that ensure your electrical system operates safely.

Next, take a moment to locate your circuit breaker panel. It’s your first line of defense against electrical mishaps. Before you begin any work, turn off the circuit that powers the existing light fixture. This step is non-negotiable; safety should always come first. Use a non-contact voltage tester to double-check that the power is truly off.

Once the power is disconnected, inspect the wiring in the existing fixture. You might find a combination of wires: the hot wire, neutral wire, and possibly a ground wire. Take note of how they are connected, as this will guide you when installing your new fixture. If you’re unsure, don’t hesitate to take a photo for reference.

When you’re ready to proceed, carefully remove the old fixture, ensuring that you untwist the wire connections gently. This is where your confidence will grow—by seeing how the wires are connected and realizing that it’s just a matter of connecting like with like. The new fixture will typically come with instructions, so follow those closely for any specific wiring requirements.

Finally, once your new light fixture is secured and connected correctly, restore power at the circuit breaker and flip the switch. The moment the new fixture illuminates your space is not just a reward for your hard work; it’s a testament to your newfound understanding of electrical wiring. Remember, if you ever feel uncertain or overwhelmed, consulting a professional electrician is always a wise choice. Your safety is paramount, and sometimes it’s best to leave complex tasks to the experts.

8. Installing the New Light Fixture: A Detailed Process

Once you’ve selected the perfect light fixture to elevate your space, it’s time to get into the nitty-gritty of installation. This stage is where your vision truly comes to life, transforming the ambiance of your room. Follow these detailed steps to ensure a smooth installation process:

1. **Prepare Your Workspace**: Start by clearing the area beneath the existing light fixture. Lay down a drop cloth to protect your flooring and ensure that you have ample space to work. Gather all necessary tools, including a screwdriver, wire stripper, voltage tester, and ladder. Always double-check that your new fixture comes with all the required mounting hardware.

2. **Turn Off the Power**: Safety first! Locate your circuit breaker and switch off the power to the existing light fixture. To ensure there’s no electrical hazard, use a voltage tester to confirm that the wires are not live. This step is crucial for preventing any potential accidents or shocks while you work.

3. **Remove the Old Fixture**: Carefully detach the old light fixture from the ceiling. This typically involves unscrewing the mounting bracket and disconnecting the wires. As you remove the fixture, take note of how the wires are connected—this will help guide you in connecting the new fixture. If you’re unsure, a quick photo with your phone can serve as a handy reference.

4. **Prepare the New Fixture**: Before installation, assemble your new light fixture according to the manufacturer’s guidelines. This may involve attaching bulbs, shades, or other decorative elements. Make sure everything is secure and ready for mounting.

5. **Connect the Wires**: Following the instructions that came with your new fixture, connect the wires from the fixture to the corresponding wires in the ceiling. Typically, this involves twisting the black (live) wire from the fixture to the black wire in the ceiling, the white (neutral) wires together, and grounding it with the green or bare wire. Use wire nuts to secure each connection and ensure that no bare wire is exposed.

6. **Mount the New Fixture**: Once the wiring is secured, it’s time to mount the fixture to the ceiling. Align it with the mounting bracket, and gently push any excess wiring back into the electrical box. Use screws to secure the fixture in place, following the manufacturer’s instructions for proper installation.

7. **Install Light Bulbs and Test**: With the fixture securely mounted, insert the appropriate light bulbs. Once everything is in place, return to your circuit breaker and switch the power back on. Test your new light fixture to ensure it’s working correctly. If it doesn’t illuminate, double-check your wiring connections to troubleshoot any issues.

8. **Final Touches**: With the light fixture functioning properly, take a moment to clean up your workspace. Dispose of any packaging materials and tools, and enjoy the fresh glow of your newly installed light fixture. Consider adjusting the brightness with dimmable bulbs or smart lighting options for added versatility.

By following these detailed steps, you’ll not only enhance the aesthetic of your space but also gain a sense of accomplishment from your DIY project. Enjoy your beautifully illuminated room!

9. Connecting Wires: Tips for Safe and Secure Connections

Connecting wires is a crucial step in the installation of your new light fixture, and it’s essential to approach this task with both care and precision to ensure safety and functionality. Before diving into the process, it’s imperative to turn off the power at the circuit breaker to avoid any electrical hazards. Once you’ve confirmed that the power is off, gather your tools: a wire stripper, a voltage tester, and some wire nuts.

Begin by removing the existing fixture and carefully inspecting the wiring. You should see three types of wires: the hot wire (usually black or red), the neutral wire (typically white), and the ground wire (green or bare copper). It’s helpful to organize these wires visually so you can clearly identify which ones need to be connected to your new fixture.

When connecting wires, always follow the color-coded system: twist the hot wires together, pairing the black from your fixture with the black from the ceiling. Then, do the same for the neutral wires, connecting white to white. Ground wires are connected last; secure them to the fixture’s ground wire or a grounding screw on the mounting bracket. Ensure that each twist connection is tight and secure, as loose connections can lead to flickering lights or, worse, electrical fires.

After making your connections, it’s a good idea to use a voltage tester to double-check that everything is safe before powering the circuit back on. Once you’ve verified that there are no exposed wires and that all connections are insulated with wire nuts, you can gently tuck the wires into the electrical box and mount your new light fixture according to the manufacturer’s instructions.

Remember, if at any point you feel uncertain about the wiring process, it’s always wise to consult with or hire a professional electrician to ensure that your installation is safe and up to code. With the right approach, your new light fixture will not only brighten your space but will also be installed securely and safely.

10. Securing the Fixture: Ensuring Stability and Safety

Securing your new light fixture is a crucial step that ensures both stability and safety in your home. After you’ve successfully connected the wiring, it’s time to focus on mounting the fixture securely to the ceiling or wall. Begin by aligning the fixture with the mounting bracket, ensuring that any screws or clips designed to hold it in place are easily accessible.

Before you proceed, double-check that the mounting bracket is firmly attached to the electrical box. If the electrical box wobbles or feels loose, it’s imperative to address this issue first. A sturdy mount is essential for preventing accidents or damage, particularly for heavier fixtures.

Once you are confident that everything is secure, carefully position the fixture against the ceiling. If it has a canopy, make sure it covers the electrical box completely to prevent any exposed wiring. Use the included screws to fasten the fixture to the mounting bracket, ensuring that they are tightened adequately but not overly so, as this could strip the threads or damage the fixture.

As you work, it’s important to keep your hands steady and check for level alignment. An uneven fixture can not only look unappealing but can also place undue stress on the wiring, leading to potential electrical issues down the line. Use a level tool if necessary to ensure that everything is straight.

After the fixture is secured, take a moment to gently tug on it to confirm that it is firmly in place. If it holds steady, you’ve successfully completed this phase of the installation! This attention to detail will not only enhance the aesthetic appeal of your space but also provide peace of mind knowing that your light fixture is safe and secure. With the fixture now in place, you’re just a switch flick away from illuminating your space beautifully!

11. Restoring Power: How to Turn the Electricity Back On

Restoring power after installing a new light fixture is a crucial step that marks the culmination of your hard work. Once you’ve ensured that the fixture is securely mounted and all electrical connections are properly made, it’s time to breathe life back into your newly illuminated space.

Start by locating your circuit breaker panel, which is typically found in a basement, utility room, or closet. Before you flip the switch back on, take a moment to double-check that all tools and materials are cleared from the installation area. It’s essential to ensure that everything is clean and free of any debris, as this will help prevent any accidents when the power is restored.

Identify the circuit breaker that corresponds to the area where you installed your new light fixture. Most panels are clearly labeled, but if yours isn’t, you may need to turn off and on a few breakers to find the correct one. Once you’ve identified the right breaker, firmly switch it back to the ‘on’ position.

As you do this, remain vigilant for any unusual sounds or smells. If you hear a pop or notice any burning odors, turn the breaker off immediately and double-check your connections. A simple mistake can lead to a short circuit, so it’s better to be cautious.

Now, with the power restored, it’s time to test your new light fixture. Flip the wall switch and bask in the glow of your hard work. If the light illuminates as intended, you’ve successfully completed the installation! If not, revisit your wiring connections to ensure everything is in order.

Lastly, take a moment to tidy up your workspace and dispose of any old fixtures or packaging materials. Enjoy the fresh ambiance your new light fixture brings to your space, and revel in the satisfaction of having accomplished this illuminating task!

12. Testing Your New Light Fixture: What to Look For

Once you’ve successfully installed your new light fixture, it’s time for the moment of truth: testing it to ensure everything is functioning as it should. This step is crucial, as it not only confirms that your hard work has paid off but also ensures that the fixture is safe and effective in illuminating your space.

Start by flipping the switch to turn on your new fixture. Observe the light closely. Is it illuminating the room as you envisioned? Take note of the brightness and the quality of the light. Does it cast a warm, inviting glow, or is it harsh and unflattering? If the light seems dim or overly bright, you may need to consider swapping out the bulb for a different wattage or type to achieve the desired ambiance.

Next, check for any flickering or unusual noises. Flickering could indicate a loose connection or the need for a different bulb, while buzzing sounds might suggest an issue with the fixture itself or the electrical wiring. If you notice any of these issues, it’s best to turn the power off and double-check your connections to ensure everything is secure.

Additionally, pay attention to the fixture’s placement. Walk around the room to see how the light interacts with the space. Are there any dark corners that could benefit from additional lighting? Does the fixture create any unwanted shadows? This is your opportunity to adjust the height or angle of the fixture if it’s adjustable, or to consider adding supplementary lights for a more balanced illumination.

Lastly, allow your fixture to run for a short period and monitor how it behaves over time. This will help you identify any potential overheating issues. If everything checks out, congratulations! You’ve successfully illuminated your space and created a beautiful focal point in your home. With your new light fixture shining brightly, you can now enjoy the enhanced atmosphere and style it brings to your environment.

13. Troubleshooting Common Installation Issues

Even the most meticulous DIY enthusiasts can encounter a few bumps in the road when installing a new light fixture. Troubleshooting common installation issues is essential to ensure your lighting project goes smoothly and safely. Here are some of the most frequent problems you might face, along with tips to resolve them.

**1. The Light Fixture Won’t Turn On:**
If your new light fixture isn’t illuminating, the first step is to check the power supply. Ensure that the circuit breaker is switched on and that you have replaced any blown fuses. Next, verify that all connections are secure—loose wires can easily disrupt the flow of electricity. If you’ve done all this and the fixture still doesn’t work, consider testing the bulb in a different fixture to rule out a faulty light bulb.

**2. Flickering Lights:**
A flickering light can be more than just an annoyance; it could indicate a deeper electrical issue. Check to make sure the bulb is tightly screwed in. If that doesn’t resolve the flicker, inspect the wiring connections in the junction box. Corroded or loose connections can cause fluctuations in power. If your fixture is compatible with a dimmer switch, ensure the bulb type is compatible as well, as some LED bulbs don’t work well with older dimmer systems.

**3. Uneven Lighting:**
If your new fixture isn’t providing the desired amount of light, it may be positioned incorrectly or the wrong type of fixture for the space. Consider the wattage and lumens of the bulb you’re using—an underpowered bulb could be the culprit. Additionally, assess the height and angle of the fixture; sometimes simply adjusting its position can enhance light distribution.

**4. Noise from the Fixture:**
Humming or buzzing sounds from your fixture can be frustrating. This is often caused by incompatible dimmer switches or a faulty ballast in fluorescent fixtures. If you suspect the dimmer is the issue, try replacing it with a compatible one or switch to standard switches to see if that eliminates the noise. If the problem persists with a fluorescent fixture, you may need to replace the ballast.

**5. Incorrect Fixture Size:**
Sometimes, the size of your new fixture can feel out of place, either dwarfing the room or overwhelming it. If you find that your new light fixture isn’t proportional to the space, take a moment to evaluate the room’s dimensions. Consider swapping it out for a size that better complements your decor and the scale of the room.

By addressing these common issues head-on, you can ensure that your new light fixture not only shines brightly but also enhances the beauty and functionality of your space. Remember, safety is paramount, so if you encounter complex wiring problems or persistent issues, don’t hesitate to consult a professional electrician. With a little patience and problem-solving, you’ll have your space illuminated just the way you envision!

14. Final Touches: Enhancing Your Space with Light

Once your new light fixture is securely installed and shining bright, it’s time to consider the final touches that will truly enhance your space. Lighting is not just about functionality; it plays a pivotal role in setting the mood and atmosphere of a room. Here are some simple yet effective ways to elevate your newly illuminated area.

First, think about the color of your bulbs. Soft white or warm LED bulbs create a cozy ambiance, perfect for living rooms and bedrooms, while bright white or daylight bulbs work well in kitchens and workspaces, promoting clarity and focus. Experiment with different bulb options to find the perfect hue that complements your decor and personal style.

Next, consider adding dimmers. A dimmer switch allows you to adjust the brightness of your new fixture, giving you control over the ambiance depending on the time of day or the occasion. Whether you want bright light for a lively gathering or a soft glow for a romantic dinner, dimmers give you that versatile flexibility.

Additionally, think about layering your lighting. While your new fixture may serve as the centerpiece, incorporating other light sources can create depth and interest. Table lamps, floor lamps, or even wall sconces can provide supplementary light, enhancing the overall aesthetic and functionality of the space.

Don’t forget to consider decorative elements that can enhance the light itself. Mirrors can reflect light, making your space feel larger and brighter. Placing a strategically positioned mirror across from your light fixture can double the effect of your new installation.

Finally, add personal touches that resonate with your style. Whether it’s a beautiful lampshade, decorative bulbs, or even a few accents around the base of your fixture, these details will tie your design together and make the space feel uniquely yours.

By focusing on these final touches, you can transform your newly installed light fixture from a mere necessity into a stunning focal point that enhances both your space and your experience within it. Happy illuminating!

15. Conclusion: Enjoying Your Newly Illuminated Room

Congratulations! After following the steps outlined in this guide, you have successfully transformed your space with a new light fixture. Stepping back to appreciate your handiwork is not just a moment of pride; it’s the beginning of a new chapter in how you experience your room. The gentle glow of your freshly installed fixture creates an inviting atmosphere that enhances both the aesthetics and functionality of the space.

As you bask in the warm light, take a moment to notice how the illumination has altered the dynamics of the room. Perhaps the colors on your walls now shine brighter, or the texture of your furniture becomes more pronounced under the new lighting. Whether it’s a cozy dining area, a vibrant living room, or a serene bedroom, your choice of fixture has undoubtedly added a personal touch that reflects your style.

Moreover, consider the various ways you can maximize your new lighting. Experiment with dimmers to adjust the ambiance according to the time of day or occasion. Layer your lighting by adding complementary sources, such as floor lamps or wall sconces, to create depth and warmth. You may even find joy in arranging your decor to highlight the new fixture, turning it into a focal point that draws the eye.

Lastly, don’t forget to share your achievement! Showcase your newly illuminated room on social media or with friends and family. Your project may inspire others to embark on their own lighting upgrades. So, sit back, relax, and enjoy the transformed atmosphere that your new light fixture brings—because a well-lit room is not just about visibility; it’s about setting the mood for countless memories to come.

As we wrap up our guide on installing a new light fixture, we hope you feel empowered to transform your space with newfound brilliance. Whether you’re looking to create a cozy ambiance in your living room or a bright workspace in your home office, the right lighting can truly elevate the atmosphere of any room. By following our step-by-step instructions, you can confidently tackle this DIY project and enjoy the satisfaction of a job well done. Remember, the process may take a little time and patience, but the end result—a beautifully illuminated space that reflects your personal style—will be well worth the effort. So gather your tools, unleash your creativity, and let your home shine with warmth and elegance! Happy illuminating!

What are the best ways to create a serene and relaxing bedroom?

Your bedroom should be more than just a place to sleep; it should be a sanctuary where you can escape the chaos of the outside world and rejuvenate your spirit.

In today’s fast-paced life, creating a serene and relaxing bedroom is essential for promoting restful sleep and overall well-being. Imagine stepping into a space that envelops you in tranquility—a retreat adorned with calming colors, soft textures, and personal touches that reflect your unique style. In this blog post, we’ll explore top tips for transforming your bedroom into a peaceful haven. From selecting the right color palette to optimizing lighting and incorporating soothing scents, we’ll guide you through every step to cultivate an atmosphere that encourages relaxation and rejuvenation. Say goodbye to stress and hello to serenity as you embark on this journey to create your perfect sleep sanctuary!

1. Understanding the Importance of a Serene Bedroom

What are the best ways to create a serene and relaxing bedroom?
Credit : whatcanu.com

Creating a serene bedroom is more than just an aesthetic choice; it’s a vital component of your overall well-being. In our fast-paced lives, where stress often lurks around every corner, the bedroom serves as a personal sanctuary — a space to unwind, recharge, and escape the chaos of the outside world. Understanding the importance of this sacred space can profoundly impact your mental and physical health.

A serene bedroom fosters a sense of calm and tranquility, helping you to cultivate a restful environment that promotes quality sleep. Quality sleep is essential for a robust immune system, improved mood, and enhanced cognitive function. When your bedroom is designed for relaxation, it not only encourages you to slip into slumber more easily but also allows you to wake up feeling refreshed and rejuvenated.

Moreover, a harmonious bedroom can act as a daily retreat for meditation or reflection, allowing you to start and end your day with clarity. Imagine stepping into a space filled with soothing colors, gentle textures, and minimal distractions—each element carefully curated to evoke peace and serenity. By prioritizing a serene bedroom, you are investing in yourself; you are choosing to create a haven that nurtures your soul and enhances your everyday life.

In the following sections, we will explore practical tips and design ideas that can transform your bedroom into a serene oasis, perfectly tailored to your unique preferences and lifestyle. Get ready to embrace the tranquility that comes from understanding the profound importance of a calm and relaxing bedroom.

2. Choosing the Right Color Palette for Calmness

When it comes to transforming your bedroom into a serene sanctuary, the color palette you choose plays a pivotal role in setting the mood. Colors have the power to evoke emotions and influence our state of mind, making it essential to select hues that promote calmness and relaxation.

Start by considering soft, muted tones that create a soothing atmosphere. Shades of blue, for instance, are renowned for their tranquil qualities, reminiscent of clear skies and serene waters. Light blues, in particular, can help lower blood pressure and reduce stress levels, making them an excellent choice for a restful retreat.

Alternatively, consider gentle greens, which evoke the refreshing essence of nature. Soft sage or mint green can create an inviting and rejuvenating space, bringing a sense of peace and balance that encourages relaxation. For those who prefer warmth, soft beige or creamy whites can provide a cozy backdrop without overwhelming the senses. These neutral tones work beautifully with natural textures, enhancing the overall serenity of the room.

Avoid overly vibrant or harsh colors, as they can be stimulating and detract from the tranquil atmosphere you aim to achieve. If you desire a touch of boldness, consider incorporating deeper shades as accents through pillows, throws, or artwork, allowing for a burst of personality without compromising the overall calmness.

Remember, the key to a serene bedroom lies in the harmonious interplay of colors. Mixing and matching different shades within your chosen palette can add depth and dimension while maintaining a cohesive look. By thoughtfully selecting your color scheme, you can create a peaceful haven that invites relaxation and rejuvenation, turning your bedroom into the ultimate sanctuary.

3. Essential Furniture for a Relaxing Space

What are the best ways to create a serene and relaxing bedroom?
Credit : whatcanu.com

When it comes to crafting a serene and relaxing bedroom, the right furniture choices can make all the difference. Think of your bedroom as a sanctuary, a personal retreat where comfort reigns supreme. Here are some essential pieces to consider for creating that tranquil atmosphere.

**1. A Luxurious Bed:** The centerpiece of any bedroom is undoubtedly the bed. Opt for a high-quality mattress that suits your comfort needs, paired with soft, breathable bedding. Consider a plush headboard that not only adds style but also provides a cozy backrest for reading or relaxing. Layer your bed with a combination of pillows—varying in sizes and textures—to create an inviting, cloud-like escape.

**2. Cozy Seating:** Incorporate a comfortable chair or a small loveseat in a corner of the room. This cozy nook can serve as a perfect spot for morning coffee, reading, or simply unwinding with a good book. Choose fabrics that feel soft against your skin, like velvet or high-thread-count cotton, and consider seating that complements the overall aesthetic of your sanctuary.

**3. Functional Nightstands:** On either side of your bed, functional nightstands are a must. They provide essential storage for nighttime essentials like books, glasses, and a glass of water. Choose nightstands that reflect your style—whether sleek and modern or rustic and charming—and consider pieces that offer drawers or shelves for added organization.

**4. Soft Lighting:** To create an atmosphere of calm, select lighting fixtures that provide a warm glow. Bedside lamps with dimmers allow you to adjust the brightness to suit your mood, while overhead fixtures should be soft and inviting. Consider using candles or string lights to add a touch of warmth and ambiance, perfect for those peaceful evenings.

**5. Minimalist Desks or Dressers:** If space allows, a minimalist desk can serve as a tranquil workspace, keeping clutter at bay while allowing you to focus on productivity without distraction. A well-organized dresser can also help maintain a serene environment, ensuring that everything has its place and your personal items remain tidy and out of view.

Incorporating these essential furniture pieces into your bedroom will not only enhance its functionality but will also foster a sense of tranquility. Remember, your sanctuary should reflect your personal style while promoting relaxation, allowing you to retreat from the chaos of daily life and recharge in a peaceful environment.

4. Decluttering: Creating a Minimalist Oasis

In the quest for a serene and relaxing bedroom, decluttering serves as a vital first step toward creating your minimalist oasis. A cluttered space often breeds a cluttered mind, making it difficult to unwind and find peace after a long day. To transform your bedroom into a sanctuary of calm, begin by assessing your belongings with a critical eye.

Start by removing everything from surfaces—dressers, nightstands, and even the floor. As you sort through items, ask yourself what truly deserves a place in your calming retreat. Keep only those items that bring you joy or serve a functional purpose. This could mean parting with extra pillows that never get used, decorative pieces that gather dust, or clothing that doesn’t fit your lifestyle.

Once you’ve sorted through your belongings, focus on creating designated spaces for the items you decide to keep. Invest in stylish storage solutions—think chic baskets or sleek boxes—that not only hide away clutter but also contribute to the overall aesthetic of your room. Remember, the goal is to minimize visual distractions, allowing your space to breathe and feel open.

Incorporating a minimalist approach doesn’t just clear physical space; it also sets the stage for a more mindful and intentional lifestyle. With fewer items vying for your attention, you create an environment that encourages relaxation and promotes restful sleep. Whether it’s a serene color palette, soft textures, or the gentle glow of ambient lighting, your decluttered sanctuary will become a retreat that nurtures both body and mind, inviting you to unwind and recharge.

5. Lighting Matters: How to Use Natural and Artificial Light

What are the best ways to create a serene and relaxing bedroom?
Credit : whatcanu.com

When it comes to creating a serene and relaxing bedroom, lighting plays a pivotal role in setting the mood and enhancing the overall ambiance. Both natural and artificial light can significantly influence how you feel in your space, so it’s essential to strike the right balance.

Start by harnessing the power of natural light. Consider the layout of your room and the position of your windows. During the day, let sunlight pour in by using sheer, light-filtering curtains that provide privacy without sacrificing brightness. Position your furniture to take advantage of the sun’s path; a cozy reading nook by the window can become your favorite retreat for basking in the warmth of daylight. If privacy is a concern, consider using reflective surfaces or strategically placed mirrors to amplify the natural light, creating an illusion of a larger, brighter space.

As twilight approaches, it’s time to layer in artificial lighting. A well-thought-out lighting scheme can transform your bedroom from a bustling daytime hub to a peaceful nighttime sanctuary. Start with ambient lighting—soft overhead fixtures or wall-mounted sconces that cast a warm glow help create a relaxing atmosphere. Supplement this with task lighting, like bedside lamps or adjustable reading lights, to ensure you have adequate light for nighttime activities without overwhelming brightness.

Don’t underestimate the power of dimmers! Installing dimmer switches allows you to control the intensity of your lights, letting you transition seamlessly from bright, energizing light in the morning to soft, calming light in the evening. For a touch of warmth, consider incorporating candles or string lights for an inviting, cozy feel.

Finally, remember that color temperature matters. Opt for warmer hues in your artificial lighting to promote relaxation and comfort, steering clear of harsh, cool tones that can be stimulating. By thoughtfully combining natural and artificial light, you can create a harmonious and inviting sanctuary that beckons you to unwind and recharge after a long day.

6. Incorporating Nature: Plants for Peace and Relaxation

Incorporating nature into your bedroom design is a powerful way to cultivate a serene and relaxing atmosphere. The presence of plants not only enhances the aesthetic appeal of your sanctuary but also contributes to your overall well-being. Studies have shown that being surrounded by greenery can reduce stress, improve air quality, and promote a sense of calm.

When selecting plants for your bedroom, consider the following options that thrive in lower light conditions and are known for their air-purifying qualities. Snake plants, for example, are virtually indestructible and can help filter out toxins while releasing oxygen at night, making them a perfect companion for restful sleep. Peace lilies are another excellent choice; their lush foliage and elegant white blooms can transform any corner into a tranquil retreat while absorbing harmful pollutants.

If you’re looking for a more fragrant option, consider incorporating lavender or jasmine. Not only do these plants bring a delightful aroma, but they are also renowned for their calming effects, which can help reduce anxiety and promote relaxation. For those who prefer a minimalist approach, small succulents or cacti can add a touch of nature without overwhelming your space.

To effectively integrate plants into your bedroom, think about placement. A large potted plant in a corner can create a focal point, while smaller plants on bedside tables or shelves can serve as delightful reminders of nature right where you need them. Hanging planters can also add dimension to your space, drawing the eye upwards and creating a sense of openness.

Remember, the goal is to create a calming environment, so choose pots and planters that complement your existing décor. Whether you opt for sleek ceramic vessels or rustic wooden boxes, the right containers can enhance the overall aesthetic of your sanctuary.

By bringing nature into your bedroom, you’re not just decorating—you’re creating a peaceful oasis that invites relaxation and rejuvenation. Take a moment to nurture your plants, and in return, they will help nurture your mind, body, and spirit, making your bedroom a true sanctuary of tranquility.

7. Textures and Fabrics That Promote Comfort

What are the best ways to create a serene and relaxing bedroom?
Credit : whatcanu.com

Creating a serene and relaxing bedroom goes beyond just color palettes and layouts; the textures and fabrics you choose play a pivotal role in establishing a calming atmosphere. Soft, inviting materials can transform your space into a sanctuary where you can unwind and recharge.

Start with your bedding—invest in high-quality sheets made from natural fibers like cotton, linen, or bamboo. These materials not only feel luxurious against your skin but also promote breathability, ensuring a comfortable night’s sleep. Opt for a duvet or comforter with a plush texture that adds an inviting layer of warmth, making your bed a cozy retreat.

Don’t overlook throw pillows and blankets. Incorporating a variety of textures, such as velvet, knitted, or faux fur, can enhance the visual appeal of your bedroom while providing tactile comfort. Layering different fabrics invites relaxation, as you can snuggle up with a soft throw while reading or watching your favorite show.

Rugs can also contribute significantly to the overall comfort of your space. A thick, shaggy rug can create a warm, cushioned surface underfoot, making your bedroom feel more inviting. Choose a color that complements your decor but also invokes a sense of calm—think soft neutrals or muted pastels.

Finally, consider the curtains or window treatments you use. Heavy drapes can block out light and insulate against noise, while sheer fabrics allow for gentle light filtration, creating a soothing ambiance. The right fabric can help you control the mood of the room, whether you want a bright, airy feel during the day or a dark, peaceful environment at night.

By thoughtfully selecting textures and fabrics that promote comfort, you can create a bedroom that not only looks beautiful but also feels like a true sanctuary, encouraging relaxation and tranquility at the end of a long day.

8. The Role of Aromatherapy in a Relaxing Bedroom

Aromatherapy plays a pivotal role in transforming your bedroom into a serene sanctuary. The power of scent is profound; it can evoke memories, influence moods, and even promote relaxation. Incorporating essential oils into your space not only enhances the ambiance but also provides therapeutic benefits that can help you unwind after a long day.

To begin, consider investing in a high-quality diffuser. This device disperses essential oils into the air, filling your bedroom with soothing aromas that can create a tranquil atmosphere. Popular choices for relaxation include lavender, known for its calming properties, and chamomile, which can help ease anxiety and promote sleep. A few drops of eucalyptus or sandalwood can also cleanse the air and bring a sense of peace to your environment.

For those who prefer a more hands-on approach, you might explore using scented candles or pillow sprays infused with essential oils. Lighting a candle as part of your evening ritual can signal to your mind that it’s time to relax and prepare for rest. Similarly, a gentle spritz of lavender pillow spray can lull you into a state of calm, making it easier to drift off to sleep.

Remember, the key to effective aromatherapy is personalization. Experiment with different scents to find what resonates most with you. You might even create your own blends, combining oils that appeal to your senses and reflect your unique style. By introducing the right aromas into your bedroom, you can cultivate an inviting space that nurtures relaxation, rejuvenation, and a deeper connection to your inner peace.

9. Creating a Relaxation Zone: Reading Nooks and More

Creating a relaxation zone within your bedroom can transform it from a simple sleeping space into a personal sanctuary where you can unwind and recharge. One of the best ways to do this is by incorporating a cozy reading nook. Imagine curling up in a plush armchair or a hammock chair, surrounded by soft pillows and a warm throw blanket, with your favorite book in hand. Position this nook near a window to take advantage of natural light during the day, or add a stylish floor lamp for those tranquil evenings when you want to lose yourself in the pages of a gripping novel.

To enhance the atmosphere, consider adding soothing elements that engage your senses. A small side table can hold a steaming cup of herbal tea or a fragrant candle to create an inviting ambiance. Incorporate soft textures through a shaggy rug or layered cushions to provide comfort and warmth. You might also want to include a small bookshelf or a decorative basket filled with your top reads, allowing for easy access while adding a personal touch to your space.

Beyond reading nooks, think about other relaxation zones you can create. A meditation corner with floor cushions and calming art can offer a peaceful retreat for mindfulness practices. You could also include a small indoor plant or a water feature, like a tabletop fountain, to introduce a sense of tranquility and connection to nature.

By thoughtfully designing these relaxation zones, you can cultivate an environment that encourages unwinding after a long day, fostering a sense of peace and serenity that will make your bedroom a cherished retreat.

10. Tips for Soundproofing Your Bedroom

Creating a serene and relaxing bedroom often starts with ensuring that your space is a sanctuary of peace. One of the most crucial elements in achieving that tranquility is soundproofing. Noise from outside—whether it’s bustling city sounds, neighbors, or even the hum of traffic—can disrupt your sleep and overall relaxation. Here are some effective tips for soundproofing your bedroom, helping you create the perfect retreat.

**1. Choose the Right Windows:** Start with your windows, as they often serve as the primary entry point for external noise. Consider upgrading to double-glazed windows, which are designed to provide better insulation against sound. If replacement isn’t an option, adding thick curtains or soundproof window inserts can significantly reduce noise levels.

**2. Invest in Quality Doors:** Solid-core doors are your best bet for soundproofing. Unlike hollow doors, which allow sound to travel easily, solid-core doors absorb sound and create a more peaceful environment. Additionally, ensure that your door fits snugly in its frame; adding a door sweep can seal gaps at the bottom where sound can sneak in.

**3. Utilize Soft Furnishings:** Soft textiles can absorb sound effectively. Consider incorporating plush rugs, upholstered furniture, and heavy drapes into your décor. The more fabric you add to the space, the less echo and noise will bounce around your room.

**4. Add Acoustic Panels:** For a more professional approach, acoustic panels can be installed on walls to absorb sound. These panels come in various designs and colors, allowing you to enhance your bedroom’s aesthetic while quietly muting disruptive noises from outside.

**5. Create a Layered Sound Barrier:** If noise continues to be a problem, you might consider creating a layered sound barrier. Placing bookshelves filled with books or decorative items against the wall shared with noisy neighbors can help muffle sound. This not only serves a practical purpose but also enhances your room’s visual appeal.

**6. White Noise Machines:** For those particularly sensitive to sound, white noise machines can be a game changer. These devices produce a consistent sound that masks disruptive noises, creating a soothing auditory backdrop that can lull you to sleep.

By implementing these soundproofing strategies, you can transform your bedroom into a tranquil oasis, free from the disturbances of the outside world. A little effort in soundproofing goes a long way in ensuring that your bedroom remains a serene space for rest, relaxation, and rejuvenation.

11. Personalizing Your Space with Meaningful Decor

Personalizing your space with meaningful decor can transform your bedroom from a simple resting place into a sanctuary that resonates with your identity and experiences. The items you choose to display should tell your story, evoke positive emotions, and create an atmosphere that soothes your mind and spirit.

Start by selecting pieces that hold special significance to you. Perhaps it’s a framed photograph from a cherished vacation or a piece of art created by a loved one. Incorporating these items not only adds a personal touch but also infuses your space with warmth and nostalgia. Consider a gallery wall where you can showcase a collection of memories, achievements, and inspirations. This visual narrative serves as a daily reminder of what you value most.

Textures also play a vital role in personalization. Layering different fabrics—such as a soft throw blanket, plush pillows, or a textured area rug—can make your bedroom feel more inviting. Choose colors and patterns that resonate with your style and evoke a sense of calm. Soft, muted tones can create a tranquil atmosphere, while bolder hues can energize the space.

Incorporating elements from nature, such as indoor plants or natural wood accents, can enhance the serene quality of your bedroom. Plants not only purify the air but also bring life and vibrancy into your personal oasis.

Finally, consider adding items that promote relaxation and mindfulness. A small bookshelf filled with your favorite novels, a cozy reading nook, or soothing candles can all contribute to a peaceful environment where you can unwind at the end of the day.

By curating a space filled with meaningful decor that reflects your personality and aspirations, you cultivate an environment that nurtures relaxation and rejuvenation. Your bedroom becomes more than just a place to sleep; it evolves into a haven that inspires serenity and well-being.

12. Technology Detox: Creating a Screen-Free Sanctuary

In our fast-paced, tech-driven world, our bedrooms often become an extension of our devices, flooded with notifications, blue light, and the constant buzz of connectivity. To truly transform your sanctuary into a serene retreat, consider implementing a technology detox—an intentional step towards creating a screen-free haven that promotes relaxation and rejuvenation.

Start by designating your bedroom as a tech-free zone. This means removing televisions, computers, and even smartphones from the space. Instead, cultivate an environment that encourages mindfulness and tranquility. You can replace the digital clutter with calming elements such as books, soft lighting, and soothing scents. A stack of your favorite novels on the bedside table invites quiet evenings of escape through reading, while a scented candle or essential oil diffuser can enhance the ambiance with calming aromas like lavender or chamomile.

To further embrace the serenity of a screen-free sanctuary, consider incorporating natural elements into your bedroom. Houseplants not only purify the air but also connect you to nature, fostering a sense of peace. Opt for low-maintenance varieties like snake plants or peace lilies, which thrive in various lighting conditions.

Moreover, establish a nightly routine that signals the end of the day and promotes relaxation. This could include activities like journaling, meditating, or practicing gentle yoga. By replacing screen time with these calming rituals, you’ll create a peaceful atmosphere that encourages restful sleep and rejuvenation.

Lastly, consider how you can enhance your bedroom’s design to reflect this tech-free philosophy. Opt for cozy textiles, such as soft throws and plush cushions, to create a warm and inviting space. Choose colors that evoke calmness—soft blues, greens, or earthy tones can help create a serene backdrop that encourages relaxation.

By committing to a technology detox in your bedroom, you’re not just cutting down on screen time; you’re actively crafting a sanctuary that nurtures your well-being. Embrace the peace and tranquility that comes with disconnecting, and watch as your bedroom transforms into the ultimate retreat for rest and rejuvenation.

13. Establishing a Nighttime Routine for Better Sleep

Establishing a nighttime routine is one of the most effective strategies for enhancing your sleep quality and creating a tranquil bedroom environment. In today’s fast-paced world, it’s easy to fall into a pattern of late-night screen time, stress, and disorganization, all of which can disrupt your ability to unwind and rest fully. By implementing a consistent pre-sleep routine, you signal to your body that it’s time to relax and prepare for restorative sleep.

Start by setting a specific bedtime that allows for at least seven to eight hours of quality sleep. Once you have your target bedtime, work backward to determine when you should start winding down. Consider including calming activities in your routine, such as dimming the lights, switching off electronic devices, and engaging in relaxing practices like reading a book, sipping herbal tea, or practicing gentle yoga stretches. These activities not only help to lower stress levels but also create a peaceful atmosphere that encourages your mind and body to transition into sleep mode.

Incorporating mindfulness techniques, such as meditation or deep breathing exercises, can further enhance your nighttime routine. Spending even just a few minutes focusing on your breath can help clear your mind of the day’s worries and promote a sense of calm. Additionally, consider creating a soothing ambiance in your bedroom—experiment with essential oils, soft lighting, or even a white noise machine to create an environment that feels safe and nurturing.

Remember, consistency is key. By sticking to your nighttime routine, you reinforce healthy sleep habits, making it easier for your body to recognize when it’s time to relax and rejuvenate. Over time, these simple yet powerful practices will transform your bedroom into a serene sanctuary, ultimately leading to better sleep and a more restful night. Embrace the tranquility of a well-established routine, and watch as your bedroom evolves into the peaceful haven you’ve always desired.

14. The Importance of Organization and Storage Solutions

When it comes to creating a serene and relaxing bedroom, organization and effective storage solutions are paramount. A cluttered space can lead to a cluttered mind, making it difficult to unwind and recharge. By implementing thoughtful organization techniques, you can transform your bedroom into a tranquil retreat that promotes peace and relaxation.

Start by assessing your space and identifying areas that need improvement. Invest in multifunctional furniture, such as a bed with built-in drawers or a storage ottoman, which can help you maximize storage while maintaining a sleek appearance. These pieces not only provide practical solutions for stowing away extra blankets or books but also keep your bedroom looking neat and tidy.

Consider utilizing vertical space to your advantage. Wall-mounted shelves or floating nightstands can free up floor space, giving the illusion of a larger room while providing convenient storage for books, decorative items, or personal treasures. Additionally, using decorative baskets or bins can add style to your organization efforts, allowing you to store items like clothes or accessories out of sight while still being easily accessible.

Don’t forget about your closet! A well-organized closet can make a significant difference in your daily routine and overall bedroom atmosphere. Use matching hangers, drawer dividers, and clear storage boxes to create a cohesive and visually appealing system for your clothes and accessories. Seasonal rotations can also help keep your wardrobe manageable and your closet space optimized.

Finally, remember to regularly declutter your bedroom. Set aside time each month to evaluate what you truly need and cherish. Letting go of items that no longer serve you can bring a refreshing sense of clarity to your space, fostering a serene environment where you can truly relax and unwind. By prioritizing organization and thoughtful storage solutions, you’ll cultivate a peaceful sanctuary that invites tranquility into your life.

15. Regular Maintenance: Keeping Your Sanctuary Serene

Regular maintenance is the unsung hero of a serene bedroom sanctuary. While it may be tempting to think that once you’ve created your tranquil oasis, the work is done, the truth is that a little ongoing care can make a substantial difference in maintaining the calm atmosphere you’ve cultivated.

Start with the basics: dusting surfaces, vacuuming, and washing your bedding regularly. Fresh, clean linens not only enhance comfort but also contribute to a peaceful aesthetic. Aim to change your sheets at least once a week; the sensation of slipping into a bed made with crisp, freshly laundered sheets is one of life’s simplest pleasures.

Next, pay attention to the decor. Over time, knick-knacks can accumulate, and clutter can creep in, disrupting the serene vibe. Make it a habit to declutter your space regularly, perhaps once a month, to evaluate what items truly contribute to your sanctuary and what can be removed. This process not only keeps your bedroom looking tidy but also creates a more calming environment.

Don’t forget about the air quality in your sanctuary. Consider investing in air purifiers or incorporating houseplants that improve air quality, like peace lilies or snake plants. Regularly checking the filters in your HVAC system and keeping windows open when possible can also help ensure that the air you breathe is fresh and revitalizing.

Lastly, check the ambiance of your space. Dimmer switches, soft lighting, and calming scents from essential oil diffusers or candles can dramatically enhance the atmosphere. Make it a point to refresh any scent diffusers or replace burnt-out light bulbs to keep the mood just right.

By incorporating these simple maintenance tips into your routine, you’ll ensure that your bedroom remains the serene retreat you envisioned, a sanctuary where you can escape the hustle and bustle of daily life and truly unwind.

In conclusion, transforming your bedroom into a serene sanctuary is an achievable goal that can significantly enhance your well-being and overall quality of life. By incorporating the thoughtful tips outlined in this post—from selecting calming color palettes and investing in quality bedding to minimizing clutter and embracing soft lighting—you can create a personal retreat that promotes relaxation and rejuvenation. Remember that the journey to a serene space is personal, so take the time to infuse your unique style and preferences into your sanctuary. As you embark on this transformation, may your bedroom become a haven of peace and comfort, inviting you to unwind and recharge after a long day. Sweet dreams and restful nights await you!

How to choose the right paint color for your bedroom?

The bedroom is more than just a place to sleep; it’s a sanctuary where we retreat at the end of a long day, a personal oasis that reflects our individuality and nurtures our well-being.

The color of your walls plays a pivotal role in shaping the atmosphere of this intimate space, influencing your mood, energy levels, and overall sense of tranquility. With a kaleidoscope of paint colors available, choosing the perfect hue can feel overwhelming. Should you go for calming blues that evoke serenity, warm earth tones that bring comfort, or bold shades that inspire creativity? In this blog post, we’ll explore the psychology of color and how different shades can transform your bedroom into a harmonious retreat tailored to your personal style and emotional needs. Dive into the art of color selection with practical tips, expert insights, and inspiring ideas to help you master the mood of your sleeping space and create the bedroom of your dreams.

1. Understanding the Psychology of Color

How to choose the right paint color for your bedroom?
Credit : whatcanu.com

When it comes to selecting the perfect paint color for your bedroom, understanding the psychology of color is crucial. Colors evoke emotions, influence moods, and can significantly impact how we feel in a space. Each hue carries its own meaning and can either uplift or calm the spirit, making the choice of color a powerful tool in shaping the ambiance of your sanctuary.

Warm colors like reds, oranges, and yellows can generate feelings of warmth and energy, but they may not be the best choice for a bedroom meant for relaxation. Instead, consider cooler tones like soft blues and greens, which are known for their calming effects. These colors can create a serene environment, promoting tranquility and restful sleep.

Neutrals, such as soft grays, beiges, and whites, offer versatility and can serve as a perfect backdrop for layering textures and accents. They can make a space feel more open and airy, while enabling you to experiment with bolder decor elements without overwhelming the senses.

It’s also important to consider how lighting affects color perception in your bedroom. Natural light can enhance colors, making them appear brighter, while artificial lighting can alter their appearance in unexpected ways. Test swatches on your walls at different times of the day to see how the color transforms from morning to evening.

Ultimately, the key to mastering mood through paint color lies in aligning your choices with the feelings you wish to cultivate in your space. By understanding the psychology of color, you can create a bedroom that not only looks stunning but also nourishes your well-being and invites restful nights.

2. The Importance of Mood in Bedroom Design

When it comes to creating a sanctuary within your home, the mood of your bedroom plays a pivotal role in your overall well-being. The hues that envelop you upon entering the space can influence your emotions, affect your sleep quality, and even shape your daily mindset. Choosing the right paint color is not merely an aesthetic decision; it’s a powerful tool that can transform your bedroom into a serene retreat or an energizing haven.

Warm tones such as soft yellows and gentle peaches tend to evoke feelings of comfort and happiness, making them ideal for creating a cozy atmosphere that feels inviting at all times. These colors can mimic the warmth of sunlight, promoting a sense of cheerfulness that can uplift your spirits as you begin or end your day. On the other hand, cooler shades like tranquil blues and soothing greens are known for their calming effects. These colors can reduce anxiety and stress, fostering a peaceful environment conducive to relaxation and restful sleep.

Moreover, the saturation and brightness of a color can also affect the mood. Bright, bold colors can energize and inspire creativity, making them perfect for mornings, while muted and pastel shades can create a soft, nurturing atmosphere that encourages unwinding. The key is to consider the purpose of your bedroom — is it a space for restful sleep or a creative workspace? By aligning your color choices with your intended mood, you can significantly enhance your bedroom’s functionality.

In essence, understanding the psychological impact of color allows you to craft an environment that resonates with your personal style and emotional needs. As you embark on the journey of selecting the perfect paint color for your bedroom, remember that it’s not just about aesthetics; it’s about creating a mood that nurtures your spirit and enhances your quality of life. Whether you seek tranquility, vibrancy, or a balance of both, the right color palette can be the foundation for a harmonious bedroom retreat.

3. Factors to Consider Before Choosing a Color

How to choose the right paint color for your bedroom?
Credit : whatcanu.com

Choosing the perfect paint color for your bedroom is not just about aesthetics; it’s about creating an atmosphere that resonates with your personal style and emotional well-being. Before you dive into swatches and samples, there are several key factors to consider that can significantly influence your final decision.

**1. Room Size and Lighting:** The dimensions of your bedroom and the quality of natural light it receives can dramatically affect how a color appears. Lighter shades can make a small space feel larger and more open, while deeper hues can create a cozy, intimate vibe. Pay attention to how the light shifts throughout the day—colors can look drastically different in morning light versus the warm glow of the evening. If your room is bathed in bright sunlight, consider colors that will complement this natural brightness, such as soft whites or pastel shades. Conversely, if your space lacks natural light, you might want to lean towards warmer tones to create a welcoming atmosphere.

**2. Personal Taste and Emotional Response:** Your own preferences play a pivotal role in your choice. Think about the colors that resonate with you personally. Do you feel calm and serene surrounded by cool blues and greens, or do you thrive in the energy of vibrant yellows and reds? Consider the emotional impact of colors—while blues and greens evoke tranquility, warm colors like reds and oranges can energize the space. It’s essential to select hues that not only align with your taste but also promote the mood you want to foster in your bedroom.

**3. Existing Decor and Furniture:** Take inventory of your bedroom’s existing decor, furnishings, and textiles. The color you choose should harmonize with these elements to create a cohesive look. If you have a statement piece, such as a colorful rug or a bold headboard, use that as your anchor while selecting a complementary wall color. Additionally, consider the finish of your furniture; for instance, a sleek modern bedroom set may be best paired with a contemporary palette, while vintage pieces could shine against softer, more muted tones.

**4. Trends vs. Timelessness:** While it’s tempting to jump on the latest color trends, think about how long you plan to keep your bedroom looking fresh. Trendy colors can quickly become outdated, so it might be wiser to choose a timeless palette that you won’t tire of after a season. If you want to incorporate trendy shades, consider using them as accents through accessories like throw pillows or artwork, allowing you the freedom to update your space without a complete overhaul.

By thoughtfully considering these factors, you’ll be better equipped to choose a paint color that not only beautifies your bedroom but also nurtures your overall well-being. Remember, the goal is to create a sanctuary—a space that reflects who you are and fosters relaxation and rejuvenation.

4. Assessing Your Personal Style and Preferences

When it comes to choosing the perfect paint color for your bedroom, understanding and embracing your personal style and preferences is essential. Your bedroom should be a sanctuary—a reflection of who you are and how you want to feel when you step inside. Take a moment to consider the elements that resonate with you: Are you drawn to the tranquility of soft pastels, or does the bold vibrancy of jewel tones speak to your adventurous spirit?

Begin by exploring your existing decor and furnishings. What colors dominate your space? If you have a favorite piece of art or a comfortable throw blanket that you adore, these can serve as excellent anchors for your color palette. Consider the textures and patterns in your room as well; a rich, textured fabric can create a striking contrast against a muted wall, adding depth and dimension to your design.

Next, think about the mood you want to create. Do you envision a serene retreat that promotes relaxation and restful sleep, or a vibrant, energizing space that inspires creativity? Colors can evoke powerful emotions, so take the time to experiment with different hues. For instance, soft blues and greens can foster calmness, while warm yellows and oranges can inject a sense of warmth and cheer.

Consider also how your personal style translates into color preferences. Are you a minimalist who prefers a neutral palette, or do you embrace a more eclectic approach with bold, contrasting colors? Use platforms like Pinterest to curate mood boards, or create physical swatches that reflect your style. By visualizing your ideas, you’ll be better equipped to choose a color that not only suits your personal taste but also harmonizes with the overall aesthetic of your bedroom.

Ultimately, the key is to trust your instincts. Your bedroom is a personal haven, and the colors you choose should resonate with you on a deep level. Spend time in your space with paint swatches, observing how each color interacts with the light at different times of the day. The right shade will not only enhance the beauty of your room but also create a nurturing environment where you can retreat, recharge, and find peace.

5. The Impact of Natural Light on Paint Colors

How to choose the right paint color for your bedroom?
Credit : whatcanu.com

When it comes to choosing the perfect paint color for your bedroom, one of the most crucial factors to consider is the impact of natural light. The way a color appears can drastically change depending on the time of day, the direction your windows face, and the quality of natural light that filters through.

Morning light, often soft and warm, can breathe life into light blues or soft yellows, making them feel inviting and serene. On the other hand, harsh afternoon sun can wash out lighter shades, leaving them looking drab and unappealing. If your bedroom faces north, the light tends to be cooler and more subdued, which can make colors appear muted and less vibrant. In spaces with southern exposure, colors may seem more vivid and saturated due to the abundance of sunlight, while eastern-facing rooms may benefit from brighter hues in the morning light.

To truly understand how a paint color will behave in your bedroom, it’s essential to observe how it changes throughout the day. Test swatches on different walls and watch them during different times—early morning, midday, and late afternoon—to see how the interplay of light affects your chosen shade. Also, consider the type of light fixtures you use at night; incandescent bulbs can give a warm glow, while LED lights may render colors cooler.

Ultimately, the goal is to create a harmonious atmosphere that complements both the natural light and your personal style. By being mindful of how light interacts with your paint choices, you can craft a bedroom sanctuary that feels perfectly balanced and inviting at all hours of the day.

6. Popular Color Schemes for Bedroom Serenity

When it comes to creating a serene bedroom sanctuary, choosing the right color scheme is essential. Popular color schemes can significantly influence the mood of the space, promoting relaxation and tranquility. Here are a few timeless palettes that evoke a sense of peace and harmony:

**1. Soft Neutrals:** Shades of beige, taupe, and soft gray create a soothing backdrop that allows for versatility in decor. These colors are not only calming but also serve as a perfect canvas for layering textures, from plush linens to woven baskets. Adding a few accent pieces in darker hues can provide depth without overwhelming the senses.

**2. Cool Blues:** Inspired by the tranquility of the ocean and sky, soft blues and aquas work wonders in a bedroom setting. These shades are known for their calming effects and can help lower blood pressure, making them ideal for a restful retreat. Consider complementing light blue walls with white or sandy-colored accents to enhance the fresh, airy feel.

**3. Gentle Greens:** Nature-inspired greens, like sage or mint, can bring a refreshing touch to your bedroom. Green is associated with renewal and growth, and when applied in soft tones, it invites a sense of balance and harmony. Pairing these colors with natural wood elements or botanical prints can deepen the connection to the outdoors.

**4. Warm Earth Tones:** Rich browns, terracotta, and muted rust create a cozy ambiance, reminiscent of autumn. These colors are perfect for creating a warm, inviting space. When used thoughtfully, they can evoke feelings of comfort and stability. Combining these hues with soft textiles in creams or whites can help keep the atmosphere light and inviting.

**5. Serene Pastels:** Soft pastels like lavender, blush pink, or buttery yellow can infuse a sense of serenity and warmth into your bedroom. These playful yet calming colors offer a gentle touch that encourages relaxation. Consider using pastel shades for accent walls or in decorative accessories to create a dreamy environment without overwhelming the space.

Each of these color schemes provides a unique approach to achieving bedroom serenity. When selecting your palette, think about the emotions you want to evoke and how each color resonates with you personally. The goal is to create a space where you can unwind, recharge, and escape from the hustle and bustle of daily life.

7. Warm vs. Cool Colors: What Works Best?

How to choose the right paint color for your bedroom?
Credit : whatcanu.com

When it comes to selecting the perfect paint color for your bedroom, understanding the distinction between warm and cool colors is crucial, as each can dramatically influence the ambiance and mood of your personal sanctuary.

Warm colors—think soft reds, sunny yellows, and rich oranges—tend to evoke feelings of comfort and coziness. They can make a space feel inviting and energizing, perfect for those who want their bedroom to be a lively retreat. A warm-toned palette can mimic the glow of a sunset, creating a serene yet stimulating environment where you can unwind after a long day. For instance, painting your walls a warm peach or a muted terracotta can infuse your room with a sense of warmth, making it feel both intimate and welcoming.

On the other hand, cool colors like blues, greens, and purples instill a sense of calm and tranquility. These hues are reminiscent of nature—think of the soothing blue of the sky or the refreshing green of a forest. Cool colors can help create a peaceful atmosphere, making them ideal for a bedroom where relaxation is the priority. A serene light blue or a soft lavender can transform your space into a calming oasis, promoting restfulness and reflection, which is essential for a good night’s sleep.

When deciding between warm and cool colors, consider not only your personal preferences but also the overall mood you want to achieve. If your bedroom is a space for relaxation and rejuvenation, leaning towards cooler tones might be the best option. However, if you prefer a more vibrant, energizing atmosphere, warm colors could be your go-to choice. Remember, the lighting in your room will also play a significant role in how these colors appear; warm colors can appear more vibrant in natural light, while cool colors can enhance a cozy feel in dimmer settings.

Ultimately, the choice between warm and cool colors is about creating a bedroom that reflects your personality and meets your lifestyle needs. By understanding the emotional impact of these color families, you can make an informed decision that transforms your bedroom into the perfect retreat.

8. Using Accent Walls to Enhance Mood

Accent walls are a powerful design tool that can significantly enhance the mood of your bedroom while showcasing your personal style. By strategically selecting one wall to feature a bold or contrasting color, you can create a stunning focal point that draws the eye and sets the overall tone of the space. This technique allows for the introduction of vibrant hues without overwhelming the entire room, making it an ideal choice for those who may feel hesitant about fully committing to a bright color palette.

When considering your accent wall, think about the emotions you want to evoke. For instance, deep blues and greens can instill a sense of calm and tranquility, making them perfect for a restful retreat. On the other hand, warm tones like rich terracotta or sunny yellows can infuse your space with energy and positivity, perfect for those mornings when you need a little extra motivation.

Texture can also play a role in enhancing the mood of your accent wall. Consider using materials like reclaimed wood, textured wallpaper, or even a creative mural to add depth and interest. These elements not only add visual appeal but also contribute to the overall ambiance of the room, inviting warmth and a sense of comfort.

Finally, don’t forget to consider the surrounding decor and furnishings when choosing your accent wall color. A thoughtfully selected hue can complement existing pieces, bringing the entire room together in a cohesive and harmonious way. By using accent walls effectively, you can transform your bedroom into a sanctuary that reflects your personality and sets the perfect mood for relaxation and rejuvenation.

9. Testing Paint Samples: How and Why

Choosing the perfect paint color for your bedroom is no small feat, and testing paint samples is a crucial step in this transformative journey. The colors you envision in your mind may not always translate as expected once applied to your walls. This is where testing comes into play—giving you the opportunity to see how various shades interact with your space, lighting, and existing decor.

**How to Test Paint Samples**

Start by selecting a handful of colors that resonate with your vision for the room. Many paint stores offer sample pots, which are a cost-effective way to experiment without committing to a full gallon. Once you’ve narrowed it down, apply swatches of each color directly onto the walls you plan to paint. It’s best to paint a square foot or two of each sample to get a true sense of how the color will look in your space.

When applying the samples, consider the light in your room. Natural sunlight, artificial lighting, and even the time of day can dramatically alter how a color appears. That vibrant blue you loved in the store may seem icy in the morning light but warm and inviting during the golden hour. For the best results, observe the samples at different times of the day and in various lighting conditions.

**Why Testing Paint Samples is Essential**

Testing paint samples is not just about visual appeal; it also engages your emotional connection to color. Colors can evoke feelings and set the tone for your bedroom sanctuary. A calming lavender might make you feel relaxed and serene, while a lively coral could invigorate the space. By testing, you can hone in on not just any color, but the *right* color that will contribute to the atmosphere you wish to create.

Additionally, this step helps to mitigate the risk of buyer’s remorse. There’s nothing worse than investing time and money into painting your bedroom, only to find that the chosen color doesn’t deliver the desired effect. By taking the time to test samples, you empower yourself with knowledge and confidence in your decision.

In summary, paint samples are an invaluable tool in your quest for the perfect bedroom color. They allow you to visualize, experiment, and ultimately choose a shade that not only enhances the beauty of your space but also aligns with your personal style and emotional needs. So grab those sample pots, roll up your sleeves, and let the testing begin!

10. The Role of Texture and Finish in Color Perception

When it comes to selecting the perfect paint color for your bedroom, it’s essential to consider not just the hue itself but also the texture and finish that accompany it. The interplay between color and finish can dramatically influence the overall mood and atmosphere of your space.

A matte finish, for instance, often lends a soft, cozy feel to a room, absorbing light and creating a more intimate ambiance. This is particularly effective when using deeper, richer colors like navy blue or forest green, which can envelop a room in a serene embrace. Conversely, a satin or glossy finish reflects light, enhancing brighter shades such as crisp whites or sunny yellows, making your space feel more open and airy. This reflective quality can add a layer of vibrancy and energy, perfect for those who want to invigorate their mornings.

Texture also plays a crucial role in how we perceive color. A smooth, even surface can make colors appear more uniform and true to their essence, while a textured wall can introduce depth and complexity to the shade. For example, a lightly textured finish can soften a bold color, making it feel more approachable and warm.

Moreover, consider the materials in your bedroom—furniture, linens, and decor. A rich, velvety fabric can complement a soft pastel, while a sleek, modern finish can enhance bolder, contemporary colors. By thoughtfully combining paint finishes and textures, you not only craft a visually stunning environment but also curate a specific emotional response, ensuring that your bedroom is a true reflection of your personal style and mood.

So, as you embark on your journey to transform your bedroom, remember that the role of texture and finish is just as vital as the color choice itself. Together, they create an immersive experience that can either soothe you to sleep or energize you for the day ahead.

11. Complementary Colors: Coordinating with Furnishings

When it comes to transforming your bedroom into a serene sanctuary, understanding the art of complementary colors is crucial. This technique involves selecting colors that enhance and harmonize with the existing furnishings in your space, creating a cohesive and inviting atmosphere. The key is to find a balance between your wall color and the tones of your furniture, bedding, and decor.

Start by taking stock of the main colors in your room. If your furnishings are predominantly neutral—think soft grays, beiges, or whites—you have a versatile canvas to work with. In this case, you might opt for a muted pastel like a soft lavender or a gentle seafoam green, which will add a touch of color without overwhelming your space. These hues can evoke a sense of calm and relaxation, making them ideal for a bedroom.

On the other hand, if your furniture features bold colors, such as deep blues or rich woods, consider choosing a paint color that complements these shades. For example, a warm gold or a creamy ivory can beautifully offset darker tones, creating a warm, inviting feel. This approach not only enhances the visual appeal but also contributes to a balanced and harmonious environment.

Don’t forget about the power of accent walls! If you want to create a focal point in your bedroom while still maintaining a sense of harmony, consider painting one wall in a complementary color that draws the eye without clashing with your furnishings. For instance, if you have a deep mahogany dresser, a soft blush or muted teal wall can serve as a stunning backdrop, allowing the furniture to shine as a statement piece.

Ultimately, the goal is to ensure that your chosen paint color seamlessly blends with your bedroom’s existing elements while also reflecting your personal style. By thoughtfully considering the interplay between your wall color and furnishings, you’ll create a space that feels not only cohesive but also uniquely yours—perfect for restful nights and rejuvenating mornings.

12. Seasonal Considerations for Paint Choices

When it comes to selecting the perfect paint color for your bedroom, it’s essential to factor in the changing seasons. Each season brings with it a unique atmosphere and emotional resonance, which can significantly influence your choice of color. By aligning your paint selection with the seasonal shifts, you can create a space that feels harmonious and inviting year-round.

In the warmer months, consider lighter, airier colors that evoke a sense of freshness and vitality. Soft pastels, gentle creams, and pale blues can enhance the natural light flooding your space, making your bedroom feel more expansive and breezy. These colors can mirror the lush greenery outside and create a serene retreat that feels connected to nature.

As autumn approaches, you might find yourself drawn to warmer, earthier tones. Rich terracotta, deep olive greens, and warm taupes can create a cozy sanctuary that reflects the beauty of falling leaves and the crispness in the air. These colors invite a sense of warmth and comfort, perfect for snuggling in as the temperatures drop.

Winter often calls for deeper, more dramatic hues that instill a sense of calm and tranquility. Deep blues, charcoal grays, or even moody jewel tones can create an intimate atmosphere, ideal for restful nights during the cold winter months. Pair these with soft textiles and warm lighting to enhance the cozy vibe.

As spring blossoms, consider refreshing your space with vibrant and invigorating colors. Bright yellows, soft greens, or lively corals can breathe new life into your bedroom, echoing the rejuvenation of the season. These colors can uplift your mood and inspire a sense of creativity and renewal as nature awakens.

By consciously thinking about how the seasons affect your mood and the ambience in your bedroom, you can choose paint colors that not only complement the changing environment but also enhance your overall well-being. Embrace the cyclical nature of your surroundings and let it guide your palette for a bedroom that feels just right, no matter the time of year.

13. The Influence of Trends vs. Timeless Choices

When it comes to selecting the perfect paint color for your bedroom, it’s essential to navigate the delicate balance between the allure of current trends and the comfort of timeless choices. Trends can be captivating, offering a fresh perspective and an air of modernity that can transform your space. Think of the soothing greens of biophilic design or the serene beachy blues that evoke a sense of calm and relaxation. These colors can feel invigorating and inspire creativity, making them enticing options for a bedroom makeover.

However, trends can also be fleeting. What’s in vogue today might feel outdated tomorrow, leaving you with a color scheme that no longer resonates with your personal aesthetic. This is where timeless choices come into play. Classic hues like soft whites, muted grays, and gentle beiges have a way of fostering a serene atmosphere that transcends the whims of fashion. These shades create a neutral backdrop, allowing your personal decor style to shine through and evolve over time without the need for frequent repainting.

When choosing a color for your sanctuary, it’s vital to consider both the immediate appeal of trendy shades and the enduring quality of timeless options. Ask yourself how a particular color makes you feel and whether it aligns with your vision for relaxation and restfulness. Picture your bedroom a few years down the line—will you still love that bold, trendy shade, or will you be yearning for the comfort of a classic? By thoughtfully weighing these factors, you can create a space that feels both current and enduring, giving your bedroom a lasting sense of harmony and tranquility.

14. Tips for Maintaining Your Chosen Color

Once you’ve selected the perfect paint color for your bedroom, the journey doesn’t end there. Maintaining that vibrant hue and ensuring it continues to evoke the desired mood is crucial for creating a serene sanctuary. Here are some essential tips to help you preserve your chosen color and enhance the overall ambiance of your space.

**1. Regular Cleaning:** Over time, dust and grime can dull your paint’s finish, making it appear lackluster. To keep your walls looking fresh, gently wipe them down with a soft, damp cloth or a sponge. For deeper cleaning, use a mild soap solution, ensuring you test a small area first to avoid any discoloration.

**2. Touch Ups:** Life happens—accidental scratches, dings, or stains can occur. Keep a small can of your paint on hand for quick touch-ups. Before you start, make sure to stir the paint well and use a quality brush or roller to blend the new paint with the old for a seamless finish.

**3. Consider Lighting:** The way your paint color interacts with light can change throughout the day. To maintain your desired mood, be mindful of how natural and artificial light affects your walls. If you notice your color looking different at various times, consider adding sheer curtains or adjusting your light fixtures to create a more consistent atmosphere.

**4. Avoid Excessive Moisture:** Humidity can lead to mold and mildew, which can damage your walls and alter your paint’s appearance. To prevent this, ensure proper ventilation in your bedroom. Use exhaust fans when needed, and consider a dehumidifier if your space tends to be particularly damp.

**5. Seasonal Refresh:** Sometimes, a simple refresh can breathe new life into your chosen color. Consider swapping out bedding, curtains, or decorative accessories to complement your wall color seasonally. This not only keeps your bedroom feeling fresh but can also enhance the overall aesthetic without the need for a complete repaint.

By taking these simple steps, you can ensure that your chosen paint color remains vibrant, inviting, and aligned with the mood you envisioned for your bedroom retreat. Remember, a little maintenance goes a long way in preserving the beauty of your space.

15. Real-Life Examples: Successful Bedroom Color Transformations

When it comes to choosing the perfect paint color for your bedroom, sometimes seeing is believing. Real-life transformations can provide inspiration and insight into how different hues can dramatically alter the atmosphere of a space. Here are a few successful bedroom color transformations that showcase the power of paint.

**1. Serene Sanctuary with Soft Blues:** One couple decided to revamp their stark white bedroom by incorporating a tranquil shade of soft blue. The transformation was astounding; the once sterile room evolved into a serene sanctuary. The cool tones not only made the space feel larger but also promoted a calming effect, perfect for relaxation. Complemented by white bedding and light wooden furniture, the room now radiates peace, making it an ideal retreat after a long day.

**2. Cozy Warmth with Earthy Tones:** A small, dimly lit bedroom was brought to life with the introduction of warm earthy tones, such as deep terracotta and rich taupe. The new color palette created an inviting and cozy atmosphere, transforming the space into a snug haven. This couple added layered textures with throws and cushions in complementary shades, enhancing the warm vibe. The result was a bedroom that felt both intimate and stylish, encouraging them to spend more time enjoying their cozy escape.

**3. Bold Statements with Jewel Tones:** For those who dare to be bold, a vibrant jewel-toned transformation can turn a mundane bedroom into a striking focal point. One homeowner opted for a deep emerald green accent wall, complemented by luxurious gold accents and white trim. The bold color added depth and intrigue, making the bed the centerpiece of the room. By balancing the richness of the green with lighter bedding and decor, the space felt both dramatic and sophisticated, proving that a little risk can lead to stunning results.

**4. Minimalist Elegance with Soft Grays:** Another striking example featured a minimalist approach with soft grays that created an air of sophisticated elegance. The couple chose a pale gray for the walls, paired with crisp white furniture and pops of black for contrast. The transformation was subtle yet impactful, making the small room feel more expansive and airy. By incorporating natural light through sheer curtains, they created a bright and inviting environment that felt modern and fresh.

These real-life examples demonstrate that the right paint color can completely transform a bedroom, impacting not just the aesthetic but also the overall mood of the space. Whether you’re seeking tranquility, warmth, boldness, or minimalist elegance, drawing inspiration from these successful transformations can guide you on your journey to mastering mood through color. So grab your paintbrush and let your creativity flow, knowing that your dream bedroom is just a color choice away!

In conclusion, selecting the perfect paint color for your bedroom is a powerful way to create a sanctuary that reflects your personal style and enhances your mood. By considering the psychological effects of colors, experimenting with different hues, and taking into account the natural light in your space, you can transform your bedroom into a serene retreat that promotes relaxation and restful sleep. Whether you opt for soft pastels, bold jewel tones, or calming neutrals, remember that the right color can significantly influence the ambiance of your room. So, don’t hesitate to explore your creativity and make your bedroom a true reflection of you. Happy painting, and may your newly transformed space bring you comfort and joy for years to come!