How to fix a leaky roof?

A leaky roof can be a homeowner’s worst nightmare, turning a tranquil sanctuary into a source of stress and worry.

Whether it’s the result of heavy rainfall, age-related wear, or unexpected damage, a leak can lead to costly repairs if not addressed promptly. Understanding how to tackle this issue effectively is crucial for maintaining the integrity of your home. In this ultimate guide, we will walk you through the top seven essential steps to effectively fix a leaky roof, providing you with the knowledge and confidence to take on this task. From identifying the source of the leak to implementing necessary repairs and preventative measures, we’ll cover everything you need to know to safeguard your home from water damage. Say goodbye to the drip-drip-drip of anxiety and hello to peace of mind as you restore your roof to its former glory!

1. Introduction: Understanding Roof Leaks

How to fix a leaky roof?
Credit : whatcanu.com

A leaky roof can feel like a silent intruder, gradually infiltrating your home and causing havoc before you even realize it. Understanding roof leaks is the first step in effectively addressing and preventing them. Roof leaks can stem from various sources, including age, weather conditions, poor installation, and even debris buildup. They aren’t just about a few drips during a storm; the consequences can escalate quickly, leading to mold growth, structural damage, and costly repairs.

As the first line of defense against the elements, your roof plays a crucial role in maintaining the integrity of your home. Understanding how different components of your roof work together is vital. From shingles and flashing to gutters and underlayment, each part has a specific function that contributes to waterproofing your living space. Recognizing where vulnerabilities lie can help you spot potential issues before they become significant problems.

Moreover, it’s important to note that not all leaks are obvious. Sometimes, water stains on ceilings or walls may be the only indicators, often appearing long after the leak has started. This can lead to frustration and confusion, especially for homeowners who may not know where to begin looking. By taking the time to educate yourself about the common causes and signs of roof leaks, you empower yourself with the knowledge needed to act swiftly and effectively when problems arise.

In this guide, we will delve into practical steps to identify, address, and ultimately fix a leaky roof, ensuring your home remains a safe and dry sanctuary. Whether you’re a seasoned DIY enthusiast or a novice homeowner, understanding the intricacies of roof leaks will prepare you for effective repair and maintenance, setting the stage for a resilient and leak-free roof.

2. Step 1: Identify the Source of the Leak

Identifying the source of the leak is the crucial first step in effectively fixing a leaky roof. Before you grab your tools or call in a professional, take some time to investigate the problem area thoroughly. Start by checking your attic or crawl space, especially after a rainstorm, as this is often where leaks manifest first. Look for any signs of water stains, mold, or dark patches on the ceiling or rafters, which may indicate moisture intrusion.

Next, inspect the exterior of your roof. Look for missing or damaged shingles, cracked tiles, or any debris that may be blocking drainage paths. Pay close attention to areas around chimneys, vents, and skylights, as these are common culprits for leaks due to improper sealing or flashing issues. If your roof has valleys, be sure to check those as well, as they can easily trap water and lead to leaks if not maintained properly.

once you’ve identified potential problem areas, try to trace the water’s path. This might involve getting on a ladder to closely examine the roof’s surface. Use a hose to simulate rain; by systematically watering sections of the roof, you can pinpoint the exact location where water enters. Remember to work carefully and safely—if you’re not comfortable on a ladder, consider enlisting the help of a professional to ensure both your safety and an accurate diagnosis.

By thoroughly identifying the source of the leak, you lay the groundwork for effective repairs. This step is essential not only for solving the immediate issue but also for preventing future leaks and protecting your home from further damage. Once you have a clear understanding of the source, you can move on to the subsequent steps with confidence, armed with the knowledge needed to restore your roof to its optimal condition.

3. Step 2: Inspect the Roof Condition

How to fix a leaky roof?
Credit : whatcanu.com

Once you’ve identified the source of the leak, the next crucial step is to thoroughly inspect the overall condition of your roof. This means examining not just the area around the leak, but the entire roof surface for signs of wear and potential weaknesses. Start by safely accessing your roof—if possible, use a sturdy ladder and, if necessary, consider safety harnesses to protect yourself during the inspection.

As you walk along the roof, look for broken or missing shingles, as these are common culprits in leaks. Pay attention to any areas where shingles are curling, buckling, or have lost their granules, as these can indicate aging or damage that could lead to further leaks down the line. Don’t forget to inspect the flashing—the metal strips that help seal joints and prevent water infiltration. Check for rust, gaps, or cracks in the flashing, particularly around chimneys, vents, and skylights, as these are common areas where leaks can occur.

While you’re up there, take note of any other issues, such as sagging areas that might suggest structural damage or pooling water that indicates poor drainage. If your roof has a flat section, the presence of standing water can be particularly troublesome and may require immediate attention.

Once you’ve completed your inspection, make a detailed list of the issues you’ve found. This will not only help you prioritize repairs but also give you a clearer idea of whether you can handle the fixes yourself or if it’s time to call in a professional. Remember, addressing roof problems promptly can save you from more extensive damage and costly repairs in the future, so take this inspection seriously!

4. Step 3: Gather Necessary Tools and Materials

Before you dive into the hands-on work of fixing your leaky roof, it’s essential to gather all the necessary tools and materials. This preparation phase will ensure you have everything at your fingertips, minimizing interruptions and maximizing efficiency.

Start by assessing the extent of the damage to determine what tools you will need. Common items for roof repairs include a sturdy ladder, roofing nails, a hammer, a utility knife, and a pry bar. If your roof is steep or you will be working at significant heights, consider investing in a harness for safety. Don’t forget gloves to protect your hands and safety goggles to shield your eyes from debris.

Next, identify the materials required for the repair. Depending on the type of roof you have—shingle, metal, or flat—you may need specific materials. For shingle roofs, ensure you have matching replacement shingles, roofing cement, and underlayment. For metal roofs, you’ll need metal sheets, sealant, and potentially new screws. If your roof has a flat section, waterproofing membrane or patches may be necessary.

Prepare your workspace by clearing any debris, such as leaves or branches, that could obstruct your repair efforts. It’s also wise to have a tarp on hand to protect the area below your roof from any falling materials.

By gathering all the necessary tools and materials beforehand, you set the stage for a smoother and more efficient repair process. With everything ready, you can tackle the leak with confidence, ensuring your roof is restored to its former glory and safeguarding your home from future water damage.

5. Step 4: Safety Measures Before Climbing onto the Roof

How to fix a leaky roof?
Credit : whatcanu.com

Before you take that first step onto your roof, it’s essential to prioritize safety. Climbing onto a roof, even for seasoned DIYers, poses significant risks, and taking the appropriate precautions can mean the difference between a simple repair and a trip to the hospital. Here are the key safety measures you should adopt before embarking on your roofing project.

First and foremost, equip yourself with the right gear. A sturdy pair of non-slip shoes with good grip is crucial, as they will provide stability on potentially slippery surfaces. Additionally, consider wearing a hard hat to protect against falling debris and leg protection to guard against sharp tools or unexpected slips.

Next, don’t underestimate the importance of using a harness. If your roof has a steep slope, a safety harness anchored to a secure point is a must. This will provide you with an extra layer of security, allowing you to move more freely without the fear of losing your balance.

Before you ascend, perform a thorough inspection of your roof from the ground. Look for any signs of damage or instability that could pose hazards, such as broken shingles, sagging sections, or loose flashing. This preemptive step can help you avoid precarious situations once you’re up there.

Furthermore, check the weather conditions. Avoid working on your roof during rainy, windy, or icy days, as these elements can make surfaces treacherous and increase the risk of accidents. Ideally, choose a clear day to ensure maximum visibility and a safer working environment.

Lastly, don’t hesitate to ask for help. Whether it’s a friend, family member, or a professional contractor, having someone on the ground to support you can be invaluable. They can assist with handing you tools or even provide a quick rescue if the situation calls for it.

By following these safety measures, you’ll set yourself up for a successful and secure roofing repair. Remember, a cautious approach not only protects you but also ensures that your focus remains on fixing that leaky roof effectively.

6. Step 5: Temporary Fixes for Immediate Relief

When a leaky roof strikes, it can feel like a race against time to mitigate the damage before it worsens. Step 5 of our guide emphasizes the importance of implementing temporary fixes for immediate relief while you plan a more permanent solution.

First and foremost, it’s essential to act quickly. If you notice water dripping from the ceiling or an obvious leak, your first line of defense is to contain the water. Place a bucket or a large container directly under the leak to catch any drips, preventing water from pooling on the floor and potentially damaging your interior spaces. This simple step can save you from costly repairs to your flooring and furnishings.

Next, assess the leak’s source from the interior. If it’s safe to do so, climb into your attic with a flashlight to inspect the area. Look for signs of water damage, such as dark spots on the insulation or beams, and try to pinpoint the leak’s origin. While you may not be able to fix the roof just yet, you can place a tarp or a waterproof sheet over the area to shield it from the elements, especially if rain is in the forecast. Secure the tarp well, using roofing nails or weights to ensure it stays in place until you can tackle the permanent repair.

In addition to physical barriers, consider using roofing tape or sealant as a temporary measure. If the leak is minor, applying roofing tape over small cracks can provide an immediate stopgap solution. Just be sure to choose a product specifically designed for roofing materials, as this will ensure better adhesion and longevity until you can execute proper repairs.

Lastly, keep your customers informed if the leaking roof affects your business operations. Transparency fosters trust, and a simple communication about the situation and your proactive measures can go a long way in maintaining customer loyalty.

By implementing these temporary fixes, you not only protect your home and belongings but also buy yourself time to plan for a thorough and effective long-term repair. Remember, these solutions are just that—temporary. Prioritize scheduling a professional inspection to assess the full extent of the damage and execute the necessary repairs as soon as possible. Your home deserves the best care!

7. Step 6: Permanent Repair Techniques

How to fix a leaky roof?
Credit : whatcanu.com

Once you’ve identified the source of the leak and taken the necessary temporary measures to mitigate damage, it’s time to focus on permanent repair techniques that will restore your roof’s integrity. This step is crucial not only for sealing the leak but also for ensuring the longevity of your roofing system.

**1. Replace Damaged Shingles or Tiles:** If you’ve discovered missing, cracked, or broken shingles or tiles, replacing them is essential. Start by carefully removing the damaged pieces. For asphalt shingles, use a utility knife to cut around the affected area, and lift the shingles away. Install new shingles by sliding them under the existing ones and securing them with roofing nails. Ensure that the new shingles align with the others for a cohesive look.

**2. Repair Flashing:** Flashing, the metal strips used to direct water away from critical areas, can often be the culprit behind leaks. If you notice rust or gaps in your flashing, it may need to be replaced or resealed. Remove the old flashing carefully and install new flashing using roofing cement or a similar adhesive to ensure a watertight seal.

**3. Seal Roof Penetrations:** Areas around vents, chimneys, and skylights are common leak points. Check for cracks in the caulking or gaps around these penetrations. Clean the area and apply a high-quality roofing sealant to create a waterproof barrier. For larger gaps, consider using a rubber boot or other specialized flashing.

**4. Consider Roof Coatings:** For flat roofs or those in need of additional protection, applying a roof coating can add an extra layer of defense against leaks. These coatings are designed to reflect UV rays and provide a waterproof barrier, extending the life of your roof. Ensure the surface is clean and dry before application, and follow the manufacturer’s instructions for the best results.

**5. Inspect and Clean Gutters and Downspouts:** Clogged gutters can lead to water pooling on your roof, contributing to leaks. Regularly inspect and clean your gutters to ensure proper drainage. If you find that your gutters are sagging or damaged, repair or replace them to maintain an effective water management system.

By employing these permanent repair techniques, you can effectively address leaks and prevent future issues. Regular maintenance and inspections are key to keeping your roof in optimal condition, ensuring your home remains safe and dry for years to come. Remember, if you’re ever unsure about the repairs or the extent of the damage, consult a professional roofing contractor to assess your situation and provide expert guidance.

8. Step 7: Regular Maintenance to Prevent Future Leaks

### Step 7: Regular Maintenance to Prevent Future Leaks

Once you’ve successfully addressed a leaky roof, the journey doesn’t end there. In fact, the most crucial phase of roof care begins with regular maintenance to prevent future leaks and extend the life of your roofing system. Think of your roof as a protective shield—it requires consistent upkeep to remain effective against nature’s elements.

Start by scheduling seasonal inspections, ideally in the spring and fall, to catch any potential issues before they escalate. During these inspections, check for cracked or missing shingles, rust spots on metal roofs, and any signs of wear on flashing or seals around vents and chimneys. Even minor damage can lead to significant problems if left unattended.

Cleaning your gutters and downspouts is another essential task. Clogged gutters can lead to water pooling on your roof, increasing the risk of leaks. Ensure that they are clear of debris and functioning properly, allowing rainwater to flow freely away from your home.

In addition to these visual checks, consider investing in a roof maintenance plan offered by professional roofing contractors. These plans often include routine inspections, cleaning, and necessary repairs, providing peace of mind that your roof is in expert hands.

Lastly, be proactive in addressing any changes to your roof’s condition. If you notice any unusual spots or water stains inside your home, don’t delay in investigating further. Early detection is key to preventing minor issues from transforming into costly repairs.

By committing to regular maintenance, you not only protect your investment but also ensure that your home remains safe and dry for years to come. A well-maintained roof is a resilient roof, ready to weather any storm that comes its way.

9. When to Call a Professional Roofer

While some roofing issues can be tackled as DIY projects, there are instances when it’s best to call in a professional roofer. Knowing when to seek expert help is crucial to ensuring the integrity of your roof and your home. If you find yourself facing significant water damage, noticing sagging areas, or witnessing extensive leaks that are beyond a simple patch job, it’s time to reach out to a qualified professional.

Furthermore, if your roof is older—typically over 20 years—it’s wise to consult an expert even for minor issues, as older roofs may require more than just repairs; they might need a complete replacement. Professionals bring invaluable knowledge and experience, allowing them to accurately assess the extent of the damage and recommend the most effective solutions.

Additionally, if you’re uncomfortable working at heights or lack the necessary tools, don’t hesitate to call in a pro. Safety should always be your top priority. Professional roofers have the equipment and training to handle repairs safely and efficiently, minimizing the risk of accidents or further damage to your roof. Reputable roofing companies often provide warranties on their work, offering peace of mind that your investment is protected.

Ultimately, knowing when to call a professional can save you time, money, and potential headaches down the road. Trusting your roof to an expert ensures that it remains a sturdy shield over your home for years to come.

10. Common Mistakes to Avoid When Fixing a Roof Leak

When tackling the issue of a leaky roof, it’s essential to be aware of common pitfalls that can hinder your efforts and lead to further complications. Here are some frequent mistakes that DIYers and even seasoned professionals should avoid to ensure a successful repair:

**1. Underestimating the Source of the Leak:** One of the biggest mistakes is assuming the leak originates directly above the visible water stains on your ceiling. Roof leaks can travel along beams and trusses, making it crucial to trace the leak back to its source accurately. Always conduct a thorough inspection to pinpoint the actual location of the damage.

**2. Skipping Safety Precautions:** Climbing onto a roof can be dangerous, and neglecting safety measures is a recipe for disaster. Always wear appropriate gear, such as non-slip shoes, a safety harness, and use a sturdy ladder. If the roof is steep or slick, consider hiring a professional instead.

**3. Using Inadequate Materials:** Opting for cheap or inappropriate materials can lead to more leaks down the line. Invest in high-quality roofing materials that are suited for your specific roof type and climate. It’s worth spending a little more upfront to avoid costly repairs in the future.

**4. Ignoring Weather Conditions:** Attempting repairs during rain, snow, or high winds can be not only ineffective but also dangerous. Always check the weather forecast and choose a dry, calm day to make your repairs. This will ensure that materials adhere properly and that you can work safely.

**5. Overlooking Ventilation Issues:** Poor attic ventilation can exacerbate roof leaks and lead to mold and mildew growth. When fixing a roof, take the opportunity to assess and improve ventilation to prevent future issues. This will help regulate temperature and moisture levels, extending the life of your roof.

**6. Failing to Clean the Area:** Before starting repairs, it’s crucial to clear away debris, moss, or old materials from the repair site. Not only does this ensure a clean surface for adhesion, but it also allows you to properly assess the extent of the damage.

**7. Neglecting Future Maintenance:** After successfully fixing a roof leak, many homeowners forget to schedule regular maintenance checks. To avoid future leaks, make it a habit to inspect your roof at least twice a year, trimming overhanging branches, clearing gutters, and taking note of wear and tear.

By steering clear of these common mistakes, you can enhance the effectiveness of your roof repair efforts and ensure your home remains protected against the elements for years to come. Remember, a well-repaired roof not only safeguards your home but also adds to its overall value and aesthetic appeal.

11. Cost Considerations for DIY Repairs vs. Professional Help

When it comes to fixing a leaky roof, one of the most significant decisions you’ll face is whether to tackle the repairs yourself or to hire a professional. Both options come with their own set of cost considerations that can greatly impact your budget and the overall outcome of the repair.

**DIY Repairs: Weighing the Savings and Risks**

Taking the DIY route may seem like a financially savvy choice at first glance. The primary appeal is the potential savings on labor costs, allowing you to allocate funds toward materials instead. Simple repairs, such as patching small leaks or replacing a few shingles, can often be completed with just a handful of tools and a little know-how. Many resources, from online tutorials to home improvement books, can guide you through the process.

However, it’s crucial to be realistic about your skill level and the complexity of the job. If you’re not familiar with roofing materials or techniques, mistakes can lead to further damage, which may end up costing you more in the long run. Additionally, consider the cost of renting or purchasing specialized tools and the time you’ll spend completing the project. Remember, your time is valuable, and if the repair ends up taking longer than expected, the savings may not be worth the effort.

**Professional Help: Investing in Expertise**

On the other hand, hiring a professional roofing contractor provides the advantage of expertise and experience. Professionals can quickly assess the source of the leak, offer solutions, and complete the repair efficiently, often in a fraction of the time it would take an inexperienced homeowner. They also bring access to quality materials, which can enhance the longevity of the repair.

While the upfront cost may seem higher, this investment can be justified by the peace of mind it brings. Many reputable contractors offer warranties on their work, ensuring that if something goes wrong, you won’t be left to foot the bill. Furthermore, in many cases, professionals can spot other potential issues that an untrained eye might miss, saving you from future headaches and expenses.

**Finding the Right Balance**

Ultimately, the decision between DIY repairs and hiring a professional comes down to assessing your skills, the severity of the leak, and your budget. If you’re confident in your abilities and dealing with a minor issue, DIY could be the way to go. However, for more complicated repairs or if you’re unsure, it’s often wiser to invest in professional help. Weighing these cost considerations carefully will help you make the best choice for your leaky roof. Remember, a roof is a critical part of your home, and ensuring it’s fixed correctly is paramount to protecting your investment.

12. Conclusion: Ensuring Long-Term Roof Integrity

In conclusion, ensuring the long-term integrity of your roof goes beyond just addressing immediate leaks. It requires a proactive approach to maintenance and care that can save you time, money, and headaches down the line. By investing in regular inspections, timely repairs, and quality materials, you can significantly extend the lifespan of your roof and maintain its performance against the elements.

Remember, a well-maintained roof not only protects your home but also contributes to its overall value. Engage with professionals for thorough assessments, especially after severe weather or significant changes in your roof’s condition. Building a relationship with a trusted roofing contractor can provide you with peace of mind, knowing that you have an expert on hand to guide you through any necessary repairs or upgrades.

Moreover, keep an eye on the small details—such as gutters, flashing, and shingles—as these components play a crucial role in your roof’s effectiveness. Simple steps like cleaning debris from gutters and checking for loose or damaged shingles can prevent larger issues before they arise.

Ultimately, a little vigilance and care can lead to a resilient roof that stands the test of time. By following the steps outlined in this guide, you can ensure that your roof remains a steadfast shield, safeguarding your home and everything within it for years to come. So take those proactive steps today, and invest in the longevity and integrity of your roofing system—it’s a decision that will pay off in comfort, safety, and savings.

13. Additional Resources for Homeowners

When it comes to managing a leaky roof, knowledge is your best ally. Fortunately, there are a plethora of additional resources available for homeowners that can empower you to tackle roof repairs with confidence. Whether you’re a seasoned DIY enthusiast or a first-time homeowner, these resources can provide invaluable insights and guidance.

First and foremost, consider diving into online platforms that specialize in home improvement. Websites such as HomeAdvisor and Angie’s List not only connect you with local contractors but also offer a wealth of articles, videos, and tutorials on roof repair techniques. These resources can help you understand the nuances of roof maintenance and provide step-by-step instructions for various repair methods.

YouTube is another treasure trove of visual content. Search for channels dedicated to home improvement, where skilled professionals demonstrate everything from patching up small leaks to replacing entire sections of roofing material. Watching these tutorials can give you a clearer understanding of the tools and materials you’ll need, as well as tips to avoid common pitfalls.

Don’t overlook the value of local hardware stores or home improvement centers. Many of these establishments offer workshops or classes that cover DIY repairs, including roofing. Attending one of these sessions can not only provide hands-on experience but also give you the chance to ask questions from knowledgeable staff.

Additionally, local government websites and community organizations may provide helpful resources on home maintenance and safety standards. They often offer brochures or guides that cover everything from seasonal roof inspections to understanding local building codes.

Finally, consider joining homeowner forums or social media groups where you can engage with others who have faced similar roofing challenges. Sharing experiences and advice can lead to practical solutions and may even help you discover local contractors who come highly recommended by your peers.

By tapping into these additional resources, you can arm yourself with the knowledge needed to effectively address a leaky roof and ensure your home remains a safe and comfortable haven for years to come.

14. Frequently Asked Questions about Roof Leaks

### 14. Frequently Asked Questions about Roof Leaks

When it comes to maintaining the integrity of your home, understanding roof leaks is crucial. Here, we address some of the most frequently asked questions about roof leaks to help homeowners navigate this common issue with confidence and clarity.

**1. What are the most common causes of roof leaks?**
Roof leaks can stem from a variety of sources, including damaged shingles, improperly sealed flashing, clogged gutters, or even ice dams during winter months. Regular inspections can help identify and mitigate these risks before they lead to significant damage.

**2. How can I tell if my roof is leaking?**
Signs of a roof leak often manifest as water stains on ceilings or walls, mold growth, or a musty odor. If you notice any of these symptoms, it’s vital to investigate further, as even small leaks can lead to extensive water damage over time.

**3. Should I tackle a roof leak myself, or hire a professional?**
While minor leaks may be manageable for the DIY enthusiast, it’s generally advisable to consult a professional roofer, especially if you are uncomfortable working at heights or if the leak is extensive. Professionals have the expertise and tools necessary to assess the situation accurately and perform safe repairs.

**4. How can I prevent roof leaks?**
Preventative measures include regular roof inspections, keeping gutters clear of debris, maintaining proper ventilation, and addressing minor repairs promptly. Investing in quality roofing materials and proper installation will also enhance your roof’s durability against leaks.

**5. What should I do if I discover a leak?**
If you find a leak, the first step is to contain the water damage. Use buckets to catch dripping water and move valuables out of the affected area. Then, contact a roofing professional to assess the damage and schedule necessary repairs.

**6. How much will it cost to repair a roof leak?**
Repair costs can vary widely depending on the extent of the damage and the roofing materials involved. On average, homeowners can expect to pay anywhere from $200 to $1,500 for roof leak repairs. Getting multiple estimates from contractors can help you find the best price for your situation.

**7. How often should I inspect my roof for leaks?**
It’s recommended to conduct roof inspections at least twice a year—preferably in the spring and fall. Additionally, post-storm inspections are important to check for damage that may have resulted from heavy rain, snow, or high winds.

By addressing these frequently asked questions, we hope to empower you with the knowledge needed to handle roof leaks effectively. Remember, proactive maintenance and prompt action can save you time, money, and stress in the long run.

In conclusion, addressing a leaky roof promptly and effectively is essential for maintaining the integrity of your home and ensuring your peace of mind. By following the top seven steps outlined in our ultimate guide, you can tackle this common issue with confidence and prevent further damage. Remember to assess the problem thoroughly, gather the right materials, and take your time with each step to ensure a lasting repair. Whether you choose to do it yourself or enlist the help of professionals, being proactive about roof maintenance will save you time and money in the long run. We hope this guide empowers you to handle your leaky roof with ease, allowing you to enjoy a safe and dry home for years to come. Happy repairing!

What are the different types of plumbing fixtures?

When it comes to designing or renovating your home, one of the most crucial yet often overlooked elements is the plumbing fixtures.

These essential components not only serve functional purposes but also play a significant role in the overall aesthetic of your space. From sleek faucets and stylish sinks to elegant bathtubs and efficient toilets, the right plumbing fixtures can transform your bathroom and kitchen into stylish sanctuaries. However, with the myriad of options available in the market, choosing the perfect fixtures can be a daunting task. In this comprehensive guide, we’ll explore the various types of plumbing fixtures, their unique uses, and essential selection tips to help you make informed decisions that align with your personal style and practical needs. Whether you’re a DIY enthusiast, a seasoned renovator, or simply looking to refresh your living space, this ultimate guide will equip you with the knowledge you need to elevate your home’s functionality and design.

1. Introduction to Plumbing Fixtures

What are the different types of plumbing fixtures?
Credit : whatcanu.com

Plumbing fixtures are the unsung heroes of our everyday lives, seamlessly blending functionality with style in our homes and businesses. From the moment we turn on a tap to wash our hands, fill a bathtub, or flush a toilet, we rely on these essential components to deliver water efficiently and effectively. But plumbing fixtures are not merely utilitarian; they also play a significant role in the aesthetic appeal of our spaces.

In this comprehensive guide, we will explore the various types of plumbing fixtures, their specific uses, and key considerations for selecting the right fixtures for your needs. Whether you are embarking on a renovation project, building a new home, or simply looking to upgrade your existing plumbing, understanding the different options available is crucial.

We’ll delve into the common types of fixtures, such as faucets, sinks, toilets, bathtubs, and showerheads, highlighting their unique features and functions. Additionally, we’ll discuss the importance of water efficiency and how modern fixtures can contribute to sustainability efforts, ultimately saving you money on utility bills while being kinder to the environment.

Moreover, we’ll provide tips on how to choose fixtures that complement your interior design, fit your lifestyle, and meet your budget. By the end of this guide, you will be well-equipped to make informed decisions about plumbing fixtures that enhance both the functionality and beauty of your spaces. So, let’s dive in and discover the world of plumbing fixtures together!

2. Understanding Different Types of Plumbing Fixtures

When embarking on a plumbing project, understanding the various types of plumbing fixtures is crucial to achieving both functionality and aesthetic appeal in your space. Plumbing fixtures are not just essential for the practical aspects of water distribution and waste management; they also contribute significantly to the overall design of your home or business.

**1. Faucets:** The unsung heroes of any kitchen or bathroom, faucets come in a variety of styles, finishes, and functionalities. From single-handle pull-down sprayers in modern kitchens to classic widespread faucets in traditional bathrooms, the right faucet can enhance your space while ensuring efficient water flow. Look for features such as high-arc designs for greater clearance or touchless sensors for added convenience.

**2. Sinks:** Sinks serve as the heart of both kitchens and bathrooms. Kitchen sinks are typically larger and come in styles such as farmhouse, undermount, or drop-in, accommodating everything from food prep to dishwashing. Bathroom sinks range from pedestal and wall-mounted designs to vessel sinks that sit atop countertops. Consider the sink’s material—stainless steel, porcelain, or composite—and its size in relation to the overall space and functionality you desire.

**3. Toilets:** Today’s toilets offer a blend of comfort, efficiency, and style. From conventional two-piece models to sleek one-piece designs, the choices are vast. Look for features such as dual-flush options for water conservation, comfort height for ease of use, and noise-reduction technologies for a quieter experience. Selecting the right toilet can significantly impact both your water usage and the overall aesthetic of your bathroom.

**4. Showers and Bathtubs:** Showers can range from basic models to luxurious walk-in enclosures with multiple showerheads and body sprays. Bathtubs, whether freestanding, alcove, or drop-in, can be a statement piece in a bathroom. Consider your lifestyle and preferences when selecting these fixtures; for instance, if relaxation is key, a deep soaking tub may be ideal, while a streamlined shower may suit smaller spaces or busy households.

**5. Accessories and Additional Fixtures:** Don’t overlook the importance of accessories like showerheads, towel racks, and bathroom storage. These smaller fixtures can dramatically enhance functionality and style. Consider selecting finishes and designs that complement your primary fixtures to create a cohesive look in your space.

By familiarizing yourself with the different types of plumbing fixtures and their unique features, you can make informed decisions that not only meet your practical needs but also elevate the overall design of your home. As you dive into the selection process, keep in mind aspects such as water efficiency, ease of maintenance, and compatibility with your existing plumbing to ensure a seamless integration of style and function.

– 2.1 Faucets

What are the different types of plumbing fixtures?
Credit : whatcanu.com

### 2.1 Faucets

Faucets are the unsung heroes of any plumbing system, serving as the primary interface between users and the water supply. While they may seem like a simple fixture, the variety of styles, designs, and functionalities available today can make selecting the right faucet a daunting task. Understanding the different types of faucets, their uses, and the selection tips can significantly enhance your plumbing project.

At a basic level, faucets can be categorized based on their design and functionality. **Compression faucets**, the traditional type, operate with two separate handles for hot and cold water, allowing for precise temperature control. However, they require a bit of effort to turn on and off, making them less popular in modern applications.

In contrast, **cartridge faucets** feature a single handle or two handles with a cartridge that controls the flow and temperature of water. This type is known for its smooth operation and longevity, making it a favorite for kitchens and bathrooms alike. **Ball faucets**, commonly found in modern kitchen sinks, utilize a single handle that moves over a ball joint to control water flow and temperature, offering a sleek and user-friendly experience.

For those looking for convenience, **pull-down and pull-out faucets** provide added flexibility in the kitchen. These faucets come with a retractable hose that makes it easy to wash dishes or fill large pots directly from the sink. Additionally, **touchless faucets**, which use motion sensors to activate water flow, are increasingly popular in both residential and commercial settings for their hygiene and ease of use.

When selecting a faucet, consider the style and finish that will best complement your space. From polished chrome to matte black, the finish can dramatically impact the overall aesthetic of your kitchen or bathroom. Don’t forget about the installation requirements; some faucets are designed for easy DIY setups, while others may necessitate professional assistance.

Finally, it’s essential to think about your water pressure and the faucet’s flow rate. A faucet that doesn’t match your plumbing system can lead to frustrating issues like low flow or fluctuating temperatures. Researching and selecting a faucet that aligns with your specific needs will not only enhance functionality but also elevate the overall design of your space.

In conclusion, faucets are more than just fixtures; they are integral components that combine practicality with style. By understanding the various types and considering your unique requirements, you can confidently choose the perfect faucet that will serve you well for years to come.

– 2.2 Sinks

### 2.2 Sinks

Sinks are essential fixtures in any home, serving as the heart of many daily activities, from cooking and cleaning to personal hygiene. Available in a wide variety of styles, materials, and configurations, sinks can significantly impact both functionality and aesthetics in your space.

**Types of Sinks**

1. **Kitchen Sinks**: These are typically larger and more robust, designed to handle everything from washing dishes to food preparation. Common types include single-basin, double-basin, and farmhouse sinks, each catering to different needs and preferences. Stainless steel is a popular choice for its durability and ease of cleaning, while porcelain and composite materials can add a touch of elegance.

2. **Bathroom Sinks**: Bathroom sinks come in various shapes and sizes, including pedestal sinks, vessel sinks, and undermount sinks. Pedestal sinks offer a classic look and save space, while vessel sinks add a stylish, modern flair. Materials range from ceramic and glass to stone and metal, allowing homeowners to choose based on their design aesthetic.

3. **Utility Sinks**: Often found in laundry rooms or garages, utility sinks are designed for heavy-duty tasks. These sinks are typically deeper and more rugged, perfect for washing out paintbrushes, rinsing muddy shoes, or cleaning pet supplies. They often come with a high arch faucet for added convenience.

4. **Bar and Prep Sinks**: Smaller in size, these sinks are ideal for entertaining or food prep areas. They can be found in kitchens and bars, providing a convenient spot for washing hands, rinsing fruits and vegetables, or prepping cocktails.

**Materials and Finishes**

When selecting a sink, the material plays a crucial role in both functionality and style. Here are a few popular options:

– **Stainless Steel**: Known for its durability and resistance to stains, stainless steel is a staple in many kitchens. It offers a sleek, modern look but can show water spots and scratches over time.

– **Ceramic and Porcelain**: These materials are often used for bathroom sinks due to their classic aesthetic and ease of cleaning. They are available in various colors but can chip or crack if not handled carefully.

– **Granite and Composite**: These materials provide a luxurious appearance and are resistant to scratches and stains. They come in various colors and patterns, allowing for more personalization in your home.

**Selection Tips**

When selecting a sink, consider the following factors to find the perfect fit for your space:

– **Size and Configuration**: Measure your space to ensure the sink will fit properly, and think about your daily tasks to determine if you need a single or double basin.

– **Style**: Choose a sink that complements your overall design aesthetic, whether it’s modern, traditional, or somewhere in between.

– **Functionality**: Think about how you use your sink daily and select features that enhance efficiency, such as additional accessories like cutting boards or drying racks.

– **Installation Type**: Decide between drop-in, undermount, or vessel sinks based on your countertop material and desired look.

By understanding the various types of sinks available and considering your specific needs and preferences, you can make an informed decision that enhances both the function and style of your home. Remember, a well-chosen sink not only serves practical purposes but also adds to the overall ambiance of your space, making it a vital fixture in your plumbing arsenal.

– 2.3 Toilets

What are the different types of plumbing fixtures?
Credit : whatcanu.com

### 2.3 Toilets

Toilets are among the most essential plumbing fixtures in any home, serving a vital function in daily life while also contributing to the overall aesthetics of a bathroom. When considering toilets, it’s important to understand the various types available, their unique features, and how to select the right one for your needs.

**Types of Toilets**

1. **Two-Piece Toilets:** These are the most common type, consisting of a separate tank and bowl. They are generally easier to install and maintain, and they come in a wide range of styles and price points. Their modular design also allows for easier transport and replacement of parts.

2. **One-Piece Toilets:** As the name suggests, these toilets feature a seamless design where the tank and bowl are integrated into one unit. This design not only creates a sleek, modern look but also minimizes the likelihood of leaks and is easier to clean due to the lack of crevices.

3. **Wall-Mounted Toilets:** For a contemporary touch, wall-mounted toilets offer a space-saving solution, as they free up floor space and provide a minimalist appearance. The tank is hidden behind the wall, which makes cleaning the bathroom floor a breeze. However, installation can be more complex and may require professional assistance.

4. **High-Efficiency Toilets (HETs):** These eco-friendly options use significantly less water per flush compared to standard toilets, making them an excellent choice for those looking to conserve water and reduce utility bills. Many models are designed to flush effectively despite using less water, ensuring both performance and sustainability.

**Features to Consider**

When selecting a toilet, consider features such as the height (standard or comfort height), which can impact accessibility and comfort, especially for taller individuals or those with mobility issues. Additionally, look for toilets with efficient flushing mechanisms, such as dual-flush systems, which allow users to choose between a lower volume flush for liquid waste and a higher volume flush for solid waste.

**Selecting the Right Toilet**

Choosing the right toilet goes beyond just aesthetics; it’s crucial to consider your household’s specific needs and preferences. Measure your bathroom space to ensure that the toilet fits comfortably alongside other fixtures. Pay attention to the rough-in measurement—the distance from the wall to the center of the toilet drain—since this can vary among homes.

Finally, don’t overlook the importance of style and color. Toilets are available in various designs and finishes, from classic white to bold colors and sleek modern shapes. Choosing a toilet that complements your bathroom decor can elevate the overall look of your space.

In conclusion, toilets are a fundamental aspect of any plumbing system. By understanding the different types available and evaluating your needs and preferences, you can make a well-informed decision that ensures both functionality and style in your bathroom.

– 2.4 Showers and Bathtubs

When it comes to creating a relaxing and functional bathroom, the choice between showers and bathtubs is pivotal. Both fixtures serve their unique purposes and can dramatically influence the overall aesthetic and utility of your space.

**Showers** are often favored for their efficiency and convenience. They are ideal for those with busy lifestyles who appreciate a quick, invigorating cleanse. Available in a variety of styles, from compact corner units to expansive walk-in designs, showers can be customized with features such as rainfall showerheads, adjustable jets, and digital controls for a luxurious experience. Modern shower enclosures can also incorporate glass panels that create an open, airy feel, making them a perfect fit for smaller bathrooms.

On the other hand, **bathtubs** evoke a sense of relaxation and indulgence. They provide a sanctuary for unwinding after a long day, making them a staple in many homes. From classic clawfoot tubs that add vintage charm to sleek, modern soaking tubs that encourage long, leisurely baths, the options are endless. Bathtubs can also double as a functional element in the bathroom, serving as a focal point or a space for decorative accents. However, it’s essential to consider the space available; a larger bathroom can accommodate a standalone tub or a luxurious whirlpool, while smaller spaces may benefit from a shower-tub combo.

When deciding between a shower and a bathtub, consider your lifestyle, the needs of your household, and the overall design you wish to achieve. If your home is family-oriented, a bathtub may be invaluable for bath time with young children. Conversely, if space is limited or you prioritize quick routines, a shower might be the more practical choice. Ultimately, the right selection can elevate your bathroom into a personal oasis that meets both functional and aesthetic needs.

– 2.5 Bidets

What are the different types of plumbing fixtures?
Credit : whatcanu.com

### 2.5 Bidets

Bidets have long been celebrated in many cultures for their hygiene and comfort, yet they remain a relatively underappreciated fixture in many Western bathrooms. These ingenious plumbing fixtures are designed specifically for a more thorough cleansing experience after using the toilet, offering an alternative to traditional toilet paper.

Typically resembling a low-mounted sink, a bidet allows users to wash their intimate areas with a gentle stream of water, promoting cleanliness and reducing irritation. Bidets come in various styles, from standalone units that require a dedicated space in your bathroom to more modern attachments that can be easily installed on existing toilets.

In addition to their hygiene benefits, bidets can also be an eco-friendly choice, significantly reducing toilet paper consumption and the associated environmental impact. With many models now featuring adjustable water pressure, temperature control, and even air-drying capabilities, bidets provide a customizable experience that caters to individual preferences.

When selecting a bidet, consider the size and layout of your bathroom, as well as your plumbing capabilities. If space is limited, a bidet toilet seat—an attachment that fits directly onto your existing toilet—may be the ideal solution. For those with more room to spare, a standalone bidet can become a stylish centerpiece, often available in various finishes and designs to complement your bathroom decor.

Investing in a bidet not only enhances personal hygiene but also elevates your bathroom experience, making it a fixture worth considering for any home renovation or upgrade.

– 2.6 Water Heaters

Water heaters are an essential plumbing fixture often taken for granted until the moment we find ourselves shivering in a cold shower. These units provide hot water for a variety of household needs, from bathing and cleaning to cooking and laundry. Understanding the different types of water heaters available can help homeowners make informed decisions that align with their lifestyle and budget.

there are primarily two categories of water heaters: tank and tankless. **Tank water heaters** are the traditional choice, featuring a large reservoir that stores heated water for immediate use. These units come in various sizes, typically measured in gallons, and can supply a significant amount of hot water at once—perfect for families with high demand. However, they may take longer to refill once depleted and can lead to higher energy costs due to heat loss from the tank.

On the other hand, **tankless water heaters** are a more modern solution, providing hot water on demand without the need for a storage tank. They heat water directly as it flows through the unit, delivering a continuous supply of hot water. While tankless models are often more energy-efficient and take up less space, they can be more expensive upfront and may require additional installation considerations, especially for larger households.

When selecting a water heater, homeowners should assess their hot water needs. Factors such as the number of residents in the home, simultaneous hot water usage (e.g., running the dishwasher while showering), and energy source (electric, gas, or solar) all play crucial roles in determining the best fit. Energy efficiency ratings, such as the Energy Factor (EF) or the Uniform Energy Factor (UEF), can guide users toward models that will save them money on utility bills over time.

Moreover, considering the installation process and maintenance requirements is vital. Some models may require professional installation, while others can be DIY-friendly. Regular maintenance, such as flushing the tank to remove sediment build-up and checking the anode rod, can extend the life of any water heater and enhance its efficiency.

In summary, selecting the right water heater is a key step in optimizing your home’s plumbing system. By understanding the differences between tank and tankless options, assessing your hot water needs, and considering energy efficiency and maintenance, you can ensure that you choose a water heater that delivers comfort, convenience, and cost savings for years to come.

3. Choosing the Right Plumbing Fixtures for Your Home

Choosing the right plumbing fixtures for your home is a task that goes beyond mere aesthetics; it significantly impacts both functionality and comfort in your living space. With a myriad of options available, from faucets to sinks, showerheads to toilets, each selection plays a crucial role in the overall efficiency and style of your home.

First, consider your lifestyle and the needs of your household. If you have a busy family, durability and ease of use should be at the forefront of your decision-making process. Look for fixtures made from sturdy materials like brass or stainless steel, which can withstand daily wear and tear. Additionally, choosing fixtures with user-friendly features, such as single-handle faucets or touchless technology, can enhance convenience and hygiene.

Next, think about the overall design of your space. Plumbing fixtures come in various styles—from sleek modern designs to timeless traditional looks. Selecting fixtures that complement your home’s decor not only enhances visual appeal but also creates a cohesive environment. For instance, if you have a farmhouse-style kitchen, a vintage-inspired farmhouse sink paired with a classic bridge faucet can elevate the space beautifully.

Don’t forget about water efficiency! With growing concerns about water conservation, opting for fixtures that meet WaterSense standards can save you money on utility bills while also being environmentally friendly. Low-flow faucets and showerheads, as well as dual-flush toilets, are excellent choices that balance performance with sustainability.

Finally, take the time to measure your existing plumbing setup and any new fixtures you’re considering. Ensuring compatibility is vital to avoid unexpected complications during installation. Many retailers provide detailed specifications for their products, making it easier to determine if your choice will fit seamlessly into your space.

By carefully considering your family’s needs, design preferences, water efficiency, and compatibility, you can choose plumbing fixtures that not only look great but also enhance your home’s functionality and sustainability for years to come.

4. Key Features to Consider in Plumbing Fixtures

When it comes to selecting plumbing fixtures for your home or business, understanding the key features that set different options apart is essential. These fixtures are not just functional; they also significantly impact the overall aesthetics and efficiency of your space. Here are some crucial features to consider:

**1. Material Quality:** The durability and longevity of plumbing fixtures largely depend on the materials used in their construction. Stainless steel and brass are popular choices due to their resistance to corrosion and rust, while ceramic is often favored for sinks and toilets because of its ease of cleaning and classic appearance. Opting for high-quality materials can save you money in the long run, as they often come with longer warranties and require less frequent replacement.

**2. Finish and Style:** The finish of your plumbing fixtures can dramatically influence the look and feel of your bathroom or kitchen. From sleek chrome and polished nickel to matte black and brushed gold, the finish can complement your design scheme while also providing a level of maintenance ease. Remember to choose a style that resonates with your overall decor—whether it’s modern, traditional, or industrial—to create a cohesive look.

**3. Water Efficiency:** In today’s eco-conscious world, water efficiency is more important than ever. Look for fixtures with the WaterSense label, which indicates they meet strict water conservation criteria without sacrificing performance. Low-flow faucets, dual-flush toilets, and aerating showerheads can help reduce water usage, lower your utility bills, and minimize your environmental footprint.

**4. Ease of Installation and Maintenance:** Some fixtures are simpler to install than others, and considering your skill level or willingness to hire a professional can influence your choice. Additionally, some fixtures come with features that make maintenance easier, such as removable aerators or easy-clean coatings. Think about how often you want to clean and maintain your fixtures, and choose accordingly.

**5. Functionality and Ergonomics:** While aesthetics are important, the functionality of plumbing fixtures cannot be overlooked. Consider factors such as handle placement, spout height, and the reach of faucets. Fixtures that are user-friendly will enhance the overall experience in your space, making everyday tasks more enjoyable and efficient.

By keeping these key features in mind, you can make informed choices that not only enhance the beauty of your spaces but also ensure that your plumbing fixtures are functional, durable, and efficient. Selecting the right fixtures is an investment in your home’s comfort and style, so take the time to evaluate each option thoroughly.

5. Materials Used in Plumbing Fixtures

When selecting plumbing fixtures, understanding the materials they are made from is crucial, as it impacts both performance and aesthetics. The right material can enhance the durability of your fixtures while complementing your overall home design. Here’s a closer look at some of the most common materials used in plumbing fixtures, along with their unique qualities.

**1. Chrome:** Chrome-plated fixtures are a popular choice due to their sleek, shiny finish that adds a modern touch to any bathroom or kitchen. They are resistant to tarnishing and corrosion, making them easy to maintain. However, they can show water spots and require regular cleaning to keep their brilliant shine.

**2. Stainless Steel:** Known for its strength and durability, stainless steel fixtures are perfect for high-traffic areas. They resist rust and stains and have a contemporary look that fits well in both modern and traditional settings. While they may come with a higher price tag, their longevity often makes them a worthwhile investment.

**3. Brass:** Brass fixtures exude a classic charm that never goes out of style. This material is highly resistant to corrosion, making it an excellent choice for both aesthetic appeal and functionality. Over time, brass can develop a beautiful patina, adding character to your fixtures. However, if you prefer a polished look, regular maintenance is needed to prevent tarnishing.

**4. Plastic:** Lightweight and cost-effective, plastic fixtures can be a practical option for budget-conscious homeowners. They are often available in a variety of colors and styles, allowing for easy customization. While they resist corrosion, plastic fixtures may not offer the same level of durability as metal options, making them more suitable for temporary or less frequently used spaces.

**5. Porcelain and Ceramic:** Often found in sinks and toilets, porcelain and ceramic fixtures are valued for their smooth, glossy finishes and ease of cleaning. These materials are durable and resistant to scratches and stains, but they can be prone to chipping if not handled carefully. Their aesthetic appeal makes them a popular choice in traditional and vintage-style bathrooms.

**6. Bronze:** Oil-rubbed bronze fixtures offer a rustic, antique look that is highly sought after in home design. They are exceptionally durable and resist corrosion, making them ideal for both indoor and outdoor use. The deep, rich tones of bronze can add warmth and sophistication to any space.

When selecting plumbing fixtures, consider not only the material but also the overall style, maintenance requirements, and how well they will hold up in your specific environment. By understanding the advantages and disadvantages of each material, you can make informed decisions that enhance both the functionality and beauty of your home.

6. Popular Plumbing Fixture Brands

When it comes to selecting plumbing fixtures, the brand can significantly influence not only the aesthetic appeal but also the quality and longevity of the products you choose. With countless manufacturers on the market, certain brands have established themselves as leaders, known for their innovative designs, reliable performance, and commitment to customer satisfaction. Here’s a closer look at some popular plumbing fixture brands that are worth considering for your next renovation or new build.

**Moen**: Renowned for its stylish designs and functional innovations, Moen offers a wide range of faucets, showerheads, and accessories. Their products often feature the brand’s signature Spot Resist™ finish, which repels water spots and fingerprints, making maintenance a breeze. Moen also stands out for its commitment to sustainability, providing water-saving options without sacrificing performance.

**Kohler**: A name synonymous with luxury and quality, Kohler fixtures blend classic elegance with modern technology. From high-efficiency toilets to beautifully crafted sinks and stylish faucets, Kohler offers an extensive selection to suit various tastes and budgets. Their innovative features, such as the Touchless technology in faucets and advanced flushing systems in toilets, enhance convenience while promoting water conservation.

**Delta**: Delta Plumbing is known for its cutting-edge technology and user-friendly designs. Their faucets often come equipped with the Touch2O® Technology, allowing users to turn water on or off with just a touch, which is especially handy when hands are full. Delta’s commitment to innovation extends to their wide range of styles, from contemporary to traditional, ensuring there’s something for everyone.

**American Standard**: Focusing on both function and form, American Standard offers a variety of plumbing fixtures that are both stylish and dependable. Their products often emphasize ease of installation and maintenance, making them a favorite among contractors and DIY enthusiasts alike. With options that cater to various budgets, American Standard ensures quality without breaking the bank.

**Grohe**: For those seeking high-end European designs, Grohe is a top contender. Known for their sleek aesthetics and exceptional engineering, Grohe fixtures often feature advanced technology for water efficiency and user comfort. Their commitment to quality is evident in their durable finishes and innovative features, making them a preferred choice for luxury bathrooms and kitchens.

When shopping for plumbing fixtures, it’s crucial to consider the reputation of the brand alongside the specifics of your project. Investing in reputable brands can ensure that you receive a product that not only enhances your space aesthetically but also performs reliably for years to come. Whether you prioritize style, technology, or sustainability, these popular plumbing fixture brands provide an array of options to meet your needs.

7. Energy Efficiency and Water Conservation

When it comes to choosing plumbing fixtures, energy efficiency and water conservation should be at the forefront of your decision-making process. With the increasing awareness of environmental issues and rising utility costs, selecting fixtures that minimize water usage without sacrificing performance is not just a trend—it’s a necessity.

Modern plumbing fixtures come equipped with innovative technology designed to conserve water and energy. Low-flow faucets and showerheads, for instance, can significantly reduce water consumption, allowing you to enjoy a refreshing shower or a leisurely hand wash while using up to 30% less water than traditional fixtures. Look for models that have the WaterSense label, which indicates they meet specific water-saving criteria set by the Environmental Protection Agency (EPA).

In addition to faucets and showerheads, consider the efficiency of your toilets. Dual-flush toilets, which offer a choice between a low flush for liquid waste and a higher flush for solid waste, can save thousands of gallons of water each year compared to older models. These toilets use advanced flushing technology that maximizes performance while minimizing water use, making them an excellent investment for both your wallet and the environment.

Moreover, when selecting plumbing fixtures, pay attention to the materials used. Fixtures made from durable, sustainable materials not only last longer but can also reduce the need for replacements, thus conserving resources in the long run. Stainless steel, for instance, is not only stylish but also highly resistant to corrosion, while fixtures made from recycled materials can further enhance your commitment to sustainability.

Incorporating energy-efficient appliances, like tankless water heaters, can also contribute to overall water conservation. These heaters only warm water as needed, eliminating standby energy loss and reducing both energy bills and water waste.

Ultimately, by prioritizing energy efficiency and water conservation in your plumbing fixture selections, you not only contribute to a healthier planet but also enjoy the financial benefits of lower utility bills. As you make your choices, consider the long-term impact of your fixtures—both on your home and the environment.

8. Installation Tips for Plumbing Fixtures

When it comes to installing plumbing fixtures, a little preparation can go a long way in ensuring a smooth and hassle-free process. Whether you’re a seasoned DIY enthusiast or a first-time installer, following these essential tips can help you achieve professional results.

**1. Gather Your Tools and Materials:** Before diving into the installation, make sure you have all necessary tools at hand. Common tools include adjustable wrenches, screwdrivers, pliers, a plumber’s tape, a level, and a bucket to catch any stray water. Having everything ready will save you time and frustration.

**2. Read the Instructions:** Each plumbing fixture comes with its own set of instructions tailored to that specific model. Take the time to read through the manufacturer’s guidelines to familiarize yourself with the installation process, parts list, and any special requirements. This can help prevent errors and ensure you don’t miss any critical steps.

**3. Shut Off the Water Supply:** It sounds simple, but it’s a crucial step that many forget. Before you begin any installation, locate the main water shut-off valve and turn it off. This will prevent flooding and reduce the risk of water damage during the installation process.

**4. Prepare the Area:** Clear the installation area of any debris or old fixtures. If you are replacing an existing fixture, ensure that all remnants—like old fittings or pipes—are removed before you begin. This will make the installation cleaner and more efficient.

**5. Take Accurate Measurements:** Precision is key in plumbing. Use a measuring tape to confirm that your new fixture will fit in the designated space, and check that any plumbing connections align properly. If you’re installing a sink, for example, ensure that the faucet holes match the new fixture’s specifications.

**6. Use Plumber’s Tape:** When connecting pipes and fittings, use plumber’s tape on threaded connections to create a watertight seal. This simple step can help prevent leaks and save you from future headaches.

**7. Test for Leaks:** Once your fixture is installed, gradually turn the water supply back on and check for leaks. This initial test is crucial; if you spot any dripping or puddles, turn off the water supply and address the issue before proceeding further.

**8. Don’t Hesitate to Seek Help:** If you encounter challenges or feel uncertain during installation, don’t hesitate to consult a professional plumber. Sometimes, a little expert advice can save you time and money in the long run.

By following these installation tips, you can enhance your confidence and ensure that your new plumbing fixtures are installed correctly and efficiently. With each successful installation, you’ll become more adept at maintaining your home’s plumbing system and enjoying the benefits of your upgraded fixtures.

9. Maintenance and Care for Long-Lasting Fixtures

When it comes to plumbing fixtures, maintenance and care are paramount for ensuring longevity and optimal performance. Well-maintained fixtures not only enhance the aesthetic appeal of your space, but they also save you money in the long run by preventing costly repairs and replacements. Here are some essential tips to keep your plumbing fixtures looking and functioning their best.

**Regular Cleaning:** Different materials require different cleaning methods. For instance, stainless steel fixtures can be cleaned with a mild dish soap and warm water, while chrome fixtures may benefit from a gentle vinegar solution to remove hard water stains. Avoid abrasive cleaners that can scratch the surfaces; instead, opt for soft cloths or sponges to maintain that shiny finish.

**Inspect for Leaks:** Periodically check your faucets, showerheads, and pipes for any signs of leaks. Even a small drip can lead to larger problems over time, such as water damage or mold growth. If you notice any leaks, address them promptly—sometimes, a simple tightening of a screw or replacing a washer can resolve the issue.

**Replace Worn Parts:** Fixtures have components that may wear out over time, such as washers, O-rings, and aerators. Regularly inspect these parts and replace them as needed. A worn washer can cause frustrating dripping, while a clogged aerator can reduce water flow. Keeping these elements in check can enhance the efficiency and performance of your fixtures.

**Avoid Harsh Chemicals:** While it might be tempting to use strong chemical cleaners to tackle tough stains or clogs, these can be damaging to your plumbing fixtures. Instead, consider natural alternatives like baking soda and vinegar, which can effectively clean without causing harm.

**Professional Inspections:** Every few years, consider having a professional plumber inspect your fixtures and plumbing system. They can identify potential issues before they become significant problems and offer tailored maintenance advice based on your specific fixtures and their usage.

By incorporating these maintenance tips into your routine, you can ensure that your plumbing fixtures remain functional, attractive, and durable for years to come, enhancing both your home’s comfort and value. Remember, a little care goes a long way in preserving the beauty and efficiency of your plumbing investments!

10. Trends in Plumbing Fixture Design

In the ever-evolving world of home design, plumbing fixtures are no longer just functional necessities; they have transformed into stylish statements that enhance the overall aesthetic of a space. As homeowners increasingly seek to create personalized environments, plumbing fixture design trends reflect a blend of innovation, sustainability, and elegance.

One prominent trend is the rise of minimalist designs that emphasize clean lines and uncluttered spaces. Fixtures with sleek, geometric shapes made from materials like matte black, brushed nickel, or polished brass are gaining popularity, offering a modern touch that complements various decor styles—from industrial to Scandinavian. The simplicity of these designs allows them to seamlessly integrate into any bathroom or kitchen while making a strong visual impact.

Sustainability is another key trend shaping the plumbing fixture landscape. With a growing awareness of environmental issues, many consumers are opting for water-efficient fixtures that reduce consumption without sacrificing performance. Brands are responding by creating products that blend functionality with eco-friendly technology, such as faucets with aerators that limit water flow while maintaining pressure, and dual-flush toilets that allow users to choose the amount of water used per flush.

Colorful fixtures are also making waves in the design world. Gone are the days of standard chrome and white; now, vibrant hues in fixtures are capturing attention and adding personality to spaces. From deep navy sinks to bold red faucets, these colorful options allow homeowners to express their style and create striking focal points in their bathrooms and kitchens.

Finally, smart technology is revolutionizing plumbing fixtures, integrating convenience and efficiency into everyday tasks. From touchless faucets that activate with a simple wave to shower systems that can be controlled via smartphone apps, these innovations not only enhance the user experience but also promote hygiene and save water.

As you consider updating your plumbing fixtures, staying informed about these trends can help ensure your selections not only meet your practical needs but also reflect your personal style and values. Embracing these design elements can transform your space into a contemporary haven that balances aesthetics with functionality.

11. Cost Considerations: Budgeting for Fixtures

When it comes to renovating or updating your home’s plumbing fixtures, budgeting is a crucial step that can significantly impact your choices and overall satisfaction with the project. Understanding the cost considerations associated with different types of fixtures is essential for making informed decisions that align with your financial plans.

First and foremost, it’s important to establish a realistic budget based on your specific needs and desired aesthetic. Plumbing fixtures can range widely in price, from affordable options that offer solid functionality to high-end designs that serve as statement pieces in your home. For instance, basic faucets and showerheads can be found for as little as $50, while luxury brands may charge upwards of $500 or more for designer models crafted from premium materials.

Beyond the initial purchase price, consider the long-term costs associated with your chosen fixtures. Some high-efficiency models may come with a steeper upfront investment but can save you money on water bills in the long run. Similarly, investing in durable materials, such as brass or stainless steel, can reduce the frequency of replacements and repairs, ultimately saving you money over time.

Don’t forget to account for additional expenses that may arise during the installation process. Hiring a licensed plumber can lead to added labor costs, especially if your project involves complex plumbing work or if you’re replacing old fixtures with new ones that require different plumbing configurations. To streamline costs, it’s often wise to tackle multiple fixture upgrades at once, minimizing labor fees and maximizing efficiency.

Lastly, keep an eye out for promotions, sales, or package deals offered by home improvement retailers. Many stores frequently run discounts on plumbing fixtures, especially during seasonal sales events, providing an opportunity to snag high-quality products at a more budget-friendly price.

By carefully considering all these factors and setting a well-defined budget, you can confidently select plumbing fixtures that not only enhance your home’s functionality and style but also fit within your financial parameters.

12. Common Plumbing Fixture Problems and Solutions

When it comes to plumbing fixtures, even the most reliable installations can encounter issues over time. Understanding the common problems associated with these fixtures, along with their solutions, can save you both time and money while ensuring your home remains comfortable and functional.

One of the most frequent issues homeowners face is dripping faucets. Not only can a leaky faucet be a nuisance, but it can also lead to increased water bills. The culprit is often a worn-out washer or O-ring. To resolve this, you can easily disassemble the faucet, replace the damaged components, and restore it to its original state. Regular maintenance, such as checking and replacing washers every few years, can help prevent this problem from recurring.

Another common issue is clogged drains, which can occur in sinks, bathtubs, and showers. Hair, soap residue, and food particles often contribute to these blockages. A simple solution involves using a plunger or a drain snake to dislodge the clog. For persistent blockages, a mixture of baking soda and vinegar can effectively break down buildup, providing a natural alternative to harsh chemical drain cleaners.

Toilet problems can also arise, with running toilets being a particularly common complaint. This can waste a significant amount of water, leading to a higher utility bill. The cause is often a faulty flapper valve that fails to seal properly. Replacing this inexpensive part can quickly restore your toilet to its efficient state.

Lastly, low water pressure can be incredibly frustrating, especially when showering or washing dishes. This issue can stem from mineral buildup in aerators or showerheads, or even from issues with your plumbing system itself. Cleaning these fixtures can often resolve the problem; however, if low pressure persists, it may be time to consult a professional plumber to assess any underlying issues.

By being aware of these common plumbing fixture problems and their solutions, you can take proactive measures to maintain your fixtures and address any issues promptly, ensuring your home remains a comfortable and efficient space.

13. DIY vs. Professional Installation: What You Need to Know

When it comes to installing plumbing fixtures, one of the most critical decisions you’ll face is whether to tackle the project yourself or hire a professional plumber. This choice can significantly impact not only the outcome of your installation but also the overall cost, time commitment, and potential headaches down the road.

**DIY Installation: The Pros and Cons**

Taking the DIY route can be enticing for many homeowners, particularly those who enjoy hands-on projects and wish to save some money. With a plethora of online tutorials, videos, and guides available, the knowledge to successfully install fixtures like faucets, sinks, and showerheads is often just a click away. If you have a basic understanding of plumbing and are comfortable with tools, you might find DIY installation rewarding and straightforward.

However, it’s essential to weigh the pros against the cons. While you may save on labor costs, mistakes can lead to costly repairs or water damage if something goes wrong. Additionally, some plumbing fixtures may require specialized knowledge or tools, such as knowledge of local plumbing codes or the ability to navigate complex piping systems. If you’re unsure about your skills, consider the time investment—what seems like a simple task can quickly become time-consuming, especially if you encounter unexpected challenges.

**Professional Installation: The Benefits**

On the other hand, opting for professional installation ensures that the job is completed correctly and efficiently. Licensed plumbers bring a wealth of experience and expertise, which can be particularly beneficial for more complex installations, such as those involving multiple fixtures or significant plumbing modifications. Professionals can also navigate local building codes and regulations, ensuring that your installation meets all safety standards.

Moreover, many plumbing companies offer warranties on their work, giving you peace of mind that if anything goes wrong after installation, you have a safety net. This can save you from the stress of potential future repairs and provide confidence in your investment.

**Making the Right Choice**

So, how do you decide? Start by evaluating the scope and complexity of your project. For straightforward installations, such as replacing a faucet or installing a new showerhead, DIY may be a feasible option if you’re comfortable with the task. However, for more involved projects, such as a complete bathroom remodel or significant plumbing work, hiring a professional can save you stress and ensure a high-quality result.

Ultimately, whether you choose to go the DIY route or enlist the help of a professional, understanding the requirements and potential pitfalls of plumbing fixture installation will help you make an informed decision that aligns with your skills, budget, and time constraints.

14. Conclusion: Making Informed Choices for Your Plumbing Needs

As we reach the conclusion of our ultimate guide to plumbing fixtures, it’s clear that making informed choices is essential for both functionality and aesthetics in your home. The vast array of options available can be overwhelming, but understanding the different types of fixtures, their uses, and how to select the right ones for your specific needs can transform your space into a well-coordinated haven.

When considering plumbing fixtures, always prioritize quality and durability. Investing in high-quality materials can save you money in the long run by reducing the need for repairs or replacements. Additionally, consider the style and design of each fixture to ensure they complement your existing decor. Whether you lean towards a sleek modern look or a classic vintage charm, there are fixtures available to match every aesthetic preference.

Don’t overlook the importance of functionality. Assess the specific needs of your household—how many people will be using the fixtures, and what are their habits? For instance, if you have a large family, a dual-flush toilet or a spacious showerhead might be ideal. Furthermore, energy-efficient fixtures not only save water but also lower utility bills, making them a smart choice for environmentally conscious homeowners.

Lastly, seek advice from plumbing professionals or experienced suppliers when in doubt. They can offer insights based on your unique situation and help you navigate the sometimes complex world of plumbing fixtures.

In summary, informed choices regarding plumbing fixtures can enhance your home’s functionality, aesthetic appeal, and energy efficiency. By taking the time to research and consider your options, you’ll ensure that your plumbing system not only meets your immediate needs but also stands the test of time. Happy renovating!

15. Resources for Further Reading and Exploration

When it comes to deepening your understanding of plumbing fixtures, a wealth of resources is available to guide you through the nuances of selection, installation, and maintenance. Whether you’re a DIY enthusiast looking to tackle a home improvement project or a homeowner seeking to make informed decisions, these resources can serve as invaluable tools in your journey.

**Books and E-books**: Consider diving into comprehensive guides such as “The Complete Guide to Plumbing” by Black & Decker or “Plumbing 101” by the same publisher. These books not only cover the fundamentals of plumbing fixtures but also offer insights into the latest trends and technologies in the industry.

**Online Courses**: Websites like Udemy and Coursera offer expert-led courses on plumbing basics and advanced techniques. These courses often include video tutorials, quizzes, and forums for discussion, providing a structured learning environment where you can gain hands-on skills and knowledge.

**Manufacturer Websites**: Many plumbing fixture manufacturers provide detailed resources on their websites, including installation guides, product specifications, and maintenance tips. Brands like Kohler, Moen, and Delta often have video tutorials and downloadable manuals that can help you better understand their products.

**DIY Forums and Community Groups**: Platforms such as Reddit’s r/Plumbing or DIY Network forums are great places to connect with other homeowners and professionals. Here, you can ask questions, share experiences, and gain insights from those who have tackled similar projects.

**YouTube Channels**: Visual learners will find YouTube to be a treasure trove of information. Channels dedicated to home improvement, such as Home Repair Tutor or This Old House, regularly feature plumbing projects and tips, showcasing step-by-step processes that can demystify even the most complex installations.

**Local Workshops and Classes**: Many community colleges and home improvement stores offer workshops on plumbing basics. These hands-on classes provide an excellent opportunity to learn from experienced instructors, ask questions, and practice skills in a supportive environment.

By exploring these resources, you’ll equip yourself with the knowledge and confidence needed to make informed decisions about plumbing fixtures. Whether you’re upgrading your bathroom or tackling a plumbing emergency, staying informed will ensure that you choose the right fixtures and maintain them effectively, enhancing both the functionality and aesthetics of your home.

In conclusion, we hope this ultimate guide to plumbing fixtures has equipped you with the knowledge and confidence to make informed choices for your home or renovation project. From understanding the different types and their specific uses to navigating the selection tips that can elevate both functionality and aesthetics, you’re now prepared to tackle any plumbing fixture decision. Remember, the right fixtures not only enhance the beauty of your space but also contribute to its overall efficiency and value. So, whether you’re refreshing a bathroom, upgrading a kitchen, or planning a complete remodel, take the time to choose fixtures that reflect your style and meet your needs. Happy plumbing, and may your spaces be both beautiful and functional!

How to install a new dishwasher?

Bringing home a new dishwasher can be an exciting upgrade for your kitchen, promising to save you time and effort on the never-ending chore of dishwashing.

However, the thought of installation can often feel daunting, leaving many to hire professionals or postpone the process altogether. Fear not! With the right guidance and a little bit of confidence, you can tackle this task like a pro. In this step-by-step guide, we’ll walk you through everything you need to know to install your new dishwasher seamlessly. From gathering the necessary tools and preparing your kitchen to connecting water lines and ensuring proper drainage, you’ll learn how to transform this potentially overwhelming project into a manageable and rewarding experience. Get ready to roll up your sleeves and dive into the world of DIY home improvement, all while elevating the convenience of your kitchen!

1. Introduction: Why Installing Your Dishwasher Yourself is a Great Idea

How to install a new dishwasher?
Credit : whatcanu.com

Installing your dishwasher yourself can be a rewarding and cost-effective project that not only saves you money on professional installation fees but also gives you a sense of accomplishment. Imagine the satisfaction of standing back to admire your handiwork, knowing you’ve added convenience to your kitchen without relying on outside help.

In today’s DIY culture, many homeowners are discovering that tackling household projects can be both easy and fulfilling. Installing a dishwasher is one of those tasks that, with the right guidance and tools, can be completed within a single afternoon. Not only does this allow you to take control of your kitchen renovation, but it also offers an opportunity to learn valuable skills that can be applied to future home improvement endeavors.

Moreover, undertaking this project yourself provides a unique perspective on your appliance, allowing you to familiarize yourself with its components and maintenance needs. You’ll gain a deeper understanding of how your dishwasher operates, empowering you to troubleshoot minor issues down the line. Plus, the time you invest in this task pays off every time you load and run your new appliance, knowing you did it all yourself.

In this step-by-step guide, we’ll walk you through everything you need to know to install your new dishwasher like a pro. From gathering the necessary tools to making the final connections, you’ll find that with a little preparation and confidence, this project is not only doable but truly enjoyable! So roll up your sleeves, and let’s get started on transforming your kitchen with a brand-new dishwasher!

2. Tools and Materials You’ll Need

Before diving into the installation process, it’s crucial to gather all the necessary tools and materials to ensure a smooth and efficient setup. Having everything ready at hand not only saves time but also minimizes frustrations mid-installation. Here’s a comprehensive list of what you’ll need:

### Tools:
1. **Screwdriver Set**: A mix of Phillips and flat-head screwdrivers will come in handy for various screws and fittings.
2. **Adjustable Wrench**: This versatile tool is essential for tightening and loosening plumbing connections.
3. **Level**: To ensure your dishwasher is perfectly aligned, a level is indispensable. This will help prevent excess noise and ensure proper function.
4. **Pliers**: A pair of pliers will assist in gripping and manipulating small parts and hoses.
5. **Drill**: If your installation requires new holes for mounting brackets, a drill will make this task easier.
6. **Tape Measure**: Accurate measurements are key to fitting your new appliance snugly into its designated space.
7. **Bucket or Towels**: Water spills can happen, especially when disconnecting the old unit, so keep a bucket or towels handy for quick clean-ups.

### Materials:
1. **Dishwasher Installation Kit**: Most new dishwashers come with an installation kit that includes essential components like hoses and electrical connectors. Check your model to ensure you have everything required.
2. **Water Supply Line**: If the existing line is old or damaged, you may need to purchase a new one.
3. **Drain Hose**: Ensure your drain hose is in good condition; if not, replacing it will prevent leaks and clogs.
4. **Electrical Wiring**: Depending on your setup, you might need specific wiring or a power cord to connect your dishwasher to the power supply.
5. **Mounting Brackets**: These may not come with the dishwasher but are necessary to secure your appliance under the countertop.

Having these tools and materials ready before you begin will not only streamline the installation process but also equip you with everything you need to tackle any unexpected challenges. With your workspace organized and all your equipment at your fingertips, you’ll be well on your way to installing your new dishwasher with confidence and ease!

3. Safety First: Preparing Your Kitchen for Installation

How to install a new dishwasher?
Credit : whatcanu.com

Before diving into the installation process, ensuring your kitchen is prepared for the task at hand is crucial—safety first! A well-prepared workspace not only streamlines the installation but also minimizes the risk of accidents. start by clearing the area around your old dishwasher and the path to your kitchen sink. Remove any clutter, such as pots, pans, or kitchen gadgets that may obstruct your movement. This creates a safe space for you to work and prevents any unnecessary damage to your belongings.

Next, turn off the power supply to the dishwasher at the circuit breaker. It’s essential to avoid any electrical hazards while working on the appliance. If your dishwasher has a water shut-off valve, locate it and turn it off as well to prevent leaks during the installation process. Remember to test the water flow by turning on the tap to ensure that the line is completely shut off.

Once your workspace is clear and safe, consider laying down a protective covering, such as a drop cloth or old towels, on the floor to catch any spills or scratches that may occur. This added layer of protection will preserve your flooring and make cleanup easier once the job is done.

Lastly, gather all the necessary tools and materials you’ll need for installation—such as a wrench, screwdriver, and level—within arm’s reach. Having everything organized beforehand not only saves time but also reduces the risk of accidents caused by searching for tools in the middle of the project. By taking these safety precautions and preparing your kitchen, you’ll set the stage for a smooth and successful dishwasher installation.

4. Understanding Your Dishwasher: Key Components Explained

Before diving into the installation process, it’s crucial to familiarize yourself with the key components of your new dishwasher. Understanding how each part works will not only make the installation smoother but will also equip you with the knowledge to troubleshoot any issues in the future.

**1. **Control Panel:** This is where the magic begins. The control panel allows you to set wash cycles, adjust temperature settings, and activate special features such as delay start or sanitize options. It can be a simple console or a digital touchscreen, but knowing how to navigate it is essential for optimal performance.

**2. **Water Inlet Valve:** This vital component connects your dishwasher to the water supply. When you start a wash cycle, the water inlet valve opens to let water flow into the appliance. It’s important to ensure that this valve is securely connected and functioning properly to avoid leaks.

**3. **Spray Arms:** The spray arms are responsible for distributing water throughout the dishwasher. Located at the bottom and sometimes the middle or top of the unit, these arms rotate during the wash cycle to ensure every dish is thoroughly cleaned. Double-check that they are free of obstructions and are able to spin freely.

**4. **Filter System:** A clean filter is key to maintaining the efficiency of your dishwasher. This component traps food particles and debris to prevent them from clinging to your clean dishes. Your dishwasher might have multiple filters, so familiarize yourself with how to remove and clean them regularly.

**5. **Draining System:** After washing, your dishwasher needs to expel the dirty water. The draining system, which includes the drain hose and pump, is crucial in this process. Make sure the drain hose is properly positioned to avoid any kinks or clogs, which can lead to water backup.

**6. **Racks and Baskets:** Understanding the layout of your dishwasher is vital for efficient loading. Most units come with adjustable racks and specialized compartments for silverware, pots, and pans. Properly utilizing these features will maximize space and ensure thorough cleaning.

By taking the time to learn about these key components, you’ll not only simplify the installation process but also set yourself up for years of hassle-free dishwashing. With this knowledge in hand, you’ll be ready to roll up your sleeves and start your dishwasher installation like a pro!

5. Step 1: Removing the Old Dishwasher

How to install a new dishwasher?
Credit : whatcanu.com

Before you can revel in the convenience of your brand-new dishwasher, you’ll need to bid farewell to the old one. Removing the old dishwasher may seem daunting, but with a little preparation and the right tools, you can tackle this step like a pro.

**Safety First**: Start by ensuring your kitchen is ready for the task at hand. Disconnect the power supply by switching off the circuit breaker dedicated to your dishwasher. This crucial step prevents any electrical mishaps as you work. Next, turn off the water supply to the dishwasher—usually located under the sink—by twisting the valve clockwise.

**Gather Your Tools**: Equip yourself with a few essential tools: a screwdriver (both Phillips and flathead), pliers, a towel or sponge, and a bucket. These will help you navigate the nuts and bolts of this process seamlessly.

**Disconnecting the Dishwasher**: Begin by removing the kick plate or toe panel at the bottom front of the dishwasher. This will expose the mounting screws. Use your screwdriver to loosen and remove these screws, which are typically found on either side of the appliance. Once loose, carefully slide the dishwasher out from its cabinet space—a little pull may be necessary, but be cautious not to damage surrounding cabinetry.

**Plumbing and Electrical Connections**: With the dishwasher now partially freed, you’ll need to disconnect the water supply line. Place your bucket underneath the connection to catch any residual water. Use your pliers to loosen the nuts on the supply line; once removed, be prepared for a small trickle of water. After this, locate the drain hose, which is often secured with a clamp. Loosen the clamp and slide the hose off, ensuring you have that towel handy for any spills.

Finally, check for any electrical connections that may need to be detached. If you see a power cord, simply unplug it. If wired directly, carefully unscrew the wire nuts and separate the wires—just make sure you remember their connections for when you install the new unit.

**Final Steps**: Once everything is disconnected, gently pull the dishwasher out of its space and make sure to clear any debris from the area. You’re now ready to move on to the next exciting step—installing your new dishwasher! This initial phase may seem labor-intensive, but with careful execution, you’ll be well on your way to enjoying the benefits of modern dishwashing technology in no time.

6. Step 2: Preparing the Installation Area

Before diving into the actual installation of your new dishwasher, it’s essential to prepare the installation area properly. A well-prepared space not only simplifies the process but also ensures that your dishwasher operates efficiently for years to come.

Start by clearing out the area around your existing dishwasher. Remove any dishes, pots, or clutter that may obstruct your progress. If you’re replacing an old unit, carefully disconnect it and move it out of the way, taking care not to damage any plumbing or electrical connections. This is also a great time to inspect the area for any signs of wear or damage, such as leaks or mold, which might need your attention before you install the new appliance.

Next, ensure that the space is clean and free of debris. Sweep up any dust or dirt, and wipe down surfaces to create a welcoming environment for your new dishwasher. Check the floor for any unevenness; if needed, use shims to level the dishwasher once it’s in place.

Don’t forget to gather your tools and materials before you start. You’ll typically need a wrench, screwdriver, pliers, and possibly a level. Having everything within reach will save you time and prevent interruptions. Additionally, review the manufacturer’s installation instructions to familiarize yourself with any specific requirements or recommendations unique to your model.

Lastly, assess your plumbing and electrical connections. Make sure the water supply valve is easily accessible and the electrical outlet is in good condition. If you’re unsure about the safety or functionality of these connections, it might be wise to consult a professional before proceeding.

By preparing the installation area thoughtfully, you’ll set the stage for a smooth and successful dishwasher installation, making you feel like a pro in no time!

7. Step 3: Connecting the Water Supply

How to install a new dishwasher?
Credit : whatcanu.com

Connecting the water supply to your new dishwasher is a crucial step that ensures your appliance has the necessary resources to function effectively. Before you dive into this process, make sure you have all the required tools at hand — a wrench or adjustable pliers, a bucket to catch any spills, and a towel for quick cleanups.

Begin by locating the water supply line, which is usually found beneath your kitchen sink. If it’s not already in place, you’ll need to install a shut-off valve specifically for the dishwasher. This valve allows you to easily control water flow and is an essential safety feature. Once the valve is securely installed, it’s time to connect the water supply line to your dishwasher.

Carefully position the dishwasher so that the water supply line can reach it without any tension or bends. Next, take the plastic or copper supply line and attach it to the dishwasher’s inlet valve, which is typically located at the bottom left corner of the unit. Ensure that the connection is tight but avoid over-tightening, as this can damage the fittings.

As you make this connection, be mindful of the placement of the rubber washer, which helps create a watertight seal. If the washer is missing or damaged, it can lead to leaks, so double-check that it’s in good condition before securing the connection.

Once everything is connected, turn the shut-off valve on and check for any leaks. It’s a good idea to have your bucket nearby to catch any water that might spill during this process. If you notice any dripping or leaking, you may need to adjust the connections or replace the washer. Taking the time to ensure a secure and leak-free connection will save you from potential water damage and costly repairs down the line.

With the water supply successfully connected, you’re one step closer to enjoying the convenience of your new dishwasher!

8. Step 4: Installing the Drain Hose

Once you’ve secured the dishwasher in its designated space and connected the water supply, it’s time to tackle the crucial task of installing the drain hose. This step is vital for ensuring that dirty water is properly expelled during the wash cycle, preventing any mess or potential damage.

Start by locating the drain hose that came with your dishwasher. It is usually a flexible plastic tube designed to fit snugly into the drain connection. Your first task is to determine the ideal attachment point. Typically, this will either be a dedicated drain outlet under your sink or a standpipe that leads to your household plumbing system.

Before you make any connections, ensure that the drain hose is free of kinks or obstructions. If it appears bent or twisted, carefully straighten it out to allow for smooth water flow. Next, slide the end of the hose onto the drain connection, ensuring that it fits securely. Use a hose clamp, which is often included with your dishwasher, to tighten the connection. This is a critical step as it prevents leaks that could lead to water damage.

If your setup involves a high loop or air gap, make sure the hose is elevated accordingly. This means positioning the hose so that it rises to a higher point before it connects to the drain. This configuration helps prevent wastewater from siphoning back into the dishwasher, maintaining the hygiene of your kitchen.

Once everything is connected, double-check your work. Ensure that the hose is not pinched and that the connections are tight. Now, it’s time to test your installation. With the dishwasher still pulled out slightly from the wall, run a short cycle and keep an eye on the drain hose for any leaks. If you spot any issues, it’s better to address them now rather than waiting until after the dishwasher is fully installed.

With the drain hose securely in place and functioning as it should, you’re one step closer to enjoying your new appliance! Next up, you’ll finalize your installation by securing the dishwasher to the countertop and checking all connections for a seamless setup.

9. Step 5: Electrical Connections: Hardwired vs. Plugged In

When it comes to connecting your new dishwasher, the choice between hardwired and plugged-in installations can significantly impact both functionality and convenience. Understanding the distinctions between these two methods is crucial for a seamless setup and safety compliance.

**Hardwired Connections**
If your dishwasher is hardwired, it will be directly connected to your home’s electrical system. This method typically involves using a junction box and requires you to connect the dishwasher’s wiring directly to your home’s wiring. Hardwiring provides a clean, permanent solution, eliminating the need for visible outlets and reducing the risk of someone accidentally unplugging the unit. However, this method can be more complex and may require professional assistance, especially if you’re not familiar with electrical work. Always ensure to turn off the power at the circuit breaker before attempting any connections, and double-check that your dishwasher’s voltage matches your home’s electrical specifications.

**Plugged-In Connections**
Conversely, if your dishwasher is designed to be plugged in, it comes with a power cord that connects directly to a standard electrical outlet. This option is often more user-friendly and allows for easier removal or replacement of the unit in the future. A plugged-in dishwasher can be beneficial for those who prefer flexibility, as it offers the option to simply unplug the appliance if needed. However, it’s crucial to ensure that the outlet is properly grounded and that it can handle the dishwasher’s power requirements.

Regardless of the connection type you choose, remember to follow the manufacturer’s instructions carefully. Take the time to secure all connections and check for any potential electrical issues before turning the power back on. Doing so will not only ensure the safety and efficiency of your appliance but also give you peace of mind as you enjoy the convenience of your new dishwasher!

10. Step 6: Positioning and Leveling the Dishwasher

Positioning and leveling your new dishwasher is a crucial step that ensures optimal performance and a seamless integration into your kitchen. Begin by carefully sliding the dishwasher into the designated space, making sure to connect the water supply and drain lines without pinching or damaging them. Gently push the unit back until it is flush with the cabinetry, ensuring that there is enough clearance for the door to open fully.

Once the dishwasher is in place, it’s time to check its level. Using a carpenter’s level, place it on the top edge of the appliance. Ideally, the bubble should be centered between the lines. If the dishwasher isn’t level, adjust the feet located at the bottom of the unit. Most dishwashers come with adjustable leveling legs that can be twisted to raise or lower the appliance as needed.

Take your time with leveling; an uneven dishwasher can lead to improper drainage, which might result in leaks or poor cleaning performance. After adjusting, double-check the level from both side to side and front to back. Once you’re satisfied that the dishwasher is perfectly level, secure it to the cabinetry by using screws provided in the installation kit. This will help stabilize the unit and prevent any movement during use, ensuring a long-lasting and trouble-free operation.

With the dishwasher properly positioned and leveled, you’re one step closer to enjoying the convenience of your new appliance!

11. Step 7: Securing the Dishwasher in Place

Once your dishwasher is properly connected to the water supply and drainage system, it’s time to secure it in place. This step is crucial to ensure your appliance functions efficiently and remains stable during use.

Begin by locating the mounting brackets that usually come with your dishwasher. These brackets are typically found on the top edges of the appliance and are designed to anchor the dishwasher to the underside of your countertop. Using a level, make sure your dishwasher is perfectly aligned, so it sits flush with the surrounding cabinetry. An uneven installation can lead to functional issues and may even result in water leaks over time.

With the dishwasher positioned correctly, take your drill and carefully screw the mounting brackets into the countertop. If your countertop is made of a softer material like laminate, be cautious not to overtighten, as this can cause damage. For sturdier surfaces such as granite or quartz, you might need to use a masonry bit to pre-drill holes before inserting screws.

Next, locate the leveling legs at the bottom of the dishwasher. Adjust these legs as necessary to ensure the dishwasher is level from front to back and side to side. You can do this by turning the legs clockwise to raise them or counterclockwise to lower them. A level dishwasher not only enhances performance but also helps prevent leaks and ensures that the door seals properly.

Finally, double-check that there are no gaps between the dishwasher and the cabinetry. This will help prevent any potential vibrations during operation, which could lead to wear and tear over time. Once everything is secured and aligned, you can step back and admire your handiwork—you’re one step closer to enjoying the convenience of your new dishwasher!

12. Step 8: Testing for Leaks and Proper Function

After your new dishwasher is securely installed and connected, it’s time for the crucial step of testing for leaks and ensuring everything functions as it should. This phase is not just about double-checking; it’s about safeguarding your home from potential water damage and ensuring your appliance operates efficiently.

Start by turning on the water supply and checking for any immediate leaks around the connections. Look closely at the water inlet hose where it connects to the dishwasher, as well as the drain hose and any other joints. If you notice any dripping or pooling water, turn off the supply and tighten the connections, or use additional plumbing tape if necessary.

Next, run a short cycle on your dishwasher without any dishes inside. This initial run serves multiple purposes: it allows you to observe the appliance in action, check for leaks during operation, and assess the sound levels. Listen for any unusual noises that could indicate a problem, such as grinding or excessive rattling.

While the cycle runs, keep an eye on the floor beneath the dishwasher. A dry floor is a good sign that your connections are secure. If you do spot any water, shut off the dishwasher immediately and investigate further. It’s better to catch issues early on than to risk a larger problem down the line.

Once the cycle is complete, open the dishwasher and inspect the interior. Ensure that the spray arms are rotating freely and that water has reached every corner. Check for any leftover detergent, which might indicate that the dishwasher isn’t draining properly.

Finally, take a moment to familiarize yourself with the control panel and features. Run through the settings and options to ensure everything is functioning correctly. If all checks out, congratulations! You’ve successfully installed your dishwasher like a pro, and you’re now ready to enjoy the convenience of clean dishes at the touch of a button.

13. Step 9: Final Touches: Adjusting the Dishwasher Door

Once your dishwasher is securely installed and connected, it’s time to add the finishing touches by adjusting the dishwasher door. This step is crucial not only for aesthetics but also for ensuring optimal functionality and longevity of your appliance. A properly aligned door will close seamlessly, preventing leaks and ensuring efficient operation.

Start by checking the alignment of the door. Open and close the dishwasher a few times to see if it operates smoothly. If you notice any resistance or if the door doesn’t close evenly, you may need to make some adjustments. Most dishwashers come with adjustable hinges or leveling legs that allow you to fine-tune the positioning.

To adjust the door, first, locate the hinge adjustment screws, which are typically found on the inside of the door. Using a screwdriver, make slight turns on the screws to raise or lower the door as needed. Aim for a snug fit when the door is closed—there should be no gaps along the edges, but it shouldn’t be so tight that it’s difficult to operate.

Next, check the top of the door for proper spacing. The dishwasher door should align flush with the surrounding cabinetry for a clean, polished look. If necessary, adjust the leveling legs at the bottom of the dishwasher to help achieve this alignment. Turn them clockwise to raise the appliance or counterclockwise to lower it until you reach the desired height.

Finally, test the door one last time. Make sure it opens and closes effortlessly, and that there are no obstructions in the way. If everything looks good, you’ve successfully completed the installation process!

With the door properly adjusted, you can now enjoy the peace of mind that comes with knowing your new dishwasher is perfectly positioned and ready to tackle your dirty dishes. Congratulations on your accomplishment—now it’s time to load it up and experience the convenience of your new appliance!

14. Troubleshooting Common Installation Issues

When it comes to installing your new dishwasher, encountering issues can feel daunting, but fear not! Troubleshooting common installation problems can often be a straightforward process, and with a little patience and persistence, you can resolve them like a pro.

First, let’s talk about water supply issues. If your dishwasher isn’t filling up, check to ensure that the water supply valve is fully opened. Sometimes, it may appear open but isn’t allowing water to flow due to debris or mineral buildup. A quick inspection of the hose connections can also reveal whether there are kinks or blockages impeding water flow.

Next, look out for drainage problems. If your dishwasher is not draining properly, check the drain hose for any clogs or bends. Ensure that it’s installed at the right height—ideally, the top of the hose should reach the underside of your countertop to prevent backflow. If you notice standing water at the bottom of the tub, inspect the filter and drain area for food particles or debris that may be obstructing proper drainage.

Another common issue is noise during operation. If your dishwasher sounds louder than expected, it could be due to improper leveling. Make sure that all four feet are adjusted evenly and that the appliance is stable to minimize vibrations. Additionally, ensure that items inside the dishwasher are arranged properly, as loose cutlery or dishes can rattle against each other and create unwanted noise.

Lastly, keep an eye out for leaks. If you notice water pooling around the base of the dishwasher, double-check all connections, including the water supply line and drain hose. Tighten any loose fittings and inspect the door seal for wear and tear. If the seal is compromised, replacing it might be necessary to prevent future leaks.

By systematically addressing these common installation issues, you can not only ensure that your dishwasher operates effectively but also gain confidence in your DIY skills. Remember, every problem has a solution, and with each challenge you conquer, you’ll be one step closer to mastering appliance installation!

15. Conclusion: Enjoying Your New Dishwasher and Maintenance Tips

Congratulations! You’ve successfully installed your new dishwasher, and now it’s time to enjoy the convenience and efficiency it brings to your kitchen. No more endless hours spent scrubbing pots and pans by hand; instead, you can relax while your new appliance takes care of the dirty dishes. As you bask in the ease of this modern marvel, it’s essential to remember that proper maintenance will ensure your dishwasher remains in top-notch condition for years to come.

To keep your dishwasher running smoothly, make it a habit to regularly clean the filter, as food particles can accumulate and hinder performance. Simply remove the filter, rinse it under warm water, and scrub away any stubborn debris. This small step can significantly enhance the efficiency of your machine.

Additionally, consider running a maintenance cycle every few months. You can achieve this by placing a cup of vinegar or a dishwasher cleaner on the top rack and running a hot water cycle. This process helps eliminate grime, odors, and buildup, leaving your dishwasher fresh and clean.

Don’t forget to check the spray arms, too! Ensure they are free of obstructions and can rotate freely to distribute water effectively. If you notice any debris stuck in the nozzles, use a toothpick to clear it out gently.

Lastly, remember to keep the door seals clean and intact. Wipe them down with a damp cloth regularly to prevent mold and mildew buildup, ensuring a tight seal during operation.

By following these simple maintenance tips, you can extend the lifespan of your dishwasher and continue to enjoy its benefits. So, sit back, relax, and let your new kitchen companion handle the dirty work—after all, you’ve earned it!

In conclusion, installing your new dishwasher doesn’t have to be an intimidating task reserved for the professionals. With the right tools, a little patience, and the step-by-step guidance provided in this article, you can confidently tackle this home improvement project and achieve professional-looking results. Remember to take your time during each stage, from preparing the space to connecting the plumbing and electrical components, ensuring that everything is secure and properly aligned. Soon enough, you’ll be enjoying the convenience of your new appliance, while also taking pride in the fact that you completed the installation yourself. So roll up your sleeves, gather your tools, and get ready to transform your kitchen experience—happy dishwashing!

What are the best ways to prevent mold and mildew in your home?

Mold and mildew can be unwelcome guests in any home, thriving in damp, dark corners and often leading to significant health issues and costly repairs.

With their ability to multiply quickly, these fungi can create a host of problems if left unchecked, from musty odors to respiratory problems and structural damage. The good news is that prevention is key, and with the right strategies in place, you can keep your home mold-free and foster a healthier living environment. In this blog post, we’ll explore the top strategies for mold and mildew prevention, offering practical tips to help you identify potential problem areas, maintain optimal humidity levels, and implement effective cleaning routines. Say goodbye to the worry of mold and mildew, and hello to a cleaner, safer home!

1. Understanding Mold and Mildew: Definitions and Differences

What are the best ways to prevent mold and mildew in your home?
Credit : whatcanu.com

To effectively combat mold and mildew in your home, it’s crucial to first understand what they are and how they differ. While the terms are often used interchangeably, they refer to distinct types of fungi that can take root in our living spaces.

Mold is a type of fungus that appears in various colors, including green, black, yellow, and white. It thrives in damp, warm environments and can penetrate and damage the materials it grows on, such as wood, drywall, and fabric. Mold spores are microscopic and can travel through the air, making it easy for them to spread throughout your home. Some molds can produce allergens or irritants and can even lead to more serious health issues, especially for those with respiratory conditions or weakened immune systems.

On the other hand, mildew is a specific type of mold that typically presents as a white, powdery substance. Often found in areas with high humidity, such as bathrooms and kitchens, mildew can usually be wiped away with a simple cleaning solution. While it may not be as harmful as some types of mold, it can still lead to unpleasant odors and potential health concerns if left untreated.

Understanding these distinctions is the first step in protecting your home. By recognizing the environments in which mold and mildew thrive, you can implement effective strategies to prevent their growth and maintain a safe and clean living space. With proper knowledge and proactive measures, you can ensure your home remains a healthy haven—free from the clutches of these unwanted fungi.

2. The Health Risks Associated with Mold Exposure

Mold and mildew are not just unsightly nuisances; they pose significant health risks that can affect anyone, particularly those with preexisting conditions or compromised immune systems. When mold spores are inhaled, they can trigger a cascade of respiratory issues, ranging from mild allergies to severe asthma attacks. Symptoms may include sneezing, runny or stuffy noses, coughing, and itchy or watery eyes. For individuals with asthma, exposure to mold can exacerbate symptoms, leading to more frequent and severe attacks.

Beyond respiratory complications, mold exposure can also cause skin irritations and rashes, headaches, and fatigue. In some cases, prolonged exposure to certain types of mold, such as Stachybotrys chartarum (commonly known as black mold), can lead to more serious health concerns, including neurological symptoms and immune system suppression. The risk is particularly acute for vulnerable populations, including children, the elderly, and those with preexisting health conditions, as their bodies may not respond as effectively to mold exposure.

Understanding the health risks associated with mold is crucial for homeowners. It serves as a vital reminder that effective prevention and prompt remediation are not just about maintaining the integrity of your living space; they are essential for safeguarding your family’s health. By staying informed and proactive, you can create a safer, healthier home environment that minimizes the likelihood of mold growth and protects those who live within it.

3. Identifying Common Areas for Mold Growth

What are the best ways to prevent mold and mildew in your home?
Credit : whatcanu.com

Identifying common areas for mold growth in your home is a crucial step in prevention. Mold thrives in damp, warm environments, making certain spaces more susceptible to infestations. Start with your bathrooms, where humidity levels can skyrocket after hot showers. Pay special attention to corners, behind toilets, and under sinks, as these areas often trap moisture.

Kitchens also warrant close inspection. Look beneath the sink, around dishwashers, and behind refrigerators where condensation can build up. Any leaks from plumbing or appliances should be addressed immediately to minimize moisture accumulation.

Basements and crawl spaces are notorious for mold growth due to their typically cooler and more humid conditions. Ensure these areas are well-ventilated and consider using dehumidifiers to keep humidity levels in check.

Don’t overlook laundry rooms, especially if you have a washer and dryer located in a basement or poorly ventilated area. A damp towel left in the washer for too long can lead to mold growth, so make it a habit to remove clothes promptly.

Lastly, check your home’s exterior. Gutters that are clogged or not draining properly can lead to water pooling around the foundation, creating an ideal breeding ground for mold. By identifying these common areas and taking proactive measures, you can effectively reduce the risk of mold and mildew taking hold in your home. Regular inspections and maintenance are key to ensuring a safe and healthy living environment.

4. Importance of Proper Ventilation in Your Home

Proper ventilation is a cornerstone of mold and mildew prevention, acting as a silent guardian against the damp conditions that these unwanted invaders thrive on. When air is allowed to circulate freely within your home, it helps to regulate humidity levels, ensuring that moisture does not accumulate in corners, closets, or other hidden spaces.

Imagine your home as a living organism; just like breathing is essential for our health, adequate airflow is crucial for your living space. In areas prone to high humidity, such as bathrooms, kitchens, and basements, the introduction of fresh air can significantly reduce the chances of mold growth. This is especially important during the warmer months when humidity levels soar and indoor air can become stagnant.

To achieve optimal ventilation, consider installing exhaust fans in moisture-heavy areas to expel humid air directly outside. Additionally, opening windows and doors to promote cross-ventilation can create a refreshing breeze that helps to dry out damp surfaces. It may also be beneficial to invest in a dehumidifier for spaces that struggle with excess moisture; this device works tirelessly to remove humidity from the air, providing a dry environment that is inhospitable to mold spores.

Regular maintenance is key as well. Ensure that your ventilation systems, such as HVAC units and ductwork, are clean and functioning properly to maximize airflow. If you have a chimney or attic, be sure they are adequately ventilated to prevent moisture build-up. By making ventilation a priority in your home, you not only enhance air quality but also create a less inviting environment for mold and mildew, allowing you to enjoy a healthier, more comfortable living space.

5. Controlling Humidity Levels: Ideal Ranges and Tools

What are the best ways to prevent mold and mildew in your home?
Credit : whatcanu.com

When it comes to mold and mildew prevention, controlling humidity levels is one of the most crucial aspects of maintaining a healthy home environment. Mold thrives in damp conditions, making it essential to keep indoor humidity within an ideal range of 30% to 50%. This range not only hinders the growth of mold spores but also contributes to overall comfort and air quality within your home.

To monitor and manage humidity levels effectively, consider investing in a hygrometer—a simple yet effective tool that measures the moisture in the air. Placing hygrometers in key areas, such as your basement, kitchen, and bathrooms, can provide you with real-time data on humidity fluctuations. If you find that certain areas consistently exceed the recommended levels, it’s time to take action.

There are several tools and methods available to help control humidity. Dehumidifiers are a popular choice, particularly in basements and other damp areas. These units work to extract moisture from the air and can significantly reduce humidity levels. Make sure to choose a model that suits the size of the space you’re treating for maximum effectiveness. Additionally, using exhaust fans in bathrooms and kitchens during and after activities that generate moisture, like cooking or showering, is another effective strategy to lower humidity levels.

Natural ventilation is also key. Opening windows and doors when weather permits can help circulate fresh air and reduce indoor humidity. If outdoor humidity levels are high, however, it may be wise to keep windows closed and rely on air conditioning, which typically dehumidifies as it cools, to maintain a comfortable indoor environment.

By actively controlling humidity levels in your home, you not only deter mold and mildew growth but also promote a more pleasant living space for you and your family. Remember, a proactive approach to humidity management is not just a seasonal task but an ongoing commitment to safeguard your home from the perils of excessive moisture.

6. Best Practices for Bathroom and Kitchen Maintenance

Bathrooms and kitchens are the most common breeding grounds for mold and mildew in any home, primarily due to the high levels of moisture generated in these areas. Implementing best practices for maintenance in these spaces is crucial for mold prevention and overall hygiene.

First and foremost, ensure proper ventilation. Install exhaust fans in bathrooms and kitchens to help eliminate moisture. When showering or cooking, run these fans to pull excess humidity from the air. If your kitchen or bathroom lacks a fan, consider opening windows or doors to promote airflow, especially during and after activities that generate steam or moisture.

Regular cleaning is another essential practice. Use mold-inhibiting cleaners on surfaces prone to dampness, such as tiles, grout, and countertops. Pay special attention to corners, seams, and any areas where water tends to accumulate. A solution of vinegar and water can effectively prevent mold growth, as vinegar is known for its antimicrobial properties.

Additionally, inspect plumbing fixtures for leaks or drips, as even minor leaks can create an environment conducive to mold. If you identify any leaks, address them promptly to minimize water accumulation.

Lastly, consider the use of dehumidifiers in particularly humid climates or seasons. These devices can significantly reduce moisture levels in the air, making it harder for mold spores to settle and thrive. Incorporating these best practices into your bathroom and kitchen maintenance routine will help create a healthier living space, free from the threat of mold and mildew. By taking these proactive steps, you not only protect your home but also enhance your overall well-being.

7. How to Inspect and Maintain Your Roof and Gutters

What are the best ways to prevent mold and mildew in your home?
Credit : whatcanu.com

Maintaining the integrity of your roof and gutters is a foundational strategy in preventing mold and mildew from taking hold in your home. A well-functioning roof not only shields your living space from the elements but also plays a crucial role in managing moisture levels—one of the main contributors to mold growth. Regular inspections and maintenance can help you catch potential issues before they escalate into costly repairs and serious health hazards.

Start by conducting a visual inspection of your roof at least twice a year, ideally in the spring and fall. Look for signs of damage, such as missing or cracked shingles, rusted flashing, or accumulated debris. Pay special attention to areas prone to water pooling, as standing water can lead to leaks over time. If your roof is more than 20 years old, consider consulting a professional to evaluate its condition thoroughly.

Equally important is the maintenance of your gutters. Clogged gutters can cause water to overflow and seep into your home, creating the perfect environment for mold and mildew to thrive. Clean your gutters regularly—at least twice a year, or more often if you live in a wooded area. Remove leaves, twigs, and other debris that can hinder water flow. Ensure that downspouts direct water at least three to four feet away from your foundation to prevent moisture accumulation.

While you’re at it, check for proper gutter slope and alignment; gutters should have a slight incline towards the downspouts to facilitate efficient drainage. If you notice sagging gutters or any signs of rust, it may be time for repairs or replacements.

By taking the time to inspect and maintain your roof and gutters, you can significantly reduce the risk of moisture intrusion and mold growth in your home. This proactive approach not only protects your living environment but also enhances the longevity of your property, ensuring a safe and healthy space for you and your family.

8. The Role of Insulation in Mold Prevention

When it comes to mold and mildew prevention in your home, insulation plays a surprisingly pivotal role that often goes overlooked. Proper insulation not only regulates your home’s temperature but also creates a barrier against moisture—a key contributor to mold growth. When areas of your home are poorly insulated, they become susceptible to temperature fluctuations that can lead to condensation, particularly in attics, basements, and crawl spaces.

When warm, moist air encounters cold surfaces, such as inadequately insulated walls or ceilings, it cools down and releases moisture in the form of condensation. This damp environment is ideal for mold spores to thrive and multiply. By investing in high-quality insulation, you are effectively reducing the risk of these temperature-induced condensation issues.

Fiberglass, foam board, and spray foam insulation are excellent choices to consider. They not only provide thermal resistance but also help maintain a consistent temperature throughout your home, minimizing the likelihood of moisture accumulation. Additionally, insulated ductwork can prevent condensation from forming in your heating and cooling systems, which can also become a breeding ground for mold.

Moreover, insulation can enhance your home’s energy efficiency, leading to lower utility bills while simultaneously keeping your indoor environment healthier. It’s a twofold solution: you protect your home from the damaging effects of mold and mildew while ensuring that your living spaces remain comfortable.

In summary, the role of insulation in mold prevention cannot be overstated. By ensuring that your home is well-insulated, you create a less hospitable environment for mold growth, safeguarding your health and preserving the integrity of your home for years to come.

9. Effective Cleaning Techniques for Mold-Prone Areas

Maintaining a mold-free home begins with understanding the areas most susceptible to mold growth—typically those that are damp, dark, and poorly ventilated. In this section, we will explore effective cleaning techniques specifically tailored for mold-prone areas, ensuring your efforts yield lasting results.

**1. Focus on High-Risk Spots:** Start by identifying the hot spots in your home where moisture tends to accumulate, such as bathrooms, kitchens, basements, and laundry rooms. These areas require routine attention to prevent mold spores from taking root.

**2. Use the Right Cleaning Solutions:** While there are numerous commercial cleaners available, many effective cleaning solutions can be made right at home. A mixture of equal parts vinegar and water is a powerful natural cleaner that can disrupt mold growth without harsh chemicals. For tougher spots, consider a solution of hydrogen peroxide or a diluted bleach mixture (always remember to use bleach with caution and ensure proper ventilation).

**3. Scrub and Dry Thoroughly:** When tackling mold, scrubbing is key. Use a stiff brush to scrub away visible mold from surfaces. Once you’ve cleaned the area, ensure it dries completely, as lingering moisture can lead to regrowth. For larger areas, a wet/dry vacuum can efficiently remove excess water and moisture.

**4. Ventilation is Vital:** After cleaning, improving ventilation in mold-prone areas can significantly reduce moisture levels. Consider using exhaust fans in bathrooms and kitchens, and open windows when possible to promote airflow. A dehumidifier can also be a great investment to keep humidity levels in check, particularly in basements or other enclosed spaces.

**5. Regular Maintenance:** Make cleaning mold-prone areas part of your regular home maintenance routine. Schedule inspections and cleanings at least once a month to keep any potential mold growth at bay. This proactive approach will not only keep your home looking pristine but will also enhance your overall indoor air quality.

By implementing these effective cleaning techniques in mold-prone areas of your home, you can significantly reduce the likelihood of mold growth, creating a healthier and more inviting living environment for you and your family. Remember, the key to mold prevention lies not just in cleanup but in consistent vigilance and maintenance.

10. Choosing Mold-Resistant Products for Home Improvement

When it comes to mold and mildew prevention, one of the most effective strategies is incorporating mold-resistant products during any home improvement projects. These specially designed materials can significantly reduce the risk of mold growth, especially in areas prone to moisture, such as bathrooms, kitchens, and basements.

Start by considering mold-resistant drywall, also known as green board or cement board, which is treated to resist moisture. This type of drywall is ideal for high-humidity areas, as it provides a robust barrier against water penetration. Similarly, when selecting paint for these spaces, opt for mold-resistant paint that contains antimicrobial properties, preventing mold spores from taking hold on your walls.

In addition to these materials, think about incorporating mold-resistant flooring options. Vinyl, tile, and specific treated wood products can withstand damp conditions far better than traditional carpeting, which can trap moisture and promote mold growth. For outdoor projects, consider using composite decking materials that resist moisture and are less susceptible to mold compared to conventional wood.

Additionally, remember to select mold-resistant insulation and sealants, especially around windows and doors, to create airtight seals that prevent moisture accumulation. By being strategic about the products you choose for your home improvement projects, you not only enhance the durability of your home but also create a healthier living environment. Investing in these mold-resistant options is a proactive step towards protecting your home from the pervasive threat of mold and mildew, ensuring your living spaces remain safe, clean, and comfortable for years to come.

11. Seasonal Tips for Mold Prevention

As the seasons change, so too do the conditions that can contribute to mold and mildew growth in your home. Understanding these seasonal dynamics and adjusting your prevention strategies accordingly is crucial for maintaining a healthy living environment.

**Spring** heralds warmer temperatures and increased humidity, creating a perfect breeding ground for mold spores. To combat this, ensure that your gutters are clean and functioning properly to divert rainwater away from your foundation. Additionally, consider investing in a dehumidifier for particularly damp areas of your home, such as basements or crawl spaces. Regularly check for leaks around windows and doors, as the spring showers can exacerbate moisture issues.

As we transition into **summer**, the heat can lead to increased humidity levels indoors, especially if air conditioning systems are not used effectively. Keep your HVAC system well-maintained, changing filters regularly to ensure optimal airflow and moisture control. Encourage good ventilation by opening windows and using exhaust fans in kitchens and bathrooms to help reduce humidity buildup.

With the arrival of **autumn**, falling leaves can clog gutters and downspouts, potentially leading to water pooling around your home. Be proactive by cleaning gutters and ensuring that your yard is well-drained. Additionally, as you prepare for winter, inspect your home for any signs of leaks or water damage, and seal any cracks in your walls or foundation to prevent moisture from seeping in.

Finally, as winter sets in, the cold air can force us to seal up our homes tightly, trapping moisture inside. Be mindful of indoor humidity levels; using a hygrometer can help you monitor moisture levels, and aim to keep them between 30-50%. Regularly check for condensation on windows and use a squeegee to wipe it away before it can settle and lead to mold growth.

By adapting your mold prevention strategies to the changing seasons, you’ll create a proactive approach that not only protects your home but also promotes a healthier indoor environment year-round. Remember, vigilance is key—regular checks and preventive measures will go a long way in keeping mold and mildew at bay.

12. Dealing with Flooding or Water Damage: Immediate Steps

When faced with flooding or water damage, swift action is crucial. The longer moisture lingers in your home, the greater the risk of mold and mildew taking hold. Here are immediate steps you should take to mitigate damage and safeguard your living space.

First and foremost, prioritize safety. If the flooding is severe, ensure that the electricity is turned off in affected areas before entering, as water and electricity can be a deadly combination. Wear protective gear, such as gloves and boots, to guard against contaminated water which may pose health risks.

Once you’re safely inside, begin the process of removing standing water. Utilize pumps or wet vacuums to extract as much water as possible. If the flooding is minor, mops and towels can suffice, but be prepared for larger quantities in more severe situations. Once the bulk of the water is removed, open windows and doors to promote ventilation. This not only helps in drying out the space but also reduces humidity levels, making it less conducive for mold growth.

Next, it’s essential to remove any items that have absorbed water. Carpets, rugs, and upholstered furniture can become breeding grounds for mold if not dried promptly. If items cannot be dried within 48 hours, consider discarding them to prevent further issues. Additionally, porous materials like drywall and insulation may need to be replaced if they’ve been saturated.

After you’ve tackled the water, it’s time to dry everything out thoroughly. Use fans and dehumidifiers to accelerate the drying process. Aim for a humidity level below 60% to reduce the chance of mold spores settling in. Regularly check for signs of moisture, especially in hidden areas like basements or attics.

Lastly, once everything is dried and cleaned, take preventive measures moving forward. Consider applying mold-resistant products to walls and surfaces, and ensure that your home’s drainage systems are functioning properly to prevent future flooding.

By acting quickly and effectively in the face of water damage, you can protect your home from the lurking dangers of mold and mildew, ensuring a healthy environment for you and your family.

13. When to Seek Professional Help for Mold Issues

### 13. When to Seek Professional Help for Mold Issues

Mold can be a persistent and often troubling issue in any home, but knowing when to seek professional help is crucial for effectively managing and mitigating its effects. While small patches of mold can often be addressed with DIY cleaning solutions, there are certain circumstances where the expertise of a mold remediation specialist becomes not just beneficial, but necessary.

First and foremost, if you encounter mold growth that spans more than 10 square feet, it’s a strong indicator that the problem is larger than a simple DIY fix. Larger infestations can often signal underlying issues, such as hidden moisture problems or structural damage, that require professional assessment. Additionally, if the mold is located in hard-to-reach areas like behind walls, above ceilings, or within HVAC systems, a professional’s tools and techniques will be essential for thorough remediation.

Another critical factor to consider is the health of your household members. If anyone in your home has respiratory issues, allergies, or compromised immune systems, it’s vital to address mold growth immediately with professional assistance. Mold spores can exacerbate these health conditions, leading to increased symptoms or even severe reactions.

Furthermore, if you see signs of water damage—such as discoloration, peeling paint, or warped surfaces—this often means there is more than just surface mold present. A professional will be able to identify the source of the moisture, recommend repairs to prevent future growth, and ensure that the area is safely cleaned and remediated.

Don’t hesitate to reach out for help if you’re unsure about the severity of the situation or how to proceed. Mold specialists are equipped with the knowledge, experience, and specialized equipment necessary to tackle complex mold issues safely and effectively, providing you with peace of mind and a healthier living environment. Remember, addressing mold issues promptly can save you from more significant problems and costs down the line, making professional help a wise investment in your home’s health.

14. Regular Maintenance Checklists for Homeowners

Maintaining a mold-free home requires diligence and a proactive approach, which is where regular maintenance checklists come into play. Establishing a systematic routine not only helps you stay organized but also ensures that you address potential issues before they escalate into more serious problems.

Start by creating a seasonal checklist tailored to the specific needs of your home. In the spring, focus on inspecting your gutters and downspouts to ensure they’re clear of debris, allowing rainwater to flow freely away from your foundation. This simple step can prevent excess moisture from seeping into your home, which is a primary culprit for mold growth. Additionally, take the time to check the seals around windows and doors, as even the tiniest gaps can allow humidity and moisture to infiltrate your living space.

As summer approaches, it’s essential to keep an eye on your air conditioning units. Regularly clean or replace filters to enhance airflow and reduce humidity levels indoors. Moreover, inspect the basement and crawl spaces for signs of moisture buildup or leaks. Consider installing a dehumidifier in these areas to maintain optimal humidity levels, ideally between 30-50%.

When fall arrives, turn your attention to your roof and siding. Look for any damaged shingles or cracks that could allow water to enter your home. This is also a great time to clean out your chimney and fireplace, as improved ventilation can reduce indoor humidity levels. Finally, as the colder months approach, ensure that your heating system is running efficiently. A well-maintained heating system can help regulate indoor temperatures and minimize moisture accumulation.

Lastly, don’t forget about your indoor spaces throughout the year. Establish a routine for cleaning and decluttering, especially in areas prone to dampness, such as bathrooms and kitchens. Use mold-resistant paints and materials when renovating, and keep an eye out for any signs of mold or mildew, addressing them immediately to prevent further spread. By adhering to these regular maintenance checklists, you empower yourself to maintain a healthier home environment, safeguarding against the persistent threat of mold and mildew.

15. Conclusion: Building a Mold-Free Environment

In conclusion, building a mold-free environment is not just about removing existing mold but also about implementing proactive strategies that prevent its return. By focusing on the key areas discussed throughout this blog—such as controlling humidity levels, ensuring proper ventilation, and maintaining clean and dry surfaces—you can create a home that is inhospitable to mold and mildew.

Regular inspections of your home, especially in high-risk areas like basements, bathrooms, and kitchens, will help you catch potential moisture problems before they escalate. Investing in dehumidifiers and using exhaust fans can significantly lower humidity levels, while routine cleaning with mold-inhibiting solutions will keep surfaces free of spores.

Moreover, it’s essential to be mindful of building materials; opting for mold-resistant paints and finishes can provide an added layer of defense. Remember, prevention is a continuous process—integrating these strategies into your home maintenance routine will ensure that your living space remains safe, healthy, and comfortable for you and your family.

With diligence and awareness, you can successfully cultivate a mold-free environment, allowing you to breathe easier and enjoy the peace of mind that comes with a clean and well-maintained home. Embrace these strategies, and take the first step toward a healthier living space today!

In conclusion, maintaining a mold-free environment in your home is not just about aesthetics; it’s crucial for your health and well-being. By implementing the top strategies outlined in this post, from controlling humidity levels to ensuring proper ventilation and regular cleaning, you can significantly reduce the risk of mold and mildew growth. Remember, prevention is always easier and more cost-effective than remediation. Take proactive steps today to create a healthier living space for you and your loved ones. We encourage you to share your own tips and experiences in the comments below—let’s work together to keep our homes safe and mold-free!

What are the best ways to protect your home from the elements?

Your home is your sanctuary, a place where you seek refuge from the outside world and create lasting memories with loved ones.

However, the elements—ranging from relentless rain and snow to scorching sun and howling winds—can pose significant threats to your fortress, compromising its integrity and comfort. As homeowners, it’s essential to take proactive measures to safeguard your abode against nature’s unpredictable whims. In this blog post, we will explore top strategies designed to fortify your home, ensuring it stands strong against the challenges posed by Mother Nature. From investing in durable roofing materials and energy-efficient windows to enhancing drainage systems and embracing eco-friendly landscaping, we’ll guide you through practical steps that not only protect your investment but also enhance your living environment. Join us as we delve into the best practices for creating a resilient home, so you can enjoy peace of mind and comfort, no matter what the weather brings.

1. Introduction: Understanding the Importance of Home Protection

What are the best ways to protect your home from the elements?
Credit : whatcanu.com

In an ever-changing world, the importance of safeguarding your home from the elements cannot be overstated. Your home is not just a structure; it’s a sanctuary—a place where you and your loved ones seek comfort, security, and peace of mind. However, it is constantly subjected to a variety of environmental challenges, from relentless rain and fierce winds to the scorching sun and bitter cold. Each weather condition poses its own set of risks, capable of causing both minor inconveniences and major damage if left unaddressed.

Understanding the significance of a well-protected home is the first step towards creating a resilient fortress. Not only does effective protection minimize the risk of costly repairs, but it also enhances the longevity of your property. A sturdy home can withstand nature’s wrath, ensuring that your family remains safe and comfortable no matter what Mother Nature has in store.

But home protection goes beyond physical barriers; it encompasses a holistic approach to maintaining your living space. This involves evaluating potential vulnerabilities, implementing preventative measures, and regularly updating your defense strategies to adapt to changing weather patterns. Whether you live in a flood-prone area, experience heavy snowfall, or are in the path of hurricanes, tailoring your protection plan to your specific environment is crucial.

In this blog post, we will explore essential strategies to fortify your home against the elements. From reinforcing your roof and sealing windows to landscaping wisely and investing in quality materials, each tactic plays a vital role in creating a safe haven for you and your family. Join us as we delve into the top strategies for protecting your home and ensuring that it stands strong against whatever nature throws your way.

2. Assessing Your Home’s Vulnerabilities

Assessing your home’s vulnerabilities is a crucial first step in fortifying your fortress against the elements. Every home has its weak points, and identifying these areas can save you from costly damages and ensure your shelter remains a safe haven. Start by conducting a thorough inspection of the exterior; look for cracks in the foundation, gaps around windows and doors, and any signs of wear on your roofing materials.

Check for areas where water might pool, as standing water can lead to seepage and structural damage over time. Pay special attention to your gutters and downspouts—clogged or damaged systems can redirect water to your home’s foundation rather than away from it.

Next, consider the materials your home is constructed from. For instance, wooden siding may be more susceptible to rot and pests compared to vinyl or fiber-cement alternatives. If you live in an area prone to high winds or heavy snow, evaluate the strength and integrity of your roofing and siding to ensure they can withstand the elements.

Don’t forget about the interior! Look for drafts around windows and doors, as well as insulation in the attic and walls. Upgrading insulation can significantly enhance your home’s energy efficiency and temperature regulation.

Finally, consult with professionals if you’re unsure about your findings. A home inspector or a contractor can provide expert insight into potential vulnerabilities you might overlook. By thoroughly assessing your home’s weaknesses, you’ll be better equipped to implement protective measures and fortify your fortress against whatever nature may throw your way.

3. Weatherproofing Your Exterior: Doors and Windows

What are the best ways to protect your home from the elements?
Credit : whatcanu.com

When it comes to fortifying your home against the unpredictable whims of Mother Nature, weatherproofing your exterior is an essential strategy that should not be overlooked. Your doors and windows serve as the first line of defense against the elements, and ensuring they are properly sealed can significantly enhance your home’s resilience and energy efficiency.

Start with your doors. Inspect them for gaps or cracks that could allow drafts to seep in. A simple yet effective measure is to apply weather stripping around the edges. This not only helps keep cold air out during the winter months but also prevents cool air from escaping in the summer, ultimately reducing your energy bills. For added protection, consider replacing hollow-core doors with solid wood or fiberglass options, which provide better insulation and durability.

Next, turn your attention to your windows. Older windows can be a significant source of heat loss, so it’s crucial to assess their condition. If you notice condensation between the panes or difficulty in opening and closing, it may be time for a replacement. Opt for double or triple-glazed windows that offer superior insulation and noise reduction. Additionally, applying storm windows can provide an extra layer of security against heavy winds and rain.

Don’t forget to check your window frames and sills. Look for any signs of rot or decay, especially in wooden frames. These can weaken your home’s structure and allow moisture to enter. Sealing any gaps with caulk or expanding foam can further enhance the moisture barrier, preventing water from infiltrating and causing costly damage.

Incorporating these weatherproofing measures will not only protect your home from harsh weather conditions but also contribute to a more comfortable and energy-efficient living space. By investing time and resources into your doors and windows, you’re fortifying your fortress against the elements, ensuring your home remains a safe haven for years to come.

4. The Role of Insulation in Home Defense

When it comes to fortifying your home against the elements, insulation plays a crucial role that often goes unnoticed. Think of insulation as the protective barrier that keeps your living space comfortable while shielding it from the harsh realities of weather fluctuations. It’s not just about shaking off the winter chill or avoiding the summer heat; effective insulation serves as your home’s first line of defense against moisture, noise, and energy loss.

A well-insulated home helps maintain a consistent internal temperature, reducing reliance on heating and cooling systems and, in turn, lowering energy bills. This is especially significant in regions prone to extreme temperatures, where inadequate insulation can lead to skyrocketing utility expenses and uncomfortable living conditions. Insulation comes in various forms—fiberglass, spray foam, cellulose, and rigid foam boards—each offering unique benefits depending on your home’s structure and your specific needs.

Furthermore, insulation acts as a moisture barrier, preventing condensation and the subsequent growth of mold and mildew, which can not only compromise the structural integrity of your home but also pose health risks to you and your family. Investing in quality insulation means investing in long-term protection for your home and well-being.

When planning your insulation strategy, consider areas that often get overlooked, such as attics, crawl spaces, and even around windows and doors. Sealing these vulnerable spots can significantly enhance overall energy efficiency. As you fortify your fortress, remember that the right insulation can make all the difference in creating a resilient home that stands strong against the elements. So, take the time to assess your current insulation and make necessary upgrades—your home will thank you.

5. Roofing Strategies for Extreme Weather Conditions

What are the best ways to protect your home from the elements?
Credit : whatcanu.com

When it comes to fortifying your home against the forces of nature, the roof is your first line of defense. Extreme weather conditions—be it torrential rains, heavy snow, intense heat, or fierce winds—can take a significant toll on your roofing system. Therefore, implementing effective roofing strategies is crucial to ensure that your home remains a safe haven, no matter the weather outside.

**Choose the Right Materials:** Start by selecting roofing materials that are specifically designed to withstand your local climate. For areas prone to heavy snowfall, consider materials like metal or slate, which can handle the weight and resist cracking. In regions with high winds, such as coastal areas, opt for shingles rated for wind resistance or a roof that utilizes a low-profile design to minimize the risk of uplift. Additionally, reflective roofing materials can help combat extreme heat by reducing your home’s cooling costs in the sweltering summer months.

**regular Inspections and Maintenance:** Proactive maintenance is key to extending the life of your roof. Schedule regular inspections, especially after severe weather events, to identify and address issues like loose shingles, leaks, or damage caused by debris. Cleaning gutters and downspouts to ensure proper drainage can also prevent water from accumulating and causing structural damage.

**Consider Roof Reinforcement:** In areas frequently affected by hurricanes or tornadoes, reinforcing your roof can provide an extra layer of protection. This can involve securing the roof deck to the house frame or installing hurricane straps that help hold the roof in place during high winds. These modifications can significantly enhance your roof’s ability to withstand extreme weather conditions.

**Implement Proper Insulation and Ventilation:** A well-insulated roof not only keeps your home comfortable but also prevents moisture buildup that can lead to mold and structural damage. Ensure that your attic is properly ventilated to allow for adequate air circulation, reducing the risk of ice dams in winter and overheating in summer.

By taking these roofing strategies into account, you can better protect your home from the elements, ensuring that your fortress remains strong and secure through every storm. Remember, a resilient roof not only safeguards your property but also contributes to the overall longevity and value of your home.

6. Landscaping Tips to Shield Your Home

Landscaping isn’t just about aesthetics; it’s a powerful tool for creating a natural barrier that shields your home from the elements. By making thoughtful choices in your outdoor space, you can significantly enhance your home’s resilience against weather-related threats.

**1. Plant Strategically:** Choose trees and shrubs that can act as windbreaks, reducing the impact of strong gusts on your home. Evergreens are particularly effective, as they maintain their foliage year-round, providing a consistent shield. Position these plants on the side of your home that faces the prevailing winds to create a natural barrier that mitigates storm damage.

**2. Elevate Your Garden Beds:** When heavy rains arrive, flooding can pose a serious risk to your home. By raising your garden beds or creating swales, you can guide water away from your foundation, preventing potential water damage. Adding mulch or gravel to your landscape not only enhances drainage but also adds an attractive touch to your outdoor aesthetics.

**3. Use Native Plants:** Opt for native plants that are well adapted to your local climate. These plants require less water and are more resilient to environmental stressors, making them an excellent choice for sustainable landscaping. Additionally, native plants can improve soil stability and reduce erosion, protecting your home from the impact of heavy rains or soil shifts.

**4. Create a Rock Barrier:** Consider incorporating decorative rocks or gravel around your foundation to divert water away from your home. These elements can absorb excess moisture and prevent pooling, while also adding texture and visual interest to your landscaping design.

**5. Mulch Wisely:** Organic mulch not only enhances your garden’s appearance but also plays a crucial role in moisture retention and weed control. Applying a thick layer of mulch around your plants helps regulate soil temperature and keeps roots protected during extreme heat or cold, further reinforcing your home’s defenses against the elements.

By implementing these landscaping strategies, you’re not just beautifying your property; you’re proactively fortifying your fortress against nature’s challenges. With a well-designed landscape, you can create a harmonious balance between safety and beauty, ensuring your home stands strong against whatever Mother Nature throws its way.

7. Gutter Maintenance: Keeping Water Away from Your Foundation

What are the best ways to protect your home from the elements?
Credit : whatcanu.com

Gutter Maintenance: Keeping Water Away from Your Foundation

When it comes to protecting your home from the elements, one of the most crucial yet often overlooked aspects is the maintenance of your gutters. These seemingly simple channels play a vital role in directing rainwater away from your roof and foundation, preventing costly water damage and structural problems. Neglecting your gutters can lead to a host of issues, from mold growth and rotting wood to basement flooding and foundation cracks.

To ensure your gutters are functioning optimally, start by inspecting them at least twice a year, ideally in the spring and fall. Look for signs of blockages, such as leaves, twigs, and debris that can impede the flow of water. A clogged gutter can quickly turn into a waterfall, pouring water down the sides of your home instead of directing it away. When cleaning, use a sturdy ladder and wear gloves to safely remove any buildup. It’s also wise to check for any rust or damage, as even minor issues can escalate if not addressed promptly.

In addition to regular cleaning, consider installing gutter guards. These protective covers can significantly reduce the amount of debris that accumulates in your gutters, minimizing the frequency of cleanings and ensuring that water flows freely. Another effective strategy is to ensure that your downspouts are directed away from your foundation, ideally at least three to four feet away. This simple adjustment can make a world of difference in preventing water from pooling around your home.

Furthermore, while you’re tending to your gutters, take a moment to inspect the soil around your foundation. Ensure that it’s sloped away from your home, allowing for excellent drainage. If you notice any areas where water tends to collect, consider regrading the landscape or adding drainage solutions like French drains to further mitigate water issues.

By prioritizing gutter maintenance, you not only extend the lifespan of your home’s exterior but also fortify your fortress against the relentless forces of nature. A little attention to this critical aspect of home care can save you from significant headaches and expenses down the line, ensuring that your home remains a safe haven for years to come.

8. Installing Storm Shutters for Added Security

When it comes to safeguarding your home against the unpredictable forces of nature, installing storm shutters is a strategic move that combines both functionality and aesthetics. Storm shutters are more than just a protective barrier; they serve as an essential line of defense against harsh weather conditions such as strong winds, heavy rain, and flying debris.

Available in various materials, including aluminum, vinyl, and wood, storm shutters come in a range of styles to suit your home’s design—from classic Colonial to modern minimalism. This versatility means you don’t have to compromise on curb appeal while enhancing your home’s resilience. When closed, storm shutters not only shield your windows from potential damage during storms but also provide an extra layer of security against break-ins, making your home a less attractive target for intruders.

Furthermore, storm shutters can contribute to energy efficiency. By blocking out direct sunlight, they can help regulate indoor temperatures, keeping your home cooler in the summer and warmer in the winter. This can lead to reduced energy bills, as your heating and cooling systems won’t have to work as hard.

Installation is straightforward, with options ranging from manual to motorized systems that can be deployed at the touch of a button, ensuring you’re always prepared regardless of the weather forecast. Investing in storm shutters not only fortifies your home against the elements but also provides peace of mind, knowing that your fortress is well-protected and ready to withstand whatever Mother Nature throws its way.

9. Choosing Durable Materials for Outdoor Features

When it comes to fortifying your home against the elements, the choice of materials for outdoor features can make all the difference. Opting for durable, weather-resistant materials is essential not only for longevity but also for maintaining the aesthetic appeal of your property.

Start with your deck or patio. Composite decking materials, for instance, are engineered to withstand the harshness of sun, rain, and snow without warping or fading over time. Unlike traditional wood, composites resist splintering and require minimal maintenance—just a simple wash now and then to keep them looking fresh. If you prefer natural materials, consider using treated hardwoods like teak or mahogany, which are naturally resistant to decay and insect damage.

For outdoor furniture, look for options made from aluminum or stainless steel. These metals are not only lightweight and stylish but also impervious to rust, ensuring that your investment remains intact through the seasons. Additionally, synthetic wicker can provide a chic, comfortable seating area without the worry of mold or mildew that comes with traditional wicker.

When it comes to fencing and gates, materials like vinyl or metal are excellent choices. Vinyl fencing is virtually maintenance-free and stands up to UV rays, while metal fences can provide both security and style, remaining unaffected by moisture and pests.

Finally, don’t overlook roofing and siding materials. Architectural shingles or metal roofing can offer superior protection against high winds and heavy precipitation, while fiber-cement siding is highly resistant to rot, warping, and insect damage.

By carefully selecting durable materials for your outdoor features, you not only enhance your home’s resilience against the elements but also elevate its overall curb appeal, creating a fortress that stands the test of time. Investing in quality materials is an investment in peace of mind, ensuring that your home remains a safe haven for years to come.

10. Preparing Your Home for Natural Disasters

Natural disasters can strike without warning, and being unprepared can lead to devastating consequences for your home and loved ones. To fortify your fortress against the unpredictable forces of nature, it’s essential to implement a proactive approach to disaster readiness.

Start by assessing your home’s vulnerability to the types of natural disasters most common in your area—be it hurricanes, floods, wildfires, or earthquakes. Each threat requires a tailored strategy to mitigate damage. For instance, if you live in a flood-prone zone, consider investing in raised foundations and proper drainage systems. Installing sump pumps can also help divert water away from your home during heavy rains.

For those in hurricane-prone regions, reinforcing your windows and doors with storm shutters can provide an extra layer of protection against high winds and flying debris. Similarly, securing roof shingles and ensuring your gutters are clean and functioning will help prevent water from seeping into your home during severe storms.

In the face of wildfires, creating defensible space around your property is crucial. This involves clearing flammable vegetation, maintaining a well-trimmed lawn, and using fire-resistant materials for fences and decks. Additionally, having a reliable evacuation plan and a go-bag ready with essentials can make all the difference should you need to leave quickly.

Don’t forget the importance of insulation and structural integrity in earthquake-prone areas. Investing in retrofitting your home can minimize damage and protect your family when the ground begins to shake. Regularly inspecting your home for vulnerabilities, such as cracks in the foundation or aging roofing materials, can also help you stay one step ahead of potential disasters.

Lastly, consider joining or forming a community preparedness group. Sharing resources and knowledge with neighbors can enhance your collective resilience against natural disasters. By taking these steps to prepare your home, you’re not just safeguarding your property; you’re fortifying your fortress for whatever nature has in store.

11. The Benefits of Regular Home Inspections

Regular home inspections are not just a precaution; they are a proactive strategy for safeguarding your fortress against the relentless forces of nature. These inspections provide a crucial opportunity to identify potential vulnerabilities before they escalate into costly repairs or, worse, structural failures. By enlisting a professional inspector to assess your home on a routine basis, you can uncover issues such as roof wear, foundation cracks, and water damage that might otherwise go unnoticed.

One of the most significant benefits of regular inspections is the peace of mind they offer. Knowing that your home is fortified and sound allows you to focus on enjoying your living space rather than worrying about hidden problems. Moreover, these inspections can highlight areas where your home may be vulnerable to extreme weather conditions—whether it’s reinforcing your roof to withstand heavy winds or ensuring your gutters are clear to prevent water damage during torrential rain.

Additionally, a home inspection can be a valuable tool for planning future upgrades or renovations. If an inspector identifies outdated insulation or inefficient windows, you can prioritize these improvements, enhancing your home’s energy efficiency and reducing your utility bills. This not only contributes to your comfort but also adds value to your property.

In summary, regular home inspections are an investment in your home’s longevity and your family’s safety. They empower you to take control of your living environment, ensuring that it remains a sturdy bastion against the elements while providing you with invaluable peace of mind. Don’t wait for the storm to hit—fortify your fortress with the knowledge gained from a thorough inspection today.

12. Smart Home Technology for Monitoring Weather Conditions

In today’s rapidly evolving technological landscape, smart home technology has emerged as a powerful ally in your quest to fortify your home against the elements. Imagine a system that not only alerts you to impending storms but also allows you to monitor temperature fluctuations and manage your home’s energy consumption—all from your smartphone or tablet. This level of connectivity can be both a proactive defense and a reactive response to nature’s unpredictability.

Smart weather stations are at the forefront of this movement, providing real-time data on wind speed, humidity, and precipitation directly to your devices. Equipped with advanced sensors, these stations can forecast conditions specific to your location, giving you a heads-up about potential weather threats before they strike. This means you can batten down the hatches or adjust your heating and cooling settings ahead of time, ensuring your home remains a safe haven.

Furthermore, integrating your weather monitoring systems with your home automation setup elevates your defense strategy. For instance, pairing weather alerts with smart window shades can keep your home cooler during a heatwave by automatically adjusting to block out the sun. Similarly, smart thermostats can adjust temperatures based on the forecast, optimizing energy efficiency while keeping your home comfortable.

Additionally, smart irrigation systems can help mitigate water damage during heavy rainfall by adjusting your watering schedule based on current weather conditions. This not only protects your landscaping but also prevents unnecessary flooding in your yard.

By investing in smart home technology dedicated to weather monitoring, you create a dynamic shield against the elements, ensuring your home remains resilient and secure no matter what Mother Nature throws your way. Embracing these innovations not only enhances your home’s safety but also offers the peace of mind that comes from being prepared for whatever weather may come.

13. Creating an Emergency Preparedness Plan

Creating an Emergency Preparedness Plan is a vital step in fortifying your home against the unpredictable forces of nature. While we often think about safeguarding our homes from immediate threats like storms or floods, it’s equally important to prepare for the aftermath. A well-structured emergency plan not only helps you respond effectively during a crisis but also reassures your family that you’re ready for whatever may come your way.

Start by assessing the specific risks your home faces based on its geographical location. Is your area prone to hurricanes, heavy snowfall, wildfires, or earthquakes? Understanding these risks will allow you to tailor your plan accordingly. Once you’ve identified potential threats, gather your family and discuss the kinds of emergencies that could arise. Involving everyone in the discussion fosters a sense of responsibility and ensures that everyone knows what to do when the time comes.

Next, create a comprehensive communication plan. Ensure that every family member knows how to reach each other during an emergency, and establish a designated meeting spot in case you become separated. Consider keeping a list of important phone numbers, including local emergency services, neighbors, and family members who live outside the immediate area.

An essential part of your preparedness plan is assembling an emergency kit. This kit should contain essential supplies such as water, non-perishable food, first-aid supplies, flashlights, batteries, and any required medications. Regularly review and update your kit to ensure that it remains stocked and relevant. Additionally, make sure that your home’s safety equipment—like smoke detectors, carbon monoxide alarms, and fire extinguishers—are functional and easily accessible.

Lastly, don’t overlook the importance of practice. Conduct regular drills with your family to ensure everyone is familiar with the plan and knows their role during an emergency. These drills not only help reinforce the steps to take but can also ease anxiety during actual events. By creating and refining your Emergency Preparedness Plan, you not only protect your home but also empower your family to face adversity with confidence and resilience.

14. Insurance Considerations for Elemental Protection

When it comes to fortifying your home against the elements, having the right insurance coverage is as crucial as the physical barriers you put in place. Many homeowners underestimate the importance of a comprehensive insurance policy that specifically addresses the threats posed by natural disasters and extreme weather conditions.

Before you finalize your insurance plan, take a moment to assess the unique vulnerabilities of your home based on its location. For instance, homes in flood-prone areas should prioritize flood insurance, while those in hurricane territories might benefit from windstorm coverage. It’s essential to consult with your insurance agent to understand the specifics of your policy, including what is covered and what is excluded.

Moreover, consider adding endorsements or riders to your standard homeowner’s insurance to enhance your coverage. These additional provisions can help protect against specific risks, such as seismic activity in earthquake-prone zones or damage from hailstorms.

Another important factor to consider is the replacement cost versus actual cash value. While the latter may seem appealing with lower premiums, it only compensates you for the depreciated value of your items, potentially leaving you short in the event of a significant loss. Opting for replacement cost coverage ensures that you can replace items at current market value, providing a much-needed safety net when disaster strikes.

Lastly, keep your insurance information organized and accessible. Regularly update your policy to reflect renovations or valuable acquisitions, and maintain an inventory of your belongings, documenting their condition and value. This preparation will not only streamline the claims process but also give you peace of mind, knowing that you’re well-protected against the unpredictable forces of nature. In essence, thoughtful insurance considerations can serve as a vital layer of defense for your home, complementing the physical strategies you implement to shield your fortress from the elements.

15. Conclusion: Building a Resilient Home for the Future

In conclusion, fortifying your home against the elements is not merely a one-time investment; it’s a continuous commitment to creating a resilient environment that safeguards your family and property for years to come. By implementing the strategies discussed, such as enhancing insulation, investing in quality roofing materials, and installing storm-resistant windows, you can significantly reduce the impact of harsh weather conditions.

Consider the importance of regular maintenance, which often gets overlooked. Routine inspections and timely repairs can save you from costly damages down the line. Moreover, embracing sustainable practices, like utilizing rainwater harvesting and solar energy, not only bolsters your home’s defenses but also contributes to environmental preservation.

As climate patterns evolve and extreme weather events become more frequent, the proactive measures you take today will determine your home’s ability to withstand future challenges. A resilient home is not merely a structure; it’s a sanctuary that provides safety, comfort, and peace of mind. By fortifying your fortress, you are investing in the well-being of your loved ones and ensuring that your home remains a steadfast refuge against whatever nature may throw its way. Remember, the best time to prepare is now; don’t wait for the storm to strike before taking action. Your future self will thank you.

In conclusion, protecting your home from the elements is not just about aesthetics; it’s about ensuring the safety, comfort, and longevity of your living space. By implementing the strategies outlined in this post—such as investing in quality roofing, proper insulation, and effective drainage systems—you can fortify your fortress against nature’s unpredictable forces. Remember, a proactive approach not only shields your home but also enhances its value and reduces long-term repair costs. So take the first steps today to safeguard your sanctuary, and enjoy the peace of mind that comes with knowing your home is well-protected. We’d love to hear about your own strategies and experiences in fortifying your home, so feel free to share in the comments below!

How to fix a clogged drain?

Dealing with a clogged drain can be a frustrating ordeal that disrupts your daily routine and causes unnecessary stress.

Whether it’s the slow trickle of water in your sink or a complete blockage in your shower, these pesky plumbing issues can quickly escalate if not addressed promptly. Fortunately, you don’t always have to call in a professional to resolve the problem. With a little know-how and some handy household items, you can tackle minor clogs right from the comfort of your home. In this blog post, we’ll explore ten effective methods to unclog your drain, ranging from simple DIY techniques to natural remedies that are safe for your plumbing. Say goodbye to the hassle of standing water and hello to smooth-flowing drains as we guide you through these practical solutions that every homeowner should have in their toolkit!

1. Understanding the Common Causes of Clogged Drains

How to fix a clogged drain?
Credit : whatcanu.com

Understanding the common causes of clogged drains is essential for addressing the issue effectively and preventing future blockages. While it may seem like an inconvenience that comes out of nowhere, clogged drains often result from a series of predictable culprits that can build up over time.

One of the most common offenders is hair. Whether it’s long strands from a shower or tiny strands from a bathroom sink, hair can easily accumulate in your pipes, creating a tangled mess that restricts water flow. In kitchens, food debris is a frequent culprit. Small bits of grease, oil, and leftover food particles can combine to create a sticky sludge that clings to the insides of your pipes, gradually narrowing the passageway until water can no longer flow freely.

Another hidden menace is soap scum, particularly in bathrooms. Traditional soaps can leave behind residues that collect over time, especially when mixed with minerals found in hard water. Similarly, mineral buildup from hard water can create scale deposits, further constricting your pipes.

Roots from nearby trees are another common cause of drain issues, as they can invade your home’s plumbing system in search of moisture and nutrients. Once roots find their way into the pipes, they can grow and cause significant blockages.

Lastly, foreign objects—like cotton swabs, dental floss, and even toys—often make their way into drains, leading to unexpected clogs. Understanding these common causes is the first step in taking proactive measures to keep your drains clear and flowing smoothly. By being aware of what can lead to blockage, you can implement preventive practices and be better prepared to tackle any issues that arise.

2. Method 1: Boiling Water to the Rescue

When faced with a sluggish drain, the simplest solution may often be the most effective: boiling water. This time-honored method is not only easy but also requires no special tools or expensive products. Here’s how it works.

Start by bringing a large pot of water to a rolling boil. The ideal temperature is just below boiling point—around 212°F (100°C)—which will help dissolve the grease and grime that often contribute to drain clogs. Carefully pour the boiling water directly into the drain in a slow, steady stream. This allows the heat to penetrate deeper into the blockage, breaking down any stubborn buildups of soap scum, hair, or food particles.

For optimal results, repeat this process two or three times, allowing a few moments in between each pour. The heat from the water will not only melt away the debris but also help flush it through the pipes, promoting a clearer flow.

While boiling water can be a great first step for minor clogs, it’s essential to use caution, especially if you have PVC pipes, as excessive heat may cause damage. If you suspect your clog is more severe or has been lingering for an extended period, it might be time to explore additional methods. However, in many cases, this simple technique can work wonders, leaving your drains flowing freely and your home feeling fresh. So, before reaching for harsher chemicals, give boiling water a chance to work its magic—your drains will thank you!

3. Method 2: Baking Soda and Vinegar Solution

How to fix a clogged drain?
Credit : whatcanu.com

When it comes to tackling stubborn clogs, the dynamic duo of baking soda and vinegar is a powerful, eco-friendly solution that many homeowners swear by. This method not only helps clear your drains but also offers a gentle cleanse for your plumbing system, making it an ideal choice for regular maintenance.

To begin, gather your materials: a box of baking soda, a bottle of white vinegar, and a kettle of boiling water. This simple household combination works as a natural chemical reaction that can dissolve grime, grease, and debris.

Start by pouring about a cup of baking soda directly into the clogged drain. Ensure it’s as close to the source of the blockage as possible. Follow this with a cup of white vinegar; you’ll hear a satisfying fizzing sound as the two ingredients react. This effervescent reaction creates bubbles that work to break down stubborn build-up within the pipes, loosening anything that might be causing the blockage.

Allow the mixture to sit undisturbed for about 30 minutes. During this time, the powerful combination of baking soda and vinegar is doing its job, breaking down clogs and deodorizing your pipes. For particularly stubborn clogs, you can let it sit for up to an hour for maximum effect.

After the waiting period, boil a kettle of water and carefully pour it down the drain. This final step flushes away the loosened debris, leaving your pipes clear and fresh. Not only is this method effective, but it’s also safe for your plumbing and the environment, making it a go-to for those looking to maintain a healthy home without resorting to harsh chemicals.

So, next time you face a sluggish drain, remember this baking soda and vinegar solution—it’s a simple, natural remedy that can save you time and money while keeping your plumbing system in top shape.

4. Method 3: The Power of a Plunger

When it comes to tackling stubborn clogs, few tools are as iconic and effective as the trusty plunger. Often overlooked, this simple device can be your first line of defense against blocked drains, whether in the kitchen sink, bathroom, or even the toilet.

To use a plunger effectively, begin by ensuring there’s enough water in the basin to cover the rubber cup completely. This water creates the necessary seal for maximum suction. Position the plunger over the drain, aligning it so that the cup fully envelops the opening. Apply firm, steady pressure as you push down to expel air, followed by an equally vigorous pull to create suction. Repeat this motion several times—typically, a good rhythm of 15 to 20 plunges should suffice.

The power of a plunger lies in its ability to generate pressure that can dislodge stubborn blockages. Whether it’s a buildup of hair, grease, or food particles, the force created can often break up the clog, allowing water to flow freely once again. After several attempts, remove the plunger and watch as the water begins to drain away; if it does, you’ve successfully cleared the blockage!

However, if the water doesn’t budge, don’t despair. Sometimes, stubborn clogs require a bit more finesse. Consider using the plunger in conjunction with hot water or a mixture of baking soda and vinegar for a more robust approach. Nonetheless, the plunger remains a vital tool in your plumbing arsenal, embodying the essence of DIY home remedies—simple, effective, and always ready to tackle the unexpected hiccups of household maintenance.

5. Method 4: Using a Drain Snake

How to fix a clogged drain?
Credit : whatcanu.com

When it comes to clearing stubborn clogs, a drain snake is one of the most effective tools in your arsenal. A drain snake, also known as a plumber’s snake or auger, is a long, flexible tool designed to navigate the twists and turns of your plumbing system, reaching deep into the pipes to dislodge blockages that simple plungers can’t reach.

To use a drain snake, start by removing the drain cover or stopper from the affected sink or tub. Insert the end of the snake into the drain, and gently push it down the pipe while rotating the handle. You’ll want to apply slight pressure as you maneuver the snake deeper, feeling for resistance that indicates the location of the clog. Once you encounter the blockage, continue twisting the snake to break it up or hook it, pulling it back toward you.

It’s important to be patient during this process; sometimes, you may need to repeat the insertion and rotation several times before you fully clear the debris. Once you believe the clog has been dislodged, run hot water down the drain to flush any remaining particles and ensure proper flow.

Using a drain snake can be a bit messy, so be sure to have towels or a bucket handy to catch any residual water or debris that may spill out during the process. With a little persistence and the right technique, a drain snake can save you from costly plumbing bills and restore peace to your home’s drainage system.

6. Method 5: Wet/Dry Vacuum Magic

When it comes to tackling stubborn clogs, the wet/dry vacuum proves to be an unsung hero in the realm of home maintenance. This versatile tool, often hiding in garages or utility rooms, can work wonders for your drains when traditional methods fail.

To harness the magic of a wet/dry vacuum, start by ensuring it’s set to the liquid setting. If your vacuum has a filter, make sure it’s designed for wet use; otherwise, you might find yourself with a messy cleanup. Next, create a tight seal over the drain. This can often be achieved by using the vacuum hose to cover the opening completely, ensuring no air escapes. If the clog is located in a sink or shower, you might find it helpful to use a wet cloth or duct tape to further seal the edges—this will enhance the vacuum’s suction power.

Once everything is set, turn the vacuum on to its highest setting. The suction should pull the obstruction up and out of the drain, making it a surprisingly effective solution for hair, food particles, and other debris that tends to build up over time. For deeper clogs, you may need to alternate between the vacuum’s suction and a bit of water, allowing the powerful pull to break loose and extract the blockage.

Remember to empty the vacuum reservoir as needed, especially if the clog is particularly large or the tank fills quickly. Once you’ve successfully removed the blockage, follow up with a hot water rinse down the drain to flush away any lingering residue.

Using a wet/dry vacuum not only saves you from harsh chemicals but also offers a quick and environmentally friendly method to reclaim your drains. So next time you find yourself facing a stubborn clog, don’t underestimate the power of this handy tool—it might just work magic in restoring your plumbing flow!

7. Method 6: Salt and Hot Water Treatment

How to fix a clogged drain?
Credit : whatcanu.com

Method 6: Salt and Hot Water Treatment

If you’re facing a stubborn clog, the combination of salt and hot water may just be the remedy your drains need. This simple yet effective method harnesses the natural properties of salt to break down buildup in your pipes while the hot water acts as a catalyst to enhance the process.

To start, gather about half a cup of coarse salt—table salt will work in a pinch, but coarse salt is preferable due to its larger granules, which can provide a scrubbing effect. Pour the salt directly down the drain, ensuring it reaches the areas where the clog is most likely situated. Next, heat a pot of water until it reaches a rolling boil.

Once the water is hot, carefully pour it down the drain over the salt. You’ll want to do this in stages, allowing the hot water to work its magic on the salt before adding more. The heat helps dissolve grease and food particles, while the salt aids in breaking apart stubborn debris clinging to the sides of your pipes.

This method is especially effective for kitchens where greasy buildup is common. After pouring the hot water and salt mixture, let it sit for about 15 minutes to allow the solution to penetrate and break down the clog. Follow this with a final flush of hot water to rinse away any remaining debris and salt.

This treatment is not only eco-friendly but also an inexpensive alternative to chemical drain cleaners. Regularly using this method can help maintain clear drains and prevent future clogs, ensuring that your plumbing system remains in good health. So, the next time you notice slow drainage, reach for the salt and hot water—it might just be the perfect solution!

8. Method 7: Enzyme Cleaners Explained

When it comes to tackling stubborn clogs, enzyme cleaners offer a powerful, eco-friendly alternative to traditional chemical drain cleaners. These unique products harness the natural power of enzymes and bacteria to break down organic material, such as hair, grease, soap scum, and food particles, that often contribute to blockages in your plumbing system.

Unlike harsh chemicals that can corrode your pipes and release toxic fumes into your home, enzyme cleaners are gentle yet effective. They work by introducing specific strains of bacteria into your drain that feed on the organic waste, effectively digesting it and clearing the obstruction over time. This means that while you might not see immediate results as you would with a chemical cleaner, enzyme cleaners provide a more sustainable solution that can help maintain the health of your plumbing.

Using enzyme cleaners is simple. Just pour the recommended amount down your drain, and let it sit for several hours or overnight, allowing the enzymes to get to work. For best results, it’s beneficial to use these cleaners regularly—perhaps once a month—to prevent buildup and keep your drains flowing smoothly.

In addition to being safe for your pipes and the environment, enzyme cleaners are also a great option for homes with septic systems, as they help maintain the balance of beneficial bacteria essential for proper septic function. So, if you’re looking for an effective and responsible way to unclog your drains, consider giving enzyme cleaners a try. They not only clear your drains but also promote a healthier plumbing system, making them an invaluable tool in your home maintenance arsenal.

9. Method 8: Cleaning the Trap

Cleaning the trap is often an overlooked yet vital step in unclogging your drain. The trap, a U-shaped pipe located beneath your sink, plays a crucial role in preventing sewer gases from entering your home. However, it can also become a catch-all for debris, food particles, hair, and soap scum, leading to frustrating clogs.

To begin, gather your supplies: a bucket or large bowl, a pair of gloves, and a wrench or pliers. Place the bucket beneath the sink to catch any water or debris that may spill out when you remove the trap. Once you’ve prepared your workspace, carefully unscrew the trap using your wrench or pliers, being cautious not to apply too much force, as this could damage the plumbing.

As you detach the trap, you’ll likely encounter a mix of unpleasant odors and a buildup of grime. This is normal, and it’s a clear indicator that it’s time for a thorough cleaning. Use an old toothbrush or a small scrub brush to remove any stubborn residue stuck to the interior surfaces. For a deeper clean, soak the trap in hot, soapy water for a few minutes before scrubbing.

Once you’ve cleaned the trap thoroughly, rinse it with hot water to wash away any remaining soap. Reattach the trap securely, ensuring all connections are tight to prevent leaks. After everything is back in place, run some hot water through the sink to verify that the flow has improved and that no leaks are present.

Cleaning the trap not only helps to eliminate clogs but also enhances the overall hygiene of your kitchen or bathroom, reducing odors and preventing future build-up. By incorporating this simple method into your regular home maintenance routine, you can keep your drains flowing freely and avoid more serious plumbing issues down the line.

10. Method 9: Chemical Drain Cleaners: Pros and Cons

When it comes to tackling stubborn clogs, chemical drain cleaners can often seem like a quick and convenient solution. These powerful formulations are designed to break down hair, grease, and other debris that can accumulate in your pipes, making them a tempting option for many homeowners. However, before you reach for that bottle, it’s essential to weigh the pros and cons of using chemical drain cleaners in your home.

**Pros:**

One of the most significant advantages of chemical drain cleaners is their effectiveness. They can work wonders on tough clogs, often dissolving blockages within minutes. This speed can be a lifesaver when you’re in a pinch and need immediate results. Additionally, chemical drain cleaners are widely available at most grocery stores and home improvement centers, making them an accessible option for many.

Another benefit is that these products can reach areas that manual methods may struggle with, penetrating deep into your plumbing system. With just a pour and a wait, many homeowners find that they can achieve results without the need for elaborate tools or professional help.

**Cons:**

Despite their convenience, chemical drain cleaners come with notable drawbacks that shouldn’t be overlooked. First and foremost, these products contain harsh chemicals, which can be harmful to both your plumbing and the environment. Over time, they can corrode pipes, leading to leaks and costly repairs. If used excessively, they can even contribute to more severe plumbing issues.

Moreover, chemical drain cleaners can pose health risks. The fumes emitted during use can be toxic, and if any residue remains in your pipes, it can lead to exposure during future plumbing work. It’s crucial to prioritize safety by wearing gloves and ensuring good ventilation when using these products.

Lastly, while chemical drain cleaners can be effective for many clogs, they aren’t a universal solution. Some blockages may be too severe for these chemicals to handle, requiring more manual methods or professional assistance.

In conclusion, while chemical drain cleaners can offer a quick fix for minor clogs, it’s essential to consider their potential risks and impact on your plumbing system. Weighing the pros and cons can help you make an informed decision on whether this method is right for your home, ensuring that you maintain a healthy and functional drainage system in the long run.

11. Method 10: Preventative Tips to Avoid Future Clogs

While it’s essential to know how to tackle a clogged drain when it happens, the best approach is to prevent clogs from forming in the first place. By implementing a few simple habits and maintenance routines, you can keep your drains flowing smoothly and avoid the hassle of future blockages.

### Regular Maintenance

Start by making regular drain maintenance a part of your cleaning routine. Pouring a mixture of baking soda and vinegar down your drains once a month creates a natural fizzing reaction that helps break down buildup. Follow this with hot water to flush away any remaining debris. This not only keeps your drains clear but also helps combat any unpleasant odors.

### Mind What Goes Down the Drain

Be mindful of what you put down your sinks and toilets. Avoid disposing of grease, coffee grounds, and food scraps in the kitchen sink, as these can easily accumulate and cause clogs. Instead, use a compost bin for food waste and allow grease to cool and solidify before throwing it away. In the bathroom, use a mesh strainer over your drain to catch hair and soap scum, which are common culprits in shower and sink clogs.

### Invest in Drain Screens

Installing drain screens or guards is an easy and effective way to prevent larger particles from entering your plumbing system. These simple devices can catch hair, food particles, and other debris, preventing them from causing blockages. Make it a habit to clean these screens regularly to ensure they are functioning properly.

### Educate Your Family and Guests

Make sure everyone in your household understands the importance of keeping drains clear. Educate family members—and inform guests—about what can and cannot go down the sink or toilet. A little communication can go a long way in preventing costly plumbing issues.

### Schedule Professional Inspections

Finally, consider scheduling periodic professional inspections of your plumbing system. A qualified plumber can identify potential issues before they become serious problems, ensuring that your drains remain clear and functional. Regular maintenance checks can provide peace of mind and save you from emergency repairs down the line.

By incorporating these preventative tips into your routine, you can significantly reduce the risk of clogs and keep your drains flowing freely. Remember, a little proactive care goes a long way in maintaining a healthy plumbing system!

12. When to Call a Professional Plumber

While many clogged drains can be tackled with DIY methods and household remedies, there comes a time when the situation is beyond your expertise and equipment. Knowing when to call a professional plumber is crucial for preventing further damage to your plumbing system and ensuring a safe, effective resolution to the problem.

If you’ve tried multiple attempts at unclogging your drain with no success—whether it’s plunging, using a drain snake, or pouring in a mixture of vinegar and baking soda—it may be time to reach for the phone. Persistent clogs can indicate deeper issues within your plumbing, such as tree root invasions, pipe corrosion, or major blockages further down the line. These require specialized tools and knowledge that only a licensed plumber can provide.

Moreover, if you notice strange signs like water backing up in multiple drains simultaneously, foul odors emanating from your pipes, or unusual sounds (like gurgling) coming from your plumbing, it’s a strong signal that professional intervention is needed. Ignoring these symptoms may lead to more severe problems, including pipe bursts or sewage backups, which can be costly and hazardous to your health.

Additionally, if you’re dealing with a clogged toilet that won’t budge despite your best efforts, it’s wise to call a plumber. Toilets can be particularly tricky; a wrong move can lead to overflow and messy situations. A professional will have the right tools and techniques to handle the task efficiently and safely.

In short, while it’s empowering to handle minor clogs on your own, recognizing the limits of your DIY abilities is essential. When in doubt, don’t hesitate to enlist the expertise of a professional plumber to ensure your plumbing system remains in excellent condition and to give you peace of mind.

13. Safety Precautions While Unclogging Drains

When it comes to unclogging drains, safety should always be your top priority. While the DIY approach can save you time and money, it can also expose you to a range of hazards if not done carefully. Before you embark on any drain-clearing mission, consider these essential safety precautions.

First and foremost, always wear protective gear. Gloves are a must, as they not only shield your hands from dirt and bacteria but also protect you from harsh chemicals if you choose to use commercial drain cleaners. Opt for sturdy rubber gloves that provide a good grip and are resistant to spills. Additionally, consider wearing safety goggles to protect your eyes from splashes, especially when dealing with chemical solutions or when using tools that could inadvertently send debris flying.

If you’re using chemical drain cleaners, read the labels carefully and follow the manufacturer’s instructions. Ensure that the area is well-ventilated by opening windows or using fans, as fumes can be harmful. Never mix different cleaning agents, as this can lead to dangerous reactions. For example, combining bleach with ammonia can produce toxic gases that are hazardous to your health.

When using tools like plungers or snakes, ensure that you’re familiar with their proper use to avoid injury. Always maintain a firm grip and use controlled movements to prevent slipping. If you’re working beneath a sink or in tight spaces, be cautious of sharp edges and potential hazards in the area. Clear the workspace of any obstructions to avoid tripping or falling.

Lastly, if the clog is severe or you feel uncomfortable tackling the issue yourself, don’t hesitate to call in a professional. Unclogging drains can sometimes lead to unexpected complications, and it’s better to err on the side of caution. By taking these safety precautions, you can effectively address your clogged drains while keeping yourself safe and sound.

14. Eco-Friendly Alternatives for Drain Cleaning

In an age where sustainability is a growing concern, many homeowners are seeking eco-friendly alternatives for drain cleaning that are both effective and gentle on the environment. Traditional chemical drain cleaners can be harsh, not only on your pipes but also on the planet, often containing toxic substances that can harm aquatic life and pollute water sources. Fortunately, there are several natural solutions that can help you tackle clogs without the environmental impact.

One of the most popular eco-friendly methods is the combination of baking soda and vinegar. This dynamic duo creates a natural fizzing reaction that can help break down grease and grime in your pipes. To use this method, start by pouring a pot of boiling water down the drain to loosen any debris. Next, add about half a cup of baking soda, followed by the same amount of vinegar. Cover the drain with a cloth or plug to keep the reaction concentrated in the pipe, allowing it to sit for 30 minutes before flushing it with more hot water. This simple yet effective approach not only clears clogs but also deodorizes your pipes, leaving them fresh and clean.

Another excellent eco-friendly option is using salt and boiling water. Salt acts as a natural abrasive, helping to dislodge stubborn clogs, while the hot water aids in breaking down fats and oils. Just pour half a cup of salt down the drain, followed by a kettle of boiling water, and watch as the combination works its magic.

If you’re looking for something even more straightforward, consider utilizing a plunger or a plumber’s snake. These tools are entirely mechanical, requiring no chemicals at all. With a little elbow grease, you can often dislodge clogs that are causing blockages without resorting to harmful substances.

Lastly, regular maintenance is key to preventing clogs in the first place. Using a mixture of hot water and a few drops of biodegradable dish soap can help keep your drains clear over time. Pour this mixture down your drains once a month to break down any buildup before it becomes a problem.

By opting for these eco-friendly alternatives, you not only maintain a healthy plumbing system but also contribute to a healthier planet. With these methods at your disposal, you can confidently tackle drain issues while being kind to the earth.

15. Conclusion: Maintaining Healthy Drains for a Hassle-Free Home

In conclusion, maintaining healthy drains is essential for a hassle-free home experience. Regular care and preventative measures can save you from the headaches of clogs and costly plumbing repairs down the line. By adopting simple habits, such as using drain screens, avoiding grease disposal, and conducting periodic maintenance checks, you can ensure that your plumbing system functions smoothly.

Furthermore, leveraging natural drain cleaners and being mindful of what goes down your sinks and toilets can significantly reduce the risk of blockages. Remember, a little attention goes a long way in preserving the integrity of your drainage system.

Incorporate these effective methods into your routine, and you’ll not only enjoy the convenience of efficient drains but also contribute to a healthier home environment. With proactive measures in place, you can rest easy knowing that your drains are clear and functioning as they should. So, take the time to care for your drains today, and embrace the peace of mind that comes with a hassle-free home!

In conclusion, unclogging your drain doesn’t have to be a daunting task, nor does it require expensive professional help every time. With the ten effective methods outlined in this article, you now have a toolkit of practical solutions at your fingertips to tackle clogs swiftly and efficiently. From the trusty combination of baking soda and vinegar to the more hands-on approach of using a plumber’s snake, these techniques empower you to maintain your plumbing and keep your home running smoothly. Remember, regular maintenance is key to preventing future blockages, so incorporate these methods into your home care routine. We hope you feel inspired to take action and reclaim the flow in your drains. Happy unclogging!

How to create a relaxing outdoor space?

Imagine stepping into your backyard and being instantly enveloped in a serene sanctuary, where the hustle and bustle of everyday life fades away, replaced by the soothing sounds of nature and the gentle caress of a warm breeze.

Transforming your outdoor space into a relaxing oasis is not just a dream; it can be your reality with the right guidance and a bit of creativity. In this step-by-step guide, we’ll explore how to turn your backyard into a tranquil retreat, perfect for unwinding after a long day or hosting intimate gatherings with friends and family. From selecting the ideal plants and furniture to creating cozy nooks and adding ambient lighting, we’ll cover everything you need to know to cultivate a peaceful environment that reflects your personal style. Get ready to ditch the chaos and embrace the calm as we embark on this journey to create your very own outdoor paradise!

1. Introduction: The Benefits of a Relaxing Outdoor Oasis

How to create a relaxing outdoor space?
Credit : whatcanu.com

In our fast-paced, technology-driven world, finding a serene escape within the comforts of our own homes has never been more essential. Transforming your backyard into a relaxing outdoor oasis offers a multitude of benefits that extend far beyond aesthetics; it cultivates a sanctuary for rejuvenation, relaxation, and connection with nature. Imagine stepping outside your door to be greeted by the gentle rustle of leaves, the sweet fragrance of blooming flowers, and the soothing sounds of water cascading from a fountain or pond.

Creating a personal retreat not only enhances your overall quality of life but also encourages you to spend more time outdoors, promoting physical health and well-being. Research has shown that exposure to nature can reduce stress levels, boost mood, and even improve cognitive function. Whether you’re sipping your morning coffee in a cozy nook or hosting evening gatherings under twinkling lights, your outdoor oasis can be a space for mindfulness and reflection, fostering a deeper connection with yourself and your loved ones.

Moreover, an inviting outdoor space can enhance your home’s value and appeal, making it a worthwhile investment. It serves as a versatile extension of your living area, perfect for entertaining guests, enjoying family time, or simply unwinding after a long day. In this guide, we will explore the various elements that contribute to a relaxing outdoor oasis, from the selection of plants and furniture to the incorporation of water features and ambient lighting. Let’s embark on this journey to transform your backyard into a peaceful retreat that you and your family can enjoy for years to come.

2. Assessing Your Backyard Space

Before diving into the exciting world of landscaping and décor, it’s essential to take a step back and thoroughly assess your backyard space. This crucial first step sets the foundation for your outdoor oasis, allowing you to visualize how best to transform the area into a serene retreat.

Start by observing the layout of your yard. Take note of its dimensions, shape, and any existing features, such as trees, shrubs, or pathways. Are there areas that receive ample sunlight, or are there shaded spots that could be perfect for lounging? Understanding these elements will help you determine where to place seating, gardens, or water features.

Next, consider the terrain. Is your yard flat, or does it have slopes and dips? Hills can provide a beautiful backdrop for a tiered garden or a cozy nook, while flat areas are often ideal for patios and fire pits. Don’t forget to check the soil quality as well; this is vital if you plan to incorporate plants or a vegetable garden into your design.

Take a moment to identify any existing limitations or challenges in your backyard. Are there drainage issues that need to be addressed? Are there unsightly fences or utility boxes that could detract from your oasis? Acknowledging these challenges upfront will allow you to develop creative solutions as you plan your outdoor haven.

Finally, think about your personal preferences and lifestyle. Do you envision a space for entertaining friends and family, or do you seek a quiet corner for meditation and reflection? Perhaps you want a vibrant garden filled with native plants or a minimalist area with sleek furniture. Sketch out a rough plan, jotting down ideas that resonate with you.

By taking the time to assess your backyard space thoughtfully, you’ll create a solid blueprint that reflects your vision and caters to your needs, setting the stage for a truly relaxing outdoor oasis.

3. Defining Your Vision: Style, Theme, and Purpose

How to create a relaxing outdoor space?
Credit : whatcanu.com

Before diving into the physical transformation of your backyard, it’s essential to take a step back and define your vision. This is the foundational step that will guide every decision you make, from plant selection to furniture placement. Consider what style resonates with you—do you envision a contemporary space with clean lines and minimalistic decor, or perhaps a cozy, rustic retreat adorned with natural materials?

Once you’ve settled on a style, think about the theme you want to incorporate. Themes can range from tropical paradise to Mediterranean escape, or even a serene Zen garden. Each theme brings its own unique charm and character, setting the tone for your outdoor oasis. You may want to draw inspiration from nature, travel experiences, or even your favorite vacation spot.

Next, consider the purpose of your outdoor space. Will it be a tranquil haven for relaxation and meditation, a lively area for entertaining family and friends, or a multifunctional space that accommodates both? Identifying the primary function you want your backyard to serve will help you choose the right elements that enhance its usability.

Write down your ideas, sketch out a rough layout, and gather images that inspire you. By clearly defining your vision, you’re not only setting a direction for your project but also ensuring that the final result is a harmonious blend of style, theme, and purpose—a true reflection of your personal sanctuary. This thoughtful planning phase is crucial to creating a backyard that you will love and enjoy for years to come.

4. Essential Elements of a Backyard Oasis

Creating a truly relaxing outdoor oasis requires more than just a collection of furniture and plants; it’s about cultivating an environment that promotes serenity and comfort. Here are the essential elements that will transform your backyard into a personal retreat.

**1. Comfortable Seating:** The cornerstone of any outdoor oasis is comfortable seating that invites you to unwind. Opt for plush lounge chairs, a cozy hammock, or a stylish outdoor sofa adorned with soft cushions. Consider incorporating varied seating options, such as a swinging bench or a fire pit surrounded by sturdy chairs, to accommodate different moods and gatherings.

**2. Lush Greenery:** Surround yourself with nature’s beauty by incorporating a mix of plants, trees, and flowers. Choose a variety of foliage to create layers and depth in your landscape design. Incorporating fragrant herbs, vibrant seasonal blooms, and evergreens can provide both visual interest and a soothing aroma. Don’t forget to include some vertical elements, such as trellises or hanging planters, to maximize space and create a sense of enclosure.

**3. Water Features:** The calming sound of gently flowing water can instantly elevate the tranquility of your backyard. Consider adding a small fountain, pond, or even a birdbath to attract wildlife and create a serene atmosphere. The sight and sound of water not only soothe the soul but can also mask unwanted noise from nearby streets or neighbors.

**4. Ambient Lighting:** As day fades into night, the right lighting can create a magical ambiance. Incorporate soft, warm lighting through string lights, lanterns, or solar-powered garden lights. Place lights strategically around pathways, seating areas, and plants to highlight features and ensure safety. A flickering candle or a stylish fire pit can also provide a cozy glow for evening gatherings.

**5. Personal Touches:** Finally, make the space your own with personal touches that reflect your style and interests. Add decorative elements such as outdoor rugs, artwork, or sculptures that resonate with you. Incorporate cozy throws or pillows to provide warmth during cooler evenings. Remember, this is your sanctuary, and it should be a reflection of who you are.

By thoughtfully integrating these essential elements into your backyard design, you’ll create a relaxing outdoor oasis that beckons you to unwind and enjoy the beauty of nature, right in your own home.

5. Step 1: Planning and Design

How to create a relaxing outdoor space?
Credit : whatcanu.com

Creating a relaxing outdoor oasis begins with thoughtful planning and design. This initial step is crucial, as it sets the foundation for your entire project. Start by envisioning how you want to use your backyard. Will it be a serene retreat for solo relaxation, a vibrant space for entertaining friends, or a family-friendly area for play and enjoyment? Take the time to jot down your ideas and prioritize your needs.

Next, evaluate your existing space. Consider the layout, the amount of sunlight different areas receive throughout the day, and any natural features you may want to highlight, such as trees, flower beds, or water elements. Sketch a rough layout of your yard, marking the locations of these features alongside potential areas for seating, pathways, and other elements like fire pits or outdoor kitchens.

Don’t forget to think about the ambiance you wish to create. Are you envisioning a lush garden filled with vibrant flowers and greenery, or a minimalist space with clean lines and modern furnishings? Consider the colors, textures, and materials that resonate with you.

Finally, set a budget. Determine how much you are willing to spend and allocate funds to different aspects of your project, such as landscaping, furniture, and decor. Having a clear budget will help keep your project on track and prevent overspending.

By dedicating time to this planning phase, you will ensure that your outdoor oasis not only meets your personal style but also caters to your lifestyle, creating a harmonious environment where you can unwind and rejuvenate. Once your plan is in place, you’ll be ready to dive into the exciting next steps of transforming your backyard into a personal paradise.

6. Step 2: Choosing the Right Plants and Landscaping

Choosing the right plants and landscaping is a crucial step in transforming your backyard into a serene outdoor oasis. The selection of flora can significantly influence the ambiance, functionality, and overall aesthetic of your space. Begin by considering the climate and soil type in your area, as these factors will determine which plants will thrive in your garden. Research native plants that not only require less maintenance but also provide a natural habitat for local wildlife. Incorporating a mix of perennials, annuals, and evergreens will ensure that your garden remains vibrant throughout the seasons.

Next, think about the layout. Create a harmonious balance between hardscaping—such as paths, patios, and decking—and softscaping, which includes your lush greenery and flowers. Use larger plants, such as ornamental grasses or shrubs, to create natural barriers or privacy screens. This adds depth to your space and makes it feel more secluded and intimate.

Consider adding flowering plants with varying bloom times to provide continuous color and fragrance throughout the year. Perennial flowers like lavender and coneflowers not only attract pollinators but also bring a delightful scent to your outdoor retreat. Don’t forget about the importance of texture; combining plants with different leaf shapes and sizes can create visual interest and a sense of lushness.

Additionally, think about the mood you want to create. If relaxation is your goal, opt for calming colors like soft greens, blues, and purples. Planting fragrant herbs such as rosemary or mint can also enhance the sensory experience of your oasis. For those who seek a more vibrant atmosphere, consider a mix of bold annuals and tropical plants to energize the space.

Lastly, pay attention to the layout of your plants. Arranging them in clusters rather than in straight lines can create a more natural feel. Use pathways and borders to guide the eye through the garden and encourage exploration. By thoughtfully choosing and arranging your plants, you’ll lay the foundation for a tranquil outdoor environment that invites you to unwind and connect with nature.

7. Step 3: Selecting Furniture and Decor

How to create a relaxing outdoor space?
Credit : whatcanu.com

Selecting furniture and decor is one of the most exciting steps in the process of transforming your backyard into a serene outdoor oasis. This is where your personal style truly shines and where comfort meets aesthetics. Start by considering the overall vibe you want to create. Are you aiming for a cozy, rustic retreat, a sleek modern space, or perhaps a tropical paradise? Your vision will guide your choices.

Begin with the essentials: seating. Look for weather-resistant materials like aluminum, teak, or synthetic wicker, which not only withstand the elements but also offer durability and comfort. Opt for plush cushions in colors and textures that harmonize with your garden’s palette. A well-placed hammock or a couple of vibrant bean bags can also add a casual, inviting touch that encourages relaxation.

Next, think about tables. A sturdy coffee table can serve as a gathering point for drinks and snacks, while a dining table will set the stage for al fresco meals with family and friends. Consider incorporating versatile options, such as nesting tables or an extendable dining table, to accommodate different occasions.

Once you have your basic furniture in place, it’s time to layer in decor that reflects your personality. Outdoor rugs can define spaces and add warmth, while string lights or lanterns can create an enchanting ambiance as the sun sets. Don’t overlook the power of greenery; potted plants or vertical gardens can bring life to your area and complement the natural beauty around you.

Finally, personal touches—a collection of your favorite outdoor candles, weather-resistant artwork, or even a fire pit—can make your backyard feel uniquely yours. Selecting the right furniture and decor not only enhances the visual appeal of your outdoor space but also lays the foundation for countless moments of relaxation and joy. So, take your time, explore various styles, and curate a space where you’ll love to unwind, entertain, and create lasting memories.

8. Step 4: Incorporating Water Features

### Step 4: Incorporating Water Features

Water features can truly transform your backyard into a serene oasis, adding both visual appeal and soothing sounds that promote relaxation. Whether you opt for a grand fountain, a tranquil pond, or a simple birdbath, the presence of water can create a calming atmosphere that invites you to unwind and connect with nature.

Begin by considering the size and scale of your outdoor space. A large pond can serve as a stunning focal point, providing a habitat for fish and aquatic plants, while smaller water features like tabletop fountains or wall-mounted cascades can fit snugly into tight corners or patios. Choose a style that complements your overall design theme—rustic stone fountains can evoke a natural feel, while sleek, modern water installations add a contemporary touch.

Once you’ve selected the type of water feature that suits your backyard, think about its placement. Position your feature where it can be easily viewed from your main sitting areas, such as your patio or deck. This ensures that you can enjoy the gentle sound of flowing water while sipping your morning coffee or lounging with a good book. Additionally, consider how the water feature interacts with existing landscaping. Surround it with lush greenery, colorful flowers, or smooth pebbles to create a harmonious scene that enhances your oasis.

Don’t forget about the maintenance aspect. While water features can be low-maintenance, regular cleaning and occasional checks on water levels and pumps will keep them functioning well. If you’re feeling adventurous, consider adding aquatic plants like water lilies or floating ferns, which not only beautify your pond but also contribute to a balanced ecosystem.

Lastly, enhance your water feature with lighting. Incorporating soft LED lights can create a magical ambiance in the evening, transforming your backyard into a captivating retreat after sunset. With the gentle glow reflecting off the water, you’ll create a peaceful environment perfect for evening gatherings or quiet moments of reflection.

By thoughtfully incorporating water features into your backyard design, you can elevate your outdoor space into a relaxing oasis that beckons you to escape the hustle and bustle of daily life.

9. Step 5: Lighting Ideas for Ambiance

Creating the perfect ambiance in your outdoor oasis hinges significantly on the right lighting. The right illumination can transform a simple backyard into a magical retreat, ideal for evening gatherings, quiet moments of reflection, or romantic dinners under the stars. Here are some enchanting lighting ideas to elevate the atmosphere in your transformed space.

**1. String Lights:** One of the most popular and effective ways to add a warm glow is through string lights. Drape them across your patio, wrap them around trees, or hang them from pergolas to create a whimsical feel. Choose soft white or warm yellow bulbs to cast a gentle light that promotes relaxation and conversation.

**2. Solar-Powered Path Lights:** Enhance the safety and aesthetics of your garden pathways with solar-powered lights. These eco-friendly options charge during the day and automatically illuminate at night, guiding your guests through your outdoor haven. Opt for designs that suit your style—whether sleek and modern or rustic and charming.

**3. Lanterns and Candles:** For a touch of romance, incorporate lanterns and candles into your design. Place them on tables, hang them from hooks, or set them along walkways to create flickering pools of light. Consider using flameless candles for a worry-free alternative that still provides the mesmerizing glow of real flames.

**4. Spotlighting Focal Points:** Highlight specific features of your backyard, like a beautifully shaped tree, a water feature, or a stunning piece of garden art, with strategically placed spotlights. This not only draws attention to these elements but also adds depth and drama to your outdoor space.

**5. Fire Pits:** A fire pit serves as both a source of warmth and light, providing a cozy gathering spot for family and friends. The soft flickering flames create an inviting atmosphere, perfect for roasting marshmallows or sharing stories long into the night.

**6. Under-Bench Lighting:** If you have seating areas in your backyard, consider adding under-bench lighting. This subtle touch not only improves visibility but also adds a layer of sophistication to your space, making it feel more like an outdoor lounge.

By thoughtfully incorporating these lighting ideas, you can create an inviting and serene ambiance that encourages relaxation and enjoyment in your outdoor oasis. Whether you’re hosting a lively barbecue or enjoying a quiet evening alone, the right lighting will enhance every moment spent in your transformed backyard.

10. Step 6: Creating Cozy Zones for Relaxation

Creating cozy zones for relaxation in your backyard is all about designing spaces that invite you to unwind and enjoy the tranquility of nature. Start by identifying different areas within your outdoor space that can serve unique purposes—think of a reading nook, a meditation corner, or a space for evening gatherings with friends.

Begin by choosing comfortable seating options that complement the style of your oasis. Plush outdoor cushions, hammocks, or even a swinging bench can create inviting spots for lounging. Consider using weather-resistant furniture that not only adds comfort but also ensures durability against the elements.

Once you have your seating figured out, enhance these zones with thoughtful decor. Layering rugs can define the area and add warmth, while soft throw blankets can invite snuggling on cooler evenings. Don’t forget about lighting! String lights, lanterns, or solar-powered garden lights can create a magical ambiance as the sun sets, allowing you to enjoy your outdoor haven well into the night.

Incorporating natural elements is key to creating a serene environment. Surround your cozy zones with fragrant plants or flowering shrubs to engage the senses. You can also add privacy with trellises, outdoor curtains, or strategically placed potted plants that help create a secluded retreat from the hustle and bustle of everyday life.

Finally, consider adding personal touches that reflect your personality—whether it’s a small fountain that provides soothing sounds, a fire pit for warmth and storytelling, or a selection of your favorite outdoor games. Each cozy zone should feel like a little escape, encouraging you to disconnect from the chaos and reconnect with yourself or loved ones. With these elements in place, your backyard will transform into a true outdoor oasis, beckoning you to relax and rejuvenate whenever you step outside.

11. Step 7: Adding Outdoor Accessories and Personal Touches

Once you’ve established the foundational elements of your backyard oasis, it’s time to infuse it with personality and charm through outdoor accessories and personal touches. These finishing details not only enhance the aesthetic appeal but also create a welcoming atmosphere that reflects your unique style.

Start by selecting a cohesive color palette that complements your existing landscape and furniture. Consider vibrant throw pillows, soft outdoor rugs, and colorful cushions that invite relaxation and comfort. These simple additions can transform a basic seating area into an inviting lounge where you can unwind with a good book or entertain friends.

Next, think about lighting options that will create a magical ambiance as the sun sets. String lights draped across pergolas or trees provide a whimsical glow, while lanterns and solar-powered garden lights add both practicality and beauty. Consider incorporating candles for a romantic touch, or opt for fire pits to create a cozy gathering spot on cooler evenings.

Incorporating greenery is also a fantastic way to enhance your outdoor space. Potted plants, hanging baskets, or even a vertical garden can bring life and color, while also improving air quality. Choose plants that thrive in your climate and require minimal upkeep, allowing you to enjoy your oasis without the stress of constant maintenance.

Don’t forget about personal touches that tell your story. Perhaps it’s a mosaic birdbath that showcases your artistic flair, or a collection of garden sculptures that spark conversation. Incorporate items like family heirlooms or travel souvenirs that evoke fond memories and make the space feel like home.

Lastly, consider adding functional accessories such as outdoor dining essentials, blankets for cooler nights, or even a small bar cart stocked with your favorite beverages. These practical additions ensure your outdoor oasis is not only visually appealing but also ready for entertaining and relaxation.

By thoughtfully selecting and arranging outdoor accessories and personal touches, you’ll create a serene retreat that beckons you to step outside and enjoy the beauty of your transformed backyard. Your oasis will become a cherished haven for relaxation, connection, and joy—an extension of your home that you and your loved ones can savor for years to come.

12. Step 8: Maintenance Tips for Your Oasis

Creating a relaxing outdoor oasis is just the beginning; maintaining its beauty and functionality is key to ensuring it remains a sanctuary for years to come. Regular upkeep not only preserves the aesthetic appeal of your space but also enhances its longevity and enjoyment. Here are some essential maintenance tips to keep your backyard retreat in top shape.

1. **Regular Cleaning**: Just like any indoor space, your outdoor oasis needs regular cleaning. Sweep away leaves and debris, wipe down outdoor furniture, and periodically wash cushions to prevent mold and mildew. Depending on your climate, you may need to do this weekly or bi-weekly to keep everything looking fresh.

2. **Pruning and Trimming**: Plants are the heart of your oasis, and maintaining them is crucial. Regularly prune shrubs and trees to encourage healthy growth and to prevent overgrowth that can detract from your space. This not only keeps your plants looking tidy but also allows for better air circulation and sunlight penetration.

3. **Seasonal Check-Ups**: The changing seasons bring different challenges. In the fall, clear out leaves and prepare your garden for winter. In the spring, inspect your plants for any winter damage and start replanting annuals or perennials. Summer maintenance might include regular watering schedules and checking for pests.

4. **Pest Control**: An outdoor oasis can attract unwanted guests. Keep an eye out for pests like aphids, spider mites, and snails. Utilize organic pest control methods or introduce beneficial insects like ladybugs to keep your plants healthy without compromising your ecosystem.

5. **Furniture Care**: Protect your outdoor furniture from the elements by applying weatherproofing treatments. Regularly check for any signs of wear and tear, and consider storing cushions and accessories indoors during harsh weather to extend their lifespan.

6. **Water Features**: If your oasis includes a fountain or pond, regular maintenance is key. Clean the water features to prevent algae buildup, and check the water level regularly to ensure it remains at optimal levels. This will keep your oasis not only visually appealing but also serene with the soothing sounds of flowing water.

7. **Color Updates**: Over time, colors may fade due to sun exposure. Consider refreshing the paint on any wooden structures or adding new accents through colorful planters or decorative elements. This can rejuvenate the overall look of your oasis and keep it inviting.

By incorporating these maintenance tips into your routine, you’ll ensure that your backyard oasis remains a tranquil escape from the hustle and bustle of everyday life. Consistent care not only enhances the beauty of your outdoor space but also makes it a welcoming retreat for friends, family, and yourself for years to come.

13. Budgeting for Your Backyard Transformation

When it comes to transforming your backyard into a relaxing outdoor oasis, budgeting is a crucial step that can make or break your project. Start by assessing your overall vision: what elements do you want to incorporate? Perhaps a tranquil water feature, lush landscaping, cozy seating areas, or a fire pit for evening gatherings? Having a clear concept will help you allocate your budget effectively.

Begin with a comprehensive list of all the elements you wish to include. This might encompass materials for landscaping, furniture, lighting, and any additional features, like outdoor cooking equipment. Once you have your wish list, research the costs associated with each item. Online marketplaces, local garden centers, and home improvement stores are great resources for price comparisons.

Don’t forget to factor in potential labor costs if you plan to hire professionals for installation or design. If you’re going the DIY route, budget for tools and equipment rentals that might be necessary to bring your vision to life.

It’s also wise to set aside a contingency fund—typically around 10-15% of your total budget—to handle unexpected expenses that may arise during the transformation process. This way, you won’t be caught off guard by surprises that could derail your plans or compromise the quality of your project.

Finally, keep in mind that creating a backyard oasis doesn’t have to happen all at once. You can break your project into phases, allowing you to spread out costs over time while still enjoying the transformation along the way. By carefully budgeting for your backyard transformation, you can ensure a beautiful and relaxing outdoor space that meets your needs without exceeding your financial limits.

14. Safety Considerations for Outdoor Spaces

Creating a relaxing outdoor oasis is an exciting endeavor, but it’s essential to prioritize safety to ensure that your tranquil retreat remains a worry-free haven. As you embark on this transformation, keep in mind several key safety considerations that will protect both your space and those who enjoy it.

First and foremost, assess the terrain of your backyard. Uneven ground can lead to trips and falls, so consider leveling out any bumpy areas and filling in holes to create a smooth surface. If you’re installing pathways or patios, opt for non-slip materials that provide stability, even when wet.

Next, pay attention to the placement of furniture and decor. Ensure that chairs, tables, and other elements are positioned thoughtfully to avoid overcrowding and to create clear pathways for movement. Additionally, if you have children or pets, opt for furnishings with rounded edges and avoid sharp corners that could pose a risk of injury.

Lighting is another critical aspect of safety. Adequate outdoor lighting not only enhances the ambiance of your oasis but also helps prevent accidents after dark. Illuminate pathways, seating areas, and any steps or elevations with a combination of ambient lights, spotlights, and solar-powered fixtures to ensure visibility and security.

Finally, consider the materials you use for building structures like decks, pergolas, or fences. Ensure that they are treated and maintained to withstand the elements and prevent deterioration. Regularly inspect your outdoor space for any hazards, such as loose boards, rusty nails, or unstable furniture.

By prioritizing these safety considerations, you can create an inviting outdoor oasis that serves as a peaceful escape while keeping everyone who enjoys it safe and sound. With a focus on both beauty and safety, your backyard can become a cherished retreat for relaxation and enjoyment.

15. Conclusion: Enjoying Your New Outdoor Sanctuary

As you step back to admire your newly transformed outdoor oasis, there’s an unmistakable sense of accomplishment that washes over you. This space, once merely an extension of your home, has evolved into a sanctuary where nature and comfort converge harmoniously. The vibrant colors of blooming flowers dance in the gentle breeze, while the sound of trickling water from your carefully placed fountain serenades you, inviting relaxation and peace.

Imagine sinking into your plush lounge chair with a good book in hand, enveloped by the soothing aromas of lavender and rosemary wafting from your herb garden. Perhaps you envision hosting intimate gatherings with friends and family around a cozy fire pit, sharing stories and laughter under a starlit sky. Your outdoor oasis is not just a place; it’s an experience—a retreat from the chaos of everyday life.

In this serene setting, you can indulge in mindfulness practices, such as yoga or meditation, rejuvenating your spirit while breathing in the fresh air. The subtle sounds of nature, from chirping birds to rustling leaves, create a tranquil backdrop that enhances your moments of reflection and relaxation.

As you settle into your new outdoor sanctuary, remember to embrace the changing seasons. Each season brings its own unique beauty and opportunities for enjoyment. In the summer, host barbecues and pool parties; in the fall, savor the crisp air while sipping warm cider by the fire; and in winter, decorate with twinkling lights to create a festive atmosphere.

Ultimately, your backyard transformation is more than just landscaping; it’s about crafting a space that resonates with your lifestyle and enhances your well-being. So take a deep breath, soak in the beauty around you, and enjoy every moment spent in your very own outdoor retreat. This is your haven—where relaxation meets nature—and it’s time to make the most of it.

As we wrap up our guide on transforming your backyard into a relaxing outdoor oasis, we hope you’re feeling inspired to embark on this rewarding journey. By following these step-by-step instructions, you can create a personal haven that not only enhances your home’s aesthetic but also provides a serene escape from the hustle and bustle of daily life. Whether it’s incorporating lush greenery, comfortable seating, or soothing water features, every detail you add will contribute to a tranquil atmosphere where you can unwind and recharge. So gather your tools, unleash your creativity, and let your backyard bloom into the peaceful retreat you’ve always dreamed of. We can’t wait to see the stunning transformations you achieve—share your progress and final results with us, and let’s celebrate the beauty of outdoor living together!

How to choose the right shower head?

In the quest for the ultimate home sanctuary, the bathroom often emerges as a personal retreat where relaxation and rejuvenation intertwine.

At the heart of this oasis lies a seemingly simple yet crucial element: the shower head. With an overwhelming array of options available, from luxurious rain showers to sleek handheld designs, selecting the perfect shower head can feel like a daunting task. But fear not! In this blog post, we’ll dive deep into the world of shower heads, exploring the features, styles, and functionalities that will elevate your daily cleansing ritual. Whether you seek a spa-like experience or a practical solution for your morning routine, our comprehensive guide will empower you to make an informed choice, ensuring that every shower leaves you feeling refreshed and revitalized. Get ready to transform your bathroom experience as we embark on this shower head showdown!

1. Understanding Different Types of Shower Heads

How to choose the right shower head?
Credit : whatcanu.com

When it comes to transforming your daily shower into a rejuvenating experience, understanding the different types of shower heads available is essential. With a myriad of options on the market, each designed to cater to varying preferences and needs, selecting the right one can be both exciting and overwhelming.

**Fixed Shower Heads** are the classic choice, mounted securely to the wall or ceiling. They provide a steady stream of water at a consistent height, making them an excellent option for those who prefer a traditional shower experience. Many come with adjustable spray patterns, allowing you to customize your water flow to suit your mood—whether you want a gentle mist or a powerful jet.

**Handheld Shower Heads** offer versatility and convenience. Attached to a flexible hose, these shower heads can be easily maneuvered for rinsing hard-to-reach areas or for bathing children and pets. They often feature multiple spray settings, making them a favorite for families and anyone who appreciates a bit of flexibility in their shower routine.

**Rainfall Shower Heads** recreate the soothing sensation of being caught in a gentle rain. Typically larger in size, these overhead installations deliver a wide, even spread of water that envelops you in a luxurious cascade. Ideal for creating a spa-like atmosphere, rainfall shower heads are perfect for those who enjoy a tranquil bathing experience.

**Body Spray Shower Heads** bring another layer of luxury to your shower. Installed in the walls of your shower, these fixtures provide a massaging effect, targeting specific areas of your body for a refreshing experience. They can often be installed in conjunction with other types of shower heads for a fully customized experience.

Lastly, **Smart Shower Heads** are revolutionizing how we think about our daily rinse. Equipped with technology that allows for water temperature control, flow rate adjustments, and even Bluetooth connectivity for music, these modern marvels cater to the tech-savvy user looking for comfort and convenience.

Ultimately, the right shower head for you will depend on your personal preferences, bathroom layout, and the type of showering experience you seek. By understanding the distinct features and benefits of each type, you can make an informed decision that will elevate your bathroom experience for years to come.

2. The Importance of Water Pressure in Your Shower Head Choice

When it comes to selecting the ideal shower head for your bathroom, understanding water pressure is crucial to ensuring a satisfying shower experience. Water pressure, measured in pounds per square inch (PSI), dictates how forcefully water flows from your shower head, significantly impacting everything from the comfort of your shower to the efficiency of your water use.

Low water pressure can result in a disappointing drizzle that leaves you feeling unclean and frustrated, while high pressure can lead to a vigorous spray that feels invigorating but can be wasteful. Ideally, your shower head should strike a balance that complements your home’s plumbing system and your personal preferences.

Before making a purchase, take a moment to assess your home’s water pressure. You can do this by simply turning on a faucet and observing the flow. If you experience a weak stream, you may want to consider a shower head designed specifically for low water pressure, which typically features technology that enhances the flow rate without increasing water usage. Conversely, if your pressure is on the higher end, look for shower heads with adjustable settings or built-in pressure regulation to prevent water wastage and ensure a comfortable experience.

Additionally, consider the type of shower head that best suits your lifestyle. If you enjoy a luxurious spa-like experience, a rain shower head with a wider diameter may be your best option, providing a gentle cascade of water. For those who prefer a quick rinse, a handheld or adjustable shower head allows for versatility and ease of use.

Ultimately, understanding the importance of water pressure in your shower head choice is about more than just the immediate shower experience; it’s also about creating an efficient, enjoyable space in your bathroom that meets your daily needs. By carefully considering your water pressure and selecting a shower head that enhances it, you can transform your daily routine into a refreshing escape every time you step into the shower.

3. Fixed vs. Handheld Shower Heads: Which is Right for You?

How to choose the right shower head?
Credit : whatcanu.com

When it comes to choosing the perfect shower head for your bathroom, one of the most crucial decisions you’ll face is whether to go with a fixed or a handheld option. Each type offers distinct advantages, catering to different preferences and practical needs, so understanding their features can help you make an informed choice.

**Fixed Shower Heads** are mounted directly to the wall and provide a steady stream of water from a specific angle. They come in various styles, from sleek and modern to vintage and ornate, allowing you to seamlessly integrate them into your bathroom decor. This type of shower head often delivers a consistent water pressure and coverage, making it ideal for those who enjoy a straightforward shower experience. Many fixed shower heads also feature advanced technologies, such as rain shower or high-pressure options, to enhance your daily routine. However, they can be limiting if you prefer a bit more flexibility in your showering experience.

On the other hand, **Handheld Shower Heads** are incredibly versatile and designed for mobility. They are attached to a flexible hose, allowing you to direct the water flow wherever you need it most. This is particularly beneficial for individuals with limited mobility or those who enjoy rinsing off hard-to-reach areas. Handheld shower heads are also perfect for bathing children or pets, making them an excellent choice for families. Additionally, they often come with multiple spray settings, giving you the luxury of customizing your shower experience to your liking.

Ultimately, the decision between a fixed or handheld shower head boils down to your individual preferences and bathroom layout. If you value a sleek, minimalist design and a consistent flow of water, a fixed shower head might be your best bet. However, if you crave flexibility and convenience, a handheld option could be the ideal solution. In some cases, you may even find the perfect compromise with a combination of both, allowing you to revel in the best of both worlds! Whatever you choose, make sure it aligns with your lifestyle and enhances your daily shower ritual.

4. Exploring Smart Shower Head Technology

In an era where technology seamlessly integrates into our daily lives, it’s no surprise that even our showers have gotten a high-tech upgrade. Smart shower head technology is rapidly gaining popularity, offering a range of features that can transform your bathing experience into something truly luxurious. But what exactly does this mean for you and your bathroom?

At its core, a smart shower head allows for personalized control over your water settings. Imagine stepping into your shower and adjusting the temperature and flow with just a tap on your smartphone or through voice commands integrated with your home assistant. Many models come equipped with Wi-Fi connectivity, enabling you to schedule your showers, monitor water usage, and even receive alerts when your ideal temperature is reached. This not only enhances convenience but also promotes water conservation—a crucial factor in today’s eco-conscious world.

Moreover, some smart shower heads offer advanced features such as built-in LED lights that change color based on water temperature, creating a visually stunning shower experience while also helping you avoid unexpected bursts of cold water. Others might include aromatherapy options that disperse essential oils into the mist, turning your daily routine into a soothing spa-like retreat.

When exploring these innovative options, consider compatibility with your existing plumbing and any additional features that may enhance your overall experience. Whether it’s a touchless activation system, integrated speakers for your favorite tunes, or even a shower timer to help you keep your water usage in check, smart shower heads are redefining how we think about our time in the bathroom.

As you navigate the exciting landscape of smart shower technology, remember that the right choice can elevate your daily routine, making your shower not just a necessity but a delightful escape. With so many options available, take the time to explore and find the perfect smart shower head that aligns with your lifestyle and preferences.

5. Choosing the Right Spray Pattern for Your Preferences

How to choose the right shower head?
Credit : whatcanu.com

Choosing the right spray pattern for your shower head is a crucial step in transforming your bathing experience into a personalized retreat. With a plethora of options available, it can feel overwhelming to determine which style best suits your preferences and needs.

At one end of the spectrum, you have the classic rain shower spray. This pattern mimics the gentle, enveloping sensation of rainfall, perfect for those who enjoy a soothing, relaxing experience. The wide coverage can create a tranquil atmosphere, making it ideal for unwinding after a long day. Picture yourself standing under a warm cascade of water, letting the stresses of the day melt away.

On the other hand, if you’re looking for something invigorating to kickstart your mornings, consider a concentrated massage spray. This powerful jet focuses on specific areas, providing a stimulating experience that can help ease muscle tension and invigorate your senses. It’s particularly beneficial for those who engage in regular workouts or suffer from sore spots, as the targeted pressure can provide a refreshing wake-up call.

For those who appreciate versatility, many modern shower heads offer multiple spray settings, allowing you to switch between gentle and powerful sprays with the flick of a switch. This adaptability ensures that you can tailor your shower experience to your mood—whether you want to indulge in a tranquil soak or energize yourself for the day ahead.

Ultimately, the right spray pattern can elevate your shower from a mundane routine to a luxurious escape. Take the time to explore your options, perhaps even testing a few in-store if possible, to find the perfect match for your personal bathing style. After all, your shower should be a sanctuary that caters to your unique preferences and enhances your overall well-being.

6. Material Matters: Plastic vs. Metal Shower Heads

When it comes to selecting the perfect shower head for your bathroom, the choice of material is a pivotal factor that can significantly influence both performance and longevity. In this showdown between plastic and metal shower heads, each material brings its own set of advantages and considerations.

Plastic shower heads are often favored for their lightweight design and affordability. They come in a vast array of styles and colors, making it easy to find one that complements your bathroom decor. Moreover, plastic shower heads are less prone to corrosion, which can be a significant advantage in areas with hard water. Their ease of installation and maintenance also makes them an appealing option for those who might be tackling DIY projects. However, the downside is that they may not always offer the durability and premium feel that some homeowners desire.

On the other hand, metal shower heads, typically made from materials such as stainless steel or brass, exude a sense of elegance and robustness. They tend to be heavier and more durable, often offering a longer lifespan. Metal shower heads are less likely to warp or fade over time, making them a great choice for those investing in a long-term bathroom upgrade. Additionally, many metal options come with advanced features such as adjustable spray settings and water-saving technology, providing enhanced functionality. However, it’s essential to consider that metal shower heads can be more expensive and, in some cases, may require more effort to install due to their weight.

Ultimately, the decision between plastic and metal shower heads should align with your budget, style preferences, and long-term bathroom goals. Whether you prioritize affordability and versatility or elegance and durability, understanding the nuances of each material will guide you toward a choice that harmonizes with your unique showering experience.

7. The Impact of Flow Rate on Water Efficiency

How to choose the right shower head?
Credit : whatcanu.com

When it comes to choosing the perfect shower head, one of the most crucial factors to consider is the flow rate, which significantly impacts both your water efficiency and your overall shower experience. The flow rate, typically measured in gallons per minute (GPM), indicates how much water the shower head dispenses while in use. A standard shower head generally has a flow rate of 2.5 GPM, but many modern options offer more sustainable alternatives, reducing water consumption without sacrificing performance.

Selecting a shower head with a lower flow rate can lead to substantial water savings, which is not only beneficial for the environment but can also translate into lower utility bills. For instance, opting for a water-efficient shower head that operates at 1.8 GPM can save you over 2,300 gallons of water annually compared to a traditional model, making a significant difference in your household’s water usage.

However, it’s essential to strike a balance between water efficiency and your desired shower experience. Some lower flow rate shower heads incorporate advanced technology to enhance the pressure, ensuring that you still enjoy a refreshing and powerful shower. Features such as air-infusion or pressure-boosting designs can help maintain that invigorating feel you crave, even while being eco-friendly.

In addition to the flow rate, consider local regulations and certifications when selecting your shower head. Look for models labeled with the WaterSense label, which signifies that they meet the U.S. Environmental Protection Agency’s criteria for water efficiency without compromising performance. By being mindful of flow rates and choosing the right shower head, you can create a luxurious bathing experience while promoting water conservation in your home. So, as you embark on your shower head showdown, remember that every drop counts!

8. Easy Installation: What You Need to Know

When it comes to upgrading your shower experience, the installation process can often feel daunting. However, choosing a shower head that emphasizes easy installation can save you time, effort, and even some frustration. Before diving into the specifics, it’s essential to determine what type of shower head suits your bathroom setup.

Most modern shower heads are designed with user-friendly installation in mind. Look for options that come with clear instructions and all necessary tools included. Many shower heads today feature a simple twist-and-lock mechanism, allowing you to replace your existing model without any special plumbing skills. Just a wrench and a little elbow grease are often all you need!

If you’re dealing with a standard shower arm, a universal fit shower head is your best bet. These models are designed to accommodate standard fittings, making them compatible with most existing setups. However, if you have a more unique system, such as a wall-mounted shower panel or a handheld shower, be sure to check the specifications before purchasing.

Additionally, consider the materials used in the construction of the shower head. Stainless steel and high-quality plastics are not only durable but also often come with features like easy-clean nozzles, which prevent mineral buildup and make maintenance a breeze. This means less time scrubbing and more time enjoying a revitalizing shower.

Lastly, don’t overlook the option of professional installation if you’re feeling uncertain. While many shower heads are designed for DIY enthusiasts, a quick consultation or hiring a plumber can ensure that everything is fitted correctly and functions as intended. After all, the goal is to transform your bathroom into a personal oasis, and a hassle-free installation is a crucial first step in that journey!

9. Budgeting for Your Shower Head: Price Ranges and Options

When it comes to choosing the perfect shower head for your bathroom, budgeting is a crucial aspect that often shapes your options and decisions. Shower heads come in a wide range of price points, and understanding these can help you navigate the myriad choices without breaking the bank.

At the lower end of the spectrum, you’ll find budget-friendly shower heads typically ranging from $20 to $50. These models usually offer basic features and designs but can still provide a satisfying shower experience. Often made from durable plastic or simple chrome finishes, they are perfect for those looking for quick fixes or who may be renting a space.

Mid-range options, priced between $50 and $150, strike a balance between quality and affordability. These shower heads often feature enhanced water-saving technology, adjustable settings, and more appealing designs. You might find options that come with luxurious features such as multiple spray settings, rainfall effects, or even handheld functionality that can elevate your shower experience without a hefty investment.

For those willing to splurge, high-end shower heads can range from $150 to upwards of $500. These premium models often boast innovative designs, high-quality materials like brass or stainless steel, and advanced technology, including digital controls and smart features that allow you to customize your water temperature and flow rate. Investing in a luxury shower head can transform your bathroom into a spa-like retreat, turning every shower into a rejuvenating experience.

Ultimately, determining your budget will help narrow down your choices and guide you toward a shower head that meets your needs and lifestyle. Remember, a shower head is not just a fixture; it’s an essential part of your daily routine, and finding one that fits your budget while offering the features you desire is key to creating your ideal bathing environment.

10. Popular Shower Head Brands and Their Features

When it comes to selecting the ideal shower head for your bathroom, the brand you choose can significantly influence your showering experience. Understanding the unique features offered by popular shower head brands can help narrow down your options and ensure you make an informed decision. Here’s a look at some of the leading brands in the market and what they bring to the table.

**1. Moen**
Known for its innovative designs and quality engineering, Moen offers a diverse range of shower heads, from sleek handheld models to luxurious rain showers. Their Magnetic Docking Technology allows for easy detachment and reattachment, making cleaning and use a breeze. Additionally, they often incorporate water-saving features without sacrificing pressure, ensuring an eco-friendly yet indulgent shower experience.

**2. Delta**
Delta is celebrated for its commitment to technology and user-friendly features. Many of their shower heads come with H2Okinetic technology, which creates a unique wave pattern that feels like a powerful spray while using less water. Their touch-clean nozzles make maintenance simple, allowing you to easily wipe away mineral buildup with just a touch of your finger. Delta also offers a variety of finishes and styles to match your bathroom decor perfectly.

**3. Kohler**
Kohler shower heads are synonymous with luxury and performance. Many models feature their innovative spray technology, which delivers a superior cleansing experience. With options like the Rain Shower and the Multifunction Showerhead, you can customize your water flow to suit your preferences. Kohler is also known for its stylish designs, making it easier than ever to upgrade your bathroom’s aesthetic while enjoying top-notch functionality.

**4. Hansgrohe**
For those seeking a blend of modern design and high performance, Hansgrohe is a top contender. Their products are crafted with precision and often include features such as AirPower, which infuses air into the water for a fuller, softer spray. Hansgrohe’s EcoSmart technology ensures water conservation without compromising on performance, making them a favorite among environmentally conscious consumers.

**5. Grohe**
Grohe shower heads are engineered for both luxury and efficiency. Their DreamSpray technology ensures an even distribution of water across all nozzles, providing a consistent and enjoyable shower experience. They also offer a variety of SmartControl systems that allow for customizable water flow and temperature settings, making every shower feel tailor-made just for you.

As you explore these popular brands, consider not just their features but also how they align with your needs and preferences. Each brand brings its own unique flair and technological advancements, allowing you to find the perfect shower head that transforms your daily routine into a rejuvenating experience.

11. Eco-Friendly Options: Saving Water without Sacrificing Comfort

In an age where sustainability is more important than ever, choosing an eco-friendly shower head is a fantastic way to conserve water while still enjoying a relaxing and invigorating shower experience. Modern eco-friendly shower heads are designed with innovative technology that allows you to save water without compromising on performance or comfort.

These shower heads often feature advanced aeration systems that mix air with water, creating a powerful spray that feels luxurious while using significantly less water. Many models are designed to restrict flow to a maximum of 2.0 gallons per minute (GPM), compared to traditional shower heads that can use up to 5.0 GPM. This means you can enjoy a refreshing shower while doing your part to reduce water consumption and lower your utility bills.

When shopping for eco-friendly options, look for shower heads that are WaterSense certified. This label ensures that the product meets strict criteria set by the Environmental Protection Agency (EPA) for water efficiency and performance. In addition to the flow rate, consider features like adjustable spray patterns or temperature control, which can enhance your shower experience without increasing water usage.

Installing an eco-friendly shower head is a simple yet effective way to contribute to water conservation efforts, and many models come equipped with easy-to-install mechanisms that don’t require professional plumbing services. By making this small change in your bathroom, you’ll not only enjoy a guilt-free shower but also join the movement towards a more sustainable future. So, embrace the eco-friendly revolution—your water bill and the planet will thank you!

12. Maintenance Tips for Longevity and Performance

When it comes to ensuring the longevity and performance of your shower head, regular maintenance is key. A well-maintained shower head not only enhances your shower experience but also extends its lifespan, allowing you to enjoy optimal water pressure and flow for years to come. Here are some essential tips to keep your shower head in top shape.

**1. Regular Cleaning:** Over time, mineral deposits and soap scum can accumulate, leading to reduced water flow and unsightly buildup. To prevent this, make it a routine to clean your shower head every few weeks. Simply remove the shower head and soak it in a solution of equal parts vinegar and water for at least 30 minutes. The acidity of the vinegar will dissolve mineral deposits, ensuring your shower head stays pristine. For fixed shower heads, you can fill a plastic bag with the vinegar solution, secure it around the shower head with a rubber band, and let it soak while you enjoy a different part of your day.

**2. Check for Leaks:** Regularly inspect your shower head for leaks, which can result in water wastage and increased utility bills. If you notice any dripping, it could be a sign that the washer inside the shower head needs replacing. A simple fix usually involves disassembling the head, swapping out the old washer with a new one, and reassembling it.

**3. Adjust Water Pressure:** High water pressure can lead to premature wear and tear of your shower head. If you notice a sudden increase in pressure, consider installing a pressure-reducing valve to help maintain a steady flow, thus prolonging the life of your shower fixture.

**4. Seasonal Considerations:** If you live in an area prone to freezing temperatures, it’s essential to take precautions to prevent damage during the winter months. Consider draining your shower head and keeping it covered when not in use for extended periods to prevent cracks from freezing water.

By incorporating these simple yet effective maintenance tips into your cleaning routine, you can enjoy a shower head that performs beautifully and lasts longer, ensuring that your daily ritual remains a refreshing escape from the hustle and bustle of life. Remember, a little care goes a long way in making your bathroom oasis a sanctuary you can enjoy for years to come!

13. Aesthetics: Matching Your Shower Head to Your Bathroom Decor

When it comes to designing your bathroom, every detail matters — and that includes your shower head. Aesthetics play a significant role in creating a cohesive and inviting space. The right shower head can elevate your bathroom’s style, transforming it from a mundane necessity into a luxurious retreat.

Consider the overall theme and color scheme of your bathroom. Are you leaning towards a sleek, modern look with clean lines and minimalist fixtures? A chrome or matte black shower head with a contemporary design will complement that aesthetic perfectly. Alternatively, if your space is imbued with rustic charm, a vintage-inspired shower head with antique brass or oil-rubbed bronze finishes can add a touch of warmth and nostalgia.

Beyond color and finish, think about the shape and size of the shower head. A large, rain-style shower head can create a spa-like atmosphere, while a compact, handheld model offers versatility and convenience. Both styles can enhance your bathroom decor, but they serve different design purposes.

Don’t forget about how the shower head interacts with other fixtures in the space. Ensure that it harmonizes with the faucet, towel bars, and even the lighting. Consistency in design elements will create a unified look that feels intentional and well thought out.

Lastly, consider the materials. High-quality finishes not only look great but also stand the test of time, meaning your stylish shower head will continue to shine for years to come. By carefully selecting a shower head that complements your bathroom decor, you can create a space that is not only functional but also visually stunning, inviting you to indulge in the ultimate shower experience every day.

14. Customer Reviews: How to Interpret Feedback

When navigating the vast array of shower heads available on the market, customer reviews can serve as valuable signposts in your decision-making journey. However, interpreting this feedback requires a discerning eye. Not all reviews are created equal; some may be overly enthusiastic, while others could stem from unrealistic expectations.

Start by looking for patterns in the reviews. Are multiple customers praising the same features, such as water pressure, ease of installation, or durability? This can indicate a product’s reliability. Conversely, if numerous reviewers are highlighting similar issues—like leaks or poor flow rate—this is a significant red flag that shouldn’t be ignored.

Pay close attention to the reviewer’s context. A user who appreciates a high-pressure shower might leave a glowing review for a shower head that others find too forceful, highlighting the importance of personal preference. Additionally, consider the reviewer’s history. A customer with a track record of thoughtful feedback is likely to provide more reliable insights than one who leaves a single, vague comment.

Also, don’t shy away from reading the less favorable reviews. They often reveal insights that can help you avoid potential pitfalls. A shower head that sounds perfect might not be the best fit if it requires frequent maintenance or if its aesthetic doesn’t mesh with your bathroom decor.

Lastly, look for reviews that include images. Visual testimonials can provide a clearer picture of the product in real-life settings, allowing you to gauge its size, appearance, and how it fits into various bathroom styles.

By carefully analyzing customer reviews and understanding the common themes and individual experiences, you can make a more informed decision, ensuring that the shower head you choose aligns perfectly with your needs and preferences.

15. Conclusion: Finding Your Perfect Shower Head Match

In the quest for the perfect shower head, it’s essential to remember that the right choice can transform an ordinary bathing routine into a luxurious daily retreat. After exploring the various styles, features, and benefits discussed throughout this guide, you’re now equipped with the knowledge to make an informed decision that suits your preferences and lifestyle.

Consider the atmosphere you wish to create in your bathroom. Are you seeking a calming spa experience with a rain shower head that mimics the gentle patter of raindrops? Or perhaps you prefer the invigorating power of a multi-function spray that awakens your senses each morning? The choices are abundant, but so are the considerations—water pressure, design aesthetics, and even eco-friendliness play significant roles in your selection.

Take the time to evaluate your personal needs and the needs of your household. Don’t hesitate to involve family members in the decision-making process, as everyone deserves a shower experience tailored to their liking. With options ranging from sleek and modern fixtures to classic and ornate designs, you have the opportunity to enhance not just functionality, but also the overall style of your bathroom.

Ultimately, the perfect shower head is one that resonates with you, providing comfort and satisfaction every time you step into the shower. Embrace the journey of finding your ideal match, and remember that the right shower head can elevate your bathroom into a sanctuary of relaxation and rejuvenation. Happy showering!

In conclusion, selecting the perfect shower head for your bathroom is not just about functionality; it’s about enhancing your daily routine and elevating your overall bathing experience. As we’ve explored throughout this guide, considering factors such as water pressure, spray patterns, style, and eco-friendliness can lead you to a choice that perfectly suits your needs and aesthetic preferences. Whether you desire a luxurious rainfall shower or a practical handheld option, the right shower head can transform your bathroom into a personal oasis. We hope this showdown has equipped you with the insights and confidence to make an informed decision. Happy showering, and may your new fixture bring you countless refreshing moments of relaxation!

How to build a raised garden bed?

Transforming your outdoor space into a flourishing oasis begins with a simple yet rewarding project: building your dream raised garden bed.

Whether you’re an experienced gardener or a beginner with a budding green thumb, raised garden beds offer numerous benefits, from improved soil drainage to easier access for planting and harvesting. They not only enhance the aesthetic appeal of your garden but also provide a controlled environment for your plants to thrive. In this step-by-step guide, we will walk you through the entire process—from selecting the perfect location and materials to planting your favorite flowers, herbs, or vegetables. With our detailed instructions and helpful tips, you’ll be well on your way to creating a vibrant garden that reflects your personal style and brings joy to your gardening experience. Let’s dig in and get started on your journey to cultivating your dream garden!

1. Introduction to Raised Garden Beds

How to build a raised garden bed?
Credit : whatcanu.com

Raised garden beds are a fantastic way to cultivate a thriving garden, offering a multitude of benefits for both novice and seasoned gardeners alike. By elevating your planting area, these beds create an ideal growing environment that maximizes space, improves drainage, and enhances soil quality. Whether you’re looking to grow vibrant vegetables, fragrant herbs, or stunning flowers, a raised garden bed can be tailored to fit your specific needs and aesthetic preferences.

One of the key advantages of raised garden beds is their ability to provide better control over soil conditions. By filling your bed with a custom soil mix, you can ensure that your plants receive the optimal nutrients, moisture retention, and aeration they require for healthy growth. Additionally, the height of the beds often makes gardening more accessible, reducing the strain on your back and knees.

Beyond functionality, raised garden beds also offer a visually appealing element to your outdoor space. They can be constructed in various shapes, sizes, and materials, allowing you to create a personalized garden that complements your home and landscape. From rustic wooden frames to sleek metal designs, the options are endless.

In this step-by-step guide, we will walk you through the process of building your dream raised garden bed, from selecting the right materials to planting your first seeds. Whether you have a sprawling backyard or a cozy balcony, it’s time to roll up your sleeves and embark on an exciting gardening adventure!

2. Benefits of a Raised Garden Bed

When it comes to gardening, raised garden beds offer a multitude of benefits that can transform your gardening experience from the ground up. One of the primary advantages is improved soil quality. By elevating your plants above the natural ground level, you have complete control over the soil composition. This allows you to create a nutrient-rich environment tailored to the specific needs of your plants, whether they thrive in sandy loam or a more clay-like structure.

Additionally, raised garden beds facilitate better drainage. Traditional gardening can often lead to waterlogged soil, but with a raised structure, excess water can easily flow away, ensuring that your roots stay healthy and well-aerated. This is especially beneficial in areas prone to heavy rainfall, as it minimizes the risk of root rot and other moisture-related issues.

Moreover, the height of a raised garden bed can reduce the strain on your back and knees. No more bending down or crouching to tend to your plants—simply stand and enjoy your gardening tasks. This ergonomic advantage makes gardening accessible for everyone, from the seasoned gardener to those who may have mobility challenges.

Raised beds can also help deter pests. The elevation makes it more challenging for certain critters, like rabbits and groundhogs, to access your plants. Plus, you can easily incorporate protective measures such as row covers or netting without disrupting the surrounding landscape.

Finally, let’s not overlook the aesthetic appeal of raised garden beds. They create clean lines and structured spaces in your yard, enhancing its overall visual appeal. You can customize the design and materials to match your style, whether it’s rustic wooden frames or sleek metal containers.

In summary, raised garden beds are more than just a gardening trend; they are a practical solution that offers enhanced soil quality, better drainage, ergonomic benefits, pest deterrence, and a touch of beauty to your garden. With these advantages in mind, you’ll be eager to embark on your journey to build the perfect raised garden bed!

3. Choosing the Right Location

How to build a raised garden bed?
Credit : whatcanu.com

Choosing the right location for your raised garden bed is a critical step in ensuring a thriving garden that yields a bountiful harvest. The ideal spot will be influenced by several factors, including sunlight, accessibility, and soil drainage.

**Sunlight:** Most vegetables and flowering plants crave sunlight, so it’s essential to select a location that receives at least six to eight hours of direct sunlight each day. Observe your yard throughout the day to identify sunny spots, and take note of any areas that may be shaded by trees, fences, or buildings. If you have limited sun exposure, consider opting for shade-tolerant plants that can thrive in lower light conditions.

**Accessibility:** Your garden should be easily accessible for regular maintenance, watering, and harvesting. Choose a location that is convenient for you to reach, ideally close to your kitchen or living area. This proximity will not only make it easier to tend to your plants but also encourage you to engage with your garden more frequently. Ensure that the path to your garden bed is clear and that you can easily maneuver tools or watering cans without obstruction.

**Soil Drainage:** Good drainage is vital for healthy plant growth, as standing water can lead to root rot and other issues. To assess drainage, watch how water behaves in the area after a rainfall. If you notice puddles forming or the ground remains soggy for an extended period, you may need to consider elevating your garden bed further or amending the existing soil with organic matter to improve its drainage capabilities.

Take the time to carefully evaluate these factors before finalizing your garden bed’s location. A well-placed raised garden bed not only enhances the aesthetics of your outdoor space but also sets the stage for a successful gardening experience. With the right location secured, you’ll be well on your way to growing your dream garden!

4. Selecting Materials for Your Garden Bed

Choosing the right materials for your raised garden bed is a crucial step that will significantly influence the longevity, aesthetics, and overall health of your garden. The materials you select will not only define the structure of your garden bed but also contribute to the growing environment for your plants. Here are some options to consider, along with their pros and cons.

**wood:**
Wood is the most popular choice for building raised garden beds, thanks to its natural appearance and ease of use. Cedar and redwood are excellent options due to their resistance to rot and insects, which can help your garden bed last for many years. However, softer woods like pine can be more affordable but may require replacement sooner. When using wood, it’s essential to ensure that it’s untreated, as chemicals in treated wood can leach into the soil and harm your plants.

**Metal:**
For a modern look and extreme durability, consider using metal, such as galvanized steel or aluminum. These materials are resistant to weathering and pests, making them a long-lasting choice. Metal beds can also retain heat, which may benefit certain plants that thrive in warmer soil. However, be cautious of the potential for metal to heat up in direct sunlight, which could lead to overheating roots in extreme climates.

**Bricks or Concrete Blocks:**
If you’re looking for a more permanent solution, bricks or concrete blocks can create a sturdy and aesthetically pleasing raised garden bed. While these materials are durable and provide excellent drainage, they can be more labor-intensive to install. Additionally, ensure that any concrete blocks are free from harmful chemicals, as some can leach into the soil.

**Composite Materials:**
Recycled plastic or composite materials are becoming increasingly popular for raised garden beds. These materials mimic the look of wood without the risk of rotting or splintering, making them a low-maintenance option. They are typically more expensive but offer excellent durability and environmental benefits.

As you select materials, consider the size and design of your raised garden bed, as well as your personal style and budget. Ensure that whatever you choose will provide a safe and healthy environment for your plants to thrive. With the right materials in hand, you’re one step closer to creating the garden of your dreams!

5. Designing Your Garden Bed: Size and Shape Considerations

How to build a raised garden bed?
Credit : whatcanu.com

Designing your garden bed is one of the most exciting steps in the process of creating your dream raised garden. The size and shape of your garden bed play a crucial role in not only its functionality but also its aesthetic appeal. Before you dive into construction, take a moment to envision the space you have available and how you want it to look in your outdoor environment.

First, consider the size of your garden bed. A common width for raised beds is 4 feet, as this allows easy access to the center without the need to step into the bed itself. This width facilitates maintenance tasks like weeding, harvesting, and watering while also ensuring that plants grow healthily without overcrowding. The length can vary based on your available space; however, keeping it between 4 to 8 feet is ideal for managing the garden comfortably.

Next, think about the height of your raised bed. Taller beds, usually between 12 to 24 inches, can be easier on your back and help with drainage in heavy soils. However, if you’re planting deep-rooted vegetables like tomatoes or carrots, consider a deeper bed to accommodate their growth.

Once you’ve settled on size, it’s time to decide on the shape. Traditional rectangular beds are popular, but don’t be afraid to get creative! Curved edges can soften the look of your garden and blend seamlessly into a more natural landscape, while tiered designs can add depth and visual interest. Circular or hexagonal beds can also be a striking focal point in your yard, allowing you to plant in a way that maximizes sun exposure and airflow.

Finally, think about how your garden design fits into your overall landscape. Will it be a standalone feature, or will it complement existing paths, patios, or flower beds? Drawing a simple sketch can help you visualize your ideas and ensure that your raised bed will harmonize with the surrounding environment.

In summary, the size and shape of your raised garden bed are foundational elements that can significantly impact your gardening experience. Take the time to plan thoughtfully, and you’ll create a space that not only meets your gardening needs but also enhances the beauty of your outdoor area. Happy gardening!
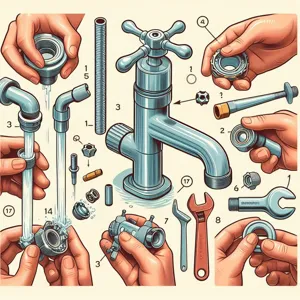
6. Tools You’ll Need for the Project

Before diving into the construction of your dream raised garden bed, it’s essential to gather the right tools to ensure a smooth and efficient building process. Having the appropriate equipment on hand not only saves you time but also helps you achieve a professional finish. Here’s a comprehensive list of tools you’ll need for this project:

1. **Measuring Tape**: Accurate measurements are crucial when planning your raised garden bed. A reliable measuring tape will help you determine the length, width, and height, ensuring your dimensions are spot on.

2. **Level**: To create a stable and even garden bed, a level is indispensable. This tool will help you ensure that your frame sits perfectly flat on the ground, preventing any water drainage issues and ensuring your plants grow evenly.

3. **Saw**: Depending on the materials you choose, you may need a hand saw or a power saw to cut your wood to the desired lengths. A miter saw is particularly effective for making precise angle cuts, while a circular saw can handle longer boards easily.

4. **Drill**: A cordless drill is a must-have for assembling your raised garden bed. It will allow you to easily bore holes and drive screws into your wood, ensuring your structure is sturdy and secure.

5. **Screwdriver**: While a drill can do most of the heavy lifting, a good screwdriver is helpful for tightening screws that may not be fully flush with the wood or for any adjustments that need to be made during assembly.

6. **Wood Screws**: Opt for weather-resistant wood screws that can withstand the elements and ensure the longevity of your garden bed. A length of 2.5 to 3 inches is typically ideal for securing the corners and joints.

7. **Hammer**: A hammer will come in handy for driving in stakes, if you’re using them to reinforce the corners of your bed or to attach other materials.

8. **Garden Trowel**: Once your raised bed is built, a garden trowel will be useful for digging and planting your flowers or vegetables directly into the soil.

9. **Gloves**: Protect your hands from splinters and dirt by wearing sturdy gardening gloves. They’ll help you maintain grip while working with tools and materials.

10. **Safety Goggles**: Always prioritize safety. Wearing safety goggles will protect your eyes from dust and debris, especially when cutting wood or drilling.

By gathering these tools and materials beforehand, you’ll set yourself up for success as you embark on the rewarding journey of building your raised garden bed. Each tool plays a vital role in crafting a structure that will not only enhance your garden but also serve as a functional and beautiful space for your plants to thrive. Happy building!

7. Step 1: Preparing the Site

How to build a raised garden bed?
Credit : whatcanu.com

Preparing the site is a crucial first step in building your dream raised garden bed. The success of your gardening venture hinges on the foundation you create, so it’s important to take the time to lay the groundwork properly.

Start by selecting a suitable location that receives ample sunlight—ideally, at least six to eight hours of direct sunlight each day. Observe your yard throughout the day to note the shifts in light and shade. Look for a spot that is relatively level and free from debris, including rocks, roots, and weeds. A clear space not only makes construction easier but also minimizes competition for nutrients and water.

Once you’ve identified the perfect spot, it’s time to clear the area. Use a shovel or hoe to remove any grass and weeds, ensuring that you dig down a few inches to get rid of any invasive roots. This will prevent them from creeping back into your garden bed and competing with your plants. If you’re particularly cautious about weeds, consider laying down landscaping fabric or cardboard to smother any remaining foliage before you build.

Next, assess the soil quality. While raised beds allow you to control the soil composition, starting with good-quality native soil can provide a solid base. If the existing soil is compacted or poor, consider loosening it with a garden fork or tiller to encourage healthy drainage and root growth.

Finally, outline the dimensions of your raised garden bed on the ground using stakes and twine or marking paint. This visual guide will help you understand how much space you have to work with and will ensure that your bed is properly positioned according to your plan. With the site prepared, you’re ready to move on to the next step: constructing your raised garden bed and filling it with the perfect soil mix for your plants to thrive.

8. Step 2: Building the Frame

Once you’ve selected the perfect spot for your raised garden bed, it’s time to dive into the heart of your project: building the frame. This step is crucial, as the frame will serve as the structural foundation for your garden, ensuring it remains sturdy and functional throughout the growing season.

### Materials Needed

Before you start, gather your materials. For a standard raised garden bed, you’ll need rot-resistant wood such as cedar or redwood, which can withstand the elements without warping or decaying. Common dimensions for a raised bed are 4 feet wide, 8 feet long, and 12 to 24 inches deep, but feel free to adjust based on your available space and gardening needs.

### Constructing the Frame

1. **Cut the Wood**: Begin by cutting your wood to the desired lengths. For a basic rectangular bed, you will need four pieces for the sides—two long pieces (8 feet) and two shorter ones (4 feet). If you’re using a power saw, take necessary safety precautions, and ensure your cuts are straight for a snug fit.

2. **Assemble the Corners**: Position the long pieces parallel to each other, then attach the shorter pieces at each end to form a rectangle. You can use wood screws or corner brackets for a secure hold. If you prefer a more rustic look, consider using untreated wooden stakes in the corners, which can be hammered into the ground for reinforcement.

3. **Reinforce the Structure**: To ensure your raised bed can withstand the weight of soil and plants, add cross supports. Cut two additional pieces of wood to fit diagonally from corner to corner inside the frame. This will help prevent any bowing of the sides as the bed fills up with soil.

4. **Level the Frame**: Once your frame is assembled, it’s crucial to ensure that it sits level on the ground. Use a level to check each side, making adjustments as necessary by digging out or adding soil beneath the frame. A level bed will promote even drainage and healthy plant growth.

### Finishing Touches

After your frame is built and leveled, consider giving it a protective finish. Applying a non-toxic wood sealant or stain can help prolong the life of your garden bed while ensuring that no harmful chemicals leach into the soil where your plants will grow.

With the frame complete, you’re now one step closer to turning your gardening dreams into reality. The next phase will focus on filling your raised bed with the right soil mix that promotes optimal growth. Stay tuned for that essential step in the journey to your thriving garden!

9. Step 3: Adding Drainage and Soil

Once your raised garden bed is securely assembled in its chosen spot, it’s time to turn your attention to an essential element for thriving plants: drainage and soil. Proper drainage ensures that excess water can escape, preventing root rot and promoting healthy growth.

Start by adding a layer of drainage material to the bottom of your garden bed. This could include gravel, small stones, or even broken pottery pieces. Aim for a depth of about 2-3 inches. This layer allows water to flow freely away from the roots while also providing aeration, which is crucial for a healthy root system.

Next, you’ll want to fill the bed with a well-balanced soil mixture. A good rule of thumb is to use one-third topsoil, one-third compost, and one-third organic material like peat moss or coconut coir. This blend provides the nutrients your plants need while ensuring proper drainage and moisture retention. As you fill the bed, gently tamp down the soil to eliminate air pockets, but be careful not to compact it too much, as this can hinder root growth.

Once your raised bed is filled, give it a good watering. This helps settle the soil and provides moisture for the beneficial microorganisms that will aid in breaking down the organic material. After watering, you may notice that the soil level has dropped slightly; don’t hesitate to add a bit more soil to bring it back up to the top of the frame.

With the drainage layer in place and your soil mixture settled, your raised garden bed is now primed and ready for planting. This step is crucial for setting the stage for a bountiful garden; a well-drained, nutrient-rich environment will help your plants flourish and produce a vibrant harvest. So take a moment to admire your hard work before moving on to the next step in building your dream garden oasis!

10. Step 4: Planting Your Seeds or Plants

Now that you’ve prepared your raised garden bed, it’s time for the most exciting part: planting your seeds or plants! This step is where your vision begins to take root—quite literally.

Before you dive in, take a moment to consider what you want to grow. Whether you’re aiming for vibrant flowers, fresh vegetables, or aromatic herbs, it’s essential to select plants that thrive in your local climate and soil conditions. Research the specific needs of each plant, including sunlight, watering requirements, and spacing, to ensure a flourishing garden.

As you approach the planting process, start by marking out your garden layout. Use a garden twine or small stakes to create rows or blocks, depending on the type of plants you’re sowing. This helps you visualize the space and ensures each plant has enough room to grow. For seeds, follow the recommended planting depth found on the seed packets; typically, you’ll want to plant them two to three times deeper than the seed’s diameter. Gently press the soil over the seeds, ensuring they are adequately covered.

If you’re planting seedlings, carefully remove them from their containers, taking care not to damage the roots. Dig a small hole in the soil, place the seedling in, and cover the roots with soil, gently patting it down to eliminate air pockets. Make sure the crown of the plant is level with the soil surface to prevent rot.

Once everything is in the ground, give your new plants a good drink of water to help them settle in. This not only hydrates them but also encourages the soil to firm around their roots. Take a moment to admire your handiwork—you’ve transformed a simple raised bed into a thriving potential habitat for growth!

As you nurture your garden in the coming days and weeks, keep an eye on your plants’ progress. Be attentive to their needs, adjusting water, and light as necessary, and soon enough, you’ll witness the fruits of your labor blossoming beautifully in your raised garden bed. Happy planting!

11. Step 5: Implementing a Watering System

Implementing a watering system is a crucial step in ensuring your raised garden bed thrives throughout the growing season. Proper hydration not only supports plant health but also reduces the time you spend manually watering, allowing you to enjoy your garden rather than labor over it. Here are some effective methods to consider when designing your watering system.

### Drip Irrigation
One of the most efficient ways to water your raised garden bed is by installing a drip irrigation system. This method delivers water directly to the plant roots through a network of tubing and emitters, minimizing evaporation and runoff. To set this up, you’ll need a main hose to connect to your water source, drip tubing to run through your bed, and emitters strategically placed near the base of each plant. This system allows you to customize the amount of water each plant receives, ensuring that your vegetables and flowers get the hydration they need without waste.

### Soaker Hoses
If you’re looking for a simpler option, soaker hoses can be an excellent alternative. These porous hoses allow water to seep out slowly along their length, providing even moisture to the soil. Lay the soaker hose in your raised bed, weaving it around your plants to ensure thorough coverage. Connect it to a water source, and you can easily water your garden by turning on the tap. Soaker hoses are particularly beneficial for maintaining consistent moisture levels, which is vital for preventing plant stress.

### Manual Watering
For those who enjoy a hands-on approach, traditional manual watering with a garden hose or watering can is always an option. However, to make this method more efficient, consider using a spray nozzle with adjustable settings. This allows you to switch from a gentle shower for seedlings to a more powerful stream for established plants. To make watering easier, set a routine that aligns with the weather conditions—more frequent watering during hot spells and less when it’s rainy.

### Rainwater Collection
To create a more sustainable watering system, consider incorporating a rainwater collection setup. Position a rain barrel near your garden to capture runoff from your roof. This not only provides an eco-friendly source of water but also reduces your water bill. You can connect a soaker hose or drip irrigation system directly to the rain barrel, ensuring your plants receive the hydration they need without relying solely on municipal water.

### Scheduled Watering
Regardless of the watering method you choose, establishing a watering schedule is essential. Early morning or late afternoon are ideal times to water, as these periods minimize evaporation loss and allow plants to absorb moisture effectively. If you opt for an automated system, you can program it to run during these optimal times, ensuring your garden remains hydrated without daily effort.

By implementing a smart watering system tailored to your raised garden bed, you’ll set the stage for a flourishing garden that yields bountiful harvests all season long. Whether you choose a high-tech drip irrigation setup or a simple rainwater collection system, staying ahead of your plants’ hydration needs is key to nurturing your dream garden into reality.

12. Step 6: Mulching and Maintaining Your Garden Bed

Mulching and maintaining your garden bed is a crucial step in ensuring the longevity and productivity of your planted oasis. Once your garden bed is built and you’ve sown your seeds or planted your seedlings, it’s time to pay close attention to the next layer of care that will help your garden thrive.

Start by applying a generous layer of organic mulch—about three to four inches deep—around your plants. This could be straw, shredded leaves, wood chips, or even grass clippings. Mulch serves multiple purposes: it helps retain soil moisture, suppresses weeds, and adds nutrients back into the soil as it breaks down. Choose a mulch that complements your garden’s aesthetic and is suitable for the plants you’re growing.

As you mulch, be mindful not to pile it directly against the stems of your plants, as this can encourage rot and pests. Instead, create a small buffer zone around each plant to ensure they remain healthy and vigorous.

Maintenance doesn’t end with mulching. Regularly check your garden bed for signs of pests or disease, which can quickly spread if left unchecked. Implementing companion planting can naturally deter unwanted insects, while also promoting healthy growth among your plants. Additionally, keep an eye on moisture levels; raised beds tend to dry out faster than traditional gardens, so be prepared to water more frequently during hotter months.

Fertilizing is another key component of maintaining your garden bed. Depending on the type of plants you’re growing, you may need to reapply organic fertilizers throughout the growing season. Compost is an excellent choice, providing a steady supply of nutrients while enhancing soil structure.

Finally, consider rotating your crops each season. This practice helps prevent soil depletion and reduces the risk of disease. By following these mulching and maintenance tips, you’ll ensure that your raised garden bed remains a flourishing and productive space, providing you with bountiful harvests and a wonderful place to relax and enjoy nature. Happy gardening!

13. Tips for Companion Planting and Crop Rotation

Companion planting and crop rotation are two essential techniques that can significantly enhance the health and productivity of your raised garden bed. By understanding how different plants interact and support one another, you can create a thriving ecosystem right in your backyard.

**Companion Planting:** This method involves strategically placing certain plants next to each other to promote growth, deter pests, and improve flavor. For instance, planting marigolds alongside your vegetables can help repel harmful insects, while basil is known to enhance the growth and taste of tomatoes. Consider mixing root vegetables, which grow below ground, with leafy greens that thrive above ground. This not only maximizes space but also helps to balance nutrient levels in the soil. Remember to research specific plant combinations that work well together, as some plants can inhibit each other’s growth.

**Crop Rotation:** This practice is vital for maintaining soil health and preventing the buildup of pests and diseases. By changing the location of your plants each season, you allow the soil to replenish its nutrients and reduce the risk of crop-specific ailments. For example, if you planted tomatoes in one section of your raised bed this year, consider planting legumes, such as beans or peas, in that same spot next year. Legumes fix nitrogen in the soil, enriching it for the next round of crops.

As you plan your garden layout, take the time to create a simple rotation schedule. This might involve dividing your garden into sections and rotating plant families—such as nightshades (tomatoes and peppers), brassicas (cabbage and broccoli), and leafy greens—throughout the seasons. By implementing these strategies, you’ll not only boost your harvest but also create a more sustainable gardening practice that benefits both your plants and the environment.

With companion planting and crop rotation, your raised garden bed will flourish, offering you a bountiful supply of fresh produce season after season. Happy gardening!

14. Troubleshooting Common Raised Bed Issues

Even the most meticulously planned raised garden beds can encounter a few bumps along the way. Understanding how to troubleshoot common issues will empower you to maintain a thriving garden and enjoy the fruits (and vegetables) of your labor. Here are some prevalent concerns you may encounter and effective solutions to address them.

**1. Poor Drainage:** If you notice water pooling in your raised bed after heavy rain, it may indicate inadequate drainage. To rectify this, check the bed’s base. Adding a layer of gravel or small stones at the bottom can improve drainage significantly. Additionally, ensure that the soil mix includes amendments like perlite or sand to enhance aeration and drainage.

**2. Soil Compaction:** Over time, soil in raised beds may become compacted, restricting root growth and water absorption. To combat this, gently turn the soil with a garden fork to aerate it. You can also add organic matter, such as compost or well-rotted manure, to improve soil structure and ensure that nutrients are readily available to your plants.

**3. Pest Problems:** Pests can be a gardener’s worst nightmare. If you notice signs of nibbling or damage on your plants, take action quickly. Implement natural deterrents like neem oil or insecticidal soap, and consider introducing beneficial insects such as ladybugs to help control pest populations. Additionally, installing physical barriers like row covers can protect your crops from hungry critters.

**4. Nutrient Deficiencies:** Yellowing leaves or stunted growth may signal nutrient deficiencies in your garden bed. Regularly testing your soil can help identify what nutrients may be lacking. Incorporate a balanced organic fertilizer or specific amendments (like bone meal for phosphorus or fish emulsion for nitrogen) to replenish the necessary nutrients.

**5. Weeds Out of Control:** Weeds can quickly take over a raised bed if not kept in check. To prevent them, ensure you use a thick layer of mulch to smother weed growth. When you do notice weeds popping up, pull them out by hand before they have a chance to establish deep roots. Regular maintenance is key to keeping your raised bed weed-free.

By addressing these common issues proactively, you can ensure your raised garden bed remains a flourishing oasis of growth. Remember, every gardener faces challenges, but with the right strategies in place, you can turn obstacles into learning experiences that contribute to your gardening success!

15. Conclusion and Next Steps for Your Garden Journey

As we draw the curtains on this comprehensive guide to building your dream raised garden bed, it’s essential to reflect on the journey ahead. You’ve not only equipped yourself with the knowledge to construct a sturdy and aesthetically pleasing garden bed, but you’ve also embraced the spirit of cultivation and connection with nature.

Now that your raised garden bed is complete, the next steps are both exciting and rewarding. Start by selecting the right soil mix—choose a blend rich in nutrients, such as a combination of compost, peat moss, and vermiculite, to ensure your plants thrive. Consider what you want to grow: whether vibrant vegetables, fragrant herbs, or colorful flowers, planning your planting layout can help maximize space and yield.

Don’t forget about ongoing maintenance! Regular watering, mulching, and monitoring for pests will keep your garden flourishing. As you watch your plants grow, take the time to learn about companion planting and crop rotation, which can enhance your garden’s health and productivity.

Lastly, share your journey! Document the progress of your garden with photos or journal entries, and consider joining local gardening communities or online forums for support and inspiration. By connecting with fellow gardeners, you can exchange tips, trade plants, and foster friendships rooted in a shared passion for gardening.

Embrace the process, celebrate small victories, and remember that every garden is a unique reflection of its gardener. Now, go forth and cultivate the garden of your dreams! Happy gardening! 🌱✨

As you embark on the journey of building your dream raised garden bed, we hope this step-by-step guide has provided you with the inspiration and practical knowledge to turn your gardening vision into a reality. Creating a raised garden bed not only enhances the aesthetic of your outdoor space but also offers numerous benefits for your plants, such as improved drainage, easier access, and better soil management. With the right materials, a little elbow grease, and the tips we’ve shared, you’re well on your way to cultivating a thriving garden that flourishes with color and life. So, gather your supplies, roll up your sleeves, and get ready to dig into the rewarding experience of gardening. We can’t wait to see the bountiful harvests and beautiful blooms that await you in your new raised garden bed! Happy gardening!

How to fix a leaky faucet?

A leaky faucet may seem like a minor inconvenience, but those constant drips can lead to a significant waste of water and an uptick in your utility bills.

If you’ve found yourself frustrated by the incessant sound of dripping water or the unsightly puddles forming in your sink, fear not! Tackling this common household issue can be simpler than you think. In this DIY guide, we’ll walk you through five straightforward steps to fix that leaky faucet and restore peace to your kitchen or bathroom. Armed with just a few basic tools and a little bit of patience, you’ll not only save money but also gain the satisfaction of completing a home repair on your own. So roll up your sleeves, and let’s get started on making that drippy faucet a thing of the past!

1. Introduction: Why Fixing a Leaky Faucet Matters

How to fix a leaky faucet?
Credit : whatcanu.com

A leaky faucet may seem like a minor inconvenience, but it can lead to significant issues if left unaddressed. The incessant drip-drip-drip can be more than just an annoyance; it can waste an astonishing amount of water over time, potentially driving up your utility bills and harming the environment. In fact, a single faucet that drips just once every second can waste more than 3,000 gallons of water a year—enough to fill a swimming pool!

Beyond the financial implications, a leaky faucet can also indicate underlying plumbing problems that require immediate attention. The constant moisture can lead to mold growth, damaging your home and impacting your health. Furthermore, if the leak is severe, it may cause water to pool around the base of the faucet, leading to corrosion or even structural damage to your cabinetry.

By fixing a leaky faucet, you not only save water and money but also contribute to a more sustainable lifestyle and protect your home’s integrity. Plus, the satisfaction of resolving a home maintenance issue yourself can be incredibly rewarding. In this DIY guide, we will take you through five simple steps to help you tackle that leaky faucet and restore peace to your household. Let’s get started!

2. Tools and Materials You’ll Need

Before diving into the repair process, it’s essential to gather all the necessary tools and materials to ensure a smooth and efficient fix. Having everything at your fingertips will save you time and frustration, allowing you to stay focused on the task at hand. Here’s a handy list of what you’ll need:

### Tools:
1. **Adjustable Wrench**: This versatile tool will help you grip and turn various nuts and bolts securely, making it easier to disassemble the faucet.
2. **Screwdriver Set**: Depending on the type of faucet, you’ll likely need both flathead and Phillips head screwdrivers. These will assist in removing screws that secure the faucet handle and other components.
3. **Pliers**: A good pair of pliers will be invaluable for gripping and twisting stubborn components that may be difficult to handle with your fingers alone.
4. **Allen Wrench**: If you have a faucet with a hex screw, an Allen wrench will be necessary to remove the handle.

### Materials:
1. **Replacement Washers or O-Rings**: These small yet crucial components often wear out and are common culprits behind leaks. Be sure to check your faucet type to purchase the correct size.
2. **Plumber’s Grease**: This lubricant is perfect for ensuring a smooth operation of moving parts and can help extend the life of your faucet components.
3. **Drop Cloth or Towels**: Having a drop cloth or some old towels handy will protect your countertop from scratches and absorb any water that spills during the repair process.

With your tools and materials assembled, you’re now ready to tackle that leaky faucet! Each item plays a vital role in ensuring that your repair goes off without a hitch, so double-check that you have everything before proceeding to the next step. With a little preparation, you’ll not only fix that pesky leak but also gain confidence in your DIY skills.

3. Step 1: Turn Off the Water Supply

How to fix a leaky faucet?
Credit : whatcanu.com

Before you dive into the intricate world of faucet repairs, the very first step—perhaps the most crucial one—is to turn off the water supply. This simple yet essential action will save you from a potential deluge and allow you to work without the constant worry of water spraying unexpectedly.

To locate the water supply, look beneath your sink for the shut-off valves. These are typically two knobs or lever handles, one for hot water and another for cold. Turn them clockwise until they stop to fully close the valves. If your faucet is connected to a separate shut-off valve, ensure that it is also turned off.

After shutting off the water, it’s wise to open the faucet to relieve any remaining pressure and drain any leftover water in the lines. This step not only keeps your workspace dry but also minimizes the mess you’ll have to deal with later.

Once you’ve ensured that the water is completely off and the faucet is dry, you can confidently proceed with the next steps of your repair, knowing that you’ve set a solid foundation for a successful fix. Remember, safety first—taking the time to properly turn off the water supply will make your DIY experience smoother and more efficient.

4. Step 2: Plug the Drain

Before diving into the intricate workings of your faucet, it’s essential to create a clean and manageable workspace. Step 2: Plug the Drain may seem like a minor detail, but it’s actually a crucial step in preventing any small parts or debris from disappearing into the abyss of your sink.

To begin, gather a clean rag or a purpose-made sink plug. If your sink has a built-in stopper, ensure it’s securely closed. For those without one, simply take the rag and wad it up tightly; then, place it in the drain opening. This acts as a safeguard, blocking any screws, washers, or other components from slipping away during your repair.

While this may feel like a small task, it’s a foundational step that can save you a significant amount of frustration later on. Imagine reaching the end of your fix only to realize a vital screw has vanished down the drain! By taking this extra precaution, you’ll maintain control over your workspace and ensure a smooth and efficient repair process. With the drain securely plugged, you can now confidently proceed to the next step in fixing that pesky leak.

5. Step 3: Disassemble the Faucet

How to fix a leaky faucet?
Credit : whatcanu.com

Once you’ve gathered your tools and turned off the water supply, it’s time to tackle the heart of the problem: disassembling the faucet. This step is crucial for accessing the inner components that may be causing the leak.

Begin by placing a cloth or towel beneath the faucet to catch any residual water that might spill during this process. Using a screwdriver, carefully remove any decorative caps or handles that are covering the screws. If your faucet features a lever, you may need to look for a small set screw located at the back or underside, which can often be loosened with an Allen wrench.

With the handles removed, you’ll need to unscrew the packing nut. This nut can be tightly fitted, so employ your adjustable wrench to gently loosen it. Be mindful not to apply too much force, as excessive pressure can damage the faucet body. Once the packing nut is loose, carefully lift it off to expose the stem or cartridge inside.

At this stage, take a moment to examine the parts you’ve disassembled. Look for worn-out washers, O-rings, or other components that may need replacing. Keeping these parts organized will save you hassle when it’s time to reassemble. Documenting the order of disassembly with your phone or a notepad can also be incredibly helpful, ensuring you can easily put everything back together once you’ve made your repairs.

Disassembling the faucet might seem intimidating, but with patience and attention to detail, you’ll be well on your way to fixing that leaky faucet and restoring peace to your home.

6. Step 4: Identify the Problem: Washer, O-ring, or Cartridge

Once you have the faucet disassembled and laid out in front of you, it’s time to diagnose the issue. This is a crucial step in your DIY journey, as identifying whether the culprit is a worn washer, a faulty O-ring, or a damaged cartridge will dictate your next moves and ensure a successful repair.

**Washer Problems:** If your faucet is dripping from the spout, the most common offender is often the washer. The washer is a rubber component that provides a tight seal when the faucet is turned off. Over time, regular use can wear down this component, leading to leaks. Inspect the washer for any signs of cracks, fraying, or compression. If it looks worn, it’s likely time for a replacement.

**O-ring Issues:** O-rings are small circular gaskets that help prevent leaks around the handle of the faucet. If you notice water pooling around the faucet handle itself, the O-ring may be to blame. Check for signs of wear or deterioration. If it seems to be losing its elasticity or has developed hard spots, replacing it can resolve the issue and restore your faucet’s functionality.

**Cartridge Dilemmas:** If your faucet is still leaking despite having replaced the washer and O-ring, the problem may lie in the cartridge. Cartridges are more commonly found in cartridge faucets, and they can wear out over time, leading to leaks. Look for any visible cracks or damage, and if necessary, take the cartridge to a hardware store to find an exact match for replacement.

Understanding these components and their roles is essential for diagnosing and addressing the leak effectively. Once you’ve identified the problem, you can move forward with the appropriate replacements, confident in your ability to restore your faucet to its drip-free state. This step not only empowers you as a DIYer but also saves you money and the hassle of calling in a professional.

7. Step 5: Replace the Damaged Parts

How to fix a leaky faucet?
Credit : whatcanu.com

### Step 5: Replace the Damaged Parts

Once you’ve successfully disassembled the faucet and identified the culprit behind the leak, it’s time to replace the damaged parts. This is a crucial step in ensuring your repair is effective and long-lasting. Depending on the type of faucet you have—be it compression, cartridge, ball, or ceramic disc—the parts you need to replace may vary.

First, carefully inspect the components you’ve removed. Look for worn-out washers, O-rings, or seals, as these are often the primary suspects in leaks. If they appear cracked, frayed, or misshapen, it’s time to swap them out. Many hardware stores offer repair kits that include all the necessary parts for your specific faucet model, making it easy to find replacements.

Before purchasing new parts, bring the old ones with you as a reference. This will ensure you get the right size and type for a proper fit. Once you have your new components, follow the manufacturer’s instructions to install them. Make sure to seat the washers and O-rings snugly, as a proper seal is essential to prevent future leaks.

As you reassemble the faucet, take care not to overtighten any screws or nuts, as this can cause damage to the new parts. Instead, aim for a firm but gentle tightening to ensure everything is secure without compromising the integrity of the fittings.

Replacing the damaged parts is a straightforward yet vital step in your faucet repair journey. Doing it correctly will not only stop the leak but also extend the life of your faucet, giving you peace of mind and a fully functional kitchen or bathroom fixture. With the new parts in place, you’re now one step closer to enjoying a leak-free experience!

8. Reassemble the Faucet

After you’ve successfully replaced the faulty components, it’s time to reassemble the faucet to restore it to its original state. This step is crucial, as a proper reassembly not only ensures functionality but also prevents future leaks.

Start by carefully placing the faucet handle back onto its base, aligning any screws or fasteners as needed. If your faucet has a decorative cap, don’t forget to secure it back in place; this is often a simple twist-on piece that can enhance the overall appearance of your fixture.

Next, use your screwdriver to tighten any screws that hold the handle in position. Be cautious not to overtighten, as this could cause damage to the faucet or its components. If your faucet has multiple handles or levers, repeat this process for each one, ensuring they all fit snugly and operate smoothly.

Once the handles are secure, it’s time to reattach any decorative elements or covers that you removed earlier. These parts not only contribute to the aesthetics of your faucet but also provide additional protection against moisture and dust.

Finally, turn the water supply back on and check for leaks. With everything reassembled, run the faucet for a few moments to ensure that water flows freely and that no drips or leaks are present. If all looks good, congratulations—you’ve successfully reassembled your faucet! Enjoy the satisfaction of knowing you tackled this DIY project with skill and precision, and relish in the quiet of a leak-free home.

9. Step 6: Turn the Water Supply Back On

Once you’ve reassembled the faucet and ensured that all components are securely in place, it’s time to turn the water supply back on. This step marks a significant moment in your DIY journey, as it will reveal whether your repairs have been successful. Start by locating the shut-off valves beneath the sink; they are typically positioned on the wall or the cabinet floor.

Carefully turn the valves counterclockwise to restore the water flow. As you do this, listen for the sound of rushing water—this is a good sign that you’re on the right track! However, immediate caution is warranted: keep an eye on the faucet to check for any signs of leaks.

Once the water is flowing, turn the faucet handle to test its operation. Run the water for a moment to ensure a steady stream without spluttering or drips. Feel the temperature of the water to confirm that hot and cold are functioning correctly. If everything seems to be in order, congratulations! You’ve successfully tackled the leaky faucet. But don’t get too comfortable just yet—take a few moments to wipe down any excess water around the sink area and double-check your work. If all looks good, you can pat yourself on the back for a job well done and enjoy the satisfaction of having fixed the issue yourself!

10. Step 7: Test for Leaks

After you’ve meticulously reassembled your faucet and tightened all the screws and fittings, it’s time for the moment of truth: testing for leaks. This crucial step ensures that your hard work has paid off and that your faucet is working as it should.

Start by turning the water supply back on, gradually opening the valves to avoid any sudden bursts of water. As the flow begins, pay close attention to the area around the faucet itself and the joints where you’ve made adjustments. Look for any signs of dripping or pooling water. A small leak can often be fixed with a simple twist of a screw or a minor adjustment, so don’t be discouraged if you see a little moisture at first.

To get a comprehensive check, run the faucet through its various settings—hot, cold, and mixed. This will help you identify any leaks that might only occur under certain conditions. If you do notice any leaks, it’s essential to turn the water supply off again and revisit your work. Check the O-rings, washers, and any seals you might have changed; sometimes, a misaligned component is all it takes to create a leak.

Once you’re confident that everything is secure and there are no leaks, take a moment to admire your handiwork. Not only have you just saved yourself some money by avoiding a plumber, but you’ve also gained valuable skills in home maintenance. With a little patience and attention to detail, you’ve turned a potentially frustrating problem into a successful DIY project!

11. Common Mistakes to Avoid

When tackling a DIY project like fixing a leaky faucet, it’s crucial to be aware of common mistakes that can turn a simple repair into a frustrating endeavor. Here are some pitfalls to steer clear of as you embark on your plumbing adventure:

1. **Neglecting to Turn Off the Water Supply**: It may seem obvious, but many DIYers forget this essential step. Failing to shut off the water supply can lead to a messy situation, with water gushing out as you start disassembling the faucet. Always locate the shut-off valves under the sink and turn them off before you begin.

2. **Skipping the Preparation**: Jumping right into the repair without gathering the necessary tools and materials can lead to interruptions and confusion. Ensure you have everything you need—like wrenches, screwdrivers, replacement parts, and a cloth to catch any drips—before you start.

3. **Using the Wrong Tools**: Each faucet type requires specific tools for repair. Using the wrong tools can damage the faucet or make it difficult to complete the repair. Invest in or borrow the right tools, such as basin wrenches, pliers, and screwdrivers, to ensure you can work effectively and avoid stripping screws or damaging fittings.

4. **Ignoring the Manufacturer’s Instructions**: Each faucet brand and model may have unique components and assembly methods. Failing to consult the manufacturer’s instructions can lead to confusion during reassembly or the use of incorrect replacement parts. Always refer to the manual or look up the model online for guidance.

5. **Over-Tightening**: It’s easy to think that cranking down on screws and bolts will ensure a watertight seal, but over-tightening can cause damage to the components, leading to future leaks or breakage. Use a gentle hand and tighten just enough to create a good seal.

By being mindful of these common mistakes, you’ll set yourself up for a successful faucet repair. With a little patience and the right approach, you can effectively fix that leaky faucet and enjoy the satisfaction of a job well done!

12. Tips for Preventing Future Faucet Leaks

While fixing a leaky faucet can save you money and water, taking proactive steps to prevent future leaks is equally important. Here are some essential tips to keep your faucet in top condition and avoid the hassle of leaks down the line.

**1. Regular Maintenance:** Schedule routine checks on your faucets and fixtures. Inspect for signs of wear, such as corrosion or loose parts, and replace washers or O-rings as needed. A little preventive care can go a long way in extending the life of your faucet.

**2. Use the Right Tools:** When working on your faucet, always use the appropriate tools for the job. Using the wrong size wrench or screwdriver can strip screws or damage components, leading to leaks. Invest in a good set of plumbing tools to ensure you have what you need.

**3. Avoid Over-Tightening:** It may be tempting to crank down on screws or nuts to prevent leaks, but over-tightening can cause more harm than good. This can lead to cracks in hardware or misalignment, ultimately creating new leaks. Tighten only until snug.

**4. Check Water Pressure:** High water pressure can put unnecessary stress on your faucet and its components, leading to leaks. Use a pressure gauge to check your home’s water pressure, and if it’s above the recommended range (generally 40-60 psi), consider installing a pressure regulator.

**5. Choose Quality Fixtures:** When replacing faucets or fixtures, invest in high-quality products from reputable brands. While they might carry a higher upfront cost, quality fixtures are often built to last longer and withstand wear and tear better than cheaper alternatives.

By adopting these simple practices, you can significantly reduce the likelihood of future leaks and enjoy a well-functioning faucet for years to come. Remember, a little attention today can save you time, money, and the frustration of unexpected repairs tomorrow.

13. When to Call a Professional

While many leaky faucet repairs can be successfully tackled by enthusiastic DIYers, there are times when calling a professional is the wisest course of action. Knowing when to hand the wrench over to an expert can save you time, money, and frustration down the line.

If you’ve followed the previous steps and your faucet is still leaking, it may be a sign of a more complex issue. Sometimes, the problem might stem from deeper within your plumbing system, such as high water pressure or corroded pipes, which aren’t easily fixable without specialized knowledge and tools. Additionally, if you notice water pooling around the base of the faucet or under the sink, this could indicate a more serious leak that requires an experienced plumber’s intervention.

Another situation where a professional’s help is warranted is if you’re dealing with a faucet type that is particularly intricate or outdated. Vintage or specialty faucets may have unique components that are hard to find or require specific expertise to repair correctly. In these cases, a professional can ensure that repairs are done without damaging your faucet further.

Finally, if you feel overwhelmed or uncertain at any point during your repair attempts, it’s perfectly okay to reach out for help. Plumbing can be tricky, and the last thing you want is to inadvertently create a bigger problem that leads to costly repairs. Trust your instincts—if a task feels beyond your skill level, calling a licensed plumber is a smart and responsible decision. They can provide peace of mind, ensure the job is done right, and ultimately save you from the headache of future complications.

14. Conclusion: Enjoying Your Leak-Free Faucet!

Congratulations! You’ve successfully tackled the task of fixing your leaky faucet, and now it’s time to sit back, relax, and enjoy the fruits of your labor. There’s something immensely satisfying about resolving a household issue with your own hands, and a leak-free faucet is a testament to your DIY skills. No more drips, no more annoying water sounds in the night, and certainly no more wasted water sneaking through those faulty seals.

As you turn on the faucet and hear the smooth flow of water, take a moment to appreciate the quietude of your kitchen or bathroom—free from the persistent drip-drip that once interrupted your peace. Not only have you saved yourself money on potential plumbing bills, but you’ve also contributed to water conservation, which is essential for our planet.

Remember, maintaining your faucet is key to ensuring its longevity. Regular checks for wear and tear, cleaning out aerators, and replacing washers can prevent future leaks. Should you encounter any further issues, don’t hesitate to refer back to this guide or consult a professional if needed.

By embracing the DIY spirit, you’ve not only fixed a problem but also gained valuable skills that empower you to handle similar repairs in the future. So, go ahead, enjoy that leak-free faucet, and let the water flow freely—without the worry of unwanted puddles beneath!

15. Additional Resources and References

When tackling a DIY project like fixing a leaky faucet, having the right resources at your fingertips can make all the difference. Here are some additional materials and references that can help you along the way, ensuring your repair is successful and stress-free.

1. **Online Tutorials and Videos:** Websites like YouTube are treasure troves of DIY content. Search for specific faucet types or brands for step-by-step video guides that visually walk you through the repair process. Seeing the steps in action can help clarify complex instructions and give you the confidence to proceed.

2. **Manufacturer’s Manuals:** If you still have the manual that came with your faucet, it’s worth a look. These manuals often include troubleshooting sections that can point you directly to the source of the leak, as well as specific diagrams and parts lists that are invaluable during repairs.

3. **DIY Forums and Communities:** Online forums such as Reddit’s r/HomeImprovement or DIY Network can be excellent resources. Here, you can ask questions, share your experiences, and learn from others who have tackled similar projects. Community members often provide tips and tricks that can save you time and frustration.

4. **Home Improvement Books:** If you prefer a more traditional approach, consider picking up a home improvement book from your local library or bookstore. Many of these guides offer comprehensive chapters on plumbing and faucet repairs, complete with illustrations and troubleshooting advice.

5. **Local Hardware Store Workshops:** Some hardware stores offer free workshops or classes on home repairs, including plumbing. Check with your local store to see if they have any upcoming sessions where you can gain hands-on experience and ask questions from knowledgeable staff.

By utilizing these additional resources, you can enhance your understanding of faucet repairs and gain the confidence to tackle even the trickiest plumbing issues. Remember, every DIY project is a learning opportunity, so don’t hesitate to seek out information that can help refine your skills. With the right guidance, you’ll not only fix that leaky faucet but also feel empowered to take on future home improvement challenges!

In conclusion, fixing a leaky faucet doesn’t have to be an overwhelming task. With the straightforward steps outlined in our DIY guide, you can tackle this common household issue with confidence and ease. Not only will you save money by avoiding costly plumber fees, but you’ll also gain a sense of accomplishment by successfully completing the repair yourself. Remember, every drop counts—both in conserving water and in preserving your home’s plumbing health. We encourage you to gather your tools, roll up your sleeves, and embark on this simple yet rewarding project. Happy fixing, and may your faucet be forever drip-free!