How to create a stylish and functional kitchen island?

The kitchen is often considered the heart of the home, a gathering place where culinary adventures unfold and memories are made.

At the center of this vibrant space, a stylish and functional kitchen island can serve as the ultimate multifunctional hub, blending practicality with aesthetic appeal. Whether you’re a passionate home chef looking to elevate your cooking experience, a busy parent needing extra prep space, or an entertainer seeking a chic setting for social gatherings, a well-designed kitchen island can transform your cooking area into a dynamic environment. In this blog post, we’ll explore innovative ideas and practical tips on how to create a kitchen island that not only enhances the style of your space but also maximizes its functionality, ensuring that it becomes the go-to spot for both everyday meals and special occasions. Get ready to reimagine your kitchen and discover how the perfect island can redefine your culinary experience!

1. Introduction: The Benefits of a Kitchen Island

How to create a stylish and functional kitchen island?
Credit : whatcanu.com

A kitchen island is more than just a functional addition to your cooking space; it is the heart of your kitchen and can dramatically transform the way you interact with this essential area of your home. Imagine a versatile surface where culinary creativity flourishes, where family and friends gather for casual meals, and where kids can complete their homework while you prepare dinner. The benefits of incorporating a kitchen island extend beyond mere aesthetics, offering a blend of style, functionality, and social connection.

One of the primary advantages of a kitchen island is the additional workspace it provides. Whether you are chopping vegetables, rolling out dough, or assembling elaborate meals, having that extra counter space can make cooking a more enjoyable and efficient process. Furthermore, many kitchen islands come equipped with storage solutions, such as cabinets and drawers, allowing you to keep your kitchen organized and clutter-free. This added functionality ensures that essential tools and ingredients are within arm’s reach, making meal preparation a breeze.

In addition to practicality, a well-designed kitchen island can serve as a stunning focal point in your kitchen. With an array of materials, colors, and styles to choose from, it can reflect your personal taste and complement the overall design of your home. Whether you opt for a sleek, modern look with a quartz countertop or a rustic farmhouse style with reclaimed wood, the right kitchen island can elevate your space and create an inviting atmosphere.

Moreover, a kitchen island fosters social interaction, making it an ideal spot for entertaining guests. Picture hosting a dinner party where conversations flow effortlessly as your friends gather around the island, enjoying appetizers and drinks while you finish preparing the main course. This communal space encourages connection and makes your kitchen the go-to hub for gatherings.

In summary, the benefits of a kitchen island are vast and varied, enhancing both the functionality and aesthetics of your home. As we delve deeper into this guide, we will explore the essential elements to consider when designing your dream kitchen island, ensuring it becomes a beloved feature of your culinary space for years to come.

2. Assessing Your Space: Measuring and Planning

Creating a stylish and functional kitchen island begins with a crucial step: assessing your space. This phase is all about measurement and thoughtful planning, ensuring your new island not only enhances your kitchen’s aesthetic but also fits seamlessly into your existing layout.

Start by taking precise measurements of your kitchen, noting the dimensions of the room, the location of windows, doorways, and any existing fixtures such as cabinets and appliances. A well-planned island should complement your kitchen’s flow, so consider how different areas are utilized. For instance, if you often entertain guests, a larger island with seating options can encourage social interaction. If your kitchen is compact, a smaller, multifunctional island that doubles as a prep area might be more suitable.

When measuring, allow for ample walking space around the island. A general rule of thumb is to maintain a clearance of at least 36 to 48 inches on all sides to ensure easy movement, especially when multiple people are in the kitchen. Visualize your design by using painter’s tape to outline the island’s dimensions on the floor. This will give you a palpable sense of how the island will fit within the overall space and help you gauge sightlines and accessibility.

Additionally, think about the functionality you desire from your island. Will it serve as a cooking station, a breakfast bar, or a homework hub? Planning for electric outlets, storage solutions, and even built-in appliances will elevate your island’s utility. By carefully measuring and planning, you can ensure your kitchen island not only looks stunning but also enhances the overall functionality of your kitchen, making it the heart of your home.

3. Choosing the Right Style: Modern, Rustic, or Traditional?

How to create a stylish and functional kitchen island?
Credit : whatcanu.com

Selecting the right style for your kitchen island is crucial, as it sets the tone for the entire space and reflects your personal aesthetic. With three popular styles to consider—modern, rustic, and traditional—understanding the nuances of each can help you make a choice that harmonizes with the existing décor of your kitchen while also fulfilling your functional needs.

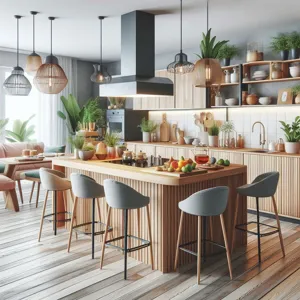
**Modern Style:** If you lean towards sleek lines and minimalist design, a modern kitchen island is your go-to. Characterized by clean, geometric shapes and a neutral color palette, modern islands often feature materials like stainless steel, quartz, or glass. These islands are not just visually appealing but also highly functional, often integrating smart technology, ample storage, and even built-in appliances. Imagine a spacious island with a waterfall countertop, seamlessly blending beauty and functionality, perfect for a contemporary kitchen where style and efficiency reign supreme.

**Rustic Style:** For those who favor warmth and charm, a rustic kitchen island can evoke a sense of coziness and nostalgia. Typically crafted from reclaimed wood or distressed finishes, these islands often showcase natural textures and earthy tones that bring the outdoors inside. Think of a large farmhouse table-style island adorned with vintage-inspired accessories—perhaps a butcher block surface for food prep, open shelving for displaying cookbooks, and mason jar decor that adds a personal touch. A rustic island not only serves practical purposes but also becomes the heart of the home, inviting family and friends to gather and share meals.

**Traditional Style:** If you appreciate classic elegance, a traditional kitchen island might be the perfect fit. This style often features ornate details, intricate moldings, and rich wood tones that exude sophistication. Traditional islands may include additional elements like decorative legs, raised panels, and even an antique finish that tells a story of timeless craftsmanship. These islands serve as a beautiful focal point, often complementing cabinetry and fixtures to create a cohesive and inviting space. With the right design, a traditional island can enhance the overall warmth of your kitchen while providing essential functionality for cooking and entertaining.

Ultimately, the style you choose should reflect your personality and lifestyle. Whether you opt for the sleek lines of modernity, the warmth of rustic charm, or the timeless elegance of tradition, your kitchen island can be a stylish and functional centerpiece that transforms your culinary space into a haven of creativity and comfort.

4. Material Matters: Selecting Countertops and Cabinetry

When it comes to creating a stylish and functional kitchen island, the choice of materials for countertops and cabinetry can make all the difference. Not only do they define the aesthetic of your space, but they also play a crucial role in the durability and functionality of your kitchen.

**Countertops** are one of the most prominent features of an island, acting as both a workspace and a visual focal point. Consider materials that suit your lifestyle and cooking habits. For a sleek, modern look, quartz and marble are popular choices, each offering a unique blend of beauty and resilience. Quartz is non-porous and low-maintenance, making it ideal for busy kitchens. Marble, on the other hand, boasts a timeless elegance, though it requires more care to maintain its pristine appearance.

If you’re seeking a rustic charm, butcher block countertops can provide warmth and a touch of homey appeal. They are perfect for those who love to cook, as they are gentle on knives and can be refinished when they show wear. For a more industrial vibe, consider concrete countertops, which offer a unique, customizable look that can be both stylish and incredibly durable.

**Cabinetry**, too, plays a pivotal role in the overall design of your kitchen island. Choose cabinetry that complements your countertops and aligns with your design vision. Shaker-style cabinets offer a classic and versatile look, while sleek, flat-panel cabinets can enhance a contemporary aesthetic. Material choices range from solid wood to high-quality laminate, each offering distinct advantages. Solid wood provides durability and a rich, authentic feel, while laminate can offer a more budget-friendly and low-maintenance option.

Beyond aesthetics, consider the functionality of your cabinetry. Incorporate features like pull-out shelves, deep drawers for pots and pans, or open shelving to display your favorite cookbooks and decorative items. Thoughtfully designed cabinetry not only enhances the visual appeal of your kitchen island but also makes cooking and entertaining more efficient and enjoyable.

In conclusion, when selecting materials for your kitchen island, prioritize both style and practicality. By choosing the right countertops and cabinetry, you can create a stunning centerpiece that elevates your kitchen’s design while ensuring it meets your everyday needs.

5. Functional Features: Incorporating Storage Solutions

How to create a stylish and functional kitchen island?
Credit : whatcanu.com

When it comes to designing a kitchen island that is both stylish and functional, incorporating smart storage solutions is essential. A well-thought-out island can serve as the heart of your kitchen, offering not only additional workspace but also a clever way to maximize storage in an often-limited area.

Begin by considering the layout of your kitchen and the specific items you need to store. Deep drawers for pots and pans are a must; they keep everything organized and easily accessible while eliminating the hassle of rummaging through cluttered cabinets. Pull-out shelves can be a game changer, allowing you to effortlessly reach the items at the back without awkwardly bending over.

If you’re short on space, think vertically. Open shelving above the island can display your favorite cookbooks, stylish dishes, or even decorative items. This not only adds a personal touch but also encourages organization and easy access. For those looking to keep the countertop clear, a concealed trash bin integrated into the island is a practical solution, ensuring waste is out of sight yet still within reach.

Consider adding a wine rack or cubby for cookbooks, which not only looks chic but also reflects your culinary interests while keeping everything within arm’s reach. If you’re a baking enthusiast, designing a dedicated section for baking sheets and mixing bowls could elevate your cooking game, making it easier to pivot from prep to bake.

Lastly, don’t forget about electrical storage. Including outlets in your island design allows for convenient access to power, whether you need to plug in a mixer or charge your devices.

By thoughtfully incorporating these functional features into your kitchen island, you can create a space that is not only aesthetically pleasing but also enhances your cooking experience, making your kitchen the ultimate gathering spot for family and friends.

6. Seating Arrangements: Bar Stools vs. Dining Chairs

When designing your kitchen island, the choice of seating can significantly influence both its functionality and aesthetic appeal. Two popular options are bar stools and dining chairs, each bringing distinct characteristics to your space.

**Bar Stools:** If you envision a casual, lively atmosphere, bar stools might be your best bet. Their height naturally complements the elevated surfaces of most kitchen islands, allowing for a comfortable perch that encourages social interaction. Available in a variety of styles, materials, and colors, bar stools can become a focal point in your kitchen. Opt for sleek, modern designs in metal or wood for a contemporary look, or choose upholstered stools for a touch of warmth and comfort. Additionally, consider stools with adjustable height features or swivel capabilities for added versatility, making it easy for family and friends to gather around during meal prep or casual snacking.

**Dining Chairs:** On the other hand, if you prefer a more formal or traditional dining experience, dining chairs could be the perfect addition to your kitchen island. Their wider bases and lower heights can create a seamless transition between your kitchen and dining areas, providing comfortable seating for longer meals or family gatherings. Dining chairs offer the opportunity to mix and match styles, allowing for a more personalized and eclectic look. You can choose from a variety of materials, from rustic wooden chairs to sleek upholstered designs, ensuring that your seating complements the overall decor of your kitchen.

Ultimately, the decision between bar stools and dining chairs comes down to your lifestyle and design preferences. Think about how you plan to use your kitchen island: is it a space for quick breakfasts, or a gathering spot for family dinners? By carefully considering your seating arrangements, you can create a kitchen island that is not only stylish but also functional, elevating the heart of your home to new heights.

7. Lighting Design: Enhancing Your Kitchen Island with Illumination

How to create a stylish and functional kitchen island?
Credit : whatcanu.com

Lighting design plays a crucial role in elevating the aesthetic and functional aspects of your kitchen island. A well-lit island not only enhances the overall ambiance of the kitchen but also serves practical purposes, making meal prep, cooking, and socializing more enjoyable.

To start, consider layering your lighting. A combination of ambient, task, and accent lighting can create a warm and inviting atmosphere while ensuring that the island is adequately illuminated for various activities. Pendant lights are a popular choice, hanging gracefully above the island to provide focused light right where you need it. Choose fixtures that reflect your style—whether sleek and modern or rustic and vintage—to add personality to your space.

In addition to pendant lights, under-cabinet lighting can be a game-changer. This soft glow not only brightens the countertop but also highlights any beautiful materials or textures you’ve chosen for your island, such as a stunning marble or rich wood finish. LED strip lights are an excellent option for this; they are energy-efficient and can be easily installed to create a seamless look.

Don’t overlook the importance of dimmers. Installing dimmable switches allows you to control the intensity of the light, adapting the mood of your kitchen island for different occasions, from lively gatherings with friends to quiet family dinners.

Lastly, consider the color temperature of your lighting. Warmer tones create a cozy environment, perfect for family gatherings, while cooler tones can lend a more contemporary feel, ideal for cooking and meal prep. By thoughtfully designing the lighting around your kitchen island, you not only enhance functionality but also create a space that invites connection and creativity, making your kitchen the heart of your home.

8. Color Schemes: Harmonizing with Your Kitchen Aesthetic

When it comes to designing the perfect kitchen island, the color scheme you choose plays a pivotal role in harmonizing the island with your overall kitchen aesthetic. This is not just about picking a color that looks good; it’s about creating a cohesive visual flow that enhances the beauty and functionality of your space.

Start by considering the existing colors in your kitchen. If you have a neutral palette featuring whites, grays, or beiges, you might want to incorporate a bold accent color for your island to create a striking focal point. Deep navy or a rich, earthy green can add depth and sophistication, transforming your island into a statement piece. Alternatively, if your kitchen already boasts vibrant hues, opt for a complementary or analogous shade to maintain visual harmony without overwhelming the senses.

Textures also play a crucial role in your color scheme. Pairing a smooth, glossy finish with a matte or textured surface can add dimension and intrigue. For instance, a sleek white marble countertop atop a warm wooden base can create a beautiful contrast that invites touch and interaction. Consider the materials of your cabinetry, countertops, and flooring as you choose colors; consistency across these elements will help tie the space together seamlessly.

Don’t forget the impact of lighting on your color choices. Natural light can shift the perception of colors throughout the day, while pendant lights or under-cabinet lighting can cast delightful warm tones or cooler shades. Test your color selections in various lighting conditions to ensure they evoke the desired mood and complement your kitchen’s overall design.

Lastly, remember that the kitchen is often the heart of the home, where family and friends gather. Choose colors that not only reflect your personal style but also create an inviting atmosphere. Soft pastels can evoke a sense of calm, while vibrant, energetic tones can inspire creativity and conversation. By thoughtfully harmonizing your kitchen island’s color scheme with your kitchen’s aesthetic, you’ll create a space that is both stylish and functional, welcoming all who enter.

9. Adding Personal Touches: Décor and Accessories

When it comes to creating a kitchen island that truly reflects your personality and lifestyle, adding personal touches through décor and accessories is key. This is the stage where functionality meets individuality, transforming your kitchen island from a mere workstation into a vibrant focal point that exudes warmth and style.

Start by selecting decorative items that resonate with your taste. Perhaps a collection of rustic wooden bowls filled with fresh fruits can introduce a pop of color and a touch of nature. Not only do they serve a practical purpose, but they also create a welcoming atmosphere. Consider displaying a few cookbooks that not only provide culinary inspiration but also showcase your love for cooking. Stacking them on the countertop or propping them up with a decorative stand can add an inviting touch.

Lighting is another essential element that can elevate the aesthetic of your kitchen island. Pendant lights hung above the island can create a dramatic effect, providing both illumination and style. Opt for fixtures that complement the overall theme of your kitchen—whether you prefer modern, industrial, or farmhouse styles, the right lighting can enhance the ambiance and make your island a gathering place for family and friends.

Incorporate personal accessories that tell your story. A stylish vase filled with fresh flowers can add a touch of elegance and vibrancy, while unique kitchen gadgets or artisanal serving trays can showcase your culinary passion. If you love to entertain, consider adding a chic wine rack or a selection of your favorite cookbooks, ensuring your island is not just functional but also a conversation starter.

Lastly, don’t forget about textiles! A couple of well-placed placemats or a soft runner can add warmth and comfort, inviting everyone to gather around. By thoughtfully selecting décor and accessories, you can create an island that is not only stylish but also a true reflection of who you are, making your kitchen the heart of your home.

10. Maximizing Utility: Integrating Appliances and Sinks

When it comes to creating a stylish and functional kitchen island, maximizing utility is key—especially when considering the integration of appliances and sinks. An island isn’t just a beautiful centerpiece; it can also serve as a powerhouse of functionality, streamlining your cooking and entertaining experiences.

Start by envisioning your island as a multi-functional workspace. If space allows, incorporate a cooktop or a built-in stovetop that transforms your island into the heart of culinary activity. This allows you to engage with family and guests while preparing meals, making your kitchen a more sociable environment. Pair this with a ventilation hood overhead to maintain air quality and keep your cooking area pleasant.

Next, consider integrating a sink into your island design. A wet bar or prep sink can be a game-changer for meal prep and cleanup. This addition not only enhances convenience but also keeps the workflow efficient—allowing you to rinse vegetables or wash hands without having to traverse back and forth to the main sink. Select a stylish faucet that complements your overall kitchen aesthetic, adding a touch of elegance while enhancing functionality.

For those looking to elevate their kitchen island further, think about incorporating under-counter appliances, such as a wine fridge or a microwave. These hidden gems can free up counter space and offer easy access to beverages and snacks for entertaining without cluttering the surface.

Lastly, ensure that your island has ample storage solutions. Open shelving can add style and accessibility, while drawers and cabinets can keep utensils, pots, and pans neatly tucked away. Organizing your kitchen tools within reach keeps your workspace tidy and efficient.

By thoughtfully integrating appliances and sinks into your kitchen island design, you’ll create a space that not only looks incredible but also works hard for you, transforming your kitchen into a hub of style and functionality that you’ll love for years to come.

11. DIY vs. Professional Installation: Making the Right Choice

When it comes to installing a kitchen island, one of the most pivotal decisions you’ll face is whether to undertake the project yourself or hire a professional. Both options come with their own set of advantages and challenges, and making the right choice depends on various factors, including your skill level, budget, and the complexity of the installation.

**DIY Installation: The Hands-On Approach**
For those who relish a challenge and have a knack for home improvement, a DIY installation can be a rewarding endeavor. It allows you to personalize every aspect of your kitchen island, from the materials used to the final aesthetics. There are countless online resources, tutorials, and community forums that can guide you through the process, making it accessible even for novice DIYers. Additionally, tackling the project yourself can save you a significant amount of money, which can be redirected towards high-quality materials or enhancements. However, it’s crucial to be realistic about your skills and the time commitment involved. If you’re not well-versed in carpentry or plumbing, you might find yourself facing unexpected hurdles that could delay your project and lead to frustration.

**Professional Installation: Expertise at Your Service**
On the other hand, hiring a professional can streamline the process and ensure a polished finish. Experienced contractors bring a wealth of knowledge and skills, allowing them to navigate potential pitfalls and complexities with ease. They can also help with things like electrical work, plumbing, and ensuring that the island adheres to local building codes—elements that can be daunting for an inexperienced DIYer. While the initial cost may be higher, the peace of mind that comes from knowing the job will be done right can be well worth the investment. Plus, professionals often have access to better tools and resources, which can enhance the quality of the final product.

Ultimately, the decision between DIY and professional installation hinges on your confidence in your abilities and your willingness to invest time and energy into the project. Whichever route you choose, a well-planned kitchen island can transform your cooking space into a hub of style and functionality, making it the heart of your home.

12. Budgeting: Cost Considerations and Tips for Savings

When it comes to creating a stylish and functional kitchen island, budgeting is a crucial step that can make or break your project. The cost of a kitchen island can vary widely based on materials, size, and design complexity. To ensure you stay on track financially, it is essential to assess your budget early in the planning process.

Start by outlining your overall kitchen renovation budget, then determine how much of that you can allocate specifically for the island. Consider essential expenses such as materials, labor, and any additional features you wish to include, such as built-in appliances or seating. Custom islands, for instance, can significantly increase costs, while a DIY approach using ready-made components may offer substantial savings.

To maximize your budget, consider these tips for savings:

1. **Explore Multiple Options**: Visit local home improvement stores and browse online marketplaces for diverse materials and designs. Sometimes, off-the-shelf solutions can offer a more budget-friendly alternative to custom-built options without sacrificing style.

2. **Repurpose Materials**: If you’re feeling creative, think about incorporating reclaimed wood or salvaged materials. Not only does this add unique character to your island, but it can also be a cost-effective choice.

3. **Prioritize Functionality Over Aesthetics**: While aesthetics are important, ensure that functionality remains at the forefront of your design. Consider how you intend to use your island—whether for cooking, dining, or entertaining—and allocate your budget towards features that will enhance usability.

4. **Plan for the Future**: Think long-term when budgeting for your kitchen island. Investing in higher-quality materials may have a higher upfront cost but can lead to greater durability and less frequent need for replacement or repairs.

5. **Seek Professional Advice**: Consulting with a kitchen designer or contractor can provide insights into potential cost-saving measures. They can help you make informed decisions about what elements are worth splurging on and which can be scaled back.

By carefully considering these cost factors and tips, you can create a kitchen island that seamlessly blends style and functionality while remaining within your budget. Remember, a well-planned kitchen island can enhance both the aesthetics and the efficiency of your cooking space, making it a worthwhile investment in your home.

13. Maintenance Tips for Your Kitchen Island

Once you’ve invested time and creativity into crafting the perfect kitchen island, maintaining its beauty and functionality becomes essential. Regular upkeep not only extends the life of your island but also keeps it looking its best, ensuring it continues to be the heart of your kitchen for years to come. Here are some practical maintenance tips to keep your kitchen island in top shape.

**1. Regular Cleaning:** Start with the basics—keeping your island clean. Use a soft cloth and a gentle cleanser suitable for the surface material, whether it’s wood, granite, or quartz. For wooden islands, opt for a wood-safe cleaner and always wipe in the direction of the grain to prevent scratches. For stone surfaces, consider a pH-balanced cleaner to avoid damaging the finish.

**2. Sealing and Protecting:** If your kitchen island features wood, be sure to apply a quality sealant or finish regularly to protect it from moisture and spills. For stone surfaces, periodic resealing can help maintain their luster and prevent staining. Check the manufacturer’s recommendations for the best sealing schedules based on your material type.

**3. Avoid Heat Damage:** Be cautious with hot pots and pans directly on the surface. Always use trivets or hot pads to protect your island from heat damage, especially if it’s made of wood or has a delicate finish. A little prevention goes a long way in maintaining its appearance.

**4. Address Scratches Promptly:** Over time, your kitchen island may experience scratches or dents. For wooden surfaces, a simple touch-up with a wood marker or a bit of wax can work wonders. For stone surfaces, consult with a professional for more significant repairs to avoid further damage.

**5. Organize and Declutter:** A functional kitchen island does more than just look good; it serves as a workspace. Regularly organize items on your island, keeping only essentials and decorative pieces that enhance the overall aesthetic. A clutter-free surface not only looks appealing but also makes cleaning easier.

**6. Inspect for Wear and Tear:** Take the time to regularly inspect your kitchen island for any signs of wear, loose hardware, or structural issues. Addressing these concerns early can prevent more extensive repairs down the line, ensuring your kitchen island remains a stylish and functional centerpiece.

By incorporating these simple maintenance tips, you’ll not only preserve the beauty of your kitchen island but also enhance its functionality, making it a beloved gathering spot for family and friends for years to come.

14. Real-Life Examples: Inspiring Kitchen Island Transformations

When it comes to kitchen islands, inspiration can be found in an array of styles, designs, and functionalities that cater to various tastes and needs. Here, we delve into real-life examples of kitchen islands that have undergone stunning transformations, showcasing the creativity and innovation that can be achieved in this central hub of the home.

**The Rustic Charm Revival**
In a cozy farmhouse-style kitchen, a once-plain island was transformed into a stunning focal point with reclaimed wood and a live-edge countertop. The warm tones of the wood complemented the white cabinetry, while industrial-style pendant lights hung overhead, adding a touch of modernity. This island not only serves as a prep space but also features open shelving for displaying beautiful dishware and cookbooks, blending functionality with charm.

**Modern Minimalist Marvel**
In a sleek urban apartment, a kitchen island was reimagined as a minimalist masterpiece. Crafted from pure white quartz with clean lines, it features an integrated sink and a subtle overhang for casual dining. The island’s streamlined design enhances the open-concept layout, making it feel spacious and airy. The use of hidden storage beneath the island ensures that everything needed for meal prep is neatly tucked away, maintaining the aesthetic of simplicity.

**Multi-Functional Family Hub**
In a bustling family home, the kitchen island was transformed into a multi-functional hub to accommodate the needs of a busy lifestyle. This renovation included a built-in breakfast nook on one side with comfortable seating for casual meals and homework sessions. On the opposite side, a dual-level countertop allowed for designated prep space and dining, while cabinets and drawers provided ample storage for kitchen essentials, toys, and games. Bright, cheerful colors and playful decor made this island a beloved gathering spot for the whole family.

**Gourmet Chef’s Dream**
For the culinary enthusiast, a kitchen island can be a chef’s paradise. In one example, a homeowner transformed their kitchen island into a culinary workspace equipped with a professional-grade cooktop, a warming drawer, and a separate prep sink. The island’s surface was enhanced with a durable and heat-resistant material, perfect for baking and cooking adventures. With strategically placed lighting and a built-in spice rack, this kitchen island became a dream come true for anyone who loves to cook and entertain.

These real-life examples illustrate that a kitchen island can be much more than a simple countertop; it can be a stylish centerpiece that enhances both the aesthetic and functionality of your kitchen. Whether you lean towards rustic charm, modern minimalism, family-friendly designs, or gourmet culinary spaces, the possibilities are endless. Let these transformations inspire your own kitchen island project, and create a space that reflects your personal style while meeting your functional needs.

15. Conclusion: Enjoying Your Stylish and Functional Kitchen Space

In conclusion, creating a stylish and functional kitchen island is not just about aesthetics; it’s about enhancing the way you interact with your space. As the heart of the home, the kitchen deserves to be both beautiful and practical, serving as a gathering spot for family and friends while also elevating your cooking experience.

By thoughtfully considering your needs—from storage solutions to seating arrangements—you can design an island that reflects your personal style and fits seamlessly into your daily routine. Whether you choose a bold color to make a statement, opt for durable materials that withstand the rigors of daily use, or incorporate smart technology to streamline meal prep, the possibilities are endless.

As you step back to admire your newly transformed kitchen, take a moment to envision the memories that will be created around your island. Picture yourself hosting lively dinner parties, enjoying casual breakfasts with loved ones, or simply sipping coffee while planning your day. A well-designed kitchen island is more than just a functional piece; it’s an invitation to enjoy the culinary adventures that await.

So, embrace the process, let your creativity flow, and enjoy every moment spent in your stylish and functional kitchen space. You’ve earned it!

In conclusion, creating a stylish and functional kitchen island can truly transform your cooking space into a hub of creativity and comfort. By thoughtfully considering your design choices, materials, and the practical elements that suit your lifestyle, you can craft an island that not only enhances the aesthetic appeal of your kitchen but also meets your everyday needs. Whether you envision a sleek marble top for culinary adventures, a cozy breakfast bar for family gatherings, or ample storage to declutter your kitchen, the possibilities are endless. We hope you feel inspired to embark on this exciting project and make your kitchen the heart of your home. Share your kitchen island transformations with us—we can’t wait to see how you bring your vision to life!

What are the best ways to add character to your home?

Transforming a house into a home is an art that goes beyond mere decoration; it’s about infusing spaces with personality and warmth that truly reflect who you are.

Whether you’re moving into a new place or simply seeking to refresh your current surroundings, embracing creativity can breathe new life into every corner. In this blog post, we will explore 10 imaginative ways to infuse unique character into your home, from incorporating meaningful artwork and personal mementos to experimenting with bold colors and unconventional furniture arrangements. Say goodbye to cookie-cutter aesthetics and hello to a living space that tells your story, sparks joy, and invites conversation. Join us as we delve into innovative ideas that will help you create a home that’s not only stylish but also a true reflection of your individuality!

1. Understanding Your Personal Style

What are the best ways to add character to your home?
Credit : whatcanu.com

Understanding your personal style is the cornerstone of transforming your home into a unique reflection of who you are. It’s an exploration of your tastes, preferences, and the experiences that shape your aesthetic sensibility. Begin by considering what inspires you—be it the vibrant hues of a sunset, the rustic charm of a countryside cottage, or the sleek lines of modern architecture.

Take a moment to browse through design magazines, Pinterest boards, or even your favorite travel photos. Pay attention to the colors, textures, and patterns that catch your eye. Are you drawn to bold colors and eclectic decor, or do you prefer a more minimalist and streamlined approach? This initial investigation is crucial; it will help you identify patterns in your preferences, paving the way for a cohesive design narrative throughout your home.

Next, reflect on your lifestyle. Are you a social butterfly who loves hosting gatherings, or do you find solace in quiet, cozy corners with a good book? Your personal style should not only resonate visually but also be functional, accommodating your daily activities and routines. If you have children or pets, for instance, consider durable materials and practical layouts that still embody your unique flair.

To further refine your personal style, create a mood board. Collect swatches of fabric, color samples, and images of furniture or decor that speak to you. This tactile process will help you visualize how various elements can come together harmoniously in your space. Remember, this is about expressing your individuality, so don’t be afraid to let your personality shine through. Whether you lean toward bohemian charm or industrial chic, understanding your personal style is the first step in curating a home that feels distinctly yours—an authentic sanctuary that tells your story.

2. Incorporating Vintage Finds

Incorporating vintage finds into your home decor is a delightful way to infuse unique character and charm into your living space. Vintage pieces tell a story, adding layers of history and personality that contemporary items often lack. Whether you scour thrift stores, estate sales, or online marketplaces, each treasure you discover has the potential to transform your home into a curated gallery of your personal tastes and experiences.

Imagine walking into a room adorned with a beautifully restored mid-century armchair that stands out against modern furnishings, or a rustic farmhouse table that invites friends and family to gather for meals. These vintage finds not only serve a functional purpose but also act as conversation starters, providing guests with glimpses of your eclectic style and appreciation for the past.

To successfully incorporate vintage items, consider blending them with your existing decor. A vintage globe can add a touch of exploration to a modern bookshelf, while an ornate mirror from a bygone era can serve as a stunning focal point in a minimalist hallway. Don’t shy away from mixing different periods and styles; the juxtaposition of old and new can create a dynamic and visually interesting space.

Additionally, think about the stories behind your vintage finds. Perhaps a quirky lamp once illuminated a jazz club in the 1960s or a collection of vintage postcards captures the essence of distant travels. Display these items prominently, allowing their narratives to enrich your home and spark curiosity among visitors.

Ultimately, incorporating vintage finds is not just about aesthetics; it’s about creating a space that reflects who you are and the journey you’ve taken. Each piece you choose adds a layer of depth and character, making your home a true representation of your unique style and history.

3. Utilizing Statement Wall Art

What are the best ways to add character to your home?
Credit : whatcanu.com

When it comes to transforming your living space, few elements can make as bold a statement as wall art. Utilizing statement wall art is an effective way to infuse unique character into your home, allowing you to express your personality and style in a visually captivating manner. Whether you’re drawn to vibrant abstract pieces, serene landscapes, or striking photography, the right artwork can become the focal point of any room.

Consider the scale and placement of your wall art. A large canvas can dominate a space, drawing the eye and setting the tone for the entire room. Positioning it above a sofa or a fireplace creates an inviting atmosphere, while a gallery wall filled with smaller pieces can showcase a collection of memories, travels, or artistic styles that resonate with you. Mix and match frames and styles for an eclectic look, or opt for a cohesive color palette to create a more unified feel.

Don’t shy away from unconventional materials and mediums. Think beyond traditional prints—consider textiles, metal sculptures, or even handmade ceramic pieces that add texture and depth to your walls. These unique materials can serve as conversation starters and reflect your personal aesthetics.

Moreover, the stories behind your artwork can add an extra layer of character to your home. Whether it’s a piece from a local artist, a print from your travels, or a family heirloom, sharing the inspiration behind your wall art can make your space feel even more personal and inviting.

Incorporating statement wall art into your home decor is not just about filling empty space; it’s about creating an environment that resonates with who you are. Choose pieces that speak to you, evoke emotions, and invite curiosity, and watch as your home transforms into a true reflection of your unique character.

4. Experimenting with Bold Color Palettes

When it comes to transforming your living space, few elements have the power to make a more immediate impact than color. Experimenting with bold color palettes can breathe life into your home, reflecting your unique personality and creating an atmosphere that resonates with who you are. Gone are the days of sticking to safe neutrals; it’s time to unleash your creativity!

Start by considering the mood you want to evoke in each room. Vibrant hues like deep blues, fiery reds, and rich yellows can inject energy and excitement into your spaces, while soft pastels can create a calm and serene environment. Don’t be afraid to mix and match contrasting colors—think emerald greens paired with sunny yellows, or navy blues against coral pinks. The key is to find a balance that feels cohesive while still allowing for playful experimentation.

One effective way to introduce bold colors is through accent walls. Choose a single wall to paint in a striking shade or use removable wallpaper with eye-catching patterns. This approach allows you to make a statement without overwhelming the room. If you’re hesitant to commit to a permanent change, consider accessorizing with colorful throw pillows, rugs, or art pieces that bring your chosen palette to life.

Another creative avenue is to incorporate color through furniture choices. A bright blue sofa or a vibrant yellow dining table can become the focal point of a room. Pair these bold pieces with more subdued elements to ensure they stand out while keeping the overall aesthetic harmonious.

Remember, experimenting with color isn’t just about adding it to your walls or furniture; it’s also about how you layer different shades throughout the space. Use varying tones of the same color for depth, or incorporate unexpected pops of color through plants, books, or decorative items. The goal is to create a lively tapestry of hues that invites conversation and sparks joy every time you step into your home.

In the end, the beauty of experimenting with bold color palettes is in the journey. Allow yourself the freedom to play and explore, and you’ll discover a unique character for your home that reflects your individual style and spirit. Embrace the vibrancy, and watch as your space transforms into a true expression of you!

5. DIY Projects for Personalized Touches

What are the best ways to add character to your home?
Credit : whatcanu.com

When it comes to transforming your living space into a reflection of your personality, diy projects are the perfect avenue to infuse unique character into your home. These projects not only allow you to express your creativity but also result in personalized touches that store-bought items simply can’t replicate. Plus, they often come with the added benefit of being budget-friendly!

Start by identifying areas in your home that feel a bit bland or impersonal. Perhaps it’s a plain wall in your living room, a bare shelf in the kitchen, or even a dull piece of furniture. Once you’ve pinpointed these spaces, brainstorm DIY projects that can breathe new life into them.

For instance, consider creating a gallery wall that showcases your favorite photographs, art pieces, or even your children’s artwork. Use mismatched frames for an eclectic look or paint them in coordinating colors to create a cohesive theme. Another idea is to upcycle old furniture with a fresh coat of paint or new upholstery, giving it a modern twist while preserving its history.

If you enjoy crafting, try your hand at making decorative items such as custom throw pillows with unique fabrics, hand-painted planters for your indoor plants, or even a handmade quilt that showcases your personal style. These small but meaningful additions can drastically change the atmosphere of a room.

Don’t overlook the power of scent, either! Create homemade candles or potpourri using your favorite essential oils to add an aromatic charm that’s uniquely yours. By engaging in these DIY projects, you not only create one-of-a-kind pieces but also cultivate a sense of accomplishment and pride in your home.

Ultimately, the beauty of DIY is that it allows you to tell your story through design. Every piece you create carries a memory, a moment of inspiration, or a reflection of your journey. So roll up your sleeves, gather your materials, and let your imagination run wild—your home will thank you for it!

6. Creating a Gallery Wall

Creating a gallery wall is one of the most dynamic and personal ways to infuse unique character into your home. This visual display not only showcases your taste and experiences but also serves as a conversation starter for guests. Imagine stepping into a room adorned with a stunning arrangement of framed art, photographs, and eclectic finds that reflect your journey and style.

To begin, choose a wall that serves as a focal point in your space—perhaps a hallway, living room, or even a cozy corner of your bedroom. Consider the size and layout; a larger wall can accommodate an expansive collection, while a smaller wall may benefit from a more curated selection.

Next, gather an assortment of pieces that resonate with you. This could include a mix of family photos, travel souvenirs, favorite quotes, or artwork from local artists. Don’t shy away from mixing different frame styles, colors, and textures; this approach adds depth and visual interest to your display. For a truly unique touch, consider incorporating three-dimensional items like decorative plates, woven textiles, or small sculptures that can be hung or placed alongside your framed pieces.

Before you start hammering nails into the wall, lay your pieces out on the floor to experiment with different arrangements. This will help you visualize how they’ll interact with one another and allow you to play with spacing and alignment. Once you’ve found a layout you love, take a photo to reference as you hang your artwork.

As you build your gallery wall, remember to leave room for growth. This could mean creating a designated space for new pieces or rotating artwork seasonally to keep your display fresh. Not only will this keep your home looking lively, but it will also allow your gallery wall to evolve as your tastes and experiences change over time.

Ultimately, a well-crafted gallery wall is a reflection of you—your story, your passions, and your unique character. It transforms a simple wall into an expression of individuality and creativity, making your home a place that feels distinctly yours.

7. Mixing Textures and Patterns

What are the best ways to add character to your home?
Credit : whatcanu.com

One of the most dynamic ways to infuse unique character into your home is by mixing textures and patterns. This creative approach can transform a dull space into a vibrant and inviting retreat, reflecting your personal style and taste. The key lies in finding a harmonious balance between various elements to create a cohesive yet eclectic look.

Start by identifying a color palette that resonates with you—this will serve as the foundation for your design. Once you have your colors in mind, experiment with different textures. Consider soft, plush fabrics like velvet or faux fur for throw pillows and blankets, paired with sleek, smooth surfaces such as glass or polished metal. A chunky knit throw draped over a sleek leather sofa can create a stunning contrast that draws the eye and adds depth to the room.

Patterns offer another exciting avenue for creativity. Don’t shy away from mixing geometric designs with florals or stripes. A bold floral print on a statement chair can be beautifully complemented by striped cushions on a neutral-colored sofa. The juxtaposition of patterns not only adds visual interest but also gives each piece its own personality, contributing to a layered and inviting atmosphere.

When working with patterns, consider the scale—pair larger patterns with smaller ones to avoid overwhelming the space. Using a common color from your palette in both patterns can help tie them together, ensuring they complement rather than clash. For instance, a large paisley print can work harmoniously with thin pinstripes, especially if both designs incorporate a shared accent color.

Incorporate texture and pattern into your space through rugs, wall art, and accessories. A patterned area rug can anchor a room while offering an opportunity to play with texture. Wall art, particularly in mixed media, can introduce an array of textures and colors, serving as a focal point that invites conversation.

Ultimately, mixing textures and patterns is about expressing your individuality and creating an environment that feels uniquely yours. Don’t be afraid to experiment—your home should be a reflection of your personality, where every piece tells a story and contributes to the overall character of your space. Embrace the adventure of layering and let your creativity shine!

8. Showcasing Travel Souvenirs

Travel souvenirs are more than just trinkets; they are tangible memories that carry stories from far-off places and adventures. By showcasing these treasures in your home, you can infuse unique character into your space while celebrating your journeys. Imagine stepping into your living room and being greeted by a vibrant tapestry from Morocco, a hand-blown glass piece from Venice, or a collection of tiny wooden figurines from a bustling market in Thailand. Each item not only adds visual interest but also sparks conversations and invites guests to share in your experiences.

To create a cohesive display, consider designating a specific area or shelf for your souvenirs. This could be a shadow box filled with postcards and small mementos, a gallery wall featuring framed photos alongside artifacts, or a dedicated shelf showcasing larger items like an intricately carved statue or a colorful ceramic vase. Arranging these pieces with care can create a curated look that feels intentional rather than cluttered.

You can also incorporate your souvenirs into your everyday life. Use a beautifully patterned sarong as a throw on your couch, or transform a vintage suitcase into a chic coffee table. The key is to find ways to integrate these items into your decor while allowing their individual stories to shine through. Not only will your home reflect your personality and passions, but it will also serve as a reminder of the cultures and experiences that have shaped you. So, as you gather new treasures from your travels, think about how each piece can add unique character and warmth to your living space.

9. Indoor Plants and Greenery as Decor

Bringing the beauty of nature indoors is one of the most effective ways to infuse unique character into your home, and indoor plants and greenery serve as the perfect solution. Not only do they add vibrant splashes of color and texture, but they also breathe life into any space, creating an inviting ambiance that feels fresh and rejuvenating.

Imagine walking into a room adorned with lush ferns cascading from hanging planters, or a stylish corner featuring a tall monstera, its large, glossy leaves reaching towards the ceiling. Each plant contributes its own personality, transforming ordinary spaces into vibrant ecosystems that reflect your personal taste.

Choosing the right plants is key. From low-maintenance succulents and snake plants to more exotic varieties like orchids and peace lilies, the options are endless. Consider mixing different heights and textures to create visual interest, or curate a mini indoor garden on a windowsill with a variety of small pots.

For a more dramatic effect, think about using plant stands or wall-mounted shelves to elevate your greenery, making it a focal point of the room. Woven baskets and ceramic pots can also enhance the aesthetic, adding layers of texture and style.

Beyond their visual appeal, indoor plants offer numerous benefits, such as improving air quality and boosting your mood. Studies have shown that being surrounded by nature can reduce stress and promote overall well-being, making your home not just more beautiful, but also a healthier place to be.

So, whether you’re an experienced plant parent or a newbie just starting your green journey, incorporating indoor plants into your decor can set the stage for a unique and inviting atmosphere that truly reflects your character and style. Embrace the greenery and watch as your home transforms into a living, breathing sanctuary.

10. Upcycling Furniture for a Unique Look

Upcycling furniture is not just a trend; it’s a creative adventure that allows you to breathe new life into old pieces while adding a distinct personality to your home. Imagine transforming a worn-out wooden chair into a whimsical statement piece by sanding it down and painting it with vibrant colors or intricate patterns. This simple act not only makes the chair visually striking but also tells a story of rebirth and creativity.

Dive into the world of upcycling by scouring thrift stores, flea markets, or even your own garage for forgotten treasures. An outdated dresser can become a stunning media console with a fresh coat of paint and some clever modifications. Consider replacing old knobs with unique vintage finds or even handmade ceramic pulls to give it that extra flair.

For those who are a bit more adventurous, why not turn an old door into a rustic dining table? By simply adding some sturdy legs and a protective finish, you can create a functional piece that serves as a beautiful centerpiece for gatherings. Or, take a stack of wooden crates and turn them into a charming bookshelf or coffee table, showcasing your books and decorative items in a way that reflects your eclectic taste.

Upcycling not only allows you to create unique home decor but also promotes sustainability by reducing waste. Each project is an opportunity to express your personality, whether through bold colors, quirky designs, or handcrafted details. So gather your tools, unleash your creativity, and watch as the forgotten transforms into the fabulous—each piece with its own unique character, just like you.

11. Customizing Lighting Fixtures

### 11. Customizing Lighting Fixtures

Lighting is not just a practical necessity in your home; it is also an opportunity to showcase your unique style and character. Customizing your lighting fixtures allows you to transform ordinary spaces into extraordinary ones, creating ambiance and enhancing the overall aesthetic of your home.

Start by considering the varied roles that lighting plays in different areas of your home. In a cozy living room, for instance, you might want to create a warm and inviting atmosphere. Look for vintage-inspired pendant lights or chandeliers that can serve as statement pieces. Imagine a beautifully crafted wooden chandelier adorned with Edison bulbs, casting a soft, golden glow that invites conversation and relaxation.

In contrast, your home office may benefit from focused task lighting. Opt for a sleek, modern desk lamp with adjustable arms that not only illuminates your workspace but also adds a touch of contemporary flair. Consider personalizing this fixture further by painting it in a color that complements your décor or adding a unique lampshade that reflects your personality, such as one covered in fabric with a bold pattern or a design that speaks to your hobbies.

Don’t overlook the power of DIY lighting projects! Upcycling old fixtures can infuse character and a sense of history into your home. For instance, you might transform an old bicycle wheel into a rustic chandelier or repurpose mason jars into charming pendant lights. These creative projects not only light up your space but also tell a story, making your home feel distinctly yours.

Finally, don’t forget about smart lighting options. Programmable LED bulbs can change colors and intensity, allowing you to tailor the lighting to suit your mood or the occasion. Imagine hosting a dinner party where the lights gradually dim to create an intimate atmosphere, or a lively gathering where vibrant colors pulse to the beat of the music.

Customizing your lighting fixtures is a remarkable way to express your individuality and enhance the atmosphere of your home. Whether through carefully chosen designs, DIY projects, or innovative technology, the right lighting can elevate your space from mundane to magical, inviting warmth and character into every corner.

12. Using Throw Pillows and Blankets for Character

Throw pillows and blankets may seem like small, insignificant decor items, but they possess the remarkable ability to transform a room and infuse it with unique character. Think of them as the finishing touches that add warmth, texture, and personality to your living spaces.

Start by selecting throw pillows that reflect your style—whether it’s bold geometric patterns, lush botanical prints, or cozy knitted textures. Mixing and matching different shapes and sizes can create an inviting and layered look that draws the eye and invites comfort. Consider incorporating pillows with unique embellishments, such as tassels or embroidery, to add an artisanal flair.

Blankets, too, play a vital role in enhancing the ambiance of your home. Drape a soft, chunky knit blanket over the back of a sofa or chair to create a cozy nook that beckons you to curl up with a good book. Choosing blankets in rich colors or interesting patterns can also serve as a focal point, breaking up the monotony of a neutral palette.

Don’t hesitate to rotate your throw pillows and blankets seasonally—swap out lighter, breezy fabrics for heavier, luxurious materials as the weather changes. This not only keeps your decor fresh but also allows you to celebrate the unique character of each season, from the vibrant hues of autumn to the soft pastels of spring.

Ultimately, using throw pillows and blankets is an easy, affordable way to express your personality while making your home feel warm and inviting. The right combination can turn a simple space into a reflection of who you are, inviting guests to engage with your home on a more personal level.

13. Creating a Cozy Reading Nook

Creating a cozy reading nook is a delightful way to infuse unique character into your home while offering a personal retreat for relaxation and exploration. Imagine a serene corner bathed in soft, natural light, where the outside world fades away, and the joys of literature come to life. Start by selecting a quiet space, perhaps beside a window or in a cozy alcove, where you can escape the hustle and bustle of everyday life.

To enhance the ambiance, choose a comfortable chair or a plush bean bag that invites you to sink in with a good book. Layer it with soft throw blankets and an array of colorful cushions to make it truly inviting. Consider adding a small side table to hold your current reads, a steaming cup of tea, or a fragrant candle.

Lighting plays a crucial role in setting the mood. A stylish floor lamp or a string of fairy lights can create a warm, welcoming glow, transforming your nook into a haven of tranquility. Don’t forget to incorporate elements that reflect your personality—perhaps a bookshelf brimming with your favorite novels, framed prints of literary quotes, or a small plant to bring a touch of nature indoors.

Lastly, consider the soundscape of your reading nook. A subtle Bluetooth speaker can fill the air with soft instrumental music or nature sounds, enhancing the immersive experience of reading. By thoughtfully curating these elements, your cozy reading nook will not only serve as a retreat but also a reflection of your unique character, making it a cherished spot in your home.

14. Incorporating Personal Photography

Incorporating personal photography into your home decor is a powerful way to infuse unique character and tell your story through visuals. Unlike generic art prints that can often feel impersonal, your own photographs carry memories and emotions, transforming your space into a personal gallery that reflects who you are and what you cherish.

Start by selecting a collection of your favorite photographs—these could be captured moments from your travels, candid family portraits, or snapshots of your beloved pets. Once you have a selection, consider the display options that will best showcase their significance. For a modern approach, create a gallery wall with a mix of framed photos in various sizes and styles, or opt for a cohesive look with matching frames to maintain a sense of order. You can even experiment with different arrangements, such as a grid pattern or a more organic, freeform layout that invites the eye to wander.

If you’re looking to make a bold statement, consider printing your photos on canvas or metal for a sleek, contemporary finish. This not only adds texture to your walls but also elevates the visual impact of your images. Additionally, you might explore creative alternatives such as photo books or even a digital picture frame that rotates through your favorite memories, allowing you to enjoy a constantly changing display.

Don’t be afraid to get creative with the context of your photographs, either. Pair them with meaningful quotes, family heirlooms, or vibrant artwork to create an engaging narrative throughout your home. By weaving personal photography into your decor, you’ll not only enhance the aesthetic appeal of your space but also create an environment that fosters nostalgia and connection—inviting guests to share in the story of your life. Embrace the power of your own lens, and watch as your home transforms into a warm, personalized sanctuary that reflects your journey and values.

15. Designing Multi-Functional Spaces

Designing multi-functional spaces is an innovative approach that not only maximizes the utility of your home but also adds a unique character to it. In today’s fast-paced world, where living spaces can often feel cramped, the key lies in creating areas that serve more than one purpose without sacrificing style or comfort.

Imagine a cozy nook that doubles as a home office by day and a serene reading corner by night. A sleek, foldable desk can seamlessly tuck away into a custom-built shelf, leaving behind a tranquil space filled with your favorite novels and a plush chair that invites you to unwind. By selecting furniture that is both beautiful and functional, like a stylish ottoman that opens to reveal hidden storage, you can maintain a clutter-free environment while showcasing your personal taste.

Another creative idea is to transform your dining area into a versatile space for entertaining. Consider a dining table that expands to accommodate guests or a trendy bar cart that can easily transition from a dining accessory to a cocktail station during gatherings. Incorporating movable partitions or curtains can also allow you to create intimate settings within a larger room, providing flexibility to host everything from dinner parties to yoga sessions.

Moreover, think about integrating multi-functional decor elements. A statement wall adorned with art can also serve as a backdrop for a foldable table or a seating area, emphasizing your style while enhancing functionality. By carefully curating these spaces, you not only optimize the layout of your home but also infuse it with a unique character that reflects your lifestyle and creativity.

Ultimately, designing multi-functional spaces is about reimagining how you interact with your environment. It invites you to think outside the box and create a home that evolves with your needs, making every square foot a testament to your personal flair.

In conclusion, infusing unique character into your home is not just about aesthetics; it’s about creating a space that reflects your personality and tells your story. Whether you choose to showcase your travels through carefully curated decor, experiment with bold color palettes, or embrace the charm of handmade pieces, each creative approach adds depth and warmth to your living environment. By applying the ideas we’ve explored in this blog post, you can transform your space into a vibrant reflection of who you are. Embrace your creativity, take risks, and don’t be afraid to let your individuality shine through. We can’t wait to see how you bring your home to life with these unique touches—share your transformations with us and inspire others on their journey to a beautifully personalized sanctuary!

How to create a cozy reading nook?

In a world that often feels fast-paced and overwhelming, finding a serene escape within your own home is essential for rejuvenation.

Imagine curling up with a good book in a space that envelops you in warmth and comfort—a cozy reading nook designed just for you. Whether you have a spare corner, a sunny window seat, or an entire room at your disposal, crafting your perfect reading retreat can transform ordinary moments into extraordinary experiences. In this step-by-step guide, we’ll explore how to curate a sanctuary that invites you to unwind, immerse yourself in stories, and savor the joy of reading. From choosing the right location and selecting the perfect furnishings to adding those little personal touches that make the space uniquely yours, get ready to create a cozy haven where your imagination can roam free and your stress can melt away.

1. Introduction: The Importance of a Cozy Reading Nook

How to create a cozy reading nook?
Credit : whatcanu.com

In a fast-paced world filled with distractions and endless to-do lists, carving out a sanctuary for yourself—a cozy reading nook—can be a transformative experience that nurtures your spirit and ignites your passion for reading. This dedicated space offers more than just a comfortable chair and a stack of books; it serves as an oasis where you can escape the hustle and bustle of daily life, immerse yourself in captivating stories, and indulge in moments of tranquility.

The importance of a cozy reading nook transcends mere aesthetics; it is about creating an environment that encourages relaxation and creativity. This intimate setting fosters a sense of comfort and peace, inviting you to slow down, unwind, and get lost in the pages of your favorite novels. Whether you’re curling up with a classic or diving into the latest bestseller, a well-designed nook can enhance your reading experience, making it feel like a cherished ritual rather than just a pastime.

Moreover, a reading nook can be a personal reflection of your tastes and personality, allowing you to curate a space filled with items that inspire and comfort you. Think plush cushions in your favorite colors, soft throws that beckon you to stay a little longer, and shelves adorned with literary treasures. This is your space, and it should evoke a sense of warmth and belonging.

In this guide, we will explore the essential steps to transform a corner of your home into the ultimate cozy reading nook. From selecting the perfect location to choosing furnishings that promote relaxation, you’ll learn how to create a haven that not only nurtures your love for reading but also becomes a special retreat in your home. So, grab your favorite mug, brew a cup of tea, and let’s embark on the journey to design the reading nook of your dreams!

2. Assessing Your Space: Finding the Perfect Spot

Before diving into the fun of decorating and furnishing your cozy reading nook, it’s crucial to take a step back and assess your space. Finding the perfect spot can make all the difference in creating an inviting atmosphere where you can escape into your favorite books.

Start by exploring different areas of your home—think about spaces that naturally offer comfort and tranquility. Is there a sunny corner by the window that beckons with warm light? Or perhaps a quiet alcove that’s tucked away from the hustle and bustle, allowing for peace and solitude? Look for areas where you can feel relaxed, as this will be the heart of your reading sanctuary.

Consider the layout and flow of the room as well. A nook shouldn’t feel cramped or isolated; it should feel like a seamless extension of your home. If you have a large living room, a cozy corner with a plush armchair paired with a small side table could be just the spot. In a bedroom, a window seat or a corner with a soft throw and a stack of pillows might serve perfectly.

Don’t forget to evaluate the lighting, too. Natural light is ideal for reading during the day, but you’ll also want adjustable task lighting for evenings spent lost in stories. A well-placed floor lamp or a stylish table lamp can enhance the coziness of your nook while ensuring you have the right lighting for your reading endeavors.

Finally, think about accessibility. Your reading nook should be stocked with your favorite books, a comfy blanket, and perhaps a cup of tea or coffee within reach. By choosing a location that’s both practical and inviting, you’ll create a space that calls you back time and time again, making it the perfect hideaway for hours of literary exploration.

3. Setting a Budget: How Much to Spend on Your Nook

How to create a cozy reading nook?
Credit : whatcanu.com

Creating the perfect cozy reading nook doesn’t have to break the bank, but setting a realistic budget is essential to ensuring that your dream space becomes a reality without causing financial stress. Start by considering the overall look and feel you want to achieve. Are you aiming for a minimalist vibe with simple, clean lines, or are you envisioning a bohemian escape filled with eclectic finds? Your design preference will significantly impact your budget.

Next, break down your budget into categories. Think about major elements like furniture, lighting, and textiles. For instance, investing in a comfortable chair or a plush floor cushion should be a priority, as this is where you’ll spend most of your reading time. A good-quality chair may require a larger share of your budget, but it will pay off in comfort.

Lighting is another crucial element; a well-placed floor lamp or a set of fairy lights can transform your nook into a warm, inviting space. Set aside funds for accessories, such as shelves for your books, decorative pillows, and throws that add personality and warmth to your nook. Don’t forget to account for any DIY projects or renovations you might want to undertake. A fresh coat of paint or a new rug can dramatically change the atmosphere without costing a fortune.

Lastly, keep an eye out for sales, thrift stores, or online marketplaces where you can find unique items at a fraction of the cost. By being resourceful and strategic, you can create a cozy reading nook that reflects your style and fits within your budget, allowing you to escape into your favorite books without any financial regrets.

4. Choosing the Right Furniture: Essential Pieces for Comfort

When it comes to creating the ultimate cozy reading nook, the right furniture can make all the difference. Imagine sinking into a plush armchair that envelops you like a warm hug or stretching out on a soft chaise lounge, where you can lose yourself in the pages of a good book. Selecting essential pieces that prioritize comfort and style will transform your nook into a personal sanctuary.

Start with a comfortable chair or sofa—this will be the heart of your reading space. Look for options with ample cushioning and support; oversized armchairs, bean bags, or even a small loveseat can provide the perfect spot to settle in for hours. Consider the upholstery as well; fabrics like soft chenille or velvet can add a touch of luxury, while breathable cotton blends offer practicality.

Next, don’t overlook the importance of a side table. A small, sturdy table is crucial for holding your favorite books, a steaming cup of tea, or even a cozy blanket. Choose one that complements your chair or sofa, whether it’s a rustic wooden piece or a sleek modern design. It should be easily accessible, allowing you to reach for your essentials without disrupting your reading flow.

Lighting is another key element in your furniture selection. A stylish floor lamp or a pair of table lamps will not only illuminate your space but also enhance the ambiance. Look for adjustable lighting options that allow you to create a warm glow that’s easy on the eyes, perfect for those late-night reading sessions.

Lastly, consider adding a few decorative elements, such as a plush ottoman or a small bookshelf. An ottoman can provide extra comfort, giving you a place to rest your feet, while a nearby bookshelf keeps your literary treasures within arm’s reach.

By thoughtfully choosing the right furniture, you’ll set the stage for a cozy reading nook that beckons you to unwind, relax, and escape into the pages of your favorite stories.

5. Lighting Matters: Selecting the Best Lighting Options

How to create a cozy reading nook?
Credit : whatcanu.com

Lighting is one of the most crucial elements in crafting the perfect cozy reading nook, as it sets the tone and atmosphere of your space. The right lighting can transform an ordinary corner into an inviting sanctuary, encouraging you to curl up with a good book for hours on end.

Begin by assessing the natural light in your nook. If your chosen spot is blessed with ample daylight, consider enhancing that warmth with sheer curtains that diffuse sunlight while maintaining a sense of openness. Natural light can offer a serene backdrop that revitalizes your reading experience. However, for those evenings when the sun dips below the horizon, supplementary lighting becomes essential.

Opt for a mix of ambient, task, and accent lighting to create a layered effect. Ambient lighting provides the overall glow of the space—think ceiling fixtures or floor lamps that fill the room with a soft light. Task lighting, on the other hand, is critical for reducing eye strain while reading. A well-placed table lamp or a swing-arm floor lamp can provide focused illumination on the pages of your book, allowing you to delve into your literary world comfortably.

Don’t shy away from decorative options either. String lights or fairy lights can add a whimsical touch, casting a gentle glow that invites relaxation. Consider incorporating a dimmer switch for your overhead lights, allowing you to adjust the brightness according to your mood or the time of day.

Finally, remember that the color temperature of your bulbs matters. Warmer tones (around 2700K to 3000K) create a cozy, inviting atmosphere, ideal for unwinding with a novel. In contrast, cooler tones can be jarring and less conducive to relaxation.

By thoughtfully selecting your lighting options, you’ll not only illuminate your reading nook but also infuse it with a warm ambiance that beckons you to unwind and escape into the pages of your favorite stories.

6. Textiles and Comfort: Pillows, Throws, and Rugs

When it comes to crafting the ultimate cozy reading nook, textiles play a pivotal role in creating an inviting atmosphere that beckons you to curl up with a good book. Start with the foundation: a soft, plush rug. Choose a material that feels luxurious underfoot, like a shaggy or wool rug, to add warmth and texture to your space. Not only does a well-chosen rug define the nook, but it also enhances the comfort level, making it the perfect spot to settle down for hours of reading.

Next, consider the pillows. Opt for a mix of sizes, shapes, and textures—large floor pillows for lounging, plush cushions for support, and perhaps a few decorative pillows to add visual interest. Textured fabrics such as velvet, knit, or linen can create a tactile experience that invites relaxation. Don’t hesitate to layer different patterns and colors, as this can bring personality and charm to your nook, making it a reflection of your unique style.

Lastly, drape a cozy throw blanket over the arm of your chair or keep it at the ready within reach. A soft, warm throw not only adds a sense of comfort but also serves as a perfect accessory for those chilly evenings. Choose one in a color or pattern that complements your overall theme, whether it’s a chunky knit for a rustic vibe or a sleek, cashmere blend for a modern touch.

Together, these textiles create a sensory haven within your reading nook—one that envelops you in comfort and makes every reading session feel like a luxurious escape. As you settle in, surrounded by softness and warmth, you’ll find it hard to resist the allure of getting lost in the pages of your favorite book.

7. Color Schemes: Picking the Perfect Palette for Serenity

How to create a cozy reading nook?
Credit : whatcanu.com

When it comes to designing a cozy reading nook, the color scheme you choose can significantly impact the overall ambiance and comfort of the space. A well-thought-out palette not only enhances the visual appeal but also fosters a serene environment conducive to relaxation and focus.

### Choosing Soothing Hues

Start by considering the mood you want to evoke in your reading nook. Soft, muted tones like gentle blues, warm creams, and earthy greens can create a calming atmosphere that invites you to unwind with your favorite book. These colors mimic the tranquility of nature, making them perfect for enveloping your nook in a sense of peace. For instance, a pale sage green can evoke the freshness of a serene garden, while a light sky blue can remind you of clear, sunny days.

### Accent with Warmth

While a soothing primary palette sets the stage for relaxation, don’t shy away from adding pops of warmth to make the space feel inviting. Rich terracotta, deep mustard, or soft coral can serve as accent colors through cushions, throws, or even artwork. These hues can create a delightful contrast that energizes the space without overwhelming it, making your nook both cozy and vibrant.

### Texture and Contrast

In addition to selecting colors, consider how different textures and finishes can enhance your palette. A plush, knitted throw in a warm hue juxtaposed with a sleek, wooden bookshelf can add depth and interest to your space. Layering different materials—like a soft rug, smooth cushions, and a wooden side table—will create a tactile experience that complements your color choices and invites you to sink into your reading bliss.

### Personal Touches

Lastly, think about incorporating colors that reflect your personality and taste. Perhaps a favorite book cover inspires a particular shade, or a cherished piece of art influences your color choices. By infusing your nook with personal touches, you’ll create a unique space that feels like an extension of yourself, making it even more inviting to escape into the pages of a novel.

In summary, the perfect color scheme for your reading nook should embody serenity, warmth, and personal significance. By thoughtfully selecting and combining colors and textures, you can create a tranquil haven that beckons you to curl up with a good book and lose track of time.

8. Shelving Ideas: Organizing Your Books and Decor

When it comes to crafting the ultimate cozy reading nook, shelving plays a pivotal role in both organization and aesthetics. Not only does it provide a practical solution for storing your cherished books, but it also allows you to display delightful decor that reflects your personality and style. Here are some creative shelving ideas to elevate your reading space:

**1. Floating Shelves:** For a modern and minimalist look, consider installing floating shelves. These sleek, wall-mounted platforms create an illusion of space while showcasing your books and decor items. Mix and match your favorite novels with decorative objects like small plants, framed photos, or quirky trinkets. The key is to balance the visual weight—group items in odd numbers and vary the heights for an effortlessly curated feel.

**2. Bookshelf Styling:** If you have a traditional bookshelf, don’t just line up your books neatly; think of it as a canvas. Organize your books by color for a vibrant rainbow effect, or group them by genre for a more structured look. Incorporate decor pieces, such as a cozy throw blanket draped over the side or a decorative bowl filled with bookmarks, to add warmth and character. Remember, your bookshelf should be as inviting as the books it holds!

**3. Corner Shelving Units:** If space is limited, corner shelving units can be a game-changer. These clever designs maximize awkward spaces while providing ample storage for both books and decorative items. Fill the shelves with a combination of your favorite reads and personal mementos, like travel souvenirs or art pieces, to create a narrative of your experiences.

**4. Baskets and Boxes:** For a cozy touch, consider using baskets or decorative boxes on your shelves. These can house not only books but also cozy blankets, spare reading glasses, or journals. Choose woven baskets for a rustic vibe or sleek boxes for a more contemporary look. This keeps your nook organized while adding texture and warmth to the overall design.

**5. Themed Displays:** Create themed displays that resonate with your interests. If you love nature, include books on gardening or wildlife alongside potted plants and nature-inspired decor. For a vintage feel, mix classic literature with antique finds, like an old globe or a vintage clock. These curated collections not only showcase your favorite reads but also serve as conversation starters for guests.

By thoughtfully organizing your books and decor, you’ll not only enhance the visual appeal of your reading nook but also create an inviting atmosphere that beckons you to escape into the pages of your next great read. So gather your favorite titles, unleash your creativity, and watch as your cozy sanctuary comes to life!

9. Personal Touches: Adding Art and Accessories

Personal touches are the heart and soul of any cozy reading nook, transforming a simple corner into a sanctuary that reflects your unique personality and style. As you curate your space, think about the art and accessories that resonate with you and evoke feelings of comfort and joy.

Start by selecting artwork that inspires you. Whether it’s a vibrant painting that brightens your mood, a serene landscape that invites tranquility, or a gallery wall of cherished photographs, these pieces can set the tone for your reading retreat. Hang your chosen art at eye level to create focal points that draw you in, allowing your nook to feel like an extension of your personality.

Next, consider adding decorative accessories that enhance the cozy atmosphere. A soft, textured throw blanket draped over your chair can invite you to curl up with a book on chilly evenings. Complement this with a few plush cushions in varying sizes and patterns to create an inviting seat. You might also want to include a small side table to hold your current reads, a steaming mug of tea, or a flickering candle, adding warmth and charm to the setting.

Don’t forget the power of plants! Incorporating greenery, whether it’s a small potted succulent or a trailing vine, can bring life to your nook and boost your mood. Choose plants that thrive in low light if your nook isn’t flooded with sunlight, ensuring they remain vibrant and healthy.

Finally, consider adding personal mementos that tell your story—perhaps a vintage clock that belonged to a grandparent, a beloved book with a handwritten dedication, or a quirky sculpture that sparks joy. Each accessory and piece of art you choose should resonate with you, creating a space not only for reading but for reflection, inspiration, and relaxation. By weaving these personal touches into your nook, you’ll create a cozy haven that invites you to escape into the pages of your favorite stories for years to come.

10. Incorporating Nature: Houseplants for a Fresh Atmosphere

Incorporating nature into your reading nook is an essential step in creating a fresh and inviting atmosphere. The presence of houseplants not only beautifies your space but also enhances your mood and well-being, making it the perfect sanctuary for diving into your favorite books.

Start by choosing a variety of plants that suit your environment and care preferences. For low-light nooks, consider hardy options like pothos or snake plants, which thrive in less-than-ideal conditions while adding a lush, green touch. If your nook basks in sunlight, succulents and cacti can bring an element of charm and uniqueness.

To truly integrate nature into your nook, think about the arrangement of your plants. A small bookshelf can double as a plant stand, allowing vines to cascade down while creating a visual focal point. Hanging planters can add height and dimension, drawing the eye upward and making your nook feel more expansive. You might even consider a small herb garden on a windowsill, filling the air with delightful scents that can enhance your reading experience.

Don’t forget about the pots! Choose decorative planters that reflect your personal style, whether it’s rustic terracotta, sleek ceramic, or vibrant colors. These details will add character to your nook and contribute to a cohesive design.

Finally, remember that caring for your plants can become a mindful practice that complements your reading habit. The act of watering, pruning, and simply observing their growth can be a calming ritual, allowing you to unwind and fully immerse yourself in the world of literature. By incorporating houseplants into your cozy reading nook, you’ll create a refreshing atmosphere that beckons you to relax and escape into the pages of your favorite stories.

11. Soundscapes: Music and Background Noise for Relaxation

When crafting the perfect cozy reading nook, one element that often gets overlooked is the auditory experience. Soundscapes can dramatically enhance your reading environment, creating an atmosphere that invites relaxation and focus. Whether you prefer the gentle rustle of leaves, the soothing sound of rain, or the soft strumming of acoustic guitar, integrating music and background noise can transform your nook from a simple reading spot into a serene retreat.

Start by curating a playlist that complements the mood you wish to create. Instrumental music, such as classical or ambient tracks, can provide a calming backdrop without distracting from your book. Consider platforms like Spotify or Apple Music, which offer pre-made playlists designed specifically for relaxation and concentration. If you’re a fan of nature sounds, there are countless options available that mimic the tranquility of a forest, ocean waves, or a crackling fireplace. These sounds can foster a peaceful ambiance, making it easier to lose yourself in the pages of your favorite novel.

For those who find silence unsettling, background noise can be a game changer. White noise machines or apps can drown out distracting sounds from outside, such as traffic or neighbors, allowing you to immerse yourself fully in your reading. Alternatively, you might try playing a low volume of café sounds—think soft chatter and the clinking of coffee cups—to recreate the comforting atmosphere of your favorite local coffee shop.

Experiment with these auditory elements until you find the perfect soundscape that resonates with your personal preferences. By thoughtfully incorporating music and background noise into your cozy reading nook, you’ll create an inviting space that beckons you to unwind, escape, and dive into new literary adventures.

12. Maintaining Your Nook: Tips for Keeping It Inviting

Creating a cozy reading nook is just the beginning; maintaining its inviting atmosphere is essential for ensuring it remains your favorite escape. Here are a few tips to keep your nook feeling fresh and welcoming:

**Regular Tidying**: Clutter can quickly detract from the serenity of your reading space. Make it a habit to tidy up your nook daily or weekly. This means putting away stray books, straightening cushions, and ensuring your blanket is neatly folded. A tidy nook not only looks appealing but also invites you to spend more time in it.

**Refresh the décor**: Every season brings new colors and themes. Consider updating your nook’s décor with the change of seasons. In the fall, add warm-toned pillows and a soft throw; in the spring, introduce floral patterns and lighter fabrics. Small changes can breathe new life into the space and keep it feeling fresh.

**Maintain Comfort**: A cozy nook is all about comfort, so regularly check the condition of your seating and accessories. Fluff cushions, check for wear and tear on your throws, and ensure your chair or sofa maintains its supportive structure. If something feels off, don’t hesitate to replace or repair items to preserve that inviting atmosphere.

**Incorporate Fresh Elements**: Adding fresh elements, such as a small potted plant or a scented candle, can enhance your nook’s ambiance. Plants not only look great but also improve air quality. Choose scents that promote relaxation, like lavender or vanilla, to create a calming environment that beckons you to unwind with a good book.

**Curate Your Reading Material**: Keep your selection of books dynamic and engaging. Regularly rotate your reading materials to keep your interests piqued. You might designate a space for your current reads while setting aside others that you’ve loved but may not revisit for a while. This curated approach helps create a sense of anticipation whenever you enter your nook.

**Personal Touches**: Finally, don’t forget to inject your personality into the space. Whether it’s displaying cherished mementos, artwork that inspires you, or a vision board of future reading goals, these personal touches create a sense of ownership and warmth, making your nook truly feel like your own sanctuary.

By following these simple maintenance tips, you can ensure that your cozy reading nook remains a beloved retreat, inviting you to curl up with a book and escape into new worlds whenever you desire!

13. Creating a Reading Routine: Making Time for Your Nook

Creating a reading routine is essential for fully embracing the cozy haven you’ve crafted. Just like any cherished hobby, setting aside dedicated time for reading transforms your nook from a mere space into a sanctuary of stories and imagination. To cultivate this routine, start by carving out specific times in your day that are free from distractions—perhaps an early morning escape with a cup of coffee or a tranquil evening unwind with a lighted candle and a good book.

Consistency is key, so try to establish a schedule that aligns with your lifestyle. Whether it’s a weekend ritual or a nightly wind-down routine, marking these moments on your calendar can help prioritize your reading time. Create a cozy ambiance by dimming the lights, wrapping yourself in a soft blanket, and choosing soothing background music or complete silence, depending on your preference.

Consider setting a reading goal to motivate yourself—maybe it’s a chapter a day or a book a month. Tracking your progress in a journal can provide a sense of accomplishment and encourage you to dive deeper into your literary adventures. As you settle into this routine, allow yourself the freedom to explore different genres and authors, enriching your experience and keeping the joy of reading alive.

Remember, this is your personal retreat; it’s about enjoying the process, not just completing books. Embrace the little rituals that make your reading time special, whether it’s a favorite mug, a warm beverage, or a comfy pair of socks. By making time for your nook, you not only nurture your love for reading but also create a cherished habit that enhances your daily life. So go ahead—grab that book and let your cozy nook transport you to new worlds!

14. Inspiring Your Reading List: Books to Enjoy in Your Cozy Space

Creating a cozy reading nook is only half the journey; the other half lies in filling it with books that will transport you to new worlds and inspire your imagination. To truly enhance your reading experience, curate a reading list that not only complements the sanctuary you’ve created but also ignites your passion for literature. Here are some delightful suggestions across various genres that are perfect for curling up with in your new haven.

**Fiction to Get Lost In**
Dive into the enchanting realms of fiction with classics like *Pride and Prejudice* by Jane Austen or contemporary gems like *The Night Circus* by Erin Morgenstern. These stories are rich in detail and character, making them ideal companions for those long, lazy afternoons spent nestled in your nook.

**Non-Fiction for the Curious Mind**
For those who crave knowledge, consider titles like *Sapiens: A Brief History of Humankind* by Yuval Noah Harari or *Becoming* by Michelle Obama. Engaging and thought-provoking, these books are sure to enrich your understanding of the world while you sip your favorite tea in your cozy corner.

**Poetry for Reflection**
Sometimes, all you need is a few beautifully crafted lines to stir your soul. Collections like *The Sun and Her Flowers* by Rupi Kaur or *Milk and Honey* offer bite-sized pieces of inspiration that can elevate your mood and make your reading nook feel even more intimate.

**Mystery and Thrills**
If you’re in the mood for some suspense, indulge in a gripping mystery novel like *The Girl with the Dragon Tattoo* by Stieg Larsson or a psychological thriller such as *Gone Girl* by Gillian Flynn. These books will keep you on the edge of your seat, perfect for those moments when you want to curl up and hold your breath.

**Fantasy for Escapism**
Let your imagination soar with epic fantasy novels like *The Hobbit* by J.R.R. Tolkien or *A Darker Shade of Magic* by V.E. Schwab. These immersive tales are perfect for escaping reality and getting lost in a world of magic and adventure, all while snuggled up in your favorite reading spot.

**Young Adult for Nostalgia**
Don’t forget the charm of Young Adult literature! Classics like *The Perks of Being a Wallflower* by Stephen Chbosky or the whimsical *Eleanor & Park* by Rainbow Rowell can evoke feelings of nostalgia while capturing the complexities of youth and love.

As you curate your reading list, remember that the ultimate goal is to find books that resonate with you personally. Collect a mix of genres and styles, allowing your cozy nook to become a sanctuary not just for relaxation, but for exploration and growth. So, brew your favorite beverage, wrap up in a soft blanket, and let the pages take you on an unforgettable journey. Happy reading!

15. Conclusion: Embracing the Joy of Your New Reading Nook

As you step back to admire your newly created reading nook, take a moment to bask in the tranquility you’ve crafted. This cozy corner is more than just a space; it’s a sanctuary where you can escape the hustle and bustle of daily life, lose yourself in the pages of a captivating novel, or simply enjoy a cup of tea while gazing out the window. The soft lighting, plush seating, and carefully curated decor invite you to unwind and immerse yourself in your favorite stories.

Embracing the joy of your new reading nook means allowing yourself the freedom to explore new literary worlds and rediscover beloved classics. Whether it’s a thrilling mystery, a heartwarming romance, or a thought-provoking piece of non-fiction, the right book can transport you to another realm, all while nestled in the comfort of your own home.

Don’t forget to personalize this special place with items that bring you joy—perhaps a framed photo, a cherished memento, or a plant that adds a touch of life to the area. Each element contributes to a unique atmosphere that reflects your personality and invites you to spend hours lost in your reading adventures.

As you settle into your cozy nook, remember that this space is not just about reading; it’s about creating a ritual of relaxation that nourishes your mind and spirit. So curl up, let the outside world fade away, and embrace the joy of your new reading nook. It’s a little haven that encourages you to take a pause, indulge in your passions, and savor the simple pleasure of a good book. Happy reading!

As we wrap up our journey to creating the ultimate cozy reading nook, we hope you feel inspired and equipped to transform your space into a personal retreat that beckons you to unwind with a good book. Remember, the key elements to a successful reading nook are comfort, warmth, and a touch of personal style. Whether you choose a sunny corner by the window, a quiet alcove, or a dedicated room, each step in this guide can help you curate a sanctuary that reflects your taste while providing the perfect escape. So, gather your favorite books, throw on a soft blanket, and create a haven where you can lose yourself in stories and find solace in the pages. Happy reading!

What are the different types of plumbing fixtures?

When it comes to designing or renovating your home, one of the most crucial yet often overlooked elements is the plumbing fixtures.

These essential components not only serve functional purposes but also play a significant role in the overall aesthetic of your space. From sleek faucets and stylish sinks to elegant bathtubs and efficient toilets, the right plumbing fixtures can transform your bathroom and kitchen into stylish sanctuaries. However, with the myriad of options available in the market, choosing the perfect fixtures can be a daunting task. In this comprehensive guide, we’ll explore the various types of plumbing fixtures, their unique uses, and essential selection tips to help you make informed decisions that align with your personal style and practical needs. Whether you’re a DIY enthusiast, a seasoned renovator, or simply looking to refresh your living space, this ultimate guide will equip you with the knowledge you need to elevate your home’s functionality and design.

1. Introduction to Plumbing Fixtures

What are the different types of plumbing fixtures?
Credit : whatcanu.com

Plumbing fixtures are the unsung heroes of our everyday lives, seamlessly blending functionality with style in our homes and businesses. From the moment we turn on a tap to wash our hands, fill a bathtub, or flush a toilet, we rely on these essential components to deliver water efficiently and effectively. But plumbing fixtures are not merely utilitarian; they also play a significant role in the aesthetic appeal of our spaces.

In this comprehensive guide, we will explore the various types of plumbing fixtures, their specific uses, and key considerations for selecting the right fixtures for your needs. Whether you are embarking on a renovation project, building a new home, or simply looking to upgrade your existing plumbing, understanding the different options available is crucial.

We’ll delve into the common types of fixtures, such as faucets, sinks, toilets, bathtubs, and showerheads, highlighting their unique features and functions. Additionally, we’ll discuss the importance of water efficiency and how modern fixtures can contribute to sustainability efforts, ultimately saving you money on utility bills while being kinder to the environment.

Moreover, we’ll provide tips on how to choose fixtures that complement your interior design, fit your lifestyle, and meet your budget. By the end of this guide, you will be well-equipped to make informed decisions about plumbing fixtures that enhance both the functionality and beauty of your spaces. So, let’s dive in and discover the world of plumbing fixtures together!

2. Understanding Different Types of Plumbing Fixtures

When embarking on a plumbing project, understanding the various types of plumbing fixtures is crucial to achieving both functionality and aesthetic appeal in your space. Plumbing fixtures are not just essential for the practical aspects of water distribution and waste management; they also contribute significantly to the overall design of your home or business.

**1. Faucets:** The unsung heroes of any kitchen or bathroom, faucets come in a variety of styles, finishes, and functionalities. From single-handle pull-down sprayers in modern kitchens to classic widespread faucets in traditional bathrooms, the right faucet can enhance your space while ensuring efficient water flow. Look for features such as high-arc designs for greater clearance or touchless sensors for added convenience.

**2. Sinks:** Sinks serve as the heart of both kitchens and bathrooms. Kitchen sinks are typically larger and come in styles such as farmhouse, undermount, or drop-in, accommodating everything from food prep to dishwashing. Bathroom sinks range from pedestal and wall-mounted designs to vessel sinks that sit atop countertops. Consider the sink’s material—stainless steel, porcelain, or composite—and its size in relation to the overall space and functionality you desire.

**3. Toilets:** Today’s toilets offer a blend of comfort, efficiency, and style. From conventional two-piece models to sleek one-piece designs, the choices are vast. Look for features such as dual-flush options for water conservation, comfort height for ease of use, and noise-reduction technologies for a quieter experience. Selecting the right toilet can significantly impact both your water usage and the overall aesthetic of your bathroom.

**4. Showers and Bathtubs:** Showers can range from basic models to luxurious walk-in enclosures with multiple showerheads and body sprays. Bathtubs, whether freestanding, alcove, or drop-in, can be a statement piece in a bathroom. Consider your lifestyle and preferences when selecting these fixtures; for instance, if relaxation is key, a deep soaking tub may be ideal, while a streamlined shower may suit smaller spaces or busy households.

**5. Accessories and Additional Fixtures:** Don’t overlook the importance of accessories like showerheads, towel racks, and bathroom storage. These smaller fixtures can dramatically enhance functionality and style. Consider selecting finishes and designs that complement your primary fixtures to create a cohesive look in your space.

By familiarizing yourself with the different types of plumbing fixtures and their unique features, you can make informed decisions that not only meet your practical needs but also elevate the overall design of your home. As you dive into the selection process, keep in mind aspects such as water efficiency, ease of maintenance, and compatibility with your existing plumbing to ensure a seamless integration of style and function.

– 2.1 Faucets

What are the different types of plumbing fixtures?
Credit : whatcanu.com

### 2.1 Faucets

Faucets are the unsung heroes of any plumbing system, serving as the primary interface between users and the water supply. While they may seem like a simple fixture, the variety of styles, designs, and functionalities available today can make selecting the right faucet a daunting task. Understanding the different types of faucets, their uses, and the selection tips can significantly enhance your plumbing project.

At a basic level, faucets can be categorized based on their design and functionality. **Compression faucets**, the traditional type, operate with two separate handles for hot and cold water, allowing for precise temperature control. However, they require a bit of effort to turn on and off, making them less popular in modern applications.

In contrast, **cartridge faucets** feature a single handle or two handles with a cartridge that controls the flow and temperature of water. This type is known for its smooth operation and longevity, making it a favorite for kitchens and bathrooms alike. **Ball faucets**, commonly found in modern kitchen sinks, utilize a single handle that moves over a ball joint to control water flow and temperature, offering a sleek and user-friendly experience.

For those looking for convenience, **pull-down and pull-out faucets** provide added flexibility in the kitchen. These faucets come with a retractable hose that makes it easy to wash dishes or fill large pots directly from the sink. Additionally, **touchless faucets**, which use motion sensors to activate water flow, are increasingly popular in both residential and commercial settings for their hygiene and ease of use.

When selecting a faucet, consider the style and finish that will best complement your space. From polished chrome to matte black, the finish can dramatically impact the overall aesthetic of your kitchen or bathroom. Don’t forget about the installation requirements; some faucets are designed for easy DIY setups, while others may necessitate professional assistance.

Finally, it’s essential to think about your water pressure and the faucet’s flow rate. A faucet that doesn’t match your plumbing system can lead to frustrating issues like low flow or fluctuating temperatures. Researching and selecting a faucet that aligns with your specific needs will not only enhance functionality but also elevate the overall design of your space.

In conclusion, faucets are more than just fixtures; they are integral components that combine practicality with style. By understanding the various types and considering your unique requirements, you can confidently choose the perfect faucet that will serve you well for years to come.

– 2.2 Sinks

### 2.2 Sinks

Sinks are essential fixtures in any home, serving as the heart of many daily activities, from cooking and cleaning to personal hygiene. Available in a wide variety of styles, materials, and configurations, sinks can significantly impact both functionality and aesthetics in your space.

**Types of Sinks**

1. **Kitchen Sinks**: These are typically larger and more robust, designed to handle everything from washing dishes to food preparation. Common types include single-basin, double-basin, and farmhouse sinks, each catering to different needs and preferences. Stainless steel is a popular choice for its durability and ease of cleaning, while porcelain and composite materials can add a touch of elegance.

2. **Bathroom Sinks**: Bathroom sinks come in various shapes and sizes, including pedestal sinks, vessel sinks, and undermount sinks. Pedestal sinks offer a classic look and save space, while vessel sinks add a stylish, modern flair. Materials range from ceramic and glass to stone and metal, allowing homeowners to choose based on their design aesthetic.

3. **Utility Sinks**: Often found in laundry rooms or garages, utility sinks are designed for heavy-duty tasks. These sinks are typically deeper and more rugged, perfect for washing out paintbrushes, rinsing muddy shoes, or cleaning pet supplies. They often come with a high arch faucet for added convenience.

4. **Bar and Prep Sinks**: Smaller in size, these sinks are ideal for entertaining or food prep areas. They can be found in kitchens and bars, providing a convenient spot for washing hands, rinsing fruits and vegetables, or prepping cocktails.

**Materials and Finishes**

When selecting a sink, the material plays a crucial role in both functionality and style. Here are a few popular options:

– **Stainless Steel**: Known for its durability and resistance to stains, stainless steel is a staple in many kitchens. It offers a sleek, modern look but can show water spots and scratches over time.

– **Ceramic and Porcelain**: These materials are often used for bathroom sinks due to their classic aesthetic and ease of cleaning. They are available in various colors but can chip or crack if not handled carefully.

– **Granite and Composite**: These materials provide a luxurious appearance and are resistant to scratches and stains. They come in various colors and patterns, allowing for more personalization in your home.

**Selection Tips**

When selecting a sink, consider the following factors to find the perfect fit for your space:

– **Size and Configuration**: Measure your space to ensure the sink will fit properly, and think about your daily tasks to determine if you need a single or double basin.

– **Style**: Choose a sink that complements your overall design aesthetic, whether it’s modern, traditional, or somewhere in between.

– **Functionality**: Think about how you use your sink daily and select features that enhance efficiency, such as additional accessories like cutting boards or drying racks.

– **Installation Type**: Decide between drop-in, undermount, or vessel sinks based on your countertop material and desired look.

By understanding the various types of sinks available and considering your specific needs and preferences, you can make an informed decision that enhances both the function and style of your home. Remember, a well-chosen sink not only serves practical purposes but also adds to the overall ambiance of your space, making it a vital fixture in your plumbing arsenal.

– 2.3 Toilets

What are the different types of plumbing fixtures?
Credit : whatcanu.com

### 2.3 Toilets

Toilets are among the most essential plumbing fixtures in any home, serving a vital function in daily life while also contributing to the overall aesthetics of a bathroom. When considering toilets, it’s important to understand the various types available, their unique features, and how to select the right one for your needs.

**Types of Toilets**

1. **Two-Piece Toilets:** These are the most common type, consisting of a separate tank and bowl. They are generally easier to install and maintain, and they come in a wide range of styles and price points. Their modular design also allows for easier transport and replacement of parts.

2. **One-Piece Toilets:** As the name suggests, these toilets feature a seamless design where the tank and bowl are integrated into one unit. This design not only creates a sleek, modern look but also minimizes the likelihood of leaks and is easier to clean due to the lack of crevices.

3. **Wall-Mounted Toilets:** For a contemporary touch, wall-mounted toilets offer a space-saving solution, as they free up floor space and provide a minimalist appearance. The tank is hidden behind the wall, which makes cleaning the bathroom floor a breeze. However, installation can be more complex and may require professional assistance.

4. **High-Efficiency Toilets (HETs):** These eco-friendly options use significantly less water per flush compared to standard toilets, making them an excellent choice for those looking to conserve water and reduce utility bills. Many models are designed to flush effectively despite using less water, ensuring both performance and sustainability.

**Features to Consider**

When selecting a toilet, consider features such as the height (standard or comfort height), which can impact accessibility and comfort, especially for taller individuals or those with mobility issues. Additionally, look for toilets with efficient flushing mechanisms, such as dual-flush systems, which allow users to choose between a lower volume flush for liquid waste and a higher volume flush for solid waste.

**Selecting the Right Toilet**

Choosing the right toilet goes beyond just aesthetics; it’s crucial to consider your household’s specific needs and preferences. Measure your bathroom space to ensure that the toilet fits comfortably alongside other fixtures. Pay attention to the rough-in measurement—the distance from the wall to the center of the toilet drain—since this can vary among homes.

Finally, don’t overlook the importance of style and color. Toilets are available in various designs and finishes, from classic white to bold colors and sleek modern shapes. Choosing a toilet that complements your bathroom decor can elevate the overall look of your space.

In conclusion, toilets are a fundamental aspect of any plumbing system. By understanding the different types available and evaluating your needs and preferences, you can make a well-informed decision that ensures both functionality and style in your bathroom.

– 2.4 Showers and Bathtubs

When it comes to creating a relaxing and functional bathroom, the choice between showers and bathtubs is pivotal. Both fixtures serve their unique purposes and can dramatically influence the overall aesthetic and utility of your space.

**Showers** are often favored for their efficiency and convenience. They are ideal for those with busy lifestyles who appreciate a quick, invigorating cleanse. Available in a variety of styles, from compact corner units to expansive walk-in designs, showers can be customized with features such as rainfall showerheads, adjustable jets, and digital controls for a luxurious experience. Modern shower enclosures can also incorporate glass panels that create an open, airy feel, making them a perfect fit for smaller bathrooms.

On the other hand, **bathtubs** evoke a sense of relaxation and indulgence. They provide a sanctuary for unwinding after a long day, making them a staple in many homes. From classic clawfoot tubs that add vintage charm to sleek, modern soaking tubs that encourage long, leisurely baths, the options are endless. Bathtubs can also double as a functional element in the bathroom, serving as a focal point or a space for decorative accents. However, it’s essential to consider the space available; a larger bathroom can accommodate a standalone tub or a luxurious whirlpool, while smaller spaces may benefit from a shower-tub combo.

When deciding between a shower and a bathtub, consider your lifestyle, the needs of your household, and the overall design you wish to achieve. If your home is family-oriented, a bathtub may be invaluable for bath time with young children. Conversely, if space is limited or you prioritize quick routines, a shower might be the more practical choice. Ultimately, the right selection can elevate your bathroom into a personal oasis that meets both functional and aesthetic needs.

– 2.5 Bidets

What are the different types of plumbing fixtures?
Credit : whatcanu.com

### 2.5 Bidets

Bidets have long been celebrated in many cultures for their hygiene and comfort, yet they remain a relatively underappreciated fixture in many Western bathrooms. These ingenious plumbing fixtures are designed specifically for a more thorough cleansing experience after using the toilet, offering an alternative to traditional toilet paper.

Typically resembling a low-mounted sink, a bidet allows users to wash their intimate areas with a gentle stream of water, promoting cleanliness and reducing irritation. Bidets come in various styles, from standalone units that require a dedicated space in your bathroom to more modern attachments that can be easily installed on existing toilets.

In addition to their hygiene benefits, bidets can also be an eco-friendly choice, significantly reducing toilet paper consumption and the associated environmental impact. With many models now featuring adjustable water pressure, temperature control, and even air-drying capabilities, bidets provide a customizable experience that caters to individual preferences.

When selecting a bidet, consider the size and layout of your bathroom, as well as your plumbing capabilities. If space is limited, a bidet toilet seat—an attachment that fits directly onto your existing toilet—may be the ideal solution. For those with more room to spare, a standalone bidet can become a stylish centerpiece, often available in various finishes and designs to complement your bathroom decor.

Investing in a bidet not only enhances personal hygiene but also elevates your bathroom experience, making it a fixture worth considering for any home renovation or upgrade.

– 2.6 Water Heaters

Water heaters are an essential plumbing fixture often taken for granted until the moment we find ourselves shivering in a cold shower. These units provide hot water for a variety of household needs, from bathing and cleaning to cooking and laundry. Understanding the different types of water heaters available can help homeowners make informed decisions that align with their lifestyle and budget.

there are primarily two categories of water heaters: tank and tankless. **Tank water heaters** are the traditional choice, featuring a large reservoir that stores heated water for immediate use. These units come in various sizes, typically measured in gallons, and can supply a significant amount of hot water at once—perfect for families with high demand. However, they may take longer to refill once depleted and can lead to higher energy costs due to heat loss from the tank.

On the other hand, **tankless water heaters** are a more modern solution, providing hot water on demand without the need for a storage tank. They heat water directly as it flows through the unit, delivering a continuous supply of hot water. While tankless models are often more energy-efficient and take up less space, they can be more expensive upfront and may require additional installation considerations, especially for larger households.

When selecting a water heater, homeowners should assess their hot water needs. Factors such as the number of residents in the home, simultaneous hot water usage (e.g., running the dishwasher while showering), and energy source (electric, gas, or solar) all play crucial roles in determining the best fit. Energy efficiency ratings, such as the Energy Factor (EF) or the Uniform Energy Factor (UEF), can guide users toward models that will save them money on utility bills over time.

Moreover, considering the installation process and maintenance requirements is vital. Some models may require professional installation, while others can be DIY-friendly. Regular maintenance, such as flushing the tank to remove sediment build-up and checking the anode rod, can extend the life of any water heater and enhance its efficiency.

In summary, selecting the right water heater is a key step in optimizing your home’s plumbing system. By understanding the differences between tank and tankless options, assessing your hot water needs, and considering energy efficiency and maintenance, you can ensure that you choose a water heater that delivers comfort, convenience, and cost savings for years to come.

3. Choosing the Right Plumbing Fixtures for Your Home

Choosing the right plumbing fixtures for your home is a task that goes beyond mere aesthetics; it significantly impacts both functionality and comfort in your living space. With a myriad of options available, from faucets to sinks, showerheads to toilets, each selection plays a crucial role in the overall efficiency and style of your home.

First, consider your lifestyle and the needs of your household. If you have a busy family, durability and ease of use should be at the forefront of your decision-making process. Look for fixtures made from sturdy materials like brass or stainless steel, which can withstand daily wear and tear. Additionally, choosing fixtures with user-friendly features, such as single-handle faucets or touchless technology, can enhance convenience and hygiene.

Next, think about the overall design of your space. Plumbing fixtures come in various styles—from sleek modern designs to timeless traditional looks. Selecting fixtures that complement your home’s decor not only enhances visual appeal but also creates a cohesive environment. For instance, if you have a farmhouse-style kitchen, a vintage-inspired farmhouse sink paired with a classic bridge faucet can elevate the space beautifully.

Don’t forget about water efficiency! With growing concerns about water conservation, opting for fixtures that meet WaterSense standards can save you money on utility bills while also being environmentally friendly. Low-flow faucets and showerheads, as well as dual-flush toilets, are excellent choices that balance performance with sustainability.

Finally, take the time to measure your existing plumbing setup and any new fixtures you’re considering. Ensuring compatibility is vital to avoid unexpected complications during installation. Many retailers provide detailed specifications for their products, making it easier to determine if your choice will fit seamlessly into your space.

By carefully considering your family’s needs, design preferences, water efficiency, and compatibility, you can choose plumbing fixtures that not only look great but also enhance your home’s functionality and sustainability for years to come.

4. Key Features to Consider in Plumbing Fixtures

When it comes to selecting plumbing fixtures for your home or business, understanding the key features that set different options apart is essential. These fixtures are not just functional; they also significantly impact the overall aesthetics and efficiency of your space. Here are some crucial features to consider:

**1. Material Quality:** The durability and longevity of plumbing fixtures largely depend on the materials used in their construction. Stainless steel and brass are popular choices due to their resistance to corrosion and rust, while ceramic is often favored for sinks and toilets because of its ease of cleaning and classic appearance. Opting for high-quality materials can save you money in the long run, as they often come with longer warranties and require less frequent replacement.

**2. Finish and Style:** The finish of your plumbing fixtures can dramatically influence the look and feel of your bathroom or kitchen. From sleek chrome and polished nickel to matte black and brushed gold, the finish can complement your design scheme while also providing a level of maintenance ease. Remember to choose a style that resonates with your overall decor—whether it’s modern, traditional, or industrial—to create a cohesive look.

**3. Water Efficiency:** In today’s eco-conscious world, water efficiency is more important than ever. Look for fixtures with the WaterSense label, which indicates they meet strict water conservation criteria without sacrificing performance. Low-flow faucets, dual-flush toilets, and aerating showerheads can help reduce water usage, lower your utility bills, and minimize your environmental footprint.

**4. Ease of Installation and Maintenance:** Some fixtures are simpler to install than others, and considering your skill level or willingness to hire a professional can influence your choice. Additionally, some fixtures come with features that make maintenance easier, such as removable aerators or easy-clean coatings. Think about how often you want to clean and maintain your fixtures, and choose accordingly.

**5. Functionality and Ergonomics:** While aesthetics are important, the functionality of plumbing fixtures cannot be overlooked. Consider factors such as handle placement, spout height, and the reach of faucets. Fixtures that are user-friendly will enhance the overall experience in your space, making everyday tasks more enjoyable and efficient.

By keeping these key features in mind, you can make informed choices that not only enhance the beauty of your spaces but also ensure that your plumbing fixtures are functional, durable, and efficient. Selecting the right fixtures is an investment in your home’s comfort and style, so take the time to evaluate each option thoroughly.

5. Materials Used in Plumbing Fixtures

When selecting plumbing fixtures, understanding the materials they are made from is crucial, as it impacts both performance and aesthetics. The right material can enhance the durability of your fixtures while complementing your overall home design. Here’s a closer look at some of the most common materials used in plumbing fixtures, along with their unique qualities.

**1. Chrome:** Chrome-plated fixtures are a popular choice due to their sleek, shiny finish that adds a modern touch to any bathroom or kitchen. They are resistant to tarnishing and corrosion, making them easy to maintain. However, they can show water spots and require regular cleaning to keep their brilliant shine.

**2. Stainless Steel:** Known for its strength and durability, stainless steel fixtures are perfect for high-traffic areas. They resist rust and stains and have a contemporary look that fits well in both modern and traditional settings. While they may come with a higher price tag, their longevity often makes them a worthwhile investment.

**3. Brass:** Brass fixtures exude a classic charm that never goes out of style. This material is highly resistant to corrosion, making it an excellent choice for both aesthetic appeal and functionality. Over time, brass can develop a beautiful patina, adding character to your fixtures. However, if you prefer a polished look, regular maintenance is needed to prevent tarnishing.

**4. Plastic:** Lightweight and cost-effective, plastic fixtures can be a practical option for budget-conscious homeowners. They are often available in a variety of colors and styles, allowing for easy customization. While they resist corrosion, plastic fixtures may not offer the same level of durability as metal options, making them more suitable for temporary or less frequently used spaces.

**5. Porcelain and Ceramic:** Often found in sinks and toilets, porcelain and ceramic fixtures are valued for their smooth, glossy finishes and ease of cleaning. These materials are durable and resistant to scratches and stains, but they can be prone to chipping if not handled carefully. Their aesthetic appeal makes them a popular choice in traditional and vintage-style bathrooms.

**6. Bronze:** Oil-rubbed bronze fixtures offer a rustic, antique look that is highly sought after in home design. They are exceptionally durable and resist corrosion, making them ideal for both indoor and outdoor use. The deep, rich tones of bronze can add warmth and sophistication to any space.

When selecting plumbing fixtures, consider not only the material but also the overall style, maintenance requirements, and how well they will hold up in your specific environment. By understanding the advantages and disadvantages of each material, you can make informed decisions that enhance both the functionality and beauty of your home.

6. Popular Plumbing Fixture Brands

When it comes to selecting plumbing fixtures, the brand can significantly influence not only the aesthetic appeal but also the quality and longevity of the products you choose. With countless manufacturers on the market, certain brands have established themselves as leaders, known for their innovative designs, reliable performance, and commitment to customer satisfaction. Here’s a closer look at some popular plumbing fixture brands that are worth considering for your next renovation or new build.

**Moen**: Renowned for its stylish designs and functional innovations, Moen offers a wide range of faucets, showerheads, and accessories. Their products often feature the brand’s signature Spot Resist™ finish, which repels water spots and fingerprints, making maintenance a breeze. Moen also stands out for its commitment to sustainability, providing water-saving options without sacrificing performance.

**Kohler**: A name synonymous with luxury and quality, Kohler fixtures blend classic elegance with modern technology. From high-efficiency toilets to beautifully crafted sinks and stylish faucets, Kohler offers an extensive selection to suit various tastes and budgets. Their innovative features, such as the Touchless technology in faucets and advanced flushing systems in toilets, enhance convenience while promoting water conservation.

**Delta**: Delta Plumbing is known for its cutting-edge technology and user-friendly designs. Their faucets often come equipped with the Touch2O® Technology, allowing users to turn water on or off with just a touch, which is especially handy when hands are full. Delta’s commitment to innovation extends to their wide range of styles, from contemporary to traditional, ensuring there’s something for everyone.

**American Standard**: Focusing on both function and form, American Standard offers a variety of plumbing fixtures that are both stylish and dependable. Their products often emphasize ease of installation and maintenance, making them a favorite among contractors and DIY enthusiasts alike. With options that cater to various budgets, American Standard ensures quality without breaking the bank.

**Grohe**: For those seeking high-end European designs, Grohe is a top contender. Known for their sleek aesthetics and exceptional engineering, Grohe fixtures often feature advanced technology for water efficiency and user comfort. Their commitment to quality is evident in their durable finishes and innovative features, making them a preferred choice for luxury bathrooms and kitchens.

When shopping for plumbing fixtures, it’s crucial to consider the reputation of the brand alongside the specifics of your project. Investing in reputable brands can ensure that you receive a product that not only enhances your space aesthetically but also performs reliably for years to come. Whether you prioritize style, technology, or sustainability, these popular plumbing fixture brands provide an array of options to meet your needs.

7. Energy Efficiency and Water Conservation

When it comes to choosing plumbing fixtures, energy efficiency and water conservation should be at the forefront of your decision-making process. With the increasing awareness of environmental issues and rising utility costs, selecting fixtures that minimize water usage without sacrificing performance is not just a trend—it’s a necessity.

Modern plumbing fixtures come equipped with innovative technology designed to conserve water and energy. Low-flow faucets and showerheads, for instance, can significantly reduce water consumption, allowing you to enjoy a refreshing shower or a leisurely hand wash while using up to 30% less water than traditional fixtures. Look for models that have the WaterSense label, which indicates they meet specific water-saving criteria set by the Environmental Protection Agency (EPA).

In addition to faucets and showerheads, consider the efficiency of your toilets. Dual-flush toilets, which offer a choice between a low flush for liquid waste and a higher flush for solid waste, can save thousands of gallons of water each year compared to older models. These toilets use advanced flushing technology that maximizes performance while minimizing water use, making them an excellent investment for both your wallet and the environment.

Moreover, when selecting plumbing fixtures, pay attention to the materials used. Fixtures made from durable, sustainable materials not only last longer but can also reduce the need for replacements, thus conserving resources in the long run. Stainless steel, for instance, is not only stylish but also highly resistant to corrosion, while fixtures made from recycled materials can further enhance your commitment to sustainability.

Incorporating energy-efficient appliances, like tankless water heaters, can also contribute to overall water conservation. These heaters only warm water as needed, eliminating standby energy loss and reducing both energy bills and water waste.

Ultimately, by prioritizing energy efficiency and water conservation in your plumbing fixture selections, you not only contribute to a healthier planet but also enjoy the financial benefits of lower utility bills. As you make your choices, consider the long-term impact of your fixtures—both on your home and the environment.

8. Installation Tips for Plumbing Fixtures

When it comes to installing plumbing fixtures, a little preparation can go a long way in ensuring a smooth and hassle-free process. Whether you’re a seasoned DIY enthusiast or a first-time installer, following these essential tips can help you achieve professional results.

**1. Gather Your Tools and Materials:** Before diving into the installation, make sure you have all necessary tools at hand. Common tools include adjustable wrenches, screwdrivers, pliers, a plumber’s tape, a level, and a bucket to catch any stray water. Having everything ready will save you time and frustration.

**2. Read the Instructions:** Each plumbing fixture comes with its own set of instructions tailored to that specific model. Take the time to read through the manufacturer’s guidelines to familiarize yourself with the installation process, parts list, and any special requirements. This can help prevent errors and ensure you don’t miss any critical steps.

**3. Shut Off the Water Supply:** It sounds simple, but it’s a crucial step that many forget. Before you begin any installation, locate the main water shut-off valve and turn it off. This will prevent flooding and reduce the risk of water damage during the installation process.

**4. Prepare the Area:** Clear the installation area of any debris or old fixtures. If you are replacing an existing fixture, ensure that all remnants—like old fittings or pipes—are removed before you begin. This will make the installation cleaner and more efficient.

**5. Take Accurate Measurements:** Precision is key in plumbing. Use a measuring tape to confirm that your new fixture will fit in the designated space, and check that any plumbing connections align properly. If you’re installing a sink, for example, ensure that the faucet holes match the new fixture’s specifications.

**6. Use Plumber’s Tape:** When connecting pipes and fittings, use plumber’s tape on threaded connections to create a watertight seal. This simple step can help prevent leaks and save you from future headaches.

**7. Test for Leaks:** Once your fixture is installed, gradually turn the water supply back on and check for leaks. This initial test is crucial; if you spot any dripping or puddles, turn off the water supply and address the issue before proceeding further.

**8. Don’t Hesitate to Seek Help:** If you encounter challenges or feel uncertain during installation, don’t hesitate to consult a professional plumber. Sometimes, a little expert advice can save you time and money in the long run.

By following these installation tips, you can enhance your confidence and ensure that your new plumbing fixtures are installed correctly and efficiently. With each successful installation, you’ll become more adept at maintaining your home’s plumbing system and enjoying the benefits of your upgraded fixtures.

9. Maintenance and Care for Long-Lasting Fixtures

When it comes to plumbing fixtures, maintenance and care are paramount for ensuring longevity and optimal performance. Well-maintained fixtures not only enhance the aesthetic appeal of your space, but they also save you money in the long run by preventing costly repairs and replacements. Here are some essential tips to keep your plumbing fixtures looking and functioning their best.

**Regular Cleaning:** Different materials require different cleaning methods. For instance, stainless steel fixtures can be cleaned with a mild dish soap and warm water, while chrome fixtures may benefit from a gentle vinegar solution to remove hard water stains. Avoid abrasive cleaners that can scratch the surfaces; instead, opt for soft cloths or sponges to maintain that shiny finish.

**Inspect for Leaks:** Periodically check your faucets, showerheads, and pipes for any signs of leaks. Even a small drip can lead to larger problems over time, such as water damage or mold growth. If you notice any leaks, address them promptly—sometimes, a simple tightening of a screw or replacing a washer can resolve the issue.

**Replace Worn Parts:** Fixtures have components that may wear out over time, such as washers, O-rings, and aerators. Regularly inspect these parts and replace them as needed. A worn washer can cause frustrating dripping, while a clogged aerator can reduce water flow. Keeping these elements in check can enhance the efficiency and performance of your fixtures.

**Avoid Harsh Chemicals:** While it might be tempting to use strong chemical cleaners to tackle tough stains or clogs, these can be damaging to your plumbing fixtures. Instead, consider natural alternatives like baking soda and vinegar, which can effectively clean without causing harm.

**Professional Inspections:** Every few years, consider having a professional plumber inspect your fixtures and plumbing system. They can identify potential issues before they become significant problems and offer tailored maintenance advice based on your specific fixtures and their usage.

By incorporating these maintenance tips into your routine, you can ensure that your plumbing fixtures remain functional, attractive, and durable for years to come, enhancing both your home’s comfort and value. Remember, a little care goes a long way in preserving the beauty and efficiency of your plumbing investments!

10. Trends in Plumbing Fixture Design

In the ever-evolving world of home design, plumbing fixtures are no longer just functional necessities; they have transformed into stylish statements that enhance the overall aesthetic of a space. As homeowners increasingly seek to create personalized environments, plumbing fixture design trends reflect a blend of innovation, sustainability, and elegance.

One prominent trend is the rise of minimalist designs that emphasize clean lines and uncluttered spaces. Fixtures with sleek, geometric shapes made from materials like matte black, brushed nickel, or polished brass are gaining popularity, offering a modern touch that complements various decor styles—from industrial to Scandinavian. The simplicity of these designs allows them to seamlessly integrate into any bathroom or kitchen while making a strong visual impact.

Sustainability is another key trend shaping the plumbing fixture landscape. With a growing awareness of environmental issues, many consumers are opting for water-efficient fixtures that reduce consumption without sacrificing performance. Brands are responding by creating products that blend functionality with eco-friendly technology, such as faucets with aerators that limit water flow while maintaining pressure, and dual-flush toilets that allow users to choose the amount of water used per flush.

Colorful fixtures are also making waves in the design world. Gone are the days of standard chrome and white; now, vibrant hues in fixtures are capturing attention and adding personality to spaces. From deep navy sinks to bold red faucets, these colorful options allow homeowners to express their style and create striking focal points in their bathrooms and kitchens.

Finally, smart technology is revolutionizing plumbing fixtures, integrating convenience and efficiency into everyday tasks. From touchless faucets that activate with a simple wave to shower systems that can be controlled via smartphone apps, these innovations not only enhance the user experience but also promote hygiene and save water.

As you consider updating your plumbing fixtures, staying informed about these trends can help ensure your selections not only meet your practical needs but also reflect your personal style and values. Embracing these design elements can transform your space into a contemporary haven that balances aesthetics with functionality.

11. Cost Considerations: Budgeting for Fixtures

When it comes to renovating or updating your home’s plumbing fixtures, budgeting is a crucial step that can significantly impact your choices and overall satisfaction with the project. Understanding the cost considerations associated with different types of fixtures is essential for making informed decisions that align with your financial plans.

First and foremost, it’s important to establish a realistic budget based on your specific needs and desired aesthetic. Plumbing fixtures can range widely in price, from affordable options that offer solid functionality to high-end designs that serve as statement pieces in your home. For instance, basic faucets and showerheads can be found for as little as $50, while luxury brands may charge upwards of $500 or more for designer models crafted from premium materials.

Beyond the initial purchase price, consider the long-term costs associated with your chosen fixtures. Some high-efficiency models may come with a steeper upfront investment but can save you money on water bills in the long run. Similarly, investing in durable materials, such as brass or stainless steel, can reduce the frequency of replacements and repairs, ultimately saving you money over time.

Don’t forget to account for additional expenses that may arise during the installation process. Hiring a licensed plumber can lead to added labor costs, especially if your project involves complex plumbing work or if you’re replacing old fixtures with new ones that require different plumbing configurations. To streamline costs, it’s often wise to tackle multiple fixture upgrades at once, minimizing labor fees and maximizing efficiency.

Lastly, keep an eye out for promotions, sales, or package deals offered by home improvement retailers. Many stores frequently run discounts on plumbing fixtures, especially during seasonal sales events, providing an opportunity to snag high-quality products at a more budget-friendly price.

By carefully considering all these factors and setting a well-defined budget, you can confidently select plumbing fixtures that not only enhance your home’s functionality and style but also fit within your financial parameters.

12. Common Plumbing Fixture Problems and Solutions

When it comes to plumbing fixtures, even the most reliable installations can encounter issues over time. Understanding the common problems associated with these fixtures, along with their solutions, can save you both time and money while ensuring your home remains comfortable and functional.

One of the most frequent issues homeowners face is dripping faucets. Not only can a leaky faucet be a nuisance, but it can also lead to increased water bills. The culprit is often a worn-out washer or O-ring. To resolve this, you can easily disassemble the faucet, replace the damaged components, and restore it to its original state. Regular maintenance, such as checking and replacing washers every few years, can help prevent this problem from recurring.

Another common issue is clogged drains, which can occur in sinks, bathtubs, and showers. Hair, soap residue, and food particles often contribute to these blockages. A simple solution involves using a plunger or a drain snake to dislodge the clog. For persistent blockages, a mixture of baking soda and vinegar can effectively break down buildup, providing a natural alternative to harsh chemical drain cleaners.

Toilet problems can also arise, with running toilets being a particularly common complaint. This can waste a significant amount of water, leading to a higher utility bill. The cause is often a faulty flapper valve that fails to seal properly. Replacing this inexpensive part can quickly restore your toilet to its efficient state.

Lastly, low water pressure can be incredibly frustrating, especially when showering or washing dishes. This issue can stem from mineral buildup in aerators or showerheads, or even from issues with your plumbing system itself. Cleaning these fixtures can often resolve the problem; however, if low pressure persists, it may be time to consult a professional plumber to assess any underlying issues.

By being aware of these common plumbing fixture problems and their solutions, you can take proactive measures to maintain your fixtures and address any issues promptly, ensuring your home remains a comfortable and efficient space.

13. DIY vs. Professional Installation: What You Need to Know

When it comes to installing plumbing fixtures, one of the most critical decisions you’ll face is whether to tackle the project yourself or hire a professional plumber. This choice can significantly impact not only the outcome of your installation but also the overall cost, time commitment, and potential headaches down the road.

**DIY Installation: The Pros and Cons**

Taking the DIY route can be enticing for many homeowners, particularly those who enjoy hands-on projects and wish to save some money. With a plethora of online tutorials, videos, and guides available, the knowledge to successfully install fixtures like faucets, sinks, and showerheads is often just a click away. If you have a basic understanding of plumbing and are comfortable with tools, you might find DIY installation rewarding and straightforward.

However, it’s essential to weigh the pros against the cons. While you may save on labor costs, mistakes can lead to costly repairs or water damage if something goes wrong. Additionally, some plumbing fixtures may require specialized knowledge or tools, such as knowledge of local plumbing codes or the ability to navigate complex piping systems. If you’re unsure about your skills, consider the time investment—what seems like a simple task can quickly become time-consuming, especially if you encounter unexpected challenges.

**Professional Installation: The Benefits**

On the other hand, opting for professional installation ensures that the job is completed correctly and efficiently. Licensed plumbers bring a wealth of experience and expertise, which can be particularly beneficial for more complex installations, such as those involving multiple fixtures or significant plumbing modifications. Professionals can also navigate local building codes and regulations, ensuring that your installation meets all safety standards.

Moreover, many plumbing companies offer warranties on their work, giving you peace of mind that if anything goes wrong after installation, you have a safety net. This can save you from the stress of potential future repairs and provide confidence in your investment.

**Making the Right Choice**

So, how do you decide? Start by evaluating the scope and complexity of your project. For straightforward installations, such as replacing a faucet or installing a new showerhead, DIY may be a feasible option if you’re comfortable with the task. However, for more involved projects, such as a complete bathroom remodel or significant plumbing work, hiring a professional can save you stress and ensure a high-quality result.

Ultimately, whether you choose to go the DIY route or enlist the help of a professional, understanding the requirements and potential pitfalls of plumbing fixture installation will help you make an informed decision that aligns with your skills, budget, and time constraints.

14. Conclusion: Making Informed Choices for Your Plumbing Needs

As we reach the conclusion of our ultimate guide to plumbing fixtures, it’s clear that making informed choices is essential for both functionality and aesthetics in your home. The vast array of options available can be overwhelming, but understanding the different types of fixtures, their uses, and how to select the right ones for your specific needs can transform your space into a well-coordinated haven.

When considering plumbing fixtures, always prioritize quality and durability. Investing in high-quality materials can save you money in the long run by reducing the need for repairs or replacements. Additionally, consider the style and design of each fixture to ensure they complement your existing decor. Whether you lean towards a sleek modern look or a classic vintage charm, there are fixtures available to match every aesthetic preference.

Don’t overlook the importance of functionality. Assess the specific needs of your household—how many people will be using the fixtures, and what are their habits? For instance, if you have a large family, a dual-flush toilet or a spacious showerhead might be ideal. Furthermore, energy-efficient fixtures not only save water but also lower utility bills, making them a smart choice for environmentally conscious homeowners.

Lastly, seek advice from plumbing professionals or experienced suppliers when in doubt. They can offer insights based on your unique situation and help you navigate the sometimes complex world of plumbing fixtures.

In summary, informed choices regarding plumbing fixtures can enhance your home’s functionality, aesthetic appeal, and energy efficiency. By taking the time to research and consider your options, you’ll ensure that your plumbing system not only meets your immediate needs but also stands the test of time. Happy renovating!

15. Resources for Further Reading and Exploration

When it comes to deepening your understanding of plumbing fixtures, a wealth of resources is available to guide you through the nuances of selection, installation, and maintenance. Whether you’re a DIY enthusiast looking to tackle a home improvement project or a homeowner seeking to make informed decisions, these resources can serve as invaluable tools in your journey.

**Books and E-books**: Consider diving into comprehensive guides such as “The Complete Guide to Plumbing” by Black & Decker or “Plumbing 101” by the same publisher. These books not only cover the fundamentals of plumbing fixtures but also offer insights into the latest trends and technologies in the industry.

**Online Courses**: Websites like Udemy and Coursera offer expert-led courses on plumbing basics and advanced techniques. These courses often include video tutorials, quizzes, and forums for discussion, providing a structured learning environment where you can gain hands-on skills and knowledge.

**Manufacturer Websites**: Many plumbing fixture manufacturers provide detailed resources on their websites, including installation guides, product specifications, and maintenance tips. Brands like Kohler, Moen, and Delta often have video tutorials and downloadable manuals that can help you better understand their products.

**DIY Forums and Community Groups**: Platforms such as Reddit’s r/Plumbing or DIY Network forums are great places to connect with other homeowners and professionals. Here, you can ask questions, share experiences, and gain insights from those who have tackled similar projects.

**YouTube Channels**: Visual learners will find YouTube to be a treasure trove of information. Channels dedicated to home improvement, such as Home Repair Tutor or This Old House, regularly feature plumbing projects and tips, showcasing step-by-step processes that can demystify even the most complex installations.

**Local Workshops and Classes**: Many community colleges and home improvement stores offer workshops on plumbing basics. These hands-on classes provide an excellent opportunity to learn from experienced instructors, ask questions, and practice skills in a supportive environment.

By exploring these resources, you’ll equip yourself with the knowledge and confidence needed to make informed decisions about plumbing fixtures. Whether you’re upgrading your bathroom or tackling a plumbing emergency, staying informed will ensure that you choose the right fixtures and maintain them effectively, enhancing both the functionality and aesthetics of your home.

In conclusion, we hope this ultimate guide to plumbing fixtures has equipped you with the knowledge and confidence to make informed choices for your home or renovation project. From understanding the different types and their specific uses to navigating the selection tips that can elevate both functionality and aesthetics, you’re now prepared to tackle any plumbing fixture decision. Remember, the right fixtures not only enhance the beauty of your space but also contribute to its overall efficiency and value. So, whether you’re refreshing a bathroom, upgrading a kitchen, or planning a complete remodel, take the time to choose fixtures that reflect your style and meet your needs. Happy plumbing, and may your spaces be both beautiful and functional!

What are the different types of landscaping styles?

Transforming your outdoor space into a stunning haven is more attainable than you might think, especially when you understand the diverse landscaping styles available at your fingertips.

Whether you’re looking to create a tranquil retreat, a vibrant garden for entertaining, or a low-maintenance escape, the right landscaping style can breathe new life into your yard. From the serene elegance of Japanese zen gardens to the rustic charm of cottage gardens, each style offers a unique aesthetic and atmosphere that can elevate your outdoor experience. In this blog post, we will explore the top seven landscaping styles that can transform your outdoor space, providing you with inspiration and practical tips to cultivate your dream landscape. So grab a cup of coffee, and let’s embark on this journey to discover how to harmonize nature and design for a beautiful, inviting outdoor sanctuary!

1. Introduction to Landscaping Styles

What are the different types of landscaping styles?
Credit : whatcanu.com

Landscaping is not just about planting flowers and trimming hedges; it’s an art form that has the power to completely transform your outdoor space into a personal oasis. The right landscaping style can enhance the beauty of your property, create inviting spaces for relaxation and recreation, and even increase the value of your home. With countless options available, understanding the various landscaping styles is key to finding the perfect fit for your aesthetic and functional needs.

In this blog post, we will delve into the top seven landscaping styles that are trending today. From the serene elegance of Japanese gardens to the vibrant chaos of cottage gardens, each style offers a unique way to express your personality and adapt to your environment. We’ll explore the defining characteristics of each style, including the types of plants, materials, and design elements that make them stand out. Whether you are looking to create a low-maintenance retreat, a lush tropical paradise, or a sleek modern landscape, this guide will inspire you to reimagine your outdoor space.

Join us on this journey as we uncover the principles behind each landscaping style, providing you with the insights you need to elevate your yard into a beautiful and functional extension of your home. Whether you’re a seasoned gardener or a novice looking to dip your toes into the world of landscaping, there’s something for everyone in the diverse palette of styles available. Let’s get started!

2. The Benefits of Choosing the Right Landscaping Style

Choosing the right landscaping style for your outdoor space is more than just an aesthetic decision; it’s a strategic move that can enhance the functionality, sustainability, and overall enjoyment of your environment. Each landscaping style brings with it a unique set of benefits, helping to create spaces that cater to your lifestyle, preferences, and the natural characteristics of your property.

Firstly, the right landscaping style can significantly boost your property’s curb appeal, making it more inviting and attractive to visitors and potential buyers. A well-designed landscape creates a harmonious blend between your home and the outdoor space, elevating the overall look and feel of your property. For instance, a contemporary style with clean lines and minimalist features can convey a sense of modern elegance, while a cottage garden filled with vibrant flowers and rustic elements can evoke a feeling of charm and warmth.

Moreover, selecting an appropriate landscaping style can enhance the functionality of your outdoor area. Whether you envision a serene retreat for relaxation, a vibrant space for entertaining, or a practical garden for growing herbs and vegetables, the right style will help you achieve your goals. For example, a Mediterranean landscape with terracotta pots and drought-resistant plants can create a low-maintenance oasis, perfect for those with busy lifestyles.

Another significant benefit is the potential for environmental sustainability. Different landscaping styles encourage various ecological practices that can help conserve water, reduce waste, and support local wildlife. By opting for native plants and xeriscaping techniques, for example, you not only create a beautiful landscape but also contribute to the health of your local ecosystem.

Lastly, the right landscaping style can also provide a sense of personal expression and connection to nature. Whether you prefer the structured elegance of formal gardens or the wild beauty of naturalistic designs, your outdoor space can reflect your personality and values. This connection to your environment can enhance your well-being, providing a peaceful sanctuary where you can unwind and recharge.

In conclusion, selecting the right landscaping style is a multifaceted decision that impacts your home’s aesthetics, functionality, sustainability, and personal satisfaction. By carefully considering your options, you can create an outdoor space that not only enhances your property but also enriches your life.

3. 1. Traditional Landscaping: Classic Elegance

What are the different types of landscaping styles?
Credit : whatcanu.com

Traditional landscaping embodies a timeless elegance that evokes a sense of nostalgia and refinement. Characterized by its meticulous design, this style often draws inspiration from European gardens, showcasing a harmonious blend of symmetry and order. Picture well-defined pathways, neatly trimmed hedges, and lush flower beds bursting with seasonal blooms, all carefully arranged to create a cohesive and inviting outdoor space.

At the heart of traditional landscaping is the use of classic elements such as topiaries, arbors, and pergolas, which frame the landscape and provide structure. Flowering plants like roses, peonies, and hydrangeas are favored for their vibrant colors and pleasant fragrances, adding layers of texture and visual interest. Additionally, ornamental grasses and low-lying shrubs are strategically placed to soften hard edges and provide continuity throughout the garden.

Water features, such as elegant fountains or koi ponds, are often incorporated to enhance the tranquil atmosphere, while stone or brick pathways invite exploration and provide a clear flow throughout the space. A traditional landscape often includes elements like benches and gazebos, offering serene spots to relax and enjoy nature’s beauty.

In essence, traditional landscaping is about creating a sense of balance and harmony, where every plant, feature, and pathway works together to craft an inviting retreat. Whether you’re hosting a garden party or simply enjoying a quiet afternoon with a good book, traditional landscaping elevates your outdoor experience to one of refined beauty and timeless charm.

4. 2. Modern Landscaping: Sleek and Minimalist

Modern landscaping embodies the principles of sleekness and minimalism, creating outdoor spaces that exude sophistication and tranquility. This style thrives on the philosophy of “less is more,” emphasizing clean lines, geometric shapes, and an overall uncluttered aesthetic. The use of a limited color palette—often dominated by neutral tones, whites, and earthy hues—complements the minimalist ethos, allowing the beauty of the materials and the layout to take center stage.

One of the defining features of modern landscaping is the clever integration of hardscaping elements such as patios, walkways, and retaining walls. These structures are often constructed from materials like concrete, stone, or composite wood, which not only enhance durability but also contribute to the sleek, polished look that is characteristic of this style. Water features in modern landscapes tend to be understated, such as sleek reflecting pools or contemporary fountains that serve as tranquil focal points without overwhelming the senses.

Plant selection in modern landscaping favors low-maintenance and drought-resistant varieties, focusing on architectural plants like succulents, ornamental grasses, and sculptural evergreens. These plants are often arranged in thoughtful groupings, allowing the eye to appreciate the negative space around them, further enhancing the minimalist design.

Lighting plays a crucial role in modern landscapes, with strategically placed fixtures that highlight key features while maintaining a subtle glow. The result is an outdoor space that invites relaxation and contemplation, perfect for quiet evenings or entertaining guests in an elegant setting.

In essence, modern landscaping transforms outdoor areas into serene retreats where simplicity reigns, offering an ideal blend of form and function that harmonizes beautifully with contemporary living. Whether you’re reimagining a small patio or overhauling an expansive backyard, embracing modern landscaping can redefine your outdoor experience.

5. 3. Cottage Garden: A Charming Oasis

What are the different types of landscaping styles?
Credit : whatcanu.com

The cottage garden style embodies a whimsical charm that transports you to a serene oasis filled with vibrant colors and delightful fragrances. This enchanting landscaping approach embraces a more relaxed and informal aesthetic, often characterized by a delightful mix of flowers, herbs, and vegetables that grow in a seemingly haphazard yet harmonious manner. Picture a lush tapestry of blooms—roses, daisies, lavender, and foxgloves—interspersed with lush greenery and aromatic herbs like rosemary and thyme.

Cottage gardens are designed to be inviting and accessible, encouraging exploration and interaction. Pathways made of natural stone or gravel meander through the garden, leading visitors past overflowing flower beds and quaint seating areas where one can enjoy the soothing sounds of nature. A picket fence or rustic trellis adorned with climbing vines adds to the idyllic charm, providing a sense of enclosure while inviting the outside world to admire your floral haven.

The beauty of the cottage garden lies in its emphasis on biodiversity and sustainability. Native plants attract a variety of pollinators, such as bees and butterflies, fostering a healthy ecosystem. Additionally, this style celebrates the use of salvaged materials, vintage garden ornaments, and rustic furniture, creating a sense of nostalgia that evokes fond memories of simpler times.

To truly embody the essence of a cottage garden, consider incorporating elements like raised beds for vegetables, whimsical garden art, and even a small water feature to enhance the tranquil atmosphere. With its lush abundance and enchanting allure, a cottage garden not only beautifies your outdoor space but also offers a peaceful retreat where you can reconnect with nature and enjoy the simple pleasures of life.

6. 4. Xeriscaping: Sustainable and Water-Efficient

Xeriscaping is a revolutionary landscaping style that marries beauty with sustainability, making it an increasingly popular choice for homeowners looking to transform their outdoor spaces. This design philosophy centers around creating lush, vibrant landscapes that require minimal irrigation, making it ideal for regions prone to drought or for those who simply want to embrace eco-friendly practices.

At its core, xeriscaping focuses on using native and drought-resistant plants that thrive in local climates, reducing the need for excessive watering. Imagine a garden filled with vibrant succulents, hardy ornamental grasses, and colorful wildflowers, all harmonizing to create a stunning visual tapestry. This style not only conserves water but also promotes biodiversity by providing habitats for local wildlife and pollinators.

In addition to plant selection, xeriscaping incorporates smart design elements that enhance water efficiency. Features like gravel pathways, strategically placed mulch, and rock gardens not only add texture and interest to your landscape but also help retain moisture in the soil. Incorporating rainwater harvesting systems or permeable paving can further enhance your outdoor space, allowing you to make the most of natural resources.

Beyond its environmental benefits, xeriscaping offers a low-maintenance solution for busy homeowners. With reduced watering and minimal upkeep, you can spend less time tending to your garden and more time enjoying it. Whether you live in a scorching desert or a temperate climate, xeriscaping provides an elegant, sustainable way to embrace the beauty of nature while conserving precious water resources. Transform your outdoor space into a thriving oasis that reflects your commitment to sustainability and showcases the unique beauty of your region with xeriscaping.

7. 5. Mediterranean Landscaping: Sun-Kissed Serenity

What are the different types of landscaping styles?
Credit : whatcanu.com

Mediterranean landscaping embodies the essence of sun-drenched beauty and relaxed elegance, making it a perfect choice for those yearning to create a serene outdoor oasis. Inspired by the picturesque coastal regions of Southern Europe, this style brings together vibrant colors, fragrant plants, and rustic materials, resulting in an enchanting space that invites relaxation and enjoyment.

At the heart of Mediterranean landscaping is the strategic use of native plants that thrive in warm, dry climates. Think of lush lavender, vibrant bougainvillea, and hardy rosemary, all of which not only add a burst of color but also infuse your garden with delightful fragrances. These plants are often arranged in informal groupings, creating a natural, organic feel that mirrors the beauty of the Mediterranean coastline.

Incorporating elements like terracotta pots, stone pathways, and wooden trellises can further enhance the allure of your outdoor space. A classic feature of Mediterranean gardens is the use of hardscaping materials such as natural stone or gravel, which not only provide a sturdy foundation for seating areas but also contribute to the overall rustic charm. Consider adding a pergola draped with climbing vines, offering a shaded retreat where you can enjoy your surroundings in comfort.

Water features, such as fountains or small ponds, are also integral to this style, reflecting the tranquil ambiance of Mediterranean towns. The sound of gently flowing water can create a calming atmosphere, making your garden a serene escape from the hustle and bustle of daily life.

To truly embrace the Mediterranean lifestyle, consider incorporating outdoor living spaces. Comfortable seating areas adorned with plush cushions and vibrant textiles allow you to bask in the sun or dine al fresco under the stars. With the right design, your outdoor space can become a seamless extension of your home, perfect for entertaining friends or enjoying quiet moments of solitude.

In summary, Mediterranean landscaping offers a harmonious blend of beauty, functionality, and relaxation, transforming your outdoor area into a sun-kissed sanctuary that captures the spirit of coastal living. Embrace the warmth, colors, and textures of this style, and watch as your garden flourishes into a vibrant retreat that invites you to unwind and savor life’s simple pleasures.

8. 6. Tropical Landscaping: Lush and Vibrant

Tropical landscaping is a feast for the senses, bringing the vibrancy and lushness of exotic climates right to your backyard. This style is characterized by a rich tapestry of colors, textures, and scents that evoke the feeling of a serene island paradise. Imagine stepping into your outdoor space and being greeted by towering palm trees swaying gently in the breeze, their fronds casting playful shadows on the ground below.

In a tropical landscape, the plants are the star of the show. Bold foliage is key, with large-leaved plants like elephant ears and taro creating an immediate visual impact. Brightly colored flowers, such as hibiscus and bougainvillea, add splashes of color, attracting butterflies and hummingbirds that flit about in a lively dance. To enhance the tropical atmosphere, consider incorporating fragrant plants like gardenias and jasmine, which release their sweet scents as the sun sets, inviting you to unwind and relax in your beautiful oasis.

Water features are another hallmark of tropical landscaping. A meandering stream, koi pond, or even a simple fountain can introduce the soothing sounds of flowing water, further immersing you in a tranquil environment. Pathways made of natural stone or wooden planks may wind through your garden, leading visitors on a delightful journey of discovery as they explore the lush scenery.

Furnish your outdoor space with comfortable seating, perhaps under a thatched gazebo or a pergola draped with climbing vines, providing a perfect spot for enjoying your morning coffee or hosting evening gatherings with friends and family. Incorporating vibrant outdoor textiles—think bright cushions and patterned rugs—will enhance the feeling of a tropical retreat.

Overall, tropical landscaping invites you to embrace nature in all its glory, creating a vibrant, lush environment that captivates the eye and soothes the soul. It’s not just about aesthetics; it’s about creating a sanctuary where you can escape the everyday hustle and immerse yourself in a slice of paradise right outside your door.

9. 7. Japanese Zen Gardens: Tranquility and Balance

Japanese Zen gardens, often referred to as “karesansui” or dry landscape gardens, embody tranquility and balance, making them a perfect choice for those seeking a serene outdoor space. These meticulously designed gardens are a reflection of the principles of Zen Buddhism, promoting mindfulness and contemplation through their simplicity and natural beauty.

At the heart of a Zen garden lies a thoughtful arrangement of rocks, gravel, and carefully pruned plants. The use of raked gravel symbolizes water ripples, creating a soothing visual rhythm that invites the mind to wander and reflect. Boulders and stones are strategically placed to represent mountains or islands, while moss or delicate shrubs add a touch of greenery, enhancing the overall harmony of the space.

When designing your own Japanese Zen garden, consider integrating elements such as a koi pond or a bamboo water feature for an added auditory experience. The gentle sound of flowing water can enhance the atmosphere of peace, encouraging visitors to pause, breathe, and reconnect with nature.

Pathways made of stepping stones or gravel lead the way through the garden, guiding visitors on a tranquil journey of discovery. Incorporating minimalistic seating, such as a simple wooden bench or a stone seat, provides a quiet spot for reflection, making it an ideal retreat for meditation or reading.

Lighting plays a crucial role in a Zen garden, too. soft, subtle illumination can highlight the beauty of the rocks and plants at dusk, creating a magical ambiance that draws people in. Whether you choose lanterns that evoke traditional Japanese design or modern fixtures that blend seamlessly with the landscape, thoughtful lighting can enhance the tranquility of your space.

Ultimately, a Japanese Zen garden is more than just a beautifully arranged outdoor area; it’s a sanctuary for the soul. By incorporating natural elements, maintaining simplicity, and focusing on balance, you can create a peaceful oasis that offers respite from the chaos of everyday life. Embrace the art of Zen gardening, and transform your outdoor space into a haven of tranquility and balance.

10. Tips for Choosing the Right Landscaping Style for Your Space

When it comes to selecting the perfect landscaping style for your outdoor space, the process can be both exciting and overwhelming. With so many options to consider, it’s essential to take a thoughtful approach that reflects your personal taste while also harmonizing with the environment around you. Here are some helpful tips to guide you in making the right choice.

**1. Assess Your Space:** Start by evaluating the size, shape, and condition of your outdoor area. Is it sprawling and open, or small and intimate? Take note of existing features, such as trees, slopes, and hardscape elements, as these will influence your design choices. A well-planned layout will maximize the potential of your landscape while minimizing the need for extensive alterations.

**2. Consider Your Lifestyle:** Your landscaping should cater to how you plan to use the space. If you envision hosting gatherings with friends and family, opt for a style that incorporates social zones, such as patios, fire pits, or outdoor kitchens. Conversely, if you seek a tranquil retreat, consider serene elements like meditation gardens or quiet seating areas surrounded by lush greenery.

**3. Embrace Local Climate:** The natural climate of your region plays a significant role in determining the right landscaping style. For instance, arid areas may benefit from xeriscaping, which emphasizes drought-resistant plants, while cooler climates might lend themselves to vibrant flower gardens. Research native plants that thrive in your environment, as they typically require less maintenance and resources.

**4. Set a Budget:** Landscaping can range from simple DIY projects to elaborate designs with professional help. Establishing a budget before diving into your project helps you prioritize elements and avoid overspending. keep in mind that certain styles, like minimalist landscaping, may require less investment in materials, while others might necessitate more extensive planning and labor.

**5. Visualize Your Design:** Create a mood board or sketch out your ideas to bring your vision to life. Collect images of landscaping styles that resonate with you, and don’t hesitate to mix and match elements from various styles. Online design tools and apps can also help visualize how different styles will look in your space.

**6. Seek Inspiration:** Discovering what others have done can spark creativity and guide your choices. Visit botanical gardens, local parks, or even your neighbors’ yards to gather inspiration. Online platforms like Pinterest and landscaping blogs are treasure troves of ideas that can help you refine your vision.

**7. Consult with Professionals:** If you’re feeling overwhelmed or unsure, consider consulting with a landscape designer or architect. Their expertise can provide invaluable insights into what works best for your space, helping you to bring your dream landscape to fruition while avoiding common pitfalls.

By taking these factors into account, you can confidently select a landscaping style that not only enhances your outdoor area but also reflects your personality and lifestyle. The right choice will create a welcoming space that you and your loved ones can enjoy for years to come.

11. Incorporating Hardscaping Elements: Patios, Walkways, and More

In the realm of landscaping, the term “hardscaping” refers to the non-plant elements that create structure and functionality within your outdoor space. Incorporating hardscaping elements such as patios, walkways, and retaining walls can dramatically enhance the aesthetic appeal and usability of your yard, turning it into a versatile extension of your home.

**Patios** serve as the cornerstone of outdoor living, offering a dedicated area for relaxation, dining, and entertaining. Whether you envision a rustic flagstone patio nestled among lush greenery or a sleek modern paver design with clean lines, the choice of materials and layout can set the tone for your entire space. By choosing the right size and placement, you can create a seamless transition from indoor to outdoor living, making your patio a welcoming gathering spot for family and friends.

**Walkways** guide visitors through your garden, adding both practicality and charm. Whether you opt for natural stone, brick, or gravel, a well-designed walkway can enhance the flow of your landscape, leading the eye through carefully curated plantings and focal points. Consider incorporating curves and varying widths to create a more organic feel, allowing the pathway to blend harmoniously with the surrounding environment.

**Retaining walls**, on the other hand, serve a dual purpose: they provide necessary structural support for sloped areas while adding visual interest to your landscape. Constructed from materials like timber, stone, or concrete, retaining walls can define spaces, create terraces for gardening, or simply serve as a backdrop for beautiful flower beds. Additionally, they can be adorned with built-in seating or decorative elements, transforming an ordinary wall into a picturesque feature.

Incorporating these hardscaping elements not only solidifies the foundation of your landscape but also enhances its functionality, making your outdoor space a true reflection of your style and lifestyle. With thoughtful design and execution, patios, walkways, and retaining walls can turn an uninspired yard into a captivating oasis, inviting you to enjoy the beauty of nature right at your doorstep.

12. Plant Selection: Choosing the Right Flora for Your Style

When it comes to landscaping, the plants you choose can either elevate your outdoor space or leave it feeling lackluster. Selecting the right flora is crucial, as it not only complements your chosen landscaping style but also enhances the overall aesthetic and functionality of your garden. Each landscaping style has its own unique set of characteristics, and the right plant selection is an extension of that vision.

For instance, if you’re leaning toward a modern landscape design, consider incorporating clean lines and geometric shapes with ornamental grasses and sleek shrubs. Varieties like Blue Fescue or Japanese Forest Grass provide texture while maintaining a minimalist appeal. On the other hand, a cottage garden calls for an explosion of color and a mix of perennials and annuals. Think of fragrant lavender, cheerful daisies, and climbing roses that create a romantic, whimsical atmosphere.

If your style leans towards a Mediterranean theme, opt for drought-resistant plants like lavender, rosemary, and olive trees, which not only thrive in warmer climates but also bring a touch of the sun-drenched Mediterranean to your backyard. For a tropical oasis, consider bold foliage plants such as palms, hibiscus, and bird-of-paradise flowers that create a lush, vibrant environment.

In addition to aesthetics, it’s essential to consider the growing conditions of your chosen plants—sunlight, soil type, and moisture levels. Native plants are also a fantastic choice as they are adapted to your local climate and require less maintenance while supporting local wildlife. By thoughtfully selecting the right flora that aligns with your landscaping style and environmental conditions, you can create a harmonious outdoor space that reflects your personal taste, enhances biodiversity, and brings your garden to life.

13. Maintenance Considerations for Different Landscaping Styles

When it comes to transforming your outdoor space, choosing a landscaping style is only the beginning. Each style comes with its own unique set of maintenance considerations that can greatly affect your long-term enjoyment and the overall health of your garden. Understanding these aspects is crucial to ensure that the beauty and functionality of your landscape thrive throughout the seasons.

For instance, a formal garden, characterized by its structured layouts and symmetrical designs, often requires meticulous upkeep. Regular trimming, pruning, and shaping of hedges and topiaries are essential to maintain its crisp, polished appearance. This style may also demand more frequent watering and fertilization to keep the plants vibrant and healthy, especially in regions with arid climates.

In contrast, a cottage garden, celebrated for its charm and abundance, tends to be more forgiving in terms of maintenance. While it still requires weeding and the occasional deadheading, the emphasis is on a more natural and relaxed aesthetic. This style often embraces a mix of perennial and annual plants, allowing for some self-sowing, which can reduce the time spent on planting new flowers each season.

If you lean towards a xeriscape design, which focuses on water conservation and drought-resistant plants, you’ll find that maintenance can be relatively low. These landscapes often require less frequent watering and minimal trimming, allowing you to enjoy a beautiful outdoor space that thrives with minimal intervention. However, it’s important to regularly check for invasive species and ensure that the ecosystem remains balanced.

On the other hand, if you opt for a tropical paradise, expect to invest more time in upkeep. This style typically involves lush foliage and vibrant flowers that may require regular fertilization, pruning, and pest management to keep the landscape looking its best. Additionally, the climate conditions in your area will play a significant role in determining the types of plants you can successfully maintain.

Ultimately, when choosing a landscaping style, it’s essential to consider not just the visual appeal but also how much time and effort you’re willing to invest in maintenance. By aligning your landscaping choice with your lifestyle and preferences, you can create an outdoor space that remains beautiful and functional for years to come.

14. Case Studies: Transformations Through Landscaping

### 14. Case Studies: Transformations Through Landscaping

To truly appreciate the power of landscaping, we can look at a few compelling case studies that illustrate how thoughtful design and execution can transform outdoor spaces into breathtaking sanctuaries.

**1. The Urban Oasis:** In a bustling city, a firm was tasked with transforming a small, neglected courtyard of a downtown apartment complex. The space, once barren and uninspiring, was transformed into a lush urban oasis. By incorporating vertical gardens, colorful planters, and cozy seating areas, the courtyard became a vibrant gathering spot for residents. The addition of soft lighting and water features not only enhanced the aesthetic appeal but also created a serene atmosphere, providing a perfect escape from the city’s hustle and bustle.

**2. The Family-Friendly Backyard:** In suburban neighborhoods, families often seek ways to maximize their outdoor spaces for recreation and relaxation. One such case involved a standard backyard that lacked functionality. The landscaping team introduced a multifunctional design that included a playground for children, a fire pit for family gatherings, and a vegetable garden for homegrown produce. By using strategically placed trees for shade and colorful flower beds to add vibrancy, the once-ordinary backyard was transformed into a lively family hub, fostering connections and outdoor activities.

**3. The Eco-Friendly Retreat:** Another notable transformation occurred in a hillside property where the owners wanted to create an eco-friendly retreat. The design focused on sustainable practices, incorporating native plants to reduce water usage and attract local wildlife. Pathways made of permeable materials allowed rainwater to seep into the ground, promoting a healthy ecosystem. Additionally, a small rain garden was installed to manage stormwater runoff. The result was a stunning landscape that not only promoted sustainability but also offered breathtaking views of the surrounding nature, making it a peaceful haven for the homeowners.

These case studies exemplify how landscaping can elevate outdoor spaces, catering to the needs and desires of homeowners while enhancing their environment. Whether it’s creating a vibrant community space, a family-friendly backyard, or an eco-conscious retreat, the right landscaping can turn a vision into a stunning reality. By learning from these transformations, you can draw inspiration for your own outdoor space, ensuring that it is not only beautiful but also functional and sustainable.

15. Conclusion: Crafting Your Ideal Outdoor Space

In conclusion, crafting your ideal outdoor space is a journey that reflects your personal style, lifestyle, and the unique characteristics of your home. The landscaping styles we’ve explored offer a diverse palette of options, each with its own charm and functionality. Whether you’re drawn to the tranquil simplicity of a Japanese garden, the structured elegance of formal landscaping, or the vibrant chaos of a cottage garden, there is a style that can harmonize with your vision.

As you embark on this transformation, remember that the best outdoor spaces are those that blend aesthetics with practicality. Consider factors such as your climate, the amount of sunlight your space receives, and how you intend to use your outdoor area. Incorporating elements like native plants, sustainable materials, and thoughtful design can enhance not only the beauty of your landscape but also its resilience and functionality.

Don’t shy away from experimenting and personalizing your space. Each plant, stone, and structure can tell a story that resonates with you and your family. Involve professionals if needed, but also trust your instincts; after all, your outdoor area should be an extension of your home and a reflection of your lifestyle.

With the right planning and creativity, you can create an outdoor sanctuary that invites relaxation, fosters connection, and enhances your enjoyment of nature. So, roll up your sleeves, ignite your imagination, and start crafting the outdoor oasis you’ve always dreamed of. The perfect landscape awaits you!

As we conclude our journey through the top seven landscaping styles, we hope you feel inspired and equipped to transform your outdoor space into a personal oasis that reflects your unique taste and lifestyle. From the serene lines of Zen gardens to the vibrant chaos of cottage gardens, each style offers a distinct way to enhance your home’s exterior and create a welcoming environment. Remember, landscaping is not just about aesthetics; it’s about creating a space where you can unwind, entertain, and connect with nature. As you embark on your landscaping adventure, let your imagination run wild, mix and match styles, and don’t hesitate to put your own creative spin on the designs that resonate with you. Happy gardening, and may your outdoor space flourish with beauty and tranquility!

How to create a welcoming entryway?

The entryway is the unsung hero of any home, serving as the first impression for guests and a personal sanctuary for daily comings and goings.

It sets the tone for the rest of your space, blending functionality and aesthetics into a seamless introduction to your living environment. However, many of us overlook this pivotal area, leaving it cluttered or uninspired. In this ultimate guide, we’ll explore transformative ideas that will elevate your entryway from mundane to magnificent. From clever storage solutions and stunning decor to lighting options that create an inviting ambiance, we’ll provide you with practical tips and creative inspiration to craft a welcoming entryway that reflects your style and makes a lasting impression. Get ready to roll up your sleeves and reinvent this essential space into one that greets you and your visitors with warmth and charm!

1. Understanding the Importance of an Entryway

How to create a welcoming entryway?
Credit : whatcanu.com

The entryway is the first impression your home makes on guests, and it often sets the tone for their entire visit. It’s more than just a passage; it’s a transition space that welcomes people into your sanctuary. Understanding the importance of an entryway goes beyond aesthetics—it encompasses functionality, organization, and the emotional warmth that a well-designed entry can evoke.

When you step through the front door, what do you want your guests to feel? A cluttered or disorganized entry can create a sense of chaos, while a thoughtfully arranged space invites a sense of calm and hospitality. It’s in this area that you can express your personal style, showcasing decor that reflects your personality while simultaneously creating a warm atmosphere. From a chic console table adorned with family photos to a vibrant piece of artwork that sparks conversation, every element can contribute to a welcoming vibe.

Moreover, a well-organized entryway enhances the functionality of your home. It serves as a practical hub where you can manage the daily influx of items—shoes, bags, keys, and coats. By incorporating smart storage solutions such as hooks, baskets, and benches, you can keep this space tidy and efficient. This organization not only makes life easier but also ensures that your home remains a serene refuge from the outside world.

In essence, a thoughtfully designed entryway is key to creating an inviting atmosphere. It’s the first space your family and visitors encounter, and it should embody the warmth, style, and functionality that defines your home. As we explore how to transform this area, remember that every choice you make contributes to the overall impression your home leaves on those who enter. Let’s dive deeper into the elements that will elevate your entryway from mundane to magnificent!

2. Assessing Your Current Entryway: Key Considerations

Before diving into the exciting world of design and decor, it’s crucial to take a step back and assess your current entryway. This foundational step will not only help you understand the space you’re working with but also guide your transformation efforts in a way that reflects your personal style and meets your functional needs. Here are some key considerations to keep in mind during your assessment:

**Size and Layout**: Begin by measuring your entryway. Is it spacious or more compact? Understanding the dimensions will help you determine what types of furniture and decor will fit comfortably without creating a cluttered feel. Consider the layout: are there any existing architectural features like stairs, doors, or windows that you need to work around?

**Lighting**: Evaluate the natural light that enters your entryway throughout the day. A well-lit space can feel more inviting, while a dimly lit area may need additional light sources. Consider the placement of existing light fixtures and think about whether you need to add wall sconces, a stylish pendant, or even a console table with a lamp to brighten up the space.

**Functionality**: Reflect on how you currently use your entryway. Is it primarily a passageway, or does it serve additional purposes, like a drop zone for keys and bags? Identifying the functions your entryway needs to fulfill will help you select appropriate storage solutions, such as hooks for coats, a bench for seating, or baskets for shoes.

**Style and Aesthetic**: Take note of the existing colors, textures, and styles in your entryway. Is it aligned with the rest of your home, or does it feel disconnected? Consider what kind of atmosphere you want to create—should it be modern and sleek, warm and rustic, or colorful and eclectic? This will influence your choices in paint, flooring, and decor.

**Traffic Flow**: Observe how people move through your entryway. Is there enough space for everyone to come and go without bumping into furniture or each other? Ensuring a smooth traffic flow is essential for a welcoming space. Think about how you can rearrange or remove elements to enhance accessibility.

By taking the time to assess these aspects of your current entryway, you’ll be better equipped to create a welcoming and functional space that not only complements your home but also makes every arrival feel special. With a clear understanding of your starting point, you can confidently move forward with your design plans, ensuring a transformation that is both practical and aesthetically pleasing.

3. Defining Your Entryway Style: Modern, Traditional, or Eclectic

How to create a welcoming entryway?
Credit : whatcanu.com

Defining your entryway style is a crucial step in creating a welcoming atmosphere that reflects your personality and sets the tone for the rest of your home. The entryway is often the first impression guests have of your space, so whether you lean towards modern, traditional, or eclectic, choosing a cohesive style will enhance the overall aesthetic and functionality.

**Modern Entryway**: If clean lines and minimalist designs appeal to you, a modern entryway might be the perfect fit. Think sleek furnishings, neutral color palettes, and metallic accents. Consider a geometric console table paired with a simple mirror to create an illusion of space and light. To add warmth, incorporate natural elements, such as a potted plant or a textured rug. With modern style, less is often more, so aim for a clutter-free zone that prioritizes functionality while maintaining a sense of sophistication.

**Traditional Entryway**: For those who cherish classic elegance, a traditional entryway can evoke a sense of timeless charm. rich woods, ornate details, and classic color schemes are hallmarks of this style. An antique hall tree or a beautifully upholstered bench can serve as a focal point, providing both seating and storage. Layering your space with vintage-inspired decor, such as framed artwork or a decorative mirror, will create a warm and inviting feel. soft lighting from a chandelier or wall sconces can enhance the atmosphere, enveloping your guests in a cozy embrace as soon as they step through the door.

**Eclectic Entryway**: If you’re someone who loves to mix and match different styles, an eclectic entryway is your canvas. This style allows for creativity and personal expression, blending various textures, colors, and patterns. Consider combining a bold, patterned wallpaper with an array of unique artwork that reflects your travels or hobbies. A vintage rug can add warmth, while mismatched furniture pieces can create an inviting, lived-in feel. Don’t shy away from layering textures—think about incorporating items like woven baskets, metal accents, and soft textiles to create a dynamic entryway that invites conversation and inspires curiosity.

In defining your entryway style, consider not just aesthetics but also how the space will function for you and your guests. By aligning your entryway with your personal taste and lifestyle, you’ll create a welcoming atmosphere that serves as a beautiful introduction to your home.

4. Essential Elements of a Welcoming Entryway

A welcoming entryway sets the tone for your entire home, creating an inviting atmosphere that makes guests feel instantly at ease. To achieve this, consider incorporating several essential elements that work harmoniously to enhance both functionality and aesthetics.

**1. A Statement Door:** Begin with your front door—it’s the first impression guests have of your home. Opt for a door that reflects your personal style, whether it’s a bold color that stands out in your neighborhood or a classic wooden finish that exudes warmth. Don’t forget to adorn it with a beautiful wreath or seasonal decorations to add a personal touch.

**2. Thoughtful Lighting:** Good lighting is crucial in an entryway. Consider layering your lighting with a combination of overhead fixtures, sconces, and table lamps to create a warm glow that welcomes visitors. A stylish pendant light or chandelier not only illuminates the space but also acts as a focal point that enhances your entryway’s character.

**3. Functional Furniture:** Incorporate practical pieces that serve a purpose while enhancing the visual appeal. A console table can provide a spot for keys and mail, while a bench or a set of stylish stools offers a place to sit as guests put on or take off their shoes. Choose furniture that complements your home’s decor and is proportionate to the size of your entryway.

**4. Storage Solutions:** Keep your entryway clutter-free with smart storage solutions. A decorative basket or a stylish coat rack can help manage outerwear and accessories, while built-in shelves or cabinets can provide additional space for shoes and bags. This not only maintains a tidy appearance but also ensures that your entryway remains functional and organized.

**5. Personal Touches:** Finally, add elements that reflect your personality and make the space truly yours. Family photos, artwork, or a curated collection of travel souvenirs can personalize your entryway and create a warm, inviting atmosphere that tells your story. Incorporating plants or fresh flowers can also breathe life into the space, bringing a touch of nature indoors.

By thoughtfully combining these essential elements, you can transform your entryway into a welcoming space that leaves a lasting impression on all who visit. Whether your style is modern, traditional, or eclectic, these tips will help you create an entryway that beautifully reflects your home and invites everyone in with open arms.

5. Color Palette and Lighting: Setting the Mood

How to create a welcoming entryway?
Credit : whatcanu.com

When it comes to transforming your entryway, the color palette and lighting play a pivotal role in setting the mood and creating a lasting first impression. The entryway is the threshold to your home, a space that should immediately convey warmth and style while reflecting your personal taste.

Choosing the right colors can evoke different emotions and set the stage for the rest of your home. Soft, neutral tones—like warm whites, soft grays, or muted earth tones—offer a serene and inviting atmosphere, making the space feel open and airy. Alternatively, bolder hues such as deep blues or rich greens can create a striking focal point, exuding confidence and sophistication. Consider incorporating accent walls or decorative elements in these colors to add depth and interest without overwhelming the space.

Lighting is equally essential in crafting the ideal ambiance. A well-lit entryway is not only practical but also welcoming. Natural light is your best friend, so if your entryway has windows, be sure to maximize that brightness. For spaces lacking natural light, opt for layered lighting solutions that include overhead fixtures, wall sconces, and table lamps. Choose warm-toned bulbs to create a cozy glow, and consider installing dimmers to adjust the mood according to the time of day or occasion.

To further enhance the aesthetic, think about adding lighting fixtures that double as statement pieces. A charming chandelier or a unique pendant light can draw the eye upward, making the area feel more spacious and inviting. Incorporating mirrors can also amplify light and create the illusion of a larger entryway while reflecting your carefully curated decor.

By thoughtfully selecting your color palette and lighting, you can transform your entryway into a warm and welcoming space that not only impresses guests but also sets a positive tone for the rest of your home. Remember, it’s the little details that make a big difference, so let your personality shine through as you create an inviting atmosphere that beckons everyone to step inside.

6. Choosing the Right Flooring for Your Entryway

### 6. Choosing the Right Flooring for Your Entryway

Selecting the right flooring for your entryway is a crucial step in transforming your home into a welcoming space. The entryway is the first impression guests receive, so it’s essential to choose a flooring material that is both functional and aesthetically pleasing.

When considering flooring options, durability should be at the forefront of your mind. The entryway endures heavy foot traffic, so materials like ceramic tile, luxury vinyl, or engineered hardwood are excellent choices. These options not only withstand the wear and tear but are also easy to clean, making them practical for daily use. For instance, ceramic tiles come in various styles and textures, allowing you to create a chic, polished look while remaining resilient against spills and dirt.

Additionally, think about the climate in your area. If you live in a particularly wet region, consider slip-resistant tiles or rubber flooring to enhance safety for you and your guests. On the other hand, if you want to introduce warmth and comfort, consider a high-quality area rug over a hardwood or laminate floor. The rug can add a touch of personality, color, and style while providing a cozy welcome.

Another important factor is color and design. Lighter hues can make a small entryway feel more spacious and inviting, while darker tones can add sophistication and depth. You might even opt for a bold pattern to create a statement that reflects your personal style. Remember, the entryway sets the tone for the rest of your home, so choose a flooring design that harmonizes with your overall décor.

Finally, don’t forget about maintenance. Choose materials that align with your lifestyle. If you have pets or young children, you may want to prioritize scratch-resistant and stain-resistant options. By thoughtfully selecting the flooring for your entryway, you’ll create a functional space that is not only welcoming but also a true reflection of your home’s character.

7. Functional Furniture: Benches, Hooks, and Storage Solutions

How to create a welcoming entryway?
Credit : whatcanu.com

When it comes to transforming your entryway into a welcoming and functional space, the right furniture can make all the difference. Functional furniture serves a dual purpose: it enhances the aesthetic appeal of your home while providing practical solutions to everyday challenges. Consider incorporating benches, hooks, and storage solutions that not only elevate your entryway’s style but also streamline its functionality.

**Benches** are a fantastic starting point. They offer a convenient spot for putting on or taking off shoes, and they create a cozy nook that beckons guests to sit and relax for a moment. Opt for a bench with hidden storage underneath to maximize space; this can be the perfect place to stow away shoes, seasonal items, or even dog leashes, keeping clutter at bay.

**Hooks** are another essential element in a functional entryway. They provide a designated spot for coats, bags, and hats, ensuring that your entryway remains tidy. Choose decorative hooks that align with your home’s aesthetic—whether you prefer sleek modern designs or rustic, vintage-inspired pieces. For an organized look, consider a wall-mounted rack that combines hooks with a small shelf for keys or decorative items, adding both charm and utility.

**Storage solutions** are crucial for maintaining a neat and inviting atmosphere. Consider incorporating a stylish console table with drawers for storing mail and miscellaneous items, or a tall cabinet that can hide away larger items while still offering easy access. Baskets can also be a charming addition; they not only provide a practical way to keep smaller items organized, but they also add texture and warmth to the space.

By thoughtfully selecting functional furniture that meets your needs, you create an entryway that is both inviting and efficient. A well-arranged entryway sets the tone for your home, welcoming guests with open arms while keeping your family organized and ready for the day ahead. With the right pieces in place, you can effortlessly transform your entryway into a stylish and functional introduction to your home.

8. Adding Personal Touches: Artwork and Decor

When it comes to transforming your home, the entryway serves as the perfect canvas to showcase your personality and set the tone for the rest of your space. Adding personal touches through artwork and decor can elevate this often-overlooked area into a warm and inviting introduction to your home.

Consider selecting pieces that resonate with you or tell a story—whether it’s a vibrant painting that evokes fond memories of a family vacation or a print from a local artist that captures the essence of your community. These elements can serve as conversation starters and create a sense of connection to your space.

In addition to artwork, consider incorporating unique decorative items that reflect your style. A beautifully crafted console table adorned with a few curated pieces—like a vintage vase, a stack of treasured books, or a framed photograph—can create an inviting atmosphere. These small details not only enhance the visual appeal of your entryway but also make it feel more lived-in and personal.

Don’t shy away from mixing textures and materials to add depth. A combination of wood, metal, and fabric can create a layered look that feels both stylish and cozy. Throw in a soft rug or a woven basket for umbrellas and shoes, and you’ll achieve a harmonious blend of aesthetics and functionality.

Ultimately, your entryway should feel like an extension of who you are. By thoughtfully selecting artwork and decor that resonates with you, you can create an inviting space that welcomes both you and your guests every time you walk through the door.

9. Incorporating Plants and Natural Elements

Incorporating plants and natural elements into your entryway is one of the most effective ways to create a warm and inviting atmosphere. The presence of greenery not only breathes life into the space but also enhances the overall aesthetics, making it a perfect welcome for both you and your guests.

Start by selecting a few carefully chosen plants that thrive in low-light conditions, as entryways often lack direct sunlight. Consider options like snake plants, pothos, or peace lilies, which require minimal maintenance while offering vibrant foliage. These plants can be placed in stylish pots that complement your decor — think terracotta for a rustic feel, sleek ceramics for a modern touch, or woven baskets for a cozy, natural vibe.

In addition to potted plants, you can incorporate natural elements such as wood, stone, and even water features. A reclaimed wood bench can provide a functional seating area while adding warmth and character. A stone accent piece, like a small sculpture or a decorative bowl filled with smooth river stones, can serve as a beautiful focal point. If space permits, a cascading water feature can introduce soothing sounds and a sense of tranquility, making your entryway feel more like a serene retreat.

Don’t forget to play with texture and color! Layering different types of greenery alongside earthy materials can create a harmonious balance that feels both fresh and inviting. You can also consider seasonal arrangements, switching out plants or adding seasonal blooms to keep the entryway dynamic and reflective of the time of year.

By thoughtfully incorporating plants and natural elements, you’ll not only enhance the visual appeal of your entryway but also create a welcoming environment that leaves a lasting impression on all who enter your home.

10. Maximizing Space: Tips for Small Entryways

When dealing with a compact entryway, the key lies in maximizing every inch without sacrificing style. An inviting small entryway can set the tone for your entire home, and there are several creative strategies to transform this often-overlooked space into a functional and welcoming area.

**1. Opt for Multi-Functional Furniture:** Choose pieces that serve more than one purpose. A sleek bench with built-in storage can provide a place to sit while donning shoes and discreetly hide away clutter, such as bags and seasonal items. Look for slim console tables that can double as a drop zone for keys and mail, or consider wall-mounted shelves that keep surfaces clear while adding decorative touches.

**2. Utilize Vertical Space:** When square footage is limited, think vertically. Install hooks or a pegboard above the entryway bench for hanging coats, bags, and accessories. Tall shelving units can draw the eye upward, creating the illusion of more space while offering practical storage for shoes or decorative items.

**3. Embrace Mirrors:** Mirrors are a small space’s best friend. They reflect light and create a sense of depth, making your entryway feel larger and airier. A well-placed mirror not only serves as a functional item for last-minute touch-ups but also adds a stylish element to the decor.

**4. Choose Light Colors:** Light and neutral color palettes can make a small space feel open and inviting. Soft whites, light grays, or muted pastels can help brighten the entryway and give it a more expansive feel. You can add pops of color through accessories such as rugs, artwork, or potted plants to maintain interest without overwhelming the space.

**5. Keep It Clutter-Free:** A small entryway can quickly become chaotic if not managed properly. Establish a daily routine for keeping the area tidy—designate a spot for shoes, bags, and other essentials, and encourage family members to stick to it. Regular decluttering can help maintain an inviting atmosphere and ensure that your entryway remains a true welcome home.

By incorporating these tips, you can transform a small entryway into a stylish, organized, and functional space that greets both you and your guests with warmth and charm. Whether through clever use of furniture, strategic color choices, or smart organizing techniques, maximizing your entryway can set the stage for a cozy atmosphere throughout your home.

11. Seasonal Decor Ideas for a Fresh Look

Transforming your entryway with seasonal decor is a delightful way to keep your home feeling fresh and inviting throughout the year. Each season brings its own unique colors, textures, and themes that can effortlessly enhance the aesthetic of your space.

**Spring** is the perfect time to embrace vibrant hues and natural elements. Consider incorporating pastel-colored wreaths adorned with faux flowers or fresh blooms to hang on your door. A cheerful doormat featuring colorful designs can set a welcoming tone before guests even step inside. Add potted plants or small topiaries flanking your entryway for a touch of greenery that symbolizes new beginnings.

As summer rolls in, think about creating a coastal vibe. Swap out heavier decorations for light, airy pieces. Seashells in decorative bowls, nautical-themed artwork, or a simple, breezy garland made from driftwood can evoke the essence of summer. Brightly colored cushions on a nearby bench or chair can also invite guests to linger a little longer in your welcoming entryway.

Fall offers a wonderful opportunity to celebrate the changing leaves and the harvest season. Incorporate rich, warm tones like deep oranges, reds, and browns through decorative pumpkins, hay bales, or a rustic basket filled with pinecones. A cozy throw draped over a bench or a stylish rug with autumn motifs can create an inviting atmosphere, perfect for those crisp fall days.

Finally, as winter approaches, transform your entryway into a cozy retreat that captures the magic of the season. Opt for elegant decorations like twinkling fairy lights, garlands made of evergreen, or even a festive wreath adorned with berries and pinecones. A lovely, warm throw can be added to a chair, inviting guests to wrap themselves up as they step inside from the cold. With a few simple changes, your entryway can reflect the beauty of each season, making every arrival feel special and welcoming.

By embracing seasonal decor, you’ll not only enhance your home’s aesthetic but also create an entryway that resonates with the warmth and joy of each time of year.

12. Creating a Scented Welcome: Candles and Diffusers

Creating a scented welcome in your entryway is a simple yet impactful way to set the tone for your home. As soon as guests step inside, the inviting aroma can evoke feelings of warmth and comfort, making them feel instantly at ease. Candles and diffusers are not only functional but also decorative elements that can enhance the ambiance of your space.

When selecting candles, consider those with soothing fragrances like lavender, vanilla, or citrus—scents known for their calming and uplifting properties. Opt for beautifully designed candle holders that complement your entryway decor. Grouping candles of varying heights can create an elegant focal point on a console table or shelf, while the flickering flame adds a cozy glow.

Diffusers, on the other hand, offer a more subtle and continuous scent experience. Reed diffusers are an excellent choice for entryways, as they gently release fragrance over time without any flame. Choose essential oils or fragrant blends that resonate with your personal style—perhaps a refreshing eucalyptus or a warm spice blend. Place the diffuser in a strategic spot where it can be easily seen but won’t be in the way of daily activities.

To elevate the sensory experience further, consider incorporating seasonal scents. In the fall, you might lean towards pumpkin spice or apple cinnamon, while winter could introduce notes of pine or peppermint. This seasonal rotation not only keeps your entryway fresh but also creates a sense of anticipation and celebration throughout the year.

Finally, remember that less is sometimes more. A well-placed candle or a single stylish diffuser can make a statement without overwhelming the senses. By thoughtfully curating the scents in your entryway, you create an atmosphere that welcomes guests with open arms, leaving a lasting impression that invites them to linger longer in your home.

13. Maintenance Tips for a Beautiful Entryway

An inviting entryway sets the stage for the entire home, but maintaining its charm requires consistent effort and attention. Here are some essential maintenance tips to ensure your entryway remains beautiful and welcoming year-round.

**1. Regular Cleaning:** Dust, dirt, and debris can quickly accumulate, especially in high-traffic areas. Sweep or vacuum the floor regularly and wipe down surfaces like tables and shelves. Don’t forget to clean any glass elements, such as mirrors or windows, to let natural light filter through and enhance the space.

**2. Seasonal updates:** Your entryway can benefit from seasonal decor changes. Swap out decorative elements with the seasons—a wreath for the door, a new runner for the floor, or a fresh vase of seasonal flowers can make a big impact. These small updates keep the space feeling fresh and inviting.

**3. Organize Clutter:** Keep your entryway clutter-free by implementing smart storage solutions. Use baskets, bins, or stylish hooks to corral items like shoes, bags, and jackets. Regularly assess these items to ensure everything has a place, and make it a habit to remove any belongings that don’t belong in the entryway.

**4. Check Lighting:** Proper lighting is crucial for creating a warm and welcoming entryway. Regularly check and replace bulbs in overhead fixtures or wall sconces to maintain a bright atmosphere. Consider adding accent lighting, like a table lamp or decorative lanterns, to create a cozy ambiance, especially during the evening.

**5. Maintain the Floor:** Your flooring endures heavy foot traffic, so it’s essential to keep it in good shape. For hardwood floors, use a suitable cleaning product to avoid damage. If you have rugs or mats, shake them out regularly and wash them as needed to prevent them from looking worn or dirty.

**6. Refresh Paint and Finishes:** Over time, even the most carefully maintained entryway can start to look tired. Keep an eye out for scuff marks or fading paint, and consider a fresh coat every few years. Touching up finishes on furniture can also keep them looking vibrant.

**7. Assess the Functionality:** Finally, take some time to evaluate the functionality of your entryway. Is it still serving its purpose effectively? If not, consider rearranging furniture or adding new elements, such as a bench for seating or a small table for keys and mail, to enhance both aesthetics and usability.

By incorporating these maintenance tips into your routine, you can ensure that your entryway remains a beautiful and welcoming introduction to your home, making a lasting impression on every guest who walks through your door.

14. Budget-Friendly Entryway Upgrades

Transforming your entryway doesn’t have to come with a hefty price tag. In fact, there are numerous budget-friendly upgrades that can create a warm and inviting atmosphere without breaking the bank. Start with a fresh coat of paint on the walls; a new hue can instantly revitalize the space and set the tone for your entire home. Soft, welcoming colors like pastel blues or warm neutrals can create a calming environment, while a bold accent color may inject energy and personality.

Next, consider adding some functional yet stylish storage solutions. Simple items like a wooden bench with built-in storage or decorative baskets can help keep the area organized while providing a place to sit when putting on shoes. These pieces not only serve a practical purpose but also add character to your entryway.

Accessorizing is another opportunity to elevate your entryway on a budget. A few carefully chosen decor items, such as a vibrant indoor plant, a colorful rug, or a gallery wall of family photos, can make the space feel personal and inviting. Mirrors are also a great addition; they reflect light and create the illusion of a larger space while providing a last-minute check before heading out the door.

Lastly, don’t overlook the power of lighting. Updating your light fixtures or simply adding a few stylish candles can create an inviting ambiance. String lights or battery-operated lanterns can add a touch of warmth during the evening hours, making your entryway a welcoming sight for family and guests alike.

By implementing these budget-friendly upgrades, you can create an entryway that not only looks beautiful but also feels welcoming, setting the perfect tone for the rest of your home.

15. Inspiring Entryway Makeover Examples and Ideas

When it comes to transforming your home, the entryway is often the first area that sets the tone for the rest of your space. It’s not just a passageway; it’s the welcoming embrace that greets both you and your guests. To inspire your own entryway makeover, here are some stunning examples and ideas that can elevate this often-overlooked area into a beautiful and functional introduction to your home.

**1. The Minimalist Marvel:** Picture a sleek, uncluttered entryway with a simple wooden bench, a large, round mirror that reflects natural light, and a few potted plants. The color palette is soothing, with neutral tones that create a calm atmosphere. This design emphasizes simplicity and functionality, making it easy to grab your keys and go.

**2. The Eclectic Charm:** If you love a mix of styles, an eclectic entryway can be a delightful way to showcase your personality. Combine vintage furniture, such as a repurposed dresser as a shoe cabinet, with modern art pieces and quirky decor. Layering textures with a vibrant rug or an array of framed photos can add warmth and character, making every entry a conversation starter.

**3. The Cozy Nook:** Transform your entryway into a cozy nook by incorporating soft lighting, such as a stylish pendant light or wall sconces. Add a tufted armchair or a cushioned window seat where guests can sit and remove their shoes. This inviting setup can be enhanced with throw pillows and a small bookshelf filled with your favorite reads, inviting guests to linger just a bit longer.

**4. The Functional Space:** For families or busy households, a functional entryway is key. Consider installing built-in cabinetry for storage, complete with hooks for bags and coats. A chalkboard or corkboard can be a practical addition for notes and reminders. Pair this with a durable mat that can withstand the daily hustle and bustle, ensuring that your entryway remains tidy and organized.

**5. The Nature-Inspired Retreat:** Bring the outdoors in with a nature-inspired entryway. Use natural materials like wood and stone, and incorporate greenery through indoor plants or a vertical garden. A calming color scheme dominated by earthy tones can create a refreshing atmosphere that makes your entryway feel like a serene retreat.

These inspiring ideas demonstrate that a welcoming entryway can be both beautiful and functional. Whether you lean towards minimalist elegance or bohemian charm, the key is to create a space that reflects your style while providing a warm welcome to all who enter your home.

In conclusion, we hope this ultimate guide to creating a welcoming entryway has inspired you to transform this often-overlooked space into a true reflection of your home’s personality and warmth. From thoughtful decor choices and functional furnishings to clever organization tips, each step is designed to encourage a sense of comfort and hospitality for both you and your guests. Remember, your entryway is the first impression of your home, so make it count! Embrace creativity and personal touches as you embark on your transformation journey. We can’t wait to see how you bring your vision to life—share your entryway makeovers with us, and let’s celebrate the beauty of a warm welcome together!

How to create a relaxing outdoor space?

Imagine stepping into your backyard and being instantly enveloped in a serene sanctuary, where the hustle and bustle of everyday life fades away, replaced by the soothing sounds of nature and the gentle caress of a warm breeze.

Transforming your outdoor space into a relaxing oasis is not just a dream; it can be your reality with the right guidance and a bit of creativity. In this step-by-step guide, we’ll explore how to turn your backyard into a tranquil retreat, perfect for unwinding after a long day or hosting intimate gatherings with friends and family. From selecting the ideal plants and furniture to creating cozy nooks and adding ambient lighting, we’ll cover everything you need to know to cultivate a peaceful environment that reflects your personal style. Get ready to ditch the chaos and embrace the calm as we embark on this journey to create your very own outdoor paradise!

1. Introduction: The Benefits of a Relaxing Outdoor Oasis

How to create a relaxing outdoor space?
Credit : whatcanu.com

In our fast-paced, technology-driven world, finding a serene escape within the comforts of our own homes has never been more essential. Transforming your backyard into a relaxing outdoor oasis offers a multitude of benefits that extend far beyond aesthetics; it cultivates a sanctuary for rejuvenation, relaxation, and connection with nature. Imagine stepping outside your door to be greeted by the gentle rustle of leaves, the sweet fragrance of blooming flowers, and the soothing sounds of water cascading from a fountain or pond.

Creating a personal retreat not only enhances your overall quality of life but also encourages you to spend more time outdoors, promoting physical health and well-being. Research has shown that exposure to nature can reduce stress levels, boost mood, and even improve cognitive function. Whether you’re sipping your morning coffee in a cozy nook or hosting evening gatherings under twinkling lights, your outdoor oasis can be a space for mindfulness and reflection, fostering a deeper connection with yourself and your loved ones.

Moreover, an inviting outdoor space can enhance your home’s value and appeal, making it a worthwhile investment. It serves as a versatile extension of your living area, perfect for entertaining guests, enjoying family time, or simply unwinding after a long day. In this guide, we will explore the various elements that contribute to a relaxing outdoor oasis, from the selection of plants and furniture to the incorporation of water features and ambient lighting. Let’s embark on this journey to transform your backyard into a peaceful retreat that you and your family can enjoy for years to come.

2. Assessing Your Backyard Space

Before diving into the exciting world of landscaping and décor, it’s essential to take a step back and thoroughly assess your backyard space. This crucial first step sets the foundation for your outdoor oasis, allowing you to visualize how best to transform the area into a serene retreat.

Start by observing the layout of your yard. Take note of its dimensions, shape, and any existing features, such as trees, shrubs, or pathways. Are there areas that receive ample sunlight, or are there shaded spots that could be perfect for lounging? Understanding these elements will help you determine where to place seating, gardens, or water features.

Next, consider the terrain. Is your yard flat, or does it have slopes and dips? Hills can provide a beautiful backdrop for a tiered garden or a cozy nook, while flat areas are often ideal for patios and fire pits. Don’t forget to check the soil quality as well; this is vital if you plan to incorporate plants or a vegetable garden into your design.

Take a moment to identify any existing limitations or challenges in your backyard. Are there drainage issues that need to be addressed? Are there unsightly fences or utility boxes that could detract from your oasis? Acknowledging these challenges upfront will allow you to develop creative solutions as you plan your outdoor haven.

Finally, think about your personal preferences and lifestyle. Do you envision a space for entertaining friends and family, or do you seek a quiet corner for meditation and reflection? Perhaps you want a vibrant garden filled with native plants or a minimalist area with sleek furniture. Sketch out a rough plan, jotting down ideas that resonate with you.

By taking the time to assess your backyard space thoughtfully, you’ll create a solid blueprint that reflects your vision and caters to your needs, setting the stage for a truly relaxing outdoor oasis.

3. Defining Your Vision: Style, Theme, and Purpose

How to create a relaxing outdoor space?
Credit : whatcanu.com

Before diving into the physical transformation of your backyard, it’s essential to take a step back and define your vision. This is the foundational step that will guide every decision you make, from plant selection to furniture placement. Consider what style resonates with you—do you envision a contemporary space with clean lines and minimalistic decor, or perhaps a cozy, rustic retreat adorned with natural materials?

Once you’ve settled on a style, think about the theme you want to incorporate. Themes can range from tropical paradise to Mediterranean escape, or even a serene Zen garden. Each theme brings its own unique charm and character, setting the tone for your outdoor oasis. You may want to draw inspiration from nature, travel experiences, or even your favorite vacation spot.

Next, consider the purpose of your outdoor space. Will it be a tranquil haven for relaxation and meditation, a lively area for entertaining family and friends, or a multifunctional space that accommodates both? Identifying the primary function you want your backyard to serve will help you choose the right elements that enhance its usability.

Write down your ideas, sketch out a rough layout, and gather images that inspire you. By clearly defining your vision, you’re not only setting a direction for your project but also ensuring that the final result is a harmonious blend of style, theme, and purpose—a true reflection of your personal sanctuary. This thoughtful planning phase is crucial to creating a backyard that you will love and enjoy for years to come.

4. Essential Elements of a Backyard Oasis

Creating a truly relaxing outdoor oasis requires more than just a collection of furniture and plants; it’s about cultivating an environment that promotes serenity and comfort. Here are the essential elements that will transform your backyard into a personal retreat.

**1. Comfortable Seating:** The cornerstone of any outdoor oasis is comfortable seating that invites you to unwind. Opt for plush lounge chairs, a cozy hammock, or a stylish outdoor sofa adorned with soft cushions. Consider incorporating varied seating options, such as a swinging bench or a fire pit surrounded by sturdy chairs, to accommodate different moods and gatherings.

**2. Lush Greenery:** Surround yourself with nature’s beauty by incorporating a mix of plants, trees, and flowers. Choose a variety of foliage to create layers and depth in your landscape design. Incorporating fragrant herbs, vibrant seasonal blooms, and evergreens can provide both visual interest and a soothing aroma. Don’t forget to include some vertical elements, such as trellises or hanging planters, to maximize space and create a sense of enclosure.

**3. Water Features:** The calming sound of gently flowing water can instantly elevate the tranquility of your backyard. Consider adding a small fountain, pond, or even a birdbath to attract wildlife and create a serene atmosphere. The sight and sound of water not only soothe the soul but can also mask unwanted noise from nearby streets or neighbors.

**4. Ambient Lighting:** As day fades into night, the right lighting can create a magical ambiance. Incorporate soft, warm lighting through string lights, lanterns, or solar-powered garden lights. Place lights strategically around pathways, seating areas, and plants to highlight features and ensure safety. A flickering candle or a stylish fire pit can also provide a cozy glow for evening gatherings.

**5. Personal Touches:** Finally, make the space your own with personal touches that reflect your style and interests. Add decorative elements such as outdoor rugs, artwork, or sculptures that resonate with you. Incorporate cozy throws or pillows to provide warmth during cooler evenings. Remember, this is your sanctuary, and it should be a reflection of who you are.

By thoughtfully integrating these essential elements into your backyard design, you’ll create a relaxing outdoor oasis that beckons you to unwind and enjoy the beauty of nature, right in your own home.

5. Step 1: Planning and Design

How to create a relaxing outdoor space?
Credit : whatcanu.com

Creating a relaxing outdoor oasis begins with thoughtful planning and design. This initial step is crucial, as it sets the foundation for your entire project. Start by envisioning how you want to use your backyard. Will it be a serene retreat for solo relaxation, a vibrant space for entertaining friends, or a family-friendly area for play and enjoyment? Take the time to jot down your ideas and prioritize your needs.

Next, evaluate your existing space. Consider the layout, the amount of sunlight different areas receive throughout the day, and any natural features you may want to highlight, such as trees, flower beds, or water elements. Sketch a rough layout of your yard, marking the locations of these features alongside potential areas for seating, pathways, and other elements like fire pits or outdoor kitchens.

Don’t forget to think about the ambiance you wish to create. Are you envisioning a lush garden filled with vibrant flowers and greenery, or a minimalist space with clean lines and modern furnishings? Consider the colors, textures, and materials that resonate with you.

Finally, set a budget. Determine how much you are willing to spend and allocate funds to different aspects of your project, such as landscaping, furniture, and decor. Having a clear budget will help keep your project on track and prevent overspending.

By dedicating time to this planning phase, you will ensure that your outdoor oasis not only meets your personal style but also caters to your lifestyle, creating a harmonious environment where you can unwind and rejuvenate. Once your plan is in place, you’ll be ready to dive into the exciting next steps of transforming your backyard into a personal paradise.

6. Step 2: Choosing the Right Plants and Landscaping

Choosing the right plants and landscaping is a crucial step in transforming your backyard into a serene outdoor oasis. The selection of flora can significantly influence the ambiance, functionality, and overall aesthetic of your space. Begin by considering the climate and soil type in your area, as these factors will determine which plants will thrive in your garden. Research native plants that not only require less maintenance but also provide a natural habitat for local wildlife. Incorporating a mix of perennials, annuals, and evergreens will ensure that your garden remains vibrant throughout the seasons.

Next, think about the layout. Create a harmonious balance between hardscaping—such as paths, patios, and decking—and softscaping, which includes your lush greenery and flowers. Use larger plants, such as ornamental grasses or shrubs, to create natural barriers or privacy screens. This adds depth to your space and makes it feel more secluded and intimate.

Consider adding flowering plants with varying bloom times to provide continuous color and fragrance throughout the year. Perennial flowers like lavender and coneflowers not only attract pollinators but also bring a delightful scent to your outdoor retreat. Don’t forget about the importance of texture; combining plants with different leaf shapes and sizes can create visual interest and a sense of lushness.

Additionally, think about the mood you want to create. If relaxation is your goal, opt for calming colors like soft greens, blues, and purples. Planting fragrant herbs such as rosemary or mint can also enhance the sensory experience of your oasis. For those who seek a more vibrant atmosphere, consider a mix of bold annuals and tropical plants to energize the space.

Lastly, pay attention to the layout of your plants. Arranging them in clusters rather than in straight lines can create a more natural feel. Use pathways and borders to guide the eye through the garden and encourage exploration. By thoughtfully choosing and arranging your plants, you’ll lay the foundation for a tranquil outdoor environment that invites you to unwind and connect with nature.

7. Step 3: Selecting Furniture and Decor

How to create a relaxing outdoor space?
Credit : whatcanu.com

Selecting furniture and decor is one of the most exciting steps in the process of transforming your backyard into a serene outdoor oasis. This is where your personal style truly shines and where comfort meets aesthetics. Start by considering the overall vibe you want to create. Are you aiming for a cozy, rustic retreat, a sleek modern space, or perhaps a tropical paradise? Your vision will guide your choices.

Begin with the essentials: seating. Look for weather-resistant materials like aluminum, teak, or synthetic wicker, which not only withstand the elements but also offer durability and comfort. Opt for plush cushions in colors and textures that harmonize with your garden’s palette. A well-placed hammock or a couple of vibrant bean bags can also add a casual, inviting touch that encourages relaxation.

Next, think about tables. A sturdy coffee table can serve as a gathering point for drinks and snacks, while a dining table will set the stage for al fresco meals with family and friends. Consider incorporating versatile options, such as nesting tables or an extendable dining table, to accommodate different occasions.

Once you have your basic furniture in place, it’s time to layer in decor that reflects your personality. Outdoor rugs can define spaces and add warmth, while string lights or lanterns can create an enchanting ambiance as the sun sets. Don’t overlook the power of greenery; potted plants or vertical gardens can bring life to your area and complement the natural beauty around you.

Finally, personal touches—a collection of your favorite outdoor candles, weather-resistant artwork, or even a fire pit—can make your backyard feel uniquely yours. Selecting the right furniture and decor not only enhances the visual appeal of your outdoor space but also lays the foundation for countless moments of relaxation and joy. So, take your time, explore various styles, and curate a space where you’ll love to unwind, entertain, and create lasting memories.

8. Step 4: Incorporating Water Features

### Step 4: Incorporating Water Features

Water features can truly transform your backyard into a serene oasis, adding both visual appeal and soothing sounds that promote relaxation. Whether you opt for a grand fountain, a tranquil pond, or a simple birdbath, the presence of water can create a calming atmosphere that invites you to unwind and connect with nature.

Begin by considering the size and scale of your outdoor space. A large pond can serve as a stunning focal point, providing a habitat for fish and aquatic plants, while smaller water features like tabletop fountains or wall-mounted cascades can fit snugly into tight corners or patios. Choose a style that complements your overall design theme—rustic stone fountains can evoke a natural feel, while sleek, modern water installations add a contemporary touch.

Once you’ve selected the type of water feature that suits your backyard, think about its placement. Position your feature where it can be easily viewed from your main sitting areas, such as your patio or deck. This ensures that you can enjoy the gentle sound of flowing water while sipping your morning coffee or lounging with a good book. Additionally, consider how the water feature interacts with existing landscaping. Surround it with lush greenery, colorful flowers, or smooth pebbles to create a harmonious scene that enhances your oasis.

Don’t forget about the maintenance aspect. While water features can be low-maintenance, regular cleaning and occasional checks on water levels and pumps will keep them functioning well. If you’re feeling adventurous, consider adding aquatic plants like water lilies or floating ferns, which not only beautify your pond but also contribute to a balanced ecosystem.

Lastly, enhance your water feature with lighting. Incorporating soft LED lights can create a magical ambiance in the evening, transforming your backyard into a captivating retreat after sunset. With the gentle glow reflecting off the water, you’ll create a peaceful environment perfect for evening gatherings or quiet moments of reflection.

By thoughtfully incorporating water features into your backyard design, you can elevate your outdoor space into a relaxing oasis that beckons you to escape the hustle and bustle of daily life.

9. Step 5: Lighting Ideas for Ambiance

Creating the perfect ambiance in your outdoor oasis hinges significantly on the right lighting. The right illumination can transform a simple backyard into a magical retreat, ideal for evening gatherings, quiet moments of reflection, or romantic dinners under the stars. Here are some enchanting lighting ideas to elevate the atmosphere in your transformed space.

**1. String Lights:** One of the most popular and effective ways to add a warm glow is through string lights. Drape them across your patio, wrap them around trees, or hang them from pergolas to create a whimsical feel. Choose soft white or warm yellow bulbs to cast a gentle light that promotes relaxation and conversation.

**2. Solar-Powered Path Lights:** Enhance the safety and aesthetics of your garden pathways with solar-powered lights. These eco-friendly options charge during the day and automatically illuminate at night, guiding your guests through your outdoor haven. Opt for designs that suit your style—whether sleek and modern or rustic and charming.

**3. Lanterns and Candles:** For a touch of romance, incorporate lanterns and candles into your design. Place them on tables, hang them from hooks, or set them along walkways to create flickering pools of light. Consider using flameless candles for a worry-free alternative that still provides the mesmerizing glow of real flames.

**4. Spotlighting Focal Points:** Highlight specific features of your backyard, like a beautifully shaped tree, a water feature, or a stunning piece of garden art, with strategically placed spotlights. This not only draws attention to these elements but also adds depth and drama to your outdoor space.

**5. Fire Pits:** A fire pit serves as both a source of warmth and light, providing a cozy gathering spot for family and friends. The soft flickering flames create an inviting atmosphere, perfect for roasting marshmallows or sharing stories long into the night.

**6. Under-Bench Lighting:** If you have seating areas in your backyard, consider adding under-bench lighting. This subtle touch not only improves visibility but also adds a layer of sophistication to your space, making it feel more like an outdoor lounge.

By thoughtfully incorporating these lighting ideas, you can create an inviting and serene ambiance that encourages relaxation and enjoyment in your outdoor oasis. Whether you’re hosting a lively barbecue or enjoying a quiet evening alone, the right lighting will enhance every moment spent in your transformed backyard.

10. Step 6: Creating Cozy Zones for Relaxation

Creating cozy zones for relaxation in your backyard is all about designing spaces that invite you to unwind and enjoy the tranquility of nature. Start by identifying different areas within your outdoor space that can serve unique purposes—think of a reading nook, a meditation corner, or a space for evening gatherings with friends.

Begin by choosing comfortable seating options that complement the style of your oasis. Plush outdoor cushions, hammocks, or even a swinging bench can create inviting spots for lounging. Consider using weather-resistant furniture that not only adds comfort but also ensures durability against the elements.

Once you have your seating figured out, enhance these zones with thoughtful decor. Layering rugs can define the area and add warmth, while soft throw blankets can invite snuggling on cooler evenings. Don’t forget about lighting! String lights, lanterns, or solar-powered garden lights can create a magical ambiance as the sun sets, allowing you to enjoy your outdoor haven well into the night.

Incorporating natural elements is key to creating a serene environment. Surround your cozy zones with fragrant plants or flowering shrubs to engage the senses. You can also add privacy with trellises, outdoor curtains, or strategically placed potted plants that help create a secluded retreat from the hustle and bustle of everyday life.

Finally, consider adding personal touches that reflect your personality—whether it’s a small fountain that provides soothing sounds, a fire pit for warmth and storytelling, or a selection of your favorite outdoor games. Each cozy zone should feel like a little escape, encouraging you to disconnect from the chaos and reconnect with yourself or loved ones. With these elements in place, your backyard will transform into a true outdoor oasis, beckoning you to relax and rejuvenate whenever you step outside.

11. Step 7: Adding Outdoor Accessories and Personal Touches

Once you’ve established the foundational elements of your backyard oasis, it’s time to infuse it with personality and charm through outdoor accessories and personal touches. These finishing details not only enhance the aesthetic appeal but also create a welcoming atmosphere that reflects your unique style.

Start by selecting a cohesive color palette that complements your existing landscape and furniture. Consider vibrant throw pillows, soft outdoor rugs, and colorful cushions that invite relaxation and comfort. These simple additions can transform a basic seating area into an inviting lounge where you can unwind with a good book or entertain friends.

Next, think about lighting options that will create a magical ambiance as the sun sets. String lights draped across pergolas or trees provide a whimsical glow, while lanterns and solar-powered garden lights add both practicality and beauty. Consider incorporating candles for a romantic touch, or opt for fire pits to create a cozy gathering spot on cooler evenings.

Incorporating greenery is also a fantastic way to enhance your outdoor space. Potted plants, hanging baskets, or even a vertical garden can bring life and color, while also improving air quality. Choose plants that thrive in your climate and require minimal upkeep, allowing you to enjoy your oasis without the stress of constant maintenance.

Don’t forget about personal touches that tell your story. Perhaps it’s a mosaic birdbath that showcases your artistic flair, or a collection of garden sculptures that spark conversation. Incorporate items like family heirlooms or travel souvenirs that evoke fond memories and make the space feel like home.

Lastly, consider adding functional accessories such as outdoor dining essentials, blankets for cooler nights, or even a small bar cart stocked with your favorite beverages. These practical additions ensure your outdoor oasis is not only visually appealing but also ready for entertaining and relaxation.

By thoughtfully selecting and arranging outdoor accessories and personal touches, you’ll create a serene retreat that beckons you to step outside and enjoy the beauty of your transformed backyard. Your oasis will become a cherished haven for relaxation, connection, and joy—an extension of your home that you and your loved ones can savor for years to come.

12. Step 8: Maintenance Tips for Your Oasis

Creating a relaxing outdoor oasis is just the beginning; maintaining its beauty and functionality is key to ensuring it remains a sanctuary for years to come. Regular upkeep not only preserves the aesthetic appeal of your space but also enhances its longevity and enjoyment. Here are some essential maintenance tips to keep your backyard retreat in top shape.

1. **Regular Cleaning**: Just like any indoor space, your outdoor oasis needs regular cleaning. Sweep away leaves and debris, wipe down outdoor furniture, and periodically wash cushions to prevent mold and mildew. Depending on your climate, you may need to do this weekly or bi-weekly to keep everything looking fresh.

2. **Pruning and Trimming**: Plants are the heart of your oasis, and maintaining them is crucial. Regularly prune shrubs and trees to encourage healthy growth and to prevent overgrowth that can detract from your space. This not only keeps your plants looking tidy but also allows for better air circulation and sunlight penetration.

3. **Seasonal Check-Ups**: The changing seasons bring different challenges. In the fall, clear out leaves and prepare your garden for winter. In the spring, inspect your plants for any winter damage and start replanting annuals or perennials. Summer maintenance might include regular watering schedules and checking for pests.

4. **Pest Control**: An outdoor oasis can attract unwanted guests. Keep an eye out for pests like aphids, spider mites, and snails. Utilize organic pest control methods or introduce beneficial insects like ladybugs to keep your plants healthy without compromising your ecosystem.

5. **Furniture Care**: Protect your outdoor furniture from the elements by applying weatherproofing treatments. Regularly check for any signs of wear and tear, and consider storing cushions and accessories indoors during harsh weather to extend their lifespan.

6. **Water Features**: If your oasis includes a fountain or pond, regular maintenance is key. Clean the water features to prevent algae buildup, and check the water level regularly to ensure it remains at optimal levels. This will keep your oasis not only visually appealing but also serene with the soothing sounds of flowing water.

7. **Color Updates**: Over time, colors may fade due to sun exposure. Consider refreshing the paint on any wooden structures or adding new accents through colorful planters or decorative elements. This can rejuvenate the overall look of your oasis and keep it inviting.

By incorporating these maintenance tips into your routine, you’ll ensure that your backyard oasis remains a tranquil escape from the hustle and bustle of everyday life. Consistent care not only enhances the beauty of your outdoor space but also makes it a welcoming retreat for friends, family, and yourself for years to come.

13. Budgeting for Your Backyard Transformation

When it comes to transforming your backyard into a relaxing outdoor oasis, budgeting is a crucial step that can make or break your project. Start by assessing your overall vision: what elements do you want to incorporate? Perhaps a tranquil water feature, lush landscaping, cozy seating areas, or a fire pit for evening gatherings? Having a clear concept will help you allocate your budget effectively.

Begin with a comprehensive list of all the elements you wish to include. This might encompass materials for landscaping, furniture, lighting, and any additional features, like outdoor cooking equipment. Once you have your wish list, research the costs associated with each item. Online marketplaces, local garden centers, and home improvement stores are great resources for price comparisons.

Don’t forget to factor in potential labor costs if you plan to hire professionals for installation or design. If you’re going the DIY route, budget for tools and equipment rentals that might be necessary to bring your vision to life.

It’s also wise to set aside a contingency fund—typically around 10-15% of your total budget—to handle unexpected expenses that may arise during the transformation process. This way, you won’t be caught off guard by surprises that could derail your plans or compromise the quality of your project.

Finally, keep in mind that creating a backyard oasis doesn’t have to happen all at once. You can break your project into phases, allowing you to spread out costs over time while still enjoying the transformation along the way. By carefully budgeting for your backyard transformation, you can ensure a beautiful and relaxing outdoor space that meets your needs without exceeding your financial limits.

14. Safety Considerations for Outdoor Spaces

Creating a relaxing outdoor oasis is an exciting endeavor, but it’s essential to prioritize safety to ensure that your tranquil retreat remains a worry-free haven. As you embark on this transformation, keep in mind several key safety considerations that will protect both your space and those who enjoy it.

First and foremost, assess the terrain of your backyard. Uneven ground can lead to trips and falls, so consider leveling out any bumpy areas and filling in holes to create a smooth surface. If you’re installing pathways or patios, opt for non-slip materials that provide stability, even when wet.

Next, pay attention to the placement of furniture and decor. Ensure that chairs, tables, and other elements are positioned thoughtfully to avoid overcrowding and to create clear pathways for movement. Additionally, if you have children or pets, opt for furnishings with rounded edges and avoid sharp corners that could pose a risk of injury.

Lighting is another critical aspect of safety. Adequate outdoor lighting not only enhances the ambiance of your oasis but also helps prevent accidents after dark. Illuminate pathways, seating areas, and any steps or elevations with a combination of ambient lights, spotlights, and solar-powered fixtures to ensure visibility and security.

Finally, consider the materials you use for building structures like decks, pergolas, or fences. Ensure that they are treated and maintained to withstand the elements and prevent deterioration. Regularly inspect your outdoor space for any hazards, such as loose boards, rusty nails, or unstable furniture.

By prioritizing these safety considerations, you can create an inviting outdoor oasis that serves as a peaceful escape while keeping everyone who enjoys it safe and sound. With a focus on both beauty and safety, your backyard can become a cherished retreat for relaxation and enjoyment.

15. Conclusion: Enjoying Your New Outdoor Sanctuary

As you step back to admire your newly transformed outdoor oasis, there’s an unmistakable sense of accomplishment that washes over you. This space, once merely an extension of your home, has evolved into a sanctuary where nature and comfort converge harmoniously. The vibrant colors of blooming flowers dance in the gentle breeze, while the sound of trickling water from your carefully placed fountain serenades you, inviting relaxation and peace.

Imagine sinking into your plush lounge chair with a good book in hand, enveloped by the soothing aromas of lavender and rosemary wafting from your herb garden. Perhaps you envision hosting intimate gatherings with friends and family around a cozy fire pit, sharing stories and laughter under a starlit sky. Your outdoor oasis is not just a place; it’s an experience—a retreat from the chaos of everyday life.

In this serene setting, you can indulge in mindfulness practices, such as yoga or meditation, rejuvenating your spirit while breathing in the fresh air. The subtle sounds of nature, from chirping birds to rustling leaves, create a tranquil backdrop that enhances your moments of reflection and relaxation.

As you settle into your new outdoor sanctuary, remember to embrace the changing seasons. Each season brings its own unique beauty and opportunities for enjoyment. In the summer, host barbecues and pool parties; in the fall, savor the crisp air while sipping warm cider by the fire; and in winter, decorate with twinkling lights to create a festive atmosphere.

Ultimately, your backyard transformation is more than just landscaping; it’s about crafting a space that resonates with your lifestyle and enhances your well-being. So take a deep breath, soak in the beauty around you, and enjoy every moment spent in your very own outdoor retreat. This is your haven—where relaxation meets nature—and it’s time to make the most of it.

As we wrap up our guide on transforming your backyard into a relaxing outdoor oasis, we hope you’re feeling inspired to embark on this rewarding journey. By following these step-by-step instructions, you can create a personal haven that not only enhances your home’s aesthetic but also provides a serene escape from the hustle and bustle of daily life. Whether it’s incorporating lush greenery, comfortable seating, or soothing water features, every detail you add will contribute to a tranquil atmosphere where you can unwind and recharge. So gather your tools, unleash your creativity, and let your backyard bloom into the peaceful retreat you’ve always dreamed of. We can’t wait to see the stunning transformations you achieve—share your progress and final results with us, and let’s celebrate the beauty of outdoor living together!

What are the best ways to organize your garage?

Your garage is often the unsung hero of your home—a multifaceted space that serves as a workshop, storage area, and sometimes even a gym or laundry room.

However, it can quickly become a chaotic catch-all for tools, seasonal decorations, and forgotten items, leaving you overwhelmed and frustrated. If you’re ready to reclaim this valuable space and transform it into an organized haven of efficiency, you’re in the right place! In this blog post, we’ll explore top tips and innovative strategies to help you streamline your garage organization, maximize storage potential, and create a functional environment that meets all your needs. Whether you’re looking to create a streamlined workspace for your DIY projects or simply want to find room for your car again, our comprehensive guide will empower you to take control and breathe new life into your garage. Get ready to roll up your sleeves and discover how a little planning and creativity can turn your cluttered garage into a beautifully organized space!

1. Assessing Your Garage Space: A Comprehensive Inventory

What are the best ways to organize your garage?
Credit : whatcanu.com

Before diving headfirst into the exciting world of garage organization, it’s essential to take a step back and conduct a thorough assessment of your available space. This comprehensive inventory will serve as the foundation for your transformation, ensuring that every inch of your garage is utilized efficiently and effectively.

Start by emptying your garage completely. This may seem daunting, but it’s a crucial step in understanding what you have and how best to arrange it. As you clear the clutter, take the opportunity to categorize your belongings into distinct groups: tools, seasonal decorations, sports equipment, gardening supplies, and more. This will not only help you visualize the items you own but will also highlight any duplicates or forgotten treasures that can be donated or discarded.

Once you’ve sorted through your items, create a detailed inventory list. Note down the quantity of each category and any specific items that need special attention, such as expensive tools that require secure storage or fragile decorations that need protective containers. This inventory will help you identify what needs to stay, what can go, and what storage solutions may be necessary to accommodate everything.

While you’re assessing your space, take a close look at the layout of your garage. Note the existing shelving, hooks, and cabinets, and consider how you can maximize these features. Pay attention to the flow of movement: how easy is it to access frequently used items? Are there areas that feel cramped or inefficient? Jot down ideas for optimizing your layout, such as moving bulky items to the back or using vertical space with wall-mounted storage options.

By completing a comprehensive inventory and assessing your garage space with a critical eye, you will not only gain clarity on what you own but will also set the stage for an organized, functional garage that meets your needs. Armed with this foundational knowledge, you’re ready to embark on the journey of transforming your garage into a well-organized sanctuary of efficiency and utility.

2. Setting Clear Goals for Your Garage Transformation

Setting clear goals for your garage transformation is the first and most crucial step in creating an organized and efficient space. Before diving into the physical work, take a moment to envision what you want your garage to look like and how you intend to use it. Are you aiming for a sleek workshop, an organized storage area, or perhaps a multifunctional space that accommodates both? By defining your objectives, you’ll be able to tailor your efforts to meet your specific needs.

Start by making a list of all the items currently cluttering your garage. Categorize them into groups—tools, sports equipment, seasonal decorations, or gardening supplies. This will help you identify what you really need to keep, what can be donated or discarded, and what might require a designated storage solution. For instance, if you find that your garage is mainly used for gardening, then your goal might be to create a dedicated potting station complete with shelving for soil and tools.

Once you have a clear vision, consider what changes will help you achieve that goal. This could involve investing in shelving units, pegboards, or storage bins to keep everything in its place. You might also want to think about the layout of your garage—ensuring that frequently used items are easily accessible while less-used items are stored out of the way.

Remember, setting goals also means establishing a timeline. Whether you plan to complete your transformation over a weekend or spread it out over several weeks, having deadlines will help keep you motivated and on track. By clearly defining your goals for the garage transformation, you’ll not only create a space that functions efficiently but also one that enhances your home’s overall utility. Embrace the process, and you’ll soon find your garage evolving into a well-organized sanctuary that meets all your needs.

3. Decluttering: The First Step to a Functional Garage

What are the best ways to organize your garage?
Credit : whatcanu.com

Before you embark on any organization project, the most crucial step is decluttering. A garage often becomes a catch-all for items that don’t have a designated space in your home, leading to a chaotic jumble of tools, seasonal decorations, sporting equipment, and forgotten treasures. To reclaim this valuable space, start by evaluating every item within your garage.

Begin by emptying the space entirely—this might seem daunting, but it allows you to see the full extent of what you’re working with. As you pull everything out, sort items into three distinct categories: keep, donate, and discard. Be honest with yourself; if you haven’t used something in the past year, it’s likely time to let it go. This is an excellent opportunity to donate items that are still in good condition but no longer serve a purpose in your life.

For those items that belong in the keep pile, consider their functionality and frequency of use. Group similar items together—tools with tools, sports gear with sports gear, and seasonal items with their counterparts. As you start to see the floor of your garage again, you’ll gain clarity on what you truly need to keep and what can be stored away or disposed of.

Decluttering isn’t just about tossing things out; it’s about creating a curated space that reflects your lifestyle and priorities. Once you’ve sifted through the clutter, you’ll lay the groundwork for a more organized garage, making it easier to implement the organizational systems that follow. With a clean slate, you can start thinking about smart storage solutions that optimize efficiency and ensure your garage remains a functional space for years to come.

4. Categorizing Your Items: Tools, Sports Equipment, and Seasonal Décor

When it comes to transforming your garage into a haven of organization and efficiency, categorizing your items is a crucial step that can simplify your space dramatically. Start by creating distinct zones for your belongings—this not only makes it easier to find what you need but also maximizes your available space.

**Tools**: Designate a specific area for your tools, which can often become a chaotic jumble if left unchecked. Utilize pegboards to hang frequently used tools within easy reach, and invest in shelving or tool cabinets to keep everything orderly. Group tools by type—hand tools, power tools, and gardening implements—so you can quickly grab what you need without rummaging through a disorganized mess. Consider using clear containers or labels to ensure every item has its place.

**Sports Equipment**: Next, tackle the sports equipment that often takes over garage floor space. Create a dedicated corner for bikes, balls, and other gear. Use wall-mounted racks for larger items like bicycles, and bins or baskets for smaller items, such as balls and gloves. This not only keeps everything tidy but also makes it easy to grab and go for spontaneous games or outdoor adventures.

**Seasonal Décor**: Seasonal items, such as holiday decorations, can also benefit from thoughtful categorization. Use opaque bins to store décor for each season, clearly labeled to simplify access when the time comes to deck the halls or celebrate a festive occasion. Stack these bins on high shelves to keep them out of the way during off-seasons, ensuring your garage remains uncluttered year-round.

By categorizing your items into these three key areas, you’ll create a functional garage that not only looks great but enhances your ability to find and use your possessions efficiently. Embrace the freedom of a well-organized space and enjoy the newfound ease it brings to your daily life!

5. Choosing the Right Storage Solutions: Shelving, Cabinets, and Bins

What are the best ways to organize your garage?
Credit : whatcanu.com

When it comes to transforming your garage into a functional and organized space, selecting the right storage solutions is crucial. The vast array of options available today can make the task feel overwhelming, but with a little guidance, you can create a system that works perfectly for your needs.

**Shelving** is a foundational element of garage organization. Open shelving units provide easy access to frequently used items, while heavier-duty shelves can handle the weight of larger tools and equipment. Consider adjustable shelves that can be repositioned as your storage needs change, allowing for flexibility as you accumulate more items over time. Metal or plastic shelves are both durable choices, but be sure to assess the weight capacity to avoid any mishaps.

**Cabinets** offer a sleek and tidy solution for stowing away tools, chemicals, and other equipment that you may not want on display. Opt for cabinets with lockable doors if you’re storing hazardous materials or valuable items. Look for options that include built-in drawers or sliding shelves for added convenience; these features can help maximize space and keep smaller items from getting lost in the clutter.

Don’t overlook the power of **bins**! Clear plastic bins are perfect for categorizing smaller items, such as nails, screws, and gardening tools. Labeling each bin will not only make it easier to find what you need at a glance but will also encourage the whole family to participate in keeping the garage organized. Stackable bins can help you make the most of vertical space, ensuring that every corner of your garage is utilized efficiently.

When selecting your storage solutions, consider the specific items you need to store and how often you access them. A combination of shelving, cabinets, and bins will create a harmonious system that enhances both the organization and efficiency of your garage. By investing a bit of time and thought into these choices, you’re setting the stage for a space that not only looks great but also works seamlessly for your lifestyle.

6. Maximizing Vertical Space: Wall Storage Ideas

When it comes to garage organization, one of the most effective strategies is to look up—literally! Maximizing vertical space can free up valuable floor area, allowing for a more efficient and organized garage. Utilizing your garage walls is not just a smart move; it’s an essential one, especially if you’re working with limited square footage.

Start by installing sturdy shelving units that can accommodate bins, boxes, and tools. Opt for adjustable shelves so you can customize the height according to your storage needs. Adding pegboards is another fantastic option; they can be easily customized with hooks and shelves to store everything from hand tools to gardening supplies. This not only keeps your tools visible and accessible but also adds a pop of visual interest to your garage walls.

Consider wall-mounted cabinets for a cleaner look. These can hide away clutter while still providing ample storage. Choose cabinets with transparent doors or labels to quickly identify contents, making it easier to find what you need without digging through piles of items.

Don’t forget about over-the-door storage solutions! Utilize the inside of your garage door with hanging organizers for smaller items like sports equipment, cleaning supplies, or even paint cans. This clever use of space can significantly declutter your garage while keeping everything within reach.

For those with bicycles or larger sporting gear, consider vertical bike racks or hooks that keep these items off the floor. Not only does this prevent them from becoming obstacles, but it also adds a touch of organization that showcases your gear.

By maximizing vertical space, you can transform your garage from a chaotic storage area into a highly functional workspace. Embrace the walls as your allies in organization, and you’ll find yourself enjoying a more efficient and pleasant garage environment.

7. The Importance of Zones: Creating Functional Areas in Your Garage

What are the best ways to organize your garage?
Credit : whatcanu.com

When it comes to transforming your garage into a well-organized, efficient space, the concept of zoning is paramount. Just as a well-designed home features distinct areas for living, cooking, and relaxing, your garage can benefit from clear, functional zones tailored to your specific needs. By creating designated areas for different activities or types of items, you’ll not only maximize space but also enhance your efficiency when accessing tools, sports equipment, or seasonal décor.

Start by assessing how you currently use your garage. Do you need a workshop area for your DIY projects? A designated space for gardening supplies? Or perhaps an organized section for your kids’ toys and outdoor gear? Once you’ve identified your primary functions, you can begin to allocate space accordingly.

For instance, consider establishing a “Workshop Zone” that includes pegboards for tools, a sturdy workbench, and storage bins for screws and nails—everything you need to keep your projects flowing smoothly. Next, a “Seasonal Zone” can house holiday decorations, camping gear, and winter sports equipment, clearly labeled and stored in easy-to-reach containers. By grouping like items together, you’ll eliminate the frustration of searching for misplaced tools or gear when you need them most.

Don’t forget about vertical space! Installing shelves and wall-mounted racks can help you take advantage of every inch of your garage. This allows you to keep the floor clear, making the space feel larger and more inviting. Additionally, incorporating rolling carts or mobile storage solutions can provide flexibility, allowing you to shift items around as your needs evolve.

Ultimately, creating functional areas in your garage is about more than just aesthetics; it’s about cultivating an environment that supports your daily activities and hobbies. With well-defined zones, you’ll find that not only does your garage become more visually appealing, but it also transforms into a practical, efficient hub that simplifies your life. Embrace the art of zoning, and watch as your garage transforms into a beautifully organized space that works for you.

8. Essential Tools for a DIY Garage Organization Project

When embarking on a DIY garage organization project, having the right tools at your disposal can make all the difference. A well-equipped garage isn’t just about aesthetics; it’s about creating a functional space that enhances efficiency and productivity. Here are some essential tools that will streamline your organization efforts and help you reclaim your garage from chaos.

**1. Tool Storage Solutions:** Start with storage solutions that suit your needs. Tool chests, pegboards, and wall-mounted shelves are invaluable for keeping your tools easily accessible yet neatly stored. Consider investing in stackable bins or clear containers for small items; they allow for easy visibility and prevent misplacement.

**2. Labeling Supplies:** A labeling system is crucial for any organized garage. Use a label maker or colorful adhesive labels to clearly mark boxes and shelves. This not only helps you find items swiftly but also encourages family members to return things to their rightful place.

**3. Measuring Tools:** Accurate measurements are key to optimizing your garage’s layout. Have a tape measure, level, and square handy to ensure everything fits perfectly and is aligned correctly, whether you’re installing shelves or arranging larger items.

**4. Cleaning Supplies:** Before you can organize, you need to clean. A broom, dustpan, shop vacuum, and microfiber cloths will help clear away dust, dirt, and debris. Consider using a degreaser for those tougher stains that often collect in a garage.

**5. Hooks and Racks:** Maximize vertical space by incorporating hooks and racks. They are perfect for hanging bikes, ladders, and garden tools, which free up floor space and make it easier to navigate your garage.

**6. Workbench:** A sturdy workbench provides a dedicated space for projects and repairs. Choose one that includes drawers or shelves for additional storage, keeping your tools and materials organized and within reach.

**7. Storage Cabinets:** Invest in weather-resistant storage cabinets to keep hazardous materials and lesser-used items out of sight. Look for cabinets with locking mechanisms for added safety, especially if children are around.

**8. Safety Gear:** Finally, don’t forget your safety gear. Gloves, goggles, and masks protect you while you work, ensuring that your DIY project is safe as well as productive.

Equipped with these essential tools, you’ll be well on your way to transforming your garage into an organized, efficient space that you can be proud of. With a little planning and the right equipment, you can create a garage that not only serves its purpose but also inspires creativity and productivity.

9. Tips for Maintaining Your Organized Garage

Once you’ve transformed your garage into a well-organized haven, the next challenge is maintaining that order. A well-maintained garage not only enhances efficiency but also extends the life of your belongings and maximizes your space. Here are some valuable tips to help you keep your organized garage in tip-top shape:

1. **Establish a Routine**: Set aside a specific time each month to assess your garage’s organization. Use this time to tidy up, put tools back in their designated spots, and remove any items that no longer belong. This habit will help prevent clutter from accumulating and ensure that everything remains in its place.

2. **Implement a “One In, One Out” Policy**: When you bring a new item into your garage—be it a tool, a storage box, or seasonal equipment—commit to removing one item. This practice not only keeps your space from becoming overcrowded but also encourages thoughtful purchasing.

3. **Utilize Clear Storage Solutions**: Invest in clear bins or containers for your items. Being able to see the contents at a glance helps you quickly identify what you need, reducing the likelihood of rummaging through multiple boxes. Label each container clearly to make retrieval even easier.

4. **Regularly Reassess Storage Systems**: As your needs change, so should your storage solutions. Evaluate your shelving, hooks, and bins every few months to ensure they are still serving their purpose. You might find that some areas need more organization, while others could benefit from a downsizing.

5. **Engage the Family**: Make garage maintenance a family affair. Assign each family member specific tasks, such as keeping their sports equipment organized or maintaining tool cleanliness. This shared responsibility not only lightens your load but also fosters a collective sense of ownership over the space.

6. **Embrace Seasonal Cleanouts**: Take advantage of seasonal changes to re-evaluate your garage’s contents. Before winter, check that your snow shovels and winter gear are accessible. In the spring, ensure that your gardening tools and outdoor equipment are ready for use. Seasonal checks can help you stay organized year-round.

By implementing these maintenance strategies, you’ll not only keep your garage organized but also create a functional space that enhances your daily life. A well-kept garage can be a source of pride, embodying a sense of order and efficiency that resonates throughout your home.

10. Incorporating Smart Solutions: Technology for Garage Efficiency

In today’s fast-paced world, incorporating smart solutions into your garage organization can elevate both efficiency and convenience to new heights. Imagine stepping into your garage and instantly knowing where everything is stored, thanks to a seamless integration of technology. From smart shelving units that adjust their height at the touch of a button to app-controlled lighting that illuminates your workspace, innovative technologies can transform your cluttered garage into a streamlined haven of productivity.

One of the most effective ways to incorporate technology is through the use of smart storage systems. These systems often come equipped with built-in sensors that can track inventory levels, alerting you when it’s time to restock supplies or when certain items are being used more frequently. Imagine having a digital inventory list accessible on your smartphone, allowing you to quickly find tools or equipment without digging through piles of boxes.

Additionally, consider integrating smart charging stations for your power tools and batteries. These stations not only keep your devices charged and ready for use but also feature organization solutions that prevent clutter. With designated spots for each tool, you’ll never have to waste time searching for a drill or a saw again.

Moreover, smart garage door openers equipped with mobile app controls can enhance the safety and accessibility of your space. No more fumbling for keys or worrying about whether you left the garage door open; you can control it from anywhere, ensuring peace of mind whether you’re home or away.

Finally, implement smart lighting solutions featuring motion sensors that automatically turn on when you enter. This not only saves energy but also provides a well-lit workspace, making it easier to tackle projects without fumbling in the dark.

Incorporating these cutting-edge technologies into your garage will not only optimize your organizational efforts but also create a more enjoyable and efficient environment. Embrace the future of garage organization, and watch as your space transforms into a well-oiled machine that works as hard as you do.

11. Creative Ideas for Repurposing Garage Items

When it comes to transforming your garage into a well-organized haven, one of the most rewarding approaches is to repurpose items you already have. Not only does this practice promote sustainability, but it also allows you to utilize your creativity and give new life to overlooked objects. Here are some inventive ideas for repurposing common garage items that can enhance both functionality and aesthetic appeal.

1. **Old Cans and Jars**: Instead of tossing out those empty paint cans or mason jars, consider using them for storage. Paint cans can be transformed into vibrant containers for tools or small garden supplies, while jars can neatly organize screws, nails, and other small hardware items. Label them for easy identification and stack them on shelves for a tidy look.

2. **Wood Pallets**: If you have wooden pallets lying around, they can be repurposed into a variety of useful items. Create a unique shelving unit by stacking pallets vertically, or use them as a base for a workbench. With a little sanding and finishing, they can add a rustic charm to your garage space.

3. **Unused Bike Racks**: Instead of letting an old bike rack gather dust, consider repurposing it as a tool holder. Hang it on the wall and use the hooks to store garden tools, brooms, or even extension cords. This frees up floor space and keeps your tools organized and easily accessible.

4. **Wine Crates**: Those sturdy wooden wine crates can be given a second life as stylish storage solutions. Stack them to create shelving for smaller items, or mount them on the wall for a more artistic display. They can also serve as rustic planters for your favorite herbs or flowers, adding a touch of greenery to your garage.

5. **Mismatched Hooks and Hangers**: If you have a collection of leftover hooks or hangers from various projects, don’t let them go to waste. Mix and match them to create a custom wall organizer for tools, gardening equipment, or sports gear. This eclectic display not only serves a practical purpose but also adds a quirky touch to your garage décor.

6. **Old Furniture**: Repurpose that old dresser or cabinet you no longer need. With a bit of creativity, it can become a fantastic storage solution for smaller items or even a workbench. Remove the drawers to create an open shelf for larger tools, or keep them intact to store paints and supplies out of sight.

By embracing these creative repurposing ideas, you can transform your garage into an organized, efficient space that reflects your personality and meets your storage needs. Not only will you declutter and maximize your space, but you’ll also find joy in the process of giving new life to items that might have otherwise been discarded. So gather those unused treasures and get creative—your dream garage awaits!

12. Safety First: Ensuring a Secure and Safe Garage Environment

When it comes to transforming your garage into a well-organized and efficient space, safety should always be your top priority. A cluttered garage not only creates a stressful environment but can also pose significant hazards. By taking proactive steps to ensure a secure and safe garage, you’re not just protecting your belongings but also safeguarding your family and pets.

Start by assessing your garage for any potential dangers. Look for sharp tools, heavy items that could fall, or hazardous materials like chemicals and paints that need proper storage. Invest in sturdy shelving units to elevate items off the floor, reducing tripping hazards and protecting your possessions from water damage in case of flooding. Clearly label all storage bins and containers, especially those that contain toxic substances, to prevent accidental exposure.

Another crucial aspect of garage safety is proper lighting. A well-lit space allows you to navigate easily and spot any hazards before they become an issue. Consider installing motion-sensor lights or bright LED fixtures to illuminate every corner of your garage. This not only enhances visibility but also adds an extra layer of security by discouraging unwanted visitors.

Furthermore, ensure that your garage door is functioning correctly. Regular maintenance checks can prevent accidents related to malfunctioning doors. If you have a garage door opener, keep the remote out of reach of children and ensure all family members understand how to operate it safely.

Lastly, create a clear pathway in your garage to facilitate easy movement. This involves regularly decluttering and re-evaluating what items you truly need. By maintaining an organized space, you reduce the risk of accidents and promote a more efficient workflow.

By prioritizing safety in your garage organization project, you’ll create not only an aesthetically pleasing space but also one that is functional and secure—allowing you to enjoy all the benefits your transformed garage has to offer.

13. Seasonal Maintenance: Keeping Your Garage Organized Year-Round

Seasonal maintenance is a crucial aspect of keeping your garage organized, ensuring that it remains a functional space all year round. As the seasons change, so do the items we store and the activities we enjoy. This means it’s important to regularly assess and adjust the organization of your garage based on seasonal needs.

In the spring, for instance, you might find gardening tools, lawn equipment, and sports gear coming to the forefront. Take this opportunity to declutter and clean, removing any items that are broken or no longer used. Consider implementing a designated area for gardening supplies, complete with shelves for pots and planters, hooks for tools, and bins for soil and fertilizer. This not only keeps everything handy but also encourages you to engage in your gardening projects with ease.

As summer rolls in, focus on outdoor gear like bicycles, camping equipment, and beach supplies. This is the ideal time to create a dedicated storage solution for these items, such as wall-mounted racks or overhead storage to free up floor space. Adding clear bins can help you easily identify seasonal items at a glance, making it simple to grab what you need for weekend adventures.

When fall approaches, your garage will likely become a hub for tools and decorations as you prepare for the harvest season and holidays. This is a perfect time to sort through your Halloween decorations, organize your tool collection for home improvements, and even set up a space for holiday storage. Consider investing in clear storage bins with labels to keep everything organized and easy to find, minimizing the chaos that often accompanies holiday prep.

Finally, winter necessitates a focus on snow removal tools, seasonal sports equipment, and other cold-weather gear. Ensure that shovels, snow blowers, and winter tires are easily accessible, and consider using wall hooks or pegboards to keep them off the ground. Additionally, use this season to review your inventory of items that can be donated or discarded, making way for fresh starts in the New Year.

By committing to seasonal maintenance, you not only keep your garage organized, but you also enhance its efficiency, making it a space that adapts to your changing needs throughout the year. Regularly revisiting your storage solutions and adjusting them as necessary will ensure that your garage remains a valuable, clutter-free area that you can rely on, no matter the season.

14. Inspiring Before-and-After Transformations: Case Studies

There’s nothing quite like witnessing a dramatic before-and-after transformation to fuel your own organizational dreams. In this section, we delve into some inspiring case studies that showcase the incredible potential of a well-organized garage. Each of these transformations not only maximizes space but also enhances functionality, turning cluttered chaos into an oasis of efficiency.

**Case Study 1: The Family Hub**

Meet the Johnsons, a family of four whose garage had become a dumping ground for everything from sports equipment to holiday decorations. Before the transformation, they struggled to find space for their car, let alone their bikes and gardening tools. After assessing their needs, we helped them implement a custom shelving system that utilized vertical space and labeled bins for easy access. The result? A garage that now serves as a family hub for activities. The kids can easily grab their bikes, and the family can access holiday decorations in a fraction of the time it once took.

**Case Study 2: The DIY Dream**

Next, we feature Mark, an avid DIYer whose garage was overrun with tools and materials. His before photo depicts a chaotic mix of saws, paints, and lumber strewn about, making it nearly impossible to work on projects. Together, we designed a pegboard wall to display tools prominently and included a mobile workbench for versatility. After the transformation, Mark can now focus on his projects without the distraction of disorder. The garage not only serves as a workspace but also inspires creativity, showcasing beautifully organized tools and materials.

**Case Study 3: The Minimalist Approach**

Lastly, we highlight Sarah, a minimalist who wanted her garage to reflect her lifestyle. Initially, her garage was cluttered with rarely used items, creating a sense of overwhelm. We proposed a radical decluttering session, which included donating items and finding new homes for others. With the remaining essentials, we introduced a sleek storage solution that melded form and function, such as stylish bins and a compact, multi-purpose shelving unit. The after photo reveals a serene space that epitomizes simplicity and calm – a true testament to the power of organization.

These case studies illustrate that with a bit of vision and the right organizational tools, any garage can be transformed into a well-ordered, efficient space. Whether you’re looking for functionality, creativity, or a minimalist aesthetic, these inspiring transformations can motivate you to embark on your own garage makeover journey. So grab your tools, roll up your sleeves, and get ready to turn your cluttered garage into a space you love!

15. Final Thoughts: Embracing an Organized Garage Lifestyle

As you stand in your freshly organized garage, it’s hard not to feel a sense of accomplishment and relief. The clutter that once consumed your space has been replaced with a sense of order and tranquility, allowing your garage to become a functional extension of your home rather than just a storage area. Embracing an organized garage lifestyle is more than just a one-time project; it’s a commitment to maintaining a space that promotes efficiency and peace of mind.

Imagine opening your garage door and stepping into a well-structured environment where everything has its place. Tools are neatly arranged on pegboards, seasonal decorations are stored in labeled bins, and your car has ample room to park without the threat of bumping into scattered boxes. This level of organization not only enhances the functionality of your garage but also simplifies your life. No more frantic searches for misplaced tools or forgotten items; instead, you’ll enjoy a seamless workflow every time you enter the space.

Embracing this organized lifestyle means establishing routines that prioritize tidiness and efficiency. Regularly reassess your storage solutions—what worked a few months ago might need adjusting as your needs evolve. Encourage family members to participate in maintaining this newfound organization, fostering a collective sense of responsibility. With everyone on board, your garage can remain a well-oiled machine, ready to serve you through every season and project.

Ultimately, an organized garage is about more than just aesthetics or storage solutions; it’s about creating a space that inspires creativity, productivity, and peace of mind. By committing to this organized lifestyle, you’ll not only enhance your garage’s functionality but also free up mental space, allowing you to focus on what truly matters – whether that’s tackling new projects, spending quality time with family, or simply enjoying the serenity of a clutter-free environment. So take a deep breath, step back, and embrace the organized garage lifestyle—you’ve earned it!

We hope you found our tips for transforming your garage into a well-organized and efficient space both inspiring and practical. A garage can be so much more than just a storage area; with the right strategies, it can become a functional extension of your home, tailored to meet your needs. By implementing the ideas we’ve shared—like decluttering, utilizing vertical space, and investing in smart storage solutions—you can create a garage that not only enhances your lifestyle but also adds value to your property. As you embark on this organizational journey, remember that every small step counts towards achieving the ultimate garage transformation. We’d love to hear about your progress, so feel free to share your before-and-after photos or any additional tips in the comments below. Happy organizing!

How to install a new light fixture?

Lighting can transform a room from ordinary to extraordinary, setting the mood and enhancing the overall aesthetic of your space.

Whether you’re looking to brighten up a dim corner, create a cozy atmosphere for evenings in, or showcase your personal style with a stunning new light fixture, the right lighting can make all the difference. However, the thought of installing a new fixture might seem daunting, especially if you’re not well-versed in home improvement projects. Fear not! In this step-by-step guide, we will walk you through the process of selecting the perfect light fixture and provide you with clear, practical instructions for installation. From understanding the types of fixtures and their intended spaces to ensuring safety and achieving a seamless finish, you’ll be equipped with all the knowledge you need to illuminate your space with confidence and flair. Get ready to brighten your home and unleash your inner interior designer!

1. Introduction: The Importance of Lighting in Home Design

How to install a new light fixture?
Credit : whatcanu.com

When it comes to home design, lighting is often an unsung hero, wielding the power to transform a space from ordinary to extraordinary. The right light fixture not only illuminates a room but also sets the tone and ambiance, influencing how we feel and interact within our environments. Imagine stepping into a room bathed in soft, warm light, where shadows dance gently along the walls, creating a cozy and inviting atmosphere. Conversely, stark overhead lighting can render a space cold and unwelcoming, dulling the vibrancy of your carefully chosen decor.

Incorporating effective lighting design goes beyond mere functionality; it is an art form that can enhance the aesthetic appeal of your home. Whether it’s a statement chandelier that becomes the focal point of your dining area or understated sconces that provide a warm glow in a hallway, each light fixture plays a crucial role in defining the character of your space.

Moreover, the right lighting can accentuate architectural features, highlight artwork, and even affect the perceived size of a room, creating the illusion of openness or intimacy as needed. It can guide the eye and draw attention to the areas you want to showcase, while also providing the necessary illumination for everyday tasks.

As we delve into this step-by-step guide on installing a new light fixture, remember that lighting is not just a functional necessity; it’s an opportunity to express your unique style and enhance the atmosphere of your home. Let’s embark on this illuminating journey together, ensuring that every room shines as brightly as your vision for it.

2. Choosing the Right Light Fixture for Your Space

Choosing the right light fixture for your space is a crucial step that can transform the ambiance and functionality of any room. With a myriad of styles, shapes, and sizes available, it can be overwhelming to narrow down your options. Start by considering the purpose of the room—different spaces require different types of lighting. For example, a warm, inviting chandelier might be perfect for a dining area, while a sleek, modern pendant light could enhance the aesthetic of a minimalist kitchen.

Next, think about the size of the fixture in relation to your space. A large, statement piece can become a stunning focal point in a spacious living room, while a smaller, more understated fixture might be ideal for a cozy bedroom. It’s also essential to consider the height at which the light will hang. A fixture that’s too low can obstruct views and movement, while one that’s too high may fail to illuminate the area effectively.

Don’t forget to take into account the overall design theme of your home. Whether your style is contemporary, rustic, or eclectic, the light fixture should complement the existing décor. Materials and finishes play a significant role here; for example, a brushed nickel finish might lend a modern touch, while a vintage brass fixture could add a hint of nostalgia.

Finally, consider the type of bulbs you’ll be using. LED bulbs are energy-efficient and long-lasting, perfect for everyday use, while dimmable options can create a versatile lighting scheme that adjusts to your needs. By thoughtfully selecting a light fixture that aligns with your space’s purpose, style, and lighting requirements, you’ll not only enhance the aesthetic appeal of your room but also create a welcoming and functional environment.

3. Tools You’ll Need for the Installation

How to install a new light fixture?
Credit : whatcanu.com

Before diving into the installation of your new light fixture, it’s essential to gather the right tools. Having everything you need on hand will not only streamline the process but also ensure a safe and effective installation. Here’s a detailed list of tools you’ll require:

1. **Screwdriver Set**: A basic set of screwdrivers, both flat-head and Phillips, is crucial for loosening and tightening screws on your light fixture. Depending on the fixture, you might also need a torque screwdriver for specific screws.

2. **Wire Cutters/Strippers**: These handy tools are vital for preparing your wiring. Wire cutters will help you trim any excess wire, while wire strippers will strip the insulation from the ends of the wires, ensuring a clean connection.

3. **Voltage Tester**: Safety first! A non-contact voltage tester will help you confirm that the power is off in the circuit you’ll be working on. This tool is invaluable for preventing electrical shocks.

4. **Pliers**: Needle-nose pliers are particularly useful for grasping and twisting wires together. They provide the leverage needed to secure wire nuts tightly.

5. **Ladder**: Depending on the height of your ceiling, a sturdy ladder will give you safe access to the area where the light fixture will be installed. Ensure it’s stable and positioned on a level surface.

6. **Tape Measure**: To ensure your new light fixture is installed at the right height and distance from walls or furniture, a tape measure is indispensable. Proper measurements will enhance both functionality and aesthetics.

7. **Level**: For fixtures that need to be hung in a straight line or at a specific angle, a level is essential. This tool helps you achieve that perfect alignment that makes a significant difference in the overall look.

8. **Safety Goggles and Gloves**: Protecting yourself during installation is paramount. Safety goggles will shield your eyes from debris, while gloves can prevent cuts and scrapes when handling tools and fixtures.

With these tools in hand, you’re well-equipped to tackle the installation of your new light fixture. Take a moment to familiarize yourself with each tool before you begin, ensuring that the installation process goes as smoothly as possible. Remember, preparation is key to a successful and safe lighting upgrade!

4. Safety First: Precautions Before You Start

Before diving into the exciting process of installing your new light fixture, it’s crucial to prioritize safety. Working with electricity can pose risks, but with the right precautions, you can ensure a smooth and safe installation. Here’s how to prepare yourself and your workspace.

### Turn Off the Power

The first step is to locate your circuit breaker and turn off the power to the area where you’ll be working. This is non-negotiable. No matter how tempting it may be to just “get it done quickly,” working with live wires is dangerous. After you’ve flipped the switch, double-check your work by testing the existing light fixture with a voltage tester to confirm that the power is indeed off.

### Gather the Right Tools

Having the proper tools on hand not only makes the job easier but also safer. Ensure you have a sturdy ladder, screwdrivers (both flathead and Phillips), wire strippers, pliers, and electrical tape. A safety goggles and rubber-soled shoes can also provide added protection, helping you to avoid slips and falls while working at height.

### Wear Protective Gear

Consider wearing protective gear such as gloves and safety glasses. Gloves will help prevent any cuts or scrapes from sharp edges, while safety glasses will protect your eyes from dust and debris. If you’re sensitive to dust or allergens, a mask can also come in handy, especially if you’re working in an older home.

### Assess Your Environment

Take a moment to assess your workspace. Make sure the area is well-lit, free of clutter, and that you have enough space to maneuver safely. If you’re using a ladder, ensure it’s placed on stable ground and is fully extended. A clean and organized environment will help you focus on the task at hand and reduce the risk of accidents.

### Read the Instructions

Before you start, carefully read the manufacturer’s instructions that come with your new light fixture. These guidelines often include specific safety tips and installation procedures tailored to the product, ensuring that you’re following the best practices for your particular fixture.

By taking these safety precautions seriously, you set the stage for a successful lighting installation. With the power off and your workspace prepared, you’re ready to transform your space and brighten your home with that stunning new fixture!

5. Turning Off the Power: Locating Your Circuit Breaker

How to install a new light fixture?
Credit : whatcanu.com

Before you embark on the journey of installing your new light fixture, one crucial step stands between you and a successful installation: turning off the power. Ensuring your safety is paramount, and the first order of business is to locate your circuit breaker. This compact yet powerful box, often found in a basement, utility room, or closet, is the heart of your home’s electrical system.

To find your circuit breaker, start by identifying the area of your home where the electrical panel resides. It’s typically a gray or metallic box mounted on the wall, featuring a door that swings open to reveal a series of switches or breakers. Each of these controls a specific area or circuit in your home, so it’s important to take a moment to familiarize yourself with its layout.

Once you’ve located your circuit breaker, open the door and inspect the switches. Look for a switch labeled for the room or area where you’ll be working—often, the labels will indicate which lights or outlets each breaker controls. If your circuit breaker doesn’t have clear labels, don’t worry; you can always turn off the main power switch to ensure all electricity is cut off, although this will affect the entire house.

After identifying the correct breaker, firmly switch it to the “off” position. It’s a good idea to keep a flashlight handy in case your workspace becomes dark during this process. To further ensure your safety, use a voltage tester to double-check that the power is indeed off before proceeding with the installation. By taking these precautions, you’re not only protecting yourself but also setting the foundation for a smooth and successful light fixture installation. Now that you’ve responsibly turned off the power, you’re ready to move on to the next steps in illuminating your space!

6. Removing the Old Light Fixture: Step-by-Step Instructions

Removing the old light fixture is a crucial step in your lighting upgrade journey. To begin, ensure your safety by turning off the power at the circuit breaker. This eliminates the risk of electric shock while you work. Once the power is off, it’s time to gather your tools—typically, you’ll need a screwdriver, a voltage tester, and possibly a ladder if the fixture is out of reach.

Next, use the voltage tester to double-check that the power is indeed off. Test the wires connected to the old fixture; if the tester lights up, turn off the power again and revisit your connections. Safety first!

Now, carefully remove the light bulb(s) from the old fixture. If your fixture has a globe or shade, gently unscrew or unclip it to avoid any breakage. With the shade removed, you should have clear access to the fixture’s mounting screws. Loosen these screws with your screwdriver, being cautious not to drop them.

Once the screws are removed, you can gently pull the fixture away from the ceiling. As you do so, take a moment to examine the wiring. You’ll typically find two or three wires: a black (or red) wire for the hot connection, a white wire for the neutral, and a green or bare wire for the ground. Carefully detach these wires by unscrewing the wire nuts or by unclipping them, making sure to note where each wire was connected to facilitate the installation of your new fixture.

After removing all connections, set the old fixture aside. Take a moment to clean the area around the electrical box, as dust and debris can accumulate over time. With the old fixture out of the way, you’re now ready to move on to the next step—installing your brand-new light fixture and transforming your space!

7. Preparing the Electrical Wiring for the New Fixture

How to install a new light fixture?
Credit : whatcanu.com

Before diving into the installation of your stunning new light fixture, it’s crucial to ensure that the electrical wiring is properly prepared. This step is foundational for the safety and functionality of your lighting, so take your time and follow these guidelines closely.

First, turn off the power at the circuit breaker to prevent any accidents while you work. It’s wise to use a voltage tester to double-check that the power is indeed off before touching any wires. Safety first!

Once you’ve confirmed the power is off, remove the old fixture, taking care to document how the existing wiring is connected. This will serve as a reference when you install the new fixture. With the old fixture detached, you’ll need to assess the existing wiring. Look for any signs of fraying, discoloration, or damage; if you notice anything concerning, it’s best to call a professional electrician to address these issues.

Next, prepare the wires for your new fixture. Strip about half an inch of insulation from the ends of the wires using wire strippers, being careful not to cut into the copper strands. You should see three types of wires: the hot wire (typically black or red), the neutral wire (usually white), and the ground wire (green or bare). If your new fixture comes with a ground wire, ensure it’s securely connected to the fixture’s ground point.

Finally, if your new light fixture requires a different setup (like a different number of wires or connections), refer to the manufacturer’s instructions. Each fixture may have unique requirements, so it’s essential to follow their guidelines for optimal performance and safety.

With the electrical wiring properly prepared, you’re now ready to proceed to the installation of your new light fixture, bringing you one step closer to illuminating your space beautifully!

8. Installing the New Light Fixture: A Detailed Guide

Now that you’ve safely removed the old fixture and prepared the electrical connections, it’s time to dive into the exciting part: installing your new light fixture! This step is where your vision for an illuminated space truly begins to take shape. Follow these detailed instructions to ensure a smooth installation process.

**1. Gather Your Tools and Materials:**
Before you start, make sure you have all the necessary tools at hand. You’ll need a screwdriver (both flat-head and Phillips), wire strippers, pliers, and a voltage tester. Additionally, have your new light fixture, mounting hardware, and wire nuts ready. It’s always a good idea to double-check that you have everything within reach so you won’t be scrambling mid-installation.

**2. Prepare the Fixture:**
Unbox your new light fixture and read through the manufacturer’s instructions. Many fixtures come with specific mounting hardware and installation guides tailored to their design. Familiarize yourself with these details and ensure you have all the components needed for assembly. If your fixture has adjustable arms or shades, now is the time to set them up according to your design preference.

**3. Connect the Wiring:**
Carefully lift the new fixture up to the ceiling bracket, aligning it with the electrical box. The colors of the wires will guide you: typically, the black or red wire is the hot wire, the white wire is neutral, and the green or bare wire is the ground. Using wire strippers, strip about half an inch of insulation off the ends of each wire. Twist together the corresponding wires—black to black, white to white, and ground to ground—using wire nuts to secure them firmly. Make sure there are no exposed wire ends, as this can cause a short circuit.

**4. Secure the Fixture:**
Once the wiring is connected, carefully tuck the wires back into the electrical box, ensuring they are not pinched or strained. Line up the fixture with the mounting bracket and secure it in place using the provided screws. If your fixture has a canopy, ensure it covers the junction box neatly and is level for a polished look.

**5. Attach Bulbs and Shades:**
After securing the fixture, it’s time to attach any light bulbs and shades as per your design. Be sure to use the correct wattage as specified by the manufacturer. If your fixture includes decorative elements or diffusers, follow the included instructions to attach these components seamlessly.

**6. Turn On the Power:**
With everything securely in place, it’s time to restore power to the circuit. Head back to your circuit breaker and switch the power back on. Before flipping the switch to test your new light fixture, double-check that everything is securely installed to avoid any accidents.

**7. Enjoy Your New Illumination:**
Finally, flip the switch and bask in the glow of your newly installed light fixture! Take a moment to admire how it transforms your space, creating both functionality and style. If necessary, adjust the fixture’s positioning or shades to achieve the desired ambiance.

By following these detailed steps, you can confidently install your new light fixture, bringing a fresh brilliance to your home. Remember, the right lighting can dramatically affect your space, enhancing both its beauty and functionality. Happy illuminating!

9. Connecting the Wires: Color-Coding and Techniques

When it comes to connecting the wires of your new light fixture, understanding color-coding and employing proper techniques is crucial for both functionality and safety. Before diving into the process, ensure you have the right tools at hand: wire strippers, electrical tape, and a voltage tester.

Begin by identifying the wires in your ceiling and the ones attached to your new fixture. Typically, you’ll encounter three types: black (or red) for the hot wire, white for the neutral wire, and green or bare for the ground wire. The black wire carries electricity from the power source, while the white wire returns the current back to the panel. The ground wire is a safety feature, redirecting any stray electricity to prevent shocks.

Once you’ve confirmed the proper identification of each wire, it’s time to prepare them for connection. Use your wire strippers to carefully remove about half an inch of insulation from the ends of each wire. Be cautious not to nick the wire itself, as this could compromise its integrity.

Next, align the corresponding wires from your fixture with those from the ceiling. Start with the black (or red) wires—twist them together clockwise until they are tightly secured. Follow this by connecting the white wires in the same manner. For the ground wires, if your fixture has a green or bare wire, connect it to the ground wire in the ceiling. If there is no ground wire present, you can attach the ground wire from the fixture to the mounting bracket of the light fixture, ensuring it has a solid connection.

After making all the connections, wrap each twisted pair with electrical tape to provide an extra layer of insulation and protection. This step is vital; it not only safeguards against potential short circuits but also ensures longevity for your connections.

Once everything is securely fastened and taped, gently tuck the wires back into the electrical box, taking care not to pinch or strain any of the connections. Finally, attach the light fixture to the mounting bracket according to the manufacturer’s instructions. With the wiring complete, you’re ready to restore power and see your new light fixture illuminate your space beautifully!

10. Securing the Fixture: Ensuring Stability and Safety

Securing the fixture is a crucial step in the installation process, as it directly impacts both the stability and safety of your new lighting. A well-mounted fixture not only enhances the aesthetic appeal of your space but also prevents potential hazards, such as electrical malfunctions or falling fixtures.

Begin by carefully positioning the fixture against the ceiling, aligning it with the electrical box. Make sure you have a clear view of the mounting bracket, which will serve as the anchor for your light. Most fixtures come with a mounting plate that requires you to attach it securely to the electrical box using the provided screws. It’s essential to use the correct screws that match the size and type of your electrical box—typically, these will be either 1″ or 2″ screws for standard installations.

Once the plate is in place, gently pull the fixture’s wiring through the center opening of the mounting bracket. Before proceeding, double-check that all wires are properly connected and insulated to avoid any risk of short-circuiting. Follow the manufacturer’s instructions to ensure that each wire is attached correctly: black to black (or live), white to white (or neutral), and green or copper to the grounding wire.

After securing the wiring, it’s time to attach the fixture to the mounting bracket. Depending on your light fixture, you may need to tighten screws or use clips to hold it firmly in place. Be sure to give the fixture a gentle tug once it’s installed to confirm that it is securely fastened.

Finally, always take a moment to step back and visually inspect your work, ensuring that the fixture is level and appropriately aligned. A well-secured light fixture not only looks professional but also contributes to a well-lit, safe environment in your home. With your fixture firmly in place, you are now ready to restore power and enjoy the warm glow of your newly installed lighting.

11. Turning the Power Back On: Testing Your New Light Fixture

After you’ve diligently followed each step of the installation process, it’s finally time for the moment of truth: turning the power back on and testing your new light fixture. This is where all your hard work pays off, and the excitement of seeing your space illuminated in a fresh, new way comes to life.

Before flipping the switch, take a moment to ensure everything is in order. Double-check that all wires are securely connected, and the fixture is firmly mounted. Safety first! Once you’re satisfied that everything looks good, it’s time to restore power. Head back to your circuit breaker and flip the switch for the corresponding room.

With your heart racing in anticipation, return to the light fixture. Take a deep breath, and reach for the light switch. As you flick it on, pay close attention to how the new fixture responds. Does it illuminate instantly with a warm glow, or is there a flicker of hesitation? If the light turns on as expected, you’ll likely feel a rush of satisfaction.

However, if it doesn’t light up, don’t panic! This could simply be a matter of a loose connection or an incorrect wiring setup. Turn the power off again, and carefully revisit your wiring connections, ensuring that each wire is tightly secured and in the right place.

Once you’ve confirmed that everything is as it should be, restore the power once more. When you finally flip that switch again, and the room is bathed in beautiful light, relish in your accomplishment. You’ve successfully transformed your space and created a welcoming atmosphere with your new light fixture! Take a moment to appreciate how the fixture enhances the overall aesthetic of the room and consider how it will impact your daily life. Whether it’s brightening up a cozy reading nook or providing essential light in a functional workspace, your new fixture is sure to make a significant difference.

12. Adjusting Light Levels: Dimming Options and Bulb Choices

When it comes to setting the perfect ambiance in your space, adjusting light levels is a pivotal consideration that should not be overlooked. The right lighting can dramatically transform a room, setting the mood for relaxation, productivity, or social gatherings. To achieve this, you have a variety of dimming options and bulb choices at your disposal.

**Dimming Options:**
Installing a dimmer switch is one of the simplest ways to gain control over your lighting. These devices allow you to adjust the brightness of your fixtures, giving you the flexibility to create the perfect environment for any occasion. Modern dimmers come in various styles, including rotary, slide, and smart dimmers that can be controlled via smartphone apps or voice commands. When choosing a dimmer, ensure it is compatible with the type of bulbs you plan to use, as traditional incandescent bulbs work well with most dimmers, while LED and CFL bulbs may require specific dimmable versions.

**Bulb Choices:**
The next step in adjusting light levels is selecting the right bulbs for your fixtures. LED bulbs are a popular choice due to their energy efficiency and long lifespan. They come in a variety of color temperatures, ranging from warm white (2700K) to cool daylight (5000K), allowing you to tailor the light to suit your space. For a cozy atmosphere, opt for warm white bulbs in living rooms and bedrooms. Conversely, brighter, cooler bulbs work well in kitchens and workspaces where clarity and focus are essential.

You might also explore smart bulbs that allow you to change colors and dimming levels directly from your smartphone or through voice commands. This versatility not only adds convenience but also allows for dynamic changes in your space, making it easy to adapt to different activities or moods.

By thoughtfully selecting your dimming options and bulb choices, you can illuminate your space in a way that enhances its beauty and functionality, bringing warmth and life to your home. With this combination, you’re well on your way to creating a lighting scheme that is both practical and visually appealing, ensuring that your new light fixture becomes a stunning focal point for years to come.

13. Common Mistakes to Avoid During Installation

When embarking on the journey of installing a new light fixture, it’s essential to be aware of potential pitfalls that can turn an exciting project into a frustrating ordeal. Here are some common mistakes to avoid, ensuring your installation goes smoothly and safely.

**1. Skipping the Safety Check:** Before you even think about unscrewing that old fixture, make sure to turn off the power at the circuit breaker. Many DIY enthusiasts underestimate the importance of this step. Forgetting to shut off the power could lead to serious injuries or even electrocution. Always double-check with a voltage tester to confirm that the wires are dead before touching them.

**2. Ignoring the Weight Limit:** Every light fixture has a weight limit determined by the mounting hardware and ceiling structure. Overloading can lead to sagging, or worse, the entire fixture falling off the ceiling. Always check the specifications of both your light fixture and the mounting bracket to ensure they are compatible and secure.

**3. Neglecting the Right Tools:** Using the wrong tools can lead to stripped screws, damaged wires, or even injury. Ensure you have all the necessary tools on hand—screwdrivers, wire strippers, pliers, and a ladder—and that they are in good condition. Investing in a quality toolkit can save you time and headaches during the installation process.

**4. Poor Wire Connections:** One of the most critical aspects of installing a light fixture is making secure wire connections. Many DIYers make the mistake of simply twisting wires together without properly securing them with wire nuts or electrical tape. Loose connections can lead to flickering lights, short circuits, or fire hazards. Always ensure that your wires are tightly twisted and that wire nuts are firmly in place.

**5. Not Considering Placement:** Before you mount your new light fixture, take a moment to think about its placement. Is it centered over a dining table, or is it providing adequate illumination for a workspace? Failing to consider the fixture’s functionality and aesthetics can leave your space poorly lit or looking unbalanced.

**6. Overlooking the Final Touches:** Once your fixture is installed, don’t rush to turn on the power. Take a moment to tidy up any visible wires, making sure everything is neatly tucked away and secured. Then, step back and admire your work. A well-installed fixture not only illuminates your space but can also serve as a stunning focal point.

By steering clear of these common mistakes, you’ll set yourself up for a successful light fixture installation. With careful planning and attention to detail, you’ll create a beautifully lit space that enhances your home’s ambiance.

14. Maintaining Your Light Fixture: Tips for Longevity

Once you’ve successfully installed your new light fixture, the next crucial step is ensuring its longevity through proper maintenance. A well-cared-for light fixture not only enhances the aesthetic of your space but also functions efficiently over time. Here are some practical tips to keep your fixture shining bright for years to come.

### Regular Dusting and Cleaning

Dust and grime can accumulate on light fixtures, dulling their shine and affecting their performance. Make it a habit to dust your fixture regularly with a soft, dry cloth. For more thorough cleaning, turn off the power and use a damp cloth or sponge with mild soap to gently wipe down surfaces. Be sure to avoid harsh chemicals that can damage finishes or materials. For intricate designs, a soft-bristle brush can help reach those tricky crevices.

### Check and Replace Bulbs as Needed

Regularly check the bulbs in your light fixture to ensure they are functioning correctly. If you notice any flickering or dimming, it might be time to replace them. When replacing bulbs, opt for those recommended by the manufacturer to maintain compatibility. Consider energy-efficient LED bulbs, which not only last longer but also reduce your energy consumption.

### Inspect Electrical Connections

While you shouldn’t need to frequently tamper with the electrical components, it’s wise to conduct periodic inspections. Look for signs of wear, such as frayed wires or loose connections. If you’re unsure, don’t hesitate to call a professional electrician to ensure everything is safe and secure.

### Avoid Overloading Circuits

Be mindful of the wattage limitations specified for your fixture. Overloading can lead to overheating, potentially causing damage to both the fixture and your home’s electrical system. Always adhere to the manufacturer’s recommendations and consider the total wattage of all bulbs used.

### Store Seasonal Decorations Safely

If your light fixture accommodates seasonal decorations, like hanging ornaments or garlands, ensure they’re stored safely when not in use. Avoid placing heavy items that could stress the fixture or wires. When decorating, use lightweight materials that won’t compromise the integrity of the fixture.

### Schedule Professional Maintenance

For complex fixtures, especially those that require specialized cleaning or maintenance, consider scheduling an annual check-up with a professional. They can offer insights and services that ensure your fixture remains in top condition.

By incorporating these maintenance tips into your routine, you’ll not only enhance the beauty of your space but also extend the lifespan of your light fixture. A little care goes a long way in keeping your lighting sparkling and functional!

15. Conclusion: Enjoying Your Newly Illuminated Space

As you stand back and admire your newly installed light fixture, there’s a palpable sense of satisfaction that envelops the room. The warm glow fills the space, transforming dull corners into inviting areas, and highlighting the unique features of your décor. Whether you chose a sleek modern pendant light or a vintage-inspired chandelier, the right fixture not only serves a functional purpose but also acts as a statement piece that reflects your personal style.

Now that the installation process is behind you, take a moment to revel in this achievement. Consider how the new lighting enhances the ambiance of your home — perhaps it creates a cozy reading nook in the living room, a stimulating workspace in your office, or a romantic setting in your dining area. The possibilities are endless, and the impact of good lighting cannot be overstated.

Don’t forget to experiment with different bulb types and brightness levels to find the perfect balance for your space. Dimming capabilities can further elevate the atmosphere, allowing you to adjust the mood according to the time of day or occasion. Plus, with the right maintenance, your fixture will continue to shine brightly for years to come.

In conclusion, installing a new light fixture is more than just a home improvement task; it’s an opportunity to express your creativity and enhance your living environment. Enjoy the newfound brightness and warmth in your space, and let your beautifully illuminated home inspire you and your guests for many gatherings to come. Embrace the change, and let the light guide you through those cozy evenings and vibrant days ahead.

As we conclude our step-by-step guide to installing a new light fixture, we hope you feel empowered to transform your space with the perfect illumination. Whether you’re updating a single room or enhancing your entire home, the right light fixture can dramatically alter the ambiance and functionality of your environment. By following the tips and techniques outlined in this post, you can confidently tackle this DIY project, bringing both style and brightness to your living areas. Remember, lighting is more than just a practical necessity; it’s an opportunity to express your personal taste and create a welcoming atmosphere. So gather your tools, unleash your creativity, and let your space shine like never before! We can’t wait to see the stunning results of your efforts—don’t forget to share your transformation with us!

How to create a stylish and functional mudroom?

Your entryway is the first impression of your home, and it sets the tone for what lies beyond.

Yet, it often becomes a cluttered catch-all for shoes, bags, jackets, and everything in between. Enter the mudroom—a stylish and functional solution that not only enhances your home’s aesthetic but also streamlines everyday living. Imagine a dedicated space where organization meets design, offering a perfect blend of practicality and elegance. In this blog post, we will explore innovative ideas and essential tips for transforming your entryway into a welcoming mudroom. From chic storage solutions to eye-catching decor, discover how to create a space that captures your personal style while keeping chaos at bay. Say goodbye to the disarray and hello to a beautifully organized space that greets you with warmth and functionality every time you step through the door!

1. Understanding the Purpose of a Mudroom

How to create a stylish and functional mudroom?
Credit : whatcanu.com

When it comes to designing a stylish and functional mudroom, the first step is to understand its purpose and how it can serve your household. A mudroom is more than just a transitional space; it’s the first line of defense against the chaos that can accompany daily life. This area acts as a buffer zone between the outdoors and your home, providing a designated spot for shoes, coats, bags, and other items that can clutter your living space.

At its core, a mudroom is a practical solution to organizing your family’s essentials. It’s where muddy boots can be shed, wet umbrellas can be hung, and the dog can be wiped down after a romp in the rain. However, the mudroom can also be an inviting and stylish space that reflects your personal aesthetic. Consider how you want this area to function based on your lifestyle: will it need to accommodate sports equipment, children’s backpacks, or even pet supplies?

A well-designed mudroom can include features such as built-in benches for comfortable seating while putting on or removing shoes, ample storage options like cabinets and cubbies for easy access to frequently used items, and durable materials that can withstand the wear and tear of daily use.

By understanding the unique role a mudroom plays in your home, you can create a space that not only meets your practical needs but also enhances your overall entryway aesthetic. This thoughtful design approach will ensure that your mudroom becomes a harmonious blend of functionality and style, making it a welcoming space for family and guests alike.

2. Essential Features of a Functional Mudroom

When designing a mudroom, the goal is to create a space that is not only stylish but also highly functional, catering to the needs of your household while standing up to the demands of daily life. Here are some essential features that will elevate your mudroom from a simple entryway to a pivotal part of your home.

**1. Ample Storage Solutions:**
At the heart of any functional mudroom is storage. Consider incorporating built-in cabinetry, open shelving, and hooks at varying heights to accommodate everyone in the family. A designated space for shoes, coats, bags, and sports equipment helps keep clutter at bay. Bench seating with hidden storage compartments can provide a convenient spot to sit and put on or remove shoes while keeping essentials organized.

**2. Durable Flooring:**
Mudrooms see a lot of traffic and can quickly become dirty or worn. Opt for durable flooring materials that can withstand mud, water, and heavy foot traffic. Tiles, vinyl, or luxury vinyl planks are excellent choices since they are easy to clean and can resist stains. Additionally, consider adding a large area rug or runner that can be easily washed to enhance comfort and style.

**3. Easy-to-Clean Surfaces:**
Choose materials that are easy to maintain. For example, wall panels or beadboard can add charm while protecting your walls from scuffs and dirt. Select paint finishes that are washable, and consider using a backsplash behind storage areas to make clean-up simple.

**4. Hooks and Racks:**
Incorporate a variety of hooks and racks to simplify the process of putting items away. Wall-mounted hooks can offer a designated space for coats and bags, while pegboards can hold hats, scarves, and other accessories. Think about adding a chalkboard or whiteboard for reminders and notes—a small touch that can make a big difference in organization.

**5. Good Lighting:**
A well-lit mudroom is essential, especially during the darker months of the year. Natural light is ideal, so if possible, include a window or a glass door to brighten the space. Additionally, overhead lighting combined with task lighting can ensure all corners are well-illuminated, making it easier to locate items and navigate the area, even on the dreariest days.

**6. Personal Touches:**
Finally, don’t forget to add personal touches that reflect your style and make the space welcoming. Consider decorative storage bins, a stylish mirror, or artwork that complements your home’s overall aesthetic. These details will not only enhance the functionality of your mudroom but also make it a pleasant entry point that sets the tone for your home.

By integrating these essential features into your mudroom design, you’ll create a space that is not only practical but also a stylish reflection of your personal taste. A well-thought-out mudroom can streamline your daily routine, making it easier for you and your family to transition from the great outdoors to the comfort of home.

3. Choosing the Right Location for Your Mudroom

How to create a stylish and functional mudroom?
Credit : whatcanu.com

Selecting the ideal location for your mudroom is a pivotal step in achieving both style and functionality in your entryway transformation. The right placement can significantly enhance the efficiency of your home’s flow while providing a seamless transition from the outdoors to the indoors.

First, consider the foot traffic patterns in your home. A mudroom situated near the main entrance or garage is often the most practical choice, allowing for easy access when coming in from outdoor activities or errands. This placement minimizes the mess that can accumulate in other areas of your home, creating a dedicated space for dropping off shoes, coats, and sports gear.

If you have a busy household with children or pets, a mudroom near the kitchen or laundry room can be particularly advantageous. This setup allows for quick clean-ups and makes it easier to manage laundry and storage needs. Additionally, incorporating a separate entrance for guests can help maintain cleanliness within your main living areas, ensuring that muddy shoes and wet umbrellas don’t disrupt your home’s aesthetic.

Consider the natural light available in your chosen spot, too. A mudroom with windows can create an inviting atmosphere, making it a pleasant space to enter after a long day. If natural light is limited, thoughtful lighting design—such as pendant lights or wall sconces—can create a warm and welcoming environment.

Finally, think about your home’s overall layout and design. The mudroom should harmonize with your existing decor while providing a functional area that meets your family’s specific needs. Whether you envision a rustic charm with wooden benches and hooks or a sleek modern design with built-in storage, the location of your mudroom sets the stage for the aesthetic and functionality you desire.

By carefully selecting the right location, you’ll ensure that your mudroom not only serves its purpose effectively but also enhances the overall appeal of your entryway, making it a stylish and welcoming introduction to your home.

4. Design Styles: Traditional vs. Modern Mudrooms

When it comes to mudroom design, the choice between traditional and modern styles can significantly influence the overall aesthetic and functionality of your entryway. Understanding the nuances of both styles will help you create a space that not only meets your practical needs but also complements your home’s architecture and interior decor.

**Traditional Mudrooms** exude warmth and charm, often characterized by rich wood finishes, classic moldings, and an inviting color palette. These spaces typically feature built-in benches with plush cushions, ornate cabinetry, and decorative hooks for hanging coats and bags. To enhance the traditional vibe, consider incorporating wainscoting, beadboard details, and vintage-inspired lighting fixtures. Accessories like woven baskets or antique storage trunks can add an extra layer of character, making your mudroom feel like a cozy extension of your home. The overall effect is a space that welcomes guests and family alike, providing a sense of nostalgia and comfort.

On the other hand, **Modern Mudrooms** focus on sleek lines, minimalism, and functionality. This style often employs a neutral color scheme with pops of bold accents, utilizing materials such as metal, glass, and smooth finishes. Open shelving, modular storage units, and built-in benches with hidden compartments are hallmark features of a modern mudroom, designed to maximize space and organization. Large windows or glass doors can enhance natural light, making the area feel more open and airy. Incorporating smart technology, like automated lighting or climate control, can also elevate the functionality of a modern mudroom, catering to the needs of today’s busy lifestyles.

Ultimately, the choice between traditional and modern mudroom designs comes down to personal preference and the overall style of your home. Whether you lean towards the timeless elegance of traditional aesthetics or the sleek, functional appeal of modern design, both styles offer unique opportunities to create a welcoming and efficient entryway that sets the tone for the rest of your living space. Embrace your individual style and let your mudroom reflect who you are, while also serving as a practical hub for everyday life.

5. Color Schemes and Materials for a Stylish Entryway

How to create a stylish and functional mudroom?
Credit : whatcanu.com

When it comes to transforming your entryway into a stylish and functional mudroom, choosing the right color schemes and materials plays a pivotal role in setting the tone of the space. The entryway is the first impression guests receive of your home, so it’s essential to create an inviting and cohesive look that reflects your personal style.

Start by considering a color palette that harmonizes with the rest of your home. Soft, neutral shades—such as warm whites, gentle grays, or soothing beiges—can create a serene atmosphere, allowing natural light to bounce around the space. For those who crave a bit more personality, pops of color in accents like bold hooks or a vibrant runner can make a striking statement without overwhelming the area. Deep blues or rich greens can evoke a sense of calm, while sunny yellows or cheerful corals can inject energy into the space.

Materials also play a crucial role in both aesthetics and functionality. Opt for durable and easy-to-clean surfaces that can withstand the wear and tear of daily use. For flooring, consider options like ceramic tiles or luxury vinyl planks that mimic wood but offer superior durability against mud and moisture. If you prefer warmth underfoot, natural wood can add a rustic charm, but be sure to treat it with a water-resistant finish.

Walls provide another opportunity to express style; shiplap or beadboard can add texture and character, while washable paint allows for easy maintenance. For storage solutions, select materials that blend seamlessly with your design scheme. Woven baskets or fabric bins can add a cozy, casual touch, while metal shelving units provide a modern edge.

Ultimately, a well-thought-out color scheme paired with practical materials will not only enhance the beauty of your entryway but also create a welcoming and functional space that makes a lasting impression. Whether you opt for a minimalist design or a bold and eclectic mix, the right choices will ensure your mudroom is as stylish as it is practical.

6. Maximizing Space: Storage Solutions for Small Mudrooms

When it comes to small mudrooms, every square inch counts. Maximizing space while maintaining a stylish aesthetic can be a delightful challenge that enhances both functionality and design. To begin with, consider vertical storage solutions that draw the eye upward and utilize wall space effectively. Tall shelving units or floating shelves can provide ample room for hats, gloves, and seasonal accessories, while also showcasing decorative elements like plants or framed photos.

Incorporate multifunctional furniture to make the most out of limited space. A bench with built-in storage can serve as both a place to sit while removing shoes and a discreet spot for storing boots, bags, or sports equipment. Look for stylish bins or baskets that fit neatly underneath the bench, keeping clutter at bay while adding a touch of texture and warmth.

Hooks are another essential element in a small mudroom. Opt for an array of hooks at different heights to accommodate family members of all ages, and consider installing a stylish pegboard or a magnetic board for even more versatility. You can personalize this space with colorful hooks or fun designs that reflect your style.

Don’t forget about the importance of lighting in making a small space feel larger and more inviting. A well-placed mirror can help to bounce light around the room, creating an illusion of depth, while pendant lights or wall sconces can add both style and functionality.

Finally, embrace a cohesive color palette and decorative elements that unify the space. Soft, light colors can open up the area, while thoughtful accents like a chic rug or artwork can inject personality.

By thoughtfully integrating these storage solutions and design strategies, your small mudroom can become a stylish and functional entryway that welcomes you home while keeping the chaos of daily life organized and at bay.

7. Must-Have Furniture and Accessories

How to create a stylish and functional mudroom?
Credit : whatcanu.com

When it comes to designing a mudroom that is both stylish and functional, selecting the right furniture and accessories is key. A well-curated selection can elevate your entryway from a mere transitional space to a welcoming and organized hub for your home. Here are some must-have items that blend practicality with aesthetics.

**1. Storage Benches:** A storage bench is a versatile piece that serves multiple purposes. It provides a comfortable spot to sit while putting on or taking off shoes, while also offering hidden compartments for stashing away miscellaneous items like gloves, scarves, or dog leashes. Opt for a bench with a cushion in a durable fabric to ensure it withstands daily use while adding a touch of comfort.

**2. Hooks and Racks:** Wall-mounted hooks or racks are essential for keeping coats, bags, and hats easily accessible. Choose hooks that complement your décor style—rustic wooden hooks for a farmhouse vibe or sleek metal designs for a modern look. A combination of various hook sizes can accommodate items of different shapes and lengths, maximizing your storage potential.

**3. Baskets and Bins:** Incorporating stylish baskets and bins can help maintain order in your mudroom. Use them to corral items like shoes, sports equipment, or outdoor gear. Woven baskets in natural fibers offer a cozy, textured look, while sleek plastic or fabric bins can provide a more contemporary feel. Labeling each basket not only enhances organization but also adds a personal touch.

**4. Shelving Units:** Open shelving can showcase decorative items while providing additional storage space. Use shelves to display potted plants, family photos, or decorative boxes. They can also serve as a perfect spot for items you need to grab on the go, such as sunglasses or keys. If space allows, consider a tall shelving unit that draws the eye upward, making the entryway feel larger and more inviting.

**5. Area Rugs:** A stylish area rug can anchor your mudroom, adding warmth and color to the space. Choose a durable, easy-to-clean material that can handle dirt and moisture. A patterned rug can also help camouflage stains, while solid colors can create a clean, modern look. Make sure it fits well within the space, allowing easy movement in and out.

**6. Mirror:** A mirror is not just a functional item; it can also make your mudroom feel larger and brighter. Adding a mirror above the storage bench or hooks can give a quick check before heading out the door, ensuring you always look your best. Choose a frame that complements the overall design theme of your home—whether it’s rustic, modern, or traditional.

By thoughtfully selecting these key furniture pieces and accessories, you can design a mudroom that is not only stylish but also serves as an efficient gateway into your home. This space can become a seamless blend of function and design, inviting both family and guests to feel at ease as they step inside.

8. Practical Flooring Options for High-Traffic Areas

When designing a mudroom, choosing the right flooring is crucial, especially in high-traffic areas where dirt, moisture, and wear and tear are inevitable. You want flooring that not only enhances the aesthetic appeal of your entryway but also withstands the daily hustle and bustle of family life. Here are some practical flooring options that strike the perfect balance between style and functionality.

**1. Luxury Vinyl Plank (LVP):** One of the most popular choices for mudrooms, luxury vinyl planks mimic the look of hardwood but offer superior durability and water resistance. They are easy to clean, resistant to scratches, and can withstand the scuffs and stains that come with muddy shoes and wet umbrellas, making them an ideal option for busy households.

**2. Porcelain Tile:** Known for its durability and water resistance, porcelain tile is another excellent choice for high-traffic areas. Available in a plethora of colors, sizes, and patterns, it can be styled to suit any decor—from rustic farmhouse to sleek modern. Additionally, tiles can be placed with a textured finish to provide extra grip, enhancing safety in case of spills.

**3. Laminate Flooring:** Offering a budget-friendly option, laminate flooring is designed to mimic hardwood or stone while providing a robust surface that resists scratches and stains. With advancements in technology, laminate can now provide a realistic wood look while being easy on the wallet. It’s also quick to install, making it a practical choice for a swift remodel.

**4. Natural Stone:** For those looking to add a touch of luxury, natural stone such as slate or travertine can create a stunning entryway. While they offer high durability, it’s important to consider that they require proper sealing to protect against moisture and stains. The unique textures and colors of natural stone can elevate the look of your mudroom, making it a statement piece in your home.

**5. Rubber Flooring:** Ideal for those who prioritize functionality, rubber flooring is exceptionally durable and easy to clean. It offers excellent traction, making it a safe choice in wet conditions. Available in various colors and patterns, rubber flooring can add a fun and vibrant touch to your mudroom while being practical for everyday use.

**6. Carpet Tiles:** If you desire a softer feel, consider carpet tiles that are designed for high-traffic areas. They can absorb moisture and provide warmth, making your mudroom more inviting. Plus, if a tile gets stained or damaged, you can easily replace it without needing to redo the entire floor.

When selecting flooring for your mudroom, consider the balance between aesthetics and practicality. Each of these options offers unique advantages, ensuring that your entryway remains stylish while standing up to the demands of everyday life. Choose wisely, and your mudroom will not only serve as a functional space but also a welcoming introduction to your home.

9. Lighting Ideas to Brighten Your Mudroom

When it comes to designing a stylish and functional mudroom, lighting plays a pivotal role in creating an inviting and practical space. A well-lit mudroom not only enhances the aesthetic appeal but also improves functionality, making it easier to navigate your daily routines. Here are some lighting ideas to brighten your mudroom and elevate its overall design.

**1. Layered Lighting:** Consider incorporating a mix of ambient, task, and accent lighting to achieve a well-balanced atmosphere. Start with a central overhead fixture that provides general illumination. Pendant lights or a stylish chandelier can add a touch of elegance while ensuring the room is adequately lit.

**2. Task Lighting:** Since the mudroom often serves as a transition space for activities like shoe removal or coat hanging, adding task lighting can be incredibly beneficial. Wall sconces or LED strip lights under cabinets can illuminate specific areas where you need extra light, making it easier to find what you need when you’re in a hurry.

**3. Natural Light:** If your mudroom has windows, make the most of them! Use sheer curtains or blinds that can be easily opened to allow natural light to flood the space. Sunlight not only brightens the room but also brings warmth and a sense of openness. If natural light is limited, consider installing a skylight to create a brighter and more airy feel.

**4. Decorative Fixtures:** Don’t underestimate the impact of decorative lighting. Unique light fixtures can serve as statement pieces, setting the tone for your mudroom’s design. From rustic lanterns to modern geometric designs, choose fixtures that reflect your personal style and complement the overall decor.

**5. Dimmer Switches:** For added flexibility, consider installing dimmer switches for your lighting. This allows you to adjust the brightness according to the time of day or mood, creating a cozy atmosphere when you need it, while still providing bright light when you’re engaged in tasks.

By thoughtfully selecting and layering your lighting, you can transform your mudroom into a bright, welcoming space that not only looks great but also supports your everyday activities. Whether you’re coming in from a rainy day or prepping for a busy outing, a well-lit mudroom will make every entrance a pleasant one.

10. Incorporating Personal Touches and Decor

Incorporating personal touches and decor into your mudroom is the icing on the cake that transforms it from a mere functional space into a welcoming entryway that reflects your unique personality and style. This is your opportunity to make a statement right at the threshold of your home, where practicality meets creativity.

Start by considering artwork that speaks to you—whether it’s a bold abstract piece, a collection of family photos, or a charming vintage sign, these elements can infuse the space with character. A gallery wall can be a delightful focal point, showcasing your favorite memories and adding a personal narrative to the area.

Textiles also play a crucial role in adding warmth and charm. Think about colorful area rugs, cozy throws, or stylish cushions for your seating area. These not only enhance visual appeal but also create a comfortable atmosphere for you and your guests. Opt for fabrics that are durable and easy to clean, ensuring your mudroom remains practical without sacrificing style.

Natural elements can bring a fresh and inviting vibe to your mudroom. Consider incorporating greenery with potted plants or hanging planters that thrive in lower light conditions. The vibrant touch of plants can liven up the area, making it feel more welcoming. Don’t forget practical decor items like stylish hooks for coats and bags, or decorative baskets for shoes, which can help maintain order while complementing your design theme.

Finally, personal touches like monogrammed items or custom storage solutions can add a unique flair that sets your mudroom apart. Whether it’s a bench with your family name on it or personalized labels on storage bins, these small details create a sense of belonging and make the space truly yours.

By thoughtfully incorporating decor and personal touches, your mudroom can evolve into a stylish and functional entryway that not only welcomes you home but also tells your story to all who enter.

11. Keeping It Organized: Tips for Maintenance

Once you’ve successfully designed your dream mudroom, the next step is to ensure it remains a stylish and functional space. Maintaining an organized mudroom is crucial for keeping the chaos of daily life at bay and for ensuring that it continues to serve its purpose effectively. Here are some practical tips to help you uphold the order in your mudroom while keeping it looking its best.

**1. Establish Zones:** Divide your mudroom into designated areas for different activities—like a shoe zone, a coat hanging area, and a storage zone for bags and sports gear. Clearly defining these zones helps family members know where to place items, reducing clutter and confusion.

**2. Regular Decluttering:** Schedule regular intervals, perhaps once a month, to go through your mudroom and remove items that no longer belong. This practice keeps unnecessary clutter from piling up and makes it easier to find what you need when you need it.

**3. Invest in Quality Storage Solutions:** Choose durable bins, baskets, and hooks that can withstand the wear and tear of daily use. Labeling these storage solutions can also help everyone remember where items belong, making it easier to maintain order.

**4. Use Vertical Space:** Don’t forget about the vertical space in your mudroom! Wall-mounted shelves and hooks can be fantastic for storing items off the ground. Consider installing a pegboard for hanging tools, bags, or seasonal accessories for quick access.

**5. Encourage Good Habits:** Educate your family members on the importance of keeping the mudroom tidy. Simple practices like taking off shoes at the door or hanging up coats immediately can make a significant difference in maintaining an organized space.

**6. Routine Cleanliness:** Develop a cleaning schedule that includes sweeping or vacuuming the floor, wiping down surfaces, and checking for any items that need to be returned to their rightful places. A clean mudroom not only looks good but also sets a positive tone for the rest of your home.

By implementing these maintenance tips, you can ensure that your mudroom remains a stylish and functional entryway that welcomes you and your guests with open arms—transforming the sometimes chaotic ritual of coming home into a seamless and enjoyable experience.

12. Seasonal Considerations: Adapting Your Mudroom

When it comes to designing a mudroom, seasonal considerations play a crucial role in ensuring the space remains both stylish and functional throughout the year. As the seasons change, so do the needs and activities of your household, and your mudroom should reflect these shifts accordingly.

**Spring and Summer:** During these warmer months, your mudroom can transform into a refreshing space that welcomes the outdoors. Consider incorporating lighter colors and airy fabrics to create a bright and inviting atmosphere. Use this time to add elements like wicker baskets for storing gardening tools, or hooks for hanging hats and sunglasses. You might also want to include a small bench where family members can sit while removing shoes after playing outside. A well-placed indoor plant can add a touch of life, bridging the gap between your home and nature.

**Fall:** As the weather begins to cool, it’s time to prepare your mudroom for the hustle and bustle of back-to-school activities and the impending winter. This is the perfect season to introduce cozier textiles, such as warm-toned cushions and throws for your seating area. Adding extra shoe racks or bins can help manage the influx of boots and sneakers, keeping the space organized. A dedicated area for umbrellas and raincoats will ensure that your family is ready to tackle those unpredictable autumn showers.

**Winter:** Once the cold weather sets in, your mudroom becomes a sanctuary for winter gear. Prioritize functionality by adding sturdy hooks for heavy coats, and consider investing in a boot dryer or mat to keep wet shoes from spreading mud throughout your home. This is also a great time to incorporate a decorative touch—perhaps some festive seasonal decor or a warm rug that invites guests to wipe their feet before entering. Think about adding a small table or shelf for gloves and scarves, ensuring everything has a dedicated spot and is easy to access.

By thoughtfully adapting your mudroom to reflect seasonal changes, you’ll create a space that is not only functional but also a stylish reflection of your home’s aesthetic. With careful planning, your mudroom can smoothly transition through the seasons while maintaining its purpose as the first line of defense against the elements.

13. Budgeting for Your Mudroom Transformation

Transforming your entryway into a stylish and functional mudroom is an exciting venture, but it’s essential to approach it with a well-thought-out budget. A well-planned budget not only ensures that you stay within financial limits but also allows you to allocate resources effectively for each element of your mudroom design.

Begin by assessing the available space and determining the extent of your transformation. Will you be doing a complete overhaul, or is a refresh of your existing entryway sufficient? Take the time to create a detailed list of everything you want to include—storage solutions like cubbies and hooks, seating options, flooring, lighting fixtures, and decorative elements.

Once you have your wish list, research the costs associated with each item. Consider both high-end options and budget-friendly alternatives to find a balance that suits your needs. For instance, while custom cabinetry can elevate the overall aesthetic, ready-made storage solutions or DIY options can also provide functional space without breaking the bank.

Don’t forget to factor in additional costs such as paint, hardware, and any professional services you may need, like carpentry or electrical work. Setting aside a contingency fund—typically around 10-15% of your total budget—can also be a lifesaver for unexpected expenses that may arise during the project.

By carefully budgeting for your mudroom transformation, you’ll not only create a welcoming and organized entryway but also enjoy the satisfaction of completing the project within your financial means. With a clear financial plan in place, you can focus on transforming your mudroom into a stylish and functional space that enhances your home’s overall appeal.

14. Real-Life Mudroom Makeover Examples

When it comes to mudroom makeovers, real-life transformations can serve as both inspiration and a practical guide for your own project. Let’s explore some stunning examples that beautifully blend style and functionality, showcasing how a well-designed mudroom can elevate your home’s entryway experience.

Take the Smith family’s mudroom, for instance. Once a cluttered catch-all space, they transformed it into a bright and airy haven with a coastal theme. They installed shiplap walls painted in a soft seafoam green, which instantly added a refreshing vibe. A built-in bench with cushioned seating provides a comfortable spot to slip on shoes, while open shelving above displays colorful baskets for storage. This not only keeps the space organized but also adds a pop of personality.

In another example, the Johnsons opted for a more rustic approach, incorporating reclaimed wood elements. Their mudroom features a stunning barn door that swings open to reveal a practical yet stylish area. A large wooden bench, paired with vintage hooks for coats and bags, creates an inviting atmosphere. To increase functionality, they included a durable tile floor that stands up to muddy boots while adding a chic touch with a patterned area rug.

Meanwhile, the Garcia family’s mudroom is a masterclass in maximizing limited space. Utilizing vertical storage solutions, they installed tall cabinets that reach up to the ceiling, allowing for ample storage without overcrowding the area. A narrow but stylish console table serves as a landing spot for keys and mail, while a chalkboard wall offers a space for reminders and family messages.

These real-life mudroom makeovers illustrate how thoughtful design choices can transform a utilitarian space into a stylish entryway that sets the tone for your home. Whether you’re drawn to modern minimalism, rustic charm, or practical organization, these examples provide a wealth of ideas to inspire your own mudroom transformation. Remember, the key is to blend aesthetics with functionality, ensuring your mudroom is as beautiful as it is practical for everyday use.

15. Conclusion: Creating an Inviting First Impression

In conclusion, transforming your entryway into a stylish and functional mudroom is an investment not just in your home’s aesthetics, but in the overall experience of your daily life. This often-overlooked space serves as the first point of contact for guests and family alike, setting the tone for your entire home. By carefully considering design elements such as color, materials, and layout, you can create an inviting atmosphere that welcomes visitors and provides a sense of comfort.

Imagine stepping through the door into a beautifully organized space, where every item has its place—coats hung neatly, shoes tucked away, and bags easily accessible. A well-designed mudroom enhances functionality, making those busy mornings a little less chaotic and keeping clutter at bay. It allows you to maintain a sense of order and cleanliness, even during the most hectic times.

To leave a lasting impression on your guests, incorporate personal touches like artwork, family photos, or decorative storage solutions that reflect your style and personality. Consider adding elements of greenery with indoor plants or a fresh bouquet to bring life into the space. Stylish lighting can also play a crucial role in creating a warm and inviting ambiance.

Ultimately, your mudroom should be more than just a transitional area; it should evoke a sense of welcome and harmony. As you embark on this design journey, remember that every detail counts. A well-thought-out mudroom not only enhances the functionality of your home but also elevates your entryway into a statement space that leaves a memorable first impression. Embrace the opportunity to create a mudroom that reflects your unique style while serving the practical needs of your family, ensuring that every arrival feels like a warm embrace.

In conclusion, transforming your entryway into a stylish and functional mudroom can significantly enhance both the aesthetic and practicality of your home. By carefully considering elements such as storage solutions, organization systems, and design choices, you can create a welcoming space that not only keeps clutter at bay but also reflects your personal style. Whether you opt for a minimalist approach or a cozy, family-friendly design, the key is to find a balance between form and function. As you embark on this exciting project, remember that your mudroom is the first impression your home makes, so let it shine with creativity and purpose. We can’t wait to see how you bring your vision to life—share your transformation journey with us, and let’s inspire others to create their own beautiful entryways!