What are the best tips for making delicious pasta?

There is something undeniably comforting about a plate of homemade pasta—its rich texture and fresh flavors can transform an ordinary meal into an extraordinary experience.

In a world where convenience often takes precedence, the artistry of crafting your own pasta can seem daunting, yet the rewards are immeasurable. Whether you’re twirling spaghetti around your fork or savoring the delicate folds of ravioli, mastering the art of pasta-making opens up a world of culinary creativity. In this blog post, we will share top tips that will guide you through the process of making delicious homemade pasta from scratch. From choosing the right ingredients and mastering the dough to perfecting cooking techniques and exploring inventive sauces, join us on this flavorful journey to elevate your pasta game and impress your family and friends with mouthwatering dishes that celebrate the timeless tradition of Italian cuisine.

1. Introduction to Homemade Pasta

What are the best tips for making delicious pasta?
Credit : whatcanu.com

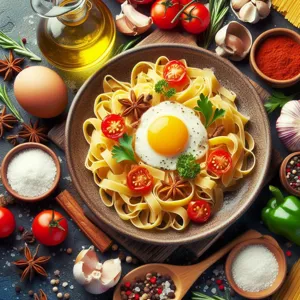
When it comes to Italian cuisine, few things evoke the same joy and satisfaction as a plate of homemade pasta. The very act of creating your own pasta from scratch transforms a simple meal into a labor of love, bringing the kitchen to life with the comforting aroma of flour and eggs blending together. Homemade pasta is not only a testament to culinary skill but also a delightful experience that allows you to connect with your food in a way that store-bought options simply cannot match.

The beauty of homemade pasta lies in its versatility. Whether you prefer the delicate strands of fettuccine, the pillowy softness of gnocchi, or the rustic charm of pappardelle, the possibilities are endless. With just a handful of basic ingredients—flour, eggs, and a pinch of salt—you can embark on a culinary adventure that will elevate your dishes and impress your family and friends.

Moreover, making pasta at home offers an opportunity to customize flavors and textures to suit your taste. Want to infuse your dough with vibrant spinach or rich beetroot? Go for it! Craving a hint of nuttiness? Try substituting some of the all-purpose flour with semolina. The process of kneading the dough, rolling it out, and cutting it into your desired shape can be incredibly therapeutic, allowing you to unleash your creativity in the kitchen.

In this guide, we will explore the essential techniques, tips, and tricks for mastering homemade pasta. From the foundational skills of mixing and kneading to the art of shaping and cooking, we will equip you with everything you need to create delectable pasta dishes that will leave your taste buds dancing. So, roll up your sleeves, dust off your countertop, and get ready to dive into the wonderful world of homemade pasta!

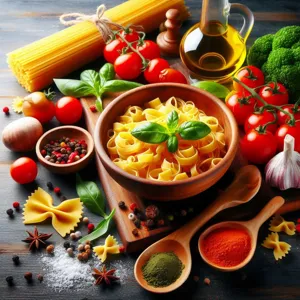
2. Essential Ingredients for Perfect Pasta

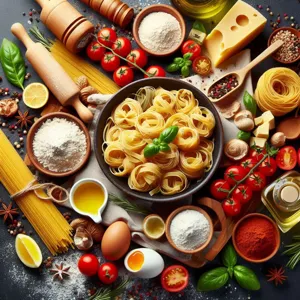
When it comes to mastering the art of homemade pasta, the quality of your ingredients can make all the difference. While the recipe may seem simple, the right components elevate your dish from ordinary to exceptional. Here are the essential ingredients you need to create perfect pasta every time:

**1. Flour:** The cornerstone of any pasta dish, flour plays a crucial role in determining the texture and flavor of your noodles. For traditional Italian pasta, “00” flour is often preferred due to its fine grind and high protein content, which yields a silky, elastic dough. However, semolina flour can also be used for a firmer bite, particularly in shapes like gnocchi or orecchiette. Experimenting with a blend of these flours can lead to a pasta that’s uniquely yours.

**2. Eggs:** Fresh eggs are another key ingredient, especially for rich, egg-based pasta like tagliatelle or fettuccine. The yolks lend a beautiful golden hue and enhance the pasta’s flavor, while the whites help bind the dough. If you’re looking for a vegan alternative, you can substitute eggs with water and a touch of olive oil, although the texture will differ slightly.

**3. Salt:** It may seem like a minor addition, but salt is essential for enhancing the flavor of your pasta. When making the dough, a pinch of salt will bring out the natural flavors of the ingredients. Additionally, don’t forget to season your cooking water generously before adding the pasta—it should taste like the sea. This ensures that every bite is seasoned to perfection.

**4. Water:** The binding agent in your pasta dough, the water should be added gradually to achieve the right consistency. Use room temperature water for a smoother dough, and adjust the amount based on the humidity and flour type. Remember, it’s easier to add a little more water than to fix a too-wet dough!

**5. Olive Oil:** While not always necessary, a drizzle of high-quality extra virgin olive oil can lend richness to your dough and prevent it from becoming too sticky. It also adds a lovely flavor that complements many pasta dishes.

By focusing on these essential ingredients, you’ll set a solid foundation for your homemade pasta-making journey. Remember, the beauty of pasta lies in its simplicity, so choose the best ingredients you can find and treat them with care. With practice and passion, your homemade pasta will become the star of your dining table.

3. Choosing the Right Flour: Semolina vs. All-Purpose

What are the best tips for making delicious pasta?
Credit : whatcanu.com

When it comes to crafting the perfect pasta from scratch, the choice of flour can make all the difference. Two of the most common options are semolina flour and all-purpose flour, each bringing its own unique qualities to the table. Understanding these differences is key to mastering your homemade pasta.

**Semolina Flour** is a coarser flour made from durum wheat, and it’s the traditional choice for pasta-making. Its high protein content and robust gluten structure give pasta a firm texture that holds up beautifully during cooking. When you use semolina, your pasta will have a slightly yellow hue and a delightful bite, making it perfect for dishes like lasagna, fettuccine, or gnocchi. Additionally, the grainy texture of semolina helps absorb sauces better, resulting in a more flavorful dish.

On the other hand, **All-Purpose Flour** is a versatile staple in most kitchens, suitable for a variety of baking tasks, including pasta. While it lacks the same high protein levels as semolina, all-purpose flour can still yield tender pasta with a softer mouthfeel. This type of flour is ideal for lighter pasta dishes, such as delicate ravioli or thinner sheets for lasagna, where a softer texture is desired.

When deciding which flour to use, consider the type of pasta you want to create and the desired texture. For a more traditional, hearty pasta that stands up to rich sauces, semolina is your best bet. If you’re looking for something lighter or are working with a specific recipe, all-purpose flour can serve you well.

In the quest for the perfect pasta, don’t shy away from experimenting. You might even find that a blend of both flours offers the ideal balance, providing a unique texture and flavor profile that elevates your homemade dishes to new heights. With the right flour in your pantry, you’re well on your way to mastering the art of pasta-making!

4. The Importance of Fresh Eggs in Pasta Making

When it comes to making homemade pasta, the quality of your ingredients can make all the difference, and none are more crucial than fresh eggs. Using fresh eggs in your pasta dough not only enhances the flavor but also significantly improves the texture and color of your final product. The vibrant, golden yolks contribute a richness that elevates your pasta to restaurant-quality levels, creating a beautiful hue that can turn even the simplest dish into a feast for the eyes.

Fresh eggs contain a higher moisture content, which means they integrate seamlessly into the flour, resulting in a silky, pliable dough that’s easy to work with. This elasticity is key for achieving that perfect bite, allowing your pasta to hold its shape while cooking and providing a delightful chewiness that dried pasta simply can’t replicate. Additionally, the proteins in fresh eggs help to create a sturdy structure, giving your pasta the resilience it needs to hold up under sauces or when baked in dishes like lasagna.

Moreover, the nutritional benefits of fresh eggs cannot be overlooked. Packed with protein, vitamins, and minerals, they make your homemade pasta not only more flavorful but also more nourishing. When you crack open a fresh egg, you’ll notice the vibrant color and firm texture of the yolk, indicators of the quality and freshness that will translate directly into your pasta.

To truly embrace the art of pasta making, consider sourcing your eggs from local farms or farmers’ markets. Not only will you support local agriculture, but you’ll also be rewarded with eggs that are often fresher and richer in flavor than those found in grocery stores. In the realm of pasta making, embracing fresh eggs is not just a tip; it’s a game-changer that can transform your culinary creations into something truly special. So, the next time you roll up your sleeves to make pasta, remember: fresh eggs are your best friend in the kitchen!

5. Step-by-Step Guide to Making Fresh Pasta Dough

What are the best tips for making delicious pasta?
Credit : whatcanu.com

Making fresh pasta dough at home can be a rewarding experience, and with the right technique, it’s easier than you might think! Here’s a step-by-step guide to help you create the perfect pasta dough that will elevate your homemade dishes to a whole new level.

**Step 1: Gather Your Ingredients**
start with high-quality ingredients for the best results. You’ll need 2 cups of all-purpose flour (or semolina flour for a firmer texture), 3 large eggs, a pinch of salt, and a drizzle of olive oil for added richness. You can use a clean countertop or a large mixing bowl as your workspace.

**Step 2: Create a Flour Well**
Pour the flour onto your countertop or into your bowl and form it into a mound. Make a deep well in the center, ensuring the walls are thick enough to hold the eggs without spilling. This is where the magic begins!

**Step 3: Add the Eggs and Salt**
Crack the eggs into the well and sprinkle a pinch of salt over them. If you’re using olive oil, drizzle a small amount in as well. Using a fork, gently beat the eggs, gradually incorporating the flour from the edges of the well. Be patient, as this will take a little time!

**Step 4: Knead the Dough**
Once the mixture starts coming together, use your hands to form it into a rough ball. Transfer the dough to a lightly floured surface and begin kneading. Press down and fold the dough over itself with the heel of your hand, turning it a quarter turn after each fold. Knead for about 8-10 minutes until the dough is smooth and elastic. If it’s too sticky, sprinkle a little more flour as needed.

**Step 5: Rest the Dough**
Wrap your dough ball in plastic wrap or place it in a bowl covered with a damp cloth. Let it rest for at least 30 minutes at room temperature. This resting period is crucial as it allows the gluten to relax, making the dough easier to roll out.

**Step 6: Roll Out Your Dough**
After resting, divide the dough into manageable pieces. Using a rolling pin or a pasta machine, roll out each piece to your desired thickness. Dust with flour to prevent sticking and ensure a smooth surface.

**Step 7: Cut and Shape**
Now comes the fun part! Depending on your pasta preference, you can cut your sheets into tagliatelle, fettuccine, or even lasagna sheets. For stuffed pasta like ravioli or tortellini, use a round cutter to create circles, fill them with your favorite fillings, and seal the edges tightly.

**Final Touch: Cooking Your Fresh Pasta**
Bring a large pot of salted water to a rolling boil. Fresh pasta cooks quickly, usually in just 2-4 minutes, so keep an eye on it. Once it floats to the surface, it’s ready! Pair your fresh pasta with a delicious sauce, and watch as your homemade dish wows family and friends.

With these simple steps, making fresh pasta dough at home is an enjoyable process that yields delicious results. Embrace the art of pasta-making, and you’ll find yourself creating mouthwatering dishes that are sure to impress!

6. Rolling Techniques: Hand-Rolled vs. Pasta Machine

When it comes to crafting the perfect pasta, the rolling technique you choose can significantly impact the texture and quality of your final dish. Both hand-rolling and using a pasta machine have their unique advantages, and understanding these can help you decide which method suits your culinary style best.

**Hand-Rolled Pasta**

Hand-rolling pasta is an age-old technique that connects you with the traditions of Italian cooking. It requires a bit more effort and practice, but the rewards are well worth it. When you roll out the dough by hand, you have greater control over its thickness and consistency. Using a simple rolling pin, you can achieve a rustic, artisanal feel that many chefs and home cooks cherish.

The tactile experience of kneading the dough, feeling its texture, and rolling it out with your own hands can be immensely satisfying. Plus, hand-rolled pasta tends to have slight irregularities that can add charm and character to your dishes. It’s perfect for those who love to embrace the craft of cooking and appreciate the subtle nuances that come with it.

**Pasta Machine**

On the other hand, a pasta machine can be a real game changer for those looking for speed and precision. With adjustable rollers, you can achieve uniform thickness with minimal effort, which is particularly beneficial when making delicate pasta types like lasagna sheets or ravioli. A pasta machine also reduces the physical exertion involved, making it easier for anyone to produce consistent results.

Using a machine can also save time, especially when preparing large batches of pasta. The efficient rolling process allows you to focus on other aspects of your meal, such as preparing sauces or filling. Additionally, many pasta machines come equipped with various attachments, enabling you to create an array of pasta shapes, from fettuccine to tagliatelle, with ease.

Ultimately, the choice between hand-rolling and using a pasta machine boils down to personal preference. If you relish the hands-on experience and authenticity of traditional methods, hand-rolling may be your go-to. However, if convenience and speed are your priorities, a pasta machine can help you whip up delicious homemade pasta in no time. Regardless of your choice, both methods can lead to mouthwatering results that are sure to impress family and friends alike.

7. Shaping Your Pasta: Fettuccine, Ravioli, and More

What are the best tips for making delicious pasta?
Credit : whatcanu.com

Shaping your pasta is where the magic truly happens, transforming simple dough into an array of delightful forms that can elevate your homemade dishes from ordinary to extraordinary. The process can be both an art and a science, allowing you to experiment with various shapes and sizes to find what resonates best with your palate.

**Fettuccine** is a classic choice, perfect for capturing rich sauces. To create this beloved flat noodle, roll out your pasta dough into a thin sheet using a pasta machine or a rolling pin. Once you’ve achieved a uniform thickness, dust the surface with a little flour to prevent sticking, and gently fold the sheet over itself a few times. With a sharp knife or a pizza cutter, slice the dough into strips about 1/4 inch wide. Unravel the strands and hang them on a pasta drying rack or lay them flat, ensuring they don’t stick together. The result? Perfectly formed fettuccine that’s ready to pair with creamy Alfredo or vibrant marinara.

If you’re feeling adventurous, try your hand at **ravioli**. This stuffed pasta is a canvas for your culinary creativity. Start by rolling out two sheets of pasta dough, ensuring they’re thin enough for delicate bites but sturdy enough to hold fillings. Use a cookie cutter or a glass to cut out circles or squares from one sheet. Place a spoonful of your desired filling—be it ricotta and spinach, mushroom duxelles, or a savory meat mixture—onto the center of each shape. Moisten the edges with water, then carefully place the second sheet on top and press around the filling to seal. Don’t forget to crimp the edges with a fork for an elegant touch!

Other shapes to explore include **farfalle**, often referred to as “bow-tie” pasta, which can be created by cutting the rolled dough into rectangles, pinching the center to form the iconic shape. Or consider **gnocchi**, which involves rolling small pieces of dough into logs and cutting them into bite-sized pillows before gently indenting them with a fork for that classic texture.

As you experiment with these shapes, remember that the key to success lies in practice and patience. Each pasta form has its unique allure and culinary purpose, and mastering them will not only enhance your dishes but also deepen your appreciation for this timeless craft. So, roll up your sleeves, gather your ingredients, and let your creativity flow—delicious homemade pasta is just a shape away!

8. Cooking Pasta: Tips for the Perfect Al Dente Texture

Achieving the perfect al dente texture is one of the hallmarks of mastering pasta, elevating your homemade dishes from good to extraordinary. Al dente, meaning “to the tooth” in Italian, describes pasta that is cooked to be firm yet tender, providing a delightful bite that complements sauces beautifully. Here are some essential tips to ensure your pasta reaches that ideal state.

First and foremost, the choice of pasta is crucial. Fresh pasta cooks more quickly than dried varieties, so be mindful of the cooking times provided on the package. Regardless of the type, always refer to the recommended cooking time, but remember to start testing a minute or two early. This proactive approach allows you to catch your pasta right at the moment it transitions from firm to perfectly al dente.

Next, the pot of water is your pasta’s first home, and it deserves your attention. Fill a large pot with plenty of water—at least four to six quarts for every pound of pasta—and bring it to a rolling boil. The abundance of water helps prevent the pasta from sticking together and ensures even cooking. Don’t forget to season the water generously with salt; it should taste like the sea. This is your opportunity to infuse flavor right into the pasta itself.

When the water is boiling vigorously, add the pasta and give it a gentle stir to keep it from clumping. As the pasta cooks, taste it periodically, starting about two minutes before the package’s suggested cooking time. A perfectly cooked piece should feel firm when bitten but should also yield slightly under pressure. For a more precise approach, you can use a kitchen timer to keep track of your cooking time, but ultimately, your taste buds are your best guide.

Once your pasta reaches that ideal al dente texture, it’s time to drain, but don’t rinse! Rinsing washes away the starch that helps sauces adhere to the noodles. Instead, reserve a cup of the starchy pasta water before draining; this liquid can be a game-changer for adjusting the consistency of your sauce.

Finally, toss the drained pasta with your sauce immediately in a hot pan. This technique allows the pasta to absorb the flavors of the sauce while maintaining that desired bite. If the sauce is too thick, add a splash of the reserved pasta water to achieve your perfect consistency.

By following these tips, not only will you master the art of cooking pasta, but you’ll also impress your family and friends with dishes that boast the delightful texture and authentic flavor of Italian cuisine. With practice, you’ll find it second nature to achieve that perfect al dente bite every time. Happy cooking!

9. Flavoring Your Pasta: Infusions and Additives

When it comes to elevating your homemade pasta, flavoring is the secret ingredient that can transform a simple dish into a culinary masterpiece. Infusions and additives are your best friends in this endeavor, allowing you to play with taste, aroma, and even color to create a dining experience that excites the palate.

**Infusions** are a delightful way to introduce new flavors directly into your pasta dough. One of the simplest methods is to infuse your water with ingredients like garlic, herbs, or even vegetables. For instance, boiling your pasta in water infused with fresh basil or rosemary can impart a subtle, aromatic quality that pairs beautifully with a light olive oil or cream sauce. You can even experiment with vegetable juices, such as beet or spinach, to create vibrant-colored pasta that tastes as good as it looks.

**Additives** offer another layer of flavor that can be incorporated directly into the dough. Consider adding a splash of olive oil or a pinch of sea salt to your pasta mixture for a richer taste. For those looking to spice things up, a dash of crushed red pepper flakes or a sprinkle of grated Parmesan cheese can add depth and complexity. If you’re feeling adventurous, try mixing in pureed sun-dried tomatoes or roasted garlic for a burst of flavor that will make your pasta stand out.

Don’t forget about the finishing touches! Tossing your freshly cooked pasta with a drizzle of flavored oil—like garlic-infused or chili oil—can enhance the dish’s overall taste. Alternatively, tossing in fresh herbs just before serving can add a bright, fresh note that elevates the entire meal.

By exploring the world of infusions and additives, you can master the art of flavoring your pasta, ensuring that every bite is a delicious revelation. Whether you’re aiming for a classic Italian dish or something uniquely your own, the possibilities are endless, and your taste buds are sure to thank you!

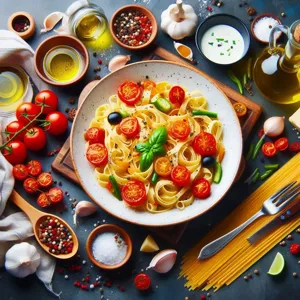
10. Sauces that Elevate Your Homemade Pasta

When it comes to homemade pasta, the sauce is where the magic truly happens. A well-crafted sauce can elevate a simple dish into a culinary masterpiece, offering layers of flavor that dance harmoniously with your freshly made noodles. The beauty of pasta lies in its versatility, and the right sauce can transform it into a hearty meal, a light refreshment, or an indulgent treat.

Start with the classics: a rich marinara bursting with the freshness of ripe tomatoes, garlic, and a hint of basil can make your spaghetti sing. For something creamier, consider a luscious Alfredo sauce, made from butter, heavy cream, and Parmesan cheese, which clings beautifully to fettuccine and offers a satisfyingly decadent experience. If you’re looking to impress, a homemade pesto is a fantastic choice. With its vibrant green hue and aromatic blend of basil, garlic, pine nuts, and olive oil, this sauce not only tastes divine but also adds a pop of color to your plate.

Don’t shy away from experimenting with the unexpected, either. A tangy lemon and caper sauce can brighten up a dish of linguine, while a robust ragù, simmered slowly with tender meats and aromatic vegetables, brings warmth and heartiness to your table. For those craving a touch of elegance, a saffron-infused sauce can provide a luxurious twist, lending a unique flavor profile that complements delicate pasta shapes like tagliatelle or pappardelle.

Remember, the key to a great sauce is balance. Ensure that it harmonizes with the pasta’s texture and flavor without overpowering it. For instance, lighter sauces pair beautifully with thinner noodles, while heartier sauces can stand up to thicker, more substantial shapes. By paying attention to these details and selecting high-quality ingredients, you can create sauces that not only enhance your homemade pasta dishes but also leave a lasting impression on your diners. So, roll up your sleeves, gather your ingredients, and let your creativity flow as you master the art of pasta sauces!

11. Pairing Pasta with the Right Ingredients

Pairing pasta with the right ingredients is an essential skill that can elevate your homemade dishes from simple to spectacular. The beauty of pasta lies not only in its variety but also in its versatility; it can be a canvas for an array of flavors, textures, and aromas. Understanding how to match pasta shapes with complementary ingredients is the key to achieving a harmonious dish that delights the palate.

Start by considering the shape and texture of your pasta. For instance, delicate angel hair or thin spaghetti pairs beautifully with light, oil-based sauces or fresh herb-infused dressings, allowing the subtle flavors to shine through without overwhelming the dish. On the other hand, robust shapes like penne or rigatoni can hold up to heartier sauces, such as rich meat ragu or creamy Alfredo, their ridges and hollows capturing every bit of flavor.

Don’t overlook the importance of seasonal ingredients. Fresh vegetables, herbs, and proteins can make a significant difference in the overall taste of your pasta dish. In the summer, toss your pasta with fresh cherry tomatoes, basil, and a drizzle of olive oil for a refreshing take. In the colder months, consider hearty root vegetables and winter greens, sautéed with garlic and tossed with your pasta for a comforting meal.

Additionally, consider the balance of flavors. A sprinkle of salty cheese, like Pecorino Romano or Parmesan, can add depth to a dish, while a touch of acidity from lemon juice or a vinegar-based dressing can brighten up rich sauces. Experiment with different textures, too—adding crunchy elements like toasted nuts or crispy breadcrumbs can create a delightful contrast that keeps each bite interesting.

Ultimately, the magic of pasta lies in its ability to adapt and shine with the right pairings. By thoughtfully selecting your ingredients, you can create pasta dishes that not only satisfy but also leave a lasting impression on your family and friends, making every meal a celebration of flavor and creativity.

12. Storing and Freezing Homemade Pasta

Storing and freezing homemade pasta is an essential skill that can help you make the most of your culinary creations, ensuring you have fresh, delicious pasta ready to cook whenever the craving strikes. After investing time and effort into crafting your pasta from scratch, it’s vital to know how to preserve that flavor and texture for later enjoyment.

Once your pasta is made, whether it’s delicate fettuccine, hearty lasagna sheets, or whimsical farfalle, you’ll want to ensure it’s dried properly before storage. Lay the pasta strands in a single layer on a floured surface or a drying rack, allowing them to air dry for about 30 minutes. This step helps prevent the noodles from sticking together and preserves their integrity when stored.

For short-term storage, fresh pasta can be placed in an airtight container and kept in the refrigerator for up to two days. Be sure to sprinkle a bit of flour between layers to keep them from clumping. Alternatively, if you want to stock up for future meals, freezing is the way to go.

To freeze your pasta, first, let it dry slightly, as mentioned earlier, then arrange it in a single layer on a baking sheet and place it in the freezer for about 30 minutes. This method, known as flash freezing, prevents the pasta from sticking together in one big lump. Once frozen, transfer the pasta to a resealable freezer bag, removing as much air as possible to prevent freezer burn. Label the bag with the date, and enjoy your homemade pasta for up to three months!

When you’re ready to cook your frozen pasta, there’s no need to thaw it beforehand. Simply bring a pot of salted water to a rolling boil and drop the frozen pasta directly into the pot. Cook for a minute or two longer than you would fresh pasta, and you’ll have a delightful meal ready in no time.

With proper storage and freezing techniques, you can enjoy the fruits of your labor long after the dough has been rolled and cut, making homemade pasta an even more rewarding endeavor.

13. Common Mistakes to Avoid in Pasta Making

When it comes to mastering the art of pasta making, avoiding common pitfalls can mean the difference between a mediocre dish and a culinary masterpiece. Here are some frequent mistakes that home cooks often make, along with tips on how to steer clear of them.

Firstly, many novice pasta makers underestimate the importance of using the right flour. While all-purpose flour is handy, opting for a high-quality semolina or ’00’ flour can significantly enhance the texture and flavor of your dough. These flours contain a higher protein content, which contributes to a firmer structure and allows for better absorption of sauces.

Another common error is neglecting to measure ingredients accurately. Pasta making is as much a science as it is an art; a slight imbalance in flour to liquid ratio can lead to a dough that is either too dry and crumbly or too sticky and unmanageable. Always weigh your ingredients for the best results and consider adjusting based on environmental factors like humidity.

Additionally, many enthusiasts make the mistake of rushing the resting phase. After kneading, it’s crucial to let your dough rest, allowing the gluten to relax. This resting period results in a more pliable dough that’s easier to roll out. Skipping this step can lead to pasta that tears easily or doesn’t hold its shape when cooked.

Another pitfall lies in cooking the pasta. Overcooking is a common issue; remember that fresh pasta cooks much faster than dried varieties. Keep an eye on it as it boils, and taste a strand a minute or two before the recommended cooking time to achieve that perfect al dente texture.

Lastly, don’t forget to generously salt your pasta water. This is your opportunity to infuse flavor directly into the pasta itself, making a noticeable difference in the final dish. A common rule of thumb is to use enough salt that the water tastes like the sea.

By being mindful of these common mistakes, you can elevate your pasta-making skills and create delicious, homemade dishes that will impress family and friends alike. Embrace the learning process, take your time, and soon you’ll be crafting pasta that rivals that of the finest Italian trattorias.

14. Exploring Regional Pasta Dishes from Italy

Italy, a country renowned for its rich culinary heritage, boasts a stunning array of regional pasta dishes that reflect the diverse landscapes, climates, and traditions of its various provinces. Each region has its own unique take on pasta, utilizing local ingredients and time-honored techniques, making the exploration of these dishes not just a feast for the palate but also a journey through the heart of Italian culture.

In the northern regions, such as Lombardy and Piedmont, you’ll find creamy, buttery sauces that pair beautifully with stuffed pastas like ravioli and tortellini. The exquisite *Tortellini in Brodo*, for example, features delicate meat-filled pasta served in a savory broth, a comforting dish that warms both body and soul during the cooler months.

Travel south to Emilia-Romagna, the birthplace of some of Italy’s most beloved pasta, including *Tagliatelle al Ragù* (better known as Bolognese). Here, the rich, slow-cooked meat sauce clings to the long, flat noodles, creating a hearty meal that speaks to the region’s tradition of culinary excellence. The use of fresh eggs in the pasta dough adds a luxurious touch that elevates this dish to the next level.

In contrast, the coastal regions like Campania and Sicily bring a burst of vibrancy with their seafood pastas. Dishes like *Spaghetti alle Vongole* (spaghetti with clams) showcase the simplicity and freshness of local ingredients, allowing the flavors of the sea to shine through. With a drizzle of olive oil, a sprinkle of parsley, and a hint of garlic, this dish captures the essence of coastal living.

Don’t overlook the southern regions, where you’ll find bold flavors and hearty ingredients. In Calabria, for instance, the famed *Fileja* pasta is often served with spicy ‘nduja sausage, a spreadable salami that adds depth and heat to the dish. The combination of robust flavors and artisanal pasta showcases the region’s passion for cooking.

As you embark on your journey to master homemade pasta, take the time to explore these regional dishes. Not only will you expand your culinary repertoire, but you’ll also gain an appreciation for the rich traditions that have shaped Italian cuisine over centuries. By incorporating these authentic flavors and techniques into your cooking, you’ll bring a taste of Italy to your table, along with the warmth and joy that comes from sharing beloved family recipes. So grab your apron and get ready to savor the delightful world of regional Italian pasta!

15. Conclusion: The Joy of Sharing Homemade Pasta

In conclusion, the joy of sharing homemade pasta transcends mere nourishment; it is an experience that weaves together moments of laughter, love, and connection. The act of crafting pasta from scratch is not only an artistic endeavor but also a way to cultivate memories with family and friends. As you roll out the dough, cut the fettuccine, or shape the gnocchi, you’re not just preparing a meal; you’re creating a centerpiece for gatherings that invite warmth and togetherness.

Imagine the scene: a beautifully set table adorned with freshly made pasta in vibrant sauces, surrounded by loved ones eagerly sharing stories and savoring each bite. The aroma of garlic and herbs wafts through the air, mingling with the sound of clinking glasses and joyful chatter. Each dish you serve becomes a conversation starter, a testament to your efforts and a celebration of homemade goodness.

Moreover, making pasta from scratch offers a unique opportunity to experiment with flavors and textures, allowing you to tailor your creations to personal tastes and dietary preferences. Whether you’re crafting a rich, creamy Alfredo or a light, herb-infused primavera, the versatility of pasta means there’s something for everyone to enjoy.

So, embrace the artistry of pasta-making and invite others into your kitchen. Share your culinary triumphs, teach your friends the techniques you’ve learned, and pass down family recipes that hold sentimental value. In doing so, you’re not just feeding appetites; you’re nourishing relationships and creating lasting traditions. After all, the best meals are those enjoyed together, and there’s nothing quite like the joy of sharing a plate of homemade pasta with the people who mean the most to you.

As we wrap up our exploration of mastering pasta, we hope you feel inspired and equipped to create delicious homemade dishes that will delight your taste buds and impress your loved ones. From selecting the right flour and mastering dough techniques to experimenting with sauces and fresh ingredients, each step in the process brings you closer to pasta perfection. Remember, the beauty of cooking lies in its ability to bring people together, so don’t hesitate to invite family and friends to join you in the kitchen. With a sprinkle of creativity and a dash of passion, you can transform simple ingredients into culinary masterpieces. We can’t wait to hear about your pasta-making adventures, so be sure to share your favorite recipes and tips with us! Happy cooking!

What are the best ways to make homemade pasta?

There’s something undeniably magical about the art of making homemade pasta.

The process, from kneading the dough to rolling it out into delicate sheets, is a culinary journey that connects you to centuries of tradition and flavor. Imagine the satisfaction of crafting your own noodles, tailored to your taste and texture, elevating any dish from ordinary to extraordinary. Whether you’re a novice cook or a seasoned chef looking to refine your skills, this blog post will guide you through the essential tips and techniques to achieve pasta perfection every time. From choosing the right flour and mastering the dough consistency to exploring various shapes and sauces that complement your creations, we’ll unlock the secrets of pasta-making that will have your friends and family raving about your culinary prowess. Join us as we dive into the world of homemade pasta and discover how you can bring this delightful experience into your kitchen!

1. Introduction to Homemade Pasta: Why You Should Try It

What are the best ways to make homemade pasta?
Credit : whatcanu.com

There’s something undeniably magical about homemade pasta that sets it apart from its store-bought counterpart. The process of making pasta from scratch transforms simple ingredients into a culinary masterpiece that captures the essence of traditional Italian cooking. The tactile experience of kneading the dough, the mesmerizing sight of it rolling through a pasta machine, and the intoxicating aroma of freshly cooked noodles are all part of the joy that comes with crafting your own pasta.

But why should you invest time and effort into this seemingly daunting task? For starters, homemade pasta offers an unparalleled flavor and texture that simply cannot be replicated. The moment you take a bite of your freshly made fettuccine or pappardelle, you’ll discover a delightful chewiness that brings every dish to life. Unlike dried pasta, which can sometimes feel bland or overcooked, homemade noodles absorb sauces beautifully, allowing for a harmonious marriage of flavors.

Moreover, making pasta is an opportunity to connect with family and friends. It’s a culinary project that invites collaboration—whether it’s gathering around the kitchen table to roll out sheets of dough, or sharing tips and techniques passed down through generations. It’s a chance to slow down, embrace the process, and experience the joy of creating something delicious from scratch.

Finally, homemade pasta allows for endless creativity. You have full control over the ingredients, meaning you can experiment with flavors, colors, and shapes. Want to infuse your dough with vibrant spinach or rich beetroot? Go for it! Craving unique shapes like orecchiette or tortellini? The sky’s the limit!

So, whether you’re a seasoned chef looking to hone your skills or a curious beginner eager to explore the world of pasta-making, diving into homemade pasta is a rewarding adventure that promises satisfaction in every bite. Let’s roll up our sleeves and embark on this delightful journey together!

2. Essential Tools and Equipment for Making Pasta

Creating homemade pasta can be a delightful culinary adventure, and having the right tools and equipment at your disposal can make all the difference in achieving noodle perfection. While the charm of hand-rolling dough with just a wooden pin is undeniable, a few essential tools can elevate your pasta-making experience to new heights, ensuring consistent results every time.

First and foremost, invest in a high-quality **pasta machine**. This device not only allows for uniform thickness but also speeds up the process, taking the guesswork out of rolling your dough. With adjustable settings, you can easily transition from fettuccine to lasagna sheets with a simple twist of the dial. If you’re short on space, a hand-crank model can be a compact and effective alternative.

Next, don’t underestimate the importance of a good **cutting tool**. While you can use a sharp knife to cut your pasta, a dedicated pasta cutter will create clean, precise edges, enhancing the overall presentation of your dish. Look for one with various attachments to create different shapes – from tagliatelle to ravioli – allowing for endless culinary creativity.

An **automatic kitchen scale** is also a must-have for measuring your flour and eggs accurately. Precision is key in pasta making; even a slight variation in ingredients can affect the final texture. Pair this with a large **mixing bowl** for combining your ingredients, and a sturdy **bench scraper** for easy dough handling and cleanup.

Don’t forget a **dough scraper** and **rolling pin** for those moments when you need to get hands-on. A dough scraper is invaluable for portioning and shaping, while a heavy rolling pin gives you the leverage needed to roll out dough to your desired thickness.

Lastly, consider investing in a few **drying racks** or a clean, uncluttered space to hang your freshly cut pasta. Ensuring your noodles have room to breathe will prevent them from sticking together and will help maintain their integrity before cooking.

With these essential tools in your kitchen arsenal, you’ll be well on your way to mastering the art of homemade pasta. The right equipment not only simplifies the process but also enhances your overall enjoyment, allowing you to focus on the creative and delicious journey that lies ahead!

3. Choosing the Right Flour for Your Pasta Dough

What are the best ways to make homemade pasta?
Credit : whatcanu.com

When it comes to mastering homemade pasta, the choice of flour is crucial to achieving that perfect texture and flavor in your noodles. The foundation of any great pasta begins with the right ingredients, and flour is arguably the most important of them all. But with so many options available, how do you know which one to pick?

For traditional pasta, **00 flour** is the gold standard. This finely milled Italian flour is made from the heart of the wheat kernel, resulting in a silky-smooth dough that’s easy to work with and yields a chewy, delightful bite. The high protein content in 00 flour provides the structure and elasticity needed for pasta that holds its shape during cooking, making it ideal for everything from tagliatelle to pappardelle.

If you’re looking for a slightly different flavor profile, consider using **semolina flour**. Made from durum wheat, semolina has a coarser texture and a rich, nutty taste that adds depth to your pasta. It’s particularly well-suited for making robust shapes like gnocchi or orecchiette, as its higher gluten content gives the pasta a firm bite and helps it hold sauces beautifully.

For those who prefer a healthier alternative, whole wheat flour can also be an option. It incorporates the entire wheat grain, offering more fiber and nutrients. However, it can result in a denser dough, so it’s often recommended to blend whole wheat flour with all-purpose flour or 00 flour to maintain a lighter texture.

When experimenting with gluten-free options, look for blends specifically designed for pasta-making. These often include a combination of rice flour, tapioca flour, and xanthan gum. While gluten-free pasta may not mimic the exact texture of traditional pasta, the right blend can still produce delicious results.

Ultimately, the flour you choose will impact not just the taste but also the texture of your pasta. So, take some time to explore different types, and don’t hesitate to experiment until you find the perfect match for your culinary creations. Your homemade pasta journey starts with this essential ingredient, setting the stage for flavorful, satisfying dishes that will impress both family and friends alike.

4. The Perfect Egg-to-Flour Ratio: A Guide

When it comes to mastering homemade pasta, understanding the perfect egg-to-flour ratio is crucial for achieving that ideal texture and flavor. The classic starting point is a simple 1:1 ratio, with one large egg for every 100 grams of flour. However, this formula can be tweaked depending on the type of pasta you’re making and your personal preferences.

For a richer, more decadent pasta, consider using an extra egg yolk in your mixture. This addition not only enhances the color but also contributes to a silkier, more luxurious texture. Conversely, if you’re aiming for a lighter pasta, you can reduce the number of egg yolks and replace them with water or milk, adjusting the flour quantity accordingly.

It’s essential to choose the right type of flour as well. “00” flour is often recommended for its fine grind and high protein content, which leads to a beautifully smooth dough. All-purpose flour works too, but if you’re feeling adventurous, experimenting with semolina flour can yield a delightful bite.

As you mix your ingredients, pay attention to the dough’s consistency. It should be smooth and elastic, yet firm enough to hold its shape. Don’t be afraid to get your hands in there; kneading is key to developing the gluten that gives your pasta its structure. If the dough feels too sticky, a sprinkle of flour can help, but be cautious not to overdo it, as too much flour can lead to a dense final product.

Once you’ve found that perfect balance in your egg-to-flour ratio, let the dough rest for at least 30 minutes. This resting period allows the gluten to relax, making it easier to roll out the pasta into thin sheets or shape it into your favorite noodles. With practice, you’ll develop an intuitive sense of the ideal ratios and techniques that work best for you, leading to perfect homemade pasta every time. So roll up your sleeves and get ready to impress your family and friends with your newfound pasta-making prowess!

5. Step-by-Step Instructions for Making Pasta Dough

What are the best ways to make homemade pasta?
Credit : whatcanu.com

Making pasta dough from scratch is a delightful and rewarding process, and with the right approach, you can master it with ease. Here’s a step-by-step guide to help you create the perfect pasta dough every time.

**Step 1: Gather Your Ingredients**
Start with the basics: high-quality flour and fresh eggs. For a classic pasta, use a mix of all-purpose flour and semolina flour for a firmer texture. You’ll need about 2 cups of flour and 3 large eggs for a batch that serves four. Optional additions include a pinch of salt for flavor and a little olive oil for richness.

**Step 2: Create the Dough Well**
On a clean, flat surface, pile your flour and create a well in the center. This well is crucial as it will contain the eggs and prevent spills. If you prefer, you can use a large mixing bowl, but the traditional method allows for better control.

**Step 3: Incorporate the Eggs**
Crack the eggs into the well, adding them one at a time. Use a fork to beat the eggs gently, gradually incorporating the flour from the edges of the well. Be patient and avoid rushing this step; it’s vital to keep the mixture contained.

**Step 4: Knead the Dough**
Once the mixture starts to come together, it’s time to use your hands. Knead the dough for about 8-10 minutes until it’s smooth and elastic. If the dough feels too sticky, sprinkle a little more flour as needed. Conversely, if it’s too dry, add a few drops of water or a bit of olive oil.

**Step 5: Rest the Dough**
After kneading, wrap the dough in plastic wrap and let it rest for at least 30 minutes at room temperature. This resting period allows the gluten to relax, making it easier to roll out later.

**Step 6: Roll Out the Dough**
Once rested, divide the dough into smaller portions. Using a rolling pin or a pasta machine, roll each piece out to your desired thickness. Remember, the thinner the pasta, the quicker it will cook!

**Step 7: Cut and Shape Your Pasta**
With your rolled-out dough, you can cut it into various shapes—tagliatelle, fettuccine, or even lasagna sheets. Use a sharp knife or a pasta cutter for precise edges.

**Step 8: Dry and Cook**
If you’re not cooking the pasta immediately, lay the cut strands on a floured surface or a drying rack. To cook, bring a large pot of salted water to a boil and add your fresh pasta, cooking for just 2-4 minutes until al dente.

By following these simple steps, you’ll be well on your way to creating delicious homemade pasta from scratch. Each batch is a canvas for your culinary creativity, and with practice, you’ll find your rhythm in crafting perfect noodles every time!

6. Tips for Kneading and Resting the Dough

Kneading and resting the dough are crucial steps in the pasta-making process that can significantly impact the texture and flavor of your noodles. When it comes to kneading, think of it as a workout for your dough. Start by dusting your clean countertop with a light sprinkling of flour to prevent sticking. Place your dough ball onto the surface and begin pressing it with the heel of your hand. Fold it over, give it a quarter turn, and continue this rhythmic motion for about 8 to 10 minutes. This process helps develop the gluten, which gives your pasta that perfect bite, or “al dente” texture.

It’s important to pay attention to the feel of the dough. It should be smooth and elastic, not overly wet or sticky. If it’s too sticky, simply add a touch more flour, but be cautious; too much flour can lead to tough noodles. As you knead, you may find yourself getting into a groove, but don’t rush this step—effective kneading is the foundation of good pasta.

After kneading, the resting phase is equally vital. Wrap your dough in plastic wrap or cover it with a clean kitchen towel and let it rest for at least 30 minutes at room temperature. This resting period allows the gluten to relax, making the dough easier to roll out later and resulting in a more tender pasta. If you’re short on time, even a 15-minute rest can make a difference, but the longer, the better! This time allows the flavors to meld and the texture to improve, setting the stage for the perfect homemade pasta that is sure to impress at your dinner table. With these kneading and resting tips, you’re well on your way to achieving noodle perfection!

7. How to Roll Out Your Pasta: Techniques and Tools

What are the best ways to make homemade pasta?
Credit : whatcanu.com

Rolling out your pasta is a crucial step in achieving that perfect noodle texture—thin enough to be delicate, yet sturdy enough to hold its shape. Mastering this technique not only enhances the quality of your homemade pasta but also adds a touch of authenticity to your dining experience. Here’s a closer look at the best techniques and tools to roll out your pasta like a pro.

### Techniques

1. **Divide and Conquer**: Start by dividing your dough into smaller portions. This makes it more manageable and ensures even thickness. Keep the unused dough covered with a damp cloth to prevent it from drying out.

2. **Flour It Up**: Lightly dust your work surface and the dough with flour before rolling. This prevents sticking and allows the pasta to glide smoothly as you work.

3. **Gentle pressure**: Using a rolling pin, begin rolling from the center of the dough outward. Apply gentle, even pressure, rotating the dough as you go to maintain a round shape. If you find the pasta sticking, sprinkle a little more flour—just enough to keep it moving without overdoing it.

4. **Thin It Out**: Aim for a thickness of about 1/16 inch (or paper-thin) for most pasta types. If you’re making lasagna or other thicker pasta shapes, you can go a little thicker, but the goal is to achieve that melt-in-your-mouth texture.

5. **Check for Consistency**: As you roll, periodically lift the pasta to check its thickness. If it’s uneven, return to rolling until you achieve a uniform consistency.

### Tools

1. **Rolling Pin**: A traditional wooden or marble rolling pin works beautifully for this task, allowing you to control the pressure and angle with ease.

2. **Pasta Machine**: For those looking for a more efficient way to roll out pasta, a pasta machine is a fantastic investment. It enables you to easily adjust thickness settings and produces consistently thin sheets of dough with minimal effort.

3. **Bench Scraper**: This handy tool helps lift and maneuver the dough without tearing. It’s especially useful for scraping off any bits of dough stuck to the surface.

4. **Flour Duster**: A flour duster, or a simple sieve filled with flour, can help you maintain a light coating of flour on your pasta without overdoing it.

5. **Ruler or Measuring Tool**: If you’re aiming for precision, keep a ruler handy to check the thickness of your pasta as you roll.

By mastering the art of rolling out pasta with these techniques and tools, you’ll elevate your homemade pasta game to new heights. Whether you’re crafting fettuccine, ravioli, or lasagna sheets, the right approach will ensure each noodle is perfect, setting the stage for a delicious meal that will impress family and friends alike. Happy rolling!

8. Different Pasta Shapes and How to Create Them

When it comes to homemade pasta, the shape is just as important as the dough itself. Each pasta shape has its own character and purpose, enhancing the dining experience and complementing various sauces and ingredients. Understanding how to create these shapes can elevate your homemade pasta game to new heights.

**Fettuccine** is a classic choice, and it’s surprisingly easy to make. Roll your dough into thin sheets, then use a sharp knife or a pasta cutter to slice it into long, flat ribbons. This shape is perfect for pairing with rich, creamy sauces like Alfredo or hearty ragù.

**Penne**, on the other hand, requires a bit more technique. Once you’ve rolled out your dough, use a fluted cutter to create rectangular pieces. Then, roll each piece around a dowel or a thin object to form the iconic tubular shape. The ridges of penne hold onto sauces beautifully, making it an excellent choice for baked dishes or pesto.

For something a bit more whimsical, try your hand at **farfalle** (bow-tie pasta). Cut your dough into small rectangles and pinch the center together to create the signature butterfly shape. This pasta works wonderfully in salads or light sauces, adding both texture and visual appeal to your dish.

**Orecchiette**, or “little ears,” is another fun shape that’s easy to create. Roll small pieces of dough into balls and then press them down with your thumb to form small cups. These little pockets are perfect for catching bits of sauce, making them ideal for pairing with vegetables or chunky meat sauces.

Don’t forget about **ravioli**! These delightful stuffed pasta pockets can be made by rolling out two sheets of dough and placing small mounds of filling between them. Cut into squares and seal the edges with a fork to ensure your delicious filling stays intact during cooking. Ravioli can be filled with a variety of ingredients—from ricotta and spinach to butternut squash—adding a personal touch to your meal.

Experimenting with different shapes not only allows you to express your creativity but also enhances the overall dining experience. Each shape brings its own texture and mouthfeel, transforming a simple pasta dish into a culinary masterpiece. So grab your rolling pin, get creative with your pasta shapes, and enjoy the delicious results of your hard work in the kitchen!

9. Cooking Pasta: Timing and Techniques for Perfect Texture

Cooking pasta perfectly is an art that hinges on timing and technique, and mastering this can elevate your homemade noodles from good to exceptional. The first step to achieving the ideal texture is to use a large pot filled with water, generously seasoned with salt. This not only enhances the flavor but also helps the pasta cook evenly. As a general rule, for every pound of pasta, you should aim for at least four quarts of water.

Once the water reaches a vigorous boil, add the pasta and stir it gently to prevent clumping. Keep a close eye on the clock and refer to the cooking time indicated on the package as a guideline, but remember that fresh pasta cooks much faster than dried. For fresh noodles, a mere 2 to 4 minutes is typically sufficient, while dried pasta usually requires 8 to 12 minutes.

To achieve the perfect al dente texture, which translates to “to the tooth,” start tasting your pasta a minute or two before the suggested time is up. You want it to be firm yet tender, with a slight bite in the center. This is especially important if you plan to finish cooking the pasta in a sauce, as it will continue to absorb moisture and cook further.

When the pasta is ready, reserve a cup of the starchy cooking water before draining, as this liquid can be a secret weapon in your sauce. Toss the drained pasta immediately in your sauce of choice, combining them over low heat. The starch from the pasta will help emulsify the sauce, creating a cohesive and silky coating that clings to every strand. With these timing tips and techniques, you’ll be well on your way to serving up pasta that’s perfectly cooked and bursting with flavor, impressing family and friends with each delightful bite!

10. Making Homemade Pasta Sauce Pairings

Creating the perfect homemade pasta is only half the battle; the sauce you pair it with can elevate your dish from delicious to extraordinary. The right sauce can enhance the flavors of your noodles, creating a harmonious balance that delights the palate. Here are some tips for making homemade pasta sauce pairings that will have your family and friends coming back for seconds.

First, consider the type of pasta you’re using. For delicate strands like angel hair, a light sauce made from olive oil, garlic, and fresh herbs works wonders without overwhelming the subtle flavors of the noodles. On the other hand, robust shapes like rigatoni or pappardelle can hold up beautifully against heartier sauces, such as a rich bolognese or a thick, creamy Alfredo.

Next, think about the seasonality of ingredients. Fresh, in-season vegetables can make a simple marinara come alive. Imagine vibrant cherry tomatoes roasted to perfection, blended with basil and a drizzle of balsamic vinegar for a fresh summer sauce. In the colder months, opt for richer, deeper flavors; a slow-cooked ragu or a savory pumpkin cream sauce can bring warmth and comfort to your dining experience.

Don’t forget about texture! A sprinkle of toasted nuts or a handful of sautéed mushrooms can add dimension to your sauce, making each bite more interesting. For a touch of sophistication, finish your dish with a generous grating of Parmigiano-Reggiano or a few fresh basil leaves for an aromatic touch.

Lastly, remember to taste as you go. The beauty of homemade sauce lies in its adaptability—feel free to adjust seasoning, acidity, and sweetness based on your preferences. Whether you prefer a classic tomato sauce or an innovative twist with unexpected ingredients like butternut squash or sun-dried tomatoes, the key is to experiment and find what works best for you.

With these tips in mind, you’ll be well on your way to crafting delicious homemade pasta sauces that perfectly complement your noodles, creating a memorable meal that showcases your culinary skills. So roll up your sleeves, grab your ingredients, and get ready to impress with your homemade pasta creations!

11. Storing and Freezing Fresh Pasta

When it comes to homemade pasta, knowing how to store and freeze your creations can extend their shelf life and ensure you always have fresh noodles on hand, ready to transform your meals. Fresh pasta is delicate and can spoil quickly, so proper storage is essential to maintain its texture and flavor.

To store fresh pasta, start by allowing it to dry slightly on a clean surface for about 15 to 30 minutes. This step helps prevent the noodles from sticking together. After this initial drying period, you can either leave the pasta in nests or lay it flat. If you’re opting for nests, gently twist your strands into loose spirals and place them on a tray or plate, ensuring they don’t touch. If you choose to lay them flat, dust a light coating of flour over the pasta to absorb any excess moisture and prevent clumping.

For short-term storage, fresh pasta can be kept in the refrigerator. Place the nests or flat sheets in an airtight container, and they will stay fresh for up to 2 days. Be mindful not to crowd the container, as this can lead to sticking and uneven drying.

If you find yourself with an abundance of pasta, freezing is a fantastic option. To freeze fresh pasta, follow the same initial drying process as before, then arrange the nests on a parchment-lined baking sheet in a single layer, ensuring they are spaced apart. Place the baking sheet in the freezer for about 30 minutes or until the pasta is frozen solid. Once frozen, transfer the noodles to a resealable plastic bag or airtight container, removing as much air as possible to prevent freezer burn. Properly stored, frozen pasta can last for up to 2 months, ready to be cooked straight from the freezer—no need to thaw!

When it’s time to enjoy your frozen pasta, simply drop it into boiling water and cook for a minute or two longer than you would with fresh pasta. With these storage and freezing tips, you can savor the taste of homemade noodles any day of the week, ensuring that your pasta-making efforts never go to waste!

12. Creative Variations: Adding Flavors and Ingredients

When it comes to homemade pasta, the beauty lies not just in the technique but also in the endless opportunities for creativity. While traditional pasta is a delightful canvas of flour and water, don’t be afraid to think outside the box and elevate your dishes with unique flavors and ingredients.

Start by experimenting with the base dough. Instead of the classic semolina and all-purpose flour, consider incorporating different flours like whole wheat, spelt, or even chickpea flour for a nutty twist. For a vibrant color and an added health boost, try mixing in vegetable purees such as spinach, beetroot, or pumpkin. These not only enhance the aesthetic appeal of your pasta but also infuse it with rich flavors and nutrients.

Next, think about the flavors you can introduce directly into the dough. A sprinkle of fresh herbs, like basil or parsley, can bring a fragrant touch, while a pinch of spices like saffron or smoked paprika can add depth and intrigue. You might even consider adding cheese into the mix—ricotta or goat cheese can create a creamy texture that elevates your noodles in a delightful way.

Don’t forget about the fillings! If you’re venturing into stuffed pasta like ravioli or tortellini, the options are virtually limitless. Blend roasted garlic and ricotta for a creamy filling, or go for a savory mix of sautéed mushrooms and spinach. For something extra special, consider crafting a sweet filling with mascarpone and citrus zest for dessert pasta, which can be served with a drizzle of honey or a dusting of powdered sugar.

Finally, as you experiment with these creative variations, remember that the beauty of homemade pasta lies in its versatility. Whether you’re crafting a classic spaghetti or daring to try a colorful beetroot fettuccine, each batch is an opportunity to showcase your culinary flair. So roll up your sleeves, gather your ingredients, and let your imagination guide you to pasta perfection!

13. Troubleshooting Common Pasta-Making Problems

Making homemade pasta is a delightful culinary journey, but even the most seasoned chefs encounter hiccups along the way. Understanding how to troubleshoot common pasta-making problems can elevate your skills and ensure your noodles turn out perfect every time.

**1. Dough Too Sticky:** If your dough feels more like a sticky mess than a smooth ball, fear not! This is a common issue, especially in humid conditions. Simply sprinkle a little extra flour onto your work surface and knead it in. Just be cautious not to overdo it, as too much flour can lead to tough pasta.

**2. Dough Too Dry:** On the flip side, if your pasta dough is cracking and feels crumbly, it may be too dry. This can happen if you accidentally added too much flour or not enough moisture. To remedy this, gently incorporate a few drops of water or an extra egg if you’re using egg pasta. Knead until you achieve that silky texture.

**3. Pasta Not Cooking Evenly:** If your pasta is unevenly cooked, with some noodles mushy and others underdone, check your boiling water. It should be at a rolling boil before you add the pasta, and remember to stir occasionally to prevent sticking. Additionally, ensure you’re cooking in batches; overcrowding the pot can lead to uneven cooking.

**4. Pasta Sticking Together:** After rolling out your dough and cutting it into shapes, you may find the pieces sticking together. To prevent this, dust your noodles lightly with semolina flour or all-purpose flour immediately after cutting. This creates a barrier and keeps them from clumping.

**5. Over or Under Seasoned:** Finally, the taste of your pasta can be easily adjusted. If you’ve accidentally over-salted your dough, consider adding a touch of sugar to balance the flavors. Conversely, if your pasta is too bland, boil it in salted water for a perfectly seasoned finish.

Remember, every pasta-making mishap is an opportunity to learn and refine your technique. With these troubleshooting tips in your back pocket, you’ll be well-equipped to conquer any pasta-making challenges and enjoy the art of crafting delicious homemade noodles. Happy cooking!

14. Serving Suggestions and Presentation Tips

Once you’ve mastered the art of making homemade pasta, it’s time to elevate your culinary creation through thoughtful serving suggestions and presentation tips that will delight both the eyes and the palate. After all, a beautifully presented dish can elevate a simple meal into a memorable dining experience.

**Choose the Right Plate:** Start with selecting the perfect plate. Opt for a wide, shallow bowl for saucy pastas, allowing the sauce to pool beautifully around the noodles. For a heartier dish, a deeper bowl can showcase your pasta while holding in any delicious toppings.

**Twirl for Elegance:** When serving long pasta like spaghetti or fettuccine, use a pasta fork or tongs to twirl a portion into a nest-like shape. This classic presentation not only looks sophisticated but also allows for easy eating. Place the twirled pasta in the center of the plate and let it cascade slightly over the edges for an inviting look.

**Garnish with Fresh Ingredients:** Elevate your dish with fresh herbs, such as basil or parsley, finely chopped and sprinkled on top just before serving. Add a few shavings of Parmesan cheese or a dollop of ricotta for a creamy touch. A drizzle of high-quality olive oil or balsamic reduction can add a glossy finish and enhancement in flavor.

**Add Color and Texture:** Incorporate vibrant vegetables or proteins that complement your pasta dish. Roasted cherry tomatoes, sautéed spinach, or grilled chicken can provide not only color but also texture that contrasts beautifully with the soft noodles.

**Play with Height:** When plating, think vertically. Layer your components to create height—perhaps a mound of pasta topped with sautéed vegetables or a piece of grilled fish resting on a bed of linguine. This not only enhances visual appeal but also promises a delightful variety of flavors and textures in each bite.

**Final Touches:** Before serving, take a moment to wipe the edges of the plate with a clean cloth to remove any splatters, allowing your dish to shine. A sprinkle of freshly cracked black pepper can add a touch of sophistication, completing the look.

With these serving suggestions and presentation tips, your homemade pasta will not only taste incredible but also look like a dish straight out of a fine dining restaurant. Remember, the goal is to create a feast for the senses, ensuring that your guests are as enchanted by the visual presentation as they are by the delightful flavors of your handcrafted noodles.

15. Conclusion: Celebrating Your Homemade Pasta Success!

As you twirl that perfectly cooked strand of homemade pasta around your fork, take a moment to savor not just the deliciousness of your culinary creation, but also the journey that brought you here. Mastering homemade pasta is more than just a cooking skill; it’s a celebration of tradition, creativity, and the joy of sharing a meal with loved ones.

With each batch of dough you knead, each cut of fettuccine you make, and every sauce you pair with your noodles, you are tapping into a rich history that spans generations. Remember that the beauty of pasta lies in its versatility—whether you prefer the classic simplicity of a marinara sauce or a rich, creamy Alfredo, your homemade noodles are the perfect canvas for your culinary imagination.

As you enjoy your delicious handiwork, reflect on the tips and techniques you’ve learned throughout this journey. From mastering the dough’s texture to perfecting the cooking time, each tip will empower you to create even more exquisite pasta dishes in the future.

So, gather your friends and family around the table, serve your homemade masterpiece, and revel in the applause that follows! Celebrate your success, share your passion for pasta, and continue to experiment with flavors and shapes. After all, the world of homemade pasta is vast and inviting, and there’s always more to explore. Here’s to many more delicious meals and the joy of homemade pasta—buon appetito!

As we wrap up our journey into the art of mastering homemade pasta, we hope you feel inspired and equipped to create your own perfect noodles right in your kitchen. From selecting the finest ingredients to perfecting your kneading and rolling techniques, each step is an opportunity to enhance your culinary skills and enjoy the rewarding process of making pasta from scratch. Remember, practice makes perfect, so don’t hesitate to experiment with different shapes, flavors, and sauces until you find your signature dish. We can’t wait to hear about your pasta-making adventures and see the delicious results! Buon appetito!

What are the best ways to make homemade sauces?

In the culinary world, sauces are the unsung heroes that elevate a simple meal into a gastronomic delight.

Whether it’s a rich marinara bringing warmth to a bowl of pasta, a zesty chimichurri adding a burst of flavor to grilled meats, or a velvety béchamel transforming a humble vegetable into a gourmet experience, the right sauce can make all the difference. In this blog post, “Saucy Secrets: Mastering Homemade Sauces for Every Dish,” we will embark on a flavorful journey, exploring the art of sauce-making from the basic foundations to intricate blends that tantalize the taste buds. With a dash of creativity and a sprinkle of inspiration, you’ll learn how to create versatile sauces that not only enhance your favorite dishes but also impress your family and friends. Get ready to unlock the secret to elevating your culinary repertoire and making every meal a celebration!

1. Introduction to the World of Sauces

What are the best ways to make homemade sauces?
Credit : whatcanu.com

Sauces are the unsung heroes of the culinary world, transforming even the simplest of dishes into extraordinary experiences. They are the lush, flavorful blankets that envelop your food, adding depth, richness, and complexity to every bite. Imagine a perfectly grilled chicken breast served with a tangy chimichurri, or a bowl of pasta elevated by a creamy Alfredo sauce—these combinations highlight how a well-crafted sauce can turn a mundane meal into a memorable feast.

In this introduction to the world of sauces, we will explore the myriad types of sauces that grace tables around the globe, from classic French reductions to spicy Asian dips. each sauce tells a story, reflecting the culture and traditions from which it originates. Whether you’re a novice cook or a seasoned chef, understanding the foundational techniques and ingredients behind sauces will unlock a new realm of culinary creativity.

We will delve into different categories, including emulsions like vinaigrettes, reductions that enhance the natural flavors of your ingredients, and even fresh sauces that burst with vibrant herbs and spices. Discover the essential components that make a sauce successful: the balance of acidity, sweetness, saltiness, and umami. With a few simple techniques and a dash of creativity, you’ll be crafting sauces that not only complement your dishes but also impress your family and friends.

Get ready to embark on a flavorful journey that will elevate your cooking and enrich your meals. From the comforting familiarity of a homemade marinara to the exotic allure of a spicy harissa, mastering sauces will set you on the path to becoming a true culinary artist!

2. Essential Tools for Sauce-Making

When it comes to crafting the perfect sauce, having the right tools at your disposal can make all the difference. While the ingredients are undoubtedly important, the equipment you use will elevate your culinary experience and ensure consistent results every time. Here’s a breakdown of some essential tools that every home chef should consider for their sauce-making arsenal.

**1. High-Quality Saucepan:**
A sturdy saucepan with a thick bottom is key for preventing sauces from scorching. Opt for a medium-sized pot, ideally made from stainless steel or enameled cast iron, which provides even heat distribution. This will allow your sauces to simmer gently, promoting the perfect melding of flavors.

**2. Whisk:**
A good whisk is essential for stirring sauces, especially when incorporating ingredients like butter or emulsifying oil and vinegar. A balloon whisk, with its flexible wire design, is perfect for achieving a smooth, lump-free texture in your sauces.

**3. Wooden Spoon:**
Durable and versatile, a wooden spoon is an indispensable tool in the kitchen. Use it to stir, scrape, and combine ingredients in your saucepan without the risk of scratching non-stick surfaces. Plus, wooden spoons can withstand high temperatures, making them ideal for savory sauces that require long cooking times.

**4. Fine Mesh Strainer:**
To achieve a velvety-smooth finish, a fine mesh strainer is essential. Whether you’re straining out solids from a stock-based sauce or purifying a fruit coulis, this tool will help you achieve that refined texture that makes gourmet sauces stand out.

**5. Immersion Blender:**
For those who love creamy sauces, an immersion blender is a game changer. This handheld tool allows you to blend sauces directly in the pot, making it easy to achieve a silky consistency without the need for transferring hot mixtures to a traditional blender.

**6. measuring Cups and Spoons:**
Precision is key in sauce-making, and having a reliable set of measuring cups and spoons ensures that your flavors are balanced. Invest in both dry and liquid measuring tools to accurately gauge your ingredients, especially when crafting complex sauces that require careful ratios.

**7. Storage Containers:**
Once you’ve mastered your homemade sauces, you’ll want to store them properly to maintain their freshness. Invest in high-quality glass or BPA-free plastic containers with airtight seals. Labeling each container with the sauce name and date will help you keep track of your creations and make it easy to grab them when needed.

By equipping your kitchen with these essential tools, you’ll be well on your way to mastering the art of sauce-making. With the right equipment at your fingertips, you can confidently experiment with flavors, textures, and techniques, transforming any dish into a culinary masterpiece!

3. Understanding the Basics: Sauce Categories

What are the best ways to make homemade sauces?
Credit : whatcanu.com

Before diving into the world of homemade sauces, it’s essential to understand the foundational categories they fall into. Each category carries its own distinctive character and purpose, transforming simple dishes into culinary masterpieces. Here’s a breakdown of the primary sauce categories that every home cook should familiarize themselves with:

1. **Mother Sauces**: These are the cornerstone of classical cuisine and serve as the base for a multitude of other sauces. The five traditional mother sauces include béchamel (a creamy white sauce made from milk and a roux), velouté (a light stock-based sauce thickened with a roux), espagnole (a rich brown sauce made from a dark roux, mirepoix, and tomatoes), tomato sauce (a savory blend of tomatoes and various seasonings), and hollandaise (a rich sauce made from egg yolks, butter, and lemon juice). Mastering these will give you the confidence to explore endless variations.

2. **Emulsified Sauces**: These sauces are characterized by their creamy texture and ability to blend oil and water-based ingredients. Think of classics like mayonnaise and vinaigrettes. Understanding how to properly emulsify will allow you to create a variety of dressings and sauces that can elevate salads, sandwiches, and grilled dishes.

3. **Pan Sauces**: Often created in the same pan where the main dish was cooked, these sauces capitalize on the flavorful bits left behind, known as fond. By deglazing the pan with broth, wine, or vinegar and reducing it, you can create a quick and robust sauce that enhances the flavors of your protein or vegetables.

4. **Stock-based Sauces**: These sauces rely on the rich, concentrated flavors of homemade or store-bought stock. By reducing stock down to a syrupy consistency and adding aromatics or herbs, you can achieve a depth of flavor that will impress even the most discerning palates.

5. **Sweet Sauces**: Don’t overlook the power of sweet sauces! From a luscious chocolate ganache to a tangy fruit coulis, sweet sauces can turn desserts from ordinary to extraordinary. Knowing how to balance sweetness with acidity can make your desserts sing.

Understanding these categories not only equips you with a solid foundation but also allows you to experiment and innovate. With each sauce, you will learn the techniques that can be adapted and combined to create unique flavors and textures. So, roll up your sleeves, gather your ingredients, and let the saucy adventures begin!

4. Classic Sauces Every Home Cook Should Know

When it comes to elevating your culinary skills, mastering a few classic sauces can be the secret ingredient that transforms everyday meals into extraordinary dining experiences. These foundational sauces not only enhance the flavor of your dishes but also add a touch of sophistication to your home cooking repertoire. Here are some must-know classic sauces that every home cook should have in their arsenal:

**1. Béchamel Sauce:** Often referred to as the “white sauce,” béchamel is a creamy concoction made from butter, flour, and milk. This versatile sauce serves as the base for numerous dishes, from lasagna to macaroni and cheese. Its luscious texture and mild flavor make it perfect for draping over vegetables or incorporating into comforting casseroles.

**2. Marinara Sauce:** A staple in Italian cuisine, marinara sauce is a simple tomato-based sauce that bursts with flavor. Made with ripe tomatoes, garlic, olive oil, and a sprinkle of herbs, this sauce is perfect for pasta, pizza, or as a dipping sauce. Its bright acidity and aromatic qualities can elevate even the simplest of meals.

**3. Hollandaise Sauce:** Known for its rich, buttery flavor, hollandaise sauce is a key component of classic dishes like Eggs Benedict. Made with egg yolks, melted butter, and lemon juice, this sauce requires a bit of technique but is well worth the effort. Its creamy texture and tangy notes make it a delightful accompaniment for vegetables, fish, and meats.

**4. Velouté Sauce:** Often regarded as one of the “mother sauces” of French cuisine, velouté is a smooth, light sauce made from a roux and stock. This sauce can serve as a base for countless variations, such as adding cream for a luscious sauce suprême or enriching it with mushrooms for a delightful sauce allemande. Its versatility makes it a go-to for both sauces and soups.

**5. Pesto Sauce:** A vibrant green sauce with roots in Italian cuisine, pesto is typically made from fresh basil, garlic, pine nuts, Parmesan cheese, and olive oil. This uncooked sauce bursts with flavor and can be tossed with pasta, spread on sandwiches, or drizzled over grilled vegetables for a fresh, herbal kick.

Incorporating these classic sauces into your cooking not only enhances the taste of your dishes but also boosts your confidence in the kitchen. Experiment with these recipes, tweak them to your liking, and soon you’ll find that the art of sauce-making is truly a delicious journey worth taking!

5. Step-by-Step Guide to Making a Basic Tomato Sauce

What are the best ways to make homemade sauces?
Credit : whatcanu.com

Creating a basic tomato sauce is a culinary rite of passage that can elevate your dishes to new heights. This versatile sauce serves as the foundation for countless recipes, from pasta and pizza to stews and soups. Here’s a step-by-step guide to help you master this essential sauce, ensuring it becomes a staple in your kitchen.

**Ingredients You’ll Need:**
– 2 tablespoons of olive oil
– 1 medium onion, finely chopped
– 2-3 cloves of garlic, minced
– 1 can (28 ounces) of whole peeled tomatoes (or 2 pounds of fresh tomatoes, peeled and chopped)
– 1 teaspoon of sugar (optional, to balance acidity)
– Salt and pepper, to taste
– Fresh basil leaves, for garnish

**Step 1: Sauté the Aromatics**
In a large saucepan, heat the olive oil over medium heat. Add the chopped onion and sauté for about 5-7 minutes, or until it becomes translucent and fragrant. Stir in the minced garlic, cooking for an additional 1-2 minutes until it releases its sweet aroma—be careful not to let it brown, as this can impart a bitter flavor.

**Step 2: Add the Tomatoes**
If you’re using canned tomatoes, crush them gently with your hands or a spoon before adding them to the pot. For fresh tomatoes, ensure they’re peeled and chopped before tossing them in. Stir well to combine with the sautéed onions and garlic.

**Step 3: Season and Simmer**
Add a pinch of salt and pepper to taste. If you find your tomatoes a bit too acidic, sprinkle in a teaspoon of sugar to balance it out. Bring the mixture to a gentle simmer, then reduce the heat to low. Cover the saucepan partially, allowing the sauce to bubble away for 30-45 minutes. This slow cooking process deepens the flavors, allowing the sauce to reduce and thicken beautifully.

**Step 4: Blend for Smoothness (Optional)**
For a smoother consistency, you can use an immersion blender directly in the pot or transfer the sauce to a countertop blender. Blend until you reach your desired texture, whether chunky or silky smooth.

**Step 5: Final Touches**
Once your sauce has reached the perfect thickness and flavor, taste and adjust the seasoning as needed. This is also the time to stir in some fresh chopped basil for a burst of herbal freshness.

**Step 6: Serve or Store**
Your homemade tomato sauce is now ready to use! Pour it over pasta, spread it on pizza, or incorporate it into your favorite dishes. If you have leftovers, let the sauce cool before transferring it to an airtight container. It can be refrigerated for up to a week or frozen for later use—perfect for those busy weeknights when you crave something homemade.

With this step-by-step guide, mastering a basic tomato sauce is not only achievable but also incredibly rewarding. Enjoy the process and experiment with additional herbs or spices to make it uniquely yours!

6. Creating Rich and Creamy Alfredo Sauce

Creating a rich and creamy Alfredo sauce is a culinary journey that will transform your pasta dishes into an indulgent experience. This classic Italian sauce, beloved for its velvety texture and decadent flavor, is surprisingly simple to make, requiring just a handful of ingredients and a bit of technique.

Start with high-quality unsalted butter; its subtle flavor will form the foundation of your sauce. Melt the butter gently in a large skillet over medium heat, allowing it to bubble without browning. Once melted, add freshly minced garlic, sautéing until fragrant—this will infuse your sauce with a warm, aromatic depth.

Next, it’s time to introduce the cream. For the richest sauce, opt for heavy cream. Pour it into the skillet, stirring gently to combine with the butter and garlic. Bring the mixture to a gentle simmer, which will allow the flavors to meld beautifully while thickening the sauce. The key is to avoid boiling, as this can cause the cream to separate, leading to a less-than-desirable texture.

Once your cream is simmering, it’s time to incorporate the star ingredient: freshly grated Parmesan cheese. This cheese not only thickens the sauce but also adds a nutty, salty flavor that elevates the entire dish. Stir the cheese in gradually, allowing it to melt into the sauce fully, creating a harmonious blend. Keep an eye on the consistency; if the sauce becomes too thick, you can thin it out with a splash of pasta cooking water for a silky finish.

For an extra touch, season your Alfredo sauce with salt, freshly cracked black pepper, and a hint of nutmeg. These simple spices will enhance the flavor profile without overpowering the dish. Finally, toss your cooked pasta directly into the skillet, ensuring each strand is coated with the luxurious sauce.

Serve your creation with a sprinkle of additional Parmesan and a garnish of freshly chopped parsley for a touch of color. With this easy-to-master Alfredo sauce, every meal becomes a rich, comforting experience, leaving your guests—or yourself—delighted and craving more!

7. Mastering the Art of Homemade Pesto

What are the best ways to make homemade sauces?
Credit : whatcanu.com

Pesto is more than just a condiment; it’s a vibrant, aromatic celebration of fresh ingredients that can elevate any dish. Mastering the art of homemade pesto allows you to capture the essence of summer, no matter the season. The classic version, originating from the Liguria region of Italy, is a delightful blend of basil, garlic, pine nuts, Parmesan cheese, and extra virgin olive oil. Each component plays a crucial role, contributing its own unique flavor and texture to the mix.

To begin your pesto journey, choose the freshest basil leaves you can find. The bright green leaves should be fragrant and free from wilting or browning. The vibrant color and aromatic quality of the basil will form the foundation of your pesto, lending it that signature fresh taste. Next, select high-quality pine nuts, as their buttery flavor will complement the basil perfectly. You can also experiment with alternatives like walnuts, almonds, or even pecans for a twist on the traditional recipe.

When it comes to garlic, opt for fresh cloves to avoid the overpowering taste of pre-jarred varieties. A couple of cloves should provide just the right amount of pungency to balance the sweetness of the basil. As for cheese, freshly grated Parmesan or Pecorino Romano adds a salty depth that ties all the flavors together. Finally, drizzle in a generous amount of extra virgin olive oil; this not only enriches the pesto but also helps to emulsify everything into a smooth, cohesive sauce.

To create your pesto, simply combine the basil, garlic, and pine nuts in a food processor. Pulse until finely chopped before gradually adding the cheese and olive oil. Depending on your desired texture, you can blend it into a silky smooth paste or leave it slightly chunky for a more rustic feel. Taste and adjust the seasonings with salt and pepper to ensure a perfect balance.

The beauty of homemade pesto lies in its versatility. Use it as a sauce for pasta, a spread on sandwiches, or a drizzle over grilled vegetables. You can even incorporate it into marinades or salad dressings for an extra kick of flavor. The possibilities are endless! Plus, storing your pesto in an airtight container in the refrigerator allows you to savor that fresh taste for weeks. With a little practice, you’ll master the art of homemade pesto, bringing a touch of Italian culinary magic to your everyday meals.

8. Exploring Asian Flavors: Teriyaki and Hoisin Sauces

When it comes to elevating your dishes with vibrant and complex flavors, few sauces can compete with the bold profiles of teriyaki and hoisin. These two Asian staples are not just condiments; they are culinary powerhouses that can transform a simple meal into a gourmet experience.

**Teriyaki Sauce** is a delightful concoction that balances sweet and savory notes, typically made from soy sauce, sugar, mirin, and sake. Its origins in Japanese cuisine date back centuries, where it was traditionally used to glaze grilled meats, imparting a glossy finish and a rich, umami flavor. Imagine marinating juicy chicken thighs in a homemade teriyaki sauce, allowing the sweet soy glaze to seep into every crevice, then grilling them to perfection. The result? A dish that bursts with flavor and leaves your guests in awe. But teriyaki isn’t limited to chicken; it can also enhance the flavors of beef, fish, and even vegetables, making it an incredibly versatile sauce in your culinary arsenal.

**Hoisin Sauce**, often referred to as “Chinese barbecue sauce,” is the perfect counterpart to teriyaki. This thick, dark sauce combines soybeans, garlic, vinegar, sugar, and various spices, resulting in a sweet and slightly spicy flavor profile. Hoisin is commonly used in Chinese cuisine, particularly for dipping sauces, stir-fries, and marinades. Picture a vibrant stir-fry of crisp vegetables and tender tofu, all coated in a luscious hoisin sauce that clings to every bite. Its depth of flavor adds richness to grilled meats and can even serve as a delightful glaze on roasted duck or pork.

To truly master these sauces, don’t be afraid to experiment. Try combining teriyaki and hoisin for a fusion twist that brings out the best of both worlds—perhaps a teriyaki-hoisin glaze for grilled shrimp or a dipping sauce that bridges the flavors of East and West. The key is to start with high-quality ingredients and adjust the balance of sweet, salty, and umami to suit your palate. With just a few simple ingredients and a splash of creativity, you’ll be well on your way to creating dishes that not only satisfy your taste buds but also impress everyone around your table. Embrace the flavors of Asia and let your culinary adventures begin!

9. How to Make the Perfect Barbecue Sauce

Barbecue sauce is more than just a condiment; it’s the soul of summer cookouts, family gatherings, and cozy backyard barbecues. The perfect barbecue sauce strikes a delicate balance between sweet, savory, tangy, and smoky flavors, enhancing the natural taste of grilled meats and vegetables alike. Here’s how to craft an irresistible sauce that will elevate your grilling game to new heights.

**Start with the Base:** Begin your sauce with a solid foundation. Tomato sauce or ketchup is a popular choice, providing a rich, tangy backdrop. For a more unique flavor profile, consider using a base of apple cider vinegar or mustard. This will lend a delightful zing to your sauce.

**Sweeten the Deal:** To achieve that signature barbecue sweetness, incorporate brown sugar or honey. These ingredients not only add sweetness but also help create a caramelized glaze on your grilled items. Experiment with different sugars like molasses for a deeper flavor or maple syrup for a touch of earthiness.

**Add Depth with Spices:** The magic of barbecue sauce lies in its spices. Garlic powder, onion powder, smoked paprika, and black pepper are fantastic staples. For those who enjoy a little heat, don’t shy away from cayenne pepper or chili powder. A splash of Worcestershire sauce can also contribute umami richness, making your sauce more complex.

**Bring on the Tang:** A dash of apple cider vinegar or lemon juice adds necessary acidity, cutting through the richness and balancing the sweetness. This tangy element is essential for a well-rounded barbecue sauce.

**Get Creative:** Don’t be afraid to personalize your sauce! Consider adding ingredients like chipotle peppers for a smoky kick, or peach preserves for a fruity twist. Each addition can transform your sauce into something uniquely yours.

**Simmer to Perfection:** Once you’ve combined your ingredients, let your sauce simmer on low heat for about 20-30 minutes. This allows the flavors to meld beautifully and develop that signature thickness. Stir occasionally to prevent sticking and ensure even cooking.

**Taste Test:** As your sauce simmers, taste it along the way. Adjust the sweetness, acidity, or heat to match your personal preference. Remember, the best sauces are those that reflect your taste and the dishes they accompany.

**Store for Later:** If you make a larger batch (and trust us, you’ll want to), store your barbecue sauce in an airtight container in the refrigerator. It will keep for up to two weeks, allowing you to enjoy that homemade goodness with every grilled meal.

With these steps, you’ll be well on your way to mastering the perfect barbecue sauce—one that will have friends and family raving and coming back for seconds (or thirds!). So fire up the grill, pour on the sauce, and savor the deliciousness of your homemade creation!

10. Elevating Dishes with Homemade Vinaigrettes

Homemade vinaigrettes are the unsung heroes of the culinary world, capable of transforming even the simplest of dishes into gourmet experiences. These versatile dressings can elevate salads, marinate meats, or serve as zesty dips, all while adding a personal touch that store-bought varieties simply can’t match.

Creating your own vinaigrette is not only easy but also a delightful exercise in flavor experimentation. The basic formula is a balance of acids and fats—typically a ratio of three parts oil to one part vinegar—along with a dash of seasoning and optional flavor enhancers. Start with high-quality extra virgin olive oil for a rich, peppery base, and pair it with your choice of vinegar, such as tangy balsamic, sharp red wine, or even fragrant apple cider.

To further enhance your vinaigrette, consider incorporating fresh herbs like basil or thyme, a spoonful of honey for sweetness, or a splash of citrus juice for brightness. Whisk everything together until emulsified, and you’ll have a dressing that’s bursting with flavor.

Imagine drizzling your homemade vinaigrette over a crisp mixed greens salad, where the brightness of the dressing complements the crunch of the vegetables, or using it to marinate chicken, infusing the meat with layers of zesty goodness before grilling. Even drizzling it over roasted vegetables can take a simple side dish to new heights, making them irresistible.

The beauty of homemade vinaigrettes lies in their adaptability. Feel free to play around with different flavor profiles—add garlic for a robust kick, or a hint of Dijon mustard for a creamy texture. With just a little creativity, you can create a signature vinaigrette that reflects your personal taste and enhances every dish it accompanies. So grab your mixing bowl and start experimenting; your next meal deserves that extra touch of homemade flair!

11. Tips for Balancing Flavors in Your Sauces

Creating a delicious sauce is an art, and mastering the balance of flavors is the key to achieving culinary excellence. When crafting your homemade sauces, it’s essential to understand the harmony between the primary flavor components: acidity, sweetness, saltiness, and bitterness. Each element plays a crucial role and can elevate your sauce from ordinary to extraordinary.

Start by incorporating acidity to brighten your sauce. Ingredients like vinegar, citrus juice, or even a splash of wine can cut through richness and add a refreshing zing. A dash of acid can transform a heavy cream sauce into a lighter, more vibrant creation. Remember, it’s all about balance—too much acidity can overpower the dish, so add it gradually and taste as you go.

Next, consider sweetness. A touch of honey, maple syrup, or even a finely chopped onion can enhance the depth of your sauce. Sweetness can act as a counterbalance to acidity and bitterness, creating a more rounded flavor profile. However, be cautious; a little sweetness goes a long way, and you don’t want your sauce to veer into dessert territory.

Saltiness is another crucial element. It amplifies flavors and brings out the best in your ingredients. Use kosher salt or sea salt for a cleaner taste, and don’t forget that some ingredients, like soy sauce or cheese, already contain salt. Taste frequently to ensure your sauce is seasoned to perfection without becoming overly salty.

Lastly, embrace bitterness as a flavor enhancer. Ingredients like dark chocolate, coffee, or even certain herbs can introduce an intriguing complexity to your sauce. Just a pinch can add depth, but be careful not to dominate the other flavors.

Don’t shy away from experimenting with herbs and spices, either. Fresh herbs like basil, cilantro, or parsley can add brightness, while spices like cumin, paprika, or black pepper can impart warmth and depth. Always taste your sauce throughout the cooking process; this will allow you to adjust and refine the flavors until they sing in harmony.

By mastering these tips for balancing flavors, you’ll unlock the secret to creating unforgettable sauces that elevate any dish. Whether you’re drizzling a rich béchamel over pasta or crafting a zesty chimichurri for grilled meats, the right balance will make all the difference on your plate!

12. Storing and Preserving Your Homemade Sauces

Storing and preserving your homemade sauces is just as crucial as crafting them to perfection. Proper storage not only extends the shelf life of your culinary creations but also ensures that their flavors remain vibrant and delightful.

First and foremost, choose the right containers. Glass jars with airtight lids are an excellent option, as they help prevent oxidation and maintain the freshness of your sauces. Opt for containers that are appropriately sized for your needs; smaller jars are ideal for single-use sauces, while larger ones work well for batch-made favorites that you plan to use frequently.

Once you’ve poured your sauce into its container, allow it to cool completely at room temperature before sealing and storing it in the fridge. Most homemade sauces can last about a week in the refrigerator, but for longer preservation, consider freezing your sauces. Portion them into ice cube trays or freezer-safe bags, and once frozen, transfer the cubes to a larger container or bag for easy access. This method allows you to thaw just the right amount for any dish, minimizing waste and maximizing convenience.

Labeling is another essential step. Be sure to write the name of the sauce and the date it was made on each container. This simple practice helps you keep track of freshness and ensures that you use your sauces within their optimal timeframe.

For those interested in canning, homemade sauces can be preserved for months or even years. However, it’s crucial to follow proper canning guidelines to ensure food safety. High-acid sauces like marinara or barbecue sauce are generally safe for water bath canning, while low-acid sauces may require pressure canning.

By mastering the art of storing and preserving your homemade sauces, you not only enhance their shelf life but also make your culinary journey smoother and more enjoyable. With sauces ready at your fingertips, every meal can transform into a flavorful masterpiece!

13. Creative Uses for Leftover Sauces

When it comes to homemade sauces, it’s easy to get caught up in the excitement of crafting the perfect blend of flavors, only to find yourself with a bit left over once the meal is done. But don’t let those flavorful remnants go to waste! Leftover sauces are culinary goldmines, full of potential to enhance future dishes in delicious and unexpected ways.

Consider a rich marinara sauce that’s just a bit too much for your spaghetti night. Instead of tossing it in the fridge, think creatively! Use it as a base for a savory shakshuka, where poached eggs simmer gently in the sauce, soaking up its vibrant flavors. Alternatively, blend it into a creamy soup for an instant flavor boost, or use it as a dipping sauce for freshly baked breadsticks at your next gathering.

Got some extra pesto lying around? This herbaceous wonder can be swirled into a creamy risotto for a fresh twist or used as a zesty marinade for grilled chicken or vegetables. You can even stir it into scrambled eggs for a gourmet breakfast that will elevate your morning routine to new heights.

Sweet sauces, like leftover barbecue or teriyaki, can bring life to an otherwise ordinary stir-fry or roasted vegetables. Drizzle them over grilled fish for a delightful glaze or mix them into your salad dressings for a unique, tangy kick.

And don’t forget about dessert! A leftover chocolate sauce can transform plain vanilla ice cream into an indulgent treat, while a fruit sauce can be drizzled over pancakes or used as a topping for yogurt parfaits.

By embracing creative uses for leftover sauces, you not only minimize waste but also expand your culinary repertoire. With a little imagination, those remnants can become the star ingredient in a new dish, ensuring that every drop of your homemade creation is savored. So next time you find yourself with extra sauce, let your creativity flow and discover the endless possibilities that await!

14. Pairing Sauces with Different Dishes

Pairing sauces with the right dishes can elevate your culinary creations from ordinary to extraordinary. The magic of a well-chosen sauce lies in its ability to enhance flavors, add depth, and bring a harmonious balance to your meals. Let’s explore how to expertly match sauces with various dishes to create unforgettable dining experiences.

**1. Pasta:** Rich, hearty sauces like marinara, Alfredo, or pesto are perfect companions for pasta. A classic tomato-based marinara sauce with its tangy sweetness pairs beautifully with spaghetti, while a creamy Alfredo sauce brings a velvety richness to fettuccine. For a fresh burst of flavor, toss your favorite pasta with homemade basil pesto, allowing the vibrant herbs to shine through.

**2. Grilled Meats:** When it comes to grilled meats, a bold barbecue sauce can add a smoky sweetness that complements the charred flavors beautifully. Consider a tangy mustard-based sauce for grilled chicken or a rich chimichurri for steak, which adds a fresh herbaceous note that cuts through the meat’s richness.

**3. Vegetables:** Sauces can transform even the simplest vegetables into a sensational side dish. A light vinaigrette drizzled over roasted asparagus or a zesty tahini sauce can elevate the dish while keeping it healthy. For stir-fried vegetables, a savory soy sauce or teriyaki glaze can enhance the natural flavors and add an irresistible umami punch.

**4. Seafood:** When pairing sauces with seafood, think light and bright. A lemon-butter sauce can enhance the delicate flavors of fish, while a spicy aioli can add a delightful kick to shrimp tacos. For a more adventurous pairing, consider a mango salsa to bring a tropical sweetness to grilled salmon.

**5. Desserts:** Don’t forget about the sweet side! A drizzle of chocolate sauce can elevate a scoop of vanilla ice cream, while a homemade caramel sauce can transform a simple slice of apple pie into a decadent dessert experience. Fresh fruit compotes or flavored syrups can also add a burst of flavor and color to your favorite sweets.

By understanding the unique profiles of different sauces and how they interact with various dishes, you can create meals that are not only delicious but also memorable. So, don your apron and experiment with these pairings—your taste buds will thank you!

15. Conclusion: Your Journey to Sauce Mastery

As we reach the conclusion of our flavorful journey, it’s essential to recognize that mastering homemade sauces is not just about following recipes; it’s about embracing creativity, experimenting with flavors, and discovering what truly delights your palate. Each sauce you create becomes a reflection of your personality and culinary preferences, transforming simple ingredients into extraordinary accompaniments that elevate your meals.

Remember, sauce-making is an art that improves with practice. Don’t shy away from adjusting ingredients to suit your taste, whether it’s adding a dash of heat, a splash of acidity, or a hint of sweetness. Keep a well-stocked pantry with essential herbs, spices, and bases, and you’ll find that the possibilities are endless.

As you venture into your kitchen, let each sauce be a new adventure. From a classic béchamel that graces your lasagna to a zesty chimichurri that livens up grilled meats, these sauces can turn the ordinary into the extraordinary. And don’t forget the power of presentation; a beautifully sauced dish can be as delightful to the eyes as it is to the taste buds.

So, gather your ingredients, unleash your imagination, and start experimenting! Your journey to sauce mastery is just beginning, and with each batch, you’ll not only refine your skills but also delight your family and friends with unforgettable meals. Here’s to creating sauces that inspire, impress, and invite everyone to gather around your table time and again!

As we wrap up our exploration of homemade sauces, we hope you’re feeling inspired and excited to elevate your culinary creations with these flavorful additions. From the zesty tang of a fresh salsa to the rich creaminess of a classic Alfredo, mastering these sauces can transform even the simplest dish into a gourmet experience. Remember, the beauty of homemade sauces lies not only in their taste but also in your ability to customize them to suit your preferences. So, roll up your sleeves, experiment with flavors, and don’t hesitate to make these recipes your own. With a little practice, you’ll soon be the sauce maestro of your kitchen, impressing family and friends with your newfound skills. Happy cooking, and may your dishes always be saucy!

What are the best ways to make homemade desserts?

There’s something incredibly satisfying about crafting a delectable dessert from scratch, and the sweet rewards are well worth the effort.

Whether you’re a seasoned baker or a curious novice, the joy of creating irresistible homemade treats can elevate any occasion—from cozy family dinners to festive gatherings with friends. In this blog post, we’ll explore ten mouthwatering dessert recipes that are not only easy to master but also guaranteed to impress. From rich chocolate cakes and creamy cheesecakes to fruity tarts and delicate cookies, each recipe offers a delightful combination of flavors and textures that will tantalize your taste buds. Grab your apron and get ready to indulge in the art of homemade desserts, as we guide you through simple steps to create confections that will bring smiles and satisfaction to everyone around your table!

1. Introduction: The Joy of Homemade Desserts

What are the best ways to make homemade desserts?
Credit : whatcanu.com

In a world that often feels rushed and impersonal, there’s something truly magical about the warmth and comfort of homemade desserts. The act of baking is more than just a means to satisfy a sweet tooth; it’s a time-honored tradition that brings families together, ignites creativity, and fills homes with delightful aromas. Imagine walking into your kitchen and being enveloped by the rich scents of freshly baked cookies or a bubbling fruit cobbler. Each bite tells a story, a testament to the love and care that went into creating it.

Homemade desserts not only allow for a personal touch but also offer the freedom to experiment with flavors and ingredients that resonate with you and your loved ones. Whether you’re a novice baker or a seasoned pro, the joy of mastering a new recipe can be incredibly rewarding. It’s about more than just the final product; it’s the process—measuring, mixing, and watching as simple ingredients transform into something extraordinary.

Join us on a sweet journey as we explore 10 irresistible homemade desserts that you can easily master today. From classic treats to innovative twists, these recipes are designed to inspire and delight, promising to turn any day into a special occasion. So, gather your ingredients, roll up your sleeves, and let’s dive into the delightful world of homemade desserts!

2. Essential Baking Tools and Ingredients

Before diving into the world of homemade desserts, it’s crucial to equip yourself with the right baking tools and ingredients. Having the essentials on hand not only streamlines the baking process but also elevates the quality of your creations. Here’s a rundown of what you’ll need to ensure your baking adventures are as enjoyable as they are successful.

**Baking Tools:**

1. **Mixing Bowls:** Invest in a set of sturdy mixing bowls in various sizes. Glass or stainless steel options are ideal as they are durable and easy to clean.

2. **Measuring Cups and Spoons:** Precision is key in baking. A set of dry measuring cups, liquid measuring cups, and a variety of measuring spoons will help you get your ratios just right.

3. **Whisk and Spatula:** A good whisk is essential for mixing, folding, and aerating your ingredients. Silicone spatulas are perfect for scraping down the sides of bowls and folding in delicate mixtures without deflating them.

4. **Baking Sheet and Pans:** A versatile baking sheet is a must-have for cookies and sheet cakes. Additionally, invest in a range of cake pans (round and square) and a muffin tin for those moments when you want to bake in batches.

5. **Rolling Pin:** Whether you’re rolling out pie crusts or cookie dough, a sturdy rolling pin will help you achieve the perfect thickness.

6. **Oven Thermometer:** Ensuring your oven is at the right temperature is crucial for baking success. An oven thermometer will help you avoid underbaked or overbaked disasters.

7. **Cooling Rack:** After pulling your treats from the oven, cooling racks allow air to circulate around them, preventing sogginess and ensuring they set properly.

**Essential Ingredients:**

1. **Flour:** All-purpose flour is the backbone of most baking recipes, but keep specialty flours like cake flour or whole wheat flour on hand for specific desserts.

2. **Sugar:** Granulated sugar, brown sugar, and powdered sugar each serve different roles in baking, from sweetening to providing texture.

3. **Butter:** Unsalted butter is ideal for baking, allowing you to control the saltiness in your recipes.

4. **Eggs:** Fresh eggs bring moisture and structure to your baked goods. Make sure to have a supply on hand, as they are a common ingredient in most desserts.

5. **Baking Powder and Baking Soda:** These leavening agents are essential for achieving that light, fluffy texture in cakes and cookies.

6. **Vanilla Extract:** A splash of pure vanilla extract enhances the flavor of almost any dessert, adding a warm, inviting aroma.

7. **Chocolate:** Whether it’s chips, bars, or cocoa powder, chocolate is a beloved ingredient in countless desserts.

Having the right tools and ingredients not only sets the foundation for your baking journey but also ignites your creativity in the kitchen. With these essentials at your fingertips, you’ll be well-prepared to tackle any dessert recipe that catches your eye. Happy baking!

3. Classic Chocolate Chip Cookies

What are the best ways to make homemade desserts?
Credit : whatcanu.com

When it comes to homemade desserts, few treats evoke the warmth and nostalgia of classic chocolate chip cookies. There’s something undeniably comforting about the aroma of freshly baked cookies wafting through your kitchen, instantly transporting you to simpler times when life was sweet, and so were the treats.

The charm of these cookies lies not only in their delightful flavors but also in their simplicity. With just a handful of ingredients—flour, butter, sugar, eggs, vanilla extract, baking soda, and, of course, those luscious chocolate chips—you can create a batch that rivals any bakery. The key to achieving that perfect cookie lies in the balance: a crispy edge, a chewy center, and an abundance of chocolate melting in your mouth with every bite.

To master this classic recipe, start by creaming together your softened butter and sugars until the mixture is light and fluffy. This is the secret to achieving that melt-in-your-mouth texture. Next, add in the eggs one at a time, followed by a splash of vanilla that adds a touch of warmth to the flavor profile. Gently fold in the dry ingredients, being careful not to overmix—this ensures your cookies remain tender.

The pièce de résistance, of course, is the chocolate chips. Whether you prefer semi-sweet, dark, or even a mix of both, don’t hold back! Generously fold them into the dough, and if you’re feeling adventurous, consider adding a sprinkle of sea salt on top before baking for an extra layer of flavor contrast.

Scoop the dough onto a baking sheet, allowing space for the cookies to spread, and pop them in the oven. As they bake, keep an eye on them—golden brown edges with a soft, slightly underbaked center are the hallmark of a perfect chocolate chip cookie. Once out of the oven, let them cool (if you can resist the temptation) and watch as your family and friends flock to them, their faces lighting up with joy at the sight of these homemade delights.

With every bite of these classic chocolate chip cookies, you’re not just satisfying a sweet tooth; you’re creating memories. Whether enjoyed with a glass of milk, crumbled over ice cream, or simply savored on their own, these cookies are sure to become a favorite in your homemade dessert repertoire. So preheat your oven, gather your ingredients, and get ready to indulge in the ultimate comfort food!

4. Decadent Fudge Brownies

When it comes to indulgent homemade desserts, nothing quite compares to the rich, chocolatey allure of decadent fudge brownies. These delightful treats are the epitome of comfort food, boasting a fudgy, dense texture that melts in your mouth with each bite. Imagine pulling a warm pan from the oven, the aroma of cocoa and vanilla wafting through your kitchen, beckoning everyone to gather around.

The beauty of fudge brownies lies in their simplicity. With just a handful of pantry staples—unsweetened cocoa powder, butter, sugar, eggs, flour, and a sprinkle of salt—you can create a dessert that feels luxurious yet is incredibly easy to master. The secret? Start with high-quality chocolate for a deeper flavor, and don’t skimp on the butter for that signature gooeyness.

As you mix the ingredients, you’ll notice the batter coming together into a glossy, thick consistency. Pour it into a prepared baking dish and, if you’re feeling adventurous, swirl in some chocolate chips or nuts for added texture and flavor. Bake until the edges are set but the center remains slightly soft—you want that perfect balance between chewy and fudgy.

Once they’ve cooled, cut them into generous squares and watch as chocolate lovers swoon at the sight. Serve them warm with a scoop of vanilla ice cream for an unforgettable dessert experience, or indulge in them plain for a chocolate fix that’s hard to resist. Whether enjoyed alone or shared with friends, these decadent fudge brownies will undoubtedly become a cherished recipe in your homemade dessert arsenal. Get ready to impress yourself and others with this irresistible treat!

5. Luscious No-Bake Cheesecake

What are the best ways to make homemade desserts?
Credit : whatcanu.com

When it comes to desserts, few can rival the creamy decadence of a luscious no-bake cheesecake. This heavenly treat is perfect for those moments when you crave something sweet but want to avoid the oven. The beauty of a no-bake cheesecake lies in its simplicity and the rich, velvety texture that melts in your mouth, making it an irresistible choice for any occasion.

To start, imagine a buttery graham cracker crust, perfectly crisp yet tender, forming the foundation of your cheesecake. Each bite offers a delightful crunch that contrasts beautifully with the smooth filling. The filling itself is a dreamy blend of cream cheese, sugar, and whipped cream, creating a light and airy texture that’s not overly sweet. You can enhance its flavor with a splash of vanilla extract or a hint of lemon juice for a refreshing zest that cuts through the richness.

What truly makes this dessert shine is its versatility. You can dress your no-bake cheesecake with a variety of toppings. Freshly sliced strawberries, a drizzle of rich chocolate ganache, or a swirl of tangy raspberry coulis can elevate your creation to new heights, adding bursts of flavor and vibrant color. Each topping offers a different experience, allowing you to customize the cheesecake to suit your tastes or the preferences of your guests.

Best of all, this dessert requires minimal prep time. With just a few simple ingredients and a little patience while it chills in the fridge, you can whip up a delightful cheesecake that will impress family and friends alike. So grab your mixing bowl and whisk; it’s time to create a luscious no-bake cheesecake that everyone will be raving about!

6. Fluffy Vanilla Cupcakes with Buttercream Frosting

There’s something undeniably delightful about biting into a fluffy vanilla cupcake, and when topped with rich buttercream frosting, it transforms into a little piece of heaven. These cupcakes are the epitome of comfort food, perfect for any occasion—whether you’re celebrating a birthday, a holiday, or simply indulging in a sweet treat after a long day.

To create the perfect fluffy vanilla cupcakes, start with high-quality ingredients. Use pure vanilla extract to give your cupcakes that classic, aromatic flavor, and don’t skimp on the butter for the batter; it’s the secret to achieving a light and airy texture. As you mix the ingredients, pay attention to the batter—overmixing can lead to dense cupcakes, while a gentle fold ensures they rise beautifully in the oven.

Once baked to a golden perfection, let your cupcakes cool completely before slathering on that delectable buttercream frosting. This frosting is where the magic happens. Whipped to creamy perfection, it’s a blend of softened butter, powdered sugar, a splash of heavy cream, and more vanilla extract. The result? A smooth, rich topping that melts in your mouth and complements the lightness of the cupcake itself.

Feel free to get creative with your frosting techniques—whether you choose to pipe it on with a star tip for a professional finish or simply spread it on with a spatula for a rustic touch, each cupcake can be uniquely yours. For an extra pop of color and flavor, consider garnishing with sprinkles, fresh berries, or a drizzle of chocolate.

These fluffy vanilla cupcakes with buttercream frosting are not just a dessert; they’re an experience. With every bite, you’ll savor the tenderness of the cake and the sweet, buttery richness of the frosting, making them a guaranteed crowd-pleaser. Best of all, mastering this simple recipe means you can whip up a batch any time a craving strikes—because who could resist a delicious homemade cupcake?

7. Easy Fruit Tart with Fresh Seasonal Fruits

What are the best ways to make homemade desserts?
Credit : whatcanu.com

Indulging in a homemade fruit tart is like capturing the essence of a sun-kissed orchard in every bite. This Easy Fruit Tart with Fresh Seasonal Fruits is not only visually stunning but also incredibly simple to make, making it a perfect dessert for both novice and experienced bakers alike.

The foundation of this delightful treat is a buttery, flaky tart crust that crumbles beautifully at the first bite. Made from just a handful of ingredients—flour, butter, sugar, and a pinch of salt—this crust comes together effortlessly. Once baked to a golden perfection, it serves as the ideal canvas for the vibrant array of fresh fruits that will adorn it.

The star of this dessert is undoubtedly the seasonal fruits. Depending on when you decide to make this tart, you can choose from luscious strawberries, plump blueberries, juicy peaches, or even zesty citrus slices. The beauty of this recipe lies in its versatility; you can mix and match fruits to create a colorful mosaic that reflects the bounty of the season. A simple glaze made from apricot jam adds a glossy finish, ensuring that your tart looks as appealing as it tastes.

To elevate the flavor profile, consider spreading a layer of creamy vanilla custard or sweet mascarpone cheese on the tart crust before arranging the fruits. This luscious base not only adds a rich creaminess but also enhances the overall taste experience, balancing the tartness of the fruits with its velvety sweetness.

As you slice into this Easy Fruit Tart, you’ll be greeted by a symphony of textures and flavors that dance on your palate. Each bite is a celebration of freshness, and the vibrant colors make it a stunning centerpiece for any gathering. Whether you’re serving it at a summer picnic, a birthday party, or simply enjoying it on a cozy evening at home, this dessert is sure to impress and leave everyone wanting more. So gather your favorite seasonal fruits, roll up your sleeves, and let your culinary creativity shine with this irresistibly delightful fruit tart!

8. Rich and Creamy Pudding Variations

Indulging in rich and creamy puddings is like wrapping yourself in a warm, velvety blanket of comfort. These luscious desserts are not only easy to make but also incredibly versatile, allowing you to experiment with a variety of flavors that will tantalize your taste buds. From classic chocolate and vanilla to adventurous matcha and salted caramel, the possibilities are endless!

To start, a basic pudding recipe usually involves a combination of milk, sugar, cornstarch, and egg yolks, whisked together until thickened to create a silky-smooth texture. But why stop there? Elevate your pudding game by adding a splash of vanilla extract for warmth, or a pinch of sea salt to enhance the sweetness. You can even infuse your milk with spices like cinnamon or nutmeg for a delightful twist.

For a fun and colorful presentation, consider layering your puddings in clear cups or bowls, alternating between different flavors to create a stunning visual treat. Top your creations with whipped cream, fresh berries, or a sprinkle of crushed cookies for added texture and flair. If you’re feeling particularly adventurous, why not try a chocolate-mint pudding or a tropical coconut version? Each bite will transport you to dessert heaven!

Whether you’re enjoying a quiet evening at home or hosting friends for a gathering, these rich and creamy pudding variations are sure to impress. With just a little creativity and a few simple ingredients, you can master these irresistible desserts today and keep everyone coming back for more!

9. Simple Chocolate Mousse Recipe

### 9. Simple Chocolate Mousse Recipe

Indulging in a rich, velvety chocolate mousse is a delight that can transport you to dessert heaven, and the best part is, you can whip it up in no time with just a handful of ingredients. This simple chocolate mousse recipe is perfect for both novice bakers and seasoned dessert enthusiasts alike.

To start, gather your ingredients: 1 cup of heavy cream, 2 tablespoons of sugar, 1 teaspoon of vanilla extract, and 4 ounces of high-quality bittersweet chocolate. The key to a successful mousse is using good chocolate, as its flavor will shine through in every silky spoonful.

Begin by melting the chocolate. You can do this gently in a microwave or over a double boiler, taking care to stir it frequently until it’s smooth and glossy. Let it cool slightly while you prepare the cream. In a separate bowl, whip the heavy cream with the sugar and vanilla extract until soft peaks form. This is where the magic happens; the cream will transform into a light and airy cloud that provides the mousse with its signature texture.

Once the chocolate has cooled to room temperature, gently fold it into the whipped cream. Be careful not to deflate the mixture; you want to maintain that light, airy quality. Use a spatula to combine the two mixtures until just blended. Spoon the mousse into individual serving dishes or cups, and refrigerate for at least an hour to allow it to set.

When you’re ready to serve, you can garnish your chocolate mousse with a sprinkle of cocoa powder, a dollop of whipped cream, or even fresh berries for a pop of color. The result is a decadent dessert that is not only luxurious but also incredibly easy to make. With its silky texture and rich chocolate flavor, this simple chocolate mousse will undoubtedly become a favorite in your dessert repertoire, perfect for impressing guests or treating yourself after a long day. Enjoy each velvety spoonful, and watch as it disappears quicker than you can say “homemade dessert”!

10. Warm Apple Crisp with Oat Topping

**10. Warm Apple Crisp with Oat Topping**

Indulging in a warm apple crisp with oat topping is like wrapping yourself in a cozy blanket on a chilly autumn evening. This delightful dessert combines the sweet, tart crunch of fresh apples with a buttery, golden oat topping that creates a satisfying contrast of textures. Imagine the aroma wafting through your kitchen as the crisp bakes, filling the air with the comforting scents of cinnamon and brown sugar.

To start, you’ll need to slice up some tart apples—Granny Smith or Honeycrisp work beautifully—mixing them with a sprinkle of sugar, a dash of cinnamon, and a hint of lemon juice to enhance their natural flavors. Once your apple mixture is nestled in a baking dish, it’s time to whip up the oat topping. Combining rolled oats with flour, brown sugar, and melted butter creates a crumbly, rustic topping that bakes to a golden perfection.

As the apple crisp bakes in the oven, the apples soften and caramelize, while the oat topping turns wonderfully crisp and crunchy. Serve it warm, perhaps with a generous scoop of vanilla ice cream melting on top, or a dollop of freshly whipped cream. Each spoonful offers a delightful balance of sweetness and warmth, making it a perfect end to any meal or a comforting dessert to share with loved ones. This homemade apple crisp is not just a treat; it’s a heartwarming experience that captures the essence of home and the joy of baking. Get ready to master this irresistible dessert today and enjoy the smiles it brings!

11. Homemade Ice Cream: Basic Recipe and Flavor Variations

When it comes to homemade desserts, few indulgences can rival the creamy, dreamy delight of homemade ice cream. Not only is it a treat that evokes nostalgia, but it’s also incredibly simple to make from the comfort of your own kitchen. With just a few basic ingredients and some creativity, you can whip up a batch of ice cream that rivals any store-bought version.

**Basic Recipe:**

To start your ice cream journey, you’ll need the following essentials: 2 cups of heavy cream, 1 cup of whole milk, 3/4 cup of granulated sugar, and a pinch of salt. Begin by whisking the sugar and salt into the milk until fully dissolved. Then, gently fold in the heavy cream. This mixture is your canvas—the base for countless flavor variations!

Once your mixture is ready, pour it into your ice cream maker and churn according to the manufacturer’s instructions until it reaches a soft-serve consistency. If you don’t have an ice cream maker, no worries! Simply pour the mixture into a freezer-safe container and freeze for about 4-6 hours, stirring every 30 minutes to break up ice crystals and ensure a creamy texture.

**Flavor Variations:**

Now comes the fun part—customizing your homemade ice cream! Here are some delectable flavor ideas to get your creativity flowing:

1. **Classic Vanilla:** Add 1 tablespoon of pure vanilla extract to your base for a timeless treat.

2. **Chocolate Fudge Swirl:** Stir in 1/2 cup of cocoa powder and swirl in some store-bought hot fudge sauce right before freezing for a rich chocolate experience.

3. **Mint Chocolate Chip:** Infuse your cream with fresh mint leaves before straining them out, then fold in mini chocolate chips for a refreshing twist.

4. **Strawberry Bliss:** Blend fresh strawberries into a purée and mix it into your base for a fruity, summery flavor.

5. **Cookie Dough Delight:** Chop up your favorite cookie dough and fold it into the ice cream before freezing for a delightful surprise in every scoop.

6. **Salted Caramel:** Drizzle in homemade or store-bought caramel sauce and a sprinkle of sea salt for a perfect sweet-salty balance.

7. **Coffee Dream:** Mix in brewed coffee or espresso powder for a sophisticated caffeine kick.

8. **Peanut Butter Cup:** Swirl in creamy peanut butter and fold in chopped chocolate or peanut butter cups for an irresistible treat.

No matter which flavor you choose, the joy of creating your own homemade ice cream lies in the experimentation and personalization. With each scoop, you’ll be rewarded with the satisfaction of knowing you crafted something truly special. So grab your ingredients, unleash your inner ice cream artisan, and let your taste buds revel in the sweet symphony of flavors!

12. Tips for Perfecting Your Dessert Skills

Mastering the art of dessert-making is a delightful journey, one that transforms simple ingredients into mouthwatering creations that can impress family and friends alike. To help you on this sweet adventure, here are some essential tips for perfecting your dessert skills that will elevate your baking game and ensure every treat you whip up is a resounding success.

**1. Understand Your Ingredients:** The foundation of any great dessert lies in its ingredients. Familiarize yourself with the role of each element—whether it’s the leavening power of baking soda, the moisture from eggs, or the richness of butter. Using fresh, high-quality ingredients will also make a noticeable difference in flavor and texture.

**2. Read the Recipe Thoroughly:** Before diving into a new dessert, take the time to read the entire recipe from start to finish. Understanding each step will help you anticipate any challenges and prepare for the process, ensuring a smoother baking experience.

**3. Measure Accurately:** Precision is key in baking. Invest in a good set of measuring cups and spoons, and consider a digital kitchen scale for dry ingredients. Even a slight variance can affect the outcome of your dessert, so be diligent about measurements.

**4. Embrace the Importance of Temperature:** Many desserts require ingredients to be at room temperature for optimal mixing and texture. Take butter out of the fridge in advance, and allow eggs and dairy to warm up. This simple step can make a significant difference in the final product.

**5. Don’t Rush the Process:** Baking is a science, and sometimes, good things take time. Allow your desserts to cool properly before frosting or serving. For example, a hot cake may collapse under the weight of icing, while a pie needs time to set up for the perfect slice.

**6. Experiment with Flavors:** While mastering classic recipes is essential, don’t be afraid to experiment with flavors and add your personal touch. Infuse your desserts with spices, citrus zest, or extracts to create unique twists on beloved favorites.

**7. Practice Patience and Perseverance:** Not every attempt will yield perfect results, and that’s okay! Baking is a skill that improves with practice, so embrace any mistakes as learning opportunities. Each dessert you create brings you closer to mastering the craft.

By applying these tips, you’ll cultivate your dessert-making skills, turning your kitchen into a haven of sweet delights. So gather your ingredients, preheat that oven, and let your creativity shine as you embark on a journey to create irresistible homemade desserts!

13. Storing and Serving Your Homemade Desserts

Storing and serving your homemade desserts is just as crucial as crafting them to perfection. After all, the way you present and preserve your sweet creations can significantly influence the taste and overall experience for your guests.

**Storage Tips:**
To ensure your desserts maintain their freshness and flavor, it’s essential to store them properly. For cakes and pies, using an airtight container is key. If you’re dealing with something delicate, like a mousse or a tart, consider wrapping it gently in plastic wrap before placing it in the fridge. This not only keeps them fresh but also prevents them from absorbing any odors from the refrigerator. For cookies and brownies, a zip-top bag can work wonders; just be sure to separate layers with parchment paper to prevent sticking.

**Freezing for Future Enjoyment:**
Many desserts freeze beautifully, allowing you to enjoy your homemade treats later. Cakes can be frozen either uniced or fully decorated, while cookies can be dough-rolled and frozen for quick baking later. Just remember to label each item with the date and type of dessert, so you can easily find them when the craving strikes!

**Serving Suggestions:**
When it’s time to serve, presentation is everything. A simple, elegant display can elevate even the most basic dessert. Consider using decorative plates, vibrant garnishes like fresh berries, or a dusting of powdered sugar to add visual appeal. For desserts served in individual portions, such as trifles or parfaits, clear glasses can showcase the beautiful layers and colors of your creation.

Finally, don’t forget about accompanying elements! A scoop of homemade whipped cream, a drizzle of chocolate sauce, or a scoop of ice cream can take your desserts to the next level. By focusing on both storage and serving, you’ll ensure that your homemade desserts are not only delightful to make but also a joy to share. Enjoy your sweet creations, and watch as they become the star of every gathering!

14. Conclusion: Sharing Your Sweet Creations

As we wrap up this delightful journey through the world of homemade desserts, it’s clear that the joy of baking is not just about the end result but also about the experiences and memories created along the way. Each recipe we’ve explored offers a unique opportunity to unleash your creativity, experiment with flavors, and indulge your taste buds. Whether you’ve mastered the art of a rich chocolate lava cake or perfectly flaky apple pie, the real magic happens when you share these sweet creations with others.

Imagine the smiles on your friends’ and family’s faces as they savor your treats. Baking is a heartfelt gesture that can turn any gathering into a celebration and transform an ordinary day into something special. Don’t hesitate to host a dessert night, bring your homemade goodies to work, or surprise a neighbor with a sweet gift. Sharing your culinary masterpieces not only spreads joy but also allows you to connect with others over the universal love of dessert.

Furthermore, don’t forget the power of social media! Snap some beautiful photos of your delicious creations and share them online. Use hashtags and engage with fellow dessert enthusiasts to inspire and be inspired. You might even find a community of like-minded bakers eager to share tips, tricks, and new recipes.

In the end, remember that every dessert you make is more than just a recipe; it’s a chance to create lasting memories and strengthen bonds through the simple yet profound act of sharing food. So, roll up your sleeves, preheat that oven, and let your sweet adventure continue! Happy baking!

15. Additional Resources and Recipe Links

When it comes to mastering the art of homemade desserts, having access to quality resources and reliable recipe links can make all the difference. Below, we’ve compiled a curated list of additional resources that will not only inspire you but also guide you step-by-step as you embark on your sweet culinary adventure.

1. **Food Blogs**: Websites like Smitten Kitchen and Minimalist Baker offer a plethora of dessert recipes ranging from classic cakes to innovative vegan treats. These blogs often include tips and tricks, ensuring even novice bakers can follow along with ease.

2. **YouTube Channels**: For those who prefer visual instructions, YouTube is a treasure trove of baking tutorials. Channels like Tasty and Bigger Bolder Baking provide engaging video content that breaks down complex techniques into simple, manageable steps.

3. **Recipe Apps**: Downloading apps like Yummly or Tasty can put thousands of dessert recipes at your fingertips. These apps allow you to filter recipes based on dietary preferences, cooking time, and ingredients you have on hand, making it easy to whip up something delicious.

4. **Cookbooks**: Invest in a few staple dessert cookbooks such as “Baking: From My Home to Yours” by Dorie Greenspan or “Dessert Person” by Claire Saffitz. These books not only provide tried-and-true recipes but also delve into the science of baking, helping you understand what makes desserts successful.

5. **Online Communities**: Joining forums or social media groups dedicated to baking can be incredibly beneficial. Platforms like Reddit’s r/baking or Facebook baking groups allow you to connect with fellow dessert lovers, share your creations, and seek advice on your baking endeavors.

6. **Pinterest Boards**: If you love visual inspiration, Pinterest is perfect for discovering new dessert ideas. You can find boards dedicated to everything from no-bake desserts to elaborate pastries, complete with links to the recipes.

With these additional resources at your disposal, you’ll be well-equipped to tackle any homemade dessert recipe that catches your eye. So preheat your oven, gather your ingredients, and get ready to impress your friends and family with your newfound baking skills!

As we conclude our delectable journey through these 10 irresistible homemade desserts, we hope you feel inspired to roll up your sleeves and unleash your inner pastry chef! Each recipe is designed not only to delight your taste buds but also to bring joy and warmth into your kitchen. From the rich, velvety textures of a chocolate lava cake to the refreshing simplicity of a fruit tart, there’s something for every craving and skill level. So gather your ingredients, invite some friends or family, and create sweet memories together as you master these delightful treats. Don’t forget to share your creations and experiences with us—we can’t wait to see how you put your own spin on these desserts! Happy baking!

What are the best ways to make homemade drinks?

As the sun shines brightly and the temperatures rise, there’s nothing quite like sipping on a refreshing homemade drink to quench your thirst and revitalize your spirit.

Whether you’re lounging by the pool, hosting a backyard barbecue, or simply enjoying a quiet afternoon on the porch, the right beverage can elevate any occasion. In this blog post, we will explore a collection of irresistible homemade drink recipes that are not only easy to make but also bursting with flavor and creativity. From fruity mocktails and zesty lemonades to soothing herbal infusions and decadent smoothies, there’s something here for everyone to enjoy. Join us as we embark on a delightful journey of crafting refreshment, where each sip promises to transport you to a world of blissful relaxation and invigorating taste. Cheers to the art of homemade drinks!

1. Introduction: The Joy of Homemade Drinks

What are the best ways to make homemade drinks?
Credit : whatcanu.com

In a world where convenience often trumps creativity, there’s something uniquely satisfying about crafting your own beverages at home. Homemade drinks not only allow you to control the ingredients—ensuring freshness and quality—but also provide a creative outlet that can be both fun and rewarding. Whether it’s a hot summer day calling for a refreshing iced tea or a chilly evening begging for a cozy hot chocolate, the joy of preparing your own drinks goes beyond mere sustenance; it becomes an experience.

Imagine the simple pleasure of waking up to the invigorating aroma of freshly squeezed citrus or the soothing fragrance of herbs steeping in hot water. These moments invite you to engage your senses, offering a chance to experiment with flavors, textures, and presentations. Perhaps you’ll try blending vibrant fruits into a smoothie that bursts with color and nutrition, or concocting a sophisticated cocktail that rivals those found in upscale bars. The possibilities are endless, limited only by your imagination and the ingredients at hand.

Moreover, homemade drinks create opportunities for connection and celebration. Picture gathering with friends for a weekend brunch, each of you sipping on a signature mocktail or a spiced chai that you’ve meticulously crafted. These shared moments, punctuated by laughter and clinking glasses, become cherished memories that linger long after the last drop is consumed.

Join us as we explore a collection of irresistible recipes that will inspire you to roll up your sleeves and embrace the art of drink-making. From thirst-quenching juices to comforting warm brews, you’ll discover that crafting your own beverages is not just about quenching thirst—it’s about creating joy, nurturing relationships, and celebrating the simple pleasures of life.

2. Classic Refreshing Lemonade: A Timeless Recipe

When the sun shines brightly and the temperatures rise, nothing quite beats the classic charm of homemade lemonade. This timeless drink is the epitome of refreshment, balancing sweet and tart flavors perfectly. To craft your own batch of this beloved beverage, you’ll need just a few simple ingredients: fresh lemons, granulated sugar, and cold water.

Start by squeezing the juice from several ripe lemons, aiming for about one cup of the bright, tangy liquid. The fragrance of freshly squeezed lemon juice is invigorating, promising a delightful burst of flavor in every sip. Next, in a separate bowl, combine the lemon juice with sugar, adjusting the amount to your taste. The sugar not only sweetens the drink but also helps to highlight the lemonade’s zesty notes.

Once the sugar is fully dissolved—this might require a little stirring or even a gentle heat if you prefer a quicker method—mix in about four cups of cold water. This dilution is crucial; it transforms the concentrated lemon juice into a refreshing drink that is neither overly sweet nor too tart. For an extra touch, consider adding slices of fresh lemon and a handful of mint leaves to the pitcher. This not only enhances the visual appeal but also infuses a delightful herbal aroma that elevates your lemonade to new heights.

Serve it over ice in tall glasses, garnishing with a sprig of mint or a colorful straw for that quintessential summer vibe. This classic refreshing lemonade is not just a drink; it’s an experience that brings back memories of warm afternoons, backyard barbecues, and shared laughter with friends and family. Whether enjoyed on a hot day or during a cozy gathering, this timeless recipe is sure to quench your thirst and leave everyone craving more.

3. Zesty Citrus Spritzer: A Burst of Flavor

What are the best ways to make homemade drinks?
Credit : whatcanu.com

When the sun blazes overhead and the temperature rises, nothing beats the invigorating taste of a Zesty Citrus Spritzer. This homemade drink is a refreshing symphony of flavors, combining the tangy brightness of citrus fruits with the effervescence of sparkling water. It’s the perfect companion for lazy afternoons, backyard barbecues, or any occasion that calls for a burst of refreshment.

To craft this delightful beverage, start by juicing a medley of your favorite citrus fruits. Think juicy oranges, tart lemons, and vibrant grapefruits. The key is to strike a balance between sweet and tangy, so feel free to experiment with different combinations. For an extra layer of flavor, consider adding a splash of lime juice—its sharpness enhances the overall zestiness of the drink.

Next, take your freshly squeezed juice and mix it with chilled sparkling water. The bubbles add a playful effervescence that elevates the entire experience, making each sip feel like a fizzy celebration. For a touch of sweetness, you can stir in a bit of honey or agave syrup, adjusting to your taste preference.

To elevate your Zesty Citrus Spritzer even further, garnish it with slices of citrus fruits and a sprig of fresh mint. The vibrant colors not only make the drink visually appealing but also infuse it with subtle herbal notes. Serve it over ice in a tall glass, and watch as your guests’ eyes light up with anticipation.

With each sip of this invigorating spritzer, you’ll feel the cool burst of flavor wash over you, making it a quintessential drink for any warm day. Whether you’re lounging by the pool, hosting a garden party, or simply enjoying a quiet moment at home, the Zesty Citrus Spritzer is sure to become a favorite in your collection of homemade drinks. Cheers to refreshing moments and the magic of citrus!

4. Fruity Infused Water: Hydration with a Twist

When it comes to staying hydrated, plain water can sometimes feel a bit lackluster. That’s where fruity infused water comes in—a colorful and flavorful alternative that not only quenches your thirst but also adds a delightful twist to your daily hydration routine. This refreshing drink is incredibly easy to prepare and allows you to experiment with a variety of fruits, herbs, and even vegetables, making it a versatile choice for any palate.

To get started, choose your favorite fruits—think vibrant strawberries, zesty lemons, succulent peaches, or juicy watermelon. The key is to select ingredients that complement each other, both in taste and visual appeal. For an extra layer of flavor, consider adding fresh herbs like mint or basil, which can elevate the drink with a refreshing aroma.

Begin by slicing your chosen fruits into thin pieces to maximize their surface area, allowing the flavors to infuse into the water more effectively. Fill a pitcher with cold filtered water, toss in the fruits (and herbs, if using), and let the mixture sit in the refrigerator for at least an hour. This chilling period allows the flavors to meld beautifully, creating a drink that is not only hydrating but also bursting with natural sweetness.

As an added bonus, fruity infused water is a fantastic way to reduce waste—if you have leftover fruits from a previous recipe or meal, this is the perfect opportunity to put them to good use. Plus, you can continually refill the pitcher with water throughout the day, ensuring that you reap the benefits of your carefully chosen ingredients long after they’re initially added.

Serve your fruity infused water in clear glasses to showcase its vibrant colors, and garnish with a sprig of fresh herbs or a slice of citrus for that extra touch of elegance. Whether you’re hosting a summer barbecue, enjoying a quiet afternoon on the porch, or simply looking to spice up your daily hydration, fruity infused water is a deliciously refreshing choice that will keep you reaching for more. Cheers to health and hydration with a twist!

5. Iced Herbal Teas: Cooling and Calming

What are the best ways to make homemade drinks?
Credit : whatcanu.com

As the sun blazes overhead and the heat envelops us, there’s nothing quite as refreshing as a chilled glass of iced herbal tea. Not only does it provide a soothing escape from the sweltering temperatures, but it also offers a plethora of flavors and health benefits that can lift your spirits and cool your senses. The beauty of iced herbal teas lies in their versatility; whether you prefer the floral notes of hibiscus, the earthy undertones of rooibos, or the crispness of mint, there’s an herbal concoction just waiting to be brewed.

To craft your perfect iced herbal tea, start with your chosen herb. Steep a handful of dried herbs or a selection of fresh leaves in boiling water for about 5 to 10 minutes, allowing the flavors to fully infuse. For a touch of sweetness, consider adding a drizzle of honey or agave syrup while the tea is still warm, as this will help dissolve the sweetener evenly. Once cooled, pour the tea over ice, and for an extra burst of flavor, garnish with fresh fruit slices or a sprig of mint.

Imagine sipping on a refreshing glass of hibiscus tea, vibrant in color and tangy in taste, adorned with slices of juicy lime and a hint of sweetness—a perfect complement to a sunny afternoon. Or perhaps a calming chamomile and lavender blend, served chilled and garnished with delicate edible flowers, which not only looks stunning but also invites tranquility into your day.

Iced herbal teas can also be a wonderful base for creative mocktails. Mix your chilled tea with sparkling water for a fizzy treat, or combine it with fresh fruit purees for a refreshing twist. The possibilities are endless, and each sip is a reminder that homemade beverages can be simple yet elegant, providing a delightful respite from the heat while indulging your taste buds in a world of flavor. So, why not brew a batch today and explore the cooling and calming effects of iced herbal teas?

6. Sparkling Berry Punch: Perfect for Gatherings

As the sun dips below the horizon and the air fills with laughter, there’s nothing quite like a vibrant bowl of Sparkling Berry Punch to set the mood for your gathering. This delightful concoction bursts with the sweetness of fresh berries and the effervescence of sparkling water, creating a refreshing drink that appeals to both young and old alike.

To craft this enchanting punch, start with a medley of ripe strawberries, plump blueberries, and tart raspberries. Their vibrant colors not only enhance the visual appeal of your drink but also infuse it with a symphony of flavors. Begin by muddling the berries gently in a large punch bowl to release their juices, creating a beautiful base that captures the essence of summer.

Next, add a splash of freshly squeezed lemon or lime juice to balance the sweetness and elevate the flavor profile. This zesty kick will invigorate the palate, making each sip a delightful experience. To sweeten the deal, incorporate a simple syrup made from equal parts sugar and water, gently simmered until dissolved. Adjust the sweetness to your liking, ensuring it complements the natural flavors of the fruit without overpowering them.

Now, the star of the show: the sparkling aspect. Slowly pour in chilled sparkling water or a lemon-lime soda, allowing the bubbles to dance through the vibrant berry mixture. The carbonation adds a festive touch, transforming your punch into a bubbly delight that beckons guests to indulge.

For an extra touch of elegance, garnish your punch with fresh mint leaves and additional whole berries floating atop the surface. These visual accents not only enhance the aesthetic but also impart a refreshing aroma with each pour. Serve in clear glasses to showcase the beautiful hues of the berries and watch as your guests are drawn to this enticing beverage.

With its refreshing taste and eye-catching presentation, Sparkling Berry Punch is sure to become the highlight of your gatherings. Whether it’s a summer barbecue, a holiday celebration, or a casual get-together, this punch will leave your guests reaching for seconds and savoring every bubbly sip. So, gather your friends and family, pour the punch, and let the good times roll!

7. Tropical Smoothies: A Taste of Paradise

What are the best ways to make homemade drinks?
Credit : whatcanu.com

Tropical smoothies are the epitome of summer in a glass, transporting you to sun-soaked beaches and swaying palm trees with every sip. Bursting with vibrant colors and flavors, these smoothies are not only visually appealing but also packed with nutrients, making them a deliciously healthy choice for any time of day.

To craft your own taste of paradise, start with a base of ripe, juicy fruits like mangoes, pineapples, and bananas. These tropical staples bring a natural sweetness and creamy texture that perfectly complements each other. For an extra zing, consider adding a splash of fresh coconut water or a dollop of Greek yogurt, which will enhance the drink’s creaminess while adding a protein punch.

Blend your chosen fruits with a handful of ice for a refreshing chill, and don’t shy away from experimenting with additional flavors. A squeeze of lime juice can brighten the overall taste, while a handful of spinach or kale can sneak in some greens without compromising the fruity goodness. For those who crave a little indulgence, a drizzle of honey or agave syrup can elevate the sweetness to new heights.

Serve your tropical smoothie in a chilled glass, garnished with a slice of fresh fruit or a sprig of mint for that extra touch of paradise. Whether enjoyed as a morning pick-me-up, a midday snack, or a post-workout rejuvenator, these smoothies are sure to transport your taste buds to a sunny getaway. So blend yourself a cup of bliss and let each sip whisk you away to tropical shores, right from the comfort of your kitchen!

8. Homemade Cold Brew Coffee: A Smooth Pick-Me-Up

When it comes to lifting your spirits and invigorating your day, nothing quite compares to a perfectly crafted glass of homemade cold brew coffee. This refreshing beverage not only offers a smooth, rich flavor but also delivers a gentle caffeine boost that can power you through even the busiest of afternoons.

To embark on your cold brew journey, start by selecting your favorite coarsely ground coffee beans. The quality of your beans will significantly influence the final taste, so opt for freshly roasted options for the best results. Combine one cup of coffee grounds with four cups of cold or room temperature water in a large jar or pitcher. Gently stir the mixture to ensure all the grounds are saturated, then cover it and let it steep in the refrigerator for a solid 12 to 24 hours.

The magic happens as the coffee steeps, allowing the water to extract the rich flavors and smooth notes without the bitterness that can often accompany traditional brewing methods. Once you’ve reached your desired strength, strain the mixture through a fine-mesh sieve or coffee filter to separate the grounds from the liquid. What you’re left with is a concentrated cold brew coffee that can be enjoyed straight or diluted with water or milk to taste.

Serve your cold brew over ice and play around with different flavor profiles. A splash of vanilla extract, a sprinkle of cinnamon, or a drizzle of caramel syrup can elevate your drink to new heights. For those who prefer a creamy texture, consider adding a dollop of whipped cream or a splash of your favorite milk—dairy or plant-based.

Not only does homemade cold brew coffee taste amazing, but it also allows you to control the ingredients and customize it to your liking. Whether you’re sipping it leisurely on a sunny afternoon or grabbing it on the go, this smooth pick-me-up is sure to become a staple in your homemade drink repertoire. So grab your coffee grounds and start brewing; the perfect cold brew awaits!

9. Creative Mocktails: Non-Alcoholic Delights

In a world where health-conscious choices are on the rise, the demand for creative mocktails has soared. These non-alcoholic delights are not just an alternative; they are a celebration of flavors, colors, and refreshing experiences that can elevate any occasion. Crafting a mocktail is like painting a canvas—each ingredient adds a unique stroke, creating a masterpiece that tantalizes the taste buds and pleases the eye.

Imagine a vibrant sunrise mocktail, where freshly squeezed orange juice meets the zesty brightness of lime, all layered atop a sparkling ginger ale. Garnished with a sprig of mint and a slice of orange, it’s a drink that radiates warmth and vitality, perfect for brunches or summer gatherings. Or consider a refreshing cucumber and basil cooler, where the cooling crunch of cucumber is paired with fragrant basil and a splash of tonic water. The result is a drink that feels like a stroll through a sun-drenched garden, offering a refreshing respite on a hot day.

Don’t forget the power of herbal infusions! Craft a soothing lavender lemonade by steeping dried lavender in hot water, then combining it with fresh lemon juice and a hint of honey. This elegant drink is not only delicious but also serves as a calming elixir, ideal for winding down after a busy day.

For a festive touch, try making a berry mojito mocktail. Muddle fresh mint leaves and a handful of mixed berries in a glass, then top it off with soda water and lime juice for a sparkling burst of flavor. The vibrant colors and refreshing taste make it a showstopper at any celebration, appealing to guests of all ages.

These creative mocktails showcase that you don’t need alcohol to enjoy a sophisticated and delightful drink. With just a few simple ingredients and a dash of imagination, you can craft non-alcoholic treats that are sure to impress, ensuring everyone can raise a glass and join in the celebration. So, gather your ingredients, unleash your creativity, and let these mocktail recipes refresh and inspire you!

10. Seasonal Favorites: Drinks for Every Occasion

As the seasons change, so too should your drink repertoire. Seasonal favorites not only capture the essence of the time of year but also elevate your gatherings and celebrations with vibrant flavors and festive flair. Whether it’s the bright, refreshing taste of summer or the cozy, spiced notes of winter, crafting seasonal drinks can transform any occasion into something special.

**Spring Sips:** As flowers bloom and days grow longer, spring is the perfect time to embrace fruity, floral drinks. Consider a refreshing lavender lemonade, where the tartness of fresh lemons is beautifully balanced by the subtle sweetness of lavender syrup. Serve it over ice, garnished with a sprig of lavender and a slice of lemon for a visually stunning and fragrant drink that screams spring.

**Summer Refreshments:** When the heat of summer hits, nothing beats a cool, fruity beverage. Watermelon slushies are a quintessential summer treat; blend fresh watermelon with ice and a splash of lime juice for a refreshing drink that’s not only hydrating but also deliciously sweet. For a more festive touch, add a splash of rum or vodka for an adult version.

**Autumn Warmers:** As the leaves turn and the air gets crisp, it’s time to bring warmth into your drink choices. A spiced apple cider, simmered with cinnamon sticks, cloves, and orange zest, can create a comforting atmosphere perfect for fall gatherings. Serve it warm in mugs, and don’t forget to top it with a slice of apple and a cinnamon stick for an aromatic touch.

**Winter Indulgences:** The winter months call for rich, warming beverages. Hot chocolate is a classic choice, but why not elevate it with a hint of peppermint or a dash of chili powder for a twist? Top with whipped cream and crushed candy canes for a festive finish that will delight both kids and adults alike. For a cozy evening in, a spiked eggnog or spiced mulled wine can wrap you in warmth and cheer.

By aligning your drink choices with the seasons, you not only create a sensory experience that resonates with your guests but also celebrate the flavors that each time of year brings. So, gather your ingredients, embrace the seasonal produce, and craft drinks that will leave your guests eagerly awaiting your next gathering. Cheers to seasonal favorites that make every occasion a little more special!

11. Tips for Garnishing and Presentation

When it comes to homemade drinks, the first sip often begins with the eyes. A beautifully garnished beverage can elevate your creation from ordinary to extraordinary, enticing guests before they even taste it. Here are some tips for garnishing and presentation that will make your drinks not only delicious but visually stunning.

**1. Choose Fresh Ingredients:** Fresh herbs, vibrant fruits, and colorful edible flowers can instantly enhance the aesthetic of your drink. Consider sprigs of mint or basil for a refreshing touch, or slices of citrus fruits like lemons, limes, or oranges for a pop of color. Berries, such as raspberries and blueberries, add both charm and a burst of flavor.

**2. Play with Glassware:** The right glass can make all the difference. Use elegant stemware for cocktails, mason jars for a rustic feel, or tall clear glasses for layered drinks that showcase their ingredients. Don’t shy away from experimenting with unconventional containers, like vintage teacups or patterned mugs, to give your drinks a unique flair.

**3. Create Layers:** For cocktails and mocktails with multiple ingredients, consider crafting layers to create a visually appealing drink. Pouring ingredients slowly over the back of a spoon allows them to settle into distinct layers, resulting in a beautiful gradient effect. This technique works particularly well with colorful juices and syrups.

**4. Incorporate Ice Creatively:** Instead of plain ice cubes, try freezing fruits, herbs, or edible flowers in your ice to add a decorative touch as they melt. This not only looks stunning but also infuses your drink with additional flavors as the ice melts. Alternatively, use large ice spheres or cubes to slow down dilution and keep your drink cold longer.

**5. Add Final Touches:** Don’t forget the small details that can make a big impact. Rim glasses with sugar, salt, or even crushed spices for an eye-catching finish. A drizzle of flavored syrup or a swirl of cream can add depth to the drink’s appearance. Lastly, a simple straw or cocktail stirrer can enhance the overall presentation while providing a practical element.

**6. Consider the Environment:** When serving drinks, consider the setting and context. A well-set table or a cozy outdoor space can amplify the experience. Use cloth napkins, coasters, or decorative trays to create an inviting atmosphere that complements your homemade beverages.

By incorporating these garnishing and presentation tips, you’ll transform your homemade drinks into a feast for the senses, making every gathering more memorable and every sip a celebration. Whether you’re hosting a casual get-together or a sophisticated soirée, these simple yet effective enhancements will impress your guests and keep them coming back for more.

12. Health Benefits of Homemade Drinks

When it comes to quenching your thirst, nothing beats the vibrant flavors and health benefits of homemade drinks. Unlike their store-bought counterparts, which often contain preservatives, added sugars, and artificial flavors, homemade beverages allow you to control every ingredient, ensuring a refreshing and nutritious experience.

One of the most significant advantages of crafting your own drinks is the ability to incorporate fresh, whole ingredients. Fruits, vegetables, herbs, and spices are not only bursting with flavor but also packed with essential vitamins and antioxidants. For instance, a simple cucumber-mint-infused water not only hydrates but also offers a refreshing boost of vitamins K and C, while aiding digestion. Similarly, adding ginger to your smoothies or teas can provide anti-inflammatory benefits and support your immune system.

Moreover, homemade drinks can be tailored to meet specific dietary needs or preferences. Whether you’re looking for a low-sugar alternative, a dairy-free option, or a boost of protein, the possibilities are endless. You can experiment with natural sweeteners like honey or maple syrup, or go for herbal teas that promote relaxation, like chamomile or lavender.

Beyond the nutritional perks, there’s also a sense of satisfaction that comes from creating your own beverages. The act of blending, muddling, or steeping allows you to engage with your ingredients and experiment with flavors, resulting in a drink that not only tastes good but feels good too. This hands-on approach can enhance mindfulness, making your homemade drink not just a treat for your taste buds, but also a wholesome ritual for your well-being.

So, as you explore the world of homemade drinks, remember that every sip is an opportunity to nourish your body and mind. From revitalizing green smoothies to soothing herbal infusions, these drinks offer a delicious way to stay hydrated and healthy, all while embracing the joy of crafting your own refreshment.

13. Sustainable Practices: Reducing Waste in Drink-Making

In an era where sustainability is more than just a trend—it’s a necessity—crafting homemade drinks can be an opportunity to embrace eco-friendly practices while tantalizing your taste buds. Reducing waste in drink-making not only benefits the environment but also enhances the overall experience of creating and enjoying your beverages.

Start by considering the ingredients you use. Opt for fresh, locally-sourced produce whenever possible. Not only does this support local farmers and reduce the carbon footprint associated with transportation, but it also ensures that your drinks are bursting with flavor. When using fruits for your concoctions, such as zesty lemonades or vibrant fruit punches, don’t discard the peels and cores. Instead, repurpose them! Citrus peels can be turned into zesty garnishes or even infused into syrups for added depth, while apple cores can be steeped to create a deliciously unique apple-infused tea.

Another sustainable practice is to embrace the art of batch-making. Instead of whipping up individual servings, make larger quantities of your favorite drinks. This not only saves time but also reduces energy consumption—less frequent blending means less power use. Consider using reusable glass bottles for storage, which can be filled with your refreshing concoctions and kept in the fridge, ready to enjoy throughout the week.

Be mindful of your packaging as well. When purchasing ingredients, opt for bulk options or products with minimal packaging to further reduce waste. If you do find yourself with leftover ingredients—perhaps a half-opened bag of mint or a few extra limes—get creative! Whip up a refreshing mint mojito or preserve the flavors by making homemade syrups that can be stored for future use.

Finally, consider composting any organic waste generated during your drink-making process. Fruit scraps, herb stems, and spent tea leaves can all contribute to a nutrient-rich compost pile, giving back to the earth instead of ending up in the landfill.

By integrating these sustainable practices into your drink-making routine, you not only enhance the flavor and quality of your beverages but also contribute positively to the environment. Cheers to crafting refreshment sustainably!

14. Exploring Global Drink Recipes: A World of Flavor

In our quest for refreshment, sometimes the best way to quench our thirst is by exploring the vibrant tapestry of global drink recipes. Each culture boasts its own unique concoctions that not only tantalize the taste buds but also tell a story of tradition, celebration, and community. By venturing into the world of international beverages, you open the door to a diverse array of flavors that can elevate your homemade drink repertoire.

Imagine sipping a refreshing **Mojito** from Cuba, where the zesty notes of lime and mint dance on your palate, offering a perfect balance of sweetness and tang. Or perhaps you’d prefer the aromatic warmth of **Masala Chai**, a beloved Indian spiced tea that envelops you in its comforting embrace, invigorated by ginger, cardamom, and cinnamon.

From the bustling streets of Mexico, you can indulge in **Horchata**, a creamy rice drink infused with cinnamon and vanilla, perfect for cooling down on a hot day. Meanwhile, the refreshing **Thai Iced Tea**, with its bold flavors of black tea, condensed milk, and a hint of star anise, transports you to a vibrant street market with every sip.

Don’t forget the enchanting **Sangria** from Spain, where fruity notes of citrus and berry mingle with red wine, creating a festive drink that’s perfect for gatherings. Or, venture to the Middle East for a taste of **Ayran**, a yogurt-based beverage that offers a creamy, tangy balance to spicy dishes.

As you dive into these global drink recipes, consider not only the ingredients but also the stories behind them. Each sip is an invitation to experience the culture that birthed it, enriching your gatherings with new flavors and traditions. So gather your friends and family, embark on this flavorful journey, and create a delightful mosaic of global refreshments right in your own kitchen. The world of flavor awaits!

15. Conclusion: The Art of Refreshing Your Palate

In conclusion, mastering the art of crafting homemade drinks is not just about quenching thirst; it’s an invitation to explore flavors, ignite creativity, and elevate your gatherings. Each recipe shared in this post serves as a canvas for your personal touch—whether you opt for the zesty brightness of citrus-infused iced teas or the rich, indulgent notes of a chocolatey milkshake, the possibilities are endless.

As you experiment with different combinations and ingredients, remember that the beauty of homemade beverages lies in their adaptability. Seasonal fruits can transform a classic lemonade into a refreshing summer delight, while cozy spices can turn a simple hot chocolate into a comforting winter ritual.

Moreover, creating these drinks can become a cherished activity to share with friends and family, fostering connection and conversation over refreshing sips. So, gather your favorite ingredients, unleash your inner mixologist, and let each concoction be a celebration of flavors that invigorate your palate. Cheers to your next refreshing adventure!

As we wrap up our exploration of crafting refreshing homemade drinks, we hope you feel inspired to shake, stir, and blend your way to deliciousness in your own kitchen. From invigorating lemonades to flavorful herbal teas, these top recipes not only tantalize the taste buds but also offer a delightful way to cool down and hydrate. Whether you’re hosting a summer gathering or simply enjoying a quiet afternoon, these irresistible drinks are sure to impress and satisfy. So gather your ingredients, unleash your creativity, and let each sip transport you to a moment of pure refreshment. Cheers to your next homemade beverage adventure!

What are the best ways to make homemade cheese?

There’s something truly magical about transforming simple ingredients into delicious homemade creations, and few culinary endeavors capture this essence quite like cheese-making.

Whether you’re a seasoned cook or a curious beginner, the journey from milk to masterpiece is both rewarding and surprisingly accessible. Imagine savoring the rich, creamy flavor of fresh mozzarella, the tangy bite of artisanal goat cheese, or the velvety texture of ricotta, all crafted by your own hands. In this blog post, we will explore the best ways to make homemade cheese, guiding you through the essential techniques, ingredients, and tips that will empower you to create your very own dairy delights. Get ready to embrace your inner cheese maker and elevate your culinary repertoire with these delightful recipes that promise to impress your family and friends!

1. Introduction to Homemade Cheese: Why You Should Try It

What are the best ways to make homemade cheese?
Credit : whatcanu.com

Making homemade cheese is more than just a culinary endeavor; it’s a rewarding journey that connects you to the art of food craftsmanship. Imagine transforming something as simple as milk into a luscious, creamy delight that tantalizes your taste buds and elevates your meals. Whether you’re a seasoned cook or a kitchen novice, crafting your own cheese opens up a world of flavors and textures that store-bought varieties simply can’t replicate.

One of the most compelling reasons to try your hand at cheese-making is the satisfaction of creating something uniquely yours. You’ll not only gain a deeper appreciation for the ingredients but also for the process itself. Each batch can be an experiment, a chance to play with flavors, and an opportunity to bring your culinary vision to life. Plus, homemade cheese can be tailored to suit your tastes—whether you prefer a sharp cheddar, a creamy ricotta, or a tangy goat cheese, the possibilities are limited only by your imagination.

Beyond the joy of creation, there’s also a practical aspect to consider. Making cheese at home can be a cost-effective alternative to purchasing artisanal cheeses, especially if you’re a cheese lover. You’ll find that the simple ingredients—milk, salt, and a few others—are often far less expensive than the gourmet varieties found in stores. Plus, you can control the quality of the ingredients, opting for organic or local options that align with your values.

Lastly, creating homemade cheese is a fantastic way to connect with family and friends. Picture a gathering where you proudly present a cheese board made from your own creations, complete with fresh fruits, nuts, and artisanal bread. The delight and intrigue on your guests’ faces as they taste your handiwork will make all the effort worthwhile.

So, if you’re ready to embark on a flavorful adventure, let’s dive into the world of homemade cheese. With a little guidance and a pinch of patience, you’ll soon be on your way to transforming humble milk into mouthwatering masterpieces.

2. Understanding the Basics

Before you embark on your cheese-making journey, it’s essential to grasp the foundational principles that underpin this age-old craft. Understanding the basics of cheese making involves recognizing the key ingredients, processes, and equipment required to transform simple milk into a delectable dairy delight.

At its core, cheese making revolves around just a few fundamental ingredients: milk, cultures, rennet, and salt. The type of milk you choose—be it cow, goat, or sheep—will significantly influence the flavor and texture of your final product. Whole milk is often recommended for beginners, as the higher fat content contributes to a creamier cheese.

Next, the role of cultures cannot be overstated. These are the bacteria that ferment the lactose in the milk, producing lactic acid, which is crucial for flavor development and the coagulation process. There are various types of cultures available, each lending its unique characteristics to the cheese. Whether you opt for mesophilic cultures for softer cheeses or thermophilic cultures for harder varieties, understanding their function will help you select the right ones for your desired outcome.

Rennet, an enzyme that helps coagulate the milk, is another essential component. It can be derived from animal, vegetable, or microbial sources, and using the appropriate type for your cheese will ensure proper curd formation. Finally, salt is not just a flavor enhancer; it also acts as a preservative, inhibiting unwanted bacterial growth and enhancing the cheese’s overall taste.

Equipping yourself with the right tools is equally important. A large pot for heating the milk, a thermometer to monitor temperature, a ladle for stirring, cheese molds for shaping, and fine cheesecloth for draining are the staples of a home cheesemaker’s toolkit. Investing in quality equipment will streamline your process and improve your results.

With a solid understanding of these basics, you’ll be well on your way to experimenting with different cheese varieties. Whether you’re dreaming of creamy ricotta, tangy goat cheese, or robust cheddar, mastering these foundational elements is the first step toward creating your own homemade cheese masterpiece. So gather your ingredients, equip yourself with knowledge, and get ready to turn the humble milk into something extraordinary!

3. Essential Tools and Equipment for Cheese Making

What are the best ways to make homemade cheese?
Credit : whatcanu.com

Embarking on the journey of homemade cheese-making can be both exciting and rewarding, but having the right tools and equipment is crucial for achieving that creamy, delectable end product. While cheese-making can be as simple or as intricate as you desire, here are the essential tools that every aspiring cheese artisan should consider having in their kitchen.

**1. Cheese Thermometer:** Precision is key when making cheese, and a good cheese thermometer will help you monitor milk temperatures accurately. Look for one that reads temperatures in both Fahrenheit and Celsius, with a range suitable for both heating milk and cooking curds.

**2. Large Stainless Steel Pot:** A heavy-bottomed stainless steel pot is ideal for heating milk evenly without scorching it. Choose a pot with a capacity that matches the quantity of cheese you intend to make, typically ranging from 2 to 8 quarts for home cheese-making.

**3. Long-Handled Spoon:** A sturdy, long-handled spoon is essential for stirring the milk as it heats and for gently mixing in ingredients like rennet and cultures. Opt for a spoon made from stainless steel or food-grade plastic to avoid any unwanted reactions with the ingredients.

**4. Cheese Mold and Press:** For hard cheeses, a cheese mold is necessary to shape and drain the curds. Molds come in various sizes and shapes, so consider the type of cheese you want to make. A cheese press is also a valuable tool to apply even pressure during the draining process, ensuring your cheese reaches the desired texture.

**5. Cheese Cloth:** A fine cheesecloth is vital for straining curds from whey and allows for easy drainage. Look for a durable, reusable option that can withstand repeated use and washing.

**6. pH Meter or Test Strips:** Monitoring acidity is important for some cheese varieties. A pH meter or test strips can help you track the curd’s acidity levels, ensuring optimal fermentation and flavor development.

**7. Preserving Jars or Cheese Storage Containers:** Once your cheese is made, proper storage is key to maintaining its quality. Invest in airtight containers or glass jars to keep your cheese fresh and ready for enjoyment.

Equipped with these essential tools, you’ll be well on your way to transforming humble milk into a delicious masterpiece. Each piece of equipment plays a crucial role in the cheese-making process, and understanding their functions will empower you to experiment and refine your techniques. So gather your tools, roll up your sleeves, and get ready to savor the delightful fruits of your labor!

4. Selecting the Right Milk for Your Cheese

Selecting the right milk for your cheese is arguably one of the most critical steps in the cheese-making process. The type of milk you choose not only influences the flavor and texture of the final product but can also dictate the overall success of your cheese-making journey.

When embarking on your homemade cheese adventure, consider the source of your milk. Cow, goat, and sheep milk each bring unique characteristics to the table. Cow milk, with its creamy texture and mild flavor, is an excellent choice for beginners, ideal for making soft cheeses like mozzarella or ricotta. Goat milk, on the other hand, offers a tangy zip and is perfect for creating deliciously distinct cheeses such as chèvre. If you’re feeling a bit more adventurous, sheep milk is rich and buttery, providing a luxurious base for cheeses like feta or pecorino.

Beyond the type of animal, the quality of milk is paramount. Fresh, high-quality, whole milk without additives or preservatives is essential for achieving the best results. If possible, seek out milk from local farms or markets that prioritize humane practices and do not use hormones or antibiotics. The fresher the milk, the more vibrant the flavors in your cheese will be.

Additionally, consider whether you want to use raw or pasteurized milk. While raw milk can yield cheeses with complex flavors, it also requires more advanced techniques and a thorough understanding of food safety. For beginners, pasteurized milk is often the safest and most accessible option, allowing you to focus on honing your cheese-making skills without additional concerns.

In summary, the milk you select is a foundational element that can elevate your cheese from good to extraordinary. Take the time to explore local options, and don’t hesitate to experiment with different types to discover the flavors and textures that resonate with your palate. Happy cheese-making!

5. The Science of Curdling: Acid vs. Rennet

What are the best ways to make homemade cheese?
Credit : whatcanu.com

In the world of cheese-making, understanding the science of curdling is crucial, as it forms the foundation of your cheese’s texture and flavor. At the heart of this process are two primary agents: acid and rennet. Each plays a distinct role in transforming liquid milk into the solid curds that will be the building blocks of your homemade cheese.

**Acid** is typically achieved through the addition of ingredients like lemon juice, vinegar, or cultured buttermilk. When you introduce acid to warm milk, the pH level drops, causing the proteins—primarily casein—to coagulate and form curds. This method is often used in fresh cheeses like ricotta and paneer, where a light, delicate texture is desired. Here, curdling occurs quickly, and the resulting cheese is usually mild and slightly tangy, perfect for salads or cooking.

On the other hand, **rennet** is a complex of enzymes traditionally sourced from the stomachs of ruminant animals, although vegetarian options are now available. When rennet is added to warm milk, it acts on the casein proteins, promoting a more gradual and thorough curdling process. This results in firmer curds with a richer flavor profile, making it ideal for cheeses like cheddar, mozzarella, or gouda. The use of rennet allows for a greater control over the texture and aging potential of the cheese, transforming it into a masterpiece that can develop complex flavors over time.

Understanding when to use acid versus rennet can elevate your cheese-making game. Experimenting with both methods will give you a deeper appreciation for the craft and help you create a variety of cheeses, each with its own unique character and taste. Whether you’re drawn to the quick satisfaction of an acid-set cheese or the intricate artistry of rennet-based varieties, mastering the science of curdling is your gateway to transforming simple milk into delicious homemade cheese.

6. Step-by-Step Guide to Making Fresh Cheese (e.g., Ricotta or Paneer)

Making fresh cheese at home is a rewarding and straightforward process that can elevate your culinary creations from ordinary to extraordinary. Whether you choose to make ricotta, paneer, or another variety, the basic steps remain largely the same. Here’s a step-by-step guide to help you craft your own delightful cheese.

### Ingredients You’ll Need:
– **Milk**: Use whole milk for the creamiest results. You can opt for cow’s, goat’s, or sheep’s milk based on your preference.
– **Acid**: Lemon juice or white vinegar works well to curdle the milk.
– **Salt**: For flavor, to taste.

### Step 1: Prepare Your Equipment
Before you begin, gather your utensils. You’ll need a large pot, a thermometer, a slotted spoon, cheesecloth or a clean dish towel, and a colander. Ensuring everything is clean will help prevent any unwanted bacteria from spoiling your cheese.

### Step 2: Heat the Milk
Pour your milk into the large pot and slowly heat it over medium heat. Stir gently to prevent scorching. Use your thermometer to monitor the temperature; you want to heat the milk to around 190°F (88°C). At this temperature, the milk will begin to froth and bubble, indicating that it’s ready for the next step.

### Step 3: Add the Acid
Once the milk reaches the desired temperature, remove it from heat and add your acid (lemon juice or vinegar). Stir gently for a few seconds, then allow the mixture to sit undisturbed for about 5-10 minutes. You’ll see curds forming as the milk separates from the whey.

### Step 4: Strain the Curds
Line your colander with cheesecloth or a clean dish towel and place it over a large bowl to catch the whey. Carefully ladle the curds into the colander, letting the whey drain away. If you prefer a drier cheese, let it drain for a bit longer.

### Step 5: Rinse and Season
Once the curds are well-drained, rinse them under cold water to remove the acidity from the vinegar or lemon juice. This step not only cools the curds but also helps to create a milder flavor. After rinsing, transfer the curds to a mixing bowl, sprinkle in salt to taste, and gently combine.

### Step 6: Shape and Store
At this stage, you can either leave the cheese loose for a rustic texture or shape it into balls or a block. If you’re making paneer, press the curds into a mold or wrap them in cheesecloth and place a weight on top to help them firm up. Once shaped, wrap your cheese tightly in plastic wrap or store it in an airtight container in the refrigerator.

### Enjoying Your Homemade Cheese
Whether you use it in a savory dish, as a topping for salads, or simply enjoy it fresh with a drizzle of olive oil and herbs, your homemade cheese will surely impress. The satisfaction of creating something so delightful from just a few simple ingredients is unparalleled. Plus, once you master the basic techniques, you can experiment with flavors and textures, making every batch uniquely yours. Happy cheesemaking!

7. Techniques for Aging Cheese: How to Create Unique Flavors

What are the best ways to make homemade cheese?
Credit : whatcanu.com

Aging cheese is both an art and a science, transforming humble curds into complex, flavor-packed masterpieces. The process of aging, or affinage, allows the cheese to develop its character, aroma, and taste, creating a unique profile that can range from nutty and buttery to sharp and tangy. Here are some techniques to harness the power of aging and elevate your homemade cheese experience.

1. **Temperature and Humidity Control**: The first step in successful aging is finding the right environment. Cheese thrives in cool, humid conditions. Ideally, aim for a temperature between 50°F and 55°F (10°C to 13°C) and a humidity level of around 85%. A dedicated cheese cave is perfect, but if that’s not available, a wine refrigerator or a simple cooler with a humidity source (like a damp sponge) can work wonders.

2. **Choosing the Right Rind**: The rind of the cheese is more than just a protective barrier; it plays a crucial role in flavor development. Soft cheeses, such as Brie, benefit from a bloomy rind that allows mold to flourish, imparting earthy tones. Hard cheeses, like Parmigiano-Reggiano, develop a firm, dry rind that protects the cheese while allowing for the enzymatic reactions that deepen flavors. Experimenting with different rind types can yield delightful variations in taste.

3. **Turning and Brushing**: Regularly turning your cheese wheels promotes even aging and prevents undesirable mold growth. For cheeses with a natural rind, gentle brushing with a cloth can help maintain surface cleanliness and encourage beneficial bacteria while removing any unwanted mold. Be consistent—turn your cheeses every few days to ensure they age evenly.

4. **Salting Techniques**: Salt is not just a flavor enhancer; it also acts as a natural preservative. The salting technique you choose will significantly impact the final flavor. Dry salting involves rubbing salt directly onto the cheese surface, while brining submerges the cheese in a saltwater solution. Experiment with different salt concentrations and methods to discover the perfect balance for your cheese type.

5. **Experimenting with Flavors**: Aging is the perfect time to infuse your cheeses with unique flavors. Consider adding herbs, spices, or even infused oils during the aging process. For example, a sprinkle of cracked black pepper can add a delightful kick, while fresh herbs like rosemary can impart a fragrant, earthy quality. As you age your cheese, don’t shy away from getting creative—this is where your culinary instincts can shine.

6. **Patience is Key**: While it may be tempting to sample your creations early, remember that great cheese takes time. The aging process can range from a few weeks to several months, depending on the type of cheese. Take notes throughout the journey, and don’t hesitate to make adjustments based on your observations. Each batch is an opportunity to learn and refine your techniques.

By embracing these aging techniques, you’ll unlock a world of flavors and textures, transforming your homemade cheese into a gourmet experience that friends and family will rave about. With a little patience and a dash of creativity, you’ll be well on your way to crafting cheese that not only delights your palate but also tells the unique story of your cheese-making journey.

8. Exploring Different Types of Cheese: A Brief Overview

When it comes to homemade cheese, the world is your oyster—or, in this case, your milk! Cheese-making is a delightful journey that opens up a realm of flavors and textures, each type offering its own unique character and culinary uses. Understanding the different types of cheese can inspire your cheese-making adventures and help you choose which ones to tackle first.

**Fresh Cheese:** This category includes soft cheeses like ricotta, mozzarella, and cream cheese. Fresh cheeses are typically made without aging, resulting in a mild flavor and creamy texture. They are incredibly versatile, perfect for spreading on toast, dolloping on pasta, or incorporating into salads. The process is often straightforward, making fresh cheese an excellent starting point for novice cheesemakers.

**Soft Cheese:** A step up from fresh cheese, soft cheeses like Brie and Camembert undergo a little aging but are still creamy and spreadable. These cheeses develop a lovely white rind, thanks to specific molds introduced during the aging process. Making soft cheese requires patience, as they need time to mature, but the reward is a rich and luscious treat that pairs beautifully with crusty bread and fruit.

**Semi-Hard Cheese:** Cheddar, Gouda, and Swiss fall into this category. These cheeses possess firmer textures and are aged longer than their soft counterparts, resulting in more complex flavors. The cheese-making process is slightly more involved, requiring careful monitoring of temperature and pH levels, but the outcome is well worth the effort. Aged semi-hard cheeses can be used in a variety of dishes, from melty grilled cheese sandwiches to savory cheese boards.

**Hard Cheese:** Parmesan and Pecorino are quintessential examples of hard cheeses. With their robust flavors and granular textures, hard cheeses are perfect for grating over pasta or salads. The aging process for these cheeses can take several months or even years, allowing them to develop deep, rich flavors. While making hard cheese is more intricate, the satisfaction of crafting a cheese that enhances your culinary creations is unparalleled.

**Blue Cheese:** For the adventurous cheesemaker, blue cheese offers a unique challenge. Characterized by its distinct blue veins of mold, varieties like Roquefort and Gorgonzola boast bold flavors that can be both tangy and creamy. The process involves inoculating the cheese with specific molds and allowing it to develop in a controlled environment. While blue cheese may require a bit more expertise, the resulting cheese is a true masterpiece.

Exploring these different types of cheese not only enhances your skill set but also broadens your culinary horizons. Each cheese has its own story and potential, waiting for you to uncover in your kitchen. Whether you’re creating a simple ricotta or embarking on the intricate journey of making a blue cheese, the experience is sure to enrich your appreciation for this amazing dairy delight. So grab your milk and let your cheese-making adventure begin!

9. Flavoring Your Cheese: Herbs, Spices, and Other Additions

Flavoring your cheese is where the magic truly happens, transforming a simple block of white curds into a delectable work of art that tantalizes the taste buds. The possibilities are virtually endless, and experimenting with different herbs, spices, and other additions can elevate your homemade cheese to restaurant-quality indulgence.

Start with the classics. Fresh herbs like basil, chives, or dill can be chopped and folded into your curds, imparting a vibrant freshness that adds a delightful twist to your cheese. Alternatively, dried herbs such as oregano or thyme can provide a more concentrated flavor that develops beautifully as the cheese ages. For an aromatic boost, consider seasoning your cheese with crushed garlic or a sprinkle of onion powder, creating a savory depth that pairs wonderfully with crusty bread or crackers.

Spices also play a crucial role in flavoring your cheese. A pinch of smoked paprika can lend a subtle smokiness, while crushed red pepper flakes add just the right amount of heat for those with a bold palate. For a distinctly Mediterranean flair, try adding za’atar, a fragrant blend of thyme, sesame seeds, and sumac that will transport your taste buds to sun-soaked shores.

Don’t overlook the potential of sweet additions, either! A touch of honey or a swirl of maple syrup can create an intriguing contrast in a creamy cheese, while fruits like figs, cranberries, or even sun-dried tomatoes can introduce a sweet-tart balance. Experimenting with nuts, such as finely chopped walnuts or pistachios, can add a satisfying crunch and nuttiness to your cheese, making it even more enticing.

As you play with flavors, keep in mind that less is often more. Start with small amounts of your chosen ingredients and taste as you go, allowing the natural cheese flavors to come through while enhancing them with your flavorful additions. Whether you prefer a herby spreadable cheese, a zesty pepper-infused cheese, or a sweet and nutty creation, the key is to have fun and let your creativity shine. With each batch, you’ll not only refine your cheese-making skills but also develop a unique flavor profile that reflects your personal tastes, ensuring that your homemade cheese is always a masterpiece.

10. Common Mistakes to Avoid

Making cheese at home can be a rewarding and delicious endeavor, but it’s not without its challenges. Even seasoned home cheesemakers can find themselves tripped up by a few common missteps. Here are some pitfalls to watch out for to ensure your cheese-making experience yields the best results.

**1. Skipping the Sanitization Process:**
One of the most crucial steps in cheese-making is ensuring that all your equipment is impeccably clean. Bacteria and unwanted microorganisms can easily spoil your milk and ruin your cheese. Always sanitize your utensils, molds, and surfaces before you start, and avoid touching anything that isn’t clean during the process.

**2. Using the Wrong Milk:**
Not all milk is created equal when it comes to cheese-making. While whole milk is often ideal, be wary of ultra-pasteurized milk, which can prevent your rennet from coagulating the milk properly. Opt for fresh, raw, or pasteurized milk from a reliable source for best results.

**3. Ignoring Temperature Control:**
Temperature plays a critical role in cheese-making. Too high or too low temperatures can affect the curd formation and texture of your cheese. Invest in a reliable thermometer and keep a close eye on the temperature at every stage, especially during heating and culturing.

**4. Rushing the Curd Cutting Process:**
Cutting the curds too soon or too late can drastically alter your cheese’s texture. Allowing the curds to set for the appropriate time is essential for achieving the right consistency. Follow your recipe closely and be patient; good things come to those who wait!

**5. Over- or Under-salting:**
Salt is not just for flavor; it also helps with preservation and affects the cheese’s texture and moisture. Too much salt can overpower the flavor, while too little can lead to spoilage. Be precise with your measurements and taste as you go.

**6. Neglecting to Age Properly:**
Aging is where the magic happens for many cheeses, contributing to their flavor and texture. Avoid the mistake of rushing this process. Ensure you have a suitable aging environment—cool, dark, and humid—and be patient as your cheese develops its character.

By steering clear of these common mistakes, you’ll be well on your way to crafting delicious homemade cheese that you can be proud of. Embrace the learning curve, and remember that even the occasional mishap can lead to valuable lessons and, perhaps, unexpectedly delightful flavors!

11. Storing and Preserving Your Homemade Cheese

Storing and preserving your homemade cheese is just as crucial as the crafting process itself. Once you’ve put in the time and effort to create your cheesy masterpiece, ensuring it stays fresh and flavorful is essential to enjoying it for weeks or even months to come. The right storage techniques can significantly extend the shelf life of your cheese while maintaining its delightful taste and texture.

First and foremost, consider the type of cheese you’ve made. Soft cheeses, like ricotta and cream cheese, have a higher moisture content and should be stored in an airtight container in the refrigerator. This will help prevent them from drying out and picking up unwanted odors from the fridge. Make sure to consume these cheeses within a week or two for optimal freshness.

On the other hand, harder cheeses, such as cheddar or gouda, can be wrapped in parchment paper or cheese paper, which allows them to breathe while preventing them from drying out. After wrapping, place the cheese in a breathable container or a cheese dome to further protect it from moisture loss. Hard cheeses can often last for several weeks in the fridge, but be sure to check for signs of mold or spoilage regularly.

For longer-term storage, you might consider freezing your cheese. However, not all cheeses freeze well. Hard cheeses generally hold up better when frozen, while soft cheeses may become crumbly after thawing. To freeze cheese, cut it into manageable portions and wrap it tightly in plastic wrap, followed by aluminum foil to prevent freezer burn. You can also vacuum seal your cheese for the best preservation results. Just remember to label your packages with the date and type of cheese to keep track of your stash.

Lastly, don’t overlook the importance of proper aging for certain types of cheese. If you’re crafting a cheese that benefits from aging, like a blue cheese or aged cheddar, be sure to monitor the temperature and humidity levels in your aging environment. A dedicated cheese cave or a controlled space in your refrigerator can create the ideal conditions for your cheese to develop its full flavor potential.

By mastering the art of storing and preserving your homemade cheese, you can ensure that your delicious creations remain enjoyable for as long as possible, ready to be savored on your favorite charcuterie board or melted into your next culinary masterpiece.

12. Pairing Homemade Cheese with Food and Wine

Pairing homemade cheese with food and wine can elevate your culinary experience from delightful to extraordinary. The beauty of crafting your own cheese is that it allows you to explore a world of flavors, textures, and aromas that store-bought varieties simply can’t match. Once you’ve mastered the art of cheese-making, the next step is to discover how to complement your creations with the right accompaniments.

Start with the basics: fresh cheeses like ricotta or mozzarella. These mild varieties shine when paired with fresh fruits and herbs. Imagine a creamy dollop of homemade ricotta atop a warm slice of rustic bread, drizzled with honey and sprinkled with sea salt. Add a handful of fresh figs or berries, and you’ve got a dish that sings with seasonal vibrancy. For mozzarella, a classic caprese salad—layered with ripe tomatoes, fragrant basil, and a splash of balsamic glaze—showcases the cheese’s delicate flavor beautifully.

As you venture into aged cheeses like cheddar or gouda, consider pairing them with hearty accompaniments. A sharp cheddar pairs wonderfully with crisp apples or pears, while aged gouda, with its nutty undertones, complements rich meats like prosciutto or salami. A charcuterie board featuring your homemade cheeses, artisan meats, and a variety of pickles and olives can become a stunning centerpiece at any gathering.

When it comes to wine, the right pairing can truly enhance the tasting experience. Fresh cheeses generally pair well with light, crisp whites such as Sauvignon Blanc or Pinot Grigio, which balance the creaminess without overpowering it. For aged cheeses, consider a bold red like Cabernet Sauvignon or a rich Chardonnay that can stand up to the deeper flavors. Don’t forget to experiment with sparkling wines, as their effervescence can cut through the richness of cheese, providing a refreshing contrast.

Ultimately, the art of pairing is about personal preference. Invite friends and family to join in the exploration, creating a festive atmosphere where everyone can share their thoughts on the delightful combinations. With your homemade cheese as the star of the show, the possibilities for delicious pairings are endless, making every meal a memorable celebration of flavor.

13. Creative Ways to Use Your Cheese in Recipes

Once you’ve mastered the art of cheese-making, the culinary adventure doesn’t end there! Homemade cheese presents a world of possibilities, allowing you to elevate your everyday meals and impress your friends and family. Here are some creative ways to incorporate your artisanal creations into delicious recipes that celebrate your handiwork.

**1. Creamy Cheese Spreads:** Blend your soft cheeses, such as ricotta or cream cheese, with herbs, spices, and perhaps a touch of honey for a delightful spread. Serve it on crusty bread or crackers as a part of an appetizer platter. You can experiment with flavors—think sun-dried tomatoes and basil or garlic and chive—to suit your palate.

**2. Gourmet Mac and Cheese:** Take your homemade cheese to the next level in a classic comfort dish. Mix a medley of your cheeses—sharp cheddar, creamy mozzarella, or a tangy goat cheese—with cooked pasta and a splash of cream. Top it with breadcrumbs and bake until golden for an indulgent treat that will have everyone asking for seconds.

**3. Cheese-Stuffed Vegetables:** Hollow out bell peppers, zucchini, or tomatoes and fill them with a savory mixture of your cheeses, grains, and spices. Bake until the vegetables are tender and the cheese is bubbling for a colorful and nutritious main course or side dish.

**4. Homemade Pizza:** Nothing beats the taste of freshly made pizza topped with your own cheese. Use mozzarella or a blend of cheeses, along with your favorite toppings. Bake in a hot oven for a crispy crust and gooey, melty cheese that will make pizza night a feast to remember.

**5. Salads with Flair:** Crumble your homemade feta or goat cheese over fresh salads to add a creamy texture and flavor contrast. Pair it with seasonal vegetables, nuts, and a light vinaigrette for a refreshing and satisfying dish.

**6. Cheese Desserts:** Yes, cheese can be part of your dessert repertoire too! Use mascarpone or ricotta to create light and airy desserts like cheesecakes, tiramisu, or layered parfaits. The natural sweetness of the cheese pairs beautifully with fruits and honey, perfect for a sweet ending to any meal.

By thinking outside the box and exploring these creative culinary uses for your homemade cheese, you can turn your kitchen into a gourmet paradise. Each dish not only showcases your cheese-making skills but also invites others to savor the delicious flavors and textures that only homemade cheese can provide. Enjoy the delightful journey from milk to masterpiece, one delicious recipe at a time!

14. Troubleshooting Common Cheese-Making Problems

Making cheese at home can be a rewarding and creative endeavor, but it’s not without its challenges. Even the most experienced cheesemakers encounter hiccups along the way. Understanding how to troubleshoot common cheese-making problems can save your batch and enhance your skills.

One frequent issue is curd separation, where the curds and whey don’t fully separate as expected. This can often be traced back to temperature inconsistencies. Ensure you’re maintaining the right temperature throughout the process; investing in a reliable thermometer can make a world of difference. If you find yourself with curds that are too dry, try a gentler heating method or reduce the acidification time in your recipe.

Another common problem is unwanted flavors or odors in the finished cheese, which may arise from improper sanitation or contamination. Always ensure your equipment is meticulously cleaned and sanitized before starting, as even the smallest residue can affect the taste of your cheese. If you notice bitterness, it could be due to overcooking your curds or using poor-quality milk, so be mindful of your ingredients and cooking times.

Texture issues can also arise, with cheese turning out grainy or crumbly instead of smooth and creamy. This could be the result of too much acid or not enough fat in your milk. When experimenting with different types of milk, remember that higher fat content typically leads to creamier cheeses. Lastly, if your cheese isn’t aging properly or developing the desired flavor profile, consider adjusting your aging conditions—humidity and temperature play crucial roles in the maturation process.

By keeping an eye on these potential pitfalls and being ready to adapt, you’ll not only salvage your current batch but also gain invaluable insights for your next cheese-making adventure. Remember, each mistake is a stepping stone toward mastery, turning your initial frustrations into flavorful triumphs!

15. Conclusion: The Joy of Making Cheese at Home

In conclusion, the journey of making cheese at home is not just a culinary venture; it’s a delightful experience that transforms the humble ingredients of milk and culture into a delicious masterpiece. The process may seem daunting at first, but with each step, you’ll discover the joy that comes from creating something uniquely your own. From the pristine moment of curdling milk to the satisfaction of crafting your favorite varieties—be it creamy ricotta, tangy feta, or robust aged cheddar—the rewards are truly unparalleled.

Homemade cheese offers an intimate connection to your food, allowing you to experiment with flavors and textures that store-bought varieties simply can’t match. Each batch you make becomes a testament to your growing skills and creativity in the kitchen. Imagine sharing a platter of your homemade cheese with friends and family, savoring the pride that comes from serving something crafted by your own hands.

As you embark on this cheesy adventure, remember that the journey is just as important as the destination. Whether you’re perfecting the art of mozzarella or venturing into the world of blue cheese, embrace the learning process, celebrate your successes, and don’t shy away from the occasional mishap—each mistake is a stepping stone toward mastering this timeless craft.

So, gather your ingredients, roll up your sleeves, and dive into the world of cheese-making. The joy of creating delectable cheese at home is waiting for you, and with each bite, you’ll savor not just the flavor, but the fulfillment that comes from bringing a little piece of culinary magic into your kitchen. Happy cheese making!

As we wrap up our exploration of transforming humble milk into delicious homemade cheese, we hope you feel inspired to embark on this rewarding culinary journey. Whether you’re aiming to perfect a creamy mozzarella, a tangy ricotta, or a robust aged cheddar, the techniques and tips shared in this post will guide you every step of the way. Homemade cheese not only elevates your meals but also brings a sense of accomplishment and creativity to your kitchen. So gather your ingredients, roll up your sleeves, and let your taste buds lead the way. We can’t wait to hear about your cheesy creations—share your masterpieces with us and let the world savor the fruits of your labor! Happy cheesemaking!

What are the best ways to make homemade yogurt?

There’s something undeniably satisfying about crafting your own homemade yogurt, transforming simple ingredients into a creamy, tangy delight that can elevate any meal or snack.

Whether you’re a health enthusiast seeking to control the ingredients you consume, a culinary adventurer eager to explore the art of fermentation, or simply someone who cherishes the rich, fresh taste of homemade products, this guide is for you. Unlocking the creamy secret of yogurt-making not only allows you to enjoy a deliciously smooth treat but also opens the door to a world of flavors and health benefits that store-bought varieties often lack. Join us as we delve into the best methods for creating your own yogurt at home, from choosing the right starter culture to mastering the fermentation process, ensuring that every spoonful is a testament to your kitchen prowess and dedication to wholesome living. Prepare to indulge in the velvety goodness of homemade yogurt, and discover just how easy it is to make this delightful staple in your very own kitchen!

1. Introduction to Homemade Yogurt

What are the best ways to make homemade yogurt?
Credit : whatcanu.com

Yogurt has long been cherished for its creamy texture and tangy flavor, but nothing compares to the satisfaction of making it at home. The process is not only simple but also incredibly rewarding, allowing you to create a product that is fresher, healthier, and more customizable than anything you can find in the store. Homemade yogurt is a versatile ingredient, perfect for everything from breakfast parfaits to savory dips, and it can be tailored to suit your taste—whether you prefer it plain, sweetened, or infused with your favorite fruits and spices.

At its core, yogurt is a product of fermentation, a magical transformation of milk that occurs when beneficial bacteria are introduced. This process not only thickens the milk but also enhances its nutritional profile, making homemade yogurt a powerhouse of protein, calcium, and probiotics. With a little patience and a few basic ingredients—milk and yogurt starter culture—you can unlock the creamy secret of yogurt-making right in your kitchen.

In this blog post, we’ll guide you through the steps to create your very own batch of homemade yogurt, sharing tips, tricks, and variations to elevate your yogurt-making experience. Whether you’re a novice or a seasoned culinary enthusiast, you’ll discover that with just a few tools and a dash of creativity, you can enjoy the rich, velvety goodness of yogurt made to your liking. So, roll up your sleeves and get ready to embark on a delicious journey into the world of homemade yogurt!

2. Benefits of Making Yogurt at Home

Making yogurt at home is not just a culinary adventure; it comes with a plethora of benefits that make it a worthwhile endeavor. first and foremost, homemade yogurt is a treasure trove of health benefits. It’s packed with probiotics—those beneficial bacteria that support gut health, boost immunity, and improve digestion. By making your yogurt, you can customize the strain of probiotics to fit your health needs, something that store-bought varieties often lack.

Another significant advantage is the control you gain over the ingredients. When you make yogurt at home, you can choose high-quality milk, whether it’s whole, low-fat, or even plant-based alternatives, and you can avoid the preservatives, artificial flavors, and sugars that may be lurking in commercial products. This means you can create a yogurt that is as pure and nutritious as you desire, tailored to your palate and dietary requirements.

Cost-effectiveness is another perk of homemade yogurt. A gallon of milk can yield a substantial amount of yogurt, often at a fraction of the cost of purchasing a similar quantity at the grocery store. This not only saves you money but also encourages you to experiment with flavors and uses, from smoothies to desserts, without the guilt of wasting resources.

Moreover, the process of making yogurt is incredibly rewarding. Watching the transformation from milk to creamy yogurt is like a mini-science experiment in your kitchen. It gives you a sense of accomplishment and connection to your food that is often lost in the hustle of modern life. Plus, the creamy texture and tangy flavor of freshly made yogurt is a treat that can elevate any meal—whether it’s a breakfast parfait, a savory dip, or a cooling sauce for your favorite dishes.

Lastly, homemade yogurt allows for endless creativity. You can infuse different flavors—think vanilla, honey, or fresh fruits—experiment with various add-ins like nuts and seeds, and create your unique blends that cater to your tastes. The possibilities are as vast as your imagination! So, embrace the art of yogurt-making, and unlock a world of creamy goodness right in your kitchen.

3. Essential Ingredients for Creamy Yogurt

What are the best ways to make homemade yogurt?
Credit : whatcanu.com

To embark on your homemade yogurt journey, it’s crucial to start with the right ingredients that will ensure a rich, creamy texture and delightful flavor. At the heart of this culinary adventure are just a few essential components that can elevate your yogurt-making game.

**1. Quality Milk:** The foundation of any great yogurt is, of course, milk. Whole milk is often the best choice for achieving that luscious creaminess, but you can also experiment with 2% or even non-dairy alternatives if you’re looking for a plant-based option. The fat content in whole milk creates a thicker, more indulgent yogurt, so if creaminess is your goal, opt for the richest milk you can find.

**2. Yogurt Starter Culture:** This is the magic ingredient that transforms your milk into yogurt. Look for a high-quality plain yogurt that contains live active cultures; this could be store-bought yogurt or a freeze-dried starter culture specifically designed for yogurt-making. The beneficial bacteria in the starter not only impart flavor but also contribute to the creamy texture by thickening the milk during fermentation.

**3. Optional Additives:** While not strictly essential, certain additives can enhance the creaminess and flavor of your yogurt. For instance, a splash of heavy cream can provide a richer texture, while a tablespoon of powdered milk can help absorb excess moisture, resulting in a thicker consistency. Additionally, sweeteners like honey or maple syrup can be added to taste, offering a touch of sweetness that complements the tang of the yogurt.

When combined, these ingredients lay the groundwork for a delectable homemade yogurt that’s not only creamy but also packed with probiotics. With these essentials in hand, you’re well on your way to unlocking the creamy secret of homemade yogurt! So gather your ingredients, and let the yogurt-making begin!

4. Choosing the Right Milk: Whole vs. Low-Fat

When it comes to making homemade yogurt, one of the most crucial decisions you’ll face is choosing the right type of milk. The texture, creaminess, and overall flavor of your yogurt largely depend on this selection. You may find yourself torn between whole milk and low-fat options, each offering distinct advantages.

Whole milk is often hailed as the gold standard for yogurt-making. Its rich, creamy consistency results in a velvety texture that makes every spoonful delightful. The higher fat content not only contributes to a luxurious mouthfeel but also fosters a creamier, thicker yogurt that is both satisfying and indulgent. If you’re aiming for a luscious Greek-style yogurt, whole milk is your best bet, providing that satisfying richness that keeps yogurt lovers coming back for more.

On the other hand, low-fat or skim milk can be appealing for health-conscious individuals looking to reduce their calorie intake. While it may not produce yogurt with the same creamy texture as whole milk, low-fat options can still yield tasty results, especially when you’re after a lighter snack. You might discover that some people prefer the tangy bite of low-fat yogurt, which can serve as a refreshing base for smoothies or a delightful addition to salads.

Ultimately, choosing between whole and low-fat milk will depend on your personal preferences and health goals. If you decide to experiment, consider blending the two—using a combination of whole and low-fat milk can strike a balance between creaminess and a lighter feel. Whatever you decide, the key is to use high-quality milk, as fresh and wholesome ingredients will always lead to superior homemade yogurt. So, roll up your sleeves, grab your chosen milk, and let the yogurt-making adventure begin!

5. Starter Cultures: What You Need to Know

What are the best ways to make homemade yogurt?
Credit : whatcanu.com

When it comes to making homemade yogurt, understanding starter cultures is crucial to achieving that velvety texture and tangy flavor we all love. A starter culture is essentially a collection of live bacteria that kickstarts the fermentation process, transforming milk into creamy yogurt.

You have several options when it comes to selecting a starter culture. You can opt for store-bought yogurt that contains live active cultures—just be sure to check the label for strains like *Lactobacillus bulgaricus* and *Streptococcus thermophilus*, as these are the essential bacteria needed for yogurt-making. Alternatively, for a more artisanal approach, you can purchase freeze-dried starter cultures specifically designed for yogurt production. These cultures come in a variety of strains, each offering unique flavors and health benefits, allowing you to experiment and find your perfect match.

If you decide to use store-bought yogurt as a starter, remember that it should be plain, unflavored, and free from additives. The fresher the yogurt, the better your results will be, as the potency of the bacteria decreases over time. On the other hand, freeze-dried cultures can be a bit pricier, but they often yield a more consistent product and allow you to create yogurt with specific characteristics, such as thickness or probiotic content.

Once you’ve chosen your starter culture, it’s essential to maintain proper temperatures during the fermentation process. Most yogurt cultures thrive between 110°F and 115°F (43°C to 46°C). Investing in a yogurt maker or using a simple method like wrapping your container in towels and placing it in a warm spot can help regulate the temperature and ensure a successful fermentation.

In summary, selecting the right starter culture is a pivotal step in your homemade yogurt journey. Whether you choose a beloved store-bought option or opt for a specialized freeze-dried culture, the microorganisms you introduce will shape the flavor, texture, and health benefits of your yogurt. With a little knowledge and experimentation, you’ll unlock the creamy secret to creating delicious, homemade yogurt that will have everyone coming back for more!

6. Step-by-Step Guide to Making Yogurt

Making your own yogurt at home is not only a rewarding culinary adventure, but it also allows you to create a creamy, delicious product tailored to your taste preferences. Below is a straightforward, step-by-step guide to help you achieve yogurt-making success.

**Step 1: Gather Your Ingredients and Tools**
To start, you’ll need just a few simple ingredients: milk (whole or low-fat, depending on your preference), and a tablespoon of plain yogurt with live active cultures. If you want to infuse your yogurt with flavors or sweetness, consider adding honey, vanilla extract, or fruits later in the process. Ensure you have a heavy-bottomed pot, a whisk, a thermometer, and a container to incubate the yogurt, such as a glass jar or a yogurt maker.

**Step 2: Heat the Milk**
Pour your desired amount of milk into the pot and slowly heat it over medium heat. Stir occasionally to prevent the milk from scorching. Monitor the temperature with your thermometer; you want to bring it to around 180°F (82°C). This step is crucial as it helps to denature the proteins, ensuring a smoother texture.

**Step 3: Cool the Milk**
Once the milk reaches the right temperature, remove it from the heat and allow it to cool to about 110°F (43°C). You can expedite this process by placing the pot in an ice bath.

**Step 4: Add the Starter Culture**
Once the milk has cooled, whisk in the tablespoon of plain yogurt until thoroughly combined. Make sure the yogurt contains live active cultures, as these are the beneficial bacteria that will ferment your milk into yogurt.

**Step 5: Incubate the Mixture**
Transfer the milk mixture into your container and cover it with a lid or a clean kitchen towel. To maintain a consistent warm temperature, place the container in a warm spot in your kitchen—this can be an oven with the light on, or a warm insulated cooler. The incubation period typically lasts between 6 to 12 hours, depending on how tangy and thick you want your yogurt. The longer you let it sit, the tangier it will become.

**Step 6: Check for Doneness**
After the incubation period, carefully check the yogurt. It should be thickened and have a slight tangy aroma. If it’s to your liking, proceed to the next step; if not, let it ferment a few more hours.

**Step 7: Refrigerate and Enjoy**
Once your yogurt has reached your desired flavor and texture, transfer it to the refrigerator to cool and set. Homemade yogurt can be stored in an airtight container for up to a week. Before serving, you can whisk it for a creamier consistency and add your favorite toppings—think fresh fruits, granola, or a drizzle of honey.

By following these simple steps, you will unlock the creamy secret to homemade yogurt, allowing you to savor the freshest and most delicious yogurt in the comfort of your own kitchen! Enjoy the satisfaction of knowing exactly what’s in your yogurt, and experiment with flavors and textures to make it uniquely yours.

7. Tips for Achieving the Perfect Consistency

What are the best ways to make homemade yogurt?
Credit : whatcanu.com

Achieving the perfect consistency in homemade yogurt can elevate your culinary experience from good to extraordinary. The texture of your yogurt is influenced by several factors, and mastering these will ensure you get that creamy, luscious mouthfeel every time.

**1. Choose the Right Milk:** Start with high-quality milk—whole milk is ideal for achieving a rich and creamy texture, while low-fat options can lead to a thinner consistency. If you’re adventurous, try using a mix of whole and half-and-half for an ultra-creamy result.

**2. Heat to the Right Temperature:** When heating your milk, aim for about 180°F (82°C). This step not only helps to kill any unwanted bacteria but also denatures the proteins, allowing them to form a smooth and cohesive structure once cooled and cultured.

**3. Cool Gradually:** After heating, let the milk cool to between 110°F and 115°F (43°C to 46°C) before adding your yogurt starter. This is the ideal temperature for the bacteria to thrive and will contribute to a thicker consistency. If you rush this step, you may end up with a runny yogurt.

**4. Use a Quality Starter:** The quality of your yogurt starter can make a world of difference. Look for live cultures with a variety of probiotics, as these will not only enhance flavor but also collaborate to create a thicker texture. You can use plain yogurt from the store or a powdered starter culture; just ensure it contains active cultures.

**5. Incubate the Right Way:** The incubation period is crucial for thickness. Allow your yogurt to ferment undisturbed for 6 to 12 hours, depending on personal preference for tartness. The longer it incubates, the thicker it will become. Use a yogurt maker, a warm oven, or even a thermos to maintain a stable temperature.

**6. Avoid Stirring:** Once your yogurt has set, resist the urge to stir it. This can break down the structure you’ve so carefully developed. If you want to add flavors or sweeteners, do so gently after the yogurt has reached your desired thickness.

**7. Chill Before Serving:** Finally, chilling your yogurt in the refrigerator for a few hours after it has set will help improve its thickness. The cold temperature helps the proteins solidify, resulting in a firmer texture.

By following these tips, you’ll be well on your way to crafting homemade yogurt that boasts the perfect consistency—smooth, creamy, and utterly delightful. Whether enjoyed on its own, drizzled with honey, or blended into smoothies, your homemade yogurt will be a testament to your kitchen prowess!

8. Common Mistakes to Avoid

Making homemade yogurt can be a delightful and rewarding experience, but it’s easy to stumble into a few common pitfalls that can derail your creamy creation. Here are some mistakes to watch out for to ensure your yogurt turns out smooth, tangy, and absolutely delicious.

**1. Skipping the Temperature Check:** One of the most crucial steps in yogurt-making is ensuring your milk is heated to the right temperature. If you heat it too much, you risk scalding the milk, which can alter the flavor and texture. Conversely, if it’s not hot enough, the bacteria won’t thrive, leading to thin and runny yogurt. Aim for a sweet spot of around 180°F (82°C) for optimal results.

**2. Not Cooling Down Properly:** After heating your milk, it’s essential to let it cool to around 110°F (43°C) before adding your starter culture. If you add the culture when the milk is too hot, you’ll kill the beneficial bacteria that help ferment the yogurt. Use a food thermometer to monitor the temperature closely for the best outcome.

**3. Choosing the Wrong Starter Culture:** Using a starter with live active cultures is key to successful fermentation. Avoid store-bought yogurts that may contain stabilizers or are past their expiration date. Instead, opt for plain yogurt from a reputable brand, or even better, use a yogurt starter culture specifically designed for homemade yogurt.

**4. Forgetting to Maintain a Steady Temperature:** Yogurt needs a warm environment to ferment properly. If your kitchen is too cool, the cultures won’t thrive, resulting in yogurt that is less tangy and thick. Invest in a yogurt maker or find a warm spot in your home—like an oven with the light on or a warming drawer—to keep the temperature stable during fermentation.

**5. Overlooking Fermentation Time:** Each batch of yogurt is unique, and fermentation times can vary based on factors like the type of milk used, the starter culture, and the ambient temperature. While most yogurt requires anywhere from 4 to 12 hours to ferment, it’s essential to taste-check periodically. If you leave it too long, you might end up with overly tart yogurt.

**6. Neglecting Hygiene Practices:** Cleanliness is paramount in yogurt-making. Any stray bacteria can spoil your batch or lead to inconsistent results. Always sanitize your equipment and work surfaces before you begin to ensure a healthy fermentation process.

By steering clear of these common mistakes, you’ll be well on your way to crafting creamy, homemade yogurt that’s not only delicious but also nourishing. Embrace the process, learn from any missteps, and soon you’ll be enjoying the rich flavors of your own yogurt creations!

9. Flavoring Your Yogurt: Natural Add-ins and Toppings

Flavoring your yogurt is where the magic truly happens, transforming a simple, creamy base into a delightful culinary experience. While plain yogurt offers a wholesome foundation packed with probiotics, adding natural ingredients can elevate its taste and nutritional profile, making it a treat you’ll look forward to indulging in every day.

Consider starting with fresh fruits, which not only enhance the flavor but also provide a burst of color and nutrients. Sliced strawberries, ripe bananas, or a handful of blueberries can add sweetness and natural sugars without the need for artificial additives. If you’re feeling adventurous, experiment with tropical fruits like mango or pineapple for a refreshing twist that transports your taste buds to a sun-soaked paradise.

For those who enjoy a bit of crunch, nuts and seeds are excellent choices. A sprinkle of toasted almonds, walnuts, or chia seeds can provide a satisfying texture while adding healthy fats and protein. You might also consider incorporating granola, offering a delightful combination of flavors and crunch that will make breakfast or a snack feel indulgent.

Herbs and spices can also work wonders in flavoring your yogurt. A dash of cinnamon or a hint of vanilla can infuse warmth and depth, while fresh mint leaves can add a refreshing note that brightens up the dish. For a unique twist, try mixing in a spoonful of honey or maple syrup—a drizzle that not only sweetens but also adds an enticing layer of complexity to your yogurt.

Don’t forget about the power of savory toppings! A sprinkle of sea salt or a drizzle of olive oil can create a bold contrast, perfect for serving yogurt as a dip with pita or vegetable sticks. Combining yogurt with garlic and herbs can transform it into a creamy sauce that elevates any meal.

Ultimately, the beauty of homemade yogurt lies in its versatility. As you explore natural add-ins and toppings, you’ll discover endless possibilities to personalize your yogurt experience, ensuring that each spoonful is a delightful journey of flavors and textures. So get creative, experiment with your favorite ingredients, and unlock the creamy secret to making yogurt that’s truly your own!

10. Creative Uses for Homemade Yogurt

Homemade yogurt is not just a delicious snack on its own; it’s a versatile ingredient that can elevate a multitude of dishes. Once you’ve mastered the art of making your own creamy yogurt, you’ll discover a world of creative uses that will have you reaching for that jar in your fridge time and time again.

**1. Smoothies and Shakes:** Start your day on a refreshing note by blending homemade yogurt into your morning smoothies. Its creamy texture adds body and richness while boosting the protein content. Combine it with fruits like bananas, berries, or mangoes for a nutrient-packed breakfast or a post-workout snack.

**2. Salad Dressings:** Elevate your salads with homemade yogurt-based dressings. Mix it with olive oil, lemon juice, herbs, and spices to create a tangy, creamy dressing that’s far healthier than store-bought alternatives. It adds a delightful zip to your greens, enhancing both flavor and nutrition.

**3. Baking Substitute:** When baking, replace sour cream or buttermilk with homemade yogurt for a moist and tender texture in cakes, muffins, and pancakes. The subtle tanginess will add depth to the flavors and keep your baked goods from drying out.

**4. Dips and Spreads:** Whip up a quick and healthy dip by mixing yogurt with garlic, herbs, and your favorite spices. Serve it alongside fresh vegetables, pita bread, or chips for a delightful appetizer. You can also incorporate yogurt into spreads to slather on sandwiches or toast, adding creaminess without the added calories of mayonnaise.

**5. Marinades:** Harness the natural probiotic qualities of yogurt to create tenderizing marinades for meats and vegetables. The acidity in yogurt helps to break down proteins, resulting in juicy and flavorful dishes. Combine it with spices and herbs to complement whatever you’re grilling or roasting.

**6. Frozen Treats:** Beat the heat with homemade yogurt popsicles! Simply blend yogurt with fruits, honey, or your favorite flavorings, pour into molds, and freeze. These treats are not only delicious but also a healthier alternative to store-bought ice creams.

**7. Soups and Sauces:** Stir a dollop of yogurt into soups just before serving for added creaminess and flavor. It works wonders in both chilled soups, like gazpacho, and warm soups, adding a rich texture and a cooling effect. You can also use it as a base for creamy sauces, perfect for drizzling over pasta or grilled vegetables.

With these creative uses for homemade yogurt, you can transform your culinary repertoire while enjoying the health benefits of this probiotic powerhouse. So, don’t be shy—experiment and discover new ways to incorporate your delicious homemade yogurt into everyday meals!

11. Storing and Preserving Your Yogurt

Once you’ve mastered the art of making your own creamy homemade yogurt, the next step is to ensure that it stays fresh and delicious for as long as possible. Proper storage and preservation are crucial, not just for maintaining flavor and texture, but also for maximizing the health benefits that yogurt offers. Here are some essential tips to help you store your yogurt like a pro.

**Choose the Right Container:**
The type of container you use can significantly affect the shelf life of your yogurt. Opt for airtight glass jars or food-safe plastic containers, as these will help maintain the yogurt’s texture and prevent any unwanted odors from seeping in. Avoid using metal containers, which can react with the acidity of yogurt and alter its flavor.

**Refrigeration is Key:**
Fresh homemade yogurt should always be stored in the refrigerator. The cold temperature slows down bacterial growth, keeping your yogurt safe to eat for longer. Ideally, yogurt can last up to two weeks when stored properly in the fridge. However, check for any signs of spoilage, such as an off smell or mold, before consuming.

**Portion it Out:**
If you’ve made a large batch of yogurt, consider portioning it out into smaller containers. This way, you only open one jar at a time, which limits exposure to air and helps maintain the overall freshness of the remaining yogurt. This is especially handy if you enjoy different flavors or toppings; you can customize each portion without affecting the entire batch.

**Freeze for Longer Storage:**
If you find that you have more yogurt than you can consume within two weeks, don’t worry! Yogurt can be frozen for future enjoyment. Scoop it into ice cube trays or freezer-safe containers, and freeze it for up to two months. When you’re ready to indulge, simply thaw it in the refrigerator overnight. Keep in mind that the texture may change slightly after freezing, making it best suited for smoothies or baking.

**Label and Date:**
To keep track of freshness, always label your containers with the date you made the yogurt. This simple step ensures you know how long it has been stored and helps you enjoy your yogurt at its peak quality.

By following these storage and preservation tips, you can savor the creamy goodness of your homemade yogurt for as long as possible. Whether enjoyed plain, topped with fruits, or blended into smoothies, your yogurt will be a delightful staple in your kitchen, ready whenever you need it!

12. Troubleshooting: What to Do If It Doesn’t Set

Making homemade yogurt can be a delightful and rewarding process, but sometimes things don’t go as planned. If you find yourself facing the frustrating situation where your yogurt hasn’t set properly, don’t worry! There are several common issues that can lead to this, and with a little troubleshooting, you can get back on track.

First, check the temperature of your incubation environment. Yogurt cultures thrive in warm conditions, typically around 110°F (43°C). If your mixture is too cool, the cultures may not grow adequately. You can create a cozy setting by wrapping your yogurt container in a thick towel or placing it in a warm oven (turned off) with the light on. Conversely, if it’s too hot, the cultures can die, so make sure the temperature stays consistent.

Next, consider the quality and type of starter culture you used. If your yogurt didn’t set, it might be that the live cultures in your starter were not strong enough or that they were past their expiration date. Always opt for a high-quality yogurt with active live cultures, or use a specially formulated yogurt starter for the best results.

Another potential issue could be the milk itself. Make sure you’re using fresh milk, as spoiled or overly processed milk can interfere with the fermentation process. Whole milk often yields creamier yogurt due to its higher fat content, but if you prefer a lower-fat option, ensure it’s pasteurized and not ultra-pasteurized, which can hinder proper setting.

Finally, if you’ve checked all these factors and your yogurt still hasn’t set after the typical incubation period (usually around 6-12 hours), consider giving it a little more time. Sometimes, yogurt just needs a bit longer to reach that perfect creamy consistency. If all else fails, don’t discard your efforts! You can salvage runny yogurt by straining it through cheesecloth or a fine mesh sieve to create a delicious Greek-style yogurt.

Remember, every batch of homemade yogurt is a learning experience. With a little patience and adjustment, you’ll soon be enjoying the rich, tangy goodness of your very own yogurt—just the way you like it!

13. Health Benefits of Yogurt

Yogurt isn’t just a delicious addition to your diet; it’s also a powerhouse of health benefits that can enhance your overall well-being. Packed with nutrients, homemade yogurt is a superb source of protein, calcium, and essential vitamins, making it an ideal choice for anyone looking to boost their nutritional intake.

One of the most notable benefits of yogurt is its probiotic content. These beneficial bacteria promote a healthy gut microbiome, aiding digestion and potentially reducing issues like bloating and constipation. A balanced gut can also bolster your immune system, helping your body fend off illness more effectively.

Additionally, yogurt is rich in calcium, which is vital for maintaining strong bones and teeth. For individuals looking to reduce their dairy consumption, yogurt can serve as an excellent alternative, providing the same bone-healthy benefits without the heavy load of other dairy products.

Moreover, many studies have suggested that regular consumption of yogurt may help in weight management. The protein content aids in satiety, keeping you fuller for longer and reducing the likelihood of unhealthy snacking. This can be particularly beneficial for those looking to maintain a healthy weight or shed a few pounds.

Another significant benefit of yogurt is its versatility. It can be incorporated into a variety of meals, from breakfast parfaits and smoothies to savory marinades and dressings. By making your yogurt at home, you can control the ingredients, avoiding added sugars and preservatives often found in store-bought varieties.

Incorporating homemade yogurt into your daily routine not only satisfies your taste buds but also nurtures your body, making it a smart and delicious choice for health-conscious individuals. So, as you embark on your yogurt-making journey, remember that you’re not just creating a tasty treat; you’re also unlocking a treasure trove of health benefits that can contribute to a healthier lifestyle!

14. Yogurt Varieties: Greek, Regular, and More

When it comes to yogurt, the world is bursting with delicious varieties, each bringing its own unique flavor and texture to the table. Understanding these differences not only enhances your yogurt-making experience but also allows you to tailor your creations to suit your taste preferences and nutritional needs.

**Greek Yogurt** is perhaps the most popular variety, beloved for its thick, creamy texture and rich flavor. The secret to its dense consistency lies in the straining process that removes most of the whey, resulting in a yogurt that’s higher in protein and lower in sugar compared to its regular counterpart. Greek yogurt is perfect for those looking to add a satisfying punch of protein to their breakfast or snacks, and it serves as an excellent base for smoothies, dressings, and dips.

**Regular Yogurt**, on the other hand, offers a smoother, more liquid consistency. This type of yogurt is versatile and can be enjoyed on its own, used in recipes, or incorporated into baked goods. Regular yogurt retains more of the whey, which contributes to a tangier flavor and a creamier mouthfeel. It’s a fantastic choice for anyone who enjoys a lighter, less concentrated yogurt experience.

Beyond these two, there are a plethora of yogurt varieties to explore. **Skyr**, an Icelandic specialty, is similar to Greek yogurt but is typically even thicker and has a slightly milder flavor, making it a fantastic option for those who prefer a less tangy taste. Then there’s **Kefir**, a fermented drinkable yogurt that’s packed with probiotics, offering a refreshing twist with a slightly fizzy texture that’s perfect for those hot summer days.

You can also experiment with **flavored yogurts**, which come in an array of fruit and spice combinations, or try your hand at **non-dairy options** made from almond, coconut, or soy milk, perfect for lactose-intolerant individuals or those following a vegan diet. Each variety presents a unique opportunity to explore different culinary landscapes, allowing you to customize your yogurt creations to suit your cravings and dietary needs.

So, whether you’re stirring in fresh fruits, drizzling honey, or creating savory sauces, understanding the nuances of yogurt varieties will elevate your homemade yogurt experience. Embrace the creaminess, and unlock a world of flavor possibilities right in your kitchen!

15. Conclusion: Enjoying Your Homemade Creation!

As we reach the end of our yogurt-making journey, it’s time to celebrate and savor the fruits of your labor. There’s something undeniably satisfying about creating your own yogurt from scratch—transforming simple ingredients into a delicious, creamy indulgence that’s tailored to your taste. Whether you’ve opted for a tangy Greek yogurt or a smooth, luscious regular variety, the satisfaction of enjoying a homemade creation is truly unparalleled.

Once your yogurt has set and chilled, the fun really begins! Picture opening your refrigerator to find a jar brimming with velvety yogurt, ready to elevate your breakfasts, snacks, and desserts. The versatility of homemade yogurt is one of its greatest charms. Enjoy it plain, drizzled with honey, or topped with your favorite fresh fruits and nuts for a wholesome breakfast. Blend it into smoothies for a protein boost, or use it as a base for dips and dressings that can transform your meals into culinary delights.

Don’t forget about the health benefits! Homemade yogurt is probiotic-rich, promoting gut health and immunity. Plus, you have complete control over the ingredients, ensuring there are no additives or preservatives—just pure, wholesome goodness.

As you embark on this delicious journey, remember that practice makes perfect. Each batch may inspire you to experiment with flavors, textures, and toppings, turning yogurt-making into a delightful ritual. So, roll up your sleeves, unleash your creativity, and enjoy each spoonful of your homemade yogurt. Taste the difference, and let your culinary creations become a staple in your kitchen. Cheers to your delicious homemade yogurt adventure!

In conclusion, making homemade yogurt is not only a rewarding culinary adventure but also a delicious way to enjoy a creamy, nutritious treat tailored to your taste. By following the tips and methods outlined in our blog, you can unlock the secrets to creating the perfect batch of yogurt that is rich in flavor and probiotics. Whether you prefer it plain, sweetened, or flavored with fruits and spices, the possibilities are endless. So gather your ingredients, embrace your inner chef, and start experimenting with different cultures and techniques. Before you know it, you’ll be savoring the delightful taste and health benefits of your very own homemade yogurt. Happy yogurt-making!

What are the best ways to make homemade ice cream?

As the sun blazes and temperatures rise, nothing quite compares to the joy of indulging in a bowl of creamy, homemade ice cream.

There’s a certain magic in the process—transforming simple ingredients like fresh cream, sugar, and your favorite flavors into a delightful frozen treat that cools you down and brings a smile to your face. Whether you’re craving classic vanilla, adventurous salted caramel, or fruity sorbet, making ice cream at home allows you to customize every scoop to your liking. In this ultimate guide, we’ll take you through the essentials of homemade ice cream-making, from choosing the right tools and ingredients to mastering churn techniques and creative flavor combinations. Get ready to chill out and learn how you can turn your kitchen into an ice cream parlor, perfect for hot summer days or any occasion that calls for a sweet, creamy escape!

1. Introduction to Homemade Ice Cream

What are the best ways to make homemade ice cream?
Credit : whatcanu.com

There’s something undeniably magical about ice cream. The creamy texture, the delightful flavors, and the sheer joy of indulging in a scoop (or two) on a hot summer day can bring a smile to anyone’s face. But have you ever considered taking that joy to the next level by making your own homemade ice cream? This guide will take you on a delicious journey into the world of crafting your very own frozen treats, right from the comfort of your kitchen.

Homemade ice cream isn’t just a nostalgic nod to childhood summers; it’s an opportunity to unleash your creativity and tailor flavors to suit your taste buds. Imagine swirling together your favorite ingredients—be it rich chocolate, fresh fruits, or even unexpected spices. The best part? You have complete control over the quality and freshness of every component that goes into your ice cream. No preservatives, no artificial flavors, just pure, decadent goodness.

In this ultimate guide, we’ll explore the basics of ice cream making, from selecting the right equipment to understanding the science behind the freezing process. Whether you’re a seasoned home chef or a curious beginner, you’ll find tips and techniques to create ice cream that rivals even the most beloved parlors. So grab an ice cream maker (or a trusty blender), gather your ingredients, and get ready to chill out with the ultimate homemade ice cream experience!

2. The Benefits of Making Ice Cream at Home

Making ice cream at home is not just a delightful culinary endeavor; it also comes with a plethora of benefits that can elevate your experience beyond what you’d find in a store-bought pint.

First and foremost, there’s the sheer joy of customization. When you make your own ice cream, you have complete control over the ingredients. This means you can craft flavors that cater to your specific tastes, whether that’s a classic vanilla bean, a rich chocolate fudge, or an adventurous lavender honey. You can experiment with mix-ins like fresh fruits, nuts, or even swirls of caramel and fudge, allowing you to create truly unique concoctions that tantalize your taste buds.

Health-conscious individuals will appreciate the ability to choose wholesome ingredients. Homemade ice cream can be made with organic dairy, natural sweeteners, and fresh, seasonal produce, allowing you to indulge guilt-free. You can even explore dairy-free alternatives using coconut milk, almond milk, or cashew cream, making it an inclusive treat for those with dietary restrictions.

Additionally, making ice cream at home fosters creativity and brings a sense of accomplishment. The process can be a fun activity for the whole family, turning a warm afternoon into a memorable experience. Whether you’re hosting a gathering or simply enjoying a quiet evening, the satisfaction of scooping out a bowl of your own creation adds a personal touch that store-bought options simply cannot match.

Finally, there’s an undeniable charm in sharing your homemade ice cream with friends and family. It can become a centerpiece for gatherings, a thoughtful gift, or a delightful treat on a hot summer day. So, not only do you get to enjoy a delicious dessert, but you also create lasting memories that are just as sweet as the ice cream itself. Embrace the joy of making ice cream at home, and discover how it can be so much more than just a treat—it’s an experience!

3. Essential Tools and Equipment for Ice Cream Making

What are the best ways to make homemade ice cream?
Credit : whatcanu.com

Creating your own homemade ice cream can be a delightful adventure, but having the right tools and equipment is essential to achieving that perfect creamy texture and flavor. Here’s a rundown of the must-have items that will elevate your ice cream-making experience:

1. **Ice Cream Maker**: At the heart of your homemade ice cream journey is the ice cream maker. While there are several types available—manual, electric, and compressor models—electric ice cream makers are often the most user-friendly for beginners. They come with built-in freezing mechanisms that take the guesswork out of the process, allowing you to churn your mixture to perfection without the hassle of ice and salt.

2. **Mixing Bowls**: A set of mixing bowls is essential for combining your ingredients. Opt for a variety of sizes, preferably stainless steel or glass, as they are durable and easy to clean. A larger bowl is perfect for mixing your cream and sugar, while smaller bowls can be used for incorporating flavorings or toppings.

3. **Whisk and Spatula**: A sturdy whisk will help you blend your base smoothly, ensuring that the sugar dissolves completely and the ingredients are well incorporated. A silicone spatula is perfect for scraping down the sides of your bowls and transferring your mixture into the ice cream maker with minimal mess.

4. **Measuring Cups and Spoons**: Accurate measurements are crucial in ice cream making. Invest in a set of measuring cups and spoons to ensure you get the ratios of cream, milk, sugar, and flavorings just right. Precision can make a significant difference in the final taste and texture of your ice cream.

5. **Thermometer**: If you’re making a custard base, a food thermometer is invaluable for ensuring that your mixture reaches the correct temperature without overheating. This step is crucial for achieving the perfect custard consistency and preventing scrambled eggs in your ice cream!

6. **Storage Containers**: Once your ice cream is churned to creamy perfection, you’ll need suitable containers to store it. Airtight plastic or glass containers work well, as they help retain freshness and prevent freezer burn. Consider using containers with wide openings for easy scooping!

7. **Ice Cream Scoop**: Finally, don’t forget a high-quality ice cream scoop. A sturdy scoop allows you to serve your homemade creation with ease, ensuring that every bowl is a generous, perfectly rounded portion.

With these essential tools and equipment in your arsenal, you’ll be well on your way to crafting delicious homemade ice cream that rivals your favorite shop. Get ready to experiment with flavors, create scrumptious toppings, and enjoy the sweet rewards of your labor!

4. Choosing the Right Ingredients: Dairy, Sweeteners, and Flavorings

When it comes to crafting the perfect homemade ice cream, the choice of ingredients plays a pivotal role in achieving that creamy, dreamy texture and flavor explosion that keeps everyone coming back for more. Let’s dive into the essential components: dairy, sweeteners, and flavorings.

**Dairy**: The foundation of any great ice cream starts with high-quality dairy. Whole milk and heavy cream are the stars of the show, providing the rich, velvety mouthfeel that we associate with premium ice cream. If you’re looking for a lighter option, you can also experiment with half-and-half or even non-dairy alternatives like coconut cream or almond milk. Just be mindful that non-dairy bases may yield a different texture and flavor profile. For a delicious twist, consider adding a splash of buttermilk or sour cream to enhance the creaminess and introduce a subtle tang.

**Sweeteners**: The sweetener you choose can significantly impact not just the flavor but also the texture of your ice cream. Traditional granulated sugar is the most common choice, providing a classic sweetness that balances the richness of the dairy. However, you might want to explore alternatives like honey, maple syrup, or agave nectar for a unique twist. Remember that liquid sweeteners may require adjustments to your cream base to maintain the right consistency, so don’t hesitate to experiment! For a sugar-free option, consider using erythritol or stevia, but keep in mind that some sugar substitutes can create a different mouthfeel and may not freeze as smoothly as traditional sugar.

**Flavorings**: This is where your creativity can really shine! Whether you’re opting for classic vanilla, decadent chocolate, or fruity strawberry, the key is to select high-quality flavorings. Pure extracts, like vanilla or almond, will elevate your ice cream to a whole new level, while fresh fruits can add a vibrant burst of flavor. If you’re feeling adventurous, try infusing your cream with herbs like basil or mint, or add spices like cinnamon or nutmeg for a unique flavor profile. Don’t forget about mix-ins—think chocolate chips, nuts, or cookie pieces—that can add both texture and surprise to every delightful scoop.

In summary, the right combination of dairy, sweeteners, and flavorings can transform your homemade ice cream from simple to sensational. So gather your ingredients, unleash your inner ice cream artisan, and get ready to savor the deliciousness of your creations!

5. Base Types: Custard vs. Philadelphia Style

What are the best ways to make homemade ice cream?
Credit : whatcanu.com

When it comes to making homemade ice cream, one of the most crucial decisions you’ll encounter is choosing the right base. The two primary styles of ice cream bases are custard and Philadelphia style, each offering distinct flavors and textures that can elevate your frozen treat to new heights.

**Custard Style Ice Cream** is rich, creamy, and indulgent. Made with egg yolks, this base requires a careful cooking process to create a smooth custard before chilling. The addition of egg yolks not only gives the ice cream a luxurious texture but also enhances the overall flavor profile, creating a velvety experience with every spoonful. The custard base is often cooked gently over a double boiler, allowing the eggs to thicken without scrambling. Once cooled, it’s combined with cream, milk, and sugar, resulting in a decadent ice cream that is perfect for those who appreciate a more complex flavor.

On the other hand, **Philadelphia Style Ice Cream** is the simpler, no-cook alternative, making it a favorite among home ice cream makers seeking a quick and straightforward approach. This style relies primarily on heavy cream and milk, with no eggs involved, which allows for a lighter, fresher taste. The absence of eggs means you skip the time-consuming step of cooking the custard, making it an excellent option for those who want to whip up a batch of ice cream on a whim. Philadelphia style ice cream is particularly well-suited for bold flavors, as the creaminess showcases the ingredients beautifully without the rich undertones of eggs.

Ultimately, the choice between custard and Philadelphia style comes down to personal preference. If you’re in the mood for something luxurious and rich, go for the custard base. But if you’re craving a light, refreshing treat that highlights the flavors of your favorite mix-ins, Philadelphia style is the way to go. Whichever you choose, both styles promise to deliver delicious homemade ice cream that’s sure to impress family and friends alike!

6. Step-by-Step Guide to Making Ice Cream from Scratch

Making ice cream from scratch is a delightful and rewarding experience that allows you to indulge in creamy, dreamy flavors tailored to your preferences. Here’s a simple, step-by-step guide to creating your own ice cream masterpiece:

**Step 1: Gather Your Ingredients**
To kick off your ice cream adventure, collect the essential ingredients: heavy cream, whole milk, granulated sugar, and vanilla extract. For a basic vanilla ice cream, you’ll want about 2 cups of heavy cream, 1 cup of whole milk, and 3/4 cup of sugar. Don’t forget to grab your favorite mix-ins like chocolate chips, fruit, or nuts for that personal touch!

**Step 2: Prepare the Base**
In a medium mixing bowl, whisk together the sugar and whole milk until the sugar is completely dissolved. This will ensure a smooth texture without any gritty surprises. Once mixed, gently fold in the heavy cream and vanilla extract. The mixture should be rich and velvety, setting the stage for your creamy creation.

**Step 3: Chill the Mixture**
To enhance the flavor and improve the final texture, refrigerate the ice cream base for at least 1-2 hours. This step helps the ingredients meld together while cooling the mixture, making it easier to churn later.

**Step 4: Churn Your Ice Cream**
Once your base is chilled, it’s time to churn! If you have an ice cream maker, pour the mixture into the machine and churn according to the manufacturer’s instructions, usually around 20-30 minutes. If you don’t have a machine, you can pour the mixture into a shallow dish and place it in the freezer, stirring vigorously every 30 minutes for about 3-4 hours until it reaches a soft-serve consistency.

**Step 5: Add Mix-Ins**
During the last few minutes of churning (or just before your ice cream sets in the freezer), fold in any mix-ins you desire. Think chocolate chunks, cookie crumbles, or fresh berries. This is where you can get creative, adding your favorite flavors and textures.

**Step 6: Freeze Until Firm**
Once you’ve achieved the desired consistency and added your mix-ins, transfer your ice cream to an airtight container and freeze for at least 4 hours, or until it’s hard enough to scoop. This final freeze will give your ice cream that perfect, scoopable texture.

**Step 7: Serve and Enjoy**
After patiently waiting, your homemade ice cream is ready to be served! Scoop it into bowls or cones, and consider topping it with sprinkles, syrups, or whipped cream. Enjoy the fruits of your labor with friends and family, or keep it all to yourself—after all, you deserve it!

By following these simple steps, you’ll be well on your way to mastering the art of homemade ice cream, treating yourself and your loved ones to a sweet, personalized delight that’s sure to impress!

7. Flavor Ideas: Classic, Unique, and Seasonal Variations

What are the best ways to make homemade ice cream?
Credit : whatcanu.com

When it comes to homemade ice cream, the flavor possibilities are as vast as your imagination. Whether you’re a fan of timeless classics or adventurous enough to explore seasonal and unique concoctions, there’s a flavor waiting to tantalize your taste buds.

**Classic Flavors**
Start with the tried-and-true favorites that have stood the test of time. Vanilla, chocolate, and strawberry are the holy trinity of ice cream flavors. Vanilla serves as a blank canvas, allowing you to add a variety of mix-ins like chocolate chips, cookie dough, or fresh fruit. Chocolate lovers can indulge in rich, creamy chocolate ice cream, perhaps swirled with fudge for added decadence. Meanwhile, strawberry ice cream, made with ripe, juicy berries, provides a refreshing and fruity experience that’s perfect for summer.

**Unique Flavors**
If you’re feeling adventurous, why not venture into the realm of unique and unexpected flavors? Consider experimenting with flavors like lavender honey, where the floral notes of lavender beautifully complement the sweetness of honey. Or try a spicy chocolate ice cream infused with a hint of chili for a surprising kick. For a taste of the tropics, coconut lime could transport you straight to a beachside paradise, while matcha green tea offers a delightful earthy flavor that’s both refreshing and invigorating.

**Seasonal Variations**
Embrace the changing seasons by incorporating seasonal ingredients into your ice cream creations. In the spring, consider a fresh mint chocolate chip, with vibrant green mint leaves blended into a creamy base. Summer calls for refreshing fruit flavors like peach or raspberry, using peak-season produce for an unbeatable taste. As autumn approaches, why not whip up a pumpkin spice ice cream, rich with the warm spices of cinnamon and nutmeg? Finally, during the winter months, indulge in a cozy eggnog ice cream, perfect for holiday gatherings and chilly nights.

No matter which direction you choose, the beauty of making homemade ice cream lies in the ability to customize and experiment. So grab your ingredients, unleash your creativity, and get ready to delight in the endless world of flavors that await you!

8. Tips for Achieving the Perfect Texture

Achieving the perfect texture in homemade ice cream is an art that combines science, technique, and a little bit of love. The texture of your ice cream can make or break the experience, transforming a simple scoop into a creamy delight that melts beautifully in your mouth. Here are some essential tips to help you create that coveted silky-smooth texture.

First and foremost, start with a base that has the right balance of fat and sugar. Higher fat content, usually from heavy cream, not only enhances the flavor but also contributes to a richer texture. Aim for a base that contains at least 10-20% fat, as this will help create that luscious creaminess we all adore. Sugar also plays a crucial role; it lowers the freezing point of the mixture, allowing the ice cream to remain softer and easier to scoop after freezing.

Next, don’t underestimate the power of proper chilling. Before churning your mixture, ensure that it is thoroughly chilled in the refrigerator for several hours. This step not only accelerates the churning process but also helps incorporate air into the mixture, creating a light and fluffy texture. For best results, chill your base to at least 40°F (4°C) before pouring it into the ice cream maker.

When it’s time to churn, keep your ice cream maker bowl as cold as possible. If you’re using a bowl that requires pre-freezing, make sure to freeze it for at least 24 hours. The colder the bowl, the quicker the mixture will freeze, which helps minimize ice crystal formation. This results in a smoother texture, so don’t rush this crucial step!

Another tip is to avoid over-churning. While it may be tempting to let your ice cream maker run indefinitely, doing so can lead to a grainy texture as too much air is incorporated. Keep an eye on the consistency and stop churning once you see a soft-serve texture. After churning, transfer your ice cream to an airtight container and freeze it for a few hours to achieve the ideal scoopable consistency.

Finally, consider adding stabilizers to your mixture. Ingredients like cornstarch or gelatin can help improve the texture by preventing ice crystals from forming during the freezing process. These are especially helpful if you plan to store your ice cream for an extended period.

With these tips in your toolkit, you’ll be well on your way to creating homemade ice cream that’s not just delicious, but also boasts the perfect texture that will have your friends and family coming back for more. So grab your ice cream maker and start experimenting—you’re in for a real treat!

9. Add-ins and Mix-ins: Get Creative with Your Ice Cream

When it comes to homemade ice cream, the possibilities for add-ins and mix-ins are virtually endless, and this is where your creativity can truly shine. Imagine scooping into a velvety base of vanilla bean ice cream, only to discover delightful surprises hidden within. From classic favorites to adventurous twists, the right mix-ins can elevate your homemade concoction from ordinary to extraordinary.

Start with the classics: chunks of rich chocolate, ribbons of caramel, or a generous handful of crunchy nuts can all add texture and flavor. But why stop there? Consider mixing in crushed cookies for a delightful cookie dough flavor, or swirl in some fruit preserves for a refreshing tartness that complements the creaminess of the ice cream. Fresh fruit such as strawberries, blueberries, or bananas can infuse natural sweetness and vibrant color, while also providing a burst of freshness in every bite.

For those who love a bit of crunch, think about incorporating granola or toasted coconut flakes, which not only add a satisfying texture but also a unique flavor profile. If you’re feeling particularly adventurous, try adding spicy elements like crushed chili peppers or ginger, or even savory touches like a sprinkle of sea salt to enhance the sweetness.

Don’t forget about the fun toppings! After churning your ice cream, why not serve it with an array of toppings that guests can customize themselves? A DIY sundae bar with whipped cream, sprinkles, and various syrups can turn your ice cream experience into a party, delighting both kids and adults alike.

No matter how you choose to get creative, remember that the heart of homemade ice cream is all about personal expression. So, grab your favorite add-ins and mix-ins, and let your imagination run wild—after all, the best ice cream is the one that reflects your unique taste!

10. Storing Homemade Ice Cream: Best Practices

Storing homemade ice cream properly is key to preserving its creamy texture and delightful flavor. After all the effort you’ve put into creating that perfect batch, you want to ensure it remains as delicious as the day it was made. Here are some best practices to keep your ice cream in top shape.

First and foremost, choose the right container. Opt for an airtight, freezer-safe container that’s made of plastic or metal, as glass can crack under extreme cold. A shallow container is ideal, as it allows for faster freezing and easier scooping. If you have a larger batch, consider dividing it into smaller portions. This way, every time you open the freezer, you’re not exposing the entire batch to warmer air, which can lead to ice crystals forming—a texture enemy for your homemade creation.

When packing your ice cream into the container, leave just a little bit of space at the top to allow for expansion as it freezes. Then, press a piece of parchment paper directly onto the surface of the ice cream before sealing the container. This additional layer acts as a barrier against air, helping to lock in that velvety smoothness you worked so hard to achieve.

Next, store your ice cream in the coldest part of the freezer, ideally the back, rather than the door. The door tends to fluctuate in temperature every time it opens, which can affect the consistency of your ice cream. Aim to keep your freezer at a steady 0°F (-18°C) or lower to maintain the best texture.

Finally, remember to consume your homemade ice cream within a month for optimal flavor and quality. While it may last longer, the longer it sits in the freezer, the more likely it is to succumb to freezer burn or lose that fresh taste. So, gather your friends and family and invite them over for an ice cream party—after all, nothing is quite as delightful as sharing your homemade treat! With these best practices, your homemade ice cream will remain a delightful indulgence, ready to enjoy whenever the craving strikes.

11. Common Mistakes to Avoid When Making Ice Cream

Making homemade ice cream can be a delightful and rewarding experience, but it’s easy to stumble over a few common pitfalls that could turn your creamy dreams into icy disappointments. Here’s a rundown of mistakes to avoid, ensuring that each batch is a success.

**1. Skipping the Pre-Chill Step:** One of the most crucial steps in making ice cream is pre-chilling your ice cream maker’s bowl. If the bowl isn’t cold enough, your mixture won’t freeze properly, leading to a soupy texture rather than the smooth, creamy consistency you desire. Always ensure you’ve placed the bowl in the freezer for at least 24 hours before use.

**2. Not Tempering Eggs:** If your recipe calls for eggs, make sure to temper them before adding them to your mixture. Quickly whisking the eggs with a small amount of hot cream prevents them from scrambling and ensures a silky texture. This step is vital for custard-based ice creams, so don’t skip it!

**3. Using Too Much Sugar:** While sweetness is essential, overdoing it can lead to an overly soft ice cream that doesn’t freeze well. Sugar lowers the freezing point of your mixture, so balance is key. Follow your recipe closely, and consider tasting along the way to hit that sweet spot without going overboard.

**4. Forgetting to Strain:** If your recipe includes a custard base, always strain it after cooking. This removes any potential egg bits and ensures a perfectly smooth texture. You want your ice cream to be a luxurious treat, free of any unwanted crunch.

**5. Ignoring Flavor Balance:** When adding flavors like vanilla, chocolate, or fruit purees, be mindful of your ratios. Too much flavoring can overpower the overall taste, while too little may leave your ice cream bland. Start with smaller amounts, tasting as you go, to create a well-rounded profile.

**6. Overchurning:** While it may be tempting to keep the mixture churning until it’s super thick, overchurning can lead to icy crystals forming. Once your ice cream reaches a soft-serve consistency, it’s time to stop and transfer it to a container for freezing.

**7. Skipping the Freeze Time:** After churning, it’s essential to let your ice cream set in the freezer for at least a few hours before serving. This additional freezing time allows flavors to meld and the texture to firm up, resulting in a more enjoyable scoop.

By avoiding these common mistakes, you’ll be well on your way to crafting delicious, homemade ice cream that rivals the best scoop shops. Whether you’re experimenting with traditional flavors or getting creative with unique combinations, following these tips will help ensure your frozen treats are nothing short of perfection.

12. Dairy-Free and Vegan Ice Cream Options

As the demand for inclusive dessert options continues to rise, crafting delicious dairy-free and vegan ice cream has never been more rewarding. Whether you’re lactose intolerant, following a vegan lifestyle, or simply looking to explore new flavors and textures, there are countless ways to create creamy and satisfying frozen treats without traditional dairy.

Start with a base that’s rich and flavorful. Coconut milk is a popular choice thanks to its luscious consistency and subtle sweetness, making it an ideal canvas for a variety of flavors. Almond milk and cashew milk are also excellent alternatives, imparting their unique nutty notes to your ice cream. For a thicker, creamier texture, consider using silken tofu, which blends smoothly and provides a protein boost, or opt for a blend of nut butters for added richness.

When it comes to sweeteners, the options are plentiful. Agave nectar, maple syrup, and coconut sugar can infuse your ice cream with natural sweetness, while dates or bananas can provide a whole-food option that also contributes to creaminess. Experiment with different sweeteners to find the perfect balance for your palate.

Flavors are where the fun truly begins! From classic vanilla to decadent chocolate, and adventurous combinations like matcha green tea or lavender, the possibilities are endless. Don’t shy away from adding mix-ins like chopped nuts, dairy-free chocolate chips, or chunks of fresh fruit to elevate the texture and taste of your creations.

To make your process even easier, consider using an ice cream maker, which can help achieve that desired smoothness and prevent ice crystals from forming. If you don’t have one, fear not! Simply pour your mixture into a shallow dish and stir every 30 minutes as it freezes to achieve a still creamy texture.

With these dairy-free and vegan options, you can indulge in homemade ice cream that caters to everyone’s dietary needs while tantalizing their taste buds. So gather your ingredients, unleash your creativity, and get ready to enjoy guilt-free frozen delights that are sure to impress family and friends alike!

13. Fun Serving Ideas and Presentation Tips

When it comes to homemade ice cream, the experience isn’t just about the taste—it’s also about how you serve it! Elevating the presentation of your frozen creations can add a dash of excitement to any gathering and make your homemade treats even more memorable. Here are some fun serving ideas and presentation tips that will impress your family and friends.

**1. Colorful Bowls and Unique Cones:** Start by selecting vibrant bowls or quirky ice cream cones to serve your creations. Opt for rainbow-hued cups, vintage glassware, or even edible waffle bowls for a delightful twist. The right container can turn even the simplest scoop into a visual masterpiece.

**2. Layered Sundaes:** Layering your ice cream can create a stunning presentation. Start with a scoop of one flavor, drizzle some sauce (think chocolate, caramel, or fruit compote), and then add another scoop of a different flavor. Top it off with whipped cream, sprinkles, and a cherry for that classic sundae look.

**3. Garnish with Fresh Ingredients:** Fresh fruits can provide a burst of color and flavor. Consider garnishing your ice cream with slices of strawberries, blueberries, or kiwi. Fresh mint leaves can also add a pop of green that brightens up your dish.

**4. Creative Toppings Bar:** Set up a toppings bar at your next gathering, where guests can customize their own sundaes or cones. Include a variety of toppings such as crushed cookies, nuts, mini marshmallows, and a selection of syrups. This interactive approach not only makes serving fun but also lets everyone tailor their dessert to their liking.

**5. Ice Cream Sandwiches:** For a playful twist, create ice cream sandwiches using cookies, brownies, or even donuts. Roll the edges in sprinkles or nuts for an added surprise. These handheld treats are not only delicious but also make for great photo opportunities!

**6. Themed Presentation:** If you’re hosting a themed party, align your ice cream presentation accordingly. For a beach party, serve ice cream in coconut shells topped with crushed graham crackers to mimic sand. For a movie night, use popcorn boxes filled with scoops of ice cream, complete with a drizzle of chocolate sauce for a fun and unexpected treat.

**7. Freeze and Serve:** For a dramatic effect, freeze your serving plates or bowls before serving. The condensation that forms will give your dessert a frosty, inviting look, while also keeping your ice cream from melting too quickly.

Remember, the key to a delightful ice cream presentation is to let your creativity shine. Each scoop of your homemade ice cream is a blank canvas waiting for your artistic touch. With these fun serving ideas and presentation tips, you’ll be ready to create an unforgettable dessert experience that will leave everyone craving more!

14. Hosting an Ice Cream Party: Themes and Recipes

Hosting an ice cream party is a delightful way to gather friends and family while indulging in everyone’s favorite frozen treat. The beauty of an ice cream party lies in its versatility; it can be as simple or as extravagant as you’d like, and the themes can be tailored to suit any occasion. Here are some fun ideas to get you started, along with delicious recipe suggestions that will make your ice cream party unforgettable.

**Themed Parties:**
1. **Classic Sundae Bar:** Set up a stunning sundae bar with a variety of ice cream flavors like vanilla, chocolate, and strawberry. Offer an array of toppings, from hot fudge and caramel sauce to sprinkles, crushed cookies, and fresh fruits. Provide fun bowls and spoons, and let guests create their own masterpiece while mingling.

2. **Tropical Luau:** Transport your guests to a tropical paradise with flavors inspired by the islands. Think coconut, pineapple, and mango ice creams. Pair these with toppings like toasted coconut flakes, macadamia nuts, and rum-infused fruit compote. Decorate with Hawaiian leis and play some upbeat island music to enhance the vibe.

3. **Decadent Chocolate Affair:** For the chocolate lovers, host a chocolate-themed party with rich chocolate ice cream as the star. Experiment with different recipes—dark chocolate, white chocolate raspberry, or even chocolate brownie ice cream. Add toppings like chocolate shavings, brownie bites, and chocolate syrup for an indulgent experience.

4. **Seasonal Flavors:** Celebrate the seasons by featuring flavors that reflect the time of year. In summer, go for refreshing mint chocolate chip and strawberry basil. In fall, pumpkin spice and apple pie ice cream can capture the essence of autumn. Create seasonal decor to complement the flavors and make the event feel special.

**Recipe Inspiration:**
– **No-Churn Vanilla Ice Cream:** Simple to prepare, this recipe requires just heavy cream, sweetened condensed milk, and vanilla extract. Mix and freeze for a creamy, dreamy treat that can serve as a base for countless toppings.

– **Strawberry Sorbet:** Perfect for a refreshing dessert, this sorbet combines fresh strawberries, sugar, and a touch of lemon juice. Blend until smooth, freeze, and serve for a light, fruity option that everyone will love.

– **Chocolate Chip Cookie Dough Ice Cream:** Who doesn’t love cookie dough? Make a classic vanilla ice cream base and mix in chunks of cookie dough for a nostalgic twist that brings back childhood memories.

– **Dairy-Free Coconut Ice Cream:** For guests with dietary restrictions, whip up a coconut milk-based ice cream. Infuse it with vanilla and throw in some shredded coconut for added texture.

As you plan your ice cream party, don’t forget the essential elements—fun activities like ice cream-making contests or tasting games can keep the energy high. Provide comfortable seating and perhaps even a photo booth with fun props to capture the sweet memories. With delicious flavors, creative themes, and a festive atmosphere, your ice cream party is sure to be a hit, leaving your guests with smiles and satisfied taste buds!

15. Conclusion: Enjoying Your Homemade Creations

As you reach the end of this delightful journey into the world of homemade ice cream, it’s time to savor the fruits of your labor. There’s something incredibly satisfying about crafting your own frozen treats—it’s not just about the creamy, dreamy flavors but also the joy of sharing these creations with family and friends.

Imagine opening your freezer to find a colorful array of ice cream tubs, each representing a different flavor you’ve expertly concocted. From classic vanilla bean to adventurous lavender honey or rich chocolate fudge, the choices are as limitless as your imagination. The moment you scoop that first serving, the silky texture and vibrant taste remind you of the care and creativity that went into each batch.

But the enjoyment doesn’t stop there. Picture a sunny afternoon, the laughter of loved ones filling the air as they gather around a bowl of your homemade ice cream. Whether it’s a simple scoop served in a cone or an extravagant sundae topped with whipped cream, sprinkles, and cherries, each bite is a celebration of your culinary skills. You’ll find that your creations spark conversation, evoke memories, and create new experiences, making every scoop a cherished moment.

So, as you conclude your ice cream-making adventure, remember that the real reward lies not just in the creamy delights you’ve made but in the smiles and laughter they bring. Embrace the messiness of experimentation, keep refining your flavors, and most importantly, enjoy every delicious moment of your homemade creations. After all, the joy of ice cream is best when shared!

As we wrap up our ultimate guide to making homemade ice cream, we hope you’re feeling inspired to unleash your inner ice cream artisan and create delightful frozen treats that will impress family and friends alike. With the simple techniques and creative flavor ideas we’ve shared, you now have the tools to craft everything from classic vanilla to adventurous combinations that tickle the taste buds. So, gather your ingredients, fire up that ice cream maker, and embark on a delicious journey that not only cools you down but also warms your heart with the joy of homemade goodness. Don’t forget to share your delicious creations with us—tag us on social media and let the world see your frozen masterpieces! Enjoy every scoop!