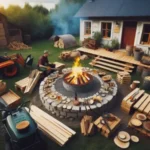
How to build a simple outdoor fire pit?

Building a fire pit is a permanent upgrade to your landscape. You do not need professional mason skills to get a high-quality result. You need a systematic approach to ensure safety and durability. Follow this guide to build a structure that survives both high heat and heavy rain.
Site Selection: The Safety Audit
Most fire pit failures start with poor placement. You need a buffer zone to prevent accidental fires. Place your pit at least 20 feet from any wooden structure or fence. Ensure a 15-foot vertical clearance from trees; think of this like a chimney, where rising heat and sparks need room to dissipate safely.
Check your local municipal ordinances before you dig. Some areas require a permit or mandate specific distances from property lines. Use a garden hose to trace your layout. A 3 to 4-foot diameter is ideal. Anything larger is difficult to heat, and anything smaller makes social interaction uncomfortable.
The Critical Materials Checklist

Avoid river rocks or random stones found in nature. These stones often contain internal moisture pockets. When heated, this moisture turns into steam, causing the rock to explode like a pressure cooker. Only use fire-rated bricks or concrete retaining wall blocks.
- Fire-rated masonry blocks: These are engineered to handle extreme thermal expansion.
- Crushed drainage gravel: You need 4 inches of this to keep your pit dry.
- Steel fire ring: This acts as a barrier, preventing direct flame contact with your masonry.
- High-heat adhesive: Use specific masonry glue designed for ovens or fireplaces.
- Leveling tools: A rubber mallet and a long spirit level are mandatory for structural integrity.
Excavation and Foundation
Dig your circle to a depth of 8 inches. The base must be perfectly flat. Use a hand tamper to compact the soil until it feels solid like a roadbed. If the earth is soft, the weight of your blocks will cause the pit to sink unevenly over time.
Pour 4 inches of crushed gravel into the hole. This acts like a sponge, allowing rainwater to soak into the ground rather than pooling inside the pit. If your pit holds water, the bottom layer of wood will stay damp, causing excessive smoke and poor burn quality.
The Build: Structural Integrity

Lay the first course of blocks carefully. Use your level every time you set a block. If the base layer is tilted by even a few degrees, the top layer will be dangerously uneven. This is the most common mistake beginners make, leading to a leaning structure.
Stack your blocks in a running bond pattern. This is like brickwork on a house, where the vertical joints of one row do not align with the row below. This pattern locks the structure together. Apply a bead of high-heat adhesive between every single layer to handle the constant expansion and contraction cycles of the fire.
Real-World Advice: Avoid These Traps
Never use railroad ties or treated lumber. The chemicals inside this wood are toxic when burned and create a significant fire hazard. Keep the airflow in mind as you build. Your fire needs oxygen to burn hot and clean. If you build the walls too tall and thick, the fire will struggle for air, leading to a smoky, frustrating experience.

Pro-tip: If your fire pit feels like it isn’t heating well, it is likely lacking proper air intake. Ensure the base allows for a small amount of airflow underneath the wood, or ensure your masonry has small gaps between blocks in the bottom row to feed the fire.
Maintenance for Seasonal Durability
A fire pit is a high-stress environment. Once a month, check the interior bricks for hairline cracks. If you find a crack, patch it immediately with masonry adhesive. Small cracks let in water, which expands when it freezes, eventually crumbling your masonry.
Clean the pit of ash every three uses. Ash holds moisture, which turns into a mild acid when mixed with rainwater. This acid will eat through metal rings and weaken concrete blocks over several seasons. In winter, use a heavy-duty vinyl cover. Keeping your structure dry is the single most important factor for its lifespan.
Content updated on 2026-08-29