pc gaming – How to overclock your CPU for gaming?

In the exhilarating world of gaming, every frame counts, and every millisecond can make the difference between victory and defeat.

If you’re a passionate gamer looking to maximize your system’s potential, overclocking your CPU might just be the game-changer you need. This step-by-step guide will walk you through the process of unlocking hidden performance within your processor, allowing you to experience smoother gameplay, faster load times, and an edge over your competition. Whether you’re a seasoned tech enthusiast or a curious newcomer, we’ll demystify the overclocking process, ensuring you understand the benefits, risks, and best practices for safely pushing your CPU to its limits. Get ready to enhance your gaming experience and unleash the full power of your rig—because the next level of performance is just a few tweaks away!

1. Introduction to Overclocking: What You Need to Know

pc gaming -  How to overclock your CPU for gaming?
Credit : whatcanu.com

Overclocking your CPU can be a game-changer, especially for avid gamers looking to maximize their system’s performance. But before you dive headfirst into this exhilarating world of enhanced speed and power, it’s crucial to understand the fundamentals of what overclocking entails and the potential risks and rewards involved.

At its core, overclocking is the process of increasing the clock speed of your CPU beyond the manufacturer’s specifications. This effectively makes your processor run faster, enabling better performance in CPU-intensive tasks like gaming, video editing, and 3D rendering. While many modern CPUs come with impressive out-of-the-box performance, overclocking allows tech enthusiasts to squeeze out every last drop of power.

But why should you consider overclocking? The most compelling reason is performance enhancement. By pushing your CPU to its limits, you can achieve higher frame rates in your favorite games, faster load times, and an overall smoother gaming experience. However, overclocking is not without its challenges. It involves juggling various factors such as voltage, temperature, and stability to ensure your system remains reliable while operating at higher speeds.

Before you embark on your overclocking journey, it’s essential to have a solid understanding of your hardware. Not all CPUs are created equal; some are designed with overclocking in mind—often labeled as “unlocked” processors—while others are not. Additionally, the cooling solution you employ plays a significant role in the success of your overclocking efforts. Overclocking generates additional heat, which can lead to thermal throttling or even damage if not managed properly.

In this guide, we’ll walk you through the step-by-step process of safely overclocking your CPU, from selecting the right components to monitoring performance metrics. Whether you’re a seasoned techie or a curious newcomer, our comprehensive overview will equip you with the knowledge needed to unlock the full potential of your CPU and elevate your gaming experience to new heights. Prepare to dive into the exciting realm of overclocking, where performance and power await!

2. Understanding CPU Architecture: How Overclocking Works

To effectively overclock your CPU, it’s essential to first grasp the fundamental architecture of the processor you’re working with. Central Processing Units (CPUs) are intricate pieces of technology that consist of multiple cores, cache memory, and various supporting components that work in harmony to execute instructions. Understanding these elements is critical, as they directly influence how overclocking affects performance.

At its core, overclocking involves increasing the CPU’s clock speed beyond the manufacturer’s specifications. The clock speed, measured in gigahertz (GHz), dictates how many cycles per second the CPU can execute. By boosting this speed, you can enhance the processor’s performance, allowing it to handle more tasks in less time—something particularly beneficial for gaming, where split-second decisions can make all the difference.

However, it’s not just about cranking up the speed; you need to consider the architecture of your CPU. For instance, modern CPUs often feature multiple cores, allowing them to handle multiple threads simultaneously. Overclocking can lead to diminishing returns if the workload isn’t optimized for multi-core performance. Additionally, the cache hierarchy plays a vital role in how quickly data can be accessed. A CPU with a larger L3 cache might see more significant gains from overclocking compared to one with a smaller cache, as it can store more data closer to the processing cores.

Moreover, different CPU architectures (like Intel’s Core series versus AMD’s Ryzen) respond differently to overclocking. Some architectures are designed with better thermal efficiency and can handle higher speeds with less heat generation. Understanding your CPU’s limitations and capabilities is crucial for successful overclocking.

In summary, a solid grasp of your CPU’s architecture and how it operates under different conditions will not only help you push its limits safely but also enhance your overall gaming experience. With this knowledge in hand, you’re well on your way to unlocking your CPU’s full potential—ready to dive into the precise steps of overclocking in the next section!

3. Benefits of Overclocking for Gaming Performance
pc gaming -  How to overclock your CPU for gaming?
Credit : whatcanu.com

Overclocking your CPU can be a game-changing modification that unlocks a world of enhanced performance, particularly for gaming enthusiasts. By pushing your processor beyond its factory-set limits, you can experience a noticeable increase in frame rates, smoother gameplay, and reduced loading times. Here are some of the key benefits of overclocking your CPU for gaming:

**1. Enhanced Frame Rates:** One of the most immediate benefits of overclocking is the boost in frame rates. Games are often CPU-bound, especially in intensive scenes or during complex calculations. By increasing your CPU’s clock speed, you can achieve higher frames per second (FPS), which translates into a more fluid and immersive gaming experience.

**2. Improved Responsiveness:** A higher clock speed means that your CPU can process tasks more quickly. This results in reduced latency, making your games feel more responsive. Whether you’re engaging in fast-paced action or tactical gameplay, every millisecond counts, and overclocking can give you that edge over your competition.

**3. Better Multitasking:** Gamers often run multiple applications simultaneously—streaming gameplay, browsing the internet, or using voice chat software. Overclocking your CPU provides the extra power needed to manage these tasks without noticeable slowdowns, ensuring that your gaming experience remains smooth even when multitasking.

**4. Future-Proofing Your Setup:** As games continue to evolve and demand more processing power, overclocking can help extend the lifespan of your current hardware. By boosting your CPU’s performance, you can keep up with new titles that may require higher specifications, delaying the need for a complete upgrade.

**5. Cost-Effective Performance Increase:** Instead of investing in a new, high-end CPU, overclocking can provide a significant performance increase at a fraction of the cost. For gamers on a budget, this means maximizing the capabilities of existing hardware without breaking the bank.

**6. Personalization and Customization:** Overclocking allows you to tailor your system’s performance to your specific needs and preferences. Adjusting clock speeds and voltages can lead to an optimized gaming experience that suits your style, whether you prioritize higher FPS or cooler operation.

In summary, the benefits of overclocking your CPU for gaming performance are compelling. From enhanced frame rates and improved responsiveness to cost-effective upgrades, overclocking can elevate your gaming experience to new heights. As with any modification, it’s essential to approach overclocking with caution and understanding, but the payoff can be well worth the effort for avid gamers looking to unlock the full potential of their systems.

4. Risks and Considerations: What to Watch Out For

Overclocking your CPU can significantly enhance your gaming experience, but it doesn’t come without its fair share of risks and considerations. Before you dive headfirst into this thrilling endeavor, it’s crucial to be aware of the potential pitfalls that could turn your performance-boosting efforts into a frustrating ordeal.

First and foremost, overheating is a primary concern. When you overclock your CPU, you increase its clock speed, which in turn generates more heat. If your cooling system isn’t robust enough—whether it’s a high-end air cooler or a liquid cooling setup—you run the risk of overheating your CPU, which can lead to thermal throttling or even permanent damage. Always monitor your temperatures using reliable software, and consider investing in additional cooling solutions if necessary.

Another risk is system instability. Pushing your CPU beyond its designed limits can result in crashes, freezes, and data corruption. It’s essential to incrementally increase your clock speed and test stability at each step, using stress-testing software to ensure that your system can handle the increased demands. If you experience frequent crashes or errors, it’s a sign that you need to dial back your overclock.

Additionally, overclocking can void warranties. Many manufacturers have specific terms that state any alterations to the hardware, including overclocking, may void your warranty. Before you proceed, review your CPU’s warranty policy and consider whether you’re willing to take that risk.

Lastly, there’s the consideration of power consumption. Overclocking typically requires more voltage, which can lead to increased power draw and higher electricity bills. It’s wise to ensure your power supply can handle the increased load and to be mindful of your overall energy usage.

By understanding these risks and taking the necessary precautions, you can confidently navigate the world of CPU overclocking, unlocking the full potential of your gaming rig while minimizing the chances of detrimental outcomes. Remember, preparation and caution are your best allies in this thrilling performance-enhancing journey.

5. Essential Tools and Software for Overclocking
pc gaming -  How to overclock your CPU for gaming?
Credit : whatcanu.com

When it comes to overclocking your CPU, having the right tools and software is crucial for both achieving optimal performance and ensuring system stability. Overclocking can push your hardware to its limits, so it’s essential to arm yourself with reliable utilities that can monitor temperatures, tweak settings, and stress-test your CPU effectively.

**1. BIOS/UEFI Firmware:**
The first tool at your disposal is the BIOS or UEFI firmware of your motherboard. This is where the real magic happens. By rebooting your system and entering the BIOS setup, you gain access to advanced settings that allow you to adjust multipliers, voltages, and base clock speeds. Each motherboard has its unique interface, but look for options related to “CPU Multiplier,” “Core Voltage,” and “Load-Line Calibration.” Familiarizing yourself with these settings is essential for effective overclocking.

**2. CPU-Z:**
This lightweight utility is a favorite among overclockers for its simplicity and effectiveness. CPU-Z provides real-time information about your CPU, including clock speeds, core voltage, and even memory timings. Keeping an eye on these metrics is crucial during the overclocking process, as it enables you to verify that your adjustments are being applied correctly.

**3. HWMonitor:**
Monitoring temperatures is critical when overclocking. HWMonitor gives you a comprehensive overview of your CPU’s thermal performance, as well as the temperatures of other components in your system. Keeping your CPU within safe temperature limits is essential to avoid overheating and potential damage. Ideally, you want to keep your temperatures below 80°C under load.

**4. Prime95 or AIDA64:**
Stress-testing your CPU after making adjustments is vital to ensure stability and performance gains. Both Prime95 and AIDA64 are excellent options for this purpose. These programs push your CPU to its limits, allowing you to check for system stability and identify any potential issues caused by your overclock. Run these tests for several hours to ensure your system can handle the increased load without crashing.

**5. MSI Afterburner:**
While primarily known as a GPU overclocking tool, MSI Afterburner also offers a powerful monitoring function that can be useful for CPU overclockers. It provides real-time graphs of CPU usage, clock speeds, and temperatures, allowing you to see how your adjustments impact performance in real time. Additionally, its customizable overlays can enhance your gaming experience by displaying critical data while you play.

**6. Intel XTU or AMD Ryzen Master:**
For Intel and AMD users respectively, these manufacturer-specific tools can simplify the overclocking process. Intel XTU (Extreme Tuning Utility) and AMD Ryzen Master provide user-friendly interfaces that allow you to tweak settings, monitor performance, and even perform stress tests directly from Windows without needing to access the BIOS. These tools are particularly useful for beginners, as they often include presets and automatic tuning options.

Equipping yourself with these essential tools and software not only streamlines the overclocking process but also enhances your ability to monitor and maintain your system’s health. As you embark on your overclocking journey, remember that patience and careful adjustments are key to unlocking the full potential of your CPU while ensuring a stable and enjoyable gaming experience.

6. Checking Your CPU’s Current Performance and Temperatures

Before diving into the intricacies of overclocking, it’s crucial to assess your CPU’s current performance and temperatures. This step not only provides a baseline for your overclocking journey but also ensures you’re aware of how much headroom you have for potential enhancements.

Start by using reliable software tools such as CPU-Z, HWMonitor, or Core Temp. These applications offer real-time monitoring of your CPU’s clock speeds, voltage levels, and core temperatures, allowing you to gauge how your processor is currently performing under typical workloads. Take note of your CPU’s base clock speed and performance metrics while running a few demanding applications or benchmarks. This data will be invaluable as you increase the clock speeds and push your CPU to its limits.

Next, pay close attention to the temperatures. Modern CPUs are designed to operate efficiently, but they can become unstable or even suffer damage when temperatures rise too high. Ideally, you want to keep your CPU temperature well below the manufacturer’s maximum threshold, which can usually be found in the specifications on their website. A good rule of thumb is to aim for temperatures under 80°C during heavy loads. If you notice your CPU is running hotter than these recommended levels, it may be time to invest in better cooling solutions, such as an aftermarket CPU cooler or enhanced airflow in your case.

By taking the time to understand your CPU’s current performance and thermal state, you lay a solid foundation for the overclocking process. This meticulous preparation not only enhances your gaming experience but also helps you to avoid potential pitfalls down the road, ensuring that your system remains stable and reliable as you unlock the extra power your CPU has to offer.

7. Step-by-Step Guide to Accessing BIOS Settings
pc gaming -  How to overclock your CPU for gaming?
Credit : whatcanu.com

Accessing your BIOS settings is a critical step in the overclocking process, allowing you to tweak the various parameters necessary to unlock your CPU’s full potential. While the exact method may vary slightly depending on your motherboard manufacturer, the general steps are quite consistent. Here’s how to navigate this essential phase:

1. **Restart Your Computer**: Begin by restarting your PC. If you’re currently working on something, save your progress, as you’ll need to exit your operating system.

2. **Enter BIOS/UEFI**: As soon as your computer starts to boot up, repeatedly press the designated key to enter the BIOS. Common keys include **Delete**, **F2**, or **Esc**, but refer to your motherboard’s manual if you’re unsure. Timing is key—press the key before the operating system begins to load to ensure you access the BIOS.

3. **Navigating the BIOS Interface**: Once inside the BIOS, you’ll be greeted by a menu that can seem daunting at first. Most modern motherboards now use a graphical UEFI interface, making navigation easier. Use your keyboard’s arrow keys to move through the options, and look for categories like “Advanced,” “Overclocking,” or “Tweaker” depending on your motherboard’s layout.

4. **Adjust CPU Multiplier and Voltage**: Locate the CPU settings, where you can adjust the CPU multiplier and core voltage. Increasing the multiplier boosts the CPU’s clock speed, while adjusting the voltage can provide the necessary power to maintain stability at higher speeds. Remember, small adjustments are key—increment by one or two at a time to avoid overheating or instability.

5. **Save Your Changes**: After making your adjustments, navigate to the “Exit” or “Save & Exit” option. Choose the option to save your changes and exit the BIOS. Your computer will reboot, applying the new settings.

6. **Monitor Temperatures and Stability**: Once your system restarts, it’s crucial to monitor the CPU temperatures and system stability. Use software like HWMonitor or Core Temp to keep an eye on temperatures under load, and run stability tests using programs like Prime95 or AIDA64 to ensure your overclock is stable.

By following these steps, you’ll be well on your way to accessing your BIOS settings and preparing your CPU for the overclocking journey. With each adjustment, remember to prioritize stability and temperature management for an optimal gaming experience.

8. How to Adjust CPU Multiplier and Voltage Settings

Once you’ve confirmed that your CPU is capable of overclocking and you’ve taken the necessary precautions, it’s time to dive into the heart of the process: adjusting the CPU multiplier and voltage settings. This step is crucial for maximizing your CPU’s performance, but it requires a careful touch to strike the right balance between power and stability.

**Understanding the CPU Multiplier**
The CPU multiplier is a vital component that determines the clock speed of your processor. Essentially, it multiplies the base clock (BCLK) frequency to achieve the final operating frequency of your CPU. For instance, if your BCLK is 100 MHz and your multiplier is set to 40, your CPU will run at 4.0 GHz. Increasing the multiplier can lead to significant performance gains in gaming and demanding applications, but it’s important to do so incrementally to avoid instability.

**Accessing the BIOS**
To adjust these settings, start by rebooting your system and entering the BIOS or UEFI firmware settings. This is typically done by pressing a designated key—often `Delete`, `F2`, or `F10`—during the boot process. Once in the BIOS, navigate to the “Overclocking” or “Advanced Settings” section, where you’ll find options for modifying the CPU multiplier and voltage.

**Adjusting the Multiplier**
Begin by gently increasing the CPU multiplier by one or two increments at a time. After each adjustment, save your changes and exit the BIOS, allowing your system to boot up. Once in your operating system, run stress tests using software like Prime95 or AIDA64 to ensure stability. Monitor your CPU temperatures during this process; keeping your CPU cool is paramount to successful overclocking.

**Modifying Voltage Settings**
If you experience instability during stress testing, you may need to adjust the CPU voltage settings. Increasing the voltage can help stabilize your overclock, but caution is key. Voltage affects the heat output of your CPU significantly, so raise it gradually—typically in 0.01V increments—while continually monitoring temperatures. Keep a close eye on your CPU temps; ideally, they should remain below 80°C under load.

**Fine-Tuning for Performance**
Once you’ve established a stable overclock, you can further refine your settings by alternating between adjusting the multiplier and voltage. This fine-tuning process may take some time but will help you achieve the best possible performance tailored to your specific gaming needs. Remember to document your changes, so you can easily revert to previous settings if needed.

By carefully adjusting the CPU multiplier and voltage settings, you’ll unlock your CPU’s full potential, enhancing your gaming experience with smoother performance and higher frame rates. Just be patient, stay vigilant, and enjoy the journey of overclocking!

9. Stress Testing Your Overclock: Ensuring Stability

Once you’ve successfully overclocked your CPU, the next crucial step is stress testing to ensure stability. Overclocking can push your hardware beyond its intended limits, which may lead to performance gains but also increases the risk of overheating and system crashes. Therefore, it’s essential to verify that your new settings can withstand prolonged periods of heavy use, especially during intense gaming sessions.

To begin the stress testing process, you’ll need reliable software tools designed to push your CPU to its limits. Popular options include Prime95, AIDA64, and Cinebench, each offering various methods to evaluate your CPU’s performance under stress. For instance, Prime95 runs complex mathematical calculations to maximize CPU usage, while AIDA64 provides a comprehensive analysis of system stability by taxing multiple components simultaneously.

Once you’ve selected your stress-testing software, monitor your CPU temperatures closely. Ideally, you want to keep your temperatures below the maximum threshold specified by the manufacturer, typically around 80-85°C for most CPUs. Use monitoring software like HWMonitor or Core Temp to keep an eye on these metrics. If you notice temperatures climbing too high, it may be necessary to dial back your overclock or improve your cooling solution, whether that’s upgrading to a more efficient air cooler or an all-in-one liquid cooling system.

Run your stress test for a minimum of 30 minutes, but for optimal results, consider extending it to several hours. This duration will help you identify any potential instabilities that may arise over time. If your system remains stable and temperatures are within an acceptable range, congratulations! You’ve successfully overclocked your CPU with stability in mind.

However, if you encounter crashes, freezes, or errors during the stress test, it’s a signal that your overclock may be too aggressive. In this case, you’ll want to gradually adjust your settings by either reducing the clock multiplier or increasing the voltage incrementally while keeping a close eye on those temperatures. Stress testing is an ongoing process; even seasoned overclockers routinely test their configurations to ensure that everything runs smoothly. By prioritizing stability, you can enhance your gaming experience without compromising the longevity of your hardware.

10. Monitoring Temperatures and Performance During Gameplay

Monitoring temperatures and performance during gameplay is a crucial step in the overclocking process. While pushing your CPU to its limits can lead to enhanced frame rates and smoother gameplay, it also generates additional heat that, if unchecked, can lead to thermal throttling or even permanent damage. Therefore, keeping a watchful eye on the temperature is of utmost importance to ensure your gaming experience remains exhilarating without compromising your hardware.

To start, utilize reliable monitoring software like HWMonitor, Core Temp, or MSI Afterburner. These tools provide real-time data on your CPU’s temperature, clock speeds, and overall performance metrics. Once you’ve launched your favorite game, keep the monitoring software running in the background. This will give you a live feed of how your overclocked settings are holding up under load. Ideally, you want to maintain temperatures below 80°C during intense gaming sessions. If you notice temperatures creeping above this threshold, it may be time to dial back your overclocking settings or improve your cooling solution.

Additionally, pay attention to your CPU’s performance metrics. Frame rates and system responsiveness should ideally improve with overclocking, but if you notice stuttering or crashes, these could be signs that your settings are too aggressive. In such cases, don’t hesitate to revert to more conservative settings or fine-tune your overclock until you find the sweet spot between performance and stability.

Incorporating stress tests, such as Prime95 or AIDA64, into your routine can also provide valuable insights into your CPU’s behavior under maximum load. Running these tests for a few hours will help you identify any potential issues before diving into a gaming session. Remember, the goal of overclocking is not just to boost performance, but to do so safely. By actively monitoring temperatures and performance, you ensure that your gaming rig runs smoothly, delivering an immersive experience without the risk of overheating or hardware failure.

11. Troubleshooting Common Overclocking Issues

Overclocking can significantly enhance your gaming experience, but it’s not without its hurdles. As you push your CPU beyond its stock settings, you might encounter a variety of issues that can disrupt your gaming sessions or even harm your hardware if not addressed promptly. Here, we’ll explore some common overclocking problems and how to troubleshoot them effectively.

**1. System Instability and Crashes:** One of the most frequent issues users face after overclocking is system instability, which often manifests as random crashes, freezes, or blue screens of death (BSOD). If you experience these symptoms, it’s a sign that your CPU is not receiving adequate voltage or that the overclock is too aggressive. Try gradually reducing the overclock settings in your BIOS or increasing the voltage slightly, while keeping a close eye on temperatures.

**2. Overheating:** High-performance demands can lead to increased heat production, which can be detrimental to your CPU’s longevity. If you’re noticing temperatures exceeding safe limits (generally above 85°C under load), it’s time to revisit your cooling solution. Ensure your CPU cooler is properly seated, consider applying new thermal paste, or even upgrading to a more efficient cooling system, such as a liquid cooler or high-performance air cooler.

**3. Boot Issues:** Sometimes, overclocking might prevent your system from booting up altogether. If you encounter a black screen or continuous rebooting, it’s likely that the settings are too aggressive. In this case, you can reset your BIOS settings to default by either using the jumper method on the motherboard or removing the CMOS battery for a few minutes. Once reset, you can gradually reintroduce overclock settings, starting at a more conservative level.

**4. Incompatibility with RAM or Motherboard:** Overclocking doesn’t only affect the CPU; it can also have an impact on your RAM and motherboard. If your system is malfunctioning, verify that your RAM is rated for the speeds you’re aiming for and that your motherboard supports the overclocking features you’re utilizing. Sometimes, tweaking the memory settings alongside the CPU can yield better stability.

**5. Performance Anomalies:** If you notice odd performance issues, like lower frame rates or stuttering while gaming, it could be due to an imbalance in your system’s components. Ensure that your GPU and RAM are also overclocked (if applicable) and that your power supply can handle the increased load from your overclocked CPU. Monitoring software can help you assess if your hardware is bottlenecking.

By methodically addressing these common overclocking issues, you can fine-tune your system for optimal performance while maintaining stability. Remember, overclocking is as much about patience and precision as it is about performance. With careful adjustments and monitoring, you’ll be well on your way to unlocking the full potential of your CPU for an exhilarating gaming experience.

12. Finalizing and Saving Your Overclocking Settings

Once you’ve achieved the desired performance boost through overclocking your CPU, the next step is to finalize and save your settings to ensure a seamless gaming experience. This phase is crucial, as it not only locks in your adjustments but also safeguards against any potential issues that might arise during your gaming sessions.

Start by entering your BIOS or UEFI firmware settings once more. Here, you will find the overclocking options that you previously adjusted. Take a moment to review your settings—voltage, clock speeds, and any other parameters you modified. Double-check that everything aligns with the stability tests you conducted earlier. If you’re satisfied with the performance and temperatures observed during those tests, it’s time to save your configuration.

Most motherboards offer an easy way to save profiles within the BIOS. Look for options labeled “Save Profile” or “User Profile.” This feature allows you to create a dedicated profile for your overclocked settings, which can be easily loaded in the future. Some advanced motherboards even allow for multiple profiles, giving you the flexibility to switch between different overclock configurations based on your needs—be it high-performance gaming or a more balanced, energy-efficient setup for daily tasks.

After saving your settings, exit the BIOS and allow your system to reboot. Upon starting your computer, it’s essential to monitor your CPU temperatures and system stability for a while. Tools like HWMonitor or Core Temp can help you keep an eye on your CPU temperatures and ensure that they remain within safe limits during both idle and load conditions.

Finally, don’t forget to run a few gaming sessions or stress tests to confirm that your CPU is performing as expected. If you notice any instability or overheating, return to the BIOS and make the necessary adjustments. Remember, the goal of overclocking is not just to achieve higher clock speeds, but to do so without compromising the longevity of your hardware or the quality of your gaming experience. With your settings finalized and saved, you can now enjoy the enhanced performance your CPU has to offer, all while ensuring that your system remains stable and reliable. Happy gaming!

13. Comparing Performance: Benchmarks Before and After

Before diving into the thrilling world of overclocking, it’s essential to understand the tangible benefits it can bring to your gaming experience. One of the most effective ways to measure these improvements is through benchmarking—an objective method of assessing your CPU’s performance both before and after you apply your overclocking settings.

Start by utilizing reliable benchmarking tools such as Cinebench, 3DMark, or AIDA64. These applications run a series of tests that push your CPU to its limits, measuring its performance under various loads and conditions. Before you begin the overclocking process, record your baseline scores. This initial data will serve as a reference point, showcasing how your CPU performs at stock settings.

Once you’ve completed your overclocking and fine-tuned your settings, it’s time to put your CPU through the same benchmarking tests again. This will provide a direct comparison of performance metrics, highlighting improvements in processing speed, frame rates, and overall gaming responsiveness. Look for increases in scores, which can indicate a more powerful CPU that’s capable of handling demanding games with ease.

In addition to numerical scores, pay attention to real-world gaming scenarios. Launch your favorite titles and observe the difference in frame rates and gameplay smoothness. Not only will you notice improved performance in graphically intensive games, but you may also experience reduced load times and increased stability during long gaming sessions.

By comparing benchmarks before and after your overclocking journey, you gain valuable insights into the effectiveness of your adjustments. This process not only enhances your understanding of your hardware’s capabilities but also fuels your passion for gaming, as you witness firsthand the performance gains that come from unlocking your CPU’s full potential. Remember, documenting your findings can also help refine your overclocking strategy in the future, ensuring you continue to maximize your system’s performance.

14. Long-Term Maintenance and Monitoring After Overclocking

Overclocking your CPU can unlock impressive performance boosts, but the journey doesn’t end once the settings have been adjusted and the system is running smoothly. Long-term maintenance and monitoring are crucial to ensure that your overclock remains stable and doesn’t lead to overheating or component degradation over time.

After the initial excitement of enhanced gaming performance, it’s essential to adopt a proactive approach to monitoring your system’s health. Begin by utilizing reliable software tools such as HWMonitor or Core Temp, which allow you to keep a close eye on your CPU temperatures, voltages, and clock speeds. Setting up alerts for temperature thresholds can act as an early warning system, helping you to catch potential issues before they escalate into serious problems.

Regularly stress-testing your CPU with tools like Prime95 or AIDA64 can also help you assess the stability of your overclock. Schedule these tests periodically or after any significant software updates to ensure that your system handles demanding tasks without crashing.

Additionally, don’t overlook the importance of cleaning your PC. Dust accumulation can impede airflow and lead to higher temperatures. Make it a habit to open your case and gently clean the components every few months, ensuring that fans and heat sinks are working efficiently.

Finally, stay informed about the latest updates from your motherboard manufacturer. BIOS updates can enhance stability and performance, so keeping your system’s firmware up to date is an essential part of maintaining your overclock.

By committing to these long-term maintenance practices, you’ll not only preserve the performance gains achieved through overclocking but also extend the lifespan of your components, allowing for countless gaming sessions to come.

15. Conclusion: Is Overclocking Right for You?

In conclusion, the decision to overclock your CPU ultimately hinges on your specific gaming needs, your comfort level with technical adjustments, and your willingness to accept the potential risks involved. Overclocking can unlock additional performance, elevate frame rates, and enhance your overall gaming experience, transforming how your system handles demanding titles. However, it’s essential to weigh the benefits against the possibility of increased heat generation and the need for more robust cooling solutions.

If you’re a casual gamer or someone who prefers a plug-and-play experience, the stock performance of most modern CPUs is more than sufficient for a fantastic gaming experience. However, for enthusiasts eager to squeeze every ounce of performance from their systems, overclocking can be an exhilarating journey. Just remember that success in overclocking comes with careful planning, thorough testing, and a willingness to learn from the process.

As you consider whether overclocking is the right choice for you, take stock of your current setup and future gaming aspirations. If you decide to take the plunge, arm yourself with knowledge, utilize reliable resources, and proceed with caution. With the right approach, you can unlock the full potential of your CPU and enjoy smoother gameplay, faster load times, and an overall competitive edge in the gaming arena. Happy gaming!

In conclusion, overclocking your CPU can be a game-changer, unlocking an impressive boost in performance that enhances your gaming experience. By following our step-by-step guide, you’ve gained the knowledge and confidence to push your hardware to its limits safely and effectively. Remember to monitor your temperatures and stability as you explore the exciting world of overclocking, and don’t hesitate to fine-tune your settings to find the perfect balance between performance and reliability. With your newly optimized CPU, you’re now equipped to tackle the most demanding games and enjoy smoother gameplay like never before. Happy gaming, and may your frames per second soar!


What are the best ways to grill chicken?

As the warm sun beckons and the tantalizing aroma of sizzling meat fills the air, there’s nothing quite like the joy of gathering around the grill for a delicious feast.

Grilling chicken can be a delightful experience, but achieving that perfectly charred, juicy, and flavorful result often eludes even the most enthusiastic backyard chefs. Whether you’re preparing for a summer barbecue, a cozy family dinner, or just a casual weeknight meal, mastering the art of grilling chicken can elevate your culinary skills and impress your guests. In this post, we’ll unveil the top techniques to ensure your chicken turns out perfectly grilled every single time. From marinating and seasoning tips to temperature control and grilling methods, we’ll cover everything you need to know to become a grill master and create mouthwatering chicken dishes that will have everyone coming back for seconds. Get ready to fire up the grill and embark on a flavorful journey that will transform your cooking game!

1. Understanding Different Cuts of Chicken

What are the best ways to grill chicken?
Credit : whatcanu.com

When it comes to grilling chicken, understanding the various cuts and their unique characteristics is essential for achieving perfectly cooked results every time. Each cut of chicken brings its own flavor profile, texture, and cooking requirements, making it crucial to choose the right one for your grilling adventure.

**Chicken Breasts**: Often the go-to cut for many grill enthusiasts, chicken breasts are lean and cook relatively quickly. They can be boneless or bone-in, with the latter providing a bit more flavor and moisture. However, because they are so lean, they can easily dry out if overcooked. To combat this, consider marinating them beforehand or using techniques like brining to infuse moisture and flavor.

**Chicken Thighs**: For those who prefer a richer taste, chicken thighs are a perfect option. Dark meat is juicier than white meat due to its higher fat content, which makes it more forgiving on the grill. Thighs can be purchased boneless or bone-in, and they benefit from longer cooking times, allowing the fat to render out and the meat to become tender and flavorful.

**Drumsticks**: Another popular choice, drumsticks offer a fun, hands-on eating experience. They are also relatively inexpensive and packed with flavor. When grilling drumsticks, it’s best to cook them at a lower temperature initially to ensure that they cook through without burning on the outside. Once they’re nearly done, a quick sear over higher heat can create a deliciously crispy skin.

**Whole Chicken**: For the ultimate grilling experience, consider roasting a whole chicken on the grill. This method allows you to infuse flavors throughout the entire bird. Spatchcocking (removing the backbone) can help the chicken cook more evenly and reduce cooking time. With the right seasoning and a good grill setup, you can achieve crispy skin and succulent meat that will impress family and friends alike.

By understanding the different cuts of chicken and their specific grilling needs, you can tailor your cooking techniques to ensure each piece is flavorful, juicy, and perfectly grilled. Whether you choose tender breasts, flavorful thighs, or delightful drumsticks, knowing how to handle each cut will elevate your grilling game and ensure a delicious outcome every time.

2. Marinating: The Key to Flavorful Chicken

Marinating is the secret sauce to unlocking a world of flavor in your grilled chicken, transforming a simple piece of meat into a succulent masterpiece. The process of marination involves soaking your chicken in a mixture of acidic ingredients, oils, and seasonings, allowing it to absorb layers of taste and tenderness. The right marinade not only infuses flavor but also helps to break down the proteins in the chicken, resulting in a juicier and more tender bite.

To create a standout marinade, start with an acid base—think yogurt, vinegar, or citrus juice. These ingredients not only contribute tanginess but also help to tenderize the meat. Next, add a good-quality oil, such as olive oil or sesame oil, which acts as a carrier for the flavors and aids in the cooking process. Then, it’s time to get creative with your seasonings! fresh herbs like rosemary or thyme, spices like paprika or cumin, garlic, ginger, and even a touch of honey or brown sugar can elevate your marinade to new heights.

Once your marinade is ready, immerse the chicken, ensuring every crevice is coated. For optimal results, let it marinate for at least 30 minutes, but longer is often better—aim for four hours or even overnight for maximum flavor penetration. Keep in mind the type of chicken you’re working with; bone-in pieces may require more time than boneless cuts.

When it’s time to grill, remove the chicken from the marinade, allowing any excess liquid to drip off. This step is crucial to avoid flare-ups on the grill. As you place the chicken on the grill, you’ll immediately notice the enticing aroma of the marinated meat cooking, promising a flavor explosion with every bite.

By mastering the art of marinating, you not only ensure that your grilled chicken is bursting with flavor but also impress your guests with your culinary prowess. So gather your ingredients, unleash your creativity, and watch as simple chicken transforms into a flavorful delight that keeps everyone coming back for more!

3. The Importance of Temperature Control

What are the best ways to grill chicken?
Credit : whatcanu.com

When it comes to grilling chicken, mastering temperature control is the secret ingredient that can make or break your culinary masterpiece. Chicken is notoriously tricky; its lean meat can easily go from succulent to dry in a matter of moments if not cooked at the right temperature. This is why understanding and managing the heat of your grill is crucial.

first, let’s talk about preheating. Before you even place your chicken on the grill, it’s essential to preheat it to a steady, medium-high temperature, usually around 375°F to 450°F. This initial heat sears the surface of the chicken, locking in moisture and creating that coveted crispy skin. Use a grill thermometer to ensure accuracy; an improperly heated grill can lead to uneven cooking and undesirable textures.

Once your chicken is on the grill, it’s important to monitor the temperature of the chicken itself. The USDA recommends cooking chicken to an internal temperature of 165°F. Using a meat thermometer can help you achieve this without guesswork. Insert the thermometer into the thickest part of the chicken, avoiding the bone, to get an accurate reading.

Additionally, consider the concept of direct and indirect heat. For thicker cuts, such as bone-in breasts or whole chickens, start by searing them over direct heat to create those grill marks and then move them to a cooler part of the grill to finish cooking through indirect heat. This dual-zone cooking method allows you to control the temperature more effectively and prevents the outside from burning while the inside remains undercooked.

Lastly, don’t forget to let your chicken rest after grilling! Allowing it to sit for a few minutes will enable the juices to redistribute, resulting in a more flavorful and tender piece of meat. Mastering temperature control gives you the power to serve perfectly grilled chicken every time, impressing your friends and family with your grilling prowess. So fire up that grill, keep an eye on the heat, and get ready to savor the delicious results!

4. Preparing the Grill: Charcoal vs. Gas

When it comes to grilling chicken to perfection, one of the most crucial steps lies in the preparation of your grill. The choice between charcoal and gas can significantly influence the flavor, texture, and overall outcome of your meal. Each method has its unique advantages, and understanding these can help you make an informed decision that aligns with your grilling style.

**Charcoal Grilling**: For many aficionados, charcoal grilling is the gold standard. The unmistakable smoky flavor imparted by burning charcoal is difficult to replicate. When using a charcoal grill, start by arranging the charcoal into a mound and lighting it until the coals are covered with a light ash—this usually takes about 15-20 minutes. Once they’re glowing hot, spread them out evenly for direct grilling, or bank them to one side for indirect cooking. The key here is to control the heat: have a hot zone for searing and a cooler zone for cooking through. Don’t forget to add wood chips for an extra layer of flavor; hickory or applewood can elevate your chicken to new heights.

**Gas Grilling**: On the other hand, gas grills offer convenience and precision. With the simple turn of a knob, you can adjust the heat to your preferred level, making it easier to maintain a consistent temperature throughout the cooking process. Preheat your gas grill by lighting it and letting it reach the desired temperature before placing your chicken on the grates. The even heat distribution allows for perfect cooking without the need for constant monitoring. While gas grills may not impart the same smoky flavor as their charcoal counterparts, experimenting with smoker boxes filled with wood chips can introduce that beloved smokiness to your chicken.

Ultimately, the choice between charcoal and gas comes down to personal preference, convenience, and the flavors you desire. Whether you opt for the traditional charm of charcoal or the modern ease of gas, mastering the grill comes down to understanding how to prepare your cooking surface, ensuring your chicken turns out juicy and flavorful every time. So fire up those grills, and get ready to impress your taste buds!

5. Essential Tools for Grilling Chicken

What are the best ways to grill chicken?
Credit : whatcanu.com

When it comes to grilling chicken to perfection, having the right tools at your disposal can make all the difference between a lackluster meal and a mouthwatering masterpiece. Here’s a rundown of essential tools that every grilling enthusiast should consider for achieving juicy, flavorful chicken every time.

**1. Grill Thermometer:** Ensuring your chicken is cooked to the perfect internal temperature is crucial for both safety and flavor. A reliable grill thermometer takes the guesswork out of cooking. Opt for a digital instant-read thermometer for quick results, allowing you to check the doneness without losing valuable heat from the grill.

**2. Long-Handled Tongs:** When it comes to flipping and turning your chicken, a sturdy pair of long-handled tongs is indispensable. These allow you to maneuver chicken pieces easily while keeping your hands at a safe distance from the heat. Look for tongs with a good grip and a locking mechanism for easy storage.

**3. Grill Basket:** For those times when you’re grilling smaller cuts of chicken or marinated pieces that may fall through the grates, a grill basket is a lifesaver. These baskets provide a secure place for your chicken, allowing for even cooking and easy flipping without the fear of losing your dinner to the flames.

**4. Basting Brush:** To enhance the flavor of your grilled chicken, a basting brush is essential for applying marinades, sauces, or oils. Opt for a silicone brush that can withstand high temperatures and is easy to clean. Basting your chicken periodically keeps it moist and infuses it with layers of flavor.

**5. Aluminum Foil:** While it might not seem like a tool, aluminum foil is your friend when it comes to grilling chicken. Use it to create foil packets for marinated chicken or to cover the grill for indirect cooking. Foil can also be used to wrap leftover grilled chicken, preserving its moisture and flavor for future meals.

**6. Grill Brush:** Maintaining your grill is just as important as cooking on it. A grill brush will help you keep your grates clean and free from burnt residue, which can affect the taste of your chicken. Choose a sturdy brush with stainless steel bristles for durability and effectiveness.

By equipping yourself with these essential grilling tools, you’ll be well on your way to mastering the grill and serving perfectly grilled chicken that will impress family and friends alike. Each tool serves its purpose, ensuring that your grilling experience is not only enjoyable but also yields delicious results every time. Happy grilling!

6. The Art of Seasoning: Herbs and Spices to Use

When it comes to grilling chicken, the secret to achieving that mouthwatering flavor lies in the art of seasoning. A well-seasoned piece of chicken can elevate your dish from ordinary to extraordinary, transforming a simple meal into a culinary delight. The key is to strike a balance between enhancing the natural flavors of the chicken and introducing bold notes that tantalize the taste buds.

**Herbs:** Fresh herbs are a grill master’s best friend. Consider using classic staples like rosemary and thyme, which add an earthy depth to grilled chicken. For a brighter taste, sprinkle some fresh parsley or basil just before serving. A marinade that includes cilantro can also lend a refreshing twist, especially when paired with lime juice for a zesty kick. Don’t shy away from experimenting with herbs like tarragon or dill for a unique flavor profile that surprises and delights.

**Spices:** The world of spices opens up a realm of possibilities. Paprika, whether sweet or smoked, provides a warm, rich flavor and a beautiful color to your chicken. Cumin and coriander bring a subtle earthiness, while a pinch of cayenne can add just the right amount of heat for those who enjoy a bit of spice. For a more adventurous palate, try a blend of garam masala or za’atar to transport your taste buds on a flavor journey.

**Marinades and Rubs:** Combining herbs and spices into a marinade or rub can create a flavor-packed experience. A simple mixture of olive oil, lemon juice, garlic, and your choice of herbs can work wonders. Let your chicken soak in this blend for at least 30 minutes—or even overnight—to ensure the flavors penetrate the meat deeply. Alternatively, a dry rub made with your favorite spices can also create a beautifully caramelized crust on the grill, sealing in moisture while imparting rich flavor.

Remember, the art of seasoning is all about personal preference. Don’t be afraid to taste as you go and adjust according to your liking. With the right herbs and spices, you’ll unlock a world of flavor that will keep your guests coming back for more. So grab your favorite seasonings, unleash your creativity, and get ready to grill chicken that’s not just cooked, but perfectly seasoned and bursting with flavor!

7. Techniques for Even Cooking: Direct vs. Indirect Heat

What are the best ways to grill chicken?
Credit : whatcanu.com

When it comes to grilling chicken to perfection, understanding the difference between direct and indirect heat is crucial for achieving that coveted juicy, evenly cooked result. Both techniques serve distinct purposes, and mastering them can elevate your grilling game to new heights.

**Direct heat** is your go-to method for quick cooking and achieving those beautiful grill marks. This technique involves placing the chicken directly over the heat source, whether it’s charcoal or gas flames. Ideal for thinner cuts, like chicken breasts or wings, direct heat allows for a sear that locks in moisture and flavor. To utilize this method effectively, preheat your grill to a high temperature, then place the chicken on the grates for a few minutes on each side. Keep a close eye on it, as cooking times can vary based on the thickness of the pieces. The result? A tantalizingly charred exterior that contrasts beautifully with the tender, juicy meat inside.

On the other hand, **indirect heat** is your secret weapon for larger cuts, such as whole chickens or bone-in thighs. This method involves placing the chicken away from the direct flames, allowing it to cook slowly in a more controlled environment. To set up your grill for indirect heat, simply light one side and leave the other side off, creating a two-zone cooking area. This technique is perfect for ensuring that the chicken cooks evenly without burning the outside. Cover the grill to trap heat and smoke, resulting in a deliciously cooked bird that’s tender and infused with flavor. The key here is patience; slow cooking allows the interior to reach the desired temperature without compromising the exterior.

Combining these two techniques can also yield fantastic results. Start by searing the chicken over direct heat to develop a flavorful crust, and then move it to the cooler side of the grill for gentle cooking. This dual approach not only enhances the flavor but also ensures that your chicken is perfectly cooked through, eliminating the risk of dry, overcooked meat.

By skillfully employing direct and indirect heat, you can become a grill master, ensuring that every chicken dish you serve is nothing short of extraordinary. Whether you’re cooking up a casual backyard barbecue or an elegant dinner, understanding these techniques will make all the difference in delivering perfectly grilled chicken every time.

8. Using a Meat Thermometer for Perfect Doneness

When it comes to grilling chicken, achieving the perfect doneness can be a daunting task, but a meat thermometer is your ultimate ally in this culinary quest. Gone are the days of slicing into your chicken to check for that elusive, juicy pinkness at the bone, which can lead to dry, overcooked meat or, worse yet, undercooked poultry. Investing in a quality meat thermometer takes the guesswork out of grilling, ensuring that your chicken is cooked to perfection every single time.

To use a meat thermometer effectively, insert the probe into the thickest part of the chicken, avoiding the bone, which can give you an inaccurate reading. For chicken breasts, you’re aiming for an internal temperature of 165°F (74°C), while thighs can be safely enjoyed at 175°F (80°C). As the chicken cooks, monitor the temperature closely. As it approaches the target, reduce your grill’s heat, allowing for a gentle finish that locks in moisture and flavor.

Not only does using a meat thermometer help you achieve the ideal doneness, but it also grants you the confidence to experiment with different marinades and grilling techniques. Whether you’re going for a smoky barbecue glaze or a light herb-infused rub, knowing that your chicken is cooked accurately frees you to focus on the flavors and presentation.

Once your chicken reaches the desired temperature, remember to let it rest for a few minutes before slicing. This crucial step allows the juices to redistribute, resulting in tender, flavorful meat. So, grab that meat thermometer, and take your chicken grilling game to the next level—your taste buds will thank you!

9. Tips for Achieving Perfect Grill Marks

Achieving those coveted grill marks on your chicken is not just a matter of aesthetics; it’s a badge of honor that signifies a perfectly grilled piece of meat. Grill marks not only enhance the visual appeal of your dish but also contribute to the overall flavor by creating delicious caramelization on the surface. Here are some essential tips to ensure you achieve those iconic crosshatch patterns on your chicken every time.

**Preheat Your Grill:** The first step to perfect grill marks is to ensure your grill is hot enough. Preheat your grill to a high temperature, ideally around 400°F to 450°F. A properly heated grill will sear the chicken quickly, locking in moisture and flavor while creating those distinctive lines.

**Oil Your Grates:** To prevent sticking and ensure clean grill marks, oil your grates before placing your chicken on them. Use a paper towel dipped in vegetable oil and carefully wipe the grates, or use a grill-safe spray. This not only helps with the marks but also contributes to an even sear.

**Positioning is Key:** When placing your chicken on the grill, be deliberate with your positioning. For classic grill marks, set the chicken down at a 45-degree angle to the grates. After a few minutes, rotate the chicken 90 degrees without flipping it over. This technique will create the beautiful crosshatch pattern that makes grilled chicken look professionally done.

**Timing and Patience:** Don’t rush the process. Allow the chicken to sear undisturbed for about 4-5 minutes on each side, depending on the thickness. This waiting period is crucial for developing those grill marks—flipping too soon can lead to sticking and uneven marks.

**Flip with Care:** When it’s time to flip your chicken, use tongs instead of a fork, which can pierce the meat and release valuable juices. Gently lift the chicken and turn it over, ensuring you don’t disrupt the sear you’ve already created.

**Finishing Touches:** Once your chicken is cooked through and has those beautiful grill marks, consider adding a final touch. A light brush of marinade or glaze during the last few minutes on the grill can enhance both flavor and appearance, leaving you with a beautifully charred and enticing dish.

By following these tips, you’ll not only impress your guests with the visual appeal of your grilled chicken but also elevate its flavor, making each bite a true delight. Mastering the art of grill marks is just one step on your journey to becoming a grilling aficionado!

10. Resting the Chicken: Why It Matters

Resting the chicken after grilling is a crucial step that many home cooks overlook, but it can make all the difference in achieving perfectly juicy and flavorful results. When chicken is cooked, the proteins contract and the juices are pushed towards the center of the meat. If you cut into it immediately after grilling, all those delightful juices will escape, leaving you with a dry and less satisfying dish.

Allowing the chicken to rest for at least 5 to 10 minutes after it comes off the grill gives the juices time to redistribute throughout the meat. This resting period helps ensure that each bite is succulent and moist. The residual heat continues to cook the chicken slightly, bringing it to the optimal temperature without overcooking.

To rest your chicken properly, transfer it from the grill to a cutting board and loosely cover it with aluminum foil. This maintains warmth while allowing steam to escape, preventing the skin from becoming soggy. During this time, you can prepare any side dishes or sauces, making it a perfect moment to add the finishing touches to your meal.

Remember, patience is key. The few extra minutes you take to let your chicken rest will be rewarded with tender, juicy meat that’s bursting with flavor, making every bite a delightful experience. So, resist the urge to dive in too quickly—your taste buds will thank you!

11. Creative Sauce and Glaze Ideas

When it comes to grilling chicken, the sauce or glaze can elevate the dish from ordinary to extraordinary. The right combination of flavors not only enhances the natural juiciness of the chicken but also adds a delightful complexity that keeps taste buds tingling. Here are some creative sauce and glaze ideas that will make your grilled chicken the star of any BBQ.

**1. Zesty Citrus Marinade:** Combine fresh orange juice, lime juice, minced garlic, and a splash of olive oil for a bright, refreshing marinade. The acidity from the citrus not only tenderizes the chicken but also infuses it with a vibrant flavor. Let it marinate for at least an hour, and you’ll have a dish that bursts with sunshine in every bite.

**2. Smoky BBQ Honey Glaze:** Mix your favorite barbecue sauce with honey and a dash of smoked paprika for a sticky, sweet glaze that caramelizes beautifully on the grill. This combo allows the sugars to caramelize, forming a glossy finish that adds depth to your grilled chicken, making it irresistible.

**3. Spicy Sriracha and Lime:** For those who crave heat, a mixture of sriracha, lime juice, and a hint of brown sugar creates a fiery glaze that packs a punch. Brush it on during the last few minutes of grilling to achieve a sticky, spicy coating that will have your guests reaching for seconds.

**4. Herbed Yogurt Sauce:** For a refreshing twist, consider a herbed yogurt sauce made from Greek yogurt, fresh dill, mint, and a squeeze of lemon. This cooling sauce is perfect for grilled chicken, balancing the smoky flavors with its creamy texture and zesty notes.

**5. Teriyaki Soy Glaze:** Combine soy sauce, mirin, brown sugar, and sesame oil for a classic teriyaki glaze. Brush this on your chicken during the last few minutes of grilling for a sticky, savory finish that’s reminiscent of your favorite Asian takeout.

**6. Pineapple Salsa:** For a fruity flair, try a fresh pineapple salsa made with diced pineapple, red onion, cilantro, and jalapeño. This vibrant topping adds a refreshing crunch and a sweet-and-spicy kick that pairs perfectly with grilled chicken.

Experimenting with these sauces and glazes not only enhances flavor but also allows you to customize your chicken to suit various palates. Whether you prefer something tangy, sweet, spicy, or fresh, these creative ideas will help you master the grill and serve up perfectly grilled chicken every time. So fire up that grill, get creative, and let your culinary imagination run wild!

12. Troubleshooting Common Grilling Issues

Grilling chicken can be a delightful experience, but even the most seasoned grillers encounter challenges along the way. Troubleshooting common grilling issues is essential to ensure your chicken turns out perfectly every time. Here are some common problems and their solutions to keep your grilling game strong.

**1. Uneven Cooking:** If you find that some pieces of chicken are undercooked while others are overdone, it may be due to uneven heat distribution on your grill. To combat this, invest in a good quality grill thermometer to monitor the temperature accurately. Additionally, consider using the two-zone grilling method—create a hot side for searing and a cooler side for gentle cooking. This way, you can start with high heat to get those beautiful grill marks and then move the chicken to the cooler side to finish cooking without burning.

**2. Sticking to the Grill:** There’s nothing more frustrating than when your chicken skin sticks to the grill grates, tearing apart your beautifully marinated pieces. To prevent this, ensure your grill is preheated and properly oiled. Use a paper towel dipped in cooking oil and carefully wipe down the grates just before placing the chicken on them. This simple step creates a non-stick surface that allows for easy flipping and removal.

**3. Dry or Overcooked Chicken:** Achieving juicy and flavorful chicken can sometimes feel like a balancing act. If your chicken tends to come out dry, it may be due to cooking it at too high a temperature or for too long. Always aim for an internal temperature of 165°F (75°C) and use a meat thermometer to check. Additionally, consider brining your chicken beforehand or marinating it for a few hours. This infuses moisture and flavor, ensuring your chicken stays succulent even when cooked over high heat.

**4. Flavorless Chicken:** If your grilled chicken lacks flavor, it’s time to rethink your seasoning strategy. Don’t skimp on the marinade or rub! A good marinade should have a balance of acidity (like lemon juice or vinegar), oil, and plenty of spices. Allow your chicken to marinate for at least 30 minutes, but ideally, a few hours or overnight for maximum flavor infusion. For an extra kick, consider adding a dry rub right before grilling to enhance the exterior flavor.

**5. Burnt Outside, Raw Inside:** This common issue often arises from cooking chicken over flames that are too high. To avoid this, use indirect heat to cook your chicken through while still achieving a gorgeous char. Start by searing the chicken on direct heat for a few minutes on each side, then move it to the cooler side of the grill to finish cooking. This method allows the internal temperature to rise without burning the exterior.

By keeping these troubleshooting tips in mind, you can tackle common grilling issues head-on, ensuring that your chicken not only looks great but also tastes divine. Mastering these techniques will elevate your grilling skills, making every barbecue event a resounding success!

13. Pairing Sides and Drinks with Grilled Chicken

When it comes to mastering the grill, the chicken may take center stage, but the sides and drinks you choose can elevate your meal from ordinary to extraordinary. Pairing your perfectly grilled chicken with the right accompaniments not only enhances the overall flavor profile but also creates a well-rounded dining experience that will leave your guests raving.

**Sides that Sing:** Think about the textures and flavors that will complement your grilled chicken. A light and refreshing coleslaw can provide a crunchy contrast, while a creamy potato salad offers a rich comfort. Grilled vegetables, such as bell peppers, zucchini, and asparagus, bring vibrant colors and earthy flavors to your plate. Consider adding a zesty corn salad with lime and cilantro to bring a burst of freshness. For a more indulgent option, a creamy mac and cheese or buttery garlic bread can satisfy those craving something hearty.

**The Perfect Drink:** Don’t forget about beverages! The right drink can enhance the enjoyment of your meal. A crisp, chilled white wine like Sauvignon Blanc or a light red like Pinot Noir can beautifully complement the flavors of your grilled chicken, especially if you’ve marinated it with herbs or citrus. If you’re catering to a non-alcoholic crowd, consider refreshing iced teas or lemonades, perhaps infused with herbs like mint or basil to add an extra layer of flavor. For something fun, craft cocktails featuring fresh fruits or herbs can add a festive touch to your gathering.

**Balancing Act:** Remember, the key to a great meal is balance. If your grilled chicken has a spicy kick, consider serving it with cooling sides and refreshing drinks. Conversely, if your chicken is lightly seasoned, don’t shy away from bold, flavorful sides that can stand up to it. By thoughtfully pairing your sides and drinks with grilled chicken, you’ll create a harmonious meal that celebrates the art of grilling while tantalizing the taste buds of everyone at your table. Whether it’s a casual backyard barbecue or an elegant dinner party, these pairings will ensure your grilled chicken shines in the best possible light.

14. Cleaning and Maintaining Your Grill

Cleaning and maintaining your grill is an essential step that often gets overlooked amidst the excitement of cooking up a delicious meal. A well-maintained grill not only ensures better flavor and cooking performance but also extends the life of your grilling equipment. To start, make it a habit to clean your grill grates after every use. While the grill is still warm, use a stiff wire brush to scrub away any food residue or charred bits. For stubborn grime, a mixture of vinegar and baking soda works wonders—spray it on, let it sit for a few minutes, and then scrub away.

Don’t forget about the grease trap! Over time, grease can build up and create a fire hazard, so regularly check, empty, and clean it out to prevent flare-ups. For gas grills, inspect the burners and hoses for any clogs or leaks at the start of each grilling season. A simple soap and water solution can reveal any leaks; just apply it to the hoses and look for bubbles forming.

For charcoal grills, ensure that you remove leftover ash after each use. Ash can trap moisture, leading to rust and deterioration, so a quick cleanup will help keep your grill in prime condition. Additionally, every few months, consider giving your grill a deeper clean by disassembling components and washing them with warm, soapy water.

Finally, protect your investment by using a grill cover when it’s not in use. This simple step will shield your grill from the elements, preventing rust and fading while keeping it ready for your next barbecue. With consistent care and maintenance, you’ll ensure that your grill performs at its best, allowing you to master the art of grilling perfectly succulent chicken, time after time.

15. Experimenting with Different Grilling Methods: Smoking and Rotisserie

When it comes to grilling chicken, there’s a world of flavors waiting to be explored beyond the traditional direct heat method. Two techniques that can elevate your poultry game to new heights are smoking and rotisserie cooking. Both methods offer unique benefits, infusing your chicken with tantalizing flavors and creating a succulent texture that’s hard to resist.

**Smoking** is a technique that allows you to impart a rich, deep flavor through the slow infusion of wood smoke. Whether you choose hickory, applewood, or mesquite, each type of wood brings its own signature taste. To get started, you’ll want to use a dedicated smoker or a grill set up for indirect heat. Soak your wood chips in water for about 30 minutes and then add them to the heat source. The key is to maintain a low temperature, usually between 225°F to 250°F, allowing the chicken to cook slowly and absorb those smoky notes. This method is perfect for bone-in pieces like thighs and drumsticks, which benefit from the extended cooking time, resulting in tender, juicy meat with a delightful crust.

On the other hand, **rotisserie grilling** offers a mesmerizing way to cook chicken evenly while keeping it moist. This method involves skewering the chicken on a rotisserie spit, which rotates over the heat source. The constant rotation ensures that the chicken cooks uniformly, and the skin gets beautifully crispy while the meat remains juicy. If you have a gas or charcoal grill with a rotisserie attachment, this method is worth trying. To enhance the flavor, consider marinating your chicken beforehand or seasoning it generously with your favorite rub. The slow, even cooking allows the fat to render down, basting the chicken as it spins, creating a mouthwatering dish that’s perfect for impressing guests at your next barbecue.

By experimenting with these alternative grilling methods, you not only expand your culinary repertoire but also delight your taste buds with an array of flavors and textures. So fire up your grill and let your creativity soar—your perfectly grilled chicken awaits!

As we wrap up our guide on mastering the grill for perfectly grilled chicken every time, we hope you feel inspired and equipped to take your grilling skills to the next level. From selecting the right cut of chicken to mastering marinades, temperature control, and cooking techniques, you now have a toolkit filled with essential tips to ensure juicy, flavorful results. Remember, practice makes perfect, so don’t be afraid to experiment and find what works best for you. Whether you’re hosting a backyard barbecue or enjoying a quiet dinner at home, the satisfaction of serving up perfectly grilled chicken will surely delight your family and friends. So fire up that grill, embrace the smoke and sizzle, and enjoy the delicious journey of grilling! Happy grilling!

What vitamin deficiency causes you to feel cold ?

A vitamin deficiency can cause a variety of symptoms, including feeling cold.

Vitamin deficiencies can lead to a variety of symptoms, including feeling cold. One vitamin that is particularly important for regulating body temperature is vitamin B12. A deficiency in vitamin B12 can cause a decrease in red blood cells, which can lead to a feeling of being cold, as well as fatigue and weakness.

vitamin deficiency

Another vitamin that is important for maintaining body temperature is vitamin D. A deficiency in vitamin D can lead to a decrease in bone density and muscle weakness, which can contribute to feelings of coldness.

Iron is another essential nutrient that plays a role in regulating body temperature. An iron deficiency can lead to a decrease in the production of red blood cells, which can cause feelings of coldness, as well as fatigue and weakness.

Eat a balanced diet

Another vitamin that is important for maintaining body temperature is vitamin C. A deficiency in vitamin C can lead to a decrease in collagen production, which can contribute to feelings of coldness, as well as poor wound healing and dry, rough skin.

In summary, vitamin deficiencies, especially B12, D, Iron, C can cause a feeling of coldness. These deficiencies can also cause a variety of other symptoms, such as fatigue and weakness, which can make it difficult to stay warm. It’s important to make sure you are getting enough of these vitamins through your diet or supplements. Consult with a healthcare professional for a proper diagnosis and treatment.

It is also important to eat a balanced diet that includes a variety of vitamins and minerals to ensure that your body has all the nutrients it needs to function properly.

How long can you leave cooked chicken out ?

Eating an entire chicken during one single diner is not something usual, even for a familly. When cooked, what is the maximum duration a chicken can be left out ?

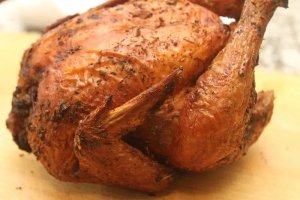
It is not recommended to leave cooked chicken out for extended periods of time. It can quickly become a breeding ground for bacteria and other harmful microorganisms. In general, cooked poultry should not be left out at room temperature for more than two hours.

chicken

If the ambient temperature is above 90 °F, the maximum time that cooked chicken should be left out is reduced to just one hour. This is because the warmer the temperature, the more quickly bacteria will grow and multiply.

However, even if the poultry is kept in a cooler environment, it is still not advisable to leave it out for extended periods of time. If the cooked chicken is not consumed within two hours, it should be promptly transferred to the refrigerator. Do this to prevent bacterial growth and potential food poisoning.

If the cooked chicken has been left out for longer than two hours and it is not consumed immediately, it should be discarded to avoid potential health risks. It is better to throw away the poultry than to risk consuming contaminated food.

To prevent food poisoning, it is important to store cooked chicken properly. It is also important to avoid it out at room temperature for extended periods of time. This can be achieved by placing the poultry in an airtight container and storing it in the refrigerator or freezer.

In summary, cooked chicken should not be left out at room temperature for more than two hours. In warmer environments, it should be consumed or refrigerated within one hour. To ensure the safety of your food and prevent the risk of food poisoning, it is best to follow these guidelines. keep your cooked chicken properly chilled and stored.