What are the best vegetarian recipes?

In a world where culinary creativity knows no bounds, vegetarian cooking has emerged as an exciting and vibrant avenue for food lovers to explore.

Whether you’re a lifelong vegetarian, a curious omnivore, or simply looking to incorporate more plant-based meals into your diet, this collection of delicious vegetarian recipes is sure to delight your taste buds and inspire your kitchen adventures. From hearty, flavor-packed dishes that make vegetables the star of the show to light and refreshing options perfect for any season, these ten recipes showcase the incredible versatility and richness of vegetarian cuisine. Join us on this mouthwatering journey as we uncover the top ten vegetarian recipes you absolutely need to try today—and discover how satisfying and delicious a meat-free lifestyle can be!

1. Introduction to Vegetarian Cooking

What are the best vegetarian recipes?
Credit : whatcanu.com

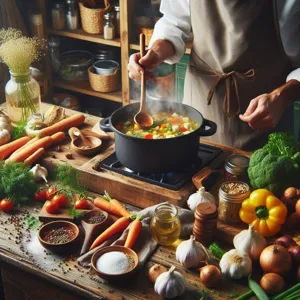
Vegetarian cooking is more than just a dietary choice; it’s a vibrant celebration of flavors, colors, and textures that can transform any meal into a culinary adventure. With the world increasingly embracing plant-based diets for health, environmental, and ethical reasons, vegetarian cooking has become a thriving, innovative field that invites everyone—regardless of dietary preferences—to explore the bountiful possibilities of fruits, vegetables, grains, and legumes.

Imagine walking through a sun-drenched farmers’ market, where the vivid hues of ripe tomatoes, earthy greens, and fragrant herbs beckon you to experiment in your kitchen. Vegetarian cooking invites you to harness the natural flavors found in seasonal produce and turn simple ingredients into extraordinary dishes. It’s about creativity and exploration, mixing and matching spices, and discovering new textures that can tantalize your taste buds.

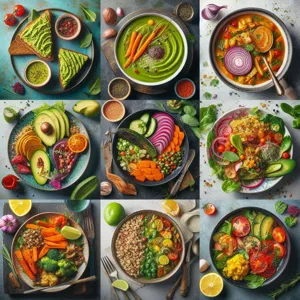
From hearty stews brimming with nutritious legumes to fresh, crisp salads bursting with seasonal vegetables, vegetarian recipes offer something for everyone. Whether you are a lifelong vegetarian or someone just starting to dabble in plant-based cuisine, you’ll find that cooking without meat can be both satisfying and delicious. With the right recipes in hand, you can craft meals that not only please your palate but also nourish your body and soul.

In this post, we’ll delve into ten delectable vegetarian recipes that are not only easy to prepare but also packed with flavor and nutrition. Each recipe is designed to inspire and excite, showcasing the diversity of vegetarian cooking. So, roll up your sleeves, grab your favorite apron, and get ready to embark on a delightful culinary journey that will have you and your loved ones savoring every bite!

2. Benefits of a Vegetarian Diet

Adopting a vegetarian diet offers a myriad of benefits that extend beyond just health; it encompasses environmental, ethical, and culinary advantages that make it an appealing choice for many.

Firstly, from a health perspective, a vegetarian diet is often associated with a lower risk of chronic diseases. Rich in essential nutrients, vitamins, and fiber, a plant-based diet can lead to improved heart health, lower blood pressure, and reduced cholesterol levels. Studies have shown that those who follow a vegetarian diet tend to have healthier body weights and lower risks of type 2 diabetes. This is largely due to the abundance of fruits, vegetables, whole grains, and legumes that are staples in vegetarian cooking, providing essential nutrients while keeping calorie counts in check.

Moreover, choosing vegetarianism is a powerful way to make a positive impact on the planet. The production of plant-based foods generally requires fewer natural resources and results in lower greenhouse gas emissions compared to meat production. By opting for vegetarian meals, you’re contributing to a more sustainable food system and helping to reduce your carbon footprint, making it a choice that benefits both your body and the environment.

Ethically, adopting a vegetarian lifestyle aligns with a commitment to animal welfare. Many people choose to go vegetarian to avoid the inhumane practices often associated with factory farming. By reducing or eliminating meat from their diets, they take a stand against animal cruelty and support more humane farming practices.

Finally, the culinary world opens up with a vegetarian diet. It encourages creativity and exploration in the kitchen, pushing you to discover new ingredients and flavors you might not have considered before. From hearty lentil stews to vibrant vegetable stir-fries, the possibilities are endless, and you may find that your meals become more colorful and diverse.

In essence, the benefits of a vegetarian diet are multifaceted, enhancing your health, contributing positively to the planet, supporting ethical practices, and expanding your culinary horizons. If you haven’t yet explored this delicious lifestyle, now is the perfect time to dive in!

3. Recipe 1: Hearty Vegetable Stir-Fry

What are the best vegetarian recipes?
Credit : whatcanu.com

A Hearty Vegetable Stir-Fry is a colorful celebration of flavors and textures that will satisfy both vegetarians and meat-lovers alike. This quick and versatile dish allows you to showcase a vibrant medley of fresh vegetables, all while packing a nutritional punch. Imagine crisp broccoli florets, sweet bell peppers, tender snap peas, and juicy carrots, all sautéed to perfection in a zesty garlic and ginger sauce that awakens your taste buds.

To start, gather your favorite vegetables—feel free to mix and match based on what’s in season or what you have on hand. For the best results, aim for a variety of colors to create a visually appealing dish. The key to achieving that perfect stir-fry is high heat and constant motion; this ensures your veggies remain crunchy while developing a delightful caramelization.

As the vegetables sizzle away, prepare a simple yet flavorful sauce using soy sauce, sesame oil, and a splash of rice vinegar. You can also add a pinch of red pepper flakes for some heat or a drizzle of honey for a touch of sweetness. Once your vegetables are nearly cooked, toss in the sauce and let it coat every morsel, allowing the flavors to meld beautifully.

Serve your Hearty Vegetable Stir-Fry over a bed of fluffy jasmine rice or quinoa to soak up all that delicious sauce. Top it off with a sprinkle of sesame seeds and freshly chopped scallions for an extra layer of flavor and crunch. This dish not only nourishes the body but also delights the senses, making it an ideal choice for a quick weeknight dinner or a vibrant dish to impress guests. With its endless variations and fulfilling nature, you’ll find yourself making this stir-fry again and again. So grab your wok and get ready to stir up some culinary magic!

4. Recipe 2: Creamy Spinach and Ricotta Stuffed Shells

Creamy Spinach and Ricotta Stuffed Shells are the epitome of comfort food, combining velvety textures with vibrant flavors that will leave you craving more. This dish features large pasta shells generously filled with a rich mixture of creamy ricotta, fresh spinach, and a hint of nutmeg, all enveloped in a luscious marinara sauce.

To begin, cook the pasta shells until al dente, ensuring they maintain their shape for stuffing. While the shells are boiling, sauté fresh spinach until wilted, then mix it with ricotta cheese, grated Parmesan, garlic, and a sprinkle of salt and pepper. This filling is not only delicious but also packed with nutrients, making it a wholesome choice for any meal.

Once the shells are filled, arrange them in a baking dish, generously slathering them with your favorite marinara sauce. For an extra touch of indulgence, sprinkle a layer of mozzarella cheese on top before placing the dish in the oven. As it bakes, the cheese melts into a gooey, golden layer, harmonizing perfectly with the savory flavors of the filling.

After about 30 minutes in the oven, the aroma wafting through your kitchen will be irresistible. Serve these stuffed shells with a side of garlic bread and a fresh salad, and you have a complete meal that’s sure to impress both vegetarians and meat-lovers alike. Each bite offers a delightful combination of creamy, cheesy goodness and the earthy taste of spinach, making this dish a must-try for anyone looking to elevate their vegetarian repertoire. Enjoy the comfort of home-cooked goodness with every stuffed shell!

5. Recipe 3: Quinoa and Black Bean Salad

What are the best vegetarian recipes?
Credit : whatcanu.com

Quinoa and black Bean Salad is a vibrant dish that not only tantalizes the taste buds but also nourishes the body. This recipe showcases the versatility of quinoa—an ancient grain packed with protein and essential amino acids—paired harmoniously with hearty black beans, rich in fiber.

To start, rinse one cup of quinoa under cold water to remove its natural coating, known as saponin, which can impart a bitter flavor. Cook the quinoa in two cups of vegetable broth for a deeper taste, bringing it to a boil and then simmering until the grains are fluffy and translucent. While the quinoa cools, prepare the other ingredients: drain and rinse a can of black beans, chop a colorful medley of bell peppers, red onion, and fresh cilantro, and dice a ripe avocado for creaminess.

In a large bowl, combine the cooled quinoa and black beans, then fold in the chopped vegetables and avocado. For the dressing, whisk together fresh lime juice, olive oil, cumin, salt, and a pinch of cayenne pepper for a hint of heat. Drizzle this zesty mixture over the salad, tossing gently to ensure every bite is coated in flavor.

Serve this salad as a refreshing side dish or a satisfying main course. It’s perfect for meal prep, as the flavors deepen and meld beautifully when allowed to sit for a few hours in the fridge. Not only is this Quinoa and Black Bean Salad a feast for the eyes with its colorful display, but it also delivers a delightful crunch and a burst of flavors that will have you reaching for seconds. Enjoy this nutritious dish as part of your quest for delicious vegetarian recipes that will leave you feeling full and satisfied!

6. Recipe 4: Roasted Cauliflower Tacos

### 6. Recipe 4: Roasted Cauliflower Tacos

Prepare to embark on a flavor-packed journey with these Roasted Cauliflower Tacos! This dish transforms humble cauliflower into a smoky, savory delight that is sure to become a staple in your kitchen. The key to these tacos lies in the roasting process, which caramelizes the natural sugars in the cauliflower, enhancing its flavor and giving it a wonderful texture.

**Ingredients:**
– 1 medium head of cauliflower, cut into florets
– 2 tablespoons olive oil
– 1 teaspoon smoked paprika
– 1 teaspoon ground cumin
– Salt and pepper, to taste
– Corn or flour tortillas
– Fresh cilantro, for garnish
– Avocado slices, for serving
– Lime wedges, for that zesty finish

**Instructions:**
1. **Preheat the Oven:** Start by preheating your oven to 425°F (220°C). This high heat will help the cauliflower roast to perfection.

2. **Prepare the Cauliflower:** In a large bowl, toss the cauliflower florets with olive oil, smoked paprika, cumin, salt, and pepper until well-coated. The spices will add depth, while the olive oil ensures a crispy exterior.

3. **Roast:** Spread the seasoned cauliflower evenly on a baking sheet lined with parchment paper. Roast for about 25-30 minutes, flipping halfway through, until the edges are golden and crispy.

4. **Assemble the Tacos:** While the cauliflower is roasting, warm the tortillas in a skillet or directly over a flame for a few seconds on each side. Once the cauliflower is out of the oven, it’s time to build your tacos! Layer the roasted cauliflower on each tortilla, then top with fresh avocado slices and a sprinkle of cilantro.

5. **Finish with Lime:** A squeeze of fresh lime juice will elevate the flavors and add a bright contrast to the smoky cauliflower.

These Roasted Cauliflower Tacos are not only visually appealing with their vibrant colors but also packed with nutrients and flavor. Each bite is a delightful combination of crunchy, creamy, and zesty elements that make them irresistible. Perfect for a quick weeknight dinner or a weekend gathering with friends, they are sure to impress even the most devoted carnivores. Enjoy these tacos with a side of your favorite salsa or a refreshing slaw for an extra crunch!

7. Recipe 5: Chickpea Curry with Coconut Milk

What are the best vegetarian recipes?
Credit : whatcanu.com

Chickpea Curry with Coconut Milk is a delightful fusion of flavors that transports you to the heart of Indian cuisine with every bite. This comforting dish is not only quick and easy to prepare but also packed with nutrients, making it a perfect choice for both seasoned vegetarians and newcomers alike.

To start, gather your ingredients: canned chickpeas, creamy coconut milk, ripe tomatoes, onion, garlic, ginger, and a medley of spices, including cumin, coriander, turmeric, and garam masala. The chickpeas serve as the protein-packed base, while the coconut milk adds a luscious creaminess that perfectly balances the spices.

Begin by sautéing finely chopped onions, garlic, and ginger in a splash of oil until they become fragrant and golden. As the aroma envelops your kitchen, add in the spices to toast them lightly, releasing their essential oils and deepening their flavors. Next, stir in the tomatoes, allowing them to simmer until they soften and meld into a rich sauce.

Once the tomato mixture is bubbling happily, toss in the chickpeas and pour in the coconut milk. This is where the magic happens; the chickpeas absorb the coconut’s sweetness while the spices create a harmonious blend. Let the curry simmer gently, allowing all the ingredients to unite, and then finish it off with a sprinkle of fresh cilantro for a burst of freshness.

Serve your Chickpea Curry with Coconut Milk over a bed of fluffy basmati rice or alongside warm naan bread for the ultimate comfort meal. The combination of creamy coconut, hearty chickpeas, and aromatic spices will leave your taste buds dancing and your stomach satisfied. It’s not just a dish; it’s an experience that showcases the vibrant flavors of vegetarian cooking. Try it today, and you’ll find yourself reaching for seconds!

8. Recipe 6: Zucchini Noodles with Pesto

### Recipe 6: Zucchini Noodles with Pesto

If you’re looking for a fresh and vibrant dish that bursts with flavor, look no further than Zucchini Noodles with Pesto. This delightful recipe is not only a feast for the eyes but also a celebration of health and taste, making it a perfect addition to your vegetarian repertoire.

To start, spiralize your zucchini into beautiful, long noodles—think of them as a lighter, gluten-free alternative to traditional pasta. The key is to choose firm, fresh zucchinis that yield perfectly tender noodles without becoming mushy. You can use a spiralizer, a julienne peeler, or even a box grater to achieve your desired thickness. The vibrant green strands will instantly brighten your plate.

Next, it’s all about the pesto. You can whip up a homemade version using fresh basil, garlic, pine nuts, Parmesan cheese, and a good drizzle of extra virgin olive oil. Blend these ingredients until you reach a creamy consistency, adjusting with more olive oil or a splash of lemon juice for brightness, if needed. If you’re short on time, store-bought pesto works just as well—just make sure to choose a high-quality option to ensure maximum flavor.

Toss the zucchini noodles in the luscious pesto sauce until every strand is coated in that aromatic herbal goodness. For an added crunch and flavor, consider sprinkling some toasted pine nuts or walnuts on top, along with a few halved cherry tomatoes for a pop of color and sweetness. A sprinkle of grated Parmesan or nutritional yeast can enhance the umami factor, making this dish even more irresistible.

Serve your Zucchini Noodles with Pesto warm or chilled, depending on your preference. This dish is not only quick to prepare but also versatile—feel free to customize it with additional veggies like bell peppers, spinach, or even roasted chickpeas for added protein. Not only is it a delightful meal to enjoy, but it also embodies the essence of summer with its fresh ingredients and bright flavors.

This recipe is perfect for a light lunch, a quick dinner, or even a picnic in the park. Once you try these Zucchini Noodles with Pesto, you might just find your new go-to dish that keeps you coming back for more! Enjoy every bite of this delicious vegetarian delight!

9. Recipe 7: Sweet Potato and Kale Hash

### Recipe 7: Sweet Potato and Kale Hash

If you’re looking for a hearty and nutritious dish that bursts with flavor, look no further than this Sweet Potato and Kale Hash. This vibrant recipe combines the earthy sweetness of roasted sweet potatoes with the robust, slightly bitter notes of sautéed kale, creating a perfect harmony of flavors that’s both satisfying and wholesome.

**Ingredients:**
– 2 medium sweet potatoes, peeled and diced
– 1 bunch of kale, stems removed and chopped
– 1 small onion, finely diced
– 2 cloves of garlic, minced
– 1 tablespoon olive oil
– Salt and pepper to taste
– A pinch of red pepper flakes (optional)
– Fresh herbs (like thyme or parsley) for garnish

**Instructions:**

1. **Prepare the Sweet Potatoes:** Begin by preheating your oven to 400°F (200°C). Toss the diced sweet potatoes with a drizzle of olive oil, salt, and pepper, then spread them out evenly on a baking sheet. Roast for about 20–25 minutes, or until they are tender and golden, flipping halfway through to ensure even cooking.

2. **Sauté the Aromatics:** While the sweet potatoes are roasting, heat a tablespoon of olive oil in a large skillet over medium heat. Add the diced onion and sauté until translucent, about 5 minutes. Then, stir in the minced garlic and cook for an additional minute until fragrant.

3. **Add the Kale:** Once the onions and garlic are perfectly sautéed, add the chopped kale to the skillet. Sprinkle in a pinch of salt, pepper, and red pepper flakes if you like a bit of heat. Sauté the kale for 5–7 minutes, or until it’s wilted and tender, stirring occasionally.

4. **Combine:** When the sweet potatoes are ready, fold them gently into the skillet with the kale mixture. Stir everything together, allowing the flavors to meld for an additional 2–3 minutes. Taste and adjust the seasoning as needed.

5. **Serve:** Transfer the hash to a serving dish and garnish with fresh herbs for an added touch of color and flavor. This dish can be enjoyed as a wholesome breakfast topped with a fried or poached egg, as a delightful lunch alongside a crisp salad, or as a comforting dinner paired with your favorite protein.

The Sweet Potato and Kale Hash is not just visually appealing with its vibrant orange and green hues, but it’s also packed with nutrients. Sweet potatoes are rich in vitamins A and C, while kale offers a hearty dose of iron and fiber. This recipe is a perfect example of how delicious vegetarian cooking can be—simple, fresh, and utterly satisfying. So, grab your ingredients, and get ready to enjoy a dish that will keep you coming back for more!

10. Recipe 8: Lentil Soup with Fresh Herbs

**10. Recipe 8: Lentil Soup with Fresh Herbs**

Lentil soup is a hearty, nourishing dish that brings warmth and comfort, perfect for any time of the year. This particular recipe elevates the humble lentil with a symphony of fresh herbs, creating a delightful explosion of flavor that will tantalize your taste buds.

To start, gather your ingredients: luscious green or brown lentils, aromatic onions, garlic, and a medley of colorful vegetables such as carrots and celery. The base of this soup is further enhanced by the addition of ripe tomatoes, which lend a subtle sweetness and depth to the broth. As the ingredients simmer together, the earthy flavors of the lentils meld beautifully with the bright notes of fresh herbs.

Chop up a handful of fresh parsley, cilantro, or thyme and sprinkle them into the pot during the last few minutes of cooking. This not only adds vibrant color but also infuses the soup with a refreshing aroma that will have everyone eagerly awaiting their first bowl. For an extra layer of flavor, consider adding a touch of cumin or smoked paprika, which will offer a warm, smoky undertone.

Serve this comforting soup with a drizzle of good-quality olive oil and a squeeze of lemon juice to brighten the flavors even more. Pair it with crusty bread or a light salad for a complete meal. Whether you’re looking to impress dinner guests or simply enjoy a healthy weeknight meal, this lentil soup with fresh herbs is sure to become a staple in your kitchen. It’s wholesome, easy to prepare, and packed with protein, making it a delicious choice that you and your loved ones will come back to time and time again!

11. Recipe 9: Caprese Salad with Balsamic Glaze

### Recipe 9: Caprese Salad with Balsamic Glaze

When it comes to simple yet stunning vegetarian dishes, few can rival the classic Caprese salad. Originating from the sun-drenched shores of Italy, this salad is a vibrant celebration of fresh ingredients. Picture a plate adorned with luscious slices of ripe, juicy tomatoes, their red hues contrasting beautifully with creamy, fresh mozzarella. The addition of fragrant basil leaves adds a burst of green that not only enhances the aesthetic appeal but also infuses the dish with a delightful aroma.

To elevate this already exquisite salad, drizzle a generous amount of rich balsamic glaze over the top. This sweet and tangy reduction adds depth and complexity, transforming the Caprese into a truly gourmet experience. The glaze clings to each ingredient, intensifying the flavors and bringing out the natural sweetness of the tomatoes while complementing the creamy texture of the mozzarella.

To prepare, simply layer alternating slices of tomato and mozzarella on a serving platter, tucking whole basil leaves between each layer. Once assembled, drizzle with the balsamic glaze and a sprinkle of sea salt and freshly ground black pepper to taste. For an extra touch, a splash of extra virgin olive oil can enhance the richness further.

This Caprese salad is not only a feast for the eyes but also a refreshing dish that is perfect for warm afternoons, picnics, or as a light starter for dinner parties. Whether enjoyed as a standalone meal or as part of a larger spread, this recipe is sure to impress your guests and leave them craving more. So gather your freshest ingredients and indulge in this delicious vegetarian delight today!

12. Recipe 10: Chocolate Avocado Mousse

Indulging in a decadent dessert has never been easier or more guilt-free than with this luscious **Chocolate Avocado Mousse**. This recipe is the perfect blend of rich chocolate and creamy avocado, creating a velvety texture that will surprise even the most ardent chocolate lovers. Not only is this mousse delicious, but it’s also packed with healthy fats and nutrients, making it a delightful treat that you can feel good about.

### Ingredients:
– 2 ripe avocados
– 1/4 cup cocoa powder
– 1/4 cup maple syrup (or honey for a non-vegan option)
– 1/4 cup almond milk (or any plant-based milk)
– 1 teaspoon vanilla extract
– A pinch of salt
– Optional toppings: fresh berries, coconut flakes, or crushed nuts

### Instructions:
1. **Prep the Avocados**: Start by cutting the ripe avocados in half, removing the pit, and scooping the flesh into a blender or food processor. The creaminess of ripe avocados is what gives this mousse its silky texture.

2. **Blend it Together**: Add the cocoa powder, maple syrup, almond milk, vanilla extract, and a pinch of salt into the blender. Blend until the mixture is completely smooth and creamy, scraping down the sides as needed to ensure everything is well combined.

3. **Taste and Adjust**: This is the fun part! Taste your mousse and adjust the sweetness if necessary by adding more maple syrup or honey, depending on your preference. If you love a richer chocolate flavor, feel free to add a bit more cocoa powder.

4. **Chill**: Transfer the mousse into serving dishes or bowls and refrigerate for at least 30 minutes. This chilling time allows the flavors to meld and the mousse to firm up slightly.

5. **Serve and Enjoy**: Once chilled, take the mousse out of the refrigerator and garnish with your choice of toppings. Fresh berries add a pop of color and tartness, while coconut flakes bring a touch of tropical flair.

With its rich, chocolatey flavor and a hint of creaminess from the avocados, this Chocolate Avocado Mousse is sure to become a favorite in your dessert repertoire. It’s not only a delightful way to satisfy your sweet tooth, but it’s also a simple, wholesome recipe that showcases how delicious vegetarian desserts can be. Enjoy this treat any time you need a little indulgence!

13. Tips for Cooking Vegetarian Meals

Cooking vegetarian meals can be a delightful and rewarding experience, allowing you to explore a vibrant world of flavors, textures, and colors. Here are some essential tips to elevate your vegetarian cooking game and make every meal a celebration of plant-based goodness.

**1. Embrace Variety:** One of the most exciting aspects of vegetarian cooking is the sheer diversity of ingredients available. Don’t shy away from experimenting with different vegetables, grains, legumes, and spices. Seasonal produce can bring freshness to your dishes, while international cuisines can inspire new flavor combinations. Think beyond the salad—try roasted root vegetables, stuffed peppers, or hearty grain bowls.

**2. Master the Basics:** Understanding how to cook fundamental ingredients like grains, beans, and vegetables can greatly enhance your meals. Learn the best methods for preparing quinoa, lentils, or brown rice, and how to perfectly sauté, steam, or roast your favorite vegetables. With these skills in your toolkit, you can create satisfying and nutritious meals with ease.

**3. Layer Your Flavors:** Building layers of flavor is key to any great dish. Start with aromatics like garlic, onions, or ginger, then add herbs and spices at various stages of cooking to create depth. Don’t forget to season generously! Salt, acidity (like lemon juice or vinegar), and umami-rich ingredients (such as soy sauce or nutritional yeast) can transform a simple plate of vegetables into a gourmet experience.

**4. Don’t Skimp on Protein:** While vegetarian meals are often rich in carbohydrates and fiber, it’s important to include protein as well. Incorporate sources like beans, lentils, tofu, tempeh, nuts, and seeds to ensure your meals are balanced and filling. Combining different protein sources can also enhance the amino acid profile of your dishes.

**5. Get creative with Meat Alternatives:** If you’re transitioning from a meat-based diet or simply miss the texture of meat, explore various meat substitutes. From flavorful mushroom burgers to hearty jackfruit tacos, there are countless options that can satisfy those cravings while still being plant-based. Just remember to season and cook them well for the best results!

**6. Plan Ahead:** Meal prepping can save you time and ensure you always have delicious vegetarian options on hand. Spend a little time at the beginning of the week to chop vegetables, cook grains, or prepare sauces, so you can mix and match throughout the week. Having a well-stocked pantry and fridge will make whipping up a quick vegetarian meal a breeze.

With these tips in mind, you’ll be well-equipped to create mouthwatering vegetarian dishes that even the most devoted carnivores will love. Happy cooking!

14. Conclusion: Embracing Vegetarian Cuisine

As we conclude our culinary journey through these top 10 delicious vegetarian recipes, it’s clear that embracing vegetarian cuisine opens up a world of vibrant flavors, textures, and nutritional benefits. The shift towards plant-based eating isn’t just a trend; it’s a celebration of creativity in the kitchen and a commitment to a healthier lifestyle and planet.

Whether you’re a seasoned vegetarian or simply looking to incorporate more meat-free meals into your diet, these recipes offer something for everyone. From the hearty and comforting flavors of a creamy mushroom risotto to the refreshing zest of a Mediterranean quinoa salad, each dish showcases the versatility of vegetables and grains, proving that meat-free meals can be just as satisfying and indulgent.

Moreover, by opting for vegetarian recipes, you are not only treating your taste buds but also supporting sustainability and reducing your carbon footprint. The ingredients in these dishes are often more accessible, less expensive, and can be sourced locally, allowing you to enjoy fresh, seasonal produce while supporting your community.

So, gather your friends and family, and make mealtime a joyous occasion with these delightful vegetarian recipes. Don’t hesitate to experiment with spices, herbs, and seasonal vegetables—after all, cooking is all about discovery and enjoyment. Embrace this vibrant way of eating and watch as it transforms your meals, your health, and perhaps even your perspective on food. Happy cooking, and may your journey in vegetarian cuisine be filled with endless delicious discoveries!

15. Share Your Favorite Vegetarian Recipes!

Sharing your favorite vegetarian recipes is a wonderful way to connect with fellow food enthusiasts and inspire others to embrace the joys of plant-based cooking. Whether you’re a seasoned chef or just starting out in the kitchen, the act of sharing not only fosters a sense of community but also encourages creativity in the culinary arts.

Consider hosting a virtual recipe swap with friends, where each participant contributes their go-to vegetarian dish. This can be a fun, interactive way to discover new flavors and cooking techniques. You might find yourself sharing a zesty chickpea salad or a comforting lentil stew, while others may introduce you to unexpected delights like butternut squash tacos or a savory mushroom risotto.

Don’t forget to utilize social media platforms, where you can showcase your creations through vibrant photos and engaging captions. Use hashtags like #MeatlessMonday or #VeggieDelight to connect with a broader audience, and encourage others to tag you when they try your recipe. This not only amplifies your reach but also builds a network of like-minded individuals who share a passion for delicious vegetarian food.

Additionally, consider creating a blog or an online recipe collection to document your culinary journey. You can include tips for ingredient substitutions, cooking methods, and personal stories behind each recipe. By sharing your favorite vegetarian dishes, you not only nourish your own passion for cooking but also help others discover the rich and diverse world of plant-based cuisine. So go ahead—share that cherished recipe, inspire someone to try something new, and watch as your love for vegetarian cooking spreads like wildfire!

As we wrap up our exploration of the top 10 delicious vegetarian recipes you need to try today, we hope you’re feeling inspired to bring some vibrant flavors and wholesome ingredients into your kitchen. Each dish offers a unique way to celebrate the joys of plant-based cooking, whether you’re a seasoned vegetarian or just looking to incorporate more meatless meals into your diet. From hearty stews to refreshing salads, these recipes are not only satisfying but also showcase the incredible versatility of vegetables. So gather your ingredients, roll up your sleeves, and embark on a culinary adventure that promises to delight your taste buds. We can’t wait to hear about your cooking experiences—share your creations with us and let us know which recipes became your favorites! Happy cooking!

What are the best vegan recipes?

Embarking on a vegan journey doesn’t mean sacrificing flavor or satisfaction; in fact, it opens the door to a vibrant world of culinary creativity! As more people embrace plant-based diets for health, environmental, and ethical reasons, the appeal of delicious vegan meals continues to soar.

whether you’re a seasoned vegan, a curious flexitarian, or simply looking to incorporate more plant-based meals into your diet, this post is for you. We’ve curated a list of the top 10 vegan recipes that are not only packed with nutrition but also bursting with flavor. From hearty comfort foods to refreshing dishes perfect for any season, these recipes will tantalize your taste buds and nourish your body. Get ready to explore the delightful combinations of fresh ingredients and bold spices that make vegan cooking an exciting adventure you won’t want to miss!

1. Introduction to Vegan Cooking

What are the best vegan recipes?
Credit : whatcanu.com

Vegan cooking is not just a dietary choice; it’s a vibrant culinary adventure that celebrates the rich tapestry of plant-based ingredients. As more people seek healthier, sustainable lifestyles, the appeal of vegan cuisine has surged, and for good reason. Imagine a world where flavor and nutrition come together in harmony, where every meal is a canvas for creativity, and where the abundance of nature’s bounty takes center stage.

At its core, vegan cooking embraces the philosophy of using only plant-derived ingredients—fruits, vegetables, grains, legumes, nuts, and seeds—while excluding all animal products. This shift not only promotes better health but also contributes to environmental sustainability and animal welfare. From hearty stews to refreshing salads and indulgent desserts, vegan recipes offer a diverse range of tastes and textures that can satisfy even the most discerning palates.

As you delve into the world of vegan cooking, you’ll discover an exciting array of flavors. Think creamy cashew sauces, zesty avocado dressings, and rich, savory lentil curries bursting with aromatic spices. Each dish showcases the versatility of plant-based ingredients, transforming humble staples into culinary masterpieces. Whether you’re a seasoned vegan or just curious about incorporating more plant-based meals into your diet, this introduction to vegan cooking will inspire you to explore new ingredients and techniques.

In this blog post, we’ll guide you through ten of the most delicious and nutritious vegan recipes that you absolutely need to try. Get ready to expand your cooking repertoire and delight your taste buds with meals that are as satisfying as they are wholesome!

2. Benefits of a Vegan Diet

Embracing a vegan diet offers a multitude of benefits that extend beyond just the culinary realm. First and foremost, it can significantly improve your health. A well-planned vegan diet is rich in fruits, vegetables, whole grains, nuts, and seeds, all of which are packed with essential vitamins, minerals, and antioxidants. These nutrient-dense foods can help lower the risk of chronic diseases, including heart disease, diabetes, and certain cancers. Numerous studies have shown that vegans tend to have lower cholesterol levels, healthier blood pressure, and a reduced risk of obesity, thanks to the emphasis on whole, plant-based foods.

Beyond health, a vegan diet is also incredibly environmentally friendly. The production of plant-based foods generally requires fewer resources—such as land, water, and energy—compared to animal farming. By opting for a vegan lifestyle, you contribute to a reduction in greenhouse gas emissions and help lessen the environmental impact associated with meat and dairy production. This not only nurtures the planet but also promotes a more sustainable future for generations to come.

Moreover, the ethical considerations of a vegan diet cannot be overlooked. Choosing plant-based options aligns with a compassionate approach to living that seeks to minimize harm to animals. Many individuals turn to veganism as a way to express their values and advocate for animal rights, contributing to a movement that is gaining momentum worldwide.

Finally, a vegan diet opens up a world of culinary creativity. With an abundance of ingredients to explore, you can experiment with diverse flavors, textures, and cuisines. From hearty lentil stews to vibrant vegetable stir-fries, the possibilities are endless. So, not only are you nourishing your body and supporting the planet, but you’re also embarking on a delicious journey of discovery in the kitchen. Whether you’re a seasoned vegan or just curious about incorporating more plant-based meals into your life, the benefits of a vegan diet are well worth considering.

3. Tips for Cooking Delicious Vegan Meals

What are the best vegan recipes?
Credit : whatcanu.com

Cooking delicious vegan meals can be an exciting culinary adventure, full of vibrant flavors and textures that will leave your taste buds dancing. Here are some tried-and-true tips to elevate your vegan cooking game and ensure each dish is as satisfying as it is nutritious.

**1. Embrace Umami:** One of the keys to creating rich, delicious flavors in vegan dishes is to embrace umami—the savory taste that makes food crave-worthy. Ingredients like mushrooms, sun-dried tomatoes, nutritional yeast, miso paste, and tamari can add depth to your meals. For example, sautéing shiitake mushrooms or adding a sprinkle of nutritional yeast to your sauces can transform a simple dish into a flavor sensation.

**2. Experiment with Herbs and Spices:** The right combination of herbs and spices can elevate your dishes from bland to bursting with flavor. Don’t shy away from experimenting with fresh herbs like basil, cilantro, and parsley, or spices such as cumin, smoked paprika, and turmeric. A pinch of chili powder can bring warmth, while a hint of cinnamon can add a surprising twist to savory dishes.

**3. Utilize Whole Foods:** Focus on whole, unprocessed ingredients as much as possible. Fresh vegetables, legumes, whole grains, nuts, and seeds not only provide essential nutrients but also offer a variety of textures and flavors. Consider preparing a hearty quinoa salad with roasted veggies or a comforting lentil stew, where the natural flavors of the ingredients shine.

**4. Incorporate Healthy Fats:** Healthy fats enhance flavor and improve the absorption of fat-soluble vitamins. Avocado, coconut oil, nuts, and seeds can add creaminess and richness to your meals. Try blending avocado into your smoothies for a luscious texture or drizzling tahini over your roasted vegetables for a delectable finish.

**5. Experiment with Plant-Based Substitutes:** With the rise of plant-based cooking, there are now countless alternatives to traditional animal products. From cashew cream to chickpea flour, these substitutes can help recreate your favorite dishes. For instance, using lentils or jackfruit can give you the satisfying texture of meat in tacos or BBQ sandwiches, while cashew cheese can satisfy any cheese cravings.

**6. Balance Your Plate:** A well-rounded vegan meal should include a balance of protein, healthy fats, and carbohydrates. Pair beans or lentils with whole grains like brown rice or quinoa, and add a variety of colorful vegetables to ensure you’re getting a full spectrum of nutrients.

**7. Don’t Forget the Sweetness:** A touch of sweetness can enhance flavors, so don’t hesitate to add elements like maple syrup, agave nectar, or dates to your savory dishes. Caramelizing onions or roasting sweet potatoes can also bring out their natural sweetness and create a delightful contrast against savory ingredients.

By incorporating these tips into your cooking, you’ll not only make your vegan meals more delicious but also showcase the incredible variety and potential of plant-based eating. Whether you’re whipping up a comforting stew or a vibrant salad, these strategies will help you create dishes that are both satisfying and nourishing. Happy cooking!

4. Recipe 1: Creamy Vegan Pasta Alfredo

When you’re in the mood for comfort food that’s both indulgent and nourishing, look no further than this Creamy Vegan Pasta Alfredo. This recipe is a delightful twist on a classic favorite, proving that you don’t have to sacrifice flavor or texture when opting for a plant-based diet.

To start, select your favorite pasta—whether it’s spaghetti, fettuccine, or even gluten-free options, the choice is yours. The base of this luscious sauce is a blend of soaked cashews and nutritional yeast, which together create a rich, creamy consistency reminiscent of traditional Alfredo. Simply soak the cashews in water for a couple of hours or overnight, then blend them with garlic, lemon juice, and a splash of plant-based milk until smooth and velvety. The nutritional yeast adds a cheesy, umami flavor that elevates the dish to new heights.

As the pasta cooks to al dente perfection, sauté some fresh vegetables such as spinach, mushrooms, or broccoli in a splash of olive oil. This not only adds a pop of color but also packs in extra nutrients. Once the pasta is cooked, toss it in the creamy sauce and stir in the sautéed veggies for a hearty meal that’s bursting with flavor.

Finish it off with a sprinkle of fresh parsley and a dash of black pepper for a vibrant garnish. Whether you’re serving it for a cozy dinner at home or impressing guests at a gathering, this Creamy Vegan Pasta Alfredo is guaranteed to please everyone at the table. It’s a dish that showcases how easy it can be to whip up something deliciously satisfying while keeping it entirely plant-based. Enjoy this creamy delight and watch your friends and family fall in love with vegan cooking!

5. Recipe 2: Spicy Chickpea Tacos

What are the best vegan recipes?
Credit : whatcanu.com

### 5. Recipe 2: Spicy Chickpea Tacos

If you’re looking for a vibrant, flavor-packed meal that’s both satisfying and nutritious, look no further than these Spicy Chickpea Tacos. This dish brings together the hearty, protein-rich goodness of chickpeas with a fiery kick that will tantalize your taste buds.

To begin, you’ll want to sauté finely chopped onions and minced garlic in a splash of olive oil until they’re golden and aromatic. Next, add in your canned chickpeas (drained and rinsed) and season them with a robust blend of spices, including cumin, smoked paprika, and a touch of cayenne pepper for that extra heat. As the chickpeas cook, they soak up the spices, creating a wonderfully rich and savory filling that’s sure to impress.

While your chickpeas are sizzling away, prepare your taco shells. You can opt for traditional corn tortillas, warm them on a skillet, or try using lettuce wraps for a refreshing twist. Once your chickpeas are perfectly spiced and slightly crispy on the outside, it’s time to assemble your tacos.

Layer the chickpea mixture into your chosen shells and top them off with a medley of fresh ingredients. Imagine the crunch of diced cucumbers, the creaminess of avocado slices, and the zesty brightness of lime juice drizzled on top. For those who crave a little extra flavor, a dollop of homemade vegan sour cream or a sprinkle of chopped cilantro can elevate this dish to new heights.

These Spicy Chickpea Tacos are not only a feast for the senses but also a quick and easy option for weeknight dinners or a vibrant addition to a weekend gathering. They’re packed with protein, fiber, and a bounty of vitamins, making them a perfect choice for anyone seeking a healthy, plant-based meal. Trust us, once you take your first bite, you’ll be adding this recipe to your regular rotation!

6. Recipe 3: Hearty Lentil Soup

When the weather turns chilly or you simply crave a comforting bowl of goodness, there’s nothing quite like a hearty lentil soup to warm your soul. This vegan delight is not only packed with flavor but also brimming with nutrients, making it the perfect dish to nourish your body and satisfy your taste buds.

### Ingredients:
To create this deliciously rich soup, you’ll need a medley of wholesome ingredients:

– 1 cup of green or brown lentils, rinsed and drained
– 1 tablespoon olive oil
– 1 onion, diced
– 2 carrots, chopped
– 2 celery stalks, chopped
– 3 cloves of garlic, minced
– 1 can (14 oz) of diced tomatoes
– 6 cups vegetable broth
– 2 teaspoons ground cumin
– 1 teaspoon smoked paprika
– Salt and pepper to taste
– Fresh spinach or kale (optional, for added greens)
– Fresh parsley or cilantro, chopped (for garnish)

### Instructions:
1. **Sauté the Vegetables**: In a large pot, heat the olive oil over medium heat. Add the diced onion, carrots, and celery, sautéing until they soften and the onion becomes translucent, about 5-7 minutes. Stir in the minced garlic and cook for an additional minute until fragrant.

2. **Add the Lentils and Spices**: Toss in the rinsed lentils, diced tomatoes, cumin, and smoked paprika. Stir to combine, allowing the spices to infuse with the vegetables for a minute.

3. **Pour in the Broth**: Add the vegetable broth to the pot, bringing the mixture to a gentle boil. Once boiling, reduce the heat to low and let it simmer uncovered for about 30-35 minutes, or until the lentils are tender.

4. **Incorporate Greens**: If you’re adding spinach or kale, stir them in during the last 5 minutes of cooking. They should wilt nicely without losing their vibrant color.

5. **Season to Taste**: After simmering, taste and adjust the seasoning with salt and pepper.

6. **Serve and Garnish**: Ladle the soup into bowls and sprinkle with fresh parsley or cilantro for a burst of freshness. For an extra touch, consider a drizzle of olive oil or a squeeze of lemon juice.

### Why You’ll Love It:
This hearty lentil soup is not only incredibly satisfying but also a powerhouse of nutrition. Lentils are rich in protein, fiber, and essential minerals, making them a staple in vegan diets. The combination of vegetables adds color and a range of vitamins, while the warm spices create a cozy, aromatic experience.

Whether enjoyed as a warm lunch or a cozy dinner, this soup is sure to become a staple in your kitchen. Plus, it’s easy to make in large batches, allowing you to enjoy leftovers throughout the week or freeze some for later. Dive into this delicious and nutritious recipe, and let the comforting flavors embrace you!

7. Recipe 4: Quinoa and Black Bean Salad

What are the best vegan recipes?
Credit : whatcanu.com

Quinoa and Black Bean Salad is a vibrant dish that perfectly balances taste and nutrition, making it a must-try for anyone looking to embrace a healthier lifestyle. This salad is not only visually appealing with its colorful array of ingredients, but it’s also packed with protein, fiber, and essential vitamins.

To prepare this delightful dish, begin by cooking a cup of quinoa until it’s fluffy and has absorbed all of its water. As it cooks, rinse and drain a can of black beans, which adds a hearty texture and rich flavor to the salad. Next, chop up a medley of fresh vegetables: crisp bell peppers, sweet cherry tomatoes, and refreshing red onion. Toss in a handful of corn kernels for a pop of sweetness and a splash of color.

For the dressing, whisk together fresh lime juice, olive oil, cumin, and a pinch of salt and pepper to create a zesty marinade that brings all the components together. Combine the cooked quinoa, black beans, and chopped vegetables in a large bowl, then drizzle the dressing over the top. Gently toss everything until well coated, and let it sit for a few minutes to allow the flavors to meld.

Serve this salad chilled or at room temperature, and don’t forget to sprinkle some fresh cilantro on top for an extra burst of flavor. This Quinoa and Black Bean Salad can be a light lunch, a side dish for dinner, or a nutritious option for meal prep, making it incredibly versatile. With its delicious taste and impressive health benefits, it’s no wonder this recipe has earned a spot on our top ten list. Enjoy this wholesome dish that will keep you coming back for more!

8. Recipe 5: Vegan Mushroom Stroganoff

### Recipe 5: Vegan Mushroom Stroganoff

If you’re seeking a comforting and hearty dish that will leave you satisfied without sacrificing flavor, look no further than this Vegan Mushroom Stroganoff. This recipe transforms the classic creamy stroganoff into a plant-based delight, featuring earthy mushrooms and a rich, savory sauce that clings beautifully to your choice of pasta or grains.

To start, gather an assortment of mushrooms—cremini, shiitake, and portobello work wonderfully together, creating a depth of flavor that elevates the dish. Sauté the mushrooms in a splash of olive oil until they’re beautifully browned, releasing their umami essence. Next, add in garlic and onions, allowing their aromatic goodness to infuse the dish.

The magic truly happens when you incorporate a blend of vegetable broth, coconut cream or cashew cream, and a splash of soy sauce or tamari for a hint of saltiness. These ingredients meld together to create a luscious sauce that envelops the mushrooms and your choice of pasta, whether it be traditional egg noodles or gluten-free options like zucchini noodles or whole grain pasta.

For an extra layer of flavor, a sprinkle of nutritional yeast adds a cheesy, nutty taste, while a dash of smoked paprika gives the stroganoff a subtle warmth. Finally, finish with a generous handful of fresh parsley for a pop of color and freshness.

Serve your Vegan Mushroom Stroganoff hot, perhaps with a side of crusty whole-grain bread or a crisp green salad. This dish not only showcases the hearty texture of mushrooms but also packs a nutritional punch, offering protein, fiber, and a bounty of vitamins. Perfect for a cozy weeknight dinner or impressing guests at a dinner party, this Vegan Mushroom Stroganoff is sure to become a staple in your culinary repertoire. Enjoy every creamy, delicious bite!

9. Recipe 6: Roasted Vegetable Buddha Bowl

### Recipe 6: Roasted Vegetable Buddha Bowl

The Roasted Vegetable Buddha Bowl is a vibrant, nourishing meal that celebrates the simplicity and flavor of whole foods. This dish is not only visually appealing but also packed with nutrients to fuel your day. Picture a colorful mix of seasonal vegetables, roasted to perfection, their natural sweetness enhanced by a drizzle of olive oil and a sprinkle of your favorite spices.

Start with a base of fluffy quinoa or brown rice, which provides a hearty foundation for the bowl. As the grains soak up the flavors of the roasted veggies, you can prepare the star of the show: an assortment of vegetables such as sweet potatoes, bell peppers, zucchini, and Brussels sprouts. Roast them in the oven until they reach a golden-brown hue and develop a delicious caramelized texture.

To elevate this dish, add a handful of leafy greens like kale or spinach, which provide a fresh crunch and vibrant color. Top it all off with a creamy tahini dressing, made from tahini, lemon juice, garlic, and a hint of maple syrup for sweetness. This dressing brings everything together, adding a rich, nutty flavor that perfectly complements the roasted vegetables.

Finally, finish your Buddha Bowl with a sprinkle of sesame seeds or chopped nuts for a satisfying crunch and a boost of healthy fats. Enjoy it warm or cold; either way, this Roasted Vegetable Buddha Bowl is a versatile, wholesome meal that will leave you feeling satisfied and energized. Whether you’re meal prepping for the week or looking for a quick dinner option, this recipe is a must-try that embodies the deliciousness and nutrition of vegan cooking.

10. Recipe 7: Chocolate Avocado Mousse

### Recipe 7: Chocolate Avocado Mousse

Indulge in a rich and creamy dessert that defies the traditional notion of indulgence—meet the Chocolate Avocado Mousse! This decadent treat is not only a feast for the senses but also a powerhouse of nutrients that will leave you feeling satisfied without the guilt.

At first glance, the combination of chocolate and avocado might raise some eyebrows, but trust us, this is a match made in culinary heaven. Ripe avocados serve as the base, lending a silky texture that mimics the creaminess of traditional mousse while packing in healthy fats, fiber, and a wealth of vitamins. The natural richness of the avocado is perfectly complemented by the deep, luxurious flavor of high-quality cocoa powder.

To whip up this delightful mousse, simply blend together ripe avocados, cocoa powder, maple syrup or agave nectar for sweetness, a splash of vanilla extract, and a pinch of salt to enhance the flavors. The result is a luscious, velvety mousse that can be enjoyed straight from the blender or chilled for an even more indulgent experience.

For an extra touch of elegance, consider garnishing with fresh berries, a sprinkle of crushed nuts, or a dollop of coconut whipped cream. Not only does this add a beautiful visual element, but it also enhances the flavor and texture, making each bite a delightful surprise.

Perfect for parties, romantic dinners, or simply when you’re in the mood for a sweet treat, this Chocolate Avocado Mousse is a dessert that proves you can have your cake and eat it too—without compromising on health or flavor. Once you try this recipe, you’ll wonder how you ever lived without it!

11. Recipe 8: Vegan Pancakes with Maple Syrup

Fluffy, golden-brown, and drizzled with rich maple syrup, these vegan pancakes are a delightful way to start your day or enjoy a cozy brunch. Made with simple, wholesome ingredients, they offer a perfect balance of taste and nutrition that will have everyone coming back for seconds.

To make these delectable pancakes, you’ll need a combination of flour, plant-based milk, a touch of baking powder, and a natural sweetener like mashed bananas or agave syrup to give them that delightful sweetness without compromising the vegan ethos. The result is a batter that comes together effortlessly, creating pancakes that are light and airy yet hearty enough to satisfy your hunger.

As you pour the batter onto a hot skillet, watch as the surface bubbles gently, signaling the perfect moment to flip. The aroma that fills your kitchen is simply irresistible—warm, inviting, and reminiscent of lazy weekend mornings. Once cooked to a beautiful golden hue, serve these pancakes stacked high, topped with a generous drizzle of pure maple syrup, and perhaps some fresh berries or sliced bananas for an extra burst of flavor and nutrients.

These vegan pancakes are not just a treat for the taste buds but also a canvas for creativity. You can easily customize them by adding in your favorite ingredients such as chocolate chips, chopped nuts, or even a sprinkle of cinnamon for a warming spice. Whether you enjoy them for breakfast, dessert, or a quick snack, these pancakes are bound to become a staple in your vegan cooking repertoire. Indulge in the deliciousness and let these vegan pancakes redefine your breakfast experience!

12. Recipe 9: Zucchini Noodles with Pesto

Zucchini noodles, often referred to as “zoodles,” are a fantastic way to enjoy a low-carb, gluten-free alternative to traditional pasta, all while packing in the nutrients. This delightful dish not only satisfies your pasta cravings but also bursts with vibrant flavors that will keep you coming back for more.

To prepare this refreshing meal, start by spiralizing fresh zucchini into long, curly strands that resemble spaghetti. The key to achieving the perfect texture is to lightly sauté the zoodles for just a few minutes until they are tender yet still retain a slight crunch. This quick cooking method allows the zucchini to absorb the flavors of the accompanying sauce without becoming too soggy.

For the star of the dish, the pesto, you have the option to create your own or opt for a store-bought variety. Making your own is simple and rewarding: blend together fresh basil, pine nuts, garlic, nutritional yeast, and a splash of olive oil until smooth. This vibrant green sauce is rich in antioxidants and healthy fats, making it both a flavorful and nutritious addition to your zoodles.

Once your noodles are cooked and your pesto is ready, toss them together in a large bowl, ensuring each strand is coated in that aromatic sauce. To elevate the dish further, consider adding cherry tomatoes for a pop of color and sweetness, a sprinkle of toasted pine nuts for added crunch, and a squeeze of lemon juice to brighten the flavors.

Serve your Zucchini Noodles with Pesto warm or chilled, garnished with fresh basil or a sprinkle of red pepper flakes for an extra kick. This dish not only looks beautiful but is also a powerhouse of nutrients, providing a guilt-free yet satisfying meal that is sure to impress both vegans and non-vegans alike. Dive into this delicious recipe and discover how easy it is to enjoy a wholesome plant-based meal!

13. Recipe 10: Coconut Curry with Tofu

**Recipe 10: Coconut Curry with Tofu**

Indulge your taste buds with a vibrant and fragrant Coconut Curry with Tofu that embodies the essence of comfort food, all while being entirely plant-based. This recipe is a delightful fusion of spices, creamy coconut milk, and fresh vegetables, creating a dish that is not only visually appealing but also packed with nutrients.

Begin by pressing firm tofu to remove excess moisture, allowing it to absorb all the flavors of the curry. Once golden and crispy, the tofu becomes the perfect canvas for the rich, aromatic curry sauce. Sauté a medley of colorful vegetables—think bell peppers, zucchini, and snap peas—in a splash of olive oil, allowing them to retain their crunch and vibrant hues.

Next, introduce a blend of spices—cumin, coriander, and a hint of turmeric—into the pan, letting their natural fragrances bloom. The addition of garlic and ginger adds a zesty kick, while the star ingredient, coconut milk, creates a luscious and creamy base that ties all the flavors together. Simmering the mixture allows the spices to infuse, forming a harmonious balance of heat and sweetness.

Serve the curry over a bed of fluffy jasmine rice or quinoa, garnishing with fresh cilantro and a squeeze of lime for an extra zing. This Coconut Curry with Tofu not only delivers on flavor but also nourishes the body with plant-based protein and an array of vitamins. Perfect for weeknight dinners or meal prep, it’s a dish that promises to leave everyone at the table craving seconds. Dive into this delectable recipe and discover how easy and satisfying vegan cooking can be!

14. How to Customize and Adapt Recipes

When it comes to vegan cooking, one of the most exciting aspects is the ability to customize and adapt recipes to suit your tastes, dietary needs, and the ingredients you have on hand. Embracing creativity in the kitchen not only adds a personal touch to your meals but also makes the cooking process more enjoyable and intuitive.

**Start with the Basics:** Every recipe has a foundation, whether it’s a hearty vegetable stew or a refreshing smoothie. Begin by identifying the core components of the dish—these might include proteins, grains, and vegetables. Once you understand the base, you can easily swap ingredients based on what you have available or what flavors you prefer. For example, if a recipe calls for quinoa but you only have brown rice, go ahead and make that substitution; they both provide a similar texture and nutritional profile.

**Experiment with Flavors:** Don’t be afraid to play with spices and herbs. If a recipe suggests cumin but you’re more fond of smoked paprika, make that switch! Taste as you go and let your palate guide you. Adding a splash of lemon juice or a drizzle of balsamic vinegar can completely transform a dish, so keep your seasoning options varied and be bold in your choices.

**Consider Dietary Needs:** Whether you’re gluten-free, nut-free, or looking to lower your sodium intake, vegan recipes are incredibly adaptable. Use gluten-free grains like millet or buckwheat instead of traditional pasta or bread. If you’re avoiding nuts, substitute them with seeds or legumes to maintain crunch and protein without compromising on taste.

**Portion control and Meal Prep:** Adjust serving sizes and ingredient amounts based on your household needs. If you’re cooking for one, it’s easy to scale down a recipe or make a large batch for meal prep. Leftovers can often be transformed into new meals, like turning a roasted vegetable medley into a filling for tacos or a salad topping.

**Incorporate Seasonal Ingredients:** One of the joys of cooking vegan is the opportunity to embrace seasonal produce. Visit your local farmer’s market and let fresh fruits and vegetables inspire your meals. For example, substituting zucchini for pasta in summer or incorporating hearty root vegetables in winter can add a seasonal touch and enhance the dish’s nutritional value.

In essence, customizing and adapting vegan recipes is about embracing flexibility and creativity in the kitchen. With a willingness to experiment and a knack for substituting ingredients, you’ll find that deliciousness and nutrition can be tailored to fit any lifestyle or palate. So grab your apron, gather your ingredients, and start crafting your own unique vegan masterpieces!

15. Conclusion and Encouragement to Explore Vegan Cooking

In conclusion, the journey into vegan cooking is not just about substituting ingredients; it’s a vibrant exploration of flavors, textures, and colors that can invigorate your meals and your well-being. The ten recipes we’ve shared offer a delicious starting point for anyone, whether you’re a seasoned vegan or simply curious about incorporating more plant-based meals into your diet.

As you experiment with these dishes, don’t be afraid to make them your own. Swap out ingredients based on what’s in season, add your favorite spices, or try new plant-based ingredients that catch your eye. The beauty of vegan cooking lies in its versatility and the endless possibilities it presents.

Embrace the adventure of cooking with fresh vegetables, whole grains, and legumes, and you’ll find that preparing vegan meals can be both simple and rewarding. Not only will you enjoy the satisfaction of creating nourishing dishes, but you’ll also be contributing positively to your health and the environment.

So, gather your ingredients, roll up your sleeves, and dive into the world of vegan cooking. With each dish you create, you’ll discover that plant-based meals can be immensely satisfying and delicious. Remember, every meal is an opportunity to nourish your body while tantalizing your taste buds. Happy cooking!

As we wrap up our exploration of the top 10 delicious and nutritious vegan recipes, we hope you’re feeling inspired to embrace the vibrant world of plant-based cooking. Each recipe not only showcases the incredible flavors and textures that vegan cuisine has to offer but also highlights the health benefits of incorporating more plant-based meals into your diet. Whether you’re a seasoned vegan or simply looking to add more nutritious options to your meals, these recipes are sure to delight your taste buds and nourish your body. So gather your ingredients, roll up your sleeves, and embark on a culinary adventure that celebrates the beauty of vegan cooking. We can’t wait to hear about your experiences in the kitchen, so be sure to share your creations with us! Happy cooking!

——————————

What are the best ways to cook fish?

There’s something undeniably alluring about the ocean, and when it comes to culinary delights, fish embodies that allure with its fresh, delicate flavors and versatile textures.

Whether you’re a seasoned chef or a home cook looking to elevate your culinary repertoire, mastering the art of cooking fish can open up a world of gastronomic possibilities. However, the key to serving up a truly exceptional seafood dish lies in the techniques you employ. In this blog post, we’ll dive into the top techniques for cooking fish perfectly, from grilling and poaching to pan-searing and baking. Discover how to bring out the natural flavors of your catch while ensuring a tender and flaky texture that will impress even the most discerning palates. So, roll up your sleeves and get ready to savor the sea with these expert tips and mouthwatering ideas that will transform your fish dishes into ocean-inspired masterpieces!

1. Understanding Different Types of Fish

What are the best ways to cook fish?
Credit : whatcanu.com

When it comes to cooking fish perfectly, the first step is understanding the diverse array of fish available and how their unique characteristics influence cooking methods and flavor profiles. Fish can be broadly categorized into two main types: **lean fish** and **oily fish**, each offering a distinct culinary experience.

**Lean fish**, such as cod, halibut, and sole, are characterized by their mild flavor and firm texture. These fish are low in fat, which means they can easily dry out if overcooked. Cooking techniques that enhance their delicate nature include poaching, baking, and steaming, often complemented by light sauces or garnishes like lemon and herbs to accentuate their subtle taste.

On the other hand, **oily fish**, such as salmon, mackerel, and sardines, are rich in healthy fats, which contribute to their robust flavor and moist texture. These fish are incredibly versatile and can withstand high-heat cooking methods like grilling, broiling, or pan-searing, allowing the natural oils to caramelize and enhance their rich taste. When preparing oily fish, consider bold marinades or spices to elevate their flavor profile.

Additionally, it’s essential to recognize the importance of freshness. Fresh fish should have a clean, ocean-like smell, bright eyes, and firm flesh that bounces back when pressed. Understanding the differences between farmed and wild-caught fish is also crucial, as each type can have varying flavor profiles, textures, and environmental impacts.

By familiarizing yourself with these categories and the qualities of different fish, you’ll be well-equipped to make informed choices and employ the right cooking techniques that will bring out the best in your seafood dishes. Whether you prefer the gentle flavors of lean fish or the hearty richness of oily varieties, mastering how to cook fish perfectly begins with a solid understanding of what’s swimming in your kitchen.

2. Fresh vs. Frozen: What You Need to Know

When it comes to cooking fish perfectly, understanding the difference between fresh and frozen fish is essential. Many home cooks often find themselves torn between the two, unsure which option will yield the best flavor and texture. Let’s dive into the nuances of each to help you make an informed choice for your next seafood dish.

**Fresh Fish**: The allure of fresh fish is undeniable. When you purchase fish that has been recently caught, you benefit from its peak flavor and texture. Fresh fish boasts a delicate, flaky consistency that melts in your mouth and a subtle brininess that can elevate any dish. Look for clear, bright eyes and vibrant skin when selecting fresh fish; these indicators are signs of quality. However, keep in mind that fresh fish has a shorter shelf life, so it’s best consumed within a day or two of purchase. If you’re buying fresh fish, ensure you store it properly on ice or in the coldest part of your refrigerator to preserve its freshness.

**Frozen Fish**: On the other hand, frozen fish can be a game-changer in terms of convenience and availability. Many frozen fish products are flash-frozen immediately after being caught, which locks in their freshness and nutrients. This process often preserves the quality better than you might expect, making frozen fish a viable option. Additionally, frozen fish is readily available year-round, allowing you to enjoy a wider variety without the constraints of seasonal availability. When choosing frozen fish, look for products that are vacuum-sealed to prevent freezer burn, and opt for those that have been frozen without additives or preservatives for the healthiest choice.

Both fresh and frozen fish have their merits, and the best choice ultimately depends on your cooking needs and preferences. If you’re looking for a quick weeknight meal, frozen fish can save the day without sacrificing quality. On the other hand, if you’re preparing a special occasion dinner, fresh fish can provide that exquisite touch. Understanding these differences will empower you to make the best choice, ensuring every fish dish you create is nothing short of spectacular.

3. Essential Tools for Cooking Fish

What are the best ways to cook fish?
Credit : whatcanu.com

When it comes to cooking fish perfectly, having the right tools in your culinary arsenal can make all the difference. Here’s a look at some essential tools that every home cook should consider to elevate their fish cooking game.

**1. A High-Quality Fish Spatula**
A fish spatula is an indispensable tool for anyone who cooks fish regularly. Its thin, flexible design allows you to slide easily under delicate fillets without breaking them apart. Look for one with a slotted surface to help drain excess oil or juices as you lift the fish from the pan, ensuring a beautifully presented dish every time.

**2. A Reliable Instant-Read Thermometer**
Fish is notoriously tricky to cook just right, as it can go from perfectly flaky to overcooked in a matter of minutes. An instant-read thermometer takes the guesswork out of cooking, allowing you to check the internal temperature quickly. aim for 145°F (63°C) for most fish; this ensures that it’s safely cooked while retaining moisture and flavor.

**3. A Nonstick or Cast Iron Skillet**
The choice of skillet can greatly influence how your fish turns out. A nonstick skillet is ideal for cooking delicate fish like sole or tilapia, preventing it from sticking and breaking apart during the cooking process. On the other hand, a well-seasoned cast iron skillet is perfect for heartier fish like salmon or tuna, providing excellent heat retention and a beautiful sear.

**4. A Fish Cleaning Kit**
If you’re starting with whole fish, a fish cleaning kit is essential. Look for a set that includes a fillet knife, a scaler, and a cutting board. A sharp fillet knife will allow you to create clean cuts, while a scaler helps to remove scales without damaging the flesh. This preparation step is critical to ensuring that your fish is not only ready to cook but also that it tastes as fresh as possible.

**5. A Good Quality Steamer**
Steaming is a healthy and flavorful way to prepare fish, preserving its natural moisture and delicate flavors. A good quality steamer, whether it’s a bamboo steamer or a stainless steel multi-tiered model, can enhance your cooking experience. Add herbs, lemon slices, or aromatic vegetables to the steaming water for an infusion of flavor that will elevate your dish.

Equipping your kitchen with these essential tools will not only streamline the cooking process but also ensure that your fish dishes turn out perfectly every time. With the right equipment at your disposal, you’ll be well on your way to savoring the sea’s bounty like a pro!

4. Preparing Fish: Cleaning and Filleting Tips

Preparing fish for cooking is an art that can significantly enhance your culinary experience. The first step in this process is cleaning, which is crucial to ensure that your meal is not only delicious but also safe to eat. Start by rinsing the fish under cold running water to remove any slime or debris. It’s essential to use a clean surface and a sharp filleting knife to make the task smoother.

When it comes to gutting, make a shallow incision along the belly of the fish from the tail to the head. Be careful not to cut too deep, as you want to avoid puncturing the internal organs. With a steady hand, open the fish up and gently remove the entrails, discarding them properly. It’s wise to have a bowl or container ready for this purpose. Rinse the cavity thoroughly to remove any residual blood or impurities.

Next, we move on to filleting. Place the fish on a cutting board, belly side down, and secure it with a damp cloth to prevent slipping. Starting at the head and using your knife, cut along the back bone, applying light pressure to separate the flesh from the spine. Follow the rib cage with your knife to ensure you extract as much meat as possible. Once you have one fillet, flip the fish over and repeat the process on the other side.

As you work, keep an eye out for pin bones; these small, slender bones can be a nuisance when eating. Use tweezers to remove them carefully, ensuring a smooth dining experience. After filleting, rinse the fish fillets under cold water and pat them dry with paper towels. Properly cleaning and filleting your fish not only prepares it for cooking but also elevates the overall flavor and texture, setting the stage for a truly memorable meal. Now you’re ready to savor the sea with confidence!

5. The Importance of Marinating: Techniques and Recipes

What are the best ways to cook fish?
Credit : whatcanu.com

Marinating fish is not just a way to infuse flavor; it’s a technique that enhances the overall texture and tenderness of your catch, transforming a simple meal into a culinary masterpiece. The process of marinating involves soaking the fish in a seasoned liquid, typically composed of acidic ingredients like citrus juice or vinegar, combined with oils, herbs, and spices. This delightful combination not only penetrates the fish, imparting vibrant flavors, but also helps break down proteins, ensuring a moist and succulent result.

When marinating fish, the key is to strike the right balance between flavor and time. Depending on the type of fish, a marinade of 15 to 30 minutes is usually sufficient. Delicate fish like sole or flounder benefit from shorter marination times, allowing them to absorb the flavors without becoming overly mushy. Heartier fish, such as salmon or swordfish, can withstand a longer soak, typically up to an hour, allowing the flavors to permeate deeper.

To elevate your marinating game, consider experimenting with various ingredient combinations. A classic lemon-dill marinade can brighten up grilled salmon, while a soy-ginger mixture can add an Asian flair to your teriyaki tuna steaks. For a more adventurous twist, try a spicy harissa marinade for a bold flavor infusion or a tropical pineapple-coconut blend that transports your taste buds to a sunny beach.

Don’t forget to include aromatic herbs like cilantro, parsley, or basil, along with spices like cumin, paprika, or even a hint of chili for added depth. And for those looking to add a touch of sweetness, a drizzle of honey or maple syrup can create a beautifully balanced marinade that enhances the natural flavors of the fish.

Once marinated, your fish is ready for the grill, oven, or stovetop, and the result is sure to impress. With these techniques and recipes in your culinary arsenal, you’ll discover that marinating fish is not just an important step; it’s an essential part of creating delicious, restaurant-quality meals right in your own kitchen. Savor the flavors, and let the ocean’s bounty shine through in every bite!

6. Cooking Methods: Grilling, Baking, and Poaching

When it comes to cooking fish to perfection, the method you choose can make all the difference in flavor, texture, and presentation. Each technique brings out unique qualities in the fish, allowing you to explore a delightful spectrum of culinary possibilities. Let’s dive into three popular cooking methods: grilling, baking, and poaching.

**Grilling:** Grilling fish adds a smoky char that complements its natural flavors beautifully. The high heat of the grill caramelizes the fish’s exterior while sealing in moisture, resulting in a tender, flaky interior. For the best results, choose firm fish like salmon, tuna, or swordfish that can withstand the heat. Marinating the fish beforehand can enhance its flavor profile, while a simple seasoning of salt, pepper, and a squeeze of lemon can let the fish shine. Remember to oil the grill grates to prevent sticking and use a fish spatula for easy flipping.

**Baking:** Baking is an incredibly versatile method that allows for even cooking with minimal effort. Simply season your fish, place it on a baking sheet lined with parchment paper or foil, and let the oven work its magic. This method is ideal for delicate fish like sole or cod, which can easily fall apart on the grill. To elevate your baked fish, consider using aromatics such as garlic, herbs, and citrus slices, or even enclose it in parchment paper for a French “en papillote” technique. This not only locks in moisture but also infuses the fish with fragrant flavors as it steams in its own juices.

**Poaching:** For a gentle, healthy cooking method, poaching is a superb choice. This technique involves simmering fish in a flavored liquid—think broth, wine, or even water infused with herbs and spices—at a lower temperature. Poaching is particularly well-suited for delicate fish like trout or flounder, ensuring they remain moist and tender without the risk of drying out. Serve your poached fish with a drizzle of the poaching liquid or a light sauce for a dish that feels elegant yet effortless.

By mastering these cooking methods, you’ll unlock a world of flavor and delight in your fish dishes. Each technique offers its own set of advantages and can be tailored to your personal taste, ensuring that every meal is a celebration of the sea’s bounty. So fire up the grill, preheat the oven, or gently simmer your fish; with these methods, perfection is just a recipe away.

7. Mastering the Art of Pan-Searing Fish

What are the best ways to cook fish?
Credit : whatcanu.com

Pan-searing fish is a technique that not only enhances the natural flavors of the seafood but also creates a beautifully crisp exterior that contrasts wonderfully with the tender, flaky interior. To master this art, begin by selecting the right cut of fish—firm varieties like salmon, swordfish, or sea bass are ideal as they hold up well during cooking.

Start with a clean, dry fish fillet; moisture is the enemy of a good sear. Pat the fish dry with paper towels to remove any excess moisture, then season generously with salt and pepper, allowing the flavors to penetrate the flesh. The choice of skillet is crucial; a heavy, cast-iron or stainless-steel pan retains heat well, providing the ideal surface for achieving that coveted golden crust.

Heat your skillet over medium-high heat until it’s hot but not smoking. Add a splash of high-smoke-point oil, such as canola or grapeseed, and swirl it around the pan. Once the oil shimmers, it’s time to introduce the fish to the pan, placing it skin-side down (if applicable). This initial contact with the hot surface is what creates the delicious sear, so resist the urge to move the fish around too much—let it do its thing.

After a few minutes, you’ll notice the edges of the fish turning a beautiful golden brown. To ensure even cooking, gently flip the fish with a spatula, cooking the other side until it reaches your desired doneness. A handy tip is to use a meat thermometer; fish is perfectly cooked when it reaches an internal temperature of 145°F (63°C).

Once removed from the heat, let the fish rest for a couple of minutes before serving. This allows the juices to redistribute, resulting in a moist and flavorful bite every time. To elevate your dish, consider finishing with a squeeze of fresh lemon juice or a drizzle of herb-infused olive oil. Pan-seared fish is not just a meal; it’s an experience, one that brings the ocean’s bounty to your table with elegance and simplicity.

8. How to Achieve Perfectly Flaky Fish

Achieving perfectly flaky fish is both an art and a science, and it starts with understanding the properties of the fish you’re working with. The goal is to create a tender and moist texture that practically melts in your mouth, while still allowing those beautifully delicate flakes to separate effortlessly. Here are some essential techniques to help you master this culinary skill.

**1. Choose the Right Type of Fish**: Not all fish are created equal when it comes to flakiness. Fish like cod, haddock, and salmon are particularly known for their flaky texture when cooked properly. Look for fresh, high-quality fillets with vibrant color and a clean ocean smell.

**2. Temperature Matters**: Before cooking, allow your fish to come to room temperature for about 15-20 minutes. This helps it cook evenly, preventing the outside from overcooking while the inside remains underdone.

**3. Use the Right Cooking Method**: Different cooking methods yield varying results. Baking and poaching are excellent for achieving flaky fish. When baking, use a moderate temperature, around 375°F (190°C), and wrap the fish in parchment paper or foil to create a steaming effect. When poaching, keep the water just below boiling; this gentle heat allows the fish to cook slowly, preserving its moisture and encouraging flakiness.

**4. Don’t Overcook**: This is the golden rule when it comes to cooking fish. The moment fish reaches an internal temperature of 145°F (63°C), it’s done. Use a fork to gently prod the fish; if it flakes easily without resistance, it’s ready to come off the heat. Overcooking causes fish to dry out, resulting in a tough texture rather than the desired flakiness.

**5. Rest Your Fish**: Just like any protein, letting your fish rest for a few minutes after cooking allows the juices to redistribute, enhancing its flavor and texture.

**6. The Right Tools**: A good fish spatula is your best friend in the kitchen. Its thin, flexible design allows you to lift the delicate fillets without breaking them apart, ensuring that the beautiful, flaky texture remains intact as you serve.

By incorporating these techniques into your cooking routine, you’ll be well on your way to serving fish that not only looks appealing but also has that coveted flaky texture that keeps diners coming back for more. So, roll up your sleeves, and let the flavors of the sea shine through in each perfectly cooked bite!

9. Flavor Pairings: Herbs, Spices, and Sauces

When it comes to cooking fish, the right flavor pairings can elevate your dish from ordinary to extraordinary. Fish often has a delicate flavor profile that can be beautifully enhanced with the right combination of herbs, spices, and sauces. Understanding these pairings not only complements the inherent taste of the fish but also allows you to explore a world of culinary creativity.

**Herbs** are a classic choice for fish, with fresh options like dill, parsley, cilantro, and basil standing out for their ability to add brightness and freshness. Dill works particularly well with salmon, while parsley can enhance almost any white fish, lending a clean and crisp flavor. For a Mediterranean twist, try pairing fish with oregano and thyme, which provide earthy notes that can balance the dish perfectly.

**Spices**, on the other hand, can add depth and warmth to your seafood creations. A sprinkle of smoked paprika can introduce a subtle smokiness, while cumin adds a warm, nutty flavor that pairs beautifully with grilled fish. For those who enjoy a kick, a dash of cayenne or chili powder can spice things up, especially in dishes inspired by Latin or Asian cuisines.

**Sauces** are the final touch that can tie your entire dish together. A simple lemon butter sauce can brighten up a fillet, while a rich garlic and herb sauce can create a decadent experience. For a burst of flavor, consider a mango salsa or a zesty chimichurri, which not only add vibrant colors to the plate but also bring a fresh, tangy dimension to the meal.

Experimenting with different combinations of herbs, spices, and sauces opens up a treasure trove of possibilities, allowing you to customize your fish dishes to suit any palate. Whether you’re grilling, baking, or pan-searing, these flavor pairings will not only enhance the natural taste of the fish but will also make your culinary creations unforgettable. So, don’t shy away from experimenting—your taste buds will thank you!

10. Common Mistakes to Avoid When Cooking Fish

Cooking fish can be a delightful culinary adventure, but it’s easy to fall into some common pitfalls that can lead to disappointing results. To help you achieve that perfect fillet, here are a few mistakes to avoid when cooking fish.

Firstly, **overcooking** is perhaps the most prevalent error. Fish cooks quickly, and the difference between a moist, flaky texture and a dry, rubbery one can be mere seconds. A good rule of thumb is to cook fish for about 10 minutes per inch of thickness, flipping it halfway through. Using a meat thermometer can also be a lifesaver; fish is perfectly cooked when it reaches an internal temperature of 145°F (63°C).

Another mistake is **insufficient seasoning**. Fish has a delicate flavor that can be enhanced with the right herbs, spices, and marinades. Don’t shy away from experimenting with lemon juice, garlic, fresh herbs, or a sprinkle of sea salt to elevate your dish. Remember, a little seasoning goes a long way, so balance is key.

Additionally, many home cooks neglect **the importance of a hot pan**. Whether you’re grilling or pan-searing, starting with a hot surface ensures a beautiful sear and helps prevent sticking. If you’re using a non-stick skillet, preheat it before adding oil, and if you’re grilling, make sure the grates are preheated and well-oiled to avoid tearing the fish when flipping.

Finally, be mindful of **the quality of your fish**. Freshness matters tremendously when it comes to seafood. Always look for bright, clear eyes, firm flesh, and a mild ocean scent. Avoid purchasing fish that looks dull or has a strong, fishy odor. Sourcing your fish from reputable markets or local fishmongers can make a significant difference in your culinary creation.

By steering clear of these common mistakes, you’ll not only enhance your cooking techniques but also ensure that every fish dish you serve is a delectable masterpiece that will have everyone coming back for seconds!

11. Serving Suggestions: Creating Beautiful Fish Dishes

When it comes to serving fish, presentation is just as important as flavor. A beautifully plated dish not only enhances the dining experience but also elevates the appeal of your culinary creation. Here are some inspiring serving suggestions to help you create stunning fish dishes that will impress your guests and make your meals memorable.

**Colorful Accompaniments**: Start by incorporating a vibrant array of colors on the plate. Use seasonal vegetables such as roasted asparagus, sautéed bell peppers, or a medley of cherry tomatoes to add visual interest. Consider a fresh salad with mixed greens, radishes, and edible flowers to bring freshness and a pop of color to your dish.

**Garnishes and Sauces**: A well-chosen garnish can transform a simple plate into a work of art. Fresh herbs like dill, parsley, or cilantro add a burst of color and a hint of flavor. A drizzle of vibrant sauce, such as a bright green chimichurri or a tangy citrus beurre blanc, can complement the fish beautifully. Remember, a little goes a long way—aim for a delicate touch that enhances rather than overwhelms.

**Textural Contrast**: Introduce contrasting textures to create a more dynamic dish. Pair your flaky, tender fish with crispy elements like fried capers, toasted breadcrumbs, or a sprinkle of crushed nuts. This contrast adds an exciting crunch that will delight your diners and keep them coming back for more.

**Elegant Arrangements**: Pay attention to the arrangement on the plate. Position the fish slightly off-center for a more modern look, and consider using a ring mold for grains or vegetables to create height and structure. Layering elements can add depth, creating a visually appealing stack of flavors.

**Seasonal Themes**: Tailor your serving suggestions to the season or the occasion. In summer, a light, refreshing presentation with citrus and fresh herbs might be ideal. In contrast, a heartier, more comforting dish in winter could feature roasted root vegetables and a rich sauce.

By thoughtfully considering your serving suggestions, you can transform a simple fish dish into an impressive culinary experience. Remember, the goal is not just to satisfy the palate but also to delight the eyes, making every meal a feast for the senses. So, roll up your sleeves, get creative, and let your imagination guide you as you plate your next fish dish!

12. Sustainability in Seafood: Choosing Wisely

In today’s culinary landscape, the call for sustainability extends to every corner of the kitchen, and seafood is no exception. As we savor the ocean’s bounty, it’s essential to prioritize not just taste and freshness, but also the environmental impact of our choices. When selecting fish, consider sourcing options that are both sustainable and ethical. Look for labels such as Marine Stewardship Council (MSC) or Aquaculture Stewardship Council (ASC), which signify that the seafood has been harvested or farmed in ways that maintain healthy fish populations and minimize environmental damage.

Moreover, embracing seasonal seafood can elevate your dishes while supporting local fishing communities. Different species peak at various times of the year, and by aligning your cooking with these natural cycles, you contribute to the health of marine ecosystems.

It’s also beneficial to educate yourself about the fish you choose to cook. Some species, like bluefin tuna and certain shark varieties, are facing significant population declines, while others, such as farmed tilapia or Pacific sardines, are more abundantly available and can be enjoyed guilt-free. Utilize resources like the Seafood Watch app, which provides guidance on making environmentally conscious seafood choices based on your location.

By prioritizing sustainability in your seafood selection, you not only set the stage for flavorful, responsible meals but also play a part in preserving our oceans for future generations. Cooking fish perfectly is not just about technique; it’s also about being mindful of the impact your choices have on the world around you. Savor each bite knowing that you’ve made a wise decision for both your palate and the planet.

13. Fish Cooking Times: A Quick Reference Guide

When it comes to cooking fish, timing is everything. Overcooking can lead to dry, rubbery fillets, while undercooking can leave you with a dish that’s unsafe to eat. To help you master the art of cooking fish perfectly, we’ve put together a quick reference guide that outlines optimal cooking times based on various methods and types of fish.

**Grilling:** For firm, meaty fish such as salmon or swordfish, aim for about 6 to 8 minutes per side over medium heat. If you’re grilling delicate fish like flounder or tilapia, reduce the time to about 3 to 4 minutes per side, keeping a close watch to prevent it from breaking apart.

**Baking:** When baking fish in the oven, a good rule of thumb is to cook at 400°F (200°C) for approximately 10 minutes per inch of thickness. For example, a 1-inch thick piece of cod will need about 10 minutes, while a thicker, 2-inch piece may require up to 20 minutes. Always check for doneness by inserting a fork into the thickest part of the fish; it should flake easily and appear opaque.

**Poaching:** Poaching is a gentle cooking method that can be particularly beneficial for delicate fish. In simmering water or broth, cook fish fillets for about 10 minutes per inch of thickness. For instance, a 1-inch thick piece of sole will typically be ready in about 10 minutes.

**Searing:** Searing fish in a hot pan with a little oil will give you a crisp exterior while keeping the inside tender. Cook fish fillets for about 3 to 4 minutes on each side, depending on thickness. Keep an eye on the edges; when they turn opaque, it’s usually a sign that the fish is close to being done.

**Frying:** For deep-frying, fish should be cooked for about 4 to 6 minutes, depending on the thickness. The batter should be golden brown, and the fish should flake easily with a fork.

Remember, the key to perfect fish is not only timing but also quality. Always start with the freshest fish you can find and use a meat thermometer if you’re unsure. The FDA recommends an internal temperature of 145°F (63°C) for safely cooked fish. With this quick reference guide in hand, you’ll be well on your way to mastering fish cooking times, ensuring your seafood dishes are both delicious and perfectly cooked every time.

14. Pairing Fish with Sides and Wines

Pairing fish with the right sides and wines can elevate your seafood dish from a simple meal to an extraordinary culinary experience. The delicate flavors of fish can be complemented or contrasted beautifully with a variety of accompaniments, enhancing the overall dining experience.

When it comes to sides, consider the texture and flavor profile of the fish you are serving. For lighter, flaky fish like cod or sole, fresh salads or steamed vegetables can provide a refreshing counterbalance. Think of a citrusy arugula salad or sautéed asparagus drizzled with a light vinaigrette that will highlight the fish’s natural flavors without overwhelming them. On the other hand, heartier fish such as salmon or swordfish can stand up to richer sides. Creamy risottos, roasted root vegetables, or a savory potato gratin can create a satisfying harmony on the plate.

Now, let’s talk about wine, which plays a pivotal role in the overall presentation of your meal. A crisp white wine, such as Sauvignon Blanc or Pinot Grigio, pairs wonderfully with lighter fish, enhancing their fresh and delicate taste. These wines often have zesty acidity that can cut through richer sauces or complement a squeeze of lemon on your dish. For those rich, oily fish varieties, a light red like Pinot Noir or a robust white like Chardonnay can create a delightful contrast, bringing out the flavors of both the wine and the fish.

Don’t hesitate to experiment with various regional wines that correspond to the fish you’re cooking. For instance, serving a Mediterranean sea bass with a chilled glass of Verdicchio can transport your taste buds straight to the coastal towns of Italy. Similarly, pairing a spicy blackened catfish with a slightly sweet Riesling can create an exciting flavor explosion.

Ultimately, pairing fish with the right sides and wines is about balance, bringing together complementary flavors that create a memorable dining experience. So, the next time you prepare a fish dish, take a moment to consider the perfect accompaniments, and watch as your meal transforms into a delightful feast for the senses.

15. Conclusion: Embracing the Ocean’s Bounty in Your Kitchen

As we reach the conclusion of our culinary journey through the waves, it’s clear that cooking fish is not just a technique; it’s an art that embraces the essence of the ocean’s bounty. With every fillet, you have the opportunity to celebrate the delicate flavors, vibrant textures, and nutritional benefits that seafood offers. By mastering the techniques we’ve explored—whether it’s the subtle finesse of poaching, the crispy allure of pan-searing, or the smoky richness of grilling—you can unlock a world of culinary possibilities that will elevate your dishes and impress your guests.

But beyond the methods lies a deeper connection to the ingredients themselves. Embracing sustainable sourcing, understanding the seasonal availability of different types of fish, and respecting the environment from which they come is essential in today’s cooking landscape. Each time you prepare a fish dish, you are partaking in a tradition that spans cultures and generations, celebrating the ocean’s treasures and the communities that rely on them.

So, as you step into your kitchen, remember to savor every moment. Allow the fresh scents of the sea to inspire you, experiment with flavors, and don’t shy away from making mistakes—they are often the stepping stones to culinary mastery. Whether you’re preparing a simple weeknight dinner or an elaborate feast for friends, the ocean’s bounty is waiting to be embraced, inviting you to create delicious memories with every meal. Dive in, have fun, and let the magic of cooking fish transform your kitchen into a seaside haven!

As we conclude our culinary journey through the depths of the ocean, we hope you feel inspired and equipped to elevate your fish-cooking skills to new heights. Mastering the art of cooking fish perfectly is not just about technique; it’s about embracing the flavors of the sea and bringing them to life on your plate. Whether you choose to grill, steam, pan-sear, or bake, the techniques we’ve shared will help you create mouthwatering dishes that celebrate the freshness and versatility of seafood. So, gather your ingredients, unleash your creativity, and savor the delightful tastes of your culinary creations. Here’s to many delicious meals ahead—may each bite be a reminder of the ocean’s bounty! Happy cooking!

What are the best tips for making delicious pasta?

There is something undeniably comforting about a plate of homemade pasta—its rich texture and fresh flavors can transform an ordinary meal into an extraordinary experience.

In a world where convenience often takes precedence, the artistry of crafting your own pasta can seem daunting, yet the rewards are immeasurable. Whether you’re twirling spaghetti around your fork or savoring the delicate folds of ravioli, mastering the art of pasta-making opens up a world of culinary creativity. In this blog post, we will share top tips that will guide you through the process of making delicious homemade pasta from scratch. From choosing the right ingredients and mastering the dough to perfecting cooking techniques and exploring inventive sauces, join us on this flavorful journey to elevate your pasta game and impress your family and friends with mouthwatering dishes that celebrate the timeless tradition of Italian cuisine.

1. Introduction to Homemade Pasta

What are the best tips for making delicious pasta?
Credit : whatcanu.com

When it comes to Italian cuisine, few things evoke the same joy and satisfaction as a plate of homemade pasta. The very act of creating your own pasta from scratch transforms a simple meal into a labor of love, bringing the kitchen to life with the comforting aroma of flour and eggs blending together. Homemade pasta is not only a testament to culinary skill but also a delightful experience that allows you to connect with your food in a way that store-bought options simply cannot match.

The beauty of homemade pasta lies in its versatility. Whether you prefer the delicate strands of fettuccine, the pillowy softness of gnocchi, or the rustic charm of pappardelle, the possibilities are endless. With just a handful of basic ingredients—flour, eggs, and a pinch of salt—you can embark on a culinary adventure that will elevate your dishes and impress your family and friends.

Moreover, making pasta at home offers an opportunity to customize flavors and textures to suit your taste. Want to infuse your dough with vibrant spinach or rich beetroot? Go for it! Craving a hint of nuttiness? Try substituting some of the all-purpose flour with semolina. The process of kneading the dough, rolling it out, and cutting it into your desired shape can be incredibly therapeutic, allowing you to unleash your creativity in the kitchen.

In this guide, we will explore the essential techniques, tips, and tricks for mastering homemade pasta. From the foundational skills of mixing and kneading to the art of shaping and cooking, we will equip you with everything you need to create delectable pasta dishes that will leave your taste buds dancing. So, roll up your sleeves, dust off your countertop, and get ready to dive into the wonderful world of homemade pasta!

2. Essential Ingredients for Perfect Pasta

When it comes to mastering the art of homemade pasta, the quality of your ingredients can make all the difference. While the recipe may seem simple, the right components elevate your dish from ordinary to exceptional. Here are the essential ingredients you need to create perfect pasta every time:

**1. Flour:** The cornerstone of any pasta dish, flour plays a crucial role in determining the texture and flavor of your noodles. For traditional Italian pasta, “00” flour is often preferred due to its fine grind and high protein content, which yields a silky, elastic dough. However, semolina flour can also be used for a firmer bite, particularly in shapes like gnocchi or orecchiette. Experimenting with a blend of these flours can lead to a pasta that’s uniquely yours.

**2. Eggs:** Fresh eggs are another key ingredient, especially for rich, egg-based pasta like tagliatelle or fettuccine. The yolks lend a beautiful golden hue and enhance the pasta’s flavor, while the whites help bind the dough. If you’re looking for a vegan alternative, you can substitute eggs with water and a touch of olive oil, although the texture will differ slightly.

**3. Salt:** It may seem like a minor addition, but salt is essential for enhancing the flavor of your pasta. When making the dough, a pinch of salt will bring out the natural flavors of the ingredients. Additionally, don’t forget to season your cooking water generously before adding the pasta—it should taste like the sea. This ensures that every bite is seasoned to perfection.

**4. Water:** The binding agent in your pasta dough, the water should be added gradually to achieve the right consistency. Use room temperature water for a smoother dough, and adjust the amount based on the humidity and flour type. Remember, it’s easier to add a little more water than to fix a too-wet dough!

**5. Olive Oil:** While not always necessary, a drizzle of high-quality extra virgin olive oil can lend richness to your dough and prevent it from becoming too sticky. It also adds a lovely flavor that complements many pasta dishes.

By focusing on these essential ingredients, you’ll set a solid foundation for your homemade pasta-making journey. Remember, the beauty of pasta lies in its simplicity, so choose the best ingredients you can find and treat them with care. With practice and passion, your homemade pasta will become the star of your dining table.

3. Choosing the Right Flour: Semolina vs. All-Purpose

What are the best tips for making delicious pasta?
Credit : whatcanu.com

When it comes to crafting the perfect pasta from scratch, the choice of flour can make all the difference. Two of the most common options are semolina flour and all-purpose flour, each bringing its own unique qualities to the table. Understanding these differences is key to mastering your homemade pasta.

**Semolina Flour** is a coarser flour made from durum wheat, and it’s the traditional choice for pasta-making. Its high protein content and robust gluten structure give pasta a firm texture that holds up beautifully during cooking. When you use semolina, your pasta will have a slightly yellow hue and a delightful bite, making it perfect for dishes like lasagna, fettuccine, or gnocchi. Additionally, the grainy texture of semolina helps absorb sauces better, resulting in a more flavorful dish.

On the other hand, **All-Purpose Flour** is a versatile staple in most kitchens, suitable for a variety of baking tasks, including pasta. While it lacks the same high protein levels as semolina, all-purpose flour can still yield tender pasta with a softer mouthfeel. This type of flour is ideal for lighter pasta dishes, such as delicate ravioli or thinner sheets for lasagna, where a softer texture is desired.

When deciding which flour to use, consider the type of pasta you want to create and the desired texture. For a more traditional, hearty pasta that stands up to rich sauces, semolina is your best bet. If you’re looking for something lighter or are working with a specific recipe, all-purpose flour can serve you well.

In the quest for the perfect pasta, don’t shy away from experimenting. You might even find that a blend of both flours offers the ideal balance, providing a unique texture and flavor profile that elevates your homemade dishes to new heights. With the right flour in your pantry, you’re well on your way to mastering the art of pasta-making!

4. The Importance of Fresh Eggs in Pasta Making

When it comes to making homemade pasta, the quality of your ingredients can make all the difference, and none are more crucial than fresh eggs. Using fresh eggs in your pasta dough not only enhances the flavor but also significantly improves the texture and color of your final product. The vibrant, golden yolks contribute a richness that elevates your pasta to restaurant-quality levels, creating a beautiful hue that can turn even the simplest dish into a feast for the eyes.

Fresh eggs contain a higher moisture content, which means they integrate seamlessly into the flour, resulting in a silky, pliable dough that’s easy to work with. This elasticity is key for achieving that perfect bite, allowing your pasta to hold its shape while cooking and providing a delightful chewiness that dried pasta simply can’t replicate. Additionally, the proteins in fresh eggs help to create a sturdy structure, giving your pasta the resilience it needs to hold up under sauces or when baked in dishes like lasagna.

Moreover, the nutritional benefits of fresh eggs cannot be overlooked. Packed with protein, vitamins, and minerals, they make your homemade pasta not only more flavorful but also more nourishing. When you crack open a fresh egg, you’ll notice the vibrant color and firm texture of the yolk, indicators of the quality and freshness that will translate directly into your pasta.

To truly embrace the art of pasta making, consider sourcing your eggs from local farms or farmers’ markets. Not only will you support local agriculture, but you’ll also be rewarded with eggs that are often fresher and richer in flavor than those found in grocery stores. In the realm of pasta making, embracing fresh eggs is not just a tip; it’s a game-changer that can transform your culinary creations into something truly special. So, the next time you roll up your sleeves to make pasta, remember: fresh eggs are your best friend in the kitchen!

5. Step-by-Step Guide to Making Fresh Pasta Dough

What are the best tips for making delicious pasta?
Credit : whatcanu.com

Making fresh pasta dough at home can be a rewarding experience, and with the right technique, it’s easier than you might think! Here’s a step-by-step guide to help you create the perfect pasta dough that will elevate your homemade dishes to a whole new level.

**Step 1: Gather Your Ingredients**
start with high-quality ingredients for the best results. You’ll need 2 cups of all-purpose flour (or semolina flour for a firmer texture), 3 large eggs, a pinch of salt, and a drizzle of olive oil for added richness. You can use a clean countertop or a large mixing bowl as your workspace.

**Step 2: Create a Flour Well**
Pour the flour onto your countertop or into your bowl and form it into a mound. Make a deep well in the center, ensuring the walls are thick enough to hold the eggs without spilling. This is where the magic begins!

**Step 3: Add the Eggs and Salt**
Crack the eggs into the well and sprinkle a pinch of salt over them. If you’re using olive oil, drizzle a small amount in as well. Using a fork, gently beat the eggs, gradually incorporating the flour from the edges of the well. Be patient, as this will take a little time!

**Step 4: Knead the Dough**
Once the mixture starts coming together, use your hands to form it into a rough ball. Transfer the dough to a lightly floured surface and begin kneading. Press down and fold the dough over itself with the heel of your hand, turning it a quarter turn after each fold. Knead for about 8-10 minutes until the dough is smooth and elastic. If it’s too sticky, sprinkle a little more flour as needed.

**Step 5: Rest the Dough**
Wrap your dough ball in plastic wrap or place it in a bowl covered with a damp cloth. Let it rest for at least 30 minutes at room temperature. This resting period is crucial as it allows the gluten to relax, making the dough easier to roll out.

**Step 6: Roll Out Your Dough**
After resting, divide the dough into manageable pieces. Using a rolling pin or a pasta machine, roll out each piece to your desired thickness. Dust with flour to prevent sticking and ensure a smooth surface.

**Step 7: Cut and Shape**
Now comes the fun part! Depending on your pasta preference, you can cut your sheets into tagliatelle, fettuccine, or even lasagna sheets. For stuffed pasta like ravioli or tortellini, use a round cutter to create circles, fill them with your favorite fillings, and seal the edges tightly.

**Final Touch: Cooking Your Fresh Pasta**
Bring a large pot of salted water to a rolling boil. Fresh pasta cooks quickly, usually in just 2-4 minutes, so keep an eye on it. Once it floats to the surface, it’s ready! Pair your fresh pasta with a delicious sauce, and watch as your homemade dish wows family and friends.

With these simple steps, making fresh pasta dough at home is an enjoyable process that yields delicious results. Embrace the art of pasta-making, and you’ll find yourself creating mouthwatering dishes that are sure to impress!

6. Rolling Techniques: Hand-Rolled vs. Pasta Machine

When it comes to crafting the perfect pasta, the rolling technique you choose can significantly impact the texture and quality of your final dish. Both hand-rolling and using a pasta machine have their unique advantages, and understanding these can help you decide which method suits your culinary style best.

**Hand-Rolled Pasta**

Hand-rolling pasta is an age-old technique that connects you with the traditions of Italian cooking. It requires a bit more effort and practice, but the rewards are well worth it. When you roll out the dough by hand, you have greater control over its thickness and consistency. Using a simple rolling pin, you can achieve a rustic, artisanal feel that many chefs and home cooks cherish.

The tactile experience of kneading the dough, feeling its texture, and rolling it out with your own hands can be immensely satisfying. Plus, hand-rolled pasta tends to have slight irregularities that can add charm and character to your dishes. It’s perfect for those who love to embrace the craft of cooking and appreciate the subtle nuances that come with it.

**Pasta Machine**

On the other hand, a pasta machine can be a real game changer for those looking for speed and precision. With adjustable rollers, you can achieve uniform thickness with minimal effort, which is particularly beneficial when making delicate pasta types like lasagna sheets or ravioli. A pasta machine also reduces the physical exertion involved, making it easier for anyone to produce consistent results.

Using a machine can also save time, especially when preparing large batches of pasta. The efficient rolling process allows you to focus on other aspects of your meal, such as preparing sauces or filling. Additionally, many pasta machines come equipped with various attachments, enabling you to create an array of pasta shapes, from fettuccine to tagliatelle, with ease.

Ultimately, the choice between hand-rolling and using a pasta machine boils down to personal preference. If you relish the hands-on experience and authenticity of traditional methods, hand-rolling may be your go-to. However, if convenience and speed are your priorities, a pasta machine can help you whip up delicious homemade pasta in no time. Regardless of your choice, both methods can lead to mouthwatering results that are sure to impress family and friends alike.

7. Shaping Your Pasta: Fettuccine, Ravioli, and More

What are the best tips for making delicious pasta?
Credit : whatcanu.com

Shaping your pasta is where the magic truly happens, transforming simple dough into an array of delightful forms that can elevate your homemade dishes from ordinary to extraordinary. The process can be both an art and a science, allowing you to experiment with various shapes and sizes to find what resonates best with your palate.

**Fettuccine** is a classic choice, perfect for capturing rich sauces. To create this beloved flat noodle, roll out your pasta dough into a thin sheet using a pasta machine or a rolling pin. Once you’ve achieved a uniform thickness, dust the surface with a little flour to prevent sticking, and gently fold the sheet over itself a few times. With a sharp knife or a pizza cutter, slice the dough into strips about 1/4 inch wide. Unravel the strands and hang them on a pasta drying rack or lay them flat, ensuring they don’t stick together. The result? Perfectly formed fettuccine that’s ready to pair with creamy Alfredo or vibrant marinara.

If you’re feeling adventurous, try your hand at **ravioli**. This stuffed pasta is a canvas for your culinary creativity. Start by rolling out two sheets of pasta dough, ensuring they’re thin enough for delicate bites but sturdy enough to hold fillings. Use a cookie cutter or a glass to cut out circles or squares from one sheet. Place a spoonful of your desired filling—be it ricotta and spinach, mushroom duxelles, or a savory meat mixture—onto the center of each shape. Moisten the edges with water, then carefully place the second sheet on top and press around the filling to seal. Don’t forget to crimp the edges with a fork for an elegant touch!

Other shapes to explore include **farfalle**, often referred to as “bow-tie” pasta, which can be created by cutting the rolled dough into rectangles, pinching the center to form the iconic shape. Or consider **gnocchi**, which involves rolling small pieces of dough into logs and cutting them into bite-sized pillows before gently indenting them with a fork for that classic texture.

As you experiment with these shapes, remember that the key to success lies in practice and patience. Each pasta form has its unique allure and culinary purpose, and mastering them will not only enhance your dishes but also deepen your appreciation for this timeless craft. So, roll up your sleeves, gather your ingredients, and let your creativity flow—delicious homemade pasta is just a shape away!

8. Cooking Pasta: Tips for the Perfect Al Dente Texture

Achieving the perfect al dente texture is one of the hallmarks of mastering pasta, elevating your homemade dishes from good to extraordinary. Al dente, meaning “to the tooth” in Italian, describes pasta that is cooked to be firm yet tender, providing a delightful bite that complements sauces beautifully. Here are some essential tips to ensure your pasta reaches that ideal state.

First and foremost, the choice of pasta is crucial. Fresh pasta cooks more quickly than dried varieties, so be mindful of the cooking times provided on the package. Regardless of the type, always refer to the recommended cooking time, but remember to start testing a minute or two early. This proactive approach allows you to catch your pasta right at the moment it transitions from firm to perfectly al dente.

Next, the pot of water is your pasta’s first home, and it deserves your attention. Fill a large pot with plenty of water—at least four to six quarts for every pound of pasta—and bring it to a rolling boil. The abundance of water helps prevent the pasta from sticking together and ensures even cooking. Don’t forget to season the water generously with salt; it should taste like the sea. This is your opportunity to infuse flavor right into the pasta itself.

When the water is boiling vigorously, add the pasta and give it a gentle stir to keep it from clumping. As the pasta cooks, taste it periodically, starting about two minutes before the package’s suggested cooking time. A perfectly cooked piece should feel firm when bitten but should also yield slightly under pressure. For a more precise approach, you can use a kitchen timer to keep track of your cooking time, but ultimately, your taste buds are your best guide.

Once your pasta reaches that ideal al dente texture, it’s time to drain, but don’t rinse! Rinsing washes away the starch that helps sauces adhere to the noodles. Instead, reserve a cup of the starchy pasta water before draining; this liquid can be a game-changer for adjusting the consistency of your sauce.

Finally, toss the drained pasta with your sauce immediately in a hot pan. This technique allows the pasta to absorb the flavors of the sauce while maintaining that desired bite. If the sauce is too thick, add a splash of the reserved pasta water to achieve your perfect consistency.

By following these tips, not only will you master the art of cooking pasta, but you’ll also impress your family and friends with dishes that boast the delightful texture and authentic flavor of Italian cuisine. With practice, you’ll find it second nature to achieve that perfect al dente bite every time. Happy cooking!

9. Flavoring Your Pasta: Infusions and Additives

When it comes to elevating your homemade pasta, flavoring is the secret ingredient that can transform a simple dish into a culinary masterpiece. Infusions and additives are your best friends in this endeavor, allowing you to play with taste, aroma, and even color to create a dining experience that excites the palate.

**Infusions** are a delightful way to introduce new flavors directly into your pasta dough. One of the simplest methods is to infuse your water with ingredients like garlic, herbs, or even vegetables. For instance, boiling your pasta in water infused with fresh basil or rosemary can impart a subtle, aromatic quality that pairs beautifully with a light olive oil or cream sauce. You can even experiment with vegetable juices, such as beet or spinach, to create vibrant-colored pasta that tastes as good as it looks.

**Additives** offer another layer of flavor that can be incorporated directly into the dough. Consider adding a splash of olive oil or a pinch of sea salt to your pasta mixture for a richer taste. For those looking to spice things up, a dash of crushed red pepper flakes or a sprinkle of grated Parmesan cheese can add depth and complexity. If you’re feeling adventurous, try mixing in pureed sun-dried tomatoes or roasted garlic for a burst of flavor that will make your pasta stand out.

Don’t forget about the finishing touches! Tossing your freshly cooked pasta with a drizzle of flavored oil—like garlic-infused or chili oil—can enhance the dish’s overall taste. Alternatively, tossing in fresh herbs just before serving can add a bright, fresh note that elevates the entire meal.

By exploring the world of infusions and additives, you can master the art of flavoring your pasta, ensuring that every bite is a delicious revelation. Whether you’re aiming for a classic Italian dish or something uniquely your own, the possibilities are endless, and your taste buds are sure to thank you!

10. Sauces that Elevate Your Homemade Pasta

When it comes to homemade pasta, the sauce is where the magic truly happens. A well-crafted sauce can elevate a simple dish into a culinary masterpiece, offering layers of flavor that dance harmoniously with your freshly made noodles. The beauty of pasta lies in its versatility, and the right sauce can transform it into a hearty meal, a light refreshment, or an indulgent treat.

Start with the classics: a rich marinara bursting with the freshness of ripe tomatoes, garlic, and a hint of basil can make your spaghetti sing. For something creamier, consider a luscious Alfredo sauce, made from butter, heavy cream, and Parmesan cheese, which clings beautifully to fettuccine and offers a satisfyingly decadent experience. If you’re looking to impress, a homemade pesto is a fantastic choice. With its vibrant green hue and aromatic blend of basil, garlic, pine nuts, and olive oil, this sauce not only tastes divine but also adds a pop of color to your plate.

Don’t shy away from experimenting with the unexpected, either. A tangy lemon and caper sauce can brighten up a dish of linguine, while a robust ragù, simmered slowly with tender meats and aromatic vegetables, brings warmth and heartiness to your table. For those craving a touch of elegance, a saffron-infused sauce can provide a luxurious twist, lending a unique flavor profile that complements delicate pasta shapes like tagliatelle or pappardelle.

Remember, the key to a great sauce is balance. Ensure that it harmonizes with the pasta’s texture and flavor without overpowering it. For instance, lighter sauces pair beautifully with thinner noodles, while heartier sauces can stand up to thicker, more substantial shapes. By paying attention to these details and selecting high-quality ingredients, you can create sauces that not only enhance your homemade pasta dishes but also leave a lasting impression on your diners. So, roll up your sleeves, gather your ingredients, and let your creativity flow as you master the art of pasta sauces!

11. Pairing Pasta with the Right Ingredients

Pairing pasta with the right ingredients is an essential skill that can elevate your homemade dishes from simple to spectacular. The beauty of pasta lies not only in its variety but also in its versatility; it can be a canvas for an array of flavors, textures, and aromas. Understanding how to match pasta shapes with complementary ingredients is the key to achieving a harmonious dish that delights the palate.

Start by considering the shape and texture of your pasta. For instance, delicate angel hair or thin spaghetti pairs beautifully with light, oil-based sauces or fresh herb-infused dressings, allowing the subtle flavors to shine through without overwhelming the dish. On the other hand, robust shapes like penne or rigatoni can hold up to heartier sauces, such as rich meat ragu or creamy Alfredo, their ridges and hollows capturing every bit of flavor.

Don’t overlook the importance of seasonal ingredients. Fresh vegetables, herbs, and proteins can make a significant difference in the overall taste of your pasta dish. In the summer, toss your pasta with fresh cherry tomatoes, basil, and a drizzle of olive oil for a refreshing take. In the colder months, consider hearty root vegetables and winter greens, sautéed with garlic and tossed with your pasta for a comforting meal.

Additionally, consider the balance of flavors. A sprinkle of salty cheese, like Pecorino Romano or Parmesan, can add depth to a dish, while a touch of acidity from lemon juice or a vinegar-based dressing can brighten up rich sauces. Experiment with different textures, too—adding crunchy elements like toasted nuts or crispy breadcrumbs can create a delightful contrast that keeps each bite interesting.

Ultimately, the magic of pasta lies in its ability to adapt and shine with the right pairings. By thoughtfully selecting your ingredients, you can create pasta dishes that not only satisfy but also leave a lasting impression on your family and friends, making every meal a celebration of flavor and creativity.

12. Storing and Freezing Homemade Pasta

Storing and freezing homemade pasta is an essential skill that can help you make the most of your culinary creations, ensuring you have fresh, delicious pasta ready to cook whenever the craving strikes. After investing time and effort into crafting your pasta from scratch, it’s vital to know how to preserve that flavor and texture for later enjoyment.

Once your pasta is made, whether it’s delicate fettuccine, hearty lasagna sheets, or whimsical farfalle, you’ll want to ensure it’s dried properly before storage. Lay the pasta strands in a single layer on a floured surface or a drying rack, allowing them to air dry for about 30 minutes. This step helps prevent the noodles from sticking together and preserves their integrity when stored.

For short-term storage, fresh pasta can be placed in an airtight container and kept in the refrigerator for up to two days. Be sure to sprinkle a bit of flour between layers to keep them from clumping. Alternatively, if you want to stock up for future meals, freezing is the way to go.

To freeze your pasta, first, let it dry slightly, as mentioned earlier, then arrange it in a single layer on a baking sheet and place it in the freezer for about 30 minutes. This method, known as flash freezing, prevents the pasta from sticking together in one big lump. Once frozen, transfer the pasta to a resealable freezer bag, removing as much air as possible to prevent freezer burn. Label the bag with the date, and enjoy your homemade pasta for up to three months!

When you’re ready to cook your frozen pasta, there’s no need to thaw it beforehand. Simply bring a pot of salted water to a rolling boil and drop the frozen pasta directly into the pot. Cook for a minute or two longer than you would fresh pasta, and you’ll have a delightful meal ready in no time.

With proper storage and freezing techniques, you can enjoy the fruits of your labor long after the dough has been rolled and cut, making homemade pasta an even more rewarding endeavor.

13. Common Mistakes to Avoid in Pasta Making

When it comes to mastering the art of pasta making, avoiding common pitfalls can mean the difference between a mediocre dish and a culinary masterpiece. Here are some frequent mistakes that home cooks often make, along with tips on how to steer clear of them.

Firstly, many novice pasta makers underestimate the importance of using the right flour. While all-purpose flour is handy, opting for a high-quality semolina or ’00’ flour can significantly enhance the texture and flavor of your dough. These flours contain a higher protein content, which contributes to a firmer structure and allows for better absorption of sauces.

Another common error is neglecting to measure ingredients accurately. Pasta making is as much a science as it is an art; a slight imbalance in flour to liquid ratio can lead to a dough that is either too dry and crumbly or too sticky and unmanageable. Always weigh your ingredients for the best results and consider adjusting based on environmental factors like humidity.

Additionally, many enthusiasts make the mistake of rushing the resting phase. After kneading, it’s crucial to let your dough rest, allowing the gluten to relax. This resting period results in a more pliable dough that’s easier to roll out. Skipping this step can lead to pasta that tears easily or doesn’t hold its shape when cooked.

Another pitfall lies in cooking the pasta. Overcooking is a common issue; remember that fresh pasta cooks much faster than dried varieties. Keep an eye on it as it boils, and taste a strand a minute or two before the recommended cooking time to achieve that perfect al dente texture.

Lastly, don’t forget to generously salt your pasta water. This is your opportunity to infuse flavor directly into the pasta itself, making a noticeable difference in the final dish. A common rule of thumb is to use enough salt that the water tastes like the sea.

By being mindful of these common mistakes, you can elevate your pasta-making skills and create delicious, homemade dishes that will impress family and friends alike. Embrace the learning process, take your time, and soon you’ll be crafting pasta that rivals that of the finest Italian trattorias.

14. Exploring Regional Pasta Dishes from Italy

Italy, a country renowned for its rich culinary heritage, boasts a stunning array of regional pasta dishes that reflect the diverse landscapes, climates, and traditions of its various provinces. Each region has its own unique take on pasta, utilizing local ingredients and time-honored techniques, making the exploration of these dishes not just a feast for the palate but also a journey through the heart of Italian culture.

In the northern regions, such as Lombardy and Piedmont, you’ll find creamy, buttery sauces that pair beautifully with stuffed pastas like ravioli and tortellini. The exquisite *Tortellini in Brodo*, for example, features delicate meat-filled pasta served in a savory broth, a comforting dish that warms both body and soul during the cooler months.

Travel south to Emilia-Romagna, the birthplace of some of Italy’s most beloved pasta, including *Tagliatelle al Ragù* (better known as Bolognese). Here, the rich, slow-cooked meat sauce clings to the long, flat noodles, creating a hearty meal that speaks to the region’s tradition of culinary excellence. The use of fresh eggs in the pasta dough adds a luxurious touch that elevates this dish to the next level.

In contrast, the coastal regions like Campania and Sicily bring a burst of vibrancy with their seafood pastas. Dishes like *Spaghetti alle Vongole* (spaghetti with clams) showcase the simplicity and freshness of local ingredients, allowing the flavors of the sea to shine through. With a drizzle of olive oil, a sprinkle of parsley, and a hint of garlic, this dish captures the essence of coastal living.

Don’t overlook the southern regions, where you’ll find bold flavors and hearty ingredients. In Calabria, for instance, the famed *Fileja* pasta is often served with spicy ‘nduja sausage, a spreadable salami that adds depth and heat to the dish. The combination of robust flavors and artisanal pasta showcases the region’s passion for cooking.

As you embark on your journey to master homemade pasta, take the time to explore these regional dishes. Not only will you expand your culinary repertoire, but you’ll also gain an appreciation for the rich traditions that have shaped Italian cuisine over centuries. By incorporating these authentic flavors and techniques into your cooking, you’ll bring a taste of Italy to your table, along with the warmth and joy that comes from sharing beloved family recipes. So grab your apron and get ready to savor the delightful world of regional Italian pasta!

15. Conclusion: The Joy of Sharing Homemade Pasta

In conclusion, the joy of sharing homemade pasta transcends mere nourishment; it is an experience that weaves together moments of laughter, love, and connection. The act of crafting pasta from scratch is not only an artistic endeavor but also a way to cultivate memories with family and friends. As you roll out the dough, cut the fettuccine, or shape the gnocchi, you’re not just preparing a meal; you’re creating a centerpiece for gatherings that invite warmth and togetherness.

Imagine the scene: a beautifully set table adorned with freshly made pasta in vibrant sauces, surrounded by loved ones eagerly sharing stories and savoring each bite. The aroma of garlic and herbs wafts through the air, mingling with the sound of clinking glasses and joyful chatter. Each dish you serve becomes a conversation starter, a testament to your efforts and a celebration of homemade goodness.

Moreover, making pasta from scratch offers a unique opportunity to experiment with flavors and textures, allowing you to tailor your creations to personal tastes and dietary preferences. Whether you’re crafting a rich, creamy Alfredo or a light, herb-infused primavera, the versatility of pasta means there’s something for everyone to enjoy.

So, embrace the artistry of pasta-making and invite others into your kitchen. Share your culinary triumphs, teach your friends the techniques you’ve learned, and pass down family recipes that hold sentimental value. In doing so, you’re not just feeding appetites; you’re nourishing relationships and creating lasting traditions. After all, the best meals are those enjoyed together, and there’s nothing quite like the joy of sharing a plate of homemade pasta with the people who mean the most to you.

As we wrap up our exploration of mastering pasta, we hope you feel inspired and equipped to create delicious homemade dishes that will delight your taste buds and impress your loved ones. From selecting the right flour and mastering dough techniques to experimenting with sauces and fresh ingredients, each step in the process brings you closer to pasta perfection. Remember, the beauty of cooking lies in its ability to bring people together, so don’t hesitate to invite family and friends to join you in the kitchen. With a sprinkle of creativity and a dash of passion, you can transform simple ingredients into culinary masterpieces. We can’t wait to hear about your pasta-making adventures, so be sure to share your favorite recipes and tips with us! Happy cooking!

What are the best ways to make homemade soup?

As the chill of autumn creeps in and winter settles over us, there’s nothing quite like a steaming bowl of soup to soothe the soul and warm the body.

The simple act of ladling a rich, fragrant broth over fresh ingredients has a unique way of transforming a cold day into a cozy experience. In this post, we’ll explore ten delicious homemade soup recipes that are not only easy to prepare but also packed with flavors that will comfort and nourish you from the inside out. From hearty classics like creamy tomato basil and savory chicken noodle to innovative blends like roasted butternut squash and spicy lentil, each recipe is designed to bring warmth to your table and joy to your palate. So grab your favorite pot, gather your ingredients, and let’s dive into a world of comforting soups that are sure to become staples in your kitchen!

1. Introduction: The Comfort of Homemade Soup

What are the best ways to make homemade soup?
Credit : whatcanu.com

As the crisp air of autumn sets in and the days grow shorter, there’s nothing quite like a bowl of homemade soup to provide warmth and comfort. Soup has a unique ability to evoke nostalgia, drawing us back to cherished memories of family gatherings and cozy evenings spent around the kitchen table. The gentle simmering sounds, the aromatic scents wafting through the air, and the vibrant colors bubbling in a pot all combine to create an inviting atmosphere that wraps us in a sense of security and happiness.

Homemade soup is more than just a meal; it’s a labor of love that allows for creativity and personalization. With countless ingredients and flavor combinations at your disposal, each recipe can be tailored to suit your taste preferences and dietary needs. Whether you prefer a rich, creamy bisque, a hearty vegetable medley, or a spicy chili, there’s a soup for every palate, mood, and occasion.

In this blog post, we’ll explore ten delicious homemade soup recipes that are not only easy to prepare but also brimming with nourishing ingredients. From classic favorites to innovative twists, these soups are designed to warm your soul, nourish your body, and bring a smile to your face. So grab your favorite pot, gather your ingredients, and let’s dive into the world of comforting homemade soup that is sure to fill your kitchen with delightful aromas and your heart with warmth.

2. Classic Chicken Noodle Soup

When the chill of winter settles in or a rainy day calls for comfort, nothing quite compares to a steaming bowl of Classic Chicken Noodle Soup. This timeless dish is a symphony of flavors and textures, beginning with tender morsels of chicken simmered to perfection in a rich, savory broth. The aroma wafting through your kitchen as the broth bubbles is enough to warm your heart even before you take the first sip.

To create this soul-soothing masterpiece, start by sautéing a medley of onions, carrots, and celery—often referred to as mirepoix—until they soften and release their natural sweetness. The vibrant colors of the vegetables mingle in the pot, creating a beautiful base for your soup. Next, add chicken thighs or breasts, allowing them to infuse the broth with their savory essence as they cook to juicy perfection.

Once the chicken is tender, it’s time to add the star of the show: noodles. Wide egg noodles are a classic choice, providing a delightful chew that contrasts beautifully with the tender chicken and crisp vegetables. As they cook in the broth, they absorb all the delicious flavors, expanding to create a hearty meal.

Finish off your Classic Chicken Noodle Soup with a sprinkle of fresh herbs—like parsley or thyme—to elevate the dish with a burst of freshness. Serve it hot, garnished with a slice of crusty bread or a warm biscuit, and watch as your loved ones gather around the table, eager to savor each comforting bite. With its nourishing qualities and straightforward preparation, this soup is sure to become a beloved staple in your home, warming both body and soul with every spoonful.

3. Creamy Tomato Basil Soup

What are the best ways to make homemade soup?
Credit : whatcanu.com

### 3. Creamy Tomato Basil Soup

Nothing embodies comfort quite like a steaming bowl of Creamy Tomato Basil Soup. This classic recipe combines the vibrant sweetness of ripe tomatoes with the fresh, aromatic notes of basil, creating a rich and satisfying dish that is both nourishing and indulgent.

Start by sautéing chopped onions and garlic in a splash of olive oil, allowing their fragrant aroma to fill your kitchen. As they soften, add in ripe, diced tomatoes—preferably vine-ripened for their superior flavor. A sprinkle of salt will help draw out their natural sweetness, while a touch of sugar can balance any acidity. For a depth of flavor, toss in a bay leaf and a pinch of red pepper flakes to awaken your taste buds.

As the tomatoes simmer, you can transform this soup into a creamy delight. Blend in a generous splash of heavy cream or a dollop of crème fraîche for a velvety texture that coats your palate with warmth. If you prefer a lighter option, a splash of coconut milk or a blend of cashews and water can yield a similarly luscious result while keeping it dairy-free.

The final flourish comes from a handful of fresh basil leaves, torn just before adding them to the pot, allowing their vibrant green color and intense fragrance to infuse the soup. Simmer for a few more minutes, letting the flavors meld together, then remove the bay leaf and blend until smooth.

Serve your Creamy Tomato Basil Soup hot, garnished with a drizzle of olive oil, a sprinkle of freshly cracked black pepper, and a few more basil leaves for that picturesque finish. Pair it with a crusty piece of garlic bread or a grilled cheese sandwich for the ultimate soul-warming meal. This delightful soup is not just a dish; it’s a hug in a bowl, perfect for cozy nights in or when you need a little extra comfort. Enjoy each spoonful as it warms both your body and your spirit!

4. Hearty Vegetable Minestrone

Hearty Vegetable Minestrone is a vibrant symphony of flavors and textures that encapsulates the essence of comfort food. This rustic Italian soup is brimming with a medley of seasonal vegetables, tender beans, and wholesome pasta, all simmered in a rich, savory broth.

Imagine a bubbling pot filled with colorful carrots, zucchini, and green beans, their natural sweetness enhanced by the aromatic notes of garlic and onion. As the vegetables soften, you can add in fresh tomatoes, bursting with juiciness, to create a robust base. The addition of cannellini beans not only adds a creamy texture but also packs a protein punch, making this soup as filling as it is nutritious.

A handful of small pasta shapes, like ditalini or elbow macaroni, adds the perfect heartiness, soaking up the flavors of the broth. For that extra touch of authenticity, a sprinkle of Italian herbs—such as basil and oregano—infuses the dish with a fragrant aroma that will have your family flocking to the kitchen.

As it simmers, the wonderful mingling of flavors creates a dish that is not just a meal, but a warm embrace in a bowl. Serve your Hearty Vegetable Minestrone with a drizzle of good-quality olive oil and a generous sprinkle of freshly grated Parmesan cheese for a delightful finish. This soup is perfect for chilly evenings or whenever you need a comforting reminder of home, nourishing your body and soul with each delightful spoonful.

5. Savory Beef Barley Soup

What are the best ways to make homemade soup?
Credit : whatcanu.com

When the chilly winds of winter sweep in and the days grow shorter, there’s nothing quite like a warm bowl of Savory Beef Barley Soup to restore your spirits and warm your soul. This hearty dish is a comforting classic that combines tender chunks of beef, earthy barley, and a medley of flavorful vegetables, creating a symphony of textures and tastes in every spoonful.

Imagine the rich aroma of beef simmering slowly in a pot, mingling with the fragrant notes of garlic and onions. As the beef browns to perfection, you add in carrots and celery, allowing them to soften and release their natural sweetness. Then comes the star of the show: pearl barley. This nutty grain not only adds body to the soup but also brings a delightful chewiness that perfectly complements the melt-in-your-mouth beef.

The secret to an exceptional Savory Beef Barley Soup lies in the broth. A robust beef stock, perhaps enhanced with a splash of red wine, forms the foundation of this dish, infusing it with deep, savory flavors. As the soup simmers gently, the barley absorbs the broth, thickening the mixture and transforming it into a sumptuous, satisfying meal.

To elevate the experience, finish your soup with a sprinkle of fresh herbs, such as thyme or parsley, which add a burst of freshness and color. Serve it alongside warm, crusty bread, and you’ll have a meal that not only nourishes the body but also soothes the soul. Whether shared with family on a cold evening or savored alone as a moment of self-care, this Savory Beef Barley Soup is sure to become a cherished recipe in your culinary repertoire.

6. Creamy Potato Leek Soup

Creamy Potato Leek Soup A Velvety Hug in a Bowl

As the chilly winds swirl outside, there’s nothing quite like a steaming bowl of creamy potato leek soup to bring warmth and comfort to your day. This luscious soup is a delightful blend of buttery leeks and hearty potatoes, simmered to perfection and finished with a splash of cream for a rich, velvety texture.

To start, thinly sliced leeks are gently sautéed in butter until they become tender and fragrant, releasing their sweet, onion-like aroma. The addition of diced potatoes brings a satisfying starchiness that thickens the soup beautifully as it cooks. As the ingredients simmer together in a rich broth, they meld into a harmonious blend of flavors that will have your taste buds dancing with joy.

Once the potatoes are tender, reach for your immersion blender or a countertop blender, and watch as the soup transforms into a silky-smooth delight. For an added touch of luxury, swirl in heavy cream just before serving, creating a beautiful contrast with the pale green hue of the leeks.

To elevate this heavenly soup, consider garnishing it with a sprinkle of freshly chopped chives or a drizzle of truffle oil for an extra touch of elegance. Serve it alongside a crusty loaf of bread, perfect for dipping, and let the comforting aroma fill your kitchen as you savor each spoonful.

Whether enjoyed as a light lunch or a cozy dinner, creamy potato leek soup is not only a feast for the senses but also a heartwarming reminder that sometimes, the simplest ingredients can create the most soul-nourishing dishes. So grab your pot and apron, and get ready to indulge in a bowl of pure comfort!

7. Spicy Black Bean Soup

What are the best ways to make homemade soup?
Credit : whatcanu.com

Spicy Black Bean Soup is a delightful symphony of flavors that warms both the body and the soul. This robust dish begins with a base of tender black beans, simmered to perfection until they’re soft and creamy. The magic unfolds as you add a medley of aromatic spices—cumin, coriander, and a hint of smoked paprika—that create a depth of flavor that dances on the palate.

To start, sauté onions, garlic, and bell peppers in a splash of olive oil until they’re fragrant and golden. Their sweetness balances the heat from freshly chopped jalapeños, which add a delightful kick to the soup. As you stir in the beans and a rich vegetable broth, the ingredients meld together, creating a hearty texture that’s satisfying with each spoonful.

For an extra burst of flavor, consider adding a splash of lime juice just before serving. This brightens the dish and enhances the overall experience. Top each bowl with a dollop of creamy avocado or a sprinkle of fresh cilantro, allowing the coolness to contrast perfectly with the spice of the soup.

Serve it alongside warm, crusty bread or a side of tortilla chips for dipping, and you have a meal that’s not only delicious but also deeply comforting. Whether you’re seeking warmth on a chilly day or simply craving a dish that packs a flavorful punch, Spicy Black Bean Soup is sure to become a staple in your kitchen. Enjoy it as a filling lunch, a light dinner, or even as a make-ahead meal that will taste just as delightful when reheated.

8. French Onion Soup with Gruyère

French Onion Soup with Gruyère is a timeless classic that embodies comfort in a bowl. Imagine a rich, golden broth that has been simmered to perfection, infused with the deep, sweet flavor of caramelized onions. The aroma alone is enough to transport you to a bustling Parisian bistro, where the warmth of the soup mingles with the clinking of wine glasses and soft chatter.

To create this culinary masterpiece, start by slowly caramelizing thinly sliced onions in a generous amount of butter, allowing them to become tender and deeply browned—this process can take up to an hour, but it’s worth every minute. The onions’ natural sugars will develop into a sweet, savory base that serves as the heart of the soup. Once your onions are perfectly caramelized, deglaze the pot with a splash of dry white wine or sherry, scraping up those flavorful bits stuck to the bottom.

Next, add beef broth (or a rich vegetable broth for a vegetarian option) and let the mixture simmer to meld the flavors beautifully. To elevate the experience, season with thyme, bay leaves, and a hint of garlic, allowing the fragrant herbs to steep into the broth.

The pièce de résistance, of course, is the Gruyère cheese. As the soup nears completion, ladle the steaming broth into oven-safe bowls, top each with a generous slice of crusty baguette, and then heap on the grated Gruyère. Pop them under the broiler until the cheese bubbles and turns a glorious golden brown, creating a gooey, irresistible topping that adds a delightful texture contrast to the silky soup beneath.

Serve your French Onion Soup with Gruyère hot and bubbling, garnished with a sprinkle of fresh chives or parsley for a touch of color. As you take your first spoonful, the combination of the sweet onions, savory broth, and melted cheese will envelop you in a cozy embrace, making it the perfect dish to warm your soul on a chilly day. Whether enjoyed as an appetizer or a main course, this soup is bound to become a cherished staple in your kitchen, inviting friends and family to gather around and savor the simple joys of homemade cooking.

9. Thai Coconut Curry Soup

### 9. Thai Coconut Curry Soup

Transport your taste buds to the vibrant streets of Thailand with a steaming bowl of Thai Coconut Curry Soup. This soul-warming dish combines the rich, creamy goodness of coconut milk with the aromatic spices typical of Thai cuisine, creating a harmonious blend that is both comforting and invigorating.

Start by sautéing a medley of fragrant ingredients—ginger, garlic, and shallots—until they release their enticing aromas. Add in a generous spoonful of red curry paste, allowing it to bloom and fill your kitchen with its spicy, sweet scent. Next, pour in a can of full-fat coconut milk, stirring until it melds seamlessly with the spices, creating a luscious broth that promises to envelop you in warmth with every spoonful.

For a burst of freshness, toss in vibrant vegetables like bell peppers, carrots, and snap peas, letting them soak up the soup’s flavor as they cook to tender perfection. You can also enhance the nutritional value by adding protein—think tender chunks of chicken, shrimp, or even tofu for a vegetarian option. As the soup simmers, the ingredients meld together beautifully, creating a colorful and inviting dish that is as pleasing to the eye as it is to the palate.

Finish off your Thai Coconut Curry Soup with a sprinkle of fresh cilantro and a squeeze of lime juice to elevate the flavors. Served hot, this soup not only warms the body but also nourishes the soul, making it the perfect remedy for chilly evenings or a delightful meal any time of the year. Pair it with steamed jasmine rice or crusty bread, and you have a meal that is sure to impress family and friends alike. Enjoy the comforting embrace of this delicious homemade soup, and let its vibrant flavors transport you to a tropical paradise.

10. Butternut Squash and Apple Soup

As the leaves turn golden and the air grows crisp, there’s nothing quite like a bowl of Butternut Squash and Apple Soup to embody the spirit of fall. This velvety, vibrant concoction marries the sweet, nutty flavor of roasted butternut squash with the crisp, tart essence of fresh apples, creating a harmonious blend that warms the soul with every spoonful.

To start, the butternut squash is peeled, cubed, and roasted until caramelized, enhancing its natural sweetness and depth of flavor. Meanwhile, a medley of aromatic onions and garlic is gently sautéed in butter, infusing the base of the soup with a savory aroma that beckons from the kitchen. As the butternut squash and a selection of diced apples—think Granny Smith for a tangy kick—join the sautéed mixture, a sprinkle of cinnamon and nutmeg adds warmth and complexity, evoking the cozy feelings of the season.

Once everything is blended together and simmered to perfection, you’ll find that blending the soup creates an incredibly smooth texture. A splash of vegetable broth or apple cider helps to achieve the desired consistency, allowing the flavors to meld beautifully. Finish with a drizzle of cream or a dollop of Greek yogurt for a touch of richness, and garnish with toasted pumpkin seeds or a sprinkle of fresh herbs for added texture and color.

Served warm with crusty bread or a light salad, this Butternut Squash and Apple Soup is not just a meal; it’s a comforting embrace in a bowl. Perfect for chilly evenings or as a centerpiece for gatherings, it’s sure to become a beloved staple in your autumn repertoire. Enjoy each savory sip as it transports you to a cozy autumn afternoon, surrounded by the beauty of nature’s changing palette.

11. Tomato and Roasted Red Pepper Soup

### Tomato and Roasted Red Pepper Soup

There’s something undeniably comforting about a steaming bowl of tomato soup, and when you elevate it with the smoky sweetness of roasted red peppers, you create a dish that’s both nostalgic and exciting. This Tomato and Roasted Red Pepper Soup is the perfect blend of flavors, making it an ideal choice for a chilly evening or a cozy lunch.

To start, ripe, juicy tomatoes are essential. Choose the freshest tomatoes you can find, as their bright, tangy sweetness will shine through in the final dish. Pair these with vibrant red bell peppers, which are roasted until their skins are charred and blistered, enhancing their natural sweetness and adding a delightful depth of flavor. The roasting process transforms these peppers, creating a rich, smoky undertone that perfectly complements the acidity of the tomatoes.

As you prepare the soup, sauté onions and garlic in olive oil until they become fragrant and translucent, infusing the base with layers of flavor. Once your veggies are ready, add the diced tomatoes and roasted red peppers into the pot, along with vegetable broth to create a luscious, velvety texture. Season with fresh basil, a pinch of salt, and a hint of black pepper to elevate the taste further.

Simmer the mixture until everything melds beautifully, then blend it until smooth, creating a luxurious consistency that glides over your tongue. For an extra touch of indulgence, consider stirring in a splash of cream or a dollop of crème fraîche before serving, which adds a rich, silky finish to the soup.

Serve this delightful concoction in warm bowls, garnished with fresh basil leaves and a drizzle of olive oil for a touch of elegance. Pair it with a crusty piece of bread or a grilled cheese sandwich for the ultimate comfort meal. Each spoonful of this Tomato and Roasted Red Pepper Soup is sure to warm your soul and bring a smile to your face, making it a cherished addition to your homemade soup repertoire.

12. Tips for Making the Perfect Soup

When it comes to creating the perfect soup, a few key tips can elevate your culinary experience from ordinary to extraordinary. First and foremost, always start with a robust base. Whether you opt for a homemade stock or a store-bought version, the quality of your broth sets the foundation for flavor. For deeper taste, consider roasting your vegetables before adding them to the pot; this caramelization enhances their natural sweetness and adds a delightful complexity.

Next, embrace the power of herbs and spices. Fresh herbs like thyme, rosemary, or basil can infuse your soup with vibrant flavor, while spices such as cumin, paprika, or bay leaves can add warmth and depth. Remember to add these aromatics at different stages of cooking—some should be added early on to develop their flavors, while others are best added just before serving to preserve their freshness.

Don’t forget the texture! A perfectly balanced soup often combines both smooth and chunky elements. For creamy soups, blend a portion of the mixture to create a velvety consistency, then stir in whole vegetables or grains for added bite. If you’re making a broth-based soup, consider incorporating grains like rice, quinoa, or barley, which not only add heartiness but also absorb the flavors beautifully.

Finally, taste as you go. Adjusting seasoning and flavors throughout the cooking process ensures that your soup will be perfectly balanced. A squeeze of fresh lemon juice or a dash of vinegar right before serving can brighten the dish and enhance the overall flavor profile. With these tips in hand, you’ll be well on your way to crafting a delicious, soul-warming soup that will become a staple in your kitchen. Happy cooking!

13. Storing and Freezing Soup for Later

Storing and freezing soup for later is an excellent way to ensure that you always have a comforting meal on hand, ready to warm your soul whenever the mood strikes. Properly storing soup not only preserves its flavor and nutrients but also enhances your meal prep efficiency. Here’s how to do it right.

**Cooling Down**: Before you store your soup, allow it to cool to room temperature. This is crucial, as placing hot soup directly into the refrigerator or freezer can raise the temperature inside, potentially compromising the safety of other foods. A good rule of thumb is to let the soup cool for about 30 minutes. If you’re in a hurry, you can speed up the process by transferring it to a shallow container or using an ice bath.

**Choosing Containers**: When it comes to storage containers, opt for airtight, freezer-safe containers or heavy-duty freezer bags. Glass containers are great for long-term storage, but make sure they are labeled as freezer-safe to prevent cracking. If you go with bags, squeeze out as much air as possible before sealing to avoid freezer burn.

**Portion Control**: Consider portioning your soup into individual servings. This makes it easier to grab a quick meal on busy days or when unexpected guests drop by. Plus, it reduces the likelihood of thawing more than you need, minimizing waste.

**Labeling**: Don’t forget to label your containers with the soup type and the date it was made. This simple step will help you keep track of what you have on hand and ensure you use older soups first.

**Freezing**: When you’re ready to freeze, place your containers in the freezer in a way that allows air to circulate around them. Soups can generally be frozen for about 3-6 months, but for the best flavor and texture, aim to use them within the first few months.

**Thawing and Reheating**: When it’s time to enjoy your soup, thaw it in the refrigerator overnight or use the defrost setting on your microwave. For reheating, do so gently on the stove over low heat, stirring occasionally. If the soup appears too thick, you can add a splash of broth or water to achieve your desired consistency.

By mastering the art of storing and freezing soup, you’ll always have a delightful bowl waiting for you, ready to nourish your body and soul. Enjoy the convenience of homemade soup at your fingertips, and never miss out on that comforting hug in a bowl!

14. Pairing Soups with Delicious Sides

When it comes to enjoying a hearty bowl of soup, the experience can be elevated to new heights by thoughtfully pairing it with delicious sides. The right accompaniments not only enhance the flavors of your soup but also provide a delightful contrast in texture and taste, making your meal more satisfying and complete.

For a classic tomato basil soup, consider serving it alongside a warm, crusty grilled cheese sandwich. The gooey, melted cheese perfectly complements the tangy sweetness of the tomato, while the crispy exterior of the sandwich adds a comforting crunch. A sprinkle of fresh basil on top of the soup can tie the dish together beautifully, showcasing the vibrant flavors.

If you’re savoring a rich and creamy potato leek soup, a side of buttery, flaky biscuits can be a match made in culinary heaven. The soft, pillowy texture of the biscuits dips seamlessly into the soup, soaking up its comforting warmth. For added flair, try serving them with a dollop of herb-infused butter or a sprinkle of sharp cheddar for a flavor boost.

For those craving something a bit more adventurous, consider a spicy butternut squash soup paired with a refreshing side salad tossed with citrus vinaigrette. The zesty dressing cuts through the soup’s sweetness, while the crunchy greens add a refreshing bite, balancing out the meal perfectly.

And let’s not forget about the timeless pairing of French onion soup with a side of garlic bread. The crusty, toasted bread topped with melted cheese serves as the ideal vessel for soaking up the rich, savory broth, while also offering a satisfying crunch with each bite.

Experimenting with different sides can transform your soup night into a gourmet experience. Whether you opt for crisp vegetable sticks with a tangy dip, a hearty slice of focaccia, or even a simple bowl of olives, the key is to find combinations that excite your taste buds and complement the soup’s unique flavors. So go ahead, get creative in the kitchen, and discover the delightful world of soup pairings that will warm not only your soul but also your dining table!

15. Conclusion: Finding Joy in Homemade Cooking

As we wrap up this journey through our collection of 10 delicious homemade soup recipes, it’s essential to reflect on the deeper joys that cooking can bring to our lives. Homemade cooking is not just about nourishing our bodies; it’s an art that nurtures our souls and fosters connections with those we cherish. Each simmering pot of soup is a canvas, awaiting the vibrant hues of fresh ingredients, the aromatic whispers of herbs, and the subtle complexities that come from time spent stirring, tasting, and perfecting.

In a world that often moves too fast, setting aside time to create something from scratch can be an incredible source of joy and satisfaction. The process of chopping vegetables, sautéing onions, and allowing flavors to meld together is therapeutic—an act of mindfulness that invites us to slow down and savor the moment. Whether it’s a hearty chicken noodle soup brimming with nostalgia or a spicy lentil concoction that warms both heart and home, each recipe tells a story, evokes memories, and brings loved ones together around the table.

Moreover, sharing a meal made with love can strengthen bonds and create lasting memories. So, as you enjoy these recipes, remember that the true magic of homemade cooking lies not just in the flavors, but in the laughter shared, the stories exchanged, and the warmth that fills your kitchen and your heart. Embrace the joy of cooking, experiment with your creations, and relish the comfort that a bowl of homemade soup can provide. Here’s to many more cozy evenings spent in the kitchen, crafting delicious soups that warm both body and soul!

As we wrap up our journey through these 10 delicious homemade soup recipes, we hope you feel inspired to embrace the comforting embrace of a warm bowl of goodness. Whether you opt for a classic chicken noodle, a rich butternut squash, or a hearty minestrone, each recipe offers a unique blend of flavors and nourishment that not only satisfies your hunger but also warms your soul. Cooking soup at home allows you to experiment with fresh, seasonal ingredients and create meals that bring family and friends together. So, gather your loved ones, don your apron, and let the aromas fill your kitchen. We can’t wait to hear about your own soup creations and the memories they help you forge. Happy cooking!

What are the best ways to make homemade sauces?

In the culinary world, sauces are the unsung heroes that elevate a simple meal into a gastronomic delight.

Whether it’s a rich marinara bringing warmth to a bowl of pasta, a zesty chimichurri adding a burst of flavor to grilled meats, or a velvety béchamel transforming a humble vegetable into a gourmet experience, the right sauce can make all the difference. In this blog post, “Saucy Secrets: Mastering Homemade Sauces for Every Dish,” we will embark on a flavorful journey, exploring the art of sauce-making from the basic foundations to intricate blends that tantalize the taste buds. With a dash of creativity and a sprinkle of inspiration, you’ll learn how to create versatile sauces that not only enhance your favorite dishes but also impress your family and friends. Get ready to unlock the secret to elevating your culinary repertoire and making every meal a celebration!

1. Introduction to the World of Sauces

What are the best ways to make homemade sauces?
Credit : whatcanu.com

Sauces are the unsung heroes of the culinary world, transforming even the simplest of dishes into extraordinary experiences. They are the lush, flavorful blankets that envelop your food, adding depth, richness, and complexity to every bite. Imagine a perfectly grilled chicken breast served with a tangy chimichurri, or a bowl of pasta elevated by a creamy Alfredo sauce—these combinations highlight how a well-crafted sauce can turn a mundane meal into a memorable feast.

In this introduction to the world of sauces, we will explore the myriad types of sauces that grace tables around the globe, from classic French reductions to spicy Asian dips. each sauce tells a story, reflecting the culture and traditions from which it originates. Whether you’re a novice cook or a seasoned chef, understanding the foundational techniques and ingredients behind sauces will unlock a new realm of culinary creativity.

We will delve into different categories, including emulsions like vinaigrettes, reductions that enhance the natural flavors of your ingredients, and even fresh sauces that burst with vibrant herbs and spices. Discover the essential components that make a sauce successful: the balance of acidity, sweetness, saltiness, and umami. With a few simple techniques and a dash of creativity, you’ll be crafting sauces that not only complement your dishes but also impress your family and friends.

Get ready to embark on a flavorful journey that will elevate your cooking and enrich your meals. From the comforting familiarity of a homemade marinara to the exotic allure of a spicy harissa, mastering sauces will set you on the path to becoming a true culinary artist!

2. Essential Tools for Sauce-Making

When it comes to crafting the perfect sauce, having the right tools at your disposal can make all the difference. While the ingredients are undoubtedly important, the equipment you use will elevate your culinary experience and ensure consistent results every time. Here’s a breakdown of some essential tools that every home chef should consider for their sauce-making arsenal.

**1. High-Quality Saucepan:**
A sturdy saucepan with a thick bottom is key for preventing sauces from scorching. Opt for a medium-sized pot, ideally made from stainless steel or enameled cast iron, which provides even heat distribution. This will allow your sauces to simmer gently, promoting the perfect melding of flavors.

**2. Whisk:**
A good whisk is essential for stirring sauces, especially when incorporating ingredients like butter or emulsifying oil and vinegar. A balloon whisk, with its flexible wire design, is perfect for achieving a smooth, lump-free texture in your sauces.

**3. Wooden Spoon:**
Durable and versatile, a wooden spoon is an indispensable tool in the kitchen. Use it to stir, scrape, and combine ingredients in your saucepan without the risk of scratching non-stick surfaces. Plus, wooden spoons can withstand high temperatures, making them ideal for savory sauces that require long cooking times.

**4. Fine Mesh Strainer:**
To achieve a velvety-smooth finish, a fine mesh strainer is essential. Whether you’re straining out solids from a stock-based sauce or purifying a fruit coulis, this tool will help you achieve that refined texture that makes gourmet sauces stand out.

**5. Immersion Blender:**
For those who love creamy sauces, an immersion blender is a game changer. This handheld tool allows you to blend sauces directly in the pot, making it easy to achieve a silky consistency without the need for transferring hot mixtures to a traditional blender.

**6. measuring Cups and Spoons:**
Precision is key in sauce-making, and having a reliable set of measuring cups and spoons ensures that your flavors are balanced. Invest in both dry and liquid measuring tools to accurately gauge your ingredients, especially when crafting complex sauces that require careful ratios.

**7. Storage Containers:**
Once you’ve mastered your homemade sauces, you’ll want to store them properly to maintain their freshness. Invest in high-quality glass or BPA-free plastic containers with airtight seals. Labeling each container with the sauce name and date will help you keep track of your creations and make it easy to grab them when needed.

By equipping your kitchen with these essential tools, you’ll be well on your way to mastering the art of sauce-making. With the right equipment at your fingertips, you can confidently experiment with flavors, textures, and techniques, transforming any dish into a culinary masterpiece!

3. Understanding the Basics: Sauce Categories

What are the best ways to make homemade sauces?
Credit : whatcanu.com

Before diving into the world of homemade sauces, it’s essential to understand the foundational categories they fall into. Each category carries its own distinctive character and purpose, transforming simple dishes into culinary masterpieces. Here’s a breakdown of the primary sauce categories that every home cook should familiarize themselves with:

1. **Mother Sauces**: These are the cornerstone of classical cuisine and serve as the base for a multitude of other sauces. The five traditional mother sauces include béchamel (a creamy white sauce made from milk and a roux), velouté (a light stock-based sauce thickened with a roux), espagnole (a rich brown sauce made from a dark roux, mirepoix, and tomatoes), tomato sauce (a savory blend of tomatoes and various seasonings), and hollandaise (a rich sauce made from egg yolks, butter, and lemon juice). Mastering these will give you the confidence to explore endless variations.

2. **Emulsified Sauces**: These sauces are characterized by their creamy texture and ability to blend oil and water-based ingredients. Think of classics like mayonnaise and vinaigrettes. Understanding how to properly emulsify will allow you to create a variety of dressings and sauces that can elevate salads, sandwiches, and grilled dishes.

3. **Pan Sauces**: Often created in the same pan where the main dish was cooked, these sauces capitalize on the flavorful bits left behind, known as fond. By deglazing the pan with broth, wine, or vinegar and reducing it, you can create a quick and robust sauce that enhances the flavors of your protein or vegetables.

4. **Stock-based Sauces**: These sauces rely on the rich, concentrated flavors of homemade or store-bought stock. By reducing stock down to a syrupy consistency and adding aromatics or herbs, you can achieve a depth of flavor that will impress even the most discerning palates.

5. **Sweet Sauces**: Don’t overlook the power of sweet sauces! From a luscious chocolate ganache to a tangy fruit coulis, sweet sauces can turn desserts from ordinary to extraordinary. Knowing how to balance sweetness with acidity can make your desserts sing.

Understanding these categories not only equips you with a solid foundation but also allows you to experiment and innovate. With each sauce, you will learn the techniques that can be adapted and combined to create unique flavors and textures. So, roll up your sleeves, gather your ingredients, and let the saucy adventures begin!

4. Classic Sauces Every Home Cook Should Know

When it comes to elevating your culinary skills, mastering a few classic sauces can be the secret ingredient that transforms everyday meals into extraordinary dining experiences. These foundational sauces not only enhance the flavor of your dishes but also add a touch of sophistication to your home cooking repertoire. Here are some must-know classic sauces that every home cook should have in their arsenal:

**1. Béchamel Sauce:** Often referred to as the “white sauce,” béchamel is a creamy concoction made from butter, flour, and milk. This versatile sauce serves as the base for numerous dishes, from lasagna to macaroni and cheese. Its luscious texture and mild flavor make it perfect for draping over vegetables or incorporating into comforting casseroles.

**2. Marinara Sauce:** A staple in Italian cuisine, marinara sauce is a simple tomato-based sauce that bursts with flavor. Made with ripe tomatoes, garlic, olive oil, and a sprinkle of herbs, this sauce is perfect for pasta, pizza, or as a dipping sauce. Its bright acidity and aromatic qualities can elevate even the simplest of meals.

**3. Hollandaise Sauce:** Known for its rich, buttery flavor, hollandaise sauce is a key component of classic dishes like Eggs Benedict. Made with egg yolks, melted butter, and lemon juice, this sauce requires a bit of technique but is well worth the effort. Its creamy texture and tangy notes make it a delightful accompaniment for vegetables, fish, and meats.

**4. Velouté Sauce:** Often regarded as one of the “mother sauces” of French cuisine, velouté is a smooth, light sauce made from a roux and stock. This sauce can serve as a base for countless variations, such as adding cream for a luscious sauce suprême or enriching it with mushrooms for a delightful sauce allemande. Its versatility makes it a go-to for both sauces and soups.

**5. Pesto Sauce:** A vibrant green sauce with roots in Italian cuisine, pesto is typically made from fresh basil, garlic, pine nuts, Parmesan cheese, and olive oil. This uncooked sauce bursts with flavor and can be tossed with pasta, spread on sandwiches, or drizzled over grilled vegetables for a fresh, herbal kick.

Incorporating these classic sauces into your cooking not only enhances the taste of your dishes but also boosts your confidence in the kitchen. Experiment with these recipes, tweak them to your liking, and soon you’ll find that the art of sauce-making is truly a delicious journey worth taking!

5. Step-by-Step Guide to Making a Basic Tomato Sauce

What are the best ways to make homemade sauces?
Credit : whatcanu.com

Creating a basic tomato sauce is a culinary rite of passage that can elevate your dishes to new heights. This versatile sauce serves as the foundation for countless recipes, from pasta and pizza to stews and soups. Here’s a step-by-step guide to help you master this essential sauce, ensuring it becomes a staple in your kitchen.

**Ingredients You’ll Need:**
– 2 tablespoons of olive oil
– 1 medium onion, finely chopped
– 2-3 cloves of garlic, minced
– 1 can (28 ounces) of whole peeled tomatoes (or 2 pounds of fresh tomatoes, peeled and chopped)
– 1 teaspoon of sugar (optional, to balance acidity)
– Salt and pepper, to taste
– Fresh basil leaves, for garnish

**Step 1: Sauté the Aromatics**
In a large saucepan, heat the olive oil over medium heat. Add the chopped onion and sauté for about 5-7 minutes, or until it becomes translucent and fragrant. Stir in the minced garlic, cooking for an additional 1-2 minutes until it releases its sweet aroma—be careful not to let it brown, as this can impart a bitter flavor.

**Step 2: Add the Tomatoes**
If you’re using canned tomatoes, crush them gently with your hands or a spoon before adding them to the pot. For fresh tomatoes, ensure they’re peeled and chopped before tossing them in. Stir well to combine with the sautéed onions and garlic.

**Step 3: Season and Simmer**
Add a pinch of salt and pepper to taste. If you find your tomatoes a bit too acidic, sprinkle in a teaspoon of sugar to balance it out. Bring the mixture to a gentle simmer, then reduce the heat to low. Cover the saucepan partially, allowing the sauce to bubble away for 30-45 minutes. This slow cooking process deepens the flavors, allowing the sauce to reduce and thicken beautifully.

**Step 4: Blend for Smoothness (Optional)**
For a smoother consistency, you can use an immersion blender directly in the pot or transfer the sauce to a countertop blender. Blend until you reach your desired texture, whether chunky or silky smooth.

**Step 5: Final Touches**
Once your sauce has reached the perfect thickness and flavor, taste and adjust the seasoning as needed. This is also the time to stir in some fresh chopped basil for a burst of herbal freshness.

**Step 6: Serve or Store**
Your homemade tomato sauce is now ready to use! Pour it over pasta, spread it on pizza, or incorporate it into your favorite dishes. If you have leftovers, let the sauce cool before transferring it to an airtight container. It can be refrigerated for up to a week or frozen for later use—perfect for those busy weeknights when you crave something homemade.

With this step-by-step guide, mastering a basic tomato sauce is not only achievable but also incredibly rewarding. Enjoy the process and experiment with additional herbs or spices to make it uniquely yours!

6. Creating Rich and Creamy Alfredo Sauce

Creating a rich and creamy Alfredo sauce is a culinary journey that will transform your pasta dishes into an indulgent experience. This classic Italian sauce, beloved for its velvety texture and decadent flavor, is surprisingly simple to make, requiring just a handful of ingredients and a bit of technique.

Start with high-quality unsalted butter; its subtle flavor will form the foundation of your sauce. Melt the butter gently in a large skillet over medium heat, allowing it to bubble without browning. Once melted, add freshly minced garlic, sautéing until fragrant—this will infuse your sauce with a warm, aromatic depth.

Next, it’s time to introduce the cream. For the richest sauce, opt for heavy cream. Pour it into the skillet, stirring gently to combine with the butter and garlic. Bring the mixture to a gentle simmer, which will allow the flavors to meld beautifully while thickening the sauce. The key is to avoid boiling, as this can cause the cream to separate, leading to a less-than-desirable texture.

Once your cream is simmering, it’s time to incorporate the star ingredient: freshly grated Parmesan cheese. This cheese not only thickens the sauce but also adds a nutty, salty flavor that elevates the entire dish. Stir the cheese in gradually, allowing it to melt into the sauce fully, creating a harmonious blend. Keep an eye on the consistency; if the sauce becomes too thick, you can thin it out with a splash of pasta cooking water for a silky finish.

For an extra touch, season your Alfredo sauce with salt, freshly cracked black pepper, and a hint of nutmeg. These simple spices will enhance the flavor profile without overpowering the dish. Finally, toss your cooked pasta directly into the skillet, ensuring each strand is coated with the luxurious sauce.

Serve your creation with a sprinkle of additional Parmesan and a garnish of freshly chopped parsley for a touch of color. With this easy-to-master Alfredo sauce, every meal becomes a rich, comforting experience, leaving your guests—or yourself—delighted and craving more!

7. Mastering the Art of Homemade Pesto

What are the best ways to make homemade sauces?
Credit : whatcanu.com

Pesto is more than just a condiment; it’s a vibrant, aromatic celebration of fresh ingredients that can elevate any dish. Mastering the art of homemade pesto allows you to capture the essence of summer, no matter the season. The classic version, originating from the Liguria region of Italy, is a delightful blend of basil, garlic, pine nuts, Parmesan cheese, and extra virgin olive oil. Each component plays a crucial role, contributing its own unique flavor and texture to the mix.

To begin your pesto journey, choose the freshest basil leaves you can find. The bright green leaves should be fragrant and free from wilting or browning. The vibrant color and aromatic quality of the basil will form the foundation of your pesto, lending it that signature fresh taste. Next, select high-quality pine nuts, as their buttery flavor will complement the basil perfectly. You can also experiment with alternatives like walnuts, almonds, or even pecans for a twist on the traditional recipe.

When it comes to garlic, opt for fresh cloves to avoid the overpowering taste of pre-jarred varieties. A couple of cloves should provide just the right amount of pungency to balance the sweetness of the basil. As for cheese, freshly grated Parmesan or Pecorino Romano adds a salty depth that ties all the flavors together. Finally, drizzle in a generous amount of extra virgin olive oil; this not only enriches the pesto but also helps to emulsify everything into a smooth, cohesive sauce.

To create your pesto, simply combine the basil, garlic, and pine nuts in a food processor. Pulse until finely chopped before gradually adding the cheese and olive oil. Depending on your desired texture, you can blend it into a silky smooth paste or leave it slightly chunky for a more rustic feel. Taste and adjust the seasonings with salt and pepper to ensure a perfect balance.

The beauty of homemade pesto lies in its versatility. Use it as a sauce for pasta, a spread on sandwiches, or a drizzle over grilled vegetables. You can even incorporate it into marinades or salad dressings for an extra kick of flavor. The possibilities are endless! Plus, storing your pesto in an airtight container in the refrigerator allows you to savor that fresh taste for weeks. With a little practice, you’ll master the art of homemade pesto, bringing a touch of Italian culinary magic to your everyday meals.

8. Exploring Asian Flavors: Teriyaki and Hoisin Sauces

When it comes to elevating your dishes with vibrant and complex flavors, few sauces can compete with the bold profiles of teriyaki and hoisin. These two Asian staples are not just condiments; they are culinary powerhouses that can transform a simple meal into a gourmet experience.

**Teriyaki Sauce** is a delightful concoction that balances sweet and savory notes, typically made from soy sauce, sugar, mirin, and sake. Its origins in Japanese cuisine date back centuries, where it was traditionally used to glaze grilled meats, imparting a glossy finish and a rich, umami flavor. Imagine marinating juicy chicken thighs in a homemade teriyaki sauce, allowing the sweet soy glaze to seep into every crevice, then grilling them to perfection. The result? A dish that bursts with flavor and leaves your guests in awe. But teriyaki isn’t limited to chicken; it can also enhance the flavors of beef, fish, and even vegetables, making it an incredibly versatile sauce in your culinary arsenal.

**Hoisin Sauce**, often referred to as “Chinese barbecue sauce,” is the perfect counterpart to teriyaki. This thick, dark sauce combines soybeans, garlic, vinegar, sugar, and various spices, resulting in a sweet and slightly spicy flavor profile. Hoisin is commonly used in Chinese cuisine, particularly for dipping sauces, stir-fries, and marinades. Picture a vibrant stir-fry of crisp vegetables and tender tofu, all coated in a luscious hoisin sauce that clings to every bite. Its depth of flavor adds richness to grilled meats and can even serve as a delightful glaze on roasted duck or pork.

To truly master these sauces, don’t be afraid to experiment. Try combining teriyaki and hoisin for a fusion twist that brings out the best of both worlds—perhaps a teriyaki-hoisin glaze for grilled shrimp or a dipping sauce that bridges the flavors of East and West. The key is to start with high-quality ingredients and adjust the balance of sweet, salty, and umami to suit your palate. With just a few simple ingredients and a splash of creativity, you’ll be well on your way to creating dishes that not only satisfy your taste buds but also impress everyone around your table. Embrace the flavors of Asia and let your culinary adventures begin!

9. How to Make the Perfect Barbecue Sauce

Barbecue sauce is more than just a condiment; it’s the soul of summer cookouts, family gatherings, and cozy backyard barbecues. The perfect barbecue sauce strikes a delicate balance between sweet, savory, tangy, and smoky flavors, enhancing the natural taste of grilled meats and vegetables alike. Here’s how to craft an irresistible sauce that will elevate your grilling game to new heights.

**Start with the Base:** Begin your sauce with a solid foundation. Tomato sauce or ketchup is a popular choice, providing a rich, tangy backdrop. For a more unique flavor profile, consider using a base of apple cider vinegar or mustard. This will lend a delightful zing to your sauce.

**Sweeten the Deal:** To achieve that signature barbecue sweetness, incorporate brown sugar or honey. These ingredients not only add sweetness but also help create a caramelized glaze on your grilled items. Experiment with different sugars like molasses for a deeper flavor or maple syrup for a touch of earthiness.

**Add Depth with Spices:** The magic of barbecue sauce lies in its spices. Garlic powder, onion powder, smoked paprika, and black pepper are fantastic staples. For those who enjoy a little heat, don’t shy away from cayenne pepper or chili powder. A splash of Worcestershire sauce can also contribute umami richness, making your sauce more complex.

**Bring on the Tang:** A dash of apple cider vinegar or lemon juice adds necessary acidity, cutting through the richness and balancing the sweetness. This tangy element is essential for a well-rounded barbecue sauce.

**Get Creative:** Don’t be afraid to personalize your sauce! Consider adding ingredients like chipotle peppers for a smoky kick, or peach preserves for a fruity twist. Each addition can transform your sauce into something uniquely yours.

**Simmer to Perfection:** Once you’ve combined your ingredients, let your sauce simmer on low heat for about 20-30 minutes. This allows the flavors to meld beautifully and develop that signature thickness. Stir occasionally to prevent sticking and ensure even cooking.

**Taste Test:** As your sauce simmers, taste it along the way. Adjust the sweetness, acidity, or heat to match your personal preference. Remember, the best sauces are those that reflect your taste and the dishes they accompany.

**Store for Later:** If you make a larger batch (and trust us, you’ll want to), store your barbecue sauce in an airtight container in the refrigerator. It will keep for up to two weeks, allowing you to enjoy that homemade goodness with every grilled meal.

With these steps, you’ll be well on your way to mastering the perfect barbecue sauce—one that will have friends and family raving and coming back for seconds (or thirds!). So fire up the grill, pour on the sauce, and savor the deliciousness of your homemade creation!

10. Elevating Dishes with Homemade Vinaigrettes

Homemade vinaigrettes are the unsung heroes of the culinary world, capable of transforming even the simplest of dishes into gourmet experiences. These versatile dressings can elevate salads, marinate meats, or serve as zesty dips, all while adding a personal touch that store-bought varieties simply can’t match.

Creating your own vinaigrette is not only easy but also a delightful exercise in flavor experimentation. The basic formula is a balance of acids and fats—typically a ratio of three parts oil to one part vinegar—along with a dash of seasoning and optional flavor enhancers. Start with high-quality extra virgin olive oil for a rich, peppery base, and pair it with your choice of vinegar, such as tangy balsamic, sharp red wine, or even fragrant apple cider.

To further enhance your vinaigrette, consider incorporating fresh herbs like basil or thyme, a spoonful of honey for sweetness, or a splash of citrus juice for brightness. Whisk everything together until emulsified, and you’ll have a dressing that’s bursting with flavor.

Imagine drizzling your homemade vinaigrette over a crisp mixed greens salad, where the brightness of the dressing complements the crunch of the vegetables, or using it to marinate chicken, infusing the meat with layers of zesty goodness before grilling. Even drizzling it over roasted vegetables can take a simple side dish to new heights, making them irresistible.

The beauty of homemade vinaigrettes lies in their adaptability. Feel free to play around with different flavor profiles—add garlic for a robust kick, or a hint of Dijon mustard for a creamy texture. With just a little creativity, you can create a signature vinaigrette that reflects your personal taste and enhances every dish it accompanies. So grab your mixing bowl and start experimenting; your next meal deserves that extra touch of homemade flair!

11. Tips for Balancing Flavors in Your Sauces

Creating a delicious sauce is an art, and mastering the balance of flavors is the key to achieving culinary excellence. When crafting your homemade sauces, it’s essential to understand the harmony between the primary flavor components: acidity, sweetness, saltiness, and bitterness. Each element plays a crucial role and can elevate your sauce from ordinary to extraordinary.

Start by incorporating acidity to brighten your sauce. Ingredients like vinegar, citrus juice, or even a splash of wine can cut through richness and add a refreshing zing. A dash of acid can transform a heavy cream sauce into a lighter, more vibrant creation. Remember, it’s all about balance—too much acidity can overpower the dish, so add it gradually and taste as you go.

Next, consider sweetness. A touch of honey, maple syrup, or even a finely chopped onion can enhance the depth of your sauce. Sweetness can act as a counterbalance to acidity and bitterness, creating a more rounded flavor profile. However, be cautious; a little sweetness goes a long way, and you don’t want your sauce to veer into dessert territory.

Saltiness is another crucial element. It amplifies flavors and brings out the best in your ingredients. Use kosher salt or sea salt for a cleaner taste, and don’t forget that some ingredients, like soy sauce or cheese, already contain salt. Taste frequently to ensure your sauce is seasoned to perfection without becoming overly salty.

Lastly, embrace bitterness as a flavor enhancer. Ingredients like dark chocolate, coffee, or even certain herbs can introduce an intriguing complexity to your sauce. Just a pinch can add depth, but be careful not to dominate the other flavors.

Don’t shy away from experimenting with herbs and spices, either. Fresh herbs like basil, cilantro, or parsley can add brightness, while spices like cumin, paprika, or black pepper can impart warmth and depth. Always taste your sauce throughout the cooking process; this will allow you to adjust and refine the flavors until they sing in harmony.

By mastering these tips for balancing flavors, you’ll unlock the secret to creating unforgettable sauces that elevate any dish. Whether you’re drizzling a rich béchamel over pasta or crafting a zesty chimichurri for grilled meats, the right balance will make all the difference on your plate!

12. Storing and Preserving Your Homemade Sauces

Storing and preserving your homemade sauces is just as crucial as crafting them to perfection. Proper storage not only extends the shelf life of your culinary creations but also ensures that their flavors remain vibrant and delightful.

First and foremost, choose the right containers. Glass jars with airtight lids are an excellent option, as they help prevent oxidation and maintain the freshness of your sauces. Opt for containers that are appropriately sized for your needs; smaller jars are ideal for single-use sauces, while larger ones work well for batch-made favorites that you plan to use frequently.

Once you’ve poured your sauce into its container, allow it to cool completely at room temperature before sealing and storing it in the fridge. Most homemade sauces can last about a week in the refrigerator, but for longer preservation, consider freezing your sauces. Portion them into ice cube trays or freezer-safe bags, and once frozen, transfer the cubes to a larger container or bag for easy access. This method allows you to thaw just the right amount for any dish, minimizing waste and maximizing convenience.

Labeling is another essential step. Be sure to write the name of the sauce and the date it was made on each container. This simple practice helps you keep track of freshness and ensures that you use your sauces within their optimal timeframe.

For those interested in canning, homemade sauces can be preserved for months or even years. However, it’s crucial to follow proper canning guidelines to ensure food safety. High-acid sauces like marinara or barbecue sauce are generally safe for water bath canning, while low-acid sauces may require pressure canning.

By mastering the art of storing and preserving your homemade sauces, you not only enhance their shelf life but also make your culinary journey smoother and more enjoyable. With sauces ready at your fingertips, every meal can transform into a flavorful masterpiece!

13. Creative Uses for Leftover Sauces

When it comes to homemade sauces, it’s easy to get caught up in the excitement of crafting the perfect blend of flavors, only to find yourself with a bit left over once the meal is done. But don’t let those flavorful remnants go to waste! Leftover sauces are culinary goldmines, full of potential to enhance future dishes in delicious and unexpected ways.

Consider a rich marinara sauce that’s just a bit too much for your spaghetti night. Instead of tossing it in the fridge, think creatively! Use it as a base for a savory shakshuka, where poached eggs simmer gently in the sauce, soaking up its vibrant flavors. Alternatively, blend it into a creamy soup for an instant flavor boost, or use it as a dipping sauce for freshly baked breadsticks at your next gathering.

Got some extra pesto lying around? This herbaceous wonder can be swirled into a creamy risotto for a fresh twist or used as a zesty marinade for grilled chicken or vegetables. You can even stir it into scrambled eggs for a gourmet breakfast that will elevate your morning routine to new heights.

Sweet sauces, like leftover barbecue or teriyaki, can bring life to an otherwise ordinary stir-fry or roasted vegetables. Drizzle them over grilled fish for a delightful glaze or mix them into your salad dressings for a unique, tangy kick.

And don’t forget about dessert! A leftover chocolate sauce can transform plain vanilla ice cream into an indulgent treat, while a fruit sauce can be drizzled over pancakes or used as a topping for yogurt parfaits.

By embracing creative uses for leftover sauces, you not only minimize waste but also expand your culinary repertoire. With a little imagination, those remnants can become the star ingredient in a new dish, ensuring that every drop of your homemade creation is savored. So next time you find yourself with extra sauce, let your creativity flow and discover the endless possibilities that await!

14. Pairing Sauces with Different Dishes

Pairing sauces with the right dishes can elevate your culinary creations from ordinary to extraordinary. The magic of a well-chosen sauce lies in its ability to enhance flavors, add depth, and bring a harmonious balance to your meals. Let’s explore how to expertly match sauces with various dishes to create unforgettable dining experiences.

**1. Pasta:** Rich, hearty sauces like marinara, Alfredo, or pesto are perfect companions for pasta. A classic tomato-based marinara sauce with its tangy sweetness pairs beautifully with spaghetti, while a creamy Alfredo sauce brings a velvety richness to fettuccine. For a fresh burst of flavor, toss your favorite pasta with homemade basil pesto, allowing the vibrant herbs to shine through.

**2. Grilled Meats:** When it comes to grilled meats, a bold barbecue sauce can add a smoky sweetness that complements the charred flavors beautifully. Consider a tangy mustard-based sauce for grilled chicken or a rich chimichurri for steak, which adds a fresh herbaceous note that cuts through the meat’s richness.

**3. Vegetables:** Sauces can transform even the simplest vegetables into a sensational side dish. A light vinaigrette drizzled over roasted asparagus or a zesty tahini sauce can elevate the dish while keeping it healthy. For stir-fried vegetables, a savory soy sauce or teriyaki glaze can enhance the natural flavors and add an irresistible umami punch.

**4. Seafood:** When pairing sauces with seafood, think light and bright. A lemon-butter sauce can enhance the delicate flavors of fish, while a spicy aioli can add a delightful kick to shrimp tacos. For a more adventurous pairing, consider a mango salsa to bring a tropical sweetness to grilled salmon.

**5. Desserts:** Don’t forget about the sweet side! A drizzle of chocolate sauce can elevate a scoop of vanilla ice cream, while a homemade caramel sauce can transform a simple slice of apple pie into a decadent dessert experience. Fresh fruit compotes or flavored syrups can also add a burst of flavor and color to your favorite sweets.

By understanding the unique profiles of different sauces and how they interact with various dishes, you can create meals that are not only delicious but also memorable. So, don your apron and experiment with these pairings—your taste buds will thank you!

15. Conclusion: Your Journey to Sauce Mastery

As we reach the conclusion of our flavorful journey, it’s essential to recognize that mastering homemade sauces is not just about following recipes; it’s about embracing creativity, experimenting with flavors, and discovering what truly delights your palate. Each sauce you create becomes a reflection of your personality and culinary preferences, transforming simple ingredients into extraordinary accompaniments that elevate your meals.

Remember, sauce-making is an art that improves with practice. Don’t shy away from adjusting ingredients to suit your taste, whether it’s adding a dash of heat, a splash of acidity, or a hint of sweetness. Keep a well-stocked pantry with essential herbs, spices, and bases, and you’ll find that the possibilities are endless.

As you venture into your kitchen, let each sauce be a new adventure. From a classic béchamel that graces your lasagna to a zesty chimichurri that livens up grilled meats, these sauces can turn the ordinary into the extraordinary. And don’t forget the power of presentation; a beautifully sauced dish can be as delightful to the eyes as it is to the taste buds.

So, gather your ingredients, unleash your imagination, and start experimenting! Your journey to sauce mastery is just beginning, and with each batch, you’ll not only refine your skills but also delight your family and friends with unforgettable meals. Here’s to creating sauces that inspire, impress, and invite everyone to gather around your table time and again!

As we wrap up our exploration of homemade sauces, we hope you’re feeling inspired and excited to elevate your culinary creations with these flavorful additions. From the zesty tang of a fresh salsa to the rich creaminess of a classic Alfredo, mastering these sauces can transform even the simplest dish into a gourmet experience. Remember, the beauty of homemade sauces lies not only in their taste but also in your ability to customize them to suit your preferences. So, roll up your sleeves, experiment with flavors, and don’t hesitate to make these recipes your own. With a little practice, you’ll soon be the sauce maestro of your kitchen, impressing family and friends with your newfound skills. Happy cooking, and may your dishes always be saucy!

What are the best ways to use pantry staples?

In the heart of every home lies a treasure trove of pantry staples, waiting to be transformed into culinary masterpieces.

Often overlooked, these basic ingredients—such as rice, beans, pasta, and canned goods—hold the potential to elevate your cooking game and impress even the most discerning palates. With a splash of creativity and a dash of inspiration, you can turn everyday items into gourmet meals that tantalize the taste buds and bring joy to the dinner table. In this blog post, we’ll explore a variety of innovative culinary hacks that will not only enhance your cooking skills but also reignite your passion for home-cooked meals. Say goodbye to mundane dinners and hello to a world of flavor, as we unlock the secrets to transforming your pantry staples into extraordinary dishes that celebrate simplicity and creativity in the kitchen. Get ready to embark on a delicious journey that will forever change the way you view your pantry!

1. Introduction: Elevating Everyday Ingredients

What are the best ways to use pantry staples?
Credit : whatcanu.com

In today’s fast-paced world, where gourmet dining seems reserved for special occasions or extravagant outings, the beauty of culinary creativity lies in the everyday pantry staples that often go unnoticed. Imagine transforming a simple can of chickpeas or a bag of frozen peas into a culinary masterpiece that tantalizes the taste buds and impresses the dinner guests. This blog seeks to unveil the magic that can happen when you elevate commonplace ingredients into gourmet meals, proving that you don’t need a Michelin star chef in the kitchen to create something extraordinary.

Every cook, from the novice to the seasoned gourmet, has faced the daunting question: “What should I make for dinner?” Often, the answer lies in the pantry. With a bit of imagination and some clever techniques, staples like rice, pasta, and canned goods can be reinvented into dishes that are not only delicious but also visually stunning. We’ll explore innovative methods such as flavor infusions, creative pairings, and unexpected presentations that highlight the potential of these humble ingredients.

In this blog post, we’ll dive into various culinary hacks that will inspire you to look beyond the ordinary. Whether you’re a busy professional looking to whip up something quick and satisfying or a home cook eager to impress with minimal effort, these tips will help you unlock the gourmet potential in your kitchen. So, gather your pantry staples, roll up your sleeves, and get ready to embark on a culinary adventure that turns the ordinary into the extraordinary!

2. Understanding Pantry Staples: What You Probably Already Have

Understanding pantry staples is the first step toward culinary creativity, and the good news is that you likely already have a treasure trove of potential gourmet ingredients sitting right in your kitchen. When we think of pantry staples, we often envision basic items like rice, pasta, canned tomatoes, and beans. However, these unassuming ingredients can serve as a blank canvas for your culinary masterpieces.

Take, for instance, a humble bag of rice. While it may seem basic, with a few strategic additions, you can transform it into a fragrant biryani, a creamy risotto, or even a refreshing rice salad bursting with seasonal vegetables and herbs. Similarly, a can of chickpeas can easily be elevated into a rich, spiced hummus or a hearty salad with roasted vegetables and a drizzle of tahini.

Don’t overlook the power of spices and herbs, which can elevate even the simplest of dishes. A dash of smoked paprika can add depth to roasted potatoes, while a sprinkle of fresh basil can brighten up a classic tomato sauce. Understanding how to combine these staple ingredients with flavorful seasonings can open up a world of culinary possibilities.

Moreover, think about what’s lurking in the back of your pantry. Those jars of preserved lemon? They can bring an unexpected brightness to a grain bowl. That half-empty bottle of soy sauce? It’s the secret ingredient for a quick stir-fry or a marinade that packs a punch.

By taking stock of what you already have, you can create a vibrant menu without the need for a lengthy grocery list. Embrace the creativity that comes with working with pantry staples, and you’ll soon find yourself whipping up gourmet meals that impress both your palate and your guests. So, take a moment to explore your pantry—it may just hold the keys to your next culinary adventure.

3. The Art of Flavor Pairing: Unexpected Combinations

What are the best ways to use pantry staples?
Credit : whatcanu.com

In the world of culinary creativity, the art of flavor pairing stands out as a gateway to transforming simple pantry staples into gourmet meals. The magic lies in the unexpected combinations that can elevate ordinary ingredients into extraordinary dishes. Imagine taking a humble can of chickpeas, often overlooked in the pantry, and pairing it with bold flavors like smoky paprika and zesty lemon. The result? A vibrant, protein-packed hummus that dances on the palate and brings life to any meal.

Exploring flavor pairings is akin to embarking on a delicious adventure. Consider the classic marriage of sweet and savory: drizzling honey over roasted Brussels sprouts can create a caramelized masterpiece that tantalizes the taste buds. Or, how about the surprising pairing of chocolate with chili? A pinch of cayenne mixed into a rich chocolate sauce can add a thrilling kick that transforms a simple dessert into a showstopper.

Don’t shy away from experimenting with herbs and spices, either. A sprinkle of fresh basil on a bowl of pasta can elevate it to new heights, while a dash of cardamom in your morning oatmeal brings warmth and depth that’s both comforting and unexpected. The key is to think outside the box. Take inspiration from various cuisines—Asian ginger and garlic can breathe life into a Mediterranean dish, while Italian balsamic vinegar can add a tangy twist to a Thai-inspired salad.

As you delve into the world of flavor pairing, remember that the possibilities are endless. Keep an open mind and allow your palate to guide you. Your pantry is not just a collection of ingredients; it’s a canvas waiting for your culinary masterpiece. With a little creativity, you can transform everyday staples into gourmet experiences that delight and surprise. So, grab those unexpected combinations and let your kitchen become the stage for your next culinary triumph!

4. Transforming Rice: From Basic to Gourmet Risotto

Rice is a pantry staple that often gets a bad rap for being bland and boring, but with a few creative culinary hacks, you can elevate this humble grain into an indulgent gourmet dish—risotto. While traditional risotto may seem intimidating with its reputation for requiring constant stirring and precise timing, the truth is that anyone can master this creamy, comforting classic with a little finesse.

Start by choosing the right type of rice; Arborio, Carnaroli, or Vialone Nano are all ideal choices due to their high starch content, which is crucial for that signature creaminess. Begin by sautéing finely chopped onions or shallots in a drizzle of olive oil or a pat of butter until they become translucent and fragrant. This aromatic base sets the stage for a flavor-packed dish.

Next, toast the rice in the pan for a minute or two until it turns slightly translucent. This step might seem trivial, but it enhances the nutty flavor of the rice and adds depth to your dish. Once toasted, deglaze the pan with a splash of white wine, allowing the alcohol to cook off while the rice absorbs the flavorful essence.

Now for the magic of risotto: the gradual addition of warm broth. Start with a ladleful of homemade or store-bought chicken or vegetable broth, stirring gently and allowing the rice to absorb the liquid before adding more. This slow process releases the starches, resulting in a rich and creamy texture without the need for cream.

For an added gourmet touch, consider incorporating seasonal vegetables, sautéed mushrooms, or fresh herbs towards the end of cooking. A handful of peas or asparagus can add a pop of color and freshness, while a sprinkle of grated Parmesan cheese just before serving elevates the dish to new heights.

Finally, finish with a drizzle of high-quality olive oil or a pat of butter for a glossy sheen, and garnish with freshly chopped herbs or a zest of lemon to brighten the flavors. With just a little creativity and a few extra steps, you can transform plain rice into a luxurious risotto that impresses at any dinner table. Enjoy your culinary masterpiece—your pantry staples just achieved gourmet status!

5. Pasta Perfection: Quick Sauces Using Pantry Essentials

What are the best ways to use pantry staples?
Credit : whatcanu.com

When it comes to quick and delicious meals, pasta is the ultimate canvas. With just a handful of pantry staples, you can whip up gourmet sauces that elevate your dish from mundane to magnificent in mere minutes. The beauty of pasta lies not only in its versatility but also in its ability to absorb flavors, making it the perfect vehicle for your culinary creativity.

Start with the classic garlic and olive oil sauce, a simple yet sophisticated option that requires just two key ingredients: minced garlic and high-quality olive oil. Sauté the garlic in a generous drizzle of olive oil until it turns golden and fragrant, then toss in your cooked pasta. Finish with a sprinkle of red pepper flakes, grated Parmesan, and a handful of fresh parsley for a vibrant, aromatic dish that feels indulgent without breaking a sweat.

For those craving something a bit creamier, a pantry staple like canned tomatoes can be transformed into a luscious marinara. Sauté onions and garlic in olive oil, add crushed tomatoes, and season with salt, pepper, and Italian herbs. Let it simmer while your pasta cooks, and you’ll have a rich, flavorful sauce that rivals any restaurant offering.

If you’re looking to incorporate more veggies, consider a quick pesto made from pantry essentials. Blend together your favorite nuts—almonds or walnuts work beautifully—with garlic, olive oil, and any leftover greens like spinach or kale. Toss this vibrant green sauce with freshly cooked pasta, and you’ll have a dish that’s not only delicious but packed with nutrients.

Lastly, don’t overlook the power of cheese! A simple cheese sauce can be made by melting butter and whisking in flour to create a roux, then gradually adding milk and your choice of cheese until you achieve a creamy consistency. Drizzle this decadent creation over your pasta for an instant comfort-food classic.

With these quick sauces made from pantry staples, you can turn any ordinary pasta night into an extraordinary culinary experience, proving that gourmet doesn’t always mean complicated. So next time you find yourself staring into your pantry, remember that magic is just a pot of boiling water away!

6. Creative Uses for Canned Goods: Beyond the Basics

Canned goods often get a bad rap, relegated to the realm of quick soups or last-minute meals, but these versatile staples hold the potential to elevate your culinary game to new heights. By thinking outside the box and embracing creativity, you can transform ordinary canned items into gourmet-inspired dishes that impress and satisfy.

Start with canned tomatoes: instead of simply pouring them into a pot for a basic sauce, consider roasting them with garlic, herbs, and a drizzle of olive oil to deepen their flavor. This simple technique can turn a humble can of tomatoes into a rich, concentrated sauce perfect for pasta or as a base for a savory ratatouille.

Canned beans are another pantry powerhouse waiting to be unleashed. Rather than using them solely in salads or chili, try mashing them into a creamy dip or blending them into a bean hummus, adding spices and herbs for a unique twist. You’ll surprise your guests with a protein-rich appetizer that pairs beautifully with veggies or pita chips.

Don’t overlook canned fish, either. While tuna salad is a classic, why not try a Mediterranean-inspired dish by mixing canned sardines with olive oil, capers, and a squeeze of lemon juice? Serve it on crostini for an elegant starter that highlights the savory depth of the fish.

Even canned fruits can take a gourmet turn. Instead of just tossing them into a fruit salad, consider caramelizing canned peaches with a sprinkle of brown sugar and a touch of cinnamon. Serve them warm over a scoop of vanilla ice cream or as an accompaniment to a cheese platter for an unexpected sweet-savory combination.

With these creative uses for canned goods, you’ll not only reduce food waste but also discover that these pantry staples can be the foundation for gourmet meals that delight the palate and impress your family and friends. Embrace the adventure of cooking with canned ingredients, and watch as your kitchen transforms into a culinary playground.

7. Elevating Frozen Vegetables: Simple Techniques for Flavor

What are the best ways to use pantry staples?
Credit : whatcanu.com

Frozen vegetables often get a bad rap, dismissed as bland or uninteresting, but with a little creativity and the right techniques, they can transform into vibrant, gourmet dishes that pack a punch of flavor. The secret lies in how you prepare and season them.

First, consider roasting your frozen veggies. Preheat your oven to a high temperature—around 425°F (220°C)—and spread the vegetables in a single layer on a baking sheet. Drizzle with olive oil, sprinkle with sea salt, and toss in your favorite spices—think garlic powder, smoked paprika, or a touch of cayenne for heat. The high heat will caramelize the sugars in the vegetables, enhancing their natural sweetness while adding depth and a satisfying crunch.

Another technique is to sauté your frozen vegetables in a hot skillet. Begin by heating a tablespoon of oil in a pan and add minced garlic or shallots for an aromatic base. Once fragrant, toss in the frozen vegetables, stirring frequently. The key here is to cook them just until heated through, allowing them to retain their vibrant color and crisp texture. Finish with a splash of soy sauce, a sprinkle of sesame seeds, or a squeeze of lemon juice to elevate the dish and add a burst of brightness.

For a creamy twist, consider blending frozen vegetables into a smooth soup. Simply simmer your choice of veggies with vegetable broth, onion, and herbs until tender, then use an immersion blender to create a silky puree. A dollop of cream or a swirl of pesto can take this dish to the next level, making it a comforting yet elegant option.

By incorporating these simple techniques, frozen vegetables can easily become the star of your meals, turning pantry staples into gourmet creations that delight the palate. So the next time you reach into your freezer, remember that with a little flair, those humble veggies can shine on your dinner plate!

8. Bread Revival: Turn Stale Bread into Gourmet Dishes

Stale bread might seem like a culinary disaster waiting to happen, but with a little creativity, it can easily be transformed into gourmet dishes that will impress even the most discerning palates. Instead of tossing that leftover loaf or half-bag of rolls, take a moment to explore the endless possibilities that stale bread offers.

One of the simplest yet most delicious ways to revive stale bread is by making **croutons**. Cut the bread into bite-sized cubes, toss them in olive oil, and season with your favorite herbs and spices. Roast them in the oven until they’re crispy and golden, and you’ll have an irresistible addition to salads or soups. Not only do these croutons add texture and flavor, but they also elevate your dishes to a restaurant-worthy standard.

For a heartier option, consider crafting a **bread pudding**. This classic dish can be both sweet and savory. For a sweet twist, combine stale bread with milk, eggs, sugar, and cinnamon, then bake until it’s set and golden. Serve it warm with a drizzle of caramel or a scoop of vanilla ice cream. On the savory side, mix stale bread with sautéed vegetables, cheese, and a custard base for a delightful entrée that’s perfect for brunch or dinner.

If you’re feeling adventurous, try your hand at making **panzanella**, a traditional Italian bread salad that takes advantage of stale bread’s unique texture. Combine cubes of stale bread with ripe tomatoes, cucumbers, red onions, and a generous drizzle of olive oil and vinegar. Let it sit for a bit to allow the flavors to meld, and you’ll have a vibrant, refreshing dish that embodies the essence of summer.

Finally, don’t forget about the classic **garlic bread**. Revitalize your stale bread by slathering it with a mixture of butter, garlic, and fresh herbs. Toast it in the oven until it’s crispy and fragrant, and you’ll have a complementary side dish that pairs perfectly with pasta or soups.

With these creative culinary hacks, stale bread transforms from a kitchen nuisance to a pantry hero, proving that with a little ingenuity, you can turn everyday ingredients into gourmet masterpieces that delight the senses. So, the next time you find yourself with stale bread, remember: it’s not trash; it’s a treasure waiting to be rediscovered.

9. Spice it Up: Using Spices and Herbs to Enhance Flavors

When it comes to transforming everyday pantry staples into gourmet meals, spices and herbs are your secret weapons. These flavor enhancers can elevate the simplest of dishes from mundane to magnificent, creating a culinary experience that delights the palate and excites the senses.

Imagine taking a basic bowl of rice and, with just a sprinkle of cumin and a dash of turmeric, turning it into a vibrant, aromatic side that complements any main dish. Or consider the humble can of tomatoes; a pinch of oregano, a swirl of olive oil, and a hint of red pepper flakes can morph it into a rich, zesty marinara sauce worthy of a fine dining experience.

Fresh herbs, when used thoughtfully, can breathe life into your cooking. Basil, parsley, and cilantro add brightness and freshness, perfect for garnishing dishes or blending into sauces. A handful of freshly chopped herbs can transform a simple salad or pasta dish into a culinary masterpiece, providing not just flavor but also a burst of color that pleases the eye.

Don’t overlook the power of spice blends, either. A dash of garam masala can transport you to the streets of Delhi, while a sprinkle of za’atar evokes the warm, sun-kissed markets of the Middle East. Experimenting with different combinations can lead to exciting discoveries; you might find that your taste buds revel in the pairing of cinnamon with savory dishes or the addition of smoked paprika to a classic stew.

Remember, the key to mastering the art of spicing up your meals is to start slowly. Taste as you go, allowing the flavors to meld and develop. Before long, you’ll not only enhance the taste of your everyday meals but also impress your family and friends with your newfound culinary prowess. So go ahead, dive into your spice cabinet, and let your creativity run wild—your pantry staples are just waiting for their moment to shine!

10. Making Gourmet Meals with Common Legumes

Legumes are often viewed as humble pantry staples—simple, nutritious, and versatile—but with a pinch of creativity and the right techniques, they can be transformed into gourmet meals that tantalize the taste buds. From lentils and chickpeas to black beans and kidney beans, these protein-packed powerhouses are not just for soups and salads; they can be the star ingredient in a variety of sophisticated dishes that impress even the most discerning palates.

Start by elevating the humble lentil. Instead of merely boiling them for a basic side dish, try creating a spiced lentil salad with roasted vegetables, fresh herbs, and a zesty citrus vinaigrette. The combination of textures and flavors—from the earthiness of the lentils to the sweetness of roasted carrots—will make your dish pop. You can also experiment by blending cooked lentils into a creamy soup, enriched with coconut milk and flavored with curry spices for an exotic twist.

Chickpeas are another legume that can shine in gourmet cuisine. Beyond the classic hummus, consider roasting them with a medley of spices for a crunchy snack or tossing them into a vibrant grain bowl. A chickpea and quinoa salad topped with tangy feta, cherry tomatoes, and a drizzle of balsamic reduction can serve as a delightful centerpiece for any meal. Alternatively, use them to craft a luxurious chickpea curry, simmered in a rich tomato and coconut sauce, served over fluffy basmati rice—transforming an everyday ingredient into an indulgent feast.

Black beans, with their creamy texture and rich flavor, can become the foundation of a gourmet black bean burger that rivals any restaurant’s offering. Add finely chopped onions, garlic, and spices to create a savory patty that can be grilled and served with a homemade avocado lime sauce. For a more sophisticated touch, present them in a black bean and roasted corn salad with cilantro-lime dressing, garnished with edible flowers for a stunning visual appeal.

Lastly, kidney beans shouldn’t be overlooked. Transform them into a luscious chili, simmered with dark chocolate and spices, or blend them into a smooth bean dip that pairs beautifully with artisan bread or gourmet crackers.

By reimagining how you prepare and serve legumes, you can elevate these everyday ingredients into gourmet highlights of your culinary repertoire, proving that with a bit of creativity, anything is possible in the kitchen.

11. Sweet Transformations: Turning Basic Ingredients into Desserts

When it comes to satisfying a sweet tooth, you don’t always need to stock your kitchen with fancy ingredients or elaborate recipes. Many basic pantry staples can be magically transformed into delightful desserts that impress both your palate and your guests. Let’s explore some creative culinary hacks that will elevate humble ingredients into decadent treats.

First up, consider the versatility of oats. While often relegated to breakfast, oats can be the star of a rich and chewy cookie or a cozy crumble. Simply mix oats with a bit of flour, sugar, and butter to create a simple cookie dough. Add in whatever mix-ins you have on hand—chocolate chips, nuts, or dried fruits—and bake until golden brown. You’ll find that these cookies are not only delicious but also heartier than traditional versions.

Another pantry staple with untapped potential is the can of beans. Yes, you read that right! Black beans, when blended, can create a surprisingly rich and fudgy brownie. Combine them with cocoa powder, eggs, and a bit of sweetener, and you’ll have a gluten-free dessert that’s both nutritious and indulgent. The beans add moisture and a hint of protein, making these brownies a guilt-free pleasure.

Don’t underestimate the power of bananas, either. Overripe bananas can be mashed and transformed into a delightful banana bread or fluffy pancakes. Mix them with a few pantry staples like flour, baking powder, and eggs, and you’ll have breakfast or dessert that’s both simple and satisfying. For an extra touch, add a sprinkle of cinnamon or a handful of nuts for a gourmet flair.

Lastly, let’s not forget about yogurt. This creamy ingredient can be used as a base for delicious parfaits or transformed into a luscious frozen yogurt with just a bit of sweetener and your favorite fruits. Layer it with granola and fresh berries for an elegant dessert that looks as good as it tastes.

By thinking outside the box and getting a little creative with your pantry staples, you can whip up desserts that will delight your family and friends without the need for complex techniques or rare ingredients. Embrace these sweet transformations and let your culinary imagination run wild!

12. Meal Presentation: Plating Techniques for Gourmet Appeal

When it comes to elevating your culinary creations from everyday meals to gourmet masterpieces, the art of plating cannot be overlooked. Meal presentation is not just a final touch; it’s an essential aspect of the dining experience that engages the senses and enhances the overall enjoyment of your food. Here are some techniques to transform your pantry staples into stunning visual feasts.

First, consider the color palette of your dish. Using a variety of colors not only makes the meal visually appealing but also stimulates the appetite. For instance, a vibrant tomato sauce over creamy polenta can be accented with fresh green herbs or a sprinkle of bright orange zest. The contrast between colors draws the eye and invites curiosity, making diners eager to dig in.

Next, think about the shapes on your plate. Layering ingredients can add height and dimension to your presentation. For example, stacking roasted vegetables or arranging slices of grilled chicken fan-style can create an impressive visual effect. Don’t shy away from using different textures, either; a crunchy garnish sprinkled on top of a smooth puree can provide a delightful contrast that pleases both the eyes and the palate.

Plating isn’t just about the food itself; the plate can be an essential component of your presentation. Choose plates that complement the colors and shapes of your dish. A simple white plate can make vibrant food pop, while a textured or boldly colored plate can add an extra dimension to more muted dishes. Remember to leave some empty space on the plate—the negative space can highlight your carefully arranged food and give it room to breathe.

Finally, don’t forget the finishing touches. A drizzle of balsamic reduction, a sprinkle of microgreens, or a dollop of herbed yogurt can add that final gourmet flair. These elements not only enhance the visual appeal but also contribute layers of flavor that elevate your dish from ordinary to extraordinary.

With a little attention to detail and creativity, you can transform even the simplest pantry staples into gourmet meals that delight the senses and impress your guests. Remember, every meal is an opportunity to showcase your culinary skills—so let your imagination run wild and plate with passion!

13. Budget-Friendly Gourmet: Cooking Delicious Meals on a Dime

Cooking gourmet meals doesn’t have to mean breaking the bank. With a little creativity and smart ingredient choices, you can transform humble pantry staples into mouthwatering dishes that impress both your palate and your wallet. The key is to think outside the box and leverage what you already have.

Start with versatile staples like rice, pasta, beans, and lentils. These ingredients form the backbone of countless gourmet recipes. For instance, a simple pot of white rice can be elevated with an infusion of spices, sautéed onions, and a splash of soy sauce to create a fragrant fried rice dish that rivals any restaurant offering. Similarly, lentils can be spiced and simmered with tomatoes and herbs to make a hearty stew that’s not only filling but bursting with flavor.

Don’t underestimate the power of herbs and spices. A well-stocked spice rack can turn an ordinary dish into something extraordinary. A pinch of smoked paprika, a sprinkle of crushed red pepper, or a dash of cumin can elevate your meals to new heights. Experiment with flavor combinations that excite your taste buds. For example, try pairing garlic and lemon with chickpeas for a refreshing and zesty salad or toss roasted vegetables with balsamic vinegar and a touch of honey for a sweet-savory side dish.

Utilizing seasonal produce can also stretch your budget while enhancing your dishes. Visit your local farmer’s market or grocery store and keep an eye out for discounts on fruits and vegetables that are in season. Not only will they be more affordable, but they’ll also be at their peak flavor, making your meals even more delicious.

Finally, don’t forget about presentation. Even the simplest meals can look gourmet when plated beautifully. A sprinkle of fresh herbs, a drizzle of olive oil, or a squeeze of citrus can add that final touch of elegance. Remember, cooking on a budget doesn’t mean sacrificing quality or flavor—it’s all about resourcefulness and a little culinary flair. With these budget-friendly gourmet hacks, your pantry staples will shine, transforming your everyday meals into culinary masterpieces.

14. Quick Gourmet Hacks: 15-Minute Meal Transformations

When time is of the essence but your taste buds demand something extraordinary, quick gourmet hacks can be your culinary lifesaver. With just a little creativity and some clever techniques, pantry staples can be elevated into gourmet meals in a flash, all within a mere 15 minutes.

Imagine transforming a simple can of chickpeas into a vibrant Mediterranean salad. Begin by draining and rinsing the chickpeas, then toss them with fresh diced cucumbers, cherry tomatoes, red onion, and a handful of parsley. Drizzle with olive oil, a splash of lemon juice, and season with salt and pepper for a refreshingly light dish that sings with flavor.

Or take a basic box of pasta and elevate it to a restaurant-quality dish. Cook the pasta according to package instructions, and while it’s boiling, sauté minced garlic in olive oil until fragrant. Add in a handful of spinach or arugula, letting it wilt down, then combine it with the drained pasta. Finish with a generous sprinkle of grated Parmesan cheese and a pinch of red pepper flakes for a meal that’s both comforting and sophisticated.

Even a humble can of tuna can be transformed into a gourmet delight. Mix the tuna with a dollop of Greek yogurt, a squeeze of lemon, and finely chopped celery and dill. Serve it atop a bed of mixed greens or in a whole-grain wrap with sliced avocado for a lunch that is as nutritious as it is delicious.

These quick gourmet hacks not only save time but also allow you to impress your family or guests with minimal effort. With a few pantry staples and a sprinkle of imagination, you can create dishes that feel indulgent and satisfying, proving that gourmet dining doesn’t always require hours in the kitchen.

15. Conclusion: Embracing Creativity in the Kitchen

As we reach the end of our culinary journey, it’s clear that the secret to transforming ordinary pantry staples into gourmet meals lies in the embrace of creativity and resourcefulness. The kitchen is not just a place for cooking; it’s a canvas waiting for your imagination to paint vibrant flavors and textures. With a little inspiration and a willingness to experiment, even the most humble ingredients can be the stars of your dining table.

Remember, gourmet cooking isn’t solely about expensive ingredients or complex techniques; it’s about the joy of discovery, the thrill of experimentation, and the pleasure of sharing your creations. Whether it’s a can of chickpeas turned into a tantalizing curry, or day-old bread reimagined as a savory bread pudding, each dish you create is an opportunity to express yourself and delight your taste buds.

So, the next time you find yourself staring at your pantry, don’t see it as a collection of basic items; see it as a treasure trove of potential. Harness the power of spices, herbs, and everyday staples to create meals that not only satisfy hunger but also evoke the warmth of home-cooked comfort. Embrace the art of culinary improvisation, and let your creativity shine. As you step into your kitchen, remember: every meal is a chance to innovate, to celebrate, and to savor the delicious results of your imagination. Happy cooking!

As we wrap up our exploration of creative culinary hacks, we hope you feel inspired to transform your pantry staples into gourmet meals that delight both your palate and your guests. By thinking outside the box and using the tips and techniques shared in this post, you can elevate everyday ingredients into extraordinary dishes that showcase your culinary creativity. Embrace the art of experimentation, and don’t be afraid to play with flavors and textures. The kitchen is your canvas, and with a little imagination and resourcefulness, you can create memorable dining experiences without breaking the bank. So go ahead—dive into your pantry, unleash your inner chef, and let the gourmet adventures begin! Happy cooking!

What are the different types of dishwashers and their features?

In the bustling heart of every home, the kitchen stands as a hub of activity, and at the center of it all is the humble dishwasher—a modern marvel that transforms the tedious chore of washing dishes into a breeze.

But with a plethora of options available, how do you choose the right dishwasher that suits your needs and lifestyle? From the sleek, energy-efficient built-in models to the versatile portable designs, each type comes packed with features that promise to enhance your dishwashing experience. In this comprehensive guide, we will delve into the various types of dishwashers, unravel their unique features, and provide you with the insights needed to make an informed decision. Whether you’re a culinary enthusiast or a busy parent seeking convenience, understanding the ins and outs of dishwashers will empower you to select the perfect appliance that not only complements your kitchen but also streamlines your daily routine. Join us as we navigate the world of dishwashers and help you find the ideal match for your home!

1. Introduction to Dishwashers: Why Choose One?

What are the different types of dishwashers and their features?
Credit : whatcanu.com

In today’s fast-paced world, where time is often a luxury, the humble dishwasher has transformed from a mere convenience to an essential household appliance. Imagine the relief of not having to spend precious moments scrubbing pots and pans, only to find yourself facing a mountain of dishes after every meal. With a dishwasher, you can reclaim that time for what truly matters—be it enjoying a leisurely dinner with family or catching up on your favorite shows.

Choosing a dishwasher is not just about selecting an appliance; it’s about enhancing your lifestyle. From energy-efficient models that help reduce your carbon footprint to smart dishwashers equipped with Wi-Fi capabilities for remote operation, the options available today cater to a wide array of needs and preferences. Whether you have a bustling household with a constant stream of dirty dishes or a cozy kitchen for two, there’s a dishwasher designed to fit seamlessly into your routine.

In this guide, we will explore the various types of dishwashers—some built to handle large loads with ease, while others are compact and perfect for smaller kitchens. We will also delve into essential features to consider, such as noise levels, wash cycles, and energy efficiency ratings. By the end of this article, you will not only understand the different options available but also be well-equipped to make an informed decision that perfectly suits your lifestyle and kitchen needs. So, let’s dive in and discover why choosing the right dishwasher can revolutionize your dishwashing experience!

2. Types of Dishwashers: Built-in, Portable, and Drawer Models

When it comes to selecting the right dishwasher for your home, understanding the different types available can significantly impact your decision. Dishwashers come in three main designs: built-in, portable, and drawer models, each catering to distinct needs and lifestyles.

**Built-in Dishwashers** are the most common type found in homes. These units are seamlessly installed under the countertop, providing a permanent solution for dishwashing. They usually come in standard sizes (24 inches is typical) and can hold a substantial amount of dishes, pots, and pans, making them ideal for families or anyone who frequently entertains guests. Built-in models often come equipped with advanced features such as multiple wash cycles, energy-efficient options, and smart technology that allows for remote operation via smartphones.

**Portable Dishwashers** offer a flexible alternative for those who may not have the space or plumbing for a built-in unit. These dishwashers typically sit on wheels, allowing you to move them wherever needed, and can be easily connected to a kitchen faucet when in use. This makes them perfect for renters or smaller kitchens that require versatility. Portable dishwashers generally have a smaller capacity than their built-in counterparts but still get the job done efficiently. With various styles and colors available, they can blend in with your kitchen decor while providing the functionality you need.

**Drawer Dishwashers** are a more modern and innovative option, featuring a unique design that allows for easier loading and unloading. These models consist of one or two separate drawers that can operate independently, making them great for smaller loads or quick clean-ups. Drawer dishwashers are particularly beneficial for those with limited kitchen space, as they can be installed in cabinets or countertops. Additionally, many drawer models come with advanced features like adjustable racks and specialized wash settings for delicate items.

By recognizing the advantages and limitations of each type of dishwasher, you can make an informed decision that aligns with your household needs, kitchen layout, and lifestyle. Whether you opt for the classic built-in, the versatile portable, or the innovative drawer model, choosing the right dishwasher will enhance your kitchen experience and streamline your dishwashing routine.

3. Key Features to Consider When Buying a Dishwasher

What are the different types of dishwashers and their features?
Credit : whatcanu.com

When embarking on the journey to choose the perfect dishwasher, understanding the key features available can significantly enhance your decision-making process. Modern dishwashers come packed with a variety of options designed to cater to diverse household needs, making it crucial to identify which features align with your lifestyle and preferences.

**1. Wash Cycles and Options:**
One of the first features to consider is the variety of wash cycles your dishwasher offers. Standard options include heavy, normal, and light cycles, but advanced models may also provide eco-friendly settings, quick wash options, and even specialized cycles for delicate glassware or pots and pans. Having multiple cycles allows you to customize the cleaning process based on your specific load requirements, ensuring that your dishes receive the appropriate care.

**2. Energy Efficiency:**
Energy-efficient dishwashers not only save you money on utility bills but also contribute to environmental sustainability. Look for models with the ENERGY STAR label, which indicates they meet rigorous energy efficiency standards. Additionally, consider features like soil sensors that adjust the wash cycle based on the dirtiness of the dishes, optimizing water and energy usage.

**3. Noise Level:**
For those who value peace and quiet, the noise level of a dishwasher is an essential feature to keep in mind. Measured in decibels (dB), a quieter dishwasher typically operates between 44-50 dB, allowing you to run it during the night or while entertaining guests without disruption. If your kitchen is open to your living space, investing in a quieter model can enhance your overall comfort.

**4. Interior Layout and Capacity:**
The layout of the dishwasher’s interior can greatly impact its usability. Look for adjustable racks, foldable tines, and designated spaces for utensils and larger items. A flexible configuration allows you to maximize capacity and accommodate various dish sizes, from oversized pots to delicate stemware. Assessing your typical load size and shape will help you determine the best interior design for your needs.

**5. Smart Features:**
As technology advances, many dishwashers now come equipped with smart features that can elevate your cleaning experience. Wi-Fi connectivity allows you to monitor and control your dishwasher remotely, receive alerts when cycles are complete, or even run diagnostic tests. Some models are compatible with voice assistants, making it easier to set cycles without lifting a finger.

**6. Build Quality and Design:**
Finally, consider the build quality and design aesthetics of the dishwasher. Stainless steel interiors are not only durable but also resist odors and stains, making them easier to clean. The exterior design should complement your kitchen decor, with options ranging from sleek, modern lines to classic finishes. A well-designed dishwasher can seamlessly integrate into your kitchen while providing lasting performance.

By carefully evaluating these key features, you’ll be well-equipped to select a dishwasher that not only meets your cleaning demands but also enhances your kitchen’s functionality and style. Whether you prioritize efficiency, noise reduction, or advanced technology, understanding these elements will lead you to a choice that keeps your dishes sparkling while fitting seamlessly into your home.

4. Energy Efficiency Ratings: What You Need to Know

When selecting a dishwasher, one of the most critical factors to consider is its energy efficiency rating. Not only does this metric highlight the appliance’s environmental impact, but it can also significantly influence your household utility costs. Dishwashers are assigned an energy efficiency rating based on their energy consumption during typical use, usually represented by the Energy Star label or the Federal Trade Commission (FTC) guidelines.

Energy Star-rated dishwashers, for instance, are designed to use less water and electricity compared to standard models, making them a sustainable choice for eco-conscious consumers. These dishwashers often incorporate advanced technologies, such as soil sensors and smart wash cycles, which optimize water and energy usage based on the load’s specific needs.

When perusing different models, look for the EnergyGuide label, which provides an estimated annual operating cost and energy consumption. This label is a valuable tool for comparing efficiency among various options, allowing you to weigh the potential savings against the initial purchase price.

Beyond just the numbers, consider how features like adjustable spray arms, energy-saving modes, and hybrid drying systems contribute to overall efficiency. Some dishwashers even allow you to run shorter cycles for lightly soiled dishes, minimizing water and energy usage.

By prioritizing energy efficiency, not only will you reduce your environmental footprint, but you’ll also enjoy long-term savings on your energy bills, making it a smart, cost-effective choice for any kitchen. As you navigate through your options, keep these energy efficiency ratings in mind to ensure you select a dishwasher that balances performance with sustainability.

5. Noise Levels and Their Importance in Choosing a Dishwasher

What are the different types of dishwashers and their features?
Credit : whatcanu.com

When it comes to selecting the perfect dishwasher for your home, noise levels should be a top consideration. After all, the last thing you want is to invest in a sleek, efficient appliance that disrupts the tranquility of your household with persistent clattering and whirring sounds. Modern dishwashers come with a range of noise levels, typically measured in decibels (dB), and understanding this measurement is crucial for making an informed choice.

Most dishwashers today operate between 40 dB and 60 dB. For reference, a quiet library registers at about 40 dB, while normal conversation can reach around 60 dB. If you have an open-concept living space or your kitchen is adjacent to your living area, opting for a model that operates below 50 dB will ensure a peaceful environment, allowing you to watch TV or have a conversation without raising your voice.

Additionally, many manufacturers now highlight their dishwashers’ noise levels prominently in their specifications, with terms like “ultra-quiet” or “whisper-quiet” often indicating models that operate at the lower end of the scale. Features such as sound insulation and a well-designed motor can contribute significantly to reducing noise levels, so it’s worth considering these aspects when shopping.

Moreover, pay attention to the dishwasher’s cycle types. Some cycles, like the heavy-duty or sanitize settings, may generate more noise due to increased water pressure and longer run times. Understanding when these louder cycles occur can help you plan your dishwashing schedule around them—perhaps running heavier loads at night when the household is quieter.

Ultimately, a dishwasher’s noise level can greatly influence your overall satisfaction with the appliance. By prioritizing this feature in your purchasing decision, you can enjoy the convenience of a dishwasher without the unwelcome distraction of excessive noise, creating a harmonious balance in your home.

6. Size and Capacity: Finding the Right Fit for Your Kitchen

When it comes to selecting the perfect dishwasher for your kitchen, size and capacity are crucial factors that can significantly impact both functionality and convenience. Dishwashers come in a variety of sizes, typically categorized as standard, compact, and portable models, each designed to cater to different kitchen layouts and household needs.

**Standard Size Dishwashers** typically measure around 24 inches wide and are built to accommodate a full load of dishes, making them ideal for larger families or those who frequently entertain guests. These models often offer adjustable racks and flexible loading options, allowing you to maximize their capacity for pots, pans, and tall items. If you find yourself cooking elaborate meals or accumulating a mountain of dishes after a gathering, a standard dishwasher could be your best bet.

On the other hand, **Compact Dishwashers**, generally around 18 inches wide, are designed for smaller kitchens or apartments where space is limited. Despite their size, many compact models don’t compromise on performance, offering efficient cleaning cycles and energy-saving features. They typically hold fewer dishes than standard models but can still handle everyday needs for singles or couples.

For those who are short on space but still want the convenience of a dishwasher, **Portable Dishwashers** may be the solution. These units can be wheeled into place and connected to the kitchen sink when needed, providing flexibility without the commitment of a permanent installation. Perfect for renters or anyone who is not ready for a full kitchen remodel, portable dishwashers come in various sizes and designs to suit any style.

In addition to the physical size, consider the **capacity** of the dishwasher. Most models list their capacity in terms of place settings, which is the standard measure of how many dishes, glasses, and utensils can be washed in one cycle. A typical standard-sized dishwasher holds about 12 to 16 place settings, while compact models usually accommodate 6 to 8. Choose a capacity that aligns with your household’s dishwashing habits—overestimating your needs can lead to a machine that’s underused, while underestimating can leave you washing dishes by hand more often than you’d like.

Ultimately, the right dishwasher for your kitchen is one that fits both your space and your lifestyle. Take the time to measure your available space, consider the size of your household, and think about how often you cook and entertain. By doing so, you’ll ensure that your new dishwasher not only fits seamlessly into your kitchen but also meets your dishwashing demands effectively.

7. Wash Cycle Options: Understanding Different Settings

What are the different types of dishwashers and their features?
Credit : whatcanu.com

When selecting a dishwasher, one of the most critical aspects to consider is the variety of wash cycle options available. These settings not only define how effectively your dishes will be cleaned but also enhance the appliance’s efficiency by allowing you to customize the wash according to your specific needs. Understanding these different settings can significantly impact your dishwashing experience and help you maintain optimal performance.

1. **Normal Cycle**: This is the standard setting most commonly used for everyday loads. It typically uses moderate water pressure and heat, making it suitable for a mix of lightly soiled and moderately dirty dishes. This cycle is perfect for day-to-day cleaning, ensuring your plates, utensils, and glasses come out sparkling without excessive energy use.

2. **Heavy Duty / Pots and Pans Cycle**: Designed for those stubborn, baked-on messes, this cycle employs higher water temperatures and extended wash times. It’s ideal for cleaning cookware, such as pots and pans, that require a little more elbow grease. If you frequently entertain or cook large meals, this setting will become one of your best friends in the kitchen.

3. **Quick Wash / Express Cycle**: For those times when you need clean dishes in a hurry, the quick wash cycle is a lifesaver. It significantly reduces the wash time, making it perfect for lightly soiled items or when you have a small load. However, it’s important to note that while convenient, this setting may not offer the thoroughness of a normal cycle.

4. **Eco Mode**: As sustainability becomes a priority for many households, the eco mode has gained popularity. This setting uses less water and energy by extending the wash duration and lowering the temperature. If you want to minimize your environmental footprint while still achieving clean dishes, this is the option for you.

5. **Sanitize Cycle**: If you’re particularly concerned about germs and bacteria, the sanitize cycle is a must-have feature. This setting raises the water temperature to a level that kills harmful microorganisms, making it an excellent choice for cleaning baby bottles, cutting boards, and other items that require thorough sanitization.

6. **Glassware Cycle**: Delicate items like wine glasses and crystal require special care to avoid chipping or breaking. The glassware cycle typically uses gentler water pressure and lower temperatures to protect these fragile pieces while still providing effective cleaning.

7. **Self-Cleaning Cycle**: While not a wash cycle for your dishes, this feature is worth mentioning. A self-cleaning cycle helps maintain the dishwasher itself by using high heat to eliminate built-up grime and odor, ensuring that your appliance runs efficiently and extends its lifespan.

In summary, understanding the wash cycle options available on your dishwasher can enhance your cleaning efficiency and ensure that your dishes are always spotless. By selecting the right cycle for your specific needs, you’ll not only save time and energy but also prolong the life of your dishware and your appliance. Consider your dishwashing habits and the types of items you frequently clean to choose the perfect dishwasher settings for your household.

8. Smart Technology: The Benefits of Smart Dishwashers

In the age of smart homes, dishwashers have evolved far beyond their traditional roles, thanks to the advent of smart technology. Smart dishwashers come equipped with innovative features that not only streamline the dishwashing process but also enhance convenience and efficiency. Imagine being able to control your dishwasher from your smartphone, allowing you to start or pause a cycle while you’re out grocery shopping or even at work.

One of the most significant benefits of smart dishwashers is their ability to connect to Wi-Fi, enabling you to receive alerts and notifications directly to your mobile device. This means you’ll know exactly when your dishes are clean and ready to be unloaded, eliminating the guesswork often associated with traditional models. Many smart dishwashers also offer diagnostic features that can alert you to potential issues before they become major problems, saving you time and repair costs down the line.

Additionally, smart dishwashers often include advanced sensors that optimize water and energy usage based on the load size and soil level of your dishes. This not only reduces your utility bills but also contributes to a more environmentally friendly home. Some models even allow you to customize wash cycles and settings through a dedicated app, so you can easily select the best program for your specific needs—whether that’s a quick wash for lightly soiled plates or a more intensive cycle for baked-on grime.

Moreover, many smart dishwashers come with integration features that allow them to work seamlessly with other smart home devices. For instance, you can set your dishwasher to run while you’re away, or sync it with your smart speaker to receive updates on its cycle status. With voice control capabilities, you can simply ask your smart assistant when it will be finished, ensuring that dishwashing fits effortlessly into your busy schedule.

In summary, investing in a smart dishwasher can transform your kitchen experience. With convenience, efficiency, and advanced technology at your fingertips, you can enjoy sparkling clean dishes without the hassle. As you evaluate your options, consider how these features can fit into your lifestyle and help you make an informed decision that will keep your kitchen running smoothly.

9. Interior Design: Racks, Tines, and Loading Flexibility

When it comes to choosing the right dishwasher, the interior design is just as crucial as the exterior finish. A well-thought-out interior layout can significantly enhance your dishwashing experience, making it easier and more efficient to load and unload your dishes.

First and foremost, consider the configuration of the racks and tines. Most modern dishwashers come equipped with adjustable racks, which allow you to customize the space according to your needs. This flexibility is particularly beneficial if you frequently wash larger items, such as pots and pans, or if you have a collection of delicate glassware that requires special handling. Some models even feature a third rack, which provides additional space for utensils and smaller items, maximizing every inch of available loading space.

The tines—the prongs that hold your dishes in place—also play a significant role in how effectively you can load your dishwasher. Look for models with fold-down tines that can be manipulated to accommodate awkwardly shaped items. This added versatility can make a world of difference when you’re trying to fit a variety of dishes in one load. Some dishwashers offer tines that are adjustable in height, allowing you to create more room for larger items without sacrificing the ability to wash smaller ones.

Another important aspect of interior design is the layout of the spray arms. A well-designed dishwasher will have multiple spray arms that reach every corner of the machine. This ensures that every dish is thoroughly cleaned, no matter where it’s placed inside the unit. Additionally, look for models that offer targeted spray zones, which provide extra cleaning power for heavily soiled dishes.

Ultimately, the right combination of racks, tines, and loading flexibility can not only simplify the process of loading and unloading your dishwasher but also enhance the overall effectiveness of the cleaning cycle. By prioritizing these features, you can choose a dishwasher that seamlessly fits into your kitchen routine, saving you time and effort after every meal.

10. Maintenance and Cleaning: What to Look For

When selecting a dishwasher, maintenance and cleaning should be at the forefront of your decision-making process. A dishwasher is an investment, and keeping it running efficiently requires a bit of attention. Therefore, understanding the maintenance requirements and ease of cleaning will save you time and headaches in the long run.

First, consider the interior design of the dishwasher. Models with stainless steel interiors are not only aesthetically pleasing, but they are also more resistant to stains and odors compared to plastic interiors. Stainless steel is easier to wipe down and is less likely to harbor bacteria, making it a hygienic choice.

Next, pay attention to the filter system. A dishwasher with a self-cleaning filter can save you the hassle of manually cleaning out food debris, which can accumulate and cause unpleasant odors or clogs. However, if you opt for a model with a manual filter, ensure it is easily accessible; a removable filter that can be quickly rinsed under running water will encourage regular maintenance.

Look for features that simplify cleaning, such as smooth racks and spray arms. Racks that can be adjusted or removed make cleaning the interior easier and allow you to fit larger items without obstruction. Additionally, spray arms that are easy to detach can facilitate thorough cleaning, ensuring that every nook and cranny of your dishwasher remains free from grime.

Don’t overlook the importance of user-friendly controls and indicators. A dishwasher with a clear, intuitive interface will help you identify when it’s time to clean the filter or run a maintenance cycle. Some modern dishwashers even feature self-diagnostic tools that alert you to potential issues before they become significant problems.

Finally, consider the noise level during operation. A quieter model not only makes for a more pleasant kitchen environment but also encourages you to run it more frequently without feeling like you’re disrupting your home. Look for dishwashers with sound insulation and a decibel level rating that suits your lifestyle.

In summary, when choosing your dishwasher, pay close attention to its maintenance and cleaning features. A model designed for easy upkeep will enhance your kitchen experience, ensuring that your investment remains in top-notch condition for years to come.

11. Price Range: Budgeting for Your Dishwasher Purchase

When it comes to choosing a dishwasher, understanding the price range is crucial to making a sound investment. Dishwashers can vary significantly in cost, from budget-friendly models to high-end machines laden with advanced features. Setting a budget beforehand will help streamline your options and ensure that you find a dishwasher that meets both your needs and financial constraints.

At the lower end of the spectrum, you’ll find basic models that typically range from $300 to $600. These dishwashers often focus on essential cleaning functions and may lack some of the bells and whistles that enhance convenience and efficiency. However, don’t underestimate these budget options; they can still deliver reliable performance for everyday dishwashing tasks.

Mid-range dishwashers, priced between $600 and $1,200, often come equipped with additional features such as multiple wash cycles, improved energy efficiency, and quieter operation. These models strike a balance between functionality and affordability, making them a popular choice for many households looking for a bit more sophistication without breaking the bank.

If you’re in the market for a high-end dishwasher, expect to invest $1,200 and up. These premium models boast advanced technology like smart connectivity, customizable wash cycles, and superior energy efficiency. They often come with sleek designs and premium materials that not only enhance their performance but also elevate the aesthetic of your kitchen. For those who frequently entertain or have larger families, the investment in a high-quality dishwasher can be well worth it, as it saves time and offers exceptional cleaning power.

As you consider your budget, also factor in potential long-term savings. Investing in a more efficient model may lead to lower utility bills over time, making certain higher-priced dishwashers more economical in the long run. Remember, whether you’re opting for a basic model or a top-of-the-line machine, careful budgeting will help you choose the right dishwasher that fits your lifestyle and ensures your dishes are always sparkling clean.

12. Brand Reputation: Which Brands Stand Out?

When it comes to choosing the right dishwasher, brand reputation can play a significant role in your decision-making process. A well-established brand often signifies reliability, quality, and customer support, all of which are crucial for such an essential kitchen appliance. With so many options available, it’s important to consider which brands stand out in the crowded market and what they bring to the table.

**Bosch** is consistently lauded for its innovative engineering and quiet operation. Renowned for their sleek designs and energy-efficient models, Bosch dishwashers often come equipped with advanced features like the MyWay rack system and the EasyGlide system for smooth loading and unloading. Their commitment to quality and performance has earned them a loyal customer base.

**KitchenAid** is another brand that shines in the realm of dishwashing. Known for their robust build and high-performance cleaning capabilities, KitchenAid dishwashers are a favorite among home chefs. Features like the ProWash cycle adjust the wash settings based on the soil level, ensuring your dishes receive the perfect clean every time. Additionally, their stylish designs often complement high-end kitchen aesthetics.

If you’re looking for value without sacrificing quality, **Whirlpool** might be the brand for you. Their dishwashers are celebrated for their straightforward functionality and durability. With options that range from budget-friendly to more advanced models, Whirlpool caters to a wide audience without compromising on cleaning power or efficiency.

**Miele**, a luxury brand, deserves mention for their commitment to longevity and excellence. With a reputation for being built to last, Miele dishwashers often come with advanced features such as the innovative AutoOpen drying function and impressive energy efficiency ratings. Though they come with a higher price tag, many users find the investment worthwhile due to their exceptional performance and durability.

Finally, **Samsung** has made a name for itself with its modern, tech-savvy dishwashers that offer smart features and connectivity. Their models often include options like the WaterWall technology for thorough cleaning and Wi-Fi connectivity for remote monitoring and control. This brand appeals to tech enthusiasts who appreciate the integration of smart home capabilities in their kitchen appliances.

When selecting a dishwasher, consider the reputation of these brands along with your specific needs and preferences. Research customer reviews and ratings to gain insight into the reliability and performance of different models. A reputable brand can provide not only a quality product but also peace of mind, ensuring that your investment is protected for years to come.

13. Customer Reviews: How to Use Feedback in Your Decision

When it comes to choosing the right dishwasher, customer reviews can be an invaluable resource in your decision-making process. These insights come directly from individuals who have used the products in real-life situations, offering a wealth of information that specifications alone cannot provide.

Start by searching for reviews on trusted retail websites, appliance forums, and social media platforms. Pay attention to both the positive and negative feedback—while a glowing review can point out the strengths of a model, critical comments often highlight potential shortcomings that you might not have considered.

Look for common themes in the reviews. Is there a recurring issue with noise levels? Are customers consistently praising the energy efficiency? Do several users mention that a particular brand offers exceptional customer service? These patterns can help you gauge whether a specific model will meet your needs.

Additionally, consider the context of the reviews. A dishwasher that works perfectly for a family of four may not be the best choice for a single-person household, and vice versa. Take note of the reviewer’s circumstances and how they align with your lifestyle and usage habits.

Also, don’t overlook the importance of verified purchase reviews. Many platforms label reviews from verified buyers, which can add a level of authenticity to the feedback you’re reading. This distinction helps ensure that you’re relying on opinions from actual users rather than fictitious accounts.

Lastly, engage with customer feedback by asking questions on forums or social media. Reach out to users who have reviewed the product to get a more nuanced understanding of their experiences. This proactive approach can provide you with a clearer picture of which dishwasher will truly suit your needs, ensuring that your final decision is informed, confident, and tailored to your home.

14. Conclusion: Making an Informed Choice for Your Kitchen

Choosing the right dishwasher for your kitchen is more than just a matter of preference; it’s an investment that can significantly enhance your daily routine and overall kitchen efficiency. As we’ve explored throughout this guide, the landscape of dishwashers is diverse, ranging from compact models perfect for small spaces to spacious, high-capacity machines designed for large households. Each type comes with its own set of features, such as energy efficiency ratings, noise levels, wash cycles, and smart technology integration, all of which can impact your decision.

In conclusion, making an informed choice requires careful consideration of your specific needs—think about the size of your family, your cooking habits, and your kitchen layout. Are you someone who frequently hosts gatherings and needs a machine that can handle heavy loads? Or perhaps you live alone and would benefit from a compact model that saves space without sacrificing performance?

Don’t forget to factor in the long-term costs associated with energy use and maintenance. While it may be tempting to opt for the cheapest model available, investing in a reliable, energy-efficient dishwasher can save you money in the long run. Additionally, consider the aesthetic and functional aspects of your kitchen design and how a new dishwasher can complement your existing appliances.

Ultimately, the right dishwasher should seamlessly integrate into your lifestyle, making cleanup a breeze and giving you more time to enjoy the moments that matter. By weighing the features discussed in this guide and aligning them with your personal preferences, you’ll be well on your way to choosing a dishwasher that not only meets your needs but also enhances the heart of your home. Happy dishwashing!

15. Frequently Asked Questions About Dishwashers

When embarking on the journey to choose the right dishwasher, you may find yourself grappling with a multitude of questions. Understanding these common queries can help demystify the selection process and ensure that you invest in a machine that suits your needs perfectly. Here are some frequently asked questions that often arise:

**1. What are the different types of dishwashers?**
Dishwashers come in various forms, including built-in, portable, and countertop models. Built-in dishwashers are installed under the counter and are the most common type, while portable dishwashers can be moved and connected to a faucet when needed. Countertop models are compact and ideal for smaller kitchens or limited spaces.

**2. How do I determine the right size for my dishwasher?**
Size is crucial for both functionality and space. Most full-sized dishwashers are 24 inches wide and can accommodate around 12 to 16 place settings. If space is limited, consider compact models, which are typically 18 inches wide and suitable for smaller households.

**3. What features should I look for?**
Key features can significantly enhance your dishwashing experience. Look for options like adjustable racks, multiple wash cycles, energy efficiency ratings (like ENERGY STAR certification), noise levels (measured in decibels), and drying options. Smart technology features are also becoming increasingly popular, allowing you to control your dishwasher remotely or receive alerts when your dishes are clean.

**4. How much water and energy do dishwashers use?**
Modern dishwashers are designed to be both water and energy-efficient. On average, a standard dishwasher uses about 3 to 5 gallons of water per cycle, whereas older models may consume up to 10 gallons. For energy usage, check the energy guide label to compare models and choose one that minimizes your utility costs.

**5. Do I really need to pre-rinse my dishes?**
This is a common misconception! Most modern dishwashers are equipped to handle food residues without pre-rinsing. However, it’s best to scrape off large food particles, as they can clog the filter and affect performance. Simply loading your dirty dishes directly into the dishwasher can save you time and water.

By addressing these frequently asked questions, you’ll be better equipped to make an informed decision when selecting the dishwasher that best fits your lifestyle and kitchen needs. Whether you prioritize size, features, or energy efficiency, understanding your options can lead you to the perfect machine that will make dishwashing a breeze for years to come.

In conclusion, selecting the right dishwasher for your home doesn’t have to be a daunting task. With the insights we’ve shared in this guide, you’re now equipped to navigate the myriad of options available, whether you’re drawn to the energy efficiency of a front-loader or the convenience of a portable model. By understanding the various types and features—from wash cycles and noise levels to smart technology and size considerations—you can make an informed decision that perfectly aligns with your kitchen needs and lifestyle. Remember, investing in a dishwasher is not just about convenience; it’s about enhancing your daily routine and creating a more efficient home. Happy dishwashing, and may your choice bring you years of sparkling clean dishes and joy in your kitchen!

What are the best ways to cook for one person?

Cooking for one can often feel like a chore, leading to repetitive meals or, worse, those last-minute takeout orders that leave you unsatisfied.

But what if we told you that dining solo can be an opportunity for culinary exploration and personal indulgence? In this blog post, we’ll take you on a delightful journey into the world of solo suppers, where creativity meets convenience. Discover how cooking for one can be a chance to experiment with flavors, try new recipes, and embrace the joy of personalized dining. From vibrant stir-fries packed with fresh vegetables to comforting single-serving casseroles, we’ll share innovative ideas that make mealtime a pleasure rather than a task. Say goodbye to boring leftovers and hello to a table set just for you, where every bite is a celebration of your unique tastes and preferences. Get ready to elevate your solo dining experience with these creative and delicious ways to cook for one!

1. Embracing the Solo Dining Experience

What are the best ways to cook for one person?
Credit : whatcanu.com

Dining alone doesn’t have to be a lonely affair; in fact, it can be a delightful celebration of self-care and culinary creativity. Embracing the solo dining experience allows you to explore your tastes, experiment with flavors, and enjoy the intimacy of preparing a meal just for you. Picture this: the kitchen is your canvas, and each ingredient is a brushstroke waiting to come together in a masterpiece that reflects your unique palate.

When you cook for one, you have the freedom to choose exactly what you want to eat without compromise. Fancy a spicy stir-fry with vibrant vegetables and fragrant herbs? Go for it! Craving a comforting bowl of homemade soup with all your favorite ingredients? It’s all yours. There’s no need to please anyone else’s preferences; this is your time to indulge in what makes you happy.

Taking the time to set the scene can enhance your solo dining experience as well. Light a candle, play your favorite music, or pour yourself a glass of wine to elevate the atmosphere. Dining alone can be a moment of mindfulness, allowing you to savor each bite and truly appreciate the flavors you’ve created. Consider it a mini getaway from the rush of everyday life, a chance to reconnect with yourself and enjoy the simple pleasure of good food.

Additionally, cooking for one can lead to newfound culinary skills. With fewer mouths to feed, you can experiment with new recipes and techniques without the pressure of pleasing a crowd. Try your hand at that intricate dish you’ve always wanted to tackle or explore cuisines from around the world; the kitchen is your playground, and every dish is a new adventure waiting to be tasted.

So, as you dive into the world of solo supper, remember that this is a time to celebrate you. Embrace the joy of cooking, the art of presentation, and the satisfaction of a meal crafted entirely to your liking. Whether it’s a vibrant salad, a hearty pasta, or a decadent dessert, the solo dining experience is an opportunity to nourish not just your body, but also your spirit.

2. Benefits of Cooking for One

Cooking for one might seem like a daunting task, but it comes with a plethora of benefits that can transform your dining experience. First and foremost, it allows for complete culinary freedom. With no one else to please, you can experiment with ingredients, flavors, and recipes that tickle your fancy. Whether it’s trying that exotic spice you’ve been curious about or whipping up a dish that you love but your friends and family might not, cooking solo gives you the ultimate license to explore your palate.

Additionally, cooking for one can be a significant time-saver. You can streamline your meal prep, avoiding the long hours spent in the kitchen preparing large quantities of food. Instead, you can whip up a quick, satisfying meal in no time, allowing you to focus on other aspects of your life, whether that’s catching up on reading, watching your favorite show, or simply relaxing after a long day.

Moreover, cooking for one can also be a healthier choice. You have complete control over your ingredients and portion sizes, making it easier to choose nutritious options that cater to your dietary preferences. You can prioritize fresh vegetables, lean proteins, and wholesome grains, crafting meals that nourish your body without the temptation of unhealthy leftovers that often come with cooking for a crowd.

Lastly, cooking for one fosters a wonderful sense of independence and self-care. It encourages you to take the time to prepare a meal that caters specifically to your tastes, elevating the act of eating from a mundane task to a delightful ritual. Whether you’re enjoying a quiet dinner at your kitchen table or savoring a meal in front of your favorite movie, cooking for one can be a rewarding experience that celebrates your individuality and creativity in the kitchen.

3. Essential Kitchen Tools for Solo Cooking

What are the best ways to cook for one person?
Credit : whatcanu.com

When embarking on your solo cooking journey, having the right kitchen tools can make all the difference. Cooking for one doesn’t mean you need to sacrifice quality or creativity in your meals; it simply means you need to adapt your toolkit to fit your needs. Here are some essential kitchen tools that will elevate your solo cooking experience and inspire you to whip up delightful dishes with ease.

**1. A Good Chef’s Knife:**
A sharp, versatile chef’s knife is the cornerstone of any kitchen, and it becomes even more crucial when cooking for one. With the ability to chop, slice, and dice, a well-maintained knife will not only save you time but also enhance your cooking precision. Investing in a quality chef’s knife will allow you to tackle everything from finely chopping herbs to dicing vegetables for a stir-fry.

**2. A Small Cutting Board:**
When cooking solo, a compact cutting board is a practical choice. It’s easy to handle, fits snugly in your kitchen space, and simplifies the cleanup process. Opt for a wooden or bamboo board, which not only looks great but is also gentle on your knife’s edge.

**3. Non-Stick Skillet:**
A non-stick skillet is an invaluable tool for quick and easy meals. Whether you’re sautéing veggies, frying an egg, or cooking a single chicken breast, this versatile pan allows for effortless cooking and cleanup. Choose a medium-sized skillet that’s easy to maneuver and perfect for one-person portions.

**4. A Medium Saucepan:**
A medium saucepan is essential for boiling pasta, simmering sauces, or steaming vegetables. Look for one with a lid to help retain heat and moisture, making your cooking more efficient. It’s the perfect size for preparing one-pot meals that pack a flavorful punch without the fuss.

**5. Baking Sheet:**
Don’t underestimate the power of a good baking sheet! It’s not just for cookies—roasting vegetables, baking a single portion of fish, or even making a mini pizza can all be done on a baking sheet. Line it with parchment paper for easy cleanup and discover how versatile this tool can be in your solo cooking repertoire.

**6. Measuring Cups and Spoons:**
Precision is key, even when cooking for one. A set of measuring cups and spoons will help you accurately portion ingredients, ensuring your dishes turn out perfect every time. Look for compact, easy-to-store options that won’t take up much space in your kitchen.

**7. Food Storage Containers:**
Finally, invest in a few quality food storage containers. Cooking for one often results in leftovers, and having the right containers allows you to store and enjoy your meals later without compromising freshness. Choose containers in various sizes, preferably microwave-safe and stackable, to make your meal prep and storage a breeze.

With these essential kitchen tools at your disposal, cooking for one can be an exciting and enjoyable experience. Embrace the freedom of solo cooking, experiment with flavors, and savor the delicious meals you create, all while keeping your kitchen efficient and clutter-free. Happy cooking!

4. Planning Your Meals: Tips for One

When it comes to cooking for one, planning your meals is essential for both efficiency and enjoyment. Nobody wants to spend hours in the kitchen for a single meal, and with a bit of foresight, you can transform solitary dining into a delightful culinary adventure.

Start by dedicating a little time each week to map out your meals. Consider incorporating a variety of proteins, grains, and vegetables to keep your palate excited. For instance, roast a batch of seasonal vegetables on Sunday, which can be added to different dishes throughout the week—think salads, grain bowls, or pasta. This not only saves time but also minimizes food waste, as you can use leftovers creatively in subsequent meals.

Another tip is to invest in versatile ingredients. A small batch of quinoa, for example, can serve as a base for a hearty salad one day and a warm, comforting bowl of grain and veggies the next. Likewise, a rotisserie chicken can provide delicious meat for sandwiches, soups, and stir-fries, stretching your meal options without requiring extensive cooking each time.

Don’t forget about portion control! Cooking in small quantities not only helps you avoid leftovers but also allows you to experiment with new recipes without the fear of wasting food. Consider using portioned containers to store single-serving meals, making it easy to grab something nutritious on busy days without resorting to takeout.

Lastly, embrace the joy of spontaneity! Although planning is beneficial, leave room for creativity. If you find an interesting ingredient at the market or a recipe that piques your interest, don’t hesitate to incorporate it into your week. Cooking for one can be an opportunity to explore new flavors and techniques at your own pace, making each meal a unique experience. With these planning tips, you’ll transform your solo supper into a delicious celebration of culinary creativity.

5. Creative Recipes for Solo Suppers

What are the best ways to cook for one person?
Credit : whatcanu.com

When it comes to cooking for one, the possibilities are endless, and the joy of creating a meal that caters solely to your tastes is unmatched. Embracing the art of solo supper means you can experiment without the pressure of pleasing anyone but yourself. Here are some creative recipes that are not only simple to prepare but also tantalizingly delicious, ensuring that dining alone becomes a delightful experience.

**1. One-Pan Mediterranean Quinoa Bowl:** Start with a base of fluffy quinoa, cooked to perfection. Toss in cherry tomatoes, olives, and spinach, then drizzle with a zesty lemon-tahini dressing. This vibrant dish is packed with flavors and nutrients, satisfying your hunger while transporting your taste buds to the sunny shores of the Mediterranean.

**2. Stuffed Sweet Potato:** Bake a sweet potato until tender, then slice it open and fill it with a medley of black beans, corn, diced tomatoes, and avocado. Top it off with a sprinkle of feta cheese and a dollop of Greek yogurt. This hearty yet healthy meal is not only colorful but also rich in fiber and protein, making it an ideal solo supper.

**3. Creamy Garlic Mushroom Risotto for One:** Risotto often seems like a labor-intensive dish, but it can easily be adapted for a single serving. Sauté fresh mushrooms and garlic in olive oil, then stir in Arborio rice and gradually add vegetable broth until creamy and al dente. Finish with a handful of grated Parmesan and fresh parsley for a comforting bowl that feels indulgent yet is surprisingly easy to whip up.

**4. Veggie-Packed Omelette:** Eggs are a solo cook’s best friend. Whip up an omelette filled with your favorite vegetables—think bell peppers, spinach, and mushrooms—and a sprinkle of cheese. Pair it with a side of whole-grain toast for a quick yet satisfying meal that can be enjoyed any time of day.

**5. Asian-inspired Ramen Bowl:** Elevate your instant ramen by adding fresh ingredients. Start with the noodles, then toss in sautéed bok choy, sliced green onions, and a soft-boiled egg. Finish with a drizzle of soy sauce and a sprinkle of sesame seeds for a warm, comforting bowl that rivals takeout.

Cooking for one opens up a world of creativity, allowing you to explore flavors and combinations that you love. With these simple and delightful recipes, solo suppers can transform from a mundane necessity into a culinary adventure that nourishes both body and soul. So grab your apron and get ready to savor the art of cooking for yourself!

6. Building a Versatile Pantry for One

Building a versatile pantry for one is an essential step in transforming solo cooking from a chore into an exciting culinary adventure. When you’re cooking for yourself, having a well-stocked pantry can be the difference between a quick, uninspired meal and a flavorful dish that feels like a true indulgence.

Start by selecting a few staple items that can serve as the foundation for a variety of meals. Opt for grains like quinoa, rice, or pasta that can be easily cooked in small batches and pair well with numerous ingredients. Canned beans and legumes are not only nutritious but also provide a hearty protein source that can elevate any meal.

Don’t forget to include a selection of spices and herbs; they can dramatically change the flavor profile of a dish without taking up much space. A simple collection of garlic powder, cumin, chili flakes, and dried oregano can offer the versatility needed to create anything from a comforting stew to a zesty stir-fry.

Fresh ingredients, such as seasonal vegetables and herbs, should also be a priority. When shopping, consider buying only what you’ll use in a week or two to avoid waste. Think about easy-to-store options like carrots, bell peppers, and sweet potatoes, which can be incorporated into a variety of dishes.

Lastly, invest in a few high-quality condiments—soy sauce, balsamic vinegar, olive oil, and hot sauce can add depth to your meals and keep your cooking exciting. With a well-rounded pantry, you’ll find that cooking for one doesn’t have to be dull or repetitive; instead, it opens up a world of creative possibilities, allowing you to explore new flavors and cuisines right from your kitchen. So, stock up wisely and let your solo supper adventures begin!

7. Time-Saving Cooking Techniques

What are the best ways to cook for one person?
Credit : whatcanu.com

When cooking for one, time is often of the essence, and mastering time-saving techniques can transform your solo dining experience from a chore into a delightful culinary adventure. Here are some of the most effective strategies to streamline your cooking while still enjoying delicious meals.

**1. One-Pan Wonders:** Simplify your meal prep by embracing one-pan dishes. Whether it’s a stir-fry, sheet pan dinner, or a cozy casserole, cooking everything in a single vessel not only cuts down on cleanup time but allows flavors to meld beautifully as they cook together. Imagine tossing your favorite vegetables, protein, and spices onto a sheet pan, then letting the oven do the work while you relax with a book or catch up on your favorite show.

**2. Batch Cooking:** Prepare larger quantities of base ingredients that can be easily repurposed throughout the week. Spend an hour or two on the weekend cooking up a big batch of grains, like quinoa or brown rice, and roasting a mix of seasonal vegetables. These versatile components can be quickly transformed into salads, grain bowls, or even soups, saving you precious time on busy weeknights.

**3. Instant Pot Magic:** If you haven’t yet welcomed an Instant Pot into your kitchen, now is the time. This multifunctional appliance can pressure cook, slow cook, sauté, and more, significantly reducing cooking times. Imagine tossing in your ingredients for a hearty stew and having it ready in a fraction of the time it would take on the stovetop. Plus, the ability to set it and forget it means you can attend to other tasks while your meal cooks.

**4. Pre-Chopped Ingredients:** While cooking from scratch is rewarding, sometimes you just need a shortcut. Many grocery stores now offer pre-chopped vegetables, pre-marinated proteins, and ready-to-use sauces. While this may come at a slight premium, the time saved in preparation can be invaluable, allowing you to whip up a delicious meal in minutes.

**5. Freezer-Friendly Meals:** Take advantage of your freezer by preparing and storing meals in advance. Soups, stews, and casseroles freeze exceptionally well and can be portioned out for quick reheating. Label each container with the date and contents so you can easily pull out a homemade meal on those days when cooking feels like too much effort.

By incorporating these time-saving techniques into your cooking routine, you can enjoy a variety of creative and delicious meals without spending hours in the kitchen. Cooking for one doesn’t have to feel isolating or time-consuming—embrace the simplicity and savor every bite!

8. Utilizing Leftovers and Batch Cooking

When it comes to cooking for one, embracing the power of leftovers and batch cooking can transform your culinary experience from mundane to magnificent. Rather than viewing leftovers as mere remnants of past meals, think of them as culinary building blocks that can spark creativity in the kitchen. With a little ingenuity, yesterday’s roast chicken can become today’s zesty chicken salad, while leftover vegetables can serve as the base for a hearty soup or stir-fry.

Batch cooking is not just a time-saver; it’s a strategic way to ensure you have a variety of meals at your fingertips without the daily grind of cooking from scratch. Imagine spending a few hours on a Sunday preparing a big pot of chili or a fragrant curry, portioning it out into individual servings, and stowing them away in your freezer. On those busy weeknights when you’re tempted to reach for takeout, simply pop a container in the microwave, and voilà! You have a homemade meal ready in minutes.

To maximize your batch cooking efforts, choose versatile recipes that can be easily adapted. For example, a large batch of quinoa can be used as a side dish, a base for salads, or even mixed into a savory breakfast bowl with eggs and sautéed greens. Similarly, roasted vegetables can elevate a simple pasta dish or be tossed into a grain bowl topped with your favorite dressing.

Don’t forget the power of seasoning! A sprinkle of fresh herbs, a dash of hot sauce, or a drizzle of balsamic glaze can completely change the flavor profile of your leftovers, ensuring that each meal feels fresh and exciting. By utilizing leftovers and embracing batch cooking, cooking for one can become not just a necessity, but a delightful exploration of flavors and textures that you look forward to each day.

9. Exploring International Dishes for Solo Dining

When it comes to solo dining, why limit yourself to the familiar comforts of home cooking? Exploring international dishes can elevate your meal experience, transforming a simple dinner for one into a culinary adventure. With the world at your fingertips, you can embark on a flavorful journey right from your kitchen, experimenting with spices, techniques, and ingredients that harken back to distant lands.

Consider the vibrant aromas of a Moroccan tagine, where tender chicken or chickpeas are simmered with fragrant spices like cumin and cinnamon, served alongside fluffy couscous. Not only is this dish easy to prepare in a single serving, but it also invites you to indulge in the rich flavors of North Africa, all while savoring the communal essence of a shared meal, albeit enjoyed solo.

Or perhaps the comforting warmth of a classic Italian risotto, rich and creamy, can be your next solo creation. With just a handful of ingredients—arborio rice, broth, and your choice of fresh vegetables or proteins—you can craft a dish that’s both satisfying and sophisticated. The slow stirring of the risotto offers a meditative cooking experience, allowing you to connect with the food and the moment, making your dining experience feel special.

Don’t overlook the simplicity and freshness of a Japanese donburi, a rice bowl adorned with ingredients like teriyaki chicken or sautéed vegetables, topped with a perfectly fried egg. This dish is not only easy to customize based on what you have on hand, but it also embodies the beautiful balance of flavors and textures that Japanese cuisine is known for.

By embracing international dishes when cooking for one, you’re not just feeding your body; you’re also feeding your curiosity and creativity. So grab your apron, dive into a new recipe, and let each meal transport you to a different corner of the globe, making your solo supper not just a necessity, but a delightful journey of taste and culture.

10. Healthy Eating Tips for One

Eating healthy while cooking for one can be a delightful journey rather than a daunting task. When you’re the sole diner at your table, it’s easy to let convenience take precedence over nutrition. However, with a few thoughtful strategies, you can create meals that are both nourishing and satisfying.

First, embrace the idea of batch cooking. Prepare larger portions of versatile base ingredients like quinoa, brown rice, or roasted vegetables at the beginning of the week. These staples can be stored in the fridge and easily transformed into various dishes. For instance, add some beans and salsa to your rice for a quick burrito bowl, or toss roasted veggies with a handful of leafy greens for a vibrant salad.

Next, focus on incorporating a rainbow of fruits and vegetables into your meals. Not only do they add color and flavor, but they also provide essential vitamins and minerals. Try to include at least three different colors on your plate each time you eat. This can be as simple as adding cherry tomatoes and spinach to your scrambled eggs in the morning or mixing berries into your yogurt for a refreshing snack.

Don’t shy away from experimenting with spices and herbs. They can transform a simple dish into a culinary masterpiece without adding extra calories. A sprinkle of cumin can elevate a vegetable stir-fry, while fresh basil can brighten up a tomato salad.

Lastly, plan for leftovers! While cooking for one, it might be tempting to scale down your recipes, but making a little extra can save you time and effort on busier days. Leftovers can be reinvented; think of yesterday’s roasted chicken as today’s chicken salad or a hearty soup.

By employing these healthy eating tips, you’ll not only nourish your body but also discover the joy of cooking for yourself. Embrace the freedom that comes with solo supper, and let your kitchen become a canvas for your culinary creativity!

11. Enhancing Your Meal with Simple Pairings

Cooking for one doesn’t mean you have to sacrifice flavor or creativity. In fact, enhancing your meal with simple pairings can elevate a solitary dining experience to something truly special. Think of pairings as your secret weapon, turning basic ingredients into a culinary delight.

Start with a base component – perhaps a perfectly cooked piece of salmon or a warm bowl of quinoa. From there, let your imagination run wild with complementary flavors. A squeeze of fresh lemon juice and a sprinkle of dill can brighten a fish dish, while a drizzle of olive oil and a dash of balsamic vinegar can transform a simple grain into a flavorful side.

Don’t underestimate the power of textures either. Consider adding crunchy roasted chickpeas to your salad for an unexpected twist, or topping your soup with a dollop of creamy yogurt and a handful of fresh herbs. These little touches can make a world of difference, adding depth and interest to your plate.

Additionally, think about how you can incorporate seasonal produce. A handful of sautéed spinach can add a pop of color and nutrients to a pasta dish, while a few slices of ripe avocado can lend creaminess to a grain bowl. Remember, the goal is to create a well-rounded meal that satisfies both your palate and your hunger.

So, the next time you find yourself cooking for one, don’t settle for a mundane meal. Embrace the art of simple pairings and watch as your dining experience transforms into a delightful feast that celebrates the joy of eating well, even when you’re flying solo.

12. Mindful Eating: Enjoying Your Own Company

In a world that often prioritizes multitasking and constant connectivity, the practice of mindful eating can be a refreshing and enriching experience, especially when dining solo. Rather than viewing a meal for one as a lonely affair, embrace it as an opportunity to savor not only the flavors on your plate but also the joy of your own company.

Set the scene for your meal: dim the lights, play soft music, or even light a candle to create a cozy atmosphere that transforms your dining space into a personal sanctuary. As you prepare your dish, take your time to appreciate the colors, textures, and aromas of the ingredients. Consider the nutritional benefits of what you’re cooking, and how each element contributes to your well-being.

When it’s time to eat, put away distractions. This means no scrolling through your phone or catching up on your favorite show. Instead, focus on each bite. Notice the way the flavors mingle on your palate, the crunch of fresh vegetables, or the warmth of a comforting broth. Eating slowly allows you to fully experience your food, making every meal a small celebration of the moment.

Mindful eating is not just about the food; it’s also about reflection. Use this time to think about your day, set intentions for tomorrow, or simply appreciate the present moment. Enjoying your own company can be a powerful reminder of self-love and acceptance. When you treat your solo meals as an occasion to nourish both body and spirit, you cultivate a deeper relationship with food while fostering a sense of independence and fulfillment.

So, the next time you find yourself cooking for one, remember that it’s not just a meal; it’s an experience to be cherished. Embrace the tranquility of your solo supper and let each bite remind you of the pleasure that comes from being at peace with yourself.

13. Incorporating Seasonal Ingredients

Incorporating seasonal ingredients into your solo meals can elevate your cooking game, transforming a simple dish into something truly special. Seasonal produce is not only fresher and more flavorful, but it also allows you to experiment with a variety of tastes and textures throughout the year. Imagine the sweet, juicy tomatoes of summer, bursting with flavor, or the earthy, comforting squashes that signal the arrival of fall.

Start by visiting your local farmers’ market or grocery store to see what’s in season. You’ll find vibrant greens in the spring, robust root vegetables in the winter, and an array of colorful fruits and vegetables that change with the seasons. For example, a spring meal could feature asparagus and peas sautéed with lemon and garlic, while in the autumn, you might enjoy a hearty soup made with pumpkin and sage.

When planning your meals, think about the flavors that complement each other and how you can incorporate a variety of seasonal items. A simple stir-fry can be transformed by using crisp, fresh vegetables that are at their peak, while a classic pasta dish can be brightened with the addition of seasonal herbs or a drizzle of homemade pesto made with spring basil.

Not only does cooking with seasonal ingredients make your meals more exciting, but it also supports local farmers and reduces your carbon footprint. Plus, the satisfaction of creating a dish that celebrates the colors and flavors of the season adds a delightful touch to your solo supper experience. So, gather those seasonal treasures and let your creativity flow, knowing that each bite is a celebration of the time and place in which you live!

14. Quick and Easy One-Pot Meals

When it comes to cooking for one, quick and easy one-pot meals are the ultimate solution for those busy weeknights or lazy weekends. These meals not only minimize the number of dishes you have to wash but also allow you to experiment with flavors and textures without the fuss of complex recipes. Imagine a warm, comforting dish that requires minimal effort yet delivers maximum satisfaction – that’s the beauty of one-pot cooking.

Consider the classic risotto, a creamy rice dish that can be prepared in just one pot. Start by sautéing some onions and garlic in a splash of olive oil, then add Arborio rice and gradually stir in your favorite broth, allowing it to absorb the liquid to create a rich, velvety texture. You can elevate this dish with seasonal vegetables or protein, such as peas, mushrooms, or shrimp, making it as vibrant and hearty as you desire.

Another fantastic option is a hearty one-pot pasta dish. Simply toss your pasta of choice into a pot with diced tomatoes, garlic, spinach, and your favorite herbs, then cover with just enough water or broth to cook the pasta. In under 20 minutes, you’ll have a delicious, steaming bowl of pasta that captures the essence of Italian comfort food, all while keeping the cleanup to a minimum.

For those craving something with a kick, a one-pot chili can be both filling and flavorful. Brown some ground meat or opt for a plant-based protein, then add canned beans, diced tomatoes, bell peppers, and spices. Let it simmer away while you unwind, and you’ll have a robust meal that’s perfect for any night of the week.

These one-pot wonders not only save time and effort but also leave room for creativity. Feel free to mix and match ingredients based on what you have on hand. The beauty of cooking for one is that you can tailor each meal to your taste, ensuring that every bite is perfectly suited to your cravings. So grab your favorite pot, embrace the simplicity, and enjoy the satisfaction of delicious, home-cooked meals made just for you.

15. Conclusion: Finding Joy in Solo Suppers

In conclusion, cooking for one can be a delightful and fulfilling experience that sparks creativity in the kitchen and invites a sense of mindfulness into your daily routine. As we’ve explored throughout this journey into solo suppers, preparing meals just for yourself offers an opportunity to experiment with flavors, try new techniques, and indulge in your personal preferences without compromise. It’s a chance to reconnect with the joy of cooking, where every dish becomes a reflection of your unique taste and style.

Embracing this solo culinary adventure means you can thoughtfully select ingredients, craft meals that excite your palate, and take the time to savor each bite. Whether you’re whipping up a simple pasta dish infused with fresh herbs or experimenting with vibrant seasonal vegetables in a hearty stir-fry, each meal is a step toward celebrating your individuality.

Moreover, the act of preparing your own food allows you to create a sanctuary of comfort, where you can unwind after a long day, nourish your body, and celebrate the simple pleasures of life. So, the next time you find yourself cooking for one, remember that it’s more than just a meal; it’s an opportunity to embrace your creativity, foster self-care, and truly enjoy the art of cooking. Finding joy in solo suppers not only enriches your dining experience but also paves the way for a deeper appreciation of the time spent in your kitchen, transforming each solitary meal into a delicious celebration of you.

As we wrap up our exploration of creative and delicious ways to cook for one, we hope you feel inspired to embrace the joy of solo suppers. Cooking for yourself can be a delightful experience, allowing you to experiment with flavors, try new recipes, and savor each bite at your own pace. Remember, dining alone doesn’t mean sacrificing taste or creativity; rather, it’s an opportunity to indulge in meals that cater to your unique preferences. So, gather your favorite ingredients, unleash your culinary imagination, and make every solo supper a celebration of you. Share your culinary creations with us, and let’s continue to inspire each other on this flavorful journey!

What are the best ways to cook without a recipe?

In a world where culinary trends come and go, there’s something liberating about stepping into the kitchen without a recipe in hand.

Mastering the art of cooking without a recipe not only unleashes your inner chef but also invites a sense of adventure and creativity that can transform everyday meals into extraordinary experiences. Imagine the thrill of combining flavors, experimenting with textures, and embracing seasonal ingredients, all guided by your instincts rather than a rigid set of instructions. Whether you’re a seasoned cook looking to break free from the confines of structured recipes or a novice eager to explore the joys of improvisation, this blog post will equip you with essential tips and techniques to enhance your culinary creativity. From understanding flavor profiles and mastering basic techniques to learning how to trust your palate, we’ll dive into the exhilarating world of freestyle cooking, where the kitchen becomes your canvas and every meal is a masterpiece waiting to be created. Join us as we embark on a delicious journey that celebrates the art of cooking without boundaries!

1. Understanding the Basics of Flavors and Ingredients

What are the best ways to cook without a recipe?
Credit : whatcanu.com

Understanding the basics of flavors and ingredients is the foundation upon which your culinary creativity will flourish. Before you can confidently toss aside the recipe and embark on your freestyle cooking adventure, it’s essential to familiarize yourself with the essential building blocks of flavor profiles and how they interact.

Start by exploring the five primary taste sensations: sweet, sour, salty, bitter, and umami. Each of these plays a vital role in creating a well-rounded dish. Sweetness can balance acidity, while a touch of salt can enhance the natural flavors of your ingredients. Understanding how these tastes work together allows you to elevate even the simplest of dishes into something extraordinary.

Next, dive into the world of ingredients. Familiarize yourself with herbs, spices, and other flavor enhancers. Fresh herbs like basil, cilantro, and parsley can add brightness and freshness, while spices such as cumin, paprika, and chili powder can introduce depth and warmth. Knowing which ingredients complement each other will empower you to mix and match freely, creating a harmonious symphony of flavors.

Consider also the various cooking techniques that can alter the flavor and texture of your ingredients. Sautéing brings out the sweetness in onions, while roasting can intensify the earthiness of root vegetables. Grilling adds a smoky char that can transform the simplest cuts of meat into a mouthwatering dish. By mastering these techniques, you’ll gain the confidence to improvise and make spontaneous decisions in the kitchen, guided by the ingredients you have on hand.

Finally, don’t shy away from experimentation. Taste as you go, adjusting seasoning and flavor combinations until they feel just right. Keep a journal of your culinary experiments—what worked, what didn’t, and what you’d like to try next time. This practice not only hones your palate but also sparks inspiration for future creations.

By building a solid understanding of flavors and ingredients, you’ll unlock the door to a world of culinary creativity. With these fundamentals in your toolkit, you’ll be well-equipped to cook freestyle, crafting delightful dishes that reflect your unique style and passion for food.

2. The Importance of Seasoning: Salt, Acid, Fat, and Heat

When it comes to cooking freestyle, mastering the balance of salt, acid, fat, and heat is essential. These four elements serve as the backbone of flavor development, transforming simple ingredients into extraordinary dishes. Understanding how to manipulate these components will empower you to create mouthwatering meals without the confines of a recipe.

**Salt** is often referred to as the magical enhancer of flavor. It doesn’t just make food taste salty; it elevates the inherent flavors of your ingredients. When you sprinkle salt on vegetables, meats, or even grains, you unlock their natural sweetness and depth. The key is to season as you go—adding a pinch here and a dash there—allowing the flavors to meld and develop throughout the cooking process.

**Acid** is another critical player in the flavor game. It brings brightness and freshness to your dishes, cutting through richness and balancing flavors. Think of a splash of lemon juice over roasted vegetables or a drizzle of balsamic vinegar on a hearty salad. Acid can awaken your palate, making each bite more vibrant and exciting. Experiment with different acidic ingredients, such as citrus, vinegars, or even yogurt, to find the perfect balance for your creations.

**Fat** plays a dual role in cooking—it not only carries flavor but also adds a luxurious mouthfeel to your dishes. Whether it’s the richness of olive oil, the creaminess of butter, or the depth of toasted nuts, fat rounds out the flavors and adds a satisfying texture. When cooking freestyle, don’t shy away from incorporating various fats; they can be used for sautéing, drizzling, or even as a finishing touch to elevate your dish.

Finally, **heat** is the element that brings everything together. The way you apply heat—whether through roasting, grilling, sautéing, or braising—will affect the final flavor and texture of your meal. High heat can create a beautiful caramelization, while lower temperatures may allow for gentler cooking, preserving the integrity of delicate ingredients. Understanding how and when to adjust the heat will help you achieve the desired results, enhancing the overall experience of your culinary creations.

By paying attention to the interplay of salt, acid, fat, and heat, you’ll develop an intuitive sense for flavor. This knowledge frees you from the constraints of recipes, allowing you to explore, experiment, and express your culinary creativity with confidence. Embrace the art of improvisation in the kitchen, and watch as you transform everyday ingredients into unforgettable meals.

3. Building a Well-Stocked Pantry for Freestyle Cooking

What are the best ways to cook without a recipe?
Credit : whatcanu.com

A well-stocked pantry is the cornerstone of successful freestyle cooking, serving as your creative playground where flavors, textures, and colors intertwine. Imagine opening your pantry doors to a treasure trove of ingredients, each waiting to inspire your next culinary masterpiece. The key to building a pantry that fuels your creativity lies in selecting versatile staples that can be combined in countless ways.

Start with the basics: grains and legumes. Quinoa, brown rice, and lentils are excellent foundations for a variety of dishes, providing both nutrition and substance. Pair these with a selection of canned tomatoes and broths, which can add depth and richness to your creations. Don’t forget about the power of spices and herbs; a well-curated spice rack can transform a simple dish into a flavorful experience. Stock up on essentials like cumin, paprika, oregano, and fresh herbs like basil and cilantro to elevate your meals with aromatic flair.

Include a variety of oils and vinegars in your pantry, as these can significantly enhance the flavor of your dishes. Olive oil, sesame oil, and a selection of vinegars—such as balsamic, red wine, and apple cider—offer a range of tastes that can complement any ingredient you choose. Additionally, consider keeping a few condiments on hand, like soy sauce, mustard, and hot sauce, to add that extra punch when needed.

Fresh produce is equally important in your freestyle cooking journey. While these items are not pantry staples, keeping a rotating selection of seasonal fruits and vegetables on hand can inspire spontaneity. Think of vibrant bell peppers, hearty root vegetables, and sweet seasonal fruits that can be incorporated into both savory and sweet dishes.

Finally, don’t forget about proteins. Whether it’s chicken, tofu, or legumes, having a few go-to options can help anchor your meals. With these building blocks in place, you’ll be ready to let your creativity flow, mixing and matching ingredients to create delicious and unique dishes without ever needing a recipe. A well-stocked pantry is not just a collection of items; it’s an invitation to experiment, innovate, and discover the joy of cooking freestyle.

4. Learning to Improvise with What You Have

Learning to improvise with what you have is at the heart of culinary creativity and the ultimate expression of freestyle cooking. Instead of being tethered to a rigid recipe, embrace the freedom that comes from using your pantry and refrigerator as your primary inspiration. Start by surveying your ingredients—what vegetables are on the verge of wilting? Do you have an abundance of herbs that need to be used? Perhaps a lone protein or a half-opened can of beans is waiting for its moment to shine.

Once you have a mental inventory of your supplies, let your imagination take the lead. Think about flavor profiles that might work well together. For instance, if you have fresh tomatoes, basil, and mozzarella, you might be inspired to create a vibrant salad or a quick pasta dish. If you’ve got a random assortment of grains, some leftover roasted vegetables, and nuts, toss them together with a simple vinaigrette for a hearty grain bowl.

Don’t be afraid to experiment! Cooking freestyle means taking risks and learning from your experiences. If you accidentally over-season a dish, you can balance it out with a touch of acidity or sweetness. If a combination doesn’t work out as planned, take note of what didn’t mesh and try something different next time.

Use improvisation as a way to express yourself and your tastes. If you love spicy food, add a kick with chili flakes or sriracha. If you prefer creamy textures, think about how you might incorporate yogurt, coconut milk, or cheese into your dish. Remember, cooking is an art form, and each meal you create is a canvas that reflects your unique personality and preferences.

So next time you step into your kitchen, forget the recipes for a moment and embrace the challenge of creating something new with what you have on hand. The joy of freestyle cooking lies not just in the final dish but in the process of discovery and the delicious surprises that await you.

5. Techniques for Flavor Pairing and Combining Ingredients

What are the best ways to cook without a recipe?
Credit : whatcanu.com

When it comes to cooking freestyle, mastering the techniques for flavor pairing and combining ingredients can elevate your culinary creations to new heights. The essence of this art lies in understanding how different flavors interact and enhance each other, allowing you to experiment boldly and confidently in the kitchen.

First, familiarize yourself with the flavor wheel, which categorizes tastes into groups like sweet, sour, salty, bitter, and umami. This foundational knowledge can guide you in creating harmonious combinations. For example, if you’re working with something sweet, like roasted butternut squash, consider pairing it with a touch of acidity, such as a drizzle of balsamic vinegar or a squeeze of fresh lemon juice. This contrast not only adds depth but also balances the dish beautifully.

Next, think about texture as a complementary factor in your dishes. Combining creamy elements, like a rich avocado or thick yogurt, with crunchy ingredients, such as toasted nuts or fresh vegetables, creates a delightful sensory experience. Experimenting with various textures can make even the simplest ingredients feel gourmet.

Don’t shy away from herbs and spices, either! Fresh herbs like basil, cilantro, and mint can transform a dish with their vibrant flavors. Meanwhile, spices such as cumin, paprika, or cardamom can add warmth and complexity. A dash of spice can awaken a dish in unexpected ways, so don’t hesitate to sprinkle, taste, and adjust as you go.

Finally, consider the seasonality of ingredients. Fresh, in-season produce not only tastes better but also pairs well together. A summer salad bursting with ripe tomatoes and cucumbers can be brightened with fresh basil and a splash of olive oil, while a cozy winter stew can thrive on root vegetables and hearty spices.

By embracing these techniques, you’ll cultivate an intuitive understanding of flavor dynamics, allowing you to create dishes that are not only unique but also irresistibly delicious. So grab those ingredients, trust your instincts, and let your creativity flow!

6. The Role of Textures in Creating Balanced Dishes

When it comes to mastering the art of cooking freestyle, understanding the role of textures in creating balanced dishes is paramount. Texture is what elevates a meal from ordinary to extraordinary, transforming a simple plate into a delightful sensory experience. Imagine the satisfying crunch of roasted vegetables juxtaposed against the creamy richness of a velvety sauce, or the tender bite of perfectly cooked pasta paired with the crisp snap of fresh herbs. These contrasting textures not only make a dish more visually appealing but also create a symphony of sensations that engage your palate.

As you embark on your culinary journey without the confines of a recipe, consider the textures available in your pantry and fridge. Embrace the variety—from the silky smoothness of pureed soups to the satisfying crunch of toasted nuts or crispy breadcrumbs. Incorporating a range of textures can enhance the overall experience of your dish and keep your taste buds excited.

For instance, when preparing a salad, think beyond just leafy greens. Add roasted chickpeas for a hearty crunch, creamy avocado for richness, and perhaps a sprinkle of feta for a crumbly, tangy bite. In a stir-fry, balance the crispness of fresh vegetables like bell peppers and snow peas with the tenderness of stir-fried tofu or seared meat. This interplay not only adds depth to your dish but also encourages a more engaging eating experience.

Experimentation is key. Don’t shy away from mixing different textures in unexpected ways. A smooth purée can serve as a base for crunchy toppings, while soft, braised meats can be paired with crisp pickled vegetables for contrast. By consciously considering the textures in your dishes, you will create harmonious balances that tantalize not just the taste buds but the entire dining experience.

Incorporating a variety of textures not only makes for visually stunning plates but also enhances the flavor profiles of your meals. So, the next time you step into the kitchen to cook freestyle, remember to think beyond flavors alone—explore the delightful world of textures, and watch as your culinary creations come to life in ways you never imagined.

7. Mastering Cooking Techniques: Sautéing, Roasting, Grilling, and More

What are the best ways to cook without a recipe?
Credit : whatcanu.com

Mastering cooking techniques is the cornerstone of culinary creativity. When you have a solid grasp of various methods—like sautéing, roasting, grilling, and braising—you arm yourself with the tools to transform simple ingredients into extraordinary dishes without relying on strict recipes. Each technique offers unique benefits and flavors, allowing you to experiment with a wide range of foods.

**Sautéing** is a quick and efficient way to bring out the natural flavors of your ingredients. Using a hot pan and a small amount of oil, you can achieve that perfect caramelization on vegetables, proteins, or aromatics like garlic and onions. The high heat helps lock in moisture while creating a beautiful golden-brown crust. Experiment by combining different ingredients, adjusting cooking times, and playing with spices to develop your signature sautéed creations.

**Roasting**, on the other hand, is a method that celebrates the beauty of slow cooking. Whether it’s root vegetables, meats, or even fruits, roasting enhances the natural sweetness and depth of flavor. The dry heat of the oven creates a crispy exterior while keeping the interior tender and juicy. Don’t be afraid to mix and match vegetables on the same tray, drizzling them with olive oil, herbs, and spices to discover delightful flavor combinations that reflect your palate.

**Grilling** introduces a smoky essence that is hard to replicate in other cooking methods. Whether you’re using a gas grill, charcoal, or even a stovetop grill pan, grilling allows you to infuse your food with rich flavors while creating beautiful grill marks. Try marinating proteins or tossing vegetables with olive oil and seasoning before grilling; the high heat will enhance their natural flavors while adding that coveted charred finish.

Finally, techniques like **braising** and **steaming** open the door to new textures and tastes. Braising combines both dry and moist heat, perfect for tougher cuts of meat or hearty vegetables, resulting in tender, flavor-infused dishes. Steaming is a healthier option that preserves nutrients and allows for the pure taste of ingredients to shine through—ideal for delicate foods like fish or greens.

As you learn and practice these techniques, remember that the key to cooking freestyle lies in your intuition. Taste as you go, adjust seasoning, and let your creativity flow. With each dish you prepare, you’ll grow more confident in your ability to transform whatever ingredients you have on hand into culinary masterpieces, all while savoring the joy of cooking without the confines of a recipe. Happy cooking!

8. Using Herbs and Spices to Elevate Your Dishes

Herbs and spices are the secret powerhouses in any kitchen, capable of transforming a mundane dish into a culinary masterpiece. When cooking freestyle, harnessing the vibrant flavors and aromatic profiles of these ingredients can elevate your meals and spark your creativity.

Start by exploring the vast world of fresh herbs—basil, cilantro, thyme, and rosemary are just a few that can add depth and brightness to your dishes. Fresh herbs should be added towards the end of cooking to preserve their vibrant flavors and beautiful colors. For instance, a sprinkle of fresh parsley or chives can brighten up a hearty stew or a creamy pasta, giving it a burst of freshness that tantalizes the palate.

On the other hand, dried spices are like little treasure chests of flavor waiting to be uncovered. They can be added at different stages of cooking to create layers of taste. Spices like cumin, smoked paprika, and coriander can impart warmth and complexity, while chili flakes can introduce a delightful kick. Don’t be afraid to experiment with spice blends, such as garam masala or za’atar, to transport your dishes to new culinary realms.

To truly master the art of cooking freestyle, consider the balance of flavors. Pairing sweet, savory, and spicy elements can turn a simple dish into a flavor symphony. For instance, a dash of cinnamon in a savory stew can create a warm and inviting profile, while a squeeze of lemon can brighten up the richness of a creamy sauce.

Remember, the key to using herbs and spices effectively is to trust your palate. Start with small amounts, taste as you go, and adjust according to your preference. This intuitive approach will not only enhance your cooking skills but also build your confidence in the kitchen. With herbs and spices as your allies, every dish can become a canvas for your culinary creativity, inviting you to explore and express your unique flavor profile.

9. The Art of Plating: Making Your Creations Visually Appealing

In the world of freestyle cooking, the journey doesn’t end when your dish is cooked; it reaches a new dimension when it’s time to plate. The art of plating is about transforming your culinary creations into visually stunning presentations that entice the eye and elevate the dining experience. Think of your plate as a blank canvas, where colors, textures, and shapes collide to tell a story.

First, consider the color palette of your dish. Aim for a balance that incorporates vibrant hues—such as the deep green of fresh herbs, the bright orange of roasted carrots, or the rich purples of beets—against a neutral backdrop, like a white or slate plate. This contrast not only makes the food pop but also draws attention to the ingredients themselves. Don’t shy away from garnishing; a sprinkle of microgreens, a drizzle of balsamic reduction, or a dollop of vibrant salsa can transform a simple dish into an eye-catching masterpiece.

Next, think about the arrangement of your components. Use the rule of thirds, a principle borrowed from photography, to create a balanced composition. Place your main protein in one-third of the plate, while the accompanying sides can be artfully arranged in the other two-thirds. This asymmetry adds intrigue and invites curiosity. Also, consider height—stacking elements vertically can create drama and make your dish more dynamic.

Textures play a crucial role as well. A crispy element, like fried shallots or toasted nuts, can contrast beautifully with creamy or soft components, such as a velvety puree or a delicate sauce. Layering these textures not only enhances the taste but also contributes to a visually stimulating experience.

Finally, don’t forget about the finishing touches. A light drizzle of high-quality olive oil, a sprinkle of flaky sea salt, or a few freshly cracked peppercorns can add that final flourish that elevates your dish from ordinary to extraordinary. Remember, plating is an expression of your culinary creativity—embrace the process, experiment with different styles, and most importantly, have fun as you transform your freestyle creations into artfully presented plates that will leave your diners in awe.

10. Overcoming Fear of Improvisation in the Kitchen

Overcoming the fear of improvisation in the kitchen is one of the most liberating steps you can take on your culinary journey. Many home cooks find themselves tethered to recipes, believing that the secret to a great dish lies solely in the precision of measurements and the exactness of ingredients. However, embracing the art of freestyle cooking opens up a world of creativity and personal expression.

Begin by shifting your mindset: view the kitchen as a canvas rather than a laboratory. It’s natural to feel apprehensive about straying from established guidelines, especially if you’ve spent years honing your skills with traditional recipes. Yet, every great chef started with uncertainty. Acknowledge that mistakes are part of the learning process, and often lead to unexpected discoveries.

Start small by choosing a few staple ingredients you enjoy. Allow your senses to guide you—consider the aroma, texture, and color of the ingredients at hand. Experiment with combinations that may not seem conventional: a sprinkle of cinnamon in your savory dishes or a dash of soy sauce in a fruit-based sauce can result in delightful surprises.

Moreover, don’t underestimate the power of seasoning. Herbs, spices, and acids (like lemon juice or vinegar) can transform even the simplest of dishes. Trust your palate. If something feels off, adjust it as you go. Remember, cooking is a dialogue between you and your ingredients; respond to the flavors as they unfold.

To build confidence, consider hosting a cooking night with friends. Encourage each other to create something unique without the constraints of a recipe. This supportive environment can help dispel fears and inspire daring creativity.

As you practice, you’ll find your culinary instincts sharpen. You’ll begin to recognize the balance of flavors, the harmony of textures, and the potential of unexpected ingredients. The kitchen will become your playground, where the fear of improvisation fades away, replaced by the thrill of discovery and the joy of creating dishes that are uniquely yours. Embrace the chaos, and let your creativity flow!

11. Experimenting with Global Cuisines and Ingredients

One of the most exhilarating aspects of cooking freestyle is the opportunity to explore global cuisines and ingredients, allowing your culinary creativity to flourish without the constraints of a recipe. This journey can transform your kitchen into a melting pot of flavors, aromas, and textures from around the world.

Start by stocking your pantry with a diverse array of spices, oils, and sauces that are hallmarks of various cuisines. Think fragrant cumin and coriander from Middle Eastern cooking, zesty harissa from North Africa, or bright, fresh herbs like cilantro and basil that are staples in Asian dishes. Each ingredient brings its own unique character, inviting you to play with traditional flavor profiles and create something entirely your own.

Don’t hesitate to visit local international markets or specialty stores to discover fresh, exotic ingredients that may be new to you. Consider the vibrant produce of Latin american cuisine, such as tomatillos and plantains, or the umami-rich mushrooms and greens found in Japanese cooking. Engaging with these ingredients can inspire you to combine culinary techniques and flavors that you might never have thought to pair.

As you experiment, remember that cooking is a sensory experience. Taste and smell are your best guides. If you’re trying a new spice, add a little, then a little more, and see how it transforms your dish. Don’t be afraid to mix and match—combine a Thai curry paste with Italian pasta, or use Indian spices to season a classic roast chicken.

Embrace the unexpected; sometimes the best dishes emerge from the most unlikely combinations. Invite friends or family to join you in this culinary adventure; cooking together can spark ideas and new approaches, turning each meal into a collaborative masterpiece.

As you immerse yourself in the world of global cuisines, you’ll not only enhance your cooking skills but also deepen your appreciation for the diverse tapestry of flavors that define our culinary heritage. With each experiment, you’ll build confidence in your intuition, learn to trust your palate, and ultimately master the art of cooking freestyle. Happy cooking!

12. Keeping a Culinary Journal: Documenting Your Creations

Keeping a culinary journal is one of the most rewarding practices you can adopt on your journey to mastering freestyle cooking. This journal serves as a canvas for your culinary creativity, allowing you to document your creations, thoughts, and experiences in the kitchen. It’s not just a record of what you’ve cooked; it’s a reflection of your growth as a cook and a source of inspiration for future culinary adventures.

As you experiment with flavors, techniques, and ingredients, jot down notes about what worked, what didn’t, and what you might try next time. Did that unexpected pinch of cayenne elevate your dish to new heights? Did a dash of lemon juice brighten up a heavy sauce? Capture those little victories and missteps alike; they are all part of your personal culinary journey. You may find yourself recording not just the recipes you’ve created but also the emotions and memories associated with each dish—perhaps the laughter shared over a meal with friends or the quiet satisfaction of a solo dinner.

Incorporate sketches of plating ideas or notes on presentation styles that caught your eye. Use your culinary journal to explore and document seasonal ingredients as they come into play, capturing the essence of each harvest and how they inspire your cooking. This practice not only helps you to remember your favorite combinations and techniques but also fosters a deeper connection to the food you prepare.

Moreover, revisiting your journal can spark new ideas and inspire you to recreate or reinvent dishes you loved in the past. It becomes a treasure trove of knowledge that reflects your unique culinary voice over time. So, grab a notebook (or go digital, if that suits you better) and start documenting your creations. The more you write, the more you’ll discover about your tastes, preferences, and style, ultimately enhancing your confidence in the kitchen and empowering you to cook freestyle with flair.

13. How to Taste and Adjust as You Cook

Cooking freestyle is all about trusting your instincts and honing your palate. One of the most vital skills in this culinary adventure is the ability to taste and adjust as you go. This process transforms a good dish into a great one and empowers you to tailor flavors to your liking.

Start by taking small, deliberate tastes throughout the cooking process. This isn’t just about ensuring your dish is seasoned properly; it’s an opportunity to discover the interplay of flavors and textures. A bite of a simmering sauce can reveal whether it needs a pinch more salt, a splash of acidity, or a hint of sweetness. Remember, flavors can evolve as they cook, so don’t be afraid to revisit your dish at different stages.

When you taste, think critically about what you’re experiencing. Is the dish too salty? A squeeze of lemon juice can brighten it up and balance the flavors. Is it lacking depth? A dash of soy sauce or Worcestershire sauce can introduce umami and complexity. If it feels flat, consider adding fresh herbs or spices for a vibrant lift.

Moreover, don’t forget the importance of texture in your adjustments. A sprinkle of toasted nuts can add crunch, while a swirl of cream can create a luscious finish. Each of these elements contributes to the overall experience of the dish.

As you taste and adjust, keep a notebook handy to jot down your thoughts. Over time, you’ll start to recognize patterns in your flavor preferences and develop a repertoire of adjustments that resonate with your palate. This practice will not only enhance your cooking but also build your confidence, allowing you to embrace spontaneity in the kitchen like never before. Cooking freestyle becomes not just an act of creating a meal but an expressive art form that showcases your unique culinary voice.

14. Embracing Mistakes as Learning Opportunities

In the journey of mastering freestyle cooking, embracing mistakes as learning opportunities is not just a mindset; it’s a crucial part of your culinary evolution. Every seasoned chef knows that the path to culinary creativity is often paved with missteps, but rather than shying away from these blunders, you should welcome them with open arms.

Picture this: you’re confidently experimenting with a new dish, adding a pinch of this and a dash of that, when suddenly, you realize you’ve added way too much salt or an unexpected spice that alters the entire flavor profile. Instead of viewing this as a disaster, take a moment to assess what happened. Was the flavor too overpowering? Could you balance it with something sweet or acidic? These moments of trial and error are golden opportunities for growth. They teach you about flavor balance, ingredient compatibility, and the art of improvisation in the kitchen.

Reflecting on your mistakes can also spark new ideas. Perhaps that overly salty soup can be transformed into a savory sauce, or that burnt edge of a cake can lead you to experiment with different baking times or temperatures. By keeping a positive attitude towards your culinary misadventures, you cultivate an environment of experimentation and creativity.

Moreover, documenting your cooking experiences—both the triumphs and the flops—can serve as a valuable resource. Jot down what went wrong and what you learned from it, creating your own personal encyclopedia of cooking wisdom. Over time, you’ll find that these so-called “mistakes” are actually stepping stones, leading you to develop a more intuitive understanding of flavors and techniques.

So, the next time you find yourself in the kitchen and things don’t go as planned, embrace it! Dive into the unexpected, taste everything, and remember: in the world of freestyle cooking, there are no failures—only lessons waiting to be discovered.

15. Building Confidence: From Home Cook to Freestyle Chef

Transitioning from a home cook to a freestyle chef is all about cultivating confidence in your culinary instincts and embracing the creative process. It’s easy to feel intimidated by the precision of recipes, but true mastery in the kitchen comes from understanding flavors, techniques, and, most importantly, your own palate.

Start by experimenting with ingredients you love. Select a few of your favorite vegetables, proteins, and spices, and challenge yourself to create a dish without relying on a recipe. Don’t shy away from making mistakes; they are essential to learning and discovering new flavor combinations. Each time you step into the kitchen, view it as an opportunity to play and explore rather than a task to check off your to-do list.

One effective way to build confidence is to familiarize yourself with fundamental cooking techniques. Mastering basic knife skills, sautéing, and roasting can give you the foundation you need to improvise. Once you feel comfortable with these skills, challenge yourself to switch up the ingredients in a dish you’ve mastered, allowing you to see how different flavors interact and complement one another.

Another key element is tasting as you go. This practice not only helps refine your palate but also encourages you to trust your instincts. Don’t be afraid to adjust seasonings or add a splash of acidity or sweetness; this is where the magic happens. With each dish you create, reflect on what worked and what didn’t, and use that insight to inform your next culinary adventure.

Finally, embrace the idea that cooking is a journey, not a destination. Celebrate your successes and learn from your failures, and soon you’ll find yourself confidently navigating your kitchen like a freestyle chef. With practice and passion, you’ll develop a unique style that is distinctly yours, turning every meal into an exciting expression of creativity.

As we wrap up our exploration of mastering the art of cooking freestyle, we hope you feel inspired to unleash your culinary creativity without the confines of traditional recipes. Embracing the freedom to experiment with flavors, textures, and techniques can transform your kitchen into a playground of innovation, allowing you to create dishes that are uniquely yours. Remember, the key to successful freestyle cooking lies in understanding the basics, trusting your instincts, and having fun along the way. So, gather your ingredients, let your imagination run wild, and savor the joy of crafting delicious meals that reflect your personal flair. Happy cooking, and may every dish you create be a delightful adventure!