What are the best ways to add greenery to your home?

In a world increasingly dominated by concrete and technology, the desire to connect with nature has never been more pronounced.

Bringing the outside in isn’t just a design trend; it’s a refreshing lifestyle choice that transforms our living spaces into serene sanctuaries filled with life and vitality. Incorporating greenery into your home not only enhances aesthetic appeal but also improves air quality and promotes a sense of well-being. Whether you have a sprawling house or a cozy apartment, there are countless creative ways to infuse your environment with the beauty of nature. From hanging planters and vertical gardens to stylish terrariums and succulents, this blog post will inspire you with innovative ideas to create your own indoor oasis. Join us as we explore the myriad of options for enriching your home with lush greenery, helping you cultivate a space that is both inviting and invigorating.

1. The Benefits of Indoor Plants

What are the best ways to add greenery to your home?
Credit : whatcanu.com

Indoor plants are not just a trendy addition to your home decor; they offer a plethora of benefits that can enhance your living space in various ways. First and foremost, they improve air quality. Plants absorb carbon dioxide and release oxygen, making the air in your home cleaner and fresher. Certain varieties, like peace lilies and spider plants, are particularly effective at filtering out toxins and pollutants, creating a healthier environment for you and your family.

Beyond their air-purifying capabilities, indoor plants also contribute to your mental well-being. Studies have shown that greenery can reduce stress, boost mood, and even increase productivity. The presence of plants is known to promote feelings of calm and relaxation, making your living space a sanctuary from the hustle and bustle of daily life. Whether it’s the soothing sight of a lush fern or the vibrant colors of blooming orchids, these natural elements can create a sense of peace.

Additionally, indoor plants can enhance the aesthetic appeal of your home. They bring a touch of nature indoors, adding texture, color, and life to your rooms. From towering fiddle leaf figs in the corner of your living room to delicate succulents on your windowsill, the variety of shapes and sizes can complement any decor style, making your space feel more inviting and vibrant.

Moreover, indoor gardening can be a rewarding hobby that fosters a deeper connection with nature. Caring for plants can be a form of mindfulness, allowing you to slow down and appreciate the little joys of life. The act of nurturing a living thing can also provide a sense of accomplishment and purpose, especially when you witness your plants thrive and flourish.

In summary, incorporating indoor plants into your home is a win-win situation. You not only beautify your space but also enrich your life with cleaner air, improved mental health, and a gratifying hobby. So, as you embark on your journey of bringing the outside in, remember that each green addition is a step toward creating a healthier and more vibrant home.

2. Choosing the Right Plants for Your Space

When it comes to transforming your home into a lush, green oasis, choosing the right plants is crucial. The ideal plant should not only complement your interior design but also thrive in the specific conditions of your space. Start by assessing the natural light available in each room. bright, sunny areas can accommodate sun-loving varieties like succulents, cacti, or vibrant flowering plants, while lower-light spaces may be best suited for hardy options like snake plants or pothos, which can flourish even in dim corners.

Next, consider the size of the plants in relation to your space. Large statement pieces, such as fiddle leaf figs or rubber trees, can serve as striking focal points in a spacious living room, while smaller plants, like air plants or mini ferns, can be used to create charming vignettes on shelves or coffee tables. Don’t forget about your lifestyle, too; if you have pets or young children, opt for non-toxic varieties to ensure safety for all family members.

Additionally, think about the maintenance level each plant requires. If you’re a busy individual with limited time for plant care, choose low-maintenance options that require minimal watering and care. Many of these resilient plants not only look beautiful but also help purify the air, contributing to a healthier living environment.

By thoughtfully selecting plants that fit your space, lifestyle, and aesthetic preferences, you can effortlessly bring the outside in, creating a vibrant sanctuary that not only enhances the beauty of your home but also nurtures your well-being.

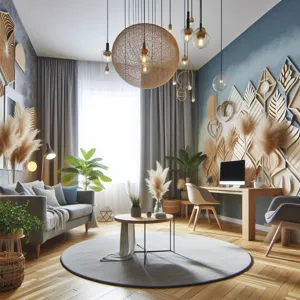
3. Creative Plant Display Ideas

What are the best ways to add greenery to your home?
Credit : whatcanu.com

When it comes to incorporating greenery into your home, the way you display your plants can be just as important as the plants themselves. Creative plant display ideas not only elevate the aesthetic of your space but also showcase your personal style. Here are some innovative ways to showcase your leafy companions.

**1. Vertical Gardens:** Transform an empty wall into a lush green canvas by creating a vertical garden. Use a variety of wall-mounted planters or pocket planters that allow you to hang small pots filled with herbs, succulents, or trailing vines. This not only saves space but also adds a stunning focal point that invites nature indoors.

**2. Shelving Units:** Consider repurposing an old bookshelf or installing open shelves to create a mini indoor jungle. Mix and match plant sizes and types on the shelves, incorporating decorative pots that complement your home decor. This layered approach adds depth and interest, turning your plants into a dynamic display.

**3. Hanging Planters:** Utilize the vertical space in your home by incorporating hanging planters. Whether you choose macramé hangers, decorative ceramic pots, or sleek metal containers, dangling greenery can create an enchanting atmosphere. Position them near windows or in corners to draw the eye upward and create a sense of airiness.

**4. Terrariums:** For a unique touch, try creating a terrarium—a miniature garden housed within a glass container. These self-contained ecosystems can be customized with various plants, stones, and decorations to reflect your personality. They make for beautiful centerpieces on coffee tables or accent pieces on shelves.

**5. Plant Stands:** Elevate your plants with stylish plant stands that add height and dimension to your displays. Choose from a variety of materials, such as wood, metal, or ceramic, to match your decor. Stacking different heights together can create an eye-catching arrangement that draws attention to your favorite greenery.

By experimenting with these creative plant display ideas, you can bring the outside in and create a vibrant, inviting atmosphere in your home. Not only will your space feel more alive, but the thoughtful arrangement of plants will also inspire you to nurture your green thumb and enjoy the beauty of nature indoors.

4. Vertical Gardening: Maximizing Space with Greenery

Vertical gardening is a game-changing trend that allows you to transform even the smallest of spaces into lush, green havens. If you’re limited on floor space or live in an apartment with minimal access to a garden, this innovative approach enables you to maximize your environment by utilizing vertical surfaces—walls, fences, and even balconies—effectively turning them into living art.

One of the key benefits of vertical gardening is its ability to create a stunning visual impact. Imagine a wall adorned with cascading vines, vibrant flowers, or an array of herbs, each adding texture and color to your home. Living walls can serve as beautiful focal points in your living room or kitchen, bringing an element of nature inside and enhancing your décor with organic beauty.

To get started, consider using wall-mounted planters, trellises, or even repurposed items like pallets or shoe organizers. Choose plants that thrive in vertical arrangements, such as ferns, succulents, or climbing varieties like ivy and jasmine. Herbs like basil and mint not only look great but also provide a fresh supply for your culinary endeavors.

For those looking to take it a step further, installing a hydroponic system can revolutionize your vertical gardening experience. This soil-less method allows plants to grow in nutrient-rich water, giving you the ability to cultivate a wide range of greenery in smaller spaces without the mess of traditional gardening.

In addition to the aesthetic appeal, vertical gardens can also improve air quality and promote a sense of tranquility in your home. The presence of greenery has been shown to reduce stress and enhance overall well-being, making your indoor environment not just more beautiful, but healthier too.

Embrace the art of vertical gardening and watch as your home transforms into a vibrant sanctuary filled with life, all while making the most out of your available space. Whether you opt for a simple DIY project or a sophisticated indoor garden system, the possibilities are endless, and the rewards are undeniably refreshing.

5. Using Plants as Natural Dividers

What are the best ways to add greenery to your home?
Credit : whatcanu.com

Using plants as natural dividers is an innovative and visually striking way to define spaces within your home while simultaneously enhancing its aesthetic appeal. Unlike traditional room dividers or bulky furniture, greenery introduces a refreshing touch that brings the outdoors in, creating a serene and inviting atmosphere.

Imagine a spacious open-plan living area where a tall, leafy fiddle leaf fig or a cascading pothos subtly delineates the dining space from the living room. These vibrant plants not only serve a functional purpose but also add a layer of texture and color, creating a seamless transition between areas without the need for walls.

For smaller spaces, consider using a collection of smaller plants arranged on a stylish plant stand or shelf. This creates a tiered effect that can visually separate zones while still allowing light to flow through. Additionally, vertical gardens or wall-mounted planters can transform bare walls into lush green canvases, offering both privacy and style without sacrificing floor space.

In outdoor areas, large potted plants can effectively create cozy nooks on balconies or patios. Strategically placed, they can offer a sense of enclosure, making these spaces feel more intimate and inviting.

When selecting plants for this purpose, consider options that thrive in the lighting conditions of your home. Tall, architectural plants like snake plants or palms work beautifully in corners, while trailing plants like ivy or string of pearls can soften edges and create a more organic feel.

By incorporating plants as natural dividers, you not only enhance your home’s decor but also promote a healthier living environment. Foliage can improve air quality, reduce stress, and elevate your mood, making your home a true sanctuary. Embrace the beauty of nature and let your interior spaces flourish!

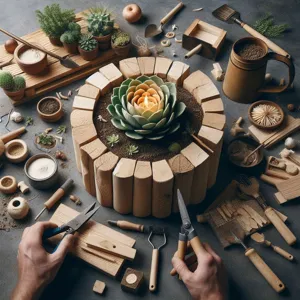
6. DIY Planters: Personalizing Your Green Space

Creating your own DIY planters is a delightful way to add a personal touch to your green space while showcasing your creativity. Not only do these planters provide a unique aesthetic, but they also allow you to express your style and preferences in your home décor. The process can be both rewarding and relaxing, making it an ideal weekend project for plant lovers and DIY enthusiasts alike.

Start with materials you have on hand or visit your local craft store for inspiration. Wooden crates, terracotta pots, repurposed tin cans, or even old shoes can transform into charming planters with just a bit of imagination. Consider painting or staining your containers in vibrant colors or subtle pastels to complement your interior design. Adding stencils or hand-painted designs can elevate the look, making each planter a small work of art.

For a more rustic feel, try using natural materials like woven baskets or driftwood to create an organic look. You can also experiment with vertical planters by stacking small pots or utilizing a pallet to create a living wall, maximizing your space while adding depth to your decor.

Don’t forget to incorporate drainage holes in your planters if necessary, as this will help keep your plants healthy and thriving. Once your planters are ready, choose plants that resonate with your style—succulents, herbs, or colorful flowers can all add vibrancy and life to your home.

By personalizing your planters, you not only create a unique green oasis within your living space but also cultivate a sense of pride in your home. Each time you look at your DIY creations, you’ll be reminded of your creativity and the joy that greenery brings to your environment. So gather your supplies, unleash your imagination, and let your indoor garden flourish!

7. Incorporating Plants into Your Decor Style

What are the best ways to add greenery to your home?
Credit : whatcanu.com

Incorporating plants into your decor style is not just about adding a splash of color; it’s about creating a vibrant atmosphere that breathes life into your home. Whether you lean towards a minimalist aesthetic, modern chic, rustic charm, or bohemian flair, there are countless ways to seamlessly integrate greenery into your spaces.

For a minimalist approach, consider using a single statement plant, such as a tall fiddle leaf fig or a sleek snake plant, placed strategically in a corner or beside a piece of furniture. This not only adds height and interest but also maintains a clean, uncluttered look. Alternatively, if your style is more eclectic, mix and match a variety of smaller plants—succulents, air plants, or trailing vines—displayed in an array of colorful pots on shelves, windowsills, or hanging from the ceiling. This creates a playful and inviting atmosphere.

For those who appreciate a rustic vibe, think about using reclaimed wood planters or vintage pots to house your greenery. Herbs like rosemary and thyme can thrive in a kitchen window, not only adding a fragrant touch but also serving as a functional element in your cooking. Meanwhile, a macramé plant hanger can add a trendy bohemian twist, allowing trailing plants like pothos or string of hearts to cascade beautifully.

Moreover, don’t forget the power of wall-mounted planters. These can serve as living art pieces, transforming a blank wall into a lush vertical garden. When choosing plants, consider their light requirements and growth patterns to ensure they thrive in their designated spots.

By thoughtfully incorporating plants that resonate with your decor style, you create a cohesive look that enhances the aesthetic of your home while fostering a calming and revitalizing environment. Embrace the myriad of textures and colors that plants offer, and watch as your space transforms into a sanctuary of greenery.

8. The Role of Light in Plant Placement

When it comes to incorporating greenery into your home, understanding the role of light in plant placement is crucial for both aesthetics and plant health. Different plants have varying light requirements, and recognizing these needs can make all the difference in creating a thriving indoor garden.

Natural light floods through your windows, creating a vibrant canvas that can enhance the beauty of your plants. For instance, succulents and cacti thrive in bright, direct sunlight, making a south-facing window the perfect spot for them to bask in their glory. Their striking shapes and colors can become focal points, adding a touch of the desert to your living space.

On the other hand, if you have a cozy nook that receives only filtered light, consider plants like snake plants or pothos. These resilient varieties not only tolerate lower light conditions but also bring a lush, cascading effect that softens the edges of a room. Their ability to purify the air is an added bonus, making them an excellent choice for bedrooms or home offices.

Moreover, understanding the movement of the sun throughout the day can help you strategically place your plants for optimal growth. Rotate your pots periodically to ensure even exposure, which can help prevent uneven growth and keep your greenery looking lush and full.

Additionally, consider incorporating grow lights for areas that lack sufficient natural light. These artificial lights can mimic the sun’s rays, allowing you to expand your botanical horizons without the constraints of your home’s lighting conditions.

In summary, thoughtfully considering the light requirements of your plants not only promotes their health but also enhances your home’s aesthetic. By strategically placing greenery based on light accessibility, you can create a harmonious balance that breathes life into any room, fostering an inviting atmosphere that bridges the gap between the indoors and the great outdoors.

9. Terrariums: Bringing a Mini Ecosystem Indoors

Terrariums are a captivating and enchanting way to bring the beauty of nature into your home, offering a miniature ecosystem that thrives within the confines of glass. These self-sustaining gardens, often housed in jars or geometric containers, not only add a touch of greenery to your space but also serve as a stunning focal point that sparks conversation.

Creating a terrarium is an art form that combines creativity with a basic understanding of plant care. Start with a clear glass container, which can range from simple mason jars to intricate hanging globes or even larger display cases. The beauty of terrariums lies in their versatility; you can design a lush tropical paradise, a dry desert landscape with succulents, or even a whimsical fairy garden with tiny figurines nestled among the foliage.

The layering process is essential to ensure the health of your plants. Begin with a drainage layer, such as small pebbles or activated charcoal, to prevent water from stagnating and causing root rot. Follow this with a layer of soil suitable for your chosen plants, allowing enough space for their roots to spread. When selecting plants, consider varieties that thrive in enclosed environments, such as ferns, mosses, and small air plants, which will flourish in the humidity of the terrarium.

Once assembled, the closed environment of a terrarium creates its own microclimate, making it a low-maintenance option for the busy urban dweller. The glass acts as a greenhouse, trapping moisture and heat, allowing the plants to photosynthesize and thrive with minimal intervention. Just remember to periodically check for condensation and give your terrarium some indirect sunlight to keep your mini ecosystem healthy.

Beyond their aesthetic appeal, terrariums also serve as a reminder of the wonders of nature, bringing a slice of the outdoors into your daily life. Whether placed on a coffee table, desk, or windowsill, these living artworks invite tranquility and natural beauty into your home, making them an ideal addition for anyone looking to enhance their space with a touch of green.

10. Edible Plants: Growing Herbs and Veggies at Home

Incorporating edible plants into your home not only enhances your décor but also invites the delightful benefits of fresh herbs and vegetables right to your kitchen. Imagine snipping a sprig of basil or plucking a ripe tomato just moments before adding them to your favorite dish. Growing your own herbs and veggies is a rewarding endeavor that combines aesthetics with functionality.

Start small by selecting a few easy-to-grow herbs like basil, mint, or rosemary. These fragrant plants thrive indoors with minimal care and can be cultivated on a sunny windowsill or in decorative pots that complement your kitchen’s style. Choose containers that allow for good drainage and consider varying their heights to create an appealing visual display. The vibrant greens and aromatic scents not only beautify your space but also infuse your culinary creations with fresh flavors.

For those with a bit more space, exploring vertical gardening options or dedicated indoor garden kits can yield a bounty of vegetables. Microgreens, lettuce, and peppers are great choices that do well in smaller areas and provide a sense of achievement as you watch them grow. Utilizing hydroponic systems can also simplify the process, allowing you to grow produce in water without soil, making it ideal for urban dwellers with limited outdoor access.

In addition to being visually stunning and practical, growing your own edible plants can foster a deeper connection to the food you consume. It encourages a sustainable lifestyle and reduces the need for store-bought produce, which often comes with excessive packaging. Plus, the joy of harvesting your homegrown herbs and veggies can transform cooking into a more engaging and fulfilling experience.

So, whether you’re a seasoned gardener or a curious beginner, introducing edible plants into your home is a creative way to enhance your living space, while also embracing a lifestyle that celebrates fresh, homegrown goodness. Get your hands dirty and experience the satisfaction of cultivating your own green oasis right in your kitchen!

11. Care Tips for Keeping Indoor Plants Thriving

Bringing the beauty of nature indoors can transform your living space into a vibrant and inviting sanctuary. However, to truly enjoy the benefits of indoor plants, it’s essential to know how to care for them properly. Here are some key care tips to ensure your leafy companions thrive and flourish in your home.

**1. Understand Light Requirements:** Different plants have varying light needs, from low-light tolerant varieties like snake plants to sun-loving succulents. Position your plants according to their preferences, and consider the seasonal changes in sunlight. Don’t hesitate to experiment with different spots in your home until you find the ideal location.

**2. Water Wisely:** Overwatering is one of the leading causes of indoor plant demise. It’s crucial to gauge your plant’s water needs based on its type, size, and the environment it’s in. Check the soil moisture regularly; if the top inch of soil feels dry, it’s time to water. Always use pots with drainage holes to prevent water from pooling at the bottom, which can lead to rot.

**3. Maintain Humidity:** Many indoor plants, especially tropical varieties, thrive in higher humidity levels. If your home is dry, especially during winter months, consider using a humidifier or placing a tray of water with pebbles beneath your plants. Misting their leaves occasionally can also help, although be mindful of plants that might not appreciate moisture on their foliage.

**4. Fertilize Appropriately:** Indoor plants benefit from regular feeding, especially during the growing season (spring and summer). Use a balanced liquid fertilizer every few weeks, following the manufacturer’s instructions. Be cautious not to over-fertilize, which can harm the roots and lead to unhealthy growth.

**5. Prune and Repot:** Regularly inspect your plants for dead or yellowing leaves, which should be pruned to promote new growth. As your plants grow, they may outgrow their containers. Repotting them into a slightly larger pot with fresh soil can give them the space and nutrients they need to continue thriving.

**6. Watch for Pests:** Keep an eye out for common pests like spider mites, aphids, or mealybugs. If you notice any signs of infestation, act quickly by isolating the affected plant and treating it with insecticidal soap or neem oil.

By following these essential care tips, you can create a flourishing indoor garden that not only enhances your home’s aesthetic but also contributes to your well-being. With a little attention and love, your indoor plants will thrive, bringing fresh air and a sense of tranquility to your living space.

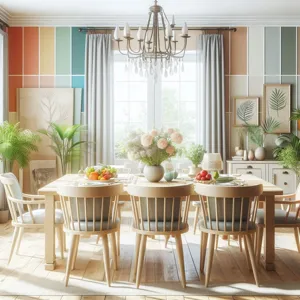
12. Seasonal Plant Arrangements for a Fresh Look

Incorporating seasonal plant arrangements into your home is a delightful way to refresh your space and embrace the changing moods of nature throughout the year. Think of your home as a canvas, and plants as the vibrant colors that bring it to life. Each season offers unique opportunities to showcase a variety of textures, colors, and scents that can transform your environment and elevate your mood.

In spring, consider vibrant blooms like tulips or daffodils, which symbolize renewal and growth. Place them in cheerful, pastel-colored pots to enhance the fresh, uplifting spirit of the season. Transitioning into summer, you can introduce lush greens and tropical plants like monstera or fiddle leaf figs, which thrive in the warm weather and bring a bold, exotic flair to your living areas.

As autumn approaches, swap out your bright blooms for richer, earthier tones. Incorporate seasonal favorites such as chrysanthemums or ornamental kale, and don’t shy away from adding rustic elements like pinecones or branches to your arrangements. These additions can evoke the cozy essence of fall, making your home feel inviting and warm.

When winter arrives, evergreen plants and festive arrangements can keep your space feeling alive despite the chilly weather outside. Consider a beautiful arrangement of holly and pine, or perhaps a compact indoor tree adorned with ornaments that reflect your personal style. You can even create a terrarium with winter-themed decorations to bring a touch of whimsy to your decor.

By curating seasonal plant arrangements, you not only enhance your home’s aesthetic but also create a dynamic atmosphere that reflects the beauty of nature’s cycles. Keep your arrangements varied and playful, and your home will always feel fresh and inviting, no matter what time of year it is.

13. How to Create a Plant Care Routine

Creating a plant care routine is essential for ensuring that your indoor greenery thrives and flourishes. Just like any living thing, houseplants require consistent attention and care to reach their full potential. By establishing a structured routine, you not only enhance the health of your plants but also deepen your connection to nature within your home.

Start by assessing the specific needs of each plant species in your collection. Different plants have varying requirements for sunlight, water, humidity, and nutrients. Make a list and categorize your plants based on their care needs. For example, succulents and cacti thrive in bright, direct sunlight and require infrequent watering, while tropical plants like ferns and peace lilies prefer indirect light and a more humid environment.

Next, incorporate regular watering into your routine. set a specific day of the week to check on your plants; this could be a leisurely Sunday morning or a mid-week check-in. Use this time to assess the moisture level of the soil—stick your finger about an inch deep to gauge whether it’s time to water. Remember, overwatering is a common mistake, so it’s crucial to ensure the soil is dry before adding more water.

Fertilizing is another key aspect of plant care. Most houseplants benefit from a balanced fertilizer every few months, particularly during the growing season in spring and summer. Mark your calendar to remind yourself when it’s time to feed your plants, ensuring they receive the nutrients they need to thrive.

Don’t forget about pruning and cleaning! Dust can accumulate on leaves, blocking sunlight and hindering photosynthesis. Incorporate a gentle cleaning session into your routine once a month—simply wipe the leaves with a damp cloth to help them breathe easier. Additionally, pruning dead or yellowing leaves encourages new growth and keeps your plants looking their best.

Lastly, take time to simply enjoy your plants. Schedule regular moments to appreciate their beauty and monitor their growth. This connection not only fosters a sense of tranquility in your space but also motivates you to maintain your plant care routine. By dedicating time to these simple tasks, you’ll create a thriving indoor garden that brings the vibrancy of nature into your home.

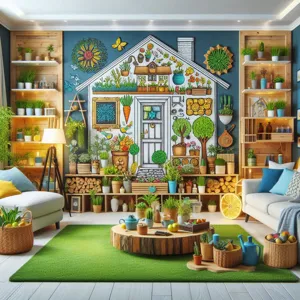
14. Combining Art and Nature: Plant Art Installations

Incorporating greenery into your home decor can transcend traditional potted plants and create stunning focal points that blend art with nature. Enter the world of plant art installations—a creative approach that transforms living spaces into lush, vibrant galleries. These installations can range from intricate wall-mounted planters to striking hanging gardens that draw the eye upward, celebrating the beauty of both flora and artistic expression.

Imagine a living wall adorned with a curated selection of succulents, ferns, and flowering plants, arranged in a mosaic pattern that shifts with the seasons. This dynamic display not only serves as a breathtaking backdrop but also acts as a natural air purifier, enhancing the overall ambiance of your home. Alternatively, consider crafting a three-dimensional art piece using driftwood or reclaimed materials, entwined with climbing vines or cascading string of pearls. This fusion of materials can evoke a sense of tranquility, reminiscent of a serene forest, while also showcasing your personal style.

For those with a penchant for minimalism, a single large-scale terrarium might be the answer. These glass-enclosed ecosystems can feature a variety of plants, stones, and even decorative elements like fairy lights or miniature figurines. Position it on a coffee table or a shelf, and it becomes not just a plant, but a conversation starter—an ever-evolving piece of living art that invites curiosity and admiration.

By embracing plant art installations, you invite the essence of the outdoors into your home in a way that is both innovative and deeply personal. The marriage of art and nature can invigorate your living spaces, making them feel more vibrant and alive while reflecting your unique aesthetic. So, unleash your creativity, and let your home blossom into a breathtaking gallery where nature takes center stage.

15. Greenery in Unexpected Spaces: Bathrooms and Kitchens

When we think of adding greenery to our homes, our minds often drift toward living rooms and bedrooms, but the bathrooms and kitchens can become delightful green sanctuaries too. These spaces, typically overlooked, can benefit greatly from a splash of plant life, transforming them into fresh and inviting areas.

In the bathroom, humidity levels are usually higher due to showers and baths, creating an ideal environment for many plants. Consider hanging a trailing pothos from a shelf or a small window sill. Its cascading vines can soften the sterile lines of bathroom fixtures and create a calming atmosphere. Alternatively, small ferns thrive in these conditions, their lush foliage bringing a touch of nature to your daily routines. For those with limited light, low-maintenance options like snake plants or peace lilies can flourish with minimal care, all while purifying the air.

Kitchens, on the other hand, are perfect for integrating functional greenery. Herbs like basil, mint, and rosemary not only add a pop of color but also serve a practical purpose, offering fresh ingredients at your fingertips for culinary creations. You can place small pots on the windowsill or create a vertical herb garden on a wall-mounted shelf. Additionally, larger leafy plants, such as spider plants or rubber trees, can fill empty corners, lending life to what might otherwise be a utilitarian space.

When choosing plants for these unexpected spaces, think about the light, humidity, and your own maintenance capabilities. With a little creativity and consideration, you can turn your bathrooms and kitchens into lush, green havens that breathe life into your home. Embrace the tranquility and freshness that greenery brings, and watch as these spaces transform into your new favorite retreats.

In conclusion, infusing your home with greenery is not only a way to enhance your decor but also a means to create a serene and inviting atmosphere. As we explored in this post, there are countless creative ways to bring the outside in, from stylish indoor gardens and vertical plant walls to charming terrariums and unique plant displays. Each method offers a chance to personalize your space while reaping the numerous physical and mental health benefits that plants provide. So, whether you’re a seasoned plant parent or a beginner looking to dip your toes into the world of indoor gardening, we encourage you to experiment with these ideas and find what resonates with you. Embrace the beauty of nature within your home, and watch as your space transforms into a lush, vibrant oasis that brings joy and tranquility to your everyday life. Happy decorating!

What are the best ways to attract birds to your backyard?

Imagine stepping into your backyard and being greeted by the cheerful melodies of songbirds, the fluttering of colorful wings, and the gentle rustle of leaves as nature comes alive around you.

Transforming your outdoor space into a bird paradise is not only a delightful way to connect with wildlife but also a rewarding endeavor that can enhance the beauty of your home. Whether you’re an avid birdwatcher or simply someone looking to add a touch of nature to your surroundings, creating a welcoming habitat for our feathered friends is easier than you might think. In this blog post, we’ll share 10 simple yet effective tips that will help you attract a variety of birds, from vibrant hummingbirds to majestic finches, while also enriching your backyard’s ecosystem. Get ready to roll up your sleeves and turn your outdoor retreat into a vibrant sanctuary where birds can thrive and bring joy to your everyday life!

1. Assessing Your Backyard Space

What are the best ways to attract birds to your backyard?
Credit : whatcanu.com

Before you embark on your journey to create a bird paradise, the first step is to evaluate your backyard space thoroughly. Take a moment to step outside and observe the area with fresh eyes. consider the size of your yard, the existing landscape features, and the surrounding environment. Is it a sun-drenched haven or a shaded retreat? Understanding these elements will guide your decisions on what types of birds you can attract and what features to incorporate.

Look for natural elements that could either aid or hinder your feathered friends. Are there mature trees that offer shelter and nesting opportunities? Do you have open areas that could benefit from the addition of bird feeders or baths? Pay attention to existing plants—native flora can be particularly inviting to birds, providing both food and cover.

Additionally, take note of any nearby structures or fences that could create barriers or disrupt the birds’ flight paths. Consider how the layout of your yard influences visibility and accessibility. For instance, a cozy corner may provide a perfect spot for a birdhouse, while an open area might be ideal for a feeding station.

By assessing your backyard space, you’ll gain valuable insights into how to design a welcoming environment for birds. A thoughtful approach based on your unique landscape will ensure you create a vibrant sanctuary that attracts a variety of species year after year. With a solid plan in place, you can move on to the next steps of transforming your outdoor space into a true bird paradise.

2. Choosing the Right Bird Feeders

Choosing the right bird feeders is crucial for attracting a diverse array of feathered friends to your backyard paradise. With so many styles and types available, selecting feeders that cater to the preferences of different bird species can make all the difference. Start by considering the local birds in your area. For instance, tube feeders are perfect for appealing to smaller birds like finches and chickadees, while platform feeders can accommodate larger species like cardinals and jays.

Opt for feeders made from durable, weather-resistant materials to ensure they withstand the elements and last through multiple seasons. Additionally, think about feeder design: one with drainage holes helps keep seeds dry, while a feeder with a wide perch allows for comfortable feeding.

Placement is equally important; position your feeders in a sheltered spot near trees or shrubs to provide birds with a safe haven from predators. It’s also beneficial to have a variety of feeders—offering different seed types, such as sunflower seeds, safflower seeds, or mixed blends—will attract a broader range of species.

Don’t forget to keep your feeders clean! Regular maintenance not only ensures a healthy feeding environment but also keeps your backyard looking pristine. By thoughtfully selecting and placing the right bird feeders, you’ll create an inviting space that transforms your backyard into a vibrant hub of avian activity, bringing joy and natural beauty to your outdoor oasis.

3. Selecting the Best Bird Seed

What are the best ways to attract birds to your backyard?
Credit : whatcanu.com

Selecting the best bird seed is a vital step in transforming your backyard into a thriving bird paradise. Different birds have varying dietary preferences, so understanding the specific species that frequent your area will help you choose the right blend to attract them.

For instance, if you’re hoping to lure colorful finches, a thistle seed (nyjer) feeder will be your best bet, while chickadees and woodpeckers will eagerly flock to feeders filled with sunflower seeds. A mixed seed blend can also be effective, offering a variety of choices to entice different bird species. Just be mindful that not all blends are created equal; many contain fillers like millet and cracked corn that the birds may ignore.

Consider investing in high-quality seeds that offer a higher nutritional value, ensuring that your feathered visitors receive the best possible food. You might also want to explore the option of purchasing seeds in bulk, which can save you money and keep your feeders stocked longer.

Moreover, remember to regularly clean your feeders and replace old seed to prevent mold and bacteria growth, which can be harmful to birds. By curating a thoughtful selection of bird seed, you’ll not only attract a diverse range of birds but also create a welcoming environment that encourages them to return to your backyard time and again. With the right seed, you’ll be rewarded with colorful visitors and the sweet symphony of chirps and songs that fill the air, truly transforming your outdoor space into a serene bird haven.

4. Planting Native and Bird-Friendly Plants

Creating a bird paradise in your backyard begins with the right selection of plants. Planting native and bird-friendly species is not just beneficial for your avian visitors, it also enhances the overall health and beauty of your garden. Native plants are well-adapted to your local climate and soil conditions, making them easier to maintain while providing essential food and shelter for birds.

Start by researching which plants are indigenous to your area, as these will attract local bird species that have evolved to thrive on them. Think about incorporating a variety of plants, such as shrubs, trees, and flowering perennials, to create layers of habitat. For instance, berry-producing shrubs like elderberry and serviceberry not only provide delicious snacks for birds but also offer shelter from predators.

In addition to native species, consider adding flowering plants that produce seeds, such as sunflowers and coneflowers, which can draw in a multitude of birds during different seasons. Moreover, plants like milkweed can attract pollinators, which in turn supports the entire ecosystem, including the birds that feed on insects.

Don’t forget about providing water sources as well. A simple birdbath or a small pond can be a game-changer, giving birds a place to drink and bathe. Include some rocks or shallow areas to help smaller birds feel safe while they enjoy their refreshing dip.

By thoughtfully selecting and planting native, bird-friendly species, you’ll create not just a sanctuary for your feathered friends but a vibrant, thriving backyard that bursts with color and life. Each season will bring new visitors and sounds, transforming your outdoor space into a lively avian haven.

5. Creating Water Sources for Birds

What are the best ways to attract birds to your backyard?
Credit : whatcanu.com

Creating water sources for birds is one of the most effective and rewarding ways to attract a diverse array of feathered friends to your backyard oasis. Birds, much like humans, require fresh water not only for drinking but also for bathing, which plays a crucial role in maintaining their plumage. By incorporating appealing water features into your outdoor space, you can create a lively hub of activity that brings joy and color to your yard.

Start with a simple birdbath, which can be easily purchased or even DIY-ed using shallow containers. Position it in a visible area, preferably near trees or shrubs that provide natural cover. Birds feel safer when they have nearby escape routes from potential predators, so a strategic placement is essential. Ensure the water is shallow enough for small birds to wade in without risk of drowning, ideally no deeper than two inches.

To keep the water fresh and enticing, change it regularly—ideally every day during the hot summer months. Adding a small fountain or dripper can create movement in the water, which is particularly attractive to birds. The sound of trickling water can also draw them in from afar, making your backyard a go-to destination for thirsty visitors.

Additionally, consider installing a small pond if space allows. A pond not only serves as a water source but also creates an ecosystem that can attract various species of birds and other wildlife. Surround it with native plants that provide shelter and food, turning your water source into a thriving habitat.

Lastly, don’t forget about the importance of cleanliness. Regularly scrub your birdbath or pond to prevent any algae buildup or waterborne diseases. By providing a safe and welcoming water source, you’ll not only witness an increase in bird activity but also contribute to their well-being, making your backyard a true paradise for avian life.

6. Providing Shelter with Birdhouses and Nesting Boxes

Creating a welcoming environment for birds in your backyard goes beyond just providing food and water; it also involves offering safe and cozy shelter. Birdhouses and nesting boxes serve as essential havens for our feathered friends, giving them a secure space to rest, raise their young, and take refuge from predators and harsh weather conditions.

When selecting or building birdhouses, consider the specific needs of the bird species in your area. Different birds have different preferences for nesting sites, so it’s important to choose or construct houses that cater to these preferences. For example, bluebirds prefer open, spacious houses with a circular entrance, while wrens thrive in smaller, more enclosed spaces. Additionally, ensure that the dimensions and materials used are appropriate; untreated wood is often the best choice, as it allows for ventilation and insulation while providing a natural feel.

Placement is also key to attracting birds to your backyard sanctuary. Position your birdhouses at varying heights and distances from trees or shrubs, as many birds appreciate having nearby perches to survey their surroundings. It’s advisable to avoid direct sunlight or overly windy spots, as these can deter nesting. Instead, find a balance that offers both sunny spots and shaded areas, creating a cozy retreat for your avian visitors.

Don’t forget to keep an eye on maintenance! Cleaning out old nesting materials after the breeding season can prevent the spread of disease and encourage birds to return year after year. By providing well-placed and well-maintained birdhouses and nesting boxes, you’ll not only give birds a safe space to thrive but also create a vibrant and lively atmosphere in your backyard, filled with the charming sights and sounds of nature.

7. Incorporating Birdbaths for Bathing and Drinking

What are the best ways to attract birds to your backyard?
Credit : whatcanu.com

Incorporating birdbaths into your backyard is one of the most delightful ways to attract a diverse array of feathered friends while adding a serene focal point to your outdoor space. Birds, much like humans, appreciate a refreshing bath, and a birdbath serves as a perfect oasis for them to cleanse their feathers and hydrate.

When selecting a birdbath, consider the size and style that will complement your garden. A shallow basin—ideally no deeper than two inches—will cater to smaller birds, while a slightly deeper option can attract larger species. Materials such as ceramic, stone, or concrete not only provide durability but also blend beautifully with natural surroundings.

Position your birdbath in a quiet, sheltered area, preferably near trees or shrubs that offer cover. This allows birds to feel safe as they approach for a drink or a dip. Adding a gentle water feature, like a small fountain or dripper, can create soothing sounds and rippling water that will entice birds even more.

To maximize usage, keep the birdbath clean and filled with fresh water. Regular maintenance is key; change the water every few days, especially in hot weather, to prevent algae buildup and keep it inviting for your avian visitors.

You might also consider adding decorative stones or pebbles in the birdbath to provide birds with safe perches while they sip or splash. With the right setup, your backyard birdbath can become a bustling hub of activity, bringing nature closer to home and allowing you to observe the enchanting behaviors of your local birds. Whether it’s the quick flutters of a sparrow or the elegant dips of a blue jay, a well-placed birdbath will transform your outdoor space into a bird paradise that you—and your feathered friends—will cherish.

8. Designing a Bird-Friendly Garden Layout

Creating a bird-friendly garden layout is both an art and a science, one that harmonizes the needs of our feathered friends with the natural beauty of your outdoor space. To begin, consider incorporating a diverse range of plants that provide food, shelter, and nesting opportunities for various bird species. Native plants are particularly beneficial, as they offer the seeds, fruits, and insects that local birds rely on for sustenance.

Aim for a layered garden design, combining trees, shrubs, and flowers to create a multi-dimensional space. Tall trees can serve as lookout perches, while dense shrubs provide hiding spots from predators and cozy nesting sites. Consider planting flowers that bloom at different times throughout the seasons to ensure a steady supply of nectar and seeds. Wildflowers and native grasses can also attract insects, which are vital for feeding hungry chicks during breeding season.

In addition to plant selection, think about the layout of your garden. Create a welcoming environment by incorporating bird baths, feeders, and nesting boxes placed at varying heights. A bird bath not only quenches their thirst but also offers a place for bathing, which is essential for their plumage maintenance. Ensure it is shallow and has a gentle slope for easy access.

Strategically position your feeders near natural cover, such as trees or bushes, so that birds feel safe while dining. Use a mix of feeder types to attract different species; tube feeders for finches, platform feeders for larger birds, and suet feeders for woodpeckers, for example. Avoid placing feeders too close to windows to reduce the risk of collisions.

Finally, make your garden a sanctuary by minimizing pesticide use and providing a safe haven for all creatures. By thoughtfully designing your bird-friendly garden layout, you’ll not only create an inviting habitat for birds but also enjoy the soothing presence of nature right in your backyard, transforming it into a vibrant bird paradise.

9. Minimizing Pesticide Use for a Safe Habitat

Creating a bird paradise in your backyard goes hand in hand with ensuring a safe and welcoming environment for your feathered friends. One of the most significant steps you can take is to minimize pesticide use. While these chemicals might seem like a quick solution to pesky insects or unwanted weeds, they can have devastating effects on local bird populations and the overall health of your ecosystem.

Birds are incredibly sensitive to toxins, and pesticide residues can disrupt their reproductive systems, diminish their food sources, and even lead to fatal consequences. By reducing or eliminating pesticides, you not only protect the birds but also foster a healthier environment for beneficial insects, like ladybugs and bees, which play crucial roles in pollination and pest control.

Instead of reaching for chemical solutions, consider organic alternatives. Natural pest repellents made from ingredients like neem oil or diatomaceous earth can help manage pests without harming your avian visitors. Additionally, implementing integrated pest management (IPM) techniques—such as encouraging natural predators, planting pest-resistant plants, and promoting biodiversity—can effectively keep your garden thriving.

Creating a safe habitat also means providing clean water sources and native plants that offer shelter and food. By cultivating an organic garden, rich in native flora, you can create a lush environment that attracts a variety of birds, all while maintaining ecological balance.

In short, minimizing pesticide use is a small yet impactful step toward transforming your backyard into a sanctuary for birds. By prioritizing their safety and well-being, you contribute to a sustainable ecosystem that your avian companions will thrive in, ensuring they return to your yard time and time again.

10. Attracting Specific Bird Species with Targeted Features

To truly transform your backyard into a bird paradise, consider tailoring your space to attract specific bird species that you admire. Different birds have varying preferences for food, shelter, and nesting sites, so understanding the habits and needs of your desired feathered friends is crucial.

For instance, if you want to invite vibrant hummingbirds into your garden, installing nectar feeders filled with a sugar-water solution is essential. Choose bright, tubular feeders that mimic the flowers they love, and position them in a sunny area away from predators. Additionally, planting native flowering plants will not only provide natural food sources but also create a beautiful landscape that complements your feeders.

If songbirds like finches or chickadees are your target, consider incorporating specific features such as platform feeders filled with sunflower seeds or nyjer thistle. These birds appreciate open feeding spaces where they can easily spot potential threats. Furthermore, adding birdbaths with shallow, gently sloping edges can entice a variety of birds to visit, offering them a refreshing place to drink and bathe.

For those interested in attracting owls or woodpeckers, install nesting boxes designed specifically for these species. Make sure to place them in quiet, undisturbed areas of your yard, providing the shelter and safety these birds crave. Remember, the right combination of food, water, and shelter can create an irresistible oasis for your desired bird species.

By thoughtfully curating your backyard with targeted features, you can create a vibrant ecosystem that supports specific birds, enriching both their lives and yours. Enjoy the process of observing and learning, and soon you’ll find your garden alive with the songs, colors, and antics of your favorite avian visitors.

11. Creating a Birdwatching Area

Creating a dedicated birdwatching area in your backyard can transform your outdoor space into a serene sanctuary, inviting both feathered friends and nature enthusiasts alike. Start by selecting a quiet corner of your yard where you can observe the birds without startling them. This space should be away from heavy foot traffic and noise, allowing for a peaceful environment that encourages birds to visit.

Next, consider investing in a comfortable chair or a cozy bench. This will be your vantage point for observing the various species that come to your backyard. Enhance the space with a small table to hold your birdwatching gear—binoculars, a field guide, or even a notebook for jotting down your observations.

To attract a diverse array of birds, make sure your birdwatching area is thoughtfully designed. Install bird feeders filled with a variety of seeds, suet, and nectar to cater to different bird species. Position these feeders within clear sightlines from your seating area, ensuring they are easily visible but not too close, as this may deter shy birds.

Incorporate native plants, shrubs, and trees that provide natural shelter and nesting sites. Not only do these plants offer food sources such as berries and seeds, but they also create a beautiful, lush backdrop for your birdwatching experience. Adding a small water feature, like a birdbath or pond, can further entice birds to your yard, allowing them to drink and bathe while you watch in delight.

Finally, consider adding birdhouses and nesting boxes to encourage more permanent residents in your backyard paradise. Choose designs suitable for the bird species you wish to attract, and place them in sheltered, quiet spots away from predators.

With these thoughtful touches, your birdwatching area will not only enhance your backyard’s aesthetic but also create a haven for birds, making your space a vibrant hub of activity and a delightful retreat for you to enjoy the wonders of nature.

12. Using Bird-Friendly Decorations and Accessories

When it comes to creating a bird paradise in your backyard, the aesthetics matter just as much as the essentials. Using bird-friendly decorations and accessories not only enhances the beauty of your outdoor space but also makes it more inviting for our feathered friends. Imagine vibrant, eye-catching ornaments that blend harmoniously with nature, creating an environment where birds feel safe and welcomed.

Start with birdhouses that are both functional and decorative. Choose designs that mimic the natural habitats of local birds, incorporating materials like untreated wood, which is not only safer for birds but also adds a rustic charm to your backyard. You can paint these houses in soft, nature-inspired colors to draw attention without overwhelming the landscape. Ensure they are placed in sheltered areas, away from predators, to encourage nesting.

Wind chimes and vibrant garden stakes can add a touch of whimsy while also drawing birds in. Opt for chimes made from natural materials that produce gentle sounds, as harsh noises can startle birds away. Similarly, colorful garden stakes can serve as landmarks in your yard, helping birds navigate their new paradise while adding splashes of color.

Additionally, consider using decorative feeders that match your garden’s theme. Not only should they be functional, providing easy access to seeds or nectar, but they can also be works of art. Look for feeders shaped like flowers, fruits, or even abstract designs that can become focal points in your garden while catering to specific bird species.

Don’t forget to incorporate a water feature, such as a birdbath or a small pond. Opt for shallow designs with textured surfaces that provide birds with a safe spot to drink and bathe. Decorate your birdbath with stones, pebbles, or even floating flowers to create a serene oasis that attracts birds while enhancing the overall aesthetics of your yard.

Incorporating these bird-friendly decorations and accessories not only beautifies your outdoor space but also contributes to a more welcoming atmosphere for birds. With thoughtful design and consideration, your backyard can transform into a stunning sanctuary where both humans and birds can enjoy the beauty of nature together.

13. Educating Yourself on Local Bird Species

Educating yourself on local bird species is one of the most rewarding steps you can take in your journey to create a bird paradise right in your backyard. Not only does this knowledge enhance your appreciation for the avian visitors, but it also allows you to tailor your environment to meet their specific needs. Start by researching the types of birds that are naturally found in your area; this could include common species such as cardinals, blue jays, and sparrows, or perhaps more exotic ones like orioles or hummingbirds, depending on your location.

Consider investing in a good field guide or downloading a bird identification app to help you recognize different species by their colors, shapes, and calls. Being able to identify the birds that frequent your backyard will enhance your birdwatching experience and enable you to provide the right food, nesting materials, and habitats for them. For instance, if you discover that your area is home to warblers, you might choose to plant native shrubs that provide the insects they need for nourishment.

Additionally, joining local birdwatching groups or online communities can be invaluable. These platforms offer a wealth of knowledge, from understanding seasonal migrations to learning about nesting habits and behaviors. Engaging with fellow bird enthusiasts can provide tips on attracting specific species and fostering a thriving ecosystem in your backyard.

Ultimately, becoming familiar with your local birds not only enriches your gardening efforts but also connects you more deeply with nature. As you watch these beautiful creatures flit from feeder to tree branch, you’ll find a sense of joy and fulfillment in knowing that your backyard has become a safe haven for them. Embrace the journey of learning, and you’ll be rewarded with countless moments of wonder right outside your window.

14. Keeping a Birdwatching Journal

Keeping a birdwatching journal is not just a delightful way to document your feathered visitors; it’s also an enriching practice that deepens your connection with nature. As you sit quietly in your backyard, the vibrant colors and unique behaviors of birds can inspire you to grab a notebook and pen. This journal becomes a personal record of your observations—detailing the species that visit, their feeding habits, and the times of day they are most active.

Imagine flipping through the pages and reminiscing about the bright flash of a ruby-throated hummingbird darting to your feeder or the majestic flight of a hawk soaring overhead. You can note the weather conditions, the plants in bloom, and even the sounds that accompany your sightings. Over time, you’ll start to recognize patterns, such as seasonal migrations or the arrival of specific birds at certain times of the year.

In addition to being a reflective practice, a birdwatching journal serves as an educational tool. You can include sketches or photographs of the birds you encounter, research interesting facts about them, and jot down notes on their behaviors. This not only enhances your knowledge but also enriches your experience as you become more attuned to the intricate lives of these creatures.

Furthermore, sharing your journal with family and friends can inspire others to take an interest in birdwatching and conservation. Consider inviting them to join you in this rewarding endeavor; together, you can create a community of bird enthusiasts, exchanging tips and stories over a cup of coffee in your backyard sanctuary. By keeping a birdwatching journal, you cultivate not just a record of your observations but a deeper appreciation for the lively ecosystem that thrives right outside your door.

15. Engaging with the Birdwatching Community

Engaging with the birdwatching community can elevate your backyard bird paradise from a simple hobby to a rich, shared experience. Connecting with fellow bird enthusiasts not only enhances your understanding of avian behavior but also opens the door to a wealth of knowledge, resources, and inspiration.

Start by joining local birdwatching clubs or online forums where you can share your experiences, exchange tips, and discuss the different species that visit your area. These communities are often full of seasoned birdwatchers who can provide valuable insights on attracting specific species or creating a more inviting habitat. For example, they might suggest the best types of feeders for attracting finches or the ideal water features for drawing in more songbirds.

Participating in organized birdwatching events, such as group outings or educational workshops, can also deepen your appreciation for these feathered visitors. Such gatherings are a fantastic opportunity to observe birds in the wild, learn from experienced birders, and even take part in citizen science initiatives, like bird counts or habitat restoration projects.

Sharing your backyard birdwatching journey on social media can further connect you with this vibrant community. Posting photos of your visits, sharing tips on your setup, or even live-streaming your backyard activity can inspire others while also inviting them to share their own experiences.

Ultimately, engaging with the birdwatching community enriches your backyard experience and fosters a collective passion for nature that can lead to lifelong friendships and shared adventures. So, get involved, share your story, and watch as your bird paradise flourishes, both in your backyard and within the community around you.

As we wrap up our exploration of transforming your backyard into a bird paradise, we hope you feel inspired to take action and create a vibrant sanctuary for our feathered friends. By implementing these 10 simple tips, you can cultivate an inviting environment that not only attracts a diverse array of birds but also enhances your outdoor space with the beauty and joy of nature. From selecting the right plants to providing ample food and water sources, each step contributes to a thriving ecosystem right in your own backyard. So grab your gardening gloves, hang those feeders, and get ready to enjoy the delightful sights and sounds of birds flocking to your transformed haven. Happy birdwatching!

What are the best ways to create a spacious feeling in a small room?

Living in a small space can often feel constricting, but it doesn’t have to be a compromise on style or comfort.

With the right techniques, you can transform your cozy quarters into a spacious and inviting haven. Whether you’re in an apartment, a studio, or simply dealing with a compact room, the challenge lies in maximizing every inch without sacrificing aesthetic appeal. In this blog post, we’ll share ten expert tips that reveal how to create an illusion of space while enhancing the overall ambiance of your small room. From smart furniture choices and strategic color palettes to clever storage solutions and lighting tricks, these insights will empower you to cultivate a serene and welcoming atmosphere that feels anything but cramped. Get ready to embrace the charm of your small space and unlock its full potential!

1. Understanding the Psychology of Space

What are the best ways to create a spacious feeling in a small room?
Credit : whatcanu.com

When it comes to small rooms, the way we perceive and interact with our space plays a crucial role in how spacious and inviting it feels. Understanding the psychology of space involves recognizing that our environment can significantly influence our mood, behavior, and sense of comfort. A well-designed small room should feel like a cozy retreat rather than a cramped enclosure.

One key element of this psychology is the concept of openness. Rooms that feel airy and expansive often incorporate light colors, reflective surfaces, and strategic furniture placement. Light hues, such as soft whites, pastels, or gentle grays, can create an illusion of a larger area, allowing walls to recede visually. Complementing this with mirrors can enhance the effect, as they reflect light and create depth, tricking the eye into perceiving a larger space.

Moreover, the arrangement of furniture is paramount. Choosing multi-functional pieces can not only save space but also contribute to the overall flow of the room. For instance, a well-placed ottoman can serve as both a footrest and extra seating, while a wall-mounted desk frees up floor space. It’s essential to maintain clear pathways and avoid overcrowding, as clutter can stifle movement and create a sense of chaos.

The layout should also consider the vertical space. Utilizing shelves and wall-mounted storage can draw the eye upward, creating a sense of height and spaciousness. This upward dimension can be further enhanced by hanging artwork or decorative elements at varying heights, which adds visual interest and prevents the room from feeling flat.

Ultimately, understanding the psychology of space is about creating a harmonious balance between functionality and aesthetics. By making conscious design choices that promote openness, clarity, and comfort, you can transform your small room into a sanctuary that feels both spacious and inviting.

2. Choosing the Right Color Palette

When it comes to making a small room feel spacious and inviting, color plays a pivotal role. The right color palette can transform a cramped space into a serene retreat, creating an illusion of roominess and openness. Start with light colors, as they naturally reflect more light and can make walls appear further away. Soft whites, pale blues, gentle greens, and light grays are excellent choices that evoke a sense of calm and tranquility.

Consider painting the ceiling a shade lighter than the walls; this trick draws the eye upward, creating an airy effect that can make even the smallest rooms feel more expansive. For a touch of warmth, you can introduce pastel accents or muted tones through decor elements like cushions, throws, or artwork. This adds depth without overwhelming the space, maintaining that airy feel.

Furthermore, opting for monochromatic schemes can create a seamless flow, letting the eye move effortlessly across the room. If you’re feeling adventurous, incorporate one or two bolder hues for visual interest—think an accent wall or colorful furniture pieces. Just remember to balance these with lighter tones to prevent the space from feeling cramped.

Lastly, don’t shy away from incorporating reflective surfaces, such as mirrors or glossy finishes, which can enhance natural light and further amplify the sense of space. Choosing the right color palette is not just about aesthetics; it’s about crafting an environment that feels open, inviting, and comfortable. By carefully selecting your colors, you can create a harmonious sanctuary that charms and uplifts anyone who steps inside.

3. Maximizing Natural Light

What are the best ways to create a spacious feeling in a small room?
Credit : whatcanu.com

Maximizing natural light is one of the most effective strategies to transform a small room into a bright, airy sanctuary. Sunlight has an incredible ability to open up spaces, creating an illusion of expansiveness that can make even the coziest of rooms feel inviting. To harness the power of natural light, start by assessing your windows. Keep window treatments light and breezy—opt for sheer curtains or blinds that can be easily raised to allow sunlight to stream in. Avoid heavy drapes that can block light and make the space feel cramped.

In addition to window treatments, consider the placement of mirrors in your room. Strategically placing a large mirror opposite a window can reflect light back into the room, amplifying the effects of sunlight and adding depth to your space. You can also experiment with lighter paint colors on the walls, as soft whites, pastels, or light grays can enhance the brightness and make the room feel more open.

Moreover, think about the furniture and decor you choose. Select pieces that are low-profile and streamlined, allowing light to flow freely throughout the room. Glass furniture or items with reflective surfaces can further contribute to a sense of openness. Finally, don’t overlook the importance of keeping the space uncluttered. A tidy room not only feels larger but also allows the natural light to shine through unobstructed, creating a warm and welcoming atmosphere. By thoughtfully maximizing natural light, you can turn your small room into a spacious haven that radiates comfort and style.

4. Smart Furniture Selection

When it comes to making a small room feel spacious and inviting, smart furniture selection is key. The right pieces can transform a cramped space into a comfortable and aesthetically pleasing retreat. Start by opting for multi-functional furniture that serves more than one purpose. For instance, a chic ottoman that doubles as storage can keep clutter at bay while providing extra seating. Similarly, a bed with built-in drawers or a coffee table that can extend into a dining table maximizes utility without overwhelming the space.

Additionally, consider the scale and style of your furniture. Choosing items that are proportionate to the room can create a sense of harmony. Avoid bulky, oversized pieces that can make the room feel even smaller. Instead, look for sleek, streamlined designs that draw the eye upward, creating the illusion of height. Furniture with legs, such as sofas and chairs, can also foster a sense of openness by allowing light to flow underneath.

Color plays a crucial role in furniture selection as well. Light, neutral tones can blend seamlessly into the room, making the space feel airy and expansive. If you want to incorporate color, choose accent pieces that can easily be moved or replaced, such as cushions or throws, allowing for flexibility without compromising the overall spacious feel.

Lastly, don’t underestimate the power of transparency. Furniture made from glass or acrylic can create an unobtrusive effect, allowing light to filter through and maintaining an open atmosphere. By thoughtfully selecting your furniture, you can cultivate a small room that feels inviting, lively, and surprisingly expansive.

5. The Power of Mirrors

What are the best ways to create a spacious feeling in a small room?
Credit : whatcanu.com

Mirrors are a small room’s best friend, wielding the power to transform confined spaces into airy, inviting retreats. By strategically placing mirrors within your room, you can create an illusion of depth and openness, making even the coziest areas feel more expansive.

Consider hanging a large mirror on one wall; this not only reflects light, making the space feel brighter, but also visually doubles the area, drawing the eye outward. A well-placed mirror across from a window can amplify natural light, bringing in the outside world and enhancing the overall ambiance.

Additionally, mirrored furniture, such as a coffee table or dresser, can contribute to this effect. These reflective surfaces add a touch of elegance while seamlessly blending into the decor, allowing the room to breathe rather than feel weighed down by bulky furniture.

For a more dynamic approach, try arranging a collage of smaller mirrors in varying shapes and sizes. This not only adds visual interest but also invites curiosity, encouraging guests to explore the nuances of the space.

Ultimately, the strategic use of mirrors can enhance the flow of a small room, creating a harmonious balance between style and functionality. By harnessing their reflective magic, you can turn your intimate quarters into a spacious sanctuary that feels both welcoming and expansive.

6. Creating Multi-Functional Spaces

Creating multi-functional spaces is a game-changer when it comes to maximizing the potential of a small room. In a world where square footage is often at a premium, the ability to repurpose areas for various uses can make all the difference between feeling cramped and cozy.

Start by identifying the activities you want to accommodate within the room. Perhaps it’s a cozy reading nook that doubles as a workspace, or a guest bedroom that can transform into a home office. Consider furniture pieces that serve multiple purposes, such as a sofa bed or an ottoman with hidden storage. A stylish coffee table can also double as a desk if you opt for a slim design that can be easily pushed aside when not in use.

Utilize vertical space by installing shelves that can hold both decorative items and practical essentials, such as books or office supplies. This not only helps declutter surfaces but also draws the eye upward, creating the illusion of higher ceilings. Foldable furniture, like wall-mounted desks or collapsible dining tables, can be a fantastic way to create flexible spaces that adapt to your needs throughout the day.

Lighting plays a pivotal role in multi-functional spaces as well. Bright, well-placed lighting can enhance the functionality of each area, while softer, ambient lighting can create a warm, inviting atmosphere for relaxation. Use layered lighting techniques—overhead fixtures, floor lamps, and accent lights—to ensure each part of your room serves its purpose without overwhelming the senses.

By thoughtfully designing a room that can easily transition between functions, you’ll not only maximize your available space but also create a dynamic environment that feels both spacious and inviting. With a little creativity and strategic planning, your small room can become a versatile haven tailored to your lifestyle.

7. Utilizing Vertical Space

What are the best ways to create a spacious feeling in a small room?
Credit : whatcanu.com

When it comes to maximizing the space in a small room, utilizing vertical space can be a game-changer. Instead of focusing solely on the floor area, think about how you can draw the eye upward and make the most of your walls. This approach not only creates an illusion of height but also adds an element of style and functionality to your space.

Start by installing tall bookshelves that reach up to the ceiling. These towering structures can store books, decorative items, and even plants, making use of every inch available. Arrange items in a visually appealing way, mixing taller objects with shorter ones to create a dynamic look. Floating shelves are another fantastic option; they allow you to display art, photographs, or collectibles without taking up valuable floor space.

Consider adding hooks or pegboards for hanging items like bicycles, bags, or even kitchen utensils, transforming your walls into functional storage solutions. In the bedroom, opt for a lofted bed to create a cozy nook underneath for a desk or reading area.

Don’t overlook the power of vertical patterns, too. Choose wallpapers or paint techniques that draw the eye upward, such as vertical stripes or tall, slim prints. Mirrors can also be strategically placed to enhance this effect, reflecting light and creating an airy feel throughout the room.

By embracing verticality, you can turn a small room into a stylish and inviting sanctuary that feels much larger than it is. With a little creativity, you’ll not only maximize your space but also create a visually stunning environment that reflects your personal style.

8. Keeping Clutter at Bay

A small room can quickly feel cramped and overwhelming if clutter starts to pile up. One of the most effective ways to create a spacious and inviting atmosphere is to adopt a clutter-free mindset. Begin by assessing your belongings and determining what you truly need versus what can be tucked away or discarded. Invest in smart storage solutions that blend seamlessly with your décor—think stylish baskets, multi-functional furniture, or floating shelves that utilize vertical space without sacrificing style.

Regularly declutter your space, setting aside time each week to tidy up and evaluate items that may have outlived their usefulness. Remember, less is more when it comes to small rooms. A few well-chosen decorative pieces can make a significant impact, while too many items can create visual chaos.

Incorporate organizational tools that keep your essentials accessible but out of sight, such as under-bed storage boxes or decorative bins for everyday items. This not only helps maintain a clean look but also enables you to enjoy your space fully without the distraction of disarray.

Additionally, encourage a minimalistic approach to your décor. Opt for a few statement pieces rather than overwhelming your walls with a gallery of pictures or excessive knick-knacks. By keeping clutter at bay, you’ll foster an environment that feels open, airy, and welcoming—one where you can truly relax and unwind.

9. Incorporating Open Shelving

Incorporating open shelving into your small room design is a clever way to create an illusion of space while also adding functionality and style. Unlike traditional closed cabinets that can feel bulky and confining, open shelves allow for a more airy aesthetic, making the walls feel less cluttered and more inviting.

When executed thoughtfully, open shelving can serve as a stunning focal point in any room. For instance, in a living area, floating shelves adorned with carefully curated books, plants, and decorative items can draw the eye upward, giving the space a sense of height and openness. In a kitchen, open shelving can showcase your favorite dishware, cookbooks, or unique collectibles, transforming everyday items into beautiful displays that enhance the room’s decor.

To maximize the benefits of open shelving, consider using light-colored materials or transparent glass for the shelves themselves. This will help maintain an unobstructed view and contribute to a more expansive feel. Additionally, alternating between decorative items and functional ones ensures that your shelves not only look good but are also useful, striking a balance between form and function.

Another tip is to install the shelves at different heights. This not only adds visual interest but also allows you to utilize vertical space effectively, drawing the eye upward and creating the illusion of a taller room. When styling your shelves, remember to leave some spaces empty; a bit of negative space can be just as important as the items you display, as it allows the eye to rest and prevents the area from feeling overcrowded.

In summary, open shelving is a versatile and stylish solution for small rooms. By thoughtfully curating what you display and considering the materials and arrangements, you can create an inviting atmosphere that feels spacious and well-organized, making the most of every inch in your home.

10. Using Light Fabrics and Textures

When it comes to creating an illusion of space in a small room, the choice of fabrics and textures plays a pivotal role. Opting for light fabrics can significantly enhance the overall ambiance, making the area feel more open and airy. Think sheer curtains that gently filter sunlight, allowing natural light to flood the room without overwhelming it with heavy drapery. Light-colored linens, like whites, soft pastels, or even delicate patterns, can also contribute to a sense of spaciousness, adding a fresh and inviting feel.

Incorporating a variety of textures can further enrich your small space without weighing it down. Light, woven textiles like cotton or linen for throw pillows and blankets add depth while maintaining a breezy vibe. Consider layering these fabrics—pairing a soft, lightweight throw over a light sofa, or using textured cushions against a smooth, light-colored backdrop. This not only creates visual interest but also encourages a cozy atmosphere that invites relaxation.

Additionally, using light fabrics on furniture can contribute to a more spacious feel. Upholstering chairs or sofas in lighter shades or fabrics with subtle patterns can prevent them from visually dominating the space. If you’re working with a small bedroom, consider light bedding that complements your walls and furniture; the consistent color palette can create a seamless flow, making the room appear larger.

Finally, don’t underestimate the power of reflective surfaces. Incorporating light-colored textures alongside mirrors can amplify the effect of natural light, further enhancing the open feel of your room. Whether it’s a mirrored bedside table or decorative elements that catch the light, these small touches can make a significant difference in how spacious and inviting your small room feels. By thoughtfully selecting light fabrics and textures, you can transform your space into a serene retreat that feels expansive and welcoming.

11. Strategic Artwork Placement

### 11. Strategic Artwork Placement

Artwork has an incredible power to transform the ambiance of a room, and when it comes to small spaces, thoughtful placement can make all the difference. Instead of overcrowding your walls with multiple pieces, consider curating a few select artworks that resonate with your personal style and enhance the room’s overall aesthetic.

Start by choosing larger pieces that draw the eye and create a focal point. A bold painting or an oversized photograph can add depth and interest to a small room, making the space feel more expansive. Hang it at eye level to ensure it captures attention without overwhelming the viewer. Positioning art above furniture, like a sofa or a console table, can also create a sense of height, drawing the eye upward and making the room feel taller.

Additionally, consider the use of mirrors as artwork. A well-placed mirror not only reflects light but also creates the illusion of additional space. By incorporating a decorative mirror into your display, you can double the impact of your artwork while enhancing the room’s brightness and openness.

Don’t shy away from experimenting with different arrangements. A gallery wall with a mix of framed art, photographs, and even decorative objects can add personality without feeling cluttered. To maintain a sense of balance, use a consistent frame style or color palette throughout the collection. This creates a cohesive look that ties the room together.

Lastly, pay attention to the colors in your artwork. Lighter, brighter pieces can open up a space, while darker, heavier colors might feel more constricting. Choose artworks that complement your room’s color scheme to create harmony and make the area feel inviting. By strategically placing your artwork, you can create an illusion of spaciousness, transforming your small room into a stylish and welcoming retreat.

12. Adding Greenery for Freshness

Adding greenery to your small space can transform it into a fresh, inviting oasis. Plants have an incredible ability to breathe life into any room, creating a sense of vibrancy and warmth that instantly uplifts the atmosphere. Whether you choose a single statement plant or a collection of smaller ones, the right greenery can make your space feel larger and more open.

Start with versatile options like snake plants, pothos, or peace lilies, which thrive in various lighting conditions and require minimal maintenance. These hardy plants not only purify the air but also add texture and color, drawing the eye across the room. For a more dramatic effect, consider taller plants like a fiddle leaf fig or a rubber plant, which can create vertical lines and give the illusion of height in your small room.

If floor space is at a premium, don’t fret! Hanging plants or wall-mounted planters are excellent alternatives that can add depth without consuming valuable square footage. You might also consider using plant stands to elevate your greenery, which not only adds visual interest but also makes it easier to care for your plants.

Incorporating greenery doesn’t just enhance your room’s aesthetics; it invites a sense of tranquility and wellness into your home. Studies show that being surrounded by nature can reduce stress and promote a sense of calm, making your small room not just feel bigger but also more enjoyable to inhabit. So, whether you’re nurturing a vibrant monstera or a delicate fern, remember that a touch of greenery is a simple yet powerful way to create an inviting and spacious atmosphere.

13. Designing with Scale in Mind

When it comes to maximizing the potential of a small room, designing with scale in mind is a crucial strategy that can significantly enhance the perception of space. Scale refers to the size of furniture and decor relative to the dimensions of the room, and making thoughtful choices in this area can transform a cramped area into an inviting sanctuary.

First and foremost, consider the proportions of your furniture. Opt for pieces that are appropriately sized for your space; oversized sofas or bulky armoires can overwhelm a room, making it feel even smaller. Instead, look for streamlined furniture that offers functionality without dominating the visual landscape. For example, a sleek, low-profile sofa paired with a glass coffee table can create an airy feel, allowing for uninterrupted sightlines and an open atmosphere.

Additionally, vertical space is your ally. Tall bookshelves or cabinets can draw the eye upward, creating the illusion of height in the room. This not only encourages the perception of spaciousness but also provides ample storage for books, decor, and other items, keeping the floor clutter-free. Incorporating wall-mounted shelves can further optimize vertical space while showcasing decorative elements that reflect your personal style.

Color choice also plays a pivotal role in scaling a room. Light, neutral colors tend to reflect light, making a space feel larger and more open, while darker hues can cocoon a room, making it feel cozy but potentially smaller. If you love bold colors, consider using them as accents rather than the primary palette, allowing them to pop against a backdrop of lighter shades.

Finally, don’t overlook the power of mirrors. Strategically placing mirrors can create depth and reflect light, enhancing the sense of openness. A large mirror on one wall can act as a visual portal, giving the illusion of an extended space beyond the confines of your small room.

By designing with scale in mind, you can create a harmonious environment that feels spacious and inviting, allowing you to enjoy your small room to the fullest while showcasing your unique style.

14. Creating Zones with Rugs

Creating zones with rugs is a clever and stylish way to delineate spaces within a small room, adding both functionality and an inviting atmosphere. Rugs can serve as visual anchors that help define different areas, making your space feel more organized and purposeful. For instance, in a studio apartment, a plush area rug can create a cozy living nook while separating it from the sleeping area.

When selecting a rug, consider its size and shape—opting for larger rugs can help unify a space, making it appear more expansive. A round rug, for instance, can soften sharp corners and create a more relaxed vibe, while a rectangular rug can define dining or work areas, guiding the flow of movement.

Color and pattern also play crucial roles in creating zones. Lighter colors can make a room feel airy and spacious, while bold patterns can add character and interest. Just be sure to choose designs that complement each other; cohesive color palettes can enhance the feeling of continuity and openness. Layering rugs can also add depth and texture, allowing you to create intimate spaces without overwhelming the room.

Additionally, consider the placement of furniture in relation to the rug. Ideally, the front legs of your furniture should rest on the rug, helping to visually tie the pieces together and establish a sense of cohesion. By thoughtfully using rugs to create zones, you can transform your small room into a beautifully organized retreat that feels both spacious and welcoming.

15. Personal Touches for Inviting Warmth

When it comes to transforming a small room into a welcoming oasis, personal touches play a pivotal role in creating an inviting atmosphere. Infusing your space with elements that reflect your personality and experiences not only adds warmth but also makes the room truly feel like home.

Start by displaying cherished photographs in stylish frames. Choose a few key images that evoke positive memories, such as family gatherings, travel adventures, or milestones. Arrange them in a gallery wall format to add visual interest while keeping the room feeling cohesive. Consider varying the frame sizes and colors to create a playful yet curated look.

Textiles are another powerful way to introduce warmth and comfort. Incorporate soft throws and decorative cushions in rich textures and inviting colors. Opt for fabrics that beckon you to sink into your space, like plush velvets or cozy knits. Layering different textiles can add depth and create a sense of comfort, making your small room feel more inviting.

Plants are essential for breathing life into your small space. Choose a few low-maintenance indoor plants to incorporate greenery and bring a touch of nature indoors. Not only do plants purify the air, but they also create a calming ambiance. Consider hanging plants, small succulents on shelves, or even a larger statement plant in a corner to maximize your available space.

Finally, don’t underestimate the power of scent in making a room feel warm and welcoming. Introduce inviting aromas through scented candles, essential oil diffusers, or fresh flowers. Choose scents that evoke feelings of comfort and relaxation, like vanilla, lavender, or citrus.

By adding these personal touches, you’ll create a small room that feels spacious not just in terms of physical space, but also in the warmth and comfort it exudes. Your unique personality will shine through, making it a delightful haven that you and your guests will love to spend time in.

As we wrap up our exploration of expert tips to make your small room feel spacious and inviting, we hope you’re inspired to transform your space into a serene oasis that reflects your personal style. From strategic furniture placement to the clever use of color and light, each suggestion offers a unique way to enhance the sense of openness while maintaining warmth and comfort. Remember, it’s not just about the size of the space, but how you choose to utilize it. Embrace these tips, experiment with your decor, and watch your small room flourish into a welcoming haven. We’d love to see your transformations, so don’t hesitate to share your before-and-after photos or any additional tips you discover along the way! Happy decorating!

How to choose the right paint color for your dining room?

Choosing the perfect paint color for your dining room can be both an exciting and overwhelming task.

This space is more than just a room; it’s where memories are made over shared meals, laughter, and conversation. The right color can set the tone for these cherished moments, influencing the ambiance and feel of the entire home. With countless hues, shades, and finishes to consider, it’s easy to feel lost in the sea of options. Do you want a warm, inviting atmosphere that encourages long dinners, or a fresh, modern look that sparks creativity? In this ultimate guide, we’ll explore the psychology of color, offer expert tips on how to select a palette that complements your style, and provide inspiration to help you transform your dining room into a vibrant gathering space that reflects your personality and enhances your dining experience. Get ready to unleash your inner designer and create a backdrop for unforgettable moments!

1. Understanding the Psychology of Color

How to choose the right paint color for your dining room?
Credit : whatcanu.com

When it comes to selecting the ideal paint color for your dining room, understanding the psychology of color is paramount. Colors have a profound impact on our emotions and behavior, influencing the ambiance of a space and the experiences we have within it. For instance, warm shades like reds, oranges, and yellows tend to evoke feelings of warmth and comfort, making them perfect for creating a cozy atmosphere that encourages conversation and connection. These colors can stimulate the appetite and create an inviting environment for gatherings and family dinners.

On the other hand, cooler tones such as blues and greens can foster a sense of calm and tranquility, making them suitable for more relaxed dining experiences. These hues can help to create a serene backdrop for intimate dinners or quiet family meals, allowing for a peaceful dining experience. Additionally, neutral colors like soft grays and beiges offer versatility and elegance, providing a timeless backdrop that allows your furniture and decor to shine.

Consider the emotions you want to evoke in your dining room. Do you envision lively family dinners filled with laughter and chatter, or serene evenings with soft conversations over candlelight? By selecting a paint color that aligns with your vision, you can create a space that not only reflects your style but also enhances the overall dining experience.

Ultimately, understanding the psychology of color is about more than just aesthetics; it’s about crafting an atmosphere that resonates with your lifestyle and preferences. Take the time to explore the emotional implications of different colors, and let that guide your choices as you embark on the journey of transforming your dining room into the perfect gathering space.

2. Assessing Your Dining Room’s Natural Light

Assessing your dining room’s natural light is a pivotal step in choosing the perfect paint color. The amount and quality of light your space receives can dramatically influence how colors appear on your walls. Begin by observing the light throughout different times of the day—morning, midday, and evening—to understand how the shifting sunlight interacts with your room’s dimensions and architecture.

If your dining room boasts large windows or faces south, it will likely receive an abundance of bright, warm light, which can bring out the vibrancy in hues like buttery yellows, soft whites, or even bold jewel tones. Conversely, a north-facing room typically lacks direct sunlight, often resulting in cooler, muted lighting. In such cases, consider warm tones that can evoke coziness—think soft taupes or warm greys that can help brighten the space without sacrificing depth.

Additionally, consider the type of artificial lighting you’ll be using. The warmth of your dining room’s bulbs can alter how your chosen paint color looks at night. If you plan to use warm lighting, opt for shades that harmonize with that glow, while cooler lighting may require a more neutral or cooler palette to prevent clashing.

Take the time to test paint samples on your walls, observing them under different lighting conditions before making your final decision. Painting swatches on poster boards and moving them around the room can also help you visualize how each color interacts with the light and other elements in the space. By carefully assessing your dining room’s natural light, you can select a color that not only enhances the aesthetic of your dining area but also sets the perfect mood for memorable gatherings.

3. Considering the Size and Shape of the Space

How to choose the right paint color for your dining room?
Credit : whatcanu.com

When it comes to selecting the perfect paint color for your dining room, understanding the size and shape of the space is crucial. Each room tells its own story, and the dimensions and layout play a significant role in how that narrative unfolds. A spacious dining area invites bold, rich hues that can create a dramatic and inviting atmosphere, while smaller rooms benefit from lighter, airy colors that help to visually expand the space.

Start by assessing the proportions of your dining room. If the ceilings are high, darker colors can add warmth and coziness, making the room feel more intimate. Conversely, if you’re working with lower ceilings, light shades can help to lift the space and create an illusion of height. Consider the room’s shape as well; long, narrow dining rooms may benefit from painting the shorter walls a vibrant color to draw the eye and create a sense of balance.

In addition, think about how the layout impacts the flow and functionality of the room. If your dining area opens up into other spaces, you might want to choose colors that complement adjacent rooms to create a cohesive look throughout your home. Pay attention to natural light, too—rooms that receive ample sunlight can handle deeper tones without feeling cramped, while those with limited light may thrive in softer pastels or whites that reflect whatever light is available.

Ultimately, understanding the size and shape of your dining room is about more than just aesthetics; it’s about creating an environment that feels comfortable and inviting. Whether you aim for a modern, minimalist vibe or a rich, traditional ambiance, the right paint color can transform your dining space into the heart of your home.

4. Defining Your Dining Room Style

Defining your dining room style is a crucial step in the process of selecting the perfect paint color. The dining room serves as more than just a place to eat; it is often the heart of the home, a space where family and friends gather to share meals, celebrate special occasions, and create memories. Therefore, the atmosphere you want to cultivate in this room should guide your color choices.

Start by considering the overall aesthetic of your home. Is it modern and minimalist, with sleek lines and a neutral palette? Or perhaps it leans towards a cozy, rustic vibe with warm woods and vintage accents? Identifying your design style will help you choose a paint color that complements the existing elements in your home. For a contemporary space, you might opt for bold, vibrant hues that deliver a punch of energy, whereas a traditional setting might benefit from classic shades like soft creams or muted greens.

Next, think about the mood you want to evoke in your dining room. Warm colors such as reds, oranges, and yellows can create a lively and inviting atmosphere, perfect for encouraging conversation and a sense of warmth during gatherings. On the other hand, cooler colors like blues and greens can instill a sense of calm, making them ideal for more intimate dinners or family meals.

Additionally, consider the furniture and decor you already have or plan to incorporate. The color of your dining table, chairs, and even your tableware can significantly influence your paint choice. If you have dark wood furniture, lighter wall colors can create a beautiful contrast, while a bright, modern table might pair well with a darker, bolder wall color.

Finally, don’t forget about the lighting in your dining room. Natural light can dramatically change how a paint color appears throughout the day. A color that looks stunning in the morning sun may feel entirely different under the warm glow of evening lights. Be sure to test your chosen color swatches at various times of the day to see how they interact with your space.

By clearly defining your dining room style, you’ll not only narrow down your color options but also ensure that the final choice reflects your personal taste and the ambiance you want to create. In this way, your dining room will become a beautiful backdrop for the meaningful moments that happen around the table.

5. Popular Color Trends for Dining Rooms

How to choose the right paint color for your dining room?
Credit : whatcanu.com

When it comes to selecting the perfect paint color for your dining room, staying attuned to current color trends can provide inspiration and direction. In 2023, a blend of bold statements and soft, inviting tones is shaping the dining room aesthetic, creating spaces that are both stylish and comfortable for gatherings with family and friends.

One of the standout trends this year is the resurgence of earthy tones. Warm terracotta and muted olive greens are making waves, evoking a sense of nature and tranquility. These colors not only create a cozy atmosphere but also pair beautifully with natural wood furnishings and plants, enhancing the overall dining experience.

Another popular choice is deep, moody hues like navy blue and emerald green. These rich colors add drama and sophistication, making your dining room feel like an upscale restaurant or an intimate bistro. When used thoughtfully, they can create a striking backdrop for artwork and decor, drawing attention to your personal style and the unique character of the space.

For those who prefer a more classic approach, soft neutrals like creamy whites, warm beiges, and light grays continue to be a timeless favorite. These shades provide a versatile canvas that can easily adapt to seasonal decor changes and allow for bold accents through table settings and artwork.

Lastly, pastels are making a comeback, with soft blush pinks and gentle sky blues bringing a fresh, airy feel to dining spaces. These colors can evoke a sense of calm and approachability, perfect for casual dinners and family gatherings.

Embracing these popular color trends not only elevates the aesthetic of your dining room but also sets the mood for memorable meals and meaningful conversations. As you consider your options, remember to visualize how the color will interact with your dining room’s lighting, furniture, and overall style. The right shade can transform your dining area into a welcoming haven that invites guests to linger long after the last bite has been served.

6. How to Use Color Theory to Your Advantage

Color theory is a powerful tool that can transform your dining room into an inviting and harmonious space. By understanding the basics of color theory, you can effectively choose hues that not only reflect your personal style but also create the desired atmosphere for dining and entertaining.

Start by considering the color wheel, which is divided into primary, secondary, and tertiary colors. Colors that are opposite each other on the wheel, known as complementary colors, can create a vibrant contrast that energizes the space. For instance, pairing a rich navy blue with a warm orange can add a dynamic and lively feel to your dining area, making it perfect for lively gatherings.

On the other hand, if you’re looking for a more serene and calming environment, explore analogous colors—those that sit next to each other on the wheel, such as soft greens, blues, and yellows. These colors blend seamlessly and create a cohesive look that invites relaxation, making them ideal for intimate family dinners or quiet weekend brunches.

Additionally, pay attention to the psychological effects of colors. Warm tones like reds, yellows, and oranges can stimulate appetite and conversation, making them great choices for a dining room. Cool colors, such as blues and greens, evoke tranquility and can help slow down the pace of a meal, fostering a more relaxed dining experience.

Don’t forget the importance of lighting, which can significantly alter how colors are perceived. Natural light can bring out the true vibrancy of your chosen palette, while warmer artificial lights can soften and enhance the coziness of deeper hues. Test your color choices in different lighting throughout the day to ensure they resonate with the ambiance you wish to create.

Incorporating color theory into your decorating process not only enriches the aesthetic appeal of your dining room but also enhances the overall experience for you and your guests. By thoughtfully selecting colors that complement each other and align with your dining goals, you can create a space that feels both inviting and visually stunning.

7. Testing Paint Samples: Best Practices

How to choose the right paint color for your dining room?
Credit : whatcanu.com

When it comes to selecting the perfect paint color for your dining room, testing paint samples is an essential step that can make all the difference. This is not just about picking a color from a swatch; it’s about experiencing how that color interacts with your space, lighting, and furnishings. Here are some best practices to ensure you choose wisely.

First, invest in sample pots of your top color choices. Most paint brands offer small containers at a reasonable price, allowing you to experiment without committing to a full gallon. Once you have your samples, apply swatches on different walls in your dining room. This is crucial because the way a color looks can vary significantly depending on the wall it’s on and the surrounding elements.

Consider the lighting in your dining room throughout the day. Natural light can change a paint color dramatically, so observe how your samples look in both the morning sun and the evening glow. If your dining room only receives limited natural light, you might want to test your colors on walls that receive the most sunlight as well as those that don’t.

Another effective method is to use large poster boards painted with your sample colors. This way, you can move the boards around the room to see how they interact with different angles of light and against your furniture and decor. It’s also helpful to observe the colors at different times of day to see how they shift under varying light conditions.

Don’t forget to take into account the existing elements of your dining room, such as your dining table, chairs, and any artwork on the walls. The right color should not only complement these pieces but also create a cohesive and inviting atmosphere.

Finally, after thorough testing, take a step back and evaluate how each color makes you feel in the space. The dining room is a gathering place, so it’s important that the color you choose fosters warmth and comfort. By following these best practices for testing paint samples, you’ll ensure that the color you ultimately select will enhance your dining experience for years to come.

8. The Role of Accent Walls in Color Selection

When it comes to choosing the perfect paint color for your dining room, accent walls play a transformative role that can enhance both the aesthetic and ambiance of the space. An accent wall—typically one that is painted a bolder or contrasting color compared to the other walls—serves as a focal point, drawing the eye and adding depth to your dining area.

Imagine stepping into a room where three walls are painted in a soft, neutral hue. The fourth wall, however, bursts with a vibrant navy blue or a rich burgundy, instantly creating an inviting atmosphere. This strategic use of color can highlight architectural features like a beautiful mantel, a stunning piece of artwork, or even a buffet table, making your dining room feel both stylish and cohesive.

When selecting your accent wall color, consider the overall mood you wish to evoke. Warm tones like terracotta or mustard yellow can create a cozy, welcoming environment, perfect for family gatherings and intimate dinners. In contrast, cooler shades like teal or olive green can instill a sense of tranquility, making your dining space feel serene and sophisticated.

Furthermore, the color of your accent wall can influence the choice of decor and furnishings. A bold accent wall can serve as a canvas, allowing you to play with complementary colors in your table settings, artwork, and even dining chairs. For instance, a deep charcoal accent wall pairs beautifully with crisp white tableware and warm wood tones, creating a chic and modern vibe.

Additionally, lighting plays a crucial role in how your chosen accent color appears throughout the day. Natural light can enhance the vibrancy of the hue, while softer, ambient lighting can create a more subdued and intimate feel in the evening. Be sure to test paint samples in different lighting throughout the day to see how the colors interact with each other and the overall space.

Incorporating an accent wall into your dining room design not only allows for playful experimentation with color but also provides an opportunity to express your personal style. Whether you opt for a bold statement or a subtle enhancement, the right accent wall can elevate your dining room, making it a space where memories are created and shared.

9. Harmonizing with Existing Furniture and Décor

When it comes to selecting the perfect paint color for your dining room, harmonizing with existing furniture and décor is crucial for creating a cohesive and inviting atmosphere. Your dining room isn’t just a place to eat; it’s a space that reflects your personal style and sets the tone for gatherings with family and friends. To achieve a seamless look, consider the hues, materials, and textures already present in your dining space.

Begin by assessing the color palette of your furniture—dining tables, chairs, and sideboards often serve as focal points in the room. If your furniture boasts rich, dark woods or bold upholstery, softer, lighter paint colors can provide a beautiful contrast, creating a balanced and welcoming feel. Conversely, if your furnishings are in light tones, consider deeper, more saturated shades to add depth and sophistication.

Next, take stock of the décor elements in your dining room, such as artwork, curtains, and decorative accessories. These items can serve as inspiration for your paint choice. For instance, if you have a vibrant piece of artwork that you cherish, pull colors from that piece to create a harmonious link between the walls and your décor. This approach not only enhances visual interest but also ensures that every element in the room feels interconnected.

Don’t forget about the texture of your items as well. A glossy finish on your dining table or a plush rug may inspire you to choose a paint that complements or contrasts with these textures. If your décor leans towards rustic or farmhouse styles, warm, earthy tones can enhance that vibe, while sleek modern furniture might call for cooler, more contemporary shades.

Finally, lighting plays a significant role in how colors appear in your space. Test your paint samples in different lighting conditions—natural light, evening light, and with your overhead fixtures—to see how they interact with your furniture and decor throughout the day. This will help you visualize the final effect and ensure that your chosen color harmonizes beautifully with everything in the room.

By carefully considering how your paint color interacts with your existing furniture and décor, you can create a dining room that feels unified and inviting—one that encourages memorable meals and cherished moments shared around the table.

10. The Impact of Finish: Matte vs. Glossy

When it comes to selecting the perfect paint color for your dining room, the finish you choose can have as much impact as the color itself. The two primary categories—matte and glossy—each offer unique characteristics that can dramatically influence the ambiance and functionality of the space.

**Matte finishes** are known for their soft, non-reflective surfaces. They create a warm, inviting atmosphere, making them ideal for dining rooms where comfort and intimacy are paramount. A matte finish is excellent for hiding imperfections on the walls, as it absorbs light rather than reflecting it. This can be particularly beneficial in older homes with textured walls or uneven surfaces. However, it’s important to note that matte paint can be less durable and more challenging to clean than its glossy counterpart. If you have young children or frequent dinner parties, consider that a matte finish may require more upkeep to maintain its fresh appearance.

On the other hand, **glossy finishes** bring a vibrant energy to any space. These paints reflect light, which can make a room feel larger and brighter, an attractive quality if your dining room lacks natural light. Glossy finishes are also highly durable and easy to wipe clean, making them ideal for high-traffic areas. However, their reflective nature can accentuate imperfections in your walls, so it’s advisable to ensure your surfaces are smooth and well-prepared before applying a glossy coat.

In addition to aesthetics and practicality, consider how the finish interacts with your chosen color. A deep navy blue in a matte finish can evoke a cozy, sophisticated vibe, while the same color in a glossy finish might create a bold, contemporary look. Experimenting with different combinations can help you achieve the desired effect, ensuring your dining room not only looks stunning but also feels inviting during every meal.

Ultimately, the choice between matte and glossy should align with your personal style, the mood you want to create, and the practical needs of your dining area. By carefully considering the impact of finish alongside your color selection, you can transform your dining room into a space that is both beautiful and functional, perfect for every gathering.

11. Seasonal Colors: When to Make a Change

When it comes to painting your dining room, considering seasonal colors can breathe new life into your space and create a dynamic atmosphere that reflects the changing moods of the year. As the seasons shift, so do the colors around us, influencing not only the interior aesthetics but also the emotional ambience of your home.

Spring, with its gentle pastels and fresh, vibrant hues, invites a sense of renewal and warmth. Soft greens, blush pinks, and sunlit yellows can transform your dining area into a cheerful gathering place, perfect for hosting brunches with friends or family feasts. As you transition into summer, you might opt for brighter, bolder colors that echo the vibrancy of the season. Think of sunny oranges and deep blues that evoke the joy of warm evenings spent outdoors.

As the leaves begin to change in autumn, deeper, richer tones become more appealing. Warm terracotta, burnt sienna, and earthy olive greens can create a cozy, inviting atmosphere that complements the harvest season. These colors not only enhance the dining experience but also create a comforting backdrop for those intimate gatherings as the days become shorter.

When winter arrives, consider cooler, more subdued palettes. Soft grays, icy blues, and deep charcoal can evoke a serene and elegant setting, perfect for cozy dinners by candlelight. By aligning your paint choices with the seasons, you can create an environment that feels both relevant and refreshing, ensuring your dining room remains a beloved space throughout the year.

Remember, transitioning your dining room colors seasonally doesn’t have to mean a complete overhaul; small accents like a fresh coat of paint on an accent wall or new decor elements can make a significant impact. Embrace the changing seasons, and let your dining room reflect the beauty of nature outside your window.

12. Creating a Cohesive Flow with Adjacent Rooms

When it comes to selecting the perfect paint color for your dining room, considering the adjacent spaces is crucial for creating a harmonious and inviting atmosphere throughout your home. The dining room often serves as a central gathering place, and its color scheme can significantly impact the overall flow and aesthetic of your living areas. To achieve a cohesive look, start by evaluating the colors of nearby rooms—your kitchen, living room, or hallway.

For instance, if your kitchen boasts warm, earthy tones, such as terracotta or soft beige, you might want to carry those hues into your dining room with a complementary shade that enhances the warm palette. Think of colors that transition smoothly from one space to another; a subtle gradient can create a serene environment that feels intentional and well thought out.

Additionally, consider the architectural elements and furnishings in adjacent rooms. If your living room features a bold accent wall or vibrant artwork, a more subdued shade in the dining room can help balance the visual weight, allowing each space to shine in its own right while still feeling connected.

Another effective technique is to choose a common color that recurs throughout your home, perhaps in different shades or finishes. This could be a soft blue, a muted green, or even a classic neutral that ties everything together, creating a seamless transition and a sense of unity in your home’s design.

Ultimately, the goal is to create a cohesive flow that invites guests to move effortlessly from one area to another. By thoughtfully considering the colors in adjacent rooms, you can achieve a beautifully coordinated look that enhances your dining experience and reflects your personal style.

13. Expert Tips for Small Dining Rooms

### Expert Tips for Small Dining Rooms

When it comes to selecting the perfect paint color for a small dining room, the challenge lies in creating an inviting and spacious atmosphere without overwhelming the space. Here are some expert tips to help you make the most of your compact dining area.

**1. Choose Light and Airy Hues:** Soft, light colors such as pale blues, soft grays, and creamy whites can make a small room feel larger and more open. These hues reflect light, creating a bright and airy vibe. They also provide a neutral backdrop that allows your dining furniture and decor to shine.

**2. Consider Monochromatic Schemes:** Using varying shades of a single color can create a sense of harmony and depth. For example, painting the walls in a light shade of sage green and using slightly darker accents in the decor can add visual interest without making the room feel cluttered. This technique can also elongate the walls, giving the illusion of height.

**3. Use Accent Walls Wisely:** If you’re looking to add a pop of color, consider creating an accent wall. Choose one wall to paint in a bold color while keeping the other walls light. This strategy draws the eye and can make the room feel more dynamic without overwhelming the entire space.

**4. Test with Samples:** Before committing to a color, always test samples on the walls of your small dining room. Paint swatches can look vastly different in varying light conditions, so take the time to observe how the colors change throughout the day. This step is vital in ensuring that you choose a color that complements your room’s natural lighting.

**5. Incorporate Reflective Surfaces:** To enhance the sense of space, consider incorporating reflective elements such as mirrors or glossy finishes. Painting the dining room with a high-gloss finish or adding a mirror on the opposite wall can help bounce light around the room, making it feel more expansive.

**6. Don’t Forget the Ceiling:** Often overlooked, the ceiling is an important surface that can contribute to the room’s overall feel. A lighter ceiling color can create an illusion of height, while a slightly darker or contrasting color can add warmth and coziness.

By following these expert tips, you can transform your small dining room into a stylish and inviting space that feels larger than life. Remember, the right paint color can set the mood for countless gatherings, so choose wisely and enjoy the process!

14. Common Mistakes to Avoid When Choosing Paint Colors

Choosing the perfect paint color for your dining room can transform the space into a welcoming haven, but it’s all too easy to make missteps along the way. Here are some common mistakes to avoid that can save you time, money, and frustration.

**1. Ignoring the Lighting:** One of the most significant factors in how a paint color looks is the lighting in your dining room. Natural light can make colors appear different at different times of the day, while artificial lighting can alter shades dramatically. Before committing to a color, test it in various lighting conditions. Swatch samples on your walls and observe how they change as the sun rises and sets.

**2. Skipping the Samples:** A small paint chip or digital color preview can be misleading. Always invest time in purchasing sample pots and painting larger swatches on your walls. This allows you to see how the color interacts with your furniture, decor, and even the food you serve. Balancing hues can make a world of difference, so take the time to visualize the color in the full context of the room.

**3. Overlooking the Size of the Space:** Lighter colors can make a small room feel more spacious, while darker shades can create a cozy atmosphere. However, using a dark color in a cramped space may make it feel even smaller. Conversely, very bright colors can be overwhelming in larger rooms. Consider the dimensions of your dining room when selecting shades, aiming for a balance that complements both size and function.

**4. Not Considering the Flow of Your Home:** Your dining room is just one part of your home’s overall aesthetic. Choosing a color that clashes with adjacent rooms can disrupt the visual flow of your home. When selecting a paint color, consider the hues in nearby spaces and strive for a cohesive palette that seamlessly connects the rooms, creating a harmonious environment.

**5. Rushing the Decision:** Choosing a paint color should be a thoughtful process, not a hasty decision made on a whim. Take your time to research, explore different palettes, and visualize how each color will affect your dining room’s mood and functionality. Remember, paint is not just a color; it’s an expression of your style and can significantly impact your dining experience.

By avoiding these common pitfalls, you can confidently select a paint color that enhances your dining room’s beauty and creates an inviting atmosphere for family and friends to gather. Embrace the journey of color selection, and enjoy the transformation that awaits!

15. Finalizing Your Color Choice: How to Make the Decision

Finalizing your color choice for your dining room can often feel like a daunting task, especially with the plethora of options available. However, narrowing it down can be made simpler by following a few key steps. Start by reflecting on the mood you want to create. Dining rooms are typically places of warmth and connection, so consider colors that evoke feelings of comfort and hospitality. Warm neutrals like soft taupes or creamy whites can create an inviting backdrop, while muted shades of blue or green can bring a sense of tranquility.

Once you have a general idea of the mood, gather samples of your top contenders and apply them to the walls. This is crucial because colors can look drastically different under various lighting conditions throughout the day. Observe how each hue interacts with the natural light coming into the room, as well as how it complements your existing furniture and decor.

Next, enlist the help of friends or family for their opinions, but remember to trust your instincts. Sometimes, the perfect color is the one that resonates with you the most. Visualize how each shade will look with your dining table set up and consider how it will harmonize during gatherings and family dinners.

As you weigh your options, don’t forget to think about the longevity of your choice. Trends come and go, but timeless colors tend to withstand the test of time, offering a classic look that won’t feel outdated in a couple of years.

Finally, when you’re ready to make the decision, take a step back and envision the completed space. Imagine celebrating milestones, sharing meals, and creating lasting memories within those walls painted in the color you’ve chosen. Ultimately, the right paint color should reflect your personal style and enhance the overall ambiance of your dining room, making it a welcoming haven for every guest that walks through your door.

As we wrap up this ultimate guide to choosing the perfect paint color for your dining room, we hope you feel inspired and equipped to make a decision that reflects your style and enhances your dining experience. The right paint color can transform the atmosphere of your space, setting the tone for memorable meals and cherished gatherings with family and friends. Remember to consider factors like lighting, room size, and your personal preferences as you embark on this creative journey. Whether you opt for a calming hue or a bold statement color, trust your instincts and have fun with the process. Your dining room is not just a place to eat; it’s a canvas for connection and conversation. Happy painting!

What are the best ways to improve your home’s curb appeal?

First impressions matter, and your home’s exterior is the first thing visitors and passersby see.

Whether you’re looking to sell your home or simply want to enhance its beauty, boosting curb appeal can make a significant difference. A well-maintained exterior not only elevates the overall aesthetic of your property but also reflects the care and attention you put into your living space. From revitalizing your landscaping to choosing the right color palette for your front door, there are countless ways to transform your home and make it stand out in the neighborhood. In this blog post, we’ll explore top tips that can instantly elevate your curb appeal, making your home not just a place to live, but a welcoming haven that exudes charm and character. Get ready to roll up your sleeves and discover the simple yet effective changes that can turn your house into a stunning showcase!

1. Understanding Curb Appeal: What It Means and Why It Matters

What are the best ways to improve your home's curb appeal?
Credit : whatcanu.com

Curb appeal is more than just a catchy term; it encapsulates the first impression your home makes from the street. It’s the visual allure that captures the attention of passersby, potential buyers, and even neighbors—essentially anyone who catches a glimpse of your property. Think of it as the “face” of your home; just like how we dress to impress in social situations, your home needs to do the same.

But why does curb appeal matter? The reasons are manifold. First and foremost, a home with strong curb appeal stands out in a competitive real estate market. Whether you are looking to sell or simply wish to enhance your living environment, an inviting exterior can significantly increase your home’s value and desirability. Statistics show that homes with appealing exteriors often sell faster and at higher prices compared to their less attractive counterparts.

Moreover, curb appeal isn’t just for potential buyers; it also boosts your own pride in homeownership. An attractive front yard, a fresh coat of paint, and well-maintained landscaping create a welcoming atmosphere, making your home a joy to return to every day. It fosters a sense of community and can even inspire your neighbors to elevate their own properties.

In short, understanding and investing in curb appeal can transform your home’s exterior from ordinary to extraordinary, enhancing both its market value and your personal enjoyment. So, let’s dive into the essential tips that will elevate your home’s curb appeal instantly!

2. The First Impression: Importance of a Welcoming Entrance

The entrance of your home serves as the first impression to visitors and passersby alike, making it one of the most crucial aspects of your property’s curb appeal. A welcoming entrance sets the tone for what lies beyond, creating an inviting atmosphere that reflects your personal style and attention to detail. Imagine approaching a home with a beautifully adorned front door, perhaps painted in a cheerful hue, framed by elegant sidelights and an attractive doorbell; it instantly evokes a sense of warmth and hospitality.

To elevate your entrance, consider the elements that can enhance its appeal. Start with the door itself—updating its color or adding a fresh coat of paint can work wonders. Opt for a bold, eye-catching color that complements the overall color palette of your home, giving it a contemporary flair. Don’t forget the hardware; new handles and locks can add a touch of sophistication.

Next, think about lighting. Well-placed outdoor lights can illuminate your entrance beautifully, providing both safety and charm. Lantern-style fixtures or wall sconces flanking the door create a cozy glow, while string lights can add a whimsical touch, perfect for those evening gatherings.

Landscaping also plays a pivotal role in enhancing your entrance. Neatly trimmed hedges, vibrant flower beds, or even a simple potted plant can add life and color to the area. Consider creating a small pathway lined with inviting stepping stones or decorative gravel leading to the door, guiding guests with a sense of purpose and intrigue.

Lastly, don’t underestimate the power of seasonal decor. A welcoming wreath, festive welcome mat, or seasonal planters can transform your entrance throughout the year, making it feel fresh and inviting. By focusing on these aspects of your entrance, you not only boost your home’s curb appeal but also cultivate an atmosphere that makes friends and neighbors feel right at home from the very first step.

3. Landscaping Basics: Adding Color and Life to Your Yard

What are the best ways to improve your home's curb appeal?
Credit : whatcanu.com

Landscaping is one of the most effective ways to enhance your home’s curb appeal and create a welcoming atmosphere. A well-maintained yard can transform the entire look of your property, adding vibrancy and life that draws the eye. Begin with the basics: assess your current landscape and identify areas that could benefit from a little love and attention.

Start by introducing a splash of color with seasonal flowers. Planting a mix of perennials and annuals will ensure that your garden remains lively throughout the year. Consider bold blooms like dahlias, petunias, or marigolds for a cheerful pop against the greenery. For structure, incorporate shrubs that provide both height and texture. Evergreens are a fantastic choice, as they offer year-round appeal and require minimal maintenance.

Don’t forget about the power of foliage! Different shades of green can create visual interest, so mix various leaf shapes and colors. For added depth, consider layering your plants by placing taller varieties in the back and shorter ones in the front, creating a lush, tiered effect that draws the eye upward.

In addition to flowers and shrubs, consider adding hardscape elements like decorative stones, a gravel path, or a stylish border to define your beds. These features create contrast and can help organize the space, making your yard look polished and intentional.

Finally, don’t underestimate the importance of upkeep. Regularly trimming hedges, mowing the lawn, and weeding will ensure your landscape looks its best. By investing in these landscaping basics, you’ll add color and life to your yard, making a memorable first impression that enhances your home’s overall curb appeal!

4. Choosing the Right Paint Colors for Your Exterior

Choosing the right paint colors for your exterior can make a dramatic difference in your home’s curb appeal. First impressions matter, and the colors you select will set the tone for your entire property. When considering paint hues, think about how they harmonize with the architectural style of your home and the surrounding environment.

Begin by assessing the existing elements, such as the roof, brickwork, or stone accents. Neutral palettes—like soft grays, warm beiges, or crisp whites—provide a timeless foundation that can enhance traditional or modern designs alike. For a more vibrant touch, consider adding a bold color to your front door or shutters to create a stunning focal point that draws the eye. Rich navy blues, deep forest greens, or even bright reds can evoke a sense of warmth and welcome.

Additionally, don’t forget to take into account the psychological impact of color. For instance, blues and greens can evoke tranquility and calmness, while yellows and oranges bring a cheerful, inviting vibe. It’s also wise to consider your neighborhood’s aesthetic; aligning your color choices with nearby homes can create a sense of cohesion while still allowing your personality to shine through.

Before making a final decision, test your chosen colors on a small section of your home. Lighting conditions can dramatically affect how paint appears, so observe the colors throughout the day. Consulting a color wheel or working with a professional can also provide valuable insight into complementary shades and combinations that will enhance your home’s charm. By carefully selecting the right paint colors, you can transform your exterior from ordinary to extraordinary, boosting your curb appeal in an instant!

5. Upgrading Your Front Door: Styles and Accessories

What are the best ways to improve your home's curb appeal?
Credit : whatcanu.com

The front door of your home serves as the gateway to your personal sanctuary, and upgrading it can dramatically enhance your curb appeal. A striking entrance not only welcomes guests but also sets the tone for the entire property. When considering an upgrade, think about both style and functionality.

Start with the door itself—perhaps you want to replace an old, weathered door with a modern, sleek design. Fiberglass or steel doors offer durability and security, while wooden doors can provide a classic charm. Opt for bold colors that make a statement; a vibrant red, deep navy, or even a cheerful yellow can turn an ordinary door into a focal point. If a full door replacement isn’t in the cards, consider a fresh coat of paint to breathe new life into your existing door.

Next, accessorize! Hardware can make a world of difference. Elegant door handles, stylish knockers, and sophisticated house numbers not only enhance the visual appeal but also reflect your personal style. Consider a matching set of hardware for a cohesive look. Additionally, the addition of a decorative wreath or seasonal garland can add warmth and personality, inviting passersby to take a closer look.

Don’t forget about lighting! Flanking your door with stylish sconces or installing a statement pendant light can illuminate your entrance beautifully and improve safety at night. Choose fixtures that complement the architectural style of your home for a polished appearance.

Finally, consider adding a welcoming mat and some potted plants or flowers near your doorstep. This simple touch can create a cozy atmosphere that makes your home feel inviting. By upgrading your front door and its surroundings, you’ll create a stunning first impression that boosts your home’s curb appeal and leaves a lasting impact on visitors.

6. Lighting Matters: Enhancing Curb Appeal with Outdoor Lighting

When it comes to enhancing your home’s curb appeal, one often-overlooked element is lighting. Outdoor lighting not only serves a practical purpose but also adds a touch of elegance and warmth to your home’s exterior. Imagine returning home after a long day and being greeted by a beautifully illuminated pathway or a softly lit porch that invites you in. Proper lighting can transform your outdoor space into a welcoming oasis.

Start by assessing key areas of your home that could benefit from additional light. Consider installing stylish fixtures along your walkway to guide guests safely to your door while showcasing your landscaping. Solar-powered path lights are an eco-friendly option that adds charm without breaking the bank. For a more dramatic effect, accentuate architectural features like columns or eaves with uplighting, casting a warm glow that highlights the unique character of your home.

Don’t forget about the importance of layering your lighting. Combine ambient lights, such as soft sconces near the entrance, with task lighting for functional areas like the driveway or garage. Finally, consider incorporating decorative elements such as string lights or lanterns to create a cozy atmosphere for evening gatherings. With thoughtful outdoor lighting, you can not only elevate your home’s curb appeal but also extend your living space into the night, making your home a beacon of warmth and style.

7. Window Treatments: Improving Aesthetics from the Outside

What are the best ways to improve your home's curb appeal?
Credit : whatcanu.com

When it comes to enhancing your home’s curb appeal, window treatments are often an overlooked yet impactful element. The right window treatments can not only elevate the aesthetic of your home but also provide a cohesive look that ties your exterior design together. From the street, windows serve as the “eyes” of your home, so it’s essential to dress them thoughtfully.

Start by considering the style of your home. For traditional homes, elegant drapes in rich fabrics can add a touch of sophistication, while modern homes might benefit from sleek, minimalist shades that offer a contemporary edge. For a more rustic or farmhouse feel, wooden shutters can introduce warmth and charm, creating a welcoming vibe.

Color is another crucial factor in selecting window treatments. Opt for shades that complement your home’s exterior color palette. Neutral tones can provide a timeless look, while bold colors can make a statement and draw attention to your windows. Don’t shy away from patterns either; floral or geometric designs can infuse personality and flair, making your home stand out in a delightful way.

In addition to aesthetics, consider the functionality of your window treatments. Options like external roller shades or sheer curtains can help regulate light and improve energy efficiency while maintaining an attractive facade. You can also explore smart window treatments that can be adjusted effortlessly, keeping your home both stylish and practical.

Finally, don’t forget to maintain your window treatments. Clean, well-kept windows and treatments reflect a sense of pride in your home, enhancing curb appeal even further. By investing in thoughtful window treatments, you’ll not only improve the look of your home from the outside but also create a welcoming environment that invites friends and passersby to take a closer look.

8. Paving the Way: The Impact of Driveways and Walkways

When it comes to enhancing your home’s curb appeal, the pathways leading to your front door play a pivotal role. Driveways and walkways are not merely functional elements; they are the first impressions that visitors and potential buyers have of your property. A well-designed and maintained driveway or walkway can set the tone for the entire home, guiding eyes and feet toward your front door with elegance and style.

Start by assessing the current condition of your driveway and walkways. Cracked concrete, overgrown weeds, or faded asphalt can detract from the overall appearance of your home. Consider resurfacing or repairing these surfaces to create a smooth, inviting path. If budget allows, upgrading to materials like pavers or natural stone can add a touch of luxury while also increasing durability.

Color and pattern are key elements that can dramatically affect the aesthetic appeal of your entryway. Opt for colors that complement your home’s exterior and landscaping. For a classic look, neutral tones work beautifully, while bold colors can add a modern twist. Incorporating patterns, such as herringbone or circular designs, can create visual interest and make your driveway or walkway stand out.

Lighting is another important factor in enhancing the curb appeal of your driveways and walkways. Strategically placed solar lights or elegant lanterns not only illuminate the path for evening arrivals but also enhance the beauty of your landscape at night. This added layer of functionality can create a welcoming ambiance that draws the eye.

Lastly, don’t forget about the borders! Adding flower beds, decorative stones, or low hedges alongside your driveway or walkway can soften the hard edges and provide a splash of color throughout the seasons. These finishing touches will not only elevate the visual appeal but also reflect your personal style, making your home truly stand out in the neighborhood.

In summary, investing time and resources into improving your driveways and walkways can yield instant returns in curb appeal. A well-maintained pathway beckons guests with charm and elegance, ensuring your home makes a lasting impression.

9. Outdoor Décor: Using Furniture and Accessories Wisely

When it comes to enhancing your home’s curb appeal, outdoor décor plays a pivotal role in creating an inviting first impression. Thoughtfully chosen furniture and accessories can transform your front yard into an extension of your living space, blending style and functionality. Start by evaluating your current outdoor seating arrangements; a well-placed bench or a pair of inviting chairs can create a warm and welcoming atmosphere. Opt for weather-resistant materials that not only withstand the elements but also maintain their aesthetic charm.

Consider the colors and textures of your outdoor furniture. Bright, vibrant hues can infuse cheerfulness into your space, while neutral tones lend a sophisticated touch. Layering different textures—such as wicker chairs paired with plush cushions or a sleek metal table alongside a rustic wooden bench—adds visual interest and warmth.

In addition to furniture, accessories are key to personalizing your outdoor area. Incorporate decorative pillows, throws, and outdoor rugs to create cozy nooks perfect for sipping morning coffee or enjoying evening sunsets. A strategically placed outdoor lantern or string lights can provide a magical ambiance as dusk falls, making your home feel more inviting.

Don’t forget about planters and garden accessories! Vibrant flowers, lush greenery, or even a small herb garden can breathe life and color into your entryway. Choose planters that complement your existing architecture, whether it’s sleek and modern or charmingly rustic.

Lastly, don’t underestimate the power of seasonal décor. Changing accessories according to the season—like pumpkins in the fall or festive wreaths during the winter—keeps your space fresh and engaging throughout the year. By using furniture and accessories wisely, you can effortlessly elevate your home’s curb appeal and create a stunning outdoor space that invites admiration from neighbors and passersby alike.

10. Seasonal Touches: Maintaining Appeal Year-Round

Maintaining your home’s curb appeal throughout the changing seasons is crucial for making a lasting impression and ensuring your property remains inviting all year long. Seasonal touches not only enhance your home’s exterior but also reflect the warmth and care you put into your living space.

As the seasons shift, so should your approach to curb appeal. In spring, consider planting vibrant flowers or adding colorful window boxes brimming with blossoms. This is the perfect time to declutter your yard and give those neglected areas a fresh start with a thorough clean-up and a pop of color.

Summer calls for a lush, green lawn and well-kept hedges. Invest time in regular mowing, edging, and watering to ensure your landscape looks its best. Consider adding outdoor furniture or a cozy seating area to create a welcoming atmosphere for gatherings. Brightly colored outdoor cushions and decor can add a cheerful vibe, making your home the go-to spot for summer barbecues.

As autumn arrives, it’s the season to embrace warm hues and textures. Swap out your summer flowers for rich, fall-colored plants and decorative pumpkins. A simple wreath made of seasonal foliage on your front door can exude charm and hospitality. Ensure your pathways are lined with twinkling lights or lanterns to create a cozy ambiance as the days grow shorter.

When winter rolls in, focus on creating a peaceful and inviting aesthetic. Keep your walkways clear of snow and add a layer of evergreen garlands to your porch for a touch of seasonal cheer. A festive, well-lit display can bring warmth to the cold months, while incorporating natural elements like pine cones or holly can keep your home looking fresh and appealing.

By embracing seasonal touches, you not only enhance your home’s exterior but also show a level of care and attention that can significantly boost curb appeal. No matter the time of year, a little seasonal flair can transform your home into a welcoming haven that draws admiration from neighbors and passersby alike.

11. DIY Projects vs. Hiring Professionals: Finding the Right Balance

When it comes to enhancing your home’s curb appeal, the decision between tackling DIY projects and hiring professionals can feel overwhelming. Both options have their merits, and striking the right balance can lead to stunning results without breaking the bank.

DIY projects allow you to infuse your personal touch into your home’s exterior. Simple tasks like painting the front door, planting vibrant flowers, or even creating a charming pathway can be incredibly rewarding. These projects not only save you money but also provide a sense of accomplishment as you watch your efforts transform your space. Imagine the satisfaction of stepping back to admire a freshly painted fence or a meticulously landscaped garden that you nurtured with your own hands.

However, it’s essential to recognize when a project is best left to the professionals. Complex tasks—such as roof repairs, extensive landscaping, or structural changes—require specialized skills and knowledge to ensure safety and quality. Hiring professionals can save you time and stress, allowing you to focus on the aspects of the project that truly excite you. Plus, their expertise can elevate your curb appeal in ways that a DIY approach might not achieve, such as ensuring proper drainage in landscaping or choosing the right materials for a stunning new facade.

Finding the right balance means assessing your skills, the time you can dedicate, and the potential impact on your home’s value. Consider starting with small DIY projects that build your confidence and enhance your space, while reserving larger, more intricate tasks for experienced hands. By blending your personal touch with professional quality, you can create a home that not only looks fabulous but also reflects your unique style. Ultimately, the goal is to create a welcoming exterior that draws in admirers and elevates your home’s overall charm.

12. Maintenance Tips: Keeping Your Home Looking Its Best

Maintaining the curb appeal of your home is like nurturing a beautiful garden; it requires consistent care and attention. To ensure your home always looks its best, consider establishing a regular maintenance routine that targets both the exterior and the surrounding landscape.

Start with your lawn, as it often serves as the first impression of your property. Regular mowing, edging, and watering keep the grass lush and vibrant. Consider seasonal treatments like fertilization or aeration to promote healthy growth. Don’t forget about weeds; a quick pull here and there can prevent them from taking over and detracting from your home’s appearance.

Next, pay attention to your landscaping. Trim back overgrown shrubs, deadhead flowers, and replace any wilted plants to keep your garden looking fresh and inviting. Mulching not only enhances the visual appeal but also helps retain moisture and suppress weeds. Adding colorful annuals or perennials can provide seasonal bursts of color and charm.

Your home’s exterior surfaces also require care. Regularly wash windows, siding, and any outdoor furniture to remove dirt and grime. A fresh coat of paint on the front door or shutters can work wonders, instantly rejuvenating your home’s facade. Inspect for any peeling paint or damaged areas that may need repair, as these can quickly detract from your home’s overall appeal.

Lastly, don’t underestimate the power of details. Clean and polish house numbers, replace old fixtures, and ensure that walkways are free of debris. Adding outdoor lighting not only enhances safety but also creates a warm, welcoming atmosphere at dusk. By committing to these maintenance tips, you can ensure your home remains an eye-catching masterpiece, boosting its curb appeal and making it the envy of the neighborhood.

13. Eco-Friendly Options: Sustainable Choices for Curb Appeal

In today’s world, transforming your home’s curb appeal doesn’t just mean enhancing its visual aesthetics; it also offers an opportunity to make sustainable choices that benefit both your home and the environment. Eco-friendly options are not only appealing to the eye—they can also significantly boost your home’s value while promoting a healthier planet.

Start with landscaping: consider replacing your traditional grass lawn with drought-resistant plants or native species that thrive in your local climate. These plants require less water, attract pollinators, and provide vibrant colors throughout the seasons. A rock garden or a well-placed mulch bed can also reduce water consumption while giving your yard a polished look.

Next, focus on sustainable materials for your exterior updates. If you’re thinking about a fresh coat of paint, opt for low-VOC (volatile organic compounds) paints that minimize harmful emissions and contribute to better indoor air quality. For decking or fencing, look for reclaimed wood or composite materials made from recycled plastics. These options not only reduce waste but also offer durability and style.

Don’t forget about energy-efficient lighting! Installing solar-powered pathway lights or LED fixtures can illuminate your home beautifully while cutting down on energy costs. Additionally, consider adding a rain garden to manage stormwater runoff, which can help filter pollutants and provide a stunning focal point in your yard.

By incorporating these eco-friendly choices into your home’s exterior, you will not only enhance your curb appeal but also make a positive impact on the environment. Plus, today’s homebuyers are increasingly looking for homes that reflect sustainability, making your eco-conscious decisions a smart investment for the future. Embrace the beauty of a greener home—your curb appeal will shine, and so will your commitment to the planet!

14. Budget-Friendly Ideas for Instant Transformation

When it comes to enhancing your home’s curb appeal without breaking the bank, there are plenty of budget-friendly ideas that can lead to an instant transformation. First and foremost, consider a fresh coat of paint. A vibrant door color can make a striking impression, while a neutral palette can create a sense of harmony. Choose a hue that complements your home’s architecture and surrounding landscape.

Next, focus on landscaping. By simply trimming overgrown bushes, weeding flower beds, and planting seasonal flowers, you can add a pop of color and freshness to your outdoor space. Consider using mulch to define flower beds and retain moisture; it’s an inexpensive way to make your garden look tidy and well-maintained.

Another impactful yet affordable idea is to upgrade your house numbers. Swapping your old, faded numbers for sleek, modern alternatives can make your home stand out. Pair them with a well-lit porch or stylish lighting fixtures to enhance visibility during the evening hours, adding both safety and charm.

Don’t underestimate the power of outdoor decor. Adding a few well-placed potted plants, a charming welcome mat, or even a decorative bench can create an inviting atmosphere. Look for items at thrift stores or garage sales to save even more money while adding some unique character to your entryway.

Lastly, consider creating a clean and welcoming pathway leading up to your front door. You can do this by power washing your existing walkway or laying down inexpensive pavers to define the path. A clear, well-defined route not only directs visitors but also enhances the overall look of your home.

These budget-friendly ideas can significantly enhance your home’s curb appeal, making it more inviting and attractive to passersby, all without straining your finances. With just a little creativity and effort, your home will radiate charm and warmth, instantly boosting its visual appeal.

15. Final Thoughts: Crafting a Home You Love to Come Home To

When it comes to transforming your home and enhancing its curb appeal, the ultimate goal is to create a space that resonates with you—a sanctuary that invites you in and reflects your personal style. As you embark on this journey, remember that curb appeal is not just about aesthetics; it’s about crafting an experience that makes you proud every time you arrive.

Consider the emotions you want to evoke when you step through your front door. Is it warmth, comfort, or perhaps a sense of tranquility? Start by incorporating elements that speak to those feelings. A vibrant garden bursting with colors, charming outdoor lighting that casts a welcoming glow, or a freshly painted front door in a hue that makes your heart sing can all contribute to an inviting atmosphere.

Engaging with your home’s exterior should be an enjoyable process. Take the time to explore different design ideas, whether it’s through inspiration from home improvement shows, magazines, or even your neighbors’ beautiful spaces. Involve family members in the decision-making process; after all, everyone deserves to feel a sense of ownership over their home.

Lastly, keep in mind that your home is a living entity, one that evolves with you. Regular updates, no matter how small, can ensure that your space remains a reflection of your changing tastes and lifestyle. By investing time and effort into enhancing your home’s curb appeal, you’re not just improving its look—you’re cultivating a place where cherished memories are made and where you’ll always love to come home to.

In conclusion, enhancing your home’s curb appeal doesn’t have to be a daunting or expensive task. By implementing the tips we’ve shared, from refreshing your landscaping to giving your front door a vibrant new coat of paint, you can transform your home’s exterior into a welcoming sight that reflects your personal style. Remember, first impressions matter, whether you’re looking to sell or simply want to enjoy a more beautiful living space. Take the time to invest in these small yet impactful changes, and watch as your home’s charm and value increase. We hope these ideas inspire you to start your curb appeal journey today. Happy transforming!

How to create a cozy and inviting fireplace?

As the chill of winter settles in and the days grow shorter, there’s nothing quite like the warm embrace of a cozy fireplace to transform your home into a welcoming retreat.

Whether you have a traditional wood-burning fireplace or a modern electric design, creating an inviting space around this focal point can elevate your living area and provide a sanctuary for relaxation and connection. Imagine gathering with loved ones, sipping hot cocoa, and sharing stories while the flames dance and flicker. In this blog post, we’ll explore essential tips for crafting a fireplace retreat that radiates comfort and style. From choosing the perfect seating arrangements and selecting plush textiles to incorporating ambient lighting and personal touches, your fireplace can become the heart of your home—a space where memories are made and cherished. Get ready to ignite your creativity and transform your living space into a cozy haven that beckons you to unwind and enjoy the simple pleasures of life.

1. The Importance of a Cozy Fireplace Retreat

How to create a cozy and inviting fireplace?
Credit : whatcanu.com

A cozy fireplace retreat is more than just a decorative feature in your home; it’s a sanctuary that invites warmth, comfort, and connection. As the heart of the living space, a fireplace serves as a gathering point for family and friends, providing a sense of security and relaxation during chilly evenings. Imagine curling up in your favorite blanket, sipping on a warm beverage while the flickering flames cast a gentle glow, transforming your living area into a haven of tranquility.

The ambiance created by a crackling fire can elevate any occasion, whether it’s a holiday celebration with loved ones or a quiet evening spent with a good book. The sight and sound of the flames have a way of soothing the mind and spirit, allowing you to unwind after a long day. Furthermore, a well-designed fireplace retreat can enhance the aesthetic appeal of your home, acting as a stunning focal point that draws the eye and sparks conversation.

In today’s fast-paced world, carving out a space dedicated to relaxation is essential for mental well-being. A cozy fireplace retreat not only adds value to your home but also provides an opportunity to slow down, connect with those around you, and create lasting memories. Whether you opt for a traditional wood-burning fireplace, a sleek modern gas model, or even an electric alternative, the key is to curate an inviting atmosphere that beckons you to pause, reflect, and enjoy the warmth of your surroundings.

2. Choosing the Right Location for Your Fireplace

Choosing the right location for your fireplace is a crucial first step in creating a cozy and inviting retreat. The placement of your fireplace can dramatically influence the ambiance of your space, so it’s important to consider both functionality and aesthetics as you decide where it will reside.

Begin by evaluating the layout of your room. Ideally, your fireplace should be the focal point, drawing the eye and becoming a gathering spot for friends and family. Common locations include the living room or den, where it can serve as a centerpiece during social gatherings or quiet evenings spent curled up with a good book. If you have an open-concept design, positioning the fireplace to be partially visible from adjoining spaces can enhance the overall flow of warmth and light throughout your home.

Consider the existing architectural features as well. A fireplace nestled within a built-in nook or flanked by large windows can create a stunning visual effect, while also maximizing natural light. If you’re working with a smaller space, a corner fireplace can save room while still providing the cozy atmosphere you desire.

Don’t forget about practical considerations, too. Ensure that your fireplace is easily accessible and that there’s enough clearance around it for safety. Check local building codes and regulations, especially if you’re considering a wood-burning option, as these can dictate where and how fireplaces can be installed.

Lastly, think about the activities you want to enjoy around your fireplace. If you envision family game nights or intimate conversations over warm drinks, ensure that the seating is arranged to promote conversation and connection. With a little thought and planning, the right location for your fireplace can transform your space into a cozy haven, inviting warmth and comfort into your home.

3. Selecting the Perfect Fireplace Style

How to create a cozy and inviting fireplace?
Credit : whatcanu.com

Selecting the perfect fireplace style is essential for transforming your home into a cozy retreat. The fireplace is often the heart of a room, a gathering place where warmth and comfort converge, so it’s important to choose a design that resonates with your personal taste and complements your home’s decor.

First, consider the architectural style of your home. A traditional brick fireplace may be ideal for a classic or rustic setting, while a sleek, modern fireplace with clean lines could enhance a contemporary space. If your home leans toward a farmhouse aesthetic, a wooden mantel with distressed finishes can add both charm and warmth. Conversely, if you prefer a more minimalist approach, a wall-mounted electric fireplace can provide a striking focal point without dominating the room.

Next, think about the type of fireplace that suits your lifestyle. Wood-burning fireplaces offer an authentic experience with crackling logs and the tantalizing smell of wood smoke, perfect for those who enjoy the traditional ambiance of a real fire. Gas fireplaces, on the other hand, provide the convenience of quick ignition and easy temperature control, making them ideal for busy households. For those living in apartments or smaller spaces, consider an ethanol fireplace or a tabletop fire bowl, which can create a cozy atmosphere without the need for extensive installation.

Finally, don’t forget the finishing touches that can enhance your fireplace’s appeal. Surrounding the fireplace with comfortable seating, plush blankets, and decorative accents like candles or artwork can create an inviting atmosphere. Adding a stylish screen or a set of attractive tools not only boosts the visual appeal but also ensures safety while maintaining functionality.

Choosing the right fireplace style is not just about aesthetics; it’s about creating a warm and inviting space where memories are made. With careful consideration of your home’s character, your lifestyle needs, and the final decor, you can curate a fireplace retreat that beckons family and friends to gather around its warmth.

4. Materials and Design: Creating a Cohesive Look

When it comes to transforming your fireplace area into a cozy retreat, the materials and design you choose are crucial for achieving a harmonious and inviting atmosphere. Start by considering the surrounding elements of your fireplace—think of the mantel, the hearth, and the walls. Selecting materials that complement each other can significantly enhance the overall aesthetic of the space.

For a rustic feel, consider using natural stone or reclaimed wood for the mantel and hearth. These elements not only add texture but also bring warmth and character to the room. If you prefer a more modern look, sleek marble or polished granite can create a sophisticated and elegant vibe. Pair these materials with a neutral color palette to maintain a cohesive look, allowing your fireplace to become the focal point of the room without overwhelming the senses.

Don’t forget to consider the design style of your space. If your home features a farmhouse aesthetic, incorporate vintage-inspired decor and soft textiles, such as woven throws or plaid cushions, to enhance the cozy feel. For a contemporary interior, opt for minimalist designs with clean lines and bold accents, such as metallic candle holders or geometric art.

Accessorizing your fireplace area is another opportunity to create a unified look. Choose decorative elements, such as a stylish firewood holder or a set of elegant tools, that match your chosen materials. Layering different textures—like a plush area rug beneath your seating or chunky knit blankets draped over chairs—can also contribute to the inviting atmosphere.

Ultimately, your goal is to create a space that not only looks good but feels good. By thoughtfully selecting materials and design elements that work together, you’ll create a cozy fireplace retreat that beckons you to unwind, relax, and enjoy the warmth of your home.

5. Lighting: Enhancing the Ambiance

How to create a cozy and inviting fireplace?
Credit : whatcanu.com

Lighting plays a crucial role in setting the tone and atmosphere of your fireplace retreat, transforming it from a simple gathering space into a warm, inviting haven. The flicker of flames provides a natural glow, but enhancing that warmth with strategic lighting choices can elevate the entire experience.

Start by considering the placement of your lighting fixtures. Soft, ambient lighting is ideal for creating a cozy atmosphere, so opt for table lamps with warm-toned bulbs or wall sconces that can cast a gentle glow across the room. Dimmers can be your best friend here; they allow you to adjust the brightness according to the time of day or the mood you want to create. Imagine curling up with a good book as the soft light dances off the walls, perfectly complementing the crackling fire.

In addition to traditional lighting, don’t underestimate the power of accent lighting. String lights draped around the mantel or along shelves can add a whimsical touch, while candles placed strategically on tables or in lanterns can offer a soft flickering light that enhances the fireplace’s ambiance. Consider using aromatherapy candles, which not only illuminate but also fill the air with soothing scents, adding another layer of comfort to your retreat.

Finally, integrating natural light into your design can further enhance the space during the day. If possible, position your seating to take advantage of any windows or skylights, allowing the sunlight to stream in and mingle with the warm glow of your fireplace. This balance of natural and artificial light creates an inviting atmosphere that beckons you and your guests to relax and unwind.

By thoughtfully layering your lighting, you can create a fireplace retreat that feels cozy and inviting, a space where memories are made, and comfort reigns supreme.

6. Furniture Arrangement for Comfort and Flow

When it comes to creating a cozy and inviting fireplace retreat, the arrangement of your furniture plays a crucial role in establishing both comfort and flow. Imagine sinking into a plush armchair, a soft blanket draped over your lap, with the gentle glow of the fire casting a warm ambiance around the room. To achieve this inviting atmosphere, start by considering the focal point of your space—the fireplace itself.

Position your seating to face the fireplace, allowing everyone to gather around this natural gathering spot. Sofas and chairs should be spaced close enough to encourage conversation but not so close that they feel cramped. A circular or semi-circular layout can enhance the sense of intimacy and connection among guests. Adding a small coffee table in the center can provide a convenient surface for mugs of hot cocoa or a game of cards, seamlessly blending functionality with coziness.

In addition to the main seating, consider the flow of movement throughout the room. Ensure that pathways are clear, allowing easy access to the fireplace without the risk of tripping over furniture. If space allows, incorporate additional seating options like floor cushions or poufs, which can be easily moved to accommodate different gatherings.

Don’t forget about layering your lighting to enhance the fireplace’s warmth. Combine soft overhead lights with strategically placed table lamps or wall sconces to create a cozy glow that invites relaxation. Ultimately, the key is to create an inviting space where comfort reigns supreme, allowing family and friends to gather and enjoy the soothing ambiance of your fireplace retreat. With thoughtful furniture arrangement, your home can become a haven of warmth and togetherness, perfect for those chilly evenings spent by the fire.

7. Textiles That Add Warmth: Pillows, Throws, and Rugs

How to create a cozy and inviting fireplace?
Credit : whatcanu.com

When it comes to creating a cozy and inviting fireplace retreat, the right textiles can make all the difference. Imagine sinking into a plush chair beside the crackling flames, surrounded by layers of comfort that beckon you to unwind. Pillows, throws, and rugs are not just decorative; they are essential elements that enhance the warmth and ambiance of your space.

Start with **plump pillows** in rich textures and warm colors that invite you to lean back and relax. Opt for patterns that resonate with your personal style, whether it’s a classic plaid, a modern geometric, or a soft floral. A mix of sizes and shapes can create a visually appealing display while ensuring that comfort is always at hand. Place them generously on a nearby sofa, armchair, or even on the floor for a casual, inviting vibe.

Next, drape soft **throws** across your seating or have them neatly folded at arm’s reach. Cashmere, chunky knits, or fleece throws not only provide warmth during chilly evenings but also add a layer of visual interest to your decor. Consider selecting throws in complementary colors or patterns that harmonize with your overall color scheme, creating a cohesive look that ties the room together.

Finally, don’t overlook the importance of **rugs** in anchoring your fireplace retreat. A plush area rug can define the space and add warmth underfoot, making it feel more intimate and inviting. Choose a rug that feels soft against your skin—something you’ll want to sink your toes into as you enjoy the flickering flames. Layering rugs can also be a stylish option, combining different textures and patterns to create depth.

By thoughtfully incorporating pillows, throws, and rugs, you’ll transform your fireplace area into a cozy sanctuary that invites relaxation and connection, perfect for curling up with a good book or enjoying intimate gatherings with loved ones.

8. Incorporating Natural Elements: Wood, Plants, and Stones

Incorporating natural elements into your fireplace retreat is a surefire way to enhance its cozy ambiance and create a serene, inviting atmosphere. The warmth of wood, the freshness of plants, and the earthy tones of stones can transform your space into a peaceful sanctuary that feels connected to the outdoors.

**Wood** plays an essential role in this transformation. Whether you choose to include rustic wooden beams as a mantle or opt for a chic wood storage basket filled with neatly stacked logs, the natural texture of wood adds warmth and character to your fireplace area. Consider using reclaimed wood for a touch of history and sustainability. A wooden coffee table or side tables can also tie the space together, creating a harmonious balance between the fireplace and the surrounding decor.

**Plants**, on the other hand, breathe life into your retreat. Introducing greenery not only enhances the aesthetic appeal but also improves air quality and fosters a sense of well-being. Opt for low-maintenance houseplants that thrive in your environment, such as snake plants or pothos, and place them on the mantel or nearby shelves. For a bolder statement, hang trailing plants in macramé hangers from the ceiling or place larger potted plants in the corners of the room. The vibrant greens will contrast beautifully with the warm tones of the fireplace, creating a refreshing and inviting vibe.

Don’t forget about **stones**—they are the ultimate natural element to forge a connection with the earth. Incorporating stone accents can add a touch of rustic elegance to your fireplace. Whether it’s a stone surround that frames your fire or decorative pebbles nestled in a bowl on the coffee table, the textures and colors of stones can ground the space and bring an organic, timeless feel. You might even consider creating a small stone pathway leading to your fireplace, adding a touch of whimsy and charm.

By thoughtfully integrating wood, plants, and stones into your fireplace retreat, you’ll create a cozy haven that invites relaxation and connection. This natural fusion not only enhances the visual appeal of your space but also makes it a perfect gathering spot for family and friends, where memories can be made around the flickering warmth of the fire.

9. Personal Touches: Decor and Accessories

When it comes to transforming your fireplace area into a cozy retreat, personal touches through decor and accessories can make all the difference. This is your sanctuary, and it should reflect your unique style and personality. Start by considering the overall theme of your space—do you prefer rustic charm, modern minimalism, or perhaps a blend of both?

Layering is key. Begin with a soft, textured throw blanket draped over a nearby chair or the arm of your sofa. Opt for rich, warm colors that not only complement the hues of your fireplace but also invite you to snuggle up with a hot cup of cocoa. Consider adding an assortment of cushions in varying sizes and patterns to create an inviting seating area that encourages relaxation.

Next, think about the accessories that will enhance the ambiance. Curate a collection of your favorite books and place them on a small side table or a decorative stack on the hearth itself. This not only provides a cozy reading nook but also adds a personal touch that tells a story about you.

Candles are another essential element; choose an array of sizes and shapes to create a warm glow that flickers gently in the evening light. Scented candles or a nearby diffuser can fill the space with comforting fragrances, such as pine, cinnamon, or vanilla, instantly enhancing the inviting atmosphere.

Don’t forget to include natural elements. A small potted plant or a vase of fresh flowers can bring life to your fireplace retreat, while also purifying the air. For a rustic touch, consider placing a basket nearby filled with logs or pinecones, not only adding to the decor but also serving a practical purpose.

Finally, your décor should reflect your journey and experiences. Display cherished photographs, artwork, or handmade crafts that evoke fond memories and spark conversation among guests. Remember, the goal is to create a space that feels like home—a warm and inviting retreat where you, your family, and friends can gather, unwind, and create lasting memories. With these personal touches, your fireplace area will not only be a focal point of warmth but also a true reflection of who you are.

10. Safety Considerations for Your Fireplace Retreat

When transforming your home into a cozy fireplace retreat, safety should always be a top priority. After all, a warm and inviting space is only enjoyable when you can relax without worry. Here are some essential safety considerations to keep in mind as you create your perfect fireplace nook.

First and foremost, ensure that your fireplace is properly maintained and inspected regularly. Whether you have a wood-burning, gas, or electric fireplace, each type requires specific care to operate safely. For wood-burning fireplaces, this means regularly cleaning the chimney to prevent creosote buildup, which can lead to chimney fires. For gas units, check for leaks and ensure that the venting system is functioning properly. Schedule annual professional inspections to catch any potential issues before they escalate.

Next, be mindful of the materials you use in your fireplace retreat. Surrounding your fireplace with flammable decor or furniture can pose a significant risk. Opt for heat-resistant materials, such as stone, brick, or tempered glass, for the area around your fireplace. Additionally, keep a safe distance between your fire source and any combustible items, such as blankets, curtains, or decorative pillows. A general rule of thumb is to maintain at least three feet of clearance.

Consider installing a fireplace screen or a glass door to protect your space from errant sparks and embers. These barriers not only enhance safety but can also add a stylish touch to your fireplace. If you have young children or pets, safety gates can provide an extra layer of protection, keeping curious little ones at a safe distance.

Lastly, always keep a fire extinguisher nearby, and ensure that smoke and carbon monoxide detectors are installed and functioning correctly. Familiarize yourself and your family with emergency protocols in case of an unexpected situation. By taking these safety precautions, you can enjoy the warmth and comfort of your fireplace retreat while ensuring a safe environment for you and your loved ones.

With these considerations in mind, your cozy fireplace retreat can become a beloved gathering spot for family and friends, providing warmth and comfort for countless evenings to come.

11. Seasonal Decor: Keeping the Space Fresh

When it comes to transforming your fireplace area into a cozy retreat, seasonal decor plays a pivotal role in keeping the space feeling fresh and inviting all year round. Embracing the changing seasons allows you to inject new life into your home while celebrating the beauty of nature’s cycles.

Start by selecting a color palette that reflects the essence of each season. In autumn, think warm hues of amber, rust, and deep burgundy; incorporate plush blankets and decorative pillows in these shades to create a snug atmosphere. Add elements like small pumpkins or rich foliage arrangements to your mantel, bringing the essence of fall indoors.

As winter settles in, swap out the autumn accents for softer whites, silvers, and evergreen tones. A garland of pine branches draped across the mantel or a collection of glass lanterns filled with fairy lights can evoke the magic of a winter wonderland. Cozy up the area with a thick, knitted throw and a selection of your favorite seasonal reads, inviting family and friends to gather around the warmth of the fireplace.

With the arrival of spring, it’s time to breathe new life into your retreat. Bright, cheerful colors like pastels and vibrant greens can uplift the mood. Fresh flowers in a vase or a small herb garden placed nearby not only add a pop of color but also infuse the space with delightful fragrances.

Finally, as summer approaches, consider incorporating light fabrics and airy designs. Swap heavy blankets for lightweight throws, and introduce bright, cheerful decor that reflects the warmth of the season. Think seashells, beachy elements, and perhaps a few framed photographs from your summer adventures to personalize the space.

By rotating your decor with the seasons, you not only keep your fireplace retreat looking fresh and inviting but also create a dynamic space that resonates with the rhythms of nature. This thoughtful approach not only enhances your home’s aesthetic but also cultivates a sense of comfort and belonging for you and your guests.

12. Ideas for Cozy Seating: Chairs, Benches, and More

When it comes to creating a cozy fireplace retreat, the seating you choose can make all the difference. Imagine curling up with a warm blanket and a good book, surrounded by inviting furniture that beckons you to relax. Here are some ideas to help you select the perfect seating options for your space.

**1. Plush Armchairs:** A pair of oversized, plush armchairs can become the focal point of your fireplace nook. Opt for armchairs upholstered in soft fabrics like velvet or chenille, which not only provide comfort but also add a touch of luxury. Consider styles that have a classic silhouette or even a modern design, depending on your decor theme. Add a few colorful throw pillows and a knitted blanket for that extra touch of warmth.

**2. Cozy Benches:** If you have a larger space, a wooden or upholstered bench can be a charming addition. Place it directly in front of the fireplace, where it can serve as both seating and a decorative element. You might choose a bench with built-in storage to stow away blankets and pillows, keeping your retreat tidy and organized.

**3. Floor Cushions:** For a more casual, laid-back vibe, consider incorporating large floor cushions or poufs. These versatile seating options can easily be moved around, allowing guests to arrange themselves comfortably. Choose cushions in various textures and colors to create an inviting atmosphere. They’re perfect for gatherings, where everyone can lounge around and enjoy the warmth of the fire.

**4. Swinging Seats or Hammocks:** If you’re feeling adventurous and have the appropriate space, a hanging chair or a hammock can add a unique twist to your fireplace area. These whimsical seating options not only create a cozy spot to relax but also lend a playful element to your design. Just imagine swaying gently while being warmed by the fire!

**5. Rocking Chairs:** Embrace nostalgia with a classic rocking chair. This timeless piece encourages relaxation and can be a charming addition to your fireplace retreat. Look for one with a comfortable cushion and a beautiful finish that complements your existing decor. Rocking chairs evoke a sense of tranquility, making them a perfect choice for unwinding with a cup of tea.

Incorporating a mix of these seating ideas can transform your fireplace area into a cozy retreat that invites relaxation and connection. The key is to prioritize comfort and style, ensuring that your space feels both welcoming and warm. After all, the flickering flames of the fire paired with the right seating can create the ultimate sanctuary in your home, perfect for enjoying quiet evenings or lively gatherings with loved ones.

13. Using the Fireplace Year-Round: Beyond Winter

When we think about fireplaces, our minds often drift to the chilly months of winter, envisioning cozy evenings spent by the crackling flames with a cup of hot cocoa in hand. However, a fireplace can be a year-round feature that enhances your home’s ambiance, regardless of the season. Embracing this versatile element allows you to transform your space into a warm and inviting retreat at any time of the year.

In spring and summer, consider creating a vibrant outdoor lounge area around your fireplace. If you have a patio or backyard, a fire pit can serve as a focal point for gatherings with family and friends. Picture warm evenings spent sharing stories around the fire, roasting marshmallows for s’mores, or simply enjoying the flickering glow as the sun sets. To enhance this experience, surround your fire pit with comfortable seating, colorful cushions, and perhaps even string lights to create a magical atmosphere.

As fall approaches, your fireplace can become a stunning centerpiece for seasonal decor. Embrace autumn by adding rich, warm colors to your space—think deep oranges, rustic reds, and golden yellows. Decorate the mantel with seasonal items like small pumpkins, dried leaves, and cozy blankets that invite you to snuggle up as the air turns crisp. You can even use the fireplace for seasonal gatherings, hosting friends for a harvest feast or a Halloween-themed night.

Even in the heat of summer, your fireplace can play a role in your home’s charm. On particularly cool summer evenings, you can light a fire for warmth and ambiance while enjoying an outdoor movie night or an intimate dinner al fresco. Inside, consider using the fireplace as a decorative element rather than a functional one. Fill it with plants, candles, or colorful logs to maintain its inviting presence without the heat.

By reimagining how you use your fireplace throughout the year, you not only enhance your home’s aesthetic but also create a welcoming environment that encourages relaxation and connection with loved ones. So, don’t let your fireplace gather dust during the warmer months—embrace its potential and turn it into a year-round retreat that brings comfort and joy to your home.

14. Maintenance Tips for a Pristine Fireplace

To truly enjoy the warmth and ambiance of your fireplace, regular maintenance is essential. A pristine fireplace not only enhances the beauty of your home but also ensures safety and efficiency. Here are some key maintenance tips to keep your fireplace looking its best and functioning properly.

**1. Regular Cleaning:** Whether you have a wood-burning, gas, or electric fireplace, routine cleaning is crucial. For wood-burning fireplaces, make it a habit to remove ashes at least once a week during the burning season. Use a fireplace shovel and bucket to avoid mess and dispose of ashes safely. Gas fireplaces require a different approach—clean the glass doors with a suitable cleaner to maintain clarity and shine. For electric fireplaces, simply dust the exterior and wipe down surfaces to keep them looking fresh.

**2. Inspect the Chimney and Flue:** If you have a traditional wood-burning fireplace, an annual chimney inspection is a must. Creosote buildup can lead to dangerous chimney fires, so a professional sweep can help to keep your flue clear and safe. For gas fireplaces, ensure the venting system is unobstructed and functioning properly.

**3. Check for Damage:** Regularly inspect your fireplace for any signs of wear and tear. Look for cracks in the masonry, rust on metal components, or damage to the firebox. Addressing these issues promptly can prevent larger problems down the line and ensure your fireplace remains a safe haven.

**4. Maintain the Surroundings:** A clean and organized hearth area enhances the overall aesthetic of your fireplace. Keep flammable materials, such as wood piles, blankets, or decorations, at a safe distance. Additionally, consider adding decorative elements like firewood holders or stylish screens that not only serve a purpose but also elevate the look of your fireplace retreat.

**5. Seasonal Check-Ups:** As seasons change, so do your fireplace needs. Before the colder months set in, perform a thorough check-up to ensure everything is in working order. If you’ve used your fireplace extensively during winter, consider a mid-season inspection to keep it in top shape.

By following these maintenance tips, your fireplace will not only remain a cozy centerpiece in your home but also a safe one. Regular care allows you to enjoy the warmth and charm of your fireplace retreat, transforming it into the inviting gathering spot you and your loved ones will cherish for years to come.

15. Inspiring Examples: Fireplace Retreats to Spark Your Creativity

As you embark on the journey to create your own cozy fireplace retreat, sometimes the best inspiration comes from seeing how others have transformed their spaces. Here are a few captivating examples that might spark your creativity and help you visualize your ideal sanctuary.

**1. The Rustic Lodge Vibe:** Imagine stepping into a warm, cabin-like atmosphere where weathered wooden beams frame a stone fireplace, crackling with a gentle fire. Large, plush couches adorned with soft throws invite you to sink in with a good book, while a collection of nature-inspired decor—think pinecones, antlers, and handmade pottery—adds a touch of the outdoors. This retreat is perfect for those who cherish a rustic aesthetic, seamlessly blending comfort with the charm of the wilderness.

**2. Modern Minimalism:** For lovers of sleek, contemporary design, envision a fireplace surrounded by clean lines and muted colors. A linear gas fireplace can serve as a stunning focal point, complemented by a minimalist mantel adorned with just a few carefully chosen pieces of art or greenery. Layering textures—like a soft wool rug paired with leather accents—creates a warm yet sophisticated space that encourages relaxation without the clutter.

**3. Bohemian Bliss:** If you lean towards a more eclectic style, consider a fireplace that acts as a canvas for your creativity. Surround it with a vibrant mix of patterns and colors, from vintage rugs to plush floor cushions. Hang macramé wall hangings and incorporate an array of plants to breathe life into the space. This retreat is all about comfort and self-expression, inviting you and your guests to kick back and enjoy the laid-back atmosphere.

**4. Coastal Escape:** Picture a light and airy space that brings the breezy feel of the beach indoors. A whitewashed fireplace, adorned with seashells and driftwood, creates a serene focal point. Soft, pastel furnishings and sheer curtains allow natural light to flood in, creating a bright and cheerful ambiance. This retreat is perfect for those who want to combine relaxation with a refreshing coastal vibe.

**5. Vintage Charm:** For those who adore nostalgia, consider a fireplace that showcases vintage flair. An ornate mantel adorned with antique knickknacks and framed photographs can transport you back in time. Plush, patterned upholstery and layered lighting with table lamps and sconces add warmth and character. This retreat embodies the beauty of history, making it a cherished gathering spot for family and friends.

As you draw inspiration from these examples, remember that your fireplace retreat should reflect your unique style and preferences. Incorporate elements that resonate with you, and don’t be afraid to mix and match ideas until you create a space that truly feels like home. Your cozy retreat awaits!

As we conclude our journey into transforming your home with a cozy and inviting fireplace retreat, we hope you feel inspired to create a space that embodies warmth and comfort. Whether you choose to invest in plush seating, soft lighting, or delightful decor, remember that the heart of this transformation lies in making the space uniquely yours. Embrace the joy of gathering with loved ones, sharing stories, or simply enjoying a quiet moment by the fire. With these tips, your fireplace can become a sanctuary that invites relaxation and connection. So gather your favorite blankets, light the fire, and let the magic of your new retreat envelop you and your guests in a warm embrace. Happy decorating!

How to choose the right outdoor furniture for your patio?

Transforming your patio into a cozy outdoor oasis is an inviting thought, especially as the warmer months approach.

The right outdoor furniture can turn a simple space into a stunning retreat, providing the perfect backdrop for lazy weekend afternoons, lively gatherings with friends, or serene evenings spent under the stars. But with an overwhelming variety of styles, materials, and functionalities available, how do you choose the perfect pieces that not only fit your aesthetic but also withstand the elements? In this comprehensive guide, we’ll explore essential tips and tricks for selecting outdoor furniture that harmonizes with your lifestyle and enhances your patio’s charm. From durable materials and space-saving designs to color palettes that elevate your outdoor experience, get ready to discover how to create the ultimate outdoor sanctuary tailored to your taste and needs.

1. Understanding Your Patio Space: Measurements and Layout

How to choose the right outdoor furniture for your patio?
Credit : whatcanu.com

When it comes to selecting the perfect outdoor furniture for your patio, the first step is to gain a comprehensive understanding of your space. This may seem straightforward, but meticulous measurements and thoughtful layout planning can make all the difference in creating an inviting and functional outdoor oasis.

Start by measuring the dimensions of your patio. Use a tape measure to determine the length and width, noting any unique architectural features such as columns, railings, or built-in planters that may affect your layout. Consider the height of any overhead structures like awnings or pergolas, as this will influence your choice of furniture—especially larger pieces. A cozy, intimate atmosphere can be achieved with lower-profile seating options that allow for an open and airy feel, while taller furniture may create a more dramatic, enclosed area.

Once you have your measurements, sketch a simple layout of the space. This visual representation will help you envision different configurations and how various pieces will complement one another. Consider flow and accessibility; ensure there’s enough room for people to move around comfortably without feeling cramped. Think about how you plan to use the space—whether it’s for entertaining guests, family meals, or simply relaxing with a book—and let that guide your furniture arrangement.

Next, take into account the orientation of your patio. Does it receive ample sunlight throughout the day, or is it shaded by trees or buildings? This will impact your choice of materials and colors, as well as the types of cushions and fabrics that will hold up against the elements. For sun-drenched spaces, opt for UV-resistant materials, while shaded areas may benefit from lighter colors that won’t fade as quickly.

By investing time in understanding your patio’s dimensions and layout, you’ll create a solid foundation for selecting outdoor furniture that not only fits your aesthetic but enhances the overall functionality of your outdoor space. With the right measurements and a well-thought-out plan, you can transform your patio into a stunning retreat that invites relaxation and enjoyment for years to come.

2. Defining Your Style: Traditional, Modern, or Eclectic?

Choosing the right style for your outdoor furniture is crucial in creating a cohesive and inviting atmosphere on your patio. The first step is to define your aesthetic preference, whether it leans towards traditional, modern, or eclectic. Each style has its own unique characteristics that can set the tone for your outdoor space.

**Traditional** outdoor furniture often features classic designs with ornate details, rich woods, and comfortable cushions. Think of timeless pieces that exude elegance, such as wrought iron chairs with intricate scrollwork or a sturdy wooden dining set with a warm finish. If you’re drawn to a traditional style, consider incorporating elements like patterned fabrics, decorative throw pillows, and vintage-inspired accessories. This approach creates a nostalgic charm that invites relaxation and conversation.

Alternatively, if you find yourself captivated by **modern** aesthetics, your patio can become a sleek and sophisticated oasis. Modern outdoor furniture emphasizes clean lines, minimalism, and functionality. Materials such as aluminum, teak, and synthetic wicker are popular choices, often paired with neutral color palettes or bold pops of color. Look for streamlined loungers, geometric coffee tables, and innovative designs that prioritize comfort without sacrificing style. A modern patio can be further enhanced with statement lighting and contemporary décor, turning your outdoor area into a chic retreat.

For those who embrace an **eclectic** mix, there are endless possibilities to explore. An eclectic style is all about personal expression, where you can blend various design elements, colors, and textures to create a unique outdoor experience. This may include a combination of vintage finds, DIY pieces, and modern furniture that reflects your personality. Feel free to play with patterns, layer different materials, and incorporate plants to add vibrancy and life to your space. An eclectic patio invites creativity and can evolve over time, allowing you to continually refresh your decor as new inspirations strike.

Ultimately, defining your style is about understanding what resonates with you and how you envision your outdoor oasis. Take the time to explore different styles, gather inspiration, and envision how each choice can transform your patio into a space that reflects your taste and lifestyle. With the right outdoor furniture, you’ll create an inviting environment that not only enhances your home’s aesthetic but also becomes a cherished gathering place for family and friends.

3. Choosing the Right Materials: Wood, Metal, or Synthetic?

How to choose the right outdoor furniture for your patio?
Credit : whatcanu.com

When it comes to selecting outdoor furniture, the choice of materials can make or break your patio experience. Each option—wood, metal, and synthetic—comes with its own set of advantages and considerations, making it essential to understand how they align with your lifestyle, aesthetic preferences, and local climate.

**Wood**, often regarded as the classic choice for outdoor furniture, brings natural beauty and warmth to your patio. Options like teak, cedar, and eucalyptus are not only visually appealing but also naturally resistant to decay and insects, making them suitable for outdoor use. However, wood requires regular maintenance to keep it looking its best. This might involve sanding, sealing, or staining to protect against the elements, particularly in areas with high moisture or intense sun. If you appreciate the timeless charm of wood and are prepared to invest a little effort into upkeep, this could be the ideal choice for you.

**Metal** furniture, on the other hand, offers a sleek and modern aesthetic that can complement various patio styles. Aluminum and wrought iron are popular choices, with aluminum being lightweight and resistant to rust, making it perfect for those who like to rearrange their outdoor spaces. Wrought iron, while heavier and more durable, can develop rust if not properly treated. Metal furniture often comes in a variety of colors and finishes, providing a versatile option that can easily adapt to your desired look. When considering metal, think about comfort; many metal pieces come with cushions that can enhance relaxation while also adding a pop of color.

Then we have **synthetic materials**, such as resin wicker or high-density polyethylene (HDPE), which have surged in popularity due to their durability and low maintenance. These materials are designed to withstand the elements without fading or cracking, making them an excellent choice for those who want outdoor furniture that looks great year-round with minimal effort. Synthetic options often mimic the appearance of natural materials, providing the visual appeal of wood or wicker without the associated upkeep. They are also available in a wide range of styles, colors, and textures, ensuring you can find the perfect match for your patio décor.

Ultimately, when choosing the right material for your outdoor furniture, consider your lifestyle, how much maintenance you’re willing to undertake, and the weather conditions in your area. By weighing the pros and cons of wood, metal, and synthetic options, you can make a more informed decision that will enhance your outdoor living space for years to come.

4. Comfort Matters: Selecting Cushions and Seating Options

When it comes to outdoor furniture, comfort should never be an afterthought. After all, the patio is often the heart of outdoor gatherings, a place where family and friends come together to relax, dine, and enjoy the fresh air. Selecting the right cushions and seating options is essential to creating a cozy and inviting atmosphere.

Start by considering the types of seating that will best suit your space and lifestyle. Whether you prefer a sleek modern bench, plush lounge chairs, or a sprawling sectional sofa, ensure that your choices align with how you plan to use your patio. For example, if you envision hosting lively summer barbecues, you might lean towards sturdy, spacious seating that can accommodate larger groups, while a more intimate setting may call for a pair of comfortable armchairs.

Once you’ve selected your seating framework, it’s time to focus on the cushions. Opt for high-quality, weather-resistant materials that can withstand the elements while providing optimal comfort. Look for cushions with thick foam padding that offers support without sacrificing softness. Additionally, consider the fabric’s UV resistance and ease of cleaning—after all, outdoor furniture often faces exposure to the sun, rain, and spills.

Color and pattern are also vital components of your comfort strategy. Choose cushion covers that not only complement your patio’s aesthetic but also evoke a sense of tranquility and relaxation. Soft hues like pastels or earthy tones can create a serene environment, while bold prints can add a touch of personality and vibrancy.

Finally, don’t overlook the importance of arrangement. Experiment with different layouts to find the most comfortable and functional setup. Don’t hesitate to add a few throw pillows or blankets to enhance coziness and invite relaxation. By prioritizing comfort in your selection of cushions and seating options, you’ll create an outdoor oasis that beckons you and your guests to unwind and enjoy every moment spent under the open sky.

5. Weather Resistance: What to Look for in Outdoor Furniture

How to choose the right outdoor furniture for your patio?
Credit : whatcanu.com

When it comes to selecting the perfect outdoor furniture for your patio, one of the most crucial factors to consider is weather resistance. Your patio furniture will be exposed to the elements—sunshine, rain, wind, and perhaps even snow—so investing in pieces that can withstand these conditions is essential to ensure longevity and maintain their aesthetic appeal.

First and foremost, look for materials specifically designed for outdoor use. Metals like aluminum and stainless steel are excellent choices due to their natural resistance to rust and corrosion. Aluminum is lightweight and easy to move, making it perfect for versatile patio spaces, while stainless steel offers a sleek, modern look that can elevate your outdoor decor.

If you prefer the warmth and charm of wood, opt for hardwoods such as teak, eucalyptus, or acacia. These woods are not only beautiful but also naturally resistant to moisture and decay, making them ideal for outdoor environments. To further enhance their durability, consider applying a sealant to protect against UV rays and prevent fading over time.

Fabrics are another vital component of outdoor furniture. Look for cushions and upholstery made from solution-dyed acrylic or polyester, which are designed to resist fading and mildew while maintaining comfort. These fabrics are often treated with water-repellent coatings, allowing them to dry quickly after rain showers and reducing the risk of mold and mildew growth.

Additionally, consider the construction and design of the furniture. Pieces that have a powder-coated finish or are woven with synthetic materials, like resin wicker, provide added protection against harsh weather conditions. Always check for reinforced seams and sturdy frames, which indicate quality craftsmanship and a commitment to durability.

Finally, don’t forget about maintenance! Even the most weather-resistant materials require some care to extend their lifespan. Regular cleaning, covering your furniture during extreme weather, and storing it in a sheltered area during the off-season can significantly reduce wear and tear.

By prioritizing weather resistance in your outdoor furniture selection, you’ll ensure that your patio remains an inviting and comfortable space for years to come, no matter what Mother Nature throws your way.

6. Functionality: Dining vs. Lounging Furniture

When selecting outdoor furniture for your patio, one of the most critical considerations is functionality. This boils down to understanding how you intend to use the space: will it primarily serve as a dining area for family gatherings and alfresco meals, or will it be a cozy retreat for lounging and relaxation? Each use case demands different types of furniture, and making the right choice will ensure that your outdoor space is both inviting and practical.

If you envision hosting lively dinner parties under the stars or enjoying leisurely Sunday brunches with friends, dining furniture is essential. Look for a sturdy dining table that can accommodate your guests comfortably, paired with matching chairs that offer both style and support. Consider materials that can withstand the elements, such as weather-resistant teak or powder-coated metal, to ensure durability. Extendable tables can also be a great option for those who love to entertain but may not always need a large setup.

On the other hand, if your goal is to create a serene oasis for lounging, prioritize comfort and relaxation. Cozy seating options like oversized sofas, chaise lounges, or even hammocks can transform your patio into a peaceful retreat. Look for cushions made from UV-resistant and water-repellent fabrics to withstand the outdoor conditions while providing comfort. Incorporating side tables or coffee tables can enhance the lounging experience, providing a convenient spot for drinks, books, or decorative items.

Ultimately, your choice between dining and lounging furniture—or a combination of both—will depend on your lifestyle and how you wish to engage with your outdoor space. By carefully considering functionality, you can create a patio that perfectly aligns with your needs, making it a cherished extension of your home for years to come.

7. Color Schemes: Coordinating with Your Home’s Exterior

How to choose the right outdoor furniture for your patio?
Credit : whatcanu.com

When it comes to selecting outdoor furniture for your patio, color schemes play a pivotal role in harmonizing your space with your home’s exterior. The right colors can enhance your outdoor experience, making your patio a seamless extension of your living area.

Start by assessing the existing color palette of your home. Is it a warm beige, a cool gray, or perhaps a vibrant blue? These hues can serve as your primary guide as you choose furniture that complements or contrasts beautifully. For instance, if you have a classic white house, consider opting for bold navy cushions or a rustic wood finish to create a striking contrast that adds depth and interest.

Additionally, think about the materials and textures of your furniture. Natural wood tones can add warmth and a cozy feel, while metal frames in sleek, modern colors can introduce a contemporary edge. Fabrics also play a significant role; outdoor cushions and upholstery in shades of green can echo the surrounding garden, while brighter colors can inject a sense of fun and vibrancy into your space, perfect for lively summer gatherings.

Don’t forget about seasonal changes! Consider how colors will appear in different lighting and through various seasons. For instance, earthy tones can look stunning in the fall, while brighter shades might shine in the summer sun. Ultimately, your outdoor furniture should reflect your personal style while creating a cohesive look that ties your entire patio to your home’s overall aesthetic. In this way, you’ll create an inviting outdoor oasis that feels just as comfortable and stylish as the interior of your home.

8. Maintenance and Care: Keeping Your Furniture in Top Shape

When it comes to outdoor furniture, maintenance and care are crucial for ensuring longevity and preserving the beauty of your investment. The elements can be harsh, and without proper attention, even the most durable materials can succumb to wear and tear. Start by understanding the specific needs of the materials used in your furniture—whether it’s wood, metal, wicker, or cushions, each has its own set of care requirements.

For wooden furniture, regular cleaning is essential. A gentle wash with mild soap and water can remove dirt and grime buildup. Additionally, consider applying a protective sealant annually to guard against moisture and UV damage. If your wood furniture starts to show signs of aging, a light sanding followed by a fresh coat of stain or paint can breathe new life into it.

Metal furniture, while often sturdy, can be susceptible to rust. To combat this, routinely check for any scratches or areas where the protective finish may have worn away. A simple touch-up with exterior paint can keep rust at bay. For aluminum pieces, a quick rinse with water will often suffice, but be sure to dry them thoroughly after rain.

Wicker furniture requires a bit more attention, especially if it’s made from natural materials. Regularly dust and vacuum to prevent dirt from accumulating in the weave. During the off-season, it’s wise to store wicker pieces indoors or use protective covers to shield them from moisture and UV rays.

Cushions can make your outdoor space inviting, but they also require proper care. Look for cushions made with fade-resistant and water-repellent fabrics. Regularly shake out and vacuum cushions to keep them looking fresh. For tougher stains, always check the manufacturer’s care instructions, as many outdoor fabrics can be cleaned with mild soap and water.

Finally, embrace the changing seasons by giving your furniture some extra love during transitions. Before winter, clean and cover your outdoor pieces to protect them from snow and ice. In spring, a thorough inspection and cleaning will ensure they’re ready for use. By prioritizing maintenance and care, you’ll not only extend the life of your outdoor furniture but also enjoy a beautiful and inviting patio for years to come.

9. Budgeting: How Much Should You Spend on Outdoor Furniture?

When it comes to selecting outdoor furniture, budgeting is a crucial aspect that can significantly impact your overall satisfaction and long-term enjoyment of your patio space. Understanding how much to spend requires a thoughtful evaluation of your needs, lifestyle, and the specific characteristics of your outdoor area.

First, consider the quality and durability of the materials. Outdoor furniture is exposed to the elements, so investing in high-quality pieces made from weather-resistant materials—such as teak, aluminum, or synthetic wicker—can save you money in the long run by reducing the need for replacements. A well-constructed dining set or lounge chair not only withstands the harsh sun and rain but also retains its aesthetic appeal for years to come.

Next, think about the purpose of your patio. Are you looking for a cozy space for intimate gatherings, or do you need a larger setup to accommodate family barbecues? Understanding how you plan to use your outdoor area will guide your purchasing decisions. For instance, a simple bistro set may suffice for a small balcony, while a full dining suite with ample seating might be necessary for a spacious deck.

Set a price range that reflects your priorities but also leaves room for flexibility. While it’s tempting to opt for the cheapest option available, remember that outdoor furniture is an investment in your home and lifestyle. Allocate a reasonable budget that balances quality and affordability—this may mean waiting a bit longer to save for that perfect fire pit or sectional sofa you have your eye on.

Finally, don’t forget to factor in additional costs such as cushions, maintenance products, and protective covers. These elements can enhance the comfort and longevity of your furniture, making your outdoor experience all the more enjoyable. By thoughtfully budgeting for your outdoor furniture, you can create a patio oasis that reflects your style and withstands the test of time, ensuring that it remains a beloved gathering spot for years to come.

10. Eco-Friendly Options: Sustainable Materials and Practices

As the demand for eco-conscious living continues to rise, choosing outdoor furniture that aligns with sustainable practices has never been more important. Eco-friendly options not only benefit the environment but also appeal to a growing demographic of consumers who prioritize sustainability in their purchasing decisions. When selecting outdoor furniture, consider pieces made from sustainable materials, such as reclaimed wood, recycled plastics, or bamboo.

Reclaimed wood, for instance, offers a unique aesthetic, rich with history and character while minimizing deforestation. Each piece is often a one-of-a-kind work of art, showcasing the natural beauty of the wood’s grain and color variations. Similarly, bamboo is a highly renewable resource that grows quickly and requires minimal water, making it an excellent choice for those looking to reduce their carbon footprint.

Recycled plastics, on the other hand, provide a durable and weather-resistant option that can withstand the elements without fading or deteriorating over time. These materials are often crafted from post-consumer waste, effectively diverting plastic from landfills while creating stylish, functional outdoor furniture.

In addition to the materials used, consider brands that implement sustainable practices in their manufacturing processes. Look for furniture produced with low-impact methods, such as water-based adhesives and finishes, and companies that prioritize ethical labor practices. By supporting these businesses, you contribute to a more sustainable economy while ensuring that your outdoor space reflects your values.

Choosing eco-friendly outdoor furniture not only enhances your patio’s aesthetic appeal but also allows you to enjoy your outdoor oasis with peace of mind, knowing you are making a positive impact on the planet. So, as you curate your perfect patio, let sustainability guide your choices, creating a space where nature and modern design harmoniously coexist.

11. Accessorizing Your Patio: Umbrellas, Rugs, and Decor

Accessorizing your patio is a delightful way to transform your outdoor space into a cozy oasis that reflects your personal style. While selecting the right furniture is crucial, the finishing touches are what truly elevate the ambiance and functionality of your patio. Think of your patio as an extension of your living room; it deserves just as much attention to detail.

Start with umbrellas, which not only provide essential shade on sunny days but also add a splash of color and style to your outdoor setting. Choose a design that complements your furniture—whether it’s a sleek, modern cantilever umbrella or a classic market umbrella. Ensure that the fabric is durable and UV-resistant to withstand the elements while keeping your space cool and comfortable.

Next, consider incorporating outdoor rugs to define your seating area and add warmth underfoot. Outdoor rugs are specially designed to resist fading, mold, and mildew, making them ideal for patios. A well-chosen rug can tie your furniture together, create a sense of cohesion, and enhance the overall aesthetic of your space. Look for patterns and colors that resonate with your decor theme—whether it’s a bold geometric print or a soft, natural texture.

Finally, add decorative elements that showcase your personality and invite warmth into your outdoor sanctuary. Think about incorporating potted plants, lanterns, or decorative pillows in vibrant hues and textures. These touches can bring life to your patio, making it a welcoming spot for relaxation or entertaining guests. Don’t forget to consider the lighting—string lights or solar-powered lanterns can create a magical ambiance as the sun sets, allowing you to enjoy your patio well into the evening.

By thoughtfully accessorizing your patio with umbrellas, rugs, and decor, you’ll create a beautiful, functional outdoor space that feels just as inviting as your indoor living areas. Each element you choose should not only enhance the aesthetic appeal but also contribute to a comfortable and enjoyable outdoor experience.

12. Seasonal Considerations: Choosing Furniture for Year-Round Use

When selecting outdoor furniture for your patio, it’s essential to consider the changing seasons and how your choices will stand up to the elements throughout the year. The ideal patio furniture should not only be stylish and comfortable but also durable enough to withstand varying weather conditions.

In summer, you’ll want furniture that invites relaxation and encourages outdoor gatherings, such as lightweight aluminum or wicker pieces that are easy to rearrange. Opt for cushions made from fade-resistant fabrics that can handle the sun’s harsh rays without losing their vibrancy. Look for tables with sturdy surfaces that can hold up to your favorite summer BBQs, and consider adding a large umbrella or a pergola to provide shade for those hot afternoons.

As fall approaches, think about incorporating materials that blend seamlessly with the changing landscape. Warm woods and earth-toned fabrics can create a cozy atmosphere, perfect for enjoying the crisp air. This is also a great time to invest in fire pits or outdoor heaters, allowing you to extend your patio season well into the cooler months.

Winter presents a unique challenge, especially in regions prone to snow and ice. If you live in a place where winters are harsh, consider furniture specifically designed for cold weather. For instance, metal and high-density polyethylene (HDPE) furniture are excellent choices as they resist rust and damage from freezing temperatures. Investing in high-quality protective covers can also keep your furniture safe from the elements, reducing wear and tear.

With spring comes the opportunity to refresh and rejuvenate your outdoor space. Look for lightweight, weather-resistant options that can easily be moved to accommodate blossoming flowers and new plant arrangements. This is also the perfect time to introduce colorful accents or seasonal decorations that can be swapped out to keep your patio looking fresh and inviting.

By thoughtfully considering seasonal factors when choosing your outdoor furniture, you’ll not only enhance the functionality of your patio but also create a beautiful space that you can enjoy year-round. Embrace the changing seasons with adaptable and durable pieces that allow you to make the most of your outdoor living area, no matter the weather.

13. DIY vs. Store-Bought: Pros and Cons of Each Option

When it comes to furnishing your patio, the choice between DIY and store-bought outdoor furniture presents a fascinating dilemma. Both avenues have their unique advantages and drawbacks, and understanding these can help you make the best decision for your space, budget, and lifestyle.

**DIY Outdoor Furniture: The Creative Path**

Embarking on a DIY project can be an exciting way to inject your personal style into your outdoor area. One of the most significant advantages of crafting your furniture is the opportunity for customization. You can choose the materials, colors, and designs that perfectly match your vision. Whether it’s a rustic wooden table, a cozy pallet sofa, or chic concrete planters, the creative possibilities are endless. Additionally, building your own pieces can often be more economical, especially if you have access to tools and inexpensive materials.

However, the DIY route isn’t without its challenges. It requires time, skill, and sometimes trial and error. For those who aren’t particularly handy, the prospect of building furniture from scratch may feel daunting. Furthermore, ensuring durability and weather-resistance can be tricky, as not all materials are suitable for the outdoors. You’ll need to invest time in research and possibly extra effort in maintaining your creations.

**Store-Bought Outdoor Furniture: The Convenience Factor**

On the flip side, opting for store-bought outdoor furniture provides immediate gratification and convenience. With countless styles available, from sleek modern designs to charming vintage-inspired pieces, you’re sure to find something that fits your aesthetic. Shopping at local stores or online retailers allows you to see and feel the materials before making a purchase, ensuring quality and comfort.

The main advantage of store-bought furniture is its time-saving nature. You can have a beautifully furnished patio without the hassle of construction and finishing touches. Many retailers also offer warranties, giving you peace of mind regarding the durability of your investment.

However, the downside may lie in the lack of personalization. While you can find many appealing designs, you might struggle to find something that perfectly fits your unique taste or specific measurements. Additionally, store-bought items can sometimes come with a hefty price tag, especially when looking at high-quality or designer options.

**Finding the Right Balance**

Ultimately, the decision between DIY and store-bought outdoor furniture should align with your personal preferences, skills, and needs. If you thrive on creativity and have the time to dedicate, a DIY project could result in a one-of-a-kind outdoor oasis that reflects your style. Conversely, if convenience and quality are your priorities, exploring the vast array of store-bought options might be the better choice. Whichever path you choose, your patio will undoubtedly become a cherished space for relaxation and entertainment.

14. Where to Shop: Best Places to Find Quality Outdoor Furniture

When it comes to selecting quality outdoor furniture for your patio, knowing where to shop can make all the difference. The marketplace is filled with options, from local boutiques to sprawling online retailers, each offering unique styles and materials that cater to various tastes and budgets. Here are some of the best places to find outdoor furniture that not only meets your aesthetic desires but also ensures durability and comfort.

**1. Specialty Outdoor Furniture Stores**
These stores are dedicated solely to outdoor living, providing an extensive range of options from various brands. You can find everything from classic teak loungers to modern aluminum dining sets. The advantage of shopping at specialty stores is the knowledgeable staff who can guide you through the selection process, helping you choose pieces that will withstand the elements while complementing your outdoor space.

**2. Home Improvement Centers**
Retail giants like Home Depot or Lowe’s often carry a wide array of outdoor furniture, from budget-friendly options to higher-end pieces. These centers frequently showcase seasonal collections and clearance sales, making it an excellent place to score a deal. Plus, you can see some of the furniture in person, allowing you to evaluate the quality firsthand.

**3. Online Retailers**
Websites like Wayfair, Amazon, and Overstock provide an expansive selection of outdoor furniture, often at competitive prices. Shopping online allows you to compare styles and prices easily, read customer reviews, and find inspiration through curated collections. Be sure to check the return policy and warranty information before purchasing to ensure you’re covered if the furniture doesn’t meet your expectations.

**4. Local Craft Fairs and Farmers Markets**
For those seeking unique, handcrafted pieces, local craft fairs and farmers markets can be gold mines. Artisans often sell custom outdoor furniture, allowing you to find one-of-a-kind items that truly reflect your style. You can also support local businesses and potentially negotiate prices directly with the makers.

**5. Thrift Stores and Estate Sales**
If you’re on a budget or enjoy the thrill of treasure hunting, thrift stores and estate sales can yield fantastic finds. With a little creativity, you can refurbish or upcycle older pieces into stunning outdoor furniture that has character and charm. Just be sure to check for structural integrity and weather-resistance before making a purchase.

**6. Showrooms**
Visiting a showroom can be an eye-opening experience. Showrooms allow you to see the furniture up close, test how comfortable it is, and envision how it will look in your space. Many brands also offer outdoor collections in their showrooms, so you can explore various styles and receive professional advice on layout and design.

By exploring these diverse shopping avenues, you’ll be well-equipped to find high-quality outdoor furniture that suits your style and enhances your patio. Remember, investing in durable and aesthetically pleasing pieces will create an inviting outdoor oasis that you and your guests will enjoy for years to come. Happy shopping!

15. Tips for Arranging Your Outdoor Space for Maximum Enjoyment

Arranging your outdoor space thoughtfully can transform your patio into a serene sanctuary or a lively gathering spot, maximizing enjoyment for you and your guests. The first step in this process is to consider the purpose of your patio. Will it be a tranquil retreat for morning coffees, a cozy area for evening conversations, or a vibrant space for entertaining friends? Defining the primary function of your outdoor area will guide your arrangement choices.

Start by selecting a focal point that draws the eye and sets the tone for your space. This could be a stunning dining table, a stylish fire pit, or even a beautiful garden feature. Once you have your focal point, arrange your furniture around it to create a natural flow. For dining areas, ensure there’s adequate space for chairs to pull out comfortably, keeping pathways clear for easy movement. If relaxation is your goal, consider grouping seating in a way that encourages conversation, such as placing chairs and loveseats in a circular or semi-circular arrangement.

Don’t forget about the importance of balance and scale in your outdoor layout. Opt for a mix of larger pieces, like a sectional sofa or dining table, with smaller accents like side tables or poufs. This combination not only enhances visual interest but also ensures that the space feels inviting rather than overcrowded. Additionally, layering different textures and materials, such as woven furniture paired with metal accents or soft cushions, can create a warm and inviting atmosphere.

Lighting plays a crucial role in setting the mood for your outdoor space, especially for evening use. Incorporate a mix of ambient lighting, such as string lights or lanterns, along with task lighting like table lamps or wall-mounted fixtures. This will not only illuminate your patio but also enhance its aesthetic appeal and extend the usability of your outdoor space into the night.

Finally, consider incorporating greenery and plants to add a touch of nature and vibrancy to your arrangement. Strategically placing potted plants or hanging baskets can soften hard edges and create a lush, inviting environment. By thoughtfully arranging your outdoor furniture and adding personal touches, you can create a delightful space that invites relaxation, fosters connection, and enhances your overall enjoyment of the great outdoors.

As we wrap up our ultimate guide to choosing the perfect outdoor furniture for your patio, we hope you feel inspired and equipped to create a beautiful and functional outdoor space that reflects your personal style. Selecting the right furniture is about more than just aesthetics; it’s about enhancing your outdoor living experience, whether you’re hosting lively gatherings or enjoying peaceful moments alone. With our tips in hand, you can confidently explore materials, styles, and layouts that will not only withstand the elements but also elevate your patio to a welcoming oasis. Embrace the joy of outdoor living, and don’t hesitate to share your design journey with us—we’d love to see how you bring your patio dreams to life!

How to build a simple outdoor fire pit?

Imagine gathering with family and friends under a starlit sky, the warm glow of a crackling fire providing both light and comfort as you share stories and laughter.

An outdoor fire pit not only enhances your backyard but also creates the perfect atmosphere for memorable evenings. Building your own fire pit can seem like a daunting task, but it doesn’t have to be! With just a few essential materials and a bit of creativity, you can create a cozy gathering spot that adds charm to your outdoor space. In this blog post, we’ll guide you through five easy steps to construct a simple yet stylish fire pit that will transform your backyard into an inviting oasis. Whether you’re roasting marshmallows or simply enjoying the warmth of the flames, this DIY project is sure to ignite your passion for outdoor living!

1. Introduction: Why Build Your Own Fire Pit?

How to build a simple outdoor fire pit?
Credit : whatcanu.com

### 1. Introduction: Why Build Your Own Fire Pit?

Imagine a warm evening under the starlit sky, the crackling sound of firewood, and the comforting glow of flames illuminating the faces of friends and family gathered around. An outdoor fire pit serves as more than just a source of heat; it becomes the heart of your backyard, a place where memories are forged, stories are shared, and laughter resonates long into the night. Building your own fire pit not only enhances your outdoor space but also offers numerous advantages that make it a worthwhile DIY project.

First and foremost, crafting your own fire pit allows you to customize it to fit your personal style and the aesthetic of your yard. Whether you envision a rustic stone circle, a modern metal design, or a classic brick structure, the possibilities are endless. This personalization not only adds charm to your outdoor area but also ensures that your fire pit complements your home’s architecture.

In addition to aesthetic benefits, constructing your own fire pit can save you a significant amount of money compared to purchasing a pre-made unit. With some basic materials and tools, you can create a functional and attractive fire pit that meets your needs without breaking the bank. Plus, there’s an undeniable satisfaction that comes from building something with your own hands—a sense of pride and accomplishment knowing that you created a space for cherished gatherings.

Furthermore, a DIY fire pit can serve as a catalyst for community and connection. It encourages outdoor living and provides the perfect backdrop for family barbecues, parties with friends, or quiet evenings spent with a favorite book and a cup of tea. By building your own fire pit, you’re not just investing in a feature for your yard; you’re creating an invitation for connection and relaxation.

In this blog post, we’ll take you through five easy steps to build your own simple outdoor fire pit. Whether you’re a seasoned DIY enthusiast or a beginner looking to dip your toes into home improvement, you’ll find that this project is both accessible and rewarding. So gather your materials, roll up your sleeves, and let’s get started on creating the perfect gathering spot for those unforgettable evenings around the fire!

2. Step 1: Choosing the Right Location

Choosing the right location for your outdoor fire pit is a crucial first step that sets the foundation for safe and enjoyable gatherings with family and friends. When selecting a spot, consider the layout of your yard, existing structures, and natural elements. Aim for a flat, even surface that’s away from overhanging branches, fences, or any flammable materials. A distance of at least 10 to 20 feet from your home and other structures is ideal to prevent the risk of sparks igniting anything nearby.

Take a moment to envision how you plan to use your fire pit. Do you want it nestled within a cozy seating area, surrounded by comfortable chairs and blankets for chilly evenings? Or perhaps you envision a more open space where guests can gather under the stars? Whichever setting you prefer, ensure it’s easily accessible for guests while also offering some level of privacy from neighbors.

Consider the prevailing wind direction as well. Positioning your fire pit in a way that the smoke drifts away from your seating area will enhance your comfort and enjoyment. Also, think about how the fire pit will look in relation to your garden or patio. A well-placed fire pit can become a stunning focal point, adding both charm and functionality to your outdoor space.

Lastly, check local regulations regarding fire pits, as some areas may have restrictions on where they can be placed or require certain safety measures. By thoughtfully choosing the right location, you’ll create a safe and inviting atmosphere that encourages countless memorable evenings spent around the warmth of your new fire pit.

3. Step 2: Gathering Your Materials

How to build a simple outdoor fire pit?
Credit : whatcanu.com

Gathering your materials is a crucial step in building your own outdoor fire pit, as it lays the foundation for a safe and enjoyable gathering space in your backyard. Before you head out to the hardware store, take a moment to consider the design and size of your fire pit. Are you envisioning a compact circular pit for intimate gatherings, or a larger square fire feature for bigger parties? This decision will influence the quantity and type of materials you’ll need.

Here’s a basic list to get you started:

1. **Fire Pit Ring**: You can choose from a variety of materials such as bricks, stones, or concrete blocks. These not only form the structure of your pit but also provide durability against heat. If you want a more polished look, consider purchasing a steel fire pit ring.

2. **Gravel or Sand**: This will serve as the foundation for your fire pit. A layer of gravel or sand helps with drainage and prevents moisture from accumulating at the bottom, which can impact the longevity of your fire pit.

3. **Firewood**: Depending on your pit’s design, you’ll need firewood or charcoal for fuel. Choose seasoned hardwoods like oak or maple for a longer burn time and less smoke.

4. **Outdoor Seating**: While not part of the fire pit itself, comfortable seating is essential for creating a welcoming atmosphere. Think about benches, adirondack chairs, or even a rustic log seating arrangement to complement your outdoor space.

5. **Safety Gear**: Don’t forget to equip yourself with safety gear! A sturdy pair of gloves, a shovel, and a bucket of water or a fire extinguisher are essential to ensure you’re prepared for any situation.

Once you have everything you need, you’ll be ready to move on to the next step of constructing your fire pit. With the right materials in hand, you can create a cozy and inviting outdoor space that will be the highlight of your backyard gatherings.

4. Step 3: Designing Your Fire Pit

Designing your fire pit is where the creative magic happens, allowing you to personalize your outdoor space while ensuring functionality and safety. Before diving into the construction phase, take a moment to visualize how your fire pit will fit into your yard’s overall aesthetic and layout. Consider the size and shape that best suits your needs—whether you prefer a cozy circular design for intimate gatherings or a square configuration for larger groups.

The materials you choose will play a significant role in the appearance and durability of your fire pit. If you’re going for a rustic look, natural stone or brick can blend beautifully with the surrounding landscape. Alternatively, sleek metal designs can bring a modern vibe to your outdoor area. Don’t forget to think about seating arrangements; integrating built-in benches or surrounding the fire pit with comfortable chairs can create an inviting atmosphere.

Next, think about the height of your fire pit. A raised design can help contain the flames and make it easier to cook over, while a lower pit can foster a more intimate setting. You might also want to incorporate decorative elements like colored glass stones, which can add a pop of color and enhance the flickering glow of the fire.

Be sure to consider safety features as well, such as a spark screen or a fire pit ring, which can keep the flames contained and minimize the risk of embers escaping. Lastly, sketch out your design, noting dimensions and materials, to ensure you have a clear blueprint to follow when it’s time to build. With a thoughtful design in place, you’ll be one step closer to crafting the perfect gathering spot for unforgettable evenings under the stars.

5. Step 4: Preparing the Site

How to build a simple outdoor fire pit?
Credit : whatcanu.com

### Step 4: Preparing the Site

Now that you’ve gathered your materials and outlined where your fire pit will sit, it’s time to prepare the site for your backyard bonfire haven. This crucial step ensures that your fire pit is not only functional but also safe and aesthetically pleasing.

Begin by clearing the chosen area of any debris, grass, and rocks. Use a shovel to remove the top layer of soil, creating a level surface that is at least a few feet wider than the fire pit itself. This extra space allows for a buffer zone, which is essential for safety and helps prevent any stray embers from igniting nearby vegetation.

Next, consider the proximity of your fire pit to structures, trees, or anything flammable. Ideally, it should be located at least 10 to 15 feet away from any structures or overhanging branches. This distance minimizes risk and ensures that you can enjoy your fire without worry.

After you’ve established a clear and safe area, it’s time to lay down a foundation. Use gravel or sand to create a stable base. Spread a layer about 2 to 3 inches deep, leveling it out to provide an even surface. This foundation will not only help with drainage but also prevent weeds from growing around your fire pit, maintaining a clean look.

Finally, mark the perimeter of your fire pit with stakes and string, or simply use a garden hose to create a circular outline. This visual guide will help you when it’s time to set your stones or bricks in place, ensuring that your fire pit has a uniform shape and inviting appearance.

With the site prepared, you’re one step closer to creating your cozy outdoor retreat. In the next step, you’ll learn how to assemble your fire pit and bring your vision to life!

6. Step 5: Constructing the Fire Pit

### Step 5: Constructing the Fire Pit

Now that you’ve prepared your space and gathered your materials, it’s time for the most exciting part: constructing your fire pit! This step is where your vision transforms into reality, and you’ll soon have a cozy spot to gather around on chilly evenings.

**Start with the Base:** Begin by laying a sturdy foundation. If you opted for a stone or brick fire pit, arrange the first layer of bricks or stones in a circle, ensuring they are level and stable. This will be the base of your fire pit, so take your time to ensure everything is aligned properly. A well-laid foundation will provide durability and safety for your fire pit.

**Build Upward:** Once your base is secure, continue stacking additional layers of bricks or stones. Depending on the height you desire, you can build your fire pit anywhere from two to four layers tall. As you stack, use a masonry adhesive between layers to prevent shifting and ensure a secure hold. For added flair, consider alternating the brick pattern to create a more visually appealing design.

**Create a Fire Ring:** To enhance safety, line the inside of your fire pit with fire-resistant materials. This can be done with fire bricks or a metal fire ring. These materials not only provide additional protection to the surrounding area, but they also help to contain the fire and radiate heat more effectively.

**Finishing Touches:** After constructing the main structure, take a step back and assess your work. You can customize your fire pit further by adding decorative stones, pebbles, or even a seating area around it. If you like, incorporate features such as benches or log seating to make your fire pit the perfect gathering spot for friends and family.

**Prepare for the Fire:** Finally, once all the construction is complete, clear out any debris from the inside of the fire pit. You can create a small bed of sand or gravel at the bottom to improve drainage and provide an even surface for your fire. Now, you’re ready to light your first fire and enjoy the warmth and ambiance of your new outdoor oasis!

With your fire pit constructed, you’ve not only added a functional feature to your backyard but also created a charming centerpiece for gatherings, storytelling, and s’mores-making adventures under the stars. Enjoy the cozy evenings ahead!

7. Safety Precautions to Consider

How to build a simple outdoor fire pit?
Credit : whatcanu.com

When it comes to building your own outdoor fire pit, safety should always take precedence. A cozy fire is a wonderful addition to your backyard, but ensuring that it’s safe for you, your family, and your property is essential. Here are some crucial safety precautions to consider before you light your first flame.

**1. Choose the Right Location:** Before you begin construction, select a location that is a safe distance from any structures, trees, or overhanging branches. A minimum of 10 to 15 feet away from your home, fences, and other flammable materials is ideal. Opt for a flat, stable surface to prevent any potential accidents.

**2. Use Fire-Resistant Materials:** Whether you’re using bricks, stones, or metal, make sure to select fire-resistant materials specifically designed for high temperatures. Avoid using treated wood, as it can release harmful chemicals when burned.

**3. Have a Fire Extinguisher Handy:** Always keep a fire extinguisher nearby or a bucket of sand or water to extinguish any flames quickly if they get out of hand. Familiarize yourself with how to use it before you start your fire.

**4. Monitor Wind Conditions:** Wind can quickly turn a small, contained fire into a larger, uncontrollable blaze. On windy days, consider postponing your fire pit gatherings to avoid potential hazards. Always check the weather forecast before lighting up.

**5. Supervise the Fire:** Never leave your fire unattended, especially if children or pets are around. Maintain a safe circle around the fire pit and educate your family about the importance of keeping a safe distance. When you’re finished enjoying the fire, make sure to completely extinguish it before leaving the area.

By taking these essential safety precautions, you can enjoy the warmth and ambiance of your DIY fire pit without worry. Remember, a little preparation goes a long way in ensuring a safe and enjoyable experience for everyone. Happy building!

8. Tips for Fire Pit Maintenance

Once you’ve constructed your outdoor fire pit, it’s essential to keep it in good condition to ensure safe and enjoyable use for years to come. Regular maintenance not only enhances the longevity of your fire pit but also keeps it looking great in your backyard.

**1. Clean Regularly:** After each use, make it a habit to clean your fire pit. Remove ashes and leftover debris using a metal shovel or a vacuum designed for ashes. Allowing ashes to accumulate can lead to rusting or damage, especially in metal fire pits. A clean fire pit also promotes better airflow for future fires.

**2. Check for Damage:** Regularly inspect your fire pit for any signs of wear and tear. Look for cracks, rust, or loose stones, especially after heavy use or inclement weather. Addressing these issues promptly can prevent more extensive damage down the line. For stone or brick fire pits, ensure that the mortar is intact and repair any gaps that appear.

**3. Protect from the Elements:** If your fire pit is made of metal, consider using a cover when it’s not in use. This will protect it from rain, snow, and harsh sun, which can lead to rust or fading. For stone or brick fire pits, a cover can help keep out debris and prevent moisture buildup, which can freeze and crack the structure.

**4. Use the Right Fuel:** To prolong the life of your fire pit, be mindful of the materials you burn. Avoid using treated wood, plastics, or other materials that can create harmful smoke and residue. Instead, opt for seasoned hardwoods, which burn cleaner and produce less ash.

**5. Seasonal Maintenance:** At the end of each season, conduct a thorough inspection and cleaning. This is an ideal time to perform any necessary repairs, apply sealants if needed, and prepare your fire pit for winter. If you live in an area with heavy snowfall, consider covering the pit or storing removable components indoors to protect them from freezing temperatures.

By following these maintenance tips, your outdoor fire pit will remain a cozy gathering spot for friends and family, allowing you to create lasting memories around the warmth of the fire. Enjoy your DIY delight and the comfort it brings to your outdoor space!

9. Enhancing Your Fire Pit Area with Seating

Once you’ve constructed your outdoor fire pit, it’s time to elevate the experience by creating a comfortable and inviting seating area. After all, what’s a cozy fire without a perfect spot to relax and enjoy it? Here are some tips to enhance your fire pit area with seating that complements your newly built centerpiece.

**Choose the Right Seating:** Consider the number of guests you typically host around your fire pit and select seating that accommodates them without feeling cramped. Options range from rustic wooden benches and Adirondack chairs to chic, modern outdoor sofas. Ensure that your seating is durable and weather-resistant to withstand the elements, or choose cushions that can be easily stored away when not in use.

**Create a Circular Arrangement:** For optimal interaction and ambiance, arrange your seating in a circular or semi-circular pattern around the fire pit. This setup allows everyone to enjoy the warmth of the fire while fostering conversation and connection. To enhance the visual appeal, consider using different heights and styles of seating for added interest.

**Incorporate Soft Textiles:** To make your seating area cozier, add outdoor cushions and throw blankets. Not only do they provide extra comfort, but they also allow you to infuse color and personality into your space. Choose fabrics that are fade-resistant and easy to clean, ensuring they remain vibrant throughout the seasons.

**Add Ambient Lighting:** To set the mood for those evening gatherings, think about incorporating soft ambient lighting. String lights draped overhead, lanterns placed strategically, or even solar-powered garden lights can create a magical atmosphere. Lighting not only enhances safety but also adds charm to your fire pit area after the sun sets.

**Personalize with Accessories:** Lastly, make the space your own by incorporating personal touches. Think about adding a small side table for snacks and drinks, decorative elements like outdoor rugs, or even a small firewood holder to keep your supplies within reach. Potted plants or flower arrangements can also soften the area and integrate it beautifully into your garden or patio landscape.

By thoughtfully designing your seating area around the fire pit, you create an inviting outdoor retreat that encourages relaxation, storytelling, and cherished moments with family and friends. Your fire pit will not only be a source of warmth but a gathering place where memories are made under the stars.

10. Adding Lighting for Ambiance

Adding lighting for ambiance is the finishing touch that transforms your outdoor fire pit area into a magical retreat, perfect for gatherings under the stars or cozy evenings spent with loved ones. After all, a fire pit isn’t just about the warmth; it’s about creating an inviting atmosphere that encourages conversation and relaxation.

Begin by considering the various lighting options that complement your fire pit. String lights are a popular choice, draping gracefully overhead to cast a warm, twinkling glow across your space. They can be easily hung from nearby trees, a pergola, or even simple posts anchored in the ground. Choose warm white or soft yellow bulbs to harmonize with the flickering flames of your fire pit.

For a more grounded approach, consider installing solar-powered path lights or lanterns around the perimeter of your seating area. These not only illuminate the ground for safety but also add a charming, rustic feel to your outdoor setup. Opt for designs that reflect your personal style—whether that’s sleek and modern or whimsical and vintage.

If you’re feeling a bit more adventurous, incorporate LED color-changing lights that can be adjusted to match the mood of the evening. Imagine transitioning from a soft blue glow for a calm, serene night to vibrant reds and oranges that mirror the fire’s own hues during a lively gathering.

Don’t forget to layer your lighting. Combine different sources—like wall sconces, recessed lighting, or even candles placed strategically around your fire pit—to create depth and a sense of intimacy. Remember, the goal is to enhance the natural beauty of your outdoor space, not overpower it.

With the perfect lighting, your fire pit area will not only serve as a functional feature but also as a stunning focal point that beckons friends and family to gather, share stories, and create lasting memories under the night sky. So, grab your tools and get creative—your outdoor oasis awaits!

11. Fun Fire Pit Activities and Recipes

Once your outdoor fire pit is complete, the real fun begins! A fire pit serves not only as a cozy gathering place but also as the perfect backdrop for a variety of engaging activities and delicious culinary adventures. Here are some enjoyable fire pit activities and mouthwatering recipes to elevate your outdoor experience.

**1. S’mores Galore:** No fire pit gathering is complete without the classic s’mores! Gather graham crackers, marshmallows, and chocolate bars, and let your guests roast marshmallows to golden perfection. You can even get creative by introducing flavored marshmallows or adding slices of fruit like strawberries or bananas for a twist on the traditional recipe.

**2. Campfire Stories:** As the flames flicker and crackle, encourage everyone to share their favorite campfire stories or ghost tales. This is a wonderful way to bond with family and friends, creating lasting memories around the warmth of the fire. You might even want to designate a “storyteller” for the night, complete with a cozy blanket and a comfy seat by the fire.

**3. Fire Pit Cooking:** Embrace the culinary possibilities that a fire pit offers. Skewers of marinated vegetables, chicken, or beef can be grilled over the open flame. Alternatively, try your hand at cooking a pizza on a cast-iron skillet or even wrapping dough around a stick to create delicious bread rolls. The aroma of freshly cooked food mingling with the scent of burning wood is simply irresistible!

**4. Stargazing:** After indulging in tasty treats, take advantage of the night sky. Lay out some blankets, snuggle up, and gaze at the stars. This is an excellent opportunity to teach kids about constellations or simply enjoy the peaceful ambiance. Enhancing your fire pit area with comfortable seating and soft lighting can create an inviting atmosphere for stargazing.

**5. Fire Pit Games:** Keep the fun going with some light-hearted games. Classic options like charades or card games are always a hit. You can even invent your own fire pit trivia game, where everyone takes turns asking questions about pop culture, history, or shared memories. This interactive element adds a lively spirit to your gathering and ensures everyone is engaged and having a blast.

With these activities and recipes, your outdoor fire pit will become the heart of your gatherings, bringing friends and family together for unforgettable evenings filled with laughter, warmth, and delicious food. So gather your supplies, ignite that fire, and prepare for an evening of fun and connection under the stars!

12. Conclusion: Enjoying Your DIY Fire Pit

Congratulations! By following our simple steps, you’ve transformed your backyard into a cozy haven with your very own DIY outdoor fire pit. Now that you’ve put in the effort to build this inviting centerpiece, it’s time to fully embrace the joy and warmth it brings.

Imagine gathering around the flickering flames with family and friends, the soft glow illuminating their faces as laughter fills the air. Your fire pit becomes more than just a structure; it’s a gathering place where stories are shared, s’mores are toasted, and memories are made. As the sun sets and the stars begin to twinkle overhead, the crackling fire invites you to slow down and savor the moment.

To enhance the experience, consider adding some comfortable seating around your fire pit—think cozy chairs, cushions, or even a rustic log bench. String lights overhead can create a magical ambiance, while blankets nearby ensure warmth on cooler nights. Don’t forget to stock up on firewood or your favorite fire pit fuel, along with some roasting sticks for marshmallows or hot dogs.

As you enjoy your new outdoor sanctuary, remember to prioritize safety. Keep a bucket of water or a fire extinguisher nearby, and always supervise children and pets around the fire. With safety measures in place, you can relax and take in the beauty of your handiwork.

Your DIY fire pit is not just a source of heat; it’s a place of connection and relaxation. So grab a drink, gather your loved ones, and let the flames dance as you celebrate your accomplishment. Here’s to many warm evenings spent around your fire pit, creating cherished memories for years to come!

13. Resources for Further Reading

### Resources for Further Reading

Building your own outdoor fire pit is not only a rewarding DIY project but also an opportunity to enhance your outdoor living space. If you’re eager to delve deeper into the world of fire pits, there are numerous resources available that can provide you with guidance, inspiration, and practical tips. Here are some excellent materials to help you expand your knowledge and ensure your fire pit project is a roaring success:

1. **Books**: Consider picking up a copy of “The Complete Guide to Building Your Own Outdoor Fire Pit” by D. M. Smith. This book offers step-by-step instructions tailored for beginners, complete with diagrams and safety tips. Another great read is “The Backyard Fire Pit Book” by Jamie McDonald, which explores various fire pit designs and the materials needed for each.

2. **Online Guides and Tutorials**: Websites like DIY Network and Home Depot feature extensive tutorials on building fire pits, complete with video demonstrations. These resources often include material lists, budgeting tips, and maintenance advice that can be invaluable as you embark on your project.

3. **YouTube Channels**: For those who prefer visual learning, YouTube is a treasure trove of DIY fire pit videos. Channels like “Home Repair Tutor” and “Fix This Build That” showcase real-time builds and offer practical advice from experienced DIYers. Watching these videos can provide you with a clearer understanding of the process and potential challenges.

4. **Local Workshops**: Many home improvement stores or community centers offer workshops on outdoor projects, including fire pits. Participating in one of these hands-on sessions can give you direct access to expert advice, and you may even meet fellow DIY enthusiasts to share tips and ideas.

5. **Online Forums and Communities**: Websites like Reddit or specialized DIY forums can connect you with a community of fellow DIYers. You can ask questions, share your progress, and gain insights from those who have successfully built their own fire pits.

With these resources at your fingertips, you’ll not only feel more confident in your ability to create a beautiful outdoor fire pit but also foster a deeper appreciation for the craft of DIY. So gather your materials, arm yourself with knowledge, and get ready to enjoy cozy evenings by the fire!

14. Share Your DIY Fire Pit Experience!

After you’ve completed your outdoor fire pit project, the fun doesn’t have to stop there—it’s time to share your DIY experience with others! Documenting and sharing your journey not only celebrates your hard work but also inspires fellow DIY enthusiasts and outdoor lovers. Start by snapping some high-quality photos of your finished fire pit from various angles, capturing the warmth and ambiance it brings to your backyard.

Consider creating a blog post detailing your step-by-step process, including the challenges you faced, the materials you used, and any helpful tips you discovered along the way. Sharing your personal insights can provide valuable guidance to others who are looking to embark on a similar project.

Social media is another fantastic platform for sharing your experience. Post your photos, along with a short description of your project, using hashtags like #DIYFirePit or #OutdoorLiving to reach a broader audience. Engage with your followers by asking for their thoughts or their own DIY stories.

If you’re part of any local or online DIY communities, don’t hesitate to share your fire pit project there as well. Many DIY enthusiasts love to see what others are creating, and your experience could spark new ideas for someone else’s project.

Lastly, consider hosting a gathering around your new fire pit. Invite friends and family over for a cozy evening of storytelling, marshmallow roasting, and laughter. This not only allows you to showcase your creation but also creates lasting memories that you can share in your future posts. By sharing your DIY fire pit experience, you not only celebrate your achievement but also contribute to a community of creatives eager to learn and grow together.

We hope you found our guide on building your own simple outdoor fire pit both informative and inspiring! There’s something truly special about gathering around a crackling fire under the stars, and now you have the tools to create that perfect space in your backyard. By following these five easy steps, you can enjoy cozy evenings with family and friends, share stories, roast marshmallows, and create lasting memories. So gather your materials, unleash your creativity, and get ready to transform your outdoor space into a warm and inviting retreat. Happy building, and may your new fire pit bring you countless nights of joy and relaxation!

What are the best ways to improve your home’s acoustics?

In an increasingly noisy world, the importance of a serene and acoustically balanced home cannot be overstated.

Whether you’re trying to create the perfect environment for relaxation, focus, or entertainment, the sound quality in your living space plays a pivotal role in your overall experience. From the gentle hum of background music to the crisp clarity of your favorite movie dialogue, the acoustics of your home can significantly shape how you feel and interact within your environment. In this blog post, we will explore top tips for transforming your space into a sanctuary of sound, offering practical insights on everything from the strategic placement of furniture to the selection of sound-absorbing materials. Join us as we delve into the art and science of enhancing your home’s acoustics, ensuring that every sound you hear contributes to a harmonious and enjoyable living experience.

1. Understanding Acoustics: What You Need to Know

What are the best ways to improve your home's acoustics?
Credit : whatcanu.com

Understanding acoustics is the foundation for transforming your space into a harmonious haven. Acoustics refers to the science of sound—how it travels, how it interacts with different surfaces, and how we perceive it within a given environment. The way sound behaves in a room is influenced by various factors, including the size and shape of the space, the materials used in construction, and the placement of furniture and decor.

To grasp the essentials of acoustics, it’s important to recognize the difference between sound absorption, reflection, and diffusion. Sound absorption is the process of materials soaking up sound waves, reducing echo and reverberation. Soft furnishings like carpets, curtains, and upholstered furniture play a significant role in this. On the other hand, sound reflection occurs when sound waves bounce off hard surfaces, such as walls, ceilings, and floors, which can lead to an echoing effect that distorts sound clarity.

Diffusion, meanwhile, describes the scattering of sound waves in various directions, which can help create a more balanced auditory experience. This can be achieved through the strategic placement of objects like bookcases, plants, or specialized acoustic panels that break up sound waves and minimize harsh reflections.

When designing your space, consider how sound travels through it. Are there areas that are overly loud or disturbingly quiet? Recognizing these variations is the first step in enhancing your home’s acoustics. By understanding the basic principles of acoustics, you can make informed choices about materials and layouts that contribute to a pleasant auditory environment, ultimately transforming your space into a peaceful retreat where sound feels just right.

2. The Importance of Good Acoustics in Your Home

Good acoustics in your home play a pivotal role in shaping not only the overall ambiance but also the functionality of your living space. Imagine a warm evening, where laughter fills the air during a gathering with friends, or a quiet morning spent reading your favorite book without the distraction of echoes or muffled sounds. These experiences hinge on how sound travels and resonates within your home.

When acoustics are optimized, you can enjoy clearer conversations, reduced noise pollution from outside, and a more serene atmosphere overall. Poor acoustics, on the other hand, can lead to frustrating echoes, unwanted reverberation, and a cacophony of sounds that disrupt the peaceful environment you strive to create. This is particularly crucial in open-concept homes, where sound can bounce off hard surfaces, creating a disjointed auditory experience.

Moreover, good acoustics contribute to the functionality of spaces such as home theaters, music rooms, or even your home office. Imagine watching your favorite film with crystal-clear sound, or playing an instrument with the richness and depth of sound that enhances your performance. Effective acoustic design can transform these experiences, making them more enjoyable and immersive.

Additionally, good acoustics can even improve your mental well-being. Studies have shown that excessive noise can lead to stress and anxiety, while a well-balanced sound environment promotes relaxation and focus. By investing in the right acoustic solutions, such as soundproofing materials, soft furnishings, and strategic furniture placement, you can create a harmonious home that fosters comfort and tranquility.

In essence, prioritizing good acoustics is not just about eliminating noise; it’s about enriching your daily life and creating a sanctuary where every sound contributes to a balanced, enjoyable living experience.

3. Identifying Common Acoustic Problems in Different Rooms

What are the best ways to improve your home's acoustics?
Credit : whatcanu.com

To effectively enhance your home’s acoustics, it’s crucial to first identify the common acoustic problems that can arise in different rooms. Each space in your home has unique characteristics that influence sound quality, and being aware of these issues can guide you in implementing the right solutions.

**Living Room:** Often the heart of the home, the living room is typically designed for comfort and conversation. However, its open layout and hard surfaces can create an echo, making it difficult to hear conversations clearly. Excessive reverberation can detract from movie nights or gatherings with friends. Look for sound-absorbing materials like plush sofas, area rugs, and heavy curtains to help manage sound reflections.

**Bedroom:** A sanctuary for rest, the bedroom should be a peaceful retreat. Unfortunately, noise from outside traffic or even the sounds of family members can disrupt your tranquility. If your bedroom feels too noisy, consider adding soundproofing curtains or weather stripping to windows and doors. Additionally, incorporating soft furnishings, such as thick bedding and upholstered headboards, can dampen sound and create a more serene atmosphere.

**Home Office:** As remote work becomes increasingly common, the home office must support focus and productivity. Acoustic issues here often stem from the transmission of noise from other parts of the house or outside distractions. To combat this, consider using acoustic panels on the walls or a soundproof door. Adding bookshelves filled with books can also act as natural sound barriers, absorbing noise and promoting a quieter environment.

**Kitchen:** While not typically associated with acoustic problems, the kitchen can actually be quite noisy, especially if it is open to the living area. The clattering of dishes and appliances can create a cacophony. To mitigate this, use soft-close cabinets and drawers, and try adding foam mats where you stand for long periods. These small adjustments can significantly reduce the overall sound level and create a more pleasant cooking experience.

**Bathroom:** Lastly, bathrooms often have hard surfaces that create echoes, making them feel more like a noisy chamber than a relaxing spa. To address this, consider adding soft towels, bath mats, and decorative items that can absorb sound. Additionally, installing a quiet exhaust fan can help manage not only moisture but also unwanted noise.

By identifying these common acoustic problems in each room, you can take targeted steps to create a harmonious environment that enhances both comfort and functionality in your home.

4. Choosing the Right Materials for Acoustic Treatment

When it comes to enhancing your home’s acoustics, the materials you choose for acoustic treatment can make all the difference. Selecting the right materials is not just about aesthetics; it’s about creating an environment that optimally absorbs sound, reduces echoes, and enhances overall sound quality. Here are some key materials to consider:

**Acoustic Panels:** These are perhaps the most common choice for improving sound quality in a room. Made from dense foam or fiberglass, acoustic panels are designed to absorb sound waves, thus minimizing reflections and echoes. Available in various colors and designs, they can be both functional and decorative, allowing you to seamlessly blend them into your decor.

**Bass Traps:** If you’re dealing with low-frequency sounds, such as the rumble of bass-heavy music or deep voices, bass traps are essential. These specialized panels are typically placed in the corners of a room where low frequencies tend to accumulate. They help to smooth out the sound and prevent a muddy audio experience.

**Soundproofing Curtains:** For those who may not want to commit to permanent installations, soundproofing curtains offer a flexible solution. These heavy, dense fabrics can significantly reduce sound transmission from outside while also absorbing internal echoes. Choose curtains with a high Noise Reduction Coefficient (NRC) for the best results, and consider their color and texture to complement your room’s aesthetic.

**Rugs and Carpets:** Don’t underestimate the power of soft furnishings. Thick rugs and carpets can absorb sound and reduce noise levels in a room, especially in spaces with hard flooring. Layering rugs can also add a touch of warmth and style while enhancing acoustic properties.

**Bookshelves and Furniture:** Strategically placing bookshelves and upholstered furniture can further improve a room’s acoustics. Bookshelves filled with books act as natural sound absorbers, while soft furniture can help break up sound waves, reducing echo. Consider arranging furniture to create cozy nooks that encourage conversation without excessive noise reverberation.

By thoughtfully selecting materials that suit your space and needs, you can transform your home into an acoustically pleasant environment. Not only will your space feel more comfortable, but it will also enhance your listening experience, whether you’re enjoying music, watching movies, or hosting engaging conversations with family and friends.

5. Strategic Placement of Furniture to Improve Sound

What are the best ways to improve your home's acoustics?
Credit : whatcanu.com

When it comes to enhancing your home’s acoustics, the strategic placement of furniture can make a world of difference. Think of your space as a symphony; each piece of furniture plays a vital role in how sound waves interact and resonate within the room. By thoughtfully arranging your furniture, you can create an environment that not only looks aesthetically pleasing but also optimizes sound quality.

Start with larger pieces, such as sofas and bookshelves, and position them against walls to help absorb sound. These items can act as barriers that reduce echo and dampen noise, providing a more intimate atmosphere. A plush sofa, for instance, can help absorb high frequencies, while dense bookshelves filled with books can neutralize sound waves, preventing them from bouncing around the room.

Next, consider the use of rugs and curtains. A soft area rug can significantly reduce sound reflections in a space, especially if you have hard flooring. The texture of the rug helps to absorb sound waves, creating a cozier, quieter environment. Similarly, heavy curtains can help block external noise and improve acoustics by dampening sound reflections from windows.

Don’t forget about creating “sound zones” in larger rooms. By strategically placing furniture to form distinct areas, you can create pockets of sound that work together harmoniously. For example, an L-shaped sectional can define a conversational area, while a small side table and chairs can create a quiet nook for reading or relaxing.

Finally, keep in mind that the shape and size of your furniture matter. Avoid sharp edges and opt for rounded pieces that help diffuse sound. By considering both the type and placement of your furniture, you’ll be well on your way to transforming your space into an acoustically-friendly oasis. With a few thoughtful adjustments, you can create a home that not only looks good but sounds good too!

6. Layering Textiles: Rugs, Curtains, and Cushions

When it comes to transforming the acoustics of your home, layering textiles is one of the most effective and stylish methods to absorb sound and reduce echoes. Soft furnishings have a remarkable ability to dampen noise, creating a more serene and inviting atmosphere. Start with rugs, as they not only add warmth and comfort underfoot but also act as a sound barrier, especially in larger, hard-surface areas. Opt for thick, plush rugs that can trap sound waves, minimizing the clatter of footsteps and the reverberation of voices.

Next, consider your windows—curtains are a game-changer in enhancing acoustics. Heavy drapes made from dense fabric can significantly reduce outside noise and prevent sound from bouncing around the room. For added effectiveness, layer sheer curtains underneath for a stylish touch that still allows natural light to filter through while softening harsh sounds.

Cushions and throw pillows are the final touch in your textile layer strategy. Scatter them generously across sofas and chairs; they not only provide comfort but also absorb sound, further reducing echoes. Mix and match different textures and patterns to create a cozy aesthetic that complements your décor while serving a functional purpose.

By thoughtfully incorporating rugs, curtains, and cushions into your space, you’ll not only enhance your home’s acoustics but also create a chic, inviting environment that feels harmonious and comfortable. This simple yet impactful approach allows you to enjoy a quieter, more relaxing home without sacrificing style.

7. Utilizing Wall Treatments: Panels, Paints, and Wallpaper

What are the best ways to improve your home's acoustics?
Credit : whatcanu.com

When it comes to enhancing your home’s acoustics, wall treatments play a pivotal role in absorbing sound and reducing unwanted noise. With a variety of options available, you can transform not just the auditory environment of your space, but also its aesthetic appeal.

Acoustic panels are a popular choice among homeowners looking to improve sound quality. Available in a range of materials, colors, and designs, these panels can be strategically placed on walls or ceilings to target specific sound issues, such as echoes or reverberation. Not only do they help in sound absorption, but they also serve as a stylish design element that can bring a modern flair to your home.

If you’re looking for a more seamless solution, consider acoustic paint. This specialized paint is formulated with sound-absorbing properties, allowing you to maintain the look of your walls while enhancing their acoustic performance. It can be applied to any surface, making it an excellent choice for those who want to keep their decor intact while still addressing sound issues.

For a more textured approach, wallpaper can also contribute to improved acoustics. Thicker wallpapers, especially those with fabric or textured finishes, can help dampen sound and reduce noise levels. Plus, with an endless variety of patterns and colors available, wallpaper can add a unique touch to your decor while serving a functional purpose.

By utilizing these wall treatments, you can create a more serene and comfortable environment in your home. Whether you’re looking to reduce noise in a busy family room, enhance sound quality in a home theater, or simply create a more peaceful atmosphere, the right wall treatments can make all the difference. Transform your space into a sanctuary of sound with these effective and stylish solutions.

8. Soundproofing vs. Acoustic Treatment: What’s the Difference?

When it comes to enhancing your home’s acoustics, understanding the distinction between soundproofing and acoustic treatment is crucial for achieving the desired results. While these terms are often used interchangeably, they serve different purposes and address different acoustic challenges in a space.

**Soundproofing** is all about keeping sound from entering or leaving a room. It involves creating a barrier that minimizes the transmission of sound waves, making it ideal for spaces where noise pollution is a concern—think of busy streets or lively neighbors. Techniques for soundproofing might include adding mass to walls with heavy materials, sealing gaps around windows and doors, or installing soundproof drywall. The goal is to create a sanctuary where external noises are kept at bay, allowing you to enjoy your space in peace.

On the other hand, **acoustic treatment** focuses on improving the sound quality within a room. This involves managing how sound behaves inside the space, which can often lead to echo or muddiness in audio. Acoustic treatment utilizes materials like foam panels, bass traps, and diffusers to absorb excess sound and improve clarity. This is particularly beneficial in home theaters, recording studios, or any area where clear audio is essential. By strategically placing these treatments, you can create a balanced sound environment that enhances your listening experience.

In summary, while soundproofing aims to block sound from entering or leaving a space, acoustic treatment works to refine the sound within it. Understanding this difference will allow you to make informed decisions on how best to enhance your home’s acoustics, depending on whether you want to keep noise out or improve the sound quality of what’s inside. Investing in the right approach can not only transform your space but also elevate your enjoyment of it, whether you’re hosting a gathering, watching a movie, or simply seeking tranquility.

9. Incorporating Plants for Natural Sound Absorption

Incorporating plants into your home not only enhances its aesthetic appeal but also serves as a powerful tool for improving acoustics. Plants are nature’s sound absorbers, effectively dampening noise levels and creating a more tranquil environment. Their leaves, stems, and even the soil they inhabit can help mitigate sound waves, making your space feel calmer and more inviting.

When selecting plants for acoustic enhancement, consider those with larger leaves and denser foliage. Species like the rubber plant, monstera, or peace lily are not only visually striking but also excellent at absorbing sound. Placing these plants strategically around your home—such as in corners, near windows, or in high-traffic areas—can significantly reduce echoes and soften the harshness of ambient noise.

Moreover, incorporating a variety of plants at different heights creates a more dynamic sound environment. Tall plants can act as natural barriers, breaking up sound waves, while smaller plants on shelves or tables add layers of texture and sound absorption.

Beyond their acoustic benefits, plants also contribute to improved air quality and a sense of well-being, which is essential for any living space. They bring life into your home, create a soothing atmosphere, and enhance your overall quality of life. So, as you embark on your journey to transform your space, don’t underestimate the power of greenery to create a more peaceful and acoustically balanced home.

10. Tips for Improving Acoustics in Open Concept Spaces

Open concept spaces are beloved for their airy feel and the seamless flow they provide between rooms, but they can pose unique challenges when it comes to acoustics. With fewer walls to absorb sound, noise can bounce around, creating echoes and making it difficult to carry on conversations or enjoy your favorite music without distraction. Fortunately, there are several effective strategies to enhance acoustics in these expansive areas.

**1. Incorporate Soft Furnishings**: Soft textiles are your best friends in an open concept layout. Consider adding plush sofas, upholstered chairs, and thick area rugs to help absorb sound. Opt for heavier curtains or drapes to line your windows, which can significantly reduce reverberation when closed.

**2. Add Acoustic Panels**: Decorative acoustic panels are a stylish and functional solution. Available in various colors, shapes, and designs, these panels can be strategically placed on walls or ceilings to dampen sound while adding visual interest to your space. They can blend seamlessly into your decor, ensuring that functionality doesn’t compromise aesthetics.

**3. Use Bookshelves and Plants**: Tall bookshelves filled with books can act as natural sound barriers, breaking up sound waves as they travel through the space. Similarly, adding plants not only enhances the beauty of your home but also contributes to sound absorption. Consider using larger potted plants or even hanging greenery to maximize their impact.

**4. Create Defined Zones**: While open concept living encourages fluidity, visually defining areas can help minimize noise transfer. Use rugs to delineate spaces, or arrange furniture in a way that creates distinct sections for different activities—such as a reading nook or a dining area. This not only enhances the flow but also helps contain conversations and sounds within their respective zones.

**5. Consider Ceiling Treatment**: If you’re open to more extensive renovations, consider installing a drop ceiling with acoustic tiles. This can significantly improve sound quality by absorbing sound waves before they bounce off hard surfaces. If a full ceiling overhaul isn’t in the cards, decorative ceiling beams can also help break up sound paths.

By thoughtfully incorporating these tips into your open concept space, you can create a more enjoyable and acoustically pleasant environment. Whether you’re hosting a lively gathering or simply enjoying a quiet evening at home, these enhancements will help you transform your space into a harmonious retreat that balances style and sound.

11. DIY Acoustic Solutions: Budget-Friendly Ideas

When it comes to enhancing your home’s acoustics, you don’t have to break the bank to create a more pleasant auditory environment. There are numerous DIY acoustic solutions that are both effective and budget-friendly, allowing you to transform your space without emptying your wallet.

**1. Soft Furnishings:** One of the simplest ways to improve sound quality in any room is by incorporating soft furnishings. Think plush rugs, thick curtains, and upholstered furniture. These elements help absorb sound waves, reducing echo and making your space feel cozier. If you’re looking to add a splash of color, consider vibrant textiles that not only serve a practical purpose but also elevate your room’s decor.

**2. Wall Hangings and Art:** Use wall art as a dual-purpose solution. Fabric wall hangings, tapestries, or even acoustic panels creatively disguised as art can help mitigate sound reflection. You can easily create your own acoustic panels by covering lightweight wooden frames with foam or thick fabric. Arrange them artistically on your walls to create a visually appealing soundproofing solution.

**3. Bookcases and Shelving Units:** Strategically placing bookcases or shelving units along walls can also help with sound absorption. Fill them with books, plants, or decorative items to break up sound waves and create a more balanced acoustic environment. For added effect, consider using open shelving, which allows for varied textures and materials, further enhancing sound dampening.

**4. DIY Soundproofing Panels:** If you’re willing to put in a bit of effort, you can create your own soundproofing panels using inexpensive materials such as foam insulation boards or even old mattresses. Cut them to size and cover them with fabric to match your decor. Mount them on walls or ceilings where sound tends to bounce the most, such as corners or near windows.

**5. Plants as Natural Sound Barriers:** Incorporating greenery into your space not only adds life but also helps with acoustics. Tall plants, such as fiddle leaf figs or bamboo, can act as natural sound barriers. The leaves and soil absorb sound, making your home feel quieter and more serene.

**6. DIY Window Inserts:** If outside noise is a concern, consider creating your own window inserts. Use acrylic sheets cut to size and place them inside your existing window frames. This additional layer can significantly reduce noise pollution while being a cost-effective solution compared to full window replacements.

By utilizing these budget-friendly DIY acoustic solutions, you can create a more serene environment that enhances your home’s comfort and livability. With a little creativity and effort, you’ll be well on your way to transforming your space into a peaceful oasis where sound is beautifully balanced.

12. Hiring Professionals: When to Seek Expert Help

While DIY methods can be effective for many acoustic improvements, there comes a point when the intricacies of sound management require a level of expertise that only professionals can provide. If you find yourself grappling with persistent noise issues, or if your sound treatments aren’t yielding the desired results, it may be time to consider bringing in an acoustic consultant or sound engineer.

Professionals in this field possess a wealth of knowledge about sound behavior and acoustics, often backed by years of experience and specialized training. They can conduct thorough assessments of your space, using advanced tools to analyze sound waves, reverberation times, and frequency responses. This objective data allows them to pinpoint problem areas—like echo-prone corners or overly reflective surfaces—that you might overlook.

Additionally, hiring an expert can save you time and money in the long run. While you may be tempted to experiment with various materials and layouts, a professional can streamline the process, recommending specific solutions tailored to your unique environment. Whether it’s installing high-quality acoustic panels, designing custom bass traps, or optimizing the layout of your furniture for better sound distribution, their insights can lead to a significant transformation in your space’s acoustics.

If your home serves multiple purposes—a lively family gathering space, a quiet retreat for reading, or a dedicated music room—the expertise of a professional can help you achieve a harmonious balance that suits all your needs. Remember, enhancing your home’s acoustics is an investment in comfort and quality of life. By recognizing when to seek expert assistance, you can ensure that your efforts lead to an acoustically beautiful and functional space.

13. Maintaining Your Acoustic Enhancements

Maintaining your acoustic enhancements is crucial to ensuring your sound environment remains optimal over time. Just as you wouldn’t let dust settle on your favorite artwork, it’s important to care for the elements that contribute to your home’s acoustics. Regular maintenance not only prolongs the life of your acoustic features but also protects the quality of sound within your space.

Start by routinely inspecting your acoustic panels, diffusers, and bass traps for signs of wear and tear. Dust and grime can accumulate over time, dulling the effectiveness of your soundproofing materials. A simple wipe down with a soft cloth can do wonders, keeping your panels looking fresh and functioning optimally. For fabric-covered surfaces, consider using a vacuum with an upholstery attachment to gently lift away dirt without damaging the material.

If you’ve invested in acoustic treatment like heavy drapes or carpets, check to ensure they haven’t become too worn or faded. Over time, these materials may lose their sound-absorbing properties, necessitating a replacement or a thorough cleaning. For drapes, a wash or professional clean can rejuvenate their appearance and function, while carpets may benefit from regular shampooing or deep cleaning to refresh their acoustical benefits.

Additionally, pay attention to the placement of your acoustic elements. Changes in your furniture arrangement or the addition of new decor can alter the acoustics of a room, potentially diminishing the impact of your enhancements. Regularly reassess your setup, and don’t hesitate to experiment with repositioning elements to find the perfect balance for sound quality.

Lastly, consider the environment in which your acoustic enhancements reside. High humidity or temperature fluctuations can affect materials like wood or fabric, so maintaining a stable indoor climate can help preserve the integrity of your soundproofing solutions. Investing in a hygrometer can help you monitor humidity levels, ensuring they remain in the ideal range to protect your acoustic enhancements.

By prioritizing the maintenance of your acoustic enhancements, you ensure that your home continues to be a sanctuary for sound, providing an enriching auditory experience that you and your guests can enjoy for years to come.

14. The Impact of Acoustics on Mental Well-Being

The impact of acoustics on mental well-being is often an overlooked aspect of home design, yet it plays a crucial role in shaping our daily experiences. The sounds that fill our spaces can significantly influence our mood, productivity, and overall sense of peace. Imagine stepping into a room filled with the gentle hum of ambient music, or perhaps a quiet library where the only sound is the soft rustle of pages turning. These auditory environments can either soothe the mind or create a sense of chaos, depending on how well the acoustics are managed.

Research shows that excessive noise can lead to increased stress levels, anxiety, and even impaired cognitive function. In contrast, well-designed acoustic spaces can foster relaxation, creativity, and a greater sense of control. For instance, adding soft furnishings, such as plush rugs, thick curtains, and upholstered furniture, can absorb sound and create a warmer, more inviting atmosphere. These elements not only enhance the aesthetic appeal of your home but also contribute to a calming auditory experience.

Consider the functions of each room in your home. A dedicated relaxation area, such as a reading nook or meditation space, should be designed with acoustics in mind—perhaps with soundproofing panels or strategically placed bookcases to minimize distractions. Meanwhile, your home office could benefit from sound dampening solutions to boost concentration and productivity.

By prioritizing acoustics in your home, you are not only enhancing the physical environment but also investing in your mental well-being. A serene, acoustically balanced space can transform how you feel daily, making it easier to unwind after a long day or to focus on tasks that require your full attention. So, as you embark on your journey to enhance your home’s acoustics, remember that the soundscape you create will resonate far beyond mere noise control—it can significantly enrich your quality of life.

15. Conclusion: Creating a Harmonious and Comfortable Home Environment

In conclusion, creating a harmonious and comfortable home environment is not just about aesthetics; it’s equally about how sound interacts with the space you inhabit. By implementing the strategies outlined throughout this article, you can significantly enhance the acoustics of your home, transforming it into a sanctuary where every sound—be it the gentle crackle of a fireplace, the laughter of loved ones, or your favorite music—can be enjoyed to its fullest potential.

Consider the layers of your space: from the choice of flooring and the materials of your furnishings to the strategic placement of rugs, curtains, and acoustic panels. Each element plays a crucial role in how sound travels and reverberates within your home. Don’t forget about the power of plants; they not only beautify your space but also help absorb sound, creating a more serene atmosphere.

Moreover, remember that achieving great acoustics is a journey, not a destination. It requires ongoing assessment and adjustments as your lifestyle and needs evolve. Whether you’re hosting a lively gathering, indulging in a quiet evening with a book, or simply enjoying the soothing sounds of nature outside, the right acoustic enhancements will ensure that your home is a place of comfort and joy.

As you embark on this transformative journey, think of your space as a canvas. With careful consideration and the right techniques, you can paint a soundscape that resonates with peace, creativity, and connection. Your home should be a reflection of who you are, and by prioritizing acoustics, you’ll cultivate an environment that nurtures both your spirit and your senses.

As we wrap up our exploration of how to enhance your home’s acoustics, we hope you feel inspired to take action and transform your living environment into a harmonious haven. The right acoustic improvements can significantly enhance your comfort and enjoyment, whether it’s creating a peaceful retreat for relaxation or ensuring crisp, clear sound for your entertainment. By implementing the tips shared in this post, you can enjoy a more serene atmosphere, elevate your space’s functionality, and truly make your home a sanctuary. Remember, a few thoughtful adjustments can lead to a profound impact, so don’t hesitate to experiment and find what works best for your unique needs. Here’s to a quieter, more acoustically pleasing home that resonates with joy and tranquility!

How to create a welcoming front porch?

The entryway of your home sets the tone for what lies beyond, serving as the first impression for guests and a warm embrace for you and your family after a long day.

A well-designed front porch not only enhances your home’s curb appeal but also creates a welcoming atmosphere that invites connection and comfort. Whether you have a sprawling porch or a cozy stoop, transforming this space into a charming and functional entryway can be both an exciting and rewarding endeavor. From choosing the right furniture and decor to incorporating greenery and lighting that highlights your style, this blog post will guide you through essential tips and creative ideas to breathe new life into your front porch. Let’s explore how you can create an inviting entryway that reflects your personality and welcomes all who cross your threshold!

1. The Importance of a Welcoming Entryway

How to create a welcoming front porch?
Credit : whatcanu.com

The entryway of your home serves as both a literal and figurative threshold, setting the tone for what lies beyond. It is the first impression visitors receive and often reflects the personality and warmth of the household. A welcoming entryway invites guests in, makes them feel comfortable, and creates an atmosphere of hospitality. But its importance goes beyond aesthetics; a well-designed front porch can also enhance your home’s curb appeal and boost its overall value.

Imagine stepping onto a front porch adorned with potted plants bursting with color, a cozy seating area that beckons for conversation, and tasteful lighting that softly illuminates the space in the evening. This inviting environment not only charms your guests but also offers a serene escape for you to unwind after a long day.

Moreover, a welcoming entryway fosters community and connection. It encourages neighbors to stop by for a chat and creates a sense of belonging. When your porch is inviting, it signals to the world that your home is open and ready to welcome friends and family alike.

In today’s fast-paced world, where connections can often feel fleeting, transforming your entryway into a warm and inviting space is an opportunity to cultivate relationships and create lasting memories. It’s time to embrace the importance of a welcoming entryway and transform your front porch into a charming gateway that reflects the heart of your home.

2. Assessing Your Current Entryway Space

Before diving into any transformation project, it’s essential to take a close look at your current entryway space. This initial assessment will inform your design decisions and help you create a welcoming front porch that reflects your style while being functional. Start by stepping back and observing your entryway from a distance. What is the first impression it gives? Is the space cluttered, dark, or uninviting? Take note of any elements that may detract from its charm, such as peeling paint, overgrown plants, or outdated fixtures.

Next, consider the layout. Is your porch spacious enough to accommodate seating or decorative accents, or is it more suited for a minimalist approach? Measure the dimensions of the area, paying attention to the height, width, and depth, so you know how much room you have to work with. This will help you determine what furniture and décor can fit without overcrowding the space.

Evaluate the lighting as well. Is the porch well-lit during the evening, or does it feel dim and unwelcoming? Natural light can make a world of difference, so consider how the sun moves across the porch throughout the day. If you have the opportunity, adding larger windows or a skylight can enhance the ambiance significantly.

Lastly, think about the materials and colors currently in use. Do the existing elements complement each other, or do they clash? A cohesive color palette and harmonious materials can create a more inviting atmosphere. After this thorough assessment, you’ll be equipped with the insights needed to embark on your entryway transformation journey. Whether your goal is to create a cozy nook for morning coffee or a vibrant space for entertaining guests, understanding your starting point is the key to a successful makeover.

3. Choosing the Right Color Palette

How to create a welcoming front porch?
Credit : whatcanu.com

Choosing the right color palette for your entryway is a crucial step in creating a welcoming front porch that reflects your personal style while also enhancing your home’s curb appeal. Colors have the power to evoke emotions and set the tone for the entire space, so it’s essential to select hues that harmonize with the architecture of your home and the surrounding environment.

Start by considering the mood you want to create. Soft, muted colors like pastel blues, greens, or muted yellows can impart a sense of tranquility and charm, making visitors feel instantly at ease. On the other hand, bold colors such as deep reds, vibrant blues, or eye-catching yellows can make a striking statement, showcasing your personality and inviting curiosity.

When selecting your color palette, think about the existing elements of your porch, including the front door, siding, and any outdoor furniture or decor. A cohesive color scheme can tie these elements together beautifully. For instance, if your home features a classic white exterior, a navy blue door can add a timeless touch, while bright mint green accents in your planters and cushions can inject a playful vibe.

To create depth and interest, consider using a combination of complementary colors. Perhaps a warm taupe for the walls paired with cheerful sunflower yellow accents in your decor will create a sunny, inviting atmosphere. Don’t shy away from experimenting with textures, too; a matte finish on the walls can contrast beautifully with glossy furniture or polished hardware, adding dimension to the overall look.

Finally, don’t forget to take into account the seasonal changes. Seasonal decor can provide an opportunity to refresh your palette throughout the year, incorporating autumnal oranges and deep browns in the fall, or fresh floral prints in the spring. By carefully selecting a color palette that resonates with you and complements your home, you can create a front porch that is not just an entrance, but a true extension of your living space—a warm invitation for friends, family, and neighbors alike.

4. Selecting Functional Furniture for Your Porch

When it comes to transforming your entryway, the furniture you choose for your front porch can make all the difference in creating a welcoming atmosphere. Selecting functional furniture not only enhances the aesthetic appeal of your space but also adds practicality, allowing you and your guests to enjoy the outdoors comfortably.

Start by assessing the size of your porch. A small balcony may require sleek, space-saving options like a bistro table and chairs, while a larger porch can accommodate a cozy rocking chair or a charming porch swing. Opt for materials that can withstand the elements—weather-resistant wicker, durable metal, or treated wood are excellent choices that ensure longevity and ease of maintenance. If your porch receives ample sunlight, consider furniture with UV-resistant finishes to prevent fading over time.

In addition to aesthetics, think about functionality. Adding a small side table can provide a convenient spot for drinks, books, or decorative elements, while storage benches serve a dual purpose, offering seating and space to tuck away outdoor cushions, gardening tools, or seasonal decor. Look for items that invite relaxation, like plush cushions or soft throws, which can transform your porch into a cozy retreat.

Moreover, consider the flow of movement on your porch. Arrange your furniture to create an open, inviting space that encourages conversation and allows easy access. Incorporate elements like a small ottoman for extra seating or a hammock chair that can sway gently in the breeze, inviting guests to sit and stay awhile.

Ultimately, selecting functional furniture for your front porch should reflect your personal style while serving the practical needs of your household. With the right pieces in place, your entryway will not only be an inviting first impression but also a cherished area where memories are made with family and friends.

5. Incorporating Greenery and Plants

How to create a welcoming front porch?
Credit : whatcanu.com

Incorporating greenery and plants into your front porch can dramatically enhance the welcoming atmosphere of your entryway. Imagine stepping onto a porch adorned with lush ferns swaying gently in the breeze, or vibrant petunias spilling over colorful pots, instantly rejuvenating your space. Plants not only add visual interest but also bring a sense of life and vitality that can make your home feel more inviting.

Begin by selecting plants that thrive in your local climate and the specific lighting conditions of your porch. For sunny spots, consider a mix of cheerful annuals like marigolds or geraniums, which bloom brilliantly throughout the season. In shadier areas, hostas and ferns can provide lush greenery and texture. Adding a few potted herbs, such as basil or rosemary, can infuse your entryway with delightful scents, enhancing the sensory experience for anyone who approaches your home.

Vertical gardening is another fantastic option for smaller porches. Utilize wall-mounted planters or hanging baskets to create a striking visual display without sacrificing floor space. This not only maximizes your planting area but also draws the eye upward, making your entryway feel more expansive and inviting.

Don’t forget about seasonal decorations! Swap out your plants or add seasonal accents, like pumpkins in the fall or festive poinsettias during the winter holidays, to keep your porch feeling fresh and relevant throughout the year. With just a bit of creativity and care, incorporating greenery and plants into your front porch will create a warm, inviting space that leaves a lasting impression on every visitor.

6. Adding Personal Touches with Decor

When it comes to transforming your entryway, adding personal touches with decor is where you can truly let your creativity shine. Your front porch is the first glimpse guests get of your home, and it should reflect your unique style and personality. Consider incorporating decorative elements that tell your story, making your entryway not just welcoming but also a reflection of who you are.

Start by selecting a theme that resonates with you—be it rustic charm, coastal vibes, or modern minimalism. This theme can guide your choices in furnishings and accessories. For example, a set of vintage chairs paired with a weathered wooden table can evoke a cozy, farmhouse feel, while sleek metal accents and geometric planters might lend a contemporary touch.

Next, think about incorporating personal mementos that have meaning to you. This could be a collection of handcrafted pots filled with your favorite flowers or a whimsical welcome sign that you picked up during your travels. These thoughtful additions not only enhance the visual appeal of your porch but also spark conversations and create a sense of warmth.

Lighting also plays a crucial role in setting the mood. Consider string lights draped above or lanterns that cast a soft glow to create an inviting atmosphere, especially during evening gatherings. Don’t forget to include seasonal decorations that can be easily swapped out throughout the year—think pumpkins in the fall, fresh greenery for winter, or vibrant florals for spring and summer. These changing accents keep your porch feeling fresh and lively.

Finally, add comfort with soft textiles. Outdoor cushions, a cozy throw blanket, or a patterned rug can make your entryway feel more inviting and encourage guests to linger a little longer. By thoughtfully curating your decor, you can create a front porch that not only welcomes guests but also serves as a beautiful extension of your home, showcasing your personality and style.

7. Lighting Ideas to Enhance Ambiance

How to create a welcoming front porch?
Credit : whatcanu.com

The right lighting can dramatically transform your entryway, creating an inviting atmosphere that beckons guests to step inside. When considering lighting options for your front porch, think beyond conventional fixtures; it’s about crafting a mood that reflects your personal style while ensuring functionality.

Start with layered lighting for depth and interest. A combination of ambient, task, and accent lighting can illuminate your space beautifully. Consider installing a stylish overhead fixture, like a pendant or chandelier, as the central source of light. Choose designs that complement your porch’s aesthetic—whether that’s vintage charm, modern sleekness, or rustic warmth.

Next, add wall sconces on either side of your front door to create a welcoming glow. These fixtures not only enhance safety by illuminating the entryway but also frame your door, drawing attention to it. For a touch of whimsy, you might opt for lantern-style sconces that evoke a cozy, homey feel.

Don’t forget about the ground! Pathway lights can guide guests to your door while accentuating your landscaping. Low-voltage options or solar-powered lights offer eco-friendly solutions that are easy to install and maintain. Strategically placing these along walkways or flower beds can create a magical ambiance in the evening.

For a more intimate touch, consider adding string lights or fairy lights. These can be draped across the porch ceiling, around railings, or even in nearby trees to create a twinkling canopy that invites relaxation. A small tabletop lantern or candle arrangement can also add warmth and charm, perfect for cozy evenings with friends or quiet nights spent on the porch.

Finally, think about the color temperature of your bulbs. Warmer tones (around 2700K) create a soft, inviting glow, while cooler tones can feel harsher and more clinical. Choosing the right lighting not only enhances the ambiance but also highlights the beauty of your entryway, making it a delightful introduction to your home. With these lighting ideas, your front porch can become a welcoming haven, ready to greet friends, family, and new visitors alike.

8. Creating a Seasonal Display

Creating a seasonal display is one of the most delightful ways to transform your entryway and make your front porch feel inviting throughout the year. Each season brings a unique palette of colors, textures, and themes that can be beautifully showcased, allowing your home to reflect the changing landscape outside.

**Spring** invites a burst of life with vibrant blooms and fresh greenery. Consider adorning your porch with pots of colorful seasonal flowers like tulips, daffodils, and pansies. A charming bird feeder or a whimsical garden statue can add a touch of personality. Incorporating pastels into your décor, such as light-colored cushions or decorative pillows on outdoor seating, further enhances the cheerful ambiance of the season.

As **summer** rolls in, embrace the warmth with a display that exudes relaxation and leisure. Think about setting up a cozy seating area draped in bright, summery fabrics. Hanging string lights or lanterns can create a magical glow in the evenings. Incorporate elements that celebrate summer, like a rustic wooden crate filled with fresh herbs or a stylish basket brimming with locally sourced fruits.

**Autumn** brings a rich tapestry of warm hues and textures. Use pumpkins and gourds in various shapes and sizes to create a stunning arrangement. Mums, with their vibrant colors, are perfect for adding seasonal flair. Swap out your cushions for deeper, richer tones and add a cozy throw blanket to invite guests to sit and enjoy the crisp air. Don’t forget to include a rustic wreath made of dried leaves and twigs to greet visitors at the door.

When winter descends, transform your entryway into a cozy haven. Deck the porch with evergreen garlands and twinkling lights that evoke a sense of warmth and cheer. Pinecones, holly, and winter berries can be incorporated into your display for a festive touch. A classic door wreath adorned with a big red bow can serve as a striking focal point. If you live in a snowy area, consider placing a pair of decorative sleds or snowmen as cheerful accents.

By embracing the seasons and celebrating their unique beauty, you create a front porch that not only welcomes guests but also showcases your creativity and personal style. Each seasonal display can become a reflection of your home and your appreciation for the world outside, making your entryway a delightful sight for all who pass by.

9. The Role of Textiles: Rugs and Cushions

When it comes to transforming your entryway, one of the most effective ways to create a warm and inviting atmosphere is through the strategic use of textiles—specifically rugs and cushions. These elements not only add comfort but also introduce layers of color, texture, and personality to your front porch, making it a true extension of your home.

Imagine stepping onto a soft, decorative rug that welcomes you with its vibrant patterns and plush fibers. A well-chosen rug can define your space, offering a visual anchor that draws the eye and encourages guests to linger. Opt for outdoor rugs made from durable materials that can withstand the elements yet still provide a cozy feel underfoot. From bold geometric designs to subtle, muted tones, the right rug can set the mood for your porch, whether you envision a bohemian retreat or a classic, elegant entryway.

Cushions are another essential textile element that can elevate your front porch design. Strategically placed on rocking chairs, benches, or even old-fashioned porch swings, they invite relaxation and conversation. Choose weather-resistant fabrics that can endure sun and rain while maintaining their vibrant colors. Mixing and matching patterns and textures can create a dynamic look that adds visual interest. Consider using cushions in complementary colors to your rug to create a cohesive aesthetic or contrasting hues for a more eclectic vibe.

Incorporating textiles like rugs and cushions not only enhances comfort but also reflects your personal style. They serve as functional décor that can easily be updated with the seasons—a vibrant floral print for spring, rich earthy tones for fall, or even festive patterns for the holidays. By thoughtfully selecting and arranging these textile elements, your front porch will not only welcome guests with open arms but also provide a charming and inviting space for you to enjoy.

10. Maintaining a Clutter-Free Entryway

Maintaining a clutter-free entryway is essential to creating a welcoming front porch that invites guests in and sets a positive tone for your home. The entryway often serves as the first impression for visitors, so keeping it tidy is key to showcasing your personal style and hospitality.

Start by assessing the items that typically accumulate in this space. Shoes, bags, and outdoor gear can quickly turn a charming porch into a chaotic mess. Consider implementing designated storage solutions, such as stylish baskets, shoe racks, or decorative hooks, to keep these essentials organized and out of sight. Choose items that complement your porch’s aesthetic—think natural materials like wicker or rustic wood that enhance the overall ambiance.

Next, be mindful of seasonal decor. While it’s lovely to showcase festive touches throughout the year, too many decorations can lead to visual clutter. Opt for a few carefully chosen pieces that reflect the season without overwhelming the space. A simple, seasonal wreath on the door, a couple of potted plants, or a well-placed lantern can add charm without creating chaos.

Regularly reassess your entryway, taking a few moments each week to declutter. Encourage family members to do the same by establishing a routine where everyone checks their belongings before entering the house, ensuring that unnecessary items don’t pile up.

By fostering a clutter-free environment, your entryway will not only remain inviting but also reflect the warmth and care you put into your home, making every visitor feel welcome from the moment they step onto your porch.

11. DIY Projects for a Unique Touch

When it comes to transforming your entryway, embracing diy projects is a fantastic way to add a unique touch that reflects your personal style. A well-crafted DIY piece not only enhances the aesthetic appeal of your front porch but also showcases your creativity and craftsmanship. Here are some engaging ideas to inspire your next project.

**1. Customized Welcome Sign**: Begin with a simple wooden board or a pre-cut sign and let your imagination run wild. Paint it with inviting colors, add your family name, or a cheerful message like “Welcome Home!” Use stencils or freehand for a personal touch. This sign can serve as a focal point, greeting visitors with warmth right from the start.

**2. Handcrafted Planters**: Wooden crates, terracotta pots, or even repurposed items like old tires can be transformed into charming planters. Fill them with vibrant flowers or lush greenery that not only add color but also create a refreshing atmosphere. Consider painting or staining the planters in colors that complement your home’s exterior.

**3. Upcycled Furniture**: Give new life to old furniture by upcycling it for your porch. A weathered bench can be painted and cushioned for a cozy seating area, while an old ladder can serve as a stylish plant stand. These projects are not only environmentally friendly but also provide functional and aesthetic benefits.

**4. Unique Lighting Solutions**: Create your own outdoor lighting fixtures to make your porch sparkle in the evenings. Use mason jars as hanging lanterns, fill them with fairy lights, and suspend them from your porch ceiling or trees. Alternatively, repurpose an old chandelier by adding weather-resistant bulbs for a touch of elegance.

**5. Seasonal Decor Swaps**: Consider a DIY seasonal decor strategy where you can easily swap decorations based on the time of year. Create interchangeable wreaths for your front door or festive banners that highlight holidays and seasons, ensuring your entryway always looks fresh and inviting.

These projects can be as simple or intricate as you desire, allowing you to infuse your personality into your home’s first impression. Plus, the satisfaction of creating something with your own hands adds an extra layer of warmth to your entryway, making it a truly welcoming space for family and friends alike. So gather your tools, unleash your creativity, and transform your front porch into a unique reflection of you!

12. Safety and Accessibility Considerations

Creating a welcoming front porch goes beyond aesthetics; it’s essential to prioritize safety and accessibility to ensure that all visitors feel comfortable and secure from the moment they arrive. This begins with a thorough assessment of your entryway. Check for any potential hazards, such as uneven steps, loose railings, or slippery surfaces. Repairing these issues not only enhances the safety of your porch but also prevents accidents that could discourage guests from visiting.

When it comes to accessibility, consider the needs of all potential visitors, including those with mobility challenges. Installing a sturdy handrail along steps can provide necessary support, while a gently sloping ramp can offer easy access for wheelchairs or strollers. Make sure the pathway leading to your porch is clear and well-lit, especially if you expect guests during the evening.

Incorporate non-slip mats or textured surfaces to reduce the risk of slipping, particularly in wet or icy conditions. Additionally, if your porch features any outdoor furniture, choose pieces that are easy to get in and out of, ensuring everyone can comfortably enjoy the space.

Finally, consider adding lighting elements, such as solar-powered lanterns or motion-sensor lights, to illuminate your entryway. Not only do they enhance safety during nighttime visits, but they also create a warm and inviting ambiance that beckons guests to your home. By thoughtfully addressing safety and accessibility, you not only enhance your front porch’s appeal but also demonstrate your commitment to making everyone feel welcome.

13. Inviting Features: Seating and Conversation Areas

Creating inviting features on your front porch, such as seating and conversation areas, can transform an ordinary entryway into a warm and welcoming space that beckons guests to linger. Imagine stepping onto your porch and being greeted by a cozy seating arrangement that perfectly balances comfort and style. Whether it’s a pair of rocking chairs swaying gently in the breeze or a plush bench adorned with colorful cushions, these elements invite visitors to sit down, relax, and enjoy the atmosphere.

Consider incorporating a small coffee table or side tables to hold refreshments, magazines, or decorative items, fostering an inviting environment for casual conversations. A well-placed swing can add a touch of whimsy, encouraging friends and family to gather and unwind as they share stories and laughter.

To further enhance the ambiance, think about the placement of lush potted plants or hanging planters filled with vibrant blooms. These natural elements not only add color but also create a sense of tranquility and connection to nature.

Lighting plays a crucial role in making your porch a welcoming space, too. String lights or lanterns can provide a soft glow that invites evening relaxation, while sconces or fairy lights can add a touch of charm and warmth.

By thoughtfully designing your seating and conversation areas, you create an entryway that not only welcomes visitors but also encourages them to stay awhile, enjoy the scenery, and feel right at home. A well-appointed front porch is more than just an entrance; it’s an invitation to connect, unwind, and savor the simple joys of life.

14. Engaging the Senses: Scents and Sounds

Engaging the senses is a powerful way to create an inviting atmosphere on your front porch. The right scents and sounds can transport your guests into a world of comfort and warmth before they even step inside your home.

**Scents** play a pivotal role in setting the mood. Consider incorporating fragrant plants and flowers such as lavender, rosemary, or jasmine, which release delightful aromas that can be both soothing and invigorating. A strategically placed pot of fresh herbs not only beautifies your space but also invites the scent of nature right to your doorstep. For an extra touch, consider using scented candles or essential oil diffusers. Choose warm, inviting scents like vanilla, cinnamon, or citrus to create a cozy ambiance that makes guests feel at home.

**Sounds** are equally important in crafting a welcoming entryway. The gentle tinkling of wind chimes or the soft rustle of leaves can create a peaceful oasis that draws people in. If your porch is large enough, adding a small water feature, such as a fountain, can introduce the calming sound of trickling water, further enhancing the serene environment. You could also curate a playlist of soft music that can be played in the background during gatherings, adding a personal touch that resonates with visitors.

By thoughtfully integrating these sensory elements, your front porch will transform into a welcoming retreat that beckons friends and family to relax, unwind, and enjoy their time in your space. The result? A memorable entryway that leaves a lasting impression, encouraging guests to linger a little longer.

15. Final Thoughts: Celebrating Your Transformed Entryway

As you step back to admire your newly transformed entryway, take a moment to revel in the inviting atmosphere you’ve created. Your front porch is no longer just a transition space; it has become a warm and welcoming introduction to your home. The vibrant colors of fresh paint, the charm of carefully selected furniture, and the delightful accents of greenery and decor all work together to evoke a sense of comfort and style.

Consider hosting a small gathering with family and friends to celebrate your efforts. Share your design journey and the inspiration behind your choices, inviting others to appreciate the space as much as you do. Perhaps set up a cozy seating area with soft cushions and warm blankets, perfect for sipping tea or enjoying a good book as the sun sets.

Don’t forget to maintain the beauty of your entryway. Regularly tending to plants, refreshing decor, and ensuring the space remains tidy will keep that inviting vibe alive throughout the seasons. As the years go by, continue to adapt and evolve your front porch, incorporating new trends or personal touches that reflect your ever-changing tastes.

Ultimately, your transformed entryway is more than just a pretty space; it serves as a reflection of your personality and hospitality. It’s a place where memories will be made, where conversations will flow, and where guests will feel a genuine sense of welcome. Celebrate this transformation, and let it be a reminder of the joy that comes from creating a beautiful home.

In conclusion, transforming your entryway into a welcoming front porch is an opportunity to make a lasting first impression and create a warm atmosphere for both your guests and yourself. By incorporating elements such as inviting decor, comfortable seating, and thoughtful lighting, you can turn an ordinary entrance into an extraordinary space that reflects your personal style. Remember, the key is to balance aesthetics with functionality, ensuring that your porch is not only beautiful but also practical for everyday use. We hope these tips inspire you to reimagine your entryway and create a charming welcome that sets the tone for your home. So gather your favorite plants, cushions, and decor, and embark on this delightful journey of transformation—your front porch is just waiting to shine!