How to install a new dishwasher?

Bringing home a new dishwasher can be an exciting upgrade for your kitchen, promising to save you time and effort on the never-ending chore of dishwashing.

However, the thought of installation can often feel daunting, leaving many to hire professionals or postpone the process altogether. Fear not! With the right guidance and a little bit of confidence, you can tackle this task like a pro. In this step-by-step guide, we’ll walk you through everything you need to know to install your new dishwasher seamlessly. From gathering the necessary tools and preparing your kitchen to connecting water lines and ensuring proper drainage, you’ll learn how to transform this potentially overwhelming project into a manageable and rewarding experience. Get ready to roll up your sleeves and dive into the world of DIY home improvement, all while elevating the convenience of your kitchen!

1. Introduction: Why Installing Your Dishwasher Yourself is a Great Idea

How to install a new dishwasher?
Credit : whatcanu.com

Installing your dishwasher yourself can be a rewarding and cost-effective project that not only saves you money on professional installation fees but also gives you a sense of accomplishment. Imagine the satisfaction of standing back to admire your handiwork, knowing you’ve added convenience to your kitchen without relying on outside help.

In today’s DIY culture, many homeowners are discovering that tackling household projects can be both easy and fulfilling. Installing a dishwasher is one of those tasks that, with the right guidance and tools, can be completed within a single afternoon. Not only does this allow you to take control of your kitchen renovation, but it also offers an opportunity to learn valuable skills that can be applied to future home improvement endeavors.

Moreover, undertaking this project yourself provides a unique perspective on your appliance, allowing you to familiarize yourself with its components and maintenance needs. You’ll gain a deeper understanding of how your dishwasher operates, empowering you to troubleshoot minor issues down the line. Plus, the time you invest in this task pays off every time you load and run your new appliance, knowing you did it all yourself.

In this step-by-step guide, we’ll walk you through everything you need to know to install your new dishwasher like a pro. From gathering the necessary tools to making the final connections, you’ll find that with a little preparation and confidence, this project is not only doable but truly enjoyable! So roll up your sleeves, and let’s get started on transforming your kitchen with a brand-new dishwasher!

2. Tools and Materials You’ll Need

Before diving into the installation process, it’s crucial to gather all the necessary tools and materials to ensure a smooth and efficient setup. Having everything ready at hand not only saves time but also minimizes frustrations mid-installation. Here’s a comprehensive list of what you’ll need:

### Tools:
1. **Screwdriver Set**: A mix of Phillips and flat-head screwdrivers will come in handy for various screws and fittings.
2. **Adjustable Wrench**: This versatile tool is essential for tightening and loosening plumbing connections.
3. **Level**: To ensure your dishwasher is perfectly aligned, a level is indispensable. This will help prevent excess noise and ensure proper function.
4. **Pliers**: A pair of pliers will assist in gripping and manipulating small parts and hoses.
5. **Drill**: If your installation requires new holes for mounting brackets, a drill will make this task easier.
6. **Tape Measure**: Accurate measurements are key to fitting your new appliance snugly into its designated space.
7. **Bucket or Towels**: Water spills can happen, especially when disconnecting the old unit, so keep a bucket or towels handy for quick clean-ups.

### Materials:
1. **Dishwasher Installation Kit**: Most new dishwashers come with an installation kit that includes essential components like hoses and electrical connectors. Check your model to ensure you have everything required.
2. **Water Supply Line**: If the existing line is old or damaged, you may need to purchase a new one.
3. **Drain Hose**: Ensure your drain hose is in good condition; if not, replacing it will prevent leaks and clogs.
4. **Electrical Wiring**: Depending on your setup, you might need specific wiring or a power cord to connect your dishwasher to the power supply.
5. **Mounting Brackets**: These may not come with the dishwasher but are necessary to secure your appliance under the countertop.

Having these tools and materials ready before you begin will not only streamline the installation process but also equip you with everything you need to tackle any unexpected challenges. With your workspace organized and all your equipment at your fingertips, you’ll be well on your way to installing your new dishwasher with confidence and ease!

3. Safety First: Preparing Your Kitchen for Installation

How to install a new dishwasher?
Credit : whatcanu.com

Before diving into the installation process, ensuring your kitchen is prepared for the task at hand is crucial—safety first! A well-prepared workspace not only streamlines the installation but also minimizes the risk of accidents. start by clearing the area around your old dishwasher and the path to your kitchen sink. Remove any clutter, such as pots, pans, or kitchen gadgets that may obstruct your movement. This creates a safe space for you to work and prevents any unnecessary damage to your belongings.

Next, turn off the power supply to the dishwasher at the circuit breaker. It’s essential to avoid any electrical hazards while working on the appliance. If your dishwasher has a water shut-off valve, locate it and turn it off as well to prevent leaks during the installation process. Remember to test the water flow by turning on the tap to ensure that the line is completely shut off.

Once your workspace is clear and safe, consider laying down a protective covering, such as a drop cloth or old towels, on the floor to catch any spills or scratches that may occur. This added layer of protection will preserve your flooring and make cleanup easier once the job is done.

Lastly, gather all the necessary tools and materials you’ll need for installation—such as a wrench, screwdriver, and level—within arm’s reach. Having everything organized beforehand not only saves time but also reduces the risk of accidents caused by searching for tools in the middle of the project. By taking these safety precautions and preparing your kitchen, you’ll set the stage for a smooth and successful dishwasher installation.

4. Understanding Your Dishwasher: Key Components Explained

Before diving into the installation process, it’s crucial to familiarize yourself with the key components of your new dishwasher. Understanding how each part works will not only make the installation smoother but will also equip you with the knowledge to troubleshoot any issues in the future.

**1. **Control Panel:** This is where the magic begins. The control panel allows you to set wash cycles, adjust temperature settings, and activate special features such as delay start or sanitize options. It can be a simple console or a digital touchscreen, but knowing how to navigate it is essential for optimal performance.

**2. **Water Inlet Valve:** This vital component connects your dishwasher to the water supply. When you start a wash cycle, the water inlet valve opens to let water flow into the appliance. It’s important to ensure that this valve is securely connected and functioning properly to avoid leaks.

**3. **Spray Arms:** The spray arms are responsible for distributing water throughout the dishwasher. Located at the bottom and sometimes the middle or top of the unit, these arms rotate during the wash cycle to ensure every dish is thoroughly cleaned. Double-check that they are free of obstructions and are able to spin freely.

**4. **Filter System:** A clean filter is key to maintaining the efficiency of your dishwasher. This component traps food particles and debris to prevent them from clinging to your clean dishes. Your dishwasher might have multiple filters, so familiarize yourself with how to remove and clean them regularly.

**5. **Draining System:** After washing, your dishwasher needs to expel the dirty water. The draining system, which includes the drain hose and pump, is crucial in this process. Make sure the drain hose is properly positioned to avoid any kinks or clogs, which can lead to water backup.

**6. **Racks and Baskets:** Understanding the layout of your dishwasher is vital for efficient loading. Most units come with adjustable racks and specialized compartments for silverware, pots, and pans. Properly utilizing these features will maximize space and ensure thorough cleaning.

By taking the time to learn about these key components, you’ll not only simplify the installation process but also set yourself up for years of hassle-free dishwashing. With this knowledge in hand, you’ll be ready to roll up your sleeves and start your dishwasher installation like a pro!

5. Step 1: Removing the Old Dishwasher

How to install a new dishwasher?
Credit : whatcanu.com

Before you can revel in the convenience of your brand-new dishwasher, you’ll need to bid farewell to the old one. Removing the old dishwasher may seem daunting, but with a little preparation and the right tools, you can tackle this step like a pro.

**Safety First**: Start by ensuring your kitchen is ready for the task at hand. Disconnect the power supply by switching off the circuit breaker dedicated to your dishwasher. This crucial step prevents any electrical mishaps as you work. Next, turn off the water supply to the dishwasher—usually located under the sink—by twisting the valve clockwise.

**Gather Your Tools**: Equip yourself with a few essential tools: a screwdriver (both Phillips and flathead), pliers, a towel or sponge, and a bucket. These will help you navigate the nuts and bolts of this process seamlessly.

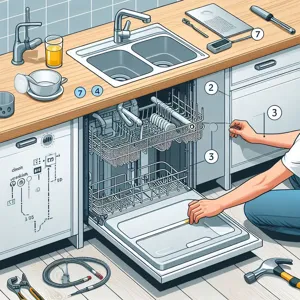
**Disconnecting the Dishwasher**: Begin by removing the kick plate or toe panel at the bottom front of the dishwasher. This will expose the mounting screws. Use your screwdriver to loosen and remove these screws, which are typically found on either side of the appliance. Once loose, carefully slide the dishwasher out from its cabinet space—a little pull may be necessary, but be cautious not to damage surrounding cabinetry.

**Plumbing and Electrical Connections**: With the dishwasher now partially freed, you’ll need to disconnect the water supply line. Place your bucket underneath the connection to catch any residual water. Use your pliers to loosen the nuts on the supply line; once removed, be prepared for a small trickle of water. After this, locate the drain hose, which is often secured with a clamp. Loosen the clamp and slide the hose off, ensuring you have that towel handy for any spills.

Finally, check for any electrical connections that may need to be detached. If you see a power cord, simply unplug it. If wired directly, carefully unscrew the wire nuts and separate the wires—just make sure you remember their connections for when you install the new unit.

**Final Steps**: Once everything is disconnected, gently pull the dishwasher out of its space and make sure to clear any debris from the area. You’re now ready to move on to the next exciting step—installing your new dishwasher! This initial phase may seem labor-intensive, but with careful execution, you’ll be well on your way to enjoying the benefits of modern dishwashing technology in no time.

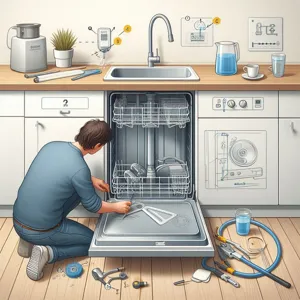
6. Step 2: Preparing the Installation Area

Before diving into the actual installation of your new dishwasher, it’s essential to prepare the installation area properly. A well-prepared space not only simplifies the process but also ensures that your dishwasher operates efficiently for years to come.

Start by clearing out the area around your existing dishwasher. Remove any dishes, pots, or clutter that may obstruct your progress. If you’re replacing an old unit, carefully disconnect it and move it out of the way, taking care not to damage any plumbing or electrical connections. This is also a great time to inspect the area for any signs of wear or damage, such as leaks or mold, which might need your attention before you install the new appliance.

Next, ensure that the space is clean and free of debris. Sweep up any dust or dirt, and wipe down surfaces to create a welcoming environment for your new dishwasher. Check the floor for any unevenness; if needed, use shims to level the dishwasher once it’s in place.

Don’t forget to gather your tools and materials before you start. You’ll typically need a wrench, screwdriver, pliers, and possibly a level. Having everything within reach will save you time and prevent interruptions. Additionally, review the manufacturer’s installation instructions to familiarize yourself with any specific requirements or recommendations unique to your model.

Lastly, assess your plumbing and electrical connections. Make sure the water supply valve is easily accessible and the electrical outlet is in good condition. If you’re unsure about the safety or functionality of these connections, it might be wise to consult a professional before proceeding.

By preparing the installation area thoughtfully, you’ll set the stage for a smooth and successful dishwasher installation, making you feel like a pro in no time!

7. Step 3: Connecting the Water Supply

How to install a new dishwasher?
Credit : whatcanu.com

Connecting the water supply to your new dishwasher is a crucial step that ensures your appliance has the necessary resources to function effectively. Before you dive into this process, make sure you have all the required tools at hand — a wrench or adjustable pliers, a bucket to catch any spills, and a towel for quick cleanups.

Begin by locating the water supply line, which is usually found beneath your kitchen sink. If it’s not already in place, you’ll need to install a shut-off valve specifically for the dishwasher. This valve allows you to easily control water flow and is an essential safety feature. Once the valve is securely installed, it’s time to connect the water supply line to your dishwasher.

Carefully position the dishwasher so that the water supply line can reach it without any tension or bends. Next, take the plastic or copper supply line and attach it to the dishwasher’s inlet valve, which is typically located at the bottom left corner of the unit. Ensure that the connection is tight but avoid over-tightening, as this can damage the fittings.

As you make this connection, be mindful of the placement of the rubber washer, which helps create a watertight seal. If the washer is missing or damaged, it can lead to leaks, so double-check that it’s in good condition before securing the connection.

Once everything is connected, turn the shut-off valve on and check for any leaks. It’s a good idea to have your bucket nearby to catch any water that might spill during this process. If you notice any dripping or leaking, you may need to adjust the connections or replace the washer. Taking the time to ensure a secure and leak-free connection will save you from potential water damage and costly repairs down the line.

With the water supply successfully connected, you’re one step closer to enjoying the convenience of your new dishwasher!

8. Step 4: Installing the Drain Hose

Once you’ve secured the dishwasher in its designated space and connected the water supply, it’s time to tackle the crucial task of installing the drain hose. This step is vital for ensuring that dirty water is properly expelled during the wash cycle, preventing any mess or potential damage.

Start by locating the drain hose that came with your dishwasher. It is usually a flexible plastic tube designed to fit snugly into the drain connection. Your first task is to determine the ideal attachment point. Typically, this will either be a dedicated drain outlet under your sink or a standpipe that leads to your household plumbing system.

Before you make any connections, ensure that the drain hose is free of kinks or obstructions. If it appears bent or twisted, carefully straighten it out to allow for smooth water flow. Next, slide the end of the hose onto the drain connection, ensuring that it fits securely. Use a hose clamp, which is often included with your dishwasher, to tighten the connection. This is a critical step as it prevents leaks that could lead to water damage.

If your setup involves a high loop or air gap, make sure the hose is elevated accordingly. This means positioning the hose so that it rises to a higher point before it connects to the drain. This configuration helps prevent wastewater from siphoning back into the dishwasher, maintaining the hygiene of your kitchen.

Once everything is connected, double-check your work. Ensure that the hose is not pinched and that the connections are tight. Now, it’s time to test your installation. With the dishwasher still pulled out slightly from the wall, run a short cycle and keep an eye on the drain hose for any leaks. If you spot any issues, it’s better to address them now rather than waiting until after the dishwasher is fully installed.

With the drain hose securely in place and functioning as it should, you’re one step closer to enjoying your new appliance! Next up, you’ll finalize your installation by securing the dishwasher to the countertop and checking all connections for a seamless setup.

9. Step 5: Electrical Connections: Hardwired vs. Plugged In

When it comes to connecting your new dishwasher, the choice between hardwired and plugged-in installations can significantly impact both functionality and convenience. Understanding the distinctions between these two methods is crucial for a seamless setup and safety compliance.

**Hardwired Connections**
If your dishwasher is hardwired, it will be directly connected to your home’s electrical system. This method typically involves using a junction box and requires you to connect the dishwasher’s wiring directly to your home’s wiring. Hardwiring provides a clean, permanent solution, eliminating the need for visible outlets and reducing the risk of someone accidentally unplugging the unit. However, this method can be more complex and may require professional assistance, especially if you’re not familiar with electrical work. Always ensure to turn off the power at the circuit breaker before attempting any connections, and double-check that your dishwasher’s voltage matches your home’s electrical specifications.

**Plugged-In Connections**
Conversely, if your dishwasher is designed to be plugged in, it comes with a power cord that connects directly to a standard electrical outlet. This option is often more user-friendly and allows for easier removal or replacement of the unit in the future. A plugged-in dishwasher can be beneficial for those who prefer flexibility, as it offers the option to simply unplug the appliance if needed. However, it’s crucial to ensure that the outlet is properly grounded and that it can handle the dishwasher’s power requirements.

Regardless of the connection type you choose, remember to follow the manufacturer’s instructions carefully. Take the time to secure all connections and check for any potential electrical issues before turning the power back on. Doing so will not only ensure the safety and efficiency of your appliance but also give you peace of mind as you enjoy the convenience of your new dishwasher!

10. Step 6: Positioning and Leveling the Dishwasher

Positioning and leveling your new dishwasher is a crucial step that ensures optimal performance and a seamless integration into your kitchen. Begin by carefully sliding the dishwasher into the designated space, making sure to connect the water supply and drain lines without pinching or damaging them. Gently push the unit back until it is flush with the cabinetry, ensuring that there is enough clearance for the door to open fully.

Once the dishwasher is in place, it’s time to check its level. Using a carpenter’s level, place it on the top edge of the appliance. Ideally, the bubble should be centered between the lines. If the dishwasher isn’t level, adjust the feet located at the bottom of the unit. Most dishwashers come with adjustable leveling legs that can be twisted to raise or lower the appliance as needed.

Take your time with leveling; an uneven dishwasher can lead to improper drainage, which might result in leaks or poor cleaning performance. After adjusting, double-check the level from both side to side and front to back. Once you’re satisfied that the dishwasher is perfectly level, secure it to the cabinetry by using screws provided in the installation kit. This will help stabilize the unit and prevent any movement during use, ensuring a long-lasting and trouble-free operation.

With the dishwasher properly positioned and leveled, you’re one step closer to enjoying the convenience of your new appliance!

11. Step 7: Securing the Dishwasher in Place

Once your dishwasher is properly connected to the water supply and drainage system, it’s time to secure it in place. This step is crucial to ensure your appliance functions efficiently and remains stable during use.

Begin by locating the mounting brackets that usually come with your dishwasher. These brackets are typically found on the top edges of the appliance and are designed to anchor the dishwasher to the underside of your countertop. Using a level, make sure your dishwasher is perfectly aligned, so it sits flush with the surrounding cabinetry. An uneven installation can lead to functional issues and may even result in water leaks over time.

With the dishwasher positioned correctly, take your drill and carefully screw the mounting brackets into the countertop. If your countertop is made of a softer material like laminate, be cautious not to overtighten, as this can cause damage. For sturdier surfaces such as granite or quartz, you might need to use a masonry bit to pre-drill holes before inserting screws.

Next, locate the leveling legs at the bottom of the dishwasher. Adjust these legs as necessary to ensure the dishwasher is level from front to back and side to side. You can do this by turning the legs clockwise to raise them or counterclockwise to lower them. A level dishwasher not only enhances performance but also helps prevent leaks and ensures that the door seals properly.

Finally, double-check that there are no gaps between the dishwasher and the cabinetry. This will help prevent any potential vibrations during operation, which could lead to wear and tear over time. Once everything is secured and aligned, you can step back and admire your handiwork—you’re one step closer to enjoying the convenience of your new dishwasher!

12. Step 8: Testing for Leaks and Proper Function

After your new dishwasher is securely installed and connected, it’s time for the crucial step of testing for leaks and ensuring everything functions as it should. This phase is not just about double-checking; it’s about safeguarding your home from potential water damage and ensuring your appliance operates efficiently.

Start by turning on the water supply and checking for any immediate leaks around the connections. Look closely at the water inlet hose where it connects to the dishwasher, as well as the drain hose and any other joints. If you notice any dripping or pooling water, turn off the supply and tighten the connections, or use additional plumbing tape if necessary.

Next, run a short cycle on your dishwasher without any dishes inside. This initial run serves multiple purposes: it allows you to observe the appliance in action, check for leaks during operation, and assess the sound levels. Listen for any unusual noises that could indicate a problem, such as grinding or excessive rattling.

While the cycle runs, keep an eye on the floor beneath the dishwasher. A dry floor is a good sign that your connections are secure. If you do spot any water, shut off the dishwasher immediately and investigate further. It’s better to catch issues early on than to risk a larger problem down the line.

Once the cycle is complete, open the dishwasher and inspect the interior. Ensure that the spray arms are rotating freely and that water has reached every corner. Check for any leftover detergent, which might indicate that the dishwasher isn’t draining properly.

Finally, take a moment to familiarize yourself with the control panel and features. Run through the settings and options to ensure everything is functioning correctly. If all checks out, congratulations! You’ve successfully installed your dishwasher like a pro, and you’re now ready to enjoy the convenience of clean dishes at the touch of a button.

13. Step 9: Final Touches: Adjusting the Dishwasher Door

Once your dishwasher is securely installed and connected, it’s time to add the finishing touches by adjusting the dishwasher door. This step is crucial not only for aesthetics but also for ensuring optimal functionality and longevity of your appliance. A properly aligned door will close seamlessly, preventing leaks and ensuring efficient operation.

Start by checking the alignment of the door. Open and close the dishwasher a few times to see if it operates smoothly. If you notice any resistance or if the door doesn’t close evenly, you may need to make some adjustments. Most dishwashers come with adjustable hinges or leveling legs that allow you to fine-tune the positioning.

To adjust the door, first, locate the hinge adjustment screws, which are typically found on the inside of the door. Using a screwdriver, make slight turns on the screws to raise or lower the door as needed. Aim for a snug fit when the door is closed—there should be no gaps along the edges, but it shouldn’t be so tight that it’s difficult to operate.

Next, check the top of the door for proper spacing. The dishwasher door should align flush with the surrounding cabinetry for a clean, polished look. If necessary, adjust the leveling legs at the bottom of the dishwasher to help achieve this alignment. Turn them clockwise to raise the appliance or counterclockwise to lower it until you reach the desired height.

Finally, test the door one last time. Make sure it opens and closes effortlessly, and that there are no obstructions in the way. If everything looks good, you’ve successfully completed the installation process!

With the door properly adjusted, you can now enjoy the peace of mind that comes with knowing your new dishwasher is perfectly positioned and ready to tackle your dirty dishes. Congratulations on your accomplishment—now it’s time to load it up and experience the convenience of your new appliance!

14. Troubleshooting Common Installation Issues

When it comes to installing your new dishwasher, encountering issues can feel daunting, but fear not! Troubleshooting common installation problems can often be a straightforward process, and with a little patience and persistence, you can resolve them like a pro.

First, let’s talk about water supply issues. If your dishwasher isn’t filling up, check to ensure that the water supply valve is fully opened. Sometimes, it may appear open but isn’t allowing water to flow due to debris or mineral buildup. A quick inspection of the hose connections can also reveal whether there are kinks or blockages impeding water flow.

Next, look out for drainage problems. If your dishwasher is not draining properly, check the drain hose for any clogs or bends. Ensure that it’s installed at the right height—ideally, the top of the hose should reach the underside of your countertop to prevent backflow. If you notice standing water at the bottom of the tub, inspect the filter and drain area for food particles or debris that may be obstructing proper drainage.

Another common issue is noise during operation. If your dishwasher sounds louder than expected, it could be due to improper leveling. Make sure that all four feet are adjusted evenly and that the appliance is stable to minimize vibrations. Additionally, ensure that items inside the dishwasher are arranged properly, as loose cutlery or dishes can rattle against each other and create unwanted noise.

Lastly, keep an eye out for leaks. If you notice water pooling around the base of the dishwasher, double-check all connections, including the water supply line and drain hose. Tighten any loose fittings and inspect the door seal for wear and tear. If the seal is compromised, replacing it might be necessary to prevent future leaks.

By systematically addressing these common installation issues, you can not only ensure that your dishwasher operates effectively but also gain confidence in your DIY skills. Remember, every problem has a solution, and with each challenge you conquer, you’ll be one step closer to mastering appliance installation!

15. Conclusion: Enjoying Your New Dishwasher and Maintenance Tips

Congratulations! You’ve successfully installed your new dishwasher, and now it’s time to enjoy the convenience and efficiency it brings to your kitchen. No more endless hours spent scrubbing pots and pans by hand; instead, you can relax while your new appliance takes care of the dirty dishes. As you bask in the ease of this modern marvel, it’s essential to remember that proper maintenance will ensure your dishwasher remains in top-notch condition for years to come.

To keep your dishwasher running smoothly, make it a habit to regularly clean the filter, as food particles can accumulate and hinder performance. Simply remove the filter, rinse it under warm water, and scrub away any stubborn debris. This small step can significantly enhance the efficiency of your machine.

Additionally, consider running a maintenance cycle every few months. You can achieve this by placing a cup of vinegar or a dishwasher cleaner on the top rack and running a hot water cycle. This process helps eliminate grime, odors, and buildup, leaving your dishwasher fresh and clean.

Don’t forget to check the spray arms, too! Ensure they are free of obstructions and can rotate freely to distribute water effectively. If you notice any debris stuck in the nozzles, use a toothpick to clear it out gently.

Lastly, remember to keep the door seals clean and intact. Wipe them down with a damp cloth regularly to prevent mold and mildew buildup, ensuring a tight seal during operation.

By following these simple maintenance tips, you can extend the lifespan of your dishwasher and continue to enjoy its benefits. So, sit back, relax, and let your new kitchen companion handle the dirty work—after all, you’ve earned it!

In conclusion, installing your new dishwasher doesn’t have to be an intimidating task reserved for the professionals. With the right tools, a little patience, and the step-by-step guidance provided in this article, you can confidently tackle this home improvement project and achieve professional-looking results. Remember to take your time during each stage, from preparing the space to connecting the plumbing and electrical components, ensuring that everything is secure and properly aligned. Soon enough, you’ll be enjoying the convenience of your new appliance, while also taking pride in the fact that you completed the installation yourself. So roll up your sleeves, gather your tools, and get ready to transform your kitchen experience—happy dishwashing!

How to install a new light fixture?

Lighting can transform a room from ordinary to extraordinary, setting the mood and enhancing the overall aesthetic of your space.

Whether you’re looking to brighten up a dim corner, create a cozy atmosphere for evenings in, or showcase your personal style with a stunning new light fixture, the right lighting can make all the difference. However, the thought of installing a new fixture might seem daunting, especially if you’re not well-versed in home improvement projects. Fear not! In this step-by-step guide, we will walk you through the process of selecting the perfect light fixture and provide you with clear, practical instructions for installation. From understanding the types of fixtures and their intended spaces to ensuring safety and achieving a seamless finish, you’ll be equipped with all the knowledge you need to illuminate your space with confidence and flair. Get ready to brighten your home and unleash your inner interior designer!

1. Introduction: The Importance of Lighting in Home Design

How to install a new light fixture?
Credit : whatcanu.com

When it comes to home design, lighting is often an unsung hero, wielding the power to transform a space from ordinary to extraordinary. The right light fixture not only illuminates a room but also sets the tone and ambiance, influencing how we feel and interact within our environments. Imagine stepping into a room bathed in soft, warm light, where shadows dance gently along the walls, creating a cozy and inviting atmosphere. Conversely, stark overhead lighting can render a space cold and unwelcoming, dulling the vibrancy of your carefully chosen decor.

Incorporating effective lighting design goes beyond mere functionality; it is an art form that can enhance the aesthetic appeal of your home. Whether it’s a statement chandelier that becomes the focal point of your dining area or understated sconces that provide a warm glow in a hallway, each light fixture plays a crucial role in defining the character of your space.

Moreover, the right lighting can accentuate architectural features, highlight artwork, and even affect the perceived size of a room, creating the illusion of openness or intimacy as needed. It can guide the eye and draw attention to the areas you want to showcase, while also providing the necessary illumination for everyday tasks.

As we delve into this step-by-step guide on installing a new light fixture, remember that lighting is not just a functional necessity; it’s an opportunity to express your unique style and enhance the atmosphere of your home. Let’s embark on this illuminating journey together, ensuring that every room shines as brightly as your vision for it.

2. Choosing the Right Light Fixture for Your Space

Choosing the right light fixture for your space is a crucial step that can transform the ambiance and functionality of any room. With a myriad of styles, shapes, and sizes available, it can be overwhelming to narrow down your options. Start by considering the purpose of the room—different spaces require different types of lighting. For example, a warm, inviting chandelier might be perfect for a dining area, while a sleek, modern pendant light could enhance the aesthetic of a minimalist kitchen.

Next, think about the size of the fixture in relation to your space. A large, statement piece can become a stunning focal point in a spacious living room, while a smaller, more understated fixture might be ideal for a cozy bedroom. It’s also essential to consider the height at which the light will hang. A fixture that’s too low can obstruct views and movement, while one that’s too high may fail to illuminate the area effectively.

Don’t forget to take into account the overall design theme of your home. Whether your style is contemporary, rustic, or eclectic, the light fixture should complement the existing décor. Materials and finishes play a significant role here; for example, a brushed nickel finish might lend a modern touch, while a vintage brass fixture could add a hint of nostalgia.

Finally, consider the type of bulbs you’ll be using. LED bulbs are energy-efficient and long-lasting, perfect for everyday use, while dimmable options can create a versatile lighting scheme that adjusts to your needs. By thoughtfully selecting a light fixture that aligns with your space’s purpose, style, and lighting requirements, you’ll not only enhance the aesthetic appeal of your room but also create a welcoming and functional environment.

3. Tools You’ll Need for the Installation

How to install a new light fixture?
Credit : whatcanu.com

Before diving into the installation of your new light fixture, it’s essential to gather the right tools. Having everything you need on hand will not only streamline the process but also ensure a safe and effective installation. Here’s a detailed list of tools you’ll require:

1. **Screwdriver Set**: A basic set of screwdrivers, both flat-head and Phillips, is crucial for loosening and tightening screws on your light fixture. Depending on the fixture, you might also need a torque screwdriver for specific screws.

2. **Wire Cutters/Strippers**: These handy tools are vital for preparing your wiring. Wire cutters will help you trim any excess wire, while wire strippers will strip the insulation from the ends of the wires, ensuring a clean connection.

3. **Voltage Tester**: Safety first! A non-contact voltage tester will help you confirm that the power is off in the circuit you’ll be working on. This tool is invaluable for preventing electrical shocks.

4. **Pliers**: Needle-nose pliers are particularly useful for grasping and twisting wires together. They provide the leverage needed to secure wire nuts tightly.

5. **Ladder**: Depending on the height of your ceiling, a sturdy ladder will give you safe access to the area where the light fixture will be installed. Ensure it’s stable and positioned on a level surface.

6. **Tape Measure**: To ensure your new light fixture is installed at the right height and distance from walls or furniture, a tape measure is indispensable. Proper measurements will enhance both functionality and aesthetics.

7. **Level**: For fixtures that need to be hung in a straight line or at a specific angle, a level is essential. This tool helps you achieve that perfect alignment that makes a significant difference in the overall look.

8. **Safety Goggles and Gloves**: Protecting yourself during installation is paramount. Safety goggles will shield your eyes from debris, while gloves can prevent cuts and scrapes when handling tools and fixtures.

With these tools in hand, you’re well-equipped to tackle the installation of your new light fixture. Take a moment to familiarize yourself with each tool before you begin, ensuring that the installation process goes as smoothly as possible. Remember, preparation is key to a successful and safe lighting upgrade!

4. Safety First: Precautions Before You Start

Before diving into the exciting process of installing your new light fixture, it’s crucial to prioritize safety. Working with electricity can pose risks, but with the right precautions, you can ensure a smooth and safe installation. Here’s how to prepare yourself and your workspace.

### Turn Off the Power

The first step is to locate your circuit breaker and turn off the power to the area where you’ll be working. This is non-negotiable. No matter how tempting it may be to just “get it done quickly,” working with live wires is dangerous. After you’ve flipped the switch, double-check your work by testing the existing light fixture with a voltage tester to confirm that the power is indeed off.

### Gather the Right Tools

Having the proper tools on hand not only makes the job easier but also safer. Ensure you have a sturdy ladder, screwdrivers (both flathead and Phillips), wire strippers, pliers, and electrical tape. A safety goggles and rubber-soled shoes can also provide added protection, helping you to avoid slips and falls while working at height.

### Wear Protective Gear

Consider wearing protective gear such as gloves and safety glasses. Gloves will help prevent any cuts or scrapes from sharp edges, while safety glasses will protect your eyes from dust and debris. If you’re sensitive to dust or allergens, a mask can also come in handy, especially if you’re working in an older home.

### Assess Your Environment

Take a moment to assess your workspace. Make sure the area is well-lit, free of clutter, and that you have enough space to maneuver safely. If you’re using a ladder, ensure it’s placed on stable ground and is fully extended. A clean and organized environment will help you focus on the task at hand and reduce the risk of accidents.

### Read the Instructions

Before you start, carefully read the manufacturer’s instructions that come with your new light fixture. These guidelines often include specific safety tips and installation procedures tailored to the product, ensuring that you’re following the best practices for your particular fixture.

By taking these safety precautions seriously, you set the stage for a successful lighting installation. With the power off and your workspace prepared, you’re ready to transform your space and brighten your home with that stunning new fixture!

5. Turning Off the Power: Locating Your Circuit Breaker

How to install a new light fixture?
Credit : whatcanu.com

Before you embark on the journey of installing your new light fixture, one crucial step stands between you and a successful installation: turning off the power. Ensuring your safety is paramount, and the first order of business is to locate your circuit breaker. This compact yet powerful box, often found in a basement, utility room, or closet, is the heart of your home’s electrical system.

To find your circuit breaker, start by identifying the area of your home where the electrical panel resides. It’s typically a gray or metallic box mounted on the wall, featuring a door that swings open to reveal a series of switches or breakers. Each of these controls a specific area or circuit in your home, so it’s important to take a moment to familiarize yourself with its layout.

Once you’ve located your circuit breaker, open the door and inspect the switches. Look for a switch labeled for the room or area where you’ll be working—often, the labels will indicate which lights or outlets each breaker controls. If your circuit breaker doesn’t have clear labels, don’t worry; you can always turn off the main power switch to ensure all electricity is cut off, although this will affect the entire house.

After identifying the correct breaker, firmly switch it to the “off” position. It’s a good idea to keep a flashlight handy in case your workspace becomes dark during this process. To further ensure your safety, use a voltage tester to double-check that the power is indeed off before proceeding with the installation. By taking these precautions, you’re not only protecting yourself but also setting the foundation for a smooth and successful light fixture installation. Now that you’ve responsibly turned off the power, you’re ready to move on to the next steps in illuminating your space!

6. Removing the Old Light Fixture: Step-by-Step Instructions

Removing the old light fixture is a crucial step in your lighting upgrade journey. To begin, ensure your safety by turning off the power at the circuit breaker. This eliminates the risk of electric shock while you work. Once the power is off, it’s time to gather your tools—typically, you’ll need a screwdriver, a voltage tester, and possibly a ladder if the fixture is out of reach.

Next, use the voltage tester to double-check that the power is indeed off. Test the wires connected to the old fixture; if the tester lights up, turn off the power again and revisit your connections. Safety first!

Now, carefully remove the light bulb(s) from the old fixture. If your fixture has a globe or shade, gently unscrew or unclip it to avoid any breakage. With the shade removed, you should have clear access to the fixture’s mounting screws. Loosen these screws with your screwdriver, being cautious not to drop them.

Once the screws are removed, you can gently pull the fixture away from the ceiling. As you do so, take a moment to examine the wiring. You’ll typically find two or three wires: a black (or red) wire for the hot connection, a white wire for the neutral, and a green or bare wire for the ground. Carefully detach these wires by unscrewing the wire nuts or by unclipping them, making sure to note where each wire was connected to facilitate the installation of your new fixture.

After removing all connections, set the old fixture aside. Take a moment to clean the area around the electrical box, as dust and debris can accumulate over time. With the old fixture out of the way, you’re now ready to move on to the next step—installing your brand-new light fixture and transforming your space!

7. Preparing the Electrical Wiring for the New Fixture

How to install a new light fixture?
Credit : whatcanu.com

Before diving into the installation of your stunning new light fixture, it’s crucial to ensure that the electrical wiring is properly prepared. This step is foundational for the safety and functionality of your lighting, so take your time and follow these guidelines closely.

First, turn off the power at the circuit breaker to prevent any accidents while you work. It’s wise to use a voltage tester to double-check that the power is indeed off before touching any wires. Safety first!

Once you’ve confirmed the power is off, remove the old fixture, taking care to document how the existing wiring is connected. This will serve as a reference when you install the new fixture. With the old fixture detached, you’ll need to assess the existing wiring. Look for any signs of fraying, discoloration, or damage; if you notice anything concerning, it’s best to call a professional electrician to address these issues.

Next, prepare the wires for your new fixture. Strip about half an inch of insulation from the ends of the wires using wire strippers, being careful not to cut into the copper strands. You should see three types of wires: the hot wire (typically black or red), the neutral wire (usually white), and the ground wire (green or bare). If your new fixture comes with a ground wire, ensure it’s securely connected to the fixture’s ground point.

Finally, if your new light fixture requires a different setup (like a different number of wires or connections), refer to the manufacturer’s instructions. Each fixture may have unique requirements, so it’s essential to follow their guidelines for optimal performance and safety.

With the electrical wiring properly prepared, you’re now ready to proceed to the installation of your new light fixture, bringing you one step closer to illuminating your space beautifully!

8. Installing the New Light Fixture: A Detailed Guide

Now that you’ve safely removed the old fixture and prepared the electrical connections, it’s time to dive into the exciting part: installing your new light fixture! This step is where your vision for an illuminated space truly begins to take shape. Follow these detailed instructions to ensure a smooth installation process.

**1. Gather Your Tools and Materials:**
Before you start, make sure you have all the necessary tools at hand. You’ll need a screwdriver (both flat-head and Phillips), wire strippers, pliers, and a voltage tester. Additionally, have your new light fixture, mounting hardware, and wire nuts ready. It’s always a good idea to double-check that you have everything within reach so you won’t be scrambling mid-installation.

**2. Prepare the Fixture:**
Unbox your new light fixture and read through the manufacturer’s instructions. Many fixtures come with specific mounting hardware and installation guides tailored to their design. Familiarize yourself with these details and ensure you have all the components needed for assembly. If your fixture has adjustable arms or shades, now is the time to set them up according to your design preference.

**3. Connect the Wiring:**
Carefully lift the new fixture up to the ceiling bracket, aligning it with the electrical box. The colors of the wires will guide you: typically, the black or red wire is the hot wire, the white wire is neutral, and the green or bare wire is the ground. Using wire strippers, strip about half an inch of insulation off the ends of each wire. Twist together the corresponding wires—black to black, white to white, and ground to ground—using wire nuts to secure them firmly. Make sure there are no exposed wire ends, as this can cause a short circuit.

**4. Secure the Fixture:**
Once the wiring is connected, carefully tuck the wires back into the electrical box, ensuring they are not pinched or strained. Line up the fixture with the mounting bracket and secure it in place using the provided screws. If your fixture has a canopy, ensure it covers the junction box neatly and is level for a polished look.

**5. Attach Bulbs and Shades:**
After securing the fixture, it’s time to attach any light bulbs and shades as per your design. Be sure to use the correct wattage as specified by the manufacturer. If your fixture includes decorative elements or diffusers, follow the included instructions to attach these components seamlessly.

**6. Turn On the Power:**
With everything securely in place, it’s time to restore power to the circuit. Head back to your circuit breaker and switch the power back on. Before flipping the switch to test your new light fixture, double-check that everything is securely installed to avoid any accidents.

**7. Enjoy Your New Illumination:**
Finally, flip the switch and bask in the glow of your newly installed light fixture! Take a moment to admire how it transforms your space, creating both functionality and style. If necessary, adjust the fixture’s positioning or shades to achieve the desired ambiance.

By following these detailed steps, you can confidently install your new light fixture, bringing a fresh brilliance to your home. Remember, the right lighting can dramatically affect your space, enhancing both its beauty and functionality. Happy illuminating!

9. Connecting the Wires: Color-Coding and Techniques

When it comes to connecting the wires of your new light fixture, understanding color-coding and employing proper techniques is crucial for both functionality and safety. Before diving into the process, ensure you have the right tools at hand: wire strippers, electrical tape, and a voltage tester.

Begin by identifying the wires in your ceiling and the ones attached to your new fixture. Typically, you’ll encounter three types: black (or red) for the hot wire, white for the neutral wire, and green or bare for the ground wire. The black wire carries electricity from the power source, while the white wire returns the current back to the panel. The ground wire is a safety feature, redirecting any stray electricity to prevent shocks.

Once you’ve confirmed the proper identification of each wire, it’s time to prepare them for connection. Use your wire strippers to carefully remove about half an inch of insulation from the ends of each wire. Be cautious not to nick the wire itself, as this could compromise its integrity.

Next, align the corresponding wires from your fixture with those from the ceiling. Start with the black (or red) wires—twist them together clockwise until they are tightly secured. Follow this by connecting the white wires in the same manner. For the ground wires, if your fixture has a green or bare wire, connect it to the ground wire in the ceiling. If there is no ground wire present, you can attach the ground wire from the fixture to the mounting bracket of the light fixture, ensuring it has a solid connection.

After making all the connections, wrap each twisted pair with electrical tape to provide an extra layer of insulation and protection. This step is vital; it not only safeguards against potential short circuits but also ensures longevity for your connections.

Once everything is securely fastened and taped, gently tuck the wires back into the electrical box, taking care not to pinch or strain any of the connections. Finally, attach the light fixture to the mounting bracket according to the manufacturer’s instructions. With the wiring complete, you’re ready to restore power and see your new light fixture illuminate your space beautifully!

10. Securing the Fixture: Ensuring Stability and Safety

Securing the fixture is a crucial step in the installation process, as it directly impacts both the stability and safety of your new lighting. A well-mounted fixture not only enhances the aesthetic appeal of your space but also prevents potential hazards, such as electrical malfunctions or falling fixtures.

Begin by carefully positioning the fixture against the ceiling, aligning it with the electrical box. Make sure you have a clear view of the mounting bracket, which will serve as the anchor for your light. Most fixtures come with a mounting plate that requires you to attach it securely to the electrical box using the provided screws. It’s essential to use the correct screws that match the size and type of your electrical box—typically, these will be either 1″ or 2″ screws for standard installations.

Once the plate is in place, gently pull the fixture’s wiring through the center opening of the mounting bracket. Before proceeding, double-check that all wires are properly connected and insulated to avoid any risk of short-circuiting. Follow the manufacturer’s instructions to ensure that each wire is attached correctly: black to black (or live), white to white (or neutral), and green or copper to the grounding wire.

After securing the wiring, it’s time to attach the fixture to the mounting bracket. Depending on your light fixture, you may need to tighten screws or use clips to hold it firmly in place. Be sure to give the fixture a gentle tug once it’s installed to confirm that it is securely fastened.

Finally, always take a moment to step back and visually inspect your work, ensuring that the fixture is level and appropriately aligned. A well-secured light fixture not only looks professional but also contributes to a well-lit, safe environment in your home. With your fixture firmly in place, you are now ready to restore power and enjoy the warm glow of your newly installed lighting.

11. Turning the Power Back On: Testing Your New Light Fixture

After you’ve diligently followed each step of the installation process, it’s finally time for the moment of truth: turning the power back on and testing your new light fixture. This is where all your hard work pays off, and the excitement of seeing your space illuminated in a fresh, new way comes to life.

Before flipping the switch, take a moment to ensure everything is in order. Double-check that all wires are securely connected, and the fixture is firmly mounted. Safety first! Once you’re satisfied that everything looks good, it’s time to restore power. Head back to your circuit breaker and flip the switch for the corresponding room.

With your heart racing in anticipation, return to the light fixture. Take a deep breath, and reach for the light switch. As you flick it on, pay close attention to how the new fixture responds. Does it illuminate instantly with a warm glow, or is there a flicker of hesitation? If the light turns on as expected, you’ll likely feel a rush of satisfaction.

However, if it doesn’t light up, don’t panic! This could simply be a matter of a loose connection or an incorrect wiring setup. Turn the power off again, and carefully revisit your wiring connections, ensuring that each wire is tightly secured and in the right place.

Once you’ve confirmed that everything is as it should be, restore the power once more. When you finally flip that switch again, and the room is bathed in beautiful light, relish in your accomplishment. You’ve successfully transformed your space and created a welcoming atmosphere with your new light fixture! Take a moment to appreciate how the fixture enhances the overall aesthetic of the room and consider how it will impact your daily life. Whether it’s brightening up a cozy reading nook or providing essential light in a functional workspace, your new fixture is sure to make a significant difference.

12. Adjusting Light Levels: Dimming Options and Bulb Choices

When it comes to setting the perfect ambiance in your space, adjusting light levels is a pivotal consideration that should not be overlooked. The right lighting can dramatically transform a room, setting the mood for relaxation, productivity, or social gatherings. To achieve this, you have a variety of dimming options and bulb choices at your disposal.

**Dimming Options:**
Installing a dimmer switch is one of the simplest ways to gain control over your lighting. These devices allow you to adjust the brightness of your fixtures, giving you the flexibility to create the perfect environment for any occasion. Modern dimmers come in various styles, including rotary, slide, and smart dimmers that can be controlled via smartphone apps or voice commands. When choosing a dimmer, ensure it is compatible with the type of bulbs you plan to use, as traditional incandescent bulbs work well with most dimmers, while LED and CFL bulbs may require specific dimmable versions.

**Bulb Choices:**
The next step in adjusting light levels is selecting the right bulbs for your fixtures. LED bulbs are a popular choice due to their energy efficiency and long lifespan. They come in a variety of color temperatures, ranging from warm white (2700K) to cool daylight (5000K), allowing you to tailor the light to suit your space. For a cozy atmosphere, opt for warm white bulbs in living rooms and bedrooms. Conversely, brighter, cooler bulbs work well in kitchens and workspaces where clarity and focus are essential.

You might also explore smart bulbs that allow you to change colors and dimming levels directly from your smartphone or through voice commands. This versatility not only adds convenience but also allows for dynamic changes in your space, making it easy to adapt to different activities or moods.

By thoughtfully selecting your dimming options and bulb choices, you can illuminate your space in a way that enhances its beauty and functionality, bringing warmth and life to your home. With this combination, you’re well on your way to creating a lighting scheme that is both practical and visually appealing, ensuring that your new light fixture becomes a stunning focal point for years to come.

13. Common Mistakes to Avoid During Installation

When embarking on the journey of installing a new light fixture, it’s essential to be aware of potential pitfalls that can turn an exciting project into a frustrating ordeal. Here are some common mistakes to avoid, ensuring your installation goes smoothly and safely.

**1. Skipping the Safety Check:** Before you even think about unscrewing that old fixture, make sure to turn off the power at the circuit breaker. Many DIY enthusiasts underestimate the importance of this step. Forgetting to shut off the power could lead to serious injuries or even electrocution. Always double-check with a voltage tester to confirm that the wires are dead before touching them.

**2. Ignoring the Weight Limit:** Every light fixture has a weight limit determined by the mounting hardware and ceiling structure. Overloading can lead to sagging, or worse, the entire fixture falling off the ceiling. Always check the specifications of both your light fixture and the mounting bracket to ensure they are compatible and secure.

**3. Neglecting the Right Tools:** Using the wrong tools can lead to stripped screws, damaged wires, or even injury. Ensure you have all the necessary tools on hand—screwdrivers, wire strippers, pliers, and a ladder—and that they are in good condition. Investing in a quality toolkit can save you time and headaches during the installation process.

**4. Poor Wire Connections:** One of the most critical aspects of installing a light fixture is making secure wire connections. Many DIYers make the mistake of simply twisting wires together without properly securing them with wire nuts or electrical tape. Loose connections can lead to flickering lights, short circuits, or fire hazards. Always ensure that your wires are tightly twisted and that wire nuts are firmly in place.

**5. Not Considering Placement:** Before you mount your new light fixture, take a moment to think about its placement. Is it centered over a dining table, or is it providing adequate illumination for a workspace? Failing to consider the fixture’s functionality and aesthetics can leave your space poorly lit or looking unbalanced.

**6. Overlooking the Final Touches:** Once your fixture is installed, don’t rush to turn on the power. Take a moment to tidy up any visible wires, making sure everything is neatly tucked away and secured. Then, step back and admire your work. A well-installed fixture not only illuminates your space but can also serve as a stunning focal point.

By steering clear of these common mistakes, you’ll set yourself up for a successful light fixture installation. With careful planning and attention to detail, you’ll create a beautifully lit space that enhances your home’s ambiance.

14. Maintaining Your Light Fixture: Tips for Longevity

Once you’ve successfully installed your new light fixture, the next crucial step is ensuring its longevity through proper maintenance. A well-cared-for light fixture not only enhances the aesthetic of your space but also functions efficiently over time. Here are some practical tips to keep your fixture shining bright for years to come.

### Regular Dusting and Cleaning

Dust and grime can accumulate on light fixtures, dulling their shine and affecting their performance. Make it a habit to dust your fixture regularly with a soft, dry cloth. For more thorough cleaning, turn off the power and use a damp cloth or sponge with mild soap to gently wipe down surfaces. Be sure to avoid harsh chemicals that can damage finishes or materials. For intricate designs, a soft-bristle brush can help reach those tricky crevices.

### Check and Replace Bulbs as Needed

Regularly check the bulbs in your light fixture to ensure they are functioning correctly. If you notice any flickering or dimming, it might be time to replace them. When replacing bulbs, opt for those recommended by the manufacturer to maintain compatibility. Consider energy-efficient LED bulbs, which not only last longer but also reduce your energy consumption.

### Inspect Electrical Connections

While you shouldn’t need to frequently tamper with the electrical components, it’s wise to conduct periodic inspections. Look for signs of wear, such as frayed wires or loose connections. If you’re unsure, don’t hesitate to call a professional electrician to ensure everything is safe and secure.

### Avoid Overloading Circuits

Be mindful of the wattage limitations specified for your fixture. Overloading can lead to overheating, potentially causing damage to both the fixture and your home’s electrical system. Always adhere to the manufacturer’s recommendations and consider the total wattage of all bulbs used.

### Store Seasonal Decorations Safely

If your light fixture accommodates seasonal decorations, like hanging ornaments or garlands, ensure they’re stored safely when not in use. Avoid placing heavy items that could stress the fixture or wires. When decorating, use lightweight materials that won’t compromise the integrity of the fixture.

### Schedule Professional Maintenance

For complex fixtures, especially those that require specialized cleaning or maintenance, consider scheduling an annual check-up with a professional. They can offer insights and services that ensure your fixture remains in top condition.

By incorporating these maintenance tips into your routine, you’ll not only enhance the beauty of your space but also extend the lifespan of your light fixture. A little care goes a long way in keeping your lighting sparkling and functional!

15. Conclusion: Enjoying Your Newly Illuminated Space

As you stand back and admire your newly installed light fixture, there’s a palpable sense of satisfaction that envelops the room. The warm glow fills the space, transforming dull corners into inviting areas, and highlighting the unique features of your décor. Whether you chose a sleek modern pendant light or a vintage-inspired chandelier, the right fixture not only serves a functional purpose but also acts as a statement piece that reflects your personal style.

Now that the installation process is behind you, take a moment to revel in this achievement. Consider how the new lighting enhances the ambiance of your home — perhaps it creates a cozy reading nook in the living room, a stimulating workspace in your office, or a romantic setting in your dining area. The possibilities are endless, and the impact of good lighting cannot be overstated.

Don’t forget to experiment with different bulb types and brightness levels to find the perfect balance for your space. Dimming capabilities can further elevate the atmosphere, allowing you to adjust the mood according to the time of day or occasion. Plus, with the right maintenance, your fixture will continue to shine brightly for years to come.

In conclusion, installing a new light fixture is more than just a home improvement task; it’s an opportunity to express your creativity and enhance your living environment. Enjoy the newfound brightness and warmth in your space, and let your beautifully illuminated home inspire you and your guests for many gatherings to come. Embrace the change, and let the light guide you through those cozy evenings and vibrant days ahead.

As we conclude our step-by-step guide to installing a new light fixture, we hope you feel empowered to transform your space with the perfect illumination. Whether you’re updating a single room or enhancing your entire home, the right light fixture can dramatically alter the ambiance and functionality of your environment. By following the tips and techniques outlined in this post, you can confidently tackle this DIY project, bringing both style and brightness to your living areas. Remember, lighting is more than just a practical necessity; it’s an opportunity to express your personal taste and create a welcoming atmosphere. So gather your tools, unleash your creativity, and let your space shine like never before! We can’t wait to see the stunning results of your efforts—don’t forget to share your transformation with us!

How to install a ceiling fan?

Installing a ceiling fan can seem like a daunting task, but with the right guidance, you can transform your living space while enhancing comfort and style.

Imagine breezy days and cozy evenings, all while adding that perfect touch to your home’s decor. This step-by-step guide is designed to empower you with the knowledge and confidence needed to install your ceiling fan like a pro. From selecting the ideal fan for your space to understanding the necessary tools and safety precautions, we’ll walk you through every aspect of the installation process. Whether you’re looking to improve energy efficiency or simply want to create a more inviting atmosphere, this article will equip you with all the tips and tricks to ensure a smooth and successful installation. Get ready to elevate your home with the cool comfort of a ceiling fan!

1. Introduction: Why Install a Ceiling Fan?

How to install a ceiling fan?
Credit : whatcanu.com

Ceiling fans are more than just stylish accents in a room; they serve a multitude of practical benefits that can transform your living space. With the rising costs of energy and a growing emphasis on sustainability, ceiling fans offer an efficient way to maintain comfort in your home without over-relying on air conditioning. They circulate air effectively, helping to create a gentle breeze that can make warm summer days feel cooler and refreshing. In the colder months, reversing the fan’s direction can help distribute warm air that rises to the ceiling, allowing you to save on heating costs.

Moreover, ceiling fans come in various designs, colors, and styles, making them an excellent way to enhance your home’s decor. Whether your aesthetic leans towards modern minimalism, rustic charm, or classic elegance, there’s a ceiling fan that can complement your space beautifully.

Installing a ceiling fan is a highly rewarding DIY project that not only elevates your home’s comfort level but also adds value to your property. With just a few tools and a bit of time, you can achieve professional-looking results that will impress your family and friends. In this guide, we’ll walk you through the step-by-step process of installing your ceiling fan like a pro, ensuring you enjoy all the benefits without the hassle. So, let’s dive in and get started on this exciting home improvement journey!

2. Tools and Materials Needed for Installation

Before diving into your ceiling fan installation, gathering the necessary tools and materials is crucial for a smooth and efficient process. Having everything on hand will minimize interruptions and ensure you can complete the job like a pro.

**Tools Needed:**

1. **Screwdrivers:** A Phillips head and a flathead screwdriver are essential for tightening screws and securing the fan to the mounting bracket.
2. **Drill:** An electric drill will make the process of installing the mounting bracket and securing the wires much easier. Make sure to have the appropriate drill bits for your ceiling type.
3. **Wire Strippers:** These handy tools are necessary for stripping the insulation off the ends of the electrical wires, allowing for a secure connection.
4. **Ladder:** A sturdy ladder will provide the height you need to reach the ceiling safely while installing your fan. Make sure it’s stable and tall enough for the height of your ceiling.
5. **Voltage Tester:** This essential tool helps ensure that the power is off before you begin working with any electrical connections, keeping you safe throughout the installation.

**Materials Needed:**

1. **Ceiling Fan Kit:** Ensure your fan comes with all the necessary components, including blades, light kit (if applicable), mounting bracket, and instructional manual. Check that your fan is compatible with your ceiling height and style.
2. **Electrical Wire:** Depending on your specific installation, you may need additional wire to connect the fan to the existing electrical box. Make sure to use wire that meets local electrical codes.
3. **Mounting Bracket:** Often included with the fan, this bracket is crucial for securely attaching the fan to the ceiling. If your fan doesn’t come with one, ensure you purchase a compatible model.
4. **Wire Nuts:** These small connectors are used to secure the electrical connections. They help keep your wiring safe and tidy, preventing any potential hazards.

By gathering these tools and materials ahead of time, you’ll set yourself up for success as you embark on your ceiling fan installation journey. With everything in place, you can proceed with confidence, transforming your space into a cool, breezy haven!

3. Safety First: Preparing for Your Installation

How to install a ceiling fan?
Credit : whatcanu.com

Before diving into the installation of your ceiling fan, it’s crucial to prioritize safety. This step is not just a precaution—it’s an essential part of ensuring a smooth and secure installation process. Here’s how to prepare for your ceiling fan installation like a pro.

First and foremost, turn off the power to the existing light fixture or ceiling outlet from which you’ll be installing the fan. Locate your circuit breaker and switch off the appropriate circuit to eliminate any risk of electric shock. It’s always better to be safe than sorry, so double-check that the power is indeed off by testing the fixture with a voltage tester.

Next, gather all necessary tools and materials. You’ll typically need a ladder to reach the ceiling, a screwdriver, wire connectors, electrical tape, and possibly a drill, depending on the installation requirements. Having everything at hand will prevent you from making unnecessary trips, keeping the momentum flowing.

If you’re replacing an existing light fixture, take a moment to carefully remove it. Be sure to support the fixture as you unscrew it, and gently lower it to avoid any damage. As you do this, take note of how the wires are connected; this will serve as a handy reference when you connect your new fan.

Inspect the ceiling box to ensure it is fan-rated, meaning it can support the weight and movement of the fan. If it’s not, you’ll need to replace it with a box specifically designed to hold ceiling fans. This is a critical step, as an inadequate support system can lead to safety hazards down the line.

Lastly, don’t forget to wear appropriate safety gear. Safety goggles will protect your eyes from dust and debris, while a dust mask can help you avoid inhaling any particles. With these preparations complete, you’re ready to move on to the installation phase—confident, safe, and fully equipped. Remember, taking the time to prepare properly will make the entire process smoother and ensure that your new ceiling fan can be enjoyed for years to come!

4. Choosing the Right Location for Your Ceiling Fan

Choosing the right location for your ceiling fan is crucial to maximizing its effectiveness and ensuring it enhances your space aesthetically. Start by considering the room’s layout and purpose. A ceiling fan is most effective when positioned in the center of the room, allowing for optimal airflow and cooling. Measure the dimensions of the room and the height of the ceiling to determine the appropriate size and type of fan you need.

Next, take note of any obstructions that could interfere with the fan’s operation, such as light fixtures, beams, or low-hanging furniture. Ideally, the bottom of the fan blades should be at least 7 feet above the floor to ensure safety and comfort while still allowing for efficient air circulation. If your ceilings are particularly high, you may need a longer downrod to achieve the perfect height.

Additionally, consider the fan’s direction. Most fans have a switch that allows you to reverse the blade rotation. In warmer months, a counterclockwise rotation creates a cooling breeze, while in winter, a clockwise rotation pushes warm air down, making your space feel cozy and inviting.

Lastly, think about the fan’s aesthetic appeal. Choose a style and finish that complements your existing décor and fits seamlessly into the room. Whether you prefer a sleek modern design or a rustic farmhouse vibe, the right ceiling fan can serve as both a functional appliance and a stunning focal point in your space. By carefully selecting the perfect location, you’ll not only enhance the comfort of your room but also elevate its overall charm.

5. Removing Your Old Light Fixture or Ceiling Fan

How to install a ceiling fan?
Credit : whatcanu.com

Before you can install your new ceiling fan and bask in the refreshing breeze it provides, you’ll need to safely remove the old light fixture or ceiling fan that’s currently in place. This step is crucial and requires your full attention to ensure both your safety and the integrity of your electrical system.

Start by turning off the power to the light fixture or fan at the circuit breaker. This not only protects you from potential electric shocks but also prevents any damage to your tools or the new fan during installation. Once the power is off, use a voltage tester to double-check that the wires are indeed not live.

Next, it’s time to remove the fixture. If you’re dealing with a light fixture, gently unscrew any decorative elements or shades to access the mounting screws. For a ceiling fan, you may need to remove the blades first. Most blades can be detached with a simple screwdriver; just be sure to place them safely aside to avoid any unnecessary accidents.

With the blades removed (if applicable), locate the mounting bracket or canopy. This is typically secured to the ceiling with screws. Carefully unscrew the bracket, and let the fixture hang down. You’ll see the wiring that connects your fixture to the electrical box. Before disconnecting any wires, take a moment to note how they are connected—taking a photo can be especially helpful for reference later.

Once you have the connections documented, carefully disconnect the wires. Most fixtures will have a standard color-coding system: black (hot), white (neutral), and green or bare copper (ground). Use wire nuts to secure the ends of each wire once they’re detached to prevent any accidental contact.

As you lower the old fixture down, keep an eye out for any loose parts or screws that might drop. With everything safely removed, take a moment to clean the area around the electrical box to prepare for your new ceiling fan installation.

Remember, if at any point you feel unsure or uncomfortable, don’t hesitate to contact a professional electrician. Safety should always be your top priority as you embark on this home improvement project!

6. Understanding Ceiling Fan Wiring Basics

Before diving into the installation process, it’s crucial to understand the basics of ceiling fan wiring. Knowledge of wiring not only empowers you to tackle the installation with confidence but also ensures safety throughout the project.

First, familiarize yourself with the primary components involved in the wiring of a ceiling fan. Most ceiling fans come with three key wires: the black wire (or sometimes red), which connects to the power supply; the white wire, which is the neutral wire; and the green or bare copper wire, which serves as the ground wire. Understanding these wires will help you make the right connections.

Next, turn off the power at the circuit breaker to avoid any electrical hazards. Use a voltage tester to double-check that there is no electricity flowing to the wires you’ll be working with. Safety should always be your number one priority!

If you are replacing an existing light fixture with a ceiling fan, you may find that the previous installation has different color wires or configurations. Take a moment to document the existing connections before removing the fixture. This will serve as a reference for reconnecting the new fan.

For new installations, ensure that the electrical box in the ceiling is fan-rated and capable of supporting the weight and motion of the fan. If you’re unsure, consult a professional or check local building codes.

Once you’re clear on the wiring system, you can start connecting the fan. Typically, the black wire from the ceiling connects to the black fan wire, and the white wire connects to the white fan wire. The green or bare wire from the ceiling should be attached to the ground wire of the fan. Secure all connections with wire nuts, and for extra safety, wrap them with electrical tape.

In summary, understanding ceiling fan wiring basics not only prepares you for a successful installation but also ensures your ceiling fan operates safely and efficiently. With this foundational knowledge, you’re one step closer to enjoying the cool breeze from your newly installed fan!

7. Installing the Ceiling Fan Mounting Bracket

How to install a ceiling fan?
Credit : whatcanu.com

Once you have ensured that the power is turned off and have gathered all your tools, it’s time to move on to the crucial step of installing the ceiling fan mounting bracket. This bracket is the unsung hero of your ceiling fan, providing the sturdy foundation needed for your fan to operate safely and efficiently.

Start by locating the electrical box in the ceiling, which is where your fan will eventually be mounted. Before proceeding, double-check that the box is rated for ceiling fan use—this is essential, as standard light fixture boxes may not be strong enough to support the weight and movement of a ceiling fan. If the box is not suitable, you’ll need to replace it with a fan-rated box.

Once you’ve confirmed the box’s compatibility, line up your mounting bracket with the holes in the electrical box. Most mounting brackets come with a variety of holes to accommodate different box types, so ensure you choose the right configuration. Using the provided screws, secure the bracket firmly to the box, making sure it is level and tight to prevent any wobbling or movement once the fan is installed.

After securing the bracket, take a moment to inspect it. A properly installed mounting bracket should feel solid and unyielding. If there is any play or looseness, recheck your screws and ensure everything is tightened correctly. This step is critical as it not only affects the fan’s performance but also ensures safety for everyone in the room.

With the mounting bracket firmly in place, you are now ready for the exciting part—attaching your new ceiling fan! Take a moment to appreciate your work so far; you’re one step closer to enjoying a refreshing breeze in your space!

8. Connecting the Wires: Step-by-Step Instructions

Connecting the wires of your ceiling fan may seem daunting, but with a little guidance, you can do it like a pro. This step is crucial, as it ensures that your fan will operate safely and efficiently. Here’s a detailed breakdown of how to make those electrical connections confidently.

**Step 1: Safety First**
Before you begin, ensure your safety by turning off the power at the circuit breaker. This will prevent any accidental shocks while you’re working. Use a voltage tester to confirm that the power is indeed off at the ceiling fan box.

**Step 2: Identify the Wires**
In most ceiling fan installations, you will encounter several wires: black (or red), white, and green (or bare). The black wire is typically for the fan motor, the white is for the neutral connection, and the green or bare wire is the ground. If your ceiling fan has additional wires for lights, they may be color-coded differently, so refer to the fan’s manual for clarity.

**Step 3: Making the Connections**
1. **Connect the Ground Wire**: Start by twisting the green or bare ground wire from the ceiling with the ground wire from the fan. Secure them together with a wire nut, ensuring that no copper is exposed.

2. **Connect the Neutral Wires**: Next, take the white wire from the ceiling and connect it to the white wire from the fan. Again, twist them together and secure with a wire nut.

3. **Connect the Hot Wires**: Now, it’s time to connect the hot wires. If your fan has a light kit, you may have more than one black wire. Generally, connect the black wire from the ceiling to the black wire from the fan. If there’s a separate wire for the light, connect it to the blue wire (if present) from the fan.

**Step 4: Secure All Connections**
After making all your connections, ensure that each wire nut is tight and that no bare wire is showing. Use electrical tape to wrap around the wire nuts for added security.

**Step 5: Tuck Wires Neatly**
Gently tuck all the wires back into the ceiling box. This will help prevent any pinching when you mount the fan.

**Step 6: Final Check**
Before you proceed to mount the fan, double-check all connections to ensure that everything is secure. Once satisfied, you can proceed to attach the fan to the mounting bracket, following the manufacturer’s instructions.

By following these step-by-step instructions, you’ll have successfully connected the wires for your ceiling fan. With everything in place, you’re now ready to restore power and enjoy the cool breeze your new fan provides!

9. Attaching the Fan Blades and Light Kit

Once your ceiling fan is securely mounted and the electrical connections are in place, it’s time to add the finishing touches: attaching the fan blades and light kit. This step is crucial in ensuring both functionality and aesthetics, as they significantly influence the overall look and performance of your fan.

Start by carefully unpacking the fan blades and checking for any damage. Most ceiling fans come with a set of blades that may vary in design and color, so take a moment to choose the configuration that best suits your space. Lay them out in the order they will be attached, as many fans require a specific sequence to ensure balance — this is particularly important for larger models.

Using the screws provided, attach each blade to the mounting brackets on the fan’s motor assembly. It’s best to loosely secure each blade first before fully tightening them down. This allows for slight adjustments, ensuring that all blades are aligned correctly and will spin smoothly. Once you’re satisfied with their positioning, go ahead and tighten the screws securely, but be cautious not to overtighten, as this could damage the blades.

Next, move on to the light kit. If your ceiling fan includes a light fixture, this is the moment to enhance your space with some illumination. Refer to the manufacturer’s instructions for specific wiring details, as they can vary between models. Typically, you will need to connect the light kit wires to the fan’s wires using wire connectors, ensuring that the colors match: black to black (or blue), white to white, and ground to ground.

Once the wiring is complete, attach the light kit to the fan, making sure it’s securely fastened. This step often involves aligning it with the mounting bracket and tightening screws. Finally, install the light bulbs, and if your fan has a glass shade, carefully attach it to complete the look.

With the fan blades and light kit securely attached, step back and admire your work! You’ve not only enhanced your room’s ambiance but also ensured that your ceiling fan is ready to provide comfort and style for years to come.

10. Securing the Ceiling Fan and Testing Stability

Once you’ve assembled the fan and ensured that all the wiring is properly connected, it’s time to secure the ceiling fan to its mounting bracket. This step is crucial for both safety and functionality, so take your time and do it right.

Begin by carefully lifting the fan into place, aligning it with the mounting bracket that you installed earlier. Most ceiling fans come with screws specifically designed for this purpose—typically, these are provided in the same packet as the fan’s assembly instructions. Using your screwdriver, carefully secure the fan by tightening these screws until they are snug. It’s important not to overtighten, as this can lead to damage or misalignment.

After securing the fan, give it a gentle shake to test its stability. It should feel firmly attached, with no wobbling or movement. If you notice any instability, double-check that all screws are tightened properly and that the mounting bracket is securely anchored in the ceiling. For added peace of mind, it’s a good idea to check that the fan blades are level and evenly spaced, as an unbalanced fan can lead to noise and reduced efficiency.

Once you’re satisfied with the installation, it’s time to test the fan. Turn the power back on at the circuit breaker, and use the remote control or wall switch to power up the fan. Observe its operation carefully: listen for any unusual noises and monitor its movement. A well-installed ceiling fan should run smoothly and quietly.

If everything checks out, congratulations! You’ve successfully installed your ceiling fan like a pro. Enjoy the comfort of your new ceiling fan, and take a moment to appreciate the satisfaction of your DIY accomplishment!

11. Installing the Remote Control or Wall Switch

Installing the remote control or wall switch for your ceiling fan is a crucial step that can significantly enhance your user experience, providing the convenience of controlling your fan from the comfort of your couch or bed. There are two primary options for controlling your ceiling fan: a handheld remote control or a wall-mounted switch, each offering unique benefits.

### Installing the Remote Control

If you’ve chosen to go with a remote control, start by ensuring you have the necessary batteries for the remote itself. Most remotes require AA or AAA batteries, which are usually included in the package. Next, locate the receiver, a small device that connects to your fan’s wiring. It’s typically found in the canopy of the fan, where it connects directly to the fan’s motor and power supply.

Begin by carefully following the manufacturer’s instructions to wire the receiver. This usually involves connecting the wires from the receiver to the corresponding wires from the ceiling fan – typically black to black (power), white to white (neutral), and green or bare to green or bare (ground). Once wired, secure the receiver within the fan canopy. Ensure that the wires are neatly tucked away to avoid any obstructions when mounting the fan.

After securing everything, attach the canopy back to the ceiling and install the batteries in the remote. Test the remote to make sure it’s communicating with the fan—turning it on and off, adjusting speeds, and controlling the light (if applicable) should all function seamlessly.

### Installing the Wall Switch

If you prefer a wall switch, start by turning off the power at the circuit breaker to ensure safety. You’ll need to replace your existing switch with a compatible fan switch, which may have additional functionalities like speed control or light dimming. Carefully remove the old switch from the wall box and disconnect the wiring.

Connect the new wall switch following the manufacturer’s wiring diagram. Generally, this involves connecting the hot wire to the switch and the ground wire to the grounding screw. Once wired, secure the switch back into the wall box and attach the cover plate.

Turn the power back on at the circuit breaker and test your new wall switch. Make sure it effectively controls the fan’s operation and any integrated lighting features.

### Final Touches

Whether you opted for a remote control or wall switch, ensure that all components are securely installed and functioning correctly. This step not only enhances your ceiling fan’s usability but also adds a polished, professional touch to your installation. A well-installed remote or switch means you can easily adjust your ceiling fan’s settings without hassle, allowing you to enjoy your newly installed fan to its fullest potential!

12. Final Touches: Balancing the Fan Blades

Once you’ve successfully installed your ceiling fan and it’s ready to spin, it’s time for the final touch: balancing the fan blades. This step is crucial, as an unbalanced fan can lead to wobbling, excessive noise, and even potential damage over time. Fortunately, balancing your fan is a straightforward process that can enhance its performance and longevity.

Start by turning on the fan and observing its movement. If you notice any wobbling or irregular motion, it’s a sign that the blades may need adjustment. Begin by checking the blade screws to ensure they are all tight. Loose screws can cause the blades to sag or flutter, leading to an imbalance.

Next, you’ll want to use a blade balancing kit, which usually includes a few adhesive weights and instructions. Most kits come with small clips that you can temporarily attach to the blades to determine where the imbalance lies. Begin by attaching one weight to the center of one blade, then turn the fan on again to see if the wobbling persists. If it does, try moving the weight along the blade or adding additional weights until the fan runs smoothly.

Remember to repeat this process for each blade, ensuring that they are all equally balanced. Once you’ve achieved a wobble-free spin, remove any temporary weights and secure the final balancing weights in place with their adhesive backing.

Finally, take a step back and admire your handiwork! With the fan balanced and running smoothly, you can enjoy the cool airflow it provides without the distraction of annoying noises or unsteady movement. This final touch not only enhances your fan’s performance but also ensures a peaceful atmosphere in your home. Congratulations! You’ve successfully installed your ceiling fan like a pro!

13. Troubleshooting Common Installation Issues

Installing a ceiling fan can feel like a straightforward task, but even the most seasoned DIYers sometimes encounter unexpected hiccups along the way. Whether you’re a first-timer or a seasoned pro, it’s essential to know how to troubleshoot common installation issues to ensure your ceiling fan operates safely and efficiently.

One of the most frequent problems arises when your fan wobbles or shakes during operation. This can often be attributed to uneven blade installation or loose screws. To remedy this, turn off the power, carefully check each blade for proper alignment, and tighten any loose screws. If the wobbling persists, consider using a blade balancing kit, which usually includes small weights to attach to the blades for balance.

Another issue might involve the fan not turning on at all. Start by checking your circuit breaker to ensure power is flowing to the fixture. If the breaker is fine, inspect your wiring connections within the fan and switch box. It’s vital that all wires are securely connected and that the power supply is correctly configured. If you’re still having trouble, a quick check of the pull chain (if applicable) can help; sometimes, it may not be set to the “on” position.

You may also encounter issues with the fan’s remote control if your model includes one. If the remote isn’t functioning as expected, check the batteries first, as dead batteries are a common culprit. If the remote still fails to work, ensure that the receiver unit inside the fan is properly connected. Sometimes a simple reset of the remote can do the trick, so refer to your user manual for specific instructions on resetting the device.

Lastly, if your fan is running but producing an unpleasant noise—like grinding or clicking—this could indicate that the motor or blades are misaligned. Make sure all components are securely fastened, and check for any debris that might be obstructing the fan’s movement.

By familiarizing yourself with these common installation issues and their solutions, you’ll not only boost your confidence in installing ceiling fans but also enhance your overall DIY skills. With a little patience and persistence, you can troubleshoot any problems that arise, ensuring your ceiling fan operates smoothly and effectively for years to come. Happy installing!

14. Maintenance Tips for Your Ceiling Fan

Maintaining your ceiling fan is essential to ensure it operates efficiently and prolongs its lifespan. Regular upkeep not only helps you enjoy a comfortable environment but also keeps your energy bills in check. Here are some practical maintenance tips to keep your ceiling fan running smoothly for years to come.

First and foremost, dusting your fan blades should be a regular part of your cleaning routine. Dust and grime can accumulate quickly, especially if your fan is used frequently. Use a microfiber cloth or an extendable duster to gently wipe the blades, ensuring you reach the hidden corners. For a deeper clean, a mixture of mild soap and water can be applied to a cloth, followed by a thorough drying to prevent moisture damage.

Next, check the balance of your fan. An unbalanced fan can lead to wobbling, noise, and even potential damage over time. To balance your fan, you can use a simple balance kit, which typically includes weights to attach to the blades. Make adjustments as needed, and your fan will operate smoothly once again.

Don’t forget to inspect the fan’s motor and pull chain. Over time, the motor can accumulate dust, leading to overheating. Carefully vacuum the motor housing, ensuring that you don’t disturb any wiring. Also, check if the pull chain is functioning correctly. If it feels loose or is stuck, it might need a little lubrication or adjustment.

Finally, consider the seasonality of your fan use. Many ceiling fans come with a switch that allows you to change the direction of blade rotation. In the summer, set your fan to spin counterclockwise to create a cool breeze, while in the winter, switch it to clockwise to circulate warm air. This simple adjustment can significantly enhance your comfort and help you save on heating and cooling costs.

By following these maintenance tips, you’ll not only keep your ceiling fan in peak condition but also enhance its performance, ensuring that your home remains a comfortable haven all year round. Regular care will go a long way in making your ceiling fan a reliable companion in your quest for the perfect indoor climate.

15. Conclusion: Enjoying Your New Ceiling Fan!

Congratulations! You’ve successfully installed your ceiling fan, and now it’s time to enjoy the fruits of your labor. A well-placed ceiling fan not only enhances the aesthetic appeal of your space but also provides a refreshing breeze, improves air circulation, and can even help reduce your energy bills. As you step back and admire your handiwork, take a moment to appreciate the way your new fan complements your room’s decor, whether it’s a sleek modern design or a rustic farmhouse style.

Before you flip the switch, ensure your fan is operating smoothly. Check the settings and make necessary adjustments to the speed and direction of the blades—the reversible motor option allows you to tailor airflow to your preferences, whether you want a cool breeze in the summer or warm air circulation in the winter.

Once everything is set, sit back and relish in the comfort your new ceiling fan brings. Perhaps you’ll enjoy a cozy evening reading a book under its gentle glow, or gather with friends for lively conversations in the cool breeze it creates. Don’t forget to take a moment to marvel at how your DIY skills have transformed your living space!

As you bask in the satisfaction of your accomplishment, remember to maintain your fan regularly. Dust the blades, check for any loose screws, and ensure it runs efficiently for years to come. With your ceiling fan installed like a pro, the perfect blend of style and comfort is now just a switch away. Enjoy your new ceiling fan and all the delightful breezes it will bring!

In conclusion, we hope our step-by-step guide has empowered you to tackle the installation of your ceiling fan with confidence and ease. Whether you’re updating your home’s aesthetic, improving air circulation, or simply seeking a more energy-efficient solution, installing a ceiling fan can be a rewarding DIY project. By following the detailed instructions and tips shared in this post, you can transform your space while saving on installation costs. Remember to take your time, double-check your work, and enjoy the satisfaction of completing the task yourself. Now, go ahead and enjoy the refreshing breeze of your new ceiling fan, and don’t hesitate to share your installation success stories with us! Happy DIY-ing!

What are the Best Ways to Protect My Pet from Poison?

As pet owners, we cherish the joy and companionship our furry friends bring into our lives, but with that love comes the responsibility of keeping them safe from harm.

One of the most urgent concerns for any pet parent is the risk of poisoning, which can stem from everyday household items, common plants, and even human foods that are toxic to animals. understanding how to protect your pet from these hidden dangers is essential for their well-being. In this comprehensive guide, we’ll explore the top tips for safeguarding your beloved companion from poisoning, including preventative measures, first-aid steps for emergencies, and a rundown of the most common hazards to watch out for. With a little knowledge and preparation, you can ensure that your home remains a safe haven for your pets, allowing you to enjoy every moment together with peace of mind.

1. Understanding Common Household Poisons for Pets

What are the Best Ways to Protect My Pet from Poison?
Credit : whatcanu.com

Understanding common household poisons for pets is the first step in safeguarding your furry companions. Many seemingly benign items can pose serious risks to animals, often lurking in the very spaces where they roam freely. From everyday foods to cleaning supplies, it’s essential to recognize what can be hazardous.

Start with the kitchen, where a range of common foods can be highly toxic to pets. Chocolate, grapes, and onions are notorious culprits that can lead to severe health issues if ingested. Even seemingly harmless items like avocados and certain nuts, such as macadamia, can cause adverse reactions in dogs and cats. It’s vital to keep these items out of reach and educate household members about their dangers.

Next, consider the cleaning products you use. Many household cleaners, detergents, and disinfectants contain chemicals that are harmful to pets if ingested or even inhaled. Products like bleach, ammonia, and certain air fresheners can lead to respiratory issues, gastrointestinal distress, or worse, depending on the exposure. Opting for pet-safe cleaning alternatives or ensuring thorough ventilation and proper storage can mitigate these risks.

Additionally, keep an eye out for common plants that are toxic to pets. While some greenery can enhance your home’s aesthetic, many popular houseplants—like lilies, philodendrons, and poinsettias—can be harmful if chewed or ingested. Familiarize yourself with the plants in your home and yard, and consider replacing any that pose a threat.

Finally, be mindful of medications and supplements. Just a few pills left unattended can spell disaster for a curious pet. Always secure your medications in high cabinets and dispose of any expired or unused drugs safely.

By understanding these common household poisons and taking proactive measures to mitigate their risks, you can help ensure a safer environment for your beloved pets. awareness is key, and being informed empowers you to act swiftly in preventing potential poisoning incidents.

2. Identifying Toxic Plants and Flowers

When it comes to safeguarding your furry friends from the dangers of poisoning, one of the most crucial steps is identifying toxic plants and flowers that may be lurking in your home or garden. Many common household and garden plants can pose serious risks to pets if ingested, and being knowledgeable about these hazards can make all the difference.

Start by familiarizing yourself with a list of plants known to be toxic to dogs and cats. For example, the beautiful but deadly lily can cause kidney failure in cats, while the seemingly harmless sago palm is extremely toxic to both dogs and cats, leading to severe liver damage if consumed. Other notorious offenders include oleander, azaleas, and philodendrons, each with varying degrees of toxicity that can lead to symptoms ranging from mild gastrointestinal upset to life-threatening conditions.

Once you’re aware of these plants, take a thorough inventory of your living space and outdoor areas. If you have any of these toxic plants, consider removing them or placing them in areas that are completely inaccessible to your pets. Additionally, educate yourself about common ornamental flowers such as tulips and daffodils, which can also be hazardous if nibbled on by curious pets.

It’s not just about removing toxic plants; it’s equally essential to create a safe environment that encourages your pets to explore without the risk of poisoning. Opt for pet-friendly plants, such as spider plants, bamboo palms, or Boston ferns, which can add a touch of greenery to your home without endangering your beloved companions.

Finally, consider labeling any remaining plants and flowers in your home and garden. This can serve as a useful reminder for family and friends, ensuring they are mindful of your pets’ safety when visiting. By taking these proactive measures and being vigilant about the plants and flowers in your surroundings, you can create a safer haven for your pets, giving you peace of mind while they play and roam freely.

3. Foods That Are Dangerous for Pets

What are the Best Ways to Protect My Pet from Poison?
Credit : whatcanu.com

When it comes to keeping your furry friends safe, knowledge is your best ally, particularly regarding the foods that can pose serious health risks. While it might be tempting to share your snacks with your pets, many common human foods can be toxic or even lethal to them. Here’s a closer look at some of the most dangerous foods that should always be kept out of reach.

**Chocolate** is perhaps the most widely known pet poison. The theobromine and caffeine it contains can lead to increased heart rate, restlessness, and even seizures in pets. Dark chocolate and baking chocolate are particularly potent, so it’s crucial to keep all chocolate products stored securely.

**Grapes and raisins** are another surprising danger. While the exact toxin is still unknown, even small amounts can cause severe kidney damage in dogs. Symptoms can include vomiting, lethargy, and decreased appetite, and the effects can be severe, making it essential to avoid feeding these fruits to your pets altogether.

**Onions and garlic**, whether raw, cooked, or powdered, can damage red blood cells in both dogs and cats, leading to anemia. Symptoms may not appear immediately, but if you notice your pet becoming lethargic or exhibiting unusual behavior, it’s important to contact a veterinarian right away.

**Avocado** is a popular superfood for humans, but it contains persin, which can be harmful to pets. While birds are particularly susceptible, dogs can also experience stomach upset or more severe reactions if they ingest large amounts.

Finally, **alcohol** is incredibly dangerous for pets. Even small amounts can lead to drunkenness, difficulty breathing, and can be fatal. It’s essential to ensure that any alcoholic beverages are safely stored and that your pets are kept away from parties or gatherings where drinks may be left unattended.

By being aware of these hazardous foods, you can take proactive steps to ensure your pet’s safety. Always double-check what you’re feeding them, and remember that when it comes to treats, it’s best to stick to pet-specific options designed for their health and wellbeing. Your vigilance can make all the difference in keeping your pet safe from poisoning.

4. Safe vs. Toxic Human Medications

When it comes to keeping your pet safe from poisoning, understanding the distinction between safe and toxic human medications is crucial. Many pet owners may not realize that the very medications we rely upon for our health can pose serious risks to our furry companions. Common over-the-counter drugs like acetaminophen and ibuprofen, for instance, can be highly toxic to pets, causing severe damage to their liver and kidneys. Even seemingly harmless medications like cold and allergy treatments can contain ingredients that are harmful to animals.

It’s essential to keep all medications—prescription and over-the-counter—securely stored out of your pet’s reach. A curious dog or cat may easily knock over a bottle, or worse, chew through packaging to access the contents inside. For those who may need to administer medications to their pets, always consult with your veterinarian before giving any human drug, even if it’s something you believe to be mild or safe. Your vet can recommend appropriate dosages and alternatives specifically formulated for pets.

Another critical aspect is educating yourself about the signs of medication poisoning. Symptoms can vary widely depending on the substance ingested and may include vomiting, lethargy, loss of appetite, or unusual behaviors. If you suspect your pet has ingested a toxic medication, seek veterinary attention immediately. It’s always better to err on the side of caution when it comes to your beloved companion’s health. By being informed and proactive, you can significantly reduce the risk of accidental poisoning and ensure your pet remains safe and healthy in your care.

5. Cleaning Products and Chemicals to Avoid

What are the Best Ways to Protect My Pet from Poison?
Credit : whatcanu.com

When it comes to protecting your furry companions from poisoning, being mindful of the cleaning products and chemicals you use in your home is essential. Many household cleaners contain toxic ingredients that can be harmful, even in small amounts. It’s crucial to familiarize yourself with these dangers to keep your pet safe.

First and foremost, avoid using cleaning products that contain bleach or ammonia. These common ingredients are not only harsh on surfaces but also produce fumes that can irritate your pet’s respiratory system. If ingested, they can lead to severe gastrointestinal distress or worse. Opt instead for pet-safe alternatives, such as vinegar and baking soda, which can effectively clean while posing minimal risk.

Similarly, many multipurpose cleaners, disinfectants, and detergents contain surfactants and solvents that can be toxic if ingested. Products labeled as “fragrance-free” or “natural” may seem safer, but they can still contain harmful chemicals. Always check the labels and look for those specifically marked as non-toxic or pet-friendly.

Another category to watch out for is insecticides and pesticides. These chemicals are designed to kill pests, but they can also be lethal to pets. If you must use these products, ensure they are applied in areas your pets cannot access, and allow sufficient time for the area to ventilate before letting them back inside.

Lastly, don’t overlook the dangers posed by automotive products such as antifreeze, motor oil, and windshield washer fluid. Antifreeze, in particular, contains ethylene glycol, which has a sweet taste that can attract pets but is highly toxic and can lead to kidney failure.

By being proactive and selecting safer cleaning products, you can significantly reduce the risk of poisoning in your beloved pets. Always store cleaning supplies out of reach, and consider creating a dedicated, pet-free zone during your cleaning routines to ensure their safety. With a little diligence, you can maintain a clean home while providing a safe environment for your furry friends.

6. The Importance of Pet-Proofing Your Home

Pet-proofing your home is an essential step in safeguarding your furry companions from potential poisoning hazards. Just like childproofing, this process involves a thorough assessment of your living space to identify and eliminate risks that could be harmful to pets. Start by taking a close look at your household items — from cleaning supplies and medications to plants and food items. Many common household products contain toxic ingredients that, if ingested, can lead to serious health issues for your pets.

Begin by securing all cleaning agents, detergents, and other chemicals in high cabinets or locked storage areas. Ensure that all medications, both prescription and over-the-counter, are kept out of reach. Pets are notoriously curious, and even the most cautious animals can find a way to access these dangerous items. Additionally, be aware of the plants you have in your home; many popular houseplants, such as lilies, philodendrons, and azaleas, can be toxic to dogs and cats.

Don’t forget about food items that may seem harmless to us but can be deadly for pets. Chocolate, grapes, onions, and xylitol (a common sugar substitute found in gum and candies) are just a few examples of foods that should never be accessible to your pets. Make it a habit to store these items in secured containers or out of reach entirely.

Finally, consider the small items that may seem innocuous but can pose a choking hazard or cause intestinal blockage if swallowed. Things like rubber bands, coins, or even small toys can easily be ingested. Creating a safe environment for your pets involves vigilance and proactive measures, but the peace of mind that comes with knowing your home is a safe haven for your furry friends is worth every effort. By taking the time to pet-proof your space, you’re not just protecting them from poisoning; you’re also creating a nurturing environment that fosters their well-being and happiness.

7. Recognizing Symptoms of Poisoning in Pets

What are the Best Ways to Protect My Pet from Poison?
Credit : whatcanu.com

Recognizing the symptoms of poisoning in pets is crucial for prompt action and treatment. As a pet owner, being vigilant and informed about the signs that your furry friend may have ingested something harmful can be the difference between a swift recovery and a tragic outcome.

One of the first signs to watch for is sudden changes in behavior. If your typically lively dog seems lethargic or your curious cat is unusually withdrawn, it could be a signal that something is amiss. Alongside behavioral changes, keep an eye out for gastrointestinal distress, which may manifest as vomiting, diarrhea, or a lack of appetite. These symptoms are not only uncomfortable for your pet but also indicate that their body is reacting negatively to a toxin.

Physical symptoms can vary widely depending on the type of poison ingested. Common signs include drooling, excessive thirst, difficulty breathing, or seizures. You may also notice changes in your pet’s eyes, such as redness or dilated pupils, which can be indicative of poisoning. If your pet exhibits any of these symptoms, it’s essential to act quickly.

Additionally, consider monitoring for odd physical reactions, such as tremors, uncoordinated movements, or unusual vocalizations. These can often be overlooked but are significant indicators that your pet may have ingested something dangerous.

Remember, while recognizing these symptoms is important, it’s equally crucial to remain calm and take action. If you suspect your pet has been poisoned, contact your veterinarian or an emergency animal poison control hotline immediately. Quick intervention can greatly improve the chances of recovery and ensure that your beloved pet receives the care they need. Keeping a close eye on your pet’s behavior and being proactive about their health will go a long way in preventing tragedies related to poisoning.

8. First Aid Steps for Poison Exposure

When it comes to your pet’s safety, being prepared for a potential poisoning incident can make all the difference in the world. Knowing the first aid steps to take in the event of poison exposure is crucial and can save your furry friend’s life. Here’s a comprehensive guide to help you navigate this critical situation effectively.

**Assess the Situation:** The first step is to remain calm and evaluate your pet’s condition. Look for any signs of distress, such as vomiting, diarrhea, lethargy, or unusual behavior. If you suspect that your pet has ingested a toxic substance, try to identify what it is and how much your pet may have consumed. This information will be vital when you speak with your veterinarian or a poison control center.

**Do Not Induce Vomiting Without Guidance:** While inducing vomiting may seem like a logical first step, it’s essential not to do this without professional advice. Some substances can cause more harm if vomited, so always consult with a veterinary professional or a pet poison hotline before taking this action.

**Gather Information:** If possible, collect packaging or any remnants of the substance your pet may have ingested. This will help veterinary professionals determine the best course of action. Be sure to note the time of ingestion, as this information can be crucial for effective treatment.

**Contact a Veterinarian or Pet Poison Control:** Time is of the essence. Reach out to your veterinarian or, if they are unavailable, contact a pet poison control hotline. Provide them with all the information you’ve gathered about the exposure, as well as your pet’s weight and overall health condition. They will guide you on the next steps to take, which may include bringing your pet in for immediate treatment.

**Monitor Your Pet:** While you await further instructions, keep a close eye on your pet. Note any changes in behavior or symptoms, as this information can be valuable for your vet. Keep your pet comfortable and calm, as stress can exacerbate their condition.

**Prepare for Transport:** If advised to take your pet to the vet or an emergency clinic, ensure you have a safe means of transport. Keep your pet secure in a carrier or on a leash, and try to minimize movement to avoid additional stress or injury during transport.

By knowing these first aid steps, you can act quickly and effectively when faced with a potential poisoning situation. Remember, prevention is always better than cure, so be proactive in safeguarding your pet from toxic exposures. Regularly review common household items and plants that may pose a risk, and ensure your living space is as safe as possible for your beloved companion.

9. Creating an Emergency Contact List

Creating an emergency contact list is an essential step in safeguarding your pet against potential poisoning incidents. Imagine a scenario where your beloved furry friend accidentally ingests something toxic; in those crucial moments, having a well-organized list of contacts can mean the difference between timely help and a delayed response.

Start by listing your primary veterinarian’s contact information, ensuring you have their phone number, address, and hours of operation readily available. Next, include the nearest emergency veterinary clinic, as situations can arise outside regular office hours. Don’t forget to jot down the Poison Control Center hotline specifically for pets, which can provide immediate advice on how to handle various poisoning situations.

In addition to veterinary contacts, consider adding a few personal emergency contacts—friends or family members who can assist you in a crisis, whether that’s driving you to the vet or providing emotional support during a stressful time. It’s also wise to have a list of any medications your pet is currently taking, as this information will be vital for any health professional assessing your pet’s condition.

Make multiple copies of this contact list: keep one on your refrigerator, another in your wallet or purse, and perhaps even a digital version on your smartphone. This ensures that no matter where you are, you have access to critical information when you need it most.

Finally, take the time to familiarize yourself and your household members with this list. In a panic, you want everyone to know exactly where to find the information and what steps to take. By preparing this emergency contact list, you’ll not only enhance your pet’s safety but also bring yourself peace of mind, knowing you’re ready to respond swiftly in an emergency.

10. Keeping Your Pet Safe During Holidays and Gatherings

The holidays and family gatherings are times of joy and celebration, but they can also pose unique risks to our beloved pets. As enticing smells waft through the air and guests come and go, it’s essential to be vigilant about potential hazards that could lead to poisoning.

Start by being mindful of the foods that are often abundant during these times. Many holiday treats, such as chocolate, grapes, raisins, and certain baked goods containing xylitol, can be extremely toxic to pets. Ensure that all food is securely stored out of reach and that any leftovers are disposed of promptly. It’s all too easy for a curious pet to swipe a tasty morsel off the table or counter, so take precautions to keep tempting items well out of paw’s reach.

Additionally, be cautious with decorations. While glittering ornaments and twinkling lights set the festive mood, they can also attract pets, leading to potential ingestion of non-edible items. Tinsel, ribbon, and small decorative objects can cause serious gastrointestinal blockages or worse. Opt for pet-safe decorations and ensure that any fragile items are displayed in higher locations.

Moreover, gatherings can be overwhelming for pets, leading to stress or anxiety. Create a safe haven for your furry friends—a quiet room stocked with their favorite toys and bedding—where they can retreat if the festivities become too much. This not only provides a safe space but also minimizes the risk of accidental poisoning from guests who may unknowingly leave harmful items within reach.

Lastly, always be prepared for emergencies. Keep the contact information for your veterinarian and a local animal poison control center handy. In the event of accidental ingestion, quick access to expert advice can make all the difference. By being proactive and mindful, you can ensure that your pets enjoy the holiday season as much as you do—safe, happy, and healthy!

11. Educating Family and Friends about Pet Safety

Educating family and friends about pet safety is a crucial step in safeguarding your furry companions from potential poisoning. While you may be well-versed in the dangers that lurk in everyday household items, it’s essential to extend that knowledge to those who interact with your pets, whether they are visiting for a day or staying for an extended period.

Start by compiling a list of common household items that are toxic to pets, such as certain plants, foods, and cleaning products. Share this information in a simple, easy-to-understand format, like a printed handout or a digital infographic, that they can refer to at a glance. Consider hosting a small gathering or a virtual meeting where you can discuss pet safety, share personal experiences, and answer any questions they may have. This not only raises awareness but also fosters a community of support around pet care.

It’s also important to highlight the significance of pet-proofing the environment. Encourage friends and family to be mindful of where they place their belongings—this includes keeping their bags, medications, and snacks out of reach of curious pets. Additionally, if they have pets of their own, discuss the importance of keeping their pets away from items that could be harmful to your animals when they visit.

By empowering your loved ones with knowledge about pet safety, you create a safer environment for your pets. When everyone is on the same page, the chances of accidental poisoning decrease significantly. Remember, prevention is always better than cure, and with a little education, you can ensure that your pets remain safe and sound in the care of others.

12. Regular Veterinary Check-ups and Poison Control Resources

Regular veterinary check-ups are a cornerstone of ensuring your pet’s health and safety, particularly when it comes to preventing poisoning. During these appointments, your veterinarian can provide valuable insights into potential hazards in your home and outdoors, as well as assess your pet’s overall health. They are equipped to discuss the most common toxins that pets might encounter—ranging from household cleaning products to certain plants—and can recommend precautions specific to your pet’s needs.

In addition to routine visits, it’s essential to have poison control resources readily available. Keep the contact information for a 24-hour pet poison control hotline on hand, or save it in your phone for quick access. This proactive step can be crucial in an emergency. Familiarize yourself with your local emergency veterinary clinics as well, as they can provide immediate assistance should a poisoning incident occur.

Moreover, consider asking your veterinarian about any specific toxins that are prevalent in your area or common within your pet’s breed. For example, certain foods like grapes and chocolate are notoriously toxic to dogs, while cats can be particularly sensitive to lilies. Being informed about these dangers and having a plan in place can make all the difference in keeping your furry friends safe. By prioritizing regular veterinary care and maintaining access to poison control resources, you can help ensure that your pet remains healthy and protected from the dangers of poisoning.

13. How to Dispose of Hazardous Materials Properly

Proper disposal of hazardous materials is crucial not only for protecting the environment but also for safeguarding your pets from potential poisoning. Many common household items, such as cleaning supplies, medications, and even certain plants, can pose serious risks if not disposed of correctly. Here are some essential steps to ensure you’re disposing of these materials safely:

**1. Identify Hazardous Materials:** Start by conducting a thorough inventory of your home. Look for items such as expired medications, toxic cleaners, paints, batteries, and other chemicals that could be harmful to your pet if ingested. Familiarize yourself with the labels on these products, as they often contain important disposal instructions.

**2. Follow Local Guidelines:** Different regions have specific regulations for disposing of hazardous waste. Check with your local waste management authority for guidelines on how to dispose of these materials safely. Many communities offer designated drop-off days or facilities for hazardous waste, ensuring that these items are handled properly and do not end up in landfills.

**3. Securely Store Until Disposal:** Until you’re ready to dispose of hazardous materials, always keep them in a safe, locked area out of your pet’s reach. Use child-proof cabinets or containers to prevent accidental access. Ensure that any containers are tightly sealed to avoid leaks or spills.

**4. Utilize Take-Back Programs:** Many pharmacies and retailers offer take-back programs for unused or expired medications. Participating in these programs helps ensure that medications are disposed of safely and do not end up in the wrong hands—or paws!

**5. Use Safe Disposal Methods:** For items that can be thrown away, such as cleaning products, always follow the manufacturer’s disposal instructions. If you’re dealing with liquids, consider pouring them into absorbent materials (like cat litter or sawdust) before placing them in a sealed bag or container to prevent leaks.

**6. Educate Your Family:** Make sure everyone in your household understands the importance of proper disposal. Teach children about the dangers of hazardous materials and the need to keep them out of reach. Encourage responsible behaviors, such as returning unused medications to the pharmacy.

By taking these proactive steps to dispose of hazardous materials properly, you can significantly reduce the risk of accidental poisoning in your pets. Keeping your home safe is a shared responsibility, and with a little diligence, you can create a protective environment for your furry companions.

14. The Role of Nutrition in Preventing Poisoning

When it comes to safeguarding your pet from the dangers of poisoning, nutrition plays a crucial role that often gets overlooked. A well-balanced diet not only supports your pet’s overall health but also fortifies their immune system, making them less susceptible to toxins. High-quality pet food, rich in essential nutrients, helps maintain optimal organ function, particularly in the liver and kidneys, which are vital in detoxifying harmful substances.

Incorporating fresh fruits and vegetables, such as carrots or blueberries, into your pet’s diet can provide antioxidants that combat cellular damage and promote longevity. Moreover, ensuring that your pet receives the right amount of vitamins and minerals can enhance their ability to process and eliminate potential toxins more effectively.

It’s also important to be mindful of what not to include in your pet’s diet. Human foods like chocolate, grapes, onions, and certain artificial sweeteners can be extremely toxic. Familiarizing yourself with safe and unsafe foods will empower you to make better dietary choices for your furry friend, thereby reducing the risk of accidental poisonings.

Additionally, consulting with a veterinarian about the best nutritional practices for your specific pet can provide tailored recommendations that align with their unique needs, age, and lifestyle. By prioritizing nutrition, you not only promote a healthier, happier pet but also create a solid foundation for preventing poisoning incidents, ensuring that your beloved companion can lead an active and vibrant life.

15. Conclusion: Staying Vigilant for a Safer Pet Environment

In conclusion, the safety of your beloved pet is a responsibility that requires constant vigilance and proactive measures. As pet owners, we must acknowledge that our furry companions are naturally curious, often exploring their environment with an eagerness that can lead them into dangerous situations. By staying informed and adopting a proactive approach to pet safety, we can significantly reduce the risk of poisoning and ensure a healthier, happier life for our pets.

Regularly reviewing our homes for potential hazards—be it toxic plants, harmful household products, or even food items that are safe for humans but dangerous for pets—is essential. Familiarize yourself with common poisons and their symptoms, and always keep emergency contacts for your veterinarian and local animal poison control centers readily accessible.

Moreover, consider educating family members and visitors about what substances are harmful to pets and encourage them to maintain a pet-safe environment. Simple practices, such as storing hazardous materials out of reach and using pet-friendly cleaning products, can make a world of difference.

Ultimately, a proactive mindset combined with consistent education and awareness is your best line of defense against accidental poisoning. By committing to these practices, you not only safeguard your pet’s health but also foster a nurturing environment in which they can thrive. Remember, your vigilance today can lead to a safer and more vibrant life for your furry family members tomorrow.

In conclusion, ensuring the safety of your beloved pet from potential poisoning is a vital responsibility that every pet owner should take seriously. We hope this comprehensive guide has equipped you with valuable knowledge and practical tips to protect your furry family members from harmful substances. From understanding common household toxins to recognizing the signs of poisoning, being proactive can make all the difference in safeguarding their health. Remember, creating a safe environment is an ongoing commitment; regular checks around your home and staying informed about pet-safe products can go a long way. By being vigilant and informed, you can enjoy peace of mind knowing you’re doing everything possible to keep your pet safe and happy. Thank you for taking the time to read our guide—your dedication to your pet’s well-being is commendable, and together we can create a safer world for our cherished companions.

Which position is always staffed in ICS applications

The Incident Command System (ICS) is a standardized approach to managing emergencies and disasters.

ICS is used by organizations across the country, from local fire departments to federal agencies, to ensure that emergency response is efficient and effective. One of the key components of ICS is the use of designated positions that are always staffed during an incident. These positions ensure that there is clear communication, coordination, and leadership during an emergency.

The Incident Commander (IC) position is the most critical in ICS. The IC is responsible for overall incident management and is the point of contact for all other agencies and organizations involved in the response. The IC must have a clear understanding of the incident and be able to make quick and informed decisions. They must be able to coordinate the efforts of all responding agencies and ensure that resources are used effectively.

ICS
Credit : Bob Adams

The Operations Section Chief (Ops) is responsible for managing the field operations of the incident. They are responsible for ensuring that the incident objectives are met, and that resources are used effectively. They must also be able to coordinate the efforts of all responding agencies and ensure that resources are used effectively.

The Planning Section Chief (Plans) is responsible for collecting and analyzing information about the incident. They must be able to provide accurate and timely information to the IC and other section chiefs. They must be able to develop and update incident action plans and ensure that they are being implemented effectively.

Each position has specific responsibilities

The Logistics Section Chief (Logistics) is responsible for ensuring that all of the resources needed to respond to the incident are available. They must be able to coordinate the efforts of all responding agencies and ensure that resources are used effectively. They must be able to provide support services to all responding agencies, such as transportation, food, and shelter.

The Finance/Administration Section Chief (Finance/Admin) is responsible for tracking and reporting on the costs of the incident. They must be able to provide accurate and timely information to the IC and other section chiefs. They must also be able to ensure that all responding agencies are reimbursed for their costs.

The public Information Officer (PIO) is responsible for providing accurate and timely information to the public about the incident. They must be able to provide accurate and timely information to the IC and other section chiefs. They must be able to ensure that the public is informed about the incident and that any potential hazards are communicated to the public.

In conclusion, the Incident Command System (ICS) is an essential approach to managing emergencies and disasters. The use of designated positions that are always staffed during an incident ensures that there is clear communication, coordination, and leadership during an emergency. The Incident Commander (IC), Operations Section Chief (Ops), Planning Section Chief (Plans), Logistics Section Chief (Logistics), Finance/Administration Section Chief (Finance/Admin), and Public Information Officer (PIO) positions are all crucial to the success of the incident response.

Finally each position has specific responsibilities that are essential to ensuring that resources are used effectively and that the incident objectives are met.

Can you eat shrimp while pregnant ?

Eating meaty shrimp can be tempting. But is it safe to eat it during pregnancy ?

Yes, women can eat shrimp as it is a safe and nutritious option during pregnancy. However, it is important to ensure that it is cooked thoroughly and properly to avoid the risk of food poisoning.

Shrimp is a rich source of protein and essential nutrients such as omega-3 fatty acids, calcium, iron, and vitamins B12 and D. These nutrients are essential for the proper development of the baby. They can help alleviate common pregnancy discomforts such as nausea and fatigue.

Take certain precautions

shrimp

However, pregnant women should avoid eating raw or undercooked shrimp, as it may contain harmful bacteria that can cause food poisoning. Symptoms of food poisoning during pregnancy can include nausea, vomiting, fever, and abdominal pain. This can be dangerous for both the mother and the baby.

To ensure the safety during pregnancy, it is recommended to purchase fresh, high-quality shrimp. The latter should be bought from a reputable source and cooked thoroughly. This can be done by boiling, grilling, or baking it until the internal temperature reaches an internal temperature of 145 °F.

Additionally, pregnant women should avoid consuming too much shrimp as it can contain high levels of mercury. Indeed, mercury can be harmful to the baby’s development. It is recommended to limit the intake of shrimp to two servings per week. In general, pregnant women should avoid consuming other high-mercury fish such as swordfish, tuna, and mackerel. Also, avoid adding spicy sauce in your plate.

Pregnant women should choose shrimp that has been sustainably harvested. Many fisheries around the world are overfished and are not managed in an environmentally responsible manner. This can lead to the depletion of populations, and can also result in the accidental capture of other marine species, such as dolphins and sea turtles. Pregnant women can ensure that they are supporting sustainable fisheries by purchasing shrimp that has been certified by organizations such as the Marine Stewardship Council.

In conclusion, pregnant women can enjoy shrimp as part of a balanced and nutritious diet. But they must be cooked properly and consumed in moderation. It is important to follow food safety guidelines and consult with a healthcare provider for personalized advice on the safe consumption during pregnancy.