What are the best ways to choose the right furniture for your living room?

Selecting the perfect furniture for your living room is more than just a matter of aesthetics; it’s about creating a space that reflects your personal style while also providing comfort and functionality.

As the heart of your home, the living room serves as a gathering place for family and friends, a haven for relaxation, and a canvas for your creativity. With countless options available—from sleek modern designs to cozy traditional pieces—navigating the world of furniture can feel overwhelming. In this blog post, we will unravel essential tips that will guide you in choosing the ideal furniture for your living room, ensuring that it harmonizes with your lifestyle, complements your decor, and meets your practical needs. Get ready to transform your space into a stylish and inviting retreat that perfectly balances form and function!

1. Assessing Your Living Room Space

What are the best ways to choose the right furniture for your living room?
Credit : whatcanu.com

When it comes to selecting the perfect furniture for your living room, the first step is to thoroughly assess your space. This foundational task not only lays the groundwork for a harmonious design but also ensures that your chosen pieces will fit seamlessly into your home.

Start by measuring the dimensions of your living room, taking note of the length and width of walls, doorways, and any architectural features like windows or fireplaces. Use a measuring tape and jot down these figures, as you’ll want to have them on hand when shopping. Consider the height of your ceilings too; a room with high ceilings can benefit from taller furniture pieces or vertical elements, while a cozy space might feel more intimate with lower profiles.

Next, think about the room’s layout and how you intend to use the space. Visualize how you want to arrange the furniture for optimal flow and functionality. Do you envision hosting gatherings with family and friends, or is your living room a quiet retreat for relaxation and solitude? This will influence your choices in terms of the size and type of furniture. For instance, a sectional sofa may be perfect for socializing, while a couple of plush armchairs could create a more intimate setting.

Also, consider the natural light that floods your living room throughout the day. This will affect not only the colors and materials you choose but also the placement of furniture. Pieces that are positioned to take advantage of light can become focal points, enhancing the overall ambiance.

Finally, don’t overlook the importance of visual balance in your space. A well-assessed living room should have a mix of heights, shapes, and textures that create a pleasing aesthetic. By taking the time to accurately assess your living room space, you can make informed decisions that will lead to a beautifully coordinated and functional environment where you and your guests will love to spend time.

2. Defining Your Style: Modern, Traditional, or Eclectic?

When it comes to furnishing your living room, one of the most crucial steps is defining your style. This foundational decision will shape not only the aesthetics of your space but also its overall atmosphere. Are you drawn to the clean lines and minimalism of modern design, or do you find comfort in the warmth and richness of traditional styles? Perhaps you’re an adventurous soul who thrives in the quirky, layered vibes of eclectic decor.

**Modern Style:** If sleek, contemporary aesthetics resonate with you, modern furniture might be your best bet. Think neutral color palettes, geometric shapes, and functional pieces that prioritize comfort without compromising on style. A modern living room typically features a mix of materials—think leather sofas paired with polished metal accents and glass coffee tables. This style embraces simplicity and often incorporates innovative designs that serve both form and function, making your space feel open and inviting.

**Traditional Style:** On the flip side, traditional furniture is characterized by its classic lines and rich, warm tones. This style embodies comfort and elegance, often featuring ornate details, plush upholstery, and timeless designs that have stood the test of time. Picture a deep-seated leather armchair, a beautifully carved wooden coffee table, and a soft area rug that ties everything together. Traditional pieces invite warmth and familiarity, creating a living room that feels like a welcoming retreat.

**Eclectic Style:** For those who love to mix and match, an eclectic approach offers endless possibilities. This style celebrates individuality, allowing you to showcase personal treasures, vintage finds, and bold colors. An eclectic living room might feature a mid-century modern sofa alongside a rustic farmhouse coffee table, accented with vibrant throw pillows and unique art pieces from your travels. The key to pulling off this look is balance—ensuring that the varied elements harmonize rather than clash.

As you define your style, consider how each option aligns with your lifestyle and personal preferences. Take inspiration from online resources, interior design magazines, or even your favorite cafes and boutiques. Ultimately, the goal is to create a living room that not only reflects your personality but also provides a comfortable space for relaxation and socializing. Embrace the journey of discovering your style, and let it guide you in choosing the perfect furniture for your living room oasis.

3. Understanding the Importance of Functionality

What are the best ways to choose the right furniture for your living room?
Credit : whatcanu.com

When it comes to choosing furniture for your living room, understanding the importance of functionality is paramount. Your living room is not just a decorative space; it’s often the heart of your home—a place for relaxation, entertainment, and family gatherings. Therefore, every piece of furniture should serve a purpose while enhancing the overall comfort and flow of the room.

Consider how you use your living room. Are you frequently hosting friends for movie nights? If so, a spacious sectional sofa with ample seating can create a cozy atmosphere while accommodating everyone. If you have children or pets, opting for durable fabrics and furniture with rounded edges can add a layer of practicality without sacrificing style.

Additionally, think about the activities that take place in your living room. If you enjoy reading, a comfortable armchair paired with a stylish side table for your coffee or tea allows for quiet moments of relaxation. On the other hand, if your living room doubles as a workspace, incorporating versatile furniture, such as a sleek desk that blends seamlessly with your decor, can help maintain a productive environment.

Storage is another crucial aspect of functionality. Consider furniture with built-in storage solutions, like ottomans or coffee tables with hidden compartments, to help keep your living room tidy and clutter-free. This not only maximizes the space but also ensures that everything has its place, making your living area more inviting.

Ultimately, the key to functionality is balancing your lifestyle needs with aesthetic appeal. By choosing furniture that reflects both your personal style and the practical demands of your living room, you can create a space that is not only beautiful but also perfectly suited to your everyday life.

4. Choosing the Right Color Palette

Choosing the right color palette for your living room is akin to setting the mood for an unforgettable gathering. It not only defines the aesthetic of the space but also influences the atmosphere, energy, and comfort level within the room. When selecting colors, consider the emotions different hues evoke. For instance, warm tones like reds, oranges, and yellows can create a lively, inviting environment, perfect for entertaining guests. In contrast, cooler shades such as blues, greens, and grays promote relaxation and tranquility, ideal for unwinding after a long day.

Begin by assessing the existing elements in your living room, such as flooring, wall color, and architectural features. You want your furniture to harmonize with these foundational aspects. A neutral base—think soft beiges, whites, or light grays—can serve as a versatile backdrop, allowing for bolder furniture choices and vibrant accent colors. If you prefer a more cohesive look, consider selecting furniture in varying shades of the same color family to create depth and visual interest.

It’s also important to think about the size of the space. Lighter colors can make a small room feel more spacious, while darker shades can add warmth and coziness to larger areas. Don’t hesitate to incorporate patterns and textures into your color scheme, as these can enhance the overall design and make your living room feel more dynamic.

Remember, the key to a successful color palette lies in balance. Aim for a mix of tones that complement each other, allowing for a flow that feels both cohesive and inviting. By thoughtfully selecting a color palette that resonates with your personal style and enhances the overall ambiance, you can create a living room that feels like home—a space where family and friends will love to gather for years to come.

5. Selecting the Right Materials for Durability and Comfort

What are the best ways to choose the right furniture for your living room?
Credit : whatcanu.com

When it comes to furnishing your living room, the choice of materials can significantly impact both the durability of your pieces and the comfort they provide. Selecting the right materials is essential to creating a space that not only looks good but also stands the test of time and daily use.

First and foremost, consider the fabric of your upholstery. Natural fibers such as cotton and linen offer breathability and a soft touch, making them comfortable for lounging. However, they may not hold up as well in high-traffic areas or households with pets and children. For those situations, synthetic fabrics like polyester or blends that include nylon can provide greater durability and resistance to stains. Performance fabrics, designed specifically to withstand wear and tear, are also an excellent option, combining comfort with practical longevity.

Next, think about the frame of your furniture. Solid wood frames, while often more expensive, provide a sturdy foundation that can last for decades. Look for hardwood options like oak, maple, or walnut, which are renowned for their strength. On the other hand, particleboard or plywood frames may be more budget-friendly but can compromise on stability and longevity. If opting for a metal frame, ensure it is treated to resist rust and corrosion, particularly if your living room has high humidity.

Additionally, consider the finish of your furniture. For wooden pieces, a high-quality stain or sealant can add to the aesthetic while protecting against scratches and spills. Upholstered furniture should ideally feature removable, washable covers or treatments that repel stains, ensuring easy maintenance and cleanliness.

Finally, don’t overlook the importance of cushioning materials. Foam density plays a crucial role in comfort and durability; high-density foam will provide better support and resilience over time compared to low-density options. Layering foam with softer materials like down or polyester can enhance the plushness, making your seating even more inviting.

In summary, when selecting materials for your living room furniture, prioritize a balance between durability and comfort. By choosing the right fabrics, frames, finishes, and cushioning, you can create a welcoming space that not only looks stylish but also endures the everyday hustle and bustle of home life. With thoughtful material choices, your living room can become a sanctuary of comfort and elegance for years to come.

6. Balancing Comfort and Aesthetics

When it comes to furnishing your living room, achieving the perfect balance between comfort and aesthetics is essential. Your living room is not just a showcase of style; it’s also a space where you and your loved ones gather to relax, unwind, and create memories. Therefore, the furniture you choose should not only enhance the visual appeal of the room but also provide a welcoming environment that invites you to sit down and stay awhile.

Start by considering the layout of your space. A beautifully designed sofa may catch your eye, but if it doesn’t fit well within your room’s dimensions or doesn’t complement the overall design, it may end up feeling out of place. Look for pieces that create a harmonious flow in the room, allowing for easy movement and conversation. For instance, a sectional sofa can offer ample seating while defining the space, but ensure it doesn’t overpower the room or obstruct pathways.

Next, think about the materials and textures you choose. Soft, plush fabrics can exude warmth and comfort, making your living room feel cozy and inviting. Consider adding decorative throw pillows or a luxurious area rug to enhance tactile comfort. On the other hand, sleek leather or modern upholstery can provide a contemporary edge, making your space feel chic and stylish. It’s all about finding what resonates with your personal taste while ensuring that the furniture feels good to use.

Color also plays a pivotal role in balancing comfort and aesthetics. Warm, muted tones can create a serene atmosphere, while bold, vibrant hues can energize the space. When selecting colors, consider how they interact with natural light and existing decor. A well-coordinated color palette can tie the entire room together, making it visually appealing while still feeling inviting.

Lastly, don’t forget to test the furniture for comfort! When shopping, take the time to sit on sofas, recliners, and chairs. Pay attention to the support they offer and how they make you feel. After all, the most aesthetically pleasing piece in the room will lose its charm if it’s not comfortable to sit on. By thoughtfully considering comfort alongside visual appeal, you can create a living room that is not only stylish but also a true sanctuary for relaxation and connection.

7. Measuring for the Perfect Fit

What are the best ways to choose the right furniture for your living room?
Credit : whatcanu.com

When it comes to selecting furniture for your living room, one of the most crucial steps is ensuring everything fits perfectly within the space. Measuring for the perfect fit goes beyond simply knowing the dimensions of your room; it involves a thoughtful consideration of scale, flow, and functionality.

Start by grabbing a tape measure and jotting down the dimensions of your living room, including the length, width, and height of any unique architectural features, such as windows, doorways, or built-in shelving. This foundational knowledge will help you visualize how different pieces will occupy the space.

Next, consider the size and proportions of the furniture you’re eyeing. A sprawling sectional might look inviting in a showroom, but in a compact living room, it can quickly overwhelm the space and make it feel cramped. Conversely, a delicate accent chair might get lost in a vast area. It’s essential to strike a balance between visual appeal and practical usability.

To aid in your decision-making, use painter’s tape to outline the dimensions of potential furniture pieces on your living room floor. This simple trick allows you to see how much space they will occupy and helps ensure there’s enough room to navigate comfortably around the pieces.

Don’t forget to account for the placement of other elements, such as coffee tables, side tables, and entertainment centers. There should be enough clearance for movement and access to items like lamps or remote controls. A good rule of thumb is to leave at least 18 inches of space between seating arrangements to promote an inviting and functional atmosphere.

Finally, remember that your furniture should not only fit the physical space but also align with your lifestyle. If you often entertain guests or have pets and children, opt for durable materials and designs that can withstand daily wear and tear without compromising on style. By carefully measuring and considering these factors, you’ll create a harmonious living room that is both beautiful and functional, inviting everyone to gather and enjoy.

8. Considering Layout and Flow

When it comes to selecting the perfect furniture for your living room, considering layout and flow is crucial to creating a harmonious and inviting space. The living room often serves as the heart of the home—a place for relaxation, socializing, and entertainment. Thus, how you arrange your furniture can greatly influence the overall ambiance and functionality of the room.

Start by assessing the room’s dimensions and architectural features. Take note of doorways, windows, and any built-in elements like fireplaces or shelves. These factors will help dictate your furniture arrangement and ensure you don’t obstruct natural light or create awkward pathways. Visualizing the space can be made easier with graph paper or design apps that allow you to experiment with different layouts without the heavy lifting.

Next, think about the flow of movement within the room. The goal is to create a layout that encourages easy navigation and fosters conversation. Grouping seating options, such as sofas and chairs, into cozy clusters can invite interaction, while leaving enough space between them—ideally 18 inches—ensures that guests can move freely without feeling cramped.

Don’t overlook the importance of scale and proportion when selecting pieces. A large sectional may dominate a small living room, making it feel cramped, while tiny accent chairs can get lost in a spacious area. Striking the right balance will enhance both comfort and style, allowing the room to breathe while still feeling anchored.

Lastly, consider how the furniture arrangement aligns with the activities you envision in your living space. Do you host movie nights frequently? Position your seating to face a TV or projector screen. Do you prefer game nights with friends? Ensure there’s ample surface space for snacks and drinks. By thoughtfully considering the layout and flow of your living room, you can create a functional, stylish environment that welcomes family and friends alike, making it a true reflection of your lifestyle.

9. Incorporating Statement Pieces

Incorporating statement pieces into your living room can transform an ordinary space into a stunning showcase of your personal style. A statement piece is typically a standout item that draws attention and serves as a focal point in the room. This could be a bold sofa in a vibrant color, an oversized piece of artwork, or a uniquely designed coffee table that sparks conversation.

When selecting a statement piece, consider the overall theme and color palette of your living room. A striking piece should complement, rather than clash with, the existing decor. For instance, if your living room features neutral tones, a vivid, patterned rug can add a layer of excitement and warmth. On the other hand, if your space is already filled with colorful accents, a sleek, minimalist piece—like a geometric bookshelf or an elegant armchair—can provide balance and contrast.

Don’t be afraid to mix textures and materials with your statement pieces. A plush velvet chair paired with a sleek metal side table can create an engaging visual dynamic. Additionally, consider the scale of your statement item. A large piece can make a bold impact in a spacious living room, while a smaller, yet equally striking item, may work better in a cozier setting.

Ultimately, incorporating statement pieces is about expressing your individuality and creating a space that resonates with who you are. This is your chance to showcase your taste and make your living room a true reflection of your personality. So, take your time selecting items that speak to you, and watch as your living room transforms into a captivating and inviting space that both you and your guests will love.

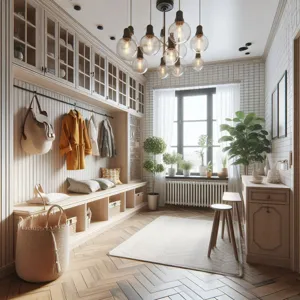
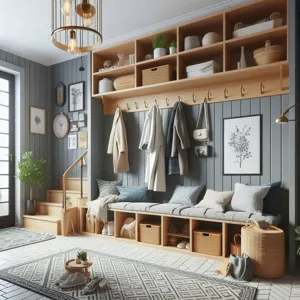
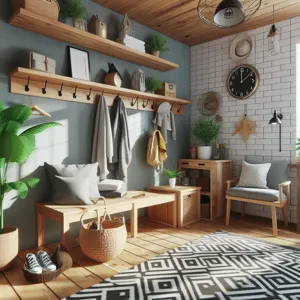
10. Accessorizing with Textiles and Decor

Accessorizing with textiles and decor is a vital step in transforming your living room from a simple space into a cozy, inviting sanctuary. Textiles have the power to add warmth, texture, and personality to your interior, while decor elements bring character and style.

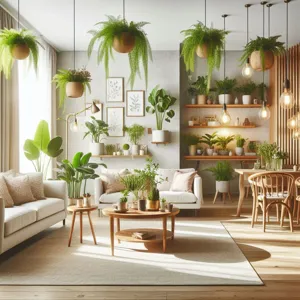
Start with your choice of textiles. Consider a mix of fabrics for your throw pillows, blankets, and rugs. Opt for soft, plush materials that invite relaxation, like velvets or knits, in a palette that complements your furniture. Layering different textures, such as a chunky knit throw draped over a sleek leather sofa or a fluffy area rug beneath a wooden coffee table, creates visual interest and depth in the room. Don’t shy away from bold patterns and colors; they can serve as focal points that inspire the overall design scheme.

Next, think about decor pieces that reflect your personality and interests. Artwork, framed photos, and decorative mirrors can enhance the ambiance and create a sense of unity in the space. A well-placed mirror not only adds a touch of elegance but also makes the room feel larger and brighter by reflecting light.

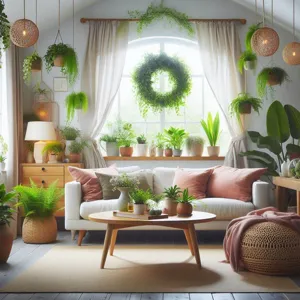
Incorporate greenery with potted plants or fresh flowers. They bring life into your living room and improve air quality while adding a splash of color. Similarly, decorative items like vases, candles, and unique sculptures can serve as conversation starters and add that finishing touch that elevates your living area.

Finally, remember to balance your decorative elements. Too many accessories can lead to a cluttered look, while too few can make the space feel stark and uninviting. Aim for a curated selection of textiles and decor that harmonizes with each other and with the furniture, creating a cohesive and stylish environment that welcomes you and your guests. By thoughtfully accessorizing with textiles and decor, you can craft a living room that is not only functional but also a true reflection of your style and lifestyle.

11. Budgeting for Your Furniture Needs

When it comes to furnishing your living room, effective budgeting is the cornerstone of a successful purchase. A well-planned budget not only helps you avoid overspending but also allows you to prioritize quality and style, ensuring that your living space reflects your personal taste without breaking the bank.

Start by assessing your overall financial situation and determining how much you’re willing to invest in your living room. Consider all aspects of the space—from the essential pieces like sofas and coffee tables to decorative accents such as lamps and artwork. It’s easy to get carried away with the allure of designer brands and trendy pieces, but establishing a budget helps you remain grounded in practicality.

Once you have a budget in mind, break it down into categories. Allocate specific amounts for each type of furniture, keeping in mind the importance of durability and longevity. For instance, investing more in a high-quality sofa that can withstand daily use may be worthwhile, while you could opt for more budget-friendly options for decorative items that can be easily swapped out later.

Don’t forget to factor in additional costs such as delivery fees, assembly services, and potential warranties. These hidden expenses can quickly add up and derail your budget if not considered from the start.

Finally, remember that budgeting doesn’t mean sacrificing style. Look for sales, discounts, and second-hand options that allow you to find unique pieces at a fraction of the cost. With a well-thought-out budget, you’ll be equipped to create a beautiful living room that meets your needs and reflects your style, all while keeping your finances intact.

12. Shopping Tips: Where to Buy Furniture

When it comes to furnishing your living room, knowing where to shop can make all the difference in finding the perfect pieces that fit your style and budget. Here are some essential shopping tips to guide you through the myriad of options available.

**1. Local Furniture Stores:** Start your search at local furniture stores, where you can often find unique, handmade pieces that reflect your community’s craftsmanship. These shops frequently offer personalized service, allowing you to ask questions about materials, construction, and care. Plus, supporting local businesses can give your living room a touch of character and a story to tell.

**2. Online Retailers:** The convenience of online shopping cannot be overstated. Websites like Wayfair, Overstock, and Amazon provide access to a vast array of furniture styles and prices. Take advantage of customer reviews and ratings, and don’t hesitate to dig into product details and dimensions. Just remember to factor in shipping costs, and check the return policy in case the piece doesn’t fit as expected.

**3. Thrift and Vintage Shops:** For those who appreciate a bit of nostalgia, thrift stores and vintage shops can be treasure troves of unique furniture. You might uncover a mid-century modern chair or a rustic coffee table that adds a unique flair to your living room. While these pieces may require a bit of refinishing or upholstery work, the character they bring can be well worth the effort.

**4. Online Marketplaces:** Platforms like Craigslist, Facebook Marketplace, and OfferUp are excellent for finding second-hand furniture at unbeatable prices. You can often negotiate prices with sellers and find items that are gently used or even brand new, all while reducing your environmental footprint. Just be sure to inspect items thoroughly before purchasing to avoid any unwanted surprises.

**5. Furniture Outlets:** If you’re looking for a bargain, consider visiting furniture outlet stores. These establishments often carry discontinued lines or floor models at significantly reduced prices. You might find high-quality pieces that fit your style without breaking the bank.

**6. Showrooms and Exhibitions:** If you’re seeking inspiration, visiting furniture showrooms can be incredibly beneficial. These spaces showcase the latest trends and designs, allowing you to visualize how different pieces will look in your own living room. Many showrooms also have staff that can offer expert advice on choosing the right furniture for your space.

**7. Specialty Stores:** Don’t overlook specialty stores that focus on particular styles, such as Scandinavian, bohemian, or industrial. These shops curate their collections with a specific aesthetic in mind, making it easier for you to find furniture that aligns with your vision for your living room.

As you embark on your furniture shopping journey, keep these tips in mind to streamline the process and enhance your chances of finding the perfect pieces that will make your living room a true reflection of your style and comfort. Happy shopping!

13. DIY vs. Ready-Made: What’s Best for You?

When it comes to furnishing your living room, one of the most crucial decisions you’ll face is choosing between DIY (do-it-yourself) projects and ready-made furniture. Each option has its own unique set of advantages and challenges, and the right choice ultimately depends on your personal style, budget, and the amount of time you’re willing to invest.

**DIY Furniture: The Creative Path**
Opting for DIY furniture can be an exciting venture that allows you to express your creativity and customize pieces to perfectly fit your space. Whether you’re building a rustic coffee table from reclaimed wood or reupholstering an old armchair with vibrant fabric, DIY projects can give your living room a personal touch that reflects your personality and taste. Plus, creating your own furniture can be a rewarding experience, offering the satisfaction of knowing you crafted something with your own hands.

However, DIY isn’t without its drawbacks. It often requires a certain level of skill, tools, and time. If you’re not handy or lack the necessary equipment, you might find yourself frustrated rather than fulfilled. Additionally, the cost of materials can sometimes creep up, making it less economical than anticipated. Careful planning and preparation can mitigate these issues, but it’s essential to honestly assess your capabilities before diving into a DIY project.

**Ready-Made Furniture: The Convenient Option**
On the other hand, ready-made furniture provides a level of convenience that can’t be overlooked. With a plethora of styles, colors, and designs available, you’re bound to find pieces that suit your aesthetic without the hassle of construction. Ready-made options save you time and effort, allowing you to focus on other aspects of decorating your living room, such as selecting complementary decor or arranging furniture layouts.

However, the downside of ready-made furniture is the potential lack of uniqueness. While many retailers offer customizable options, you might find yourself with similar pieces to those of your friends or neighbors. Additionally, quality can vary widely among manufacturers, so it’s crucial to do your research and invest in well-made items that will stand the test of time.

**Finding the Right Balance**
Ultimately, the decision between DIY and ready-made furniture should align with your lifestyle and vision for your living room. If you relish the idea of a personalized space and have the time to invest, DIY projects can result in stunning, one-of-a-kind pieces. However, if you’re looking for immediate solutions or prefer the ease of shopping, ready-made furniture might be the way to go. Consider blending both approaches for a harmonious balance—incorporating a few DIY elements alongside carefully chosen ready-made pieces can create a living room that feels both unique and thoughtfully curated.

14. Sustainable Furniture Options

In an era where environmental consciousness is at the forefront of consumer choices, opting for sustainable furniture has become more than just a trend—it’s a responsible lifestyle choice. When selecting pieces for your living room, considering sustainability can not only enhance the aesthetic appeal of your space but also contribute positively to the planet.

Sustainable furniture is typically crafted from renewable resources, such as reclaimed wood, bamboo, or sustainably sourced materials that minimize environmental impact. Not only do these materials reduce deforestation, but they also often come with unique character and history, giving each piece a story that adds depth to your living room. Imagine a coffee table made from reclaimed barn wood, with its rich textures and imperfections that spark conversations and admiration.

Moreover, many sustainable furniture brands prioritize eco-friendly manufacturing processes, ensuring that harmful chemicals and pollutants are kept to a minimum. Look for pieces that feature organic fabrics, non-toxic finishes, and low-VOC adhesives, all of which can contribute to a healthier indoor environment for you and your loved ones.

When choosing sustainable options, it’s essential to consider the longevity of the furniture. Investing in high-quality, timeless pieces means you’ll not only reduce waste but also enjoy your furniture for years to come. This mindful approach encourages a more deliberate consumption pattern—one that values craftsmanship and durability over fleeting trends.

Lastly, supporting local artisans and brands that emphasize sustainability can make a significant impact. This not only reduces the carbon footprint associated with transportation but also strengthens your local economy and fosters a sense of community. When you choose sustainable furniture, you’re not just making a choice for your living room; you’re making a statement about the kind of world you want to live in. So, as you curate your perfect living space, let sustainability guide your selections, creating an inviting atmosphere that’s as good for the planet as it is for your home.

15. Maintaining Your Living Room Furniture for Longevity

Maintaining your living room furniture is crucial for ensuring its longevity and keeping your space looking fresh and inviting. With a little care and attention, you can extend the life of your beloved pieces and preserve their beauty for years to come.

Begin by adopting a regular cleaning routine tailored to the specific materials of your furniture. For wooden pieces, dust them frequently with a soft, lint-free cloth to avoid scratches and build-up of grime. A periodic application of wood polish can help maintain their finish and prevent drying or cracking. Upholstered furniture, on the other hand, benefits from vacuuming to remove dirt and debris. Depending on the fabric, consider spot-cleaning stains promptly with appropriate cleaners or even hiring a professional service for a deep clean.

Sunlight can be a silent enemy to your furniture, causing colors to fade and fabrics to weaken over time. Position your furniture thoughtfully to minimize direct exposure to harsh sunlight, and consider using window treatments that regulate light levels in your living space. Similarly, humidity levels play a significant role in the integrity of your furniture. If you live in a particularly humid area, using a dehumidifier can help prevent wood from warping and fabrics from developing mold.

Rotation is another essential maintenance tip, especially for upholstered pieces. By rotating cushions and positioning furniture in different configurations from time to time, you can evenly distribute wear and prevent any one area from becoming overly worn.

Lastly, don’t forget to check and tighten screws and bolts periodically. Over time, even the sturdiest of furniture can develop loose joints. Regular inspections will help you catch potential issues early, ensuring that your living room remains a comfortable and safe space for family and guests.

By implementing these simple yet effective maintenance strategies, you’ll not only protect your investment but also create a welcoming environment that exemplifies your taste and style. Your living room furniture will thank you, and you’ll enjoy a beautiful, enduring space for years to come.

In conclusion, selecting the perfect furniture for your living room is an exciting yet crucial step in creating a space that reflects your style and meets your needs. By considering factors such as size, functionality, and aesthetic harmony, you can curate a harmonious environment that welcomes comfort and conversation. Whether you opt for timeless classics or contemporary pieces, remember that your living room should be a reflection of your personality and lifestyle. With these essential tips in mind, you are now equipped to make informed decisions that will transform your living room into a cozy haven for family gatherings and entertaining guests. Happy decorating, and may your living space bring you joy for years to come!

How to create a cozy and inviting living room?

Your living room is more than just a place to sit; it’s the heart of your home, a sanctuary where comfort meets style, and a gathering spot for family and friends.

After a long day, it should be a refuge that envelops you in warmth and tranquility. However, crafting that perfect cozy and inviting atmosphere can be a challenge, especially with the myriad of design choices available today. In this blog post, we will explore practical tips and creative ideas to help you transform your space into a haven that reflects your personality while providing a welcoming ambiance. From selecting the right color palette and furniture arrangement to incorporating soft textures and ambient lighting, join us as we delve into the art of creating a living room that beckons you to relax, unwind, and enjoy the moments that matter most.

1. Understanding the Importance of a Cozy Living Room

How to create a cozy and inviting living room?
Credit : whatcanu.com

A cozy living room is more than just a space filled with comfortable furniture; it serves as the heart of your home, a sanctuary where you can unwind, connect with loved ones, and create lasting memories. The importance of cultivating a warm and inviting atmosphere cannot be overstated. After all, this is where families gather for movie nights, friends come together for lively chats, and quiet moments of solitude are cherished with a good book and a cup of tea.

When you step into a cozy living room, you are embraced by a sense of comfort and tranquility. The right balance of colors, textures, and lighting plays a pivotal role in establishing this inviting environment. Soft, warm hues can evoke feelings of calm, while plush textiles like throw blankets and cushions invite you to sink in and relax. A well-placed rug underfoot adds warmth and delineates spaces, making the room feel more intimate.

Moreover, a cozy living room fosters connection. It encourages conversations and shared experiences, providing a backdrop for everything from heartfelt discussions to raucous laughter. This space should reflect your personality and style, inviting guests to feel at home. Incorporating personal touches like family photographs, cherished souvenirs, or artwork that resonates with you can enhance the warmth and character of the room.

In essence, a cozy living room is a reflection of your lifestyle and values. By understanding its importance, you can create a space that not only looks aesthetically pleasing but also feels welcoming and comfortable for everyone who steps through your door. So, let’s embark on this journey of transformation together, and explore how to turn your living room into the cozy retreat you’ve always envisioned.

2. Assessing Your Current Space: What Works and What Doesn’t

Before diving headfirst into a transformation, it’s essential to take a step back and assess your current living room. This critical evaluation will help you identify what works well and what doesn’t, ensuring that your redesign is both effective and tailored to your needs.

Start by taking a good look at the layout. Does the flow of the room feel natural, or do you often find yourself maneuvering around obstacles? Consider the placement of furniture: are your seating arrangements conducive to conversation? If your sofa faces away from the focal point, like a fireplace or entertainment center, it might be time to rearrange. A well-thought-out layout not only enhances comfort but also fosters an inviting atmosphere.

Next, evaluate the color scheme and decor. Are the walls a drab shade that makes the space feel smaller and less welcoming? Or perhaps the decor is too cluttered, detracting from the cozy vibe you’re aiming for? Take note of pieces that bring you joy and those that feel out of place. This is your opportunity to curate a space that reflects your personality while remaining comfortable and inviting.

Lighting is another crucial factor to assess. Harsh overhead lights can make a room feel sterile, while soft, layered lighting creates warmth and intimacy. Consider your options: do you have enough natural light during the day? Are there lamps strategically placed to illuminate dark corners at night? Keep in mind that a mix of ambient, task, and accent lighting can add depth and drama to your living space.

Lastly, think about the textures and materials present in the room. Do your furnishings feel inviting, or are they too stiff and formal? Incorporating soft textiles, such as plush throw pillows, cozy blankets, and warm area rugs can significantly enhance the comfort level. This tactile element is key to creating a space where you and your guests will want to linger.

By carefully assessing your current living room, you’ll lay a solid foundation for a successful transformation. Understanding what works and what doesn’t allows you to make informed decisions that result in a cozy environment, inviting you to unwind and enjoy the space to its fullest.

3. Choosing a Color Palette: Warm vs. Cool Tones

How to create a cozy and inviting living room?
Credit : whatcanu.com

When it comes to creating a cozy and inviting living room, the color palette you choose plays a pivotal role in setting the mood and atmosphere of the space. Understanding the emotional impact of colors can guide you in making selections that enhance comfort and warmth. Here, we’ll explore the difference between warm and cool tones and how each can transform your living room into a haven of relaxation.

**Warm Tones:** Think of the sun’s golden rays or the rich hues of autumn leaves—warm tones, including reds, oranges, yellows, and earthy browns, evoke feelings of warmth and energy. These colors can create an inviting ambiance, making your living room feel more intimate and friendly. Imagine a soft, terracotta accent wall paired with plush golden cushions and a deep burgundy throw draped over a cozy sofa. The combination not only invites conversation but also creates a sense of comfort that encourages guests to linger.

In addition to paint colors, warm-toned accessories like wooden furniture, copper accents, and warm-hued artwork can enhance the overall coziness of the room. Layering these elements thoughtfully will help to cultivate an environment where family and friends feel at ease, ready to unwind and share moments together.

**Cool Tones:** On the other hand, cool tones—such as blues, greens, and purples—bring a sense of calm and serenity to a space. These colors are reminiscent of tranquil waters and clear skies, which can help create a soothing retreat from the chaos of everyday life. A light blue accent wall, paired with soft green throw pillows and a lavender area rug, can transform your living room into a peaceful sanctuary where relaxation reigns supreme.

To balance the calming effects of cool tones, consider incorporating natural materials like soft textiles and live plants. A plush navy sofa adorned with sage green accents can provide both comfort and style, while strategically placed greenery adds life to the space and purifies the air.

Ultimately, the choice between warm and cool tones depends on the atmosphere you wish to cultivate in your living room. Whether you lean toward the inviting embrace of warm colors or the tranquil serenity of cool hues, selecting a cohesive palette will help you create a harmonious environment that reflects your personal style and invites everyone to feel right at home.

4. Furniture Selection: Comfort Meets Style

When it comes to transforming your living room into a cozy and inviting space, the selection of furniture is a pivotal factor that balances comfort with style. The right pieces can create an atmosphere that not only looks good but also feels good, encouraging family and friends to gather and linger.

Start by evaluating your space and understanding its unique dimensions and layout. This will guide you in choosing furniture that fits seamlessly, rather than overwhelms the area. Opt for a plush sofa that invites you to sink in and relax; look for soft fabrics like velvet or chenille that add a tactile warmth to the room. Consider incorporating a mix of seating options, such as a pair of oversized armchairs or a stylish loveseat, to create a conversational layout that feels both intimate and welcoming.

Don’t overlook the importance of layering textures. Introduce accent pillows and cozy throws in varying materials—think chunky knit blankets or soft fleece—to add depth and comfort. A well-chosen rug can also anchor the space, providing a soft foundation and visually tying together your color scheme while encouraging guests to kick off their shoes and feel at home.

Style doesn’t have to be sacrificed for comfort. Look for unique furniture pieces that reflect your personality. Perhaps a reclaimed wood coffee table or an artistic side table can serve as a conversation starter while enhancing the room’s aesthetic. Remember, your living room is a reflection of you; choose pieces that resonate with your style while providing the comfort you desire.

Lastly, consider multifunctional furniture that maximizes both comfort and utility. Ottomans that double as storage or coffee tables that expand for game nights can keep your space tidy and practical without compromising on style. By thoughtfully selecting furniture that harmonizes comfort and style, you can create a living room that beckons everyone to stay a little longer, share stories, and make lasting memories.

5. Layering Textiles: Rugs, Throws, and Cushions

How to create a cozy and inviting living room?
Credit : whatcanu.com

Layering textiles is one of the most effective ways to infuse warmth and comfort into your living room, transforming it from a mere gathering space into a cozy retreat. Start with your foundation: a plush area rug that anchors the room and adds a sense of coziness underfoot. Opt for a rug that complements your color scheme and invites bare feet to sink in. Whether you choose a soft wool, a luxurious shag, or a rustic jute, the right rug sets the tone for the entire space.

Next, add dimension and softness with throws and blankets. Drape a chunky knit or a soft cashmere throw over the back of your sofa or a stylish armchair, inviting family and friends to snuggle up during chilly evenings. Choose a variety of textures and patterns to create visual interest; think geometric prints that contrast with floral cushions or a rich, solid color throw that harmonizes with your rug. These layers not only provide warmth but also act as a canvas for expressing your personal style.

Cushions are the finishing touch that can elevate your living room from ordinary to extraordinary. Mix and match sizes, shapes, and fabrics to create an inviting and eclectic look. Oversized floor cushions can double as extra seating or a place to perch, while smaller throw pillows can be arranged artfully on your sofa, inviting guests to relax and linger. Don’t shy away from bold colors or patterns—these elements can serve as focal points and conversation starters, drawing the eye and making your living room feel both curated and lived-in.

By thoughtfully layering rugs, throws, and cushions, you can create a living room that not only looks inviting but also feels like a comforting embrace, perfect for curling up with a good book or hosting friends for an evening of laughter and conversation. Remember, the key is to experiment with textures and colors until you achieve a space that reflects your unique personality while enveloping you in warmth and coziness.

6. Lighting Matters: Natural and Artificial Options

Lighting plays a pivotal role in transforming your living room into a cozy and inviting space. The right lighting can create an atmosphere that feels warm, welcoming, and conducive to relaxation, making it essential to strike a balance between natural and artificial options.

Start with natural light—it’s the most flattering and uplifting option available. Maximize sunlight by choosing sheer curtains or blinds that can be easily drawn back during the day. Consider the layout of your room; position mirrors strategically to reflect light, making the space feel larger and more open. If your living room has large windows, embrace the view and let the sunlight stream in, creating a vibrant and energizing environment.

As the sun sets, artificial lighting becomes crucial in maintaining that cozy ambiance. Layer your lighting by incorporating different sources—overhead fixtures, floor lamps, table lamps, and even wall sconces. Opt for warm white bulbs, which emit a soft glow that enhances comfort. Dimmers are a fantastic addition as they allow you to adjust the brightness to suit your mood, whether you’re hosting a lively gathering or unwinding with a good book.

Consider accent lighting as well; highlighting artwork or architectural features can add depth and interest to your living room. String lights or LED strips can create a whimsical touch, wrapping around bookshelves or draping along mantels for a soft, enchanting glow.

Finally, don’t forget about the power of candles. They provide a flickering light that evokes a sense of calm and intimacy. Arrange them in clusters on coffee tables or mantels for added charm, and opt for scented candles to engage the senses further.

By thoughtfully combining natural and artificial lighting, you can craft a living room that feels inviting and warm, encouraging family and friends to gather and enjoy each other’s company.

7. Arranging Furniture for Optimal Flow and Comfort

How to create a cozy and inviting living room?
Credit : whatcanu.com

Arranging furniture in your living room is more than just a matter of aesthetics; it’s about creating an environment that promotes comfort and encourages conversation. The key to achieving this lies in understanding the concept of flow—how people move through and interact within the space.

Start by considering the room’s focal point, whether it’s a fireplace, a beautiful view, or a stunning piece of artwork. Position your seating around this focal point to create an inviting atmosphere. For smaller spaces, a sectional sofa can help maximize seating while maintaining open pathways. In larger areas, consider creating multiple seating zones, each with its own purpose—perhaps a cozy reading nook with an armchair and a lamp, alongside a communal seating area for gatherings.

Take note of the distances between furniture pieces. Aim for a comfortable conversation distance of about 6-8 feet between seats; this allows for easy dialogue without feeling too distant. Avoid pushing all your furniture against the walls, as this can create a stark and unwelcoming vibe. Instead, pull seating inward to create a snug, intimate setting.

Incorporate varied heights and textures to add visual interest and comfort. Layering in ottomans, poufs, or even a soft area rug can not only define spaces but also invite relaxation. Don’t forget to leave space for movement—ensuring there’s a clear path to walk between furniture will keep the room feeling open and inviting.

Finally, consider the lighting when arranging your furniture. Position seating to take advantage of natural light during the day, and include warm, ambient lighting options, such as floor lamps or table lamps, to create a cozy ambiance in the evenings.

By thoughtfully arranging your furniture, you can transform your living room into a warm, welcoming retreat that encourages connection and relaxation.

8. Incorporating Personal Touches: Decor and Art

Incorporating personal touches through decor and art is a vital step in transforming your living room into a cozy and inviting space. The essence of a home lies not just in its structure but in the stories and memories that adorn its walls and surfaces. Art pieces, family photographs, and handmade crafts can infuse your living room with warmth and personality, making it a true reflection of who you are.

Start by selecting artwork that resonates with you—whether it’s a vibrant painting that sparks joy, a serene landscape that calms the mind, or a collection of prints that tell a story. Consider mixing different styles and mediums; a gallery wall featuring a blend of photographs, paintings, and even three-dimensional pieces can create an engaging focal point. Don’t shy away from incorporating local artists or pieces from your travels, as these not only add character but also serve as conversation starters.

Family photos, displayed in stylish frames or as a photo collage, can evoke cherished memories and create a sense of belonging. Position them on shelves, mantels, or side tables to keep loved ones close, even in everyday moments. Additionally, consider integrating handmade decor items—whether it’s a knitted throw blanket draped over a chair or a handcrafted vase filled with fresh flowers. These unique elements lend authenticity to your space and show that it’s lived in and loved.

Finally, remember that the arrangement of your decor plays a crucial role in creating an inviting atmosphere. Balance is key; too many items can feel cluttered, while too few can create a sterile vibe. Aim for a harmonious layout that draws the eye around the room, allowing each piece to shine while contributing to the overall warmth of the space. By thoughtfully incorporating personal touches, your living room will not only be cozy but also a true haven that reflects your unique style and story.

9. The Role of Greenery: Adding Plants for a Fresh Feel

Incorporating greenery into your living room is one of the simplest and most effective ways to create a cozy and inviting atmosphere. Plants not only enhance the aesthetic appeal of your space but also contribute to a fresh and vibrant ambiance that can uplift your mood and improve your overall well-being.

Imagine walking into a room filled with lush foliage, where the air feels cleaner and the colors are more vibrant. From towering fiddle leaf figs to delicate peace lilies, the variety of plants available allows you to express your personal style while enhancing the natural beauty of your living space. Consider placing a tall plant in a corner to draw the eye upward, or clustering smaller pots on a coffee table for a charming, curated look.

Beyond mere decoration, plants offer numerous benefits. They help purify the air by absorbing toxins and releasing oxygen, making your living room not just visually appealing but also healthier. Moreover, studies have shown that the presence of greenery can reduce stress and increase feelings of calm.

To create a cohesive feel, choose plants that complement your color scheme and furnishings. For instance, vibrant green leaves can add a pop of color to a neutral palette, while softer, muted plants like succulents can enhance a minimalist aesthetic. Don’t forget to consider the lighting in your living room. Some plants thrive in bright, indirect sunlight, while others prefer low-light conditions, so be sure to select varieties that will flourish in your space.

To further enhance the cozy vibe, consider using decorative pots or planters that match your decor. Woven baskets, ceramic pots, or metallic finishes can all add texture and visual interest. You can even create a small indoor garden or a vertical wall of greenery to make a bold statement.

By embracing the role of greenery in your living room, you’ll not only transform the space visually but also create a serene environment that invites relaxation and connection. So, roll up your sleeves, choose your favorite plants, and watch as your living room transforms into a lush, inviting retreat.

10. Creating Zones: Areas for Relaxation and Entertainment

Creating distinct zones in your living room is an essential step in crafting a space that feels both cozy and functional. By thoughtfully delineating areas for relaxation and entertainment, you can enhance the overall flow of the room and accommodate various activities seamlessly.

Start by identifying the primary functions your living room will serve. Perhaps you envision a tranquil nook for curling up with a good book, complete with a plush armchair and a warm throw blanket. Position this area near a window to take advantage of natural light, creating a serene retreat where you can unwind. Enhance the ambiance with a small side table for your favorite beverage and a soft lamp to cast a gentle glow during evening hours.

On the opposite end, designate a vibrant entertainment zone that invites social interaction. A comfortable sectional sofa arranged around a coffee table can serve as the heart of this area, providing ample seating for friends and family. Layer in some colorful cushions and a cozy area rug to define the space and add warmth. Consider incorporating a media console or mounted shelves to house your entertainment devices, while also displaying personal touches like framed photos or decorative items, enhancing the inviting atmosphere.

Don’t overlook the importance of versatility. Use furniture that can be easily rearranged to accommodate different gatherings—think ottomans that double as seating and folding chairs for larger get-togethers. You can also incorporate a small dining table for game nights or casual meals, creating an inviting environment that caters to various social dynamics.

By clearly defining these zones, you not only create a functional layout but also ensure that your living room embodies comfort and style. With each area serving a specific purpose, you’ll find that your space becomes a welcoming haven, inviting you and your guests to relax, connect, and enjoy every moment spent within its warm embrace.

11. Tips for Decluttering: Making Space Feel Open

Creating a cozy and inviting living room often starts with the fundamental step of decluttering. A well-organized space not only looks more inviting but also promotes a sense of tranquility, allowing you to fully enjoy your environment. Here are some practical tips to help you make your living room feel open and welcoming.

**1. Assess and Prioritize:** Begin by taking a good look at your living room. Identify items that don’t belong or that you no longer use or love. Ask yourself whether each object brings you joy or serves a purpose. If it doesn’t, consider donating or discarding it. This initial assessment will make the decluttering process more manageable.

**2. Use Baskets and Bins:** Invest in attractive storage solutions like woven baskets or decorative bins. These can be strategically placed around the room to corral items like magazines, blankets, or children’s toys. Not only do they keep the space tidy, but they also add texture and warmth to your decor.

**3. Limit Surface Clutter:** Coffee tables, side tables, and shelves can quickly become catch-alls for miscellaneous items. Aim to keep surfaces as clear as possible, displaying only a few carefully chosen decor pieces. This creates a more spacious feel and allows your favorite items to shine without being overshadowed by clutter.

**4. Create Zones:** If your living room serves multiple purposes, like entertaining guests or serving as a reading nook, define these areas clearly. Use rugs to delineate spaces and ensure each zone has its own distinct purpose. This organization not only adds functionality but also enhances the room’s overall flow.

**5. Go Vertical:** When floor space is limited, think vertically. Utilize wall-mounted shelves or tall bookcases to store and display your belongings. This draws the eye upward, creating the illusion of more space and allowing for better organization without sacrificing aesthetics.

**6. Keep It Simple:** Choose a few key decor pieces rather than overwhelming the space with various knick-knacks. A statement piece of art, a large plant, or a unique lamp can become a focal point while maintaining a clean, uncluttered look.

By implementing these decluttering tips, you’ll transform your living room into a serene oasis that feels open and inviting. The result is a space where you can unwind, entertain, and create lasting memories—all while basking in the cozy atmosphere you’ve crafted.

12. Utilizing Mirrors: Enhancing Light and Space

Mirrors can be a game-changer when it comes to transforming a living room into a cozy and inviting haven. By strategically placing mirrors, you can enhance both light and space, creating an illusion of openness and brightness that elevates the overall ambiance of your room.

Start by identifying areas where natural light enters your living room. Positioning a mirror across from a window allows sunlight to bounce off its surface, flooding the room with warmth and luminosity. This not only brightens dark corners but also creates a cheerful atmosphere that invites relaxation and conversation.

In addition to amplifying light, mirrors can visually expand your living space. If your living room feels cramped or cluttered, consider using a large statement mirror on one wall. This not only draws the eye upward—giving the illusion of higher ceilings—but it also reflects the room’s décor, making it feel more expansive and airy. Smaller mirrors can be grouped together to create a dynamic gallery wall that adds visual interest and depth.

When choosing mirrors, think about the style and frame to ensure they complement your existing decor. A rustic wooden frame can bring warmth and character, while a sleek, modern design might provide a chic, minimalist touch. Regardless of the style, mirrors serve as functional art pieces that enhance your living room’s aesthetic.

Lastly, don’t underestimate the power of placement. Whether it’s a round mirror above a sofa or a tall, leaning mirror in a corner, the right positioning can redefine the space and create an inviting atmosphere. By utilizing mirrors thoughtfully, you can transform your living room into a cozy retreat that feels both spacious and welcoming.

13. Seasonal Decor: Changing Up the Cozy Factor

One of the simplest yet most effective ways to enhance the coziness of your living room is by embracing seasonal decor. Each season brings its own unique palette and mood, and by thoughtfully changing your decor to reflect these shifts, you create an inviting atmosphere that feels fresh and engaging throughout the year.

As autumn rolls in, consider swapping out light summer fabrics for rich, warm textures. Plush blankets draped over the couch, earthy-hued throw pillows, and decorative pumpkins can transform your space into a cozy retreat. Adding warm lighting, such as string lights or candles, creates a soft, inviting glow that beckons you to curl up with a good book or enjoy a cup of spiced cider.

When winter sets in, lean into the season’s charm with holiday decorations that radiate warmth. Consider a beautifully adorned tree, garlands of pine, and flickering candles. Use faux-fur throws and soft area rugs to evoke a sense of warmth against the chill outside, making your living room a perfect gathering place for family and friends.

Spring invites a breath of fresh air, and your decor can reflect that rejuvenation. Swap out heavier fabrics for lighter, airy textiles in pastel shades. Fresh flowers or potted plants can breathe life into your space, while colorful cushions can add a playful touch. This seasonal shift not only brightens your living room but also lifts spirits as you welcome the longer days and blooming nature.

As summer approaches, you can infuse your living room with vibrant colors and light, breezy fabrics. Think of nautical themes with blues and whites, or perhaps a tropical vibe with bold prints. Incorporating natural elements such as wicker accents or seashell decor can enhance the feeling of being connected to the outdoors.

By embracing the changing seasons in your decor, you not only keep your living room feeling new and inviting but also create an emotional connection with the rhythms of nature. Each transition invites you to refresh your space, foster creativity, and cultivate an atmosphere of warmth and comfort that beckons you and your loved ones to gather, share stories, and create lasting memories.

14. DIY Projects for a Personal Touch

When it comes to infusing your living room with warmth and personality, DIY projects are the perfect avenue for creativity. These hands-on endeavors not only provide a satisfying sense of accomplishment but also allow you to customize your space in a way that reflects your unique style. Whether you’re a seasoned crafter or a novice with a passion for home improvement, there are countless projects you can tackle to enhance the coziness of your living area.

Start with simple decorative elements, such as creating your own wall art. Gather some canvas, paint, and brushes to unleash your inner artist—abstract designs or nature-inspired pieces can add a vibrant splash of color and serve as conversation starters. If painting isn’t your forte, consider designing a gallery wall with framed photographs or printed quotes that resonate with you, giving your living room a personal touch that tells your story.

Next, think about upgrading your furniture with some DIY flair. A fresh coat of paint or a new stain on wooden furniture can revive tired pieces, while reupholstering chairs or sofas in cozy fabrics can instantly transform the feel of your room. For an extra layer of comfort, why not try making your own throw pillows? Choose fabrics that complement your color scheme, and experiment with different textures to create a snug atmosphere.

Another delightful project is crafting your own coffee table or side tables. With some reclaimed wood and a bit of creativity, you can design a rustic centerpiece that not only provides functional space but also enhances the aesthetic appeal of your living area. Adding personal elements, such as books you love or trinkets collected from your travels, will make your space even more inviting.

Lastly, don’t overlook the power of lighting. Consider making your own light fixtures or decorative lampshades using materials like yarn, fabric, or even paper. The right lighting can set the mood, so experiment with different styles to find what makes your living room feel most inviting.

By incorporating these DIY projects, you can create a living room that is not only cozy and inviting but also a true reflection of who you are. Each handcrafted piece will add character and charm, making your space a warm haven where you and your loved ones will love to gather.

15. Final Touches: Scent, Sound, and Ambiance

When it comes to transforming your living room into a cozy and inviting sanctuary, the final touches can make all the difference. Scent, sound, and ambiance are the trifecta that elevates a room from simply functional to truly welcoming.

**Scent** plays a powerful role in setting the mood of your space. Consider introducing subtle fragrances that evoke warmth and comfort. Scented candles, essential oil diffusers, or even a bowl of potpourri can infuse your living room with delightful aromas. Scents like vanilla, cinnamon, or sandalwood can create an inviting atmosphere, making guests feel right at home. Additionally, consider natural scents from houseplants or fresh flowers; not only do they enhance the beauty of your space, but they also provide a refreshing and organic aroma.

Next, focus on **sound**. The ambiance of a room can be significantly enhanced by the right background noise. Soft music playing from a Bluetooth speaker or a record player can provide a calming backdrop for conversations or relaxation. Alternatively, consider adding a sound machine that mimics the gentle rustling of leaves or a crackling fireplace. These soothing sounds can envelop your living room in tranquility, making it the perfect retreat from the hustle and bustle of daily life.

Finally, think about the overall **ambiance** of your living room. Dim lighting can create a warm and intimate setting, while strategically placed lamps can add layers to your space. Use a mix of light sources—overhead fixtures, floor lamps, and table lamps—to create a soft glow that invites you to unwind. Adding soft textiles, such as plush throw blankets and scattered cushions, can further enhance the cozy feel.

When combined, these elements of scent, sound, and ambiance create an enveloping environment that beckons you to sit back, relax, and enjoy your beautifully transformed living room. By paying attention to these final touches, you’ll cultivate a space that feels not only stylish but also like a true home.

In conclusion, transforming your living room into a cozy and inviting space is both an art and a personal journey that reflects your unique style and comfort needs. By incorporating warm colors, plush textures, and thoughtful decor, you can create a haven that welcomes both family and friends alike. Remember to personalize the space with meaningful accents, whether it’s cherished photographs, beloved books, or favorite mementos, to truly make it your own. As you embark on this transformation, take your time to experiment with different arrangements and elements, allowing your creativity to shine. We hope these tips inspire you to create a living room that not only looks beautiful but also feels like a warm embrace, inviting everyone to gather, relax, and enjoy each other’s company. Happy decorating!

What are the different types of faucet finishes?

When it comes to designing your home, every detail counts, and faucets are no exception.

Often overlooked, the finish of your faucets can dramatically influence the overall aesthetic of your kitchen or bathroom, blending functionality with style. With a plethora of options available—from sleek chrome and warm brass to modern matte black and timeless nickel—the choices can be as overwhelming as they are exciting. Choosing the perfect faucet finish requires a keen understanding of your personal style, existing décor, and the atmosphere you wish to create. In this comprehensive guide, we will explore the various faucet finishes available, delve into their unique characteristics, and provide valuable tips to help you select the ideal finish that not only complements your home but also enhances your daily living experience. Get ready to transform your spaces with the right faucet finish, turning mundane tasks into moments of joy!

1. Introduction to Faucet Finishes

What are the different types of faucet finishes?
Credit : whatcanu.com

When it comes to designing or renovating your kitchen or bathroom, every detail counts—including the faucet finishes you choose. Faucet finishes not only play a crucial role in the overall aesthetic of your space but also affect the functionality and maintenance of your fixtures. With a myriad of options available, from gleaming chrome to rustic oil-rubbed bronze, selecting the right finish can transform the look and feel of your home.

In this guide, we’ll explore the various types of faucet finishes, discussing their unique characteristics, benefits, and potential drawbacks. Whether you’re aiming for a sleek, modern vibe or a classic, timeless appeal, understanding the nuances of each finish will empower you to make an informed decision.

We’ll delve into popular finishes such as polished nickel, matte black, and brushed stainless steel, examining how they complement different decor styles. Additionally, we’ll touch on practical considerations like durability, ease of cleaning, and resistance to tarnishing, ensuring your faucet not only looks stunning but stands the test of time.

Join us as we embark on this journey through the fascinating world of faucet finishes, helping you find the perfect look that harmonizes with your home’s design and enhances your daily routine.

2. Understanding the Importance of Faucet Finishes

When it comes to home design, the details matter profoundly, and faucet finishes are no exception. The finish of a faucet can dramatically influence the aesthetics of your kitchen or bathroom, acting as a subtle yet striking focal point in your space. Understanding the importance of faucet finishes goes beyond mere appearances; it’s about harmonizing style, functionality, and durability.

Each finish brings its unique character to the table. For instance, chrome faucets offer a sleek, modern look with their bright, reflective surface, making them ideal for contemporary spaces. On the other hand, oil-rubbed bronze delivers a warm, rustic charm, perfect for traditional or farmhouse-style interiors. Matte black finishes have gained popularity in recent years, providing a bold and sophisticated touch that pairs beautifully with a variety of color palettes.

Moreover, the finish you choose can affect the faucet’s maintenance and longevity. Some finishes, like polished nickel, are more resistant to tarnishing and scratches, ensuring your faucet maintains its luster over time. Others, such as brass, develop a unique patina that can enhance their visual appeal but may require more regular upkeep to keep them looking pristine.

In addition to aesthetics and maintenance, consider how the faucet finish will interact with other elements in your space. The right finish can unify your design, linking the faucet with cabinet hardware, light fixtures, and even appliances. By taking the time to understand the importance of faucet finishes, you’re not just making a choice; you’re setting the tone for your entire home. A well-selected finish can elevate your space, making it feel cohesive, stylish, and thoughtfully designed.

3. Popular Faucet Finishes: An Overview

What are the different types of faucet finishes?
Credit : whatcanu.com

When it comes to selecting the perfect faucet finish for your home, understanding the popular options available is key to making an informed decision. Each finish not only contributes to the aesthetic appeal of your space but also affects the overall ambiance and functionality of your fixtures.

**1. Polished Chrome:** A classic choice, polished chrome faucets exude a sleek, modern vibe that complements a variety of design styles. The reflective surface bounces light around the room, making it an excellent option for smaller spaces. It’s also highly resistant to rust and tarnish, ensuring your faucet maintains its shine with minimal upkeep.

**2. Brushed Nickel:** If you’re looking for a more understated elegance, brushed nickel is an ideal selection. This finish has a soft, muted sheen that hides fingerprints and water spots beautifully, making it a practical choice for busy kitchens and bathrooms. It pairs well with both traditional and contemporary decor, offering versatility in design.

**3. Oil-Rubbed Bronze:** For those who appreciate a rustic or vintage aesthetic, oil-rubbed bronze is a top contender. This rich, dark finish provides a striking contrast against light-colored surfaces and introduces a warm, inviting feel to your space. Its unique patina develops over time, adding character and depth that speaks to its timeless quality.

**4. Matte Black:** The rise of matte black finishes has transformed modern interior design. This bold, sophisticated option adds a touch of drama to any room while maintaining a sleek, minimalist appearance. Matte black faucets work exceptionally well in contemporary and industrial settings, making them a favorite among design enthusiasts.

**5. Polished Gold:** For a luxurious touch, polished gold faucets can elevate your home’s aesthetic to new heights. This eye-catching finish radiates opulence and pairs beautifully with marble countertops and rich colors. However, it’s important to consider the level of maintenance required, as polished gold can be more susceptible to tarnishing.

In summary, the choice of faucet finish can significantly impact both the style and functionality of your space. By exploring these popular options, you can find the perfect look that aligns with your home’s design vision while ensuring durability and ease of maintenance. Whether you opt for the timeless elegance of polished chrome or the luxurious allure of polished gold, the right faucet finish can truly enhance your home’s overall aesthetic.

4. Chrome: The Classic Choice

When it comes to faucet finishes, chrome stands out as the classic choice that has withstood the test of time. Its shiny, reflective surface exudes a sense of cleanliness and modern elegance, making it a staple in both traditional and contemporary kitchens and bathrooms. The allure of chrome lies in its versatility; it seamlessly complements a wide array of décor styles, from minimalist and industrial to farmhouse and classic.

One of the most appealing aspects of chrome finishes is their durability. Crafted from high-quality materials, chrome faucets are resistant to tarnishing and corrosion, ensuring that their radiant luster remains intact even in high-moisture environments. This durability translates to longevity, making chrome a smart investment for homeowners looking for fixtures that will stand the rigors of daily use while maintaining their aesthetic appeal.

In addition to its practical benefits, chrome offers a timeless aesthetic that can enhance any space. The reflective surface captures and plays with light, creating a sense of brightness and openness in your kitchen or bathroom. Whether you opt for a sleek, modern design or a more ornate style, chrome effortlessly adapts, allowing you to create the desired ambiance in your home.

Maintenance is another significant advantage of chrome finishes. With just a soft cloth and mild soap, you can easily wipe away fingerprints and water spots, keeping your fixtures looking pristine. For those who appreciate a low-maintenance option without sacrificing style, chrome is the perfect choice.

In summary, choosing chrome for your faucet finish is not just about aesthetics; it’s a decision rooted in practicality, durability, and timeless elegance. As you explore your options, consider how this classic finish can elevate your home’s overall design, providing a stunning focal point that combines beauty and functionality.

5. Brushed Nickel: A Modern Favorite

What are the different types of faucet finishes?
Credit : whatcanu.com

Brushed nickel has emerged as a modern favorite in the realm of faucet finishes, captivating homeowners and designers alike with its sleek appearance and versatile charm. This finish boasts a soft, understated sheen that complements a wide range of design aesthetics, making it a go-to choice for contemporary and transitional spaces.

One of the standout features of brushed nickel is its durability. The brushed texture not only adds a layer of sophistication but also helps to hide fingerprints, water spots, and scratches, keeping your fixtures looking pristine with minimal upkeep. This practical benefit is particularly appealing for busy households where maintenance can often fall by the wayside.

In terms of color, brushed nickel strikes a harmonious balance between warm and cool tones. Its subtle silver hue pairs beautifully with various color palettes, from crisp whites and soft grays to rich jewel tones and earthy shades. This versatility allows it to effortlessly blend in with existing decor or serve as a stunning focal point in a newly designed space.

When considering brushed nickel for your faucets, think about how it can enhance the overall ambiance of your kitchen or bathroom. The finish lends itself well to modern, minimalist designs, but it can also add a touch of elegance to more traditional settings. Whether you opt for a sleek, streamlined design or an ornate, vintage-inspired style, brushed nickel is sure to elevate the aesthetic of your home.

Moreover, this finish is not limited to faucets alone; it can be found on a variety of fixtures and hardware, including cabinet handles, showerheads, and towel bars. This cohesive look can tie together different elements in your space, creating a unified design that feels polished and intentional.

In conclusion, if you’re looking for a faucet finish that embodies modern elegance while offering practical benefits, brushed nickel is an excellent choice. Its timeless appeal and adaptability ensure that it will remain a favorite in home design for years to come, making it a worthy investment for any homeowner looking to enhance their living spaces.

6. Oil-Rubbed Bronze: Timeless Elegance

When it comes to creating a warm and inviting atmosphere in your home, few finishes can compete with the timeless elegance of oil-rubbed bronze. This rich, dark finish exudes a sense of sophistication and history, making it a popular choice for those looking to add a touch of classic style to their spaces.

Oil-rubbed bronze is characterized by its deep brown color, often adorned with subtle highlights that lend an air of vintage charm. The finish is achieved through a special process that not only enhances the visual appeal but also creates a durable surface that resists wear and tear. This makes it an excellent choice for high-traffic areas like kitchens and bathrooms, where faucets are frequently used.

In addition to its aesthetic qualities, oil-rubbed bronze is incredibly versatile. It pairs beautifully with a variety of design styles, from rustic and traditional to modern and industrial. Imagine an oil-rubbed bronze faucet gracefully complementing a farmhouse sink, or elevating the sleek lines of a contemporary countertop. This finish can serve as a stunning focal point in your space, drawing the eye and sparking conversation.

Moreover, the dark hue of oil-rubbed bronze can help conceal water spots and fingerprints, making it a practical choice for busy households. With proper care, it can maintain its beauty for years, aging gracefully and developing a unique patina that adds to its character over time.

If you’re seeking a finish that embodies both style and substance, oil-rubbed bronze is an exceptional option. It not only enhances the visual appeal of your fixtures but also contributes to a cohesive, inviting atmosphere throughout your home. Whether you’re updating a single faucet or undertaking a complete renovation, consider the timeless elegance of oil-rubbed bronze for a look that will stand the test of time.

7. Polished Brass: A Vintage Touch

What are the different types of faucet finishes?
Credit : whatcanu.com

When it comes to infusing your home with a touch of timeless elegance, polished brass faucets stand out as an exceptional choice. This finish exudes a vintage charm that beautifully complements a variety of design aesthetics, from traditional and rustic to modern and eclectic. The gleaming surface of polished brass reflects light in a way that adds warmth and sophistication to any space, making it an eye-catching focal point in your kitchen or bathroom.

The allure of polished brass lies not only in its stunning appearance but also in its rich history. Once a staple in early 20th-century homes, polished brass has made a remarkable comeback, appealing to homeowners who appreciate its classic appeal and character. Its golden hue can evoke a sense of nostalgia, conjuring images of grand estates and elegant Victorian decor.

However, it’s essential to consider the maintenance that comes with this finish. While polished brass undeniably looks luxurious, it does require regular cleaning to maintain its radiant shine. Over time, exposure to moisture and air can lead to tarnishing, which may alter its appearance. But for those who love the vintage aesthetic, this upkeep can be a small price to pay for the beauty and warmth that polished brass brings.

In addition to its visual impact, polished brass is incredibly versatile. It pairs wonderfully with a range of countertops, tile, and cabinetry, allowing you to create a cohesive and inviting atmosphere in your home. Whether used in a classic farmhouse sink or a sleek modern basin, polished brass faucets are sure to be a conversation starter, inviting admiration from guests and family alike.

If you’re looking to add a vintage touch to your home, consider the enduring elegance of polished brass. It’s not just a faucet; it’s a statement piece that embodies a rich heritage while seamlessly blending into contemporary spaces. With its blend of beauty, history, and versatility, polished brass could be the perfect finishing touch your home has been waiting for.

8. Matte Black: The Bold Statement

Matte black faucet finishes have emerged as a bold and stylish choice for modern homes, captivating homeowners with their sleek, contemporary appeal. This striking finish exudes an air of sophistication and elegance, making it an ideal option for those looking to make a statement in their bathroom or kitchen. The beauty of matte black lies not only in its aesthetic charm but also in its versatility; it effortlessly complements a wide range of design styles, from industrial to minimalist, and everything in between.

One of the most alluring aspects of matte black fixtures is their ability to create a striking contrast against lighter elements in your space. Imagine a pristine white sink or a light-colored countertop paired with a matte black faucet—this combination not only draws the eye but also adds depth and dimension to your design. Additionally, matte black finishes are fantastic at hiding fingerprints and water spots, ensuring that your fixtures maintain a clean, polished look even with daily use.

In terms of functionality, matte black faucets are often available in a variety of designs, from sleek and angular to curved and organic, allowing you to find the perfect style to match your personal taste. Moreover, many brands offer matte black options in durable materials that resist tarnishing and corrosion, ensuring that your investment remains stylish and functional for years to come.

When incorporating matte black into your home, consider pairing it with complementary finishes, such as brushed gold or chrome, to create a layered look that exudes luxury and modernity. Whether you’re renovating an entire space or simply updating a few fixtures, choosing matte black can transform an ordinary room into a chic and contemporary retreat, leaving a lasting impression on all who enter.

9. Stainless Steel: Durability Meets Style

When it comes to selecting a faucet finish that marries longevity with aesthetic appeal, stainless steel stands out as a top contender. Renowned for its exceptional durability, stainless steel is not only resistant to rust and corrosion but also boasts a sleek, modern look that complements a variety of design styles. Its neutral tone effortlessly blends with both contemporary and traditional kitchens or bathrooms, making it a versatile choice for homeowners aiming to achieve a cohesive aesthetic.

One of the key advantages of stainless steel finishes is their ability to withstand the rigors of daily use. Unlike other materials that may tarnish or wear over time, stainless steel maintains its polished appearance, even in high-traffic areas. Furthermore, many stainless steel faucets come with a brushed finish, which not only enhances their resilience against scratches and fingerprints but also adds a subtle texture that can elevate your space.

Beyond functionality, stainless steel is lauded for its hygienic properties. The non-porous surface prevents bacterial growth, making it an excellent choice for families who prioritize cleanliness in their home. Additionally, its reflective quality can brighten up a room, creating a sense of openness and sophistication.

When choosing a stainless steel faucet, consider your overall design scheme and the other fixtures in your space. Pairing a stainless steel faucet with complementary materials, such as granite countertops or ceramic sinks, can create a harmonious look that enhances your home’s overall aesthetic. With its blend of practicality and style, a stainless steel faucet is not just an addition to your home—it’s an investment in quality that will stand the test of time.

10. Choosing the Right Finish for Different Spaces

When it comes to choosing the right faucet finish for different spaces in your home, it’s crucial to consider both functionality and aesthetic appeal. Each area has its unique vibe, and the finish you select can enhance the overall design while complementing other elements in the room.

In the kitchen, for example, a polished chrome finish is often favored for its sleek, modern look and exceptional durability. It not only reflects light beautifully, making the space feel more open and airy, but it’s also resistant to tarnishing and easy to clean, which is essential in a high-traffic area where spills and splashes are common. Alternatively, if you’re aiming for a cozy, rustic ambiance, a matte black or oil-rubbed bronze finish can add a touch of warmth and character, perfectly coordinating with wood cabinetry and natural stone countertops.

Moving to the bathroom, the finish you choose can dramatically affect the room’s relaxation and rejuvenation vibe. A brushed nickel finish is a popular choice for its subtle shine and ability to resist fingerprints and water spots, making it ideal for a space that frequently sees moisture. For those looking to create a spa-like retreat, consider a soft champagne or rose gold finish. These hues exude a sense of luxury and elegance, and they pair beautifully with white or light-colored tiles, creating a tranquil atmosphere.

In smaller spaces, such as powder rooms or laundry areas, don’t shy away from experimenting with bold finishes. A polished brass or vibrant matte black faucet can serve as a stunning focal point, drawing the eye and adding personality to otherwise utilitarian spaces.

Ultimately, choosing the right faucet finish for each room is about harmonizing style and practicality. Consider your home’s overall design theme, the specific functions of each space, and how each finish interacts with the light and colors around it. By thoughtfully selecting finishes that reflect both your personal taste and the ambiance of each area, you’ll create a cohesive and inviting atmosphere throughout your home.

11. Coordinating Faucet Finishes with Other Fixtures

When it comes to designing your kitchen or bathroom, coordinating faucet finishes with other fixtures is essential for creating a harmonious and visually appealing space. The faucet is not just a functional element; it is also a key aesthetic feature that can tie the entire room together. To achieve a cohesive look, consider the finishes of your other elements—such as cabinet hardware, light fixtures, and even your appliances.

Start by determining the dominant finish in your space. If you have polished chrome cabinet handles, for instance, a faucet in the same finish will create a seamless look. Alternatively, if you’re leaning towards a more eclectic style, mixing finishes can be a bold statement. Just remember that when mixing, it’s important to find a balance; for example, pairing a matte black faucet with brushed nickel hardware can create a striking contrast without overwhelming the senses.

Moreover, the style of your fixtures should complement each other. A sleek, modern faucet will feel out of place with ornate, vintage cabinet pulls. Instead, opt for a consistent design language that reflects your overall aesthetic, whether it’s contemporary, traditional, or somewhere in between.

Don’t forget to consider the color palette of your room as well. If your space features warm tones, a brass or gold faucet can add an inviting touch, while cooler tones may pair better with polished chrome or stainless steel.

Finally, think about the durability and maintenance of the finishes you choose. Some finishes, like oil-rubbed bronze, may require more upkeep to maintain their appearance compared to others, such as chrome or stainless steel, which are often more resistant to tarnishing.

By thoughtfully coordinating your faucet finish with other fixtures, you not only enhance the beauty of your space but also create a functional environment that reflects your personal style.

12. Maintenance Tips for Different Faucet Finishes

When it comes to choosing the perfect faucet finish for your home, it’s essential to consider not only the aesthetic appeal but also the maintenance required to keep your fixtures looking pristine. Different finishes have unique properties and upkeep needs, and understanding these can help you make an informed decision that will complement your lifestyle.

**Polished Chrome**: One of the most popular choices, polished chrome faucets are known for their bright, shiny appearance. However, they can show water spots and fingerprints easily. To maintain their luster, regularly wipe them down with a soft, damp cloth after use, and occasionally polish them with a gentle, non-abrasive cleaner designed for chrome.

**Brushed Nickel**: If you prefer a more muted, sophisticated look, brushed nickel is an excellent option. Its textured surface helps hide water spots and fingerprints, making it relatively low-maintenance. Simply clean it with warm soapy water and a soft cloth to avoid scratching. For tougher stains, a mixture of vinegar and baking soda can work wonders, but be sure to rinse thoroughly afterward.

**Oil-Rubbed Bronze**: This finish adds a rich, vintage flair to any space but requires a bit more care to maintain its dark hue. It can develop a patina over time, which many homeowners appreciate for its character. To clean, use a mild soap solution and a soft cloth, avoiding harsh chemicals that can strip away the finish. For deeper cleaning, an occasional application of mineral oil can help rejuvenate its appearance.

**Matte Black**: As a bold and trendy choice, matte black faucets are striking but can show dust and water spots more readily. To keep them looking sharp, use a microfiber cloth to wipe away grime and fingerprints regularly. Avoid abrasive cleaners that could scratch the surface; instead, opt for a gentle soap solution when a deeper clean is necessary.

**Stainless Steel**: Renowned for its durability and modern look, stainless steel is resistant to corrosion and tarnishing. To maintain its polished appearance, wipe with a soft cloth and mild detergent. For stubborn stains, a stainless steel cleaner can restore its shine. However, be cautious with abrasive pads, as they can scratch the surface.

By understanding the maintenance requirements for each faucet finish, you can choose one that not only enhances your home’s aesthetic but also fits seamlessly into your cleaning routine. With the right care, your faucets will not only serve their practical purpose but also remain a stunning focal point in your kitchen or bathroom for years to come.

13. Trends in Faucet Finishes for 2024

As we step into 2024, the world of faucet finishes is evolving, offering a stunning array of options that reflect the latest design trends and homeowner preferences. This year, we’re witnessing a remarkable fusion of classic aesthetics with modern flair, making it easier than ever to find the perfect finish that complements your home’s style.

One of the standout trends for 2024 is the resurgence of matte black finishes. This bold choice is favored for its sleek, contemporary look and its ability to provide a striking contrast against lighter countertops and cabinetry. Matte black faucets not only add a touch of sophistication, but they also hide fingerprints and water spots, making them a practical option for busy kitchens and bathrooms.

In contrast, the warmth of brass and gold tones continues to gain popularity, offering a timeless elegance that can elevate any space. These finishes are being reimagined with brushed and polished textures, allowing for versatility from vintage-inspired to modern chic. The soft, inviting glow of these metallics brings a luxurious feel to your home, making them a perfect choice for those looking to make a statement.

Another exciting trend is the use of mixed finishes. This approach allows homeowners to combine various faucet finishes in a single space, creating a unique and personalized look. For instance, pairing a matte black faucet with brushed nickel or polished brass accessories can yield a dynamic visual interest that tells a story of eclectic style.

Lastly, eco-conscious finishes are making waves in 2024, with many manufacturers focusing on sustainable materials and finishes that are both beautiful and environmentally friendly. These options not only look great but also align with the growing trend of creating greener homes.

As you explore your options, consider these trends in faucet finishes for 2024. Whether you lean towards bold contrasts, timeless metallics, a mix-and-match approach, or eco-friendly choices, there’s a finish out there that will perfectly enhance your home’s aesthetic and reflect your personal style.

14. How to Test Faucet Finishes for Quality

When it comes to choosing the perfect faucet finish for your home, quality should be at the forefront of your decision-making process. A beautiful faucet can elevate your space, but if it wears down or tarnishes quickly, it can become a source of frustration rather than a feature of pride. Here’s how to assess faucet finishes to ensure you’re making a wise investment.

Start by examining the finish closely. High-quality faucets often have a uniform appearance, with an even coating that lacks imperfections such as bubbles, scratches, or discoloration. Pay special attention to the edges and corners, as these are areas where subpar finishes might show wear more quickly.

Next, perform the ‘scratch test.’ While it might sound a bit unorthodox, gently scratching the surface with a fingernail or a soft cloth can provide insights into the durability of the finish. If you see noticeable marks or if the finish seems to wear away easily, you’re likely dealing with a lower-quality product. Conversely, a premium finish should resist scratching and maintain its luster even under light pressure.

Water resistance is another critical factor. A simple water test can demonstrate how well the finish holds up against moisture. Spray a small amount of water on the faucet and let it sit for a few minutes before wiping it away. A high-quality finish will repel water efficiently, allowing it to bead up rather than create water spots or stains.

Lastly, check for warranty information. Reputable manufacturers often provide warranties that cover material and finish defects for a specified period. A solid warranty not only reflects confidence in the product’s quality but also offers you peace of mind in your investment.

By taking these steps to test faucet finishes for quality, you can ensure that your selection not only complements your aesthetic but stands the test of time in both function and style. After all, a faucet should be more than just a pretty face—it’s a daily use item that deserves to be both beautiful and durable.

15. Conclusion: Finding Your Perfect Faucet Finish

In conclusion, selecting the perfect faucet finish for your home is a journey that balances aesthetics, functionality, and personal style. Each finish—whether it be the timeless elegance of polished chrome, the warm sophistication of brushed nickel, or the bold statement of matte black—offers its own unique charm and character. As you explore the myriad of options available, consider the overall design of your space, the existing fixtures, and how the faucet will integrate into your daily life.

Take the time to envision how different finishes will interact with your kitchen or bathroom decor. Imagine the way sunlight will dance off a shiny polished brass faucet versus the subtle glow of a satin bronze fixture. Reflect on maintenance requirements, as some finishes may demand more attention than others to keep them looking pristine.

Ultimately, the perfect faucet finish is one that resonates with your personal taste while enhancing your home’s functionality. With thoughtful consideration and a bit of creativity, you can choose a finish that not only elevates your space but also brings joy to your everyday routines. Remember, this seemingly small detail can have a significant impact on the ambiance of your home, so choose wisely and enjoy the process of making your space uniquely yours.

In conclusion, selecting the right faucet finish for your home is not just about aesthetics; it’s about creating a cohesive look that reflects your personal style and enhances the overall ambiance of your spaces. As we’ve explored in this guide, each finish—from polished chrome to brushed nickel, matte black, and beyond—offers its own unique charm and practical benefits. By considering factors such as durability, maintenance, and how each finish complements your existing décor, you can make an informed decision that elevates your kitchen or bathroom. We hope this guide has inspired you to confidently navigate the world of faucet finishes and transform your home into a beautiful and functional sanctuary. Happy decorating, and may your choice of finishes bring you joy for years to come!

How to install a new faucet?

Upgrading your kitchen or bathroom faucet can breathe new life into your space, making it not only more functional but also more stylish.

However, the thought of tackling a DIY plumbing project might seem daunting, especially if you’ve never attempted anything beyond a simple light bulb change. Fear not! With the right tools and a little guidance, you can install your new faucet like a seasoned professional. In this comprehensive, step-by-step guide, we’ll walk you through the entire process, from selecting the perfect faucet to ensuring a leak-free finish. Whether you’re a seasoned DIY enthusiast or a complete novice, our easy-to-follow instructions will empower you to take on this project with confidence. So roll up your sleeves and prepare to transform your sink area with a stunning new fixture that reflects your personal style and enhances your home!

1. Introduction: Why Install Your Own Faucet?

How to install a new faucet?
Credit : whatcanu.com

Installing your own faucet might seem like a daunting task reserved for seasoned DIYers, but with the right guidance, it can be a straightforward and rewarding project. Choosing to tackle this task on your own not only saves you money on plumbing costs, but it also gives you a sense of accomplishment and control over your home improvement efforts. Whether you’re looking to upgrade to a more modern style, replace a leaky unit, or simply refresh your kitchen or bathroom’s look, installing a new faucet can dramatically enhance both functionality and aesthetics.

Moreover, understanding the ins and outs of your plumbing fixtures empowers you to make informed decisions in the future. You’ll learn about your water supply lines, how to identify potential issues, and when it’s time to call in a professional. Plus, there’s something incredibly satisfying about stepping back and admiring a job well done, knowing that you’ve not only improved your space but also added a personal touch to your home.

In this step-by-step guide, we’ll break down the process of faucet installation into manageable parts, ensuring that you have the confidence and knowledge to complete the job like a pro. So, roll up your sleeves, gather your tools, and let’s get started on transforming your sink area into a stylish and functional space!

2. Tools and Materials You’ll Need

Before diving into the installation process, it’s essential to gather all the necessary tools and materials to ensure a smooth and efficient experience. Having everything on hand will save you time and frustration, allowing you to focus on achieving that professional finish.

**Tools:**
1. **Adjustable Wrench:** This versatile tool is perfect for loosening and tightening nuts and bolts on your faucet.
2. **Basin Wrench:** A must-have for reaching those hard-to-access nuts under your sink, the basin wrench provides the leverage you’ll need to secure fittings without straining your hands.
3. **Screwdriver Set:** Both flathead and Phillips screwdrivers are essential for securing mounting screws and making any necessary adjustments.
4. **Plumber’s Putty or Silicone Sealant:** Use this to create a watertight seal around the base of your new faucet, preventing leaks and ensuring longevity.
5. **Pipe Wrench:** If you encounter stubborn pipes, a pipe wrench will give you the grip and torque needed to turn them without damaging the fittings.

**Materials:**
1. **New Faucet:** Choose a faucet that fits your sink’s configuration and matches your style preferences. Read reviews and product details to ensure quality.
2. **Supply Lines:** These flexible hoses connect your faucet to the water supply. Ensure they are compatible with your faucet and sink.
3. **Tephlon Tape:** This handy tape is used to wrap threaded connections, ensuring a tight seal that helps prevent leaks.
4. **Cleaning Supplies:** Before installation, make sure you have some cloths or sponges to clean your workspace and remove any old putty or debris from your sink.
5. **Bucket or Towels:** It’s always a good idea to have a bucket or some towels nearby to catch any excess water that may spill during the installation process.

With your tools and materials assembled, you’re now ready to tackle the installation of your new faucet. This preparation will not only streamline the process but also instill confidence as you work towards achieving that pro-like result!

3. Choosing the Right Faucet for Your Space

How to install a new faucet?
Credit : whatcanu.com

Choosing the right faucet for your space is a crucial step that can significantly impact both the functionality and aesthetic of your kitchen or bathroom. With a myriad of styles, finishes, and functionalities available, selecting the perfect faucet can feel overwhelming. However, taking a moment to consider your space’s unique needs can make the decision-making process smoother and more enjoyable.

first, assess the overall style of your room. Are you aiming for a modern, sleek look with clean lines and polished chrome, or do you prefer a rustic vibe with a vintage-inspired design and matte bronze finish? Consider the existing fixtures and decor as well; your new faucet should complement and enhance the overall theme rather than clash with it.

Next, think about the functionality you need. Do you frequently cook and require a high-arc faucet that offers ample clearance for filling pots and pans? Or perhaps you need a pull-down sprayer for easy rinsing and washing? Identify the features that will best serve your daily tasks, such as single or dual handles, touchless technology, or water-saving options.

Also, don’t forget about the size and configuration of your sink. A large, farmhouse-style sink may benefit from a more substantial faucet that can hold its own against the expansive basin, while a smaller, undermount sink may call for a more streamlined option. Ensure that the faucet’s spout height and reach are appropriate for your sink’s dimensions to avoid any splashing or inconvenience.

Finally, consider the installation requirements. Some faucets come with complex mounting systems or require additional tools, while others are designed for easy DIY installation. If you’re not comfortable with plumbing tasks, it might be wise to choose a model that is straightforward to install or to consult with a professional.

By taking the time to thoughtfully choose a faucet that aligns with your space’s style, functionality, and installation needs, you’ll not only enhance the visual appeal of your kitchen or bathroom but also ensure a seamless and enjoyable experience for years to come.

4. Preparing Your Workspace

Before diving into the installation process, it’s crucial to prepare your workspace properly. A well-organized and clean area not only enhances your efficiency but also minimizes the risk of accidents or misplacing essential tools. Start by clearing the space beneath your sink and removing any items that may obstruct your work. This will give you ample room to maneuver and access all necessary parts during the installation.

Next, ensure that the plumbing area is dry and free from any leaks. If you notice any drips or moisture, take a moment to fix these issues before proceeding. It’s also wise to have a towel or sponge handy to wipe up any spills that may occur during the process.

Gather all the tools you’ll need for the job. Typically, this includes a basin wrench, adjustable pliers, a screwdriver, plumber’s tape, and possibly a bucket to catch any excess water. Having everything at arm’s reach will save you valuable time and prevent frustration.

Finally, don’t forget to turn off the water supply to the sink. Locate the shut-off valves under the sink and twist them clockwise to prevent any unexpected gushes while you’re working. By taking these preparatory steps, you’ll set yourself up for a smoother installation experience, allowing you to focus on the task at hand and achieve professional-level results!

5. Shutting Off the Water Supply

How to install a new faucet?
Credit : whatcanu.com

Before you dive into the world of plumbing and start removing your old faucet, it’s crucial to shut off the water supply. This step is often overlooked by novice DIYers, but it’s essential for preventing a mini waterfall in your kitchen or bathroom.

Locate the shut-off valves under your sink. These valves are typically positioned on the wall behind the sink or on the pipes leading to the faucet. You should see two valves—one for the hot water and one for the cold. To turn them off, simply twist the handles clockwise until they stop. If your sink doesn’t have individual shut-off valves, you may need to turn off the main water supply for your home. This can usually be found in your basement or near the perimeter of your home, often close to the water meter.

Once you’ve shut off the water supply, it’s a good idea to open the faucet to relieve any remaining pressure in the pipes. This will also help to drain any water left in the lines, making the installation process a lot cleaner and easier. Keep a towel handy, just in case there are any drips!

By ensuring that the water supply is completely turned off, you can proceed with confidence, knowing that you’ve taken the necessary precautions to avoid any mishaps. With this crucial step completed, you’re now ready to tackle the next phase of your faucet installation like a pro!

6. Removing the Old Faucet: A Step-by-Step Process

Removing the old faucet may seem daunting at first, but with a bit of patience and the right tools, you can tackle this task like a pro. Here’s a step-by-step process to make it as smooth as possible.

**Step 1: Gather Your Tools**
Before diving into the removal process, it’s essential to have the right tools on hand. You’ll need an adjustable wrench, a basin wrench (for those hard-to-reach spots), a screwdriver, a bucket to catch any water, and a cloth for any spills. Having everything ready will save you time and frustration.

**Step 2: Turn Off the Water Supply**
Locate the shutoff valves under your sink and turn them clockwise to stop the water flow. If you can’t find these valves, it may be necessary to shut off the main water supply for your home. Don’t forget to turn on the faucet to release any remaining pressure and drain the water from the lines.

**Step 3: Disconnect the Water Supply Lines**
Place your bucket underneath the sink to catch any water that may drip during the process. Using your adjustable wrench, carefully loosen the nuts that connect the water supply lines to the faucet. Once loosened, gently pull the lines away from the faucet and lay them aside.

**Step 4: Remove the Faucet Mounting Nuts**
Now it’s time to tackle the mounting nuts that secure the faucet to the sink. These may be located underneath the sink and can be tricky to reach. Use your basin wrench to grip and turn the nuts counterclockwise until they’re completely removed. If they’re particularly stubborn, a few drops of penetrating oil can help loosen them.

**Step 5: Take Out the Old Faucet**
With the mounting nuts removed, you should now be able to lift the old faucet out from the top of the sink. If it’s stuck, gently wiggle it back and forth to dislodge any remaining sealant or grime. Once freed, lift it out carefully and set it aside.

**Step 6: Clean the Sink Surface**
Before you install your new faucet, take a moment to clean the area where the old faucet was mounted. Remove any old putty, debris, or mineral buildup with a scrub brush and a suitable cleaner. This will ensure a tight seal for your new installation.

By following these steps, you’ll have successfully removed your old faucet, making way for a fresh and stylish upgrade. With a little effort, you’re one step closer to enjoying your new faucet and enhancing the heart of your home!

7. Cleaning the Sink Area and Preparing for Installation

How to install a new faucet?
Credit : whatcanu.com

Before diving into the installation of your new faucet, it’s essential to ensure that the sink area is clean and free of any debris. A tidy work environment not only makes the process smoother but also prevents any potential mishaps during installation. Start by removing any items from the countertop and clearing the area beneath the sink; this will give you ample space to work without obstruction.

Next, use a sponge or cloth along with a mild cleaner to wipe down the sink basin and surrounding countertops. Pay close attention to any buildup or residue, particularly around the existing faucet and sinkholes. A clean surface will allow for a better seal and help prevent any leaks once your new faucet is installed.

Additionally, check the plumbing connections and surrounding areas for any signs of corrosion or damage. If you notice anything amiss, it’s wise to address these issues before moving forward with the installation. This step not only ensures a better fit for your new faucet but also prolongs its lifespan.

Finally, gather all your tools and installation materials, including the new faucet, mounting hardware, and any additional supplies you might need. By organizing everything in advance, you’ll save time and keep your workspace efficient. With the sink area cleaned and prepped, you’re now ready to tackle the installation process like a pro!

8. Installing the New Faucet: A Detailed Guide

Installing a new faucet may seem like a daunting task, but with the right guidance, you can complete the job like a seasoned professional. This detailed guide will walk you through each step of the installation process, ensuring you achieve a seamless and efficient setup.

**Step 1: Gather Your Tools and Materials**
Before diving into the installation, it’s essential to have all the necessary tools and materials at your fingertips. You’ll need a basin wrench, adjustable wrench, plumber’s tape, a bucket to catch any excess water, and, of course, your new faucet. Having everything organized will save you time and frustration.

**Step 2: Shut Off the Water Supply**
The first critical step in any plumbing project is to turn off the water supply. Locate the shut-off valves under your sink and turn them clockwise until they are completely closed. If you can’t find them, you may need to shut off the main water supply for your home. Once the water is off, turn on the old faucet to drain any remaining water in the pipes.

**Step 3: Remove the Old Faucet**
Next, it’s time to detach the old faucet. Use your basin wrench to loosen and remove the nuts securing the faucet to the sink. Carefully disconnect the water supply lines, taking care to place a bucket underneath to catch any remaining water. If your old faucet is particularly stubborn, a bit of penetrating oil can help ease the removal process.

**Step 4: Prepare the Sink**
With the old faucet removed, take a moment to clean the sink surface thoroughly. Remove any old putty or debris that may interfere with the new installation. If your new faucet requires a gasket or mounting hardware, ensure these components are ready and in good condition.

**Step 5: Install the New Faucet**
Now comes the exciting part—installing your new faucet! Follow the manufacturer’s instructions closely. Typically, you’ll start by placing the faucet into the mounting holes of the sink. Secure it in place with the provided mounting nuts, tightening them with your adjustable wrench. Be careful not to overtighten, as this can damage the sink.

**Step 6: Connect the Water Supply Lines**
With the faucet securely in place, it’s time to connect the water supply lines. Attach the hot and cold water lines to the corresponding connections on the faucet, using plumber’s tape to ensure a tight seal. Make sure to connect them correctly—hot to hot and cold to cold—to avoid any mix-ups.

**Step 7: Turn on the Water Supply**
Once everything is connected, it’s time to turn the water supply back on. Go back to the shut-off valves and turn them counterclockwise to restore water flow. As you do this, check for any leaks around the connections. If you notice any, tighten the connections gently until the leak stops.

**Step 8: Test Your New Faucet**
With everything in place, turn on your new faucet to test its operation. Allow the water to run for a minute to clear any air bubbles and sediment. Check for leaks again during this process. If everything looks good, congratulations! You’ve successfully installed your new faucet.

By following these steps, you can transform your kitchen or bathroom with a new faucet without the need for professional help. Enjoy the satisfaction of your handiwork and the enhanced functionality of your space!

9. Connecting the Water Supply Lines

Connecting the water supply lines is a crucial step in the faucet installation process, and it’s one that can make or break your entire project. With the faucet securely mounted and all the necessary tools within reach, it’s time to turn your attention to those water supply lines—the veins that will bring life to your new fixture.

Start by ensuring that the water supply valves beneath your sink are turned off. This is essential to prevent any sudden sprays or floods when you begin working. Once you’ve confirmed the valves are closed, it’s a good idea to place a bucket or a towel under the sink to catch any residual water that may spill out during the connection process.

Next, locate the supply lines that will connect to your faucet. Most faucets require both hot and cold water lines, which will be clearly marked. If your new faucet didn’t come with supply lines, you can purchase flexible stainless steel or braided nylon lines that are designed to withstand high pressure and resist corrosion.

Carefully thread the supply line nuts onto the corresponding faucet inlets, ensuring that you match the hot line to the hot inlet and the cold line to the cold inlet. When tightening the connections, use a wrench, but be cautious not to overtighten—this can lead to stripped threads or cracked fittings. A snug fit is all you need; think of it like a firm handshake—strong but not overbearingly tight.

Once the connections are secure, it’s time to turn the water supply back on. Do so slowly, allowing the lines to fill with water gradually. As the pressure builds, keep an eye on the newly connected lines for any signs of leaks. If you spot any drips, it may be necessary to tighten the connections slightly more or check the washers and seals to ensure they’re properly seated.

With the water supply lines securely connected and leak-free, you’re one step closer to enjoying your new faucet. Take a moment to admire your handiwork; you’re well on your way to completing a professional-quality installation right in your own home!

10. Sealing and Securing the Faucet

Once your new faucet is in place, the final step—sealing and securing it—ensures that it operates smoothly and prevents any leaks. This crucial phase not only guarantees that your installation is watertight but also enhances the longevity and performance of your faucet.

Start by applying a bead of plumber’s putty or silicone sealant around the base of the faucet where it meets the sink. This step is essential for creating a reliable seal that will keep water from seeping underneath the faucet and causing damage over time. If you’re using plumber’s putty, roll it into a rope-like shape and lay it down evenly. If you prefer silicone, apply a neat line around the edge, ensuring it’s not too thick, as excess sealant can be squeezed out when the faucet is pressed down.

Next, carefully lower the faucet into position, aligning it with the mounting holes. Once it’s seated correctly, secure it from underneath the sink using the mounting nuts provided with your faucet. Tighten these nuts by hand, and then use a wrench for a snug fit—just be cautious not to overtighten, as this could damage the sink or the faucet itself.

Finally, to add an extra layer of security, check the alignment of the faucet and adjust as necessary. Ensure that the handles are positioned correctly and that the spout is centered. After making any adjustments, give everything a final tightening, and wipe away any excess sealant that may have oozed out during installation.

With the faucet securely in place and properly sealed, you’re ready to reconnect the water supply. Turn on the valves slowly and check for any leaks around the connections. If you notice any, it may be an indication that you need to tighten the connections or reapply sealant. Once everything is secure and leak-free, take a moment to admire your handiwork—your new faucet is now ready to serve you in style!

11. Turning the Water Supply Back On

Once you’ve successfully installed your new faucet and double-checked all the connections, it’s time for one of the most crucial steps: turning the water supply back on. This moment is not just about restoring functionality to your sink; it’s the moment of truth that will determine if your installation was a success.

Before you proceed, ensure that you have towels or a sponge handy to catch any unexpected drips. Begin by locating the shut-off valves under your sink. These valves are typically situated on the wall or the floor, and they control the water flow to your faucet. With a gentle twist, turn the valves counterclockwise to open them.

As you do this, listen for the faint sound of water rushing back into the pipes. It’s an exhilarating moment, but don’t get too excited just yet! Once the valves are fully open, it’s time to check for leaks. Turn on your new faucet to its full flow and observe closely around the base and the connections you’ve just made. If you spot any drips or moisture, it may indicate that a connection wasn’t tightened properly or that a washer needs to be adjusted.

While the water is running, take a moment to check the temperature. Adjust the hot and cold levers to ensure that both are functioning smoothly and that the water temperature is to your liking. This step not only confirms that your installation was successful but also allows you to familiarize yourself with the faucet’s controls.

If all looks good—no leaks, and the water flows beautifully—you can take a deep breath and revel in your accomplishment. You’ve just turned your kitchen or bathroom into a more functional space, all while developing your DIY skills! Don’t forget to clean up any residual water around the sink. Congratulations, you’ve officially crossed the finish line of your faucet installation project!

12. Testing for Leaks and Proper Functioning

Once you’ve successfully installed your new faucet, the moment of truth arrives: it’s time to test for leaks and ensure that everything is functioning as it should. This crucial step not only confirms that your hard work has paid off but also prevents future water damage and costly repairs.

Start by turning on the water supply valves beneath your sink. As you do this, keep a close eye on the connections you made during the installation process. Look for any signs of water seeping from the joints or under the sink. If you spot a leak, don’t panic! Tighten the connections gradually, but be careful not to overtighten, as this could cause damage.

Next, turn on the faucet and let the water run for a minute or so. Observe the flow; it should be steady and consistent. Move the handle through its full range of motion to ensure it operates smoothly. Pay attention to the temperature control as well—make sure that both hot and cold water are functioning correctly and that the temperature adjusts as expected.

While the water is running, check for any unusual noise or vibration that might indicate an issue with the installation. If everything sounds perfect, take a moment to inspect the area around the sink for any signs of dripping water or dampness.

Finally, don’t forget to test the sprayer, if your faucet has one. Activate it and check for proper operation and any leaks at the connection point.

By thoroughly testing your faucet, you can be confident that you’ve completed the installation like a pro. This attention to detail not only enhances your experience but ensures that your new fixture will serve you well for years to come.

13. Final Touches: Cleaning Up and Maintenance Tips

Once you’ve successfully installed your new faucet, it’s time to focus on the final touches that ensure everything looks pristine and operates smoothly. A clean work area not only enhances the aesthetic appeal of your newly installed faucet but also cements your accomplishment as a DIY champion!

**Cleaning Up:** Start by wiping down the surrounding area of the sink with a damp cloth to remove any dust, debris, or fingerprints that may have accumulated during the installation process. Pay special attention to the base of the faucet and the countertop—these spots can often be overlooked but are crucial for maintaining a polished look. If there are any water spots or mineral deposits, a gentle cleanser or a mixture of vinegar and water can work wonders. Just be sure to avoid abrasive cleaners that might scratch the surface.

**Check for Leaks:** Before you call it a day, turn on the faucet and let the water run for a minute. Keep an eye out for any leaks around the connections. If you notice any drips, double-check that the nuts and connections are tightened properly. It’s always better to address leaks now rather than waiting until they become a bigger problem later.

**Maintenance Tips:** Now that your faucet is installed and gleaming, regular maintenance will help keep it in top condition. Consider setting a reminder to clean the faucet every couple of weeks. Use a soft cloth and a mild soap solution to wipe it down, preventing buildup and keeping it shiny. For those pesky mineral deposits, a routine application of vinegar can help maintain the faucet’s finish.

Additionally, inspect the faucet aerator regularly. Over time, it can accumulate debris or mineral buildup that affects water flow. Unscrew it from the tip of the faucet, rinse it out, and clean it with a brush if necessary, ensuring optimal performance.

By taking these final steps to clean up and maintain your new faucet, you’ll not only enjoy its functionality but also extend its lifespan. A little care goes a long way, turning your installation success into a long-lasting triumph!

14. Troubleshooting Common Installation Issues

Even the most skilled DIYers can encounter challenges during a faucet installation, so it’s essential to be prepared for potential hiccups along the way. Here are some common issues you might face and how to troubleshoot them effectively:

**1. Leaky Connections:** One of the most frequent problems after installation is a leak at the connections. If you find water dripping from the faucet or underneath the sink, start by checking the tightness of the connections. Use an adjustable wrench to ensure that the nuts are snug but not overtightened, which can cause damage. If the leak persists, inspect the rubber washers or O-rings; they may need replacing or may not have been seated correctly.

**2. Low Water Pressure:** If your new faucet isn’t delivering water at the expected pressure, first check the aerator. Mineral deposits can accumulate over time, restricting water flow. Remove the aerator and soak it in vinegar to dissolve any buildup. If cleaning doesn’t help, ensure that the shut-off valves under the sink are fully open and that there are no kinks in the water supply hoses.

**3. No Hot Water:** Sometimes, a newly installed faucet may only deliver cold water. This could be due to a few reasons: ensure that the hot water supply line is properly connected and that the shut-off valve for hot water is open. If everything looks good but you still have no hot water, the issue might stem from your water heater or plumbing system.

**4. Noisy Faucet:** If your faucet is making strange noises—like whistling or banging—when water flows, it could indicate air in the pipes or improper installation. Start by turning off the water supply and then open the faucet to release any trapped air. If the noise persists, check for loose fittings or vibrations in the supply lines that may need to be secured.

**5. Difficulty Turning the Faucet Handle:** If the handle feels stiff or is hard to turn, it could be due to improper installation or misalignment. Inspect all components to ensure they are properly seated and aligned according to the manufacturer’s instructions. Sometimes, a little lubrication on the handle mechanism can make a significant difference.

By keeping these troubleshooting tips in mind, you can tackle common installation issues with confidence. Remember, patience is key—take your time to identify and resolve any problems, and soon enough, you’ll have a perfectly functioning faucet that enhances your kitchen or bathroom beautifully!

15. Conclusion: Enjoying Your New Faucet!

Congratulations! You’ve successfully navigated the installation process and now it’s time to sit back and enjoy the fruits of your labor. A new faucet not only enhances the aesthetics of your kitchen or bathroom, but it also brings functionality and ease to your daily routine.

As you turn on the tap for the first time, listen to the gentle flow of water and feel the smoothness of the handle. Whether you’ve chosen a sleek modern design or a classic vintage style, your new fixture is sure to be a centerpiece in your space. Take a moment to appreciate the transformation you’ve achieved—imagine how much more enjoyable washing dishes or brushing your teeth will be with this upgraded feature.

Remember to keep an eye out for any leaks over the next few days and ensure that everything is functioning as it should. Familiarize yourself with any special features your faucet may have, such as touchless activation or temperature control, and enjoy the convenience they provide.

Lastly, don’t forget to maintain your faucet regularly to prolong its life and ensure it continues to perform flawlessly. A simple routine of cleaning and checking for wear and tear will keep your faucet looking great and functioning well for years to come.

Now, go ahead and celebrate your accomplishment! You’ve not only upgraded your home but also gained a valuable DIY skill. So raise a glass (or a mug) under your brand-new faucet, and toast to your success—here’s to many more projects in the future!

In conclusion, we hope this step-by-step guide has empowered you to tackle your faucet installation project with confidence and ease. With the right tools, a little patience, and the techniques outlined in this post, you can achieve professional-level results without the hefty price tag of hiring a plumber. Remember, each step is an opportunity to enhance not just your plumbing skills but also your home’s functionality and aesthetic appeal. So, roll up your sleeves, enjoy the process, and take pride in your accomplishment. Happy plumbing, and don’t hesitate to share your success stories or ask questions in the comments below!

What are the best ways to protect your home from pests?

As the warm weather rolls in and the doors and windows fly open to invite fresh air, the last thing you want is for unwanted pests to turn your home into their personal playground.

From pesky ants marching through your kitchen to stealthy rodents scurrying in the shadows, these uninvited guests can disrupt your peace and compromise your living space. Safeguarding your home from pests is not just about maintaining a clean environment; it’s about protecting your health, property, and overall well-being. In this comprehensive guide, we’ll explore the top strategies to fortify your home against infestations, equipping you with practical tips and proactive measures. Whether you’re a seasoned homeowner or a first-time renter, our expert advice will help you create a pest-free sanctuary that you can truly relax in. Say goodbye to the anxiety of unexpected visitors and hello to a more secure and comfortable home!

1. Understanding Common Household Pests

What are the best ways to protect your home from pests?
Credit : whatcanu.com

Understanding common household pests is the first crucial step in safeguarding your home from unwanted intruders. Many homeowners may not realize that pests can vary significantly in their behavior, habitats, and the risks they pose. In this section, we will delve into some of the most prevalent culprits that could be lurking in your living spaces.

**Ants** are among the most common household pests, often invading kitchens in search of food. These tiny foragers can form extensive colonies, and once they find a reliable food source, they can quickly become a major nuisance. Identifying the type of ant present can help determine the best course of action for removal and prevention.

**Cockroaches** are another formidable foe. Not only are they unsightly, but they can also pose health risks by spreading diseases. They thrive in warm, humid environments and are notorious for their ability to hide in the smallest crevices. Keeping your home clean and dry is essential in preventing their entry.

**Rodents**, including mice and rats, can cause significant damage to your property and pose serious health risks. These pests are adept at finding their way into homes, often through small gaps and holes. To combat them, it’s vital to seal entry points and maintain a tidy living space, as clutter can provide perfect nesting areas.

**Termites** are the silent destroyers of the pest world. Often undetected until significant damage has occurred, these wood-eating insects can compromise the structural integrity of your home. Regular inspections and preventive treatments can help protect your property from their relentless appetite.

**Spiders**, while often beneficial in controlling other pest populations, can be unsettling for many homeowners. Some species can be venomous, so understanding which types are common in your area can help you decide whether to remove them or leave them be.

By familiarizing yourself with these common household pests, you can take proactive measures to deter them from invading your home. The next step will be identifying effective strategies to prevent these uninvited guests from making themselves at home. Armed with knowledge, you’ll be better equipped to create a pest-free environment and protect your living space from unwanted visitors.

2. Conducting a Thorough Home Inspection

A thorough home inspection is a cornerstone of effective pest management and is the first line of defense against unwanted invaders. By meticulously examining your home, you can identify potential entry points, nesting areas, and signs of existing infestations. Start from the outside and work your way in. Look for cracks and gaps in the foundation, windows, and doors; even the smallest openings can serve as gateways for pests like ants, spiders, and rodents. Pay special attention to areas where utility lines enter your home, as these can often be overlooked.

As you circle your property, inspect your landscaping and yard. Overgrown vegetation, piles of leaves, or standing water can attract pests by providing shelter and breeding grounds. Trim back shrubs and trees that are too close to your home, and ensure that gutters are clean and functioning properly to prevent moisture buildup.

Once you’ve completed the exterior inspection, turn your attention to the interior. Check attics, basements, and crawl spaces for any signs of pest activity, such as droppings, chewed materials, or nesting debris. Don’t forget to look behind appliances and in hidden corners, as these areas can easily become overlooked hotspots for pest activity.

Document your findings and create a plan of action based on what you discover. Whether it’s sealing entry points, removing potential food sources, or considering professional pest control services, being proactive after a thorough inspection can significantly reduce the likelihood of pests making your home their own. Regularly scheduled inspections—ideally every season—will help maintain a pest-free environment and give you peace of mind knowing your home is safeguarded against unwanted visitors.

3. Sealing Entry Points: Where Pests Enter

What are the best ways to protect your home from pests?
Credit : whatcanu.com

When it comes to pest control, the first line of defense is often the most overlooked: sealing entry points. Unwanted pests, from ants and spiders to rodents and termites, are always on the lookout for a cozy refuge, and your home can unwittingly provide an ideal habitat. To safeguard your sanctuary, it’s essential to identify and seal the various entryways that these unwelcome guests use to infiltrate your living space.

Begin your inspection at the foundation of your home. Look for cracks in the walls, gaps around windows, and spaces where pipes or wires enter the structure. Even the smallest openings can be an invitation for pests. Use caulk or expanding foam to fill in these gaps, ensuring a tight seal that prevents critters from sneaking in. Don’t forget about doors; installing weather stripping can keep out not only cold drafts but also pesky insects.

Pay special attention to your garage and attic, as these are common entry points for rodents and larger pests. Install screens on vents and ensure that any openings to the outside are tightly sealed. If you have a chimney, consider a chimney cap to keep birds and other wildlife from making a nest in your home.

Additionally, examine your landscaping for potential access points. Trees and shrubs should be trimmed away from the house, as branches can act as bridges for pests. Mulch should be kept at least six inches away from the foundation to deter termites and other insects.

By proactively sealing entry points, you not only fortify your home against pests but also create a more comfortable living environment. Taking these steps ensures that your home remains a safe haven, free from the disturbances of unwanted intruders.

4. Maintaining a Clean and Clutter-Free Environment

One of the most effective strategies to safeguard your home from unwanted pests is to maintain a clean and clutter-free environment. Pests are notorious for seeking out places that provide food, shelter, and warmth, and a disorganized home can inadvertently serve as an open invitation.

Start by focusing on the kitchen, where crumbs and spills can become a feast for ants, roaches, and other unwanted guests. Regularly wipe down countertops, sweep the floors, and promptly store food in airtight containers. Don’t forget to check behind appliances like the fridge and stove, as these hidden corners can accumulate crumbs and grease, creating a perfect breeding ground for pests.

Next, turn your attention to other areas of the house. Declutter rooms, closets, and storage spaces to eliminate potential hiding spots. Piles of clothes, boxes, and other items can provide cozy nests for rodents and insects. By keeping surfaces clear and items neatly organized, you not only create a more aesthetically pleasing living space but also deter pests from taking up residence.

Outside, maintaining a tidy yard is equally crucial. Trim back overgrown vegetation, remove debris, and ensure that garbage bins are sealed tightly. Standing water, such as in clogged gutters or bird baths, can attract mosquitoes, so be sure to regularly empty and clean these areas.

Finally, consider implementing a regular cleaning schedule that includes deep cleaning tasks, such as vacuuming carpets, dusting surfaces, and cleaning out the garage or attic. By committing to a clean and clutter-free environment, you’re not just enhancing your home’s visual appeal—you’re also significantly reducing the chances of a pest invasion. Remember, a well-kept home is your first line of defense against unwanted pests, so make cleanliness a priority!

5. Proper Food Storage and Waste Management

What are the best ways to protect your home from pests?
Credit : whatcanu.com

Proper food storage and waste management are foundational strategies in keeping unwanted pests at bay. In a household, the kitchen is often the first area where pests make their unwanted entrance, drawn in by the tantalizing scents of food and the promise of easy meals. It’s crucial to establish a routine that not only protects your food but also minimizes the potential for infestations.

Begin with airtight containers for your dry goods. Glass or high-quality plastic containers with secure lids are ideal for keeping flour, sugar, cereals, and snacks safe from curious critters. Not only do these containers prevent pests from accessing your food, but they also help maintain freshness and flavor. Consider labeling each container with the date of purchase to ensure you use older items first, reducing waste and keeping your pantry organized.

In addition to securing your food, pay close attention to leftovers and perishables. Store them in sealed containers and promptly refrigerate any items after meals. This practice not only discourages pests but also helps prevent food spoilage.

On the waste management side, ensure that your garbage bins are tightly sealed and emptied regularly. Consider using bins with locking lids to deter rodents and insects from gaining access. Composting can also attract unwanted visitors if not done correctly. Make sure your compost bin is well-aerated and covered to keep pests at bay and encourage healthy decomposition.

Lastly, don’t forget about the areas around your home. Regularly check for spills or crumbs under appliances and furniture, as these can serve as an open invitation to pests. By implementing these food storage and waste management strategies, you’ll create an environment that is less appealing to unwanted guests, paving the way for a healthier, pest-free home.

6. Managing Outdoor Spaces: Landscaping Tips

Managing outdoor spaces effectively is an essential strategy in safeguarding your home from unwanted pests. The way you design and maintain your landscaping can significantly influence the presence of critters in and around your property. Start by carefully selecting plants that are naturally resistant to pests. For instance, lavender and marigolds not only add beauty to your garden but also act as natural repellents against various insects.

Next, consider the layout of your vegetation. Dense shrubbery and overgrown plants can provide ideal hiding spots for pests. Keep plants well-trimmed and maintain a clear zone around the foundation of your home. This not only discourages pests from nesting close to your house but also creates a barrier that makes it harder for them to access entry points.

Another important aspect is the management of mulch and soil. While mulch is beneficial for retaining moisture and regulating soil temperature, it can also attract termites and other pests if applied too thickly. Aim for a mulch layer of no more than three inches, and consider using cedar or rubber mulch, which are less appealing to pests. Additionally, keep firewood stored away from the home and elevated off the ground; this will prevent termites from finding a cozy place to thrive.

Finally, ensure proper drainage in your outdoor spaces to avoid standing water, which can attract mosquitoes and other water-loving pests. Regularly check for clogged gutters and downspouts, and make sure there are no areas where water can pool. By implementing these landscaping tips, you can create an outdoor environment that not only enhances the beauty of your home but also discourages pests from making it their own. With a little attention to detail, your outdoor spaces can become a fortress against unwanted invaders.

7. Utilizing Natural Remedies for Pest Control

What are the best ways to protect your home from pests?
Credit : whatcanu.com

When it comes to safeguarding your home from unwanted pests, sometimes the best solutions are those that come straight from nature. Utilizing natural remedies for pest control not only helps you maintain a pest-free environment but also ensures that your home remains safe for children and pets. These eco-friendly alternatives can be effective, affordable, and often easy to prepare.

One of the most popular natural pest deterrents is essential oils. Scents like peppermint, lavender, and tea tree oil are known to repel various insects. For instance, a simple mixture of water and a few drops of peppermint oil can be sprayed around entry points to keep spiders and ants at bay. Not only does this method effectively deter pests, but it also fills your home with a delightful fragrance.

Another powerful natural remedy is diatomaceous earth, a fine powder made from the fossilized remains of tiny aquatic organisms. This non-toxic substance works by dehydrating insects when they come into contact with it. Sprinkling diatomaceous earth around areas where pests are likely to enter, such as doorways and windowsills, can create a formidable barrier against ants, roaches, and even fleas.

For those grappling with a rodent problem, consider using a mix of cayenne pepper, garlic, and water to create a potent spray. Rodents are highly sensitive to strong smells, and this concoction can help keep them at bay. Simply spray it around your home’s perimeter and entry points for a natural deterrent that won’t harm your furry friends.

Lastly, planting pest-repelling plants in your garden can be a twofold strategy. Marigolds, basil, and rosemary not only enhance your garden’s aesthetic appeal but also act as natural repellents for common pests like aphids and mosquitoes. Incorporating these plants into your landscaping can create a more inviting environment while simultaneously providing a defensive barrier.

By embracing these natural remedies for pest control, you can effectively protect your home while promoting a healthier living space for your family. With a little creativity and some knowledge of nature’s bounty, you can keep pesky intruders at bay without relying on harsh chemicals.

8. The Role of Professional Pest Control Services

When it comes to safeguarding your home from unwanted pests, enlisting the expertise of professional pest control services can be a game-changer. While there are many DIY methods available, nothing compares to the comprehensive assessment and targeted treatments provided by trained professionals.

These experts bring a wealth of knowledge, understanding the behavior and biology of various pests that invade homes, from insidious termites to pesky rodents. With their keen insight, they can identify vulnerabilities in your home that you may not have even considered—such as hidden entry points, damp areas prone to infestations, or potential food sources that attract unwelcome guests.

One of the primary benefits of hiring a professional pest control service is their ability to implement a customized pest management plan tailored to your specific needs. They utilize a range of advanced techniques and eco-friendly products that not only eliminate existing pests but also create a barrier to prevent future infestations. This proactive approach ensures that your home remains a safe haven, free from the disruptions and health risks associated with pests.

Additionally, professional services often provide ongoing monitoring and maintenance, giving you peace of mind that your home is consistently protected. With scheduled visits, they can quickly address any signs of re-infestation and adjust their strategies as necessary, saving you time, effort, and potentially costly damages down the line.

In summary, while DIY solutions can be effective for minor issues, when it comes to safeguarding your home from persistent or severe pest problems, professional pest control services offer the expertise, tailored strategies, and ongoing support necessary to ensure your home remains a pest-free sanctuary. Investing in these services is not just about removing pests; it’s about protecting your home and your family’s well-being in the long run.

9. Implementing Regular Maintenance Checks

Implementing regular maintenance checks is a crucial strategy in the ongoing battle against unwanted pests. Think of your home as a fortress. Just as a castle requires periodic inspections to identify weaknesses in its defenses, your home needs the same level of attention to keep pests at bay.

Start by scheduling routine inspections of both the interior and exterior of your home. During these checks, look for signs of pest activity, such as droppings, gnaw marks, or nests. Pay special attention to areas that are often overlooked, like basements, attics, and crawl spaces, where pests love to hide.

Next, examine your home’s structure for potential entry points. Cracks in the foundation, gaps around windows and doors, and holes in screens can all serve as gateways for pests seeking refuge. Seal any openings with caulk or weather stripping to create a barrier that prevents unwanted intruders from making themselves at home.

Don’t forget to inspect your landscaping, as well. Overgrown plants can provide cover for pests, while piles of leaves and debris can serve as breeding grounds. Regularly trim back shrubs, remove clutter, and maintain a clean yard to deter pests from encroaching on your space.

Finally, consider creating a seasonal maintenance checklist. With the changing of seasons, different pests become more active. By being proactive and adjusting your checks accordingly—such as clearing gutters in the fall to prevent mosquito breeding or inspecting for termites in the spring—you’ll stay one step ahead and safeguard your home effectively.

By implementing regular maintenance checks, not only do you fortify your home against pests, but you also promote a healthier living environment for you and your family. A little diligence goes a long way in ensuring that your sanctuary remains pest-free, allowing you to enjoy your home to the fullest.

10. Educating Your Family About Pest Prevention

Educating your family about pest prevention is one of the most effective strategies to safeguard your home from unwanted intruders. Pest control isn’t solely the responsibility of pest management professionals; it begins at home, within your family unit. By instilling knowledge and encouraging proactive habits, you can create a formidable barrier against pests.

Start by involving everyone in the discussion about common household pests—ants, cockroaches, rodents, and termites. Share information about how these pests can infiltrate your living space, what attracts them, and the potential health risks they pose. Understanding the enemy is the first step in prevention.

Next, implement a few simple yet powerful practices that your family can adopt. Teach them to regularly check for any cracks or gaps around doors and windows, emphasizing the importance of sealing these entry points. Discuss the significance of proper food storage—keeping pantry items in airtight containers and promptly cleaning up spills and crumbs—to eliminate food sources for pests. Encourage everyone to maintain cleanliness in common areas, including regular trash disposal and the immediate clean-up of pet waste, which can attract unwanted visitors.

Moreover, make it a family activity to inspect the yard and garden for potential pest habitats. Clearing away debris, keeping outdoor spaces tidy, and ensuring plants are healthy and well-maintained can minimize the risk of infestations.

By fostering a culture of awareness and responsibility, you empower your family to take an active role in pest prevention. This knowledge not only protects your home but also promotes a sense of teamwork and pride in maintaining a comfortable and safe living environment. Remember, when everyone is informed and engaged, you significantly bolster your defenses against unwanted pests.

11. Seasonal Strategies for Pest Control

When it comes to pest control, a proactive approach tailored to the changing seasons can make all the difference in safeguarding your home from unwanted intruders. Each season brings its own set of pest challenges, and understanding these patterns is key to effectively managing them before they become a nuisance.

**Spring** is the time when many pests emerge from their winter slumber. As temperatures rise, ants, termites, and mosquitoes are particularly active. This is the perfect moment to inspect your home for any cracks or openings in windows and doors that could serve as entry points. Seal any gaps, and consider applying a barrier treatment around your property to deter these early intruders. Additionally, keep your yard tidy by removing any standing water and debris where pests might breed.

As summer rolls in, the heat can make your home an attractive haven for insects like flies and wasps. To keep them at bay, ensure that food is stored securely and that trash cans are tightly sealed. Regularly cleaning up outdoor spaces and utilizing natural repellents, such as citronella candles or essential oils, can also help maintain a pest-free environment.

With the arrival of **autumn**, rodents start seeking warm shelter as temperatures drop. This is the time to take preventative measures by checking for any signs of rodent activity, such as droppings or gnaw marks. Install traps and create a barrier by storing firewood away from the home and ensuring that all food is properly sealed. This is also a good time to inspect your roof for any potential nesting sites, such as overhanging branches or loose shingles.

Finally, **winter** may seem like a quiet time for pest control, but don’t be fooled. While many pests hibernate, some, like cockroaches and cluster flies, may seek warmth inside your home. Keep your home well-ventilated and refrain from leaving food out. Regularly check for signs of pest activity and consider professional inspections to ensure that your home remains pest-free throughout the colder months.

By implementing these seasonal strategies, you can stay one step ahead of pests, ensuring your home remains a comfortable and safe haven year-round.

12. Recognizing Early Signs of Infestation

When it comes to keeping your home pest-free, vigilance is key. Recognizing the early signs of infestation can save you time, money, and a whole lot of stress down the line. Pests tend to be stealthy creatures, but they often leave behind subtle clues that can signal their unwelcome presence.

Start by paying attention to any unusual sounds—scratching or scurrying noises coming from walls, ceilings, or beneath floors can indicate that rodents are making themselves at home. Additionally, look for signs of droppings, which vary by pest but often appear as small, dark pellets in corners, along baseboards, or near food sources.

Another telltale sign is damaged food packaging or gnawed wood, particularly in areas where you store food or have wooden furniture. If you notice small holes in packaging or bite marks on your pantry staples, it’s time to investigate further.

Don’t overlook visual indicators either. For instance, the presence of discarded wings or shed exoskeletons can hint at an insect infestation, while stains or smear marks around entry points are often signs of rodents.

Lastly, be alert to any unusual odors; a musty smell can suggest a termite problem, while a strong, foul scent may indicate a rat or mouse issue. By familiarizing yourself with these early signs of infestation, you can act quickly to address any pest problems before they escalate, ensuring your home remains a safe and comfortable haven.

13. Eco-Friendly Pest Control Options

When it comes to safeguarding your home from unwanted pests, eco-friendly pest control options offer a sustainable and humane approach to pest management. With growing awareness about the impact of chemical pesticides on the environment and human health, many homeowners are seeking natural alternatives that are both effective and safe.

One popular eco-friendly option is the use of essential oils. Oils such as peppermint, tea tree, and citronella are known for their pest-repelling properties. For instance, a simple mixture of water infused with a few drops of peppermint oil can deter ants and spiders when sprayed around entry points and windowsills. Similarly, citronella is effective against mosquitoes, making it a great natural repellent for outdoor gatherings.

Another effective strategy is the introduction of beneficial insects into your garden. Ladybugs, lacewings, and predatory wasps are natural predators of common garden pests like aphids and caterpillars. By encouraging these insects into your yard, you create a balanced ecosystem that minimizes pest populations without resorting to harmful chemicals.

Diatomaceous earth is another fantastic eco-friendly option that acts as a mechanical pesticide. This natural powder, made from the fossilized remains of tiny aquatic organisms, can be sprinkled in areas where pests are likely to roam. Its abrasive nature damages the exoskeletons of insects, effectively dehydrating and eliminating them while remaining safe for humans and pets.

For those dealing with rodent issues, humane traps can be a great solution. These traps allow you to catch rodents alive and release them far from your home, preventing the use of toxic poisons that can pose risks to pets and children.

By opting for these eco-friendly pest control options, not only do you safeguard your home from unwanted invaders, but you also contribute to a healthier environment. Embracing these natural methods fosters a sense of responsibility toward our planet while keeping your living space free from pests.

14. Building a Pest-Resistant Home

Building a pest-resistant home is a proactive approach that can save you time, money, and a whole lot of hassle in the long run. It begins with thoughtful design and construction choices that prioritize prevention. Start by assessing your property and identifying potential entry points. This includes gaps around windows and doors, cracks in the foundation, and any spaces where pipes enter the home. Sealing these openings with durable materials like caulk or foam can significantly reduce the chances of pests finding their way inside.

Choosing the right building materials also plays a crucial role in pest resistance. Opt for treated wood that is less susceptible to termites and rot, and consider materials that are chemically resistant to insect infestations. For instance, concrete and metal are excellent choices for foundations and structural elements, as they deter pests that thrive on organic materials.

Landscaping is another vital component of building a pest-resistant home. Keep shrubs and trees trimmed back from the exterior walls, as overhanging branches can provide a direct route for pests. Additionally, create a buffer zone of gravel or mulch around the foundation; this not only enhances drainage but makes it harder for pests to travel to your home.

Finally, consider integrating pest-resistant features such as screens on windows and doors, and installing door sweeps to create a tight seal. These small yet effective measures can enhance your home’s defenses against unwanted intruders. By building a pest-resistant home, you’re not just creating a barrier against pests; you’re investing in the long-term comfort and safety of your living environment. Embrace these strategies to ensure that your sanctuary remains a pest-free haven for years to come.

15. Conclusion: A Proactive Approach to Pest Management

In conclusion, adopting a proactive approach to pest management is the cornerstone of a pest-free home. It’s not merely a matter of reacting to infestations when they arise; rather, it’s about implementing consistent preventive measures that deter pests from making your home their own. By understanding the behaviors and habits of common pests, you can create an environment that is less inviting to unwelcome guests.

Start by maintaining a clean and clutter-free space. Regularly inspecting your home for potential entry points and sealing gaps can significantly reduce the likelihood of pests slipping inside unnoticed. Incorporating natural deterrents like essential oils or planting pest-repellent herbs in your garden not only enhances your home’s ambiance but also serves as an effective barrier against many common nuisances.

Additionally, keeping your outdoor spaces tidy—trimming overgrown vegetation, managing standing water, and ensuring proper drainage—can prevent pests from thriving in your yard. Remember, regular maintenance is key; scheduling seasonal check-ups with pest control professionals can provide an extra layer of security and peace of mind.

Ultimately, a proactive approach is about vigilance and education. Equip yourself with knowledge about the pests that are common in your area and stay informed about the best practices for prevention. By fostering a habit of awareness and taking preventive action, you can safeguard your home from unwanted pests, ensuring a comfortable and harmonious living environment for you and your family.

In conclusion, safeguarding your home from unwanted pests requires a proactive and informed approach. By implementing the top strategies outlined in this blog post, from sealing entry points to maintaining a clean environment, you can significantly reduce the risk of infestations. Remember, prevention is always easier and more effective than dealing with a pest problem after it arises. Stay vigilant, conduct regular inspections, and don’t hesitate to seek professional help when necessary. Your home should be a sanctuary, free from the worry of pests, and with these strategies, you can enjoy peace of mind knowing you’re taking the right steps to protect your living space. Thank you for reading, and here’s to a pest-free home!

How to create a functional and stylish mudroom?

Your entryway is the first impression guests have of your home, yet it often becomes a chaotic catch-all for shoes, bags, and outdoor gear.

A well-designed mudroom can transform this frequently overlooked space into a functional and stylish haven that not only organizes your belongings but also enhances your home’s aesthetic. Imagine a welcoming area where practicality meets design—complete with clever storage solutions, beautiful decor, and a sense of warmth that invites everyone in. In this blog post, we will explore practical tips and creative ideas to help you craft the perfect mudroom that balances functionality with style. From choosing the right furnishings to implementing smart organizational strategies, let’s turn your entryway into a serene and stylish space that sets the tone for the rest of your home!

1. Understanding the Purpose of a Mudroom

How to create a functional and stylish mudroom?
Credit : whatcanu.com

When it comes to home design, the mudroom often serves as an unsung hero—a transitional space that bridges the outdoors and the comfort of your living areas. Understanding the purpose of a mudroom is essential for maximizing its potential as both a functional and stylish component of your home.

At its core, a mudroom is designed to handle the mess that accompanies coming in from the outside world. It is the first line of defense against dirt, mud, and clutter. This space offers a dedicated area for dropping off shoes, coats, bags, and sporting gear, preventing the chaos that often spills into hallways and living rooms. By creating a designated spot for these items, you can maintain a cleaner, more organized home.

However, the mudroom’s purpose extends beyond mere functionality. It can also be a welcoming entryway that sets the tone for your home. Imagine stepping into a beautifully designed space that combines practicality with aesthetic appeal—a place where every item has its designated area, yet the overall ambiance invites warmth and charm. From built-in benches adorned with plush cushions to chic hooks for hanging jackets, the possibilities to enhance this space are endless.

Additionally, the mudroom can serve as a multi-functional area for various activities. Whether it’s a place for kids to store their backpacks after school, a pet station complete with food bowls and leashes, or a mini laundry zone for sorting clothes, the mudroom can adapt to your family’s unique needs. By understanding the true purpose of a mudroom, you can transform it into a stylish and efficient space that enhances your home’s overall design while making daily life a little easier.

2. Essential Features of a Functional Mudroom

Creating a mudroom that is both functional and stylish requires careful consideration of its essential features. At its core, a well-designed mudroom serves as a transitional space that bridges the outdoors and your home, helping to keep dirt and clutter at bay while providing a welcoming entry point. Here are some key elements to incorporate into your mudroom design:

**1. Adequate Storage Solutions:** A functional mudroom needs ample storage to accommodate shoes, coats, bags, and outdoor gear. Consider built-in benches with cubbies or baskets beneath for easy access to frequently-used items. Hooks or a wall-mounted rack can keep jackets and backpacks organized, while a dedicated shoe rack helps contain what could easily become a chaotic array of footwear.

**2. Durable Flooring:** With the constant traffic of muddy shoes and wet clothes, the flooring in your mudroom should be both durable and easy to clean. Opt for materials like tile, vinyl, or laminate that can withstand moisture and wear. Adding a colorful or patterned rug can provide a touch of style while also serving as a designated spot for wiping feet.

**3. Functional Lighting:** Proper lighting is crucial in a mudroom, especially if it lacks windows. Install overhead fixtures for general illumination and consider adding wall sconces or pendant lights for a warm, inviting ambiance. natural light can be a game-changer, so if possible, incorporate a window or a glass door to brighten the space and create a more open feel.

**4. Practical Work Surface:** If your mudroom doubles as a laundry area or pet space, a sturdy countertop can be invaluable. This surface provides a place for sorting mail, folding laundry, or grooming pets, enhancing the room’s functionality. Choose materials that are easy to wipe down and resistant to stains.

**5. Personal Touches:** Finally, don’t forget to infuse your mudroom with style that reflects your personality. Incorporate decorative elements like framed photos, artwork, or stylish storage bins to make the space feel welcoming. A fresh coat of paint in a cheerful color or wallpaper with fun patterns can elevate the overall aesthetic and make your mudroom a charming part of your home.

By thoughtfully integrating these essential features into your mudroom design, you’ll create a space that not only looks great but also enhances the functionality of your entryway, making daily routines smoother and more enjoyable.

3. Assessing Your Space: Layout and Design Considerations

How to create a functional and stylish mudroom?
Credit : whatcanu.com

Before diving into decorating your mudroom, it’s essential to take a step back and assess the space you have available. The layout and design considerations will significantly influence both the functionality and aesthetic appeal of your mudroom. Begin by measuring the dimensions of the area, noting any architectural features like windows, doors, or built-in shelving that can either enhance or challenge your design.

Consider how you plan to use your mudroom. Will it be primarily for storage, or do you envision it as a multifunctional space that also serves as a transition area between the outdoors and your home? If you have children, think about their daily activities and the gear they bring in and out—this will help dictate the need for specific storage solutions. A well-organized layout could include hooks for coats, a bench for shoes, and cubbies for bags and outdoor equipment.

Next, visualize the flow of movement within the space. Ideally, your design should allow for an easy transition from the outside world to the comfort of your home. Ensure that the layout promotes accessibility and efficiency, making it easy for family members to drop off their belongings without cluttering the area.

In terms of design, consider the style that complements your home—whether it’s modern, rustic, or eclectic. This is your opportunity to showcase your personality through color schemes, materials, and decorative accents. For example, a bright, welcoming palette can create a cheerful vibe, while natural wood elements can add warmth and charm.

Finally, don’t forget about lighting! Adequate lighting is vital for both function and ambiance. If your mudroom lacks natural light, consider adding fixtures that not only illuminate the space but also enhance its design. Wall sconces, pendant lights, or even a stylish chandelier can make a significant impact.

By carefully assessing your space and thoughtfully considering the layout and design elements, you can create a mudroom that is both functional and stylish, setting the tone for the rest of your home.

4. Choosing the Right Furniture for Your Mudroom

When it comes to transforming your entryway into a functional and stylish mudroom, selecting the right furniture is a crucial step that can set the tone for the entire space. The furniture you choose will not only define the aesthetic appeal but also enhance the practicality of your mudroom, ensuring it effectively serves its purpose as the transitional space between the outdoors and your home.

Start by considering the size and layout of your mudroom. If you have a compact area, opt for multi-functional furniture pieces that maximize space without overwhelming the room. A narrow console table with storage underneath can serve as both a landing spot for keys and mail and a place to tuck away shoes or bags. Look for benches with hidden compartments that can double as seating while providing essential storage for seasonal items, like hats, gloves, or sports gear.

For a more spacious mudroom, consider investing in a combination of units like lockers or cubbies. These not only offer ample storage for each family member’s belongings but also add a playful element, especially if you choose colorful or uniquely designed pieces. Pair these with hooks or pegs for hanging coats and bags, ensuring that everything remains organized and easily accessible.

In terms of material, prioritize durability and ease of cleaning. Mudrooms are often the first line of defense against the elements, so furniture made from weather-resistant materials or easy-to-clean surfaces, like metal, plastic, or treated wood, can withstand the wear and tear of everyday use. Additionally, consider integrating cushions or textiles that can be easily removed and washed to maintain a fresh look.

Style is equally important. Whether you lean towards a rustic farmhouse aesthetic, a sleek modern vibe, or a cozy cottage feel, choose furniture that complements your home’s overall design. Don’t hesitate to mix textures and colors; a reclaimed wood bench paired with sleek metal hooks can create a striking visual contrast that adds character to your mudroom.

Ultimately, your choice of furniture should reflect both your personal style and your family’s needs, creating a welcoming entryway that beautifully marries functionality with aesthetics. By carefully selecting the right pieces, you can transform your mudroom into a space that is not only practical but also a delightful introduction to your home.

5. Color Schemes and Decor Ideas for a Stylish Entryway

How to create a functional and stylish mudroom?
Credit : whatcanu.com

When it comes to transforming your entryway into a stylish and functional mudroom, color schemes and decor choices play a pivotal role in setting the tone for the entire space. The right colors can create a warm, inviting atmosphere while also reflecting your personal style.

**Choose a Cohesive Color Palette**
Start by selecting a cohesive color palette that complements the rest of your home. Soft neutrals such as beige, gray, or white can create a calm and spacious feel, making your mudroom a welcoming transition between the outdoors and your living space. If you prefer a bolder statement, consider incorporating accent colors like deep navy or forest green, which can add depth and character without overwhelming the space.

**Incorporate Textures**
Texture is key to achieving a stylish entryway. Mix and match materials to create visual interest. For instance, pair a sleek, painted bench with rustic wooden hooks or a woven basket for storage. A plush area rug can soften the hard surfaces and add warmth, while a painted accent wall can serve as a stunning backdrop for your decor.

**Add Functional Decor**
Functional decor is the secret ingredient to a successful mudroom. Wall-mounted shelves not only provide a place for decorative items like plants or framed photos but also offer storage for everyday essentials. Consider stylish hooks for coats and bags that align with your chosen color scheme—metallic finishes can add a touch of modern elegance, while wooden hooks can lend a more rustic charm.

**Incorporate Personal Touches**
Don’t forget to infuse your personality into the space. Consider displaying a curated gallery of family photos or artwork that resonates with you. A chalkboard or corkboard can serve as both decor and a practical tool for reminders and notes. Choose planters that suit your aesthetic—succulents for a modern look or hanging ferns for a bohemian vibe—to breathe life into the entryway.

By thoughtfully selecting color schemes and decor elements, you can create a mudroom that not only serves as a functional entry point but also reflects your personal style, welcoming guests with charm and elegance as they step into your home.

6. Smart Storage Solutions: Shelving, Bins, and Hooks

When it comes to creating a functional and stylish mudroom, smart storage solutions are your best friends. A well-organized entryway not only enhances the aesthetic appeal of your home but also serves as a practical space that keeps clutter at bay. By incorporating shelving, bins, and hooks, you can effortlessly transform your mudroom into an efficient area that meets the needs of your family.

**Shelving** is a versatile option that can be tailored to fit any space. Consider installing wall-mounted shelves to maximize vertical space while providing a place for decorative items, shoes, or even baskets for smaller accessories. Open shelving works beautifully for displaying stylish storage bins or seasonal decor, allowing you to switch out items as needed. For a more enclosed look, opt for built-in cabinets that can hide away shoes, bags, and other everyday items, keeping the area tidy and visually appealing.

**Bins** are another essential element for maintaining order in your mudroom. Choose a variety of sizes and styles to accommodate different items—think large bins for bulky winter gear and smaller ones for everyday essentials like gloves, hats, and dog leashes. Labeling these bins can further enhance functionality, ensuring that everyone in the household knows where to find what they need. Stylish wicker or fabric bins can add a touch of charm while serving as practical storage solutions.

**Hooks** provide an easy and accessible way to keep coats, bags, and umbrellas organized. Installing a row of hooks at varying heights can make it easier for everyone in the family—from children to adults—to hang their belongings. To elevate the look of your mudroom, consider decorative hooks that reflect your personal style, whether it’s rustic, modern, or somewhere in between. A chic key holder can also be a practical addition, ensuring that you never misplace your keys again.

By thoughtfully integrating shelving, bins, and hooks into your mudroom design, you can create an entryway that is not only functional but also a reflection of your personal style. With these smart storage solutions, your mudroom can become a welcoming space that seamlessly blends practicality and aesthetic appeal, making a strong first impression every time you enter your home.

7. Flooring Options: Durable and Easy to Clean

How to create a functional and stylish mudroom?
Credit : whatcanu.com

When designing a mudroom, one of the most critical elements to consider is the flooring. This space serves as the transitional zone between the outdoors and your home, which means it’s subject to dirt, moisture, and wear and tear from frequent foot traffic. Therefore, choosing durable and easy-to-clean flooring can make all the difference in maintaining both functionality and aesthetics.

**Vinyl Flooring** is a popular choice for mudrooms due to its resilience and versatility. Available in a plethora of styles and colors, modern vinyl can mimic the look of hardwood or stone while providing water resistance and easy maintenance. Spills and muddy footprints are no match for a quick mop or wipe, making it an excellent option for busy families.

**Tile Flooring** is another fantastic option, especially ceramic or porcelain tiles. Not only are they highly durable and resistant to stains, but they also offer the advantage of being available in various designs, from classic to contemporary. The grout lines may require some upkeep, but the overall durability and ease of cleaning make it a worthwhile investment. Plus, tiles can be heated for added comfort during colder months, enhancing the mudroom’s overall functionality.

For a more natural touch, consider **Luxury Vinyl Plank (LVP)** or **Laminate Flooring**. Both options provide the beauty of natural wood without the susceptibility to warping or scratching. LVP, in particular, is designed to withstand moisture, making it ideal for a mudroom where wet shoes and coats are often the norm.

Lastly, if you’re drawn to a cozy and inviting aesthetic, **Rubber Flooring** could be the perfect fit. Available in vibrant colors and patterns, rubber is slip-resistant and incredibly easy to clean, making it a safe choice for families with children or pets. Additionally, it provides a cushioned surface that’s gentle on your feet, which is a bonus when you’re spending time organizing or waiting in the mudroom.

Ultimately, the right flooring can transform your mudroom into a stylish and functional space that withstands the rigors of daily life. By considering durability and ease of maintenance, you can ensure that your entryway remains both beautiful and practical for years to come.

8. Maximizing Natural Light in Your Mudroom

When it comes to designing a mudroom that feels inviting and functional, maximizing natural light is a game changer. A well-lit space not only enhances the overall aesthetic but also creates a warm atmosphere that makes coming and going a pleasure, especially on dreary days. Here are some strategies to brighten up your mudroom and make the most of the natural light available.

First, consider the placement of windows. If your mudroom is located near an exterior wall, opt for larger windows or even glass doors that allow abundant sunlight to flood in. If feasible, installing skylights can dramatically increase brightness and give your space a more open, airy feel. These overhead windows not only illuminate the area but also provide a unique architectural element that can elevate the entire room.

In addition to window placement, be mindful of window treatments. Heavy drapes can block out precious light, so choose sheer curtains or blinds that can be easily adjusted to let in sunlight while still providing some privacy. Reflective surfaces, such as mirrors or glossy tiles, can further amplify natural light, making the space appear larger and more welcoming.

Using a light color palette on your walls and furnishings can also enhance luminosity. Soft whites, pale grays, or muted pastels can reflect sunlight, creating a bright, cheerful environment. Pair these hues with light wood or white cabinetry for storage solutions that blend seamlessly into your design while still offering function.

Lastly, consider incorporating plants that thrive in bright conditions. Not only do they add a pop of greenery and life to your mudroom, but they also benefit from the abundant natural light, creating a harmonious and inviting entryway. By thoughtfully maximizing natural light in your mudroom, you’ll create a stylish space that welcomes you and your guests with open arms, setting a positive tone for the rest of your home.

9. Incorporating Personal Touches: Artwork and Accessories

Incorporating personal touches through artwork and accessories is a delightful way to infuse character into your mudroom while maintaining its functionality. This space, often overlooked, can transform into a welcoming gateway that reflects your personality and style.

Start by selecting artwork that resonates with you and your family. Whether it’s a bold, colorful piece that energizes the space or a series of framed family photos that evoke warmth and nostalgia, artwork can set the tone for your mudroom. Consider creating a gallery wall that showcases a mix of prints, photographs, and even handmade crafts from your children. This not only adds visual interest but also turns the mudroom into a conversation starter.

Accessories play a crucial role in personalizing your entryway. Think about adding decorative elements that are both stylish and practical. Beautifully designed hooks for hanging coats, vibrant baskets for storing shoes, or even a chic bench where you can sit while tying your laces can enhance functionality while showcasing your unique taste. Incorporate seasonal decor as well—a few pumpkins in the fall or festive wreaths during the holidays can keep your mudroom feeling fresh and inviting throughout the year.

Don’t forget about textural elements! Soft rugs, vibrant cushions on seating, and even potted plants can add warmth and comfort. These touches create a cozy atmosphere that welcomes guests and family alike. By blending practical storage solutions with personal flair, your mudroom will not only serve its purpose but also become a stylish introduction to your home, inviting everyone to step inside with a smile.

10. Seasonal Decor: Keeping It Fresh Throughout the Year

When it comes to transforming your entryway into a functional and stylish mudroom, embracing seasonal decor is a fantastic way to keep the space feeling fresh and inviting year-round. Seasonal decor not only enhances the aesthetic appeal of your mudroom but also adds a touch of warmth and personality that reflects the changing times.

As the seasons shift, consider swapping out elements like rugs, throw pillows, and wall art to reflect the current climate. In the fall, opt for warm tones of burgundy, orange, and gold. You might introduce cozy plaid patterns on a bench cushion or a rustic wreath adorned with faux leaves and mini pumpkins. Transitioning into winter, think about incorporating elements like soft whites and icy blues. A fluffy faux fur throw can add warmth, while a few snowflake decorations can evoke the charm of the season.

Spring invites a burst of color; consider pastel shades and floral accents. Freshen up your mudroom with vibrant green plants or a cheerful floral arrangement that welcomes the new season. Brightly colored baskets can also be introduced to store shoes and accessories, offering both functionality and a pop of color.

Summer is the perfect time to lighten the mood. Swap out heavy fabrics for lighter linens and bright colors. Incorporate beach-themed decor, such as shells or driftwood accents, to create a breezy atmosphere. An airy, light-feeling space can make coming and going feel more relaxed and enjoyable.

By regularly updating your decor to align with the seasons, you not only enhance the visual appeal of your mudroom but also create an environment that resonates with the experiences and feelings associated with each time of year. This thoughtful attention to detail will ensure your entryway remains a welcoming and stylish space, inviting family and guests to step in with a smile, no matter the season.

11. DIY Projects for a Budget-Friendly Mudroom Makeover

Transforming your mudroom into a functional and stylish space doesn’t have to break the bank. With a little creativity and some hands-on effort, you can embark on a variety of DIY projects that will breathe new life into this often-overlooked area of your home. Here are some budget-friendly ideas to help you revamp your mudroom without splurging.

**1. Creative Storage Solutions:** One of the biggest challenges in a mudroom is keeping it organized. Consider building your own storage benches using reclaimed wood or inexpensive plywood. Not only will this provide a place to sit while you take off shoes, but it can also double as storage for boots and bags. Add some baskets or bins to keep smaller items tidy and easily accessible.

**2. Wall Hooks and Racks:** Maximize vertical space by installing wall hooks or a pegboard for coats, hats, and bags. A simple wooden plank with hooks can be a stylish addition and is an easy DIY project that requires minimal tools. You can even personalize it with a fresh coat of paint or a fun stencil to match your decor.

**3. Custom Shelving:** If you have an empty wall or corner, consider building shelves to display decorative items or store everyday essentials. Floating shelves are a trendy and space-saving option that can be made from reclaimed wood or inexpensive shelving boards, giving your mudroom both functionality and flair.

**4. Floor Makeover:** If your mudroom floor is looking worn or outdated, consider painting it for a quick refresh. Use outdoor paint for durability, and create a pattern with painter’s tape for a stylish effect. Alternatively, peel-and-stick vinyl tiles can be an affordable and easy way to add color and texture.

**5. A Fresh Coat of Paint:** Sometimes, all a space needs is a new hue. Choose a color that reflects your style and complements the rest of your home. A bright, cheerful shade can make the mudroom feel more inviting, while a classic neutral can create a clean, sophisticated look.

With these DIY projects, you can effortlessly update your mudroom into a functional and stylish entryway. Not only will you save money, but you’ll also enjoy the satisfaction of creating a space that meets your family’s needs while reflecting your personal style. So roll up your sleeves, gather your supplies, and let your creativity shine!

12. Maintaining a Tidy Mudroom: Daily Habits and Routines

Maintaining a tidy mudroom is essential for ensuring this space remains functional and welcoming, especially as it serves as the first impression of your home. Establishing daily habits and routines can transform your mudroom from a chaotic catch-all to an organized oasis.

Start by designating specific places for each item. Hooks for coats, bins for shoes, and baskets for miscellaneous gear can streamline the clutter. Encourage family members to adopt a “one in, one out” policy—every time someone brings in a new item, they must remove something else to maintain balance and prevent overflow.

Incorporating a quick daily tidying ritual can also work wonders. Set aside five minutes every evening to do a quick sweep of the space. Hang up coats, return stray shoes to their designated spots, and empty out any bags or backpacks that may have accumulated items throughout the day. This small commitment can save you from a larger cleanup down the line.

Consider adding a chore chart for family members, assigning each person specific responsibilities for keeping the mudroom tidy. This not only distributes the workload but also fosters a sense of ownership among everyone in the household.

Finally, make it a point to periodically reassess your mudroom’s organization. Seasonal changes may require a shift in the items stored there, so take the time to purge items that are no longer needed or used. By integrating these daily habits and routines, you’ll ensure your mudroom remains a stylish and functional entryway that sets a positive tone for your home.

13. Case Studies: Inspiring Mudroom Transformations

When it comes to redesigning your mudroom, sometimes the best inspiration comes from real-life transformations. Case studies of stunning mudroom makeovers can not only spark your creativity but also provide practical solutions tailored to various lifestyles and spaces. Here are a few inspiring examples that showcase how thoughtful design can elevate the functionality and aesthetic of this often-overlooked area.

**1. The Family-Friendly Hub**
In a bustling family home, one family turned their cramped, cluttered mudroom into a welcoming hub. By installing built-in benches with hidden storage, they created a space for kids to sit down and remove shoes easily. Bright, colorful hooks were added at varying heights, making it easy for children to hang their backpacks and jackets. To top it off, the walls were painted a cheerful shade of yellow, instantly brightening the space and setting a positive tone for coming and going.

**2. The Elegant Entryway**
For a more sophisticated approach, a couple in a suburban neighborhood opted for a mudroom that exuded elegance. They replaced traditional cabinetry with sleek, custom-built cabinets featuring glass fronts to display decorative items while still maintaining organization. A stunning marble floor adds a touch of luxury, and a chic chandelier brings in a bit of glamour. This mudroom seamlessly blends style with function, proving that even the most practical spaces can reflect personal taste.

**3. The Rustic Retreat**
In a home nestled in the countryside, a rustic mudroom transformation highlighted the charm of natural materials. The owners opted for reclaimed wood for shelving and hooks, combining it with a stone accent wall that echoed the surrounding landscape. A large, vintage trunk serves as both a bench and storage solution, allowing for easy access to outdoor gear. This design not only enhances the functionality of the mudroom but also creates a warm, inviting atmosphere that resonates with the home’s rustic character.

**4. The Minimalist Marvel**
For those who appreciate simplicity, a minimalist mudroom transformation can be incredibly impactful. A young professional revamped her small entryway by eliminating clutter and opting for a clean, monochromatic palette. A simple, sleek bench with integrated storage coupled with wall-mounted hooks keeps everything tidy and organized. The use of mirrors not only creates an illusion of space but also adds a modern touch, making the mudroom feel airy and open.

These case studies illustrate that a mudroom can be much more than just a transition space; it can be a functional and stylish extension of your home. By drawing inspiration from these transformations, you can design a mudroom that not only meets your practical needs but also enhances the overall aesthetic of your entryway. Whether you lean towards family-friendly designs, elegant finishes, rustic elements, or minimalist approaches, there’s a solution out there waiting to elevate your mudroom to new heights.

14. Common Mistakes to Avoid When Designing Your Mudroom

Designing a mudroom is an exciting endeavor, but it can also be fraught with pitfalls if you’re not careful. Avoiding common mistakes can make the difference between a functional space that meets your needs and a chaotic entryway that feels more like a cluttered catch-all. Here are some key missteps to steer clear of as you embark on your mudroom transformation.

**1. Neglecting Storage Solutions:** One of the most significant errors is underestimating the importance of storage. A mudroom is meant to keep your home organized, so be sure to incorporate ample storage options. Consider built-in shelves, hooks for bags and coats, and benches with hidden compartments for shoes. If you skimp on storage, you might find your beautifully designed space quickly overwhelmed by clutter.

**2. Ignoring Traffic Flow:** A mudroom is a high-traffic area, and it’s crucial to think about how people will move through the space. Avoid placing furniture or storage too close to entryways or walkways, which can create bottlenecks and frustration. Ensure there’s enough room for family members to come and go comfortably, especially during peak times like mornings and after school.

**3. Choosing the Wrong Flooring:** Mudrooms are prone to dirt, mud, and moisture, so selecting the right flooring is essential. Avoid materials that stain easily or are difficult to clean. Instead, opt for durable, water-resistant options like tile, vinyl, or sealed hardwood that can withstand the daily wear and tear while looking stylish.

**4. Overlooking Lighting Needs:** Many mudrooms lack natural light, which can make the space feel cramped and uninviting. Ensure you include adequate lighting—both overhead and task lighting—to illuminate the area effectively. A well-lit mudroom not only enhances its functionality but also makes it a more welcoming entry point to your home.

**5. Skipping Personalization:** While functionality is vital, don’t forget to infuse your mudroom with your personal style. Skipping this step can make the space feel sterile and uninviting. Consider incorporating decorative elements like a colorful rug, framed art, or a stylish mirror to create a warm and inviting atmosphere that reflects your personality.

By avoiding these common mistakes, you can create a mudroom that is not only functional but also a stylish introduction to your home. This careful attention to detail will ensure that your entryway serves its purpose beautifully, keeping your space organized while making a lasting impression on every guest who walks through your door.

15. Conclusion: Creating a Welcoming and Practical Entryway

In conclusion, transforming your entryway into a welcoming and practical mudroom is more than just a design endeavor; it’s about enhancing the functionality of your home while creating an inviting atmosphere for family and guests alike. A well-designed mudroom serves as a buffer zone between the outside world and your living space, offering a seamless transition that keeps your home organized and clutter-free.

As you embark on your mudroom makeover, remember to prioritize both style and utility. Incorporate smart storage solutions, such as built-in cubbies, hooks, and benches, to keep shoes, bags, and outerwear neatly arranged. Select materials that are durable and easy to clean, ensuring your entryway can withstand the wear and tear of daily use.

Don’t overlook the aesthetic aspects—choose a color palette and decor that reflect your personal style, creating a warm and inviting space. Consider adding personal touches, like family photos or a decorative mirror, to make the mudroom feel like an integral part of your home.

Ultimately, a well-thought-out entryway can significantly enhance your daily routines while leaving a lasting impression on visitors. By blending functionality with stylish design, you can create a mudroom that not only meets your practical needs but also serves as a beautiful introduction to your home. Embrace the journey of transformation, and enjoy the countless benefits of a welcoming and practical entryway for years to come.

In conclusion, transforming your entryway into a functional and stylish mudroom can completely redefine the first impression of your home while providing a practical space for daily life. By incorporating thoughtful organization, clever design elements, and personal touches, you can create a welcoming environment that blends seamlessly with your decor. Whether you’re looking to streamline your family’s busy routines or simply elevate your home’s aesthetic, these tips will guide you in crafting a mudroom that meets your needs. So roll up your sleeves and get started on this exciting project—your stylish and efficient entryway awaits! Don’t forget to share your before-and-after photos with us; we’d love to celebrate your transformation!

What are the different types of window hardware?

Windows are more than just openings in our walls; they are gateways to light, fresh air, and views of the world outside.

However, the functionality and aesthetic appeal of these crucial elements of our homes largely depend on the window hardware we choose. From sleek modern designs to classic finishes, the right hardware not only enhances the beauty of your windows but also ensures their smooth operation and longevity. In this comprehensive guide, we will explore the diverse array of window hardware types available, delving into the unique features, benefits, and ideal applications of each option. Whether you’re renovating your home, building from scratch, or simply looking to upgrade your existing windows, our guide will unlock the possibilities that await you, making it easier than ever to find the perfect window hardware to complement your style and needs. Let’s dive in and discover how these often-overlooked details can transform your living space!

1. Introduction to Window Hardware

What are the different types of window hardware?
Credit : whatcanu.com

When it comes to the functionality and aesthetics of your windows, the right window hardware plays a pivotal role. Window hardware encompasses a variety of components, from the visible handles and locks that enhance security to the less noticeable hinges and brackets that ensure smooth operation. This essential hardware not only supports the mechanics of opening and closing windows but also contributes to the overall design and style of your home.

In this comprehensive guide, we will delve into the various types of window hardware available, exploring their specific functions, materials, and styles. Whether you’re renovating an old home, building a new one, or simply looking to upgrade your existing windows, understanding the different hardware options can unlock a world of possibilities for both form and function.

From classic casement window hinges to sleek sliding door tracks, each type of window hardware serves a unique purpose and can dramatically alter the way your windows perform and look. Additionally, with advancements in technology, modern window hardware also incorporates features that enhance energy efficiency and security, making it easier than ever to find the perfect match for your needs.

Join us as we embark on this journey through the myriad of window hardware types, helping you make informed choices that will elevate your living space and ensure the longevity and performance of your windows.

2. The Importance of Choosing the Right Window Hardware

Choosing the right window hardware is not merely an aesthetic decision; it’s a crucial aspect that impacts the functionality, security, and longevity of your windows. Whether you’re renovating a cherished historic home or installing new windows in a modern build, the hardware you select can significantly influence the overall performance of your window system.

First and foremost, the appropriate window hardware ensures smooth operation. From hinges to locks, every component has a specific role that contributes to the ease with which you can open, close, and secure your windows. For instance, high-quality hinges allow for effortless movement, preventing wear and tear that can result from subpar materials. Likewise, robust locks provide peace of mind, safeguarding your home against intruders while offering you the confidence that your windows are secure.

Beyond functionality, the right hardware also plays a vital role in energy efficiency. Properly fitted window hardware minimizes gaps that can lead to drafts, resulting in a more comfortable indoor environment and lower energy bills. For example, selecting suitable weather stripping can enhance insulation, creating a barrier that keeps your home warm in the winter and cool in the summer.

Aesthetic appeal is another essential factor. Window hardware comes in an array of designs, finishes, and styles, allowing you to complement your home’s decor while adding a touch of sophistication. Whether you prefer the classic charm of wrought iron or the sleek elegance of stainless steel, the right choice can elevate the overall look of your windows, enhancing curb appeal and adding value to your property.

Finally, durability cannot be overlooked. Investing in high-quality hardware means you’re choosing components that are built to withstand the elements and everyday use. Cheaper options might save you money upfront, but they often lead to increased maintenance costs and premature replacements. Opting for robust, reputable brands ensures that your window hardware will endure the test of time, providing you with a reliable solution for years to come.

In conclusion, when it comes to window hardware, making informed choices is paramount. Prioritizing functionality, energy efficiency, aesthetics, and durability will not only enhance your living space but also provide you with peace of mind. So, as you embark on your window hardware journey, take the time to explore the options available, and unlock the full potential of your windows.

3. Overview of Common Window Hardware Types

What are the different types of window hardware?
Credit : whatcanu.com

When it comes to window hardware, understanding the various types available can significantly enhance both the functionality and aesthetic appeal of your windows. Each type of hardware serves a specific purpose, allowing you to customize your window installations to suit your needs and style preferences. Here’s a closer look at some of the most common window hardware types you’ll encounter:

**1. Locks:** Window locks are essential for security and peace of mind. There are several types of locks, including cam locks, sash locks, and key-operated locks, each designed to secure different window styles. Cam locks, often used in sliding windows, are simple to operate and provide reliable security, while sash locks are commonly found in double-hung windows, ensuring both ease of use and safety.

**2. Hinges:** Hinges are crucial for operable windows, allowing them to open and close smoothly. Common types include butt hinges, which are typically used in casement windows, and pivot hinges, which allow the window to swing open from a central point. The choice of hinge can affect both the functionality and the overall look of your window, making it an important consideration in your selection process.

**3. Handles and Cranks:** For windows that open outward, such as casement or awning windows, handles and cranks are vital for operation. Crank handles provide the leverage needed to open the window with ease, while stylish handles can enhance the visual appeal of the window. Whether you prefer a modern lever-style handle or a classic, vintage-inspired design, there’s a handle to match every aesthetic.

**4. Stops and Hold-Open Devices:** These components are essential for controlling the opening of your windows. Window stops prevent the window from opening too far, protecting it from damage and keeping it secure. Hold-open devices, on the other hand, allow the window to remain open at a set angle, providing ventilation without the risk of slamming shut.

**5. Sash Rails and Stiles:** These structural components form the frame of the window and are essential for both functionality and durability. Sash rails are the horizontal pieces that hold the window panes, while stiles are the vertical supports. Together, they create a robust framework that ensures the window operates smoothly and maintains its integrity over time.

**6. Weatherstripping:** While often overlooked, weatherstripping is an essential component for energy efficiency. It helps to seal gaps around the window, preventing drafts and reducing heating and cooling costs. There are various types of weatherstripping materials available, including foam, felt, and vinyl, each offering different levels of insulation and durability.

By familiarizing yourself with these common window hardware types, you can make informed decisions that not only enhance the functionality of your windows but also add a touch of style to your home. Whether you’re renovating an existing space or installing new windows, the right hardware will unlock countless possibilities for your living environment.

4. Casement Window Hardware

Casement windows are celebrated for their ability to provide unobstructed views and optimal ventilation, and the hardware that supports these windows plays a crucial role in their functionality and aesthetic appeal. At the core of casement window hardware is the crank mechanism, which allows users to easily open and close the window with a simple turn of the handle. This design not only makes operation effortless, especially for larger windows, but also ensures a secure seal when closed, enhancing energy efficiency.

Typically crafted from durable materials such as stainless steel or brass, the crank handle and accompanying components are designed to withstand the rigors of daily use while resisting corrosion. A well-made crank system should operate smoothly, allowing the window to open outward at an angle, maximizing airflow without the obstruction of frames or sashes.

In addition to the crank mechanism, casement windows often incorporate a variety of hinges—usually side-mounted or top-mounted—that allow for smooth operation and stability. Depending on your style preferences, you can choose from different finishes, including polished, painted, or patinated options, which can complement both contemporary and traditional home designs.

Locking mechanisms are another essential aspect of casement window hardware, providing added security and peace of mind. Many modern casement windows feature multi-point locking systems that engage at multiple points along the frame, creating a tight seal that not only boosts security but also enhances energy efficiency by minimizing drafts.

When selecting casement window hardware, it’s important to consider both functionality and aesthetics. Choose hardware that aligns with your home’s architectural style and offers the durability needed for long-term use. By investing in quality casement window hardware, you can unlock the full potential of your windows—ensuring they are both beautiful and functional for years to come.

5. Double-Hung Window Hardware

What are the different types of window hardware?
Credit : whatcanu.com

Double-hung windows are a timeless choice in home design, seamlessly blending functionality with classic aesthetics. Characterized by two vertically sliding sashes, these windows allow for versatile ventilation options, making them a staple in both traditional and contemporary architecture. The hardware that supports double-hung windows plays a crucial role in ensuring their smooth operation and longevity.

At the heart of double-hung window hardware is the balance system, which can be either a spring or a block-and-tackle mechanism. This system allows for easy lifting of the sashes, enabling homeowners to open and close their windows effortlessly. When choosing hardware, it’s important to consider the material as well; options range from sturdy vinyl and aluminum to traditional wood. Each material not only contributes to the aesthetic appeal but also impacts the weight and ease of operation of the window.

Additionally, the locking mechanisms found in double-hung windows come in various designs, from simple cam locks to more advanced multi-point locks that enhance security. A well-designed lock not only keeps your home safe but also adds to the overall ease of use of the window.

Furthermore, the finish of the hardware can dramatically affect the look of your windows. Whether you prefer a sleek, modern finish or a more rustic, antique look, you’ll find a plethora of styles available, including bronze, chrome, and painted options. These finishes not only elevate the design of your windows but also enhance their resistance to the elements, ensuring durability over time.

Incorporating the right double-hung window hardware can elevate your home’s functionality while maintaining its visual appeal. By understanding the various components involved—from balances and locks to materials and finishes—you can make informed choices that enhance both the practicality and beauty of your windows. Embrace the elegance of double-hung windows, and explore the vast array of hardware options available to unlock their full potential in your home.

6. Sliding Window Hardware

Sliding windows are a popular choice for many homeowners, thanks to their sleek design and space-saving functionality. The hardware that facilitates their smooth operation is crucial to ensuring these windows not only look great but also function effectively and securely. When considering sliding window hardware, there are several key components to keep in mind.

At the heart of sliding window systems are the **track and roller mechanisms**. The track, typically made of aluminum or vinyl, is installed along the frame of the window, providing a smooth pathway for the window to glide open and closed. The rollers, located at the bottom of the window sash, are designed to fit snugly within this track, allowing for effortless movement. High-quality rollers are essential; they should be made from durable materials, such as nylon or stainless steel, to withstand wear and tear over time while remaining resistant to rust and corrosion.

Another important aspect of sliding window hardware is the **locking mechanism**. Safety is paramount, and modern sliding windows come equipped with various locking options, from simple hook locks to more advanced multi-point locking systems that engage at several points along the window frame. These features not only enhance security but also improve the overall energy efficiency of the window by ensuring a tight seal when closed, reducing drafts.

For those looking to customize their sliding windows, **handles and pulls** provide both functionality and aesthetic appeal. Available in a variety of finishes and styles, these hardware pieces can complement the interior and exterior décor of your home while making it easy to operate the window. Ergonomically designed handles ensure a comfortable grip, allowing for easy opening and closing, even for larger window sashes.

Lastly, consider the **weatherstripping** that accompanies sliding window hardware. It plays a crucial role in insulating and protecting your home from the elements. Quality weatherstripping helps block out rain, wind, and noise, contributing to a more comfortable living environment and reducing energy costs.

In summary, the right sliding window hardware is essential for combining style, functionality, and security. With a range of components available, homeowners can choose options that best fit their needs while enhancing the overall appeal of their living spaces. Whether you’re replacing existing windows or embarking on a new construction project, understanding the nuances of sliding window hardware will empower you to make informed decisions that unlock the possibilities of your home.

7. Awning Window Hardware

What are the different types of window hardware?
Credit : whatcanu.com

Awning windows are a popular choice for homeowners seeking a blend of functionality and style. Characterized by their unique design, these windows are hinged at the top and open outward, allowing for maximum ventilation while keeping rain and debris at bay. To achieve this seamless operation, it’s crucial to understand the specific hardware that makes awning windows effective and reliable.

At the heart of awning window hardware is the operator mechanism, which comes in various forms, including manual cranks and electric openers. The manual crank option is a popular choice for its simplicity and ease of use. With a gentle turn of the handle, the window effortlessly swings outward, inviting fresh air into the space. For those who prioritize convenience, electric operators offer the luxury of opening and closing windows at the touch of a button, which is particularly advantageous for hard-to-reach installations.

In addition to operators, awning windows rely on robust hinges and stay arms that ensure stability and security when the window is open. Heavy-duty hinges are essential for maintaining the window’s functionality over time, especially in areas with frequent wind or rain. Stay arms, on the other hand, hold the window securely in place, allowing homeowners to enjoy fresh air without the worry of sudden gusts.

Seals and weatherstripping are also critical components of awning window hardware. High-quality seals not only keep out drafts but also enhance energy efficiency by preventing air leakage. This is particularly important in climates with extreme temperatures, where maintaining a comfortable indoor environment is essential.

When selecting awning window hardware, it’s important to consider the materials used. Stainless steel and corrosion-resistant finishes are ideal for longevity, particularly in coastal areas where saltwater exposure can compromise hardware integrity. Choosing durable, high-quality components will ensure that your awning windows operate smoothly for years to come.

In summary, awning window hardware combines function and form to create a practical solution for ventilation and style in your home. By understanding the components involved and selecting the right hardware, homeowners can enhance both the aesthetic appeal and performance of their awning windows, unlocking a host of possibilities for natural light and fresh air.

8. Bay and Bow Window Hardware

When it comes to enhancing the elegance and functionality of bay and bow windows, the right hardware is essential. Bay and bow windows are popular architectural features that extend beyond the exterior of a home, allowing for a panoramic view and an influx of natural light. However, to make the most of their unique shape, you need specialized hardware that complements their design while ensuring ease of use.

Bay window hardware typically includes a combination of hinges, brackets, and rods that support the distinct angles of the window structure. These windows often feature multiple panels, and each requires a tailored approach to ensure smooth operation. Heavy-duty hinges are essential for sustaining the weight of the window sashes, while decorative brackets can enhance the visual appeal, adding a touch of sophistication.

On the other hand, bow windows, which consist of a series of adjoining windows that form a gentle curve, demand a more fluid approach. The hardware for bow windows often includes flexible tracks and custom-designed rods that allow the individual window sashes to open and close seamlessly. This setup not only facilitates ventilation but also maintains the aesthetic integrity of the curved design.

When selecting hardware for bay and bow windows, consider factors such as material and finish. Opt for durable materials like stainless steel or brass, which can withstand the test of time and resist corrosion. Finishes like oil-rubbed bronze or brushed nickel can complement your home’s overall décor while providing the necessary function.

Incorporating the right bay and bow window hardware can elevate your home’s style, offering a perfect blend of form and function. With the proper installation, these windows can become a stunning focal point that not only enhances your living space but also allows you to enjoy the beauty of the outdoors from the comfort of your home.

9. Specialty Window Hardware

When it comes to window hardware, specialty items play a crucial role in enhancing both functionality and aesthetics, especially for unique or custom window designs. Specialty window hardware encompasses a diverse range of fittings and accessories that cater to specific needs, preferences, or architectural styles.

For instance, consider the beauty and practicality of specialty hinges designed for casement windows. These hinges not only allow for smooth operation but also provide a secure hold when the window is open, maximizing ventilation while ensuring safety. Similarly, specialized locks and latches, often crafted from durable materials like stainless steel or brass, offer enhanced security features tailored for large picture windows or sliding glass doors.

Another fascinating aspect of specialty window hardware is the variety of finishes and designs available. Whether you’re aiming for a sleek modern look with minimalist handles or a vintage charm with ornate decorative brackets, the right hardware can significantly enhance the overall appeal of your windows. Many manufacturers offer customizable options, allowing homeowners and builders to select colors, styles, and materials that seamlessly integrate with their interior and exterior designs.

Moreover, specialty window hardware can also include energy-efficient components, such as thermal breaks in window frames and specialized weather stripping. These features not only improve comfort by regulating indoor temperatures but also contribute to energy savings, making them an intelligent choice for environmentally-conscious homeowners.

In summary, incorporating specialty window hardware can elevate your window installations, providing tailored solutions that combine practicality, security, and aesthetic appeal. Whether you’re renovating an older home or building a new one, exploring specialty options is a key step in unlocking the full potential of your windows.

10. Materials Used in Window Hardware

When it comes to window hardware, the materials used can significantly influence both the functionality and aesthetic appeal of your windows. Understanding the different types of materials available will help you make informed decisions that align with your style preferences and practical needs.

**1. Aluminum:** Lightweight yet incredibly durable, aluminum is a popular choice for window hardware. It is resistant to rust and corrosion, making it ideal for both indoor and outdoor applications. Aluminum hardware can be finished in a variety of colors, allowing for customization to match any decor. Its sleek, modern look complements contemporary designs beautifully.

**2. Stainless Steel:** Known for its strength and resistance to tarnishing, stainless steel is often used in high-end window hardware. This material not only provides a polished finish that exudes elegance, but it also offers exceptional durability against the elements. Stainless steel is particularly suited for coastal areas where saltwater exposure can be a concern.

**3. Brass:** With its warm, golden hue, brass hardware brings a classic, timeless quality to windows. This material is often chosen for its aesthetic appeal, particularly in traditional or vintage-style homes. While brass can tarnish over time, many homeowners appreciate the patina it develops, adding character to their window fixtures.

**4. Plastic (PVC):** For a budget-friendly option, plastic window hardware is lightweight and resistant to moisture, making it a practical choice for areas with high humidity. While it may lack the robust aesthetic qualities of metal options, modern advancements have led to plastic hardware that mimics the look of more expensive materials, making it a versatile choice.

**5. Wood:** Wooden hardware can add a touch of warmth and natural beauty to any window. Often used in traditional or rustic designs, wood offers a unique charm but requires more maintenance than metal or plastic options. It’s essential to treat wooden hardware with protective finishes to prevent warping or decay over time, especially in humid environments.

Each material offers distinct advantages and can dramatically alter the overall look and functionality of your windows. By carefully considering the materials used in your window hardware, you can enhance not only the durability and performance of your windows but also their visual impact within your living space. Whether you gravitate toward the sleek lines of aluminum or the classic touch of brass, the right choice can unlock a world of possibilities for your home.

11. Understanding Window Locks and Security Features

When it comes to window hardware, security is paramount. Understanding the various types of window locks and security features available can significantly enhance the safety of your home. Not only do these components protect against unauthorized entry, but they also contribute to your peace of mind, knowing that your loved ones and belongings are safe.

**Types of Window Locks**
There are several popular types of window locks that cater to different window styles. For example, **sash locks**, commonly found on double-hung windows, work by securing the upper and lower sashes together, preventing them from being opened from the outside. **Sliding window locks**, on the other hand, are designed for horizontal sliding windows, featuring a simple latch that secures the window in place. **Keyed locks** provide an additional level of security, allowing you to lock your windows with a key, making it impossible for anyone to open them without authorization.

**Additional Security Features**
Beyond basic locking mechanisms, modern window hardware often incorporates various security features that bolster your home’s defense. One such feature is the **reinforced frame**, which makes it more difficult for intruders to force windows open. **Window pins** provide extra protection for double-hung windows, while **burglar bars** or **grilles** can act as a deterrent against break-ins for those seeking a more visible security measure.

In addition to these physical locks and barriers, consider the benefits of **smart window locks**. These innovative systems allow you to control and monitor your windows remotely via a smartphone app. You’ll receive alerts if a window is opened unexpectedly, and you can even lock or unlock your windows from anywhere, adding a layer of convenience and security.

**Choosing the Right Lock for Your Needs**
When selecting window locks and security features, consider the specific needs of your home and the level of security you desire. Factors such as window type, location, and potential vulnerability should guide your decision-making process. By investing in high-quality window locks and security features, you’re not only protecting your property but also enhancing the overall value and safety of your home. Remember, windows are often the first point of entry for intruders, so ensuring they are equipped with effective security measures is a crucial step in safeguarding your living space.

12. Installation Tips for Different Window Hardware Types

When it comes to installing window hardware, the approach can vary significantly based on the type you choose. Understanding these nuances not only ensures a smooth installation process but also enhances the functionality and longevity of your windows. Here are some practical tips tailored for different window hardware types.

**1. Casement Window Hardware:**
For casement windows, which are hinged at the side and open outward, it’s crucial to ensure a proper alignment of the hinges. Before installation, double-check that the window frame is square. Use a level to confirm the alignment and make necessary adjustments. When attaching the hardware, start with the hinges, and ensure they are securely fastened to both the window and the frame to allow for smooth operation.

**2. Sliding Window Hardware:**
Sliding windows require a different approach. Start by installing the track first. Make sure it is level and securely fastened to the frame. When fitting the rollers to the sliding sash, ensure they are positioned correctly for a snug fit in the track. After installation, test the sliding action before finalizing the hardware placement to avoid any misalignment issues.

**3. Double-Hung Window Hardware:**
For double-hung windows, which feature two operable sashes, installation requires attention to detail. Begin with the lower sash by attaching the balance system according to the manufacturer’s instructions. Next, install the upper sash, ensuring both sashes can move freely within their tracks. It’s advisable to use a shim to keep the sashes equally spaced, which will help prevent wear over time.

**4. Awning Window Hardware:**
Awning windows, hinged at the top and opening outward, require careful consideration of the operator mechanism. Ensure that the operator arm is mounted securely and that the window opens and closes smoothly. Additionally, check the weather stripping during installation to ensure a tight seal when the window is closed, enhancing energy efficiency.

**5. Specialty Window Hardware:**
For specialty windows, such as those with custom shapes or designs, consulting the manufacturer’s installation guidelines is imperative. These windows may require unique hardware configurations, and following specific instructions will help avoid issues down the line.

In all cases, make sure to have the right tools on hand, including a level, drill, screwdriver, and measuring tape. Preparing your workspace by removing any debris and ensuring a clean environment will facilitate a smoother installation process. Finally, don’t forget to take your time—rushing can lead to mistakes that might compromise the window’s performance. By adhering to these tips for each window hardware type, you can confidently achieve a successful installation that enhances the beauty and functionality of your space.

13. Maintenance and Care for Window Hardware

Proper maintenance and care for window hardware is crucial to ensure the longevity and optimal performance of your windows. Just as you wouldn’t ignore the upkeep of your vehicle or home appliances, your window hardware deserves the same attention. Regular maintenance not only keeps your windows looking their best but also prevents costly repairs down the line.

Start with a simple cleaning routine. Dust and grime can accumulate on window hardware, leading to corrosion and malfunction. Use a soft cloth and a mild detergent to wipe down all visible surfaces, paying special attention to hinges, locks, and handles. For stubborn dirt, a gentle scrub with a soft-bristled brush can work wonders. Make sure to rinse thoroughly and dry the hardware to prevent moisture buildup.

Inspecting your window hardware periodically is equally important. Look for signs of wear, such as rust on metal components or cracks in plastic parts. If you notice any damage, address it immediately to prevent further deterioration. Lubricating moving parts is essential as well; a silicone-based lubricant can help keep hinges and locks functioning smoothly, reducing the likelihood of squeaks and jams.

Additionally, keep an eye on the weatherstripping around your windows. This vital component helps maintain energy efficiency by creating a seal that prevents drafts. If you notice it becoming brittle or damaged, it’s time to replace it. This not only enhances your windows’ performance but also keeps your living space comfortable year-round.

Finally, consider seasonal maintenance. As the weather changes, so do the needs of your window hardware. In the fall, check for any debris that may have accumulated in the tracks or frames, while in spring, make sure that everything is functioning smoothly after the winter months. By adopting a proactive approach to maintenance, you’ll ensure your window hardware remains reliable and aesthetically pleasing, enhancing both the functionality and beauty of your home.

14. Trends in Window Hardware Design

As we step into a new era of interior design, window hardware is no longer merely functional; it has become a focal point of aesthetic expression. Today’s trends in window hardware design reflect a blend of innovation, sustainability, and personalization, catering to a diverse range of styles and preferences.

One of the most prominent trends is the move towards minimalism. Sleek, streamlined designs with clean lines and unobtrusive finishes are gaining popularity. Hardware in matte black, brushed nickel, or even natural finishes is favored for its ability to blend seamlessly with modern decor, creating a sense of cohesion throughout the space. This minimalist approach not only enhances visual appeal but also emphasizes the beauty of the windows themselves.

Sustainability is another significant trend shaping window hardware design. Consumers are increasingly seeking eco-friendly options that minimize environmental impact. Manufacturers are responding by offering hardware made from recycled materials or sustainably sourced wood. Additionally, energy-efficient designs that facilitate better insulation and temperature control are becoming a priority, as homeowners look to reduce their carbon footprint while maintaining comfort.

Customization is also on the rise, with many brands offering bespoke solutions that allow customers to choose the color, finish, and even style of their window hardware. This trend towards personalization enables homeowners to create a unique look that reflects their individual tastes and enhances the overall design of their spaces. Whether it’s opting for ornate, vintage-inspired designs or contemporary geometric shapes, the possibilities are endless.

Lastly, technology is making waves in the realm of window hardware. Smart window systems that can be controlled via apps or home automation systems are becoming more accessible. These innovations not only offer convenience but also enhance security, allowing homeowners to monitor and manage their windows from anywhere.

In summary, the trends in window hardware design are as dynamic as they are diverse, driven by a need for functionality, sustainability, and personal expression. As you consider your options, think about how these emerging styles can not only complement your windows but also elevate the entire ambiance of your home.

15. Conclusion: Choosing the Right Hardware for Your Windows

In conclusion, selecting the right hardware for your windows is a critical decision that impacts both the functionality and aesthetic appeal of your home. With a myriad of options available, from traditional hinges and handles to modern locks and stays, it is essential to consider several factors to ensure you make the best choice for your specific needs.

Begin by evaluating the style of your home. Are you aiming for a classic look that complements historic architecture, or do you prefer a sleek, minimalist approach for a contemporary space? The right hardware should harmoniously blend with your decor while providing the necessary support and security for your windows.

Next, think about the practical aspects. Consider the type of windows you have—whether they are casement, sliding, or double-hung—as different hardware types are designed for specific window mechanisms. Additionally, assess the materials used in your windows; some hardware is better suited for wooden frames, while others work best with vinyl or aluminum.

Don’t forget to factor in safety and security. Investing in durable locks and sturdy hinges can prevent unwanted entry and enhance your peace of mind. Look for hardware that meets safety standards and offers reliability for years to come.

Finally, keep in mind your budget. While it can be tempting to splurge on high-end options, there are plenty of quality, cost-effective solutions that don’t compromise on design or functionality.

Ultimately, the right window hardware enhances your home’s beauty while providing the security and ease of use you desire. Take the time to research, compare options, and consult with professionals if necessary, ensuring that your final choice is one that you will be satisfied with for years to come. With the right hardware in place, your windows will not only perform their essential functions but also elevate the overall charm of your home.

As we wrap up our comprehensive guide to window hardware types, we hope you feel empowered to make informed decisions that enhance both the functionality and aesthetics of your windows. Understanding the diverse array of hardware options—from traditional hinges to modern locks and decorative finishes—opens up a world of possibilities for creating the perfect ambiance in your home. Whether you’re embarking on a renovation project or simply looking to upgrade your existing windows, the right hardware can make all the difference. We encourage you to explore these options further and consider how they fit into your design vision. Thank you for joining us on this journey to unlock the potential of your windows; we can’t wait to see how you transform your spaces!

How to fix a broken window pane?

A broken window pane can be more than just an eyesore; it can compromise the safety and comfort of your home.

Whether it’s a result of an unfortunate accident, a sudden storm, or simply wear and tear over time, dealing with a shattered or cracked window can feel overwhelming. But fear not! With the right tools and a little bit of guidance, you can tackle this DIY project with confidence and restore your window to its former glory. In this step-by-step guide, we’ll walk you through the essential techniques and tips that professionals use to fix broken window panes efficiently and effectively. From assessing the damage and gathering materials to executing the repair with precision, you’ll discover everything you need to know to become a home repair hero. Say goodbye to that broken pane and hello to a secure and beautifully restored window!

1. Introduction: Understanding the Importance of Window Maintenance

How to fix a broken window pane?
Credit : whatcanu.com

Windows are often the unsung heroes of our homes, quietly serving their purpose while enhancing our living spaces. They not only allow natural light to flood in and provide stunning views of the outside world, but they also play a crucial role in the overall efficiency and safety of your home. A broken window pane, however, can disrupt this balance, leading to issues such as drafts, heat loss, and even security risks.

Understanding the importance of regular window maintenance is key to ensuring that your home remains comfortable and safe. Just like any other part of your house, windows require care and attention to prevent damage and prolong their lifespan. Regular checks can help you identify minor issues before they escalate into costly repairs, saving you time and money in the long run.

Moreover, maintaining your windows enhances your home’s curb appeal and can even increase its value. A well-maintained window not only improves aesthetics but also contributes to energy efficiency, helping to lower utility bills and reduce your carbon footprint. This is especially relevant in today’s world, where eco-conscious living is more important than ever.

In this guide, we will walk you through the steps of fixing a broken window pane, equipping you with the knowledge and skills needed to tackle this task like a pro. Whether it’s a small crack or a shattered pane, with the right approach, you can restore your windows to their former glory and ensure they continue to serve your home effectively for years to come. Let’s dive in and get started!

2. Safety First: Essential Safety Gear and Precautions

When it comes to repairing a broken window pane, safety should always be your top priority. handling glass can be hazardous, and taking the right precautions can prevent injuries and ensure a smooth repair process. Start by donning essential safety gear to protect yourself from potential hazards. Here’s what you’ll need:

1. **Safety Glasses**: Protect your eyes from flying glass shards and dust. A good pair of safety glasses will shield your vision from any unexpected accidents that might occur as you work.

2. **Gloves**: Thick, cut-resistant gloves are crucial for safeguarding your hands. They will not only protect you from sharp edges but also provide a better grip on tools and materials.

3. **Dust Mask**: If you’re working with older windows, there’s a chance you may encounter lead paint or dust particles. A dust mask will help filter out harmful particles and keep your lungs safe while working.

4. **Long Sleeves and Pants**: Wearing long sleeves and pants is an effective way to cover your skin and minimize the risk of cuts. Opt for durable fabrics that can withstand minor abrasions.

5. **Closed-Toe Shoes**: Ensure you’re wearing sturdy, closed-toe shoes for added foot protection. This is especially important if you drop any glass shards or tools during the repair.

Once you’re properly equipped, make sure to clear the surrounding area of any obstacles or tripping hazards. Lay down a drop cloth or tarp to catch any debris that may fall during the repair, making cleanup easier afterward. Additionally, keep pets and young children at a safe distance from the work area to prevent accidents.

Before you begin the actual repair, take a moment to assess the situation. Look for any exposed glass or sharp edges and ensure you’re prepared to handle them carefully. By taking these essential safety measures, you’ll set the stage for a successful repair while safeguarding yourself against potential injuries. With safety as your foundation, you’re now ready to tackle the next steps in fixing that broken window pane like a pro!

3. Tools and Materials Needed for the Job

How to fix a broken window pane?
Credit : whatcanu.com

Before diving into the repair process, it’s crucial to gather all the necessary tools and materials that will help you fix your broken window pane efficiently and safely. Having everything on hand will save you time and ensure a smoother workflow. Here’s what you’ll need:

1. **Safety Gear**: First and foremost, prioritize safety. Equip yourself with safety goggles to protect your eyes from glass shards, heavy-duty gloves to shield your hands, and a dust mask to avoid inhaling any debris.

2. **Measuring Tape**: A measuring tape is essential for accurately sizing the broken pane and ensuring that your replacement glass fits perfectly into the frame.

3. **Utility Knife**: This will come in handy for cutting away any old paint or putty surrounding the broken pane, allowing for a clean removal and a smooth installation of the new glass.

4. **Putty Knife**: A putty knife is useful for applying new putty and smoothing it out once the replacement glass is in place.

5. **Replacement Glass**: Of course, you’ll need a piece of glass that matches the dimensions of your broken pane. If you’re unsure where to buy it, local hardware stores or glass supply shops are great options.

6. **Glazing Putty**: This is a crucial material for sealing the new glass into the frame. It helps to create a weather-tight seal while also providing stability.

7. **Glazing Points or Clips**: These small metal pieces are used to secure the glass in place. Depending on your window frame, you may need either glazing points or clips to hold the new pane securely.

8. **Hammer**: A hammer is necessary for gently tapping in glazing points or securing any loose components of the window frame.

9. **Caulk or Weather Stripping (Optional)**: If your window has gaps or needs extra insulation, caulk or weather stripping can help improve its energy efficiency.

Once you have all these tools and materials ready, you’ll be well-equipped to tackle your window pane repair like a true professional. Remember, preparation is half the battle, and having the right supplies at your fingertips will make the job not only easier but also more enjoyable.

4. Assessing the Damage: Identifying the Type of Break

Before you dive into repairs, it’s crucial to assess the damage thoroughly. Identifying the type of break in your window pane will help you determine the best course of action and whether you can tackle the fix yourself or if you should call in a professional.

Start by examining the glass closely. Is it a clean break, or is the glass shattered into a multitude of tiny pieces? A clean break often indicates that you can simply replace the pane, while a shattered window may require additional steps for safe removal. If the break is minor, with only a small crack or chip, you might be able to utilize a repair kit designed for glass. However, if the damage extends beyond a small area, it’s likely time for a full pane replacement.

Next, consider the frame. Is it wood, aluminum, or vinyl? Wooden frames may have warped or rotted, requiring not only a glass replacement but also some carpentry work. Aluminum frames can bend or dent, while vinyl frames are generally more durable but can still incur damage.

Don’t forget to check for any potential hazards as well. Are there sharp edges or loose shards that could pose a risk? Wearing heavy-duty gloves and safety goggles is paramount at this stage to protect yourself. By accurately assessing the type of break and the condition of the frame, you can move forward with confidence, knowing exactly what materials and tools you’ll need for your repair job. Remember, a careful evaluation now can save you time and hassle later on as you work to restore your window to its former glory.

5. Preparing the Area: Clearing the Workspace

How to fix a broken window pane?
Credit : whatcanu.com

Before you dive into the repair process, it’s essential to prepare the area where you’ll be working. A clean, organized workspace not only enhances safety but also ensures that you have everything you need within reach, making the repair go smoothly. Start by clearing away any furniture, plants, or decorations that might obstruct your access to the broken window. If you’re working indoors, consider moving items that could be inadvertently damaged by falling glass or dust.

Next, lay down a drop cloth or old newspapers beneath the window to catch any debris or shards that may fall during the repair. This will make cleanup easier and protect your flooring from scratches or stains. If you’re working outside, ensure the area is free of any clutter that could pose a tripping hazard.

Safety should always be your top priority, so don your protective gear before proceeding. Put on safety goggles to shield your eyes from sharp glass fragments and gloves to protect your hands from cuts. If the window is particularly large or high, you might also want to use a sturdy ladder for better access. By taking the time to prepare your workspace, you set the stage for a successful repair, allowing you to focus on the task at hand without distractions or safety concerns. With your area clear and organized, you’ll be ready to tackle the next steps with confidence.

6. Removing the Broken Glass: Step-by-Step Instructions

Removing the broken glass from a window pane can seem daunting, but with the right tools and a careful approach, you can tackle this task like a pro. Here’s a step-by-step guide to ensure you do it safely and effectively.

**Step 1: Gather Your Tools and Safety Gear**
Before you begin, make sure you have a few essential tools on hand: heavy-duty gloves, safety goggles, a flathead screwdriver or putty knife, pliers, and a trash bag for disposal. Wearing gloves and goggles is crucial to protect yourself from sharp glass shards.

**Step 2: Assess the Damage**
Take a moment to inspect the broken window. If there are large shards still held in place, it’s best to leave them alone for now. If the glass has shattered into smaller pieces, you may need to remove the entirety of the pane.

**Step 3: Remove Loose Glass**
Carefully clear away any loose glass from the window frame. Use your gloved hands to pick up smaller pieces, and for larger shards, gently push them towards the center of the pane with your putty knife or flathead screwdriver. This helps to minimize the risk of injury.

**Step 4: Take Out the Glazing Points**
Look for the small metal glazing points or clips that hold the glass in place. Using your flathead screwdriver, gently pry these out from the frame. Be careful not to damage the surrounding wood or material as you do this.

**Step 5: Remove the Glass Pane**
Once the glazing points are removed, it’s time to take out the broken glass pane. If the pane is still partially intact, carefully lift it out from the frame. If it’s in pieces, use your pliers to grip the edges of each shard and pull them out one by one. Make sure to dispose of these pieces in your trash bag immediately to prevent any accidents.

**Step 6: Clean the Frame**
With the broken glass removed, take a moment to clean the window frame. Use a damp cloth to wipe away any debris or glass dust. This step ensures a clean working area for your new glass pane installation.

**Step 7: Dispose of the Broken Glass Properly**
Finally, securely wrap the broken glass in newspaper or other protective material before placing it in the trash bag. This precaution prevents any injuries to you or sanitation workers who handle the waste.

By following these steps, you can safely remove a broken window pane and prepare your frame for a new installation. With patience and care, you’ll be well on your way to restoring your window to its former glory.

7. Measuring and Cutting the New Glass Pane

How to fix a broken window pane?
Credit : whatcanu.com

When it comes to replacing a broken window pane, precision is key. The seventh step in our guide, measuring and cutting the new glass pane, requires careful attention to detail to ensure a snug fit that keeps your home secure and energy-efficient.

Start by taking accurate measurements of the window frame. Use a tape measure to record the height and width of the opening, making sure to measure at multiple points, as frames can sometimes be slightly warped. Take the smallest measurement to ensure your new glass fits perfectly. It’s a good idea to jot down your measurements on a notepad or use your smartphone to avoid any mix-ups.

Once you have your dimensions, it’s time to select the right glass. Choose tempered or laminated glass for added durability, especially if the window is in a high-traffic area or if safety is a concern. With your glass type decided, head to a local hardware store or glass supplier. Many places can cut the glass to your specifications, simplifying the process. If you prefer to cut the glass yourself, make sure to pick up a glass cutter, straight edge, and safety goggles.

To cut the glass, lay it flat on a sturdy surface, ideally a workbench or table covered with a soft cloth to prevent scratches. Align your straight edge with the measurement you recorded, ensuring it is perfectly straight. With firm pressure, score the glass along the edge of the straight edge, creating a shallow incision. Remember to apply even pressure and make a single, continuous motion for the best result. Once scored, gently press down on both sides of the score line to snap the glass cleanly apart.

Finally, smooth the edges of the newly cut glass with a fine-grit sandpaper to eliminate sharp edges that could pose a hazard. With your new pane ready, you’re one step closer to restoring your window to its former glory. This critical phase of the repair not only showcases your precision but also sets the stage for a secure and visually pleasing installation.

8. Preparing the Frame for the New Glass

Before you can insert the new glass pane, it’s crucial to prepare the window frame meticulously. This step is vital to ensure a snug fit and a long-lasting repair, so let’s walk through the process.

Start by inspecting the frame for any debris, old putty, or damaged materials that might hinder the new glass from sitting properly. Carefully remove any remnants of the old glazing compound using a putty knife. Be cautious during this process—too much force can damage the frame or cause splinters. If you encounter stubborn pieces, a heat gun can help soften the putty, making it easier to scrape away.

Once the old putty is cleared, examine the frame for any imperfections or damage. If you spot any cracks or rotting wood, it’s essential to address these issues before proceeding. You can fill small cracks with wood filler and sand them down to create a smooth surface. For larger damage, you might need to replace sections of the frame or even consider a professional repair if the damage is extensive.

Next, clean the frame thoroughly to remove dust and debris. A clean surface allows for better adhesion of the new glazing. If you’re working with a wooden frame, consider applying a coat of primer to protect it from moisture and enhance the bond with the new putty.

Finally, measure the opening carefully to ensure your new glass pane fits perfectly. Take your time with this measurement—precision is key! With the frame prepped and ready, you’ll be all set for the next step: installing the new glass. This preparation not only sets the stage for a secure fit but also ensures that your window will look as good as new, maintaining both functionality and aesthetic appeal.

9. Installing the New Glass Pane: Techniques for a Secure Fit

Installing the new glass pane is a crucial step in ensuring your repair stands the test of time. With the right techniques, you can achieve a secure fit that not only enhances the aesthetic appeal of your window but also provides insulation and protection against the elements. Here’s how to do it like a pro.

**Prepare the Frame:** Before inserting the new glass, ensure the window frame is clean and free of any debris or old putty. Use a putty knife to scrape away remnants of the old glazing compound and sand down any rough edges. This creates a smooth surface for the new pane to rest against, allowing for a better seal.

**Apply a Glazing Compound:** Once the frame is prepped, it’s time to apply a bead of glazing compound. This will act as a cushion and sealant for your new glass. Using your putty knife, spread a generous yet even layer along the frame where the glass will sit. Make sure to cover the edges thoroughly, as this will help secure the glass and prevent drafts.

**Carefully Place the Glass Pane:** With the glazing compound in place, gently lift your new glass pane and position it into the frame. Take your time to ensure it’s seated evenly against the compound. It’s important to handle the glass carefully to avoid any chips or cracks during this process.

**Secure the Glass with Points:** To hold the glass in place, use glazier points—small metal tabs designed to keep the glass from shifting. Insert these points into the frame, spaced about 6 inches apart, using a putty knife or a small hammer. Press each point gently into the frame until they are flush with the surface. This will provide additional stability for the glass.

**Final Touches with Glazing Compound:** Once the glass is secured, it’s time to seal the edges. Apply another layer of glazing compound around the perimeter of the glass, ensuring it fills any gaps between the glass and the frame. Smooth it out with your putty knife for a clean finish. This not only enhances the window’s appearance but also provides insulation and protection against moisture.

**Let it Cure:** Finally, allow the glazing compound to cure according to the manufacturer’s instructions—usually a few days. During this time, avoid putting any pressure on the glass or reattaching any window hardware. This curing period is essential for achieving a solid, long-lasting repair.

By following these techniques, you’ll not only secure your new glass pane but also gain the satisfaction of completing a professional-quality repair. Whether it’s for a small crack or a complete replacement, proper installation is key to maintaining the integrity of your windows and the comfort of your home.

10. Sealing the Edges: Ensuring Weather Resistance

Sealing the edges of your newly installed window pane is a crucial step in ensuring long-lasting durability and optimal weather resistance. This final touch not only enhances the aesthetic appeal of your window but also protects your home from the elements, preventing drafts, moisture, and pests from invading your space.

Begin by selecting a high-quality weatherproof caulk suitable for your window type—silicone or polyurethane caulk are popular choices due to their flexibility and strength. Before applying, make sure the surface is clean and dry. Use a utility knife or scraper to remove any old caulk or debris from the edges of the frame, ensuring a smooth surface for adhesion.

Once prepped, cut the tip of the caulk tube at a 45-degree angle, making a small opening to control the flow. Load the caulk into a caulking gun for easier application. Start at one corner of the window and apply a continuous bead of caulk along the edges, working your way around. It’s important to maintain even pressure on the trigger to produce a consistent line of caulk.

After applying the caulk, use your finger or a caulking tool to smooth the bead, pressing it firmly into the gap between the window frame and the glass. This not only ensures a tight seal but also creates a polished finish that enhances the overall look of your window.

Allow the caulk to cure as per the manufacturer’s instructions, which typically takes 24 hours. Once it’s fully set, your window will be not only beautifully framed but also ready to withstand whatever Mother Nature throws its way. By sealing the edges effectively, you’ll enhance your home’s energy efficiency, reduce maintenance costs, and enjoy peace of mind knowing your window is protected from water infiltration and air leakage for years to come.

11. Finishing Touches: Painting and Touching Up the Frame

Once your new window pane is securely in place and the putty has dried, it’s time to turn your attention to the finishing touches that will restore your window frame to its former glory. This step not only enhances the aesthetic appeal of your window but also protects the wood from the elements.

Start by inspecting the window frame for any signs of wear and tear. If the wood has chipped or the paint has peeled, a light sanding will help create a smooth surface for painting. Use fine-grit sandpaper to gently buff any rough spots, ensuring you don’t damage the new glazing. Wipe away any dust with a damp cloth to prepare the surface for paint.

Next, select a high-quality exterior paint that matches the existing color of your window frame. If you’re feeling adventurous, this could also be the perfect opportunity to refresh the color! Using a small brush, apply a thin layer of paint to the frame, starting from the edges and working your way inward to avoid drips. Be sure to paint any corners and crevices thoroughly for a neat finish. If necessary, a second coat may be applied after the first has dried completely, providing a richer color and better protection.

For added protection against moisture, consider applying a clear sealant over the painted surface once it has dried. This will help extend the lifespan of your paint job and keep your frame looking fresh for years to come.

Finally, take a step back and admire your handiwork. The finishing touches not only complete the repair but also enhance the overall look of your home. With a little patience and attention to detail, you’ve transformed a broken window pane into a beautifully restored feature that adds character and charm to your space.

12. Cleaning Up: Proper Disposal of Broken Glass

Once you’ve successfully replaced the broken window pane and admired your handiwork, it’s time to address the remnants of your project: the shattered glass. Proper disposal of broken glass is not just a matter of convenience; it’s crucial for safety. Sharp shards can pose a serious risk, not only to you but also to anyone else who may come across them.

Start by carefully collecting the larger pieces of glass. Use a pair of sturdy gloves to protect your hands from cuts, and consider using a thick towel or a piece of cardboard to scoop up the shards. Avoid using your bare hands, as even the smallest pieces can be dangerously sharp. Place the larger glass fragments into a sturdy, puncture-resistant container—an old coffee can or a heavy-duty plastic bag works well. Seal the container tightly to prevent any accidental spills.

For the tiny slivers and dust that remain, a damp paper towel or cloth can be your best ally. Gently wipe down the area surrounding the window frame, ensuring that you capture as many of the minuscule shards as possible. Once you’ve thoroughly cleaned the area, dispose of the used paper towels in your puncture-resistant container.

To complete the cleanup, check your surrounding environment for any stray pieces of glass that may have fallen during the repair. Take a moment to scan the floor and nearby surfaces, ensuring the area is completely safe for everyone. Finally, dispose of the sealed container in accordance with your local waste management guidelines. Many municipalities have specific instructions for disposing of broken glass, so be sure to check those to avoid any penalties.

By taking the time to clean up properly, you not only enhance your own safety but also demonstrate responsibility in your DIY endeavors. With everything tidied up, you can step back and admire your finished project, knowing you handled the task like a true professional!

13. Tips for Preventing Future Breaks

Preventing future breaks in your window panes is essential not only for maintaining the aesthetic appeal of your home but also for ensuring safety and energy efficiency. Here are some practical tips that can help you safeguard your windows against potential damage:

1. **Invest in Quality Materials**: When replacing a broken pane or installing new windows, choose high-quality glass and sturdy frames. Tempered glass, for instance, is much more resistant to impact and can withstand extreme weather conditions, reducing the likelihood of future breaks.

2. **Regular Maintenance**: Make window maintenance a routine task. Check for signs of wear and tear, such as cracks in the frames or seals. Ensure that the caulking is intact to prevent water infiltration, which can weaken the structure over time. Regularly clean your windows, as dirt and debris can contribute to scratches and potential fractures.

3. **Install Screens**: If you have windows that open, consider installing screens. Not only do they keep insects at bay, but they also act as a protective barrier against flying debris during windy conditions. Screens can help reduce the risk of accidental impacts, particularly in stormy weather.

4. **Be Mindful of Landscaping**: Keep trees and bushes trimmed away from your windows. Overhanging branches can pose a risk during storms, and falling debris can easily shatter glass. Additionally, ensure that decorative elements like garden ornaments or furniture are placed away from window areas to minimize the chances of accidental bumps.

5. **Window Films**: Applying a protective window film can be an effective way to enhance their durability. These films can help hold shattered glass in place in the event of a break, reducing the risk of injury and preventing further damage. They also provide an additional layer of insulation, helping to maintain your home’s energy efficiency.

6. **Educate Your Family**: Make sure everyone in your household is aware of how to treat windows with care. Teach children not to play rough near windows and to avoid throwing objects in close proximity. Awareness is key in preventing accidental breaks.

7. **Consider Security Measures**: Installing security features, such as window locks or security cameras, can deter potential break-ins that may lead to broken panes. A secure home is less likely to experience random acts of vandalism or accidental damage.

By taking these proactive measures, you can significantly reduce the likelihood of future window breaks, ensuring that your home remains safe, energy-efficient, and visually appealing for years to come.

14. When to Call a Professional: Knowing Your Limits

While tackling a broken window pane can be a rewarding DIY project, there are certain situations where calling in a professional is not just advisable, but necessary. Recognizing your limits is key to ensuring the job is done safely and effectively.

First and foremost, assess the extent of the damage. If the break is a small crack, you might be able to handle it with a simple repair kit. However, if the glass is shattered into countless pieces or the frame is severely damaged, it may be time to reach for the phone. Professionals possess the skills and tools required to manage more complex repairs, ensuring that your window is restored to its original condition without jeopardizing your safety.

Additionally, consider your level of experience. If you’ve never worked with glass before, the prospect of handling sharp shards and heavy materials can be daunting. Professionals are trained to deal with these hazards, minimizing the risk of injury and ensuring the job is completed without mishaps.

Another factor to consider is the type of window. Specialty glass, such as stained or insulated panes, often requires specific expertise to repair. If your window falls into this category, opting for a professional is wise. They can also advise you on whether a complete replacement is necessary, saving you time and potential extra costs down the line.

Lastly, think about your timeline. If you need the repair done quickly to secure your home or office, a professional service can expedite the process, offering prompt solutions that you may not be able to achieve as a DIYer.

In summary, knowing when to call a professional can save you time, ensure your safety, and provide peace of mind. When in doubt, trust the experts to get the job done right. Your windows—and your home—will thank you.

15. Conclusion: The Satisfaction of a Job Well Done

In the world of home repairs, few tasks are as gratifying as fixing a broken window pane. As you stand back to admire your handiwork, a sense of accomplishment washes over you. Not only have you restored functionality and aesthetics to your home, but you’ve also gained valuable skills that will serve you well in future DIY endeavors.

Completing a project like this instills confidence and reinforces the notion that with a bit of patience and the right tools, you can tackle a wide range of repairs. Remember, each step you followed—from measuring the glass and removing the old pane to securing the new one and sealing it tight—was an opportunity to learn and grow.

Moreover, the satisfaction of a job well done extends beyond just the immediate results. You’ve invested time, effort, and care into your living space, enhancing both its value and your personal connection to it. Plus, there’s something undeniably rewarding about knowing you’ve saved money by avoiding costly professional repairs.

As you close the chapter on this project, take a moment to appreciate the transformation. Reflect on how far you’ve come and envision the next repair or upgrade you’ll take on. With every fix, you become more adept, more resourceful, and more empowered to maintain and beautify your home. So, celebrate this victory, and let it inspire you to tackle future projects with the same enthusiasm and determination. After all, the journey of home improvement is as fulfilling as the results it yields.

In conclusion, we hope this step-by-step guide has empowered you to tackle the task of fixing a broken window pane with confidence and ease. By following these professional tips and techniques, you can not only restore your window’s functionality but also enhance the beauty and energy efficiency of your home. Whether you’re a seasoned DIY enthusiast or a first-time fixer, remember that every repair is an opportunity to learn and improve your skills. So gather your tools, roll up your sleeves, and take pride in transforming your broken window into a flawless feature of your home. Happy repairing, and don’t hesitate to share your success stories or any questions you may have!

What are the best ways to add greenery to your home?

In a world increasingly dominated by concrete and technology, the desire to connect with nature has never been more pronounced.

Bringing the outside in isn’t just a design trend; it’s a refreshing lifestyle choice that transforms our living spaces into serene sanctuaries filled with life and vitality. Incorporating greenery into your home not only enhances aesthetic appeal but also improves air quality and promotes a sense of well-being. Whether you have a sprawling house or a cozy apartment, there are countless creative ways to infuse your environment with the beauty of nature. From hanging planters and vertical gardens to stylish terrariums and succulents, this blog post will inspire you with innovative ideas to create your own indoor oasis. Join us as we explore the myriad of options for enriching your home with lush greenery, helping you cultivate a space that is both inviting and invigorating.

1. The Benefits of Indoor Plants

What are the best ways to add greenery to your home?
Credit : whatcanu.com

Indoor plants are not just a trendy addition to your home decor; they offer a plethora of benefits that can enhance your living space in various ways. First and foremost, they improve air quality. Plants absorb carbon dioxide and release oxygen, making the air in your home cleaner and fresher. Certain varieties, like peace lilies and spider plants, are particularly effective at filtering out toxins and pollutants, creating a healthier environment for you and your family.

Beyond their air-purifying capabilities, indoor plants also contribute to your mental well-being. Studies have shown that greenery can reduce stress, boost mood, and even increase productivity. The presence of plants is known to promote feelings of calm and relaxation, making your living space a sanctuary from the hustle and bustle of daily life. Whether it’s the soothing sight of a lush fern or the vibrant colors of blooming orchids, these natural elements can create a sense of peace.

Additionally, indoor plants can enhance the aesthetic appeal of your home. They bring a touch of nature indoors, adding texture, color, and life to your rooms. From towering fiddle leaf figs in the corner of your living room to delicate succulents on your windowsill, the variety of shapes and sizes can complement any decor style, making your space feel more inviting and vibrant.

Moreover, indoor gardening can be a rewarding hobby that fosters a deeper connection with nature. Caring for plants can be a form of mindfulness, allowing you to slow down and appreciate the little joys of life. The act of nurturing a living thing can also provide a sense of accomplishment and purpose, especially when you witness your plants thrive and flourish.

In summary, incorporating indoor plants into your home is a win-win situation. You not only beautify your space but also enrich your life with cleaner air, improved mental health, and a gratifying hobby. So, as you embark on your journey of bringing the outside in, remember that each green addition is a step toward creating a healthier and more vibrant home.

2. Choosing the Right Plants for Your Space

When it comes to transforming your home into a lush, green oasis, choosing the right plants is crucial. The ideal plant should not only complement your interior design but also thrive in the specific conditions of your space. Start by assessing the natural light available in each room. bright, sunny areas can accommodate sun-loving varieties like succulents, cacti, or vibrant flowering plants, while lower-light spaces may be best suited for hardy options like snake plants or pothos, which can flourish even in dim corners.

Next, consider the size of the plants in relation to your space. Large statement pieces, such as fiddle leaf figs or rubber trees, can serve as striking focal points in a spacious living room, while smaller plants, like air plants or mini ferns, can be used to create charming vignettes on shelves or coffee tables. Don’t forget about your lifestyle, too; if you have pets or young children, opt for non-toxic varieties to ensure safety for all family members.

Additionally, think about the maintenance level each plant requires. If you’re a busy individual with limited time for plant care, choose low-maintenance options that require minimal watering and care. Many of these resilient plants not only look beautiful but also help purify the air, contributing to a healthier living environment.

By thoughtfully selecting plants that fit your space, lifestyle, and aesthetic preferences, you can effortlessly bring the outside in, creating a vibrant sanctuary that not only enhances the beauty of your home but also nurtures your well-being.

3. Creative Plant Display Ideas

What are the best ways to add greenery to your home?
Credit : whatcanu.com

When it comes to incorporating greenery into your home, the way you display your plants can be just as important as the plants themselves. Creative plant display ideas not only elevate the aesthetic of your space but also showcase your personal style. Here are some innovative ways to showcase your leafy companions.

**1. Vertical Gardens:** Transform an empty wall into a lush green canvas by creating a vertical garden. Use a variety of wall-mounted planters or pocket planters that allow you to hang small pots filled with herbs, succulents, or trailing vines. This not only saves space but also adds a stunning focal point that invites nature indoors.

**2. Shelving Units:** Consider repurposing an old bookshelf or installing open shelves to create a mini indoor jungle. Mix and match plant sizes and types on the shelves, incorporating decorative pots that complement your home decor. This layered approach adds depth and interest, turning your plants into a dynamic display.

**3. Hanging Planters:** Utilize the vertical space in your home by incorporating hanging planters. Whether you choose macramé hangers, decorative ceramic pots, or sleek metal containers, dangling greenery can create an enchanting atmosphere. Position them near windows or in corners to draw the eye upward and create a sense of airiness.

**4. Terrariums:** For a unique touch, try creating a terrarium—a miniature garden housed within a glass container. These self-contained ecosystems can be customized with various plants, stones, and decorations to reflect your personality. They make for beautiful centerpieces on coffee tables or accent pieces on shelves.

**5. Plant Stands:** Elevate your plants with stylish plant stands that add height and dimension to your displays. Choose from a variety of materials, such as wood, metal, or ceramic, to match your decor. Stacking different heights together can create an eye-catching arrangement that draws attention to your favorite greenery.

By experimenting with these creative plant display ideas, you can bring the outside in and create a vibrant, inviting atmosphere in your home. Not only will your space feel more alive, but the thoughtful arrangement of plants will also inspire you to nurture your green thumb and enjoy the beauty of nature indoors.

4. Vertical Gardening: Maximizing Space with Greenery

Vertical gardening is a game-changing trend that allows you to transform even the smallest of spaces into lush, green havens. If you’re limited on floor space or live in an apartment with minimal access to a garden, this innovative approach enables you to maximize your environment by utilizing vertical surfaces—walls, fences, and even balconies—effectively turning them into living art.

One of the key benefits of vertical gardening is its ability to create a stunning visual impact. Imagine a wall adorned with cascading vines, vibrant flowers, or an array of herbs, each adding texture and color to your home. Living walls can serve as beautiful focal points in your living room or kitchen, bringing an element of nature inside and enhancing your décor with organic beauty.

To get started, consider using wall-mounted planters, trellises, or even repurposed items like pallets or shoe organizers. Choose plants that thrive in vertical arrangements, such as ferns, succulents, or climbing varieties like ivy and jasmine. Herbs like basil and mint not only look great but also provide a fresh supply for your culinary endeavors.

For those looking to take it a step further, installing a hydroponic system can revolutionize your vertical gardening experience. This soil-less method allows plants to grow in nutrient-rich water, giving you the ability to cultivate a wide range of greenery in smaller spaces without the mess of traditional gardening.

In addition to the aesthetic appeal, vertical gardens can also improve air quality and promote a sense of tranquility in your home. The presence of greenery has been shown to reduce stress and enhance overall well-being, making your indoor environment not just more beautiful, but healthier too.

Embrace the art of vertical gardening and watch as your home transforms into a vibrant sanctuary filled with life, all while making the most out of your available space. Whether you opt for a simple DIY project or a sophisticated indoor garden system, the possibilities are endless, and the rewards are undeniably refreshing.

5. Using Plants as Natural Dividers

What are the best ways to add greenery to your home?
Credit : whatcanu.com

Using plants as natural dividers is an innovative and visually striking way to define spaces within your home while simultaneously enhancing its aesthetic appeal. Unlike traditional room dividers or bulky furniture, greenery introduces a refreshing touch that brings the outdoors in, creating a serene and inviting atmosphere.

Imagine a spacious open-plan living area where a tall, leafy fiddle leaf fig or a cascading pothos subtly delineates the dining space from the living room. These vibrant plants not only serve a functional purpose but also add a layer of texture and color, creating a seamless transition between areas without the need for walls.

For smaller spaces, consider using a collection of smaller plants arranged on a stylish plant stand or shelf. This creates a tiered effect that can visually separate zones while still allowing light to flow through. Additionally, vertical gardens or wall-mounted planters can transform bare walls into lush green canvases, offering both privacy and style without sacrificing floor space.

In outdoor areas, large potted plants can effectively create cozy nooks on balconies or patios. Strategically placed, they can offer a sense of enclosure, making these spaces feel more intimate and inviting.

When selecting plants for this purpose, consider options that thrive in the lighting conditions of your home. Tall, architectural plants like snake plants or palms work beautifully in corners, while trailing plants like ivy or string of pearls can soften edges and create a more organic feel.

By incorporating plants as natural dividers, you not only enhance your home’s decor but also promote a healthier living environment. Foliage can improve air quality, reduce stress, and elevate your mood, making your home a true sanctuary. Embrace the beauty of nature and let your interior spaces flourish!

6. DIY Planters: Personalizing Your Green Space

Creating your own DIY planters is a delightful way to add a personal touch to your green space while showcasing your creativity. Not only do these planters provide a unique aesthetic, but they also allow you to express your style and preferences in your home décor. The process can be both rewarding and relaxing, making it an ideal weekend project for plant lovers and DIY enthusiasts alike.

Start with materials you have on hand or visit your local craft store for inspiration. Wooden crates, terracotta pots, repurposed tin cans, or even old shoes can transform into charming planters with just a bit of imagination. Consider painting or staining your containers in vibrant colors or subtle pastels to complement your interior design. Adding stencils or hand-painted designs can elevate the look, making each planter a small work of art.

For a more rustic feel, try using natural materials like woven baskets or driftwood to create an organic look. You can also experiment with vertical planters by stacking small pots or utilizing a pallet to create a living wall, maximizing your space while adding depth to your decor.

Don’t forget to incorporate drainage holes in your planters if necessary, as this will help keep your plants healthy and thriving. Once your planters are ready, choose plants that resonate with your style—succulents, herbs, or colorful flowers can all add vibrancy and life to your home.

By personalizing your planters, you not only create a unique green oasis within your living space but also cultivate a sense of pride in your home. Each time you look at your DIY creations, you’ll be reminded of your creativity and the joy that greenery brings to your environment. So gather your supplies, unleash your imagination, and let your indoor garden flourish!

7. Incorporating Plants into Your Decor Style

What are the best ways to add greenery to your home?
Credit : whatcanu.com

Incorporating plants into your decor style is not just about adding a splash of color; it’s about creating a vibrant atmosphere that breathes life into your home. Whether you lean towards a minimalist aesthetic, modern chic, rustic charm, or bohemian flair, there are countless ways to seamlessly integrate greenery into your spaces.

For a minimalist approach, consider using a single statement plant, such as a tall fiddle leaf fig or a sleek snake plant, placed strategically in a corner or beside a piece of furniture. This not only adds height and interest but also maintains a clean, uncluttered look. Alternatively, if your style is more eclectic, mix and match a variety of smaller plants—succulents, air plants, or trailing vines—displayed in an array of colorful pots on shelves, windowsills, or hanging from the ceiling. This creates a playful and inviting atmosphere.

For those who appreciate a rustic vibe, think about using reclaimed wood planters or vintage pots to house your greenery. Herbs like rosemary and thyme can thrive in a kitchen window, not only adding a fragrant touch but also serving as a functional element in your cooking. Meanwhile, a macramé plant hanger can add a trendy bohemian twist, allowing trailing plants like pothos or string of hearts to cascade beautifully.

Moreover, don’t forget the power of wall-mounted planters. These can serve as living art pieces, transforming a blank wall into a lush vertical garden. When choosing plants, consider their light requirements and growth patterns to ensure they thrive in their designated spots.

By thoughtfully incorporating plants that resonate with your decor style, you create a cohesive look that enhances the aesthetic of your home while fostering a calming and revitalizing environment. Embrace the myriad of textures and colors that plants offer, and watch as your space transforms into a sanctuary of greenery.

8. The Role of Light in Plant Placement

When it comes to incorporating greenery into your home, understanding the role of light in plant placement is crucial for both aesthetics and plant health. Different plants have varying light requirements, and recognizing these needs can make all the difference in creating a thriving indoor garden.

Natural light floods through your windows, creating a vibrant canvas that can enhance the beauty of your plants. For instance, succulents and cacti thrive in bright, direct sunlight, making a south-facing window the perfect spot for them to bask in their glory. Their striking shapes and colors can become focal points, adding a touch of the desert to your living space.

On the other hand, if you have a cozy nook that receives only filtered light, consider plants like snake plants or pothos. These resilient varieties not only tolerate lower light conditions but also bring a lush, cascading effect that softens the edges of a room. Their ability to purify the air is an added bonus, making them an excellent choice for bedrooms or home offices.

Moreover, understanding the movement of the sun throughout the day can help you strategically place your plants for optimal growth. Rotate your pots periodically to ensure even exposure, which can help prevent uneven growth and keep your greenery looking lush and full.

Additionally, consider incorporating grow lights for areas that lack sufficient natural light. These artificial lights can mimic the sun’s rays, allowing you to expand your botanical horizons without the constraints of your home’s lighting conditions.

In summary, thoughtfully considering the light requirements of your plants not only promotes their health but also enhances your home’s aesthetic. By strategically placing greenery based on light accessibility, you can create a harmonious balance that breathes life into any room, fostering an inviting atmosphere that bridges the gap between the indoors and the great outdoors.

9. Terrariums: Bringing a Mini Ecosystem Indoors

Terrariums are a captivating and enchanting way to bring the beauty of nature into your home, offering a miniature ecosystem that thrives within the confines of glass. These self-sustaining gardens, often housed in jars or geometric containers, not only add a touch of greenery to your space but also serve as a stunning focal point that sparks conversation.

Creating a terrarium is an art form that combines creativity with a basic understanding of plant care. Start with a clear glass container, which can range from simple mason jars to intricate hanging globes or even larger display cases. The beauty of terrariums lies in their versatility; you can design a lush tropical paradise, a dry desert landscape with succulents, or even a whimsical fairy garden with tiny figurines nestled among the foliage.

The layering process is essential to ensure the health of your plants. Begin with a drainage layer, such as small pebbles or activated charcoal, to prevent water from stagnating and causing root rot. Follow this with a layer of soil suitable for your chosen plants, allowing enough space for their roots to spread. When selecting plants, consider varieties that thrive in enclosed environments, such as ferns, mosses, and small air plants, which will flourish in the humidity of the terrarium.

Once assembled, the closed environment of a terrarium creates its own microclimate, making it a low-maintenance option for the busy urban dweller. The glass acts as a greenhouse, trapping moisture and heat, allowing the plants to photosynthesize and thrive with minimal intervention. Just remember to periodically check for condensation and give your terrarium some indirect sunlight to keep your mini ecosystem healthy.

Beyond their aesthetic appeal, terrariums also serve as a reminder of the wonders of nature, bringing a slice of the outdoors into your daily life. Whether placed on a coffee table, desk, or windowsill, these living artworks invite tranquility and natural beauty into your home, making them an ideal addition for anyone looking to enhance their space with a touch of green.

10. Edible Plants: Growing Herbs and Veggies at Home

Incorporating edible plants into your home not only enhances your décor but also invites the delightful benefits of fresh herbs and vegetables right to your kitchen. Imagine snipping a sprig of basil or plucking a ripe tomato just moments before adding them to your favorite dish. Growing your own herbs and veggies is a rewarding endeavor that combines aesthetics with functionality.

Start small by selecting a few easy-to-grow herbs like basil, mint, or rosemary. These fragrant plants thrive indoors with minimal care and can be cultivated on a sunny windowsill or in decorative pots that complement your kitchen’s style. Choose containers that allow for good drainage and consider varying their heights to create an appealing visual display. The vibrant greens and aromatic scents not only beautify your space but also infuse your culinary creations with fresh flavors.

For those with a bit more space, exploring vertical gardening options or dedicated indoor garden kits can yield a bounty of vegetables. Microgreens, lettuce, and peppers are great choices that do well in smaller areas and provide a sense of achievement as you watch them grow. Utilizing hydroponic systems can also simplify the process, allowing you to grow produce in water without soil, making it ideal for urban dwellers with limited outdoor access.

In addition to being visually stunning and practical, growing your own edible plants can foster a deeper connection to the food you consume. It encourages a sustainable lifestyle and reduces the need for store-bought produce, which often comes with excessive packaging. Plus, the joy of harvesting your homegrown herbs and veggies can transform cooking into a more engaging and fulfilling experience.

So, whether you’re a seasoned gardener or a curious beginner, introducing edible plants into your home is a creative way to enhance your living space, while also embracing a lifestyle that celebrates fresh, homegrown goodness. Get your hands dirty and experience the satisfaction of cultivating your own green oasis right in your kitchen!

11. Care Tips for Keeping Indoor Plants Thriving

Bringing the beauty of nature indoors can transform your living space into a vibrant and inviting sanctuary. However, to truly enjoy the benefits of indoor plants, it’s essential to know how to care for them properly. Here are some key care tips to ensure your leafy companions thrive and flourish in your home.

**1. Understand Light Requirements:** Different plants have varying light needs, from low-light tolerant varieties like snake plants to sun-loving succulents. Position your plants according to their preferences, and consider the seasonal changes in sunlight. Don’t hesitate to experiment with different spots in your home until you find the ideal location.

**2. Water Wisely:** Overwatering is one of the leading causes of indoor plant demise. It’s crucial to gauge your plant’s water needs based on its type, size, and the environment it’s in. Check the soil moisture regularly; if the top inch of soil feels dry, it’s time to water. Always use pots with drainage holes to prevent water from pooling at the bottom, which can lead to rot.

**3. Maintain Humidity:** Many indoor plants, especially tropical varieties, thrive in higher humidity levels. If your home is dry, especially during winter months, consider using a humidifier or placing a tray of water with pebbles beneath your plants. Misting their leaves occasionally can also help, although be mindful of plants that might not appreciate moisture on their foliage.

**4. Fertilize Appropriately:** Indoor plants benefit from regular feeding, especially during the growing season (spring and summer). Use a balanced liquid fertilizer every few weeks, following the manufacturer’s instructions. Be cautious not to over-fertilize, which can harm the roots and lead to unhealthy growth.

**5. Prune and Repot:** Regularly inspect your plants for dead or yellowing leaves, which should be pruned to promote new growth. As your plants grow, they may outgrow their containers. Repotting them into a slightly larger pot with fresh soil can give them the space and nutrients they need to continue thriving.

**6. Watch for Pests:** Keep an eye out for common pests like spider mites, aphids, or mealybugs. If you notice any signs of infestation, act quickly by isolating the affected plant and treating it with insecticidal soap or neem oil.

By following these essential care tips, you can create a flourishing indoor garden that not only enhances your home’s aesthetic but also contributes to your well-being. With a little attention and love, your indoor plants will thrive, bringing fresh air and a sense of tranquility to your living space.

12. Seasonal Plant Arrangements for a Fresh Look

Incorporating seasonal plant arrangements into your home is a delightful way to refresh your space and embrace the changing moods of nature throughout the year. Think of your home as a canvas, and plants as the vibrant colors that bring it to life. Each season offers unique opportunities to showcase a variety of textures, colors, and scents that can transform your environment and elevate your mood.

In spring, consider vibrant blooms like tulips or daffodils, which symbolize renewal and growth. Place them in cheerful, pastel-colored pots to enhance the fresh, uplifting spirit of the season. Transitioning into summer, you can introduce lush greens and tropical plants like monstera or fiddle leaf figs, which thrive in the warm weather and bring a bold, exotic flair to your living areas.

As autumn approaches, swap out your bright blooms for richer, earthier tones. Incorporate seasonal favorites such as chrysanthemums or ornamental kale, and don’t shy away from adding rustic elements like pinecones or branches to your arrangements. These additions can evoke the cozy essence of fall, making your home feel inviting and warm.

When winter arrives, evergreen plants and festive arrangements can keep your space feeling alive despite the chilly weather outside. Consider a beautiful arrangement of holly and pine, or perhaps a compact indoor tree adorned with ornaments that reflect your personal style. You can even create a terrarium with winter-themed decorations to bring a touch of whimsy to your decor.

By curating seasonal plant arrangements, you not only enhance your home’s aesthetic but also create a dynamic atmosphere that reflects the beauty of nature’s cycles. Keep your arrangements varied and playful, and your home will always feel fresh and inviting, no matter what time of year it is.

13. How to Create a Plant Care Routine

Creating a plant care routine is essential for ensuring that your indoor greenery thrives and flourishes. Just like any living thing, houseplants require consistent attention and care to reach their full potential. By establishing a structured routine, you not only enhance the health of your plants but also deepen your connection to nature within your home.

Start by assessing the specific needs of each plant species in your collection. Different plants have varying requirements for sunlight, water, humidity, and nutrients. Make a list and categorize your plants based on their care needs. For example, succulents and cacti thrive in bright, direct sunlight and require infrequent watering, while tropical plants like ferns and peace lilies prefer indirect light and a more humid environment.

Next, incorporate regular watering into your routine. set a specific day of the week to check on your plants; this could be a leisurely Sunday morning or a mid-week check-in. Use this time to assess the moisture level of the soil—stick your finger about an inch deep to gauge whether it’s time to water. Remember, overwatering is a common mistake, so it’s crucial to ensure the soil is dry before adding more water.

Fertilizing is another key aspect of plant care. Most houseplants benefit from a balanced fertilizer every few months, particularly during the growing season in spring and summer. Mark your calendar to remind yourself when it’s time to feed your plants, ensuring they receive the nutrients they need to thrive.

Don’t forget about pruning and cleaning! Dust can accumulate on leaves, blocking sunlight and hindering photosynthesis. Incorporate a gentle cleaning session into your routine once a month—simply wipe the leaves with a damp cloth to help them breathe easier. Additionally, pruning dead or yellowing leaves encourages new growth and keeps your plants looking their best.

Lastly, take time to simply enjoy your plants. Schedule regular moments to appreciate their beauty and monitor their growth. This connection not only fosters a sense of tranquility in your space but also motivates you to maintain your plant care routine. By dedicating time to these simple tasks, you’ll create a thriving indoor garden that brings the vibrancy of nature into your home.

14. Combining Art and Nature: Plant Art Installations

Incorporating greenery into your home decor can transcend traditional potted plants and create stunning focal points that blend art with nature. Enter the world of plant art installations—a creative approach that transforms living spaces into lush, vibrant galleries. These installations can range from intricate wall-mounted planters to striking hanging gardens that draw the eye upward, celebrating the beauty of both flora and artistic expression.

Imagine a living wall adorned with a curated selection of succulents, ferns, and flowering plants, arranged in a mosaic pattern that shifts with the seasons. This dynamic display not only serves as a breathtaking backdrop but also acts as a natural air purifier, enhancing the overall ambiance of your home. Alternatively, consider crafting a three-dimensional art piece using driftwood or reclaimed materials, entwined with climbing vines or cascading string of pearls. This fusion of materials can evoke a sense of tranquility, reminiscent of a serene forest, while also showcasing your personal style.

For those with a penchant for minimalism, a single large-scale terrarium might be the answer. These glass-enclosed ecosystems can feature a variety of plants, stones, and even decorative elements like fairy lights or miniature figurines. Position it on a coffee table or a shelf, and it becomes not just a plant, but a conversation starter—an ever-evolving piece of living art that invites curiosity and admiration.

By embracing plant art installations, you invite the essence of the outdoors into your home in a way that is both innovative and deeply personal. The marriage of art and nature can invigorate your living spaces, making them feel more vibrant and alive while reflecting your unique aesthetic. So, unleash your creativity, and let your home blossom into a breathtaking gallery where nature takes center stage.

15. Greenery in Unexpected Spaces: Bathrooms and Kitchens

When we think of adding greenery to our homes, our minds often drift toward living rooms and bedrooms, but the bathrooms and kitchens can become delightful green sanctuaries too. These spaces, typically overlooked, can benefit greatly from a splash of plant life, transforming them into fresh and inviting areas.

In the bathroom, humidity levels are usually higher due to showers and baths, creating an ideal environment for many plants. Consider hanging a trailing pothos from a shelf or a small window sill. Its cascading vines can soften the sterile lines of bathroom fixtures and create a calming atmosphere. Alternatively, small ferns thrive in these conditions, their lush foliage bringing a touch of nature to your daily routines. For those with limited light, low-maintenance options like snake plants or peace lilies can flourish with minimal care, all while purifying the air.

Kitchens, on the other hand, are perfect for integrating functional greenery. Herbs like basil, mint, and rosemary not only add a pop of color but also serve a practical purpose, offering fresh ingredients at your fingertips for culinary creations. You can place small pots on the windowsill or create a vertical herb garden on a wall-mounted shelf. Additionally, larger leafy plants, such as spider plants or rubber trees, can fill empty corners, lending life to what might otherwise be a utilitarian space.

When choosing plants for these unexpected spaces, think about the light, humidity, and your own maintenance capabilities. With a little creativity and consideration, you can turn your bathrooms and kitchens into lush, green havens that breathe life into your home. Embrace the tranquility and freshness that greenery brings, and watch as these spaces transform into your new favorite retreats.

In conclusion, infusing your home with greenery is not only a way to enhance your decor but also a means to create a serene and inviting atmosphere. As we explored in this post, there are countless creative ways to bring the outside in, from stylish indoor gardens and vertical plant walls to charming terrariums and unique plant displays. Each method offers a chance to personalize your space while reaping the numerous physical and mental health benefits that plants provide. So, whether you’re a seasoned plant parent or a beginner looking to dip your toes into the world of indoor gardening, we encourage you to experiment with these ideas and find what resonates with you. Embrace the beauty of nature within your home, and watch as your space transforms into a lush, vibrant oasis that brings joy and tranquility to your everyday life. Happy decorating!

How to choose the right paint color for your front door?

Your front door is more than just an entrance; it’s the focal point of your home and the first impression visitors receive.

Choosing the right paint color for your front door can significantly enhance your home’s curb appeal, setting the tone for the entire exterior and reflecting your personal style. With a myriad of colors and finishes available, selecting the perfect hue can be both exciting and overwhelming. From vibrant reds that exude warmth and welcome to serene blues that evoke tranquility, each color carries its unique charm and message. In this guide, we will explore the art of selecting the ideal paint color for your front door, considering factors such as architectural style, neighborhood aesthetics, and your own personality. Get ready to transform your entryway into a stunning statement that captivates and invites, because unlocking curb appeal starts right at your front door!

1. Understanding Curb Appeal: Why Your Front Door Matters

How to choose the right paint color for your front door?
Credit : whatcanu.com

When it comes to enhancing the overall aesthetic of your home, the front door is often an overlooked hero. Curb appeal is the first impression your home makes on visitors and passersby, and your front door plays a pivotal role in shaping that impression. It’s not just an entry point; it’s a statement piece that can reflect your personal style, set the tone for your home’s design, and invite warmth and welcome.

Think about it: Your front door is the focal point of your exterior. It’s the gateway to your sanctuary, and its color can evoke emotions, convey character, and even boost your home’s value. A well-chosen paint color can transform a mundane entryway into a lively, inviting space that draws in the eye and sparks curiosity. Whether you’re aiming for a classic, sophisticated look with deep navy or a cheerful pop with vibrant yellow, the color you choose can tell a story about your home.

Additionally, a thoughtfully painted front door can help unify your home’s exterior. If your home has a traditional brick facade, a rich forest green or burgundy can complement the earthy tones beautifully. Conversely, a sleek modern home may benefit from a bold and unexpected hue, such as a striking coral or a sleek black, to create a contrast that speaks to contemporary design.

Understanding curb appeal means recognizing that every detail counts. A freshly painted front door not only enhances the visual appeal of your home but also communicates care and attention to detail. In neighborhoods where homes are closely situated, a vibrant front door can make yours stand out, inviting compliments from neighbors and increasing the likelihood of potential buyers taking notice should you ever decide to sell.

In essence, your front door is more than just an entrance; it’s a canvas for expression and a critical component of your home’s first impression. By investing time and thought into choosing the perfect paint color, you can unlock the full potential of your curb appeal, transforming ordinary entrances into extraordinary welcomes.

2. Factors to Consider When Choosing a Paint Color

Choosing the perfect paint color for your front door is more than just a matter of personal preference; it’s about understanding the various factors that can significantly influence your selection. Here are some critical elements to consider as you embark on this colorful journey:

**1. Architectural Style:** The design of your home plays a significant role in determining which colors work best. A modern home with clean lines may benefit from bold, contemporary colors like deep navy or vibrant red, while a quaint cottage might look more charming with softer hues such as pastel blue or sage green. Take a moment to examine your property’s architectural details; they can guide you toward a color palette that enhances the overall aesthetic.

**2. Neighborhood Trends:** Consider the colors of neighboring houses. While you want your home to stand out, you also want it to harmonize with its surroundings. Take a leisurely stroll through your neighborhood or drive around to capture the color schemes of nearby homes. This can provide inspiration and help you avoid a decision that may clash with the overall vibe of your community.

**3. Existing Elements:** Take stock of existing features such as siding, roofing, and landscaping. The front door color should complement these elements rather than compete with them. For instance, if your home has warm beige siding, a cool-toned door might look out of place. Aim for a cohesive look by selecting a color that enhances or contrasts beautifully with your home’s exterior.

**4. Psychological Impact:** Colors evoke emotions and can influence perceptions. A cheerful yellow can project warmth and friendliness, while a deep green may evoke a sense of tranquility and nature. Think about the message you want to convey to visitors and passersby. For a bold statement that exudes confidence, opt for a striking red or a sophisticated black.

**5. Climate Considerations:** Local climate can also affect your choice. In sunny areas, lighter colors may fade quickly, while darker colors can absorb heat and become overly hot. Conversely, in cooler climates, a warm color can create a welcoming feel. Consider how the weather will influence the longevity of your paint job and how often you might need to refresh it.

**6. Personal Style:** Finally, never underestimate the power of personal preference. Your front door is a canvas – a reflection of your personality and style. Whether you lean towards vibrant and adventurous or prefer a classic and understated look, your choice should ultimately resonate with who you are.

By weighing these factors carefully, you’ll find that the perfect paint color for your front door is not just a choice; it’s an opportunity to enhance your home’s curb appeal and express your unique style. Take your time, test samples, and envision how each color will complement your home’s overall look before making a final decision.

3. Analyzing Your Home’s Style and Architecture

How to choose the right paint color for your front door?
Credit : whatcanu.com

When it comes to choosing the perfect paint color for your front door, understanding your home’s style and architecture is crucial. Your front door serves as a focal point and sets the tone for your entire property; therefore, it should harmonize with the overall aesthetic of your home.

Begin by taking a step back and analyzing the architectural features of your house. Is it a charming cottage with rustic details, a sleek modern design with clean lines, or perhaps a classic Victorian with intricate embellishments? Each style has its own character, and the right color can accentuate these features beautifully. For instance, a bold red or navy blue can add a touch of drama to a contemporary home, while softer, muted tones like sage green or buttery yellow might be more appropriate for a quaint farmhouse.

Consider also the materials used in your home’s facade. If you have natural stone or brick, selecting a door color that complements these elements can create a cohesive look. Earthy tones can enhance the organic appeal, while a contrasting color can offer a striking visual impact. Additionally, take note of any existing trim or window frames; your door color should work in tandem with these accents to create a unified appearance.

Don’t forget about the surrounding landscape as well. The colors of your plants, flowers, and any outdoor furniture can influence how your door color is perceived. A vibrant turquoise door might pop against a backdrop of lush greenery, while a deep burgundy could provide a stunning contrast to white or pastel blooms.

Ultimately, the key is to choose a paint color that not only aligns with your home’s architectural style but also reflects your personal taste. Remember, your front door is an invitation to your home—make sure it welcomes guests with warmth and charm while enhancing the overall curb appeal of your property.

4. The Psychology of Color: What Different Colors Convey

Choosing the right color for your front door is not just about aesthetics; it’s also about the profound psychological effects that colors can have on our emotions and perceptions. Understanding the psychology of color can guide you in selecting a hue that not only enhances your home’s curb appeal but also communicates the right message to visitors and passersby.

**Red** is a bold choice that exudes energy and passion. It’s often associated with warmth and excitement, making it an ideal color for those who want to draw attention and create a welcoming atmosphere. A red front door can signify a sense of adventure and boldness, inviting guests to step inside and experience the vibrancy of your home.

**Blue**, on the other hand, conveys tranquility and trust. A light blue or soft seafoam can evoke feelings of calmness and serenity, while a deeper navy can suggest stability and reliability. Painting your front door blue can create a sense of peace, making your home feel like a sanctuary amidst the chaos of the outside world.

**Yellow** is the color of sunshine and happiness. A cheerful yellow door can brighten up your home’s exterior and evoke feelings of warmth and friendliness. It’s an inviting color that can make your home feel approachable, perfect for those who want to create a welcoming vibe.

**Green** symbolizes nature, renewal, and growth. A green door can bring a sense of harmony and balance to your home’s facade. Depending on the shade, it can convey a connection to the environment, making it a great choice for eco-conscious homeowners or those living in leafy neighborhoods.

**Black** embodies sophistication and elegance. A sleek black door can make a powerful statement, suggesting strength and formality. It’s a versatile choice that pairs beautifully with a range of exterior styles, from traditional to modern, and can add a touch of luxury to your home’s entrance.

**White** is the epitome of simplicity and purity. A white front door can symbolize cleanliness and openness, projecting a sense of peace and tranquility. It works well in various architectural styles and can create a fresh, airy feel, making it an excellent choice for coastal or minimalist homes.

As you consider these colors, think about the message you want to convey and how you want to make people feel as they approach your home. The right front door color can not only elevate your home’s curb appeal but also set the tone for what lies beyond. Embrace the psychology of color and choose a hue that reflects your personality while enhancing your home’s overall aesthetic.

5. Popular Front Door Colors and Their Meanings

How to choose the right paint color for your front door?
Credit : whatcanu.com

Choosing the right color for your front door is more than just a matter of aesthetics; it’s a reflection of your personality and an expression of your home’s character. different colors evoke various feelings and associations, and understanding these can help you unlock the full potential of your curb appeal. Here’s a look at some of the most popular front door colors and their meanings:

**1. Classic Red:** A timeless choice, red is often associated with warmth, comfort, and love. It exudes confidence and draws the eye, making it an ideal color for those who want to make a bold statement. Historically, a red door symbolizes a welcoming home, so it’s perfect for creating an inviting atmosphere.

**2. Tranquil Blue:** Shades of blue, particularly softer tones like sky blue or powder blue, evoke feelings of tranquility and serenity. This color is associated with trust and stability, making it an excellent choice for coastal or suburban homes. A blue door can serve as a soothing contrast against natural greenery.

**3. Elegant Black:** A black front door signifies sophistication and elegance. It’s a choice that conveys strength and authority, often found in modern or traditional homes alike. Black doors work well with a variety of architectural styles and can add a touch of drama and refinement to your entryway.

**4. Cheerful Yellow:** Bright and inviting, yellow is a color that embodies positivity and happiness. A cheerful yellow door can instantly uplift the mood of your home, making it a perfect choice for those who want to convey a sense of friendliness and approachability. It’s a popular option for beach houses or homes in sunny climates.

**5. Earthy Green:** Green is synonymous with nature and renewal. A muted sage or deep forest green can create a calming effect, while also blending seamlessly with outdoor landscaping. This color choice can suggest a love for the environment and a desire for harmony, making it an excellent option for eco-conscious homeowners.

**6. Crisp White:** A classic white door offers a clean, fresh look that never goes out of style. It symbolizes purity and simplicity, and works beautifully with any exterior color. A white door can enhance the architectural features of your home while providing a timeless appeal.

By understanding the meanings behind these popular front door colors, you can make a more informed decision that not only enhances your home’s curb appeal but also communicates the essence of who you are. Whether you opt for a bold statement or a subtle elegance, your front door color is a key element in creating a welcoming first impression.

6. Coordinating with Your Home’s Exterior Color Palette

When it comes to selecting the perfect paint color for your front door, one of the most crucial steps is to ensure it harmonizes beautifully with your home’s exterior color palette. Your front door is not just a functional element; it’s the focal point that invites guests into your home and sets the tone for your entire property. Therefore, choosing a color that complements the surrounding hues can make a significant difference in achieving that coveted curb appeal.

Begin by taking a close look at your home’s existing color scheme. Consider the primary color of your exterior walls, the roofing materials, and any trim or accents that define the structure’s character. For instance, a soft, muted beige or gray home might benefit from a bold front door color, such as deep navy or vibrant red, to create an eye-catching contrast. Conversely, if your home features a bright, cheerful facade, a more subdued or monochromatic door color, like a gentle sage or classic white, can provide a sophisticated balance.

Additionally, think about the architectural style of your home. A traditional colonial house might call for a classic black or glossy red door, while a modern minimalist home could shine with a sleek, muted color like charcoal or even a striking matte finish. Don’t forget to consider the seasonal changes in your environment as well—colors that look stunning in bright summer sunlight might appear completely different under the muted tones of winter.

To help visualize your options, create a mood board or use digital tools that allow you to experiment with different color combinations. Take photos of your home and overlay potential door colors to see how they interact with your existing palette. This strategic approach not only ensures that your front door looks inviting but also elevates your home’s overall aesthetic, making it stand out beautifully in the neighborhood. Remember, the goal is to choose a color that feels cohesive and enhances the charm of your home, ultimately creating a welcoming entry that draws people in.

7. Seasonal Considerations for Front Door Colors

How to choose the right paint color for your front door?
Credit : whatcanu.com

When it comes to choosing the perfect paint color for your front door, seasonal considerations play a crucial role in enhancing your home’s curb appeal throughout the year. Each season brings with it a unique palette of colors inspired by nature, and aligning your door’s hue with these seasonal changes can create a harmonious and inviting appearance.

In spring, when the world bursts into bloom, consider opting for pastel shades like soft pink, mint green, or buttery yellow. These colors evoke a sense of renewal and warmth, welcoming guests with the promise of new beginnings. Imagine stepping into a home with a pale lavender door framed by blossoming flowers; it sets a cheerful tone that mirrors the vibrancy of the season.

As summer arrives, bold colors can take center stage. Think bright reds, sunny yellows, or deep ocean blues that capture the essence of long, sun-drenched days. A striking navy door paired with white or bright yellow accents can create a stunning contrast, making your home stand out in the lush greenery of summer.

When autumn rolls around, rich, earthy tones become the stars of the show. Shades like burnt orange, deep burgundy, and golden mustard can complement the falling leaves and create a cozy, inviting atmosphere. A warm, chestnut-colored door can evoke images of crisp air and gatherings around a fire pit, inviting guests to come in and enjoy the warmth of your home.

In winter, cooler colors take precedence. Consider classic shades such as deep forest green or a crisp, timeless black—colors that offer a sophisticated, elegant look against a backdrop of snow or frost. A black door adorned with a festive wreath can provide a stunning focal point that captures the essence of the holiday season.

Incorporating seasonal considerations into your front door color choice not only enhances your home’s curb appeal but also reflects your personal style throughout the year. By thoughtfully selecting colors that resonate with the season, you can create a welcoming entrance that invites guests to experience the warmth and charm of your home, no matter the time of year.

8. Testing Paint Colors: Swatches and Samples

When it comes to selecting the perfect paint color for your front door, the art of testing paint colors is an essential step that can make all the difference in achieving the aesthetic you desire. Swatches and samples are your best friends in this creative journey, allowing you to visualize how different hues will interact with your home’s exterior and the surrounding landscape.

Start by gathering a variety of paint swatches that catch your eye. Many paint stores offer fan decks or sample pots, providing a range of shades from which to choose. Once you have a selection, take the time to hold them up against your door frame or even tape them directly to the door. This initial visual comparison can help you narrow down your options before committing to larger quantities.

However, the real magic happens when you move to the next step: applying actual paint samples. Choose a few of your favorite colors and paint small sections on your door. This will allow you to see how the colors look in different lighting conditions throughout the day, as natural light can dramatically alter the perception of a color. Morning sunlight, afternoon brightness, and evening shadows can all bring out different tones in the paint, revealing undertones that may not have been visible in the store.

Additionally, consider the surroundings of your home. The color of your siding, the style of your home, and even the landscape can influence how a color appears. A vibrant red door may pop beautifully against a neutral façade but could clash with an earthy stone exterior. By testing samples on your door and observing them at various times of the day, you’ll gain valuable insight into how well the colors harmonize with your home’s overall aesthetic.

In the end, this method of testing paint colors not only builds your confidence in your choice but also ensures that your front door becomes a stunning focal point that enhances your home’s curb appeal. So take your time, experiment, and enjoy the creative process of finding that perfect shade that welcomes guests with warmth and style.

9. The Role of Finish: Matte vs. Glossy Paint

When it comes to selecting the perfect paint color for your front door, the finish you choose can be just as important as the hue itself. The debate between matte and glossy finishes may seem minor, but it plays a significant role in both aesthetic appeal and functionality.

**Matte Finish:** A matte finish offers a soft, understated look that exudes elegance and sophistication. It can create a welcoming atmosphere, especially in warmer, earthy tones like terracotta or sage green. However, while matte paint can beautifully conceal imperfections in the door’s surface, it can be less durable when it comes to withstanding the elements. Matte finishes are more prone to showing dirt and scuff marks, which means your door may require more frequent touch-ups to maintain its fresh appearance. If you opt for a matte finish, consider using it in sheltered areas or where the door won’t be exposed to heavy wear and tear.

**Glossy Finish:** On the other hand, a glossy finish radiates vibrancy and energy, making colors appear more vivid. Glossy doors often catch the eye and can create a modern, chic look, particularly in bold shades such as navy blue or bright red. Beyond aesthetics, glossy finishes are also highly durable and resistant to moisture, making them ideal for exterior doors that face harsh weather conditions. They’re easier to clean, as dirt and grime can be wiped off with a damp cloth. However, the reflective nature of glossy finishes can sometimes amplify imperfections, so it’s essential to ensure the door’s surface is in good condition before application.

Ultimately, the choice between matte and glossy finishes should align with your home’s overall style, your maintenance preferences, and the message you want your front door to convey. Whether you lean towards the subtle charm of a matte finish or the striking allure of a glossy coat, both options can significantly enhance your front door’s curb appeal and make a lasting impression on visitors.

10. Enhancing Front Door Accents: Hardware and Accessories

When it comes to making a striking impression, the right paint color for your front door is just the beginning. To truly elevate the curb appeal of your home, you must consider the accessories and hardware that complement your chosen hue. Think of these elements as the jewelry to your door’s outfit—small details that can make all the difference in creating a cohesive and inviting entrance.

Start with the door hardware: doorknobs, hinges, and knockers. Opt for finishes that resonate with your door color while also enhancing its overall aesthetic. For example, a crisp white door pops beautifully against shiny brass or polished chrome hardware, while deeper shades like navy blue or forest green create a stunning contrast with matte black or antique bronze accents. Mixing metals can also add a modern twist, but be mindful to maintain a sense of balance; too many conflicting finishes can detract from your door’s beauty.

Next, consider the addition of accessories such as door mats, wreaths, and decorative house numbers. A vibrant welcome mat can introduce a playful element that draws the eye while also providing functionality. Seasonal wreaths, whether made from fresh blooms or durable faux materials, offer a personal touch and can be easily swapped out to reflect the changing seasons or your mood.

Don’t forget about lighting! Wall sconces or pendant lights flanking your door not only provide practical illumination but also frame the entrance, adding depth and warmth to your home’s exterior. Choose fixtures that coordinate with your door’s style—sleek and modern for contemporary homes, or ornate and vintage for more traditional aesthetics.

By thoughtfully enhancing your front door with complementary hardware and accessories, you create a welcoming atmosphere that invites guests in and leaves a lasting impression. Remember, the front door is the focal point of your home’s facade; treat it as the canvas that deserves attention to detail and a touch of personality.

11. Maintenance Tips for Keeping Your Front Door Color Fresh

Once you’ve chosen the perfect paint color for your front door, the next step is ensuring it remains vibrant and inviting for years to come. Regular maintenance is essential for preserving the aesthetic appeal of your door and protecting it from the elements. Here are some practical tips to keep your front door looking fresh and welcoming:

**1. Regular Cleaning:** Dust, dirt, and grime can accumulate on your front door, dulling its vibrancy. Make it a habit to wipe down your door every few weeks with a soft cloth and a gentle soap solution. For painted surfaces, avoid harsh chemicals that can strip the paint; instead, opt for mild detergents that won’t compromise the finish.

**2. Inspect for Damage:** Periodically check your door for any signs of wear and tear, such as peeling paint, scratches, or dents. Early detection allows you to address these issues before they escalate. If you notice any problems, consider touching up the paint or making minor repairs to maintain the door’s integrity.

**3. Repaint When Necessary:** Depending on your local climate and the quality of the paint used, you may need to repaint your door every few years. Signs that it’s time for a refresh include noticeable fading, chipping, or if the door begins to look dull. Repainting not only revives the color but also fortifies the surface against weather-related damage.

**4. Protect from the Elements:** If your front door is exposed to harsh sunlight or extreme weather conditions, consider using a sealant or protective coat. These products can help shield the paint from UV rays, moisture, and other environmental factors that can cause fading or deterioration.

**5. Seasonal Touch-Ups:** Changes in seasons can impact the appearance of your door. Take advantage of the spring and fall to give it a little extra love with a thorough cleaning and inspection. This seasonal maintenance not only keeps your door looking its best but also prepares it for the harsher weather ahead.

By following these maintenance tips, you can ensure that your front door remains a stunning focal point that enhances your home’s curb appeal. A well-maintained door not only invites guests in but also reflects the care and attention you put into your home’s overall appearance.

12. DIY vs. Professional Painting: What You Need to Know

When it comes to painting your front door, you may find yourself at a crossroads: should you tackle the project as a DIY endeavor, or is it best to enlist the expertise of a professional? Both options come with their own set of advantages and considerations that can significantly impact the outcome of your curb appeal transformation.

**DIY Painting: The Joy of Personal Touch**

Opting for a DIY approach can be incredibly rewarding. It allows you to infuse your personal style into the project, and there’s a certain satisfaction that comes from completing a task with your own hands. Before diving in, however, it’s essential to do your homework. Research the best types of paint for exterior surfaces, and make sure to choose a high-quality primer that will ensure the longevity of your work. Additionally, invest in proper tools—brushes, rollers, and painter’s tape—to achieve a clean and professional finish.

The DIY route also provides flexibility. You can work on your own schedule, take breaks when needed, and experiment with different colors and techniques without the pressure of a deadline. However, be prepared for the possibility of additional time commitment, especially if you’re new to painting.

**Professional Painting: Expertise at Your Service**

On the other hand, hiring a professional painter brings a different set of benefits to the table. With their experience, they can navigate color choices and application techniques that you may not consider, ensuring a flawless finish. Professionals also come equipped with high-quality tools and materials, and they are skilled at preparing surfaces to prevent issues like peeling or chipping down the line.

While the cost of hiring a pro may be higher upfront, the investment can pay off in durability and aesthetic appeal. Moreover, a professional can often complete the job in less time, allowing you to enjoy your newly painted front door sooner rather than later.

**Making the Choice**

Ultimately, the decision between DIY and professional painting hinges on your budget, time, and comfort level with home improvement tasks. If you’re confident in your abilities and eager for a hands-on project, a DIY approach could be perfect for you. However, if you prefer a polished look without the stress, hiring a professional might be the way to go. Whichever path you choose, the end goal remains the same: a beautiful front door that enhances your home’s curb appeal and welcomes guests with warmth and style.

13. Eco-Friendly Paint Options for the Environmentally Conscious

As the movement towards sustainability continues to grow, many homeowners are seeking eco-friendly options that align with their values while enhancing their home’s curb appeal. When selecting a paint color for your front door, consider opting for environmentally conscious paint products that minimize harmful chemicals and promote better air quality both inside and outside your home.

Eco-friendly paints, often labeled as low-VOC (volatile organic compounds) or zero-VOC, reduce the release of toxic fumes and are safer for your family and pets. These paints offer a range of beautiful colors, allowing you to choose shades that reflect your personal style while being gentle on the planet. Popular eco-friendly brands are now creating vibrant color palettes, from deep navy blues to sunny yellows, ensuring that you don’t have to compromise on aesthetics for sustainability.

Beyond the color itself, look for paints that are made from natural materials, such as plant-based oils and minerals, which not only reduce environmental impact but also provide a unique depth to the finish. These paints are often more durable as well, requiring fewer coats and less maintenance over time—perfect for homeowners who want to make a stylish statement without frequent touch-ups.

Additionally, consider the environmental impact of your choice by checking for certifications like Green Seal or the Environmental Protection Agency’s Safer Choice label. These certifications indicate that the product meets strict environmental standards, ensuring that your choice contributes to a healthier planet.

By choosing eco-friendly paint options for your front door, you can unlock a new level of curb appeal while making a positive impact on the environment. Not only will your door stand out with its fresh, vibrant color, but it will also reflect your commitment to sustainable living, inviting friends and neighbors to admire both your home and your values.

14. Real-Life Examples: Inspiring Front Door Transformations

When it comes to front door transformations, real-life examples can provide not only inspiration but also practical insights into what works and what doesn’t. Take, for instance, the charming yellow door of a quaint cottage in a suburban neighborhood. This vibrant hue instantly brightens the facade, creating a welcoming atmosphere that beckons guests and passersby alike. The homeowners chose a soft butter yellow, which harmonizes beautifully with their muted gray siding and white trim. The result? A cheerful entryway that radiates warmth and positivity.

Another striking example can be found in a more modern setting, where a sleek navy blue door serves as a stunning contrast against warm beige brick. The deep, rich color adds a touch of sophistication and elegance while seamlessly fitting into the contemporary aesthetic of the home. Accented by polished brass hardware, this door not only draws the eye but also elevates the overall curb appeal of the property.

For those leaning towards a more rustic vibe, consider the transformation of a traditional farmhouse with a bold red door. This choice pays homage to classic design while adding a pop of color that stands out against the natural wood and earthy tones of the home. The red door, adorned with a simple wreath, invites visitors with a sense of nostalgia and charm.

These examples illustrate that choosing the right paint color for your front door is more than just a cosmetic update; it’s an opportunity to express your personal style and enhance the overall aesthetic of your home. Whether you opt for a bold statement color or a more subdued tone, the key is to ensure that it complements the surrounding elements and reflects the character of your home. With a little creativity and inspiration from these transformations, you can unlock the full potential of your front door and boost your home’s curb appeal.

15. Final Thoughts: Choosing a Color That Reflects Your Personality

Choosing the perfect paint color for your front door is not just a matter of aesthetics; it’s a reflection of who you are and the welcoming atmosphere you wish to create. As you stand before the daunting array of colors, think about what each hue conveys. A vibrant red door speaks volumes of energy and passion, while a serene blue invokes calmness and tranquility.

Consider the overall style of your home and the surrounding landscape. Is it a modern minimalist abode or a charming cottage? The door color should harmonize with the architecture, enhancing its character rather than clashing with it. Don’t hesitate to draw inspiration from your favorite colors, artwork, or even the seasons. A sunny yellow might evoke feelings of warmth and cheer, while an earthy green can express a connection to nature.

Moreover, your door serves as the first impression for visitors and passersby, so think about the emotions you want to evoke. A classic black door symbolizes elegance and sophistication, while a playful orange invites a sense of fun and creativity.

Ultimately, the best color is one that resonates with you personally. It should make your heart smile every time you come home. Take your time, gather samples, and visualize how different shades will appear at various times of the day. Remember, this is not merely a paint choice; it’s an opportunity to express your individuality and create a welcoming entryway that invites warmth and connection into your home. So go ahead, embrace your creativity, and let your front door become a reflection of your unique personality.

In conclusion, choosing the perfect paint color for your front door is a powerful way to enhance your home’s curb appeal and create a welcoming atmosphere. By considering factors such as your home’s architectural style, the surrounding landscape, and your personal taste, you can select a color that not only stands out but also complements your overall aesthetic. Whether you opt for a bold hue that makes a statement or a soft shade that exudes charm, remember that your front door is the first impression visitors will have of your home. We hope this guide has inspired you to embark on your painting project with confidence and creativity. Transform your entryway into a reflection of your style, and watch as your home radiates warmth and character. Happy painting!