What are the best ways to cook for a crowd?

When it comes to hosting gatherings, whether it’s a family reunion, holiday celebration, or a casual backyard barbecue, cooking for a crowd can often feel overwhelming.

The pressure to please a diverse group of palates while managing timing, portions, and presentation can turn your culinary dreams into a recipe for stress. But fear not! With the right strategies and a bit of planning, you can transform the daunting task of feeding a flock into a delightful and enjoyable experience. In this blog post, we’ll share essential tips and tricks that will streamline your cooking process, from selecting crowd-pleasing dishes to mastering efficient meal prep techniques. Join us as we explore how to create mouthwatering meals that not only satisfy your guests but also allow you to enjoy the festivities alongside them!

1. Planning Your Menu: Considerations for Cooking for a Crowd

What are the best ways to cook for a crowd?
Credit : whatcanu.com

When it comes to cooking for a crowd, careful menu planning is paramount. The first step is to consider the size of your gathering and the dietary preferences of your guests. Are you hosting a casual barbecue for friends, a formal dinner for family, or perhaps a potluck where everyone brings a dish? Each occasion calls for a different approach.

Start by selecting dishes that can be prepared in large quantities without sacrificing flavor or quality. One-pot meals, such as casseroles, stews, or large pasta dishes, can be lifesavers, as they allow for easy preparation and minimal cleanup. Consider incorporating a variety of proteins, grains, and seasonal vegetables to provide a balanced meal that caters to diverse tastes.

Next, remember the importance of timing. Opt for recipes that can be made ahead of time to alleviate stress on the day of the event. Dishes like marinated salads or desserts that benefit from a bit of chilling can often be prepared the night before, freeing you up to focus on last-minute details when your guests arrive.

Don’t forget to account for dietary restrictions! It’s always a good idea to check in with guests beforehand to see if anyone has allergies or specific dietary needs, such as vegetarian or gluten-free options. Including a few inclusive dishes ensures that everyone feels welcome and satisfied.

Lastly, consider the logistics of serving. Buffet-style setups can be effective for larger groups, allowing guests to serve themselves and mingle freely. Think about how you’ll keep food warm or cold, and ensure you have enough serving utensils, plates, and seating for everyone. With thoughtful planning, you’ll create a memorable meal that leaves your guests feeling nourished and appreciated.

2. Essential Kitchen Tools for Large Batch Cooking

When it comes to cooking for a crowd, having the right kitchen tools can make all the difference between a smooth, enjoyable experience and a chaotic scramble. Here are some essential tools that will help you whip up large batches of delicious food with ease.

**1. Extra-Large Pots and Pans:** Investing in oversized pots and pans is crucial for cooking large quantities of soups, stews, or pasta. A heavy-duty stockpot can hold several gallons, ensuring you can prepare enough to feed a crowd without multiple batches. Similarly, large frying pans or griddles make it easier to cook meats and vegetables simultaneously, allowing you to maximize your cooking efficiency.

**2. Commercial-Grade Utensils:** When you’re cooking for many, your standard spatula or spoon may not cut it. Opt for sturdy, commercial-grade utensils that can withstand the rigors of heavy mixing and stirring. Long-handled spoons, large slotted spatulas, and heavy-duty whiskers will help you manage your ingredients effectively.

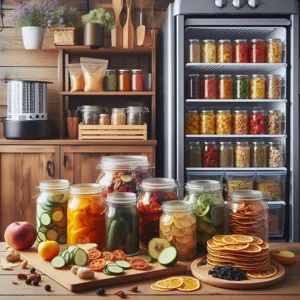
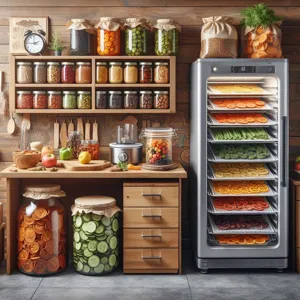
**3. Food Storage Containers:** After your culinary masterpieces are complete, you’ll need a way to store leftovers or meal prep for the coming days. Invest in a variety of airtight food storage containers in different sizes. Not only will they help you keep your food fresh, but they also make it easy to portion out meals for guests who may want to take some home.

**4. Mixing Bowls:** Large, deep mixing bowls are essential for tossing salads, marinating meats, or combining ingredients. Choose bowls made from durable materials such as stainless steel or glass that can handle both hot and cold ingredients.

**5. Slow Cookers and Instant Pots:** These versatile appliances are lifesavers when cooking for a crowd. Slow cookers are perfect for making big batches of chili, pulled pork, or hearty casseroles, allowing you to set it and forget it. Meanwhile, Instant Pots can speed up cooking time significantly, enabling you to prepare rice, beans, or even tough cuts of meat quickly and efficiently.

**6. Serving Dishes and Utensils:** Once your meal is ready, you’ll want to present it in style. Large serving platters, bowls, and trays will help you display your culinary creations beautifully. Don’t forget to have plenty of serving utensils on hand to make it easy for guests to help themselves.

By equipping your kitchen with these essential tools, you’ll streamline your cooking process and be well on your way to feeding your flock with confidence and ease. With the right tools in hand, large batch cooking can become a fun and fulfilling endeavor, allowing you to focus on what truly matters—enjoying the time spent with friends and family around the table.

3. Budgeting Tips: How to Feed a Crowd Without Breaking the Bank

What are the best ways to cook for a crowd?
Credit : whatcanu.com

Feeding a crowd can seem daunting, especially when you’re watching your budget. However, with some strategic planning and creativity, you can serve delicious meals that satisfy everyone without straining your wallet. Here are some effective budgeting tips to ensure your next gathering is both enjoyable and economical.

First, consider the power of bulk buying. When preparing meals for a large group, purchasing ingredients in bulk can significantly reduce costs. Look for wholesale clubs or local markets that offer discounts on larger quantities. Staples such as rice, pasta, beans, and frozen vegetables often come at lower prices when bought in bulk. Not only do these ingredients stretch your budget, but they also serve as versatile bases for a variety of dishes.

Next, embrace the beauty of seasonal produce. Shopping for fruits and vegetables that are in season not only enhances the freshness of your meals but also lowers your grocery bill. Seasonal ingredients are usually more abundant and thus less expensive. Incorporate these vibrant veggies into salads, sides, or main dishes to add color and nutrition while keeping costs down.

Another smart strategy is to plan a potluck-style meal. Encourage your guests to bring a dish to share, which not only lightens your cooking load but also adds variety to the menu. This communal approach fosters a sense of togetherness and allows everyone to contribute their culinary talents, while also minimizing food expenses.

Lastly, don’t forget about meal planning and portion control. Create a clear menu that outlines what you’ll serve and how much of each dish is necessary. Over-preparing can lead to wasted food, which is a drain on your budget. By estimating portion sizes, you can ensure that everyone is satisfied without excessive leftovers.

With these budgeting tips in your cooking arsenal, you can confidently host a crowd-pleasing event that leaves your guests delighted and your finances intact. Remember, feeding a group doesn’t have to be synonymous with overspending; with clever planning and creativity, you can create memorable meals that bring everyone together.

4. Choosing Dishes: Best Recipes for Large Groups

When it comes to cooking for a crowd, selecting the right dishes can make all the difference between a delightful gathering and a stressful kitchen experience. The key is to choose recipes that are not only crowd-pleasers but also easy to prepare in large quantities, allowing you to spend less time cooking and more time enjoying the company of your guests.

Start with hearty casseroles and one-pot meals, which can often be prepared in advance and simply popped into the oven when it’s time to serve. Classics like lasagna or a creamy vegetable gratin can feed many and offer a comforting touch that everyone loves. For a more interactive dining experience, consider setting up a taco bar or a pasta station. This allows guests to personalize their meals, which adds a fun element to the gathering and reduces your workload at the same time.

Don’t overlook the power of salads! A vibrant, big-batch salad can complement any meal and can be made ahead of time. Think about options like a quinoa salad with roasted vegetables or a classic Greek salad; both are nutritious and can be easily scaled up. Additionally, consider making a variety of dips or appetizers that guests can enjoy while mingling. Dishes like a large charcuterie board or a platter of assorted dips paired with fresh vegetables and pita chips create an inviting atmosphere and require minimal effort on your part.

Lastly, embrace the slow cooker or Instant Pot for dishes that require minimal supervision. From tender pulled pork to fragrant stews, these appliances can help you manage your time efficiently while ensuring that everyone is satisfied and well-fed. By thoughtfully selecting dishes that are simple to prepare, you can focus on what truly matters—creating memorable moments with friends and family around the table.

5. Meal Prep Strategies: Organizing Your Time Efficiently when cooking for a crowd

What are the best ways to cook for a crowd?
Credit : whatcanu.com

When cooking for a crowd, organization is your best ally. Meal prep strategies can make all the difference between a chaotic kitchen and a smooth, enjoyable cooking experience. The key lies in efficient time management and forward planning.

Start by creating a detailed menu that outlines every dish you plan to serve. This not only helps you visualize your meal but also allows you to identify overlapping ingredients, which can simplify shopping and prep. Once your menu is set, make a comprehensive grocery list to ensure you have everything you need before the big cooking day.

Next, dedicate some time to prep work in advance. Chopping vegetables, marinating meats, and even pre-cooking certain components can save you precious time on the day of your event. Consider batch cooking staples like rice, pasta, or sauces that can be refrigerated and quickly reheated. Not only does this lighten your workload, but it also enhances flavors as they have time to meld together.

Another effective strategy is to employ a timeline. Break down your cooking tasks by hours, prioritizing dishes that take longer to prepare. For example, if you’re roasting a large piece of meat, factor in not just the cooking time but also the resting time it needs before serving. By working backward from your meal time, you’ll ensure that everything is ready to go when your guests arrive.

Lastly, don’t underestimate the power of teamwork. If you have willing family members or friends, enlist their help. Assign specific tasks to each person, turning your cooking session into a collaborative effort. This not only speeds up the process but also makes it more enjoyable, allowing you to bond with your loved ones as you create a feast together.

With these meal prep strategies in place, you’ll transform the daunting task of cooking for a crowd into a well-orchestrated event, leaving you free to focus on what really matters—enjoying the time spent with your guests.

6. Cooking Methods: Oven, Slow Cooker, and More

When it comes to cooking for a crowd, the methods you choose can significantly impact both the ease of preparation and the quality of the food. Understanding the strengths and weaknesses of various cooking techniques is essential for a successful gathering.

**Oven Cooking**: The oven is a versatile powerhouse when feeding a large group. Roasting meats, baking casseroles, or even preparing sheet pan dinners can help you feed many with minimal fuss. The beauty of oven cooking is that it allows you to prepare multiple dishes at once, especially if you invest in a couple of robust baking sheets or roasting pans. While the oven handles the cooking, you can focus on side dishes or setting the table, maximizing your efficiency. Just be sure to keep an eye on cooking times, as larger portions may require adjustments.

**Slow Cooker**: If you’re looking for a method that allows for hands-off cooking, a slow cooker is your best friend. Perfect for stews, soups, and even pulled meats, a slow cooker can simmer flavors together while you attend to other tasks. Simply toss in your ingredients, set the timer, and let it work its magic. This method not only ensures tender, flavorful dishes but also frees you up to socialize with your guests or prepare other elements of the meal. Plus, slow cookers are often large enough to provide generous servings, making them ideal for a crowd.

**Grilling**: Don’t overlook the grill, especially during warmer months! Grilling can impart a delicious smoky flavor to meats and vegetables and can be a fun way to serve food in a casual outdoor setting. Whether you opt for burgers, skewers, or grilled vegetables, this method keeps the kitchen cool and allows you to prepare food while mingling with your guests. Just remember to plan for cooking times and ensure you have enough grill space for everything you intend to serve.

**Stovetop Cooking**: For dishes that require quick cooking, such as pasta or stir-fries, the stovetop is an efficient option. It allows for flexibility and quick adjustments, letting you whip up large portions in a fraction of the time. Utilizing multiple burners can also help you multitask, making it easier to coordinate the timing of different dishes.

Incorporating a mix of these cooking methods can alleviate the stress of preparing food for a crowd. Each method offers its set of benefits, and by balancing them, you can create a varied and delicious menu that delights your guests and keeps your stress levels in check. With a little planning and creativity, you’ll find that cooking for a crowd can be an enjoyable experience rather than a daunting task.

7. Keeping Food Safe: Essential Food Safety Guidelines

What are the best ways to cook for a crowd?
Credit : whatcanu.com

When cooking for a crowd, ensuring food safety should be at the forefront of your planning. With larger quantities and diverse dishes, the risk of foodborne illness can increase if proper precautions aren’t taken. Here are some essential food safety guidelines to help keep your meal both delicious and safe for everyone.

First and foremost, maintain cleanliness in your cooking area. Start by washing your hands thoroughly with soap and warm water for at least 20 seconds before handling any food. This simple step is crucial in preventing the spread of bacteria. Make sure all surfaces, utensils, and cutting boards are sanitized before you begin prepping your ingredients. Consider using separate cutting boards for raw meats and vegetables to avoid cross-contamination.

When it comes to storing ingredients, keep perishable items refrigerated until you’re ready to use them. The USDA recommends that food be kept out of the “danger zone” — between 40°F and 140°F — where bacteria can multiply rapidly. If your event spans several hours, consider using chafing dishes or slow cookers to keep hot foods at safe temperatures, and ensure cold dishes are served on ice or in chilled serving platters.

Another vital guideline is to monitor your cooking temperatures. Use a food thermometer to check that meats are cooked to their recommended internal temperatures: poultry should reach 165°F, ground meats 160°F, and whole cuts of beef, pork, and lamb should hit at least 145°F. This not only guarantees that your food is cooked safely but also enhances the flavor and texture of your dishes.

Lastly, be mindful of leftovers. If your gathering leaves you with uneaten food, refrigerate it within two hours to prevent bacterial growth. Store leftovers in clear, airtight containers and label them with the date to keep track of freshness. Serve only what you think will be consumed to minimize waste and ensure that everyone enjoys safe, tasty food.

By adhering to these essential food safety guidelines, you can confidently prepare a delightful meal for your guests, allowing them to focus on enjoying the occasion rather than worrying about their health. Happy cooking!

8. Setting Up Your Cooking Space: Maximizing Efficiency

When it comes to cooking for a crowd, the key to a smooth and enjoyable experience lies in how well you set up your cooking space. Maximizing efficiency is not just about having the right tools at your disposal, but also about creating a well-organized environment that allows you to move seamlessly from one task to the next.

Start by decluttering your kitchen counters and ensuring all necessary tools and ingredients are within arm’s reach. Create dedicated zones for different tasks—prep, cooking, plating, and serving. For instance, designate a large surface area for chopping vegetables and assembling dishes, while keeping your pots, pans, and utensils nearby for easy access during cooking.

Consider the flow of your kitchen. Position your stovetop, oven, and sink in a way that allows you to move fluidly between them without unnecessary backtracking. If you have a helper or two, assign specific tasks to each person, ensuring that everyone knows their role and the layout of the kitchen. This not only streamlines the cooking process but also minimizes confusion and maximizes productivity.

Don’t forget about the importance of lighting and ventilation. A well-lit kitchen enhances visibility, making it easier to see what you’re doing, while good ventilation helps keep the air fresh and free of cooking odors. If you can, open a window or turn on a fan to create a comfortable cooking environment.

Finally, embrace the use of time-saving gadgets like slow cookers, pressure cookers, or food processors. These tools can significantly cut down on preparation time and allow you to focus on other aspects of your meal. By setting up your cooking space with intention, you’ll not only enhance your efficiency but also reduce stress, making the experience of cooking for a crowd an enjoyable and rewarding one.

9. Delegating Responsibilities: Enlist Help from Friends and Family

Cooking for a crowd can be a daunting task, but it doesn’t have to be a solo endeavor. One of the most effective strategies for easing the burden and enhancing the experience is to delegate responsibilities. Enlisting friends and family not only lightens your load but also transforms the event into a collaborative and enjoyable gathering.

Start by assessing the tasks that need to be accomplished—meal prep, cooking, setting the table, and cleaning up afterward. Once you have a clear picture, reach out to your circle and assign specific responsibilities based on each person’s strengths and preferences. Perhaps your friend is a whiz at chopping vegetables, while another excels at baking desserts. By tapping into these skills, you not only ensure a smoother workflow but also allow everyone to contribute their unique talents to the meal.

Communicate clearly about what you need help with and establish a timeline for when each task should be completed. A shared digital document or group chat can be an effective way to coordinate efforts and keep everyone on the same page. This approach fosters a sense of teamwork and camaraderie, turning the cooking process into a fun and social experience rather than a stress-filled chore.

Moreover, consider making it a potluck-style gathering where each guest brings a dish. This not only eases your burden but also adds variety to the meal, allowing everyone to showcase their culinary flair. Plus, the excitement of tasting different dishes can become a highlight of the gathering, sparking conversations and connections among guests.

By involving friends and family in the cooking process, you not only lighten your workload but also create lasting memories. The laughter shared over chopping vegetables, the friendly debates over the best way to season a dish, and the collective satisfaction of a well-prepared meal will make the effort worthwhile. So, roll up your sleeves, gather your crew, and enjoy the delightful chaos that comes with cooking for a crowd!

10. Serving Styles: Buffet vs. Plated Meals

When it comes to feeding a crowd, the style of service can significantly impact both the dining experience and the overall atmosphere of your event. The two most popular serving styles—buffet and plated meals—each have their unique advantages and considerations, so it’s essential to weigh them carefully to find what works best for your gathering.

**Buffet Style:** A buffet can create a relaxed and informal vibe, allowing guests to mingle and serve themselves at their own pace. This style is particularly advantageous for larger gatherings, as it can handle a wide variety of dishes and dietary preferences. Imagine a long table adorned with colorful platters of food, where guests can choose from an array of options, from savory roasted meats to vibrant vegetarian dishes and mouthwatering sides. Buffets also reduce the need for extensive staffing, as fewer servers are needed to manage the flow of food. Plus, the visual appeal of beautifully arranged dishes can be a feast for the eyes, tantalizing guests before they even take their first bite.

**Plated Meals:** On the other hand, plated meals offer a more formal dining experience, where each guest is served a curated selection of dishes at their seat. This approach can create an elegant atmosphere, perfect for weddings, corporate events, or milestone celebrations. Plated meals allow for precise portion control and can make it easier to accommodate food allergies or specific dietary restrictions. With a well-chosen menu, guests can enjoy a thoughtfully crafted dining experience with beautifully plated dishes that showcase your culinary skills. However, it typically requires more staff for serving and can demand more time to execute, especially during peak meal times.

Ultimately, the choice between buffet and plated meals comes down to the type of gathering you’re hosting, the atmosphere you wish to create, and the logistics of serving a crowd. Consider your audience, the space you have available, and the level of formality you desire. Whichever serving style you choose, both can be executed seamlessly with a bit of planning, ensuring your guests leave satisfied and eager for the next gathering!

11. Tips for Scaling Recipes: Adjusting Ingredient Quantities

Cooking for a crowd can be a daunting task, especially when it comes to scaling recipes. However, with the right approach, you can adjust ingredient quantities without sacrificing flavor or texture. Here are some essential tips to help you navigate this culinary challenge with ease.

**1. Understand the Recipe**: Before you start scaling, take the time to understand the original recipe. Note the number of servings it yields and identify the key ingredients. This will help you determine how much to multiply each component based on the number of guests you expect.

**2. Use the Right Ratios**: While some ingredients can be scaled linearly, others require a bit more finesse. For instance, spices and seasonings often need to be adjusted to taste rather than simply multiplied. A good rule of thumb is to start with 1.5 times the original amount and taste as you go, allowing yourself to fine-tune the flavor.

**3. Consider Cooking Times**: When increasing the quantity of a dish, remember that cooking times may vary. Larger batches can take longer to cook, especially in the case of baked goods or casseroles. Make sure to adjust your cooking time accordingly and keep an eye on doneness to avoid overcooking or undercooking.

**4. Invest in Quality Equipment**: Scaling up often means you’ll need larger pots, pans, and mixing bowls. Investing in high-quality equipment can make a significant difference in your cooking experience. Additionally, larger appliances like slow cookers or roasters can be incredibly helpful for feeding a crowd.

**5. Make Ahead When Possible**: Some dishes, like stews or soups, often taste better the next day as the flavors meld. Whenever possible, prepare these dishes in advance to save time on the day of your gathering. This also allows you to focus on other elements of your meal, such as sides or desserts.

**6. Keep It Simple**: When cooking for a large group, it can be tempting to impress with intricate dishes. However, simplicity is your friend. Choose recipes that require minimal ingredients and steps, allowing you to manage your time and energy more effectively.

By following these tips for scaling recipes, you’ll find that cooking for a crowd can be a rewarding experience rather than a stressful one. With careful planning and preparation, you can create delicious meals that will leave your guests raving and eager for the next gathering.

12. Creative Leftover Ideas: Making the Most of Extra Food

When cooking for a crowd, it’s not uncommon to find yourself with an abundance of leftovers. Rather than letting that extra food go to waste, why not transform those remnants into delicious new meals? Creative leftover ideas not only help you reduce waste but also save you time and money in the kitchen.

Start by repurposing your main dishes into entirely new creations. For instance, leftover roasted chicken can be shredded and tossed into a hearty soup, added to a vibrant salad, or transformed into flavorful tacos with just a few fresh ingredients. Similarly, if you’ve prepared a large batch of pasta, consider turning it into a baked pasta dish or a refreshing pasta salad the next day.

Don’t overlook the power of a good frittata! Leftover vegetables can be whisked into eggs for a hearty breakfast or brunch option that’s both satisfying and quick to prepare. You can also blend leftover grains, like rice or quinoa, with some sautéed vegetables and a protein of your choice to create a scrumptious grain bowl, ideal for lunch.

For those sweet leftovers, consider making a decadent bread pudding with leftover bread or whipping up a smoothie with any overripe fruits. Even desserts can take on a new life; crumbled cake can become a delicious parfait layered with yogurt and fresh berries, or use extra frosting to top off cookies for a delightful treat.

By thinking outside the box and embracing your creativity, you can turn your leftover food into new culinary adventures, ensuring that nothing goes to waste while delighting your family and friends with fresh flavors. Transforming your surplus into exciting meals not only adds variety to your menu but also keeps the joy of cooking alive long after the initial gathering has ended.

13. Special Dietary Needs: Accommodating Allergies and Preferences

When cooking for a crowd, accommodating special dietary needs is not just a thoughtful gesture—it’s essential for creating an inclusive dining experience. In today’s diverse culinary landscape, guests may arrive with a range of dietary restrictions, from common allergies like gluten and nuts to lifestyle choices such as vegetarianism or veganism. Ignoring these needs can lead to discomfort, disappointment, or even health risks, so addressing them in advance will elevate your gathering.

Start by communicating with your guests ahead of time. A simple RSVP request asking about dietary restrictions can provide valuable insight. Create a checklist of common allergens—like dairy, eggs, soy, and shellfish—and ask guests to indicate any they may have. This proactive approach not only helps you plan but also shows your guests that you care about their well-being.

Once you have this information, it’s time to get creative! Consider preparing a few versatile dishes that can be easily modified to accommodate different preferences. For example, a hearty pasta salad can be made with gluten-free pasta and served with a variety of dressings on the side, allowing gluten-sensitive guests to enjoy the meal without worry. Offering a selection of toppings for a baked potato bar can delight both vegans and meat-eaters alike, providing options like dairy-free sour cream, sautéed vegetables, and crispy bacon.

Another key tip is to label your dishes clearly. Use small signs to indicate which foods are vegan, vegetarian, gluten-free, or contain common allergens. This not only assists guests in making informed choices but also sparks conversation around the food you’ve prepared.

Finally, don’t forget about dessert! Many traditional sweets can easily be adapted to suit dietary needs. Think flourless chocolate cake for gluten-free guests or fruit sorbet for a refreshing vegan option.

By taking the time to accommodate special dietary needs, you not only ensure that all your guests feel included but also showcase your culinary skills and creativity. A well-planned menu that considers everyone’s preferences can transform a simple gathering into a memorable feast where everyone leaves satisfied.

14. Presentation Tips: Making Your Spread Visually Appealing

When it comes to cooking for a crowd, the adage “we eat with our eyes first” couldn’t be more accurate. An enticing presentation can elevate your meal from ordinary to extraordinary, making it not just a feast for the stomach, but also a delight for the senses. Here are some essential presentation tips to ensure your spread looks as delicious as it tastes.

**Color, Color, Color**: Incorporate a vibrant array of colors into your dishes. Fresh herbs, roasted vegetables, and colorful sauces can all add visual interest to your table. Consider the color wheel when planning your menu; complementary colors can enhance the overall aesthetic. For instance, pairing bright green asparagus with rich purple eggplant creates a stunning visual contrast.

**Layering and Heights**: Avoid a flat presentation by layering your dishes and varying the heights on the table. Use cake stands, wooden boards, or tiered trays to create levels. For example, stack your appetizers on a multi-tiered platter or arrange salads in clear bowls to showcase the fresh ingredients. This not only adds dimension but also encourages guests to explore each dish.

**Garnish Wisely**: A thoughtful garnish can transform a simple dish into a culinary masterpiece. Fresh herbs, edible flowers, or a sprinkle of microgreens can add both flavor and visual appeal. Just be sure that your garnishes are edible and complement the dish in taste. For instance, a sprig of rosemary on roasted potatoes or a sprinkle of pomegranate seeds over a salad can provide that final touch that makes your dish pop.

**Serving Ware Matters**: The right serving dishes can make all the difference. Opt for platters and bowls that enhance the colors and textures of your food. White or light-colored dishes often serve to highlight vibrant foods, while rustic wooden boards can lend a homey feel to a charcuterie spread. Additionally, consider using clear glass containers for salads or desserts, allowing guests to see the beautiful layers within.

**Create a Narrative**: Arrange your spread in a way that tells a story. Group similar items together—think a Mediterranean section with hummus, olives, and pita, or a taco bar with all the fixings. This not only guides your guests in choosing their meals but also invites them to engage with the food, sparking conversations and excitement around the various offerings.

By attending to the visual elements of your meal, you create an inviting atmosphere that enhances the dining experience. Remember, a well-presented spread not only showcases your culinary skills but also reflects the care and effort you’ve put into feeding your flock. So, as you prepare for your gathering, take the time to arrange your dishes thoughtfully—your guests will appreciate the extra touch, and your meal will be remembered long after the last bite is taken.

15. Final Thoughts: Enjoying the Process and the Company of the crowd

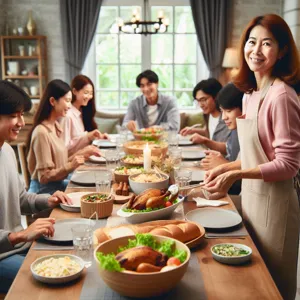
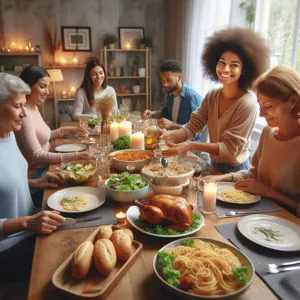
Cooking for a crowd can seem like a daunting task, but it’s essential to remember that the heart of any gathering lies in the joy of sharing food and creating memories together. As you prepare to feed a group, take a moment to shift your focus from the stress of the kitchen to the camaraderie that surrounds the table. Embrace the process as an opportunity to connect with your loved ones, whether it’s through laughter over a shared recipe or the excitement of trying something new.

In the midst of chopping, stirring, and plating, allow yourself to savor each moment. Play your favorite music in the background, invite a friend to help, or share stories with family members as you cook. These interactions can turn the preparation into an enjoyable experience rather than a chore. Remember, it’s perfectly okay if not everything goes according to plan. Sometimes, the most memorable meals come from unexpected twists, whether it’s a recipe that didn’t turn out quite right or a last-minute ingredient swap.

As the food is served and the laughter fills the air, take a step back and appreciate the fruits of your labor. Watch as your friends and family enjoy the meal you’ve lovingly prepared. Engage in conversations, reminisce about past gatherings, and create new stories to carry forward. The key to cooking for a crowd is not just about the food but about fostering connections and celebrating togetherness. So, let go of perfection, embrace the delightful chaos, and relish in the company of those who gather around your table. After all, it’s these moments of joy and connection that make the effort truly worthwhile.

We hope you found our tips for cooking for a crowd both inspiring and practical! Feeding a large group can seem daunting, but with the right planning and strategies, you can create a delicious and memorable meal that brings everyone together. From choosing the right recipes and prepping in advance to utilizing your kitchen tools efficiently, these tips will help you navigate the challenges of large-scale cooking with confidence. So gather your ingredients, invite your friends or family, and let the joy of cooking for a crowd transform your next gathering into a delightful feast. Remember, the heart of any great meal lies in the love and care you put into it—happy cooking!

What are the best ways to eat less salt?

In a world where flavor often reigns supreme, the quest to cut down on salt can feel like a daunting challenge.

Yet, as health-conscious individuals strive to lower their salt intake for better heart health and overall wellness, it’s crucial to discover delicious alternatives that don’t compromise taste. This blog post unveils ten simple strategies that will empower you to reduce salt in your meals while still enjoying vibrant, mouthwatering flavors. From harnessing the power of fresh herbs and spices to experimenting with zesty citrus and umami-packed ingredients, you’ll learn how to elevate your culinary creations without the excessive sodium. Whether you’re looking to improve your diet or simply want to explore new ways to season your food, these practical tips will help you savor every bite while keeping your salt levels in check. Get ready to embark on a flavorful journey towards healthier eating!

1. Understanding the Importance of Reducing Salt Intake

What are the best ways to eat less salt?
Credit : whatcanu.com

Reducing salt intake is crucial for maintaining overall health and well-being, yet many people find it difficult to cut back without feeling deprived of flavor. Understanding the importance of this dietary adjustment is the first step in making a lasting change. Excessive salt consumption has been linked to a myriad of health issues, including high blood pressure, heart disease, and stroke. The World Health Organization recommends that adults limit their sodium intake to less than 2,000 milligrams per day—about one teaspoon of salt—yet many of us consume significantly more than that.

Knowing the risks associated with high sodium levels can serve as a powerful motivator. While we often think of salt as simply a seasoning, it plays a much larger role in our health than we may realize. Not only does it contribute to water retention, leading to bloating and discomfort, but it can also have a lasting impact on our cardiovascular system. By reducing salt intake, you’re not just making a dietary change; you’re investing in a healthier lifestyle that can lead to increased energy levels, improved kidney function, and a lower risk of serious health conditions.

However, the good news is that cutting down on salt doesn’t mean sacrificing taste. With a little creativity and some smart substitutions, you can enhance your meals with bold flavors that don’t rely on sodium. Fresh herbs, spices, citrus, and umami-rich ingredients can bring dishes to life, allowing you to enjoy satisfying flavors while keeping your health in check. Understanding the importance of reducing salt is not just about the numbers; it’s about embracing a flavorful journey towards a healthier you.

2. Exploring the Health Risks of Excessive Sodium

Excessive sodium intake is a silent yet potent threat to our health, often lurking in our favorite foods and seasoning blends. Understanding the health risks associated with high sodium consumption is crucial for making informed choices about our diets. The most immediate concern is hypertension, or high blood pressure, which affects nearly half of all adults in the United States. Elevated blood pressure can strain the heart and blood vessels, leading to a host of cardiovascular issues, including heart disease and stroke.

But the dangers of sodium don’t stop there. High salt intake is also linked to kidney disease, as the kidneys work tirelessly to filter excess sodium from the bloodstream. Over time, this can lead to decreased kidney function or even kidney stones, which are known for their painful symptoms. Moreover, research suggests that a diet high in sodium may contribute to conditions like osteoporosis, where excessive salt can cause calcium to be leached from the bones. This not only weakens bones but also increases the risk of fractures, particularly in older adults.

For those who suffer from certain conditions, such as heart failure or edema, managing sodium intake becomes even more critical. A high-sodium diet can exacerbate fluid retention, leading to uncomfortable swelling and increased strain on the heart. By reducing sodium consumption, individuals can often find relief from these symptoms and improve their overall well-being.

Understanding these risks highlights the importance of finding flavorful alternatives to salt without compromising taste. By exploring fresh herbs, spices, and other natural flavor enhancers, we can create vibrant meals that are not only satisfying but also align with our health goals. The journey to reducing sodium doesn’t have to be bland—it’s an opportunity to discover a world of flavor that celebrates health without sacrifice.

3. Start with Fresh Ingredients: Embrace Whole Foods

What are the best ways to eat less salt?
Credit : whatcanu.com

When it comes to cutting down on salt without sacrificing flavor, starting with fresh ingredients is a game changer. Embracing whole foods is not just a healthy choice; it’s a flavorful one too. Fresh fruits, vegetables, herbs, and spices are naturally bursting with flavors that can elevate your dishes beyond the need for added salt.

Imagine walking through a vibrant farmer’s market, where the air is filled with the enticing aromas of ripe tomatoes, fragrant basil, and zesty citrus. These ingredients don’t just add color to your meal; they bring a depth of flavor that processed foods often lack. For instance, a ripe tomato can offer a sweet, tangy essence that transforms a simple salad or pasta dish, making it delightful without the need for an extra sprinkle of salt.

Herbs and spices, in particular, are your best allies in this journey. Fresh basil, cilantro, rosemary, and thyme can infuse your meals with rich layers of flavor, while spices like cumin, paprika, and black pepper can add warmth and complexity. Consider a roasted vegetable medley drizzled with olive oil and sprinkled with fresh herbs—each bite is a celebration of taste that stands strong on its own, needing no additional salt.

Moreover, whole foods are not only more nutritious, but they also offer a satisfying texture that processed options can rarely match. Crunchy fresh bell peppers, juicy cucumbers, and creamy avocados provide a sensory experience that enhances your dishes and keeps them interesting. By prioritizing these fresh ingredients, you’ll find that the natural flavors shine through, allowing you to cut back on salt while still creating delicious, satisfying meals that leave you feeling great.

So next time you’re planning your meals, remember: the fresher the ingredient, the more flavorful your dish. Embrace whole foods, and watch your culinary creations flourish.

4. Experimenting with Herbs and Spices as Flavor Boosters

When it comes to cutting down on salt without sacrificing flavor, experimenting with herbs and spices is one of the most rewarding strategies you can embrace. These natural flavor enhancers can transform a bland dish into a culinary masterpiece, inviting vibrant layers of taste that excite the palate.

Imagine reaching for a handful of fresh basil, its aromatic leaves releasing a sweet, peppery fragrance as you tear them into your pasta dish. Or consider the warm, earthy notes of cumin and coriander that can elevate a simple bean stew into an exotic experience. The right combination of herbs and spices can not only replace the savory depth that salt provides but also introduce new flavors you never thought possible.

Begin by exploring different flavor profiles. If you’re cooking Italian, consider rosemary, thyme, and oregano; for a Middle Eastern flair, try za’atar or sumac. Asian dishes can benefit greatly from ginger, garlic, and lemongrass, while a sprinkle of smoked paprika can add depth to any savory recipe. Don’t hesitate to mix and match—sometimes, the most unexpected pairings lead to the most delightful results!

To maximize the benefits of your herbs and spices, consider toasting whole spices in a dry pan to release their essential oils, or using fresh herbs toward the end of cooking to ensure their bright flavors shine through. Incorporating acidic ingredients like lemon juice or vinegar can further enhance the taste, creating a balanced dish that beckons for seconds.

By dedicating some time to experiment with herbs and spices, you not only reduce your sodium intake but also embark on a flavorful journey that can reinvigorate your cooking. So grab those jars from your pantry, try out new combinations, and let your creativity flourish—your taste buds will thank you!

5. The Power of Acid: Using Citrus and Vinegars

What are the best ways to eat less salt?
Credit : whatcanu.com

When it comes to enhancing flavor without the need for excess salt, few ingredients pack as much punch as citrus fruits and vinegars. The bright, tangy profiles of these acids can elevate any dish, creating a complex taste experience that often rivals the richness traditionally provided by salt.

Citrus fruits like lemons, limes, oranges, and grapefruits offer not only their zesty juices but also their fragrant zest, which can add an aromatic layer to your meals. A squeeze of fresh lemon or lime juice over grilled vegetables or fish can bring out their natural sweetness while simultaneously adding a refreshing lift. Similarly, incorporating citrus zest into marinades or dressings adds an invigorating burst that tantalizes the taste buds.

Vinegars, from classic balsamic to zesty apple cider or tangy rice vinegar, provide another avenue for flavor enhancement. A splash of vinegar in a salad dressing can brighten the greens, while a drizzle over roasted vegetables can transform a simple dish into a gourmet experience. The acidity found in vinegar can also help to balance out richness in heavier dishes, such as creamy pastas or hearty stews, making them feel lighter and more vibrant.

The power of acid is all about contrast. By introducing these bright flavors into your cooking, you can create depth and complexity that make the absence of salt feel almost unnoticeable. So, next time you’re whipping up a meal, don’t shy away from reaching for that lemon or vinegar bottle—embrace the zest and tang that can elevate your dishes to new heights without compromising on flavor.

6. Utilizing Cooking Techniques to Enhance Flavor

When it comes to cutting down on salt, the way you cook can make all the difference in preserving and enhancing the flavor of your dishes. By employing various cooking techniques, you can coax out the natural flavors of your ingredients, creating depth and complexity without relying heavily on salt.

**Searing and Browning:** One of the most effective methods is searing, which involves cooking food at high heat to create a caramelized crust. This technique is perfect for proteins like chicken, beef, or fish. The Maillard reaction—the chemical reaction that occurs when proteins and sugars are exposed to heat—adds a rich, savory flavor that can elevate your dish. Just a sprinkle of herbs or a squeeze of lemon afterwards can enhance this flavor further without the need for added salt.

**Roasting:** Roasting vegetables in the oven allows their natural sugars to caramelize, intensifying their sweetness and flavor. Toss vegetables like Brussels sprouts, carrots, or bell peppers with a little olive oil and your favorite spices, then roast them until they’re golden brown. The results are deliciously sweet and savory, making them a satisfying side that doesn’t miss the salt.

**Infusing:** Infusion is another technique that can enhance flavor significantly. Consider infusing oils or vinegars with aromatics such as garlic, herbs, or citrus peels. These infused ingredients can then be drizzled over your dishes to impart a burst of flavor without the need for salt. For instance, a drizzle of garlic-infused olive oil over pasta or a salad can provide a robust flavor profile that delights the palate.

**Using Acid:** Don’t underestimate the power of acidity! Ingredients like lemon juice, vinegar, or lime juice can brighten a dish and make flavors pop. A splash of balsamic vinegar on roasted vegetables or a squeeze of fresh lime juice in a fish taco can create an explosion of flavor that often compensates for the lack of salt.

**Herbs and Spices:** While not strictly a cooking technique, using fresh or dried herbs and spices effectively can transform a dish. Instead of reaching for the salt shaker, experiment with herbs like rosemary, thyme, or basil. Spices like cumin, paprika, and coriander can also add warmth and depth to your meals. When combined with the right cooking techniques, these flavor boosters can turn even the simplest of dishes into a culinary delight.

By incorporating these cooking techniques, you can cut down on salt while still enjoying vibrant, flavorful meals that satisfy your taste buds. The key lies in being adventurous in the kitchen and exploring the myriad of flavors that can be unlocked through thoughtful preparation and cooking methods.

7. Incorporating Aromatics: Onions, Garlic, and More

What are the best ways to eat less salt?
Credit : whatcanu.com

When it comes to enhancing flavor while reducing sodium, incorporating aromatics like onions, garlic, shallots, and leeks into your cooking can be a game-changer. These ingredients are not just the foundation of countless dishes; they possess unique flavors that can elevate your meals without the need for added salt.

Onions, whether they are yellow, red, or sweet varieties, provide a natural sweetness that develops beautifully when sautéed. Their caramelization releases deep, rich flavors that can make any dish feel more indulgent. Garlic, on the other hand, brings a robust and slightly spicy kick that can transform a simple pasta or vegetable dish into something extraordinary. Roasted garlic, with its mellow and creamy texture, can be spread on bread or blended into sauces, adding a layer of complexity that distracts from the absence of salt.

Shallots offer a more delicate flavor profile, with hints of both onion and garlic, making them perfect for dressings or as a finishing touch to a dish. Additionally, herbs and spices can amplify the flavor profile even further. Fresh herbs like basil, cilantro, or thyme add brightness and freshness, while spices such as paprika, cumin, and black pepper contribute warmth and depth.

Experimenting with these aromatics allows you to develop a repertoire of flavorful combinations tailored to your taste. Try adding a generous amount of chopped onions and garlic to your stir-fry, or sauté shallots in olive oil before tossing them with roasted vegetables. Not only will your meals be delicious, but they will also be healthier, demonstrating that you can indeed cut down on salt without sacrificing flavor. Embrace the power of aromatics and unlock a world of taste in your kitchen!

8. Choosing Low-Salt Alternatives: Read Labels Carefully

When it comes to cutting down on salt, one of the most effective strategies is to choose low-sodium alternatives whenever possible. However, not all low-sodium products are created equal, and this is where careful label reading becomes essential. Many consumers are surprised to discover that what seems like a healthy, low-sodium option can still contain a surprising amount of salt, especially when it comes to processed foods.

Start by familiarizing yourself with the nutritional information on the packaging. Look beyond the bold “low-sodium” label and delve into the actual sodium content per serving. A product may claim to be low in sodium, but if the serving size is unrealistically small, you might end up consuming more sodium than you bargained for. Aim for items that contain less than 140 mg of sodium per serving, which is generally considered a low-sodium option.

Additionally, keep an eye out for hidden sources of sodium. Ingredients such as soy sauce, pickles, and certain condiments can pack a salty punch, even in small amounts. Opt for low-sodium versions of these staples, or consider making your own at home. For example, homemade salad dressings can be a flavorful substitute that allows you to control the salt content.

In your quest to reduce salt, don’t overlook the importance of flavor. Many low-sodium alternatives are enhanced with herbs, spices, and other flavoring agents that can elevate your dishes without the need for added salt. Experiment with fresh ingredients like garlic, lemon juice, and various spices to keep your meals vibrant and exciting. By reading labels carefully and making informed choices, you can successfully reduce your sodium intake while still enjoying delicious, satisfying meals.

9. Creative Use of Flavorful Broths and Stocks

When it comes to reducing salt in your cooking, flavorful broths and stocks can be your best allies. They serve as a robust foundation that infuses dishes with depth and richness, allowing you to enhance flavors without relying solely on salt. Instead of reaching for that salt shaker, consider the myriad of options available to you in the world of broths and stocks.

Start with homemade broths, crafted from fresh vegetables, herbs, and spices. A simple vegetable broth simmered with aromatic ingredients like garlic, onions, and carrots can provide a natural sweetness and complexity that elevates your dish. For an extra kick, toss in a few sprigs of fresh herbs such as thyme or rosemary, or a splash of vinegar to balance the flavors.

If time is of the essence, store-bought options can also be a lifesaver; just be sure to choose low-sodium varieties. These can be used as a base for soups, stews, and sauces or even as a cooking liquid for grains and legumes. Imagine cooking your quinoa in a rich mushroom broth, allowing it to absorb that umami flavor without the additional salt.

For an unexpected twist, explore international broths that can add unique flavors to your meals. A fragrant coconut milk broth infused with lemongrass and ginger can transform a simple chicken stir-fry into a vibrant culinary experience. Alternatively, a spicy kimchi broth can bring warmth and zest to your ramen or noodle dishes.

Experiment with flavor layering by starting with your broth and then building upon it with aromatics like sautéed onions, garlic, or leeks. Incorporate spices such as cumin, coriander, or smoked paprika to create layers of taste that distract from the absence of salt. Finally, consider finishing your dishes with a drizzle of citrus juice or a sprinkle of fresh herbs to brighten the flavors and leave your taste buds satisfied.

By creatively using flavorful broths and stocks, you can cut down on salt while still delivering delicious, satisfying meals that encourage healthy eating without compromising on taste. Embrace the art of broth-making, and watch as your dishes come alive with flavor!

10. Enhancing Flavor with Fermented Foods

Incorporating fermented foods into your diet is a delicious and nutritious way to enhance flavor while reducing your reliance on salt. Fermentation not only transforms food but also amplifies its natural taste, offering a complex array of flavors that can elevate your meals without the need for excessive sodium.

Think about the tangy punch of kimchi or the sharpness of a well-aged sauerkraut. These fermented delights are bursting with umami, the savory fifth taste that can make dishes truly irresistible. A simple spoonful of kimchi can add a zesty kick to tacos, while sauerkraut can elevate a humble sandwich to new heights.

Additionally, fermented foods are often rich in probiotics, which are beneficial for gut health. This dual benefit means you’re not just cutting down on salt; you’re also nourishing your body. You can easily incorporate items like miso, tempeh, or yogurt into your cooking. Miso, for example, can be whisked into dressings or soups, providing a depth of flavor that rivals the saltiest of broths.

Experimenting with fermented condiments can also provide unexpected flavor profiles. Consider using pickled vegetables to add crunch and acidity to salads or grain bowls, or drizzle a bit of kimchi juice over roasted vegetables for a delightful contrast.

By embracing the vibrant world of fermented foods, you can open up a treasure trove of flavors that will keep your taste buds satisfied while you cut back on salt. So, dive into the world of fermentation and watch your meals transform from ordinary to extraordinary!

11. Mindful Seasoning: Techniques for Reducing Salt Gradually

When it comes to reducing salt in your cooking, adopting mindful seasoning techniques can be a game-changer. The goal is to gradually decrease your sodium intake without sacrificing the flavors that make your meals enjoyable. Start by experimenting with the concept of layering flavors. Instead of relying solely on salt, enhance your dishes with a variety of aromatic herbs and spices. Fresh herbs like basil, cilantro, or parsley can brighten up any dish, while spices such as cumin, paprika, and chili powder add depth and warmth.

Another approach is to use acid to bring balance and brightness to your meals. A splash of lemon juice, a drizzle of balsamic vinegar, or even a sprinkle of citrus zest can elevate flavors, making it easier to reduce your reliance on salt. Likewise, consider incorporating umami-rich ingredients like mushrooms, tomatoes, or nutritional yeast, which can impart a savory taste without the need for added sodium.

As you embark on this journey of mindful seasoning, take the time to taste your food at various stages of preparation. This practice not only helps you recognize the natural flavors of your ingredients but also allows you to adjust your seasoning gradually, giving your palate time to adapt. Remember, cooking is an art, and by experimenting with different techniques and combinations, you can create delicious dishes that are both satisfying and lower in salt. Ultimately, mindful seasoning empowers you to enjoy flavorful meals while prioritizing your health.

12. Flavorful Cooking Methods: Roasting, Grilling, and Sautéing

When it comes to reducing salt without sacrificing flavor, the cooking methods you choose can make all the difference. Roasting, grilling, and sautéing not only enhance the natural flavors of your ingredients but also create a delightful aroma that can elevate your meals to new heights.

**Roasting** is a fantastic technique that caramelizes the natural sugars in vegetables and proteins, imparting a rich depth of flavor. As you toss your favorite vegetables—like carrots, bell peppers, and Brussels sprouts—with a splash of olive oil and your choice of herbs, the oven works its magic. The high heat transforms those humble ingredients, developing a sweet, nutty profile that can stand strong on its own, even sans salt. Imagine biting into a perfectly roasted cauliflower steak, its edges beautifully charred and its interior tender—flavor-packed and utterly satisfying.

**Grilling,** on the other hand, introduces a smoky essence that can elevate any dish. The act of cooking over an open flame creates a unique flavor profile that enhances meats, seafood, and veggies alike. Marinate your proteins in citrus juices, garlic, and fresh herbs to amplify flavor without relying on salt. A grilled lemon-herb chicken, with its juicy, succulent texture and enticing aroma, showcases how grilling can transcend the need for extra seasoning.

**Sautéing** is another excellent method that preserves the integrity and taste of fresh ingredients. Using a small amount of healthy oil, quickly cooking vegetables over high heat creates a wonderful contrast of textures and flavors. Toss in aromatic ingredients like garlic, ginger, or onions, and you’ll create a fragrant base that enhances whatever you cook next. Think of a sautéed spinach dish—bright, vibrant, and brimming with flavor, it can easily shine without a sprinkle of salt.

Incorporating these flavorful cooking methods into your culinary repertoire not only helps you cut down on salt but also encourages a deeper appreciation for the natural flavors of your ingredients. By experimenting with roasting, grilling, and sautéing, you’ll discover that delicious meals can be crafted without the reliance on salt, all while keeping your taste buds excited and satisfied.

13. Finding Balance: How to Taste as You Cook

Finding balance in your cooking is crucial, especially when you’re trying to reduce salt while still packing a punch of flavor. One of the most effective techniques is to taste as you go, a practice that not only enhances your culinary skills but also helps you develop a deeper understanding of how different ingredients interact.

Start by sampling your dish at various stages of the cooking process. As you sauté your vegetables, for instance, take a moment to taste them before adding any seasoning. This allows you to appreciate their natural flavors and sweetness, which can often shine through without the need for extra salt.

When you’re making a broth or sauce, taste it frequently to gauge its development. If it seems flat, consider adding a splash of acidity—like lemon juice or vinegar—or a sprinkle of herbs and spices instead of reaching for the salt shaker. Fresh herbs such as basil, cilantro, or parsley can elevate your dish, bringing a burst of freshness that helps compensate for the lower sodium content.

Additionally, keep in mind that flavors can intensify as they cook, so hold off on final seasonings until your dish is nearly complete. This practice not only encourages a mindful cooking approach but also allows you to adjust flavors incrementally, ensuring a well-balanced final product. By honing your tasting skills, you create a more intuitive cooking experience that celebrates the natural essence of your ingredients while crafting delicious meals that are kinder to your health. So, the next time you’re in the kitchen, remember: a little patience and a discerning palate can go a long way in achieving flavor without the excess salt.

14. The Role of Umami in Reducing Salt Dependence

Umami, often referred to as the “fifth taste,” is a powerful ally in your quest to reduce salt while still delivering a satisfying flavor profile. This savory taste is found in a variety of foods, including tomatoes, mushrooms, aged cheeses, soy sauce, and fermented products like miso. By harnessing the essence of umami, you can enhance the depth and richness of your dishes, allowing you to cut back on salt without compromising on taste.

When you incorporate umami-rich ingredients into your cooking, you create a complex flavor base that can mask the absence of salt. For example, adding a splash of soy sauce or a sprinkle of nutritional yeast to your recipes can provide that savory kick that makes your taste buds sing. Roasting vegetables like bell peppers, carrots, and onions can also elevate their natural sweetness and umami characteristics, creating a robust flavor that needs less seasoning.

Experimenting with umami is not just about adding flavor; it’s about understanding how it can transform your meals. Consider using mushrooms in sauces, incorporating sun-dried tomatoes into pasta dishes, or blending in some miso paste into dressings and marinades. These ingredients can infuse your dishes with a savory richness that leaves you feeling satisfied, reducing the urge to reach for the salt shaker.

Additionally, umami can enhance the perception of flavor intensity, meaning you might find that you need less salt than before. This not only benefits your health by lowering sodium intake but also encourages a more diverse palate as you explore new ingredients and cooking techniques. Embracing umami in your cooking is a delicious way to elevate your meals while maintaining a heart-healthy approach. So, the next time you’re in the kitchen, remember that umami is not just a flavor; it’s a flavorful solution to cutting down on salt!

15. Tips for Dining Out: Making Informed Choices

Dining out can often present challenges for those looking to cut down on salt without sacrificing flavor. However, with a little knowledge and some strategic choices, it’s entirely possible to enjoy your meal while keeping sodium levels in check.

Before you even step foot in the restaurant, consider researching the menu online. Many establishments provide nutritional information on their websites, allowing you to pinpoint lower-sodium dishes in advance. Look for options that emphasize fresh ingredients, as these are often prepared with less salt compared to heavily processed foods.

Once you’re seated, don’t hesitate to communicate with your server. Politely ask about the preparation methods and request that your dish be made with less salt or with sauce served on the side. This simple tweak can dramatically reduce sodium without compromising the overall taste.

When it comes to appetizers, opt for salads or vegetable-based dishes, and ask for dressings or dips to be served on the side, so you can control the amount used. Steer clear of fried or heavily seasoned items, which are often high in hidden salt.

As you explore the main course options, consider grilled, baked, or steamed dishes instead of fried or sautéed ones. These cooking methods typically require less salt while still delivering robust flavors through herbs, spices, and citrus. When ordering seafood, choose items that are simply seasoned rather than those that come with rich sauces or marinades.

Lastly, don’t forget about beverages! Choose water, herbal teas, or fresh juices to avoid the added sodium often found in soft drinks and cocktails. By making these informed choices, you can savor your dining experience while sticking to your goal of reducing salt intake, proving that a flavorful meal doesn’t have to come at the expense of your health. Enjoy the adventure of exploring new flavors that are both delicious and mindful of your dietary needs!

As we wrap up our exploration of the 10 simple strategies to cut down on salt without sacrificing flavor, we hope you feel inspired and empowered to make tasty, heart-healthy choices in your cooking. Reducing salt doesn’t mean compromising on the deliciousness of your meals; instead, it opens up a world of flavors through herbs, spices, and creative cooking techniques. By incorporating these strategies into your daily routine, you can enhance your dishes while promoting better health for yourself and your loved ones. So, roll up your sleeves and get ready to experiment in the kitchen—your taste buds and heart will thank you! Remember, every small step counts toward a healthier lifestyle, and we can’t wait to hear about the flavorful masterpieces you create along the way!

What are the best ways to eat less processed food?

In a world where convenience often trumps nutrition, the prevalence of processed foods has reached unprecedented levels, making it all too easy to compromise on health.

Many of us find ourselves reaching for pre-packaged snacks and quick meals, often neglecting the wholesome goodness that fresh, unprocessed ingredients can offer. However, making the switch to a healthier diet doesn’t have to be overwhelming. In this blog post, we will explore 10 simple yet effective strategies to help you cut down on processed foods and embrace a more nutritious lifestyle. From meal prepping to discovering delicious alternatives, these practical tips will empower you to take control of your eating habits, boost your energy levels, and ultimately lead to a happier, healthier you. Join us on this journey towards better eating and discover the joy of nourishing your body with real, wholesome foods!

1. Understanding Processed Foods: What to Look For

What are the best ways to eat less processed food?
Credit : whatcanu.com

Understanding processed foods is the first step towards making healthier dietary choices. Processed foods are typically items that have been altered from their natural state through methods such as canning, freezing, refrigeration, dehydration, and packaging. While not all processing is harmful—think of the preservation of fruits and vegetables—many processed foods contain additives that can detract from their nutritional value.

When evaluating whether a food is processed, start by reading the ingredient list. A good rule of thumb is to opt for products with ingredients that you can easily recognize and pronounce. If the list reads like a chemistry experiment, it’s likely laden with preservatives, artificial flavors, and other additives that can contribute to health issues over time. Look out for terms like high fructose corn syrup, hydrogenated oils, and sodium nitrates. These are red flags that indicate a product may be heavily processed.

Furthermore, pay attention to the nutritional information. A high sugar or sodium content often indicates a processed item. Aim to choose foods that are low in added sugars and sodium, and rich in fiber, protein, and healthy fats. Fresh produce, whole grains, lean meats, and unprocessed dairy should become staples in your pantry.

By developing a keen eye for what constitutes processed foods, you can make informed choices that prioritize your health while gradually moving towards a diet rich in whole, nourishing ingredients. This foundational understanding will empower you to navigate grocery store aisles with confidence, helping you cut down on processed foods and embrace a healthier lifestyle.

2. The Benefits of Eating Whole Foods

Eating whole foods provides a plethora of benefits that extend beyond mere nutrition; it fundamentally transforms the way you think about food and its impact on your overall health. Whole foods, which include fresh fruits, vegetables, whole grains, nuts, seeds, and lean proteins, are packed with essential nutrients that support your body’s functions and promote vitality.

Firstly, whole foods are typically rich in vitamins, minerals, antioxidants, and fiber. These nutrients not only nourish your body but also help to reduce the risk of chronic diseases such as heart disease, diabetes, and certain cancers. For instance, the fiber found in whole foods aids digestion, helps maintain a healthy weight, and keeps you feeling fuller for longer, making it easier to resist the temptation of processed snacks.

Moreover, whole foods are usually less calorically dense compared to their processed counterparts, meaning you can eat satisfying portions without overindulging. This is largely due to their natural composition, which includes water and fiber that contribute to a feeling of fullness. As a result, incorporating more whole foods into your meals can assist in weight management and promote a healthier lifestyle.

Additionally, eating whole foods fosters a deeper connection with what you consume. By choosing ingredients that are minimally processed or untouched, you become more mindful of the food journey, from farm to plate. This awareness encourages you to appreciate the flavors and textures of natural ingredients, leading to a more satisfying and pleasurable dining experience.

Lastly, embracing whole foods can significantly impact your mental well-being. Studies have shown that diets rich in whole, nutrient-dense foods are linked to improved mood and cognitive function. By nourishing your body with wholesome ingredients, you may also find yourself feeling more energized and ready to tackle the day ahead.

Incorporating whole foods into your diet is not just a change in what you eat; it’s a holistic approach to a healthier lifestyle that can lead to long-lasting benefits for both your body and mind. So, let’s dive into the world of whole foods and discover how simple changes can lead to profound improvements in your health.

3. Meal Planning: Preparing for Success

What are the best ways to eat less processed food?
Credit : whatcanu.com

Meal planning is a pivotal strategy in the quest to cut down on processed foods and embrace a healthier lifestyle. By taking the time to plan your meals for the week ahead, you not only streamline your grocery shopping but also set yourself up for culinary success. Imagine standing in front of your refrigerator, armed with a well-thought-out list of fresh ingredients and recipes that excite your taste buds, rather than succumbing to the temptation of quick, pre-packaged options.

Start by dedicating a few minutes each week to sketch out your meals. Consider incorporating a variety of colorful fruits and vegetables, lean proteins, and whole grains into your plan. This not only ensures that your meals are nutritious but also keeps them vibrant and enjoyable. By mapping out breakfast, lunch, dinner, and snacks, you create a structure that makes healthy eating both accessible and appealing.

Another essential aspect of meal planning is batch cooking. Set aside time on the weekends to prepare larger portions of your favorite dishes, such as hearty soups, stews, or grain bowls. Not only does this save time during busy weekdays, but it also allows you to control the ingredients, ensuring that you’re using wholesome, unprocessed components. Store these prepped meals in portion-sized containers, and you’ll have convenient, nutritious options ready to go, eliminating the need to reach for processed convenience foods.

Additionally, don’t forget the power of versatility. When planning, consider meals that can easily be adapted or transformed throughout the week. For example, grilled chicken can be the star of a salad one day and a filling taco the next. This keeps your meals interesting and minimizes food waste, as you can strategically use leftovers in new and creative ways.

By embracing meal planning, you not only simplify your week and save money, but you also cultivate a deeper connection with your food. This proactive approach empowers you to make healthier choices and reduces the likelihood of reaching for processed snacks or meals in moments of hunger or fatigue. With each meal you plan, you’re taking a significant step towards a healthier you.

4. Stocking Your Pantry with Healthy Staples

Stocking your pantry with healthy staples is a foundational strategy in your journey toward healthier eating. The key to reducing processed foods lies in having the right ingredients at your fingertips, making it easier to whip up nutritious meals at home.

Begin by assessing what staples align with your dietary preferences and health goals. Whole grains like quinoa, brown rice, and whole-wheat pasta should be primary contenders. These grains provide essential fiber, keeping you full longer and aiding in digestion. Next, consider canned or dried legumes such as chickpeas, lentils, and black beans. Not only are they versatile and protein-rich, but they also serve as a hearty base for salads, soups, and stews.

Fruits and vegetables are crucial, but it’s often challenging to keep fresh produce on hand without a plan for consumption. Instead, stock up on frozen fruits and vegetables, which retain their nutrients and can be easily added to smoothies, stir-fries, or casseroles. Don’t forget about healthy fats—keep olive oil, nut butters, and a selection of nuts and seeds in your pantry. These ingredients offer flavor and satiety while providing essential fatty acids.

Herbs and spices can elevate your meals while also reducing the need for salt and sugar, so fill your shelves with a variety of dried herbs, spices, and even some fresh ones if you can. Finally, having healthy snacks on hand, like popcorn, dried fruit, or rice cakes, will curb cravings for processed snacks and help you stay on track.

By creating a well-stocked pantry filled with these wholesome staples, you’ll find it much easier to prepare delicious, nutrient-dense meals at home, steering clear of the lure of processed foods. With the right ingredients within reach, you can confidently embrace a healthier lifestyle, one meal at a time.

5. Reading Labels: Decoding Food Ingredients

What are the best ways to eat less processed food?
Credit : whatcanu.com

Reading labels is one of the most powerful tools in your arsenal for cutting down on processed foods and making healthier choices. When you stroll through grocery store aisles, it’s easy to be swayed by colorful packaging and bold claims like “low-fat,” “sugar-free,” or “all-natural.” However, these phrases can often be misleading. By taking the time to decode food ingredients, you can empower yourself to make informed decisions about what you put into your body.

Start by familiarizing yourself with the ingredient list, which is typically found on the back of the packaging. Ingredients are listed in descending order by weight, meaning the first few items are the most prevalent in that product. If you see a long list filled with unrecognizable ingredients—think artificial flavors, preservatives, or additives—this is a red flag. Opt for products with short ingredient lists that feature whole, recognizable foods, such as fruits, vegetables, grains, and healthy fats.

Next, pay attention to the nutrition facts panel. Look for key indicators such as added sugars, sodium levels, and unhealthy fats. A simple rule of thumb is to aim for products that have minimal added sugars (ideally less than 5 grams per serving) and lower sodium content (under 140 mg per serving is considered low). Additionally, try to choose items that contain healthy fats like olive oil or avocados rather than trans fats or high amounts of saturated fats.

Finally, don’t be fooled by health claims on the front of the package. Always refer back to the ingredient list and nutrition facts for the real story. By developing the habit of reading labels and understanding food ingredients, you can take significant strides toward cutting down on processed foods, ultimately paving the way for a healthier lifestyle filled with nourishing whole foods. Remember, knowledge is power, and by becoming a savvy label reader, you’re equipping yourself to make better dietary choices one meal at a time.

6. Cooking at Home: Simple Recipes to Get Started

Cooking at home is one of the most effective strategies to cut down on processed foods and embrace a healthier lifestyle. When you whip up meals in your own kitchen, you gain complete control over the ingredients, allowing you to select fresh, whole foods while avoiding artificial additives and excess sugars. Plus, cooking at home can be a fun and rewarding experience that brings the whole family together.

To get started, you don’t need to be a culinary expert or invest in fancy equipment. Simple, delicious recipes can be made with just a few basic ingredients, and often, they can be ready in under 30 minutes. Think about incorporating simple dishes like stir-fries, where you can toss together a mix of colorful vegetables with a protein source like chicken or tofu, seasoned with soy sauce and garlic for flavor.

Another great option is sheet pan meals, where you can roast a variety of vegetables alongside your choice of protein, drizzled with olive oil and herbs. These meals are not only easy to prepare but also require minimal cleanup—perfect for busy weeknights.

Soups and stews are also fantastic for home cooking. They allow you to use up leftover vegetables and proteins while simmering them in a flavorful broth. You can make a big batch to enjoy throughout the week, ensuring you have healthy meals ready-to-go.

For beginners, focus on recipes with few ingredients and straightforward steps. As you become more comfortable, you can experiment with spices and cooking techniques to create exciting new dishes. The key is to keep it simple and enjoyable, allowing your culinary skills to grow alongside your confidence in the kitchen. Embracing home cooking not only cuts down on processed foods but also fosters a deeper connection to the meals you consume, ultimately leading to a healthier lifestyle.

7. Incorporating More Fruits and Vegetables into Your Diet

What are the best ways to eat less processed food?
Credit : whatcanu.com

Incorporating more fruits and vegetables into your diet is one of the simplest yet most effective strategies for cutting down on processed foods and enhancing your overall health. Imagine transforming your meals into vibrant palettes of color, texture, and flavor by adding an array of fresh produce. Not only do fruits and vegetables provide essential vitamins and minerals, but they also offer fiber and antioxidants that are key to maintaining a healthy lifestyle.

Start by making fruits and vegetables the star of your meals rather than just a side dish. This could mean crafting a hearty salad brimming with leafy greens, colorful bell peppers, and succulent cherry tomatoes, drizzled with a light vinaigrette. Or consider whipping up a stir-fry packed with crunchy broccoli, sweet carrots, and vibrant snap peas, tossed in a savory sauce. The goal is to make produce the focal point of your dishes, allowing the natural flavors to shine while minimizing the need for processed ingredients.

To ease the transition, keep a bowl of fresh fruit on your kitchen counter or pack a colorful veggie platter in your fridge for quick snacks. Experiment with new recipes that highlight seasonal fruits and vegetables—think roasted butternut squash, zesty citrus salads, or creamy avocado spreads. You might even discover a newfound love for the fresh, earthy taste of ingredients you haven’t tried before.

Another fun way to incorporate more produce is by blending up smoothies. Combine your favorite fruits with a handful of spinach or kale; the sweetness of the fruits will mask any bitterness from the greens, making it a delicious and nutritious treat.

By making a conscious effort to increase your intake of fruits and vegetables, you’ll not only reduce your reliance on processed foods but also pave the way for a more balanced, nutrient-rich diet. In doing so, you’ll feel energized, satisfied, and more connected to the wholesome ingredients that nourish your body.

8. Smart Snacking: Healthy Alternatives to Processed Snacks

When it comes to snacking, many people find themselves reaching for convenient processed options that often come loaded with unhealthy ingredients, excessive sugars, and empty calories. However, making the switch to smart snacking can significantly improve your overall diet and well-being. By incorporating healthier alternatives, you can satisfy your cravings without derailing your health goals.

Start by exploring the vibrant world of whole foods. Fresh fruits and vegetables are not only packed with essential vitamins and minerals, but they also provide natural sweetness and crunch. Consider keeping a bowl of colorful fruits like apples, bananas, or berries on your kitchen counter for easy access. For a satisfying crunch, sliced cucumbers, bell peppers, or carrot sticks can be paired with a tasty hummus dip, offering a delicious and nutrient-dense option.

Nuts and seeds are another fantastic alternative that can help curb hunger while providing healthy fats and protein. A small handful of almonds, walnuts, or sunflower seeds can be a filling snack that keeps energy levels stable without the crash associated with processed snacks. To keep things interesting, try mixing nuts with dried fruit or dark chocolate chips for a homemade trail mix that satisfies both sweet and salty cravings.

If you find yourself missing the crispy texture of chips, consider air-popped popcorn as a great alternative. This whole grain snack is low in calories and can be seasoned with your favorite spices to create a flavorful treat without the guilt. For those who crave a little indulgence, baked sweet potato fries or zucchini chips can be a nutritious yet satisfying way to enjoy that crunchy texture without the excess oil and preservatives.

Finally, don’t underestimate the power of protein-packed snacks. Greek yogurt, cottage cheese, or even boiled eggs can serve as convenient options that keep you feeling full longer. Top your yogurt with fresh fruits or a sprinkle of granola for a deliciously satisfying snack that feels indulgent but is anything but processed.

By consciously choosing healthy alternatives to processed snacks, you can nourish your body and mind while still enjoying delicious flavors and textures. Making these smart snacking choices not only promotes better health but also helps establish lifelong habits that contribute to a balanced diet.

9. Mindful Eating: Engaging with Your Food

Mindful eating is a transformative practice that invites you to engage with your food on a deeper level, fostering a stronger connection between your body and what you consume. In our fast-paced world, it’s all too easy to rush through meals, distracted by screens or the demands of daily life. However, taking the time to slow down and savor each bite can significantly enhance your eating experience and contribute to healthier choices.

Start by creating a peaceful environment for your meals. Find a quiet space, set the table, and remove distractions. As you sit down to eat, take a moment to appreciate the colors, textures, and aromas of your food. Notice the ingredients that made their way to your plate, celebrating their journey from farm to table. This mindfulness can deepen your appreciation for whole, unprocessed foods.

As you begin to eat, focus on the sensations of each bite. Chew slowly and deliberately, allowing the flavors to unfold on your palate. This practice not only enhances your enjoyment but also helps you recognize your body’s hunger and fullness cues. By tuning in to how your body feels as you eat, you may find that you’re more satisfied with smaller portions and less likely to overindulge in processed snacks that lack nutritional value.

Engaging with your food mindfully also opens the door to making healthier choices. When you truly pay attention to what you’re eating, you’re more likely to opt for nourishing ingredients that make you feel energized rather than sluggish. Moreover, this practice encourages you to explore new flavors and cooking methods, which can lead you to discover delicious whole foods that you might have otherwise overlooked.

Incorporating mindful eating into your daily routine doesn’t require a major overhaul; it simply involves a shift in your approach. Start with one meal a day, setting aside time to savor each moment. As you cultivate this awareness, you’ll find that the benefits extend far beyond your plate, enhancing your overall relationship with food and helping you cut down on processed options.

10. Finding Healthy Substitutes for Your Favorite Processed Foods

When it comes to cutting down on processed foods, one of the most effective strategies is to find healthy substitutes for your favorite snacks and meals. This doesn’t mean you have to sacrifice flavor or enjoyment; rather, it’s an opportunity to explore new tastes and ingredients that can bring a fresh twist to your meals.

Start by identifying the processed foods you often reach for. Do you love crunchy potato chips? Try air-popped popcorn seasoned with a sprinkle of sea salt or a drizzle of olive oil. Craving something sweet? Swap out sugary breakfast cereals for a bowl of oatmeal topped with fresh fruits and a sprinkle of cinnamon, which can provide lasting energy without the sugar crash.

For those who can’t resist a creamy dressing on salads, consider making your own vinaigrette with wholesome ingredients like balsamic vinegar, mustard, and extra virgin olive oil. This simple swap not only enhances the freshness of your greens but also gives you control over the ingredients, avoiding unnecessary additives and preservatives.

If you’re a fan of pasta, experiment with whole grain options or spiralized vegetables like zucchini or sweet potatoes. These alternatives not only add color and nutrients to your plate but also keep the meal light and satisfying. Even desserts can be reimagined—try using ripe bananas or avocados in smoothies for a creamy texture without the added sugar found in many processed treats.

Embracing healthy substitutes is about rediscovering your love for food while making choices that nourish your body. With a little creativity and experimentation, you can find satisfying alternatives that will keep your meals exciting and help you stay on track towards a healthier lifestyle. Remember, the goal is not just to eliminate processed foods but to enrich your diet with wholesome, delicious options that you’ll enjoy just as much—if not more.

11. Setting Realistic Goals: Making Gradual Changes

When it comes to cutting down on processed foods and embracing a healthier lifestyle, setting realistic goals is essential. The journey to a healthier diet doesn’t have to be a sudden, drastic overhaul; in fact, gradual changes often yield more sustainable results. Instead of declaring an all-out ban on processed foods, start small by identifying one or two items you consume regularly that can be swapped for healthier alternatives.

For instance, if you’re accustomed to reaching for sugary breakfast cereals, consider replacing them with oatmeal topped with fresh fruit or a smoothie packed with vegetables. This gradual approach allows your palate to adjust without feeling deprived, making it easier to stick with your new dietary habits.

Another effective strategy is to implement a “one new recipe a week” challenge. This not only encourages you to explore whole foods but also adds excitement to your meals. By experimenting with fresh ingredients, you will discover new flavors and textures that can replace processed options in your diet.

Moreover, it’s important to celebrate your progress, no matter how small. Each time you make a healthier choice, take a moment to acknowledge your commitment to your well-being. This positive reinforcement will motivate you to continue making healthier decisions.

Remember, the goal is not perfection but progress. By setting realistic, achievable goals and making gradual changes, you’ll not only cut down on processed foods but also cultivate a healthier relationship with your diet that can last a lifetime.

12. Staying Hydrated: The Importance of Water

Staying hydrated is a fundamental yet often overlooked aspect of a healthy diet, especially when aiming to cut down on processed foods. Water is not just a basic necessity; it plays an essential role in maintaining bodily functions, promoting optimal digestion, and supporting overall well-being. Many people fail to realize that dehydration can often masquerade as hunger, leading to unnecessary snacking on unhealthy, processed options.

By prioritizing hydration, you can help curb those cravings and make healthier food choices. When your body is well-hydrated, it’s more efficient at metabolizing nutrients, which means you’re less likely to reach for that bag of chips or sugary snack when you’re feeling sluggish. Drinking adequate amounts of water can also enhance your energy levels, improve your mood, and sharpen your focus—qualities that will motivate you to choose fresh, whole foods over their processed counterparts.

Incorporating hydration into your daily routine can be as simple as carrying a reusable water bottle with you, setting reminders on your phone, or infusing your water with fruits and herbs for a refreshing twist. Aim for at least eight glasses of water a day, and don’t wait until you’re thirsty to drink more—make it a habit! By keeping your body hydrated, you’re not only quenching your thirst but also supporting your journey towards a healthier, more balanced diet. Remember, when it comes to nutritious choices, staying hydrated is an essential step in making mindful eating a part of your lifestyle.

13. Eating Seasonally: Benefits of Local Produce

Eating seasonally is one of the most effective strategies to cut down on processed foods while enhancing your overall health. When you consume local produce that is in season, you not only nourish your body with fresh and flavorful ingredients, but you also support sustainable farming practices and reduce your carbon footprint. Seasonal fruits and vegetables are often harvested at their peak ripeness, which means they are packed with essential nutrients, vitamins, and minerals that can significantly boost your immune system and overall well-being.

For instance, biting into a sun-ripened tomato in the summer or savoring crisp apples in the fall provides a taste experience that outshines anything found in a can or frozen aisle. Seasonal eating encourages variety in your diet, as you’ll naturally shift your meals to incorporate a wide range of produce throughout the year. This not only keeps your palate excited but also helps you explore new recipes and cooking methods, making healthy eating an enjoyable adventure rather than a chore.

Moreover, buying local produce often means you’re obtaining food that is fresher and hasn’t undergone extensive processing or long-distance transportation. This not only supports your local economy but also fosters a connection between you and your food source, fostering a greater appreciation for what you eat. Farmers’ markets are wonderful places to discover what’s in season and to engage with growers who can offer tips on how to prepare and store their produce.

By embracing the benefits of eating seasonally, you’re making a conscious choice to nourish your body with wholesome, unprocessed foods while also contributing positively to your community and the environment. So, the next time you’re planning your meals, consider visiting your local market and embracing the bounty of seasonal produce—it’s a simple yet powerful way to elevate your health and redefine your relationship with food.

14. Seeking Support: Joining a Community or Group

Embarking on a journey to cut down on processed foods and embrace healthier eating habits can feel overwhelming, but it doesn’t have to be a solitary endeavor. One of the most effective strategies for ensuring long-term success is seeking support by joining a community or group dedicated to healthy living.

When you surround yourself with like-minded individuals who share similar goals, you create an environment that fosters motivation and accountability. Whether it’s a local Meetup group focused on nutrition, an online forum, or a social media community, these spaces provide a wealth of resources, advice, and encouragement. Members often share their experiences, challenges, and triumphs, making the journey feel less daunting and more achievable.

In these supportive settings, you can exchange recipes for wholesome meals, discuss the latest findings on nutrition, or even organize group outings to farmers’ markets or cooking classes. The collective knowledge and enthusiasm can inspire you to try new foods, explore different cooking techniques, and ultimately discover healthier alternatives to your favorite processed snacks.

Moreover, being part of a community allows you to celebrate milestones together, whether it’s successfully reducing sugar intake or completing a week of meal prepping. These shared victories can amplify your commitment to healthier choices, as you receive encouragement and support when the going gets tough.

In addition to fostering motivation, these groups can also help you navigate the challenges of changing your eating habits. It’s common to encounter social situations or cravings that test your resolve. Having a network of support can provide you with strategies to handle these moments, ensuring you stay on track without feeling isolated.

So, take the leap and seek out a group that resonates with your health goals. Whether it’s online or in person, the camaraderie and shared passion for healthier living can be a game-changer in your journey toward cutting down on processed foods and embracing a more nourishing lifestyle.

15. Tracking Your Progress: Celebrating Small Wins

Tracking your progress is a vital component of any journey toward healthier eating habits, and celebrating those small wins can provide the motivation you need to keep going. As you embark on the path to cut down on processed foods, it’s essential to recognize and celebrate the incremental changes you make along the way. Each step forward, no matter how small, is a triumph worth acknowledging.

Start by keeping a food journal or using a mobile app to document your meals, snacks, and cravings. This not only helps you stay accountable but also allows you to reflect on your choices and identify patterns over time. Perhaps you’ve successfully swapped out a sugary snack for a piece of fruit, or maybe you’ve managed to cook a homemade meal instead of ordering takeout. These victories, though they may seem minor in isolation, accumulate and pave the way for lasting change.

To make the celebration of your successes even more impactful, consider setting specific, achievable goals. For instance, aim to try one new whole food recipe each week or commit to a certain number of meatless meals per month. When you reach these milestones, treat yourself to something special—a new cookbook, a kitchen gadget, or even a fun outing with friends that aligns with your healthier lifestyle.

Sharing your achievements with friends or family can also amplify your motivation. They can provide support and encouragement, turning your individual journey into a communal celebration. Social media is another great platform to showcase your progress; sharing photos of your meals or posting about your healthy choices can inspire others while reinforcing your commitment.

Remember, the journey to eating healthier doesn’t have to be a slog. By tracking your progress and celebrating small wins, you’ll not only boost your motivation but also cultivate a positive relationship with food—one that honors your efforts and celebrates your commitment to a healthier you.

In conclusion, embracing a healthier lifestyle by cutting down on processed foods is not only achievable but can also be enjoyable with the right strategies in place. By implementing the 10 simple strategies we’ve shared, you can gradually transform your eating habits, making room for fresh, whole foods that nourish your body and invigorate your mind. Remember, it’s about progress, not perfection—small, consistent changes can lead to significant results over time. We encourage you to take the first step today and explore the vibrant world of wholesome ingredients. Your body will thank you, and you might just discover a newfound passion for cooking and nutritious eating along the way! Happy eating!

What are the best ways to eat more protein?

In a world where healthy living and fitness are at the forefront of our minds, protein has emerged as a superstar nutrient, essential for muscle repair, energy levels, and overall well-being.

However, many people struggle to meet their daily protein requirements, often falling into the trap of bland diets or repetitive meals. But fear not! This blog post is here to ignite your culinary creativity and transform your approach to protein intake. From innovative recipes to clever ingredient swaps, we’ll explore ten creative ways to seamlessly incorporate more protein into your daily routine, ensuring that you not only nourish your body but also delight your taste buds. Whether you’re a fitness enthusiast, a busy professional, or simply someone looking to enhance their diet, these tips will inspire you to embrace protein-packed options that are as delicious as they are nutritious. Let’s dive in and discover the exciting possibilities that await!

1. Understanding the Importance of Protein in Your Diet

What are the best ways to eat more protein?
Credit : whatcanu.com

Understanding the Importance of Protein in Your Diet

Protein is often hailed as one of the essential building blocks of life, and for good reason. This macronutrient plays a crucial role in nearly every function within our bodies, from muscle growth and repair to hormone production and immune function. When you consume protein, your body breaks it down into amino acids, the organic compounds that serve as the foundation for various proteins necessary for health and vitality.

One of the most significant benefits of protein is its ability to support muscle development, making it a vital component for those seeking to enhance their fitness or maintain a healthy weight. Adequate protein intake can help preserve lean muscle mass, especially during weight loss, as it promotes a feeling of fullness, reducing the likelihood of overeating.

Moreover, protein is essential for the production of enzymes and hormones that regulate countless body processes. These include metabolism, digestion, and even mood regulation. In addition, protein-rich foods can provide the necessary energy to fuel your daily activities, supporting both physical and cognitive performance.

In our fast-paced world, where convenience often trumps nutrition, understanding the importance of protein in your diet can help you make informed choices. Whether you’re an athlete, a busy professional, or someone simply looking to improve your health, prioritizing adequate protein intake can lead to improved energy levels, better recovery times, and enhanced overall well-being. So, as we explore creative ways to boost your protein intake, keep in mind the myriad benefits that this vital nutrient brings to your daily life.

2. Incorporate Protein-Rich Breakfast Options

Starting your day with a protein-rich breakfast is one of the easiest and most effective ways to boost your daily protein intake. Breakfast sets the tone for the day, and by choosing high-protein options, you can fuel your body with the essential nutrients it needs to power through morning workouts, long meetings, or busy schedules.

Consider swapping out your traditional sugary cereals or white-toast breakfasts for options that pack a protein punch. Greek yogurt, for instance, is a versatile base for a morning meal; it’s creamy, delicious, and can easily be topped with fruits, nuts, or seeds for added flavor and texture. A serving of Greek yogurt can contain up to 20 grams of protein, making it an excellent choice.

If you’re a fan of eggs, you have a world of possibilities at your fingertips. Whether scrambled, poached, or made into an omelet, eggs are not only rich in protein but also versatile. Add in some spinach, tomatoes, or feta cheese for a nutrient-dense meal that will keep you satisfied until lunch. For those on the go, consider preparing a batch of egg muffins over the weekend. Simply whisk together eggs with your favorite vegetables and cheese, pour them into muffin tins, and bake for a quick grab-and-go option that’s both delicious and nutritious.

Another creative breakfast option is protein-packed smoothies. Blend together your favorite fruits, a scoop of protein powder, and a handful of spinach or kale for a refreshing drink that can easily be consumed on the way to work. The beauty of smoothies is that you can customize them to your taste while ensuring you get a substantial protein boost.

For a heartier option, consider overnight oats made with rolled oats and Greek yogurt or milk. Not only can you prepare them the night before for convenience, but you can also mix in nuts, seeds, or protein powder for an extra boost.

Incorporating protein-rich breakfast options into your daily routine doesn’t have to be time-consuming or complicated. By taking a few minutes to plan and prepare, you can ensure you’re starting each day with the fuel your body needs to thrive.

3. Snack Smart: Protein-Packed Snacks for On-the-Go

What are the best ways to eat more protein?
Credit : whatcanu.com

In our fast-paced lives, snacking can often become a mindless habit, leading to choices that are high in sugar and empty calories. However, snacking can also be a golden opportunity to boost your protein intake, especially when you’re on the go. The key is to choose snacks that not only satisfy your cravings but also provide the essential nutrients your body craves.

Start with **nuts and seeds**, which are not just portable but also packed with protein and healthy fats. A handful of almonds, walnuts, or pumpkin seeds can provide a satisfying crunch while delivering a solid protein punch. For those who prefer a sweeter option, toss together a mix of dried fruits with your nuts for a delicious trail mix that energizes and delights.

**Protein bars** are another excellent choice, but not all bars are created equal. Look for options that boast high protein content and minimal added sugars. Many brands now offer bars made from whole food ingredients, making them a nutritious and convenient snack that can easily fit in your bag.

If you’re craving something savory, consider **beef jerky or turkey jerky**. These protein-packed snacks are not only tasty but also incredibly easy to carry. Opt for brands that focus on quality meats and avoid those loaded with preservatives.

For a refreshing option, try **Greek yogurt cups**. Rich in protein and probiotics, they make for a creamy snack that can be enjoyed anywhere—just be mindful of refrigeration. For added flavor, pack some fresh berries or a sprinkle of granola in a separate container for a perfectly balanced treat.

Lastly, don’t underestimate the power of **hard-boiled eggs**. Easy to make in batches and perfect for meal prep, these little protein powerhouses can be seasoned with herbs or spices for an extra kick. Simply peel and pack them in your lunch bag for a quick, satisfying snack that will keep you full and energized throughout your day.

By opting for these protein-packed snacks, you’ll not only satisfy your hunger but also elevate your daily protein intake, all while keeping your lifestyle active and on-the-go!

4. Get Creative with Protein Supplements

When it comes to boosting your protein intake, protein supplements can be a game changer, but there’s no need to stick to the mundane shakes and bars that often come to mind. Get creative with how you incorporate these supplements into your daily routine to keep things exciting and delicious!

Start with protein powder: It’s incredibly versatile. Blend it into your morning smoothie, mixing in fruits and greens for a nutrient-packed breakfast that energizes you for the day ahead. Or, try adding a scoop to your oatmeal or yogurt for a satisfying and protein-rich meal. The subtle flavor of many protein powders allows them to blend seamlessly into these dishes without overpowering their natural tastes.

But why stop there? Use protein powder in your baking adventures. Reinvent your favorite recipes by swapping out a portion of the flour for protein powder. Whether it’s muffins, pancakes, or cookies, you’ll not only enhance the protein content but also add a unique flavor twist that will keep your taste buds intrigued.

For a savory option, consider making homemade protein-infused dips and spreads. Mix your protein powder into hummus or guacamole to create a filling snack that pairs perfectly with fresh veggies or whole grain crackers. This not only amps up the protein but also provides a delightful gastronomic experience.

Lastly, don’t overlook the power of protein fortification in your favorite beverages. Stir a scoop of protein powder into your coffee or chai latte for an energizing pick-me-up, or mix it into your post-workout smoothie for that extra recovery boost. The key is to explore and experiment—by getting creative with protein supplements, you can turn your daily intake into a culinary adventure that satisfies both your nutritional needs and your cravings.

5. Explore Plant-Based Protein Sources

What are the best ways to eat more protein?
Credit : whatcanu.com

When it comes to boosting your protein intake, plant-based sources offer a diverse and delicious array of options that can elevate your meals while supporting a healthy lifestyle. Exploring these alternatives not only enriches your diet but also introduces unique flavors and textures that you might not have considered before.

Start your journey with legumes, such as lentils, chickpeas, and black beans, which are not only rich in protein but also packed with fiber, making them perfect for keeping you satiated. Incorporate them into soups, salads, or even as a base for veggie burgers. For a quick protein-packed snack, try roasted chickpeas seasoned with your favorite spices, providing a crunchy alternative to chips.

Nuts and seeds are another excellent source of protein, loaded with healthy fats and essential nutrients. Consider adding a handful of almonds, walnuts, or pumpkin seeds to your morning oatmeal or yogurt. Nut butters, like almond or peanut butter, can also be a delightful addition to smoothies, energy balls, or simply spread on whole-grain toast for a satisfying treat.

Don’t overlook the power of grains, either! Quinoa, farro, and bulgur are not just carbohydrate sources; they offer a significant protein boost as well. Use quinoa as a base for salads or grain bowls, or incorporate farro into soups for added texture and nutrition.

Lastly, explore the world of plant-based protein powders. Made from peas, hemp, or brown rice, these powders can be easily mixed into smoothies, baked goods, or even oatmeal, allowing you to customize your protein intake effortlessly.

By incorporating these plant-based protein sources into your daily meals, you’ll not only enhance your diet but also discover new and exciting flavors that keep your meals interesting and satisfying. Embrace the variety that nature has to offer and watch as your protein intake—and culinary creativity—soar!

6. Enhance Your Meals with Protein-Enriched Ingredients

Incorporating protein-enriched ingredients into your meals is a delicious and effective way to boost your daily intake without overhauling your entire diet. The beauty of this method lies in its versatility; you can elevate almost any dish by adding a protein-packed twist.

Start with your staple grains—opt for quinoa or farro instead of white rice. Both are not only hearty but also loaded with protein. You can also experiment with protein-fortified pasta, which provides a substantial protein punch while satisfying your carb cravings.

Dairy products are another excellent avenue. Switch out regular yogurt for Greek yogurt in smoothies, dressings, or as a topping for fruits and granola. Not only does it add a creamy texture, but it also doubles the protein content. If you’re a fan of baking, consider incorporating protein powder into your pancake or muffin recipes. This way, you can enjoy a guilt-free treat that delivers on both taste and nutrition.

Don’t forget about legumes! Adding chickpeas, lentils, or black beans to salads, soups, or stir-fries not only enhances the flavor profile but also significantly boosts the protein content. You can even create a bean dip for a quick snack or appetizer that is both satisfying and nutritious.

Finally, look for protein-enriched snacks to keep on hand. Items like protein bars, nut butters, or even edamame make for convenient options that can seamlessly integrate into your day-to-day meals. By creatively enhancing your meals with these protein-enriched ingredients, you can ensure that you’re meeting your nutritional goals without sacrificing flavor or enjoyment.

7. Try New Protein-Rich Recipes

What are the best ways to eat more protein?
Credit : whatcanu.com

Experimenting with new protein-rich recipes can be a delightful way to elevate your meals while adding much-needed nutrients to your diet. Instead of relying on the same old chicken breast or boiled eggs, venture into the world of culinary creativity. Explore various cuisines that naturally emphasize protein, such as Mediterranean, Asian, or Latin American dishes.

Consider trying a zesty quinoa salad packed with black beans, chickpeas, and feta cheese, all tossed in a refreshing lemon vinaigrette. Or how about whipping up a comforting lentil soup, brimming with vegetables and spices, which not only warms the soul but also provides a healthy dose of protein?

Don’t forget the power of experimenting with plant-based protein sources! Incorporate ingredients like tempeh, edamame, or hemp seeds into your favorite recipes. Try your hand at a vibrant stir-fry with tofu and a medley of colorful veggies, or bake a batch of protein-packed energy balls using nut butter, oats, and protein powder for a quick snack.

Instagram and Pinterest are gold mines for discovering innovative recipes that can boost your protein intake while tantalizing your taste buds. Join online cooking classes or follow food bloggers dedicated to healthy eating to stay inspired. By stepping out of your culinary comfort zone and trying new protein-rich recipes, you’ll not only enhance your diet but also make mealtime an exciting adventure worth looking forward to!

8. Make Use of Leftovers for Added Protein

8. **Make Use of Leftovers for Added Protein**

Harnessing the power of leftovers is one of the simplest and most effective strategies to boost your daily protein intake. Instead of letting yesterday’s meals languish in the fridge, get creative with them! Leftover grilled chicken, for instance, can transform a simple salad into a protein-packed feast. Dice it up and toss it with mixed greens, cherry tomatoes, and a zesty dressing for a quick lunch that’s as nutritious as it is delicious.

Don’t overlook the potential of other proteins too! Leftover beans from a chili night can be easily added to soups or blended into a creamy dip. Similarly, a bit of quinoa remaining from dinner can be tossed into a breakfast bowl with yogurt and fruit, elevating your morning meal with both texture and protein.

If you’ve got some fish left over from last night’s dinner, consider flaking it into a savory omelet or mixing it with avocado for a delightful spread on whole-grain toast. Even the humble hard-boiled egg, often found lurking in the fridge, can be a versatile addition to salads, sandwiches, or simply enjoyed as a snack on its own.

The key is to think outside the box and approach your leftovers with a mindset of creativity. By repurposing what you already have, you not only minimize food waste but also enhance your meals with an extra protein boost. So next time you’re faced with a container of uneaten food, remember: it’s not just leftovers; it’s an opportunity for a delicious and nutritious protein-rich meal!

9. Join the Trend: Protein in Beverages

In recent years, the trend of incorporating protein into beverages has taken the health and wellness world by storm. This innovative approach not only makes it easier to increase your protein intake but also adds a delicious twist to your daily routine. Imagine sipping on a creamy smoothie or a refreshing iced coffee, both packed with protein to fuel your day.

From protein-packed smoothies to ready-to-drink protein shakes, the options are endless. Start your morning with a smoothie that combines your favorite fruits, a handful of spinach or kale, and a scoop of protein powder. This easy blend not only tastes great but also gives you the energy boost you need to kickstart your day. You can also try adding Greek yogurt or cottage cheese for an extra protein punch, creating a thick and satisfying drink.

For those who enjoy a caffeine kick, consider adding protein to your coffee or tea. Protein-infused coffee blends and powdered creamers are becoming increasingly popular, providing a creamy texture and a subtle flavor without the added sugars. You can even experiment with homemade versions by mixing your brewed coffee with a scoop of protein powder and a splash of almond milk, creating a delightful and nutritious morning ritual.

Don’t forget about the evening wind-down; protein-infused herbal teas or hot chocolate mixes can offer a comforting way to end your day. These beverages not only help you relax but also contribute to your daily protein goals.

With the growing availability of protein-enriched drinks on the market, you can easily find options that suit your taste and dietary preferences. Whether you prefer plant-based protein from pea or hemp sources, or traditional whey protein, there’s a beverage solution for everyone. So, embrace this exciting trend and make protein-rich drinks a staple in your diet—your body will thank you!

10. Use Protein to Fuel Your Workouts

When it comes to maximizing your workout performance and recovery, protein plays a pivotal role. Leveraging this powerhouse nutrient can elevate your fitness routine and help you achieve your goals more effectively. Here’s how to use protein strategically to fuel your workouts.

Before hitting the gym, consider incorporating a protein-rich snack or shake into your pre-workout ritual. Consuming protein before exercising provides your muscles with the amino acids they need to sustain energy and strength, ensuring that you can push through those challenging sets and reps. A banana paired with a scoop of almond butter, or a Greek yogurt with some berries, can serve as a delicious and effective fuel source.

Equally important is your post-workout nutrition. After a rigorous workout, your muscles are in a state of repair and recovery, craving the nutrients necessary to rebuild and grow stronger. Aim to consume a protein-rich meal or shake within 30 to 60 minutes after exercising. This could be a protein smoothie with spinach and avocado, a grilled chicken salad, or even a hearty quinoa bowl topped with black beans and veggies. This window of opportunity is crucial, as it helps to maximize muscle protein synthesis and reduces recovery time.

Additionally, consider incorporating protein into your hydration routine. Protein-infused beverages are gaining popularity, offering a convenient way to stay hydrated while replenishing your body with essential nutrients. Look for options that include whey or plant-based protein, which can provide a refreshing twist to your post-workout hydration.

By using protein not just as a supplement but as a pivotal part of your workout strategy, you can enhance your performance, speed up recovery, and ultimately, achieve your fitness goals with greater efficiency. Embrace the potential of protein and watch as it transforms your workouts into powerful, results-driven sessions.

11. Engage in Meal Prepping for Protein Convenience

Engaging in meal prepping is a game changer when it comes to boosting your protein intake daily. Imagine stepping into your kitchen, armed with a plan, ingredients, and a couple of hours of your time. Meal prepping transforms the often chaotic and hurried nature of daily cooking into a streamlined, efficient process that sets you up for success throughout the week.

Start by selecting a few high-protein recipes that excite you—think protein-packed grain bowls, hearty chili, or savory egg muffins. As you chop, cook, and portion, the aroma of your culinary creations will fill the air, igniting a sense of accomplishment. Cook in bulk, and don’t shy away from using diverse protein sources. Incorporate lean meats like chicken or turkey, plant-based proteins like lentils and chickpeas, and dairy options such as Greek yogurt and cottage cheese. By diversifying your protein sources, you not only enhance the flavor but also the nutritional profile of your meals.

Once your meals are prepared, portion them into individual containers, making them ready to grab when hunger strikes. This not only saves you time during your busy days but also keeps you on track with your protein goals. Whether you’re rushing to work, heading to the gym, or just settling down for a meal at home, having ready-to-eat protein-rich meals at your fingertips makes it easier to resist the temptation of less nutritious options.

Moreover, meal prepping allows you to take control of your portions and ingredients, contributing to healthier eating habits. You’ll find yourself enjoying the satisfaction of knowing exactly what you’re consuming, making it easier to stay committed to your dietary goals. With a little planning and creativity, meal prepping can become a delightful ritual that not only boosts your protein intake but also enhances your overall culinary experience. So roll up your sleeves, unleash your inner chef, and start prepping your way to a more protein-rich diet!

12. Explore Global Cuisines for Diverse Protein Options

Exploring global cuisines is a delightful and effective way to diversify your protein sources and elevate your meals. Each region of the world boasts unique dishes that highlight a variety of proteins, from legumes and seafood to meats and dairy, allowing you to not only boost your protein intake but also enrich your culinary experience.

Take a trip to the vibrant streets of Mexico, where you can savor a hearty bowl of black bean soup or indulge in some delicious tamales filled with chicken or cheese. Beans are not only a fantastic source of plant-based protein but are also rich in fiber, making them a healthy addition to your diet.

Journey eastward to the Mediterranean, where dishes like falafel—crispy chickpea balls—offer a great protein punch, while also being packed with flavor. Pair them with a creamy tahini sauce or a refreshing tabbouleh salad for a well-rounded meal.

Don’t overlook the protein-rich delights of Asian cuisine. Savor a steaming bowl of miso soup loaded with tofu, or enjoy a stir-fry packed with edamame and vegetables, complemented by brown rice for a complete meal.

Incorporate the robust flavors of Indian cuisine into your diet with dishes like lentil dal or paneer tikka, both of which are rich in protein and bursting with spices that tantalize the taste buds. The diversity of spices used also contributes to a variety of health benefits, enhancing your overall wellness.

By intentionally incorporating proteins from around the globe, you not only keep your meals exciting but also ensure you’re getting a diverse range of nutrients. So, step out of your culinary comfort zone, embrace the flavors of global cuisine, and watch your protein intake soar while enjoying the delicious journey!

13. Consider Protein in Your Baking

When it comes to boosting your protein intake, don’t overlook the potential of your baking endeavors! Baking not only offers a delightful opportunity to indulge in sweet treats but also serves as a creative canvas to enhance the nutritional value of your favorite recipes. By incorporating protein-rich ingredients into your baked goods, you can transform traditional recipes into satisfying, high-protein alternatives that keep you fueled throughout the day.

Start by swapping out regular flour for protein-enriched options like almond flour, chickpea flour, or protein powder. These alternatives not only add a nutty flavor and unique texture but also significantly increase the protein content of your baked goods. For instance, a classic banana bread recipe can be transformed into a protein powerhouse by mixing in a scoop of vanilla protein powder or substituting half of the flour with almond flour.

Another simple trick is to include protein-packed add-ins such as Greek yogurt, cottage cheese, or nut butters. Imagine biting into a warm muffin that’s not only bursting with flavor but also enriched with creamy Greek yogurt, contributing to a moist texture and a protein boost. Similarly, brownies can be elevated by mixing in some black beans or adding a swirl of peanut butter to enhance both flavor and nutrition.

Don’t forget about the power of seeds and nuts! Chia seeds, hemp seeds, and walnuts are fantastic sources of protein that can easily be sprinkled into cookies, pancakes, or loaf cakes. Not only do they enhance the overall protein profile, but they also add delightful crunch and healthy fats, making your baked goods even more satisfying.

By thinking outside the box and considering protein in your baking, you can create delicious, guilt-free treats that align with your nutritional goals. So, roll up your sleeves, preheat that oven, and start experimenting with these protein-packed ingredients. Your taste buds—and your body—will thank you!

14. Balance Your Plate: Pairing Protein with Other Nutrients

When it comes to optimizing your protein intake, simply adding more protein-rich foods to your diet isn’t always enough. The key to maximizing the benefits of protein lies in how you balance your plate by pairing it with other essential nutrients. A well-rounded meal not only enhances the absorption of protein but also fuels your body with the diverse vitamins and minerals it craves.

Start by incorporating a colorful array of vegetables alongside your protein source. Leafy greens, bell peppers, and cruciferous veggies like broccoli and Brussels sprouts are not just vibrant additions; they provide fiber, antioxidants, and vital nutrients that work synergistically with protein to promote optimal health. For instance, pairing grilled chicken with a side of quinoa and steamed broccoli not only elevates the meal’s protein content but also adds complex carbohydrates and fiber, which can help maintain stable energy levels throughout the day.

Don’t forget about healthy fats, either! Adding a sprinkle of nuts or seeds to your salads or drizzling olive oil over your roasted veggies can enhance the absorption of fat-soluble vitamins, while also contributing to a feeling of satiety. A well-balanced meal, like salmon with avocado and a side of mixed greens, offers a hearty dose of protein, omega-3 fatty acids, and an array of nutrients, ensuring you feel full and satisfied.

By thoughtfully balancing your plate with a variety of proteins, carbohydrates, and healthy fats, you not only boost your protein intake but also create delicious, nutrient-dense meals that keep you energized and nourished throughout the day. So the next time you prepare your meals, consider how you can create a harmonious balance that highlights all the nutrients your body needs to thrive.

15. Track Your Protein Intake: Tools and Apps to Help You

Tracking your protein intake can be a game-changer when it comes to meeting your daily nutritional goals. With the rise of technology, there are numerous tools and apps designed to make this process simple and efficient. Whether you’re a seasoned athlete trying to maximize muscle growth or someone just looking to improve overall health, monitoring your protein consumption can provide valuable insights into your diet.

One of the most popular apps is MyFitnessPal, which allows you to log your meals and automatically calculates the protein content of everything you consume. With an extensive database of food items, including many brand-name products, it makes tracking not only easy but also incredibly accurate. Plus, its barcode scanner feature lets you quickly input packaged foods, saving you time during meal prep.

Another excellent option is Cronometer, which offers detailed nutritional information, allowing you to see not just how much protein you’re getting but also the quality of your food choices. This app can help you identify any micronutrient deficiencies while ensuring you’re hitting your protein targets.

For those who prefer a more visual approach, you might enjoy using a food journaling app like Lose It! This app allows you to take pictures of your meals, making it easier to remember what you ate and enhancing your engagement with your dietary habits.

Don’t forget the power of wearable technology, either! Devices like Fitbit can help track your overall activity levels, while syncing with nutrition apps to provide a holistic view of your health. By combining physical activity data with protein intake, you can optimize both your workouts and recovery.

Regardless of which tool you choose, the key is consistency. By regularly logging your meals and tracking your protein intake, you’ll not only gain a clearer understanding of your eating habits but also make informed adjustments to ensure you meet your goals. So, download an app, start tracking, and watch how your awareness of protein intake transforms your daily nutrition!

Incorporating more protein into your daily diet doesn’t have to be a monotonous task—it’s an opportunity for creativity and culinary exploration! We hope our list of 10 creative ways to boost your protein intake inspires you to experiment with new recipes and food combinations that not only nourish your body but also tantalize your taste buds. From sneaking protein into smoothies to embracing protein-packed snacks, the possibilities are endless. As you embark on this journey to enhance your protein consumption, remember that variety is key to a balanced diet. So, get ready to elevate your meals, improve your energy levels, and feel your best. Share your favorite protein-packed creations with us, and let’s continue the conversation about delicious ways to fuel our bodies!

What are the best recipes for picky eaters?

Navigating the culinary preferences of picky eaters can often feel like a daunting challenge, especially when you’re eager to introduce new flavors and dishes.

Whether you’re a parent trying to please a picky child or a host aiming to cater to a diverse group of guests, finding meals that satisfy even the most discerning palates can be tricky. The good news is that deliciousness is not exclusive to adventurous eaters! In this blog post, we’ve curated a list of 10 mouthwatering recipes that are not only easy to prepare but are also designed to entice even the pickiest of eaters. From comforting classics with a twist to simple yet flavorful dishes, these recipes promise to delight taste buds while ensuring that everyone around the table leaves satisfied. Get ready to discover meals that will transform mealtime struggles into moments of joy and shared delight!

1. Introduction: The Challenge of Cooking for Picky Eaters

What are the best recipes for picky eaters?
Credit : whatcanu.com

Cooking for picky eaters can feel like navigating a culinary minefield. Whether you’re catering to a child with a discerning palate or an adult who simply prefers to keep their meals within a narrow comfort zone, the struggle is real. The challenge lies not just in the ingredients you choose, but also in understanding the unique tastes and textures that will satisfy these selective diners.

Many picky eaters often shy away from certain foods due to texture aversions, unfamiliar flavors, or past negative experiences. This can make meal preparation a daunting task, as you juggle dietary restrictions and preferences while trying to create a meal that is both appealing and nutritious. As a result, meals can sometimes become repetitive, leading to frustration for both the cook and the eater.

However, with a little creativity and the right recipes, it is entirely possible to whip up dishes that delight even the most particular of taste buds. The key is to find common ground—dishes that incorporate familiar ingredients while introducing new flavors in a subtle way. In this blog post, we’ll explore ten delicious recipes that are not only easy to prepare but are also guaranteed to win over even the most finicky eaters. From comforting classics to inventive twists, these recipes will help you transform mealtime into a stress-free and enjoyable experience for everyone at the table. So, roll up your sleeves and get ready to discover meals that are sure to please!

2. Tips for Winning Over Picky Palates

Winning over picky palates can often feel like a culinary quest, but with the right strategies, you can transform even the most selective eaters into enthusiastic food lovers. First and foremost, it’s essential to understand the preferences and aversions of your audience. Engage them in a friendly conversation about their favorite foods and flavors, and take note of what they absolutely refuse to eat. This insight will serve as the foundation for your meal planning.

Next, presentation is key! Even the most simple dishes can become appealing with a little creativity. Use vibrant colors and fun shapes to make the food visually interesting. For instance, instead of serving plain broccoli, try roasting it with olive oil and garlic until it’s crispy, then sprinkle it with a dash of parmesan. This not only enhances the flavor but can also make the dish more enticing.

Moreover, consider the power of familiarity. Start with well-known ingredients and flavors that picky eaters already enjoy, then gradually introduce new elements. For example, if they love chicken nuggets, try making homemade versions using chicken breast and a crispy almond flour coating. This way, you’re offering a twist on a beloved classic, making it easier for them to take a leap into new culinary territory.

Finally, involve them in the cooking process. When picky eaters participate in meal preparation, they often feel more invested in the final product. This could be as simple as allowing them to choose toppings for a homemade pizza or letting them mix ingredients for a smoothie. By giving them a sense of ownership and choice, you may find them more willing to try the dishes they’ve helped create.

With these tips in your arsenal, you’ll be well-equipped to entice even the most discerning of taste buds, turning mealtime into a delightful adventure rather than a battleground.

3. Recipe 1: Cheesy Cauliflower Bites

What are the best recipes for picky eaters?
Credit : whatcanu.com

### Recipe 1: Cheesy Cauliflower Bites

If you’re on the quest for a dish that transforms a humble vegetable into a cheesy delight, look no further than these Cheesy Cauliflower Bites! Perfectly crispy on the outside and irresistibly gooey on the inside, this recipe is a game changer for even the most discerning of eaters.

To start, gather one medium head of fresh cauliflower, cutting it into bite-sized florets that are just the right size for snacking. Next, prepare a simple batter made from almond flour, grated Parmesan cheese, garlic powder, and a pinch of salt. The almond flour gives these bites a gluten-free crunch, while the Parmesan adds a savory depth that will have your picky eaters reaching for seconds.

Now comes the fun part: coating the cauliflower florets in the cheesy mixture. Toss them in a large bowl until every piece is evenly coated, ensuring that the cheesy goodness sticks to each bite. For an added crunch, you can also roll them in breadcrumbs or crushed cornflakes before baking.

Spread the florets on a parchment-lined baking sheet and pop them into a preheated oven at 425°F (220°C). As they bake, the aroma of melting cheese and roasted cauliflower fills your kitchen, creating a mouthwatering anticipation. After about 20 minutes, you’ll be greeted with a golden-brown, crispy exterior that perfectly encases the tender, flavorful cauliflower within.

Serve these Cheesy Cauliflower Bites as a snack, appetizer, or even a delightful side dish. Pair them with a zesty dipping sauce, like a homemade ranch or marinara, to enhance the experience. Not only are they a delicious way to sneak in some veggies, but they also offer a guilt-free indulgence that will keep even the pickiest of eaters coming back for more. Enjoy the smiles and empty plates at your next gathering!

4. Recipe 2: Hidden Veggie Meatballs

### Recipe 2: Hidden Veggie Meatballs

When it comes to satisfying even the pickiest eaters, these Hidden Veggie Meatballs are a game changer. Packed with flavor and nutrition, these meatballs are a masterclass in sneaking in those essential veggies without a hint of their presence. Picture this: a tender, juicy meatball, rich with the familiar taste of garlic and herbs, but with a secret twist that will have your little ones (and even some adults) asking for seconds.

To create these delightful morsels, start by finely grating or blending vegetables like zucchini, carrots, and spinach. The key is to ensure they’re virtually undetectable while still delivering a powerhouse of nutrients. Combine these veggies with your choice of ground meat—beef, turkey, or chicken work beautifully—or opt for a plant-based alternative for a vegetarian version. Add breadcrumbs, a splash of milk, and a generous sprinkle of Italian seasoning to bind everything together and enhance the flavor profile.

Once mixed, roll the mixture into bite-sized balls and bake them until golden brown. The oven does the heavy lifting here, allowing the meatballs to develop a crispy exterior while remaining moist inside. Serve them with a side of marinara sauce for dipping or toss them into a comforting bowl of spaghetti. You can even top them with a sprinkle of parmesan cheese for that extra touch of indulgence.

Whether you’re serving them at a family dinner, a casual picnic, or as a fun after-school snack, these Hidden Veggie Meatballs are sure to please even the most discerning palate. They are not only delicious and satisfying but also a fantastic way to incorporate more vegetables into your diet without anyone being the wiser. With this recipe in your repertoire, mealtime will no longer be a battlefield, but rather a joyous occasion filled with laughter and tasty bites!

5. Recipe 3: Creamy Chicken and Rice Casserole

What are the best recipes for picky eaters?
Credit : whatcanu.com

### Recipe 3: Creamy Chicken and Rice Casserole

If you’re searching for a comforting dish that pleases even the most discerning palates, look no further than this Creamy Chicken and Rice Casserole. This hearty meal is an effortless blend of tender chicken, fluffy rice, and a velvety sauce, all baked to golden perfection in a single dish. It’s the ultimate solution for busy weeknights when you want something wholesome and satisfying without spending hours in the kitchen.

**Ingredients:**

– 2 cups cooked chicken, shredded
– 1 cup long-grain white rice, uncooked
– 1 can (10.5 oz) cream of chicken soup
– 1 cup chicken broth
– 1 cup sour cream
– 1 cup frozen mixed vegetables (carrots, peas, corn)
– 1 teaspoon garlic powder
– 1 teaspoon onion powder
– Salt and pepper to taste
– 1 cup shredded cheddar cheese (optional, for topping)

**Instructions:**

1. **Preheat the Oven:** Start by preheating your oven to 350°F (175°C). This ensures your casserole cooks evenly and emerges bubbling hot and ready to serve.

2. **Combine Ingredients:** In a large mixing bowl, combine the cooked chicken, uncooked rice, cream of chicken soup, chicken broth, sour cream, and frozen mixed vegetables. Add the garlic powder, onion powder, salt, and pepper. Stir until everything is well mixed and the rice is evenly distributed.

3. **Transfer to Casserole Dish:** Pour the mixture into a greased 9×13 inch casserole dish, spreading it evenly. If you’re feeling indulgent, sprinkle the shredded cheddar cheese on top for an extra layer of creamy goodness.

4. **Bake:** Cover the dish with aluminum foil and bake in the preheated oven for 45 minutes. After this time, remove the foil and continue to bake for an additional 15 minutes, or until the rice is tender and the top is golden brown.

5. **Serve:** Once done, allow the casserole to cool for a few minutes before serving. This dish pairs beautifully with a simple green salad or some crusty bread, making it perfect for both family dinners and gatherings.

The beauty of this Creamy Chicken and Rice Casserole lies in its versatility. Feel free to customize it by adding your picky eaters’ favorite veggies or swapping out the chicken for turkey or even a vegetarian alternative. Not only is it a delectable dish that checks all the boxes for flavor and comfort, but it also warms the heart and brings the family together around the dinner table. With just one bite, even the fussiest of eaters will be asking for seconds!

6. Recipe 4: Sneaky Spinach Smoothie

### Recipe 4: Sneaky Spinach Smoothie

If you’re trying to get your picky eaters to enjoy their greens without a fuss, look no further than this vibrant and delicious Sneaky Spinach Smoothie. This recipe is not only a breeze to whip up, but it’s also a clever way to camouflage nutrient-packed spinach in a sweet and creamy blend that even the most discerning taste buds will appreciate.

To start, gather your ingredients: a handful of fresh baby spinach, a ripe banana for natural sweetness, and a cup of your favorite milk—whether it’s almond, oat, or good old cow’s milk. For added flavor and nutrition, toss in a tablespoon of peanut butter or a dollop of Greek yogurt, which will give the smoothie a rich, creamy texture. Lastly, don’t forget a splash of honey or maple syrup to sweeten the deal, along with a handful of ice cubes for that refreshing chill.

Begin by blending the spinach and milk together until smooth, ensuring the greens are fully incorporated. Next, add the banana, peanut butter or yogurt, and sweetener of your choice. Blend again until the mixture is beautifully creamy and free of any lumps. The final touch is the ice; blend once more until your smoothie is frosty and inviting.

Serve in a fun glass with a colorful straw, and watch as your picky eaters take their first sip. The rich, sweet flavor of the banana and peanut butter will shine through, effectively masking any hint of spinach. You can even encourage the kids to add their favorite toppings, like granola or sliced strawberries, to make it even more enticing.

With this Sneaky Spinach Smoothie, you’ll not only be serving up a delicious treat, but you’ll also be sneakily packing in those essential vitamins and minerals that growing bodies need. It’s a win-win that makes healthy eating feel like a delicious indulgence!

7. Recipe 5: Mini Pita Pizzas

What are the best recipes for picky eaters?
Credit : whatcanu.com

Mini Pita Pizzas are not just a meal; they are a delightful canvas for culinary creativity that even the pickiest of eaters will adore. These bite-sized wonders offer the perfect opportunity to customize flavors while keeping things simple and fun. Start with whole wheat or traditional pita bread as your base, providing a perfectly soft yet sturdy foundation.

To assemble, spread a thin layer of tomato sauce or pesto on each pita, creating a rich, tangy layer that sets the stage for delicious toppings. Encourage creativity by laying out a spread of options, such as shredded mozzarella, pepperoni slices, bell peppers, olives, or even pineapple chunks. This way, each person can craft their own pizza masterpiece, ensuring that even the most discerning taste buds find something they love.

Once topped, pop the mini pizzas in the oven at 400°F for about 10-12 minutes, or until the cheese is bubbly and golden brown. The aroma wafting through the kitchen will have everyone hovering around the oven in anticipation. The result is a melty, flavorful treat that is as easy to make as it is enjoyable to eat. Serve them fresh out of the oven with a side of marinara for dipping, and watch as these mini pizzas become an instant favorite, no matter how picky your guests may be! Perfect for lunch, snacks, or even a light dinner, Mini Pita Pizzas are a delicious way to bring the family together around the table.

8. Recipe 6: Sweet Potato Fries with Dips

Sweet Potato Fries with Dips are the perfect compromise when trying to please even the pickiest of eaters! These golden, crispy fries are not only delightful to the taste buds but also pack a nutritious punch. The natural sweetness of the sweet potatoes makes them a crowd-pleaser, while their vibrant orange hue adds a pop of color to any meal.

To prepare, start by peeling and slicing fresh sweet potatoes into thin strips. Toss them in a light coating of olive oil, salt, and a sprinkle of your favorite spices—think paprika for a smoky touch or cinnamon for an unexpected twist. Spread them evenly on a baking sheet, ensuring they have plenty of space to crisp up in the oven. Bake at a high temperature until they turn golden brown and crispy on the outside, yet tender on the inside.

The best part? The dips! Pair your sweet potato fries with a variety of sauces to cater to different tastes. A tangy homemade yogurt dip, infused with garlic and herbs, provides a refreshing contrast to the sweetness of the fries. Alternatively, a creamy avocado dip adds a luscious texture and a boost of flavor. For those who crave a bit of heat, a spicy sriracha mayo can add an exciting kick.

Serve these sweet potato fries with dips as a snack, a side dish, or even as a main course. They’re not just delicious; they’re also a great way to introduce a bit of nutrition into the diets of picky eaters without compromising on flavor. With their delightful crunch and irresistible dips, these sweet potato fries are sure to become a favorite for everyone at the table!

9. Recipe 7: Banana Oatmeal Pancakes

### Recipe 7: Banana Oatmeal Pancakes

If you’re searching for a breakfast option that’s both delicious and accommodating to picky eaters, look no further than these fluffy Banana Oatmeal Pancakes. This recipe combines the wholesome goodness of oats with the natural sweetness of bananas, creating a delightful dish that even the fussiest eaters will devour.

**Ingredients:**
– 1 cup rolled oats
– 1 ripe banana, mashed
– 1 cup milk (dairy or non-dairy)
– 1 egg
– 1 teaspoon baking powder
– 1 teaspoon vanilla extract
– A pinch of salt
– Optional: cinnamon or chocolate chips for added flavor

**Instructions:**
1. **Blend the Oats**: Start by blending the rolled oats in a blender or food processor until they reach a fine, flour-like consistency. This adds a delightful texture to your pancakes while boosting their nutritional value.

2. **Mix the Batter**: In a mixing bowl, combine the blended oats, mashed banana, milk, egg, baking powder, vanilla extract, and salt. If your picky eater enjoys a hint of spice, feel free to add a sprinkle of cinnamon or a handful of chocolate chips for a fun twist. Whisk until the mixture is well-combined and slightly lumpy.

3. **Cook the Pancakes**: Heat a non-stick skillet over medium heat and lightly grease it with cooking spray or butter. Pour about 1/4 cup of the batter onto the skillet for each pancake. Cook for 2-3 minutes, or until bubbles form on the surface and the edges appear set. Flip and cook for an additional 1-2 minutes on the other side until golden brown.

4. **Serve and Enjoy**: Stack the pancakes high on a plate and serve warm with your favorite toppings. Drizzle with maple syrup, add a dollop of yogurt, or top with fresh fruit for a colorful, appealing breakfast that will make everyone smile.

These Banana Oatmeal Pancakes are not only a breeze to whip up, but they also offer a healthy dose of fiber and essential nutrients, making them a guilt-free treat to start the day. They can easily be customized to suit individual tastes, ensuring that even the pickiest eaters will be asking for seconds! Enjoy this simple yet satisfying recipe that bridges the gap between nutritious and delicious.

10. Recipe 8: Tasty Taco Cups

Taco night is a beloved tradition in many households, but for those with picky palates, the usual assembly of ingredients can be overwhelming. Enter Tasty Taco Cups—a fun, bite-sized twist on the classic taco that’s sure to win over even the most discerning eaters!

Imagine a warm, golden-brown tortilla cup, perfectly crisped to hold a delightful filling that’s both flavorful and familiar. Start by preheating your oven and shaping small tortillas into muffin tins to create the cups. Once baked to perfection, it’s time to fill them with a savory mixture that caters to all tastes. Ground beef or turkey seasoned with mild taco spice forms the hearty base, but feel free to substitute with black beans or shredded chicken for a different flair.

Next, pile on the toppings! A sprinkle of cheese—think cheddar or Monterey Jack—melts beautifully over the warm filling, while fresh diced tomatoes and crisp lettuce add a refreshing crunch. For those who prefer to keep it simple, serve the cups with a dollop of sour cream on the side, allowing each diner to customize their experience.

Not only are these Taco Cups visually appealing, with their vibrant colors and enticing aroma, but they’re also incredibly versatile. You can easily adapt the recipe to include a variety of vegetables or switch up the proteins based on your family’s preferences. Serve them as a fun appetizer for a get-together or a satisfying main dish for a weeknight meal.

With Tasty Taco Cups, you’ll find that the combination of familiar flavors in a fun presentation can turn even the most selective eaters into taco lovers. So gather your ingredients, and get ready to enjoy a delicious meal that brings everyone together—no complaints allowed!

11. Recipe 9: Flavorful Fruit and Yogurt Parfaits

When it comes to pleasing even the pickiest of eaters, a colorful, flavorful fruit and yogurt parfait is a surefire winner. This recipe combines a delightful array of textures and tastes, making it both visually appealing and utterly scrumptious. Imagine layers of creamy yogurt, sweet ripe fruits, and crunchy granola, all piled high in a clear glass to showcase the vibrant colors.

To begin, choose a selection of fruits that are sure to entice even the most discerning palate. Bananas, strawberries, blueberries, and peaches are excellent choices, as they offer a perfect balance of sweetness and tartness. For a fun twist, consider adding seasonal fruits like mango or kiwi for a burst of exotic flavor. The key is to select fruits that not only taste great but also provide a cheerful pop of color.

Next, it’s time to layer your parfait. Start with a generous scoop of creamy yogurt—Greek yogurt works beautifully here for its rich texture and protein content. Then, follow it up with a layer of your chosen fruits, arranging them in a way that highlights their natural beauty. Sprinkle a handful of granola over the fruits for that satisfying crunch, which adds an inviting contrast to the smoothness of the yogurt.

Repeat the layers until your glass is full, finishing with a final dollop of yogurt and a sprinkle of granola on top for presentation. For an extra touch of sweetness, drizzle a bit of honey or maple syrup over the top, or even throw in a few mini chocolate chips for those sweet-toothed eaters.

Not only is this fruit and yogurt parfait a delicious and nutritious option, but it also allows for customization based on individual preferences. Encourage your picky eaters to join in on the fun by letting them choose their favorite fruits and toppings, making it a delightful experience. Serve it as a breakfast treat, a midday snack, or a light dessert, and watch as even the fussiest eaters come back for seconds!

12. Recipe 10: Homemade Chicken Nuggets

When it comes to satisfying a picky eater’s palate, few dishes can compete with the classic allure of homemade chicken nuggets. These golden, crispy bites are not just a fast-food favorite; they can be made healthier and more flavorful right in your own kitchen. The beauty of homemade chicken nuggets lies not only in their taste but also in their adaptability. With just a handful of ingredients, you can create a dish that caters to even the fussiest eaters.

To start, you’ll need boneless, skinless chicken breasts, which you can cut into bite-sized pieces. This allows for a fun and interactive cooking experience, as kids can help in the preparation process. Next, you’ll prepare a simple breading station with three bowls: one for seasoned flour, one for beaten eggs, and one for breadcrumbs mixed with grated Parmesan cheese, which adds a delightful tangy flavor and extra crunch.

The cooking process is straightforward and quick. First, coat each chicken piece in flour, dip it in the egg, and then roll it in the breadcrumb mixture, ensuring every surface is well-covered. This step is essential for achieving that perfect crispy exterior. For an added touch, you can season the breadcrumbs with garlic powder, paprika, or even a hint of Italian herbs for a flavor boost that won’t overwhelm sensitive taste buds.

Once your chicken nuggets are prepped, heat up some oil in a skillet or opt for baking them for a healthier alternative. If you choose to fry, cook them until they are golden brown and cooked through, ensuring a juicy bite inside. If baking, a drizzle of olive oil will help achieve that satisfying crunch without the extra grease.

Serve your homemade nuggets with a variety of dipping sauces—think classic ketchup, honey mustard, or even a creamy ranch dressing—to keep the meal exciting. The best part? You can customize these nuggets to suit your family’s taste preferences, making them a versatile addition to any dinner table. Whether enjoyed as a quick weeknight meal or a fun weekend snack, these homemade chicken nuggets are sure to please even the pickiest of eaters, leaving everyone asking for seconds.

13. Creative Presentation Ideas to Make Food Fun

When it comes to enticing picky eaters, the presentation of food can be just as crucial as the taste. Creative presentation ideas not only make meals visually appealing but can also transform mealtime into a playful experience that sparks curiosity and excitement. Here are some imaginative ways to make food fun and irresistible:

1. **Colorful Plates**: Start by using vibrant plates or bowls to serve your dishes. A bright backdrop can elevate even the simplest meal. Consider using multi-colored foods to create a rainbow effect on the plate; think carrots, bell peppers, broccoli, and cherry tomatoes. The more visually stimulating the meal, the more likely it is to catch the attention of a discerning eater.

2. **Food Faces**: Turn your plate into a canvas by arranging ingredients to form silly faces. Use slices of cucumber for eyes, a cherry tomato for a nose, and a strip of bell pepper for a smile. This whimsical approach not only makes the food more engaging but also encourages children to participate in the meal preparation, fostering a sense of ownership and excitement.

3. **DIY Food Bars**: Transform mealtime into a build-your-own affair with DIY food bars. Whether it’s a taco bar with a variety of toppings or a yogurt parfait station, allowing picky eaters to customize their meals can empower them to make choices and try new combinations. Provide a range of options, from classic to adventurous, and watch as they experiment with flavors at their own pace.

4. **Fun Shapes and Sizes**: Use cookie cutters to create fun shapes out of sandwiches, fruits, and cheeses. Stars, hearts, and animals can make even the most ordinary foods feel special. You can also slice fruits and veggies into sticks or fun shapes to encourage dipping, which adds an interactive element to eating—think carrot sticks alongside a vibrant hummus or guacamole.

5. **Food on a Stick**: Skewers are not just for barbecues; they can be a game-changer for presenting food in an appealing way. Create colorful fruit kabobs, or thread bite-sized pieces of cheese, grapes, and cherry tomatoes onto skewers for a playful appetizer. Eating with sticks can make food feel more like a fun treat than a chore.

Incorporating these creative presentation ideas into your meals can turn even the most reluctant eaters into enthusiastic diners. By making food fun and visually enticing, you can inspire curiosity and encourage picky eaters to explore new flavors and textures—one delightful bite at a time!

14. Final Thoughts: Encouraging Exploration of New Foods

As we wrap up our culinary journey through these ten delicious recipes, it’s essential to remember that encouraging exploration of new foods is not just about expanding our palates; it’s about opening doors to new experiences and building a more adventurous relationship with food. For picky eaters, the world of flavors can seem daunting, but introducing varied and appealing dishes can make all the difference.

Consider presenting new foods in a fun and engaging way. Involve your little ones in the cooking process—allowing them to choose ingredients or help with simple tasks can spark curiosity and a sense of ownership over their meals. You might be surprised at how quickly they warm to something they’ve helped create!

Additionally, don’t hesitate to pair new dishes with familiar flavors. A sprinkle of cheese on a vegetable dish or a favorite dip can transform a previously unapproachable meal into something enticing. Gradual exposure is key; mixing new ingredients into beloved recipes can subtly introduce different tastes without overwhelming them.

Finally, remember that every food journey is unique. Celebrate small victories, whether it’s trying a new vegetable or experimenting with a different cuisine. Keep the atmosphere positive and stress-free—mealtime should be a joyful experience rather than a battleground.

So, embark on this adventure with an open mind and a sense of fun. With patience and creativity, you can help even the pickiest of eaters discover the delicious diversity that food has to offer! Here’s to new flavors, exciting meals, and a lifetime of culinary exploration!

15. Call to Action: Share Your Own Recipes for Picky Eaters!

We’ve shared some delightful recipes that cater to even the most discerning of palates, but now it’s your turn to join the conversation! We know that the journey of feeding picky eaters often comes with its own set of challenges and triumphs. Whether you’ve discovered a clever twist on a classic dish, a hidden veggie that your little ones adore, or a creative snack that has become an instant family favorite, we want to hear all about it!

Sharing your own recipes not only helps build a community of culinary creativity but also provides inspiration to others who may be facing similar mealtime struggles. So, grab your apron and jot down your go-to recipe that has won over the pickiest of eaters—whether it’s a deceptively healthy mac and cheese, a fruit-packed smoothie, or a veggie-loaded pizza.

Don’t forget to include any tips and tricks that make your recipe a hit in your household. Have a secret ingredient? A cooking hack? We’d love to hear it! Drop your recipe in the comments below, and let’s create a treasure trove of delicious ideas together. After all, cooking is more fun when we share our experiences and create dishes that bring joy to our tables. So, what are you waiting for? Share your culinary masterpieces and help us make mealtime a delightful experience for everyone!

As we wrap up our journey through these 10 delicious recipes designed to please even the pickiest of eaters, we hope you’ve found some inspiration to transform mealtime into a delightful experience for everyone at the table. From creamy pasta dishes to fun, colorful snacks, each recipe was crafted with the intention of balancing taste and nutrition while appealing to discerning palates. Remember, the key to winning over picky eaters lies in presentation and creativity, so don’t hesitate to experiment with flavors and ingredients that cater to their preferences. With a little patience and a dash of enthusiasm, you can turn mealtime into an adventure that every family member will look forward to. Happy cooking, and may your kitchen be filled with laughter and satisfied smiles!

What are the best ways to make homemade cheese?

There’s something truly magical about transforming simple ingredients into delicious homemade creations, and few culinary endeavors capture this essence quite like cheese-making.

Whether you’re a seasoned cook or a curious beginner, the journey from milk to masterpiece is both rewarding and surprisingly accessible. Imagine savoring the rich, creamy flavor of fresh mozzarella, the tangy bite of artisanal goat cheese, or the velvety texture of ricotta, all crafted by your own hands. In this blog post, we will explore the best ways to make homemade cheese, guiding you through the essential techniques, ingredients, and tips that will empower you to create your very own dairy delights. Get ready to embrace your inner cheese maker and elevate your culinary repertoire with these delightful recipes that promise to impress your family and friends!

1. Introduction to Homemade Cheese: Why You Should Try It

What are the best ways to make homemade cheese?
Credit : whatcanu.com

Making homemade cheese is more than just a culinary endeavor; it’s a rewarding journey that connects you to the art of food craftsmanship. Imagine transforming something as simple as milk into a luscious, creamy delight that tantalizes your taste buds and elevates your meals. Whether you’re a seasoned cook or a kitchen novice, crafting your own cheese opens up a world of flavors and textures that store-bought varieties simply can’t replicate.

One of the most compelling reasons to try your hand at cheese-making is the satisfaction of creating something uniquely yours. You’ll not only gain a deeper appreciation for the ingredients but also for the process itself. Each batch can be an experiment, a chance to play with flavors, and an opportunity to bring your culinary vision to life. Plus, homemade cheese can be tailored to suit your tastes—whether you prefer a sharp cheddar, a creamy ricotta, or a tangy goat cheese, the possibilities are limited only by your imagination.

Beyond the joy of creation, there’s also a practical aspect to consider. Making cheese at home can be a cost-effective alternative to purchasing artisanal cheeses, especially if you’re a cheese lover. You’ll find that the simple ingredients—milk, salt, and a few others—are often far less expensive than the gourmet varieties found in stores. Plus, you can control the quality of the ingredients, opting for organic or local options that align with your values.

Lastly, creating homemade cheese is a fantastic way to connect with family and friends. Picture a gathering where you proudly present a cheese board made from your own creations, complete with fresh fruits, nuts, and artisanal bread. The delight and intrigue on your guests’ faces as they taste your handiwork will make all the effort worthwhile.

So, if you’re ready to embark on a flavorful adventure, let’s dive into the world of homemade cheese. With a little guidance and a pinch of patience, you’ll soon be on your way to transforming humble milk into mouthwatering masterpieces.

2. Understanding the Basics

Before you embark on your cheese-making journey, it’s essential to grasp the foundational principles that underpin this age-old craft. Understanding the basics of cheese making involves recognizing the key ingredients, processes, and equipment required to transform simple milk into a delectable dairy delight.

At its core, cheese making revolves around just a few fundamental ingredients: milk, cultures, rennet, and salt. The type of milk you choose—be it cow, goat, or sheep—will significantly influence the flavor and texture of your final product. Whole milk is often recommended for beginners, as the higher fat content contributes to a creamier cheese.

Next, the role of cultures cannot be overstated. These are the bacteria that ferment the lactose in the milk, producing lactic acid, which is crucial for flavor development and the coagulation process. There are various types of cultures available, each lending its unique characteristics to the cheese. Whether you opt for mesophilic cultures for softer cheeses or thermophilic cultures for harder varieties, understanding their function will help you select the right ones for your desired outcome.

Rennet, an enzyme that helps coagulate the milk, is another essential component. It can be derived from animal, vegetable, or microbial sources, and using the appropriate type for your cheese will ensure proper curd formation. Finally, salt is not just a flavor enhancer; it also acts as a preservative, inhibiting unwanted bacterial growth and enhancing the cheese’s overall taste.

Equipping yourself with the right tools is equally important. A large pot for heating the milk, a thermometer to monitor temperature, a ladle for stirring, cheese molds for shaping, and fine cheesecloth for draining are the staples of a home cheesemaker’s toolkit. Investing in quality equipment will streamline your process and improve your results.

With a solid understanding of these basics, you’ll be well on your way to experimenting with different cheese varieties. Whether you’re dreaming of creamy ricotta, tangy goat cheese, or robust cheddar, mastering these foundational elements is the first step toward creating your own homemade cheese masterpiece. So gather your ingredients, equip yourself with knowledge, and get ready to turn the humble milk into something extraordinary!

3. Essential Tools and Equipment for Cheese Making

What are the best ways to make homemade cheese?
Credit : whatcanu.com

Embarking on the journey of homemade cheese-making can be both exciting and rewarding, but having the right tools and equipment is crucial for achieving that creamy, delectable end product. While cheese-making can be as simple or as intricate as you desire, here are the essential tools that every aspiring cheese artisan should consider having in their kitchen.

**1. Cheese Thermometer:** Precision is key when making cheese, and a good cheese thermometer will help you monitor milk temperatures accurately. Look for one that reads temperatures in both Fahrenheit and Celsius, with a range suitable for both heating milk and cooking curds.

**2. Large Stainless Steel Pot:** A heavy-bottomed stainless steel pot is ideal for heating milk evenly without scorching it. Choose a pot with a capacity that matches the quantity of cheese you intend to make, typically ranging from 2 to 8 quarts for home cheese-making.

**3. Long-Handled Spoon:** A sturdy, long-handled spoon is essential for stirring the milk as it heats and for gently mixing in ingredients like rennet and cultures. Opt for a spoon made from stainless steel or food-grade plastic to avoid any unwanted reactions with the ingredients.

**4. Cheese Mold and Press:** For hard cheeses, a cheese mold is necessary to shape and drain the curds. Molds come in various sizes and shapes, so consider the type of cheese you want to make. A cheese press is also a valuable tool to apply even pressure during the draining process, ensuring your cheese reaches the desired texture.

**5. Cheese Cloth:** A fine cheesecloth is vital for straining curds from whey and allows for easy drainage. Look for a durable, reusable option that can withstand repeated use and washing.

**6. pH Meter or Test Strips:** Monitoring acidity is important for some cheese varieties. A pH meter or test strips can help you track the curd’s acidity levels, ensuring optimal fermentation and flavor development.

**7. Preserving Jars or Cheese Storage Containers:** Once your cheese is made, proper storage is key to maintaining its quality. Invest in airtight containers or glass jars to keep your cheese fresh and ready for enjoyment.

Equipped with these essential tools, you’ll be well on your way to transforming humble milk into a delicious masterpiece. Each piece of equipment plays a crucial role in the cheese-making process, and understanding their functions will empower you to experiment and refine your techniques. So gather your tools, roll up your sleeves, and get ready to savor the delightful fruits of your labor!

4. Selecting the Right Milk for Your Cheese

Selecting the right milk for your cheese is arguably one of the most critical steps in the cheese-making process. The type of milk you choose not only influences the flavor and texture of the final product but can also dictate the overall success of your cheese-making journey.

When embarking on your homemade cheese adventure, consider the source of your milk. Cow, goat, and sheep milk each bring unique characteristics to the table. Cow milk, with its creamy texture and mild flavor, is an excellent choice for beginners, ideal for making soft cheeses like mozzarella or ricotta. Goat milk, on the other hand, offers a tangy zip and is perfect for creating deliciously distinct cheeses such as chèvre. If you’re feeling a bit more adventurous, sheep milk is rich and buttery, providing a luxurious base for cheeses like feta or pecorino.

Beyond the type of animal, the quality of milk is paramount. Fresh, high-quality, whole milk without additives or preservatives is essential for achieving the best results. If possible, seek out milk from local farms or markets that prioritize humane practices and do not use hormones or antibiotics. The fresher the milk, the more vibrant the flavors in your cheese will be.

Additionally, consider whether you want to use raw or pasteurized milk. While raw milk can yield cheeses with complex flavors, it also requires more advanced techniques and a thorough understanding of food safety. For beginners, pasteurized milk is often the safest and most accessible option, allowing you to focus on honing your cheese-making skills without additional concerns.

In summary, the milk you select is a foundational element that can elevate your cheese from good to extraordinary. Take the time to explore local options, and don’t hesitate to experiment with different types to discover the flavors and textures that resonate with your palate. Happy cheese-making!

5. The Science of Curdling: Acid vs. Rennet

What are the best ways to make homemade cheese?
Credit : whatcanu.com

In the world of cheese-making, understanding the science of curdling is crucial, as it forms the foundation of your cheese’s texture and flavor. At the heart of this process are two primary agents: acid and rennet. Each plays a distinct role in transforming liquid milk into the solid curds that will be the building blocks of your homemade cheese.

**Acid** is typically achieved through the addition of ingredients like lemon juice, vinegar, or cultured buttermilk. When you introduce acid to warm milk, the pH level drops, causing the proteins—primarily casein—to coagulate and form curds. This method is often used in fresh cheeses like ricotta and paneer, where a light, delicate texture is desired. Here, curdling occurs quickly, and the resulting cheese is usually mild and slightly tangy, perfect for salads or cooking.

On the other hand, **rennet** is a complex of enzymes traditionally sourced from the stomachs of ruminant animals, although vegetarian options are now available. When rennet is added to warm milk, it acts on the casein proteins, promoting a more gradual and thorough curdling process. This results in firmer curds with a richer flavor profile, making it ideal for cheeses like cheddar, mozzarella, or gouda. The use of rennet allows for a greater control over the texture and aging potential of the cheese, transforming it into a masterpiece that can develop complex flavors over time.

Understanding when to use acid versus rennet can elevate your cheese-making game. Experimenting with both methods will give you a deeper appreciation for the craft and help you create a variety of cheeses, each with its own unique character and taste. Whether you’re drawn to the quick satisfaction of an acid-set cheese or the intricate artistry of rennet-based varieties, mastering the science of curdling is your gateway to transforming simple milk into delicious homemade cheese.

6. Step-by-Step Guide to Making Fresh Cheese (e.g., Ricotta or Paneer)

Making fresh cheese at home is a rewarding and straightforward process that can elevate your culinary creations from ordinary to extraordinary. Whether you choose to make ricotta, paneer, or another variety, the basic steps remain largely the same. Here’s a step-by-step guide to help you craft your own delightful cheese.

### Ingredients You’ll Need:
– **Milk**: Use whole milk for the creamiest results. You can opt for cow’s, goat’s, or sheep’s milk based on your preference.
– **Acid**: Lemon juice or white vinegar works well to curdle the milk.
– **Salt**: For flavor, to taste.

### Step 1: Prepare Your Equipment
Before you begin, gather your utensils. You’ll need a large pot, a thermometer, a slotted spoon, cheesecloth or a clean dish towel, and a colander. Ensuring everything is clean will help prevent any unwanted bacteria from spoiling your cheese.

### Step 2: Heat the Milk
Pour your milk into the large pot and slowly heat it over medium heat. Stir gently to prevent scorching. Use your thermometer to monitor the temperature; you want to heat the milk to around 190°F (88°C). At this temperature, the milk will begin to froth and bubble, indicating that it’s ready for the next step.

### Step 3: Add the Acid
Once the milk reaches the desired temperature, remove it from heat and add your acid (lemon juice or vinegar). Stir gently for a few seconds, then allow the mixture to sit undisturbed for about 5-10 minutes. You’ll see curds forming as the milk separates from the whey.

### Step 4: Strain the Curds
Line your colander with cheesecloth or a clean dish towel and place it over a large bowl to catch the whey. Carefully ladle the curds into the colander, letting the whey drain away. If you prefer a drier cheese, let it drain for a bit longer.

### Step 5: Rinse and Season
Once the curds are well-drained, rinse them under cold water to remove the acidity from the vinegar or lemon juice. This step not only cools the curds but also helps to create a milder flavor. After rinsing, transfer the curds to a mixing bowl, sprinkle in salt to taste, and gently combine.

### Step 6: Shape and Store
At this stage, you can either leave the cheese loose for a rustic texture or shape it into balls or a block. If you’re making paneer, press the curds into a mold or wrap them in cheesecloth and place a weight on top to help them firm up. Once shaped, wrap your cheese tightly in plastic wrap or store it in an airtight container in the refrigerator.

### Enjoying Your Homemade Cheese
Whether you use it in a savory dish, as a topping for salads, or simply enjoy it fresh with a drizzle of olive oil and herbs, your homemade cheese will surely impress. The satisfaction of creating something so delightful from just a few simple ingredients is unparalleled. Plus, once you master the basic techniques, you can experiment with flavors and textures, making every batch uniquely yours. Happy cheesemaking!

7. Techniques for Aging Cheese: How to Create Unique Flavors

What are the best ways to make homemade cheese?
Credit : whatcanu.com

Aging cheese is both an art and a science, transforming humble curds into complex, flavor-packed masterpieces. The process of aging, or affinage, allows the cheese to develop its character, aroma, and taste, creating a unique profile that can range from nutty and buttery to sharp and tangy. Here are some techniques to harness the power of aging and elevate your homemade cheese experience.

1. **Temperature and Humidity Control**: The first step in successful aging is finding the right environment. Cheese thrives in cool, humid conditions. Ideally, aim for a temperature between 50°F and 55°F (10°C to 13°C) and a humidity level of around 85%. A dedicated cheese cave is perfect, but if that’s not available, a wine refrigerator or a simple cooler with a humidity source (like a damp sponge) can work wonders.

2. **Choosing the Right Rind**: The rind of the cheese is more than just a protective barrier; it plays a crucial role in flavor development. Soft cheeses, such as Brie, benefit from a bloomy rind that allows mold to flourish, imparting earthy tones. Hard cheeses, like Parmigiano-Reggiano, develop a firm, dry rind that protects the cheese while allowing for the enzymatic reactions that deepen flavors. Experimenting with different rind types can yield delightful variations in taste.

3. **Turning and Brushing**: Regularly turning your cheese wheels promotes even aging and prevents undesirable mold growth. For cheeses with a natural rind, gentle brushing with a cloth can help maintain surface cleanliness and encourage beneficial bacteria while removing any unwanted mold. Be consistent—turn your cheeses every few days to ensure they age evenly.

4. **Salting Techniques**: Salt is not just a flavor enhancer; it also acts as a natural preservative. The salting technique you choose will significantly impact the final flavor. Dry salting involves rubbing salt directly onto the cheese surface, while brining submerges the cheese in a saltwater solution. Experiment with different salt concentrations and methods to discover the perfect balance for your cheese type.

5. **Experimenting with Flavors**: Aging is the perfect time to infuse your cheeses with unique flavors. Consider adding herbs, spices, or even infused oils during the aging process. For example, a sprinkle of cracked black pepper can add a delightful kick, while fresh herbs like rosemary can impart a fragrant, earthy quality. As you age your cheese, don’t shy away from getting creative—this is where your culinary instincts can shine.

6. **Patience is Key**: While it may be tempting to sample your creations early, remember that great cheese takes time. The aging process can range from a few weeks to several months, depending on the type of cheese. Take notes throughout the journey, and don’t hesitate to make adjustments based on your observations. Each batch is an opportunity to learn and refine your techniques.

By embracing these aging techniques, you’ll unlock a world of flavors and textures, transforming your homemade cheese into a gourmet experience that friends and family will rave about. With a little patience and a dash of creativity, you’ll be well on your way to crafting cheese that not only delights your palate but also tells the unique story of your cheese-making journey.

8. Exploring Different Types of Cheese: A Brief Overview

When it comes to homemade cheese, the world is your oyster—or, in this case, your milk! Cheese-making is a delightful journey that opens up a realm of flavors and textures, each type offering its own unique character and culinary uses. Understanding the different types of cheese can inspire your cheese-making adventures and help you choose which ones to tackle first.

**Fresh Cheese:** This category includes soft cheeses like ricotta, mozzarella, and cream cheese. Fresh cheeses are typically made without aging, resulting in a mild flavor and creamy texture. They are incredibly versatile, perfect for spreading on toast, dolloping on pasta, or incorporating into salads. The process is often straightforward, making fresh cheese an excellent starting point for novice cheesemakers.

**Soft Cheese:** A step up from fresh cheese, soft cheeses like Brie and Camembert undergo a little aging but are still creamy and spreadable. These cheeses develop a lovely white rind, thanks to specific molds introduced during the aging process. Making soft cheese requires patience, as they need time to mature, but the reward is a rich and luscious treat that pairs beautifully with crusty bread and fruit.

**Semi-Hard Cheese:** Cheddar, Gouda, and Swiss fall into this category. These cheeses possess firmer textures and are aged longer than their soft counterparts, resulting in more complex flavors. The cheese-making process is slightly more involved, requiring careful monitoring of temperature and pH levels, but the outcome is well worth the effort. Aged semi-hard cheeses can be used in a variety of dishes, from melty grilled cheese sandwiches to savory cheese boards.

**Hard Cheese:** Parmesan and Pecorino are quintessential examples of hard cheeses. With their robust flavors and granular textures, hard cheeses are perfect for grating over pasta or salads. The aging process for these cheeses can take several months or even years, allowing them to develop deep, rich flavors. While making hard cheese is more intricate, the satisfaction of crafting a cheese that enhances your culinary creations is unparalleled.

**Blue Cheese:** For the adventurous cheesemaker, blue cheese offers a unique challenge. Characterized by its distinct blue veins of mold, varieties like Roquefort and Gorgonzola boast bold flavors that can be both tangy and creamy. The process involves inoculating the cheese with specific molds and allowing it to develop in a controlled environment. While blue cheese may require a bit more expertise, the resulting cheese is a true masterpiece.

Exploring these different types of cheese not only enhances your skill set but also broadens your culinary horizons. Each cheese has its own story and potential, waiting for you to uncover in your kitchen. Whether you’re creating a simple ricotta or embarking on the intricate journey of making a blue cheese, the experience is sure to enrich your appreciation for this amazing dairy delight. So grab your milk and let your cheese-making adventure begin!

9. Flavoring Your Cheese: Herbs, Spices, and Other Additions

Flavoring your cheese is where the magic truly happens, transforming a simple block of white curds into a delectable work of art that tantalizes the taste buds. The possibilities are virtually endless, and experimenting with different herbs, spices, and other additions can elevate your homemade cheese to restaurant-quality indulgence.

Start with the classics. Fresh herbs like basil, chives, or dill can be chopped and folded into your curds, imparting a vibrant freshness that adds a delightful twist to your cheese. Alternatively, dried herbs such as oregano or thyme can provide a more concentrated flavor that develops beautifully as the cheese ages. For an aromatic boost, consider seasoning your cheese with crushed garlic or a sprinkle of onion powder, creating a savory depth that pairs wonderfully with crusty bread or crackers.

Spices also play a crucial role in flavoring your cheese. A pinch of smoked paprika can lend a subtle smokiness, while crushed red pepper flakes add just the right amount of heat for those with a bold palate. For a distinctly Mediterranean flair, try adding za’atar, a fragrant blend of thyme, sesame seeds, and sumac that will transport your taste buds to sun-soaked shores.

Don’t overlook the potential of sweet additions, either! A touch of honey or a swirl of maple syrup can create an intriguing contrast in a creamy cheese, while fruits like figs, cranberries, or even sun-dried tomatoes can introduce a sweet-tart balance. Experimenting with nuts, such as finely chopped walnuts or pistachios, can add a satisfying crunch and nuttiness to your cheese, making it even more enticing.

As you play with flavors, keep in mind that less is often more. Start with small amounts of your chosen ingredients and taste as you go, allowing the natural cheese flavors to come through while enhancing them with your flavorful additions. Whether you prefer a herby spreadable cheese, a zesty pepper-infused cheese, or a sweet and nutty creation, the key is to have fun and let your creativity shine. With each batch, you’ll not only refine your cheese-making skills but also develop a unique flavor profile that reflects your personal tastes, ensuring that your homemade cheese is always a masterpiece.

10. Common Mistakes to Avoid

Making cheese at home can be a rewarding and delicious endeavor, but it’s not without its challenges. Even seasoned home cheesemakers can find themselves tripped up by a few common missteps. Here are some pitfalls to watch out for to ensure your cheese-making experience yields the best results.

**1. Skipping the Sanitization Process:**
One of the most crucial steps in cheese-making is ensuring that all your equipment is impeccably clean. Bacteria and unwanted microorganisms can easily spoil your milk and ruin your cheese. Always sanitize your utensils, molds, and surfaces before you start, and avoid touching anything that isn’t clean during the process.

**2. Using the Wrong Milk:**
Not all milk is created equal when it comes to cheese-making. While whole milk is often ideal, be wary of ultra-pasteurized milk, which can prevent your rennet from coagulating the milk properly. Opt for fresh, raw, or pasteurized milk from a reliable source for best results.

**3. Ignoring Temperature Control:**
Temperature plays a critical role in cheese-making. Too high or too low temperatures can affect the curd formation and texture of your cheese. Invest in a reliable thermometer and keep a close eye on the temperature at every stage, especially during heating and culturing.

**4. Rushing the Curd Cutting Process:**
Cutting the curds too soon or too late can drastically alter your cheese’s texture. Allowing the curds to set for the appropriate time is essential for achieving the right consistency. Follow your recipe closely and be patient; good things come to those who wait!

**5. Over- or Under-salting:**
Salt is not just for flavor; it also helps with preservation and affects the cheese’s texture and moisture. Too much salt can overpower the flavor, while too little can lead to spoilage. Be precise with your measurements and taste as you go.

**6. Neglecting to Age Properly:**
Aging is where the magic happens for many cheeses, contributing to their flavor and texture. Avoid the mistake of rushing this process. Ensure you have a suitable aging environment—cool, dark, and humid—and be patient as your cheese develops its character.

By steering clear of these common mistakes, you’ll be well on your way to crafting delicious homemade cheese that you can be proud of. Embrace the learning curve, and remember that even the occasional mishap can lead to valuable lessons and, perhaps, unexpectedly delightful flavors!

11. Storing and Preserving Your Homemade Cheese

Storing and preserving your homemade cheese is just as crucial as the crafting process itself. Once you’ve put in the time and effort to create your cheesy masterpiece, ensuring it stays fresh and flavorful is essential to enjoying it for weeks or even months to come. The right storage techniques can significantly extend the shelf life of your cheese while maintaining its delightful taste and texture.

First and foremost, consider the type of cheese you’ve made. Soft cheeses, like ricotta and cream cheese, have a higher moisture content and should be stored in an airtight container in the refrigerator. This will help prevent them from drying out and picking up unwanted odors from the fridge. Make sure to consume these cheeses within a week or two for optimal freshness.

On the other hand, harder cheeses, such as cheddar or gouda, can be wrapped in parchment paper or cheese paper, which allows them to breathe while preventing them from drying out. After wrapping, place the cheese in a breathable container or a cheese dome to further protect it from moisture loss. Hard cheeses can often last for several weeks in the fridge, but be sure to check for signs of mold or spoilage regularly.

For longer-term storage, you might consider freezing your cheese. However, not all cheeses freeze well. Hard cheeses generally hold up better when frozen, while soft cheeses may become crumbly after thawing. To freeze cheese, cut it into manageable portions and wrap it tightly in plastic wrap, followed by aluminum foil to prevent freezer burn. You can also vacuum seal your cheese for the best preservation results. Just remember to label your packages with the date and type of cheese to keep track of your stash.

Lastly, don’t overlook the importance of proper aging for certain types of cheese. If you’re crafting a cheese that benefits from aging, like a blue cheese or aged cheddar, be sure to monitor the temperature and humidity levels in your aging environment. A dedicated cheese cave or a controlled space in your refrigerator can create the ideal conditions for your cheese to develop its full flavor potential.

By mastering the art of storing and preserving your homemade cheese, you can ensure that your delicious creations remain enjoyable for as long as possible, ready to be savored on your favorite charcuterie board or melted into your next culinary masterpiece.

12. Pairing Homemade Cheese with Food and Wine

Pairing homemade cheese with food and wine can elevate your culinary experience from delightful to extraordinary. The beauty of crafting your own cheese is that it allows you to explore a world of flavors, textures, and aromas that store-bought varieties simply can’t match. Once you’ve mastered the art of cheese-making, the next step is to discover how to complement your creations with the right accompaniments.

Start with the basics: fresh cheeses like ricotta or mozzarella. These mild varieties shine when paired with fresh fruits and herbs. Imagine a creamy dollop of homemade ricotta atop a warm slice of rustic bread, drizzled with honey and sprinkled with sea salt. Add a handful of fresh figs or berries, and you’ve got a dish that sings with seasonal vibrancy. For mozzarella, a classic caprese salad—layered with ripe tomatoes, fragrant basil, and a splash of balsamic glaze—showcases the cheese’s delicate flavor beautifully.

As you venture into aged cheeses like cheddar or gouda, consider pairing them with hearty accompaniments. A sharp cheddar pairs wonderfully with crisp apples or pears, while aged gouda, with its nutty undertones, complements rich meats like prosciutto or salami. A charcuterie board featuring your homemade cheeses, artisan meats, and a variety of pickles and olives can become a stunning centerpiece at any gathering.

When it comes to wine, the right pairing can truly enhance the tasting experience. Fresh cheeses generally pair well with light, crisp whites such as Sauvignon Blanc or Pinot Grigio, which balance the creaminess without overpowering it. For aged cheeses, consider a bold red like Cabernet Sauvignon or a rich Chardonnay that can stand up to the deeper flavors. Don’t forget to experiment with sparkling wines, as their effervescence can cut through the richness of cheese, providing a refreshing contrast.

Ultimately, the art of pairing is about personal preference. Invite friends and family to join in the exploration, creating a festive atmosphere where everyone can share their thoughts on the delightful combinations. With your homemade cheese as the star of the show, the possibilities for delicious pairings are endless, making every meal a memorable celebration of flavor.

13. Creative Ways to Use Your Cheese in Recipes

Once you’ve mastered the art of cheese-making, the culinary adventure doesn’t end there! Homemade cheese presents a world of possibilities, allowing you to elevate your everyday meals and impress your friends and family. Here are some creative ways to incorporate your artisanal creations into delicious recipes that celebrate your handiwork.

**1. Creamy Cheese Spreads:** Blend your soft cheeses, such as ricotta or cream cheese, with herbs, spices, and perhaps a touch of honey for a delightful spread. Serve it on crusty bread or crackers as a part of an appetizer platter. You can experiment with flavors—think sun-dried tomatoes and basil or garlic and chive—to suit your palate.

**2. Gourmet Mac and Cheese:** Take your homemade cheese to the next level in a classic comfort dish. Mix a medley of your cheeses—sharp cheddar, creamy mozzarella, or a tangy goat cheese—with cooked pasta and a splash of cream. Top it with breadcrumbs and bake until golden for an indulgent treat that will have everyone asking for seconds.

**3. Cheese-Stuffed Vegetables:** Hollow out bell peppers, zucchini, or tomatoes and fill them with a savory mixture of your cheeses, grains, and spices. Bake until the vegetables are tender and the cheese is bubbling for a colorful and nutritious main course or side dish.

**4. Homemade Pizza:** Nothing beats the taste of freshly made pizza topped with your own cheese. Use mozzarella or a blend of cheeses, along with your favorite toppings. Bake in a hot oven for a crispy crust and gooey, melty cheese that will make pizza night a feast to remember.

**5. Salads with Flair:** Crumble your homemade feta or goat cheese over fresh salads to add a creamy texture and flavor contrast. Pair it with seasonal vegetables, nuts, and a light vinaigrette for a refreshing and satisfying dish.

**6. Cheese Desserts:** Yes, cheese can be part of your dessert repertoire too! Use mascarpone or ricotta to create light and airy desserts like cheesecakes, tiramisu, or layered parfaits. The natural sweetness of the cheese pairs beautifully with fruits and honey, perfect for a sweet ending to any meal.

By thinking outside the box and exploring these creative culinary uses for your homemade cheese, you can turn your kitchen into a gourmet paradise. Each dish not only showcases your cheese-making skills but also invites others to savor the delicious flavors and textures that only homemade cheese can provide. Enjoy the delightful journey from milk to masterpiece, one delicious recipe at a time!

14. Troubleshooting Common Cheese-Making Problems

Making cheese at home can be a rewarding and creative endeavor, but it’s not without its challenges. Even the most experienced cheesemakers encounter hiccups along the way. Understanding how to troubleshoot common cheese-making problems can save your batch and enhance your skills.

One frequent issue is curd separation, where the curds and whey don’t fully separate as expected. This can often be traced back to temperature inconsistencies. Ensure you’re maintaining the right temperature throughout the process; investing in a reliable thermometer can make a world of difference. If you find yourself with curds that are too dry, try a gentler heating method or reduce the acidification time in your recipe.

Another common problem is unwanted flavors or odors in the finished cheese, which may arise from improper sanitation or contamination. Always ensure your equipment is meticulously cleaned and sanitized before starting, as even the smallest residue can affect the taste of your cheese. If you notice bitterness, it could be due to overcooking your curds or using poor-quality milk, so be mindful of your ingredients and cooking times.

Texture issues can also arise, with cheese turning out grainy or crumbly instead of smooth and creamy. This could be the result of too much acid or not enough fat in your milk. When experimenting with different types of milk, remember that higher fat content typically leads to creamier cheeses. Lastly, if your cheese isn’t aging properly or developing the desired flavor profile, consider adjusting your aging conditions—humidity and temperature play crucial roles in the maturation process.

By keeping an eye on these potential pitfalls and being ready to adapt, you’ll not only salvage your current batch but also gain invaluable insights for your next cheese-making adventure. Remember, each mistake is a stepping stone toward mastery, turning your initial frustrations into flavorful triumphs!

15. Conclusion: The Joy of Making Cheese at Home

In conclusion, the journey of making cheese at home is not just a culinary venture; it’s a delightful experience that transforms the humble ingredients of milk and culture into a delicious masterpiece. The process may seem daunting at first, but with each step, you’ll discover the joy that comes from creating something uniquely your own. From the pristine moment of curdling milk to the satisfaction of crafting your favorite varieties—be it creamy ricotta, tangy feta, or robust aged cheddar—the rewards are truly unparalleled.

Homemade cheese offers an intimate connection to your food, allowing you to experiment with flavors and textures that store-bought varieties simply can’t match. Each batch you make becomes a testament to your growing skills and creativity in the kitchen. Imagine sharing a platter of your homemade cheese with friends and family, savoring the pride that comes from serving something crafted by your own hands.

As you embark on this cheesy adventure, remember that the journey is just as important as the destination. Whether you’re perfecting the art of mozzarella or venturing into the world of blue cheese, embrace the learning process, celebrate your successes, and don’t shy away from the occasional mishap—each mistake is a stepping stone toward mastering this timeless craft.

So, gather your ingredients, roll up your sleeves, and dive into the world of cheese-making. The joy of creating delectable cheese at home is waiting for you, and with each bite, you’ll savor not just the flavor, but the fulfillment that comes from bringing a little piece of culinary magic into your kitchen. Happy cheese making!

As we wrap up our exploration of transforming humble milk into delicious homemade cheese, we hope you feel inspired to embark on this rewarding culinary journey. Whether you’re aiming to perfect a creamy mozzarella, a tangy ricotta, or a robust aged cheddar, the techniques and tips shared in this post will guide you every step of the way. Homemade cheese not only elevates your meals but also brings a sense of accomplishment and creativity to your kitchen. So gather your ingredients, roll up your sleeves, and let your taste buds lead the way. We can’t wait to hear about your cheesy creations—share your masterpieces with us and let the world savor the fruits of your labor! Happy cheesemaking!

What are the best ways to make homemade yogurt?

There’s something undeniably satisfying about crafting your own homemade yogurt, transforming simple ingredients into a creamy, tangy delight that can elevate any meal or snack.

Whether you’re a health enthusiast seeking to control the ingredients you consume, a culinary adventurer eager to explore the art of fermentation, or simply someone who cherishes the rich, fresh taste of homemade products, this guide is for you. Unlocking the creamy secret of yogurt-making not only allows you to enjoy a deliciously smooth treat but also opens the door to a world of flavors and health benefits that store-bought varieties often lack. Join us as we delve into the best methods for creating your own yogurt at home, from choosing the right starter culture to mastering the fermentation process, ensuring that every spoonful is a testament to your kitchen prowess and dedication to wholesome living. Prepare to indulge in the velvety goodness of homemade yogurt, and discover just how easy it is to make this delightful staple in your very own kitchen!

1. Introduction to Homemade Yogurt

What are the best ways to make homemade yogurt?
Credit : whatcanu.com

Yogurt has long been cherished for its creamy texture and tangy flavor, but nothing compares to the satisfaction of making it at home. The process is not only simple but also incredibly rewarding, allowing you to create a product that is fresher, healthier, and more customizable than anything you can find in the store. Homemade yogurt is a versatile ingredient, perfect for everything from breakfast parfaits to savory dips, and it can be tailored to suit your taste—whether you prefer it plain, sweetened, or infused with your favorite fruits and spices.

At its core, yogurt is a product of fermentation, a magical transformation of milk that occurs when beneficial bacteria are introduced. This process not only thickens the milk but also enhances its nutritional profile, making homemade yogurt a powerhouse of protein, calcium, and probiotics. With a little patience and a few basic ingredients—milk and yogurt starter culture—you can unlock the creamy secret of yogurt-making right in your kitchen.

In this blog post, we’ll guide you through the steps to create your very own batch of homemade yogurt, sharing tips, tricks, and variations to elevate your yogurt-making experience. Whether you’re a novice or a seasoned culinary enthusiast, you’ll discover that with just a few tools and a dash of creativity, you can enjoy the rich, velvety goodness of yogurt made to your liking. So, roll up your sleeves and get ready to embark on a delicious journey into the world of homemade yogurt!

2. Benefits of Making Yogurt at Home

Making yogurt at home is not just a culinary adventure; it comes with a plethora of benefits that make it a worthwhile endeavor. First and foremost, homemade yogurt is a treasure trove of health benefits. It’s packed with probiotics—those beneficial bacteria that support gut health, boost immunity, and improve digestion. By making your yogurt, you can customize the strain of probiotics to fit your health needs, something that store-bought varieties often lack.

Another significant advantage is the control you gain over the ingredients. When you make yogurt at home, you can choose high-quality milk, whether it’s whole, low-fat, or even plant-based alternatives, and you can avoid the preservatives, artificial flavors, and sugars that may be lurking in commercial products. This means you can create a yogurt that is as pure and nutritious as you desire, tailored to your palate and dietary requirements.

Cost-effectiveness is another perk of homemade yogurt. A gallon of milk can yield a substantial amount of yogurt, often at a fraction of the cost of purchasing a similar quantity at the grocery store. This not only saves you money but also encourages you to experiment with flavors and uses, from smoothies to desserts, without the guilt of wasting resources.

Moreover, the process of making yogurt is incredibly rewarding. Watching the transformation from milk to creamy yogurt is like a mini-science experiment in your kitchen. It gives you a sense of accomplishment and connection to your food that is often lost in the hustle of modern life. Plus, the creamy texture and tangy flavor of freshly made yogurt is a treat that can elevate any meal—whether it’s a breakfast parfait, a savory dip, or a cooling sauce for your favorite dishes.

Lastly, homemade yogurt allows for endless creativity. You can infuse different flavors—think vanilla, honey, or fresh fruits—experiment with various add-ins like nuts and seeds, and create your unique blends that cater to your tastes. The possibilities are as vast as your imagination! So, embrace the art of yogurt-making, and unlock a world of creamy goodness right in your kitchen.

3. Essential Ingredients for Creamy Yogurt

What are the best ways to make homemade yogurt?
Credit : whatcanu.com

To embark on your homemade yogurt journey, it’s crucial to start with the right ingredients that will ensure a rich, creamy texture and delightful flavor. At the heart of this culinary adventure are just a few essential components that can elevate your yogurt-making game.

**1. Quality Milk:** The foundation of any great yogurt is, of course, milk. Whole milk is often the best choice for achieving that luscious creaminess, but you can also experiment with 2% or even non-dairy alternatives if you’re looking for a plant-based option. The fat content in whole milk creates a thicker, more indulgent yogurt, so if creaminess is your goal, opt for the richest milk you can find.

**2. Yogurt Starter Culture:** This is the magic ingredient that transforms your milk into yogurt. Look for a high-quality plain yogurt that contains live active cultures; this could be store-bought yogurt or a freeze-dried starter culture specifically designed for yogurt-making. The beneficial bacteria in the starter not only impart flavor but also contribute to the creamy texture by thickening the milk during fermentation.

**3. Optional Additives:** While not strictly essential, certain additives can enhance the creaminess and flavor of your yogurt. For instance, a splash of heavy cream can provide a richer texture, while a tablespoon of powdered milk can help absorb excess moisture, resulting in a thicker consistency. Additionally, sweeteners like honey or maple syrup can be added to taste, offering a touch of sweetness that complements the tang of the yogurt.

When combined, these ingredients lay the groundwork for a delectable homemade yogurt that’s not only creamy but also packed with probiotics. With these essentials in hand, you’re well on your way to unlocking the creamy secret of homemade yogurt! So gather your ingredients, and let the yogurt-making begin!

4. Choosing the Right Milk: Whole vs. Low-Fat

When it comes to making homemade yogurt, one of the most crucial decisions you’ll face is choosing the right type of milk. The texture, creaminess, and overall flavor of your yogurt largely depend on this selection. You may find yourself torn between whole milk and low-fat options, each offering distinct advantages.

Whole milk is often hailed as the gold standard for yogurt-making. Its rich, creamy consistency results in a velvety texture that makes every spoonful delightful. The higher fat content not only contributes to a luxurious mouthfeel but also fosters a creamier, thicker yogurt that is both satisfying and indulgent. If you’re aiming for a luscious Greek-style yogurt, whole milk is your best bet, providing that satisfying richness that keeps yogurt lovers coming back for more.

On the other hand, low-fat or skim milk can be appealing for health-conscious individuals looking to reduce their calorie intake. While it may not produce yogurt with the same creamy texture as whole milk, low-fat options can still yield tasty results, especially when you’re after a lighter snack. You might discover that some people prefer the tangy bite of low-fat yogurt, which can serve as a refreshing base for smoothies or a delightful addition to salads.

Ultimately, choosing between whole and low-fat milk will depend on your personal preferences and health goals. If you decide to experiment, consider blending the two—using a combination of whole and low-fat milk can strike a balance between creaminess and a lighter feel. Whatever you decide, the key is to use high-quality milk, as fresh and wholesome ingredients will always lead to superior homemade yogurt. So, roll up your sleeves, grab your chosen milk, and let the yogurt-making adventure begin!

5. Starter Cultures: What You Need to Know

What are the best ways to make homemade yogurt?
Credit : whatcanu.com

When it comes to making homemade yogurt, understanding starter cultures is crucial to achieving that velvety texture and tangy flavor we all love. A starter culture is essentially a collection of live bacteria that kickstarts the fermentation process, transforming milk into creamy yogurt.

You have several options when it comes to selecting a starter culture. You can opt for store-bought yogurt that contains live active cultures—just be sure to check the label for strains like *Lactobacillus bulgaricus* and *Streptococcus thermophilus*, as these are the essential bacteria needed for yogurt-making. Alternatively, for a more artisanal approach, you can purchase freeze-dried starter cultures specifically designed for yogurt production. These cultures come in a variety of strains, each offering unique flavors and health benefits, allowing you to experiment and find your perfect match.

If you decide to use store-bought yogurt as a starter, remember that it should be plain, unflavored, and free from additives. The fresher the yogurt, the better your results will be, as the potency of the bacteria decreases over time. On the other hand, freeze-dried cultures can be a bit pricier, but they often yield a more consistent product and allow you to create yogurt with specific characteristics, such as thickness or probiotic content.

Once you’ve chosen your starter culture, it’s essential to maintain proper temperatures during the fermentation process. Most yogurt cultures thrive between 110°F and 115°F (43°C to 46°C). Investing in a yogurt maker or using a simple method like wrapping your container in towels and placing it in a warm spot can help regulate the temperature and ensure a successful fermentation.

In summary, selecting the right starter culture is a pivotal step in your homemade yogurt journey. Whether you choose a beloved store-bought option or opt for a specialized freeze-dried culture, the microorganisms you introduce will shape the flavor, texture, and health benefits of your yogurt. With a little knowledge and experimentation, you’ll unlock the creamy secret to creating delicious, homemade yogurt that will have everyone coming back for more!

6. Step-by-Step Guide to Making Yogurt

Making your own yogurt at home is not only a rewarding culinary adventure, but it also allows you to create a creamy, delicious product tailored to your taste preferences. Below is a straightforward, step-by-step guide to help you achieve yogurt-making success.

**Step 1: Gather Your Ingredients and Tools**
To start, you’ll need just a few simple ingredients: milk (whole or low-fat, depending on your preference), and a tablespoon of plain yogurt with live active cultures. If you want to infuse your yogurt with flavors or sweetness, consider adding honey, vanilla extract, or fruits later in the process. Ensure you have a heavy-bottomed pot, a whisk, a thermometer, and a container to incubate the yogurt, such as a glass jar or a yogurt maker.

**Step 2: Heat the Milk**
Pour your desired amount of milk into the pot and slowly heat it over medium heat. Stir occasionally to prevent the milk from scorching. Monitor the temperature with your thermometer; you want to bring it to around 180°F (82°C). This step is crucial as it helps to denature the proteins, ensuring a smoother texture.

**Step 3: Cool the Milk**
Once the milk reaches the right temperature, remove it from the heat and allow it to cool to about 110°F (43°C). You can expedite this process by placing the pot in an ice bath.

**Step 4: Add the Starter Culture**
Once the milk has cooled, whisk in the tablespoon of plain yogurt until thoroughly combined. Make sure the yogurt contains live active cultures, as these are the beneficial bacteria that will ferment your milk into yogurt.

**Step 5: Incubate the Mixture**
Transfer the milk mixture into your container and cover it with a lid or a clean kitchen towel. To maintain a consistent warm temperature, place the container in a warm spot in your kitchen—this can be an oven with the light on, or a warm insulated cooler. The incubation period typically lasts between 6 to 12 hours, depending on how tangy and thick you want your yogurt. The longer you let it sit, the tangier it will become.

**Step 6: Check for Doneness**
After the incubation period, carefully check the yogurt. It should be thickened and have a slight tangy aroma. If it’s to your liking, proceed to the next step; if not, let it ferment a few more hours.

**Step 7: Refrigerate and Enjoy**
Once your yogurt has reached your desired flavor and texture, transfer it to the refrigerator to cool and set. Homemade yogurt can be stored in an airtight container for up to a week. Before serving, you can whisk it for a creamier consistency and add your favorite toppings—think fresh fruits, granola, or a drizzle of honey.

By following these simple steps, you will unlock the creamy secret to homemade yogurt, allowing you to savor the freshest and most delicious yogurt in the comfort of your own kitchen! Enjoy the satisfaction of knowing exactly what’s in your yogurt, and experiment with flavors and textures to make it uniquely yours.

7. Tips for Achieving the Perfect Consistency

What are the best ways to make homemade yogurt?
Credit : whatcanu.com

Achieving the perfect consistency in homemade yogurt can elevate your culinary experience from good to extraordinary. The texture of your yogurt is influenced by several factors, and mastering these will ensure you get that creamy, luscious mouthfeel every time.

**1. Choose the Right Milk:** Start with high-quality milk—whole milk is ideal for achieving a rich and creamy texture, while low-fat options can lead to a thinner consistency. If you’re adventurous, try using a mix of whole and half-and-half for an ultra-creamy result.

**2. Heat to the Right Temperature:** When heating your milk, aim for about 180°F (82°C). This step not only helps to kill any unwanted bacteria but also denatures the proteins, allowing them to form a smooth and cohesive structure once cooled and cultured.

**3. Cool Gradually:** After heating, let the milk cool to between 110°F and 115°F (43°C to 46°C) before adding your yogurt starter. This is the ideal temperature for the bacteria to thrive and will contribute to a thicker consistency. If you rush this step, you may end up with a runny yogurt.

**4. Use a Quality Starter:** The quality of your yogurt starter can make a world of difference. Look for live cultures with a variety of probiotics, as these will not only enhance flavor but also collaborate to create a thicker texture. You can use plain yogurt from the store or a powdered starter culture; just ensure it contains active cultures.

**5. Incubate the Right Way:** The incubation period is crucial for thickness. Allow your yogurt to ferment undisturbed for 6 to 12 hours, depending on personal preference for tartness. The longer it incubates, the thicker it will become. Use a yogurt maker, a warm oven, or even a thermos to maintain a stable temperature.

**6. Avoid Stirring:** Once your yogurt has set, resist the urge to stir it. This can break down the structure you’ve so carefully developed. If you want to add flavors or sweeteners, do so gently after the yogurt has reached your desired thickness.

**7. Chill Before Serving:** Finally, chilling your yogurt in the refrigerator for a few hours after it has set will help improve its thickness. The cold temperature helps the proteins solidify, resulting in a firmer texture.

By following these tips, you’ll be well on your way to crafting homemade yogurt that boasts the perfect consistency—smooth, creamy, and utterly delightful. Whether enjoyed on its own, drizzled with honey, or blended into smoothies, your homemade yogurt will be a testament to your kitchen prowess!

8. Common Mistakes to Avoid

Making homemade yogurt can be a delightful and rewarding experience, but it’s easy to stumble into a few common pitfalls that can derail your creamy creation. Here are some mistakes to watch out for to ensure your yogurt turns out smooth, tangy, and absolutely delicious.

**1. Skipping the Temperature Check:** One of the most crucial steps in yogurt-making is ensuring your milk is heated to the right temperature. If you heat it too much, you risk scalding the milk, which can alter the flavor and texture. Conversely, if it’s not hot enough, the bacteria won’t thrive, leading to thin and runny yogurt. Aim for a sweet spot of around 180°F (82°C) for optimal results.

**2. Not Cooling Down Properly:** After heating your milk, it’s essential to let it cool to around 110°F (43°C) before adding your starter culture. If you add the culture when the milk is too hot, you’ll kill the beneficial bacteria that help ferment the yogurt. Use a food thermometer to monitor the temperature closely for the best outcome.

**3. Choosing the Wrong Starter Culture:** Using a starter with live active cultures is key to successful fermentation. Avoid store-bought yogurts that may contain stabilizers or are past their expiration date. Instead, opt for plain yogurt from a reputable brand, or even better, use a yogurt starter culture specifically designed for homemade yogurt.

**4. Forgetting to Maintain a Steady Temperature:** Yogurt needs a warm environment to ferment properly. If your kitchen is too cool, the cultures won’t thrive, resulting in yogurt that is less tangy and thick. Invest in a yogurt maker or find a warm spot in your home—like an oven with the light on or a warming drawer—to keep the temperature stable during fermentation.

**5. Overlooking Fermentation Time:** Each batch of yogurt is unique, and fermentation times can vary based on factors like the type of milk used, the starter culture, and the ambient temperature. While most yogurt requires anywhere from 4 to 12 hours to ferment, it’s essential to taste-check periodically. If you leave it too long, you might end up with overly tart yogurt.

**6. Neglecting Hygiene Practices:** Cleanliness is paramount in yogurt-making. Any stray bacteria can spoil your batch or lead to inconsistent results. Always sanitize your equipment and work surfaces before you begin to ensure a healthy fermentation process.

By steering clear of these common mistakes, you’ll be well on your way to crafting creamy, homemade yogurt that’s not only delicious but also nourishing. Embrace the process, learn from any missteps, and soon you’ll be enjoying the rich flavors of your own yogurt creations!

9. Flavoring Your Yogurt: Natural Add-ins and Toppings

Flavoring your yogurt is where the magic truly happens, transforming a simple, creamy base into a delightful culinary experience. While plain yogurt offers a wholesome foundation packed with probiotics, adding natural ingredients can elevate its taste and nutritional profile, making it a treat you’ll look forward to indulging in every day.

Consider starting with fresh fruits, which not only enhance the flavor but also provide a burst of color and nutrients. Sliced strawberries, ripe bananas, or a handful of blueberries can add sweetness and natural sugars without the need for artificial additives. If you’re feeling adventurous, experiment with tropical fruits like mango or pineapple for a refreshing twist that transports your taste buds to a sun-soaked paradise.

For those who enjoy a bit of crunch, nuts and seeds are excellent choices. A sprinkle of toasted almonds, walnuts, or chia seeds can provide a satisfying texture while adding healthy fats and protein. You might also consider incorporating granola, offering a delightful combination of flavors and crunch that will make breakfast or a snack feel indulgent.

Herbs and spices can also work wonders in flavoring your yogurt. A dash of cinnamon or a hint of vanilla can infuse warmth and depth, while fresh mint leaves can add a refreshing note that brightens up the dish. For a unique twist, try mixing in a spoonful of honey or maple syrup—a drizzle that not only sweetens but also adds an enticing layer of complexity to your yogurt.

Don’t forget about the power of savory toppings! A sprinkle of sea salt or a drizzle of olive oil can create a bold contrast, perfect for serving yogurt as a dip with pita or vegetable sticks. Combining yogurt with garlic and herbs can transform it into a creamy sauce that elevates any meal.

Ultimately, the beauty of homemade yogurt lies in its versatility. As you explore natural add-ins and toppings, you’ll discover endless possibilities to personalize your yogurt experience, ensuring that each spoonful is a delightful journey of flavors and textures. So get creative, experiment with your favorite ingredients, and unlock the creamy secret to making yogurt that’s truly your own!

10. Creative Uses for Homemade Yogurt

Homemade yogurt is not just a delicious snack on its own; it’s a versatile ingredient that can elevate a multitude of dishes. Once you’ve mastered the art of making your own creamy yogurt, you’ll discover a world of creative uses that will have you reaching for that jar in your fridge time and time again.

**1. Smoothies and Shakes:** Start your day on a refreshing note by blending homemade yogurt into your morning smoothies. Its creamy texture adds body and richness while boosting the protein content. Combine it with fruits like bananas, berries, or mangoes for a nutrient-packed breakfast or a post-workout snack.

**2. Salad Dressings:** Elevate your salads with homemade yogurt-based dressings. Mix it with olive oil, lemon juice, herbs, and spices to create a tangy, creamy dressing that’s far healthier than store-bought alternatives. It adds a delightful zip to your greens, enhancing both flavor and nutrition.

**3. Baking Substitute:** When baking, replace sour cream or buttermilk with homemade yogurt for a moist and tender texture in cakes, muffins, and pancakes. The subtle tanginess will add depth to the flavors and keep your baked goods from drying out.

**4. Dips and Spreads:** Whip up a quick and healthy dip by mixing yogurt with garlic, herbs, and your favorite spices. Serve it alongside fresh vegetables, pita bread, or chips for a delightful appetizer. You can also incorporate yogurt into spreads to slather on sandwiches or toast, adding creaminess without the added calories of mayonnaise.

**5. Marinades:** Harness the natural probiotic qualities of yogurt to create tenderizing marinades for meats and vegetables. The acidity in yogurt helps to break down proteins, resulting in juicy and flavorful dishes. Combine it with spices and herbs to complement whatever you’re grilling or roasting.

**6. Frozen Treats:** Beat the heat with homemade yogurt popsicles! Simply blend yogurt with fruits, honey, or your favorite flavorings, pour into molds, and freeze. These treats are not only delicious but also a healthier alternative to store-bought ice creams.

**7. Soups and Sauces:** Stir a dollop of yogurt into soups just before serving for added creaminess and flavor. It works wonders in both chilled soups, like gazpacho, and warm soups, adding a rich texture and a cooling effect. You can also use it as a base for creamy sauces, perfect for drizzling over pasta or grilled vegetables.

With these creative uses for homemade yogurt, you can transform your culinary repertoire while enjoying the health benefits of this probiotic powerhouse. So, don’t be shy—experiment and discover new ways to incorporate your delicious homemade yogurt into everyday meals!

11. Storing and Preserving Your Yogurt

Once you’ve mastered the art of making your own creamy homemade yogurt, the next step is to ensure that it stays fresh and delicious for as long as possible. Proper storage and preservation are crucial, not just for maintaining flavor and texture, but also for maximizing the health benefits that yogurt offers. Here are some essential tips to help you store your yogurt like a pro.

**Choose the Right Container:**
The type of container you use can significantly affect the shelf life of your yogurt. Opt for airtight glass jars or food-safe plastic containers, as these will help maintain the yogurt’s texture and prevent any unwanted odors from seeping in. Avoid using metal containers, which can react with the acidity of yogurt and alter its flavor.

**Refrigeration is Key:**
Fresh homemade yogurt should always be stored in the refrigerator. The cold temperature slows down bacterial growth, keeping your yogurt safe to eat for longer. Ideally, yogurt can last up to two weeks when stored properly in the fridge. However, check for any signs of spoilage, such as an off smell or mold, before consuming.

**Portion it Out:**
If you’ve made a large batch of yogurt, consider portioning it out into smaller containers. This way, you only open one jar at a time, which limits exposure to air and helps maintain the overall freshness of the remaining yogurt. This is especially handy if you enjoy different flavors or toppings; you can customize each portion without affecting the entire batch.

**Freeze for Longer Storage:**
If you find that you have more yogurt than you can consume within two weeks, don’t worry! Yogurt can be frozen for future enjoyment. Scoop it into ice cube trays or freezer-safe containers, and freeze it for up to two months. When you’re ready to indulge, simply thaw it in the refrigerator overnight. Keep in mind that the texture may change slightly after freezing, making it best suited for smoothies or baking.

**Label and Date:**
To keep track of freshness, always label your containers with the date you made the yogurt. This simple step ensures you know how long it has been stored and helps you enjoy your yogurt at its peak quality.

By following these storage and preservation tips, you can savor the creamy goodness of your homemade yogurt for as long as possible. Whether enjoyed plain, topped with fruits, or blended into smoothies, your yogurt will be a delightful staple in your kitchen, ready whenever you need it!

12. Troubleshooting: What to Do If It Doesn’t Set

Making homemade yogurt can be a delightful and rewarding process, but sometimes things don’t go as planned. If you find yourself facing the frustrating situation where your yogurt hasn’t set properly, don’t worry! There are several common issues that can lead to this, and with a little troubleshooting, you can get back on track.

First, check the temperature of your incubation environment. Yogurt cultures thrive in warm conditions, typically around 110°F (43°C). If your mixture is too cool, the cultures may not grow adequately. You can create a cozy setting by wrapping your yogurt container in a thick towel or placing it in a warm oven (turned off) with the light on. Conversely, if it’s too hot, the cultures can die, so make sure the temperature stays consistent.

Next, consider the quality and type of starter culture you used. If your yogurt didn’t set, it might be that the live cultures in your starter were not strong enough or that they were past their expiration date. Always opt for a high-quality yogurt with active live cultures, or use a specially formulated yogurt starter for the best results.

Another potential issue could be the milk itself. Make sure you’re using fresh milk, as spoiled or overly processed milk can interfere with the fermentation process. Whole milk often yields creamier yogurt due to its higher fat content, but if you prefer a lower-fat option, ensure it’s pasteurized and not ultra-pasteurized, which can hinder proper setting.

Finally, if you’ve checked all these factors and your yogurt still hasn’t set after the typical incubation period (usually around 6-12 hours), consider giving it a little more time. Sometimes, yogurt just needs a bit longer to reach that perfect creamy consistency. If all else fails, don’t discard your efforts! You can salvage runny yogurt by straining it through cheesecloth or a fine mesh sieve to create a delicious Greek-style yogurt.

Remember, every batch of homemade yogurt is a learning experience. With a little patience and adjustment, you’ll soon be enjoying the rich, tangy goodness of your very own yogurt—just the way you like it!

13. Health Benefits of Yogurt

Yogurt isn’t just a delicious addition to your diet; it’s also a powerhouse of health benefits that can enhance your overall well-being. Packed with nutrients, homemade yogurt is a superb source of protein, calcium, and essential vitamins, making it an ideal choice for anyone looking to boost their nutritional intake.

One of the most notable benefits of yogurt is its probiotic content. These beneficial bacteria promote a healthy gut microbiome, aiding digestion and potentially reducing issues like bloating and constipation. A balanced gut can also bolster your immune system, helping your body fend off illness more effectively.

Additionally, yogurt is rich in calcium, which is vital for maintaining strong bones and teeth. For individuals looking to reduce their dairy consumption, yogurt can serve as an excellent alternative, providing the same bone-healthy benefits without the heavy load of other dairy products.

Moreover, many studies have suggested that regular consumption of yogurt may help in weight management. The protein content aids in satiety, keeping you fuller for longer and reducing the likelihood of unhealthy snacking. This can be particularly beneficial for those looking to maintain a healthy weight or shed a few pounds.

Another significant benefit of yogurt is its versatility. It can be incorporated into a variety of meals, from breakfast parfaits and smoothies to savory marinades and dressings. By making your yogurt at home, you can control the ingredients, avoiding added sugars and preservatives often found in store-bought varieties.

Incorporating homemade yogurt into your daily routine not only satisfies your taste buds but also nurtures your body, making it a smart and delicious choice for health-conscious individuals. So, as you embark on your yogurt-making journey, remember that you’re not just creating a tasty treat; you’re also unlocking a treasure trove of health benefits that can contribute to a healthier lifestyle!

14. Yogurt Varieties: Greek, Regular, and More

When it comes to yogurt, the world is bursting with delicious varieties, each bringing its own unique flavor and texture to the table. Understanding these differences not only enhances your yogurt-making experience but also allows you to tailor your creations to suit your taste preferences and nutritional needs.

**Greek Yogurt** is perhaps the most popular variety, beloved for its thick, creamy texture and rich flavor. The secret to its dense consistency lies in the straining process that removes most of the whey, resulting in a yogurt that’s higher in protein and lower in sugar compared to its regular counterpart. Greek yogurt is perfect for those looking to add a satisfying punch of protein to their breakfast or snacks, and it serves as an excellent base for smoothies, dressings, and dips.

**Regular Yogurt**, on the other hand, offers a smoother, more liquid consistency. This type of yogurt is versatile and can be enjoyed on its own, used in recipes, or incorporated into baked goods. Regular yogurt retains more of the whey, which contributes to a tangier flavor and a creamier mouthfeel. It’s a fantastic choice for anyone who enjoys a lighter, less concentrated yogurt experience.

Beyond these two, there are a plethora of yogurt varieties to explore. **Skyr**, an Icelandic specialty, is similar to Greek yogurt but is typically even thicker and has a slightly milder flavor, making it a fantastic option for those who prefer a less tangy taste. Then there’s **Kefir**, a fermented drinkable yogurt that’s packed with probiotics, offering a refreshing twist with a slightly fizzy texture that’s perfect for those hot summer days.

You can also experiment with **flavored yogurts**, which come in an array of fruit and spice combinations, or try your hand at **non-dairy options** made from almond, coconut, or soy milk, perfect for lactose-intolerant individuals or those following a vegan diet. Each variety presents a unique opportunity to explore different culinary landscapes, allowing you to customize your yogurt creations to suit your cravings and dietary needs.

So, whether you’re stirring in fresh fruits, drizzling honey, or creating savory sauces, understanding the nuances of yogurt varieties will elevate your homemade yogurt experience. Embrace the creaminess, and unlock a world of flavor possibilities right in your kitchen!

15. Conclusion: Enjoying Your Homemade Creation!

As we reach the end of our yogurt-making journey, it’s time to celebrate and savor the fruits of your labor. There’s something undeniably satisfying about creating your own yogurt from scratch—transforming simple ingredients into a delicious, creamy indulgence that’s tailored to your taste. Whether you’ve opted for a tangy Greek yogurt or a smooth, luscious regular variety, the satisfaction of enjoying a homemade creation is truly unparalleled.

Once your yogurt has set and chilled, the fun really begins! Picture opening your refrigerator to find a jar brimming with velvety yogurt, ready to elevate your breakfasts, snacks, and desserts. The versatility of homemade yogurt is one of its greatest charms. Enjoy it plain, drizzled with honey, or topped with your favorite fresh fruits and nuts for a wholesome breakfast. Blend it into smoothies for a protein boost, or use it as a base for dips and dressings that can transform your meals into culinary delights.

Don’t forget about the health benefits! Homemade yogurt is probiotic-rich, promoting gut health and immunity. Plus, you have complete control over the ingredients, ensuring there are no additives or preservatives—just pure, wholesome goodness.

As you embark on this delicious journey, remember that practice makes perfect. Each batch may inspire you to experiment with flavors, textures, and toppings, turning yogurt-making into a delightful ritual. So, roll up your sleeves, unleash your creativity, and enjoy each spoonful of your homemade yogurt. Taste the difference, and let your culinary creations become a staple in your kitchen. Cheers to your delicious homemade yogurt adventure!

In conclusion, making homemade yogurt is not only a rewarding culinary adventure but also a delicious way to enjoy a creamy, nutritious treat tailored to your taste. By following the tips and methods outlined in our blog, you can unlock the secrets to creating the perfect batch of yogurt that is rich in flavor and probiotics. Whether you prefer it plain, sweetened, or flavored with fruits and spices, the possibilities are endless. So gather your ingredients, embrace your inner chef, and start experimenting with different cultures and techniques. Before you know it, you’ll be savoring the delightful taste and health benefits of your very own homemade yogurt. Happy yogurt-making!

What are the best ways to make homemade ice cream?

As the sun blazes and temperatures rise, nothing quite compares to the joy of indulging in a bowl of creamy, homemade ice cream.

There’s a certain magic in the process—transforming simple ingredients like fresh cream, sugar, and your favorite flavors into a delightful frozen treat that cools you down and brings a smile to your face. Whether you’re craving classic vanilla, adventurous salted caramel, or fruity sorbet, making ice cream at home allows you to customize every scoop to your liking. In this ultimate guide, we’ll take you through the essentials of homemade ice cream-making, from choosing the right tools and ingredients to mastering churn techniques and creative flavor combinations. Get ready to chill out and learn how you can turn your kitchen into an ice cream parlor, perfect for hot summer days or any occasion that calls for a sweet, creamy escape!

1. Introduction to Homemade Ice Cream

What are the best ways to make homemade ice cream?
Credit : whatcanu.com

There’s something undeniably magical about ice cream. The creamy texture, the delightful flavors, and the sheer joy of indulging in a scoop (or two) on a hot summer day can bring a smile to anyone’s face. But have you ever considered taking that joy to the next level by making your own homemade ice cream? This guide will take you on a delicious journey into the world of crafting your very own frozen treats, right from the comfort of your kitchen.

Homemade ice cream isn’t just a nostalgic nod to childhood summers; it’s an opportunity to unleash your creativity and tailor flavors to suit your taste buds. Imagine swirling together your favorite ingredients—be it rich chocolate, fresh fruits, or even unexpected spices. The best part? You have complete control over the quality and freshness of every component that goes into your ice cream. No preservatives, no artificial flavors, just pure, decadent goodness.

In this ultimate guide, we’ll explore the basics of ice cream making, from selecting the right equipment to understanding the science behind the freezing process. Whether you’re a seasoned home chef or a curious beginner, you’ll find tips and techniques to create ice cream that rivals even the most beloved parlors. So grab an ice cream maker (or a trusty blender), gather your ingredients, and get ready to chill out with the ultimate homemade ice cream experience!

2. The Benefits of Making Ice Cream at Home

Making ice cream at home is not just a delightful culinary endeavor; it also comes with a plethora of benefits that can elevate your experience beyond what you’d find in a store-bought pint.

First and foremost, there’s the sheer joy of customization. When you make your own ice cream, you have complete control over the ingredients. This means you can craft flavors that cater to your specific tastes, whether that’s a classic vanilla bean, a rich chocolate fudge, or an adventurous lavender honey. You can experiment with mix-ins like fresh fruits, nuts, or even swirls of caramel and fudge, allowing you to create truly unique concoctions that tantalize your taste buds.

Health-conscious individuals will appreciate the ability to choose wholesome ingredients. Homemade ice cream can be made with organic dairy, natural sweeteners, and fresh, seasonal produce, allowing you to indulge guilt-free. You can even explore dairy-free alternatives using coconut milk, almond milk, or cashew cream, making it an inclusive treat for those with dietary restrictions.

Additionally, making ice cream at home fosters creativity and brings a sense of accomplishment. The process can be a fun activity for the whole family, turning a warm afternoon into a memorable experience. Whether you’re hosting a gathering or simply enjoying a quiet evening, the satisfaction of scooping out a bowl of your own creation adds a personal touch that store-bought options simply cannot match.

Finally, there’s an undeniable charm in sharing your homemade ice cream with friends and family. It can become a centerpiece for gatherings, a thoughtful gift, or a delightful treat on a hot summer day. So, not only do you get to enjoy a delicious dessert, but you also create lasting memories that are just as sweet as the ice cream itself. Embrace the joy of making ice cream at home, and discover how it can be so much more than just a treat—it’s an experience!

3. Essential Tools and Equipment for Ice Cream Making

What are the best ways to make homemade ice cream?
Credit : whatcanu.com

Creating your own homemade ice cream can be a delightful adventure, but having the right tools and equipment is essential to achieving that perfect creamy texture and flavor. Here’s a rundown of the must-have items that will elevate your ice cream-making experience:

1. **Ice Cream Maker**: At the heart of your homemade ice cream journey is the ice cream maker. While there are several types available—manual, electric, and compressor models—electric ice cream makers are often the most user-friendly for beginners. They come with built-in freezing mechanisms that take the guesswork out of the process, allowing you to churn your mixture to perfection without the hassle of ice and salt.

2. **Mixing Bowls**: A set of mixing bowls is essential for combining your ingredients. Opt for a variety of sizes, preferably stainless steel or glass, as they are durable and easy to clean. A larger bowl is perfect for mixing your cream and sugar, while smaller bowls can be used for incorporating flavorings or toppings.

3. **Whisk and Spatula**: A sturdy whisk will help you blend your base smoothly, ensuring that the sugar dissolves completely and the ingredients are well incorporated. A silicone spatula is perfect for scraping down the sides of your bowls and transferring your mixture into the ice cream maker with minimal mess.

4. **Measuring Cups and Spoons**: Accurate measurements are crucial in ice cream making. Invest in a set of measuring cups and spoons to ensure you get the ratios of cream, milk, sugar, and flavorings just right. Precision can make a significant difference in the final taste and texture of your ice cream.

5. **Thermometer**: If you’re making a custard base, a food thermometer is invaluable for ensuring that your mixture reaches the correct temperature without overheating. This step is crucial for achieving the perfect custard consistency and preventing scrambled eggs in your ice cream!

6. **Storage Containers**: Once your ice cream is churned to creamy perfection, you’ll need suitable containers to store it. Airtight plastic or glass containers work well, as they help retain freshness and prevent freezer burn. Consider using containers with wide openings for easy scooping!

7. **Ice Cream Scoop**: Finally, don’t forget a high-quality ice cream scoop. A sturdy scoop allows you to serve your homemade creation with ease, ensuring that every bowl is a generous, perfectly rounded portion.

With these essential tools and equipment in your arsenal, you’ll be well on your way to crafting delicious homemade ice cream that rivals your favorite shop. Get ready to experiment with flavors, create scrumptious toppings, and enjoy the sweet rewards of your labor!

4. Choosing the Right Ingredients: Dairy, Sweeteners, and Flavorings

When it comes to crafting the perfect homemade ice cream, the choice of ingredients plays a pivotal role in achieving that creamy, dreamy texture and flavor explosion that keeps everyone coming back for more. Let’s dive into the essential components: dairy, sweeteners, and flavorings.

**Dairy**: The foundation of any great ice cream starts with high-quality dairy. Whole milk and heavy cream are the stars of the show, providing the rich, velvety mouthfeel that we associate with premium ice cream. If you’re looking for a lighter option, you can also experiment with half-and-half or even non-dairy alternatives like coconut cream or almond milk. Just be mindful that non-dairy bases may yield a different texture and flavor profile. For a delicious twist, consider adding a splash of buttermilk or sour cream to enhance the creaminess and introduce a subtle tang.

**Sweeteners**: The sweetener you choose can significantly impact not just the flavor but also the texture of your ice cream. Traditional granulated sugar is the most common choice, providing a classic sweetness that balances the richness of the dairy. However, you might want to explore alternatives like honey, maple syrup, or agave nectar for a unique twist. Remember that liquid sweeteners may require adjustments to your cream base to maintain the right consistency, so don’t hesitate to experiment! For a sugar-free option, consider using erythritol or stevia, but keep in mind that some sugar substitutes can create a different mouthfeel and may not freeze as smoothly as traditional sugar.

**Flavorings**: This is where your creativity can really shine! Whether you’re opting for classic vanilla, decadent chocolate, or fruity strawberry, the key is to select high-quality flavorings. Pure extracts, like vanilla or almond, will elevate your ice cream to a whole new level, while fresh fruits can add a vibrant burst of flavor. If you’re feeling adventurous, try infusing your cream with herbs like basil or mint, or add spices like cinnamon or nutmeg for a unique flavor profile. Don’t forget about mix-ins—think chocolate chips, nuts, or cookie pieces—that can add both texture and surprise to every delightful scoop.

In summary, the right combination of dairy, sweeteners, and flavorings can transform your homemade ice cream from simple to sensational. So gather your ingredients, unleash your inner ice cream artisan, and get ready to savor the deliciousness of your creations!

5. Base Types: Custard vs. Philadelphia Style

What are the best ways to make homemade ice cream?
Credit : whatcanu.com

When it comes to making homemade ice cream, one of the most crucial decisions you’ll encounter is choosing the right base. The two primary styles of ice cream bases are custard and Philadelphia style, each offering distinct flavors and textures that can elevate your frozen treat to new heights.

**Custard Style Ice Cream** is rich, creamy, and indulgent. Made with egg yolks, this base requires a careful cooking process to create a smooth custard before chilling. The addition of egg yolks not only gives the ice cream a luxurious texture but also enhances the overall flavor profile, creating a velvety experience with every spoonful. The custard base is often cooked gently over a double boiler, allowing the eggs to thicken without scrambling. Once cooled, it’s combined with cream, milk, and sugar, resulting in a decadent ice cream that is perfect for those who appreciate a more complex flavor.

On the other hand, **Philadelphia Style Ice Cream** is the simpler, no-cook alternative, making it a favorite among home ice cream makers seeking a quick and straightforward approach. This style relies primarily on heavy cream and milk, with no eggs involved, which allows for a lighter, fresher taste. The absence of eggs means you skip the time-consuming step of cooking the custard, making it an excellent option for those who want to whip up a batch of ice cream on a whim. Philadelphia style ice cream is particularly well-suited for bold flavors, as the creaminess showcases the ingredients beautifully without the rich undertones of eggs.

Ultimately, the choice between custard and Philadelphia style comes down to personal preference. If you’re in the mood for something luxurious and rich, go for the custard base. But if you’re craving a light, refreshing treat that highlights the flavors of your favorite mix-ins, Philadelphia style is the way to go. Whichever you choose, both styles promise to deliver delicious homemade ice cream that’s sure to impress family and friends alike!

6. Step-by-Step Guide to Making Ice Cream from Scratch

Making ice cream from scratch is a delightful and rewarding experience that allows you to indulge in creamy, dreamy flavors tailored to your preferences. Here’s a simple, step-by-step guide to creating your own ice cream masterpiece:

**Step 1: Gather Your Ingredients**
To kick off your ice cream adventure, collect the essential ingredients: heavy cream, whole milk, granulated sugar, and vanilla extract. For a basic vanilla ice cream, you’ll want about 2 cups of heavy cream, 1 cup of whole milk, and 3/4 cup of sugar. Don’t forget to grab your favorite mix-ins like chocolate chips, fruit, or nuts for that personal touch!

**Step 2: Prepare the Base**
In a medium mixing bowl, whisk together the sugar and whole milk until the sugar is completely dissolved. This will ensure a smooth texture without any gritty surprises. Once mixed, gently fold in the heavy cream and vanilla extract. The mixture should be rich and velvety, setting the stage for your creamy creation.

**Step 3: Chill the Mixture**
To enhance the flavor and improve the final texture, refrigerate the ice cream base for at least 1-2 hours. This step helps the ingredients meld together while cooling the mixture, making it easier to churn later.

**Step 4: Churn Your Ice Cream**
Once your base is chilled, it’s time to churn! If you have an ice cream maker, pour the mixture into the machine and churn according to the manufacturer’s instructions, usually around 20-30 minutes. If you don’t have a machine, you can pour the mixture into a shallow dish and place it in the freezer, stirring vigorously every 30 minutes for about 3-4 hours until it reaches a soft-serve consistency.

**Step 5: Add Mix-Ins**
During the last few minutes of churning (or just before your ice cream sets in the freezer), fold in any mix-ins you desire. Think chocolate chunks, cookie crumbles, or fresh berries. This is where you can get creative, adding your favorite flavors and textures.

**Step 6: Freeze Until Firm**
Once you’ve achieved the desired consistency and added your mix-ins, transfer your ice cream to an airtight container and freeze for at least 4 hours, or until it’s hard enough to scoop. This final freeze will give your ice cream that perfect, scoopable texture.

**Step 7: Serve and Enjoy**
After patiently waiting, your homemade ice cream is ready to be served! Scoop it into bowls or cones, and consider topping it with sprinkles, syrups, or whipped cream. Enjoy the fruits of your labor with friends and family, or keep it all to yourself—after all, you deserve it!

By following these simple steps, you’ll be well on your way to mastering the art of homemade ice cream, treating yourself and your loved ones to a sweet, personalized delight that’s sure to impress!

7. Flavor Ideas: Classic, Unique, and Seasonal Variations

What are the best ways to make homemade ice cream?
Credit : whatcanu.com

When it comes to homemade ice cream, the flavor possibilities are as vast as your imagination. Whether you’re a fan of timeless classics or adventurous enough to explore seasonal and unique concoctions, there’s a flavor waiting to tantalize your taste buds.

**Classic Flavors**
Start with the tried-and-true favorites that have stood the test of time. Vanilla, chocolate, and strawberry are the holy trinity of ice cream flavors. Vanilla serves as a blank canvas, allowing you to add a variety of mix-ins like chocolate chips, cookie dough, or fresh fruit. Chocolate lovers can indulge in rich, creamy chocolate ice cream, perhaps swirled with fudge for added decadence. Meanwhile, strawberry ice cream, made with ripe, juicy berries, provides a refreshing and fruity experience that’s perfect for summer.

**Unique Flavors**
If you’re feeling adventurous, why not venture into the realm of unique and unexpected flavors? Consider experimenting with flavors like lavender honey, where the floral notes of lavender beautifully complement the sweetness of honey. Or try a spicy chocolate ice cream infused with a hint of chili for a surprising kick. For a taste of the tropics, coconut lime could transport you straight to a beachside paradise, while matcha green tea offers a delightful earthy flavor that’s both refreshing and invigorating.

**Seasonal Variations**
Embrace the changing seasons by incorporating seasonal ingredients into your ice cream creations. In the spring, consider a fresh mint chocolate chip, with vibrant green mint leaves blended into a creamy base. Summer calls for refreshing fruit flavors like peach or raspberry, using peak-season produce for an unbeatable taste. As autumn approaches, why not whip up a pumpkin spice ice cream, rich with the warm spices of cinnamon and nutmeg? Finally, during the winter months, indulge in a cozy eggnog ice cream, perfect for holiday gatherings and chilly nights.

No matter which direction you choose, the beauty of making homemade ice cream lies in the ability to customize and experiment. So grab your ingredients, unleash your creativity, and get ready to delight in the endless world of flavors that await you!

8. Tips for Achieving the Perfect Texture

Achieving the perfect texture in homemade ice cream is an art that combines science, technique, and a little bit of love. The texture of your ice cream can make or break the experience, transforming a simple scoop into a creamy delight that melts beautifully in your mouth. Here are some essential tips to help you create that coveted silky-smooth texture.

First and foremost, start with a base that has the right balance of fat and sugar. Higher fat content, usually from heavy cream, not only enhances the flavor but also contributes to a richer texture. Aim for a base that contains at least 10-20% fat, as this will help create that luscious creaminess we all adore. Sugar also plays a crucial role; it lowers the freezing point of the mixture, allowing the ice cream to remain softer and easier to scoop after freezing.

Next, don’t underestimate the power of proper chilling. Before churning your mixture, ensure that it is thoroughly chilled in the refrigerator for several hours. This step not only accelerates the churning process but also helps incorporate air into the mixture, creating a light and fluffy texture. For best results, chill your base to at least 40°F (4°C) before pouring it into the ice cream maker.

When it’s time to churn, keep your ice cream maker bowl as cold as possible. If you’re using a bowl that requires pre-freezing, make sure to freeze it for at least 24 hours. The colder the bowl, the quicker the mixture will freeze, which helps minimize ice crystal formation. This results in a smoother texture, so don’t rush this crucial step!

Another tip is to avoid over-churning. While it may be tempting to let your ice cream maker run indefinitely, doing so can lead to a grainy texture as too much air is incorporated. Keep an eye on the consistency and stop churning once you see a soft-serve texture. After churning, transfer your ice cream to an airtight container and freeze it for a few hours to achieve the ideal scoopable consistency.

Finally, consider adding stabilizers to your mixture. Ingredients like cornstarch or gelatin can help improve the texture by preventing ice crystals from forming during the freezing process. These are especially helpful if you plan to store your ice cream for an extended period.

With these tips in your toolkit, you’ll be well on your way to creating homemade ice cream that’s not just delicious, but also boasts the perfect texture that will have your friends and family coming back for more. So grab your ice cream maker and start experimenting—you’re in for a real treat!

9. Add-ins and Mix-ins: Get Creative with Your Ice Cream

When it comes to homemade ice cream, the possibilities for add-ins and mix-ins are virtually endless, and this is where your creativity can truly shine. Imagine scooping into a velvety base of vanilla bean ice cream, only to discover delightful surprises hidden within. From classic favorites to adventurous twists, the right mix-ins can elevate your homemade concoction from ordinary to extraordinary.

Start with the classics: chunks of rich chocolate, ribbons of caramel, or a generous handful of crunchy nuts can all add texture and flavor. But why stop there? Consider mixing in crushed cookies for a delightful cookie dough flavor, or swirl in some fruit preserves for a refreshing tartness that complements the creaminess of the ice cream. Fresh fruit such as strawberries, blueberries, or bananas can infuse natural sweetness and vibrant color, while also providing a burst of freshness in every bite.

For those who love a bit of crunch, think about incorporating granola or toasted coconut flakes, which not only add a satisfying texture but also a unique flavor profile. If you’re feeling particularly adventurous, try adding spicy elements like crushed chili peppers or ginger, or even savory touches like a sprinkle of sea salt to enhance the sweetness.

Don’t forget about the fun toppings! After churning your ice cream, why not serve it with an array of toppings that guests can customize themselves? A DIY sundae bar with whipped cream, sprinkles, and various syrups can turn your ice cream experience into a party, delighting both kids and adults alike.

No matter how you choose to get creative, remember that the heart of homemade ice cream is all about personal expression. So, grab your favorite add-ins and mix-ins, and let your imagination run wild—after all, the best ice cream is the one that reflects your unique taste!

10. Storing Homemade Ice Cream: Best Practices

Storing homemade ice cream properly is key to preserving its creamy texture and delightful flavor. After all the effort you’ve put into creating that perfect batch, you want to ensure it remains as delicious as the day it was made. Here are some best practices to keep your ice cream in top shape.

First and foremost, choose the right container. Opt for an airtight, freezer-safe container that’s made of plastic or metal, as glass can crack under extreme cold. A shallow container is ideal, as it allows for faster freezing and easier scooping. If you have a larger batch, consider dividing it into smaller portions. This way, every time you open the freezer, you’re not exposing the entire batch to warmer air, which can lead to ice crystals forming—a texture enemy for your homemade creation.

When packing your ice cream into the container, leave just a little bit of space at the top to allow for expansion as it freezes. Then, press a piece of parchment paper directly onto the surface of the ice cream before sealing the container. This additional layer acts as a barrier against air, helping to lock in that velvety smoothness you worked so hard to achieve.

Next, store your ice cream in the coldest part of the freezer, ideally the back, rather than the door. The door tends to fluctuate in temperature every time it opens, which can affect the consistency of your ice cream. Aim to keep your freezer at a steady 0°F (-18°C) or lower to maintain the best texture.

Finally, remember to consume your homemade ice cream within a month for optimal flavor and quality. While it may last longer, the longer it sits in the freezer, the more likely it is to succumb to freezer burn or lose that fresh taste. So, gather your friends and family and invite them over for an ice cream party—after all, nothing is quite as delightful as sharing your homemade treat! With these best practices, your homemade ice cream will remain a delightful indulgence, ready to enjoy whenever the craving strikes.

11. Common Mistakes to Avoid When Making Ice Cream

Making homemade ice cream can be a delightful and rewarding experience, but it’s easy to stumble over a few common pitfalls that could turn your creamy dreams into icy disappointments. Here’s a rundown of mistakes to avoid, ensuring that each batch is a success.

**1. Skipping the Pre-Chill Step:** One of the most crucial steps in making ice cream is pre-chilling your ice cream maker’s bowl. If the bowl isn’t cold enough, your mixture won’t freeze properly, leading to a soupy texture rather than the smooth, creamy consistency you desire. Always ensure you’ve placed the bowl in the freezer for at least 24 hours before use.

**2. Not Tempering Eggs:** If your recipe calls for eggs, make sure to temper them before adding them to your mixture. Quickly whisking the eggs with a small amount of hot cream prevents them from scrambling and ensures a silky texture. This step is vital for custard-based ice creams, so don’t skip it!

**3. Using Too Much Sugar:** While sweetness is essential, overdoing it can lead to an overly soft ice cream that doesn’t freeze well. Sugar lowers the freezing point of your mixture, so balance is key. Follow your recipe closely, and consider tasting along the way to hit that sweet spot without going overboard.

**4. Forgetting to Strain:** If your recipe includes a custard base, always strain it after cooking. This removes any potential egg bits and ensures a perfectly smooth texture. You want your ice cream to be a luxurious treat, free of any unwanted crunch.

**5. Ignoring Flavor Balance:** When adding flavors like vanilla, chocolate, or fruit purees, be mindful of your ratios. Too much flavoring can overpower the overall taste, while too little may leave your ice cream bland. Start with smaller amounts, tasting as you go, to create a well-rounded profile.

**6. Overchurning:** While it may be tempting to keep the mixture churning until it’s super thick, overchurning can lead to icy crystals forming. Once your ice cream reaches a soft-serve consistency, it’s time to stop and transfer it to a container for freezing.

**7. Skipping the Freeze Time:** After churning, it’s essential to let your ice cream set in the freezer for at least a few hours before serving. This additional freezing time allows flavors to meld and the texture to firm up, resulting in a more enjoyable scoop.

By avoiding these common mistakes, you’ll be well on your way to crafting delicious, homemade ice cream that rivals the best scoop shops. Whether you’re experimenting with traditional flavors or getting creative with unique combinations, following these tips will help ensure your frozen treats are nothing short of perfection.

12. Dairy-Free and Vegan Ice Cream Options

As the demand for inclusive dessert options continues to rise, crafting delicious dairy-free and vegan ice cream has never been more rewarding. Whether you’re lactose intolerant, following a vegan lifestyle, or simply looking to explore new flavors and textures, there are countless ways to create creamy and satisfying frozen treats without traditional dairy.

Start with a base that’s rich and flavorful. Coconut milk is a popular choice thanks to its luscious consistency and subtle sweetness, making it an ideal canvas for a variety of flavors. Almond milk and cashew milk are also excellent alternatives, imparting their unique nutty notes to your ice cream. For a thicker, creamier texture, consider using silken tofu, which blends smoothly and provides a protein boost, or opt for a blend of nut butters for added richness.

When it comes to sweeteners, the options are plentiful. Agave nectar, maple syrup, and coconut sugar can infuse your ice cream with natural sweetness, while dates or bananas can provide a whole-food option that also contributes to creaminess. Experiment with different sweeteners to find the perfect balance for your palate.

Flavors are where the fun truly begins! From classic vanilla to decadent chocolate, and adventurous combinations like matcha green tea or lavender, the possibilities are endless. Don’t shy away from adding mix-ins like chopped nuts, dairy-free chocolate chips, or chunks of fresh fruit to elevate the texture and taste of your creations.

To make your process even easier, consider using an ice cream maker, which can help achieve that desired smoothness and prevent ice crystals from forming. If you don’t have one, fear not! Simply pour your mixture into a shallow dish and stir every 30 minutes as it freezes to achieve a still creamy texture.

With these dairy-free and vegan options, you can indulge in homemade ice cream that caters to everyone’s dietary needs while tantalizing their taste buds. So gather your ingredients, unleash your creativity, and get ready to enjoy guilt-free frozen delights that are sure to impress family and friends alike!

13. Fun Serving Ideas and Presentation Tips

When it comes to homemade ice cream, the experience isn’t just about the taste—it’s also about how you serve it! Elevating the presentation of your frozen creations can add a dash of excitement to any gathering and make your homemade treats even more memorable. Here are some fun serving ideas and presentation tips that will impress your family and friends.

**1. Colorful Bowls and Unique Cones:** Start by selecting vibrant bowls or quirky ice cream cones to serve your creations. Opt for rainbow-hued cups, vintage glassware, or even edible waffle bowls for a delightful twist. The right container can turn even the simplest scoop into a visual masterpiece.

**2. Layered Sundaes:** Layering your ice cream can create a stunning presentation. Start with a scoop of one flavor, drizzle some sauce (think chocolate, caramel, or fruit compote), and then add another scoop of a different flavor. Top it off with whipped cream, sprinkles, and a cherry for that classic sundae look.

**3. Garnish with Fresh Ingredients:** Fresh fruits can provide a burst of color and flavor. Consider garnishing your ice cream with slices of strawberries, blueberries, or kiwi. Fresh mint leaves can also add a pop of green that brightens up your dish.

**4. Creative Toppings Bar:** Set up a toppings bar at your next gathering, where guests can customize their own sundaes or cones. Include a variety of toppings such as crushed cookies, nuts, mini marshmallows, and a selection of syrups. This interactive approach not only makes serving fun but also lets everyone tailor their dessert to their liking.

**5. Ice Cream Sandwiches:** For a playful twist, create ice cream sandwiches using cookies, brownies, or even donuts. Roll the edges in sprinkles or nuts for an added surprise. These handheld treats are not only delicious but also make for great photo opportunities!

**6. Themed Presentation:** If you’re hosting a themed party, align your ice cream presentation accordingly. For a beach party, serve ice cream in coconut shells topped with crushed graham crackers to mimic sand. For a movie night, use popcorn boxes filled with scoops of ice cream, complete with a drizzle of chocolate sauce for a fun and unexpected treat.

**7. Freeze and Serve:** For a dramatic effect, freeze your serving plates or bowls before serving. The condensation that forms will give your dessert a frosty, inviting look, while also keeping your ice cream from melting too quickly.

Remember, the key to a delightful ice cream presentation is to let your creativity shine. Each scoop of your homemade ice cream is a blank canvas waiting for your artistic touch. With these fun serving ideas and presentation tips, you’ll be ready to create an unforgettable dessert experience that will leave everyone craving more!

14. Hosting an Ice Cream Party: Themes and Recipes

Hosting an ice cream party is a delightful way to gather friends and family while indulging in everyone’s favorite frozen treat. The beauty of an ice cream party lies in its versatility; it can be as simple or as extravagant as you’d like, and the themes can be tailored to suit any occasion. Here are some fun ideas to get you started, along with delicious recipe suggestions that will make your ice cream party unforgettable.

**Themed Parties:**
1. **Classic Sundae Bar:** Set up a stunning sundae bar with a variety of ice cream flavors like vanilla, chocolate, and strawberry. Offer an array of toppings, from hot fudge and caramel sauce to sprinkles, crushed cookies, and fresh fruits. Provide fun bowls and spoons, and let guests create their own masterpiece while mingling.

2. **Tropical Luau:** Transport your guests to a tropical paradise with flavors inspired by the islands. Think coconut, pineapple, and mango ice creams. Pair these with toppings like toasted coconut flakes, macadamia nuts, and rum-infused fruit compote. Decorate with Hawaiian leis and play some upbeat island music to enhance the vibe.

3. **Decadent Chocolate Affair:** For the chocolate lovers, host a chocolate-themed party with rich chocolate ice cream as the star. Experiment with different recipes—dark chocolate, white chocolate raspberry, or even chocolate brownie ice cream. Add toppings like chocolate shavings, brownie bites, and chocolate syrup for an indulgent experience.

4. **Seasonal Flavors:** Celebrate the seasons by featuring flavors that reflect the time of year. In summer, go for refreshing mint chocolate chip and strawberry basil. In fall, pumpkin spice and apple pie ice cream can capture the essence of autumn. Create seasonal decor to complement the flavors and make the event feel special.

**Recipe Inspiration:**
– **No-Churn Vanilla Ice Cream:** Simple to prepare, this recipe requires just heavy cream, sweetened condensed milk, and vanilla extract. Mix and freeze for a creamy, dreamy treat that can serve as a base for countless toppings.

– **Strawberry Sorbet:** Perfect for a refreshing dessert, this sorbet combines fresh strawberries, sugar, and a touch of lemon juice. Blend until smooth, freeze, and serve for a light, fruity option that everyone will love.

– **Chocolate Chip Cookie Dough Ice Cream:** Who doesn’t love cookie dough? Make a classic vanilla ice cream base and mix in chunks of cookie dough for a nostalgic twist that brings back childhood memories.

– **Dairy-Free Coconut Ice Cream:** For guests with dietary restrictions, whip up a coconut milk-based ice cream. Infuse it with vanilla and throw in some shredded coconut for added texture.

As you plan your ice cream party, don’t forget the essential elements—fun activities like ice cream-making contests or tasting games can keep the energy high. Provide comfortable seating and perhaps even a photo booth with fun props to capture the sweet memories. With delicious flavors, creative themes, and a festive atmosphere, your ice cream party is sure to be a hit, leaving your guests with smiles and satisfied taste buds!

15. Conclusion: Enjoying Your Homemade Creations

As you reach the end of this delightful journey into the world of homemade ice cream, it’s time to savor the fruits of your labor. There’s something incredibly satisfying about crafting your own frozen treats—it’s not just about the creamy, dreamy flavors but also the joy of sharing these creations with family and friends.

Imagine opening your freezer to find a colorful array of ice cream tubs, each representing a different flavor you’ve expertly concocted. From classic vanilla bean to adventurous lavender honey or rich chocolate fudge, the choices are as limitless as your imagination. The moment you scoop that first serving, the silky texture and vibrant taste remind you of the care and creativity that went into each batch.

But the enjoyment doesn’t stop there. Picture a sunny afternoon, the laughter of loved ones filling the air as they gather around a bowl of your homemade ice cream. Whether it’s a simple scoop served in a cone or an extravagant sundae topped with whipped cream, sprinkles, and cherries, each bite is a celebration of your culinary skills. You’ll find that your creations spark conversation, evoke memories, and create new experiences, making every scoop a cherished moment.

So, as you conclude your ice cream-making adventure, remember that the real reward lies not just in the creamy delights you’ve made but in the smiles and laughter they bring. Embrace the messiness of experimentation, keep refining your flavors, and most importantly, enjoy every delicious moment of your homemade creations. After all, the joy of ice cream is best when shared!

As we wrap up our ultimate guide to making homemade ice cream, we hope you’re feeling inspired to unleash your inner ice cream artisan and create delightful frozen treats that will impress family and friends alike. With the simple techniques and creative flavor ideas we’ve shared, you now have the tools to craft everything from classic vanilla to adventurous combinations that tickle the taste buds. So, gather your ingredients, fire up that ice cream maker, and embark on a delicious journey that not only cools you down but also warms your heart with the joy of homemade goodness. Don’t forget to share your delicious creations with us—tag us on social media and let the world see your frozen masterpieces! Enjoy every scoop!

What are the best ways to preserve food?

In an era where sustainability and mindful eating are at the forefront of our culinary conversations, the art of food preservation has made a remarkable comeback.

Gone are the days of letting leftover fruits and vegetables wilt away in the depths of your refrigerator. Instead, home cooks and food enthusiasts alike are rediscovering the time-honored techniques that not only extend the shelf life of their favorite foods but also enhance their flavors. Whether you’re looking to stock your pantry with seasonal bounty or create a stash of homemade delights, mastering the methods of food preservation can transform your kitchen game entirely. In this post, we’ll explore the top seven tried-and-true methods that will empower you to preserve food like a pro, ensuring that nothing goes to waste and every bite is as delicious as the day you harvested it. From traditional canning to innovative fermentation techniques, get ready to roll up your sleeves and embark on a flavorful journey that celebrates freshness and sustainability!

1. Introduction to Food Preservation

What are the best ways to preserve food?
Credit : whatcanu.com

Food preservation is an age-old practice that has evolved over centuries, yet its fundamental purpose remains the same: to extend the shelf life of food while retaining its flavor, texture, and nutritional value. In a world increasingly focused on sustainability and reducing waste, knowing how to preserve food effectively has never been more relevant. Whether it’s through canning, freezing, drying, or fermenting, each method offers unique benefits and flavors, allowing you to savor the bounty of seasonal produce throughout the year.

Imagine biting into a sun-ripened tomato in the heart of winter, or enjoying the tangy crunch of homemade pickles on a hot summer day. These experiences are made possible through the art of food preservation, enabling you to capture nature’s flavors at their peak and store them for later enjoyment. Not only does preserving food help in saving money and reducing food waste, but it also empowers you to take control of what goes into your meals, steering clear of unnecessary additives and preservatives found in many store-bought options.

In this guide, we will delve into the top seven tried-and-true methods for preserving food like a pro. From the vibrant colors of jars filled with homemade jams to the satisfying crunch of dehydrated fruits, each technique offers a hands-on approach to enjoying your favorite foods all year round. Whether you’re a seasoned home cook or a beginner, these methods are accessible and rewarding, transforming your kitchen into a hub of culinary creativity and sustainability. Let’s embark on this flavorful journey and discover how you can master the art of food preservation!

2. Understanding the Importance of Food Preservation

Understanding the importance of food preservation is more critical than ever in our fast-paced, convenience-focused world. At its core, food preservation is not just a method to extend the shelf life of perishable items; it is a vital practice that can significantly contribute to minimizing waste, saving money, and ensuring food safety.

With the alarming rates of food spoilage and waste reported globally, learning how to preserve food effectively can have a profound impact. Each year, millions of tons of fresh produce and other food items end up in landfills simply because they were not consumed in time. By mastering preservation techniques, you can take a stand against this wastefulness, ensuring that the fruits of your labor—or the products you purchase—last longer and remain enjoyable.

Moreover, food preservation allows you to harness the flavors and nutrition of seasonal produce, capturing the essence of each harvest for enjoyment throughout the year. Imagine savoring the taste of summer strawberries in the depths of winter or enjoying homemade pickles that add zest to your meals long after the cucumbers have been harvested. This not only enriches your culinary experiences but also promotes a more sustainable lifestyle.

Additionally, understanding food preservation is essential for food safety. Techniques such as canning, freezing, and fermenting can inhibit the growth of harmful bacteria and pathogens, protecting you and your family from foodborne illnesses. With proper techniques, you can create a safe, delicious, and nutritious pantry stocked with your favorite foods.

In essence, food preservation is a skill that empowers you to take control of your kitchen. It enhances your cooking options, reduces grocery bills, and helps you to build a sustainable food system at home. Embracing these practices is not just about storing food; it’s about creating a lifestyle that values freshness, sustainability, and health.

3. Method #1: Canning – The Basics to preserve food

What are the best ways to preserve food?
Credit : whatcanu.com

Canning is one of the oldest and most reliable methods of food preservation, allowing you to enjoy the bounty of your garden or the flavors of your favorite seasonal produce year-round. At its core, canning involves sealing food in airtight containers and heating them to kill bacteria, yeasts, and molds that cause spoilage. This method not only extends shelf life but also locks in nutrients and flavors, making your preserved foods taste as vibrant as the day they were processed.

**Getting Started with Canning**

Before diving into the canning process, it’s essential to gather the right equipment. You’ll need canning jars with tight-fitting lids, a large pot or canner, a jar lifter, and a funnel. These tools help ensure a safe and efficient canning experience. When selecting jars, opt for those specifically designed for canning, as they are made to withstand high temperatures and create a proper seal.

**Choosing Your Ingredients**

When it comes to canning, freshness is key. Select fruits and vegetables that are ripe but not overripe, as they’ll yield the best flavor and texture. Common choices for canning include tomatoes, pickles, peaches, and jams. Be sure to wash and prepare your produce thoroughly, cutting them into appropriate sizes for the jars.

**The Canning Process**

The canning process typically involves two methods: water bath canning and pressure canning. Water bath canning is ideal for high-acid foods like fruits and pickles, while pressure canning is necessary for low-acid foods, such as vegetables and meats, to ensure safety.

1. **Prepare Your Jars**: Start by sterilizing your jars in boiling water for about 10 minutes to eliminate any bacteria. Keep the jars warm until you’re ready to fill them to prevent breakage.

2. **Fill the Jars**: Using the funnel, fill each jar with your prepared food, leaving the recommended headspace to allow for expansion during processing. Make sure to wipe the rims of the jars clean to ensure a proper seal.

3. **Seal and Process**: Place the lids on the jars and tighten the rings just until snug—over-tightening can prevent a proper seal. Process the jars in your water bath or pressure canner according to the recommended times for each type of food.

4. **Cool and Store**: After processing, remove the jars using the jar lifter and set them on a towel or cooling rack. Allow them to cool completely, usually taking 12 to 24 hours. Once cooled, check the seals by pressing down in the center of each lid. If it pops back, the jar hasn’t sealed properly and should be refrigerated and used immediately. Properly sealed jars can be stored in a cool, dark place for up to a year or more.

**Final Thoughts**

Canning not only preserves food but also captures the essence of your culinary experiences and memories. With practice, you’ll hone your skills and gain confidence in your canning abilities, allowing you to create a pantry full of delicious, homemade delights that you can enjoy throughout the year. Whether you’re canning out of necessity or as a fun hobby, this timeless method is sure to elevate your food preservation game.

4. Method #2: Freezing – Best Practices to preserve food

Freezing is one of the most effective and convenient methods for preserving food, allowing you to enjoy seasonal flavors year-round. By properly freezing your food, you can lock in freshness, nutrients, and taste, ensuring that your meals are just as delicious as the day they were harvested or cooked. Here are some best practices to keep in mind when freezing food like a pro:

**1. Choose Quality Ingredients:** The foundation of successful freezing begins with high-quality ingredients. Select fresh, ripe produce or freshly cooked meals without any signs of spoilage. Remember, you can only freeze what you start with, so prioritize the best.

**2. Prepare Food Properly:** Before freezing, make sure to clean, peel, chop, or cook your food as necessary. For vegetables, blanching—briefly boiling and then plunging them into ice water—helps to preserve color, texture, and nutrients. For meats, trim off excess fat to prevent freezer burn, which can affect the taste and quality.

**3. Use Proper Packaging:** Invest in quality freezer-safe bags, airtight containers, or vacuum sealers. Remove as much air as possible before sealing to prevent freezer burn and oxidation. Label each package with the contents and date to keep track of what you have and how long it’s been stored.

**4. Don’t Overload the Freezer:** When freezing food, it’s crucial to maintain a consistent temperature. Avoid overloading your freezer, which can hinder air circulation and lead to uneven freezing. Ideally, your freezer should be set to 0°F (-18°C) or lower for optimal preservation.

**5. Freeze in Portions:** Portioning your food into meal-sized servings not only makes it easier to thaw only what you need but also helps maintain quality. Consider using muffin tins or ice cube trays for smaller portions of sauces, broths, or herbs, which can be easily popped out and stored.

**6. Thaw Safely:** When you’re ready to enjoy your frozen food, ensure to thaw it safely. The best methods include transferring it to the refrigerator overnight, using the defrost setting on your microwave, or cooking directly from frozen, depending on the food type. Avoid thawing at room temperature, as this can promote bacterial growth.

**7. Keep an Inventory:** To avoid wasting food, keep a simple inventory of what you have in your freezer. This not only helps you keep track of your frozen treasures but also encourages you to use older items before they become forgotten.

By following these best practices, you can master the art of freezing and ensure that your favorite foods are always within reach, ready to be enjoyed whenever you desire. Whether it’s a bounty of summer berries or a hearty batch of soup, embracing the freezer will elevate your food preservation game to a whole new level.

5. Method #3: Dehydrating – How to Get Started

What are the best ways to preserve food?
Credit : whatcanu.com

Dehydrating is one of the oldest and most effective methods of food preservation, allowing you to extend the shelf life of fruits, vegetables, herbs, and even meats while retaining their essential nutrients and flavors. This technique not only enhances the taste of your favorite foods, but it also creates convenient, lightweight snacks that are perfect for hiking, camping, or simply enjoying at home. If you’re eager to dive into the world of dehydrating, here’s a step-by-step guide to get you started.

**Choosing Your Equipment**
First, consider your options for dehydrating. You can use a dedicated food dehydrator, which offers consistent temperature control and airflow for optimal results. Alternatively, your oven can double as a dehydrator if you set it to a low temperature (usually around 140°F or 60°C), allowing moisture to escape without cooking the food. Whichever method you choose, make sure to have some parchment paper and airtight containers on hand for storage.

**Selecting Your Ingredients**
Next, choose the right foods for dehydrating. Fruits like apples, bananas, and strawberries are excellent choices, while vegetables such as bell peppers, zucchini, and tomatoes also work wonderfully. For meats, lean cuts are best; consider making jerky from beef, chicken, or turkey. Remember, the key to successful dehydrating is starting with fresh, high-quality ingredients.

**Preparation and Cutting**
Once you have your ingredients, it’s time to prepare them. Wash your fruits and vegetables thoroughly and peel them if necessary. Slice them into uniform pieces to ensure even drying, typically about 1/4 inch thick. For items like apples and bananas, consider soaking them in a mixture of lemon juice and water for a few minutes to prevent browning and enhance flavor.

**Dehydrating Process**
Arrange the prepared food on your dehydrator trays or baking sheets in a single layer, leaving space between each piece for air circulation. Set your dehydrator or oven to the recommended temperature for the items you are drying—generally, fruits should be dehydrated at around 135°F (57°C), while vegetables can be done at 125°F (52°C). Depending on the moisture content of the food, the drying process can take anywhere from a few hours to a full day. Be sure to check periodically, as different foods may require different drying times.

**Storing Your Dehydrated Food**
Once fully dehydrated, allow the food to cool completely before transferring it to airtight containers. Glass jars, vacuum-sealed bags, or Mylar bags with oxygen absorbers work well for storage. Keep your dehydrated foods in a cool, dark place, and they can last for months—sometimes even years!

By mastering the art of dehydrating, you’ll not only be able to preserve the bounty of your garden or local farmers’ market but also create delicious snacks that are perfect for any occasion. Happy dehydrating!

6. Method #4: Fermentation – A Flavorful Choice

Fermentation is not just a preservation method; it’s a culinary art that transforms ordinary ingredients into vibrant, flavorful delights. This ancient technique harnesses the power of beneficial bacteria and yeasts to convert sugars into acids, gases, or alcohol, resulting in foods that are not only shelf-stable but bursting with complex flavors and nutritional benefits.

Imagine the tangy crunch of sauerkraut, the rich umami of miso, or the effervescent zing of homemade kombucha—these are just a few examples of the wonders fermentation can conjure. The process begins with fresh, high-quality ingredients, whether you’re working with vegetables, fruits, grains, or dairy. The key is to create an environment that encourages the right microorganisms to thrive while inhibiting harmful ones. This often involves submerging your ingredients in a brine or utilizing a starter culture, allowing the magic of fermentation to take place over days, weeks, or even months.

One of the best parts of fermentation is its versatility. You can experiment with different spices, herbs, and flavoring agents to create unique variations that suit your palate. Not only does fermentation enhance flavors, but it also increases the nutritional value of your food, making vitamins and minerals more bioavailable. Plus, fermented foods are known for their gut health benefits, thanks to the probiotics they contain.

To get started with fermentation, all you need is some basic equipment—think jars, weights, and a cool, dark space in your kitchen. There are countless resources and recipes available to guide you through the process, whether you’re a seasoned pro or a curious beginner. Embrace the art of fermentation, and soon you’ll find that not only are you preserving food like a pro, but you’re also enhancing your meals with layers of flavor that will keep your taste buds excited and satisfied.

7. Method #5: Pickling – Step-by-Step Guide

What are the best ways to preserve food?
Credit : whatcanu.com

Pickling is an age-old preservation method that not only extends the shelf life of your favorite fruits and vegetables but also infuses them with vibrant flavors. Whether you’re looking to preserve a bountiful harvest from your garden or simply want to add a tangy twist to your meals, pickling can be both a practical and enjoyable process. Here’s a step-by-step guide to help you master the art of pickling like a pro.

### Step 1: Choose Your Produce
Start by selecting fresh, high-quality fruits or vegetables. Cucumbers, carrots, green beans, and cabbage are popular choices, but don’t hesitate to experiment with unique options like radishes, beets, or even watermelon rinds. The fresher your ingredients, the better your pickles will taste.

### Step 2: Prepare Your Jars
Sanitize your jars and lids by washing them in hot, soapy water and then rinsing them well. To ensure they are completely clean, you can also run them through a dishwasher cycle. For long-term storage, consider processing your jars in a boiling water bath to eliminate any lingering bacteria.

### Step 3: Make the Brine
The brine is the heart of the pickling process. In a saucepan, combine water, vinegar (white, apple cider, or rice vinegar works well), and salt. You can also add sugar for a sweeter pickle or spices like mustard seeds, dill, garlic, and peppercorns to enhance the flavor. Bring the mixture to a boil, stirring until the salt and sugar dissolve completely.

### Step 4: Pack Your Jars
Once your brine is ready, pack your cleaned produce tightly into the jars. You can slice or quarter your vegetables as needed to fit them snugly. Leave some headspace at the top—about half an inch—to allow for the brine to expand during processing.

### Step 5: Pour in the Brine
Carefully ladle the hot brine over your packed jars, ensuring the produce is fully submerged. Use a clean utensil, like a chopstick or a skewer, to remove any air bubbles trapped within the jars. Wipe the rims of your jars with a clean cloth to ensure a tight seal, then place the lids on securely.

### Step 6: Process Your Jars
For long-term preservation, process your jars in a boiling water bath. Submerge the jars in boiling water, making sure they are covered by at least an inch of water. The processing time will depend on the size of your jars and the specific recipe you are following, typically ranging from 10 to 15 minutes.

### Step 7: Cool and Store
After processing, carefully remove the jars from the water and let them cool on a clean kitchen towel or cooling rack. You should hear the satisfying “pop” of the lids sealing as they cool. Once cooled, check the seals by pressing down in the center of each lid—if it doesn’t flex up and down, it’s sealed properly. Store your pickled goodies in a cool, dark place for at least a few weeks to allow the flavors to develop before enjoying the tangy delights of your homemade pickles.

By following these steps, you’ll not only be able to preserve your favorite produce but also create delicious additions to salads, sandwiches, and charcuterie boards that will impress your family and friends. Happy pickling!

8. Method #6: Vacuum Sealing – Keeping Food Fresh

Vacuum sealing has emerged as one of the most effective methods for keeping food fresh for extended periods, and it’s no wonder that professional chefs and home cooks alike are turning to this technique. This method involves removing air from specially designed bags or containers before sealing them tightly, which significantly reduces the oxidation process that causes spoilage.

When you vacuum seal food, you not only keep it fresher but also retain its flavor, color, and nutritional value. Fruits and vegetables, when vacuum sealed, can maintain their crispness and vibrant hues, while meats and fish stay juicy and flavorful, free from freezer burn and dehydration. The magic lies in the absence of air; without exposure to oxygen, the growth of bacteria and mold is inhibited, allowing you to enjoy your favorite foods for weeks or even months longer than traditional storage methods allow.

Moreover, vacuum sealing is incredibly versatile. It can be used for meal prep, portion control, or even sous vide cooking, where vacuum-sealed bags are immersed in hot water to cook food to perfection. Whether you’re preserving leftovers, bulk buying perishable items, or planning for a camping trip, investing in a vacuum sealer can greatly enhance your food storage strategy.

To get started, simply place your food in a vacuum bag, adjust your vacuum sealer to the appropriate settings, and let the machine do the work. If you’re looking to take your food preservation skills to the next level, consider adding a variety of marinades or seasonings before sealing to infuse your meals with flavor while they marinate.

In conclusion, vacuum sealing is a game-changing technique that not only extends the life of your food but also elevates your culinary experience, making it an essential tool for anyone serious about food preservation.

9. Method #7: Root Cellaring – Natural Preservation Techniques

Root cellaring is an age-old preservation technique that taps into the natural conditions of the earth to keep your produce fresh and flavorful. This method, which dates back centuries, relies on the simple principles of temperature, humidity, and darkness to create an ideal environment for storing various fruits and vegetables.

Imagine stepping into a cool, dimly lit space lined with shelves filled with potatoes, carrots, onions, and apples, all nestled in layers of straw or sand. A root cellar can be as simple as a dug-out space in your backyard or a designated corner of your basement, designed to maintain a steady temperature of around 32 to 40 degrees Fahrenheit. The key is to choose a location that remains consistently cool and has good ventilation to prevent rot and spoilage.

The beauty of root cellaring is its sustainability; it requires no electricity and minimal effort once set up. Many root vegetables, such as beets and turnips, thrive in these conditions, developing a sweeter taste as they store sugars from the surrounding earth. Apples, stored in a single layer to avoid bruising, can last for months, providing you with the crisp taste of fall long into the winter.

To maximize your success with root cellaring, consider the type of produce you’re storing. Hardier varieties, like squash and pumpkins, benefit from the dry air of a root cellar, while moisture-loving crops, such as carrots, should be kept in slightly damp sand to maintain their crispness. Regularly check your stored items for signs of decay, and rotate them as necessary to ensure nothing goes to waste.

Ultimately, root cellaring is not just a method of food preservation; it’s a connection to our agricultural roots and a reminder of the bounty that each season brings. Embracing this technique allows you to enjoy the flavors of homegrown produce year-round while reducing your reliance on modern refrigeration and packaging. So, dig in, and discover the satisfying art of root cellaring—you might find it becomes a cherished tradition in your kitchen!

10. Common Mistakes to Avoid in Food Preservation

When it comes to preserving food, even the most seasoned home cooks can fall prey to common pitfalls that can compromise both the quality and safety of their preserved goods. Understanding these mistakes is essential for anyone looking to maintain the integrity of their food, and avoiding them can mean the difference between delicious, long-lasting preserves and a regrettable batch gone wrong.

One of the most frequent errors is neglecting proper sanitation. It’s easy to overlook the importance of sterilizing jars and equipment, but even the smallest amount of bacteria can spoil an entire batch. Ensure that all your tools are thoroughly cleaned and that your jars are either new or properly sanitized to prevent contamination.

Another common mistake is misunderstanding the principles of acidity. Many preservation methods rely on the correct pH level to inhibit the growth of harmful microorganisms. For example, when canning vegetables, it’s crucial to add sufficient acid—whether through vinegar or lemon juice—to ensure safety. Ignoring this step can lead to serious food safety risks.

Overfilling jars is also a mistake many make in the heat of the moment. Leaving proper headspace in jars is essential for the food to expand during processing and for creating a vacuum seal as they cool. Too little space can not only lead to messy, poorly sealed jars but can also jeopardize the preservation process.

Additionally, it’s important to pay attention to processing times and temperatures. Each type of food has specific guidelines that should be followed closely. Rushing through the canning process or using incorrect temperatures can result in under-processed food, which is a breeding ground for bacteria and spoilage.

Lastly, don’t overlook the importance of labeling. Failing to mark your jars with the contents and the date can lead to confusion months down the line. Not only does this help you keep track of what you have, but it also ensures you use older items first, reducing waste and keeping your pantry organized.

By being mindful of these common mistakes, you can elevate your food preservation game, ensuring that your efforts yield safe, tasty, and long-lasting results every time. With a little diligence and attention to detail, you’ll be able to preserve your bounty like a true pro!

11. Tips for Storing Preserved Foods

When it comes to storing preserved foods, proper techniques can make all the difference in maintaining flavor, texture, and safety. Here are some essential tips to ensure your hard work in canning, pickling, or fermenting pays off long term.

**1. Choose the Right Containers:** Opt for glass jars with airtight seals for canning, as they resist leaching and maintain the integrity of your preserved foods. For freezer storage, use freezer-safe plastic containers or heavy-duty freezer bags designed to prevent air exposure, which can lead to freezer burn.

**2. Label Everything:** Always label your jars and containers with the date of preservation and the contents. This simple step will help you keep track of freshness and ensure you use older items first, minimizing waste and optimizing your culinary repertoire.

**3. Store in a Cool, Dark Place:** Light and heat can degrade the quality of preserved foods over time. Store your jars in a cool, dark pantry or cupboard, away from direct sunlight and temperature fluctuations. Ideal storage temperatures range between 50°F and 70°F (10°C to 21°C).

**4. Keep it Dry:** Moisture can lead to mold and spoilage. Ensure that your storage area is dry, and avoid placing jars directly on the ground where humidity can be higher. Consider using a shelf or rack to provide better airflow and reduce moisture exposure.

**5. Check Seals Regularly:** For canned goods, periodically inspect the seals on your jars. If you notice any swelling, rust, or broken seals, it’s best to discard those jars to ensure safety. Healthy seals should be tight and not flex when pressed.

**6. Use Preserved Foods Within a Year:** While many preserved foods can last longer, for optimal flavor and quality, aim to use your preserves within a year of storage. Some items, like jams or pickles, may last up to two years, while others, such as canned vegetables, are best enjoyed fresh within a few months to a year.

**7. Refrigerate After Opening:** Once you’ve opened a jar of preserves, transfer any unused portions to the refrigerator. Most opened canned goods should be consumed within a week or two, while pickles and jams can last longer, typically up to a month.

By following these storage tips, you can enjoy the fruits of your labor for months to come, savoring the flavors of home-preserved foods while minimizing wastage and ensuring quality. Happy preserving!

12. How to Choose the Right Method for Your Needs

Choosing the right food preservation method is crucial to ensuring that your hard-earned harvest or grocery haul remains fresh, flavorful, and safe to consume. With a plethora of techniques available, the key is to align your preservation choice with your specific needs, available resources, and the types of food you wish to preserve.

**Consider Your Food Types:** Different foods have distinct preservation requirements. For instance, high-moisture fruits like peaches and berries often lend themselves well to canning or freezing, while denser vegetables such as carrots and potatoes may be better suited for blanching and freezing or dehydration. Assessing the moisture content and texture of your food can help determine the most effective method.

**Evaluate Equipment and Space:** Next, take stock of the tools and space you have at your disposal. Canning requires specialized equipment like jars, lids, and a pressure cooker or water bath canner, while freezing merely needs airtight containers or freezer bags. If space is limited, consider methods that require less room, such as dehydrating or fermenting, which can often be done with minimal equipment.

**Think About Shelf Life:** Different preservation methods offer varying shelf lives. If you want to keep food for extended periods, canning or vacuum sealing may be your best options. On the other hand, freezing is perfect for short-term storage, keeping food fresh for several months without sacrificing quality.

**Assess Your Time Commitment:** Some methods, like pickling or fermenting, require more time and patience but can yield delicious and unique flavors. Others, such as freezing or dehydrating, are quicker and require less hands-on involvement. Consider how much time you can dedicate to the preservation process, as this will help you choose a method that fits your lifestyle.

**Health Considerations:** Lastly, don’t overlook health and safety. Ensure you understand the specific guidelines for each preservation method, especially when canning. Following safe practices is vital to prevent foodborne illnesses and ensure the longevity of your preserved foods.

By carefully considering these factors, you can confidently select the food preservation method that best meets your culinary needs and lifestyle, empowering you to enjoy the fruits of your labor all year round.

13. Safety Guidelines to Preserve Food

When it comes to preserving food, safety should always be your top priority. Proper preservation techniques not only help maintain the quality and flavor of your food but also ensure that what you’re storing is safe to consume later. Here are some essential safety guidelines to follow as you embark on your food preservation journey:

1. **Start with Clean Equipment**: Before you dive into any preservation method, ensure that all your equipment—jars, lids, utensils, and surfaces—are thoroughly cleaned and sanitized. This reduces the risk of contamination and helps prevent spoilage.

2. **Choose Fresh Ingredients**: The quality of your preserved food starts with the raw ingredients. Select only the freshest produce, meats, or dairy products. Overripe or damaged items can harbor bacteria and lead to spoilage, compromising your efforts.

3. **Follow Tested Recipes**: When preserving food, stick to researched and tested recipes from reputable sources. This is particularly crucial for canning, as improper methods can lead to serious foodborne illnesses, such as botulism. Resources like the USDA or local extension services provide reliable guidelines.

4. **Monitor Processing Times and Temperatures**: Whether you’re canning, freezing, or fermenting, adhering to the recommended processing times and temperatures is vital. This ensures that harmful bacteria are destroyed and that your food remains safe for consumption.

5. **Use Proper Storage Techniques**: Once your food is preserved, store it in a cool, dark place to maximize shelf life. For frozen items, ensure your freezer is set to 0°F (-18°C) or lower. Label and date your jars or bags to keep track of when they were processed.

6. **Check for Signs of Spoilage**: Before using any preserved food, inspect it carefully. Look for any signs of mold, unusual odors, or changes in texture. If something seems off, it’s better to err on the side of caution and discard it.

7. **Educate Yourself Continuously**: Food preservation techniques are continually evolving, and new safety information can emerge. Stay informed by reading books, attending workshops, or joining online communities dedicated to food preservation. This knowledge will help you avoid common pitfalls and enhance your preserving skills.

By adhering to these safety guidelines, you can confidently preserve food like a pro, ensuring that your home-canned goods and frozen delights are not only delicious but also safe for you and your loved ones to enjoy. Happy preserving!

14. Creative Uses for Preserved Foods

Preserved foods are not just staples in your pantry; they’re a gateway to culinary creativity that can elevate your meals and spark your imagination. Once you’ve mastered the art of preserving, the real fun begins with exploring the myriad of ways to incorporate these flavorful delights into your everyday cooking.

Imagine opening a jar of tangy pickled vegetables to add a crunchy, zesty punch to your sandwiches or salads. The vibrant colors and bold flavors can transform a simple dish into a gourmet experience. Similarly, jars of homemade fruit preserves can be spread across morning toast or swirled into yogurt, turning breakfast into a delightful treat that’s both nutritious and satisfying.

But it doesn’t stop there. Think beyond the basics—use preserved tomatoes to create a rich, savory sauce for pasta, or add a spoonful of your favorite chutney to enhance the flavors of grilled meats and fish. Dried herbs and spices, for instance, can be rehydrated and incorporated into marinades, soups, and stews, infusing your dishes with depth and complexity.

For the adventurous home cook, preserved foods can inspire unique flavor combinations. Consider crafting a savory galette topped with roasted vegetables preserved in oil, or a vibrant salad featuring both fresh greens and preserved fruits for a surprising contrast. Even baked goods can benefit from your preserved creations—adding a layer of fruit preserves to cakes or muffins can introduce unexpected sweetness and moisture.

Moreover, preserved foods aren’t just about taste; they add a splash of color and texture to your meals. A simple charcuterie board adorned with various preserved items—like olives, pickles, and jams—can become the centerpiece of your gatherings, impressing guests while showcasing your preserving prowess.

So, roll up your sleeves and get creative! The options are limitless when it comes to utilizing your preserved foods. By incorporating them into your cooking, you not only enhance your meals but also celebrate the fruits of your labor, making every bite a nod to your culinary skills and dedication to sustainable eating.

15. Conclusion: Embrace the Art of Food Preservation

In a world that often prioritizes convenience over quality, embracing the art of food preservation can feel like stepping back in time. However, this age-old practice is not only a means of extending the life of your food but also a way to enhance its flavor and nutritional value. As we’ve explored throughout this blog, there are various tried-and-true methods to preserve food, each with its unique charm and benefits.

From the crisp crunch of pickled vegetables to the rich, concentrated taste of homemade jams, the rewards of preserving your food are manifold. Not only do you gain the satisfaction of transforming fresh, seasonal produce into delightful pantry staples, but you also engage in a sustainable practice that reduces waste and promotes mindful consumption. Each jar you fill, each batch you freeze, serves as a testament to your creativity and resourcefulness as a home cook.

Moreover, food preservation fosters a deeper appreciation for the ingredients you use. By understanding the intricacies of each method—whether it’s canning, dehydrating, fermenting, or freezing—you’ll develop a more profound connection to your food and the seasons. You’ll learn to respect the natural rhythms of harvest, enhancing your meals with flavors that reflect the time and care you’ve invested in them.

So, gather your ingredients, dust off those jars, and immerse yourself in the fulfilling world of food preservation. Whether you’re preserving your garden’s bounty or taking advantage of seasonal sales at the local market, remember that each technique you master brings you closer to becoming a true food preservation pro. Embrace this culinary art, and you’ll not only savor the fruits of your labor year-round but also inspire those around you to appreciate the beauty of homemade goodness. Happy preserving!

As we wrap up our exploration of the top 7 tried-and-true methods for preserving food like a pro, we hope you feel inspired and equipped to embark on your own food preservation journey. Whether you’re canning seasonal fruits, fermenting vegetables, or freezing your favorite meals, these techniques will not only help you extend the shelf life of your food but also enhance your culinary creativity and sustainability. Remember, the joy of preserving food lies in the delicious results and the satisfaction of knowing you’re making the most of your ingredients. So roll up your sleeves, gather your supplies, and start experimenting—your future self will thank you with every flavorful bite! Happy preserving!

What is the future of plant-based meat?

As the world shifts towards more sustainable eating habits, plant-based meat alternatives have rapidly emerged as a groundbreaking innovation, challenging traditional notions of protein consumption.

Beyond mere substitutes, these culinary creations are transforming the way we think about food, health, and the environment. With a plethora of options now available—from juicy burgers and savory sausages to artisanal nuggets—plant-based meat is not only appealing to vegans and vegetarians but also captivating the palates of omnivores seeking healthier and eco-friendly choices. In this blog post, we will delve into the exciting future of plant-based meat innovation, exploring the latest advancements in food technology, emerging trends, and the creative minds driving this revolution. Join us on a journey that goes beyond the plate to discover how these innovations are reshaping our culinary landscape and paving the way for a more sustainable future.

1. Introduction to Plant-Based Meat: A Brief Overview

What is the future of plant-based meat?
Credit : whatcanu.com

As the global demand for sustainable food options continues to rise, plant-based meat has emerged as a revolutionary alternative to traditional animal protein. This culinary innovation is not just a fleeting trend; it represents a profound shift in how we think about food, health, and the environment. With increasing concerns over climate change, animal welfare, and personal health, consumers are actively seeking alternatives that align with their values without sacrificing taste or texture.

Plant-based meat products are crafted from a variety of plant sources, including peas, beans, lentils, and grains, and they are designed to replicate the flavor, texture, and juiciness of their animal-derived counterparts. Companies like Beyond Meat and Impossible Foods have taken the world by storm, creating burgers, sausages, and even ground meat that satisfy the cravings of carnivores and vegetarians alike. But the innovation doesn’t stop at burgers; the plant-based revolution is expanding into an array of products, from dairy alternatives to seafood substitutes, showcasing the versatility and potential of plant-derived ingredients.

In this blog post, we will delve into the fascinating world of plant-based meat, exploring its origins, the technology that powers it, and the future innovations on the horizon. With advancements in food science and a growing consumer base, the potential for plant-based meat to reshape our dietary landscape is immense. Join us as we investigate how this movement is not only changing what’s on our plates but also contributing to a more sustainable and ethical food system for generations to come.

2. The Rise of Plant-Based Meat: Trends and Market Demand

The rise of plant-based meat is not just a fleeting trend; it represents a significant shift in consumer preferences and market dynamics. As health-conscious diners and environmentally aware consumers seek alternatives to traditional animal products, the demand for plant-based meat has surged dramatically. According to recent market research, the global plant-based meat market is projected to reach over $35 billion by 2027, showcasing a compound annual growth rate (CAGR) of more than 14%. This rapid growth is fueled by a myriad of factors, from ethical considerations and sustainability concerns to the desire for healthier lifestyles.

Trends within this burgeoning market reveal a diverse array of motivations driving consumers toward plant-based options. Millennials and Gen Z, in particular, prioritize food choices that align with their values, gravitating toward products that promise health benefits while minimizing environmental impact. Additionally, the COVID-19 pandemic has heightened awareness around food safety and supply chain vulnerabilities, prompting many to explore alternative protein sources that are perceived as safer and more resilient.

Innovative brands are responding to this shift with an ever-expanding range of products that go beyond traditional veggie burgers. From realistic plant-based sausages to meat-like ground proteins and even gourmet items like plant-based sushi, the variety of offerings is enticing a broader audience. Moreover, advancements in food technology are enabling manufacturers to create plant-based meat that closely mimics the taste, texture, and appearance of their animal-based counterparts. This evolution is essential for attracting flexitarians—those who primarily eat a plant-based diet but occasionally indulge in meat products—who are looking for satisfying alternatives without compromising on flavor or experience.

As restaurants and food service providers integrate these innovative options into their menus, the market demand for plant-based meat continues to grow. Whether it’s a quick-service burger joint offering a plant-based option or a fine dining establishment featuring gourmet plant-based dishes, the culinary landscape is rapidly adapting to cater to the changing preferences of consumers. With brands eager to invest in research and development, the future of plant-based meat is not just promising; it’s poised to redefine how we think about protein consumption altogether.

3. Innovations in Ingredients: What’s Driving Change?

What is the future of plant-based meat?
Credit : whatcanu.com

As the demand for plant-based meat alternatives continues to surge, the innovations in ingredients driving this change are becoming ever more fascinating. The quest for creating products that not only mimic the taste and texture of traditional meat but also provide nutritional benefits has spurred food scientists and culinary innovators alike to explore uncharted territories.

One of the most exciting developments is the exploration of novel protein sources. Beyond the conventional standbys of soy and pea protein, companies are now delving into the realms of algae, fungi, and even insects. Algae, rich in omega-3 fatty acids and minerals, offers a unique nutrient profile, while fungi bring umami flavors and a meaty texture that can elevate the overall sensory experience of plant-based dishes. By tapping into these alternative protein sources, manufacturers are enhancing the nutritional value of their products while also appealing to environmentally conscious consumers.

Moreover, the focus on clean-label ingredients is reshaping plant-based meat formulations. Today’s consumers are increasingly scrutinizing food labels, seeking products free from artificial additives and preservatives. In response, brands are experimenting with whole-food ingredients like lentils, chickpeas, and quinoa, which not only contribute to a more wholesome product but also resonate with the growing trend of clean eating. This shift towards transparency is not merely a trend; it reflects a fundamental change in consumer expectations regarding health and sustainability.

Flavor innovation is another critical driver of change. The industry is witnessing a renaissance of culinary creativity, as chefs and food technologists experiment with marinades, spices, and fermentation techniques that enhance the flavor profiles of plant-based meats. The use of fermentation, in particular, opens up exciting possibilities for developing complex flavors that can rival those found in traditional animal proteins. By harnessing the power of natural fermentation processes, brands can create products that are not only delicious but also rich in probiotics, further enhancing their health appeal.

Finally, the role of technology cannot be overlooked. Advances in food technology, such as 3D printing and precision fermentation, are paving the way for unprecedented innovation. These technologies enable the creation of plant-based products that can closely replicate the look and feel of animal meat, offering consumers a familiar eating experience that feels less like a compromise. As these innovations continue to evolve, the potential for plant-based meat alternatives to redefine the culinary landscape becomes increasingly promising.

In conclusion, the future of plant-based meat innovation is being driven by a combination of novel ingredients, clean label demands, flavor innovation, and cutting-edge technology. As these elements converge, we can expect to see an exciting array of products that not only satisfy the cravings of meat lovers but also contribute to a more sustainable food system. The journey beyond the plate is just beginning, and the possibilities are endless.

4. Technology Behind Plant-Based Meat: The Role of Food Science

In recent years, the evolution of plant-based meat has been nothing short of revolutionary, and at the heart of this transformation lies the intricate world of food science. This discipline plays a pivotal role in developing innovative products that not only replicate the taste and texture of traditional meat but also offer nutritional benefits that appeal to a wide range of consumers.

At the forefront of this technological advancement is the meticulous process of ingredient selection. Food scientists are harnessing the power of various plant proteins—such as pea, soy, and lentils—to create meat alternatives that boast a similar mouthfeel to beef, chicken, or pork. By isolating these proteins and studying their molecular structures, researchers can determine how to best mimic the fibrous texture of animal meat, ensuring that plant-based options satisfy even the most discerning palates.

Moreover, the use of cutting-edge techniques like extrusion and fermentation is revolutionizing the way we think about meat substitutes. Extrusion cooking, for example, allows for the creation of complex textures by forcing a mixture of plant proteins and other ingredients through a machine that applies heat and pressure. This process not only enhances the texture but also improves the overall flavor profile, making plant-based meats more appealing to consumers.

Fermentation, on the other hand, introduces another layer of innovation. By utilizing microorganisms like yeast and bacteria, food scientists can develop umami-rich flavors and improve the nutritional profile of plant-based meats. This biotechnological approach not only enhances taste but also adds essential nutrients, making these products more akin to their animal-based counterparts.

As we look to the future, the role of food science in plant-based meat innovation will only grow more significant. With ongoing research into new ingredients, processing methods, and flavor enhancement techniques, the possibilities are endless. Consumers can expect to see more diverse offerings that cater to different dietary preferences, sustainability goals, and culinary experiences. The technological advancements driven by food science promise to take plant-based meat beyond mere imitation, transforming it into a delicious and nutritious alternative that stands on its own merits.

In essence, the marriage of technology and food science is not just about creating a product; it’s about redefining our relationship with food and paving the way for a more sustainable future. As these innovations continue to unfold, one thing is clear: the future of plant-based meat is bright, and its evolution is being driven by the brilliant minds in food science who are dedicated to making our meals not only better for our health but also for the planet.

5. Exploring Alternative Proteins: Beyond Soy and Pea Protein

What is the future of plant-based meat?
Credit : whatcanu.com

As the plant-based meat landscape continues to evolve, the quest for alternative proteins has expanded far beyond the traditional staples of soy and pea. While these proteins have laid a strong foundation for the meat-alternative industry, innovators are now turning to a diverse array of sources that promise to enhance flavor, texture, and nutritional profiles.

One exciting avenue is the exploration of ancient grains such as quinoa and amaranth, which not only offer protein but also a wealth of essential amino acids, vitamins, and minerals. These grains can be incorporated into meat substitutes to create a more complex flavor profile and improve the overall health benefits of the final product.

Mushrooms, too, are taking center stage in the world of alternative proteins. Their natural umami flavor and meaty texture make them an ideal candidate for mimicking the mouthfeel of traditional meats. Companies are experimenting with various species, from the robust portobello to the delicate shiitake, to craft products that appeal to both the health-conscious and the environmentally minded consumer.

Another promising frontier lies in the realm of legumes beyond peas, such as lentils and chickpeas. These nutrient-dense sources not only provide protein but also contribute fiber and other beneficial nutrients, making them an attractive option for consumers seeking wholesome alternatives.

Moreover, the rise of fermentation technology is paving the way for truly innovative protein sources. By harnessing the power of microbes, companies are developing new protein-rich ingredients from unexpected sources, such as fungi and bacteria. This process not only enhances the nutritional value but can also reduce the environmental impact of production.

As we look to the future of plant-based meat innovation, it’s clear that the possibilities are limitless. By embracing a diverse range of alternative proteins, the industry can create products that cater to various dietary preferences, enhance sustainability, and redefine our relationship with food. The exploration of these ingredients promises not only to satisfy our cravings but also to inspire a new generation of conscious consumers who prioritize both taste and the health of our planet.

6. The Impact of Plant-Based Meat on Health and Nutrition

The rising popularity of plant-based meat alternatives is not just a culinary trend; it carries significant implications for health and nutrition that are garnering attention from consumers, health professionals, and researchers alike. As more individuals shift from traditional meat products to these innovative substitutes, it’s crucial to understand what this transition means for our bodies and overall well-being.

Plant-based meats, crafted from ingredients like soy, peas, lentils, and various grains, often provide a lower saturated fat content compared to their animal-based counterparts. This reduction can contribute to improved heart health, making these alternatives attractive options for those looking to lower their cholesterol levels or reduce the risk of cardiovascular diseases. Additionally, many plant-based options are fortified with essential nutrients, such as vitamins B12 and D, iron, and omega-3 fatty acids, which are crucial for those following a vegetarian or vegan diet.

Moreover, the fiber content in plant-based meats is typically higher, promoting better digestion and a feeling of fullness that can aid in weight management. Unlike traditional meat, which lacks dietary fiber, these alternatives can support a healthy gut microbiome, potentially leading to improved metabolic health and reduced risk of chronic diseases.

However, it’s important to approach plant-based meats with a discerning eye. While many products are marketed as healthy, consumers should be aware of the potential for high sodium levels and artificial additives often used to enhance flavor and texture. Reading labels and choosing minimally processed options can help ensure that you are making nutritious choices.

As research continues to explore the health impacts of these alternatives, one thing remains clear: the shift towards plant-based diets, driven by innovations in meat substitutes, offers a promising avenue for enhancing public health. By embracing these alternatives, consumers not only contribute to environmental sustainability but also take proactive steps towards a healthier lifestyle, making plant-based meat a pivotal player in the future of nutrition.

7. Environmental Benefits of Plant-Based Meat Innovations

What is the future of plant-based meat?
Credit : whatcanu.com

As the world grapples with the urgent need for sustainable food systems, the environmental benefits of plant-based meat innovations are becoming increasingly evident. Traditional livestock farming is resource-intensive, requiring vast amounts of land, water, and feed while contributing significantly to greenhouse gas emissions. In contrast, plant-based meat alternatives offer a promising solution that can help mitigate these environmental challenges.

The production of plant-based meats typically involves fewer resources, resulting in a reduced carbon footprint. For instance, switching to plant-based sources of protein can save up to 75% of the water and land required for animal farming. This not only conserves precious natural resources but also helps to preserve biodiversity by reducing the need for deforestation and habitat destruction.

Moreover, plant-based innovations can lead to lower emissions of methane—a potent greenhouse gas produced by ruminant animals. By reducing the reliance on livestock, we can significantly lessen the environmental impact associated with meat production. Recent advancements in food technology are also making it possible to create plant-based alternatives that closely mimic the taste and texture of traditional meats, encouraging more consumers to make the switch.

Additionally, innovative methods such as cellular agriculture are emerging, where animal cells are cultivated in labs to produce meat without the need for raising and slaughtering animals. This not only promises to decrease environmental degradation but also opens up new pathways for ethical consumption.

As consumer awareness about sustainability continues to grow, the embrace of plant-based meat alternatives not only reflects changing dietary preferences but also signifies a collective step towards a more sustainable future. By choosing these innovations, consumers can contribute to a decrease in environmental harm while enjoying delicious and nutritious food options. The future of plant-based meat is not just about taste—it’s a crucial part of the broader conversation on how we can nourish our planet and its inhabitants responsibly.

8. Consumer Perception: Taste, Texture, and Acceptance

As the plant-based meat industry continues to evolve, understanding consumer perception is critical to its success. Taste, texture, and overall acceptance are the triad of factors that can make or break a product in this competitive market. While many consumers are drawn to plant-based options for health, environmental, or ethical reasons, their ultimate decision often hinges on the sensory experience the product delivers.

First and foremost, taste remains paramount. Even the most environmentally friendly or cruelty-free option won’t succeed if it doesn’t satisfy the palate. The industry has made significant strides in flavor development, with innovative chefs and food scientists experimenting with herbs, spices, and cooking techniques to create a flavor profile that rivals traditional meat. The emphasis on umami—a savory taste found in meats—has led to breakthrough formulations that leave consumers pleasantly surprised, often challenging preconceived notions about the taste of plant-based foods.

Texture is equally important, as it plays a crucial role in the overall eating experience. For many, the mouthfeel of meat is irreplaceable, and replicating that sensation has been a significant focus for manufacturers. Advances in food technology, such as extrusion processes and the use of high-moisture proteins, have allowed brands to craft products that mimic the fibrous texture of beef, chicken, and pork. The success of these innovations can be seen in the growing acceptance of plant-based burgers that “bleed” like their beef counterparts, prompting consumers to take a second look and reconsider their choices.

Acceptance is the final piece of the puzzle, encompassing not just the willingness to try these new products but also the integration of plant-based meat into everyday diets. Factors influencing acceptance include cultural norms, dietary habits, and marketing efforts. Brands that effectively communicate their values, engage with consumers through storytelling, and promote inclusivity in their messaging are more likely to foster a sense of community around their products. As more people share their positive experiences with plant-based options, social proof becomes a powerful driver of acceptance, encouraging others to join the movement.

In summary, as the market for plant-based meat continues to expand, understanding and addressing consumer perception through taste, texture, and acceptance will be pivotal. Businesses that prioritize these elements in their product development and marketing strategies will not only capture the attention of curious consumers but also build a loyal customer base that values the evolution of food in a sustainable future.

9. The Role of Startups vs. Established Brands in Innovation

In the rapidly evolving landscape of plant-based meat, the dynamic interplay between startups and established brands plays a pivotal role in shaping innovation. Startups, often fueled by a passion for sustainability and a drive for disruption, are at the forefront of creative experimentation. These agile companies tend to be more unencumbered by legacy practices, allowing them to explore novel ingredients, production methods, and flavors that push the boundaries of what plant-based meat can be. Their willingness to take risks often leads to breakthroughs, whether it’s a new process that enhances texture or a unique blend of plant proteins that delivers a meat-like experience.

On the other hand, established brands bring invaluable resources to the table, including extensive supply chains, significant funding, and brand trust. They have the ability to scale successful innovations quickly, ensuring that new products reach a wider audience. Brands with a long-standing presence in the food industry can leverage their existing customer base and market knowledge to introduce plant-based options that appeal to both loyal consumers and those new to the category. Additionally, their established relationships with retailers can facilitate quicker distribution and visibility in stores.

The synergy between these two forces can lead to a more robust and diverse market. Startups often partner with or are acquired by larger companies, allowing for a cross-pollination of ideas and resources. This collaboration can help bring radical innovations to the mainstream, making plant-based meat more accessible to consumers. As we look toward the future, the balance of creativity from startups and the operational excellence of established brands will be critical in propelling plant-based meat innovation to new heights, ultimately redefining our relationship with food and the environment.

10. Regulatory Challenges and Opportunities in Plant-Based Meat

As the plant-based meat industry continues to expand at an unprecedented rate, it faces a unique blend of regulatory challenges and opportunities that could shape its future trajectory. Navigating the complex landscape of food regulation is essential for both established companies and startups seeking to carve out their niche in this burgeoning market.

One of the primary challenges lies in the regulatory definitions of what constitutes “meat.” Many countries have stringent laws governing the labeling and marketing of meat products, which can complicate how plant-based alternatives are portrayed to consumers. For instance, some regions require that plant-based products cannot use terms like “burger” or “sausage” unless they contain animal-derived ingredients. This presents a significant hurdle for brands looking to appeal to traditional meat consumers who may not immediately recognize plant-based options as viable substitutes.

However, these regulatory challenges can also create opportunities for innovation. As consumer demand for plant-based meat alternatives grows, food authorities may be prompted to revisit and revise outdated regulations. This shift could lead to clearer labeling guidelines that allow plant-based products to be marketed more effectively, ultimately fostering greater consumer acceptance. Progressive regulatory frameworks could also incentivize companies to invest in research and development, leading to new and improved products that mimic the taste and texture of animal meat more closely than ever before.

Additionally, as sustainability and health become increasingly important to consumers, regulatory bodies could implement policies that favor environmentally friendly food sources. This could manifest in subsidies for plant-based meat producers or streamlined approval processes for novel ingredients, such as lab-grown proteins and innovative plant extracts. The potential for collaboration between regulators and the plant-based sector offers an exciting avenue for growth, driving innovation that aligns with public health and environmental goals.

In conclusion, while regulatory challenges may seem daunting, they also serve as catalysts for change. The future of plant-based meat innovation is not solely dependent on consumer trends but will also be significantly influenced by how effectively the industry can engage with regulators to navigate and reshape the existing frameworks. By embracing these challenges as opportunities, stakeholders can help pave the way for a thriving, sustainable plant-based meat market that meets the evolving needs of consumers worldwide.

11. Future Trends: What’s Next for Plant-Based Meat Products?

As we stand on the precipice of a new culinary era, the future of plant-based meat products is ripe with exciting possibilities. The innovations on the horizon promise to elevate these alternatives far beyond simple substitutes for traditional meat. One significant trend is the focus on improving the sensory experience of plant-based meats. Companies are investing heavily in research and development to create products that not only mimic the taste and texture of real meat but also engage the senses in unexpected ways. Expect to see advancements in flavor profiles that incorporate global spices, marinades, and cooking techniques that enhance the overall eating experience.

Another emerging trend is the integration of sustainable practices in the production of plant-based meats. As consumers become increasingly conscious of their environmental impact, brands are seeking ways to reduce their carbon footprint. This includes sourcing ingredients locally, utilizing regenerative agriculture practices, and adopting eco-friendly packaging solutions. Brands that prioritize sustainability are likely to resonate more with consumers, building loyalty and trust in a world where ethical consumption is on the rise.

Moreover, the future of plant-based meat innovation will likely embrace technology in unprecedented ways. The rise of lab-grown meat technologies and cellular agriculture could blur the lines between animal and plant-based proteins. This fusion could lead to hybrid products that deliver the nutritional benefits of both worlds while minimizing ethical concerns associated with animal slaughter.

Finally, we may see a shift towards greater personalization in plant-based diets. With advancements in data analytics and consumer insights, brands could tailor products to meet individual dietary needs and preferences, whether that be high-protein, low-carb, or allergen-free. Imagine being able to customize your own plant-based burger, specifically designed to meet your nutritional goals, all while enjoying the same satisfaction as a traditional meat patty.

As we look ahead, it’s clear that the future of plant-based meat products is not just about replication but innovation. With a commitment to flavor, sustainability, and personalization, the landscape of plant-based eating is set to expand dramatically, inviting everyone—from die-hard carnivores to dedicated vegans—to explore the diverse and delicious offerings that await. The culinary world is about to get a lot more interesting!

12. The Role of Culinary Creativity in Plant-Based Innovations

As the plant-based meat industry continues to evolve, culinary creativity emerges as a powerful catalyst for innovation. Chefs and food scientists are collaborating like never before, blending traditional cooking techniques with modern food technology to create plant-based offerings that tantalize the taste buds and satisfy even the most discerning carnivores.

Imagine a juicy, smoky burger made entirely from peas, lentils, and a medley of spices, designed not just to mimic the flavor and texture of beef but to elevate the dining experience to new heights. This is where artistic culinary expression plays a vital role. By reimagining classic dishes and infusing them with vibrant plant-based ingredients, chefs are not only expanding the palate but also redefining the concept of comfort food. Think of richly flavored meatballs made from a blend of mushrooms and walnuts, served atop a bed of zesty marinara and whole-grain pasta—an irresistible dish that showcases the versatility of plant-based ingredients while delivering on taste and satisfaction.

Moreover, culinary creativity extends beyond just the food itself. Innovative presentation techniques, such as deconstructed meals or interactive dining experiences, can transform the way consumers engage with plant-based options. From colorful charcuterie boards featuring an array of plant-based cheeses and spreads to gourmet tasting menus that highlight seasonal vegetables, these creative approaches serve to elevate the perception of plant-based meals from mere substitutes to full-fledged culinary experiences.

As we look to the future, the role of culinary creativity in plant-based innovations will only become more pronounced. As chefs experiment with fermentation, smoking, and other techniques, they will uncover new flavors and textures that will surprise and delight consumers. By pushing the boundaries of what plant-based cuisine can be, they not only cater to the growing demand for sustainable eating but also inspire a cultural shift toward a more inclusive and flavorful food landscape. In this exciting era of culinary exploration, it’s clear that the creativity of chefs will play a pivotal role in shaping the future of plant-based meat, ensuring that it’s not just a trend, but a delicious and integral part of our dining experiences.

13. Global Perspectives: Plant-Based Meat Around the World

The rise of plant-based meat isn’t just a trend; it’s a global movement that transcends borders, cultures, and culinary traditions. As consumers become more health-conscious and environmentally aware, countries around the world are embracing innovative alternatives to traditional meat products, each adding its unique twist to the plant-based revolution.

In the United States, brands like Beyond Meat and Impossible Foods have gained significant traction, positioning plant-based burgers and sausages as not only healthier options but also as flavorful, satisfying substitutes. The marketing strategies often highlight sustainability and ethical considerations, appealing to a younger demographic that prioritizes conscious consumerism.

Meanwhile, in Europe, the plant-based meat landscape varies greatly. Countries like Germany and the Netherlands are at the forefront of innovation, with a plethora of brands offering everything from soy-based schnitzels to pea protein burgers. The European Union’s regulatory framework encourages transparency and quality, which resonates with consumers eager for clean-label products. In Sweden, innovative startups are experimenting with lab-grown meat, pushing the boundaries of what plant-based means and even sparking debates about the future of food.

In Asia, nations such as India and China are redefining plant-based meat with their rich culinary heritage. In India, where vegetarianism is deeply rooted in culture, companies are creating plant-based versions of traditional dishes like kebabs and biryani, making it easier for consumers to enjoy familiar flavors without compromising their dietary choices. In China, the demand for alternative proteins is surging, driven by a growing middle class and rising health concerns. Chinese startups are innovating with ingredients like jackfruit and mushrooms, crafting products that mimic the taste and texture of local favorites.

As we explore the global perspectives on plant-based meat, it becomes clear that this movement is not just about replicating meat; it’s about creating a new paradigm of eating that respects cultural identities while promoting sustainability. With each region contributing its flavors, preferences, and practices, the future of plant-based meat is not only diverse but also rich in opportunities for innovation, collaboration, and growth. As consumers around the world continue to seek out healthier and more sustainable choices, the evolution of plant-based meat promises to reshape our plates and our planet for generations to come.

14. Case Studies: Successful Plant-Based Meat Innovations

As the plant-based meat industry continues to evolve, several pioneering companies have emerged as leaders in innovation, each with unique approaches that highlight the versatility and potential of plant-derived ingredients. These case studies not only showcase successful products but also offer valuable insights into the strategies that have propelled these brands to the forefront of the market.

One standout example is **Beyond Meat**, whose flagship product, the Beyond Burger, has redefined the expectations of what a plant-based burger can be. By meticulously crafting a patty that mimics the taste, texture, and juiciness of traditional beef, Beyond Meat has gained a loyal following among both vegans and meat-eaters alike. Their commitment to sustainability, paired with strategic partnerships with major fast-food chains, has allowed them to reach a broad audience, proving that plant-based options can appeal to the mainstream.

Another compelling case is **Impossible Foods**, known for its revolutionary use of heme, a molecule found in both plants and animals, which contributes to the rich, savory flavor of meat. By leveraging cutting-edge biotechnology, Impossible Foods has created a burger that not only tastes like beef but also “bleeds” like one, captivating consumers and chefs alike. Their innovative approach demonstrates how scientific advancements can play a pivotal role in developing plant-based alternatives that satisfy the cravings of meat lovers.

A lesser-known but equally inspiring case is **Oumph!**, a Swedish brand that focuses on a unique ingredient: jackfruit. Their products, which range from pulled “pork” to various meat substitutes, emphasize the importance of whole food ingredients in plant-based innovation. Oumph! has successfully tapped into the growing trend of flexitarianism, where consumers are looking for tasty, nutritious alternatives without fully committing to a plant-based diet. By showcasing the versatility of jackfruit in savory dishes, Oumph! not only appeals to health-conscious consumers but also emphasizes the culinary potential of plant-based ingredients.

These case studies illustrate that successful plant-based meat innovations are not just about replicating meat; they involve understanding consumer preferences, harnessing the power of science, and embracing sustainability. As the industry continues to grow, these examples serve as a roadmap for aspiring entrepreneurs seeking to make their mark in the ever-evolving landscape of plant-based foods. Through creativity, research, and a focus on flavor, the future of plant-based meat holds endless possibilities, inviting consumers to embrace a more sustainable and delicious way of eating.

15. Conclusion: A Sustainable Future with Plant-Based Meat Options

As we stand on the brink of a culinary revolution, the future of plant-based meat options glimmers with promise. The advancements in technology, coupled with a growing awareness of environmental sustainability and health, are reshaping the way we think about food. Plant-based meat is no longer just an alternative; it has evolved into a viable and delicious option that appeals to a diverse array of consumers—meat-eaters, flexitarians, and vegans alike.

The shift towards plant-based proteins reflects not only a changing palate but also a collective consciousness aimed at reducing our carbon footprint and promoting animal welfare. With innovative companies pushing the boundaries of flavor, texture, and nutrition, the next generation of plant-based products is likely to redefine our culinary landscape. We are witnessing the fusion of science and gastronomy, where chefs and food scientists collaborate to create offerings that can satisfy even the most discerning tastes.

Moreover, as more people embrace these options, we can expect a ripple effect that influences agricultural practices, food production, and global food security. The potential for plant-based meat to alleviate some of the pressing issues facing our planet, such as climate change and resource depletion, is monumental. By choosing plant-based alternatives, consumers are not just filling their plates; they are making a statement about the future they desire—one that is sustainable, ethical, and inclusive.

In conclusion, the journey of plant-based meat innovation is just beginning, and its impact on our diets and the environment is profound. As we look ahead, let us embrace this evolution in food and support the innovations that will shape a healthier, more sustainable world. Together, we can forge a future where the choices we make at the table contribute to the well-being of our planet and its inhabitants—one delicious bite at a time.

As we conclude our exploration of the future of plant-based meat innovation, it’s clear that this culinary revolution is just beginning. With advancements in technology and an increasing awareness of sustainability, the possibilities for plant-based alternatives are expanding at an astonishing rate. From enhanced textures to bold flavors, the innovations on the horizon promise not only to satisfy our palates but also to contribute to a healthier planet. As consumers, we have the power to drive this change by supporting brands that prioritize creativity and sustainability. So, whether you’re a devoted vegan or simply curious about plant-based options, embracing this movement opens up a world of delicious opportunities. Let’s continue to champion innovation and celebrate the exciting journey of plant-based meat together—after all, the future of food is not just about what’s on our plates, but how we impact our world beyond them.