How to choose the right furniture for your living room?

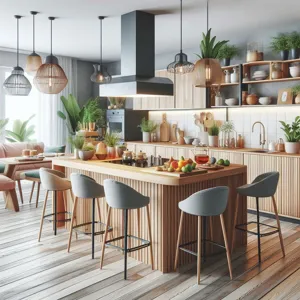
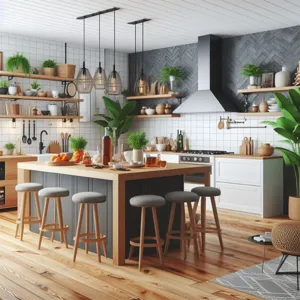
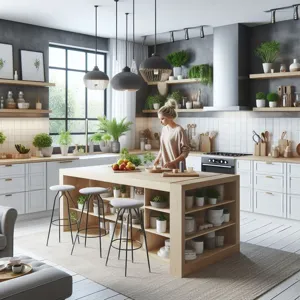
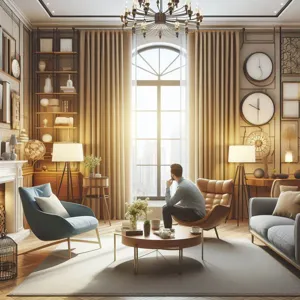
Your living room is more than just a space; it’s the heart of your home where laughter echoes, conversations flow, and memories are created.

As the first room guests often see, it reflects your personal style and sets the tone for your entire living space. Choosing the perfect furniture for this vital area can feel overwhelming with countless styles, materials, and layouts to consider. From cozy sofas that invite relaxation to chic coffee tables that serve as functional art pieces, each element plays a crucial role in crafting a harmonious environment. In this ultimate guide, we’ll navigate through the essentials of selecting furniture that not only complements your aesthetic but also enhances comfort and functionality. Whether you’re revamping your existing setup or starting from scratch, we’ll provide you with insightful tips and inspiration to transform your living room into a welcoming sanctuary that truly feels like home.

1. Understanding Your Living Room Needs

How to choose the right furniture for your living room?
Credit : whatcanu.com

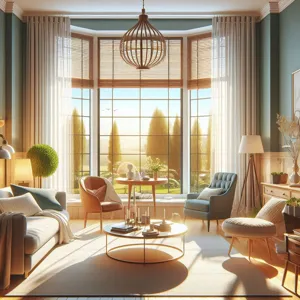
Before diving into the world of sofas, coffee tables, and accent chairs, it’s essential to take a step back and truly understand your living room needs. Your living room is often the heart of your home, a space where you gather with family and friends, unwind after a long day, and create lasting memories. Therefore, the furniture you choose should reflect not just your style but also how you intend to use the space.

Begin by assessing the size and layout of your living room. Is it a cozy nook, perfect for intimate gatherings, or a spacious area meant for entertaining larger groups? Measuring your space will help you determine the scale of the furniture pieces that will fit comfortably without overwhelming the room. Consider traffic flow as well; you want to ensure that people can move freely without navigating around bulky furniture.

Next, think about your lifestyle. Do you have kids or pets that require durable, easy-to-clean fabrics? Are you an avid reader who needs ample seating and good lighting for those cozy evenings with a book? Perhaps you love hosting movie nights and need a large sectional to accommodate your guests. Identifying these key activities will guide your selections and help you prioritize functionality alongside aesthetics.

Additionally, consider the mood and atmosphere you want to create in your living room. Are you aiming for a modern look with sleek lines and minimalistic décor, or do you prefer a more traditional vibe with plush fabrics and ornate details? The color palette and style of your furniture should harmonize with the overall theme of your home while also providing a comfortable and inviting environment.

Taking the time to fully understand your living room needs will not only streamline your furniture shopping experience but also ensure that you select pieces that enhance your lifestyle and create a welcoming space for all who enter. With a clear vision in mind, you’ll be well-equipped to choose furniture that not only looks great but also serves you and your family well for years to come.

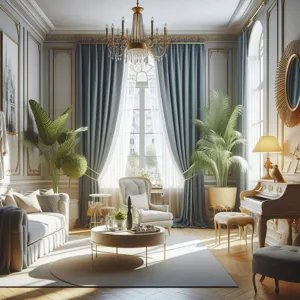
2. Defining Your Style: Modern, Traditional, or Eclectic?

Defining your style is one of the most exciting yet challenging steps in choosing furniture for your living room. Your living space is a reflection of your personality, and the style you choose will set the tone for every gathering, family moment, and quiet evening at home.

**Modern** furniture typically features clean lines, minimalistic designs, and a neutral color palette. Think sleek sofas with geometric shapes, glass coffee tables, and metal accents. If you’re drawn to simplicity and functionality, a modern aesthetic can create a serene and uncluttered atmosphere. Consider incorporating statement pieces like a bold, abstract painting or a uniquely shaped chair to add character without overwhelming the space.

On the other end of the spectrum, **Traditional** style embraces classic design elements, showcasing ornate details and rich, warm colors. Here, you might opt for plush, upholstered sofas, intricately carved wooden furniture, and elegant fabrics like velvet or silk. Accessories play a key role in traditional design—think about adding vintage lamps, framed family portraits, or decorative throw pillows that echo historical patterns. This style exudes comfort and nostalgia, making it perfect for creating an inviting environment.

If you find yourself inspired by a mix of influences, then an **Eclectic** style might be the perfect fit. This approach allows you to blend various styles, textures, and colors to create a unique and personalized space. An eclectic living room could feature a mid-century modern sofa paired with a vintage coffee table and bold art pieces from different cultures. The key is balance; while mixing styles, ensure that your choices harmonize through common colors or themes. This will not only showcase your creativity but also make your living room feel lively and dynamic.

As you define your style, take the time to explore different sources of inspiration—magazines, websites, or even social media platforms like Pinterest. Remember, your living room is where you’ll spend countless hours with family and friends, so selecting a style that resonates with you is essential for creating a space that feels like home.

3. Measuring Your Space: Tips for Accurate Dimensions

How to choose the right furniture for your living room?
Credit : whatcanu.com

When it comes to selecting the perfect furniture for your living room, measuring your space accurately is a crucial step that can make or break your design vision. Nothing feels more disappointing than purchasing a stunning sofa or a chic coffee table only to find that it overwhelms the room or, conversely, gets lost in the expansive space. To avoid these pitfalls, follow these tips for taking accurate dimensions.

**Start with a Floor Plan**: Begin by sketching a simple floor plan of your living room. Include doors, windows, and any architectural features like fireplaces or built-in shelves. This visual representation will help you understand the layout and flow of the space.

**Use a Tape Measure**: Armed with a tape measure, carefully measure the length and width of your room. Don’t forget to account for ceiling height, especially if you’re considering tall bookshelves or floor lamps that could affect the room’s proportions.

**Consider Scale and Proportions**: When measuring potential furniture pieces, keep scale in mind. A large sectional can dominate a small space, while dainty pieces may seem insignificant in a cavernous living room. A good rule of thumb is to maintain a balance—allow for walking paths of at least 18 inches between furniture to ensure comfort and accessibility.

**Mock It Up**: If you’re unsure how a piece will fit, consider using painter’s tape to outline the dimensions of the furniture on your floor. This visual aid can provide a clearer picture of how the furniture will occupy the space and help you visualize the arrangement before making a purchase.

**Think About Functionality**: Beyond just fitting in the space, think about how you intend to use your living room. Will you be entertaining guests, enjoying family movie nights, or creating a cozy reading nook? This understanding will guide your furniture choices and help you decide on the number of pieces you need, their size, and their arrangement.

By taking the time to accurately measure your space and consider the scale and functionality of your furniture, you can create a harmonious living room that feels both inviting and well-coordinated. With the right dimensions in mind, you’ll be well on your way to transforming your living room into a stylish and functional haven.

4. Choosing the Right Furniture Layout

Choosing the right furniture layout for your living room is a pivotal step in creating a functional, inviting, and aesthetically pleasing space. The layout not only dictates the flow of the room but also impacts how you and your guests interact with each other and the environment.

Start by assessing the dimensions of your living room. This means measuring the length and width of the space, as well as noting any architectural features such as windows, doors, and built-in elements like fireplaces or shelves. Understanding the size and shape of your room will help you determine the appropriate scale for your furniture pieces, ensuring they fit harmoniously within the space.

Next, consider the focal point of your living room. This could be a striking piece of artwork, a cozy fireplace, or even a stunning view from the window. Arranging your furniture around this focal point creates a natural visual anchor and encourages conversation. For instance, if you have a fireplace, you might want to position your seating area in a way that allows everyone to enjoy its warmth and ambiance.

Think about the function of your living room. Is it primarily a space for entertaining guests, a family gathering spot, or a quiet reading nook? Depending on its primary use, you may want to adjust your layout. For social gatherings, create an open seating arrangement that promotes interaction, such as a circular or U-shaped formation. For a more relaxed atmosphere, consider a cozy arrangement with a plush sofa facing a comfortable armchair, ensuring a sense of intimacy.

Don’t forget to leave ample space for movement. Aim for at least 18 inches between furniture pieces to allow for easy navigation. This is especially important in high-traffic areas where people will be entering or exiting the room.

Finally, consider incorporating additional elements such as rugs and lighting to enhance your layout. A well-placed area rug can help define your seating area, while strategically positioned lamps can provide both function and warmth to the room.

By thoughtfully choosing your furniture layout, you can transform your living room into a welcoming haven that reflects your style and meets your needs. Remember, the goal is to create a space where you and your loved ones feel comfortable and connected.

5. Selecting Key Pieces: Sofas, Chairs, and Tables

How to choose the right furniture for your living room?
Credit : whatcanu.com

When it comes to curating a living room that truly reflects your style and meets your functional needs, selecting key pieces is essential. Sofas, chairs, and tables are the foundational elements that not only set the tone for your space but also dictate how you and your guests will interact with it.

**Sofas** are often the centerpiece of a living room, serving as both a comfort zone and a design statement. Whether you prefer the sleek lines of a modern sectional or the inviting warmth of a traditional Chesterfield, your sofa should harmonize with the overall aesthetic of the room. Consider factors such as size, fabric, and color—opt for durable materials that can withstand daily use, especially if you have children or pets. Remember, the sofa should not only be stylish but also provide ample seating and comfort for family gatherings or cozy movie nights.

Next, **chairs** play a crucial role in complementing your sofa while adding additional seating options. Accent chairs can introduce a pop of color or unique texture, creating visual interest in the space. Think about various styles, such as armchairs, recliners, or even stylish ottomans that double as footrests. The arrangement of your chairs should encourage conversation and flow within the living room, so experiment with different layouts until you find what feels right.

Finally, **tables**—both coffee tables and side tables—are functional elements that tie the room together. A coffee table can serve as the focal point of the seating area, so consider its shape and material carefully. Whether you choose a rustic wooden table, a sleek glass design, or a bold statement piece, it should be both aesthetically pleasing and practical, providing a surface for drinks, books, and decor. Side tables can be utilized for lamps or snacks, enhancing the overall usability of your space.

In selecting these key pieces, don’t forget to consider the scale of your furniture in relation to the room’s dimensions. The right proportions will ensure a balanced look and feel, allowing for easy movement and making the space more inviting. By thoughtfully choosing each element, you will create a cohesive, stylish living room that welcomes both comfort and style, making it a place your family and friends will love to gather.

6. Material Matters: Wood, Fabric, and Leather Choices

When it comes to selecting furniture for your living room, the material you choose can significantly impact not only the aesthetic appeal but also the durability and functionality of your pieces. Understanding the characteristics of different materials is essential in making an informed decision that suits your lifestyle and design preferences.

**Wood** is a classic choice that exudes warmth and timelessness. From the rich hues of mahogany to the light and airy tones of pine, wood can effortlessly enhance any decor style, be it rustic, modern, or traditional. It’s important to consider the type of wood, as hardwoods like oak and cherry tend to be more durable and resistant to wear and tear than softer woods. Additionally, wooden furniture can be easily refinished, allowing you to maintain its beauty over the years.

**Fabric** offers an array of colors, patterns, and textures, making it a versatile option for upholstery. Whether you prefer the inviting softness of cotton, the luxurious feel of velvet, or the durability of polyester blends, fabric choices can reflect your personality and tie the room together. Consider the practicality of the fabric as well—if you have pets or children, look for materials that are stain-resistant and easy to clean. Performance fabrics, designed to withstand spills and heavy use, are becoming increasingly popular for family-friendly living spaces.

**Leather** is synonymous with sophistication and elegance. Its natural fibers not only provide a chic aesthetic but also age beautifully, developing a unique patina over time. Leather is relatively easy to maintain, requiring only occasional conditioning to keep it supple. However, it tends to be more expensive than other materials, so it’s worth considering your budget and how much wear the furniture will receive. Keep in mind that leather can be sensitive to temperature changes, so it may not be the best choice for homes in extreme climates.

In summary, when choosing furniture for your living room, take the time to consider the material that best fits your needs. Each option—wood, fabric, and leather—has its own set of advantages and challenges. By aligning your choice with your lifestyle and design vision, you can create a welcoming and stylish environment that you and your guests will enjoy for years to come.

7. Color Palette: Harmonizing with Your Home’s Decor

How to choose the right furniture for your living room?
Credit : whatcanu.com

When it comes to selecting furniture for your living room, the color palette you choose plays a pivotal role in harmonizing the overall decor of your home. A carefully curated color scheme not only sets the mood for the room but also creates a cohesive flow throughout your space, making it feel inviting and well thought out.

Start by assessing the existing colors in your living room. Take note of the wall paint, flooring, and any prominent decor elements like artwork or drapery. Are your walls painted in warm, earthy tones, or do they feature cool, calming shades? Understanding your base colors will help you select furniture that complements and enhances the ambiance of the room.

Once you have identified your primary colors, consider how the furniture will interact with them. For a timeless look, opt for neutral furniture pieces—think soft grays, beiges, or whites—that can seamlessly blend with any decor style. These classic choices provide a versatile backdrop, allowing you to play with colorful throw pillows, rugs, and accessories that can be easily swapped out as trends change or your taste evolves.

If you’re feeling bolder, don’t shy away from using vibrant hues in your furniture selection. A deep teal sofa or a mustard yellow armchair can serve as a stunning focal point, drawing the eye and sparking conversation. Just be sure to balance these bold choices with complementary colors found elsewhere in the room to prevent overwhelming the space.

Lastly, consider the mood you want to evoke. Soft pastels can create a serene and calming environment, while rich jewel tones can add a sense of luxury and warmth. By thoughtfully pairing your furniture colors with the existing decor, you can create a living room that not only reflects your personal style but also invites comfort and connection for all who enter. Remember, the goal is to create a harmonious space where every element feels intentional and cohesive.

8. Functionality vs. Aesthetics: Finding the Balance

When it comes to furnishing your living room, the age-old debate of functionality versus aesthetics often takes center stage. While it’s tempting to select pieces solely based on their visual appeal, practicality plays an equally crucial role in creating a space that is both stylish and livable. Striking the right balance between these two elements can transform your living room into a harmonious sanctuary that reflects your personality while serving your lifestyle needs.

Start by considering how you and your family use the space. Do you entertain frequently? If so, investing in a spacious sectional sofa that invites conversation and provides ample seating could be your priority. On the other hand, if you prefer cozy movie nights, a comfortable reclining chair paired with a chic coffee table might be the focal point you need. Functionality encompasses not just seating arrangements but also storage solutions. Look for ottomans that double as storage units or coffee tables with built-in shelving to keep your space tidy without sacrificing style.

However, aesthetics should never be an afterthought. The colors, textures, and shapes of your furniture can dramatically affect the overall vibe of your living room. Choose pieces that resonate with your personal taste—whether it’s the sleek modern lines of a minimalist sofa or the warm charm of vintage furniture. Don’t shy away from mixing styles; a rustic coffee table can add character to a contemporary setting, creating an eclectic look that feels curated yet effortless.

Ultimately, the goal is to create a living room that not only looks stunning but also accommodates your day-to-day activities. By thoughtfully selecting furniture that embodies both functionality and aesthetics, you’ll cultivate a space that invites relaxation and enjoyment, making it the heart of your home for years to come.

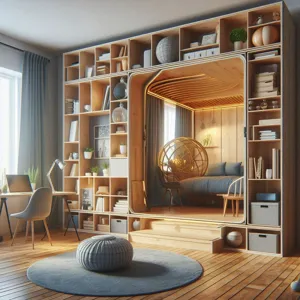
9. Storage Solutions: Maximizing Space in Your Living Room

When it comes to furnishing your living room, one of the most crucial aspects to consider is storage solutions. In today’s homes, where space can often feel limited, maximizing every square foot is not just practical—it’s essential for creating a harmonious and clutter-free environment.

Start by assessing your storage needs: what items do you need to store? From books and magazines to toys and electronics, having a clear idea of your belongings will help you choose furniture that serves dual purposes. Consider investing in coffee tables or ottomans with hidden compartments. These multifunctional pieces not only add aesthetic appeal but also provide a clever solution for tucking away everyday items.

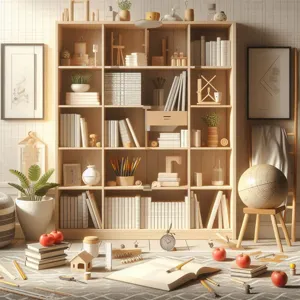
Shelving units are another excellent option for maximizing vertical space. Tall bookcases or floating shelves can draw the eye upward, creating the illusion of a larger room while offering ample storage for decorative items, books, or plants. You can also customize your shelving by incorporating stylish baskets or boxes that can hide away less attractive items while adding texture and style to the overall decor.

When it comes to sofas, look for those with built-in storage beneath the seats or armrests. These cleverly designed pieces can hold blankets, pillows, or even board games, ensuring your living area remains organized and inviting. If you frequently entertain guests, a stylish sideboard or console table can serve as both a storage solution and a surface for displaying decor or serving snacks during gatherings.

Lastly, don’t overlook the power of decorative storage options. Stylish bins, vintage trunks, or chic cabinets can serve as focal points in your living room while providing essential storage. By carefully selecting pieces that complement your design aesthetic, you can maintain a cohesive look while keeping your space functional.

In conclusion, focusing on storage solutions when choosing furniture for your living room not only enhances the room’s functionality but also elevates its style. With thoughtful planning and the right choices, you can create a living space that is both beautiful and practical, where everything has its place and clutter becomes a thing of the past.

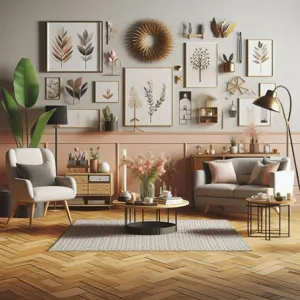
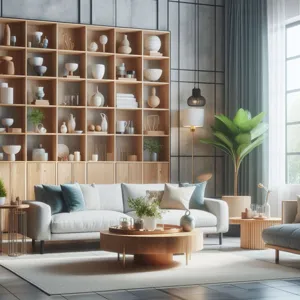
10. Accessorizing: The Role of Rugs, Art, and Decor

Accessorizing your living room is where the magic truly happens; it’s the finishing touch that transforms a house into a home. When it comes to furniture, the right accessories can elevate your space, adding depth, personality, and warmth. Rugs, art, and decor serve as the vital elements that tie your entire aesthetic together, creating a cohesive and inviting atmosphere.

**Rugs** are more than just floor coverings; they define spaces and add layers of texture to your living room. A well-chosen rug can anchor your seating arrangement, providing a plush foundation for the room. Whether you opt for a bold pattern that makes a statement or a subtle, neutral hue that complements your furniture, the right rug can enhance the overall design. Consider the size and shape carefully—too small, and the room may feel disjointed; too large, and it can overwhelm the space.

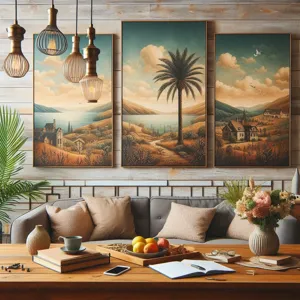
**Art** is another essential element that infuses your living room with character. It reflects your personal tastes and interests, serving as a conversation starter for guests. Large canvases can act as focal points, while smaller pieces can be arranged in gallery-style displays, creating visual interest on your walls. Choose artwork that resonates with you—whether it’s a stunning landscape, abstract pieces, or family portraits—and don’t forget to consider the color palette to ensure it harmonizes with your furniture.

**Decor** encompasses a wide range of items, from decorative pillows and throws to vases and books. These elements allow you to showcase your unique style and add personality to your space. Layering textures through fabrics, incorporating natural materials like wood and stone, and adding greenery with plants can create an inviting and lived-in feel. Remember to balance functionality with aesthetics; decorative items should enhance the room’s beauty without causing clutter.

Ultimately, accessorizing your living room is about creating an environment that feels both stylish and comfortable. It’s an opportunity to express yourself and make the space truly your own. By carefully selecting rugs, art, and decor, you can craft a living room that not only looks stunning but also invites relaxation and connection—a place where memories are made and cherished.

11. Budgeting for Your Living Room Furniture

When it comes to furnishing your living room, budgeting is a crucial step that can make or break your design plans. Establishing a clear budget helps you navigate the myriad of options available, ensuring that you make informed choices without overspending. Start by assessing how much you’re willing to allocate for this space; consider not only the cost of individual pieces but also potential delivery fees, assembly costs, and any additional accessories you might need to complete the look.

Once you have a budget in mind, prioritize your purchases. Identify the essential pieces that form the foundation of your living room—think sofas, coffee tables, and entertainment centers. These items often carry the most significance in terms of both function and aesthetic appeal, so it’s worth investing a bit more for quality.

Don’t forget to account for lesser-known items that contribute to the overall comfort and style, such as side tables, lighting fixtures, or throw pillows. These may seem like small expenses, but they can add up quickly. Consider creating a tiered budget that allocates a specific percentage for each category of furniture. This structured approach not only helps you stay on track but also allows for flexibility—if you find a stunning piece that’s slightly above your initial target, you may be able to reallocate funds from another area without breaking the bank.

Lastly, keep an eye on sales and promotions, especially during holiday seasons or clearance events. Many retailers offer significant discounts that can help stretch your budget further, allowing you to upgrade your selections or add an extra decorative touch without guilt. By carefully planning and sticking to your budget, you can create a beautiful and inviting living room that reflects your personal style while remaining financially sound.

12. Where to Shop: Online vs. In-Store

When it comes to selecting the ideal furniture for your living room, one of the pivotal decisions you’ll face is where to shop: online or in-store. Each option has its unique advantages and drawbacks, so understanding the nuances can help you make an informed choice that best suits your needs.

**Shopping Online**
The online shopping experience offers unparalleled convenience. With just a few clicks, you can browse an extensive array of styles, materials, and price points from the comfort of your home. Online retailers often feature user-friendly websites that allow you to filter options based on your specific criteria—be it color, size, or budget. Additionally, many sites provide customer reviews and high-resolution images, giving you a clearer picture of what to expect. Another significant benefit is the ability to easily compare prices across different platforms, ensuring you get the best deal possible. However, the downside is that you can’t physically interact with the furniture. You miss out on the tactile experience of feeling the fabric, assessing the comfort level of a couch, or visualizing how a piece fits in your living space.

**Shopping In-Store**
On the other hand, shopping in-store offers a sensory experience that online shopping simply cannot replicate. Walking through a furniture showroom allows you to see, touch, and test pieces firsthand, giving you a better sense of the scale and comfort of your selections. You can appreciate the craftsmanship in person, which is particularly important for items like sofas and dining tables that you want to last. Additionally, knowledgeable sales associates can provide personalized assistance, answer your questions, and even suggest complementary pieces to enhance your living room’s aesthetic. However, the downside of in-store shopping can sometimes be limited inventory; smaller showrooms may not have the vast selection available online.

Ultimately, the decision of where to shop for your living room furniture often comes down to your personal preferences and lifestyle. Many savvy shoppers find a balance by starting their search online to gather ideas and narrow down their options, then visiting stores to test out their top choices. Whichever route you choose, being well-informed will help you find the perfect pieces to create a cozy and stylish living space.

13. Eco-Friendly Furniture Options

In today’s world, where sustainability has become a cornerstone of modern living, eco-friendly furniture options are not only a responsible choice but also a stylish one. When selecting pieces for your living room, consider furniture made from reclaimed wood, bamboo, or sustainably sourced materials. These options not only minimize environmental impact but also add unique character to your space. Reclaimed wood, for instance, carries a history and charm that new materials simply can’t replicate, often showcasing beautiful grain patterns and textures that tell a story.

Another significant aspect of eco-friendly furniture is the use of non-toxic finishes and adhesives. Many manufacturers are now prioritizing low-VOC (volatile organic compounds) materials, ensuring that your living room not only looks good but also contributes to a healthier indoor air quality. Brands that focus on sustainable practices often highlight their commitment to the environment, which can give you peace of mind knowing that your choices support responsible production methods.

Additionally, consider investing in furniture that is designed to last. Quality over quantity applies here—rather than filling your space with trendy pieces that might need replacement within a few years, opt for timeless designs that will withstand the test of time, both in durability and style. Many eco-friendly furniture options also come with customizable features, allowing you to tailor pieces to your specific needs while reducing waste.

To elevate your living room further, look for furniture upholstered in organic fabrics, such as hemp or certified organic cotton, which are free from harmful chemicals and dyes. Not only do these materials feel good against your skin, but they also align with a sustainable lifestyle.

By choosing eco-friendly furniture options, you’re not just enhancing your living room’s aesthetic appeal; you’re making a conscious choice to protect the planet. Embrace these sustainable solutions and create a space that reflects your values while remaining inviting and stylish. Your living room will be a haven of comfort, creativity, and environmental responsibility.

14. Maintenance Tips for Your Living Room Furniture

Maintaining your living room furniture is essential not only for preserving its aesthetic appeal but also for extending its lifespan and functionality. Here are some practical tips to keep your furniture looking as good as new, ensuring your living space remains inviting and stylish.

**1. Regular Cleaning:** Dust and dirt can accumulate quickly, so make it a habit to dust surfaces weekly using a soft, lint-free cloth. For upholstered furniture, a vacuum with an upholstery attachment can effectively remove crumbs and debris. Don’t forget to check the manufacturer’s instructions for any specific cleaning guidelines.

**2. Protect from Direct Sunlight:** Sunlight can fade and damage fabrics and finishes over time. Position your furniture away from direct sunlight whenever possible, or invest in UV-filtering window treatments to shield it from harsh rays.

**3. Use Coasters and Placemats:** Prevent scratches and stains by placing coasters under drinks and placemats under dishes or decorative items. This simple step can save you from having to deal with unsightly rings or heat marks on your surfaces.

**4. Address Spills Immediately:** Accidents happen! If a spill occurs, quickly blot the area with a clean, dry cloth to absorb as much liquid as possible. For fabric furniture, use a specialized upholstery cleaner or a mixture of mild soap and water, testing any cleaning solution on a hidden area first.

**5. Rotate Cushions:** For sofas and chairs with removable cushions, make it a practice to rotate them regularly. This helps distribute wear evenly and maintains their shape, preventing sagging over time.

**6. Check for Loose Parts:** Periodically inspect your furniture for any loose screws, hinges, or joints, especially in wooden pieces. Tightening these components can prevent further damage and maintain stability.

**7. Use Furniture Polish Wisely:** For wooden surfaces, a good-quality furniture polish can help restore shine and protect against scratches. However, avoid over-polishing, as this can create a buildup that dulls the finish.

By following these maintenance tips, you can ensure your living room furniture not only retains its beauty but also provides comfort and functionality for years to come. Remember, a little effort goes a long way in keeping your space looking its best!

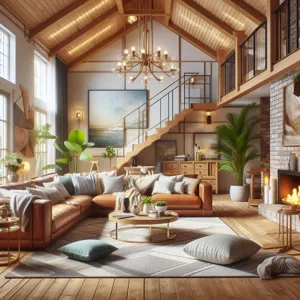
15. Final Thoughts: Creating a Comfortable and Inviting Space

When it comes to creating a comfortable and inviting living room, the journey begins with understanding your personal style and the functional needs of your space. Your living room is more than just a collection of furniture; it’s a sanctuary for relaxation, a gathering spot for family and friends, and a reflection of your unique personality. As you finalize your choices, consider the balance between aesthetics and comfort.

Start by selecting pieces that not only look great but also feel great. Plush sofas, soft throws, and well-cushioned chairs invite your guests to sink in and stay awhile. Integrate textures, such as a cozy area rug or knitted poufs, to add warmth and depth. Don’t forget about the importance of lighting—layered lighting from various sources, including floor lamps, table lamps, and dimmer switches, can create a welcoming ambiance that adapts to different moods and occasions.

Moreover, think about the flow of the room. Arrange your furniture to encourage conversation and movement, ensuring there’s enough space for guests to navigate comfortably. Incorporate personal touches through artwork, family photos, or cherished collectibles, which can spark joy and tell your story, making the space feel distinctly yours.

Finally, don’t overlook the importance of greenery. Adding houseplants not only purifies the air but also brings life and vibrancy to your living room. As you step back to admire your work, remember that the perfect living room is one where comfort meets style, creating a harmonious environment that invites everyone to unwind and enjoy. With thoughtful planning and a dash of creativity, your living room can become a true haven—a place where memories are made and cherished.

As we wrap up our ultimate guide to choosing the perfect furniture for your living room, we hope you feel inspired and equipped to create a welcoming and stylish space that reflects your unique personality. Selecting the right furniture is not just about aesthetics; it’s about functionality, comfort, and harmony within your home. Remember to consider your lifestyle, the size of your space, and your design preferences as you explore your options. Whether you prefer a contemporary look or a more traditional vibe, the right pieces can transform your living room into a cozy retreat for relaxation and connection. We’d love to hear about your furniture choices and how they enhance your living space—don’t hesitate to share your experiences in the comments below! Happy decorating!

What are the different types of home décor styles?

Your home is a reflection of who you are, a canvas where your personality and tastes come to life through carefully selected décor and design.

Yet, with so many styles to choose from, finding the perfect aesthetic that resonates with you can be both exciting and overwhelming. From the cozy warmth of rustic charm to the sleek lines of modern minimalism, each home décor style tells a unique story and creates a distinct atmosphere. In this blog post, we invite you to embark on a journey of self-discovery as we explore the diverse range of home décor styles, including bohemian, industrial, farmhouse, and more. Whether you’re looking to revamp your space or simply seeking inspiration, this guide will help you uncover the aesthetic that best embodies your vision and transforms your home into a sanctuary that feels both stylish and uniquely you.

1. Introduction to Home Décor Aesthetics

What are the different types of home décor styles?
Credit : whatcanu.com

When it comes to creating a space that feels uniquely yours, understanding home décor aesthetics is essential. Your home is more than just a shelter; it’s a reflection of your personality, lifestyle, and values. The right aesthetic not only enhances the beauty of your surroundings but also contributes to a sense of comfort and belonging. With an array of styles to choose from, diving into the world of home décor aesthetics can be both exciting and overwhelming.

From the sleek lines of modern minimalism to the warm, inviting vibes of rustic farmhouse decor, each style tells a story and evokes a certain mood. Transitional designs blend elements from different genres, while bohemian spaces embrace eclectic patterns and vibrant colors, inviting creativity and individuality. Whether you’re drawn to the elegance of traditional interiors or the carefree charm of coastal themes, understanding these various aesthetics can help you curate a cohesive look that resonates with your personal taste.

In this exploration, we’ll demystify the most popular home décor styles, providing insights into their defining characteristics, color palettes, and key elements. Armed with this knowledge, you’ll be better equipped to discover your own aesthetic—transforming your home into a sanctuary that truly reflects who you are. So, let’s embark on this journey through the diverse realm of home décor styles and unlock the potential of your living space!

2. The Importance of Defining Your Aesthetic

Defining your aesthetic is more than just choosing a few colors or selecting trendy furniture pieces; it is about creating a cohesive environment that resonates with your personality and lifestyle. Your home is a reflection of who you are, and establishing a clear aesthetic can transform not only your space but also your overall well-being. When you define your aesthetic, you create a narrative that guides your decor choices, ensuring they harmonize with your vision.

Understanding your aesthetic helps streamline the decorating process, making it easier to select items that complement each other and fit your intended vibe. Whether you lean towards minimalist Scandinavian designs, cozy farmhouse charm, or bold bohemian flair, having a defined aesthetic acts as a roadmap. This clarity can save you from impulsive buys that might clash with your overall vision, preventing buyer’s remorse and unnecessary clutter.

Moreover, a well-defined aesthetic enhances the functionality of your space. It allows you to consider not just how your home looks, but how it feels and functions for you and your family. By evaluating your needs and preferences, you can create zones within your home that cater to different activities—like a serene reading nook, a vibrant entertainment area, or a calming workspace— all while ensuring they remain visually cohesive.

Additionally, the importance of defining your aesthetic extends beyond personal enjoyment. It can significantly affect the value of your home should you ever decide to sell. A well-curated space that reflects a distinct style can attract potential buyers, making it easier for them to envision living in your home. Ultimately, defining your aesthetic is about embracing and celebrating your individuality, allowing you to cultivate a living space that feels uniquely yours.

3. Overview of Popular Home Décor Styles

What are the different types of home décor styles?
Credit : whatcanu.com

When it comes to decorating your home, understanding the various styles available can be both exciting and overwhelming. Each décor style carries its own unique charm, offering a distinct vibe that can transform your living space into a reflection of your personality and taste. Here’s an overview of some of the most popular home décor styles that you might consider as you embark on your aesthetic journey:

**1. Modern:** Characterized by clean lines, minimalist design, and a neutral color palette, modern decor embraces simplicity and functionality. Think open spaces filled with natural light, sleek furniture, and understated elegance. This style often incorporates innovative materials and blends seamlessly with contemporary art pieces.

**2. Bohemian:** For those who love eclectic and vibrant spaces, the bohemian style is a free-spirited approach to home décor. It celebrates individuality through an abundance of textures, layers, and colors. Rich patterns, vintage finds, and global influences come together to create a warm and inviting atmosphere, often adorned with plants and handcrafted items.

**3. Farmhouse:** Emphasizing comfort and coziness, farmhouse décor brings a touch of rustic charm into your home. Characterized by weathered wood, soft textiles, and vintage accents, this style evokes a sense of nostalgia. The color palette typically features whites, soft grays, and earthy tones, creating a serene and welcoming environment reminiscent of country living.

**4. Industrial:** Inspired by urban lofts and warehouses, industrial décor showcases raw materials such as exposed brick, metal, and concrete. This style is all about embracing the beauty of imperfection, with a focus on functional furniture and a muted color scheme. The industrial aesthetic often combines vintage elements with modern design, resulting in a unique and striking look.

**5. Scandinavian:** Known for its simplicity, functionality, and connection to nature, Scandinavian décor reflects a minimalist ethos. Light, airy spaces adorned with natural materials, soft color palettes, and cozy textiles create an inviting atmosphere. This style emphasizes decluttering and maximizing natural light, making your home feel both spacious and serene.

**6. Mid-Century Modern:** This timeless style, popularized in the mid-20th century, combines organic shapes with a playful use of color. Characterized by functional furniture, geometric patterns, and a seamless connection between indoor and outdoor spaces, mid-century modern design is both stylish and practical. The focus is on creating a harmonious balance of form and function.

By exploring these popular home décor styles, you can begin to identify which resonates with your personal aesthetic. Whether you prefer the sleek lines of modern design or the eclectic charm of bohemian flair, understanding these styles will help you curate a space that truly feels like home.

4. Modern Minimalism: Embracing Simplicity

Modern minimalism is more than just a design trend; it’s a lifestyle choice that emphasizes the beauty of simplicity and functionality. Rooted in the principle of “less is more,” this aesthetic embraces clean lines, uncluttered spaces, and a calming color palette, allowing each element to breathe and shine in its own right. When you step into a modern minimalist home, you are greeted by an atmosphere of tranquility, where every piece of furniture and decor serves a purpose and contributes to the overall harmony of the space.

The color scheme in a modern minimalist setting typically revolves around neutral tones—whites, grays, and beiges dominate, creating a serene backdrop that enhances natural light and promotes a sense of openness. Accents of bold colors may punctuate the decor, but they are carefully curated to maintain the overall sense of calm. Textures play a crucial role in modern minimalism, with organic materials like wood and stone offsetting the sleekness of metal and glass, adding warmth and depth without overwhelming the senses.

Furnishings in a modern minimalist home are often low-profile and functional, emphasizing geometric shapes and simplicity in design. Think of a low-slung sofa paired with a sleek coffee table, or a single statement chair that draws the eye without cluttering the room. Accessories are kept to a minimum, with a focus on quality over quantity. A few thoughtfully chosen art pieces or decorative objects can add personality while still aligning with the minimalist ethos.

Storage solutions are cleverly integrated to maintain the clean lines and open spaces characteristic of modern minimalism. Built-in shelves, hidden compartments, and multi-functional furniture help keep belongings out of sight, ensuring that surfaces remain clear and clutter-free. The result is a sanctuary that invites relaxation and mindfulness, where every moment spent in the space feels intentional and rejuvenating.

Embracing modern minimalism is about more than just aesthetics; it encourages a lifestyle that values simplicity and intentional living. By curating your home in this way, you not only create a beautiful environment but also cultivate a mindset that prioritizes clarity and peace, allowing you to focus on what truly matters in your life.

5. Bohemian Chic: Eclectic and Free-Spirited

What are the different types of home décor styles?
Credit : whatcanu.com

Bohemian Chic, often referred to simply as “Boho,” is a home décor style that embodies a vibrant and free-spirited lifestyle. This aesthetic draws inspiration from a myriad of cultures and eras, creating an eclectic mix that feels both lived-in and artistic. Imagine stepping into a space that feels like a vibrant tapestry woven from textiles and treasures collected from around the world—this is the essence of Bohemian Chic.

At the heart of this style is a celebration of individuality and self-expression. Bold patterns, vivid colors, and an assortment of textures come together to create a visually stimulating environment. Layering is key; think soft rugs piled on top of one another, an array of throw pillows in varying shapes and sizes, and wall hangings that might include everything from macramé to vintage tapestries. The use of natural materials such as wood, stone, and plants enhances the earthy vibe, making the space feel grounded and connected to nature.

Furniture in a Bohemian Chic home often consists of mismatched pieces that tell a story—perhaps a mid-century modern chair paired with a rustic antique table. Vintage finds and second-hand treasures play a significant role, giving the space a curated feel without being overly polished. This style encourages the use of handmade items, whether it’s artisanal pottery, handwoven baskets, or unique artwork, all contributing to a narrative that’s as much about the journey as it is about the destination.

Lighting also plays an essential role in establishing the Boho ambiance. Soft, diffused light from lanterns, fairy lights, or intricately designed lamps creates a warm and inviting atmosphere, perfect for late-night gatherings or quiet moments of reflection. Plants, both large and small, are often scattered throughout the space, adding life and a splash of color while promoting a sense of tranquility.

In essence, Bohemian Chic is more than just a décor style; it’s a lifestyle choice that invites you to embrace creativity, celebrate diversity, and cultivate a home that reflects who you are. Whether you incorporate just a few Boho elements or go all out with a full transformation, this aesthetic invites you to create a space that feels uniquely yours—eclectic, vibrant, and utterly free-spirited.

6. Rustic Farmhouse: Cozy and Inviting

The Rustic Farmhouse style embodies a warm, inviting atmosphere that harkens back to simpler times, making it a favorite among those seeking comfort and charm in their home décor. This style is characterized by a harmonious blend of natural materials, vintage accents, and a touch of practicality, resulting in spaces that feel both homey and stylish.

Imagine stepping into a rustic farmhouse kitchen, where weathered wooden beams stretch across the ceiling, and a large farmhouse table sits at the center, surrounded by mismatched chairs that tell stories of family gatherings and shared meals. The color palette typically features soft, muted tones—think creams, earthy browns, and sage greens—that evoke a sense of tranquility and connection to nature.

Key elements of this style often include reclaimed wood furniture, vintage metal accents, and woven textiles, all of which contribute to an overall sense of authenticity. Open shelving displays cherished dishware and mason jars filled with fresh herbs, while cozy throw blankets drape over the back of a well-loved sofa.

Decorative touches like galvanized metal buckets, mason jar centerpieces, and rustic lanterns complete the look, creating a space that is not only aesthetically pleasing but also functional. Whether it’s a charming living room with a stone fireplace or a sunlit porch adorned with potted plants, the Rustic Farmhouse style invites you to unwind and embrace the beauty of everyday life.

In a world that often feels fast-paced and overwhelming, this décor style serves as a gentle reminder to slow down, savor moments, and find joy in the simple pleasures of home. If you’re looking to create an environment that feels cozy and inviting, the Rustic Farmhouse aesthetic may just be your perfect match.

7. Industrial Style: Raw and Urban

What are the different types of home décor styles?
Credit : whatcanu.com

Industrial style is a captivating blend of raw materials and urban chic, creating spaces that are as functional as they are visually striking. Originating from the repurposing of old factories and warehouses, this design aesthetic embraces the beauty of imperfection and the allure of unfinished spaces. Picture exposed brick walls, weathered wooden beams, and polished concrete floors—all elements that evoke a sense of history and authenticity.

One of the most defining characteristics of industrial style is its commitment to showcasing the structural elements of a space. Open floor plans with high ceilings and large windows are hallmarks of this design, allowing natural light to flood in and highlighting the rugged textures that make industrial décor so appealing. You might also find exposed ductwork and piping, which not only serve a functional purpose but also add an edgy, architectural element to the overall look.

In terms of color palette, industrial style leans heavily on muted tones and earthy hues. Think deep grays, rusty browns, and blacks, often accented by pops of color through artwork or decorative accessories. Furniture pieces in industrial spaces tend to be minimalist and utilitarian, often crafted from reclaimed wood, metal, or leather. This emphasis on raw materials fosters a sense of durability and timelessness, ensuring that your décor stands the test of time.

To incorporate industrial style into your home, consider mixing modern furnishings with vintage finds. A sleek leather sofa paired with a reclaimed wood coffee table can create a perfect balance of comfort and rugged elegance. Accessories such as metal light fixtures, factory-style stools, and abstract art pieces can further enhance the industrial vibe, adding character and personality to your space.

Ultimately, industrial style is about embracing the beauty of rawness and celebrating the stories behind the materials used in your home. Whether you live in a loft, a renovated warehouse, or a cozy apartment, adopting this aesthetic invites an urban edge into your décor, transforming your space into a stylish and inviting sanctuary.

8. Scandinavian Design: Functional and Clean

Scandinavian design epitomizes the beauty of simplicity and functionality, making it a captivating choice for those looking to cultivate a serene home environment. Originating from the Nordic countries, this aesthetic is characterized by its minimalistic approach, emphasizing clean lines, natural materials, and a neutral color palette that brings a sense of calm and order to any space.

At its core, Scandinavian design prioritizes functionality without compromising on style. Furniture is often designed with practicality in mind, featuring multi-purpose pieces that maximize space—ideal for smaller homes or apartments. Think of sleek sofas that double as storage solutions or dining tables that can extend for gatherings. The emphasis is on creating an open, airy atmosphere that invites light and encourages a sense of coziness.

Natural materials play a pivotal role in this décor style. Woods, particularly light-toned varieties like oak and birch, are frequently used, lending warmth to interiors while maintaining a fresh, uncluttered feel. Textures are equally important; soft woolen throws, knitted cushions, and plush rugs add comfort and layers to a minimalist space, making it feel inviting rather than stark.

In terms of color, Scandinavian design often leans towards a muted palette—think whites, grays, and soft pastels—punctuated by occasional bold accents that can be introduced through artwork or decorative accessories. The goal is to create a soothing environment that promotes relaxation and mindfulness, reflecting the natural beauty of the surrounding landscapes.

Lighting is another critical element in Scandinavian homes, where long winter months demand well-thought-out illumination. Large windows allow as much natural light as possible, while strategically placed fixtures—often featuring sleek designs—enhance the overall aesthetic and create a warm ambiance.

Whether you’re drawn to the uncluttered nature of Scandinavian design or its harmonious blend of form and function, embracing this style can transform your living space into a serene retreat that feels both stylish and livable.

9. Traditional Elegance: Classic and Timeless

When it comes to home décor, few styles evoke the same sense of comfort and sophistication as Traditional Elegance. Rooted in history and characterized by classic design elements, this style reflects a deep appreciation for craftsmanship and a keen eye for detail. Traditional homes often feature rich wood finishes, ornate moldings, and elegant furnishings that tell a story of timeless beauty.

The color palette in a Traditional Elegance setting leans towards soft, warm tones, with colors such as cream, beige, deep burgundy, and forest green creating a welcoming atmosphere. Textures play a significant role, too; think plush fabrics like velvet and silk draping elegantly over antique furniture, paired with detailed patterns found in wallpapers and upholstery that echo the charm of eras gone by.

Incorporating traditional elements such as wingback chairs, tufted sofas, and intricately carved coffee tables can instantly elevate your space. Accessories like vintage mirrors, brass candlesticks, and fine china add layers of depth, while framed artwork and family portraits evoke a sense of nostalgia and personal history.

Lighting is crucial in achieving the Traditional Elegance aesthetic. Chandeliers, with their sparkling crystals, and table lamps with fabric shades provide warm, inviting light, enhancing the overall ambiance. Layering different light sources, from sconces to floor lamps, creates a cozy yet sophisticated environment.

Ultimately, Traditional Elegance is about creating a space that feels both refined and lived-in, a harmonious blend of formality and comfort that invites relaxation. By embracing this style, you not only honor the past but also create a timeless sanctuary that resonates with warmth and welcome for years to come.

10. Mid-Century Modern: Retro and Stylish

Mid-Century Modern design encapsulates an era of innovation and creativity that flourished between the 1940s and the 1960s. This aesthetic draws inspiration from the optimism of post-war America, blending form and function in a way that feels both retro and refreshingly contemporary. Characterized by its clean lines, organic curves, and a focus on simplicity, Mid-Century Modern emphasizes a seamless connection between indoor and outdoor spaces, often utilizing large windows and an open floor plan.

The color palette of Mid-Century Modern décor is as distinctive as its furniture—think rich earth tones, vibrant accents, and a harmonious mix of both. You’ll often find warm woods like walnut or teak paired with pops of color from bold fabrics or statement pieces in shades of mustard yellow, teal, and burnt orange. Iconic furniture pieces, such as the Eames lounge chair or the Noguchi coffee table, are hallmarks of this style, showcasing meticulous craftsmanship and innovative materials like molded fiberglass and metal.

In Mid-Century Modern homes, décor is kept minimal yet impactful. Accessories are carefully curated; think geometric patterns, sleek ceramics, and abstract art that reflect the era’s artistic movements. The aim is not to overwhelm, but rather to create an inviting space that encourages conversation and relaxation. By integrating plants and natural elements, this style fosters a sense of tranquility, making it perfect for those who seek a balance between sophistication and comfort.

Whether you’re a devoted fan of retro design or simply looking to add a touch of vintage charm to your home, Mid-Century Modern offers a timeless elegance that continues to inspire and captivate. Embrace this aesthetic by sourcing authentic pieces or modern interpretations, and watch as your space transforms into a stylish homage to a beloved design era.

11. Coastal and Nautical: Fresh and Breezy

Coastal and nautical décor styles evoke the soothing essence of the ocean, bringing a refreshing and breezy atmosphere into your home. This aesthetic is all about creating a serene retreat that mirrors the beauty of seaside living, regardless of how far you are from the actual shore. With its light color palettes, natural materials, and whimsical maritime accents, this style fosters a sense of calm and relaxation.

Imagine stepping into a space adorned with soft whites, sandy beiges, and gentle aquas that mimic the ebb and flow of the tide. Light, airy fabrics—like linen and cotton—are often used for window treatments and upholstery, allowing sunlight to filter through and illuminate the room. Textured elements like jute rugs and driftwood accents enhance the connection to nature, while nautical motifs, such as ropes, anchors, and seashells, lend a playful charm.

In a coastal-inspired home, furniture pieces are typically uncomplicated and functional, often featuring weathered finishes that mirror the look of sun-bleached wood. Open shelving displays a curated collection of beachcombed treasures and nautical knickknacks, inviting conversation and nostalgia. Whether it’s the subtle scent of sea salt wafting through the air or the sound of waves crashing in the distance, the coastal aesthetic invites you to unwind and bask in the tranquility of your surroundings.

To fully embrace this style, consider incorporating elements that reflect your personal connection to the sea, such as artwork depicting marine life, photographs of coastal landscapes, or even a gallery wall showcasing your favorite beach memories. By blending these elements with your unique flair, you can create a home that not only looks beautiful but also feels like a serene getaway, no matter where you are.

12. Eclectic Style: Mixing and Matching

Eclectic style is a vibrant celebration of individuality, where the ordinary rules of home décor are thrown out the window in favor of personal expression and creativity. This style thrives on the idea that there are no boundaries when it comes to choosing furnishings, colors, and art; it invites you to mix and match elements from various eras, cultures, and design philosophies to create a space that truly feels like you.

Imagine walking into a room where a vintage mid-century chair sits comfortably next to a modern glass coffee table, while a colorful, handwoven Persian rug anchors the space beneath. Walls adorned with an eclectic mix of artwork—from abstract pieces to family portraits—tell a story of your travels and personal experiences. Here, bold patterns and textures coexist harmoniously, as a geometric-print sofa pairs effortlessly with floral-patterned throw pillows, creating a delightful visual contrast.

At the heart of eclectic style is the art of layering. It encourages you to play with various materials and colors, allowing your creativity to shine. Don’t shy away from mixing wood, metal, and fabric; the beauty of eclectic décor lies in its ability to tell a unique story through unexpected combinations. Perhaps you’ll find a sleek, contemporary lamp illuminating a collection of rustic wooden sculptures, or a vibrant pop of color from an oversized piece of art that brings the room to life.

When embracing eclectic style, the key is to maintain a sense of balance. While variety is the spice of life in this décor approach, cohesion is vital to avoid a chaotic look. This can be achieved by selecting a unifying color palette or theme—perhaps focusing on warm tones or nature-inspired hues that can be found throughout the room. Additionally, consider incorporating a few statement pieces that act as focal points, drawing the eye and grounding the space amidst the diverse elements.

Ultimately, eclectic style is about embracing what you love, allowing your personality to shine through every aspect of your home. Whether you’re drawn to the bohemian charm of global finds or the sleek appeal of modern art, the eclectic approach invites you to create an inviting, dynamic environment that feels uniquely yours. So, let your imagination run wild, and remember: in the world of eclectic décor, the only rule is to have fun!

13. How to Choose the Right Décor Style for You

Choosing the right décor style for your home is a deeply personal journey that reflects not just your tastes but also your lifestyle and personality. Begin by evaluating your preferences—think about the colors that make you feel at peace, the textures you find comforting, and the overall atmosphere you wish to create. Do you gravitate towards the clean lines of modern minimalism, or are you enchanted by the cozy warmth of rustic farmhouse aesthetics?

Start with inspiration; browse through design magazines, websites like Pinterest, or home décor shows to gather ideas. Create a mood board that showcases elements that resonate with you—this could include furniture styles, color palettes, patterns, and even artwork. Pay close attention to the details that catch your eye, as these will guide you in forming a cohesive style.

Consider your lifestyle as well. If you have young children or pets, a more durable and practical style, such as industrial or bohemian, might be better suited to withstand wear and tear while still looking stylish. Conversely, if you prioritize relaxation, a soft, muted palette with plush furnishings might align perfectly with your vision of comfort.

Don’t forget to reflect on the architecture of your home; it can often provide hints about which décor styles will harmonize best. A Victorian house, for example, may call for a more traditional approach with rich fabrics and antique furnishings, while a sleek, contemporary home may shine with a minimalist or Scandinavian aesthetic.

Ultimately, selecting the right décor style is about creating a space that feels authentically you. Take your time, trust your instincts, and remember that your home is a living reflection of who you are—embrace the journey of discovery!

14. Tips for Incorporating Your Aesthetic into Your Home

Incorporating your aesthetic into your home is a rewarding journey that allows your personality to shine through in every room. Whether you lean toward bohemian charm, modern minimalism, rustic farmhouse, or eclectic vibrancy, there are practical steps to infuse your unique style into your living space.

**1. Start with a Color Palette:** Every aesthetic has its signature colors. Begin by selecting a palette that resonates with you. For a coastal vibe, think soft blues and sandy beiges; for a mid-century modern look, consider warm earth tones paired with pops of bright color. Paint your walls, choose furnishings, and accessorize with these hues in mind to create a cohesive look.

**2. Mix Textures and Materials:** Texture can elevate your décor style significantly. Pair smooth surfaces with rough ones; for instance, a sleek glass coffee table can be beautifully contrasted with a chunky knit throw or a reclaimed wood side table. The interplay of materials—like combining metal, wood, and fabric—can add depth and intrigue to your space.

**3. Curate Your Furniture:** Select furniture pieces that reflect your aesthetic and serve a purpose. For a vintage-inspired look, scour thrift stores for unique finds, while modern styles may benefit from streamlined, functional furniture. Remember, each piece should not only be visually appealing but also comfortable and practical for your lifestyle.

**4. Add Personal Touches:** Your home should tell your story. Incorporate personal mementos, such as artwork, photographs, or travel souvenirs, that resonate with your aesthetic. These items can evoke cherished memories and give your space a sense of warmth and individuality.

**5. Layer Lighting:** Lighting plays a crucial role in setting the mood of your home. Use a combination of ambient, task, and accent lighting to highlight different areas. Soft, warm light can enhance a cozy, rustic feel, while sleek, bright fixtures can underscore a modern aesthetic. Don’t forget to choose lamps and shades that complement your overall design theme.

**6. Embrace Greenery:** Plants can breathe life into your home, adding color and texture while improving air quality. Select houseplants that fit your aesthetic; succulents or cacti for a minimalist look, or lush ferns and flowering plants for a bohemian vibe. Use decorative pots that echo your color palette to tie everything together.

**7. Create Zones:** If you have an open-plan space, define different areas by using rugs, furniture arrangements, or decorative screens. This helps to create distinct zones that reflect various aspects of your aesthetic. For example, a reading nook can feature a comfy chair, a small bookshelf, and a stylish floor lamp, all harmonizing with your chosen style.

By thoughtfully incorporating these elements, you can create a home that not only looks stunning but also resonates with your personal aesthetic. Remember, the key is to stay true to yourself; your home should be a reflection of who you are, providing a sanctuary that feels uniquely yours.

15. Conclusion: Creating a Space that Reflects You

In conclusion, creating a space that reflects you is not just about choosing the right furniture or paint color; it’s about weaving together your personal story, experiences, and tastes into a cohesive aesthetic. As we’ve explored the diverse range of home décor styles—from the minimalistic charm of Scandinavian design to the vibrant energy of bohemian chic—you’ve likely discovered elements that resonate with your own preferences.

Remember, your home should be a sanctuary that nurtures your spirit and accommodates your lifestyle. It’s perfectly acceptable to blend styles, allowing your individuality to shine through while embracing the beauty of contrast. Whether you prefer the rustic warmth of farmhouse décor or the sleek lines of contemporary design, the key is to infuse your personality into every corner of your space.

As you embark on this creative journey, take the time to experiment and curate pieces that speak to you. Don’t shy away from mixing textures, colors, and patterns that evoke joy and comfort. Let your walls tell your story—through cherished photographs, unique art pieces, and treasured keepsakes that spark memories.

Ultimately, your home should be a reflection of who you are. It’s a canvas waiting for your touch, a space where you can relax, entertain, and thrive. So, take the plunge, embrace your unique aesthetic, and create a haven that not only looks beautiful but feels authentically you. Happy decorating!

As we wrap up our exploration of various home décor styles, we hope you’ve found inspiration and clarity in discovering your unique aesthetic. From the cozy charm of farmhouse decor to the sleek lines of modern minimalism, each style offers a distinct way to express your personality and create a space that truly feels like home. Remember, your home is a canvas waiting for your personal touch, so don’t hesitate to mix and match elements that resonate with you. Whether you choose to embrace bold colors, natural textures, or timeless elegance, the key is to create an environment that brings you joy and comfort. So go ahead, dive into the world of décor, and let your creativity flourish as you transform your living space into a reflection of your style. Happy decorating!

How to install a new door?

Installing a new door may seem like a daunting task, but with the right guidance, it can be a rewarding DIY project that transforms the look and function of your space.

Whether you’re upgrading for aesthetics, improving energy efficiency, or enhancing security, knowing how to properly install a door can save you time and money while giving you the satisfaction of a job well done. In this comprehensive step-by-step guide, we’ll take you through the entire process—from selecting the perfect door for your home to the final touches that ensure a flawless fit. With practical tips, essential tools, and expert advice, you’ll be equipped to tackle this project with confidence, making your new door installation feel like a professional achievement. So roll up your sleeves and get ready to elevate your home’s entrance with our easy-to-follow instructions!

1. Introduction: Why Installing a Door Yourself is a Great Idea

How to install a new door?
Credit : whatcanu.com

Installing a new door might seem like a daunting task, but taking it on yourself can be a rewarding and cost-effective endeavor. There are several compelling reasons why installing a door yourself is not only practical but also a fantastic opportunity to enhance your home.

First and foremost, DIY door installation allows you to save money. Hiring a professional can quickly add up in costs, with labor charges often exceeding the price of the door itself. By rolling up your sleeves and tackling the project on your own, you not only gain financial savings but also the satisfaction of knowing you accomplished it yourself.

Additionally, installing a door gives you complete control over the design and materials used. You can select the perfect style, color, and finish that complements your home’s aesthetic. Whether you prefer a classic wooden door, a sleek modern design, or a sturdy steel option, the choice is entirely yours. This personal touch can greatly enhance your home’s curb appeal and overall value.

Moreover, the sense of accomplishment that comes with completing a home improvement project cannot be overstated. Each step in the installation process, from measuring and cutting to hanging the door and securing the hardware, provides an opportunity to learn new skills and boost your confidence as a DIYer.

Lastly, the process of installing a door yourself fosters a deeper connection with your home. Each time you pass through that newly installed entrance, you’ll be reminded of your hard work and dedication. You’ll appreciate the time and effort you put into creating a welcoming space for family and friends.

In this guide, we’ll walk you through the step-by-step process of installing your new door like a pro, ensuring you have all the information you need to achieve a flawless finish. So grab your tools, roll up your sleeves, and let’s get started on this exciting home improvement journey!

2. Tools and Materials You’ll Need

Before diving into the installation process, it’s crucial to gather all the necessary tools and materials to ensure a smooth and efficient project. Having everything at your fingertips will not only save you time but also prevent frustration mid-installation. Here’s a comprehensive list of what you’ll need:

**Tools:**
1. **Tape Measure:** A reliable tape measure is essential for ensuring precise measurements of your new door and the frame.
2. **Level:** A level will help you confirm that your door is perfectly aligned, preventing any unwanted gaps or misalignment.
3. **Screwdriver Set:** Both flathead and Phillips screwdrivers will be needed for various screws throughout the installation.
4. **Drill:** A power drill with drill bits is critical for creating pilot holes and securing screws efficiently.
5. **Hammer:** A good hammer will be useful for tapping in shims or prying out old door frames if you’re replacing an existing door.
6. **Chisel:** If your new door requires mortising for hinges, a sharp chisel will ensure clean and precise cuts.
7. **Utility Knife:** This will come in handy for various cutting tasks, such as trimming shims or removing old weather stripping.

**Materials:**
1. **New Door:** Choose a door that fits your style and the dimensions of your door frame. Don’t forget to check if it comes pre-hung or as a slab!
2. **Hinges:** Be sure to select sturdy, high-quality hinges that can support the weight of your new door.
3. **Door Handle/Lockset:** Depending on your preference, choose a handle and lockset that complements your door and enhances security.
4. **Shims:** These small, wedge-shaped pieces will help you adjust the door frame for a perfect fit and level installation.
5. **Weather Stripping:** If you’re replacing an exterior door, weather stripping will help improve energy efficiency by blocking drafts.
6. **Wood Glue or Construction Adhesive:** This will be useful for securing shims in place or reinforcing joints.

With these tools and materials ready, you’ll be well-equipped to tackle your door installation with confidence. Remember, preparation is key to achieving a professional finish, so take the time to gather everything you need before you start. Happy installing!

3. Choosing the Right Door for Your Space

How to install a new door?
Credit : whatcanu.com

Choosing the right door for your space is a pivotal step in your installation journey, as it sets the tone for both aesthetics and functionality. Before you head to the store or browse online, consider the following factors to ensure you select a door that complements your home and meets your needs.

First and foremost, assess the style of your home. Whether you have a modern, traditional, or eclectic design, the door should harmonize with the overall aesthetic. For a contemporary space, sleek and minimalistic designs work wonders, while a classic home may benefit from a solid wood door with intricate details.

Next, think about the material. Doors come in various materials, each offering unique benefits. Solid wood doors exude warmth and durability, while fiberglass doors provide insulation and are resistant to the elements. Steel doors are incredibly secure and great for exterior use, while hollow-core doors are a budget-friendly option for interior spaces. Consider your climate and the level of maintenance you’re willing to commit to when making your choice.

Don’t forget to measure your door frame carefully! A door that’s too large or too small can lead to installation headaches and can compromise energy efficiency. Make sure to note the height, width, and thickness of your existing door frame, and double-check these measurements against the specifications of your chosen door.

Finally, think about the door’s functionality. Do you want a door that swings open, slides, or even folds? Each option has its advantages depending on the space you are working with. For narrow hallways, pocket doors can save space, while traditional swinging doors are ideal for larger openings.

By taking the time to carefully select the right door for your space, you’ll ensure that your installation goes smoothly and that the final result enhances the beauty and functionality of your home. With the right door in hand, you’ll be one step closer to a professional-looking installation!

4. Measuring Your Door Frame Accurately

Measuring your door frame accurately is a crucial step that can make or break the success of your installation. Even the slightest miscalculation can lead to gaps, drafts, or an ill-fitting door that could compromise both aesthetics and functionality. To begin, gather your tools: a tape measure, a level, and a pencil for marking your measurements.

Start by measuring the width of the door frame. Place your tape measure at the inside edge of one side of the frame and extend it to the inside edge of the opposite side. Jot down this measurement; it’s essential to take at least three width measurements at different heights—top, middle, and bottom—to account for any irregularities in the frame. The smallest of these measurements will determine the width of your new door.

Next, measure the height of the door frame. Again, measure from the top inside edge down to the bottom inside edge at both the left and right sides of the frame. Just like with the width, take multiple measurements here to ensure accuracy; the shortest measurement will be your final height.

Additionally, check the squareness of the frame using a level. Place the level diagonally from one corner of the frame to the opposite corner. If the level does not sit evenly, this indicates that your frame may be out of square, which can affect the fit of your new door.

Lastly, don’t forget to note the thickness of the frame and any other relevant details, such as the presence of molding or trim. Accurate measurements are the foundation of a successful door installation, so take your time and double-check your figures. A well-measured door frame sets the stage for a smooth installation process and ensures that your new door will function perfectly for years to come.

5. Preparing the Old Door Frame for Installation

How to install a new door?
Credit : whatcanu.com

Preparing the old door frame for installation is a crucial step that can make or break your project. Before you dive into the installation of your new door, take a moment to assess the condition of the existing frame. look for any signs of damage, such as warping, rot, or cracks, which could compromise the integrity of your new door. If you notice any issues, it may be wise to repair or replace the frame to ensure a snug fit and long-lasting performance.

Once the frame’s condition is confirmed, it’s time to clean it thoroughly. Remove any dust, debris, or old paint that may have accumulated over the years. A clean surface is key to achieving a smooth installation. Use a putty knife to scrape away any peeling paint, and a vacuum or a damp cloth to pick up the remnants. If you encounter stubborn old caulk or adhesive, a heat gun can help soften it for easier removal.

Next, check the level and plumb of the door frame. Use a spirit level to make sure the frame is straight and aligned correctly; this will help prevent any future issues with your new door not closing properly or getting stuck. If the frame is out of square, you may need to shim it with small pieces of wood to correct its alignment.

Finally, take the time to measure the door frame accurately. Use a tape measure to determine the height and width of the frame, noting down these dimensions. It’s always best to double-check your measurements to ensure a proper fit for your new door. With the old door frame prepped and ready, you’re now set to bring in your new door and transform your space with ease!

6. Removing the Old Door Safely

Removing the old door safely is a crucial step in the installation process, and it requires a bit of care and precision. Begin by gathering your tools: a screwdriver, a pry bar, and a utility knife. Before you start, ensure you have someone to assist you, as doors can be heavy and cumbersome, making it easier to handle with an extra set of hands.

First, close the door and inspect the hinges. Using your screwdriver, carefully remove the screws from the hinges, working from the bottom hinge to the top. This method helps to relieve the weight gradually, minimizing the risk of the door falling unexpectedly. As you remove each screw, place them in a small container to avoid losing them, as you may need them later for your new door.

Once the hinges are detached, gently push the door towards you and lift it off the frame. If the door feels stuck, check for any additional screws that may be holding it in place, or use a utility knife to cut through any paint or caulk that may be sealing it. When you finally have the door free, set it aside safely so it won’t fall or get damaged.

Next, inspect the door frame for any lingering hardware, like strike plates or latches. Removing these components will ensure a clean and smooth installation for your new door. If necessary, use your pry bar to carefully remove any nails or screws that may have been left behind.

Taking your time during this process is vital. Rushing can lead to accidents or damage, so be mindful of your surroundings and the materials you’re working with. With the old door safely removed, you’re one step closer to transforming your entryway with a fresh, new door that will enhance both the functionality and aesthetic of your home.

7. Unpacking and Inspecting Your New Door

How to install a new door?
Credit : whatcanu.com

Unpacking and inspecting your new door is a crucial step that sets the stage for a smooth installation process. Once your door arrives, take a moment to find a clean, spacious area where you can safely unbox it. Gently remove the packaging, being careful not to damage the door itself. Most doors come wrapped in protective materials like cardboard or foam, so handle everything with care as you peel back these layers.

As you unveil your new door, conduct a thorough inspection. Start by checking for any visible damage, such as dents, scratches, or warping. It’s essential to catch these issues early, as they may affect the door’s functionality and aesthetic appeal. Don’t just rely on a cursory glance—run your hands over the surface to feel for any imperfections that might not be immediately visible.

Next, confirm that all components of your door are included in the package. This typically includes the door itself, hinges, a handle or knob, and any additional hardware necessary for installation. Refer to the manufacturer’s instructions to ensure you have everything you need. If something is missing or damaged, reach out to the supplier promptly to arrange for replacements.

Lastly, take a moment to familiarize yourself with the door’s features, whether it’s a solid wood door with intricate designs or a sleek, modern fiberglass model. Knowing the specifics can help you make informed decisions during the installation process, ensuring that you not only install the door correctly but also appreciate its design and functionality to the fullest.

By taking the time to unpack and inspect your new door carefully, you’re ensuring a successful installation ahead. This diligence will save you time and potential headaches down the road, allowing you to enjoy your new door with confidence.

8. Installing Door Hinges: Step-by-Step

Installing door hinges may seem like a small detail, but it’s a crucial step that ensures your door functions smoothly and securely. Follow this step-by-step guide to install your new door hinges like a pro!

**Step 1: Gather Your Tools and Materials**
Before you begin, make sure you have everything you need at hand. You’ll require a drill, a screwdriver, a measuring tape, a chisel, and, of course, your door hinges. Most hinges come with screws, but double-check to ensure you have the correct size for your door.

**Step 2: Mark the Hinge Placement**
Using your measuring tape, measure down from the top of the door to where you want the top hinge to go—typically around 7 inches from the top edge. Mark this spot with a pencil. Repeat this process for the bottom hinge, generally placed about 11 inches from the bottom. If you’re adding a third hinge, position it halfway between the top and bottom hinges.

**Step 3: Create the Hinge Recesses**
Place the hinge flat against the door where you marked it. Using your chisel, carefully carve out a shallow recess for the hinge to sit flush with the door surface. This step is crucial for a clean, professional look and ensures the door swings smoothly.

**Step 4: Attach the Hinges to the Door**
Align the hinge with the recess you created. Using your drill, insert the screws provided with the hinge into the pre-drilled holes. Tighten them securely but avoid overtightening, as this could strip the screws or damage the wood.

**Step 5: Position the Door in the Frame**
With the hinges attached to the door, it’s time to position the door in the frame. You may need a helper for this step to hold the door steady. Align the hinges with the corresponding plates in the door frame.

**Step 6: Secure the Hinges to the Frame**
Once the door is in place, attach the other half of the hinge to the door frame by drilling screws into the hinge plates. Make sure the door swings freely and check for alignment. If it’s too tight or doesn’t close properly, you may need to adjust the hinges slightly or add shims to the frame.

**Step 7: Test the Door**
After everything is secured, give the door a few test swings. It should open and close smoothly without any sticking or rubbing. If there are issues, revisit the hinge placements and make minor adjustments as needed.

**Step 8: Final Touches**
Once you’re satisfied with the installation, clean any dust or debris from the installation process. If your hinges are visible, consider applying a coat of lubricant to ensure they remain functional and quiet.

By carefully following these steps, you’ll have installed your door hinges like a pro, ensuring your new door not only looks fantastic but operates seamlessly in your space! Happy DIY-ing!

9. Hanging the New Door: Tips for Alignment

Hanging a new door can seem daunting, but with a few expert tips on alignment, you can ensure that your installation goes off without a hitch. Proper alignment is crucial not only for aesthetics but also for functionality; a misaligned door can lead to issues such as sticking, gaps, or even security concerns. Here’s how to get it just right.

First, before you even attempt to hang the door, make sure your hinges are properly installed on the door frame. Use a level to check that the hinge side of the frame is plumb, adjusting as necessary with shims. If the frame isn’t square, you may find that your door doesn’t fit correctly, so take the time to get this step right.

Once your hinges are secured, it’s time to position the door. Hold the door in place with the help of a friend or use a door jig to support it temporarily. Begin by securing the top hinge first. This will help anchor the door and allow you to check its alignment without it swinging open or closed unexpectedly.

Next, check the gap between the door and the frame on both the hinge and latch sides. Ideally, you want a consistent gap of about 1/8 inch. If you notice that the door is leaning or there are uneven gaps, adjust the lower hinge by adding or removing shims until the door hangs evenly. It may take a bit of trial and error, but patience is key.

Once you’re satisfied with the alignment, secure the bottom hinge. Before closing the door completely, open and shut it a few times to ensure it swings smoothly without dragging. If you encounter any resistance, it’s likely a sign that further adjustments are needed.

Finally, after confirming that the door is properly aligned and functions smoothly, you can drive in the screws fully and install any additional hardware, such as doorknobs or locks. A well-hung door not only enhances the aesthetic appeal of your space but also contributes to the overall security and efficiency of your home. With these alignment tips, you’ll be hanging doors like a pro in no time!

10. Securing the Door Frame: Shims and Screws

Securing the door frame is a crucial step that ensures your new door operates smoothly and stands the test of time. This process involves using shims and screws to create a sturdy, level framework that can withstand daily use.

Begin by inserting shims—small, wedge-like pieces of wood—into the gaps between the door frame and the rough opening of the wall. Shims are essential for adjusting the alignment of the door; they help fill any uneven spaces, ensuring that the door hangs straight and operates without obstruction. Start at the bottom hinge side and gently tap the shim into place, checking frequently with a level to ensure the frame is perfectly plumb. You want the door to swing effortlessly, so this step cannot be rushed.

Once the shims are in position, it’s time to secure the frame with screws. Using a power drill, fasten screws through the frame into the wall studs. Place screws approximately every 12 to 16 inches along the sides and top of the frame, ensuring they penetrate the studs for maximum stability. Be careful not to over-tighten the screws, as this can warp the frame and affect the door’s functionality.

After securing the frame, double-check the door’s alignment and operation. Open and close the door to make sure it swings freely without sticking or dragging. If adjustments are necessary, you can easily add or remove shims as needed. By carefully securing the door frame with shims and screws, you’ll create a solid base that will enhance the longevity and performance of your new door, giving it the professional finish you desire.

11. Installing the Door Handle and Lockset

Once your door is hung securely in its frame, it’s time to add the finishing touches that not only enhance its functionality but also add to its aesthetic appeal: the door handle and lockset. Installing these components may seem like a straightforward task, but a careful approach ensures smooth operation and a polished look.

Start by selecting the right handle and lockset that matches your door style and complements your home decor. Before you dive into installation, gather your tools: a tape measure, screwdriver, chisel, and a level. Having everything on hand will streamline the process and minimize interruptions.

Begin by determining the correct height for your door handle. A common standard is around 36 inches from the floor, but you can adjust based on your preference or the specific ergonomic needs of your household. Mark the spot lightly with a pencil.

Next, position the lockset, which typically consists of two main components: the latch and the deadbolt (if applicable). Use your chisel to create a mortise for the latch, following the manufacturer’s instructions for depth and width. This step is crucial; a snug fit will prevent any wobbling and ensure the latch operates smoothly.

Once the mortises are cut, insert the latch into the side of the door. Secure it with screws, ensuring that it is flush with the door’s edge. Then, place the strike plate in the door frame, marking the location where it will fit. Chisel out a small recess if necessary to accommodate it, and screw it into place.

Now, it’s time to install the door handle. Align the handle’s spindle with the latch and push it through the hole you’ve prepared. Attach the outer handle by securing it with the provided screws. Make sure both handles are aligned properly and turn smoothly.

Finally, if your lockset includes a deadbolt, repeat the process for this component. Mark the position for the deadbolt, drill the necessary holes, and secure it in place. Once everything is installed, test the lock and handle to ensure they function correctly, making any adjustments as needed.

With the handle and lockset securely in place, you can step back and admire your handiwork. Not only have you successfully enhanced the functionality of your door, but you’ve also added a stylish touch that will welcome guests and provide security for your home.

12. Adjusting the Door for a Perfect Fit

Once your new door is securely hung and you’ve taken a moment to admire your handiwork, it’s time to ensure it fits perfectly within its frame. Proper adjustment is crucial for both aesthetics and functionality, as a misaligned door can lead to operational issues and compromise security.

Start by checking the gaps between the door and the frame. Ideally, there should be an even space of about 1/8 inch on the top and sides, allowing for smooth operation and easy opening and closing. If you notice uneven gaps, it may be necessary to adjust the hinges. Loosen the screws on the hinge plate slightly, use a shim to raise or lower the door as needed, and then retighten the screws. This might take a few attempts, so don’t be discouraged if it takes a bit of tweaking to achieve that perfect alignment.

Next, check how the door swings. It should open and close without catching or scraping against the frame or floor. If the door drags on the floor, you may need to trim the bottom edge. Measure from the floor to the bottom of the door, and then mark where the cut will be. Using a circular saw or hand saw, make a clean cut, and be sure to sand down the edges to prevent splintering.

Finally, test the latch and strike plate. Close the door and ensure that the latch easily engages with the strike plate without excessive force. If the latch doesn’t align properly, you may need to reposition the strike plate. Mark the new position, drill pilot holes, and install it at the adjusted height.

Once you’ve made these adjustments, step back and appreciate your efforts. A well-fitted door not only enhances the overall look of your home but also ensures that it functions seamlessly for years to come. With a little patience and attention to detail, you can achieve a professional finish that reflects your hard work and dedication.

13. Finishing Touches: Painting or Staining Your Door

Once your new door is securely installed and all adjustments have been made, it’s time to focus on the finishing touches that will elevate its appearance and protect it from the elements. Painting or staining your door not only enhances its aesthetic appeal but also adds a layer of protection against wear and tear, moisture, and sunlight.

Before you start, ensure the surface of the door is clean and free of dust. If you’ve just installed a wooden door, consider sanding it lightly to create a smooth surface that will better absorb your chosen finish. For painted doors, a primer may be necessary, especially if you’re transitioning from a darker color to a lighter one or if the door has never been painted before.

When it comes to choosing between paint and stain, consider the look you want to achieve. Paint offers a vibrant, opaque finish that can complement the color scheme of your home, while stain highlights the natural grain of the wood, providing a warm and timeless appearance. If you opt for stain, be sure to select a high-quality product that’s designed for exterior use to ensure durability.

Apply your chosen finish using a high-quality brush or roller for a smooth, even application. For paint, start with the edges and grooves before moving to the flat surfaces, making sure to apply multiple thin coats rather than one thick coat for the best results. If staining, work in the direction of the wood grain and wipe off any excess with a clean cloth to avoid blotches.

Allow ample drying time between coats, and don’t forget to finish with a clear sealant if you chose stain, as this will provide additional protection against moisture and UV damage. Once everything is dry and set, step back and admire your handiwork—your newly installed door not only looks professional but is now ready to withstand the elements while adding curb appeal to your home.

14. Troubleshooting Common Installation Issues

Installing a new door can be a rewarding DIY project, but it’s not without its challenges. Encountering issues during installation is common, and knowing how to troubleshoot these problems can save you time, frustration, and potentially costly repairs. Here are some typical installation issues you might face and how to resolve them like a pro.

**1. Door Doesn’t Fit Properly:**
If your door doesn’t seem to fit in the frame correctly, start by checking the measurements. Ensure that the door is aligned with the hinges and that the frame is square. Use a level to check for evenness; if the frame is out of square, shimming may be necessary. Adjust or trim the door edges slightly if it’s too large, but be cautious—removing too much material can lead to gaps.

**2. Alignment Issues with Hinges:**
Misalignment of hinges can cause your door to sag or not close properly. Check that the screws are tight and that the hinges are mounted flush against the door and the frame. If the door is still misaligned, consider repositioning the hinge plates or using additional shims to elevate the door back into proper alignment.

**3. The Door Sticks or Gets Jammed:**
A sticking door can be a major annoyance. This issue often arises from humidity causing wood to swell or an improper installation. Inspect the door and frame for any obstructions or debris that might be causing the sticking. Sanding down the edges of the door slightly can help alleviate this issue. If the door is swelling due to moisture, consider applying a sealant to protect it from humidity in the future.

**4. Gaps Around the Door:**
If you notice gaps between the door and the frame, it could affect energy efficiency and security. Check that the door is hung evenly and make adjustments as needed. Weather stripping can also be an effective solution for sealing these gaps, as it not only improves insulation but also enhances the overall appearance of your installation.

**5. Difficulty With Lock Mechanism:**
Sometimes, the lock may not align properly, which can be frustrating. Ensure that the strike plate is correctly positioned and that the hole in the door is drilled at the right depth. If the lock cylinder is sticking, lubricate it with graphite or a silicone spray to ensure smooth operation.

By anticipating these common installation issues and knowing how to troubleshoot them, you’ll not only save time but also ensure that your new door functions perfectly for years to come. Remember, every challenge you face is an opportunity to learn and improve your DIY skills!

15. Conclusion: Enjoying Your New Door and Final Thoughts

Congratulations on successfully installing your new door! As you step back and admire your handiwork, take a moment to appreciate not just the aesthetic upgrade but also the functional benefits it brings to your home. A new door can enhance your home’s energy efficiency, improve security, and elevate curb appeal, making it an investment that pays off in more ways than one.

Now that your door is in place, it’s time to revel in the satisfaction of a job well done. Enjoy the fresh look and feel it adds to your space, and take note of how it complements your interior and exterior design. Whether you chose a sleek modern style or a classic wooden finish, your new door serves as a testament to your DIY skills and attention to detail.

Remember, the journey doesn’t end here. Regular maintenance is key to keeping your door looking and functioning at its best. Periodically check the hinges and hardware, clean the surface, and apply any necessary treatments to protect against the elements. Establishing a routine will ensure that your door remains a stunning feature for years to come.

As you close this chapter of your home improvement project, consider sharing your experience with others. Post pictures of your newly installed door on social media, or share tips and tricks with friends and family who may be considering a similar upgrade. Your insights could inspire someone else to take the plunge into their own home improvement journey.

In conclusion, installing your new door is not just about the end result; it’s about the pride you feel in transforming your space. So, enjoy the beauty and functionality it brings, and let it be a reminder of your ability to tackle DIY projects like a pro! Happy home improving!

In conclusion, we hope this step-by-step guide has empowered you with the knowledge and confidence to install your new door like a pro! From selecting the right tools to ensuring a perfect fit, each step is crucial in achieving a polished and professional finish. Remember, patience and precision are your best friends throughout this process. As you stand back and admire your handiwork, take pride in knowing you transformed your space with your own two hands. Whether you’re upgrading for aesthetic appeal, energy efficiency, or security, your new door will undoubtedly enhance your home. We encourage you to share your installation experience and photos with us; we’d love to celebrate your achievement! Happy DIYing!

What are the best ways to add storage space to your home?

In an age where minimalist living and maximizing space are more important than ever, effective storage solutions have become a necessity for every homeowner.

Whether you’re navigating the challenges of a cozy apartment or trying to bring order to a bustling family home, finding clever ways to store your belongings can transform your living environment from chaotic to serene. This blog post dives into a treasure trove of creative ideas that not only enhance your home’s functionality but also add a touch of style. From innovative furniture designs that double as storage to repurposed everyday items that can declutter your space, we’ll explore a variety of strategies that cater to every taste and necessity. Say goodbye to clutter and hello to an organized oasis, as we guide you through the art of maximizing your space with functional and aesthetically pleasing storage solutions!

1. Introduction: The Importance of Maximizing Space

What are the best ways to add storage space to your home?
Credit : whatcanu.com

In today’s fast-paced world, where the hustle and bustle of daily life often leaves little room for clutter, maximizing space in our homes has never been more critical. As living spaces shrink and the demand for multifunctional areas rises, the ability to cleverly utilize every square inch of our homes transforms from a mere preference into a necessity.

Imagine stepping into a space that feels both organized and functional, where every item has its place and chaos is kept at bay. The importance of maximizing space lies not just in storing belongings but in creating a sanctuary that promotes peace of mind and enhances our overall quality of life. A well-organized home can lead to increased productivity, reduced stress, and a greater sense of well-being.

Moreover, effective storage solutions can breathe new life into an area that may feel cramped or neglected. By thinking creatively about how we arrange our belongings, we can open up rooms, create inviting atmospheres, and ultimately cultivate a space that reflects our unique personalities. From innovative shelving to hidden compartments, the options for maximizing storage are limited only by our imagination.

In this blog post, we’ll explore a variety of creative strategies to add storage to your home, ensuring that you can enjoy both style and functionality in every corner. Let’s embark on this journey towards a more organized and spacious living environment together!

2. Assessing Your Storage Needs

Before diving into the world of storage solutions, it’s essential to take a step back and assess your unique storage needs. Every home is different, and understanding what you truly require will help you make informed decisions about the best ways to maximize your space. Start by walking through each room in your home with a critical eye. Take note of the areas that feel cluttered or disorganized—these are the spaces that could benefit from additional storage.

Consider the items you use regularly versus those that are seldom touched. Are there seasonal items, like holiday decorations or winter clothing, that could be stored away until needed? Create a list that categorizes your belongings—daily essentials, occasional use items, and things you can part with. This exercise will help you prioritize what needs to be easily accessible and what can be tucked away in less visible storage.

Additionally, take measurements of your available spaces. Whether it’s a narrow hallway, an underutilized corner, or even vertical wall space, knowing the dimensions will allow you to explore creative storage solutions that fit perfectly into your home. Assess how often you use certain items and where they are currently stored; this will give you insights into how to arrange and optimize your storage effectively.

By understanding your storage needs and the specific challenges you face, you can tailor your approach to transforming your home. This thoughtful assessment lays the groundwork for implementing innovative storage solutions that not only alleviate clutter but also enhance the overall functionality of your living space. As you progress through this journey, remember that efficient organization isn’t just about adding more storage—it’s about creating a harmonious environment that works for you and your lifestyle.

3. Creative Shelving Solutions

What are the best ways to add storage space to your home?
Credit : whatcanu.com

When it comes to maximizing your home’s storage potential, creative shelving solutions can be game-changers. Shelves are not just about functionality; they can also serve as stunning design elements that enhance your space. Here are some innovative ideas to consider:

**Floating Shelves:** These minimalist shelves create the illusion of more space by eliminating bulky brackets. Perfect for small rooms or narrow hallways, floating shelves can be used to display books, plants, or decorative items, adding both style and storage without overwhelming the area. Consider varying the lengths and heights to create an eye-catching visual effect.

**Corner Shelves:** Don’t let those unused corners go to waste! Corner shelves can turn awkward spaces into charming storage solutions. Whether you opt for a tiered design that cascades down the wall or a simple corner unit, these shelves can hold everything from plants to collectibles while adding depth to your room.

**Ladder Shelves:** A trendy option that marries functionality with a casual aesthetic, ladder shelves lean against the wall and provide ample space for books, knick-knacks, and more. They work particularly well in living rooms or bedrooms, where they can add height and dimension, inviting the eye to travel upwards.

**Open Cubby Shelves:** If you’re looking for a versatile storage solution, open cubby shelves allow for easy organization and accessibility. These shelves can double as room dividers in open-concept spaces, creating designated zones while providing ample storage for bins, boxes, and larger items.

**Under-Stair Shelving:** The space under your stairs is often overlooked; however, it can become a treasure trove of storage opportunities. With custom-built shelving or repurposed bookcases, this area can be transformed into a functional nook for books, games, or seasonal decor. This not only maximizes your storage but also adds a unique focal point to your home.

By embracing these creative shelving solutions, you can enhance your home’s storage capacity while adding character and charm. Remember, the key is to think outside the box and choose designs that not only serve a practical purpose but also reflect your personal style. With the right shelving, you can turn clutter into curated collections and make every inch of your space work for you.

4. Utilizing Under-Bed Storage

When it comes to maximizing space in your home, one of the most overlooked areas is the space lurking right beneath your bed. Under-bed storage offers a treasure trove of possibilities for reclaiming valuable square footage without sacrificing style or accessibility. Rather than letting this area gather dust bunnies, consider transforming it into a functional storage haven.

Start by assessing the items you need to store. Seasonal clothing, extra linens, shoes, and even sports equipment can all find a home beneath your bed. To keep things organized, invest in sleek, low-profile storage bins or vacuum-sealed bags that slide effortlessly under the bed. Choose clear plastic containers for easy visibility, or opt for decorative fabric bins that can add a touch of style while hiding clutter.

If you’re looking for a more permanent solution, consider a bed frame with built-in drawers or a lofted bed that elevates the sleeping space, leaving ample room underneath for shelves or storage units. This not only maximizes storage but also creates an airy, spacious feel in your bedroom.

Incorporating under-bed storage into your home can be both practical and aesthetically pleasing. By creatively utilizing this often-neglected space, you can keep your belongings organized and easily accessible, all while maintaining a clean and tidy environment. So, take a moment to explore what’s hiding under your bed—it just might be the key to unlocking more space in your home!

5. Multi-Functional Furniture Ideas

What are the best ways to add storage space to your home?
Credit : whatcanu.com

When it comes to maximizing your space, multi-functional furniture is a game changer. These innovative pieces not only serve their primary purpose but also provide additional storage and utility, making them perfect for small homes or apartments where every square foot counts.

Imagine a sleek coffee table that opens up to reveal hidden compartments for magazines, remote controls, and even board games, allowing your living area to stay tidy while still being functional. Or picture a stylish ottoman that doubles as a storage unit — perfect for stashing away blankets or children’s toys. With a flip of the lid, your living room transforms into an organized oasis, free from clutter.

Consider investing in a bed frame with built-in drawers or a lofted bed that creates a cozy workspace beneath it. This clever use of vertical space can turn a cramped bedroom into a multi-functional haven. In the dining area, choose a bench with storage underneath to not only provide extra seating but also keep linens and dishware neatly tucked away.

Don’t overlook the power of convertible furniture. Folding desks that can collapse against the wall after use or extendable dining tables that can comfortably host a small gathering but tuck away neatly when not in use are fantastic options for maximizing utility while minimizing your footprint.

By selecting multi-functional furniture, you can create a home that is not only stylish but also maximally efficient. Embrace the versatility of these pieces, and watch as your space transforms into an organized, welcoming environment that meets all your needs without sacrificing aesthetics.

6. Making the Most of Vertical Space

When it comes to maximizing storage in your home, one of the most underutilized resources is the vertical space that often goes unnoticed. By thinking upwards, you can transform even the smallest rooms into functional areas that offer ample storage solutions without sacrificing style.

Start by assessing your walls—are they bare and waiting to be adorned? Consider installing floating shelves to display books, plants, or decorative items, all while providing a convenient place to store everyday essentials. This simple addition not only draws the eye upwards, creating the illusion of higher ceilings, but also allows you to free up valuable floor space.

Another innovative way to utilize vertical real estate is by incorporating tall shelving units or bookcases. These pieces can be strategically placed in corners or along walls, maximizing every inch while offering a wealth of storage. Use the upper shelves for items you don’t frequently access, like seasonal decor or extra linens, reserving the lower shelves for everyday items that need to be easily reachable.

Don’t overlook the potential of your doors! Over-the-door organizers can be a game-changer in areas like kitchens and bathrooms, providing extra space for everything from cleaning supplies to pantry items. Hooks or racks can also be installed on the backs of doors, perfect for hanging bags, accessories, or even kitchen utensils.

Finally, consider vertical storage solutions in your closet. Adding tiered hangers, cascading hooks, or even a pegboard can transform a cluttered closet into a neatly organized space that makes the most out of every square foot.

By shifting your perspective and embracing the vertical dimensions of your home, you can create a stylish and functional living environment that keeps clutter at bay while enhancing your overall decor. So, take a moment to look up—your walls might just hold the key to a more organized and spacious home!

7. Innovative Closet Organization Tips

What are the best ways to add storage space to your home?
Credit : whatcanu.com

When it comes to maximizing your space, innovative closet organization can transform even the most chaotic of wardrobes into a beautifully curated collection. The closet is often one of the most underutilized areas in a home, but with a little creativity and strategic planning, it can serve as a functional oasis of order.

Start by evaluating your closet’s layout and consider using vertical space to your advantage. Installing shelves above hanging rods can provide additional storage for shoes, bags, or even seasonal clothing that you don’t need on a daily basis. Consider adding adjustable shelving units that can be customized to fit your needs as your wardrobe evolves.

Incorporating clear bins and labeled boxes can also enhance organization. Not only do they keep items visible and accessible, but they also create a clean, uniform look that makes it easy to see what you have. For a touch of flair, opt for stylish storage solutions—think woven baskets or decorative boxes that add a pop of color or texture while serving a practical purpose.

Another innovative approach is to use multi-functional hangers. These clever tools allow you to hang multiple pairs of pants or scarves in a single space, freeing up valuable real estate in your closet. Additionally, consider investing in cascading hangers to maximize hanging space for tops and dresses.

Don’t overlook the power of hooks and pegboards! They can be mounted on the inside of closet doors or on side walls to hold accessories, jewelry, or hats, making it easy to grab what you need while keeping everything neatly displayed.

Lastly, decluttering is an essential step in any organization project. Regularly assess your clothing and accessories, and consider donating items that no longer serve you. By streamlining your wardrobe, you create more space and make it easier to keep your closet organized.

With these innovative tips, your closet can become a functional and aesthetically pleasing part of your home, allowing you to maximize your space while simplifying your daily routine. Embrace the challenge of closet organization, and watch as your once-cluttered space transforms into a stylish sanctuary.

8. Repurposing Unused Areas (e.g., Hallways, Corners)

When it comes to maximizing storage in your home, one of the most effective yet often overlooked strategies is repurposing unused areas. Hallways and corners, for instance, are prime candidates for creative storage solutions that not only declutter your space but also add a unique flair to your decor.

**Hallways** are frequently just passageways, but with a little imagination, they can transform into functional storage areas. Consider installing floating shelves along the walls to display books, plants, or cherished photographs. This not only utilizes vertical space but also draws the eye, making the hallway feel more inviting. If you have a narrow hallway, slim cabinets or tall, narrow bookcases can fit snugly against the wall, providing hidden storage for shoes, bags, or even seasonal items.

**Corners**, on the other hand, are often the dark horses of home storage. Think about investing in corner shelving units that can fit into those awkward spaces. These shelves can be perfect for displaying decor or storing items like extra linens, craft supplies, or games. Corner cabinets with doors can also provide a tidy solution for concealing clutter while maximizing storage in a visually appealing way.

Another creative idea is to use the space above door frames. If you have high ceilings, consider adding shelves that can be accessed with a step stool. This is perfect for seldom-used items, like holiday decorations or family heirlooms, keeping them out of the way yet easily retrievable when needed.

By repurposing these often-ignored areas of your home, you can create functional and stylish storage solutions that enhance your living space. Not only do they make your home more organized, but they also add character and charm, proving that even the smallest nooks can make a big impact when it comes to storage!

9. The Benefits of Open Shelving

Open shelving has gained immense popularity in recent years, and for good reason. Not only does it offer a stylish and modern aesthetic, but it also serves as a practical solution for maximizing storage in your home. One of the primary benefits of open shelving is its ability to create an illusion of space. Unlike bulky cabinets that can make a room feel cramped, open shelves allow light to flow freely, making your area feel airy and expansive.

Moreover, open shelving encourages organization and accessibility. Items displayed on open shelves are easy to see and reach, reducing the time spent rummaging through closed cabinets. This can be particularly beneficial in a kitchen setting, where quick access to spices, utensils, and dishware can streamline your cooking process. By arranging your items thoughtfully, you can turn mundane kitchenware into a display of art, showcasing beautiful dishes, glassware, or even potted herbs.

In addition to practicality, open shelving offers a canvas for your creativity. You can mix and match various materials and styles, from rustic wooden shelves to sleek metal brackets, creating a personalized look that reflects your taste. Adorning the shelves with decorative items, such as picture frames, books, and plants, can add character to your space, making it feel warm and inviting.

Another significant advantage of open shelving is its cost-effectiveness. Compared to traditional cabinetry, shelves are often less expensive and easier to install, making them a great option for those looking to enhance their storage without breaking the bank. Plus, they can be a DIY project for those who enjoy hands-on home improvement.

However, it’s essential to consider the maintenance aspect of open shelving. Unlike closed cabinets, open shelves require regular cleaning and organization to maintain their visual appeal. Dust, fingerprints, and clutter can quickly diminish their charm, so committing to a routine of tidying up is crucial.

In conclusion, open shelving is a versatile storage solution that combines style and functionality. By embracing this trend, you can transform your home into a more organized, visually appealing space while enjoying the many benefits that come with it. So go ahead, unleash your creativity, and let your shelves tell your story!

10. Smart Storage Solutions for Small Kitchens

Kitchens often serve as the heart of the home, where culinary creativity and family gatherings come to life. However, when space is limited, maximizing every inch becomes essential. Here are some smart storage solutions that can transform your small kitchen into a functional and organized cooking haven.

**1. Vertical Space Utilization:** One of the most effective ways to enhance storage in any small kitchen is by looking upwards. Install floating shelves above countertops to display cookbooks, spices, or decorative jars. This not only frees up counter space but also adds a personal touch to your kitchen decor. Additionally, consider wall-mounted pot racks or magnetic strips for hanging knives, which keeps frequently used items within easy reach while saving drawer space.

**2. Under-Cabinet Storage:** The area beneath cabinets often goes underutilized. Install pull-out trays or baskets to store canned goods or kitchen gadgets that might otherwise clutter your countertops. Another great idea is to attach hooks or racks underneath cabinets for hanging mugs, utensils, or even a small dish towel.

**3. Multi-Functional Furniture:** Opt for kitchen islands or carts that offer additional storage and workspace. Many of these pieces come equipped with shelves or drawers, allowing you to store pots, pans, and other essentials right where you need them. Plus, they can easily be moved or tucked away when not in use, making them a versatile solution for compact kitchens.

**4. Creative Use of Cabinet Space:** Don’t overlook the power of organizers inside cabinets. Invest in tiered shelves to maximize vertical space inside your cupboards or use lazy Susans for easy access to spices and condiments. Drawer dividers can help keep utensils sorted and easy to find, while stackable bins can store small items without creating chaos.

**5. Door Storage:** The backs of cabinet doors are often a goldmine for extra storage. Attach racks or small bins to hold cutting boards, lids, or spices. This keeps items organized and prevents them from taking up valuable shelf space, ensuring everything has its place.

By implementing these smart storage solutions, even the smallest kitchens can feel spacious and efficient. With a little creativity and strategic planning, you can transform your culinary space into an organized oasis, making cooking and entertaining a joyful experience rather than a cluttered hassle. Embrace the challenge of small spaces and watch your kitchen flourish!

11. Bathroom Storage Hacks

When it comes to maximizing space in your home, the bathroom often presents unique challenges. Limited square footage combined with an array of toiletries, towels, and cleaning supplies can quickly turn this sanctuary into a cluttered mess. However, with a bit of creativity and clever organization, you can transform your bathroom into a functional and stylish oasis. Here are some ingenious bathroom storage hacks to help you reclaim that precious space.

**Utilize Vertical Space:** One of the most effective ways to create storage in a small bathroom is to think vertically. Install floating shelves above the toilet or sink area to store items like extra towels, decorative plants, or baskets filled with skincare products. This not only keeps your essentials within reach but also adds a decorative touch to your walls.

**Over-the-Door Organizers:** Don’t overlook the space behind your bathroom door! Over-the-door organizers can be a game-changer, providing additional storage for everything from hair tools to cleaning supplies. Look for clear pocket organizers for easy visibility or opt for a stylish fabric version that complements your decor.

**Magnetic Strips for Small Items:** For those tiny items that always seem to get lost, magnetic strips can be a lifesaver. Attach a strip to the inside of your bathroom cabinet door to hold bobby pins, tweezers, and other metal tools. This not only keeps them organized but also frees up drawer space for larger items.

**Utilize Baskets and Bins:** Embrace the power of baskets and bins to create a cohesive storage solution. Choose stylish wicker or fabric baskets to corral similar items together, such as bath products, first aid supplies, or makeup. Labeling each basket adds a personal touch while ensuring everyone in the household knows where to find and return items.

**Under-Sink Solutions:** The area under your sink is often underutilized. Consider installing a tiered shelving unit or stacking bins to maximize this space. You can store cleaning supplies, extra toilet paper, or even a small laundry basket for dirty towels. With a little creativity, this often-forgotten area can become a prime storage zone.

**Wall-Mounted Storage:** Wall-mounted baskets or racks can provide additional storage for frequently used items, keeping them easily accessible without taking up valuable counter space. Consider a wall-mounted hairdryer holder or a small shelf for skincare products to keep your bathroom looking tidy.

By implementing these bathroom storage hacks, you can create a more organized and functional space, allowing you to enjoy the tranquility of your bathroom without the stress of clutter. With a little ingenuity, even the smallest bathrooms can shine!

12. Outdoor Storage Ideas for Balconies and Patios

When it comes to maximizing your outdoor space, balconies and patios offer a unique challenge—and opportunity—for creative storage solutions. These areas often become catch-alls for gardening tools, outdoor furniture, and seasonal decorations, leaving little room for relaxation or enjoyment. However, with a bit of ingenuity, you can transform your balcony or patio into a stylish, functional oasis that accommodates both storage and leisure.

One of the most effective ways to create additional storage is through multifunctional furniture. Consider investing in benches with hidden compartments or storage ottomans that double as seating. These pieces allow you to stow away cushions, gardening supplies, or even children’s toys while maintaining a tidy appearance. Look for weather-resistant materials that can withstand the elements, ensuring your investment lasts for years.

Vertical space is often underutilized in outdoor areas, making vertical gardens or wall-mounted shelves a brilliant solution. Install floating shelves to display potted plants, decorative items, or even a mini herb garden. This not only adds a touch of greenery but also frees up valuable floor space. If you’re feeling adventurous, you could create a vertical garden using planters that hang from the wall—bringing nature closer while providing ample storage for your gardening tools and supplies.

Don’t forget about the power of decorative storage options! Wicker baskets or stylish storage bins can be placed in corners or on tabletops, adding both charm and functionality. These can hold anything from outdoor blankets to small gardening tools, all while enhancing the aesthetic of your outdoor space.

Finally, utilize the often-overlooked space under your balcony or patio. Consider installing a storage shed or using deck boxes to keep larger items like grill accessories, patio cushions, or sports equipment out of sight. These can also serve as seating if you choose the right design, adding even more utility to your outdoor area.

By implementing these creative outdoor storage solutions, you can transform your balcony or patio into a clutter-free retreat that invites relaxation and enjoyment, all while keeping your essentials easily accessible. Embrace the opportunity to maximize your space and make your outdoor area a true extension of your home!

13. Seasonal Storage: Tips for Organizing Your Belongings

When it comes to maximizing your space, seasonal storage is a game-changer that can help you reclaim valuable square footage in your home. As the seasons change, so do our storage needs, and being strategic about how you organize your belongings can make a significant difference. Here are some practical tips for tackling the clutter that comes with seasonal transitions.

**1. Assess and Purge:** Before diving into storage solutions, take the time to assess what you have. Go through your seasonal items—holiday decorations, winter clothing, summer gear—and decide what you really need. This is the perfect opportunity to declutter. Donate or discard items that haven’t been used in the past year, freeing up space and making your storage more efficient.

**2. Invest in Clear Bins:** Visibility is key when it comes to seasonal storage. Opt for clear plastic bins that allow you to see the contents without having to dig through each container. Label each bin clearly, specifying what’s inside and the season it belongs to. This will save you time and frustration when you need to access specific items.

**3. Utilize Vertical Space:** Make the most of your available space by thinking vertically. Install shelves in closets, use wall-mounted racks in garages, or consider over-the-door organizers for seasonal items that might otherwise clutter your living space. Vertical storage not only keeps items organized but also maximizes the square footage of any room.

**4. Create a Seasonal Rotation System:** Designate a specific area in your home for seasonal storage, whether it’s a closet, attic, or basement. As each season approaches, rotate items in and out of this space. For example, when spring arrives, swap out heavy winter coats and boots for lighter clothing and outdoor gear. This not only keeps your home organized but also ensures that you’re always ready for whatever the season brings.

**5. Think Outside the Box:** Consider unconventional storage solutions that could work for your space. Under-bed storage containers are perfect for stowing away off-season clothing or holiday decorations. Furniture with built-in storage, such as ottomans or benches, can also provide a dual function and keep your living areas tidy.

By implementing these seasonal storage tips, you can create a more organized home that evolves with your lifestyle. Not only will you maximize your available space, but you’ll also cultivate a sense of calm by minimizing clutter and making it easier to find what you need, exactly when you need it. Embrace the changing seasons and enjoy the newfound freedom that comes with a well-organized home!

14. DIY Storage Projects for the Creative Homeowner

If you’re a creative homeowner looking to add a personal touch to your space while maximizing storage, DIY storage projects offer an exciting avenue to explore. Not only do these projects allow you to tailor solutions that fit your specific needs, but they also provide a satisfying sense of accomplishment when you see your handiwork in action. Here are a few inspiring ideas to get your creative juices flowing:

**1. Repurposed Furniture:** Consider transforming an old dresser into a chic storage bench. With a little sanding, paint, and some cushions, you can create a stylish piece that serves as both seating and a place to stash shoes, blankets, or toys. Similarly, turn an unused wooden ladder into a unique bookshelf or display for plants and decorative items.

**2. Floating Shelves:** Floating shelves are an excellent way to make use of vertical space. You can build your own using reclaimed wood or purchase simple brackets and planks. Customize them in various lengths and colors to add visual interest to your walls while providing a perfect spot for books, picture frames, or collectibles.

**3. Under-Bed Storage:** Maximize the often-overlooked space under your bed by creating rolling storage bins. You can easily construct these from plywood or repurpose old drawers attached to wheels. This way, you can store seasonal clothing, shoes, or linens out of sight but still within easy reach.

**4. Wall-Mounted Organizers:** Get crafty with wall-mounted organizers made from pegboards or corkboards. These versatile boards can hold anything from crafts supplies to kitchen utensils, keeping your essentials organized and at hand. You can paint them to match your decor, adding both functionality and flair.

**5. Multi-Functional Ottomans:** Why not build your own ottoman that doubles as storage? By using a sturdy box and adding a padded top, you can create a stylish piece that provides both a footrest and a place to store blankets, magazines, or remote controls.

These DIY storage projects not only help you reclaim space but also allow you to express your creativity and style throughout your home. So gather your tools, unleash your imagination, and turn clutter into clever solutions that reflect your personality while keeping your home organized.

15. Conclusion: Embracing Minimalism and Smart Design

As we conclude our exploration of creative storage solutions, it’s essential to acknowledge that maximizing your space goes beyond merely adding shelves or cabinets. It is about embracing a mindset of minimalism paired with smart design principles that transform your home into a sanctuary of organization and tranquility.

Minimalism encourages us to declutter our lives, allowing only the items that bring us joy or serve a purpose to occupy our spaces. This approach not only frees up physical room but also contributes to a sense of mental clarity and calm. By reducing the number of possessions we own, we create an environment that feels more expansive and inviting, making it easier to maintain.

Smart design, on the other hand, leverages the principles of functionality and aesthetics to ensure that every inch of your home serves a dual purpose. Think about multi-functional furniture—like a coffee table that doubles as storage or a bed with built-in drawers. Incorporating vertical shelving or utilizing the often-overlooked areas under stairs can significantly enhance your storage capabilities without sacrificing style.

Together, minimalism and smart design create a harmonious living space that reflects your personal style while being practical. As you implement these creative storage solutions, remember that the ultimate goal is not just to store more, but to cultivate an environment that promotes a balanced, organized lifestyle. Embrace this journey, and you’ll find that the right balance between form and function can lead to a home that feels both spacious and serene.

As we wrap up our exploration of creative solutions for adding storage to your home, we hope you feel inspired to transform your spaces into organized, functional havens. Whether it’s utilizing vertical wall space, investing in multifunctional furniture, or embracing clever storage hacks, the possibilities are endless when it comes to maximizing your home’s potential. Remember, a well-organized space not only enhances your home’s aesthetic but also contributes to a more serene and stress-free living environment. So, roll up your sleeves and get started on these projects—your dream of a clutter-free home is just a few creative solutions away! We’d love to hear about your own storage transformations, so feel free to share your ideas and successes with us in the comments!

How to create a stylish and functional kitchen island?

The kitchen is often considered the heart of the home, a gathering place where culinary adventures unfold and memories are made.

At the center of this vibrant space, a stylish and functional kitchen island can serve as the ultimate multifunctional hub, blending practicality with aesthetic appeal. Whether you’re a passionate home chef looking to elevate your cooking experience, a busy parent needing extra prep space, or an entertainer seeking a chic setting for social gatherings, a well-designed kitchen island can transform your cooking area into a dynamic environment. In this blog post, we’ll explore innovative ideas and practical tips on how to create a kitchen island that not only enhances the style of your space but also maximizes its functionality, ensuring that it becomes the go-to spot for both everyday meals and special occasions. Get ready to reimagine your kitchen and discover how the perfect island can redefine your culinary experience!

1. Introduction: The Benefits of a Kitchen Island

How to create a stylish and functional kitchen island?
Credit : whatcanu.com

A kitchen island is more than just a functional addition to your cooking space; it is the heart of your kitchen and can dramatically transform the way you interact with this essential area of your home. Imagine a versatile surface where culinary creativity flourishes, where family and friends gather for casual meals, and where kids can complete their homework while you prepare dinner. The benefits of incorporating a kitchen island extend beyond mere aesthetics, offering a blend of style, functionality, and social connection.

One of the primary advantages of a kitchen island is the additional workspace it provides. Whether you are chopping vegetables, rolling out dough, or assembling elaborate meals, having that extra counter space can make cooking a more enjoyable and efficient process. Furthermore, many kitchen islands come equipped with storage solutions, such as cabinets and drawers, allowing you to keep your kitchen organized and clutter-free. This added functionality ensures that essential tools and ingredients are within arm’s reach, making meal preparation a breeze.

In addition to practicality, a well-designed kitchen island can serve as a stunning focal point in your kitchen. With an array of materials, colors, and styles to choose from, it can reflect your personal taste and complement the overall design of your home. Whether you opt for a sleek, modern look with a quartz countertop or a rustic farmhouse style with reclaimed wood, the right kitchen island can elevate your space and create an inviting atmosphere.

Moreover, a kitchen island fosters social interaction, making it an ideal spot for entertaining guests. Picture hosting a dinner party where conversations flow effortlessly as your friends gather around the island, enjoying appetizers and drinks while you finish preparing the main course. This communal space encourages connection and makes your kitchen the go-to hub for gatherings.

In summary, the benefits of a kitchen island are vast and varied, enhancing both the functionality and aesthetics of your home. As we delve deeper into this guide, we will explore the essential elements to consider when designing your dream kitchen island, ensuring it becomes a beloved feature of your culinary space for years to come.

2. Assessing Your Space: Measuring and Planning

Creating a stylish and functional kitchen island begins with a crucial step: assessing your space. This phase is all about measurement and thoughtful planning, ensuring your new island not only enhances your kitchen’s aesthetic but also fits seamlessly into your existing layout.

Start by taking precise measurements of your kitchen, noting the dimensions of the room, the location of windows, doorways, and any existing fixtures such as cabinets and appliances. A well-planned island should complement your kitchen’s flow, so consider how different areas are utilized. For instance, if you often entertain guests, a larger island with seating options can encourage social interaction. If your kitchen is compact, a smaller, multifunctional island that doubles as a prep area might be more suitable.

When measuring, allow for ample walking space around the island. A general rule of thumb is to maintain a clearance of at least 36 to 48 inches on all sides to ensure easy movement, especially when multiple people are in the kitchen. Visualize your design by using painter’s tape to outline the island’s dimensions on the floor. This will give you a palpable sense of how the island will fit within the overall space and help you gauge sightlines and accessibility.

Additionally, think about the functionality you desire from your island. Will it serve as a cooking station, a breakfast bar, or a homework hub? Planning for electric outlets, storage solutions, and even built-in appliances will elevate your island’s utility. By carefully measuring and planning, you can ensure your kitchen island not only looks stunning but also enhances the overall functionality of your kitchen, making it the heart of your home.

3. Choosing the Right Style: Modern, Rustic, or Traditional?

How to create a stylish and functional kitchen island?
Credit : whatcanu.com

Selecting the right style for your kitchen island is crucial, as it sets the tone for the entire space and reflects your personal aesthetic. With three popular styles to consider—modern, rustic, and traditional—understanding the nuances of each can help you make a choice that harmonizes with the existing décor of your kitchen while also fulfilling your functional needs.

**Modern Style:** If you lean towards sleek lines and minimalist design, a modern kitchen island is your go-to. Characterized by clean, geometric shapes and a neutral color palette, modern islands often feature materials like stainless steel, quartz, or glass. These islands are not just visually appealing but also highly functional, often integrating smart technology, ample storage, and even built-in appliances. Imagine a spacious island with a waterfall countertop, seamlessly blending beauty and functionality, perfect for a contemporary kitchen where style and efficiency reign supreme.

**Rustic Style:** For those who favor warmth and charm, a rustic kitchen island can evoke a sense of coziness and nostalgia. Typically crafted from reclaimed wood or distressed finishes, these islands often showcase natural textures and earthy tones that bring the outdoors inside. Think of a large farmhouse table-style island adorned with vintage-inspired accessories—perhaps a butcher block surface for food prep, open shelving for displaying cookbooks, and mason jar decor that adds a personal touch. A rustic island not only serves practical purposes but also becomes the heart of the home, inviting family and friends to gather and share meals.

**Traditional Style:** If you appreciate classic elegance, a traditional kitchen island might be the perfect fit. This style often features ornate details, intricate moldings, and rich wood tones that exude sophistication. Traditional islands may include additional elements like decorative legs, raised panels, and even an antique finish that tells a story of timeless craftsmanship. These islands serve as a beautiful focal point, often complementing cabinetry and fixtures to create a cohesive and inviting space. With the right design, a traditional island can enhance the overall warmth of your kitchen while providing essential functionality for cooking and entertaining.

Ultimately, the style you choose should reflect your personality and lifestyle. Whether you opt for the sleek lines of modernity, the warmth of rustic charm, or the timeless elegance of tradition, your kitchen island can be a stylish and functional centerpiece that transforms your culinary space into a haven of creativity and comfort.

4. Material Matters: Selecting Countertops and Cabinetry

When it comes to creating a stylish and functional kitchen island, the choice of materials for countertops and cabinetry can make all the difference. Not only do they define the aesthetic of your space, but they also play a crucial role in the durability and functionality of your kitchen.

**Countertops** are one of the most prominent features of an island, acting as both a workspace and a visual focal point. Consider materials that suit your lifestyle and cooking habits. For a sleek, modern look, quartz and marble are popular choices, each offering a unique blend of beauty and resilience. Quartz is non-porous and low-maintenance, making it ideal for busy kitchens. Marble, on the other hand, boasts a timeless elegance, though it requires more care to maintain its pristine appearance.

If you’re seeking a rustic charm, butcher block countertops can provide warmth and a touch of homey appeal. They are perfect for those who love to cook, as they are gentle on knives and can be refinished when they show wear. For a more industrial vibe, consider concrete countertops, which offer a unique, customizable look that can be both stylish and incredibly durable.

**Cabinetry**, too, plays a pivotal role in the overall design of your kitchen island. Choose cabinetry that complements your countertops and aligns with your design vision. Shaker-style cabinets offer a classic and versatile look, while sleek, flat-panel cabinets can enhance a contemporary aesthetic. Material choices range from solid wood to high-quality laminate, each offering distinct advantages. Solid wood provides durability and a rich, authentic feel, while laminate can offer a more budget-friendly and low-maintenance option.

Beyond aesthetics, consider the functionality of your cabinetry. Incorporate features like pull-out shelves, deep drawers for pots and pans, or open shelving to display your favorite cookbooks and decorative items. Thoughtfully designed cabinetry not only enhances the visual appeal of your kitchen island but also makes cooking and entertaining more efficient and enjoyable.

In conclusion, when selecting materials for your kitchen island, prioritize both style and practicality. By choosing the right countertops and cabinetry, you can create a stunning centerpiece that elevates your kitchen’s design while ensuring it meets your everyday needs.

5. Functional Features: Incorporating Storage Solutions

How to create a stylish and functional kitchen island?
Credit : whatcanu.com

When it comes to designing a kitchen island that is both stylish and functional, incorporating smart storage solutions is essential. A well-thought-out island can serve as the heart of your kitchen, offering not only additional workspace but also a clever way to maximize storage in an often-limited area.

Begin by considering the layout of your kitchen and the specific items you need to store. Deep drawers for pots and pans are a must; they keep everything organized and easily accessible while eliminating the hassle of rummaging through cluttered cabinets. Pull-out shelves can be a game changer, allowing you to effortlessly reach the items at the back without awkwardly bending over.

If you’re short on space, think vertically. Open shelving above the island can display your favorite cookbooks, stylish dishes, or even decorative items. This not only adds a personal touch but also encourages organization and easy access. For those looking to keep the countertop clear, a concealed trash bin integrated into the island is a practical solution, ensuring waste is out of sight yet still within reach.

Consider adding a wine rack or cubby for cookbooks, which not only looks chic but also reflects your culinary interests while keeping everything within arm’s reach. If you’re a baking enthusiast, designing a dedicated section for baking sheets and mixing bowls could elevate your cooking game, making it easier to pivot from prep to bake.

Lastly, don’t forget about electrical storage. Including outlets in your island design allows for convenient access to power, whether you need to plug in a mixer or charge your devices.

By thoughtfully incorporating these functional features into your kitchen island, you can create a space that is not only aesthetically pleasing but also enhances your cooking experience, making your kitchen the ultimate gathering spot for family and friends.

6. Seating Arrangements: Bar Stools vs. Dining Chairs

When designing your kitchen island, the choice of seating can significantly influence both its functionality and aesthetic appeal. Two popular options are bar stools and dining chairs, each bringing distinct characteristics to your space.

**Bar Stools:** If you envision a casual, lively atmosphere, bar stools might be your best bet. Their height naturally complements the elevated surfaces of most kitchen islands, allowing for a comfortable perch that encourages social interaction. Available in a variety of styles, materials, and colors, bar stools can become a focal point in your kitchen. Opt for sleek, modern designs in metal or wood for a contemporary look, or choose upholstered stools for a touch of warmth and comfort. Additionally, consider stools with adjustable height features or swivel capabilities for added versatility, making it easy for family and friends to gather around during meal prep or casual snacking.

**Dining Chairs:** On the other hand, if you prefer a more formal or traditional dining experience, dining chairs could be the perfect addition to your kitchen island. Their wider bases and lower heights can create a seamless transition between your kitchen and dining areas, providing comfortable seating for longer meals or family gatherings. Dining chairs offer the opportunity to mix and match styles, allowing for a more personalized and eclectic look. You can choose from a variety of materials, from rustic wooden chairs to sleek upholstered designs, ensuring that your seating complements the overall decor of your kitchen.

Ultimately, the decision between bar stools and dining chairs comes down to your lifestyle and design preferences. Think about how you plan to use your kitchen island: is it a space for quick breakfasts, or a gathering spot for family dinners? By carefully considering your seating arrangements, you can create a kitchen island that is not only stylish but also functional, elevating the heart of your home to new heights.

7. Lighting Design: Enhancing Your Kitchen Island with Illumination

How to create a stylish and functional kitchen island?
Credit : whatcanu.com

Lighting design plays a crucial role in elevating the aesthetic and functional aspects of your kitchen island. A well-lit island not only enhances the overall ambiance of the kitchen but also serves practical purposes, making meal prep, cooking, and socializing more enjoyable.

To start, consider layering your lighting. A combination of ambient, task, and accent lighting can create a warm and inviting atmosphere while ensuring that the island is adequately illuminated for various activities. Pendant lights are a popular choice, hanging gracefully above the island to provide focused light right where you need it. Choose fixtures that reflect your style—whether sleek and modern or rustic and vintage—to add personality to your space.

In addition to pendant lights, under-cabinet lighting can be a game-changer. This soft glow not only brightens the countertop but also highlights any beautiful materials or textures you’ve chosen for your island, such as a stunning marble or rich wood finish. LED strip lights are an excellent option for this; they are energy-efficient and can be easily installed to create a seamless look.

Don’t overlook the importance of dimmers. Installing dimmable switches allows you to control the intensity of the light, adapting the mood of your kitchen island for different occasions, from lively gatherings with friends to quiet family dinners.

Lastly, consider the color temperature of your lighting. Warmer tones create a cozy environment, perfect for family gatherings, while cooler tones can lend a more contemporary feel, ideal for cooking and meal prep. By thoughtfully designing the lighting around your kitchen island, you not only enhance functionality but also create a space that invites connection and creativity, making your kitchen the heart of your home.

8. Color Schemes: Harmonizing with Your Kitchen Aesthetic

When it comes to designing the perfect kitchen island, the color scheme you choose plays a pivotal role in harmonizing the island with your overall kitchen aesthetic. This is not just about picking a color that looks good; it’s about creating a cohesive visual flow that enhances the beauty and functionality of your space.

Start by considering the existing colors in your kitchen. If you have a neutral palette featuring whites, grays, or beiges, you might want to incorporate a bold accent color for your island to create a striking focal point. Deep navy or a rich, earthy green can add depth and sophistication, transforming your island into a statement piece. Alternatively, if your kitchen already boasts vibrant hues, opt for a complementary or analogous shade to maintain visual harmony without overwhelming the senses.

Textures also play a crucial role in your color scheme. Pairing a smooth, glossy finish with a matte or textured surface can add dimension and intrigue. For instance, a sleek white marble countertop atop a warm wooden base can create a beautiful contrast that invites touch and interaction. Consider the materials of your cabinetry, countertops, and flooring as you choose colors; consistency across these elements will help tie the space together seamlessly.

Don’t forget the impact of lighting on your color choices. Natural light can shift the perception of colors throughout the day, while pendant lights or under-cabinet lighting can cast delightful warm tones or cooler shades. Test your color selections in various lighting conditions to ensure they evoke the desired mood and complement your kitchen’s overall design.

Lastly, remember that the kitchen is often the heart of the home, where family and friends gather. Choose colors that not only reflect your personal style but also create an inviting atmosphere. Soft pastels can evoke a sense of calm, while vibrant, energetic tones can inspire creativity and conversation. By thoughtfully harmonizing your kitchen island’s color scheme with your kitchen’s aesthetic, you’ll create a space that is both stylish and functional, welcoming all who enter.

9. Adding Personal Touches: Décor and Accessories

When it comes to creating a kitchen island that truly reflects your personality and lifestyle, adding personal touches through décor and accessories is key. This is the stage where functionality meets individuality, transforming your kitchen island from a mere workstation into a vibrant focal point that exudes warmth and style.

Start by selecting decorative items that resonate with your taste. Perhaps a collection of rustic wooden bowls filled with fresh fruits can introduce a pop of color and a touch of nature. Not only do they serve a practical purpose, but they also create a welcoming atmosphere. Consider displaying a few cookbooks that not only provide culinary inspiration but also showcase your love for cooking. Stacking them on the countertop or propping them up with a decorative stand can add an inviting touch.

Lighting is another essential element that can elevate the aesthetic of your kitchen island. Pendant lights hung above the island can create a dramatic effect, providing both illumination and style. Opt for fixtures that complement the overall theme of your kitchen—whether you prefer modern, industrial, or farmhouse styles, the right lighting can enhance the ambiance and make your island a gathering place for family and friends.

Incorporate personal accessories that tell your story. A stylish vase filled with fresh flowers can add a touch of elegance and vibrancy, while unique kitchen gadgets or artisanal serving trays can showcase your culinary passion. If you love to entertain, consider adding a chic wine rack or a selection of your favorite cookbooks, ensuring your island is not just functional but also a conversation starter.

Lastly, don’t forget about textiles! A couple of well-placed placemats or a soft runner can add warmth and comfort, inviting everyone to gather around. By thoughtfully selecting décor and accessories, you can create an island that is not only stylish but also a true reflection of who you are, making your kitchen the heart of your home.

10. Maximizing Utility: Integrating Appliances and Sinks

When it comes to creating a stylish and functional kitchen island, maximizing utility is key—especially when considering the integration of appliances and sinks. An island isn’t just a beautiful centerpiece; it can also serve as a powerhouse of functionality, streamlining your cooking and entertaining experiences.

Start by envisioning your island as a multi-functional workspace. If space allows, incorporate a cooktop or a built-in stovetop that transforms your island into the heart of culinary activity. This allows you to engage with family and guests while preparing meals, making your kitchen a more sociable environment. Pair this with a ventilation hood overhead to maintain air quality and keep your cooking area pleasant.

Next, consider integrating a sink into your island design. A wet bar or prep sink can be a game-changer for meal prep and cleanup. This addition not only enhances convenience but also keeps the workflow efficient—allowing you to rinse vegetables or wash hands without having to traverse back and forth to the main sink. Select a stylish faucet that complements your overall kitchen aesthetic, adding a touch of elegance while enhancing functionality.

For those looking to elevate their kitchen island further, think about incorporating under-counter appliances, such as a wine fridge or a microwave. These hidden gems can free up counter space and offer easy access to beverages and snacks for entertaining without cluttering the surface.

Lastly, ensure that your island has ample storage solutions. Open shelving can add style and accessibility, while drawers and cabinets can keep utensils, pots, and pans neatly tucked away. Organizing your kitchen tools within reach keeps your workspace tidy and efficient.

By thoughtfully integrating appliances and sinks into your kitchen island design, you’ll create a space that not only looks incredible but also works hard for you, transforming your kitchen into a hub of style and functionality that you’ll love for years to come.

11. DIY vs. Professional Installation: Making the Right Choice

When it comes to installing a kitchen island, one of the most pivotal decisions you’ll face is whether to undertake the project yourself or hire a professional. Both options come with their own set of advantages and challenges, and making the right choice depends on various factors, including your skill level, budget, and the complexity of the installation.

**DIY Installation: The Hands-On Approach**
For those who relish a challenge and have a knack for home improvement, a DIY installation can be a rewarding endeavor. It allows you to personalize every aspect of your kitchen island, from the materials used to the final aesthetics. There are countless online resources, tutorials, and community forums that can guide you through the process, making it accessible even for novice DIYers. Additionally, tackling the project yourself can save you a significant amount of money, which can be redirected towards high-quality materials or enhancements. However, it’s crucial to be realistic about your skills and the time commitment involved. If you’re not well-versed in carpentry or plumbing, you might find yourself facing unexpected hurdles that could delay your project and lead to frustration.

**Professional Installation: Expertise at Your Service**
On the other hand, hiring a professional can streamline the process and ensure a polished finish. Experienced contractors bring a wealth of knowledge and skills, allowing them to navigate potential pitfalls and complexities with ease. They can also help with things like electrical work, plumbing, and ensuring that the island adheres to local building codes—elements that can be daunting for an inexperienced DIYer. While the initial cost may be higher, the peace of mind that comes from knowing the job will be done right can be well worth the investment. Plus, professionals often have access to better tools and resources, which can enhance the quality of the final product.

Ultimately, the decision between DIY and professional installation hinges on your confidence in your abilities and your willingness to invest time and energy into the project. Whichever route you choose, a well-planned kitchen island can transform your cooking space into a hub of style and functionality, making it the heart of your home.

12. Budgeting: Cost Considerations and Tips for Savings

When it comes to creating a stylish and functional kitchen island, budgeting is a crucial step that can make or break your project. The cost of a kitchen island can vary widely based on materials, size, and design complexity. To ensure you stay on track financially, it is essential to assess your budget early in the planning process.

Start by outlining your overall kitchen renovation budget, then determine how much of that you can allocate specifically for the island. Consider essential expenses such as materials, labor, and any additional features you wish to include, such as built-in appliances or seating. Custom islands, for instance, can significantly increase costs, while a DIY approach using ready-made components may offer substantial savings.

To maximize your budget, consider these tips for savings:

1. **Explore Multiple Options**: Visit local home improvement stores and browse online marketplaces for diverse materials and designs. Sometimes, off-the-shelf solutions can offer a more budget-friendly alternative to custom-built options without sacrificing style.

2. **Repurpose Materials**: If you’re feeling creative, think about incorporating reclaimed wood or salvaged materials. Not only does this add unique character to your island, but it can also be a cost-effective choice.

3. **Prioritize Functionality Over Aesthetics**: While aesthetics are important, ensure that functionality remains at the forefront of your design. Consider how you intend to use your island—whether for cooking, dining, or entertaining—and allocate your budget towards features that will enhance usability.

4. **Plan for the Future**: Think long-term when budgeting for your kitchen island. Investing in higher-quality materials may have a higher upfront cost but can lead to greater durability and less frequent need for replacement or repairs.

5. **Seek Professional Advice**: Consulting with a kitchen designer or contractor can provide insights into potential cost-saving measures. They can help you make informed decisions about what elements are worth splurging on and which can be scaled back.

By carefully considering these cost factors and tips, you can create a kitchen island that seamlessly blends style and functionality while remaining within your budget. Remember, a well-planned kitchen island can enhance both the aesthetics and the efficiency of your cooking space, making it a worthwhile investment in your home.

13. Maintenance Tips for Your Kitchen Island

Once you’ve invested time and creativity into crafting the perfect kitchen island, maintaining its beauty and functionality becomes essential. Regular upkeep not only extends the life of your island but also keeps it looking its best, ensuring it continues to be the heart of your kitchen for years to come. Here are some practical maintenance tips to keep your kitchen island in top shape.

**1. Regular Cleaning:** Start with the basics—keeping your island clean. Use a soft cloth and a gentle cleanser suitable for the surface material, whether it’s wood, granite, or quartz. For wooden islands, opt for a wood-safe cleaner and always wipe in the direction of the grain to prevent scratches. For stone surfaces, consider a pH-balanced cleaner to avoid damaging the finish.

**2. Sealing and Protecting:** If your kitchen island features wood, be sure to apply a quality sealant or finish regularly to protect it from moisture and spills. For stone surfaces, periodic resealing can help maintain their luster and prevent staining. Check the manufacturer’s recommendations for the best sealing schedules based on your material type.

**3. Avoid Heat Damage:** Be cautious with hot pots and pans directly on the surface. Always use trivets or hot pads to protect your island from heat damage, especially if it’s made of wood or has a delicate finish. A little prevention goes a long way in maintaining its appearance.

**4. Address Scratches Promptly:** Over time, your kitchen island may experience scratches or dents. For wooden surfaces, a simple touch-up with a wood marker or a bit of wax can work wonders. For stone surfaces, consult with a professional for more significant repairs to avoid further damage.

**5. Organize and Declutter:** A functional kitchen island does more than just look good; it serves as a workspace. Regularly organize items on your island, keeping only essentials and decorative pieces that enhance the overall aesthetic. A clutter-free surface not only looks appealing but also makes cleaning easier.

**6. Inspect for Wear and Tear:** Take the time to regularly inspect your kitchen island for any signs of wear, loose hardware, or structural issues. Addressing these concerns early can prevent more extensive repairs down the line, ensuring your kitchen island remains a stylish and functional centerpiece.

By incorporating these simple maintenance tips, you’ll not only preserve the beauty of your kitchen island but also enhance its functionality, making it a beloved gathering spot for family and friends for years to come.

14. Real-Life Examples: Inspiring Kitchen Island Transformations

When it comes to kitchen islands, inspiration can be found in an array of styles, designs, and functionalities that cater to various tastes and needs. Here, we delve into real-life examples of kitchen islands that have undergone stunning transformations, showcasing the creativity and innovation that can be achieved in this central hub of the home.

**The Rustic Charm Revival**
In a cozy farmhouse-style kitchen, a once-plain island was transformed into a stunning focal point with reclaimed wood and a live-edge countertop. The warm tones of the wood complemented the white cabinetry, while industrial-style pendant lights hung overhead, adding a touch of modernity. This island not only serves as a prep space but also features open shelving for displaying beautiful dishware and cookbooks, blending functionality with charm.

**Modern Minimalist Marvel**
In a sleek urban apartment, a kitchen island was reimagined as a minimalist masterpiece. Crafted from pure white quartz with clean lines, it features an integrated sink and a subtle overhang for casual dining. The island’s streamlined design enhances the open-concept layout, making it feel spacious and airy. The use of hidden storage beneath the island ensures that everything needed for meal prep is neatly tucked away, maintaining the aesthetic of simplicity.

**Multi-Functional Family Hub**
In a bustling family home, the kitchen island was transformed into a multi-functional hub to accommodate the needs of a busy lifestyle. This renovation included a built-in breakfast nook on one side with comfortable seating for casual meals and homework sessions. On the opposite side, a dual-level countertop allowed for designated prep space and dining, while cabinets and drawers provided ample storage for kitchen essentials, toys, and games. Bright, cheerful colors and playful decor made this island a beloved gathering spot for the whole family.

**Gourmet Chef’s Dream**
For the culinary enthusiast, a kitchen island can be a chef’s paradise. In one example, a homeowner transformed their kitchen island into a culinary workspace equipped with a professional-grade cooktop, a warming drawer, and a separate prep sink. The island’s surface was enhanced with a durable and heat-resistant material, perfect for baking and cooking adventures. With strategically placed lighting and a built-in spice rack, this kitchen island became a dream come true for anyone who loves to cook and entertain.

These real-life examples illustrate that a kitchen island can be much more than a simple countertop; it can be a stylish centerpiece that enhances both the aesthetic and functionality of your kitchen. Whether you lean towards rustic charm, modern minimalism, family-friendly designs, or gourmet culinary spaces, the possibilities are endless. Let these transformations inspire your own kitchen island project, and create a space that reflects your personal style while meeting your functional needs.

15. Conclusion: Enjoying Your Stylish and Functional Kitchen Space

In conclusion, creating a stylish and functional kitchen island is not just about aesthetics; it’s about enhancing the way you interact with your space. As the heart of the home, the kitchen deserves to be both beautiful and practical, serving as a gathering spot for family and friends while also elevating your cooking experience.

By thoughtfully considering your needs—from storage solutions to seating arrangements—you can design an island that reflects your personal style and fits seamlessly into your daily routine. Whether you choose a bold color to make a statement, opt for durable materials that withstand the rigors of daily use, or incorporate smart technology to streamline meal prep, the possibilities are endless.

As you step back to admire your newly transformed kitchen, take a moment to envision the memories that will be created around your island. Picture yourself hosting lively dinner parties, enjoying casual breakfasts with loved ones, or simply sipping coffee while planning your day. A well-designed kitchen island is more than just a functional piece; it’s an invitation to enjoy the culinary adventures that await.

So, embrace the process, let your creativity flow, and enjoy every moment spent in your stylish and functional kitchen space. You’ve earned it!

In conclusion, creating a stylish and functional kitchen island can truly transform your cooking space into a hub of creativity and comfort. By thoughtfully considering your design choices, materials, and the practical elements that suit your lifestyle, you can craft an island that not only enhances the aesthetic appeal of your kitchen but also meets your everyday needs. Whether you envision a sleek marble top for culinary adventures, a cozy breakfast bar for family gatherings, or ample storage to declutter your kitchen, the possibilities are endless. We hope you feel inspired to embark on this exciting project and make your kitchen the heart of your home. Share your kitchen island transformations with us—we can’t wait to see how you bring your vision to life!

What are the different types of home security systems?

In an era where safety and peace of mind are paramount, understanding the various home security systems available is more essential than ever.

With the rise in smart technology and innovative solutions, homeowners are faced with a plethora of options designed to protect their sanctuaries. Whether you’re a first-time homeowner looking to enhance your security, or someone seeking to upgrade an outdated system, navigating the landscape of home security can feel overwhelming. From traditional alarm systems and modern smart devices to comprehensive surveillance setups, each option presents its own unique benefits and features. In this comprehensive guide, we will explore the different types of home security systems, their functionalities, and how to choose the right one to suit your specific needs. Join us as we delve into the world of home protection, ensuring that you can make informed decisions to safeguard your home and loved ones.

1. Introduction to Home Security

What are the different types of home security systems?
Credit : whatcanu.com

In an increasingly unpredictable world, the importance of home security cannot be overstated. Our homes are not just physical structures; they are sanctuaries where we create memories, find comfort, and seek refuge from the outside chaos. However, as crime rates fluctuate and new security technologies emerge, homeowners face the pressing challenge of ensuring the safety of their living spaces.

Understanding the various types of home security systems available is the first step in effectively protecting your home and loved ones. From traditional alarm systems to cutting-edge smart home technology, the options are abundant and often overwhelming. Each system comes with its own set of features, advantages, and price points, making it essential to identify the best fit for your unique needs and lifestyle.

In this comprehensive guide, we will delve into the myriad of home security solutions, exploring everything from basic alarm systems to sophisticated surveillance cameras, smart locks, and integrated home automation systems. We’ll discuss how each type can enhance your home’s security, provide peace of mind, and ultimately, help you create a safe haven for you and your family. Whether you’re a first-time homeowner or looking to upgrade your existing setup, this guide will equip you with the knowledge you need to make informed decisions about safeguarding your home. Let’s embark on this journey to explore the world of home security together.

2. The Importance of Home Security Systems

In today’s world, the importance of home security systems cannot be overstated. As our lives become increasingly intertwined with technology, so too do the risks associated with our personal safety and property. A home security system serves as both a deterrent and a safeguard, ensuring that our sanctuaries remain safe havens for our families.

The primary function of a home security system is to protect against intrusions. Studies have shown that homes without security measures are significantly more likely to be targeted by burglars. Just the presence of security cameras or alarm signs can discourage potential intruders, as they are often searching for easy targets. A comprehensive system not only dissuades criminals but also provides peace of mind for homeowners, knowing that they have taken proactive steps to protect their belongings and loved ones.

Moreover, home security systems have evolved far beyond simple alarms. Today’s systems can include smart technology that allows homeowners to monitor their properties remotely via smartphones or tablets. Features such as real-time alerts, video surveillance, motion detection, and smart locks provide a multi-layered approach to security. This flexibility enables homeowners to customize their systems according to their specific needs, whether they require monitoring for a bustling household or a more understated solution for a quieter residence.

In addition to protecting against theft, many modern systems also provide safeguards against other threats, such as fire, carbon monoxide, and water damage. Integrated sensors can alert homeowners to these dangers, potentially saving lives and preventing extensive damage to the home.

Ultimately, investing in a home security system is about more than just theft prevention; it’s about creating a sense of security and control in an unpredictable world. It empowers homeowners, allowing them to protect what matters most and create a safe environment for their families to thrive. As we explore the various types of home security systems available, it’s essential to recognize that the right system can significantly enhance not only your property’s safety but also your overall quality of life.

3. Overview of Different Types of Home Security Systems

What are the different types of home security systems?
Credit : whatcanu.com

When it comes to safeguarding your home, understanding the various types of security systems available is crucial. Each system offers unique features and benefits, catering to different needs and preferences. Here’s a comprehensive overview of the most popular home security systems to help you determine which one is right for you.

**1. Monitored Security Systems**
Monitored security systems are professionally managed services that provide round-the-clock surveillance of your home. These systems include alarms, cameras, and sensors that alert a central monitoring station in case of a breach. If an alarm is triggered, trained personnel can promptly contact local authorities, ensuring rapid response times. This option is ideal for those who want peace of mind knowing that their home is being monitored even when they are away.

**2. Unmonitored Security Systems**
Unmonitored systems operate independently, allowing homeowners to take charge of their security. They typically include alarms and cameras that activate when triggered, notifying the homeowner via text or app alerts. While these systems can be more cost-effective, they require a proactive approach from the homeowner to respond quickly to alerts. This option suits those who prefer hands-on management of their security.

**3. Wireless Security Systems**
Wireless security systems have gained popularity due to their ease of installation and flexibility. These systems utilize Wi-Fi or cellular connections to communicate, eliminating the need for cumbersome wiring. Homeowners can easily install cameras, motion sensors, and alarms without professional assistance. Additionally, many wireless systems offer mobile app integration, allowing users to monitor their homes remotely from their smartphones.

**4. Wired Security Systems**
Wired security systems consist of hardwired connections between various components, such as cameras, alarms, and control panels. While they often require professional installation, wired systems are typically more reliable and less susceptible to interference than their wireless counterparts. This option is ideal for homeowners looking for a robust and stable security solution, particularly in larger properties.

**5. Smart Home Security Systems**
The rise of smart technology has transformed the home security landscape. Smart home security systems integrate with devices like smart locks, doorbell cameras, and smart lights, allowing for a fully connected security experience. Through a single app, homeowners can control all aspects of their security system and receive real-time alerts. This option is perfect for tech-savvy individuals looking for a modern, customizable solution.

**6. DIY Security Systems**
For those who prefer a more hands-on approach, DIY security systems offer customizable solutions that homeowners can install and manage themselves. These systems often come with user-friendly interfaces and modular components, allowing you to tailor your security setup according to your specific needs. DIY systems can be a cost-effective choice and provide the flexibility to expand or adjust your security measures as necessary.

Understanding the various types of home security systems is essential for making an informed decision that aligns with your lifestyle and safety needs. Whether you opt for a monitored system for peace of mind or a DIY setup for flexibility, the right security solution can protect your home and provide reassurance for you and your family.

4. Traditional Alarm Systems: Pros and Cons

When it comes to home security, traditional alarm systems have long been a staple for homeowners seeking peace of mind. These systems typically consist of a series of sensors placed at entry points, such as doors and windows, along with a central control panel that communicates with a monitoring service. However, like any security solution, traditional alarm systems come with their own set of advantages and drawbacks.

**Pros:**

One of the most significant benefits of traditional alarm systems is their reliability. These systems are designed to trigger an alarm when unauthorized access is detected, alerting both homeowners and monitoring services. This immediate response can deter potential intruders and significantly reduce response times in emergencies. Additionally, traditional systems often come with a straightforward installation process and can be easily integrated with existing home infrastructure.

Another major advantage is the peace of mind they provide. Knowing that your home is monitored around the clock can alleviate stress, especially for families or individuals living in areas with higher crime rates. Many homeowners appreciate the simplicity of a direct connection to a professional monitoring service that can contact authorities if an alarm is triggered.

**Cons:**

However, traditional alarm systems are not without their limitations. One notable drawback is the reliance on landline connections. While many modern systems have adapted to use cellular connections or internet protocols, older models may still depend on phone lines, which can be cut by intruders to disable the security system. Additionally, while monitoring services provide a sense of safety, they can come at a cost. Monthly fees for professional monitoring can add up over time, making it a less appealing option for budget-conscious homeowners.

Furthermore, traditional alarm systems often lack the flexibility and advanced features of more modern security technologies. For instance, they may not offer smartphone integration, real-time alerts, or the ability to remotely control your system. This can leave homeowners feeling disconnected from their security measures, particularly if they travel frequently or spend long hours away from home.

In conclusion, traditional alarm systems offer a proven and reliable method for securing your home, but it’s essential to weigh their pros and cons against your specific needs and preferences. By understanding these factors, you can make an informed decision that best suits your lifestyle and enhances your overall home security strategy.

5. Wireless Security Systems: Benefits and Features

What are the different types of home security systems?
Credit : whatcanu.com

Wireless security systems have gained immense popularity in recent years, revolutionizing the way we think about home protection. These systems offer a host of benefits that make them an attractive option for homeowners looking to enhance their security measures without the hassle of complicated wiring and installations.

One of the most significant advantages of wireless security systems is their ease of installation. Unlike traditional wired systems, which often require professional installation and extensive modifications to your home, wireless systems can be set up quickly and easily by the homeowner. Most systems come with user-friendly manuals and all the necessary components, allowing you to have your security in place within a few hours. This convenience is especially appealing for renters or those who may not want to make permanent changes to their property.

Another compelling feature of wireless security systems is their flexibility and scalability. You can easily add or remove components such as cameras, motion detectors, and door/window sensors as your security needs change. This adaptability means that whether you’re moving to a new home or simply want to upgrade your system, wireless solutions can grow with you. Additionally, many wireless systems offer mobile app integration, enabling you to monitor your home from anywhere. With real-time alerts and notifications sent directly to your smartphone, you can keep an eye on your property no matter where you are.

Furthermore, wireless security systems often come equipped with advanced features, including high-definition video surveillance, two-way audio, and smart home integration. This means you can not only view live feeds from your cameras but also communicate with visitors or potential intruders through your system. Many modern wireless systems even support compatibility with voice-activated assistants like Amazon Alexa or Google Assistant, allowing for seamless control and automation.

Lastly, the aesthetic appeal of wireless systems shouldn’t be overlooked. Without the need for visible wires and bulky equipment, these systems can blend more seamlessly into your home’s décor. Many devices are designed to be discreet and stylish, maintaining the look and feel of your living space while providing top-notch security.

In summary, wireless security systems offer an array of benefits, including easy installation, flexibility, advanced features, and a sleek design. As you explore your options in home security, consider how these systems can provide peace of mind while keeping your home safe and secure.

6. Smart Home Security Systems: What You Need to Know

In today’s technology-driven world, smart home security systems are revolutionizing the way we protect our homes. These systems integrate seamlessly with your existing smart devices, offering a level of convenience and control that traditional security solutions simply can’t match. Imagine being able to monitor your home from anywhere in the world, adjusting settings, and receiving real-time alerts all from the palm of your hand. This is the promise of smart home security.

Smart home security systems typically include a combination of cameras, motion sensors, smart locks, and alarms, all interconnected via your Wi-Fi network. Many systems allow you to access live video feeds through a mobile app, enabling you to keep an eye on your property while you’re away. Some even offer advanced features such as facial recognition technology and night vision capabilities, providing an extra layer of security and peace of mind.

One of the key benefits of these systems is their adaptability. You can customize your setup to fit your specific needs, whether that means adding more cameras to cover blind spots or integrating smart lighting to deter intruders. Moreover, many smart security devices also work with voice assistants like Amazon Alexa or Google Assistant, allowing you to control your home security with simple voice commands.

However, it’s essential to consider the potential drawbacks. Smart home security systems rely heavily on your Wi-Fi connection, which means that if your internet goes down, so does your security. Additionally, the convenience of connectivity can make these systems vulnerable to hacking if not properly secured. Therefore, investing in strong passwords and keeping your software updated is crucial.

When exploring your options, look for systems that offer robust encryption and consider those that provide professional monitoring services as an additional layer of protection. Ultimately, smart home security systems can offer unparalleled convenience and peace of mind, making them an excellent choice for anyone looking to enhance their home security strategy. Whether you’re a tech enthusiast or simply seeking a more efficient way to protect your home, understanding the ins and outs of smart security can help you make an informed decision that best fits your lifestyle.

7. Video Surveillance Systems: Types and Uses

What are the different types of home security systems?
Credit : whatcanu.com

Video surveillance systems have become an integral part of modern home security, offering a visual deterrent to intruders and peace of mind to homeowners. These systems come in various types, each tailored to meet specific needs and preferences, ranging from basic setups to sophisticated networks equipped with advanced features.

**1. Analog Cameras:** Traditionally, many homes were equipped with analog cameras that transmit video signals to a digital video recorder (DVR). While these cameras can still provide reliable monitoring, their resolution is often lower compared to newer technologies. However, they remain a cost-effective option for those seeking to enhance their security without breaking the bank.

**2. IP Cameras:** Internet Protocol (IP) cameras have revolutionized the surveillance landscape. These digital cameras connect directly to the internet, allowing for high-definition video quality and remote access via smartphones or computers. This capability not only enables homeowners to monitor their property in real time but also to store footage in the cloud, providing easy retrieval and longer storage durations.

**3. Wireless Cameras:** For those seeking a hassle-free installation process, wireless cameras are the perfect solution. Without the need for extensive wiring, these cameras can be placed virtually anywhere around your home, making them highly versatile. Many wireless options also come equipped with battery power, ensuring they continue to operate during power outages.

**4. Dome Cameras:** Designed for both indoor and outdoor use, dome cameras are known for their discreet design. Typically mounted on ceilings, these cameras deter vandalism while providing a wide field of view. Their sleek appearance makes them a popular choice for residential settings, especially in areas like porches or living rooms.

**5. Bullet Cameras:** Recognizable by their elongated shape, bullet cameras are ideal for outdoor surveillance. Their focused lens allows for precise monitoring of specific areas, such as driveways or entryways. Many models also come with weatherproof casings, ensuring durability against the elements.

**6. PTZ Cameras:** Pan-Tilt-Zoom (PTZ) cameras offer dynamic monitoring capabilities, allowing users to move the camera remotely and zoom in on specific activities. This flexibility is particularly useful for larger properties or areas requiring comprehensive coverage, as it enables a single camera to monitor multiple angles.

**7. Smart Cameras:** With the rise of smart home technology, many homeowners are now opting for smart cameras that integrate seamlessly with their existing home automation systems. These cameras can send alerts to your phone, recognize faces, and even activate other smart devices, providing a comprehensive security solution at your fingertips.

Video surveillance systems not only enhance your home’s security but also provide valuable evidence in the event of an incident. By understanding the various types available and their specific uses, you can make an informed decision that best suits your home’s security needs, ensuring that your property remains safe and secure.

8. Monitored vs. Unmonitored Security Systems

When it comes to choosing a home security system, one of the most critical decisions you’ll face is whether to opt for a monitored or unmonitored setup. Each type offers distinct advantages and drawbacks that can significantly influence your home’s safety and your peace of mind.

**Monitored Security Systems** operate with a direct connection to a professional monitoring service. This means that if your alarm is triggered, a team of trained professionals is immediately alerted and can respond swiftly to any potential threats. They can contact local authorities on your behalf, ensuring that help arrives as quickly as possible. This level of vigilance is particularly beneficial for those who may be away from home for extended periods or for individuals who want the reassurance that someone is always watching over their property. Furthermore, many monitored systems come equipped with mobile apps that allow you to check your home’s status in real-time, receive alerts, and even control your system remotely.

On the other hand, **Unmonitored Security Systems** function independently, typically relying on audible alarms or notifications sent directly to the homeowner’s mobile device. While they can deter potential intruders with loud alarms, there’s no professional oversight to respond to incidents. This option may appeal to those who prefer a more hands-on approach to security or those who are comfortable being their own first line of defense. Unmonitored systems usually come with a lower upfront cost and can be easier to install, making them an attractive choice for budget-conscious homeowners. However, they require a more proactive stance from the homeowner, who must be prepared to respond to alerts and potential threats.

Ultimately, the choice between monitored and unmonitored security systems will depend on your lifestyle, budget, and personal preferences. Some homeowners even choose to combine both methods, utilizing a monitored system for peace of mind while employing unmonitored elements for additional layers of security. Whichever path you choose, understanding the differences between these two types of systems is essential in crafting a security strategy that best protects your home and loved ones.

9. DIY Home Security Solutions: Is It Right for You?

In today’s tech-savvy world, DIY home security solutions have gained immense popularity, allowing homeowners to take security into their own hands. But before you rush to purchase the latest gadgets, it’s essential to evaluate whether a DIY approach aligns with your specific needs and lifestyle.

DIY security systems generally come equipped with user-friendly interfaces and smartphone compatibility, enabling you to monitor your home from anywhere at any time. For the tech enthusiasts among us, the idea of customizing a system with motion sensors, door/window alarms, and security cameras can be enticing. These systems often allow you to pick and choose components based on your home’s unique layout, which can be both empowering and economical.

However, take a moment to consider your comfort level with technology and installation. While many systems boast easy setup processes, not everyone may feel confident in handling wires, configurations, and software downloads. If you’re someone who prefers a hands-off approach, a professionally installed system might be a more suitable option. Additionally, remember that with DIY systems, you are often responsible for monitoring and responding to alerts, which can be a significant commitment.

Another important factor to consider is the level of security you require. For instance, if you live in a neighborhood with a history of break-ins or have valuable possessions that need extra protection, a professional system may offer the comprehensive coverage and rapid response capabilities that DIY solutions typically lack. On the other hand, if your home is in a low-risk area and you’re seeking basic protection, a DIY system may be just what you need.

Ultimately, the right choice hinges on your specific situation. Weigh the pros and cons, assess your comfort with technology, and determine the level of security you desire. DIY home security solutions can be a fantastic way to ensure peace of mind, but only if they fit seamlessly into your lifestyle and security needs.

10. Key Features to Look for in a Home Security System

When it comes to selecting the right home security system for your needs, understanding the key features available can make all the difference in ensuring your home is well-protected. Here are some essential elements to consider:

1. **Monitoring Options**: One of the fundamental aspects of any security system is how it is monitored. Look for options that offer professional monitoring, which provides 24/7 surveillance by trained experts who can respond quickly in case of an emergency. Additionally, consider self-monitoring capabilities that allow you to receive alerts on your smartphone, giving you control over your home’s security even when you’re away.

2. **Smart Home Integration**: In today’s digital age, the ability to integrate your security system with other smart devices is crucial. Look for systems that are compatible with smart home technology, allowing you to control lights, locks, and cameras from a single app. This seamless integration not only enhances convenience but also enables you to create automated routines for added security.

3. **Camera Quality and Features**: High-definition cameras are a must-have for any home security system. Look for systems that offer 1080p resolution or higher, with features such as night vision, motion detection, and two-way audio. These capabilities allow you to monitor your property in real-time, communicate with visitors, and receive alerts when unusual activity is detected.

4. **Alarm System**: An effective alarm system serves as a deterrent to potential intruders. When evaluating your options, ensure the system includes a robust array of sensors—door/window sensors, glass break sensors, and motion detectors. The alarm should also be loud enough to alert you and your neighbors in the event of a break-in, providing an additional layer of protection.

5. **Ease of Installation and Use**: The best security systems are those that are user-friendly and easy to install. Many modern systems offer DIY installation options with clear instructions and online support. Additionally, intuitive mobile apps make it simple for you to monitor your home and adjust settings on the go.

6. **Battery Backup**: Power outages can leave your home vulnerable, so it’s important to choose a security system with battery backup. This feature ensures that your system remains operational during electrical failures, providing peace of mind even in unexpected situations.

7. **Customer Support and Warranty**: Finally, consider the level of customer support offered by the security provider. Reliable customer service can be invaluable when you encounter issues or have questions about your system. Additionally, look for warranties that cover both equipment and service, ensuring that you are protected against defects and unexpected problems.

By keeping these key features in mind, you can choose a home security system that not only meets your specific needs but also provides comprehensive protection for your home and loved ones. In a world where safety is paramount, investing time in selecting the right security features can safeguard your peace of mind for years to come.

11. Integrating Home Security with Smart Home Devices

Integrating home security with smart home devices is not just a trend; it’s a strategic move that enhances both convenience and safety. As technology continues to advance, homeowners have the unique opportunity to create a seamless and interconnected environment that fortifies their security measures while simplifying their daily routines.

Imagine arriving home after a long day, where your smart doorbell greets you with a video feed of who has been at your door, while your smart locks automatically disengage as you approach. This level of integration ensures that you are always aware of who is entering your space, bolstering your security system and providing peace of mind.

Smart security cameras, equipped with motion detection and real-time alerts, can be synchronized with your home automation system. This means you can monitor your property from anywhere through your smartphone, receiving instant notifications if any unusual activity is detected. Some advanced systems even allow for two-way audio communication, enabling you to interact with visitors or deter potential intruders directly from your device.

Moreover, integrating your security system with smart lighting can further enhance your home’s security. For example, you can program your outdoor lights to turn on automatically when motion is detected or schedule them to illuminate at specific times, creating the illusion that someone is home even when you’re away. This not only deters potential burglars but also adds an extra layer of safety as you navigate your home in the dark.

Additionally, voice-controlled assistants like Amazon Alexa or Google Assistant can be a valuable part of your smart home security setup. With simple voice commands, you can monitor your security cameras, lock doors, or turn on alarms without lifting a finger. This hands-free approach ensures that you can manage your home security effortlessly, whether you’re entertaining guests or simply relaxing on the couch.

As you explore various home security options, consider how integrating smart devices can create a cohesive and responsive system that adapts to your lifestyle. By leveraging these technologies, you can not only protect your home but also enhance your overall living experience, making home security an integral part of your smart home ecosystem.

12. Tips for Choosing the Right Home Security System

Choosing the right home security system can feel overwhelming, given the multitude of options available today. However, a well-informed decision can provide peace of mind and ensure your home is adequately protected. Here are some essential tips to guide you through the selection process:

1. **Assess Your Security Needs**: Start by evaluating your specific security requirements. Consider factors such as the size of your home, the number of entry points, and your neighborhood’s crime rate. A larger home may necessitate a comprehensive system with multiple cameras and sensors, while a smaller apartment might only need a basic setup.

2. **Research Different Types of Systems**: Familiarize yourself with various security systems available on the market. Wired systems, wireless systems, and smart home integrations each have their advantages and disadvantages. Wireless systems are generally easier to install and expand, while wired systems may offer more reliability. Smart home systems can provide added convenience but might require a more substantial initial investment.

3. **Look for Scalability**: When investing in a home security system, consider whether it can grow with your needs. A scalable system allows you to add new components, such as cameras or sensors, as your security requirements change or as your home expands.

4. **Evaluate Monitoring Options**: Decide whether you prefer a self-monitored system or one that comes with professional monitoring services. Professional monitoring can provide an added layer of security, as trained personnel will respond to alerts and notify authorities if necessary. On the other hand, self-monitored systems can save you money but require you to be vigilant about monitoring your home.

5. **Consider Integration with Other Smart Devices**: If you already have smart home devices, look for a security system that can seamlessly integrate with them. This could include smart locks, doorbell cameras, or smart lighting, allowing you to control everything from a single app and enhancing your overall home automation experience.

6. **Read Customer Reviews**: Before making a final decision, take the time to read customer reviews and testimonials. This can give you insights into the performance and reliability of different systems, helping you avoid common pitfalls or poorly rated products.

7. **Compare Costs**: Finally, establish a budget and compare the costs of different systems. Keep in mind that the initial price isn’t the only factor—consider ongoing costs such as subscription fees for monitoring services or replacement parts for maintenance.

By following these tips, you can make an informed choice when selecting a home security system that best fits your lifestyle and ensures the safety of your home and loved ones. Remember, investing in the right security measures today can save you from potential threats tomorrow.

13. Common Home Security Myths Debunked

When it comes to home security, misinformation can lead to poor decisions and increased vulnerability. In this section, we’ll explore some of the most common myths surrounding home security systems and debunk them, providing clarity that can help you make informed choices to protect your home.

**Myth 1: Home Security Systems Are Only for the Wealthy**
One of the biggest misconceptions is that security systems are a luxury reserved for affluent homeowners. In reality, a vast range of affordable options exists today, making security accessible to everyone. With DIY systems and smart technology, protecting your home can fit any budget.

**Myth 2: Security Systems Are Complicated to Use**
Many people believe that home security systems are too complex to operate, which deters them from investing in one. However, modern security solutions are designed with user-friendliness in mind. From intuitive mobile apps to easy setup processes, today’s systems are more straightforward than ever, allowing homeowners to monitor their properties with ease.

**Myth 3: Dogs Are Enough to Deter Burglars**
While having a dog can provide a sense of security, relying solely on a pet for protection is a myth. Many burglars are undeterred by barking dogs, especially if they know the home is left unoccupied. A comprehensive security system that includes alarms, cameras, and motion detectors is crucial for effective protection.

**Myth 4: Security Cameras Are Only for the Outside**
Another common myth is that security cameras are only necessary for outdoor surveillance. In truth, interior cameras can be just as important, especially to monitor vulnerable areas like entryways or hallways. They can help deter intruders and provide valuable evidence in case of a breach.

**Myth 5: Alarms Are Enough on Their Own**
Many homeowners believe that having a loud alarm is sufficient to protect their property. While alarms are a vital component of a security system, they work best when paired with monitoring services. Professional monitoring ensures rapid response to alarms, increasing the likelihood of preventing theft or damage.

By debunking these myths, homeowners can better understand the importance of a comprehensive security strategy. Empower yourself with accurate information and take the necessary steps to safeguard your home effectively!

14. Maintenance and Upgrades for Your Home Security System

When it comes to home security systems, the initial installation is just the beginning of your safety journey. Regular maintenance and timely upgrades are crucial to ensuring that your system continues to function optimally and effectively protects your home. Think of your security system as a living entity that requires ongoing care and attention.

First and foremost, routine maintenance checks are essential. Just like any technology, security systems can experience wear and tear over time. It’s important to inspect all components—cameras, sensors, alarms, and locks—to make sure they are operational and free from obstructions. For instance, outdoor cameras should be cleaned regularly to prevent dirt and debris from obstructing their view, while sensors must be tested to ensure they are sensitive enough to detect potential intruders.

Another key aspect of maintaining your home security system is software updates. Many modern security solutions come equipped with smart technology that relies on software to function effectively. Keeping this software updated not only enhances performance but also eliminates vulnerabilities that could be exploited by cybercriminals. Take the time to check for updates from your security provider and implement them promptly.

Upgrades are also an important consideration in advancing your security measures. As technology evolves, new features and capabilities are introduced that can significantly enhance your home’s safety. For example, you might consider upgrading to a system that integrates smart home technology, allowing you to control lights, locks, and cameras all from a single app. Additionally, the integration of artificial intelligence can improve your system’s ability to distinguish between regular activity and potential threats, reducing false alarms and increasing your overall peace of mind.

Lastly, don’t forget to reassess your security needs periodically. As your lifestyle changes—whether due to a new family member, a move, or even a change in neighborhood dynamics—so too should your security strategy. Regularly revisiting your home security plan ensures that it remains effective and relevant, keeping you one step ahead of potential threats.

By prioritizing maintenance and proactive upgrades for your home security system, you not only extend its lifespan but also bolster your peace of mind, knowing that your home is continually protected against evolving risks.

15. Conclusion: Finding the Best Security Solution for Your Home

In conclusion, selecting the best security solution for your home is a nuanced process that requires careful consideration of various factors, including your lifestyle, budget, and specific security needs. As we’ve explored throughout this guide, there are a multitude of options available, from traditional alarm systems to sophisticated smart home integrations. Each type of system comes with its own set of features, benefits, and potential drawbacks, making it essential to assess what aligns best with your personal circumstances.

Before making a final decision, take the time to evaluate the layout of your home, identify vulnerable areas, and consider the level of monitoring you desire. For instance, a simple DIY system may suffice for a small apartment, while a larger home might benefit from a professionally installed and monitored solution. Additionally, don’t overlook the importance of user-friendly technology—after all, the best security system is one that you can easily manage and maintain.

As you weigh your options, remember to read reviews, seek recommendations, and, if possible, consult with security professionals who can provide insights tailored to your unique situation. Investing in the right home security system not only protects your property and loved ones but also provides peace of mind, allowing you to enjoy your home fully.

Ultimately, the goal is to create a secure environment that meets your needs while fitting seamlessly into your lifestyle. By taking the time to research and reflect on your choices, you’ll be well-equipped to make an informed decision and find the perfect security solution to safeguard your home for years to come. Your safety is paramount—choose wisely and take the first step toward a more secure future.

As we conclude our exploration of home security systems, we hope this comprehensive guide has illuminated the diverse options available to protect your home and loved ones. From traditional alarm systems to advanced smart home integrations, understanding the various types of security measures empowers you to make informed decisions tailored to your unique needs. Remember, investing in a reliable security system is not just about safeguarding your property; it’s about creating peace of mind for you and your family. As you embark on this important journey, take the time to evaluate your priorities, budget, and lifestyle to find the perfect solution. Your home deserves the best protection, and we’re excited for you to take the next steps toward a safer living environment. Stay vigilant, stay safe, and don’t hesitate to reach out with any questions or share your experiences in the comments below!

How to choose the right window treatments?

Choosing the right window treatments can seem like a daunting task, but it plays a crucial role in defining the ambiance and functionality of your living space.

From cascading drapes that evoke a sense of elegance to sleek blinds that offer modern minimalism, the options are both vast and varied. The perfect window treatments not only enhance the aesthetic appeal of your home but also provide essential benefits like privacy, light control, and energy efficiency. In this ultimate guide, we will navigate the myriad of styles, materials, and functionalities available, helping you to consider your unique needs, preferences, and the overall design of your rooms. Whether you’re aiming for a cozy, rustic feel or a bright, contemporary vibe, our comprehensive insights will empower you to make informed decisions that transform your windows into stunning focal points. Get ready to elevate your home decor with treatments that perfectly blend style and practicality!

1. Understanding Your Needs: Function vs. Aesthetics

How to choose the right window treatments?
Credit : whatcanu.com

When it comes to selecting window treatments for your home, the first step is to clearly understand your needs, weighing the balance between function and aesthetics. Each window serves not only as a portal to the outside world but also plays a crucial role in the overall ambiance of your living space. Therefore, defining your priorities is essential.

Start by considering the functional aspects of your window treatments. Do you need them primarily for privacy, light control, or insulation? For example, if your home is in a bustling urban area, privacy might be your top priority. In this case, you may lean towards thicker drapes or shades that block the view from outside while allowing some ambient light to filter through. Conversely, if you’re looking to enhance energy efficiency, blackout curtains or thermal shades could be your best bet, as they help regulate temperature and reduce energy costs.

On the other hand, aesthetics cannot be overlooked. The right window treatments can transform a room, adding a layer of elegance or a pop of color that complements your decor. Consider the fabric, texture, and pattern that align with your home’s style. Are you aiming for a modern minimalist look, or do you prefer a more traditional, cozy feel? Fabrics such as linen or cotton can add a casual charm, while silk or velvet can infuse a touch of luxury.

Ultimately, the ideal window treatment should harmoniously blend functionality with your desired aesthetic, creating a space that is both practical and visually appealing. Take the time to envision how each option will interact with your home’s natural light, view, and overall design scheme. By clearly understanding your needs, you can make informed choices that enhance both the utility and beauty of your living spaces.

2. Types of Window Treatments: An Overview

When it comes to selecting the ideal window treatments for your home, understanding the various types available is essential to making an informed decision. Window treatments can significantly influence the aesthetics, functionality, and comfort of your living spaces, and with an array of options on the market, it’s easy to feel overwhelmed. Here, we provide an overview of the most popular types of window treatments, each offering unique benefits and styles to suit your needs.

**1. Curtains and Drapes:**
These classic window treatments come in countless fabrics, patterns, and lengths, allowing for versatile styling options. Curtains are typically lighter and can add a breezy feel to a room, while drapes are more formal, often lined for additional insulation and light blocking. Whether you prefer sheer panels to let in soft light or heavy fabrics for a dramatic effect, curtains and drapes can transform any space.

**2. Blinds:**
Blinds offer a practical solution for light control and privacy. Available in materials like wood, faux wood, aluminum, and vinyl, blinds come in various styles, including horizontal and vertical options. Their adjustable slats allow for precise control over the amount of light entering your home, making them a popular choice for many homeowners.

**3. Shades:**
Shades provide a sleek and minimalist look, often made from fabric or woven materials. They come in several styles, such as roller shades, Roman shades, and cellular shades, each offering distinct features. Cellular shades, for instance, are known for their energy efficiency, trapping air to insulate your home. Shades can also be found in blackout options, ideal for bedrooms or media rooms.

**4. Shutters:**
Shutters are an elegant and durable choice that adds a touch of sophistication to any room. Available in plantation or traditional styles, shutters are typically made from wood or vinyl, offering excellent light control and insulation. They can be custom-fitted to your windows for a seamless look, enhancing both the exterior and interior of your home.

**5. Valances:**
For those looking to add a decorative touch without overwhelming the window, valances are a perfect choice. These short treatments are hung at the top of the window, providing an opportunity to introduce color and texture. Valances can be paired with blinds or shades to create a layered look that adds depth to your decor.

**6. Cornices:**
Similar to valances, cornices are structured, often upholstered treatments that cover the top of the window. They provide a more tailored finish and can be custom-made to match your interior design. Cornices are excellent for hiding hardware or providing an architectural element to your window decor.

Each type of window treatment has its unique advantages, so it’s essential to consider your personal style, budget, and the specific needs of each room when making your decision. By exploring these options, you can create a harmonious and inviting atmosphere in your home while enhancing its overall functionality.

3. Measuring Your Windows: Getting Accurate Dimensions

How to choose the right window treatments?
Credit : whatcanu.com

Measuring your windows accurately is a crucial step in selecting the perfect window treatments for your home. The right measurements ensure that your curtains, blinds, shades, or drapes will fit seamlessly, enhancing the aesthetic appeal of your space while also providing the functionality you need. Here’s how to get it right.

Start by gathering the necessary tools: a reliable measuring tape, a pencil, and a notepad to jot down your dimensions. It’s best to have a second person assist you, especially for larger windows, as this can make the process smoother and more accurate.

When measuring, you’ll want to consider both the width and height of the window. For the width, measure from the outer edges of the window frame—this will ensure that your treatments cover the entire window area, blocking out light effectively and providing privacy. If you plan to mount your treatments outside the frame, add an extra 2 to 4 inches on each side to create an illusion of a larger window and to allow for better light control.

Next, measure the height. Start from the top of the window frame to the desired length. You can choose to let your treatments hang just above the sill, below the sill, or even all the way to the floor, depending on the style you’re aiming for. If you’re considering floor-length curtains, be sure to also account for how they will sit on the floor—whether you prefer them to skim the surface, puddle slightly, or hang with a clean finish.

Lastly, if your windows have any architectural details, such as crown molding or decorative trim, take those into account as well. Your measurements should reflect the overall look you want to achieve, providing a polished finish that complements your home’s decor.

Taking the time to measure correctly will save you from the hassle of returns and exchanges later on. With accurate dimensions in hand, you’ll be well on your way to selecting window treatments that perfectly fit your style and window specifications, transforming your living space into a cozy and inviting haven.

4. Choosing the Right Fabric: Considerations for Style and Function

When it comes to selecting window treatments, the fabric you choose plays a pivotal role in defining both the aesthetic appeal and functionality of your space. The right fabric can enhance your home’s style, regulate light, and even contribute to energy efficiency. Here are some key considerations to keep in mind when choosing the perfect fabric for your window treatments.

**1. Aesthetic Harmony:** Start by considering the overall design of your room. The fabric should complement your existing decor, whether you favor a modern, minimalist look or a more traditional, cozy atmosphere. For a light and airy feel, sheer fabrics can create a soft, ethereal ambiance, while heavier materials like velvet or brocade add a touch of elegance and sophistication.

**2. Light Control:** Think about how much natural light you want to let in. Lightweight fabrics allow for generous light flow, making them ideal for spaces where you want to maintain a bright, open feel. On the other hand, if privacy is a priority, opt for thicker, blackout fabrics that can effectively block out sunlight and create a serene environment, perfect for bedrooms or media rooms.

**3. Durability and Maintenance:** Consider the practicalities of your lifestyle. If you have pets or small children, you may want to select fabrics that are more durable and easy to clean. Synthetic fabrics like polyester or blends can withstand wear and tear and are often stain-resistant, making them a smart choice for high-traffic areas. Additionally, consider whether the fabric is machine washable or requires professional cleaning to maintain its appearance.

**4. Insulation and Energy Efficiency:** Fabrics can also play a significant role in your home’s energy efficiency. Heavier fabrics can provide better insulation, helping to keep your home warm in the winter and cool in the summer. Look for energy-efficient fabrics, such as thermal-lined options, to help regulate indoor temperatures and reduce heating and cooling costs.

**5. Texture and Layering:** Don’t forget about texture! Mixing different fabric types can add depth and visual interest to your window treatments. Consider layering sheer and opaque materials to create a more dynamic look. For instance, a sheer curtain can soften the light while a heavier drape adds drama and warmth when drawn.

Ultimately, the fabric you choose for your window treatments should reflect your personal style while meeting the functional needs of your space. By carefully considering these factors, you can create window treatments that not only enhance the beauty of your home but also provide the comfort and practicality you desire.

5. Light Control Options: Sheer, Blackout, and Everything In Between

How to choose the right window treatments?
Credit : whatcanu.com

When it comes to window treatments, one of the most significant factors to consider is how much light control you desire in your spaces. The right choice can dramatically alter the ambiance of a room, influence energy efficiency, and even impact your mood. Understanding the various options available—sheer, blackout, and everything in between—will empower you to make an informed decision that enhances both functionality and aesthetics in your home.

**Sheer Treatments:** If your goal is to invite natural light while maintaining a sense of privacy, sheer window treatments are an ideal choice. These lightweight fabrics filter sunlight, creating a soft, diffused glow that brightens your space without the harsh glare. Sheer curtains are perfect for living rooms or dining areas where you want to enjoy the view outside while keeping prying eyes at bay. They lend an ethereal quality to your decor, making rooms feel airy and open. However, keep in mind that sheer options will do little to block out heat or cold, so pairing them with heavier drapes might be beneficial in extreme weather conditions.

**Blackout Treatments:** On the other end of the spectrum, blackout window treatments are designed to completely block out light, making them a fantastic choice for bedrooms, home theaters, or nurseries. These treatments not only provide complete darkness but also offer added insulation, helping to keep your home cooler in the summer and warmer in the winter. Available in various styles—from roller shades to curtains—blackout options come in a range of colors and patterns, allowing you to maintain your design aesthetic while ensuring a good night’s sleep or uninterrupted movie nights.

**Everything In Between:** For those who desire flexibility, consider options that strike a balance between sheer and blackout. Light-filtering shades allow some natural light to enter while still offering a degree of privacy and UV protection. Dual-layer treatments, featuring both sheer and blackout fabrics, let you easily transition between light and privacy depending on the time of day or your mood. Cellular shades, with their unique honeycomb structure, provide insulation while allowing soft light to filter through, making them a versatile choice for various rooms.

Ultimately, your choice in light control should align with your lifestyle, the specific needs of each room, and your personal style. By exploring the diverse range of window treatment options available, you can create spaces that are not only beautifully designed but also perfectly suited to your light and privacy preferences.

6. Insulation and Energy Efficiency: Keeping Your Home Comfortable

When it comes to window treatments, insulation and energy efficiency are crucial factors that can significantly influence the comfort of your home. Not only do well-chosen treatments enhance the aesthetic appeal of your space, but they can also play a vital role in regulating indoor temperatures, reducing energy costs, and creating a more sustainable living environment.

Consider the material and style of your window treatments carefully. For instance, thicker fabrics, such as blackout curtains or thermal drapes, can provide excellent insulation by blocking out cold drafts in the winter and keeping your home cool during the sweltering summer months. These dense materials trap air, creating a barrier that reduces heat loss, making them an ideal choice for energy-conscious homeowners.

Another option to explore is cellular shades, which feature a unique honeycomb structure that traps air within the cells, acting as an effective insulator. This innovative design helps maintain a consistent indoor temperature, allowing you to enjoy a cozy atmosphere without relying heavily on heating or cooling systems.

In addition to fabric choices, consider the installation and operation of your window treatments. Opting for custom-fit blinds or shades can minimize gaps that allow drafts to enter or conditioned air to escape, further enhancing energy efficiency. Furthermore, motorized window treatments can be programmed to open and close at specific times, maximizing natural light while minimizing heat gain.

By selecting window treatments that prioritize insulation and energy efficiency, you not only contribute to a comfortable and inviting home but also take meaningful steps towards reducing your carbon footprint and lowering your utility bills. In a world increasingly focused on sustainability, making informed choices about window coverings is an investment in both your home and the environment.

7. Style and Design: Complementing Your Home’s Décor

How to choose the right window treatments?
Credit : whatcanu.com

When it comes to selecting window treatments, style and design play a crucial role in tying together your home’s overall aesthetic. The right window coverings can accentuate your interior design, enhance your space’s functionality, and even elevate your mood. Think of your windows as a blank canvas; the treatments you choose can either make a bold statement or seamlessly blend into the background.

First, consider the existing décor of each room. Is your style modern and sleek, or do you lean more towards a cozy, traditional vibe? For contemporary spaces, you might opt for minimalist roller shades or chic sheer panels that allow light to filter through while maintaining a clean look. Conversely, if your home boasts classic charm, elegant drapes in rich fabrics or ornate valances can add an element of sophistication and warmth.

Color is another essential factor. Window treatments can either match or contrast with your wall colors and furnishings. If your room features a neutral palette, consider adding a pop of color with bright curtains or patterned blinds to create visual interest. Alternatively, for rooms filled with vibrant hues, soft-toned or muted treatments can provide balance and prevent overwhelming the senses.

Furthermore, texture should not be overlooked. Mixing materials, such as pairing soft linen curtains with sleek wooden blinds, can introduce depth to your space. The interplay of different textures can create a warm and inviting atmosphere, enticing guests to linger longer.

Lastly, don’t forget about the functionality of your chosen treatments. Think about how you want to control light and privacy in each room. Layering options, such as combining sheer and blackout curtains, can provide flexibility to adapt to varying needs throughout the day.

In essence, choosing window treatments is not just about functionality; it’s an opportunity to express your personal style while enhancing the beauty of your home. With the right selection, your windows can become a stunning focal point that complements every aspect of your décor.

8. Popular Window Treatment Styles: Curtains, Blinds, Shades, and More

When it comes to window treatments, the variety of options available can be both exciting and overwhelming. Each style offers its own unique aesthetic and functional benefits, allowing you to tailor your home’s ambiance to your personal taste and lifestyle needs. Here’s a closer look at some of the most popular window treatment styles that can transform your space.

**1. Curtains:**
Curtains are a classic choice that can add warmth and elegance to any room. Available in an endless array of fabrics, colors, and patterns, they can serve as a focal point or a subtle complement to your decor. From sheer, gauzy panels that filter light delicately to heavy drapes that block out sunlight and provide privacy, curtains can be tailored to suit any mood or purpose. Additionally, they can be hung high and wide to create the illusion of taller windows and a more spacious room.

**2. Blinds:**
For those who prefer a more structured look, blinds are an excellent option. Made from materials such as wood, faux wood, aluminum, or vinyl, they offer precise control over light and privacy. Horizontal or vertical slats can be adjusted to let in just the right amount of sunlight, making them ideal for spaces that require versatility. Blinds are particularly popular in modern and minimalist decor, as they can provide a clean, streamlined appearance.

**3. Shades:**
Shades offer a soft, sophisticated alternative to blinds. Available in various styles, including roller, Roman, and cellular shades, they come in numerous materials ranging from light-filtering fabrics to blackout options. Roller shades are a minimalistic choice, perfect for a sleek look, while Roman shades can add a touch of elegance with their fabric folds. Cellular shades are particularly notable for their energy efficiency, as their unique honeycomb design helps insulate your home against temperature fluctuations.

**4. Shutters:**
For a timeless and charming touch, consider plantation shutters. These sturdy, wooden or vinyl constructions allow for excellent control over light and temperature, making them a practical choice for any room. Their classic look adds architectural interest to windows and can even increase your home’s resale value. Shutters come in a variety of styles, including full-height, café-style, and tier-on-tier options, allowing for customizable coverage.

**5. Valances and Cornices:**
To add a decorative finishing touch, valances and cornices can be used in conjunction with other window treatments. These stylish accents can frame your windows beautifully and can be matched with curtains, blinds, or shades to create a cohesive look. Valances are typically softer and can be made from fabric, while cornices are more structured, often made from wood or upholstered materials.

Each of these window treatment styles offers unique benefits and can dramatically enhance the aesthetic and functionality of your home. When choosing the perfect window treatments, consider your specific needs, the style of your space, and the atmosphere you wish to achieve. With the right selection, you can create a beautiful, inviting environment that reflects your personality while providing comfort and light control.

9. Budgeting for Window Treatments: Cost-Effective Options

When it comes to choosing window treatments, budgeting is a crucial step that can make or break your design project. Fortunately, there are a plethora of cost-effective options that allow you to elevate your space without emptying your wallet.

First, consider the classic charm of ready-made curtains. Available in a variety of styles, colors, and lengths, these pre-assembled drapes can be a budget-friendly way to add a touch of elegance to any room. Look for sales or discounts at major retailers, or explore local shops for unique finds that won’t break the bank.

Another economical choice is blinds. Faux wood or vinyl blinds offer the appearance of high-end materials at a fraction of the cost. They provide excellent light control and privacy while being easy to clean and maintain. For a softer look, consider fabric shades that can filter light beautifully while still allowing you to stay within your budget.

If you’re a bit more DIY-savvy, making your own window treatments can be a fun and rewarding project. A simple sewing machine and some fabric can go a long way. There are countless tutorials available online to help you create everything from basic curtains to more elaborate Roman shades. This not only saves money but allows you to customize your treatments to perfectly match your decor.

Lastly, don’t overlook the power of layering. Combining sheer curtains with heavier drapes can create a luxurious look while allowing you to purchase each layer at a lower cost. This approach not only provides versatility in controlling light and privacy but also adds depth and texture to your windows.

Remember, it’s essential to balance aesthetics with functionality while keeping an eye on your budget. By exploring these cost-effective options, you can find the perfect window treatments that enhance your home’s style while keeping your finances intact.

10. DIY vs. Professional Installation: What You Need to Know

When it comes to window treatments, one of the biggest decisions you’ll face is whether to tackle the installation yourself or hire a professional. Each option offers its own set of advantages and potential drawbacks, making it essential to weigh your circumstances carefully.

**DIY Installation** can be an appealing choice for the budget-conscious homeowner. With an array of online tutorials and how-to videos at your fingertips, you can often find step-by-step guides that make the process manageable. The satisfaction of completing a project on your own can also add a personal touch to your home. Just consider your skill level; simple treatments like curtains or blinds may be easier to install, while more complex options, such as custom shades or motorized systems, can require more expertise and tools. Additionally, remember that a DIY approach may involve unexpected challenges, such as mismeasured windows or missing hardware, which can lead to frustration and additional costs.

On the other hand, **Professional Installation** brings a level of expertise that can save you time and ensure a polished finish. Experienced installers have the knowledge and skills to handle tricky measurements, challenging window shapes, and specific mounting requirements. They can also provide valuable advice on the best placement and operation of your chosen treatments, ensuring they function perfectly and look great. While hiring a professional does come with an added cost, it can ultimately save you the hassle of mistakes and the potential need for rework.

Ultimately, your decision should hinge on your comfort level with home improvement tasks, the complexity of the window treatments you’re considering, and the budget you have in mind. If you’re leaning towards a DIY approach, make sure to gather all necessary tools and materials beforehand and set aside ample time for the project. Conversely, if you choose to go the professional route, invest time in researching reputable installers and checking reviews to ensure your windows get the care they deserve. Whichever path you choose, understanding the pros and cons of each will help you achieve the beautiful, functional window treatments that elevate your home’s aesthetic.

11. Maintenance and Care: Keeping Your Window Treatments Looking Great

When it comes to window treatments, maintenance and care are essential to ensure they remain beautiful and functional for years to come. The right upkeep not only prolongs the life of your window coverings but also enhances the overall aesthetic of your home. Different materials and styles require varying levels of attention, so it’s important to tailor your cleaning routine to the specific type of treatments you choose.

For fabric curtains and drapes, regular dusting is crucial. Use a soft brush attachment on your vacuum cleaner to gently remove dust and allergens that may accumulate over time. If they need a deeper clean, consult the care label for washing instructions—many can be machine washed, while others may require a delicate cycle or professional cleaning. Avoid exposing delicate fabrics to direct sunlight for prolonged periods, as this can lead to fading.

Blinds and shades often require a different approach. For wooden or faux-wood blinds, a damp cloth is your best friend. Gently wipe down each slat to keep them free from dust and grime, and consider using a wood polish occasionally to maintain their luster. For vinyl or aluminum blinds, a simple wipe with a microfiber cloth can work wonders. If your shades are made of fabric, ensure they’re vacuumed regularly and spot-cleaned as necessary to prevent stains.

For more intricate treatments such as shutters or motorized shades, follow manufacturer’s guidelines carefully. Shutters often only need a light dusting, while motorized shades usually require attention to their mechanical components to ensure they operate smoothly.

In addition to regular cleaning, consider seasonal checks for any necessary repairs or adjustments. Tightening loose screws or replacing worn-out cords can make a significant difference in the longevity and functionality of your window treatments.

By investing a little time and effort into the maintenance and care of your window treatments, you can keep them looking great and ensure they continue to enhance the beauty and comfort of your home for years to come.

12. Trends in Window Treatments: What’s Hot Right Now

As we step into a new era of interior design, window treatments are no longer just functional elements in a room; they are pivotal design statements that can elevate the ambiance of your space. This year’s trends reflect a harmonious blend of aesthetics and practicality, catering to diverse tastes and lifestyles.

One of the most prominent trends is the shift towards natural materials. Organic fabrics like linen and cotton are gaining popularity, providing a warm, inviting feel while promoting sustainability. These materials allow for breathability, making them ideal for spaces where light control is essential. Expect to see earthy tones and textures that mimic the outdoors, creating a serene environment that connects your indoor spaces with nature.

Another hot trend is layering window treatments. Combining sheer curtains with heavier drapes not only adds depth to your decor but also enhances light control and privacy. This versatile approach allows homeowners to customize their ambiance, making it easy to transition from bright, airy days to cozy, intimate evenings.

In terms of colors, bold hues are making a comeback. Rich jewel tones, such as emerald green, sapphire blue, and deep burgundy, are being embraced as statement colors that can define a room’s aesthetic. When paired with neutral walls and furnishings, these vibrant shades can create a striking focal point that draws the eye.

Smart window treatments are also on the rise, merging technology with style. Motorized shades and smart blinds allow for effortless control, enabling you to adjust light levels and privacy with the touch of a button or even via voice commands. This trend not only elevates convenience but also appeals to the tech-savvy homeowner looking to enhance their living experience.

Lastly, vintage and retro styles are making waves, with many homeowners seeking out unique, nostalgic designs. From patterned Roman shades that harken back to the mid-century to ornate valances that recall classic elegance, these elements add character and charm to any room.

Whether you lean towards minimalist modernism or embrace eclectic vintage vibes, staying attuned to these current trends will help you choose window treatments that not only complement your home but also reflect your personal style. As you embark on this journey to transform your space, remember that the right window treatments can be both a functional necessity and a canvas for your creativity.

13. Eco-Friendly Options: Sustainable Choices for Your Home

As the world becomes increasingly aware of environmental issues, many homeowners are seeking ways to make sustainable choices in their decor and furnishings. When it comes to window treatments, there are a variety of eco-friendly options that not only enhance your home’s aesthetic but also minimize your ecological footprint.

Start by considering materials that are both sustainable and renewable. Bamboo shades, for instance, offer a chic, natural look while being one of the fastest-growing plants on the planet. Their durability and ability to filter light make them an excellent choice for living spaces, promoting both energy efficiency and a calming atmosphere.

Another great option is organic cotton or linen curtains. These fabrics are grown without toxic pesticides or synthetic fertilizers, making them a healthier choice for your home and the environment. Available in a range of colors and patterns, they can easily complement any interior design style. Plus, opting for fabrics dyed with natural, low-impact dyes reduces harmful chemicals in your home.

For those looking to maximize energy efficiency, consider thermal or blackout window treatments made from recycled materials. These options help regulate indoor temperatures, keeping your home cooler in the summer and warmer in the winter, which can ultimately reduce energy consumption and lower utility bills.

Additionally, many companies are now offering window treatments that contribute to a sustainable lifestyle through their manufacturing processes. Look for brands that prioritize ethical sourcing, fair labor practices, and environmentally friendly production methods.

Choosing eco-friendly window treatments not only reflects your commitment to sustainability but also enhances your home’s comfort and style. By making thoughtful decisions about your window coverings, you can create a beautiful space that aligns with your values and supports a healthier planet.

14. Layering Window Treatments: Maximizing Style and Functionality

Layering window treatments is a design strategy that not only enhances the aesthetic appeal of your space but also boosts its functionality. This method involves combining two or more types of window coverings, such as curtains, blinds, shades, or valances, to create a unique and versatile look. The result is a beautifully styled window that offers varying levels of light control, privacy, and insulation—making it a practical choice for any home.

Imagine a cozy living room where sheer curtains softly filter the sunlight while adding an ethereal brightness to the space. Behind them, rich, heavy drapes provide an elegant contrast and can be drawn closed to ensure complete privacy during the evenings. This layered approach allows you to easily adjust the ambiance of the room throughout the day, transitioning from bright and airy to warm and intimate with just a simple pull of the curtains.

Additionally, layering can help you express your personal style. Consider mixing textures and patterns to create a visually stunning focal point. For instance, pairing smooth, modern roller shades with soft, embroidered drapes can add depth and interest, elevating the overall design of your room. Don’t shy away from playing with colors—complementary or contrasting hues can make your windows a standout feature.

Functionality is another key benefit of layering. By choosing different materials, you can customize your window treatments to meet specific needs. For example, blackout shades beneath sheer curtains can provide a peaceful environment for sleep while still allowing you to enjoy natural light during the day. Moreover, layering also aids in temperature control, which can lead to energy savings; heavy drapes insulate your windows in winter, while lighter sheers can help cool down a space in the summer.

Ultimately, layering window treatments is about finding the perfect balance between style and practicality. By considering your needs and preferences, you can create a window treatment design that not only complements your home’s decor but also enhances your daily life. So, don’t hesitate to experiment with different combinations—your windows are a canvas waiting for your creative touch!

15. Final Tips for Choosing the Perfect Window Treatments

Choosing the perfect window treatments can feel like a daunting task, but with a few final tips in your arsenal, you can make the decision-making process smoother and more enjoyable. First and foremost, consider the overall aesthetic of your space. Think about how the fabrics, colors, and patterns of your window treatments will harmonize with your existing decor. For a cohesive look, opt for treatments that either complement or contrast effectively with your color palette—soft neutrals can bring warmth, while bold hues can serve as striking focal points.

Next, functionality is key. Evaluate how much light control you need in each room. For instance, sheer curtains may be perfect for a sunlit living room where you want to maintain brightness while still offering some privacy, whereas blackout shades are ideal for bedrooms to ensure a restful night’s sleep. Don’t forget to consider the seasonality of your window treatments, too. Lighter, airy fabrics can keep your home feeling cool during the hot summer months, while heavier materials can provide insulation and warmth in the winter.

Lastly, think about maintenance and longevity. Choose materials that not only fit your style but also align with your lifestyle. If you have kids or pets, durable and easy-to-clean options like faux wood blinds or machine-washable curtains might be the best choice. After all, window treatments should enhance your home’s beauty and comfort while being practical for your everyday life.

As you finalize your decision, remember to measure your windows accurately, as a perfect fit can make all the difference in the world. With these tips in mind, you’re well on your way to selecting window treatments that reflect your personal style, meet your functional needs, and transform your living space into a cozy sanctuary.

In conclusion, selecting the perfect window treatments for your home is a rewarding endeavor that balances aesthetics, functionality, and personal style. With the insights and tips shared in this ultimate guide, you are now equipped to navigate the diverse world of fabrics, styles, and designs that will enhance your living spaces. Remember to consider factors such as light control, privacy, and energy efficiency as you make your choices. Whether you opt for elegant drapes, sleek blinds, or charming shades, the right window treatments can transform your home into a cozy sanctuary. Embrace the process, trust your instincts, and enjoy creating a space that reflects your unique taste and lifestyle. Happy decorating!

What are the best ways to improve your home’s security?

In an increasingly unpredictable world, ensuring the safety and security of your home has never been more crucial.

With rising concerns about burglary and property crime, homeowners are seeking effective solutions that not only safeguard their possessions but also provide peace of mind for their families. Fortunately, enhancing your home’s security doesn’t have to be an overwhelming task. In this blog post, we will explore the top 10 practical strategies that can significantly bolster your home’s defenses, from high-tech security systems and smart home innovations to simple yet effective physical measures and community involvement. Whether you’re a seasoned homeowner looking to upgrade your security measures or a first-time buyer aiming to establish a safe haven, these actionable tips will empower you to take control of your home’s security today, ensuring that your sanctuary remains a safe and welcoming space for you and your loved ones.

1. Introduction: The Importance of Home Security

What are the best ways to improve your home's security?
Credit : whatcanu.com

In an age where peace of mind is paramount, ensuring the safety and security of our homes has never been more crucial. The sanctuary we create within our four walls should be a refuge from the chaos of the outside world, a place where we can relax and feel protected. Unfortunately, the increasing rates of burglary and home invasions serve as a stark reminder that our homes can be vulnerable to unforeseen threats. This is where the importance of home security comes into play.

Home security is not just about physical barriers; it encompasses a holistic approach that includes technology, awareness, and community involvement. From state-of-the-art alarms and surveillance cameras to simple yet effective measures like proper lighting and neighborhood watch programs, a comprehensive security plan can significantly reduce the risk of intrusion. Moreover, enhancing your home’s security fosters a sense of safety for you and your loved ones, allowing you to enjoy your living space without constant worry.

Investing in home security is not merely a precaution; it’s an essential step towards safeguarding your family, belongings, and peace of mind. In this blog post, we will explore ten effective strategies that you can implement today to bolster your home’s defenses and create a more secure environment for everyone who enters. Whether you’re a homeowner or a renter, these practical tips will empower you to take proactive measures in protecting your haven. Let’s dive in!

2. Assessing Your Current Security Measures

Before implementing new security strategies, it’s crucial to evaluate your existing measures thoroughly. This assessment serves as the foundation for understanding where your home’s vulnerabilities lie and which areas require immediate attention. Start by walking around the exterior of your property, looking for potential weak points. Are there any low-hanging branches that could aid a burglar in climbing to a second-story window? Are your outdoor lights functional, or do they flicker ominously, casting shadows that could hide unwanted visitors?

Next, take a closer look at your entry points. check the condition of your doors and windows. Do they have sturdy locks, or are they old and easily compromised? Consider whether screen doors are equipped with secure closing mechanisms. Don’t overlook your garage and any side entrances; these are often the least monitored areas of a home.

Once you have a clear picture of your current security setup, list the strengths and weaknesses. For instance, if you have a state-of-the-art alarm system but no adequate outdoor lighting, that’s a red flag. Conversely, if your property is well-lit but lacks surveillance cameras, it might be time to invest in some cutting-edge technology.

In addition to physical assessments, consider your neighborhood’s crime rates and trends. Are there recent reports of break-ins in your area? Engaging with your neighbors can provide valuable insights into local threats that you might not be aware of, allowing you to adjust your security measures accordingly.

By thoroughly assessing your current security measures, you pave the way for targeted improvements that will significantly enhance the safety of your home. This process not only helps you identify specific areas for enhancement but also allows you to allocate your budget more effectively, ensuring that every dollar spent contributes to a more secure living environment.

3. Installing a Reliable Security System

What are the best ways to improve your home's security?
Credit : whatcanu.com

When it comes to enhancing your home’s security, installing a reliable security system is one of the most effective strategies you can employ. A well-designed security system acts as both a deterrent to potential intruders and a safeguard for your peace of mind.

Modern security systems have come a long way from the traditional locks and alarms of the past. Today’s systems can include a combination of video surveillance, motion detectors, smart locks, and alarm monitoring services, all working together to create a comprehensive defense against threats. Imagine having the ability to monitor your home remotely through your smartphone; with advanced security systems, that capability is just a tap away.

When selecting a security system, consider opting for one that offers 24/7 professional monitoring. This means that if an alarm is triggered, trained personnel will contact you and local authorities immediately, ensuring a swift response even when you’re not home. Moreover, features like two-way audio in doorbell cameras allow you to communicate with visitors or potential intruders, adding an extra layer of security.

Not only do these systems provide protection, but many also offer smart home integration, allowing you to control everything from your lights to your thermostat remotely. This added convenience can create the illusion that someone is always home, further deterring would-be intruders.

In addition to the technological aspects, it’s crucial to ensure that your security system is installed correctly. Professional installation can maximize the effectiveness of your system, ensuring that all components are positioned for optimal coverage. Whether you choose a DIY approach or hire professionals, taking the time to set up your security system properly can significantly enhance your home’s safety.

Investing in a reliable security system is not just about safeguarding your physical belongings; it’s about nurturing a sense of security for you and your loved ones. By effectively implementing this strategy, you can create a fortified environment that protects against intrusions and gives you the freedom to enjoy your home without worry.

4. Enhancing Door and Window Security

When it comes to fortifying your home against potential intruders, enhancing door and window security should be at the forefront of your efforts. These entry points are often the first line of defense, and ensuring they are robust can significantly deter unwanted access.

Start with your doors. Invest in high-quality, solid core doors that resist forced entry better than standard hollow-core models. Consider installing deadbolt locks, which provide an extra layer of security beyond regular doorknob locks. Look for deadbolts that are made from hardened steel for added strength, and ensure they are installed properly, with the bolt extending at least one inch into the door frame.

Next, assess your door frames and hinges. Reinforce them with longer screws that penetrate deeper into the framing, making it harder for an intruder to kick in the door. Additionally, consider adding a security strike plate; these plates can withstand more force than standard ones, giving you peace of mind.

Now, let’s turn our attention to windows, which are often overlooked but equally vulnerable. Start by examining your window locks; ensure they are functioning correctly and replace any that appear flimsy or worn. Install window security film—this transparent layer can make glass harder to break, slowing down an intruder’s access and giving you more time to respond.

For an added layer of protection, consider installing window sensors or alarms that alert you to any unauthorized attempts to open or break a window. If you have sliding glass doors, add a security bar or a dowel in the track to prevent them from being forced open.

Finally, don’t underestimate the power of outdoor lighting. Motion-activated lights around your entry points can illuminate potential threats and deter intruders who prefer to operate in the shadows. Combining all these strategies will create a comprehensive security plan that not only protects your home but also gives you and your family peace of mind.

5. Utilizing Smart Home Technology

What are the best ways to improve your home's security?
Credit : whatcanu.com

In an era where technology seamlessly integrates into our daily lives, utilizing smart home technology has emerged as a pivotal strategy for enhancing your home’s security. Imagine having the power to monitor your home from virtually anywhere in the world, all at your fingertips. Smart home devices are designed to provide peace of mind, convenience, and an additional layer of protection that traditional security systems often lack.

Start by investing in smart security cameras that offer real-time video feeds and motion detection alerts. These cameras can be accessed through your smartphone, allowing you to keep an eye on your property whether you’re at work, on vacation, or simply out for the evening. Many models even feature two-way audio, enabling you to communicate with visitors or deter potential intruders directly from your device.

Next, consider smart doorbells. These ingenious devices not only allow you to see who is at your door without having to open it, but they also provide a recording feature that captures any suspicious activity. This can be invaluable for both security and insurance purposes.

Moreover, smart locks are a game-changer for home security. With keyless entry systems, you can grant access to trusted individuals remotely, monitor entry times, and even set temporary codes for guests or service providers. This eliminates the risk of lost keys and grants you full control over who enters your home.

Integrating these devices into a cohesive smart home system can elevate your security measures even further. Smart alarms can work in conjunction with sensors that alert you to any unauthorized entry, while smart lighting systems can be programmed to mimic your daily routines, giving the illusion that someone is home even when you’re not.

Finally, don’t overlook the importance of a robust Wi-Fi network to support your smart devices. Ensure your network is secure with strong passwords and consider setting up a separate network for your smart devices to minimize vulnerabilities. By embracing smart home technology, you not only enhance your home’s security but also embrace the convenience of modern living, making your home a safer and smarter place for you and your loved ones.

6. The Role of Outdoor Lighting in Deterrence

When it comes to enhancing your home’s security, the role of outdoor lighting cannot be overstated. A well-lit exterior acts as a formidable deterrent against potential intruders, transforming your property into a less appealing target. Criminals are less likely to approach a home that is brightly illuminated, as shadows and darkness are often their allies, providing cover for their activities.

Strategically placing outdoor lighting around your property is key. Consider installing motion-sensor lights near entry points such as doors, garages, and pathways. These lights illuminate the area when they detect movement, startling would-be intruders and drawing attention to their presence. For added effectiveness, opt for bright LED bulbs that not only consume less energy but also provide clearer visibility.

Incorporating landscape lighting can also enhance your home’s security. By illuminating shrubs, trees, and other landscaping features, you eliminate hiding spots that intruders might exploit. Moreover, pathway lights can guide visitors safely to your door while simultaneously keeping an eye on any suspicious activity that may occur around your home.

Don’t forget about smart lighting options, which allow you to control your outdoor lights remotely. With smart technology, you can set schedules or turn lights on and off from your smartphone, giving the illusion that someone is home, even when you’re away. This proactive approach is particularly useful during vacations or extended absences, as it maintains a lived-in appearance.

In conclusion, outdoor lighting plays a pivotal role in enhancing your home’s security. By illuminating your property with intention and incorporating smart solutions, you not only create a welcoming environment but also significantly reduce the likelihood of a security breach. So, invest in your outdoor lighting today, and enjoy the dual benefits of safety and aesthetics.

7. Creating a Neighborhood Watch Program

What are the best ways to improve your home's security?
Credit : whatcanu.com

Creating a Neighborhood Watch Program is one of the most proactive steps you can take to enhance your home’s security while fostering a sense of community among your neighbors. This collaborative approach not only helps deter crime but also cultivates a safer environment where everyone looks out for one another.

The first step in establishing a Neighborhood Watch is to rally your neighbors. Organize a meeting where residents can discuss their concerns and share their experiences regarding local security. This initial gathering is crucial for building trust and camaraderie among participants. During the meeting, you can outline the program’s goals, discuss the importance of communication, and explore various strategies for increasing neighborhood vigilance.

Once you have a core group of committed participants, assign roles and responsibilities. Designate a few enthusiastic members as coordinators who can help organize regular meetings, communicate updates, and maintain a neighborhood directory. This ensures that everyone stays informed about suspicious activities or security breaches.

Next, enhance the program’s visibility by creating eye-catching signs that indicate your neighborhood is part of a watch program. These signs serve as a deterrent to potential criminals who may think twice before targeting an area where residents are alert and engaged.

Regular communication is vital; consider establishing a group chat or email chain to share real-time updates about unusual occurrences or safety tips. This instant flow of information can make a significant difference in addressing concerns quickly and effectively. Additionally, organizing community events, such as safety workshops or social gatherings, can strengthen relationships and build trust within the neighborhood.

By creating a Neighborhood Watch Program, you not only empower your community members to take an active role in their safety but also create a support network that fosters lasting relationships. As neighbors look out for each other, the overall security of your neighborhood improves, making it a safer place to live for everyone involved.

8. Securing Your Garage and Outbuildings

When it comes to enhancing your home’s security, overlooking your garage and outbuildings can be a critical mistake. These areas are often viewed as secondary spaces, but they can provide easy access for intruders if not properly secured. Start by assessing the vulnerabilities of your garage: is the door sturdy? Are the windows reinforced? Upgrading to a heavy-duty garage door, equipped with a secure locking mechanism, is an essential first step. Consider installing a smart lock or a keypad entry system for added convenience and security.

Next, don’t neglect the windows. If your garage has them, ensure they are made of tempered glass or fitted with security film to deter break-ins. Adding motion-sensor lights outside can make a significant difference, illuminating any suspicious activity and acting as a deterrent.

For any outbuildings—such as sheds or workshops—apply similar security measures. Ensure that all entrances have high-quality locks. Reinforce doors with deadbolts and consider using security bars for extra protection. Installing a reliable alarm system that covers these areas can provide peace of mind, alerting you to any unauthorized access.

Additionally, keep valuable items out of sight. If your garage or shed houses expensive tools or equipment, try to store them in locked cabinets or within a secure, locked area. Lastly, don’t underestimate the power of surveillance; installing cameras focused on these access points can serve as both a deterrent and a way to monitor any activity. By paying attention to these often-overlooked areas, you can significantly bolster your home’s overall security and protect your valuable assets.

9. The Benefits of Reinforcing Your Home’s Perimeter

Reinforcing your home’s perimeter is a critical strategy for enhancing security that often goes overlooked. A strong perimeter creates a formidable barrier against intruders and serves as the first line of defense for your property. By investing time and resources into this aspect of your home security, you can significantly reduce the likelihood of a break-in while also providing peace of mind for you and your family.

Start by evaluating your current fencing and gates. A sturdy, well-maintained fence not only deters intruders but also delineates your property, making it clear where your space begins and ends. Opt for materials that are known for their strength, such as chain link, vinyl, or wrought iron. If possible, consider adding features like barbed wire or trellises with thorny plants to make climbing more difficult.

In addition to physical barriers, enhancing your perimeter can also involve strategic landscaping. Trim back overgrown bushes and trees that could serve as hiding spots for potential intruders. Instead, opt for low-maintenance, thorny shrubs at ground level that can act as a natural deterrent. Installing motion-sensor lights around your perimeter can illuminate dark areas, making it harder for anyone to approach unnoticed.

Don’t forget about gates; they should be just as robust as your fencing. Secure them with high-quality locks and consider adding an electronic entry system that allows you to monitor and control access to your home. An intercom system can also be added for added convenience and security, enabling communication with visitors without needing to open the door.

Lastly, consider integrating technology into your perimeter security. Smart cameras and security systems with real-time monitoring can provide alerts when unusual activity is detected, allowing you to respond swiftly. By taking these comprehensive steps to reinforce your home’s perimeter, you create an environment that not only protects your property but also fosters a greater sense of safety and well-being for everyone inside.

10. Educating Your Family on Security Protocols

Educating your family on security protocols is a crucial yet often overlooked aspect of enhancing your home’s safety. While installing advanced security systems and locks is essential, the human element of security can be just as significant. By fostering a culture of awareness and vigilance, every member of your household can contribute to a safer environment.

Start by discussing basic safety practices, such as locking doors and windows, even when at home. Make it a habit to check that all entry points are secure before going to bed or leaving the house. Encourage family members to be mindful of their surroundings, especially when returning home after dark. This includes being cautious about who is nearby and ensuring that no one is loitering around your property.

Furthermore, create a family emergency plan that outlines specific actions to take in the event of a security breach or emergency. This plan should include designated meeting spots, phone numbers of local authorities, and guidelines for safely communicating with each other. Regularly review and practice these protocols, so that everyone feels confident and prepared.

Additionally, consider holding discussions about the importance of internet safety, especially for children and teenagers who may be less aware of the risks associated with sharing personal information online. Teach them about the dangers of social media oversharing and how to recognize phishing scams that could compromise your household’s security.

Finally, foster an open dialogue about security concerns. Encourage family members to voice their thoughts on safety measures and share any unusual occurrences in the neighborhood. This collective awareness can help identify potential threats and ensure everyone feels empowered to contribute to the home’s safety.

By making security education a family priority, you not only bolster your home’s defenses but also create a sense of shared responsibility that can significantly enhance your overall security strategy. Remember, an informed family is a safe family, and together, you can make your home a fortress against potential threats.

11. Regular Maintenance and Updates of Security Systems

Regular maintenance and updates of your security systems are crucial for ensuring that your home remains a fortress against potential threats. Just like any other system in your home, security devices require consistent attention to function at their best. Over time, wear and tear can affect performance, rendering even the most sophisticated security measures ineffective if neglected.

Start by scheduling routine check-ups for your alarm systems, surveillance cameras, and smart home devices. Ensure that all components are in working order, batteries are replaced, and firmware updates are promptly applied. For instance, many modern security cameras have software updates that enhance their functionality or patch vulnerabilities; staying on top of these updates can significantly bolster your home’s defenses.

Additionally, consider conducting a thorough inspection of all entry points, such as doors and windows, to check for any wear or damage. Hinges can rust, locks can stick, and window seals can wear out, creating potential weak spots that intruders might exploit. By routinely assessing and maintaining these areas, you not only reinforce your security but also gain peace of mind knowing that your home is well-protected.

Incorporating these practices into your regular home maintenance routine will keep your security systems running smoothly and effectively. Remember, the goal is to create a proactive approach to security; a well-maintained system is your best ally in preventing potential break-ins and ensuring the safety of your loved ones and belongings.

12. The Importance of a Security Audit

A security audit is a crucial step in fortifying your home against potential threats. Much like a health check-up, a thorough security audit evaluates the effectiveness of your current security measures and identifies vulnerabilities that could be exploited by intruders. The importance of conducting a security audit cannot be overstated; it provides you with a comprehensive overview of your security landscape, allowing you to make informed decisions to enhance your home’s protection.

During a security audit, you’ll want to assess various aspects of your home’s security, from door and window locks to outdoor lighting and alarm systems. Start by examining entry points—are your doors solid and equipped with high-quality deadbolts? Are your windows fitted with secure locks? Don’t forget to evaluate your garage or any other access points that could be overlooked.

Next, consider the perimeter of your property. Are there any areas that are poorly lit or obscured by landscaping? Installing motion-sensor lights and trimming back overgrown bushes can eliminate potential hiding spots for would-be intruders. Additionally, if you have a fence, check for any gaps or weaknesses that could be easily breached.

A security audit also includes reviewing your technology. Are your surveillance cameras positioned effectively? Do they provide clear images and cover blind spots? If you rely on smart home devices, ensure they are updated and secured against cyber threats.

Finally, don’t overlook the human element. Are your family members aware of safety protocols? Conducting a security audit is not just about physical barriers; it’s about creating a culture of safety within your home. Engage your family in discussions about emergency procedures and encourage them to be vigilant.

By prioritizing a security audit, you are taking a proactive step towards safeguarding your home. It’s an investment in peace of mind, ensuring that you and your loved ones can feel secure in your own space. So, roll up your sleeves, take stock of your home’s vulnerabilities, and implement the necessary changes to bolster your security today.

13. Recognizing and Avoiding Common Security Threats

In the realm of home security, knowledge truly is power. Recognizing and avoiding common security threats is a crucial strategy to enhance your home’s safety. Each day, countless homeowners unknowingly fall prey to simple yet preventable risks that can compromise their security. By staying informed and proactive, you can safeguard your home and loved ones against potential threats.

One of the most prevalent threats comes from social media oversharing. While it’s tempting to post about your exciting vacation plans, doing so can inadvertently alert potential burglars that your home will be unoccupied. Instead, keep such information private and save the updates for when you return home, ensuring your residence remains under the radar during your absence.

Another common vulnerability lies in inadequate door and window security. Many homeowners overlook the importance of robust locks and security features. Investing in high-quality deadbolts, window locks, and security bars can significantly deter intruders. Additionally, simple measures like reinforcing sliding glass doors with dowel rods or upgrading to smart locks can enhance your home’s defenses.

Inadequate outdoor lighting is also a significant security risk. Dark corners and unlit entryways can create perfect hiding spots for intruders. Installing motion-activated lights around your property can illuminate these areas and deter unwanted visitors. Combine this with landscaping that does not obstruct visibility, and you’ll create an environment less inviting to potential threats.

Lastly, being vigilant about your surroundings can help you recognize suspicious activity before it escalates. Encourage family members to report anything unusual, and foster a sense of community by getting to know your neighbors. A connected neighborhood is a powerful deterrent to crime, as suspicious behavior is more likely to be noticed and reported.

By understanding and addressing these common security threats, you can create a fortified home environment that not only enhances your peace of mind but also protects what matters most. Remember, the key to effective home security is not just in the systems you install, but also in the awareness and preventative measures you take every day.

14. Conclusion: Taking Action for a Safer Home

As we reach the conclusion of our exploration into effective strategies for enhancing your home’s security, it’s clear that taking action is paramount. The safety and well-being of your loved ones and your belongings should never be left to chance. With the rise in crime rates and the ever-evolving tactics of intruders, it’s crucial to be proactive rather than reactive.

Implementing the strategies outlined in this blog post—whether it’s investing in robust locking systems, installing surveillance cameras, or simply improving your home’s lighting—can significantly reduce your risk of becoming a victim. Remember, even small changes can create a formidable line of defense against potential threats. Additionally, fostering a sense of community by getting to know your neighbors and participating in local watch programs can enhance security on a broader scale.

It’s important to approach home security as an ongoing process rather than a one-time fix. Regularly reassess your security measures, stay informed about new technologies, and adapt your strategy as needed. By taking these steps today, you’re not just safeguarding your property; you’re also investing in peace of mind for yourself and your family.

So, take a moment to evaluate your current security setup, identify areas for improvement, and make a plan to implement these strategies. Your home should be a sanctuary, and with the right actions, you can ensure it remains a safe haven for years to come.

In conclusion, enhancing your home’s security doesn’t have to be a daunting task; it can be an empowering journey toward peace of mind. By implementing the top 10 effective strategies we’ve outlined, you’ll not only fortify your home but also create a safer environment for you and your loved ones. From investing in smart technology to fostering community connections, each step contributes to a comprehensive security framework that adapts to your unique needs. Remember, security is an ongoing process, so stay vigilant and proactive. We encourage you to take action today, and share your own tips and experiences in the comments below—after all, a secure home is a happy home!

How to build a simple bookshelf?

Welcoming a furry friend into your home is an exciting journey filled with love, companionship, and a few challenges along the way.

One of the most significant hurdles new dog owners face is potty training, particularly when it comes to mastering the litter box. While traditionally associated with our feline friends, litter box training for dogs is an effective and practical solution, especially for those living in apartments or with limited outdoor access. In this comprehensive guide, we’ll walk you through each step of the process—from choosing the right litter box and materials to establishing a consistent routine and reinforcing positive behavior. Whether you’re a first-time dog owner or looking to refine your pup’s training, this guide will provide you with the tools and confidence you need to ensure a smooth and successful litter box experience for both you and your beloved canine companion. Say goodbye to accidents and hello to a cleaner, stress-free home!

1. Understanding Your Dog’s Natural Instincts

How to build a simple bookshelf?
Credit : whatcanu.com

Understanding your dog’s natural instincts is the foundation of successful litter box training. Dogs, like their wild ancestors, have inherent behaviors that dictate their approach to elimination. In the wild, animals instinctively seek out specific areas to relieve themselves, often choosing spots that are away from their living and sleeping spaces. This instinct is deeply rooted and can be harnessed to facilitate the training process.

Take a moment to observe your dog’s behavior during walks or when they are outside. You may notice them sniffing the ground, circling, and even scratching at certain spots before they go. This is their way of assessing the environment and signaling that it’s time to do their business. By tapping into these natural tendencies, you can create a comfortable and appealing litter box experience for your furry friend.

Additionally, it’s crucial to consider their age and breed. Puppies, for instance, may not have full control over their bladders yet, making patience and frequent opportunities for elimination essential. On the other hand, older dogs may have developed preferences based on past experiences. Understanding these nuances will help you tailor your approach to your dog’s specific needs.

When introducing the litter box, choose a location that mimics the privacy they would seek in nature. A quiet corner of your home, away from loud noises and foot traffic, will help your dog feel secure and more inclined to use the box. Pay attention to their body language and cues; recognizing when they are about to relieve themselves can help you guide them to the box at the right moment.

By aligning your training methods with your dog’s instinctual behaviors, you can foster a positive association with the litter box, paving the way for a successful transition. Remember, it’s all about understanding your canine companion and working with, rather than against, their natural inclinations.

2. Choosing the Right Location for the Litter Box

Choosing the right location for the litter box is crucial in ensuring your dog feels comfortable and confident using it. Dogs thrive in environments that are quiet, safe, and easily accessible, so selecting the perfect spot requires careful consideration.

Start by observing your dog’s usual bathroom habits. Does your furry friend prefer secluded areas for their business? If so, placing the litter box in a corner of a low-traffic room may be ideal. Avoid high-traffic areas like hallways or rooms where family members frequently gather, as these can create distractions that deter your dog from using the box.

Moreover, ensure the litter box is located near the door to the outside if you have a backyard. This proximity helps reinforce the idea that the litter box is an acceptable place to relieve themselves, while also providing a quick exit to the outdoors when needed. If you’re using a specific type of litter, make sure to keep it consistent and place the box in an area where it won’t be disturbed by other pets or children.

Light is also an important factor; choose a location that is well-lit but not harshly illuminated. Your dog should feel relaxed and secure in their chosen spot, so consider placing the litter box in a spot where they can feel at ease without feeling exposed.

Lastly, be mindful of any scents or odors that may be present in the area. Dogs are sensitive to smells, and a location that is too close to their food or sleeping areas may deter them from using the litter box. By thoughtfully selecting the right location, you’re setting the stage for successful litter box training and creating a positive experience for your canine companion.

3. Selecting the Best Litter for Dogs

How to build a simple bookshelf?
Credit : whatcanu.com

When it comes to training your dog to use a litter box, selecting the right litter is a crucial step that can make all the difference in your success. Unlike traditional cat litter, dog litter needs to cater to your canine’s unique habits and instincts. As you embark on this journey, consider the various options available and their specific benefits to ensure a comfortable and inviting environment for your furry friend.

First and foremost, look for dog-specific litter formulations. These litters are typically made from materials that are safe and appealing to dogs, such as recycled paper, wood pellets, or even natural grass. Many pet owners find that paper-based litters are an excellent choice because they are absorbent, non-toxic, and gentle on a dog’s paws. Furthermore, they often come in unscented varieties, which can be a relief for dogs sensitive to strong odors.

Another option is the use of biodegradable litters, which not only provide a safe space for your dog to relieve themselves but also minimize environmental impact. Products made from corn, wheat, or other plant-based materials can effectively absorb moisture and control odors while being kind to the planet.

Consider your dog’s preferences, too. Some dogs may have a preference for softer textures, while others might enjoy the crunch of a wood-based litter. If you’re unsure, you can conduct a simple experiment by introducing a couple of different types of litter and observing your dog’s reactions.

Finally, pay attention to the litter’s clumping ability and odor control features. A litter that clumps well makes clean-up easier and helps maintain a fresher environment, which is especially important when training your dog to use the box consistently.

In summary, selecting the best litter for your dog goes beyond mere functionality; it’s about creating a positive experience that encourages them to return to the litter box time and time again. By choosing wisely, you’ll pave the way for a successful litter box training journey, turning what could be a daunting task into a manageable and rewarding process.

4. Introducing Your Dog to the Litter Box

Introducing your dog to the litter box can be a pivotal moment in your training journey, and it sets the stage for successful litter box habits. Begin this process in a calm and quiet environment where your dog feels safe and secure. Choose a litter box that is appropriately sized for your dog—one that they can easily enter and exit. Consider a box with low sides for small breeds or puppies, and make sure it’s placed in a designated area that is easily accessible yet private enough to encourage your dog to use it.

Once you have the litter box set up, it’s time to pique your dog’s curiosity. You can do this by placing a few treats or a favorite toy inside the box. Allow them to explore it at their own pace, as this will help them associate the box with positive experiences. Use encouraging words and a cheerful tone to reinforce their curiosity. If they show interest or even step inside, offer plenty of praise and a treat to create a positive association.

Next, establish a routine. Dogs thrive on consistency, so incorporate regular bathroom breaks into their daily schedule. After meals, playtime, or waking up from a nap are ideal moments to lead your dog to the litter box. Always use the same command or cue, such as “Go potty,” to signal that it’s time to use the box. If your dog successfully uses the litter box, reward them immediately with praise and a treat to reinforce the behavior.

Patience is key during this introduction phase. Some dogs may take a little longer to understand the concept of a litter box. If accidents happen outside the box, remain calm and avoid punishment, as this can create anxiety. Instead, gently guide them back to the box and encourage them to use it. Over time, with consistent training and positive reinforcement, your dog will learn to embrace the litter box as their designated spot for bathroom breaks, making the entire process smoother for both you and your furry friend.

5. Establishing a Routine for Litter Box Training

How to build a simple bookshelf?
Credit : whatcanu.com

Establishing a routine for litter box training is one of the most crucial steps in ensuring your dog learns to use the designated area effectively. Just like humans, dogs thrive on structure and predictability, and a consistent schedule can significantly aid in the training process. Start by choosing specific times throughout the day to take your dog to the litter box, such as after meals, playtime, or naps. This helps your dog associate those moments with the need to relieve themselves.

Begin by observing your dog’s natural habits. Pay attention to when they typically show signs of needing to go, such as sniffing around, circling, or whining. When you notice these behaviors, promptly guide them to the litter box. Consistency is key; by taking them to the same spot each time, you reinforce the idea that this is their bathroom.

During the initial training phase, it can be beneficial to use a command phrase, such as “Go potty,” every time you take them to the litter box. This verbal cue will help your dog learn to associate the phrase with the action, making it easier for them to understand what is expected.

Don’t forget to celebrate successes! When your dog uses the litter box correctly, offer plenty of praise and perhaps a small treat. This positive reinforcement will encourage them to repeat the behavior. Conversely, if an accident occurs, avoid scolding; instead, clean up thoroughly to eliminate any lingering scents that might tempt them to return to the same spot.

Lastly, be patient. Just like any training process, litter box training may take time and persistence. By establishing a routine and remaining committed, you’ll foster a successful environment for your dog to learn, creating a harmonious living space for both of you. Remember, consistency and positive reinforcement are your best tools in this endeavor!

6. Positive Reinforcement Techniques

Positive reinforcement techniques are a cornerstone of successful dog training, particularly when it comes to mastering the litter box. This method leverages the power of rewards to encourage desirable behaviors, making your dog more eager to learn and adapt. Instead of scolding your furry friend for accidents, focus on celebrating their successes, no matter how small.

Begin by selecting a high-value treat that your dog adores—this could be a piece of chicken, a small bit of cheese, or a favorite commercial dog treat. Whenever your dog uses the litter box correctly, immediately reward them with the treat and shower them with praise. Use a cheerful tone and enthusiastic body language to convey your excitement. Phrases like “Good job!” or “What a smart pup!” can reinforce their positive behavior.

Timing is crucial in positive reinforcement. Ensure that your dog receives their reward within seconds of them using the litter box, so they can connect the dots between the action and the reward. Consistency is key, too; make sure all family members follow the same protocol to avoid confusing your dog.

Additionally, consider using clicker training as part of your positive reinforcement strategy. A clicker is a small device that makes a distinct sound when pressed. When your dog uses the litter box correctly, click the device instantly, followed by a treat. This method helps establish a clear association between the behavior and the reward, helping your dog understand what you expect from them.

As your dog becomes more reliable with their litter box habits, gradually reduce the frequency of treats but continue to offer praise. This helps maintain their motivation while reinforcing your bond. Remember, patience is essential; every dog learns at their own pace. By employing positive reinforcement techniques, you’ll create a supportive environment that makes mastering the litter box a rewarding experience for both you and your dog.

7. Common Mistakes to Avoid

How to build a simple bookshelf?
Credit : whatcanu.com

Training your dog to use a litter box can be a rewarding experience, but it’s essential to navigate the process carefully to avoid common pitfalls that can hinder progress. Being aware of these mistakes can save you time, frustration, and help ensure a smoother training journey.

One of the most prevalent mistakes pet owners make is underestimating the importance of patience. Dogs, much like humans, need time to adjust to new routines. Rushing the training process can lead to confusion and setbacks. Remember, consistency is key. If you frequently change the location of the litter box or the type of litter, your dog may struggle to adapt. Establish a designated spot and stick with it to help your furry friend understand where they should go.

Another common error is using harsh disciplinary methods when accidents happen. It’s crucial to remember that dogs do not respond well to punishment; it can create fear and anxiety, ultimately leading to more accidents. Instead of scolding, focus on positive reinforcement. Celebrate small victories with treats and praise when your dog uses the litter box correctly. This encourages repeat behavior and strengthens your bond.

Additionally, neglecting the cleanliness of the litter box can create a barrier to success. Dogs are naturally clean animals and may refuse to use a dirty box. Regularly clean the litter box and refresh the litter to maintain an inviting environment. Make sure to also choose the right type of litter, as some dogs may have preferences that can impact their willingness to use the box.

Lastly, a lack of routine can throw your training off course. Dogs thrive on predictability, so establishing a consistent schedule for bathroom breaks can help reinforce the habit of using the litter box. Whether it’s first thing in the morning, after meals, or before bedtime, sticking to a routine will set your dog up for success.

By avoiding these common mistakes and approaching the training process with patience, consistency, and positivity, you can help your dog master the litter box and create a more harmonious living environment for both of you. Your efforts will pay off as your dog learns to embrace this new behavior, leaving you both feeling accomplished and ready to tackle the next training challenge together.

8. Dealing with Accidents: What to Do

Accidents are an inevitable part of the litter box training process, and how you handle them can make a significant difference in your dog’s learning curve. First and foremost, it’s essential to remain calm and composed when you discover an accident. Remember, your dog is still learning, and scolding them will only instill fear and confusion rather than promote understanding.

When you find an accident, avoid punishment. Instead, focus on cleaning up thoroughly to eliminate any lingering scents that might encourage your dog to repeat the behavior in the same spot. Use an enzymatic cleaner specifically designed for pet messes, as it breaks down the odors that regular cleaners might leave behind. This ensures that your dog won’t be tempted to return to that area for another “visit.”

After cleaning, assess the situation to identify the possible triggers that led to the accident. Was your dog left alone for too long? Did they show signs of needing to go but were ignored? By pinpointing the cause, you can adjust your training methods accordingly.

If accidents become frequent, it may be beneficial to revisit your training routine. Consider increasing the frequency of bathroom breaks, especially after meals, playtime, or naps. This not only reinforces the routine but also gives your dog ample opportunity to succeed in using the litter box.

Lastly, celebrate the successes! When your dog uses the litter box correctly, offer plenty of praise and a treat to reinforce the behavior. Positive reinforcement is key in creating lasting habits. With patience and consistency, your dog will learn the ropes, and accidents will become a thing of the past. Remember, every step forward is a step toward mastering the litter box!

9. Transitioning from Litter Box to Outdoor Potty

Transitioning your dog from a litter box to outdoor potty is a significant step in their training journey, and it requires patience and consistency. As your dog becomes accustomed to using the litter box, it’s essential to gradually introduce them to the idea of going outdoors for bathroom breaks. This process not only helps your furry friend understand where to relieve themselves but also encourages them to embrace the great outdoors.

Start by choosing a specific outdoor potty spot, preferably in a quiet area of your yard or nearby park. This location should be consistent, as dogs thrive on routine and familiarity. Each time you take your dog outside, use a command phrase like “go potty” to signal what you expect from them. This will help them associate the phrase with the action of relieving themselves outdoors.

To make the transition smoother, reduce the availability of the litter box gradually. Begin by limiting access to it, allowing your dog to use it only during specific times of the day. For example, you may want to remove the litter box during the day and only allow access during the night. This encourages your dog to rely on outdoor potty breaks instead.

Reward your dog with praise or treats immediately after they relieve themselves outside. This positive reinforcement will reinforce the behavior you want to encourage, making them more likely to repeat it. Additionally, be on the lookout for signs that your dog needs to go out, such as sniffing, circling, or whining. Promptly taking them outside when you observe these behaviors will help establish a strong connection between the need to go and the outdoor potty spot.

Keep in mind that accidents are a normal part of the training process, so remain patient and avoid scolding your dog. Instead, clean up any messes thoroughly to eliminate lingering odors that might attract them back to the old litter box. With time, consistency, and encouragement, your dog will transition smoothly to outdoor potty habits, making your home cleaner and fostering a healthier relationship with their environment.

10. Monitoring Your Dog’s Progress

Monitoring your dog’s progress is a crucial step in mastering the litter box training process. Just like any other training regimen, observing your dog’s behavior and responses will provide insights into what’s working and what might need adjusting. Begin by keeping a detailed record of your dog’s habits. Note when they use the litter box, how often they go, and any accidents that occur outside of it. This data will help you identify patterns in their behavior, allowing you to tailor your training approach accordingly.

Pay close attention to your dog’s body language and signals. Dogs are creatures of habit, and they often exhibit specific behaviors before needing to relieve themselves—sniffing around, circling, or searching for a quiet spot. By becoming attuned to these signs, you can proactively guide your furry friend to the litter box, reinforcing the idea that this is the appropriate place to go.

Additionally, consider using positive reinforcement to encourage your dog’s successes. Every time they use the litter box correctly, offer praise, treats, or playtime. This not only builds a positive association with the litter box but also fosters a trusting bond between you and your pet.

Lastly, be patient and flexible. Each dog is unique, and some may take longer to adjust than others. If you notice setbacks, don’t be discouraged; instead, reassess your strategies and make necessary adjustments. Through consistent monitoring and support, you’ll pave the way for a smoother training experience, ultimately leading to a well-trained dog who understands the importance and convenience of using the litter box.

11. Troubleshooting Behavioral Issues

Training your dog to use the litter box can be a rewarding experience, but it’s not without its challenges. As with any behavior modification, you may encounter some hiccups along the way. Troubleshooting behavioral issues is an essential part of the process, as it helps you understand your dog’s needs and adjust your training methods accordingly.

First, consider the environment. Dogs are creatures of habit and can be sensitive to changes around them. If your dog suddenly refuses to use the litter box, take a moment to assess their surroundings. Are there new sounds or smells? Have there been changes in the household, like the arrival of a new pet or a recent move? Addressing these environmental stressors may help your dog feel more comfortable and secure in their designated space.

Next, evaluate the type of litter you are using. Some dogs are particular about texture and scent, so experimenting with different types of litter may yield better results. Opt for unscented, natural options to see if your dog shows a preference. Also, ensure the litter box itself is the right size and easily accessible. A box that’s too tall or too small can deter your dog from using it.

If your dog has accidents outside the litter box, it’s crucial to remain patient and avoid punishment. Instead, focus on positive reinforcement. When your dog successfully uses the litter box, reward them with praise and treats to reinforce the behavior. If they have an accident, clean it thoroughly with an enzymatic cleaner to eliminate lingering odors that might encourage repeat offenses.

Monitoring your dog’s bathroom habits can also provide valuable insights. Keep a log of when they go, how often, and any changes in behavior. This information can help you identify patterns and adjust your training strategy. If accidents continue despite your best efforts, consider consulting with a veterinarian to rule out any underlying medical issues that could be affecting your dog’s ability to control their urges.

Finally, remember that consistency is key. Stick to a routine for feeding and bathroom breaks to establish a predictable schedule. With time, patience, and a little troubleshooting, you can help your dog master the litter box and create a harmonious living environment for both of you.

12. Maintaining a Clean Litter Box Environment

Maintaining a clean litter box environment is crucial for both your dog’s comfort and your household hygiene. Just as we appreciate a tidy restroom, dogs also prefer a clean space for their business. A well-kept litter box not only encourages your furry friend to use it consistently but also helps prevent odors and potential health issues.

Start by establishing a regular cleaning routine. Aim to scoop the litter box at least once a day, removing waste and clumps to keep the area fresh. Depending on your dog’s size and habits, you may need to clean it more frequently. A dirty litter box can deter your dog from using it, leading to accidents around the house.

In addition to daily scooping, perform a thorough cleaning of the box weekly. Empty out the old litter, wash the box with warm, soapy water, and rinse it well to remove any lingering odors or bacteria. This step is essential to provide a hygienic environment for your dog and prolong the life of your litter box.

Choosing the right litter can also play a significant role in maintaining cleanliness. Opt for high-quality, clumping, and odor-absorbing litter to make your life easier. Some litters are specifically designed to control odors effectively, while others may offer added benefits like being eco-friendly or low dust, which is particularly important for indoor air quality.

Lastly, consider the location of the litter box. It should be placed in a quiet, easily accessible area away from your dog’s food and water bowls. This can help your dog feel more comfortable and secure when using it. A clean, well-maintained litter box in a suitable location will encourage your dog to use it regularly, helping to solidify their training and keep your home clean. By prioritizing cleanliness, you not only create a pleasant experience for your dog but also foster a harmonious living environment for both of you.

13. Using Crate Training Alongside Litter Box Training

Combining crate training with litter box training can create a seamless and effective system for teaching your dog where to relieve themselves. Crate training provides a safe and secure environment, capitalizing on your dog’s natural instinct to keep their sleeping area clean. By introducing your dog to a crate, you can establish a routine that reinforces positive behaviors while also facilitating litter box training.

Start by acclimating your dog to the crate, ensuring that it’s a comfortable space filled with their favorite blanket and toys. Keep the crate in a quiet area of your home, allowing your dog to explore it at their own pace. Gradually increase the time they spend inside, always rewarding them with praise or treats for being calm and relaxed. This will help your dog associate the crate with safety and comfort rather than as a punishment.

Once your dog is comfortable in the crate, begin the litter box training process. Place the litter box in a designated spot that is easily accessible to your dog. When you notice signs that your dog needs to go—sniffing, circling, or whining—gently guide them to the litter box. Use positive reinforcement by offering treats and praise when they successfully use it, reinforcing the connection between the crate, the litter box, and the reward.

Additionally, during crate training, take your dog outside frequently, especially after they’ve been in the crate for a while. This will help them learn the difference between outdoor and indoor relief spots. With time, patience, and consistency, you’ll create a harmonious training routine that empowers your dog to feel secure in their crate while confidently using their litter box. This dual approach not only enhances their understanding of where to go but also strengthens your bond as a team working towards a common goal.

14. FAQs About Dog Litter Box Training

### 14. FAQs About Dog Litter Box Training

As dog owners embark on the journey of litter box training, it’s common to have a plethora of questions. After all, transitioning a canine companion to use a litter box isn’t something that comes naturally to them. To help you navigate this process with ease, we’ve compiled a list of frequently asked questions that may provide clarity and confidence as you train your dog.

**1. What breed of dog is best suited for litter box training?**
While any breed can be trained to use a litter box, smaller breeds and puppies tend to adapt more easily due to their size. However, with patience and consistency, larger breeds can also learn this behavior.

**2. At what age can I start litter box training my dog?**
Puppies can begin learning as early as eight weeks old. At this age, they are curious and eager to explore new habits. Adult dogs can also be trained, though it may take a bit longer depending on their previous habits.

**3. What type of litter should I use?**
Choose a litter that is safe for dogs, such as paper-based, wood-based, or artificial turf. Avoid clay or clumping litters, which can be harmful if ingested. Experiment to find the texture your dog prefers, as comfort plays a role in their willingness to use the box.

**4. How long does it typically take to train a dog to use a litter box?**
The training duration varies based on the individual dog’s temperament and previous habits. On average, expect the process to take anywhere from a few days to several weeks. Consistency and positive reinforcement are key to achieving success.

**5. What should I do if my dog refuses to use the litter box?**
If your dog is hesitant, reassess the setup. Ensure the box is in a quiet, accessible location and that the litter is appealing. Consider using treats or praise to encourage them when they approach the box. If issues persist, consult a professional trainer for additional guidance.

**6. Can I still take my dog outside for potty breaks if they are litter box trained?**
Absolutely! Litter box training is not meant to replace outdoor potty breaks. It provides a convenient option for times when you can’t take your dog outside, such as during inclement weather or late at night.

**7. Will litter box training affect my dog’s outdoor potty training?**
Not at all. Many dogs can successfully adapt to using both a litter box and going outside. Just be consistent with your command cues and expectations for both scenarios to prevent any confusion.

By addressing these frequently asked questions, we hope to demystify the litter box training process and empower you to create a positive experience for both you and your dog. Remember, patience and consistency are your best allies on this journey!

15. Celebrating Success: Tips for Continued Maintenance

Celebrating your dog’s success in mastering the litter box is not just about acknowledging their achievement; it’s a crucial step in ensuring that this positive behavior continues. Just as we humans thrive on recognition and rewards, our canine companions benefit greatly from similar reinforcement. Here are some tips for continued maintenance that will help you keep the momentum going.

First and foremost, celebrate each successful litter box use with enthusiasm! Use a cheerful tone, offer a treat, or engage in a fun game. This positive reinforcement will solidify the behavior in your dog’s mind and encourage them to repeat it. Remember, the goal is to create a positive association with the litter box, so make these moments special and frequent.

Consistency is key in maintaining your dog’s litter box training. Keep a routine by taking your dog to their designated area at the same times each day. Dogs thrive on predictability, so establishing a schedule that includes regular feeding times, potty breaks, and playtime will help your dog understand what’s expected of them. Gradually, they will become accustomed to the routine and learn to anticipate their litter box use as part of their daily activities.

Monitoring your dog’s behavior is also essential in this phase. Pay attention to any signs of confusion or anxiety regarding the litter box. If accidents occur, don’t scold or punish—this can lead to fear and regression. Instead, calmly redirect them to the litter box and reward them when they respond correctly. Mistakes are part of the learning process, and patience is vital.

Lastly, keep the litter box clean and inviting. Regularly remove waste and refresh the litter to maintain a pleasant environment. A clean and well-maintained area will encourage your dog to use the box consistently and feel comfortable doing so.

By celebrating successes, staying consistent, and fostering a positive environment, you’ll not only reinforce your dog’s litter box training but also deepen the bond between you and your furry friend. With these strategies, you can ensure that your dog continues to feel confident and secure in their litter box habits for years to come.

In conclusion, mastering the litter box training for your dog can transform your home into a harmonious haven for both you and your furry friend. By following the step-by-step guide outlined in this post, you’ll empower yourself with the knowledge and techniques needed to make this process smooth and successful. Remember, patience and consistency are key, and every dog learns at their own pace. Celebrate the small victories along the way, and don’t hesitate to reach out for support if challenges arise. With dedication and love, you’ll create a positive experience for both you and your dog, ensuring that your home remains clean and comfortable. Happy training, and may your journey to litter box mastery be filled with joy and tail wags!

What are the different types of paintbrushes and their uses?

Welcoming a furry friend into your home is an exciting journey filled with love, companionship, and a few challenges along the way.

One of the most significant hurdles new dog owners face is potty training, particularly when it comes to mastering the litter box. While traditionally associated with our feline friends, litter box training for dogs is an effective and practical solution, especially for those living in apartments or with limited outdoor access. In this comprehensive guide, we’ll walk you through each step of the process—from choosing the right litter box and materials to establishing a consistent routine and reinforcing positive behavior. Whether you’re a first-time dog owner or looking to refine your pup’s training, this guide will provide you with the tools and confidence you need to ensure a smooth and successful litter box experience for both you and your beloved canine companion. Say goodbye to accidents and hello to a cleaner, stress-free home!

1. Understanding Your Dog’s Natural Instincts

What are the different types of paintbrushes and their uses?
Credit : whatcanu.com

Understanding your dog’s natural instincts is the foundation of successful litter box training. Dogs, like their wild ancestors, have inherent behaviors that dictate their approach to elimination. In the wild, animals instinctively seek out specific areas to relieve themselves, often choosing spots that are away from their living and sleeping spaces. This instinct is deeply rooted and can be harnessed to facilitate the training process.

Take a moment to observe your dog’s behavior during walks or when they are outside. You may notice them sniffing the ground, circling, and even scratching at certain spots before they go. This is their way of assessing the environment and signaling that it’s time to do their business. By tapping into these natural tendencies, you can create a comfortable and appealing litter box experience for your furry friend.

Additionally, it’s crucial to consider their age and breed. Puppies, for instance, may not have full control over their bladders yet, making patience and frequent opportunities for elimination essential. On the other hand, older dogs may have developed preferences based on past experiences. Understanding these nuances will help you tailor your approach to your dog’s specific needs.

When introducing the litter box, choose a location that mimics the privacy they would seek in nature. A quiet corner of your home, away from loud noises and foot traffic, will help your dog feel secure and more inclined to use the box. Pay attention to their body language and cues; recognizing when they are about to relieve themselves can help you guide them to the box at the right moment.

By aligning your training methods with your dog’s instinctual behaviors, you can foster a positive association with the litter box, paving the way for a successful transition. Remember, it’s all about understanding your canine companion and working with, rather than against, their natural inclinations.

2. Choosing the Right Location for the Litter Box

Choosing the right location for the litter box is crucial in ensuring your dog feels comfortable and confident using it. Dogs thrive in environments that are quiet, safe, and easily accessible, so selecting the perfect spot requires careful consideration.

Start by observing your dog’s usual bathroom habits. Does your furry friend prefer secluded areas for their business? If so, placing the litter box in a corner of a low-traffic room may be ideal. Avoid high-traffic areas like hallways or rooms where family members frequently gather, as these can create distractions that deter your dog from using the box.

Moreover, ensure the litter box is located near the door to the outside if you have a backyard. This proximity helps reinforce the idea that the litter box is an acceptable place to relieve themselves, while also providing a quick exit to the outdoors when needed. If you’re using a specific type of litter, make sure to keep it consistent and place the box in an area where it won’t be disturbed by other pets or children.

Light is also an important factor; choose a location that is well-lit but not harshly illuminated. Your dog should feel relaxed and secure in their chosen spot, so consider placing the litter box in a spot where they can feel at ease without feeling exposed.

Lastly, be mindful of any scents or odors that may be present in the area. Dogs are sensitive to smells, and a location that is too close to their food or sleeping areas may deter them from using the litter box. By thoughtfully selecting the right location, you’re setting the stage for successful litter box training and creating a positive experience for your canine companion.

3. Selecting the Best Litter for Dogs

What are the different types of paintbrushes and their uses?
Credit : whatcanu.com

When it comes to training your dog to use a litter box, selecting the right litter is a crucial step that can make all the difference in your success. Unlike traditional cat litter, dog litter needs to cater to your canine’s unique habits and instincts. As you embark on this journey, consider the various options available and their specific benefits to ensure a comfortable and inviting environment for your furry friend.

First and foremost, look for dog-specific litter formulations. These litters are typically made from materials that are safe and appealing to dogs, such as recycled paper, wood pellets, or even natural grass. Many pet owners find that paper-based litters are an excellent choice because they are absorbent, non-toxic, and gentle on a dog’s paws. Furthermore, they often come in unscented varieties, which can be a relief for dogs sensitive to strong odors.

Another option is the use of biodegradable litters, which not only provide a safe space for your dog to relieve themselves but also minimize environmental impact. Products made from corn, wheat, or other plant-based materials can effectively absorb moisture and control odors while being kind to the planet.

Consider your dog’s preferences, too. Some dogs may have a preference for softer textures, while others might enjoy the crunch of a wood-based litter. If you’re unsure, you can conduct a simple experiment by introducing a couple of different types of litter and observing your dog’s reactions.

Finally, pay attention to the litter’s clumping ability and odor control features. A litter that clumps well makes clean-up easier and helps maintain a fresher environment, which is especially important when training your dog to use the box consistently.

In summary, selecting the best litter for your dog goes beyond mere functionality; it’s about creating a positive experience that encourages them to return to the litter box time and time again. By choosing wisely, you’ll pave the way for a successful litter box training journey, turning what could be a daunting task into a manageable and rewarding process.

4. Introducing Your Dog to the Litter Box

Introducing your dog to the litter box can be a pivotal moment in your training journey, and it sets the stage for successful litter box habits. Begin this process in a calm and quiet environment where your dog feels safe and secure. Choose a litter box that is appropriately sized for your dog—one that they can easily enter and exit. Consider a box with low sides for small breeds or puppies, and make sure it’s placed in a designated area that is easily accessible yet private enough to encourage your dog to use it.

Once you have the litter box set up, it’s time to pique your dog’s curiosity. You can do this by placing a few treats or a favorite toy inside the box. Allow them to explore it at their own pace, as this will help them associate the box with positive experiences. Use encouraging words and a cheerful tone to reinforce their curiosity. If they show interest or even step inside, offer plenty of praise and a treat to create a positive association.

Next, establish a routine. Dogs thrive on consistency, so incorporate regular bathroom breaks into their daily schedule. After meals, playtime, or waking up from a nap are ideal moments to lead your dog to the litter box. Always use the same command or cue, such as “Go potty,” to signal that it’s time to use the box. If your dog successfully uses the litter box, reward them immediately with praise and a treat to reinforce the behavior.

Patience is key during this introduction phase. Some dogs may take a little longer to understand the concept of a litter box. If accidents happen outside the box, remain calm and avoid punishment, as this can create anxiety. Instead, gently guide them back to the box and encourage them to use it. Over time, with consistent training and positive reinforcement, your dog will learn to embrace the litter box as their designated spot for bathroom breaks, making the entire process smoother for both you and your furry friend.

5. Establishing a Routine for Litter Box Training

What are the different types of paintbrushes and their uses?
Credit : whatcanu.com

Establishing a routine for litter box training is one of the most crucial steps in ensuring your dog learns to use the designated area effectively. Just like humans, dogs thrive on structure and predictability, and a consistent schedule can significantly aid in the training process. Start by choosing specific times throughout the day to take your dog to the litter box, such as after meals, playtime, or naps. This helps your dog associate those moments with the need to relieve themselves.

Begin by observing your dog’s natural habits. Pay attention to when they typically show signs of needing to go, such as sniffing around, circling, or whining. When you notice these behaviors, promptly guide them to the litter box. Consistency is key; by taking them to the same spot each time, you reinforce the idea that this is their bathroom.

During the initial training phase, it can be beneficial to use a command phrase, such as “Go potty,” every time you take them to the litter box. This verbal cue will help your dog learn to associate the phrase with the action, making it easier for them to understand what is expected.

Don’t forget to celebrate successes! When your dog uses the litter box correctly, offer plenty of praise and perhaps a small treat. This positive reinforcement will encourage them to repeat the behavior. Conversely, if an accident occurs, avoid scolding; instead, clean up thoroughly to eliminate any lingering scents that might tempt them to return to the same spot.

Lastly, be patient. Just like any training process, litter box training may take time and persistence. By establishing a routine and remaining committed, you’ll foster a successful environment for your dog to learn, creating a harmonious living space for both of you. Remember, consistency and positive reinforcement are your best tools in this endeavor!

6. Positive Reinforcement Techniques

Positive reinforcement techniques are a cornerstone of successful dog training, particularly when it comes to mastering the litter box. This method leverages the power of rewards to encourage desirable behaviors, making your dog more eager to learn and adapt. Instead of scolding your furry friend for accidents, focus on celebrating their successes, no matter how small.

Begin by selecting a high-value treat that your dog adores—this could be a piece of chicken, a small bit of cheese, or a favorite commercial dog treat. Whenever your dog uses the litter box correctly, immediately reward them with the treat and shower them with praise. Use a cheerful tone and enthusiastic body language to convey your excitement. Phrases like “Good job!” or “What a smart pup!” can reinforce their positive behavior.

Timing is crucial in positive reinforcement. Ensure that your dog receives their reward within seconds of them using the litter box, so they can connect the dots between the action and the reward. Consistency is key, too; make sure all family members follow the same protocol to avoid confusing your dog.

Additionally, consider using clicker training as part of your positive reinforcement strategy. A clicker is a small device that makes a distinct sound when pressed. When your dog uses the litter box correctly, click the device instantly, followed by a treat. This method helps establish a clear association between the behavior and the reward, helping your dog understand what you expect from them.

As your dog becomes more reliable with their litter box habits, gradually reduce the frequency of treats but continue to offer praise. This helps maintain their motivation while reinforcing your bond. Remember, patience is essential; every dog learns at their own pace. By employing positive reinforcement techniques, you’ll create a supportive environment that makes mastering the litter box a rewarding experience for both you and your dog.

7. Common Mistakes to Avoid

What are the different types of paintbrushes and their uses?
Credit : whatcanu.com

Training your dog to use a litter box can be a rewarding experience, but it’s essential to navigate the process carefully to avoid common pitfalls that can hinder progress. Being aware of these mistakes can save you time, frustration, and help ensure a smoother training journey.

One of the most prevalent mistakes pet owners make is underestimating the importance of patience. Dogs, much like humans, need time to adjust to new routines. Rushing the training process can lead to confusion and setbacks. Remember, consistency is key. If you frequently change the location of the litter box or the type of litter, your dog may struggle to adapt. Establish a designated spot and stick with it to help your furry friend understand where they should go.

Another common error is using harsh disciplinary methods when accidents happen. It’s crucial to remember that dogs do not respond well to punishment; it can create fear and anxiety, ultimately leading to more accidents. Instead of scolding, focus on positive reinforcement. Celebrate small victories with treats and praise when your dog uses the litter box correctly. This encourages repeat behavior and strengthens your bond.

Additionally, neglecting the cleanliness of the litter box can create a barrier to success. Dogs are naturally clean animals and may refuse to use a dirty box. Regularly clean the litter box and refresh the litter to maintain an inviting environment. Make sure to also choose the right type of litter, as some dogs may have preferences that can impact their willingness to use the box.

Lastly, a lack of routine can throw your training off course. Dogs thrive on predictability, so establishing a consistent schedule for bathroom breaks can help reinforce the habit of using the litter box. Whether it’s first thing in the morning, after meals, or before bedtime, sticking to a routine will set your dog up for success.

By avoiding these common mistakes and approaching the training process with patience, consistency, and positivity, you can help your dog master the litter box and create a more harmonious living environment for both of you. Your efforts will pay off as your dog learns to embrace this new behavior, leaving you both feeling accomplished and ready to tackle the next training challenge together.

8. Dealing with Accidents: What to Do

Accidents are an inevitable part of the litter box training process, and how you handle them can make a significant difference in your dog’s learning curve. First and foremost, it’s essential to remain calm and composed when you discover an accident. Remember, your dog is still learning, and scolding them will only instill fear and confusion rather than promote understanding.

When you find an accident, avoid punishment. Instead, focus on cleaning up thoroughly to eliminate any lingering scents that might encourage your dog to repeat the behavior in the same spot. Use an enzymatic cleaner specifically designed for pet messes, as it breaks down the odors that regular cleaners might leave behind. This ensures that your dog won’t be tempted to return to that area for another “visit.”

After cleaning, assess the situation to identify the possible triggers that led to the accident. Was your dog left alone for too long? Did they show signs of needing to go but were ignored? By pinpointing the cause, you can adjust your training methods accordingly.

If accidents become frequent, it may be beneficial to revisit your training routine. Consider increasing the frequency of bathroom breaks, especially after meals, playtime, or naps. This not only reinforces the routine but also gives your dog ample opportunity to succeed in using the litter box.

Lastly, celebrate the successes! When your dog uses the litter box correctly, offer plenty of praise and a treat to reinforce the behavior. Positive reinforcement is key in creating lasting habits. With patience and consistency, your dog will learn the ropes, and accidents will become a thing of the past. Remember, every step forward is a step toward mastering the litter box!

9. Transitioning from Litter Box to Outdoor Potty

Transitioning your dog from a litter box to outdoor potty is a significant step in their training journey, and it requires patience and consistency. As your dog becomes accustomed to using the litter box, it’s essential to gradually introduce them to the idea of going outdoors for bathroom breaks. This process not only helps your furry friend understand where to relieve themselves but also encourages them to embrace the great outdoors.

Start by choosing a specific outdoor potty spot, preferably in a quiet area of your yard or nearby park. This location should be consistent, as dogs thrive on routine and familiarity. Each time you take your dog outside, use a command phrase like “go potty” to signal what you expect from them. This will help them associate the phrase with the action of relieving themselves outdoors.

To make the transition smoother, reduce the availability of the litter box gradually. Begin by limiting access to it, allowing your dog to use it only during specific times of the day. For example, you may want to remove the litter box during the day and only allow access during the night. This encourages your dog to rely on outdoor potty breaks instead.

Reward your dog with praise or treats immediately after they relieve themselves outside. This positive reinforcement will reinforce the behavior you want to encourage, making them more likely to repeat it. Additionally, be on the lookout for signs that your dog needs to go out, such as sniffing, circling, or whining. Promptly taking them outside when you observe these behaviors will help establish a strong connection between the need to go and the outdoor potty spot.

Keep in mind that accidents are a normal part of the training process, so remain patient and avoid scolding your dog. Instead, clean up any messes thoroughly to eliminate lingering odors that might attract them back to the old litter box. With time, consistency, and encouragement, your dog will transition smoothly to outdoor potty habits, making your home cleaner and fostering a healthier relationship with their environment.

10. Monitoring Your Dog’s Progress

Monitoring your dog’s progress is a crucial step in mastering the litter box training process. Just like any other training regimen, observing your dog’s behavior and responses will provide insights into what’s working and what might need adjusting. Begin by keeping a detailed record of your dog’s habits. Note when they use the litter box, how often they go, and any accidents that occur outside of it. This data will help you identify patterns in their behavior, allowing you to tailor your training approach accordingly.

Pay close attention to your dog’s body language and signals. Dogs are creatures of habit, and they often exhibit specific behaviors before needing to relieve themselves—sniffing around, circling, or searching for a quiet spot. By becoming attuned to these signs, you can proactively guide your furry friend to the litter box, reinforcing the idea that this is the appropriate place to go.

Additionally, consider using positive reinforcement to encourage your dog’s successes. Every time they use the litter box correctly, offer praise, treats, or playtime. This not only builds a positive association with the litter box but also fosters a trusting bond between you and your pet.

Lastly, be patient and flexible. Each dog is unique, and some may take longer to adjust than others. If you notice setbacks, don’t be discouraged; instead, reassess your strategies and make necessary adjustments. Through consistent monitoring and support, you’ll pave the way for a smoother training experience, ultimately leading to a well-trained dog who understands the importance and convenience of using the litter box.

11. Troubleshooting Behavioral Issues

Training your dog to use the litter box can be a rewarding experience, but it’s not without its challenges. As with any behavior modification, you may encounter some hiccups along the way. Troubleshooting behavioral issues is an essential part of the process, as it helps you understand your dog’s needs and adjust your training methods accordingly.

First, consider the environment. Dogs are creatures of habit and can be sensitive to changes around them. If your dog suddenly refuses to use the litter box, take a moment to assess their surroundings. Are there new sounds or smells? Have there been changes in the household, like the arrival of a new pet or a recent move? Addressing these environmental stressors may help your dog feel more comfortable and secure in their designated space.

Next, evaluate the type of litter you are using. Some dogs are particular about texture and scent, so experimenting with different types of litter may yield better results. Opt for unscented, natural options to see if your dog shows a preference. Also, ensure the litter box itself is the right size and easily accessible. A box that’s too tall or too small can deter your dog from using it.

If your dog has accidents outside the litter box, it’s crucial to remain patient and avoid punishment. Instead, focus on positive reinforcement. When your dog successfully uses the litter box, reward them with praise and treats to reinforce the behavior. If they have an accident, clean it thoroughly with an enzymatic cleaner to eliminate lingering odors that might encourage repeat offenses.

Monitoring your dog’s bathroom habits can also provide valuable insights. Keep a log of when they go, how often, and any changes in behavior. This information can help you identify patterns and adjust your training strategy. If accidents continue despite your best efforts, consider consulting with a veterinarian to rule out any underlying medical issues that could be affecting your dog’s ability to control their urges.

Finally, remember that consistency is key. Stick to a routine for feeding and bathroom breaks to establish a predictable schedule. With time, patience, and a little troubleshooting, you can help your dog master the litter box and create a harmonious living environment for both of you.

12. Maintaining a Clean Litter Box Environment

Maintaining a clean litter box environment is crucial for both your dog’s comfort and your household hygiene. Just as we appreciate a tidy restroom, dogs also prefer a clean space for their business. A well-kept litter box not only encourages your furry friend to use it consistently but also helps prevent odors and potential health issues.

Start by establishing a regular cleaning routine. Aim to scoop the litter box at least once a day, removing waste and clumps to keep the area fresh. Depending on your dog’s size and habits, you may need to clean it more frequently. A dirty litter box can deter your dog from using it, leading to accidents around the house.

In addition to daily scooping, perform a thorough cleaning of the box weekly. Empty out the old litter, wash the box with warm, soapy water, and rinse it well to remove any lingering odors or bacteria. This step is essential to provide a hygienic environment for your dog and prolong the life of your litter box.

Choosing the right litter can also play a significant role in maintaining cleanliness. Opt for high-quality, clumping, and odor-absorbing litter to make your life easier. Some litters are specifically designed to control odors effectively, while others may offer added benefits like being eco-friendly or low dust, which is particularly important for indoor air quality.

Lastly, consider the location of the litter box. It should be placed in a quiet, easily accessible area away from your dog’s food and water bowls. This can help your dog feel more comfortable and secure when using it. A clean, well-maintained litter box in a suitable location will encourage your dog to use it regularly, helping to solidify their training and keep your home clean. By prioritizing cleanliness, you not only create a pleasant experience for your dog but also foster a harmonious living environment for both of you.

13. Using Crate Training Alongside Litter Box Training

Combining crate training with litter box training can create a seamless and effective system for teaching your dog where to relieve themselves. Crate training provides a safe and secure environment, capitalizing on your dog’s natural instinct to keep their sleeping area clean. By introducing your dog to a crate, you can establish a routine that reinforces positive behaviors while also facilitating litter box training.

Start by acclimating your dog to the crate, ensuring that it’s a comfortable space filled with their favorite blanket and toys. Keep the crate in a quiet area of your home, allowing your dog to explore it at their own pace. Gradually increase the time they spend inside, always rewarding them with praise or treats for being calm and relaxed. This will help your dog associate the crate with safety and comfort rather than as a punishment.

Once your dog is comfortable in the crate, begin the litter box training process. Place the litter box in a designated spot that is easily accessible to your dog. When you notice signs that your dog needs to go—sniffing, circling, or whining—gently guide them to the litter box. Use positive reinforcement by offering treats and praise when they successfully use it, reinforcing the connection between the crate, the litter box, and the reward.

Additionally, during crate training, take your dog outside frequently, especially after they’ve been in the crate for a while. This will help them learn the difference between outdoor and indoor relief spots. With time, patience, and consistency, you’ll create a harmonious training routine that empowers your dog to feel secure in their crate while confidently using their litter box. This dual approach not only enhances their understanding of where to go but also strengthens your bond as a team working towards a common goal.

14. FAQs About Dog Litter Box Training

### 14. FAQs About Dog Litter Box Training

As dog owners embark on the journey of litter box training, it’s common to have a plethora of questions. After all, transitioning a canine companion to use a litter box isn’t something that comes naturally to them. To help you navigate this process with ease, we’ve compiled a list of frequently asked questions that may provide clarity and confidence as you train your dog.

**1. What breed of dog is best suited for litter box training?**
While any breed can be trained to use a litter box, smaller breeds and puppies tend to adapt more easily due to their size. However, with patience and consistency, larger breeds can also learn this behavior.

**2. At what age can I start litter box training my dog?**
Puppies can begin learning as early as eight weeks old. At this age, they are curious and eager to explore new habits. Adult dogs can also be trained, though it may take a bit longer depending on their previous habits.

**3. What type of litter should I use?**
Choose a litter that is safe for dogs, such as paper-based, wood-based, or artificial turf. Avoid clay or clumping litters, which can be harmful if ingested. Experiment to find the texture your dog prefers, as comfort plays a role in their willingness to use the box.

**4. How long does it typically take to train a dog to use a litter box?**
The training duration varies based on the individual dog’s temperament and previous habits. On average, expect the process to take anywhere from a few days to several weeks. Consistency and positive reinforcement are key to achieving success.

**5. What should I do if my dog refuses to use the litter box?**
If your dog is hesitant, reassess the setup. Ensure the box is in a quiet, accessible location and that the litter is appealing. Consider using treats or praise to encourage them when they approach the box. If issues persist, consult a professional trainer for additional guidance.

**6. Can I still take my dog outside for potty breaks if they are litter box trained?**
Absolutely! Litter box training is not meant to replace outdoor potty breaks. It provides a convenient option for times when you can’t take your dog outside, such as during inclement weather or late at night.

**7. Will litter box training affect my dog’s outdoor potty training?**
Not at all. Many dogs can successfully adapt to using both a litter box and going outside. Just be consistent with your command cues and expectations for both scenarios to prevent any confusion.

By addressing these frequently asked questions, we hope to demystify the litter box training process and empower you to create a positive experience for both you and your dog. Remember, patience and consistency are your best allies on this journey!

15. Celebrating Success: Tips for Continued Maintenance

Celebrating your dog’s success in mastering the litter box is not just about acknowledging their achievement; it’s a crucial step in ensuring that this positive behavior continues. Just as we humans thrive on recognition and rewards, our canine companions benefit greatly from similar reinforcement. Here are some tips for continued maintenance that will help you keep the momentum going.

First and foremost, celebrate each successful litter box use with enthusiasm! Use a cheerful tone, offer a treat, or engage in a fun game. This positive reinforcement will solidify the behavior in your dog’s mind and encourage them to repeat it. Remember, the goal is to create a positive association with the litter box, so make these moments special and frequent.

Consistency is key in maintaining your dog’s litter box training. Keep a routine by taking your dog to their designated area at the same times each day. Dogs thrive on predictability, so establishing a schedule that includes regular feeding times, potty breaks, and playtime will help your dog understand what’s expected of them. Gradually, they will become accustomed to the routine and learn to anticipate their litter box use as part of their daily activities.

Monitoring your dog’s behavior is also essential in this phase. Pay attention to any signs of confusion or anxiety regarding the litter box. If accidents occur, don’t scold or punish—this can lead to fear and regression. Instead, calmly redirect them to the litter box and reward them when they respond correctly. Mistakes are part of the learning process, and patience is vital.

Lastly, keep the litter box clean and inviting. Regularly remove waste and refresh the litter to maintain a pleasant environment. A clean and well-maintained area will encourage your dog to use the box consistently and feel comfortable doing so.

By celebrating successes, staying consistent, and fostering a positive environment, you’ll not only reinforce your dog’s litter box training but also deepen the bond between you and your furry friend. With these strategies, you can ensure that your dog continues to feel confident and secure in their litter box habits for years to come.

In conclusion, mastering the litter box training for your dog can transform your home into a harmonious haven for both you and your furry friend. By following the step-by-step guide outlined in this post, you’ll empower yourself with the knowledge and techniques needed to make this process smooth and successful. Remember, patience and consistency are key, and every dog learns at their own pace. Celebrate the small victories along the way, and don’t hesitate to reach out for support if challenges arise. With dedication and love, you’ll create a positive experience for both you and your dog, ensuring that your home remains clean and comfortable. Happy training, and may your journey to litter box mastery be filled with joy and tail wags!