What are the different types of dishwashers and their features?

In the bustling heart of every home, the kitchen stands as a hub of activity, and at the center of it all is the humble dishwasher—a modern marvel that transforms the tedious chore of washing dishes into a breeze.

But with a plethora of options available, how do you choose the right dishwasher that suits your needs and lifestyle? From the sleek, energy-efficient built-in models to the versatile portable designs, each type comes packed with features that promise to enhance your dishwashing experience. In this comprehensive guide, we will delve into the various types of dishwashers, unravel their unique features, and provide you with the insights needed to make an informed decision. Whether you’re a culinary enthusiast or a busy parent seeking convenience, understanding the ins and outs of dishwashers will empower you to select the perfect appliance that not only complements your kitchen but also streamlines your daily routine. Join us as we navigate the world of dishwashers and help you find the ideal match for your home!

1. Introduction to Dishwashers: Why Choose One?

What are the different types of dishwashers and their features?
Credit : whatcanu.com

In today’s fast-paced world, where time is often a luxury, the humble dishwasher has transformed from a mere convenience to an essential household appliance. Imagine the relief of not having to spend precious moments scrubbing pots and pans, only to find yourself facing a mountain of dishes after every meal. With a dishwasher, you can reclaim that time for what truly matters—be it enjoying a leisurely dinner with family or catching up on your favorite shows.

Choosing a dishwasher is not just about selecting an appliance; it’s about enhancing your lifestyle. From energy-efficient models that help reduce your carbon footprint to smart dishwashers equipped with Wi-Fi capabilities for remote operation, the options available today cater to a wide array of needs and preferences. Whether you have a bustling household with a constant stream of dirty dishes or a cozy kitchen for two, there’s a dishwasher designed to fit seamlessly into your routine.

In this guide, we will explore the various types of dishwashers—some built to handle large loads with ease, while others are compact and perfect for smaller kitchens. We will also delve into essential features to consider, such as noise levels, wash cycles, and energy efficiency ratings. By the end of this article, you will not only understand the different options available but also be well-equipped to make an informed decision that perfectly suits your lifestyle and kitchen needs. So, let’s dive in and discover why choosing the right dishwasher can revolutionize your dishwashing experience!

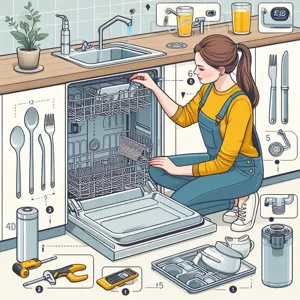
2. Types of Dishwashers: Built-in, Portable, and Drawer Models

When it comes to selecting the right dishwasher for your home, understanding the different types available can significantly impact your decision. Dishwashers come in three main designs: built-in, portable, and drawer models, each catering to distinct needs and lifestyles.

**Built-in Dishwashers** are the most common type found in homes. These units are seamlessly installed under the countertop, providing a permanent solution for dishwashing. They usually come in standard sizes (24 inches is typical) and can hold a substantial amount of dishes, pots, and pans, making them ideal for families or anyone who frequently entertains guests. Built-in models often come equipped with advanced features such as multiple wash cycles, energy-efficient options, and smart technology that allows for remote operation via smartphones.

**Portable Dishwashers** offer a flexible alternative for those who may not have the space or plumbing for a built-in unit. These dishwashers typically sit on wheels, allowing you to move them wherever needed, and can be easily connected to a kitchen faucet when in use. This makes them perfect for renters or smaller kitchens that require versatility. Portable dishwashers generally have a smaller capacity than their built-in counterparts but still get the job done efficiently. With various styles and colors available, they can blend in with your kitchen decor while providing the functionality you need.

**Drawer Dishwashers** are a more modern and innovative option, featuring a unique design that allows for easier loading and unloading. These models consist of one or two separate drawers that can operate independently, making them great for smaller loads or quick clean-ups. Drawer dishwashers are particularly beneficial for those with limited kitchen space, as they can be installed in cabinets or countertops. Additionally, many drawer models come with advanced features like adjustable racks and specialized wash settings for delicate items.

By recognizing the advantages and limitations of each type of dishwasher, you can make an informed decision that aligns with your household needs, kitchen layout, and lifestyle. Whether you opt for the classic built-in, the versatile portable, or the innovative drawer model, choosing the right dishwasher will enhance your kitchen experience and streamline your dishwashing routine.

3. Key Features to Consider When Buying a Dishwasher

What are the different types of dishwashers and their features?
Credit : whatcanu.com

When embarking on the journey to choose the perfect dishwasher, understanding the key features available can significantly enhance your decision-making process. Modern dishwashers come packed with a variety of options designed to cater to diverse household needs, making it crucial to identify which features align with your lifestyle and preferences.

**1. Wash Cycles and Options:**
One of the first features to consider is the variety of wash cycles your dishwasher offers. Standard options include heavy, normal, and light cycles, but advanced models may also provide eco-friendly settings, quick wash options, and even specialized cycles for delicate glassware or pots and pans. Having multiple cycles allows you to customize the cleaning process based on your specific load requirements, ensuring that your dishes receive the appropriate care.

**2. Energy Efficiency:**
Energy-efficient dishwashers not only save you money on utility bills but also contribute to environmental sustainability. Look for models with the ENERGY STAR label, which indicates they meet rigorous energy efficiency standards. Additionally, consider features like soil sensors that adjust the wash cycle based on the dirtiness of the dishes, optimizing water and energy usage.

**3. Noise Level:**
For those who value peace and quiet, the noise level of a dishwasher is an essential feature to keep in mind. Measured in decibels (dB), a quieter dishwasher typically operates between 44-50 dB, allowing you to run it during the night or while entertaining guests without disruption. If your kitchen is open to your living space, investing in a quieter model can enhance your overall comfort.

**4. Interior Layout and Capacity:**
The layout of the dishwasher’s interior can greatly impact its usability. Look for adjustable racks, foldable tines, and designated spaces for utensils and larger items. A flexible configuration allows you to maximize capacity and accommodate various dish sizes, from oversized pots to delicate stemware. Assessing your typical load size and shape will help you determine the best interior design for your needs.

**5. Smart Features:**
As technology advances, many dishwashers now come equipped with smart features that can elevate your cleaning experience. Wi-Fi connectivity allows you to monitor and control your dishwasher remotely, receive alerts when cycles are complete, or even run diagnostic tests. Some models are compatible with voice assistants, making it easier to set cycles without lifting a finger.

**6. Build Quality and Design:**
Finally, consider the build quality and design aesthetics of the dishwasher. Stainless steel interiors are not only durable but also resist odors and stains, making them easier to clean. The exterior design should complement your kitchen decor, with options ranging from sleek, modern lines to classic finishes. A well-designed dishwasher can seamlessly integrate into your kitchen while providing lasting performance.

By carefully evaluating these key features, you’ll be well-equipped to select a dishwasher that not only meets your cleaning demands but also enhances your kitchen’s functionality and style. Whether you prioritize efficiency, noise reduction, or advanced technology, understanding these elements will lead you to a choice that keeps your dishes sparkling while fitting seamlessly into your home.

4. Energy Efficiency Ratings: What You Need to Know

When selecting a dishwasher, one of the most critical factors to consider is its energy efficiency rating. Not only does this metric highlight the appliance’s environmental impact, but it can also significantly influence your household utility costs. Dishwashers are assigned an energy efficiency rating based on their energy consumption during typical use, usually represented by the Energy Star label or the Federal Trade Commission (FTC) guidelines.

Energy Star-rated dishwashers, for instance, are designed to use less water and electricity compared to standard models, making them a sustainable choice for eco-conscious consumers. These dishwashers often incorporate advanced technologies, such as soil sensors and smart wash cycles, which optimize water and energy usage based on the load’s specific needs.

When perusing different models, look for the EnergyGuide label, which provides an estimated annual operating cost and energy consumption. This label is a valuable tool for comparing efficiency among various options, allowing you to weigh the potential savings against the initial purchase price.

Beyond just the numbers, consider how features like adjustable spray arms, energy-saving modes, and hybrid drying systems contribute to overall efficiency. Some dishwashers even allow you to run shorter cycles for lightly soiled dishes, minimizing water and energy usage.

By prioritizing energy efficiency, not only will you reduce your environmental footprint, but you’ll also enjoy long-term savings on your energy bills, making it a smart, cost-effective choice for any kitchen. As you navigate through your options, keep these energy efficiency ratings in mind to ensure you select a dishwasher that balances performance with sustainability.

5. Noise Levels and Their Importance in Choosing a Dishwasher

What are the different types of dishwashers and their features?
Credit : whatcanu.com

When it comes to selecting the perfect dishwasher for your home, noise levels should be a top consideration. After all, the last thing you want is to invest in a sleek, efficient appliance that disrupts the tranquility of your household with persistent clattering and whirring sounds. Modern dishwashers come with a range of noise levels, typically measured in decibels (dB), and understanding this measurement is crucial for making an informed choice.

Most dishwashers today operate between 40 dB and 60 dB. For reference, a quiet library registers at about 40 dB, while normal conversation can reach around 60 dB. If you have an open-concept living space or your kitchen is adjacent to your living area, opting for a model that operates below 50 dB will ensure a peaceful environment, allowing you to watch TV or have a conversation without raising your voice.

Additionally, many manufacturers now highlight their dishwashers’ noise levels prominently in their specifications, with terms like “ultra-quiet” or “whisper-quiet” often indicating models that operate at the lower end of the scale. Features such as sound insulation and a well-designed motor can contribute significantly to reducing noise levels, so it’s worth considering these aspects when shopping.

Moreover, pay attention to the dishwasher’s cycle types. Some cycles, like the heavy-duty or sanitize settings, may generate more noise due to increased water pressure and longer run times. Understanding when these louder cycles occur can help you plan your dishwashing schedule around them—perhaps running heavier loads at night when the household is quieter.

Ultimately, a dishwasher’s noise level can greatly influence your overall satisfaction with the appliance. By prioritizing this feature in your purchasing decision, you can enjoy the convenience of a dishwasher without the unwelcome distraction of excessive noise, creating a harmonious balance in your home.

6. Size and Capacity: Finding the Right Fit for Your Kitchen

When it comes to selecting the perfect dishwasher for your kitchen, size and capacity are crucial factors that can significantly impact both functionality and convenience. Dishwashers come in a variety of sizes, typically categorized as standard, compact, and portable models, each designed to cater to different kitchen layouts and household needs.

**Standard Size Dishwashers** typically measure around 24 inches wide and are built to accommodate a full load of dishes, making them ideal for larger families or those who frequently entertain guests. These models often offer adjustable racks and flexible loading options, allowing you to maximize their capacity for pots, pans, and tall items. If you find yourself cooking elaborate meals or accumulating a mountain of dishes after a gathering, a standard dishwasher could be your best bet.

On the other hand, **Compact Dishwashers**, generally around 18 inches wide, are designed for smaller kitchens or apartments where space is limited. Despite their size, many compact models don’t compromise on performance, offering efficient cleaning cycles and energy-saving features. They typically hold fewer dishes than standard models but can still handle everyday needs for singles or couples.

For those who are short on space but still want the convenience of a dishwasher, **Portable Dishwashers** may be the solution. These units can be wheeled into place and connected to the kitchen sink when needed, providing flexibility without the commitment of a permanent installation. Perfect for renters or anyone who is not ready for a full kitchen remodel, portable dishwashers come in various sizes and designs to suit any style.

In addition to the physical size, consider the **capacity** of the dishwasher. Most models list their capacity in terms of place settings, which is the standard measure of how many dishes, glasses, and utensils can be washed in one cycle. A typical standard-sized dishwasher holds about 12 to 16 place settings, while compact models usually accommodate 6 to 8. Choose a capacity that aligns with your household’s dishwashing habits—overestimating your needs can lead to a machine that’s underused, while underestimating can leave you washing dishes by hand more often than you’d like.

Ultimately, the right dishwasher for your kitchen is one that fits both your space and your lifestyle. Take the time to measure your available space, consider the size of your household, and think about how often you cook and entertain. By doing so, you’ll ensure that your new dishwasher not only fits seamlessly into your kitchen but also meets your dishwashing demands effectively.

7. Wash Cycle Options: Understanding Different Settings

What are the different types of dishwashers and their features?
Credit : whatcanu.com

When selecting a dishwasher, one of the most critical aspects to consider is the variety of wash cycle options available. These settings not only define how effectively your dishes will be cleaned but also enhance the appliance’s efficiency by allowing you to customize the wash according to your specific needs. Understanding these different settings can significantly impact your dishwashing experience and help you maintain optimal performance.

1. **Normal Cycle**: This is the standard setting most commonly used for everyday loads. It typically uses moderate water pressure and heat, making it suitable for a mix of lightly soiled and moderately dirty dishes. This cycle is perfect for day-to-day cleaning, ensuring your plates, utensils, and glasses come out sparkling without excessive energy use.

2. **Heavy Duty / Pots and Pans Cycle**: Designed for those stubborn, baked-on messes, this cycle employs higher water temperatures and extended wash times. It’s ideal for cleaning cookware, such as pots and pans, that require a little more elbow grease. If you frequently entertain or cook large meals, this setting will become one of your best friends in the kitchen.

3. **Quick Wash / Express Cycle**: For those times when you need clean dishes in a hurry, the quick wash cycle is a lifesaver. It significantly reduces the wash time, making it perfect for lightly soiled items or when you have a small load. However, it’s important to note that while convenient, this setting may not offer the thoroughness of a normal cycle.

4. **Eco Mode**: As sustainability becomes a priority for many households, the eco mode has gained popularity. This setting uses less water and energy by extending the wash duration and lowering the temperature. If you want to minimize your environmental footprint while still achieving clean dishes, this is the option for you.

5. **Sanitize Cycle**: If you’re particularly concerned about germs and bacteria, the sanitize cycle is a must-have feature. This setting raises the water temperature to a level that kills harmful microorganisms, making it an excellent choice for cleaning baby bottles, cutting boards, and other items that require thorough sanitization.

6. **Glassware Cycle**: Delicate items like wine glasses and crystal require special care to avoid chipping or breaking. The glassware cycle typically uses gentler water pressure and lower temperatures to protect these fragile pieces while still providing effective cleaning.

7. **Self-Cleaning Cycle**: While not a wash cycle for your dishes, this feature is worth mentioning. A self-cleaning cycle helps maintain the dishwasher itself by using high heat to eliminate built-up grime and odor, ensuring that your appliance runs efficiently and extends its lifespan.

In summary, understanding the wash cycle options available on your dishwasher can enhance your cleaning efficiency and ensure that your dishes are always spotless. By selecting the right cycle for your specific needs, you’ll not only save time and energy but also prolong the life of your dishware and your appliance. Consider your dishwashing habits and the types of items you frequently clean to choose the perfect dishwasher settings for your household.

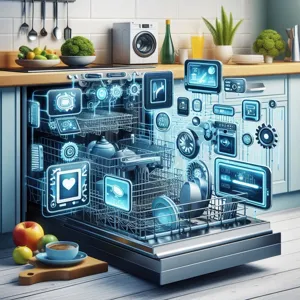
8. Smart Technology: The Benefits of Smart Dishwashers

In the age of smart homes, dishwashers have evolved far beyond their traditional roles, thanks to the advent of smart technology. Smart dishwashers come equipped with innovative features that not only streamline the dishwashing process but also enhance convenience and efficiency. Imagine being able to control your dishwasher from your smartphone, allowing you to start or pause a cycle while you’re out grocery shopping or even at work.

One of the most significant benefits of smart dishwashers is their ability to connect to Wi-Fi, enabling you to receive alerts and notifications directly to your mobile device. This means you’ll know exactly when your dishes are clean and ready to be unloaded, eliminating the guesswork often associated with traditional models. Many smart dishwashers also offer diagnostic features that can alert you to potential issues before they become major problems, saving you time and repair costs down the line.

Additionally, smart dishwashers often include advanced sensors that optimize water and energy usage based on the load size and soil level of your dishes. This not only reduces your utility bills but also contributes to a more environmentally friendly home. Some models even allow you to customize wash cycles and settings through a dedicated app, so you can easily select the best program for your specific needs—whether that’s a quick wash for lightly soiled plates or a more intensive cycle for baked-on grime.

Moreover, many smart dishwashers come with integration features that allow them to work seamlessly with other smart home devices. For instance, you can set your dishwasher to run while you’re away, or sync it with your smart speaker to receive updates on its cycle status. With voice control capabilities, you can simply ask your smart assistant when it will be finished, ensuring that dishwashing fits effortlessly into your busy schedule.

In summary, investing in a smart dishwasher can transform your kitchen experience. With convenience, efficiency, and advanced technology at your fingertips, you can enjoy sparkling clean dishes without the hassle. As you evaluate your options, consider how these features can fit into your lifestyle and help you make an informed decision that will keep your kitchen running smoothly.

9. Interior Design: Racks, Tines, and Loading Flexibility

When it comes to choosing the right dishwasher, the interior design is just as crucial as the exterior finish. A well-thought-out interior layout can significantly enhance your dishwashing experience, making it easier and more efficient to load and unload your dishes.

First and foremost, consider the configuration of the racks and tines. Most modern dishwashers come equipped with adjustable racks, which allow you to customize the space according to your needs. This flexibility is particularly beneficial if you frequently wash larger items, such as pots and pans, or if you have a collection of delicate glassware that requires special handling. Some models even feature a third rack, which provides additional space for utensils and smaller items, maximizing every inch of available loading space.

The tines—the prongs that hold your dishes in place—also play a significant role in how effectively you can load your dishwasher. Look for models with fold-down tines that can be manipulated to accommodate awkwardly shaped items. This added versatility can make a world of difference when you’re trying to fit a variety of dishes in one load. Some dishwashers offer tines that are adjustable in height, allowing you to create more room for larger items without sacrificing the ability to wash smaller ones.

Another important aspect of interior design is the layout of the spray arms. A well-designed dishwasher will have multiple spray arms that reach every corner of the machine. This ensures that every dish is thoroughly cleaned, no matter where it’s placed inside the unit. Additionally, look for models that offer targeted spray zones, which provide extra cleaning power for heavily soiled dishes.

Ultimately, the right combination of racks, tines, and loading flexibility can not only simplify the process of loading and unloading your dishwasher but also enhance the overall effectiveness of the cleaning cycle. By prioritizing these features, you can choose a dishwasher that seamlessly fits into your kitchen routine, saving you time and effort after every meal.

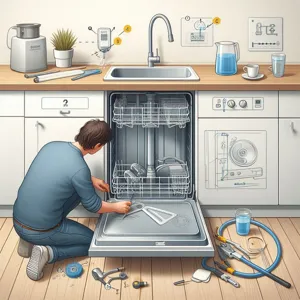
10. Maintenance and Cleaning: What to Look For

When selecting a dishwasher, maintenance and cleaning should be at the forefront of your decision-making process. A dishwasher is an investment, and keeping it running efficiently requires a bit of attention. Therefore, understanding the maintenance requirements and ease of cleaning will save you time and headaches in the long run.

First, consider the interior design of the dishwasher. Models with stainless steel interiors are not only aesthetically pleasing, but they are also more resistant to stains and odors compared to plastic interiors. Stainless steel is easier to wipe down and is less likely to harbor bacteria, making it a hygienic choice.

Next, pay attention to the filter system. A dishwasher with a self-cleaning filter can save you the hassle of manually cleaning out food debris, which can accumulate and cause unpleasant odors or clogs. However, if you opt for a model with a manual filter, ensure it is easily accessible; a removable filter that can be quickly rinsed under running water will encourage regular maintenance.

Look for features that simplify cleaning, such as smooth racks and spray arms. Racks that can be adjusted or removed make cleaning the interior easier and allow you to fit larger items without obstruction. Additionally, spray arms that are easy to detach can facilitate thorough cleaning, ensuring that every nook and cranny of your dishwasher remains free from grime.

Don’t overlook the importance of user-friendly controls and indicators. A dishwasher with a clear, intuitive interface will help you identify when it’s time to clean the filter or run a maintenance cycle. Some modern dishwashers even feature self-diagnostic tools that alert you to potential issues before they become significant problems.

Finally, consider the noise level during operation. A quieter model not only makes for a more pleasant kitchen environment but also encourages you to run it more frequently without feeling like you’re disrupting your home. Look for dishwashers with sound insulation and a decibel level rating that suits your lifestyle.

In summary, when choosing your dishwasher, pay close attention to its maintenance and cleaning features. A model designed for easy upkeep will enhance your kitchen experience, ensuring that your investment remains in top-notch condition for years to come.

11. Price Range: Budgeting for Your Dishwasher Purchase

When it comes to choosing a dishwasher, understanding the price range is crucial to making a sound investment. Dishwashers can vary significantly in cost, from budget-friendly models to high-end machines laden with advanced features. Setting a budget beforehand will help streamline your options and ensure that you find a dishwasher that meets both your needs and financial constraints.

At the lower end of the spectrum, you’ll find basic models that typically range from $300 to $600. These dishwashers often focus on essential cleaning functions and may lack some of the bells and whistles that enhance convenience and efficiency. However, don’t underestimate these budget options; they can still deliver reliable performance for everyday dishwashing tasks.

Mid-range dishwashers, priced between $600 and $1,200, often come equipped with additional features such as multiple wash cycles, improved energy efficiency, and quieter operation. These models strike a balance between functionality and affordability, making them a popular choice for many households looking for a bit more sophistication without breaking the bank.

If you’re in the market for a high-end dishwasher, expect to invest $1,200 and up. These premium models boast advanced technology like smart connectivity, customizable wash cycles, and superior energy efficiency. They often come with sleek designs and premium materials that not only enhance their performance but also elevate the aesthetic of your kitchen. For those who frequently entertain or have larger families, the investment in a high-quality dishwasher can be well worth it, as it saves time and offers exceptional cleaning power.

As you consider your budget, also factor in potential long-term savings. Investing in a more efficient model may lead to lower utility bills over time, making certain higher-priced dishwashers more economical in the long run. Remember, whether you’re opting for a basic model or a top-of-the-line machine, careful budgeting will help you choose the right dishwasher that fits your lifestyle and ensures your dishes are always sparkling clean.

12. Brand Reputation: Which Brands Stand Out?

When it comes to choosing the right dishwasher, brand reputation can play a significant role in your decision-making process. A well-established brand often signifies reliability, quality, and customer support, all of which are crucial for such an essential kitchen appliance. With so many options available, it’s important to consider which brands stand out in the crowded market and what they bring to the table.

**Bosch** is consistently lauded for its innovative engineering and quiet operation. Renowned for their sleek designs and energy-efficient models, Bosch dishwashers often come equipped with advanced features like the MyWay rack system and the EasyGlide system for smooth loading and unloading. Their commitment to quality and performance has earned them a loyal customer base.

**KitchenAid** is another brand that shines in the realm of dishwashing. Known for their robust build and high-performance cleaning capabilities, KitchenAid dishwashers are a favorite among home chefs. Features like the ProWash cycle adjust the wash settings based on the soil level, ensuring your dishes receive the perfect clean every time. Additionally, their stylish designs often complement high-end kitchen aesthetics.

If you’re looking for value without sacrificing quality, **Whirlpool** might be the brand for you. Their dishwashers are celebrated for their straightforward functionality and durability. With options that range from budget-friendly to more advanced models, Whirlpool caters to a wide audience without compromising on cleaning power or efficiency.

**Miele**, a luxury brand, deserves mention for their commitment to longevity and excellence. With a reputation for being built to last, Miele dishwashers often come with advanced features such as the innovative AutoOpen drying function and impressive energy efficiency ratings. Though they come with a higher price tag, many users find the investment worthwhile due to their exceptional performance and durability.

Finally, **Samsung** has made a name for itself with its modern, tech-savvy dishwashers that offer smart features and connectivity. Their models often include options like the WaterWall technology for thorough cleaning and Wi-Fi connectivity for remote monitoring and control. This brand appeals to tech enthusiasts who appreciate the integration of smart home capabilities in their kitchen appliances.

When selecting a dishwasher, consider the reputation of these brands along with your specific needs and preferences. Research customer reviews and ratings to gain insight into the reliability and performance of different models. A reputable brand can provide not only a quality product but also peace of mind, ensuring that your investment is protected for years to come.

13. Customer Reviews: How to Use Feedback in Your Decision

When it comes to choosing the right dishwasher, customer reviews can be an invaluable resource in your decision-making process. These insights come directly from individuals who have used the products in real-life situations, offering a wealth of information that specifications alone cannot provide.

Start by searching for reviews on trusted retail websites, appliance forums, and social media platforms. Pay attention to both the positive and negative feedback—while a glowing review can point out the strengths of a model, critical comments often highlight potential shortcomings that you might not have considered.

Look for common themes in the reviews. Is there a recurring issue with noise levels? Are customers consistently praising the energy efficiency? Do several users mention that a particular brand offers exceptional customer service? These patterns can help you gauge whether a specific model will meet your needs.

Additionally, consider the context of the reviews. A dishwasher that works perfectly for a family of four may not be the best choice for a single-person household, and vice versa. Take note of the reviewer’s circumstances and how they align with your lifestyle and usage habits.

Also, don’t overlook the importance of verified purchase reviews. Many platforms label reviews from verified buyers, which can add a level of authenticity to the feedback you’re reading. This distinction helps ensure that you’re relying on opinions from actual users rather than fictitious accounts.

Lastly, engage with customer feedback by asking questions on forums or social media. Reach out to users who have reviewed the product to get a more nuanced understanding of their experiences. This proactive approach can provide you with a clearer picture of which dishwasher will truly suit your needs, ensuring that your final decision is informed, confident, and tailored to your home.

14. Conclusion: Making an Informed Choice for Your Kitchen

Choosing the right dishwasher for your kitchen is more than just a matter of preference; it’s an investment that can significantly enhance your daily routine and overall kitchen efficiency. As we’ve explored throughout this guide, the landscape of dishwashers is diverse, ranging from compact models perfect for small spaces to spacious, high-capacity machines designed for large households. Each type comes with its own set of features, such as energy efficiency ratings, noise levels, wash cycles, and smart technology integration, all of which can impact your decision.

In conclusion, making an informed choice requires careful consideration of your specific needs—think about the size of your family, your cooking habits, and your kitchen layout. Are you someone who frequently hosts gatherings and needs a machine that can handle heavy loads? Or perhaps you live alone and would benefit from a compact model that saves space without sacrificing performance?

Don’t forget to factor in the long-term costs associated with energy use and maintenance. While it may be tempting to opt for the cheapest model available, investing in a reliable, energy-efficient dishwasher can save you money in the long run. Additionally, consider the aesthetic and functional aspects of your kitchen design and how a new dishwasher can complement your existing appliances.

Ultimately, the right dishwasher should seamlessly integrate into your lifestyle, making cleanup a breeze and giving you more time to enjoy the moments that matter. By weighing the features discussed in this guide and aligning them with your personal preferences, you’ll be well on your way to choosing a dishwasher that not only meets your needs but also enhances the heart of your home. Happy dishwashing!

15. Frequently Asked Questions About Dishwashers

When embarking on the journey to choose the right dishwasher, you may find yourself grappling with a multitude of questions. Understanding these common queries can help demystify the selection process and ensure that you invest in a machine that suits your needs perfectly. Here are some frequently asked questions that often arise:

**1. What are the different types of dishwashers?**
Dishwashers come in various forms, including built-in, portable, and countertop models. Built-in dishwashers are installed under the counter and are the most common type, while portable dishwashers can be moved and connected to a faucet when needed. Countertop models are compact and ideal for smaller kitchens or limited spaces.

**2. How do I determine the right size for my dishwasher?**
Size is crucial for both functionality and space. Most full-sized dishwashers are 24 inches wide and can accommodate around 12 to 16 place settings. If space is limited, consider compact models, which are typically 18 inches wide and suitable for smaller households.

**3. What features should I look for?**
Key features can significantly enhance your dishwashing experience. Look for options like adjustable racks, multiple wash cycles, energy efficiency ratings (like ENERGY STAR certification), noise levels (measured in decibels), and drying options. Smart technology features are also becoming increasingly popular, allowing you to control your dishwasher remotely or receive alerts when your dishes are clean.

**4. How much water and energy do dishwashers use?**
Modern dishwashers are designed to be both water and energy-efficient. On average, a standard dishwasher uses about 3 to 5 gallons of water per cycle, whereas older models may consume up to 10 gallons. For energy usage, check the energy guide label to compare models and choose one that minimizes your utility costs.

**5. Do I really need to pre-rinse my dishes?**
This is a common misconception! Most modern dishwashers are equipped to handle food residues without pre-rinsing. However, it’s best to scrape off large food particles, as they can clog the filter and affect performance. Simply loading your dirty dishes directly into the dishwasher can save you time and water.

By addressing these frequently asked questions, you’ll be better equipped to make an informed decision when selecting the dishwasher that best fits your lifestyle and kitchen needs. Whether you prioritize size, features, or energy efficiency, understanding your options can lead you to the perfect machine that will make dishwashing a breeze for years to come.

In conclusion, selecting the right dishwasher for your home doesn’t have to be a daunting task. With the insights we’ve shared in this guide, you’re now equipped to navigate the myriad of options available, whether you’re drawn to the energy efficiency of a front-loader or the convenience of a portable model. By understanding the various types and features—from wash cycles and noise levels to smart technology and size considerations—you can make an informed decision that perfectly aligns with your kitchen needs and lifestyle. Remember, investing in a dishwasher is not just about convenience; it’s about enhancing your daily routine and creating a more efficient home. Happy dishwashing, and may your choice bring you years of sparkling clean dishes and joy in your kitchen!

How to install a new dishwasher?

Installing a new dishwasher can seem like a daunting task, especially if you’re not particularly handy around the house.

However, with the right guidance and a little bit of confidence, you can transform this seemingly complex project into a straightforward and rewarding experience. In this step-by-step guide, we’ll walk you through everything you need to know to install your new dishwasher like a pro. From gathering the essential tools and materials to understanding the plumbing and electrical connections, we’ll equip you with practical tips and insider knowledge to ensure a smooth installation. Say goodbye to the hassle of waiting for a professional and hello to the satisfaction of tackling a home improvement project yourself. Get ready to enjoy the convenience of your new appliance while saving time and money with our comprehensive installation guide!

1. Introduction: Why DIY Dishwasher Installation?

How to install a new dishwasher?
Credit : whatcanu.com

Installing a new dishwasher may seem daunting to many homeowners, but taking the DIY route can be both rewarding and cost-effective. Why should you consider installing your dishwasher yourself? For starters, it empowers you to learn essential home improvement skills that can save you money on professional installation fees. In a world where convenience often comes at a premium, tackling this project on your own can provide a sense of accomplishment and independence.

Moreover, understanding the ins and outs of your kitchen appliances can lead to a better appreciation of how they function. You’ll gain valuable insights into plumbing, electrical connections, and the overall mechanics of your home, which can come in handy for future repairs or upgrades. DIY installation also allows for greater control over the process—choosing the right materials, customizing connections to suit your kitchen layout, and ensuring everything is set up to your exact specifications.

Additionally, with a plethora of resources available online, including instructional videos, forums, and detailed guides, learning how to install your dishwasher has never been easier. You can work at your own pace, revisit steps as necessary, and even ask questions from a community of fellow DIYers. So, roll up your sleeves and prepare to dive into this rewarding project—by the end, you’ll not only have a fully functional dishwasher, but you’ll also have the confidence and knowledge that comes with mastering a new skill. Let’s get started!

2. Safety First: Tools and Materials You’ll Need

Before diving into the installation process, it’s essential to prioritize safety and gather the right tools and materials. Taking the time to prepare ensures a smoother installation and minimizes potential hazards. Here’s a comprehensive list of what you’ll need to tackle the job like a pro.

**Essential Tools:**

1. **Screwdriver Set:** A mix of flathead and Phillips screwdrivers will help you tackle various screws that hold your dishwasher in place.

2. **Adjustable Wrench:** This tool is crucial for tightening and loosening the water supply line and other plumbing connections.

3. **Plumber’s Tape:** Also known as Teflon tape, this is vital for ensuring a watertight seal on all threaded connections.

4. **Level:** To make sure your dishwasher sits evenly, a level will help you avoid any unwanted tilting that can lead to leaks.

5. **Drill and Drill Bits:** If your installation requires new holes for mounting or securing the dishwasher, a power drill will be necessary.

6. **Pliers:** These are handy for gripping and turning various components, especially in tight spaces.

7. **Bucket or Towel:** In case of water spillage during the installation, having a bucket or towel on hand will save you from unwanted messes.

**Materials:**

1. **Water Supply Line:** Ensure you have a new, flexible water supply line that fits your dishwasher and is compatible with your plumbing.

2. **Drain Hose:** A proper drain hose is essential for allowing wastewater to flow from your dishwasher to the sink or disposal.

3. **Power Cord:** If your new dishwasher doesn’t come with a built-in power cord, you’ll need to purchase one that matches your electrical requirements.

4. **Mounting Brackets:** Some dishwashers come with these, but if not, you may need to buy them separately to secure your unit properly.

5. **Installation Manual:** While not a physical tool, your dishwasher’s installation manual will be your best friend during this process, providing specific instructions tailored to your model.

By ensuring you have the right tools and materials at your disposal, you set the stage for a successful and efficient dishwasher installation. Remember, safety always comes first—so put on your safety goggles, keep your workspace tidy, and prepare to transform your kitchen with your new appliance!

3. Preparing Your Kitchen: Clearing the Space

How to install a new dishwasher?
Credit : whatcanu.com

Before diving into the installation process of your new dishwasher, it’s essential to prepare your kitchen and clear the space effectively. A clutter-free environment not only makes the task easier but also ensures safety as you navigate around potentially sharp tools and heavy equipment.

Start by removing any obstacles from the area surrounding your old dishwasher. This includes emptying the appliance itself—ensure that all dishes, utensils, and cleaning supplies are removed, giving you a clear view of the space. Next, clear away any items from the countertops and adjacent cabinetry that might hinder movement. If your dishwasher is located under the counter, take the time to empty any cabinets below or beside it; this will provide ample room to maneuver and prevent accidental damage to your belongings.

Once the area is cleared, take a moment to sweep or vacuum the floor. Not only will this make the workspace more pleasant, but it will also help you avoid slipping on dust or debris as you work. If your kitchen floor is particularly slippery, consider laying down a non-slip mat to provide better traction during the installation process.

Additionally, gather all the tools and materials you’ll need for the installation. This might include a screwdriver, adjustable wrench, pliers, and a bucket to catch any water that may spill during disconnection. Having everything within arm’s reach will streamline the process and allow you to focus on the task at hand without unnecessary interruptions.

Lastly, ensure that you have access to the necessary plumbing and electrical connections. This may involve moving other appliances or furniture out of the way. If your new dishwasher requires additional electrical work or plumbing adjustments, it’s wise to consult a professional beforehand. With your kitchen prepared and a clear path to work, you’re ready to tackle the installation with confidence and ease.

4. Understanding Your Dishwasher: Key Components and Features

Before diving into the installation process, it’s essential to familiarize yourself with your dishwasher’s key components and features. Understanding these elements will not only ease your installation but also enhance your overall experience with the appliance.

First, let’s take a look at the **control panel**, usually located on the front or top edge of the door. This is where you’ll find buttons or a touchscreen to select wash cycles, adjust settings, and monitor the status of your dishwasher. Familiarizing yourself with these functions will help you navigate the machine effortlessly once it’s up and running.

Next, identify the **spray arms**. Most dishwashers have one or two spray arms that rotate to distribute water during the wash cycle. These arms are critical for ensuring your dishes come out sparkling clean, so check for any obstructions or debris before you start the installation.

Another important component is the **filter**. Located at the bottom of the dishwasher, the filter traps food particles and prevents them from recirculating onto your clean dishes. Understanding how to remove and clean the filter will not only extend the lifespan of your dishwasher but also maintain its cleaning efficiency.

The **drainage system** is another crucial feature. It usually consists of a drain pump and hose that expels dirty water after each cycle. Make sure to familiarize yourself with this system, as proper installation is key to preventing leaks or drainage issues in the future.

Lastly, don’t overlook the **power supply** and **water supply connections**. Knowing where these are located and how they interact with your dishwasher is vital for a successful installation. The electrical and plumbing connections must be secure and compatible with your home’s systems to ensure your dishwasher operates safely and efficiently.

By understanding these key components and features, you’ll not only simplify the installation process but also set yourself up for a successful and hassle-free experience with your new dishwasher.

5. Disconnecting the Old Dishwasher: Step-by-Step Instructions

How to install a new dishwasher?
Credit : whatcanu.com

Disconnecting your old dishwasher may seem daunting, but with a few simple steps, you can do it like a pro. Before diving in, ensure you have all necessary tools on hand: a screwdriver, adjustable wrench, bucket, and towels to catch any spills. Here’s a step-by-step guide to help you safely remove the old appliance.

**Step 1: Turn Off the Power and Water Supply**
Start by turning off the power to the dishwasher at your circuit breaker. This is crucial to avoid any electrical hazards during the disconnection process. Next, locate the water supply valve under your sink and turn it off as well.

**Step 2: Remove the Lower Dish Rack**
Take out the lower dish rack from the dishwasher to give yourself more space to work. This will also help prevent any accidental damage to your dishes during the disconnection.

**Step 3: Disconnect the Drain Hose**
Look for the drain hose, typically located at the back of the dishwasher. Using your screwdriver, loosen the clamp holding the hose in place, then gently pull the hose away from the dishwasher. Keep a bucket or towel handy to catch any residual water that may spill out.

**Step 4: Unscrew the Water Supply Line**
Next, locate the water supply line connected to the dishwasher. Using your adjustable wrench, carefully unscrew the line. Be prepared for a small amount of water to drip out; your bucket will be helpful here!

**Step 5: Remove the Mounting Brackets**
Most dishwashers are secured to the countertop or cabinets with mounting brackets. Open the dishwasher door and locate these brackets, which are generally found at the top. Use your screwdriver to remove any screws holding the brackets in place. Once detached, you can gently pull the dishwasher away from the cabinetry.

**Step 6: Disconnect the Electrical Wiring**
Finally, locate the electrical junction box, usually located at the bottom of the dishwasher. Carefully remove the cover plate and disconnect the wiring by unscrewing the wire nuts. Make sure to note how the wires are connected, as you’ll need this information for your new installation.

**Step 7: Safely Remove the Dishwasher**
With everything disconnected, it’s time to remove the dishwasher. Carefully slide it out from its position, taking care not to damage the surrounding cabinetry or flooring.

Once you’ve successfully removed the old dishwasher, you’re one step closer to installing your new appliance. Remember, patience and caution are your best friends in this process!

6. Inspecting Water and Electrical Connections

Before you can bring your new dishwasher to life, it’s crucial to inspect the water and electrical connections meticulously. This step is not just a formality; it’s a safeguard that ensures your appliance operates efficiently and safely.

Begin by locating the water supply line and shutoff valve, which is typically found under the kitchen sink. Turn on the water to check for any leaks or drips. A steady stream means you’re good to go, but if you spot any moisture around the fittings, it’s essential to tighten the connections or replace any worn-out gaskets. Remember, a small leak can lead to significant water damage over time, so it’s better to be cautious.

Next, turn your attention to the electrical connections. Ensure that the power supply is compatible with your new dishwasher’s requirements. Most modern dishwashers will need a dedicated circuit, so check the circuit breaker and confirm that it’s not overloaded. Use a voltage tester to verify that the outlet is working correctly before plugging in your appliance.

Additionally, take a moment to inspect the wiring and connections for any signs of fraying or damage. If you’re uncertain, don’t hesitate to consult a professional electrician to ensure everything is up to code. A little diligence now can save you a lot of headaches later, allowing you to enjoy the convenience of your new dishwasher with peace of mind.

With the water and electrical connections verified, you’ll be well on your way to completing the installation process like a pro!

7. Positioning Your New Dishwasher: Tips for Alignment

How to install a new dishwasher?
Credit : whatcanu.com

Positioning your new dishwasher correctly is crucial for both functionality and aesthetics, ensuring it operates efficiently while seamlessly integrating into your kitchen space. Start by carefully sliding the dishwasher into its designated space, typically located between the kitchen cabinets. Before doing so, check that all hoses and the power supply are readily accessible and not obstructed.

Once in position, use a level to check the alignment of the dishwasher. It should sit flush with the surrounding cabinetry without any noticeable gaps. If necessary, adjust the dishwasher’s legs to achieve the correct height. Most models feature adjustable feet that can be raised or lowered with ease, allowing you to achieve that coveted level alignment.

Next, ensure that the door swings open freely without hitting adjacent cabinets or countertops. This will not only enhance the usability of the appliance but also prevent potential damage to both the dishwasher and your kitchen fixtures. If your model includes customizable panels or trim kits, now is the time to install these to create a polished, integrated look.

Finally, take a step back and evaluate the overall appearance. A well-positioned dishwasher should look like a natural part of your kitchen, with smooth lines and a cohesive aesthetic. With these tips for alignment in mind, you’ll ensure that your new dishwasher is not just functional but also a stylish addition to your home!

8. Connecting the Water Supply Line

Connecting the water supply line is a crucial step in the installation process, and taking the time to do it correctly will ensure your dishwasher operates efficiently without leaks. To begin, you will need a few essential tools: an adjustable wrench, Teflon tape, and a bucket or towel for any potential spills.

First, locate the water supply valve, usually found under your kitchen sink. Before you start, make sure to turn off the water supply to avoid any surprises. It’s a good idea to place a bucket or towel beneath the valve to catch any residual water that may spill out when you disconnect the existing hose.

Next, use the adjustable wrench to loosen and remove the existing supply line from the valve. Once detached, inspect the connection point for any signs of wear or damage. If everything looks good, wrap Teflon tape around the threads of the new water supply line. This will create a watertight seal, preventing leaks once everything is connected.

Now, attach the new water supply line to the valve by hand, ensuring it’s snug but not overly tight. Follow this by reattaching the other end of the line to the dishwasher’s water inlet, which is typically located on the lower right side of the appliance. Again, use the adjustable wrench to secure this connection, taking care not to overtighten, as this could damage the fittings.

Once both connections are secure, it’s time to turn the water supply back on. Do this slowly and watch closely for any leaks at both connection points. If you see any water seeping out, turn off the valve immediately and double-check your connections.

With the water supply line securely connected and leak-free, you’re one step closer to enjoying the convenience of your new dishwasher. Make sure to take a moment to clean up any tools or spills before moving on to the next step in your dishwasher installation process!

9. Electrical Hookup: Hardwiring vs. Plugging In

When it comes to the electrical hookup for your new dishwasher, understanding the difference between hardwiring and plugging in is essential for a successful installation. Both methods have their own set of advantages, and your choice will largely depend on your kitchen’s existing setup and local electrical codes.

**Hardwiring** involves connecting the dishwasher directly to your home’s electrical system. This method typically requires a dedicated circuit and can provide a more permanent solution. Hardwired dishwashers usually come with a flexible conduit that contains three wires: a hot wire, a neutral wire, and a ground wire. This setup is particularly beneficial for those who want a clean look without visible cords. However, it’s crucial to ensure that you meet the necessary electrical requirements and restrictions, so consulting a professional electrician may be wise if you are unsure.

On the other hand, **plugging in** your dishwasher is often the simpler and more straightforward option. Many modern dishwashers are designed to be connected to a standard three-prong outlet. This method allows for easy removal and replacement, making it ideal for renters or those who plan to change appliances frequently. If your dishwasher comes with a power cord, all you need to do is locate an accessible outlet that matches the voltage requirements of your appliance. Ensure that the outlet is in a convenient but safe location, typically within the cabinetry, so it remains hidden from view.

Regardless of the method you choose, ensure you follow safety precautions. Turn off the power at the circuit breaker before starting any electrical work and, if necessary, consult your dishwasher’s manual for specific instructions related to electrical connections. By understanding the implications of hardwiring versus plugging in, you can make an informed decision that ensures your new dishwasher operates safely and efficiently, setting the stage for many years of hassle-free dishwashing.

10. Securing the Dishwasher to the Cabinet

Securing your new dishwasher to the cabinet is a crucial step that ensures stability and prevents any unintended movement during operation. This process not only enhances safety but also contributes to the longevity of your appliance.

Begin by locating the mounting brackets, which are typically found at the top edges of the dishwasher. These brackets will be used to anchor the dishwasher securely to the underside of your countertop. Before you start, double-check that the dishwasher is leveled properly; this will prevent any vibrations that could lead to wear and tear.

Once you’ve confirmed that your dishwasher is level, align the mounting brackets with the countertop. Using a drill, carefully drive screws into the brackets, ensuring they penetrate the cabinet above without compromising the integrity of the wood. Be cautious not to overtighten, as this can warp the dishwasher frame or damage the cabinet.

For added security, consider using shims if there are any gaps between the dishwasher and the cabinet. These small, wedge-shaped pieces help to create a snug fit and provide extra support. After securing the brackets, give the dishwasher a gentle tug to ensure it’s firmly in place.

Finally, take a moment to inspect the surrounding area. Ensure that there are no water lines or electrical cords pinched between the appliance and the cabinet, as this could lead to future issues. By taking the time to secure your dishwasher properly, you can enjoy the peace of mind that comes with a well-installed appliance, ready to tackle your dishwashing needs efficiently and reliably.

11. Testing for Leaks: Ensuring a Proper Seal

Once your new dishwasher is securely installed and connected to the water supply, it’s time for one of the most crucial steps: testing for leaks. Ensuring a proper seal is essential not only for the longevity of your appliance but also for the protection of your kitchen from water damage. A small leak can lead to significant issues if left unchecked, so take this step seriously.

Start by turning on the water supply valve that connects to your dishwasher. Once you’ve done that, run a short cycle on your dishwasher while keeping a close eye on the area around the door and the connections at the back. Look for any signs of dripping or pooling water, which could indicate a faulty seal or a loose connection.

Don’t rush this process—allow the dishwasher to run through its cycle completely. After it finishes, check the floor beneath the appliance for any signs of moisture. A dry floor means you’ve installed your dishwasher correctly, while any wet spots may require your immediate attention. If you do spot a leak, you may need to tighten the hose connections or reapply sealing tape to ensure a snug fit.

Additionally, using a paper towel or cloth to wipe down the edges of the door can help you spot any leaks that might not be immediately visible. If you notice any dampness on the towel after running the cycle, that’s a clear signal that you need to inspect the door gasket for wear or misalignment.

By taking the time to thoroughly test for leaks, you can enjoy peace of mind knowing that your new dishwasher is working efficiently and safely. Remember, an ounce of prevention is worth a pound of cure; addressing any leaks now can save you from costly repairs down the line.

12. Leveling Your Dishwasher: Importance of Stability

Leveling your dishwasher is a crucial step that can significantly impact its performance and longevity. An unlevel dishwasher can lead to a host of problems, including improper drainage, leaks, and even damage to your kitchen cabinetry. When your dishwasher is not stable, it may wobble during operation, causing loud noises and vibrations that can be unsettling. Moreover, an unlevel unit can affect how effectively the spray arms distribute water, leading to poorly cleaned dishes.

To ensure your dishwasher functions optimally, start by checking the leveling legs located at the bottom of the appliance. Most dishwashers are equipped with adjustable legs that allow you to raise or lower each corner to achieve a perfectly level surface. Using a bubble level, place it on the top edge of the dishwasher door. If the bubble is off-center, adjust the legs accordingly. Turn the legs clockwise to raise the unit and counterclockwise to lower it.

After making adjustments, recheck the level until the bubble sits perfectly centered. Once you confirm your dishwasher is level from side to side and front to back, secure it to the countertop or cabinetry, if applicable, to prevent any movement over time. Remember, taking the time to properly level your dishwasher not only ensures better performance but also extends its lifespan, making this step a vital part of your installation process. In the end, a stable dishwasher means cleaner dishes and a hassle-free experience for years to come!

13. Final Connections: Drain Hose Installation

Once your dishwasher is securely positioned and leveled, it’s time to tackle the crucial task of connecting the drain hose. This step ensures that dirty water is efficiently removed from your dishwasher during the wash cycle, preventing any backflow or leaks that could cause a mess in your kitchen.

Begin by locating the drain hose, typically made of durable plastic. You’ll find one end of the hose connected to the dishwasher itself, while the other end will need to be attached to your kitchen’s plumbing system. If your dishwasher has an air gap—a small device mounted on the countertop or sink—it’s essential to connect the drain hose to the air gap before proceeding to the sink drain.

Next, check the manufacturer’s instructions for your specific model. Most dishwashers require the drain hose to be routed upwards, creating a “high loop” that helps prevent wastewater from siphoning back into the appliance. You can achieve this by securing the hose to the underside of your countertop with a zip tie or clamp, making sure it forms a gentle curve without any sharp bends.

Once the hose is positioned correctly, attach the free end to the sink drain or garbage disposal. If connecting to a garbage disposal, ensure that the knockout plug is removed before insertion. This will allow water to flow freely from your dishwasher into the disposal. Use a hose clamp to secure the connection tightly, ensuring there are no leaks.

After everything is connected, it’s time for a quick check. Run your dishwasher on a short cycle while monitoring the drain area for any signs of leaks. This step is crucial, as it allows you to address any issues before completing the installation. If everything looks good, congratulations—you’ve successfully completed the drain hose installation! Your dishwasher is now ready to tackle your dirty dishes, giving you one more reason to enjoy the convenience of modern kitchen appliances.

14. Running Your First Cycle: What to Watch For

After successfully installing your new dishwasher, the moment has finally arrived to run your first cycle. This is an exciting step, but it’s essential to approach it with care to ensure everything is functioning correctly. Before hitting the start button, take a moment to double-check a few key elements.

First, ensure that all connections—water supply, drainage, and power—are secure. A loose hose can lead to leaks, while improper electrical connections might pose safety risks. Once you’ve confirmed everything is in order, load the dishwasher according to the manufacturer’s instructions, placing items in a way that promotes optimal water flow and cleanliness.

As you set the cycle, choose a standard wash program to start. This will give you a good baseline for the machine’s performance. Pay attention to how the dishwasher sounds during the initial cycle. A few operational noises are normal, but any strange grinding, loud banging, or persistent beeping may indicate an issue that needs addressing.

While the dishwasher runs, it’s a good idea to keep an eye on the exterior for any leaks. Inspect around the base and under the sink where the drainage hose connects. If you see any water pooling or dripping, it’s crucial to stop the cycle immediately and troubleshoot the problem. Additionally, listen for abnormal vibrations that could signal an imbalanced load or improper installation.

Finally, once the cycle completes, open the door and check the cleanliness of your dishes. If everything comes out sparkling clean, you can breathe a sigh of relief and celebrate your successful installation! However, if you notice residual food particles or cloudy glassware, it may be time to adjust your loading technique or explore the dishwasher’s settings for optimized performance. Running your first cycle is a crucial step in ensuring your new appliance is ready to serve you well for years to come. Happy washing!

15. Conclusion: Troubleshooting Common Installation Issues

### Conclusion: Troubleshooting Common Installation Issues

Now that you’ve successfully navigated the installation of your new dishwasher, it’s essential to be prepared for any hiccups that might arise in the process. Even the most meticulous DIY enthusiasts can encounter challenges, and knowing how to troubleshoot these issues can save you time and frustration.

One common problem is the dishwasher not filling with water. If this occurs, double-check that the water supply valve is fully open and inspect the inlet hose for any kinks or blockages. A clogged filter can also prevent water from entering, so don’t hesitate to clean or replace it as necessary.

Another frequent issue is the dishwasher leaking. If you notice puddles forming around the base, take a moment to inspect the door seal for wear and tear, as well as ensuring that the drain hose is securely connected and not pinched. Additionally, verify that the dishwasher is level; an uneven installation can lead to unwanted leaks.

Finally, be attentive to unusual noises during operation. While some sound is normal, loud grinding or banging may indicate that something is amiss. Check to see if any utensils or items have been left inside that could be obstructing the spray arms, or ensure that the dishwasher is properly secured to the cabinetry to minimize vibrations.

By keeping these troubleshooting tips in mind, you can address common installation issues with confidence. Remember, even if things don’t go perfectly, a little patience and problem-solving can lead to a smoothly operating dishwasher that will serve you well for years to come. Enjoy the benefits of your new appliance, and take pride in knowing that you’ve tackled the installation like a pro!

In conclusion, installing your new dishwasher doesn’t have to be an overwhelming task—armed with the right tools and our step-by-step guide, you can tackle it like a pro! By following the outlined instructions, you not only save money on installation fees but also gain a sense of accomplishment that comes from completing a DIY project. Remember to take your time, double-check your connections, and consult the manufacturer’s manual for any specific requirements. Soon enough, you’ll be enjoying the convenience of a sparkling clean kitchen without the hassle. We’d love to hear about your installation experience, so feel free to share your tips or ask any questions in the comments below. Happy dishwashing!

How to install a new dishwasher?

Bringing home a new dishwasher can be an exciting upgrade for your kitchen, promising to save you time and effort on the never-ending chore of dishwashing.

However, the thought of installation can often feel daunting, leaving many to hire professionals or postpone the process altogether. Fear not! With the right guidance and a little bit of confidence, you can tackle this task like a pro. In this step-by-step guide, we’ll walk you through everything you need to know to install your new dishwasher seamlessly. From gathering the necessary tools and preparing your kitchen to connecting water lines and ensuring proper drainage, you’ll learn how to transform this potentially overwhelming project into a manageable and rewarding experience. Get ready to roll up your sleeves and dive into the world of DIY home improvement, all while elevating the convenience of your kitchen!

1. Introduction: Why Installing Your Dishwasher Yourself is a Great Idea

How to install a new dishwasher?
Credit : whatcanu.com

Installing your dishwasher yourself can be a rewarding and cost-effective project that not only saves you money on professional installation fees but also gives you a sense of accomplishment. Imagine the satisfaction of standing back to admire your handiwork, knowing you’ve added convenience to your kitchen without relying on outside help.

In today’s DIY culture, many homeowners are discovering that tackling household projects can be both easy and fulfilling. Installing a dishwasher is one of those tasks that, with the right guidance and tools, can be completed within a single afternoon. Not only does this allow you to take control of your kitchen renovation, but it also offers an opportunity to learn valuable skills that can be applied to future home improvement endeavors.

Moreover, undertaking this project yourself provides a unique perspective on your appliance, allowing you to familiarize yourself with its components and maintenance needs. You’ll gain a deeper understanding of how your dishwasher operates, empowering you to troubleshoot minor issues down the line. Plus, the time you invest in this task pays off every time you load and run your new appliance, knowing you did it all yourself.

In this step-by-step guide, we’ll walk you through everything you need to know to install your new dishwasher like a pro. From gathering the necessary tools to making the final connections, you’ll find that with a little preparation and confidence, this project is not only doable but truly enjoyable! So roll up your sleeves, and let’s get started on transforming your kitchen with a brand-new dishwasher!

2. Tools and Materials You’ll Need

Before diving into the installation process, it’s crucial to gather all the necessary tools and materials to ensure a smooth and efficient setup. Having everything ready at hand not only saves time but also minimizes frustrations mid-installation. Here’s a comprehensive list of what you’ll need:

### Tools:
1. **Screwdriver Set**: A mix of Phillips and flat-head screwdrivers will come in handy for various screws and fittings.
2. **Adjustable Wrench**: This versatile tool is essential for tightening and loosening plumbing connections.
3. **Level**: To ensure your dishwasher is perfectly aligned, a level is indispensable. This will help prevent excess noise and ensure proper function.
4. **Pliers**: A pair of pliers will assist in gripping and manipulating small parts and hoses.
5. **Drill**: If your installation requires new holes for mounting brackets, a drill will make this task easier.
6. **Tape Measure**: Accurate measurements are key to fitting your new appliance snugly into its designated space.
7. **Bucket or Towels**: Water spills can happen, especially when disconnecting the old unit, so keep a bucket or towels handy for quick clean-ups.

### Materials:
1. **Dishwasher Installation Kit**: Most new dishwashers come with an installation kit that includes essential components like hoses and electrical connectors. Check your model to ensure you have everything required.
2. **Water Supply Line**: If the existing line is old or damaged, you may need to purchase a new one.
3. **Drain Hose**: Ensure your drain hose is in good condition; if not, replacing it will prevent leaks and clogs.
4. **Electrical Wiring**: Depending on your setup, you might need specific wiring or a power cord to connect your dishwasher to the power supply.
5. **Mounting Brackets**: These may not come with the dishwasher but are necessary to secure your appliance under the countertop.

Having these tools and materials ready before you begin will not only streamline the installation process but also equip you with everything you need to tackle any unexpected challenges. With your workspace organized and all your equipment at your fingertips, you’ll be well on your way to installing your new dishwasher with confidence and ease!

3. Safety First: Preparing Your Kitchen for Installation

How to install a new dishwasher?
Credit : whatcanu.com

Before diving into the installation process, ensuring your kitchen is prepared for the task at hand is crucial—safety first! A well-prepared workspace not only streamlines the installation but also minimizes the risk of accidents. start by clearing the area around your old dishwasher and the path to your kitchen sink. Remove any clutter, such as pots, pans, or kitchen gadgets that may obstruct your movement. This creates a safe space for you to work and prevents any unnecessary damage to your belongings.

Next, turn off the power supply to the dishwasher at the circuit breaker. It’s essential to avoid any electrical hazards while working on the appliance. If your dishwasher has a water shut-off valve, locate it and turn it off as well to prevent leaks during the installation process. Remember to test the water flow by turning on the tap to ensure that the line is completely shut off.

Once your workspace is clear and safe, consider laying down a protective covering, such as a drop cloth or old towels, on the floor to catch any spills or scratches that may occur. This added layer of protection will preserve your flooring and make cleanup easier once the job is done.

Lastly, gather all the necessary tools and materials you’ll need for installation—such as a wrench, screwdriver, and level—within arm’s reach. Having everything organized beforehand not only saves time but also reduces the risk of accidents caused by searching for tools in the middle of the project. By taking these safety precautions and preparing your kitchen, you’ll set the stage for a smooth and successful dishwasher installation.

4. Understanding Your Dishwasher: Key Components Explained

Before diving into the installation process, it’s crucial to familiarize yourself with the key components of your new dishwasher. Understanding how each part works will not only make the installation smoother but will also equip you with the knowledge to troubleshoot any issues in the future.

**1. **Control Panel:** This is where the magic begins. The control panel allows you to set wash cycles, adjust temperature settings, and activate special features such as delay start or sanitize options. It can be a simple console or a digital touchscreen, but knowing how to navigate it is essential for optimal performance.

**2. **Water Inlet Valve:** This vital component connects your dishwasher to the water supply. When you start a wash cycle, the water inlet valve opens to let water flow into the appliance. It’s important to ensure that this valve is securely connected and functioning properly to avoid leaks.

**3. **Spray Arms:** The spray arms are responsible for distributing water throughout the dishwasher. Located at the bottom and sometimes the middle or top of the unit, these arms rotate during the wash cycle to ensure every dish is thoroughly cleaned. Double-check that they are free of obstructions and are able to spin freely.

**4. **Filter System:** A clean filter is key to maintaining the efficiency of your dishwasher. This component traps food particles and debris to prevent them from clinging to your clean dishes. Your dishwasher might have multiple filters, so familiarize yourself with how to remove and clean them regularly.

**5. **Draining System:** After washing, your dishwasher needs to expel the dirty water. The draining system, which includes the drain hose and pump, is crucial in this process. Make sure the drain hose is properly positioned to avoid any kinks or clogs, which can lead to water backup.

**6. **Racks and Baskets:** Understanding the layout of your dishwasher is vital for efficient loading. Most units come with adjustable racks and specialized compartments for silverware, pots, and pans. Properly utilizing these features will maximize space and ensure thorough cleaning.

By taking the time to learn about these key components, you’ll not only simplify the installation process but also set yourself up for years of hassle-free dishwashing. With this knowledge in hand, you’ll be ready to roll up your sleeves and start your dishwasher installation like a pro!

5. Step 1: Removing the Old Dishwasher

How to install a new dishwasher?
Credit : whatcanu.com

Before you can revel in the convenience of your brand-new dishwasher, you’ll need to bid farewell to the old one. Removing the old dishwasher may seem daunting, but with a little preparation and the right tools, you can tackle this step like a pro.

**Safety First**: Start by ensuring your kitchen is ready for the task at hand. Disconnect the power supply by switching off the circuit breaker dedicated to your dishwasher. This crucial step prevents any electrical mishaps as you work. Next, turn off the water supply to the dishwasher—usually located under the sink—by twisting the valve clockwise.

**Gather Your Tools**: Equip yourself with a few essential tools: a screwdriver (both Phillips and flathead), pliers, a towel or sponge, and a bucket. These will help you navigate the nuts and bolts of this process seamlessly.

**Disconnecting the Dishwasher**: Begin by removing the kick plate or toe panel at the bottom front of the dishwasher. This will expose the mounting screws. Use your screwdriver to loosen and remove these screws, which are typically found on either side of the appliance. Once loose, carefully slide the dishwasher out from its cabinet space—a little pull may be necessary, but be cautious not to damage surrounding cabinetry.

**Plumbing and Electrical Connections**: With the dishwasher now partially freed, you’ll need to disconnect the water supply line. Place your bucket underneath the connection to catch any residual water. Use your pliers to loosen the nuts on the supply line; once removed, be prepared for a small trickle of water. After this, locate the drain hose, which is often secured with a clamp. Loosen the clamp and slide the hose off, ensuring you have that towel handy for any spills.

Finally, check for any electrical connections that may need to be detached. If you see a power cord, simply unplug it. If wired directly, carefully unscrew the wire nuts and separate the wires—just make sure you remember their connections for when you install the new unit.

**Final Steps**: Once everything is disconnected, gently pull the dishwasher out of its space and make sure to clear any debris from the area. You’re now ready to move on to the next exciting step—installing your new dishwasher! This initial phase may seem labor-intensive, but with careful execution, you’ll be well on your way to enjoying the benefits of modern dishwashing technology in no time.

6. Step 2: Preparing the Installation Area

Before diving into the actual installation of your new dishwasher, it’s essential to prepare the installation area properly. A well-prepared space not only simplifies the process but also ensures that your dishwasher operates efficiently for years to come.

Start by clearing out the area around your existing dishwasher. Remove any dishes, pots, or clutter that may obstruct your progress. If you’re replacing an old unit, carefully disconnect it and move it out of the way, taking care not to damage any plumbing or electrical connections. This is also a great time to inspect the area for any signs of wear or damage, such as leaks or mold, which might need your attention before you install the new appliance.

Next, ensure that the space is clean and free of debris. Sweep up any dust or dirt, and wipe down surfaces to create a welcoming environment for your new dishwasher. Check the floor for any unevenness; if needed, use shims to level the dishwasher once it’s in place.

Don’t forget to gather your tools and materials before you start. You’ll typically need a wrench, screwdriver, pliers, and possibly a level. Having everything within reach will save you time and prevent interruptions. Additionally, review the manufacturer’s installation instructions to familiarize yourself with any specific requirements or recommendations unique to your model.

Lastly, assess your plumbing and electrical connections. Make sure the water supply valve is easily accessible and the electrical outlet is in good condition. If you’re unsure about the safety or functionality of these connections, it might be wise to consult a professional before proceeding.

By preparing the installation area thoughtfully, you’ll set the stage for a smooth and successful dishwasher installation, making you feel like a pro in no time!

7. Step 3: Connecting the Water Supply

How to install a new dishwasher?
Credit : whatcanu.com

Connecting the water supply to your new dishwasher is a crucial step that ensures your appliance has the necessary resources to function effectively. Before you dive into this process, make sure you have all the required tools at hand — a wrench or adjustable pliers, a bucket to catch any spills, and a towel for quick cleanups.

Begin by locating the water supply line, which is usually found beneath your kitchen sink. If it’s not already in place, you’ll need to install a shut-off valve specifically for the dishwasher. This valve allows you to easily control water flow and is an essential safety feature. Once the valve is securely installed, it’s time to connect the water supply line to your dishwasher.

Carefully position the dishwasher so that the water supply line can reach it without any tension or bends. Next, take the plastic or copper supply line and attach it to the dishwasher’s inlet valve, which is typically located at the bottom left corner of the unit. Ensure that the connection is tight but avoid over-tightening, as this can damage the fittings.

As you make this connection, be mindful of the placement of the rubber washer, which helps create a watertight seal. If the washer is missing or damaged, it can lead to leaks, so double-check that it’s in good condition before securing the connection.

Once everything is connected, turn the shut-off valve on and check for any leaks. It’s a good idea to have your bucket nearby to catch any water that might spill during this process. If you notice any dripping or leaking, you may need to adjust the connections or replace the washer. Taking the time to ensure a secure and leak-free connection will save you from potential water damage and costly repairs down the line.

With the water supply successfully connected, you’re one step closer to enjoying the convenience of your new dishwasher!

8. Step 4: Installing the Drain Hose

Once you’ve secured the dishwasher in its designated space and connected the water supply, it’s time to tackle the crucial task of installing the drain hose. This step is vital for ensuring that dirty water is properly expelled during the wash cycle, preventing any mess or potential damage.

Start by locating the drain hose that came with your dishwasher. It is usually a flexible plastic tube designed to fit snugly into the drain connection. Your first task is to determine the ideal attachment point. Typically, this will either be a dedicated drain outlet under your sink or a standpipe that leads to your household plumbing system.

Before you make any connections, ensure that the drain hose is free of kinks or obstructions. If it appears bent or twisted, carefully straighten it out to allow for smooth water flow. Next, slide the end of the hose onto the drain connection, ensuring that it fits securely. Use a hose clamp, which is often included with your dishwasher, to tighten the connection. This is a critical step as it prevents leaks that could lead to water damage.

If your setup involves a high loop or air gap, make sure the hose is elevated accordingly. This means positioning the hose so that it rises to a higher point before it connects to the drain. This configuration helps prevent wastewater from siphoning back into the dishwasher, maintaining the hygiene of your kitchen.

Once everything is connected, double-check your work. Ensure that the hose is not pinched and that the connections are tight. Now, it’s time to test your installation. With the dishwasher still pulled out slightly from the wall, run a short cycle and keep an eye on the drain hose for any leaks. If you spot any issues, it’s better to address them now rather than waiting until after the dishwasher is fully installed.

With the drain hose securely in place and functioning as it should, you’re one step closer to enjoying your new appliance! Next up, you’ll finalize your installation by securing the dishwasher to the countertop and checking all connections for a seamless setup.

9. Step 5: Electrical Connections: Hardwired vs. Plugged In

When it comes to connecting your new dishwasher, the choice between hardwired and plugged-in installations can significantly impact both functionality and convenience. Understanding the distinctions between these two methods is crucial for a seamless setup and safety compliance.

**Hardwired Connections**
If your dishwasher is hardwired, it will be directly connected to your home’s electrical system. This method typically involves using a junction box and requires you to connect the dishwasher’s wiring directly to your home’s wiring. Hardwiring provides a clean, permanent solution, eliminating the need for visible outlets and reducing the risk of someone accidentally unplugging the unit. However, this method can be more complex and may require professional assistance, especially if you’re not familiar with electrical work. Always ensure to turn off the power at the circuit breaker before attempting any connections, and double-check that your dishwasher’s voltage matches your home’s electrical specifications.

**Plugged-In Connections**
Conversely, if your dishwasher is designed to be plugged in, it comes with a power cord that connects directly to a standard electrical outlet. This option is often more user-friendly and allows for easier removal or replacement of the unit in the future. A plugged-in dishwasher can be beneficial for those who prefer flexibility, as it offers the option to simply unplug the appliance if needed. However, it’s crucial to ensure that the outlet is properly grounded and that it can handle the dishwasher’s power requirements.

Regardless of the connection type you choose, remember to follow the manufacturer’s instructions carefully. Take the time to secure all connections and check for any potential electrical issues before turning the power back on. Doing so will not only ensure the safety and efficiency of your appliance but also give you peace of mind as you enjoy the convenience of your new dishwasher!

10. Step 6: Positioning and Leveling the Dishwasher

Positioning and leveling your new dishwasher is a crucial step that ensures optimal performance and a seamless integration into your kitchen. Begin by carefully sliding the dishwasher into the designated space, making sure to connect the water supply and drain lines without pinching or damaging them. Gently push the unit back until it is flush with the cabinetry, ensuring that there is enough clearance for the door to open fully.

Once the dishwasher is in place, it’s time to check its level. Using a carpenter’s level, place it on the top edge of the appliance. Ideally, the bubble should be centered between the lines. If the dishwasher isn’t level, adjust the feet located at the bottom of the unit. Most dishwashers come with adjustable leveling legs that can be twisted to raise or lower the appliance as needed.

Take your time with leveling; an uneven dishwasher can lead to improper drainage, which might result in leaks or poor cleaning performance. After adjusting, double-check the level from both side to side and front to back. Once you’re satisfied that the dishwasher is perfectly level, secure it to the cabinetry by using screws provided in the installation kit. This will help stabilize the unit and prevent any movement during use, ensuring a long-lasting and trouble-free operation.

With the dishwasher properly positioned and leveled, you’re one step closer to enjoying the convenience of your new appliance!

11. Step 7: Securing the Dishwasher in Place

Once your dishwasher is properly connected to the water supply and drainage system, it’s time to secure it in place. This step is crucial to ensure your appliance functions efficiently and remains stable during use.

Begin by locating the mounting brackets that usually come with your dishwasher. These brackets are typically found on the top edges of the appliance and are designed to anchor the dishwasher to the underside of your countertop. Using a level, make sure your dishwasher is perfectly aligned, so it sits flush with the surrounding cabinetry. An uneven installation can lead to functional issues and may even result in water leaks over time.

With the dishwasher positioned correctly, take your drill and carefully screw the mounting brackets into the countertop. If your countertop is made of a softer material like laminate, be cautious not to overtighten, as this can cause damage. For sturdier surfaces such as granite or quartz, you might need to use a masonry bit to pre-drill holes before inserting screws.

Next, locate the leveling legs at the bottom of the dishwasher. Adjust these legs as necessary to ensure the dishwasher is level from front to back and side to side. You can do this by turning the legs clockwise to raise them or counterclockwise to lower them. A level dishwasher not only enhances performance but also helps prevent leaks and ensures that the door seals properly.

Finally, double-check that there are no gaps between the dishwasher and the cabinetry. This will help prevent any potential vibrations during operation, which could lead to wear and tear over time. Once everything is secured and aligned, you can step back and admire your handiwork—you’re one step closer to enjoying the convenience of your new dishwasher!

12. Step 8: Testing for Leaks and Proper Function

After your new dishwasher is securely installed and connected, it’s time for the crucial step of testing for leaks and ensuring everything functions as it should. This phase is not just about double-checking; it’s about safeguarding your home from potential water damage and ensuring your appliance operates efficiently.

Start by turning on the water supply and checking for any immediate leaks around the connections. Look closely at the water inlet hose where it connects to the dishwasher, as well as the drain hose and any other joints. If you notice any dripping or pooling water, turn off the supply and tighten the connections, or use additional plumbing tape if necessary.

Next, run a short cycle on your dishwasher without any dishes inside. This initial run serves multiple purposes: it allows you to observe the appliance in action, check for leaks during operation, and assess the sound levels. Listen for any unusual noises that could indicate a problem, such as grinding or excessive rattling.

While the cycle runs, keep an eye on the floor beneath the dishwasher. A dry floor is a good sign that your connections are secure. If you do spot any water, shut off the dishwasher immediately and investigate further. It’s better to catch issues early on than to risk a larger problem down the line.

Once the cycle is complete, open the dishwasher and inspect the interior. Ensure that the spray arms are rotating freely and that water has reached every corner. Check for any leftover detergent, which might indicate that the dishwasher isn’t draining properly.

Finally, take a moment to familiarize yourself with the control panel and features. Run through the settings and options to ensure everything is functioning correctly. If all checks out, congratulations! You’ve successfully installed your dishwasher like a pro, and you’re now ready to enjoy the convenience of clean dishes at the touch of a button.

13. Step 9: Final Touches: Adjusting the Dishwasher Door

Once your dishwasher is securely installed and connected, it’s time to add the finishing touches by adjusting the dishwasher door. This step is crucial not only for aesthetics but also for ensuring optimal functionality and longevity of your appliance. A properly aligned door will close seamlessly, preventing leaks and ensuring efficient operation.

Start by checking the alignment of the door. Open and close the dishwasher a few times to see if it operates smoothly. If you notice any resistance or if the door doesn’t close evenly, you may need to make some adjustments. Most dishwashers come with adjustable hinges or leveling legs that allow you to fine-tune the positioning.

To adjust the door, first, locate the hinge adjustment screws, which are typically found on the inside of the door. Using a screwdriver, make slight turns on the screws to raise or lower the door as needed. Aim for a snug fit when the door is closed—there should be no gaps along the edges, but it shouldn’t be so tight that it’s difficult to operate.

Next, check the top of the door for proper spacing. The dishwasher door should align flush with the surrounding cabinetry for a clean, polished look. If necessary, adjust the leveling legs at the bottom of the dishwasher to help achieve this alignment. Turn them clockwise to raise the appliance or counterclockwise to lower it until you reach the desired height.

Finally, test the door one last time. Make sure it opens and closes effortlessly, and that there are no obstructions in the way. If everything looks good, you’ve successfully completed the installation process!

With the door properly adjusted, you can now enjoy the peace of mind that comes with knowing your new dishwasher is perfectly positioned and ready to tackle your dirty dishes. Congratulations on your accomplishment—now it’s time to load it up and experience the convenience of your new appliance!

14. Troubleshooting Common Installation Issues

When it comes to installing your new dishwasher, encountering issues can feel daunting, but fear not! Troubleshooting common installation problems can often be a straightforward process, and with a little patience and persistence, you can resolve them like a pro.

First, let’s talk about water supply issues. If your dishwasher isn’t filling up, check to ensure that the water supply valve is fully opened. Sometimes, it may appear open but isn’t allowing water to flow due to debris or mineral buildup. A quick inspection of the hose connections can also reveal whether there are kinks or blockages impeding water flow.

Next, look out for drainage problems. If your dishwasher is not draining properly, check the drain hose for any clogs or bends. Ensure that it’s installed at the right height—ideally, the top of the hose should reach the underside of your countertop to prevent backflow. If you notice standing water at the bottom of the tub, inspect the filter and drain area for food particles or debris that may be obstructing proper drainage.

Another common issue is noise during operation. If your dishwasher sounds louder than expected, it could be due to improper leveling. Make sure that all four feet are adjusted evenly and that the appliance is stable to minimize vibrations. Additionally, ensure that items inside the dishwasher are arranged properly, as loose cutlery or dishes can rattle against each other and create unwanted noise.

Lastly, keep an eye out for leaks. If you notice water pooling around the base of the dishwasher, double-check all connections, including the water supply line and drain hose. Tighten any loose fittings and inspect the door seal for wear and tear. If the seal is compromised, replacing it might be necessary to prevent future leaks.

By systematically addressing these common installation issues, you can not only ensure that your dishwasher operates effectively but also gain confidence in your DIY skills. Remember, every problem has a solution, and with each challenge you conquer, you’ll be one step closer to mastering appliance installation!

15. Conclusion: Enjoying Your New Dishwasher and Maintenance Tips

Congratulations! You’ve successfully installed your new dishwasher, and now it’s time to enjoy the convenience and efficiency it brings to your kitchen. No more endless hours spent scrubbing pots and pans by hand; instead, you can relax while your new appliance takes care of the dirty dishes. As you bask in the ease of this modern marvel, it’s essential to remember that proper maintenance will ensure your dishwasher remains in top-notch condition for years to come.

To keep your dishwasher running smoothly, make it a habit to regularly clean the filter, as food particles can accumulate and hinder performance. Simply remove the filter, rinse it under warm water, and scrub away any stubborn debris. This small step can significantly enhance the efficiency of your machine.

Additionally, consider running a maintenance cycle every few months. You can achieve this by placing a cup of vinegar or a dishwasher cleaner on the top rack and running a hot water cycle. This process helps eliminate grime, odors, and buildup, leaving your dishwasher fresh and clean.

Don’t forget to check the spray arms, too! Ensure they are free of obstructions and can rotate freely to distribute water effectively. If you notice any debris stuck in the nozzles, use a toothpick to clear it out gently.

Lastly, remember to keep the door seals clean and intact. Wipe them down with a damp cloth regularly to prevent mold and mildew buildup, ensuring a tight seal during operation.

By following these simple maintenance tips, you can extend the lifespan of your dishwasher and continue to enjoy its benefits. So, sit back, relax, and let your new kitchen companion handle the dirty work—after all, you’ve earned it!

In conclusion, installing your new dishwasher doesn’t have to be an intimidating task reserved for the professionals. With the right tools, a little patience, and the step-by-step guidance provided in this article, you can confidently tackle this home improvement project and achieve professional-looking results. Remember to take your time during each stage, from preparing the space to connecting the plumbing and electrical components, ensuring that everything is secure and properly aligned. Soon enough, you’ll be enjoying the convenience of your new appliance, while also taking pride in the fact that you completed the installation yourself. So roll up your sleeves, gather your tools, and get ready to transform your kitchen experience—happy dishwashing!