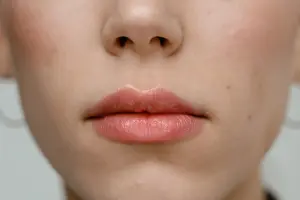
How to smile ?

A smile is a natural and universal expression of happiness, joy, and friendliness. Here are 10 steps to help you smile

A smile is something that comes naturally to most people, but for some, it may feel a bit forced or uncomfortable. Find below 10 tips to help you smile

smile
Credit : eperales
  1. Relax your face: Start by relaxing your facial muscles. Release any tension in your forehead, jaw, and cheeks.
  2. Think positive thoughts: Try to focus on positive and happy thoughts or memories. This can help naturally trigger a genuine smile.
  3. Use your eyes: A genuine smile often involves not just the lips, but also the eyes. When you do genuinely, your eyes may crinkle at the corners, creating “crow’s feet.” This is sometimes called a Duchenne smile, and it’s a sign of sincerity.
  4. Lift the corners of your mouth: Slowly turn up the corners of your mouth into a gentle smile. It doesn’t need to be a huge grin; a subtle, genuine smile can be very inviting.
  5. Show your teeth (if comfortable): Depending on your personal preference and the situation, you can show your teeth or keep your lips together. Both are valid smiles.

Practice and improve

  1. Practice in front of a mirror: If you’re unsure about your smile, practice in front of a mirror to see how it looks. Adjust as needed until you’re comfortable with it.
  2. Do it naturally: Avoid forcing. A genuine smile comes naturally, and people can often tell when it is forced or insincere.
  3. Use your whole face: Let it spread across your entire face, not just your mouth. This can make your smile appear more genuine and warm.
  4. Maintain good dental hygiene: Taking care of your teeth and gums can boost your confidence. Regular dental check-ups, brushing, flossing, and maintaining a healthy diet can help.
  5. Practice makes perfect: The more you practice smiling, the easier and more natural it will become. Try to incorporate smiling into your daily life, especially when interacting with others.

Remember, smiling is a simple yet powerful way to convey positivity and connect with others. Whether it’s a genuine, warm smile or a polite, courteous one, the act of smiling can brighten your day and the day of those around you.

While smiling may seem like a simple and natural act, its impact on our well-being and the world around us should not be underestimated. Smiling has a multitude of benefits for both ourselves and those we encounter. When we smile, our brain releases endorphins, which are natural feel-good chemicals, instantly boosting our mood and reducing stress levels. Not only does smiling make us feel happier, but it also has a contagious effect on others.

When smiling at someone, it has the power to brighten their day, improve their mood, and create a positive atmosphere. Smiling is a universal language that transcends cultural barriers and connects us on a deeper level. It can foster kindness, compassion, and empathy, creating a sense of unity among individuals. Moreover, studies have shown that people who smile more frequently are perceived as more approachable, trustworthy, and confident, leading to better social interactions and opportunities. So, let us never underestimate the power of smiling and make it a habit to share our smiles with the world

How to shoot a bow and arrow

Shooting a bow and arrow is a fun and exciting activity that requires skill and practice.

Shooting a bow and arrow can seem intimidating at first, but with a little practice and the right technique, you can become a skilled archer in no time. Here are some tips to help you get started:

bow and arrow
Credit : Ivan Radic
  • Start by selecting the right bow for your size and strength.
  • Hold it with your non-dominant hand and place your fingers on the string.
  • Use your dominant hand to grab the arrow and place it on the bow.
  • Stand with your feet shoulder-width apart and your knees slightly bent.
  • Line up the arrow with your target and aim.
  • Pull back the string with your fingers and keep your arm steady.
  • Take a deep breath and release the arrow.
  • Follow through with your shot by keeping your arm extended.
  • Practice proper form and consistency to improve your aim and accuracy.
  • Use a release aid for added precision and to reduce finger strain.
  • Experiment with different types of arrows to find the best fit for your bow and shooting style.
  • Always wear protective gear, such as a finger tab or arm guard, to prevent injuries.
  • Have fun and enjoy the experience of shooting a bow and arrow!

Focus and concentration

Shooting a bow and arrow is a great way to improve your focus and concentration.

  • It is also a great way to improve your hand-eye coordination and overall fitness level.
  • With a little bit of patience and practice, you can become an expert at shooting a bow and arrow.
  • When you are first starting out, it is important to take it slow and focus on proper form.
  • As you become more comfortable and confident, you can start to increase your speed and distance.
  • Remember that shooting a bow and arrow is not just about hitting the target, but also about the experience and the journey.
  • With a little bit of patience and practice, you can become an expert at shooting a bow and arrow.
  • So, keep practicing and have fun!
  • Remember to always wear safety gear and stay safe while practicing.
  • Always use a reliable set, and check them for any damages before use.
  • Lastly, never shoot at people or animals, it can cause serious harm or even death.
  • Respect the nature and use the bow and arrow only in designated areas and for designated purpose.
  • Happy shooting!

How to hang a horseshoe ?

Hanging a horseshoe is a traditional practice that is said to bring good luck to a home

Here are some simple steps to follow when hanging a horseshoe :

horseshoe
  1. Gather your materials: You will need a horseshoe, a nail, and a hammer.
  2. Choose the location: Decide where you want to hang the horseshoe. It is traditionally hung above the main entrance to a home, but it can also be placed in other areas such as a barn or stable.
  3. Clean it : Make sure it is clean and free of any rust or debris.
  4. Position it : Hold it in the desired location and mark the spot where the nail will go.
  5. Drive the nail: Carefully drive the nail into the marked spot, being sure to not bend or damage the horseshoe.
  6. Hang it : With the nail in place, carefully hang it on the nail.
  7. Orientation: the horseshoe should be hung with the open end facing up, as it is said to hold good luck inside.
  8. Final touch: You can add a ribbon or string for a decorative touch.

Some additional tips

  • If the horseshoe is new, it is said to bring more luck if it is given as a gift.
  • If it is found, it is said to bring even more luck.
  • Some people believe that it should be hung with seven nails for added luck.

In conclusion, hanging a horseshoe is a simple and traditional way to bring good luck to a home. With a clean sample, a nail, and a hammer, you can easily add this decorative touch to your home.

Remember to hang it with the open end facing up and add a personal touch with ribbon or string. Always use caution when hanging any kind of decoration. Finally enjoy your new decoration with the pride of a successful DIY task.

How to bind without a binder ?

Binding without a binder can be done using several methods, each with their own benefits and drawbacks.

Top 5 methods to bind without a binder :

bind without a binder
  1. Compression shirts: These shirts are designed to compress the chest, giving the appearance of a flatter chest. They can be made of a variety of materials such as spandex or nylon. They can also be worn under regular clothing.
  2. Ace bandages: An Ace bandage is a stretchy bandage that can be wrapped around the chest to compress it. This method can be uncomfortable and may cause skin irritation.
  3. Sports bras: Some sports bras are designed to compress the chest, but they may not be as effective as other methods.
  4. DIY binders: Some individuals make their own binders by cutting and sewing pieces of elastic or spandex fabric. This can be a cost-effective option. But it is important to make sure the binder is not too tight and does not restrict breathing.
  5. Layering clothing: Wearing multiple layers of clothing can help to conceal the chest. This method may not be as effective as other methods, but it can be a good option for individuals who are not comfortable with the other methods.

It is important to keep in mind that binding can be dangerous if done improperly. It can indeed restrict breathing and cause discomfort. Above all, it is best to consult with a healthcare professional before using any binding methods. It’s also important to take breaks from binding and not bind for extended periods of time.

In summary, binding without a chest binder can be a tricky task, but it is possible with the right techniques and materials. It can be done using methods such as compression shirts, ace bandages, sports bras, DIY binders and layering clothing. Always consider consulting a healthcare professional and be mindful of the risks before deciding on a method.

How to ask someone to be your valentine ?

As Valentine’s Day approaches, many people may be considering asking someone special to be their valentine.

Asking someone to be your valentine can be stressful, but it doesn’t have to be. Here are some tips for making this important request:

Valentine
  1. Plan ahead. Don’t wait until the last minute to ask someone to be your valentine. Think about what you want to say and how you want to say it. Consider the person’s interests and preferences, and plan accordingly.
  2. Choose the right time and place. Asking someone to be your valentine is an intimate and personal request, so it’s important to choose a time and place that is private and comfortable for both of you.
  3. Be sincere. When you ask someone to be your valentine, be genuine and honest about your feelings. Avoid using clichés or rehearsed lines, and speak from the heart.
  4. Keep it simple. There’s no need to go over the top or make a grand gesture. A simple, heartfelt request can be just as meaningful.
  5. Be prepared for a variety of responses. It’s important to remember that not everyone may feel the same way you do. Be prepared for the possibility of rejection, and try to handle it gracefully. If the person says no, respect their decision and move on.
  6. Don’t pressure the person. Asking someone to be your valentine should be a joyful and positive experience, not a source of stress or pressure. Make it clear that you respect their decision and that you will still be friends, regardless of their answer.
  7. Have fun! Valentine’s Day is a time to celebrate love and affection, so make the most of it. Whether you’re asking someone to be your valentine or simply spending time with loved ones, make sure to enjoy yourself and have a good time.

In conclusion, asking someone to be your valentine can be a nerve-wracking experience, but with a little planning and a lot of sincerity, it can also be a joyful and memorable moment.

By considering the person’s interests and preferences, choosing the right time and place, and being prepared for a variety of responses, you can make this special request with confidence and grace.

How to draw a rose step by step ?

The rose is known for its delicate petals and intricate structure. It is a popular subject for artists of all skill levels.

Drawing a rose is a beautiful and timeless art that can add a touch of elegance and beauty to any drawing or painting. In this article, we will show you how to draw a rose in five easy steps.

rose
Credit : Rawpixel
  • Step 1: Start by drawing the outer shape of the rose. Draw a small circle in the center of your paper. Then draw a larger, slightly elongated oval shape around it. This will be the outer shape of the flower
  • Step 2: Next, draw the petals of the rose. Begin by drawing five small petals around the center circle, evenly spaced apart. Then draw another five larger petals around the outside of the smaller petals.
  • Step 3: To add depth and dimension to the rose, draw a few more petals inside the larger petals. Draw them in a slightly different direction than the other petals to give the flower a more realistic and lifelike appearance.
  • Step 4: Now it’s time to add some detail to the rose. Start by drawing the rose’s stem and leaves. Draw a thin, curved line coming out of the bottom of the flower. Then add a few small leaves on either side of the stem.
  • Step 5: Finally, add some shading to your rose to give it a more three-dimensional appearance. Using a pencil, lightly shade the center of the flower and the areas where the petals overlap. You can also add some shadow to the stem and leaves to give them more depth and dimension.

With these five simple steps, you can easily draw a beautiful flower that will add a touch of elegance and beauty to any drawing or painting. The key to drawing a realistic rose is to take your time and be patient.

The delicate petals and its intricate structure can be challenging to draw. But with practice and perseverance, you will be able to create a stunning rose that you can be proud of.

How much water should you drink a day ?

The human body is made up of approximately 60% water, making it essential for various bodily functions such as regulating body temperature, maintaining blood pressure, and removing waste

It is advisable to imbibe a copious amount of water on a daily basis to maintain optimal health and hydration. The amount one should consume varies depending on factors such as age, gender, and level of physical activity.

water drop
Credit : Allan Foster

As a general rule, it is recommended to drink at least eight 8-ounce glasses of water per day. It is a total of 64 ounces or about 2 liters. This equates to approximately half a gallon. However, some individuals may require more or less depending on their specific needs.

For instance, individuals who engage in strenuous physical activity or live in a hot climate may require additional hydration to replace lost fluids. On the other hand, individuals with certain medical conditions or who are taking certain medications may need to limit their water intake.

Numerous health benefits

It is important to note that the consumption of water does not only come from drinking plain water. Many foods and beverages, such as fruits and vegetables, contain high amounts and can contribute to daily hydration.

In addition to maintaining hydration, consuming an adequate amount of water can also provide numerous health benefits. It helps to regulate body temperature, lubricate joints, and aid in digestion and metabolism. It also helps to flush toxins and waste from the body, promoting healthy kidney function.

Furthermore, staying hydrated can improve cognitive function and energy levels, as well as promote healthy skin and hair. Dehydration, on the other hand, can lead to symptoms such as dizziness, fatigue, and headache.

In conclusion, it is essential to incorporate a bountiful amount of water into one’s daily routine to maintain proper hydration and overall health. However, everybody is different and individual needs may vary. But a good starting point is to aim for at least eight 8-ounce glasses of water per day.

How to make your voice deeper ?

If you’re a man looking to deepen your voice, there are a few simple steps you can take to achieve a more commanding and authoritative tone.

While some men are naturally blessed with deep voices, others may need to work on their vocal technique. Here are some tips for making your voice deeper.

Deep voice
Credit : ChrisGoldNY
  1. Relax your throat muscles. When you’re speaking, try to relax your throat muscles as much as possible. Tensing up your throat can make your voice sound higher and less authoritative. To relax your throat, take deep breaths and try to speak slowly and evenly.
  2. Use a lower pitch. To make your voice sound deeper, you need to speak at a lower pitch. This means lowering the pitch as you speak, rather than simply speaking in a monotone. To practice speaking at a lower pitch, try saying the same sentence in a few different pitches and see which one sounds the deepest.
  3. Speak from your diaphragm. Another key to achieving a deeper voice is to speak from your diaphragm, rather than just using your throat muscles. Your diaphragm is a large muscle located just below your rib cage, and it’s responsible for helping you breathe and control the volume of your voice. To speak from your diaphragm, try taking deep breaths and engaging your abdominal muscles as you speak.
  4. Use a microphone. If you’re a singer or a public speaker, using a microphone can help you achieve a deeper voice. When you speak into a microphone, the microphone amplifies your voice and makes it sound louder and more powerful. This can help you achieve a deeper, more commanding tone.
  5. Practice vocal exercises. There are many vocal exercises you can do to improve your vocal technique and make your voice sound deeper. For example, you can try humming or singing a low note and then gradually increasing the pitch. You can also try speaking in different pitches and experimenting with different vocal techniques to see what works best for you.

In conclusion, making your voice deeper is all about relaxation, pitch, and technique. By relaxing your throat muscles, speaking at a lower pitch, and using your diaphragm, you can achieve a deeper, more commanding tone. Then, with practice and dedication, you can develop your vocal skills and make your voice sound deeper and more authoritative.

How to get rid of lip blackheads ?

Here are 5 tips on how to get rid of lip blackheads:

Lip blackheads are a common skincare concern for many people. They can be unsightly and difficult to get rid of. These pesky blackheads form when dead skin cells, oil, and bacteria become trapped in the pores of the lips, resulting in a dark, bumpy appearance.

lip blackheads
Credit : MART PRODUCTION

Fortunately, there are several effective methods for getting rid of lip blackheads and preventing them from forming in the first place. Here are some tips to help you achieve smooth, clear lips:

  1. Exfoliate regularly. Exfoliating helps to remove dead skin cells and unclog pores, which can prevent blackheads from forming. You can use a lip scrub or a gentle exfoliating brush to gently scrub your lips in circular motions. Be sure to only exfoliate once or twice a week. Over-exfoliating can cause irritation and damage to the delicate skin on your lips.
  2. Use a lip balm with salicylic acid. Salicylic acid is a powerful ingredient that helps to break down the buildup of dead skin cells and oil, which can help to prevent blackheads from forming. Look for a lip balm that contains salicylic acid and apply it to your lips daily to keep them moisturized.
  3. Avoid using matte lipsticks. Matte lipsticks can be drying and can cause the skin on your lips to flake and become dehydrated, which can lead to blackheads. Instead, opt for a hydrating lip balm or a moisturizing lipstick that will keep your lips smooth and plump.
  4. Keep your lips clean. Blackheads can form when bacteria and dirt accumulate on the surface of your lips. So it’s important to keep them clean. Use a gentle cleanser or makeup remover to remove any excess oil and bacteria from your lips, and be sure to wash your hands before applying any lip products to prevent contamination.
  5. Use a warm compress. A warm compress can help to loosen the pores on your lips and soften the blackheads. It will make them easier to remove. Simply soak a washcloth in warm water and hold it over your lips for a few minutes to open up the pores. You can then use a blackhead extractor tool or your fingers to gently press and remove them.

By following these tips, you can effectively get rid of lip blackheads and prevent them from forming in the future. Remember to be gentle with your lips and avoid over-exfoliating or using harsh products, as this can cause irritation and damage. With regular care and attention, you can enjoy smooth, clear lips free from pesky blackheads.

How to take sexy pics ?

Taking sexy photos can be a fun and exciting way to express your sensuality and celebrate your body. Here are some tips for taking stunning and sexy photos of yourself

7 steps to take the best sexy pics :

Credit : pxhere.com
  1. Get in the mood. Take some time to pamper yourself and get in the right headspace. Put on your favorite music, light some candles, and do whatever else makes you feel sexy and confident.
  2. Find the right lighting. Good lighting is key for taking any photo, but it’s especially important for sexy photos. Natural light is often the most flattering, so try taking your photos near a window or outdoors. But avoid harsh overhead lighting, as it can create unflattering shadows on your face and body.
  3. Experiment with different angles. Try shooting from different angles to see what works best for your body. Play around with standing, sitting, lying down, and other poses to find the ones that flatter you the most.
  4. Show off your best assets. Whether it’s your curves, your cleavage, or your legs, don’t be afraid to highlight the features you love the most. A little bit of skin can be very alluring, so consider showing a hint of your stomach, chest, or thighs.
  5. Use props and accessories. Adding props and accessories to your photos can add interest and sexiness. So consider using a piece of lingerie, a scarf, or a piece of jewelry to add a little something extra to your photos.
  6. Edit your photos. Most people aren’t perfectly symmetrical, so don’t be afraid to use photo editing tools to touch up your photos. A little bit of smoothing, whitening, or contouring can make a big difference in the final result.
  7. Be confident. Above all, remember to be confident and have fun. The sexiest thing about any photo is the person in it, so own your body and your sexuality. You’ll look and feel amazing, and that will shine through in your photos.

In conclusion, taking sexy photos of yourself can be a fun and empowering experience. By finding the right lighting, experimenting with different angles, and showing off your best assets, you can create stunning and sensual photos that celebrate your body and your sexuality.

Don’t forget to have fun and be confident, and you’ll be sure to take amazing photos that you’ll love.