The Role of Technology in Filmmaking: Friend or Foe?

In the ever-evolving landscape of cinema, technology has emerged as both a powerful ally and a contentious adversary.

From the early days of silent films to today’s digital masterpieces, technological advancements have continually reshaped the way stories are told on screen. But as filmmakers increasingly rely on cutting-edge tools—be it CGI, drones, virtual reality, or sophisticated editing software—a pressing question arises: is technology an innovation that enhances the art of filmmaking, or is it an intrusion that risks overshadowing the human touch in storytelling? In this blog post, we will explore the profound impact of technology on the filmmaking process, examining how it has transformed everything from pre-production planning to post-production polishing. We’ll delve into the benefits and potential pitfalls of modern filmmaking techniques, showcasing how they can elevate a film’s narrative while also challenging traditional craftsmanship. Join us as we navigate this complex relationship between art and technology, uncovering the true essence of creativity in the digital age.

1. Introduction: The Intersection of Technology and Filmmaking

The Role of Technology in Filmmaking: Friend or Foe?
Credit : whatcanu.com

In the realm of filmmaking, the convergence of technology and artistic vision has sparked a transformative revolution, reshaping the way stories are told and experienced. From the advent of sound in the early 20th century to the stunning visuals of today’s CGI and virtual reality, technology has continuously pushed the boundaries of creativity. But as we stand at this intersection of innovation, a pressing question emerges: is technology enhancing the filmmaking process, or is it intruding upon the very essence of art?

Filmmakers now wield a plethora of tools that empower them to craft intricate narratives and push the limits of imagination. Digital cameras with astonishing resolutions, editing software that allows for seamless post-production, and advanced sound design techniques provide filmmakers with unprecedented opportunities to bring their visions to life. However, this abundance of technological resources can also lead to an over-reliance on gadgets and gizmos, potentially overshadowing the fundamental qualities of storytelling and human emotion.

As we delve into the diverse perspectives surrounding this topic, we will explore how technology serves as both a powerful ally and a potential detractor in the filmmaking process. By examining the impacts of innovations such as artificial intelligence, streaming platforms, and immersive experiences, we aim to uncover whether these advancements enhance or diminish the art of filmmaking. Join us on this journey as we navigate the complexities of technology’s role in shaping the cinematic landscape, seeking to understand whether it is fostering a new era of creativity or creating barriers to authentic storytelling.

2. Historical Evolution of Filmmaking Technology

The history of filmmaking technology is a fascinating journey that reflects the evolution of not only the medium itself but also the artistic vision and storytelling capabilities of filmmakers throughout the ages. From the early flickers of light produced by the magic lantern in the 17th century to today’s sophisticated CGI and virtual reality experiences, each technological advancement has significantly shaped the way stories are told on screen.

In the late 19th century, the invention of the motion picture camera marked a revolutionary leap forward. Pioneers like Thomas Edison and the Lumière brothers harnessed the power of film to capture life’s moments, forever changing the landscape of entertainment. The introduction of celluloid film in the 1880s provided filmmakers with a medium that was both affordable and versatile, leading to the birth of narrative cinema.

As we moved into the 20th century, the silent film era paved the way for sound technology, transforming the audience’s experience. The 1927 release of “The Jazz Singer,” the first synchronized sound feature, marked a pivotal moment in cinematic history. This innovation not only enhanced storytelling but also pushed filmmakers to explore sound design and music as integral parts of their narratives.

The evolution didn’t stop there. The introduction of color film in the 1930s was another game changer, allowing filmmakers to infuse their work with vibrant hues that added emotional depth and visual appeal. The leap from Technicolor to digital projection in the late 20th century altered the industry once again, making film production more accessible and leading to a democratization of creativity.

In recent decades, advancements in digital technology have revolutionized filmmaking yet again. High-definition cameras, drones for aerial shots, and editing software that once required a professional studio can now be utilized by aspiring filmmakers from the comfort of their own homes. These tools not only streamline the production process but also allow for greater experimentation and innovation.

However, with these advancements come debates about the authenticity of the filmmaking process. As technology becomes more integrated into the craft, some purists argue that it detracts from the artistry, reducing the tactile experience of traditional filmmaking. Others embrace it as a means to expand creative boundaries and reach wider audiences.

The historical evolution of filmmaking technology serves as a testament to the relentless pursuit of innovation within the industry. As we stand on the brink of new technological frontiers, such as artificial intelligence and immersive experiences, the conversation surrounding technology’s role in filmmaking—whether as an innovation or an intrusion—continues to unfold, shaping the art of storytelling for generations to come.

3. Key Technological Innovations that Transformed Filmmaking

The Role of Technology in Filmmaking: Friend or Foe?
Credit : whatcanu.com

The landscape of filmmaking has been dramatically reshaped by a series of key technological innovations that have not only enhanced creativity but also transformed the very fabric of storytelling. From the early days of silent films to the current era of digital cinema, these advancements have opened new avenues for filmmakers, allowing them to explore, experiment, and engage audiences in ways previously unimaginable.

One of the most significant innovations is the advent of digital cinematography. The transition from traditional film to digital formats has revolutionized the way movies are shot and produced. Digital cameras offer filmmakers unprecedented flexibility, enabling them to shoot in a variety of conditions with high-quality results. This shift has not only reduced production costs but has also democratized filmmaking, allowing indie filmmakers access to tools once reserved for major studios.

Another groundbreaking development is the rise of computer-generated imagery (CGI). This technology has expanded the boundaries of visual storytelling, making it possible to create fantastical worlds and characters that would be impossible to achieve with practical effects alone. Iconic films such as “Avatar” and “The Lord of the Rings” showcase the power of CGI, transporting audiences to breathtaking realms that captivate the imagination.

Moreover, advancements in editing software have transformed the post-production process. Tools like Adobe Premiere Pro and Final Cut Pro enable editors to manipulate footage with incredible precision, allowing for seamless transitions and creative effects. This democratization of editing technology means that even novice filmmakers can produce professional-quality work from the comfort of their own homes.

Virtual reality (VR) and augmented reality (AR) are also making waves in the industry, offering immersive experiences that engage viewers on a whole new level. Filmmakers are experimenting with these technologies to create interactive narratives that allow audiences to step into the story, effectively blurring the lines between creator and viewer.

Finally, streaming platforms have redefined distribution and accessibility in filmmaking. With services like Netflix, Hulu, and Amazon Prime Video, films can reach global audiences instantly, breaking down geographic barriers and changing the way films are marketed and consumed. This shift has not only provided filmmakers with new revenue streams but has also encouraged a diverse range of storytelling that caters to varied tastes and preferences.

In summary, the key technological innovations in filmmaking have ushered in a new era of creativity and accessibility. While some may argue that these advancements can lead to a reliance on technology over artistry, the truth is that they offer filmmakers powerful tools to enhance their craft and engage audiences in innovative ways. As technology continues to evolve, the possibilities for storytelling in film are boundless, challenging filmmakers to push the boundaries of their imagination.

4. The Impact of Digital Cameras on Cinematography

The advent of digital cameras has fundamentally transformed the landscape of cinematography, ushering in a new era of filmmaking that is both innovative and, at times, contentious. Gone are the days when filmmakers relied heavily on cumbersome film stock, which not only dictated the technical limitations of their craft but also imposed significant financial constraints. With the introduction of digital cameras, filmmakers now have unprecedented access to a range of creative possibilities, enabling them to experiment with shots and styles previously deemed impractical or too costly.

Digital cameras offer a remarkable level of flexibility and immediacy. Filmmakers can review their takes on the spot, adjusting lighting, framing, and performance in real time. This instant feedback loop allows for a more collaborative environment on set, as directors and cinematographers can make informed decisions without the lengthy wait associated with film processing. Additionally, the lower cost of shooting with digital means that independent filmmakers can produce high-quality content without the financial backing of major studios, democratizing the industry and leading to a more diverse array of voices and stories.

However, this technological shift is not without its drawbacks. The ease of shooting with digital cameras can sometimes lead to a more casual approach to cinematography, as the perceived abundance of storage and the ability to shoot endlessly might encourage filmmakers to prioritize quantity over quality. The artistry of framing, lighting, and composition can occasionally suffer as a result, leading to a reliance on digital effects and corrections in post-production instead of meticulous planning on set.

Moreover, the rapid evolution of digital technology can create a sense of anxiety among cinematographers. With new models and advancements rolling out at a breakneck speed, there’s an ongoing pressure to stay current and adapt to the latest tools and trends. This can lead to a feeling of intrusion, where the technology itself dictates creative choices rather than serving as a facilitator of artistic expression.

Ultimately, the impact of digital cameras on cinematography is a double-edged sword. They have unlocked a world of possibilities for filmmakers, empowering them to push boundaries and explore new narrative forms. However, the challenge lies in balancing the advantages of this technology with a commitment to the core principles of cinematic artistry. As the industry continues to evolve, it remains crucial for filmmakers to leverage these tools thoughtfully, ensuring that innovation enhances rather than intrudes upon the storytelling process.

5. Editing Software: Streamlining the Post-Production Process

The Role of Technology in Filmmaking: Friend or Foe?
Credit : whatcanu.com

Editing software has revolutionized the post-production process, transforming it from a time-consuming, labor-intensive task into a streamlined, efficient workflow that enhances creativity and precision. Gone are the days of physically cutting film strips and painstakingly splicing them together; today’s digital editing platforms allow filmmakers to manipulate footage with remarkable speed and ease.

Modern editing software, such as Adobe Premiere Pro, Final Cut Pro, and DaVinci Resolve, offers an array of powerful tools that cater to both novice and professional filmmakers. These programs provide intuitive interfaces, enabling users to cut, trim, and arrange clips with just a few clicks. Advanced features like multi-camera editing, color grading, and audio mixing allow for a level of control and creativity that was previously unimaginable. Filmmakers can experiment with different sequences, visualize their stories in real-time, and even collaborate with team members across the globe through cloud-based editing solutions.

However, with this wealth of technology comes a double-edged sword. While editing software undoubtedly streamlines the process, it can also lead to an over-reliance on digital effects and shortcuts that may overshadow the storytelling aspect of filmmaking. The infinite possibilities can sometimes overwhelm creators, tempting them to prioritize flashy edits over narrative substance. Therefore, it’s essential for filmmakers to strike a balance between embracing technological advancements and maintaining the core principles of storytelling that engage audiences.

In the end, editing software serves as a powerful ally in the pursuit of cinematic excellence. By leveraging these tools effectively, filmmakers can enhance their vision, create compelling narratives, and ultimately, deliver a polished final product that resonates with viewers. The challenge lies not in the technology itself, but in ensuring that it supports the art of filmmaking rather than detracts from it.

6. Special Effects: Enhancements vs. Authenticity

In the ever-evolving landscape of filmmaking, special effects serve as a double-edged sword, offering both enhancements to storytelling and challenges to authenticity. The advancements in technology have given filmmakers unprecedented tools to create visually stunning worlds, breathtaking action sequences, and fantastical creatures that were once limited to the realms of imagination. From CGI landscapes that transport audiences to distant galaxies to meticulously crafted practical effects that ground a film in reality, the debate continues: Are these innovations enhancing the art of storytelling, or are they detracting from the raw, authentic experience that cinema can deliver?

On one hand, special effects can elevate a film, allowing creators to realize their visions in ways that were previously unattainable. Iconic films like “Avatar” and “The Lord of the Rings” have pushed the boundaries of visual storytelling, immersing viewers in elaborate universes where the impossible becomes possible. These effects can provoke awe and wonder, drawing audiences deeper into the narrative and connecting them emotionally to the characters and their journeys.

However, with the rise of digital manipulation comes the risk of overshadowing the core essence of filmmaking: storytelling. The over-reliance on special effects can lead to a disconnect between the viewer and the characters, as audiences may find themselves more focused on the spectacle than the emotional arcs that drive the narrative. This can lead to a perception of films as mere showcases of technology rather than genuine artistic endeavors. Films that heavily depend on CGI can sometimes feel sterile, lacking the visceral quality that practical effects or authentic performances can provide.

Ultimately, the challenge lies in striking a delicate balance. Filmmakers must consider how special effects serve their story and whether they enhance or detract from the emotional experience they wish to convey. The key is to use technology as a tool to enrich the narrative rather than overshadow it. When special effects are thoughtfully integrated and aligned with the film’s tone and message, they can result in a breathtaking cinematic experience that resonates with audiences long after the credits roll.

7. The Role of Streaming Services and Digital Distribution

The Role of Technology in Filmmaking: Friend or Foe?
Credit : whatcanu.com

In recent years, streaming services and digital distribution have revolutionized the landscape of filmmaking, blurring the lines between traditional cinema and at-home viewing experiences. Platforms like Netflix, Amazon Prime, Hulu, and Disney+ have emerged as powerhouses, not only providing audiences with unprecedented access to a vast array of content but also reshaping how films are produced, marketed, and consumed.

These services have democratized film distribution, enabling independent filmmakers to reach global audiences without the need for conventional studio backing. No longer constrained by theatrical release windows, creators can now release their films directly to streaming platforms, often bypassing the traditional gatekeepers of the industry. This shift has given rise to a more diverse range of voices and stories, allowing niche genres and underrepresented perspectives to find their audiences.

Moreover, the data-driven nature of streaming platforms allows filmmakers and studios to gain insights into viewer preferences and behaviors. This information can inform everything from script development to targeted marketing campaigns, ensuring that content resonates with specific demographics. However, this reliance on data also poses challenges, as it can lead to formulaic storytelling driven by algorithms rather than creativity.

On the consumer side, streaming services have fundamentally changed viewing habits. Audiences now expect instant accessibility to films and series at their fingertips, leading to the rise of binge-watching culture. The convenience of digital distribution has made it easier than ever for viewers to discover new content, but it has also contributed to a saturation of choices, often overwhelming audiences with too many options.

While many celebrate the innovative potential of streaming services to elevate diverse storytelling, others express concerns about the possible intrusion of technology into the artistic process. The ease of digital distribution may encourage a focus on quantity over quality, and the algorithms that drive content recommendations can inadvertently narrow the scope of what gets made.

Ultimately, the role of streaming services and digital distribution in filmmaking is a double-edged sword. They offer exciting opportunities for innovation and accessibility but also raise important questions about the future of film as an art form in a rapidly changing digital landscape. As audiences continue to navigate this new terrain, filmmakers must find a balance between leveraging technological advancements and preserving the soul of storytelling that makes cinema so compelling.

8. Crowdsourcing and Online Funding Platforms

In the ever-evolving landscape of filmmaking, crowdsourcing and online funding platforms have emerged as pivotal tools that democratize the creative process. Gone are the days when filmmakers were solely reliant on traditional studios and investors to bring their visions to life. Today, filmmakers can tap into the power of the crowd, harnessing the enthusiasm and financial support of individuals who share their passion for storytelling.

Platforms like Kickstarter, Indiegogo, and GoFundMe have transformed how projects are financed, allowing creators to present their ideas directly to potential backers. This shift not only broadens the scope of what can be made but also fosters a sense of community and shared investment in the creative process. Filmmakers can now showcase trailers, behind-the-scenes content, or even comprehensive pitches to engage their audience effectively, creating a buzz before the cameras even roll.

However, while crowdsourcing presents a unique opportunity for filmmakers to gain financial backing, it also raises questions about the nature of artistic integrity and audience influence. When projects are funded by public contributions, there is an inherent pressure to cater to the desires of the backers, which can lead to compromises in the original vision. On the flip side, this model encourages filmmakers to be more transparent and accountable to their audience, cultivating a loyal fanbase that feels a personal connection to the project.

Moreover, the rise of online funding platforms has introduced a new layer of accessibility to filmmaking. Independent filmmakers, who may have previously struggled to secure funding, can now reach a global audience eager to support innovative and diverse voices. This shift not only enriches the film landscape by allowing underrepresented stories to emerge but also challenges the status quo of traditional filmmaking hierarchies.

In conclusion, while crowdsourcing and online funding platforms present both opportunities and challenges, they undeniably play a vital role in shaping the future of filmmaking. They encourage innovation, foster community engagement, and provide a platform for diverse narratives, ultimately redefining what it means to create and consume film in the digital age. As filmmakers navigate this new terrain, it will be intriguing to see how they balance the excitement of collective support with the need to maintain their artistic vision.

9. Technology in Film Marketing and Audience Engagement

In today’s fast-paced digital landscape, technology plays a pivotal role in the marketing of films and in engaging audiences like never before. The traditional methods of promoting a film—such as posters, trailers, and press releases—have evolved, giving way to a multifaceted approach that harnesses the power of social media, mobile apps, and interactive content.

Social media platforms like Instagram, Twitter, and TikTok have become essential tools for filmmakers and studios, allowing them to reach potential audiences directly and organically. Through strategic campaigns, filmmakers can share behind-the-scenes content, teasers, and interactive polls that not only generate buzz but also foster a sense of community among fans. For instance, viral challenges or hashtag campaigns can create a ripple effect, encouraging viewers to participate and share their excitement, effectively turning them into brand ambassadors.

Moreover, technology facilitates immersive experiences that enhance audience engagement. Virtual reality (VR) and augmented reality (AR) are breaking new ground in film promotion by allowing audiences to step into the world of the film. Imagine being able to explore a film’s setting or interact with characters through a VR experience before the film even hits theaters. This not only captivates the audience but also builds an emotional connection to the story and its characters.

Email marketing has also taken on a new dimension, leveraging data analytics to send personalized content to subscribers. By analyzing viewers’ preferences and behaviors, studios can tailor their messaging to resonate with specific segments of their audience. This targeted approach increases the likelihood of engagement, ensuring that fans receive content they are genuinely interested in.

Additionally, data-driven insights are revolutionizing the way films are marketed. By analyzing trends, audience demographics, and social media interactions, filmmakers can refine their marketing strategies in real time. This allows for more effective allocation of resources to campaigns that show promise, maximizing return on investment.

As technology continues to advance, the question remains: is it an innovation or an intrusion? While some may argue that technology detracts from the traditional artistry of filmmaking, it’s clear that when used thoughtfully, it enhances storytelling and creates deeper connections between films and their audiences. Ultimately, the successful integration of technology in film marketing is about striking the right balance—leveraging its capabilities to engage audiences while preserving the essence of the storytelling experience.

10. The Debate: Does Technology Compromise Artistic Vision?

The intersection of technology and artistry in filmmaking often sparks a heated debate: does the relentless march of technological advancement compromise the artistic vision of filmmakers, or does it enhance their creativity and storytelling potential? This question is not merely academic; it strikes at the heart of what it means to create meaningful cinema.

On one side of the argument, proponents of technology argue that innovations such as high-definition cameras, advanced editing software, and immersive sound design offer filmmakers tools that can elevate their craft to unparalleled heights. These advancements allow for unprecedented creative expression, enabling directors to bring their visions to life with clarity and precision that was once unimaginable. For instance, the use of CGI has transformed how stories are told, allowing filmmakers to create entire worlds and characters that transcend the limitations of physical sets. Films like “Avatar” and “The Lord of the Rings” showcase how technology can push the boundaries of imagination, creating visually stunning experiences that captivate audiences on a grand scale.

However, critics caution against an over-reliance on technology, arguing that it can often blur the lines between artistry and mere spectacle. The availability of sophisticated tools can lead to a phenomenon known as “technological determinism,” where the technology itself dictates the narrative and style, rather than the filmmaker’s original vision. Some filmmakers lament that the ease of digital editing can foster a reliance on flashy effects and rapid cuts, potentially sacrificing the depth and nuance of storytelling. Iconic directors like Martin Scorsese have voiced concerns that the emphasis on technology might detract from the emotional and narrative core of cinema, leading to a homogenization of films that prioritize visual impact over meaningful content.

This debate is further fueled by the rise of streaming platforms and the democratization of filmmaking tools. With more creators able to produce content at home, the landscape of filmmaking has expanded, leading to a surge of diverse voices and stories. Yet, this accessibility also raises questions about quality control and the potential dilution of artistic integrity. As technology makes filmmaking more achievable, it challenges traditional definitions of what constitutes a “great film” and whether artistic vision can thrive in a sea of content.

Ultimately, the question of whether technology is an innovation or an intrusion in filmmaking does not have a definitive answer. It lies in the hands of the storytellers—those who wield technology as a brush to paint their narratives. As the dialogue continues, filmmakers must navigate this complex relationship, embracing the tools at their disposal while remaining steadfast in their commitment to authenticity and artistic expression. The future of cinema will likely depend on finding a harmonious balance where technology serves as an ally, not a substitute, for the human touch that lies at the heart of great storytelling.

11. Case Studies: Successful Films That Leveraged Technology

In the ever-evolving landscape of filmmaking, technology has played a pivotal role in shaping narratives, enhancing visual storytelling, and pushing the boundaries of creativity. To understand the profound impact of technology in this realm, let’s delve into a few case studies of successful films that skillfully leveraged innovative tools and techniques to create cinematic masterpieces.

**1. “Avatar” (2009)**
James Cameron’s “Avatar” is often heralded as a groundbreaking film that forever changed the visual effects landscape. Utilizing advanced motion capture technology and 3D imaging, Cameron transported audiences to the vibrant, alien world of Pandora. The film’s intricate visual effects were made possible by new innovations that allowed for realistic performances to be captured in a digital environment. The result was a visually stunning spectacle that not only captivated audiences but also set a new standard for how technology could be harnessed in storytelling.

**2. “The Irishman” (2019)**
Martin Scorsese’s “The Irishman” took a bold leap into the future of filmmaking by employing state-of-the-art de-aging technology. This innovative approach allowed actors like Robert De Niro, Al Pacino, and Joe Pesci to portray their characters across multiple decades with remarkable authenticity. The seamless integration of this technology sparked discussions about its implications for the industry, particularly in how it may redefine the aging process in storytelling and expand the possibilities of casting.

**3. “Mad Max: Fury Road” (2015)**
George Miller’s “Mad Max: Fury Road” is a testament to the power of combining practical effects with cutting-edge technology. While the film is revered for its breathtaking stunts and high-octane action sequences, it also employed digital effects to enhance the visceral experience. The film’s extensive use of real vehicles, practical stunts, and minimal CGI resulted in a visceral authenticity that resonated with audiences, proving that technology, when used thoughtfully, can elevate the art of filmmaking without overshadowing the human element.

**4. “Black Panther” (2018)**
“Black Panther” not only broke box office records but also showcased the potential of technology in creating rich, immersive worlds. The film utilized advanced CGI to bring Wakanda to life, blending traditional African aesthetics with futuristic elements. Through innovative production design and visual effects, “Black Panther” offered audiences a culturally rich narrative that resonated on multiple levels. The film’s success demonstrated how technology can serve as a bridge between cultures, enabling filmmakers to tell diverse stories in a compelling way.

These case studies highlight that technology in filmmaking, when harnessed with creativity and intention, can lead to groundbreaking results. While some may view technology as an intrusion that threatens the artistry of film, these examples illustrate that it can also serve as an invaluable tool that enhances storytelling and expands the horizons of cinematic expression. As filmmakers continue to embrace and experiment with new technologies, the conversation about innovation versus intrusion will undoubtedly evolve, reflecting the dynamic nature of the industry itself.

12. The Future of Filmmaking: Trends to Watch

As we gaze into the crystal ball of filmmaking, it’s clear that the landscape is evolving at an unprecedented pace. Technology is not just a tool; it’s becoming an integral part of the creative process, shaping how stories are told and consumed. Here are some key trends that are set to redefine the future of filmmaking:

**1. Virtual Reality (VR) and Augmented Reality (AR):** These immersive technologies are taking storytelling to new dimensions. Filmmakers are experimenting with VR experiences that place audiences directly inside the narrative, allowing them to interact with characters and environments like never before. Meanwhile, AR is enhancing traditional viewing experiences, overlaying digital elements onto the physical world, creating a hybrid experience that captivates viewers.

**2. Artificial Intelligence (AI):** From scriptwriting to editing, AI is making waves across various stages of production. Advanced algorithms can analyze scripts for narrative effectiveness, predict audience reactions, and even assist in post-production tasks such as color correction and sound editing. While some fear that AI may replace human creativity, many filmmakers are embracing these tools as collaborators that enhance their artistic visions.

**3. Streaming Services and On-Demand Content:** The rise of platforms like Netflix, Hulu, and Disney+ has transformed how films are distributed and consumed. No longer confined to the big screen, filmmakers are now crafting content that caters to binge-watching audiences. This shift is leading to an increase in serialized storytelling, where complex narratives unfold over multiple episodes, allowing for deeper character development and more engaging plots.

**4. High-Quality Content Creation with Lower Budgets:** Advances in technology have democratized filmmaking, enabling even independent creators to produce high-quality content without breaking the bank. Affordable cameras, editing software, and distribution channels have empowered a new generation of filmmakers, resulting in a diverse array of voices and stories that may have otherwise gone unheard.

**5. Sustainability in Filmmaking:** As awareness of environmental issues grows, so does the push for sustainable practices within the film industry. Innovative solutions, such as using renewable energy on set, digital scripts to reduce paper waste, and eco-friendly materials for sets and costumes, are becoming the norm. This trend not only helps to minimize the carbon footprint of film production but also resonates with an increasingly environmentally conscious audience.

**6. Enhanced Audience Engagement through Social Media:** Filmmakers are leveraging social media platforms not just for marketing, but as a way to engage with audiences during the creative process. Behind-the-scenes content, live Q&A sessions, and interactive polls are fostering a sense of community and allowing viewers to feel more connected to the projects they love.

As the intersection of technology and creativity continues to expand, filmmakers must navigate these trends thoughtfully. The challenge lies in balancing innovation with the essence of storytelling, ensuring that technology serves as a tool for enhancement rather than an intrusion into the art. The future of filmmaking is bright, filled with possibilities that promise to enrich the cinematic experience for creators and audiences alike.

13. Balancing Innovation and Tradition in Filmmaking

In the ever-evolving landscape of filmmaking, the tension between innovation and tradition is palpable. On one hand, technological advancements unlock unprecedented creative possibilities, allowing filmmakers to tell stories in ways that were once unimaginable. High-definition cameras, virtual reality, and advanced CGI have transformed the visual language of cinema, granting directors the ability to create immersive worlds that captivate audiences like never before. The ability to shoot in diverse environments with compact equipment and edit seamlessly in the cloud has democratized filmmaking, empowering a new generation of storytellers to bring their visions to life.

However, this wave of innovation can also feel like an intrusion into the artistry of filmmaking. The essence of storytelling, rooted in tradition, faces a challenge as techniques that once defined cinema are overshadowed by flashy technology. The careful craftsmanship of cinematography, the subtle nuances of performances, and the power of practical effects risk being diluted in a world that often prioritizes spectacle over substance. Classic films remind us of the beauty found in simplicity—where the story and character development took center stage, unencumbered by the distractions of over-reliance on tech.

Striking a balance between these two worlds is crucial. Filmmakers today must navigate the delicate interplay of innovation and tradition, harnessing the benefits of modern technology while respecting the foundational principles of storytelling. This balance can lead to powerful cinematic experiences, where cutting-edge techniques enhance rather than overshadow the narrative. By embracing technology as a tool rather than a replacement for traditional methods, filmmakers can pay homage to the art form’s rich history while boldly stepping into the future. Ultimately, the role of technology in filmmaking is not merely about what is possible, but about what serves the story best, ensuring that innovation enriches the cinematic experience rather than diminishes it.

14. Conclusion: Embracing Technology While Preserving the Art of Storytelling

As we navigate the ever-evolving landscape of filmmaking, it’s clear that technology plays a dual role—both as a powerful enabler of creativity and a potential disruptor of traditional storytelling. In our exploration of the ways technology reshapes the cinematic experience, we’ve seen how innovations like virtual reality, drone cinematography, and advanced editing software can elevate narratives to new heights, offering audiences immersive experiences that were once the stuff of dreams. These tools empower filmmakers to push boundaries and experiment with visual storytelling in ways that were previously unimaginable.

However, with these advancements comes a cautious reminder of the core essence of filmmaking: storytelling. At its heart, cinema has always been about human connection, emotion, and the art of conveying complex narratives. Filmmakers must strike a delicate balance between leveraging cutting-edge technology and honoring the timeless principles of good storytelling. Technology should serve as an extension of a filmmaker’s vision, not overshadow it.

As we conclude this discussion, it’s essential to embrace the technological innovations that can enhance our craft while remaining vigilant against the pitfalls of over-reliance on gadgets and effects. Filmmakers must remember that the magic of cinema lies not just in visual spectacle but in the universal truths that resonate with audiences. By marrying technology with authentic storytelling, we can ensure that the art of filmmaking continues to thrive, captivating hearts and minds for generations to come. In this brave new world, innovation need not be an intrusion; instead, it can be a powerful ally in our quest to tell stories that matter.

In conclusion, technology plays a pivotal role in shaping the landscape of filmmaking, acting as both a catalyst for innovation and a potential source of intrusion. As we’ve explored, advancements such as digital cinematography, virtual reality, and artificial intelligence have revolutionized the creative process, enabling filmmakers to tell stories in ways previously unimaginable. However, this rapid evolution also raises important questions about authenticity, artistic integrity, and the essence of human connection in storytelling. As we move forward in this dynamic industry, it is essential for filmmakers to strike a balance between embracing technological advancements and preserving the core values of their craft. Ultimately, the choice lies in the hands of creators, and how they choose to navigate this intricate relationship will define the future of filmmaking. We invite you to share your thoughts on this topic—do you see technology as a boon or a barrier in your own creative endeavors?

What are the best ways to organize your garage?

Your garage is often the unsung hero of your home—a multifaceted space that serves as a workshop, storage area, and sometimes even a gym or laundry room.

However, it can quickly become a chaotic catch-all for tools, seasonal decorations, and forgotten items, leaving you overwhelmed and frustrated. If you’re ready to reclaim this valuable space and transform it into an organized haven of efficiency, you’re in the right place! In this blog post, we’ll explore top tips and innovative strategies to help you streamline your garage organization, maximize storage potential, and create a functional environment that meets all your needs. Whether you’re looking to create a streamlined workspace for your DIY projects or simply want to find room for your car again, our comprehensive guide will empower you to take control and breathe new life into your garage. Get ready to roll up your sleeves and discover how a little planning and creativity can turn your cluttered garage into a beautifully organized space!

1. Assessing Your Garage Space: A Comprehensive Inventory

What are the best ways to organize your garage?
Credit : whatcanu.com

Before diving headfirst into the exciting world of garage organization, it’s essential to take a step back and conduct a thorough assessment of your available space. This comprehensive inventory will serve as the foundation for your transformation, ensuring that every inch of your garage is utilized efficiently and effectively.

Start by emptying your garage completely. This may seem daunting, but it’s a crucial step in understanding what you have and how best to arrange it. As you clear the clutter, take the opportunity to categorize your belongings into distinct groups: tools, seasonal decorations, sports equipment, gardening supplies, and more. This will not only help you visualize the items you own but will also highlight any duplicates or forgotten treasures that can be donated or discarded.

Once you’ve sorted through your items, create a detailed inventory list. Note down the quantity of each category and any specific items that need special attention, such as expensive tools that require secure storage or fragile decorations that need protective containers. This inventory will help you identify what needs to stay, what can go, and what storage solutions may be necessary to accommodate everything.

While you’re assessing your space, take a close look at the layout of your garage. Note the existing shelving, hooks, and cabinets, and consider how you can maximize these features. Pay attention to the flow of movement: how easy is it to access frequently used items? Are there areas that feel cramped or inefficient? Jot down ideas for optimizing your layout, such as moving bulky items to the back or using vertical space with wall-mounted storage options.

By completing a comprehensive inventory and assessing your garage space with a critical eye, you will not only gain clarity on what you own but will also set the stage for an organized, functional garage that meets your needs. Armed with this foundational knowledge, you’re ready to embark on the journey of transforming your garage into a well-organized sanctuary of efficiency and utility.

2. Setting Clear Goals for Your Garage Transformation

Setting clear goals for your garage transformation is the first and most crucial step in creating an organized and efficient space. Before diving into the physical work, take a moment to envision what you want your garage to look like and how you intend to use it. Are you aiming for a sleek workshop, an organized storage area, or perhaps a multifunctional space that accommodates both? By defining your objectives, you’ll be able to tailor your efforts to meet your specific needs.

Start by making a list of all the items currently cluttering your garage. Categorize them into groups—tools, sports equipment, seasonal decorations, or gardening supplies. This will help you identify what you really need to keep, what can be donated or discarded, and what might require a designated storage solution. For instance, if you find that your garage is mainly used for gardening, then your goal might be to create a dedicated potting station complete with shelving for soil and tools.

Once you have a clear vision, consider what changes will help you achieve that goal. This could involve investing in shelving units, pegboards, or storage bins to keep everything in its place. You might also want to think about the layout of your garage—ensuring that frequently used items are easily accessible while less-used items are stored out of the way.

Remember, setting goals also means establishing a timeline. Whether you plan to complete your transformation over a weekend or spread it out over several weeks, having deadlines will help keep you motivated and on track. By clearly defining your goals for the garage transformation, you’ll not only create a space that functions efficiently but also one that enhances your home’s overall utility. Embrace the process, and you’ll soon find your garage evolving into a well-organized sanctuary that meets all your needs.

3. Decluttering: The First Step to a Functional Garage

What are the best ways to organize your garage?
Credit : whatcanu.com

Before you embark on any organization project, the most crucial step is decluttering. A garage often becomes a catch-all for items that don’t have a designated space in your home, leading to a chaotic jumble of tools, seasonal decorations, sporting equipment, and forgotten treasures. To reclaim this valuable space, start by evaluating every item within your garage.

Begin by emptying the space entirely—this might seem daunting, but it allows you to see the full extent of what you’re working with. As you pull everything out, sort items into three distinct categories: keep, donate, and discard. Be honest with yourself; if you haven’t used something in the past year, it’s likely time to let it go. This is an excellent opportunity to donate items that are still in good condition but no longer serve a purpose in your life.

For those items that belong in the keep pile, consider their functionality and frequency of use. Group similar items together—tools with tools, sports gear with sports gear, and seasonal items with their counterparts. As you start to see the floor of your garage again, you’ll gain clarity on what you truly need to keep and what can be stored away or disposed of.

Decluttering isn’t just about tossing things out; it’s about creating a curated space that reflects your lifestyle and priorities. Once you’ve sifted through the clutter, you’ll lay the groundwork for a more organized garage, making it easier to implement the organizational systems that follow. With a clean slate, you can start thinking about smart storage solutions that optimize efficiency and ensure your garage remains a functional space for years to come.

4. Categorizing Your Items: Tools, Sports Equipment, and Seasonal Décor

When it comes to transforming your garage into a haven of organization and efficiency, categorizing your items is a crucial step that can simplify your space dramatically. Start by creating distinct zones for your belongings—this not only makes it easier to find what you need but also maximizes your available space.

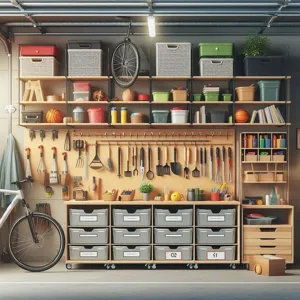
**Tools**: Designate a specific area for your tools, which can often become a chaotic jumble if left unchecked. Utilize pegboards to hang frequently used tools within easy reach, and invest in shelving or tool cabinets to keep everything orderly. Group tools by type—hand tools, power tools, and gardening implements—so you can quickly grab what you need without rummaging through a disorganized mess. Consider using clear containers or labels to ensure every item has its place.

**Sports Equipment**: Next, tackle the sports equipment that often takes over garage floor space. Create a dedicated corner for bikes, balls, and other gear. Use wall-mounted racks for larger items like bicycles, and bins or baskets for smaller items, such as balls and gloves. This not only keeps everything tidy but also makes it easy to grab and go for spontaneous games or outdoor adventures.

**Seasonal Décor**: Seasonal items, such as holiday decorations, can also benefit from thoughtful categorization. Use opaque bins to store décor for each season, clearly labeled to simplify access when the time comes to deck the halls or celebrate a festive occasion. Stack these bins on high shelves to keep them out of the way during off-seasons, ensuring your garage remains uncluttered year-round.

By categorizing your items into these three key areas, you’ll create a functional garage that not only looks great but enhances your ability to find and use your possessions efficiently. Embrace the freedom of a well-organized space and enjoy the newfound ease it brings to your daily life!

5. Choosing the Right Storage Solutions: Shelving, Cabinets, and Bins

What are the best ways to organize your garage?
Credit : whatcanu.com

When it comes to transforming your garage into a functional and organized space, selecting the right storage solutions is crucial. The vast array of options available today can make the task feel overwhelming, but with a little guidance, you can create a system that works perfectly for your needs.

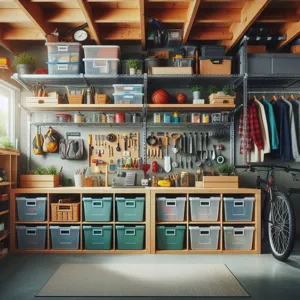
**Shelving** is a foundational element of garage organization. Open shelving units provide easy access to frequently used items, while heavier-duty shelves can handle the weight of larger tools and equipment. Consider adjustable shelves that can be repositioned as your storage needs change, allowing for flexibility as you accumulate more items over time. Metal or plastic shelves are both durable choices, but be sure to assess the weight capacity to avoid any mishaps.

**Cabinets** offer a sleek and tidy solution for stowing away tools, chemicals, and other equipment that you may not want on display. Opt for cabinets with lockable doors if you’re storing hazardous materials or valuable items. Look for options that include built-in drawers or sliding shelves for added convenience; these features can help maximize space and keep smaller items from getting lost in the clutter.

Don’t overlook the power of **bins**! Clear plastic bins are perfect for categorizing smaller items, such as nails, screws, and gardening tools. Labeling each bin will not only make it easier to find what you need at a glance but will also encourage the whole family to participate in keeping the garage organized. Stackable bins can help you make the most of vertical space, ensuring that every corner of your garage is utilized efficiently.

When selecting your storage solutions, consider the specific items you need to store and how often you access them. A combination of shelving, cabinets, and bins will create a harmonious system that enhances both the organization and efficiency of your garage. By investing a bit of time and thought into these choices, you’re setting the stage for a space that not only looks great but also works seamlessly for your lifestyle.

6. Maximizing Vertical Space: Wall Storage Ideas

When it comes to garage organization, one of the most effective strategies is to look up—literally! Maximizing vertical space can free up valuable floor area, allowing for a more efficient and organized garage. Utilizing your garage walls is not just a smart move; it’s an essential one, especially if you’re working with limited square footage.

Start by installing sturdy shelving units that can accommodate bins, boxes, and tools. Opt for adjustable shelves so you can customize the height according to your storage needs. Adding pegboards is another fantastic option; they can be easily customized with hooks and shelves to store everything from hand tools to gardening supplies. This not only keeps your tools visible and accessible but also adds a pop of visual interest to your garage walls.

Consider wall-mounted cabinets for a cleaner look. These can hide away clutter while still providing ample storage. Choose cabinets with transparent doors or labels to quickly identify contents, making it easier to find what you need without digging through piles of items.

Don’t forget about over-the-door storage solutions! Utilize the inside of your garage door with hanging organizers for smaller items like sports equipment, cleaning supplies, or even paint cans. This clever use of space can significantly declutter your garage while keeping everything within reach.

For those with bicycles or larger sporting gear, consider vertical bike racks or hooks that keep these items off the floor. Not only does this prevent them from becoming obstacles, but it also adds a touch of organization that showcases your gear.

By maximizing vertical space, you can transform your garage from a chaotic storage area into a highly functional workspace. Embrace the walls as your allies in organization, and you’ll find yourself enjoying a more efficient and pleasant garage environment.

7. The Importance of Zones: Creating Functional Areas in Your Garage

What are the best ways to organize your garage?
Credit : whatcanu.com

When it comes to transforming your garage into a well-organized, efficient space, the concept of zoning is paramount. Just as a well-designed home features distinct areas for living, cooking, and relaxing, your garage can benefit from clear, functional zones tailored to your specific needs. By creating designated areas for different activities or types of items, you’ll not only maximize space but also enhance your efficiency when accessing tools, sports equipment, or seasonal décor.

Start by assessing how you currently use your garage. Do you need a workshop area for your DIY projects? A designated space for gardening supplies? Or perhaps an organized section for your kids’ toys and outdoor gear? Once you’ve identified your primary functions, you can begin to allocate space accordingly.

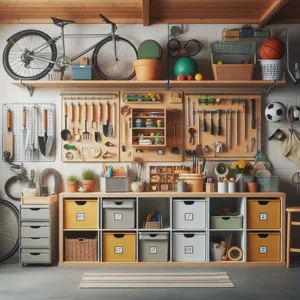
For instance, consider establishing a “Workshop Zone” that includes pegboards for tools, a sturdy workbench, and storage bins for screws and nails—everything you need to keep your projects flowing smoothly. Next, a “Seasonal Zone” can house holiday decorations, camping gear, and winter sports equipment, clearly labeled and stored in easy-to-reach containers. By grouping like items together, you’ll eliminate the frustration of searching for misplaced tools or gear when you need them most.

Don’t forget about vertical space! Installing shelves and wall-mounted racks can help you take advantage of every inch of your garage. This allows you to keep the floor clear, making the space feel larger and more inviting. Additionally, incorporating rolling carts or mobile storage solutions can provide flexibility, allowing you to shift items around as your needs evolve.

Ultimately, creating functional areas in your garage is about more than just aesthetics; it’s about cultivating an environment that supports your daily activities and hobbies. With well-defined zones, you’ll find that not only does your garage become more visually appealing, but it also transforms into a practical, efficient hub that simplifies your life. Embrace the art of zoning, and watch as your garage transforms into a beautifully organized space that works for you.

8. Essential Tools for a DIY Garage Organization Project

When embarking on a DIY garage organization project, having the right tools at your disposal can make all the difference. A well-equipped garage isn’t just about aesthetics; it’s about creating a functional space that enhances efficiency and productivity. Here are some essential tools that will streamline your organization efforts and help you reclaim your garage from chaos.

**1. Tool Storage Solutions:** Start with storage solutions that suit your needs. Tool chests, pegboards, and wall-mounted shelves are invaluable for keeping your tools easily accessible yet neatly stored. Consider investing in stackable bins or clear containers for small items; they allow for easy visibility and prevent misplacement.

**2. Labeling Supplies:** A labeling system is crucial for any organized garage. Use a label maker or colorful adhesive labels to clearly mark boxes and shelves. This not only helps you find items swiftly but also encourages family members to return things to their rightful place.

**3. Measuring Tools:** Accurate measurements are key to optimizing your garage’s layout. Have a tape measure, level, and square handy to ensure everything fits perfectly and is aligned correctly, whether you’re installing shelves or arranging larger items.

**4. Cleaning Supplies:** Before you can organize, you need to clean. A broom, dustpan, shop vacuum, and microfiber cloths will help clear away dust, dirt, and debris. Consider using a degreaser for those tougher stains that often collect in a garage.

**5. Hooks and Racks:** Maximize vertical space by incorporating hooks and racks. They are perfect for hanging bikes, ladders, and garden tools, which free up floor space and make it easier to navigate your garage.

**6. Workbench:** A sturdy workbench provides a dedicated space for projects and repairs. Choose one that includes drawers or shelves for additional storage, keeping your tools and materials organized and within reach.

**7. Storage Cabinets:** Invest in weather-resistant storage cabinets to keep hazardous materials and lesser-used items out of sight. Look for cabinets with locking mechanisms for added safety, especially if children are around.

**8. Safety Gear:** Finally, don’t forget your safety gear. Gloves, goggles, and masks protect you while you work, ensuring that your DIY project is safe as well as productive.

Equipped with these essential tools, you’ll be well on your way to transforming your garage into an organized, efficient space that you can be proud of. With a little planning and the right equipment, you can create a garage that not only serves its purpose but also inspires creativity and productivity.

9. Tips for Maintaining Your Organized Garage

Once you’ve transformed your garage into a well-organized haven, the next challenge is maintaining that order. A well-maintained garage not only enhances efficiency but also extends the life of your belongings and maximizes your space. Here are some valuable tips to help you keep your organized garage in tip-top shape:

1. **Establish a Routine**: Set aside a specific time each month to assess your garage’s organization. Use this time to tidy up, put tools back in their designated spots, and remove any items that no longer belong. This habit will help prevent clutter from accumulating and ensure that everything remains in its place.

2. **Implement a “One In, One Out” Policy**: When you bring a new item into your garage—be it a tool, a storage box, or seasonal equipment—commit to removing one item. This practice not only keeps your space from becoming overcrowded but also encourages thoughtful purchasing.

3. **Utilize Clear Storage Solutions**: Invest in clear bins or containers for your items. Being able to see the contents at a glance helps you quickly identify what you need, reducing the likelihood of rummaging through multiple boxes. Label each container clearly to make retrieval even easier.

4. **Regularly Reassess Storage Systems**: As your needs change, so should your storage solutions. Evaluate your shelving, hooks, and bins every few months to ensure they are still serving their purpose. You might find that some areas need more organization, while others could benefit from a downsizing.

5. **Engage the Family**: Make garage maintenance a family affair. Assign each family member specific tasks, such as keeping their sports equipment organized or maintaining tool cleanliness. This shared responsibility not only lightens your load but also fosters a collective sense of ownership over the space.

6. **Embrace Seasonal Cleanouts**: Take advantage of seasonal changes to re-evaluate your garage’s contents. Before winter, check that your snow shovels and winter gear are accessible. In the spring, ensure that your gardening tools and outdoor equipment are ready for use. Seasonal checks can help you stay organized year-round.

By implementing these maintenance strategies, you’ll not only keep your garage organized but also create a functional space that enhances your daily life. A well-kept garage can be a source of pride, embodying a sense of order and efficiency that resonates throughout your home.

10. Incorporating Smart Solutions: Technology for Garage Efficiency

In today’s fast-paced world, incorporating smart solutions into your garage organization can elevate both efficiency and convenience to new heights. Imagine stepping into your garage and instantly knowing where everything is stored, thanks to a seamless integration of technology. From smart shelving units that adjust their height at the touch of a button to app-controlled lighting that illuminates your workspace, innovative technologies can transform your cluttered garage into a streamlined haven of productivity.

One of the most effective ways to incorporate technology is through the use of smart storage systems. These systems often come equipped with built-in sensors that can track inventory levels, alerting you when it’s time to restock supplies or when certain items are being used more frequently. Imagine having a digital inventory list accessible on your smartphone, allowing you to quickly find tools or equipment without digging through piles of boxes.

Additionally, consider integrating smart charging stations for your power tools and batteries. These stations not only keep your devices charged and ready for use but also feature organization solutions that prevent clutter. With designated spots for each tool, you’ll never have to waste time searching for a drill or a saw again.

Moreover, smart garage door openers equipped with mobile app controls can enhance the safety and accessibility of your space. No more fumbling for keys or worrying about whether you left the garage door open; you can control it from anywhere, ensuring peace of mind whether you’re home or away.

Finally, implement smart lighting solutions featuring motion sensors that automatically turn on when you enter. This not only saves energy but also provides a well-lit workspace, making it easier to tackle projects without fumbling in the dark.

Incorporating these cutting-edge technologies into your garage will not only optimize your organizational efforts but also create a more enjoyable and efficient environment. Embrace the future of garage organization, and watch as your space transforms into a well-oiled machine that works as hard as you do.

11. Creative Ideas for Repurposing Garage Items

When it comes to transforming your garage into a well-organized haven, one of the most rewarding approaches is to repurpose items you already have. Not only does this practice promote sustainability, but it also allows you to utilize your creativity and give new life to overlooked objects. Here are some inventive ideas for repurposing common garage items that can enhance both functionality and aesthetic appeal.

1. **Old Cans and Jars**: Instead of tossing out those empty paint cans or mason jars, consider using them for storage. Paint cans can be transformed into vibrant containers for tools or small garden supplies, while jars can neatly organize screws, nails, and other small hardware items. Label them for easy identification and stack them on shelves for a tidy look.

2. **Wood Pallets**: If you have wooden pallets lying around, they can be repurposed into a variety of useful items. Create a unique shelving unit by stacking pallets vertically, or use them as a base for a workbench. With a little sanding and finishing, they can add a rustic charm to your garage space.

3. **Unused Bike Racks**: Instead of letting an old bike rack gather dust, consider repurposing it as a tool holder. Hang it on the wall and use the hooks to store garden tools, brooms, or even extension cords. This frees up floor space and keeps your tools organized and easily accessible.

4. **Wine Crates**: Those sturdy wooden wine crates can be given a second life as stylish storage solutions. Stack them to create shelving for smaller items, or mount them on the wall for a more artistic display. They can also serve as rustic planters for your favorite herbs or flowers, adding a touch of greenery to your garage.

5. **Mismatched Hooks and Hangers**: If you have a collection of leftover hooks or hangers from various projects, don’t let them go to waste. Mix and match them to create a custom wall organizer for tools, gardening equipment, or sports gear. This eclectic display not only serves a practical purpose but also adds a quirky touch to your garage décor.

6. **Old Furniture**: Repurpose that old dresser or cabinet you no longer need. With a bit of creativity, it can become a fantastic storage solution for smaller items or even a workbench. Remove the drawers to create an open shelf for larger tools, or keep them intact to store paints and supplies out of sight.

By embracing these creative repurposing ideas, you can transform your garage into an organized, efficient space that reflects your personality and meets your storage needs. Not only will you declutter and maximize your space, but you’ll also find joy in the process of giving new life to items that might have otherwise been discarded. So gather those unused treasures and get creative—your dream garage awaits!

12. Safety First: Ensuring a Secure and Safe Garage Environment

When it comes to transforming your garage into a well-organized and efficient space, safety should always be your top priority. A cluttered garage not only creates a stressful environment but can also pose significant hazards. By taking proactive steps to ensure a secure and safe garage, you’re not just protecting your belongings but also safeguarding your family and pets.

Start by assessing your garage for any potential dangers. Look for sharp tools, heavy items that could fall, or hazardous materials like chemicals and paints that need proper storage. Invest in sturdy shelving units to elevate items off the floor, reducing tripping hazards and protecting your possessions from water damage in case of flooding. Clearly label all storage bins and containers, especially those that contain toxic substances, to prevent accidental exposure.

Another crucial aspect of garage safety is proper lighting. A well-lit space allows you to navigate easily and spot any hazards before they become an issue. Consider installing motion-sensor lights or bright LED fixtures to illuminate every corner of your garage. This not only enhances visibility but also adds an extra layer of security by discouraging unwanted visitors.

Furthermore, ensure that your garage door is functioning correctly. Regular maintenance checks can prevent accidents related to malfunctioning doors. If you have a garage door opener, keep the remote out of reach of children and ensure all family members understand how to operate it safely.

Lastly, create a clear pathway in your garage to facilitate easy movement. This involves regularly decluttering and re-evaluating what items you truly need. By maintaining an organized space, you reduce the risk of accidents and promote a more efficient workflow.

By prioritizing safety in your garage organization project, you’ll create not only an aesthetically pleasing space but also one that is functional and secure—allowing you to enjoy all the benefits your transformed garage has to offer.

13. Seasonal Maintenance: Keeping Your Garage Organized Year-Round

Seasonal maintenance is a crucial aspect of keeping your garage organized, ensuring that it remains a functional space all year round. As the seasons change, so do the items we store and the activities we enjoy. This means it’s important to regularly assess and adjust the organization of your garage based on seasonal needs.

In the spring, for instance, you might find gardening tools, lawn equipment, and sports gear coming to the forefront. Take this opportunity to declutter and clean, removing any items that are broken or no longer used. Consider implementing a designated area for gardening supplies, complete with shelves for pots and planters, hooks for tools, and bins for soil and fertilizer. This not only keeps everything handy but also encourages you to engage in your gardening projects with ease.

As summer rolls in, focus on outdoor gear like bicycles, camping equipment, and beach supplies. This is the ideal time to create a dedicated storage solution for these items, such as wall-mounted racks or overhead storage to free up floor space. Adding clear bins can help you easily identify seasonal items at a glance, making it simple to grab what you need for weekend adventures.

When fall approaches, your garage will likely become a hub for tools and decorations as you prepare for the harvest season and holidays. This is a perfect time to sort through your Halloween decorations, organize your tool collection for home improvements, and even set up a space for holiday storage. Consider investing in clear storage bins with labels to keep everything organized and easy to find, minimizing the chaos that often accompanies holiday prep.

Finally, winter necessitates a focus on snow removal tools, seasonal sports equipment, and other cold-weather gear. Ensure that shovels, snow blowers, and winter tires are easily accessible, and consider using wall hooks or pegboards to keep them off the ground. Additionally, use this season to review your inventory of items that can be donated or discarded, making way for fresh starts in the New Year.

By committing to seasonal maintenance, you not only keep your garage organized, but you also enhance its efficiency, making it a space that adapts to your changing needs throughout the year. Regularly revisiting your storage solutions and adjusting them as necessary will ensure that your garage remains a valuable, clutter-free area that you can rely on, no matter the season.

14. Inspiring Before-and-After Transformations: Case Studies

There’s nothing quite like witnessing a dramatic before-and-after transformation to fuel your own organizational dreams. In this section, we delve into some inspiring case studies that showcase the incredible potential of a well-organized garage. Each of these transformations not only maximizes space but also enhances functionality, turning cluttered chaos into an oasis of efficiency.

**Case Study 1: The Family Hub**

Meet the Johnsons, a family of four whose garage had become a dumping ground for everything from sports equipment to holiday decorations. Before the transformation, they struggled to find space for their car, let alone their bikes and gardening tools. After assessing their needs, we helped them implement a custom shelving system that utilized vertical space and labeled bins for easy access. The result? A garage that now serves as a family hub for activities. The kids can easily grab their bikes, and the family can access holiday decorations in a fraction of the time it once took.

**Case Study 2: The DIY Dream**

Next, we feature Mark, an avid DIYer whose garage was overrun with tools and materials. His before photo depicts a chaotic mix of saws, paints, and lumber strewn about, making it nearly impossible to work on projects. Together, we designed a pegboard wall to display tools prominently and included a mobile workbench for versatility. After the transformation, Mark can now focus on his projects without the distraction of disorder. The garage not only serves as a workspace but also inspires creativity, showcasing beautifully organized tools and materials.

**Case Study 3: The Minimalist Approach**

Lastly, we highlight Sarah, a minimalist who wanted her garage to reflect her lifestyle. Initially, her garage was cluttered with rarely used items, creating a sense of overwhelm. We proposed a radical decluttering session, which included donating items and finding new homes for others. With the remaining essentials, we introduced a sleek storage solution that melded form and function, such as stylish bins and a compact, multi-purpose shelving unit. The after photo reveals a serene space that epitomizes simplicity and calm – a true testament to the power of organization.

These case studies illustrate that with a bit of vision and the right organizational tools, any garage can be transformed into a well-ordered, efficient space. Whether you’re looking for functionality, creativity, or a minimalist aesthetic, these inspiring transformations can motivate you to embark on your own garage makeover journey. So grab your tools, roll up your sleeves, and get ready to turn your cluttered garage into a space you love!

15. Final Thoughts: Embracing an Organized Garage Lifestyle

As you stand in your freshly organized garage, it’s hard not to feel a sense of accomplishment and relief. The clutter that once consumed your space has been replaced with a sense of order and tranquility, allowing your garage to become a functional extension of your home rather than just a storage area. Embracing an organized garage lifestyle is more than just a one-time project; it’s a commitment to maintaining a space that promotes efficiency and peace of mind.

Imagine opening your garage door and stepping into a well-structured environment where everything has its place. Tools are neatly arranged on pegboards, seasonal decorations are stored in labeled bins, and your car has ample room to park without the threat of bumping into scattered boxes. This level of organization not only enhances the functionality of your garage but also simplifies your life. No more frantic searches for misplaced tools or forgotten items; instead, you’ll enjoy a seamless workflow every time you enter the space.

Embracing this organized lifestyle means establishing routines that prioritize tidiness and efficiency. Regularly reassess your storage solutions—what worked a few months ago might need adjusting as your needs evolve. Encourage family members to participate in maintaining this newfound organization, fostering a collective sense of responsibility. With everyone on board, your garage can remain a well-oiled machine, ready to serve you through every season and project.

Ultimately, an organized garage is about more than just aesthetics or storage solutions; it’s about creating a space that inspires creativity, productivity, and peace of mind. By committing to this organized lifestyle, you’ll not only enhance your garage’s functionality but also free up mental space, allowing you to focus on what truly matters – whether that’s tackling new projects, spending quality time with family, or simply enjoying the serenity of a clutter-free environment. So take a deep breath, step back, and embrace the organized garage lifestyle—you’ve earned it!

We hope you found our tips for transforming your garage into a well-organized and efficient space both inspiring and practical. A garage can be so much more than just a storage area; with the right strategies, it can become a functional extension of your home, tailored to meet your needs. By implementing the ideas we’ve shared—like decluttering, utilizing vertical space, and investing in smart storage solutions—you can create a garage that not only enhances your lifestyle but also adds value to your property. As you embark on this organizational journey, remember that every small step counts towards achieving the ultimate garage transformation. We’d love to hear about your progress, so feel free to share your before-and-after photos or any additional tips in the comments below. Happy organizing!

How to fix a broken door handle?

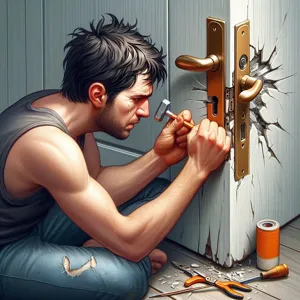
A broken door handle may seem like a minor inconvenience, but it can quickly become a frustrating obstacle in your daily routine.

Whether it’s a stubborn handle that won’t turn, a loose knob that jiggles unnervingly, or a completely detached mechanism, dealing with a malfunctioning door handle can disrupt the flow of your home. Thankfully, you don’t need to call in a professional or invest in costly replacements to restore functionality. With just a few common tools and a little bit of know-how, you can tackle this DIY project and have your door handle working like new in no time. In this guide, we’ll walk you through five easy steps that will not only empower you to fix your door handle efficiently but also enhance your overall home repair skills. Say goodbye to those pesky door handle dilemmas and hello to newfound confidence in your DIY abilities!

1. Introduction: Why Fixing a Broken Door Handle Matters

How to fix a broken door handle?
Credit : whatcanu.com

A broken door handle might seem like a minor inconvenience, but its impact can resonate throughout your home. Think about it: every time you encounter a door that won’t open smoothly, you’re faced with frustration, and that can disrupt the flow of your day. A functioning door handle is not just about convenience; it’s a fundamental aspect of security and privacy. A broken handle can leave your home vulnerable, compromise your peace of mind, and even lead to larger issues if left unaddressed.

Moreover, a faulty door handle can detract from the overall aesthetic of your space. Whether it’s a sleek modern design or a vintage charm, door handles play a significant role in your home’s decor. Fixing a broken handle not only restores functionality but also enhances the visual appeal of your doors, making them inviting and polished.

In this DIY guide, we’ll walk you through five easy steps to repair your broken door handle, empowering you to take control of your home maintenance. With just a few tools and a bit of time, you’ll find that fixing your door handle is not only achievable but also rewarding. Let’s dive into the details and get your doors back in working order!

2. Tools and Materials Needed for the Repair

Before diving into the repair process, it’s essential to gather all the necessary tools and materials to ensure a smooth and efficient fix. Here’s a handy list of what you’ll need:

**Tools:**
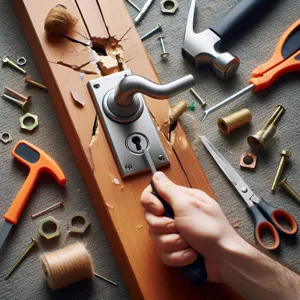
1. **Screwdriver**: Depending on your door handle, you’ll likely need either a Phillips or flathead screwdriver. A multi-bit screwdriver can be particularly useful, as it allows you to switch between different types of screws without needing multiple tools.

2. **Pliers**: A pair of pliers can help you grasp and manipulate small components, especially if they’re tightly fitted or difficult to reach.

3. **Utility Knife**: This can be useful for cutting away any old adhesive or seals, should your door handle be held in place by sticky materials.

4. **Drill**: If you need to replace screws or install a new handle, a drill will save you time and effort. Make sure to have the correct drill bits on hand.

**Materials:**
1. **Replacement Handle**: Ensure you have a handle that matches the style and size of your existing one. You can find suitable replacements at your local hardware store or online.

2. **Screws**: If your handle came without screws, or if the old screws are stripped or damaged, it’s wise to have a few extra screws of the correct size.

3. **Lubricant**: A silicone-based lubricant can help ensure smooth operation once your repair is complete, particularly if the handle mechanism feels stiff.

4. **Cleaning Supplies**: A cloth and some mild cleaner will help you tidy up the area around the door handle before and after the repair.

By gathering these tools and materials in advance, you’ll set yourself up for success, making the repair process as straightforward and hassle-free as possible. Once you have everything ready, you’ll be just a few steps away from restoring your door handle to its former glory!

3. Step 1: Identify the Type of Door Handle

How to fix a broken door handle?
Credit : whatcanu.com

Before diving into repairs, the first crucial step is to identify the type of door handle you’re dealing with. Door handles come in various styles and mechanisms, each requiring a different approach for repair. Start by examining your door handle closely. Is it a traditional knob, a lever, or a more modern pull handle? Understanding the design can help you determine the tools and techniques you’ll need.

Next, pay attention to the mechanism itself. Is it a simple passage handle that allows free entry and exit, or does it have a locking mechanism that adds a layer of complexity? If it’s a lockable handle, you’ll want to check if the key is still functioning properly or if the lock cylinder is contributing to the problem.

Additionally, consider the material of the door handle. Is it made of metal, plastic, or perhaps wood? Different materials may require specific repair methods or replacement parts. For instance, a plastic handle may break more easily and could require a different approach than a robust metal one.

Once you’ve identified the type and mechanism of your door handle, you’re ready to move on to the next steps. Having a clear understanding of what you’re working with not only sets the stage for a smoother repair process but also saves you time and frustration down the line. So, take a moment to analyze your door handle—it’s a small but vital step in ensuring a successful fix!

4. Step 2: Remove the Broken Door Handle

Once you’ve gathered your tools and assessed the situation, it’s time to remove the broken door handle—a crucial step that sets the stage for a successful repair. Start by inspecting the handle itself; if it’s equipped with visible screws, grab your screwdriver and gently unscrew them. Be sure to keep these screws in a safe place, as you’ll need them later for reassembly.

If the handle is held in place by a decorative cover plate, you may need to pry it off carefully using a flathead screwdriver. Take your time with this step to avoid damaging the surrounding door surface. Once the cover is off, you’ll have clear access to the screws anchoring the handle.

In cases where the handle is stuck or the screws are stripped, a little finesse is required. Try wiggling the handle gently while turning the screws counterclockwise; this can sometimes help loosen stubborn components. If the handle is broken beyond repair, it might be necessary to apply a bit of force—just be cautious not to damage the door itself.

Once you’ve successfully unscrewed the handle, gently pull it away from the door. If you encounter resistance, double-check for any hidden screws or clips that may be holding it in place. With the broken handle removed, take a moment to clean the area around the door latch and inspect it for any damage that may need attention. Now you’re one step closer to restoring functionality to your door!

5. Step 3: Inspect the Mechanism for Damage

How to fix a broken door handle?
Credit : whatcanu.com

Once you’ve removed the door handle, it’s time to take a closer look at the internal mechanism. This step is crucial, as it allows you to identify any underlying issues that may be causing the malfunction. Start by inspecting the latch and the surrounding components for any signs of wear, rust, or misalignment. A damaged latch might be the reason your door handle isn’t functioning properly, so give it a thorough examination.

Next, check the screws and springs within the mechanism. Sometimes, a simple tightening of screws can resolve the issue, while other times, a spring might be broken or dislodged, requiring replacement. If you notice any components that are cracked or bent, it’s essential to replace them before reassembling the handle.

Additionally, take note of how the mechanism operates. If it feels stiff or doesn’t engage smoothly, it may need lubrication. A quick application of a silicone-based lubricant can often restore fluidity to the movement and enhance the overall performance of the door handle.

By carefully inspecting the mechanism and addressing any damage or wear, you set the foundation for a successful repair. This step ensures that when you reassemble the handle, it will function like new, allowing your door to open and close seamlessly once again. After completing this inspection, you’ll be ready to move on to the next step, where you’ll make any necessary repairs or replacements before putting everything back together.

6. Step 4: Replace or Repair the Broken Parts

In Step 4, you’ll tackle the heart of the repair process: replacing or repairing the broken parts of your door handle. This step is crucial since the functionality of your door handle hinges on the condition of its components. Start by examining the damaged parts closely. If the handle is cracked or the mechanism is jammed, you may need to replace the entire handle or just specific components, like screws, springs, or the latch.

If you’re opting for a replacement, head to your local hardware store with the old handle in hand. This will ensure you find a compatible replacement that matches both the style and size of your existing setup. Look for durable materials that can withstand daily use, such as stainless steel or brass, which not only offer longevity but also add a touch of elegance to your door.

However, if you prefer to repair, clean the broken parts thoroughly to remove any debris or rust that may be contributing to the malfunction. For minor cracks, a strong adhesive or epoxy can work wonders, providing a sturdy fix once it dries. For stripped screws or fittings, consider using a thread repair kit or larger screws that can hold the components firmly in place.

Once you have either replaced or repaired the parts, reassemble the handle carefully, ensuring everything is aligned correctly. As you reattach the screws, don’t overtighten them, as this may cause additional damage. Finally, give the handle a few test turns to ensure it operates smoothly. With these steps completed, you’ll be well on your way to restoring functionality to your door handle and enhancing the overall security of your space.

7. Step 5: Reinstall the Door Handle

How to fix a broken door handle?
Credit : whatcanu.com

After you’ve successfully replaced the broken components and ensured everything is in working order, it’s time for the final step: reinstalling the door handle. This is where your efforts truly come together, and you can take a moment to appreciate the progress made throughout the repair process.

Begin by aligning the handle with the door’s edge, ensuring that any screws or mounting holes line up correctly. Gently push the handle into place, taking care not to force anything, as this could damage both the handle and the door. If your door handle includes a spindle—a metal rod that connects the two handles—make sure it fits snugly through the hole in the door.

Next, grab your screws and a screwdriver, and secure the handle by tightening the screws—be careful not to over-tighten, as this can strip the holes or cause the handle to misalign. If your handle has a decorative cover or plate, now is the time to attach it, giving the handle a polished finish and concealing any visible screws.

Once everything is securely in place, test the handle by turning it several times to ensure it operates smoothly and without resistance. If you notice any sticking or unevenness, double-check that all screws are properly fastened and that the handle is aligned correctly.

Finally, take a step back and admire your handiwork! Reinstalling the door handle not only restores functionality but also enhances the overall aesthetic of your door. With just a few simple steps, you’ve successfully fixed a common household issue, saving time and money while boosting your confidence in DIY repairs. Now, go ahead and open that door with pride!

8. Tips for Ensuring a Secure Fit

When it comes to fixing a broken door handle, ensuring a secure fit is crucial for both functionality and safety. A wobbly or loose handle can lead to frustration and even compromise the security of your home. Here are some essential tips to guarantee that your newly installed handle is snug, secure, and ready for daily use.

**1. Choose the Right Size:** Before you begin, ensure that the replacement handle you’ve selected is the correct size for your door. Measure the diameter of the existing holes and the thickness of the door to avoid any surprises during installation. A properly sized handle not only fits better but also enhances the overall aesthetic of your door.

**2. Use Quality Hardware:** Investing in high-quality screws and fittings is vital. Cheap or worn-out screws can strip easily and lead to a loose handle over time. Opt for stainless steel or brass screws, which provide durability and resist corrosion, ensuring that your handle stays firmly in place even in varying weather conditions.

**3. Align Components Properly:** As you assemble the handle, take extra care to align the internal components accurately. Misalignment can lead to unnecessary strain on the handle, resulting in premature wear or breakage. Use a level or a guide to ensure everything is straight and properly aligned before tightening any screws.

**4. Tighten Securely but Not Overly:** As you fasten the screws, aim for a firm but gentle grip. Over-tightening can strip the screw holes or damage the door material, compromising the integrity of the installation. A well-secured handle should feel solid without excessive force.

**5. Test the Handle:** Once your handle is installed, give it a few test turns and pushes. Check for any wobbling or looseness. If you notice any movement, double-check your installation steps. It may be necessary to adjust the screws or realign the components to achieve that perfect, secure fit.

By following these tips, you can ensure that your door handle not only looks great but functions flawlessly, providing you with peace of mind and years of reliable use. With a little attention to detail, you’ll have a secure fit that allows you to open and close your door with confidence.

9. Common Mistakes to Avoid During the Repair

When tackling the task of fixing a broken door handle, it’s easy to overlook some crucial details that can lead to frustration or even further damage. Here are some common mistakes to avoid during your repair process, ensuring a smoother and more effective experience.

**1. Skipping the Diagnostic Step:**
Before you grab your tools, take a moment to thoroughly assess the door handle and the surrounding mechanism. Failing to identify the specific issue—whether it’s a loose screw, a broken latch, or a misaligned plate—can lead to unnecessary repairs or the wrong replacement parts being purchased.

**2. Using Incorrect Tools:**
Using the right tools is essential for a successful repair. Many DIYers might try to make do with whatever is on hand, but this can lead to stripped screws or damaged components. Ensure you have the correct screwdriver, pliers, and any other necessary tools specific to your door handle type.

**3. Over-tightening Screws:**
While it might seem logical to tighten the screws as much as possible to secure the handle, over-tightening can actually cause damage to the handle or the door itself. Instead, find a comfortable snugness—just enough to hold the handle securely without straining the material.

**4. Neglecting Lubrication:**
After you’ve successfully reattached your door handle, it’s easy to overlook lubrication. A bit of grease or a silicone spray can go a long way in ensuring the handle operates smoothly and prolongs its lifespan. Skipping this step can lead to future sticking or squeaking.

**5. Ignoring Aesthetic Details:**
A repair isn’t just functional; it should also look good. After completing the fix, take a moment to clean up any smudges or dirt around the handle and door area. This attention to detail not only improves the appearance but can also add a finishing touch that makes your DIY effort stand out.

By being mindful of these common pitfalls during your door handle repair, you can streamline the process and achieve a professional-looking fix with ease.

10. Maintenance Tips for Preventing Future Breakages

Maintaining your door handles is essential for ensuring their longevity and functionality. Just like any other part of your home, door handles require attention and care to prevent future breakages. Here are some simple yet effective maintenance tips to keep your door handles in top condition.

**1. Regular Cleaning:** Dust and debris can accumulate around door handles, leading to wear and tear over time. Use a soft, damp cloth to wipe down the handles regularly. For metal handles, consider using a mild detergent to remove any grime, followed by a quick dry with a clean cloth to prevent rust.

**2. Lubrication is Key:** To ensure smooth operation, apply a few drops of lubricant to the handle’s moving parts, particularly if you notice any squeaking or stiffness. A silicone-based lubricant is ideal as it doesn’t attract dust and dirt like oil-based options.

**3. Check for Loose Screws:** Periodically inspect the screws and bolts that secure the door handle. Vibrations from daily use can loosen these attachments, leading to instability. Tighten any loose screws with a screwdriver to maintain a secure fit.

**4. Avoid Excessive Force:** Educate family members and guests about using door handles gently. Yanking or applying excessive force can lead to breakages, especially in older or more delicate handles. A gentle push or pull is all that’s needed for proper operation.

**5. Replace Worn Parts Promptly:** If you notice any signs of wear, such as cracks or chips in the handle, address them immediately. Replacing worn parts before they fail completely can save you time and money in the long run.

By incorporating these maintenance tips into your routine, you can significantly extend the life of your door handles, ensuring they continue to function smoothly and efficiently for years to come. A little proactive care goes a long way in preventing those frustrating breakages from occurring again!

11. When to Call a Professional

While many door handle repairs can be tackled with a bit of DIY enthusiasm and basic tools, there are certain situations when calling in a professional is the best course of action. If your door handle is part of a complex locking system, for instance, or if it’s integrated into a high-security door, it might be wise to seek expert help. Professionals possess the technical know-how to handle intricate mechanisms that can be easily damaged by inexperienced hands.

Additionally, if you encounter persistent issues such as a door that won’t latch, a handle that feels loose despite your best efforts, or if the entire door frame seems out of alignment, these could be signs of underlying structural problems that require a skilled eye to assess.

Another indicator is if you find yourself without the proper tools or materials to complete the job safely and effectively. Sometimes, the right tools make all the difference in achieving a repair that is not only functional but also aesthetically pleasing.

Lastly, if you simply don’t feel confident tackling the repair or if the thought of disassembling a door handle sends shivers down your spine, there’s no shame in reaching out for professional assistance. Remember, a door handle is a crucial component of your home’s security, and ensuring it’s fixed correctly is paramount for your peace of mind. By knowing when to call a professional, you can avoid further complications and ensure your door handle is repaired safely and efficiently.

12. Conclusion: Enjoy Your Repaired Door Handle!

Congratulations! You’ve successfully navigated the journey of repairing your broken door handle, and now it’s time to revel in the satisfaction of a job well done. As you stand back and admire your handiwork, take a moment to appreciate the small but significant transformation you’ve achieved in your space. A functioning door handle not only enhances the aesthetics of your door but also restores a sense of security and ease of access to your home.

With just a few tools and a little bit of patience, you’ve learned how to diagnose the issue, gather the right materials, and execute a straightforward repair. Whether you opted for a simple tightening, a complete replacement, or a creative workaround, you’ve empowered yourself with the skill to tackle similar issues in the future. This newfound confidence in your DIY abilities extends beyond just door handles; it opens the door (pun intended!) to tackling other small home repairs and projects.

Now, every time you open or close that door, you can take pride in knowing you handled the situation yourself. So go ahead, give your repaired door handle a test run, and enjoy the smooth operation. And remember, the next time something breaks or needs fixing around your home, don’t hesitate to roll up your sleeves and dive in—after all, there’s nothing quite like the feeling of turning a problem into a solution with your own two hands!

In conclusion, fixing a broken door handle doesn’t have to be a daunting task. With just a few simple tools and our easy-to-follow five-step guide, you can restore functionality to your door in no time. Not only will you save money by tackling this DIY project yourself, but you’ll also gain the satisfaction of knowing you’ve enhanced the safety and accessibility of your home. Whether it’s a pesky knob that won’t turn or a handle that’s come loose, we hope this guide empowers you to take control of your home repairs. So gather your tools, roll up your sleeves, and let your newfound skills shine—your doors will thank you! If you found this guide helpful, be sure to share your success stories or any questions you may have in the comments below!

What are the best tools for a beginner DIYer?

Embarking on the journey of DIY projects can be both exhilarating and intimidating, especially for beginners eager to unleash their creativity and craftsmanship.

Whether you’re looking to transform a room, tackle small repairs, or craft unique decor, having the right tools at your disposal is crucial to your success. In this comprehensive guide, we will explore the essential tools every beginner DIYer should own, ensuring you’re equipped to take on a variety of projects with confidence and ease. From the versatile hammer and trusty screwdriver to innovative gadgets that can elevate your handiwork, each tool serves as a building block in your DIY toolkit. Join us as we delve into the must-have items that will not only simplify your tasks but also inspire you to tackle your next project like a pro!

1. Introduction to DIY: Why Every Beginner Should Start

What are the best tools for a beginner DIYer?
Credit : whatcanu.com

In the world of home improvement and creative projects, the do-it-yourself (DIY) movement has gained remarkable traction, encouraging individuals to take control of their spaces and express their creativity. For beginners, diving into DIY can seem daunting at first, but the rewards are plentiful and well worth the effort. Not only does embracing DIY empower you to transform your home with personal touches, but it also cultivates a sense of accomplishment and self-sufficiency.

Starting your DIY journey opens the door to a wealth of opportunities. Whether you’re looking to spruce up your living room with a handmade shelf, tackle that long-overdue garden project, or even create personalized gifts for loved ones, the possibilities are endless. It’s about more than just home improvement; it’s about harnessing your creativity and learning new skills along the way. Each project completed, no matter how small, builds your confidence and enhances your problem-solving abilities, making you more equipped for future endeavors.

Moreover, DIY is a fantastic way to save money. Instead of hiring professionals for every little task, you can tackle many projects on your own with just a few essential tools and a bit of guidance. As you gain experience, you’ll discover that many projects can be completed for a fraction of the cost, allowing you to invest your savings into even more ambitious undertakings.

In this comprehensive guide, we’ll explore the essential tools every beginner DIYer should own, ensuring that you are well-equipped to embark on this rewarding journey. From the basic toolkit to specialized equipment, we’ll break down what you need to get started and help you build a solid foundation for your DIY adventures. So grab your safety goggles, roll up your sleeves, and let’s explore the exciting world of DIY!

2. Safety First: Essential Safety Gear for DIY Projects

When diving into the world of DIY, safety should always be your top priority. Whether you’re tackling small home repairs or embarking on ambitious renovation projects, investing in essential safety gear is crucial to protect yourself from potential hazards. Here’s a breakdown of the must-have safety equipment every beginner DIYer should own.

**1. Safety Glasses:** One of the simplest yet most effective pieces of safety gear, safety glasses shield your eyes from flying debris, dust, and harmful vapors. Look for a pair that fits comfortably and provides a snug seal around your eyes. Whether you’re drilling, sanding, or cutting, your eyes deserve protection.

**2. Hearing Protection:** Power tools can be loud, and prolonged exposure to high decibel levels can lead to hearing loss. Invest in a good pair of earplugs or earmuffs to minimize noise pollution, especially when using saws, drills, or other heavy machinery. Not only will this help preserve your hearing, but it will also allow you to focus better on your task.

**3. Dust Masks or Respirators:** Dust and fumes can pose serious health risks, particularly when working with materials like wood, drywall, or certain chemicals. A simple dust mask can filter out large particles, but for more toxic substances, consider a respirator that offers a higher level of filtration. Make sure it fits properly to ensure effective protection.

**4. Work Gloves:** Protecting your hands is essential when working with tools and materials. Choose work gloves that offer a good grip and are made from durable materials. Whether you’re handling rough wood, sharp tools, or hot surfaces, gloves provide the necessary barrier against cuts, scrapes, and burns.

**5. Steel-Toed Boots:** If you’re going to be moving heavy materials or using tools that could fall, steel-toed boots are a must. They protect your feet from heavy objects and provide additional support and stability, reducing the risk of injuries.

**6. First Aid Kit:** Accidents happen, even with the best precautions. Having a well-stocked first aid kit on hand ensures you’re equipped to handle minor injuries, from cuts and bruises to more serious mishaps. Make sure to include adhesive bandages, antiseptic wipes, gauze, and any personal medications you might need.

**7. High-Visibility Vest:** If you’re working outdoors or in low-light conditions, a high-visibility vest can help ensure you’re seen, especially if you’re sharing your workspace with others. This is particularly important during larger projects or when operating near traffic.

By equipping yourself with these essential safety tools, you’ll not only make your DIY experience safer but also more enjoyable. Always remember, taking the time to protect yourself allows you to focus on your projects with confidence and creativity!

3. Hand Tools Every Beginner Should Have

What are the best tools for a beginner DIYer?
Credit : whatcanu.com

When embarking on your DIY journey, having the right hand tools is essential to ensure not only efficiency but also the quality of your projects. A well-equipped toolbox can empower you to tackle a variety of tasks, from simple repairs to more intricate creations. Here’s a comprehensive list of hand tools every beginner should consider adding to their toolkit.

**1. Claw Hammer:** The backbone of any DIY toolkit, a claw hammer is indispensable for driving nails into wood and for removing them when necessary. Opt for a hammer that feels comfortable in your hand and has a good weight balance for optimal control.

**2. Screwdriver Set:** A versatile screwdriver set that includes both flathead and Phillips-head screwdrivers is crucial. Look for a set with varying sizes to accommodate different screws. Magnetic tips can also be a great feature, making it easier to hold screws in place while you work.

**3. Tape Measure:** Precision is key in DIY, and a sturdy tape measure ensures you take accurate measurements every time. A 25-foot tape is a common choice for beginners, as it strikes a balance between portability and reach.

**4. Utility Knife:** A reliable utility knife is a must-have for cutting various materials, from cardboard to rope. Look for a knife with a retractable blade for safety and ease of use, as well as a comfortable grip for those extended projects.

**5. Pliers:** A pair of pliers can provide a strong grip for holding, twisting, or cutting wires and small objects. Needle-nose pliers are particularly useful for reaching into tight spaces, while standard pliers can handle general tasks.

**6. Level:** Ensuring that your projects are straight and level is crucial for both aesthetics and functionality. A simple bubble level can help you achieve perfectly aligned shelves, frames, or fixtures.

**7. Adjustable Wrench:** An adjustable wrench is invaluable for loosening or tightening nuts and bolts of various sizes. Its versatility makes it a staple in any beginner’s toolkit, allowing you to tackle plumbing tasks or furniture assembly with ease.

**8. Safety Gear:** While not a traditional hand tool, investing in safety gear is essential. Safety goggles protect your eyes from debris, while gloves can prevent cuts and blisters during your DIY adventures.

By equipping yourself with these fundamental hand tools, you’ll be well-prepared to handle a wide range of projects, from minor repairs to creative endeavors. As you gain experience and confidence, you can expand your toolkit with specialized tools tailored to your specific interests, but starting with these essentials will set you on the right path to successful DIYing.

– 3.1. Hammer

A hammer is perhaps the quintessential tool in any DIY enthusiast’s arsenal, serving as both a symbol and a cornerstone of craftsmanship. Whether you’re hanging pictures, assembling furniture, or tackling home repairs, a reliable hammer is indispensable.

When selecting a hammer, consider the weight and type that best suits your projects. For general DIY tasks, a standard claw hammer—typically weighing between 16 and 20 ounces—is ideal. This versatile tool features a flat striking surface on one end for driving nails into wood and a curved claw on the other for pulling them out with ease. The balance of weight and usability makes it perfect for both beginners and seasoned DIYers alike.

The handle material also plays a crucial role in comfort and durability. Wooden handles offer a classic feel, while fiberglass or rubber grips provide shock absorption and a non-slip surface, reducing hand fatigue during extended use. Take the time to find a hammer that feels good in your hand, as this will make your DIY projects much more enjoyable.

As you embark on your DIY journey, remember that a hammer isn’t just a tool; it’s an extension of your creativity and capability. With the right hammer in hand, you’ll be empowered to transform your ideas into reality, one nail at a time. So, whether you’re crafting a beautiful piece of furniture or renovating a room, don’t underestimate the power of this simple yet essential tool.

– 3.2. Screwdrivers

What are the best tools for a beginner DIYer?
Credit : whatcanu.com

### 3.2 Screwdrivers

A sturdy and reliable set of screwdrivers is an absolute essential for any beginner DIYer. These versatile tools are not only crucial for assembling furniture and tightening loose screws but also play a vital role in countless home improvement projects. When selecting screwdrivers, it’s important to consider both the variety and quality of the tools in your kit.

Start with a set that includes both flathead and Phillips screwdrivers in various sizes. Flathead screwdrivers, with their single flat blade, are perfect for slotted screws, while Phillips screwdrivers, characterized by their cross-shaped tip, provide better grip and torque. Investing in magnetic screwdrivers can also be a game-changer; the magnetic tip helps hold screws in place, making it easier to work in tight spaces without the frustration of dropped fasteners.

It’s also worth considering a ratcheting screwdriver, which allows for quick and efficient tightening and loosening of screws without the need to reposition the tool after each turn. For those who want to take their DIY skills to the next level, a multi-bit screwdriver can be incredibly handy. This tool features interchangeable bits, allowing you to tackle various screw sizes and types without cluttering your workspace with multiple tools.

Remember to pay attention to the handle design as well. Ergonomic handles provide a comfortable grip, reducing hand fatigue during longer projects. A well-balanced screwdriver not only enhances control but also makes it easier to apply the necessary force without straining your wrist.

Ultimately, having a reliable set of screwdrivers will empower you to tackle everything from simple repairs to complex installations with confidence. As you embark on your DIY journey, make sure to keep these essential tools within easy reach, and you’ll find that many of your projects will become far less daunting!

– 3.3. Pliers

### 3.3. Pliers

Pliers are a cornerstone of any DIY toolkit, offering versatility and grip that can handle a multitude of tasks. From bending and twisting wires to gripping and pulling objects, these handy tools come in various shapes and sizes, each designed for specific functions.

**Types of Pliers:**
1. **Needle-Nose Pliers:** With their long, tapered jaws, needle-nose pliers are perfect for reaching into tight spaces and manipulating small objects. Whether you’re working with delicate electronics or intricate jewelry designs, these pliers provide the precision needed for intricate tasks.

2. **Slip-Joint Pliers:** Often referred to as adjustable pliers, these feature a movable pivot point that allows you to adjust the jaw width, making them ideal for gripping items of different sizes. They are particularly useful for plumbing tasks or when you need a stronger grip on a larger object.

3. **Cutting Pliers:** Equipped with sharp edges, cutting pliers are designed for snipping wires and cables. They come in handy for electrical projects, allowing you to cleanly cut through materials without fraying or damaging them.

4. **Locking Pliers:** Also known as Vise-Grips, these pliers can lock onto an object, providing a secure grip without requiring constant pressure from your hand. They are excellent for clamping materials together or holding tight in awkward positions while you work on a project.

**Why You Need Pliers:**
Having pliers in your toolbox offers you the flexibility to tackle a wide range of DIY projects with confidence. They empower you to handle tasks that require precision, strength, or a delicate touch. Whether you’re assembling furniture, fixing appliances, or crafting your next home décor project, pliers can be the unsung heroes of your toolkit.

**Care and Maintenance:**
To ensure your pliers last for years, it’s essential to keep them clean and lubricated. After each use, wipe down the jaws and joints to remove debris and prevent rust. Regularly check for any signs of wear, and if you notice any rust, use a wire brush or rust remover to clean them up. Properly maintaining your tools not only extends their life but also enhances their performance, helping you get the job done seamlessly.

In summary, pliers are an indispensable tool for any beginner DIYer. Their ability to grip, twist, cut, and hold makes them a must-have in your growing collection, paving the way for successful and enjoyable projects.

– 3.4. Measuring Tape

What are the best tools for a beginner DIYer?
Credit : whatcanu.com

### 3.4. Measuring Tape

A measuring tape is an indispensable tool for any DIY enthusiast, serving as the backbone of every successful project. Whether you’re hanging shelves, laying flooring, or crafting custom furniture, precise measurements are crucial to achieving a professional finish, and a measuring tape is your best ally in ensuring accuracy.

Typically extending up to 25 feet or more, a standard measuring tape features a flexible metal or fiberglass blade, allowing you to easily navigate around corners and awkward spaces. The markings on the tape are usually in both inches and centimeters, making it versatile for various projects and user preferences. Look for a model with a locking mechanism, which will hold your measurement in place, providing you with the stability needed when marking cuts or drilling holes.

Moreover, the durability of a measuring tape is an essential factor to consider. Opt for one that’s sturdy and can withstand the wear and tear of frequent use. Some tapes even come with added features like a magnetic hook or an easy-to-read standout, which can make measuring larger distances much easier.

In addition to its primary function, a measuring tape can also spark creativity. As you measure out spaces and envision your projects, you may discover new possibilities for layout, design, and functionality. Whether you’re a weekend warrior or diving into more ambitious home improvement projects, having a reliable measuring tape on hand will not only save you time but will also prevent costly mistakes. So, make sure this versatile tool is part of your essential DIY toolkit, and watch your projects come to life with precision and flair!

4. Power Tools for the Aspiring DIYer

When it comes to tackling more ambitious projects, power tools are game changers for the aspiring DIYer. These tools not only save time and effort but also expand the range of tasks you can confidently undertake. As you venture into the realm of home improvement, having the right power tools can make all the difference in achieving professional-looking results.

**1. Cordless Drill/Driver:** This versatile tool should be at the top of your list. Whether you’re assembling furniture, hanging shelves, or performing minor renovations, a cordless drill makes drilling holes and driving screws a breeze. Opt for a model with adjustable speed settings and a range of drill bits for added flexibility.

**2. Circular Saw:** Perfect for cutting lumber, plywood, and other materials with precision, a circular saw is indispensable for larger projects. Its portability allows you to work both indoors and outdoors, and its ability to make straight cuts quickly can save you hours of manual labor.

**3. Jigsaw:** For intricate cuts and curves, a jigsaw is the tool to have. This handheld saw allows you to create detailed shapes and designs in wood, plastic, or metal. With various blade types available, you can tackle a wide variety of materials, making it a must-have for creative DIY projects.

**4. Sander:** Achieving a smooth finish is essential in any DIY project. A power sander, whether it’s a belt sander for large surfaces or a palm sander for finer details, will help you eliminate rough edges and prepare your materials for painting or staining.

**5. Impact Driver:** When it comes to driving long screws or tackling tough materials, an impact driver is a powerhouse. It delivers high torque and rapid bursts of power, making it easier to drive screws without stripping them. This tool is particularly useful for outdoor projects or heavy-duty applications.

**6. Oscillating Multi-Tool:** This multi-functional tool can cut, sand, scrape, and grind, making it remarkably versatile. It’s perfect for tight spaces and detailed work, such as removing grout or trimming door frames. The oscillating motion reduces the risk of damaging surrounding materials, making it a safe choice for beginners.

As you begin your DIY journey, investing in these essential power tools will not only enhance your efficiency but also empower you to take on a broader range of projects. With practice and the right tools in hand, you’ll find that your confidence and skills will grow, transforming your home and projects one task at a time.

– 4.1. Cordless Drill

### 4.1. Cordless Drill

A cordless drill is an indispensable tool that every DIY beginner should consider as a cornerstone of their toolkit. Versatile and easy to use, this powerful device simplifies a variety of tasks, from assembling furniture and installing shelves to drilling holes in walls and tightening screws. The freedom of movement that a cordless drill provides—without the hassle of tangled cords or needing to find a power outlet—makes it an ideal companion for both indoor and outdoor projects.

When selecting a cordless drill, look for a model that strikes a balance between power and weight. A lightweight drill will be easier to handle for extended periods, while one with sufficient torque will ensure that it can tackle tougher jobs without straining. Many models come with adjustable speed settings, allowing you to switch between a slow speed for precise drilling and a higher speed for faster tasks.

Another key feature to consider is the battery life. Opt for a drill with a lithium-ion battery, which offers a longer lifespan and faster charging times compared to traditional batteries. Some drills come with interchangeable battery packs, ensuring you won’t be left stuck mid-project with a dead battery.

Additionally, a cordless drill often includes a variety of drill bits and driver heads, expanding its usability for different materials and tasks. Investing in a set with multiple attachments will enhance your toolkit and enable you to tackle a wider range of projects right from the start.

In summary, a cordless drill is not just a tool; it’s a gateway to unlocking your DIY potential. With its ease of use and multifunctionality, it empowers you to take on projects with confidence and creativity, ensuring that you can efficiently bring your ideas to life. Whether you’re hanging art, assembling that bookshelf you’ve been eyeing, or tackling home repairs, having a reliable cordless drill by your side will make all the difference.

– 4.2. Circular Saw

### 4.2 Circular Saw

A circular saw is an essential tool that every beginner DIYer should have in their arsenal. Renowned for its versatility and power, this tool can make quick work of a variety of cutting tasks, from lumber and plywood to metal and plastic. The circular saw is designed with a toothed blade that spins rapidly, allowing it to slice through materials with precision and ease.

For the novice, the circular saw might seem intimidating at first glance, but its user-friendly design makes it accessible to all skill levels. Most models feature a comfortable grip and lightweight construction, which can help reduce fatigue during extended use. Additionally, many circular saws come with adjustable cutting depths and angles, offering you the flexibility to tackle different projects, whether you’re building a deck, crafting furniture, or simply making home repairs.

When selecting a circular saw, consider the size of blade you need. Typically, a 7 1/4-inch blade is the most common and offers a good balance between power and portability. Furthermore, look for features like a laser guide or LED light, which can greatly improve accuracy when cutting.

Safety is paramount when using a circular saw, so ensure you invest in protective gear, such as safety goggles and hearing protection. Before you begin any project, always be sure to read the manufacturer’s instructions and familiarize yourself with the tool’s settings and controls.

By incorporating a circular saw into your DIY toolkit, you’ll not only enhance your cutting capabilities but also open the door to a world of creative possibilities. Whether you’re planning ambitious renovations or simple home improvements, this tool is sure to become a go-to favorite in your DIY endeavors.

– 4.3. Sander

### 4.3. Sander

A sander is an indispensable tool for any DIY enthusiast looking to achieve that flawless finish on their projects. Whether you’re working with wood, metal, or even plastic, a sander can make all the difference in the quality of your work. For beginners, investing in a versatile sander can save you a considerable amount of time and effort while ensuring a professional-looking result.

There are several types of sanders available, but two of the most beginner-friendly options are the orbital sander and the detail sander. An orbital sander is perfect for larger surfaces, like tabletops or cabinets, as it uses circular sanding pads to smooth out rough areas and prepare surfaces for painting or staining. Its random orbit motion helps to prevent swirl marks, making it ideal for achieving a smooth finish on all kinds of wood.

On the other hand, a detail sander is designed for those hard-to-reach corners and intricate areas. Its triangular shape allows you to navigate tight spaces with ease, making it perfect for sanding furniture edges, intricate moldings, or the seams of your DIY projects. With the right sandpaper grits, you can transition from rough sanding to fine finishing, ensuring every nook and cranny is perfectly smooth.

When using a sander, remember to wear appropriate safety gear, such as a dust mask and goggles, to protect yourself from fine particles. Additionally, always follow the manufacturer’s instructions for optimal performance and safety. As you become more experienced, you’ll find that a sander is not just a tool, but an extension of your creative vision, allowing you to transform raw materials into beautiful finished pieces. Embrace the power of sanding, and watch as your DIY projects come to life with a polished touch!

5. Essential Hardware and Fasteners

When embarking on your DIY journey, having the right hardware and fasteners at your fingertips is crucial for ensuring your projects are sturdy, safe, and aesthetically pleasing. These small yet mighty components often make the difference between a well-finished project and a flimsily assembled piece that falls apart at the slightest touch.

**Nails and Screws:** Start with a diverse collection of nails and screws in various sizes and types. Common wood screws, drywall screws, and finishing nails are essential for a range of tasks, from assembling furniture to securing wall fixtures. Consider investing in a screw organizer to keep them sorted and accessible.

**Anchors and Wall Fasteners:** For projects that require mounting items to walls, such as shelves or picture frames, wall anchors are indispensable. They provide extra support and prevent screws from pulling out of the wall. Choose between plastic, metal, or toggle bolts, depending on the weight of the items you’re hanging.

**Brackets and Hangers:** These hardware pieces are essential for adding strength and support to your projects. Corner brackets and L-brackets can reinforce joints, while shelf brackets can help you create sturdy shelving solutions. Don’t overlook the importance of picture hangers and ceiling hooks for your decorative needs.

**Adhesives and Sealants:** Sometimes, hardware alone isn’t enough. A good adhesive can be a game-changer. Wood glue, epoxy, and super glue each have their uses, allowing for strong bonds in different materials. Sealants, such as caulking, are perfect for filling gaps and providing a finished look, especially in kitchen and bathroom projects.

**Organizational Tools:** Lastly, invest in a sturdy toolbox or a rolling organizer to keep all your hardware and fasteners neatly stored. An organized workspace not only saves you time when searching for supplies but also contributes to a more efficient and enjoyable DIY experience.

By equipping yourself with these essential hardware and fasteners, you’ll have the foundational tools necessary to tackle a wide variety of DIY projects with confidence and skill. Whether you’re assembling a bookshelf or hanging a new mirror, the right hardware will ensure your hard work stands the test of time.

6. Storage Solutions for DIY Tools

When diving into the world of DIY, having the right tools is only part of the equation; how you store and organize those tools can significantly impact your efficiency and enjoyment of projects. Proper storage solutions for DIY tools not only keep your workspace tidy but also ensure that you can easily find what you need when creativity strikes.

Start by assessing the types and quantities of tools you have. A portable toolbox is an excellent first step, allowing you to transport your essential tools to various locations around the house or even off-site projects. Look for one with a sturdy handle and compartments to keep smaller items like screwdrivers and pliers organized. For larger tools, such as power drills and saws, consider investing in a rolling tool chest. These come with multiple drawers and can easily be moved around, providing convenient access to your tools while keeping them secure and protected.

Magnetic strips and pegboards are fantastic for wall storage, enabling you to display frequently-used tools within arm’s reach. Simply mount a pegboard above your workbench, and use hooks and shelves to hang everything from hammers to tape measures. This not only maximizes vertical space but also adds a touch of organization and aesthetic appeal to your workspace.

Don’t overlook the importance of labeling. Clearly labeling boxes and bins can save you time and frustration, especially when you’re knee-deep in a project and need to grab the right tool quickly. Use clear containers for small parts like screws and nails, and make sure they are easy to see through.

Finally, consider modular storage solutions that can be customized to fit your specific needs. Whether you’re stacking bins or using interlocking storage units, modular systems allow you to adapt your storage as your tool collection grows.

In essence, having a well-thought-out storage strategy will not only help you maintain an organized workspace but also enhance your overall DIY experience, making each project more enjoyable and less stressful. With these storage solutions in place, you’ll be ready to tackle any challenge that comes your way!

7. Organizing Your Workspace

A well-organized workspace is the cornerstone of any successful DIY project, especially for beginners who may feel overwhelmed by the variety of tools and materials at their disposal. An organized workspace not only enhances productivity but also promotes safety and fosters creativity. To create an efficient environment, begin by designating a specific area in your home for your DIY projects. This space should be well-lit and have enough room to accommodate your tools, materials, and any projects you’re currently working on.

Once you have your designated area, it’s time to tackle the organization. Start with a sturdy workbench or table where you can comfortably perform your tasks. Invest in storage solutions such as toolboxes, pegboards, or shelving units to keep your tools easily accessible and neatly arranged. Categorize your tools by type—hand tools in one section, power tools in another, and smaller items like screws and nails in labeled containers. Consider using clear bins or jars for visibility, allowing you to quickly find what you need without rummaging through clutter.

Don’t forget about the importance of maintaining a clean and tidy workspace. Regularly declutter and remove any unused items that might distract you from your current project. Implement a ‘clean as you go’ policy, where you put tools back in their designated spots immediately after use. This habit not only keeps your workspace organized but also helps prevent accidents caused by misplaced tools.

Finally, personalize your workspace to inspire creativity. Add a splash of color with wall art or motivational quotes, and incorporate plants to bring a bit of nature indoors. An organized and inviting workspace will not only make your DIY endeavors more enjoyable but will also encourage you to tackle more ambitious projects as your skills grow. Remember, a little organization goes a long way in turning your DIY dreams into reality!

8. Must-Have Materials for Various Projects

When embarking on your DIY journey, having a well-stocked arsenal of materials can make all the difference in the success and enjoyment of your projects. Beyond just tools, the right materials serve as the foundation for everything you create. Here are some must-have materials that every beginner DIYer should consider keeping on hand for a variety of projects:

**1. Wood:** Whether you’re building a simple shelf, crafting a birdhouse, or constructing furniture, having a selection of wood types—like pine for its affordability and versatility, or plywood for those larger projects—will give you the flexibility to tackle numerous tasks.

**2. Paint and Stains:** A fresh coat of paint or a beautiful stain can transform any project. Stock up on a range of colors and finishes, including primers, spray paints, and sealants to protect your finished work. Remember that samples can be a great way to test colors before committing to a larger purchase!

**3. Adhesives:** From wood glue for furniture construction to super glue for quick fixes, a variety of adhesives is essential. Don’t forget about specialty glues like epoxy for tougher materials or fabric glue for textile projects.

**4. Fasteners:** Keep a supply of screws, nails, and anchors in various sizes. These small but mighty components are crucial for joining pieces together securely. A handy organizer can help keep them sorted and easy to find.

**5. Fabrics and Textiles:** If you’re venturing into sewing or upholstery, a selection of fabrics ranging from cottons to heavier materials like canvas will allow you to experiment with different projects, from curtains to cushions.

**6. Duct Tape and Painter’s Tape:** These are often overlooked but incredibly useful in countless scenarios. Duct tape is perfect for quick repairs, while painter’s tape helps achieve clean lines when painting or staining.

**7. Safety Gear:** While technically not a “material” in the traditional sense, safety gear such as gloves, goggles, and masks is essential for protecting yourself during any DIY project. Always prioritize safety to ensure that your creative endeavors are enjoyable and hazard-free.

With these essential materials at your fingertips, you’ll be well-prepared to embark on a wide variety of DIY projects. The right materials not only enhance your capabilities but also inspire creativity, allowing you to bring your unique ideas to life with confidence. Happy crafting!

9. Resources for Learning DIY Skills

As a beginner DIYer, one of the most empowering steps you can take is to invest in your knowledge. The world of DIY is vast and full of possibilities, and understanding the foundations of various skills can turn a daunting project into a rewarding experience. Fortunately, a wealth of resources is available to help you hone your DIY skills and gain confidence in your abilities.

One of the best ways to start is by exploring online tutorials and videos. Platforms like YouTube are treasure troves of DIY content, featuring step-by-step guides for everything from basic carpentry to complex plumbing. Many seasoned DIY enthusiasts share their tips, tricks, and even mistakes, offering invaluable insights that can save you time and frustration. Look for channels with high ratings and substantial followings, as these creators have often refined their methods through experience.

In addition to video content, online forums and community groups can be incredibly beneficial. Websites like Reddit and DIY-specific forums allow you to connect with other DIYers who can provide advice, share their experiences, and answer your burning questions. Engaging in these communities not only enhances your knowledge but can also inspire you to tackle new projects you might have previously thought were beyond your capabilities.

Books and magazines dedicated to DIY projects are also excellent resources. They often cover a wide range of topics, from basic home repairs to intricate craft projects, and can serve as a handy reference guide as you work. Look for books that are highly rated and come with clear illustrations and easy-to-follow instructions.

Lastly, don’t underestimate the power of local workshops or classes. Many hardware stores, community colleges, and even craft supply shops offer hands-on sessions where you can learn directly from experienced instructors. These opportunities allow you to practice your skills in a supportive environment, ask questions in real-time, and connect with fellow DIY enthusiasts.

By leveraging these diverse resources, you’ll equip yourself with the knowledge and confidence needed to tackle any project that comes your way. As you learn and grow, you’ll find that each new skill opens the door to even more complex and fulfilling DIY endeavors. So gather your tools, dive into these resources, and get ready to unleash your inner DIY master!

10. Budgeting for Your DIY Toolkit

When it comes to embarking on your DIY journey, budgeting for your toolkit is just as crucial as selecting the right tools themselves. A well-planned budget not only helps you avoid overspending but also ensures that you acquire the essential items that will serve you well on countless projects to come.

Start by assessing the types of projects you’re most interested in tackling. Are you leaning towards woodworking, home repairs, or perhaps gardening? Identifying your primary focus will guide your spending and prevent you from purchasing tools that may end up collecting dust.

Next, create a list of must-have tools based on your project preferences. Essentials like a versatile drill, a set of screwdrivers, a reliable tape measure, and a sturdy hammer should be at the top of your list. As you compile your toolkit, consider investing in quality over quantity. High-quality tools are often more durable and effective, which can save you money in the long run by reducing the need for replacements.

It’s also wise to explore second-hand options or discounted tools to stretch your budget further. Local classifieds, garage sales, or dedicated online marketplaces can yield fantastic finds that might be just as good as new. Additionally, keep an eye out for seasonal sales or promotions at your local hardware store, which can provide opportunities to snag the critical tools you need at a lower cost.

Lastly, don’t forget to allocate some funds for maintenance supplies, such as oil for tool upkeep or storage solutions to keep your workspace organized. A well-maintained toolkit not only enhances your efficiency but also boosts your confidence as you dive into new projects.

By budgeting thoughtfully and prioritizing the right tools, you’ll set the stage for a fulfilling DIY experience filled with creativity and accomplishment. With every project you complete, you’ll find your toolkit evolving, reflecting your growing skills and aspirations as a DIY enthusiast.

11. Maintaining Your Tools for Longevity

Maintaining your tools for longevity is a critical aspect of any DIYer’s journey that often goes overlooked. After investing time and money into selecting the right tools, ensuring they remain in peak condition can save you from unnecessary expenses down the road and enhance your overall crafting experience.

First and foremost, keep your tools clean after each use. Whether it’s wiping down your hammer, sweeping debris from your saw, or cleaning paint off your brushes, a quick cleanup can prevent rust, corrosion, and buildup that can impair functionality. For power tools, consult the manufacturer’s guidelines for specifics on cleaning and maintenance, as each tool may have unique requirements.

Proper storage also plays a vital role in tool longevity. Create a dedicated space for your tools, using pegboards, toolboxes, or magnetic strips to keep them organized and easily accessible. This not only minimizes the risk of damage but also protects them from the elements. For instance, storing your tools in a dry environment prevents moisture from causing rust, while keeping them out of direct sunlight can protect plastic parts from fading or warping.

Moreover, regular inspections are essential. Make it a habit to check your tools periodically for any signs of wear and tear. Look for dull blades that need sharpening, screws that require tightening, or cords that show signs of fraying. Addressing these issues early can prevent more significant problems and potentially costly repairs.

Lastly, consider investing in a basic tool maintenance kit, which may include items such as lubricants, rust removers, and sharpening tools. These essentials make it easier to perform routine maintenance at home, ensuring that your tools are always ready for your next project.

By adopting these simple maintenance practices, you can extend the life of your tools, improve their performance, and ultimately enjoy your DIY endeavors to the fullest. Remember, a well-maintained tool is not just a tool; it’s a reliable partner in your creative journey!

12. Expanding Your Toolkit as You Grow

As you embark on your DIY journey, starting with a basic toolkit is essential. However, as your skills develop and your projects become more ambitious, expanding your toolkit will empower you to tackle a wider range of tasks with confidence and ease. Here are some key tools and equipment to consider adding to your arsenal as you grow in your DIY endeavors.

First, consider investing in a quality set of power tools. A cordless drill is a must-have for any DIYer, allowing you to effortlessly drive screws and drill holes in various materials. As you progress, a circular saw and a jigsaw can open up new possibilities for woodworking projects, enabling you to make precise cuts and intricate designs with ease.

Next, think about adding specialized hand tools that can enhance your capabilities. A chisel set is invaluable for fine woodworking, allowing you to carve and shape wood to your liking. Similarly, a good quality level ensures that your installations are straight and true, whether you’re hanging shelves or framing pictures.

Safety gear should also be a priority as you expand your toolkit. Investing in a sturdy pair of safety goggles and a quality dust mask will protect your eyes and lungs from debris and harmful particles, allowing you to work safely and comfortably.

Additionally, consider organization tools like a toolbox or pegboard. Keeping your tools neatly stored and easily accessible will save you time and frustration when tackling new projects. As you continue to grow, you might also explore specialty tools like a stud finder for wall projects or a heat gun for paint stripping, further enhancing your DIY skill set.

Remember, the key to expanding your toolkit is to invest in quality over quantity. Choose tools that are durable and versatile, allowing you to get the most out of your purchases. As you gain experience and tackle more complex projects, your growing toolkit will empower your creativity and transform the way you approach DIY tasks. Embrace the journey, and watch your skills flourish as your toolkit evolves alongside your passion for creating!

13. Conclusion: Taking the First Step in DIY

Embarking on your DIY journey can be both exciting and daunting, but with the right tools and a positive mindset, you’re well on your way to transforming your creative ideas into tangible projects. As we’ve explored in this guide, having a solid toolkit is essential for any beginner DIYer. From basic hand tools like hammers and screwdrivers to more specialized equipment like levelers and safety gear, each item plays a vital role in helping you achieve your goals.

Remember, the first step in any DIY project is not just gathering tools; it’s about embracing the learning process. Mistakes will happen, and that’s part of the journey. Each error offers you a valuable lesson, building your skills and confidence as you tackle more complex tasks. Don’t be afraid to start small—simple projects like building a bookshelf or creating custom wall art can provide a satisfying introduction to the world of DIY.

Moreover, take advantage of online resources, tutorials, and community forums to gather inspiration and advice. Sharing your projects and experiences with fellow DIY enthusiasts can not only enhance your skills but also keep you motivated along the way.

In conclusion, the world of DIY is open to anyone willing to take the plunge. Equip yourself with the essential tools outlined in this guide, cultivate a spirit of curiosity, and let your creativity flourish. With every project, you’ll not only add to your toolkit but also build a wealth of knowledge and experience that will serve you well in all your future endeavors. So grab those tools, roll up your sleeves, and start creating—your DIY adventure awaits!

14. Bonus: Recommended Brands and Where to Buy

When diving into the world of DIY, having the right tools can make all the difference in your projects’ success and enjoyment. While we’ve explored various essential tools, it’s equally important to know where to find high-quality products at reasonable prices. Here’s a curated list of recommended brands and where to purchase them, ensuring you get the best value for your investment.

**1. Tool Brands**

– **DeWalt:** Renowned for their durability and reliability, DeWalt offers a vast range of power tools and hand tools ideal for both beginners and seasoned DIYers. Their cordless drill and impact driver kits are especially popular for home improvement projects.

– **Stanley:** A trusted name in hand tools, Stanley provides a wide selection of reliable items like tape measures, hammers, and screwdrivers. Their tools are not only affordable but also designed for longevity, making them perfect for beginners.

– **Milwaukee:** Known for their innovative power tools, Milwaukee is a favorite among those looking for cutting-edge technology and performance. Their M18 battery platform is excellent for anyone who needs a versatile and powerful toolset for various projects.

– **Ryobi:** If you’re interested in a budget-friendly option with a solid range of tools, Ryobi is an excellent choice. Their One+ system allows you to use the same battery across a variety of tools, making it a cost-effective solution for DIY enthusiasts.

**2. Where to Buy**

– **Home Improvement Stores:** Chains like Home Depot and Lowe’s offer a wide selection of tools from all the major brands. They often have sales, and you can find both in-store and online shopping options.

– **Online Retailers:** Websites like Amazon provide a vast array of tools, often at competitive prices. You’ll find customer reviews that can help guide your purchase decisions. Additionally, they frequently have deals on bundles that can save you money.

– **Specialty Tool Retailers:** Stores such as Ace Hardware and Northern Tool carry a range of both popular and specialty brands. These retailers can provide knowledgeable staff who can help you choose the right tools for your specific needs.

– **Local Hardware Stores:** Don’t overlook local hardware stores! They often carry quality tools and can provide personalized service. Plus, supporting local businesses helps foster community ties.

By investing in reputable brands and knowing where to shop, you’ll be well-equipped to tackle any DIY project that comes your way. Remember, the right tools paired with the right knowledge can transform your creative ideas into tangible realities, making your DIY journey even more rewarding. Happy building!

As we wrap up our comprehensive guide on the essential tools every beginner DIYer should own, we hope you feel inspired and equipped to embark on your creative projects with confidence. From the trusty tape measure to the versatile power drill, each tool plays a vital role in transforming your ideas into reality. Remember, the right tools not only enhance your efficiency but also make your DIY journey safer and more enjoyable. Whether you’re tackling a simple home repair or crafting a personalized piece of decor, having these essentials on hand will empower you to unleash your inner handyman or handywoman. So gather your tools, embrace the learning curve, and enjoy the satisfaction that comes from creating something uniquely yours. Happy DIYing!

How to untangle a necklace ?

Untangling a necklace can be a frustrating task, but with a little patience and the right techniques, you can get it done quickly and easily.

Here are some tips to help you untangle your necklace and keep it looking great.

First, gather all the tools you will need. You will need a pair of scissors, a pair of tweezers, and a small bowl or cup. Fill the bowl or cup with warm water and add a small amount of mild detergent.

necklace
Crédit : pxhere.com

Next, lay your necklace out on a flat surface. If it is very tangled, you may need to gently pull it apart with your fingers. Be careful not to pull too hard, as this can cause the necklace to break.

Once the necklace is laid out, use the tweezers to gently pull out any knots or tangles. Be sure to work slowly and carefully, as you don’t want to damage it.

Work slowly and carefully

If the necklace is still tangled, you can try soaking it in the warm water and detergent mixture for a few minutes. This can help to loosen any knots or tangles. Be sure to rinse it thoroughly and dry it with a soft cloth before storing it.

Another technique you can use to untangle your necklace is to place it in a plastic bag and put it in the freezer for a few hours. The cold temperature can help to shrink the knots and make them easier to untangle. Once removed from the freezer, let it sit for a few minutes to thaw before working on it.

You can also use a plastic yarn needle to gently work through the knots. Use the needle to gently push through the knots and loosen them. Be sure to work slowly and carefully, as you don’t want to damage the necklace.

If all else fails, you can always take it to a jeweler for professional cleaning and untangling. They have the tools and expertise to safely untangle your necklace without causing any damage.

In conclusion, untangling a necklace can be challenging but it is often easier that it looks. Remember to work slowly and carefully, and to use the right tools for the job. With a little care and attention, your necklace will be looking great in no time.