What are the different types of patio covers?

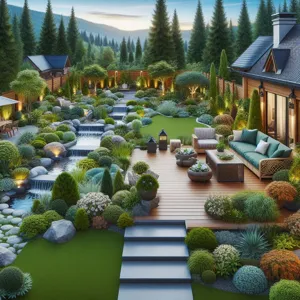
Imagine stepping outside into your own personal oasis, where the gentle rustle of leaves and the warm glow of sunlight create an inviting atmosphere for relaxation and entertainment.

A well-designed patio can transform any outdoor space into a paradise, and the right patio cover is essential for creating a comfortable environment that allows you to enjoy the outdoors, rain or shine. In this comprehensive guide, we will explore the diverse array of patio cover options available, from elegant pergolas that invite the dappled sunlight to modern retractable awnings that provide versatility and shade at a moment’s notice. Whether you’re dreaming of a cozy nook for morning coffee or an expansive area for lively gatherings, we’ll delve into the materials, styles, and features of various patio covers, helping you choose the perfect solution to enhance your outdoor living experience. Get ready to transform your patio into a stylish retreat where every moment spent outside feels like a mini-vacation!

1. Introduction to Patio Covers: Enhancing Your Outdoor Space

What are the different types of patio covers?
Credit : whatcanu.com

When it comes to transforming your outdoor space into a true oasis, patio covers play a pivotal role. These versatile structures not only provide shade and protection from the elements but also enhance the aesthetic appeal of your backyard or patio area. Imagine lounging on a sunny afternoon, sipping your favorite drink, while being shielded from harsh UV rays – that’s the magic of a well-designed patio cover.

Patio covers come in a variety of styles, materials, and designs, each offering unique benefits and charm. Whether you prefer the rustic allure of wood, the modern sleekness of aluminum, or the timeless elegance of a fabric canopy, there’s a patio cover to suit every taste and architectural style. Beyond mere functionality, these covers can serve as an extension of your indoor living space, creating a seamless transition between your home and nature.

In this guide, we’ll explore the different types of patio covers available, helping you make an informed decision about which one best fits your lifestyle and enhances your outdoor paradise. From permanent structures that provide year-round utility to retractable options that allow you to enjoy the sun when you want it, we will delve into the features and advantages of each type. So, let’s embark on this journey to discover how patio covers can elevate your outdoor experience, making your patio an inviting haven for relaxation, entertainment, and cherished moments with family and friends.

2. Benefits of Using Patio Covers

Patio covers are more than just a stylish addition to your outdoor space; they offer a plethora of benefits that can enhance your patio experience and extend the usability of your outdoor area. One of the primary advantages of installing a patio cover is the protection it provides against the elements. Whether it’s shielding you from the harsh rays of the sun during a blistering summer day or keeping you dry during unexpected rain showers, a patio cover creates a comfortable environment that allows you to enjoy your outdoor space regardless of the weather.

Additionally, patio covers help to preserve your furniture and decor. By providing shade and protection from rain, snow, and debris, they can significantly extend the life of your patio furniture, cushions, and other decorative elements. This means less money spent on replacements and more time enjoying your beautifully designed outdoor oasis.

Another key benefit is the increase in property value. A well-constructed patio cover can enhance the aesthetic appeal of your home, making it more attractive to potential buyers. It signals that your outdoor space is functional and well-maintained, which can be a significant selling point in the real estate market.

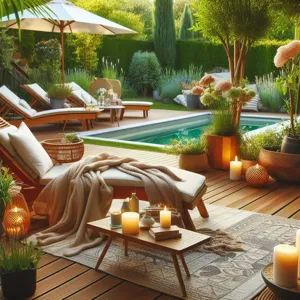
Furthermore, patio covers can also offer a sense of privacy and intimacy. They create a cozy nook where you can unwind, entertain, or enjoy a meal with family and friends without feeling exposed to the surrounding neighborhood. This added sense of seclusion can transform your patio into a true retreat, encouraging you to spend more time outdoors.

Finally, many patio covers can be customized to fit your style and needs, whether you prefer a traditional wooden structure, a sleek metal design, or a fabric canopy that can be retracted when not in use. Each option not only provides the practical benefits mentioned above but also allows you to express your personal aesthetic and enhance the overall look of your home. As you explore the various types of patio covers available, consider these benefits to find the perfect addition to your outdoor paradise.

3. Types of Patio Covers Overview

What are the different types of patio covers?
Credit : whatcanu.com

When it comes to enhancing your outdoor space, patio covers play a crucial role in defining the ambiance and functionality of your patio area. With an array of options available, selecting the right type of patio cover can transform your outdoor experience, offering both protection and aesthetic appeal. Here’s an overview of the most popular types of patio covers, each with its unique features and benefits:

1. **Pergolas**: These stylish structures are characterized by their open-roof design, making them perfect for allowing sunlight to filter through while providing partial shade. Typically made from wood or vinyl, pergolas can serve as a beautiful focal point adorned with climbing plants or draped fabrics, creating an enchanting atmosphere for gatherings or quiet evenings.

2. **Awnings**: Awnings are versatile and practical, offering a retractable solution for those who want to adjust their shade levels throughout the day. Available in various materials, including fabric and aluminum, awnings can be mounted directly to your home or a freestanding structure. Their ability to block harmful UV rays while allowing a cool breeze to flow makes them a popular choice.

3. **Patio Umbrellas**: For a more casual and portable option, patio umbrellas provide instant shade and can be easily moved to accommodate changing sunlight angles. They come in various sizes, colors, and styles, making them an ideal choice for smaller patios or dining setups. Look for options with UV protection to ensure longevity and safety.

4. **Solid Roof Covers**: If you’re seeking maximum protection from the elements, solid roof covers are an excellent choice. Made from materials such as aluminum, wood, or polycarbonate, these covers offer complete shelter from rain, snow, and intense sunlight, allowing you to enjoy your patio year-round. They can even be designed to match your home’s architecture, seamlessly blending indoor and outdoor spaces.

5. **Lattice Covers**: Lattice covers provide a charming, semi-shaded environment perfect for growing vines and flowering plants. This type of cover allows light to filter through while still offering some degree of protection from the sun. Lattice can be a lovely addition to any garden-themed patio, creating a cozy, inviting atmosphere.

6. **Screened Enclosures**: For those looking to enjoy the outdoors without the hassle of insects, screened enclosures are a fantastic option. These structures safeguard your patio from pesky bugs while allowing fresh air and natural light to pour in. They can be customized with various screen materials, making them suitable for different climates and environments.

With such a diverse range of patio cover options available, you can choose the one that best fits your lifestyle, aesthetic preferences, and budget. Whether you’re looking to create a serene relaxation spot, an entertaining space, or a lush garden retreat, the right patio cover can elevate your outdoor experience to new heights.

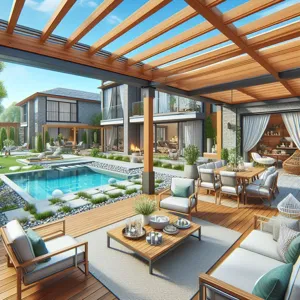
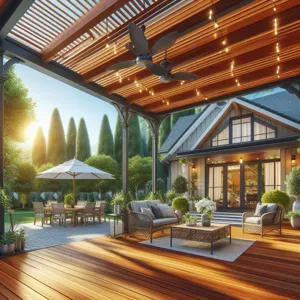
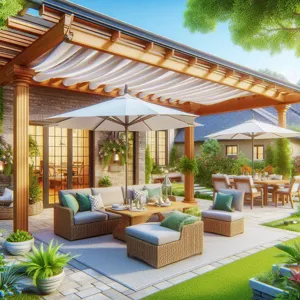
4. Pergolas: A Blend of Style and Functionality

When it comes to enhancing your outdoor space, pergolas stand out as a stunning fusion of style and functionality. These elegant structures, often characterized by their open-slat roofs and vertical posts, offer a unique way to define an outdoor area while allowing for an abundance of natural light and fresh air. Perfect for creating a cozy nook for relaxation or an inviting space for entertaining, pergolas serve as both a stylish visual centerpiece and a practical addition to your patio.

Crafted from a variety of materials, including wood, metal, and vinyl, pergolas can be customized to match your home’s architecture and your personal aesthetic. A wooden pergola, for instance, brings a warm and rustic charm, while a sleek metal design can impart a modern vibe. You can also enhance the beauty of your pergola with climbing plants, such as wisteria or grapevines, which effortlessly intertwine with the structure, adding a lush, green canopy that provides gentle shade during sunny days.

Functionality is another key advantage of pergolas. While they offer partial shelter from the sun, they are not fully enclosed, allowing for a refreshing breeze to flow through. This makes them an ideal choice for warm climates, where you want to enjoy the outdoors without being completely exposed. Many homeowners choose to complement their pergolas with additional features like outdoor curtains, retractable canopies, or built-in lighting, creating an adaptable space that can transition seamlessly from day to night.

Incorporating a pergola into your patio design not only enhances the visual appeal of your outdoor area but also elevates the overall experience. Whether you envision hosting lively gatherings with friends or enjoying quiet moments with a good book, a pergola can transform your patio into a personal paradise that invites you to unwind and savor the beauty of the outdoors.

5. Awnings: Versatile Protection from the Elements

What are the different types of patio covers?
Credit : whatcanu.com

Awnings are a fantastic option for those seeking versatile protection from the elements while enhancing the aesthetic appeal of their outdoor spaces. These fabric coverings, often attached to the exterior of a building, provide shade and shelter without the need for a permanent structure. Available in a variety of materials and styles, awnings can be custom-fitted to suit any patio dimension, making them a flexible choice for homeowners looking to create a comfortable outdoor oasis.

One of the key advantages of awnings is their ability to provide immediate relief from the sun’s harsh rays. By blocking direct sunlight, they help maintain a cooler patio environment, allowing you and your guests to enjoy al fresco dining or lounging even during the hottest days of summer. Additionally, awnings can protect your outdoor furniture from fading and wear caused by prolonged sun exposure, extending its lifespan and keeping your patio looking fresh and inviting.

Awnings come in two main types: stationary and retractable. Stationary awnings are fixed in place and offer consistent coverage, making them ideal for areas that need shade year-round. On the other hand, retractable awnings provide the flexibility to control how much sun or shade you want at any given time. With the simple push of a button or a manual crank, these awnings can be extended or retracted, allowing you to adapt to changing weather conditions or personal preferences.

Moreover, awnings can significantly enhance your home’s curb appeal. With a myriad of colors, patterns, and designs available, you can choose an awning that complements your home’s exterior and reflects your personal style. Whether you’re aiming for a classic, elegant look or a more modern vibe, there’s an awning design to match.

In addition to their protective qualities, awnings can also contribute to energy efficiency. By reducing the amount of heat that enters your home through windows, they can help lower cooling costs during warm months, making them an environmentally friendly choice as well.

In summary, awnings offer a versatile solution for those looking to shield their patios from the elements while also adding a touch of style to their outdoor space. With their ease of use, aesthetic appeal, and practical benefits, awnings are a worthy consideration for anyone looking to enhance their patio experience.

6. Louvered Roofs: Adjustable Shade and Sunlight

Louvered roofs represent the pinnacle of versatility when it comes to patio covers, allowing homeowners to seamlessly blend the beauty of the outdoors with the comfort of controlled shade. Featuring adjustable slats that can be opened or closed at various angles, these innovative structures provide the unique ability to customize the amount of sunlight filtering into your outdoor space. Imagine hosting a summer barbecue, where you can tilt the louvers just right to create a perfect balance of sun and shade, ensuring your guests remain comfortable while enjoying the fresh air.

One of the most appealing aspects of louvered roofs is their adaptability to changing weather conditions. On a bright, sunny day, you can fully open the slats to bask in the warmth of the sun, while on a rainy afternoon, simply close them to create a cozy, dry retreat. This flexibility not only enhances your outdoor experience but also protects your furniture and decor from the elements, prolonging their lifespan.

Moreover, louvered roofs come in a variety of materials, such as aluminum, wood, or vinyl, giving you the freedom to choose a style that complements your home’s architecture. Many modern designs also incorporate integrated lighting and heating options, allowing you to extend your outdoor enjoyment into the evening hours or cooler months.

With their sleek aesthetic and functional benefits, louvered roofs are not just a cover; they’re an investment in the versatility and usability of your outdoor living area, transforming your patio into an inviting paradise where you can entertain, relax, or simply enjoy the beauty of nature year-round. Whether you’re sipping coffee in the morning sunlight or hosting evening gatherings under the stars, louvered roofs provide the perfect solution for any occasion.

7. Solid Roof Covers: Maximum Protection and Insulation

What are the different types of patio covers?
Credit : whatcanu.com

Solid roof covers are the stalwarts of patio protection, providing an unparalleled combination of durability, insulation, and aesthetic appeal. These covers are typically constructed from materials such as aluminum, wood, or composite, designed to withstand the elements while offering a cozy outdoor retreat. Whether you’re looking to shield your patio from the relentless sun, unexpected rain, or even snow, solid roof covers serve as a formidable barrier against nature’s whims.

One of the standout features of solid roof covers is their ability to regulate temperature. Unlike their louvered or fabric counterparts, which may allow heat to seep through or create a greenhouse effect, solid roofs provide effective insulation. This means your patio can remain cooler during scorching summer days and warmer during chilly nights, making it a comfortable space to enjoy year-round. Imagine sipping your morning coffee on a crisp autumn day, sheltered from the brisk winds, or hosting a summer barbecue without the worry of sudden downpours ruining the fun.

In terms of design, solid roof covers can be tailored to match your home’s architecture, enhancing its overall curb appeal. With a variety of finishes and colors available, from sleek modern aluminum to rustic wooden beams, you can create a patio that reflects your personal style while seamlessly blending with your home’s exterior. Many homeowners are also opting for added features, such as skylights or built-in ceiling fans, which can elevate the ambiance and functionality of the space.

Additionally, solid roof covers offer excellent durability, requiring minimal maintenance over the years. Unlike fabric canopies that may fray or fade, these robust structures are built to last, saving you time and money in the long run. With the right design and materials, you can create a patio cover that not only protects but also becomes a standout feature of your outdoor living area.

In conclusion, if you’re seeking maximum protection and insulation for your patio, a solid roof cover is an investment worth considering. It offers a perfect blend of functionality and style, ensuring that your outdoor oasis remains a cherished retreat, no matter the season.

8. Shade Sails: Modern and Stylish Solutions

Shade sails have emerged as a chic and contemporary solution for outdoor shading, transforming patios into inviting oases of comfort. These innovative structures, typically made from durable, UV-resistant fabric, are not only practical but can also add a striking aesthetic to your outdoor space. Available in a variety of colors, shapes, and sizes, shade sails can be easily customized to fit your specific patio dimensions and style preferences.

One of the key advantages of shade sails is their versatility. They can be installed in numerous configurations – from simple triangular shapes that provide targeted shade to larger, overlapping sails that create a dramatic visual effect. This flexibility allows homeowners to get creative with their outdoor design, whether they are aiming for a sleek modern look or a more playful and whimsical atmosphere.

In addition to their visual appeal, shade sails offer excellent protection from the sun’s harsh rays, making them an ideal choice for those warm summer days. They can significantly lower the temperature beneath them, creating a cool, comfortable space for relaxation, dining, or entertaining. Moreover, the breathable fabric allows for air circulation, reducing the risk of stuffiness that can sometimes plague covered patios.

Installation is relatively straightforward, often requiring only a few sturdy posts and tensioning hardware to secure the sails in place. This means that you can easily set them up in your backyard, at a park, or even at outdoor events. Plus, they are often more affordable than traditional permanent structures like pergolas or gazebos, making them a budget-friendly option for homeowners looking to enhance their outdoor living area.

Ultimately, shade sails represent a modern solution to the age-old problem of outdoor sun exposure. With their stylish designs and practical benefits, they can elevate your patio experience, allowing you to enjoy your outdoor space to the fullest while remaining protected from the elements. Whether you’re hosting a summer BBQ or simply relaxing with a book, shade sails provide the perfect blend of form and function that every patio deserves.

9. Screened Enclosures: Combining Comfort and Bug Protection

When it comes to creating the perfect outdoor oasis, screened enclosures offer a unique blend of comfort and practicality that can elevate your patio experience. Imagine lounging on your patio, sipping iced tea, and enjoying the gentle breeze—without the annoyance of pesky insects interrupting your tranquility. Screened enclosures provide a barrier that keeps bugs at bay while allowing fresh air and natural light to flood your space.

These versatile structures can be customized to fit any style, from rustic wooden frames to modern aluminum designs, seamlessly integrating with your home’s architecture. Whether you want a simple screen room that extends your living space or a more elaborate structure with additional features like ceiling fans or skylights, the options are limitless. This adaptability ensures that your screened enclosure can serve multiple purposes—from a cozy reading nook to a lively gathering spot for friends and family.

Additionally, a screened enclosure protects your patio furniture and decor from the elements, reducing wear and tear caused by sun exposure and rain. With the added benefit of enhancing your property’s value, investing in a screened enclosure is not just about immediate comfort; it’s a long-term enhancement for your home.

In essence, screened enclosures create a serene retreat where you can enjoy the beauty of nature while remaining shielded from its less desirable aspects. With this thoughtful addition, your patio can truly become a year-round haven for relaxation and entertainment, allowing you to savor every moment spent outdoors.

10. DIY Patio Covers: Tips for the Creative Homeowner

Creating a DIY patio cover can be an incredibly rewarding project for the creative homeowner, blending personal style with practicality. Not only does it enhance your outdoor space, but it also provides valuable shelter from the elements, allowing you to enjoy your patio year-round. Here are some tips to help you embark on this fulfilling journey.

**1. Assess Your Space:** Start by evaluating the size and shape of your patio. Consider the existing elements such as furniture, plants, and pathways. This will guide your design and ensure that your cover complements the overall aesthetics of your outdoor area.

**2. Choose the Right Materials:** The type of material you select will significantly impact both the look and durability of your patio cover. Popular choices include wood, which offers a classic, warm feel; metal, which provides a modern and sleek appearance; and fabric, which can add a soft touch and versatility. Make sure to choose materials that can withstand local weather conditions to ensure longevity.

**3. Design for Functionality:** Think about how you want to use your patio. Do you want a space that’s completely shaded, or do you prefer a mix of sun and shade? Adjustable louvered roofs, pergolas with climbing plants, or even retractable awnings can provide the flexibility to adapt to changing weather and personal preference.

**4. Gather Proper Tools:** Before you start, ensure you have all the necessary tools, such as a saw, drill, level, and measuring tape. A well-prepared workspace will make the construction process smoother and more efficient.

**5. Follow Safety Guidelines:** Safety should always be a priority. Make sure to follow building codes and regulations in your area, especially if you plan to build a permanent structure. Wearing protective gear and ensuring a sturdy foundation will prevent accidents and ensure that your patio cover stands the test of time.

**6. Personalize Your Space:** This is your opportunity to let your creativity shine! Consider adding unique elements like fairy lights, hanging planters, or built-in seating to enhance your patio cover. These personal touches will make your outdoor space feel like an extension of your home.

By diving into a DIY patio cover project, not only do you gain a functional addition to your home, but you also create a space that reflects your unique style and enhances your outdoor living experience. Whether you’re sipping coffee in the morning sun or hosting a lively evening gathering, a well-crafted patio cover can transform your outdoor area into a true patio paradise.

11. Choosing the Right Material for Your Patio Cover

When it comes to selecting the perfect material for your patio cover, the choices can feel overwhelming. Each material offers its own unique benefits and aesthetic appeal, and the right choice can elevate your outdoor space while ensuring durability and functionality. Here’s a breakdown of some popular options to help you make an informed decision.

**Wood:** Classic and timeless, wooden patio covers provide a natural, warm aesthetic that blends beautifully with outdoor environments. They can be customized in various styles and finishes, giving you the flexibility to match your home’s architecture. However, wood requires regular maintenance to prevent rot and weathering, so be prepared for periodic staining or sealing.

**Aluminum:** For those seeking a low-maintenance option, aluminum patio covers are a fantastic choice. They are lightweight, resistant to rust, and can withstand harsh weather conditions, making them ideal for year-round use. Aluminum also comes in a variety of colors and finishes, allowing you to achieve a modern or classic look without the upkeep associated with wood.

**Vinyl:** If you want the appearance of wood without the maintenance headaches, vinyl is an excellent alternative. It is durable, resistant to fading, and easy to clean. Vinyl patio covers are also less likely to warp or crack, ensuring that your outdoor space maintains its beauty over time. Plus, they come in a variety of styles to fit any aesthetic.

**Fabric:** For a more casual and flexible option, fabric patio covers can create a cozy atmosphere for relaxation and entertainment. Retractable canopies allow you to adjust the amount of shade according to the time of day, providing versatility. However, fabric options may not be as durable as other materials, so it’s important to choose high-quality, weather-resistant fabrics for longevity.

**Steel or Metal:** For a sturdy and industrial look, steel or metal patio covers are unmatched in durability. They offer incredible strength and can be engineered to withstand heavy winds and snow loads, making them ideal for regions with extreme weather. While they may require some maintenance to prevent rust, their long-lasting nature makes them a worthwhile investment.

As you consider materials, also think about your climate, the style of your home, and how you plan to use your patio space. By weighing the pros and cons of each option, you can select a patio cover that not only enhances the beauty of your outdoor area but also meets your practical needs for years to come.

12. Design Considerations for Your Outdoor Space

When it comes to creating the perfect outdoor oasis, design considerations for your patio cover can significantly impact both functionality and aesthetics. The first step is to assess the layout of your outdoor space. Take note of the size and shape of your patio, as well as existing landscaping elements that can enhance or obstruct your design. Consider whether you want a cover that blends seamlessly with your home’s architecture or one that stands out as a bold feature in your garden.

Next, think about the materials you want to use. Options range from natural wood, which exudes warmth and charm, to modern aluminum or vinyl that offers a sleek and contemporary vibe. Each material comes with its own set of maintenance requirements and durability levels, so it’s essential to choose one that aligns with your lifestyle. For instance, while wood requires regular staining and sealing, aluminum is virtually maintenance-free and resistant to rot and pests.

Lighting is another crucial design element to consider. Incorporating built-in lighting, such as recessed fixtures or string lights, can create a cozy and inviting atmosphere for evening gatherings. Additionally, think about how your patio cover will affect the natural light coming into your space. A solid roof will provide ample shade, while a louvered or pergola design allows dappled sunlight to filter through, creating a delightful interplay of light and shadow.

Lastly, don’t overlook the importance of functionality. Consider how you intend to use your patio—whether for entertaining, dining, or quiet relaxation. This will help dictate the layout of the space, the placement of furniture, and the type of patio cover that will best suit your needs. Including features like outdoor ceiling fans for ventilation, or even heaters for cooler evenings, can enhance your comfort and ensure that your patio is a delightful retreat year-round. By thoughtfully considering these design elements, you can create a stunning and functional outdoor space that truly embodies your vision of patio paradise.

13. Maintenance Tips for Patio Covers

When it comes to enjoying your outdoor oasis, the longevity and appearance of your patio cover play a crucial role. Proper maintenance not only ensures that your investment lasts for years but also enhances the overall aesthetic of your patio paradise. Here are some essential maintenance tips to keep your patio cover in top condition, regardless of the material it’s made from.

**1. Regular Cleaning:** Depending on your patio cover’s material, regular cleaning is paramount. For wooden covers, gently wash with soap and water to remove dirt and debris, ensuring you reach all crevices. Metal covers can be hosed down or scrubbed with a soft brush, while fabric covers may require a gentle wash with a specialized cleaner to prevent mold and mildew buildup.

**2. Inspect for Damage:** Seasonal changes can impact the integrity of your patio cover. Make it a habit to conduct a thorough inspection at least twice a year—once in the spring and once in the fall. Look for any signs of rot, rust, or wear and tear. Early detection of issues like loose panels or cracks can save you from more extensive repairs down the road.

**3. Reseal and Repaint:** If your patio cover is made of wood, resealing is crucial every few years to protect against moisture and UV damage. Similarly, metal covers may benefit from a fresh coat of paint to prevent rust and keep them looking pristine. Choose weather-resistant paint to enhance durability and maintain aesthetic appeal.

**4. Clear Debris:** Overhanging branches or nearby trees can cause leaves, dirt, and debris to accumulate on your patio cover. Regularly clear away any buildup to prevent clogs in drainage systems and to keep your cover looking clean and inviting. This simple step not only improves appearance but also minimizes the risk of damage from excess weight or moisture.

**5. Seasonal Protection:** As seasons change, so do the elements. In winter, consider using a tarp or cover to protect against heavy snow or ice, and in summer, a UV-resistant treatment can help shield your patio cover from intense sunlight. These preventive measures can go a long way in preserving the integrity of your outdoor shelter.

By incorporating these maintenance tips into your routine, you can ensure that your patio cover remains a stunning focal point in your outdoor space, allowing you to enjoy your patio paradise for many seasons to come. Remember, a little attention goes a long way in keeping your outdoor retreat beautiful and functional!

14. Integrating Lighting and Heating for Year-Round Use

When it comes to maximizing the enjoyment of your patio, integrating lighting and heating is essential for creating a versatile outdoor space that you can use year-round. Imagine cozy evenings spent under a starlit sky, or sunny winter afternoons basking in the warmth of your patio while sipping a hot drink. The right lighting and heating solutions will ensure that your patio remains a welcoming retreat, regardless of the season.

**Lighting** is crucial for setting the mood and providing safety as the sun sets. Consider a combination of ambient, task, and accent lighting to create an inviting atmosphere. String lights draped overhead can add a whimsical touch, while solar-powered lanterns or pathway lights can illuminate walkways and create a warm glow. For more functional spaces, consider installing recessed lighting in beams or under eaves to provide ample illumination for dining or entertaining. Dimmable options can further enhance the versatility of your lighting, allowing you to adjust brightness levels as needed.

**Heating**, on the other hand, is vital for those chilly evenings or brisk autumn days. There are various options to consider, depending on your patio’s design and your preferences. Electric heaters can be discreetly mounted on walls or ceilings, providing instant warmth at the push of a button. Alternatively, gas patio heaters offer a classic, rustic charm while delivering powerful heat output. If you’re looking for a more permanent solution, consider a built-in fireplace or fire pit, which not only provides warmth but also serves as a stunning focal point for gatherings.

By thoughtfully integrating lighting and heating into your patio design, you can extend its usability throughout the year. This practice not only enhances your outdoor living experience but also increases the value of your home, making your patio paradise a true oasis for relaxation and entertainment, no matter the weather.

15. Conclusion: Creating Your Own Patio Paradise

In conclusion, creating your own patio paradise is all about blending comfort, style, and functionality to design an outdoor space that reflects your personality and meets your lifestyle needs. With the right patio cover, you can transform your backyard into a serene escape, a lively entertainment hub, or a cozy retreat, regardless of the weather conditions.

As we’ve explored, the options are abundant—from classic pergolas that offer a touch of rustic charm to sleek and modern aluminum covers that provide robust protection with a contemporary flair. Whether you prefer the natural beauty of wooden structures or the low-maintenance benefits of vinyl and fiberglass, there’s a patio cover that perfectly matches your vision.

When embarking on this exciting journey, consider not only the aesthetics but also how you plan to use your patio. Will it be a space for family gatherings and barbecues, a tranquil nook for reading, or a vibrant area for socializing with friends? Each choice you make, from the type of cover to the furniture and decor, will contribute to the overall ambiance of your patio paradise.

So gather your ideas, do your research, and don’t be afraid to get creative. With a little planning and inspiration, you can design a patio that invites relaxation and joy, becoming a cherished extension of your home where memories are made and enjoyed for years to come. Embrace the possibilities and start crafting your outdoor oasis today!

As we wrap up our exploration of patio paradise, we hope this guide has illuminated the diverse world of patio covers and inspired you to enhance your outdoor living space. Whether you’re drawn to the sleek elegance of a modern pergola, the rustic charm of a wooden gazebo, or the versatile practicality of a retractable awning, there’s a perfect solution waiting to transform your patio into a sanctuary of comfort and style. By carefully considering your needs, aesthetic preferences, and budget, you can create an outdoor oasis that not only complements your home but also elevates your outdoor experience. So as you embark on your patio project, remember that each choice you make can turn your outdoor space into a haven for relaxation, entertaining, and enjoying the beauty of nature. Cheers to your journey toward the ultimate patio paradise!

How to choose the right outdoor furniture for your patio?

Transforming your patio into a cozy outdoor oasis is an inviting thought, especially as the warmer months approach.

The right outdoor furniture can turn a simple space into a stunning retreat, providing the perfect backdrop for lazy weekend afternoons, lively gatherings with friends, or serene evenings spent under the stars. But with an overwhelming variety of styles, materials, and functionalities available, how do you choose the perfect pieces that not only fit your aesthetic but also withstand the elements? In this comprehensive guide, we’ll explore essential tips and tricks for selecting outdoor furniture that harmonizes with your lifestyle and enhances your patio’s charm. From durable materials and space-saving designs to color palettes that elevate your outdoor experience, get ready to discover how to create the ultimate outdoor sanctuary tailored to your taste and needs.

1. Understanding Your Patio Space: Measurements and Layout

How to choose the right outdoor furniture for your patio?
Credit : whatcanu.com

When it comes to selecting the perfect outdoor furniture for your patio, the first step is to gain a comprehensive understanding of your space. This may seem straightforward, but meticulous measurements and thoughtful layout planning can make all the difference in creating an inviting and functional outdoor oasis.

Start by measuring the dimensions of your patio. Use a tape measure to determine the length and width, noting any unique architectural features such as columns, railings, or built-in planters that may affect your layout. Consider the height of any overhead structures like awnings or pergolas, as this will influence your choice of furniture—especially larger pieces. A cozy, intimate atmosphere can be achieved with lower-profile seating options that allow for an open and airy feel, while taller furniture may create a more dramatic, enclosed area.

Once you have your measurements, sketch a simple layout of the space. This visual representation will help you envision different configurations and how various pieces will complement one another. Consider flow and accessibility; ensure there’s enough room for people to move around comfortably without feeling cramped. Think about how you plan to use the space—whether it’s for entertaining guests, family meals, or simply relaxing with a book—and let that guide your furniture arrangement.

Next, take into account the orientation of your patio. Does it receive ample sunlight throughout the day, or is it shaded by trees or buildings? This will impact your choice of materials and colors, as well as the types of cushions and fabrics that will hold up against the elements. For sun-drenched spaces, opt for UV-resistant materials, while shaded areas may benefit from lighter colors that won’t fade as quickly.

By investing time in understanding your patio’s dimensions and layout, you’ll create a solid foundation for selecting outdoor furniture that not only fits your aesthetic but enhances the overall functionality of your outdoor space. With the right measurements and a well-thought-out plan, you can transform your patio into a stunning retreat that invites relaxation and enjoyment for years to come.

2. Defining Your Style: Traditional, Modern, or Eclectic?

Choosing the right style for your outdoor furniture is crucial in creating a cohesive and inviting atmosphere on your patio. The first step is to define your aesthetic preference, whether it leans towards traditional, modern, or eclectic. Each style has its own unique characteristics that can set the tone for your outdoor space.

**Traditional** outdoor furniture often features classic designs with ornate details, rich woods, and comfortable cushions. Think of timeless pieces that exude elegance, such as wrought iron chairs with intricate scrollwork or a sturdy wooden dining set with a warm finish. If you’re drawn to a traditional style, consider incorporating elements like patterned fabrics, decorative throw pillows, and vintage-inspired accessories. This approach creates a nostalgic charm that invites relaxation and conversation.

Alternatively, if you find yourself captivated by **modern** aesthetics, your patio can become a sleek and sophisticated oasis. Modern outdoor furniture emphasizes clean lines, minimalism, and functionality. Materials such as aluminum, teak, and synthetic wicker are popular choices, often paired with neutral color palettes or bold pops of color. Look for streamlined loungers, geometric coffee tables, and innovative designs that prioritize comfort without sacrificing style. A modern patio can be further enhanced with statement lighting and contemporary décor, turning your outdoor area into a chic retreat.

For those who embrace an **eclectic** mix, there are endless possibilities to explore. An eclectic style is all about personal expression, where you can blend various design elements, colors, and textures to create a unique outdoor experience. This may include a combination of vintage finds, DIY pieces, and modern furniture that reflects your personality. Feel free to play with patterns, layer different materials, and incorporate plants to add vibrancy and life to your space. An eclectic patio invites creativity and can evolve over time, allowing you to continually refresh your decor as new inspirations strike.

Ultimately, defining your style is about understanding what resonates with you and how you envision your outdoor oasis. Take the time to explore different styles, gather inspiration, and envision how each choice can transform your patio into a space that reflects your taste and lifestyle. With the right outdoor furniture, you’ll create an inviting environment that not only enhances your home’s aesthetic but also becomes a cherished gathering place for family and friends.

3. Choosing the Right Materials: Wood, Metal, or Synthetic?

How to choose the right outdoor furniture for your patio?
Credit : whatcanu.com

When it comes to selecting outdoor furniture, the choice of materials can make or break your patio experience. Each option—wood, metal, and synthetic—comes with its own set of advantages and considerations, making it essential to understand how they align with your lifestyle, aesthetic preferences, and local climate.

**Wood**, often regarded as the classic choice for outdoor furniture, brings natural beauty and warmth to your patio. Options like teak, cedar, and eucalyptus are not only visually appealing but also naturally resistant to decay and insects, making them suitable for outdoor use. However, wood requires regular maintenance to keep it looking its best. This might involve sanding, sealing, or staining to protect against the elements, particularly in areas with high moisture or intense sun. If you appreciate the timeless charm of wood and are prepared to invest a little effort into upkeep, this could be the ideal choice for you.

**Metal** furniture, on the other hand, offers a sleek and modern aesthetic that can complement various patio styles. Aluminum and wrought iron are popular choices, with aluminum being lightweight and resistant to rust, making it perfect for those who like to rearrange their outdoor spaces. Wrought iron, while heavier and more durable, can develop rust if not properly treated. Metal furniture often comes in a variety of colors and finishes, providing a versatile option that can easily adapt to your desired look. When considering metal, think about comfort; many metal pieces come with cushions that can enhance relaxation while also adding a pop of color.

Then we have **synthetic materials**, such as resin wicker or high-density polyethylene (HDPE), which have surged in popularity due to their durability and low maintenance. These materials are designed to withstand the elements without fading or cracking, making them an excellent choice for those who want outdoor furniture that looks great year-round with minimal effort. Synthetic options often mimic the appearance of natural materials, providing the visual appeal of wood or wicker without the associated upkeep. They are also available in a wide range of styles, colors, and textures, ensuring you can find the perfect match for your patio décor.

Ultimately, when choosing the right material for your outdoor furniture, consider your lifestyle, how much maintenance you’re willing to undertake, and the weather conditions in your area. By weighing the pros and cons of wood, metal, and synthetic options, you can make a more informed decision that will enhance your outdoor living space for years to come.

4. Comfort Matters: Selecting Cushions and Seating Options

When it comes to outdoor furniture, comfort should never be an afterthought. After all, the patio is often the heart of outdoor gatherings, a place where family and friends come together to relax, dine, and enjoy the fresh air. Selecting the right cushions and seating options is essential to creating a cozy and inviting atmosphere.

Start by considering the types of seating that will best suit your space and lifestyle. Whether you prefer a sleek modern bench, plush lounge chairs, or a sprawling sectional sofa, ensure that your choices align with how you plan to use your patio. For example, if you envision hosting lively summer barbecues, you might lean towards sturdy, spacious seating that can accommodate larger groups, while a more intimate setting may call for a pair of comfortable armchairs.

Once you’ve selected your seating framework, it’s time to focus on the cushions. Opt for high-quality, weather-resistant materials that can withstand the elements while providing optimal comfort. Look for cushions with thick foam padding that offers support without sacrificing softness. Additionally, consider the fabric’s UV resistance and ease of cleaning—after all, outdoor furniture often faces exposure to the sun, rain, and spills.

Color and pattern are also vital components of your comfort strategy. Choose cushion covers that not only complement your patio’s aesthetic but also evoke a sense of tranquility and relaxation. Soft hues like pastels or earthy tones can create a serene environment, while bold prints can add a touch of personality and vibrancy.

Finally, don’t overlook the importance of arrangement. Experiment with different layouts to find the most comfortable and functional setup. Don’t hesitate to add a few throw pillows or blankets to enhance coziness and invite relaxation. By prioritizing comfort in your selection of cushions and seating options, you’ll create an outdoor oasis that beckons you and your guests to unwind and enjoy every moment spent under the open sky.

5. Weather Resistance: What to Look for in Outdoor Furniture

How to choose the right outdoor furniture for your patio?
Credit : whatcanu.com

When it comes to selecting the perfect outdoor furniture for your patio, one of the most crucial factors to consider is weather resistance. Your patio furniture will be exposed to the elements—sunshine, rain, wind, and perhaps even snow—so investing in pieces that can withstand these conditions is essential to ensure longevity and maintain their aesthetic appeal.

First and foremost, look for materials specifically designed for outdoor use. Metals like aluminum and stainless steel are excellent choices due to their natural resistance to rust and corrosion. Aluminum is lightweight and easy to move, making it perfect for versatile patio spaces, while stainless steel offers a sleek, modern look that can elevate your outdoor decor.

If you prefer the warmth and charm of wood, opt for hardwoods such as teak, eucalyptus, or acacia. These woods are not only beautiful but also naturally resistant to moisture and decay, making them ideal for outdoor environments. To further enhance their durability, consider applying a sealant to protect against UV rays and prevent fading over time.

Fabrics are another vital component of outdoor furniture. Look for cushions and upholstery made from solution-dyed acrylic or polyester, which are designed to resist fading and mildew while maintaining comfort. These fabrics are often treated with water-repellent coatings, allowing them to dry quickly after rain showers and reducing the risk of mold and mildew growth.

Additionally, consider the construction and design of the furniture. Pieces that have a powder-coated finish or are woven with synthetic materials, like resin wicker, provide added protection against harsh weather conditions. Always check for reinforced seams and sturdy frames, which indicate quality craftsmanship and a commitment to durability.

Finally, don’t forget about maintenance! Even the most weather-resistant materials require some care to extend their lifespan. Regular cleaning, covering your furniture during extreme weather, and storing it in a sheltered area during the off-season can significantly reduce wear and tear.

By prioritizing weather resistance in your outdoor furniture selection, you’ll ensure that your patio remains an inviting and comfortable space for years to come, no matter what Mother Nature throws your way.

6. Functionality: Dining vs. Lounging Furniture

When selecting outdoor furniture for your patio, one of the most critical considerations is functionality. This boils down to understanding how you intend to use the space: will it primarily serve as a dining area for family gatherings and alfresco meals, or will it be a cozy retreat for lounging and relaxation? Each use case demands different types of furniture, and making the right choice will ensure that your outdoor space is both inviting and practical.

If you envision hosting lively dinner parties under the stars or enjoying leisurely Sunday brunches with friends, dining furniture is essential. Look for a sturdy dining table that can accommodate your guests comfortably, paired with matching chairs that offer both style and support. Consider materials that can withstand the elements, such as weather-resistant teak or powder-coated metal, to ensure durability. Extendable tables can also be a great option for those who love to entertain but may not always need a large setup.

On the other hand, if your goal is to create a serene oasis for lounging, prioritize comfort and relaxation. Cozy seating options like oversized sofas, chaise lounges, or even hammocks can transform your patio into a peaceful retreat. Look for cushions made from UV-resistant and water-repellent fabrics to withstand the outdoor conditions while providing comfort. Incorporating side tables or coffee tables can enhance the lounging experience, providing a convenient spot for drinks, books, or decorative items.

Ultimately, your choice between dining and lounging furniture—or a combination of both—will depend on your lifestyle and how you wish to engage with your outdoor space. By carefully considering functionality, you can create a patio that perfectly aligns with your needs, making it a cherished extension of your home for years to come.

7. Color Schemes: Coordinating with Your Home’s Exterior

How to choose the right outdoor furniture for your patio?
Credit : whatcanu.com

When it comes to selecting outdoor furniture for your patio, color schemes play a pivotal role in harmonizing your space with your home’s exterior. The right colors can enhance your outdoor experience, making your patio a seamless extension of your living area.

Start by assessing the existing color palette of your home. Is it a warm beige, a cool gray, or perhaps a vibrant blue? These hues can serve as your primary guide as you choose furniture that complements or contrasts beautifully. For instance, if you have a classic white house, consider opting for bold navy cushions or a rustic wood finish to create a striking contrast that adds depth and interest.

Additionally, think about the materials and textures of your furniture. Natural wood tones can add warmth and a cozy feel, while metal frames in sleek, modern colors can introduce a contemporary edge. Fabrics also play a significant role; outdoor cushions and upholstery in shades of green can echo the surrounding garden, while brighter colors can inject a sense of fun and vibrancy into your space, perfect for lively summer gatherings.

Don’t forget about seasonal changes! Consider how colors will appear in different lighting and through various seasons. For instance, earthy tones can look stunning in the fall, while brighter shades might shine in the summer sun. Ultimately, your outdoor furniture should reflect your personal style while creating a cohesive look that ties your entire patio to your home’s overall aesthetic. In this way, you’ll create an inviting outdoor oasis that feels just as comfortable and stylish as the interior of your home.

8. Maintenance and Care: Keeping Your Furniture in Top Shape

When it comes to outdoor furniture, maintenance and care are crucial for ensuring longevity and preserving the beauty of your investment. The elements can be harsh, and without proper attention, even the most durable materials can succumb to wear and tear. Start by understanding the specific needs of the materials used in your furniture—whether it’s wood, metal, wicker, or cushions, each has its own set of care requirements.

For wooden furniture, regular cleaning is essential. A gentle wash with mild soap and water can remove dirt and grime buildup. Additionally, consider applying a protective sealant annually to guard against moisture and UV damage. If your wood furniture starts to show signs of aging, a light sanding followed by a fresh coat of stain or paint can breathe new life into it.

Metal furniture, while often sturdy, can be susceptible to rust. To combat this, routinely check for any scratches or areas where the protective finish may have worn away. A simple touch-up with exterior paint can keep rust at bay. For aluminum pieces, a quick rinse with water will often suffice, but be sure to dry them thoroughly after rain.

Wicker furniture requires a bit more attention, especially if it’s made from natural materials. Regularly dust and vacuum to prevent dirt from accumulating in the weave. During the off-season, it’s wise to store wicker pieces indoors or use protective covers to shield them from moisture and UV rays.

Cushions can make your outdoor space inviting, but they also require proper care. Look for cushions made with fade-resistant and water-repellent fabrics. Regularly shake out and vacuum cushions to keep them looking fresh. For tougher stains, always check the manufacturer’s care instructions, as many outdoor fabrics can be cleaned with mild soap and water.

Finally, embrace the changing seasons by giving your furniture some extra love during transitions. Before winter, clean and cover your outdoor pieces to protect them from snow and ice. In spring, a thorough inspection and cleaning will ensure they’re ready for use. By prioritizing maintenance and care, you’ll not only extend the life of your outdoor furniture but also enjoy a beautiful and inviting patio for years to come.

9. Budgeting: How Much Should You Spend on Outdoor Furniture?

When it comes to selecting outdoor furniture, budgeting is a crucial aspect that can significantly impact your overall satisfaction and long-term enjoyment of your patio space. Understanding how much to spend requires a thoughtful evaluation of your needs, lifestyle, and the specific characteristics of your outdoor area.

First, consider the quality and durability of the materials. Outdoor furniture is exposed to the elements, so investing in high-quality pieces made from weather-resistant materials—such as teak, aluminum, or synthetic wicker—can save you money in the long run by reducing the need for replacements. A well-constructed dining set or lounge chair not only withstands the harsh sun and rain but also retains its aesthetic appeal for years to come.

Next, think about the purpose of your patio. Are you looking for a cozy space for intimate gatherings, or do you need a larger setup to accommodate family barbecues? Understanding how you plan to use your outdoor area will guide your purchasing decisions. For instance, a simple bistro set may suffice for a small balcony, while a full dining suite with ample seating might be necessary for a spacious deck.

Set a price range that reflects your priorities but also leaves room for flexibility. While it’s tempting to opt for the cheapest option available, remember that outdoor furniture is an investment in your home and lifestyle. Allocate a reasonable budget that balances quality and affordability—this may mean waiting a bit longer to save for that perfect fire pit or sectional sofa you have your eye on.

Finally, don’t forget to factor in additional costs such as cushions, maintenance products, and protective covers. These elements can enhance the comfort and longevity of your furniture, making your outdoor experience all the more enjoyable. By thoughtfully budgeting for your outdoor furniture, you can create a patio oasis that reflects your style and withstands the test of time, ensuring that it remains a beloved gathering spot for years to come.

10. Eco-Friendly Options: Sustainable Materials and Practices

As the demand for eco-conscious living continues to rise, choosing outdoor furniture that aligns with sustainable practices has never been more important. Eco-friendly options not only benefit the environment but also appeal to a growing demographic of consumers who prioritize sustainability in their purchasing decisions. When selecting outdoor furniture, consider pieces made from sustainable materials, such as reclaimed wood, recycled plastics, or bamboo.

Reclaimed wood, for instance, offers a unique aesthetic, rich with history and character while minimizing deforestation. Each piece is often a one-of-a-kind work of art, showcasing the natural beauty of the wood’s grain and color variations. Similarly, bamboo is a highly renewable resource that grows quickly and requires minimal water, making it an excellent choice for those looking to reduce their carbon footprint.

Recycled plastics, on the other hand, provide a durable and weather-resistant option that can withstand the elements without fading or deteriorating over time. These materials are often crafted from post-consumer waste, effectively diverting plastic from landfills while creating stylish, functional outdoor furniture.

In addition to the materials used, consider brands that implement sustainable practices in their manufacturing processes. Look for furniture produced with low-impact methods, such as water-based adhesives and finishes, and companies that prioritize ethical labor practices. By supporting these businesses, you contribute to a more sustainable economy while ensuring that your outdoor space reflects your values.

Choosing eco-friendly outdoor furniture not only enhances your patio’s aesthetic appeal but also allows you to enjoy your outdoor oasis with peace of mind, knowing you are making a positive impact on the planet. So, as you curate your perfect patio, let sustainability guide your choices, creating a space where nature and modern design harmoniously coexist.

11. Accessorizing Your Patio: Umbrellas, Rugs, and Decor

Accessorizing your patio is a delightful way to transform your outdoor space into a cozy oasis that reflects your personal style. While selecting the right furniture is crucial, the finishing touches are what truly elevate the ambiance and functionality of your patio. Think of your patio as an extension of your living room; it deserves just as much attention to detail.

Start with umbrellas, which not only provide essential shade on sunny days but also add a splash of color and style to your outdoor setting. Choose a design that complements your furniture—whether it’s a sleek, modern cantilever umbrella or a classic market umbrella. Ensure that the fabric is durable and UV-resistant to withstand the elements while keeping your space cool and comfortable.

Next, consider incorporating outdoor rugs to define your seating area and add warmth underfoot. Outdoor rugs are specially designed to resist fading, mold, and mildew, making them ideal for patios. A well-chosen rug can tie your furniture together, create a sense of cohesion, and enhance the overall aesthetic of your space. Look for patterns and colors that resonate with your decor theme—whether it’s a bold geometric print or a soft, natural texture.

Finally, add decorative elements that showcase your personality and invite warmth into your outdoor sanctuary. Think about incorporating potted plants, lanterns, or decorative pillows in vibrant hues and textures. These touches can bring life to your patio, making it a welcoming spot for relaxation or entertaining guests. Don’t forget to consider the lighting—string lights or solar-powered lanterns can create a magical ambiance as the sun sets, allowing you to enjoy your patio well into the evening.

By thoughtfully accessorizing your patio with umbrellas, rugs, and decor, you’ll create a beautiful, functional outdoor space that feels just as inviting as your indoor living areas. Each element you choose should not only enhance the aesthetic appeal but also contribute to a comfortable and enjoyable outdoor experience.

12. Seasonal Considerations: Choosing Furniture for Year-Round Use

When selecting outdoor furniture for your patio, it’s essential to consider the changing seasons and how your choices will stand up to the elements throughout the year. The ideal patio furniture should not only be stylish and comfortable but also durable enough to withstand varying weather conditions.

In summer, you’ll want furniture that invites relaxation and encourages outdoor gatherings, such as lightweight aluminum or wicker pieces that are easy to rearrange. Opt for cushions made from fade-resistant fabrics that can handle the sun’s harsh rays without losing their vibrancy. Look for tables with sturdy surfaces that can hold up to your favorite summer BBQs, and consider adding a large umbrella or a pergola to provide shade for those hot afternoons.

As fall approaches, think about incorporating materials that blend seamlessly with the changing landscape. Warm woods and earth-toned fabrics can create a cozy atmosphere, perfect for enjoying the crisp air. This is also a great time to invest in fire pits or outdoor heaters, allowing you to extend your patio season well into the cooler months.

Winter presents a unique challenge, especially in regions prone to snow and ice. If you live in a place where winters are harsh, consider furniture specifically designed for cold weather. For instance, metal and high-density polyethylene (HDPE) furniture are excellent choices as they resist rust and damage from freezing temperatures. Investing in high-quality protective covers can also keep your furniture safe from the elements, reducing wear and tear.

With spring comes the opportunity to refresh and rejuvenate your outdoor space. Look for lightweight, weather-resistant options that can easily be moved to accommodate blossoming flowers and new plant arrangements. This is also the perfect time to introduce colorful accents or seasonal decorations that can be swapped out to keep your patio looking fresh and inviting.

By thoughtfully considering seasonal factors when choosing your outdoor furniture, you’ll not only enhance the functionality of your patio but also create a beautiful space that you can enjoy year-round. Embrace the changing seasons with adaptable and durable pieces that allow you to make the most of your outdoor living area, no matter the weather.

13. DIY vs. Store-Bought: Pros and Cons of Each Option

When it comes to furnishing your patio, the choice between DIY and store-bought outdoor furniture presents a fascinating dilemma. Both avenues have their unique advantages and drawbacks, and understanding these can help you make the best decision for your space, budget, and lifestyle.

**DIY Outdoor Furniture: The Creative Path**

Embarking on a DIY project can be an exciting way to inject your personal style into your outdoor area. One of the most significant advantages of crafting your furniture is the opportunity for customization. You can choose the materials, colors, and designs that perfectly match your vision. Whether it’s a rustic wooden table, a cozy pallet sofa, or chic concrete planters, the creative possibilities are endless. Additionally, building your own pieces can often be more economical, especially if you have access to tools and inexpensive materials.

However, the DIY route isn’t without its challenges. It requires time, skill, and sometimes trial and error. For those who aren’t particularly handy, the prospect of building furniture from scratch may feel daunting. Furthermore, ensuring durability and weather-resistance can be tricky, as not all materials are suitable for the outdoors. You’ll need to invest time in research and possibly extra effort in maintaining your creations.

**Store-Bought Outdoor Furniture: The Convenience Factor**

On the flip side, opting for store-bought outdoor furniture provides immediate gratification and convenience. With countless styles available, from sleek modern designs to charming vintage-inspired pieces, you’re sure to find something that fits your aesthetic. Shopping at local stores or online retailers allows you to see and feel the materials before making a purchase, ensuring quality and comfort.

The main advantage of store-bought furniture is its time-saving nature. You can have a beautifully furnished patio without the hassle of construction and finishing touches. Many retailers also offer warranties, giving you peace of mind regarding the durability of your investment.

However, the downside may lie in the lack of personalization. While you can find many appealing designs, you might struggle to find something that perfectly fits your unique taste or specific measurements. Additionally, store-bought items can sometimes come with a hefty price tag, especially when looking at high-quality or designer options.

**Finding the Right Balance**

Ultimately, the decision between DIY and store-bought outdoor furniture should align with your personal preferences, skills, and needs. If you thrive on creativity and have the time to dedicate, a DIY project could result in a one-of-a-kind outdoor oasis that reflects your style. Conversely, if convenience and quality are your priorities, exploring the vast array of store-bought options might be the better choice. Whichever path you choose, your patio will undoubtedly become a cherished space for relaxation and entertainment.

14. Where to Shop: Best Places to Find Quality Outdoor Furniture

When it comes to selecting quality outdoor furniture for your patio, knowing where to shop can make all the difference. The marketplace is filled with options, from local boutiques to sprawling online retailers, each offering unique styles and materials that cater to various tastes and budgets. Here are some of the best places to find outdoor furniture that not only meets your aesthetic desires but also ensures durability and comfort.

**1. Specialty Outdoor Furniture Stores**
These stores are dedicated solely to outdoor living, providing an extensive range of options from various brands. You can find everything from classic teak loungers to modern aluminum dining sets. The advantage of shopping at specialty stores is the knowledgeable staff who can guide you through the selection process, helping you choose pieces that will withstand the elements while complementing your outdoor space.

**2. Home Improvement Centers**
Retail giants like Home Depot or Lowe’s often carry a wide array of outdoor furniture, from budget-friendly options to higher-end pieces. These centers frequently showcase seasonal collections and clearance sales, making it an excellent place to score a deal. Plus, you can see some of the furniture in person, allowing you to evaluate the quality firsthand.

**3. Online Retailers**
Websites like Wayfair, Amazon, and Overstock provide an expansive selection of outdoor furniture, often at competitive prices. Shopping online allows you to compare styles and prices easily, read customer reviews, and find inspiration through curated collections. Be sure to check the return policy and warranty information before purchasing to ensure you’re covered if the furniture doesn’t meet your expectations.

**4. Local Craft Fairs and Farmers Markets**
For those seeking unique, handcrafted pieces, local craft fairs and farmers markets can be gold mines. Artisans often sell custom outdoor furniture, allowing you to find one-of-a-kind items that truly reflect your style. You can also support local businesses and potentially negotiate prices directly with the makers.

**5. Thrift Stores and Estate Sales**
If you’re on a budget or enjoy the thrill of treasure hunting, thrift stores and estate sales can yield fantastic finds. With a little creativity, you can refurbish or upcycle older pieces into stunning outdoor furniture that has character and charm. Just be sure to check for structural integrity and weather-resistance before making a purchase.

**6. Showrooms**
Visiting a showroom can be an eye-opening experience. Showrooms allow you to see the furniture up close, test how comfortable it is, and envision how it will look in your space. Many brands also offer outdoor collections in their showrooms, so you can explore various styles and receive professional advice on layout and design.

By exploring these diverse shopping avenues, you’ll be well-equipped to find high-quality outdoor furniture that suits your style and enhances your patio. Remember, investing in durable and aesthetically pleasing pieces will create an inviting outdoor oasis that you and your guests will enjoy for years to come. Happy shopping!

15. Tips for Arranging Your Outdoor Space for Maximum Enjoyment

Arranging your outdoor space thoughtfully can transform your patio into a serene sanctuary or a lively gathering spot, maximizing enjoyment for you and your guests. The first step in this process is to consider the purpose of your patio. Will it be a tranquil retreat for morning coffees, a cozy area for evening conversations, or a vibrant space for entertaining friends? Defining the primary function of your outdoor area will guide your arrangement choices.

Start by selecting a focal point that draws the eye and sets the tone for your space. This could be a stunning dining table, a stylish fire pit, or even a beautiful garden feature. Once you have your focal point, arrange your furniture around it to create a natural flow. For dining areas, ensure there’s adequate space for chairs to pull out comfortably, keeping pathways clear for easy movement. If relaxation is your goal, consider grouping seating in a way that encourages conversation, such as placing chairs and loveseats in a circular or semi-circular arrangement.

Don’t forget about the importance of balance and scale in your outdoor layout. Opt for a mix of larger pieces, like a sectional sofa or dining table, with smaller accents like side tables or poufs. This combination not only enhances visual interest but also ensures that the space feels inviting rather than overcrowded. Additionally, layering different textures and materials, such as woven furniture paired with metal accents or soft cushions, can create a warm and inviting atmosphere.

Lighting plays a crucial role in setting the mood for your outdoor space, especially for evening use. Incorporate a mix of ambient lighting, such as string lights or lanterns, along with task lighting like table lamps or wall-mounted fixtures. This will not only illuminate your patio but also enhance its aesthetic appeal and extend the usability of your outdoor space into the night.

Finally, consider incorporating greenery and plants to add a touch of nature and vibrancy to your arrangement. Strategically placing potted plants or hanging baskets can soften hard edges and create a lush, inviting environment. By thoughtfully arranging your outdoor furniture and adding personal touches, you can create a delightful space that invites relaxation, fosters connection, and enhances your overall enjoyment of the great outdoors.

As we wrap up our ultimate guide to choosing the perfect outdoor furniture for your patio, we hope you feel inspired and equipped to create a beautiful and functional outdoor space that reflects your personal style. Selecting the right furniture is about more than just aesthetics; it’s about enhancing your outdoor living experience, whether you’re hosting lively gatherings or enjoying peaceful moments alone. With our tips in hand, you can confidently explore materials, styles, and layouts that will not only withstand the elements but also elevate your patio to a welcoming oasis. Embrace the joy of outdoor living, and don’t hesitate to share your design journey with us—we’d love to see how you bring your patio dreams to life!

How to build a simple outdoor fire pit?

Imagine gathering with family and friends under a starlit sky, the warm glow of a crackling fire providing both light and comfort as you share stories and laughter.

An outdoor fire pit not only enhances your backyard but also creates the perfect atmosphere for memorable evenings. Building your own fire pit can seem like a daunting task, but it doesn’t have to be! With just a few essential materials and a bit of creativity, you can create a cozy gathering spot that adds charm to your outdoor space. In this blog post, we’ll guide you through five easy steps to construct a simple yet stylish fire pit that will transform your backyard into an inviting oasis. Whether you’re roasting marshmallows or simply enjoying the warmth of the flames, this DIY project is sure to ignite your passion for outdoor living!

1. Introduction: Why Build Your Own Fire Pit?

How to build a simple outdoor fire pit?
Credit : whatcanu.com

### 1. Introduction: Why Build Your Own Fire Pit?

Imagine a warm evening under the starlit sky, the crackling sound of firewood, and the comforting glow of flames illuminating the faces of friends and family gathered around. An outdoor fire pit serves as more than just a source of heat; it becomes the heart of your backyard, a place where memories are forged, stories are shared, and laughter resonates long into the night. Building your own fire pit not only enhances your outdoor space but also offers numerous advantages that make it a worthwhile DIY project.

First and foremost, crafting your own fire pit allows you to customize it to fit your personal style and the aesthetic of your yard. Whether you envision a rustic stone circle, a modern metal design, or a classic brick structure, the possibilities are endless. This personalization not only adds charm to your outdoor area but also ensures that your fire pit complements your home’s architecture.

In addition to aesthetic benefits, constructing your own fire pit can save you a significant amount of money compared to purchasing a pre-made unit. With some basic materials and tools, you can create a functional and attractive fire pit that meets your needs without breaking the bank. Plus, there’s an undeniable satisfaction that comes from building something with your own hands—a sense of pride and accomplishment knowing that you created a space for cherished gatherings.

Furthermore, a DIY fire pit can serve as a catalyst for community and connection. It encourages outdoor living and provides the perfect backdrop for family barbecues, parties with friends, or quiet evenings spent with a favorite book and a cup of tea. By building your own fire pit, you’re not just investing in a feature for your yard; you’re creating an invitation for connection and relaxation.

In this blog post, we’ll take you through five easy steps to build your own simple outdoor fire pit. Whether you’re a seasoned DIY enthusiast or a beginner looking to dip your toes into home improvement, you’ll find that this project is both accessible and rewarding. So gather your materials, roll up your sleeves, and let’s get started on creating the perfect gathering spot for those unforgettable evenings around the fire!

2. Step 1: Choosing the Right Location

Choosing the right location for your outdoor fire pit is a crucial first step that sets the foundation for safe and enjoyable gatherings with family and friends. When selecting a spot, consider the layout of your yard, existing structures, and natural elements. Aim for a flat, even surface that’s away from overhanging branches, fences, or any flammable materials. A distance of at least 10 to 20 feet from your home and other structures is ideal to prevent the risk of sparks igniting anything nearby.

Take a moment to envision how you plan to use your fire pit. Do you want it nestled within a cozy seating area, surrounded by comfortable chairs and blankets for chilly evenings? Or perhaps you envision a more open space where guests can gather under the stars? Whichever setting you prefer, ensure it’s easily accessible for guests while also offering some level of privacy from neighbors.

Consider the prevailing wind direction as well. Positioning your fire pit in a way that the smoke drifts away from your seating area will enhance your comfort and enjoyment. Also, think about how the fire pit will look in relation to your garden or patio. A well-placed fire pit can become a stunning focal point, adding both charm and functionality to your outdoor space.

Lastly, check local regulations regarding fire pits, as some areas may have restrictions on where they can be placed or require certain safety measures. By thoughtfully choosing the right location, you’ll create a safe and inviting atmosphere that encourages countless memorable evenings spent around the warmth of your new fire pit.

3. Step 2: Gathering Your Materials

How to build a simple outdoor fire pit?
Credit : whatcanu.com

Gathering your materials is a crucial step in building your own outdoor fire pit, as it lays the foundation for a safe and enjoyable gathering space in your backyard. Before you head out to the hardware store, take a moment to consider the design and size of your fire pit. Are you envisioning a compact circular pit for intimate gatherings, or a larger square fire feature for bigger parties? This decision will influence the quantity and type of materials you’ll need.

Here’s a basic list to get you started:

1. **Fire Pit Ring**: You can choose from a variety of materials such as bricks, stones, or concrete blocks. These not only form the structure of your pit but also provide durability against heat. If you want a more polished look, consider purchasing a steel fire pit ring.

2. **Gravel or Sand**: This will serve as the foundation for your fire pit. A layer of gravel or sand helps with drainage and prevents moisture from accumulating at the bottom, which can impact the longevity of your fire pit.

3. **Firewood**: Depending on your pit’s design, you’ll need firewood or charcoal for fuel. Choose seasoned hardwoods like oak or maple for a longer burn time and less smoke.

4. **Outdoor Seating**: While not part of the fire pit itself, comfortable seating is essential for creating a welcoming atmosphere. Think about benches, adirondack chairs, or even a rustic log seating arrangement to complement your outdoor space.

5. **Safety Gear**: Don’t forget to equip yourself with safety gear! A sturdy pair of gloves, a shovel, and a bucket of water or a fire extinguisher are essential to ensure you’re prepared for any situation.

Once you have everything you need, you’ll be ready to move on to the next step of constructing your fire pit. With the right materials in hand, you can create a cozy and inviting outdoor space that will be the highlight of your backyard gatherings.

4. Step 3: Designing Your Fire Pit

Designing your fire pit is where the creative magic happens, allowing you to personalize your outdoor space while ensuring functionality and safety. Before diving into the construction phase, take a moment to visualize how your fire pit will fit into your yard’s overall aesthetic and layout. Consider the size and shape that best suits your needs—whether you prefer a cozy circular design for intimate gatherings or a square configuration for larger groups.

The materials you choose will play a significant role in the appearance and durability of your fire pit. If you’re going for a rustic look, natural stone or brick can blend beautifully with the surrounding landscape. Alternatively, sleek metal designs can bring a modern vibe to your outdoor area. Don’t forget to think about seating arrangements; integrating built-in benches or surrounding the fire pit with comfortable chairs can create an inviting atmosphere.

Next, think about the height of your fire pit. A raised design can help contain the flames and make it easier to cook over, while a lower pit can foster a more intimate setting. You might also want to incorporate decorative elements like colored glass stones, which can add a pop of color and enhance the flickering glow of the fire.

Be sure to consider safety features as well, such as a spark screen or a fire pit ring, which can keep the flames contained and minimize the risk of embers escaping. Lastly, sketch out your design, noting dimensions and materials, to ensure you have a clear blueprint to follow when it’s time to build. With a thoughtful design in place, you’ll be one step closer to crafting the perfect gathering spot for unforgettable evenings under the stars.

5. Step 4: Preparing the Site

How to build a simple outdoor fire pit?
Credit : whatcanu.com

### Step 4: Preparing the Site

Now that you’ve gathered your materials and outlined where your fire pit will sit, it’s time to prepare the site for your backyard bonfire haven. This crucial step ensures that your fire pit is not only functional but also safe and aesthetically pleasing.

Begin by clearing the chosen area of any debris, grass, and rocks. Use a shovel to remove the top layer of soil, creating a level surface that is at least a few feet wider than the fire pit itself. This extra space allows for a buffer zone, which is essential for safety and helps prevent any stray embers from igniting nearby vegetation.

Next, consider the proximity of your fire pit to structures, trees, or anything flammable. Ideally, it should be located at least 10 to 15 feet away from any structures or overhanging branches. This distance minimizes risk and ensures that you can enjoy your fire without worry.

After you’ve established a clear and safe area, it’s time to lay down a foundation. Use gravel or sand to create a stable base. Spread a layer about 2 to 3 inches deep, leveling it out to provide an even surface. This foundation will not only help with drainage but also prevent weeds from growing around your fire pit, maintaining a clean look.

Finally, mark the perimeter of your fire pit with stakes and string, or simply use a garden hose to create a circular outline. This visual guide will help you when it’s time to set your stones or bricks in place, ensuring that your fire pit has a uniform shape and inviting appearance.

With the site prepared, you’re one step closer to creating your cozy outdoor retreat. In the next step, you’ll learn how to assemble your fire pit and bring your vision to life!

6. Step 5: Constructing the Fire Pit

### Step 5: Constructing the Fire Pit

Now that you’ve prepared your space and gathered your materials, it’s time for the most exciting part: constructing your fire pit! This step is where your vision transforms into reality, and you’ll soon have a cozy spot to gather around on chilly evenings.

**Start with the Base:** Begin by laying a sturdy foundation. If you opted for a stone or brick fire pit, arrange the first layer of bricks or stones in a circle, ensuring they are level and stable. This will be the base of your fire pit, so take your time to ensure everything is aligned properly. A well-laid foundation will provide durability and safety for your fire pit.

**Build Upward:** Once your base is secure, continue stacking additional layers of bricks or stones. Depending on the height you desire, you can build your fire pit anywhere from two to four layers tall. As you stack, use a masonry adhesive between layers to prevent shifting and ensure a secure hold. For added flair, consider alternating the brick pattern to create a more visually appealing design.

**Create a Fire Ring:** To enhance safety, line the inside of your fire pit with fire-resistant materials. This can be done with fire bricks or a metal fire ring. These materials not only provide additional protection to the surrounding area, but they also help to contain the fire and radiate heat more effectively.

**Finishing Touches:** After constructing the main structure, take a step back and assess your work. You can customize your fire pit further by adding decorative stones, pebbles, or even a seating area around it. If you like, incorporate features such as benches or log seating to make your fire pit the perfect gathering spot for friends and family.

**Prepare for the Fire:** Finally, once all the construction is complete, clear out any debris from the inside of the fire pit. You can create a small bed of sand or gravel at the bottom to improve drainage and provide an even surface for your fire. Now, you’re ready to light your first fire and enjoy the warmth and ambiance of your new outdoor oasis!

With your fire pit constructed, you’ve not only added a functional feature to your backyard but also created a charming centerpiece for gatherings, storytelling, and s’mores-making adventures under the stars. Enjoy the cozy evenings ahead!

7. Safety Precautions to Consider

How to build a simple outdoor fire pit?
Credit : whatcanu.com

When it comes to building your own outdoor fire pit, safety should always take precedence. A cozy fire is a wonderful addition to your backyard, but ensuring that it’s safe for you, your family, and your property is essential. Here are some crucial safety precautions to consider before you light your first flame.

**1. Choose the Right Location:** Before you begin construction, select a location that is a safe distance from any structures, trees, or overhanging branches. A minimum of 10 to 15 feet away from your home, fences, and other flammable materials is ideal. Opt for a flat, stable surface to prevent any potential accidents.

**2. Use Fire-Resistant Materials:** Whether you’re using bricks, stones, or metal, make sure to select fire-resistant materials specifically designed for high temperatures. Avoid using treated wood, as it can release harmful chemicals when burned.

**3. Have a Fire Extinguisher Handy:** Always keep a fire extinguisher nearby or a bucket of sand or water to extinguish any flames quickly if they get out of hand. Familiarize yourself with how to use it before you start your fire.

**4. Monitor Wind Conditions:** Wind can quickly turn a small, contained fire into a larger, uncontrollable blaze. On windy days, consider postponing your fire pit gatherings to avoid potential hazards. Always check the weather forecast before lighting up.

**5. Supervise the Fire:** Never leave your fire unattended, especially if children or pets are around. Maintain a safe circle around the fire pit and educate your family about the importance of keeping a safe distance. When you’re finished enjoying the fire, make sure to completely extinguish it before leaving the area.

By taking these essential safety precautions, you can enjoy the warmth and ambiance of your DIY fire pit without worry. Remember, a little preparation goes a long way in ensuring a safe and enjoyable experience for everyone. Happy building!

8. Tips for Fire Pit Maintenance

Once you’ve constructed your outdoor fire pit, it’s essential to keep it in good condition to ensure safe and enjoyable use for years to come. Regular maintenance not only enhances the longevity of your fire pit but also keeps it looking great in your backyard.

**1. Clean Regularly:** After each use, make it a habit to clean your fire pit. Remove ashes and leftover debris using a metal shovel or a vacuum designed for ashes. Allowing ashes to accumulate can lead to rusting or damage, especially in metal fire pits. A clean fire pit also promotes better airflow for future fires.

**2. Check for Damage:** Regularly inspect your fire pit for any signs of wear and tear. Look for cracks, rust, or loose stones, especially after heavy use or inclement weather. Addressing these issues promptly can prevent more extensive damage down the line. For stone or brick fire pits, ensure that the mortar is intact and repair any gaps that appear.

**3. Protect from the Elements:** If your fire pit is made of metal, consider using a cover when it’s not in use. This will protect it from rain, snow, and harsh sun, which can lead to rust or fading. For stone or brick fire pits, a cover can help keep out debris and prevent moisture buildup, which can freeze and crack the structure.

**4. Use the Right Fuel:** To prolong the life of your fire pit, be mindful of the materials you burn. Avoid using treated wood, plastics, or other materials that can create harmful smoke and residue. Instead, opt for seasoned hardwoods, which burn cleaner and produce less ash.

**5. Seasonal Maintenance:** At the end of each season, conduct a thorough inspection and cleaning. This is an ideal time to perform any necessary repairs, apply sealants if needed, and prepare your fire pit for winter. If you live in an area with heavy snowfall, consider covering the pit or storing removable components indoors to protect them from freezing temperatures.

By following these maintenance tips, your outdoor fire pit will remain a cozy gathering spot for friends and family, allowing you to create lasting memories around the warmth of the fire. Enjoy your DIY delight and the comfort it brings to your outdoor space!

9. Enhancing Your Fire Pit Area with Seating

Once you’ve constructed your outdoor fire pit, it’s time to elevate the experience by creating a comfortable and inviting seating area. After all, what’s a cozy fire without a perfect spot to relax and enjoy it? Here are some tips to enhance your fire pit area with seating that complements your newly built centerpiece.

**Choose the Right Seating:** Consider the number of guests you typically host around your fire pit and select seating that accommodates them without feeling cramped. Options range from rustic wooden benches and Adirondack chairs to chic, modern outdoor sofas. Ensure that your seating is durable and weather-resistant to withstand the elements, or choose cushions that can be easily stored away when not in use.

**Create a Circular Arrangement:** For optimal interaction and ambiance, arrange your seating in a circular or semi-circular pattern around the fire pit. This setup allows everyone to enjoy the warmth of the fire while fostering conversation and connection. To enhance the visual appeal, consider using different heights and styles of seating for added interest.

**Incorporate Soft Textiles:** To make your seating area cozier, add outdoor cushions and throw blankets. Not only do they provide extra comfort, but they also allow you to infuse color and personality into your space. Choose fabrics that are fade-resistant and easy to clean, ensuring they remain vibrant throughout the seasons.

**Add Ambient Lighting:** To set the mood for those evening gatherings, think about incorporating soft ambient lighting. String lights draped overhead, lanterns placed strategically, or even solar-powered garden lights can create a magical atmosphere. Lighting not only enhances safety but also adds charm to your fire pit area after the sun sets.

**Personalize with Accessories:** Lastly, make the space your own by incorporating personal touches. Think about adding a small side table for snacks and drinks, decorative elements like outdoor rugs, or even a small firewood holder to keep your supplies within reach. Potted plants or flower arrangements can also soften the area and integrate it beautifully into your garden or patio landscape.

By thoughtfully designing your seating area around the fire pit, you create an inviting outdoor retreat that encourages relaxation, storytelling, and cherished moments with family and friends. Your fire pit will not only be a source of warmth but a gathering place where memories are made under the stars.

10. Adding Lighting for Ambiance

Adding lighting for ambiance is the finishing touch that transforms your outdoor fire pit area into a magical retreat, perfect for gatherings under the stars or cozy evenings spent with loved ones. After all, a fire pit isn’t just about the warmth; it’s about creating an inviting atmosphere that encourages conversation and relaxation.

Begin by considering the various lighting options that complement your fire pit. String lights are a popular choice, draping gracefully overhead to cast a warm, twinkling glow across your space. They can be easily hung from nearby trees, a pergola, or even simple posts anchored in the ground. Choose warm white or soft yellow bulbs to harmonize with the flickering flames of your fire pit.

For a more grounded approach, consider installing solar-powered path lights or lanterns around the perimeter of your seating area. These not only illuminate the ground for safety but also add a charming, rustic feel to your outdoor setup. Opt for designs that reflect your personal style—whether that’s sleek and modern or whimsical and vintage.

If you’re feeling a bit more adventurous, incorporate LED color-changing lights that can be adjusted to match the mood of the evening. Imagine transitioning from a soft blue glow for a calm, serene night to vibrant reds and oranges that mirror the fire’s own hues during a lively gathering.

Don’t forget to layer your lighting. Combine different sources—like wall sconces, recessed lighting, or even candles placed strategically around your fire pit—to create depth and a sense of intimacy. Remember, the goal is to enhance the natural beauty of your outdoor space, not overpower it.

With the perfect lighting, your fire pit area will not only serve as a functional feature but also as a stunning focal point that beckons friends and family to gather, share stories, and create lasting memories under the night sky. So, grab your tools and get creative—your outdoor oasis awaits!

11. Fun Fire Pit Activities and Recipes

Once your outdoor fire pit is complete, the real fun begins! A fire pit serves not only as a cozy gathering place but also as the perfect backdrop for a variety of engaging activities and delicious culinary adventures. Here are some enjoyable fire pit activities and mouthwatering recipes to elevate your outdoor experience.

**1. S’mores Galore:** No fire pit gathering is complete without the classic s’mores! Gather graham crackers, marshmallows, and chocolate bars, and let your guests roast marshmallows to golden perfection. You can even get creative by introducing flavored marshmallows or adding slices of fruit like strawberries or bananas for a twist on the traditional recipe.

**2. Campfire Stories:** As the flames flicker and crackle, encourage everyone to share their favorite campfire stories or ghost tales. This is a wonderful way to bond with family and friends, creating lasting memories around the warmth of the fire. You might even want to designate a “storyteller” for the night, complete with a cozy blanket and a comfy seat by the fire.

**3. Fire Pit Cooking:** Embrace the culinary possibilities that a fire pit offers. Skewers of marinated vegetables, chicken, or beef can be grilled over the open flame. Alternatively, try your hand at cooking a pizza on a cast-iron skillet or even wrapping dough around a stick to create delicious bread rolls. The aroma of freshly cooked food mingling with the scent of burning wood is simply irresistible!

**4. Stargazing:** After indulging in tasty treats, take advantage of the night sky. Lay out some blankets, snuggle up, and gaze at the stars. This is an excellent opportunity to teach kids about constellations or simply enjoy the peaceful ambiance. Enhancing your fire pit area with comfortable seating and soft lighting can create an inviting atmosphere for stargazing.

**5. Fire Pit Games:** Keep the fun going with some light-hearted games. Classic options like charades or card games are always a hit. You can even invent your own fire pit trivia game, where everyone takes turns asking questions about pop culture, history, or shared memories. This interactive element adds a lively spirit to your gathering and ensures everyone is engaged and having a blast.

With these activities and recipes, your outdoor fire pit will become the heart of your gatherings, bringing friends and family together for unforgettable evenings filled with laughter, warmth, and delicious food. So gather your supplies, ignite that fire, and prepare for an evening of fun and connection under the stars!

12. Conclusion: Enjoying Your DIY Fire Pit

Congratulations! By following our simple steps, you’ve transformed your backyard into a cozy haven with your very own DIY outdoor fire pit. Now that you’ve put in the effort to build this inviting centerpiece, it’s time to fully embrace the joy and warmth it brings.

Imagine gathering around the flickering flames with family and friends, the soft glow illuminating their faces as laughter fills the air. Your fire pit becomes more than just a structure; it’s a gathering place where stories are shared, s’mores are toasted, and memories are made. As the sun sets and the stars begin to twinkle overhead, the crackling fire invites you to slow down and savor the moment.

To enhance the experience, consider adding some comfortable seating around your fire pit—think cozy chairs, cushions, or even a rustic log bench. String lights overhead can create a magical ambiance, while blankets nearby ensure warmth on cooler nights. Don’t forget to stock up on firewood or your favorite fire pit fuel, along with some roasting sticks for marshmallows or hot dogs.

As you enjoy your new outdoor sanctuary, remember to prioritize safety. Keep a bucket of water or a fire extinguisher nearby, and always supervise children and pets around the fire. With safety measures in place, you can relax and take in the beauty of your handiwork.

Your DIY fire pit is not just a source of heat; it’s a place of connection and relaxation. So grab a drink, gather your loved ones, and let the flames dance as you celebrate your accomplishment. Here’s to many warm evenings spent around your fire pit, creating cherished memories for years to come!

13. Resources for Further Reading

### Resources for Further Reading

Building your own outdoor fire pit is not only a rewarding DIY project but also an opportunity to enhance your outdoor living space. If you’re eager to delve deeper into the world of fire pits, there are numerous resources available that can provide you with guidance, inspiration, and practical tips. Here are some excellent materials to help you expand your knowledge and ensure your fire pit project is a roaring success:

1. **Books**: Consider picking up a copy of “The Complete Guide to Building Your Own Outdoor Fire Pit” by D. M. Smith. This book offers step-by-step instructions tailored for beginners, complete with diagrams and safety tips. Another great read is “The Backyard Fire Pit Book” by Jamie McDonald, which explores various fire pit designs and the materials needed for each.

2. **Online Guides and Tutorials**: Websites like DIY Network and Home Depot feature extensive tutorials on building fire pits, complete with video demonstrations. These resources often include material lists, budgeting tips, and maintenance advice that can be invaluable as you embark on your project.

3. **YouTube Channels**: For those who prefer visual learning, YouTube is a treasure trove of DIY fire pit videos. Channels like “Home Repair Tutor” and “Fix This Build That” showcase real-time builds and offer practical advice from experienced DIYers. Watching these videos can provide you with a clearer understanding of the process and potential challenges.

4. **Local Workshops**: Many home improvement stores or community centers offer workshops on outdoor projects, including fire pits. Participating in one of these hands-on sessions can give you direct access to expert advice, and you may even meet fellow DIY enthusiasts to share tips and ideas.

5. **Online Forums and Communities**: Websites like Reddit or specialized DIY forums can connect you with a community of fellow DIYers. You can ask questions, share your progress, and gain insights from those who have successfully built their own fire pits.

With these resources at your fingertips, you’ll not only feel more confident in your ability to create a beautiful outdoor fire pit but also foster a deeper appreciation for the craft of DIY. So gather your materials, arm yourself with knowledge, and get ready to enjoy cozy evenings by the fire!

14. Share Your DIY Fire Pit Experience!

After you’ve completed your outdoor fire pit project, the fun doesn’t have to stop there—it’s time to share your DIY experience with others! Documenting and sharing your journey not only celebrates your hard work but also inspires fellow DIY enthusiasts and outdoor lovers. Start by snapping some high-quality photos of your finished fire pit from various angles, capturing the warmth and ambiance it brings to your backyard.

Consider creating a blog post detailing your step-by-step process, including the challenges you faced, the materials you used, and any helpful tips you discovered along the way. Sharing your personal insights can provide valuable guidance to others who are looking to embark on a similar project.

Social media is another fantastic platform for sharing your experience. Post your photos, along with a short description of your project, using hashtags like #DIYFirePit or #OutdoorLiving to reach a broader audience. Engage with your followers by asking for their thoughts or their own DIY stories.

If you’re part of any local or online DIY communities, don’t hesitate to share your fire pit project there as well. Many DIY enthusiasts love to see what others are creating, and your experience could spark new ideas for someone else’s project.

Lastly, consider hosting a gathering around your new fire pit. Invite friends and family over for a cozy evening of storytelling, marshmallow roasting, and laughter. This not only allows you to showcase your creation but also creates lasting memories that you can share in your future posts. By sharing your DIY fire pit experience, you not only celebrate your achievement but also contribute to a community of creatives eager to learn and grow together.

We hope you found our guide on building your own simple outdoor fire pit both informative and inspiring! There’s something truly special about gathering around a crackling fire under the stars, and now you have the tools to create that perfect space in your backyard. By following these five easy steps, you can enjoy cozy evenings with family and friends, share stories, roast marshmallows, and create lasting memories. So gather your materials, unleash your creativity, and get ready to transform your outdoor space into a warm and inviting retreat. Happy building, and may your new fire pit bring you countless nights of joy and relaxation!

What are the different types of landscaping styles?

Transforming your outdoor space into a stunning haven is more attainable than you might think, especially when you understand the diverse landscaping styles available at your fingertips.

Whether you’re looking to create a tranquil retreat, a vibrant garden for entertaining, or a low-maintenance escape, the right landscaping style can breathe new life into your yard. From the serene elegance of Japanese zen gardens to the rustic charm of cottage gardens, each style offers a unique aesthetic and atmosphere that can elevate your outdoor experience. In this blog post, we will explore the top seven landscaping styles that can transform your outdoor space, providing you with inspiration and practical tips to cultivate your dream landscape. So grab a cup of coffee, and let’s embark on this journey to discover how to harmonize nature and design for a beautiful, inviting outdoor sanctuary!

1. Introduction to Landscaping Styles

What are the different types of landscaping styles?
Credit : whatcanu.com

Landscaping is not just about planting flowers and trimming hedges; it’s an art form that has the power to completely transform your outdoor space into a personal oasis. The right landscaping style can enhance the beauty of your property, create inviting spaces for relaxation and recreation, and even increase the value of your home. With countless options available, understanding the various landscaping styles is key to finding the perfect fit for your aesthetic and functional needs.

In this blog post, we will delve into the top seven landscaping styles that are trending today. From the serene elegance of Japanese gardens to the vibrant chaos of cottage gardens, each style offers a unique way to express your personality and adapt to your environment. We’ll explore the defining characteristics of each style, including the types of plants, materials, and design elements that make them stand out. Whether you are looking to create a low-maintenance retreat, a lush tropical paradise, or a sleek modern landscape, this guide will inspire you to reimagine your outdoor space.

Join us on this journey as we uncover the principles behind each landscaping style, providing you with the insights you need to elevate your yard into a beautiful and functional extension of your home. Whether you’re a seasoned gardener or a novice looking to dip your toes into the world of landscaping, there’s something for everyone in the diverse palette of styles available. Let’s get started!

2. The Benefits of Choosing the Right Landscaping Style

Choosing the right landscaping style for your outdoor space is more than just an aesthetic decision; it’s a strategic move that can enhance the functionality, sustainability, and overall enjoyment of your environment. Each landscaping style brings with it a unique set of benefits, helping to create spaces that cater to your lifestyle, preferences, and the natural characteristics of your property.

Firstly, the right landscaping style can significantly boost your property’s curb appeal, making it more inviting and attractive to visitors and potential buyers. A well-designed landscape creates a harmonious blend between your home and the outdoor space, elevating the overall look and feel of your property. For instance, a contemporary style with clean lines and minimalist features can convey a sense of modern elegance, while a cottage garden filled with vibrant flowers and rustic elements can evoke a feeling of charm and warmth.

Moreover, selecting an appropriate landscaping style can enhance the functionality of your outdoor area. Whether you envision a serene retreat for relaxation, a vibrant space for entertaining, or a practical garden for growing herbs and vegetables, the right style will help you achieve your goals. For example, a Mediterranean landscape with terracotta pots and drought-resistant plants can create a low-maintenance oasis, perfect for those with busy lifestyles.

Another significant benefit is the potential for environmental sustainability. Different landscaping styles encourage various ecological practices that can help conserve water, reduce waste, and support local wildlife. By opting for native plants and xeriscaping techniques, for example, you not only create a beautiful landscape but also contribute to the health of your local ecosystem.

Lastly, the right landscaping style can also provide a sense of personal expression and connection to nature. Whether you prefer the structured elegance of formal gardens or the wild beauty of naturalistic designs, your outdoor space can reflect your personality and values. This connection to your environment can enhance your well-being, providing a peaceful sanctuary where you can unwind and recharge.

In conclusion, selecting the right landscaping style is a multifaceted decision that impacts your home’s aesthetics, functionality, sustainability, and personal satisfaction. By carefully considering your options, you can create an outdoor space that not only enhances your property but also enriches your life.

3. 1. Traditional Landscaping: Classic Elegance

What are the different types of landscaping styles?
Credit : whatcanu.com

Traditional landscaping embodies a timeless elegance that evokes a sense of nostalgia and refinement. Characterized by its meticulous design, this style often draws inspiration from European gardens, showcasing a harmonious blend of symmetry and order. Picture well-defined pathways, neatly trimmed hedges, and lush flower beds bursting with seasonal blooms, all carefully arranged to create a cohesive and inviting outdoor space.

At the heart of traditional landscaping is the use of classic elements such as topiaries, arbors, and pergolas, which frame the landscape and provide structure. Flowering plants like roses, peonies, and hydrangeas are favored for their vibrant colors and pleasant fragrances, adding layers of texture and visual interest. Additionally, ornamental grasses and low-lying shrubs are strategically placed to soften hard edges and provide continuity throughout the garden.

Water features, such as elegant fountains or koi ponds, are often incorporated to enhance the tranquil atmosphere, while stone or brick pathways invite exploration and provide a clear flow throughout the space. A traditional landscape often includes elements like benches and gazebos, offering serene spots to relax and enjoy nature’s beauty.

In essence, traditional landscaping is about creating a sense of balance and harmony, where every plant, feature, and pathway works together to craft an inviting retreat. Whether you’re hosting a garden party or simply enjoying a quiet afternoon with a good book, traditional landscaping elevates your outdoor experience to one of refined beauty and timeless charm.

4. 2. Modern Landscaping: Sleek and Minimalist

Modern landscaping embodies the principles of sleekness and minimalism, creating outdoor spaces that exude sophistication and tranquility. This style thrives on the philosophy of “less is more,” emphasizing clean lines, geometric shapes, and an overall uncluttered aesthetic. The use of a limited color palette—often dominated by neutral tones, whites, and earthy hues—complements the minimalist ethos, allowing the beauty of the materials and the layout to take center stage.

One of the defining features of modern landscaping is the clever integration of hardscaping elements such as patios, walkways, and retaining walls. These structures are often constructed from materials like concrete, stone, or composite wood, which not only enhance durability but also contribute to the sleek, polished look that is characteristic of this style. Water features in modern landscapes tend to be understated, such as sleek reflecting pools or contemporary fountains that serve as tranquil focal points without overwhelming the senses.

Plant selection in modern landscaping favors low-maintenance and drought-resistant varieties, focusing on architectural plants like succulents, ornamental grasses, and sculptural evergreens. These plants are often arranged in thoughtful groupings, allowing the eye to appreciate the negative space around them, further enhancing the minimalist design.

Lighting plays a crucial role in modern landscapes, with strategically placed fixtures that highlight key features while maintaining a subtle glow. The result is an outdoor space that invites relaxation and contemplation, perfect for quiet evenings or entertaining guests in an elegant setting.

In essence, modern landscaping transforms outdoor areas into serene retreats where simplicity reigns, offering an ideal blend of form and function that harmonizes beautifully with contemporary living. Whether you’re reimagining a small patio or overhauling an expansive backyard, embracing modern landscaping can redefine your outdoor experience.

5. 3. Cottage Garden: A Charming Oasis

What are the different types of landscaping styles?
Credit : whatcanu.com

The cottage garden style embodies a whimsical charm that transports you to a serene oasis filled with vibrant colors and delightful fragrances. This enchanting landscaping approach embraces a more relaxed and informal aesthetic, often characterized by a delightful mix of flowers, herbs, and vegetables that grow in a seemingly haphazard yet harmonious manner. Picture a lush tapestry of blooms—roses, daisies, lavender, and foxgloves—interspersed with lush greenery and aromatic herbs like rosemary and thyme.

Cottage gardens are designed to be inviting and accessible, encouraging exploration and interaction. Pathways made of natural stone or gravel meander through the garden, leading visitors past overflowing flower beds and quaint seating areas where one can enjoy the soothing sounds of nature. A picket fence or rustic trellis adorned with climbing vines adds to the idyllic charm, providing a sense of enclosure while inviting the outside world to admire your floral haven.

The beauty of the cottage garden lies in its emphasis on biodiversity and sustainability. Native plants attract a variety of pollinators, such as bees and butterflies, fostering a healthy ecosystem. Additionally, this style celebrates the use of salvaged materials, vintage garden ornaments, and rustic furniture, creating a sense of nostalgia that evokes fond memories of simpler times.

To truly embody the essence of a cottage garden, consider incorporating elements like raised beds for vegetables, whimsical garden art, and even a small water feature to enhance the tranquil atmosphere. With its lush abundance and enchanting allure, a cottage garden not only beautifies your outdoor space but also offers a peaceful retreat where you can reconnect with nature and enjoy the simple pleasures of life.

6. 4. Xeriscaping: Sustainable and Water-Efficient

Xeriscaping is a revolutionary landscaping style that marries beauty with sustainability, making it an increasingly popular choice for homeowners looking to transform their outdoor spaces. This design philosophy centers around creating lush, vibrant landscapes that require minimal irrigation, making it ideal for regions prone to drought or for those who simply want to embrace eco-friendly practices.

At its core, xeriscaping focuses on using native and drought-resistant plants that thrive in local climates, reducing the need for excessive watering. Imagine a garden filled with vibrant succulents, hardy ornamental grasses, and colorful wildflowers, all harmonizing to create a stunning visual tapestry. This style not only conserves water but also promotes biodiversity by providing habitats for local wildlife and pollinators.

In addition to plant selection, xeriscaping incorporates smart design elements that enhance water efficiency. Features like gravel pathways, strategically placed mulch, and rock gardens not only add texture and interest to your landscape but also help retain moisture in the soil. Incorporating rainwater harvesting systems or permeable paving can further enhance your outdoor space, allowing you to make the most of natural resources.

Beyond its environmental benefits, xeriscaping offers a low-maintenance solution for busy homeowners. With reduced watering and minimal upkeep, you can spend less time tending to your garden and more time enjoying it. Whether you live in a scorching desert or a temperate climate, xeriscaping provides an elegant, sustainable way to embrace the beauty of nature while conserving precious water resources. Transform your outdoor space into a thriving oasis that reflects your commitment to sustainability and showcases the unique beauty of your region with xeriscaping.

7. 5. Mediterranean Landscaping: Sun-Kissed Serenity

What are the different types of landscaping styles?
Credit : whatcanu.com

Mediterranean landscaping embodies the essence of sun-drenched beauty and relaxed elegance, making it a perfect choice for those yearning to create a serene outdoor oasis. Inspired by the picturesque coastal regions of Southern Europe, this style brings together vibrant colors, fragrant plants, and rustic materials, resulting in an enchanting space that invites relaxation and enjoyment.

At the heart of Mediterranean landscaping is the strategic use of native plants that thrive in warm, dry climates. Think of lush lavender, vibrant bougainvillea, and hardy rosemary, all of which not only add a burst of color but also infuse your garden with delightful fragrances. These plants are often arranged in informal groupings, creating a natural, organic feel that mirrors the beauty of the Mediterranean coastline.

Incorporating elements like terracotta pots, stone pathways, and wooden trellises can further enhance the allure of your outdoor space. A classic feature of Mediterranean gardens is the use of hardscaping materials such as natural stone or gravel, which not only provide a sturdy foundation for seating areas but also contribute to the overall rustic charm. Consider adding a pergola draped with climbing vines, offering a shaded retreat where you can enjoy your surroundings in comfort.

Water features, such as fountains or small ponds, are also integral to this style, reflecting the tranquil ambiance of Mediterranean towns. The sound of gently flowing water can create a calming atmosphere, making your garden a serene escape from the hustle and bustle of daily life.

To truly embrace the Mediterranean lifestyle, consider incorporating outdoor living spaces. Comfortable seating areas adorned with plush cushions and vibrant textiles allow you to bask in the sun or dine al fresco under the stars. With the right design, your outdoor space can become a seamless extension of your home, perfect for entertaining friends or enjoying quiet moments of solitude.

In summary, Mediterranean landscaping offers a harmonious blend of beauty, functionality, and relaxation, transforming your outdoor area into a sun-kissed sanctuary that captures the spirit of coastal living. Embrace the warmth, colors, and textures of this style, and watch as your garden flourishes into a vibrant retreat that invites you to unwind and savor life’s simple pleasures.

8. 6. Tropical Landscaping: Lush and Vibrant

Tropical landscaping is a feast for the senses, bringing the vibrancy and lushness of exotic climates right to your backyard. This style is characterized by a rich tapestry of colors, textures, and scents that evoke the feeling of a serene island paradise. Imagine stepping into your outdoor space and being greeted by towering palm trees swaying gently in the breeze, their fronds casting playful shadows on the ground below.

In a tropical landscape, the plants are the star of the show. Bold foliage is key, with large-leaved plants like elephant ears and taro creating an immediate visual impact. Brightly colored flowers, such as hibiscus and bougainvillea, add splashes of color, attracting butterflies and hummingbirds that flit about in a lively dance. To enhance the tropical atmosphere, consider incorporating fragrant plants like gardenias and jasmine, which release their sweet scents as the sun sets, inviting you to unwind and relax in your beautiful oasis.

Water features are another hallmark of tropical landscaping. A meandering stream, koi pond, or even a simple fountain can introduce the soothing sounds of flowing water, further immersing you in a tranquil environment. Pathways made of natural stone or wooden planks may wind through your garden, leading visitors on a delightful journey of discovery as they explore the lush scenery.

Furnish your outdoor space with comfortable seating, perhaps under a thatched gazebo or a pergola draped with climbing vines, providing a perfect spot for enjoying your morning coffee or hosting evening gatherings with friends and family. Incorporating vibrant outdoor textiles—think bright cushions and patterned rugs—will enhance the feeling of a tropical retreat.

Overall, tropical landscaping invites you to embrace nature in all its glory, creating a vibrant, lush environment that captivates the eye and soothes the soul. It’s not just about aesthetics; it’s about creating a sanctuary where you can escape the everyday hustle and immerse yourself in a slice of paradise right outside your door.

9. 7. Japanese Zen Gardens: Tranquility and Balance

Japanese Zen gardens, often referred to as “karesansui” or dry landscape gardens, embody tranquility and balance, making them a perfect choice for those seeking a serene outdoor space. These meticulously designed gardens are a reflection of the principles of Zen Buddhism, promoting mindfulness and contemplation through their simplicity and natural beauty.

At the heart of a Zen garden lies a thoughtful arrangement of rocks, gravel, and carefully pruned plants. The use of raked gravel symbolizes water ripples, creating a soothing visual rhythm that invites the mind to wander and reflect. Boulders and stones are strategically placed to represent mountains or islands, while moss or delicate shrubs add a touch of greenery, enhancing the overall harmony of the space.

When designing your own Japanese Zen garden, consider integrating elements such as a koi pond or a bamboo water feature for an added auditory experience. The gentle sound of flowing water can enhance the atmosphere of peace, encouraging visitors to pause, breathe, and reconnect with nature.

Pathways made of stepping stones or gravel lead the way through the garden, guiding visitors on a tranquil journey of discovery. Incorporating minimalistic seating, such as a simple wooden bench or a stone seat, provides a quiet spot for reflection, making it an ideal retreat for meditation or reading.

Lighting plays a crucial role in a Zen garden, too. Soft, subtle illumination can highlight the beauty of the rocks and plants at dusk, creating a magical ambiance that draws people in. Whether you choose lanterns that evoke traditional Japanese design or modern fixtures that blend seamlessly with the landscape, thoughtful lighting can enhance the tranquility of your space.

Ultimately, a Japanese Zen garden is more than just a beautifully arranged outdoor area; it’s a sanctuary for the soul. By incorporating natural elements, maintaining simplicity, and focusing on balance, you can create a peaceful oasis that offers respite from the chaos of everyday life. Embrace the art of Zen gardening, and transform your outdoor space into a haven of tranquility and balance.

10. Tips for Choosing the Right Landscaping Style for Your Space

When it comes to selecting the perfect landscaping style for your outdoor space, the process can be both exciting and overwhelming. With so many options to consider, it’s essential to take a thoughtful approach that reflects your personal taste while also harmonizing with the environment around you. Here are some helpful tips to guide you in making the right choice.

**1. Assess Your Space:** Start by evaluating the size, shape, and condition of your outdoor area. Is it sprawling and open, or small and intimate? Take note of existing features, such as trees, slopes, and hardscape elements, as these will influence your design choices. A well-planned layout will maximize the potential of your landscape while minimizing the need for extensive alterations.

**2. Consider Your Lifestyle:** Your landscaping should cater to how you plan to use the space. If you envision hosting gatherings with friends and family, opt for a style that incorporates social zones, such as patios, fire pits, or outdoor kitchens. Conversely, if you seek a tranquil retreat, consider serene elements like meditation gardens or quiet seating areas surrounded by lush greenery.

**3. Embrace Local Climate:** The natural climate of your region plays a significant role in determining the right landscaping style. For instance, arid areas may benefit from xeriscaping, which emphasizes drought-resistant plants, while cooler climates might lend themselves to vibrant flower gardens. Research native plants that thrive in your environment, as they typically require less maintenance and resources.

**4. Set a Budget:** Landscaping can range from simple DIY projects to elaborate designs with professional help. Establishing a budget before diving into your project helps you prioritize elements and avoid overspending. Keep in mind that certain styles, like minimalist landscaping, may require less investment in materials, while others might necessitate more extensive planning and labor.

**5. Visualize Your Design:** Create a mood board or sketch out your ideas to bring your vision to life. Collect images of landscaping styles that resonate with you, and don’t hesitate to mix and match elements from various styles. Online design tools and apps can also help visualize how different styles will look in your space.

**6. Seek Inspiration:** Discovering what others have done can spark creativity and guide your choices. Visit botanical gardens, local parks, or even your neighbors’ yards to gather inspiration. Online platforms like Pinterest and landscaping blogs are treasure troves of ideas that can help you refine your vision.

**7. Consult with Professionals:** If you’re feeling overwhelmed or unsure, consider consulting with a landscape designer or architect. Their expertise can provide invaluable insights into what works best for your space, helping you to bring your dream landscape to fruition while avoiding common pitfalls.

By taking these factors into account, you can confidently select a landscaping style that not only enhances your outdoor area but also reflects your personality and lifestyle. The right choice will create a welcoming space that you and your loved ones can enjoy for years to come.

11. Incorporating Hardscaping Elements: Patios, Walkways, and More

In the realm of landscaping, the term “hardscaping” refers to the non-plant elements that create structure and functionality within your outdoor space. Incorporating hardscaping elements such as patios, walkways, and retaining walls can dramatically enhance the aesthetic appeal and usability of your yard, turning it into a versatile extension of your home.

**Patios** serve as the cornerstone of outdoor living, offering a dedicated area for relaxation, dining, and entertaining. Whether you envision a rustic flagstone patio nestled among lush greenery or a sleek modern paver design with clean lines, the choice of materials and layout can set the tone for your entire space. By choosing the right size and placement, you can create a seamless transition from indoor to outdoor living, making your patio a welcoming gathering spot for family and friends.

**Walkways** guide visitors through your garden, adding both practicality and charm. Whether you opt for natural stone, brick, or gravel, a well-designed walkway can enhance the flow of your landscape, leading the eye through carefully curated plantings and focal points. Consider incorporating curves and varying widths to create a more organic feel, allowing the pathway to blend harmoniously with the surrounding environment.

**Retaining walls**, on the other hand, serve a dual purpose: they provide necessary structural support for sloped areas while adding visual interest to your landscape. Constructed from materials like timber, stone, or concrete, retaining walls can define spaces, create terraces for gardening, or simply serve as a backdrop for beautiful flower beds. Additionally, they can be adorned with built-in seating or decorative elements, transforming an ordinary wall into a picturesque feature.

Incorporating these hardscaping elements not only solidifies the foundation of your landscape but also enhances its functionality, making your outdoor space a true reflection of your style and lifestyle. With thoughtful design and execution, patios, walkways, and retaining walls can turn an uninspired yard into a captivating oasis, inviting you to enjoy the beauty of nature right at your doorstep.

12. Plant Selection: Choosing the Right Flora for Your Style

When it comes to landscaping, the plants you choose can either elevate your outdoor space or leave it feeling lackluster. Selecting the right flora is crucial, as it not only complements your chosen landscaping style but also enhances the overall aesthetic and functionality of your garden. Each landscaping style has its own unique set of characteristics, and the right plant selection is an extension of that vision.

For instance, if you’re leaning toward a modern landscape design, consider incorporating clean lines and geometric shapes with ornamental grasses and sleek shrubs. Varieties like Blue Fescue or Japanese Forest Grass provide texture while maintaining a minimalist appeal. On the other hand, a cottage garden calls for an explosion of color and a mix of perennials and annuals. Think of fragrant lavender, cheerful daisies, and climbing roses that create a romantic, whimsical atmosphere.

If your style leans towards a Mediterranean theme, opt for drought-resistant plants like lavender, rosemary, and olive trees, which not only thrive in warmer climates but also bring a touch of the sun-drenched Mediterranean to your backyard. For a tropical oasis, consider bold foliage plants such as palms, hibiscus, and bird-of-paradise flowers that create a lush, vibrant environment.

In addition to aesthetics, it’s essential to consider the growing conditions of your chosen plants—sunlight, soil type, and moisture levels. Native plants are also a fantastic choice as they are adapted to your local climate and require less maintenance while supporting local wildlife. By thoughtfully selecting the right flora that aligns with your landscaping style and environmental conditions, you can create a harmonious outdoor space that reflects your personal taste, enhances biodiversity, and brings your garden to life.

13. Maintenance Considerations for Different Landscaping Styles

When it comes to transforming your outdoor space, choosing a landscaping style is only the beginning. Each style comes with its own unique set of maintenance considerations that can greatly affect your long-term enjoyment and the overall health of your garden. Understanding these aspects is crucial to ensure that the beauty and functionality of your landscape thrive throughout the seasons.

For instance, a formal garden, characterized by its structured layouts and symmetrical designs, often requires meticulous upkeep. Regular trimming, pruning, and shaping of hedges and topiaries are essential to maintain its crisp, polished appearance. This style may also demand more frequent watering and fertilization to keep the plants vibrant and healthy, especially in regions with arid climates.

In contrast, a cottage garden, celebrated for its charm and abundance, tends to be more forgiving in terms of maintenance. While it still requires weeding and the occasional deadheading, the emphasis is on a more natural and relaxed aesthetic. This style often embraces a mix of perennial and annual plants, allowing for some self-sowing, which can reduce the time spent on planting new flowers each season.

If you lean towards a xeriscape design, which focuses on water conservation and drought-resistant plants, you’ll find that maintenance can be relatively low. These landscapes often require less frequent watering and minimal trimming, allowing you to enjoy a beautiful outdoor space that thrives with minimal intervention. However, it’s important to regularly check for invasive species and ensure that the ecosystem remains balanced.

On the other hand, if you opt for a tropical paradise, expect to invest more time in upkeep. This style typically involves lush foliage and vibrant flowers that may require regular fertilization, pruning, and pest management to keep the landscape looking its best. Additionally, the climate conditions in your area will play a significant role in determining the types of plants you can successfully maintain.

Ultimately, when choosing a landscaping style, it’s essential to consider not just the visual appeal but also how much time and effort you’re willing to invest in maintenance. By aligning your landscaping choice with your lifestyle and preferences, you can create an outdoor space that remains beautiful and functional for years to come.

14. Case Studies: Transformations Through Landscaping

### 14. Case Studies: Transformations Through Landscaping

To truly appreciate the power of landscaping, we can look at a few compelling case studies that illustrate how thoughtful design and execution can transform outdoor spaces into breathtaking sanctuaries.

**1. The Urban Oasis:** In a bustling city, a firm was tasked with transforming a small, neglected courtyard of a downtown apartment complex. The space, once barren and uninspiring, was transformed into a lush urban oasis. By incorporating vertical gardens, colorful planters, and cozy seating areas, the courtyard became a vibrant gathering spot for residents. The addition of soft lighting and water features not only enhanced the aesthetic appeal but also created a serene atmosphere, providing a perfect escape from the city’s hustle and bustle.

**2. The Family-Friendly Backyard:** In suburban neighborhoods, families often seek ways to maximize their outdoor spaces for recreation and relaxation. One such case involved a standard backyard that lacked functionality. The landscaping team introduced a multifunctional design that included a playground for children, a fire pit for family gatherings, and a vegetable garden for homegrown produce. By using strategically placed trees for shade and colorful flower beds to add vibrancy, the once-ordinary backyard was transformed into a lively family hub, fostering connections and outdoor activities.

**3. The Eco-Friendly Retreat:** Another notable transformation occurred in a hillside property where the owners wanted to create an eco-friendly retreat. The design focused on sustainable practices, incorporating native plants to reduce water usage and attract local wildlife. Pathways made of permeable materials allowed rainwater to seep into the ground, promoting a healthy ecosystem. Additionally, a small rain garden was installed to manage stormwater runoff. The result was a stunning landscape that not only promoted sustainability but also offered breathtaking views of the surrounding nature, making it a peaceful haven for the homeowners.

These case studies exemplify how landscaping can elevate outdoor spaces, catering to the needs and desires of homeowners while enhancing their environment. Whether it’s creating a vibrant community space, a family-friendly backyard, or an eco-conscious retreat, the right landscaping can turn a vision into a stunning reality. By learning from these transformations, you can draw inspiration for your own outdoor space, ensuring that it is not only beautiful but also functional and sustainable.

15. Conclusion: Crafting Your Ideal Outdoor Space

In conclusion, crafting your ideal outdoor space is a journey that reflects your personal style, lifestyle, and the unique characteristics of your home. The landscaping styles we’ve explored offer a diverse palette of options, each with its own charm and functionality. Whether you’re drawn to the tranquil simplicity of a Japanese garden, the structured elegance of formal landscaping, or the vibrant chaos of a cottage garden, there is a style that can harmonize with your vision.

As you embark on this transformation, remember that the best outdoor spaces are those that blend aesthetics with practicality. Consider factors such as your climate, the amount of sunlight your space receives, and how you intend to use your outdoor area. Incorporating elements like native plants, sustainable materials, and thoughtful design can enhance not only the beauty of your landscape but also its resilience and functionality.

Don’t shy away from experimenting and personalizing your space. Each plant, stone, and structure can tell a story that resonates with you and your family. Involve professionals if needed, but also trust your instincts; after all, your outdoor area should be an extension of your home and a reflection of your lifestyle.

With the right planning and creativity, you can create an outdoor sanctuary that invites relaxation, fosters connection, and enhances your enjoyment of nature. So, roll up your sleeves, ignite your imagination, and start crafting the outdoor oasis you’ve always dreamed of. The perfect landscape awaits you!

As we conclude our journey through the top seven landscaping styles, we hope you feel inspired and equipped to transform your outdoor space into a personal oasis that reflects your unique taste and lifestyle. From the serene lines of Zen gardens to the vibrant chaos of cottage gardens, each style offers a distinct way to enhance your home’s exterior and create a welcoming environment. Remember, landscaping is not just about aesthetics; it’s about creating a space where you can unwind, entertain, and connect with nature. As you embark on your landscaping adventure, let your imagination run wild, mix and match styles, and don’t hesitate to put your own creative spin on the designs that resonate with you. Happy gardening, and may your outdoor space flourish with beauty and tranquility!

How to create a relaxing outdoor space?

Imagine stepping into your backyard and being instantly enveloped in a serene sanctuary, where the hustle and bustle of everyday life fades away, replaced by the soothing sounds of nature and the gentle caress of a warm breeze.

Transforming your outdoor space into a relaxing oasis is not just a dream; it can be your reality with the right guidance and a bit of creativity. In this step-by-step guide, we’ll explore how to turn your backyard into a tranquil retreat, perfect for unwinding after a long day or hosting intimate gatherings with friends and family. From selecting the ideal plants and furniture to creating cozy nooks and adding ambient lighting, we’ll cover everything you need to know to cultivate a peaceful environment that reflects your personal style. Get ready to ditch the chaos and embrace the calm as we embark on this journey to create your very own outdoor paradise!

1. Introduction: The Benefits of a Relaxing Outdoor Oasis

How to create a relaxing outdoor space?
Credit : whatcanu.com

In our fast-paced, technology-driven world, finding a serene escape within the comforts of our own homes has never been more essential. Transforming your backyard into a relaxing outdoor oasis offers a multitude of benefits that extend far beyond aesthetics; it cultivates a sanctuary for rejuvenation, relaxation, and connection with nature. Imagine stepping outside your door to be greeted by the gentle rustle of leaves, the sweet fragrance of blooming flowers, and the soothing sounds of water cascading from a fountain or pond.

Creating a personal retreat not only enhances your overall quality of life but also encourages you to spend more time outdoors, promoting physical health and well-being. Research has shown that exposure to nature can reduce stress levels, boost mood, and even improve cognitive function. Whether you’re sipping your morning coffee in a cozy nook or hosting evening gatherings under twinkling lights, your outdoor oasis can be a space for mindfulness and reflection, fostering a deeper connection with yourself and your loved ones.

Moreover, an inviting outdoor space can enhance your home’s value and appeal, making it a worthwhile investment. It serves as a versatile extension of your living area, perfect for entertaining guests, enjoying family time, or simply unwinding after a long day. In this guide, we will explore the various elements that contribute to a relaxing outdoor oasis, from the selection of plants and furniture to the incorporation of water features and ambient lighting. Let’s embark on this journey to transform your backyard into a peaceful retreat that you and your family can enjoy for years to come.

2. Assessing Your Backyard Space

Before diving into the exciting world of landscaping and décor, it’s essential to take a step back and thoroughly assess your backyard space. This crucial first step sets the foundation for your outdoor oasis, allowing you to visualize how best to transform the area into a serene retreat.

Start by observing the layout of your yard. Take note of its dimensions, shape, and any existing features, such as trees, shrubs, or pathways. Are there areas that receive ample sunlight, or are there shaded spots that could be perfect for lounging? Understanding these elements will help you determine where to place seating, gardens, or water features.

Next, consider the terrain. Is your yard flat, or does it have slopes and dips? Hills can provide a beautiful backdrop for a tiered garden or a cozy nook, while flat areas are often ideal for patios and fire pits. Don’t forget to check the soil quality as well; this is vital if you plan to incorporate plants or a vegetable garden into your design.

Take a moment to identify any existing limitations or challenges in your backyard. Are there drainage issues that need to be addressed? Are there unsightly fences or utility boxes that could detract from your oasis? Acknowledging these challenges upfront will allow you to develop creative solutions as you plan your outdoor haven.

Finally, think about your personal preferences and lifestyle. Do you envision a space for entertaining friends and family, or do you seek a quiet corner for meditation and reflection? Perhaps you want a vibrant garden filled with native plants or a minimalist area with sleek furniture. Sketch out a rough plan, jotting down ideas that resonate with you.

By taking the time to assess your backyard space thoughtfully, you’ll create a solid blueprint that reflects your vision and caters to your needs, setting the stage for a truly relaxing outdoor oasis.

3. Defining Your Vision: Style, Theme, and Purpose

How to create a relaxing outdoor space?
Credit : whatcanu.com

Before diving into the physical transformation of your backyard, it’s essential to take a step back and define your vision. This is the foundational step that will guide every decision you make, from plant selection to furniture placement. Consider what style resonates with you—do you envision a contemporary space with clean lines and minimalistic decor, or perhaps a cozy, rustic retreat adorned with natural materials?

Once you’ve settled on a style, think about the theme you want to incorporate. Themes can range from tropical paradise to Mediterranean escape, or even a serene Zen garden. Each theme brings its own unique charm and character, setting the tone for your outdoor oasis. You may want to draw inspiration from nature, travel experiences, or even your favorite vacation spot.

Next, consider the purpose of your outdoor space. Will it be a tranquil haven for relaxation and meditation, a lively area for entertaining family and friends, or a multifunctional space that accommodates both? Identifying the primary function you want your backyard to serve will help you choose the right elements that enhance its usability.

Write down your ideas, sketch out a rough layout, and gather images that inspire you. By clearly defining your vision, you’re not only setting a direction for your project but also ensuring that the final result is a harmonious blend of style, theme, and purpose—a true reflection of your personal sanctuary. This thoughtful planning phase is crucial to creating a backyard that you will love and enjoy for years to come.

4. Essential Elements of a Backyard Oasis

Creating a truly relaxing outdoor oasis requires more than just a collection of furniture and plants; it’s about cultivating an environment that promotes serenity and comfort. Here are the essential elements that will transform your backyard into a personal retreat.

**1. Comfortable Seating:** The cornerstone of any outdoor oasis is comfortable seating that invites you to unwind. Opt for plush lounge chairs, a cozy hammock, or a stylish outdoor sofa adorned with soft cushions. Consider incorporating varied seating options, such as a swinging bench or a fire pit surrounded by sturdy chairs, to accommodate different moods and gatherings.

**2. Lush Greenery:** Surround yourself with nature’s beauty by incorporating a mix of plants, trees, and flowers. Choose a variety of foliage to create layers and depth in your landscape design. Incorporating fragrant herbs, vibrant seasonal blooms, and evergreens can provide both visual interest and a soothing aroma. Don’t forget to include some vertical elements, such as trellises or hanging planters, to maximize space and create a sense of enclosure.

**3. Water Features:** The calming sound of gently flowing water can instantly elevate the tranquility of your backyard. Consider adding a small fountain, pond, or even a birdbath to attract wildlife and create a serene atmosphere. The sight and sound of water not only soothe the soul but can also mask unwanted noise from nearby streets or neighbors.

**4. Ambient Lighting:** As day fades into night, the right lighting can create a magical ambiance. Incorporate soft, warm lighting through string lights, lanterns, or solar-powered garden lights. Place lights strategically around pathways, seating areas, and plants to highlight features and ensure safety. A flickering candle or a stylish fire pit can also provide a cozy glow for evening gatherings.

**5. Personal Touches:** Finally, make the space your own with personal touches that reflect your style and interests. Add decorative elements such as outdoor rugs, artwork, or sculptures that resonate with you. Incorporate cozy throws or pillows to provide warmth during cooler evenings. Remember, this is your sanctuary, and it should be a reflection of who you are.

By thoughtfully integrating these essential elements into your backyard design, you’ll create a relaxing outdoor oasis that beckons you to unwind and enjoy the beauty of nature, right in your own home.

5. Step 1: Planning and Design

How to create a relaxing outdoor space?
Credit : whatcanu.com

Creating a relaxing outdoor oasis begins with thoughtful planning and design. This initial step is crucial, as it sets the foundation for your entire project. Start by envisioning how you want to use your backyard. Will it be a serene retreat for solo relaxation, a vibrant space for entertaining friends, or a family-friendly area for play and enjoyment? Take the time to jot down your ideas and prioritize your needs.

Next, evaluate your existing space. Consider the layout, the amount of sunlight different areas receive throughout the day, and any natural features you may want to highlight, such as trees, flower beds, or water elements. Sketch a rough layout of your yard, marking the locations of these features alongside potential areas for seating, pathways, and other elements like fire pits or outdoor kitchens.

Don’t forget to think about the ambiance you wish to create. Are you envisioning a lush garden filled with vibrant flowers and greenery, or a minimalist space with clean lines and modern furnishings? Consider the colors, textures, and materials that resonate with you.

Finally, set a budget. Determine how much you are willing to spend and allocate funds to different aspects of your project, such as landscaping, furniture, and decor. Having a clear budget will help keep your project on track and prevent overspending.

By dedicating time to this planning phase, you will ensure that your outdoor oasis not only meets your personal style but also caters to your lifestyle, creating a harmonious environment where you can unwind and rejuvenate. Once your plan is in place, you’ll be ready to dive into the exciting next steps of transforming your backyard into a personal paradise.

6. Step 2: Choosing the Right Plants and Landscaping

Choosing the right plants and landscaping is a crucial step in transforming your backyard into a serene outdoor oasis. The selection of flora can significantly influence the ambiance, functionality, and overall aesthetic of your space. Begin by considering the climate and soil type in your area, as these factors will determine which plants will thrive in your garden. Research native plants that not only require less maintenance but also provide a natural habitat for local wildlife. Incorporating a mix of perennials, annuals, and evergreens will ensure that your garden remains vibrant throughout the seasons.

Next, think about the layout. Create a harmonious balance between hardscaping—such as paths, patios, and decking—and softscaping, which includes your lush greenery and flowers. Use larger plants, such as ornamental grasses or shrubs, to create natural barriers or privacy screens. This adds depth to your space and makes it feel more secluded and intimate.

Consider adding flowering plants with varying bloom times to provide continuous color and fragrance throughout the year. Perennial flowers like lavender and coneflowers not only attract pollinators but also bring a delightful scent to your outdoor retreat. Don’t forget about the importance of texture; combining plants with different leaf shapes and sizes can create visual interest and a sense of lushness.

Additionally, think about the mood you want to create. If relaxation is your goal, opt for calming colors like soft greens, blues, and purples. Planting fragrant herbs such as rosemary or mint can also enhance the sensory experience of your oasis. For those who seek a more vibrant atmosphere, consider a mix of bold annuals and tropical plants to energize the space.

Lastly, pay attention to the layout of your plants. Arranging them in clusters rather than in straight lines can create a more natural feel. Use pathways and borders to guide the eye through the garden and encourage exploration. By thoughtfully choosing and arranging your plants, you’ll lay the foundation for a tranquil outdoor environment that invites you to unwind and connect with nature.

7. Step 3: Selecting Furniture and Decor

How to create a relaxing outdoor space?
Credit : whatcanu.com

Selecting furniture and decor is one of the most exciting steps in the process of transforming your backyard into a serene outdoor oasis. This is where your personal style truly shines and where comfort meets aesthetics. Start by considering the overall vibe you want to create. Are you aiming for a cozy, rustic retreat, a sleek modern space, or perhaps a tropical paradise? Your vision will guide your choices.

Begin with the essentials: seating. Look for weather-resistant materials like aluminum, teak, or synthetic wicker, which not only withstand the elements but also offer durability and comfort. Opt for plush cushions in colors and textures that harmonize with your garden’s palette. A well-placed hammock or a couple of vibrant bean bags can also add a casual, inviting touch that encourages relaxation.

Next, think about tables. A sturdy coffee table can serve as a gathering point for drinks and snacks, while a dining table will set the stage for al fresco meals with family and friends. Consider incorporating versatile options, such as nesting tables or an extendable dining table, to accommodate different occasions.

Once you have your basic furniture in place, it’s time to layer in decor that reflects your personality. Outdoor rugs can define spaces and add warmth, while string lights or lanterns can create an enchanting ambiance as the sun sets. Don’t overlook the power of greenery; potted plants or vertical gardens can bring life to your area and complement the natural beauty around you.

Finally, personal touches—a collection of your favorite outdoor candles, weather-resistant artwork, or even a fire pit—can make your backyard feel uniquely yours. Selecting the right furniture and decor not only enhances the visual appeal of your outdoor space but also lays the foundation for countless moments of relaxation and joy. So, take your time, explore various styles, and curate a space where you’ll love to unwind, entertain, and create lasting memories.

8. Step 4: Incorporating Water Features

### Step 4: Incorporating Water Features

Water features can truly transform your backyard into a serene oasis, adding both visual appeal and soothing sounds that promote relaxation. Whether you opt for a grand fountain, a tranquil pond, or a simple birdbath, the presence of water can create a calming atmosphere that invites you to unwind and connect with nature.

Begin by considering the size and scale of your outdoor space. A large pond can serve as a stunning focal point, providing a habitat for fish and aquatic plants, while smaller water features like tabletop fountains or wall-mounted cascades can fit snugly into tight corners or patios. Choose a style that complements your overall design theme—rustic stone fountains can evoke a natural feel, while sleek, modern water installations add a contemporary touch.

Once you’ve selected the type of water feature that suits your backyard, think about its placement. Position your feature where it can be easily viewed from your main sitting areas, such as your patio or deck. This ensures that you can enjoy the gentle sound of flowing water while sipping your morning coffee or lounging with a good book. Additionally, consider how the water feature interacts with existing landscaping. Surround it with lush greenery, colorful flowers, or smooth pebbles to create a harmonious scene that enhances your oasis.

Don’t forget about the maintenance aspect. While water features can be low-maintenance, regular cleaning and occasional checks on water levels and pumps will keep them functioning well. If you’re feeling adventurous, consider adding aquatic plants like water lilies or floating ferns, which not only beautify your pond but also contribute to a balanced ecosystem.

Lastly, enhance your water feature with lighting. Incorporating soft LED lights can create a magical ambiance in the evening, transforming your backyard into a captivating retreat after sunset. With the gentle glow reflecting off the water, you’ll create a peaceful environment perfect for evening gatherings or quiet moments of reflection.

By thoughtfully incorporating water features into your backyard design, you can elevate your outdoor space into a relaxing oasis that beckons you to escape the hustle and bustle of daily life.

9. Step 5: Lighting Ideas for Ambiance

Creating the perfect ambiance in your outdoor oasis hinges significantly on the right lighting. The right illumination can transform a simple backyard into a magical retreat, ideal for evening gatherings, quiet moments of reflection, or romantic dinners under the stars. Here are some enchanting lighting ideas to elevate the atmosphere in your transformed space.

**1. String Lights:** One of the most popular and effective ways to add a warm glow is through string lights. Drape them across your patio, wrap them around trees, or hang them from pergolas to create a whimsical feel. Choose soft white or warm yellow bulbs to cast a gentle light that promotes relaxation and conversation.

**2. Solar-Powered Path Lights:** Enhance the safety and aesthetics of your garden pathways with solar-powered lights. These eco-friendly options charge during the day and automatically illuminate at night, guiding your guests through your outdoor haven. Opt for designs that suit your style—whether sleek and modern or rustic and charming.

**3. Lanterns and Candles:** For a touch of romance, incorporate lanterns and candles into your design. Place them on tables, hang them from hooks, or set them along walkways to create flickering pools of light. Consider using flameless candles for a worry-free alternative that still provides the mesmerizing glow of real flames.

**4. Spotlighting Focal Points:** Highlight specific features of your backyard, like a beautifully shaped tree, a water feature, or a stunning piece of garden art, with strategically placed spotlights. This not only draws attention to these elements but also adds depth and drama to your outdoor space.

**5. Fire Pits:** A fire pit serves as both a source of warmth and light, providing a cozy gathering spot for family and friends. The soft flickering flames create an inviting atmosphere, perfect for roasting marshmallows or sharing stories long into the night.

**6. Under-Bench Lighting:** If you have seating areas in your backyard, consider adding under-bench lighting. This subtle touch not only improves visibility but also adds a layer of sophistication to your space, making it feel more like an outdoor lounge.

By thoughtfully incorporating these lighting ideas, you can create an inviting and serene ambiance that encourages relaxation and enjoyment in your outdoor oasis. Whether you’re hosting a lively barbecue or enjoying a quiet evening alone, the right lighting will enhance every moment spent in your transformed backyard.

10. Step 6: Creating Cozy Zones for Relaxation

Creating cozy zones for relaxation in your backyard is all about designing spaces that invite you to unwind and enjoy the tranquility of nature. Start by identifying different areas within your outdoor space that can serve unique purposes—think of a reading nook, a meditation corner, or a space for evening gatherings with friends.

Begin by choosing comfortable seating options that complement the style of your oasis. Plush outdoor cushions, hammocks, or even a swinging bench can create inviting spots for lounging. Consider using weather-resistant furniture that not only adds comfort but also ensures durability against the elements.

Once you have your seating figured out, enhance these zones with thoughtful decor. Layering rugs can define the area and add warmth, while soft throw blankets can invite snuggling on cooler evenings. Don’t forget about lighting! String lights, lanterns, or solar-powered garden lights can create a magical ambiance as the sun sets, allowing you to enjoy your outdoor haven well into the night.

Incorporating natural elements is key to creating a serene environment. Surround your cozy zones with fragrant plants or flowering shrubs to engage the senses. You can also add privacy with trellises, outdoor curtains, or strategically placed potted plants that help create a secluded retreat from the hustle and bustle of everyday life.

Finally, consider adding personal touches that reflect your personality—whether it’s a small fountain that provides soothing sounds, a fire pit for warmth and storytelling, or a selection of your favorite outdoor games. Each cozy zone should feel like a little escape, encouraging you to disconnect from the chaos and reconnect with yourself or loved ones. With these elements in place, your backyard will transform into a true outdoor oasis, beckoning you to relax and rejuvenate whenever you step outside.

11. Step 7: Adding Outdoor Accessories and Personal Touches

Once you’ve established the foundational elements of your backyard oasis, it’s time to infuse it with personality and charm through outdoor accessories and personal touches. These finishing details not only enhance the aesthetic appeal but also create a welcoming atmosphere that reflects your unique style.

Start by selecting a cohesive color palette that complements your existing landscape and furniture. Consider vibrant throw pillows, soft outdoor rugs, and colorful cushions that invite relaxation and comfort. These simple additions can transform a basic seating area into an inviting lounge where you can unwind with a good book or entertain friends.

Next, think about lighting options that will create a magical ambiance as the sun sets. String lights draped across pergolas or trees provide a whimsical glow, while lanterns and solar-powered garden lights add both practicality and beauty. Consider incorporating candles for a romantic touch, or opt for fire pits to create a cozy gathering spot on cooler evenings.

Incorporating greenery is also a fantastic way to enhance your outdoor space. Potted plants, hanging baskets, or even a vertical garden can bring life and color, while also improving air quality. Choose plants that thrive in your climate and require minimal upkeep, allowing you to enjoy your oasis without the stress of constant maintenance.

Don’t forget about personal touches that tell your story. Perhaps it’s a mosaic birdbath that showcases your artistic flair, or a collection of garden sculptures that spark conversation. Incorporate items like family heirlooms or travel souvenirs that evoke fond memories and make the space feel like home.

Lastly, consider adding functional accessories such as outdoor dining essentials, blankets for cooler nights, or even a small bar cart stocked with your favorite beverages. These practical additions ensure your outdoor oasis is not only visually appealing but also ready for entertaining and relaxation.

By thoughtfully selecting and arranging outdoor accessories and personal touches, you’ll create a serene retreat that beckons you to step outside and enjoy the beauty of your transformed backyard. Your oasis will become a cherished haven for relaxation, connection, and joy—an extension of your home that you and your loved ones can savor for years to come.

12. Step 8: Maintenance Tips for Your Oasis

Creating a relaxing outdoor oasis is just the beginning; maintaining its beauty and functionality is key to ensuring it remains a sanctuary for years to come. Regular upkeep not only preserves the aesthetic appeal of your space but also enhances its longevity and enjoyment. Here are some essential maintenance tips to keep your backyard retreat in top shape.

1. **Regular Cleaning**: Just like any indoor space, your outdoor oasis needs regular cleaning. Sweep away leaves and debris, wipe down outdoor furniture, and periodically wash cushions to prevent mold and mildew. Depending on your climate, you may need to do this weekly or bi-weekly to keep everything looking fresh.

2. **Pruning and Trimming**: Plants are the heart of your oasis, and maintaining them is crucial. Regularly prune shrubs and trees to encourage healthy growth and to prevent overgrowth that can detract from your space. This not only keeps your plants looking tidy but also allows for better air circulation and sunlight penetration.

3. **Seasonal Check-Ups**: The changing seasons bring different challenges. In the fall, clear out leaves and prepare your garden for winter. In the spring, inspect your plants for any winter damage and start replanting annuals or perennials. Summer maintenance might include regular watering schedules and checking for pests.

4. **Pest Control**: An outdoor oasis can attract unwanted guests. Keep an eye out for pests like aphids, spider mites, and snails. Utilize organic pest control methods or introduce beneficial insects like ladybugs to keep your plants healthy without compromising your ecosystem.

5. **Furniture Care**: Protect your outdoor furniture from the elements by applying weatherproofing treatments. Regularly check for any signs of wear and tear, and consider storing cushions and accessories indoors during harsh weather to extend their lifespan.

6. **Water Features**: If your oasis includes a fountain or pond, regular maintenance is key. Clean the water features to prevent algae buildup, and check the water level regularly to ensure it remains at optimal levels. This will keep your oasis not only visually appealing but also serene with the soothing sounds of flowing water.

7. **Color Updates**: Over time, colors may fade due to sun exposure. Consider refreshing the paint on any wooden structures or adding new accents through colorful planters or decorative elements. This can rejuvenate the overall look of your oasis and keep it inviting.

By incorporating these maintenance tips into your routine, you’ll ensure that your backyard oasis remains a tranquil escape from the hustle and bustle of everyday life. Consistent care not only enhances the beauty of your outdoor space but also makes it a welcoming retreat for friends, family, and yourself for years to come.

13. Budgeting for Your Backyard Transformation

When it comes to transforming your backyard into a relaxing outdoor oasis, budgeting is a crucial step that can make or break your project. Start by assessing your overall vision: what elements do you want to incorporate? Perhaps a tranquil water feature, lush landscaping, cozy seating areas, or a fire pit for evening gatherings? Having a clear concept will help you allocate your budget effectively.

Begin with a comprehensive list of all the elements you wish to include. This might encompass materials for landscaping, furniture, lighting, and any additional features, like outdoor cooking equipment. Once you have your wish list, research the costs associated with each item. Online marketplaces, local garden centers, and home improvement stores are great resources for price comparisons.

Don’t forget to factor in potential labor costs if you plan to hire professionals for installation or design. If you’re going the DIY route, budget for tools and equipment rentals that might be necessary to bring your vision to life.

It’s also wise to set aside a contingency fund—typically around 10-15% of your total budget—to handle unexpected expenses that may arise during the transformation process. This way, you won’t be caught off guard by surprises that could derail your plans or compromise the quality of your project.

Finally, keep in mind that creating a backyard oasis doesn’t have to happen all at once. You can break your project into phases, allowing you to spread out costs over time while still enjoying the transformation along the way. By carefully budgeting for your backyard transformation, you can ensure a beautiful and relaxing outdoor space that meets your needs without exceeding your financial limits.

14. Safety Considerations for Outdoor Spaces

Creating a relaxing outdoor oasis is an exciting endeavor, but it’s essential to prioritize safety to ensure that your tranquil retreat remains a worry-free haven. As you embark on this transformation, keep in mind several key safety considerations that will protect both your space and those who enjoy it.

First and foremost, assess the terrain of your backyard. Uneven ground can lead to trips and falls, so consider leveling out any bumpy areas and filling in holes to create a smooth surface. If you’re installing pathways or patios, opt for non-slip materials that provide stability, even when wet.

Next, pay attention to the placement of furniture and decor. Ensure that chairs, tables, and other elements are positioned thoughtfully to avoid overcrowding and to create clear pathways for movement. Additionally, if you have children or pets, opt for furnishings with rounded edges and avoid sharp corners that could pose a risk of injury.

Lighting is another critical aspect of safety. Adequate outdoor lighting not only enhances the ambiance of your oasis but also helps prevent accidents after dark. Illuminate pathways, seating areas, and any steps or elevations with a combination of ambient lights, spotlights, and solar-powered fixtures to ensure visibility and security.

Finally, consider the materials you use for building structures like decks, pergolas, or fences. Ensure that they are treated and maintained to withstand the elements and prevent deterioration. Regularly inspect your outdoor space for any hazards, such as loose boards, rusty nails, or unstable furniture.

By prioritizing these safety considerations, you can create an inviting outdoor oasis that serves as a peaceful escape while keeping everyone who enjoys it safe and sound. With a focus on both beauty and safety, your backyard can become a cherished retreat for relaxation and enjoyment.

15. Conclusion: Enjoying Your New Outdoor Sanctuary

As you step back to admire your newly transformed outdoor oasis, there’s an unmistakable sense of accomplishment that washes over you. This space, once merely an extension of your home, has evolved into a sanctuary where nature and comfort converge harmoniously. The vibrant colors of blooming flowers dance in the gentle breeze, while the sound of trickling water from your carefully placed fountain serenades you, inviting relaxation and peace.

Imagine sinking into your plush lounge chair with a good book in hand, enveloped by the soothing aromas of lavender and rosemary wafting from your herb garden. Perhaps you envision hosting intimate gatherings with friends and family around a cozy fire pit, sharing stories and laughter under a starlit sky. Your outdoor oasis is not just a place; it’s an experience—a retreat from the chaos of everyday life.

In this serene setting, you can indulge in mindfulness practices, such as yoga or meditation, rejuvenating your spirit while breathing in the fresh air. The subtle sounds of nature, from chirping birds to rustling leaves, create a tranquil backdrop that enhances your moments of reflection and relaxation.

As you settle into your new outdoor sanctuary, remember to embrace the changing seasons. Each season brings its own unique beauty and opportunities for enjoyment. In the summer, host barbecues and pool parties; in the fall, savor the crisp air while sipping warm cider by the fire; and in winter, decorate with twinkling lights to create a festive atmosphere.

Ultimately, your backyard transformation is more than just landscaping; it’s about crafting a space that resonates with your lifestyle and enhances your well-being. So take a deep breath, soak in the beauty around you, and enjoy every moment spent in your very own outdoor retreat. This is your haven—where relaxation meets nature—and it’s time to make the most of it.

As we wrap up our guide on transforming your backyard into a relaxing outdoor oasis, we hope you’re feeling inspired to embark on this rewarding journey. By following these step-by-step instructions, you can create a personal haven that not only enhances your home’s aesthetic but also provides a serene escape from the hustle and bustle of daily life. Whether it’s incorporating lush greenery, comfortable seating, or soothing water features, every detail you add will contribute to a tranquil atmosphere where you can unwind and recharge. So gather your tools, unleash your creativity, and let your backyard bloom into the peaceful retreat you’ve always dreamed of. We can’t wait to see the stunning transformations you achieve—share your progress and final results with us, and let’s celebrate the beauty of outdoor living together!

How to build a simple backyard fire pit?

Imagine a serene evening in your backyard, the sun gently setting and the air filled with the comforting crackle of a fire, as friends and family gather around to share stories and laughter.

A backyard fire pit not only enhances your outdoor space but also creates a warm and inviting atmosphere perfect for making cherished memories. However, building your own fire pit may seem daunting at first, but with the right guidance and a little creativity, it can be a rewarding DIY project that transforms your yard into a cozy retreat. In this ultimate guide, we will walk you through a step-by-step approach to designing and constructing your own fire pit, covering everything from selecting the perfect location and choosing materials, to safety tips and maintenance. Get ready to ignite your outdoor living experience and enjoy countless evenings under the stars with your very own fire pit!

1. Introduction: Why Build a Backyard Fire Pit?

How to build a simple backyard fire pit?
Credit : whatcanu.com

Imagine a crisp evening under a starlit sky, the soft crackle of burning wood mingling with laughter and conversation. A backyard fire pit transforms an ordinary outdoor space into an inviting haven, perfect for creating cherished memories with family and friends. But why should you consider building one? The reasons are as varied as the designs you can choose from, each offering a unique blend of functionality and aesthetic appeal.

First and foremost, a backyard fire pit serves as a focal point for gatherings, encouraging people to come together and enjoy each other’s company. Whether you’re roasting marshmallows for s’mores, sharing stories, or simply enjoying the warmth of the flames, a fire pit fosters an atmosphere of relaxation and camaraderie. It extends the usability of your outdoor space, allowing you to enjoy your yard well into the cooler months.

Moreover, fire pits are not just for socializing; they can enhance your outdoor decor, adding a touch of charm and sophistication to your landscape. With countless styles and materials available, from rustic stone to sleek modern designs, you can create a fire pit that perfectly complements your home’s aesthetics.

Additionally, a fire pit can serve practical purposes beyond relaxation and beauty. It can provide warmth on chilly evenings, light for nighttime activities, and even an outdoor cooking option for those who love to experiment with grilling or cooking over an open flame.

Finally, building a fire pit can be a rewarding DIY project. It allows you to engage with your outdoor space creatively, learning new skills while investing time and effort into something that will bring joy for years to come. In the following sections, we’ll explore how to embark on this exciting journey, from choosing the right location to selecting materials and design. So grab your tools, and let’s get started on creating a centerpiece that will light up your backyard and your life!

2. Choosing the Right Location for Your Fire Pit

Choosing the right location for your fire pit is a crucial step that can make or break your outdoor experience. It’s not just about aesthetics; safety and functionality play significant roles in your decision-making process. Start by envisioning how you want to use your fire pit—will it be a cozy gathering spot for family and friends, a place for quiet reflection, or a focal point for outdoor entertaining? This vision will guide you in determining the most suitable location.

Begin your search at least 10 to 20 feet away from any structures, including your home, fences, and overhanging branches. This distance is important to prevent any fire hazards. Consider a flat, stable surface that is easily accessible, as you don’t want guests struggling to navigate uneven terrain in the dark. Ideally, a spot sheltered from the wind will enhance the comfort of your gathering while preventing smoke from blowing directly into guests’ faces.

Also, take into account the sun’s path. If you plan to use your fire pit during the day, a location with some natural shade will be beneficial. Conversely, if you envision evenings spent around the flames, a spot that captures the sunset can create a stunning backdrop for your gatherings.

Lastly, think about the views. Positioning your fire pit to overlook a scenic area in your yard, like a garden, pond, or even a distant landscape, can elevate the ambiance and make those evenings around the fire even more magical. By thoughtfully selecting the location, you’ll create a welcoming environment that invites you and your guests to relax and enjoy the warmth and glow of your backyard fire pit.

3. Understanding Local Regulations and Safety Guidelines

How to build a simple backyard fire pit?
Credit : whatcanu.com

Before you dive into the exciting project of building your own backyard fire pit, it’s crucial to understand the local regulations and safety guidelines that govern outdoor fires in your area. Different municipalities have varying rules regarding fire pits, including size restrictions, materials, and safety distances from structures and property lines. Ignoring these regulations can lead to hefty fines or, worse, unsafe situations that could endanger you and your neighbors.

Start by checking with your local government or fire department for any specific permits you might need. Some areas require permits for any open flame, while others may have designated fire seasons that restrict outdoor burning altogether. Additionally, familiarize yourself with guidelines on the types of materials you can use for your fire pit. Some regions may prohibit the use of certain materials due to fire hazards, while others may mandate specific construction methods to ensure safety.

Safety guidelines are equally important to consider. It’s vital to maintain a safe distance between your fire pit and any flammable structures, such as fences, trees, or your home. Generally, a clearance of at least 10 to 15 feet is recommended to prevent any accidental fires. Moreover, consider wind direction and how it might affect the smoke and heat produced by your fire.

Finally, equip yourself with essential fire safety tools. A fire extinguisher, a bucket of water, or a garden hose should always be readily available when enjoying your fire pit. By understanding and adhering to local regulations and safety guidelines, you not only ensure a delightful experience for yourself and your guests but also contribute to the safety and well-being of your community. With this groundwork laid, you can confidently move forward in creating a cozy and safe space to gather around the warm glow of your new backyard fire pit.

4. Selecting the Fire Pit Design that Fits Your Style

Choosing the right fire pit design is not just about functionality; it’s about creating a space that reflects your personal style and enhances the overall aesthetic of your backyard. As you embark on this exciting journey, consider the various design options available to you, each with its unique charm and character.

First, think about the materials you want to use. Do you envision a rustic stone fire pit that harmonizes with a natural landscape, or are you drawn to a sleek, modern steel design that makes a bold statement? Stone fire pits offer a timeless appeal, seamlessly blending into gardens and wooded areas, while metal fire pits can provide a contemporary touch that complements modern architecture.

Next, consider the shape and size of your fire pit. Round fire pits are traditional and create a cozy atmosphere, perfect for gathering around with friends and family. Square or rectangular designs, on the other hand, can add a more structured look to your outdoor space and may offer additional seating options. Think about how you’ll use the space—will it be for intimate gatherings or larger parties? This will help you determine the right dimensions.

Don’t forget to reflect on the surrounding elements of your yard. A fire pit surrounded by comfortable seating, such as adirondack chairs or a built-in stone bench, invites relaxation and conversation. You might also want to incorporate a surrounding patio area or decorative gravel for a polished finish. Adding features like built-in shelving for wood storage, or even a small bar area nearby, can enhance the functionality of your fire pit and make it the ultimate gathering spot.

Lastly, think about safety and local regulations. Make sure your design adheres to any guidelines regarding fire pit placement and construction materials in your area. This not only ensures compliance but also gives you peace of mind as you enjoy those warm evenings by the fire.

By taking the time to select a fire pit design that truly fits your style, you’ll create a stunning focal point in your backyard that invites warmth, connection, and unforgettable memories for years to come.

5. Essential Tools and Materials You’ll Need

How to build a simple backyard fire pit?
Credit : whatcanu.com

When embarking on the exciting journey of building your own backyard fire pit, having the right tools and materials is crucial to ensure a smooth and successful project. Let’s explore the essentials you’ll need to gather before you break ground.

**Tools:**

1. **Shovel:** A sturdy shovel is indispensable for digging out the area where your fire pit will reside. Opt for a flat-bladed shovel for easy excavation of dirt and grass.

2. **Level:** Maintaining a level surface is key to a stable fire pit. A standard bubble level or a long level will help you ensure that your pit is perfectly balanced.

3. **Trowel:** For finer work, like smoothing out the edges of your fire pit, a trowel is a great tool to have on hand. It’s particularly useful if you’re working with stones or bricks.

4. **Rubber Mallet:** If you’re using pavers or stones, a rubber mallet will help you fit them together tightly without risking damage.

5. **Measuring Tape:** Accurate measurements are essential for a well-proportioned fire pit. A measuring tape will help you determine the right dimensions and spacing.

6. **Safety Gear:** Don’t forget your gloves, goggles, and a dust mask. Safety should always be your top priority when working with heavy materials and tools.

**Materials:**

1. **Fire Pit Ring:** You can choose a metal fire pit ring or create a stone or brick enclosure. Metal rings are durable and provide a sleek, modern look, while stone and brick can give a rustic, traditional feel.

2. **Bricks or Pavers:** If you’re building a stone fire pit, gather fire-rated bricks or pavers specifically designed for high temperatures. This will not only enhance safety but also add aesthetic appeal to your backyard.

3. **Gravel:** A layer of gravel at the bottom of your fire pit aids in drainage, preventing water from pooling and keeping your fire pit dry.

4. **Sand:** A layer of sand can also be used beneath your fire pit to provide stability and help with drainage.

5. **Firewood:** Of course, you’ll need a good supply of seasoned firewood to keep those flames roaring. Choose hardwoods like oak or maple for a longer burn and less smoke.

6. **Fire Starter:** Whether you prefer kindling, fire starters, or lighter fluid, make sure to have a reliable method for igniting your fire pit.

By gathering these essential tools and materials, you’ll be well on your way to creating a beautiful and functional fire pit that can serve as the perfect gathering spot for family and friends. With everything in hand, you’ll be ready to dive into the next steps of your backyard transformation!

6. Preparing the Ground: Clearing and Leveling the Site

Before you can enjoy the warmth and ambiance of your backyard fire pit, you’ll need to start with a solid foundation. Preparing the ground is a crucial step that lays the groundwork—quite literally—for the success of your fire pit project.

Begin by selecting the perfect location for your fire pit, ideally situated away from overhanging branches, structures, and any flammable materials. Once you’ve decided on the spot, it’s time to clear the area. Remove any grass, weeds, and debris, including rocks and sticks. This not only creates a clean slate but also prevents unwanted vegetation from creeping into your fire pit area as time goes on.

After clearing the site, the next task is leveling the ground. An uneven surface can lead to instability, which can be dangerous when you’re dealing with fire. Use a shovel to dig down any high spots and fill in any low areas with soil or gravel, ensuring the surface is as flat as possible. For added precision, you might consider using a level or a long board to check the evenness of the ground.

If your fire pit will feature a stone or brick surround, it’s important to create a base that can support the weight. You might want to pack down the earth or lay down a layer of sand or gravel for drainage and stability. Compacting the ground will provide a sturdy foundation that will help prevent shifting or sinking over time, ensuring that your fire pit remains both functional and aesthetically pleasing.

Taking the time to properly prepare the ground will pay off immensely when you finally gather around the fire with friends and family. A well-prepared site not only enhances safety but also contributes to the overall enjoyment of your backyard oasis, making your fire pit a welcoming and inviting space for years to come.

7. Building the Fire Pit Base: Materials and Techniques

How to build a simple backyard fire pit?
Credit : whatcanu.com

Creating a sturdy base for your fire pit is one of the most critical steps in ensuring its longevity and safety. The foundation not only supports the fire pit structure but also plays a significant role in preventing unwanted fires and preserving the surrounding landscape. Here’s a closer look at the materials you’ll need and the techniques to master this essential phase of your fire pit project.

### Materials:
1. **Gravel**: A layer of gravel provides excellent drainage, preventing water from pooling around the base of the fire pit. Aim for a depth of about 4-6 inches, ensuring that the gravel is evenly distributed.
2. **Sand**: After laying down the gravel, a layer of sand—approximately 1 inch thick—creates a smooth and level surface for the fire pit. Sand also helps with heat retention and reduces the risk of cracking in the fire pit materials.
3. **Fireproof Bricks or Stones**: Choose durable, heat-resistant materials like fire bricks, pavers, or natural stones that can withstand high temperatures. These will form the perimeter of your fire pit and should be arranged tightly to prevent any gaps.
4. **Steel or Cast Iron Ring**: For added safety and longevity, consider using a steel or cast iron fire ring. This will help maintain the shape of your pit and protect the surrounding materials from the intense heat.

### Techniques:
1. **Site Preparation**: Start by marking the area where your fire pit will sit. Dig out the designated space, ensuring it’s roughly 2-3 feet in diameter and deep enough to accommodate the gravel and sand layers.
2. **Layering**: Begin with the gravel, spreading it evenly and compacting it down to create a solid base. Next, add the sand layer, using a rake or board to ensure it’s level. This preparation will help prevent any shifting or settling over time.
3. **Arranging the Fire Pit**: Once your base is set, begin placing your chosen fireproof bricks or stones in a circular pattern. Use a level to ensure that the top of each brick is even, making adjustments as necessary. If you’re using a fire ring, set it in place at this stage.
4. **Finishing Touches**: After your fire pit walls are complete, backfill around the outside with dirt or gravel to secure the structure further. This additional layer will help with stabilization while enhancing the overall aesthetics of your backyard.

By taking the time to build a strong, well-prepared base, you’re not just constructing a fire pit; you’re creating a safe and inviting gathering space for family and friends to enjoy for years to come. Remember, a well-built fire pit base is the foundation of countless memorable evenings spent under the stars.

8. Constructing the Fire Pit Walls: Stone, Brick, or Metal?

When it comes to constructing the fire pit walls, one of the most crucial decisions you’ll make is selecting the right material. Each option—stone, brick, or metal—offers unique benefits and aesthetic appeal, allowing you to customize your fire pit to perfectly suit your backyard design.

**Stone:** Natural stone is a popular choice for fire pit walls, bringing an organic beauty that blends seamlessly with outdoor environments. Whether you opt for rugged fieldstone or sleek granite, the variations in color and texture can create a stunning visual effect. Stone is also incredibly durable, resisting the heat and elements over time. The installation process may require more effort, as you’ll need to fit the stones together securely, but the result is a rustic, timeless look that enhances your backyard’s charm.

**Brick:** If you’re looking for a classic, structured appearance, brick might be your best bet. Available in a myriad of colors and finishes, bricks can be arranged in various patterns, allowing for creative designs. They are easy to work with and can be stacked without the need for mortar, making construction straightforward for DIY enthusiasts. However, be sure to select fire-rated bricks specifically designed to withstand high heat, ensuring that your fire pit maintains its integrity over time.

**Metal:** For a modern, sleek aesthetic, consider using metal as your fire pit material. Steel or cast iron options not only provide a contemporary look but are also lightweight, making them easier to move if needed. Metal fire pits often come in pre-fabricated styles, simplifying installation. However, keep in mind that metal can heat up quickly and may require additional safety measures to prevent burns. It’s also essential to choose rust-resistant materials to ensure longevity, particularly if your fire pit will be exposed to the elements.

Ultimately, the choice between stone, brick, or metal will depend on your personal style, budget, and the overall theme of your backyard. Take the time to think about how each material will look and function in your space, and you’ll be well on your way to constructing a fire pit that becomes the heart of your outdoor gatherings.

9. Installing a Fire Pit Ring and Ventilation

Installing a fire pit ring and ensuring proper ventilation are crucial steps in creating a safe and enjoyable backyard fire pit experience. The fire pit ring acts as a barrier, containing the flames and protecting the surrounding area from heat and sparks. To start, choose a fire pit ring that suits your design aesthetic and is made from fire-resistant materials such as steel, stone, or brick. Measure the diameter of your fire pit to ensure a perfect fit—typically, a diameter of 36 to 44 inches works well for most backyard setups.

Once you’ve selected your fire pit ring, it’s time to prepare the base. Dig out the area where your fire pit will sit, making sure to remove any grass, rocks, or debris. The depth should be about 6 inches to accommodate a gravel base, which will aid in drainage and stability. Fill the hole with gravel, leveling it out to create a solid foundation for your fire pit ring.

With the base established, carefully position the fire pit ring in the center of the gravel area. Use a level to ensure it sits evenly, adjusting as needed. If you’re using bricks or stones, lay them out in a circular pattern, making sure to leave gaps for ventilation. Proper airflow is essential for maintaining a healthy fire, so consider including vents or gaps between the stones to allow oxygen to circulate.

While installing the fire pit ring, think about the height and design. A lower ring creates a more intimate atmosphere, while a taller one can help contain a larger fire. Once the ring is in place, backfill any gaps with additional gravel or sand to secure it further.

After the installation, take a moment to assess the ventilation. Ensure that there are enough openings to promote airflow without compromising the safety of the fire pit. This will help prevent smoke from billowing into your yard and allow for a more enjoyable experience for you and your guests.

With your fire pit ring securely installed and ventilation properly accounted for, you are one step closer to enjoying cozy evenings around your backyard fire pit. Remember to always prioritize safety by keeping a water source nearby and never leaving the fire unattended.

10. Choosing the Right Fuel: Wood, Gas, or Propane?

When it comes to selecting the right fuel for your backyard fire pit, understanding the pros and cons of wood, gas, and propane is essential to creating the perfect ambiance for your outdoor gatherings. Each fuel type offers a unique experience, and your choice will influence not only the warmth and light of your fire but also the ease of use and maintenance.

**Wood**: The classic choice for a fire pit, wood delivers a charming, rustic atmosphere that many homeowners crave. The crackling of burning logs and the dance of the flames create a mesmerizing backdrop for any evening. However, wood fires require more effort. You’ll need to source, store, and handle the wood, and the smoke produced can be a nuisance, especially for neighbors. If you go this route, consider using seasoned hardwoods like oak or maple, which burn hotter and cleaner than softwoods.

**Gas**: If you’re seeking convenience and consistency, a gas fire pit may be the best option. Propane or natural gas provides an instant flame with just the turn of a knob, allowing you to enjoy a fire at a moment’s notice. Gas fire pits are generally cleaner, producing little to no smoke, and they require less cleanup compared to wood-burning options. However, they may lack the rustic charm and crackle of a traditional fire. Additionally, you’ll need to ensure proper installation and safety measures, particularly with natural gas, which requires a direct line from your home.

**Propane**: A subset of gas fire pits, propane offers mobility and flexibility. Portable propane fire pits can be a great option for those who want to keep their outdoor space versatile. They can easily be moved for picnics or camping trips and don’t require a permanent installation. However, keep in mind that you’ll need to regularly refill your propane tank, which can lead to added costs and inconvenience over time.

Ultimately, the right fuel for your fire pit depends on your lifestyle, preferences, and the kind of experience you want to create in your backyard. Whether you choose the traditional allure of wood, the convenience of gas, or the flexibility of propane, each option will help set the stage for cozy evenings spent around the fire with family and friends.

11. Adding Safety Features: Fire Pit Screens and Surrounds

When it comes to enjoying your backyard fire pit, safety should always be a top priority. While the enchanting glow of flickering flames can create a cozy atmosphere, it’s essential to implement certain safety features to ensure a worry-free experience for you and your guests. Two effective additions to your fire pit setup are fire pit screens and surrounds, which not only enhance safety but also add an aesthetic touch to your outdoor space.

**Fire Pit Screens**
A fire pit screen is a mesh cover that fits over your fire pit, designed to contain sparks and embers that can unexpectedly pop out during a roaring fire. These screens are typically made from durable materials like steel or wrought iron, and they come in various styles and sizes to match your fire pit and overall backyard decor. When the flames dance within the confines of a sturdy screen, you can enjoy the warmth and ambiance without the concern of stray sparks causing harm to nearby guests or flammable materials. Many screens also feature a hinged design, allowing for easy access when adding logs or adjusting the fire, making them both a practical and stylish addition to your setup.

**Surrounds**
In addition to screens, a well-defined fire pit surround is another effective safety feature. Fire pit surrounds can be made from a variety of materials, including stone, brick, or heat-resistant paving stones, and they serve a dual purpose: enhancing safety and defining the area of your fire pit. By creating a barrier around the fire pit, you reduce the risk of accidental contact with the flames while also providing a clear boundary that helps keep children and pets at a safe distance. Additionally, a beautifully crafted surround can elevate the visual appeal of your fire pit, turning it into a focal point of your backyard. Consider incorporating seating around the surround to create an inviting gathering space where friends and family can sit comfortably while enjoying the warmth and glow of the fire.

By integrating fire pit screens and surrounds into your backyard setup, you can create a safer, more enjoyable environment for all. These features not only protect against potential hazards but also enhance the overall ambiance, allowing you to make the most of your outdoor evenings around the fire. Remember, a little preparation goes a long way when it comes to safety and enjoyment, so take the time to invest in these essential features as you create your ideal backyard retreat.

12. Designing the Surrounding Area: Seating and Landscaping Ideas

Creating a cozy and inviting atmosphere around your backyard fire pit is essential for maximizing your outdoor enjoyment. The right design can transform your fire pit into the focal point of your garden, making it a perfect spot for gatherings, relaxation, or simply enjoying a quiet evening under the stars. Here are some seating and landscaping ideas to enhance the area around your fire pit.

**Seating Options:** Start by considering the seating arrangements that will best suit your space and lifestyle. Comfortable seating is key to encouraging guests to linger around the fire. You can opt for built-in benches made from stone or wood, which can provide a rustic charm while seamlessly integrating with the natural surroundings. Alternatively, consider using a mix of lounge chairs, hammocks, or even oversized poufs for a more casual vibe. For added comfort, incorporate weather-resistant cushions in colors that complement your landscape design, ensuring your seating is as inviting as it is functional.

**Landscaping Ideas:** Surrounding your fire pit with beautiful landscaping can elevate the overall aesthetic of your backyard. Incorporate native plants and flowers that thrive in your climate, creating a vibrant tapestry of colors and textures. Low-maintenance options like ornamental grasses or perennials can provide year-round interest without the hassle of constant upkeep. If space allows, consider adding a few outdoor lanterns or string lights overhead to create a magical ambiance during evening gatherings. Additionally, using natural stone or gravel paths leading to your fire pit can help define the area while providing a rustic, organic feel.

**Creating Intimacy:** To foster a sense of intimacy around your fire pit, think about how to position your seating. Arranging chairs in a circular or semi-circular formation encourages conversation and connection among guests. You might also incorporate a small table or a firewood holder in the center, serving as a functional piece that brings the group together. If you have room, consider adding a small outdoor bar cart or a side table for snacks and drinks, making it easy for guests to help themselves.

By thoughtfully designing the surrounding area of your fire pit with comfortable seating and lush landscaping, you can create a welcoming outdoor retreat that invites friends and family to gather and enjoy warm evenings together. Whether it’s a summer soirée or a chilly autumn night, your backyard fire pit will be the perfect spot for unforgettable memories.

13. Maintenance Tips for Your Fire Pit

Maintaining your fire pit is crucial for ensuring its longevity and functionality, as well as for maximizing your enjoyment during those cozy outdoor evenings. While the thrill of gathering around the flames is often the highlight, a little TLC goes a long way in preserving the beauty and safety of your fire pit.

First and foremost, regular cleaning is essential. After each use, allow the fire pit to cool completely before removing any ash or debris. Use a sturdy metal scoop or a vacuum designed for ash to make this task easier. A clean fire pit not only looks better but also promotes better airflow, which leads to a more efficient burn in future fires.

Next, inspect your fire pit regularly for any signs of wear or damage. Look for cracks, rust, or loose components, especially if your fire pit is made of metal or stone. Addressing these issues promptly can prevent more significant repairs down the line. If you notice rust forming, consider applying a high-heat paint or sealant specifically designed for fire pit materials to restore its protective layer.

If your fire pit features a stone or brick structure, consider resealing it annually to protect against weather elements. This not only enhances its appearance but also protects against water damage and stains. Similarly, if your fire pit has a gas line, ensure that all connections are tight and check for leaks periodically, using a solution of soap and water to look for bubbles that indicate escaping gas.

Lastly, when the fire pit is not in use, consider covering it with a durable, weather-resistant cover. This will shield it from rain, snow, and debris, keeping it clean and ready for your next gathering. Proper maintenance not only enhances safety but also ensures that your backyard fire pit remains a cherished centerpiece for years to come, ready to create warmth and memories for you and your loved ones.

14. Enjoying Your Fire Pit: Tips for Safe Use and Fun Gatherings

Once you’ve built your backyard fire pit, it’s time to enjoy the warmth and ambiance it brings to your outdoor space. However, safety and enjoyment should go hand in hand. Here are some essential tips to ensure your fire pit gatherings are both fun and safe.

**Safety First: Setting the Stage**
Before inviting friends and family over for a cozy evening by the fire, take a moment to assess your surroundings. Clear the area of any flammable materials, such as dry leaves, overhanging branches, or garden furniture that could catch fire. Ensure your fire pit is a safe distance from your home, fences, and any structures. Always keep a bucket of water, sand, or a fire extinguisher nearby—just in case the flames get a little too lively.

**Choosing the Right Fuel**
Select the proper fuel for your fire pit to maintain control over the flames. Natural wood is a popular choice, providing a traditional campfire experience, but ensure it’s seasoned and dry to reduce excessive smoke. Alternatively, you can opt for propane or natural gas, which offer a cleaner burn and more controlled flames. Whichever fuel you choose, familiarize yourself with its burning characteristics to enjoy a safe and comfortable fire.

**Creating a Cozy Atmosphere**
To elevate your fire pit experience, set the mood with comfortable seating and soft lighting. Arrange chairs or benches around the fire pit, ensuring everyone has a clear view of the flames. Consider incorporating outdoor pillows and blankets for added comfort, especially on cooler evenings. String lights or lanterns can create a magical ambiance, illuminating the area without overpowering the fire’s glow.

**S’mores and Snacks: Fire Pit Favorites**
No fire pit gathering is complete without delicious snacks! Prepare classic s’mores with graham crackers, marshmallows, and chocolate for a sweet treat. You can also explore other fire pit-friendly foods like roasted corn, hot dogs, or even pizza cooked on a grill grate. Encourage guests to bring their favorite snacks, turning your gathering into a fun culinary adventure.

**Engaging Activities**
While the crackling fire provides a natural centerpiece, keep the energy flowing with engaging activities. Share stories, play acoustic music, or organize fun games like charades or card games. Encourage guests to bring their musical instruments for a lively sing-along under the stars. The key is to foster a sense of community and connection around the fire, making memories that will last long after the flames have died down.

By following these tips for safe use and enjoyable gatherings, your backyard fire pit can become the heart of your outdoor space—a place where laughter, warmth, and friendship come together. So gather your loved ones, ignite the fire, and create unforgettable moments around your newly built fire pit!

15. Conclusion: Your Backyard Oasis Awaits!

As you stand back and admire your newly constructed backyard fire pit, it’s hard not to feel a sense of accomplishment and excitement. You’ve transformed a simple patch of grass into an inviting oasis, a gathering place for friends and family to share stories, laughter, and warmth. The flickering flames dance in the night, casting a soft glow that beckons everyone to come closer, while the crackling of the fire creates a soothing soundtrack that eases the mind and spirit.

Remember, the journey doesn’t end here. Your fire pit is just the beginning of countless evenings filled with cozy conversations, marshmallow roasting, and starlit nights. As you plan your gatherings, consider adding comfortable seating, ambient lighting, and perhaps even a few cozy blankets to enhance the experience. Personal touches, like outdoor cushions or decorative lanterns, can further elevate your backyard space, making it uniquely yours.

Moreover, don’t forget to prioritize safety! Keep a fire extinguisher nearby, ensure proper ventilation, and be mindful of local regulations regarding outdoor fires. Taking these precautions will allow you to fully enjoy your fire pit without worry.

So go ahead, gather your loved ones around the flames, and let the stories unfold. With your fire pit as the centerpiece, your backyard has become a sanctuary, a place to unwind and connect. Your backyard oasis awaits—embrace it, enjoy it, and let it inspire memories that will last a lifetime. Happy fireside gatherings!

As we wrap up our ultimate guide to building your own backyard fire pit, we hope you feel inspired and equipped to create a cozy gathering spot right in your outdoor space. By following our step-by-step approach, from planning and design to construction and safety considerations, you can transform your backyard into a welcoming retreat where friends and family can come together to share stories and enjoy the warmth of a crackling fire. Remember, the journey doesn’t end once the fire pit is built; it’s just the beginning of countless memorable evenings under the stars. So grab your tools, gather your loved ones, and embark on this exciting project — your perfect backyard oasis awaits!