What are the best motorbike camping gear and accessories?

Embarking on a motorbike camping adventure is one of the most exhilarating ways to connect with nature and experience the open road.

However, to ensure your journey is not only thrilling but also comfortable and safe, having the right camping gear and accessories is essential. From lightweight tents that pack easily to versatile cooking tools that make meal prep a breeze, the world of motorbike camping gear is vast and ever-evolving. In this ultimate guide, we will explore the must-have items that will elevate your camping experience, allowing you to embrace the freedom of the ride while enjoying the comforts of home under the stars. Whether you’re a seasoned rider or a newcomer eager to hit the trails, gear up with our carefully curated selection, and prepare to make unforgettable memories on the open road!

1. Introduction to Motorbike Camping

What are the best motorbike camping gear and accessories?
Credit : whatcanu.com

Motorbike camping is more than just a weekend getaway; it’s an exhilarating escape into the great outdoors on two wheels. Picture this: the open road stretches ahead, the wind whips through your hair, and the thrill of adventure beckons as you embark on a journey to explore breathtaking landscapes, serene camping spots, and hidden gems off the beaten path. Whether you’re cruising along coastal highways, navigating winding mountain roads, or traversing rugged terrain, motorbike camping combines the freedom of riding with the joys of camping, creating a unique experience that appeals to both nature lovers and motorcycle enthusiasts alike.

This vibrant activity allows riders to immerse themselves in nature while enjoying the camaraderie of fellow bikers. With every mile you cover, the world unfolds before you, revealing stunning vistas, picturesque campsites, and an array of wildlife waiting to be discovered. However, to make the most of your motorbike camping experience, having the right gear and accessories is essential. From lightweight tents designed for easy packing to versatile cooking equipment that makes meal prep a breeze, the right gear can enhance your adventure and keep you comfortable on the road.

In this guide, we will delve into the must-have motorbike camping gear and accessories that every rider should consider. Whether you’re a seasoned biker or a novice eager to hit the trails, this comprehensive overview will equip you with everything you need for an unforgettable journey. So, rev up your engines, pack your bags, and let’s hit the road to explore the exciting world of motorbike camping!

2. Choosing the Right Motorcycle for Camping Adventures

When embarking on a camping adventure, the motorcycle you choose can make all the difference in the world. Not all bikes are created equal, especially when it comes to handling the unique challenges of the open road and the rugged terrain that often accompanies camping trips. To ensure your journey is as enjoyable as possible, consider the following factors when selecting the right motorcycle for your camping escapades.

First and foremost, think about the type of terrain you’ll be traversing. If your adventures will take you along unpaved trails and backcountry roads, an adventure or dual-sport bike may be your best option. These motorcycles are designed to handle both on-road and off-road conditions, providing the versatility needed for any camping excursion. Models like the BMW GS series or the Honda Africa Twin are excellent choices, boasting robust suspensions and ample ground clearance to navigate rocky paths and muddy trails with ease.

On the other hand, if you plan to stick to scenic highways and well-maintained roads, a touring motorcycle could be the ticket for comfort and storage capacity. Touring bikes such as the Harley-Davidson Electra Glide or the Honda Gold Wing come equipped with spacious saddlebags, comfortable seating, and advanced technology, making long-distance travel a breeze. With these bikes, you can carry all your camping gear without sacrificing comfort on those extended rides.

Another crucial aspect to consider is the weight of the motorcycle. Heavier bikes may provide more stability on the highway but can be cumbersome when navigating tight trails or during low-speed maneuvers. Conversely, lighter models offer increased agility and ease of handling, which can be invaluable when tackling tricky inclines or rough patches. Striking a balance between weight and stability will enhance your overall riding experience, allowing you to focus on enjoying the journey rather than wrestling with your machine.

Lastly, don’t overlook the importance of ergonomics and rider comfort. A camping trip often involves long hours in the saddle, so finding a motorcycle that suits your body type and riding style is essential. Test ride different models to identify which one feels the most comfortable for you, paying attention to seat height, handlebar position, and footpeg placement.

Ultimately, the right motorcycle for camping adventures is one that aligns with your personal preferences, the type of terrain you plan to explore, and your comfort level on the road. By taking the time to choose wisely, you’ll set the stage for countless memorable journeys through the great outdoors, where every ride brings new discoveries and every campsite tells a story.

3. Essential Camping Gear for Motorcyclists

What are the best motorbike camping gear and accessories?
Credit : whatcanu.com

When it comes to motorbike camping, the right gear can make all the difference between a memorable adventure and a frustrating experience. As a motorcyclist, your camping gear needs to be not only functional but also compact and lightweight to fit snugly on your bike. Here are some essential camping gear items that should be on every motorcyclist’s packing list.

**1. Tent:** Look for a tent that is specifically designed for motorcycle camping. These tents are generally lightweight, easy to set up, and compact enough to be strapped to your bike without taking up too much space. Consider a tent that can accommodate both you and your gear, offering enough room to ensure comfort after a long ride.

**2. Sleeping Bag:** A good sleeping bag is crucial for a restful night after a day on the road. Choose a sleeping bag that is lightweight and packable, with an appropriate temperature rating for the climate you’ll be camping in. Mummy-style bags are often favored for their thermal efficiency and compactness.

**3. Sleeping Pad:** Comfort is key when it comes to a good night’s sleep. A sleeping pad adds insulation and cushioning between you and the ground. Look for inflatable or foam pads that pack down small, yet provide enough support for a restful sleep.

**4. Cooking Gear:** Cooking on the road can be an enjoyable part of the camping experience. A compact camping stove, lightweight cookware, and reusable utensils are must-haves. Many motorcyclists prefer a multi-fuel stove, as it can run on various fuel types, making it versatile for different locations.

**5. Portable Water Filter:** Access to clean drinking water is essential, and a portable water filter can be a lifesaver in remote areas. This lightweight device allows you to drink safely from natural water sources, reducing the need to carry heavy water bottles.

**6. Multi-tool:** A high-quality multi-tool is indispensable for any motorcyclist. It can assist in minor repairs on the road, help prepare food at the campsite, or serve various other purposes. Look for one that includes a knife, screwdriver, pliers, and other useful tools.

**7. First Aid Kit:** Safety should always be a priority. A compact first aid kit tailored for outdoor adventures can address minor injuries and emergencies. Make sure it includes essentials like adhesive bandages, antiseptic wipes, pain relievers, and any personal medications.

**8. Storage Solutions:** efficient packing is crucial for motorcycle camping. Consider dry bags and compression sacks to keep your gear organized and protected from the elements. These will ensure that your equipment remains dry and compact throughout your journey.

Equipping yourself with the right camping gear not only enhances your comfort but also allows you to embrace the spirit of adventure that comes with motorcycle camping. By selecting high-quality, lightweight, and functional gear, you’ll be well on your way to creating unforgettable memories on the open road.

4. Lightweight Tents: Top Picks for Bikers

When it comes to motorbike camping, the weight and packability of your gear can make or break your adventure. A lightweight tent is not just an accessory; it’s an essential companion that ensures you can camp comfortably without being weighed down on your journey. The right tent should be easy to set up, durable enough to withstand the elements, and compact enough to fit snugly on your bike. Here are some top picks that cater specifically to the needs of bikers:

1. **Big Agnes Copper Spur HV UL2**: Renowned for its ultralight design, this tent offers a generous amount of space while remaining incredibly packable. Weighing in at just under 3 pounds, it features a unique pole design that enhances its stability against wind and rain. With two doors for easy access and ample headroom, the Copper Spur is perfect for two riders looking to share a campsite.

2. **MSR Hubba NX 2**: This tent strikes a perfect balance between durability and weight. Weighing around 3.5 pounds, the Hubba NX is designed to handle various weather conditions, thanks to its robust waterproof rainfly and sturdy construction. The tent’s versatile design allows for quick setup and offers excellent ventilation, making it an ideal choice for bikers who want a reliable shelter.

3. **Nemo Hornet 2P**: For those who prioritize weight above all else, the Nemo Hornet is a dream come true. At just 2 pounds, this tent is one of the lightest on the market without sacrificing comfort. Its unique design includes vestibules for gear storage and a spacious interior that allows for a comfortable night’s sleep. The Hornet is particularly appreciated by solo bikers or those who prefer to travel light.

4. **Sea to Summit Telos TR2**: This tent is not only lightweight but also impressively innovative. With a pack weight of 3.5 pounds, the Telos TR2 features a unique tension ridge design that maximizes livable space. Its easy pitch system and excellent ventilation make it a favorite among bikers who often encounter variable weather conditions. Plus, the added features like gear lofts and internal pockets help keep your camping essentials organized.

When selecting a lightweight tent for motorbike camping, consider the specific features that match your touring style. Look for tents that offer quick setup, weather resistance, and a compact pack size. Investing in the right tent will not only enhance your camping experience but also ensure that you can focus on the open road without the burden of heavy gear. The right lightweight tent can transform your motorbike camping experience from a simple overnight stay into a cozy retreat under the stars, making every stop along your journey a memorable one.

5. Sleeping Bags vs. Sleeping Pads: What You Need

What are the best motorbike camping gear and accessories?
Credit : whatcanu.com

When it comes to a comfortable night’s sleep under the stars, the choice between sleeping bags and sleeping pads can significantly impact your motorbike camping experience. Both serve critical roles in your outdoor setup, but understanding their distinct benefits will help you make an informed decision that suits your needs.

**Sleeping Bags:**
A good sleeping bag is your ultimate cocoon of warmth and comfort. Designed to trap heat while allowing for some breathability, sleeping bags come in various shapes—mummy, rectangular, and semi-rectangular—each catering to different preferences and weather conditions. Mummy bags are ideal for colder climates, featuring a snug fit that maximizes insulation, while rectangular bags offer more room to move around, making them a great choice for summer camping. When selecting a sleeping bag, consider the temperature rating, as it indicates the lowest temperature at which you can expect a comfortable night’s sleep. Additionally, materials like down and synthetic insulation offer varying levels of warmth, weight, and packability, so choose one that aligns with your specific camping conditions.

**Sleeping Pads:**
While a sleeping bag keeps you warm, a sleeping pad provides the essential cushioning and insulation from the ground. Sleeping pads come in two primary types: inflatable and foam. Inflatable pads are compact and lightweight, making them perfect for motorbike campers who prioritize space and weight. They can provide excellent insulation value, but their durability can be a concern in rugged terrains. On the other hand, foam pads are virtually indestructible and provide a reliable layer of comfort, though they can be bulkier to pack. When choosing a sleeping pad, consider the R-value, which measures its insulation capability; a higher R-value is necessary for colder temperatures.

**Finding the Right Combination:**
For the ultimate sleeping setup, many campers opt for a combination of both a sleeping bag and a sleeping pad. This pairing not only enhances comfort but also ensures that you are protected from the chill of the ground. A properly chosen sleeping bag will keep you cozy, while a well-insulated sleeping pad will shield you from the cold earth below. Don’t forget to test your gear at home before hitting the road—after all, a restful night can make all the difference between a great adventure and a miserable one.

In summary, both sleeping bags and sleeping pads are essential gear for any motorbike camping trip. By carefully selecting the right combination to suit your personal comfort preferences and the climate conditions you expect to encounter, you can ensure that your nights spent under the stars are as enjoyable as your daytime adventures.

6. Cooking Gear: Portable Stoves and Utensils

When it comes to motorbike camping, one of the most enjoyable aspects is the opportunity to whip up a delicious meal in the great outdoors. However, to transform your campsite into a culinary haven, investing in the right cooking gear is essential. Portable stoves and utensils are not just luxuries; they are must-have items that can elevate your camping experience from basic to gourmet.

**Portable Stoves: Compact Yet Powerful**

A portable stove is the cornerstone of any camping kitchen. Look for options that are lightweight and foldable, making them easy to stow away on your bike without taking up precious space. Many modern camping stoves run on propane, which burns cleanly and is readily available at outdoor supply stores. Some models even feature multiple burners, allowing you to cook several dishes at once—perfect for those hearty breakfasts or multi-course dinners under the stars.

Consider the cooking power and efficiency of your stove, as you’ll want something that can heat up quickly and handle a variety of cooking styles, from boiling water for coffee to sautéing vegetables. Some stoves come with windshields to protect the flame from breezy conditions, ensuring you can cook comfortably regardless of the weather.

**Essential Utensils: Lightweight and Versatile**

Alongside your stove, don’t forget about the utensils that will make your cooking experience smoother. A set of lightweight, collapsible pots and pans is essential. Look for materials like titanium or aluminum, which are durable and conduct heat efficiently. A good pot set usually includes a frying pan, a saucepan, and possibly a kettle for boiling water.

In addition to cookware, a comprehensive utensil kit is vital. This should include a spatula, a ladle, and a multi-tool that features a can opener, bottle opener, and knife. Opt for utensils that are made from heat-resistant materials to prevent melting and can withstand the rigors of outdoor cooking.

**Food Storage and Preparation**

Lastly, consider your food storage needs. Invest in compact, airtight containers to keep your ingredients fresh and protected from wildlife. A portable cutting board and a good knife are also essential for meal prep. Look for boards that can double as a plate to save space.

With the right cooking gear, your motorbike camping trips will not only satisfy your hunger but also serve as an opportunity to showcase your culinary skills amidst breathtaking natural backdrops. So gear up, fire up that portable stove, and enjoy the delicious meals that await you on your next adventure!

7. Hydration Solutions: Water Bottles and Filters

What are the best motorbike camping gear and accessories?
Credit : whatcanu.com

When it comes to motorbike camping, staying hydrated is not just a preference; it’s a necessity. The great outdoors can be unforgiving, and maintaining proper hydration is crucial for both your health and your enjoyment of the adventure. In this section, we’ll explore essential hydration solutions that will keep you refreshed on your journey: water bottles and filtration systems.

First and foremost, investing in a high-quality water bottle is essential. Look for durable, lightweight options that can withstand the rigors of the road while fitting snugly in your bike’s storage. Stainless steel bottles are a popular choice, as they keep your water cool on hot days and are resistant to rust and leaks. Many models now come with insulated walls, ensuring you can enjoy a refreshing drink no matter how long you’ve been riding.

However, simply carrying water isn’t always enough, especially if you’re venturing far from civilization. This is where portable water filters come into play. Compact and easy to use, these filters allow you to source water from natural bodies, such as rivers or lakes, effectively removing bacteria and impurities. Look for filters with a high flow rate and a lightweight design that won’t add unnecessary bulk to your gear. Brands like Sawyer and Katadyn offer excellent options that are trusted by outdoor enthusiasts.

Additionally, consider accessories like hydration packs, which can be worn like a backpack with a built-in water reservoir and a convenient drinking tube. This hands-free option lets you sip water on the go, ensuring you stay hydrated without having to stop and reach for your bottle.

Finally, don’t overlook the importance of electrolyte solutions. When you’re sweating on the trail or under the sun, your body loses vital minerals that need to be replenished. Carry electrolyte tablets or powders that can easily dissolve in your water, providing an energy boost when you need it most.

By equipping yourself with reliable water bottles and filtration systems, you’ll ensure that hydration is one less thing to worry about on your motorbike camping adventures. So gear up, stay hydrated, and hit the road with confidence!

8. Clothing Essentials for Comfort and Safety

When it comes to motorbike camping, the right clothing can make all the difference between an enjoyable adventure and an uncomfortable ordeal. Prioritizing comfort and safety is essential, as the open road can expose you to varying weather conditions and potential hazards. Here are the clothing essentials that every motorbike camper should pack to ensure a safe and comfortable journey.

**1. Protective Riding Gear:** At the top of the list is a high-quality riding jacket and pants made from durable materials like leather or textile. Look for gear with armor protection at key impact areas—shoulders, elbows, and knees. Ventilation zippers and moisture-wicking linings can help manage temperature and sweat on warm days, while thermal liners can provide extra warmth during chilly nights.

**2. Base Layers:** Comfort begins with what’s next to your skin. Invest in moisture-wicking base layers that keep you dry and comfortable during long rides. These should include both tops and bottoms, as they help regulate body temperature and prevent chafing, allowing you to focus on the scenery rather than discomfort.

**3. Weather-Resistant Outerwear:** The unpredictability of weather is a given in motorbike camping. A reliable waterproof and windproof outer layer, such as a rain suit or a dedicated waterproof riding jacket, is invaluable. This will protect you from the elements during unexpected downpours or chilly gusts while also keeping your base layers dry.

**4. Footwear:** Your choice of footwear can greatly influence your riding experience. Opt for sturdy, waterproof riding boots that offer ankle protection and excellent grip. Look for boots with breathable linings for comfort during long rides, and don’t forget to pack a pair of camp shoes, like lightweight sandals or slip-ons, for relaxing around the campsite.

**5. Gloves:** A good pair of riding gloves not only enhances grip and control over your bike but also protects your hands from the elements and potential injuries. Choose gloves that provide a balance of dexterity and protection, with features like reinforced palms and knuckle protection, and consider options with waterproof capabilities for rainy rides.

**6. Layered Accessories:** Don’t overlook the importance of accessories like neck gaiters, balaclavas, and beanies. These items can provide extra warmth and protection against wind and sun, ensuring that every part of your body is comfortable during your journey. A pair of quality sunglasses or goggles is also essential for shielding your eyes from glare and debris.

By carefully selecting your clothing essentials for motorbike camping, you not only enhance your comfort and safety on the road but also ensure that you can fully embrace the freedom of the ride. With the right gear, you’ll be ready to tackle any terrain or weather condition, making every camping experience unforgettable. So gear up, hit the road, and enjoy the adventure that awaits!

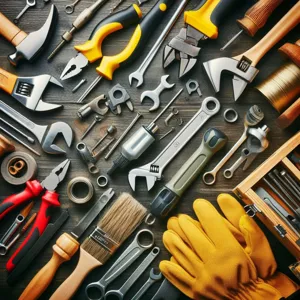
9. Tools and Repair Kits: Be Prepared on the Road

When embarking on a motorbike camping adventure, the thrill of the open road is accompanied by the potential for unexpected challenges. That’s why packing the right tools and repair kits is not just a smart decision—it’s essential for ensuring a worry-free journey. You never know when you might encounter a flat tire, a loose bolt, or any number of mechanical issues, and being prepared can make all the difference between a minor inconvenience and a major headache.

Start with the basics: a multi-tool is your best friend in the wild, combining several functions into one compact device. Look for one that includes pliers, screwdrivers, a knife, and even a can opener. It’s a versatile addition that can handle a multitude of small repairs. Next, don’t overlook a tire repair kit that includes patches, tire levers, and a compact pump. Flat tires are one of the most common issues bikers face, and being able to fix one on the spot will save you valuable time in the great outdoors.

Additionally, consider packing a small first-aid kit tailored to your needs. Accidents happen, and having bandages, antiseptic wipes, and pain relief medications can help you address minor injuries promptly. Lastly, a portable jump starter can be a lifesaver if your battery decides to give out in the middle of nowhere.

By equipping yourself with the right tools and repair kits, you’re not just preparing for the road ahead; you’re ensuring that your adventure continues smoothly, allowing you to focus on the breathtaking landscapes and the freedom of riding. After all, the journey is just as important as the destination, and being prepared helps you enjoy every moment of it!

10. Navigation Gear: Maps, GPS, and Apps

When it comes to motorbike camping, having reliable navigation gear is essential for both safety and enjoyment. The open road is beckoning, but without a clear path, even the most adventurous spirit can find themselves lost in the wilderness. Investing in a combination of traditional maps, gps devices, and modern apps can make all the difference in ensuring a smooth journey.

**Traditional Maps:** While digital navigation has become the norm, there’s something reassuring about a physical map. Maps can provide a broader perspective of the area you’re exploring, highlighting not just main roads but also hidden trails and scenic routes that a GPS might overlook. When you’re deep in the woods and your phone loses signal, a paper map can be your lifeline. Consider packing a waterproof map case to protect it from the elements and ensure it lasts throughout your trip.

**GPS Devices:** A dedicated GPS unit designed for motorcyclists is an invaluable tool. These devices are built to withstand the rigors of outdoor use and often come equipped with features tailored for two-wheeled travel, such as route optimization for curves and inclines. Many models also offer spoken turn-by-turn directions, allowing you to keep your eyes on the road while navigating unfamiliar terrain. Look for units with offline capabilities to ensure you’re never left without guidance, even in remote areas.

**Mobile Apps:** In the age of smartphones, navigation apps have revolutionized the way we explore. Apps like Google Maps, Waze, and specialized motorcycle apps such as Rever or Calimoto provide real-time traffic updates, route planning, and even community-generated content about the best roads and camping spots. Make sure to download maps for offline use, as cell service can be spotty in rural areas. Additionally, utilizing a sturdy phone mount on your bike allows for easy access to directions while keeping your hands free.

Combining these navigation tools—maps for the big picture, GPS for precision, and apps for flexibility—will empower you to embrace the open road with confidence. With the right gear at your side, you can focus on the adventure ahead, knowing that every twist and turn is just a part of the journey. Whether you’re heading to a secluded campsite or discovering hidden gems along the way, effective navigation gear will keep you on track and enhance your motorbike camping experience.

11. Packing Techniques: How to Maximize Space

When it comes to motorbike camping, packing efficiently is crucial to ensure you have everything you need without compromising on space or stability. Unlike traditional camping, where you might have the luxury of a car trunk, the limited storage of a motorcycle demands clever packing techniques. Here are some strategies to help you maximize every inch of available space.

**1. Choose the Right Luggage:** Investing in the right luggage system is the first step in effective packing. Soft-sided bags, like roll-top dry bags, conform to the shape of your bike and can be squeezed into tight spots. Hard cases, while sturdy, require more precise packing, so consider your travel style and choose accordingly.

**2. Use Compression Sacks:** For items like sleeping bags and clothing, compression sacks are a game changer. These bags allow you to pack down bulky items to a fraction of their size, freeing up room for other essentials. Aim for lightweight materials that are durable and waterproof to withstand the elements.

**3. Organize with Pouches:** Keep your gear organized and accessible by using small pouches or packing cubes. Group similar items together—first aid supplies, cooking gear, and clothing, for instance. This not only saves time when you’re digging through your luggage but also ensures you’re making the most of available space.

**4. Roll, Don’t Fold:** When packing clothing, rolling your items can save space while preventing wrinkles. This technique allows you to fit more into your bags and ensures that you can easily spot what you need without rummaging through piles of folded clothes.

**5. Utilize Every Nook and Cranny:** Don’t overlook the small spaces on your bike. Stash lightweight items like a rain jacket or snacks in the gaps between your panniers or under your seat. Even the small pocket of your tank bag can hold essentials like maps or your phone for easy access.

**6. Balance Your Load:** Proper weight distribution is key to a stable ride. Pack heavier items lower and towards the center of the bike to maintain balance, while lighter items can be placed higher or further out. This not only enhances handling but also reduces the risk of damaging your gear.

**7. Plan for Accessibility:** Consider the order in which you pack your gear, keeping frequently used items easily accessible. If you anticipate needing your cooking gear first, pack it on top or in a side bag, ensuring that you won’t have to unpack everything just to make a cup of coffee.

By mastering these packing techniques, you’ll be well on your way to enjoying a seamless and enjoyable motorbike camping experience. With careful planning and a strategic approach, you can carry all the essentials you need while maximizing space and maintaining balance on your ride. Happy camping!

12. Safety Gear: First Aid Kits and Emergency Accessories

When embarking on a motorbike camping adventure, safety should always be at the forefront of your planning. One of the most crucial elements of safety gear is a well-stocked first aid kit, tailored specifically for the rigors of the road and the unpredictability of the outdoors. A comprehensive first aid kit should include essentials such as adhesive bandages, antiseptic wipes, gauze, tweezers, and pain relief medication. Additionally, consider including items like a thermal blanket, emergency whistle, and a pair of scissors, which can be invaluable in unexpected situations.

But first aid kits are just the beginning of your safety preparations. Equally important are emergency accessories that can assist you in various situations. A tire repair kit is essential for any long-distance ride—flat tires can occur at the most inconvenient times, and being prepared can save you from being stranded. Similarly, a portable jump starter can be a lifesaver if your battery dies in the middle of nowhere.

Don’t forget about personal safety items like a high-visibility vest or reflective gear. These can make a significant difference during low-light conditions, ensuring that other motorists can see you. A multi-tool is another versatile piece of equipment that shouldn’t be overlooked; it can assist you in making various adjustments on the fly, whether it’s tightening a loose bolt or performing minor repairs on your camping gear.

Lastly, consider investing in a personal locator beacon (PLB). This small device can be a game-changer in emergency situations, allowing you to send a distress signal and your location to emergency services, even in the most remote areas.

By prioritizing safety gear, including a robust first aid kit and essential emergency accessories, you’ll not only enhance your own safety but also ensure peace of mind as you explore the great outdoors on your motorbike. The right preparation can transform your adventure from a daunting challenge into a thrilling experience, allowing you to focus on the stunning landscapes and unforgettable memories that await.

13. Tech Gadgets: Must-Have Electronics for Campers

In today’s world, tech gadgets have become indispensable companions for campers, especially for those hitting the road on their motorbikes. The right electronics can enhance your camping experience, providing convenience, safety, and even a touch of luxury amidst the rugged wilderness. Here’s a roundup of must-have tech gadgets that every motorbike camper should consider packing.

**Portable Power Banks:** Staying charged is essential, whether it’s for your phone, GPS, or camera. A high-capacity portable power bank can be a lifesaver. Look for models that are rugged, waterproof, and capable of charging multiple devices at once. Some even come with solar charging capabilities, allowing you to harness the sun’s energy during your outdoor adventures.

**Action Cameras:** Capture the thrill of the ride and the beauty of nature with an action camera. These compact devices are built to withstand the elements, providing stunning video and photo quality. Mount it to your helmet or bike for exhilarating shots of your journey, or set it up at your campsite to document the serene moments under the stars.

**GPS Navigation Systems:** While the thrill of exploration is part of motorbike camping, getting lost in the wilderness can be daunting. A reliable GPS navigation system designed for motorcycles can provide real-time directions, track your route, and even highlight points of interest along the way. Many models come with offline capabilities, ensuring you won’t lose your way even in remote areas.

**Bluetooth Speakers:** Enjoying music or podcasts while you unwind at your campsite can make the experience even more enjoyable. A compact, waterproof Bluetooth speaker is perfect for sharing tunes with fellow campers or simply setting the mood as you relax. Look for speakers with long battery life and impressive sound quality to enhance your outdoor ambiance.

**LED Lanterns and Headlamps:** As the sun sets, having adequate lighting is crucial for safety and comfort. LED lanterns can illuminate your campsite, while headlamps offer hands-free lighting for cooking, setting up your tent, or navigating after dark. Choose rechargeable options with multiple brightness settings to suit different needs.

**Smartphone Apps:** Don’t underestimate the power of your smartphone to enhance your camping adventure. There are numerous apps available that cater specifically to campers, providing everything from trail maps to weather forecasts, campsite reviews, and cooking recipes. Download essential apps before you head out to ensure you’re well-prepared for anything.

**Portable Wi-Fi Hotspots:** For those who want to stay connected while enjoying the great outdoors, a portable Wi-Fi hotspot can be a worthwhile investment. Whether you need to check in with family, share your adventures on social media, or simply catch up on news, having reliable internet access can provide peace of mind during your trip.

Incorporating these tech gadgets into your motorbike camping gear not only enhances your convenience and safety but also enriches your overall experience in the wild. As you prepare for your next adventure, consider how these electronics can help you stay connected, capture memories, and enjoy the great outdoors to the fullest.

14. Tips for Organizing Your Gear on a Bike

When it comes to motorbike camping, organization is key to a smooth and enjoyable adventure. With limited space on a bike, effective packing can make all the difference between a cluttered ride and a well-orchestrated journey. Here are some essential tips for organizing your gear on a bike, ensuring you have everything you need while maximizing your efficiency and comfort.

**1. Choose the Right Luggage**: Start with quality luggage designed for motorbikes. Hard-shell cases offer durability and weather protection, while soft bags can be more flexible and lightweight. Consider options like tank bags, saddlebags, and tail bags that attach securely to your bike. Each type of bag serves a purpose; for example, a tank bag is perfect for quick access to essentials like maps, snacks, or your phone.

**2. Prioritize Weight Distribution**: Balance is crucial when organizing your gear. Distribute weight evenly across your bike to maintain stability during your ride. Place heavier items closer to the bike’s center of gravity, such as in the saddlebags, and lighter items in the tail bag or tank bag. This not only aids in handling but also improves comfort on long rides.

**3. Use Packing Cubes or Compression Bags**: To save space and keep your gear organized, utilize packing cubes or compression bags for your clothing and sleeping gear. These handy tools minimize bulk and allow you to categorize items, making it easy to find what you need without rummaging through a pile of bags.

**4. Create a Gear Checklist**: Before hitting the road, develop a comprehensive checklist of everything you’ll need for your camping trip. This list should include camping gear, cooking supplies, clothing, and toiletries. Check off items as you pack them, which not only ensures you don’t forget anything but also helps you visualize how everything fits on your bike.

**5. Keep Essentials Accessible**: Think about the items you’ll need most frequently throughout your ride or at your campsite, such as a first-aid kit, snacks, or a rain jacket. Store these in easily accessible locations, like the top of your saddlebags or in a side pocket of your tank bag. Quick access can be a game-changer in adverse weather or when you need to make a quick stop.

**6. Secure Your Load**: Lastly, always double-check that your gear is securely fastened before you ride. Use straps, bungee cords, or netting to keep your bags from shifting or coming loose during your journey. Not only does this prevent potential accidents, but it also ensures that your gear remains intact and ready for use whenever you reach your destination.

By following these organizing tips, you’ll not only optimize your space but also enhance your overall camping experience. With everything in its rightful place, you can focus on enjoying the open road and the great outdoors, knowing that you’re well-prepared for whatever adventure lies ahead.

15. Conclusion: Enjoying the Journey with the Right Gear

As we reach the conclusion of our exploration into the essential motorbike camping gear and accessories, it’s important to reflect on the heart of the adventure: enjoying the journey. The open road and the great outdoors beckon, offering a unique blend of freedom and excitement that only motorbike camping can provide. However, the key to fully embracing this experience lies in being well-prepared with the right gear.

From lightweight tents that can withstand unexpected weather to compact cooking equipment that allows you to whip up a hearty meal after a long day on the road, each item plays a crucial role in enhancing your adventure. The right gear not only ensures your comfort but also adds to your safety, allowing you to focus on the beauty around you rather than the challenges of the journey.

Moreover, investing in quality accessories—such as portable chargers, versatile multi-tools, and comfortable riding gear—can significantly elevate your camping experience. These items not only make life on the road easier but also contribute to memorable moments as you traverse varied landscapes, meet fellow bikers, and forge connections with nature.

So, as you plan your next motorbike camping trip, remember that the gear you choose will directly impact the joy and ease of your travels. Embrace the adventure, stay prepared, and enjoy the ride—after all, it’s not just about the destination; it’s about the journey itself. With the right gear in tow, you can create unforgettable memories under the stars, all while riding through the breathtaking tapestry of the world. Happy camping!

As we wrap up our ultimate guide to must-have motorbike camping gear and accessories, we hope you feel inspired and equipped to embark on your next adventure with confidence. The right gear can transform your camping experience, ensuring comfort, safety, and convenience on the open road. From durable tents to compact cooking tools, each item on our list is designed to enhance your journey and allow you to fully immerse yourself in the beauty of nature. So, gear up, hit the trails, and embrace the thrill of motorbike camping. Share your experiences with us, and don’t forget to tag us in your camping photos—happy riding and happy camping!

How to Handle Car Maintenance During the Spring?

As winter fades and the vibrant blooms of spring begin to emerge, it’s the perfect time to give your vehicle the attention it deserves.

Just like the changing seasons, your car requires a seasonal refresh to ensure it runs smoothly and safely on the road. After months of cold weather, salt, and grime, spring is the ideal moment to spring into action with essential car maintenance tips that will keep your ride in top shape. From inspecting your tires for proper tread and inflation to refreshing your fluids and checking your brakes, this guide will walk you through crucial steps to prepare your vehicle for spring adventures. So, buckle up and get ready to revitalize your car, ensuring it’s ready to tackle the open road with confidence and style as the sunny days ahead beckon for road trips and outdoor escapades!

1. Introduction: The Importance of Seasonal Car Maintenance

How to Handle Car Maintenance During the Spring?
Credit : whatcanu.com

As the chill of winter fades and the vibrant blooms of spring emerge, it’s not just nature that requires a little TLC—your vehicle does too! Seasonal car maintenance is crucial for ensuring your car runs smoothly and safely, especially after the wear and tear of harsh weather conditions. The transition into spring brings unique challenges, from fluctuating temperatures to the onset of rain and pollen, which can affect your vehicle’s performance and longevity.

Spring is the perfect time to assess your car’s health, as the milder weather allows for more comfortable inspections and repairs. Ignoring this critical maintenance can lead to a host of problems, including decreased fuel efficiency, compromised safety, and costly repairs down the line. By taking proactive measures, you can enhance your vehicle’s reliability and enjoy worry-free drives as you embark on road trips or weekend getaways.

In this guide, we’ll explore essential car maintenance tips tailored for the spring season, ensuring your vehicle is not only ready for the challenges ahead but also primed for optimal performance. Whether you’re a seasoned car owner or new to vehicle upkeep, these tips will empower you to spring into action and give your car the care it deserves.

2. Check Your Fluids: Oil, Coolant, and Brake Fluid Levels

As the warmth of spring sweeps in and the roads become more inviting, it’s the perfect time to give your vehicle a thorough check-up, starting with its essential fluids. Ensuring that your oil, coolant, and brake fluid levels are at their optimal levels is crucial for the performance and longevity of your car.

**Oil** is the lifeblood of your engine, ensuring that all moving parts operate smoothly and efficiently. As winter’s chill fades, it’s important to check your oil level and its condition. If it appears dark and gritty, consider an oil change to keep your engine running smoothly. Not only does fresh oil enhance performance, but it also improves fuel efficiency, allowing you to enjoy those spring road trips without breaking the bank.

Next up is **coolant**, which plays a vital role in regulating your engine’s temperature. With rising temperatures, the last thing you want is to overheat on a sunny day. Inspect your coolant reservoir to ensure it’s filled to the recommended level. If your coolant looks rusty or has a strange odor, it might be time for a flush and refill. Keeping your cooling system in check not only prevents overheating but also protects vital engine components from damage.

Lastly, don’t overlook your **brake fluid**. Brakes are one of the most crucial safety features of your vehicle, and maintaining the right fluid level ensures they function properly. If your brake fluid is low, it could indicate a leak or wear in the brake system. Check the fluid’s clarity; if it appears murky or dark, it’s time for a brake fluid replacement. A well-maintained brake system is essential for safe driving, especially as you venture out for those spring adventures.

Taking the time to check these essential fluids not only enhances your vehicle’s performance but also ensures your safety on the road. So, roll up your sleeves and give your car the care it deserves this spring—you’ll be ready for the open road in no time!

3. Inspect and Replace Worn Wiper Blades

How to Handle Car Maintenance During the Spring?
Credit : whatcanu.com

As the winter snows melt away and spring showers make their appearance, ensuring your wiper blades are in top condition is vital for safe driving. The last thing you want is to be caught in a downpour with streaky, ineffective wipers that barely clear your windshield. Wiper blades endure a lot throughout the colder months, from freezing temperatures to ice and snow, which can lead to wear and tear that compromises their performance.

Start by inspecting your wiper blades visually. Look for any signs of cracking, fraying, or stiffness in the rubber. A quick test involves turning on your wipers and observing their movement—do they leave streaks, skip across the glass, or make annoying squeaking sounds? If so, it’s time to replace them.

When shopping for new wiper blades, remember that they come in various sizes and types, so consult your vehicle’s manual or check with a knowledgeable auto parts store to ensure you choose the right fit. Many modern wiper blades also feature advanced technologies, such as silicone-infused rubber that lasts longer and offers better performance in wet conditions.

Replacing your wiper blades is a simple task that can usually be accomplished in just a few minutes. Most blades feature a quick-release mechanism, allowing you to remove the old wipers and snap the new ones into place with minimal effort. Once installed, take a moment to test them out. A clear view of the road ahead is essential, especially during those spring rainstorms, and fresh wiper blades can make all the difference in your visibility and safety.

By prioritizing the inspection and replacement of worn wiper blades this spring, you’ll not only enhance your driving experience but also show your vehicle some much-needed love after the harsh winter months. Don’t wait until the rain begins—make this essential maintenance task a part of your spring car care routine!

4. Tire Maintenance: Checking Tread Depth and Pressure

As the temperatures begin to rise and the days grow longer, spring serves as the perfect reminder to give your tires the attention they deserve. Tire maintenance is crucial not only for your vehicle’s performance but also for your safety on the road. Start by checking the tread depth, which is vital for ensuring optimal traction, especially as rain showers become more frequent in the spring months. You can easily assess tread depth using the penny test: insert a penny into the tread with Lincoln’s head facing down. If you can see the top of his head, it’s time to replace those tires.

Next, don’t overlook tire pressure. Fluctuating temperatures can cause air to expand or contract, potentially leading to under-inflated or over-inflated tires. Use a reliable tire pressure gauge to check that each tire is inflated to the manufacturer’s recommended psi, which can usually be found on a sticker inside the driver’s side door or in the owner’s manual. Maintaining the correct tire pressure not only improves fuel efficiency but also enhances handling and extends the life of your tires.

As you complete your spring maintenance checklist, consider rotating your tires to ensure even wear, which promotes longevity and better performance. By taking these simple yet essential steps, you’ll not only ensure a smoother ride but also prepare your vehicle to handle whatever the season throws your way. Remember, well-maintained tires are your first line of defense against unexpected spring weather, so don’t skip this critical aspect of car care!

5. Battery Care: Testing and Cleaning Terminals

How to Handle Car Maintenance During the Spring?
Credit : whatcanu.com

As the seasons shift and the warmth of spring begins to thaw the winter chill, it’s the perfect time to give your car’s battery some well-deserved attention. A car battery can often be overlooked, but it plays a crucial role in ensuring your vehicle runs smoothly. This spring, make it a priority to test and clean your battery terminals, setting the stage for a reliable driving experience.

Start by checking the battery’s charge. If your battery is older than three years, consider having it tested at an auto parts store or by a professional. Most places offer this service for free, and it can save you from unexpected breakdowns down the road. A fully charged battery should read around 12.6 volts or higher; anything lower may indicate that it’s time for a replacement.

Once you’ve assessed the battery’s health, it’s essential to clean the terminals. Over time, battery terminals can accumulate corrosion, which appears as a white, powdery substance around the connectors. This buildup can hinder electrical flow, leading to poor performance or starting issues. To clean the terminals, you’ll need a mixture of baking soda and water. Apply this solution to the terminals with a soft brush or cloth, scrubbing away any corrosion. Afterward, rinse with clean water and dry thoroughly.

Additionally, ensure the battery connections are tight but not overly so; a snug fit helps prevent future corrosion and ensures a good electrical connection. For added protection, consider applying a thin layer of petroleum jelly or a specialized battery terminal protector to the terminals. This creates a barrier against moisture and grime, helping to keep your battery in peak condition.

By taking the time to test and clean your battery this spring, you’ll not only enhance your vehicle’s performance but also extend the life of your battery. With a bit of care and attention, you can enjoy peace of mind knowing your car is ready to take on whatever adventures the season has in store.

6. Brake System Inspection: Ensuring Safety on the Road

As the days grow longer and the temperatures rise, spring is the perfect time to give your car’s brake system a thorough inspection. After months of winter driving, your brakes may have faced harsh conditions, including icy roads and salt accumulation, which can compromise their effectiveness. Ensuring your brake system is in top shape is vital not only for your safety but also for the safety of others on the road.

Start by checking the brake pads for any signs of wear. If you hear a squeaking or grinding noise when braking, this could indicate that your pads are worn down and need replacing. Additionally, inspect the brake rotors for any grooves or discoloration, as these can also signal the need for maintenance. A smooth and even surface is essential for optimal braking performance.

Don’t forget to examine the brake fluid level in the reservoir. Low brake fluid can lead to decreased braking efficiency and may indicate a leak in the system. If the fluid appears dark or contaminated, it’s time for a change. Regularly flushing and replacing the brake fluid is crucial for maintaining hydraulic pressure within the brake lines.

Finally, take a moment to test the brake pedal itself. It should feel firm and responsive when pressed. If you notice any sponginess or excessive travel, it’s a sign that there may be air in the brake lines or a more serious issue that needs addressing.

By taking the time to inspect your brake system this spring, you’re not only extending the life of your vehicle but also ensuring a safe driving experience as you embark on your seasonal adventures. Remember, a well-maintained brake system is your first line of defense on the road, and it’s worth every effort to keep it in peak condition.

7. Air Filter Replacement: Enhancing Engine Performance

How to Handle Car Maintenance During the Spring?
Credit : whatcanu.com

As the days grow longer and warmer, it’s the perfect time to give your vehicle some much-needed attention. One often-overlooked aspect of car maintenance is the air filter, a small yet crucial component that plays a significant role in enhancing your engine’s performance. Over time, air filters accumulate dirt, dust, and debris, restricting airflow and hindering the engine’s ability to breathe freely. This can lead to a decrease in fuel efficiency and a noticeable decline in performance.

Replacing your air filter during spring not only ensures that your engine operates smoothly but also helps improve its longevity. A clean air filter allows for optimal air intake, which is essential for the combustion process. This means better fuel efficiency, more power, and reduced emissions—benefits that are not only good for your wallet but also for the environment.

Typically, air filters should be replaced every 12,000 to 15,000 miles, but it’s wise to inspect them regularly, especially if you frequently drive in dusty or polluted areas. When you pop the hood to check your air filter, look for signs of discoloration and debris buildup. If it looks dirty, it’s time for a replacement. This simple task can be done at home with minimal tools, or you can have it done at your local mechanic.

By taking the initiative to replace your air filter this spring, you’ll not only enhance your engine’s performance but also enjoy a smoother and more efficient ride. So, roll up your sleeves, and give your car the breath of fresh air it deserves!

8. Belts and Hoses: Inspect for Wear and Tear

As the cold winter months give way to the refreshing warmth of spring, it’s the perfect time to give your vehicle some much-needed attention. Among the most critical components to inspect during this seasonal maintenance is your car’s belts and hoses. These unsung heroes play a vital role in keeping your engine running smoothly, and neglecting them can lead to costly repairs down the road.

Start by visually inspecting the belts under the hood. Look for signs of wear, such as fraying edges, cracks, or significant discoloration. The serpentine belt, which powers several engine components, should be in particularly good shape, as any failure here can instantly derail your driving plans. While you’re at it, give the timing belt a thorough check, too—if this belt breaks, it can cause severe engine damage.

Next, turn your focus to the hoses. These flexible tubes are responsible for transporting essential fluids throughout your vehicle, including coolant and oil. Check for leaks, bulges, or soft spots, all of which are indicators that a hose may be on the verge of failure. Pay special attention to the radiator and heater hoses, as they are subject to extreme temperature fluctuations and can degrade over time.

It’s also wise to check the clamps that secure the hoses to ensure they are tight and free of rust. A loose or corroded clamp can lead to leaks that compromise your engine’s performance, especially as temperatures rise in the spring.

By taking the time to inspect your belts and hoses now, you can help ensure your vehicle remains in prime condition for the driving months ahead. Remember, a little proactive maintenance can save you from major headaches later on. So, roll up your sleeves, pop that hood, and give your car the spring check-up it deserves!

9. Light It Up: Checking and Replacing Bulbs

As the days grow longer and the sun shines brighter during the spring, it’s the perfect time to ensure that your vehicle’s lighting system is in top shape. Properly functioning lights are crucial for safe driving, especially as we transition from the darker winter months to brighter days. This is not just about visibility; it’s about being seen by others on the road.

Start by inspecting all your vehicle’s lights, including headlights, taillights, brake lights, turn signals, and fog lights. A simple walk-around can help you identify any burnt-out bulbs or dim lights. If you’re unsure, ask a friend to help you check the lights while you operate the controls from inside the car.

When replacing bulbs, opt for high-quality options that match your vehicle’s specifications. LED bulbs are a popular choice due to their longevity and brightness, offering enhanced visibility compared to traditional incandescent bulbs. Check your owner’s manual for the correct bulb type and wattage, as using the wrong bulb can lead to electrical issues or inadequate lighting.

Additionally, don’t forget about your interior lights. These may seem minor, but they play an essential role in your comfort and safety while driving at night. If you find any burnt-out bulbs in the cabin, replacing them will enhance your overall driving experience.

Finally, take advantage of this opportunity to clean your headlights. Over time, they can become cloudy or yellowed, which reduces their effectiveness. A simple DIY cleaning solution or a commercial headlight restoration kit can bring back their clarity, ensuring you maximize your visibility on the road.

By giving your vehicle’s lighting system some attention this spring, not only will you enhance your safety, but you’ll also enjoy a more enjoyable and worry-free driving experience as the season unfolds. So light it up and drive with confidence!

10. Clean and Protect Your Car’s Exterior

As winter fades and spring blooms, it’s the perfect time to give your car the care it deserves, starting with a thorough cleaning and protective treatment for its exterior. The harsh winter months can leave your vehicle covered in salt, grime, and debris, which can cause long-term damage if not addressed. Begin with a complete wash, focusing on the undercarriage to remove any lingering salt that can corrode metal parts.

Once your car is sparkling clean, it’s time to inspect its paintwork. Look for any scratches or blemishes that may have developed over the winter. Applying a high-quality wax not only enhances the shine but also provides a protective layer against the elements. Wax acts as a barrier against UV rays, bird droppings, tree sap, and other contaminants that can dull your car’s finish.

For those looking to take their care routine a step further, consider using a sealant or ceramic coating. Unlike traditional wax, these products offer longer-lasting protection and can make cleaning easier in the future. Don’t forget to pay attention to your wheels as well—cleaning and applying a wheel protectant can prevent brake dust from accumulating and keep them looking sharp.

Finally, spring is also a great time to check your windshield wipers and windows. Clean your windows inside and out for better visibility and replace any worn wiper blades. With these steps, you’ll not only enhance your car’s appearance but also ensure it’s ready to take on the adventures that spring has to offer. A well-maintained exterior isn’t just about aesthetics; it’s about preserving the value of your vehicle for years to come.

11. Interior Maintenance: Vacuuming and Conditioning

As the vibrant colors of spring emerge and the sun begins to shine brighter, it’s the perfect time to refresh the interior of your vehicle. While exterior washing often takes the spotlight, interior maintenance is equally essential for both the aesthetics and longevity of your car. Start by giving your cabin a thorough vacuuming. Remove floor mats, seat covers, and any trash or debris that may have accumulated over the winter months. Pay special attention to hard-to-reach areas, such as under the seats and in between crevices, where crumbs and dirt can easily hide.

Once the vacuuming is complete, it’s time to condition the surfaces inside your car. Use a quality automotive interior cleaner to wipe down the dashboard, center console, and door panels. This not only eliminates dust but also helps rejuvenate materials like vinyl, leather, and plastic, preventing them from cracking or fading due to sun exposure. If your seats are leather, consider applying a specialized leather conditioner to maintain their softness and shine.

Don’t forget about the windows and mirrors—cleaning them will enhance visibility and reduce glare from the sun. Finally, consider adding an air freshener to create a pleasant driving environment, making every journey more enjoyable as you embrace the season. By dedicating some time to vacuuming and conditioning your car’s interior, you’ll not only enhance your driving experience but also boost your vehicle’s resale value down the road.

12. Spring Cleaning: Removing Winter Gear from Your Car

As the frost melts away and the first buds of spring emerge, it’s time to give your car a thorough spring cleaning—starting with the removal of winter gear. The colder months often lead to a buildup of bulky items that served their purpose during frigid weather but are now just taking up valuable space in your vehicle.

Begin by clearing out heavy blankets, snow scrapers, and any emergency winter supplies you no longer need. While these items are essential for icy roads, they can add unnecessary weight to your car and clutter your interior. Check your trunk, glove compartment, and backseat for items like de-icers, ice scrapers, and even old snow boots that may have found their way into your car after a long day at the slopes.

Next, take a moment to assess your tires. Winter tires, while excellent for gripping icy roads, may need to be swapped out for all-season or summer tires as temperatures rise. This not only ensures optimal performance but can also enhance fuel efficiency.

Once you’ve cleared out the winter gear, give your car a good wash—inside and out. Remove any lingering salt and grime from the exterior, which can cause corrosion over time, and vacuum the interior to rid it of the dirt and debris that often accumulate during winter. Don’t forget to clean the windows, allowing the spring sunshine to stream through and brighten your driving experience.

By taking the time to remove winter gear and refresh your car’s interior, you’ll not only create a more pleasant driving environment but also set the stage for the adventures that lie ahead as the weather warms up. Spring cleaning your car is not just about tidiness; it’s a vital step in maintaining its value and ensuring it’s ready for the road ahead.

13. Preparing for Road Trips: Essential Checks Before Travel

As the days grow longer and the weather warms up, spring is the perfect time to hit the road and explore new destinations. But before you rev up your engine and set off on your adventure, it’s crucial to ensure your vehicle is ready for the journey ahead. Proper preparation can not only enhance your driving experience but also keep you safe and prevent unexpected breakdowns.

Start with a thorough inspection of your tires—check for proper inflation and tread depth. Worn or under-inflated tires can significantly affect your car’s handling and fuel efficiency, making them a critical aspect of your pre-trip checklist. Don’t forget to examine the spare tire as well; you want to make sure it’s in good condition, just in case of emergencies.

Next, give your brakes some attention. Whether you hear squeaking or grinding sounds or feel vibrations when pressing the brake pedal, it’s essential to address any issues before your trip. A quick visit to your mechanic can ensure your brakes are functioning optimally, providing peace of mind on winding roads or steep hills.

Fluids are the lifeblood of your vehicle, so check your oil, coolant, brake fluid, and windshield washer fluid levels. Dirty oil can lead to engine wear, while insufficient coolant can cause overheating, especially during the warmer months. Top off any low fluids, and consider scheduling an oil change if it’s been a while since your last service.

Don’t forget about your battery! Springtime can bring unpredictable weather, and a dead battery can ruin a lovely day out. Inspect the terminals for corrosion and ensure the battery is holding a charge. If it’s showing signs of age or you’ve had trouble starting your car recently, it might be time for a replacement.

Lastly, equip your car with an emergency kit stocked with first-aid supplies, water, non-perishable snacks, and essential tools. You never know what you might encounter on the road, and being prepared can make all the difference.

With these essential checks completed, you can hit the open road with confidence, knowing your vehicle is ready for whatever adventures await. So pack your bags, grab your travel companions, and embrace the spirit of spring with unforgettable road trips!

14. Finding a Trusted Mechanic for Professional Maintenance

When it comes to ensuring your vehicle runs smoothly and efficiently, finding a trusted mechanic is paramount. A reliable professional can make all the difference in maintaining your car’s health and longevity, especially as you prepare for the demands of the spring driving season.

Start by seeking recommendations from friends, family, or coworkers who have had positive experiences with local mechanics. Online reviews and ratings can also provide valuable insights into the reputation of a shop. Look for a mechanic who is not only well-reviewed but also specializes in your vehicle’s make and model, as this can significantly enhance the quality of service.

Once you have a shortlist, consider visiting the shops to get a feel for the environment. A clean, organized workspace often reflects the quality of work performed. Don’t hesitate to ask questions about their qualifications, experience, and the services they offer. A good mechanic will be happy to explain their processes and discuss any necessary repairs or maintenance in detail.

Additionally, assess their communication style. A trustworthy mechanic should be willing to take the time to explain issues in layman’s terms and provide transparent pricing estimates. It’s essential to establish a relationship based on trust and open communication, as this will make it easier for you to return for future maintenance needs.

Lastly, consider starting with a small service, like an oil change or a tire rotation, to gauge their effectiveness before committing to more significant repairs. By taking the time to find a mechanic you can rely on, you’ll not only ensure your car receives the best possible care but also gain peace of mind as you hit the open road this spring.

15. Conclusion: Enjoying a Smooth Spring Drive!

As we wrap up our essential car maintenance tips for the spring season, it’s time to reflect on the joy that comes with hitting the open road in a well-maintained vehicle. The arrival of spring brings not only warmer weather but also the promise of new adventures, whether it’s a leisurely drive through blooming landscapes or a spontaneous weekend getaway. By following the maintenance checklist we’ve outlined, you can ensure that your car is in peak condition, ready to handle the unique demands of the season.

From checking your tires and brakes to refreshing your fluids and inspecting your wipers, each step plays a crucial role in enhancing your vehicle’s performance and reliability. A smooth ride is not just about comfort; it’s about safety and peace of mind as you navigate through spring showers and longer daylight hours.

So, take a moment to appreciate the beauty around you as you drive. With your car in top shape, you can fully embrace the spirit of the season, enjoying every twist and turn of the road ahead. Remember, regular maintenance not only prolongs the life of your vehicle but also enhances the driving experience, allowing you to focus on what truly matters—making memories and enjoying the journey. Happy spring driving!

As we embrace the vibrant energy of spring, it’s the perfect time to give your vehicle the attention it deserves. We hope this guide on essential car maintenance tips has equipped you with the knowledge and inspiration to spring into action and ensure your car is ready for the adventures ahead. From checking fluid levels to inspecting your tires, each step we’ve outlined will not only enhance your vehicle’s performance but also extend its lifespan. Remember, a well-maintained car is your ticket to safe travels and enjoyable road trips as the weather warms up. So, roll up your sleeves, gather your tools, and get started on that spring maintenance checklist—your car will thank you, and you’ll be ready to hit the road with confidence! Happy driving!

What are the best tools for a beginner DIYer?

Embarking on the journey of DIY projects can be both exhilarating and intimidating, especially for beginners eager to unleash their creativity and craftsmanship.

Whether you’re looking to transform a room, tackle small repairs, or craft unique decor, having the right tools at your disposal is crucial to your success. In this comprehensive guide, we will explore the essential tools every beginner DIYer should own, ensuring you’re equipped to take on a variety of projects with confidence and ease. From the versatile hammer and trusty screwdriver to innovative gadgets that can elevate your handiwork, each tool serves as a building block in your DIY toolkit. Join us as we delve into the must-have items that will not only simplify your tasks but also inspire you to tackle your next project like a pro!

1. Introduction to DIY: Why Every Beginner Should Start

What are the best tools for a beginner DIYer?
Credit : whatcanu.com

In the world of home improvement and creative projects, the do-it-yourself (DIY) movement has gained remarkable traction, encouraging individuals to take control of their spaces and express their creativity. For beginners, diving into DIY can seem daunting at first, but the rewards are plentiful and well worth the effort. Not only does embracing DIY empower you to transform your home with personal touches, but it also cultivates a sense of accomplishment and self-sufficiency.

Starting your DIY journey opens the door to a wealth of opportunities. Whether you’re looking to spruce up your living room with a handmade shelf, tackle that long-overdue garden project, or even create personalized gifts for loved ones, the possibilities are endless. It’s about more than just home improvement; it’s about harnessing your creativity and learning new skills along the way. Each project completed, no matter how small, builds your confidence and enhances your problem-solving abilities, making you more equipped for future endeavors.

Moreover, DIY is a fantastic way to save money. Instead of hiring professionals for every little task, you can tackle many projects on your own with just a few essential tools and a bit of guidance. As you gain experience, you’ll discover that many projects can be completed for a fraction of the cost, allowing you to invest your savings into even more ambitious undertakings.

In this comprehensive guide, we’ll explore the essential tools every beginner DIYer should own, ensuring that you are well-equipped to embark on this rewarding journey. From the basic toolkit to specialized equipment, we’ll break down what you need to get started and help you build a solid foundation for your DIY adventures. So grab your safety goggles, roll up your sleeves, and let’s explore the exciting world of DIY!

2. Safety First: Essential Safety Gear for DIY Projects

When diving into the world of DIY, safety should always be your top priority. Whether you’re tackling small home repairs or embarking on ambitious renovation projects, investing in essential safety gear is crucial to protect yourself from potential hazards. Here’s a breakdown of the must-have safety equipment every beginner DIYer should own.

**1. Safety Glasses:** One of the simplest yet most effective pieces of safety gear, safety glasses shield your eyes from flying debris, dust, and harmful vapors. Look for a pair that fits comfortably and provides a snug seal around your eyes. Whether you’re drilling, sanding, or cutting, your eyes deserve protection.

**2. Hearing Protection:** Power tools can be loud, and prolonged exposure to high decibel levels can lead to hearing loss. Invest in a good pair of earplugs or earmuffs to minimize noise pollution, especially when using saws, drills, or other heavy machinery. Not only will this help preserve your hearing, but it will also allow you to focus better on your task.

**3. Dust Masks or Respirators:** Dust and fumes can pose serious health risks, particularly when working with materials like wood, drywall, or certain chemicals. A simple dust mask can filter out large particles, but for more toxic substances, consider a respirator that offers a higher level of filtration. Make sure it fits properly to ensure effective protection.

**4. Work Gloves:** Protecting your hands is essential when working with tools and materials. Choose work gloves that offer a good grip and are made from durable materials. Whether you’re handling rough wood, sharp tools, or hot surfaces, gloves provide the necessary barrier against cuts, scrapes, and burns.

**5. Steel-Toed Boots:** If you’re going to be moving heavy materials or using tools that could fall, steel-toed boots are a must. They protect your feet from heavy objects and provide additional support and stability, reducing the risk of injuries.

**6. First Aid Kit:** Accidents happen, even with the best precautions. Having a well-stocked first aid kit on hand ensures you’re equipped to handle minor injuries, from cuts and bruises to more serious mishaps. Make sure to include adhesive bandages, antiseptic wipes, gauze, and any personal medications you might need.

**7. High-Visibility Vest:** If you’re working outdoors or in low-light conditions, a high-visibility vest can help ensure you’re seen, especially if you’re sharing your workspace with others. This is particularly important during larger projects or when operating near traffic.

By equipping yourself with these essential safety tools, you’ll not only make your DIY experience safer but also more enjoyable. Always remember, taking the time to protect yourself allows you to focus on your projects with confidence and creativity!

3. Hand Tools Every Beginner Should Have

What are the best tools for a beginner DIYer?
Credit : whatcanu.com

When embarking on your DIY journey, having the right hand tools is essential to ensure not only efficiency but also the quality of your projects. A well-equipped toolbox can empower you to tackle a variety of tasks, from simple repairs to more intricate creations. Here’s a comprehensive list of hand tools every beginner should consider adding to their toolkit.

**1. Claw Hammer:** The backbone of any DIY toolkit, a claw hammer is indispensable for driving nails into wood and for removing them when necessary. Opt for a hammer that feels comfortable in your hand and has a good weight balance for optimal control.

**2. Screwdriver Set:** A versatile screwdriver set that includes both flathead and Phillips-head screwdrivers is crucial. Look for a set with varying sizes to accommodate different screws. Magnetic tips can also be a great feature, making it easier to hold screws in place while you work.

**3. Tape Measure:** Precision is key in DIY, and a sturdy tape measure ensures you take accurate measurements every time. A 25-foot tape is a common choice for beginners, as it strikes a balance between portability and reach.

**4. Utility Knife:** A reliable utility knife is a must-have for cutting various materials, from cardboard to rope. Look for a knife with a retractable blade for safety and ease of use, as well as a comfortable grip for those extended projects.

**5. Pliers:** A pair of pliers can provide a strong grip for holding, twisting, or cutting wires and small objects. Needle-nose pliers are particularly useful for reaching into tight spaces, while standard pliers can handle general tasks.

**6. Level:** Ensuring that your projects are straight and level is crucial for both aesthetics and functionality. A simple bubble level can help you achieve perfectly aligned shelves, frames, or fixtures.

**7. Adjustable Wrench:** An adjustable wrench is invaluable for loosening or tightening nuts and bolts of various sizes. Its versatility makes it a staple in any beginner’s toolkit, allowing you to tackle plumbing tasks or furniture assembly with ease.

**8. Safety Gear:** While not a traditional hand tool, investing in safety gear is essential. Safety goggles protect your eyes from debris, while gloves can prevent cuts and blisters during your DIY adventures.

By equipping yourself with these fundamental hand tools, you’ll be well-prepared to handle a wide range of projects, from minor repairs to creative endeavors. As you gain experience and confidence, you can expand your toolkit with specialized tools tailored to your specific interests, but starting with these essentials will set you on the right path to successful DIYing.

– 3.1. Hammer

A hammer is perhaps the quintessential tool in any DIY enthusiast’s arsenal, serving as both a symbol and a cornerstone of craftsmanship. Whether you’re hanging pictures, assembling furniture, or tackling home repairs, a reliable hammer is indispensable.

When selecting a hammer, consider the weight and type that best suits your projects. For general DIY tasks, a standard claw hammer—typically weighing between 16 and 20 ounces—is ideal. This versatile tool features a flat striking surface on one end for driving nails into wood and a curved claw on the other for pulling them out with ease. The balance of weight and usability makes it perfect for both beginners and seasoned DIYers alike.

The handle material also plays a crucial role in comfort and durability. Wooden handles offer a classic feel, while fiberglass or rubber grips provide shock absorption and a non-slip surface, reducing hand fatigue during extended use. Take the time to find a hammer that feels good in your hand, as this will make your DIY projects much more enjoyable.

As you embark on your DIY journey, remember that a hammer isn’t just a tool; it’s an extension of your creativity and capability. With the right hammer in hand, you’ll be empowered to transform your ideas into reality, one nail at a time. So, whether you’re crafting a beautiful piece of furniture or renovating a room, don’t underestimate the power of this simple yet essential tool.

– 3.2. Screwdrivers

What are the best tools for a beginner DIYer?
Credit : whatcanu.com

### 3.2 Screwdrivers

A sturdy and reliable set of screwdrivers is an absolute essential for any beginner DIYer. These versatile tools are not only crucial for assembling furniture and tightening loose screws but also play a vital role in countless home improvement projects. When selecting screwdrivers, it’s important to consider both the variety and quality of the tools in your kit.

Start with a set that includes both flathead and Phillips screwdrivers in various sizes. Flathead screwdrivers, with their single flat blade, are perfect for slotted screws, while Phillips screwdrivers, characterized by their cross-shaped tip, provide better grip and torque. Investing in magnetic screwdrivers can also be a game-changer; the magnetic tip helps hold screws in place, making it easier to work in tight spaces without the frustration of dropped fasteners.

It’s also worth considering a ratcheting screwdriver, which allows for quick and efficient tightening and loosening of screws without the need to reposition the tool after each turn. For those who want to take their DIY skills to the next level, a multi-bit screwdriver can be incredibly handy. This tool features interchangeable bits, allowing you to tackle various screw sizes and types without cluttering your workspace with multiple tools.

Remember to pay attention to the handle design as well. Ergonomic handles provide a comfortable grip, reducing hand fatigue during longer projects. A well-balanced screwdriver not only enhances control but also makes it easier to apply the necessary force without straining your wrist.

Ultimately, having a reliable set of screwdrivers will empower you to tackle everything from simple repairs to complex installations with confidence. As you embark on your DIY journey, make sure to keep these essential tools within easy reach, and you’ll find that many of your projects will become far less daunting!

– 3.3. Pliers

### 3.3. Pliers

Pliers are a cornerstone of any DIY toolkit, offering versatility and grip that can handle a multitude of tasks. From bending and twisting wires to gripping and pulling objects, these handy tools come in various shapes and sizes, each designed for specific functions.

**Types of Pliers:**
1. **Needle-Nose Pliers:** With their long, tapered jaws, needle-nose pliers are perfect for reaching into tight spaces and manipulating small objects. Whether you’re working with delicate electronics or intricate jewelry designs, these pliers provide the precision needed for intricate tasks.

2. **Slip-Joint Pliers:** Often referred to as adjustable pliers, these feature a movable pivot point that allows you to adjust the jaw width, making them ideal for gripping items of different sizes. They are particularly useful for plumbing tasks or when you need a stronger grip on a larger object.

3. **Cutting Pliers:** Equipped with sharp edges, cutting pliers are designed for snipping wires and cables. They come in handy for electrical projects, allowing you to cleanly cut through materials without fraying or damaging them.

4. **Locking Pliers:** Also known as Vise-Grips, these pliers can lock onto an object, providing a secure grip without requiring constant pressure from your hand. They are excellent for clamping materials together or holding tight in awkward positions while you work on a project.

**Why You Need Pliers:**
Having pliers in your toolbox offers you the flexibility to tackle a wide range of DIY projects with confidence. They empower you to handle tasks that require precision, strength, or a delicate touch. Whether you’re assembling furniture, fixing appliances, or crafting your next home décor project, pliers can be the unsung heroes of your toolkit.

**Care and Maintenance:**
To ensure your pliers last for years, it’s essential to keep them clean and lubricated. After each use, wipe down the jaws and joints to remove debris and prevent rust. Regularly check for any signs of wear, and if you notice any rust, use a wire brush or rust remover to clean them up. Properly maintaining your tools not only extends their life but also enhances their performance, helping you get the job done seamlessly.

In summary, pliers are an indispensable tool for any beginner DIYer. Their ability to grip, twist, cut, and hold makes them a must-have in your growing collection, paving the way for successful and enjoyable projects.

– 3.4. Measuring Tape

What are the best tools for a beginner DIYer?
Credit : whatcanu.com

### 3.4. Measuring Tape

A measuring tape is an indispensable tool for any DIY enthusiast, serving as the backbone of every successful project. Whether you’re hanging shelves, laying flooring, or crafting custom furniture, precise measurements are crucial to achieving a professional finish, and a measuring tape is your best ally in ensuring accuracy.

Typically extending up to 25 feet or more, a standard measuring tape features a flexible metal or fiberglass blade, allowing you to easily navigate around corners and awkward spaces. The markings on the tape are usually in both inches and centimeters, making it versatile for various projects and user preferences. Look for a model with a locking mechanism, which will hold your measurement in place, providing you with the stability needed when marking cuts or drilling holes.

Moreover, the durability of a measuring tape is an essential factor to consider. Opt for one that’s sturdy and can withstand the wear and tear of frequent use. Some tapes even come with added features like a magnetic hook or an easy-to-read standout, which can make measuring larger distances much easier.

In addition to its primary function, a measuring tape can also spark creativity. As you measure out spaces and envision your projects, you may discover new possibilities for layout, design, and functionality. Whether you’re a weekend warrior or diving into more ambitious home improvement projects, having a reliable measuring tape on hand will not only save you time but will also prevent costly mistakes. So, make sure this versatile tool is part of your essential DIY toolkit, and watch your projects come to life with precision and flair!

4. Power Tools for the Aspiring DIYer

When it comes to tackling more ambitious projects, power tools are game changers for the aspiring DIYer. These tools not only save time and effort but also expand the range of tasks you can confidently undertake. As you venture into the realm of home improvement, having the right power tools can make all the difference in achieving professional-looking results.

**1. Cordless Drill/Driver:** This versatile tool should be at the top of your list. Whether you’re assembling furniture, hanging shelves, or performing minor renovations, a cordless drill makes drilling holes and driving screws a breeze. Opt for a model with adjustable speed settings and a range of drill bits for added flexibility.

**2. Circular Saw:** Perfect for cutting lumber, plywood, and other materials with precision, a circular saw is indispensable for larger projects. Its portability allows you to work both indoors and outdoors, and its ability to make straight cuts quickly can save you hours of manual labor.

**3. Jigsaw:** For intricate cuts and curves, a jigsaw is the tool to have. This handheld saw allows you to create detailed shapes and designs in wood, plastic, or metal. With various blade types available, you can tackle a wide variety of materials, making it a must-have for creative DIY projects.

**4. Sander:** Achieving a smooth finish is essential in any DIY project. A power sander, whether it’s a belt sander for large surfaces or a palm sander for finer details, will help you eliminate rough edges and prepare your materials for painting or staining.

**5. Impact Driver:** When it comes to driving long screws or tackling tough materials, an impact driver is a powerhouse. It delivers high torque and rapid bursts of power, making it easier to drive screws without stripping them. This tool is particularly useful for outdoor projects or heavy-duty applications.

**6. Oscillating Multi-Tool:** This multi-functional tool can cut, sand, scrape, and grind, making it remarkably versatile. It’s perfect for tight spaces and detailed work, such as removing grout or trimming door frames. The oscillating motion reduces the risk of damaging surrounding materials, making it a safe choice for beginners.

As you begin your DIY journey, investing in these essential power tools will not only enhance your efficiency but also empower you to take on a broader range of projects. With practice and the right tools in hand, you’ll find that your confidence and skills will grow, transforming your home and projects one task at a time.

– 4.1. Cordless Drill

### 4.1. Cordless Drill

A cordless drill is an indispensable tool that every DIY beginner should consider as a cornerstone of their toolkit. Versatile and easy to use, this powerful device simplifies a variety of tasks, from assembling furniture and installing shelves to drilling holes in walls and tightening screws. The freedom of movement that a cordless drill provides—without the hassle of tangled cords or needing to find a power outlet—makes it an ideal companion for both indoor and outdoor projects.

When selecting a cordless drill, look for a model that strikes a balance between power and weight. A lightweight drill will be easier to handle for extended periods, while one with sufficient torque will ensure that it can tackle tougher jobs without straining. Many models come with adjustable speed settings, allowing you to switch between a slow speed for precise drilling and a higher speed for faster tasks.

Another key feature to consider is the battery life. Opt for a drill with a lithium-ion battery, which offers a longer lifespan and faster charging times compared to traditional batteries. Some drills come with interchangeable battery packs, ensuring you won’t be left stuck mid-project with a dead battery.

Additionally, a cordless drill often includes a variety of drill bits and driver heads, expanding its usability for different materials and tasks. Investing in a set with multiple attachments will enhance your toolkit and enable you to tackle a wider range of projects right from the start.

In summary, a cordless drill is not just a tool; it’s a gateway to unlocking your DIY potential. With its ease of use and multifunctionality, it empowers you to take on projects with confidence and creativity, ensuring that you can efficiently bring your ideas to life. Whether you’re hanging art, assembling that bookshelf you’ve been eyeing, or tackling home repairs, having a reliable cordless drill by your side will make all the difference.

– 4.2. Circular Saw

### 4.2 Circular Saw

A circular saw is an essential tool that every beginner DIYer should have in their arsenal. Renowned for its versatility and power, this tool can make quick work of a variety of cutting tasks, from lumber and plywood to metal and plastic. The circular saw is designed with a toothed blade that spins rapidly, allowing it to slice through materials with precision and ease.

For the novice, the circular saw might seem intimidating at first glance, but its user-friendly design makes it accessible to all skill levels. Most models feature a comfortable grip and lightweight construction, which can help reduce fatigue during extended use. Additionally, many circular saws come with adjustable cutting depths and angles, offering you the flexibility to tackle different projects, whether you’re building a deck, crafting furniture, or simply making home repairs.

When selecting a circular saw, consider the size of blade you need. Typically, a 7 1/4-inch blade is the most common and offers a good balance between power and portability. Furthermore, look for features like a laser guide or LED light, which can greatly improve accuracy when cutting.

Safety is paramount when using a circular saw, so ensure you invest in protective gear, such as safety goggles and hearing protection. Before you begin any project, always be sure to read the manufacturer’s instructions and familiarize yourself with the tool’s settings and controls.

By incorporating a circular saw into your DIY toolkit, you’ll not only enhance your cutting capabilities but also open the door to a world of creative possibilities. Whether you’re planning ambitious renovations or simple home improvements, this tool is sure to become a go-to favorite in your DIY endeavors.

– 4.3. Sander

### 4.3. Sander

A sander is an indispensable tool for any DIY enthusiast looking to achieve that flawless finish on their projects. Whether you’re working with wood, metal, or even plastic, a sander can make all the difference in the quality of your work. For beginners, investing in a versatile sander can save you a considerable amount of time and effort while ensuring a professional-looking result.

There are several types of sanders available, but two of the most beginner-friendly options are the orbital sander and the detail sander. An orbital sander is perfect for larger surfaces, like tabletops or cabinets, as it uses circular sanding pads to smooth out rough areas and prepare surfaces for painting or staining. Its random orbit motion helps to prevent swirl marks, making it ideal for achieving a smooth finish on all kinds of wood.

On the other hand, a detail sander is designed for those hard-to-reach corners and intricate areas. Its triangular shape allows you to navigate tight spaces with ease, making it perfect for sanding furniture edges, intricate moldings, or the seams of your DIY projects. With the right sandpaper grits, you can transition from rough sanding to fine finishing, ensuring every nook and cranny is perfectly smooth.

When using a sander, remember to wear appropriate safety gear, such as a dust mask and goggles, to protect yourself from fine particles. Additionally, always follow the manufacturer’s instructions for optimal performance and safety. As you become more experienced, you’ll find that a sander is not just a tool, but an extension of your creative vision, allowing you to transform raw materials into beautiful finished pieces. Embrace the power of sanding, and watch as your DIY projects come to life with a polished touch!

5. Essential Hardware and Fasteners

When embarking on your DIY journey, having the right hardware and fasteners at your fingertips is crucial for ensuring your projects are sturdy, safe, and aesthetically pleasing. These small yet mighty components often make the difference between a well-finished project and a flimsily assembled piece that falls apart at the slightest touch.

**Nails and Screws:** Start with a diverse collection of nails and screws in various sizes and types. Common wood screws, drywall screws, and finishing nails are essential for a range of tasks, from assembling furniture to securing wall fixtures. Consider investing in a screw organizer to keep them sorted and accessible.

**Anchors and Wall Fasteners:** For projects that require mounting items to walls, such as shelves or picture frames, wall anchors are indispensable. They provide extra support and prevent screws from pulling out of the wall. Choose between plastic, metal, or toggle bolts, depending on the weight of the items you’re hanging.

**Brackets and Hangers:** These hardware pieces are essential for adding strength and support to your projects. Corner brackets and L-brackets can reinforce joints, while shelf brackets can help you create sturdy shelving solutions. Don’t overlook the importance of picture hangers and ceiling hooks for your decorative needs.

**Adhesives and Sealants:** Sometimes, hardware alone isn’t enough. A good adhesive can be a game-changer. Wood glue, epoxy, and super glue each have their uses, allowing for strong bonds in different materials. Sealants, such as caulking, are perfect for filling gaps and providing a finished look, especially in kitchen and bathroom projects.

**Organizational Tools:** Lastly, invest in a sturdy toolbox or a rolling organizer to keep all your hardware and fasteners neatly stored. An organized workspace not only saves you time when searching for supplies but also contributes to a more efficient and enjoyable DIY experience.

By equipping yourself with these essential hardware and fasteners, you’ll have the foundational tools necessary to tackle a wide variety of DIY projects with confidence and skill. Whether you’re assembling a bookshelf or hanging a new mirror, the right hardware will ensure your hard work stands the test of time.

6. Storage Solutions for DIY Tools

When diving into the world of DIY, having the right tools is only part of the equation; how you store and organize those tools can significantly impact your efficiency and enjoyment of projects. Proper storage solutions for DIY tools not only keep your workspace tidy but also ensure that you can easily find what you need when creativity strikes.

Start by assessing the types and quantities of tools you have. A portable toolbox is an excellent first step, allowing you to transport your essential tools to various locations around the house or even off-site projects. Look for one with a sturdy handle and compartments to keep smaller items like screwdrivers and pliers organized. For larger tools, such as power drills and saws, consider investing in a rolling tool chest. These come with multiple drawers and can easily be moved around, providing convenient access to your tools while keeping them secure and protected.

Magnetic strips and pegboards are fantastic for wall storage, enabling you to display frequently-used tools within arm’s reach. Simply mount a pegboard above your workbench, and use hooks and shelves to hang everything from hammers to tape measures. This not only maximizes vertical space but also adds a touch of organization and aesthetic appeal to your workspace.

Don’t overlook the importance of labeling. Clearly labeling boxes and bins can save you time and frustration, especially when you’re knee-deep in a project and need to grab the right tool quickly. Use clear containers for small parts like screws and nails, and make sure they are easy to see through.

Finally, consider modular storage solutions that can be customized to fit your specific needs. Whether you’re stacking bins or using interlocking storage units, modular systems allow you to adapt your storage as your tool collection grows.

In essence, having a well-thought-out storage strategy will not only help you maintain an organized workspace but also enhance your overall DIY experience, making each project more enjoyable and less stressful. With these storage solutions in place, you’ll be ready to tackle any challenge that comes your way!

7. Organizing Your Workspace

A well-organized workspace is the cornerstone of any successful DIY project, especially for beginners who may feel overwhelmed by the variety of tools and materials at their disposal. An organized workspace not only enhances productivity but also promotes safety and fosters creativity. To create an efficient environment, begin by designating a specific area in your home for your DIY projects. This space should be well-lit and have enough room to accommodate your tools, materials, and any projects you’re currently working on.

Once you have your designated area, it’s time to tackle the organization. Start with a sturdy workbench or table where you can comfortably perform your tasks. Invest in storage solutions such as toolboxes, pegboards, or shelving units to keep your tools easily accessible and neatly arranged. Categorize your tools by type—hand tools in one section, power tools in another, and smaller items like screws and nails in labeled containers. Consider using clear bins or jars for visibility, allowing you to quickly find what you need without rummaging through clutter.

Don’t forget about the importance of maintaining a clean and tidy workspace. Regularly declutter and remove any unused items that might distract you from your current project. Implement a ‘clean as you go’ policy, where you put tools back in their designated spots immediately after use. This habit not only keeps your workspace organized but also helps prevent accidents caused by misplaced tools.

Finally, personalize your workspace to inspire creativity. Add a splash of color with wall art or motivational quotes, and incorporate plants to bring a bit of nature indoors. An organized and inviting workspace will not only make your DIY endeavors more enjoyable but will also encourage you to tackle more ambitious projects as your skills grow. Remember, a little organization goes a long way in turning your DIY dreams into reality!

8. Must-Have Materials for Various Projects

When embarking on your DIY journey, having a well-stocked arsenal of materials can make all the difference in the success and enjoyment of your projects. Beyond just tools, the right materials serve as the foundation for everything you create. Here are some must-have materials that every beginner DIYer should consider keeping on hand for a variety of projects:

**1. Wood:** Whether you’re building a simple shelf, crafting a birdhouse, or constructing furniture, having a selection of wood types—like pine for its affordability and versatility, or plywood for those larger projects—will give you the flexibility to tackle numerous tasks.

**2. Paint and Stains:** A fresh coat of paint or a beautiful stain can transform any project. Stock up on a range of colors and finishes, including primers, spray paints, and sealants to protect your finished work. Remember that samples can be a great way to test colors before committing to a larger purchase!

**3. Adhesives:** From wood glue for furniture construction to super glue for quick fixes, a variety of adhesives is essential. Don’t forget about specialty glues like epoxy for tougher materials or fabric glue for textile projects.

**4. Fasteners:** Keep a supply of screws, nails, and anchors in various sizes. These small but mighty components are crucial for joining pieces together securely. A handy organizer can help keep them sorted and easy to find.

**5. Fabrics and Textiles:** If you’re venturing into sewing or upholstery, a selection of fabrics ranging from cottons to heavier materials like canvas will allow you to experiment with different projects, from curtains to cushions.

**6. Duct Tape and Painter’s Tape:** These are often overlooked but incredibly useful in countless scenarios. Duct tape is perfect for quick repairs, while painter’s tape helps achieve clean lines when painting or staining.

**7. Safety Gear:** While technically not a “material” in the traditional sense, safety gear such as gloves, goggles, and masks is essential for protecting yourself during any DIY project. Always prioritize safety to ensure that your creative endeavors are enjoyable and hazard-free.

With these essential materials at your fingertips, you’ll be well-prepared to embark on a wide variety of DIY projects. The right materials not only enhance your capabilities but also inspire creativity, allowing you to bring your unique ideas to life with confidence. Happy crafting!

9. Resources for Learning DIY Skills

As a beginner DIYer, one of the most empowering steps you can take is to invest in your knowledge. The world of DIY is vast and full of possibilities, and understanding the foundations of various skills can turn a daunting project into a rewarding experience. Fortunately, a wealth of resources is available to help you hone your DIY skills and gain confidence in your abilities.

One of the best ways to start is by exploring online tutorials and videos. Platforms like YouTube are treasure troves of DIY content, featuring step-by-step guides for everything from basic carpentry to complex plumbing. Many seasoned DIY enthusiasts share their tips, tricks, and even mistakes, offering invaluable insights that can save you time and frustration. Look for channels with high ratings and substantial followings, as these creators have often refined their methods through experience.

In addition to video content, online forums and community groups can be incredibly beneficial. Websites like Reddit and DIY-specific forums allow you to connect with other DIYers who can provide advice, share their experiences, and answer your burning questions. Engaging in these communities not only enhances your knowledge but can also inspire you to tackle new projects you might have previously thought were beyond your capabilities.

Books and magazines dedicated to DIY projects are also excellent resources. They often cover a wide range of topics, from basic home repairs to intricate craft projects, and can serve as a handy reference guide as you work. Look for books that are highly rated and come with clear illustrations and easy-to-follow instructions.

Lastly, don’t underestimate the power of local workshops or classes. Many hardware stores, community colleges, and even craft supply shops offer hands-on sessions where you can learn directly from experienced instructors. These opportunities allow you to practice your skills in a supportive environment, ask questions in real-time, and connect with fellow DIY enthusiasts.

By leveraging these diverse resources, you’ll equip yourself with the knowledge and confidence needed to tackle any project that comes your way. As you learn and grow, you’ll find that each new skill opens the door to even more complex and fulfilling DIY endeavors. So gather your tools, dive into these resources, and get ready to unleash your inner DIY master!

10. Budgeting for Your DIY Toolkit

When it comes to embarking on your DIY journey, budgeting for your toolkit is just as crucial as selecting the right tools themselves. A well-planned budget not only helps you avoid overspending but also ensures that you acquire the essential items that will serve you well on countless projects to come.

Start by assessing the types of projects you’re most interested in tackling. Are you leaning towards woodworking, home repairs, or perhaps gardening? Identifying your primary focus will guide your spending and prevent you from purchasing tools that may end up collecting dust.

Next, create a list of must-have tools based on your project preferences. Essentials like a versatile drill, a set of screwdrivers, a reliable tape measure, and a sturdy hammer should be at the top of your list. As you compile your toolkit, consider investing in quality over quantity. High-quality tools are often more durable and effective, which can save you money in the long run by reducing the need for replacements.

It’s also wise to explore second-hand options or discounted tools to stretch your budget further. Local classifieds, garage sales, or dedicated online marketplaces can yield fantastic finds that might be just as good as new. Additionally, keep an eye out for seasonal sales or promotions at your local hardware store, which can provide opportunities to snag the critical tools you need at a lower cost.

Lastly, don’t forget to allocate some funds for maintenance supplies, such as oil for tool upkeep or storage solutions to keep your workspace organized. A well-maintained toolkit not only enhances your efficiency but also boosts your confidence as you dive into new projects.

By budgeting thoughtfully and prioritizing the right tools, you’ll set the stage for a fulfilling DIY experience filled with creativity and accomplishment. With every project you complete, you’ll find your toolkit evolving, reflecting your growing skills and aspirations as a DIY enthusiast.

11. Maintaining Your Tools for Longevity

Maintaining your tools for longevity is a critical aspect of any DIYer’s journey that often goes overlooked. After investing time and money into selecting the right tools, ensuring they remain in peak condition can save you from unnecessary expenses down the road and enhance your overall crafting experience.

First and foremost, keep your tools clean after each use. Whether it’s wiping down your hammer, sweeping debris from your saw, or cleaning paint off your brushes, a quick cleanup can prevent rust, corrosion, and buildup that can impair functionality. For power tools, consult the manufacturer’s guidelines for specifics on cleaning and maintenance, as each tool may have unique requirements.

Proper storage also plays a vital role in tool longevity. Create a dedicated space for your tools, using pegboards, toolboxes, or magnetic strips to keep them organized and easily accessible. This not only minimizes the risk of damage but also protects them from the elements. For instance, storing your tools in a dry environment prevents moisture from causing rust, while keeping them out of direct sunlight can protect plastic parts from fading or warping.

Moreover, regular inspections are essential. Make it a habit to check your tools periodically for any signs of wear and tear. Look for dull blades that need sharpening, screws that require tightening, or cords that show signs of fraying. Addressing these issues early can prevent more significant problems and potentially costly repairs.

Lastly, consider investing in a basic tool maintenance kit, which may include items such as lubricants, rust removers, and sharpening tools. These essentials make it easier to perform routine maintenance at home, ensuring that your tools are always ready for your next project.

By adopting these simple maintenance practices, you can extend the life of your tools, improve their performance, and ultimately enjoy your DIY endeavors to the fullest. Remember, a well-maintained tool is not just a tool; it’s a reliable partner in your creative journey!

12. Expanding Your Toolkit as You Grow

As you embark on your DIY journey, starting with a basic toolkit is essential. However, as your skills develop and your projects become more ambitious, expanding your toolkit will empower you to tackle a wider range of tasks with confidence and ease. Here are some key tools and equipment to consider adding to your arsenal as you grow in your DIY endeavors.

First, consider investing in a quality set of power tools. A cordless drill is a must-have for any DIYer, allowing you to effortlessly drive screws and drill holes in various materials. As you progress, a circular saw and a jigsaw can open up new possibilities for woodworking projects, enabling you to make precise cuts and intricate designs with ease.

Next, think about adding specialized hand tools that can enhance your capabilities. A chisel set is invaluable for fine woodworking, allowing you to carve and shape wood to your liking. Similarly, a good quality level ensures that your installations are straight and true, whether you’re hanging shelves or framing pictures.

Safety gear should also be a priority as you expand your toolkit. Investing in a sturdy pair of safety goggles and a quality dust mask will protect your eyes and lungs from debris and harmful particles, allowing you to work safely and comfortably.

Additionally, consider organization tools like a toolbox or pegboard. Keeping your tools neatly stored and easily accessible will save you time and frustration when tackling new projects. As you continue to grow, you might also explore specialty tools like a stud finder for wall projects or a heat gun for paint stripping, further enhancing your DIY skill set.

Remember, the key to expanding your toolkit is to invest in quality over quantity. Choose tools that are durable and versatile, allowing you to get the most out of your purchases. As you gain experience and tackle more complex projects, your growing toolkit will empower your creativity and transform the way you approach DIY tasks. Embrace the journey, and watch your skills flourish as your toolkit evolves alongside your passion for creating!

13. Conclusion: Taking the First Step in DIY

Embarking on your DIY journey can be both exciting and daunting, but with the right tools and a positive mindset, you’re well on your way to transforming your creative ideas into tangible projects. As we’ve explored in this guide, having a solid toolkit is essential for any beginner DIYer. From basic hand tools like hammers and screwdrivers to more specialized equipment like levelers and safety gear, each item plays a vital role in helping you achieve your goals.

Remember, the first step in any DIY project is not just gathering tools; it’s about embracing the learning process. Mistakes will happen, and that’s part of the journey. Each error offers you a valuable lesson, building your skills and confidence as you tackle more complex tasks. Don’t be afraid to start small—simple projects like building a bookshelf or creating custom wall art can provide a satisfying introduction to the world of DIY.

Moreover, take advantage of online resources, tutorials, and community forums to gather inspiration and advice. Sharing your projects and experiences with fellow DIY enthusiasts can not only enhance your skills but also keep you motivated along the way.

In conclusion, the world of DIY is open to anyone willing to take the plunge. Equip yourself with the essential tools outlined in this guide, cultivate a spirit of curiosity, and let your creativity flourish. With every project, you’ll not only add to your toolkit but also build a wealth of knowledge and experience that will serve you well in all your future endeavors. So grab those tools, roll up your sleeves, and start creating—your DIY adventure awaits!

14. Bonus: Recommended Brands and Where to Buy

When diving into the world of DIY, having the right tools can make all the difference in your projects’ success and enjoyment. While we’ve explored various essential tools, it’s equally important to know where to find high-quality products at reasonable prices. Here’s a curated list of recommended brands and where to purchase them, ensuring you get the best value for your investment.

**1. Tool Brands**

– **DeWalt:** Renowned for their durability and reliability, DeWalt offers a vast range of power tools and hand tools ideal for both beginners and seasoned DIYers. Their cordless drill and impact driver kits are especially popular for home improvement projects.

– **Stanley:** A trusted name in hand tools, Stanley provides a wide selection of reliable items like tape measures, hammers, and screwdrivers. Their tools are not only affordable but also designed for longevity, making them perfect for beginners.

– **Milwaukee:** Known for their innovative power tools, Milwaukee is a favorite among those looking for cutting-edge technology and performance. Their M18 battery platform is excellent for anyone who needs a versatile and powerful toolset for various projects.

– **Ryobi:** If you’re interested in a budget-friendly option with a solid range of tools, Ryobi is an excellent choice. Their One+ system allows you to use the same battery across a variety of tools, making it a cost-effective solution for DIY enthusiasts.

**2. Where to Buy**

– **Home Improvement Stores:** Chains like Home Depot and Lowe’s offer a wide selection of tools from all the major brands. They often have sales, and you can find both in-store and online shopping options.

– **Online Retailers:** Websites like Amazon provide a vast array of tools, often at competitive prices. You’ll find customer reviews that can help guide your purchase decisions. Additionally, they frequently have deals on bundles that can save you money.

– **Specialty Tool Retailers:** Stores such as Ace Hardware and Northern Tool carry a range of both popular and specialty brands. These retailers can provide knowledgeable staff who can help you choose the right tools for your specific needs.

– **Local Hardware Stores:** Don’t overlook local hardware stores! They often carry quality tools and can provide personalized service. Plus, supporting local businesses helps foster community ties.

By investing in reputable brands and knowing where to shop, you’ll be well-equipped to tackle any DIY project that comes your way. Remember, the right tools paired with the right knowledge can transform your creative ideas into tangible realities, making your DIY journey even more rewarding. Happy building!

As we wrap up our comprehensive guide on the essential tools every beginner DIYer should own, we hope you feel inspired and equipped to embark on your creative projects with confidence. From the trusty tape measure to the versatile power drill, each tool plays a vital role in transforming your ideas into reality. Remember, the right tools not only enhance your efficiency but also make your DIY journey safer and more enjoyable. Whether you’re tackling a simple home repair or crafting a personalized piece of decor, having these essentials on hand will empower you to unleash your inner handyman or handywoman. So gather your tools, embrace the learning curve, and enjoy the satisfaction that comes from creating something uniquely yours. Happy DIYing!