pc gaming – How to build a high-end gaming PC under $2000?

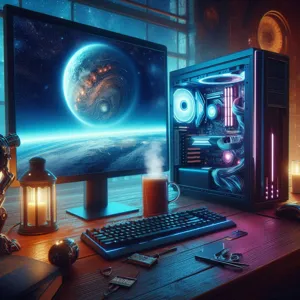
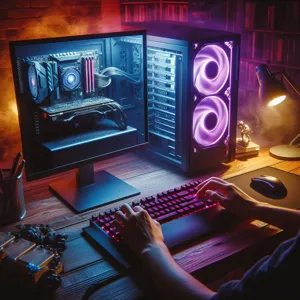
In a world where gaming has evolved into a breathtaking blend of immersive storytelling and stunning graphics, building a high-end gaming PC can often feel like a daunting financial commitment.

However, what if we told you that you could assemble a powerhouse rig without breaking the bank? In this ultimate guide, we’ll unlock the secrets to crafting a top-tier gaming pc for under $2000, ensuring you get the best bang for your buck. We’ll cover everything from selecting the right components—like the latest graphics cards and lightning-fast processors—to tips on optimal cooling solutions and stylish cases that won’t compromise on aesthetics. Whether you’re a competitive gamer looking to dominate the leaderboard or a casual player wanting to experience the latest titles in stunning detail, this guide is your roadmap to achieving gaming greatness. Get ready to unleash your gaming potential on a budget that won’t leave your wallet gasping for air!

1. Introduction: Why Build a High-End Gaming PC?

pc gaming -  How to build a high-end gaming PC under $2000?
Credit : whatcanu.com

Building a high-end gaming PC is more than just assembling a collection of components; it’s about crafting a personalized experience that elevates your gaming to new heights. In an era where immersive graphics, lightning-fast processing speeds, and seamless gameplay are paramount, investing in a custom-built rig can make all the difference. Unlike pre-built systems, constructing your own gaming PC allows you to handpick each component, tailoring the setup to suit your unique gaming style and preferences.

But why specifically choose to build rather than buy? For starters, building your own PC often provides better value for your money. With a budget of under $2000, you can select the latest graphics cards, powerful CPUs, and ample storage options that are perfectly aligned with your gaming needs, without paying extra for brand markup. Moreover, building your own system gives you the flexibility to upgrade individual parts as technology evolves, ensuring your rig remains relevant in the fast-paced world of gaming.

Furthermore, the process of building a gaming PC is a rewarding journey in itself. It fosters a deeper understanding of computer hardware and how each component contributes to performance. Whether you’re a seasoned gamer or just starting, the satisfaction of watching your meticulously chosen parts come together is unmatched. Plus, there’s an undeniable sense of pride in knowing that you have created a machine that’s uniquely yours—one that can handle everything from the latest AAA titles to demanding creative tasks with ease.

So, if you’re ready to dive into the world of high-end gaming, join us as we explore the essential components, step-by-step assembly process, and tips to ensure your gaming PC not only meets your expectations but exceeds them—all while staying within your budget. Let’s embark on this exciting journey together!

2. Setting Your Budget: Breaking Down the $2000 Limit

When diving into the world of high-end gaming PCs, setting a budget can be both exhilarating and daunting. For many gamers, the $2000 limit serves as a golden threshold, offering the potential to build a powerhouse capable of handling the latest titles at ultra settings while future-proofing your setup for years to come. However, strategically breaking down this budget is crucial to ensure you achieve the best performance without any compromises.

Start by allocating approximately 30-40% of your budget to the heart of your gaming rig: the graphics card (GPU). This component is pivotal for rendering stunning visuals and smooth gameplay. Look for models that offer the best performance per dollar, and consider options that balance power with thermal efficiency.

Next, dedicate around 20-25% of your budget to the processor (CPU). A capable CPU complements your GPU to prevent bottlenecks and ensure seamless gaming experiences, especially in CPU-intensive titles. Research compatibility with your chosen motherboard to avoid any headaches down the line.

The remaining budget should be divided among other essential components: storage, memory (ram), motherboard, power supply unit (PSU), and cooling solutions. Aim for at least 16GB of RAM to facilitate multitasking and smooth performance. For storage, consider a combination of an SSD for your operating system and frequently played games, alongside a larger HDD for additional storage needs.

Don’t forget to factor in peripherals and accessories if needed. A good gaming monitor, keyboard, and mouse can enhance your overall experience but should be approached with careful consideration to avoid overspending.

By thoughtfully dissecting your budget, you pave the way for a high-end gaming PC that satisfies your gaming aspirations without breaking the bank. Remember, each component plays a vital role in the overall performance of your machine, so invest wisely and enjoy the journey of crafting your ultimate gaming rig!

3. Essential Components for a High-End Gaming PC

pc gaming -  How to build a high-end gaming PC under $2000?
Credit : whatcanu.com

When embarking on the journey to build a high-end gaming PC, understanding the essential components is crucial to creating a machine that not only performs exceptionally but also offers great value for your investment. Here’s a breakdown of the key components that will form the backbone of your gaming rig.

**1. Processor (CPU):** At the heart of your gaming PC lies the CPU, which plays a pivotal role in determining your system’s speed and performance. Look for a high-performance processor, such as the AMD Ryzen 7 or Intel Core i7, which strikes the right balance between price and power. These processors are adept at handling demanding gaming applications and multitasking, ensuring that your gaming experience is smooth and responsive.

**2. Graphics Card (GPU):** The GPU is arguably the most critical component for gamers, as it directly influences your gaming visuals and frame rates. To achieve stunning graphics in the latest games, consider investing in a high-end graphics card like the NVIDIA RTX 3070 or AMD Radeon RX 6800. These cards are designed to handle 1440p and even 4K gaming, providing you with breathtaking visuals and immersive experiences.

**3. Memory (RAM):** For a high-end gaming PC, aim for a minimum of 16GB of RAM. This amount is sufficient for most modern games and allows for seamless multitasking. If your budget permits, consider upgrading to 32GB, which can provide extra headroom for more demanding titles and applications, especially if you plan to stream or record your gameplay.

**4. Storage:** Speed and capacity are vital when it comes to storage. A combination of a Solid State Drive (SSD) and a traditional Hard Disk Drive (HDD) is ideal. Opt for a 1TB SSD for your operating system and favorite games, ensuring quick load times and smooth performance. Additionally, a 2TB HDD can provide ample space for other files, media, and less frequently played games.

**5. Motherboard:** Your motherboard acts as the central hub connecting all components. Choose a motherboard that supports the latest technology, such as PCIe 4.0 for faster data transfer rates. Ensure it’s compatible with your chosen CPU and has enough ports for your GPU and peripherals.

**6. Power Supply Unit (PSU):** Don’t skimp on the PSU. A reliable power supply is essential for a stable system. Look for a PSU with an 80 Plus Gold certification to ensure efficiency and longevity. Aim for a wattage that can comfortably support your components, typically around 650W to 750W for high-end builds.

**7. Cooling System:** Maintaining optimal temperatures is crucial for performance and longevity. Consider a high-quality air cooler or an all-in-one liquid cooling solution to keep your CPU running cool under load. Additionally, ensure your case has good airflow, with several case fans to help dissipate heat.

**8. Case:** Finally, select a case that not only fits your aesthetic but also accommodates your components with ease. Look for features such as cable management options, airflow design, and enough space for future upgrades. A well-designed case can enhance both the functionality and the appearance of your build.

By carefully selecting these essential components, you can create a high-end gaming PC that delivers outstanding performance while staying within your $2000 budget. Each part works in harmony to ensure your gaming experience is nothing short of extraordinary, allowing you to dive into the latest titles with confidence and style.

4. Choosing the Right CPU: Options for Performance

When it comes to constructing a high-end gaming PC, the CPU (Central Processing Unit) is the heart of your system, influencing everything from game performance to multitasking capabilities. Selecting the right CPU within your budget of $2000 can be a game-changer, and fortunately, there are several outstanding options designed to deliver exceptional performance without breaking the bank.

First up, let’s consider the AMD Ryzen series. The Ryzen 5 7600X and the Ryzen 7 5800X are both excellent choices for gamers seeking performance without overspending. The Ryzen 5 offers six cores and twelve threads, which is perfect for gaming while still allowing for productive multitasking. On the other hand, the Ryzen 7, with its eight cores and sixteen threads, excels in both gaming and content creation, making it a versatile option if you plan to stream or edit videos.

If you’re leaning towards Intel, the Core i5-13600K is a formidable contender. This processor boasts a hybrid architecture, featuring both Performance-cores and Efficient-cores, which provides a significant boost to gaming and productivity tasks alike. For those willing to stretch their budget slightly, the Core i7-12700K offers even more power, ensuring you’re well-equipped to handle the latest AAA titles at high settings.

While choosing your CPU, also consider the cooling requirements, as high-performance CPUs can generate considerable heat. An aftermarket cooler may be essential for overclocking and maintaining optimal temperatures, ensuring your system runs smoothly under heavy gaming loads.

Ultimately, the choice of CPU will set the foundation for your gaming experience. Prioritize performance that caters not just to your current gaming needs but also considers future-proofing your build for upcoming titles. With the right CPU in your arsenal, you’ll be well on your way to crafting a gaming rig that can handle anything thrown its way—all while staying within your budget!

5. Selecting a Graphics Card: Maximizing Gaming Performance

pc gaming -  How to build a high-end gaming PC under $2000?
Credit : whatcanu.com

When it comes to building a high-end gaming PC, the graphics card is undoubtedly the crown jewel of your setup. It’s the powerhouse responsible for rendering stunning visuals and delivering smooth gameplay, making it a critical component in your build. Selecting the right graphics card requires careful consideration of your gaming needs, budget, and the latest technology available in the market.

As of 2023, the landscape of graphics cards is dominated by industry giants like NVIDIA and AMD, each offering a range of options tailored to various performance levels. For a budget of under $2000, you have the flexibility to choose from powerful mid-tier cards or even some entry-level models from the latest generation that offer exceptional value.

When evaluating graphics cards, focus on key specifications such as VRAM (Video Random access Memory), clock speeds, and CUDA cores (for NVIDIA cards). A minimum of 8GB of VRAM is recommended for modern gaming, especially if you plan to play at higher resolutions or with demanding settings like ray tracing. Additionally, higher clock speeds can lead to better performance, allowing your games to run more smoothly.

Consider the resolution at which you’ll be gaming. If you’re looking to play at 1440p or even 4K, investing in a more powerful GPU can significantly enhance your experience. Models like the NVIDIA GeForce RTX 3060 Ti or the AMD Radeon RX 6700 XT deliver impressive performance without breaking the bank. Meanwhile, if you’re aiming for ultra settings in demanding titles, stepping up to something like the NVIDIA GeForce RTX 3080 or the AMD Radeon RX 6800 could be worthwhile.

Don’t overlook future-proofing your investment as well. With new titles constantly pushing the boundaries of graphics fidelity, opting for a card that supports the latest technologies—like ray tracing and DLSS (Deep Learning Super Sampling)—can extend the lifespan of your gaming rig.

Finally, keep an eye on market availability and pricing trends. Graphics card prices can fluctuate wildly due to supply chain issues and demand spikes, so timing your purchase can lead to significant savings. By carefully selecting a graphics card that meets your gaming demands and fits within your budget, you can ensure that your high-end gaming PC not only performs brilliantly but also delivers an immersive gaming experience for years to come.

6. Motherboard Matters: Finding the Best Fit for Your Build

When it comes to building a high-end gaming PC, choosing the right motherboard is a crucial step that can significantly impact your system’s performance and future upgradability. The motherboard serves as the backbone of your build, connecting all components and facilitating communication between them. With a budget of $2000, you have a wealth of options, but narrowing down your choices requires a careful consideration of several key factors.

First and foremost, you’ll want to ensure that the motherboard is compatible with your chosen CPU. Whether you’re opting for an Intel or AMD processor, each has a specific socket type that dictates which motherboards are compatible. Be sure to check the specifications of both the CPU and motherboard to avoid any compatibility issues.

Next, think about the form factor. Motherboards typically come in ATX, Micro-ATX, and Mini-ITX sizes. An ATX motherboard will provide ample space for additional components, such as extra RAM slots and PCIe lanes for graphics cards or other expansion cards. If you’re aiming for a compact build, however, a Micro-ATX or Mini-ITX might be more suited to your needs, though you may sacrifice some expandability.

Another critical aspect to consider is the features you need. Are you planning to overclock your CPU or RAM? If so, look for motherboards that offer robust power delivery systems and advanced cooling options. Additionally, consider the connectivity options – the number of USB ports, SATA connections for storage devices, and built-in Wi-Fi capabilities can all enhance your gaming experience.

Don’t forget about aesthetics! A motherboard with customizable RGB lighting can complement your overall build and create a visually stunning gaming rig. Many high-end motherboards also come with reinforced PCIe slots to prevent GPU sag and high-quality capacitors for improved durability.

Ultimately, the right motherboard will not only support your current components but also offer room for future upgrades, ensuring that your gaming PC remains relevant as technology evolves. Investing time in researching and selecting the best motherboard for your high-end gaming build can make all the difference in achieving the performance and longevity you desire. So take the time to explore your options and find the perfect fit for your gaming ambitions!

7. RAM Requirements: How Much Do You Need?

pc gaming -  How to build a high-end gaming PC under $2000?
Credit : whatcanu.com

When it comes to building a high-end gaming PC, understanding your RAM requirements is crucial for achieving optimal performance. Random Access Memory (RAM) acts as your system’s short-term memory, allowing your CPU to access data quickly and efficiently. For gaming, the right amount of RAM can significantly affect load times, multitasking capabilities, and overall gameplay smoothness.

In today’s gaming landscape, 16GB of RAM is generally considered the sweet spot for most gamers. This amount provides plenty of headroom for modern titles, allowing you to run games at high settings without worrying about bottlenecks. With 16GB, you can also comfortably run background applications, such as streaming software or voice chat programs, without experiencing lag.

However, if you plan on pushing the limits with intensive tasks—like 4K gaming, video editing, or running multiple applications simultaneously—consider upgrading to 32GB of RAM. This setup is more future-proof, ensuring that your system can handle the latest games and demanding software without breaking a sweat.

When selecting your RAM, pay attention to the speed and latency as well. Opt for DDR4 RAM with a speed of at least 3200 MHz, as this can provide a noticeable performance boost in gaming scenarios. Lower latency also contributes to a snappier experience, so look for RAM with CL16 or lower for optimal performance.

Lastly, don’t overlook the aesthetic aspect. Many gamers enjoy RGB lighting options for their RAM modules, which can add a personal touch to your build. Ultimately, the choice of RAM is not just about numbers; it’s about striking the right balance between performance, capacity, and style to create a gaming rig that is both powerful and visually appealing. With the right RAM in place, you’ll be well on your way to an exceptional gaming experience that won’t break the bank.

8. Storage Solutions: SSD vs. HDD for Gaming

When it comes to building a high-end gaming PC, one of the critical decisions you’ll face is choosing the right storage solution. The choice between Solid State Drives (SSD) and Hard Disk Drives (HDD) can significantly impact your gaming experience, and understanding the differences between these two options is vital for any serious gamer.

### SSD: Speed and Performance

Solid State Drives have gained immense popularity in recent years, primarily due to their lightning-fast read and write speeds. Unlike traditional HDDs that rely on spinning disks and mechanical parts, SSDs store data on flash memory, which means quicker load times for games and applications. Imagine booting up your PC and diving straight into your favorite game in mere seconds—that’s the power of an SSD. For gaming, this translates to reduced lag during gameplay and faster loading screens, making for a more seamless experience. Additionally, many modern games are increasingly designed to take advantage of SSD technology, allowing for better performance and enhanced graphics.

### HDD: Capacity and Cost-Effectiveness

On the other hand, Hard Disk Drives offer larger storage capacities at a significantly lower price point compared to SSDs. If you have a vast library of games, movies, or other media, an HDD can provide the space you need without breaking the bank. While they may not match the speed of SSDs, they are still a reliable option for storing non-essential files or older games that don’t require lightning-fast load times. For gamers on a budget, integrating an HDD alongside an SSD can be an excellent way to balance speed with storage capacity—using the SSD for your most-played games and the HDD for everything else.

### The Best of Both Worlds

The ideal setup for a high-end gaming PC under $2000 often involves a combination of both storage types. Many gamers opt for a smaller SSD (e.g., 500GB or 1TB) to house their operating system and a few key games, while pairing it with a larger HDD (e.g., 2TB or more) for additional storage. This hybrid approach maximizes performance while still providing ample space for your gaming library and multimedia files.

In conclusion, the choice between SSD and HDD ultimately comes down to your gaming habits and budget. If speed and performance are your top priorities, an SSD is the way to go. However, if you need more space for a variety of games and applications, consider a dual-storage solution to get the best of both worlds. With the right storage setup, you’ll be well on your way to enjoying an exceptional gaming experience in your new high-end PC!

9. Power Supply: Ensuring Stability and Efficiency

When building a high-end gaming PC, one component that often gets overlooked is the power supply unit (PSU). Yet, it plays a crucial role in ensuring your system’s stability and efficiency. Think of the PSU as the heart of your PC; it delivers the essential power that keeps all other components running smoothly. A reliable PSU not only provides the necessary wattage but also ensures that your components receive clean and stable power, which is vital for optimal performance, especially during intense gaming sessions.

Choosing the right power supply involves a few key considerations. First, assess the wattage requirements of your hardware. High-performance GPUs and CPUs can demand a significant amount of power, so it’s essential to select a PSU that can accommodate your system’s peak consumption. For a high-end gaming setup, aim for a power supply in the range of 650 to 850 watts, which should provide ample headroom for future upgrades and overclocking.

Efficiency ratings are also critical when selecting a PSU. Look for units that have an 80 PLUS certification, which indicates energy efficiency. The higher the certification (Bronze, Silver, Gold, Platinum, or Titanium), the more efficient the power supply will be, leading to lower electricity bills and less heat generation. A high-efficiency PSU can also prolong the lifespan of your components by reducing unnecessary stress caused by fluctuating power levels.

Additionally, consider the modularity of the power supply. A fully modular PSU allows you to connect only the cables you need, reducing clutter and improving airflow within your case. This attention to cable management not only enhances aesthetics but can also aid in cooling, which is crucial for maintaining performance during extended gaming sessions.

In summary, investing in a quality power supply is non-negotiable in your quest to build a high-end gaming PC under $2000. By ensuring stability and efficiency through careful selection, you set a solid foundation for your gaming rig, enabling you to unleash its full potential without the worry of power-related issues.

10. Cooling Systems: Keeping Your PC Running Smoothly

When it comes to building a high-end gaming PC, one of the most critical components that often gets overlooked is the cooling system. A powerful gaming rig can generate significant heat, especially during intense gaming sessions or demanding tasks like video editing and 3D rendering. Therefore, investing in an efficient cooling system is essential to keep your components running smoothly and to prolong their lifespan.

First, you have two primary options: air cooling and liquid cooling. Air coolers are generally easier to install, more affordable, and require less maintenance. High-quality air coolers, like those from Noctua or be quiet!, can effectively dissipate heat while operating quietly. They often come with multiple heat pipes and larger heatsinks that maximize airflow and enhance cooling performance.

On the other hand, liquid cooling systems provide superior thermal management, especially for overclocked components. A good AIO (All-in-One) liquid cooler can efficiently transfer heat away from crucial parts like the CPU and GPU, ensuring they remain at optimal temperatures. Look for models with larger radiators and multiple fans to enhance cooling performance, but be mindful of the space constraints in your case.

Regardless of the cooling method you choose, make sure to consider case airflow as well. A well-ventilated case with strategically placed fans can significantly impact overall system temperatures. Aim for a balance of intake and exhaust fans to promote a steady flow of cool air into the case while pushing hot air out.

Finally, don’t forget about monitoring your temperatures! Utilizing software like MSI Afterburner or HWMonitor can help you keep an eye on your system’s thermal performance. If you notice your temperatures creeping up, it may be time to reevaluate your cooling setup.

In summary, a robust cooling system is not just an accessory but a necessity for your high-end gaming PC. By carefully choosing between air and liquid cooling, optimizing case airflow, and keeping a close watch on temperatures, you can ensure that your gaming experience remains smooth and uninterrupted. Your components will thank you for it!

11. Choosing a Case: Style and Functionality

When it comes to building your high-end gaming PC, choosing a case is not just about aesthetics—it’s a critical decision that balances style with functionality. The case is the first thing people will notice, and a well-chosen enclosure can elevate the overall look of your setup while providing essential features for optimal performance.

Start by considering the size of your components. Ensure that your case is compatible with your motherboard form factor (ATX, Micro-ATX, or Mini-ITX) and has ample space for your GPU, which can be quite lengthy in high-end builds. A good case will also offer sufficient airflow to keep your components cool under heavy gaming loads. Look for models with mesh panels and multiple fan mounts; these features facilitate better air circulation and can help prevent overheating during extended gaming sessions.

Beyond functionality, think about the design. A sleek, modern case can enhance your gaming environment, especially if you plan to showcase it in a prominent location. Many gamers opt for cases with tempered glass panels that allow them to display their carefully curated setups. RGB lighting can also add a personal touch, transforming your PC into a glowing centerpiece that reflects your style.

Consider cable management as well—well-organized cables not only improve airflow but also contribute to a cleaner, more professional appearance. Cases with built-in cable routing options and ample space behind the motherboard tray can make a significant difference in achieving that tidy look.

Ultimately, the right case should harmonize functionality and aesthetics, creating a gaming rig that not only performs exceptionally but also stands out in any room. Take your time to research and select a case that aligns with your vision, as it will be the backbone of your high-end gaming experience.

12. Peripheral Considerations: Monitors, Keyboards, and Mice

When it comes to building a high-end gaming PC, the importance of peripherals can often be overlooked in the excitement of selecting the components that live within your case. However, the right monitors, keyboards, and mice can significantly enhance your gaming experience, making them essential considerations in your overall setup.

**Monitors:** The display is your window into the game world, and investing in a high-quality monitor can make all the difference. Aim for a monitor with a high refresh rate (144Hz or higher) and low response time, which will provide smooth visuals and reduce motion blur during fast-paced action. A 1440p or 4K resolution is ideal for stunning graphics, but make sure your graphics card can handle it. Consider going for an ultrawide monitor for an immersive feel, or a dual-monitor setup if multitasking is your style. The right monitor not only enhances your gameplay but also reduces eye strain during those long gaming sessions.

**Keyboards:** The keyboard is not just about typing; it’s your primary input device when gaming. Mechanical keyboards are highly recommended for their tactile feedback and durability. Look for features like customizable RGB lighting, programmable keys, and anti-ghosting capabilities, which can give you that competitive edge. Whether you prefer a tenkeyless design or a full-sized keyboard with a number pad, choose one that feels comfortable for marathon gameplay sessions.

**Mice:** A good gaming mouse is crucial for precision and speed. Opt for a mouse with adjustable DPI settings, allowing you to switch sensitivities on the fly, which is particularly useful in different gaming scenarios. Ergonomics should also be a priority; a mouse that fits comfortably in your hand can prevent fatigue during extended play. Look for models with customizable buttons that let you execute complex commands with ease, further enhancing your gameplay.

In summary, while your gaming PC’s internal components are vital for performance, the right peripherals can elevate your gaming experience to new heights. Investing wisely in high-quality monitors, keyboards, and mice will not only complement your setup but also ensure that you enjoy every moment of your gaming adventures to the fullest. Don’t skimp on these important elements; they are the finishing touches that complete your high-end gaming rig.

13. Assembly Tips: How to Build Your Gaming PC Step-by-Step

Assembling your high-end gaming PC can be an exhilarating experience, especially when you see all your carefully chosen components come together to form a powerful machine. Here’s a step-by-step guide to help you navigate through the assembly process, ensuring you build a reliable and efficient gaming rig without any hitches.

**1. Gather Your Tools and Components:**
Before diving into the assembly, make sure you have all your components ready: the CPU, motherboard, RAM, GPU, storage drives, power supply, and cooling system, along with tools like a screwdriver, anti-static wrist strap, and cable ties for neat cable management. A clean workspace will also help prevent any accidental damage to your parts.

**2. Prepare the Case:**
Start by removing the side panels of your case. This will give you easy access to the interior. Check for any pre-installed standoffs and ensure they align with the holes on your motherboard, as these will support it once it’s in place.

**3. Install the Power Supply:**
Next, mount the power supply unit (PSU) into the designated area of the case. Ensure the fan is positioned correctly for optimal airflow. Secure it with screws and route the necessary cables towards the motherboard area, but don’t plug them in just yet.

**4. Place the CPU:**
Now it’s time to install the CPU. Carefully lift the lever on the CPU socket, align the notches on the CPU with the socket, and gently place it in. Lower the lever back down to secure it. This part is critical, so handle the CPU with care to avoid bending any pins.

**5. Add the CPU Cooler:**
Whether you’re using an air cooler or liquid cooling, follow the manufacturer’s instructions to install it properly. Make sure to apply thermal paste if it’s not pre-applied, as this ensures efficient heat transfer from the CPU to the cooler.

**6. Insert RAM Modules:**
Locate the RAM slots on your motherboard and insert the RAM sticks. Ensure they click into place and are seated correctly. It’s often recommended to populate the slots in a specific order, so consult your motherboard’s manual for the best configuration.

**7. Install the Motherboard:**
Carefully lift the motherboard and align it with the standoffs in your case. Once it’s positioned correctly, secure it with screws. Make sure the I/O shield is properly in place and that all port openings align with the motherboard.

**8. Attach Storage Drives:**
Install your SSDs and HDDs into their designated bays. If you’re using an M.2 SSD, consult the motherboard manual for the correct slot. Make sure to secure them properly with screws or clips as needed.

**9. Install the GPU:**
Now it’s time for the graphics card, the star of your gaming PC. Find the PCIe slot on your motherboard, remove the necessary backplates from the case, and carefully slide the GPU into place. Secure it with screws to ensure it doesn’t move around.

**10. Connect Cables:**
With everything in place, it’s time to connect power and data cables. Use the cables from your PSU to connect the motherboard, GPU, and drives. Make sure to tidy up the cables using cable ties to maintain airflow and aesthetics.

**11. Perform a Final Check:**
Before closing up the case, double-check all connections and make sure everything is secure. Ensure that there are no stray cables blocking fans and that the

14. Post-Build Setup: Installing Software and Drivers

After the exhilarating experience of assembling your high-end gaming PC, the next crucial step is the post-build setup, where you’ll install the necessary software and drivers to ensure your machine runs smoothly and efficiently. This phase is vital in bringing your gaming rig to life and optimizing it for peak performance.

Start by booting up your new creation. If all goes well, you should see your BIOS screen. From here, you’ll want to install your chosen operating system—most gamers opt for Windows due to its compatibility with a vast array of games and applications. Insert your installation media, whether it’s a USB drive or a DVD, and follow the prompts to get Windows installed.

Once Windows is up and running, it’s time to dive into the driver installation. Drivers are essential as they allow your hardware components to communicate effectively with the operating system. Begin with your motherboard drivers, which typically include chipset, audio, and network drivers. These can usually be downloaded from the manufacturer’s website; just make sure to choose the correct model.

Next, focus on your graphics card. Whether you’ve opted for NVIDIA or AMD, downloading the latest drivers directly from their respective websites ensures that your GPU operates at its best, providing the optimal experience in games. Both companies offer utilities that can help keep your drivers updated automatically, a handy feature that saves time in the long run.

Don’t forget about other peripherals like printers, scanners, or gaming accessories; they may require additional drivers. After all hardware drivers are installed, it’s wise to check for Windows updates, as these can enhance system stability and security.

With your drivers in place, you can now install the essential gaming software. Start with your digital distribution platforms—Steam, Epic Games Store, or Origin—so you can access your game library. Additionally, consider installing performance monitoring tools such as MSI Afterburner or HWMonitor. These applications allow you to keep an eye on your system’s temperatures and performance metrics while gaming, ensuring that everything runs smoothly.

Lastly, before diving into your gaming session, take a moment to customize your settings. Adjust your graphics settings in games for the best balance between performance and visuals, and consider setting up software for voice communication if you game with friends, like Discord or TeamSpeak.

With your software and drivers successfully installed, you’re ready to embark on your gaming adventures. Sit back, relax, and prepare to enjoy the incredible gaming experience that your newly built powerhouse has to offer!

15. Conclusion: Enjoying Your High-End Gaming Experience!

As we wrap up this ultimate guide to building a high-end gaming PC for under $2000, it’s clear that the journey to crafting your dream rig is as exhilarating as the gaming experiences that await you. With the right components carefully selected and seamlessly assembled, you’re not just investing in hardware; you’re unlocking a portal to immersive worlds, breathtaking graphics, and smooth gameplay that brings your favorite titles to life like never before.

Imagine firing up your PC for the first time, the RGB lighting illuminating your space, as you dive into stunning landscapes and intense multiplayer battles. Each frame rendered with precision, every click of the mouse echoing your strategic prowess, and the thrill of victory echoing in the background—it’s all within your reach. Whether you’re exploring vast open worlds, engaging in competitive esports, or enjoying the latest AAA titles, your new gaming setup will elevate your experience to new heights.

But remember, the journey doesn’t end with the initial build. Keeping your system updated with the latest drivers, optimizing settings for each game, and exploring new expansions will ensure that your gaming experience remains fresh and exciting. Don’t hesitate to tweak and upgrade your components over time; technology evolves rapidly, and there’s always something new to explore.

So, gather your friends for a gaming night, stream your epic adventures, or simply lose yourself in a captivating single-player campaign. With your high-end gaming PC, you’re fully equipped to enjoy countless hours of exhilarating gameplay. Here’s to the adventures ahead, the challenges to conquer, and the memories to create—happy gaming!

In conclusion, building a high-end gaming PC for under $2000 is not only achievable but can also be an incredibly rewarding experience that enhances your gaming prowess. By carefully selecting components, prioritizing performance, and considering future upgrades, you can create a powerhouse rig that meets your gaming needs without exceeding your budget. We hope this ultimate guide has equipped you with the knowledge and confidence to embark on your PC-building journey. Remember, the world of gaming is limitless, and with your new setup, you’ll be ready to dive into immersive experiences and tackle any challenge that comes your way. Happy building, and may your gaming adventures be epic!

pc gaming – What are the best PC cases for airflow?

When it comes to building the ultimate gaming rig, the choice of PC case plays a pivotal role in not just aesthetics, but also in performance and longevity.

A well-ventilated case can mean the difference between a smooth gaming experience and one overshadowed by overheating components and unwanted noise. As gaming technology continues to advance, ensuring that your setup remains cool and quiet is more important than ever. In this blog post, we will explore the top PC cases designed specifically for optimal airflow, highlighting features such as innovative fan placements, mesh panels, and liquid cooling compatibility. Whether you’re a seasoned gamer looking to upgrade your current setup or a newcomer eager to build your first rig, we’ve curated a list of cases that will help you maintain peak performance while keeping your environment serene. Get ready to discover the perfect enclosure that not only showcases your hardware but also ensures it stays cool under pressure!

1. Introduction: Importance of Airflow in PC Cases

pc gaming -  What are the best PC cases for airflow?
Credit : whatcanu.com

When it comes to building the ultimate gaming rig, enthusiasts often focus on high-performance hardware, cutting-edge graphics cards, and lightning-fast processors. However, one crucial aspect that can make or break your gaming experience is often overlooked: airflow. Efficient airflow in a PC case is paramount for maintaining optimal temperatures, enhancing performance, and prolonging the lifespan of your components.

A well-ventilated case allows cool air to flow in while expelling hot air generated by the CPU, GPU, and other components. Without proper airflow, temperatures can soar, leading to thermal throttling, where your hardware automatically reduces its performance to prevent damage. This means that even the most powerful components can underperform if they aren’t adequately cooled.

Moreover, good airflow isn’t just about temperature control; it also plays a vital role in reducing noise levels. Cases designed with airflow in mind often feature sound-dampening materials and strategic fan placements, minimizing the whirring and buzzing that can disrupt your gaming sessions or work-from-home productivity.

In this guide, we’ll explore the top PC cases that excel in airflow design, ensuring that your gaming rig remains not only cool but also impressively quiet. Whether you are a seasoned builder or a newcomer to the world of PC gaming, understanding the importance of airflow will empower you to make informed decisions for the best possible setup. Let’s dive into the world of airflow-optimized PC cases and discover the perfect fit for your high-performance needs!

2. Key Features to Look for in Airflow-Friendly Cases

When it comes to selecting the perfect PC case for optimal airflow, there are several key features to consider that can make a significant difference in both cooling performance and overall system longevity. An airflow-friendly case doesn’t just look good; it plays a crucial role in maintaining efficient thermal management under heavy loads. Here are the essential features to look for:

1. **Mesh Front Panels**: One of the most important aspects of airflow is the case’s front panel design. Mesh panels allow for a greater volume of air to flow in compared to solid panels, reducing heat buildup. Look for cases that feature a full or partially mesh front panel to maximize intake airflow.

2. **Fan Compatibility**: A good airflow case should have ample options for fan installation. Check for multiple fan mounting points, both at the front and top, as well as the rear. The ability to install larger fans or multiple fans enhances airflow significantly. Some cases even support liquid cooling radiators, which can further improve thermal performance.

3. **Positive Air Pressure Design**: To optimize airflow and minimize dust accumulation, consider cases designed for positive air pressure. This means having more intake fans than exhaust fans, which creates a pressure difference that helps push air out through any gaps, effectively keeping dust out while ensuring cool air flows in.

4. **Cable Management Options**: Clean cable management not only looks aesthetically pleasing but also promotes better airflow. Look for cases with ample space behind the motherboard tray for routing cables, along with dedicated tie-down points. This prevents cables from obstructing airflow and allows for unobstructed passage of cool air.

5. **Space for High-Performance Components**: A well-ventilated case should have enough space to accommodate large graphics cards and CPU coolers. Ensure that your chosen case supports the dimensions of your components, as cramped spaces can lead to restricted airflow and increased temperatures.

6. **Dust Filters**: To maintain airflow efficiency, dust filters are a must-have feature. These filters can be found on intake areas like the front, top, and bottom of the case. They prevent dust buildup inside your rig, which can hinder airflow and lead to overheating. Look for cases with easily removable filters for convenient cleaning.

7. **Quality Build Materials**: The materials used in the construction of the case can impact airflow and noise levels. Cases made from high-quality metal with sound-dampening features can minimize vibration and noise while providing a sturdy structure for efficient airflow.

By keeping these key features in mind, you can ensure that your chosen case not only supports optimal airflow but also creates a cooler and quieter gaming environment. With the right airflow-friendly case, you’ll be well on your way to achieving peak performance in your gaming rig!

3. Understanding Positive vs. Negative Air Pressure

pc gaming -  What are the best PC cases for airflow?
Credit : whatcanu.com

When it comes to maintaining optimal airflow in your gaming rig, understanding the concepts of positive and negative air pressure is crucial. The balance of air pressure within your PC case can significantly affect not only cooling performance but also the overall longevity of your components.

**Positive Air Pressure** occurs when there is a greater intake of air than exhaust. This configuration can be highly beneficial for keeping dust and debris out of your system. By ensuring that more air is entering the case than is leaving it, you create a scenario where any unfiltered air that does enter is pushed out through the exhaust vents, rather than allowing dust to settle inside. This is especially important for gamers who tend to leave their rigs running for extended periods, as dust buildup can lead to thermal throttling and reduced performance. Cases with multiple front or bottom fans and fewer exhaust options typically favor this airflow method.

On the other hand, **Negative Air Pressure** is characterized by an intake that is weaker than the exhaust. This setup can promote superior cooling for components directly in the airflow path, as the exhaust fans actively pull hot air out, creating a strong flow of fresh, cooler air from outside the case. However, this method often leads to an increase in dust accumulation since unfiltered air is drawn into the case through any available openings, including gaps around cables and components. While some gamers prefer this setup for its cooling benefits, it’s essential to regularly clean out your rig to prevent dust from clogging your fans and heatsinks.

Ultimately, the choice between positive and negative air pressure will depend on your specific needs and preferences. Many enthusiasts find a balanced approach to be the most effective, combining a strategic arrangement of intake and exhaust fans to achieve a harmonious airflow that optimizes cooling while minimizing dust intrusion. As you explore the top PC cases for airflow, consider how each design accommodates these pressure dynamics, ensuring that your gaming rig remains both cool and quiet during those intense gaming sessions.

4. Top 5 PC Cases for Optimal Airflow

When it comes to building a gaming rig that performs at its peak, airflow is paramount. A well-ventilated case not only keeps your components cool but also reduces noise levels, ensuring an immersive gaming experience without unwanted distractions. Here, we’ve rounded up the top five PC cases that excel in providing optimal airflow, allowing gamers to push their systems to the limit without fear of overheating.

### 1. **Fractal Design Meshify C**
The Fractal Design Meshify C is a favorite among enthusiasts for its striking aesthetic and exceptional airflow. With its full mesh front panel, this case promotes unrestricted airflow while maintaining a sleek, modern look. The spacious interior accommodates large graphics cards and multiple cooling options, including support for radiators up to 360mm. The combination of high airflow design and customizable fan options makes the Meshify C a top pick for gamers looking to keep their systems cool and quiet.

### 2. **Corsair 4000D Airflow**
Corsair is known for its commitment to quality and performance, and the 4000D Airflow is no exception. Featuring a front panel designed for maximum airflow, this case comes with two pre-installed AirGuide fans that direct airflow towards your components. The 4000D also offers a generous amount of space for cable management, ensuring a clean build that enhances both aesthetics and cooling efficiency. Gamers will appreciate the ease of installation and the robust cooling potential of this versatile case.

### 3. **NZXT H510 Flow**
The NZXT H510 Flow blends style and functionality, making it an excellent choice for gamers who prioritize both aesthetics and performance. With a mesh front panel for optimal airflow and support for several cooling options, this case ensures your components stay chill under pressure. Its intelligent cable management system simplifies the building process, while the tempered glass side panel showcases your hardware beautifully. The H510 Flow is perfect for those looking to make a statement without sacrificing cooling capabilities.

### 4. **Cooler Master MasterBox Q300L**
For gamers seeking a compact solution without compromising on airflow, the Cooler Master MasterBox Q300L is an ideal choice. This mini-tower case features a perforated front panel and top ventilation, ensuring excellent airflow even in a smaller form factor. It’s designed with versatility in mind, supporting various cooling setups and customizable fan placements. With its lightweight design and easy-to-carry handle, the Q300L is perfect for LAN parties and gamers on the go.

### 5. **Phanteks Eclipse P400A**
The Phanteks Eclipse P400A stands out with its stunning RGB lighting options and superior airflow capabilities. The case features a full mesh front panel and comes with three pre-installed fans, ensuring optimal cooling right out of the box. With ample room for additional cooling solutions and a sleek design, the Eclipse P400A allows for a fully customized build that not only performs well but looks incredible too. Gamers who value aesthetics and functionality will find this case to be a perfect match.

Choosing the right case is essential for maintaining the longevity and performance of your gaming rig. With these top five PC cases for optimal airflow, you can ensure that your components remain cool, quiet, and ready to handle any gaming challenge that comes your way!

– 4.1 Case 1: Features and Benefits

pc gaming -  What are the best PC cases for airflow?
Credit : whatcanu.com

When it comes to optimizing airflow in your gaming rig, **the Corsair 4000D Airflow** stands out as a top contender. This mid-tower ATX case is meticulously designed to balance aesthetics with functionality, ensuring that your components stay cool under pressure while looking sleek on your desk.

**Features:**

One of the standout features of the Corsair 4000D is its innovative airflow design. The front panel boasts a high-performance mesh that allows for maximum air intake, effectively drawing in cool air while minimizing dust buildup. Coupled with a spacious interior that supports up to six fans, this case offers ample room for airflow optimization. The included two 120mm fans are engineered for low noise levels without compromising performance, making it an ideal choice for gamers who prioritize a quiet gaming environment.

The 4000D also supports a variety of cooling options, including compatibility with 240mm and 360mm radiators for those looking to implement liquid cooling solutions. With dedicated cable management channels and tie-down points, you can achieve a clean and organized build that promotes unobstructed airflow.

**Benefits:**

The benefits of the Corsair 4000D Airflow extend beyond just cooling. Its sleek design features a tempered glass side panel, allowing you to showcase your high-end components and RGB lighting. This case isn’t just about looks; it’s built for performance with its easy-to-access dust filters, ensuring that maintenance is a breeze and your components remain pristine.

Moreover, the case’s versatility caters to both novice builders and seasoned enthusiasts. Its intuitive layout simplifies the building process, saving you valuable time and effort. With stellar airflow, striking aesthetics, and practical design features, the Corsair 4000D Airflow is an excellent investment for anyone looking to enhance their gaming rig’s performance while keeping it cool and quiet.

– 4.2 Case 2: Features and Benefits

The **Cooler Master MasterCase H500** stands out as a top contender in the realm of high-performance PC cases designed specifically for optimal airflow. With its striking design and practical functionality, this case is an excellent choice for gamers and PC builders who prioritize cooling efficiency without sacrificing style.

**Features:**

1. **Mesh Front Panels**: The MasterCase H500 is equipped with dual mesh front panels that allow for an impressive influx of fresh air. This feature not only enhances cooling performance but also helps in reducing dust buildup, ensuring that your components remain clean and well-ventilated.

2. **Pre-Installed Fans**: Out of the box, the case comes with two massive 200mm RGB fans at the front and a 120mm exhaust fan at the rear. These fans not only provide substantial airflow but also add a touch of customizable aesthetics with their vibrant lighting options, allowing you to sync them with your gaming setup.

3. **Versatile Cooling Options**: The H500 doesn’t just stop at fans; it offers compatibility with multiple radiator sizes, accommodating both air and liquid cooling solutions. This flexibility means you can tailor your cooling system to suit your gaming needs, whether you prefer a simple air-cooled setup or a more advanced liquid cooling system.

4. **Spacious Interior**: Designed to support a variety of builds, the interior of the MasterCase H500 is spacious enough to house high-end graphics cards and large CPU coolers. The thoughtful cable management system also keeps your build tidy, ensuring optimal airflow without clutter.

**Benefits:**

– **Enhanced Performance**: With its exceptional airflow design and expansive cooling options, the Cooler Master MasterCase H500 ensures that your gaming rig operates at peak performance. Reduced temperatures lead to increased longevity for your components, allowing you to game harder and longer without overheating worries.

– **Aesthetically Pleasing**: Beyond performance, the case’s sleek design and customizable RGB lighting make it a visually appealing addition to any gaming setup. The ability to personalize your case to match your style adds an extra layer of enjoyment to your PC building experience.

– **Easy Accessibility**: The H500’s tempered glass side panel not only showcases your build but also allows for easy access to your components. Whether you need to upgrade your GPU or clean out the dust, accessing your rig is seamless and hassle-free.

In summary, the Cooler Master MasterCase H500 is more than just a pretty face; it’s engineered for optimal airflow and performance. Whether you’re a casual gamer or a hardcore enthusiast, this case is designed to keep your system cool, quiet, and ready for action.

– 4.3 Case 3: Features and Benefits

pc gaming -  What are the best PC cases for airflow?
Credit : whatcanu.com

When it comes to balancing aesthetics, functionality, and optimal airflow, **Case 3** truly stands out as a top contender for any gaming setup. This case is meticulously designed with a focus on cooling efficiency, ensuring that your components not only perform at their best but do so quietly, enhancing your overall gaming experience.

One of the most notable features of **Case 3** is its innovative airflow design. The case boasts a mesh front panel that promotes unrestricted air intake, allowing cool air to flow directly to your GPU and CPU. This design not only assists in maintaining lower temperatures but also helps in minimizing dust accumulation, ensuring that your components stay clean and efficient over time. The strategically placed dust filters are easy to remove and clean, further simplifying maintenance.

In addition to its cooling capabilities, **Case 3** comes equipped with multiple fan mounting options, supporting both 120mm and 140mm fan sizes. This flexibility allows you to customize your cooling setup according to your specific needs, whether you prefer a more aggressive cooling solution or a quieter operation. The case also features built-in RGB lighting options, giving you the ability to personalize your rig with vibrant colors and effects, all while maintaining a sleek appearance.

Moreover, **Case 3** is designed with cable management in mind. It includes ample space behind the motherboard tray for routing cables, which not only helps in improving airflow but also contributes to a cleaner, more organized interior. This is crucial for any gamer who appreciates aesthetics as much as performance.

The spacious interior of **Case 3** supports a variety of configurations, accommodating high-end GPUs and even multiple radiators for liquid cooling setups. This adaptability ensures that as your gaming needs evolve, your case can keep up with the demands of the latest hardware.

In summary, **Case 3** provides an exceptional blend of functionality and style, making it a prime choice for gamers who prioritize cooling and aesthetics. Its superior airflow design, customizable options, and practical features make it a valuable addition to any gaming rig, ensuring that your system remains cool and quiet during those intense gaming sessions.

– 4.4 Case 4: Features and Benefits

The **Cooler Master H500** is a standout option for gamers who prioritize both aesthetics and airflow in their PC builds. With its striking design, featuring a sleek tempered glass side panel, this case offers a window into your meticulously crafted rig, showcasing the vibrant RGB lighting of your components. But it’s not just about looks; this case is engineered for optimal cooling performance.

One of the defining features of the Cooler Master H500 is its impressive airflow system. It comes equipped with two 200mm ARGB fans at the front, drawing in ample fresh air while creating a dramatic visual impact. An additional 120mm fan at the rear ensures that hot air is efficiently expelled, maintaining a steady airflow throughout the case. This thoughtful design minimizes the risk of thermal throttling during intense gaming sessions, allowing your hardware to perform at its best.

The spacious interior of the H500 supports a variety of configurations, accommodating large graphics cards and multiple cooling options, including liquid cooling systems. This flexibility means you can customize your setup to meet your specific performance needs or aesthetic desires.

Additionally, the case offers thoughtful cable management options, with ample space behind the motherboard tray for tidy routing. This not only enhances airflow but also creates a clean and organized look for your build.

In summary, the Cooler Master H500 is a perfect blend of style and substance, making it a top choice for gamers who want a case that cools effectively while also making a statement. With its robust features and user-friendly design, it ensures that your gaming rig stays cool and quiet, even during the most demanding gaming marathons.

– 4.5 Case 5: Features and Benefits

When it comes to balancing aesthetics and functionality, Case 5 stands out as a top contender in the world of PC cases designed for optimal airflow. Crafted with gamers in mind, this case combines sleek design with a series of features aimed at enhancing cooling efficiency and minimizing noise.

**1. Mesh Front Panel:** One of the standout features of Case 5 is its full-length mesh front panel. This design not only provides a contemporary look but also facilitates unrestricted airflow. The mesh allows cold air to flow directly into the case, cooling your components effectively while preventing dust accumulation, a common concern for many PC builders.

**2. Multiple Cooling Options:** To further enhance its cooling capabilities, Case 5 supports an array of cooling configurations. It comes pre-installed with two high-performance fans, with additional mounting points available for up to six fans in total. This flexibility allows you to tailor your cooling setup according to your specific needs, whether you prefer a push-pull configuration or simply want to maximize airflow.

**3. Spacious Interior:** The case boasts a roomy interior that accommodates even the largest graphics cards and CPU coolers. With ample space to work, builders can manage cables more efficiently, promoting better airflow within the case. Less clutter translates to better performance, ensuring that your hardware operates at optimal temperatures.

**4. Sound-Dampening Features:** In addition to its airflow benefits, Case 5 is designed with noise reduction in mind. It features sound-dampening panels that help absorb and minimize operational noise, allowing you to enjoy a quieter gaming experience. This is particularly beneficial during intense gaming sessions or when running demanding applications.

**5. RGB Lighting Compatibility:** For gamers who love to personalize their setups, Case 5 is compatible with RGB lighting systems. Built-in channels and mounts allow for easy installation of RGB fans and strips, enabling you to create a visually stunning rig that reflects your style.

In summary, Case 5 combines impressive airflow capabilities with thoughtful design features that cater to gamers and PC enthusiasts alike. With its blend of performance, aesthetics, and noise reduction, it’s an excellent choice for anyone looking to build a powerful and visually appealing gaming rig.

5. Budget-Friendly Options for Great Airflow

When assembling your ultimate gaming rig, you don’t have to break the bank to ensure optimal airflow. There are numerous budget-friendly PC cases that offer impressive cooling capabilities without sacrificing performance or aesthetics. These options are perfect for gamers on a budget who still want to maintain a cool and quiet environment for their system.

One standout choice is the **Cooler Master MasterBox Q300L**. This compact case is designed with a mesh front panel and ventilation on both sides, promoting excellent airflow while maintaining a sleek profile. With its versatile layout and support for multiple cooling fans, the Q300L effectively dissipates heat without putting a dent in your wallet.

Another fantastic option is the **NZXT H510**, which combines affordability with functionality. Featuring a tempered glass side panel for a stylish look, the H510 also incorporates cable management features and a well-thought-out airflow design. It allows for the installation of multiple fans and even liquid cooling solutions, ensuring that your components stay frosty during long gaming sessions.

If you prefer a more minimalistic design, the **Fractal Design Focus G** is a case that delivers both aesthetic appeal and efficient airflow. With its dual front mesh panels and included fans, the Focus G promotes a steady flow of cool air into your system while providing ample space for additional upgrades in the future.

Choosing a budget-friendly case doesn’t mean you have to compromise on performance. By selecting one of these options, you can create a powerful gaming setup that remains cool and quiet, allowing you to fully immerse yourself in your gaming adventures without worrying about overheating components or excessive noise.

6. Premium Cases for Enthusiasts: Performance and Aesthetics

When it comes to building the ultimate gaming rig, enthusiasts know that performance and aesthetics go hand in hand. Premium PC cases designed for power users not only offer superior airflow but also make a statement with their striking designs. These cases often incorporate high-quality materials, innovative engineering, and customizable lighting, allowing gamers to create a setup that reflects their personal style while optimizing their system’s thermal performance.

Take, for instance, cases featuring tempered glass panels that showcase your meticulously arranged components and RGB lighting. These visually stunning designs not only draw attention but also serve a functional purpose—allowing for ample airflow while enabling you to admire your hardware. Many premium cases also come equipped with advanced cooling solutions, such as pre-installed fans with customizable speeds and additional fan mounts to achieve the perfect balance between airflow and noise levels.

Moreover, these enthusiast-grade cases often provide ample space for liquid cooling systems, which can significantly enhance cooling performance while keeping noise to a minimum. With flexible cable management options and modular designs, they ensure a clean and efficient build that not only performs at its best but looks incredible doing so.

For those serious about gaming and performance, investing in a premium PC case is more than just a purchase; it’s a commitment to superior cooling, ease of assembly, and aesthetic appeal that elevates the entire gaming experience. Whether it’s a sleek, minimalist design or a bold, futuristic look, these cases are crafted for those who demand the best from their systems and understand that a well-cooled rig is essential for peak performance.

7. How to Properly Position Fans for Maximum Cooling

When it comes to optimizing the airflow in your PC case, the positioning of your fans can make a world of difference. Proper fan placement not only enhances cooling performance but also contributes to a quieter system by ensuring air flows smoothly without turbulence. Here are some key strategies to achieve maximum cooling efficiency.

First and foremost, it’s crucial to understand the concept of airflow direction. Most fans are designed to push air in one direction, typically indicated by arrows on the side of the fan housing. As a general rule, front and bottom fans should bring cool air into the case, while rear and top fans should exhaust hot air out. This creates a balanced airflow, often referred to as a “positive pressure” setup, which helps prevent dust buildup while maintaining optimal temperatures.

Consider the configuration of your components as well. For instance, if you have a high-performance GPU that generates a substantial amount of heat, position an intake fan directly in front of it to ensure a steady stream of cool air. Additionally, if your CPU cooler is top-mounted, pairing it with a top exhaust fan can efficiently extract the rising heat generated by the processor.

Another important factor is fan speed and noise levels. Many modern fans come with adjustable speed settings, allowing you to find the sweet spot between cooling and noise. Using software to monitor temperatures can help you adjust the fan speeds dynamically, ensuring that cooling is sufficient during intense gaming sessions without unnecessary noise during lighter workloads.

Lastly, don’t overlook the importance of clear airflow paths. Avoid cluttering your case with excess cables or components that could obstruct airflow. Utilizing cable management solutions not only improves aesthetics but also significantly enhances airflow within the case.

In summary, the proper positioning of fans is essential for maintaining optimal airflow and cooling in your gaming rig. By strategically placing intake and exhaust fans, considering the heat output of your components, and ensuring unobstructed air pathways, you can create a system that runs cooler and quieter, allowing for a seamless gaming experience.

8. The Role of Dust Filters in Maintaining Airflow

When it comes to optimizing airflow in your gaming rig, dust filters play a crucial and often overlooked role. Imagine your PC as a finely tuned high-performance engine; just as an engine needs clean air to function efficiently, your system requires unobstructed airflow to keep temperatures down and components running smoothly. Dust filters act as the first line of defense against pesky particles that can accumulate over time and impede airflow, leading to overheating and decreased performance.

High-quality dust filters are typically made from fine mesh materials that allow air to flow freely while capturing dust, pet hair, and other debris before they can enter your case. Many modern PC cases come equipped with these filters, strategically placed in areas where air intake occurs—such as the front panel, bottom, and even the side vents. What’s more, the best dust filters are designed to be easily removable and washable, making maintenance a breeze. Regularly cleaning these filters can significantly enhance your system’s airflow, ensuring your rig remains cool and quiet during those intense gaming sessions.

Moreover, keeping your PC dust-free not only helps with temperature management but also extends the lifespan of your components. Dust buildup can lead to fan malfunctions, overheating graphics cards, and even power supply failures. By incorporating dust filters into your gaming setup, you’re not just investing in airflow; you’re also protecting your investment and ensuring that every gaming experience remains top-notch. So, when selecting a case, don’t underestimate the importance of effective dust filtration—it’s a small feature that can have a monumental impact on performance and longevity.

9. Cable Management Tips for Improved Airflow

When it comes to optimizing airflow in your gaming rig, cable management is often an overlooked aspect that can significantly impact both performance and aesthetics. A cluttered interior filled with tangled wires can obstruct airflow, trapping heat and causing your components to work harder than necessary. Here are some essential cable management tips to enhance airflow and keep your gaming PC running cool and quiet.

First, invest in high-quality cable ties or Velcro straps. These simple tools can help you bundle cables together neatly, reducing the visual chaos that can impede airflow. By securing cables along the edges of your case or routing them behind the motherboard tray, you can create a clear path for air to flow from front to back, ensuring that your cooling fans and heat sinks can operate efficiently.

Next, consider using cable extensions for your power supply. Many modular power supplies allow you to connect only the cables you need, reducing excess wiring. Opting for sleeker, low-profile cables can also minimize bulk, enabling better airflow around your components. This is particularly helpful in cases with tempered glass side panels, where aesthetics are just as important as functionality.

Additionally, always pay attention to the orientation of your cables. Try to route them in a way that keeps them away from fan intakes and exhausts. For instance, if you’re using fans at the front of the case to draw in cool air, position power and data cables behind the motherboard tray or along the sides of the case. This not only promotes better airflow but also helps prevent potential airflow obstructions.

Finally, don’t forget about regular maintenance. Dust accumulation can choke airflow and make your cable management efforts moot. Periodically open your case to clean out dust bunnies and ensure that your cables remain tidy and out of the way.

By implementing these cable management tips, you’ll not only enhance the airflow in your gaming rig but also create a cleaner, more organized environment that showcases your components beautifully. A well-maintained system is key to achieving optimal performance, so take the time to manage those cables — your gaming experience will thank you!

10. Custom Cooling Solutions: Liquid Cooling vs. Air Cooling

When it comes to keeping your gaming rig cool and running quietly, the debate between liquid cooling and air cooling is one that every PC builder faces. Both options have their merits, but understanding their differences can help you make an informed choice that best suits your setup and gaming needs.

**Liquid Cooling** is often viewed as the superior option for those pushing their hardware to the limits. These systems use a series of tubes and a radiator to circulate coolant around your CPU or GPU, effectively dissipating heat more efficiently than traditional air coolers. The result? Lower temperatures and potentially quieter operation. Liquid cooling can be particularly advantageous for overclockers who demand maximum performance from their components, as it allows for higher clock speeds without the risk of thermal throttling. Additionally, custom liquid cooling solutions offer aesthetics that can elevate the overall look of your build, with vibrant coolant colors and illuminated components that make your rig a visual masterpiece.

On the other hand, **Air Cooling** remains a popular choice for many gamers and system builders due to its simplicity and reliability. High-quality air coolers can provide excellent thermal performance, often at a lower cost and with less maintenance than their liquid counterparts. Unlike liquid cooling systems, air coolers do not run the risk of leaks, which can be a significant concern for those unfamiliar with liquid cooling setups. Furthermore, advancements in air cooler technology, such as larger heat sinks and more efficient fan designs, have made them increasingly capable of handling even high-performance CPUs and GPUs.

Ultimately, the choice between liquid and air cooling comes down to your specific needs, preferences, and comfort level with setup and maintenance. If you value aesthetics and are willing to invest in a more complex system, liquid cooling might be your best bet. However, if you prefer a no-fuss approach with reliable performance, a high-quality air cooler can keep your gaming rig cool and quiet, allowing you to focus on what matters most: enjoying your games.

11. The Impact of Ambient Temperature on Gaming Performance

When it comes to gaming performance, one often overlooked factor is the ambient temperature of your environment. While we tend to focus on high-end graphics cards, powerful CPUs, and advanced cooling solutions, the temperature of the room where your gaming rig resides can significantly influence how well those components perform.

A higher ambient temperature can lead to an increase in the internal temperature of your PC, causing your components to throttle down to prevent overheating. This throttling can result in lower frame rates, increased loading times, and an overall less enjoyable gaming experience. Conversely, a cooler room can help maintain optimal operating temperatures for your hardware, allowing it to run at peak performance without the fear of overheating.

Moreover, the relationship between temperature and performance extends beyond just the immediate effects on gaming. Components like graphics cards and processors are designed to operate within specific temperature ranges. When the ambient temperature rises, even the best cooling systems can struggle to keep everything within those safe limits. This is especially true during long gaming sessions when heat builds up over time.

Additionally, consider how ambient temperature affects the efficiency of your cooling solutions. For example, if you’re using air cooling, warmer surrounding air can reduce the cooling potential of your fans, leading to higher internal temperatures. On the other hand, liquid cooling systems often perform better in cooler environments, as they can dissipate heat more effectively.

To mitigate the effects of ambient temperature, ensure that your gaming area is well-ventilated and consider investing in additional cooling solutions, such as extra case fans or an air conditioner. By creating a comfortable environment for both you and your gaming rig, you can enhance performance, prolong the life of your components, and enjoy a seamless gaming experience. Remember, a cooler environment equals a cooler rig!

12. Case Modding for Enhanced Airflow: DIY Tips

Case modding is an exciting and rewarding way to enhance the airflow of your gaming rig while showcasing your personal style. Whether you’re a seasoned modder or just starting out, there are plenty of practical DIY tips to help you achieve optimal airflow and keep your system cool and quiet.

**1. Upgrade Your Fans:** Start with the basics—upgrading your case fans can make a significant difference in airflow. Look for high-quality, high-CFM (Cubic Feet per Minute) fans that offer a good balance between airflow and noise levels. Consider using larger fans, as they can move more air at lower RPMs, resulting in less noise.

**2. Optimize Fan Placement:** The arrangement of your fans matters. Typically, you want to create a balance between intake and exhaust. Position fans to draw cool air from the front and bottom of the case while exhausting warm air from the rear and top. Experiment with different configurations to find what works best for your setup.

**3. Remove Obstructions:** Ensure that there are no cables or components obstructing airflow within the case. Use cable management techniques such as zip ties or Velcro straps to neatly bundle and route cables away from airflow pathways. Additionally, consider removing unused drive bays or components that may hinder air circulation.

**4. Create Airflow Channels:** Consider adding custom ducting to direct airflow more effectively. This could be as simple as using cardboard or plastic sheeting to create channels that guide cool air directly over critical components, like your GPU and CPU, and out through exhaust fans.

**5. Install Dust Filters:** While it may seem counterintuitive, installing dust filters on your intake fans can improve airflow in the long run. Keeping dust out of your case will ensure that fans can operate efficiently without getting clogged, which can restrict airflow and lead to higher temperatures. Just remember to clean these filters regularly!

**6. Experiment with Case Panels:** If your case has solid side panels, consider replacing them with tempered glass or mesh panels. Mesh panels allow for better airflow while still showcasing your components. If you’re feeling adventurous, you could even cut out sections of the existing panels to create a more open design.

**7. Monitor Your Temperatures:** After making modifications, keep an eye on your system temperatures. Use software tools to monitor the CPU and GPU temperatures to ensure that your modifications are having the desired effect. This will help you fine-tune your setup for the best performance.

Case modding is not just about aesthetics; it’s about creating an efficient cooling system that enhances the longevity and performance of your gaming rig. By implementing these DIY tips, you can ensure that your components remain cool and quiet, allowing you to fully enjoy your gaming experience without the distraction of overheating or noisy fans. Happy modding!

13. Real User Reviews and Feedback on Top Cases

When it comes to selecting the perfect PC case for optimal airflow, there’s no better resource than the real-world experiences of fellow gamers and builders. User reviews offer invaluable insights that go beyond the technical specifications, revealing how these cases perform under pressure and in everyday use.

For instance, many users rave about the cooling efficiency of the **Fractal Design Meshify C**, noting its exceptional airflow thanks to a front panel comprised primarily of mesh. Gamers have reported that even during marathon gaming sessions, their components remained cool, and noise levels were remarkably low, allowing for an immersive experience. Feedback highlights not just temperature management, but also the ease of installation, making it a favorite among both novices and seasoned builders.

Conversely, some users may voice concerns about certain features. Take the **Corsair 4000D Airflow**, which has been praised for its spacious interior and cable management options. Yet, a few reviewers have pointed out that while its airflow is excellent, the glass side panel can sometimes be a fingerprint magnet, requiring regular cleaning to maintain its aesthetic appeal. Such candid feedback helps prospective buyers weigh the pros and cons before making a decision.

Additionally, many users share tips based on their experiences. For example, with cases like the **NZXT H510**, customers frequently recommend using additional aftermarket fans to further enhance airflow, especially if they plan on overclocking their components or using high-performance hardware.

Reading through these real user reviews not only helps you gauge the performance of each case but also provides a sense of community—an understanding that you’re not alone in your quest for the ideal setup. Ultimately, the shared experiences of fellow gamers can guide you toward a case that not only keeps your rig cool but also fits your aesthetic and functional needs perfectly. Whether you’re looking for the sleek design or superior airflow, tapping into the wisdom of real users can make all the difference in your purchasing decision.

14. Conclusion: Choosing the Right Case for Your Needs

In conclusion, selecting the right PC case is a pivotal decision that goes beyond mere aesthetics; it directly impacts your system’s performance, cooling efficiency, and overall longevity. As we’ve explored throughout this guide, optimal airflow is essential for maintaining lower temperatures in your gaming rig, which in turn enhances component lifespan and ensures smooth performance during those intense gaming sessions.

When choosing a case, consider factors such as size, airflow design, and compatibility with your existing hardware. A well-ventilated case with strategically placed fans can make all the difference in preventing thermal throttling and reducing noise levels. Look for cases that offer ample space for future upgrades, as well as features like dust filters to keep your components clean.

Additionally, think about your personal style and how the case fits into your gaming environment. Whether you prefer sleek minimalism or vibrant RGB lighting, there’s a perfect case out there to reflect your personality while delivering optimal functionality.

Ultimately, investing time in researching and selecting the right case can lead to a more enjoyable and trouble-free gaming experience. So take your time, weigh your options, and choose a case that not only meets your cooling needs but also complements your gaming setup perfectly. Your future self—and your gaming rig—will thank you!

15. Additional Resources for PC Building and Cooling Techniques

When embarking on the journey of PC building and ensuring optimal cooling for your gaming rig, having access to the right resources can make all the difference. Fortunately, the PC building community is vast and teeming with knowledge, offering a plethora of guides, forums, and video tutorials to help both novice and experienced builders achieve their goals.

**Online Communities and Forums**
Platforms like Reddit, Tom’s Hardware, and Linus Tech Tips are treasure troves of information. Here, you can engage with fellow enthusiasts, ask questions, and share experiences. These forums offer insights on everything from choosing the right case for airflow to troubleshooting cooling issues as they arise. The collaborative spirit of these communities means you’re never alone in your quest for the perfect build.

**YouTube Tutorials**
Visual learners will find YouTube invaluable. Channels dedicated to PC building often feature step-by-step guides that cover everything from basic assembly to advanced cooling techniques. Look for videos that specifically address airflow optimization and case reviews, as these can provide real-world demonstrations of how different cases perform under load. Seeing a cooling setup in action can help you visualize how to implement similar strategies in your own rig.

**Manufacturer Resources**
Don’t overlook the resources provided by case manufacturers themselves. Many brands, such as Corsair, NZXT, and Cooler Master, have detailed product pages that include airflow diagrams, cooling performance benchmarks, and user manuals. These documents often contain useful tips on fan placement and optimal cooling configurations tailored to their specific cases.

**Cooling Product Reviews**
Before investing in cooling components, take the time to read reviews from trusted tech sites. Websites like PC Gamer, AnandTech, and TechRadar typically conduct thorough testing and provide insights into the most efficient cooling solutions available. Understanding the pros and cons of various fans, liquid cooling systems, and thermal pastes can equip you with the knowledge to make informed decisions that enhance your build’s performance.

**Guides on Airflow Optimization**
Finally, consider seeking out comprehensive guides that focus specifically on airflow optimization techniques. These resources will delve into topics such as positive vs. negative pressure setups, the importance of dust filters, and how to achieve an unobstructed airflow path. Mastering these principles will not only keep your gaming rig cool but also extend the lifespan of your components.

By tapping into these additional resources, you’ll be well on your way to creating a gaming rig that not only performs at its best but stays cool and quiet, allowing you to fully immerse yourself in your favorite games without distraction. Happy building!

In conclusion, investing in the right PC case is crucial for achieving optimal airflow and maintaining a cool, quiet gaming rig. The options we’ve explored in this post offer a variety of features tailored to suit different needs and preferences, ensuring that you can find the perfect fit for your setup. Whether you prioritize aesthetics, functionality, or noise reduction, there’s a case out there that can enhance your gaming experience while keeping your components safe and performing at their best. As you embark on your journey to upgrade your setup, remember that a well-ventilated case not only extends the lifespan of your hardware but also elevates your gaming performance. Happy building, and may your gaming sessions be both cool and exhilarating!

Can you swallow your tongue ?

Many of you have heard stories of people being saved from swallowing their own tongue. Is this something possible in reality?

No, it is physically impossible to swallow your tongue. The latter is attached to the base of the mouth, making it impossible to swallow it. In addition, the muscles in the mouth and throat work together to prevent such an occurrence.

tongue
Credit : Eric Peacock

Indeed, the tongue is attached to the bottom of the mouth by a band of tissue called the frenulum. Even if someone tries to forcibly push their tongue back, the frenulum will prevent it from being swallowed.

Additionally, it is a muscle and would require a significant amount of force to dislodge it from its attachment. Attempting to do so could cause serious injury and should be avoided.

Moreover, it serves important functions such as tasting, swallowing, and speaking, and any attempts to alter its position can affect these abilities. In rare cases, people may experience a reflex that causes the tongue to briefly move to the back of the mouth, but it quickly returns to its normal position.

Can it happen during a seizure ?

However, there is a common misconception that a person can accidentally swallow their tongue during a seizure. This is not true. During a seizure, the muscles in the mouth and throat may relax, causing the tongue to move to the side of the mouth. A person experiencing a seizure should be placed on their side to prevent them from choking on their own saliva.

In rare cases, a person may have a condition called ankyloglossia, also known as “tongue-tie.” This is when the frenulum is shorter than usual, limiting movement in the area. This can make it difficult to eat, speak, and even swallow. However, even in these cases, it is still impossible to swallow the tongue.

Overall, swallowing your tongue is a myth and should not be a concern. It is important to educate yourself and others on the facts and to seek proper medical attention if needed. You can visit other sections about health to learn more.