How to build a simple outdoor fire pit?

Imagine gathering with family and friends under a starlit sky, the warm glow of a crackling fire providing both light and comfort as you share stories and laughter.

An outdoor fire pit not only enhances your backyard but also creates the perfect atmosphere for memorable evenings. Building your own fire pit can seem like a daunting task, but it doesn’t have to be! With just a few essential materials and a bit of creativity, you can create a cozy gathering spot that adds charm to your outdoor space. In this blog post, we’ll guide you through five easy steps to construct a simple yet stylish fire pit that will transform your backyard into an inviting oasis. Whether you’re roasting marshmallows or simply enjoying the warmth of the flames, this DIY project is sure to ignite your passion for outdoor living!

1. Introduction: Why Build Your Own Fire Pit?

How to build a simple outdoor fire pit?
Credit : whatcanu.com

### 1. Introduction: Why Build Your Own Fire Pit?

Imagine a warm evening under the starlit sky, the crackling sound of firewood, and the comforting glow of flames illuminating the faces of friends and family gathered around. An outdoor fire pit serves as more than just a source of heat; it becomes the heart of your backyard, a place where memories are forged, stories are shared, and laughter resonates long into the night. Building your own fire pit not only enhances your outdoor space but also offers numerous advantages that make it a worthwhile DIY project.

First and foremost, crafting your own fire pit allows you to customize it to fit your personal style and the aesthetic of your yard. Whether you envision a rustic stone circle, a modern metal design, or a classic brick structure, the possibilities are endless. This personalization not only adds charm to your outdoor area but also ensures that your fire pit complements your home’s architecture.

In addition to aesthetic benefits, constructing your own fire pit can save you a significant amount of money compared to purchasing a pre-made unit. With some basic materials and tools, you can create a functional and attractive fire pit that meets your needs without breaking the bank. Plus, there’s an undeniable satisfaction that comes from building something with your own hands—a sense of pride and accomplishment knowing that you created a space for cherished gatherings.

Furthermore, a DIY fire pit can serve as a catalyst for community and connection. It encourages outdoor living and provides the perfect backdrop for family barbecues, parties with friends, or quiet evenings spent with a favorite book and a cup of tea. By building your own fire pit, you’re not just investing in a feature for your yard; you’re creating an invitation for connection and relaxation.

In this blog post, we’ll take you through five easy steps to build your own simple outdoor fire pit. Whether you’re a seasoned DIY enthusiast or a beginner looking to dip your toes into home improvement, you’ll find that this project is both accessible and rewarding. So gather your materials, roll up your sleeves, and let’s get started on creating the perfect gathering spot for those unforgettable evenings around the fire!

2. Step 1: Choosing the Right Location

Choosing the right location for your outdoor fire pit is a crucial first step that sets the foundation for safe and enjoyable gatherings with family and friends. When selecting a spot, consider the layout of your yard, existing structures, and natural elements. Aim for a flat, even surface that’s away from overhanging branches, fences, or any flammable materials. A distance of at least 10 to 20 feet from your home and other structures is ideal to prevent the risk of sparks igniting anything nearby.

Take a moment to envision how you plan to use your fire pit. Do you want it nestled within a cozy seating area, surrounded by comfortable chairs and blankets for chilly evenings? Or perhaps you envision a more open space where guests can gather under the stars? Whichever setting you prefer, ensure it’s easily accessible for guests while also offering some level of privacy from neighbors.

Consider the prevailing wind direction as well. Positioning your fire pit in a way that the smoke drifts away from your seating area will enhance your comfort and enjoyment. Also, think about how the fire pit will look in relation to your garden or patio. A well-placed fire pit can become a stunning focal point, adding both charm and functionality to your outdoor space.

Lastly, check local regulations regarding fire pits, as some areas may have restrictions on where they can be placed or require certain safety measures. By thoughtfully choosing the right location, you’ll create a safe and inviting atmosphere that encourages countless memorable evenings spent around the warmth of your new fire pit.

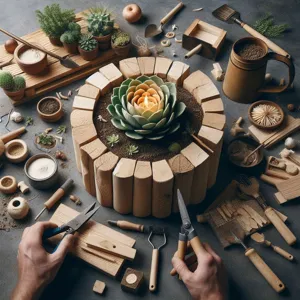
3. Step 2: Gathering Your Materials

How to build a simple outdoor fire pit?
Credit : whatcanu.com

Gathering your materials is a crucial step in building your own outdoor fire pit, as it lays the foundation for a safe and enjoyable gathering space in your backyard. Before you head out to the hardware store, take a moment to consider the design and size of your fire pit. Are you envisioning a compact circular pit for intimate gatherings, or a larger square fire feature for bigger parties? This decision will influence the quantity and type of materials you’ll need.

Here’s a basic list to get you started:

1. **Fire Pit Ring**: You can choose from a variety of materials such as bricks, stones, or concrete blocks. These not only form the structure of your pit but also provide durability against heat. If you want a more polished look, consider purchasing a steel fire pit ring.

2. **Gravel or Sand**: This will serve as the foundation for your fire pit. A layer of gravel or sand helps with drainage and prevents moisture from accumulating at the bottom, which can impact the longevity of your fire pit.

3. **Firewood**: Depending on your pit’s design, you’ll need firewood or charcoal for fuel. Choose seasoned hardwoods like oak or maple for a longer burn time and less smoke.

4. **Outdoor Seating**: While not part of the fire pit itself, comfortable seating is essential for creating a welcoming atmosphere. Think about benches, adirondack chairs, or even a rustic log seating arrangement to complement your outdoor space.

5. **Safety Gear**: Don’t forget to equip yourself with safety gear! A sturdy pair of gloves, a shovel, and a bucket of water or a fire extinguisher are essential to ensure you’re prepared for any situation.

Once you have everything you need, you’ll be ready to move on to the next step of constructing your fire pit. With the right materials in hand, you can create a cozy and inviting outdoor space that will be the highlight of your backyard gatherings.

4. Step 3: Designing Your Fire Pit

Designing your fire pit is where the creative magic happens, allowing you to personalize your outdoor space while ensuring functionality and safety. Before diving into the construction phase, take a moment to visualize how your fire pit will fit into your yard’s overall aesthetic and layout. Consider the size and shape that best suits your needs—whether you prefer a cozy circular design for intimate gatherings or a square configuration for larger groups.

The materials you choose will play a significant role in the appearance and durability of your fire pit. If you’re going for a rustic look, natural stone or brick can blend beautifully with the surrounding landscape. Alternatively, sleek metal designs can bring a modern vibe to your outdoor area. Don’t forget to think about seating arrangements; integrating built-in benches or surrounding the fire pit with comfortable chairs can create an inviting atmosphere.

Next, think about the height of your fire pit. A raised design can help contain the flames and make it easier to cook over, while a lower pit can foster a more intimate setting. You might also want to incorporate decorative elements like colored glass stones, which can add a pop of color and enhance the flickering glow of the fire.

Be sure to consider safety features as well, such as a spark screen or a fire pit ring, which can keep the flames contained and minimize the risk of embers escaping. Lastly, sketch out your design, noting dimensions and materials, to ensure you have a clear blueprint to follow when it’s time to build. With a thoughtful design in place, you’ll be one step closer to crafting the perfect gathering spot for unforgettable evenings under the stars.

5. Step 4: Preparing the Site

How to build a simple outdoor fire pit?
Credit : whatcanu.com

### Step 4: Preparing the Site

Now that you’ve gathered your materials and outlined where your fire pit will sit, it’s time to prepare the site for your backyard bonfire haven. This crucial step ensures that your fire pit is not only functional but also safe and aesthetically pleasing.

Begin by clearing the chosen area of any debris, grass, and rocks. Use a shovel to remove the top layer of soil, creating a level surface that is at least a few feet wider than the fire pit itself. This extra space allows for a buffer zone, which is essential for safety and helps prevent any stray embers from igniting nearby vegetation.

Next, consider the proximity of your fire pit to structures, trees, or anything flammable. Ideally, it should be located at least 10 to 15 feet away from any structures or overhanging branches. This distance minimizes risk and ensures that you can enjoy your fire without worry.

After you’ve established a clear and safe area, it’s time to lay down a foundation. Use gravel or sand to create a stable base. Spread a layer about 2 to 3 inches deep, leveling it out to provide an even surface. This foundation will not only help with drainage but also prevent weeds from growing around your fire pit, maintaining a clean look.

Finally, mark the perimeter of your fire pit with stakes and string, or simply use a garden hose to create a circular outline. This visual guide will help you when it’s time to set your stones or bricks in place, ensuring that your fire pit has a uniform shape and inviting appearance.

With the site prepared, you’re one step closer to creating your cozy outdoor retreat. In the next step, you’ll learn how to assemble your fire pit and bring your vision to life!

6. Step 5: Constructing the Fire Pit

### Step 5: Constructing the Fire Pit

Now that you’ve prepared your space and gathered your materials, it’s time for the most exciting part: constructing your fire pit! This step is where your vision transforms into reality, and you’ll soon have a cozy spot to gather around on chilly evenings.

**Start with the Base:** Begin by laying a sturdy foundation. If you opted for a stone or brick fire pit, arrange the first layer of bricks or stones in a circle, ensuring they are level and stable. This will be the base of your fire pit, so take your time to ensure everything is aligned properly. A well-laid foundation will provide durability and safety for your fire pit.

**Build Upward:** Once your base is secure, continue stacking additional layers of bricks or stones. Depending on the height you desire, you can build your fire pit anywhere from two to four layers tall. As you stack, use a masonry adhesive between layers to prevent shifting and ensure a secure hold. For added flair, consider alternating the brick pattern to create a more visually appealing design.

**Create a Fire Ring:** To enhance safety, line the inside of your fire pit with fire-resistant materials. This can be done with fire bricks or a metal fire ring. These materials not only provide additional protection to the surrounding area, but they also help to contain the fire and radiate heat more effectively.

**Finishing Touches:** After constructing the main structure, take a step back and assess your work. You can customize your fire pit further by adding decorative stones, pebbles, or even a seating area around it. If you like, incorporate features such as benches or log seating to make your fire pit the perfect gathering spot for friends and family.

**Prepare for the Fire:** Finally, once all the construction is complete, clear out any debris from the inside of the fire pit. You can create a small bed of sand or gravel at the bottom to improve drainage and provide an even surface for your fire. Now, you’re ready to light your first fire and enjoy the warmth and ambiance of your new outdoor oasis!

With your fire pit constructed, you’ve not only added a functional feature to your backyard but also created a charming centerpiece for gatherings, storytelling, and s’mores-making adventures under the stars. Enjoy the cozy evenings ahead!

7. Safety Precautions to Consider

How to build a simple outdoor fire pit?
Credit : whatcanu.com

When it comes to building your own outdoor fire pit, safety should always take precedence. A cozy fire is a wonderful addition to your backyard, but ensuring that it’s safe for you, your family, and your property is essential. Here are some crucial safety precautions to consider before you light your first flame.

**1. Choose the Right Location:** Before you begin construction, select a location that is a safe distance from any structures, trees, or overhanging branches. A minimum of 10 to 15 feet away from your home, fences, and other flammable materials is ideal. Opt for a flat, stable surface to prevent any potential accidents.

**2. Use Fire-Resistant Materials:** Whether you’re using bricks, stones, or metal, make sure to select fire-resistant materials specifically designed for high temperatures. Avoid using treated wood, as it can release harmful chemicals when burned.

**3. Have a Fire Extinguisher Handy:** Always keep a fire extinguisher nearby or a bucket of sand or water to extinguish any flames quickly if they get out of hand. Familiarize yourself with how to use it before you start your fire.

**4. Monitor Wind Conditions:** Wind can quickly turn a small, contained fire into a larger, uncontrollable blaze. On windy days, consider postponing your fire pit gatherings to avoid potential hazards. Always check the weather forecast before lighting up.

**5. Supervise the Fire:** Never leave your fire unattended, especially if children or pets are around. Maintain a safe circle around the fire pit and educate your family about the importance of keeping a safe distance. When you’re finished enjoying the fire, make sure to completely extinguish it before leaving the area.

By taking these essential safety precautions, you can enjoy the warmth and ambiance of your DIY fire pit without worry. Remember, a little preparation goes a long way in ensuring a safe and enjoyable experience for everyone. Happy building!

8. Tips for Fire Pit Maintenance

Once you’ve constructed your outdoor fire pit, it’s essential to keep it in good condition to ensure safe and enjoyable use for years to come. Regular maintenance not only enhances the longevity of your fire pit but also keeps it looking great in your backyard.

**1. Clean Regularly:** After each use, make it a habit to clean your fire pit. Remove ashes and leftover debris using a metal shovel or a vacuum designed for ashes. Allowing ashes to accumulate can lead to rusting or damage, especially in metal fire pits. A clean fire pit also promotes better airflow for future fires.

**2. Check for Damage:** Regularly inspect your fire pit for any signs of wear and tear. Look for cracks, rust, or loose stones, especially after heavy use or inclement weather. Addressing these issues promptly can prevent more extensive damage down the line. For stone or brick fire pits, ensure that the mortar is intact and repair any gaps that appear.

**3. Protect from the Elements:** If your fire pit is made of metal, consider using a cover when it’s not in use. This will protect it from rain, snow, and harsh sun, which can lead to rust or fading. For stone or brick fire pits, a cover can help keep out debris and prevent moisture buildup, which can freeze and crack the structure.

**4. Use the Right Fuel:** To prolong the life of your fire pit, be mindful of the materials you burn. Avoid using treated wood, plastics, or other materials that can create harmful smoke and residue. Instead, opt for seasoned hardwoods, which burn cleaner and produce less ash.

**5. Seasonal Maintenance:** At the end of each season, conduct a thorough inspection and cleaning. This is an ideal time to perform any necessary repairs, apply sealants if needed, and prepare your fire pit for winter. If you live in an area with heavy snowfall, consider covering the pit or storing removable components indoors to protect them from freezing temperatures.

By following these maintenance tips, your outdoor fire pit will remain a cozy gathering spot for friends and family, allowing you to create lasting memories around the warmth of the fire. Enjoy your DIY delight and the comfort it brings to your outdoor space!

9. Enhancing Your Fire Pit Area with Seating

Once you’ve constructed your outdoor fire pit, it’s time to elevate the experience by creating a comfortable and inviting seating area. After all, what’s a cozy fire without a perfect spot to relax and enjoy it? Here are some tips to enhance your fire pit area with seating that complements your newly built centerpiece.

**Choose the Right Seating:** Consider the number of guests you typically host around your fire pit and select seating that accommodates them without feeling cramped. Options range from rustic wooden benches and Adirondack chairs to chic, modern outdoor sofas. Ensure that your seating is durable and weather-resistant to withstand the elements, or choose cushions that can be easily stored away when not in use.

**Create a Circular Arrangement:** For optimal interaction and ambiance, arrange your seating in a circular or semi-circular pattern around the fire pit. This setup allows everyone to enjoy the warmth of the fire while fostering conversation and connection. To enhance the visual appeal, consider using different heights and styles of seating for added interest.

**Incorporate Soft Textiles:** To make your seating area cozier, add outdoor cushions and throw blankets. Not only do they provide extra comfort, but they also allow you to infuse color and personality into your space. Choose fabrics that are fade-resistant and easy to clean, ensuring they remain vibrant throughout the seasons.

**Add Ambient Lighting:** To set the mood for those evening gatherings, think about incorporating soft ambient lighting. String lights draped overhead, lanterns placed strategically, or even solar-powered garden lights can create a magical atmosphere. Lighting not only enhances safety but also adds charm to your fire pit area after the sun sets.

**Personalize with Accessories:** Lastly, make the space your own by incorporating personal touches. Think about adding a small side table for snacks and drinks, decorative elements like outdoor rugs, or even a small firewood holder to keep your supplies within reach. Potted plants or flower arrangements can also soften the area and integrate it beautifully into your garden or patio landscape.

By thoughtfully designing your seating area around the fire pit, you create an inviting outdoor retreat that encourages relaxation, storytelling, and cherished moments with family and friends. Your fire pit will not only be a source of warmth but a gathering place where memories are made under the stars.

10. Adding Lighting for Ambiance

Adding lighting for ambiance is the finishing touch that transforms your outdoor fire pit area into a magical retreat, perfect for gatherings under the stars or cozy evenings spent with loved ones. After all, a fire pit isn’t just about the warmth; it’s about creating an inviting atmosphere that encourages conversation and relaxation.

Begin by considering the various lighting options that complement your fire pit. String lights are a popular choice, draping gracefully overhead to cast a warm, twinkling glow across your space. They can be easily hung from nearby trees, a pergola, or even simple posts anchored in the ground. Choose warm white or soft yellow bulbs to harmonize with the flickering flames of your fire pit.

For a more grounded approach, consider installing solar-powered path lights or lanterns around the perimeter of your seating area. These not only illuminate the ground for safety but also add a charming, rustic feel to your outdoor setup. Opt for designs that reflect your personal style—whether that’s sleek and modern or whimsical and vintage.

If you’re feeling a bit more adventurous, incorporate LED color-changing lights that can be adjusted to match the mood of the evening. Imagine transitioning from a soft blue glow for a calm, serene night to vibrant reds and oranges that mirror the fire’s own hues during a lively gathering.

Don’t forget to layer your lighting. Combine different sources—like wall sconces, recessed lighting, or even candles placed strategically around your fire pit—to create depth and a sense of intimacy. Remember, the goal is to enhance the natural beauty of your outdoor space, not overpower it.

With the perfect lighting, your fire pit area will not only serve as a functional feature but also as a stunning focal point that beckons friends and family to gather, share stories, and create lasting memories under the night sky. So, grab your tools and get creative—your outdoor oasis awaits!

11. Fun Fire Pit Activities and Recipes

Once your outdoor fire pit is complete, the real fun begins! A fire pit serves not only as a cozy gathering place but also as the perfect backdrop for a variety of engaging activities and delicious culinary adventures. Here are some enjoyable fire pit activities and mouthwatering recipes to elevate your outdoor experience.

**1. S’mores Galore:** No fire pit gathering is complete without the classic s’mores! Gather graham crackers, marshmallows, and chocolate bars, and let your guests roast marshmallows to golden perfection. You can even get creative by introducing flavored marshmallows or adding slices of fruit like strawberries or bananas for a twist on the traditional recipe.

**2. Campfire Stories:** As the flames flicker and crackle, encourage everyone to share their favorite campfire stories or ghost tales. This is a wonderful way to bond with family and friends, creating lasting memories around the warmth of the fire. You might even want to designate a “storyteller” for the night, complete with a cozy blanket and a comfy seat by the fire.

**3. Fire Pit Cooking:** Embrace the culinary possibilities that a fire pit offers. Skewers of marinated vegetables, chicken, or beef can be grilled over the open flame. Alternatively, try your hand at cooking a pizza on a cast-iron skillet or even wrapping dough around a stick to create delicious bread rolls. The aroma of freshly cooked food mingling with the scent of burning wood is simply irresistible!

**4. Stargazing:** After indulging in tasty treats, take advantage of the night sky. Lay out some blankets, snuggle up, and gaze at the stars. This is an excellent opportunity to teach kids about constellations or simply enjoy the peaceful ambiance. Enhancing your fire pit area with comfortable seating and soft lighting can create an inviting atmosphere for stargazing.

**5. Fire Pit Games:** Keep the fun going with some light-hearted games. Classic options like charades or card games are always a hit. You can even invent your own fire pit trivia game, where everyone takes turns asking questions about pop culture, history, or shared memories. This interactive element adds a lively spirit to your gathering and ensures everyone is engaged and having a blast.

With these activities and recipes, your outdoor fire pit will become the heart of your gatherings, bringing friends and family together for unforgettable evenings filled with laughter, warmth, and delicious food. So gather your supplies, ignite that fire, and prepare for an evening of fun and connection under the stars!

12. Conclusion: Enjoying Your DIY Fire Pit

Congratulations! By following our simple steps, you’ve transformed your backyard into a cozy haven with your very own DIY outdoor fire pit. Now that you’ve put in the effort to build this inviting centerpiece, it’s time to fully embrace the joy and warmth it brings.

Imagine gathering around the flickering flames with family and friends, the soft glow illuminating their faces as laughter fills the air. Your fire pit becomes more than just a structure; it’s a gathering place where stories are shared, s’mores are toasted, and memories are made. As the sun sets and the stars begin to twinkle overhead, the crackling fire invites you to slow down and savor the moment.

To enhance the experience, consider adding some comfortable seating around your fire pit—think cozy chairs, cushions, or even a rustic log bench. String lights overhead can create a magical ambiance, while blankets nearby ensure warmth on cooler nights. Don’t forget to stock up on firewood or your favorite fire pit fuel, along with some roasting sticks for marshmallows or hot dogs.

As you enjoy your new outdoor sanctuary, remember to prioritize safety. Keep a bucket of water or a fire extinguisher nearby, and always supervise children and pets around the fire. With safety measures in place, you can relax and take in the beauty of your handiwork.

Your DIY fire pit is not just a source of heat; it’s a place of connection and relaxation. So grab a drink, gather your loved ones, and let the flames dance as you celebrate your accomplishment. Here’s to many warm evenings spent around your fire pit, creating cherished memories for years to come!

13. Resources for Further Reading

### Resources for Further Reading

Building your own outdoor fire pit is not only a rewarding DIY project but also an opportunity to enhance your outdoor living space. If you’re eager to delve deeper into the world of fire pits, there are numerous resources available that can provide you with guidance, inspiration, and practical tips. Here are some excellent materials to help you expand your knowledge and ensure your fire pit project is a roaring success:

1. **Books**: Consider picking up a copy of “The Complete Guide to Building Your Own Outdoor Fire Pit” by D. M. Smith. This book offers step-by-step instructions tailored for beginners, complete with diagrams and safety tips. Another great read is “The Backyard Fire Pit Book” by Jamie McDonald, which explores various fire pit designs and the materials needed for each.

2. **Online Guides and Tutorials**: Websites like DIY Network and Home Depot feature extensive tutorials on building fire pits, complete with video demonstrations. These resources often include material lists, budgeting tips, and maintenance advice that can be invaluable as you embark on your project.

3. **YouTube Channels**: For those who prefer visual learning, YouTube is a treasure trove of DIY fire pit videos. Channels like “Home Repair Tutor” and “Fix This Build That” showcase real-time builds and offer practical advice from experienced DIYers. Watching these videos can provide you with a clearer understanding of the process and potential challenges.

4. **Local Workshops**: Many home improvement stores or community centers offer workshops on outdoor projects, including fire pits. Participating in one of these hands-on sessions can give you direct access to expert advice, and you may even meet fellow DIY enthusiasts to share tips and ideas.

5. **Online Forums and Communities**: Websites like Reddit or specialized DIY forums can connect you with a community of fellow DIYers. You can ask questions, share your progress, and gain insights from those who have successfully built their own fire pits.

With these resources at your fingertips, you’ll not only feel more confident in your ability to create a beautiful outdoor fire pit but also foster a deeper appreciation for the craft of DIY. So gather your materials, arm yourself with knowledge, and get ready to enjoy cozy evenings by the fire!

14. Share Your DIY Fire Pit Experience!

After you’ve completed your outdoor fire pit project, the fun doesn’t have to stop there—it’s time to share your DIY experience with others! Documenting and sharing your journey not only celebrates your hard work but also inspires fellow DIY enthusiasts and outdoor lovers. Start by snapping some high-quality photos of your finished fire pit from various angles, capturing the warmth and ambiance it brings to your backyard.

Consider creating a blog post detailing your step-by-step process, including the challenges you faced, the materials you used, and any helpful tips you discovered along the way. Sharing your personal insights can provide valuable guidance to others who are looking to embark on a similar project.

Social media is another fantastic platform for sharing your experience. Post your photos, along with a short description of your project, using hashtags like #DIYFirePit or #OutdoorLiving to reach a broader audience. Engage with your followers by asking for their thoughts or their own DIY stories.

If you’re part of any local or online DIY communities, don’t hesitate to share your fire pit project there as well. Many DIY enthusiasts love to see what others are creating, and your experience could spark new ideas for someone else’s project.

Lastly, consider hosting a gathering around your new fire pit. Invite friends and family over for a cozy evening of storytelling, marshmallow roasting, and laughter. This not only allows you to showcase your creation but also creates lasting memories that you can share in your future posts. By sharing your DIY fire pit experience, you not only celebrate your achievement but also contribute to a community of creatives eager to learn and grow together.

We hope you found our guide on building your own simple outdoor fire pit both informative and inspiring! There’s something truly special about gathering around a crackling fire under the stars, and now you have the tools to create that perfect space in your backyard. By following these five easy steps, you can enjoy cozy evenings with family and friends, share stories, roast marshmallows, and create lasting memories. So gather your materials, unleash your creativity, and get ready to transform your outdoor space into a warm and inviting retreat. Happy building, and may your new fire pit bring you countless nights of joy and relaxation!

What are the best ways to prevent mold and mildew in your home?

Mold and mildew can be unwelcome guests in any home, thriving in damp, dark corners and often leading to significant health issues and costly repairs.

With their ability to multiply quickly, these fungi can create a host of problems if left unchecked, from musty odors to respiratory problems and structural damage. The good news is that prevention is key, and with the right strategies in place, you can keep your home mold-free and foster a healthier living environment. In this blog post, we’ll explore the top strategies for mold and mildew prevention, offering practical tips to help you identify potential problem areas, maintain optimal humidity levels, and implement effective cleaning routines. Say goodbye to the worry of mold and mildew, and hello to a cleaner, safer home!

1. Understanding Mold and Mildew: Definitions and Differences

What are the best ways to prevent mold and mildew in your home?
Credit : whatcanu.com

To effectively combat mold and mildew in your home, it’s crucial to first understand what they are and how they differ. While the terms are often used interchangeably, they refer to distinct types of fungi that can take root in our living spaces.

Mold is a type of fungus that appears in various colors, including green, black, yellow, and white. It thrives in damp, warm environments and can penetrate and damage the materials it grows on, such as wood, drywall, and fabric. Mold spores are microscopic and can travel through the air, making it easy for them to spread throughout your home. Some molds can produce allergens or irritants and can even lead to more serious health issues, especially for those with respiratory conditions or weakened immune systems.

On the other hand, mildew is a specific type of mold that typically presents as a white, powdery substance. Often found in areas with high humidity, such as bathrooms and kitchens, mildew can usually be wiped away with a simple cleaning solution. While it may not be as harmful as some types of mold, it can still lead to unpleasant odors and potential health concerns if left untreated.

Understanding these distinctions is the first step in protecting your home. By recognizing the environments in which mold and mildew thrive, you can implement effective strategies to prevent their growth and maintain a safe and clean living space. With proper knowledge and proactive measures, you can ensure your home remains a healthy haven—free from the clutches of these unwanted fungi.

2. The Health Risks Associated with Mold Exposure

Mold and mildew are not just unsightly nuisances; they pose significant health risks that can affect anyone, particularly those with preexisting conditions or compromised immune systems. When mold spores are inhaled, they can trigger a cascade of respiratory issues, ranging from mild allergies to severe asthma attacks. Symptoms may include sneezing, runny or stuffy noses, coughing, and itchy or watery eyes. For individuals with asthma, exposure to mold can exacerbate symptoms, leading to more frequent and severe attacks.

Beyond respiratory complications, mold exposure can also cause skin irritations and rashes, headaches, and fatigue. In some cases, prolonged exposure to certain types of mold, such as Stachybotrys chartarum (commonly known as black mold), can lead to more serious health concerns, including neurological symptoms and immune system suppression. The risk is particularly acute for vulnerable populations, including children, the elderly, and those with preexisting health conditions, as their bodies may not respond as effectively to mold exposure.

Understanding the health risks associated with mold is crucial for homeowners. It serves as a vital reminder that effective prevention and prompt remediation are not just about maintaining the integrity of your living space; they are essential for safeguarding your family’s health. By staying informed and proactive, you can create a safer, healthier home environment that minimizes the likelihood of mold growth and protects those who live within it.

3. Identifying Common Areas for Mold Growth

What are the best ways to prevent mold and mildew in your home?
Credit : whatcanu.com

Identifying common areas for mold growth in your home is a crucial step in prevention. Mold thrives in damp, warm environments, making certain spaces more susceptible to infestations. Start with your bathrooms, where humidity levels can skyrocket after hot showers. Pay special attention to corners, behind toilets, and under sinks, as these areas often trap moisture.

Kitchens also warrant close inspection. Look beneath the sink, around dishwashers, and behind refrigerators where condensation can build up. Any leaks from plumbing or appliances should be addressed immediately to minimize moisture accumulation.

Basements and crawl spaces are notorious for mold growth due to their typically cooler and more humid conditions. Ensure these areas are well-ventilated and consider using dehumidifiers to keep humidity levels in check.

Don’t overlook laundry rooms, especially if you have a washer and dryer located in a basement or poorly ventilated area. A damp towel left in the washer for too long can lead to mold growth, so make it a habit to remove clothes promptly.

Lastly, check your home’s exterior. Gutters that are clogged or not draining properly can lead to water pooling around the foundation, creating an ideal breeding ground for mold. By identifying these common areas and taking proactive measures, you can effectively reduce the risk of mold and mildew taking hold in your home. Regular inspections and maintenance are key to ensuring a safe and healthy living environment.

4. Importance of Proper Ventilation in Your Home

Proper ventilation is a cornerstone of mold and mildew prevention, acting as a silent guardian against the damp conditions that these unwanted invaders thrive on. When air is allowed to circulate freely within your home, it helps to regulate humidity levels, ensuring that moisture does not accumulate in corners, closets, or other hidden spaces.

Imagine your home as a living organism; just like breathing is essential for our health, adequate airflow is crucial for your living space. In areas prone to high humidity, such as bathrooms, kitchens, and basements, the introduction of fresh air can significantly reduce the chances of mold growth. This is especially important during the warmer months when humidity levels soar and indoor air can become stagnant.

To achieve optimal ventilation, consider installing exhaust fans in moisture-heavy areas to expel humid air directly outside. Additionally, opening windows and doors to promote cross-ventilation can create a refreshing breeze that helps to dry out damp surfaces. It may also be beneficial to invest in a dehumidifier for spaces that struggle with excess moisture; this device works tirelessly to remove humidity from the air, providing a dry environment that is inhospitable to mold spores.

Regular maintenance is key as well. Ensure that your ventilation systems, such as HVAC units and ductwork, are clean and functioning properly to maximize airflow. If you have a chimney or attic, be sure they are adequately ventilated to prevent moisture build-up. By making ventilation a priority in your home, you not only enhance air quality but also create a less inviting environment for mold and mildew, allowing you to enjoy a healthier, more comfortable living space.

5. Controlling Humidity Levels: Ideal Ranges and Tools

What are the best ways to prevent mold and mildew in your home?
Credit : whatcanu.com

When it comes to mold and mildew prevention, controlling humidity levels is one of the most crucial aspects of maintaining a healthy home environment. Mold thrives in damp conditions, making it essential to keep indoor humidity within an ideal range of 30% to 50%. This range not only hinders the growth of mold spores but also contributes to overall comfort and air quality within your home.

To monitor and manage humidity levels effectively, consider investing in a hygrometer—a simple yet effective tool that measures the moisture in the air. Placing hygrometers in key areas, such as your basement, kitchen, and bathrooms, can provide you with real-time data on humidity fluctuations. If you find that certain areas consistently exceed the recommended levels, it’s time to take action.

There are several tools and methods available to help control humidity. Dehumidifiers are a popular choice, particularly in basements and other damp areas. These units work to extract moisture from the air and can significantly reduce humidity levels. Make sure to choose a model that suits the size of the space you’re treating for maximum effectiveness. Additionally, using exhaust fans in bathrooms and kitchens during and after activities that generate moisture, like cooking or showering, is another effective strategy to lower humidity levels.

Natural ventilation is also key. Opening windows and doors when weather permits can help circulate fresh air and reduce indoor humidity. If outdoor humidity levels are high, however, it may be wise to keep windows closed and rely on air conditioning, which typically dehumidifies as it cools, to maintain a comfortable indoor environment.

By actively controlling humidity levels in your home, you not only deter mold and mildew growth but also promote a more pleasant living space for you and your family. Remember, a proactive approach to humidity management is not just a seasonal task but an ongoing commitment to safeguard your home from the perils of excessive moisture.

6. Best Practices for Bathroom and Kitchen Maintenance

Bathrooms and kitchens are the most common breeding grounds for mold and mildew in any home, primarily due to the high levels of moisture generated in these areas. Implementing best practices for maintenance in these spaces is crucial for mold prevention and overall hygiene.

First and foremost, ensure proper ventilation. Install exhaust fans in bathrooms and kitchens to help eliminate moisture. When showering or cooking, run these fans to pull excess humidity from the air. If your kitchen or bathroom lacks a fan, consider opening windows or doors to promote airflow, especially during and after activities that generate steam or moisture.

Regular cleaning is another essential practice. Use mold-inhibiting cleaners on surfaces prone to dampness, such as tiles, grout, and countertops. Pay special attention to corners, seams, and any areas where water tends to accumulate. A solution of vinegar and water can effectively prevent mold growth, as vinegar is known for its antimicrobial properties.

Additionally, inspect plumbing fixtures for leaks or drips, as even minor leaks can create an environment conducive to mold. If you identify any leaks, address them promptly to minimize water accumulation.

Lastly, consider the use of dehumidifiers in particularly humid climates or seasons. These devices can significantly reduce moisture levels in the air, making it harder for mold spores to settle and thrive. Incorporating these best practices into your bathroom and kitchen maintenance routine will help create a healthier living space, free from the threat of mold and mildew. By taking these proactive steps, you not only protect your home but also enhance your overall well-being.

7. How to Inspect and Maintain Your Roof and Gutters

What are the best ways to prevent mold and mildew in your home?
Credit : whatcanu.com

Maintaining the integrity of your roof and gutters is a foundational strategy in preventing mold and mildew from taking hold in your home. A well-functioning roof not only shields your living space from the elements but also plays a crucial role in managing moisture levels—one of the main contributors to mold growth. Regular inspections and maintenance can help you catch potential issues before they escalate into costly repairs and serious health hazards.

Start by conducting a visual inspection of your roof at least twice a year, ideally in the spring and fall. Look for signs of damage, such as missing or cracked shingles, rusted flashing, or accumulated debris. Pay special attention to areas prone to water pooling, as standing water can lead to leaks over time. If your roof is more than 20 years old, consider consulting a professional to evaluate its condition thoroughly.

Equally important is the maintenance of your gutters. Clogged gutters can cause water to overflow and seep into your home, creating the perfect environment for mold and mildew to thrive. Clean your gutters regularly—at least twice a year, or more often if you live in a wooded area. Remove leaves, twigs, and other debris that can hinder water flow. Ensure that downspouts direct water at least three to four feet away from your foundation to prevent moisture accumulation.

While you’re at it, check for proper gutter slope and alignment; gutters should have a slight incline towards the downspouts to facilitate efficient drainage. If you notice sagging gutters or any signs of rust, it may be time for repairs or replacements.

By taking the time to inspect and maintain your roof and gutters, you can significantly reduce the risk of moisture intrusion and mold growth in your home. This proactive approach not only protects your living environment but also enhances the longevity of your property, ensuring a safe and healthy space for you and your family.

8. The Role of Insulation in Mold Prevention

When it comes to mold and mildew prevention in your home, insulation plays a surprisingly pivotal role that often goes overlooked. Proper insulation not only regulates your home’s temperature but also creates a barrier against moisture—a key contributor to mold growth. When areas of your home are poorly insulated, they become susceptible to temperature fluctuations that can lead to condensation, particularly in attics, basements, and crawl spaces.

When warm, moist air encounters cold surfaces, such as inadequately insulated walls or ceilings, it cools down and releases moisture in the form of condensation. This damp environment is ideal for mold spores to thrive and multiply. By investing in high-quality insulation, you are effectively reducing the risk of these temperature-induced condensation issues.

Fiberglass, foam board, and spray foam insulation are excellent choices to consider. They not only provide thermal resistance but also help maintain a consistent temperature throughout your home, minimizing the likelihood of moisture accumulation. Additionally, insulated ductwork can prevent condensation from forming in your heating and cooling systems, which can also become a breeding ground for mold.

Moreover, insulation can enhance your home’s energy efficiency, leading to lower utility bills while simultaneously keeping your indoor environment healthier. It’s a twofold solution: you protect your home from the damaging effects of mold and mildew while ensuring that your living spaces remain comfortable.

In summary, the role of insulation in mold prevention cannot be overstated. By ensuring that your home is well-insulated, you create a less hospitable environment for mold growth, safeguarding your health and preserving the integrity of your home for years to come.

9. Effective Cleaning Techniques for Mold-Prone Areas

Maintaining a mold-free home begins with understanding the areas most susceptible to mold growth—typically those that are damp, dark, and poorly ventilated. In this section, we will explore effective cleaning techniques specifically tailored for mold-prone areas, ensuring your efforts yield lasting results.

**1. Focus on High-Risk Spots:** Start by identifying the hot spots in your home where moisture tends to accumulate, such as bathrooms, kitchens, basements, and laundry rooms. These areas require routine attention to prevent mold spores from taking root.

**2. Use the Right Cleaning Solutions:** While there are numerous commercial cleaners available, many effective cleaning solutions can be made right at home. A mixture of equal parts vinegar and water is a powerful natural cleaner that can disrupt mold growth without harsh chemicals. For tougher spots, consider a solution of hydrogen peroxide or a diluted bleach mixture (always remember to use bleach with caution and ensure proper ventilation).

**3. Scrub and Dry Thoroughly:** When tackling mold, scrubbing is key. Use a stiff brush to scrub away visible mold from surfaces. Once you’ve cleaned the area, ensure it dries completely, as lingering moisture can lead to regrowth. For larger areas, a wet/dry vacuum can efficiently remove excess water and moisture.

**4. Ventilation is Vital:** After cleaning, improving ventilation in mold-prone areas can significantly reduce moisture levels. Consider using exhaust fans in bathrooms and kitchens, and open windows when possible to promote airflow. A dehumidifier can also be a great investment to keep humidity levels in check, particularly in basements or other enclosed spaces.

**5. Regular Maintenance:** Make cleaning mold-prone areas part of your regular home maintenance routine. Schedule inspections and cleanings at least once a month to keep any potential mold growth at bay. This proactive approach will not only keep your home looking pristine but will also enhance your overall indoor air quality.

By implementing these effective cleaning techniques in mold-prone areas of your home, you can significantly reduce the likelihood of mold growth, creating a healthier and more inviting living environment for you and your family. Remember, the key to mold prevention lies not just in cleanup but in consistent vigilance and maintenance.

10. Choosing Mold-Resistant Products for Home Improvement

When it comes to mold and mildew prevention, one of the most effective strategies is incorporating mold-resistant products during any home improvement projects. These specially designed materials can significantly reduce the risk of mold growth, especially in areas prone to moisture, such as bathrooms, kitchens, and basements.

Start by considering mold-resistant drywall, also known as green board or cement board, which is treated to resist moisture. This type of drywall is ideal for high-humidity areas, as it provides a robust barrier against water penetration. Similarly, when selecting paint for these spaces, opt for mold-resistant paint that contains antimicrobial properties, preventing mold spores from taking hold on your walls.

In addition to these materials, think about incorporating mold-resistant flooring options. Vinyl, tile, and specific treated wood products can withstand damp conditions far better than traditional carpeting, which can trap moisture and promote mold growth. For outdoor projects, consider using composite decking materials that resist moisture and are less susceptible to mold compared to conventional wood.

Additionally, remember to select mold-resistant insulation and sealants, especially around windows and doors, to create airtight seals that prevent moisture accumulation. By being strategic about the products you choose for your home improvement projects, you not only enhance the durability of your home but also create a healthier living environment. Investing in these mold-resistant options is a proactive step towards protecting your home from the pervasive threat of mold and mildew, ensuring your living spaces remain safe, clean, and comfortable for years to come.

11. Seasonal Tips for Mold Prevention

As the seasons change, so too do the conditions that can contribute to mold and mildew growth in your home. Understanding these seasonal dynamics and adjusting your prevention strategies accordingly is crucial for maintaining a healthy living environment.

**Spring** heralds warmer temperatures and increased humidity, creating a perfect breeding ground for mold spores. To combat this, ensure that your gutters are clean and functioning properly to divert rainwater away from your foundation. Additionally, consider investing in a dehumidifier for particularly damp areas of your home, such as basements or crawl spaces. Regularly check for leaks around windows and doors, as the spring showers can exacerbate moisture issues.

As we transition into **summer**, the heat can lead to increased humidity levels indoors, especially if air conditioning systems are not used effectively. Keep your HVAC system well-maintained, changing filters regularly to ensure optimal airflow and moisture control. Encourage good ventilation by opening windows and using exhaust fans in kitchens and bathrooms to help reduce humidity buildup.

With the arrival of **autumn**, falling leaves can clog gutters and downspouts, potentially leading to water pooling around your home. Be proactive by cleaning gutters and ensuring that your yard is well-drained. Additionally, as you prepare for winter, inspect your home for any signs of leaks or water damage, and seal any cracks in your walls or foundation to prevent moisture from seeping in.

Finally, as winter sets in, the cold air can force us to seal up our homes tightly, trapping moisture inside. Be mindful of indoor humidity levels; using a hygrometer can help you monitor moisture levels, and aim to keep them between 30-50%. Regularly check for condensation on windows and use a squeegee to wipe it away before it can settle and lead to mold growth.

By adapting your mold prevention strategies to the changing seasons, you’ll create a proactive approach that not only protects your home but also promotes a healthier indoor environment year-round. Remember, vigilance is key—regular checks and preventive measures will go a long way in keeping mold and mildew at bay.

12. Dealing with Flooding or Water Damage: Immediate Steps

When faced with flooding or water damage, swift action is crucial. The longer moisture lingers in your home, the greater the risk of mold and mildew taking hold. Here are immediate steps you should take to mitigate damage and safeguard your living space.

First and foremost, prioritize safety. If the flooding is severe, ensure that the electricity is turned off in affected areas before entering, as water and electricity can be a deadly combination. Wear protective gear, such as gloves and boots, to guard against contaminated water which may pose health risks.

Once you’re safely inside, begin the process of removing standing water. Utilize pumps or wet vacuums to extract as much water as possible. If the flooding is minor, mops and towels can suffice, but be prepared for larger quantities in more severe situations. Once the bulk of the water is removed, open windows and doors to promote ventilation. This not only helps in drying out the space but also reduces humidity levels, making it less conducive for mold growth.

Next, it’s essential to remove any items that have absorbed water. Carpets, rugs, and upholstered furniture can become breeding grounds for mold if not dried promptly. If items cannot be dried within 48 hours, consider discarding them to prevent further issues. Additionally, porous materials like drywall and insulation may need to be replaced if they’ve been saturated.

After you’ve tackled the water, it’s time to dry everything out thoroughly. Use fans and dehumidifiers to accelerate the drying process. Aim for a humidity level below 60% to reduce the chance of mold spores settling in. Regularly check for signs of moisture, especially in hidden areas like basements or attics.

Lastly, once everything is dried and cleaned, take preventive measures moving forward. Consider applying mold-resistant products to walls and surfaces, and ensure that your home’s drainage systems are functioning properly to prevent future flooding.

By acting quickly and effectively in the face of water damage, you can protect your home from the lurking dangers of mold and mildew, ensuring a healthy environment for you and your family.

13. When to Seek Professional Help for Mold Issues

### 13. When to Seek Professional Help for Mold Issues

Mold can be a persistent and often troubling issue in any home, but knowing when to seek professional help is crucial for effectively managing and mitigating its effects. While small patches of mold can often be addressed with DIY cleaning solutions, there are certain circumstances where the expertise of a mold remediation specialist becomes not just beneficial, but necessary.

First and foremost, if you encounter mold growth that spans more than 10 square feet, it’s a strong indicator that the problem is larger than a simple DIY fix. Larger infestations can often signal underlying issues, such as hidden moisture problems or structural damage, that require professional assessment. Additionally, if the mold is located in hard-to-reach areas like behind walls, above ceilings, or within HVAC systems, a professional’s tools and techniques will be essential for thorough remediation.

Another critical factor to consider is the health of your household members. If anyone in your home has respiratory issues, allergies, or compromised immune systems, it’s vital to address mold growth immediately with professional assistance. Mold spores can exacerbate these health conditions, leading to increased symptoms or even severe reactions.

Furthermore, if you see signs of water damage—such as discoloration, peeling paint, or warped surfaces—this often means there is more than just surface mold present. A professional will be able to identify the source of the moisture, recommend repairs to prevent future growth, and ensure that the area is safely cleaned and remediated.

Don’t hesitate to reach out for help if you’re unsure about the severity of the situation or how to proceed. Mold specialists are equipped with the knowledge, experience, and specialized equipment necessary to tackle complex mold issues safely and effectively, providing you with peace of mind and a healthier living environment. Remember, addressing mold issues promptly can save you from more significant problems and costs down the line, making professional help a wise investment in your home’s health.

14. Regular Maintenance Checklists for Homeowners

Maintaining a mold-free home requires diligence and a proactive approach, which is where regular maintenance checklists come into play. Establishing a systematic routine not only helps you stay organized but also ensures that you address potential issues before they escalate into more serious problems.

Start by creating a seasonal checklist tailored to the specific needs of your home. In the spring, focus on inspecting your gutters and downspouts to ensure they’re clear of debris, allowing rainwater to flow freely away from your foundation. This simple step can prevent excess moisture from seeping into your home, which is a primary culprit for mold growth. Additionally, take the time to check the seals around windows and doors, as even the tiniest gaps can allow humidity and moisture to infiltrate your living space.

As summer approaches, it’s essential to keep an eye on your air conditioning units. Regularly clean or replace filters to enhance airflow and reduce humidity levels indoors. Moreover, inspect the basement and crawl spaces for signs of moisture buildup or leaks. Consider installing a dehumidifier in these areas to maintain optimal humidity levels, ideally between 30-50%.

When fall arrives, turn your attention to your roof and siding. Look for any damaged shingles or cracks that could allow water to enter your home. This is also a great time to clean out your chimney and fireplace, as improved ventilation can reduce indoor humidity levels. Finally, as the colder months approach, ensure that your heating system is running efficiently. A well-maintained heating system can help regulate indoor temperatures and minimize moisture accumulation.

Lastly, don’t forget about your indoor spaces throughout the year. Establish a routine for cleaning and decluttering, especially in areas prone to dampness, such as bathrooms and kitchens. Use mold-resistant paints and materials when renovating, and keep an eye out for any signs of mold or mildew, addressing them immediately to prevent further spread. By adhering to these regular maintenance checklists, you empower yourself to maintain a healthier home environment, safeguarding against the persistent threat of mold and mildew.

15. Conclusion: Building a Mold-Free Environment

In conclusion, building a mold-free environment is not just about removing existing mold but also about implementing proactive strategies that prevent its return. By focusing on the key areas discussed throughout this blog—such as controlling humidity levels, ensuring proper ventilation, and maintaining clean and dry surfaces—you can create a home that is inhospitable to mold and mildew.

Regular inspections of your home, especially in high-risk areas like basements, bathrooms, and kitchens, will help you catch potential moisture problems before they escalate. Investing in dehumidifiers and using exhaust fans can significantly lower humidity levels, while routine cleaning with mold-inhibiting solutions will keep surfaces free of spores.

Moreover, it’s essential to be mindful of building materials; opting for mold-resistant paints and finishes can provide an added layer of defense. Remember, prevention is a continuous process—integrating these strategies into your home maintenance routine will ensure that your living space remains safe, healthy, and comfortable for you and your family.

With diligence and awareness, you can successfully cultivate a mold-free environment, allowing you to breathe easier and enjoy the peace of mind that comes with a clean and well-maintained home. Embrace these strategies, and take the first step toward a healthier living space today!

In conclusion, maintaining a mold-free environment in your home is not just about aesthetics; it’s crucial for your health and well-being. By implementing the top strategies outlined in this post, from controlling humidity levels to ensuring proper ventilation and regular cleaning, you can significantly reduce the risk of mold and mildew growth. Remember, prevention is always easier and more cost-effective than remediation. Take proactive steps today to create a healthier living space for you and your loved ones. We encourage you to share your own tips and experiences in the comments below—let’s work together to keep our homes safe and mold-free!

What are the Best Ways to Clean Up Pet Accidents?

As much joy as our furry companions bring into our lives, they can sometimes leave behind little surprises that remind us of their less-than-perfect moments.

Whether it’s a puddle on the carpet or an unfortunate mishap on the couch, dealing with pet accidents can be one of the less glamorous aspects of pet ownership. However, with the right strategies and tools at your disposal, cleaning up these messes can be far less stressful and more effective than you might think. In this ultimate guide, we’ll dive into practical tips and techniques that will not only help you tackle pet accidents swiftly but also ensure your home remains fresh and welcoming. From choosing the right cleaning products to implementing preventative measures, this comprehensive resource is designed to empower every pet owner to maintain a clean, loving environment for both pets and humans alike. Say goodbye to stains and odors, and hello to a harmonious home!

1. Understanding Common Pet Accidents

What are the Best Ways to Clean Up Pet Accidents?
Credit : whatcanu.com

Understanding common pet accidents is the first step toward effectively addressing and preventing them in your home. Whether you’re a seasoned pet owner or a new parent to a playful puppy or curious kitten, accidents are an inevitable part of the journey. Familiarizing yourself with the types of mishaps that commonly occur can help you respond swiftly and effectively, minimizing damage to your home and stress for both you and your furry friend.

The most prevalent accidents typically fall into a few categories: **urination**, **defecation**, and **vomiting**. Urination accidents often occur when pets are not yet fully house-trained or when they feel anxious or excited. Puppies, in particular, may struggle to hold their bladder, especially during playtime or after drinking water. On the other hand, older pets may have accidents due to medical issues, such as urinary tract infections or incontinence.

Defecation accidents can be equally frustrating and are frequently linked to dietary changes or digestive upset. If your pet has recently switched foods or is experiencing stomach issues, you may find unexpected messes in your home. Additionally, new environments can trigger anxiety in pets, leading to incidents that could have been avoided with proper acclimatization.

Vomiting, while not necessarily related to accidents in the traditional sense, can create just as much chaos. Pets may vomit due to a variety of reasons, ranging from eating too quickly to underlying health issues. Recognizing the signs of gastrointestinal distress can help you address the problem before it leads to further accidents in your living space.

By understanding these common pet accidents and their underlying causes, you can better equip yourself with the tools and strategies needed to manage them. Proactive measures, such as regular vet check-ups, consistent training, and an awareness of your pet’s habits, can drastically reduce the likelihood of accidents and ensure a harmonious living environment for both you and your beloved companion.

2. Immediate Steps to Take After an Accident

Accidents happen, and when they do, it’s essential to act quickly to minimize damage and maintain a clean environment. The first few moments after a pet accident are crucial, and knowing exactly what to do can save you time, stress, and a lot of scrubbing later on.

As soon as you discover the accident, the first step is to remain calm. Pets can sense our emotions, and reacting with frustration can make them anxious. Instead, approach the situation with a cool head. Grab some disposable gloves to protect your hands and minimize the spread of bacteria.

Next, quickly assess the type of accident. Whether it’s urine, feces, or vomit, each requires a slightly different approach. For urine, blot up as much of the liquid as possible with paper towels or an old cloth—avoid rubbing, as this can push the stain further into the fibers. For solid waste, carefully scoop it up using a plastic bag or a scoop, sealing it tightly to prevent odors from wafting into your home.

Once the bulk has been removed, it’s time to tackle the stain and odor. For urine, a mixture of white vinegar and water can work wonders. Spray the affected area liberally, allowing the solution to penetrate the fibers. Vinegar neutralizes ammonia and helps eliminate odors. After letting it sit for a few minutes, blot again with clean towels until the area feels dry. For feces or vomit, enzymatic cleaners are your best friend, as they break down the organic material and help eradicate any lingering smells.

If the accident occurred on carpet or upholstery, ensure that you thoroughly rinse the area with water after cleaning, as residue can attract dirt and lead to further staining. Finally, allow the area to air dry completely. If the odor persists, consider sprinkling baking soda over the area to absorb any remaining smells, letting it sit for a few hours before vacuuming it up.

By taking these immediate steps, you can effectively manage pet accidents and maintain a clean, healthy home for both you and your furry friends. Remember, the sooner you act, the easier the cleanup will be!

3. Essential Cleaning Supplies You Need

What are the Best Ways to Clean Up Pet Accidents?
Credit : whatcanu.com

When it comes to effectively tackling pet accidents, having the right cleaning supplies on hand is crucial. A well-stocked cleaning arsenal not only makes the cleanup process more efficient but also ensures that your home remains fresh and odor-free. Here’s a list of essential cleaning supplies you should consider:

**1. Enzymatic Cleaners:** These specialized cleaners are a game-changer when it comes to removing pet stains and odors. Unlike traditional cleaners, enzymatic formulas break down the organic matter found in urine, feces, and vomit, effectively eliminating the source of the smell rather than just masking it. Look for products specifically designed for pet messes for the best results.

**2. Absorbent Towels:** Keep a stash of highly absorbent towels or rags nearby. Microfiber towels work particularly well due to their ability to soak up moisture quickly. The sooner you can blot the stain, the easier it will be to remove, so having these on hand is essential.

**3. Baking Soda:** This versatile household staple is not only great for baking but also works wonders for neutralizing odors. After cleaning up a mess, sprinkle baking soda over the affected area to absorb any lingering smells. Leave it for a few hours or overnight before vacuuming it up for maximum effect.

**4. White Vinegar:** A natural deodorizer and cleaner, white vinegar can help break down pet stains while also neutralizing odors. A mixture of equal parts vinegar and water can be sprayed on the stain, blotted with a towel, and rinsed with water to help lift the mess.

**5. Pet-Safe Carpet Cleaner:** If you have carpets or rugs in your home, investing in a pet-safe carpet cleaner is a must. These products are designed to penetrate fibers and eliminate stains without introducing harmful chemicals that could affect your furry friend.

**6. Rubber Gloves:** Protect your hands while cleaning up accidents with a good pair of rubber gloves. Not only do they keep your hands clean, but they also provide a barrier against any lingering odors or bacteria.

**7. Spray Bottle:** A spray bottle is essential for mixing and applying your cleaning solutions. Whether you’re using vinegar and water or an enzymatic cleaner, having a dedicated spray bottle allows for easy application and thorough coverage of the affected area.

By equipping yourself with these essential cleaning supplies, you’ll be well-prepared to handle any pet accidents that come your way. With the right tools at your disposal, you can maintain a clean and pleasant home environment while ensuring your furry companions continue to feel welcome and loved.

4. Effective Techniques for Different Surfaces (Carpet, Hardwood, etc.)

When it comes to cleaning up pet accidents, one of the most crucial steps is understanding that different surfaces require different approaches. Each material has its own characteristics and nuances, and using the right technique can make all the difference in ensuring a thorough clean while also preserving the integrity of your flooring or upholstery.

**Carpet:** For carpets, quick action is key. Start by blotting the area with paper towels or a clean cloth to absorb as much liquid as possible—avoid rubbing, as this can push the mess deeper into the fibers. Follow up with a mixture of white vinegar and water (equal parts) or a specialized pet stain cleaner. Apply it to the stained area and let it sit for a few minutes before blotting again. Finish by rinsing with cold water and using a wet/dry vacuum if available, or simply blotting until the area is clean and dry. This technique not only removes stains but also helps neutralize odors.

**Hardwood Floors:** For hardwood, the approach is slightly different. Begin by immediately wiping up the mess with a damp cloth. Avoid soaking the floor, as excessive water can warp the wood. Once the surface is clean, you can use a solution of vinegar and water to disinfect the area. However, be cautious with the amount of vinegar, as it can dull the finish over time. For stubborn stains, a gentle scrub with a soft-bristle brush may help, but always test in a discreet area first to ensure it won’t damage the wood’s finish.

**Tile and Grout:** For tile surfaces, start by removing any solid waste and then cleaning the area with soapy water or a mild detergent. Pay special attention to the grout lines, as they can trap odors and stains. A mixture of baking soda and water can be effective for deep cleaning grout—apply it, let it sit for a few minutes, and scrub with a toothbrush to lift any stains before rinsing with water.

**Upholstery:** If your pet has had an accident on furniture, be sure to check the cleaning instructions for your specific upholstery. Typically, start by blotting the area with a clean cloth to absorb excess moisture. A solution of mild dish soap and water can be effective for most fabrics. Apply it gently with a cloth or sponge, then blot with a clean, damp cloth to rinse. For sensitive fabrics, consider using a commercial upholstery cleaner specifically designed to tackle pet stains.

By tailoring your cleaning techniques to the specific surface, you can effectively eliminate stains and odors, ensuring your home remains a clean and welcoming environment for both you and your beloved pets.

5. How to Remove Odors and Stains

What are the Best Ways to Clean Up Pet Accidents?
Credit : whatcanu.com

Removing odors and stains from pet accidents is crucial not only for maintaining a clean home but also for ensuring that your furry friends don’t return to the same spot to do their business again. The lingering smell of urine or feces can be an inviting signal to pets, prompting them to mark their territory once more. To effectively tackle these stubborn stains and odors, follow these comprehensive steps:

**Act Quickly:** The sooner you address an accident, the better your chances of completely eliminating the stain and odor. Blot up as much of the mess as possible with paper towels or an old cloth, applying gentle pressure to soak up the liquid without rubbing, which can push it further into the fibers.

**Choose the Right Cleaner:** While there are many commercial pet stain removers on the market, you may also opt for natural solutions. A mixture of white vinegar and water (in a 1:1 ratio) can neutralize odors effectively. Alternatively, an enzyme-based cleaner can break down the proteins in urine, helping to eliminate both the stain and the smell at the source.

**Test the Area:** Before applying any cleaner to your carpets or upholstery, it’s wise to test it on a small, inconspicuous area to ensure it won’t discolor or damage the fabric.

**Apply and Let It Sit:** Once you have your cleaning solution ready, apply it generously to the stained area. Allow it to sit for at least 10-15 minutes—this dwell time is essential for the cleaner to penetrate deeply.

**Blot Again:** After letting the solution sit, use a fresh cloth or paper towel to blot the area once more, lifting away the moisture along with the stain and odor. For particularly stubborn marks, you may need to repeat the application and blotting process.

**Rinse and Dry:** Once you feel confident that the stain is gone, lightly rinse the area with clean water and blot it dry. If possible, use a fan or open windows to increase airflow and speed up the drying process.

**Prevent Future Accidents:** To discourage your pet from returning to the scene of the crime, consider using pet-safe deterrent sprays or placing a clean, unscented area rug over the spot until you’re certain the odor is completely gone.

By following these steps, you’ll not only keep your home looking and smelling fresh but also create a more comfortable environment for both you and your beloved pets. Remember, patience and persistence are key—sometimes it takes a little extra effort to fully eradicate stubborn stains and odors, but the results will be well worth it.

6. Natural vs. Chemical Cleaners: What You Should Know

When it comes to cleaning up pet accidents, one of the most important decisions you’ll face is whether to use natural or chemical cleaners. Each option has its own benefits and drawbacks, and understanding these can help you make the best choice for your home, your pets, and the environment.

**Natural Cleaners**
Natural cleaners, often made from ingredients like vinegar, baking soda, and essential oils, provide a safe and eco-friendly alternative to traditional chemical cleaners. These solutions are generally non-toxic, making them a great choice for households with pets and children. For instance, a simple mixture of white vinegar and water can effectively neutralize odors and break down stains, while baking soda can absorb unpleasant smells. Additionally, many pet owners appreciate the subtle, pleasant scents of natural ingredients compared to the harsh chemical odors found in commercial products.

However, while natural cleaners can be effective for minor accidents, they may not always tackle tougher stains or odors as efficiently as their chemical counterparts. In some cases, you might find yourself needing to use more elbow grease or repeat applications to achieve the desired results.

**Chemical Cleaners**
On the other hand, chemical cleaners are specifically formulated to target tough stains and odors, often providing quicker and more potent results. These products can be particularly useful for deep-set stains or persistent odors that natural solutions might struggle to eliminate. Just a few sprays may be enough to tackle an accident left behind by your furry friend.

That said, chemical cleaners can contain harsh ingredients that may pose health risks to both pets and humans. It’s crucial to read labels carefully and select pet-safe options whenever possible. Furthermore, always ensure proper ventilation when using chemical cleaners and keep your pets away from treated areas until they are fully dry and the scent has dissipated.

**Finding the Right Balance**
Ultimately, the choice between natural and chemical cleaners depends on your specific needs, the severity of the accidents you’re dealing with, and the sensitivities of your household members. For everyday messes, a natural cleaner may suffice, while more serious accidents might warrant a chemical product. Many pet owners find success in using a combination of both—starting with natural solutions for regular cleanups and reaching for chemical cleaners when faced with particularly stubborn stains.

By weighing the pros and cons of each option, you can create a cleaning routine that effectively manages pet accidents while keeping your home safe and healthy for everyone.

7. Dealing with Accidents in the Litter Box Area

What are the Best Ways to Clean Up Pet Accidents?
Credit : whatcanu.com

Dealing with accidents in the litter box area can be one of the more challenging aspects of pet ownership, but with the right strategies, you can maintain a clean and odor-free environment. First and foremost, it’s essential to ensure that the litter box itself is kept clean and appealing to your pet. Regular scooping is a must—ideally, you should scoop at least once a day to remove waste and clumps of soiled litter. Not only does this help prevent odors, but it also encourages your cat to continue using the box.

If an accident occurs outside of the litter box, remain calm. Panicking can make the situation more stressful for both you and your pet. Start by assessing the area—check for any spots that may have been missed during cleaning. Use a pet-safe enzymatic cleaner specifically designed to neutralize the odors and stains associated with pet waste. These cleaners break down the proteins found in urine and feces, effectively eliminating lingering smells that may encourage your pet to revisit the area.

In addition to deep cleaning the litter box area, it’s important to evaluate the box’s placement and the type of litter you’re using. Some cats are particular about their surroundings; if the litter box is in a high-traffic area or near their food and water, they may be reluctant to use it. Consider moving the box to a quieter, more private location. Likewise, experimenting with different types of litter may also yield positive results; some cats prefer clumping litter, while others may favor non-clumping or crystal varieties.

Lastly, take time to observe your pet’s behavior. If accidents become frequent, it may indicate a larger issue, such as stress, a medical problem, or dissatisfaction with the litter box setup. Consulting with a veterinarian can help rule out any underlying health concerns. By addressing both the cleaning and environmental factors, you’ll create a comfortable space for your furry friend, reducing the likelihood of future accidents and ensuring a harmonious home.

8. Preventing Future Accidents: Training Tips

Preventing future accidents is an essential part of maintaining a clean and harmonious home, especially for pet owners. While accidents happen, proactive training can significantly reduce their occurrence and help your furry friends understand where it’s appropriate to relieve themselves. Here are some effective training tips to consider:

**1. Establish a Routine:** Dogs thrive on consistency, so establishing a regular schedule for feeding and bathroom breaks is crucial. Take your pet outside first thing in the morning, after meals, and before bedtime. Consistent timing helps them develop a predictable bathroom routine, making accidents less likely.

**2. Positive Reinforcement:** Reward your pets for doing their business outside. Use treats, praise, or playtime as a reward immediately after they relieve themselves in the designated area. This positive reinforcement encourages them to repeat the behavior. Remember, patience is key—celebrate their successes, no matter how small!

**3. Designate a Bathroom Spot:** Choose a specific outdoor location for your pet’s bathroom breaks. The scent will help them associate that area with relieving themselves, making it easier for them to understand where they should go. Be diligent about bringing them to this spot consistently.

**4. Monitor Their Behavior:** Pay close attention to signs that indicate your pet needs to go out, such as sniffing around, circling, or whining. If you notice these behaviors, take them outside immediately. This will help them learn to communicate their needs more effectively.

**5. Limit Access Indoors:** If your pet is still learning, consider restricting their access to certain areas of the house, especially those with carpets or rugs. When you can’t supervise your pet, confine them to a crate or a designated area where accidents will be easier to manage.

**6. Be Patient and Consistent:** Training takes time and requires a great deal of patience. If your pet has an accident, don’t punish them—clean it up without fuss and continue to reinforce positive behaviors. Consistency in your approach will help them learn faster.

By integrating these training tips into your routine, you’ll not only minimize the likelihood of future accidents but also strengthen the bond between you and your pet. A well-trained pet means a happier home for everyone, and with time and dedication, you’ll see progress and enjoy a cleaner, more harmonious living space.

9. The Role of Diet in Pet Accidents

When it comes to managing pet accidents in your home, it’s essential to recognize that diet plays a pivotal role in your furry friend’s bathroom behavior. The food you choose for your pet can significantly impact not only their overall health but also their bowel movements and urinary habits.

Pets, like humans, can have different sensitivities and reactions to various ingredients in their diet. High-quality, balanced nutrition is crucial; poor diet choices can lead to gastrointestinal issues, increased urination, or even urinary tract infections, all of which may result in accidents inside the house. For instance, a diet rich in fiber can help regulate your pet’s digestive system, reducing the likelihood of messy mishaps. Conversely, sudden changes in diet or overly rich foods can disturb their stomachs, leading to diarrhea and accidents.

It’s also vital to consider the hydration levels of your pet. Insufficient water intake can lead to concentrated urine, making accidents more likely if they can’t hold it. Ensure that your pet has constant access to fresh, clean water, and monitor their drinking habits. If you notice a significant change in their water consumption or urination patterns, it might be time to consult your veterinarian, as these could be signs of underlying health issues.

In addition, be mindful of treats and snacks you offer. Many commercial pet treats are high in fillers and artificial ingredients that may upset your pet’s stomach. Opt for healthy, natural treats that align with their dietary needs. By paying attention to your pet’s diet and making informed choices, you can help minimize the chances of accidents while promoting their overall well-being. Remember, a healthy pet is a happy pet—and a happy pet is less likely to leave surprises around the house!

10. When to Consult a Veterinarian

When it comes to your furry friends, accidents happen, and most pet owners can handle the occasional mishap with a bit of cleaning solution and some patience. However, there are certain situations when consulting a veterinarian is not just advisable, but essential. Recognizing these moments can help prevent potentially serious health issues for your pet.

First and foremost, if your pet displays any signs of distress or pain during or after an accident, it’s time to reach out to a vet. Whining, excessive licking of the affected area, or reluctance to move can indicate an underlying problem that needs professional attention. Moreover, if your pet has repeated accidents in the same location, especially if they are house-trained, it could signal a urinary tract infection or other medical condition that requires diagnosis and treatment.

Additionally, if the substance involved in the accident is unknown or potentially harmful—like if your dog ingested something toxic or your cat had an accident with a cleaning product—immediate vet consultation is crucial. Many common household items can be dangerous to pets, and knowing what to do in these situations can save their life.

Lastly, if your pet is a senior or has existing health issues, it’s wise to err on the side of caution. Aging pets can have more complex medical needs, and what seems like a simple accident may be indicative of a more significant concern.

In summary, while cleaning up after pet accidents is part of being a responsible pet owner, never hesitate to consult a veterinarian if you notice any alarming signs or if the situation seems beyond the ordinary. Your vet can provide peace of mind and ensure your beloved pet stays happy and healthy.

11. The Importance of Regular Cleaning Routines

When it comes to maintaining a clean and healthy home with pets, establishing regular cleaning routines is paramount. Pets, whether they’re playful puppies or curious kittens, can sometimes have accidents that lead to stains and odors, making it essential to incorporate consistent cleaning practices into your daily life. By doing so, you can prevent the buildup of messes and ensure that your living space remains fresh and inviting.

Regular cleaning not only helps to manage the immediate aftermath of accidents but also fosters a hygienic environment for both you and your furry friends. By setting aside specific times each week to deep clean areas where your pets spend the most time, you can significantly reduce the likelihood of lingering odors and stains. For instance, a weekly vacuuming session can help eliminate pet hair and dander, while a thorough mopping of hard floors can keep surfaces clean and safe.

In addition to scheduled cleaning, it’s beneficial to have a spot-cleaning routine in place for inevitable accidents. This means being prepared with the right tools—like enzymatic cleaners designed to break down pet waste—and knowing how to quickly address messes as they occur. Not only does this approach help in maintaining a clean environment, but it also trains your pets to associate their designated areas with cleanliness, ultimately leading to better behavior over time.

In essence, a proactive cleaning schedule not only keeps your home looking great but also contributes to your pets’ health and happiness. When pets feel comfortable and clean in their surroundings, they are less likely to repeat unwanted behaviors, creating a harmonious living space for both pets and their humans. So, grab that vacuum, stock up on cleaning supplies, and make regular cleaning routines a fundamental part of your pet care strategy. Your home—and your pets—will thank you!

12. How to Handle Pet Accidents in Rental Properties

Dealing with pet accidents in rental properties can be particularly challenging, especially if you want to preserve your security deposit and maintain a good relationship with your landlord. However, with the right approach, you can effectively manage these situations without causing lasting damage to the property.

First and foremost, **act quickly**. The sooner you can address the accident, the better your chances of preventing permanent stains or lingering odors. Start by blotting up any wet mess with paper towels or an absorbent cloth, applying gentle pressure to soak up as much liquid as possible without rubbing, which could spread the stain.

Next, **choose the right cleaning solution**. While many commercial pet stain removers are available, you can also opt for natural alternatives. A mixture of equal parts white vinegar and water can work wonders to neutralize odors and break down stains. Spray the solution onto the affected area, let it sit for a few minutes, then blot again. For more stubborn stains, consider enzymatic cleaners that specifically target pet messes, breaking down the proteins that cause odors.

Once the area is clean, **thoroughly ventilate the space**. Open windows and turn on fans to help dry the carpet and eliminate any residual smells. This step is crucial, as dampness can lead to mold and mildew, which can be particularly problematic in rental properties.

If the accident occurs on hard surfaces like tile or hardwood, make sure to clean and disinfect the area properly. Scrubbing with a mixture of mild soap and water followed by a thorough rinse will ensure that no traces of the mess remain.

Finally, **communicate with your landlord** if necessary. If the damage is extensive or if you’re unsure about the cleaning process, it’s always wise to inform your landlord or property manager. They may have specific cleaning protocols or preferred service providers to mitigate any issues.

By keeping these strategies in mind and acting promptly, you can handle pet accidents in rental properties efficiently, protecting both your living space and your relationship with your landlord. Remember, accidents happen, but with a little preparation and the right tools, you can keep your rental home clean and pet-friendly.

13. Tips for Maintaining a Clean Home with Pets

Maintaining a clean home with pets can feel like an uphill battle, but with a few strategic practices in place, you can keep your living space fresh and inviting. Here are some tried-and-true tips to help you manage pet-related messes while ensuring your home remains a haven for both you and your furry companions.

**1. Invest in Pet-Friendly Fabrics:** Start with choosing the right materials for your furniture and decor. Opt for durable, stain-resistant textiles that are easy to clean, such as microfiber or leather. These materials can withstand the wear and tear of curious paws and are less likely to trap odors.

**2. Create a Cleaning Schedule:** Establishing a regular cleaning routine can help you stay ahead of the mess. Set aside dedicated time each week for vacuuming, dusting, and mopping to combat pet hair and dander. Consider enlisting the help of a robotic vacuum to streamline the process and keep pet fur at bay.

**3. Designate Pet Zones:** To minimize chaos, create specific areas in your home where your pets are allowed. This not only helps contain messes but also protects your furniture and keeps your home organized. Use baby gates or pet barriers to restrict access to certain rooms.

**4. Use Area Rugs:** Place area rugs in high-traffic zones to protect your floors and make cleaning easier. Choose washable rugs or those made from synthetic fibers that can handle spills and accidents. This allows you to quickly remove and clean them when necessary.

**5. Stock Up on Cleaning Supplies:** Keep a well-stocked cleaning kit specifically for pet-related messes. Include enzyme-based cleaners that break down stains and odors, lint rollers for quick fur removal, and disposable paper towels for easy clean-up. Having these supplies readily available will make tackling accidents a breeze.

**6. Groom Regularly:** Regular grooming is essential for reducing shedding and keeping your home cleaner. Brush your pets frequently to remove loose fur and dander, and consider scheduling professional grooming sessions for long-haired breeds. This not only helps control mess but also keeps your pets looking their best.

**7. Train Your Pets:** Consistent training can significantly reduce accidents and messes. Teach your pets commands such as “sit,” “stay,” and “outside” to encourage good behavior. Positive reinforcement can help them learn where it’s appropriate to relieve themselves, leading to fewer incidents indoors.

By implementing these strategies, you can create a harmonious living environment that accommodates your pets while keeping your home clean and inviting. Remember, a little proactive effort goes a long way in maintaining a space where both you and your pets can thrive.

14. Encouraging Good Bathroom Habits in Pets

Encouraging good bathroom habits in pets is essential for maintaining a clean and comfortable home while fostering a healthy relationship between you and your furry companions. Just like humans, pets thrive on routine and positive reinforcement. Start by establishing a regular schedule for bathroom breaks, especially for puppies and kittens. Take them outside or to their designated bathroom area at consistent intervals—after meals, playtime, and first thing in the morning. This helps them develop a clear understanding of when and where it’s appropriate to relieve themselves.

Use positive reinforcement techniques to promote desired behaviors. When your pet successfully uses the bathroom in the right spot, shower them with praise, treats, or playtime as a reward. This encourages them to associate the behavior with positive outcomes, making them more likely to repeat it in the future.

For dogs, consider using a specific word or phrase, such as “go potty,” whenever you take them out. This verbal cue can help them connect the command with the action, making it easier for them to understand what is expected. With cats, providing a clean, accessible litter box in a quiet area encourages them to use it consistently. Be vigilant about cleaning the box regularly; a dirty litter box can deter your cat from using it.

In addition to establishing a routine, pay attention to your pet’s body language. Signs of restlessness, sniffing around, or circling can indicate that they need to go. Respond promptly to these signals to help prevent accidents in the house.

Lastly, patience and consistency are key. Pets may not get it right every time, and accidents are bound to happen, especially during training. When they do, avoid punishment; instead, calmly guide them back to the desired behavior. With time and dedication, you’ll see an improvement in your pet’s bathroom habits, leading to a happier home for both of you.

15. Conclusion: Building a Positive Relationship with Your Pet

In conclusion, building a positive relationship with your pet goes hand in hand with effective cleaning strategies. While accidents may be a part of pet ownership, it’s essential to approach these situations with understanding and compassion. Every cleaning session is an opportunity to reinforce your bond with your furry friend. By remaining calm and patient, you demonstrate to your pet that mistakes are a natural part of life, allowing them to feel safe and loved in their environment.

Taking the time to train your pet and establish a consistent routine can significantly reduce the likelihood of future accidents. Utilize positive reinforcement techniques, such as rewards and praise, to encourage good behavior and create a trusting atmosphere. Additionally, ensuring your pet has access to the outdoors and understands where to relieve themselves can foster a sense of responsibility and awareness.

Moreover, don’t overlook the importance of using pet-friendly cleaning products. Not only do they safeguard your pet’s health, but they also make the cleaning process less stressful for you both. As you tackle each incident with a proactive mindset, remember that your pet is learning and adapting alongside you. Embrace the journey and celebrate the small victories that come with training and bonding.

Ultimately, by focusing on building a positive relationship with your pet, you contribute to a harmonious household where both of you can thrive. With patience, love, and effective cleaning strategies, you can navigate the challenges of pet ownership while deepening the connection with your beloved companion.

In conclusion, managing pet accidents can feel overwhelming, but with the right strategies in place, you can turn those mishaps into manageable moments. We hope this ultimate guide has equipped you with effective techniques and practical solutions to tackle any mess your furry friends may leave behind. From choosing the right cleaning products to implementing preventative measures, each step is crucial in maintaining a clean and inviting home while ensuring your pet feels loved and cared for. Remember, patience and consistency are key as you navigate pet ownership. Share your own experiences and tips in the comments below, and let’s continue to support each other in creating harmonious spaces for both our pets and ourselves!

How Can I Make My Backyard Safe for My Dog?

Transforming your backyard into a dog-friendly haven is not only a rewarding task but also a crucial step in ensuring the safety and happiness of your furry companion.

With wagging tails and playful barks, our dogs thrive in environments where they can explore, play, and unwind. However, creating a space that is both enjoyable and secure requires careful planning and consideration. From selecting the right plants to establishing safe play zones, there are many aspects to consider in order to keep your pet safe while they bask in the sun or chase after their favorite toys. In this blog post, we’ll explore essential tips for designing a backyard that caters to your dog’s instincts, ensuring they have a safe and stimulating environment to enjoy. Join us as we dive into the essentials of creating a backyard paradise that your four-legged friend will love!

1. Understanding Your Dog’s Needs

How Can I Make My Backyard Safe for My Dog?
Credit : whatcanu.com

Creating a dog-friendly backyard begins with a deep understanding of your furry friend’s needs. Each dog is unique, with different breeds, sizes, and temperaments that influence their behavior and preferences. Start by observing your dog’s habits—do they love to dig, chase after squirrels, or lounge in the sun? Recognizing these natural instincts will help you tailor your outdoor space to suit their lifestyle.

Consider your dog’s energy level as well. High-energy breeds like Border Collies or Jack Russell Terriers thrive in spaces that allow for ample running and play. Incorporate open areas where they can sprint freely or set up agility equipment to keep them mentally stimulated. On the other hand, calmer breeds may enjoy a cozy, shaded corner with soft grass for lounging and basking in the warmth.

Safety is also paramount in understanding your dog’s needs. Evaluate the potential hazards in your yard, such as toxic plants, sharp objects, or gaps in fencing that could allow for escape. Make sure your plants are non-toxic and remove any chemical fertilizers or pesticides that could harm your pet. Additionally, a secure fence will provide a sense of safety, allowing your dog to explore their space without the risk of wandering off.

Lastly, don’t forget about comfort! Providing a dedicated space for your dog—complete with a cozy dog bed, water bowl, and toys—will create an inviting atmosphere. By considering your dog’s physical, emotional, and safety needs, you can transform your backyard into a haven where they can thrive and find joy in every moment spent outdoors.

2. Assessing Your Backyard Space

Creating a dog-friendly haven begins with a thorough assessment of your backyard space. A safe, engaging environment is crucial for your furry friend, and understanding the layout and features of your outdoor area will help you identify what modifications or enhancements are needed to ensure their happiness and safety.

Start by examining the boundaries of your yard. Are there any gaps in the fencing that could allow a curious pup to escape? Look for any loose boards or areas where the ground may be uneven, as these can pose tripping hazards or potential hiding spots for mischievous escape artists. A secure, well-maintained fence is the first line of defense in keeping your dog safe while they enjoy their outdoor space.

Next, take stock of the landscape itself. Are there any toxic plants or flowers that could harm your pet if ingested? common culprits include azaleas, lilies, and certain types of ivy, so it’s wise to familiarize yourself with the plants in your yard and remove any that could pose a risk. Additionally, consider the ground cover—turf, mulch, or gravel can affect your dog’s comfort and play experience. Soft grass is generally the most inviting surface for running and rolling, while gravel can be tough on their paws.

Evaluate the availability of shade and shelter in your backyard. Dogs, especially those with thick coats, can easily overheat in direct sunlight. Ensure there are shaded areas where they can escape the sun’s rays, whether from trees, a patio, or a doghouse. If your yard lacks natural shade, consider erecting a canopy or constructing a simple shaded area where your dog can relax comfortably.

Finally, think about the overall layout of your backyard and how it can be optimized for play and exploration. Designate specific zones for different activities—like a space for fetch, a digging area, or a cozy corner for lounging. Adding dog-friendly features like agility equipment, a kiddie pool for splashing, or even a sandbox can provide mental stimulation and keep your dog engaged while they explore their outdoor haven.

By carefully assessing your backyard space and making thoughtful adjustments, you can create a safe and enjoyable environment for your dog to play, relax, and thrive. With the right setup, your backyard can become a beloved retreat for your furry friend, offering endless opportunities for fun and adventure.

3. Choosing Safe Plants and Landscaping

How Can I Make My Backyard Safe for My Dog?
Credit : whatcanu.com

When transforming your backyard into a dog-friendly haven, one of the most crucial aspects to consider is your choice of plants and landscaping. While vibrant flowers and lush greenery can enhance the beauty of your outdoor space, it’s vital to ensure that the flora you select is safe for your furry companions.

Start by conducting thorough research on the plants you wish to introduce. Many common garden plants, such as lilies, azaleas, and sago palms, are toxic to dogs and can lead to serious health issues if ingested. Instead, opt for dog-friendly alternatives like sunflowers, marigolds, or snapdragons, which add color and vibrancy without posing a risk to your pet’s well-being.

In addition to plant selection, consider the landscaping features of your yard. If you’re planning to incorporate mulch, be cautious with cocoa mulch, which contains theobromine—an ingredient toxic to dogs. Instead, choose bark or cedar mulch, which are safe and provide a pleasant aroma.

When designing pathways or play areas, think about the materials you use. Avoid sharp stones or gravel that could injure your dog’s paws. Instead, consider softer options like grass, rubber mats, or sand, which provide comfort and cushioning for their playful antics.

Lastly, be mindful of any chemicals you might use in your garden. Fertilizers and pesticides can be harmful to dogs, so look for pet-safe alternatives. By creating a safe and inviting landscape with thoughtful plant choices and materials, you’ll ensure your backyard remains a peaceful retreat where your pup can roam freely and happily. With a little planning and care, you can cultivate a beautiful outdoor space that nurtures both your garden and your beloved pet.

4. Fencing Options for Secure Boundaries

When it comes to creating a dog-friendly haven, secure boundaries are paramount, and choosing the right fencing is a crucial step in ensuring your pup’s safety. A well-fenced yard not only provides your dog with the freedom to roam and play but also keeps them safe from potential dangers lurking outside your property.

There are several fencing options to consider, each with its own benefits and suitability depending on your dog’s size, temperament, and play style.

**1. Wooden Fences:** Classic and sturdy, wooden fences offer a natural look that complements any garden while providing reliable security. Opt for a height of at least six feet to deter jumpers, and ensure there are no gaps at the bottom where a curious pup might squeeze through.

**2. Chain-Link Fences:** These fences are durable, cost-effective, and allow for visibility, which can be comforting for both you and your dog. Consider adding a privacy slat to block out distractions that might entice your dog to bark or jump.

**3. Vinyl Fences:** If you’re looking for a low-maintenance option, vinyl fences are an excellent choice. They are weather-resistant and come in various styles, offering the same security as wood without the need for regular upkeep.

**4. Invisible Fencing:** For those who prefer a less obtrusive option, invisible fencing can create a boundary without a physical barrier. While it requires training to ensure your dog understands the limits, it can be a viable solution for larger areas.

**5. Pool Fencing:** If your backyard features a pool, installing a separate pool fence is essential. Look for a gate that automatically closes and latches, providing an extra layer of security to keep your furry friend safe from water hazards.

When choosing a fencing option, consider your dog’s behavior and needs. For example, if you have a high-energy breed, a taller fence may be necessary to prevent them from leaping over. Regularly inspect your fencing for any wear and tear, and ensure that gates are securely latched after each use. By investing in the right fence, you create a safe and inviting space for your dog to enjoy the great outdoors, giving you peace of mind and your furry friend a sense of freedom.

5. Designing a Comfortable Dog Area

How Can I Make My Backyard Safe for My Dog?
Credit : whatcanu.com

Designing a comfortable dog area in your backyard is crucial for creating a space where your furry friend can relax, play, and feel secure. Start by choosing a location that is both shaded and sheltered, protecting your dog from harsh sunlight and inclement weather. Consider installing a cozy dog house or a stylish outdoor bed equipped with soft, washable bedding, giving your pup a personal retreat to escape to when they need a break from the action.

Next, think about incorporating elements that encourage play and exercise. A designated play zone with durable toys, like chew-resistant balls or tug ropes, can provide endless entertainment. If space allows, consider adding agility equipment, such as tunnels or jumps, to stimulate your dog’s mind and body. This not only helps keep them physically fit but also strengthens the bond between you and your pet as you engage in fun activities together.

Comfort is key, so ensure your dog area has a soft surface, such as artificial turf or rubber matting, to cushion their paws and joints while they romp around. Avoid using gravel or rough stones that can irritate their sensitive paws. Hydration is essential, too—install a shaded water station to keep your dog refreshed during playtime.

Finally, think about the overall aesthetics of your dog area. Use non-toxic plants and landscaping elements to create a visually appealing environment that complements your home. By designing a comfortable dog area that prioritizes safety and enjoyment, you’re not only enhancing your dog’s outdoor experience but also creating a welcoming haven where they can thrive.

6. Ensuring Shade and Water Access

Creating a dog-friendly haven in your backyard means prioritizing your furry friend’s comfort and well-being, especially when it comes to providing adequate shade and water access. As temperatures rise, dogs are particularly vulnerable to overheating, so it’s essential to offer shaded areas where they can retreat from the sun’s harsh rays. Consider planting trees or installing a sturdy gazebo that not only enhances your backyard’s aesthetics but also provides a cool refuge for your pooch.

Moreover, utilizing outdoor furniture, such as umbrellas or large shade sails, can create additional shaded spots where your dog can lounge comfortably. Keep in mind the layout of your yard; positioning these areas thoughtfully can ensure your pet has easy access to shelter while enjoying the fresh air.

Equally important is ensuring that your dog has constant access to fresh water. Install a durable, non-tip water bowl in a shaded area to prevent the water from heating up too quickly. For those particularly warm days, you might consider getting a pet water fountain, which not only keeps the water cool and flowing but also encourages your dog to drink more often, helping to prevent dehydration.

Regularly check and refill the water supply, especially during playtime or after long walks, to keep your dog hydrated and happy. By ensuring ample shade and water access, you create a safe and inviting atmosphere that allows your dog to enjoy your backyard all summer long.

7. Avoiding Common Hazards in Your Backyard

How Can I Make My Backyard Safe for My Dog?
Credit : whatcanu.com

Creating a safe and inviting backyard for your furry friend requires vigilance and a keen eye for potential hazards that could pose risks to their health and well-being. Everyday elements that might seem innocuous to us can be dangerous for dogs, so it’s essential to assess your outdoor space thoroughly.

Start by examining your fence and gates. Ensure that they are tall enough and properly secured to prevent any daring escape attempts. Dogs are notorious for their curiosity and may try to squeeze through gaps or dig under fences if they sense something interesting on the other side. Regularly inspect these barriers for any wear and tear, and address any issues immediately.

Next, consider the types of plants and flowers you have in your backyard. While you may enjoy a beautiful garden, some plants can be toxic to dogs if ingested. Common culprits include azaleas, lilies, and sago palms. Make sure to research any new plants before adding them to your landscape and, if possible, opt for dog-safe varieties like sunflowers or marigolds.

Another often-overlooked hazard is standing water. Puddles, ponds, or birdbaths can be breeding grounds for mosquitoes and other pests, potentially exposing your dog to harmful diseases. Ensure that any water features are well-maintained and consider covering them or using natural deterrents to keep them clean and safe.

Additionally, take stock of your gardening supplies. Fertilizers, pesticides, and herbicides can contain harmful chemicals that are dangerous if ingested or absorbed through the skin. Store these products securely away from your pet’s reach and consider using organic alternatives that are less harmful to both your dog and the environment.

Finally, remember to keep your backyard tidy. Loose items, such as tools, cords, and small debris, can become tripping hazards or chew toys for an inquisitive pup. Regularly cleaning up and organizing your space not only makes it more enjoyable for both you and your dog but also significantly reduces the risk of accidents.

By taking these precautions and creating a safe environment, you can ensure that your backyard is a true haven for your dog—a place where they can explore, play, and relax without worry!

8. Creating Engaging Play Zones

Creating engaging play zones in your backyard is essential for keeping your dog happy, active, and mentally stimulated. Dogs are social creatures that thrive on interaction, and a thoughtfully designed play area can provide them with a safe haven to explore, play, and bond with you and other pets.

Start by designating specific zones for different activities. A spacious area with soft grass or artificial turf can serve as the main play zone where your dog can frolic freely. Consider using colorful agility equipment, such as tunnels, jumps, and weave poles, to encourage fitness and coordination. These structures not only promote physical activity but also offer your dog exciting challenges to overcome, stimulating their mind in the process.

Incorporating sensory elements can elevate the play experience. Think about adding a digging pit filled with sand or soil where your pup can indulge their natural digging instincts. You might also include a water feature, such as a small splash pool or a dog-friendly fountain, to keep your furry friend cool and entertained during warmer months.

Don’t underestimate the power of toys! Providing a variety of toys, from chew toys to fetch balls, will keep your dog engaged and prevent boredom. Rotating these toys every few weeks can reignite your dog’s interest and make playtime feel fresh and exciting.

Lastly, ensure that the environment is safe and secure. Check the area for any hazardous plants, sharp objects, or potential escape routes. Installing a sturdy fence will keep your dog contained while allowing them to explore their paradise. By creating engaging play zones in your backyard, you’ll not only enhance your dog’s quality of life but also strengthen the bond you share through play and adventure.

9. Incorporating Chew-Proof Furniture

Creating a dog-friendly haven in your backyard means considering every aspect of your outdoor space, including the furniture. Incorporating chew-proof furniture is a savvy way to safeguard your investment while also ensuring that your furry friend has the freedom to explore and enjoy their surroundings without causing damage.

When selecting furniture, opt for materials known for their durability and resistance to chewing. High-density polyethylene, stainless steel, and treated wood are excellent choices that can withstand the playful antics of even the most determined pups. Look for items specifically designed for pet owners, such as chew-proof cushions covered in tough, waterproof fabrics that resist tearing and staining.

Additionally, consider the height and design of your furniture. Low-slung benches and tables can provide a cozy spot for your dog to lounge without the risk of jumping or climbing onto delicate pieces. If you love the look of wicker or rattan, be cautious; while stylish, these materials can be particularly susceptible to enthusiastic chewing.

Incorporating chew-proof furniture not only protects your belongings but also adds to the overall aesthetic of your yard. Choose colors and styles that complement your garden, creating a cohesive look that you can enjoy just as much as your dog. With the right furniture in place, your backyard can be a true sanctuary for both you and your canine companion—one where you can relax together, knowing that everything is safe and sound.

10. Setting Up a Designated Bathroom Area

Setting up a designated bathroom area in your backyard is an essential step in creating a dog-friendly haven. Not only does this help keep your outdoor space tidy, but it also provides your furry friend with a consistent spot to relieve themselves. Choosing the right location for this area is crucial; look for a spot that is easily accessible and away from high-traffic zones where your dog often plays.

To create this space, consider laying down some gravel or mulch to define the area and make it comfortable for your dog. These materials are not only easy on their paws but also facilitate drainage, keeping the area cleaner and reducing odors. You can even plant some dog-friendly grasses or herbs around the perimeter, like rosemary or thyme, which can help mask any unwanted smells and provide a pleasant aroma in the air.

Additionally, establishing a routine by taking your dog to this designated area at the same times each day can help them understand that this is their bathroom spot. Praise and reward them each time they use it correctly to reinforce positive behavior.

Don’t forget to keep this area clean by regularly picking up after your pet and refreshing the substrate as needed to maintain hygiene. By creating a well-defined bathroom area, you’ll not only maintain a clean backyard but also contribute to your dog’s overall well-being, making your home a more enjoyable and inviting space for everyone.

11. Installing Safe and Fun Obstacles

Creating a dog-friendly haven in your backyard goes beyond just having a spacious area for your furry friend to roam. One of the most exciting ways to enhance their outdoor experience is by installing safe and fun obstacles. These additions not only provide physical exercise but also stimulate your dog’s mind, helping to keep them happy and engaged.

Start by considering your dog’s size, breed, and energy level when choosing obstacles. For smaller breeds, lightweight agility tunnels, low jumps, and weave poles can offer a fun challenge without overwhelming them. Larger dogs, on the other hand, might enjoy more robust equipment, such as sturdy climbing structures or A-frames that allow them to channel their energy in a productive way.

Safety should always be your top priority when designing an obstacle course. Make sure all materials are non-toxic and free from sharp edges. Opt for soft, durable materials that can withstand the rigors of enthusiastic play, such as rubber or treated wood. Additionally, ensure the ground is well-maintained, using grass or soft turf to cushion any falls.

Incorporating a variety of obstacles can also promote different types of play. Consider adding a splash pad or kiddie pool for hot days, a sandbox for digging, or even a balance beam to challenge their coordination. You can also create a scent trail using treats or toys to encourage them to explore and engage with their environment.

Finally, remember to change things up from time to time. Dogs, like people, can get bored with the same routine. By rotating obstacles or introducing new challenges, you keep their playtime fresh and exciting. With a little creativity and attention to safety, your backyard can become a beloved playground that your dog will enjoy for years to come.

12. Introducing Safe Toys for Outdoor Play

When it comes to creating a dog-friendly haven in your backyard, introducing safe toys for outdoor play is a crucial step that can elevate both your pet’s enjoyment and safety. Dogs are naturally curious and energetic, and providing them with engaging toys not only helps keep them entertained but also stimulates their minds and promotes healthy physical activity.

Opt for durable, non-toxic toys specifically designed for outdoor use. Look for materials that can withstand the elements, such as sturdy rubber or high-quality fabrics that resist fading from UV rays. Avoid toys with small parts that can easily break off or chewable elements that could pose choking hazards. Instead, consider sturdy options like frisbees, tug ropes, and balls designed for heavy chewing. These toys not only provide hours of fun but also help strengthen your dog’s jaw muscles and improve dental health.

Interactive toys, such as those that dispense treats or require problem-solving, can also enhance outdoor playtime. These toys challenge your dog mentally and can prevent boredom, which is essential for their overall well-being. Set up play areas with different toys to keep things fresh and exciting. Rotating toys regularly can also maintain your dog’s interest and engagement, making outdoor play a new adventure each time.

Don’t forget about the importance of supervision during outdoor play sessions. Always keep an eye on your dog while they’re playing with toys to ensure they’re safe and not chewing on anything they shouldn’t. Encourage playtime by joining in on the fun—play fetch, tug-of-war, or simply explore your yard together. This not only strengthens your bond but also allows you to monitor the condition of the toys and replace them if necessary.

By thoughtfully introducing safe toys for outdoor play, you create a vibrant and stimulating environment for your dog, making your backyard a true haven for joy and exploration. Your furry friend will thank you with wagging tails and playful antics, knowing they have a special space to enjoy their time outdoors.

13. Maintaining Your Dog-Friendly Space

Maintaining your dog-friendly space is crucial for ensuring it remains a safe, enjoyable haven for your furry friend. A well-kept yard not only enhances your dog’s playtime experience but also promotes their health and well-being. Begin by regularly inspecting the area for any potential hazards. This means checking for sharp objects, toxic plants, or any debris that could pose a risk to your pet. It’s a good idea to establish a routine inspection schedule—weekly or bi-weekly—to keep your backyard in top shape.

Next, focus on the grass and landscaping. Regular mowing is essential to prevent your dog from hiding ticks or fleas in the tall grass. If your yard has any shrubs or flowers, consider researching which plants are safe for dogs and removing any that could be toxic if ingested. Additionally, consider setting aside a designated area for your dog to dig or explore; this not only keeps them engaged but also minimizes damage to your landscaping.

Cleaning up after your dog is another vital aspect of maintenance. Not only is it important for hygiene, but it also prevents the spread of pests and diseases. Designate a specific area for waste and ensure you have the necessary cleaning supplies on hand. If possible, make it a habit to pick up waste immediately after your dog does their business.

Lastly, consider seasonal maintenance. In the spring, prepare your yard for the warm months by checking fences for any damage that might have occurred over the winter. In the fall, rake up leaves that can harbor mold or pests. During the winter, ensure your dog has a safe path to access the yard, free from ice or snow hazards.

By staying proactive about maintaining your dog-friendly space, you can create a safe, inviting environment that your dog will love to explore and enjoy for years to come.

14. Regularly Checking for Potential Risks

Creating a dog-friendly haven in your backyard requires vigilance and a proactive approach to safety. One of the most crucial steps in maintaining a safe environment for your furry friends is to regularly check for potential risks. This means making it a habit to walk through your yard at least once a week, inspecting it for any new hazards that could pose a threat to your dog’s well-being.

Start by examining the fencing around your yard. Look for any gaps or loose boards that could allow your dog to escape or stray into dangerous territory. Even small openings can be an invitation for curious pups, so ensure that your barriers are secure and intact.

Next, keep an eye out for toxic plants. While many plants may seem harmless, some can be highly toxic to dogs. Familiarize yourself with common garden plants that are dangerous, such as azaleas, lilies, and sago palms, and remove any that could pose a risk.

Don’t forget to check for harmful objects that may have found their way into your yard. This includes sharp tools, old garden stakes, or broken glass. These items can easily injure an unsuspecting dog that is exploring or playing in the yard. Consider performing a thorough clean-up of any debris or clutter that could lead to accidents.

Additionally, be mindful of chemicals, such as fertilizers, pesticides, or herbicides. Ensure that any products you use are pet-safe, and store them securely out of reach. Even residues left on the ground can be harmful, so water the area or cover it with grass or mulch once it has dried.

Lastly, assess the play areas. If you have a dog house or play equipment, check for wear and tear. Rusty nails, splintered wood, or sharp edges can turn a fun play session into a painful experience. Regular maintenance can help keep your dog’s playtime both enjoyable and safe.

By routinely checking for potential risks and addressing them promptly, you can create a serene and secure outdoor space where your dog can thrive. Remember, a little prevention goes a long way in ensuring that your backyard remains a happy haven for your four-legged family members.

15. Tips for Supervision and Socialization in the Backyard

Creating a dog-friendly haven in your backyard goes beyond just the physical space; it also involves ensuring your furry friends are well-supervised and properly socialized while they enjoy their outdoor playground. Supervision is paramount, especially if you have a curious pup who loves to explore. Always keep an eye on your dog, whether by staying in the yard with them or using a secure, enclosed space where they can roam freely without the risk of escaping. Consider setting up a comfortable seating area or a shaded spot where you can relax while keeping a watchful eye on your four-legged companion.

Socialization is equally crucial for your dog’s development and happiness. Introduce your pup to other dogs in a controlled environment, ensuring that they possess compatible temperaments and play styles. Organize playdates or invite friends over with their pets to create a friendly atmosphere where dogs can interact and learn appropriate behaviors. Use positive reinforcement to encourage good manners during these encounters, rewarding your dog for calm behavior and polite greetings.

Incorporating interactive elements into your backyard can also enhance socialization opportunities. Install a dog-friendly agility course or set up fun toys like tug ropes and fetch items to promote playtime and cooperative activities. If space permits, a dog-friendly sandbox can provide a stimulating environment for digging and exploring, which many dogs find enjoyable.

Remember to vary your activities to keep things fresh and exciting. Schedule regular backyard play sessions, allowing your dog to express their natural instincts while building confidence and social skills. By prioritizing supervision and creating opportunities for socialization, you’ll not only ensure your backyard is a safe haven but also a vibrant, engaging space where your dog can thrive.

In conclusion, transforming your backyard into a dog-friendly haven is not just about aesthetics; it’s about creating a safe and enriching environment for your furry friend to thrive. By implementing the essential tips we’ve discussed—from securing fences and removing toxic plants to providing engaging play areas and cozy resting spots—you can ensure that your dog enjoys the great outdoors while staying safe and happy. Remember, a well-designed space fosters not only physical activity but also strengthens the bond between you and your pet. So, roll up your sleeves and start making these changes today! Your pup will thank you with wagging tails and joyful barks, and you’ll create countless cherished memories together in your very own dog paradise.

What do bed bugs look like ?

Having bed bugs is not good news. But how to make sure the insects you see are really bed bugs ?

Bed bugs are small, flattened insects with a reddish-brown hue and an oval-shaped body. They are roughly the size of an apple seed and have six legs, two antennae, and a pair of wings, although they are unable to fly.

Their flat, flexible bodies allow them to easily hide in the crevices and cracks of beds, furniture, and other household items. They are nocturnal creatures, emerging at night to feed on the blood of their hosts while dreaming.

bed bugs

Distinct, musty odor

When they are well-fed, bed bugs are plump and swollen, with a reddish-purple coloration. However, when they are hungry, they become thin and translucent, almost appearing ghostly in their pallor.

They have a distinct, musty odor that is often associated with infested areas. This odor comes from their scent glands, which they use to mark their territory and communicate with each other.

Bed bugs are highly resilient, with a lifespan of up to a year in the right conditions. They can survive for long periods without food and are resistant to many common pesticides.

They are skilled at hiding and are often difficult to detect until an infestation is well-established. To look for them, one should carefully inspect the seams, crevices, and tufts of mattresses, as well as other areas where they may hide.

Their bites are typically painless, but can cause swelling, redness, and irritation in some individuals. They are most commonly found in areas of the body that are exposed while sleeping, such as the face, neck, arms, and hands.

In conclusion, bed bugs are small, reddish-brown insects with a flattened body and six legs. They are nocturnal and feed on the blood of their hosts, leaving behind a distinct, musty odor. They are skilled at hiding and can be difficult to detect until an infestation is well-established.