What are the different types of faucet finishes?

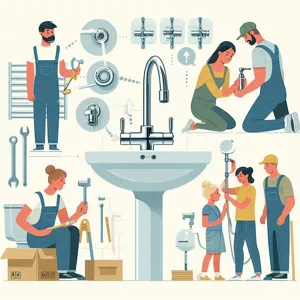
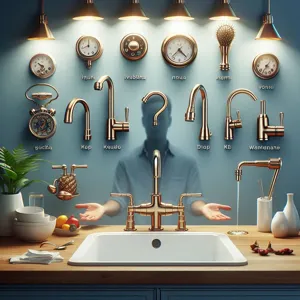
When it comes to designing your home, every detail counts, and faucets are no exception.

Often overlooked, the finish of your faucets can dramatically influence the overall aesthetic of your kitchen or bathroom, blending functionality with style. With a plethora of options available—from sleek chrome and warm brass to modern matte black and timeless nickel—the choices can be as overwhelming as they are exciting. Choosing the perfect faucet finish requires a keen understanding of your personal style, existing décor, and the atmosphere you wish to create. In this comprehensive guide, we will explore the various faucet finishes available, delve into their unique characteristics, and provide valuable tips to help you select the ideal finish that not only complements your home but also enhances your daily living experience. Get ready to transform your spaces with the right faucet finish, turning mundane tasks into moments of joy!

1. Introduction to Faucet Finishes

What are the different types of faucet finishes?
Credit : whatcanu.com

When it comes to designing or renovating your kitchen or bathroom, every detail counts—including the faucet finishes you choose. Faucet finishes not only play a crucial role in the overall aesthetic of your space but also affect the functionality and maintenance of your fixtures. With a myriad of options available, from gleaming chrome to rustic oil-rubbed bronze, selecting the right finish can transform the look and feel of your home.

In this guide, we’ll explore the various types of faucet finishes, discussing their unique characteristics, benefits, and potential drawbacks. Whether you’re aiming for a sleek, modern vibe or a classic, timeless appeal, understanding the nuances of each finish will empower you to make an informed decision.

We’ll delve into popular finishes such as polished nickel, matte black, and brushed stainless steel, examining how they complement different decor styles. Additionally, we’ll touch on practical considerations like durability, ease of cleaning, and resistance to tarnishing, ensuring your faucet not only looks stunning but stands the test of time.

Join us as we embark on this journey through the fascinating world of faucet finishes, helping you find the perfect look that harmonizes with your home’s design and enhances your daily routine.

2. Understanding the Importance of Faucet Finishes

When it comes to home design, the details matter profoundly, and faucet finishes are no exception. The finish of a faucet can dramatically influence the aesthetics of your kitchen or bathroom, acting as a subtle yet striking focal point in your space. Understanding the importance of faucet finishes goes beyond mere appearances; it’s about harmonizing style, functionality, and durability.

Each finish brings its unique character to the table. For instance, chrome faucets offer a sleek, modern look with their bright, reflective surface, making them ideal for contemporary spaces. On the other hand, oil-rubbed bronze delivers a warm, rustic charm, perfect for traditional or farmhouse-style interiors. Matte black finishes have gained popularity in recent years, providing a bold and sophisticated touch that pairs beautifully with a variety of color palettes.

Moreover, the finish you choose can affect the faucet’s maintenance and longevity. Some finishes, like polished nickel, are more resistant to tarnishing and scratches, ensuring your faucet maintains its luster over time. Others, such as brass, develop a unique patina that can enhance their visual appeal but may require more regular upkeep to keep them looking pristine.

In addition to aesthetics and maintenance, consider how the faucet finish will interact with other elements in your space. The right finish can unify your design, linking the faucet with cabinet hardware, light fixtures, and even appliances. By taking the time to understand the importance of faucet finishes, you’re not just making a choice; you’re setting the tone for your entire home. A well-selected finish can elevate your space, making it feel cohesive, stylish, and thoughtfully designed.

3. Popular Faucet Finishes: An Overview

What are the different types of faucet finishes?
Credit : whatcanu.com

When it comes to selecting the perfect faucet finish for your home, understanding the popular options available is key to making an informed decision. Each finish not only contributes to the aesthetic appeal of your space but also affects the overall ambiance and functionality of your fixtures.

**1. Polished Chrome:** A classic choice, polished chrome faucets exude a sleek, modern vibe that complements a variety of design styles. The reflective surface bounces light around the room, making it an excellent option for smaller spaces. It’s also highly resistant to rust and tarnish, ensuring your faucet maintains its shine with minimal upkeep.

**2. Brushed Nickel:** If you’re looking for a more understated elegance, brushed nickel is an ideal selection. This finish has a soft, muted sheen that hides fingerprints and water spots beautifully, making it a practical choice for busy kitchens and bathrooms. It pairs well with both traditional and contemporary decor, offering versatility in design.

**3. Oil-Rubbed Bronze:** For those who appreciate a rustic or vintage aesthetic, oil-rubbed bronze is a top contender. This rich, dark finish provides a striking contrast against light-colored surfaces and introduces a warm, inviting feel to your space. Its unique patina develops over time, adding character and depth that speaks to its timeless quality.

**4. Matte Black:** The rise of matte black finishes has transformed modern interior design. This bold, sophisticated option adds a touch of drama to any room while maintaining a sleek, minimalist appearance. Matte black faucets work exceptionally well in contemporary and industrial settings, making them a favorite among design enthusiasts.

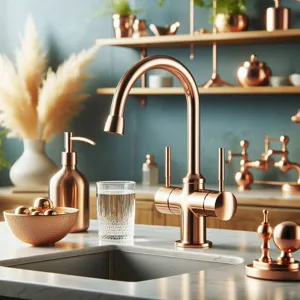
**5. Polished Gold:** For a luxurious touch, polished gold faucets can elevate your home’s aesthetic to new heights. This eye-catching finish radiates opulence and pairs beautifully with marble countertops and rich colors. However, it’s important to consider the level of maintenance required, as polished gold can be more susceptible to tarnishing.

In summary, the choice of faucet finish can significantly impact both the style and functionality of your space. By exploring these popular options, you can find the perfect look that aligns with your home’s design vision while ensuring durability and ease of maintenance. Whether you opt for the timeless elegance of polished chrome or the luxurious allure of polished gold, the right faucet finish can truly enhance your home’s overall aesthetic.

4. Chrome: The Classic Choice

When it comes to faucet finishes, chrome stands out as the classic choice that has withstood the test of time. Its shiny, reflective surface exudes a sense of cleanliness and modern elegance, making it a staple in both traditional and contemporary kitchens and bathrooms. The allure of chrome lies in its versatility; it seamlessly complements a wide array of décor styles, from minimalist and industrial to farmhouse and classic.

One of the most appealing aspects of chrome finishes is their durability. Crafted from high-quality materials, chrome faucets are resistant to tarnishing and corrosion, ensuring that their radiant luster remains intact even in high-moisture environments. This durability translates to longevity, making chrome a smart investment for homeowners looking for fixtures that will stand the rigors of daily use while maintaining their aesthetic appeal.

In addition to its practical benefits, chrome offers a timeless aesthetic that can enhance any space. The reflective surface captures and plays with light, creating a sense of brightness and openness in your kitchen or bathroom. Whether you opt for a sleek, modern design or a more ornate style, chrome effortlessly adapts, allowing you to create the desired ambiance in your home.

Maintenance is another significant advantage of chrome finishes. With just a soft cloth and mild soap, you can easily wipe away fingerprints and water spots, keeping your fixtures looking pristine. For those who appreciate a low-maintenance option without sacrificing style, chrome is the perfect choice.

In summary, choosing chrome for your faucet finish is not just about aesthetics; it’s a decision rooted in practicality, durability, and timeless elegance. As you explore your options, consider how this classic finish can elevate your home’s overall design, providing a stunning focal point that combines beauty and functionality.

5. Brushed Nickel: A Modern Favorite

What are the different types of faucet finishes?
Credit : whatcanu.com

Brushed nickel has emerged as a modern favorite in the realm of faucet finishes, captivating homeowners and designers alike with its sleek appearance and versatile charm. This finish boasts a soft, understated sheen that complements a wide range of design aesthetics, making it a go-to choice for contemporary and transitional spaces.

One of the standout features of brushed nickel is its durability. The brushed texture not only adds a layer of sophistication but also helps to hide fingerprints, water spots, and scratches, keeping your fixtures looking pristine with minimal upkeep. This practical benefit is particularly appealing for busy households where maintenance can often fall by the wayside.

In terms of color, brushed nickel strikes a harmonious balance between warm and cool tones. Its subtle silver hue pairs beautifully with various color palettes, from crisp whites and soft grays to rich jewel tones and earthy shades. This versatility allows it to effortlessly blend in with existing decor or serve as a stunning focal point in a newly designed space.

When considering brushed nickel for your faucets, think about how it can enhance the overall ambiance of your kitchen or bathroom. The finish lends itself well to modern, minimalist designs, but it can also add a touch of elegance to more traditional settings. Whether you opt for a sleek, streamlined design or an ornate, vintage-inspired style, brushed nickel is sure to elevate the aesthetic of your home.

Moreover, this finish is not limited to faucets alone; it can be found on a variety of fixtures and hardware, including cabinet handles, showerheads, and towel bars. This cohesive look can tie together different elements in your space, creating a unified design that feels polished and intentional.

In conclusion, if you’re looking for a faucet finish that embodies modern elegance while offering practical benefits, brushed nickel is an excellent choice. Its timeless appeal and adaptability ensure that it will remain a favorite in home design for years to come, making it a worthy investment for any homeowner looking to enhance their living spaces.

6. Oil-Rubbed Bronze: Timeless Elegance

When it comes to creating a warm and inviting atmosphere in your home, few finishes can compete with the timeless elegance of oil-rubbed bronze. This rich, dark finish exudes a sense of sophistication and history, making it a popular choice for those looking to add a touch of classic style to their spaces.

Oil-rubbed bronze is characterized by its deep brown color, often adorned with subtle highlights that lend an air of vintage charm. The finish is achieved through a special process that not only enhances the visual appeal but also creates a durable surface that resists wear and tear. This makes it an excellent choice for high-traffic areas like kitchens and bathrooms, where faucets are frequently used.

In addition to its aesthetic qualities, oil-rubbed bronze is incredibly versatile. It pairs beautifully with a variety of design styles, from rustic and traditional to modern and industrial. Imagine an oil-rubbed bronze faucet gracefully complementing a farmhouse sink, or elevating the sleek lines of a contemporary countertop. This finish can serve as a stunning focal point in your space, drawing the eye and sparking conversation.

Moreover, the dark hue of oil-rubbed bronze can help conceal water spots and fingerprints, making it a practical choice for busy households. With proper care, it can maintain its beauty for years, aging gracefully and developing a unique patina that adds to its character over time.

If you’re seeking a finish that embodies both style and substance, oil-rubbed bronze is an exceptional option. It not only enhances the visual appeal of your fixtures but also contributes to a cohesive, inviting atmosphere throughout your home. Whether you’re updating a single faucet or undertaking a complete renovation, consider the timeless elegance of oil-rubbed bronze for a look that will stand the test of time.

7. Polished Brass: A Vintage Touch

What are the different types of faucet finishes?
Credit : whatcanu.com

When it comes to infusing your home with a touch of timeless elegance, polished brass faucets stand out as an exceptional choice. This finish exudes a vintage charm that beautifully complements a variety of design aesthetics, from traditional and rustic to modern and eclectic. The gleaming surface of polished brass reflects light in a way that adds warmth and sophistication to any space, making it an eye-catching focal point in your kitchen or bathroom.

The allure of polished brass lies not only in its stunning appearance but also in its rich history. Once a staple in early 20th-century homes, polished brass has made a remarkable comeback, appealing to homeowners who appreciate its classic appeal and character. Its golden hue can evoke a sense of nostalgia, conjuring images of grand estates and elegant Victorian decor.

However, it’s essential to consider the maintenance that comes with this finish. While polished brass undeniably looks luxurious, it does require regular cleaning to maintain its radiant shine. Over time, exposure to moisture and air can lead to tarnishing, which may alter its appearance. But for those who love the vintage aesthetic, this upkeep can be a small price to pay for the beauty and warmth that polished brass brings.

In addition to its visual impact, polished brass is incredibly versatile. It pairs wonderfully with a range of countertops, tile, and cabinetry, allowing you to create a cohesive and inviting atmosphere in your home. Whether used in a classic farmhouse sink or a sleek modern basin, polished brass faucets are sure to be a conversation starter, inviting admiration from guests and family alike.

If you’re looking to add a vintage touch to your home, consider the enduring elegance of polished brass. It’s not just a faucet; it’s a statement piece that embodies a rich heritage while seamlessly blending into contemporary spaces. With its blend of beauty, history, and versatility, polished brass could be the perfect finishing touch your home has been waiting for.

8. Matte Black: The Bold Statement

Matte black faucet finishes have emerged as a bold and stylish choice for modern homes, captivating homeowners with their sleek, contemporary appeal. This striking finish exudes an air of sophistication and elegance, making it an ideal option for those looking to make a statement in their bathroom or kitchen. The beauty of matte black lies not only in its aesthetic charm but also in its versatility; it effortlessly complements a wide range of design styles, from industrial to minimalist, and everything in between.

One of the most alluring aspects of matte black fixtures is their ability to create a striking contrast against lighter elements in your space. Imagine a pristine white sink or a light-colored countertop paired with a matte black faucet—this combination not only draws the eye but also adds depth and dimension to your design. Additionally, matte black finishes are fantastic at hiding fingerprints and water spots, ensuring that your fixtures maintain a clean, polished look even with daily use.

In terms of functionality, matte black faucets are often available in a variety of designs, from sleek and angular to curved and organic, allowing you to find the perfect style to match your personal taste. Moreover, many brands offer matte black options in durable materials that resist tarnishing and corrosion, ensuring that your investment remains stylish and functional for years to come.

When incorporating matte black into your home, consider pairing it with complementary finishes, such as brushed gold or chrome, to create a layered look that exudes luxury and modernity. Whether you’re renovating an entire space or simply updating a few fixtures, choosing matte black can transform an ordinary room into a chic and contemporary retreat, leaving a lasting impression on all who enter.

9. Stainless Steel: Durability Meets Style

When it comes to selecting a faucet finish that marries longevity with aesthetic appeal, stainless steel stands out as a top contender. Renowned for its exceptional durability, stainless steel is not only resistant to rust and corrosion but also boasts a sleek, modern look that complements a variety of design styles. Its neutral tone effortlessly blends with both contemporary and traditional kitchens or bathrooms, making it a versatile choice for homeowners aiming to achieve a cohesive aesthetic.

One of the key advantages of stainless steel finishes is their ability to withstand the rigors of daily use. Unlike other materials that may tarnish or wear over time, stainless steel maintains its polished appearance, even in high-traffic areas. Furthermore, many stainless steel faucets come with a brushed finish, which not only enhances their resilience against scratches and fingerprints but also adds a subtle texture that can elevate your space.

Beyond functionality, stainless steel is lauded for its hygienic properties. The non-porous surface prevents bacterial growth, making it an excellent choice for families who prioritize cleanliness in their home. Additionally, its reflective quality can brighten up a room, creating a sense of openness and sophistication.

When choosing a stainless steel faucet, consider your overall design scheme and the other fixtures in your space. Pairing a stainless steel faucet with complementary materials, such as granite countertops or ceramic sinks, can create a harmonious look that enhances your home’s overall aesthetic. With its blend of practicality and style, a stainless steel faucet is not just an addition to your home—it’s an investment in quality that will stand the test of time.

10. Choosing the Right Finish for Different Spaces

When it comes to choosing the right faucet finish for different spaces in your home, it’s crucial to consider both functionality and aesthetic appeal. Each area has its unique vibe, and the finish you select can enhance the overall design while complementing other elements in the room.

In the kitchen, for example, a polished chrome finish is often favored for its sleek, modern look and exceptional durability. It not only reflects light beautifully, making the space feel more open and airy, but it’s also resistant to tarnishing and easy to clean, which is essential in a high-traffic area where spills and splashes are common. Alternatively, if you’re aiming for a cozy, rustic ambiance, a matte black or oil-rubbed bronze finish can add a touch of warmth and character, perfectly coordinating with wood cabinetry and natural stone countertops.

Moving to the bathroom, the finish you choose can dramatically affect the room’s relaxation and rejuvenation vibe. A brushed nickel finish is a popular choice for its subtle shine and ability to resist fingerprints and water spots, making it ideal for a space that frequently sees moisture. For those looking to create a spa-like retreat, consider a soft champagne or rose gold finish. These hues exude a sense of luxury and elegance, and they pair beautifully with white or light-colored tiles, creating a tranquil atmosphere.

In smaller spaces, such as powder rooms or laundry areas, don’t shy away from experimenting with bold finishes. A polished brass or vibrant matte black faucet can serve as a stunning focal point, drawing the eye and adding personality to otherwise utilitarian spaces.

Ultimately, choosing the right faucet finish for each room is about harmonizing style and practicality. Consider your home’s overall design theme, the specific functions of each space, and how each finish interacts with the light and colors around it. By thoughtfully selecting finishes that reflect both your personal taste and the ambiance of each area, you’ll create a cohesive and inviting atmosphere throughout your home.

11. Coordinating Faucet Finishes with Other Fixtures

When it comes to designing your kitchen or bathroom, coordinating faucet finishes with other fixtures is essential for creating a harmonious and visually appealing space. The faucet is not just a functional element; it is also a key aesthetic feature that can tie the entire room together. To achieve a cohesive look, consider the finishes of your other elements—such as cabinet hardware, light fixtures, and even your appliances.

Start by determining the dominant finish in your space. If you have polished chrome cabinet handles, for instance, a faucet in the same finish will create a seamless look. Alternatively, if you’re leaning towards a more eclectic style, mixing finishes can be a bold statement. Just remember that when mixing, it’s important to find a balance; for example, pairing a matte black faucet with brushed nickel hardware can create a striking contrast without overwhelming the senses.

Moreover, the style of your fixtures should complement each other. A sleek, modern faucet will feel out of place with ornate, vintage cabinet pulls. Instead, opt for a consistent design language that reflects your overall aesthetic, whether it’s contemporary, traditional, or somewhere in between.

Don’t forget to consider the color palette of your room as well. If your space features warm tones, a brass or gold faucet can add an inviting touch, while cooler tones may pair better with polished chrome or stainless steel.

Finally, think about the durability and maintenance of the finishes you choose. Some finishes, like oil-rubbed bronze, may require more upkeep to maintain their appearance compared to others, such as chrome or stainless steel, which are often more resistant to tarnishing.

By thoughtfully coordinating your faucet finish with other fixtures, you not only enhance the beauty of your space but also create a functional environment that reflects your personal style.

12. Maintenance Tips for Different Faucet Finishes

When it comes to choosing the perfect faucet finish for your home, it’s essential to consider not only the aesthetic appeal but also the maintenance required to keep your fixtures looking pristine. Different finishes have unique properties and upkeep needs, and understanding these can help you make an informed decision that will complement your lifestyle.

**Polished Chrome**: One of the most popular choices, polished chrome faucets are known for their bright, shiny appearance. However, they can show water spots and fingerprints easily. To maintain their luster, regularly wipe them down with a soft, damp cloth after use, and occasionally polish them with a gentle, non-abrasive cleaner designed for chrome.

**Brushed Nickel**: If you prefer a more muted, sophisticated look, brushed nickel is an excellent option. Its textured surface helps hide water spots and fingerprints, making it relatively low-maintenance. Simply clean it with warm soapy water and a soft cloth to avoid scratching. For tougher stains, a mixture of vinegar and baking soda can work wonders, but be sure to rinse thoroughly afterward.

**Oil-Rubbed Bronze**: This finish adds a rich, vintage flair to any space but requires a bit more care to maintain its dark hue. It can develop a patina over time, which many homeowners appreciate for its character. To clean, use a mild soap solution and a soft cloth, avoiding harsh chemicals that can strip away the finish. For deeper cleaning, an occasional application of mineral oil can help rejuvenate its appearance.

**Matte Black**: As a bold and trendy choice, matte black faucets are striking but can show dust and water spots more readily. To keep them looking sharp, use a microfiber cloth to wipe away grime and fingerprints regularly. Avoid abrasive cleaners that could scratch the surface; instead, opt for a gentle soap solution when a deeper clean is necessary.

**Stainless Steel**: Renowned for its durability and modern look, stainless steel is resistant to corrosion and tarnishing. To maintain its polished appearance, wipe with a soft cloth and mild detergent. For stubborn stains, a stainless steel cleaner can restore its shine. However, be cautious with abrasive pads, as they can scratch the surface.

By understanding the maintenance requirements for each faucet finish, you can choose one that not only enhances your home’s aesthetic but also fits seamlessly into your cleaning routine. With the right care, your faucets will not only serve their practical purpose but also remain a stunning focal point in your kitchen or bathroom for years to come.

13. Trends in Faucet Finishes for 2024

As we step into 2024, the world of faucet finishes is evolving, offering a stunning array of options that reflect the latest design trends and homeowner preferences. This year, we’re witnessing a remarkable fusion of classic aesthetics with modern flair, making it easier than ever to find the perfect finish that complements your home’s style.

One of the standout trends for 2024 is the resurgence of matte black finishes. This bold choice is favored for its sleek, contemporary look and its ability to provide a striking contrast against lighter countertops and cabinetry. Matte black faucets not only add a touch of sophistication, but they also hide fingerprints and water spots, making them a practical option for busy kitchens and bathrooms.

In contrast, the warmth of brass and gold tones continues to gain popularity, offering a timeless elegance that can elevate any space. These finishes are being reimagined with brushed and polished textures, allowing for versatility from vintage-inspired to modern chic. The soft, inviting glow of these metallics brings a luxurious feel to your home, making them a perfect choice for those looking to make a statement.

Another exciting trend is the use of mixed finishes. This approach allows homeowners to combine various faucet finishes in a single space, creating a unique and personalized look. For instance, pairing a matte black faucet with brushed nickel or polished brass accessories can yield a dynamic visual interest that tells a story of eclectic style.

Lastly, eco-conscious finishes are making waves in 2024, with many manufacturers focusing on sustainable materials and finishes that are both beautiful and environmentally friendly. These options not only look great but also align with the growing trend of creating greener homes.

As you explore your options, consider these trends in faucet finishes for 2024. Whether you lean towards bold contrasts, timeless metallics, a mix-and-match approach, or eco-friendly choices, there’s a finish out there that will perfectly enhance your home’s aesthetic and reflect your personal style.

14. How to Test Faucet Finishes for Quality

When it comes to choosing the perfect faucet finish for your home, quality should be at the forefront of your decision-making process. A beautiful faucet can elevate your space, but if it wears down or tarnishes quickly, it can become a source of frustration rather than a feature of pride. Here’s how to assess faucet finishes to ensure you’re making a wise investment.

Start by examining the finish closely. High-quality faucets often have a uniform appearance, with an even coating that lacks imperfections such as bubbles, scratches, or discoloration. Pay special attention to the edges and corners, as these are areas where subpar finishes might show wear more quickly.

Next, perform the ‘scratch test.’ While it might sound a bit unorthodox, gently scratching the surface with a fingernail or a soft cloth can provide insights into the durability of the finish. If you see noticeable marks or if the finish seems to wear away easily, you’re likely dealing with a lower-quality product. Conversely, a premium finish should resist scratching and maintain its luster even under light pressure.

Water resistance is another critical factor. A simple water test can demonstrate how well the finish holds up against moisture. Spray a small amount of water on the faucet and let it sit for a few minutes before wiping it away. A high-quality finish will repel water efficiently, allowing it to bead up rather than create water spots or stains.

Lastly, check for warranty information. Reputable manufacturers often provide warranties that cover material and finish defects for a specified period. A solid warranty not only reflects confidence in the product’s quality but also offers you peace of mind in your investment.

By taking these steps to test faucet finishes for quality, you can ensure that your selection not only complements your aesthetic but stands the test of time in both function and style. After all, a faucet should be more than just a pretty face—it’s a daily use item that deserves to be both beautiful and durable.

15. Conclusion: Finding Your Perfect Faucet Finish

In conclusion, selecting the perfect faucet finish for your home is a journey that balances aesthetics, functionality, and personal style. Each finish—whether it be the timeless elegance of polished chrome, the warm sophistication of brushed nickel, or the bold statement of matte black—offers its own unique charm and character. As you explore the myriad of options available, consider the overall design of your space, the existing fixtures, and how the faucet will integrate into your daily life.

Take the time to envision how different finishes will interact with your kitchen or bathroom decor. Imagine the way sunlight will dance off a shiny polished brass faucet versus the subtle glow of a satin bronze fixture. Reflect on maintenance requirements, as some finishes may demand more attention than others to keep them looking pristine.

Ultimately, the perfect faucet finish is one that resonates with your personal taste while enhancing your home’s functionality. With thoughtful consideration and a bit of creativity, you can choose a finish that not only elevates your space but also brings joy to your everyday routines. Remember, this seemingly small detail can have a significant impact on the ambiance of your home, so choose wisely and enjoy the process of making your space uniquely yours.

In conclusion, selecting the right faucet finish for your home is not just about aesthetics; it’s about creating a cohesive look that reflects your personal style and enhances the overall ambiance of your spaces. As we’ve explored in this guide, each finish—from polished chrome to brushed nickel, matte black, and beyond—offers its own unique charm and practical benefits. By considering factors such as durability, maintenance, and how each finish complements your existing décor, you can make an informed decision that elevates your kitchen or bathroom. We hope this guide has inspired you to confidently navigate the world of faucet finishes and transform your home into a beautiful and functional sanctuary. Happy decorating, and may your choice of finishes bring you joy for years to come!

How to install a new faucet?

Upgrading your kitchen or bathroom faucet can breathe new life into your space, making it not only more functional but also more stylish.

However, the thought of tackling a DIY plumbing project might seem daunting, especially if you’ve never attempted anything beyond a simple light bulb change. Fear not! With the right tools and a little guidance, you can install your new faucet like a seasoned professional. In this comprehensive, step-by-step guide, we’ll walk you through the entire process, from selecting the perfect faucet to ensuring a leak-free finish. Whether you’re a seasoned DIY enthusiast or a complete novice, our easy-to-follow instructions will empower you to take on this project with confidence. So roll up your sleeves and prepare to transform your sink area with a stunning new fixture that reflects your personal style and enhances your home!

1. Introduction: Why Install Your Own Faucet?

How to install a new faucet?
Credit : whatcanu.com

Installing your own faucet might seem like a daunting task reserved for seasoned DIYers, but with the right guidance, it can be a straightforward and rewarding project. Choosing to tackle this task on your own not only saves you money on plumbing costs, but it also gives you a sense of accomplishment and control over your home improvement efforts. Whether you’re looking to upgrade to a more modern style, replace a leaky unit, or simply refresh your kitchen or bathroom’s look, installing a new faucet can dramatically enhance both functionality and aesthetics.

Moreover, understanding the ins and outs of your plumbing fixtures empowers you to make informed decisions in the future. You’ll learn about your water supply lines, how to identify potential issues, and when it’s time to call in a professional. Plus, there’s something incredibly satisfying about stepping back and admiring a job well done, knowing that you’ve not only improved your space but also added a personal touch to your home.

In this step-by-step guide, we’ll break down the process of faucet installation into manageable parts, ensuring that you have the confidence and knowledge to complete the job like a pro. So, roll up your sleeves, gather your tools, and let’s get started on transforming your sink area into a stylish and functional space!

2. Tools and Materials You’ll Need

Before diving into the installation process, it’s essential to gather all the necessary tools and materials to ensure a smooth and efficient experience. Having everything on hand will save you time and frustration, allowing you to focus on achieving that professional finish.

**Tools:**
1. **Adjustable Wrench:** This versatile tool is perfect for loosening and tightening nuts and bolts on your faucet.
2. **Basin Wrench:** A must-have for reaching those hard-to-access nuts under your sink, the basin wrench provides the leverage you’ll need to secure fittings without straining your hands.
3. **Screwdriver Set:** Both flathead and Phillips screwdrivers are essential for securing mounting screws and making any necessary adjustments.
4. **Plumber’s Putty or Silicone Sealant:** Use this to create a watertight seal around the base of your new faucet, preventing leaks and ensuring longevity.
5. **Pipe Wrench:** If you encounter stubborn pipes, a pipe wrench will give you the grip and torque needed to turn them without damaging the fittings.

**Materials:**
1. **New Faucet:** Choose a faucet that fits your sink’s configuration and matches your style preferences. Read reviews and product details to ensure quality.
2. **Supply Lines:** These flexible hoses connect your faucet to the water supply. Ensure they are compatible with your faucet and sink.
3. **Tephlon Tape:** This handy tape is used to wrap threaded connections, ensuring a tight seal that helps prevent leaks.
4. **Cleaning Supplies:** Before installation, make sure you have some cloths or sponges to clean your workspace and remove any old putty or debris from your sink.
5. **Bucket or Towels:** It’s always a good idea to have a bucket or some towels nearby to catch any excess water that may spill during the installation process.

With your tools and materials assembled, you’re now ready to tackle the installation of your new faucet. This preparation will not only streamline the process but also instill confidence as you work towards achieving that pro-like result!

3. Choosing the Right Faucet for Your Space

How to install a new faucet?
Credit : whatcanu.com

Choosing the right faucet for your space is a crucial step that can significantly impact both the functionality and aesthetic of your kitchen or bathroom. With a myriad of styles, finishes, and functionalities available, selecting the perfect faucet can feel overwhelming. However, taking a moment to consider your space’s unique needs can make the decision-making process smoother and more enjoyable.

first, assess the overall style of your room. Are you aiming for a modern, sleek look with clean lines and polished chrome, or do you prefer a rustic vibe with a vintage-inspired design and matte bronze finish? Consider the existing fixtures and decor as well; your new faucet should complement and enhance the overall theme rather than clash with it.

Next, think about the functionality you need. Do you frequently cook and require a high-arc faucet that offers ample clearance for filling pots and pans? Or perhaps you need a pull-down sprayer for easy rinsing and washing? Identify the features that will best serve your daily tasks, such as single or dual handles, touchless technology, or water-saving options.

Also, don’t forget about the size and configuration of your sink. A large, farmhouse-style sink may benefit from a more substantial faucet that can hold its own against the expansive basin, while a smaller, undermount sink may call for a more streamlined option. Ensure that the faucet’s spout height and reach are appropriate for your sink’s dimensions to avoid any splashing or inconvenience.

Finally, consider the installation requirements. Some faucets come with complex mounting systems or require additional tools, while others are designed for easy DIY installation. If you’re not comfortable with plumbing tasks, it might be wise to choose a model that is straightforward to install or to consult with a professional.

By taking the time to thoughtfully choose a faucet that aligns with your space’s style, functionality, and installation needs, you’ll not only enhance the visual appeal of your kitchen or bathroom but also ensure a seamless and enjoyable experience for years to come.

4. Preparing Your Workspace

Before diving into the installation process, it’s crucial to prepare your workspace properly. A well-organized and clean area not only enhances your efficiency but also minimizes the risk of accidents or misplacing essential tools. Start by clearing the space beneath your sink and removing any items that may obstruct your work. This will give you ample room to maneuver and access all necessary parts during the installation.

Next, ensure that the plumbing area is dry and free from any leaks. If you notice any drips or moisture, take a moment to fix these issues before proceeding. It’s also wise to have a towel or sponge handy to wipe up any spills that may occur during the process.

Gather all the tools you’ll need for the job. Typically, this includes a basin wrench, adjustable pliers, a screwdriver, plumber’s tape, and possibly a bucket to catch any excess water. Having everything at arm’s reach will save you valuable time and prevent frustration.

Finally, don’t forget to turn off the water supply to the sink. Locate the shut-off valves under the sink and twist them clockwise to prevent any unexpected gushes while you’re working. By taking these preparatory steps, you’ll set yourself up for a smoother installation experience, allowing you to focus on the task at hand and achieve professional-level results!

5. Shutting Off the Water Supply

How to install a new faucet?
Credit : whatcanu.com

Before you dive into the world of plumbing and start removing your old faucet, it’s crucial to shut off the water supply. This step is often overlooked by novice DIYers, but it’s essential for preventing a mini waterfall in your kitchen or bathroom.

Locate the shut-off valves under your sink. These valves are typically positioned on the wall behind the sink or on the pipes leading to the faucet. You should see two valves—one for the hot water and one for the cold. To turn them off, simply twist the handles clockwise until they stop. If your sink doesn’t have individual shut-off valves, you may need to turn off the main water supply for your home. This can usually be found in your basement or near the perimeter of your home, often close to the water meter.

Once you’ve shut off the water supply, it’s a good idea to open the faucet to relieve any remaining pressure in the pipes. This will also help to drain any water left in the lines, making the installation process a lot cleaner and easier. Keep a towel handy, just in case there are any drips!

By ensuring that the water supply is completely turned off, you can proceed with confidence, knowing that you’ve taken the necessary precautions to avoid any mishaps. With this crucial step completed, you’re now ready to tackle the next phase of your faucet installation like a pro!

6. Removing the Old Faucet: A Step-by-Step Process

Removing the old faucet may seem daunting at first, but with a bit of patience and the right tools, you can tackle this task like a pro. Here’s a step-by-step process to make it as smooth as possible.

**Step 1: Gather Your Tools**
Before diving into the removal process, it’s essential to have the right tools on hand. You’ll need an adjustable wrench, a basin wrench (for those hard-to-reach spots), a screwdriver, a bucket to catch any water, and a cloth for any spills. Having everything ready will save you time and frustration.

**Step 2: Turn Off the Water Supply**
Locate the shutoff valves under your sink and turn them clockwise to stop the water flow. If you can’t find these valves, it may be necessary to shut off the main water supply for your home. Don’t forget to turn on the faucet to release any remaining pressure and drain the water from the lines.

**Step 3: Disconnect the Water Supply Lines**
Place your bucket underneath the sink to catch any water that may drip during the process. Using your adjustable wrench, carefully loosen the nuts that connect the water supply lines to the faucet. Once loosened, gently pull the lines away from the faucet and lay them aside.

**Step 4: Remove the Faucet Mounting Nuts**
Now it’s time to tackle the mounting nuts that secure the faucet to the sink. These may be located underneath the sink and can be tricky to reach. Use your basin wrench to grip and turn the nuts counterclockwise until they’re completely removed. If they’re particularly stubborn, a few drops of penetrating oil can help loosen them.

**Step 5: Take Out the Old Faucet**
With the mounting nuts removed, you should now be able to lift the old faucet out from the top of the sink. If it’s stuck, gently wiggle it back and forth to dislodge any remaining sealant or grime. Once freed, lift it out carefully and set it aside.

**Step 6: Clean the Sink Surface**
Before you install your new faucet, take a moment to clean the area where the old faucet was mounted. Remove any old putty, debris, or mineral buildup with a scrub brush and a suitable cleaner. This will ensure a tight seal for your new installation.

By following these steps, you’ll have successfully removed your old faucet, making way for a fresh and stylish upgrade. With a little effort, you’re one step closer to enjoying your new faucet and enhancing the heart of your home!

7. Cleaning the Sink Area and Preparing for Installation

How to install a new faucet?
Credit : whatcanu.com

Before diving into the installation of your new faucet, it’s essential to ensure that the sink area is clean and free of any debris. A tidy work environment not only makes the process smoother but also prevents any potential mishaps during installation. Start by removing any items from the countertop and clearing the area beneath the sink; this will give you ample space to work without obstruction.

Next, use a sponge or cloth along with a mild cleaner to wipe down the sink basin and surrounding countertops. Pay close attention to any buildup or residue, particularly around the existing faucet and sinkholes. A clean surface will allow for a better seal and help prevent any leaks once your new faucet is installed.

Additionally, check the plumbing connections and surrounding areas for any signs of corrosion or damage. If you notice anything amiss, it’s wise to address these issues before moving forward with the installation. This step not only ensures a better fit for your new faucet but also prolongs its lifespan.

Finally, gather all your tools and installation materials, including the new faucet, mounting hardware, and any additional supplies you might need. By organizing everything in advance, you’ll save time and keep your workspace efficient. With the sink area cleaned and prepped, you’re now ready to tackle the installation process like a pro!

8. Installing the New Faucet: A Detailed Guide

Installing a new faucet may seem like a daunting task, but with the right guidance, you can complete the job like a seasoned professional. This detailed guide will walk you through each step of the installation process, ensuring you achieve a seamless and efficient setup.

**Step 1: Gather Your Tools and Materials**
Before diving into the installation, it’s essential to have all the necessary tools and materials at your fingertips. You’ll need a basin wrench, adjustable wrench, plumber’s tape, a bucket to catch any excess water, and, of course, your new faucet. Having everything organized will save you time and frustration.

**Step 2: Shut Off the Water Supply**
The first critical step in any plumbing project is to turn off the water supply. Locate the shut-off valves under your sink and turn them clockwise until they are completely closed. If you can’t find them, you may need to shut off the main water supply for your home. Once the water is off, turn on the old faucet to drain any remaining water in the pipes.

**Step 3: Remove the Old Faucet**
Next, it’s time to detach the old faucet. Use your basin wrench to loosen and remove the nuts securing the faucet to the sink. Carefully disconnect the water supply lines, taking care to place a bucket underneath to catch any remaining water. If your old faucet is particularly stubborn, a bit of penetrating oil can help ease the removal process.

**Step 4: Prepare the Sink**
With the old faucet removed, take a moment to clean the sink surface thoroughly. Remove any old putty or debris that may interfere with the new installation. If your new faucet requires a gasket or mounting hardware, ensure these components are ready and in good condition.

**Step 5: Install the New Faucet**
Now comes the exciting part—installing your new faucet! Follow the manufacturer’s instructions closely. Typically, you’ll start by placing the faucet into the mounting holes of the sink. Secure it in place with the provided mounting nuts, tightening them with your adjustable wrench. Be careful not to overtighten, as this can damage the sink.

**Step 6: Connect the Water Supply Lines**
With the faucet securely in place, it’s time to connect the water supply lines. Attach the hot and cold water lines to the corresponding connections on the faucet, using plumber’s tape to ensure a tight seal. Make sure to connect them correctly—hot to hot and cold to cold—to avoid any mix-ups.

**Step 7: Turn on the Water Supply**
Once everything is connected, it’s time to turn the water supply back on. Go back to the shut-off valves and turn them counterclockwise to restore water flow. As you do this, check for any leaks around the connections. If you notice any, tighten the connections gently until the leak stops.

**Step 8: Test Your New Faucet**
With everything in place, turn on your new faucet to test its operation. Allow the water to run for a minute to clear any air bubbles and sediment. Check for leaks again during this process. If everything looks good, congratulations! You’ve successfully installed your new faucet.

By following these steps, you can transform your kitchen or bathroom with a new faucet without the need for professional help. Enjoy the satisfaction of your handiwork and the enhanced functionality of your space!

9. Connecting the Water Supply Lines

Connecting the water supply lines is a crucial step in the faucet installation process, and it’s one that can make or break your entire project. With the faucet securely mounted and all the necessary tools within reach, it’s time to turn your attention to those water supply lines—the veins that will bring life to your new fixture.

Start by ensuring that the water supply valves beneath your sink are turned off. This is essential to prevent any sudden sprays or floods when you begin working. Once you’ve confirmed the valves are closed, it’s a good idea to place a bucket or a towel under the sink to catch any residual water that may spill out during the connection process.

Next, locate the supply lines that will connect to your faucet. Most faucets require both hot and cold water lines, which will be clearly marked. If your new faucet didn’t come with supply lines, you can purchase flexible stainless steel or braided nylon lines that are designed to withstand high pressure and resist corrosion.

Carefully thread the supply line nuts onto the corresponding faucet inlets, ensuring that you match the hot line to the hot inlet and the cold line to the cold inlet. When tightening the connections, use a wrench, but be cautious not to overtighten—this can lead to stripped threads or cracked fittings. A snug fit is all you need; think of it like a firm handshake—strong but not overbearingly tight.

Once the connections are secure, it’s time to turn the water supply back on. Do so slowly, allowing the lines to fill with water gradually. As the pressure builds, keep an eye on the newly connected lines for any signs of leaks. If you spot any drips, it may be necessary to tighten the connections slightly more or check the washers and seals to ensure they’re properly seated.

With the water supply lines securely connected and leak-free, you’re one step closer to enjoying your new faucet. Take a moment to admire your handiwork; you’re well on your way to completing a professional-quality installation right in your own home!

10. Sealing and Securing the Faucet

Once your new faucet is in place, the final step—sealing and securing it—ensures that it operates smoothly and prevents any leaks. This crucial phase not only guarantees that your installation is watertight but also enhances the longevity and performance of your faucet.

Start by applying a bead of plumber’s putty or silicone sealant around the base of the faucet where it meets the sink. This step is essential for creating a reliable seal that will keep water from seeping underneath the faucet and causing damage over time. If you’re using plumber’s putty, roll it into a rope-like shape and lay it down evenly. If you prefer silicone, apply a neat line around the edge, ensuring it’s not too thick, as excess sealant can be squeezed out when the faucet is pressed down.

Next, carefully lower the faucet into position, aligning it with the mounting holes. Once it’s seated correctly, secure it from underneath the sink using the mounting nuts provided with your faucet. Tighten these nuts by hand, and then use a wrench for a snug fit—just be cautious not to overtighten, as this could damage the sink or the faucet itself.

Finally, to add an extra layer of security, check the alignment of the faucet and adjust as necessary. Ensure that the handles are positioned correctly and that the spout is centered. After making any adjustments, give everything a final tightening, and wipe away any excess sealant that may have oozed out during installation.

With the faucet securely in place and properly sealed, you’re ready to reconnect the water supply. Turn on the valves slowly and check for any leaks around the connections. If you notice any, it may be an indication that you need to tighten the connections or reapply sealant. Once everything is secure and leak-free, take a moment to admire your handiwork—your new faucet is now ready to serve you in style!

11. Turning the Water Supply Back On

Once you’ve successfully installed your new faucet and double-checked all the connections, it’s time for one of the most crucial steps: turning the water supply back on. This moment is not just about restoring functionality to your sink; it’s the moment of truth that will determine if your installation was a success.

Before you proceed, ensure that you have towels or a sponge handy to catch any unexpected drips. Begin by locating the shut-off valves under your sink. These valves are typically situated on the wall or the floor, and they control the water flow to your faucet. With a gentle twist, turn the valves counterclockwise to open them.

As you do this, listen for the faint sound of water rushing back into the pipes. It’s an exhilarating moment, but don’t get too excited just yet! Once the valves are fully open, it’s time to check for leaks. Turn on your new faucet to its full flow and observe closely around the base and the connections you’ve just made. If you spot any drips or moisture, it may indicate that a connection wasn’t tightened properly or that a washer needs to be adjusted.

While the water is running, take a moment to check the temperature. Adjust the hot and cold levers to ensure that both are functioning smoothly and that the water temperature is to your liking. This step not only confirms that your installation was successful but also allows you to familiarize yourself with the faucet’s controls.

If all looks good—no leaks, and the water flows beautifully—you can take a deep breath and revel in your accomplishment. You’ve just turned your kitchen or bathroom into a more functional space, all while developing your DIY skills! Don’t forget to clean up any residual water around the sink. Congratulations, you’ve officially crossed the finish line of your faucet installation project!

12. Testing for Leaks and Proper Functioning

Once you’ve successfully installed your new faucet, the moment of truth arrives: it’s time to test for leaks and ensure that everything is functioning as it should. This crucial step not only confirms that your hard work has paid off but also prevents future water damage and costly repairs.

Start by turning on the water supply valves beneath your sink. As you do this, keep a close eye on the connections you made during the installation process. Look for any signs of water seeping from the joints or under the sink. If you spot a leak, don’t panic! Tighten the connections gradually, but be careful not to overtighten, as this could cause damage.

Next, turn on the faucet and let the water run for a minute or so. Observe the flow; it should be steady and consistent. Move the handle through its full range of motion to ensure it operates smoothly. Pay attention to the temperature control as well—make sure that both hot and cold water are functioning correctly and that the temperature adjusts as expected.

While the water is running, check for any unusual noise or vibration that might indicate an issue with the installation. If everything sounds perfect, take a moment to inspect the area around the sink for any signs of dripping water or dampness.

Finally, don’t forget to test the sprayer, if your faucet has one. Activate it and check for proper operation and any leaks at the connection point.

By thoroughly testing your faucet, you can be confident that you’ve completed the installation like a pro. This attention to detail not only enhances your experience but ensures that your new fixture will serve you well for years to come.

13. Final Touches: Cleaning Up and Maintenance Tips

Once you’ve successfully installed your new faucet, it’s time to focus on the final touches that ensure everything looks pristine and operates smoothly. A clean work area not only enhances the aesthetic appeal of your newly installed faucet but also cements your accomplishment as a DIY champion!

**Cleaning Up:** Start by wiping down the surrounding area of the sink with a damp cloth to remove any dust, debris, or fingerprints that may have accumulated during the installation process. Pay special attention to the base of the faucet and the countertop—these spots can often be overlooked but are crucial for maintaining a polished look. If there are any water spots or mineral deposits, a gentle cleanser or a mixture of vinegar and water can work wonders. Just be sure to avoid abrasive cleaners that might scratch the surface.

**Check for Leaks:** Before you call it a day, turn on the faucet and let the water run for a minute. Keep an eye out for any leaks around the connections. If you notice any drips, double-check that the nuts and connections are tightened properly. It’s always better to address leaks now rather than waiting until they become a bigger problem later.

**Maintenance Tips:** Now that your faucet is installed and gleaming, regular maintenance will help keep it in top condition. Consider setting a reminder to clean the faucet every couple of weeks. Use a soft cloth and a mild soap solution to wipe it down, preventing buildup and keeping it shiny. For those pesky mineral deposits, a routine application of vinegar can help maintain the faucet’s finish.

Additionally, inspect the faucet aerator regularly. Over time, it can accumulate debris or mineral buildup that affects water flow. Unscrew it from the tip of the faucet, rinse it out, and clean it with a brush if necessary, ensuring optimal performance.

By taking these final steps to clean up and maintain your new faucet, you’ll not only enjoy its functionality but also extend its lifespan. A little care goes a long way, turning your installation success into a long-lasting triumph!

14. Troubleshooting Common Installation Issues

Even the most skilled DIYers can encounter challenges during a faucet installation, so it’s essential to be prepared for potential hiccups along the way. Here are some common issues you might face and how to troubleshoot them effectively:

**1. Leaky Connections:** One of the most frequent problems after installation is a leak at the connections. If you find water dripping from the faucet or underneath the sink, start by checking the tightness of the connections. Use an adjustable wrench to ensure that the nuts are snug but not overtightened, which can cause damage. If the leak persists, inspect the rubber washers or O-rings; they may need replacing or may not have been seated correctly.

**2. Low Water Pressure:** If your new faucet isn’t delivering water at the expected pressure, first check the aerator. Mineral deposits can accumulate over time, restricting water flow. Remove the aerator and soak it in vinegar to dissolve any buildup. If cleaning doesn’t help, ensure that the shut-off valves under the sink are fully open and that there are no kinks in the water supply hoses.

**3. No Hot Water:** Sometimes, a newly installed faucet may only deliver cold water. This could be due to a few reasons: ensure that the hot water supply line is properly connected and that the shut-off valve for hot water is open. If everything looks good but you still have no hot water, the issue might stem from your water heater or plumbing system.

**4. Noisy Faucet:** If your faucet is making strange noises—like whistling or banging—when water flows, it could indicate air in the pipes or improper installation. Start by turning off the water supply and then open the faucet to release any trapped air. If the noise persists, check for loose fittings or vibrations in the supply lines that may need to be secured.

**5. Difficulty Turning the Faucet Handle:** If the handle feels stiff or is hard to turn, it could be due to improper installation or misalignment. Inspect all components to ensure they are properly seated and aligned according to the manufacturer’s instructions. Sometimes, a little lubrication on the handle mechanism can make a significant difference.

By keeping these troubleshooting tips in mind, you can tackle common installation issues with confidence. Remember, patience is key—take your time to identify and resolve any problems, and soon enough, you’ll have a perfectly functioning faucet that enhances your kitchen or bathroom beautifully!

15. Conclusion: Enjoying Your New Faucet!

Congratulations! You’ve successfully navigated the installation process and now it’s time to sit back and enjoy the fruits of your labor. A new faucet not only enhances the aesthetics of your kitchen or bathroom, but it also brings functionality and ease to your daily routine.

As you turn on the tap for the first time, listen to the gentle flow of water and feel the smoothness of the handle. Whether you’ve chosen a sleek modern design or a classic vintage style, your new fixture is sure to be a centerpiece in your space. Take a moment to appreciate the transformation you’ve achieved—imagine how much more enjoyable washing dishes or brushing your teeth will be with this upgraded feature.

Remember to keep an eye out for any leaks over the next few days and ensure that everything is functioning as it should. Familiarize yourself with any special features your faucet may have, such as touchless activation or temperature control, and enjoy the convenience they provide.

Lastly, don’t forget to maintain your faucet regularly to prolong its life and ensure it continues to perform flawlessly. A simple routine of cleaning and checking for wear and tear will keep your faucet looking great and functioning well for years to come.

Now, go ahead and celebrate your accomplishment! You’ve not only upgraded your home but also gained a valuable DIY skill. So raise a glass (or a mug) under your brand-new faucet, and toast to your success—here’s to many more projects in the future!

In conclusion, we hope this step-by-step guide has empowered you to tackle your faucet installation project with confidence and ease. With the right tools, a little patience, and the techniques outlined in this post, you can achieve professional-level results without the hefty price tag of hiring a plumber. Remember, each step is an opportunity to enhance not just your plumbing skills but also your home’s functionality and aesthetic appeal. So, roll up your sleeves, enjoy the process, and take pride in your accomplishment. Happy plumbing, and don’t hesitate to share your success stories or ask questions in the comments below!

What are the different types of plumbing fixtures?

When it comes to designing or renovating your home, one of the most crucial yet often overlooked elements is the plumbing fixtures.

These essential components not only serve functional purposes but also play a significant role in the overall aesthetic of your space. From sleek faucets and stylish sinks to elegant bathtubs and efficient toilets, the right plumbing fixtures can transform your bathroom and kitchen into stylish sanctuaries. However, with the myriad of options available in the market, choosing the perfect fixtures can be a daunting task. In this comprehensive guide, we’ll explore the various types of plumbing fixtures, their unique uses, and essential selection tips to help you make informed decisions that align with your personal style and practical needs. Whether you’re a DIY enthusiast, a seasoned renovator, or simply looking to refresh your living space, this ultimate guide will equip you with the knowledge you need to elevate your home’s functionality and design.

1. Introduction to Plumbing Fixtures

What are the different types of plumbing fixtures?
Credit : whatcanu.com

Plumbing fixtures are the unsung heroes of our everyday lives, seamlessly blending functionality with style in our homes and businesses. From the moment we turn on a tap to wash our hands, fill a bathtub, or flush a toilet, we rely on these essential components to deliver water efficiently and effectively. But plumbing fixtures are not merely utilitarian; they also play a significant role in the aesthetic appeal of our spaces.

In this comprehensive guide, we will explore the various types of plumbing fixtures, their specific uses, and key considerations for selecting the right fixtures for your needs. Whether you are embarking on a renovation project, building a new home, or simply looking to upgrade your existing plumbing, understanding the different options available is crucial.

We’ll delve into the common types of fixtures, such as faucets, sinks, toilets, bathtubs, and showerheads, highlighting their unique features and functions. Additionally, we’ll discuss the importance of water efficiency and how modern fixtures can contribute to sustainability efforts, ultimately saving you money on utility bills while being kinder to the environment.

Moreover, we’ll provide tips on how to choose fixtures that complement your interior design, fit your lifestyle, and meet your budget. By the end of this guide, you will be well-equipped to make informed decisions about plumbing fixtures that enhance both the functionality and beauty of your spaces. So, let’s dive in and discover the world of plumbing fixtures together!

2. Understanding Different Types of Plumbing Fixtures

When embarking on a plumbing project, understanding the various types of plumbing fixtures is crucial to achieving both functionality and aesthetic appeal in your space. Plumbing fixtures are not just essential for the practical aspects of water distribution and waste management; they also contribute significantly to the overall design of your home or business.

**1. Faucets:** The unsung heroes of any kitchen or bathroom, faucets come in a variety of styles, finishes, and functionalities. From single-handle pull-down sprayers in modern kitchens to classic widespread faucets in traditional bathrooms, the right faucet can enhance your space while ensuring efficient water flow. Look for features such as high-arc designs for greater clearance or touchless sensors for added convenience.

**2. Sinks:** Sinks serve as the heart of both kitchens and bathrooms. Kitchen sinks are typically larger and come in styles such as farmhouse, undermount, or drop-in, accommodating everything from food prep to dishwashing. Bathroom sinks range from pedestal and wall-mounted designs to vessel sinks that sit atop countertops. Consider the sink’s material—stainless steel, porcelain, or composite—and its size in relation to the overall space and functionality you desire.

**3. Toilets:** Today’s toilets offer a blend of comfort, efficiency, and style. From conventional two-piece models to sleek one-piece designs, the choices are vast. Look for features such as dual-flush options for water conservation, comfort height for ease of use, and noise-reduction technologies for a quieter experience. Selecting the right toilet can significantly impact both your water usage and the overall aesthetic of your bathroom.

**4. Showers and Bathtubs:** Showers can range from basic models to luxurious walk-in enclosures with multiple showerheads and body sprays. Bathtubs, whether freestanding, alcove, or drop-in, can be a statement piece in a bathroom. Consider your lifestyle and preferences when selecting these fixtures; for instance, if relaxation is key, a deep soaking tub may be ideal, while a streamlined shower may suit smaller spaces or busy households.

**5. Accessories and Additional Fixtures:** Don’t overlook the importance of accessories like showerheads, towel racks, and bathroom storage. These smaller fixtures can dramatically enhance functionality and style. Consider selecting finishes and designs that complement your primary fixtures to create a cohesive look in your space.

By familiarizing yourself with the different types of plumbing fixtures and their unique features, you can make informed decisions that not only meet your practical needs but also elevate the overall design of your home. As you dive into the selection process, keep in mind aspects such as water efficiency, ease of maintenance, and compatibility with your existing plumbing to ensure a seamless integration of style and function.

– 2.1 Faucets

What are the different types of plumbing fixtures?
Credit : whatcanu.com

### 2.1 Faucets

Faucets are the unsung heroes of any plumbing system, serving as the primary interface between users and the water supply. While they may seem like a simple fixture, the variety of styles, designs, and functionalities available today can make selecting the right faucet a daunting task. Understanding the different types of faucets, their uses, and the selection tips can significantly enhance your plumbing project.

At a basic level, faucets can be categorized based on their design and functionality. **Compression faucets**, the traditional type, operate with two separate handles for hot and cold water, allowing for precise temperature control. However, they require a bit of effort to turn on and off, making them less popular in modern applications.

In contrast, **cartridge faucets** feature a single handle or two handles with a cartridge that controls the flow and temperature of water. This type is known for its smooth operation and longevity, making it a favorite for kitchens and bathrooms alike. **Ball faucets**, commonly found in modern kitchen sinks, utilize a single handle that moves over a ball joint to control water flow and temperature, offering a sleek and user-friendly experience.

For those looking for convenience, **pull-down and pull-out faucets** provide added flexibility in the kitchen. These faucets come with a retractable hose that makes it easy to wash dishes or fill large pots directly from the sink. Additionally, **touchless faucets**, which use motion sensors to activate water flow, are increasingly popular in both residential and commercial settings for their hygiene and ease of use.

When selecting a faucet, consider the style and finish that will best complement your space. From polished chrome to matte black, the finish can dramatically impact the overall aesthetic of your kitchen or bathroom. Don’t forget about the installation requirements; some faucets are designed for easy DIY setups, while others may necessitate professional assistance.

Finally, it’s essential to think about your water pressure and the faucet’s flow rate. A faucet that doesn’t match your plumbing system can lead to frustrating issues like low flow or fluctuating temperatures. Researching and selecting a faucet that aligns with your specific needs will not only enhance functionality but also elevate the overall design of your space.

In conclusion, faucets are more than just fixtures; they are integral components that combine practicality with style. By understanding the various types and considering your unique requirements, you can confidently choose the perfect faucet that will serve you well for years to come.

– 2.2 Sinks

### 2.2 Sinks

Sinks are essential fixtures in any home, serving as the heart of many daily activities, from cooking and cleaning to personal hygiene. Available in a wide variety of styles, materials, and configurations, sinks can significantly impact both functionality and aesthetics in your space.

**Types of Sinks**

1. **Kitchen Sinks**: These are typically larger and more robust, designed to handle everything from washing dishes to food preparation. Common types include single-basin, double-basin, and farmhouse sinks, each catering to different needs and preferences. Stainless steel is a popular choice for its durability and ease of cleaning, while porcelain and composite materials can add a touch of elegance.

2. **Bathroom Sinks**: Bathroom sinks come in various shapes and sizes, including pedestal sinks, vessel sinks, and undermount sinks. Pedestal sinks offer a classic look and save space, while vessel sinks add a stylish, modern flair. Materials range from ceramic and glass to stone and metal, allowing homeowners to choose based on their design aesthetic.

3. **Utility Sinks**: Often found in laundry rooms or garages, utility sinks are designed for heavy-duty tasks. These sinks are typically deeper and more rugged, perfect for washing out paintbrushes, rinsing muddy shoes, or cleaning pet supplies. They often come with a high arch faucet for added convenience.

4. **Bar and Prep Sinks**: Smaller in size, these sinks are ideal for entertaining or food prep areas. They can be found in kitchens and bars, providing a convenient spot for washing hands, rinsing fruits and vegetables, or prepping cocktails.

**Materials and Finishes**

When selecting a sink, the material plays a crucial role in both functionality and style. Here are a few popular options:

– **Stainless Steel**: Known for its durability and resistance to stains, stainless steel is a staple in many kitchens. It offers a sleek, modern look but can show water spots and scratches over time.

– **Ceramic and Porcelain**: These materials are often used for bathroom sinks due to their classic aesthetic and ease of cleaning. They are available in various colors but can chip or crack if not handled carefully.

– **Granite and Composite**: These materials provide a luxurious appearance and are resistant to scratches and stains. They come in various colors and patterns, allowing for more personalization in your home.

**Selection Tips**

When selecting a sink, consider the following factors to find the perfect fit for your space:

– **Size and Configuration**: Measure your space to ensure the sink will fit properly, and think about your daily tasks to determine if you need a single or double basin.

– **Style**: Choose a sink that complements your overall design aesthetic, whether it’s modern, traditional, or somewhere in between.

– **Functionality**: Think about how you use your sink daily and select features that enhance efficiency, such as additional accessories like cutting boards or drying racks.

– **Installation Type**: Decide between drop-in, undermount, or vessel sinks based on your countertop material and desired look.

By understanding the various types of sinks available and considering your specific needs and preferences, you can make an informed decision that enhances both the function and style of your home. Remember, a well-chosen sink not only serves practical purposes but also adds to the overall ambiance of your space, making it a vital fixture in your plumbing arsenal.

– 2.3 Toilets

What are the different types of plumbing fixtures?
Credit : whatcanu.com

### 2.3 Toilets

Toilets are among the most essential plumbing fixtures in any home, serving a vital function in daily life while also contributing to the overall aesthetics of a bathroom. When considering toilets, it’s important to understand the various types available, their unique features, and how to select the right one for your needs.

**Types of Toilets**

1. **Two-Piece Toilets:** These are the most common type, consisting of a separate tank and bowl. They are generally easier to install and maintain, and they come in a wide range of styles and price points. Their modular design also allows for easier transport and replacement of parts.

2. **One-Piece Toilets:** As the name suggests, these toilets feature a seamless design where the tank and bowl are integrated into one unit. This design not only creates a sleek, modern look but also minimizes the likelihood of leaks and is easier to clean due to the lack of crevices.

3. **Wall-Mounted Toilets:** For a contemporary touch, wall-mounted toilets offer a space-saving solution, as they free up floor space and provide a minimalist appearance. The tank is hidden behind the wall, which makes cleaning the bathroom floor a breeze. However, installation can be more complex and may require professional assistance.

4. **High-Efficiency Toilets (HETs):** These eco-friendly options use significantly less water per flush compared to standard toilets, making them an excellent choice for those looking to conserve water and reduce utility bills. Many models are designed to flush effectively despite using less water, ensuring both performance and sustainability.

**Features to Consider**

When selecting a toilet, consider features such as the height (standard or comfort height), which can impact accessibility and comfort, especially for taller individuals or those with mobility issues. Additionally, look for toilets with efficient flushing mechanisms, such as dual-flush systems, which allow users to choose between a lower volume flush for liquid waste and a higher volume flush for solid waste.

**Selecting the Right Toilet**

Choosing the right toilet goes beyond just aesthetics; it’s crucial to consider your household’s specific needs and preferences. Measure your bathroom space to ensure that the toilet fits comfortably alongside other fixtures. Pay attention to the rough-in measurement—the distance from the wall to the center of the toilet drain—since this can vary among homes.

Finally, don’t overlook the importance of style and color. Toilets are available in various designs and finishes, from classic white to bold colors and sleek modern shapes. Choosing a toilet that complements your bathroom decor can elevate the overall look of your space.

In conclusion, toilets are a fundamental aspect of any plumbing system. By understanding the different types available and evaluating your needs and preferences, you can make a well-informed decision that ensures both functionality and style in your bathroom.

– 2.4 Showers and Bathtubs

When it comes to creating a relaxing and functional bathroom, the choice between showers and bathtubs is pivotal. Both fixtures serve their unique purposes and can dramatically influence the overall aesthetic and utility of your space.

**Showers** are often favored for their efficiency and convenience. They are ideal for those with busy lifestyles who appreciate a quick, invigorating cleanse. Available in a variety of styles, from compact corner units to expansive walk-in designs, showers can be customized with features such as rainfall showerheads, adjustable jets, and digital controls for a luxurious experience. Modern shower enclosures can also incorporate glass panels that create an open, airy feel, making them a perfect fit for smaller bathrooms.

On the other hand, **bathtubs** evoke a sense of relaxation and indulgence. They provide a sanctuary for unwinding after a long day, making them a staple in many homes. From classic clawfoot tubs that add vintage charm to sleek, modern soaking tubs that encourage long, leisurely baths, the options are endless. Bathtubs can also double as a functional element in the bathroom, serving as a focal point or a space for decorative accents. However, it’s essential to consider the space available; a larger bathroom can accommodate a standalone tub or a luxurious whirlpool, while smaller spaces may benefit from a shower-tub combo.

When deciding between a shower and a bathtub, consider your lifestyle, the needs of your household, and the overall design you wish to achieve. If your home is family-oriented, a bathtub may be invaluable for bath time with young children. Conversely, if space is limited or you prioritize quick routines, a shower might be the more practical choice. Ultimately, the right selection can elevate your bathroom into a personal oasis that meets both functional and aesthetic needs.

– 2.5 Bidets

What are the different types of plumbing fixtures?
Credit : whatcanu.com

### 2.5 Bidets

Bidets have long been celebrated in many cultures for their hygiene and comfort, yet they remain a relatively underappreciated fixture in many Western bathrooms. These ingenious plumbing fixtures are designed specifically for a more thorough cleansing experience after using the toilet, offering an alternative to traditional toilet paper.

Typically resembling a low-mounted sink, a bidet allows users to wash their intimate areas with a gentle stream of water, promoting cleanliness and reducing irritation. Bidets come in various styles, from standalone units that require a dedicated space in your bathroom to more modern attachments that can be easily installed on existing toilets.

In addition to their hygiene benefits, bidets can also be an eco-friendly choice, significantly reducing toilet paper consumption and the associated environmental impact. With many models now featuring adjustable water pressure, temperature control, and even air-drying capabilities, bidets provide a customizable experience that caters to individual preferences.

When selecting a bidet, consider the size and layout of your bathroom, as well as your plumbing capabilities. If space is limited, a bidet toilet seat—an attachment that fits directly onto your existing toilet—may be the ideal solution. For those with more room to spare, a standalone bidet can become a stylish centerpiece, often available in various finishes and designs to complement your bathroom decor.

Investing in a bidet not only enhances personal hygiene but also elevates your bathroom experience, making it a fixture worth considering for any home renovation or upgrade.

– 2.6 Water Heaters

Water heaters are an essential plumbing fixture often taken for granted until the moment we find ourselves shivering in a cold shower. These units provide hot water for a variety of household needs, from bathing and cleaning to cooking and laundry. Understanding the different types of water heaters available can help homeowners make informed decisions that align with their lifestyle and budget.

there are primarily two categories of water heaters: tank and tankless. **Tank water heaters** are the traditional choice, featuring a large reservoir that stores heated water for immediate use. These units come in various sizes, typically measured in gallons, and can supply a significant amount of hot water at once—perfect for families with high demand. However, they may take longer to refill once depleted and can lead to higher energy costs due to heat loss from the tank.

On the other hand, **tankless water heaters** are a more modern solution, providing hot water on demand without the need for a storage tank. They heat water directly as it flows through the unit, delivering a continuous supply of hot water. While tankless models are often more energy-efficient and take up less space, they can be more expensive upfront and may require additional installation considerations, especially for larger households.

When selecting a water heater, homeowners should assess their hot water needs. Factors such as the number of residents in the home, simultaneous hot water usage (e.g., running the dishwasher while showering), and energy source (electric, gas, or solar) all play crucial roles in determining the best fit. Energy efficiency ratings, such as the Energy Factor (EF) or the Uniform Energy Factor (UEF), can guide users toward models that will save them money on utility bills over time.

Moreover, considering the installation process and maintenance requirements is vital. Some models may require professional installation, while others can be DIY-friendly. Regular maintenance, such as flushing the tank to remove sediment build-up and checking the anode rod, can extend the life of any water heater and enhance its efficiency.

In summary, selecting the right water heater is a key step in optimizing your home’s plumbing system. By understanding the differences between tank and tankless options, assessing your hot water needs, and considering energy efficiency and maintenance, you can ensure that you choose a water heater that delivers comfort, convenience, and cost savings for years to come.

3. Choosing the Right Plumbing Fixtures for Your Home

Choosing the right plumbing fixtures for your home is a task that goes beyond mere aesthetics; it significantly impacts both functionality and comfort in your living space. With a myriad of options available, from faucets to sinks, showerheads to toilets, each selection plays a crucial role in the overall efficiency and style of your home.

First, consider your lifestyle and the needs of your household. If you have a busy family, durability and ease of use should be at the forefront of your decision-making process. Look for fixtures made from sturdy materials like brass or stainless steel, which can withstand daily wear and tear. Additionally, choosing fixtures with user-friendly features, such as single-handle faucets or touchless technology, can enhance convenience and hygiene.

Next, think about the overall design of your space. Plumbing fixtures come in various styles—from sleek modern designs to timeless traditional looks. Selecting fixtures that complement your home’s decor not only enhances visual appeal but also creates a cohesive environment. For instance, if you have a farmhouse-style kitchen, a vintage-inspired farmhouse sink paired with a classic bridge faucet can elevate the space beautifully.

Don’t forget about water efficiency! With growing concerns about water conservation, opting for fixtures that meet WaterSense standards can save you money on utility bills while also being environmentally friendly. Low-flow faucets and showerheads, as well as dual-flush toilets, are excellent choices that balance performance with sustainability.

Finally, take the time to measure your existing plumbing setup and any new fixtures you’re considering. Ensuring compatibility is vital to avoid unexpected complications during installation. Many retailers provide detailed specifications for their products, making it easier to determine if your choice will fit seamlessly into your space.

By carefully considering your family’s needs, design preferences, water efficiency, and compatibility, you can choose plumbing fixtures that not only look great but also enhance your home’s functionality and sustainability for years to come.

4. Key Features to Consider in Plumbing Fixtures

When it comes to selecting plumbing fixtures for your home or business, understanding the key features that set different options apart is essential. These fixtures are not just functional; they also significantly impact the overall aesthetics and efficiency of your space. Here are some crucial features to consider:

**1. Material Quality:** The durability and longevity of plumbing fixtures largely depend on the materials used in their construction. Stainless steel and brass are popular choices due to their resistance to corrosion and rust, while ceramic is often favored for sinks and toilets because of its ease of cleaning and classic appearance. Opting for high-quality materials can save you money in the long run, as they often come with longer warranties and require less frequent replacement.

**2. Finish and Style:** The finish of your plumbing fixtures can dramatically influence the look and feel of your bathroom or kitchen. From sleek chrome and polished nickel to matte black and brushed gold, the finish can complement your design scheme while also providing a level of maintenance ease. Remember to choose a style that resonates with your overall decor—whether it’s modern, traditional, or industrial—to create a cohesive look.

**3. Water Efficiency:** In today’s eco-conscious world, water efficiency is more important than ever. Look for fixtures with the WaterSense label, which indicates they meet strict water conservation criteria without sacrificing performance. Low-flow faucets, dual-flush toilets, and aerating showerheads can help reduce water usage, lower your utility bills, and minimize your environmental footprint.

**4. Ease of Installation and Maintenance:** Some fixtures are simpler to install than others, and considering your skill level or willingness to hire a professional can influence your choice. Additionally, some fixtures come with features that make maintenance easier, such as removable aerators or easy-clean coatings. Think about how often you want to clean and maintain your fixtures, and choose accordingly.

**5. Functionality and Ergonomics:** While aesthetics are important, the functionality of plumbing fixtures cannot be overlooked. Consider factors such as handle placement, spout height, and the reach of faucets. Fixtures that are user-friendly will enhance the overall experience in your space, making everyday tasks more enjoyable and efficient.

By keeping these key features in mind, you can make informed choices that not only enhance the beauty of your spaces but also ensure that your plumbing fixtures are functional, durable, and efficient. Selecting the right fixtures is an investment in your home’s comfort and style, so take the time to evaluate each option thoroughly.

5. Materials Used in Plumbing Fixtures

When selecting plumbing fixtures, understanding the materials they are made from is crucial, as it impacts both performance and aesthetics. The right material can enhance the durability of your fixtures while complementing your overall home design. Here’s a closer look at some of the most common materials used in plumbing fixtures, along with their unique qualities.

**1. Chrome:** Chrome-plated fixtures are a popular choice due to their sleek, shiny finish that adds a modern touch to any bathroom or kitchen. They are resistant to tarnishing and corrosion, making them easy to maintain. However, they can show water spots and require regular cleaning to keep their brilliant shine.

**2. Stainless Steel:** Known for its strength and durability, stainless steel fixtures are perfect for high-traffic areas. They resist rust and stains and have a contemporary look that fits well in both modern and traditional settings. While they may come with a higher price tag, their longevity often makes them a worthwhile investment.

**3. Brass:** Brass fixtures exude a classic charm that never goes out of style. This material is highly resistant to corrosion, making it an excellent choice for both aesthetic appeal and functionality. Over time, brass can develop a beautiful patina, adding character to your fixtures. However, if you prefer a polished look, regular maintenance is needed to prevent tarnishing.

**4. Plastic:** Lightweight and cost-effective, plastic fixtures can be a practical option for budget-conscious homeowners. They are often available in a variety of colors and styles, allowing for easy customization. While they resist corrosion, plastic fixtures may not offer the same level of durability as metal options, making them more suitable for temporary or less frequently used spaces.

**5. Porcelain and Ceramic:** Often found in sinks and toilets, porcelain and ceramic fixtures are valued for their smooth, glossy finishes and ease of cleaning. These materials are durable and resistant to scratches and stains, but they can be prone to chipping if not handled carefully. Their aesthetic appeal makes them a popular choice in traditional and vintage-style bathrooms.

**6. Bronze:** Oil-rubbed bronze fixtures offer a rustic, antique look that is highly sought after in home design. They are exceptionally durable and resist corrosion, making them ideal for both indoor and outdoor use. The deep, rich tones of bronze can add warmth and sophistication to any space.

When selecting plumbing fixtures, consider not only the material but also the overall style, maintenance requirements, and how well they will hold up in your specific environment. By understanding the advantages and disadvantages of each material, you can make informed decisions that enhance both the functionality and beauty of your home.

6. Popular Plumbing Fixture Brands

When it comes to selecting plumbing fixtures, the brand can significantly influence not only the aesthetic appeal but also the quality and longevity of the products you choose. With countless manufacturers on the market, certain brands have established themselves as leaders, known for their innovative designs, reliable performance, and commitment to customer satisfaction. Here’s a closer look at some popular plumbing fixture brands that are worth considering for your next renovation or new build.

**Moen**: Renowned for its stylish designs and functional innovations, Moen offers a wide range of faucets, showerheads, and accessories. Their products often feature the brand’s signature Spot Resist™ finish, which repels water spots and fingerprints, making maintenance a breeze. Moen also stands out for its commitment to sustainability, providing water-saving options without sacrificing performance.

**Kohler**: A name synonymous with luxury and quality, Kohler fixtures blend classic elegance with modern technology. From high-efficiency toilets to beautifully crafted sinks and stylish faucets, Kohler offers an extensive selection to suit various tastes and budgets. Their innovative features, such as the Touchless technology in faucets and advanced flushing systems in toilets, enhance convenience while promoting water conservation.

**Delta**: Delta Plumbing is known for its cutting-edge technology and user-friendly designs. Their faucets often come equipped with the Touch2O® Technology, allowing users to turn water on or off with just a touch, which is especially handy when hands are full. Delta’s commitment to innovation extends to their wide range of styles, from contemporary to traditional, ensuring there’s something for everyone.

**American Standard**: Focusing on both function and form, American Standard offers a variety of plumbing fixtures that are both stylish and dependable. Their products often emphasize ease of installation and maintenance, making them a favorite among contractors and DIY enthusiasts alike. With options that cater to various budgets, American Standard ensures quality without breaking the bank.

**Grohe**: For those seeking high-end European designs, Grohe is a top contender. Known for their sleek aesthetics and exceptional engineering, Grohe fixtures often feature advanced technology for water efficiency and user comfort. Their commitment to quality is evident in their durable finishes and innovative features, making them a preferred choice for luxury bathrooms and kitchens.

When shopping for plumbing fixtures, it’s crucial to consider the reputation of the brand alongside the specifics of your project. Investing in reputable brands can ensure that you receive a product that not only enhances your space aesthetically but also performs reliably for years to come. Whether you prioritize style, technology, or sustainability, these popular plumbing fixture brands provide an array of options to meet your needs.

7. Energy Efficiency and Water Conservation

When it comes to choosing plumbing fixtures, energy efficiency and water conservation should be at the forefront of your decision-making process. With the increasing awareness of environmental issues and rising utility costs, selecting fixtures that minimize water usage without sacrificing performance is not just a trend—it’s a necessity.

Modern plumbing fixtures come equipped with innovative technology designed to conserve water and energy. Low-flow faucets and showerheads, for instance, can significantly reduce water consumption, allowing you to enjoy a refreshing shower or a leisurely hand wash while using up to 30% less water than traditional fixtures. Look for models that have the WaterSense label, which indicates they meet specific water-saving criteria set by the Environmental Protection Agency (EPA).

In addition to faucets and showerheads, consider the efficiency of your toilets. Dual-flush toilets, which offer a choice between a low flush for liquid waste and a higher flush for solid waste, can save thousands of gallons of water each year compared to older models. These toilets use advanced flushing technology that maximizes performance while minimizing water use, making them an excellent investment for both your wallet and the environment.

Moreover, when selecting plumbing fixtures, pay attention to the materials used. Fixtures made from durable, sustainable materials not only last longer but can also reduce the need for replacements, thus conserving resources in the long run. Stainless steel, for instance, is not only stylish but also highly resistant to corrosion, while fixtures made from recycled materials can further enhance your commitment to sustainability.

Incorporating energy-efficient appliances, like tankless water heaters, can also contribute to overall water conservation. These heaters only warm water as needed, eliminating standby energy loss and reducing both energy bills and water waste.

Ultimately, by prioritizing energy efficiency and water conservation in your plumbing fixture selections, you not only contribute to a healthier planet but also enjoy the financial benefits of lower utility bills. As you make your choices, consider the long-term impact of your fixtures—both on your home and the environment.

8. Installation Tips for Plumbing Fixtures

When it comes to installing plumbing fixtures, a little preparation can go a long way in ensuring a smooth and hassle-free process. Whether you’re a seasoned DIY enthusiast or a first-time installer, following these essential tips can help you achieve professional results.

**1. Gather Your Tools and Materials:** Before diving into the installation, make sure you have all necessary tools at hand. Common tools include adjustable wrenches, screwdrivers, pliers, a plumber’s tape, a level, and a bucket to catch any stray water. Having everything ready will save you time and frustration.

**2. Read the Instructions:** Each plumbing fixture comes with its own set of instructions tailored to that specific model. Take the time to read through the manufacturer’s guidelines to familiarize yourself with the installation process, parts list, and any special requirements. This can help prevent errors and ensure you don’t miss any critical steps.

**3. Shut Off the Water Supply:** It sounds simple, but it’s a crucial step that many forget. Before you begin any installation, locate the main water shut-off valve and turn it off. This will prevent flooding and reduce the risk of water damage during the installation process.

**4. Prepare the Area:** Clear the installation area of any debris or old fixtures. If you are replacing an existing fixture, ensure that all remnants—like old fittings or pipes—are removed before you begin. This will make the installation cleaner and more efficient.

**5. Take Accurate Measurements:** Precision is key in plumbing. Use a measuring tape to confirm that your new fixture will fit in the designated space, and check that any plumbing connections align properly. If you’re installing a sink, for example, ensure that the faucet holes match the new fixture’s specifications.

**6. Use Plumber’s Tape:** When connecting pipes and fittings, use plumber’s tape on threaded connections to create a watertight seal. This simple step can help prevent leaks and save you from future headaches.

**7. Test for Leaks:** Once your fixture is installed, gradually turn the water supply back on and check for leaks. This initial test is crucial; if you spot any dripping or puddles, turn off the water supply and address the issue before proceeding further.

**8. Don’t Hesitate to Seek Help:** If you encounter challenges or feel uncertain during installation, don’t hesitate to consult a professional plumber. Sometimes, a little expert advice can save you time and money in the long run.

By following these installation tips, you can enhance your confidence and ensure that your new plumbing fixtures are installed correctly and efficiently. With each successful installation, you’ll become more adept at maintaining your home’s plumbing system and enjoying the benefits of your upgraded fixtures.

9. Maintenance and Care for Long-Lasting Fixtures

When it comes to plumbing fixtures, maintenance and care are paramount for ensuring longevity and optimal performance. Well-maintained fixtures not only enhance the aesthetic appeal of your space, but they also save you money in the long run by preventing costly repairs and replacements. Here are some essential tips to keep your plumbing fixtures looking and functioning their best.

**Regular Cleaning:** Different materials require different cleaning methods. For instance, stainless steel fixtures can be cleaned with a mild dish soap and warm water, while chrome fixtures may benefit from a gentle vinegar solution to remove hard water stains. Avoid abrasive cleaners that can scratch the surfaces; instead, opt for soft cloths or sponges to maintain that shiny finish.

**Inspect for Leaks:** Periodically check your faucets, showerheads, and pipes for any signs of leaks. Even a small drip can lead to larger problems over time, such as water damage or mold growth. If you notice any leaks, address them promptly—sometimes, a simple tightening of a screw or replacing a washer can resolve the issue.

**Replace Worn Parts:** Fixtures have components that may wear out over time, such as washers, O-rings, and aerators. Regularly inspect these parts and replace them as needed. A worn washer can cause frustrating dripping, while a clogged aerator can reduce water flow. Keeping these elements in check can enhance the efficiency and performance of your fixtures.

**Avoid Harsh Chemicals:** While it might be tempting to use strong chemical cleaners to tackle tough stains or clogs, these can be damaging to your plumbing fixtures. Instead, consider natural alternatives like baking soda and vinegar, which can effectively clean without causing harm.

**Professional Inspections:** Every few years, consider having a professional plumber inspect your fixtures and plumbing system. They can identify potential issues before they become significant problems and offer tailored maintenance advice based on your specific fixtures and their usage.

By incorporating these maintenance tips into your routine, you can ensure that your plumbing fixtures remain functional, attractive, and durable for years to come, enhancing both your home’s comfort and value. Remember, a little care goes a long way in preserving the beauty and efficiency of your plumbing investments!

10. Trends in Plumbing Fixture Design

In the ever-evolving world of home design, plumbing fixtures are no longer just functional necessities; they have transformed into stylish statements that enhance the overall aesthetic of a space. As homeowners increasingly seek to create personalized environments, plumbing fixture design trends reflect a blend of innovation, sustainability, and elegance.

One prominent trend is the rise of minimalist designs that emphasize clean lines and uncluttered spaces. Fixtures with sleek, geometric shapes made from materials like matte black, brushed nickel, or polished brass are gaining popularity, offering a modern touch that complements various decor styles—from industrial to Scandinavian. The simplicity of these designs allows them to seamlessly integrate into any bathroom or kitchen while making a strong visual impact.

Sustainability is another key trend shaping the plumbing fixture landscape. With a growing awareness of environmental issues, many consumers are opting for water-efficient fixtures that reduce consumption without sacrificing performance. Brands are responding by creating products that blend functionality with eco-friendly technology, such as faucets with aerators that limit water flow while maintaining pressure, and dual-flush toilets that allow users to choose the amount of water used per flush.

Colorful fixtures are also making waves in the design world. Gone are the days of standard chrome and white; now, vibrant hues in fixtures are capturing attention and adding personality to spaces. From deep navy sinks to bold red faucets, these colorful options allow homeowners to express their style and create striking focal points in their bathrooms and kitchens.

Finally, smart technology is revolutionizing plumbing fixtures, integrating convenience and efficiency into everyday tasks. From touchless faucets that activate with a simple wave to shower systems that can be controlled via smartphone apps, these innovations not only enhance the user experience but also promote hygiene and save water.

As you consider updating your plumbing fixtures, staying informed about these trends can help ensure your selections not only meet your practical needs but also reflect your personal style and values. Embracing these design elements can transform your space into a contemporary haven that balances aesthetics with functionality.

11. Cost Considerations: Budgeting for Fixtures

When it comes to renovating or updating your home’s plumbing fixtures, budgeting is a crucial step that can significantly impact your choices and overall satisfaction with the project. Understanding the cost considerations associated with different types of fixtures is essential for making informed decisions that align with your financial plans.

First and foremost, it’s important to establish a realistic budget based on your specific needs and desired aesthetic. Plumbing fixtures can range widely in price, from affordable options that offer solid functionality to high-end designs that serve as statement pieces in your home. For instance, basic faucets and showerheads can be found for as little as $50, while luxury brands may charge upwards of $500 or more for designer models crafted from premium materials.

Beyond the initial purchase price, consider the long-term costs associated with your chosen fixtures. Some high-efficiency models may come with a steeper upfront investment but can save you money on water bills in the long run. Similarly, investing in durable materials, such as brass or stainless steel, can reduce the frequency of replacements and repairs, ultimately saving you money over time.

Don’t forget to account for additional expenses that may arise during the installation process. Hiring a licensed plumber can lead to added labor costs, especially if your project involves complex plumbing work or if you’re replacing old fixtures with new ones that require different plumbing configurations. To streamline costs, it’s often wise to tackle multiple fixture upgrades at once, minimizing labor fees and maximizing efficiency.

Lastly, keep an eye out for promotions, sales, or package deals offered by home improvement retailers. Many stores frequently run discounts on plumbing fixtures, especially during seasonal sales events, providing an opportunity to snag high-quality products at a more budget-friendly price.

By carefully considering all these factors and setting a well-defined budget, you can confidently select plumbing fixtures that not only enhance your home’s functionality and style but also fit within your financial parameters.

12. Common Plumbing Fixture Problems and Solutions

When it comes to plumbing fixtures, even the most reliable installations can encounter issues over time. Understanding the common problems associated with these fixtures, along with their solutions, can save you both time and money while ensuring your home remains comfortable and functional.

One of the most frequent issues homeowners face is dripping faucets. Not only can a leaky faucet be a nuisance, but it can also lead to increased water bills. The culprit is often a worn-out washer or O-ring. To resolve this, you can easily disassemble the faucet, replace the damaged components, and restore it to its original state. Regular maintenance, such as checking and replacing washers every few years, can help prevent this problem from recurring.

Another common issue is clogged drains, which can occur in sinks, bathtubs, and showers. Hair, soap residue, and food particles often contribute to these blockages. A simple solution involves using a plunger or a drain snake to dislodge the clog. For persistent blockages, a mixture of baking soda and vinegar can effectively break down buildup, providing a natural alternative to harsh chemical drain cleaners.

Toilet problems can also arise, with running toilets being a particularly common complaint. This can waste a significant amount of water, leading to a higher utility bill. The cause is often a faulty flapper valve that fails to seal properly. Replacing this inexpensive part can quickly restore your toilet to its efficient state.

Lastly, low water pressure can be incredibly frustrating, especially when showering or washing dishes. This issue can stem from mineral buildup in aerators or showerheads, or even from issues with your plumbing system itself. Cleaning these fixtures can often resolve the problem; however, if low pressure persists, it may be time to consult a professional plumber to assess any underlying issues.

By being aware of these common plumbing fixture problems and their solutions, you can take proactive measures to maintain your fixtures and address any issues promptly, ensuring your home remains a comfortable and efficient space.

13. DIY vs. Professional Installation: What You Need to Know

When it comes to installing plumbing fixtures, one of the most critical decisions you’ll face is whether to tackle the project yourself or hire a professional plumber. This choice can significantly impact not only the outcome of your installation but also the overall cost, time commitment, and potential headaches down the road.

**DIY Installation: The Pros and Cons**

Taking the DIY route can be enticing for many homeowners, particularly those who enjoy hands-on projects and wish to save some money. With a plethora of online tutorials, videos, and guides available, the knowledge to successfully install fixtures like faucets, sinks, and showerheads is often just a click away. If you have a basic understanding of plumbing and are comfortable with tools, you might find DIY installation rewarding and straightforward.

However, it’s essential to weigh the pros against the cons. While you may save on labor costs, mistakes can lead to costly repairs or water damage if something goes wrong. Additionally, some plumbing fixtures may require specialized knowledge or tools, such as knowledge of local plumbing codes or the ability to navigate complex piping systems. If you’re unsure about your skills, consider the time investment—what seems like a simple task can quickly become time-consuming, especially if you encounter unexpected challenges.

**Professional Installation: The Benefits**

On the other hand, opting for professional installation ensures that the job is completed correctly and efficiently. Licensed plumbers bring a wealth of experience and expertise, which can be particularly beneficial for more complex installations, such as those involving multiple fixtures or significant plumbing modifications. Professionals can also navigate local building codes and regulations, ensuring that your installation meets all safety standards.

Moreover, many plumbing companies offer warranties on their work, giving you peace of mind that if anything goes wrong after installation, you have a safety net. This can save you from the stress of potential future repairs and provide confidence in your investment.

**Making the Right Choice**

So, how do you decide? Start by evaluating the scope and complexity of your project. For straightforward installations, such as replacing a faucet or installing a new showerhead, DIY may be a feasible option if you’re comfortable with the task. However, for more involved projects, such as a complete bathroom remodel or significant plumbing work, hiring a professional can save you stress and ensure a high-quality result.

Ultimately, whether you choose to go the DIY route or enlist the help of a professional, understanding the requirements and potential pitfalls of plumbing fixture installation will help you make an informed decision that aligns with your skills, budget, and time constraints.

14. Conclusion: Making Informed Choices for Your Plumbing Needs

As we reach the conclusion of our ultimate guide to plumbing fixtures, it’s clear that making informed choices is essential for both functionality and aesthetics in your home. The vast array of options available can be overwhelming, but understanding the different types of fixtures, their uses, and how to select the right ones for your specific needs can transform your space into a well-coordinated haven.

When considering plumbing fixtures, always prioritize quality and durability. Investing in high-quality materials can save you money in the long run by reducing the need for repairs or replacements. Additionally, consider the style and design of each fixture to ensure they complement your existing decor. Whether you lean towards a sleek modern look or a classic vintage charm, there are fixtures available to match every aesthetic preference.

Don’t overlook the importance of functionality. Assess the specific needs of your household—how many people will be using the fixtures, and what are their habits? For instance, if you have a large family, a dual-flush toilet or a spacious showerhead might be ideal. Furthermore, energy-efficient fixtures not only save water but also lower utility bills, making them a smart choice for environmentally conscious homeowners.

Lastly, seek advice from plumbing professionals or experienced suppliers when in doubt. They can offer insights based on your unique situation and help you navigate the sometimes complex world of plumbing fixtures.

In summary, informed choices regarding plumbing fixtures can enhance your home’s functionality, aesthetic appeal, and energy efficiency. By taking the time to research and consider your options, you’ll ensure that your plumbing system not only meets your immediate needs but also stands the test of time. Happy renovating!

15. Resources for Further Reading and Exploration

When it comes to deepening your understanding of plumbing fixtures, a wealth of resources is available to guide you through the nuances of selection, installation, and maintenance. Whether you’re a DIY enthusiast looking to tackle a home improvement project or a homeowner seeking to make informed decisions, these resources can serve as invaluable tools in your journey.

**Books and E-books**: Consider diving into comprehensive guides such as “The Complete Guide to Plumbing” by Black & Decker or “Plumbing 101” by the same publisher. These books not only cover the fundamentals of plumbing fixtures but also offer insights into the latest trends and technologies in the industry.

**Online Courses**: Websites like Udemy and Coursera offer expert-led courses on plumbing basics and advanced techniques. These courses often include video tutorials, quizzes, and forums for discussion, providing a structured learning environment where you can gain hands-on skills and knowledge.

**Manufacturer Websites**: Many plumbing fixture manufacturers provide detailed resources on their websites, including installation guides, product specifications, and maintenance tips. Brands like Kohler, Moen, and Delta often have video tutorials and downloadable manuals that can help you better understand their products.

**DIY Forums and Community Groups**: Platforms such as Reddit’s r/Plumbing or DIY Network forums are great places to connect with other homeowners and professionals. Here, you can ask questions, share experiences, and gain insights from those who have tackled similar projects.

**YouTube Channels**: Visual learners will find YouTube to be a treasure trove of information. Channels dedicated to home improvement, such as Home Repair Tutor or This Old House, regularly feature plumbing projects and tips, showcasing step-by-step processes that can demystify even the most complex installations.

**Local Workshops and Classes**: Many community colleges and home improvement stores offer workshops on plumbing basics. These hands-on classes provide an excellent opportunity to learn from experienced instructors, ask questions, and practice skills in a supportive environment.

By exploring these resources, you’ll equip yourself with the knowledge and confidence needed to make informed decisions about plumbing fixtures. Whether you’re upgrading your bathroom or tackling a plumbing emergency, staying informed will ensure that you choose the right fixtures and maintain them effectively, enhancing both the functionality and aesthetics of your home.

In conclusion, we hope this ultimate guide to plumbing fixtures has equipped you with the knowledge and confidence to make informed choices for your home or renovation project. From understanding the different types and their specific uses to navigating the selection tips that can elevate both functionality and aesthetics, you’re now prepared to tackle any plumbing fixture decision. Remember, the right fixtures not only enhance the beauty of your space but also contribute to its overall efficiency and value. So, whether you’re refreshing a bathroom, upgrading a kitchen, or planning a complete remodel, take the time to choose fixtures that reflect your style and meet your needs. Happy plumbing, and may your spaces be both beautiful and functional!

How to fix a leaky faucet?

A leaky faucet may seem like a minor inconvenience, but those constant drips can lead to a significant waste of water and an uptick in your utility bills.

If you’ve found yourself frustrated by the incessant sound of dripping water or the unsightly puddles forming in your sink, fear not! Tackling this common household issue can be simpler than you think. In this DIY guide, we’ll walk you through five straightforward steps to fix that leaky faucet and restore peace to your kitchen or bathroom. Armed with just a few basic tools and a little bit of patience, you’ll not only save money but also gain the satisfaction of completing a home repair on your own. So roll up your sleeves, and let’s get started on making that drippy faucet a thing of the past!

1. Introduction: Why Fixing a Leaky Faucet Matters

How to fix a leaky faucet?
Credit : whatcanu.com

A leaky faucet may seem like a minor inconvenience, but it can lead to significant issues if left unaddressed. The incessant drip-drip-drip can be more than just an annoyance; it can waste an astonishing amount of water over time, potentially driving up your utility bills and harming the environment. In fact, a single faucet that drips just once every second can waste more than 3,000 gallons of water a year—enough to fill a swimming pool!

Beyond the financial implications, a leaky faucet can also indicate underlying plumbing problems that require immediate attention. The constant moisture can lead to mold growth, damaging your home and impacting your health. Furthermore, if the leak is severe, it may cause water to pool around the base of the faucet, leading to corrosion or even structural damage to your cabinetry.

By fixing a leaky faucet, you not only save water and money but also contribute to a more sustainable lifestyle and protect your home’s integrity. Plus, the satisfaction of resolving a home maintenance issue yourself can be incredibly rewarding. In this DIY guide, we will take you through five simple steps to help you tackle that leaky faucet and restore peace to your household. Let’s get started!

2. Tools and Materials You’ll Need

Before diving into the repair process, it’s essential to gather all the necessary tools and materials to ensure a smooth and efficient fix. Having everything at your fingertips will save you time and frustration, allowing you to stay focused on the task at hand. Here’s a handy list of what you’ll need:

### Tools:
1. **Adjustable Wrench**: This versatile tool will help you grip and turn various nuts and bolts securely, making it easier to disassemble the faucet.
2. **Screwdriver Set**: Depending on the type of faucet, you’ll likely need both flathead and Phillips head screwdrivers. These will assist in removing screws that secure the faucet handle and other components.
3. **Pliers**: A good pair of pliers will be invaluable for gripping and twisting stubborn components that may be difficult to handle with your fingers alone.
4. **Allen Wrench**: If you have a faucet with a hex screw, an Allen wrench will be necessary to remove the handle.

### Materials:
1. **Replacement Washers or O-Rings**: These small yet crucial components often wear out and are common culprits behind leaks. Be sure to check your faucet type to purchase the correct size.
2. **Plumber’s Grease**: This lubricant is perfect for ensuring a smooth operation of moving parts and can help extend the life of your faucet components.
3. **Drop Cloth or Towels**: Having a drop cloth or some old towels handy will protect your countertop from scratches and absorb any water that spills during the repair process.

With your tools and materials assembled, you’re now ready to tackle that leaky faucet! Each item plays a vital role in ensuring that your repair goes off without a hitch, so double-check that you have everything before proceeding to the next step. With a little preparation, you’ll not only fix that pesky leak but also gain confidence in your DIY skills.

3. Step 1: Turn Off the Water Supply

How to fix a leaky faucet?
Credit : whatcanu.com

Before you dive into the intricate world of faucet repairs, the very first step—perhaps the most crucial one—is to turn off the water supply. This simple yet essential action will save you from a potential deluge and allow you to work without the constant worry of water spraying unexpectedly.

To locate the water supply, look beneath your sink for the shut-off valves. These are typically two knobs or lever handles, one for hot water and another for cold. Turn them clockwise until they stop to fully close the valves. If your faucet is connected to a separate shut-off valve, ensure that it is also turned off.

After shutting off the water, it’s wise to open the faucet to relieve any remaining pressure and drain any leftover water in the lines. This step not only keeps your workspace dry but also minimizes the mess you’ll have to deal with later.

Once you’ve ensured that the water is completely off and the faucet is dry, you can confidently proceed with the next steps of your repair, knowing that you’ve set a solid foundation for a successful fix. Remember, safety first—taking the time to properly turn off the water supply will make your DIY experience smoother and more efficient.

4. Step 2: Plug the Drain

Before diving into the intricate workings of your faucet, it’s essential to create a clean and manageable workspace. Step 2: Plug the Drain may seem like a minor detail, but it’s actually a crucial step in preventing any small parts or debris from disappearing into the abyss of your sink.

To begin, gather a clean rag or a purpose-made sink plug. If your sink has a built-in stopper, ensure it’s securely closed. For those without one, simply take the rag and wad it up tightly; then, place it in the drain opening. This acts as a safeguard, blocking any screws, washers, or other components from slipping away during your repair.

While this may feel like a small task, it’s a foundational step that can save you a significant amount of frustration later on. Imagine reaching the end of your fix only to realize a vital screw has vanished down the drain! By taking this extra precaution, you’ll maintain control over your workspace and ensure a smooth and efficient repair process. With the drain securely plugged, you can now confidently proceed to the next step in fixing that pesky leak.

5. Step 3: Disassemble the Faucet

How to fix a leaky faucet?
Credit : whatcanu.com

Once you’ve gathered your tools and turned off the water supply, it’s time to tackle the heart of the problem: disassembling the faucet. This step is crucial for accessing the inner components that may be causing the leak.

Begin by placing a cloth or towel beneath the faucet to catch any residual water that might spill during this process. Using a screwdriver, carefully remove any decorative caps or handles that are covering the screws. If your faucet features a lever, you may need to look for a small set screw located at the back or underside, which can often be loosened with an Allen wrench.

With the handles removed, you’ll need to unscrew the packing nut. This nut can be tightly fitted, so employ your adjustable wrench to gently loosen it. Be mindful not to apply too much force, as excessive pressure can damage the faucet body. Once the packing nut is loose, carefully lift it off to expose the stem or cartridge inside.

At this stage, take a moment to examine the parts you’ve disassembled. Look for worn-out washers, O-rings, or other components that may need replacing. Keeping these parts organized will save you hassle when it’s time to reassemble. Documenting the order of disassembly with your phone or a notepad can also be incredibly helpful, ensuring you can easily put everything back together once you’ve made your repairs.

Disassembling the faucet might seem intimidating, but with patience and attention to detail, you’ll be well on your way to fixing that leaky faucet and restoring peace to your home.

6. Step 4: Identify the Problem: Washer, O-ring, or Cartridge

Once you have the faucet disassembled and laid out in front of you, it’s time to diagnose the issue. This is a crucial step in your DIY journey, as identifying whether the culprit is a worn washer, a faulty O-ring, or a damaged cartridge will dictate your next moves and ensure a successful repair.

**Washer Problems:** If your faucet is dripping from the spout, the most common offender is often the washer. The washer is a rubber component that provides a tight seal when the faucet is turned off. Over time, regular use can wear down this component, leading to leaks. Inspect the washer for any signs of cracks, fraying, or compression. If it looks worn, it’s likely time for a replacement.

**O-ring Issues:** O-rings are small circular gaskets that help prevent leaks around the handle of the faucet. If you notice water pooling around the faucet handle itself, the O-ring may be to blame. Check for signs of wear or deterioration. If it seems to be losing its elasticity or has developed hard spots, replacing it can resolve the issue and restore your faucet’s functionality.

**Cartridge Dilemmas:** If your faucet is still leaking despite having replaced the washer and O-ring, the problem may lie in the cartridge. Cartridges are more commonly found in cartridge faucets, and they can wear out over time, leading to leaks. Look for any visible cracks or damage, and if necessary, take the cartridge to a hardware store to find an exact match for replacement.

Understanding these components and their roles is essential for diagnosing and addressing the leak effectively. Once you’ve identified the problem, you can move forward with the appropriate replacements, confident in your ability to restore your faucet to its drip-free state. This step not only empowers you as a DIYer but also saves you money and the hassle of calling in a professional.

7. Step 5: Replace the Damaged Parts

How to fix a leaky faucet?
Credit : whatcanu.com

### Step 5: Replace the Damaged Parts

Once you’ve successfully disassembled the faucet and identified the culprit behind the leak, it’s time to replace the damaged parts. This is a crucial step in ensuring your repair is effective and long-lasting. Depending on the type of faucet you have—be it compression, cartridge, ball, or ceramic disc—the parts you need to replace may vary.

First, carefully inspect the components you’ve removed. Look for worn-out washers, O-rings, or seals, as these are often the primary suspects in leaks. If they appear cracked, frayed, or misshapen, it’s time to swap them out. Many hardware stores offer repair kits that include all the necessary parts for your specific faucet model, making it easy to find replacements.

Before purchasing new parts, bring the old ones with you as a reference. This will ensure you get the right size and type for a proper fit. Once you have your new components, follow the manufacturer’s instructions to install them. Make sure to seat the washers and O-rings snugly, as a proper seal is essential to prevent future leaks.

As you reassemble the faucet, take care not to overtighten any screws or nuts, as this can cause damage to the new parts. Instead, aim for a firm but gentle tightening to ensure everything is secure without compromising the integrity of the fittings.

Replacing the damaged parts is a straightforward yet vital step in your faucet repair journey. Doing it correctly will not only stop the leak but also extend the life of your faucet, giving you peace of mind and a fully functional kitchen or bathroom fixture. With the new parts in place, you’re now one step closer to enjoying a leak-free experience!

8. Reassemble the Faucet

After you’ve successfully replaced the faulty components, it’s time to reassemble the faucet to restore it to its original state. This step is crucial, as a proper reassembly not only ensures functionality but also prevents future leaks.

Start by carefully placing the faucet handle back onto its base, aligning any screws or fasteners as needed. If your faucet has a decorative cap, don’t forget to secure it back in place; this is often a simple twist-on piece that can enhance the overall appearance of your fixture.

Next, use your screwdriver to tighten any screws that hold the handle in position. Be cautious not to overtighten, as this could cause damage to the faucet or its components. If your faucet has multiple handles or levers, repeat this process for each one, ensuring they all fit snugly and operate smoothly.

Once the handles are secure, it’s time to reattach any decorative elements or covers that you removed earlier. These parts not only contribute to the aesthetics of your faucet but also provide additional protection against moisture and dust.

Finally, turn the water supply back on and check for leaks. With everything reassembled, run the faucet for a few moments to ensure that water flows freely and that no drips or leaks are present. If all looks good, congratulations—you’ve successfully reassembled your faucet! Enjoy the satisfaction of knowing you tackled this DIY project with skill and precision, and relish in the quiet of a leak-free home.

9. Step 6: Turn the Water Supply Back On

Once you’ve reassembled the faucet and ensured that all components are securely in place, it’s time to turn the water supply back on. This step marks a significant moment in your DIY journey, as it will reveal whether your repairs have been successful. Start by locating the shut-off valves beneath the sink; they are typically positioned on the wall or the cabinet floor.

Carefully turn the valves counterclockwise to restore the water flow. As you do this, listen for the sound of rushing water—this is a good sign that you’re on the right track! However, immediate caution is warranted: keep an eye on the faucet to check for any signs of leaks.

Once the water is flowing, turn the faucet handle to test its operation. Run the water for a moment to ensure a steady stream without spluttering or drips. Feel the temperature of the water to confirm that hot and cold are functioning correctly. If everything seems to be in order, congratulations! You’ve successfully tackled the leaky faucet. But don’t get too comfortable just yet—take a few moments to wipe down any excess water around the sink area and double-check your work. If all looks good, you can pat yourself on the back for a job well done and enjoy the satisfaction of having fixed the issue yourself!

10. Step 7: Test for Leaks

After you’ve meticulously reassembled your faucet and tightened all the screws and fittings, it’s time for the moment of truth: testing for leaks. This crucial step ensures that your hard work has paid off and that your faucet is working as it should.

Start by turning the water supply back on, gradually opening the valves to avoid any sudden bursts of water. As the flow begins, pay close attention to the area around the faucet itself and the joints where you’ve made adjustments. Look for any signs of dripping or pooling water. A small leak can often be fixed with a simple twist of a screw or a minor adjustment, so don’t be discouraged if you see a little moisture at first.

To get a comprehensive check, run the faucet through its various settings—hot, cold, and mixed. This will help you identify any leaks that might only occur under certain conditions. If you do notice any leaks, it’s essential to turn the water supply off again and revisit your work. Check the O-rings, washers, and any seals you might have changed; sometimes, a misaligned component is all it takes to create a leak.

Once you’re confident that everything is secure and there are no leaks, take a moment to admire your handiwork. Not only have you just saved yourself some money by avoiding a plumber, but you’ve also gained valuable skills in home maintenance. With a little patience and attention to detail, you’ve turned a potentially frustrating problem into a successful DIY project!

11. Common Mistakes to Avoid

When tackling a DIY project like fixing a leaky faucet, it’s crucial to be aware of common mistakes that can turn a simple repair into a frustrating endeavor. Here are some pitfalls to steer clear of as you embark on your plumbing adventure:

1. **Neglecting to Turn Off the Water Supply**: It may seem obvious, but many DIYers forget this essential step. Failing to shut off the water supply can lead to a messy situation, with water gushing out as you start disassembling the faucet. Always locate the shut-off valves under the sink and turn them off before you begin.

2. **Skipping the Preparation**: Jumping right into the repair without gathering the necessary tools and materials can lead to interruptions and confusion. Ensure you have everything you need—like wrenches, screwdrivers, replacement parts, and a cloth to catch any drips—before you start.

3. **Using the Wrong Tools**: Each faucet type requires specific tools for repair. Using the wrong tools can damage the faucet or make it difficult to complete the repair. Invest in or borrow the right tools, such as basin wrenches, pliers, and screwdrivers, to ensure you can work effectively and avoid stripping screws or damaging fittings.

4. **Ignoring the Manufacturer’s Instructions**: Each faucet brand and model may have unique components and assembly methods. Failing to consult the manufacturer’s instructions can lead to confusion during reassembly or the use of incorrect replacement parts. Always refer to the manual or look up the model online for guidance.

5. **Over-Tightening**: It’s easy to think that cranking down on screws and bolts will ensure a watertight seal, but over-tightening can cause damage to the components, leading to future leaks or breakage. Use a gentle hand and tighten just enough to create a good seal.

By being mindful of these common mistakes, you’ll set yourself up for a successful faucet repair. With a little patience and the right approach, you can effectively fix that leaky faucet and enjoy the satisfaction of a job well done!

12. Tips for Preventing Future Faucet Leaks

While fixing a leaky faucet can save you money and water, taking proactive steps to prevent future leaks is equally important. Here are some essential tips to keep your faucet in top condition and avoid the hassle of leaks down the line.

**1. Regular Maintenance:** Schedule routine checks on your faucets and fixtures. Inspect for signs of wear, such as corrosion or loose parts, and replace washers or O-rings as needed. A little preventive care can go a long way in extending the life of your faucet.

**2. Use the Right Tools:** When working on your faucet, always use the appropriate tools for the job. Using the wrong size wrench or screwdriver can strip screws or damage components, leading to leaks. Invest in a good set of plumbing tools to ensure you have what you need.

**3. Avoid Over-Tightening:** It may be tempting to crank down on screws or nuts to prevent leaks, but over-tightening can cause more harm than good. This can lead to cracks in hardware or misalignment, ultimately creating new leaks. Tighten only until snug.

**4. Check Water Pressure:** High water pressure can put unnecessary stress on your faucet and its components, leading to leaks. Use a pressure gauge to check your home’s water pressure, and if it’s above the recommended range (generally 40-60 psi), consider installing a pressure regulator.

**5. Choose Quality Fixtures:** When replacing faucets or fixtures, invest in high-quality products from reputable brands. While they might carry a higher upfront cost, quality fixtures are often built to last longer and withstand wear and tear better than cheaper alternatives.

By adopting these simple practices, you can significantly reduce the likelihood of future leaks and enjoy a well-functioning faucet for years to come. Remember, a little attention today can save you time, money, and the frustration of unexpected repairs tomorrow.

13. When to Call a Professional

While many leaky faucet repairs can be successfully tackled by enthusiastic DIYers, there are times when calling a professional is the wisest course of action. Knowing when to hand the wrench over to an expert can save you time, money, and frustration down the line.

If you’ve followed the previous steps and your faucet is still leaking, it may be a sign of a more complex issue. Sometimes, the problem might stem from deeper within your plumbing system, such as high water pressure or corroded pipes, which aren’t easily fixable without specialized knowledge and tools. Additionally, if you notice water pooling around the base of the faucet or under the sink, this could indicate a more serious leak that requires an experienced plumber’s intervention.

Another situation where a professional’s help is warranted is if you’re dealing with a faucet type that is particularly intricate or outdated. Vintage or specialty faucets may have unique components that are hard to find or require specific expertise to repair correctly. In these cases, a professional can ensure that repairs are done without damaging your faucet further.

Finally, if you feel overwhelmed or uncertain at any point during your repair attempts, it’s perfectly okay to reach out for help. Plumbing can be tricky, and the last thing you want is to inadvertently create a bigger problem that leads to costly repairs. Trust your instincts—if a task feels beyond your skill level, calling a licensed plumber is a smart and responsible decision. They can provide peace of mind, ensure the job is done right, and ultimately save you from the headache of future complications.

14. Conclusion: Enjoying Your Leak-Free Faucet!

Congratulations! You’ve successfully tackled the task of fixing your leaky faucet, and now it’s time to sit back, relax, and enjoy the fruits of your labor. There’s something immensely satisfying about resolving a household issue with your own hands, and a leak-free faucet is a testament to your DIY skills. No more drips, no more annoying water sounds in the night, and certainly no more wasted water sneaking through those faulty seals.

As you turn on the faucet and hear the smooth flow of water, take a moment to appreciate the quietude of your kitchen or bathroom—free from the persistent drip-drip that once interrupted your peace. Not only have you saved yourself money on potential plumbing bills, but you’ve also contributed to water conservation, which is essential for our planet.

Remember, maintaining your faucet is key to ensuring its longevity. Regular checks for wear and tear, cleaning out aerators, and replacing washers can prevent future leaks. Should you encounter any further issues, don’t hesitate to refer back to this guide or consult a professional if needed.

By embracing the DIY spirit, you’ve not only fixed a problem but also gained valuable skills that empower you to handle similar repairs in the future. So, go ahead, enjoy that leak-free faucet, and let the water flow freely—without the worry of unwanted puddles beneath!

15. Additional Resources and References

When tackling a DIY project like fixing a leaky faucet, having the right resources at your fingertips can make all the difference. Here are some additional materials and references that can help you along the way, ensuring your repair is successful and stress-free.

1. **Online Tutorials and Videos:** Websites like YouTube are treasure troves of DIY content. Search for specific faucet types or brands for step-by-step video guides that visually walk you through the repair process. Seeing the steps in action can help clarify complex instructions and give you the confidence to proceed.

2. **Manufacturer’s Manuals:** If you still have the manual that came with your faucet, it’s worth a look. These manuals often include troubleshooting sections that can point you directly to the source of the leak, as well as specific diagrams and parts lists that are invaluable during repairs.

3. **DIY Forums and Communities:** Online forums such as Reddit’s r/HomeImprovement or DIY Network can be excellent resources. Here, you can ask questions, share your experiences, and learn from others who have tackled similar projects. Community members often provide tips and tricks that can save you time and frustration.

4. **Home Improvement Books:** If you prefer a more traditional approach, consider picking up a home improvement book from your local library or bookstore. Many of these guides offer comprehensive chapters on plumbing and faucet repairs, complete with illustrations and troubleshooting advice.

5. **Local Hardware Store Workshops:** Some hardware stores offer free workshops or classes on home repairs, including plumbing. Check with your local store to see if they have any upcoming sessions where you can gain hands-on experience and ask questions from knowledgeable staff.

By utilizing these additional resources, you can enhance your understanding of faucet repairs and gain the confidence to tackle even the trickiest plumbing issues. Remember, every DIY project is a learning opportunity, so don’t hesitate to seek out information that can help refine your skills. With the right guidance, you’ll not only fix that leaky faucet but also feel empowered to take on future home improvement challenges!

In conclusion, fixing a leaky faucet doesn’t have to be an overwhelming task. With the straightforward steps outlined in our DIY guide, you can tackle this common household issue with confidence and ease. Not only will you save money by avoiding costly plumber fees, but you’ll also gain a sense of accomplishment by successfully completing the repair yourself. Remember, every drop counts—both in conserving water and in preserving your home’s plumbing health. We encourage you to gather your tools, roll up your sleeves, and embark on this simple yet rewarding project. Happy fixing, and may your faucet be forever drip-free!