What are the best ways to attract birds to your backyard?

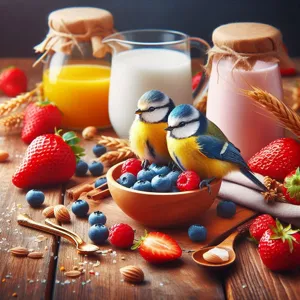
Imagine stepping into your backyard and being greeted by the cheerful melodies of songbirds, the fluttering of colorful wings, and the gentle rustle of leaves as nature comes alive around you.

Transforming your outdoor space into a bird paradise is not only a delightful way to connect with wildlife but also a rewarding endeavor that can enhance the beauty of your home. Whether you’re an avid birdwatcher or simply someone looking to add a touch of nature to your surroundings, creating a welcoming habitat for our feathered friends is easier than you might think. In this blog post, we’ll share 10 simple yet effective tips that will help you attract a variety of birds, from vibrant hummingbirds to majestic finches, while also enriching your backyard’s ecosystem. Get ready to roll up your sleeves and turn your outdoor retreat into a vibrant sanctuary where birds can thrive and bring joy to your everyday life!

1. Assessing Your Backyard Space

What are the best ways to attract birds to your backyard?
Credit : whatcanu.com

Before you embark on your journey to create a bird paradise, the first step is to evaluate your backyard space thoroughly. Take a moment to step outside and observe the area with fresh eyes. consider the size of your yard, the existing landscape features, and the surrounding environment. Is it a sun-drenched haven or a shaded retreat? Understanding these elements will guide your decisions on what types of birds you can attract and what features to incorporate.

Look for natural elements that could either aid or hinder your feathered friends. Are there mature trees that offer shelter and nesting opportunities? Do you have open areas that could benefit from the addition of bird feeders or baths? Pay attention to existing plants—native flora can be particularly inviting to birds, providing both food and cover.

Additionally, take note of any nearby structures or fences that could create barriers or disrupt the birds’ flight paths. Consider how the layout of your yard influences visibility and accessibility. For instance, a cozy corner may provide a perfect spot for a birdhouse, while an open area might be ideal for a feeding station.

By assessing your backyard space, you’ll gain valuable insights into how to design a welcoming environment for birds. A thoughtful approach based on your unique landscape will ensure you create a vibrant sanctuary that attracts a variety of species year after year. With a solid plan in place, you can move on to the next steps of transforming your outdoor space into a true bird paradise.

2. Choosing the Right Bird Feeders

Choosing the right bird feeders is crucial for attracting a diverse array of feathered friends to your backyard paradise. With so many styles and types available, selecting feeders that cater to the preferences of different bird species can make all the difference. Start by considering the local birds in your area. For instance, tube feeders are perfect for appealing to smaller birds like finches and chickadees, while platform feeders can accommodate larger species like cardinals and jays.

Opt for feeders made from durable, weather-resistant materials to ensure they withstand the elements and last through multiple seasons. Additionally, think about feeder design: one with drainage holes helps keep seeds dry, while a feeder with a wide perch allows for comfortable feeding.

Placement is equally important; position your feeders in a sheltered spot near trees or shrubs to provide birds with a safe haven from predators. It’s also beneficial to have a variety of feeders—offering different seed types, such as sunflower seeds, safflower seeds, or mixed blends—will attract a broader range of species.

Don’t forget to keep your feeders clean! Regular maintenance not only ensures a healthy feeding environment but also keeps your backyard looking pristine. By thoughtfully selecting and placing the right bird feeders, you’ll create an inviting space that transforms your backyard into a vibrant hub of avian activity, bringing joy and natural beauty to your outdoor oasis.

3. Selecting the Best Bird Seed

What are the best ways to attract birds to your backyard?
Credit : whatcanu.com

Selecting the best bird seed is a vital step in transforming your backyard into a thriving bird paradise. Different birds have varying dietary preferences, so understanding the specific species that frequent your area will help you choose the right blend to attract them.

For instance, if you’re hoping to lure colorful finches, a thistle seed (nyjer) feeder will be your best bet, while chickadees and woodpeckers will eagerly flock to feeders filled with sunflower seeds. A mixed seed blend can also be effective, offering a variety of choices to entice different bird species. Just be mindful that not all blends are created equal; many contain fillers like millet and cracked corn that the birds may ignore.

Consider investing in high-quality seeds that offer a higher nutritional value, ensuring that your feathered visitors receive the best possible food. You might also want to explore the option of purchasing seeds in bulk, which can save you money and keep your feeders stocked longer.

Moreover, remember to regularly clean your feeders and replace old seed to prevent mold and bacteria growth, which can be harmful to birds. By curating a thoughtful selection of bird seed, you’ll not only attract a diverse range of birds but also create a welcoming environment that encourages them to return to your backyard time and again. With the right seed, you’ll be rewarded with colorful visitors and the sweet symphony of chirps and songs that fill the air, truly transforming your outdoor space into a serene bird haven.

4. Planting Native and Bird-Friendly Plants

Creating a bird paradise in your backyard begins with the right selection of plants. Planting native and bird-friendly species is not just beneficial for your avian visitors, it also enhances the overall health and beauty of your garden. Native plants are well-adapted to your local climate and soil conditions, making them easier to maintain while providing essential food and shelter for birds.

Start by researching which plants are indigenous to your area, as these will attract local bird species that have evolved to thrive on them. Think about incorporating a variety of plants, such as shrubs, trees, and flowering perennials, to create layers of habitat. For instance, berry-producing shrubs like elderberry and serviceberry not only provide delicious snacks for birds but also offer shelter from predators.

In addition to native species, consider adding flowering plants that produce seeds, such as sunflowers and coneflowers, which can draw in a multitude of birds during different seasons. Moreover, plants like milkweed can attract pollinators, which in turn supports the entire ecosystem, including the birds that feed on insects.

Don’t forget about providing water sources as well. A simple birdbath or a small pond can be a game-changer, giving birds a place to drink and bathe. Include some rocks or shallow areas to help smaller birds feel safe while they enjoy their refreshing dip.

By thoughtfully selecting and planting native, bird-friendly species, you’ll create not just a sanctuary for your feathered friends but a vibrant, thriving backyard that bursts with color and life. Each season will bring new visitors and sounds, transforming your outdoor space into a lively avian haven.

5. Creating Water Sources for Birds

What are the best ways to attract birds to your backyard?
Credit : whatcanu.com

Creating water sources for birds is one of the most effective and rewarding ways to attract a diverse array of feathered friends to your backyard oasis. Birds, much like humans, require fresh water not only for drinking but also for bathing, which plays a crucial role in maintaining their plumage. By incorporating appealing water features into your outdoor space, you can create a lively hub of activity that brings joy and color to your yard.

Start with a simple birdbath, which can be easily purchased or even DIY-ed using shallow containers. Position it in a visible area, preferably near trees or shrubs that provide natural cover. Birds feel safer when they have nearby escape routes from potential predators, so a strategic placement is essential. Ensure the water is shallow enough for small birds to wade in without risk of drowning, ideally no deeper than two inches.

To keep the water fresh and enticing, change it regularly—ideally every day during the hot summer months. Adding a small fountain or dripper can create movement in the water, which is particularly attractive to birds. The sound of trickling water can also draw them in from afar, making your backyard a go-to destination for thirsty visitors.

Additionally, consider installing a small pond if space allows. A pond not only serves as a water source but also creates an ecosystem that can attract various species of birds and other wildlife. Surround it with native plants that provide shelter and food, turning your water source into a thriving habitat.

Lastly, don’t forget about the importance of cleanliness. Regularly scrub your birdbath or pond to prevent any algae buildup or waterborne diseases. By providing a safe and welcoming water source, you’ll not only witness an increase in bird activity but also contribute to their well-being, making your backyard a true paradise for avian life.

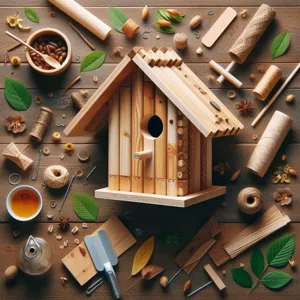
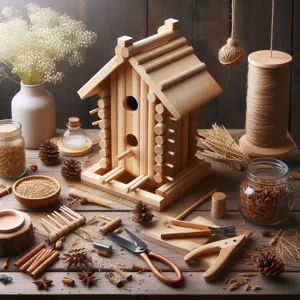
6. Providing Shelter with Birdhouses and Nesting Boxes

Creating a welcoming environment for birds in your backyard goes beyond just providing food and water; it also involves offering safe and cozy shelter. Birdhouses and nesting boxes serve as essential havens for our feathered friends, giving them a secure space to rest, raise their young, and take refuge from predators and harsh weather conditions.

When selecting or building birdhouses, consider the specific needs of the bird species in your area. Different birds have different preferences for nesting sites, so it’s important to choose or construct houses that cater to these preferences. For example, bluebirds prefer open, spacious houses with a circular entrance, while wrens thrive in smaller, more enclosed spaces. Additionally, ensure that the dimensions and materials used are appropriate; untreated wood is often the best choice, as it allows for ventilation and insulation while providing a natural feel.

Placement is also key to attracting birds to your backyard sanctuary. Position your birdhouses at varying heights and distances from trees or shrubs, as many birds appreciate having nearby perches to survey their surroundings. It’s advisable to avoid direct sunlight or overly windy spots, as these can deter nesting. Instead, find a balance that offers both sunny spots and shaded areas, creating a cozy retreat for your avian visitors.

Don’t forget to keep an eye on maintenance! Cleaning out old nesting materials after the breeding season can prevent the spread of disease and encourage birds to return year after year. By providing well-placed and well-maintained birdhouses and nesting boxes, you’ll not only give birds a safe space to thrive but also create a vibrant and lively atmosphere in your backyard, filled with the charming sights and sounds of nature.

7. Incorporating Birdbaths for Bathing and Drinking

What are the best ways to attract birds to your backyard?
Credit : whatcanu.com

Incorporating birdbaths into your backyard is one of the most delightful ways to attract a diverse array of feathered friends while adding a serene focal point to your outdoor space. Birds, much like humans, appreciate a refreshing bath, and a birdbath serves as a perfect oasis for them to cleanse their feathers and hydrate.

When selecting a birdbath, consider the size and style that will complement your garden. A shallow basin—ideally no deeper than two inches—will cater to smaller birds, while a slightly deeper option can attract larger species. Materials such as ceramic, stone, or concrete not only provide durability but also blend beautifully with natural surroundings.

Position your birdbath in a quiet, sheltered area, preferably near trees or shrubs that offer cover. This allows birds to feel safe as they approach for a drink or a dip. Adding a gentle water feature, like a small fountain or dripper, can create soothing sounds and rippling water that will entice birds even more.

To maximize usage, keep the birdbath clean and filled with fresh water. Regular maintenance is key; change the water every few days, especially in hot weather, to prevent algae buildup and keep it inviting for your avian visitors.

You might also consider adding decorative stones or pebbles in the birdbath to provide birds with safe perches while they sip or splash. With the right setup, your backyard birdbath can become a bustling hub of activity, bringing nature closer to home and allowing you to observe the enchanting behaviors of your local birds. Whether it’s the quick flutters of a sparrow or the elegant dips of a blue jay, a well-placed birdbath will transform your outdoor space into a bird paradise that you—and your feathered friends—will cherish.

8. Designing a Bird-Friendly Garden Layout

Creating a bird-friendly garden layout is both an art and a science, one that harmonizes the needs of our feathered friends with the natural beauty of your outdoor space. To begin, consider incorporating a diverse range of plants that provide food, shelter, and nesting opportunities for various bird species. Native plants are particularly beneficial, as they offer the seeds, fruits, and insects that local birds rely on for sustenance.

Aim for a layered garden design, combining trees, shrubs, and flowers to create a multi-dimensional space. Tall trees can serve as lookout perches, while dense shrubs provide hiding spots from predators and cozy nesting sites. Consider planting flowers that bloom at different times throughout the seasons to ensure a steady supply of nectar and seeds. Wildflowers and native grasses can also attract insects, which are vital for feeding hungry chicks during breeding season.

In addition to plant selection, think about the layout of your garden. Create a welcoming environment by incorporating bird baths, feeders, and nesting boxes placed at varying heights. A bird bath not only quenches their thirst but also offers a place for bathing, which is essential for their plumage maintenance. Ensure it is shallow and has a gentle slope for easy access.

Strategically position your feeders near natural cover, such as trees or bushes, so that birds feel safe while dining. Use a mix of feeder types to attract different species; tube feeders for finches, platform feeders for larger birds, and suet feeders for woodpeckers, for example. Avoid placing feeders too close to windows to reduce the risk of collisions.

Finally, make your garden a sanctuary by minimizing pesticide use and providing a safe haven for all creatures. By thoughtfully designing your bird-friendly garden layout, you’ll not only create an inviting habitat for birds but also enjoy the soothing presence of nature right in your backyard, transforming it into a vibrant bird paradise.

9. Minimizing Pesticide Use for a Safe Habitat

Creating a bird paradise in your backyard goes hand in hand with ensuring a safe and welcoming environment for your feathered friends. One of the most significant steps you can take is to minimize pesticide use. While these chemicals might seem like a quick solution to pesky insects or unwanted weeds, they can have devastating effects on local bird populations and the overall health of your ecosystem.

Birds are incredibly sensitive to toxins, and pesticide residues can disrupt their reproductive systems, diminish their food sources, and even lead to fatal consequences. By reducing or eliminating pesticides, you not only protect the birds but also foster a healthier environment for beneficial insects, like ladybugs and bees, which play crucial roles in pollination and pest control.

Instead of reaching for chemical solutions, consider organic alternatives. Natural pest repellents made from ingredients like neem oil or diatomaceous earth can help manage pests without harming your avian visitors. Additionally, implementing integrated pest management (IPM) techniques—such as encouraging natural predators, planting pest-resistant plants, and promoting biodiversity—can effectively keep your garden thriving.

Creating a safe habitat also means providing clean water sources and native plants that offer shelter and food. By cultivating an organic garden, rich in native flora, you can create a lush environment that attracts a variety of birds, all while maintaining ecological balance.

In short, minimizing pesticide use is a small yet impactful step toward transforming your backyard into a sanctuary for birds. By prioritizing their safety and well-being, you contribute to a sustainable ecosystem that your avian companions will thrive in, ensuring they return to your yard time and time again.

10. Attracting Specific Bird Species with Targeted Features

To truly transform your backyard into a bird paradise, consider tailoring your space to attract specific bird species that you admire. Different birds have varying preferences for food, shelter, and nesting sites, so understanding the habits and needs of your desired feathered friends is crucial.

For instance, if you want to invite vibrant hummingbirds into your garden, installing nectar feeders filled with a sugar-water solution is essential. Choose bright, tubular feeders that mimic the flowers they love, and position them in a sunny area away from predators. Additionally, planting native flowering plants will not only provide natural food sources but also create a beautiful landscape that complements your feeders.

If songbirds like finches or chickadees are your target, consider incorporating specific features such as platform feeders filled with sunflower seeds or nyjer thistle. These birds appreciate open feeding spaces where they can easily spot potential threats. Furthermore, adding birdbaths with shallow, gently sloping edges can entice a variety of birds to visit, offering them a refreshing place to drink and bathe.

For those interested in attracting owls or woodpeckers, install nesting boxes designed specifically for these species. Make sure to place them in quiet, undisturbed areas of your yard, providing the shelter and safety these birds crave. Remember, the right combination of food, water, and shelter can create an irresistible oasis for your desired bird species.

By thoughtfully curating your backyard with targeted features, you can create a vibrant ecosystem that supports specific birds, enriching both their lives and yours. Enjoy the process of observing and learning, and soon you’ll find your garden alive with the songs, colors, and antics of your favorite avian visitors.

11. Creating a Birdwatching Area

Creating a dedicated birdwatching area in your backyard can transform your outdoor space into a serene sanctuary, inviting both feathered friends and nature enthusiasts alike. Start by selecting a quiet corner of your yard where you can observe the birds without startling them. This space should be away from heavy foot traffic and noise, allowing for a peaceful environment that encourages birds to visit.

Next, consider investing in a comfortable chair or a cozy bench. This will be your vantage point for observing the various species that come to your backyard. Enhance the space with a small table to hold your birdwatching gear—binoculars, a field guide, or even a notebook for jotting down your observations.

To attract a diverse array of birds, make sure your birdwatching area is thoughtfully designed. Install bird feeders filled with a variety of seeds, suet, and nectar to cater to different bird species. Position these feeders within clear sightlines from your seating area, ensuring they are easily visible but not too close, as this may deter shy birds.

Incorporate native plants, shrubs, and trees that provide natural shelter and nesting sites. Not only do these plants offer food sources such as berries and seeds, but they also create a beautiful, lush backdrop for your birdwatching experience. Adding a small water feature, like a birdbath or pond, can further entice birds to your yard, allowing them to drink and bathe while you watch in delight.

Finally, consider adding birdhouses and nesting boxes to encourage more permanent residents in your backyard paradise. Choose designs suitable for the bird species you wish to attract, and place them in sheltered, quiet spots away from predators.

With these thoughtful touches, your birdwatching area will not only enhance your backyard’s aesthetic but also create a haven for birds, making your space a vibrant hub of activity and a delightful retreat for you to enjoy the wonders of nature.

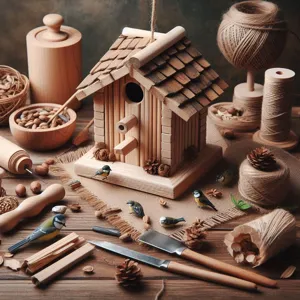
12. Using Bird-Friendly Decorations and Accessories

When it comes to creating a bird paradise in your backyard, the aesthetics matter just as much as the essentials. Using bird-friendly decorations and accessories not only enhances the beauty of your outdoor space but also makes it more inviting for our feathered friends. Imagine vibrant, eye-catching ornaments that blend harmoniously with nature, creating an environment where birds feel safe and welcomed.

Start with birdhouses that are both functional and decorative. Choose designs that mimic the natural habitats of local birds, incorporating materials like untreated wood, which is not only safer for birds but also adds a rustic charm to your backyard. You can paint these houses in soft, nature-inspired colors to draw attention without overwhelming the landscape. Ensure they are placed in sheltered areas, away from predators, to encourage nesting.

Wind chimes and vibrant garden stakes can add a touch of whimsy while also drawing birds in. Opt for chimes made from natural materials that produce gentle sounds, as harsh noises can startle birds away. Similarly, colorful garden stakes can serve as landmarks in your yard, helping birds navigate their new paradise while adding splashes of color.

Additionally, consider using decorative feeders that match your garden’s theme. Not only should they be functional, providing easy access to seeds or nectar, but they can also be works of art. Look for feeders shaped like flowers, fruits, or even abstract designs that can become focal points in your garden while catering to specific bird species.

Don’t forget to incorporate a water feature, such as a birdbath or a small pond. Opt for shallow designs with textured surfaces that provide birds with a safe spot to drink and bathe. Decorate your birdbath with stones, pebbles, or even floating flowers to create a serene oasis that attracts birds while enhancing the overall aesthetics of your yard.

Incorporating these bird-friendly decorations and accessories not only beautifies your outdoor space but also contributes to a more welcoming atmosphere for birds. With thoughtful design and consideration, your backyard can transform into a stunning sanctuary where both humans and birds can enjoy the beauty of nature together.

13. Educating Yourself on Local Bird Species

Educating yourself on local bird species is one of the most rewarding steps you can take in your journey to create a bird paradise right in your backyard. Not only does this knowledge enhance your appreciation for the avian visitors, but it also allows you to tailor your environment to meet their specific needs. Start by researching the types of birds that are naturally found in your area; this could include common species such as cardinals, blue jays, and sparrows, or perhaps more exotic ones like orioles or hummingbirds, depending on your location.

Consider investing in a good field guide or downloading a bird identification app to help you recognize different species by their colors, shapes, and calls. Being able to identify the birds that frequent your backyard will enhance your birdwatching experience and enable you to provide the right food, nesting materials, and habitats for them. For instance, if you discover that your area is home to warblers, you might choose to plant native shrubs that provide the insects they need for nourishment.

Additionally, joining local birdwatching groups or online communities can be invaluable. These platforms offer a wealth of knowledge, from understanding seasonal migrations to learning about nesting habits and behaviors. Engaging with fellow bird enthusiasts can provide tips on attracting specific species and fostering a thriving ecosystem in your backyard.

Ultimately, becoming familiar with your local birds not only enriches your gardening efforts but also connects you more deeply with nature. As you watch these beautiful creatures flit from feeder to tree branch, you’ll find a sense of joy and fulfillment in knowing that your backyard has become a safe haven for them. Embrace the journey of learning, and you’ll be rewarded with countless moments of wonder right outside your window.

14. Keeping a Birdwatching Journal

Keeping a birdwatching journal is not just a delightful way to document your feathered visitors; it’s also an enriching practice that deepens your connection with nature. As you sit quietly in your backyard, the vibrant colors and unique behaviors of birds can inspire you to grab a notebook and pen. This journal becomes a personal record of your observations—detailing the species that visit, their feeding habits, and the times of day they are most active.

Imagine flipping through the pages and reminiscing about the bright flash of a ruby-throated hummingbird darting to your feeder or the majestic flight of a hawk soaring overhead. You can note the weather conditions, the plants in bloom, and even the sounds that accompany your sightings. Over time, you’ll start to recognize patterns, such as seasonal migrations or the arrival of specific birds at certain times of the year.

In addition to being a reflective practice, a birdwatching journal serves as an educational tool. You can include sketches or photographs of the birds you encounter, research interesting facts about them, and jot down notes on their behaviors. This not only enhances your knowledge but also enriches your experience as you become more attuned to the intricate lives of these creatures.

Furthermore, sharing your journal with family and friends can inspire others to take an interest in birdwatching and conservation. Consider inviting them to join you in this rewarding endeavor; together, you can create a community of bird enthusiasts, exchanging tips and stories over a cup of coffee in your backyard sanctuary. By keeping a birdwatching journal, you cultivate not just a record of your observations but a deeper appreciation for the lively ecosystem that thrives right outside your door.

15. Engaging with the Birdwatching Community

Engaging with the birdwatching community can elevate your backyard bird paradise from a simple hobby to a rich, shared experience. Connecting with fellow bird enthusiasts not only enhances your understanding of avian behavior but also opens the door to a wealth of knowledge, resources, and inspiration.

Start by joining local birdwatching clubs or online forums where you can share your experiences, exchange tips, and discuss the different species that visit your area. These communities are often full of seasoned birdwatchers who can provide valuable insights on attracting specific species or creating a more inviting habitat. For example, they might suggest the best types of feeders for attracting finches or the ideal water features for drawing in more songbirds.

Participating in organized birdwatching events, such as group outings or educational workshops, can also deepen your appreciation for these feathered visitors. Such gatherings are a fantastic opportunity to observe birds in the wild, learn from experienced birders, and even take part in citizen science initiatives, like bird counts or habitat restoration projects.

Sharing your backyard birdwatching journey on social media can further connect you with this vibrant community. Posting photos of your visits, sharing tips on your setup, or even live-streaming your backyard activity can inspire others while also inviting them to share their own experiences.

Ultimately, engaging with the birdwatching community enriches your backyard experience and fosters a collective passion for nature that can lead to lifelong friendships and shared adventures. So, get involved, share your story, and watch as your bird paradise flourishes, both in your backyard and within the community around you.

As we wrap up our exploration of transforming your backyard into a bird paradise, we hope you feel inspired to take action and create a vibrant sanctuary for our feathered friends. By implementing these 10 simple tips, you can cultivate an inviting environment that not only attracts a diverse array of birds but also enhances your outdoor space with the beauty and joy of nature. From selecting the right plants to providing ample food and water sources, each step contributes to a thriving ecosystem right in your own backyard. So grab your gardening gloves, hang those feeders, and get ready to enjoy the delightful sights and sounds of birds flocking to your transformed haven. Happy birdwatching!

How to build a simple bird feeder?

Transforming your backyard into a haven for local wildlife can be a rewarding and delightful experience, especially when you invite our feathered friends to visit.

Imagine the joy of watching vibrant birds flit about, chirping and singing as they enjoy the treats you’ve thoughtfully provided. In this blog post, we will guide you through the process of crafting a simple yet charming DIY bird feeder that not only adds a touch of creativity to your outdoor space but also promotes a deeper connection with nature. With just a few materials and some easy-to-follow steps, you can create a functional and stylish feeder that will attract a variety of birds right to your window. Whether you’re an experienced crafter or a beginner, this project is perfect for anyone looking to enhance their backyard experience while contributing to the well-being of local wildlife. So, gather your supplies and let’s embark on this delightful crafting adventure together!

1. Introduction: The Joy of Bird Watching

How to build a simple bird feeder?
Credit : whatcanu.com

Bird watching is more than just a pastime; it’s a delightful journey into the vibrant world of nature that can transform your backyard into a lively sanctuary. Imagine sipping your morning coffee while colorful songbirds flit about, their cheerful melodies filling the air. The gentle flutter of wings and the soft chirping create an enchanting atmosphere that invites calm and contemplation.

Creating a space where birds feel welcome not only enhances the beauty of your outdoor environment but also fosters a deeper connection with the natural world. Whether you’re a seasoned bird enthusiast or a curious beginner, the thrill of spotting a new species at your feeder is unmatched. From the spirited chirps of sparrows to the striking plumage of cardinals, each bird brings its own charm and character.

In this blog post, we’ll guide you through crafting a simple bird feeder that will invite these delightful creatures into your backyard. With just a few materials and a sprinkle of creativity, you can create a cozy dining spot for our feathered friends. Get ready to embrace the joy of bird watching and witness the magic of nature unfold right outside your window!

2. Benefits of Feeding Birds in Your Backyard

Feeding birds in your backyard offers a wealth of benefits that enrich not just the avian visitors but also your own outdoor experience. First and foremost, attracting birds brings a vibrant splash of life to your garden. The cheerful chirping and fluttering of wings create a joyful symphony that transforms your outdoor space into a lively sanctuary. Imagine sipping your morning coffee while observing colorful finches, majestic cardinals, or playful chickadees flit about, each adding their unique charm to your surroundings.

Beyond the aesthetic pleasure, feeding birds also plays a crucial role in supporting local ecosystems. During harsh weather conditions or when natural food sources are scarce, your bird feeder becomes a lifeline for these creatures. By providing a reliable food source, you contribute to their survival, helping to sustain populations of beneficial species that can aid in pest control and pollination in your garden.

Moreover, birdwatching can be a therapeutic and educational experience. It fosters a deeper connection with nature and encourages mindfulness as you observe the various species and their behaviors. Children and adults alike can learn about the different types of birds, their diets, and their habits, inspiring a greater appreciation for wildlife and the environment.

Lastly, feeding birds can also have a positive impact on your garden. Many birds are natural pest controllers, feasting on insects that might otherwise harm your plants. This can lead to a healthier and more robust garden ecosystem, allowing your flowers and vegetables to thrive without the heavy reliance on chemical pesticides.

In summary, the simple act of feeding birds not only beautifies your backyard but also supports local wildlife, enhances personal well-being, and promotes ecological balance. With each seed you scatter, you’re not just inviting feathered friends; you’re nurturing a vibrant, interconnected world right outside your door.

3. Materials Needed for Your DIY Bird Feeder

How to build a simple bird feeder?
Credit : whatcanu.com

Creating a DIY bird feeder is not only a rewarding project but also a wonderful way to invite nature into your backyard. To get started, you’ll need a few simple materials that are likely already lying around your home or are easily accessible at your local craft store.

**1. A Plastic Bottle:** A standard two-liter soda bottle works perfectly for this project. Its lightweight and durable design makes it an ideal choice for holding birdseed while allowing birds to perch comfortably. If you don’t have a soda bottle, any empty plastic container with a lid will suffice.

**2. Wooden Dowels or Sticks:** These will serve as perches for the birds. Look for dowels that are about ¼ inch in diameter and a foot long. If you don’t have dowels, sturdy twigs can work just as well.

**3. Birdseed:** Opt for a mix that attracts a variety of birds, such as sunflower seeds, millet, and safflower. You can also include nuts and dried fruit to appeal to different species.

**4. Drill or Scissors:** You’ll need a tool to make holes in the plastic bottle for the perches and for the birdseed to dispense. A drill with a small bit works best, but if you’re using scissors, be sure to exercise caution when cutting.

**5. String or Wire:** This will be used to hang your bird feeder. Choose a durable material that can withstand outdoor conditions. If you opt for string, make sure it’s thick enough to support the weight of the feeder.

**6. Paint or Markers (optional):** If you want to add a decorative touch, non-toxic paint or permanent markers can be used to personalize your feeder. Bright colors can attract birds while adding a whimsical flair to your yard.

Once you have gathered these materials, you’ll be well on your way to creating a charming and functional bird feeder that not only benefits local wildlife but also enhances your outdoor space with beauty and liveliness. Get ready to watch the birds flock to your backyard!

4. Step-by-Step Instructions to Build Your Bird Feeder

Creating a charming bird feeder for your backyard is a rewarding DIY project that not only enhances your outdoor space but also invites delightful feathered friends to visit. Follow these step-by-step instructions to craft a simple yet effective bird feeder that will attract a variety of birds all year round.

**Materials Needed:**
– A clean, empty plastic bottle (such as a 1-liter soda bottle)
– Two wooden dowels or sturdy sticks (about 6-8 inches long)
– Birdseed (your choice of seed mix)
– A small piece of wire or string for hanging
– A sharp knife or scissors
– A funnel (optional, but helpful for filling)

**Step 1: Prepare the Bottle**
Begin by thoroughly cleaning your plastic bottle to ensure it’s free of any residue. Once it’s dry, use your knife or scissors to carefully cut small holes on opposite sides of the bottle, about 2-3 inches from the bottom. These holes should be just large enough to fit the wooden dowels, which will serve as perches for the birds.

**Step 2: Insert the Perches**
Take your wooden dowels and insert them through the holes you just created. This will allow the birds to land comfortably as they enjoy the seeds. Ensure that the dowels are secure and protrude evenly from the sides of the bottle.

**Step 3: Create a Seed Dispenser**
Next, use your knife to make a few small holes towards the bottom of the bottle. These holes should be slightly larger than the birdseed, allowing it to flow out when the feeder is full. The downward slope of the bottle will help the seeds move towards these openings.

**Step 4: Fill the Feeder**
Using a funnel (or simply your hands), fill the bottle with your chosen birdseed. Avoid overfilling, as this may cause the seeds to clog the dispensing holes. Leave some space at the top to allow for easy refilling.

**Step 5: Attach the Hanging Mechanism**
To hang your bird feeder, take a piece of wire or string and create a loop around the neck of the bottle, securing it tightly. This will allow you to easily suspend your feeder from a tree branch or hook in your yard.

**Step 6: Find the Perfect Spot**
Now that your bird feeder is ready, it’s time to hang it up! Choose a visible location in your backyard, ideally near some shrubbery or trees, where birds can feel safe while feeding. Make sure it’s also within view from your favorite window, so you can enjoy the show.

**Step 7: Maintenance and Enjoyment**
Regularly check your bird feeder to refill the seeds and clean it when necessary. Keep an eye out for the various bird species that come to visit, and enjoy the peaceful atmosphere they bring to your backyard.

By following these simple steps, you’ll have a charming bird feeder that not only beautifies your outdoor space but also supports local wildlife. Get ready to embrace the joy of birdwatching right from your home!

5. Choosing the Right Location for Your Feeder

How to build a simple bird feeder?
Credit : whatcanu.com

Choosing the right location for your bird feeder is crucial to attracting a diverse range of feathered friends to your backyard. A well-placed feeder not only enhances your birdwatching experience but also ensures the safety and enjoyment of the birds visiting your garden. Here are some essential factors to consider when deciding where to hang your new creation.

First and foremost, think about visibility. Select a spot where you can easily view the feeder from a window or your patio. This will allow you to enjoy the delightful antics of your avian visitors up close. Ideally, position the feeder about 5 to 10 feet away from any structures, such as trees, fences, or buildings, to give birds enough space to feel safe while feeding. This distance helps prevent predators, like cats or hawks, from launching surprise attacks.

Light is another vital aspect to consider. Birds prefer feeders that are situated in a moderately sunny area, as sunlight provides warmth and visibility. However, avoid placing the feeder in full, blazing sunlight, as this can cause the seeds to spoil more quickly. A location with dappled sunlight or morning sun is often ideal, allowing birds to feed comfortably while keeping the seeds fresh.

Additionally, consider the surrounding environment. Ideally, your feeder should be located near natural cover, such as shrubs or bushes, which offer birds a quick getaway from potential threats. These hiding spots not only provide a sense of security but also serve as resting places for birds as they survey the area before approaching the feeder.

Lastly, think about accessibility for yourself. Choose a location that allows for easy refilling and cleaning of the feeder without too much hassle. A spot that’s easily reachable will encourage you to maintain the feeder regularly, ensuring it remains a welcoming haven for your backyard guests.

By thoughtfully considering these factors, you’ll create an inviting space that attracts an array of birds and transforms your backyard into a lively sanctuary filled with color and song. So gather your materials, hang that feeder, and get ready for the delightful show that nature has in store for you!

6. Different Types of Bird Feed to Use

When it comes to attracting a diverse array of feathered friends to your backyard, the type of bird feed you choose can make all the difference. Different birds have different dietary preferences, and offering a variety of feeds can draw in a colorful cast of characters to your new bird feeder. Here are some popular options to consider:

1. **Seed Mixes**: A standard birdseed mix is a great starting point. Look for blends that include sunflower seeds, millet, and cracked corn, which are favorites among many birds, including finches, sparrows, and cardinals.

2. **Sunflower Seeds**: These are a top choice for many backyard birds, especially larger species like chickadees and jays. Black oil sunflower seeds, in particular, are rich in fat and have thinner shells, making them easier for smaller birds to crack open.

3. **Nyjer (Thistle) Seeds**: These tiny seeds are a magnet for goldfinches and other small birds. Nyjer feeders are specifically designed for these seeds, featuring small holes that prevent the seeds from spilling out.

4. **Peanuts**: Unsalted, shelled peanuts are a high-protein option that attracts jays, woodpeckers, and nuthatches. You can scatter them on the ground or offer them in a platform feeder for easy access.

5. **Suet**: Suet cakes are a fantastic treat for insect-eating birds like woodpeckers and wrens. These high-energy snacks are typically made from animal fat mixed with seeds or nuts and can be hung in specialized suet feeders.

6. **Fruit**: Don’t forget about fresh fruit! Slices of apples, oranges, or berries can lure in fruit-loving birds such as orioles and mockingbirds. Simply skewer the fruit onto a branch or use a hanging feeder designed for this purpose.

7. **Mealworms**: If you want to attract bluebirds or wrens, consider offering dried mealworms. These protein-rich treats are especially appealing during nesting season when birds need extra energy for themselves and their chicks.

By diversifying the types of bird feed you offer, you not only increase the chances of spotting various species but also create a lively and entertaining atmosphere in your backyard. Remember, it’s not just about feeding the birds; it’s about creating a thriving ecosystem that you can enjoy throughout the seasons. So, stock up on these bird feed options, grab your DIY bird feeder, and get ready to welcome your new avian visitors!

7. Tips for Attracting a Variety of Bird Species

How to build a simple bird feeder?
Credit : whatcanu.com

Creating a welcoming environment for a diverse range of bird species can transform your backyard into a lively oasis of chirps and flutters. Here are some practical tips to attract various feathered friends to your newly crafted bird feeder.

**1. Choose the Right Feed:** Different bird species have distinct dietary preferences. For instance, finches enjoy nyjer (thistle) seeds, while woodpeckers favor suet. Consider offering a mix of seeds, including sunflower seeds, millet, and peanuts, to cater to a broader audience. A seed blend specifically designed for mixed birds can work wonders, ensuring that you appeal to a variety of species.

**2. Vary Your Feeders:** To attract different birds, use a combination of feeder types. Tube feeders are great for smaller birds, while platform feeders can accommodate larger species. Suet feeders are essential for attracting woodpeckers and other insectivores. By diversifying your feeders, you create an inviting buffet for your avian visitors.

**3. Add Water Sources:** Birds need water for drinking and bathing, making a birdbath an excellent addition to your backyard. Ensure it has clean, fresh water and consider adding pebbles or shallow stones for smaller birds to perch on. Changing the water regularly will not only keep it clean but also encourage birds to return frequently.

**4. Create a Safe Space:** Birds seek safety from predators, so providing shelter near your feeder is crucial. Planting native shrubs and trees can offer natural cover and nesting spots. The more natural the environment, the more likely birds will feel secure enough to visit your feeder.

**5. Keep Your Feeder Clean:** Regular maintenance of your feeder is essential for attracting birds. Clean it every couple of weeks to prevent mold and bacteria from building up. A clean feeder ensures that the food remains fresh and appealing, encouraging birds to return time and again.

**6. Be Patient and Observant:** Attracting a variety of birds takes time, so be patient. Keep an eye on your feeder and jot down any visitors you see. This not only enhances your birdwatching experience but also gives you insights into which species are drawn to your feeder, allowing you to tailor your offerings accordingly.

By implementing these tips, you’ll not only provide a nourishing sanctuary for your feathered friends but also create a delightful experience for yourself as you watch the vibrant dance of nature unfold in your backyard. Happy birdwatching!

8. Maintenance: Keeping Your Bird Feeder Clean and Functional

Maintenance is key to ensuring your bird feeder remains a welcoming oasis for our feathered friends. A clean feeder not only promotes the health and safety of the birds but also enhances your enjoyment of the birdwatching experience. Over time, leftover seeds, droppings, and debris can accumulate, creating an unsightly and potentially hazardous environment.

To keep your bird feeder in top shape, make it a habit to inspect it regularly—ideally once a week. First, empty any remaining seeds, and give the feeder a thorough cleaning. A mixture of warm water and mild soap works wonders; scrub the feeder with a soft brush to remove any mold or mildew that may have formed. Rinse it well to ensure no soap residue lingers, as this can be harmful to birds.

For wooden feeders, consider sealing them with a non-toxic wood preservative to protect against the elements, but remember to clean them often to prevent rot. Plastic feeders can usually withstand the elements, but sunlight can cause them to become brittle over time. If you notice any cracks or damage, it’s best to replace the feeder to ensure safety for the birds.

Additionally, consider the type of seed you’re using. Some seeds, especially those high in oil content, can spoil more quickly. Opt for seeds that are less likely to go rancid and consider rotating them frequently to keep them fresh.

Lastly, don’t forget to monitor the feeder’s placement. Ensure it’s positioned in a safe spot away from potential predators, yet close enough to provide shelter and visibility for your avian guests. By committing to routine maintenance and care, your backyard bird feeder can become a thriving hub of activity, attracting a variety of birds and bringing joy to your outdoor space for years to come.

9. Seasonal Considerations for Bird Feeding

When it comes to bird feeding, understanding the seasonal dynamics can greatly enhance your backyard experience. Each season presents unique challenges and opportunities for attracting various bird species, making it crucial to tailor your feeding strategies accordingly.

**Spring:** As winter fades and warmer weather approaches, birds become increasingly active, seeking food to fuel their nesting efforts. This is the ideal time to offer a variety of seeds, such as sunflower hearts and nyjer seeds, which are particularly appealing to finches and other small birds. Consider adding suet cakes to provide high-energy nutrition for birds like woodpeckers and chickadees. Additionally, make sure to keep your feeders clean and well-stocked to support the influx of feathered visitors.

**Summer:** In the heat of summer, birds require ample hydration alongside their food sources. Incorporating a shallow birdbath or a water feature near your feeder can attract birds looking for a refreshing drink or a place to cool off. During these months, opt for seed mixes that include millet and cracked corn, which are favorites among ground-feeding birds. You can also hang fruit, like orange halves or grape clusters, to entice summer residents like orioles and tanagers.

**Fall:** As the days begin to shorten and temperatures drop, many birds enter a phase of migration, while others prepare for winter. This is a crucial time to offer high-calorie foods, such as peanuts and sunflower seeds, to help them build up fat reserves. Be mindful of the types of feeders you use; tube feeders are ideal for smaller birds, while platform feeders can accommodate larger species that may be gathering for winter.

**Winter:** When the landscape becomes blanketed in snow, birds face increased challenges in finding food. Your backyard can become a vital refuge for many species during this harsh season. Fill your feeders with high-energy seeds, suet, and even kitchen scraps like unsalted peanuts and dried fruits. Consider adding a heated birdbath to your setup to provide a constant source of water, which can be scarce in freezing temperatures.

By adjusting your bird feeding practices to align with the seasons, you’ll not only create a welcoming haven for backyard birds but also enjoy the beauty and diversity of wildlife right outside your window. Remember, each season brings its own unique visitors, and with a little planning, you can ensure that your feathered friends have the nourishment they need all year round.

10. Enhancing Your Backyard Habitat for Birds

Creating a welcoming environment for birds in your backyard goes beyond just placing a feeder; it’s about enhancing the entire habitat to ensure that your feathered friends feel safe, nourished, and at home. Start by incorporating a variety of plants that provide natural food sources, such as berry-producing shrubs and nectar-rich flowers. Native plants are particularly beneficial, as they attract local bird species and support the ecosystem.

In addition to food sources, consider providing shelter. Dense shrubs and trees can offer birds protection from predators and harsh weather, while strategically placed birdhouses can give them a cozy place to nest. Different species have varying needs, so do a bit of research to ensure your birdhouses are tailored to attract your desired guests. For instance, wrens prefer smaller openings, while bluebirds need larger ones.

Water is another crucial element in enhancing your backyard habitat. A simple birdbath can be a game-changer, providing birds with a refreshing place to drink and bathe. Ensure the water is shallow enough for various species and change it regularly to keep it clean and inviting.

Finally, consider minimizing disturbances in your yard. Creating quiet zones where birds can feed and nest without interruption will encourage them to linger longer. By combining food, shelter, water, and a peaceful atmosphere, you’ll transform your backyard into a bustling avian paradise, attracting a delightful array of birds while offering them a safe haven. Your DIY bird feeder will serve as the centerpiece of this vibrant habitat, drawing in curious birds eager to partake in the feast you’ve prepared for them.

11. Creative Variations: Personalizing Your Bird Feeder

Once you’ve mastered the basics of bird feeder crafting, it’s time to unleash your creativity! Personalizing your bird feeder can transform a simple project into a unique centerpiece that reflects your style while attracting feathered friends to your backyard. Here are some engaging variations to consider:

**1. Colorful Paints:** Start by choosing a color palette that complements your backyard. Non-toxic, weather-resistant paints are perfect for this project. You can use stencils to create intricate designs or go for a whimsical look by splattering bright colors. Allow your artistic side to shine—after all, your bird feeder should be as vibrant as the birds it attracts!

**2. Decorative Elements:** Incorporate natural materials like twigs, pinecones, or dried flowers to give your feeder a rustic feel. You could also add beads or shells for a touch of coastal charm. Just be sure that any embellishments are securely attached and won’t pose a danger to visiting birds.

**3. Themed Feeders:** Consider designing your feeder around a specific theme. A beach-inspired feeder could feature seashells and sand-colored paints, while a woodland theme might include earthy tones and small branches. This thematic approach can add character to your garden and make your feeder a great conversation starter among visitors.

**4. Functional Additions:** Think about adding functional elements that enhance the feeder’s purpose. A small roof can provide shelter for birds during rain, while a perch can offer a comfortable resting spot. Additionally, creating compartments for different types of seeds can attract a wider variety of birds, making your backyard a bustling oasis.

**5. Seasonal Decor:** Keep things fresh by changing the decor with the seasons. In autumn, you might adorn your feeder with small gourds or leaves, while winter could see it wrapped in cozy burlap or twinkling lights. This not only keeps the aesthetic appealing but also allows you to engage with nature in different ways throughout the year.

Personalizing your bird feeder is not just about aesthetics; it’s a way to create a welcoming environment for local wildlife. By incorporating your personality into this project, you not only foster a love for nature but also cultivate a serene space where you can enjoy the beauty of birds as they flit and flutter in your backyard. So gather your supplies, let your imagination run wild, and prepare to delight in the joyful chorus of your new feathered friends!

12. Safety and Sustainability: Eco-Friendly Practices

When crafting a bird feeder for your backyard, it’s essential to prioritize safety and sustainability, ensuring that your project is not only enjoyable but also environmentally responsible. Begin by selecting materials that are safe for both birds and the environment. Opt for untreated wood, such as cedar or pine, as these natural materials are not only durable but also free of harmful chemicals that could leach into the birdseed.

Additionally, consider repurposing items you already have at home. Old plastic bottles, tin cans, and wooden pallets can be transformed into charming bird feeders, reducing waste and giving new life to items that might otherwise end up in a landfill. When using any recycled materials, make sure to clean them thoroughly to remove any residues that could be harmful to birds.

In terms of sustainability, it’s crucial to choose birdseed that is organic and free from pesticides. Look for blends that include seeds native to your region, as they not only attract local birds but also support their natural diets. Furthermore, be mindful of the feeder’s location; place it in a spot that’s safe from predators and easily accessible for birds, like near bushes or trees.

By implementing these eco-friendly practices, you can create a bird feeder that not only delights your feathered friends but also fosters a healthier environment. As you watch the birds flock to your garden, you’ll feel a sense of satisfaction knowing you’ve made a positive impact on your local ecosystem. Embrace the joy of DIY while being a responsible steward of nature!

13. Troubleshooting Common Issues with Bird Feeders

While crafting a bird feeder can be a delightful project, it’s not uncommon to encounter a few hiccups along the way. Understanding how to troubleshoot common issues can ensure that your feathered friends have a safe and welcoming dining experience in your backyard.

**1. Seed Spillage:** One of the most frequent problems is seeing seeds scattered on the ground rather than in the feeder. This can happen if the feeder’s opening is too large or if the perch is too short. To combat this, consider adjusting the feeder’s dimensions, or adding a shallow tray beneath the feeder to catch any fallen seeds. Additionally, using seeds that are less likely to scatter, such as sunflower seeds, can help keep the mess to a minimum.

**2. Ants and Pests:** If you notice unwanted visitors, such as ants or squirrels, raiding your feeder, it may be time to rethink your design. Ants can be deterred by using a baffle — a curved piece of material that prevents them from climbing up the pole. For squirrels, consider adding a squirrel-proof feeder or placing the feeder on a pole that is at least six feet tall and away from any nearby trees or fences.

**3. Birds Not Feeding:** It can be disheartening to see your beautiful feeder untouched. This could be due to several factors, such as poor seed choice, feeder placement, or even the type of birds in your area. Ensure you’re using fresh, high-quality seeds that attract local species, and place the feeder in a quiet, sheltered spot where birds feel safe from predators. You might also try offering a variety of seeds to entice different birds.

**4. Moldy Seeds:** If your feeder has been exposed to rain or high humidity, mold can quickly become a problem. This not only makes the seeds unappetizing for birds but can also be harmful to their health. Regularly clean your feeder with a mixture of vinegar and water, and ensure that it has proper drainage to allow for airflow and moisture escape.

By addressing these common issues, you can create a bird feeder that not only serves its purpose but also becomes a cherished centerpiece in your backyard, attracting a vibrant array of birds all year round. Remember, patience is key — with a little troubleshooting, you’ll soon be enjoying the sight and sounds of happy birds flocking to your feeder!

14. Encouraging Kids to Get Involved in Bird Watching

Encouraging kids to get involved in bird watching not only fosters a love for nature but also provides a wonderful opportunity for learning and bonding. As you embark on the delightful journey of bird feeder crafting, invite your little ones to join in the fun. Explain the importance of birds in our ecosystem and how feeding them can help sustain local wildlife, especially during tough seasons when food is scarce.

Start by transforming the backyard into a bird-watching haven. Equip your kids with binoculars, and let them decorate a designated bird-watching spot with colorful cushions and blankets. Set up a small notebook or a scrapbook where they can jot down their observations, sketch the birds they see, or even document the different species that visit the feeder. This activity not only sharpens their observational skills but also encourages creativity and curiosity about the natural world.

Make it a family event by organizing bird-watching sessions during quiet times of the day. Encourage your children to be patient and quiet, teaching them the art of stillness necessary for observing wildlife. You can even turn it into a friendly competition—whoever spots the most bird species in a week gets to pick the next craft project, or perhaps choose a special treat.

Additionally, you can enhance their experience by incorporating educational resources, such as bird identification guides or apps designed for young naturalists. This will give them the tools to recognize different species and learn about their habits and habitats, making each sighting more meaningful.

By involving kids in bird watching, you’re not just creating a fun pastime; you’re nurturing a sense of responsibility for nature and instilling an appreciation for the environment that can last a lifetime. With each chirp and flutter, you’ll be helping to cultivate future conservationists right in your own backyard.

15. Conclusion: Enjoying the Rewards of Your DIY Project

As you step back and admire your newly crafted bird feeder, a sense of accomplishment washes over you. This simple DIY project has not only beautified your backyard but also created a thriving hub of activity and joy. The thrill of seeing your feathered friends flit about, chirping and feeding, is a reward that far surpasses the time and effort you invested.

Each morning, as sunlight spills over your garden, you’ll witness the delightful ballet of birds visiting your feeder, bringing life and color to your outdoor space. Whether it’s the vivid flash of a cardinal, the gentle flutter of a chickadee, or the cheerful song of a blue jay, these moments offer a unique connection to nature and a reminder of the beauty that surrounds us.

Additionally, this project can spark curiosity and enthusiasm in your family and friends, encouraging them to join in the fun of birdwatching and DIY crafting. It’s a perfect opportunity to teach children the importance of nature conservation and mindfulness, as well as instilling in them a sense of pride as they observe the fruits of their labor.

In the end, the simple act of creating a bird feeder transforms your backyard into a vibrant ecosystem, fostering not just a haven for birds but also a sanctuary for your spirit. So grab your materials, unleash your creativity, and enjoy the countless rewards that come from your DIY endeavor. With every bird that visits, you’ll be reminded that sometimes the simplest projects yield the greatest joys.

We hope you found inspiration in our guide to crafting a simple bird feeder for your backyard. Not only is this DIY project a rewarding way to connect with nature, but it also provides a welcoming haven for our feathered friends. With just a few materials and a little creativity, you can transform your outdoor space into a lively sanctuary filled with the joyful songs and vibrant colors of birds. As you watch them flock to your creation, take a moment to appreciate the beauty of nature and the satisfaction of knowing you’ve made a difference. So gather your supplies, unleash your creativity, and enjoy the delightful experience of birdwatching from your own backyard! Happy crafting!

How to create a relaxing outdoor space?

Imagine stepping into your backyard and being instantly enveloped in a serene sanctuary, where the hustle and bustle of everyday life fades away, replaced by the soothing sounds of nature and the gentle caress of a warm breeze.

Transforming your outdoor space into a relaxing oasis is not just a dream; it can be your reality with the right guidance and a bit of creativity. In this step-by-step guide, we’ll explore how to turn your backyard into a tranquil retreat, perfect for unwinding after a long day or hosting intimate gatherings with friends and family. From selecting the ideal plants and furniture to creating cozy nooks and adding ambient lighting, we’ll cover everything you need to know to cultivate a peaceful environment that reflects your personal style. Get ready to ditch the chaos and embrace the calm as we embark on this journey to create your very own outdoor paradise!

1. Introduction: The Benefits of a Relaxing Outdoor Oasis

How to create a relaxing outdoor space?
Credit : whatcanu.com

In our fast-paced, technology-driven world, finding a serene escape within the comforts of our own homes has never been more essential. Transforming your backyard into a relaxing outdoor oasis offers a multitude of benefits that extend far beyond aesthetics; it cultivates a sanctuary for rejuvenation, relaxation, and connection with nature. Imagine stepping outside your door to be greeted by the gentle rustle of leaves, the sweet fragrance of blooming flowers, and the soothing sounds of water cascading from a fountain or pond.

Creating a personal retreat not only enhances your overall quality of life but also encourages you to spend more time outdoors, promoting physical health and well-being. Research has shown that exposure to nature can reduce stress levels, boost mood, and even improve cognitive function. Whether you’re sipping your morning coffee in a cozy nook or hosting evening gatherings under twinkling lights, your outdoor oasis can be a space for mindfulness and reflection, fostering a deeper connection with yourself and your loved ones.

Moreover, an inviting outdoor space can enhance your home’s value and appeal, making it a worthwhile investment. It serves as a versatile extension of your living area, perfect for entertaining guests, enjoying family time, or simply unwinding after a long day. In this guide, we will explore the various elements that contribute to a relaxing outdoor oasis, from the selection of plants and furniture to the incorporation of water features and ambient lighting. Let’s embark on this journey to transform your backyard into a peaceful retreat that you and your family can enjoy for years to come.

2. Assessing Your Backyard Space

Before diving into the exciting world of landscaping and décor, it’s essential to take a step back and thoroughly assess your backyard space. This crucial first step sets the foundation for your outdoor oasis, allowing you to visualize how best to transform the area into a serene retreat.

Start by observing the layout of your yard. Take note of its dimensions, shape, and any existing features, such as trees, shrubs, or pathways. Are there areas that receive ample sunlight, or are there shaded spots that could be perfect for lounging? Understanding these elements will help you determine where to place seating, gardens, or water features.

Next, consider the terrain. Is your yard flat, or does it have slopes and dips? Hills can provide a beautiful backdrop for a tiered garden or a cozy nook, while flat areas are often ideal for patios and fire pits. Don’t forget to check the soil quality as well; this is vital if you plan to incorporate plants or a vegetable garden into your design.

Take a moment to identify any existing limitations or challenges in your backyard. Are there drainage issues that need to be addressed? Are there unsightly fences or utility boxes that could detract from your oasis? Acknowledging these challenges upfront will allow you to develop creative solutions as you plan your outdoor haven.

Finally, think about your personal preferences and lifestyle. Do you envision a space for entertaining friends and family, or do you seek a quiet corner for meditation and reflection? Perhaps you want a vibrant garden filled with native plants or a minimalist area with sleek furniture. Sketch out a rough plan, jotting down ideas that resonate with you.

By taking the time to assess your backyard space thoughtfully, you’ll create a solid blueprint that reflects your vision and caters to your needs, setting the stage for a truly relaxing outdoor oasis.

3. Defining Your Vision: Style, Theme, and Purpose

How to create a relaxing outdoor space?
Credit : whatcanu.com

Before diving into the physical transformation of your backyard, it’s essential to take a step back and define your vision. This is the foundational step that will guide every decision you make, from plant selection to furniture placement. Consider what style resonates with you—do you envision a contemporary space with clean lines and minimalistic decor, or perhaps a cozy, rustic retreat adorned with natural materials?

Once you’ve settled on a style, think about the theme you want to incorporate. Themes can range from tropical paradise to Mediterranean escape, or even a serene Zen garden. Each theme brings its own unique charm and character, setting the tone for your outdoor oasis. You may want to draw inspiration from nature, travel experiences, or even your favorite vacation spot.

Next, consider the purpose of your outdoor space. Will it be a tranquil haven for relaxation and meditation, a lively area for entertaining family and friends, or a multifunctional space that accommodates both? Identifying the primary function you want your backyard to serve will help you choose the right elements that enhance its usability.

Write down your ideas, sketch out a rough layout, and gather images that inspire you. By clearly defining your vision, you’re not only setting a direction for your project but also ensuring that the final result is a harmonious blend of style, theme, and purpose—a true reflection of your personal sanctuary. This thoughtful planning phase is crucial to creating a backyard that you will love and enjoy for years to come.

4. Essential Elements of a Backyard Oasis

Creating a truly relaxing outdoor oasis requires more than just a collection of furniture and plants; it’s about cultivating an environment that promotes serenity and comfort. Here are the essential elements that will transform your backyard into a personal retreat.

**1. Comfortable Seating:** The cornerstone of any outdoor oasis is comfortable seating that invites you to unwind. Opt for plush lounge chairs, a cozy hammock, or a stylish outdoor sofa adorned with soft cushions. Consider incorporating varied seating options, such as a swinging bench or a fire pit surrounded by sturdy chairs, to accommodate different moods and gatherings.

**2. Lush Greenery:** Surround yourself with nature’s beauty by incorporating a mix of plants, trees, and flowers. Choose a variety of foliage to create layers and depth in your landscape design. Incorporating fragrant herbs, vibrant seasonal blooms, and evergreens can provide both visual interest and a soothing aroma. Don’t forget to include some vertical elements, such as trellises or hanging planters, to maximize space and create a sense of enclosure.

**3. Water Features:** The calming sound of gently flowing water can instantly elevate the tranquility of your backyard. Consider adding a small fountain, pond, or even a birdbath to attract wildlife and create a serene atmosphere. The sight and sound of water not only soothe the soul but can also mask unwanted noise from nearby streets or neighbors.

**4. Ambient Lighting:** As day fades into night, the right lighting can create a magical ambiance. Incorporate soft, warm lighting through string lights, lanterns, or solar-powered garden lights. Place lights strategically around pathways, seating areas, and plants to highlight features and ensure safety. A flickering candle or a stylish fire pit can also provide a cozy glow for evening gatherings.

**5. Personal Touches:** Finally, make the space your own with personal touches that reflect your style and interests. Add decorative elements such as outdoor rugs, artwork, or sculptures that resonate with you. Incorporate cozy throws or pillows to provide warmth during cooler evenings. Remember, this is your sanctuary, and it should be a reflection of who you are.

By thoughtfully integrating these essential elements into your backyard design, you’ll create a relaxing outdoor oasis that beckons you to unwind and enjoy the beauty of nature, right in your own home.

5. Step 1: Planning and Design

How to create a relaxing outdoor space?
Credit : whatcanu.com

Creating a relaxing outdoor oasis begins with thoughtful planning and design. This initial step is crucial, as it sets the foundation for your entire project. Start by envisioning how you want to use your backyard. Will it be a serene retreat for solo relaxation, a vibrant space for entertaining friends, or a family-friendly area for play and enjoyment? Take the time to jot down your ideas and prioritize your needs.

Next, evaluate your existing space. Consider the layout, the amount of sunlight different areas receive throughout the day, and any natural features you may want to highlight, such as trees, flower beds, or water elements. Sketch a rough layout of your yard, marking the locations of these features alongside potential areas for seating, pathways, and other elements like fire pits or outdoor kitchens.

Don’t forget to think about the ambiance you wish to create. Are you envisioning a lush garden filled with vibrant flowers and greenery, or a minimalist space with clean lines and modern furnishings? Consider the colors, textures, and materials that resonate with you.

Finally, set a budget. Determine how much you are willing to spend and allocate funds to different aspects of your project, such as landscaping, furniture, and decor. Having a clear budget will help keep your project on track and prevent overspending.

By dedicating time to this planning phase, you will ensure that your outdoor oasis not only meets your personal style but also caters to your lifestyle, creating a harmonious environment where you can unwind and rejuvenate. Once your plan is in place, you’ll be ready to dive into the exciting next steps of transforming your backyard into a personal paradise.

6. Step 2: Choosing the Right Plants and Landscaping

Choosing the right plants and landscaping is a crucial step in transforming your backyard into a serene outdoor oasis. The selection of flora can significantly influence the ambiance, functionality, and overall aesthetic of your space. Begin by considering the climate and soil type in your area, as these factors will determine which plants will thrive in your garden. Research native plants that not only require less maintenance but also provide a natural habitat for local wildlife. Incorporating a mix of perennials, annuals, and evergreens will ensure that your garden remains vibrant throughout the seasons.

Next, think about the layout. Create a harmonious balance between hardscaping—such as paths, patios, and decking—and softscaping, which includes your lush greenery and flowers. Use larger plants, such as ornamental grasses or shrubs, to create natural barriers or privacy screens. This adds depth to your space and makes it feel more secluded and intimate.

Consider adding flowering plants with varying bloom times to provide continuous color and fragrance throughout the year. Perennial flowers like lavender and coneflowers not only attract pollinators but also bring a delightful scent to your outdoor retreat. Don’t forget about the importance of texture; combining plants with different leaf shapes and sizes can create visual interest and a sense of lushness.

Additionally, think about the mood you want to create. If relaxation is your goal, opt for calming colors like soft greens, blues, and purples. Planting fragrant herbs such as rosemary or mint can also enhance the sensory experience of your oasis. For those who seek a more vibrant atmosphere, consider a mix of bold annuals and tropical plants to energize the space.

Lastly, pay attention to the layout of your plants. Arranging them in clusters rather than in straight lines can create a more natural feel. Use pathways and borders to guide the eye through the garden and encourage exploration. By thoughtfully choosing and arranging your plants, you’ll lay the foundation for a tranquil outdoor environment that invites you to unwind and connect with nature.

7. Step 3: Selecting Furniture and Decor

How to create a relaxing outdoor space?
Credit : whatcanu.com

Selecting furniture and decor is one of the most exciting steps in the process of transforming your backyard into a serene outdoor oasis. This is where your personal style truly shines and where comfort meets aesthetics. Start by considering the overall vibe you want to create. Are you aiming for a cozy, rustic retreat, a sleek modern space, or perhaps a tropical paradise? Your vision will guide your choices.

Begin with the essentials: seating. Look for weather-resistant materials like aluminum, teak, or synthetic wicker, which not only withstand the elements but also offer durability and comfort. Opt for plush cushions in colors and textures that harmonize with your garden’s palette. A well-placed hammock or a couple of vibrant bean bags can also add a casual, inviting touch that encourages relaxation.

Next, think about tables. A sturdy coffee table can serve as a gathering point for drinks and snacks, while a dining table will set the stage for al fresco meals with family and friends. Consider incorporating versatile options, such as nesting tables or an extendable dining table, to accommodate different occasions.

Once you have your basic furniture in place, it’s time to layer in decor that reflects your personality. Outdoor rugs can define spaces and add warmth, while string lights or lanterns can create an enchanting ambiance as the sun sets. Don’t overlook the power of greenery; potted plants or vertical gardens can bring life to your area and complement the natural beauty around you.

Finally, personal touches—a collection of your favorite outdoor candles, weather-resistant artwork, or even a fire pit—can make your backyard feel uniquely yours. Selecting the right furniture and decor not only enhances the visual appeal of your outdoor space but also lays the foundation for countless moments of relaxation and joy. So, take your time, explore various styles, and curate a space where you’ll love to unwind, entertain, and create lasting memories.

8. Step 4: Incorporating Water Features

### Step 4: Incorporating Water Features

Water features can truly transform your backyard into a serene oasis, adding both visual appeal and soothing sounds that promote relaxation. Whether you opt for a grand fountain, a tranquil pond, or a simple birdbath, the presence of water can create a calming atmosphere that invites you to unwind and connect with nature.

Begin by considering the size and scale of your outdoor space. A large pond can serve as a stunning focal point, providing a habitat for fish and aquatic plants, while smaller water features like tabletop fountains or wall-mounted cascades can fit snugly into tight corners or patios. Choose a style that complements your overall design theme—rustic stone fountains can evoke a natural feel, while sleek, modern water installations add a contemporary touch.

Once you’ve selected the type of water feature that suits your backyard, think about its placement. Position your feature where it can be easily viewed from your main sitting areas, such as your patio or deck. This ensures that you can enjoy the gentle sound of flowing water while sipping your morning coffee or lounging with a good book. Additionally, consider how the water feature interacts with existing landscaping. Surround it with lush greenery, colorful flowers, or smooth pebbles to create a harmonious scene that enhances your oasis.

Don’t forget about the maintenance aspect. While water features can be low-maintenance, regular cleaning and occasional checks on water levels and pumps will keep them functioning well. If you’re feeling adventurous, consider adding aquatic plants like water lilies or floating ferns, which not only beautify your pond but also contribute to a balanced ecosystem.

Lastly, enhance your water feature with lighting. Incorporating soft LED lights can create a magical ambiance in the evening, transforming your backyard into a captivating retreat after sunset. With the gentle glow reflecting off the water, you’ll create a peaceful environment perfect for evening gatherings or quiet moments of reflection.

By thoughtfully incorporating water features into your backyard design, you can elevate your outdoor space into a relaxing oasis that beckons you to escape the hustle and bustle of daily life.

9. Step 5: Lighting Ideas for Ambiance

Creating the perfect ambiance in your outdoor oasis hinges significantly on the right lighting. The right illumination can transform a simple backyard into a magical retreat, ideal for evening gatherings, quiet moments of reflection, or romantic dinners under the stars. Here are some enchanting lighting ideas to elevate the atmosphere in your transformed space.

**1. String Lights:** One of the most popular and effective ways to add a warm glow is through string lights. Drape them across your patio, wrap them around trees, or hang them from pergolas to create a whimsical feel. Choose soft white or warm yellow bulbs to cast a gentle light that promotes relaxation and conversation.

**2. Solar-Powered Path Lights:** Enhance the safety and aesthetics of your garden pathways with solar-powered lights. These eco-friendly options charge during the day and automatically illuminate at night, guiding your guests through your outdoor haven. Opt for designs that suit your style—whether sleek and modern or rustic and charming.

**3. Lanterns and Candles:** For a touch of romance, incorporate lanterns and candles into your design. Place them on tables, hang them from hooks, or set them along walkways to create flickering pools of light. Consider using flameless candles for a worry-free alternative that still provides the mesmerizing glow of real flames.

**4. Spotlighting Focal Points:** Highlight specific features of your backyard, like a beautifully shaped tree, a water feature, or a stunning piece of garden art, with strategically placed spotlights. This not only draws attention to these elements but also adds depth and drama to your outdoor space.

**5. Fire Pits:** A fire pit serves as both a source of warmth and light, providing a cozy gathering spot for family and friends. The soft flickering flames create an inviting atmosphere, perfect for roasting marshmallows or sharing stories long into the night.

**6. Under-Bench Lighting:** If you have seating areas in your backyard, consider adding under-bench lighting. This subtle touch not only improves visibility but also adds a layer of sophistication to your space, making it feel more like an outdoor lounge.

By thoughtfully incorporating these lighting ideas, you can create an inviting and serene ambiance that encourages relaxation and enjoyment in your outdoor oasis. Whether you’re hosting a lively barbecue or enjoying a quiet evening alone, the right lighting will enhance every moment spent in your transformed backyard.

10. Step 6: Creating Cozy Zones for Relaxation

Creating cozy zones for relaxation in your backyard is all about designing spaces that invite you to unwind and enjoy the tranquility of nature. Start by identifying different areas within your outdoor space that can serve unique purposes—think of a reading nook, a meditation corner, or a space for evening gatherings with friends.

Begin by choosing comfortable seating options that complement the style of your oasis. Plush outdoor cushions, hammocks, or even a swinging bench can create inviting spots for lounging. Consider using weather-resistant furniture that not only adds comfort but also ensures durability against the elements.

Once you have your seating figured out, enhance these zones with thoughtful decor. Layering rugs can define the area and add warmth, while soft throw blankets can invite snuggling on cooler evenings. Don’t forget about lighting! String lights, lanterns, or solar-powered garden lights can create a magical ambiance as the sun sets, allowing you to enjoy your outdoor haven well into the night.

Incorporating natural elements is key to creating a serene environment. Surround your cozy zones with fragrant plants or flowering shrubs to engage the senses. You can also add privacy with trellises, outdoor curtains, or strategically placed potted plants that help create a secluded retreat from the hustle and bustle of everyday life.

Finally, consider adding personal touches that reflect your personality—whether it’s a small fountain that provides soothing sounds, a fire pit for warmth and storytelling, or a selection of your favorite outdoor games. Each cozy zone should feel like a little escape, encouraging you to disconnect from the chaos and reconnect with yourself or loved ones. With these elements in place, your backyard will transform into a true outdoor oasis, beckoning you to relax and rejuvenate whenever you step outside.

11. Step 7: Adding Outdoor Accessories and Personal Touches

Once you’ve established the foundational elements of your backyard oasis, it’s time to infuse it with personality and charm through outdoor accessories and personal touches. These finishing details not only enhance the aesthetic appeal but also create a welcoming atmosphere that reflects your unique style.

Start by selecting a cohesive color palette that complements your existing landscape and furniture. Consider vibrant throw pillows, soft outdoor rugs, and colorful cushions that invite relaxation and comfort. These simple additions can transform a basic seating area into an inviting lounge where you can unwind with a good book or entertain friends.

Next, think about lighting options that will create a magical ambiance as the sun sets. String lights draped across pergolas or trees provide a whimsical glow, while lanterns and solar-powered garden lights add both practicality and beauty. Consider incorporating candles for a romantic touch, or opt for fire pits to create a cozy gathering spot on cooler evenings.

Incorporating greenery is also a fantastic way to enhance your outdoor space. Potted plants, hanging baskets, or even a vertical garden can bring life and color, while also improving air quality. Choose plants that thrive in your climate and require minimal upkeep, allowing you to enjoy your oasis without the stress of constant maintenance.

Don’t forget about personal touches that tell your story. Perhaps it’s a mosaic birdbath that showcases your artistic flair, or a collection of garden sculptures that spark conversation. Incorporate items like family heirlooms or travel souvenirs that evoke fond memories and make the space feel like home.

Lastly, consider adding functional accessories such as outdoor dining essentials, blankets for cooler nights, or even a small bar cart stocked with your favorite beverages. These practical additions ensure your outdoor oasis is not only visually appealing but also ready for entertaining and relaxation.

By thoughtfully selecting and arranging outdoor accessories and personal touches, you’ll create a serene retreat that beckons you to step outside and enjoy the beauty of your transformed backyard. Your oasis will become a cherished haven for relaxation, connection, and joy—an extension of your home that you and your loved ones can savor for years to come.

12. Step 8: Maintenance Tips for Your Oasis

Creating a relaxing outdoor oasis is just the beginning; maintaining its beauty and functionality is key to ensuring it remains a sanctuary for years to come. Regular upkeep not only preserves the aesthetic appeal of your space but also enhances its longevity and enjoyment. Here are some essential maintenance tips to keep your backyard retreat in top shape.

1. **Regular Cleaning**: Just like any indoor space, your outdoor oasis needs regular cleaning. Sweep away leaves and debris, wipe down outdoor furniture, and periodically wash cushions to prevent mold and mildew. Depending on your climate, you may need to do this weekly or bi-weekly to keep everything looking fresh.

2. **Pruning and Trimming**: Plants are the heart of your oasis, and maintaining them is crucial. Regularly prune shrubs and trees to encourage healthy growth and to prevent overgrowth that can detract from your space. This not only keeps your plants looking tidy but also allows for better air circulation and sunlight penetration.

3. **Seasonal Check-Ups**: The changing seasons bring different challenges. In the fall, clear out leaves and prepare your garden for winter. In the spring, inspect your plants for any winter damage and start replanting annuals or perennials. Summer maintenance might include regular watering schedules and checking for pests.

4. **Pest Control**: An outdoor oasis can attract unwanted guests. Keep an eye out for pests like aphids, spider mites, and snails. Utilize organic pest control methods or introduce beneficial insects like ladybugs to keep your plants healthy without compromising your ecosystem.

5. **Furniture Care**: Protect your outdoor furniture from the elements by applying weatherproofing treatments. Regularly check for any signs of wear and tear, and consider storing cushions and accessories indoors during harsh weather to extend their lifespan.

6. **Water Features**: If your oasis includes a fountain or pond, regular maintenance is key. Clean the water features to prevent algae buildup, and check the water level regularly to ensure it remains at optimal levels. This will keep your oasis not only visually appealing but also serene with the soothing sounds of flowing water.

7. **Color Updates**: Over time, colors may fade due to sun exposure. Consider refreshing the paint on any wooden structures or adding new accents through colorful planters or decorative elements. This can rejuvenate the overall look of your oasis and keep it inviting.

By incorporating these maintenance tips into your routine, you’ll ensure that your backyard oasis remains a tranquil escape from the hustle and bustle of everyday life. Consistent care not only enhances the beauty of your outdoor space but also makes it a welcoming retreat for friends, family, and yourself for years to come.

13. Budgeting for Your Backyard Transformation

When it comes to transforming your backyard into a relaxing outdoor oasis, budgeting is a crucial step that can make or break your project. Start by assessing your overall vision: what elements do you want to incorporate? Perhaps a tranquil water feature, lush landscaping, cozy seating areas, or a fire pit for evening gatherings? Having a clear concept will help you allocate your budget effectively.

Begin with a comprehensive list of all the elements you wish to include. This might encompass materials for landscaping, furniture, lighting, and any additional features, like outdoor cooking equipment. Once you have your wish list, research the costs associated with each item. Online marketplaces, local garden centers, and home improvement stores are great resources for price comparisons.

Don’t forget to factor in potential labor costs if you plan to hire professionals for installation or design. If you’re going the DIY route, budget for tools and equipment rentals that might be necessary to bring your vision to life.

It’s also wise to set aside a contingency fund—typically around 10-15% of your total budget—to handle unexpected expenses that may arise during the transformation process. This way, you won’t be caught off guard by surprises that could derail your plans or compromise the quality of your project.

Finally, keep in mind that creating a backyard oasis doesn’t have to happen all at once. You can break your project into phases, allowing you to spread out costs over time while still enjoying the transformation along the way. By carefully budgeting for your backyard transformation, you can ensure a beautiful and relaxing outdoor space that meets your needs without exceeding your financial limits.

14. Safety Considerations for Outdoor Spaces

Creating a relaxing outdoor oasis is an exciting endeavor, but it’s essential to prioritize safety to ensure that your tranquil retreat remains a worry-free haven. As you embark on this transformation, keep in mind several key safety considerations that will protect both your space and those who enjoy it.

First and foremost, assess the terrain of your backyard. Uneven ground can lead to trips and falls, so consider leveling out any bumpy areas and filling in holes to create a smooth surface. If you’re installing pathways or patios, opt for non-slip materials that provide stability, even when wet.

Next, pay attention to the placement of furniture and decor. Ensure that chairs, tables, and other elements are positioned thoughtfully to avoid overcrowding and to create clear pathways for movement. Additionally, if you have children or pets, opt for furnishings with rounded edges and avoid sharp corners that could pose a risk of injury.

Lighting is another critical aspect of safety. Adequate outdoor lighting not only enhances the ambiance of your oasis but also helps prevent accidents after dark. Illuminate pathways, seating areas, and any steps or elevations with a combination of ambient lights, spotlights, and solar-powered fixtures to ensure visibility and security.

Finally, consider the materials you use for building structures like decks, pergolas, or fences. Ensure that they are treated and maintained to withstand the elements and prevent deterioration. Regularly inspect your outdoor space for any hazards, such as loose boards, rusty nails, or unstable furniture.

By prioritizing these safety considerations, you can create an inviting outdoor oasis that serves as a peaceful escape while keeping everyone who enjoys it safe and sound. With a focus on both beauty and safety, your backyard can become a cherished retreat for relaxation and enjoyment.

15. Conclusion: Enjoying Your New Outdoor Sanctuary

As you step back to admire your newly transformed outdoor oasis, there’s an unmistakable sense of accomplishment that washes over you. This space, once merely an extension of your home, has evolved into a sanctuary where nature and comfort converge harmoniously. The vibrant colors of blooming flowers dance in the gentle breeze, while the sound of trickling water from your carefully placed fountain serenades you, inviting relaxation and peace.

Imagine sinking into your plush lounge chair with a good book in hand, enveloped by the soothing aromas of lavender and rosemary wafting from your herb garden. Perhaps you envision hosting intimate gatherings with friends and family around a cozy fire pit, sharing stories and laughter under a starlit sky. Your outdoor oasis is not just a place; it’s an experience—a retreat from the chaos of everyday life.

In this serene setting, you can indulge in mindfulness practices, such as yoga or meditation, rejuvenating your spirit while breathing in the fresh air. The subtle sounds of nature, from chirping birds to rustling leaves, create a tranquil backdrop that enhances your moments of reflection and relaxation.

As you settle into your new outdoor sanctuary, remember to embrace the changing seasons. Each season brings its own unique beauty and opportunities for enjoyment. In the summer, host barbecues and pool parties; in the fall, savor the crisp air while sipping warm cider by the fire; and in winter, decorate with twinkling lights to create a festive atmosphere.

Ultimately, your backyard transformation is more than just landscaping; it’s about crafting a space that resonates with your lifestyle and enhances your well-being. So take a deep breath, soak in the beauty around you, and enjoy every moment spent in your very own outdoor retreat. This is your haven—where relaxation meets nature—and it’s time to make the most of it.

As we wrap up our guide on transforming your backyard into a relaxing outdoor oasis, we hope you’re feeling inspired to embark on this rewarding journey. By following these step-by-step instructions, you can create a personal haven that not only enhances your home’s aesthetic but also provides a serene escape from the hustle and bustle of daily life. Whether it’s incorporating lush greenery, comfortable seating, or soothing water features, every detail you add will contribute to a tranquil atmosphere where you can unwind and recharge. So gather your tools, unleash your creativity, and let your backyard bloom into the peaceful retreat you’ve always dreamed of. We can’t wait to see the stunning transformations you achieve—share your progress and final results with us, and let’s celebrate the beauty of outdoor living together!

How to build a simple backyard fire pit?

Imagine a serene evening in your backyard, the sun gently setting and the air filled with the comforting crackle of a fire, as friends and family gather around to share stories and laughter.

A backyard fire pit not only enhances your outdoor space but also creates a warm and inviting atmosphere perfect for making cherished memories. However, building your own fire pit may seem daunting at first, but with the right guidance and a little creativity, it can be a rewarding DIY project that transforms your yard into a cozy retreat. In this ultimate guide, we will walk you through a step-by-step approach to designing and constructing your own fire pit, covering everything from selecting the perfect location and choosing materials, to safety tips and maintenance. Get ready to ignite your outdoor living experience and enjoy countless evenings under the stars with your very own fire pit!

1. Introduction: Why Build a Backyard Fire Pit?

How to build a simple backyard fire pit?
Credit : whatcanu.com

Imagine a crisp evening under a starlit sky, the soft crackle of burning wood mingling with laughter and conversation. A backyard fire pit transforms an ordinary outdoor space into an inviting haven, perfect for creating cherished memories with family and friends. But why should you consider building one? The reasons are as varied as the designs you can choose from, each offering a unique blend of functionality and aesthetic appeal.

First and foremost, a backyard fire pit serves as a focal point for gatherings, encouraging people to come together and enjoy each other’s company. whether you’re roasting marshmallows for s’mores, sharing stories, or simply enjoying the warmth of the flames, a fire pit fosters an atmosphere of relaxation and camaraderie. It extends the usability of your outdoor space, allowing you to enjoy your yard well into the cooler months.

Moreover, fire pits are not just for socializing; they can enhance your outdoor decor, adding a touch of charm and sophistication to your landscape. With countless styles and materials available, from rustic stone to sleek modern designs, you can create a fire pit that perfectly complements your home’s aesthetics.

Additionally, a fire pit can serve practical purposes beyond relaxation and beauty. It can provide warmth on chilly evenings, light for nighttime activities, and even an outdoor cooking option for those who love to experiment with grilling or cooking over an open flame.

Finally, building a fire pit can be a rewarding DIY project. It allows you to engage with your outdoor space creatively, learning new skills while investing time and effort into something that will bring joy for years to come. In the following sections, we’ll explore how to embark on this exciting journey, from choosing the right location to selecting materials and design. So grab your tools, and let’s get started on creating a centerpiece that will light up your backyard and your life!

2. Choosing the Right Location for Your Fire Pit

Choosing the right location for your fire pit is a crucial step that can make or break your outdoor experience. It’s not just about aesthetics; safety and functionality play significant roles in your decision-making process. Start by envisioning how you want to use your fire pit—will it be a cozy gathering spot for family and friends, a place for quiet reflection, or a focal point for outdoor entertaining? This vision will guide you in determining the most suitable location.

Begin your search at least 10 to 20 feet away from any structures, including your home, fences, and overhanging branches. This distance is important to prevent any fire hazards. Consider a flat, stable surface that is easily accessible, as you don’t want guests struggling to navigate uneven terrain in the dark. Ideally, a spot sheltered from the wind will enhance the comfort of your gathering while preventing smoke from blowing directly into guests’ faces.

Also, take into account the sun’s path. If you plan to use your fire pit during the day, a location with some natural shade will be beneficial. Conversely, if you envision evenings spent around the flames, a spot that captures the sunset can create a stunning backdrop for your gatherings.

Lastly, think about the views. Positioning your fire pit to overlook a scenic area in your yard, like a garden, pond, or even a distant landscape, can elevate the ambiance and make those evenings around the fire even more magical. By thoughtfully selecting the location, you’ll create a welcoming environment that invites you and your guests to relax and enjoy the warmth and glow of your backyard fire pit.

3. Understanding Local Regulations and Safety Guidelines

How to build a simple backyard fire pit?
Credit : whatcanu.com

Before you dive into the exciting project of building your own backyard fire pit, it’s crucial to understand the local regulations and safety guidelines that govern outdoor fires in your area. Different municipalities have varying rules regarding fire pits, including size restrictions, materials, and safety distances from structures and property lines. Ignoring these regulations can lead to hefty fines or, worse, unsafe situations that could endanger you and your neighbors.

Start by checking with your local government or fire department for any specific permits you might need. Some areas require permits for any open flame, while others may have designated fire seasons that restrict outdoor burning altogether. Additionally, familiarize yourself with guidelines on the types of materials you can use for your fire pit. Some regions may prohibit the use of certain materials due to fire hazards, while others may mandate specific construction methods to ensure safety.

Safety guidelines are equally important to consider. It’s vital to maintain a safe distance between your fire pit and any flammable structures, such as fences, trees, or your home. Generally, a clearance of at least 10 to 15 feet is recommended to prevent any accidental fires. Moreover, consider wind direction and how it might affect the smoke and heat produced by your fire.

Finally, equip yourself with essential fire safety tools. A fire extinguisher, a bucket of water, or a garden hose should always be readily available when enjoying your fire pit. By understanding and adhering to local regulations and safety guidelines, you not only ensure a delightful experience for yourself and your guests but also contribute to the safety and well-being of your community. With this groundwork laid, you can confidently move forward in creating a cozy and safe space to gather around the warm glow of your new backyard fire pit.

4. Selecting the Fire Pit Design that Fits Your Style

Choosing the right fire pit design is not just about functionality; it’s about creating a space that reflects your personal style and enhances the overall aesthetic of your backyard. As you embark on this exciting journey, consider the various design options available to you, each with its unique charm and character.

First, think about the materials you want to use. Do you envision a rustic stone fire pit that harmonizes with a natural landscape, or are you drawn to a sleek, modern steel design that makes a bold statement? Stone fire pits offer a timeless appeal, seamlessly blending into gardens and wooded areas, while metal fire pits can provide a contemporary touch that complements modern architecture.

Next, consider the shape and size of your fire pit. Round fire pits are traditional and create a cozy atmosphere, perfect for gathering around with friends and family. Square or rectangular designs, on the other hand, can add a more structured look to your outdoor space and may offer additional seating options. Think about how you’ll use the space—will it be for intimate gatherings or larger parties? This will help you determine the right dimensions.

Don’t forget to reflect on the surrounding elements of your yard. A fire pit surrounded by comfortable seating, such as adirondack chairs or a built-in stone bench, invites relaxation and conversation. You might also want to incorporate a surrounding patio area or decorative gravel for a polished finish. Adding features like built-in shelving for wood storage, or even a small bar area nearby, can enhance the functionality of your fire pit and make it the ultimate gathering spot.

Lastly, think about safety and local regulations. Make sure your design adheres to any guidelines regarding fire pit placement and construction materials in your area. This not only ensures compliance but also gives you peace of mind as you enjoy those warm evenings by the fire.

By taking the time to select a fire pit design that truly fits your style, you’ll create a stunning focal point in your backyard that invites warmth, connection, and unforgettable memories for years to come.

5. Essential Tools and Materials You’ll Need

How to build a simple backyard fire pit?
Credit : whatcanu.com

When embarking on the exciting journey of building your own backyard fire pit, having the right tools and materials is crucial to ensure a smooth and successful project. Let’s explore the essentials you’ll need to gather before you break ground.

**Tools:**

1. **Shovel:** A sturdy shovel is indispensable for digging out the area where your fire pit will reside. Opt for a flat-bladed shovel for easy excavation of dirt and grass.

2. **Level:** Maintaining a level surface is key to a stable fire pit. A standard bubble level or a long level will help you ensure that your pit is perfectly balanced.

3. **Trowel:** For finer work, like smoothing out the edges of your fire pit, a trowel is a great tool to have on hand. It’s particularly useful if you’re working with stones or bricks.

4. **Rubber Mallet:** If you’re using pavers or stones, a rubber mallet will help you fit them together tightly without risking damage.

5. **Measuring Tape:** Accurate measurements are essential for a well-proportioned fire pit. A measuring tape will help you determine the right dimensions and spacing.

6. **Safety Gear:** Don’t forget your gloves, goggles, and a dust mask. Safety should always be your top priority when working with heavy materials and tools.

**Materials:**

1. **Fire Pit Ring:** You can choose a metal fire pit ring or create a stone or brick enclosure. Metal rings are durable and provide a sleek, modern look, while stone and brick can give a rustic, traditional feel.

2. **Bricks or Pavers:** If you’re building a stone fire pit, gather fire-rated bricks or pavers specifically designed for high temperatures. This will not only enhance safety but also add aesthetic appeal to your backyard.

3. **Gravel:** A layer of gravel at the bottom of your fire pit aids in drainage, preventing water from pooling and keeping your fire pit dry.

4. **Sand:** A layer of sand can also be used beneath your fire pit to provide stability and help with drainage.

5. **Firewood:** Of course, you’ll need a good supply of seasoned firewood to keep those flames roaring. Choose hardwoods like oak or maple for a longer burn and less smoke.

6. **Fire Starter:** Whether you prefer kindling, fire starters, or lighter fluid, make sure to have a reliable method for igniting your fire pit.

By gathering these essential tools and materials, you’ll be well on your way to creating a beautiful and functional fire pit that can serve as the perfect gathering spot for family and friends. With everything in hand, you’ll be ready to dive into the next steps of your backyard transformation!

6. Preparing the Ground: Clearing and Leveling the Site

Before you can enjoy the warmth and ambiance of your backyard fire pit, you’ll need to start with a solid foundation. Preparing the ground is a crucial step that lays the groundwork—quite literally—for the success of your fire pit project.

Begin by selecting the perfect location for your fire pit, ideally situated away from overhanging branches, structures, and any flammable materials. Once you’ve decided on the spot, it’s time to clear the area. Remove any grass, weeds, and debris, including rocks and sticks. This not only creates a clean slate but also prevents unwanted vegetation from creeping into your fire pit area as time goes on.

After clearing the site, the next task is leveling the ground. An uneven surface can lead to instability, which can be dangerous when you’re dealing with fire. Use a shovel to dig down any high spots and fill in any low areas with soil or gravel, ensuring the surface is as flat as possible. For added precision, you might consider using a level or a long board to check the evenness of the ground.

If your fire pit will feature a stone or brick surround, it’s important to create a base that can support the weight. You might want to pack down the earth or lay down a layer of sand or gravel for drainage and stability. Compacting the ground will provide a sturdy foundation that will help prevent shifting or sinking over time, ensuring that your fire pit remains both functional and aesthetically pleasing.

Taking the time to properly prepare the ground will pay off immensely when you finally gather around the fire with friends and family. A well-prepared site not only enhances safety but also contributes to the overall enjoyment of your backyard oasis, making your fire pit a welcoming and inviting space for years to come.

7. Building the Fire Pit Base: Materials and Techniques

How to build a simple backyard fire pit?
Credit : whatcanu.com

Creating a sturdy base for your fire pit is one of the most critical steps in ensuring its longevity and safety. The foundation not only supports the fire pit structure but also plays a significant role in preventing unwanted fires and preserving the surrounding landscape. Here’s a closer look at the materials you’ll need and the techniques to master this essential phase of your fire pit project.

### Materials:
1. **Gravel**: A layer of gravel provides excellent drainage, preventing water from pooling around the base of the fire pit. Aim for a depth of about 4-6 inches, ensuring that the gravel is evenly distributed.
2. **Sand**: After laying down the gravel, a layer of sand—approximately 1 inch thick—creates a smooth and level surface for the fire pit. Sand also helps with heat retention and reduces the risk of cracking in the fire pit materials.
3. **Fireproof Bricks or Stones**: Choose durable, heat-resistant materials like fire bricks, pavers, or natural stones that can withstand high temperatures. These will form the perimeter of your fire pit and should be arranged tightly to prevent any gaps.
4. **Steel or Cast Iron Ring**: For added safety and longevity, consider using a steel or cast iron fire ring. This will help maintain the shape of your pit and protect the surrounding materials from the intense heat.

### Techniques:
1. **Site Preparation**: Start by marking the area where your fire pit will sit. Dig out the designated space, ensuring it’s roughly 2-3 feet in diameter and deep enough to accommodate the gravel and sand layers.
2. **Layering**: Begin with the gravel, spreading it evenly and compacting it down to create a solid base. Next, add the sand layer, using a rake or board to ensure it’s level. This preparation will help prevent any shifting or settling over time.
3. **Arranging the Fire Pit**: Once your base is set, begin placing your chosen fireproof bricks or stones in a circular pattern. Use a level to ensure that the top of each brick is even, making adjustments as necessary. If you’re using a fire ring, set it in place at this stage.
4. **Finishing Touches**: After your fire pit walls are complete, backfill around the outside with dirt or gravel to secure the structure further. This additional layer will help with stabilization while enhancing the overall aesthetics of your backyard.

By taking the time to build a strong, well-prepared base, you’re not just constructing a fire pit; you’re creating a safe and inviting gathering space for family and friends to enjoy for years to come. Remember, a well-built fire pit base is the foundation of countless memorable evenings spent under the stars.

8. Constructing the Fire Pit Walls: Stone, Brick, or Metal?

When it comes to constructing the fire pit walls, one of the most crucial decisions you’ll make is selecting the right material. Each option—stone, brick, or metal—offers unique benefits and aesthetic appeal, allowing you to customize your fire pit to perfectly suit your backyard design.

**Stone:** Natural stone is a popular choice for fire pit walls, bringing an organic beauty that blends seamlessly with outdoor environments. Whether you opt for rugged fieldstone or sleek granite, the variations in color and texture can create a stunning visual effect. Stone is also incredibly durable, resisting the heat and elements over time. The installation process may require more effort, as you’ll need to fit the stones together securely, but the result is a rustic, timeless look that enhances your backyard’s charm.

**Brick:** If you’re looking for a classic, structured appearance, brick might be your best bet. Available in a myriad of colors and finishes, bricks can be arranged in various patterns, allowing for creative designs. They are easy to work with and can be stacked without the need for mortar, making construction straightforward for DIY enthusiasts. However, be sure to select fire-rated bricks specifically designed to withstand high heat, ensuring that your fire pit maintains its integrity over time.

**Metal:** For a modern, sleek aesthetic, consider using metal as your fire pit material. Steel or cast iron options not only provide a contemporary look but are also lightweight, making them easier to move if needed. Metal fire pits often come in pre-fabricated styles, simplifying installation. However, keep in mind that metal can heat up quickly and may require additional safety measures to prevent burns. It’s also essential to choose rust-resistant materials to ensure longevity, particularly if your fire pit will be exposed to the elements.

Ultimately, the choice between stone, brick, or metal will depend on your personal style, budget, and the overall theme of your backyard. Take the time to think about how each material will look and function in your space, and you’ll be well on your way to constructing a fire pit that becomes the heart of your outdoor gatherings.

9. Installing a Fire Pit Ring and Ventilation

Installing a fire pit ring and ensuring proper ventilation are crucial steps in creating a safe and enjoyable backyard fire pit experience. The fire pit ring acts as a barrier, containing the flames and protecting the surrounding area from heat and sparks. To start, choose a fire pit ring that suits your design aesthetic and is made from fire-resistant materials such as steel, stone, or brick. Measure the diameter of your fire pit to ensure a perfect fit—typically, a diameter of 36 to 44 inches works well for most backyard setups.

Once you’ve selected your fire pit ring, it’s time to prepare the base. Dig out the area where your fire pit will sit, making sure to remove any grass, rocks, or debris. The depth should be about 6 inches to accommodate a gravel base, which will aid in drainage and stability. Fill the hole with gravel, leveling it out to create a solid foundation for your fire pit ring.

With the base established, carefully position the fire pit ring in the center of the gravel area. Use a level to ensure it sits evenly, adjusting as needed. If you’re using bricks or stones, lay them out in a circular pattern, making sure to leave gaps for ventilation. Proper airflow is essential for maintaining a healthy fire, so consider including vents or gaps between the stones to allow oxygen to circulate.

While installing the fire pit ring, think about the height and design. A lower ring creates a more intimate atmosphere, while a taller one can help contain a larger fire. Once the ring is in place, backfill any gaps with additional gravel or sand to secure it further.

After the installation, take a moment to assess the ventilation. Ensure that there are enough openings to promote airflow without compromising the safety of the fire pit. This will help prevent smoke from billowing into your yard and allow for a more enjoyable experience for you and your guests.

With your fire pit ring securely installed and ventilation properly accounted for, you are one step closer to enjoying cozy evenings around your backyard fire pit. Remember to always prioritize safety by keeping a water source nearby and never leaving the fire unattended.

10. Choosing the Right Fuel: Wood, Gas, or Propane?

When it comes to selecting the right fuel for your backyard fire pit, understanding the pros and cons of wood, gas, and propane is essential to creating the perfect ambiance for your outdoor gatherings. Each fuel type offers a unique experience, and your choice will influence not only the warmth and light of your fire but also the ease of use and maintenance.

**Wood**: The classic choice for a fire pit, wood delivers a charming, rustic atmosphere that many homeowners crave. The crackling of burning logs and the dance of the flames create a mesmerizing backdrop for any evening. However, wood fires require more effort. You’ll need to source, store, and handle the wood, and the smoke produced can be a nuisance, especially for neighbors. If you go this route, consider using seasoned hardwoods like oak or maple, which burn hotter and cleaner than softwoods.

**Gas**: If you’re seeking convenience and consistency, a gas fire pit may be the best option. Propane or natural gas provides an instant flame with just the turn of a knob, allowing you to enjoy a fire at a moment’s notice. Gas fire pits are generally cleaner, producing little to no smoke, and they require less cleanup compared to wood-burning options. However, they may lack the rustic charm and crackle of a traditional fire. Additionally, you’ll need to ensure proper installation and safety measures, particularly with natural gas, which requires a direct line from your home.

**Propane**: A subset of gas fire pits, propane offers mobility and flexibility. Portable propane fire pits can be a great option for those who want to keep their outdoor space versatile. They can easily be moved for picnics or camping trips and don’t require a permanent installation. However, keep in mind that you’ll need to regularly refill your propane tank, which can lead to added costs and inconvenience over time.

Ultimately, the right fuel for your fire pit depends on your lifestyle, preferences, and the kind of experience you want to create in your backyard. Whether you choose the traditional allure of wood, the convenience of gas, or the flexibility of propane, each option will help set the stage for cozy evenings spent around the fire with family and friends.

11. Adding Safety Features: Fire Pit Screens and Surrounds

When it comes to enjoying your backyard fire pit, safety should always be a top priority. While the enchanting glow of flickering flames can create a cozy atmosphere, it’s essential to implement certain safety features to ensure a worry-free experience for you and your guests. Two effective additions to your fire pit setup are fire pit screens and surrounds, which not only enhance safety but also add an aesthetic touch to your outdoor space.

**Fire Pit Screens**
A fire pit screen is a mesh cover that fits over your fire pit, designed to contain sparks and embers that can unexpectedly pop out during a roaring fire. These screens are typically made from durable materials like steel or wrought iron, and they come in various styles and sizes to match your fire pit and overall backyard decor. When the flames dance within the confines of a sturdy screen, you can enjoy the warmth and ambiance without the concern of stray sparks causing harm to nearby guests or flammable materials. Many screens also feature a hinged design, allowing for easy access when adding logs or adjusting the fire, making them both a practical and stylish addition to your setup.

**Surrounds**
In addition to screens, a well-defined fire pit surround is another effective safety feature. Fire pit surrounds can be made from a variety of materials, including stone, brick, or heat-resistant paving stones, and they serve a dual purpose: enhancing safety and defining the area of your fire pit. By creating a barrier around the fire pit, you reduce the risk of accidental contact with the flames while also providing a clear boundary that helps keep children and pets at a safe distance. Additionally, a beautifully crafted surround can elevate the visual appeal of your fire pit, turning it into a focal point of your backyard. Consider incorporating seating around the surround to create an inviting gathering space where friends and family can sit comfortably while enjoying the warmth and glow of the fire.

By integrating fire pit screens and surrounds into your backyard setup, you can create a safer, more enjoyable environment for all. These features not only protect against potential hazards but also enhance the overall ambiance, allowing you to make the most of your outdoor evenings around the fire. Remember, a little preparation goes a long way when it comes to safety and enjoyment, so take the time to invest in these essential features as you create your ideal backyard retreat.

12. Designing the Surrounding Area: Seating and Landscaping Ideas

Creating a cozy and inviting atmosphere around your backyard fire pit is essential for maximizing your outdoor enjoyment. The right design can transform your fire pit into the focal point of your garden, making it a perfect spot for gatherings, relaxation, or simply enjoying a quiet evening under the stars. Here are some seating and landscaping ideas to enhance the area around your fire pit.

**Seating Options:** Start by considering the seating arrangements that will best suit your space and lifestyle. Comfortable seating is key to encouraging guests to linger around the fire. You can opt for built-in benches made from stone or wood, which can provide a rustic charm while seamlessly integrating with the natural surroundings. Alternatively, consider using a mix of lounge chairs, hammocks, or even oversized poufs for a more casual vibe. For added comfort, incorporate weather-resistant cushions in colors that complement your landscape design, ensuring your seating is as inviting as it is functional.

**Landscaping Ideas:** Surrounding your fire pit with beautiful landscaping can elevate the overall aesthetic of your backyard. Incorporate native plants and flowers that thrive in your climate, creating a vibrant tapestry of colors and textures. Low-maintenance options like ornamental grasses or perennials can provide year-round interest without the hassle of constant upkeep. If space allows, consider adding a few outdoor lanterns or string lights overhead to create a magical ambiance during evening gatherings. Additionally, using natural stone or gravel paths leading to your fire pit can help define the area while providing a rustic, organic feel.

**Creating Intimacy:** To foster a sense of intimacy around your fire pit, think about how to position your seating. Arranging chairs in a circular or semi-circular formation encourages conversation and connection among guests. You might also incorporate a small table or a firewood holder in the center, serving as a functional piece that brings the group together. If you have room, consider adding a small outdoor bar cart or a side table for snacks and drinks, making it easy for guests to help themselves.

By thoughtfully designing the surrounding area of your fire pit with comfortable seating and lush landscaping, you can create a welcoming outdoor retreat that invites friends and family to gather and enjoy warm evenings together. Whether it’s a summer soirée or a chilly autumn night, your backyard fire pit will be the perfect spot for unforgettable memories.

13. Maintenance Tips for Your Fire Pit

Maintaining your fire pit is crucial for ensuring its longevity and functionality, as well as for maximizing your enjoyment during those cozy outdoor evenings. While the thrill of gathering around the flames is often the highlight, a little TLC goes a long way in preserving the beauty and safety of your fire pit.

First and foremost, regular cleaning is essential. After each use, allow the fire pit to cool completely before removing any ash or debris. Use a sturdy metal scoop or a vacuum designed for ash to make this task easier. A clean fire pit not only looks better but also promotes better airflow, which leads to a more efficient burn in future fires.

Next, inspect your fire pit regularly for any signs of wear or damage. Look for cracks, rust, or loose components, especially if your fire pit is made of metal or stone. Addressing these issues promptly can prevent more significant repairs down the line. If you notice rust forming, consider applying a high-heat paint or sealant specifically designed for fire pit materials to restore its protective layer.

If your fire pit features a stone or brick structure, consider resealing it annually to protect against weather elements. This not only enhances its appearance but also protects against water damage and stains. Similarly, if your fire pit has a gas line, ensure that all connections are tight and check for leaks periodically, using a solution of soap and water to look for bubbles that indicate escaping gas.

Lastly, when the fire pit is not in use, consider covering it with a durable, weather-resistant cover. This will shield it from rain, snow, and debris, keeping it clean and ready for your next gathering. Proper maintenance not only enhances safety but also ensures that your backyard fire pit remains a cherished centerpiece for years to come, ready to create warmth and memories for you and your loved ones.

14. Enjoying Your Fire Pit: Tips for Safe Use and Fun Gatherings

Once you’ve built your backyard fire pit, it’s time to enjoy the warmth and ambiance it brings to your outdoor space. However, safety and enjoyment should go hand in hand. Here are some essential tips to ensure your fire pit gatherings are both fun and safe.

**Safety First: Setting the Stage**
Before inviting friends and family over for a cozy evening by the fire, take a moment to assess your surroundings. Clear the area of any flammable materials, such as dry leaves, overhanging branches, or garden furniture that could catch fire. Ensure your fire pit is a safe distance from your home, fences, and any structures. Always keep a bucket of water, sand, or a fire extinguisher nearby—just in case the flames get a little too lively.

**Choosing the Right Fuel**
Select the proper fuel for your fire pit to maintain control over the flames. Natural wood is a popular choice, providing a traditional campfire experience, but ensure it’s seasoned and dry to reduce excessive smoke. Alternatively, you can opt for propane or natural gas, which offer a cleaner burn and more controlled flames. Whichever fuel you choose, familiarize yourself with its burning characteristics to enjoy a safe and comfortable fire.

**Creating a Cozy Atmosphere**
To elevate your fire pit experience, set the mood with comfortable seating and soft lighting. Arrange chairs or benches around the fire pit, ensuring everyone has a clear view of the flames. Consider incorporating outdoor pillows and blankets for added comfort, especially on cooler evenings. String lights or lanterns can create a magical ambiance, illuminating the area without overpowering the fire’s glow.

**S’mores and Snacks: Fire Pit Favorites**
No fire pit gathering is complete without delicious snacks! Prepare classic s’mores with graham crackers, marshmallows, and chocolate for a sweet treat. You can also explore other fire pit-friendly foods like roasted corn, hot dogs, or even pizza cooked on a grill grate. Encourage guests to bring their favorite snacks, turning your gathering into a fun culinary adventure.

**Engaging Activities**
While the crackling fire provides a natural centerpiece, keep the energy flowing with engaging activities. Share stories, play acoustic music, or organize fun games like charades or card games. Encourage guests to bring their musical instruments for a lively sing-along under the stars. The key is to foster a sense of community and connection around the fire, making memories that will last long after the flames have died down.

By following these tips for safe use and enjoyable gatherings, your backyard fire pit can become the heart of your outdoor space—a place where laughter, warmth, and friendship come together. So gather your loved ones, ignite the fire, and create unforgettable moments around your newly built fire pit!

15. Conclusion: Your Backyard Oasis Awaits!

As you stand back and admire your newly constructed backyard fire pit, it’s hard not to feel a sense of accomplishment and excitement. You’ve transformed a simple patch of grass into an inviting oasis, a gathering place for friends and family to share stories, laughter, and warmth. The flickering flames dance in the night, casting a soft glow that beckons everyone to come closer, while the crackling of the fire creates a soothing soundtrack that eases the mind and spirit.

Remember, the journey doesn’t end here. Your fire pit is just the beginning of countless evenings filled with cozy conversations, marshmallow roasting, and starlit nights. As you plan your gatherings, consider adding comfortable seating, ambient lighting, and perhaps even a few cozy blankets to enhance the experience. Personal touches, like outdoor cushions or decorative lanterns, can further elevate your backyard space, making it uniquely yours.

Moreover, don’t forget to prioritize safety! Keep a fire extinguisher nearby, ensure proper ventilation, and be mindful of local regulations regarding outdoor fires. Taking these precautions will allow you to fully enjoy your fire pit without worry.

So go ahead, gather your loved ones around the flames, and let the stories unfold. With your fire pit as the centerpiece, your backyard has become a sanctuary, a place to unwind and connect. Your backyard oasis awaits—embrace it, enjoy it, and let it inspire memories that will last a lifetime. Happy fireside gatherings!

As we wrap up our ultimate guide to building your own backyard fire pit, we hope you feel inspired and equipped to create a cozy gathering spot right in your outdoor space. By following our step-by-step approach, from planning and design to construction and safety considerations, you can transform your backyard into a welcoming retreat where friends and family can come together to share stories and enjoy the warmth of a crackling fire. Remember, the journey doesn’t end once the fire pit is built; it’s just the beginning of countless memorable evenings under the stars. So grab your tools, gather your loved ones, and embark on this exciting project — your perfect backyard oasis awaits!

How Can I Make My Backyard Safe for My Dog?

Transforming your backyard into a dog-friendly haven is not only a rewarding task but also a crucial step in ensuring the safety and happiness of your furry companion.

With wagging tails and playful barks, our dogs thrive in environments where they can explore, play, and unwind. However, creating a space that is both enjoyable and secure requires careful planning and consideration. From selecting the right plants to establishing safe play zones, there are many aspects to consider in order to keep your pet safe while they bask in the sun or chase after their favorite toys. In this blog post, we’ll explore essential tips for designing a backyard that caters to your dog’s instincts, ensuring they have a safe and stimulating environment to enjoy. Join us as we dive into the essentials of creating a backyard paradise that your four-legged friend will love!

1. Understanding Your Dog’s Needs

How Can I Make My Backyard Safe for My Dog?
Credit : whatcanu.com

Creating a dog-friendly backyard begins with a deep understanding of your furry friend’s needs. Each dog is unique, with different breeds, sizes, and temperaments that influence their behavior and preferences. Start by observing your dog’s habits—do they love to dig, chase after squirrels, or lounge in the sun? Recognizing these natural instincts will help you tailor your outdoor space to suit their lifestyle.

Consider your dog’s energy level as well. High-energy breeds like Border Collies or Jack Russell Terriers thrive in spaces that allow for ample running and play. Incorporate open areas where they can sprint freely or set up agility equipment to keep them mentally stimulated. On the other hand, calmer breeds may enjoy a cozy, shaded corner with soft grass for lounging and basking in the warmth.

Safety is also paramount in understanding your dog’s needs. Evaluate the potential hazards in your yard, such as toxic plants, sharp objects, or gaps in fencing that could allow for escape. Make sure your plants are non-toxic and remove any chemical fertilizers or pesticides that could harm your pet. Additionally, a secure fence will provide a sense of safety, allowing your dog to explore their space without the risk of wandering off.

Lastly, don’t forget about comfort! Providing a dedicated space for your dog—complete with a cozy dog bed, water bowl, and toys—will create an inviting atmosphere. By considering your dog’s physical, emotional, and safety needs, you can transform your backyard into a haven where they can thrive and find joy in every moment spent outdoors.

2. Assessing Your Backyard Space

Creating a dog-friendly haven begins with a thorough assessment of your backyard space. A safe, engaging environment is crucial for your furry friend, and understanding the layout and features of your outdoor area will help you identify what modifications or enhancements are needed to ensure their happiness and safety.

Start by examining the boundaries of your yard. Are there any gaps in the fencing that could allow a curious pup to escape? Look for any loose boards or areas where the ground may be uneven, as these can pose tripping hazards or potential hiding spots for mischievous escape artists. A secure, well-maintained fence is the first line of defense in keeping your dog safe while they enjoy their outdoor space.

Next, take stock of the landscape itself. Are there any toxic plants or flowers that could harm your pet if ingested? common culprits include azaleas, lilies, and certain types of ivy, so it’s wise to familiarize yourself with the plants in your yard and remove any that could pose a risk. Additionally, consider the ground cover—turf, mulch, or gravel can affect your dog’s comfort and play experience. Soft grass is generally the most inviting surface for running and rolling, while gravel can be tough on their paws.

Evaluate the availability of shade and shelter in your backyard. Dogs, especially those with thick coats, can easily overheat in direct sunlight. Ensure there are shaded areas where they can escape the sun’s rays, whether from trees, a patio, or a doghouse. If your yard lacks natural shade, consider erecting a canopy or constructing a simple shaded area where your dog can relax comfortably.

Finally, think about the overall layout of your backyard and how it can be optimized for play and exploration. Designate specific zones for different activities—like a space for fetch, a digging area, or a cozy corner for lounging. Adding dog-friendly features like agility equipment, a kiddie pool for splashing, or even a sandbox can provide mental stimulation and keep your dog engaged while they explore their outdoor haven.

By carefully assessing your backyard space and making thoughtful adjustments, you can create a safe and enjoyable environment for your dog to play, relax, and thrive. With the right setup, your backyard can become a beloved retreat for your furry friend, offering endless opportunities for fun and adventure.

3. Choosing Safe Plants and Landscaping

How Can I Make My Backyard Safe for My Dog?
Credit : whatcanu.com

When transforming your backyard into a dog-friendly haven, one of the most crucial aspects to consider is your choice of plants and landscaping. While vibrant flowers and lush greenery can enhance the beauty of your outdoor space, it’s vital to ensure that the flora you select is safe for your furry companions.

Start by conducting thorough research on the plants you wish to introduce. Many common garden plants, such as lilies, azaleas, and sago palms, are toxic to dogs and can lead to serious health issues if ingested. Instead, opt for dog-friendly alternatives like sunflowers, marigolds, or snapdragons, which add color and vibrancy without posing a risk to your pet’s well-being.

In addition to plant selection, consider the landscaping features of your yard. If you’re planning to incorporate mulch, be cautious with cocoa mulch, which contains theobromine—an ingredient toxic to dogs. Instead, choose bark or cedar mulch, which are safe and provide a pleasant aroma.

When designing pathways or play areas, think about the materials you use. Avoid sharp stones or gravel that could injure your dog’s paws. Instead, consider softer options like grass, rubber mats, or sand, which provide comfort and cushioning for their playful antics.

Lastly, be mindful of any chemicals you might use in your garden. Fertilizers and pesticides can be harmful to dogs, so look for pet-safe alternatives. By creating a safe and inviting landscape with thoughtful plant choices and materials, you’ll ensure your backyard remains a peaceful retreat where your pup can roam freely and happily. With a little planning and care, you can cultivate a beautiful outdoor space that nurtures both your garden and your beloved pet.

4. Fencing Options for Secure Boundaries

When it comes to creating a dog-friendly haven, secure boundaries are paramount, and choosing the right fencing is a crucial step in ensuring your pup’s safety. A well-fenced yard not only provides your dog with the freedom to roam and play but also keeps them safe from potential dangers lurking outside your property.

There are several fencing options to consider, each with its own benefits and suitability depending on your dog’s size, temperament, and play style.

**1. Wooden Fences:** Classic and sturdy, wooden fences offer a natural look that complements any garden while providing reliable security. Opt for a height of at least six feet to deter jumpers, and ensure there are no gaps at the bottom where a curious pup might squeeze through.

**2. Chain-Link Fences:** These fences are durable, cost-effective, and allow for visibility, which can be comforting for both you and your dog. Consider adding a privacy slat to block out distractions that might entice your dog to bark or jump.

**3. Vinyl Fences:** If you’re looking for a low-maintenance option, vinyl fences are an excellent choice. They are weather-resistant and come in various styles, offering the same security as wood without the need for regular upkeep.

**4. Invisible Fencing:** For those who prefer a less obtrusive option, invisible fencing can create a boundary without a physical barrier. While it requires training to ensure your dog understands the limits, it can be a viable solution for larger areas.

**5. Pool Fencing:** If your backyard features a pool, installing a separate pool fence is essential. Look for a gate that automatically closes and latches, providing an extra layer of security to keep your furry friend safe from water hazards.

When choosing a fencing option, consider your dog’s behavior and needs. For example, if you have a high-energy breed, a taller fence may be necessary to prevent them from leaping over. Regularly inspect your fencing for any wear and tear, and ensure that gates are securely latched after each use. By investing in the right fence, you create a safe and inviting space for your dog to enjoy the great outdoors, giving you peace of mind and your furry friend a sense of freedom.

5. Designing a Comfortable Dog Area

How Can I Make My Backyard Safe for My Dog?
Credit : whatcanu.com

Designing a comfortable dog area in your backyard is crucial for creating a space where your furry friend can relax, play, and feel secure. Start by choosing a location that is both shaded and sheltered, protecting your dog from harsh sunlight and inclement weather. Consider installing a cozy dog house or a stylish outdoor bed equipped with soft, washable bedding, giving your pup a personal retreat to escape to when they need a break from the action.

Next, think about incorporating elements that encourage play and exercise. A designated play zone with durable toys, like chew-resistant balls or tug ropes, can provide endless entertainment. If space allows, consider adding agility equipment, such as tunnels or jumps, to stimulate your dog’s mind and body. This not only helps keep them physically fit but also strengthens the bond between you and your pet as you engage in fun activities together.

Comfort is key, so ensure your dog area has a soft surface, such as artificial turf or rubber matting, to cushion their paws and joints while they romp around. Avoid using gravel or rough stones that can irritate their sensitive paws. Hydration is essential, too—install a shaded water station to keep your dog refreshed during playtime.

Finally, think about the overall aesthetics of your dog area. Use non-toxic plants and landscaping elements to create a visually appealing environment that complements your home. By designing a comfortable dog area that prioritizes safety and enjoyment, you’re not only enhancing your dog’s outdoor experience but also creating a welcoming haven where they can thrive.

6. Ensuring Shade and Water Access

Creating a dog-friendly haven in your backyard means prioritizing your furry friend’s comfort and well-being, especially when it comes to providing adequate shade and water access. As temperatures rise, dogs are particularly vulnerable to overheating, so it’s essential to offer shaded areas where they can retreat from the sun’s harsh rays. Consider planting trees or installing a sturdy gazebo that not only enhances your backyard’s aesthetics but also provides a cool refuge for your pooch.

Moreover, utilizing outdoor furniture, such as umbrellas or large shade sails, can create additional shaded spots where your dog can lounge comfortably. Keep in mind the layout of your yard; positioning these areas thoughtfully can ensure your pet has easy access to shelter while enjoying the fresh air.

Equally important is ensuring that your dog has constant access to fresh water. Install a durable, non-tip water bowl in a shaded area to prevent the water from heating up too quickly. For those particularly warm days, you might consider getting a pet water fountain, which not only keeps the water cool and flowing but also encourages your dog to drink more often, helping to prevent dehydration.

Regularly check and refill the water supply, especially during playtime or after long walks, to keep your dog hydrated and happy. By ensuring ample shade and water access, you create a safe and inviting atmosphere that allows your dog to enjoy your backyard all summer long.

7. Avoiding Common Hazards in Your Backyard

How Can I Make My Backyard Safe for My Dog?
Credit : whatcanu.com

Creating a safe and inviting backyard for your furry friend requires vigilance and a keen eye for potential hazards that could pose risks to their health and well-being. Everyday elements that might seem innocuous to us can be dangerous for dogs, so it’s essential to assess your outdoor space thoroughly.

Start by examining your fence and gates. Ensure that they are tall enough and properly secured to prevent any daring escape attempts. Dogs are notorious for their curiosity and may try to squeeze through gaps or dig under fences if they sense something interesting on the other side. Regularly inspect these barriers for any wear and tear, and address any issues immediately.

Next, consider the types of plants and flowers you have in your backyard. While you may enjoy a beautiful garden, some plants can be toxic to dogs if ingested. Common culprits include azaleas, lilies, and sago palms. Make sure to research any new plants before adding them to your landscape and, if possible, opt for dog-safe varieties like sunflowers or marigolds.

Another often-overlooked hazard is standing water. Puddles, ponds, or birdbaths can be breeding grounds for mosquitoes and other pests, potentially exposing your dog to harmful diseases. Ensure that any water features are well-maintained and consider covering them or using natural deterrents to keep them clean and safe.

Additionally, take stock of your gardening supplies. Fertilizers, pesticides, and herbicides can contain harmful chemicals that are dangerous if ingested or absorbed through the skin. Store these products securely away from your pet’s reach and consider using organic alternatives that are less harmful to both your dog and the environment.

Finally, remember to keep your backyard tidy. Loose items, such as tools, cords, and small debris, can become tripping hazards or chew toys for an inquisitive pup. Regularly cleaning up and organizing your space not only makes it more enjoyable for both you and your dog but also significantly reduces the risk of accidents.

By taking these precautions and creating a safe environment, you can ensure that your backyard is a true haven for your dog—a place where they can explore, play, and relax without worry!

8. Creating Engaging Play Zones

Creating engaging play zones in your backyard is essential for keeping your dog happy, active, and mentally stimulated. Dogs are social creatures that thrive on interaction, and a thoughtfully designed play area can provide them with a safe haven to explore, play, and bond with you and other pets.

Start by designating specific zones for different activities. A spacious area with soft grass or artificial turf can serve as the main play zone where your dog can frolic freely. Consider using colorful agility equipment, such as tunnels, jumps, and weave poles, to encourage fitness and coordination. These structures not only promote physical activity but also offer your dog exciting challenges to overcome, stimulating their mind in the process.

Incorporating sensory elements can elevate the play experience. Think about adding a digging pit filled with sand or soil where your pup can indulge their natural digging instincts. You might also include a water feature, such as a small splash pool or a dog-friendly fountain, to keep your furry friend cool and entertained during warmer months.

Don’t underestimate the power of toys! Providing a variety of toys, from chew toys to fetch balls, will keep your dog engaged and prevent boredom. Rotating these toys every few weeks can reignite your dog’s interest and make playtime feel fresh and exciting.

Lastly, ensure that the environment is safe and secure. Check the area for any hazardous plants, sharp objects, or potential escape routes. Installing a sturdy fence will keep your dog contained while allowing them to explore their paradise. By creating engaging play zones in your backyard, you’ll not only enhance your dog’s quality of life but also strengthen the bond you share through play and adventure.

9. Incorporating Chew-Proof Furniture

Creating a dog-friendly haven in your backyard means considering every aspect of your outdoor space, including the furniture. Incorporating chew-proof furniture is a savvy way to safeguard your investment while also ensuring that your furry friend has the freedom to explore and enjoy their surroundings without causing damage.

When selecting furniture, opt for materials known for their durability and resistance to chewing. High-density polyethylene, stainless steel, and treated wood are excellent choices that can withstand the playful antics of even the most determined pups. Look for items specifically designed for pet owners, such as chew-proof cushions covered in tough, waterproof fabrics that resist tearing and staining.

Additionally, consider the height and design of your furniture. Low-slung benches and tables can provide a cozy spot for your dog to lounge without the risk of jumping or climbing onto delicate pieces. If you love the look of wicker or rattan, be cautious; while stylish, these materials can be particularly susceptible to enthusiastic chewing.

Incorporating chew-proof furniture not only protects your belongings but also adds to the overall aesthetic of your yard. Choose colors and styles that complement your garden, creating a cohesive look that you can enjoy just as much as your dog. With the right furniture in place, your backyard can be a true sanctuary for both you and your canine companion—one where you can relax together, knowing that everything is safe and sound.

10. Setting Up a Designated Bathroom Area

Setting up a designated bathroom area in your backyard is an essential step in creating a dog-friendly haven. Not only does this help keep your outdoor space tidy, but it also provides your furry friend with a consistent spot to relieve themselves. Choosing the right location for this area is crucial; look for a spot that is easily accessible and away from high-traffic zones where your dog often plays.

To create this space, consider laying down some gravel or mulch to define the area and make it comfortable for your dog. These materials are not only easy on their paws but also facilitate drainage, keeping the area cleaner and reducing odors. You can even plant some dog-friendly grasses or herbs around the perimeter, like rosemary or thyme, which can help mask any unwanted smells and provide a pleasant aroma in the air.

Additionally, establishing a routine by taking your dog to this designated area at the same times each day can help them understand that this is their bathroom spot. Praise and reward them each time they use it correctly to reinforce positive behavior.

Don’t forget to keep this area clean by regularly picking up after your pet and refreshing the substrate as needed to maintain hygiene. By creating a well-defined bathroom area, you’ll not only maintain a clean backyard but also contribute to your dog’s overall well-being, making your home a more enjoyable and inviting space for everyone.

11. Installing Safe and Fun Obstacles

Creating a dog-friendly haven in your backyard goes beyond just having a spacious area for your furry friend to roam. One of the most exciting ways to enhance their outdoor experience is by installing safe and fun obstacles. These additions not only provide physical exercise but also stimulate your dog’s mind, helping to keep them happy and engaged.

Start by considering your dog’s size, breed, and energy level when choosing obstacles. For smaller breeds, lightweight agility tunnels, low jumps, and weave poles can offer a fun challenge without overwhelming them. Larger dogs, on the other hand, might enjoy more robust equipment, such as sturdy climbing structures or A-frames that allow them to channel their energy in a productive way.

Safety should always be your top priority when designing an obstacle course. Make sure all materials are non-toxic and free from sharp edges. Opt for soft, durable materials that can withstand the rigors of enthusiastic play, such as rubber or treated wood. Additionally, ensure the ground is well-maintained, using grass or soft turf to cushion any falls.

Incorporating a variety of obstacles can also promote different types of play. Consider adding a splash pad or kiddie pool for hot days, a sandbox for digging, or even a balance beam to challenge their coordination. You can also create a scent trail using treats or toys to encourage them to explore and engage with their environment.

Finally, remember to change things up from time to time. Dogs, like people, can get bored with the same routine. By rotating obstacles or introducing new challenges, you keep their playtime fresh and exciting. With a little creativity and attention to safety, your backyard can become a beloved playground that your dog will enjoy for years to come.

12. Introducing Safe Toys for Outdoor Play

When it comes to creating a dog-friendly haven in your backyard, introducing safe toys for outdoor play is a crucial step that can elevate both your pet’s enjoyment and safety. Dogs are naturally curious and energetic, and providing them with engaging toys not only helps keep them entertained but also stimulates their minds and promotes healthy physical activity.

Opt for durable, non-toxic toys specifically designed for outdoor use. Look for materials that can withstand the elements, such as sturdy rubber or high-quality fabrics that resist fading from UV rays. Avoid toys with small parts that can easily break off or chewable elements that could pose choking hazards. Instead, consider sturdy options like frisbees, tug ropes, and balls designed for heavy chewing. These toys not only provide hours of fun but also help strengthen your dog’s jaw muscles and improve dental health.

Interactive toys, such as those that dispense treats or require problem-solving, can also enhance outdoor playtime. These toys challenge your dog mentally and can prevent boredom, which is essential for their overall well-being. Set up play areas with different toys to keep things fresh and exciting. Rotating toys regularly can also maintain your dog’s interest and engagement, making outdoor play a new adventure each time.

Don’t forget about the importance of supervision during outdoor play sessions. Always keep an eye on your dog while they’re playing with toys to ensure they’re safe and not chewing on anything they shouldn’t. Encourage playtime by joining in on the fun—play fetch, tug-of-war, or simply explore your yard together. This not only strengthens your bond but also allows you to monitor the condition of the toys and replace them if necessary.

By thoughtfully introducing safe toys for outdoor play, you create a vibrant and stimulating environment for your dog, making your backyard a true haven for joy and exploration. Your furry friend will thank you with wagging tails and playful antics, knowing they have a special space to enjoy their time outdoors.

13. Maintaining Your Dog-Friendly Space

Maintaining your dog-friendly space is crucial for ensuring it remains a safe, enjoyable haven for your furry friend. A well-kept yard not only enhances your dog’s playtime experience but also promotes their health and well-being. Begin by regularly inspecting the area for any potential hazards. This means checking for sharp objects, toxic plants, or any debris that could pose a risk to your pet. It’s a good idea to establish a routine inspection schedule—weekly or bi-weekly—to keep your backyard in top shape.

Next, focus on the grass and landscaping. Regular mowing is essential to prevent your dog from hiding ticks or fleas in the tall grass. If your yard has any shrubs or flowers, consider researching which plants are safe for dogs and removing any that could be toxic if ingested. Additionally, consider setting aside a designated area for your dog to dig or explore; this not only keeps them engaged but also minimizes damage to your landscaping.

Cleaning up after your dog is another vital aspect of maintenance. Not only is it important for hygiene, but it also prevents the spread of pests and diseases. Designate a specific area for waste and ensure you have the necessary cleaning supplies on hand. If possible, make it a habit to pick up waste immediately after your dog does their business.

Lastly, consider seasonal maintenance. In the spring, prepare your yard for the warm months by checking fences for any damage that might have occurred over the winter. In the fall, rake up leaves that can harbor mold or pests. During the winter, ensure your dog has a safe path to access the yard, free from ice or snow hazards.

By staying proactive about maintaining your dog-friendly space, you can create a safe, inviting environment that your dog will love to explore and enjoy for years to come.

14. Regularly Checking for Potential Risks

Creating a dog-friendly haven in your backyard requires vigilance and a proactive approach to safety. One of the most crucial steps in maintaining a safe environment for your furry friends is to regularly check for potential risks. This means making it a habit to walk through your yard at least once a week, inspecting it for any new hazards that could pose a threat to your dog’s well-being.

Start by examining the fencing around your yard. Look for any gaps or loose boards that could allow your dog to escape or stray into dangerous territory. Even small openings can be an invitation for curious pups, so ensure that your barriers are secure and intact.

Next, keep an eye out for toxic plants. While many plants may seem harmless, some can be highly toxic to dogs. Familiarize yourself with common garden plants that are dangerous, such as azaleas, lilies, and sago palms, and remove any that could pose a risk.

Don’t forget to check for harmful objects that may have found their way into your yard. This includes sharp tools, old garden stakes, or broken glass. These items can easily injure an unsuspecting dog that is exploring or playing in the yard. Consider performing a thorough clean-up of any debris or clutter that could lead to accidents.

Additionally, be mindful of chemicals, such as fertilizers, pesticides, or herbicides. Ensure that any products you use are pet-safe, and store them securely out of reach. Even residues left on the ground can be harmful, so water the area or cover it with grass or mulch once it has dried.

Lastly, assess the play areas. If you have a dog house or play equipment, check for wear and tear. Rusty nails, splintered wood, or sharp edges can turn a fun play session into a painful experience. Regular maintenance can help keep your dog’s playtime both enjoyable and safe.

By routinely checking for potential risks and addressing them promptly, you can create a serene and secure outdoor space where your dog can thrive. Remember, a little prevention goes a long way in ensuring that your backyard remains a happy haven for your four-legged family members.

15. Tips for Supervision and Socialization in the Backyard

Creating a dog-friendly haven in your backyard goes beyond just the physical space; it also involves ensuring your furry friends are well-supervised and properly socialized while they enjoy their outdoor playground. Supervision is paramount, especially if you have a curious pup who loves to explore. Always keep an eye on your dog, whether by staying in the yard with them or using a secure, enclosed space where they can roam freely without the risk of escaping. Consider setting up a comfortable seating area or a shaded spot where you can relax while keeping a watchful eye on your four-legged companion.

Socialization is equally crucial for your dog’s development and happiness. Introduce your pup to other dogs in a controlled environment, ensuring that they possess compatible temperaments and play styles. Organize playdates or invite friends over with their pets to create a friendly atmosphere where dogs can interact and learn appropriate behaviors. Use positive reinforcement to encourage good manners during these encounters, rewarding your dog for calm behavior and polite greetings.

Incorporating interactive elements into your backyard can also enhance socialization opportunities. Install a dog-friendly agility course or set up fun toys like tug ropes and fetch items to promote playtime and cooperative activities. If space permits, a dog-friendly sandbox can provide a stimulating environment for digging and exploring, which many dogs find enjoyable.

Remember to vary your activities to keep things fresh and exciting. Schedule regular backyard play sessions, allowing your dog to express their natural instincts while building confidence and social skills. By prioritizing supervision and creating opportunities for socialization, you’ll not only ensure your backyard is a safe haven but also a vibrant, engaging space where your dog can thrive.

In conclusion, transforming your backyard into a dog-friendly haven is not just about aesthetics; it’s about creating a safe and enriching environment for your furry friend to thrive. By implementing the essential tips we’ve discussed—from securing fences and removing toxic plants to providing engaging play areas and cozy resting spots—you can ensure that your dog enjoys the great outdoors while staying safe and happy. Remember, a well-designed space fosters not only physical activity but also strengthens the bond between you and your pet. So, roll up your sleeves and start making these changes today! Your pup will thank you with wagging tails and joyful barks, and you’ll create countless cherished memories together in your very own dog paradise.