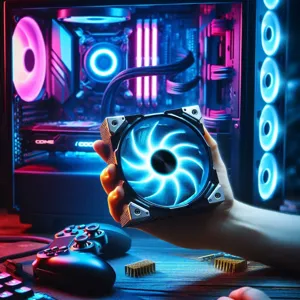
As gaming technology advances and graphics become increasingly demanding, keeping your PC cool has never been more crucial.
Overheating can lead to decreased performance, hardware damage, and ultimately, a frustrating gaming experience. Whether you’re a casual gamer or a competitive eSports enthusiast, ensuring your rig operates at optimal temperatures is essential for enjoying those intense gaming sessions without interruption. In this comprehensive guide, we’ll explore the various cooling solutions available, from traditional air coolers to advanced liquid cooling systems, helping you make an informed choice that suits your gaming setup. We’ll delve into the benefits and drawbacks of each option, provide tips for installation and maintenance, and share insights on how to monitor your PC’s temperature effectively. Get ready to cool your game and enhance your performance—your ultimate gaming experience awaits!
1. Understanding the Importance of PC Cooling
When it comes to building or upgrading your PC, understanding the importance of cooling is crucial to ensuring optimal performance and longevity. just like a high-performance car needs a well-functioning radiator to prevent overheating, your computer requires an efficient cooling solution to manage the heat generated by its components. As processors and graphics cards become increasingly powerful, they also produce more heat during operation. Without adequate cooling, this heat can lead to thermal throttling, which reduces performance, or worse, permanent damage to your hardware.
Heat is an enemy to your PC’s health. It can accelerate wear and tear on vital components like the CPU, GPU, and power supply, ultimately shortening their lifespan. Moreover, excessive heat can cause system instability, leading to unexpected crashes, corrupted files, and lost work. A well-cooled system not only maintains peak performance but also enhances the overall user experience.
Moreover, an effective cooling strategy extends beyond just the immediate components. It contributes to a more comfortable environment, especially for gamers and professionals who spend long hours at their machines. A cooler PC runs quieter too, as overheating components often lead to increased fan speeds and noise. Therefore, investing time and resources into understanding your cooling needs is not just about maintaining system performance; it’s about creating a reliable, efficient, and enjoyable computing experience.
In this guide, we will explore various cooling solutions, their benefits, and how to choose the right one for your specific setup. Whether you’re a casual user, a gamer, or a content creator, understanding the importance of PC cooling is the first step in optimizing your machine for peak performance.
2. Common Signs Your PC Needs Better Cooling
Recognizing when your PC is in desperate need of better cooling is crucial for maintaining its performance and longevity. There are several telltale signs that indicate your system is struggling to keep its temperature in check.
One of the most obvious indicators is an increase in fan noise. If your once-quiet PC now sounds like a jet engine taking off, it’s likely that the fans are working overtime to dissipate excessive heat. This can be particularly pronounced during gaming sessions or when running demanding applications.
Another sign to watch for is elevated component temperatures. Most modern motherboards come equipped with temperature sensors that allow you to monitor your CPU and GPU temperatures. If you notice that your CPU is regularly hitting temperatures above 80°C or your GPU is consistently in the upper ranges, it’s a clear signal that something needs to change.
You might also experience unexpected performance drops, commonly referred to as thermal throttling. This occurs when the CPU or GPU reduces its performance to prevent overheating, resulting in lag during gameplay or slowdowns during intensive tasks.
Additionally, keep an eye out for system instability, including frequent crashes or unexpected shutdowns. These issues can often be linked to overheating, as components may become too hot to function properly.
Finally, physical signs like dust build-up or hot air blowing out of the case can’t be ignored. Dust accumulation can impede airflow, trapping heat inside your system and contributing to higher temperatures. Regular cleaning and maintenance can help prevent this issue.
By recognizing these common signs, you can take action to improve your PC’s cooling system before it leads to more serious problems, ensuring your gaming experience remains smooth and enjoyable.
3. Types of Cooling Solutions: Air vs. Liquid Cooling
When it comes to keeping your PC at optimal temperatures, understanding the two primary types of cooling solutions—air cooling and liquid cooling—is essential. Each system has its strengths, weaknesses, and unique characteristics, which cater to different needs and preferences among PC enthusiasts.
**Air Cooling** is the traditional go-to method for many builders. It utilizes heat sinks and fans to dissipate heat away from the CPU and GPU. The mechanics are straightforward: a heat sink, often made of aluminum or copper, absorbs heat generated by the components. Fans then push air through the heat sink, cooling it down before it re-enters the casing. This method is generally more cost-effective and easier to install, making it an excellent choice for casual gamers and those building their first PC. Moreover, air coolers are less prone to failure, as they have fewer moving parts and do not run the risk of leaks. However, they can be less efficient in overclocking scenarios, where higher performance necessitates superior cooling capabilities.
On the other hand, **Liquid Cooling** systems have gained popularity among serious gamers and overclockers for their superior thermal performance. These systems circulate a coolant, typically a mixture of water and other additives, through a closed loop that includes a pump, radiator, and water blocks. The coolant absorbs heat from the components, effectively moving it away to the radiator, where it is cooled by fans before being recirculated. Liquid cooling is particularly effective in maintaining lower temperatures, allowing for higher performance and quieter operation compared to air systems. However, the installation process can be more complex, requiring careful setup to avoid leaks and ensure proper flow. It’s also worth noting that liquid coolers tend to be pricier, which can be a consideration for budget-conscious gamers.
In summary, the choice between air and liquid cooling largely depends on your individual needs and preferences. If you’re after simplicity, reliability, and cost-effectiveness, air cooling is an excellent option. Conversely, if you’re aiming for high performance with potentially quieter operation and are willing to invest time and resources, liquid cooling might be the route for you. Understanding these differences will help you make an informed decision, ensuring your gaming rig runs cool and performs at its best.
4. How Air Coolers Work: Pros and Cons
When it comes to cooling your gaming rig, air coolers have long been a staple in the PC building community. Utilizing a straightforward yet effective mechanism, these cooling solutions rely on the combination of metal heat sinks and fans to dissipate heat generated by your CPU or GPU. The process begins with the heat sink, a metal structure—usually made of aluminum or copper—that absorbs heat from the processor. Once the heat is transferred, the attached fan kicks into gear, pushing cool air over the heat sink while simultaneously expelling the warm air away from the unit. This continuous airflow helps maintain optimal temperatures, ensuring your components operate efficiently even during intense gaming sessions.
### Pros of Air Coolers:
1. **Cost-Effective**: Air coolers are generally more budget-friendly than their liquid counterparts. They come in various price ranges, making them accessible to gamers at all levels.
2. **Simplicity and Reliability**: With fewer moving parts and no risk of leaks, air coolers often boast a reliability that many users appreciate. Installation is typically straightforward, requiring minimal maintenance.
3. **Less Noise**: While some air coolers can be loud, many modern designs feature efficient fans that operate quietly even under load, providing a peaceful gaming experience.
4. **No Risk of Liquid Damage**: Unlike liquid cooling solutions, air coolers eliminate concerns about coolant leaks, making them a safer choice for those wary of potential mishaps.
### Cons of Air Coolers:
1. **Bulkiness**: Depending on the model, air coolers can be quite large and may interfere with other components, such as RAM or case fans. It’s essential to ensure compatibility with your PC case before purchasing.
2. **Cooling Efficiency**: While air coolers can handle standard workloads efficiently, they may struggle to maintain lower temperatures under extreme conditions, such as overclocking or during heavy gaming sessions.
3. **Limited Aesthetics**: While some air coolers come with RGB lighting, they may not offer the same visual flair that some custom liquid cooling setups provide, which can be a consideration for gamers who prioritize aesthetics.
4. **Thermal Performance**: In scenarios where extreme cooling is necessary, air coolers may not perform as well as liquid cooling solutions, making them less suitable for high-end builds pushing performance limits.
In conclusion, air coolers represent a solid choice for gamers looking for a reliable, cost-effective cooling solution. Understanding their mechanics and weighing their pros and cons will help you determine if they meet your gaming needs, keeping your rig cool and your gameplay smooth.
5. Liquid Cooling Explained: A Deep Dive
Liquid cooling has emerged as a popular choice among PC enthusiasts and gamers alike, thanks to its efficiency and effectiveness in managing heat. Unlike traditional air cooling systems that rely on fans to circulate air and dissipate heat, liquid cooling employs a coolant—usually a mixture of water and antifreeze—that circulates through tubes to absorb and carry heat away from the components. This method not only provides superior cooling performance but also operates more quietly, making it an appealing option for those who demand both power and tranquility in their gaming rigs.
At the heart of a liquid cooling system is the pump, which propels the coolant through the loop. The coolant absorbs heat from the CPU or GPU via the water block, a metal component that makes direct contact with the processor. From there, the heated coolant travels to the radiator, where it passes through a series of thin fins. As air flows over these fins—thanks to one or more fans mounted on the radiator—the heat is dissipated, and the cooled liquid returns to the water block, ready to absorb heat once again.
Liquid cooling systems come in two main varieties: closed-loop (AIO) and custom loop. Closed-loop systems are pre-assembled and sealed, making them user-friendly and ideal for beginners or those who prefer a hassle-free setup. They offer excellent cooling performance and require minimal maintenance, which is perfect for gamers who want to focus on their gameplay rather than their hardware. On the other hand, custom loop systems provide an opportunity for advanced users to build a tailored cooling solution that not only meets their specific thermal demands but also showcases their creativity. These systems involve selecting individual components—such as pumps, radiators, tubing, and fittings—and can be as elaborate or straightforward as the user desires.
However, while liquid cooling offers numerous benefits, it also comes with its own set of challenges. Installation can be more complex than air cooling, and there’s the potential risk of leaks if not done correctly. Regular maintenance is also required to ensure that the coolant remains clean and at optimal levels. Despite these considerations, many PC builders find that the advantages far outweigh the drawbacks, enjoying lower temperatures and increased performance capabilities.
In summary, liquid cooling is a powerful option for any PC builder looking to enhance their system’s thermal performance. By understanding how it works and weighing the pros and cons, you can make an informed decision that aligns with your gaming needs and preferences, ensuring that your rig runs cool and efficiently while you conquer the digital battlefield.
6. A Guide to Passive Cooling Solutions
In the world of PC building and maintenance, passive cooling solutions often fly under the radar, yet they can be a game-changer for those seeking silent operation and energy efficiency. Unlike their active counterparts, which rely on fans or pumps to circulate air or coolant, passive cooling systems take a more subtle approach. They dissipate heat through natural convection and conduction, utilizing heat sinks, aluminum or copper fins, and thermal pads to draw heat away from critical components without any moving parts.
When considering passive cooling, one of the key factors is the material used. Copper, for instance, is renowned for its superior thermal conductivity, making it an excellent choice for heat sinks. Aluminum is lighter and more cost-effective, but it may not dissipate heat as efficiently. A combination of both materials can often yield the best results, providing a balance between performance and weight.
Another critical aspect of passive cooling is the design and placement of the heat sinks. These components should be strategically positioned to ensure optimal airflow around them, taking advantage of natural convection currents within the case. This means that not only should the heat sink itself be large enough to dissipate adequate heat, but it should also be complemented by a well-thought-out case layout that minimizes airflow obstruction.
While passive cooling might not be suitable for high-performance gaming rigs or overclocked systems, it excels in scenarios where low noise and energy efficiency are paramount. Ideal for home theater PCs, office computers, or even lightweight gaming systems, passive cooling can deliver sufficient thermal management without the whirring of fans to disrupt your environment.
Ultimately, if you’re looking for a cooling solution that operates quietly and efficiently, passive cooling might be the perfect match for your PC build. By understanding the materials, design, and placement of your cooling components, you can create a system that runs smoothly while keeping noise levels to a minimum. Embrace the silent revolution and let your PC perform without the distraction of noisy fans!
7. Factors to Consider When Choosing a Cooling Solution
When it comes to selecting the perfect cooling solution for your PC, several key factors should guide your decision-making process. The right choice can significantly enhance performance, prolong the lifespan of your components, and ensure a smooth user experience. Here are the most important factors to consider:
1. **Type of Cooling**: First, determine whether you want air or liquid cooling. Air cooling systems are generally easier to install, require less maintenance, and are more affordable. However, liquid cooling solutions can provide superior cooling efficiency and are often quieter, making them suitable for high-performance builds or overclocking.
2. **Case Compatibility**: Before making any purchases, check your case specifications. The size and configuration of your PC case will dictate the dimensions of your cooling solution. Ensure that your chosen cooler fits comfortably without obstructing other components, such as RAM or graphics cards.
3. **Thermal Performance**: Look at the thermal performance ratings of potential cooling solutions. This can usually be found in reviews or specifications. Consider the heat dissipation capabilities, especially if you plan to push your PC to its limits with gaming or intensive tasks.
4. **Noise Levels**: For many users, a quiet operation is a top priority. Compare the noise levels (measured in decibels) of different cooling systems. While some fans can be quite noisy at higher RPMs, others are designed for quiet operation, which can be particularly important if you’re building a system for gaming or media consumption.
5. **Aesthetics**: If you value the visual aspect of your PC build, take into account the design and look of the cooling solution. Many modern coolers come with customizable RGB lighting and sleek designs that can enhance the overall aesthetics of your setup.
6. **Budget**: Finally, consider your budget. Cooling solutions vary widely in price, so balance your need for performance with what you’re willing to spend. Remember that investing in a quality cooling system can save you money in the long run by preventing overheating and damage to your components.
By carefully evaluating these factors, you can make an informed decision that will not only keep your PC cool but will also optimize its performance and longevity. The right cooling solution is a crucial investment for any PC enthusiast looking to maintain a reliable and efficient system.
8. Cooling System Compatibility with Your PC Components
When considering a cooling solution for your PC, one of the most critical factors to keep in mind is compatibility with your existing components. The heart of your build—your CPU, GPU, motherboard, and case—must work harmoniously with your chosen cooling system to ensure optimal performance and longevity.
Start with your CPU. Different processors have varying thermal outputs, and the cooling solution you select must be capable of dissipating this heat efficiently. For example, high-performance CPUs often require robust air or liquid cooling systems. However, if you’re running a more modest setup, a simpler air cooler might suffice. Always check the thermal design power (TDP) rating of your CPU against the specifications of your cooling solution to ensure they match.
Next, consider your GPU. Graphics cards can generate significant heat during intense gaming or rendering sessions, requiring dedicated cooling solutions. Some aftermarket GPUs come equipped with advanced cooling systems, while others may benefit from additional case fans or external cooling solutions. Be sure to verify the dimensions of your chosen cooling system to avoid any spatial conflicts within your case, ensuring that all components fit comfortably without obstructing airflow.
Your motherboard also plays a crucial role in compatibility. Some cooling systems require specific mounting brackets or connectivity options, so it’s essential to check your motherboard’s specifications and ensure your cooling solution supports them. Additionally, certain motherboards have limited clearance for larger air coolers, making it vital to measure the available space before making a purchase.
Lastly, don’t overlook the case itself. A well-ventilated case can significantly enhance cooling performance. When selecting a cooling solution, ensure it not only fits within the physical dimensions of your case but also complements its airflow design. If you’re considering a liquid cooling solution, evaluate the case’s radiator support and hose routing options to avoid unnecessary complications during installation.
In summary, achieving an effective cooling setup isn’t just about choosing the most powerful solution—it’s about ensuring that every component of your PC works together seamlessly. By taking the time to assess compatibility with your CPU, GPU, motherboard, and case, you can create a balanced system that maintains optimal temperatures, ensuring your PC runs smoothly for years to come.
9. The Role of Case Airflow in PC Cooling
When it comes to maintaining optimal temperatures within your PC, the importance of case airflow cannot be overstated. Think of your computer case as a vital ecosystem where heat generation and dissipation must be carefully balanced to ensure peak performance and longevity of your components. Proper airflow is the unsung hero in this equation, working behind the scenes to usher hot air out while drawing in cooler air from the surroundings.
Case airflow is primarily dictated by the arrangement and quality of your fans, the design of your case, and the strategic placement of components. A well-ventilated case will have multiple intake and exhaust fans, creating a consistent flow of air that prevents heat buildup. This is crucial because every component within your PC generates heat—especially the CPU and GPU during intensive tasks like gaming or video editing. When airflow is restricted, you run the risk of overheating, which can lead to throttling, crashes, or even permanent damage to your hardware.
To optimize airflow, consider the direction of your fans. Typically, front and bottom fans should draw air into the case, while top and rear fans should expel warm air. Maintaining a positive pressure setup—where intake airflow exceeds exhaust—can also help minimize dust buildup, keeping your internals clean and efficient. Additionally, cable management plays a significant role in airflow; neatly routed cables not only enhance aesthetics but also reduce obstructions that can impede airflow.
In essence, understanding and optimizing case airflow is a foundational step in building a cooling solution tailored to your PC’s needs. It creates a harmonious environment where your components can thrive, ensuring that your gaming sessions remain uninterrupted and your system runs smoothly for years to come.
10. Noise Levels: Balancing Performance and Quiet Operation
When it comes to choosing the right cooling solution for your PC, noise levels are a crucial factor that often gets overlooked in the pursuit of peak performance. A powerful cooling system can keep your components running optimally, but if it sounds like a jet engine taking off, it can be a major distraction whether you’re gaming, working, or just enjoying some downtime.
The balance between performance and quiet operation is a delicate one, and understanding the nuances can make all the difference for your user experience. High-performance cooling solutions, such as aftermarket air coolers and liquid cooling systems, can vary significantly in their noise output. While some may boast impressive cooling capabilities, they might also come equipped with fans that spin at high RPMs, generating unwanted noise.
To find the sweet spot, consider the decibel (dB) rating of potential cooling solutions. Many manufacturers provide this information, allowing you to compare models based on their sound output. Generally, a fan operating below 30 dB is considered whisper-quiet, while anything above 40 dB can start to become intrusive.
Additionally, think about the type of cooling solution you’re opting for. High-quality fans often incorporate features like fluid dynamic bearings or magnetic levitation technology, which can significantly reduce noise while enhancing airflow. If you’re leaning toward liquid cooling, closed-loop systems tend to be quieter than custom loops, as they often use larger radiators and slower-spinning fans to maintain lower temperatures with minimal noise.
Finally, remember that ambient noise can also play a role. If your gaming setup is in a quiet environment, even a slightly noisy cooler can become a major annoyance. On the other hand, in a bustling space with other sounds, you might find that a louder solution is more tolerable. Ultimately, the goal is to create a harmonious balance where you enjoy optimal performance without sacrificing the peace of your gaming or work environment. By carefully considering noise levels in your cooling solution selection, you can ensure that your PC operates efficiently and quietly, allowing you to focus on what matters most—your gaming experience.
11. Budgeting for Your Cooling Solution
When it comes to choosing the right cooling solution for your PC, budgeting is a crucial step that cannot be overlooked. As the heart of your gaming rig, your cooling system plays a pivotal role in maintaining optimal performance and longevity. However, the vast array of options available can make it easy to overspend or, conversely, to skimp on an essential component.
Start by assessing your specific needs and the components in your build. High-performance CPUs and GPUs generate substantial heat, which means investing in a reliable cooling solution is more important than ever. A budget of around $50 to $100 can secure you a decent air cooler or a basic liquid cooling system, perfect for mid-range gaming setups. If you’re aiming for extreme performance or planning to overclock, consider allocating $150 or more for premium coolers that offer advanced features like customizable RGB lighting and enhanced airflow.
Remember to factor in not just the initial purchase price of your cooling solution but also any additional costs. Will you need extra thermal paste, fans, or a more powerful power supply to support your cooling system? These considerations can add up quickly. Don’t forget about the potential savings in energy costs and the extended lifespan of your components when you invest in an efficient cooling solution. A well-cooled system can run smoother and last longer, ultimately providing better value for your investment.
Lastly, keep an eye out for sales, bundles, or discounts from reputable brands. Sometimes, you can find high-quality cooling solutions at a fraction of the original price during special promotions. By carefully budgeting and considering your options, you can ensure that your cooling solution not only fits your financial plan but also meets the performance demands of your gaming experience.
12. Installation Tips for Different Cooling Systems
When it comes to installing your chosen cooling system for your PC, following the right steps can make the difference between optimal performance and a frustrating experience. Whether you’re opting for air coolers, liquid cooling systems, or even more advanced solutions, understanding the installation process is crucial.
### Air Coolers
For air coolers, start by ensuring your CPU socket is clean and free of dust. Apply a thin, even layer of thermal paste on the processor to promote efficient heat transfer. Carefully line up the cooler with the mounting bracket, ensuring that it is firmly seated before securing it in place. Be mindful of the cooler’s orientation to promote proper airflow within your case. Lastly, connect the cooler’s fan to the motherboard, and double-check that everything is snug and secure.
### Liquid Cooling Systems
Liquid cooling can be a bit more intricate, but with patience, you can master the process. Begin by removing the existing CPU cooler and cleaning the CPU surface thoroughly. Apply thermal paste as you would for air coolers. When mounting the radiator, ensure it is positioned for optimal airflow; typically, this means placing the fans so that air flows through the radiator and out of the case. Be sure to secure all tubing properly and double-check for any potential leaks before powering on your system. Don’t forget to fill the reservoir or loop with the appropriate coolant if you’re using a custom liquid cooling system.
### All-in-One (AIO) Coolers
AIO coolers strike a balance between convenience and performance. Installation begins similarly to liquid cooling systems, with a clean CPU surface and thermal paste application. Most AIOs come with pre-installed fans and tubes, making the process simpler. Attach the radiator to the case, aligning it with the pre-drilled holes, and connect the pump to the CPU socket. Make sure to run cables neatly to avoid obstructing airflow or fans, which can lead to overheating.
### General Tips
Regardless of the cooling system you choose, always refer to the manufacturer’s guidelines for specific installation instructions. Take your time during the process—rushing can lead to mistakes that might compromise your system’s cooling efficiency. Ensure that your case has adequate airflow, as well-placed fans can significantly enhance cooling performance. Lastly, after installation, monitor temperatures during the first few sessions to ensure that everything is working as intended.
By following these installation tips tailored to your cooling system of choice, you’ll not only optimize your PC’s performance but also extend its lifespan, keeping your gaming experience smooth and enjoyable.
13. Maintenance and Upkeep of Cooling Solutions
When it comes to maintaining the optimal performance of your PC cooling solutions, regular upkeep is non-negotiable. Just as you wouldn’t ignore the oil change in your car, your cooling system requires consistent attention to function efficiently and prolong the life of your components.
Start by assessing your cooling fans and heatsinks. Dust accumulation is their worst enemy, leading to reduced airflow and increased temperatures. A monthly check can make a world of difference: use compressed air to carefully blow out dust from fans and other components. Pay special attention to the corners and crevices where dirt tends to gather, as these can obstruct airflow significantly.
For liquid cooling systems, it’s essential to monitor the coolant levels and look for any signs of leaks. Over time, the coolant can evaporate or degrade, leading to inefficient cooling. If your setup allows for it, consider changing the coolant every six months to a year to keep your system running smoothly. Additionally, inspect the pump for functionality; a failing pump can lead to catastrophic overheating, so replacing it promptly can save your hardware.
Another critical aspect of maintenance is cable management. Poorly arranged cables can obstruct airflow, causing fans to work harder than necessary. Take the time to tidy up your cables, using zip ties or Velcro straps to secure them neatly against the chassis. This not only improves airflow but also enhances the overall aesthetics of your build.
Lastly, don’t overlook software monitoring tools that allow you to keep an eye on your system’s temperatures and fan speeds. Programs like HWMonitor or MSI Afterburner can provide real-time data, enabling you to make adjustments as needed. Keeping your cooling solutions well-maintained ensures that your PC operates at peak performance, allowing you to enjoy your games without the worry of overheating. In the world of gaming, where every frame counts, having a reliable cooling system is not just a luxury—it’s a necessity.
14. Upgrading Your Cooling System: When and Why
Upgrading your cooling system is a crucial step in maintaining optimal performance and longevity for your PC. As technology evolves, so do the demands placed on your hardware. If you’ve noticed your system struggling to keep cool during gaming marathons or intensive tasks, it may be time to consider an upgrade. But when exactly should you take the plunge, and why is it so important?
**Signs It’s Time to Upgrade**
1. **Increased Temperatures**: If your CPU or GPU temperatures consistently hit the upper limits of their thermal thresholds, it’s a clear sign that your current cooling solution isn’t cutting it. Regularly checking your component temperatures can help you make informed decisions about when to upgrade.
2. **Overclocking**: Enthusiasts often push their hardware beyond factory settings to gain extra performance. However, overclocking generates additional heat, making a robust cooling system essential. If you’ve overclocked your components and are still relying on stock cooling, it’s time to seek a more effective solution.
3. **Noise Levels**: As fans age or struggle to keep up with cooling demands, they can become noisy or even fail altogether. If you find your system sounding like a jet engine during use, consider upgrading to a more efficient cooling solution that operates quietly while still keeping your components cool.
4. **New Hardware**: Upgrading to a more powerful CPU or GPU requires adequate cooling to ensure reliable performance. Newer components may have different cooling requirements, so if you’re planning a hardware refresh, assess your current cooling system to ensure it can handle the increased heat output.
**Why Upgrade?**
Investing in a better cooling solution not only helps maintain lower temperatures but can also enhance the overall performance of your PC. Cooler components tend to operate more efficiently, reducing the risk of thermal throttling—where your hardware intentionally slows down to prevent overheating. Additionally, a well-cooled system can extend the lifespan of your components, saving you money in the long run.
Moreover, upgrading your cooling system can provide a more enjoyable user experience. Whether you’re gaming, streaming, or designing, a quieter and cooler PC makes for a more pleasant environment, allowing you to focus on what you love most—your games, work, or creative projects.
In summary, if you notice signs of thermal strain, are pushing your hardware to its limits, or are planning significant upgrades, it’s time to evaluate your cooling options. With the right solution, you can ensure your PC runs smoothly for years to come, no matter how intense the workload.
15. Final Thoughts: Finding the Right Balance for Your Gaming PC
As we reach the final thoughts of this comprehensive guide, it’s essential to emphasize the importance of finding the right balance for your gaming PC’s cooling solution. Your gaming rig is a significant investment, and ensuring it runs cool and efficiently is crucial for optimal performance and longevity.
When selecting a cooling solution, consider not just the raw power of your components, but also the unique environment in which your PC operates. Do you live in a warmer climate? Is your setup confined to a small space with limited airflow? These factors will influence your cooling needs.
Additionally, strike a balance between performance, noise level, and aesthetics. High-performance cooling systems can be noisy, which can detract from the immersive experience of gaming. On the other hand, stylish RGB-lit fans and heatsinks can enhance the visual appeal of your setup, but make sure they don’t compromise functionality for looks.
Remember that cooling is not a one-size-fits-all approach. Whether you opt for air cooling, liquid cooling, or a combination of both, ensure that you consider the specifications of your components, the case design, and your personal preferences. Regular maintenance, such as cleaning dust from fans and ensuring adequate airflow, will also play a vital role in maintaining your system’s cooling efficiency.
Ultimately, the goal is to create a harmonious environment where your gaming PC can thrive, providing you with seamless gameplay, high frame rates, and an enjoyable experience without the worry of overheating. Take the time to analyze your options, do your research, and invest wisely in a cooling solution that meets your needs. With the right balance, your gaming rig will not only perform at its best but will also endure the test of time. Happy gaming!
In conclusion, finding the perfect cooling solution for your PC is essential to maintaining optimal performance and extending the lifespan of your components. Whether you opt for air cooling, liquid cooling, or a hybrid approach, understanding the unique needs of your system and your personal preferences will guide you in making the best choice. Armed with the insights from our comprehensive guide, you can confidently navigate the myriad options available, ensuring your gaming rig runs cool and quiet during even the most intense sessions. Remember, a well-cooled PC not only enhances performance but also elevates your overall gaming experience. So, take the plunge, invest in the right cooling solution, and enjoy the smooth, uninterrupted gameplay that awaits you! Happy gaming!