How can I make my own sourdough bread?

There’s something undeniably magical about the aroma of freshly baked bread wafting through your home, especially when that bread is a beautifully crafted sourdough.

With its crusty exterior, chewy texture, and tangy flavor, sourdough has captured the hearts (and appetites) of bakers and food lovers alike. But the journey to mastering this artisanal bread can feel overwhelming for beginners and seasoned bakers alike. Fear not! In this comprehensive guide, we’ll demystify the sourdough-making process, breaking it down into easy-to-follow steps that will empower you to create your very own loaf from scratch. Whether you’re aiming to impress guests at your next gathering or simply want to enjoy the satisfaction of baking your own bread, our guide will provide you with valuable tips, techniques, and troubleshooting advice to ensure your sourdough journey is as rewarding as it is delicious. So, roll up your sleeves, grab your ingredients, and get ready to embark on a delightful culinary adventure!

1. Introduction to Sourdough: What Makes It Unique?

How can I make my own sourdough bread?
Credit : whatcanu.com

Sourdough bread is more than just a loaf; it’s a flavorful journey steeped in tradition and science. Unlike conventional bread that relies on commercial yeast for leavening, sourdough harnesses the power of wild yeast and lactic acid bacteria, naturally present in the environment, to rise. This unique fermentation process not only gives sourdough its distinctive tangy flavor but also contributes to a complex texture, with a crispy crust and a soft, airy crumb that is simply irresistible.

What truly sets sourdough apart is the culture of patience and care that comes with it. The initial step involves creating a sourdough starter, a living mixture of flour and water that captures wild yeasts from the air and your kitchen. This starter requires regular feeding and nurturing, transforming into a bubbly, vigorous culture that can be used to leaven your bread. The relationship you build with your starter is akin to that of a gardener tending to a plant; it thrives on attention and love, rewarding you with delicious results.

Additionally, the health benefits of sourdough cannot be overlooked. The fermentation process breaks down gluten and phytic acid, making the nutrients in the flour more accessible and easier to digest. Many people who struggle with gluten sensitivity have found sourdough to be a more forgiving option. Plus, the lactic acid produced during fermentation acts as a natural preservative, allowing your bread to stay fresh longer without the need for additives.

In this guide, we will delve deeper into the art of sourdough baking, exploring everything from creating your starter to mastering the perfect loaf. Whether you’re a seasoned baker or a curious beginner, you’ll find the steps straightforward and the rewards immensely satisfying. Get ready to embark on a delicious adventure that not only fills your home with the intoxicating aroma of freshly baked bread but also nourishes your creative spirit.

2. Understanding the Science Behind Sourdough

To truly master the art of sourdough, it’s essential to grasp the fascinating science that transforms simple ingredients into a loaf of bread with a unique tang and incredible texture. At its core, sourdough bread relies on a symbiotic relationship between wild yeast and beneficial bacteria, primarily Lactobacillus, which work together to ferment the dough.

When you mix flour and water and allow it to sit, you’re creating an environment where wild yeast from the air and the flour can settle in. This wild yeast is significantly different from the commercial yeast typically found in grocery stores. It’s slower acting and thrives on the natural sugars present in the flour, leading to a more complex flavor profile. Alongside the yeast, the lactic acid bacteria begin to proliferate, producing lactic and acetic acids that contribute to sourdough’s characteristic tanginess.

As the fermentation process unfolds, the dough becomes more elastic and develops a structure that traps the gas produced by the yeast, which is responsible for leavening the bread. This is where the gluten comes into play. The proteins in the flour hydrate and form gluten networks, giving the bread its chewy texture. During this process, enzymes break down starches into sugars, further feeding the yeast and enhancing the overall flavor.

Understanding this science isn’t just for the curious baker; it’s crucial for troubleshooting and perfecting your technique. A variety of factors—such as temperature, hydration, and the specific flour you use—can all influence the fermentation process. For instance, warmer temperatures accelerate fermentation, potentially leading to a more pronounced sour flavor, while cooler temperatures allow for a slower rise, creating a milder taste.

By appreciating the delicate balance of these elements, you’ll not only gain insights into why your sourdough behaves the way it does, but you’ll also learn how to manipulate these variables to achieve the perfect loaf. Whether you’re aiming for a subtle hint of sourness or a robust flavor, understanding the science behind sourdough will empower you to become a more confident and creative baker.

3. Essential Ingredients for Sourdough Bread

How can I make my own sourdough bread?
Credit : whatcanu.com

When it comes to crafting the perfect loaf of sourdough, understanding the essential ingredients is key. each component plays a vital role in developing the unique flavor, texture, and rise that sourdough is renowned for. Let’s break down these foundational ingredients that will transform simple elements into a true masterpiece.

**1. Flour:** The heart of your sourdough bread begins with high-quality flour. While all-purpose flour can work, opting for bread flour will yield a chewier texture thanks to its higher protein content, which aids gluten development. Many bakers also enjoy incorporating whole wheat or rye flour to enhance the flavor profile. These flours not only contribute to the bread’s depth but also add nutrients that feed the sourdough starter.

**2. Water:** Next to flour, water is crucial for bringing your dough to life. It hydrates the flour, dissolves the minerals and enzymes, and activates the gluten. The temperature of your water can also influence fermentation times. Generally, room temperature water (around 75°F to 80°F) is ideal for most home bakers, but feel free to experiment with warmer or cooler water to adjust your fermentation speed.

**3. Salt:** Often underestimated, salt is essential for flavor and control in the fermentation process. It strengthens the gluten structure and acts as a natural preservative, extending the shelf life of your bread. Sea salt or kosher salt is preferred over table salt due to its texture and purity. Just remember to add it to your dough after mixing in the flour and water to ensure even distribution.

**4. Sourdough Starter:** Finally, the star of the show—the sourdough starter. This living culture of flour and water is where the magic happens. It contains wild yeast and beneficial bacteria that ferment the dough, creating that signature tangy flavor and airy crumb. A well-fed starter will yield the best results, so be sure to maintain it properly and give it time to develop before use.

With these essential ingredients in hand, you’re ready to embark on your sourdough journey. Each element contributes to the symphony of flavors and textures that make sourdough bread so beloved. As you knead, shape, and bake, remember that the process is as important as the ingredients themselves—patience and practice will lead you to the artisanal loaf of your dreams. Happy baking!

4. Choosing the Right Flour: A Guide

When it comes to baking the perfect sourdough, the choice of flour is paramount. Flour is not just a mere ingredient; it is the foundation of your bread, influencing everything from texture and flavor to the rise and crust. Understanding the different types of flour available can help you make an informed decision that elevates your sourdough to artisanal levels.

**All-Purpose Flour**: This versatile flour is a staple in many kitchens and can serve as a solid base for sourdough. With a moderate protein content, it provides a good balance of strength and tenderness. While it may not yield the same depth of flavor as higher-protein options, it’s a great choice for beginners looking to dip their toes into sourdough baking.

**Bread Flour**: For those who crave a chewier crust and a more robust structure, bread flour is the way to go. With a higher protein content (typically around 12-14%), it promotes gluten development, resulting in a bread that rises beautifully and has a satisfying chew. This flour is particularly suited for sourdough, as it helps capture the gas released by the fermentation process, contributing to a lighter loaf.

**Whole Wheat Flour**: If you’re looking to add a nutty flavor and a bit more nutrition to your sourdough, whole wheat flour is an excellent option. While it can make your bread denser, the flavor it imparts is rich and satisfying. To achieve a balance, many bakers opt for a mix of whole wheat and bread flour, allowing the earthy notes of whole grain to shine through without compromising the loaf’s structure.

**Rye Flour**: For the adventurous baker, rye flour opens up a world of flavor possibilities. Known for its distinctive taste and dense crumb, rye flour is often used in combination with other flours to create a uniquely flavored sourdough. It has a lower gluten content, so use it in moderation to avoid overly dense bread. Rye not only adds complexity to your loaf but also enhances the fermentation process, thanks to its rich nutrient profile.

**Specialty Flours**: Don’t hesitate to experiment with specialty flours like spelt, einkorn, or even gluten-free mixes if you’re catering to specific dietary needs. Each brings its unique flavors and textures to the table, allowing for a creative twist on traditional sourdough.

When choosing your flour, consider the hydration level of your dough, as different flours absorb water differently. Higher protein flours typically require more hydration, so adjust your water ratios accordingly for optimal results.

Ultimately, the best flour for your sourdough is the one that aligns with your taste preferences and baking goals. With a little experimentation and an understanding of how each flour behaves, you’ll be well on your way to mastering the art of sourdough, creating loaves that not only rise beautifully but also tantalize the taste buds. Happy baking!

5. How to Create and Maintain a Sourdough Starter

How can I make my own sourdough bread?
Credit : whatcanu.com

Creating and maintaining a sourdough starter is the heart and soul of your sourdough baking journey. This living culture of flour and water is what brings your bread to life, providing that distinctive tangy flavor and delightful texture we all love. To embark on this fermentation adventure, you’ll need just two ingredients: flour and water.

**Step 1: The Initial Mix**
Start by combining equal parts of flour and water in a clean glass jar. A good ratio to begin with is 100 grams of flour to 100 grams of water. Stir until you achieve a thick, paste-like consistency, ensuring there are no dry pockets of flour. The type of flour you use can impact your starter—whole wheat flour tends to ferment faster due to its higher nutrient content, while all-purpose flour is also a reliable choice.

**Step 2: The Waiting Game**
Cover the jar loosely with a lid or a clean cloth to allow air to circulate while keeping out unwanted debris. Place it in a warm spot in your kitchen, ideally around 70-75°F (21-24°C). This is where the magic happens—wild yeast and bacteria from the environment will find their way into your mixture, starting the fermentation process.

**Step 3: Feeding Your Starter**
After 24 hours, you should see some bubbles forming, indicating that fermentation is underway. To feed your starter, discard half of the mixture (about 100 grams), and add another 100 grams of flour and 100 grams of water. Stir well, cover loosely, and return it to its warm spot. Repeat this feeding process daily for about 5 to 7 days. You’ll notice your starter becoming more active, bubbly, and aromatic with each feeding.

**Step 4: Recognizing Readiness**
Your starter is ready to use when it has doubled in size within 4 to 6 hours of feeding and produces a pleasant, slightly sour smell. To test its readiness, drop a small spoonful into a glass of water—if it floats, it’s time to bake!

**Step 5: Maintenance**
Once you have a robust starter, you can choose to keep it at room temperature (feeding daily) or refrigerate it (feeding weekly). If refrigerated, allow it to come to room temperature and feed it at least once before using it in your dough.

With patience and care, your sourdough starter will become a cherished kitchen companion, providing you with the foundation for delicious homemade bread. Embrace the journey of nurturing this living culture, and you’ll be rewarded with loaves that are as flavorful as they are fulfilling. Happy baking!

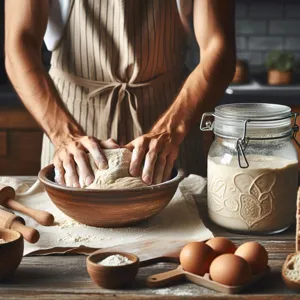
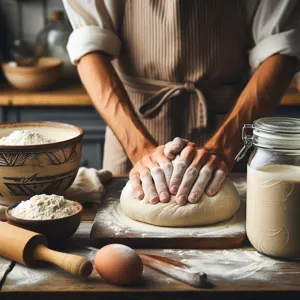
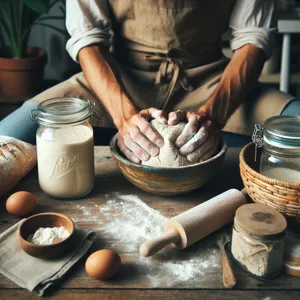
6. Step 1: Mixing the Dough

Mixing the dough is where the magic of sourdough begins. This initial step sets the foundation for your bread, influencing its texture, flavor, and overall character. Start by gathering your ingredients: high-quality bread flour, water, salt, and, of course, your active sourdough starter. The quality of your ingredients will significantly impact the final product, so choose a flour that has a good protein content for better gluten development.

In a large mixing bowl, combine the flour and salt first, ensuring they are evenly distributed. Next, add the bubbly sourdough starter, which should be at its peak activity, along with the water. Using a wooden spoon or your hands, gently mix the ingredients together until they form a shaggy mass. At this stage, don’t worry about achieving a perfectly smooth dough—it’s the mixing process that will help incorporate the ingredients and begin the gluten development.

As you mix, you’ll notice the dough becoming sticky and cohesive. This is a crucial moment; the warmth of your hands helps activate the starter, encouraging fermentation. Once the ingredients are combined, let the dough rest for about 30 minutes. This resting period allows the flour to fully hydrate and the gluten to relax, making it easier to knead later on.

After the rest, it’s time to knead. This can be done by hand or using a stand mixer fitted with a dough hook. Kneading helps develop the gluten structure, which is essential for trapping the gases produced by the fermentation process. Aim for a dough that is smooth, elastic, and slightly tacky to the touch, but not overly sticky.

As you embark on this step, take a moment to appreciate the transformation happening in front of you. The simple combination of flour, water, and starter is starting to come alive, setting the stage for the delicious sourdough bread that awaits. The journey of sourdough is not just about following a recipe; it’s about engaging with the ingredients and nurturing them through each phase, and mixing the dough is a beautiful beginning to this artisanal adventure.

7. Step 2: Autolyse: The Key to Flavor and Texture

How can I make my own sourdough bread?
Credit : whatcanu.com

Autolyse is a vital step in the sourdough bread-making process, and it’s where the magic truly begins. After measuring your flour and water, allow them to mingle in a bowl, creating a shaggy, unformed mass. The term “autolyse,” derived from the Greek word meaning “to break down,” refers to this crucial resting period where time works in your favor.

During the autolyse, which typically lasts anywhere from 20 minutes to an hour, the flour begins to absorb the water. This hydration not only helps to activate the enzymes present in the flour but also initiates the gluten development process. As the flour absorbs water, it transforms from a dry, powdery substance into a cohesive, elastic dough, setting the foundation for the bread’s structure. This is your opportunity to cultivate the dough’s flavor and texture, as the enzymes break down starches into sugars and proteins into amino acids, enriching the final taste.

As you watch the dough rest, you might notice that it becomes smoother and more pliable, almost like a living entity. The aroma that wafts up during this time is a delightful precursor to the bread that awaits. The autolyse also enhances the dough’s extensibility, making it easier to shape later on.

Don’t rush this step; the longer the autolyse, the deeper the flavors will develop. This patience pays off in the end, as you’ll be rewarded with a loaf that boasts a complex flavor profile and a beautifully chewy texture. So, take a moment to appreciate the transformation happening in your bowl—this is where your journey towards baking exceptional sourdough truly begins. Once your autolyse is complete, you’ll be ready to move on to the next exciting phase of your sourdough adventure: mixing in your starter and salt to create a dough that’s ready to rise and shine.

8. Step 3: Bulk Fermentation: Developing Flavor

### Step 3: Bulk Fermentation: Developing Flavor

As you embark on the journey of sourdough baking, bulk fermentation is where the magic truly begins. This crucial step not only allows the dough to rise but also plays a vital role in developing the complex flavors that sourdough is renowned for.

Once you’ve mixed your ingredients—your flour, water, starter, and salt—it’s time to let the dough rest and come alive. Pour your mixture into a large, clean bowl, and cover it with a damp cloth or plastic wrap to keep it moist. The bulk fermentation phase typically lasts anywhere from 4 to 6 hours, depending on the temperature of your kitchen and the strength of your starter.

During this time, you’ll notice a beautiful metamorphosis taking place. The dough will gradually increase in volume, becoming airy and light. This is due to the natural fermentation process, where wild yeast and beneficial bacteria from your sourdough starter feast on the sugars in the flour, producing carbon dioxide and organic acids. The result? A dough that not only rises but also develops a nuanced flavor profile that’s tangy and rich.

To enhance this process, consider performing a series of stretch and folds every 30 minutes during the first couple of hours of bulk fermentation. Gently pull one edge of the dough up and fold it over to the center, rotating the bowl as you go. This technique strengthens the gluten structure, helps incorporate air, and further encourages flavor development.

As you monitor your dough, keep an eye on its texture and appearance. A well-fermented dough will feel smooth and elastic, with small bubbles forming on the surface, indicating that fermentation is in full swing. When the dough has roughly doubled in size and retains a slight domed shape, it’s time to move on to the next step.

Bulk fermentation is not just about waiting; it’s about observing and understanding the transformation your dough is undergoing. Embrace the process, and savor the anticipation of the delicious sourdough that awaits you!

9. Step 4: Shaping the Dough: Techniques for Success

Shaping your dough is a crucial step in the sourdough baking process, one that can significantly affect the final texture and appearance of your bread. At this stage, your dough has risen beautifully, and it’s time to turn it into a shape that will not only hold its form but also create the ideal crust and crumb structure for the perfect loaf.

Begin by lightly flouring your work surface to prevent sticking. Gently turn the dough out from its bowl, being careful not to deflate it too much. You want to maintain the air pockets that have formed during fermentation; these will contribute to your bread’s airy texture.

Now comes the folding technique. With floured hands, stretch the edges of the dough towards the center, folding it over itself. This process helps to build tension in the dough, which is essential for achieving a good rise during baking. Once you’ve folded all sides into the center, flip the dough over so the smooth side is facing up.

Next, it’s time to shape. For a round loaf, use your hands to gently cup the dough and pull it towards you, dragging it slightly across the counter. This motion helps to create surface tension. For a batard or oval shape, you’ll want to flatten the dough slightly, then roll it towards you while tucking in the sides. Each shape has its own unique character, so choose one that appeals to you or complements your baking goals.

Practice makes perfect here; don’t be discouraged if your first few attempts aren’t picture-perfect. As you gain confidence, you’ll develop a knack for recognizing when your dough is ready to be shaped and how much tension to create.

Once you’ve shaped your dough, it’s time to let it rest in a proofing basket or on a floured surface, covered with a damp cloth to prevent drying. This final fermentation period is your opportunity to let the dough relax and rise once more, resulting in a beautifully shaped loaf that will impress both you and anyone lucky enough to taste your creation.

Remember, the shaping process is not just about aesthetics; it’s about creating the conditions for a successful bake. With a little practice and patience, you’ll master this essential technique and elevate your sourdough baking to new heights.

10. Step 5: Proofing: The Art of Timing

Proofing is where the magic truly happens in the sourdough process. This step is crucial for developing the flavor, texture, and overall character of your bread. After shaping your dough, it’s time to let it rest, allowing the yeast to work its wonders. The timing of this phase can greatly influence the outcome of your loaf, so understanding the art of timing is essential.

As you place your shaped dough into a proofing basket or bowl, cover it gently with a damp cloth or plastic wrap to maintain humidity and prevent a crust from forming. The ideal proofing environment is warm and draft-free, with a temperature range of about 75°F to 85°F. This cozy setting encourages the yeast to ferment and produce carbon dioxide, causing the dough to rise and develop those delightful bubbles that give sourdough its signature texture.

The duration of proofing can vary based on several factors, including the strength of your starter, the ambient temperature, and the hydration level of your dough. Typically, a bulk fermentation period lasts anywhere from 4 to 12 hours, but this can extend to 24 hours in cooler conditions. During this time, you should keep a close eye on your dough; look for it to double in size and become airy and puffy.

To help you gauge when your dough is ready, you might want to employ the “poke test.” Gently press your finger into the surface of the dough; if the indentation springs back slowly, it’s ready for the next stage. If it springs back quickly, give it a bit more time. Conversely, if the dough doesn’t spring back at all, it may have over-proofed, leading to potential issues in the baking stage.

Remember, proofing is as much an art as it is a science. It requires practice and a bit of intuition to master, so don’t be discouraged by early attempts. Embrace the process, and soon you’ll find the perfect balance of timing that results in a beautifully risen, flavorful sourdough loaf that will have your kitchen filled with the irresistible aroma of freshly baked bread.

11. Step 6: Scoring and Baking Your Sourdough

As you approach the final stages of your sourdough journey, it’s time to unleash your creativity and ensure a perfect bake with Step 6: Scoring and Baking Your Sourdough. This step is not only practical but also an opportunity to showcase your artistic flair.

**Scoring Your Dough**

Before sliding your beautiful loaf into the oven, scoring is a critical technique that allows the bread to expand properly during baking. Skipping this step might result in a loaf that bursts unpredictably, leading to an uneven crumb structure. To score your dough, use a sharp blade or a lame—an essential tool for any serious baker. Hold the blade at a slight angle and make swift, confident cuts on the surface of the dough. You can opt for simple slashes or create intricate patterns; the choice is yours! This not only enhances the visual appeal but also adds an artisanal touch to your sourdough.

**Baking Your Sourdough**

Now comes the moment you’ve been waiting for: baking! Preheat your oven to a high temperature, usually around 450°F (232°C). If you have a Dutch oven, place it inside the oven to preheat as well; this will help create a steamy environment crucial for achieving that coveted crispy crust. Once the oven is hot, carefully transfer your scored dough into the pot (you can use parchment paper for easier handling) and cover with the lid. This initial steam will help the bread rise beautifully.

After about 30 minutes, remove the lid to let the crust develop a rich, golden-brown color. Monitor the loaf closely as it bakes for an additional 15 to 20 minutes, until you achieve that enticing crust you’ve been dreaming about. The aroma wafting through your kitchen will be nothing short of heavenly.

As the baking concludes, tap the bottom of the loaf; a hollow sound signifies that your sourdough is done. Remove it from the oven and let it cool on a wire rack. Patience is key here—resist the urge to slice into it immediately, as letting it rest helps to set the crumb and flavor.

In this step, you’ll not only see the fruits of your labor but also experience the joy of transforming simple ingredients into a masterpiece. Scoring and baking your sourdough is where the magic truly happens, leading to a loaf that is both stunning to behold and delicious to taste. Enjoy the fruits of your hard work, and prepare to share your creation with friends and family!

12. Troubleshooting Common Sourdough Problems

Baking sourdough bread is as much an art as it is a science, and like any creative endeavor, it can come with its fair share of challenges. If you find yourself facing some common sourdough problems, don’t feel discouraged—every baker encounters hurdles along the way. Understanding how to troubleshoot these issues can help you refine your technique and achieve that perfect loaf.

One of the most frequent problems is a loaf that doesn’t rise properly. If your sourdough is dense and flat, it might be a sign that your starter isn’t active enough. Ensure your starter is bubbly and has doubled in size after feeding before you mix it into your dough. Additionally, consider the temperature of your environment; sourdough thrives in warmth, so a chilly kitchen might require longer fermentation times.

Another common issue is a crust that is either too hard or too soft. If you’re facing a crust that could double as armor, it may be due to baking at too high a temperature or not using enough steam in the oven. A hot oven and an initial burst of steam can create that desirable crust. Conversely, if your crust is soft and chewy, try increasing the baking time or temperature, as well as ensuring you’re using a preheated baking vessel.

If your bread has a gummy texture, it might not have been baked long enough, or the dough may have been too wet. Experiment with adjusting your hydration levels and make sure to monitor the internal temperature with an instant-read thermometer—aim for about 200 to 210 degrees Fahrenheit for a fully baked loaf.

Lastly, if you notice a weird smell or off flavors in your bread, it’s crucial to examine your ingredients and processes. Stale flour or an improperly maintained starter can introduce unwanted flavors. Regularly refresh your starter and store your flour in a cool, dry place to maintain freshness.

By identifying these common pitfalls and knowing how to address them, you can cultivate your sourdough skills and create loaves that are not only beautiful but also bursting with flavor. Remember, every loaf is a learning experience, so embrace the journey of mastering the art of sourdough!

13. Tips for Storing and Freezing Sourdough Bread

Once you’ve successfully baked your own delicious sourdough bread, it’s essential to know how to store and preserve it so you can enjoy its crusty goodness long after it’s come out of the oven. Proper storage will help maintain the bread’s texture and flavor, ensuring every slice remains as delightful as the first.

### Storing Sourdough Bread

The key to maintaining the freshness of your sourdough lies in how you store it. Ideally, you want to keep your bread at room temperature to allow its crust to stay crisp while preventing it from going stale too quickly. Wrap your loaf in a clean kitchen towel or place it in a paper bag; this helps absorb excess moisture while still allowing the bread to breathe. Avoid plastic wrap or bags, as they can trap moisture, leading to a soft crust and potential mold growth.

If you’re planning to consume your bread within a few days, this method will suffice. However, if you have a larger loaf or simply want to extend its shelf life, consider using a bread box, which provides a dark and dry environment that preserves the bread effectively.

### Freezing Sourdough Bread

For longer storage, freezing is a fantastic option. Start by allowing your bread to cool completely to prevent condensation from forming when wrapped. Slice the loaf into portions, which makes it easier to grab just what you need later without having to defrost the entire loaf. Wrap each slice tightly in plastic wrap or aluminum foil, and then place the wrapped slices inside a freezer-safe bag or container to protect against freezer burn.

When you’re ready to enjoy your sourdough again, simply remove the number of slices you need and let them thaw at room temperature. For an extra touch, pop the slices in the toaster or under the broiler for a few minutes to revive that lovely crispy crust. By following these tips for storing and freezing your sourdough bread, you can savor its artisanal flavor and texture for weeks to come, making each meal a delightful experience.

14. Creative Variations: Adding Flavor and Texture

Once you’ve mastered the basic sourdough recipe, the world of flavor and texture awaits you. This is where your creativity can truly shine as you experiment with various ingredients to elevate your bread from simple staple to a delightful culinary experience.

Begin by considering herbs and spices—these can be added directly to your dough during the mixing stage. Fresh rosemary, thyme, or basil can impart a fragrant aroma and a savory twist. For a touch of warmth, try incorporating ground spices like cinnamon or nutmeg, which work beautifully in sweeter loaves.

Next, think about incorporating grains and seeds. Adding whole grains such as oats, rye, or barley can enhance the nutritional profile of your bread while introducing a hearty texture. Seeds like sunflower, sesame, or flax not only contribute a delightful crunch but also a nutty flavor that complements the sourdough’s tanginess. A touch of olive oil can enhance moisture and richness, making your loaves even more irresistible.

Fruits and nuts present another exciting avenue for experimentation. Dried fruits, such as cranberries, figs, or apricots, add sweetness and a burst of flavor, while nuts like walnuts, almonds, or pecans create a satisfying contrast with their crunch. For a more indulgent treat, consider swirling in chocolate chips or a rich caramel mixture just before shaping your dough.

Don’t forget about the impact of different types of flour! While traditional bread flour provides a solid foundation, experimenting with alternative flours like spelt, einkorn, or even gluten-free options can produce distinct flavors and textures, making each loaf a unique creation.

As you explore these creative variations, keep in mind that balance is key. Aim for complementary flavors that enhance rather than overpower the inherent sourdough profile. Document your experiments, noting what works and what doesn’t, and soon you’ll have a repertoire of signature sourdough recipes that not only satisfy your taste buds but also impress those lucky enough to share in your baking journey. Happy baking!

15. Conclusion: The Joy of Baking Your Own Sourdough Bread

As we reach the conclusion of our sourdough journey, it’s essential to reflect on the profound joy that comes from baking your own bread. There’s something magical about transforming simple ingredients—flour, water, salt, and a little patience—into a warm, crusty loaf that fills your home with an irresistible aroma. The process of nurturing your starter, watching it bubble and rise, is akin to tending to a living creature, fostering a connection that deepens with each bake.

Baking sourdough is not just about the final product; it’s about the experience. Each step, from the initial mixing to the rhythmic kneading and the anxious wait for the dough to rise, is an opportunity for mindfulness. It encourages you to slow down and appreciate the art of creation, turning a seemingly mundane task into a fulfilling ritual. The sense of accomplishment when you finally slice into a loaf you’ve crafted yourself is unparalleled. The crust crackles under your knife, revealing a soft, airy interior that you can’t wait to slather with butter or enjoy alongside your favorite spread.

Moreover, sourdough baking fosters a spirit of community. Sharing your homemade loaves with friends, family, or neighbors not only spreads joy but also creates bonds over the shared experience of bread-making. You may find yourself swapping tips and techniques, discovering new flavors, and even passing on your starter to a loved one, continuing the cycle of creativity and connection.

In conclusion, mastering the art of sourdough baking is more than just a culinary skill; it’s a journey filled with discovery, patience, and delight. Whether you’re a seasoned baker or a curious beginner, embracing the process allows you to savor not just the bread, but the entire experience. So, roll up your sleeves, grab your ingredients, and immerse yourself in the delightful world of sourdough. Happy baking!

As we wrap up our journey into mastering the art of sourdough, we hope you feel inspired and equipped to embark on your own baking adventure. Creating your own loaf of sourdough bread is not just about the ingredients; it’s a beautiful blend of science, patience, and creativity that transforms simple elements into something truly extraordinary. Remember, every loaf tells a story, and with each rise and fold, you’re not just baking bread—you’re cultivating a skill that connects you to a rich tradition of craftsmanship. So, roll up your sleeves, trust the process, and enjoy the delightful aroma of freshly baked sourdough wafting through your kitchen. We can’t wait to hear about your baking successes and the delicious creations you’ll share with family and friends. Happy baking!

What are the best ways to make homemade bread?

There’s something undeniably magical about the scent of fresh bread wafting through your home, a warm embrace that evokes comfort and nostalgia.

Baking homemade bread is an art that combines simple ingredients with a touch of love and patience, resulting in a delightful creation that can elevate any meal or stand alone as a satisfying snack. In this ultimate guide, we’ll delve into the essential tips and techniques that will transform your kitchen into a haven of irresistible aromas and golden crusts. Whether you’re a novice baker or looking to refine your skills, this comprehensive resource will walk you through the fundamentals of bread-making—from selecting the right flour and mastering the perfect knead to achieving that sought-after crust and tender crumb. Join us on this delicious journey and discover how to bake perfect homemade bread that will impress family and friends alike, and leave you craving for more!

1. Introduction: The Joy of Baking Bread at Home

What are the best ways to make homemade bread?
Credit : whatcanu.com

Baking bread at home is more than just a culinary endeavor; it’s a delightful journey that engages all your senses and nourishes the soul. The warm, inviting aroma of freshly baked bread wafting through your kitchen has a way of creating an atmosphere of comfort and nostalgia. For many, the simple act of kneading dough and watching it rise can be a form of meditation, a moment of stillness in our fast-paced lives.

Imagine the satisfaction of pulling a golden loaf from the oven, the crust crackling as it cools, and the first slice revealing a tender, fluffy interior. Each bite carries the essence of your personal touch—whether it’s the choice of ingredients you’ve selected, the herbs and spices you’ve added, or the unique techniques you’ve employed. Baking your own bread allows for creativity and experimentation, transforming basic ingredients like flour, water, yeast, and salt into something extraordinary.

Moreover, baking bread at home fosters a sense of accomplishment. There’s a profound joy in mastering the art of bread-making, from understanding the science behind fermentation to perfecting your kneading technique. It’s an opportunity to connect with a long-standing tradition that has been cherished across cultures and generations. In this guide, we will explore essential tips and techniques to help you navigate the world of homemade bread with confidence, ensuring that each loaf you create is not just good, but truly perfect. So, let’s roll up our sleeves, dust the counter with flour, and embark on this rewarding baking adventure together!

2. Essential Tools and Equipment for Bread Baking

Baking bread at home can be a rewarding experience, but having the right tools and equipment is crucial to achieving that perfect loaf. Let’s delve into the essentials you’ll need to embark on your bread-baking journey.

**1. Mixing Bowls:** A set of sturdy mixing bowls in various sizes is fundamental. Opt for glass or stainless steel, as they are durable and won’t absorb odors. A large bowl is ideal for mixing your dough while smaller bowls can help with ingredient prep.

**2. Kitchen Scale:** Precision is key in baking, and a kitchen scale allows for accurate measurements of flour, water, and other ingredients. This is especially important in bread-making, where the balance of ingredients can significantly affect the texture and rise of your loaf.

**3. Dough Scraper:** This simple yet effective tool is invaluable for handling sticky dough. A dough scraper helps you mix, knead, and shape your bread without making a mess. It’s also perfect for portioning your dough into equal sizes for rolls or loaves.

**4. Stand Mixer with Dough Hook:** While mixing by hand is a time-honored tradition, a stand mixer equipped with a dough hook can save you time and effort, especially for large batches. The mixer kneads the dough efficiently, providing the necessary gluten development for a perfect loaf.

**5. Proofing Basket:** Also known as a banneton, this tool helps shape your dough as it proofs, creating a beautiful swirl pattern on your loaf. It allows for better moisture retention, which is crucial for achieving a crispy crust. If you don’t have one, a bowl lined with a floured kitchen towel will work in a pinch.

**6. Baking Stone or Steel:** For a crusty, artisan-style bread, investing in a baking stone or steel can make all the difference. These tools retain heat exceptionally well, helping to create a professional-quality crust by simulating the conditions of a traditional bread oven.

**7. Oven Thermometer:** Home ovens can often be inaccurate, resulting in uneven baking. An oven thermometer will ensure that your bread bakes at the correct temperature, providing consistency and helping you avoid undercooked or burnt loaves.

**8. Lame or Sharp Knife:** Scoring your bread before baking not only allows for proper expansion but also enhances the aesthetic appeal of your loaf. A lame (a specialized bread knife) or a sharp kitchen knife will give you clean cuts, ensuring a beautiful rise.

**9. Cooling Rack:** once your bread is out of the oven, it needs to cool properly to prevent sogginess. A cooling rack allows air to circulate around the bread, maintaining its crisp crust and fluffy interior.

With these essential tools in your baking arsenal, you’ll be well-equipped to tackle any bread recipe that comes your way. Remember, the right equipment not only makes the process easier but also enhances the quality of the bread you create. Happy baking!

3. Understanding Ingredients: Flour, Yeast, Water, and Salt

What are the best ways to make homemade bread?
Credit : whatcanu.com

### Understanding Ingredients: Flour, Yeast, Water, and Salt

The foundation of any great homemade bread lies in its core ingredients: flour, yeast, water, and salt. Each component plays a crucial role in the baking process, and understanding their functions can significantly improve your results.

**Flour** is the backbone of your bread. Different types of flour have varying protein content, which affects gluten development—the key to achieving that desirable chewy texture. All-purpose flour is versatile and suitable for most bread recipes, while bread flour, with its higher protein content, enhances gluten strength for a chewier crust. Whole wheat flour adds a nutty flavor and earthy texture but often requires additional hydration due to its bran content. Experimenting with different flours can lead to delightful variations in flavor and texture.

**Yeast** is the magical organism that brings your dough to life. When activated, yeast ferments the sugars in the flour, producing carbon dioxide gas that causes the dough to rise. There are primarily two types of yeast used in bread-making: active dry yeast and instant yeast. Active dry yeast requires proofing in warm water before use, while instant yeast can be mixed directly into the dry ingredients. Understanding the right amount and type of yeast to use is essential, as it influences both the rise and flavor of your bread.

**Water** is often an underestimated ingredient but is vital in the baking process. It hydrates the flour, allowing gluten to develop and facilitating yeast fermentation. The temperature of the water matters; too hot can kill the yeast, while too cold can inhibit its activity. A good rule of thumb is to use water around 100°F (37°C) for optimal yeast activation. You may also want to consider the mineral content of your water, as certain minerals can enhance the flavor and texture of the bread.

**Salt** is not just a flavor enhancer; it also strengthens gluten structure and helps regulate yeast activity. Without it, your bread would be bland and dense. However, too much salt can hinder yeast fermentation, so finding the right balance is crucial. Typically, a ratio of 1.5-2% salt to the weight of flour is a good starting point. It’s also important to mix salt into the dry ingredients before adding the yeast, as direct contact with yeast can inhibit its growth.

By understanding the roles of flour, yeast, water, and salt, you can experiment with different combinations and techniques. Each ingredient not only impacts the flavor and texture of your bread but also influences how well your dough rises and bakes. So, embrace the science behind these essentials, and let them guide you on your journey to baking perfect homemade bread.

4. The Science of Bread: How Ingredients Work Together

Understanding the science behind bread-making is essential for creating that perfect loaf that boasts a crusty exterior and a soft, airy crumb. Each ingredient plays a vital role in this intricate dance of flavors and textures, and knowing how they interact can elevate your baking to new heights.

**Flour:** The foundation of any bread, flour provides the structure. Most bread recipes call for all-purpose or bread flour, which has a higher protein content than regular flour. This protein, primarily gluten, develops when mixed with water and kneaded, forming a network that traps gases produced by yeast. The result? A loaf that rises beautifully and holds its shape.

**Water:** Often underestimated, water is crucial not just for hydration but also for activating the yeast and dissolving the flour’s proteins. The temperature of the water matters, too—warm water (around 100°F) encourages yeast activity, while cold water can slow it down. The right balance of moisture is key; too much can make the dough sticky and unmanageable, while too little can lead to a dry loaf.

**Yeast:** The magical ingredient that allows bread to rise, yeast ferments the sugars present in the flour, producing carbon dioxide gas. This gas expands within the gluten network, causing the dough to rise. Different types of yeast, such as active dry, instant, or fresh yeast, can affect the fermentation time and flavor profile of your bread. Understanding how to properly activate and incorporate yeast can make all the difference in your final product.

**Salt:** Often viewed as just a seasoning, salt is a crucial player in bread-making. It not only enhances flavor but also tightens the gluten structure, providing better elasticity and texture. Additionally, salt helps to control yeast activity, preventing it from fermenting too quickly, which can lead to an unbalanced flavor.

**Sugar:** While not always necessary, sugar contributes to the bread’s flavor and helps with browning during baking. It serves as food for the yeast, promoting fermentation, and can enhance the overall texture of the bread. Some recipes call for additional sweeteners like honey or molasses, which can impart unique flavors and moisture.

By grasping how these ingredients work together, you can experiment with proportions and techniques to achieve your desired outcome. Whether you prefer a crusty baguette or a soft sandwich loaf, understanding the science behind your ingredients will empower you to bake with confidence and finesse, ensuring that each loaf is a delicious success. Happy baking!

5. Choosing the Right Type of Bread to Bake

What are the best ways to make homemade bread?
Credit : whatcanu.com

Choosing the right type of bread to bake is a crucial step in your journey to becoming a home baking maestro. With a myriad of options available, from crusty sourdough loaves to soft brioche, the choice can feel overwhelming. However, understanding the characteristics and techniques involved in each type of bread can help you select the perfect recipe that aligns with your skill level and desired outcome.

If you’re new to baking, starting with a simple white bread or a basic whole wheat loaf can set a solid foundation. These recipes typically require fewer ingredients and less intricate techniques, allowing you to build confidence as you master the basics of mixing, kneading, and proofing. On the other hand, if you’re feeling adventurous, consider venturing into the realm of artisan breads, such as ciabatta or focaccia. These breads often feature unique flavors and textures, and while they may require a bit more skill and patience, the reward of pulling a beautifully crusty loaf from the oven is well worth the effort.

For those who have dietary restrictions or preferences, there are also a variety of gluten-free, dairy-free, and whole grain options to explore. Each type of bread brings its own set of challenges and flavor profiles. For instance, gluten-free breads often require a blend of flours and additional binding agents to achieve the right texture, while whole grain breads tend to be denser, offering a rustic flavor that many find appealing.

Ultimately, the best approach is to choose a bread that excites you. Whether your heart is set on a classic baguette, a sweet cinnamon roll, or a hearty rye, select a recipe that speaks to your taste buds and inspires your baking endeavors. Embrace the journey of experimentation—after all, each loaf you bake will bring you one step closer to mastering the art of homemade bread. Happy baking!

6. Step-by-Step Guide to Making Basic Bread Dough

Making basic bread dough is the cornerstone of any successful baking journey, and with a little patience and practice, you can master this fundamental skill. Here’s a step-by-step guide to help you create a delicious loaf that will impress both your taste buds and your family.

**Step 1: Gather Your Ingredients**
Start with the essentials: flour, water, yeast, and salt. For a typical loaf, you’ll need about 4 cups of all-purpose flour, 1 and ½ cups of warm water (around 110°F), 2 teaspoons of active dry yeast, and 1 tablespoon of salt. Using high-quality ingredients is crucial, as they will significantly impact the final taste and texture of your bread.

**Step 2: Activate the Yeast**
In a small bowl, combine the warm water with the yeast and a pinch of sugar. Let it sit for about 5-10 minutes until it becomes frothy. This step is essential as it proves that your yeast is alive and ready to work its magic, creating the rise that gives bread its airy structure.

**Step 3: Mix the Dough**
In a large mixing bowl, combine the flour and salt. Make a well in the center and pour in the activated yeast mixture. Using a wooden spoon or your hands, start mixing until the dough comes together. You may need to add a little more flour or water, depending on the humidity and the absorbency of your flour. The goal is to achieve a slightly sticky, yet manageable dough.

**Step 4: Knead the Dough**
Once the dough forms a cohesive ball, transfer it to a floured surface. Knead the dough for about 8-10 minutes, folding and pushing it with the heel of your hand. This process develops gluten, which gives your bread its structure and chewiness. You’ll know it’s ready when the dough is smooth and elastic, bouncing back when poked.

**Step 5: First Rise**
Shape the kneaded dough into a ball and place it in a lightly greased bowl, covering it with a damp cloth or plastic wrap. Set it in a warm, draft-free area to rise for about 1 to 2 hours, or until it has doubled in size. This step is crucial, as it allows the yeast to ferment and produce carbon dioxide, resulting in a light, airy loaf.

**Step 6: Shape the Dough**
Once the dough has risen, gently punch it down to release the air. turn it out onto a floured surface and shape it into a loaf or divide it into smaller portions for rolls. Place the shaped dough into a greased loaf pan or on a baking sheet lined with parchment paper.

**Step 7: Second Rise**
Let the shaped dough rise again for about 30-60 minutes, covered with a cloth. This second rise helps to improve the texture and flavor of the bread, so be patient and allow it to puff up nicely.

**Step 8: Bake**
Preheat your oven to 375°F (190°C) while the dough rises. Once ready, bake the bread for 30-35 minutes, or until it sounds hollow when tapped on the bottom and has a beautiful golden-brown crust. If you want a crustier loaf, place a shallow pan of water in the oven while it bakes to create steam.

**Step 9: Cool and Enjoy**
After baking, remove

7. Kneading Techniques: Achieving the Perfect Texture

What are the best ways to make homemade bread?
Credit : whatcanu.com

Kneading is one of the most crucial steps in the bread-making process, as it develops the gluten that gives bread its structure and chewy texture. Mastering the art of kneading can mean the difference between a dense loaf and one that is light and airy. Whether you choose to knead by hand or use a stand mixer, understanding the techniques involved can elevate your homemade bread to new heights.

**Hand Kneading:** If you prefer the traditional approach, hand kneading can be a meditative experience. Start by flouring your work surface and your hands to prevent sticking. Gather your dough into a rough ball, and with the heel of your hand, push the dough away from you. Fold it back over itself, give it a quarter turn, and repeat the process. This rhythmic motion helps align the gluten strands and incorporates air into the dough. Aim for about 8 to 10 minutes of kneading until the dough becomes smooth and elastic. To test if you’ve kneaded enough, perform the “windowpane test”: stretch a small piece of dough between your fingers. If it stretches into a thin, translucent membrane without tearing, you’re good to go!

**Using a Stand Mixer:** If you’re short on time or prefer a hands-off approach, a stand mixer can do the heavy lifting for you. Equip your mixer with the dough hook, and mix your ingredients on low speed until they come together. Gradually increase the speed to medium and let the machine knead the dough for about 5 to 7 minutes. Just like with hand kneading, the dough should be smooth and elastic when it’s ready. Keep an eye on the texture; if it appears too sticky, add a little flour, but be cautious not to overdo it, as too much flour can lead to a dry loaf.

**Resting Time:** After kneading, it’s essential to let your dough rest. This resting period allows the gluten to relax, making it easier to shape later on. Cover the dough with a damp cloth or plastic wrap and let it rise in a warm, draft-free area until it has doubled in size—usually about 1 to 2 hours, depending on the recipe.

By mastering these kneading techniques, you’ll not only achieve the perfect texture for your bread but also deepen your appreciation for the craft of baking. The satisfaction of pulling a beautifully risen loaf from the oven, with that inviting golden crust and soft, airy interior, is well worth the effort!

8. The Importance of Proofing: How to Get It Right

Proofing is a crucial step in the bread-making process that can dramatically influence the texture and flavor of your loaf. At its core, proofing is the final rise of your shaped dough before it goes into the oven. During this time, yeast continues to ferment, producing carbon dioxide that causes the dough to expand and develop an airy structure. However, getting this stage right requires a delicate balance of time, temperature, and technique.

To achieve the perfect proof, start by shaping your dough into the desired form—whether it’s a rustic round loaf, a braided challah, or a classic baguette. Once shaped, place your dough in a lightly greased bowl or on a floured surface, and cover it with a damp cloth or plastic wrap to prevent it from drying out. The ideal environment for proofing is a warm, draft-free area, typically between 75°F to 85°F (24°C to 29°C). If your kitchen is on the cooler side, consider placing the dough in an oven with the light on or near a slightly warmed stovetop.

Timing is key during proofing. While a general guideline is to let the dough rise until it has doubled in size, this can vary based on the type of bread, the ingredients used, and even the humidity level in your kitchen. A great way to check for readiness is to perform the “poke test”: gently press your finger into the dough. If the indentation springs back slowly, your dough is ready to go. If it springs back quickly, it needs more time; if it doesn’t spring back at all, it may be over-proofed.

Don’t underestimate the importance of this step—proper proofing not only enhances the bread’s flavor through the development of natural sugars but also ensures a light, airy crumb. So, as you embark on your bread-baking journey, remember that patience and attention to detail during the proofing stage will reward you with a delicious homemade loaf that’s worthy of celebration.

9. Shaping Your Dough: Techniques for Different Bread Styles

Shaping your dough is an art that can significantly influence the texture and appearance of your homemade bread, and mastering different techniques will allow you to create a variety of styles, each with its unique character. Whether you’re aiming for the rustic charm of a sourdough boule or the elegant, tight crumb of a baguette, the way you shape your dough plays a crucial role in the final product.

**1. The Round Boule:** To create a round boule, start by lightly flouring your work surface. Gently flatten your risen dough into a rectangle using your fingertips, then fold the edges towards the center, creating a tighter surface. Flip the dough over, seam side down, and use your hands to cup the dough, rotating it on the surface to create tension. This technique not only gives your loaf a lovely shape but also helps the dough to rise evenly.

**2. The Baguette:** Shaping a baguette requires a bit more finesse. Begin by dividing your dough into equal portions. Gently flatten each piece and use a rolling pin to elongate it, being careful not to deflate the air pockets too much. Once you have a long, tapered shape, roll it tightly, starting from one end, and seal the seam well. The key to a good baguette is creating a tight surface that will hold its shape during the second rise, ensuring a beautiful crust when baked.

**3. The Focaccia:** Focaccia is one of the easiest breads to shape, as its rustic style embraces a more relaxed form. After your dough has risen, simply press it into a well-oiled baking sheet, using your fingers to create dimples all over the surface. This not only creates an inviting texture but also allows olive oil and toppings to seep into the dough as it bakes, resulting in a flavorful crust.

**4. The Sandwich Loaf:** For a classic sandwich loaf, shape your dough into a rectangle and roll it tightly, ensuring that each layer is compact. Pinch the seams closed and place it seam side down in a greased loaf pan. This method provides structure and height, giving you soft, even slices perfect for your favorite sandwiches.

By understanding and practicing these shaping techniques, you’ll not only enhance the aesthetics of your loaves but also optimize their rise and texture. Remember, each type of bread has its unique characteristics, and with a little experimentation, you’ll find joy in shaping your dough into delicious masterpieces that are not just tasty but also visually appealing. Embrace the process, and let your creativity shine as you craft your next homemade bread.

10. Baking Tips: Oven Temperature and Steam for Perfect Crust

When it comes to achieving that perfect crust on your homemade bread, understanding oven temperature and the role of steam is absolutely essential. The right temperature not only ensures that your loaf rises beautifully but also helps to develop the golden-brown exterior that we all crave. Preheat your oven to a high temperature—around 450°F (232°C) is ideal for most artisan breads. This intense heat creates an immediate burst of steam when the dough enters the oven, which is crucial for achieving a crust that is both crispy and chewy.

But how do you create this steam? One effective method is to place a shallow pan filled with water at the bottom of your oven while it preheats. As the water heats up, it will produce steam that envelops your dough, allowing it to expand fully before the crust sets. Alternatively, you can spray the oven walls with water using a spray bottle just before closing the door. This brief introduction of steam will help your bread achieve a lovely rise, while also preventing the crust from hardening too quickly.

Another tip is to bake your bread on a preheated baking stone or steel, which retains heat and helps to create a crust that crackles with each bite. If you don’t have one, a sturdy baking sheet turned upside down will do the trick. Remember to check your bread in the first 10-15 minutes of baking; this is when the steam effect is most critical, helping to lift your dough and create that airy, open crumb structure.

Once your bread has reached the desired color, you can reduce the temperature slightly to finish baking without burning the crust. The perfect loaf should sound hollow when tapped on the bottom—this is a sign it’s fully baked. With these tips on oven temperature and steam, you’ll be well on your way to mastering the art of homemade bread, creating loaves that not only taste delightful but also look stunning!

11. Common Mistakes to Avoid When Baking Bread

Baking homemade bread can be a delightful and rewarding experience, but it’s easy to fall into a few common pitfalls that can lead to less-than-perfect results. To help you on your journey to achieving that ideal crust and tender crumb, let’s explore some of the most frequent mistakes bakers make and how to avoid them.

**1. Skipping the Proofing Stage:** One of the most critical mistakes is neglecting to properly proof your dough. This step allows the yeast to ferment and develop flavor, as well as to rise effectively. Rushing this process can result in dense, underdeveloped bread. Always give your dough the time it needs to rise until it has doubled in size.

**2. Using the Wrong Flour:** Not all flours are created equal. Using an all-purpose flour when your recipe calls for bread flour can lead to disappointing results. Bread flour has a higher protein content, which contributes to gluten development and gives your loaf its characteristic chewiness. Be sure to choose the right type of flour for your desired texture.

**3. Overworking the Dough:** While it’s important to knead your dough to develop gluten, overdoing it can lead to tough bread. Knead just until the dough is smooth and elastic. Remember, gentle folding can also be an effective way to shape your dough without overworking it.

**4. Incorrect Oven Temperature:** An oven that’s too hot can cause the crust to burn before the interior is fully baked, while an oven that’s too cool can result in a pale loaf with little rise. Invest in an oven thermometer to ensure your baking temperatures are accurate, and preheat your oven thoroughly before placing your bread inside.

**5. Not Using Steam:** Many bakers overlook the importance of steam in the first few minutes of baking. Steam helps to create a beautiful crust and allows the bread to expand fully during the initial rise in the oven. You can create steam by placing a pan of hot water in the oven or by misting the oven walls with water just before you close the door.

**6. Cutting Into the Bread Too Soon:** It’s tempting to slice into a freshly baked loaf right out of the oven, but doing so can ruin the texture. Allow your bread to cool completely on a wire rack before cutting. This resting period helps the crumb set, ensuring a better texture and flavor.

By being mindful of these common mistakes, you can enhance your bread-baking skills and achieve that perfect loaf that you’ll be proud to share with family and friends. Happy baking!

12. Flavor Enhancements: Herbs, Spices, and Add-ins

When it comes to baking homemade bread, flavor enhancements are the secret ingredients that can elevate your loaf from ordinary to extraordinary. While the foundational ingredients—flour, water, yeast, and salt—create the essential structure of your bread, the addition of herbs, spices, and various add-ins can transform the taste and aroma, making each slice an experience to savor.

**Herbs and Spices**
Imagine the earthy aroma of rosemary wafting through your kitchen as you knead your dough. Fresh or dried herbs like thyme, oregano, and basil can add depth and character to your bread, whether you’re making a rustic loaf or a soft sandwich bread. For a hint of warmth, consider spices like cinnamon, nutmeg, or even a touch of cayenne pepper for those who like a little heat. The key is to experiment—start with small amounts and gradually increase to find the perfect balance that complements your bread without overpowering it.

**Add-ins for Texture and Flavor**
Beyond herbs and spices, think about incorporating add-ins that contribute both texture and flavor. Chopped nuts, seeds, or grains can provide a delightful crunch and nutty undertones. Consider adding sunflower seeds for a pop of flavor, or walnuts for a rich, buttery contrast. Dried fruits like cranberries, apricots, or raisins can lend a touch of sweetness, creating a lovely harmony with the savory notes of your bread.

**Cheese and Other Dairy Products**
If you’re feeling adventurous, fold in shredded cheese or even crumbled feta for a savory twist. Cheese not only enriches the flavor but also adds moisture, resulting in a tender crumb. For a richer taste, try using buttermilk or yogurt in place of water; these dairy products can create a softer texture and a pleasantly tangy flavor profile.

**Citrus Zest and Other Flavoring Agents**
Don’t shy away from the bright notes of citrus zest, which can add a refreshing lift to your bread. A hint of lemon or orange zest can make a world of difference, especially in enriched bread recipes. Alternatively, a splash of balsamic vinegar or a drizzle of honey can enhance the overall flavor complexity, providing layers of taste that will keep your customers (or family) coming back for more.

Incorporating these flavor enhancements into your bread-making routine not only showcases your creativity but also tailors each loaf to your personal taste preferences. So the next time you prepare to knead, remember that the journey to baking the perfect loaf includes a delightful adventure in flavor exploration. Embrace the art of enhancement, and watch your homemade bread take on new dimensions of deliciousness!

13. Storing and Slicing Your Homemade Bread

Once you’ve put in the effort to bake a beautiful loaf of homemade bread, the next crucial step is ensuring it stays fresh and delicious. Proper storage not only prolongs the lifespan of your bread but also preserves its texture and flavor, so you can enjoy that perfect slice for days to come.

First, allow your bread to cool completely on a wire rack. This step is essential; if you store it while still warm, the steam trapped inside can create a soggy loaf. After cooling, the best way to store your homemade bread is in a breathable bag. A cotton or linen bread bag is ideal, as it allows airflow while keeping dust and pests at bay. Avoid plastic bags, as they can trap moisture and lead to a chewy or stale texture.

If you plan to consume your bread within a few days, simply placing it in a cool, dry place in your kitchen is sufficient. For longer storage, consider slicing your loaf and freezing individual pieces. This method not only makes it easier to grab a slice when you need it but also helps maintain freshness. Simply wrap each slice in plastic wrap or aluminum foil, and then place them in a zip-top freezer bag. When you’re ready to enjoy a slice, just pop it in the toaster or let it thaw at room temperature.

When it comes to slicing, using a serrated bread knife is essential for achieving clean, even slices without squashing the loaf. Start from one end and use a gentle sawing motion, applying minimal pressure to avoid compressing the bread. Aim for slices that are about half an inch thick; this thickness is perfect for toasting or creating hearty sandwiches while still allowing the crust to shine.

By following these simple steps for storing and slicing, you can ensure that your homemade bread remains a delightful addition to your meals throughout the week, capturing the essence of your hard work and dedication to the art of baking. Enjoy the fruits of your labor in every delicious bite!

14. Troubleshooting: What to Do If Your Bread Doesn’t Rise

Baking bread is as much an art as it is a science, and sometimes, despite your best efforts, you might find your dough stubbornly refusing to rise. Don’t be discouraged! Troubleshooting this common issue can often lead to a better understanding of the baking process and improve your future loaves. Here are some key factors to consider when your bread doesn’t rise as expected.

**1. Yeast Issues**
The first thing to check is your yeast. If you’re using active dry yeast, ensure it’s fresh and properly activated. To do this, dissolve it in warm water (about 110°F or 43°C) with a pinch of sugar. If it doesn’t foam within 5-10 minutes, your yeast is likely dead and you’ll need to start over with a new packet. For instant yeast, although it doesn’t require activation, it still needs to be fresh, so check the expiration date before using.

**2. Temperature Matters**
Temperature plays a crucial role in the proofing process. If your kitchen is too cold, your dough may take an eternity to rise, or not rise at all. Aim for a warm, draft-free environment—around 75°F to 80°F (24°C to 27°C) is ideal. If your home is chilly, consider placing your dough in a warm oven (turned off) or near a heat source. Alternatively, you can create a makeshift proofing box by placing a bowl of hot water alongside your dough.

**3. Flour and Hydration**
The type of flour you use and the hydration level of your dough can also impact rising. Bread flour, with its higher protein content, yields better gluten development compared to all-purpose flour. If your dough is too dry, it may not rise adequately. Ensure your recipe has the right water-to-flour ratio, and don’t be afraid to adjust as needed based on the humidity and the flour you’re using.

**4. Kneading Technique**
Under-kneaded dough lacks the necessary gluten development to trap the gases produced by yeast, leading to poor rise. Ensure that you knead your dough until it is smooth and elastic, which usually takes about 8-10 minutes by hand or 5-7 minutes in a stand mixer. If in doubt, perform the “windowpane test”—stretch a small piece of dough; if it forms a thin, translucent membrane without tearing, you’re good to go.

**5. Time and Patience**
Finally, don’t rush the process. Allow your dough ample time to rise. The first rise, known as bulk fermentation, should double the dough in size. If it hasn’t, give it more time. If you’re in a hurry, consider using a longer fermentation method in the refrigerator overnight, which can enhance flavor and texture.

If your bread doesn’t rise as you hoped, remember that each baking experience is an opportunity to learn and tweak your technique. With these troubleshooting tips, you’ll be on your way to baking perfect homemade bread that rises beautifully and tastes delicious. Keep experimenting, and soon enough, you’ll be a bread-baking pro!

15. Conclusion: Your Bread Baking Journey Awaits!

As we come to the end of this ultimate guide to baking perfect homemade bread, remember that your journey is just beginning. The art of bread making is not merely about following a recipe; it’s an exploration of flavors, textures, and techniques that evolve with each loaf you create. Each time you knead dough or watch it rise, you are engaging in a timeless ritual that connects you to bakers throughout history.

Embrace the learning process—mistakes will happen, and not every loaf will turn out as planned, but that’s part of the adventure! With each bake, you’ll gain confidence and deepen your understanding of the ingredients and methods. Don’t hesitate to experiment with different flours, add-ins, and techniques. Whether you prefer the rustic charm of a sourdough crust or the soft, pillowy texture of a brioche, there’s a world of possibilities waiting for you.

As you step into your kitchen, armed with the tips and techniques from this guide, remember to savor the experience. The aroma of freshly baked bread wafting through your home is not just a reward—it’s a testament to your hard work and creativity. So, gather your ingredients, roll up your sleeves, and let your baking journey unfold. Your perfect loaf is just a knead away! Happy baking!

As we wrap up this ultimate guide to baking perfect homemade bread, we hope you feel inspired and equipped to embark on your own baking journey. From understanding the science behind yeast to mastering the art of kneading and shaping, each step brings you closer to creating that warm, crusty loaf that fills your home with an irresistible aroma. Remember, the joy of baking comes not just from the final product, but from the process itself—experiment, make mistakes, and enjoy the delicious rewards along the way. So, gather your ingredients, preheat your oven, and let the magic of homemade bread-making transform your kitchen into a haven of comfort and creativity. Happy baking!