
How to make sourdough bread: The foundational recipe

Making sourdough at home is less about magic and more about managing a biological process. You do not need professional equipment, but you do need consistency. This guide focuses on a simple, repeatable process to bake your first loaf. Follow these steps precisely to achieve a crisp crust and a light, airy crumb.
The essential ingredients
You only need four ingredients. Quality matters, as there are no additives to hide behind. Use a kitchen scale for every measurement; volumetric cups are too inaccurate for bread baking.
- Active sourdough starter: 100g (fed and bubbly).
- Bread flour: 400g (high protein content helps structure).
- Whole wheat flour: 100g (adds flavor and fermentation activity).
- Water: 350g (warm, around 25°C).
- Fine sea salt: 10g.
Step 1: The Mix and Autolyse
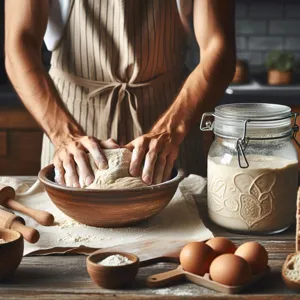
Combine your flour and water in a large bowl. Mix until no dry spots remain, then let it rest for 45 minutes. This is called an autolyse. Think of it like soaking a dry sponge; it makes the flour pliable and easier to work with later. After the rest, add your starter and salt, pinching the dough to ensure everything is evenly incorporated.
Step 2: Building strength
Forget vigorous kneading. Sourdough benefits from gentle handling to preserve air bubbles. Every 30 minutes for two hours, perform a stretch and fold. Grab one edge of the dough, pull it upward until you feel resistance, and fold it over the center. Rotate the bowl and repeat for all four sides. This aligns the protein chains, creating a strong network that holds gas.
Step 3: Bulk fermentation
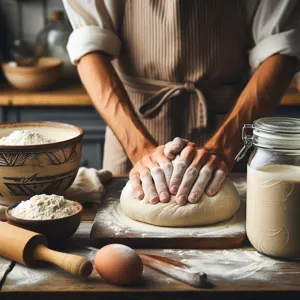
Cover the bowl with a damp cloth and let it rest at room temperature. This is where flavor develops. Watch for the dough to increase by about 50% in volume and show small bubbles on the surface. If your kitchen is cold, this may take up to six hours. In a warm kitchen, it might only take four.
Step 4: Shaping the loaf
Turn the dough onto a lightly floured surface. Gently shape it into a round ball by pulling the edges toward the center. Flip it over so the seam is down and drag it toward you against the counter to create tension on the surface. This ‘skin’ acts like a balloon shell, forcing the bread to rise upward in the oven.
Step 5: The final proof

Place your shaped dough upside down into a floured proofing basket or a bowl lined with a floured towel. Let it rest for another two hours. If you want more sour flavor, place the bowl in the refrigerator for 12 hours instead. Cold temperatures slow down yeast but allow beneficial bacteria to continue producing lactic acid.
Step 6: The bake
Preheat your oven to 240°C with a Dutch oven inside for one hour. Carefully transfer your dough into the hot Dutch oven. Use a razor blade to score the top of the loaf with a deep, swift cut. This cut acts as a pressure relief valve, allowing the bread to expand without tearing randomly. Cover with the lid and bake for 20 minutes. Remove the lid and bake for another 20 to 25 minutes until the crust is a deep golden brown.
Expert tips to avoid common failures
- The gummy crumb mistake: Never cut into your bread while it is hot. Steam is still finishing the cooking process inside. Cutting too early releases this moisture as gas, leaving you with a sticky, rubbery interior. Wait at least three hours for the bread to cool completely.
- Flat loaf syndrome: If your bread spreads like a pancake instead of rising, it is likely over-proofed. The gluten structure has broken down because the yeast worked for too long. Shorten your fermentation time by 30 minutes in your next attempt.
- The steam trick: If you do not have a Dutch oven, you must create steam. Place a metal tray on the bottom rack of your oven and pour a cup of boiling water into it when you put your bread in. This mimics the professional bread ovens that keep the crust soft long enough for the loaf to spring upward.
Keep a simple log of your baking days. Note the ambient room temperature and the time you started. If your loaf turns out perfectly, you can repeat the exact conditions. If it fails, you will know exactly which variable—temperature or time—needs an adjustment for the next attempt.
Content updated on 2026-10-10