WhatCanU.com has managed to bring together the most common questions that Internet users ask and provide relevant and precise answers
pc gaming – How to create a custom gaming PC build?
In the ever-evolving realm of gaming, nothing quite compares to the thrill of assembling your very own custom PC—a dream machine tailored to your unique gaming preferences and performance needs.
whetheryou’re a casual gamer looking to dip your toes into the world of PC gaming or a seasoned enthusiast aiming for the ultimate powerhouse, building your own rig is a rewarding journey that combines creativity, technical skill, and personalized design. This comprehensive guide will walk you through each step of the process, from selecting the perfect components that suit your budget and performance goals to piecing them together in a way that maximizes efficiency and style. With expert tips and insider tricks, we’ll ensure that your custom gaming build not only meets your expectations but also elevates your gaming experience to new heights. Get ready to unleash your inner techie and embark on the exciting adventure of crafting a machine that’s truly your own!
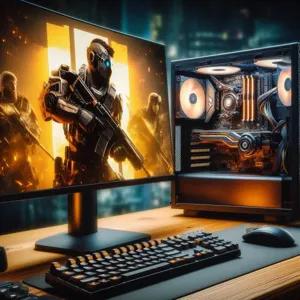
1. Introduction to Custom PC Gaming Builds
Credit : whatcanu.com
In the ever-evolving world of gaming, there’s something undeniably exhilarating about the prospect of building your own custom PC. Unlike purchasing a pre-built machine, a custom gaming rig allows you to tailor every component to your specific needs and preferences, resulting in a setup that perfectly aligns with your gaming style and visual expectations. Whether you’re a casual gamer, a competitive player, or simply someone who enjoys the artistry of PC hardware, embarking on this journey opens up a realm of possibilities.
A custom PC gaming build is not just about performance; it’s about crafting a unique experience. With the right knowledge and a dash of creativity, you can select components that not only deliver exceptional speed and graphics but also reflect your personal aesthetic. From choosing the perfect graphics card that can handle the latest AAA games at max settings to selecting a motherboard that provides the best features and expandability, each decision is an opportunity to create a machine that’s truly yours.
In this step-by-step guide, we’ll explore everything you need to know, from understanding the essential components and their functions to assembling your system with care. We’ll help demystify the process, ensuring you feel confident and excited as you dive into the world of custom builds. Whether you’re piecing together a powerhouse to experience the latest virtual reality landscapes or a sleek system for streaming, this guide will equip you with the information you need to bring your dream machine to life. Get ready to unleash your inner builder and elevate your gaming experience like never before!
2. Defining Your Gaming Needs and Budget
Before diving into the exhilarating world of custom PC gaming builds, it’s crucial to take a moment to define your gaming needs and set a realistic budget. This foundational step not only shapes the direction of your build but also ensures that you invest wisely in components that cater specifically to your gaming preferences.
Start by assessing the types of games you play or aspire to play. Are you a casual gamer who enjoys indie titles and classic RPGs, or are you a competitive player immersed in fast-paced shooters and graphically demanding open-world adventures? Understanding your gaming style will help you prioritize which components deserve more of your budget. For instance, a high-performance graphics card might be essential for those seeking stunning visuals and smooth frame rates in the latest AAA titles, while a solid processor may take precedence for gamers who rely on complex simulations or multitasking.
Next, consider how much you’re willing to spend to bring your dream machine to life. Custom PC builds can vary widely in price, from budget-friendly setups under $800 to extravagant systems that exceed several thousand dollars. Establishing a clear budget will help you make informed decisions and avoid the temptation of overspending on flashy components that may not significantly enhance your gaming experience.
As you outline your budget, remember to account for additional costs beyond just the core components. Don’t overlook the importance of peripherals—like a quality monitor, keyboard, and mouse—as well as software, such as gaming subscriptions and performance optimization tools.
By defining your gaming needs and budget upfront, you’ll create a roadmap for your custom PC build, ensuring that every dollar is spent wisely toward achieving the gaming experience you desire. This strategic approach not only maximizes the overall performance of your machine but also enhances your long-term satisfaction with your investment.
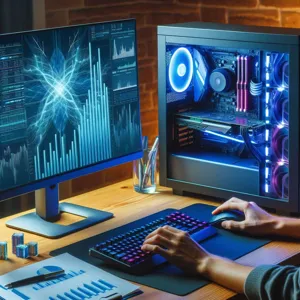
3. Understanding PC Components: A Quick Overview
Credit : whatcanu.com
Building your dream gaming rig is an exciting venture, and understanding the core components that will make up your custom PC is crucial to creating a machine that meets your gaming needs. Here’s a quick overview of the essential parts that you’ll need to consider:
**1. Central Processing Unit (CPU):** Often referred to as the brain of your computer, the CPU processes all the instructions from your applications and games. When selecting a CPU, consider the number of cores and threads it has, as well as its clock speed. Popular brands like Intel and AMD offer a range of options, from budget-friendly to high-end models that can handle intense gaming sessions.
**2. Graphics Processing Unit (GPU):** The GPU is a critical component for gamers, as it handles all the rendering of graphics. A powerful GPU allows for high frame rates and stunning visual fidelity. Depending on your gaming preferences, you might opt for a mid-range card for casual gaming or a top-tier model for immersive experiences in the latest AAA titles.
**3. Motherboard:** The motherboard is the backbone of your PC, connecting all components and allowing them to communicate. When choosing a motherboard, ensure it is compatible with your CPU and supports the features you need, such as Wi-Fi capabilities or multiple GPU setups. Look for options with ample USB ports and expansion slots to future-proof your build.
**4. Memory (RAM):** RAM is essential for multitasking and smooth gameplay. For gaming, 16GB is typically the sweet spot, but if you plan on streaming or running demanding applications simultaneously, you might consider 32GB. The speed of the RAM, measured in MHz, can also impact performance, so be sure to choose RAM that complements your CPU and motherboard.
**5. Storage:** Fast storage drives significantly reduce load times and improve overall system responsiveness. Solid State Drives (SSDs) are preferred for their speed, while Hard Disk Drives (HDDs) offer larger storage capacities at a lower cost. A combination of both—a smaller SSD for your operating system and most-played games, paired with a larger HDD for additional storage—can be an ideal setup.
**6. powerSupply Unit (PSU):** The PSU provides power to all your components, so it’s crucial to choose one that offers enough wattage and reliability. Look for units with an 80 Plus certification, which indicates energy efficiency and stability. Always err on the side of caution by selecting a PSU with a bit more wattage than you think you’ll need, especially if you plan on upgrading in the future.
**7. Case:** Your case not only houses all these components but also affects airflow and cooling. Choose a case that fits your motherboard size (ATX, Micro-ATX, etc.) and has enough space for your GPU and cooling solutions. Pay attention to cable management features and aesthetics if you want your build to look as great as it performs.
**8. Cooling Solutions:** Keeping your components cool is vital for performance and longevity. Depending on your CPU and GPU, you can opt for air or liquid cooling solutions. Good airflow in your case, complemented by quality fans, can make a significant difference in keeping temperatures in check during long gaming sessions.
By understanding these key components, you’ll be better equipped to make informed decisions as you embark on your custom PC gaming build journey. Each element plays a vital role in ensuring that your dream machine not only meets your gaming expectations but also stands the test of time.
4. Choosing the Right CPU: Processing Power Explained
When it comes to building your dream gaming PC, the central processing unit (CPU) is the heart of your machine, responsible for executing commands and processing data. Choosing the right CPU is crucial, as it will determine not only the performance of your gaming experience but also how well your system can handle multitasking, streaming, and future software demands.
First, familiarize yourself with the two major players in the CPU market: Intel and AMD. Each brand offers a range of processors that cater to different needs and budgets. Intel’s Core series, particularly the i5 and i7 models, are known for their strong single-thread performance, making them excellent choices for gaming. On the other hand, AMD’s Ryzen processors have gained popularity for their competitive multi-threading capabilities and value for money, especially in the Ryzen 5 and Ryzen 7 lines.
When selecting a CPU, consider the number of cores and threads. Modern games are increasingly optimized to use multiple cores, so a processor with at least four cores is recommended for a smooth experience. However, opting for six or eight cores will future-proof your build, enabling it to handle more demanding titles as they are released.
Another essential factor is clock speed, measured in gigahertz (GHz). A higher clock speed usually translates to better performance, but it’s important to balance this with core count and the specific games you play. Keep an eye on benchmarks and reviews, as they provide real-world performance comparisons that can help you make an informed decision.
Finally, consider compatibility with your motherboard and cooling system. Ensure that your chosen CPU fits your motherboard’s socket type and keep in mind the thermal design power (TDP) rating. A CPU with a higher TDP may require superior cooling solutions to maintain optimal performance during intense gaming sessions.
In conclusion, selecting the right CPU is a foundational step in building your custom gaming PC. By understanding the nuances of processing power, you’ll set the stage for an exhilarating gaming experience that meets your expectations and evolves with your gaming needs.
5. Selecting the Perfect GPU for Your Gaming Experience
Credit : whatcanu.com
When it comes to building your dream gaming machine, selecting the perfect Graphics Processing Unit (GPU) is one of the most crucial steps in ensuring an exhilarating gaming experience. The GPU is often considered the heart of a gaming rig, responsible for rendering images, animations, and video in real time. Choosing the right GPU can mean the difference between smooth, high-frame-rate gameplay and frustrating lag.
Start by assessing your gaming needs and preferences. Are you an avid gamer seeking the latest AAA titles with stunning graphics, or do you enjoy indie games that demand less power? Your answer will guide you toward the appropriate GPU. Modern games often come with heavy visual demands, so a robust GPU will ensure you can play at higher resolutions and settings, providing an immersive experience.
Next, consider the specifications that matter most. Look for a GPU with a good balance of core clock speed, memory bandwidth, and VRAM. For instance, if you’re gaming at 1080p, a card with 4GB to 6GB of VRAM may suffice; however, for 4K gaming or VR experiences, aim for 8GB or more. Popular choices from manufacturers like NVIDIA and AMD offer various models, so be sure to compare benchmarks and reviews to find a card that fits your performance expectations and budget.
It’s crucial to ensure compatibility with your motherboard and power supply. Check the PCIe slots and the wattage requirements of your GPU to avoid any surprises during installation. Additionally, consider the physical size of the GPU. Some high-end models can be quite large, so measure your case to ensure a proper fit.
Finally, don’t overlook the importance of cooling solutions. A powerful GPU can generate a significant amount of heat, so look for models with efficient cooling systems or consider investing in aftermarket cooling options. By carefully selecting a GPU that aligns with your gaming style, budget, and system compatibility, you’ll be well on your way to unlocking a thrilling gaming experience in your custom-built PC.
6. Motherboards: What You Need to Know
When it comes to building your dream gaming PC, the motherboard is the backbone of your setup. It serves as the central hub that connects all the components, from the CPU and RAM to storage devices and graphics cards. Choosing the right motherboard can significantly impact your system’s performance, expandability, and future upgrade options. Here are the key factors to consider when selecting a motherboard for your custom gaming rig.
**Form Factor:** Motherboards come in various sizes, including ATX, Micro-ATX, and Mini-ITX. The form factor determines the layout, the number of expansion slots, and how many peripheral devices you can connect. If you plan to build a compact setup, a Mini-ITX motherboard might be suitable. However, for larger builds with multiple graphics cards or extensive cooling systems, an ATX motherboard is the way to go.
**Socket Type:** The CPU socket type is crucial as it must match the processor you intend to use. Common socket types include Intel’s LGA 1200 and AMD’s AM4. Before purchasing your motherboard, ensure it supports the specific CPU model you wish to install, as this compatibility is essential for optimal performance.
**Chipset Features:** The chipset governs the motherboard’s capabilities and features. Higher-end chipsets often come with advanced overclocking support, more USB ports, and better networking options. Research the various chipsets available for your chosen CPU to find one that aligns with your gaming needs and performance aspirations.
**RAM Compatibility:** Look for a motherboard that supports the amount and type of RAM you want to use. Most modern motherboards support DDR4 memory, with options for speeds often exceeding 3000 MHz. Consider the number of RAM slots available, as this will determine how much memory you can install now and in the future.
**Expansion Slots:** If you plan to add additional components, such as extra GPUs or sound cards, check the number and type of expansion slots on the motherboard. PCIe slots come in various versions, with PCIe 4.0 providing faster data transfer speeds compared to older versions. Ensure that your motherboard has enough slots to accommodate your current and future upgrades.
**Connectivity Options:** The last thing you want is a lack of connectivity options. Look for motherboards with a variety of ports, including USB 3.0, USB-C, and HDMI. Additionally, consider built-in Wi-Fi and Bluetooth capabilities for added convenience, especially if you prefer a wireless setup.
In summary, selecting the right motherboard is a critical step in your custom gaming build. Take the time to research and compare different models, ensuring they align with your gaming goals and setup requirements. With the right motherboard, you’ll be one step closer to creating a powerful machine that delivers the performance you desire in your gaming adventures.
7. RAM: How Much Do You Really Need?
Credit : whatcanu.com
When it comes to building your dream gaming machine, one of the most crucial components to consider is RAM (Random Access Memory). But how much do you really need? The answer depends on your gaming habits, the types of games you play, and how you intend to use your PC beyond gaming.
For most gamers, 16GB of RAM is the sweet spot. This amount provides plenty of headroom for modern games, allowing for smooth multitasking and eliminating the dreaded stuttering that can occur when your system runs out of memory. Whether you’re delving into expansive open-world adventures or engaging in fast-paced online battles, 16GB will keep your system running fluidly.
However, if you’re a power user who enjoys playing demanding titles, editing videos, or running multiple applications simultaneously, you might want to consider upgrading to 32GB. This gives you the flexibility to handle more intensive workloads and future-proofs your system for upcoming games that may require more resources.
It’s also worth noting that the speed of your RAM can impact performance. Look for RAM with a higher MHz rating to enhance your gaming experience further, as faster RAM can improve load times and overall responsiveness. Opting for dual-channel configurations can also help maximize your memory’s efficiency, ensuring that your system works harmoniously.
In summary, while 16GB is generally sufficient for most gamers, evaluating your specific needs and considering future-proofing options will guide you to the right amount of RAM for your custom build. Remember, a well-balanced system is key to achieving that seamless gaming experience you’ve always dreamed of.
8. Storage Solutions: SSD vs. HDD
When it comes to choosing the right storage solution for your custom gaming PC, understanding the differences between SSDs (Solid State Drives) and HDDs (Hard Disk Drives) is crucial. Each option has its own set of advantages and drawbacks that can significantly impact your gaming experience and overall system performance.
**SSDs: Speed and Performance**
SSDs are the go-to choice for gamers looking for speed and efficiency. Unlike traditional HDDs, which rely on spinning disks to read and write data, SSDs use flash memory to store information. This fundamental difference allows SSDs to deliver lightning-fast load times, dramatically reducing the time it takes to boot up your operating system, launch games, and access files. Imagine diving into your favorite game in seconds rather than minutes—this speed can be a game-changer in competitive environments where every second counts.
Another benefit of SSDs is their durability. With no moving parts, they are less susceptible to physical damage, making them an ideal choice for gamers who transport their machines frequently. Additionally, the compact form factor of SSDs allows for more flexible build designs, freeing up space for other components.
**HDDs: Capacity and Cost-Effectiveness**
On the other hand, HDDs offer a different set of benefits, primarily in terms of storage capacity and cost. If you’re a gamer with a vast library of titles, including large AAA games, an HDD can provide the massive storage space needed without breaking the bank. With capacities often reaching several terabytes at a fraction of the cost of SSDs, HDDs are a practical solution for storing your entire game collection, media files, and more.
However, it’s essential to consider the trade-offs. While HDDs are generally slower than SSDs, they can still serve well as secondary storage for files that don’t require rapid access, such as videos, music, and older games you don’t play as often.
**The Best of Both Worlds**
Ultimately, the best storage solution for your gaming PC may involve a combination of both SSD and HDD. Utilizing an SSD as your primary drive for your operating system and frequently played games will ensure optimal performance, while an HDD can serve as a secondary drive for less frequently accessed files and games. This hybrid approach allows you to harness the speed of SSDs without sacrificing the large storage capacity that HDDs offer, striking the perfect balance for any gaming enthusiast.
As you build your dream machine, weigh your options carefully to create a storage setup that meets your gaming needs and enhances your overall experience.
9. Power Supply Units (PSUs): Ensuring Reliability
When it comes to building your dream gaming PC, the importance of a reliable Power Supply Unit (PSU) cannot be overstated. Often overlooked in the excitement of selecting flashy graphics cards and cutting-edge CPUs, the PSU is the unsung hero of your build. It’s the component that ensures your entire setup runs smoothly, providing the necessary power to each part of your machine without interruption.
To start, it’s crucial to choose a PSU that offers both sufficient wattage and efficiency. Start by calculating the total power requirements of your components—this includes the CPU, GPU, motherboard, RAM, storage drives, and any additional peripherals. A PSU that delivers at least 20% more power than your maximum needs is a safe bet, as it allows for potential upgrades and prevents overloading the unit.
Efficiency ratings, indicated by the 80 PLUS certification, should also guide your choice. A PSU with a higher efficiency rating (such as 80 PLUS Gold or Platinum) will waste less energy as heat, translating to lower electricity bills and a cooler-running system. This is particularly important during those marathon gaming sessions where performance and stability are paramount.
Moreover, take note of the PSU’s build quality and features. Look for units with high-quality capacitors and sturdy cables that can withstand the rigors of daily usage. Modularity is another aspect to consider; a fully modular PSU allows you to connect only the cables you need, reducing clutter inside your case and improving airflow.
In summary, investing in a reliable PSU is not just about powering your gaming rig; it’s about ensuring longevity and maximized performance for your entire setup. A well-chosen PSU will keep your system stable, protect your components from power fluctuations, and ultimately provide peace of mind as you delve into the immersive worlds of your favorite games.
10. Cases and Cooling: Keeping Your Build Stylish and Efficient
When it comes to assembling your dream gaming rig, the case and cooling system play pivotal roles not just in functionality, but also in aesthetics. Choosing the right case is the first step to creating a visually stunning and efficient build. Look for a chassis that not only fits your components snugly but also complements your personal style. Whether you prefer a sleek minimalist design, a vibrant RGB-lit powerhouse, or a classic tower with elegant curves, your case serves as the canvas for your masterpiece.
Consider factors such as airflow, materials, and cable management when selecting your case. Good airflow is crucial for maintaining optimal temperatures, especially during long gaming sessions. Look for cases with ample ventilation, mesh panels, or pre-installed fans to ensure that your components remain cool and perform at their best. Additionally, a case with built-in cable management features will help keep your interior tidy, allowing for better airflow and easier upgrades in the future.
Cooling systems are equally important, as they directly impact performance and longevity. While many gamers opt for traditional air cooling solutions, liquid cooling has gained popularity for its efficiency and aesthetics. Custom liquid cooling loops can give your build a unique flair while keeping your CPU and GPU temperatures low. However, they require careful planning and maintenance, so weigh your options based on your comfort level and technical expertise.
Don’t forget about the importance of RGB lighting, which can breathe life into your build and create an immersive atmosphere. Synchronizing your lighting effects across your components can turn your gaming setup into a dazzling spectacle that reflects your personality.
In summary, the right case and cooling solution can transform your gaming PC from a mere collection of components into a stunning work of art, all while ensuring that everything runs smoothly and efficiently. So take your time, explore your options, and let your creativity shine as you equip your dream machine with style and functionality.
11. Assembling Your Custom PC: A Step-by-Step Guide
Assembling your custom PC is the moment you’ve been eagerly anticipating—the culmination of careful planning, selection, and investment in your dream gaming machine. With parts laid out before you, it’s time to dive into the hands-on part of the process. Here’s a step-by-step guide to help you navigate this exciting journey.
### Step 1: Prepare Your Workspace
Before you begin, ensure your workspace is clean and organized. A large, flat surface is ideal, as it provides ample room to maneuver. Consider using an anti-static mat to prevent any damage to sensitive components during assembly. Gather your tools—typically, all you’ll need is a Phillips screwdriver and perhaps a pair of tweezers for those tiny screws.
### Step 2: Install the CPU
Start with the heart of your machine: the CPU. Gently lift the lever on the CPU socket of your motherboard, align the CPU with the socket (noting the small triangle marking for proper orientation), and lower it into place. Secure the lever back down to lock it in. If you’re using an aftermarket cooler, now’s the time to apply thermal paste before installing the cooler.
### Step 3: Secure the RAM
Next, insert your RAM sticks. Open the clips on the RAM slots, align the notch on the RAM stick with the slot, and firmly press down until the clips click back into place. If you have multiple sticks, consult your motherboard manual for the optimal configuration, often utilizing alternating slots for dual-channel performance.
### Step 4: Mount the Motherboard
Now, it’s time to install the motherboard into the case. Carefully position the motherboard over the standoffs within the case, ensuring that the I/O shield aligns correctly with the ports. Secure the motherboard using the screws provided, taking care not to overtighten.
### Step 5: Install the Power Supply
Next, install the power supply unit (PSU) at the designated area within your case. Secure it with screws and manage the cables to ensure they won’t obstruct airflow. Connect the main power cable from the PSU to the motherboard, along with any additional cables needed for the CPU and components.
### Step 6: Add Storage Drives
Install your SSDs or HDDs next. If you’re using a 2.5-inch SSD, slide it into the designated bay or mount it on the motherboard using M.2 slots. For traditional HDDs, slide them into the drive bays and secure them with screws. Don’t forget to connect the SATA cables from the drives to the motherboard and the power cables from the PSU.
### Step 7: Install the Graphics Card
The graphics card is often the centerpiece of a gaming PC. Carefully remove the PCIe slot covers from your case, align the graphics card with the appropriate slot on the motherboard, and press down firmly until it clicks into place. Secure it with screws and connect any necessary power cables from the PSU.
### Step 8: Connect All Cables
Now, it’s time to connect all remaining cables. Manage your cable routing to keep the interior tidy and ensure optimal airflow. Connect case fans, RGB lighting, and any additional peripherals. Double-check that all connections are secure and that there are no loose cables that could obstruct airflow or damage components.
### Step 9: Power On and Test
With everything assembled, it’s time for the moment of truth. Connect your monitor, keyboard, and mouse, then power on the system. If all goes well,
12. Installing the Operating System and Drivers
Once your custom PC is fully assembled and all the cables neatly tucked away, it’s time to breathe life into your machine by installing the operating system (OS) and drivers. This step is crucial, as it transforms your hardware into a fully functional gaming powerhouse.
Begin by preparing a bootable USB drive with your chosen operating system. Whether you opt for Windows, Linux, or another OS, download the installation files from the official website and use tools like Rufus or the Windows Media Creation Tool to create your bootable drive. Make sure to check the system requirements for your OS to ensure compatibility with your new hardware.
Next, insert the USB drive into your custom PC and power it on. You’ll need to access the BIOS or UEFI settings by pressing a designated key (usually F2, Delete, or Esc) during startup. Once in the BIOS, navigate to the boot menu and set the USB drive as the primary boot device. Save your settings and restart the machine.
As the system boots from the USB, you’ll be greeted by the installation wizard. Follow the on-screen prompts to select your language, choose the installation type, and specify the drive where the OS will be installed. If you’ve built your PC with multiple drives, it’s essential to pick the correct one—typically, this is your primary SSD or HDD for optimal performance.
After the OS has been installed, it’s time to focus on the drivers. Drivers are crucial as they allow your operating system to communicate effectively with your hardware, ensuring optimal performance and functionality. Start by visiting the manufacturer’s website for each component, such as your graphics card, motherboard, and peripherals, to download the latest drivers. Some systems may also require chipset drivers to ensure smooth operation.
Install the drivers one by one, rebooting as necessary. This process will ensure that your graphics card can utilize its full capabilities, your motherboard can communicate with your CPU and RAM efficiently, and your peripherals perform as intended.
Once you’ve completed these installations, take a moment to check for any operating system updates. Keeping your OS updated will not only enhance performance but also provide important security patches.
With the operating system and drivers in place, your custom PC is now ready for the next exciting step—installing your favorite games and software. Take a moment to admire your handiwork; you’ve successfully built and powered on your dream machine, paving the way for countless gaming adventures ahead!
13. Optimizing Your PC for Gaming Performance
Once you’ve meticulously assembled your dream gaming machine and felt the thrill of powering it on for the first time, the next step is to ensure it operates at peak performance. Optimizing your PC for gaming isn’t just about having powerful components; it’s about tweaking settings and configurations to extract every ounce of performance from your system.
Begin with your graphics settings. Most modern games come equipped with a plethora of graphics options, ranging from texture quality to shadow effects. While it might be tempting to max out every setting, take the time to find a balance that enhances visual fidelity without sacrificing frame rates. Utilizing tools like NVIDIA GeForce Experience or AMD’s Radeon Software can help automate this process, optimizing settings based on your specific hardware.
Next, ensure your drivers are up to date. Graphics card manufacturers frequently release driver updates that enhance performance and fix bugs, so keeping these updated can lead to significant gains in gaming performance. Additionally, consider overclocking your GPU and CPU. While this requires some technical know-how and carries risks, when done correctly, it can provide a noticeable boost in performance. Just be sure to monitor temperatures closely to avoid overheating.
Another critical aspect of optimization is managing background processes. Before you dive into a gaming session, close unnecessary applications that could drain your system’s resources. Tools like Task Manager can help identify resource-heavy applications that may be running in the background.
Lastly, don’t overlook the importance of regular maintenance. dustaccumulation can lead to overheating, which can throttle your performance. Make it a routine to clean out your PC’s internals, ensuring optimal airflow and cooling.
By taking these steps to optimize your PC for gaming performance, you can transform your already impressive rig into a powerhouse that delivers the immersive experiences you crave. Whether you’re exploring vast open worlds or battling it out in fast-paced shooters, the right optimizations will ensure your custom-built machine runs smoothly and efficiently, providing you with the ultimate gaming experience.
14. Troubleshooting Common Build Issues
Building your dream gaming PC can be an exhilarating experience, but it’s not uncommon to encounter a few bumps along the way. Troubleshooting common build issues is an essential skill that can save you time, money, and a lot of headaches. Here are some typical problems you might face and how to address them.
**1. No Power or Boot Issues:** If your PC doesn’t power on at all, start by checking the basics. Ensure that all power cables are securely connected to the motherboard and components. Verify that your power supply unit (PSU) is functioning. A simple way to test this is to use a PSU tester or try booting with a different PSU if available. Additionally, ensure that the power switch on the back of the PSU is turned on and that the wall outlet is working.
**2. Beeping Sounds:** If your PC emits a series of beeps when trying to boot, this is often an indicator of hardware failure. The pattern of beeping can help identify the issue, so refer to your motherboard’s manual for beep codes. Common culprits include improperly seated RAM or GPU. Reseat these components and try booting again.
**3. Display Issues:** A blank screen can be frustrating, especially after all your hard work. First, check that your monitor is powered on and connected properly. Ensure that the correct input source is selected on your monitor. If everything seems in order, reseat your GPU and check for any visible damage to the graphics card.
**4. Overheating:** If your system boots but crashes shortly after, overheating might be the culprit. Make sure your CPU cooler is correctly installed and that thermal paste is applied adequately. Check all fans to ensure they’re spinning and that your case has proper airflow. Cleaning dust from vents and ensuring cables are neatly managed can improve cooling efficiency.
**5. Software Conflicts:** Once your PC is up and running, software issues can arise. If you experience crashes or performance issues, consider updating your drivers, especially for the GPU. Sometimes, a clean installation of your operating system can resolve persistent problems caused by software conflicts or corrupted files.
Remember, patience is key when troubleshooting. It’s perfectly normal to face challenges during the building process, but with a methodical approach and a little bit of research, you’ll be well-equipped to overcome any obstacles and enjoy your gaming experience to the fullest!
15. Conclusion: Enjoying Your Dream Machine and Future Upgrades
As you power up your custom-built gaming rig for the first time, a wave of excitement washes over you. The culmination of your careful planning, research, and hands-on assembly transforms into an exhilarating reality. You’re not just a gamer now; you’re the proud owner of a machine tailored to your specific needs and preferences, perfectly suited to deliver breathtaking graphics and lightning-fast processing speeds. The satisfaction of seeing your dream machine come to life is unparalleled, and it’s a testament to the hard work and dedication you’ve invested in this project.
But the journey doesn’t end here. One of the most rewarding aspects of building your own PC is the ability to upgrade and expand it over time. Technology is ever-evolving, and staying ahead of the curve means embracing future improvements. Whether it’s upgrading your graphics card to experience the latest titles with stunning realism or adding more RAM to enhance performance during resource-heavy tasks, your custom build is a canvas for continuous enhancement.
Moreover, understanding your machine inside and out empowers you to make informed decisions regarding upgrades. You’ll know exactly what components can be swapped out and what new technologies can elevate your gaming experience. Keep an eye on emerging trends, read reviews, and stay connected with the vibrant gaming community; they are invaluable resources for inspiration and advice.
As you embark on this exciting journey with your dream machine, remember to take the time to enjoy the fruits of your labor. Dive into your favorite games, experiment with different settings, and share your experiences with fellow gamers. Your custom PC is not just a tool; it’s a gateway to unforgettable adventures and a vibrant community. The world of gaming is at your fingertips, and with your custom build, you’re ready to conquer new realms. Happy gaming, and may your dream machine serve you well for years to come!
As we wrap up our step-by-step guide to building your dream gaming machine, we hope you feel inspired and empowered to embark on this exciting journey. Crafting a custom PC not only allows you to tailor your setup to your unique gaming preferences but also gives you the satisfaction of creating something truly your own. From selecting the right components to assembling them with care, each step brings you closer to an immersive gaming experience that’s optimized for performance and style. Whether you’re a seasoned gamer or a newcomer ready to take the plunge, remember that patience and attention to detail will be your best allies. Happy building, and may your new rig bring you countless hours of thrilling adventures in the gaming world! Share your progress with us—we can’t wait to see the incredible machines you create!