WhatCanU.com has managed to bring together the most common questions that Internet users ask and provide relevant and precise answers
What are the common motorbike repairs you can do yourself?
For many motorbike enthusiasts, the thrill of the ride is only matched by the satisfaction of mastering their machine.
However, the journey of motorcycle ownership often comes with its fair share of challenges, especially when it comes to maintenance and repairs. While some riders may shy away from getting their hands dirty, there’s a whole world of DIY motorbike repairs waiting to be explored, offering not only a sense of accomplishment but also the potential for significant cost savings. In this blog post, we’ll delve into some common motorbike repairs that you can confidently tackle yourself, empowering you to take control of your bike’s upkeep. From changing your oil and replacing brake pads to diagnosing electrical issues, we’ll provide you with essential tips, tricks, and step-by-step guides to help you get back on the road faster and more knowledgeable than ever. Whether you’re a seasoned rider or a newcomer to the scene, mastering these skills will deepen your connection with your bike and enhance your riding experience. So roll up your sleeves, grab your tools, and let’s dive into the world of DIY motorbike repairs!
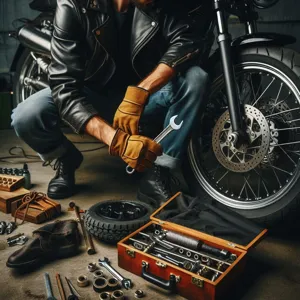
1. Introduction to DIY Motorbike Repairs
Credit : whatcanu.com
Motorbikes are not just a mode of transportation; they represent freedom, adventure, and a sense of community. However, owning a motorbike also comes with the responsibility of maintenance and repairs. Many riders shy away from DIY repairs, fearing the complexity of mechanics and the potential for costly mistakes. But, with the right knowledge and a bit of confidence, you can take charge of your bike’s upkeep and handle common repairs yourself.
In this section, we’ll explore the basics of DIY motorbike repairs, empowering you to roll up your sleeves and dive into the hands-on world of motorcycle maintenance. Whether it’s changing the oil, replacing a flat tire, or adjusting the chain, these tasks not only enhance your riding experience but can also save you money and deepen your understanding of your machine.
Embracing DIY repairs can transform the way you perceive your motorbike, turning it from a mere vehicle into a personal project that you can nurture and improve over time. With the right tools, a bit of patience, and a willingness to learn, you’ll discover that many repairs are well within your skill set. So, let’s rev up your confidence and get started on the road to mastering DIY motorbike repairs!
2. Essential Tools for Motorbike Maintenance
When it comes to mastering DIY motorbike repairs, having the right tools is just as crucial as understanding the mechanics of your bike. Equipping yourself with essential tools not only empowers you to tackle common repairs but also ensures that the job is done efficiently and safely. Here’s a rundown of the must-have tools every DIY motorbike enthusiast should have in their arsenal.
**1. Socket Set:** A comprehensive socket set is the backbone of any motorbike repair toolkit. With various sizes and types, it allows you to tackle everything from tightening bolts to removing engine components. Look for a set that includes both metric and imperial sizes to cover all bases.
**2. Wrenches:** A combination of adjustable and fixed wrenches is essential for gripping and turning nuts and bolts. A torque wrench is particularly important for ensuring that your fasteners are tightened to the manufacturer’s specifications, preventing damage to sensitive components.
**3. Screwdrivers:** A quality set of screwdrivers, including both flathead and Phillips, is necessary for handling a variety of screws found throughout your motorbike. Magnetic tips can be a great addition to ensure you don’t lose screws in hard-to-reach places.
**4. Pliers:** Needle-nose pliers and slip-joint pliers will come in handy for gripping, twisting, and cutting wires or cables. They are particularly useful when you need to maneuver in tight spaces or handle delicate components.
**5. Oil Change Supplies:** Regular oil changes are vital for maintaining engine health. Ensure you have an oil filter wrench, a drain pan to catch old oil, and a funnel for easy pouring. Don’t forget the proper type of oil and a new filter specific to your motorbike model.
**6. Tire Changing Tools:** Flat tires can happen when you least expect it, so having a tire lever and a pump is essential. A pressure gauge will also help you keep your tires properly inflated for optimal performance.
**7. Safety Gear:** Never underestimate the importance of safety. Gloves, goggles, and a good-quality mechanic’s apron will protect you from grease and grime, while also keeping you safe from potential hazards.
**8. A Repair Manual:** While not a tool in the traditional sense, having a repair manual specific to your bike can be invaluable. It provides step-by-step instructions for repairs and maintenance, making even complex tasks more manageable.
By investing in these essential tools, you’ll not only be prepared for common motorbike repairs but also gain the confidence to tackle more intricate issues over time. Mastering DIY repairs not only saves you money but also deepens your understanding of your motorbike, allowing you to enjoy every ride with peace of mind.
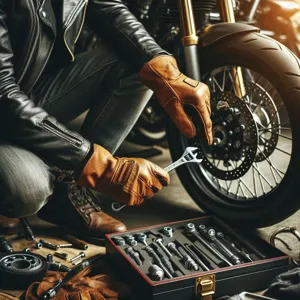
3. Safety First: Protective Gear and Precautions
Credit : whatcanu.com
When it comes to tackling DIY motorbike repairs, prioritizing safety should always be your first step. Whether you’re changing the oil, replacing brake pads, or adjusting the chain, the right protective gear is essential to keep you safe from potential hazards. Start with a sturdy pair of gloves; they provide a barrier against sharp edges and hot components while also ensuring a better grip on tools. Look for gloves specifically designed for mechanical work, as they offer added durability and tactile sensitivity.
Next, don’t underestimate the importance of eye protection. Safety goggles or a full-face shield protect your eyes from flying debris, dust, and harmful chemicals that could cause serious injuries. Additionally, consider wearing a long-sleeved shirt and durable pants to shield your skin from cuts and scrapes, especially when working around the engine or under the bike.
Your workspace also plays a crucial role in maintaining safety. Ensure that your garage or workshop is well-ventilated, especially when dealing with fuels or solvents. Keep your tools organized and within reach to prevent accidents caused by searching for misplaced items. Also, make sure to elevate your bike securely if you’re working underneath it; a stable motorcycle lift or stands can prevent tipping and provide a safe environment to work.
Lastly, familiarize yourself with the specific repairs you plan to undertake. Read through manuals, watch instructional videos, or join online forums to gather insights and tips from experienced DIYers. The more prepared you are, the less likely you are to encounter surprises that could compromise your safety. By equipping yourself with the right knowledge and gear, you’ll not only protect yourself but also gain confidence as you master those common motorbike repairs.
4. Understanding Your Motorbike: A Quick Overview of Components
Before you dive into the world of DIY motorbike repairs, it’s essential to familiarize yourself with the various components of your machine. Understanding these parts not only empowers you to tackle repairs with confidence but also helps you appreciate the mechanics of your ride.
At the heart of your motorbike lies the **engine**, often referred to as the beating heart of the machine. Comprising intricate components such as cylinders, pistons, and camshafts, the engine is where the magic happens, converting fuel into the power that propels you forward. Familiarize yourself with the engine type—be it a single-cylinder, twin-cylinder, or four-cylinder—as each will have distinct characteristics and maintenance needs.
Next, we have the **transmission**, which plays a crucial role in managing the power generated by the engine. It allows you to shift gears smoothly, ensuring optimal performance and fuel efficiency. Understanding how to check the transmission fluid levels and recognizing the signs of wear can save you from costly repairs down the line.
The **braking system** is another critical component that demands your attention. Motorbikes typically feature either disc or drum brakes. Knowing how to inspect brake pads, change fluid, and recognize the signs of wear can keep you safe on the road. A well-maintained braking system can be the difference between a smooth ride and a potentially dangerous situation.
Don’t overlook the **suspension system**, which includes components like forks, shocks, and swingarms. A properly functioning suspension ensures a comfortable ride and better handling. Learning how to adjust your suspension settings based on your weight, riding style, and terrain can enhance your riding experience significantly.
Lastly, the **electrical system** is the nerve center of your motorbike. From the battery to the ignition system, understanding how these components work together is essential. Regularly checking your battery’s charge, ensuring your wiring is intact, and replacing blown fuses can prevent frustrating breakdowns.
By gaining a solid understanding of these key components, you’ll be better equipped to diagnose issues, perform routine maintenance, and tackle repairs with ease. This knowledge not only enhances your confidence as a DIY mechanic but also deepens your connection with your motorbike, transforming your riding experience into something truly special.
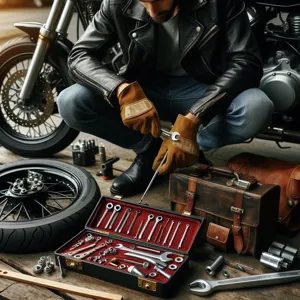
5. How to Change Your Motorbike Oil
Credit : whatcanu.com
Changing your motorbike oil is one of the most essential maintenance tasks you can undertake to keep your ride running smoothly and efficiently. While it may seem intimidating at first, with the right tools and a bit of guidance, you’ll find that this task is well within your capabilities.
### Gather Your Supplies
Before you dive in, make sure you have all the necessary tools on hand. You’ll need a socket wrench or spanner, an oil filter wrench, a drain pan, a funnel, and, of course, the right type of motorbike oil and a new oil filter. It’s crucial to consult your owner’s manual to determine the specific oil type and capacity recommended for your motorcycle.
### Prepare Your Workspace
Find a flat and stable surface to work on, ideally in a well-ventilated area. If you have a motorcycle stand, this is the perfect time to use it, as it will elevate your bike and make the process easier. Ensure you have plenty of rags or paper towels handy to clean up any spills.
### Drain the Old Oil
Start by warming up your engine for a few minutes; this helps the oil drain more smoothly. Once warmed, turn off the engine and allow it to cool slightly. Locate the oil drain plug underneath your motorbike. Using your socket wrench, carefully remove the drain plug, allowing the old oil to flow into your drain pan. Be mindful of the hot oil and give it enough time to drain completely.
### Replace the Oil Filter
While the oil is draining, take this opportunity to replace the oil filter. Using your oil filter wrench, remove the old filter, making sure to catch any residual oil that may spill out. Before installing the new filter, apply a bit of fresh oil to the rubber gasket on the new filter to ensure a proper seal. Screw the new filter into place, but avoid over-tightening.
### Add the New Oil
Once the old oil has fully drained and the plug is securely replaced, it’s time to add the new oil. Using your funnel, pour in the recommended amount of fresh motorbike oil through the fill cap, taking care not to overfill. After adding the new oil, replace the fill cap and wipe down any spills.
### Check the Oil Level
Finally, start your motorbike and let it run for a minute. This helps circulate the new oil throughout the engine. Once done, turn off the engine and wait a moment before checking the oil level with the dipstick or sight glass. If needed, add more oil to reach the appropriate level.
### Clean Up
Dispose of the old oil and filter responsibly by taking them to a local recycling center or automotive shop that accepts hazardous waste. cleaningup your workspace not only helps you maintain a safe environment but also prepares you for your next DIY adventure.
By mastering the skill of changing your motorbike oil, you not only save money but also gain a deeper understanding of your machine. With regular oil changes, you’ll ensure a longer lifespan for your bike, a smoother ride, and a rewarding sense of accomplishment after each job well done.
6. Replacing the Air Filter: Step-by-Step Guide
Replacing the air filter on your motorbike is one of the most straightforward yet essential maintenance tasks you can undertake to ensure your machine runs efficiently. A clean air filter improves airflow to the engine, enhancing performance and fuel economy, while also prolonging the life of your engine. Here’s a step-by-step guide to help you tackle this DIY project with confidence.
**Step 1: Gather Your Tools and Materials**
Before diving into the replacement, gather the necessary tools: a socket wrench, screwdrivers (both flathead and Phillips), and a new air filter (be sure to check your bike’s model specifications for the correct type). Having everything at hand will make the process smoother and more efficient.
**Step 2: Locate the Air Filter**
Next, find the air filter compartment on your motorbike. Depending on your model, it may be located under the seat, side panel, or within the frame. Refer to your owner’s manual if you’re unsure – it’s a handy resource that often provides diagrams and specific instructions tailored to your bike.
**Step 3: Remove the Cover**
Using your screwdriver or socket wrench, carefully remove the screws or bolts securing the air filter cover. Keep these fasteners in a safe place so you don’t lose them. Gently lift off the cover, taking care not to damage any clips or rubber seals.
**Step 4: Take Out the Old Filter**
Carefully remove the old air filter from its compartment. Be mindful of any dirt or debris that may have accumulated around it; using a soft brush or cloth, clean the area to ensure no contaminants enter the engine during the replacement.
**Step 5: Insert the New Air Filter**
Now it’s time to install the new air filter. Ensure it fits snugly into the compartment, following the orientation of the old filter. If your new filter has a specific side that should face the engine, make sure to adhere to this to maximize airflow efficiency.
**Step 6: Reattach the Cover**
Once the new filter is securely in place, reattach the cover by aligning it correctly and securing it with the screws or bolts you removed earlier. Double-check that everything is tight but not over-tightened, as this can damage the plastic components.
**Step 7: Final Check**
Before you take your bike for a spin, do a quick visual inspection to ensure everything is properly reassembled and that no tools or debris are left behind. A clean air filter can significantly improve your bike’s performance, so you may notice the difference in how smoothly it runs.
By following these simple steps, you not only save on labor costs but also gain a sense of accomplishment and deeper knowledge of your motorbike. Regularly replacing your air filter can contribute to a longer lifespan for your bike and a more enjoyable ride, making it a worthwhile addition to your DIY maintenance routine. Happy riding!
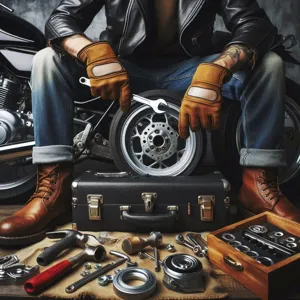
7. Brake Maintenance: Inspecting and Replacing Brake Pads
Credit : whatcanu.com
Brake maintenance is one of the most critical aspects of motorbike upkeep that every rider should master. After all, your brakes are your lifeline on the road, ensuring not only your safety but that of others as well. Regularly inspecting and replacing brake pads can significantly enhance your bike’s performance and extend the lifespan of your braking system.
To begin, gather the necessary tools: a socket set, a torque wrench, and a flathead screwdriver. Start by carefully lifting your bike on a stand to access the wheels. Once elevated, take a moment to visually inspect the brake pads. Look for signs of wear and tear, such as uneven surfaces, cracks, or a thickness below the manufacturer’s recommended minimum. If you notice such issues, it’s time to replace them.
Removing the wheel is typically your next step. For most bikes, this involves loosening the axle nut and sliding the wheel off. With the wheel removed, you can easily access the brake caliper. Carefully unbolt the caliper, ensuring you don’t damage any surrounding components. Once the caliper is free, you can slide out the old brake pads. Pay close attention to how they’re fitted, as this will guide you when it’s time to install the new ones.
When selecting replacement brake pads, consider the type of riding you do. Organic pads offer a quieter ride with less dust but may wear out faster, while metallic pads provide superior stopping power and durability, making them ideal for aggressive riding. Once you’ve chosen the right pads, slide them into place, ensuring they fit snugly into the caliper.
Afterward, reattach the caliper and wheel, tightening everything to the manufacturer’s specifications. Don’t forget to pump the brake lever a few times to seat the new pads properly against the rotor before hitting the road. Finally, take a moment to test your brakes in a safe area. This simple yet essential maintenance task not only enhances your bike’s safety and performance but also enriches your understanding of your machine, empowering you as a DIY enthusiast. With regular brake inspections and timely replacements, you can ensure a smoother, safer ride for miles to come.
8. Tire Care: How to Check and Change Tires
When it comes to maintaining your motorbike, tire care is paramount—not only for your bike’s performance but also for your safety on the road. Your tires are the only contact point between your bike and the asphalt, making regular checks essential for optimal handling and performance. Luckily, checking and changing tires is a straightforward DIY task that can save you time and money while giving you a deeper understanding of your bike.
**Checking Your Tires: The Essentials**
Start by inspecting your tires for any visible signs of wear and tear. Look for cracks, bulges, or punctures, and check the tread depth. A simple way to gauge tread wear is to use the penny test: insert a penny into the tread with Lincoln’s head facing down. If you can see all of Lincoln’s head, it’s time for a replacement. Additionally, ensure your tires are properly inflated. Under-inflated tires can lead to poor handling and increased wear, while over-inflated tires reduce traction and can lead to blowouts. Use a reliable pressure gauge to check the PSI and adjust accordingly, following the manufacturer’s recommendations found in your bike’s manual.
**Changing Your Tires: A Step-by-Step Guide**
If it turns out your tires need replacing, don’t worry; changing them is a manageable task. Begin by securing your bike on a stable surface, preferably on a center stand or paddock stand to keep it upright. Use a wrench to loosen the wheel bolts, then carefully remove the wheel from the bike.
Once you have the wheel off, it’s time to remove the old tire. Use tire levers to pry the tire off the rim, taking care not to damage the rim in the process. Once the tire is off, clean the rim thoroughly to remove any debris, dirt, or old tire sealant.
Now, it’s time to fit the new tire. Align the tire with the rim and use the tire levers to push it into place, ensuring it sits evenly. Inflate the tire to the recommended PSI, and before reattaching the wheel to your bike, check for any air leaks and make sure the tire is seated correctly.
Finally, reattach the wheel to your bike, tightening the bolts in a crisscross pattern to ensure even pressure. Once you’ve completed the installation, take a moment to double-check everything before taking your bike for a spin.
By mastering tire checks and changes, you enhance your DIY skills and ensure your ride is always road-ready. Keeping your tires in top condition not only boosts performance but also ensures you enjoy every ride with peace of mind.
9. Battery Maintenance: Cleaning and Replacing the Battery
When it comes to maintaining your motorbike, one of the most critical components to keep in check is the battery. A well-functioning battery ensures reliable starts, consistent power delivery, and overall performance of your bike. Neglecting this vital piece of machinery can lead to frustrating breakdowns and costly repairs. Luckily, battery maintenance is a straightforward task that you can tackle yourself, saving both time and money.
**Cleaning the Battery**
Before you get started, it’s essential to gather your tools: a pair of gloves, a wrench, a wire brush or battery cleaning tool, and a solution of baking soda and water. Begin by turning off your bike and disconnecting the negative terminal first to avoid any electrical shorts. Once that’s done, inspect the battery for corrosion— a white, powdery substance around the terminals is a clear sign that it needs attention.
To clean the terminals, dip your brush in the baking soda solution and gently scrub away the corrosion. This not only improves electrical connectivity but also extends the life of your battery. After cleaning, rinse the terminals with a small amount of water and dry them thoroughly. Reconnect the terminals, starting with the positive side, and apply a thin layer of petroleum jelly to prevent future corrosion.
**Replacing the Battery**
If your battery is older than three to five years or you’ve noticed signs of weakness—like dim lights or slow engine cranking—it may be time for a replacement. To replace the battery, you’ll need a new one that is compatible with your motorbike. Always consult your owner’s manual or speak to an expert if you’re unsure.
Disconnect the old battery by following the same disconnection process mentioned earlier. Remove any securing straps or brackets, and lift the old battery out carefully, as they can be heavier than they look. Place the new battery in the same position, securing it with straps or brackets, and connect the terminals—positive first, followed by negative.
Finally, ensure everything is tight and secure, and give your bike a test start. With proper battery maintenance, your motorbike will be ready to hit the road with confidence, and you’ll feel accomplished knowing you’ve tackled this essential repair on your own. Regular battery checks can save you from unexpected inconveniences and keep your ride smooth and reliable.
10. Diagnosing and Fixing Electrical Issues
Diagnosing and fixing electrical issues on your motorbike can seem daunting, but with a little patience and the right approach, it’s a task well within the reach of the DIY enthusiast. Electrical problems can manifest in various ways—dim lights, dead batteries, or even a complete failure to start. Understanding the basics of your bike’s electrical system is key to identifying and resolving these issues effectively.
Start by ensuring that the battery is fully charged and properly connected. A loose or corroded battery terminal can lead to all sorts of electrical gremlins, so give it a good clean and tighten any loose connections. If the battery checks out, move on to the fuses. A blown fuse can often be the culprit behind non-functioning lights or signals. Consult your owner’s manual to locate the fuse box and replace any blown fuses with the correct amperage.
Next, inspect the wiring harness for any visible damage, such as frayed wires or exposed connections. These can cause shorts or intermittent connections that lead to erratic behavior. If you find any damaged wires, use electrical tape or heat-shrink tubing to secure them, or consider replacing the entire harness if the damage is extensive.
For more complex electrical issues, a multimeter becomes an invaluable tool. This device allows you to measure voltage, continuity, and resistance, helping you pinpoint issues with components like the ignition system, starter relay, or even the ECU. Testing these components methodically can reveal whether they are functioning correctly or need replacement.
Lastly, don’t underestimate the power of online forums and repair guides. The motorcycling community is vast, and chances are someone has encountered the same issue you are facing. With the right resources and a bit of determination, you can tackle electrical repairs yourself, saving money and gaining valuable knowledge about your bike in the process. Remember, every time you successfully resolve an issue, you’re not just fixing your motorbike; you’re also becoming a more skilled and confident DIY mechanic.
11. Chain Maintenance: Lubrication and Adjustment
Maintaining your motorbike chain is crucial for ensuring a smooth ride and prolonging the life of your bike. A well-lubricated and properly adjusted chain not only enhances performance but also improves safety on the road. Fortunately, chain maintenance is a straightforward task that any DIY enthusiast can master with a little knowledge and the right tools.
**Lubrication** is the first step in chain maintenance. Over time, dirt, grime, and moisture can accumulate on your chain, causing friction and wear. To begin, gather the necessary supplies: a quality chain lubricant, a cleaning brush or rag, and a chain cleaning solution if your chain is particularly dirty. Start by raising your bike on a stand to give you easy access to the chain. Rotate the rear wheel to expose all sections of the chain, and use the brush to remove any debris. For stubborn dirt, apply the cleaning solution and wipe it away with a clean rag. Once the chain is clean, spray or apply the lubricant evenly along the chain while turning the wheel to ensure that every link is coated. This helps to reduce wear and tear while preventing rust and corrosion.
**Adjustment** is equally important to keep your chain in optimal condition. Chains can stretch over time due to the forces exerted during riding, which can lead to poor performance and even potential hazards. To check the chain tension, refer to your motorbike’s manual for the manufacturer’s recommended slack. Using a ruler or a chain tension gauge, measure the slack at the midpoint of the chain. If it’s too loose, you’ll need to adjust it. Locate the adjustment bolts on the rear axle and loosen them slightly. Then, turn the adjustment screws evenly on both sides until the desired tension is achieved. Make sure to re-tighten the bolts securely once you’re satisfied with the adjustment.
By regularly lubricating and adjusting your motorbike chain, you can enhance performance, improve safety, and extend the lifespan of your bike. Not only does this routine maintenance save you money on professional repairs, but it also gives you a sense of accomplishment as you take control of your bike’s upkeep. With practice, chain maintenance will become an effortless part of your DIY routine, keeping your ride smooth and your spirit high on every journey.
12. Troubleshooting Common Engine Problems
When it comes to mastering DIY motorbike repairs, troubleshooting common engine problems is an invaluable skill that every rider should possess. The engine is the heart of your motorcycle, and understanding its quirks can save you both time and money.
Start by familiarizing yourself with the sounds your engine makes. A well-tuned engine should hum smoothly, but if you notice unusual noises—like knocking, grinding, or rattling—it’s a sign that something is amiss. These sounds can often indicate problems such as a loose component or an issue with the oil levels.
Next, pay attention to your bike’s performance. If you experience a lack of power during acceleration or notice that your motorcycle is stalling frequently, it could be an issue with the fuel system. Check the fuel lines for blockages, inspect the air filter for dirt and debris, and ensure that your carburetor or fuel injection system is functioning properly.
Another common problem is overheating. Always keep an eye on your temperature gauge, and if your engine seems to be running hot, check the coolant levels and ensure that there are no leaks in the cooling system. A dirty radiator or a malfunctioning thermostat can also contribute to overheating, so regular cleaning and maintenance are essential.
Don’t forget to check for warning lights on your dashboard as well. These indicators are your motorcycle’s way of communicating potential issues. A flashing check engine light could alert you to a variety of problems, from minor sensor issues to serious engine failures.
Lastly, don’t underestimate the importance of regular maintenance. Routine checks on your spark plugs, oil levels, and fuel filters can prevent many engine problems before they even arise. With a bit of patience and a willingness to learn, you can troubleshoot and resolve common engine issues, ensuring that your motorbike remains in peak condition for every ride. Embrace the challenge and take pride in your ability to keep your machine running smoothly!
13. Seasonal Maintenance Tips for Your Motorbike
As the seasons change, so too does the condition and performance of your motorbike. Proper seasonal maintenance is crucial for ensuring your ride remains in top shape, whether you’re gearing up for summer road trips or hunkering down for the winter months. Here are some essential tips to keep your motorbike running smoothly all year long.
**Spring Refresh:** After a long winter, your motorbike deserves some TLC. Start by giving it a thorough wash to remove any road salt, grime, and debris that may have accumulated. Next, check the battery, as cold temperatures can affect its lifespan. A quick charge or a replacement might be necessary. Inspect your tires for wear and ensure they’re properly inflated; this not only enhances performance but also improves safety. Finally, it’s a good idea to change the oil and replace the oil filter to keep your engine running smoothly as you hit the open road.
**Summer Readiness:** As the temperatures rise, so do the odds of overheating. Check your coolant levels and inspect the hoses for any signs of wear or leaks. Cleaning the air filter is also vital during these warmer months, as it prevents dirt and debris from clogging your engine. Ensure your brakes are in top condition; summer rides often mean longer distances and higher speeds, making brake reliability essential.
**Fall Preparation:** As leaves start to change, it’s time to prepare for the cooler air and potential rain. Start by checking your lights and signals; shorter days mean you’ll be riding in lower visibility. Ensure your tires have adequate tread for wet conditions and consider switching to a more suitable tire for the season. It’s also wise to inspect your chain and lubricate it if necessary, as autumn can introduce moisture to your ride.
**Winter Storage:** If you live in an area where winter brings snow and ice, proper storage is key to preserving your motorbike. Clean it thoroughly, then apply a protective coat of wax to shield the paint from harsh elements. Fill up your gas tank and add a fuel stabilizer to prevent any issues with fuel degradation. Finally, consider investing in a quality cover to keep dust and moisture at bay while your bike hibernates until spring.
By staying proactive with seasonal maintenance, you’ll not only prolong the life of your motorbike but also enhance your riding experience throughout the year. Each season presents its own set of challenges, but with these tips in your toolkit, you’ll be equipped to tackle them all like a pro.
14. Resources for Further Learning: Manuals and Online Communities
When it comes to mastering DIY motorbike repairs, having access to the right resources can make all the difference. Whether you’re a beginner or a seasoned enthusiast, tapping into the wealth of knowledge available through manuals and online communities is essential for enhancing your skills and confidence.
**Manuals: Your Go-To Guides**
Service manuals are indispensable for any motorbike owner. These detailed documents provide step-by-step instructions for repairs, maintenance schedules, and specifications tailored to your specific make and model. They often include diagrams that make complex tasks more manageable, such as adjusting the chain tension or replacing brake pads. Many manufacturers offer downloadable versions on their websites, while others can be found in print at your local dealership or motorcycle parts store. Investing in a high-quality service manual not only empowers you to handle repairs but also helps you understand your bike better, fostering a deeper appreciation for its mechanics.
**Online Communities: A Wealth of Knowledge**
In addition to manuals, the internet is brimming with online communities where motorbike enthusiasts gather to share tips, troubleshoot issues, and celebrate their successes. Popular forums and social media groups are fantastic places to ask questions and receive advice from more experienced riders. Websites like Reddit have dedicated subreddits for motorbike repairs, while platforms like Facebook host numerous groups tailored to specific brands or types of bikes. By engaging in these communities, you can gain insights into common problems, learn about the latest repair techniques, and even share your own experiences with others.
**YouTube and Online Courses**
Don’t overlook the power of visual learning! YouTube is an invaluable resource for DIY repairs, featuring countless tutorial videos that walk you through everything from basic maintenance tasks to complex overhauls. Many channels are hosted by seasoned mechanics who break down the processes into easy-to-follow steps. Additionally, consider exploring online courses offered by motorcycle repair schools or platforms like Udemy, which can provide structured learning and cover more advanced topics at your own pace.
By utilizing these resources, you’ll not only become more adept at handling repairs but also build a supportive network of fellow motorbike enthusiasts who share your passion. Embrace the journey of learning, and watch as your confidence in tackling motorbike repairs grows with every step you take.
15. Conclusion: Benefits of DIY Repairs and Keeping Your Motorbike in Top Shape
In conclusion, mastering DIY motorbike repairs not only enhances your mechanical skills but also fosters a deeper connection with your ride. Taking the reins of your bike’s maintenance allows you to intimately understand its workings, ensuring that every bolt is tightened, every component is lubricated, and every part is in top-notch condition. This hands-on approach can lead to significant savings on labor costs and spare parts, freeing up your budget for essential upgrades or accessories that enhance your biking experience.
Moreover, the sense of accomplishment that comes from successfully completing repairs can be incredibly rewarding. It empowers you to take control of your motorbike’s health and performance, instilling confidence in your ability to handle any issue that may arise on the road. You’ll find that regular DIY maintenance keeps your motorbike running smoothly, prolonging its lifespan and enhancing your overall riding experience.
Additionally, engaging in DIY repairs can foster a sense of community among fellow motorbike enthusiasts. Sharing tips, tricks, and experiences can lead to lasting friendships and invaluable knowledge exchange. Whether you’re in a garage tinkering with your bike or discussing techniques in an online forum, the camaraderie of the biking community is a powerful motivator to keep your motorbike in peak condition.
Ultimately, embracing DIY repairs not only saves you time and money but also cultivates a sense of pride and ownership in your motorbike. So, roll up your sleeves, grab those tools, and enjoy the journey of keeping your beloved machine in top shape. You’ll not only enhance your riding experience but also unlock a world of knowledge and satisfaction that comes from being hands-on with your motorbike.
We hope you found our guide on mastering DIY motorbike repairs both informative and inspiring. Embracing the world of hands-on maintenance can not only save you money but also deepen your bond with your bike, giving you the satisfaction of knowing that you’ve tackled those repairs yourself. From changing your oil to adjusting your brakes, each step you take empowers you as a rider and enhances your understanding of your machine. So gear up, grab your tools, and don’t hesitate to take on these common repairs with confidence! Remember, every successful repair is a step toward becoming a more skilled and self-sufficient motorcyclist. Happy riding and repairing!