What are the best ways to eat less sugar?

In a world where sugary snacks and beverages often tempt us at every corner, reducing sugar intake can feel like a daunting challenge.

However, the journey to a healthier lifestyle doesn’t have to be overwhelming or flavorless. With the right strategies in your toolkit, you can achieve sweet success and enjoy the benefits of cutting back on sugar without sacrificing taste or satisfaction. This blog post will explore top strategies that make reducing sugar simple and achievable, from practical meal planning tips and delicious, naturally sweet alternatives to mindful eating practices that will help you regain control over your cravings. Whether you’re looking to boost your energy, improve your mood, or simply feel better in your skin, join us as we uncover effective methods to help you kick the sugar habit and embrace a more balanced, vibrant life.

1. Understanding Sugar: Types and Sources

What are the best ways to eat less sugar?
Credit : whatcanu.com

Understanding sugar is the first pivotal step in successfully reducing your intake. Sugar comes in various forms and can be found in an array of foods, often lurking where you least expect it. Broadly speaking, sugars can be categorized into two main types: naturally occurring sugars and added sugars.

Naturally occurring sugars are found in whole foods such as fruits, vegetables, and dairy products. These sugars, like fructose in fruits and lactose in milk, come packaged with vitamins, minerals, and fiber, which slow down their absorption and provide your body with essential nutrients. For instance, the sweetness of a ripe apple not only satisfies your sweet tooth but also delivers a healthy dose of fiber and antioxidants, making it a far better choice than processed snacks.

On the flip side, added sugars are those that are introduced during processing or preparation, elevating the sweetness of products like sodas, pastries, and sauces. These sugars, including sucrose and high-fructose corn syrup, contribute little more than empty calories, often leading to spikes in blood sugar levels and subsequent crashes that can leave you craving more sweets.

To effectively reduce your sugar intake, it’s crucial to identify these sources in your diet. Start by reading labels carefully—sugar can masquerade under various names such as glucose, dextrose, maltose, and even honey or syrup. Awareness is key; the more you know about where sugar hides, the better equipped you’ll be to make conscious choices. By understanding the different types of sugar and their sources, you can take the first step towards sugar reduction and embrace a healthier lifestyle.

2. Why Reducing Sugar Intake Matters

Reducing sugar intake is about more than just cutting back on sweet treats; it’s a vital step towards enhancing your overall health and well-being. The modern diet is often overloaded with added sugars, which can lead to a myriad of health issues, including obesity, diabetes, heart disease, and even certain types of cancer. When we consume excessive sugar, our bodies can experience spikes and crashes in energy levels, leading to fatigue and irritability. This rollercoaster effect can significantly impact our mood, focus, and productivity.

Moreover, sugar can also be addictive. The more we consume, the more our bodies crave it, creating a cycle that can be hard to break. By reducing sugar intake, you can help regulate your appetite and stabilize your blood sugar levels, fostering a healthier relationship with food. This not only helps in weight management but also contributes to increased energy and improved mental clarity.

Additionally, cutting down on sugar can lead to healthier skin, improved dental health, and a stronger immune system. For those looking to enhance their overall quality of life, reducing sugar intake is a foundational step. It empowers you to make choices that align better with your wellness goals, paving the way for a more vibrant and energetic existence. Understanding the importance of this change is the first step toward embracing a healthier lifestyle, and once you do, the benefits will be nothing short of transformative.

3. Recognizing Hidden Sugars in Your Diet

What are the best ways to eat less sugar?
Credit : whatcanu.com

When it comes to reducing sugar intake, one of the biggest challenges is recognizing hidden sugars lurking in our everyday foods. Sugar can be deceptively present in a wide variety of products, often where we least expect it. While it’s easy to identify sugary treats like candies, sodas, and desserts, many seemingly healthy options can also pack a sugary punch.

For instance, sauces and dressings are often culprits; a seemingly innocent bottle of ketchup can contain more sugar than a chocolate bar. Breakfast cereals, even those marketed as “healthy” or “whole grain,” can be laden with added sugars. Yogurts, especially flavored varieties, may taste like a treat but can contain as much sugar as a dessert. Even savory snacks, like certain granola bars or protein bars, can be high in sugar, making it crucial to read labels carefully.

To effectively recognize hidden sugars, familiarize yourself with the various names sugar can go by. Terms like sucrose, fructose, glucose, corn syrup, and honey may seem harmless, but they all contribute to your overall sugar intake. When scanning ingredient lists, aim for products that list sugar near the end of the list, indicating a lower overall sugar content.

Additionally, consider keeping a food diary for a week to track your consumption. This not only helps you identify hidden sugars but also raises your awareness of your eating habits. By becoming more informed and vigilant about the ingredients in your food, you can make smarter choices that lead to a significant reduction in your sugar intake, paving the way for a healthier lifestyle.

4. Setting Realistic Goals for Sugar Reduction

Setting realistic goals for sugar reduction is a critical step in achieving long-term success in your journey toward healthier eating habits. It’s easy to get swept up in the excitement of wanting to overhaul your diet overnight, but making drastic changes can often lead to feelings of deprivation and, ultimately, failure. Instead, aim for gradual progress that feels manageable and sustainable.

Start by assessing your current sugar intake. Keep a food diary for a week, noting every sugary treat, beverage, and hidden sugar source that sneaks into your meals. This exercise will provide valuable insights into your habits and help you identify specific areas for improvement. Once you have a clear picture, set achievable, short-term goals. For instance, if you typically consume three sugary snacks a day, try reducing it to two for a week, then one the following week.

Additionally, consider the context of your lifestyle. If you have a busy schedule, committing to making elaborate sugar-free meals might be unrealistic. Instead, focus on simple swaps—like replacing sugary sodas with sparkling water or choosing fruit for dessert instead of cake. Each small victory will build your confidence and keep you motivated as you navigate your sugar reduction journey.

Remember, the key to success is not perfection but progress. Celebrate each milestone, no matter how small, and don’t be too hard on yourself if you slip up occasionally. By setting realistic goals and gradually adjusting your habits, you’ll foster a healthier relationship with sugar and pave the way for lasting change. Your taste buds—and your body—will thank you for it!

5. Strategies for Gradual Reduction of Sugar

What are the best ways to eat less sugar?
Credit : whatcanu.com

Reducing sugar intake can feel like a daunting challenge, especially in a world where sweet treats are everywhere. However, implementing gradual strategies can make this transition smoother and more sustainable. Here are some effective approaches to help you cut back on sugar without feeling deprived.

**1. Start with Awareness:** The first step in reducing your sugar intake is to understand where it’s hiding in your diet. Begin by keeping a food diary for a week, noting everything you eat and drink. This exercise will reveal surprising sources of sugar, from the obvious culprits like soda and desserts to the less apparent ones like sauces and salad dressings. Once you’re aware of your sugar consumption, you can make informed choices.

**2. Substitute Wisely:** Instead of going cold turkey, consider swapping out your sugary favorites for healthier alternatives. If you enjoy sweetened yogurt, try plain Greek yogurt with a sprinkle of fresh fruit or a drizzle of honey. Similarly, when baking, experiment with using mashed bananas, applesauce, or dates for natural sweetness instead of refined sugars. These substitutions not only reduce sugar but also add nutrients to your meals.

**3. Gradually Decrease Sugar in Recipes:** If you’re used to adding a certain amount of sugar to your recipes, start by reducing that amount by a quarter. Each time you make a dish, decrease the sugar a little more until you find a level that suits your taste buds. This gradual reduction allows your palate to adjust without sacrificing flavor.

**4. Be Mindful of Beverages:** Sugary drinks can be one of the largest sources of added sugars in our diets. Begin to replace sugary sodas and juices with water, herbal teas, or infused water with slices of citrus or berries for a refreshing twist. If you crave that sweetness, gradually dilute your favorite drinks with more water to reduce their sugar content.

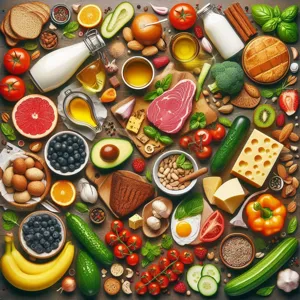
**5. Embrace Whole Foods:** Focusing on whole, unprocessed foods is a powerful strategy for reducing sugar. Fill your plate with fruits, vegetables, lean proteins, and whole grains that naturally contain less sugar and are packed with nutrients. Not only will this help you feel fuller for longer, but it’ll also keep your energy levels stable throughout the day, reducing cravings for sugary snacks.

**6. Find Satisfaction in Sugar-Free Treats:** As you reduce your sugar intake, explore sugar-free or low-sugar desserts that can satisfy your sweet tooth without the guilt. Dark chocolate, for instance, offers a rich, satisfying flavor that can curb cravings with just a small amount. Look for recipes that utilize natural sweeteners like monk fruit or stevia to create delicious treats that align with your goals.

By implementing these gradual strategies, you can successfully reduce sugar intake while still enjoying the foods you love. Remember, the goal isn’t to eliminate sugar completely but to create a healthier balance that supports your overall well-being. Embrace the journey and celebrate your progress, one small step at a time!

6. Exploring Natural Sugar Alternatives

When it comes to reducing sugar intake, one of the most effective and enjoyable strategies is exploring natural sugar alternatives. These substitutes not only satisfy your sweet tooth but also offer a range of health benefits, making them a fantastic choice for those looking to cut down on refined sugars without sacrificing flavor.

One of the most popular natural sweeteners is honey, renowned for its rich flavor and natural antibacterial properties. A spoonful of honey can elevate your favorite beverages and baked goods, all while providing antioxidants that support your immune system. Similarly, maple syrup, with its unique flavor profile, not only sweetens but also contains essential vitamins and minerals like manganese and zinc.

Another fantastic alternative is agave nectar, derived from the agave plant. It has a lower glycemic index than table sugar, making it a great option for those concerned about blood sugar spikes. Its mild taste makes it an ideal addition to smoothies, dressings, and desserts.

For those seeking zero-calorie options, stevia and monk fruit sweeteners are excellent choices. Derived from natural sources, these sweeteners pack a punch of sweetness without the calories. Stevia, made from the leaves of the Stevia rebaudiana plant, is about 50 to 300 times sweeter than sugar, meaning a little goes a long way. Monk fruit, on the other hand, contains antioxidants and has been used in traditional medicine for centuries.

It’s important to remember that while these alternatives can be beneficial, moderation is key. Just because a sweetener is labeled as “natural” doesn’t mean it should be consumed in excess. Experimenting with these alternatives can lead to delicious discoveries, allowing you to create satisfying snacks and meals that align with your goals of reducing sugar intake. Whether you’re drizzling honey on your morning oatmeal or sweetening your coffee with stevia, embracing natural sugar alternatives can lead to a healthier, sweeter life.

7. Meal Planning for Lower Sugar Consumption

What are the best ways to eat less sugar?
Credit : whatcanu.com

Meal planning is a powerful strategy for anyone looking to reduce their sugar intake while still enjoying delicious and satisfying meals. By taking the time to plan your meals ahead of time, you gain control over what you eat, making it easier to opt for healthier, low-sugar options.

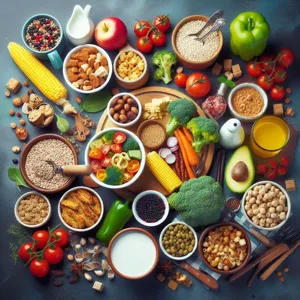
Start by dedicating a specific day each week to plan your meals. As you create your menu, focus on incorporating whole, unprocessed foods such as fruits, vegetables, whole grains, lean proteins, and healthy fats. These foods not only nourish your body but also naturally contain less sugar than their processed counterparts. For example, swapping sugary breakfast cereals for oatmeal topped with fresh berries or nuts can significantly cut down on sugar while providing a hearty start to your day.

When planning your meals, be sure to read labels carefully and avoid items with added sugars. Ingredients like high fructose corn syrup, cane sugar, or any syrups can sneak their way into products you might think are healthy. Instead, opt for homemade sauces and dressings where you can control the ingredients, or use herbs and spices to add flavor without the sugar.

To make meal planning sustainable, consider batch cooking. Preparing larger quantities of low-sugar meals and freezing portions for later can save time and reduce the temptation to reach for quick, sugary snacks when hunger strikes.

Furthermore, don’t forget to plan for snacks. Healthy snacks like nuts, yogurt (preferably unsweetened), or chopped veggies with hummus can bridge the gap between meals without the sugar overload.

By committing to a well-thought-out meal plan, you can significantly lower your sugar consumption, nourish your body, and pave the way for a healthier lifestyle. Not only will you feel more energized, but you’ll also cultivate a more mindful approach to eating, making it easier to resist the allure of sugar-laden treats.

8. Reading Food Labels: What to Look For

When embarking on your journey to reduce sugar intake, becoming adept at reading food labels is essential. Food packaging can often be misleading, with enticing claims that obscure the true sugar content lurking within. To navigate this maze of marketing, here are key elements to scrutinize.

First and foremost, check the **Nutrition Facts panel**, which provides a clear breakdown of the amount of sugar per serving. Pay attention to both the **total sugars** and the **added sugars** sections. Total sugars include both naturally occurring sugars, such as those found in fruits and dairy, and added sugars introduced during processing. Ideally, you want to minimize consumption of added sugars, so a product with a high level in this category should raise a red flag.

Next, look for the **ingredients list**. Ingredients are listed in descending order by weight, meaning that the first few items are present in the highest quantities. If sugar—or any of its many aliases, such as sucrose, high-fructose corn syrup, or agave nectar—appears among the first three ingredients, it’s a sign that sugar is a major component of that product.

Be on the lookout for **hidden sugars** often disguised under different names. Terms like maltose, dextrose, and cane juice can also contribute to your overall sugar intake without you realizing it.

Lastly, familiarize yourself with the **daily value percentage (%DV)** for added sugars. The American Heart Association recommends limiting added sugars to no more than 6 teaspoons (25 grams) for women and 9 teaspoons (38 grams) for men each day. Products that exceed 5% of your daily value for added sugars per serving should be approached with caution.

By developing a habit of reading food labels thoroughly, you empower yourself to make informed choices that align with your health goals, ultimately paving the way for sweet success in reducing your sugar consumption.

9. The Role of Hydration in Reducing Sugar Cravings

Hydration plays a surprisingly crucial role in managing sugar cravings, often acting as an unsung hero in the battle against excessive sugar intake. When our bodies are dehydrated, they can sometimes misinterpret this state as hunger, leading us to reach for sugary snacks in a misguided attempt to satisfy what we think is a craving for food. The truth, however, is that a simple glass of water could be all you need to quell those sudden urges.

Research suggests that even mild dehydration can trigger cravings for high-sugar foods, as our bodies seek quick energy sources to compensate for the lack of fluid. When we are properly hydrated, our metabolism operates more efficiently, and our body is better equipped to regulate blood sugar levels. This balance helps reduce the likelihood of those sudden spikes and crashes that can lead to cravings for sugary treats.

To harness the power of hydration, aim to drink water consistently throughout the day. Keeping a water bottle handy can serve as a constant reminder, and infusing your water with slices of citrus, berries, or herbs can make hydration more enjoyable and flavorful. Herbal teas, coconut water, and even broths can also contribute to your daily fluid intake, providing variety while keeping your hydration levels up.

Another effective strategy is to incorporate a glass of water before meals and snacks. This not only helps ensure you’re adequately hydrated but can also create a sense of fullness, potentially curbing the urge to reach for that candy bar or sugary dessert. By prioritizing hydration, you can create a powerful ally in your journey toward reducing sugar intake, ultimately leading to a healthier lifestyle and a sweeter sense of accomplishment.

10. Mindful Eating: Techniques to Curb Sugar Intake

Mindful eating is an essential strategy for anyone looking to reduce sugar intake while fostering a healthier relationship with food. This practice encourages you to slow down and truly engage with what you’re eating, allowing you to savor every bite while being more aware of your body’s signals. By implementing mindful eating techniques, you can significantly lower your sugar consumption without feeling deprived.

Start by creating a distraction-free environment during meals. Set aside your phone, turn off the television, and sit at a table away from any interruptions. This not only enhances your focus on the food but also encourages you to appreciate the textures, flavors, and aromas of what you’re consuming. As you eat, take smaller bites and chew thoroughly, allowing your taste buds to fully experience the sweetness—or lack thereof—of each bite. This can help you become more attuned to how sugary foods make you feel, enabling you to make more informed choices.

Another technique is to pause between bites. This simple act allows your brain to catch up with your stomach, helping you to recognize when you’re truly satisfied rather than just full. You might find that you don’t need that extra slice of cake or sugary snack after all. Additionally, consider keeping a food journal to track your eating habits, noting when you crave sugary foods and the emotions surrounding those cravings. This can help identify triggers and patterns, empowering you to make healthier decisions.

Finally, practice gratitude for your food. Reflect on where it comes from, the effort involved in its preparation, and the nourishment it provides. This shift in perspective can reduce the allure of sugary treats, as you become more appreciative of whole foods that fuel your body better. By integrating these mindful eating techniques into your daily routine, you can curb your sugar intake and create a more balanced approach to your diet, ultimately leading to sweeter success in your health journey.

11. Healthy Snack Alternatives to Satisfy Sweet Cravings

When it comes to curbing those pesky sweet cravings, the key is to have healthy snack alternatives at the ready. Instead of reaching for that candy bar or sugary pastry, consider satisfying your sweet tooth with options that nourish your body while still indulging your senses.

One delicious alternative is fruit. Fresh, ripe fruits like berries, apples, and bananas are naturally sweet and packed with vitamins, minerals, and fiber. A bowl of mixed berries drizzled with a bit of honey or a sliced apple served with almond butter can provide the sweetness you crave without the added sugars.

Another fantastic option is Greek yogurt. Its creamy texture and tangy flavor can be a delightful base for a sweet treat. Top it with a sprinkle of cinnamon, a handful of granola, or some chopped nuts and fruits for a balanced snack that feels indulgent but keeps the sugar content in check.

For those who prefer something crunchy, consider making your own trail mix with a blend of nuts, seeds, and a few dark chocolate chips. Dark chocolate has a rich flavor and lower sugar content than milk chocolate, making it a guilt-free way to satisfy a sweet craving.

If you’re in the mood for something baked, try homemade energy bites. These tasty morsels can be made with oats, nut butter, and a touch of honey or maple syrup, mixed with ingredients like chia seeds or dried fruits. They’re easy to prepare and can be stored for quick, on-the-go snacking.

Lastly, don’t overlook the power of smoothies. Blend your favorite fruits with some spinach, a scoop of protein powder, and a splash of almond milk for a refreshing drink that feels like a treat but is loaded with nutrients.

By swapping out sugary snacks for these healthier alternatives, you can satisfy your sweet cravings while staying on track with your goal of reducing sugar intake. With a little creativity and preparation, you’ll find that healthy snacking can be just as enjoyable as the sugary options you’re trying to limit.

12. The Benefits of a Balanced Diet on Overall Health

A balanced diet is not just a dietary choice; it’s a cornerstone of overall health that pays dividends far beyond the confines of a single meal. When you prioritize a variety of whole foods, including fruits, vegetables, whole grains, lean proteins, and healthy fats, you create a nutrient-rich foundation that supports every aspect of your well-being.

First and foremost, a balanced diet enhances your body’s ability to function optimally. Each food group contributes essential vitamins, minerals, and antioxidants that play critical roles in bodily functions, from boosting your immune system to aiding in digestion and promoting healthy skin. For instance, leafy greens are packed with iron and vitamins A and C, while nuts and seeds offer healthy fats that support brain function and heart health.

Moreover, maintaining a balanced diet can significantly impact your energy levels and mood. Foods that are high in sugar may give you a quick burst of energy, but they often lead to a crash that leaves you feeling fatigued and irritable. In contrast, whole foods provide a steady release of energy, helping you to stay alert and focused throughout the day. Additionally, certain nutrients, such as omega-3 fatty acids found in fish, have been linked to improved mental health, reducing the risk of anxiety and depression.

Another often-overlooked benefit of a balanced diet is its role in weight management. By incorporating a variety of nutrient-dense foods, you’re less likely to reach for unhealthy snacks that are high in sugars and empty calories. This not only helps in maintaining a healthy weight but also reduces the risk of chronic diseases such as diabetes, heart disease, and certain types of cancer.

Lastly, a balanced diet fosters a positive relationship with food. When you focus on eating a wide array of foods rather than restricting yourself, you can enjoy meals without guilt and develop a sustainable approach to eating. This mindset shift can be particularly beneficial in reducing sugar intake, as it encourages you to seek out naturally sweet options, such as fruits, rather than processed sugary snacks.

Incorporating a balanced diet into your lifestyle is a powerful strategy not just for sugar reduction, but for enhancing your overall health and well-being. By choosing a variety of wholesome foods, you’re investing in your body, mind, and future. Remember, every meal is an opportunity to nourish yourself and pave the way for a healthier tomorrow.

13. Overcoming Sugar Cravings: Tips and Tricks

Overcoming sugar cravings can feel like climbing a steep mountain, but with the right strategies in your toolkit, you can turn those peaks into manageable hills. Sugar cravings often strike unexpectedly, leading to impulsive snacking or bingeing on sweet treats. Understanding the triggers behind these cravings is the first step in conquering them. Stress, fatigue, and even boredom can send your brain scrambling for a quick sugar fix, so identifying your personal triggers can help you develop effective coping mechanisms.

One powerful technique is to keep your mind and body busy. Engaging in physical activity, whether it’s a brisk walk, a workout session, or even some stretching, can distract you from cravings and release endorphins—your body’s natural mood lifters. If you find yourself craving something sweet, try sipping on herbal tea or munching on a piece of fruit instead. The natural sugars in fruits can satisfy your sweet tooth while providing valuable nutrients.

Another effective strategy is to stay hydrated. Sometimes, our bodies confuse thirst for hunger, leading us to reach for sugary snacks when all we really need is a glass of water. Keeping a water bottle handy and sipping throughout the day can help mitigate those cravings. Furthermore, consider practicing mindfulness techniques. Taking a moment to breathe deeply, meditate, or simply pause and reflect can help you recognize the craving without yielding to it.

Planning your meals and snacks in advance can be incredibly beneficial. Stock your kitchen with healthy alternatives to sugary snacks, such as nuts, yogurt, or dark chocolate. When you have nutritious options readily available, you’re less likely to succumb to the lure of processed sugary treats. Finally, don’t forget to allow yourself the occasional indulgence. Completely depriving yourself can lead to a backlash of cravings. Instead, treat yourself mindfully and savor your favorite sweet treat in moderation. By implementing these tips and tricks, you’ll be well on your way to overcoming sugar cravings and embracing a healthier lifestyle!

14. Tracking Progress: Tools and Apps for Success

When it comes to reducing sugar intake, tracking your progress can be one of the most empowering strategies at your disposal. In an age where technology is at our fingertips, a plethora of tools and apps are available to help you stay on top of your health goals. These digital companions not only provide insights into your eating habits but also offer a visual representation of your journey, making it easier to stay motivated.

Apps like MyFitnessPal and Cronometer are excellent choices for those looking to monitor their daily sugar intake alongside other nutritional aspects. With user-friendly interfaces, these apps allow you to log meals, scan barcodes, and even track exercise, offering a comprehensive view of your dietary habits. You’ll be able to see exactly how much sugar is sneaking into your diet, whether it’s from obvious sources like candy or hidden sugars in sauces and snacks.

For those who enjoy a bit more visual flair, consider using apps like Yummly or Lifesum, which not only track your intake but also provide personalized meal recommendations and recipes. This can be incredibly helpful when you’re trying to find alternatives to high-sugar meals or snacks. In addition, these platforms often feature community support, allowing you to connect with others on similar journeys, share tips, and celebrate milestones together.

If you prefer a more traditional approach, keeping a handwritten food diary can also yield fantastic results. Documenting what you eat each day can raise awareness of your consumption patterns and help you pinpoint sources of added sugars. Plus, it adds a tactile element to your tracking, which many find rewarding.

Regardless of the method you choose, the act of tracking your progress is a powerful tool in your arsenal. It cultivates mindfulness about what you’re consuming, holds you accountable, and ultimately empowers you to make informed choices that align with your goal of reducing sugar intake. Celebrate your victories—big and small—by reviewing your progress regularly, and don’t hesitate to adjust your strategies as you learn more about your preferences and habits. With the right tools at your disposal, you’re well on your way to sweet success!

15. Celebrating Milestones: Rewarding Yourself Without Sugar

Celebrating milestones is a pivotal part of any journey, and while it can be tempting to turn to sugary treats as a reward, there are countless creative and satisfying alternatives that can enhance your experience without compromising your health goals. Think of your accomplishments—not just the big ones, but even the small victories—as opportunities to indulge in self-care rituals that nourish both body and spirit.

Instead of reaching for a slice of cake or a box of chocolates, consider treating yourself to experiences that bring you joy. Perhaps you could book a relaxing massage, enjoy a day at the spa, or treat yourself to a new book or a cozy night of your favorite movie marathon. These are all fulfilling rewards that celebrate your hard work without sugar’s tempting allure.

Another idea is to embrace the culinary arts by preparing a special meal. Experiment with creating a delicious dish made from wholesome ingredients that excite your palate. You could explore new recipes that focus on natural sweeteners like fruit or spices, allowing you to enjoy sweetness in a healthier way.

If you crave something a bit more indulgent, why not try crafting a delightful fruit platter or a vibrant smoothie bowl? Load it with your favorite seasonal fruits, nuts, and seeds, transforming a typical snack into a celebratory feast that feels both celebratory and nourishing.

You could also gather your friends for a sugar-free potluck. Not only will it be a wonderful way to connect with loved ones, but it also opens up a world of creative, sugar-free dishes to share and enjoy together.

Remember, celebrating milestones is about acknowledging your hard work and progress, and it can be as sweet as any dessert without the added sugar. By choosing to reward yourself with meaningful experiences and delicious, healthy alternatives, you’ll reinforce your commitment to a balanced lifestyle while creating lasting memories that align with your goals.

As we wrap up our exploration of effective strategies for reducing sugar intake, it’s clear that achieving sweet success doesn’t have to be a daunting task. By implementing the tips and tricks discussed in this blog post, you can make gradual yet impactful changes to your diet, leading to improved health and well-being. Remember, it’s all about finding balance and making mindful choices that suit your lifestyle. Whether it’s swapping sugary snacks for healthier alternatives or becoming more aware of hidden sugars in everyday foods, each small step contributes to a larger journey towards a healthier you. Embrace the challenge, celebrate your progress, and enjoy the sweet victories that come with reducing sugar in your life. Here’s to a healthier, happier you!

What are the best ways to organize your home office?

In today’s fast-paced digital world, a well-organized home office is more than just a luxury—it’s a necessity for maximizing productivity and maintaining focus.

As remote work becomes increasingly prevalent, the importance of creating a workspace that fosters creativity and efficiency cannot be overstated. From managing clutter to optimizing your layout, the right strategies can transform your office into a sanctuary of productivity. In this blog post, we’ll explore ten essential tips that will help you streamline your work environment, enhance your workflow, and ultimately elevate your performance. Whether you’re a seasoned remote worker or new to the home office setup, these practical insights will guide you in crafting a space that not only inspires productivity but also brings you peace of mind as you tackle your daily tasks. Get ready to unlock your full potential with a home office that works as hard as you do!

1. Assessing Your Space: Understanding Your Needs

What are the best ways to organize your home office?
Credit : whatcanu.com

Before diving into the exciting world of home office organization, it’s crucial to start with a thorough assessment of your space and a clear understanding of your unique needs. Take a moment to step back and examine the area you’ll be working in. Is it a dedicated room, a nook in your living space, or perhaps a corner of your dining room? Each configuration comes with its own set of challenges and opportunities.

Begin by considering how you use your workspace. Do you require a large desk for multiple monitors, or do you prefer a minimalist setup with just a laptop? Think about the nature of your work: Are you frequently on calls, requiring a quiet environment, or do you thrive in a bustling atmosphere? Understanding these nuances will help you create an environment that fuels your productivity rather than stifles it.

Next, take stock of your current furniture and equipment. Is your chair ergonomic, supporting long hours of sitting, or does it leave you feeling strained? Does your desk have enough surface area for your essential tools, or is clutter a constant battle? Don’t hesitate to jot down what works for you and what doesn’t. This self-reflection will guide your decisions as you curate your ideal workspace.

Finally, consider the elements that inspire you. Do you find motivation in plants, art, or personal mementos? Incorporating these items into your design can enhance your creativity and create an environment that you genuinely enjoy spending time in. By thoughtfully assessing your space and understanding your needs, you’ll set the foundation for a home office that not only maximizes productivity but also feels uniquely yours.

2. Choosing the Right Location for Your Home Office

Choosing the right location for your home office is a crucial step in fostering an environment that promotes productivity and focus. The ideal spot should be a place where you feel comfortable, inspired, and free from distractions. Begin by evaluating your home layout: look for areas that receive ample natural light, as studies show that exposure to sunlight can enhance mood and energy levels. A well-lit space can also reduce eye strain, making it easier for you to concentrate on your tasks.

Consider the noise level in different rooms. If you have a bustling household, it might be wise to choose a room away from the main living areas, where children or pets may create interruptions. A quieter space can help you maintain a strong focus and minimize distractions. If a separate room isn’t available, think about utilizing a corner of a larger area, such as a living room or bedroom, and use strategic dividers or plants to create a sense of separation.

Additionally, think about how the location aligns with your work habits. Do you thrive in a cozy nook or do you prefer a more open area? Do you need access to specific resources like a printer or filing cabinet? Your workspace should cater to your workflow, allowing for easy access to essential tools and materials.

Lastly, personalization is key. Once you’ve identified the perfect location, make it your own. Infuse your workspace with elements that inspire you—whether it’s artwork, motivational quotes, or plants. This personal touch not only makes the space more inviting but can also boost your creativity and enthusiasm for the tasks at hand. By thoughtfully selecting the right location for your home office, you lay the foundation for a productive work environment that supports your goals and enhances your overall work experience.

3. Decluttering: The First Step to an Organized Office

What are the best ways to organize your home office?
Credit : whatcanu.com

Decluttering is the cornerstone of creating an organized home office, and it’s often the first step toward maximizing your productivity. Picture this: a workspace overflowing with papers, outdated gadgets, and miscellaneous items can be overwhelming, making it challenging to focus on the tasks at hand. The clutter not only distracts the mind but can also drain your motivation.

To begin your decluttering journey, set aside dedicated time to assess your workspace. Start with a thorough evaluation of every item on your desk and in your drawers. Ask yourself, “Do I use this? Does it serve a purpose?” If the answer is no, it’s time to let it go. Create three categories: keep, donate, and toss. Be ruthless—if an item hasn’t been used in the last six months and doesn’t hold sentimental value, it likely doesn’t belong in your office.

Once you’ve sorted through your belongings, implement an efficient filing system for important documents. Invest in labeled folders, binders, or digital tools that help you easily access what you need without sifting through piles of paper. For items that you frequently use, consider storage solutions that keep them within arm’s reach yet neatly organized, such as drawer organizers or decorative boxes.

Don’t forget to declutter your digital workspace as well. A disorganized desktop filled with files and applications can be just as distracting as a messy physical space. Take some time to organize your digital files into clearly labeled folders, delete what you no longer need, and create a streamlined system that enhances your workflow.

By prioritizing decluttering, you’ll not only clear the physical space around you but also create a mental environment conducive to focus and creativity. With a fresh, organized office, you’ll find that you can tackle your tasks with renewed energy and clarity, leading to increased productivity and success in your work.

4. Essential Furniture for Comfort and Productivity

When it comes to creating an efficient home office, the right furniture is not just a luxury; it’s a necessity. Comfort and productivity go hand in hand, and investing in quality furniture can make all the difference in your work-from-home experience.

Start with an ergonomic chair that supports your posture throughout long hours of sitting. Look for features like adjustable height, lumbar support, and breathable material to ensure you stay comfortable and focused. A well-designed chair will prevent fatigue and discomfort, allowing you to concentrate on your tasks without distraction.

Next, consider your desk space. A sturdy, spacious desk can significantly enhance your workflow. Whether you prefer a traditional style or a modern standing desk, ensure it accommodates all your essential tools—like your computer, documents, and stationery—without feeling cluttered. If you’re short on space, opting for a wall-mounted desk can help you maximize your area while still providing a dedicated workspace.

Don’t forget about additional furniture pieces that promote organization and ease. Storage solutions like shelves, cabinets, or filing systems are invaluable for keeping your workspace tidy and efficient. A clean environment fosters a clear mind, so have a designated place for everything, from books and supplies to important paperwork.

Finally, consider the overall aesthetic of your office. Incorporating elements like a cozy reading nook, decorative plants, or personal touches can create a warm and inviting atmosphere that inspires creativity. A well-thought-out office layout, paired with the right furniture, will not only enhance your comfort but also elevate your productivity, making it easier to tackle your daily tasks with enthusiasm.

5. Effective Desk Setup: Ergonomics Matter

What are the best ways to organize your home office?
Credit : whatcanu.com

Creating an effective desk setup is pivotal for enhancing productivity and maintaining your well-being while working from home. Ergonomics, the science of designing your workspace to fit your body, plays a crucial role in this equation. The right ergonomic setup not only helps prevent discomfort and injury but also boosts your focus and efficiency.

Begin with your chair, as it serves as the cornerstone of your workspace. Opt for an adjustable chair that supports your lower back and encourages good posture. Ideally, your feet should rest flat on the floor, with your knees at a 90-degree angle. Consider using a footrest if your chair is too high, or adjusting your desk height to accommodate your seated position.

Next, pay attention to your desk height. Your elbows should rest comfortably at a 90-degree angle when typing, with your wrists straight and hands slightly above the keyboard. If your desk is too high or too low, it can lead to fatigue and strain over time. An adjustable desk or a standing desk converter can offer flexibility, allowing you to alternate between sitting and standing throughout the day.

Monitor placement is another critical aspect of an effective desk setup. Position your monitor at eye level, approximately an arm’s length away, to reduce neck strain and promote better posture. If you use multiple monitors, ensure they are aligned and at the same height to avoid awkward neck movements.

Don’t overlook the importance of keyboard and mouse placement, either. These should be situated close enough that you can use them without stretching your arms, and your wrists should remain in a neutral position. Consider using wrist supports if you find yourself frequently experiencing discomfort.

Finally, take the time to personalize your workspace with elements that inspire and motivate you, such as plants, artwork, or motivational quotes. A visually appealing environment can enhance your mood and keep you engaged in your work.

By prioritizing ergonomics in your desk setup, you’ll create a workspace that not only caters to your physical needs but also fosters a productive atmosphere, allowing you to focus on what truly matters—getting the job done efficiently and comfortably.

6. Smart Storage Solutions: Maximizing Vertical and Horizontal Space

In the quest for an organized home office, utilizing smart storage solutions can make all the difference in enhancing your productivity. When space is limited, it’s essential to think creatively about how to maximize both vertical and horizontal areas to keep your workspace tidy and efficient.

Start by taking advantage of vertical space. Wall-mounted shelves, pegboards, and floating cabinets provide ample room for books, office supplies, and decorative items without encroaching on your desk area. By elevating your storage, you not only free up valuable surface space but also draw the eye upward, creating an illusion of a larger, more open environment. Consider installing a corkboard or magnetic board above your desk to keep important reminders and documents within easy reach while maintaining a clutter-free workspace.

On the horizontal front, think about multi-functional furniture. A desk with built-in drawers or shelves can house essential items while keeping your workspace clear. Utilize under-desk storage solutions, such as rolling carts or file cabinets, to keep files and materials organized yet accessible. Slim, stackable bins can be a game-changer for organizing miscellaneous items like chargers, stationery, or paperwork that tends to pile up.

Additionally, use baskets or decorative boxes to corral smaller items. Labeling these containers not only aids in quick identification but also encourages a habit of returning items to their designated spots. With a focus on both vertical and horizontal organization, you can create a home office that fosters creativity and focus, empowering you to tackle tasks with renewed energy and enthusiasm. Embrace these smart storage solutions, and watch your productivity soar as you transform your workspace into a well-organized haven.

7. Organizing Digital Files and Documents

What are the best ways to organize your home office?
Credit : whatcanu.com

In the digital age, a cluttered digital workspace can be just as distracting as a messy physical desk. Organizing your digital files and documents is crucial for maximizing productivity and ensuring that you can find what you need when you need it. Start by creating a logical folder structure that mirrors the way you think and work. For instance, categorize your files into main folders such as “Projects,” “Clients,” “Finance,” and “Resources.” Within each main folder, create subfolders to further organize your documents. This hierarchical approach not only streamlines access but also helps you maintain focus on the task at hand.

Another essential aspect of digital organization is naming conventions. Use clear, descriptive file names that include relevant dates or project details. This way, a quick glance will tell you exactly what a file contains without needing to open it. Consider using date formats (e.g., YYYY-MM-DD) to ensure that your files are sorted chronologically, making it easier to find the latest version of any document.

Regularly decluttering your digital space is equally important. Set aside time each month to review your files, delete duplicates, and archive outdated documents. Utilizing cloud storage solutions can also enhance your organization efforts, as they often come equipped with robust search functions that allow you to locate files quickly. Plus, cloud storage ensures that your documents are accessible from anywhere, making remote work seamless.

Finally, consider using productivity tools and apps designed for file management. Tools like Trello or Asana can help you keep track of projects, while Google Drive or Dropbox can keep your files organized and easily shareable. By investing time in organizing your digital files and documents, you’ll create a streamlined workflow that fosters focus and efficiency, setting you up for success in your home office.

8. Creating a Distraction-Free Environment

Creating a distraction-free environment is essential for fostering maximum productivity in your home office. In today’s fast-paced world, it’s all too easy to get sidetracked by the myriad of potential interruptions, from the allure of social media notifications to the tempting siren call of household chores. To combat these distractions, the first step is to establish a dedicated workspace that is solely dedicated to your professional tasks. Ideally, this space should be separate from personal areas in your home, allowing you to mentally shift gears when you enter.

Next, consider the layout and organization of your office. Keep your desk clear of clutter, and only display items that are necessary for your work. Invest in storage solutions like filing cabinets, shelves, and desk organizers to keep paperwork and supplies neatly stowed away. A clean workspace can significantly enhance focus, allowing your mind to concentrate on the task at hand rather than getting lost in disarray.

Lighting plays a crucial role in creating a distraction-free environment. Natural light is ideal, as it can boost mood and energy levels, but if that’s not an option, opt for soft, adjustable lighting that reduces glare and eye strain. Additionally, consider using noise-canceling headphones or playing soft background music to drown out ambient noises that may disrupt your concentration.

Lastly, set boundaries with those around you. Clearly communicate your work hours and the importance of minimizing interruptions during this time. By establishing these guidelines, you signal to others that your work is a priority, helping you maintain focus and productivity throughout your day. By implementing these strategies, you can transform your home office into a sanctuary of concentration, empowering you to achieve your goals while enjoying the flexibility of remote work.

9. Incorporating Personal Touches for Inspiration

Creating a home office that fosters productivity often requires more than just a functional layout and the right technology; it also involves infusing your workspace with personal touches that inspire and motivate you. Personalization can transform a sterile environment into a creative sanctuary, reflecting your personality and igniting your passion for work.

Start by displaying items that hold sentimental value or inspire you daily. This could be photographs of loved ones, artwork that resonates with you, or mementos from memorable trips. Each item serves as a reminder of what you value most, helping to cultivate a positive mindset as you tackle your tasks. Consider a vision board filled with quotes, images, and goals that speak to your aspirations—this visual reminder can spark creativity and keep you focused on your objectives.

Incorporating plants into your office is another effective way to bring life and energy into your workspace. Studies have shown that greenery can enhance mood, reduce stress, and increase overall productivity. Choose low-maintenance plants like succulents or snake plants if you’re not confident in your gardening skills. Their vibrant presence will not only purify the air but will also create a calming atmosphere conducive to deep concentration.

Additionally, don’t underestimate the power of color. Choose a color scheme that energizes you. Perhaps you prefer the calming effects of blues and greens, or maybe you thrive in a more vibrant space with pops of yellow or orange. Use desk accessories, wall art, or even the paint on your walls to create an environment that resonates with your style and boosts your motivation.

Ultimately, your home office should be a reflection of who you are, a space that welcomes you each day and encourages your best work. By incorporating personal touches that inspire you, you’ll not only enhance your productivity but also create a workspace that feels uniquely yours—where creativity flows effortlessly and work feels less like a chore and more like a rewarding endeavor.

10. Utilizing Office Supplies Wisely

Utilizing office supplies wisely is crucial for maintaining an organized and productive home office. A well-stocked workspace doesn’t just mean having an abundance of supplies; it means strategically choosing and arranging them to enhance your workflow and minimize clutter. Start with the basics: pens, notepads, sticky notes, and highlighters. Invest in quality items that will last longer and perform better, reducing the need for constant replacements.

Consider implementing a system for your supplies that promotes easy access and efficient use. Use drawer organizers or desktop caddies to keep frequently used items within reach while reserving larger storage solutions for less commonly needed supplies. Categorize your materials—keep all writing tools together, and designate a section for paper products like notebooks and sticky notes. Clear labeling can further streamline your process, ensuring you know exactly where everything is at a glance.

To maximize your space, think beyond traditional supplies. Utilize digital tools such as project management apps and cloud storage to minimize physical paperwork. Not only does this declutter your desk, but it also ensures that important documents are readily accessible without the risk of misplacement. Additionally, consider incorporating multifunctional items, such as a printer that scans and copies, to reduce the need for various devices and save space.

Finally, don’t forget about the aesthetic appeal of your office supplies. Choose items that resonate with your personal style, whether they are sleek and modern or colorful and fun. This not only makes your workspace more inviting but also keeps you motivated and engaged throughout the day. By utilizing office supplies wisely, you can create a streamlined, efficient, and inspiring environment that sets the stage for maximum productivity.

11. Establishing a Routine for Maintenance

Establishing a routine for maintenance is crucial in ensuring that your home office remains a productive haven rather than a chaotic workspace. Just like any other aspect of our lives, consistency is key. Set aside a specific time each week dedicated to tidying up your office—this could be a quiet Sunday morning or a mid-week refresh during your lunch break. During this time, tackle clutter, file away important documents, and ensure that your workspace is not just functional but also inviting.

Incorporate small habits into your daily routine that help maintain order. For instance, commit to a “clean desk” policy by taking a few minutes at the end of each workday to clear your desk of unnecessary items. This could mean putting away papers, wiping down surfaces, or organizing your digital files. Invest in organizational tools like drawer dividers, file organizers, or cable management solutions to streamline this process and make it easier to maintain your workspace.

Additionally, consider establishing a monthly deep-clean schedule. This can involve decluttering your office supplies, dusting surfaces, and reorganizing furniture for optimal comfort and functionality. By making maintenance a regular part of your routine, you’ll not only create a more pleasant working environment but also boost your productivity in the long run. A well-organized space fosters clarity of thought and helps to minimize distractions, enabling you to focus on what truly matters—getting the job done.

12. Tips for Managing Time and Tasks Efficiently

Managing time and tasks efficiently is crucial for creating a productive home office environment. In a space where distractions abound and the lines between work and home life can blur, having a robust time management strategy is essential. Here are some practical tips to help you stay organized and focused throughout your workday.

**1. Prioritize Your Tasks:** Start each day by identifying your most important tasks. Use tools like the Eisenhower Matrix to distinguish between what’s urgent and what’s important, allowing you to focus on high-impact activities that drive results.

**2. Set Specific Goals:** Break down larger projects into manageable, bite-sized goals. This not only makes daunting tasks feel achievable but also provides a sense of accomplishment as you tick them off your list. Consider using SMART criteria—specific, measurable, achievable, relevant, and time-bound—to formulate your goals.

**3. Use a Digital Planner or Task Manager:** Embrace technology by utilizing digital planners or task management apps like Trello, Asana, or Todoist. These tools help you visualize your tasks, set deadlines, and remind you of upcoming priorities, ensuring nothing slips through the cracks.

**4. Implement Time Blocking:** Allocate specific blocks of time for different tasks or types of work. For example, designate mornings for creative tasks when your mind is fresh and afternoons for meetings or administrative work. This structured approach can enhance focus and reduce decision fatigue.

**5. Establish a Routine:** Creating a consistent daily routine helps signal to your brain when it’s time to work and when it’s time to relax. Start your day with a morning ritual that prepares you for productivity—whether it’s a cup of coffee, a quick workout, or quiet reflection.

**6. Limit Distractions:** Identify your biggest distractions and take proactive steps to minimize them. This might mean turning off social media notifications, setting boundaries with family members during work hours, or using noise-canceling headphones to block out background noise.

**7. Schedule Breaks:** Don’t forget to incorporate short breaks into your day. Techniques like the Pomodoro Technique—working for 25 minutes followed by a 5-minute break—can boost your productivity while preventing burnout. Use these breaks to stretch, grab a snack, or practice mindfulness.

**8. Reflect and Adjust:** At the end of each week, take a moment to reflect on what worked and what didn’t. Adjust your strategies as necessary, experimenting with different time management techniques until you find the perfect fit for your workflow.

By implementing these time and task management tips, you’ll create a home office environment that fosters productivity and keeps you focused on your goals. With a little planning and discipline, you can turn your workspace into a powerhouse of efficiency, making the most of your time and minimizing stress.

13. The Role of Lighting in Productivity

Lighting plays a pivotal role in shaping the atmosphere of your home office, directly influencing your productivity, mood, and overall well-being. A well-lit workspace can transform a dreary corner into an inspiring hub of creativity, while insufficient or harsh lighting can lead to fatigue and decreased focus.

Natural light is often the gold standard when it comes to home office illumination. Studies have shown that exposure to daylight can enhance your mood, boost energy levels, and improve concentration. If possible, position your desk near a window to take advantage of this natural resource. The warm glow of sunlight can invigorate your work sessions, making tasks feel less daunting. Additionally, consider using sheer curtains that allow diffused light to flood the space without causing glare on your computer screen.

However, not everyone is fortunate enough to have a sun-drenched office. In those cases, artificial lighting becomes essential. Opt for a combination of ambient, task, and accent lighting to create a well-balanced environment. Ambient lighting serves as the overall illumination, ensuring the room is bright enough to work in. Task lighting, such as desk lamps with adjustable brightness, provides targeted light for specific activities—ideal for reading documents or writing notes. Accent lighting, like wall sconces or decorative fixtures, can add a touch of personality to your space while enhancing the overall ambiance.

When selecting light bulbs, consider their color temperature. Warmer tones (around 2700K to 3000K) create a cozy, inviting atmosphere, while cooler tones (4000K and above) promote alertness and clarity, making them ideal for focus-intensive tasks. Investing in smart lighting solutions can also allow you to adjust brightness and color temperature according to your needs throughout the day.

Finally, don’t underestimate the importance of reducing glare and reflections, especially if you spend long hours in front of a screen. Position your monitor away from direct light sources and use anti-glare screens if necessary. By thoughtfully considering your lighting choices, you can create a home office that not only looks good but also fosters productivity, creativity, and a sense of well-being.

14. Technology Tools to Keep You Organized

In today’s fast-paced world, leveraging technology is essential for creating an organized and efficient home office. With the right digital tools at your fingertips, you can streamline your workflow, manage tasks effortlessly, and keep your workspace clutter-free. Here are some must-have technology tools that can help you stay organized and boost your productivity.

**1. Project Management Software:** Tools like Trello, Asana, or Monday.com allow you to break down your projects into manageable tasks, set deadlines, and track your progress. These platforms offer visual boards and lists that can help you prioritize your workload and ensure nothing falls through the cracks.

**2. Digital Note-Taking Apps:** Gone are the days of scribbling notes on sticky pads. Apps like Evernote, OneNote, or Notion enable you to capture ideas, create to-do lists, and organize your thoughts in one central location. With features like tagging and powerful search capabilities, you can easily retrieve important information when you need it.

**3. Cloud Storage Solutions:** Services like Google Drive, Dropbox, or Microsoft OneDrive provide a safe space for your documents and files. By storing your work in the cloud, you can access it from anywhere, collaborate with others in real-time, and ensure that your important files are backed up and secure.

**4. Time Management Tools:** Keep track of how you spend your time with tools like Toggl or RescueTime. These apps help you identify productivity patterns, manage distractions, and allocate your hours effectively, allowing you to create a schedule that maximizes your output.

**5. Communication Platforms:** Staying connected with team members or clients is crucial for a productive home office. Utilize platforms like Slack, Microsoft Teams, or Zoom for seamless communication and collaboration. These tools facilitate quick discussions, video meetings, and file sharing, helping you stay in sync with your colleagues.

**6. Task Automation Tools:** Simplify repetitive tasks with automation tools like Zapier or IFTTT. These platforms allow you to create workflows that automatically trigger actions between different apps, saving you time and reducing manual effort.

By integrating these technology tools into your home office, you can create a structured environment that fosters productivity and minimizes distractions. Embrace the digital age and watch as your organization skills and efficiency soar to new heights.

15. Regularly Reviewing and Adjusting Your Setup for Optimal Performance

Creating a productive home office isn’t a one-and-done task; it requires ongoing attention and refinement. Regularly reviewing and adjusting your setup is essential to ensure that your workspace continues to meet your evolving needs and preferences. Start by setting aside time—perhaps monthly or quarterly—to evaluate the effectiveness of your current arrangement. Are you still comfortable in your chair, or has it begun to feel less supportive? Is your desk height still ideal for long hours of work, or are you finding yourself slouching or straining your neck?

Consider the tools and technology you use daily. Are there new apps or gadgets that could enhance your workflow? Perhaps you’ve discovered that a standing desk would better suit your working style, allowing for healthier posture and increased energy levels throughout the day. Additionally, take a moment to assess your organization systems. Are your files cluttered, or is your digital workspace in disarray? Streamlining these areas can significantly reduce distractions and enhance your focus.

Don’t forget to seek feedback from your own experiences and, if applicable, from colleagues or family members who share the space with you. They might offer insights into what works well and what could be improved. By making it a habit to regularly review and adjust your home office setup, you not only promote optimal performance but also create an environment that reflects your personal style and supports your productivity goals. A well-tuned workspace can lead to greater inspiration, increased efficiency, and ultimately, a more fulfilling work experience.

In conclusion, creating an organized home office is a vital investment in your productivity and overall well-being. By implementing the 10 essential tips we’ve shared, you can transform your workspace into a haven of focus and efficiency. From decluttering and establishing a designated workspace to incorporating inspiring decor and ergonomic furniture, each step plays a crucial role in fostering a productive environment. Remember, a well-organized office not only enhances your workflow but also promotes a sense of calm and clarity. As you embark on this journey, take the time to personalize your space and create an atmosphere that inspires creativity and motivation. Happy organizing, and may your newfound productivity lead to great success in all your endeavors!

What are the best ways to add greenery to your home?

In a world increasingly dominated by concrete and technology, the desire to connect with nature has never been more pronounced.

Bringing the outside in isn’t just a design trend; it’s a refreshing lifestyle choice that transforms our living spaces into serene sanctuaries filled with life and vitality. Incorporating greenery into your home not only enhances aesthetic appeal but also improves air quality and promotes a sense of well-being. Whether you have a sprawling house or a cozy apartment, there are countless creative ways to infuse your environment with the beauty of nature. From hanging planters and vertical gardens to stylish terrariums and succulents, this blog post will inspire you with innovative ideas to create your own indoor oasis. Join us as we explore the myriad of options for enriching your home with lush greenery, helping you cultivate a space that is both inviting and invigorating.

1. The Benefits of Indoor Plants

What are the best ways to add greenery to your home?
Credit : whatcanu.com

Indoor plants are not just a trendy addition to your home decor; they offer a plethora of benefits that can enhance your living space in various ways. First and foremost, they improve air quality. Plants absorb carbon dioxide and release oxygen, making the air in your home cleaner and fresher. Certain varieties, like peace lilies and spider plants, are particularly effective at filtering out toxins and pollutants, creating a healthier environment for you and your family.

Beyond their air-purifying capabilities, indoor plants also contribute to your mental well-being. Studies have shown that greenery can reduce stress, boost mood, and even increase productivity. The presence of plants is known to promote feelings of calm and relaxation, making your living space a sanctuary from the hustle and bustle of daily life. Whether it’s the soothing sight of a lush fern or the vibrant colors of blooming orchids, these natural elements can create a sense of peace.

Additionally, indoor plants can enhance the aesthetic appeal of your home. They bring a touch of nature indoors, adding texture, color, and life to your rooms. From towering fiddle leaf figs in the corner of your living room to delicate succulents on your windowsill, the variety of shapes and sizes can complement any decor style, making your space feel more inviting and vibrant.

Moreover, indoor gardening can be a rewarding hobby that fosters a deeper connection with nature. Caring for plants can be a form of mindfulness, allowing you to slow down and appreciate the little joys of life. The act of nurturing a living thing can also provide a sense of accomplishment and purpose, especially when you witness your plants thrive and flourish.

In summary, incorporating indoor plants into your home is a win-win situation. You not only beautify your space but also enrich your life with cleaner air, improved mental health, and a gratifying hobby. So, as you embark on your journey of bringing the outside in, remember that each green addition is a step toward creating a healthier and more vibrant home.

2. Choosing the Right Plants for Your Space

When it comes to transforming your home into a lush, green oasis, choosing the right plants is crucial. The ideal plant should not only complement your interior design but also thrive in the specific conditions of your space. Start by assessing the natural light available in each room. Bright, sunny areas can accommodate sun-loving varieties like succulents, cacti, or vibrant flowering plants, while lower-light spaces may be best suited for hardy options like snake plants or pothos, which can flourish even in dim corners.

Next, consider the size of the plants in relation to your space. Large statement pieces, such as fiddle leaf figs or rubber trees, can serve as striking focal points in a spacious living room, while smaller plants, like air plants or mini ferns, can be used to create charming vignettes on shelves or coffee tables. Don’t forget about your lifestyle, too; if you have pets or young children, opt for non-toxic varieties to ensure safety for all family members.

Additionally, think about the maintenance level each plant requires. If you’re a busy individual with limited time for plant care, choose low-maintenance options that require minimal watering and care. Many of these resilient plants not only look beautiful but also help purify the air, contributing to a healthier living environment.

By thoughtfully selecting plants that fit your space, lifestyle, and aesthetic preferences, you can effortlessly bring the outside in, creating a vibrant sanctuary that not only enhances the beauty of your home but also nurtures your well-being.

3. Creative Plant Display Ideas

What are the best ways to add greenery to your home?
Credit : whatcanu.com

When it comes to incorporating greenery into your home, the way you display your plants can be just as important as the plants themselves. Creative plant display ideas not only elevate the aesthetic of your space but also showcase your personal style. Here are some innovative ways to showcase your leafy companions.

**1. Vertical Gardens:** Transform an empty wall into a lush green canvas by creating a vertical garden. Use a variety of wall-mounted planters or pocket planters that allow you to hang small pots filled with herbs, succulents, or trailing vines. This not only saves space but also adds a stunning focal point that invites nature indoors.

**2. Shelving Units:** Consider repurposing an old bookshelf or installing open shelves to create a mini indoor jungle. Mix and match plant sizes and types on the shelves, incorporating decorative pots that complement your home decor. This layered approach adds depth and interest, turning your plants into a dynamic display.

**3. Hanging Planters:** Utilize the vertical space in your home by incorporating hanging planters. Whether you choose macramé hangers, decorative ceramic pots, or sleek metal containers, dangling greenery can create an enchanting atmosphere. Position them near windows or in corners to draw the eye upward and create a sense of airiness.

**4. Terrariums:** For a unique touch, try creating a terrarium—a miniature garden housed within a glass container. These self-contained ecosystems can be customized with various plants, stones, and decorations to reflect your personality. They make for beautiful centerpieces on coffee tables or accent pieces on shelves.

**5. Plant Stands:** Elevate your plants with stylish plant stands that add height and dimension to your displays. Choose from a variety of materials, such as wood, metal, or ceramic, to match your decor. Stacking different heights together can create an eye-catching arrangement that draws attention to your favorite greenery.

By experimenting with these creative plant display ideas, you can bring the outside in and create a vibrant, inviting atmosphere in your home. Not only will your space feel more alive, but the thoughtful arrangement of plants will also inspire you to nurture your green thumb and enjoy the beauty of nature indoors.

4. Vertical Gardening: Maximizing Space with Greenery

Vertical gardening is a game-changing trend that allows you to transform even the smallest of spaces into lush, green havens. If you’re limited on floor space or live in an apartment with minimal access to a garden, this innovative approach enables you to maximize your environment by utilizing vertical surfaces—walls, fences, and even balconies—effectively turning them into living art.

One of the key benefits of vertical gardening is its ability to create a stunning visual impact. Imagine a wall adorned with cascading vines, vibrant flowers, or an array of herbs, each adding texture and color to your home. Living walls can serve as beautiful focal points in your living room or kitchen, bringing an element of nature inside and enhancing your décor with organic beauty.

To get started, consider using wall-mounted planters, trellises, or even repurposed items like pallets or shoe organizers. Choose plants that thrive in vertical arrangements, such as ferns, succulents, or climbing varieties like ivy and jasmine. Herbs like basil and mint not only look great but also provide a fresh supply for your culinary endeavors.

For those looking to take it a step further, installing a hydroponic system can revolutionize your vertical gardening experience. This soil-less method allows plants to grow in nutrient-rich water, giving you the ability to cultivate a wide range of greenery in smaller spaces without the mess of traditional gardening.

In addition to the aesthetic appeal, vertical gardens can also improve air quality and promote a sense of tranquility in your home. The presence of greenery has been shown to reduce stress and enhance overall well-being, making your indoor environment not just more beautiful, but healthier too.

Embrace the art of vertical gardening and watch as your home transforms into a vibrant sanctuary filled with life, all while making the most out of your available space. Whether you opt for a simple DIY project or a sophisticated indoor garden system, the possibilities are endless, and the rewards are undeniably refreshing.

5. Using Plants as Natural Dividers

What are the best ways to add greenery to your home?
Credit : whatcanu.com

Using plants as natural dividers is an innovative and visually striking way to define spaces within your home while simultaneously enhancing its aesthetic appeal. Unlike traditional room dividers or bulky furniture, greenery introduces a refreshing touch that brings the outdoors in, creating a serene and inviting atmosphere.

Imagine a spacious open-plan living area where a tall, leafy fiddle leaf fig or a cascading pothos subtly delineates the dining space from the living room. These vibrant plants not only serve a functional purpose but also add a layer of texture and color, creating a seamless transition between areas without the need for walls.

For smaller spaces, consider using a collection of smaller plants arranged on a stylish plant stand or shelf. This creates a tiered effect that can visually separate zones while still allowing light to flow through. Additionally, vertical gardens or wall-mounted planters can transform bare walls into lush green canvases, offering both privacy and style without sacrificing floor space.

In outdoor areas, large potted plants can effectively create cozy nooks on balconies or patios. Strategically placed, they can offer a sense of enclosure, making these spaces feel more intimate and inviting.

When selecting plants for this purpose, consider options that thrive in the lighting conditions of your home. Tall, architectural plants like snake plants or palms work beautifully in corners, while trailing plants like ivy or string of pearls can soften edges and create a more organic feel.

By incorporating plants as natural dividers, you not only enhance your home’s decor but also promote a healthier living environment. Foliage can improve air quality, reduce stress, and elevate your mood, making your home a true sanctuary. Embrace the beauty of nature and let your interior spaces flourish!

6. DIY Planters: Personalizing Your Green Space

Creating your own DIY planters is a delightful way to add a personal touch to your green space while showcasing your creativity. Not only do these planters provide a unique aesthetic, but they also allow you to express your style and preferences in your home décor. The process can be both rewarding and relaxing, making it an ideal weekend project for plant lovers and DIY enthusiasts alike.

Start with materials you have on hand or visit your local craft store for inspiration. Wooden crates, terracotta pots, repurposed tin cans, or even old shoes can transform into charming planters with just a bit of imagination. Consider painting or staining your containers in vibrant colors or subtle pastels to complement your interior design. Adding stencils or hand-painted designs can elevate the look, making each planter a small work of art.

For a more rustic feel, try using natural materials like woven baskets or driftwood to create an organic look. You can also experiment with vertical planters by stacking small pots or utilizing a pallet to create a living wall, maximizing your space while adding depth to your decor.

Don’t forget to incorporate drainage holes in your planters if necessary, as this will help keep your plants healthy and thriving. Once your planters are ready, choose plants that resonate with your style—succulents, herbs, or colorful flowers can all add vibrancy and life to your home.

By personalizing your planters, you not only create a unique green oasis within your living space but also cultivate a sense of pride in your home. Each time you look at your DIY creations, you’ll be reminded of your creativity and the joy that greenery brings to your environment. So gather your supplies, unleash your imagination, and let your indoor garden flourish!

7. Incorporating Plants into Your Decor Style

What are the best ways to add greenery to your home?
Credit : whatcanu.com

Incorporating plants into your decor style is not just about adding a splash of color; it’s about creating a vibrant atmosphere that breathes life into your home. Whether you lean towards a minimalist aesthetic, modern chic, rustic charm, or bohemian flair, there are countless ways to seamlessly integrate greenery into your spaces.

For a minimalist approach, consider using a single statement plant, such as a tall fiddle leaf fig or a sleek snake plant, placed strategically in a corner or beside a piece of furniture. This not only adds height and interest but also maintains a clean, uncluttered look. Alternatively, if your style is more eclectic, mix and match a variety of smaller plants—succulents, air plants, or trailing vines—displayed in an array of colorful pots on shelves, windowsills, or hanging from the ceiling. This creates a playful and inviting atmosphere.

For those who appreciate a rustic vibe, think about using reclaimed wood planters or vintage pots to house your greenery. Herbs like rosemary and thyme can thrive in a kitchen window, not only adding a fragrant touch but also serving as a functional element in your cooking. Meanwhile, a macramé plant hanger can add a trendy bohemian twist, allowing trailing plants like pothos or string of hearts to cascade beautifully.

Moreover, don’t forget the power of wall-mounted planters. These can serve as living art pieces, transforming a blank wall into a lush vertical garden. When choosing plants, consider their light requirements and growth patterns to ensure they thrive in their designated spots.

By thoughtfully incorporating plants that resonate with your decor style, you create a cohesive look that enhances the aesthetic of your home while fostering a calming and revitalizing environment. Embrace the myriad of textures and colors that plants offer, and watch as your space transforms into a sanctuary of greenery.

8. The Role of Light in Plant Placement

When it comes to incorporating greenery into your home, understanding the role of light in plant placement is crucial for both aesthetics and plant health. Different plants have varying light requirements, and recognizing these needs can make all the difference in creating a thriving indoor garden.

Natural light floods through your windows, creating a vibrant canvas that can enhance the beauty of your plants. For instance, succulents and cacti thrive in bright, direct sunlight, making a south-facing window the perfect spot for them to bask in their glory. Their striking shapes and colors can become focal points, adding a touch of the desert to your living space.

On the other hand, if you have a cozy nook that receives only filtered light, consider plants like snake plants or pothos. These resilient varieties not only tolerate lower light conditions but also bring a lush, cascading effect that softens the edges of a room. Their ability to purify the air is an added bonus, making them an excellent choice for bedrooms or home offices.

Moreover, understanding the movement of the sun throughout the day can help you strategically place your plants for optimal growth. Rotate your pots periodically to ensure even exposure, which can help prevent uneven growth and keep your greenery looking lush and full.

Additionally, consider incorporating grow lights for areas that lack sufficient natural light. These artificial lights can mimic the sun’s rays, allowing you to expand your botanical horizons without the constraints of your home’s lighting conditions.

In summary, thoughtfully considering the light requirements of your plants not only promotes their health but also enhances your home’s aesthetic. By strategically placing greenery based on light accessibility, you can create a harmonious balance that breathes life into any room, fostering an inviting atmosphere that bridges the gap between the indoors and the great outdoors.

9. Terrariums: Bringing a Mini Ecosystem Indoors

Terrariums are a captivating and enchanting way to bring the beauty of nature into your home, offering a miniature ecosystem that thrives within the confines of glass. These self-sustaining gardens, often housed in jars or geometric containers, not only add a touch of greenery to your space but also serve as a stunning focal point that sparks conversation.

Creating a terrarium is an art form that combines creativity with a basic understanding of plant care. Start with a clear glass container, which can range from simple mason jars to intricate hanging globes or even larger display cases. The beauty of terrariums lies in their versatility; you can design a lush tropical paradise, a dry desert landscape with succulents, or even a whimsical fairy garden with tiny figurines nestled among the foliage.

The layering process is essential to ensure the health of your plants. Begin with a drainage layer, such as small pebbles or activated charcoal, to prevent water from stagnating and causing root rot. Follow this with a layer of soil suitable for your chosen plants, allowing enough space for their roots to spread. When selecting plants, consider varieties that thrive in enclosed environments, such as ferns, mosses, and small air plants, which will flourish in the humidity of the terrarium.

Once assembled, the closed environment of a terrarium creates its own microclimate, making it a low-maintenance option for the busy urban dweller. The glass acts as a greenhouse, trapping moisture and heat, allowing the plants to photosynthesize and thrive with minimal intervention. Just remember to periodically check for condensation and give your terrarium some indirect sunlight to keep your mini ecosystem healthy.

Beyond their aesthetic appeal, terrariums also serve as a reminder of the wonders of nature, bringing a slice of the outdoors into your daily life. Whether placed on a coffee table, desk, or windowsill, these living artworks invite tranquility and natural beauty into your home, making them an ideal addition for anyone looking to enhance their space with a touch of green.

10. Edible Plants: Growing Herbs and Veggies at Home

Incorporating edible plants into your home not only enhances your décor but also invites the delightful benefits of fresh herbs and vegetables right to your kitchen. Imagine snipping a sprig of basil or plucking a ripe tomato just moments before adding them to your favorite dish. Growing your own herbs and veggies is a rewarding endeavor that combines aesthetics with functionality.

Start small by selecting a few easy-to-grow herbs like basil, mint, or rosemary. These fragrant plants thrive indoors with minimal care and can be cultivated on a sunny windowsill or in decorative pots that complement your kitchen’s style. Choose containers that allow for good drainage and consider varying their heights to create an appealing visual display. The vibrant greens and aromatic scents not only beautify your space but also infuse your culinary creations with fresh flavors.

For those with a bit more space, exploring vertical gardening options or dedicated indoor garden kits can yield a bounty of vegetables. Microgreens, lettuce, and peppers are great choices that do well in smaller areas and provide a sense of achievement as you watch them grow. Utilizing hydroponic systems can also simplify the process, allowing you to grow produce in water without soil, making it ideal for urban dwellers with limited outdoor access.

In addition to being visually stunning and practical, growing your own edible plants can foster a deeper connection to the food you consume. It encourages a sustainable lifestyle and reduces the need for store-bought produce, which often comes with excessive packaging. Plus, the joy of harvesting your homegrown herbs and veggies can transform cooking into a more engaging and fulfilling experience.

So, whether you’re a seasoned gardener or a curious beginner, introducing edible plants into your home is a creative way to enhance your living space, while also embracing a lifestyle that celebrates fresh, homegrown goodness. Get your hands dirty and experience the satisfaction of cultivating your own green oasis right in your kitchen!

11. Care Tips for Keeping Indoor Plants Thriving

Bringing the beauty of nature indoors can transform your living space into a vibrant and inviting sanctuary. However, to truly enjoy the benefits of indoor plants, it’s essential to know how to care for them properly. Here are some key care tips to ensure your leafy companions thrive and flourish in your home.

**1. Understand Light Requirements:** Different plants have varying light needs, from low-light tolerant varieties like snake plants to sun-loving succulents. Position your plants according to their preferences, and consider the seasonal changes in sunlight. Don’t hesitate to experiment with different spots in your home until you find the ideal location.

**2. Water Wisely:** Overwatering is one of the leading causes of indoor plant demise. It’s crucial to gauge your plant’s water needs based on its type, size, and the environment it’s in. Check the soil moisture regularly; if the top inch of soil feels dry, it’s time to water. Always use pots with drainage holes to prevent water from pooling at the bottom, which can lead to rot.

**3. Maintain Humidity:** Many indoor plants, especially tropical varieties, thrive in higher humidity levels. If your home is dry, especially during winter months, consider using a humidifier or placing a tray of water with pebbles beneath your plants. Misting their leaves occasionally can also help, although be mindful of plants that might not appreciate moisture on their foliage.

**4. Fertilize Appropriately:** Indoor plants benefit from regular feeding, especially during the growing season (spring and summer). Use a balanced liquid fertilizer every few weeks, following the manufacturer’s instructions. Be cautious not to over-fertilize, which can harm the roots and lead to unhealthy growth.

**5. Prune and Repot:** Regularly inspect your plants for dead or yellowing leaves, which should be pruned to promote new growth. As your plants grow, they may outgrow their containers. Repotting them into a slightly larger pot with fresh soil can give them the space and nutrients they need to continue thriving.

**6. Watch for Pests:** Keep an eye out for common pests like spider mites, aphids, or mealybugs. If you notice any signs of infestation, act quickly by isolating the affected plant and treating it with insecticidal soap or neem oil.

By following these essential care tips, you can create a flourishing indoor garden that not only enhances your home’s aesthetic but also contributes to your well-being. With a little attention and love, your indoor plants will thrive, bringing fresh air and a sense of tranquility to your living space.

12. Seasonal Plant Arrangements for a Fresh Look

Incorporating seasonal plant arrangements into your home is a delightful way to refresh your space and embrace the changing moods of nature throughout the year. Think of your home as a canvas, and plants as the vibrant colors that bring it to life. Each season offers unique opportunities to showcase a variety of textures, colors, and scents that can transform your environment and elevate your mood.

In spring, consider vibrant blooms like tulips or daffodils, which symbolize renewal and growth. Place them in cheerful, pastel-colored pots to enhance the fresh, uplifting spirit of the season. Transitioning into summer, you can introduce lush greens and tropical plants like monstera or fiddle leaf figs, which thrive in the warm weather and bring a bold, exotic flair to your living areas.

As autumn approaches, swap out your bright blooms for richer, earthier tones. Incorporate seasonal favorites such as chrysanthemums or ornamental kale, and don’t shy away from adding rustic elements like pinecones or branches to your arrangements. These additions can evoke the cozy essence of fall, making your home feel inviting and warm.

When winter arrives, evergreen plants and festive arrangements can keep your space feeling alive despite the chilly weather outside. Consider a beautiful arrangement of holly and pine, or perhaps a compact indoor tree adorned with ornaments that reflect your personal style. You can even create a terrarium with winter-themed decorations to bring a touch of whimsy to your decor.

By curating seasonal plant arrangements, you not only enhance your home’s aesthetic but also create a dynamic atmosphere that reflects the beauty of nature’s cycles. Keep your arrangements varied and playful, and your home will always feel fresh and inviting, no matter what time of year it is.

13. How to Create a Plant Care Routine

Creating a plant care routine is essential for ensuring that your indoor greenery thrives and flourishes. Just like any living thing, houseplants require consistent attention and care to reach their full potential. By establishing a structured routine, you not only enhance the health of your plants but also deepen your connection to nature within your home.

Start by assessing the specific needs of each plant species in your collection. Different plants have varying requirements for sunlight, water, humidity, and nutrients. Make a list and categorize your plants based on their care needs. For example, succulents and cacti thrive in bright, direct sunlight and require infrequent watering, while tropical plants like ferns and peace lilies prefer indirect light and a more humid environment.

Next, incorporate regular watering into your routine. Set a specific day of the week to check on your plants; this could be a leisurely Sunday morning or a mid-week check-in. Use this time to assess the moisture level of the soil—stick your finger about an inch deep to gauge whether it’s time to water. Remember, overwatering is a common mistake, so it’s crucial to ensure the soil is dry before adding more water.

Fertilizing is another key aspect of plant care. Most houseplants benefit from a balanced fertilizer every few months, particularly during the growing season in spring and summer. Mark your calendar to remind yourself when it’s time to feed your plants, ensuring they receive the nutrients they need to thrive.

Don’t forget about pruning and cleaning! Dust can accumulate on leaves, blocking sunlight and hindering photosynthesis. Incorporate a gentle cleaning session into your routine once a month—simply wipe the leaves with a damp cloth to help them breathe easier. Additionally, pruning dead or yellowing leaves encourages new growth and keeps your plants looking their best.

Lastly, take time to simply enjoy your plants. Schedule regular moments to appreciate their beauty and monitor their growth. This connection not only fosters a sense of tranquility in your space but also motivates you to maintain your plant care routine. By dedicating time to these simple tasks, you’ll create a thriving indoor garden that brings the vibrancy of nature into your home.

14. Combining Art and Nature: Plant Art Installations

Incorporating greenery into your home decor can transcend traditional potted plants and create stunning focal points that blend art with nature. Enter the world of plant art installations—a creative approach that transforms living spaces into lush, vibrant galleries. These installations can range from intricate wall-mounted planters to striking hanging gardens that draw the eye upward, celebrating the beauty of both flora and artistic expression.

Imagine a living wall adorned with a curated selection of succulents, ferns, and flowering plants, arranged in a mosaic pattern that shifts with the seasons. This dynamic display not only serves as a breathtaking backdrop but also acts as a natural air purifier, enhancing the overall ambiance of your home. Alternatively, consider crafting a three-dimensional art piece using driftwood or reclaimed materials, entwined with climbing vines or cascading string of pearls. This fusion of materials can evoke a sense of tranquility, reminiscent of a serene forest, while also showcasing your personal style.

For those with a penchant for minimalism, a single large-scale terrarium might be the answer. These glass-enclosed ecosystems can feature a variety of plants, stones, and even decorative elements like fairy lights or miniature figurines. Position it on a coffee table or a shelf, and it becomes not just a plant, but a conversation starter—an ever-evolving piece of living art that invites curiosity and admiration.

By embracing plant art installations, you invite the essence of the outdoors into your home in a way that is both innovative and deeply personal. The marriage of art and nature can invigorate your living spaces, making them feel more vibrant and alive while reflecting your unique aesthetic. So, unleash your creativity, and let your home blossom into a breathtaking gallery where nature takes center stage.

15. Greenery in Unexpected Spaces: Bathrooms and Kitchens

When we think of adding greenery to our homes, our minds often drift toward living rooms and bedrooms, but the bathrooms and kitchens can become delightful green sanctuaries too. These spaces, typically overlooked, can benefit greatly from a splash of plant life, transforming them into fresh and inviting areas.

In the bathroom, humidity levels are usually higher due to showers and baths, creating an ideal environment for many plants. Consider hanging a trailing pothos from a shelf or a small window sill. Its cascading vines can soften the sterile lines of bathroom fixtures and create a calming atmosphere. Alternatively, small ferns thrive in these conditions, their lush foliage bringing a touch of nature to your daily routines. For those with limited light, low-maintenance options like snake plants or peace lilies can flourish with minimal care, all while purifying the air.

Kitchens, on the other hand, are perfect for integrating functional greenery. Herbs like basil, mint, and rosemary not only add a pop of color but also serve a practical purpose, offering fresh ingredients at your fingertips for culinary creations. You can place small pots on the windowsill or create a vertical herb garden on a wall-mounted shelf. Additionally, larger leafy plants, such as spider plants or rubber trees, can fill empty corners, lending life to what might otherwise be a utilitarian space.

When choosing plants for these unexpected spaces, think about the light, humidity, and your own maintenance capabilities. With a little creativity and consideration, you can turn your bathrooms and kitchens into lush, green havens that breathe life into your home. Embrace the tranquility and freshness that greenery brings, and watch as these spaces transform into your new favorite retreats.

In conclusion, infusing your home with greenery is not only a way to enhance your decor but also a means to create a serene and inviting atmosphere. As we explored in this post, there are countless creative ways to bring the outside in, from stylish indoor gardens and vertical plant walls to charming terrariums and unique plant displays. Each method offers a chance to personalize your space while reaping the numerous physical and mental health benefits that plants provide. So, whether you’re a seasoned plant parent or a beginner looking to dip your toes into the world of indoor gardening, we encourage you to experiment with these ideas and find what resonates with you. Embrace the beauty of nature within your home, and watch as your space transforms into a lush, vibrant oasis that brings joy and tranquility to your everyday life. Happy decorating!

What are the best ways to organize your bathroom?

Imagine stepping into your bathroom and feeling an immediate sense of calm and order, rather than chaos and clutter.

The bathroom, often the most overlooked space in our homes, can become a sanctuary of relaxation and efficiency with just a few thoughtful changes. In this blog post, we’ll explore 10 clever tips to help you transform your bathroom into an organized oasis that not only looks inviting but also functions seamlessly for your daily routines. From creative storage solutions to strategic decluttering techniques, these practical ideas will empower you to reclaim this space, turning it into a personal retreat where every item has its place and every visit feels rejuvenating. Say goodbye to the stress of disarray and hello to a beautifully organized haven where you can unwind and refresh!

1. Assessing Your Bathroom Space: A Fresh Start

What are the best ways to organize your bathroom?
Credit : whatcanu.com

Before diving into the world of organizational strategies and stylish upgrades, the first step in transforming your bathroom into an organized oasis is to conduct a thorough assessment of your space. This process is not just about measuring dimensions; it’s about understanding how you currently use the bathroom and identifying the areas that need the most attention.

Start by decluttering every nook and cranny. Empty out cabinets, drawers, and shelves, and lay everything out in front of you. As you sift through your belongings, ask yourself what you truly need. Keep only the essentials—your favorite skincare products, the toiletries you use daily, and items that bring you joy. Discard expired products and consider donating those that are in good condition but no longer serve a purpose in your home.

Next, evaluate the layout of your bathroom. Is it cramped and chaotic, or does it have potential that you haven’t fully realized? Take note of how often you reach for specific items and where they are located. If your toothbrush is stashed in a drawer, for example, but you use it twice a day, it might make sense to give it a more accessible home. Consider the flow of movement within the space. Are there obstacles that make it difficult to navigate?

This assessment is the foundation upon which you’ll build your organized oasis. With a clearer vision of what you have, what you need, and how your bathroom functions, you’ll be better equipped to plan your next steps—whether that means reimagining storage solutions, choosing stylish containers, or even considering a fresh coat of paint to rejuvenate the atmosphere. Embrace this fresh start as an opportunity to create a serene and functional retreat that reflects your personal style while meeting your practical needs.

2. Declutter: The First Step to an Organized Oasis

When it comes to transforming your bathroom into an organized oasis, decluttering is the essential first step. A cluttered space can quickly become overwhelming, making it difficult to find what you need and diminishing the overall tranquility of the room. Start by emptying all cabinets, drawers, and countertop surfaces. This allows you to see everything you have and gives you a blank canvas to work with.

Once everything is out in the open, it’s time to sort through your items. Create designated piles: keep, toss, and donate. Be ruthless in your decision-making. If you haven’t used a product in the last year or if it has expired, it’s time to let it go. Pay particular attention to beauty products, toiletries, and towels—these can accumulate quickly and take up valuable space.

As you sort, consider the frequency of use for each item. Daily essentials like toothpaste and shampoo should be easily accessible, while seasonal items, such as thick towels or holiday-themed decor, can be stored out of sight. This process not only frees up space but also helps you become more mindful of what you truly need in your bathroom.

Once you’ve decluttered, take a moment to appreciate the newfound space. A clean slate allows you to visualize the organized oasis you’re about to create. With less clutter, the next steps—like implementing storage solutions and decorative elements—will feel far more achievable. Remember, decluttering is not just about removing items; it’s about creating a serene environment where you can unwind and rejuvenate. By starting with this crucial step, you’re laying the groundwork for a bathroom that not only looks beautiful but functions seamlessly as a personal retreat.

3. Maximize Vertical Space with Shelving Solutions

What are the best ways to organize your bathroom?
Credit : whatcanu.com

When it comes to bathroom organization, one of the most underutilized assets is vertical space. Often, we focus solely on floor space and neglect the potential that lies above our heads. By incorporating clever shelving solutions, you can transform your bathroom into a serene oasis that not only looks great but functions efficiently.

Start by assessing the available vertical space in your bathroom. Look for walls that are crying out for attention—areas above the toilet, behind the door, or even along the sides of cabinets. Floating shelves are an excellent choice for creating an airy feel while providing ample storage for essentials like towels, toiletries, and decorative accents. Choose sleek designs in light colors to maintain an open atmosphere, or go for rustic wooden shelves to add warmth and character.

Consider installing a tiered shelf unit or a tall, narrow bookcase for those compact corners that often go unused. These can be perfect for storing extra rolls of toilet paper, baskets of cosmetics, or even potted plants that bring a touch of nature indoors. Don’t shy away from using attractive containers or decorative jars to house smaller items—this not only keeps things tidy but also adds a personal touch to your space.

In addition to traditional shelving, think outside the box. Hooks and pegboards can be mounted on walls to hang towels, robes, or even accessories, saving valuable drawer and counter space. Magnetic strips can be affixed to the inside of cabinet doors to hold small metal items like tweezers and scissors, keeping them easily accessible yet out of sight.

By maximizing vertical space with creative shelving solutions, you can elevate your bathroom from a cluttered necessity to a stylish, organized retreat. With everything in its place, you’ll be amazed at how a few thoughtful adjustments can completely transform your daily routine into a rejuvenating experience.

4. Utilize Baskets and Containers for Easy Storage

Transforming your bathroom into an organized oasis is all about creating a serene and clutter-free environment, and one of the most effective ways to achieve this is by utilizing baskets and containers for easy storage. These versatile tools not only add a touch of style but also enhance the functionality of your space.

Imagine walking into your bathroom and immediately feeling a sense of calm as you see neatly arranged baskets that house everything from toiletries to towels. By using decorative baskets, you can turn everyday items into visually appealing components of your decor. Opt for woven baskets in natural fibers for a rustic look or sleek, modern containers to give your space a contemporary edge.

To maximize efficiency, categorize your belongings and assign each basket or container a specific purpose. For instance, keep all your hair care products in one basket, skincare essentials in another, and extra toiletries in a larger container. Labeling each basket can further streamline your routine, allowing you to find what you need at a glance without having to rummage through clutter.

Consider utilizing vertical space by installing shelves where you can place your containers. This not only organizes your items but also makes them easily accessible while freeing up counter space. Additionally, using clear containers for smaller items like cotton swabs, makeup brushes, or nail polishes provides visibility, ensuring that everything has its designated spot while maintaining a clean aesthetic.

Incorporating baskets and containers into your bathroom storage solutions not only promotes organization but also transforms your space into a tranquil retreat. With everything in its place, you can create a soothing atmosphere that invites relaxation and rejuvenation, making your bathroom not just a functional space, but a personal oasis.

5. Create a Product Inventory: Know What You Have

What are the best ways to organize your bathroom?
Credit : whatcanu.com

Creating a product inventory is a game-changer when it comes to transforming your bathroom into an organized oasis. Imagine stepping into a space where everything has its place, where you can effortlessly find your favorite shampoo or the perfect shade of lipstick without rummaging through clutter. A well-maintained inventory is key to achieving this level of order.

Start by taking stock of all the products currently residing in your bathroom. This doesn’t just mean jotting down names; it’s about understanding what you have and how often you use it. Categorize your items into groups—skincare, haircare, makeup, toiletries, and cleaning supplies. This logical organization will not only make it easier to locate items but will also highlight duplicates and expired products that need to be discarded.

Once you’ve compiled your inventory, consider creating a digital or physical checklist. Digital apps can help you track usage and expiration dates, sending reminders when it’s time to restock or replace. If you prefer a tactile approach, a simple spreadsheet or a beautifully designed notebook can serve just as well.

By keeping a current inventory, you can avoid the frustration of purchasing items you already own. You’ll also foster a mindful approach to your bathroom products, leading to less waste and more intentional purchases in the future. Ultimately, knowing what you have empowers you to curate a bathroom that reflects your personal style while maintaining an airy, uncluttered feel that invites relaxation and rejuvenation.

6. Implement a Daily Cleaning Routine for Maintenance

Implementing a daily cleaning routine for maintenance is one of the most effective ways to keep your bathroom looking pristine and organized. Think of your bathroom as a sanctuary—a space meant for relaxation and rejuvenation. However, without consistent upkeep, this haven can quickly become cluttered and chaotic.

Start by dedicating just 10-15 minutes each day to tackle quick cleaning tasks. This could include wiping down surfaces, such as sinks and countertops, to prevent the buildup of soap scum and grime. Use a gentle all-purpose cleaner for a refreshing scent and a sparkling finish. Don’t forget to give the mirrors a quick polish, as nothing feels more serene than a spotless reflection to greet you in the morning.

Next, implement a system for keeping clutter at bay. Each day, take a moment to return items to their designated places. Whether it’s your favorite moisturizer, a hairbrush, or a tube of toothpaste, having a specific spot for everything will help maintain an organized appearance. Consider using attractive baskets or trays to corral smaller items, making them easy to access yet concealed from view.

Finally, incorporate a weekly deep-cleaning schedule to complement your daily routine. This may involve scrubbing the shower, disinfecting the toilet, and mopping the floors. By breaking these tasks into manageable daily and weekly segments, you’re not only preserving cleanliness but also cultivating a serene atmosphere that invites relaxation.

By establishing a daily cleaning routine, you’re not just maintaining order; you’re transforming your bathroom into an organized oasis that reflects tranquility and care. So grab your cleaning supplies, set a timer, and enjoy the satisfaction of a bathroom that remains a peaceful retreat, day after day.

7. Organizing Cabinets: Tips for Efficient Use of Space

What are the best ways to organize your bathroom?
Credit : whatcanu.com

When it comes to transforming your bathroom into an organized oasis, the cabinets are often the unsung heroes of the space. Efficiently utilizing cabinet space can make a significant difference in keeping your bathroom clutter-free and functional. Here are some clever tips to help you maximize your cabinets and create a serene environment.

Start by decluttering your cabinets. Remove everything and assess what you truly need. Toss out expired products and items you haven’t used in the past year. This will not only free up space but also make it easier to see what you have and what you need. Once you’ve narrowed down your essentials, it’s time to get organized.

Invest in adjustable shelving or stackable bins to create vertical space. This allows you to customize the height of your shelves to accommodate taller bottles or smaller items, ensuring that every inch of space is utilized efficiently. Clear containers are particularly helpful because they provide visibility, allowing you to quickly find what you’re looking for without rummaging through drawers or shelves.

Consider using drawer dividers or small baskets to keep smaller items like toiletries, makeup, or hair accessories neatly compartmentalized. This prevents chaos and makes it easier to grab what you need without making a mess. Labeling your bins can also be a game changer, especially for shared bathrooms. Everyone will know exactly where to find their items, making it a breeze to maintain order.

Don’t forget about the inside of cabinet doors! Use adhesive hooks or small racks to hang items like hairdryers or styling tools, freeing up valuable shelf space. This simple addition not only organizes but also keeps your tools easily accessible when you need them.

With these tips, you can transform your bathroom cabinets into efficient storage solutions that enhance your space and make your daily routine a little more enjoyable. Remember, an organized oasis is just a well-planned cabinet away!

8. Stylish Storage Solutions: Combining Function with Aesthetics

When it comes to creating an organized oasis in your bathroom, stylish storage solutions are key to balancing function with aesthetics. In a space often limited by square footage and teeming with various essentials, the right storage can elevate both the look and feel of your bathroom.

Consider open shelving as a chic way to display towels, toiletries, and decorative items. Wooden shelves with a rustic finish can add warmth, while sleek glass or metal options lend a modern touch. To keep your items organized yet accessible, use decorative baskets or bins that complement your décor—think woven wicker or vibrant colored fabric that can infuse personality into the space.

Another clever approach is to utilize vertical space. Over-the-toilet shelving units or tall cabinets can dramatically increase your storage capacity without encroaching on precious floor space. These units can house everything from extra toilet paper to your favorite scented candles, all while providing a stylish backdrop.

Don’t forget about under-sink storage! With an array of attractive organizers, you can reclaim the chaos often lurking beneath the sink. Drawer dividers, stackable bins, and pull-out shelves ensure every item has its place, making it easy to find exactly what you need when you need it.

Finally, consider incorporating design elements that double as storage, such as a mirrored cabinet that reflects light while hiding your bathroom essentials, or a stylish ladder shelf that showcases potted plants and curated décor alongside practical items. By thoughtfully combining function with aesthetics, you can create a bathroom that is not only organized but also a true sanctuary where serenity and style coexist.

9. The Power of Labels: Simplifying Access to Essentials

In the quest for an organized bathroom, labels emerge as unsung heroes, wielding the power to transform chaos into calm. When you walk into a bathroom that has been thoughtfully labeled, everything seems to fall into place. The toothbrushes reside in their designated holder, the towels are neatly stacked and clearly marked, and the myriad of beauty products are grouped by function, each with a clear label guiding you to what you need in an instant.

Consider the sheer magic of a well-placed label. It not only enhances the aesthetics of your space but also streamlines your daily routines. Imagine opening a cabinet to find neatly organized bins, each one labeled with categories like “Hair Care,” “Skincare,” or “First Aid.” No more rummaging through cluttered drawers or forgetting where you stashed that elusive hair serum. Labels eliminate the guesswork, allowing you to access your essentials quickly and efficiently.

You can get creative with labeling materials, too. From chic chalkboard tags that can be rewritten as your inventory changes, to elegant printed labels that match your bathroom’s decor, the options are endless. Incorporate color coding for added visual appeal; for instance, use calming blues for bath products and soft greens for skincare. This not only makes your bathroom look more inviting but also adds a personal touch that reflects your style.

Moreover, the act of labeling encourages you to take stock of what you have, prompting a much-needed purge of expired products and unused items. By consciously curating your collection and labeling what remains, you create a space that is not just organized, but a true oasis of tranquility. As you step into your beautifully labeled bathroom, you’re greeted by a sense of order and clarity that sets a positive tone for your day. So, harness the power of labels, and watch as your bathroom transforms from a hectic space into a serene sanctuary where everything has its rightful place.

10. Designate a Towel Area: Keeping Linens Neat and Tidy

A designated towel area can be the cornerstone of a well-organized bathroom, transforming your space from chaotic to serene. Imagine stepping into your bathroom and being greeted by neatly folded towels, each one waiting to envelop you in comfort after a refreshing shower. To achieve this oasis of order, consider dedicating a specific shelf or cabinet to your linens, ensuring they have a home that’s both functional and aesthetically pleasing.

Start by decluttering your current towel collection. Assess which towels you actually use and consider donating or repurposing those that have seen better days. Once you have a streamlined selection, opt for uniform folding techniques—this not only enhances the visual appeal but also maximizes space. For added flair, consider using decorative baskets or bins to house your towels, keeping them easily accessible while adding a touch of style.

Labeling can also be beneficial, particularly in larger households where multiple family members may have their own towel preferences. Use chic tags or chalkboard labels to designate areas for each person’s towels, promoting a sense of ownership and encouraging everyone to keep their space tidy.

Finally, consider the location of your towel area. Placing it within arm’s reach of the shower or tub can elevate convenience, allowing for a seamless transition from bathing to drying off. By thoughtfully arranging your towel area, you’ll cultivate a sense of calm and organization in your bathroom—a true oasis for relaxation and self-care.

11. Incorporating a Relaxation Zone: Bath Accessories and Decor

Creating a relaxation zone within your bathroom is essential for transforming it into an organized oasis that promotes tranquility and rejuvenation. When you think of bath accessories and decor, envision a serene space that invites you to unwind after a long day. Begin by selecting a color palette that evokes calmness—soft hues like muted blues, gentle greens, or warm neutrals can create a soothing atmosphere.

Choose bath accessories that not only enhance functionality but also add to the aesthetic appeal. Opt for elegant storage solutions, such as woven baskets or decorative trays, to keep essentials like towels, bath products, and candles neatly arranged. Consider adding a plush bath mat and fluffy towels in complementary colors for a touch of luxury. These small details can make your bathroom feel like a high-end spa retreat.

Don’t overlook the power of scent in creating a relaxing environment. Incorporate scented candles, essential oil diffusers, or a beautiful bowl of potpourri to fill the air with calming fragrances like lavender, eucalyptus, or chamomile. These scents can enhance your bathing experience and set the mood for relaxation.

Additionally, consider incorporating natural elements into your decor. A potted plant or a small vase of fresh flowers can bring life and vibrancy to your space while improving air quality. Hanging artwork or photographs that resonate with your personal sense of peace can also contribute to a calming ambiance.

Finally, enhance your relaxation zone with thoughtful lighting. Soft, ambient lighting can make a significant difference in how your bathroom feels. Consider installing dimmer switches or adding candles for a warm glow that encourages relaxation during your baths. With these carefully chosen bath accessories and decor, you can create a harmonious sanctuary that not only keeps your space organized but also invites you to indulge in the ultimate self-care experience.

12. Eco-Friendly Organization: Sustainable Practices for Your Bathroom

In today’s world, transforming your bathroom into an organized oasis doesn’t just mean decluttering and maximizing space; it also involves embracing eco-friendly practices that contribute to a sustainable lifestyle. By incorporating eco-conscious organization methods, you can create a serene sanctuary while caring for the planet.

Start by assessing the materials of your storage solutions. Opt for bamboo shelves and sustainably sourced wood storage bins that not only add a touch of natural elegance but are also biodegradable. Consider glass containers for holding cotton balls, swabs, and other small items. Glass is both reusable and recyclable, making it a much greener alternative to plastic.

Next, embrace refillable products to minimize waste. Choose shampoo, conditioner, and body wash in bulk sizes or opt for brands that offer refill stations. Not only does this help reduce single-use plastic, but it also often saves you money in the long run. Pair these products with attractive dispensers that complement your bathroom decor, so even your essentials look stylish and organized.

Another tip is to create a designated space for eco-friendly cleaning supplies. Use natural ingredients like vinegar, baking soda, and essential oils for cleaning, and store them in labeled glass jars or reusable spray bottles. This not only keeps your cleaning supplies organized but also ensures that your bathroom remains a chemical-free zone, promoting a healthier environment for you and your family.

Lastly, embrace the concept of minimalism. Evaluate the items you truly need and donate or recycle those that no longer serve a purpose. This not only declutters your space but also encourages mindful consumption. By making thoughtful choices about what you keep in your bathroom, you can cultivate a peaceful atmosphere that reflects your commitment to sustainability.

By integrating these eco-friendly organization practices into your bathroom, you’ll not only create a visually appealing and functional space but also contribute to a more sustainable future, proving that caring for the environment can seamlessly blend with your personal style.

13. Personalize Your Oasis: Adding Your Unique Touch

Creating a bathroom that truly feels like your own oasis goes beyond just organization; it’s about infusing your personality and style into every corner. Personalization transforms a standard bathroom into a sanctuary that reflects who you are and how you want to feel in your space. Start by selecting a color palette that resonates with you—whether that’s calming blues and greens for a serene vibe or vibrant pops of color that energize the space.

One of the easiest ways to add your unique touch is through decor. Consider incorporating art that inspires you, such as framed prints or photographs that bring joy every time you step in. A simple shelf can be adorned with decorative items that tell your story, such as travel souvenirs, cherished books, or handmade pottery.

Textiles also play a crucial role in personalization. Choose towels and bath mats that are not only functional but also speak to your aesthetic. Opt for soft, luxurious fabrics in colors or patterns that bring you happiness. You might even want to add a statement shower curtain that serves as a focal point, making a bold statement about your style.

Plants can also breathe life into your bathroom, offering both a splash of color and a sense of tranquility. Select low-maintenance options like succulents or ferns that thrive in the humid environment, adding a touch of nature that promotes relaxation.

Lastly, don’t underestimate the power of scent. Introduce candles, essential oil diffusers, or potpourri that reflect your favorite aromas. Whether it’s the refreshing scent of eucalyptus or the warm embrace of vanilla, fragrances can evoke powerful feelings and enhance your oasis experience.

By incorporating these personalized elements, your bathroom will not only be organized but also a true reflection of you—an oasis where you can unwind, rejuvenate, and escape from the hustle and bustle of daily life.

14. Transitioning Seasonal Items: Keeping Your Space Relevant

Transitioning seasonal items in your bathroom is essential for creating an organized oasis that not only looks immaculate but feels relevant throughout the year. Just as you would swap out your wardrobe with the changing seasons, your bathroom can benefit from a thoughtful approach to seasonal decor and essentials.

As summer gives way to fall, consider swapping out bright, tropical bath towels for warm, earthy tones that evoke the coziness of autumn. Replace your lightweight, floral-scented body wash with richer, spicier fragrances that resonate with the season—think pumpkin spice or cinnamon. By making these simple changes, you not only refresh the aesthetic of your space but also enhance the sensory experience of your daily routines.

Utilize dedicated bins or baskets to store seasonal items neatly, making it easy to access them when needed. For instance, store your winter skincare products, such as heavier moisturizers and soothing balms, in a clearly labeled container that can be tucked away under the sink or on a bathroom shelf. Similarly, during the warmer months, make space for lighter lotions and refreshing sprays. This ensures that your bathroom remains a sanctuary tailored to the current climate.

Don’t forget to incorporate seasonal decorations, such as a small vase of fresh flowers in spring or a few autumn leaves in a decorative bowl. These elements add warmth and charm while keeping your space visually appealing. By thoughtfully transitioning seasonal items, you create a bathroom that feels not only organized but also inviting and relevant all year round.

15. Final Touches: Creating a Spa-Like Atmosphere

Creating a spa-like atmosphere in your bathroom is the perfect way to elevate your daily routine into a serene escape. The final touches can transform even the most utilitarian spaces into a calming oasis that invites relaxation and rejuvenation. Start by incorporating soft, ambient lighting; consider installing dimmable sconces or using warm-toned bulbs that create a soothing glow. Candles—whether flickering real ones or elegant LED options—can add an extra layer of tranquility, filling the air with gentle scents and casting a warm light.

Next, focus on textiles. Opt for plush, absorbent towels in calming colors like soft blues, muted grays, or earthy tones that evoke the peacefulness of nature. A luxurious bath mat underfoot adds warmth and comfort, while a coordinated shower curtain can provide a cohesive look. To further enhance the atmosphere, consider adding natural elements such as potted plants or fresh flowers. Plants like spider plants or peace lilies not only purify the air but also add a touch of greenery that enhances the spa-like feel.

Don’t forget about sound—consider incorporating a Bluetooth speaker that can play soft music or nature sounds to create a soothing auditory backdrop. Finally, add personal touches that resonate with you: a favorite piece of art, a beautifully arranged tray with your favorite skincare products, or a book you’ve been wanting to dive into. These final touches will not only beautify your space but also infuse it with a sense of peace and personal connection, making your bathroom a true sanctuary for relaxation.

As we wrap up our exploration of transforming your bathroom into an organized oasis, we hope you’ve discovered inspiring ideas and practical strategies to elevate this essential space in your home. From clever storage solutions to aesthetically pleasing arrangements, each tip is designed to help you create a serene and functional environment that caters to your daily routines. Remember, a well-organized bathroom not only enhances your overall experience but also promotes a sense of calm and relaxation. So, take these insights and start your journey toward a beautifully organized oasis today. Here’s to enjoying a stress-free, clutter-free sanctuary that reflects your unique style and meets your needs! Happy organizing!

How to create a stylish and functional laundry room?

Laundry rooms are often the unsung heroes of our homes, tucked away and overlooked, yet essential to our daily routines.

However, with a little creativity and thoughtful design, this utilitarian space can be transformed into a stylish haven that combines functionality with aesthetic appeal. Imagine stepping into a laundry room that not only makes chores more enjoyable but also reflects your personal style. In this blog post, we will explore innovative tips and ideas to elevate your laundry room, from choosing the right color palette and efficient storage solutions to incorporating smart appliances and decorative accents. Whether you’re working with a small nook or a spacious area, these transformative strategies will help you create a laundry room that inspires efficiency and adds charm to your home. Say goodbye to drab and disorganized spaces, and get ready to embrace a laundry room that truly shines!

1. Understanding the Importance of a Functional Laundry Room

How to create a stylish and functional laundry room?
Credit : whatcanu.com

A laundry room may often be seen as just a utilitarian space, tucked away in the corner of your home, but it serves a far more vital role than simply housing a washer and dryer. Understanding the importance of a functional laundry room can transform the way you perceive and utilize this space. When designed thoughtfully, a laundry room can enhance not only the efficiency of your chores but also the overall aesthetic of your home.

Imagine stepping into a well-organized laundry room where everything has its place. You can easily find detergent, fabric softeners, and dryer sheets, all neatly arranged in stylish baskets or on dedicated shelves. A functional layout allows for smooth workflow; you’ll have enough counter space to sort and fold clothes, and perhaps even a designated area for ironing or mending. This thoughtful arrangement not only saves time but also reduces the stress often associated with laundry day.

Moreover, a stylish laundry room can elevate your home’s overall design. By incorporating colors and materials that resonate with the rest of your decor, you can create a cohesive look that makes even mundane tasks feel more enjoyable. Whether it’s a splash of cheerful paint, chic cabinetry, or decorative touches like framed art or plants, a visually appealing laundry space can inspire a sense of pride and ease.

Additionally, investing in a functional laundry room ultimately adds value to your home. Homebuyers increasingly appreciate well-designed utility spaces that offer both efficiency and style. By understanding and prioritizing the importance of this often-overlooked room, you can create a space that not only meets your practical needs but also enhances your home’s charm and appeal.

2. Assessing Your Current Laundry Space

Before diving into a transformation, it’s essential to take a step back and assess your current laundry space. This initial evaluation will provide valuable insights into what works and what doesn’t, allowing you to make informed decisions moving forward.

Start by taking a good look at the layout. Is your washer and dryer easily accessible, or are they tucked away in a corner? Consider the flow of the room: can you move easily between the appliances, or do you find yourself navigating around obstacles? Take note of the storage solutions you currently have in place. Are they sufficient for your needs, or do you find yourself scrambling to find detergent, fabric softener, or dryer sheets?

Next, evaluate the lighting—both natural and artificial. A well-lit laundry room can make all the difference, transforming the space from a chore zone into a more inviting area. If your laundry room feels cramped or dingy, consider how you can enhance the brightness through better light fixtures or by maximizing windows.

Don’t forget to consider the aesthetic elements as well. Is your laundry room a reflection of your style, or does it feel more like an afterthought? Take note of the color scheme, decor, and overall vibe. A laundry room that feels disorganized or unattractive can often make doing laundry feel like an even bigger chore.

By thoroughly assessing your current laundry space, you’ll lay the foundation for a more stylish and functional redesign that not only enhances your workflow but also elevates the overall look of your home. This thoughtful approach ensures that your laundry room becomes a space you actually enjoy spending time in, making the mundane task of washing clothes feel more manageable.

3. Setting a Budget for Your Laundry Room Transformation

How to create a stylish and functional laundry room?
Credit : whatcanu.com

When embarking on the journey to transform your laundry room, setting a realistic budget is essential for ensuring a smooth and satisfying renovation experience. A well-defined budget not only helps you avoid overspending but also allows you to prioritize your needs and desires. Start by assessing the current state of your laundry space and identifying what changes are necessary. Are you looking to upgrade appliances, enhance storage solutions, or perhaps add a fresh coat of paint?

Begin by listing all the elements you wish to change or improve. Research the costs associated with each item—appliances, cabinetry, countertops, flooring, and decorative accents. It’s wise to allocate funds for both essential items and those that add style, such as stylish lighting fixtures or a chic backsplash. As a rule of thumb, consider setting aside an additional 10-15% of your total budget for unexpected expenses, which are common in home renovations.

Once you have a ballpark figure, assess your financial situation. Determine if you’ll pay cash upfront, finance the project, or perhaps even save over a few months to fund the transformation. This approach not only keeps your spending in check but also allows you to make informed decisions that reflect your personal style and functional needs.

Remember, a laundry room doesn’t have to be a neglected space; it can be a stylish and functional area that enhances your home’s overall appeal. By establishing a well-thought-out budget and sticking to it, you can create a laundry room that you’ll love spending time in, making the mundane task of laundry feel a little more enjoyable. So roll up your sleeves and get ready to create a space that combines both form and function—while keeping your finances in line!

4. Choosing the Right Color Palette

When it comes to transforming your laundry room into a stylish and functional space, choosing the right color palette is crucial. The colors you select can significantly influence the mood and functionality of the room, making it feel either relaxing and inviting or cold and unwelcoming.

Start by considering the overall aesthetic you wish to achieve. Soft, muted tones such as pastel blues, gentle greens, or warm creams can create a serene atmosphere, perfect for a space often associated with chores and tasks. These hues not only promote a sense of calm but also reflect light, making the room feel larger and more airy. Combine these shades with crisp white cabinetry or shelving to enhance the brightness and freshness of the space.

For those looking to inject a bit of personality into their laundry room, bolder colors can be a fantastic option. Deep navy, rich emerald, or even a vibrant coral can add a touch of sophistication and energy to the room. Pair these stronger colors with lighter accents, such as a white countertop or light-colored flooring, to strike a balance that ensures the space remains functional without being overwhelming.

Additionally, consider the lighting in your laundry room. Natural light can affect how colors appear, so it’s essential to test your chosen palette at different times of the day. If your laundry area lacks windows, opt for lighter shades to prevent the space from feeling cramped or gloomy.

Lastly, don’t forget about the impact of accessories. Use textiles, such as curtains, rugs, and towels, to bring in pops of color that complement your primary palette. This not only ties the room together but also adds warmth and texture, making your laundry room a space you actually enjoy spending time in.

By thoughtfully choosing a color palette that reflects your style while enhancing the room’s functionality, you can create a laundry space that is both visually appealing and a delight to use.

5. Selecting Stylish and Functional Appliances

How to create a stylish and functional laundry room?
Credit : whatcanu.com

When it comes to transforming your laundry room into a stylish and functional space, the selection of appliances plays a pivotal role. Gone are the days when washing machines and dryers were simply utilitarian items tucked away in a corner. Today’s appliances come in a multitude of designs, colors, and features that can enhance both the aesthetics and efficiency of your laundry area.

Start by considering the overall design theme you want to achieve. Do you prefer a sleek, modern look with stainless steel finishes, or are you drawn to the warmth of vintage-inspired appliances with retro colors? Manufacturers now offer a range of options, from bold hues like deep navy or vibrant red to classic white and black, allowing you to choose pieces that reflect your personal style while harmonizing with the rest of your home.

Functionality is just as important as style. Look for appliances that offer advanced features like energy-efficient settings, smart technology, and customizable cycles. For instance, a washer with a steam clean option can tackle stubborn stains, while a dryer equipped with moisture sensors will prevent over-drying, saving you time and energy. Additionally, consider compact models if space is at a premium, as they can fit seamlessly into smaller laundry rooms without sacrificing performance.

Don’t overlook the importance of matching your appliances. A cohesive look can elevate the entire space, so try to select both the washer and dryer from the same line or brand. Many manufacturers offer coordinating designs that not only look great but are also built to work together efficiently.

Lastly, think about the layout of your laundry room. If you have the flexibility to do so, opt for stacking washer and dryer units. This not only saves valuable floor space but also creates an open feel. You can then incorporate stylish shelving or cabinetry above them to keep your laundry essentials organized and within reach.

Selecting stylish and functional appliances is key to creating a laundry room that you’ll love spending time in. By carefully considering both aesthetics and practicality, you can transform this often-overlooked area into a chic and efficient space that meets all your laundry needs.

6. Maximizing Storage Solutions

When it comes to laundry rooms, maximizing storage solutions is key to transforming this often-overlooked space into a stylish and functional area. With the right storage strategies, you can turn your laundry room from a cluttered afterthought into an organized oasis that not only looks great but also enhances your laundry efficiency.

Start by assessing your available space and identifying underutilized areas. Vertical space is often a goldmine for storage potential. Consider installing tall shelving units that reach up to the ceiling, enabling you to make use of every inch. Use these shelves to store extra supplies, laundry detergents, fabric softeners, and even decorative baskets to keep everything neatly contained. Labeling these containers can make it even easier to find what you need at a glance.

Cabinets are another excellent option for maximizing storage. If you have the budget, opt for custom cabinetry that fits your laundry room’s dimensions. This allows you to create a seamless look while providing ample storage for cleaning supplies, ironing boards, and other essentials. If custom cabinets aren’t feasible, ready-to-assemble options can also work wonders, offering a polished appearance without breaking the bank.

Don’t forget about functional accessories. Wall-mounted hooks or racks can hold everything from hangers to brooms, keeping frequently used items within easy reach. A foldable drying rack can be stowed away when not in use, saving precious space while still accommodating delicate items that require air drying.

Lastly, consider incorporating a multi-functional island or countertop. This provides a dedicated space for folding clothes, sorting laundry, or even a temporary workspace for crafty projects. If you choose an island with built-in storage, you’ll create a practical hub for all your laundry activities while keeping everything organized and accessible.

By thoughtfully maximizing your storage solutions, your laundry room can become a stylish and functional part of your home, making the chore of laundry a little less daunting and a lot more enjoyable.

7. Incorporating Smart Organization Techniques

How to create a stylish and functional laundry room?
Credit : whatcanu.com

When it comes to maximizing both style and functionality in your laundry room, smart organization techniques are essential. A well-organized space not only enhances the overall aesthetic but also streamlines your laundry tasks, making them more efficient and enjoyable. Begin by evaluating your current setup and identifying areas that could benefit from a little reorganization.

One effective technique is to incorporate vertical storage solutions. Shelving units or wall-mounted cabinets can free up valuable floor space while providing easy access to laundry essentials. Use clear bins or labeled baskets to categorize items such as detergents, fabric softeners, and dryer sheets. This not only keeps everything tidy but also allows you to quickly locate what you need amidst the hustle and bustle of laundry day.

Don’t overlook the potential of multifunctional furniture. Consider a stylish folding table that can double as a decorative surface or a bench with built-in storage. These pieces not only enhance the visual appeal of your laundry room but also provide practical solutions for sorting and folding clothes.

Magnetic strips or pegboards can also work wonders for keeping tools and small items organized. Hang your scissors, measuring cups, or even fabric swatches within easy reach, ensuring that you never have to rummage through drawers again.

Finally, remember to keep your organization sustainable. Regularly reassess your space and adjust your storage solutions as your needs change. By adopting these smart organization techniques, you’ll create a laundry room that is not only stylish but also a functional haven that enhances your home’s overall appeal.

8. The Role of Lighting in Your Laundry Room

When it comes to transforming your laundry room, one often-overlooked element that can make a world of difference is lighting. The right lighting not only enhances the functionality of the space but also contributes to the overall aesthetic, turning a mundane chore into a more enjoyable experience.

Consider the tasks you’ll be performing in this room—sorting, folding, ironing—and how crucial it is to see what you’re doing. Natural light is ideal, so if you have windows, make the most of them. Sheer curtains can diffuse the sunlight, creating a warm and inviting atmosphere while still allowing plenty of brightness. However, not all laundry rooms have the luxury of windows, which makes artificial lighting all the more important.

For a well-lit laundry room, opt for layered lighting: a combination of ambient, task, and accent lighting. Start with ambient lighting, such as ceiling fixtures or recessed lights, to provide overall illumination. Then, incorporate task lighting in strategic areas—like above the folding station or beside the ironing board—using pendant lights or under-cabinet lighting. This focused light will help you see those pesky sock pairs and ensure you don’t miss any wrinkles in your clothes.

Don’t forget about the aesthetic aspect; choose fixtures that complement your design theme. Industrial-style pendant lights can add a modern edge, while vintage-inspired sconces can create a cozy, rustic feel. Dimmable lights are also a great option, allowing you to adjust the brightness based on your mood or the task at hand.

Ultimately, the right lighting will not only brighten your laundry room but will also elevate its style and functionality, making this often-neglected space a pleasant and efficient part of your home. So, before you dive into other design elements, take a moment to assess your laundry room’s lighting—it’s the key to transforming it into a stylish and functional haven.

9. Creative Décor Ideas to Enhance Aesthetics

When it comes to transforming your laundry room, a little creativity goes a long way in enhancing both aesthetics and functionality. While it’s easy to overlook this often utilitarian space, infusing it with personal style can turn laundry day into a more enjoyable experience. Here are some creative décor ideas to consider:

1. **Color Palette and Paint**: Start with a fresh coat of paint to set the mood. Light, airy colors like soft blues, pale greens, or crisp whites can make the space feel larger and more inviting. For a bolder statement, consider an accent wall with a vibrant hue or fun wallpaper that reflects your personality.

2. **Artful Storage Solutions**: Instead of hiding your cleaning supplies, showcase them! Use decorative baskets, vintage crates, or stylish bins to organize items while adding character to the room. Labels can add a chic touch while ensuring everything is easy to find.

3. **Incorporate Greenery**: Plants not only purify the air but also bring life into the laundry room. Consider low-maintenance plants like snake plants or pothos, which thrive in various light conditions. Hanging planters or wall-mounted shelves can create a visually appealing display.

4. **Functional Décor**: Turn mundane items into decorative features. A stylish drying rack can become a focal point, while a chic ironing board cover can elevate the look of everyday tasks. Consider wall-mounted hooks for hanging frequently used items, adorned with decorative accessories to keep them looking polished.

5. **Creative Wall Art**: Add some whimsy with laundry-themed art or inspirational quotes that motivate you to tackle your chores. A gallery wall of framed prints or photographs can bring personality to the space. Choose frames that complement your color scheme for a cohesive look.

6. **Stylish Lighting**: Don’t underestimate the power of lighting! Swap out stark overhead fixtures for pendant lights or vintage-inspired fixtures to add warmth and charm. Consider under-cabinet lighting for a modern touch that highlights your workspace while providing practical illumination.

7. **Personal Touches**: Finally, think about your unique style. Incorporate personal touches like family photos, a chalkboard for jotting down reminders, or even a small seating area if space permits. These elements not only enhance the aesthetics but also create a space that feels distinctly yours.

By implementing these creative décor ideas, you can transform your laundry room from a mundane chore zone into a stylish and functional space that you’ll enjoy spending time in. Your laundry room doesn’t have to be just a place to clean clothes; it can become a reflection of your personal style and a functional area that adds value to your home.

10. Easy Maintenance Tips for Your Laundry Room

When it comes to maintaining a stylish and functional laundry room, a little routine upkeep can go a long way in keeping your space looking fresh and organized. Here are some easy maintenance tips to ensure your laundry room remains a beacon of cleanliness and efficiency.

**1. Regular Cleaning Schedule:** Set aside a specific time each week to give your laundry room a thorough cleaning. Dust surfaces, wipe down appliances, and sweep the floor to prevent lint buildup and maintain a tidy environment. A clean space not only looks good but also functions better.

**2. Organize Supplies:** Keep your laundry supplies organized by using labeled bins or baskets. This will help you quickly find what you need and reduce clutter. Regularly check your inventory and restock items like detergent, fabric softener, and dryer sheets to avoid last-minute trips to the store.

**3. Check for Leaks:** Regularly inspect your washing machine and sink for any signs of leaks or water damage. Addressing these issues early can prevent bigger problems down the line, such as mold growth or structural damage.

**4. Maintain Appliances:** Follow the manufacturer’s guidelines for maintenance on your washing machine and dryer. This may include cleaning the lint trap, checking hoses for wear, and scheduling periodic professional inspections. Keeping your appliances in good working order can extend their lifespan and improve efficiency.

**5. Declutter Often:** Laundry rooms can quickly become catch-all spaces for miscellaneous items. Make it a habit to declutter regularly, removing items that don’t belong or are no longer needed. This will create a more functional and inviting space.

**6. Refresh Décor:** A quick refresh of your laundry room décor can make a huge difference. Change out linens, add a splash of color with a new rug, or hang some cheerful artwork. Keeping the space visually appealing can make laundry day feel a little less mundane.

By integrating these simple maintenance tips into your routine, you can create a laundry room that not only looks stylish but also operates smoothly. A well-kept space makes the task of laundry feel less daunting, allowing you to transform this often-overlooked area into a functional and enjoyable part of your home.

11. Designing for Multi-Functionality: Laundry and Beyond

When it comes to designing a laundry room, think beyond the mere act of washing and folding clothes. A well-designed laundry space can serve multiple functions, seamlessly integrating into your home’s overall aesthetic while enhancing its utility.

Start by considering how you can optimize the layout to accommodate various tasks. For instance, if space allows, include a small folding station or countertop adjacent to your washer and dryer. This can serve as a handy area for sorting laundry, organizing cleaning supplies, or even wrapping gifts. Adding shelves or cabinetry above this workspace can further increase storage options, keeping essentials like detergents, fabric softeners, and other household items neatly tucked away yet easily accessible.

Incorporate stylish elements that reflect your personal taste while ensuring practicality. A beautiful backsplash made of ceramic tiles or a chic countertop can transform the laundry room into a visually appealing space. Consider incorporating hooks or a pegboard for hanging cleaning tools, and opt for decorative baskets to store items like clothespins, dryer balls, or laundry bags.

Don’t forget about lighting! A well-lit laundry room is not just more functional but can also uplift your mood while tackling mundane tasks. Whether you choose bright overhead fixtures or softer task lighting above your workspace, good lighting can make a significant difference.

Lastly, think about how the room can double as a mudroom or utility area. Adding a bench with storage underneath can provide a perfect spot for removing dirty shoes or coats, keeping clutter at bay. With thoughtful design choices, your laundry room can evolve into a stylish and functional space that works seamlessly with your lifestyle, making chores feel less like a chore and more like an integral part of your beautifully designed home.

12. Adding Personal Touches and Style Elements

When it comes to transforming your laundry room, personal touches and style elements can make all the difference between a mundane chore space and a stylish sanctuary. After all, this is a room that you’ll likely spend a fair amount of time in, so why not make it a place that sparks joy and inspiration?

Start by considering your personal aesthetic. Do you lean towards modern minimalism, rustic charm, or perhaps a vibrant bohemian flair? Your laundry room should reflect who you are, and incorporating elements that resonate with your style can create a more inviting atmosphere. Think about adding decorative elements such as framed artwork, an inspiring quote, or even a vintage laundry sign that brings a touch of nostalgia.

Textures play a significant role in design, so consider introducing different materials to add depth to your space. A woven basket for storing laundry supplies can add a rustic touch while keeping your essentials organized. Soft textiles, like a stylish rug or cushioned stool, not only enhance comfort but also introduce warmth and color.

Plants are another fantastic way to inject life into your laundry room. A few potted plants or hanging planters can purify the air and create a refreshing vibe. Consider low-maintenance options like succulents or snake plants, which are perfect for spaces with limited natural light.

Don’t forget about functional decorations! Stylish storage solutions can double as decor. Open shelves lined with neatly folded towels or chic baskets can keep your essentials within reach while looking aesthetically pleasing. Choose containers in colors and patterns that complement your overall design theme.

Finally, add personal mementos like family photos, travel souvenirs, or even a vibrant chalkboard for jotting down reminders or inspirational thoughts. These small but meaningful touches will make your laundry room uniquely yours, turning it into a space you enjoy spending time in rather than just a place to tackle chores. With the right personal touches and style elements, your laundry room can become a stylish and functional haven that not only meets your practical needs but also reflects your individuality.

13. Eco-Friendly Options for Your Laundry Room

Creating an eco-friendly laundry room not only contributes to a healthier planet but can also enhance the overall aesthetics and functionality of your space. As consumers become increasingly aware of their environmental impact, incorporating sustainable practices into your laundry routine is a smart choice. Here are some stylish and practical ideas to transform your laundry area into an eco-conscious haven.

**Choose Energy-Efficient Appliances**
Start with the heart of your laundry room—your appliances. Energy-efficient washers and dryers consume less water and electricity, reducing your utility bills and carbon footprint. Look for models with the ENERGY STAR label, which guarantees that they meet strict efficiency guidelines. Not only will these appliances save you money in the long run, but their sleek designs can elevate the overall look of your laundry space.

**Opt for Eco-Friendly Detergents**
When it comes to detergents, consider switching to eco-friendly options. Many brands now offer biodegradable, plant-based formulas that are free from harsh chemicals and artificial fragrances. These products are not only gentler on the environment but also on your clothes and skin, making them a safer choice for your family. To keep your laundry room looking stylish, store these detergents in beautiful glass jars or refillable containers that complement your decor.

**Install a Water-Saving System**
If you’re looking to go the extra mile in conserving water, consider installing a rainwater harvesting system or a gray water recycling setup. This can allow you to reuse water from sinks, showers, or even washing machines for irrigation or toilet flushing. Besides being an eco-friendly choice, these systems can add a unique touch to your laundry room while showcasing your commitment to sustainability.

**Incorporate Natural Materials**
When choosing materials for your laundry room, opt for sustainable options like bamboo, reclaimed wood, or recycled tiles. These materials not only look chic but also have a lower environmental impact compared to traditional options. For instance, a bamboo countertop can add a touch of elegance while being durable and easy to maintain.

**Maximize Airflow with Natural Drying Solutions**
Rather than relying solely on a dryer, create an inviting space for air-drying clothes. Install a stylish drying rack or invest in a collapsible clothesline that can be easily tucked away when not in use. This not only reduces energy consumption but also helps your clothes last longer and maintain their shape. Add a few potted plants to enhance the atmosphere and help purify the air in your laundry room.

By integrating these eco-friendly options into your laundry room, you can create a stylish, functional space that reflects your commitment to sustainability. Embracing green practices not only benefits the environment but also enhances your home, making your laundry routine more enjoyable and guilt-free.

14. Inspirational Laundry Room Makeover Examples

When it comes to transforming your laundry room, inspiration can be the spark that ignites your creativity and helps you envision the possibilities. A laundry space doesn’t have to be merely utilitarian; it can be a stylish haven that enhances both functionality and aesthetics. Here are some captivating examples of laundry room makeovers that blend efficiency with chic design, proving that even the most mundane tasks can be a pleasure.

**1. The Farmhouse Chic Retreat:** Imagine stepping into a laundry room that exudes warmth and charm, with rustic wooden shelves adorned with neatly folded towels and vintage mason jars filled with laundry essentials. This makeover features a classic farmhouse sink, complete with a gooseneck faucet, and a spacious countertop made from reclaimed wood. The addition of soft, neutral colors, distressed cabinetry, and decorative touches like a chalkboard for notes or reminders creates an inviting atmosphere that makes doing laundry feel less like a chore.

**2. The Modern Minimalist:** For those who prefer a sleek and streamlined look, a modern minimalist laundry room can be both functional and visually appealing. Think clean lines, a monochromatic color palette, and hidden storage solutions that keep clutter at bay. This style often incorporates high-efficiency appliances that blend seamlessly into cabinetry, along with open shelving for easy access to laundry supplies. A pop of color can be introduced through a bold backsplash or vibrant accessories, adding personality without overwhelming the space.

**3. The Bold and Bright Oasis:** If you’re looking to inject some energy into your laundry routine, consider a makeover that celebrates color. Brightly painted cabinets, cheerful wallpaper, or playful accents like patterned rugs can transform your laundry room into a vibrant oasis. This style often features fun elements like a statement light fixture or quirky art pieces that reflect your personality. By infusing your space with color and creativity, you’ll make laundry day a little more enjoyable.

**4. The Multi-Functional Marvel:** In today’s homes, maximizing space is key. This example showcases a laundry room that doubles as a mudroom, complete with a built-in bench, hooks for coats, and ample storage for shoes and bags. The design cleverly integrates laundry appliances into the cabinetry while providing a designated folding area. With thoughtful organization and stylish decor, this multi-functional space proves that practicality and elegance can coexist beautifully.

These examples highlight just a few of the limitless possibilities for transforming your laundry room into a stylish and functional space. Whether you prefer a cozy farmhouse vibe or a sleek modern aesthetic, the key is to create an environment that inspires you and makes the laundry process a joy rather than a chore. Remember, with a little imagination and intentional design, your laundry room can be both a practical utility space and a stylish reflection of your home.

15. Final Thoughts: Balancing Style and Functionality

As we wrap up our journey through the transformative possibilities of a stylish and functional laundry room, it’s essential to emphasize the delicate balance between aesthetics and practicality. A laundry room is often an overlooked space, relegated to the realm of utility, but with a little creativity and thoughtful design, it can become a harmonious blend of both style and function.

When designing your laundry space, consider how each element serves a dual purpose. Choose cabinetry that not only looks sleek but also maximizes storage, allowing you to keep detergents, fabric softeners, and other essentials neatly tucked away. Opt for a countertop that provides a chic surface for folding clothes while also being durable enough to withstand the wear and tear of daily use.

Lighting plays a crucial role in elevating the ambiance of your laundry room. A well-lit space not only makes chores easier but can also enhance the overall aesthetic. Incorporate a mix of task lighting and decorative fixtures that align with your design theme, whether that’s modern, farmhouse, or minimalist.

Don’t forget the importance of color and texture! Soft hues can create a calming atmosphere, while bold accents can inject personality into the space. Consider adding a stylish backsplash or decorative wall art that reflects your taste and makes doing laundry a bit more enjoyable.

Ultimately, the key to a successful laundry room transformation lies in your ability to envision a space that caters to your needs while also mirroring your style. When you strike that perfect balance, you’ll find that laundry day becomes less of a chore and more of a seamless part of your beautifully crafted home. Embrace the potential of this often-overlooked area and watch as it evolves into a space that is both functional and a joy to be in.

In conclusion, transforming your laundry room into a stylish and functional space is entirely achievable with a little creativity and planning. By implementing the tips we’ve shared—from maximizing storage solutions to choosing a cohesive color palette—you can turn this often-overlooked area of your home into a place that not only meets your practical needs but also reflects your personal style. Remember, a well-designed laundry room can make the chore of doing laundry feel less daunting and even a bit enjoyable. So roll up your sleeves, get inspired, and watch how a few thoughtful changes can elevate your laundry experience. Happy decorating!

How to create a relaxing bathroom oasis?

Your bathroom should be more than just a functional space; it can be a serene sanctuary where you escape the chaos of everyday life.

Imagine stepping into a calming oasis, where the stresses of the day melt away amidst soothing colors, fragrant scents, and the gentle sound of trickling water. Transforming your bathroom into a relaxing retreat doesn’t have to be a daunting task; with the right approach and a little creativity, you can create a personal haven that invites relaxation and rejuvenation. In this step-by-step guide, we’ll explore practical tips and inspiring ideas to help you redesign your bathroom into a tranquil escape. From choosing a soothing color palette and selecting the perfect lighting to incorporating luxurious textures and calming scents, we’ll walk you through every detail to ensure your bathroom becomes the peaceful oasis you’ve always dreamed of. Get ready to indulge in self-care and unwind in style!

1. Introduction: The Importance of a Relaxing Bathroom Oasis

How to create a relaxing bathroom oasis?
Credit : whatcanu.com

In today’s fast-paced world, where the demands of daily life can feel overwhelming, finding a sanctuary within your home is essential for rejuvenation and peace of mind. Your bathroom, often overlooked as simply a functional space, has the incredible potential to transform into a soothing oasis that encourages relaxation and self-care. Imagine stepping into a space that envelops you in calmness, filled with gentle fragrances, soft lighting, and the tranquil sound of water. This is the essence of a relaxing bathroom sanctuary.

Creating a bathroom oasis is not just about aesthetics; it’s about crafting an environment that nurtures your well-being. The importance of this transformation extends beyond the visual appeal—it’s about cultivating a space where you can unwind after a long day, recharge your spirit, and indulge in moments of solitude. Whether you dream of soaking in a luxurious tub surrounded by candles, or prefer a streamlined, minimalist design that promotes tranquility, the journey to a serene bathroom begins with understanding your personal needs and preferences.

As you embark on this step-by-step guide to transform your bathroom into a relaxing oasis, remember that the key is to harmonize functionality with comfort. By incorporating elements that resonate with your senses, you can create a space that not only looks beautiful but also feels restorative. Let’s dive into the essential steps to elevate your bathroom from a mundane space to a rejuvenating retreat, where every visit feels like a mini-vacation.

2. Assessing Your Space: Understanding Your Bathroom’s Potential

Before diving into the exhilarating world of bathroom transformation, it’s essential to pause and assess your space thoughtfully. Understanding your bathroom’s potential is the first step in crafting a relaxing oasis that reflects your style and meets your needs.

Start by measuring your bathroom dimensions, noting the layout, and identifying key features such as windows, doors, and plumbing fixtures. Take a moment to visualize how these elements can influence your design decisions. For instance, natural light streaming through a window can be harnessed to create a serene atmosphere, while the placement of existing fixtures may dictate the flow of your newly envisioned space.

Next, consider the current condition of your bathroom. Are the tiles chipped or outdated? Is the lighting dim and uninviting? Jot down any areas that require repair or improvement, as these will guide your renovation choices. Additionally, assess the overall ambiance of the room. Do you feel relaxed when you step inside, or is it a source of stress? This emotional response will serve as a compass for your design direction.

As you evaluate your space, think about your personal preferences and lifestyle. Are you someone who enjoys long, leisurely baths, or do you prefer quick, invigorating showers? Incorporating elements that cater to your routine will enhance the functionality of your oasis.

Finally, keep an open mind. Sometimes the best ideas come from embracing the unique quirks of your existing space. Whether it’s a small nook that could become a reading corner or an awkward corner that might house a stylish plant, envision how you can turn limitations into opportunities.

By thoroughly assessing your bathroom and understanding its potential, you lay the groundwork for a transformation that not only elevates the aesthetic but also turns your daily rituals into moments of blissful escape.

3. Setting a Budget: How Much to Invest in Your Sanctuary

How to create a relaxing bathroom oasis?
Credit : whatcanu.com

Setting a budget for your bathroom transformation is a crucial step in creating your personal sanctuary. Before diving headfirst into the myriad options available, take a moment to reflect on how much you’re willing to invest in this rejuvenating space. A well-defined budget not only helps you prioritize your spending but also ensures you stay grounded throughout the renovation process.

Begin by assessing the current state of your bathroom and identifying which elements need improvement—perhaps it’s the tired, peeling wallpaper, outdated fixtures, or a lack of storage space. Next, research the costs associated with the upgrades you’re considering. From luxurious soaking tubs and sleek vanities to calming lighting fixtures and high-quality tiles, prices can vary significantly based on the brands and materials you choose.

Consider allocating funds for both essential upgrades and those indulgent touches that will truly elevate your oasis. For instance, while you may opt for a mid-range toilet, splurging on a rainfall showerhead can create a spa-like experience without breaking the bank.

Don’t forget to factor in labor costs if you’re hiring professionals—plumbers and electricians can add significant value, ensuring your upgrades are not only beautiful but functional and safe. Additionally, always leave a little wiggle room in your budget for unexpected expenses; renovations often come with surprises that can impact your financial plan.

By establishing a clear budget and sticking to it, you’ll ensure that your bathroom transformation is not just a dream, but a reality you can enjoy for years to come. With careful planning and consideration, your investment will reflect the peaceful retreat you envision, allowing you to unwind and recharge in your very own bathroom oasis.

4. Choosing a Color Palette: Calming Colors for a Peaceful Environment

Choosing the right color palette is essential in transforming your bathroom into a serene oasis. The colors you select can significantly influence the atmosphere, promoting relaxation and tranquility. To create a peaceful environment, consider incorporating calming hues that evoke a sense of calm and comfort.

Soft blues and gentle greens are excellent choices, reminiscent of nature and the soothing effects of water. These colors can be used on the walls, tiles, or even in accent pieces like towels and shower curtains. Light shades of these colors can make the space feel airy and open, while deeper tones, like navy or forest green, can add depth and a touch of sophistication when used sparingly.

If you prefer a more neutral palette, soft grays, warm beiges, and creamy whites offer a versatile backdrop that can be easily complemented with natural materials and textures. These shades create a warm, inviting space that feels both modern and timeless. Additionally, incorporating natural wood accents or stone elements can further enhance the calming effect and bring a touch of the outdoors inside.

Don’t forget to consider the lighting in your bathroom when selecting colors. Natural light can significantly alter how colors appear, so test your chosen shades at different times of the day to see how they interact with your space. For artificial lighting, opt for warmer bulbs that mimic natural light to create a cozy ambiance.

Ultimately, the key to a calming color palette is to choose shades that resonate with you personally. Whether you lean toward soft pastels, earthy neutrals, or tranquil jewel tones, let your preferences guide your selection, as this will ensure your bathroom feels like a true retreat tailored to your style. Embrace the process, and soon, you’ll have a bathroom that’s not just a functional space but a peaceful sanctuary where you can unwind and rejuvenate.

5. Selecting the Right Lighting: Creating Ambiance with Fixtures

How to create a relaxing bathroom oasis?
Credit : whatcanu.com

When it comes to transforming your bathroom into a relaxing oasis, lighting plays a pivotal role in setting the mood and enhancing the overall atmosphere. Selecting the right fixtures can make all the difference between a sterile, utilitarian space and a serene sanctuary.

Begin by assessing the natural light in your bathroom. If you have a window, consider how the light changes throughout the day and how it interacts with your chosen color palette. Soft, diffused lighting can emulate the gentle glow of sunrise or sunset, creating a harmonious backdrop for your self-care rituals. If natural light is limited, you can simulate its warmth with carefully chosen fixtures.

Layering your lighting is key. Start with ambient lighting—overhead fixtures or recessed lights that provide a base level of illumination. Opt for warm white bulbs to create a cozy and inviting feel. Next, add task lighting around mirrors or vanities, using sconces or LED strips to ensure you have adequate light for grooming and skincare routines. Position these lights at eye level to minimize shadows and create a flattering reflection.

Don’t forget about accent lighting, which can add a touch of luxury and highlight architectural features or decor elements. Consider installing dimmer switches to adjust the brightness according to your mood. A soft, low light is perfect for a calming bath, while brighter light may be ideal for morning routines.

Finally, think outside the box with decorative fixtures that reflect your personal style. Whether you prefer sleek modern lines or vintage charm, your lighting should complement the overall design of your bathroom. With the right lighting in place, your bathroom will not only be functional but also a serene retreat where you can unwind and rejuvenate.

6. Incorporating Nature: Plants and Greenery for Freshness

Incorporating nature into your bathroom design is a powerful way to create a soothing atmosphere that promotes relaxation and rejuvenation. The presence of plants and greenery not only enhances the aesthetic appeal of the space but also contributes to improved air quality, making your bathroom feel fresh and invigorating.

Start by selecting plants that thrive in humid environments, as bathrooms typically provide the ideal conditions for growth. Consider options such as pothos, spider plants, ferns, or peace lilies—these resilient varieties not only tolerate low light but also help purify the air, removing toxins and adding moisture to the atmosphere. Hang small pots from the ceiling or place them on shelves to draw the eye upward, creating a sense of height and openness.

If floor space is limited, consider vertical gardening solutions. Wall-mounted planters can be a striking focal point while maximizing your available area. Alternatively, a simple arrangement of succulents on your windowsill or a cluster of herbs on the counter can add a pop of color and life without overwhelming the space.

To enhance the natural vibe, complement your greenery with natural materials. Wooden accents—such as bamboo soap dishes or a reclaimed wood bath mat—can harmonize beautifully with plants, offering a warm and inviting feel. You might also consider adding a touch of nature with stone or pebble designs, perhaps through a minimalist stone tray for your toiletries or a pebble-lined shower floor.

Lastly, don’t forget about the power of scent. Incorporating essential oil diffusers or placing fragrant plants like lavender or mint in your bathroom can elevate the sensory experience, making every visit feel like a mini retreat. By thoughtfully integrating plants and natural elements, you can transform your bathroom into a tranquil oasis, inviting you to unwind and refresh both body and mind.

7. Choosing Comfortable Textiles: Towels, Rugs, and Curtains

How to create a relaxing bathroom oasis?
Credit : whatcanu.com

When transforming your bathroom into a relaxing oasis, the choice of textiles can significantly elevate the overall ambiance and comfort of the space. Towels, rugs, and curtains not only serve functional purposes but also contribute to the aesthetic appeal, making them essential elements in your design strategy.

**Towels**: Start with plush, high-quality towels that invite you to wrap yourself in softness after a soothing bath or shower. Opt for materials like Egyptian cotton or bamboo, known for their exceptional absorbency and luxurious feel. Consider a color palette that aligns with your sanctuary theme—soft neutrals, calming blues, or earthy tones can create a serene environment. Layering different sizes, from oversized bath sheets to smaller hand towels, adds depth and visual interest while ensuring you have the right towel for every need.

**Rugs**: A carefully chosen rug can enhance the feeling of warmth and comfort underfoot. Look for options that are both stylish and practical; materials like cotton or microfiber are easy to clean while providing that cushy feel. A plush bath mat can act as a barrier against cold tiles, making every step a delightful experience. For a more spa-like atmosphere, consider a larger area rug to unify the space, bringing in textures that complement the overall design—think soft woven patterns or a subtle geometric design that invites bare feet to linger.

**Curtains**: Finally, don’t overlook the impact of curtains in your bathroom retreat. They can frame your windows beautifully while providing privacy and controlling natural light. Choose lightweight fabrics that allow gentle sunlight to filter through, casting a warm glow. If you have a larger window or a glass door leading to an outdoor space, consider layering sheer curtains with heavier drapes for added dimension and versatility. The right choice of curtain color and pattern can tie the whole look together, enhancing the tranquility of your oasis.

By thoughtfully selecting your bathroom textiles, you create a cohesive and inviting space that encourages relaxation and rejuvenation. Each element—from the towels you wrap yourself in to the rug that cushions your feet—contributes to an atmosphere where you can unwind and escape the stresses of daily life. Embrace comfort and style in your choices, and watch as your bathroom transforms into the serene sanctuary you’ve always dreamed of.

8. Adding Soothing Scents: Exploring Candles, Oils, and Diffusers

Creating a relaxing oasis in your bathroom isn’t just about the visuals; it’s also about engaging the senses, and one of the most effective ways to do this is by incorporating soothing scents. The right fragrance can transform your space into a serene sanctuary, inviting calmness and tranquility. Let’s explore the various options available, from candles to oils and diffusers, to help you craft the perfect aromatic atmosphere.

**Candles** are a classic choice for infusing your bathroom with delightful scents. Opt for natural soy or beeswax candles, which burn cleaner and emit fewer toxins than traditional paraffin. Choose calming fragrances like lavender, chamomile, or sandalwood to promote relaxation. The soft flicker of candlelight adds a warm ambiance, making your bath experience feel even more luxurious. Place them around your tub or on a shelf, but remember to keep them at a safe distance from water and flammable materials.

**Essential oils** are another fantastic way to enhance your bathroom’s scent profile. These concentrated plant extracts can be used in various ways—add a few drops to your bathwater, mix them with a carrier oil for a soothing massage, or simply place a few drops in a bowl of water to create a gentle aroma. Popular choices for relaxation include eucalyptus, peppermint, and ylang-ylang. You can also create your own unique blends tailored to your preferences.

**Diffusers** offer a modern and stylish alternative for scent distribution. Whether you choose a traditional reed diffuser or an electric ultrasonic diffuser, both options can fill your bathroom with delightful aromas without the need for an open flame. Reed diffusers are low-maintenance and last for weeks, while electric diffusers often come with adjustable settings, allowing you to control the intensity of the fragrance. Look for essential oil blends specifically designed for relaxation, or experiment with different oils until you find your perfect combination.

When incorporating these elements into your bathroom, consider the overall theme and color palette of the space. Soft, neutral tones can complement the gentle glow of candles and the delicate presentation of diffusers. Additionally, consider incorporating natural elements like plants or stones to further enhance the tranquil vibe.

By thoughtfully adding soothing scents through candles, oils, and diffusers, you can elevate your bathroom into a true oasis of relaxation. As you unwind in your rejuvenated space, you’ll find that these fragrant touches not only enhance your physical environment but also nurture a deeper sense of peace and well-being. So go ahead, light a candle, diffuse some oils, and let the soothing scents wash over you as you transform your bathroom into a tranquil retreat.

9. Creating a Spa-Like Experience: Bathtubs, Showers, and Accessories

When envisioning a tranquil retreat within your home, the bathroom often serves as a blank canvas for creating your personal spa-like experience. The right combination of elements can transform this essential space into a soothing oasis where you can unwind and rejuvenate after a long day. Let’s explore how to craft this serene ambiance through thoughtful choices in bathtubs, showers, and accessories.

**Bathtubs: The Centerpiece of Relaxation**
Start with the bathtub, which can serve as the focal point of your spa-like sanctuary. Consider investing in a freestanding soaking tub that invites you to indulge in long, leisurely baths. These tubs come in various styles, from modern minimalist designs to classic clawfoot options, allowing you to select one that aligns with your aesthetic. To elevate the experience, incorporate features like built-in armrests, neck support, or even a whirlpool option for hydrotherapy benefits. Surround your tub with soft, ambient lighting and natural elements, such as potted plants or candles, to create a calming atmosphere.

**Showers: An Invigorating Escape**
For those who prefer quick refreshment, a luxurious shower can be just as rejuvenating. Consider installing a rainfall showerhead that mimics the gentle patter of rain, providing a serene sensory experience. Opt for multi-functional shower systems that include adjustable settings, such as massage jets or steam options, to cater to your personal preferences. Glass enclosures can enhance the space, making it feel larger and more open while allowing natural light to flood in. Don’t forget to include a comfortable shower mat and soft towels nearby, ensuring that every step you take is cushioned and cozy.

**Accessories: The Finishing Touches**
The right accessories can elevate your bathroom from ordinary to extraordinary. Start by selecting calming color palettes—think soft blues, greens, or neutral tones—to promote a sense of tranquility. Incorporate plush bath mats and towels that beckon you to soak in their softness. Scented candles, essential oil diffusers, or aromatic bath salts can add olfactory pleasure, creating a multi-sensory experience. Finally, consider adding personal touches, such as artwork that inspires relaxation or a small Bluetooth speaker to enjoy soothing music or nature sounds while you unwind.

By thoughtfully selecting bathtubs, showers, and accessories that align with your vision of a spa-like experience, you can transform your bathroom into a serene haven. Each element contributes to an atmosphere of relaxation, allowing you to escape the stresses of daily life and indulge in moments of peace and tranquility. Embrace these steps, and soon you’ll find that your bathroom has become more than just a functional space—it’s your personal retreat.

10. Organizing for Clarity: Storage Solutions to Reduce Clutter

When it comes to transforming your bathroom into a relaxing oasis, clarity is key. One of the most effective ways to achieve this is by organizing your space with smart storage solutions that reduce clutter and enhance tranquility. An organized bathroom not only looks more appealing but also makes your daily routines feel more serene and efficient.

Start by assessing your current storage setup. Consider what items are essential for your daily routine and which can be stored away or discarded. Utilize vertical space with shelves or wall-mounted organizers that keep items off the counter and within easy reach. Clear acrylic or wicker baskets can be stylish yet functional, providing designated spaces for toiletries, towels, and other essentials while maintaining a cohesive look.

Incorporate drawer dividers to keep smaller items neatly separated. This simple addition allows you to find what you need without rummaging through a disorganized mess. For larger items like extra towels or cleaning supplies, consider under-sink storage solutions. A tiered organizer or pull-out bins can maximize this often-overlooked space, making it easier to access your cleaning products or spare linens.

Don’t forget about the power of labels. Labeling baskets and bins not only adds a touch of personalization but also helps everyone in the household know where things belong, promoting a sense of order.

Lastly, make use of decorative elements that double as storage, such as a stylish wooden tray for perfumes and skincare products or a chic ladder for hanging towels. These thoughtful touches will elevate your bathroom’s aesthetic while keeping clutter at bay.

By implementing these storage solutions, you’ll create a calming environment where everything has its place, allowing you to unwind in your beautifully organized oasis.

11. Personal Touches: Art, Décor, and Accessories that Inspire Relaxation

Creating a relaxing oasis in your bathroom goes beyond just the choice of colors and materials; it’s also about the personal touches that reflect your style and promote a sense of tranquility. Art, décor, and accessories play a vital role in transforming your space into a sanctuary where you can unwind after a long day.

Start by selecting artwork that resonates with you—pieces that evoke calmness or bring a smile to your face. Consider serene landscapes, abstract designs, or even botanical prints that can infuse your bathroom with a touch of nature. When framing these artworks, opt for lightweight frames that can withstand the bathroom’s humidity, ensuring they remain pristine and vibrant.

Next, turn your attention to décor elements. Soft, textured textiles can enhance the serenity of your oasis. Consider plush towels in soothing colors or patterns, and layer them with a stylish bath mat to create a cozy feel underfoot. Bring in a few decorative items like candles, which not only add ambiance but also introduce delightful scents that can help soothe the mind. Opt for natural soy or beeswax candles, as they burn cleaner and are better for your health.

Don’t forget the power of plants to breathe life into your bathroom. Choose hardy, humidity-loving plants like ferns or spider plants that thrive in moist environments. Not only do they purify the air, but they also introduce a splash of vibrant color and a sense of calm. For smaller spaces, consider hanging plants or using a stylish shelf to display them, making the most of every inch.

Finally, accessorize with intention. Select storage baskets that not only serve a functional purpose but also add aesthetic value. Choose materials like woven wicker or natural fibers in calming shades that complement your bathroom’s color palette. Incorporate soothing scents through essential oil diffusers or decorative jars filled with bath salts that invite relaxation into your daily routine.

With these personal touches, your bathroom will not only reflect your unique personality but also become a cherished retreat where you can escape the stresses of everyday life. Embrace creativity and mindfulness as you curate a space that inspires relaxation, making every visit a rejuvenating experience.

12. Incorporating Sound: Music and Water Features for Serenity

When it comes to creating a relaxing oasis in your bathroom, the auditory experience is just as important as the visual. Incorporating sound—whether through soothing music or the gentle melody of flowing water—can transform your space into a sanctuary of serenity.

Start by selecting a high-quality wireless speaker that blends seamlessly into your bathroom decor. Opt for a model that is waterproof or water-resistant to ensure durability in the humid environment. Curate a playlist filled with calming tunes, nature sounds, or soft instrumental music that resonates with tranquility. Consider genres like ambient, classical, or spa music, which can help transport you to a peaceful state of mind the moment you step into your bath.

If you want to take it a step further, think about adding a water feature. A small tabletop fountain can create a delightful backdrop of gentle trickling sounds, reminiscent of a peaceful stream. The sound of water is inherently soothing and can help drown out any distracting noises from outside, allowing you to fully immerse yourself in relaxation. Place the fountain near your soaking tub or shower area to enhance the auditory experience.

For a more luxurious touch, consider installing a rain shower head. The sound of water cascading gently overhead creates a spa-like atmosphere that instantly elevates your bathing experience. Pair it with soft lighting and aromatic candles, and you’ll have a multi-sensory retreat that invites you to unwind and rejuvenate.

By thoughtfully incorporating music and water features, you can create an ambiance that encourages relaxation and self-care, making your bathroom a true oasis of tranquility. Whether you’re soaking in the tub after a long day or preparing for the day ahead, the serene sounds you’ve curated will help you escape the chaos of the outside world and find your moment of peace.

13. Final Touches: Tips for a Spa-Day Atmosphere at Home

Creating a spa-day atmosphere in your bathroom hinges on the final touches that elevate the space from functional to luxurious. These small yet impactful details can transform your daily routine into a serene escape, inviting relaxation and rejuvenation.

Start with soft, ambient lighting. Replace harsh overhead bulbs with dimmable options or add candles in various sizes to create a warm glow. Consider scented candles or LED lights that mimic candlelight; both will set the perfect mood for unwinding. For a touch of elegance, opt for candle holders in natural materials like wood or stone, which complement the overall aesthetic of your oasis.

Next, introduce soothing scents to enhance the sensory experience. Aromatherapy diffusers filled with essential oils such as lavender, eucalyptus, or bergamot can instantly create a calming environment. Alternatively, potpourri or fragrant bath salts tucked into decorative jars can provide a visually pleasing element while releasing delightful aromas throughout the space.

Textiles play a vital role in achieving that spa-like feel. Invest in plush bath towels and a soft bath mat that invite you to indulge in comfort every time you step out of the shower. Choose colors that evoke tranquility—think soft whites, muted blues, or gentle greens. You might also consider adding a luxurious robe hanging by the door, ready for you to slip into post-bath.

Incorporate nature into your space by adding greenery. Plants like snake plants or peace lilies not only purify the air but also bring a sense of tranquility and connection to nature. If space allows, a small vase of fresh flowers can provide a burst of color and vitality.

Finally, pay attention to the little details that enhance the overall experience. A wooden tray to organize your skincare products, a soft music playlist to play in the background, or a small speaker for soothing sounds of nature can make all the difference.

With these final touches, your bathroom will not only serve its practical purpose but also become a sanctuary—a personal retreat where you can escape the stresses of daily life and indulge in well-deserved self-care. Embrace the serenity of your newly transformed oasis, and let each bath become a cherished ritual of relaxation.

14. Maintenance Tips: Keeping Your Oasis Fresh and Inviting

Transforming your bathroom into a relaxing oasis is just the beginning; maintaining that serene atmosphere is essential for ensuring it remains your personal haven. Regular upkeep not only preserves the aesthetic appeal of your space but also enhances your overall experience every time you step into your sanctuary. Here are some effective maintenance tips to keep your oasis fresh and inviting.

First and foremost, establish a cleaning routine. Regularly wiping down surfaces, such as countertops, sinks, and bathtubs, prevents the buildup of soap scum and mildew. Opt for natural cleaning solutions like vinegar and baking soda to maintain a soothing atmosphere free from harsh chemical smells. A light daily wipe-down can make a significant difference, while a more thorough weekly cleaning can keep your oasis sparkling.

Next, pay attention to the towels and linens you use. Fresh, fluffy towels not only feel luxurious but also contribute to the overall ambiance of your bathroom. Wash and replace them regularly to keep them smelling fresh and looking inviting. Consider investing in a beautiful towel rack or hooks that complement your decor, turning these everyday items into stylish accents.

Don’t forget about the power of scents. A bathroom that smells good enhances the relaxation experience. Use essential oil diffusers, scented candles, or potpourri to fill the air with calming fragrances like lavender or eucalyptus. Additionally, consider incorporating indoor plants that are both aesthetically pleasing and effective at purifying the air, such as snake plants or peace lilies.

Lastly, be mindful of clutter. A serene oasis should feel open and organized, so regularly declutter countertops and shelves. Use decorative baskets or trays to store toiletries and accessories neatly, making sure everything has a designated spot. This not only creates a visually appealing environment but also makes your bathroom feel more spacious.

By implementing these maintenance tips, you’ll ensure that your bathroom oasis remains a fresh and inviting retreat, ready to provide you with the relaxation and rejuvenation you deserve every time you step inside.

15. Conclusion: Enjoying Your New Relaxing Bathroom Retreat

As you step back and take in the serene ambiance of your newly transformed bathroom, it’s time to relish the fruits of your labor. The soothing color palette, the gentle glow of strategically placed lighting, and the subtle scent of essential oils combine to create an environment that invites relaxation and tranquility. Your bathroom is no longer just a functional space; it has evolved into a personal retreat, a sanctuary where you can escape the stresses of daily life.

Imagine slipping into a warm bath surrounded by soft, plush towels and the calming sounds of gentle music or nature. You’ve designed a space that encourages you to pause, breathe deeply, and unwind. With every detail meticulously chosen—from the elegant fixtures to the comforting textures—you’ve curated an oasis that reflects your personal style and promotes well-being.

Now, as you settle into your new routine, allow yourself the luxury of regular moments spent in this space. Whether it’s a leisurely soak in the tub, an invigorating shower, or simply enjoying a few quiet minutes with a good book, embrace the opportunity to rejuvenate your mind and body. Consider incorporating small rituals, like lighting a candle or using your favorite bath products, to enhance your experience further.

In conclusion, your transformed bathroom is more than just a visual upgrade; it’s a commitment to self-care and relaxation. So, go ahead and indulge in the serenity of your new bathroom retreat. You’ve earned it. Here’s to many peaceful moments spent in this haven of tranquility—you deserve every second!

In conclusion, transforming your bathroom into a relaxing oasis is not just a home improvement project but a journey towards creating a personal sanctuary where you can unwind and rejuvenate. By following the step-by-step guide outlined in this post, you can infuse your space with tranquility and style, from selecting soothing color palettes to incorporating elements like soft lighting and natural textures. Remember, the key is to personalize your oasis in a way that resonates with your unique sense of comfort and aesthetic. So, gather your supplies, unleash your creativity, and prepare to indulge in the serene retreat you’ve always dreamed of. Your perfect escape is just a few thoughtful changes away! Happy renovating!

How to create a cozy reading nook?

In a world that often feels fast-paced and overwhelming, finding a serene escape within your own home is essential for rejuvenation.

Imagine curling up with a good book in a space that envelops you in warmth and comfort—a cozy reading nook designed just for you. Whether you have a spare corner, a sunny window seat, or an entire room at your disposal, crafting your perfect reading retreat can transform ordinary moments into extraordinary experiences. In this step-by-step guide, we’ll explore how to curate a sanctuary that invites you to unwind, immerse yourself in stories, and savor the joy of reading. From choosing the right location and selecting the perfect furnishings to adding those little personal touches that make the space uniquely yours, get ready to create a cozy haven where your imagination can roam free and your stress can melt away.

1. Introduction: The Importance of a Cozy Reading Nook

How to create a cozy reading nook?
Credit : whatcanu.com

In a fast-paced world filled with distractions and endless to-do lists, carving out a sanctuary for yourself—a cozy reading nook—can be a transformative experience that nurtures your spirit and ignites your passion for reading. This dedicated space offers more than just a comfortable chair and a stack of books; it serves as an oasis where you can escape the hustle and bustle of daily life, immerse yourself in captivating stories, and indulge in moments of tranquility.

The importance of a cozy reading nook transcends mere aesthetics; it is about creating an environment that encourages relaxation and creativity. This intimate setting fosters a sense of comfort and peace, inviting you to slow down, unwind, and get lost in the pages of your favorite novels. Whether you’re curling up with a classic or diving into the latest bestseller, a well-designed nook can enhance your reading experience, making it feel like a cherished ritual rather than just a pastime.

Moreover, a reading nook can be a personal reflection of your tastes and personality, allowing you to curate a space filled with items that inspire and comfort you. Think plush cushions in your favorite colors, soft throws that beckon you to stay a little longer, and shelves adorned with literary treasures. This is your space, and it should evoke a sense of warmth and belonging.

In this guide, we will explore the essential steps to transform a corner of your home into the ultimate cozy reading nook. From selecting the perfect location to choosing furnishings that promote relaxation, you’ll learn how to create a haven that not only nurtures your love for reading but also becomes a special retreat in your home. So, grab your favorite mug, brew a cup of tea, and let’s embark on the journey to design the reading nook of your dreams!

2. Assessing Your Space: Finding the Perfect Spot

Before diving into the fun of decorating and furnishing your cozy reading nook, it’s crucial to take a step back and assess your space. Finding the perfect spot can make all the difference in creating an inviting atmosphere where you can escape into your favorite books.

Start by exploring different areas of your home—think about spaces that naturally offer comfort and tranquility. Is there a sunny corner by the window that beckons with warm light? Or perhaps a quiet alcove that’s tucked away from the hustle and bustle, allowing for peace and solitude? Look for areas where you can feel relaxed, as this will be the heart of your reading sanctuary.

Consider the layout and flow of the room as well. A nook shouldn’t feel cramped or isolated; it should feel like a seamless extension of your home. If you have a large living room, a cozy corner with a plush armchair paired with a small side table could be just the spot. In a bedroom, a window seat or a corner with a soft throw and a stack of pillows might serve perfectly.

Don’t forget to evaluate the lighting, too. Natural light is ideal for reading during the day, but you’ll also want adjustable task lighting for evenings spent lost in stories. A well-placed floor lamp or a stylish table lamp can enhance the coziness of your nook while ensuring you have the right lighting for your reading endeavors.

Finally, think about accessibility. Your reading nook should be stocked with your favorite books, a comfy blanket, and perhaps a cup of tea or coffee within reach. By choosing a location that’s both practical and inviting, you’ll create a space that calls you back time and time again, making it the perfect hideaway for hours of literary exploration.

3. Setting a Budget: How Much to Spend on Your Nook

How to create a cozy reading nook?
Credit : whatcanu.com

Creating the perfect cozy reading nook doesn’t have to break the bank, but setting a realistic budget is essential to ensuring that your dream space becomes a reality without causing financial stress. Start by considering the overall look and feel you want to achieve. Are you aiming for a minimalist vibe with simple, clean lines, or are you envisioning a bohemian escape filled with eclectic finds? Your design preference will significantly impact your budget.

Next, break down your budget into categories. Think about major elements like furniture, lighting, and textiles. For instance, investing in a comfortable chair or a plush floor cushion should be a priority, as this is where you’ll spend most of your reading time. A good-quality chair may require a larger share of your budget, but it will pay off in comfort.

Lighting is another crucial element; a well-placed floor lamp or a set of fairy lights can transform your nook into a warm, inviting space. Set aside funds for accessories, such as shelves for your books, decorative pillows, and throws that add personality and warmth to your nook. Don’t forget to account for any DIY projects or renovations you might want to undertake. A fresh coat of paint or a new rug can dramatically change the atmosphere without costing a fortune.

Lastly, keep an eye out for sales, thrift stores, or online marketplaces where you can find unique items at a fraction of the cost. By being resourceful and strategic, you can create a cozy reading nook that reflects your style and fits within your budget, allowing you to escape into your favorite books without any financial regrets.

4. Choosing the Right Furniture: Essential Pieces for Comfort

When it comes to creating the ultimate cozy reading nook, the right furniture can make all the difference. Imagine sinking into a plush armchair that envelops you like a warm hug or stretching out on a soft chaise lounge, where you can lose yourself in the pages of a good book. Selecting essential pieces that prioritize comfort and style will transform your nook into a personal sanctuary.

Start with a comfortable chair or sofa—this will be the heart of your reading space. Look for options with ample cushioning and support; oversized armchairs, bean bags, or even a small loveseat can provide the perfect spot to settle in for hours. Consider the upholstery as well; fabrics like soft chenille or velvet can add a touch of luxury, while breathable cotton blends offer practicality.

Next, don’t overlook the importance of a side table. A small, sturdy table is crucial for holding your favorite books, a steaming cup of tea, or even a cozy blanket. Choose one that complements your chair or sofa, whether it’s a rustic wooden piece or a sleek modern design. It should be easily accessible, allowing you to reach for your essentials without disrupting your reading flow.

Lighting is another key element in your furniture selection. A stylish floor lamp or a pair of table lamps will not only illuminate your space but also enhance the ambiance. Look for adjustable lighting options that allow you to create a warm glow that’s easy on the eyes, perfect for those late-night reading sessions.

Lastly, consider adding a few decorative elements, such as a plush ottoman or a small bookshelf. An ottoman can provide extra comfort, giving you a place to rest your feet, while a nearby bookshelf keeps your literary treasures within arm’s reach.

By thoughtfully choosing the right furniture, you’ll set the stage for a cozy reading nook that beckons you to unwind, relax, and escape into the pages of your favorite stories.

5. Lighting Matters: Selecting the Best Lighting Options

How to create a cozy reading nook?
Credit : whatcanu.com

Lighting is one of the most crucial elements in crafting the perfect cozy reading nook, as it sets the tone and atmosphere of your space. The right lighting can transform an ordinary corner into an inviting sanctuary, encouraging you to curl up with a good book for hours on end.

Begin by assessing the natural light in your nook. If your chosen spot is blessed with ample daylight, consider enhancing that warmth with sheer curtains that diffuse sunlight while maintaining a sense of openness. Natural light can offer a serene backdrop that revitalizes your reading experience. However, for those evenings when the sun dips below the horizon, supplementary lighting becomes essential.

Opt for a mix of ambient, task, and accent lighting to create a layered effect. Ambient lighting provides the overall glow of the space—think ceiling fixtures or floor lamps that fill the room with a soft light. Task lighting, on the other hand, is critical for reducing eye strain while reading. A well-placed table lamp or a swing-arm floor lamp can provide focused illumination on the pages of your book, allowing you to delve into your literary world comfortably.

Don’t shy away from decorative options either. String lights or fairy lights can add a whimsical touch, casting a gentle glow that invites relaxation. Consider incorporating a dimmer switch for your overhead lights, allowing you to adjust the brightness according to your mood or the time of day.

Finally, remember that the color temperature of your bulbs matters. Warmer tones (around 2700K to 3000K) create a cozy, inviting atmosphere, ideal for unwinding with a novel. In contrast, cooler tones can be jarring and less conducive to relaxation.

By thoughtfully selecting your lighting options, you’ll not only illuminate your reading nook but also infuse it with a warm ambiance that beckons you to unwind and escape into the pages of your favorite stories.

6. Textiles and Comfort: Pillows, Throws, and Rugs

When it comes to crafting the ultimate cozy reading nook, textiles play a pivotal role in creating an inviting atmosphere that beckons you to curl up with a good book. Start with the foundation: a soft, plush rug. Choose a material that feels luxurious underfoot, like a shaggy or wool rug, to add warmth and texture to your space. Not only does a well-chosen rug define the nook, but it also enhances the comfort level, making it the perfect spot to settle down for hours of reading.

Next, consider the pillows. Opt for a mix of sizes, shapes, and textures—large floor pillows for lounging, plush cushions for support, and perhaps a few decorative pillows to add visual interest. Textured fabrics such as velvet, knit, or linen can create a tactile experience that invites relaxation. Don’t hesitate to layer different patterns and colors, as this can bring personality and charm to your nook, making it a reflection of your unique style.

Lastly, drape a cozy throw blanket over the arm of your chair or keep it at the ready within reach. A soft, warm throw not only adds a sense of comfort but also serves as a perfect accessory for those chilly evenings. Choose one in a color or pattern that complements your overall theme, whether it’s a chunky knit for a rustic vibe or a sleek, cashmere blend for a modern touch.

Together, these textiles create a sensory haven within your reading nook—one that envelops you in comfort and makes every reading session feel like a luxurious escape. As you settle in, surrounded by softness and warmth, you’ll find it hard to resist the allure of getting lost in the pages of your favorite book.

7. Color Schemes: Picking the Perfect Palette for Serenity

How to create a cozy reading nook?
Credit : whatcanu.com

When it comes to designing a cozy reading nook, the color scheme you choose can significantly impact the overall ambiance and comfort of the space. A well-thought-out palette not only enhances the visual appeal but also fosters a serene environment conducive to relaxation and focus.

### Choosing Soothing Hues

Start by considering the mood you want to evoke in your reading nook. Soft, muted tones like gentle blues, warm creams, and earthy greens can create a calming atmosphere that invites you to unwind with your favorite book. These colors mimic the tranquility of nature, making them perfect for enveloping your nook in a sense of peace. For instance, a pale sage green can evoke the freshness of a serene garden, while a light sky blue can remind you of clear, sunny days.

### Accent with Warmth

While a soothing primary palette sets the stage for relaxation, don’t shy away from adding pops of warmth to make the space feel inviting. Rich terracotta, deep mustard, or soft coral can serve as accent colors through cushions, throws, or even artwork. These hues can create a delightful contrast that energizes the space without overwhelming it, making your nook both cozy and vibrant.

### Texture and Contrast

In addition to selecting colors, consider how different textures and finishes can enhance your palette. A plush, knitted throw in a warm hue juxtaposed with a sleek, wooden bookshelf can add depth and interest to your space. Layering different materials—like a soft rug, smooth cushions, and a wooden side table—will create a tactile experience that complements your color choices and invites you to sink into your reading bliss.

### Personal Touches

Lastly, think about incorporating colors that reflect your personality and taste. Perhaps a favorite book cover inspires a particular shade, or a cherished piece of art influences your color choices. By infusing your nook with personal touches, you’ll create a unique space that feels like an extension of yourself, making it even more inviting to escape into the pages of a novel.

In summary, the perfect color scheme for your reading nook should embody serenity, warmth, and personal significance. By thoughtfully selecting and combining colors and textures, you can create a tranquil haven that beckons you to curl up with a good book and lose track of time.

8. Shelving Ideas: Organizing Your Books and Decor

When it comes to crafting the ultimate cozy reading nook, shelving plays a pivotal role in both organization and aesthetics. Not only does it provide a practical solution for storing your cherished books, but it also allows you to display delightful decor that reflects your personality and style. Here are some creative shelving ideas to elevate your reading space:

**1. Floating Shelves:** For a modern and minimalist look, consider installing floating shelves. These sleek, wall-mounted platforms create an illusion of space while showcasing your books and decor items. Mix and match your favorite novels with decorative objects like small plants, framed photos, or quirky trinkets. The key is to balance the visual weight—group items in odd numbers and vary the heights for an effortlessly curated feel.

**2. Bookshelf Styling:** If you have a traditional bookshelf, don’t just line up your books neatly; think of it as a canvas. Organize your books by color for a vibrant rainbow effect, or group them by genre for a more structured look. Incorporate decor pieces, such as a cozy throw blanket draped over the side or a decorative bowl filled with bookmarks, to add warmth and character. Remember, your bookshelf should be as inviting as the books it holds!

**3. Corner Shelving Units:** If space is limited, corner shelving units can be a game-changer. These clever designs maximize awkward spaces while providing ample storage for both books and decorative items. Fill the shelves with a combination of your favorite reads and personal mementos, like travel souvenirs or art pieces, to create a narrative of your experiences.

**4. Baskets and Boxes:** For a cozy touch, consider using baskets or decorative boxes on your shelves. These can house not only books but also cozy blankets, spare reading glasses, or journals. Choose woven baskets for a rustic vibe or sleek boxes for a more contemporary look. This keeps your nook organized while adding texture and warmth to the overall design.

**5. Themed Displays:** Create themed displays that resonate with your interests. If you love nature, include books on gardening or wildlife alongside potted plants and nature-inspired decor. For a vintage feel, mix classic literature with antique finds, like an old globe or a vintage clock. These curated collections not only showcase your favorite reads but also serve as conversation starters for guests.

By thoughtfully organizing your books and decor, you’ll not only enhance the visual appeal of your reading nook but also create an inviting atmosphere that beckons you to escape into the pages of your next great read. So gather your favorite titles, unleash your creativity, and watch as your cozy sanctuary comes to life!

9. Personal Touches: Adding Art and Accessories

Personal touches are the heart and soul of any cozy reading nook, transforming a simple corner into a sanctuary that reflects your unique personality and style. As you curate your space, think about the art and accessories that resonate with you and evoke feelings of comfort and joy.

Start by selecting artwork that inspires you. Whether it’s a vibrant painting that brightens your mood, a serene landscape that invites tranquility, or a gallery wall of cherished photographs, these pieces can set the tone for your reading retreat. Hang your chosen art at eye level to create focal points that draw you in, allowing your nook to feel like an extension of your personality.

Next, consider adding decorative accessories that enhance the cozy atmosphere. A soft, textured throw blanket draped over your chair can invite you to curl up with a book on chilly evenings. Complement this with a few plush cushions in varying sizes and patterns to create an inviting seat. You might also want to include a small side table to hold your current reads, a steaming mug of tea, or a flickering candle, adding warmth and charm to the setting.

Don’t forget the power of plants! Incorporating greenery, whether it’s a small potted succulent or a trailing vine, can bring life to your nook and boost your mood. Choose plants that thrive in low light if your nook isn’t flooded with sunlight, ensuring they remain vibrant and healthy.

Finally, consider adding personal mementos that tell your story—perhaps a vintage clock that belonged to a grandparent, a beloved book with a handwritten dedication, or a quirky sculpture that sparks joy. Each accessory and piece of art you choose should resonate with you, creating a space not only for reading but for reflection, inspiration, and relaxation. By weaving these personal touches into your nook, you’ll create a cozy haven that invites you to escape into the pages of your favorite stories for years to come.

10. Incorporating Nature: Houseplants for a Fresh Atmosphere

Incorporating nature into your reading nook is an essential step in creating a fresh and inviting atmosphere. The presence of houseplants not only beautifies your space but also enhances your mood and well-being, making it the perfect sanctuary for diving into your favorite books.

Start by choosing a variety of plants that suit your environment and care preferences. For low-light nooks, consider hardy options like pothos or snake plants, which thrive in less-than-ideal conditions while adding a lush, green touch. If your nook basks in sunlight, succulents and cacti can bring an element of charm and uniqueness.

To truly integrate nature into your nook, think about the arrangement of your plants. A small bookshelf can double as a plant stand, allowing vines to cascade down while creating a visual focal point. Hanging planters can add height and dimension, drawing the eye upward and making your nook feel more expansive. You might even consider a small herb garden on a windowsill, filling the air with delightful scents that can enhance your reading experience.

Don’t forget about the pots! Choose decorative planters that reflect your personal style, whether it’s rustic terracotta, sleek ceramic, or vibrant colors. These details will add character to your nook and contribute to a cohesive design.

Finally, remember that caring for your plants can become a mindful practice that complements your reading habit. The act of watering, pruning, and simply observing their growth can be a calming ritual, allowing you to unwind and fully immerse yourself in the world of literature. By incorporating houseplants into your cozy reading nook, you’ll create a refreshing atmosphere that beckons you to relax and escape into the pages of your favorite stories.

11. Soundscapes: Music and Background Noise for Relaxation

When crafting the perfect cozy reading nook, one element that often gets overlooked is the auditory experience. Soundscapes can dramatically enhance your reading environment, creating an atmosphere that invites relaxation and focus. Whether you prefer the gentle rustle of leaves, the soothing sound of rain, or the soft strumming of acoustic guitar, integrating music and background noise can transform your nook from a simple reading spot into a serene retreat.

Start by curating a playlist that complements the mood you wish to create. Instrumental music, such as classical or ambient tracks, can provide a calming backdrop without distracting from your book. Consider platforms like Spotify or Apple Music, which offer pre-made playlists designed specifically for relaxation and concentration. If you’re a fan of nature sounds, there are countless options available that mimic the tranquility of a forest, ocean waves, or a crackling fireplace. These sounds can foster a peaceful ambiance, making it easier to lose yourself in the pages of your favorite novel.

For those who find silence unsettling, background noise can be a game changer. White noise machines or apps can drown out distracting sounds from outside, such as traffic or neighbors, allowing you to immerse yourself fully in your reading. Alternatively, you might try playing a low volume of café sounds—think soft chatter and the clinking of coffee cups—to recreate the comforting atmosphere of your favorite local coffee shop.

Experiment with these auditory elements until you find the perfect soundscape that resonates with your personal preferences. By thoughtfully incorporating music and background noise into your cozy reading nook, you’ll create an inviting space that beckons you to unwind, escape, and dive into new literary adventures.

12. Maintaining Your Nook: Tips for Keeping It Inviting

Creating a cozy reading nook is just the beginning; maintaining its inviting atmosphere is essential for ensuring it remains your favorite escape. Here are a few tips to keep your nook feeling fresh and welcoming:

**Regular Tidying**: Clutter can quickly detract from the serenity of your reading space. Make it a habit to tidy up your nook daily or weekly. This means putting away stray books, straightening cushions, and ensuring your blanket is neatly folded. A tidy nook not only looks appealing but also invites you to spend more time in it.

**Refresh the Décor**: Every season brings new colors and themes. Consider updating your nook’s décor with the change of seasons. In the fall, add warm-toned pillows and a soft throw; in the spring, introduce floral patterns and lighter fabrics. Small changes can breathe new life into the space and keep it feeling fresh.

**Maintain Comfort**: A cozy nook is all about comfort, so regularly check the condition of your seating and accessories. Fluff cushions, check for wear and tear on your throws, and ensure your chair or sofa maintains its supportive structure. If something feels off, don’t hesitate to replace or repair items to preserve that inviting atmosphere.

**Incorporate Fresh Elements**: Adding fresh elements, such as a small potted plant or a scented candle, can enhance your nook’s ambiance. Plants not only look great but also improve air quality. Choose scents that promote relaxation, like lavender or vanilla, to create a calming environment that beckons you to unwind with a good book.

**Curate Your Reading Material**: Keep your selection of books dynamic and engaging. Regularly rotate your reading materials to keep your interests piqued. You might designate a space for your current reads while setting aside others that you’ve loved but may not revisit for a while. This curated approach helps create a sense of anticipation whenever you enter your nook.

**Personal Touches**: Finally, don’t forget to inject your personality into the space. Whether it’s displaying cherished mementos, artwork that inspires you, or a vision board of future reading goals, these personal touches create a sense of ownership and warmth, making your nook truly feel like your own sanctuary.

By following these simple maintenance tips, you can ensure that your cozy reading nook remains a beloved retreat, inviting you to curl up with a book and escape into new worlds whenever you desire!

13. Creating a Reading Routine: Making Time for Your Nook

Creating a reading routine is essential for fully embracing the cozy haven you’ve crafted. Just like any cherished hobby, setting aside dedicated time for reading transforms your nook from a mere space into a sanctuary of stories and imagination. To cultivate this routine, start by carving out specific times in your day that are free from distractions—perhaps an early morning escape with a cup of coffee or a tranquil evening unwind with a lighted candle and a good book.

Consistency is key, so try to establish a schedule that aligns with your lifestyle. Whether it’s a weekend ritual or a nightly wind-down routine, marking these moments on your calendar can help prioritize your reading time. Create a cozy ambiance by dimming the lights, wrapping yourself in a soft blanket, and choosing soothing background music or complete silence, depending on your preference.

Consider setting a reading goal to motivate yourself—maybe it’s a chapter a day or a book a month. Tracking your progress in a journal can provide a sense of accomplishment and encourage you to dive deeper into your literary adventures. As you settle into this routine, allow yourself the freedom to explore different genres and authors, enriching your experience and keeping the joy of reading alive.

Remember, this is your personal retreat; it’s about enjoying the process, not just completing books. Embrace the little rituals that make your reading time special, whether it’s a favorite mug, a warm beverage, or a comfy pair of socks. By making time for your nook, you not only nurture your love for reading but also create a cherished habit that enhances your daily life. So go ahead—grab that book and let your cozy nook transport you to new worlds!

14. Inspiring Your Reading List: Books to Enjoy in Your Cozy Space

Creating a cozy reading nook is only half the journey; the other half lies in filling it with books that will transport you to new worlds and inspire your imagination. To truly enhance your reading experience, curate a reading list that not only complements the sanctuary you’ve created but also ignites your passion for literature. Here are some delightful suggestions across various genres that are perfect for curling up with in your new haven.

**Fiction to Get Lost In**
Dive into the enchanting realms of fiction with classics like *Pride and Prejudice* by Jane Austen or contemporary gems like *The Night Circus* by Erin Morgenstern. These stories are rich in detail and character, making them ideal companions for those long, lazy afternoons spent nestled in your nook.

**Non-Fiction for the Curious Mind**
For those who crave knowledge, consider titles like *Sapiens: A Brief History of Humankind* by Yuval Noah Harari or *Becoming* by Michelle Obama. Engaging and thought-provoking, these books are sure to enrich your understanding of the world while you sip your favorite tea in your cozy corner.

**Poetry for Reflection**
Sometimes, all you need is a few beautifully crafted lines to stir your soul. Collections like *The Sun and Her Flowers* by Rupi Kaur or *Milk and Honey* offer bite-sized pieces of inspiration that can elevate your mood and make your reading nook feel even more intimate.

**Mystery and Thrills**
If you’re in the mood for some suspense, indulge in a gripping mystery novel like *The Girl with the Dragon Tattoo* by Stieg Larsson or a psychological thriller such as *Gone Girl* by Gillian Flynn. These books will keep you on the edge of your seat, perfect for those moments when you want to curl up and hold your breath.

**Fantasy for Escapism**
Let your imagination soar with epic fantasy novels like *The Hobbit* by J.R.R. Tolkien or *A Darker Shade of Magic* by V.E. Schwab. These immersive tales are perfect for escaping reality and getting lost in a world of magic and adventure, all while snuggled up in your favorite reading spot.

**Young Adult for Nostalgia**
Don’t forget the charm of Young Adult literature! Classics like *The Perks of Being a Wallflower* by Stephen Chbosky or the whimsical *Eleanor & Park* by Rainbow Rowell can evoke feelings of nostalgia while capturing the complexities of youth and love.

As you curate your reading list, remember that the ultimate goal is to find books that resonate with you personally. Collect a mix of genres and styles, allowing your cozy nook to become a sanctuary not just for relaxation, but for exploration and growth. So, brew your favorite beverage, wrap up in a soft blanket, and let the pages take you on an unforgettable journey. Happy reading!

15. Conclusion: Embracing the Joy of Your New Reading Nook

As you step back to admire your newly created reading nook, take a moment to bask in the tranquility you’ve crafted. This cozy corner is more than just a space; it’s a sanctuary where you can escape the hustle and bustle of daily life, lose yourself in the pages of a captivating novel, or simply enjoy a cup of tea while gazing out the window. The soft lighting, plush seating, and carefully curated decor invite you to unwind and immerse yourself in your favorite stories.

Embracing the joy of your new reading nook means allowing yourself the freedom to explore new literary worlds and rediscover beloved classics. Whether it’s a thrilling mystery, a heartwarming romance, or a thought-provoking piece of non-fiction, the right book can transport you to another realm, all while nestled in the comfort of your own home.

Don’t forget to personalize this special place with items that bring you joy—perhaps a framed photo, a cherished memento, or a plant that adds a touch of life to the area. Each element contributes to a unique atmosphere that reflects your personality and invites you to spend hours lost in your reading adventures.

As you settle into your cozy nook, remember that this space is not just about reading; it’s about creating a ritual of relaxation that nourishes your mind and spirit. So curl up, let the outside world fade away, and embrace the joy of your new reading nook. It’s a little haven that encourages you to take a pause, indulge in your passions, and savor the simple pleasure of a good book. Happy reading!

As we wrap up our journey to creating the ultimate cozy reading nook, we hope you feel inspired and equipped to transform your space into a personal retreat that beckons you to unwind with a good book. Remember, the key elements to a successful reading nook are comfort, warmth, and a touch of personal style. Whether you choose a sunny corner by the window, a quiet alcove, or a dedicated room, each step in this guide can help you curate a sanctuary that reflects your taste while providing the perfect escape. So, gather your favorite books, throw on a soft blanket, and create a haven where you can lose yourself in stories and find solace in the pages. Happy reading!

What are the best ways to cook for different dietary restrictions?

Cooking for diverse dietary restrictions can often feel like navigating a culinary minefield, but it doesn’t have to be a challenge.

With a dash of creativity and a sprinkle of innovation, you can whip up delicious meals that cater to everyone’s needs, whether they are gluten-free, vegan, nut-free, or adhering to low-carb diets. In a world where food brings us together, it’s essential to embrace the art of creative cooking, transforming limitations into opportunities for flavor and nourishment. This blog post will explore an array of mouthwatering recipes, clever ingredient swaps, and practical tips that will not only satisfy various dietary requirements but also delight the taste buds of all your guests. Join us on this culinary adventure as we uncover inspiring solutions that prove that cooking for dietary restrictions can be both easy and enjoyable, ensuring that everyone at the table leaves with a smile and a satisfied palate.

1. Understanding Dietary Restrictions: An Overview

What are the best ways to cook for different dietary restrictions?
Credit : whatcanu.com

In today’s diverse culinary landscape, understanding dietary restrictions is more crucial than ever. With a growing awareness of health and wellness, many individuals are embracing specific diets for various reasons, including health conditions, ethical choices, and lifestyle preferences. From gluten intolerance and dairy allergies to vegetarianism and veganism, each dietary restriction has its unique set of guidelines and challenges.

Gluten intolerance, for instance, affects a significant portion of the population, leading many to adopt gluten-free diets. This means avoiding wheat, barley, and rye, which can be daunting when navigating traditional recipes. Similarly, those with lactose intolerance must steer clear of dairy products, prompting creative substitutions that can still yield delicious results.

Vegetarians and vegans take a stand for animal welfare and environmental sustainability by eliminating meat and animal products from their diets. However, this shift necessitates an inventive approach to cooking, as it often involves finding alternative protein sources and ensuring a well-rounded nutrient intake.

Moreover, food allergies, such as nut or shellfish allergies, pose immediate health risks, making it imperative for cooks to be vigilant about cross-contamination and ingredient sourcing. Understanding these dietary restrictions not only helps in creating inclusive meals but also opens the door to culinary creativity.

By embracing the challenges presented by various dietary needs, we can explore a world of flavors and textures that cater to everyone at the table. This overview serves as a foundation for our culinary journey, as we delve into creative cooking solutions that honor each individual’s dietary preferences while delivering mouthwatering dishes that everyone can enjoy.

2. Common Dietary Restrictions and Their Challenges

In today’s diverse culinary landscape, understanding common dietary restrictions is crucial for both home cooks and professional chefs alike. Whether motivated by health concerns, ethical beliefs, or personal preferences, these restrictions can present unique challenges in the kitchen. Here, we explore some of the most prevalent dietary limitations and the hurdles they can create, along with tips on how to navigate them.

**Gluten-Free Diets**
For those with celiac disease or gluten sensitivity, avoiding gluten—a protein found in wheat, barley, and rye—is essential. The challenge lies not only in finding gluten-free alternatives but also in avoiding cross-contamination with gluten-containing foods. This requires vigilance and creativity in sourcing ingredients, as well as a solid understanding of which products are safe to consume. Luckily, the market has expanded significantly, offering a plethora of gluten-free grains like quinoa, rice, and buckwheat, as well as an array of gluten-free flours for baking.

**Dairy-Free Diets**
Lactose intolerance and dairy allergies can make it difficult for individuals to enjoy traditional recipes that rely on milk, cheese, and butter. The challenge here is finding suitable substitutes that provide the same creamy texture and flavor without compromising the dish. Thankfully, options such as almond milk, coconut yogurt, and cashew cheese have become popular choices, allowing for delicious dairy-free adaptations of beloved recipes.

**Vegetarian and Vegan Diets**
Choosing to follow a vegetarian or vegan diet can be a rewarding lifestyle choice, but it often requires careful planning to ensure all nutritional needs are met. The challenge lies in replacing meat and animal products with plant-based alternatives, which can sometimes lead to a lack of essential nutrients such as protein, iron, and Vitamin B12. However, with an abundance of legumes, nuts, seeds, and fortified foods available, creative cooks can craft satisfying, nutrient-dense meals that appeal to everyone at the table.

**Paleo and Ketogenic Diets**
These diets emphasize whole foods and healthy fats while eliminating grains, legumes, and refined sugars. The challenge for cooks here is to reimagine classic dishes by using alternative ingredients that align with these guidelines. This often means swapping traditional staples for vegetables or healthy fats, which can be both a fun and engaging culinary challenge. Exploring new flavor profiles and cooking techniques can lead to the creation of innovative meals that satisfy cravings while adhering to dietary restrictions.

**Nut Allergies**
For those with nut allergies, the kitchen can feel like a minefield. Even trace amounts of nuts can trigger severe reactions, making it essential to read labels carefully and communicate openly about food preparation. The challenge is finding safe, nut-free ingredients that still provide flavor and texture in dishes. Fortunately, alternatives like seeds (such as sunflower or pumpkin seeds) and nut-free butters are widely available, allowing for the creation of delicious snacks and meals without the risk.

Navigating these common dietary restrictions might seem daunting at first, but with a little creativity and resourcefulness, cooks can turn challenges into opportunities. By embracing alternative ingredients and exploring new cooking techniques, anyone can create flavorful, satisfying meals that cater to diverse dietary needs, ensuring that everyone can enjoy the culinary experience together.

3. Stocking Your Pantry for Creative Cooking

What are the best ways to cook for different dietary restrictions?
Credit : whatcanu.com

When it comes to creative cooking, the key to unlocking a world of delicious possibilities lies within your pantry. A well-stocked pantry is your culinary playground, filled with a diverse array of ingredients that cater to various dietary restrictions and preferences. Whether you’re gluten-free, vegan, or following a low-carb lifestyle, having the right staples on hand can make all the difference.

Begin by stocking up on whole grains that serve as versatile bases for countless dishes. Quinoa, brown rice, and gluten-free pasta are excellent choices that provide a hearty foundation for salads, stir-fries, and casseroles. For those adhering to a plant-based diet, legumes such as lentils, chickpeas, and black beans are not only rich in protein but also add texture and flavor to soups, stews, and veggie burgers.

Next, don’t forget about the power of spices and herbs. A well-curated spice rack can transform even the simplest ingredients into culinary masterpieces. From cumin and smoked paprika for a hint of warmth to fresh basil and cilantro for a burst of freshness, spices can elevate your dishes while accommodating any dietary needs.

Healthy fats are another essential component of a creative pantry. Stock up on olive oil, avocado oil, and nut butters, which not only enhance flavors but also provide essential nutrients. These can be used in dressings, marinades, and as cooking oils, catering to those looking for heart-healthy options.

Finally, keep your pantry stocked with alternative flours, like almond flour or coconut flour, for baking and cooking. These options allow for delicious treats and savory dishes without traditional wheat, catering to gluten-free and low-carb diets.

With a well-stocked pantry, your creative cooking endeavors can flourish, allowing you to whip up delightful meals that not only satisfy your taste buds but also meet the dietary needs of you and your loved ones. Embrace the joy of experimentation and watch as your culinary skills blossom!

4. Substitutions: Finding Alternatives for Common Ingredients

When it comes to creative cooking, substitutions can be a game-changer for anyone navigating dietary restrictions. Whether you’re dealing with allergies, intolerances, or personal choices, discovering alternatives for common ingredients can open up a world of culinary possibilities.

Imagine you’re preparing a classic dish, but one of your guests is gluten-free, and another is dairy-free. Instead of feeling limited, you can embrace the challenge! For flour, consider using almond flour or coconut flour. These nutty alternatives not only provide a unique flavor profile but also bring added nutrition to your recipes. For dairy, plant-based milks such as almond, oat, or soy can substitute traditional cow’s milk, giving your dishes a creamy texture without the lactose.

Eggs can often be tricky, especially in baking, but fear not! Mashed bananas, unsweetened applesauce, or flaxseed meal mixed with water can serve as excellent egg replacements, binding your ingredients together while imparting subtle sweetness or a hint of nuttiness.

Moreover, if you’re looking to cut down on sugar, you can explore natural sweeteners like maple syrup, agave nectar, or stevia. These alternatives not only satisfy your sweet tooth but also cater to those looking for healthier options without sacrificing taste.

Exploring substitutions doesn’t just help accommodate dietary needs; it also invites you to experiment with new flavors and textures. Each alternative ingredient you try can transform a familiar recipe into something fresh and exciting. So the next time you find yourself restricted by dietary needs, remember that creativity in the kitchen thrives on adaptability. Embrace the substitutions, and you may just discover a new family favorite that everyone, regardless of their dietary restrictions, can enjoy!

5. Meal Planning for Dietary Restrictions

What are the best ways to cook for different dietary restrictions?
Credit : whatcanu.com

Meal planning for dietary restrictions can be both a challenge and an opportunity to explore new culinary horizons. Whether you’re accommodating gluten-free, dairy-free, vegan, or nut-free diets, a well-thought-out meal plan can ensure that everyone at the table enjoys delicious and satisfying meals.

Start by assessing the specific needs of those you’re cooking for. Understanding the restrictions is key—are we avoiding ingredients entirely, or merely reducing certain things? Once you have clarity, it’s time to get creative! Scour your favorite cookbooks, food blogs, and social media for inspiration. Engage with communities that cater to dietary restrictions; you’ll often find a treasure trove of recipes that you may not have considered.

Next, create a balanced menu that reflects a variety of textures and flavors. For instance, if you’re planning a week of gluten-free meals, think about incorporating grains like quinoa or rice, which provide that hearty satisfaction without the gluten. Experiment with alternative flours—almond, coconut, or chickpea flour can be used to create everything from pancakes to bread.

Don’t forget to include plenty of colorful fruits and vegetables! They not only add vibrancy to your meals but also ensure you’re getting a wide range of nutrients. For protein, explore plant-based options like lentils, beans, and tofu, or if permitted, lean meats and fish. Preparing bulk portions of versatile staples, like roasted vegetables or a big pot of soup, can help you mix and match throughout the week, saving you time and effort.

Lastly, always keep your pantry stocked with dietary-friendly staples. Having ingredients on hand—like gluten-free pasta, dairy-free milk, or nut-free spreads—will make meal prep seamless and enjoyable. By embracing the challenge of meal planning for dietary restrictions, you not only ensure that everyone feels included and satisfied but also open the door to new flavors and culinary adventures that can delight your taste buds. With a little creativity and planning, you can transform dietary limitations into an exciting journey of discovery in the kitchen.

6. Creative Cooking Techniques to Enhance Flavor

When it comes to creative cooking, the methods you choose can significantly elevate your dishes, especially when accommodating various dietary restrictions. Enhancing flavor is about more than just the ingredients; it’s about how you apply heat, combine textures, and introduce unexpected elements. Here are some innovative techniques to consider:

**1. Roasting and Caramelization:** Roasting vegetables is a surefire way to bring out their natural sweetness and complexity. The high heat of the oven caramelizes the sugars in the veggies, resulting in a rich, deep flavor profile. For those on gluten-free or vegan diets, this technique can turn simple ingredients like carrots, Brussels sprouts, or sweet potatoes into show-stopping side dishes.

**2. Infusion and Marination:** Using infusions and marinades can dramatically enhance the flavor of proteins and vegetables alike. For gluten-free or low-FODMAP diets, consider infusing olive oil with herbs or spices to drizzle over grilled chicken or roasted veggies. Marinating tofu or tempeh in a mixture of citrus juices, soy sauce, and spices can yield a flavor-packed addition to any dish.

**3. Smoking and Grilling:** Incorporating smokiness can add depth and intrigue to your meals. Whether you’re using a traditional smoker, a stovetop smoker, or simply grilling over charcoal, the result is an irresistible flavor that pairs beautifully with vegetarian options or lean meats. Consider smoked paprika or liquid smoke for a quick flavor boost in sauces or soups.

**4. Sous Vide Cooking:** This technique involves vacuum-sealing food and cooking it in a temperature-controlled water bath. It’s an excellent way to maintain moisture and flavor, ensuring that proteins are perfectly cooked without losing their essence. Ideal for those with specific dietary needs, sous vide allows for precise control over cooking, meaning you can cater to various preferences, like low-sodium or low-fat diets.

**5. Flavor Layering:** One of the most effective ways to enhance the overall taste of a dish is to layer flavors through different cooking methods. Start with aromatic bases like sautéed onions or garlic, add fresh herbs just before serving, and finish with a splash of acid—like lemon juice or vinegar. This technique can refresh and elevate meals while keeping them entirely within dietary guidelines.

By experimenting with these creative cooking techniques, you can transform everyday meals into extraordinary culinary experiences that delight the palate, no matter the dietary restrictions. Flavor enhancement is an art form, and with a bit of creativity, you can create dishes that not only satisfy but also inspire!

7. Breakfast Ideas for Every Dietary Need

What are the best ways to cook for different dietary restrictions?
Credit : whatcanu.com

Breakfast is often heralded as the most important meal of the day, but for those with dietary restrictions, it can also be one of the most challenging. Thankfully, with a little creativity and some kitchen ingenuity, there are breakfast ideas that cater to every dietary need while still being delicious and satisfying.

For the gluten-free crowd, consider whipping up a batch of fluffy quinoa pancakes. Made with cooked quinoa, almond milk, and a touch of maple syrup, these pancakes are not only gluten-free but also packed with protein and fiber. Serve them with fresh berries and a drizzle of honey for a delightful start to the day.

Vegans can rejoice with a nutrient-rich smoothie bowl, blending together spinach, banana, and almond milk, then topped with slices of kiwi, chia seeds, and a sprinkle of granola. This colorful dish is not only visually appealing but also provides a refreshing burst of energy to kick off the morning.

For those following a low-carb or keto diet, an avocado and egg breakfast bowl is a fantastic option. Simply slice ripe avocados and pair them with poached eggs, sprinkled with a dash of salt, pepper, and paprika for an extra kick. This hearty meal is not only filling but also rich in healthy fats.

Diabetics can enjoy overnight oats made with steel-cut oats, unsweetened almond milk, and a spoonful of nut butter. Add in some cinnamon and a handful of berries to sweeten the dish naturally while keeping blood sugar levels in check. Prepare these jars the night before for a hassle-free, nutritious breakfast.

For individuals with nut allergies, oatmeal made with water or coconut milk, topped with sliced bananas and a sprinkle of cinnamon, makes for a warm and comforting start to the day. This classic dish can be easily customized with seeds and dried fruits, ensuring that everyone can find a version they love.

No matter the dietary restriction, breakfast can be a delightful meal that sets a positive tone for the day. With these creative ideas, you can cater to every need in a way that is both inclusive and delicious, ensuring that no one has to sacrifice flavor for dietary requirements.

8. Lunch and Dinner Recipes for Diverse Diets

When it comes to accommodating diverse dietary restrictions, creativity in the kitchen can transform mealtime from a challenge into a delightful experience. Whether you’re cooking for someone with gluten intolerance, a vegan, or a person following a ketogenic lifestyle, there are countless ways to whip up satisfying and flavorful lunch and dinner options that everyone can enjoy.

For a gluten-free lunch, consider a vibrant quinoa salad bursting with seasonal vegetables, tossed in a zesty lemon-tahini dressing. This dish not only packs a nutritional punch, but the delightful textures and colors will make it a hit at any table. Pair it with grilled shrimp or chicken for added protein, and you’ve got a meal that satisfies both taste and dietary needs.

If you’re catering to a vegan audience, try creating a hearty chickpea curry, simmered with coconut milk and an array of spices. This dish is not only comforting but also incredibly versatile; serve it over brown rice or with warm naan for a fulfilling dinner option. Top it off with fresh cilantro and a squeeze of lime for an extra burst of flavor.

For those on a ketogenic diet, think outside the traditional pasta box and prepare zucchini noodles with a rich avocado pesto. Toss in cherry tomatoes and pine nuts for a satisfying crunch. This dish is not only low in carbs but also rich in healthy fats, making it a perfect dinner option that feels indulgent without the guilt.

By incorporating diverse ingredients and cooking techniques, you can create meals that cater to various dietary restrictions while ensuring everyone enjoys the dining experience. Remember, creativity is key—experiment with spices, textures, and colors to keep your lunch and dinner recipes exciting, delicious, and inclusive!

9. Snacks and Desserts That Everyone Can Enjoy

When it comes to catering to dietary restrictions, snacks and desserts often pose the greatest challenge. However, with a little creativity and the right ingredients, you can whip up treats that everyone can enjoy, regardless of their dietary needs. Gone are the days when gluten-free, vegan, or nut-free meant flavorless or bland. Today, innovative recipes abound that celebrate inclusivity and taste.

Imagine a vibrant platter of energy balls made from a blend of oats, dates, and seeds—each bite packed with nutrients and natural sweetness. These no-bake delights are perfect for anyone, offering a quick pick-me-up that’s as satisfying as it is wholesome. For those with a sweet tooth, consider whipping up a batch of aquafaba meringues—light, airy, and surprisingly easy to make using the liquid from canned chickpeas. Flavor them with vanilla or a hint of cocoa powder, and you’ll have a delightful treat that is both egg-free and utterly irresistible.

For a more indulgent option, try a rich chocolate avocado mousse. This luscious dessert is not only dairy-free but also offers a creamy texture without the use of heavy creams. The natural fats from the avocado combine with cocoa powder and a sweetener of your choice to create a decadent dish that will have everyone asking for seconds.

Additionally, explore the world of fruit-based snacks. A colorful fruit salad drizzled with a little lime juice and sprinkled with fresh mint can be a refreshing treat that appeals to all. Or, for those craving something crispy, baked apple chips sprinkled with cinnamon provide a delightful crunch that’s both healthy and satisfying.

By opting for inclusive snacks and desserts, you not only cater to various dietary restrictions but also create an inviting atmosphere where everyone can indulge freely. With these creative solutions, your culinary repertoire will shine, proving that deliciousness knows no boundaries!

10. Tips for Cooking for a Mixed-Diet Group

Cooking for a mixed-diet group can be a delightful challenge that sparks creativity in the kitchen. When faced with the task of pleasing a diverse array of dietary preferences and restrictions, it’s essential to strike a balance that allows everyone to enjoy a meal together. Here are some tips to help you navigate this culinary conundrum.

**1. Focus on Base Ingredients:** Start with versatile base ingredients that can cater to various diets. Think grains like quinoa or rice, which can serve as a foundation for both gluten-free and traditional dishes. Leafy greens, vegetables, and legumes are also fantastic options that can easily be adapted to fit different dietary needs.

**2. Offer Customization:** Create a build-your-own style meal that allows guests to personalize their plates. For instance, set up a taco bar with an array of fillings—seasoned beans, grilled chicken, sautéed vegetables, and toppings like guacamole, salsa, and dairy-free cheese. This approach ensures that everyone can choose what suits their palate and dietary restrictions.

**3. Highlight Plant-Based Options:** Incorporating more plant-based dishes into your menu is a surefire way to please a mixed-diet crowd. Dishes like hearty vegetable stir-fries, lentil salads, or chickpea curries are not only healthy but also packed with flavor. Many omnivores enjoy these options just as much as those who follow vegetarian or vegan diets.

**4. Be Mindful of Allergens:** When planning your menu, keep common allergens in mind—such as nuts, dairy, and gluten. Clearly label dishes and consider preparing a few allergen-free options, such as a nut-free dessert or gluten-free pasta, ensuring that everyone feels included without the worry of an adverse reaction.

**5. Communicate and Collaborate:** Before the gathering, reach out to your guests to inquire about their dietary restrictions and preferences. This not only shows that you care but also allows you to plan accordingly. Some guests might even enjoy contributing a dish, providing you with additional options and further enriching the meal.

**6. Embrace Global Cuisines:** Explore recipes from different culinary traditions that naturally cater to various diets. For instance, many Mediterranean dishes are inherently vegetarian and gluten-free, while Indian cuisine offers a plethora of vegan and dairy-free options. This exploratory approach not only diversifies your menu but also makes the mealtime experience exciting and educational.

By thoughtfully considering your guests’ dietary needs and preferences, you can create a harmonious dining experience that celebrates diversity and fosters connection. Cooking for a mixed-diet group may require a bit more effort, but the joy of sharing a delicious meal together will make it all worthwhile.

11. Exploring International Cuisines with Dietary Restrictions

One of the most exciting ways to navigate dietary restrictions is by exploring the rich and diverse tapestry of international cuisines. Around the world, culinary traditions have developed unique ways to accommodate various dietary needs, often long before the terms “gluten-free” or “vegan” became mainstream. By tapping into these global flavors, you can create delicious meals that not only satisfy your cravings but also align with your dietary restrictions.

For instance, consider the vibrant world of Indian cuisine. Many traditional Indian dishes are naturally vegetarian or vegan, making use of lentils, chickpeas, and a wide array of spices. Dishes like chana masala or vegetable biryani can be easily adapted to suit gluten-free diets simply by ensuring that the accompanying sides are free of wheat. Similarly, Thai cuisine offers a plethora of options for those avoiding dairy, with coconut milk as a creamy substitute in curries, soups, and desserts.

Exploring Middle Eastern dishes can also yield delightful results. Dishes such as falafel, tabbouleh, and baba ganoush are not only packed with flavor but are often gluten-free and vegan as well. These meals showcase the use of fresh herbs, spices, and legumes, providing a nutritious and satisfying option for any dietary preference.

Additionally, delving into Japanese cuisine can offer inspiration for those avoiding animal products. Many traditional dishes, like miso soup or vegetable sushi rolls, can be made entirely plant-based, allowing you to indulge in the delicate flavors of umami without compromising your dietary needs.

The beauty of international cuisines lies in their adaptability; with a little creativity, you can substitute ingredients to create dishes that are both authentic and suitable for your dietary restrictions. So, whether you’re in the mood for a spicy Mexican enchilada, a hearty Italian risotto, or a fragrant Moroccan tagine, there’s a world of culinary possibilities waiting to be explored. Embrace these international flavors and turn your home kitchen into a globe-trotting culinary adventure, proving that dietary restrictions need not limit your culinary creativity.

12. The Importance of Presentation in Creative Cooking

When it comes to creative cooking, the importance of presentation cannot be overstated. The adage “we eat with our eyes first” rings particularly true, especially in a world where food photography dominates social media feeds and culinary blogs. A beautifully plated dish can elevate even the simplest ingredients, transforming a mundane meal into a feast for the senses.

Imagine a vibrant quinoa salad, its nutty grains mingling with colorful cherry tomatoes, crisp cucumbers, and a sprinkle of fresh herbs. When artfully arranged on a contrasting plate, perhaps garnished with a drizzle of zesty dressing, this dish becomes not just a source of nutrition but a visual delight that entices and excites.

For those adhering to specific dietary restrictions, such as gluten-free, vegan, or low-carb diets, presentation takes on an additional significance. A well-composed plate can help dispel preconceived notions about what these diets entail. By showcasing fresh vegetables, unique textures, and bold colors, you can create an appealing meal that defies stereotypes and highlights the diversity of your culinary repertoire.

Incorporating elements like height, layering, and even the choice of serving dish can add depth to your presentation. Using rustic wooden boards for a charcuterie display or sleek, modern plates for a minimalist entrée can convey a distinct atmosphere that complements the flavors of your dish. Don’t forget the power of garnishes—an artistic sprinkle of microgreens, a dash of spice, or a few edible flowers can uplift your dish from ordinary to extraordinary.

Ultimately, the goal of presentation in creative cooking is to create an experience that delights the senses and invites your diners to engage with their food. Whether you’re cooking for family, friends, or a broader audience with dietary restrictions, taking the time to present your culinary creations beautifully can transform a simple meal into a memorable occasion. Remember, in the world of creative cooking, a stunning presentation not only satisfies hunger but also nurtures the soul, making every bite a celebration of flavor and artistry.

13. Meal Prep Strategies for Busy Lives

In today’s fast-paced world, finding time to prepare healthy meals can often feel like an uphill battle. However, with some effective meal prep strategies, you can ensure that delicious and nutritious food is always within reach, regardless of your dietary restrictions. Here are some practical tips to streamline your meal preparation process and make healthy eating a breeze.

**1. Plan Your Menus:** Start by dedicating a few minutes each week to plan your meals. Choose recipes that cater to your dietary restrictions while also considering your personal tastes. This will ensure you have a balanced diet and can take advantage of seasonal ingredients. Write down your menu and create a shopping list to avoid impulse purchases at the grocery store.

**2. Batch Cooking:** Set aside a few hours on the weekend to batch-cook meals for the week ahead. Prepare large quantities of staples like quinoa, brown rice, or roasted vegetables that can be mixed and matched throughout the week. Make big pots of soups, stews, or casseroles that can be easily reheated. Not only does this save time, but it also reduces food waste.

**3. Invest in Quality Containers:** Having the right storage containers can make all the difference in your meal prep routine. Look for BPA-free, microwave-safe containers that are easy to stack in your fridge or freezer. Clear containers are particularly helpful, allowing you to quickly identify what you have on hand.

**4. Pre-portion Snacks:** To avoid reaching for unhealthy options during the day, pre-portion your snacks into grab-and-go bags. Whether it’s cut-up veggies with hummus, mixed nuts, or fruit, having these on hand can curb cravings and keep you energized.

**5. Embrace Freezer-Friendly Meals:** The freezer is your best friend when it comes to meal prep. Cook once, eat twice (or more!) by freezing individual portions of meals. Label each container with the date and contents so you can easily rotate through your meals and avoid freezer burn.

**6. Stay Flexible:** Life can be unpredictable, so it’s essential to stay flexible with your meal prep. If plans change and you can’t eat a dish you’ve prepared, consider swapping it with another meal or changing up your ingredients based on what you have available. Flexibility will help you keep your meals exciting and prevent boredom.

By integrating these meal prep strategies into your busy life, you can take control of your diet, save time during the week, and enjoy flavorful dishes that cater to your dietary needs. With a little planning and creativity, you’ll be well on your way to enjoying delicious, home-cooked meals every day!

14. Resources for Finding Inspiration and Recipes

In the vast world of culinary creativity, finding inspiration and recipes that cater to various dietary restrictions can sometimes feel like a daunting task. However, there is a wealth of resources available that can turn this challenge into an exciting culinary adventure.

Start by exploring dedicated websites and blogs that focus on specific dietary needs. For instance, platforms like Minimalist Baker offer a treasure trove of simple, plant-based recipes that are often gluten-free and refined sugar-free. Meanwhile, sites like Gluten-Free Girl provide a plethora of delicious options for those avoiding gluten, complete with personal stories and tips that make cooking more relatable.

Don’t overlook social media as a powerful tool for inspiration. Instagram and Pinterest are brimming with creative cooks and chefs who share their recipes, cooking tips, and beautiful food photography. By following relevant hashtags such as #VeganRecipes, #PaleoDiet, or #KetoMeals, you can discover a continuous stream of innovative ideas that cater to your specific dietary needs.

Additionally, consider joining forums or Facebook groups that focus on dietary restrictions. These online communities are fantastic for sharing recipes, tips, and advice, as well as for finding encouragement from others who share similar dietary challenges. Engaging in these spaces can also spark new ideas and introduce you to ingredients or cooking techniques you may not have considered before.

Books are another excellent resource. Whether you prefer flipping through the pages of a beautifully illustrated cookbook or seeking out e-books, many authors now specialize in dietary restrictions, providing not only recipes but also valuable insights into the nutritional aspects of each dish.

Lastly, don’t forget the power of local resources. Farmers’ markets, health food stores, and specialty shops often hold classes or workshops that can inspire you and teach you how to use seasonal ingredients in innovative ways. By tapping into these resources, you’ll find that cooking for dietary restrictions can be not just manageable, but truly enjoyable and creative. With a little exploration and open-mindedness, you’ll be well on your way to whipping up dishes that delight the palate, nourish the body, and respect every dietary need.

15. Conclusion: Embracing Creativity in the Kitchen

In conclusion, embracing creativity in the kitchen is not just about whipping up a meal; it’s about transforming challenges into opportunities for deliciousness. Dietary restrictions, whether they stem from allergies, intolerances, or lifestyle choices, can initially feel like barriers to culinary enjoyment. However, with a sprinkle of imagination and a dash of resourcefulness, these limitations can lead to exciting new flavors and textures that may have otherwise gone unexplored.

As you venture into the realm of creative cooking, remember that each ingredient has its potential waiting to be unlocked. Substitutions, innovative cooking techniques, and an open mind can turn even the simplest dish into a culinary masterpiece. Don’t shy away from experimenting; the kitchen is your canvas. Try out new spices to elevate familiar recipes or explore cuisines that align with your dietary needs.

Moreover, sharing your culinary creations with friends and family not only spreads joy but also inspires others to think outside the box. By showcasing that food can be both inclusive and delightful, you can foster a community that celebrates diversity in dining.

So, whether you’re crafting a gluten-free dessert or a vegan main course, let your creativity flow. With every meal, you’re not only nourishing your body but also igniting your passion for cooking. Embrace the adventure, savor the process, and remember: every dietary restriction can lead to a delicious solution just waiting to be discovered in your kitchen!

In conclusion, navigating dietary restrictions doesn’t have to compromise your culinary creativity or the joy of sharing meals with loved ones. With the tips and recipes shared in this article, you now have a variety of delicious solutions at your fingertips, making it easier than ever to cater to diverse dietary needs without sacrificing flavor or enjoyment. Embrace the challenge of cooking creatively; experiment with new ingredients, explore different cuisines, and let your imagination flourish in the kitchen. We hope these ideas inspire you to create meals that not only accommodate dietary restrictions but also bring everyone together around the table. Happy cooking, and may your culinary adventures be both satisfying and inclusive!

What are the best ways to make homemade cheese?

There’s something truly magical about transforming simple ingredients into delicious homemade creations, and few culinary endeavors capture this essence quite like cheese-making.

Whether you’re a seasoned cook or a curious beginner, the journey from milk to masterpiece is both rewarding and surprisingly accessible. Imagine savoring the rich, creamy flavor of fresh mozzarella, the tangy bite of artisanal goat cheese, or the velvety texture of ricotta, all crafted by your own hands. In this blog post, we will explore the best ways to make homemade cheese, guiding you through the essential techniques, ingredients, and tips that will empower you to create your very own dairy delights. Get ready to embrace your inner cheese maker and elevate your culinary repertoire with these delightful recipes that promise to impress your family and friends!

1. Introduction to Homemade Cheese: Why You Should Try It

What are the best ways to make homemade cheese?
Credit : whatcanu.com

Making homemade cheese is more than just a culinary endeavor; it’s a rewarding journey that connects you to the art of food craftsmanship. Imagine transforming something as simple as milk into a luscious, creamy delight that tantalizes your taste buds and elevates your meals. Whether you’re a seasoned cook or a kitchen novice, crafting your own cheese opens up a world of flavors and textures that store-bought varieties simply can’t replicate.

One of the most compelling reasons to try your hand at cheese-making is the satisfaction of creating something uniquely yours. You’ll not only gain a deeper appreciation for the ingredients but also for the process itself. Each batch can be an experiment, a chance to play with flavors, and an opportunity to bring your culinary vision to life. Plus, homemade cheese can be tailored to suit your tastes—whether you prefer a sharp cheddar, a creamy ricotta, or a tangy goat cheese, the possibilities are limited only by your imagination.

Beyond the joy of creation, there’s also a practical aspect to consider. Making cheese at home can be a cost-effective alternative to purchasing artisanal cheeses, especially if you’re a cheese lover. You’ll find that the simple ingredients—milk, salt, and a few others—are often far less expensive than the gourmet varieties found in stores. Plus, you can control the quality of the ingredients, opting for organic or local options that align with your values.

Lastly, creating homemade cheese is a fantastic way to connect with family and friends. Picture a gathering where you proudly present a cheese board made from your own creations, complete with fresh fruits, nuts, and artisanal bread. The delight and intrigue on your guests’ faces as they taste your handiwork will make all the effort worthwhile.

So, if you’re ready to embark on a flavorful adventure, let’s dive into the world of homemade cheese. With a little guidance and a pinch of patience, you’ll soon be on your way to transforming humble milk into mouthwatering masterpieces.

2. Understanding the Basics

Before you embark on your cheese-making journey, it’s essential to grasp the foundational principles that underpin this age-old craft. Understanding the basics of cheese making involves recognizing the key ingredients, processes, and equipment required to transform simple milk into a delectable dairy delight.

At its core, cheese making revolves around just a few fundamental ingredients: milk, cultures, rennet, and salt. The type of milk you choose—be it cow, goat, or sheep—will significantly influence the flavor and texture of your final product. Whole milk is often recommended for beginners, as the higher fat content contributes to a creamier cheese.

Next, the role of cultures cannot be overstated. These are the bacteria that ferment the lactose in the milk, producing lactic acid, which is crucial for flavor development and the coagulation process. There are various types of cultures available, each lending its unique characteristics to the cheese. Whether you opt for mesophilic cultures for softer cheeses or thermophilic cultures for harder varieties, understanding their function will help you select the right ones for your desired outcome.

Rennet, an enzyme that helps coagulate the milk, is another essential component. It can be derived from animal, vegetable, or microbial sources, and using the appropriate type for your cheese will ensure proper curd formation. Finally, salt is not just a flavor enhancer; it also acts as a preservative, inhibiting unwanted bacterial growth and enhancing the cheese’s overall taste.

Equipping yourself with the right tools is equally important. A large pot for heating the milk, a thermometer to monitor temperature, a ladle for stirring, cheese molds for shaping, and fine cheesecloth for draining are the staples of a home cheesemaker’s toolkit. Investing in quality equipment will streamline your process and improve your results.

With a solid understanding of these basics, you’ll be well on your way to experimenting with different cheese varieties. Whether you’re dreaming of creamy ricotta, tangy goat cheese, or robust cheddar, mastering these foundational elements is the first step toward creating your own homemade cheese masterpiece. So gather your ingredients, equip yourself with knowledge, and get ready to turn the humble milk into something extraordinary!

3. Essential Tools and Equipment for Cheese Making

What are the best ways to make homemade cheese?
Credit : whatcanu.com

Embarking on the journey of homemade cheese-making can be both exciting and rewarding, but having the right tools and equipment is crucial for achieving that creamy, delectable end product. While cheese-making can be as simple or as intricate as you desire, here are the essential tools that every aspiring cheese artisan should consider having in their kitchen.

**1. Cheese Thermometer:** Precision is key when making cheese, and a good cheese thermometer will help you monitor milk temperatures accurately. Look for one that reads temperatures in both Fahrenheit and Celsius, with a range suitable for both heating milk and cooking curds.

**2. Large Stainless Steel Pot:** A heavy-bottomed stainless steel pot is ideal for heating milk evenly without scorching it. Choose a pot with a capacity that matches the quantity of cheese you intend to make, typically ranging from 2 to 8 quarts for home cheese-making.

**3. Long-Handled Spoon:** A sturdy, long-handled spoon is essential for stirring the milk as it heats and for gently mixing in ingredients like rennet and cultures. Opt for a spoon made from stainless steel or food-grade plastic to avoid any unwanted reactions with the ingredients.

**4. Cheese Mold and Press:** For hard cheeses, a cheese mold is necessary to shape and drain the curds. Molds come in various sizes and shapes, so consider the type of cheese you want to make. A cheese press is also a valuable tool to apply even pressure during the draining process, ensuring your cheese reaches the desired texture.

**5. Cheese Cloth:** A fine cheesecloth is vital for straining curds from whey and allows for easy drainage. Look for a durable, reusable option that can withstand repeated use and washing.

**6. pH Meter or Test Strips:** Monitoring acidity is important for some cheese varieties. A pH meter or test strips can help you track the curd’s acidity levels, ensuring optimal fermentation and flavor development.

**7. Preserving Jars or Cheese Storage Containers:** Once your cheese is made, proper storage is key to maintaining its quality. Invest in airtight containers or glass jars to keep your cheese fresh and ready for enjoyment.

Equipped with these essential tools, you’ll be well on your way to transforming humble milk into a delicious masterpiece. Each piece of equipment plays a crucial role in the cheese-making process, and understanding their functions will empower you to experiment and refine your techniques. So gather your tools, roll up your sleeves, and get ready to savor the delightful fruits of your labor!

4. Selecting the Right Milk for Your Cheese

Selecting the right milk for your cheese is arguably one of the most critical steps in the cheese-making process. The type of milk you choose not only influences the flavor and texture of the final product but can also dictate the overall success of your cheese-making journey.

When embarking on your homemade cheese adventure, consider the source of your milk. Cow, goat, and sheep milk each bring unique characteristics to the table. Cow milk, with its creamy texture and mild flavor, is an excellent choice for beginners, ideal for making soft cheeses like mozzarella or ricotta. Goat milk, on the other hand, offers a tangy zip and is perfect for creating deliciously distinct cheeses such as chèvre. If you’re feeling a bit more adventurous, sheep milk is rich and buttery, providing a luxurious base for cheeses like feta or pecorino.

Beyond the type of animal, the quality of milk is paramount. Fresh, high-quality, whole milk without additives or preservatives is essential for achieving the best results. If possible, seek out milk from local farms or markets that prioritize humane practices and do not use hormones or antibiotics. The fresher the milk, the more vibrant the flavors in your cheese will be.

Additionally, consider whether you want to use raw or pasteurized milk. While raw milk can yield cheeses with complex flavors, it also requires more advanced techniques and a thorough understanding of food safety. For beginners, pasteurized milk is often the safest and most accessible option, allowing you to focus on honing your cheese-making skills without additional concerns.

In summary, the milk you select is a foundational element that can elevate your cheese from good to extraordinary. Take the time to explore local options, and don’t hesitate to experiment with different types to discover the flavors and textures that resonate with your palate. Happy cheese-making!

5. The Science of Curdling: Acid vs. Rennet

What are the best ways to make homemade cheese?
Credit : whatcanu.com

In the world of cheese-making, understanding the science of curdling is crucial, as it forms the foundation of your cheese’s texture and flavor. At the heart of this process are two primary agents: acid and rennet. Each plays a distinct role in transforming liquid milk into the solid curds that will be the building blocks of your homemade cheese.

**Acid** is typically achieved through the addition of ingredients like lemon juice, vinegar, or cultured buttermilk. When you introduce acid to warm milk, the pH level drops, causing the proteins—primarily casein—to coagulate and form curds. This method is often used in fresh cheeses like ricotta and paneer, where a light, delicate texture is desired. Here, curdling occurs quickly, and the resulting cheese is usually mild and slightly tangy, perfect for salads or cooking.

On the other hand, **rennet** is a complex of enzymes traditionally sourced from the stomachs of ruminant animals, although vegetarian options are now available. When rennet is added to warm milk, it acts on the casein proteins, promoting a more gradual and thorough curdling process. This results in firmer curds with a richer flavor profile, making it ideal for cheeses like cheddar, mozzarella, or gouda. The use of rennet allows for a greater control over the texture and aging potential of the cheese, transforming it into a masterpiece that can develop complex flavors over time.

Understanding when to use acid versus rennet can elevate your cheese-making game. Experimenting with both methods will give you a deeper appreciation for the craft and help you create a variety of cheeses, each with its own unique character and taste. Whether you’re drawn to the quick satisfaction of an acid-set cheese or the intricate artistry of rennet-based varieties, mastering the science of curdling is your gateway to transforming simple milk into delicious homemade cheese.

6. Step-by-Step Guide to Making Fresh Cheese (e.g., Ricotta or Paneer)

Making fresh cheese at home is a rewarding and straightforward process that can elevate your culinary creations from ordinary to extraordinary. Whether you choose to make ricotta, paneer, or another variety, the basic steps remain largely the same. Here’s a step-by-step guide to help you craft your own delightful cheese.

### Ingredients You’ll Need:
– **Milk**: Use whole milk for the creamiest results. You can opt for cow’s, goat’s, or sheep’s milk based on your preference.
– **Acid**: Lemon juice or white vinegar works well to curdle the milk.
– **Salt**: For flavor, to taste.

### Step 1: Prepare Your Equipment
Before you begin, gather your utensils. You’ll need a large pot, a thermometer, a slotted spoon, cheesecloth or a clean dish towel, and a colander. Ensuring everything is clean will help prevent any unwanted bacteria from spoiling your cheese.

### Step 2: Heat the Milk
Pour your milk into the large pot and slowly heat it over medium heat. Stir gently to prevent scorching. Use your thermometer to monitor the temperature; you want to heat the milk to around 190°F (88°C). At this temperature, the milk will begin to froth and bubble, indicating that it’s ready for the next step.

### Step 3: Add the Acid
Once the milk reaches the desired temperature, remove it from heat and add your acid (lemon juice or vinegar). Stir gently for a few seconds, then allow the mixture to sit undisturbed for about 5-10 minutes. You’ll see curds forming as the milk separates from the whey.

### Step 4: Strain the Curds
Line your colander with cheesecloth or a clean dish towel and place it over a large bowl to catch the whey. Carefully ladle the curds into the colander, letting the whey drain away. If you prefer a drier cheese, let it drain for a bit longer.

### Step 5: Rinse and Season
Once the curds are well-drained, rinse them under cold water to remove the acidity from the vinegar or lemon juice. This step not only cools the curds but also helps to create a milder flavor. After rinsing, transfer the curds to a mixing bowl, sprinkle in salt to taste, and gently combine.

### Step 6: Shape and Store
At this stage, you can either leave the cheese loose for a rustic texture or shape it into balls or a block. If you’re making paneer, press the curds into a mold or wrap them in cheesecloth and place a weight on top to help them firm up. Once shaped, wrap your cheese tightly in plastic wrap or store it in an airtight container in the refrigerator.

### Enjoying Your Homemade Cheese
Whether you use it in a savory dish, as a topping for salads, or simply enjoy it fresh with a drizzle of olive oil and herbs, your homemade cheese will surely impress. The satisfaction of creating something so delightful from just a few simple ingredients is unparalleled. Plus, once you master the basic techniques, you can experiment with flavors and textures, making every batch uniquely yours. Happy cheesemaking!

7. Techniques for Aging Cheese: How to Create Unique Flavors

What are the best ways to make homemade cheese?
Credit : whatcanu.com

Aging cheese is both an art and a science, transforming humble curds into complex, flavor-packed masterpieces. The process of aging, or affinage, allows the cheese to develop its character, aroma, and taste, creating a unique profile that can range from nutty and buttery to sharp and tangy. Here are some techniques to harness the power of aging and elevate your homemade cheese experience.

1. **Temperature and Humidity Control**: The first step in successful aging is finding the right environment. Cheese thrives in cool, humid conditions. Ideally, aim for a temperature between 50°F and 55°F (10°C to 13°C) and a humidity level of around 85%. A dedicated cheese cave is perfect, but if that’s not available, a wine refrigerator or a simple cooler with a humidity source (like a damp sponge) can work wonders.

2. **Choosing the Right Rind**: The rind of the cheese is more than just a protective barrier; it plays a crucial role in flavor development. Soft cheeses, such as Brie, benefit from a bloomy rind that allows mold to flourish, imparting earthy tones. Hard cheeses, like Parmigiano-Reggiano, develop a firm, dry rind that protects the cheese while allowing for the enzymatic reactions that deepen flavors. Experimenting with different rind types can yield delightful variations in taste.

3. **Turning and Brushing**: Regularly turning your cheese wheels promotes even aging and prevents undesirable mold growth. For cheeses with a natural rind, gentle brushing with a cloth can help maintain surface cleanliness and encourage beneficial bacteria while removing any unwanted mold. Be consistent—turn your cheeses every few days to ensure they age evenly.

4. **Salting Techniques**: Salt is not just a flavor enhancer; it also acts as a natural preservative. The salting technique you choose will significantly impact the final flavor. Dry salting involves rubbing salt directly onto the cheese surface, while brining submerges the cheese in a saltwater solution. Experiment with different salt concentrations and methods to discover the perfect balance for your cheese type.

5. **Experimenting with Flavors**: Aging is the perfect time to infuse your cheeses with unique flavors. Consider adding herbs, spices, or even infused oils during the aging process. For example, a sprinkle of cracked black pepper can add a delightful kick, while fresh herbs like rosemary can impart a fragrant, earthy quality. As you age your cheese, don’t shy away from getting creative—this is where your culinary instincts can shine.

6. **Patience is Key**: While it may be tempting to sample your creations early, remember that great cheese takes time. The aging process can range from a few weeks to several months, depending on the type of cheese. Take notes throughout the journey, and don’t hesitate to make adjustments based on your observations. Each batch is an opportunity to learn and refine your techniques.

By embracing these aging techniques, you’ll unlock a world of flavors and textures, transforming your homemade cheese into a gourmet experience that friends and family will rave about. With a little patience and a dash of creativity, you’ll be well on your way to crafting cheese that not only delights your palate but also tells the unique story of your cheese-making journey.

8. Exploring Different Types of Cheese: A Brief Overview

When it comes to homemade cheese, the world is your oyster—or, in this case, your milk! Cheese-making is a delightful journey that opens up a realm of flavors and textures, each type offering its own unique character and culinary uses. Understanding the different types of cheese can inspire your cheese-making adventures and help you choose which ones to tackle first.

**Fresh Cheese:** This category includes soft cheeses like ricotta, mozzarella, and cream cheese. Fresh cheeses are typically made without aging, resulting in a mild flavor and creamy texture. They are incredibly versatile, perfect for spreading on toast, dolloping on pasta, or incorporating into salads. The process is often straightforward, making fresh cheese an excellent starting point for novice cheesemakers.

**Soft Cheese:** A step up from fresh cheese, soft cheeses like Brie and Camembert undergo a little aging but are still creamy and spreadable. These cheeses develop a lovely white rind, thanks to specific molds introduced during the aging process. Making soft cheese requires patience, as they need time to mature, but the reward is a rich and luscious treat that pairs beautifully with crusty bread and fruit.

**Semi-Hard Cheese:** Cheddar, Gouda, and Swiss fall into this category. These cheeses possess firmer textures and are aged longer than their soft counterparts, resulting in more complex flavors. The cheese-making process is slightly more involved, requiring careful monitoring of temperature and pH levels, but the outcome is well worth the effort. Aged semi-hard cheeses can be used in a variety of dishes, from melty grilled cheese sandwiches to savory cheese boards.

**Hard Cheese:** Parmesan and Pecorino are quintessential examples of hard cheeses. With their robust flavors and granular textures, hard cheeses are perfect for grating over pasta or salads. The aging process for these cheeses can take several months or even years, allowing them to develop deep, rich flavors. While making hard cheese is more intricate, the satisfaction of crafting a cheese that enhances your culinary creations is unparalleled.

**Blue Cheese:** For the adventurous cheesemaker, blue cheese offers a unique challenge. Characterized by its distinct blue veins of mold, varieties like Roquefort and Gorgonzola boast bold flavors that can be both tangy and creamy. The process involves inoculating the cheese with specific molds and allowing it to develop in a controlled environment. While blue cheese may require a bit more expertise, the resulting cheese is a true masterpiece.

Exploring these different types of cheese not only enhances your skill set but also broadens your culinary horizons. Each cheese has its own story and potential, waiting for you to uncover in your kitchen. Whether you’re creating a simple ricotta or embarking on the intricate journey of making a blue cheese, the experience is sure to enrich your appreciation for this amazing dairy delight. So grab your milk and let your cheese-making adventure begin!

9. Flavoring Your Cheese: Herbs, Spices, and Other Additions

Flavoring your cheese is where the magic truly happens, transforming a simple block of white curds into a delectable work of art that tantalizes the taste buds. The possibilities are virtually endless, and experimenting with different herbs, spices, and other additions can elevate your homemade cheese to restaurant-quality indulgence.

Start with the classics. Fresh herbs like basil, chives, or dill can be chopped and folded into your curds, imparting a vibrant freshness that adds a delightful twist to your cheese. Alternatively, dried herbs such as oregano or thyme can provide a more concentrated flavor that develops beautifully as the cheese ages. For an aromatic boost, consider seasoning your cheese with crushed garlic or a sprinkle of onion powder, creating a savory depth that pairs wonderfully with crusty bread or crackers.

Spices also play a crucial role in flavoring your cheese. A pinch of smoked paprika can lend a subtle smokiness, while crushed red pepper flakes add just the right amount of heat for those with a bold palate. For a distinctly Mediterranean flair, try adding za’atar, a fragrant blend of thyme, sesame seeds, and sumac that will transport your taste buds to sun-soaked shores.

Don’t overlook the potential of sweet additions, either! A touch of honey or a swirl of maple syrup can create an intriguing contrast in a creamy cheese, while fruits like figs, cranberries, or even sun-dried tomatoes can introduce a sweet-tart balance. Experimenting with nuts, such as finely chopped walnuts or pistachios, can add a satisfying crunch and nuttiness to your cheese, making it even more enticing.

As you play with flavors, keep in mind that less is often more. Start with small amounts of your chosen ingredients and taste as you go, allowing the natural cheese flavors to come through while enhancing them with your flavorful additions. Whether you prefer a herby spreadable cheese, a zesty pepper-infused cheese, or a sweet and nutty creation, the key is to have fun and let your creativity shine. With each batch, you’ll not only refine your cheese-making skills but also develop a unique flavor profile that reflects your personal tastes, ensuring that your homemade cheese is always a masterpiece.

10. Common Mistakes to Avoid

Making cheese at home can be a rewarding and delicious endeavor, but it’s not without its challenges. Even seasoned home cheesemakers can find themselves tripped up by a few common missteps. Here are some pitfalls to watch out for to ensure your cheese-making experience yields the best results.

**1. Skipping the Sanitization Process:**
One of the most crucial steps in cheese-making is ensuring that all your equipment is impeccably clean. Bacteria and unwanted microorganisms can easily spoil your milk and ruin your cheese. Always sanitize your utensils, molds, and surfaces before you start, and avoid touching anything that isn’t clean during the process.

**2. Using the Wrong Milk:**
Not all milk is created equal when it comes to cheese-making. While whole milk is often ideal, be wary of ultra-pasteurized milk, which can prevent your rennet from coagulating the milk properly. Opt for fresh, raw, or pasteurized milk from a reliable source for best results.

**3. Ignoring Temperature Control:**
Temperature plays a critical role in cheese-making. Too high or too low temperatures can affect the curd formation and texture of your cheese. Invest in a reliable thermometer and keep a close eye on the temperature at every stage, especially during heating and culturing.

**4. Rushing the Curd Cutting Process:**
Cutting the curds too soon or too late can drastically alter your cheese’s texture. Allowing the curds to set for the appropriate time is essential for achieving the right consistency. Follow your recipe closely and be patient; good things come to those who wait!

**5. Over- or Under-salting:**
Salt is not just for flavor; it also helps with preservation and affects the cheese’s texture and moisture. Too much salt can overpower the flavor, while too little can lead to spoilage. Be precise with your measurements and taste as you go.

**6. Neglecting to Age Properly:**
Aging is where the magic happens for many cheeses, contributing to their flavor and texture. Avoid the mistake of rushing this process. Ensure you have a suitable aging environment—cool, dark, and humid—and be patient as your cheese develops its character.

By steering clear of these common mistakes, you’ll be well on your way to crafting delicious homemade cheese that you can be proud of. Embrace the learning curve, and remember that even the occasional mishap can lead to valuable lessons and, perhaps, unexpectedly delightful flavors!

11. Storing and Preserving Your Homemade Cheese

Storing and preserving your homemade cheese is just as crucial as the crafting process itself. Once you’ve put in the time and effort to create your cheesy masterpiece, ensuring it stays fresh and flavorful is essential to enjoying it for weeks or even months to come. The right storage techniques can significantly extend the shelf life of your cheese while maintaining its delightful taste and texture.

First and foremost, consider the type of cheese you’ve made. Soft cheeses, like ricotta and cream cheese, have a higher moisture content and should be stored in an airtight container in the refrigerator. This will help prevent them from drying out and picking up unwanted odors from the fridge. Make sure to consume these cheeses within a week or two for optimal freshness.

On the other hand, harder cheeses, such as cheddar or gouda, can be wrapped in parchment paper or cheese paper, which allows them to breathe while preventing them from drying out. After wrapping, place the cheese in a breathable container or a cheese dome to further protect it from moisture loss. Hard cheeses can often last for several weeks in the fridge, but be sure to check for signs of mold or spoilage regularly.

For longer-term storage, you might consider freezing your cheese. However, not all cheeses freeze well. Hard cheeses generally hold up better when frozen, while soft cheeses may become crumbly after thawing. To freeze cheese, cut it into manageable portions and wrap it tightly in plastic wrap, followed by aluminum foil to prevent freezer burn. You can also vacuum seal your cheese for the best preservation results. Just remember to label your packages with the date and type of cheese to keep track of your stash.

Lastly, don’t overlook the importance of proper aging for certain types of cheese. If you’re crafting a cheese that benefits from aging, like a blue cheese or aged cheddar, be sure to monitor the temperature and humidity levels in your aging environment. A dedicated cheese cave or a controlled space in your refrigerator can create the ideal conditions for your cheese to develop its full flavor potential.

By mastering the art of storing and preserving your homemade cheese, you can ensure that your delicious creations remain enjoyable for as long as possible, ready to be savored on your favorite charcuterie board or melted into your next culinary masterpiece.

12. Pairing Homemade Cheese with Food and Wine

Pairing homemade cheese with food and wine can elevate your culinary experience from delightful to extraordinary. The beauty of crafting your own cheese is that it allows you to explore a world of flavors, textures, and aromas that store-bought varieties simply can’t match. Once you’ve mastered the art of cheese-making, the next step is to discover how to complement your creations with the right accompaniments.

Start with the basics: fresh cheeses like ricotta or mozzarella. These mild varieties shine when paired with fresh fruits and herbs. Imagine a creamy dollop of homemade ricotta atop a warm slice of rustic bread, drizzled with honey and sprinkled with sea salt. Add a handful of fresh figs or berries, and you’ve got a dish that sings with seasonal vibrancy. For mozzarella, a classic caprese salad—layered with ripe tomatoes, fragrant basil, and a splash of balsamic glaze—showcases the cheese’s delicate flavor beautifully.

As you venture into aged cheeses like cheddar or gouda, consider pairing them with hearty accompaniments. A sharp cheddar pairs wonderfully with crisp apples or pears, while aged gouda, with its nutty undertones, complements rich meats like prosciutto or salami. A charcuterie board featuring your homemade cheeses, artisan meats, and a variety of pickles and olives can become a stunning centerpiece at any gathering.

When it comes to wine, the right pairing can truly enhance the tasting experience. Fresh cheeses generally pair well with light, crisp whites such as Sauvignon Blanc or Pinot Grigio, which balance the creaminess without overpowering it. For aged cheeses, consider a bold red like Cabernet Sauvignon or a rich Chardonnay that can stand up to the deeper flavors. Don’t forget to experiment with sparkling wines, as their effervescence can cut through the richness of cheese, providing a refreshing contrast.

Ultimately, the art of pairing is about personal preference. Invite friends and family to join in the exploration, creating a festive atmosphere where everyone can share their thoughts on the delightful combinations. With your homemade cheese as the star of the show, the possibilities for delicious pairings are endless, making every meal a memorable celebration of flavor.

13. Creative Ways to Use Your Cheese in Recipes

Once you’ve mastered the art of cheese-making, the culinary adventure doesn’t end there! Homemade cheese presents a world of possibilities, allowing you to elevate your everyday meals and impress your friends and family. Here are some creative ways to incorporate your artisanal creations into delicious recipes that celebrate your handiwork.

**1. Creamy Cheese Spreads:** Blend your soft cheeses, such as ricotta or cream cheese, with herbs, spices, and perhaps a touch of honey for a delightful spread. Serve it on crusty bread or crackers as a part of an appetizer platter. You can experiment with flavors—think sun-dried tomatoes and basil or garlic and chive—to suit your palate.

**2. Gourmet Mac and Cheese:** Take your homemade cheese to the next level in a classic comfort dish. Mix a medley of your cheeses—sharp cheddar, creamy mozzarella, or a tangy goat cheese—with cooked pasta and a splash of cream. Top it with breadcrumbs and bake until golden for an indulgent treat that will have everyone asking for seconds.

**3. Cheese-Stuffed Vegetables:** Hollow out bell peppers, zucchini, or tomatoes and fill them with a savory mixture of your cheeses, grains, and spices. Bake until the vegetables are tender and the cheese is bubbling for a colorful and nutritious main course or side dish.

**4. Homemade Pizza:** Nothing beats the taste of freshly made pizza topped with your own cheese. Use mozzarella or a blend of cheeses, along with your favorite toppings. Bake in a hot oven for a crispy crust and gooey, melty cheese that will make pizza night a feast to remember.

**5. Salads with Flair:** Crumble your homemade feta or goat cheese over fresh salads to add a creamy texture and flavor contrast. Pair it with seasonal vegetables, nuts, and a light vinaigrette for a refreshing and satisfying dish.

**6. Cheese Desserts:** Yes, cheese can be part of your dessert repertoire too! Use mascarpone or ricotta to create light and airy desserts like cheesecakes, tiramisu, or layered parfaits. The natural sweetness of the cheese pairs beautifully with fruits and honey, perfect for a sweet ending to any meal.

By thinking outside the box and exploring these creative culinary uses for your homemade cheese, you can turn your kitchen into a gourmet paradise. Each dish not only showcases your cheese-making skills but also invites others to savor the delicious flavors and textures that only homemade cheese can provide. Enjoy the delightful journey from milk to masterpiece, one delicious recipe at a time!

14. Troubleshooting Common Cheese-Making Problems

Making cheese at home can be a rewarding and creative endeavor, but it’s not without its challenges. Even the most experienced cheesemakers encounter hiccups along the way. Understanding how to troubleshoot common cheese-making problems can save your batch and enhance your skills.

One frequent issue is curd separation, where the curds and whey don’t fully separate as expected. This can often be traced back to temperature inconsistencies. Ensure you’re maintaining the right temperature throughout the process; investing in a reliable thermometer can make a world of difference. If you find yourself with curds that are too dry, try a gentler heating method or reduce the acidification time in your recipe.

Another common problem is unwanted flavors or odors in the finished cheese, which may arise from improper sanitation or contamination. Always ensure your equipment is meticulously cleaned and sanitized before starting, as even the smallest residue can affect the taste of your cheese. If you notice bitterness, it could be due to overcooking your curds or using poor-quality milk, so be mindful of your ingredients and cooking times.

Texture issues can also arise, with cheese turning out grainy or crumbly instead of smooth and creamy. This could be the result of too much acid or not enough fat in your milk. When experimenting with different types of milk, remember that higher fat content typically leads to creamier cheeses. Lastly, if your cheese isn’t aging properly or developing the desired flavor profile, consider adjusting your aging conditions—humidity and temperature play crucial roles in the maturation process.

By keeping an eye on these potential pitfalls and being ready to adapt, you’ll not only salvage your current batch but also gain invaluable insights for your next cheese-making adventure. Remember, each mistake is a stepping stone toward mastery, turning your initial frustrations into flavorful triumphs!

15. Conclusion: The Joy of Making Cheese at Home

In conclusion, the journey of making cheese at home is not just a culinary venture; it’s a delightful experience that transforms the humble ingredients of milk and culture into a delicious masterpiece. The process may seem daunting at first, but with each step, you’ll discover the joy that comes from creating something uniquely your own. From the pristine moment of curdling milk to the satisfaction of crafting your favorite varieties—be it creamy ricotta, tangy feta, or robust aged cheddar—the rewards are truly unparalleled.

Homemade cheese offers an intimate connection to your food, allowing you to experiment with flavors and textures that store-bought varieties simply can’t match. Each batch you make becomes a testament to your growing skills and creativity in the kitchen. Imagine sharing a platter of your homemade cheese with friends and family, savoring the pride that comes from serving something crafted by your own hands.

As you embark on this cheesy adventure, remember that the journey is just as important as the destination. Whether you’re perfecting the art of mozzarella or venturing into the world of blue cheese, embrace the learning process, celebrate your successes, and don’t shy away from the occasional mishap—each mistake is a stepping stone toward mastering this timeless craft.

So, gather your ingredients, roll up your sleeves, and dive into the world of cheese-making. The joy of creating delectable cheese at home is waiting for you, and with each bite, you’ll savor not just the flavor, but the fulfillment that comes from bringing a little piece of culinary magic into your kitchen. Happy cheese making!

As we wrap up our exploration of transforming humble milk into delicious homemade cheese, we hope you feel inspired to embark on this rewarding culinary journey. Whether you’re aiming to perfect a creamy mozzarella, a tangy ricotta, or a robust aged cheddar, the techniques and tips shared in this post will guide you every step of the way. Homemade cheese not only elevates your meals but also brings a sense of accomplishment and creativity to your kitchen. So gather your ingredients, roll up your sleeves, and let your taste buds lead the way. We can’t wait to hear about your cheesy creations—share your masterpieces with us and let the world savor the fruits of your labor! Happy cheesemaking!

What are the best ways to make homemade ice cream?

As the sun blazes and temperatures rise, nothing quite compares to the joy of indulging in a bowl of creamy, homemade ice cream.

There’s a certain magic in the process—transforming simple ingredients like fresh cream, sugar, and your favorite flavors into a delightful frozen treat that cools you down and brings a smile to your face. Whether you’re craving classic vanilla, adventurous salted caramel, or fruity sorbet, making ice cream at home allows you to customize every scoop to your liking. In this ultimate guide, we’ll take you through the essentials of homemade ice cream-making, from choosing the right tools and ingredients to mastering churn techniques and creative flavor combinations. Get ready to chill out and learn how you can turn your kitchen into an ice cream parlor, perfect for hot summer days or any occasion that calls for a sweet, creamy escape!

1. Introduction to Homemade Ice Cream

What are the best ways to make homemade ice cream?
Credit : whatcanu.com

There’s something undeniably magical about ice cream. The creamy texture, the delightful flavors, and the sheer joy of indulging in a scoop (or two) on a hot summer day can bring a smile to anyone’s face. But have you ever considered taking that joy to the next level by making your own homemade ice cream? This guide will take you on a delicious journey into the world of crafting your very own frozen treats, right from the comfort of your kitchen.

Homemade ice cream isn’t just a nostalgic nod to childhood summers; it’s an opportunity to unleash your creativity and tailor flavors to suit your taste buds. Imagine swirling together your favorite ingredients—be it rich chocolate, fresh fruits, or even unexpected spices. The best part? You have complete control over the quality and freshness of every component that goes into your ice cream. No preservatives, no artificial flavors, just pure, decadent goodness.

In this ultimate guide, we’ll explore the basics of ice cream making, from selecting the right equipment to understanding the science behind the freezing process. Whether you’re a seasoned home chef or a curious beginner, you’ll find tips and techniques to create ice cream that rivals even the most beloved parlors. So grab an ice cream maker (or a trusty blender), gather your ingredients, and get ready to chill out with the ultimate homemade ice cream experience!

2. The Benefits of Making Ice Cream at Home

Making ice cream at home is not just a delightful culinary endeavor; it also comes with a plethora of benefits that can elevate your experience beyond what you’d find in a store-bought pint.

First and foremost, there’s the sheer joy of customization. When you make your own ice cream, you have complete control over the ingredients. This means you can craft flavors that cater to your specific tastes, whether that’s a classic vanilla bean, a rich chocolate fudge, or an adventurous lavender honey. You can experiment with mix-ins like fresh fruits, nuts, or even swirls of caramel and fudge, allowing you to create truly unique concoctions that tantalize your taste buds.

Health-conscious individuals will appreciate the ability to choose wholesome ingredients. Homemade ice cream can be made with organic dairy, natural sweeteners, and fresh, seasonal produce, allowing you to indulge guilt-free. You can even explore dairy-free alternatives using coconut milk, almond milk, or cashew cream, making it an inclusive treat for those with dietary restrictions.

Additionally, making ice cream at home fosters creativity and brings a sense of accomplishment. The process can be a fun activity for the whole family, turning a warm afternoon into a memorable experience. Whether you’re hosting a gathering or simply enjoying a quiet evening, the satisfaction of scooping out a bowl of your own creation adds a personal touch that store-bought options simply cannot match.

Finally, there’s an undeniable charm in sharing your homemade ice cream with friends and family. It can become a centerpiece for gatherings, a thoughtful gift, or a delightful treat on a hot summer day. So, not only do you get to enjoy a delicious dessert, but you also create lasting memories that are just as sweet as the ice cream itself. Embrace the joy of making ice cream at home, and discover how it can be so much more than just a treat—it’s an experience!

3. Essential Tools and Equipment for Ice Cream Making

What are the best ways to make homemade ice cream?
Credit : whatcanu.com

Creating your own homemade ice cream can be a delightful adventure, but having the right tools and equipment is essential to achieving that perfect creamy texture and flavor. Here’s a rundown of the must-have items that will elevate your ice cream-making experience:

1. **Ice Cream Maker**: At the heart of your homemade ice cream journey is the ice cream maker. While there are several types available—manual, electric, and compressor models—electric ice cream makers are often the most user-friendly for beginners. They come with built-in freezing mechanisms that take the guesswork out of the process, allowing you to churn your mixture to perfection without the hassle of ice and salt.

2. **Mixing Bowls**: A set of mixing bowls is essential for combining your ingredients. Opt for a variety of sizes, preferably stainless steel or glass, as they are durable and easy to clean. A larger bowl is perfect for mixing your cream and sugar, while smaller bowls can be used for incorporating flavorings or toppings.

3. **Whisk and Spatula**: A sturdy whisk will help you blend your base smoothly, ensuring that the sugar dissolves completely and the ingredients are well incorporated. A silicone spatula is perfect for scraping down the sides of your bowls and transferring your mixture into the ice cream maker with minimal mess.

4. **Measuring Cups and Spoons**: Accurate measurements are crucial in ice cream making. Invest in a set of measuring cups and spoons to ensure you get the ratios of cream, milk, sugar, and flavorings just right. Precision can make a significant difference in the final taste and texture of your ice cream.

5. **Thermometer**: If you’re making a custard base, a food thermometer is invaluable for ensuring that your mixture reaches the correct temperature without overheating. This step is crucial for achieving the perfect custard consistency and preventing scrambled eggs in your ice cream!

6. **Storage Containers**: Once your ice cream is churned to creamy perfection, you’ll need suitable containers to store it. Airtight plastic or glass containers work well, as they help retain freshness and prevent freezer burn. Consider using containers with wide openings for easy scooping!

7. **Ice Cream Scoop**: Finally, don’t forget a high-quality ice cream scoop. A sturdy scoop allows you to serve your homemade creation with ease, ensuring that every bowl is a generous, perfectly rounded portion.

With these essential tools and equipment in your arsenal, you’ll be well on your way to crafting delicious homemade ice cream that rivals your favorite shop. Get ready to experiment with flavors, create scrumptious toppings, and enjoy the sweet rewards of your labor!

4. Choosing the Right Ingredients: Dairy, Sweeteners, and Flavorings

When it comes to crafting the perfect homemade ice cream, the choice of ingredients plays a pivotal role in achieving that creamy, dreamy texture and flavor explosion that keeps everyone coming back for more. Let’s dive into the essential components: dairy, sweeteners, and flavorings.

**Dairy**: The foundation of any great ice cream starts with high-quality dairy. Whole milk and heavy cream are the stars of the show, providing the rich, velvety mouthfeel that we associate with premium ice cream. If you’re looking for a lighter option, you can also experiment with half-and-half or even non-dairy alternatives like coconut cream or almond milk. Just be mindful that non-dairy bases may yield a different texture and flavor profile. For a delicious twist, consider adding a splash of buttermilk or sour cream to enhance the creaminess and introduce a subtle tang.

**Sweeteners**: The sweetener you choose can significantly impact not just the flavor but also the texture of your ice cream. Traditional granulated sugar is the most common choice, providing a classic sweetness that balances the richness of the dairy. However, you might want to explore alternatives like honey, maple syrup, or agave nectar for a unique twist. Remember that liquid sweeteners may require adjustments to your cream base to maintain the right consistency, so don’t hesitate to experiment! For a sugar-free option, consider using erythritol or stevia, but keep in mind that some sugar substitutes can create a different mouthfeel and may not freeze as smoothly as traditional sugar.

**Flavorings**: This is where your creativity can really shine! Whether you’re opting for classic vanilla, decadent chocolate, or fruity strawberry, the key is to select high-quality flavorings. Pure extracts, like vanilla or almond, will elevate your ice cream to a whole new level, while fresh fruits can add a vibrant burst of flavor. If you’re feeling adventurous, try infusing your cream with herbs like basil or mint, or add spices like cinnamon or nutmeg for a unique flavor profile. Don’t forget about mix-ins—think chocolate chips, nuts, or cookie pieces—that can add both texture and surprise to every delightful scoop.

In summary, the right combination of dairy, sweeteners, and flavorings can transform your homemade ice cream from simple to sensational. So gather your ingredients, unleash your inner ice cream artisan, and get ready to savor the deliciousness of your creations!

5. Base Types: Custard vs. Philadelphia Style

What are the best ways to make homemade ice cream?
Credit : whatcanu.com

When it comes to making homemade ice cream, one of the most crucial decisions you’ll encounter is choosing the right base. The two primary styles of ice cream bases are custard and Philadelphia style, each offering distinct flavors and textures that can elevate your frozen treat to new heights.

**Custard Style Ice Cream** is rich, creamy, and indulgent. Made with egg yolks, this base requires a careful cooking process to create a smooth custard before chilling. The addition of egg yolks not only gives the ice cream a luxurious texture but also enhances the overall flavor profile, creating a velvety experience with every spoonful. The custard base is often cooked gently over a double boiler, allowing the eggs to thicken without scrambling. Once cooled, it’s combined with cream, milk, and sugar, resulting in a decadent ice cream that is perfect for those who appreciate a more complex flavor.

On the other hand, **Philadelphia Style Ice Cream** is the simpler, no-cook alternative, making it a favorite among home ice cream makers seeking a quick and straightforward approach. This style relies primarily on heavy cream and milk, with no eggs involved, which allows for a lighter, fresher taste. The absence of eggs means you skip the time-consuming step of cooking the custard, making it an excellent option for those who want to whip up a batch of ice cream on a whim. Philadelphia style ice cream is particularly well-suited for bold flavors, as the creaminess showcases the ingredients beautifully without the rich undertones of eggs.

Ultimately, the choice between custard and Philadelphia style comes down to personal preference. If you’re in the mood for something luxurious and rich, go for the custard base. But if you’re craving a light, refreshing treat that highlights the flavors of your favorite mix-ins, Philadelphia style is the way to go. Whichever you choose, both styles promise to deliver delicious homemade ice cream that’s sure to impress family and friends alike!

6. Step-by-Step Guide to Making Ice Cream from Scratch

Making ice cream from scratch is a delightful and rewarding experience that allows you to indulge in creamy, dreamy flavors tailored to your preferences. Here’s a simple, step-by-step guide to creating your own ice cream masterpiece:

**Step 1: Gather Your Ingredients**
To kick off your ice cream adventure, collect the essential ingredients: heavy cream, whole milk, granulated sugar, and vanilla extract. For a basic vanilla ice cream, you’ll want about 2 cups of heavy cream, 1 cup of whole milk, and 3/4 cup of sugar. Don’t forget to grab your favorite mix-ins like chocolate chips, fruit, or nuts for that personal touch!

**Step 2: Prepare the Base**
In a medium mixing bowl, whisk together the sugar and whole milk until the sugar is completely dissolved. This will ensure a smooth texture without any gritty surprises. Once mixed, gently fold in the heavy cream and vanilla extract. The mixture should be rich and velvety, setting the stage for your creamy creation.

**Step 3: Chill the Mixture**
To enhance the flavor and improve the final texture, refrigerate the ice cream base for at least 1-2 hours. This step helps the ingredients meld together while cooling the mixture, making it easier to churn later.

**Step 4: Churn Your Ice Cream**
Once your base is chilled, it’s time to churn! If you have an ice cream maker, pour the mixture into the machine and churn according to the manufacturer’s instructions, usually around 20-30 minutes. If you don’t have a machine, you can pour the mixture into a shallow dish and place it in the freezer, stirring vigorously every 30 minutes for about 3-4 hours until it reaches a soft-serve consistency.

**Step 5: Add Mix-Ins**
During the last few minutes of churning (or just before your ice cream sets in the freezer), fold in any mix-ins you desire. Think chocolate chunks, cookie crumbles, or fresh berries. This is where you can get creative, adding your favorite flavors and textures.

**Step 6: Freeze Until Firm**
Once you’ve achieved the desired consistency and added your mix-ins, transfer your ice cream to an airtight container and freeze for at least 4 hours, or until it’s hard enough to scoop. This final freeze will give your ice cream that perfect, scoopable texture.

**Step 7: Serve and Enjoy**
After patiently waiting, your homemade ice cream is ready to be served! Scoop it into bowls or cones, and consider topping it with sprinkles, syrups, or whipped cream. Enjoy the fruits of your labor with friends and family, or keep it all to yourself—after all, you deserve it!

By following these simple steps, you’ll be well on your way to mastering the art of homemade ice cream, treating yourself and your loved ones to a sweet, personalized delight that’s sure to impress!

7. Flavor Ideas: Classic, Unique, and Seasonal Variations

What are the best ways to make homemade ice cream?
Credit : whatcanu.com

When it comes to homemade ice cream, the flavor possibilities are as vast as your imagination. Whether you’re a fan of timeless classics or adventurous enough to explore seasonal and unique concoctions, there’s a flavor waiting to tantalize your taste buds.

**Classic Flavors**
Start with the tried-and-true favorites that have stood the test of time. Vanilla, chocolate, and strawberry are the holy trinity of ice cream flavors. Vanilla serves as a blank canvas, allowing you to add a variety of mix-ins like chocolate chips, cookie dough, or fresh fruit. Chocolate lovers can indulge in rich, creamy chocolate ice cream, perhaps swirled with fudge for added decadence. Meanwhile, strawberry ice cream, made with ripe, juicy berries, provides a refreshing and fruity experience that’s perfect for summer.

**Unique Flavors**
If you’re feeling adventurous, why not venture into the realm of unique and unexpected flavors? Consider experimenting with flavors like lavender honey, where the floral notes of lavender beautifully complement the sweetness of honey. Or try a spicy chocolate ice cream infused with a hint of chili for a surprising kick. For a taste of the tropics, coconut lime could transport you straight to a beachside paradise, while matcha green tea offers a delightful earthy flavor that’s both refreshing and invigorating.

**Seasonal Variations**
Embrace the changing seasons by incorporating seasonal ingredients into your ice cream creations. In the spring, consider a fresh mint chocolate chip, with vibrant green mint leaves blended into a creamy base. Summer calls for refreshing fruit flavors like peach or raspberry, using peak-season produce for an unbeatable taste. As autumn approaches, why not whip up a pumpkin spice ice cream, rich with the warm spices of cinnamon and nutmeg? Finally, during the winter months, indulge in a cozy eggnog ice cream, perfect for holiday gatherings and chilly nights.

No matter which direction you choose, the beauty of making homemade ice cream lies in the ability to customize and experiment. So grab your ingredients, unleash your creativity, and get ready to delight in the endless world of flavors that await you!

8. Tips for Achieving the Perfect Texture

Achieving the perfect texture in homemade ice cream is an art that combines science, technique, and a little bit of love. The texture of your ice cream can make or break the experience, transforming a simple scoop into a creamy delight that melts beautifully in your mouth. Here are some essential tips to help you create that coveted silky-smooth texture.

First and foremost, start with a base that has the right balance of fat and sugar. Higher fat content, usually from heavy cream, not only enhances the flavor but also contributes to a richer texture. Aim for a base that contains at least 10-20% fat, as this will help create that luscious creaminess we all adore. Sugar also plays a crucial role; it lowers the freezing point of the mixture, allowing the ice cream to remain softer and easier to scoop after freezing.

Next, don’t underestimate the power of proper chilling. Before churning your mixture, ensure that it is thoroughly chilled in the refrigerator for several hours. This step not only accelerates the churning process but also helps incorporate air into the mixture, creating a light and fluffy texture. For best results, chill your base to at least 40°F (4°C) before pouring it into the ice cream maker.

When it’s time to churn, keep your ice cream maker bowl as cold as possible. If you’re using a bowl that requires pre-freezing, make sure to freeze it for at least 24 hours. The colder the bowl, the quicker the mixture will freeze, which helps minimize ice crystal formation. This results in a smoother texture, so don’t rush this crucial step!

Another tip is to avoid over-churning. While it may be tempting to let your ice cream maker run indefinitely, doing so can lead to a grainy texture as too much air is incorporated. Keep an eye on the consistency and stop churning once you see a soft-serve texture. After churning, transfer your ice cream to an airtight container and freeze it for a few hours to achieve the ideal scoopable consistency.

Finally, consider adding stabilizers to your mixture. Ingredients like cornstarch or gelatin can help improve the texture by preventing ice crystals from forming during the freezing process. These are especially helpful if you plan to store your ice cream for an extended period.

With these tips in your toolkit, you’ll be well on your way to creating homemade ice cream that’s not just delicious, but also boasts the perfect texture that will have your friends and family coming back for more. So grab your ice cream maker and start experimenting—you’re in for a real treat!

9. Add-ins and Mix-ins: Get Creative with Your Ice Cream

When it comes to homemade ice cream, the possibilities for add-ins and mix-ins are virtually endless, and this is where your creativity can truly shine. Imagine scooping into a velvety base of vanilla bean ice cream, only to discover delightful surprises hidden within. From classic favorites to adventurous twists, the right mix-ins can elevate your homemade concoction from ordinary to extraordinary.

Start with the classics: chunks of rich chocolate, ribbons of caramel, or a generous handful of crunchy nuts can all add texture and flavor. But why stop there? Consider mixing in crushed cookies for a delightful cookie dough flavor, or swirl in some fruit preserves for a refreshing tartness that complements the creaminess of the ice cream. Fresh fruit such as strawberries, blueberries, or bananas can infuse natural sweetness and vibrant color, while also providing a burst of freshness in every bite.

For those who love a bit of crunch, think about incorporating granola or toasted coconut flakes, which not only add a satisfying texture but also a unique flavor profile. If you’re feeling particularly adventurous, try adding spicy elements like crushed chili peppers or ginger, or even savory touches like a sprinkle of sea salt to enhance the sweetness.

Don’t forget about the fun toppings! After churning your ice cream, why not serve it with an array of toppings that guests can customize themselves? A DIY sundae bar with whipped cream, sprinkles, and various syrups can turn your ice cream experience into a party, delighting both kids and adults alike.

No matter how you choose to get creative, remember that the heart of homemade ice cream is all about personal expression. So, grab your favorite add-ins and mix-ins, and let your imagination run wild—after all, the best ice cream is the one that reflects your unique taste!

10. Storing Homemade Ice Cream: Best Practices

Storing homemade ice cream properly is key to preserving its creamy texture and delightful flavor. After all the effort you’ve put into creating that perfect batch, you want to ensure it remains as delicious as the day it was made. Here are some best practices to keep your ice cream in top shape.

First and foremost, choose the right container. Opt for an airtight, freezer-safe container that’s made of plastic or metal, as glass can crack under extreme cold. A shallow container is ideal, as it allows for faster freezing and easier scooping. If you have a larger batch, consider dividing it into smaller portions. This way, every time you open the freezer, you’re not exposing the entire batch to warmer air, which can lead to ice crystals forming—a texture enemy for your homemade creation.

When packing your ice cream into the container, leave just a little bit of space at the top to allow for expansion as it freezes. Then, press a piece of parchment paper directly onto the surface of the ice cream before sealing the container. This additional layer acts as a barrier against air, helping to lock in that velvety smoothness you worked so hard to achieve.

Next, store your ice cream in the coldest part of the freezer, ideally the back, rather than the door. The door tends to fluctuate in temperature every time it opens, which can affect the consistency of your ice cream. Aim to keep your freezer at a steady 0°F (-18°C) or lower to maintain the best texture.

Finally, remember to consume your homemade ice cream within a month for optimal flavor and quality. While it may last longer, the longer it sits in the freezer, the more likely it is to succumb to freezer burn or lose that fresh taste. So, gather your friends and family and invite them over for an ice cream party—after all, nothing is quite as delightful as sharing your homemade treat! With these best practices, your homemade ice cream will remain a delightful indulgence, ready to enjoy whenever the craving strikes.

11. Common Mistakes to Avoid When Making Ice Cream

Making homemade ice cream can be a delightful and rewarding experience, but it’s easy to stumble over a few common pitfalls that could turn your creamy dreams into icy disappointments. Here’s a rundown of mistakes to avoid, ensuring that each batch is a success.

**1. Skipping the Pre-Chill Step:** One of the most crucial steps in making ice cream is pre-chilling your ice cream maker’s bowl. If the bowl isn’t cold enough, your mixture won’t freeze properly, leading to a soupy texture rather than the smooth, creamy consistency you desire. Always ensure you’ve placed the bowl in the freezer for at least 24 hours before use.

**2. Not Tempering Eggs:** If your recipe calls for eggs, make sure to temper them before adding them to your mixture. Quickly whisking the eggs with a small amount of hot cream prevents them from scrambling and ensures a silky texture. This step is vital for custard-based ice creams, so don’t skip it!

**3. Using Too Much Sugar:** While sweetness is essential, overdoing it can lead to an overly soft ice cream that doesn’t freeze well. Sugar lowers the freezing point of your mixture, so balance is key. Follow your recipe closely, and consider tasting along the way to hit that sweet spot without going overboard.

**4. Forgetting to Strain:** If your recipe includes a custard base, always strain it after cooking. This removes any potential egg bits and ensures a perfectly smooth texture. You want your ice cream to be a luxurious treat, free of any unwanted crunch.

**5. Ignoring Flavor Balance:** When adding flavors like vanilla, chocolate, or fruit purees, be mindful of your ratios. Too much flavoring can overpower the overall taste, while too little may leave your ice cream bland. Start with smaller amounts, tasting as you go, to create a well-rounded profile.

**6. Overchurning:** While it may be tempting to keep the mixture churning until it’s super thick, overchurning can lead to icy crystals forming. Once your ice cream reaches a soft-serve consistency, it’s time to stop and transfer it to a container for freezing.

**7. Skipping the Freeze Time:** After churning, it’s essential to let your ice cream set in the freezer for at least a few hours before serving. This additional freezing time allows flavors to meld and the texture to firm up, resulting in a more enjoyable scoop.

By avoiding these common mistakes, you’ll be well on your way to crafting delicious, homemade ice cream that rivals the best scoop shops. Whether you’re experimenting with traditional flavors or getting creative with unique combinations, following these tips will help ensure your frozen treats are nothing short of perfection.

12. Dairy-Free and Vegan Ice Cream Options

As the demand for inclusive dessert options continues to rise, crafting delicious dairy-free and vegan ice cream has never been more rewarding. Whether you’re lactose intolerant, following a vegan lifestyle, or simply looking to explore new flavors and textures, there are countless ways to create creamy and satisfying frozen treats without traditional dairy.

Start with a base that’s rich and flavorful. Coconut milk is a popular choice thanks to its luscious consistency and subtle sweetness, making it an ideal canvas for a variety of flavors. Almond milk and cashew milk are also excellent alternatives, imparting their unique nutty notes to your ice cream. For a thicker, creamier texture, consider using silken tofu, which blends smoothly and provides a protein boost, or opt for a blend of nut butters for added richness.

When it comes to sweeteners, the options are plentiful. Agave nectar, maple syrup, and coconut sugar can infuse your ice cream with natural sweetness, while dates or bananas can provide a whole-food option that also contributes to creaminess. Experiment with different sweeteners to find the perfect balance for your palate.

Flavors are where the fun truly begins! From classic vanilla to decadent chocolate, and adventurous combinations like matcha green tea or lavender, the possibilities are endless. Don’t shy away from adding mix-ins like chopped nuts, dairy-free chocolate chips, or chunks of fresh fruit to elevate the texture and taste of your creations.

To make your process even easier, consider using an ice cream maker, which can help achieve that desired smoothness and prevent ice crystals from forming. If you don’t have one, fear not! Simply pour your mixture into a shallow dish and stir every 30 minutes as it freezes to achieve a still creamy texture.

With these dairy-free and vegan options, you can indulge in homemade ice cream that caters to everyone’s dietary needs while tantalizing their taste buds. So gather your ingredients, unleash your creativity, and get ready to enjoy guilt-free frozen delights that are sure to impress family and friends alike!

13. Fun Serving Ideas and Presentation Tips

When it comes to homemade ice cream, the experience isn’t just about the taste—it’s also about how you serve it! Elevating the presentation of your frozen creations can add a dash of excitement to any gathering and make your homemade treats even more memorable. Here are some fun serving ideas and presentation tips that will impress your family and friends.

**1. Colorful Bowls and Unique Cones:** Start by selecting vibrant bowls or quirky ice cream cones to serve your creations. Opt for rainbow-hued cups, vintage glassware, or even edible waffle bowls for a delightful twist. The right container can turn even the simplest scoop into a visual masterpiece.

**2. Layered Sundaes:** Layering your ice cream can create a stunning presentation. Start with a scoop of one flavor, drizzle some sauce (think chocolate, caramel, or fruit compote), and then add another scoop of a different flavor. Top it off with whipped cream, sprinkles, and a cherry for that classic sundae look.

**3. Garnish with Fresh Ingredients:** Fresh fruits can provide a burst of color and flavor. Consider garnishing your ice cream with slices of strawberries, blueberries, or kiwi. Fresh mint leaves can also add a pop of green that brightens up your dish.

**4. Creative Toppings Bar:** Set up a toppings bar at your next gathering, where guests can customize their own sundaes or cones. Include a variety of toppings such as crushed cookies, nuts, mini marshmallows, and a selection of syrups. This interactive approach not only makes serving fun but also lets everyone tailor their dessert to their liking.

**5. Ice Cream Sandwiches:** For a playful twist, create ice cream sandwiches using cookies, brownies, or even donuts. Roll the edges in sprinkles or nuts for an added surprise. These handheld treats are not only delicious but also make for great photo opportunities!

**6. Themed Presentation:** If you’re hosting a themed party, align your ice cream presentation accordingly. For a beach party, serve ice cream in coconut shells topped with crushed graham crackers to mimic sand. For a movie night, use popcorn boxes filled with scoops of ice cream, complete with a drizzle of chocolate sauce for a fun and unexpected treat.

**7. Freeze and Serve:** For a dramatic effect, freeze your serving plates or bowls before serving. The condensation that forms will give your dessert a frosty, inviting look, while also keeping your ice cream from melting too quickly.

Remember, the key to a delightful ice cream presentation is to let your creativity shine. Each scoop of your homemade ice cream is a blank canvas waiting for your artistic touch. With these fun serving ideas and presentation tips, you’ll be ready to create an unforgettable dessert experience that will leave everyone craving more!

14. Hosting an Ice Cream Party: Themes and Recipes

Hosting an ice cream party is a delightful way to gather friends and family while indulging in everyone’s favorite frozen treat. The beauty of an ice cream party lies in its versatility; it can be as simple or as extravagant as you’d like, and the themes can be tailored to suit any occasion. Here are some fun ideas to get you started, along with delicious recipe suggestions that will make your ice cream party unforgettable.

**Themed Parties:**
1. **Classic Sundae Bar:** Set up a stunning sundae bar with a variety of ice cream flavors like vanilla, chocolate, and strawberry. Offer an array of toppings, from hot fudge and caramel sauce to sprinkles, crushed cookies, and fresh fruits. Provide fun bowls and spoons, and let guests create their own masterpiece while mingling.

2. **Tropical Luau:** Transport your guests to a tropical paradise with flavors inspired by the islands. Think coconut, pineapple, and mango ice creams. Pair these with toppings like toasted coconut flakes, macadamia nuts, and rum-infused fruit compote. Decorate with Hawaiian leis and play some upbeat island music to enhance the vibe.

3. **Decadent Chocolate Affair:** For the chocolate lovers, host a chocolate-themed party with rich chocolate ice cream as the star. Experiment with different recipes—dark chocolate, white chocolate raspberry, or even chocolate brownie ice cream. Add toppings like chocolate shavings, brownie bites, and chocolate syrup for an indulgent experience.

4. **Seasonal Flavors:** Celebrate the seasons by featuring flavors that reflect the time of year. In summer, go for refreshing mint chocolate chip and strawberry basil. In fall, pumpkin spice and apple pie ice cream can capture the essence of autumn. Create seasonal decor to complement the flavors and make the event feel special.

**Recipe Inspiration:**
– **No-Churn Vanilla Ice Cream:** Simple to prepare, this recipe requires just heavy cream, sweetened condensed milk, and vanilla extract. Mix and freeze for a creamy, dreamy treat that can serve as a base for countless toppings.

– **Strawberry Sorbet:** Perfect for a refreshing dessert, this sorbet combines fresh strawberries, sugar, and a touch of lemon juice. Blend until smooth, freeze, and serve for a light, fruity option that everyone will love.

– **Chocolate Chip Cookie Dough Ice Cream:** Who doesn’t love cookie dough? Make a classic vanilla ice cream base and mix in chunks of cookie dough for a nostalgic twist that brings back childhood memories.

– **Dairy-Free Coconut Ice Cream:** For guests with dietary restrictions, whip up a coconut milk-based ice cream. Infuse it with vanilla and throw in some shredded coconut for added texture.

As you plan your ice cream party, don’t forget the essential elements—fun activities like ice cream-making contests or tasting games can keep the energy high. Provide comfortable seating and perhaps even a photo booth with fun props to capture the sweet memories. With delicious flavors, creative themes, and a festive atmosphere, your ice cream party is sure to be a hit, leaving your guests with smiles and satisfied taste buds!

15. Conclusion: Enjoying Your Homemade Creations

As you reach the end of this delightful journey into the world of homemade ice cream, it’s time to savor the fruits of your labor. There’s something incredibly satisfying about crafting your own frozen treats—it’s not just about the creamy, dreamy flavors but also the joy of sharing these creations with family and friends.

Imagine opening your freezer to find a colorful array of ice cream tubs, each representing a different flavor you’ve expertly concocted. From classic vanilla bean to adventurous lavender honey or rich chocolate fudge, the choices are as limitless as your imagination. The moment you scoop that first serving, the silky texture and vibrant taste remind you of the care and creativity that went into each batch.

But the enjoyment doesn’t stop there. Picture a sunny afternoon, the laughter of loved ones filling the air as they gather around a bowl of your homemade ice cream. Whether it’s a simple scoop served in a cone or an extravagant sundae topped with whipped cream, sprinkles, and cherries, each bite is a celebration of your culinary skills. You’ll find that your creations spark conversation, evoke memories, and create new experiences, making every scoop a cherished moment.

So, as you conclude your ice cream-making adventure, remember that the real reward lies not just in the creamy delights you’ve made but in the smiles and laughter they bring. Embrace the messiness of experimentation, keep refining your flavors, and most importantly, enjoy every delicious moment of your homemade creations. After all, the joy of ice cream is best when shared!

As we wrap up our ultimate guide to making homemade ice cream, we hope you’re feeling inspired to unleash your inner ice cream artisan and create delightful frozen treats that will impress family and friends alike. With the simple techniques and creative flavor ideas we’ve shared, you now have the tools to craft everything from classic vanilla to adventurous combinations that tickle the taste buds. So, gather your ingredients, fire up that ice cream maker, and embark on a delicious journey that not only cools you down but also warms your heart with the joy of homemade goodness. Don’t forget to share your delicious creations with us—tag us on social media and let the world see your frozen masterpieces! Enjoy every scoop!